Just in case you missed this article on creating DIY stuffed animal storage the first time we shared it a couple of years ago, we are republishing it. After Sharon wrote this blog originally, we got an awesome response. This is one of the PYP Best Blogs!
My daughter has an addiction – a stuffed animal addiction! Although I don’t mind enabling her, I don’t like how they end up piled in an ugly heap on the shelf, and I don’t like how she can never find the specific critter she’s looking for – especially the little ones. Here is how we solved the problem.
If you are DIY’ers with a well stocked garage you can do this project very inexpensively. Even if you have to buy everything, it should only cost about $15.
What you’ll need
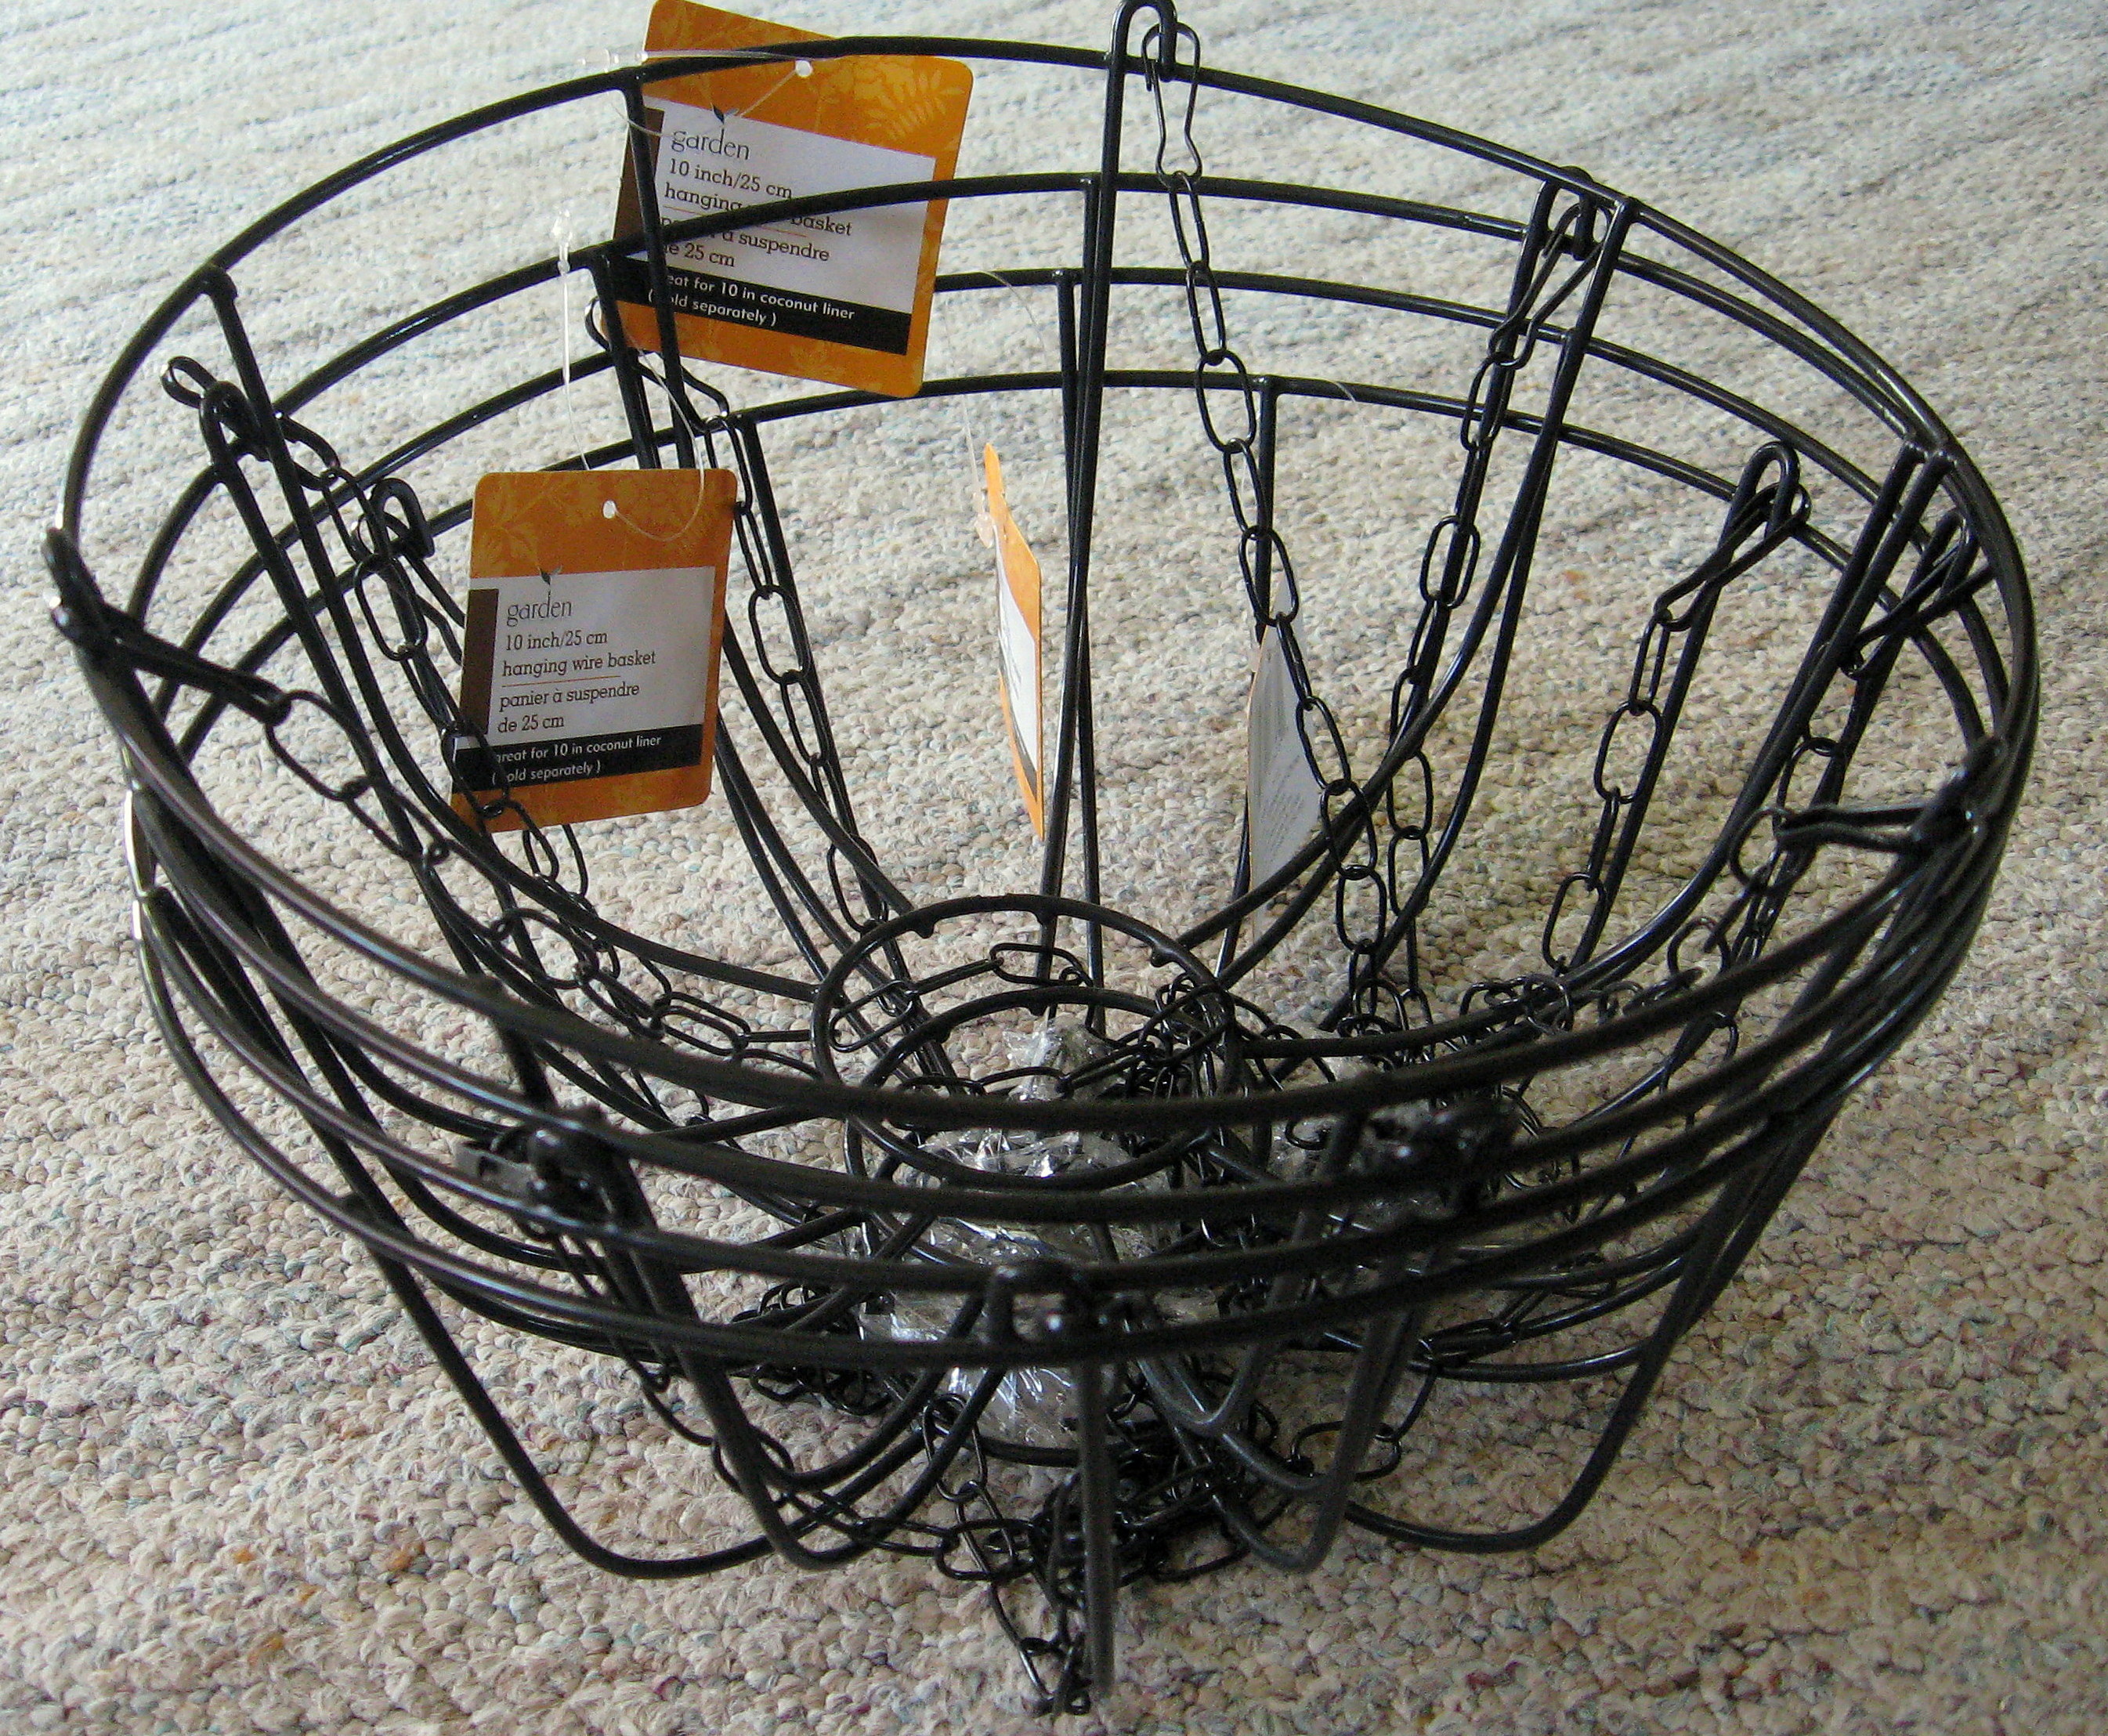
- Wire hanging planter baskets. I used 5 and I got them at Dollar Tree.
- Board(s); as tall as you would like, and wide enough to accommodate the baskets; I used 3 6-ft. tall cedar fence boards. These are about $1.90 at Home Depot but they regularly go on sale this time of year for less than $1. (I use these for crafts all the time, so I buy a stack whenever they are on sale.)
- Thin boards to connect the fence boards together; I used scraps from my garage, but if you have to buy something, ask for lathing strips. You should be able to get one long board for about $1.
- Nuts and bolts a bit longer than the board is wide – look for these hanging in little bags in the same aisle as screws and nails. Should be less than $1 per bag and if you follow my design you will need 10.
- Screws
- Drill
- Saw
- Sander or Sandpaper
- Strong Wire cutters
- Paint
Let’s get started!
Start with the wire baskets; take off the hanging chain and either throw them out or save them for another project; you won’t be using them for this project.
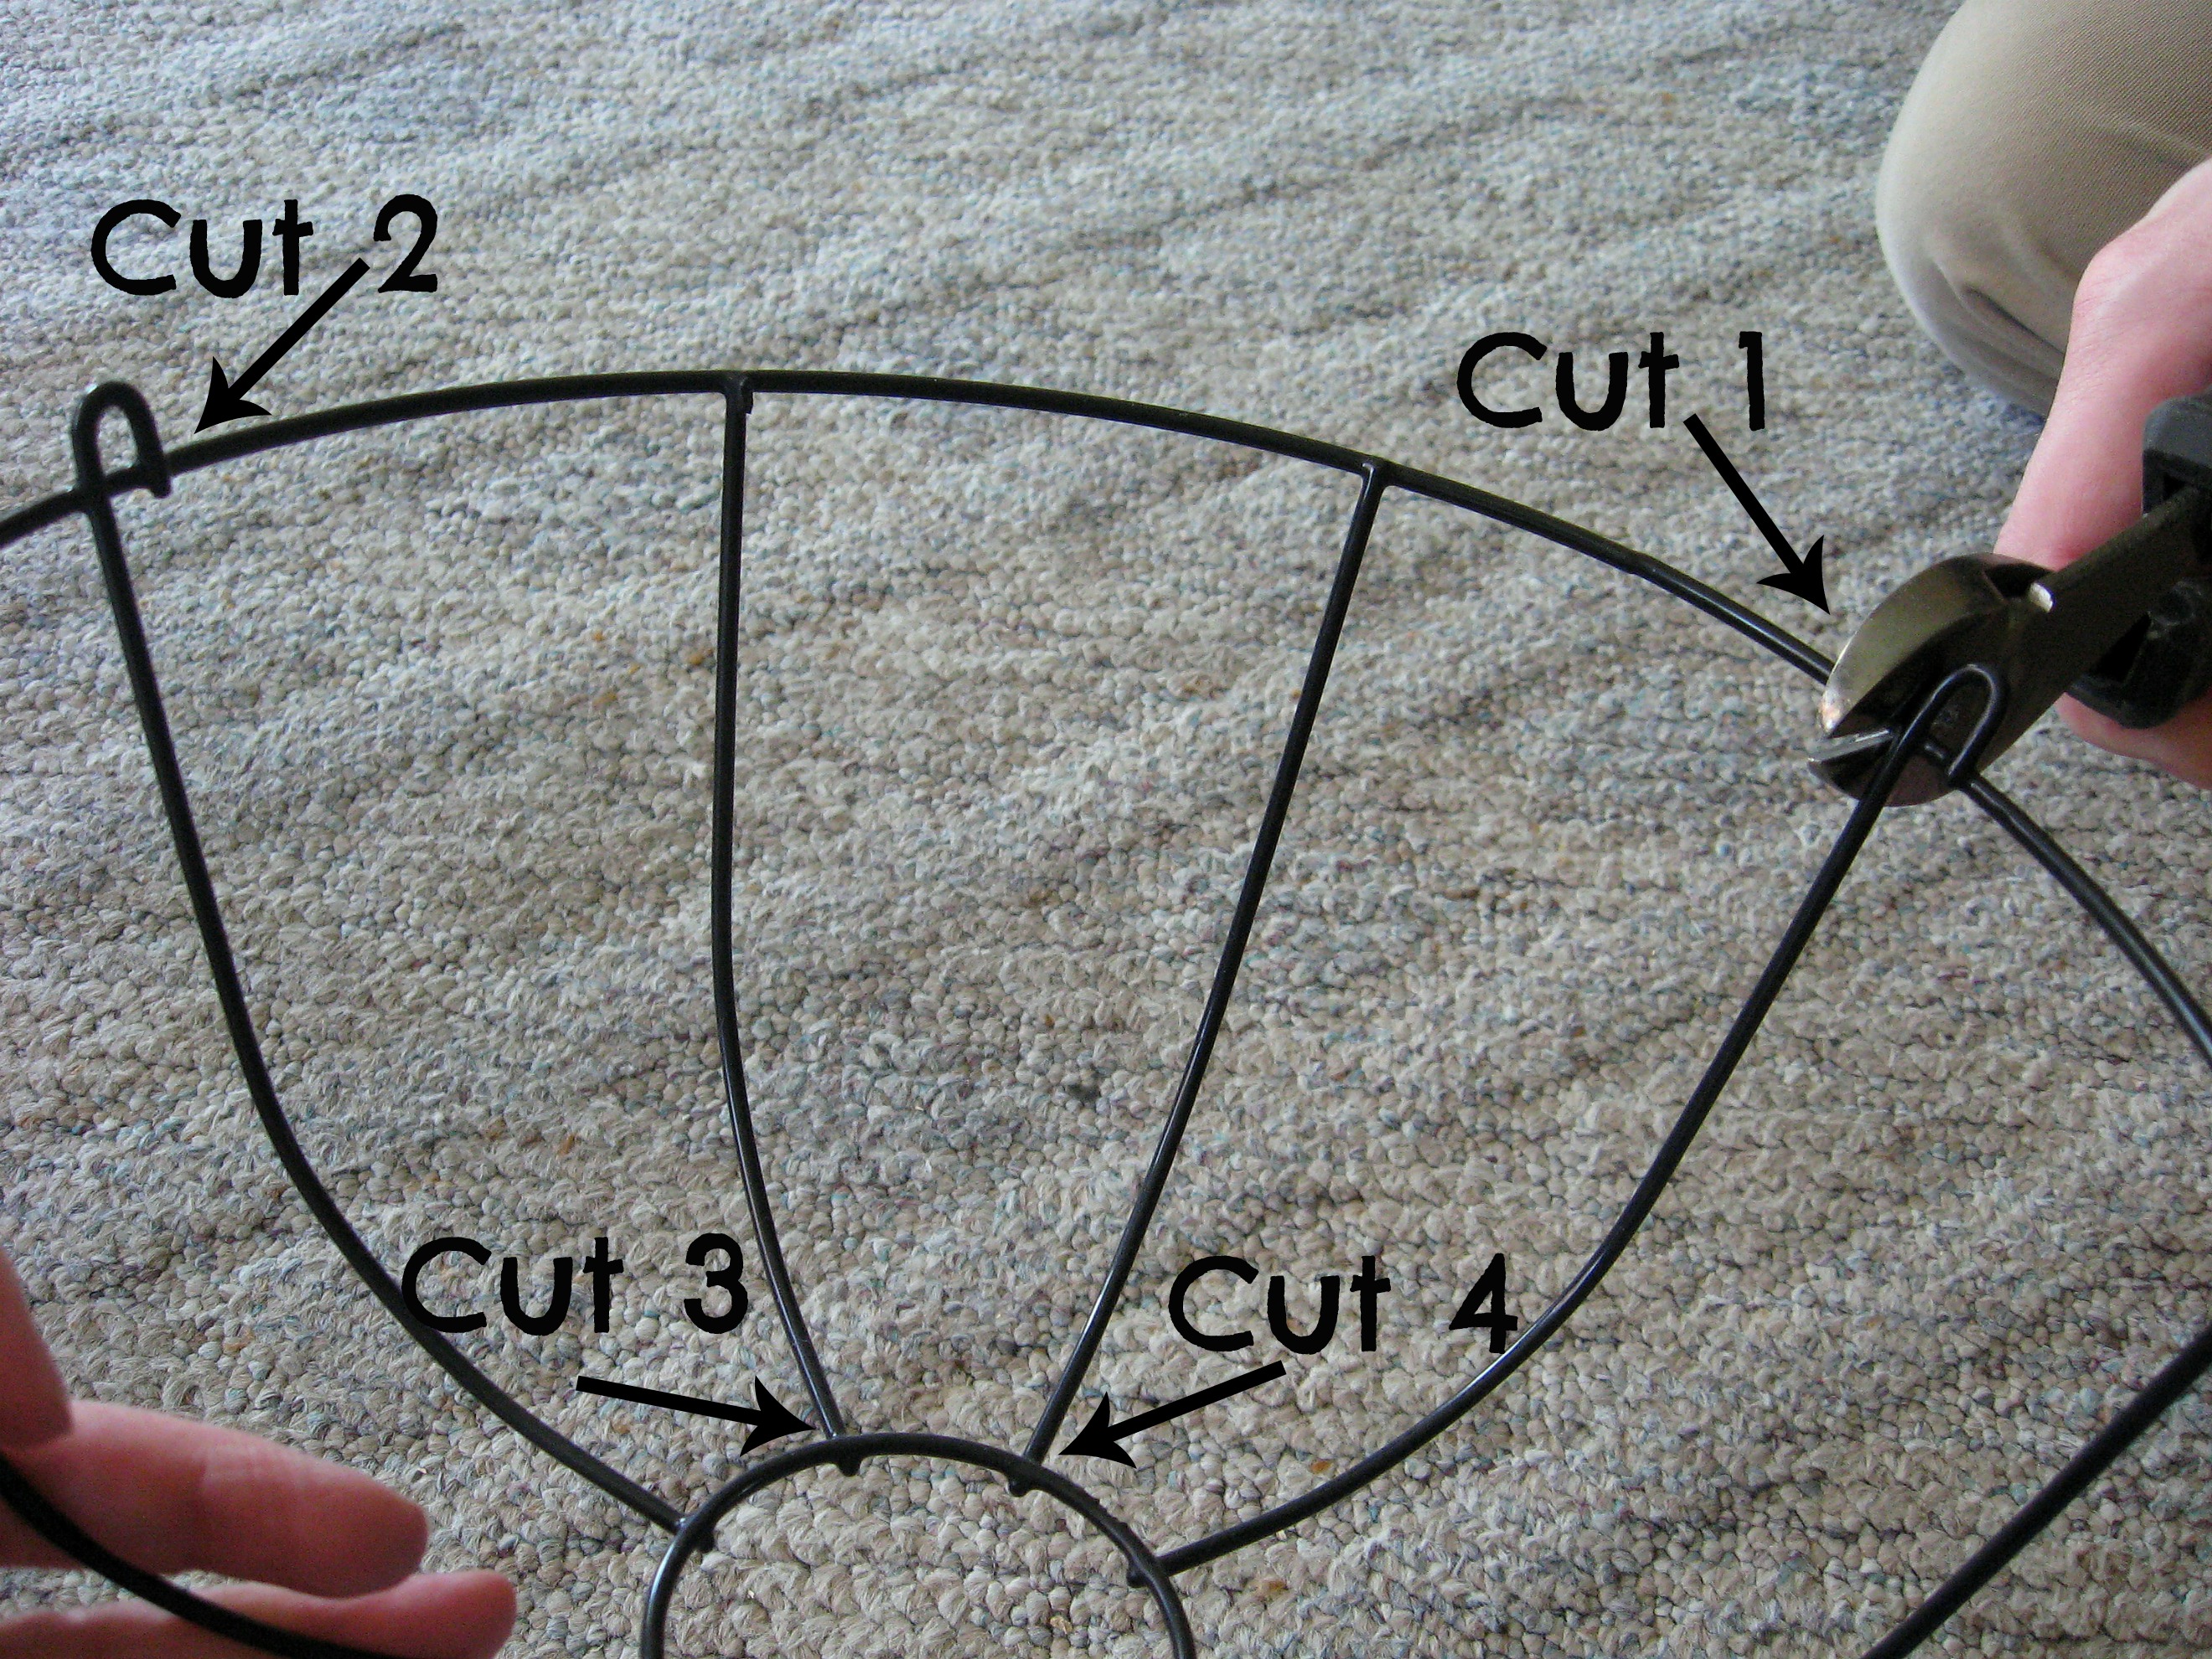
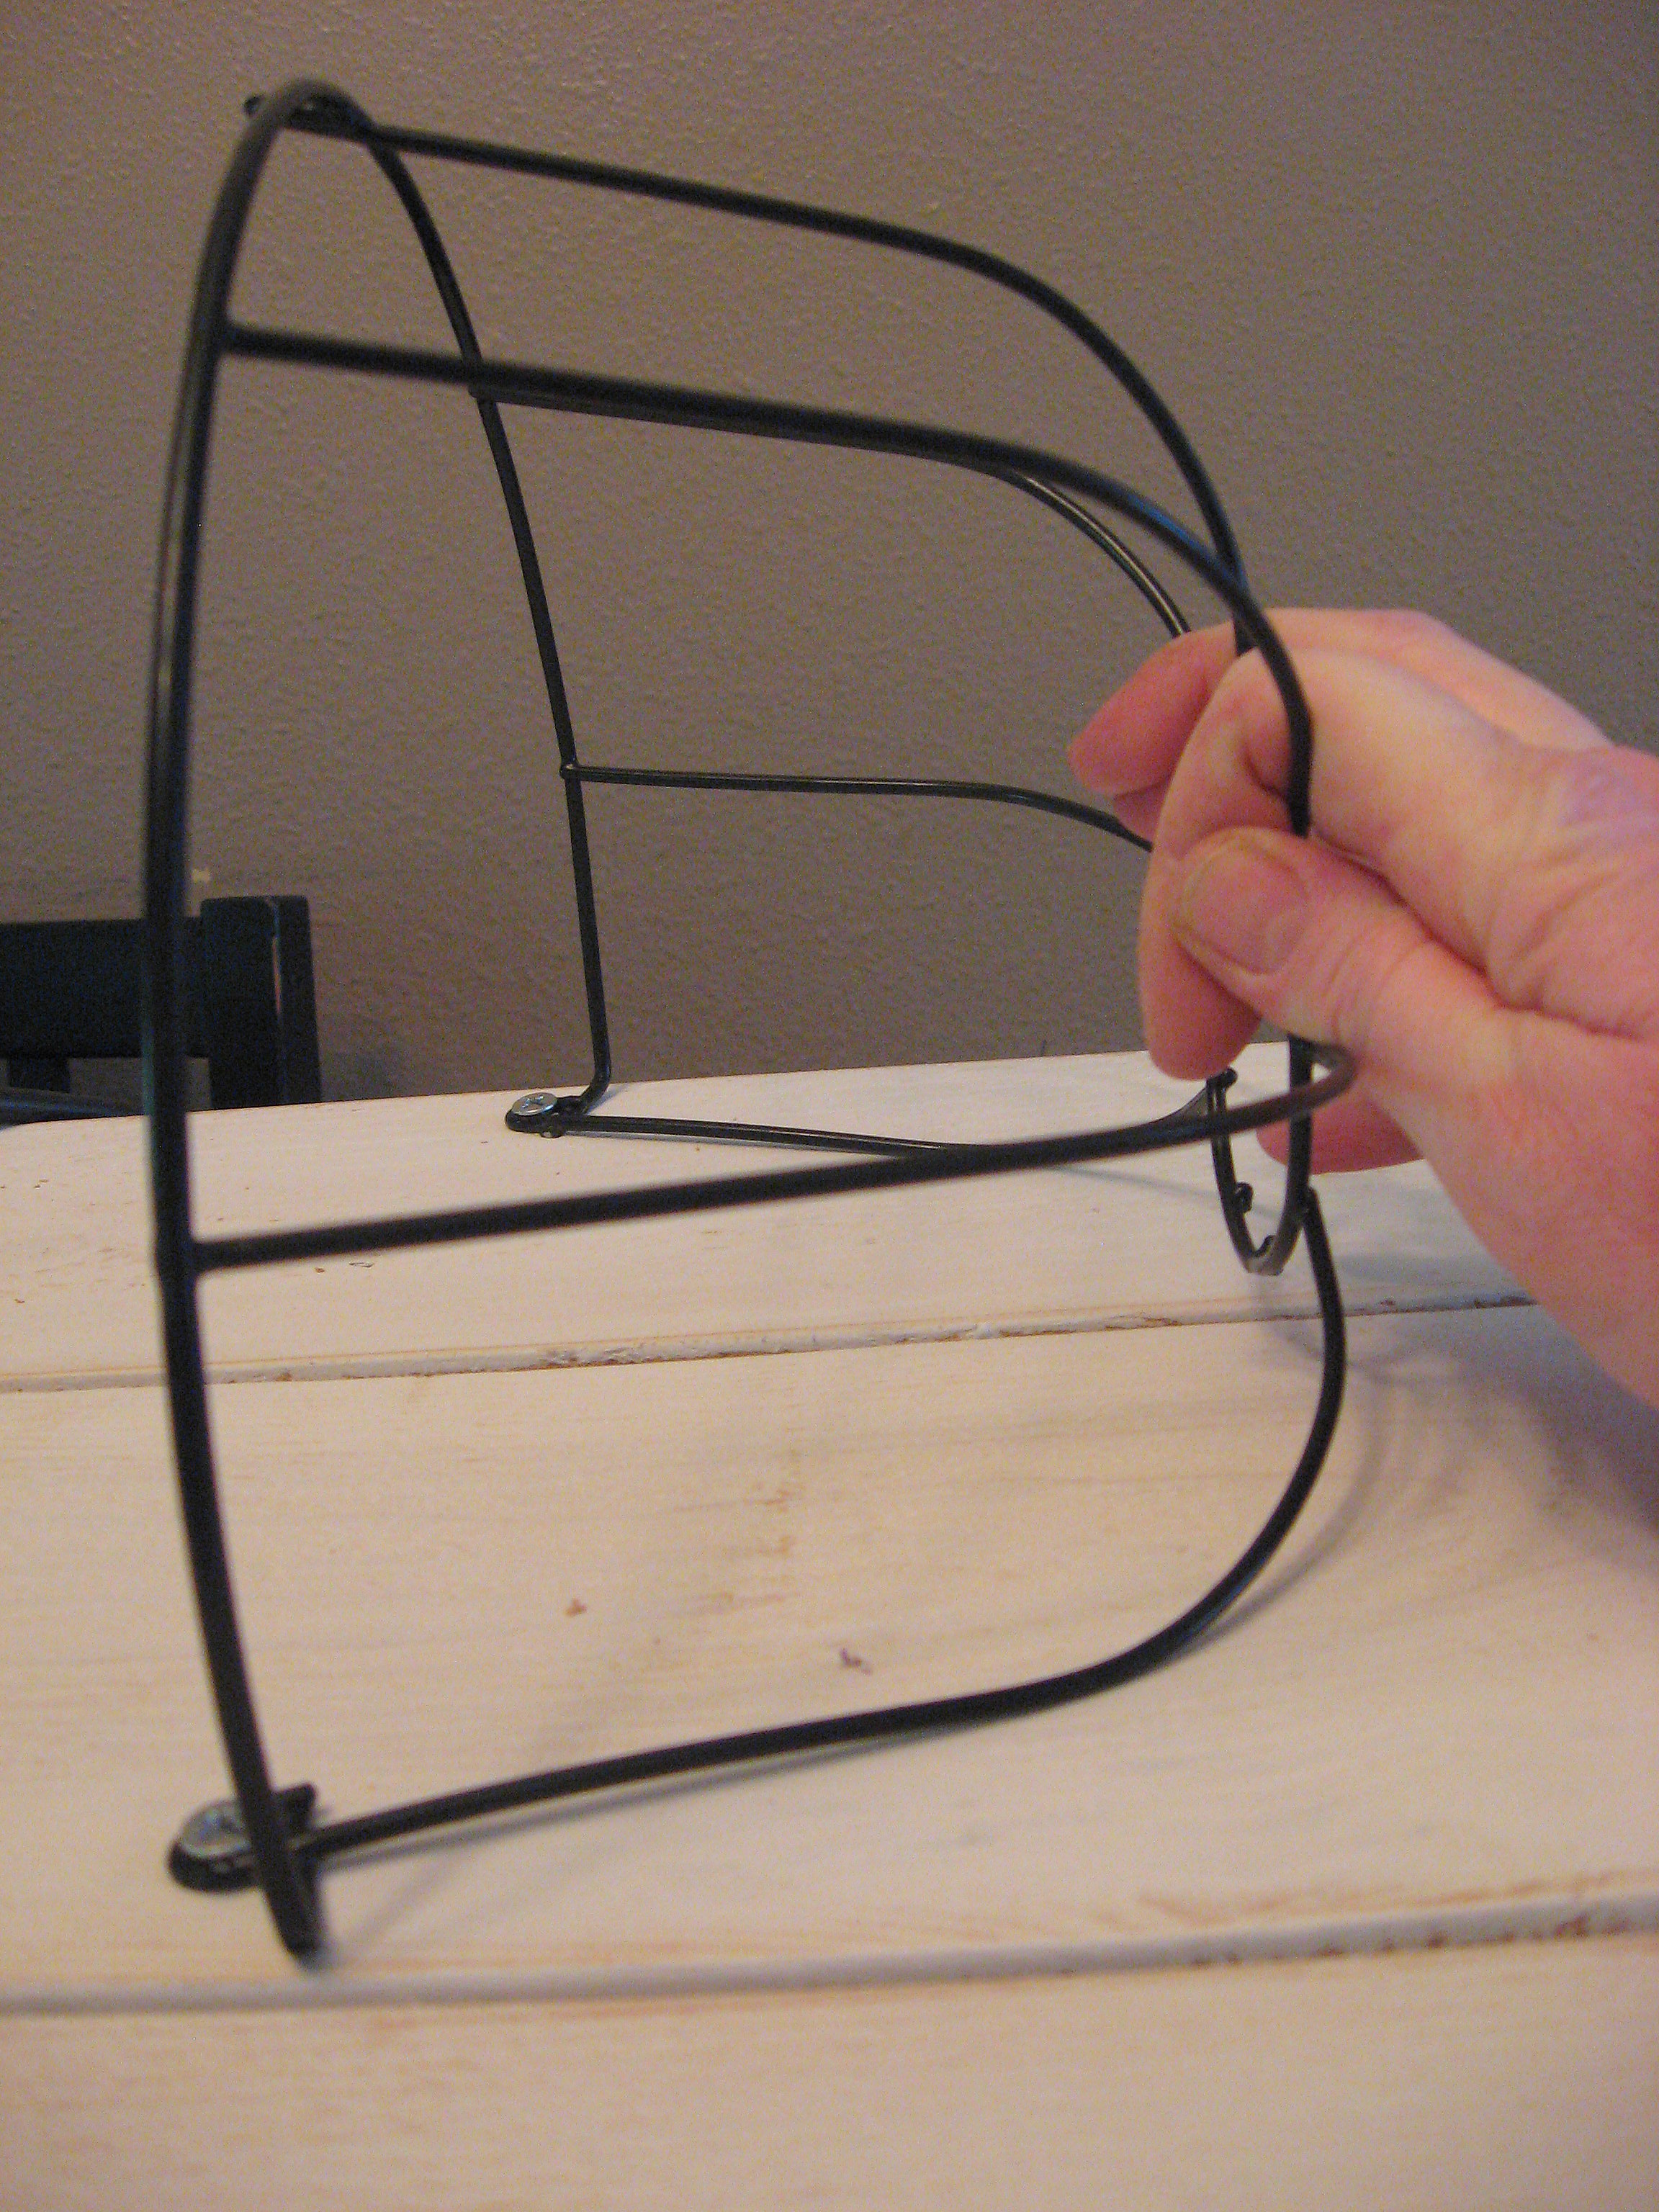
Here is a close up of what my basket looks like. You will cut out a section of the basket so that it sits flat against the board. Make sure you keep the little loops that held the chain; that is where you will screw the basket into the board.
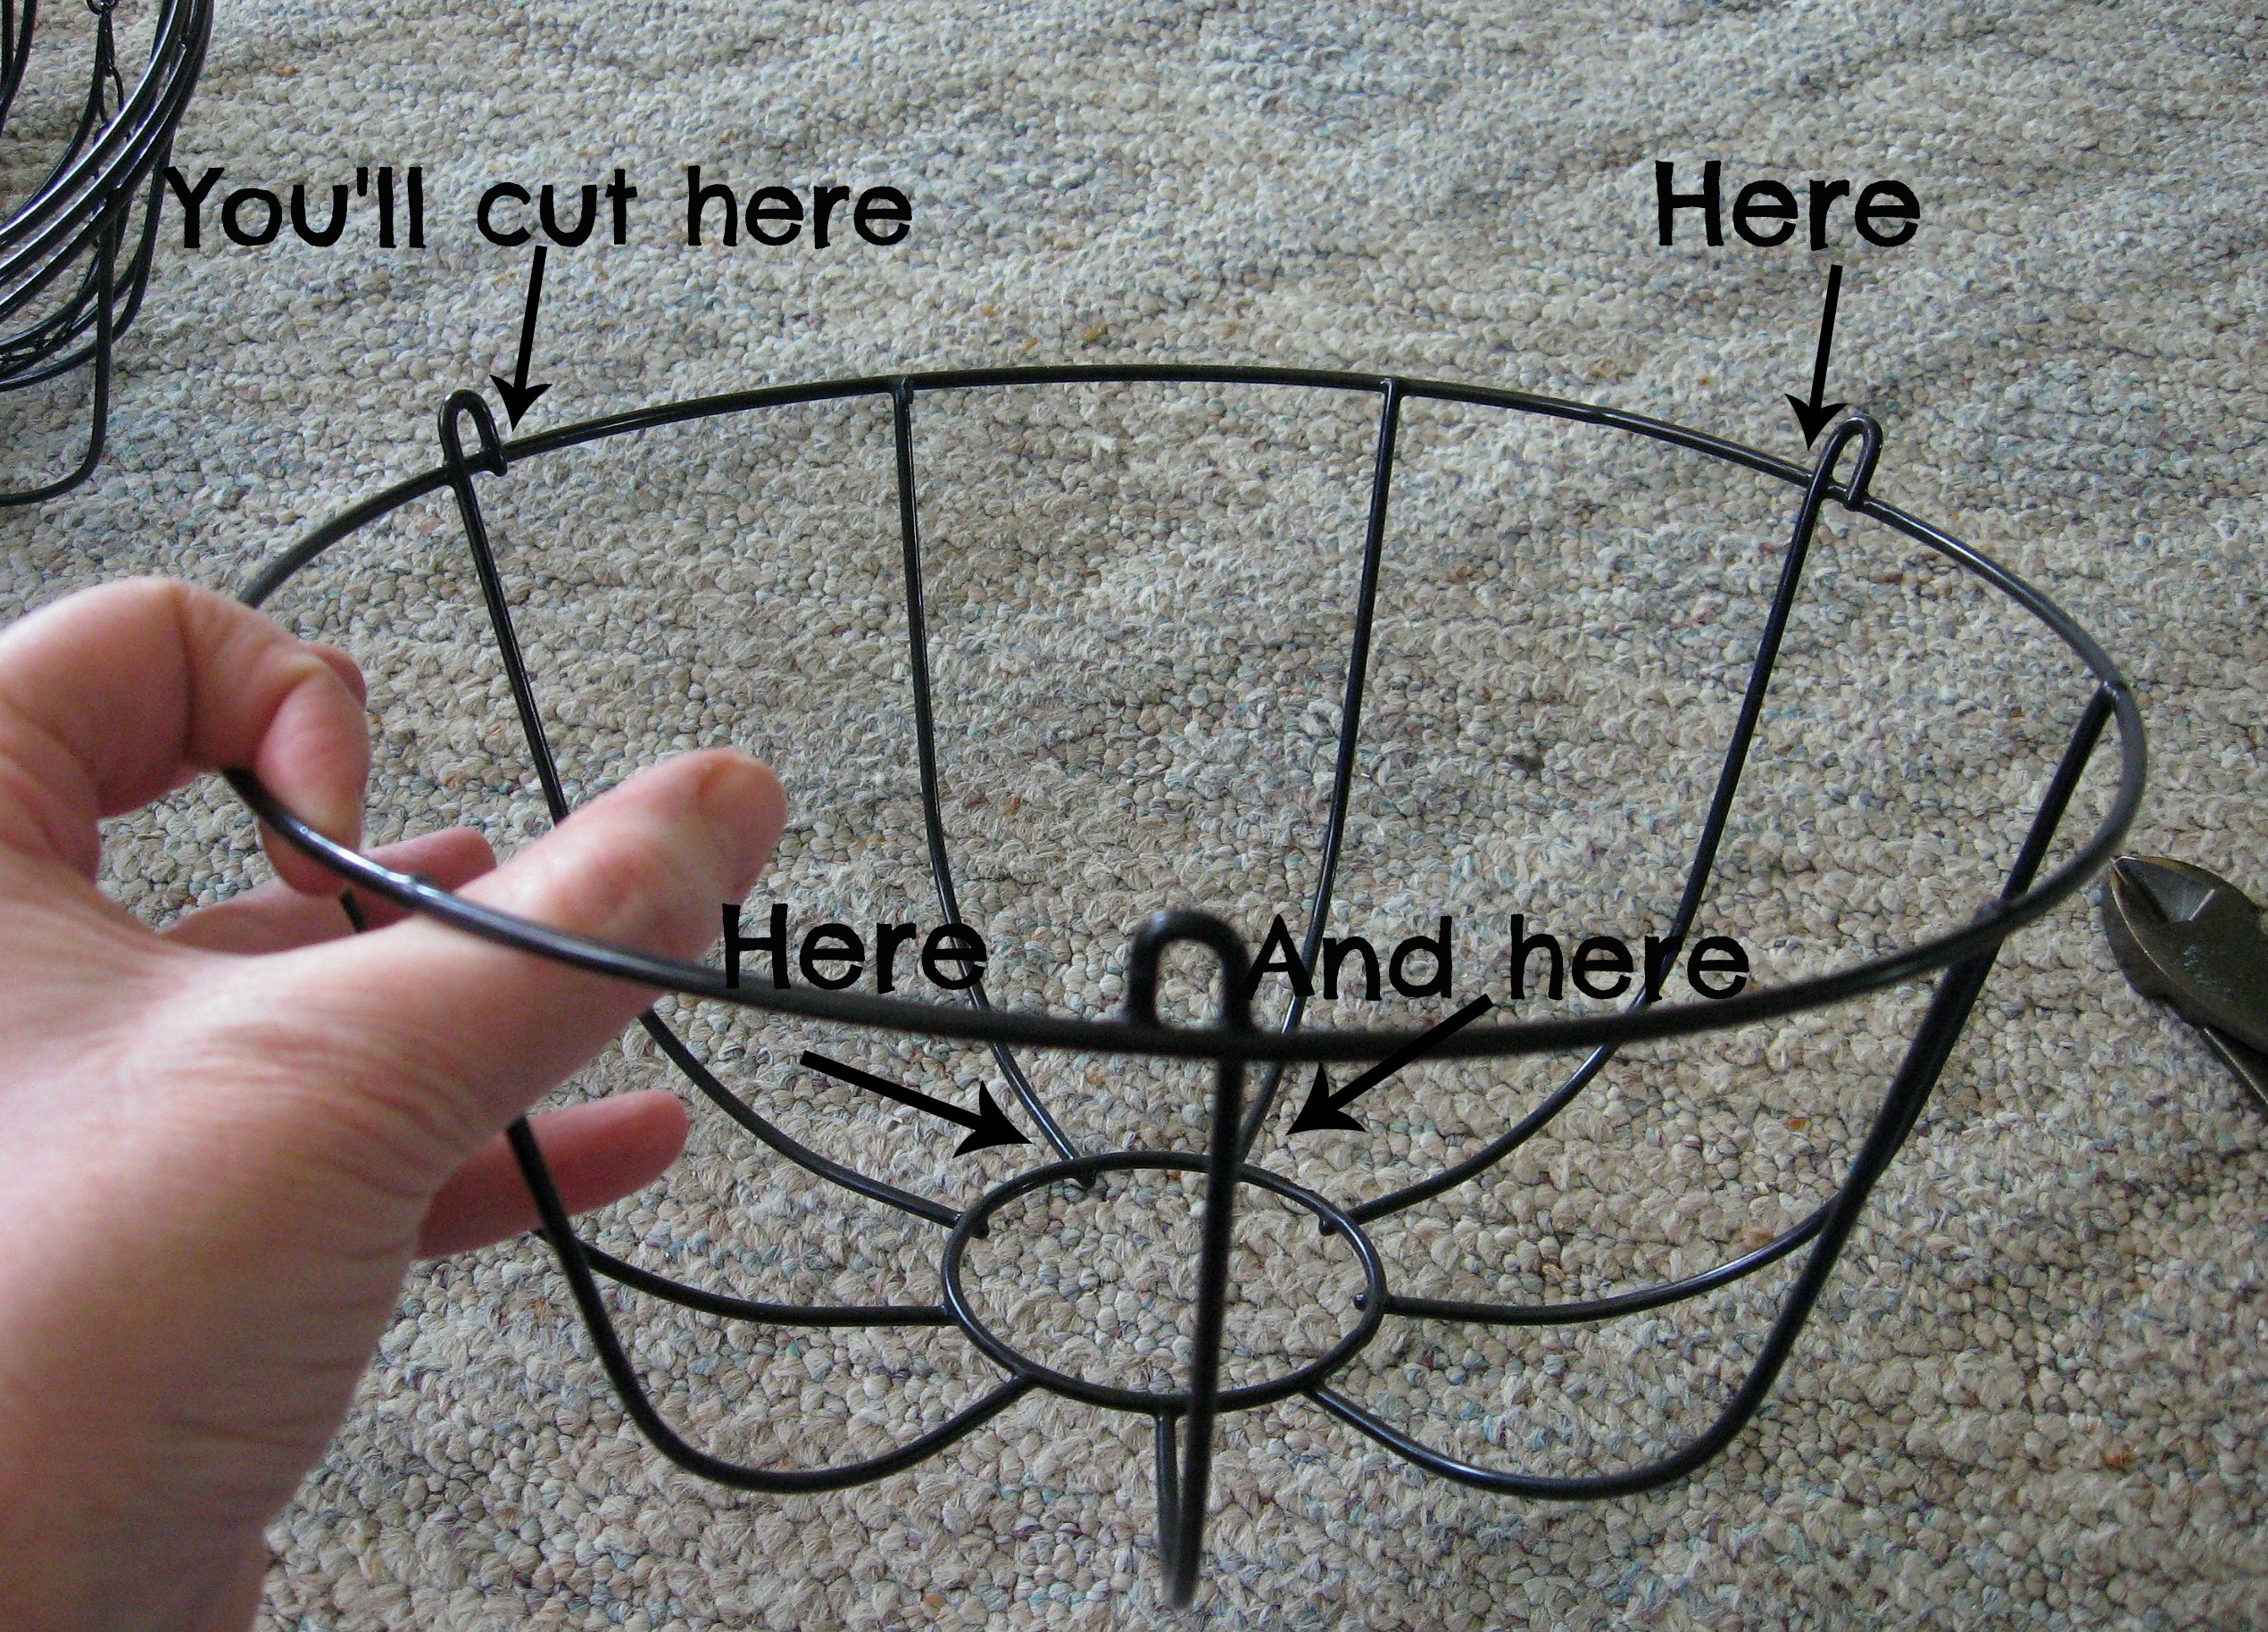
Use heavy duty wire cutters and cut as close to the intersections as you can, so you don’t leave a sharp end.
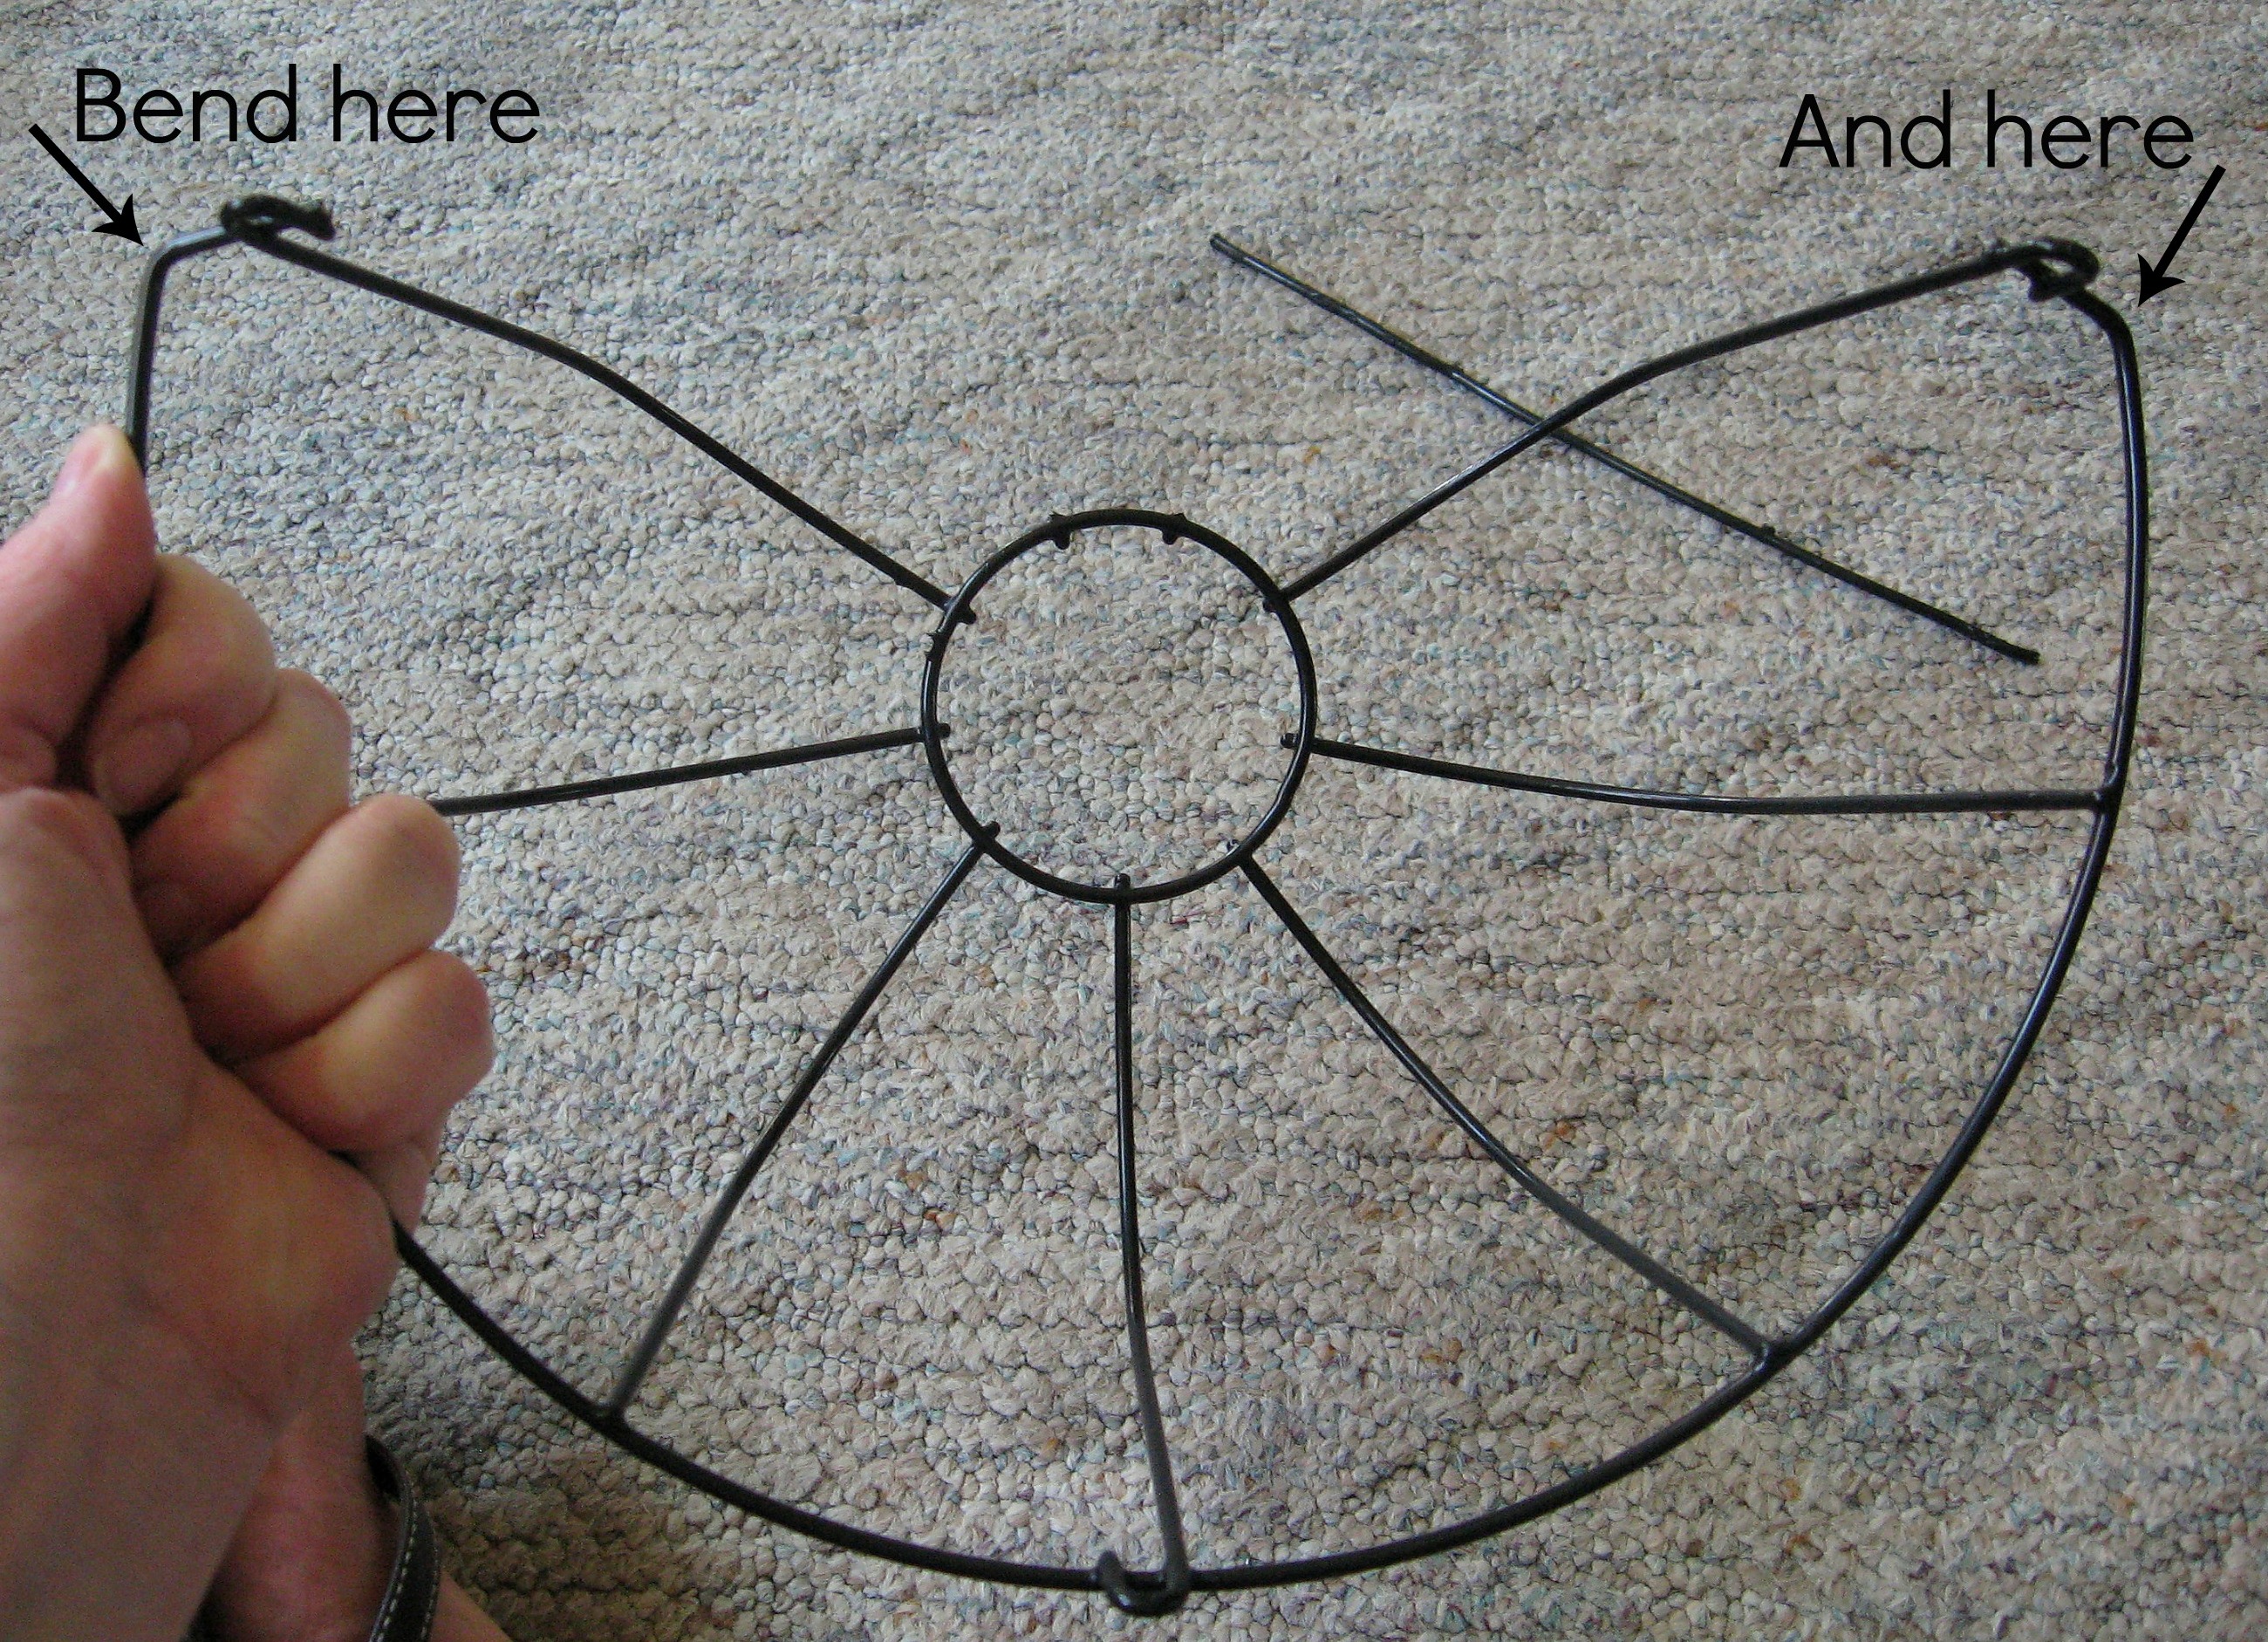
Now you’ll have a basket that has one whole “side” cut away. Next, with pliers, bend the little wire loops in at a 90* angle like this:
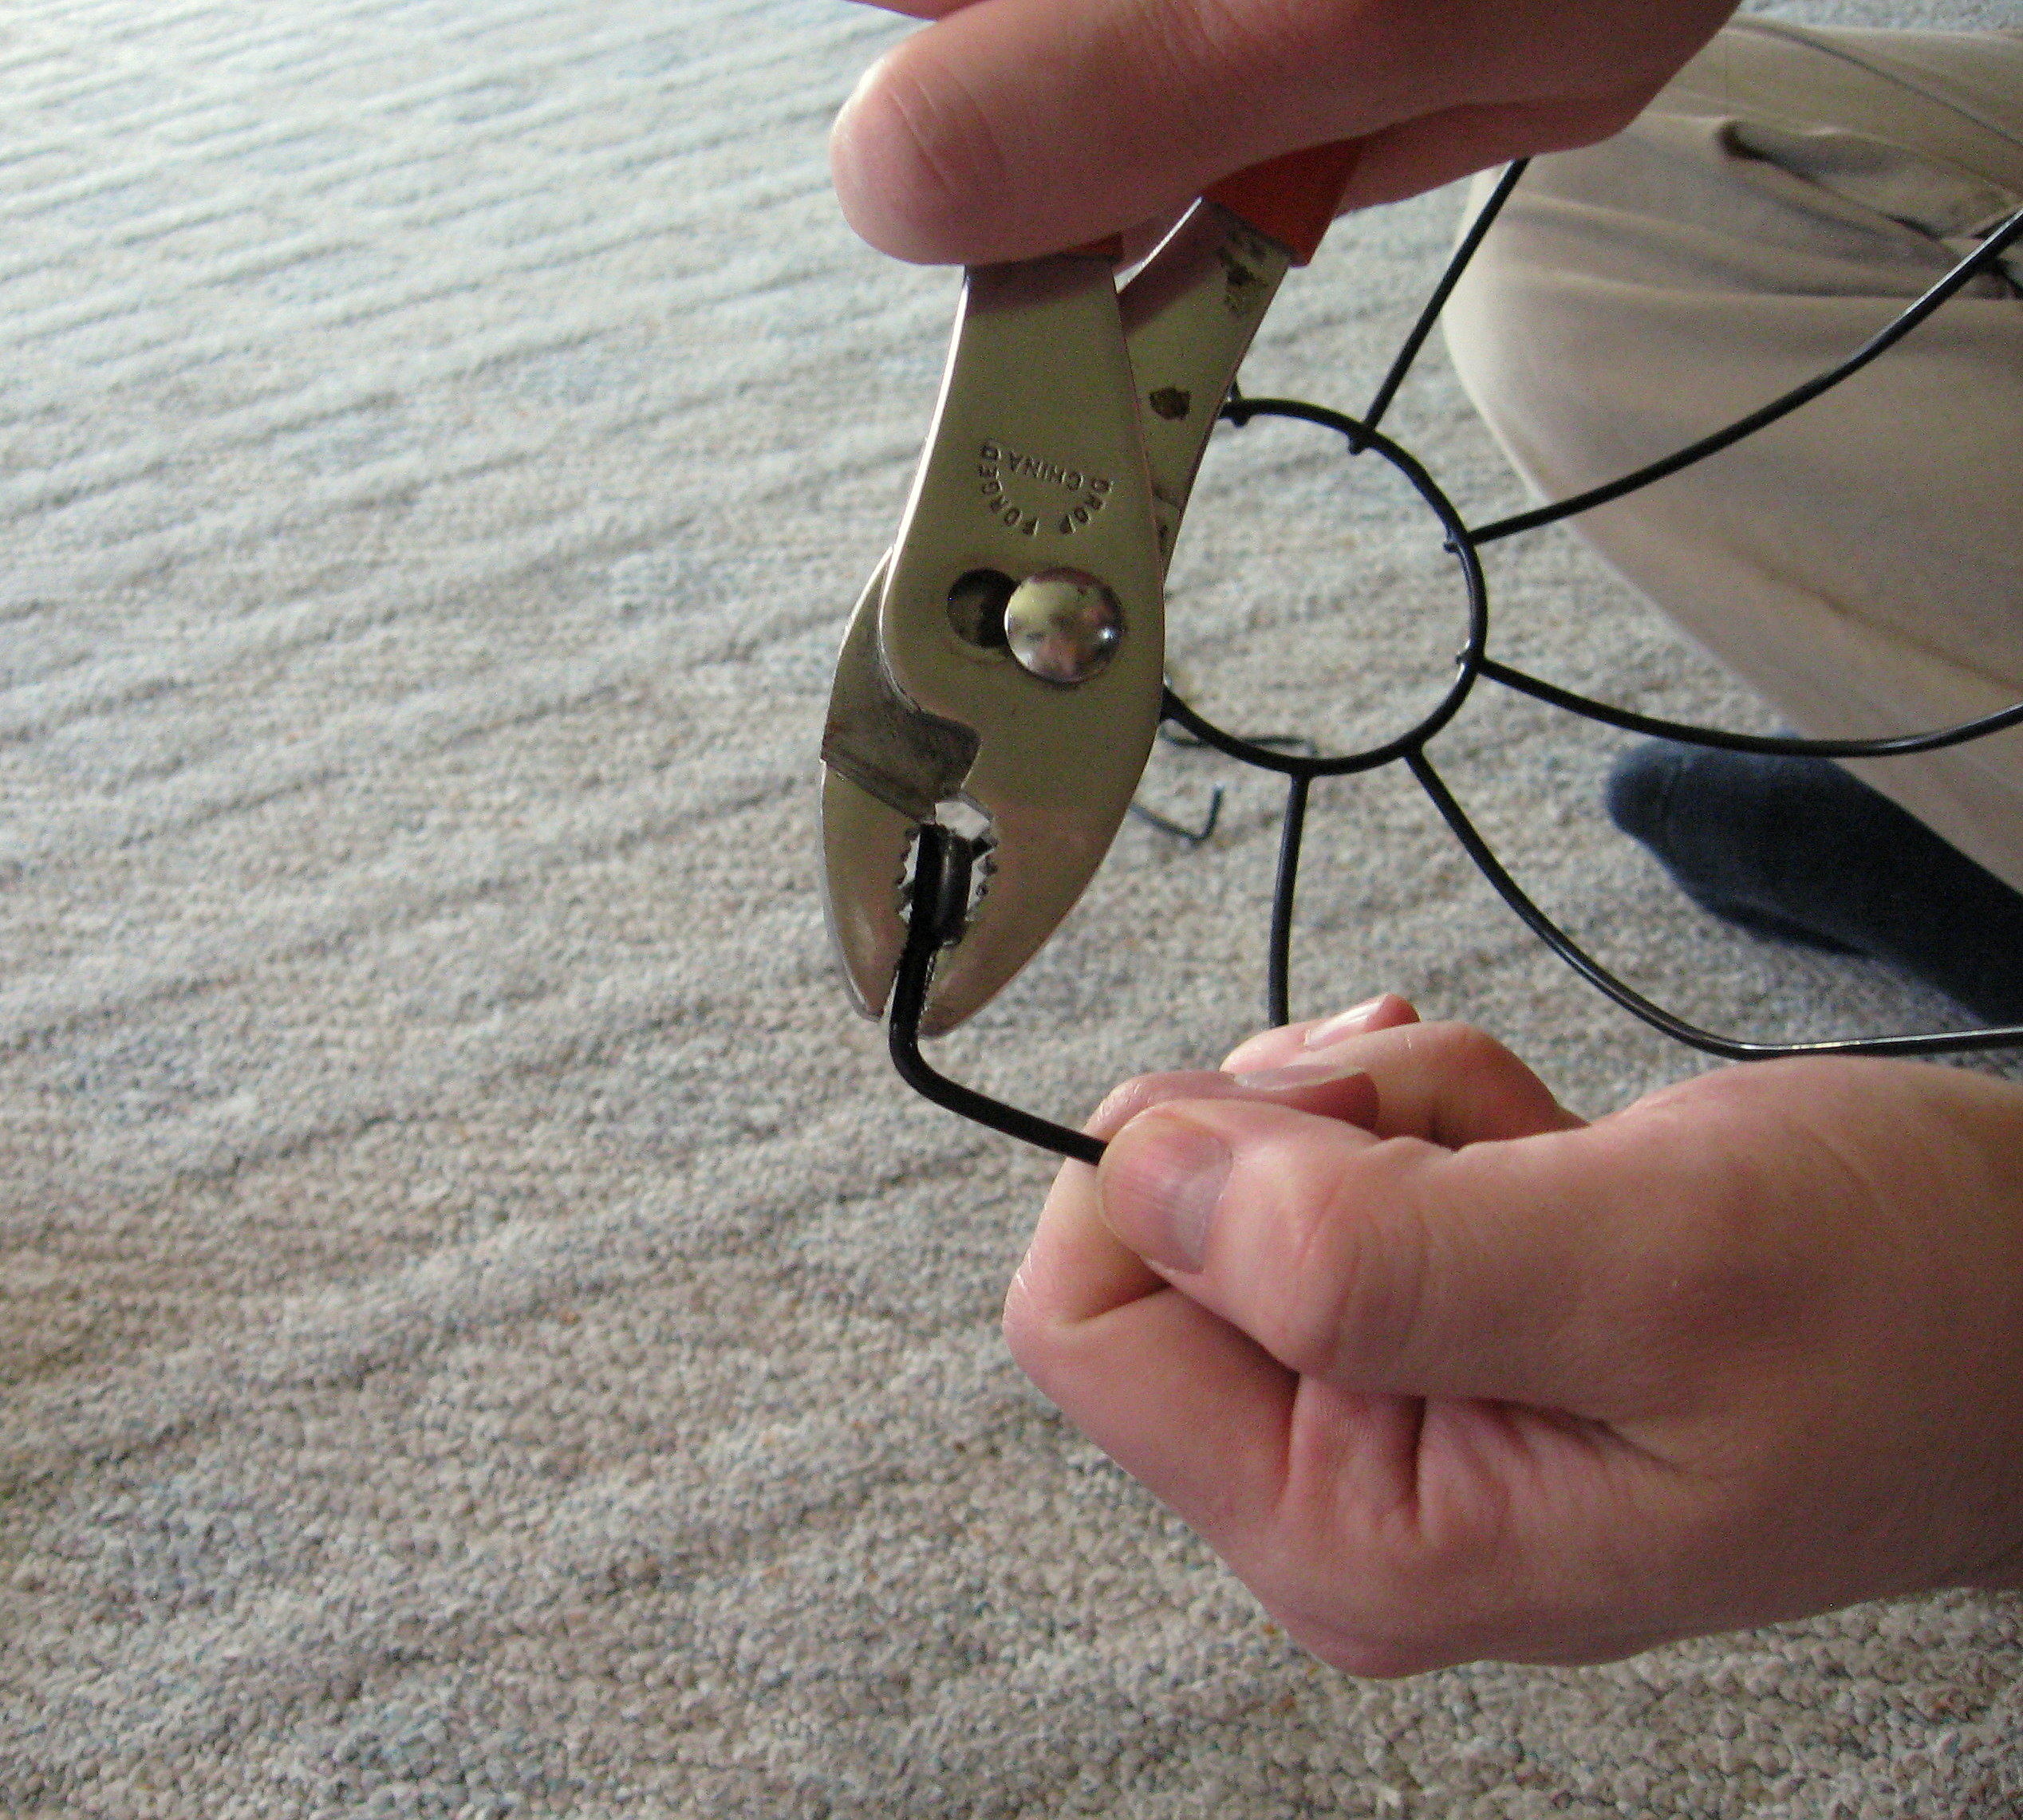
Bend the loops on each side, in towards each other.
Now it should look like this:
Cut and bend all of your baskets. Now take a minute to make sure you don’t have any sharp points, and if you find one, either cut it closer or file it down with a metal file.
Now we will put the boards together. A couple of notes about the boards that I used; I chose the dog eared cedar fence boards because that is what matches the style of my daughters room. You could easily change the style of this project by using one board that is wide enough for the baskets. You could even skip this part and attach the baskets straight to the wall. I considered attaching the baskets to the boards the other way. I decided that it fits better in her room vertically, but horizontally would be super cute too!
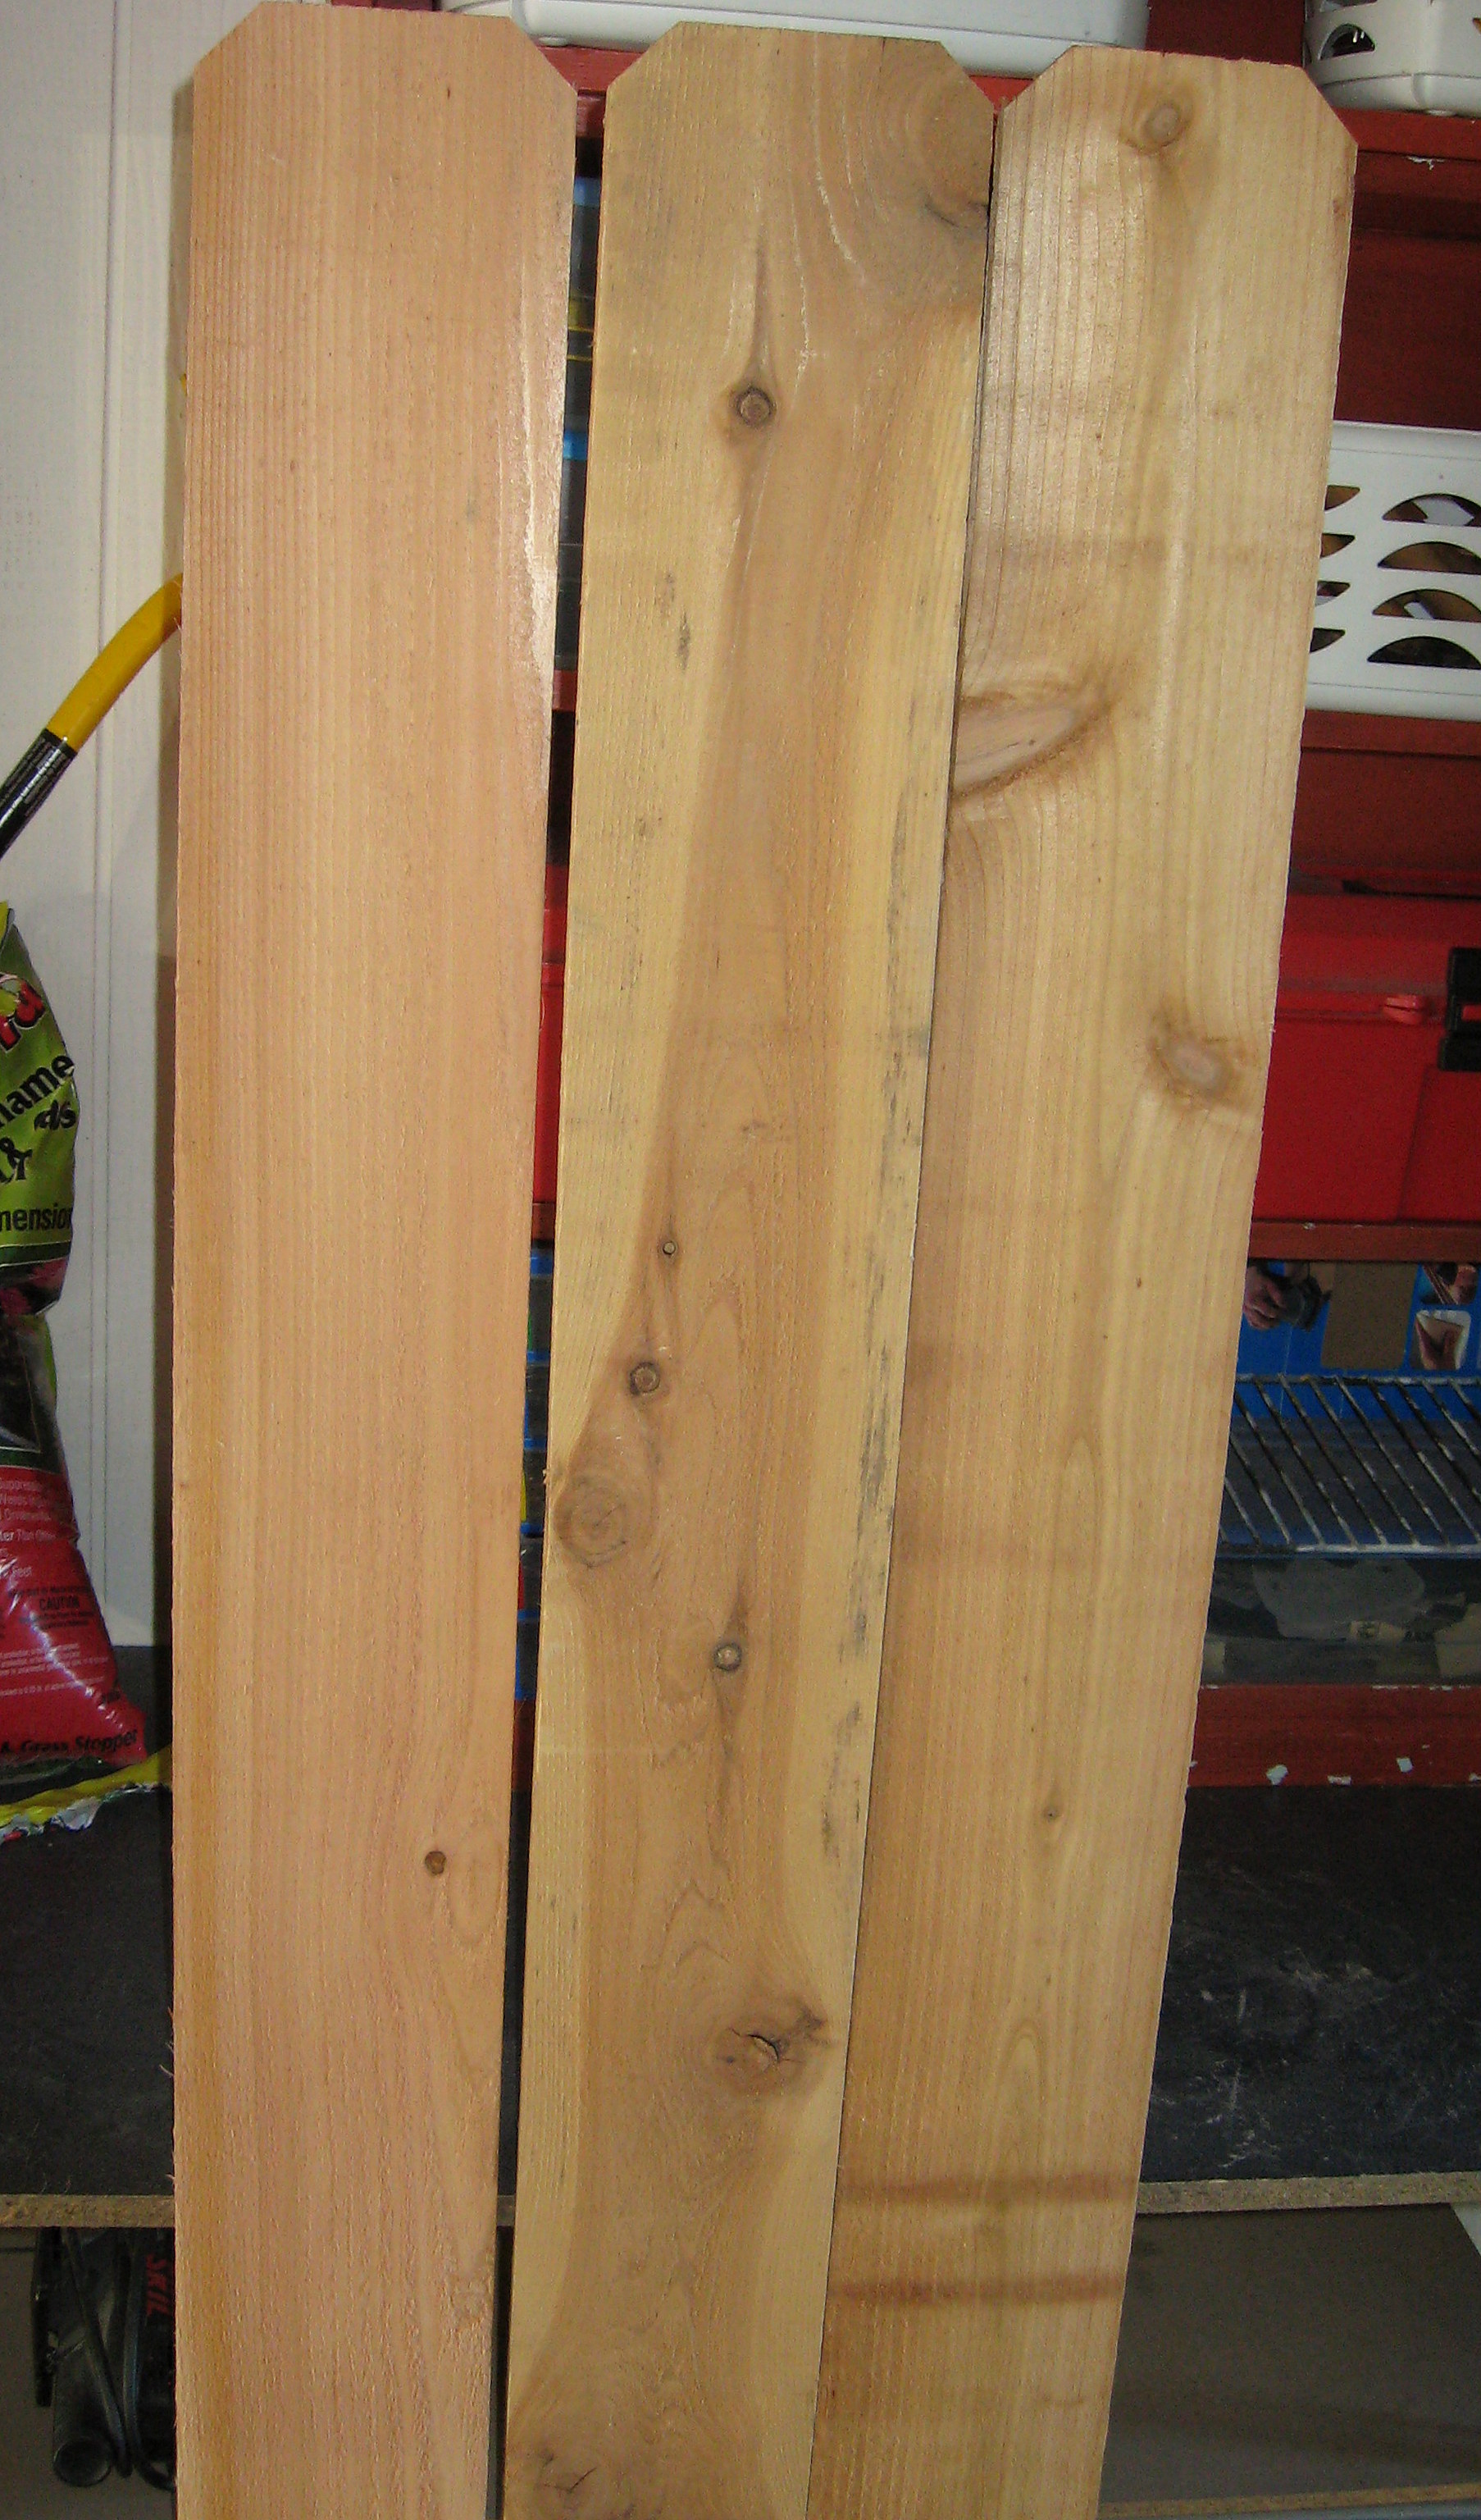
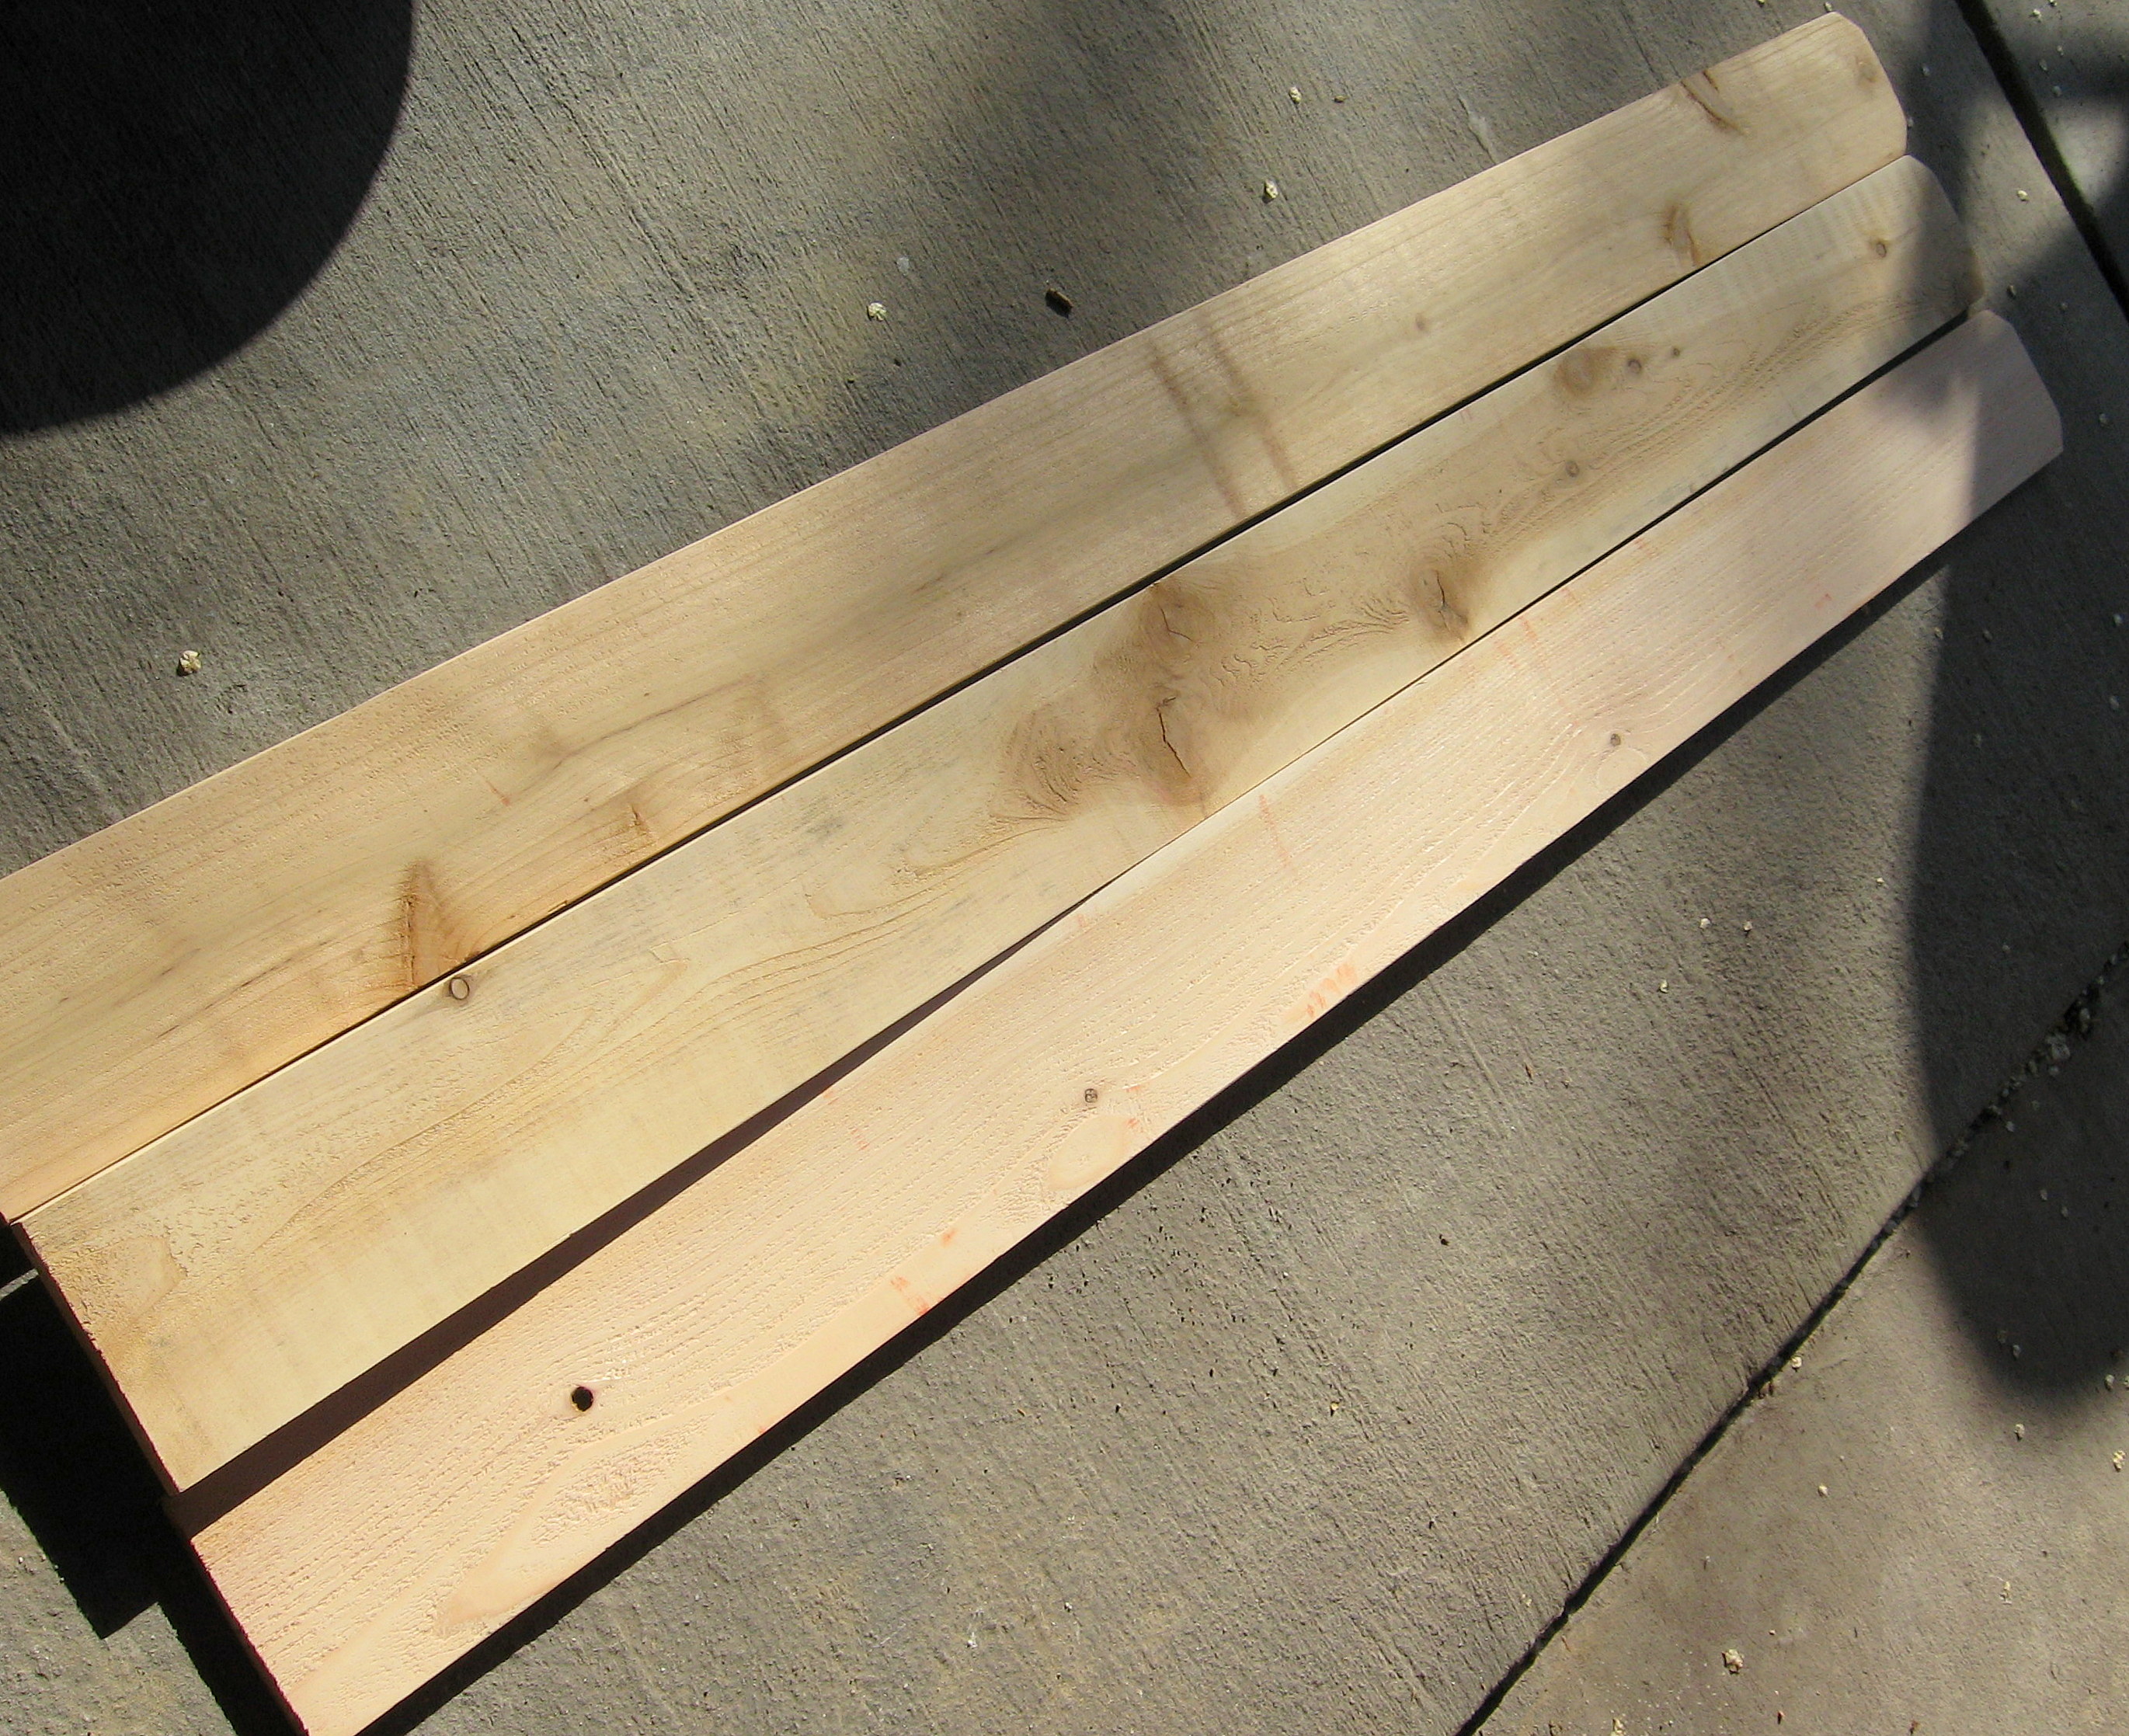
Here we go… cedar fence boards are notoriously warped and wonky. Again, for the style I was going for I didn’t mind if they didn’t fit together really tight, but if that matters to you make sure to take the time in the store to sort through the pile and find the straightest, flattest ones you can find.
The wood is very rough so start by giving them a quick sanding on all sides. Lay them out on the ground face down. Push them together and line up the bottoms so they are straight and perfectly lined up. See how mine are warped? That is fine; they’ll still go together. Just make sure the bottoms are even.
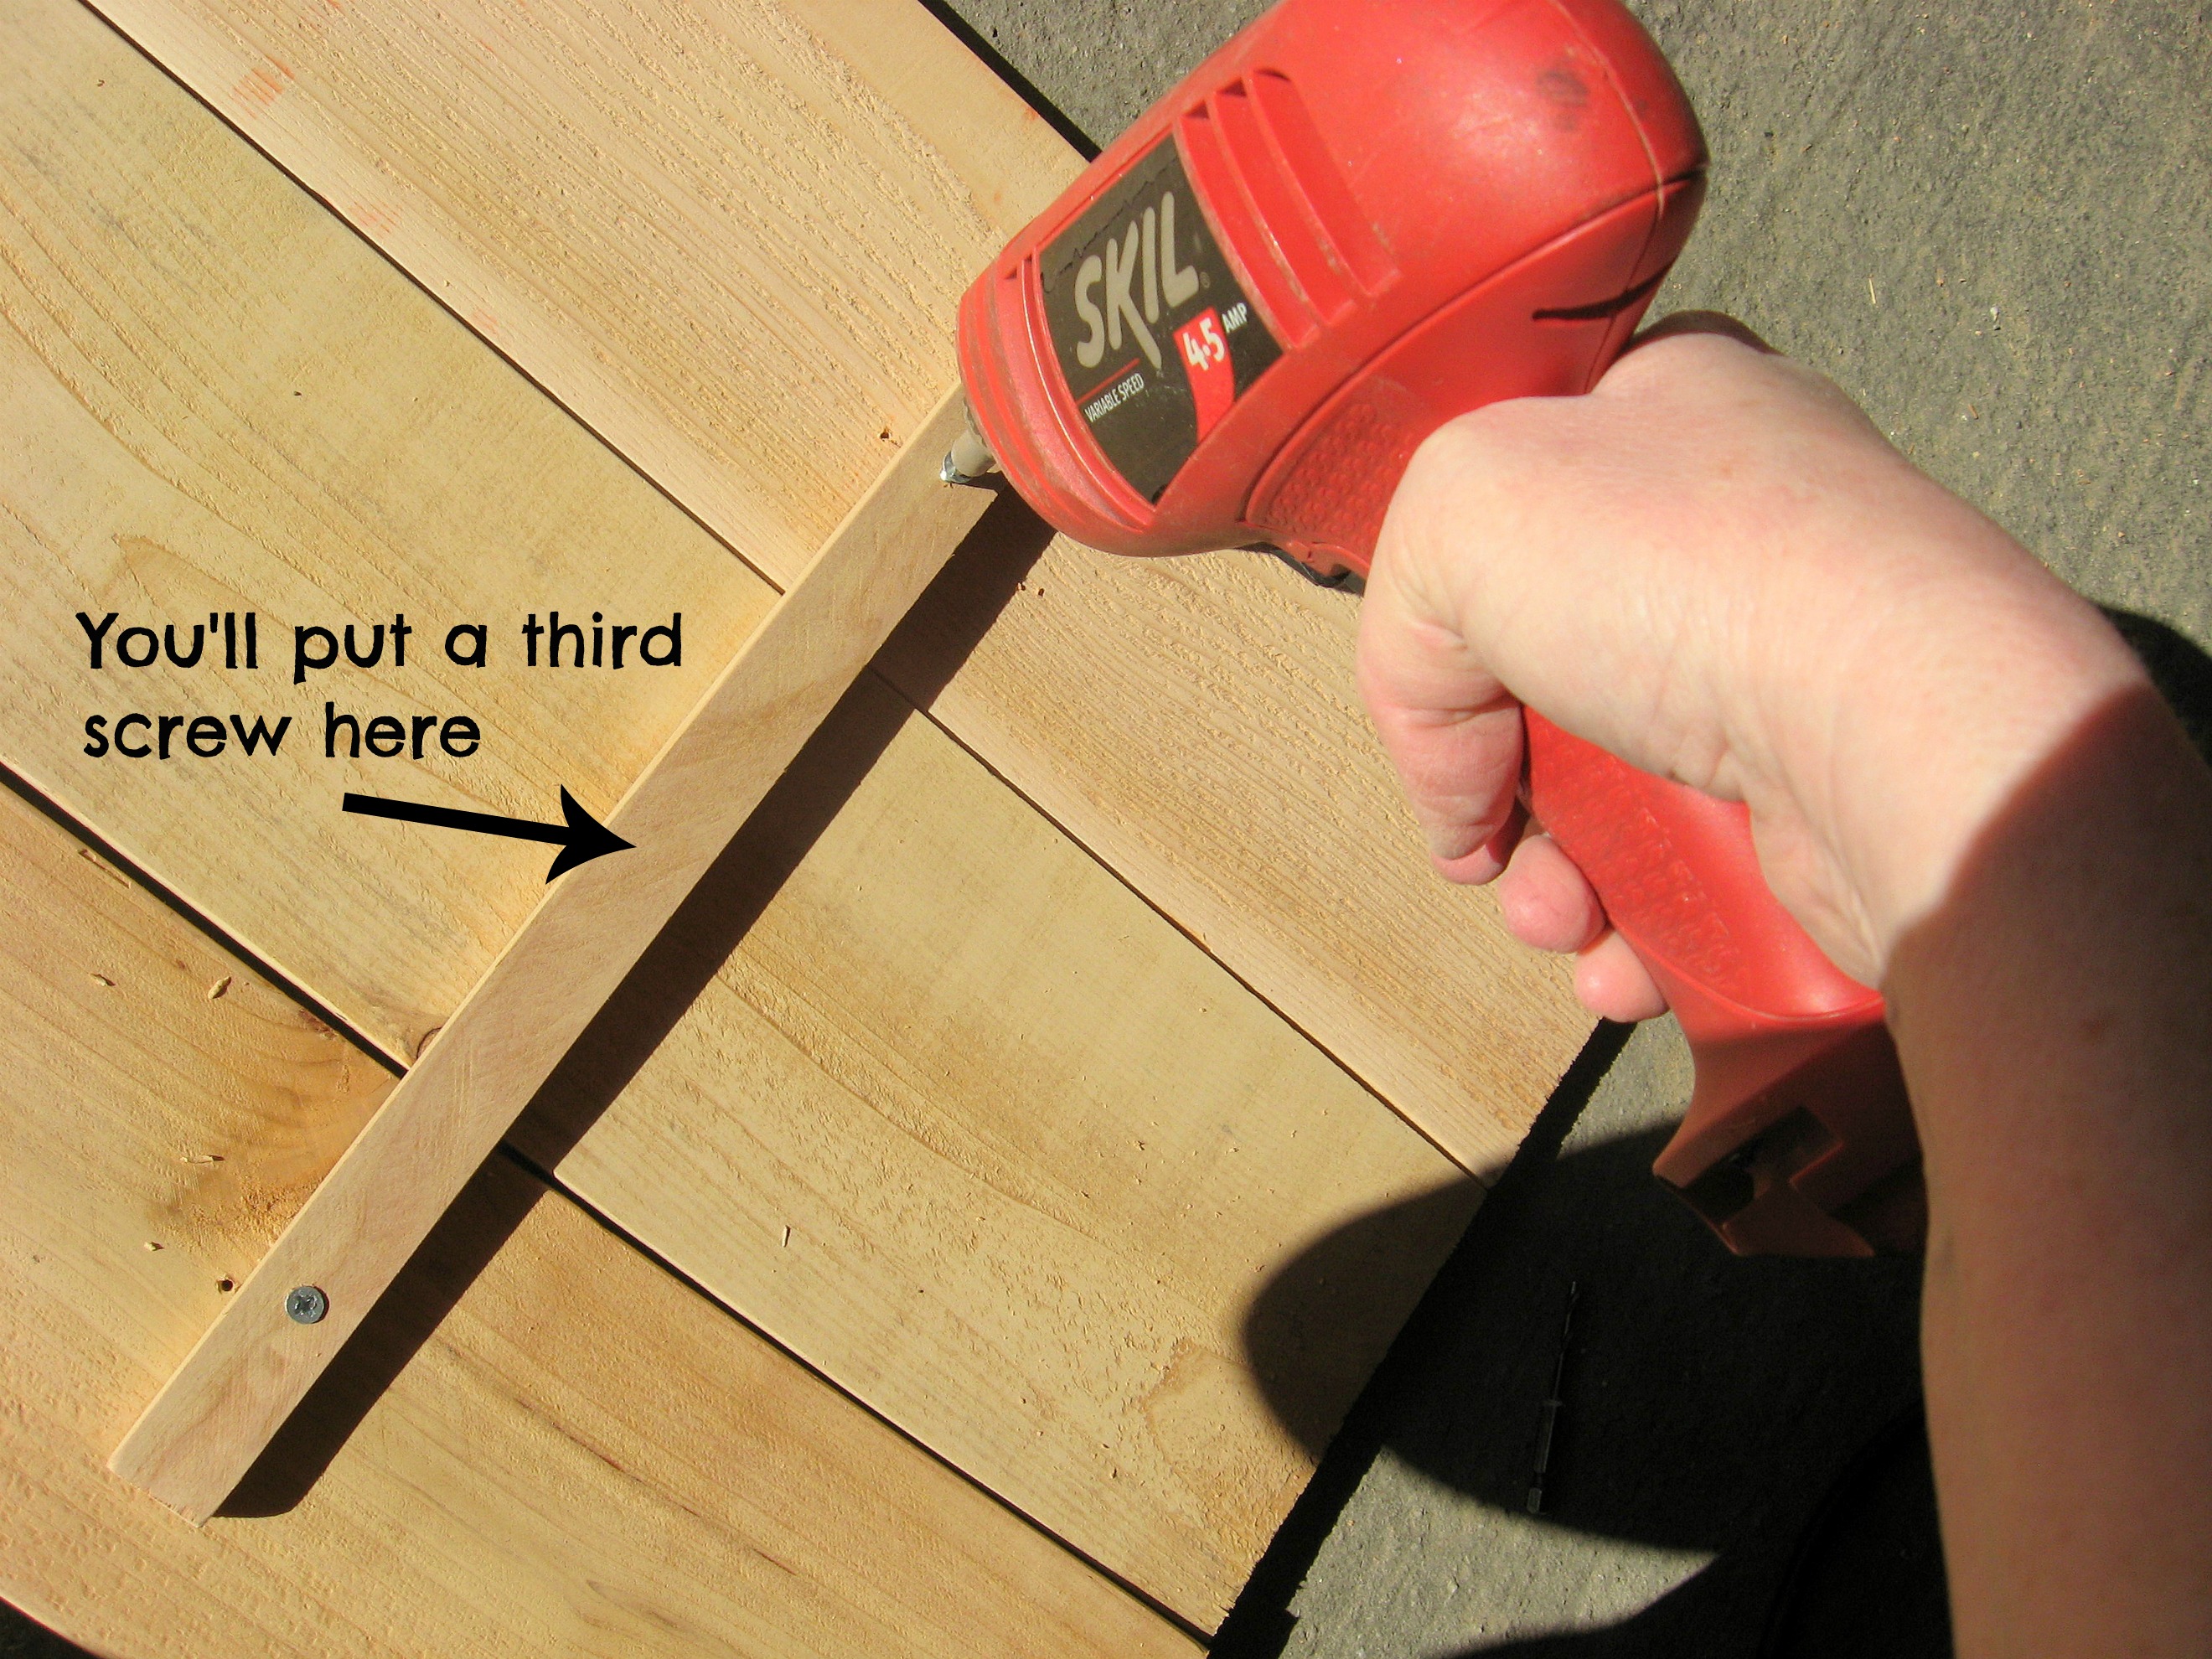
Now you will attach them together by screwing three strips of wood across them through the back. This is the wood I used – sorry for the shadows!
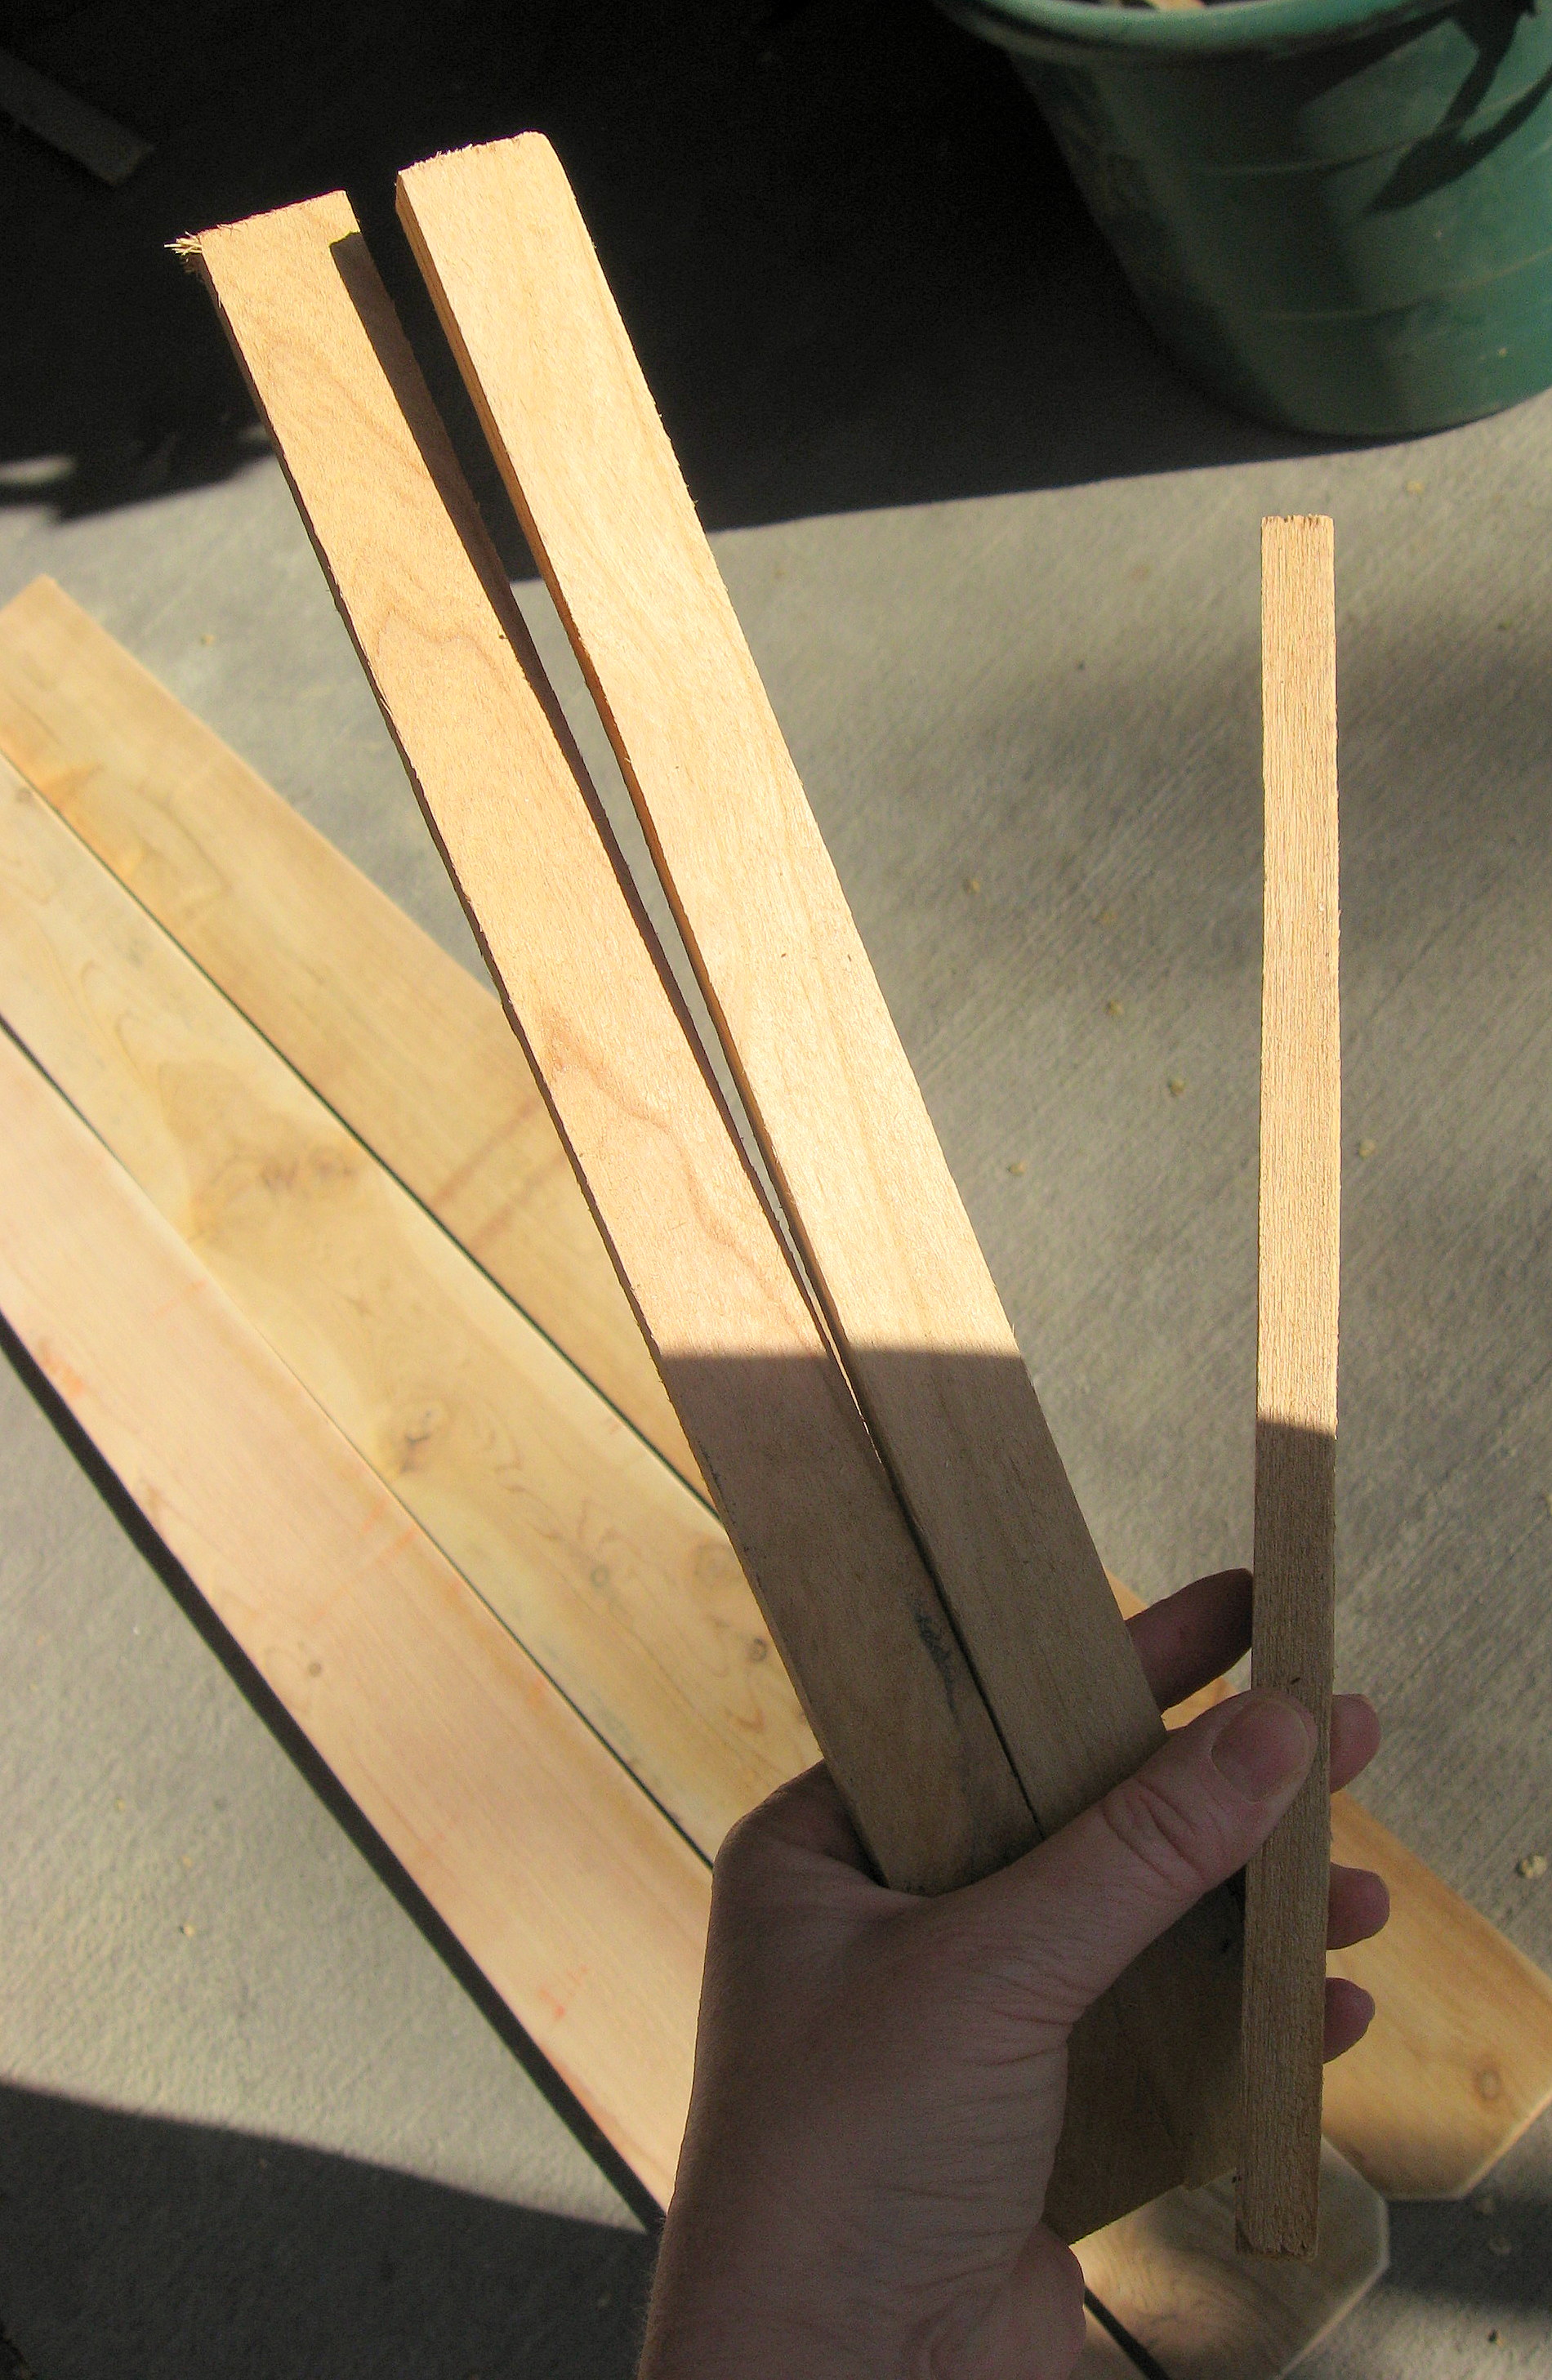
Hold the fence boards together tightly as you screw the cross boards in – use an extra set of hands, a large clamp or even some heavy cinder blocks on either side of the boards. Make sure you pre-drill all the holes so you don’t split the wood.
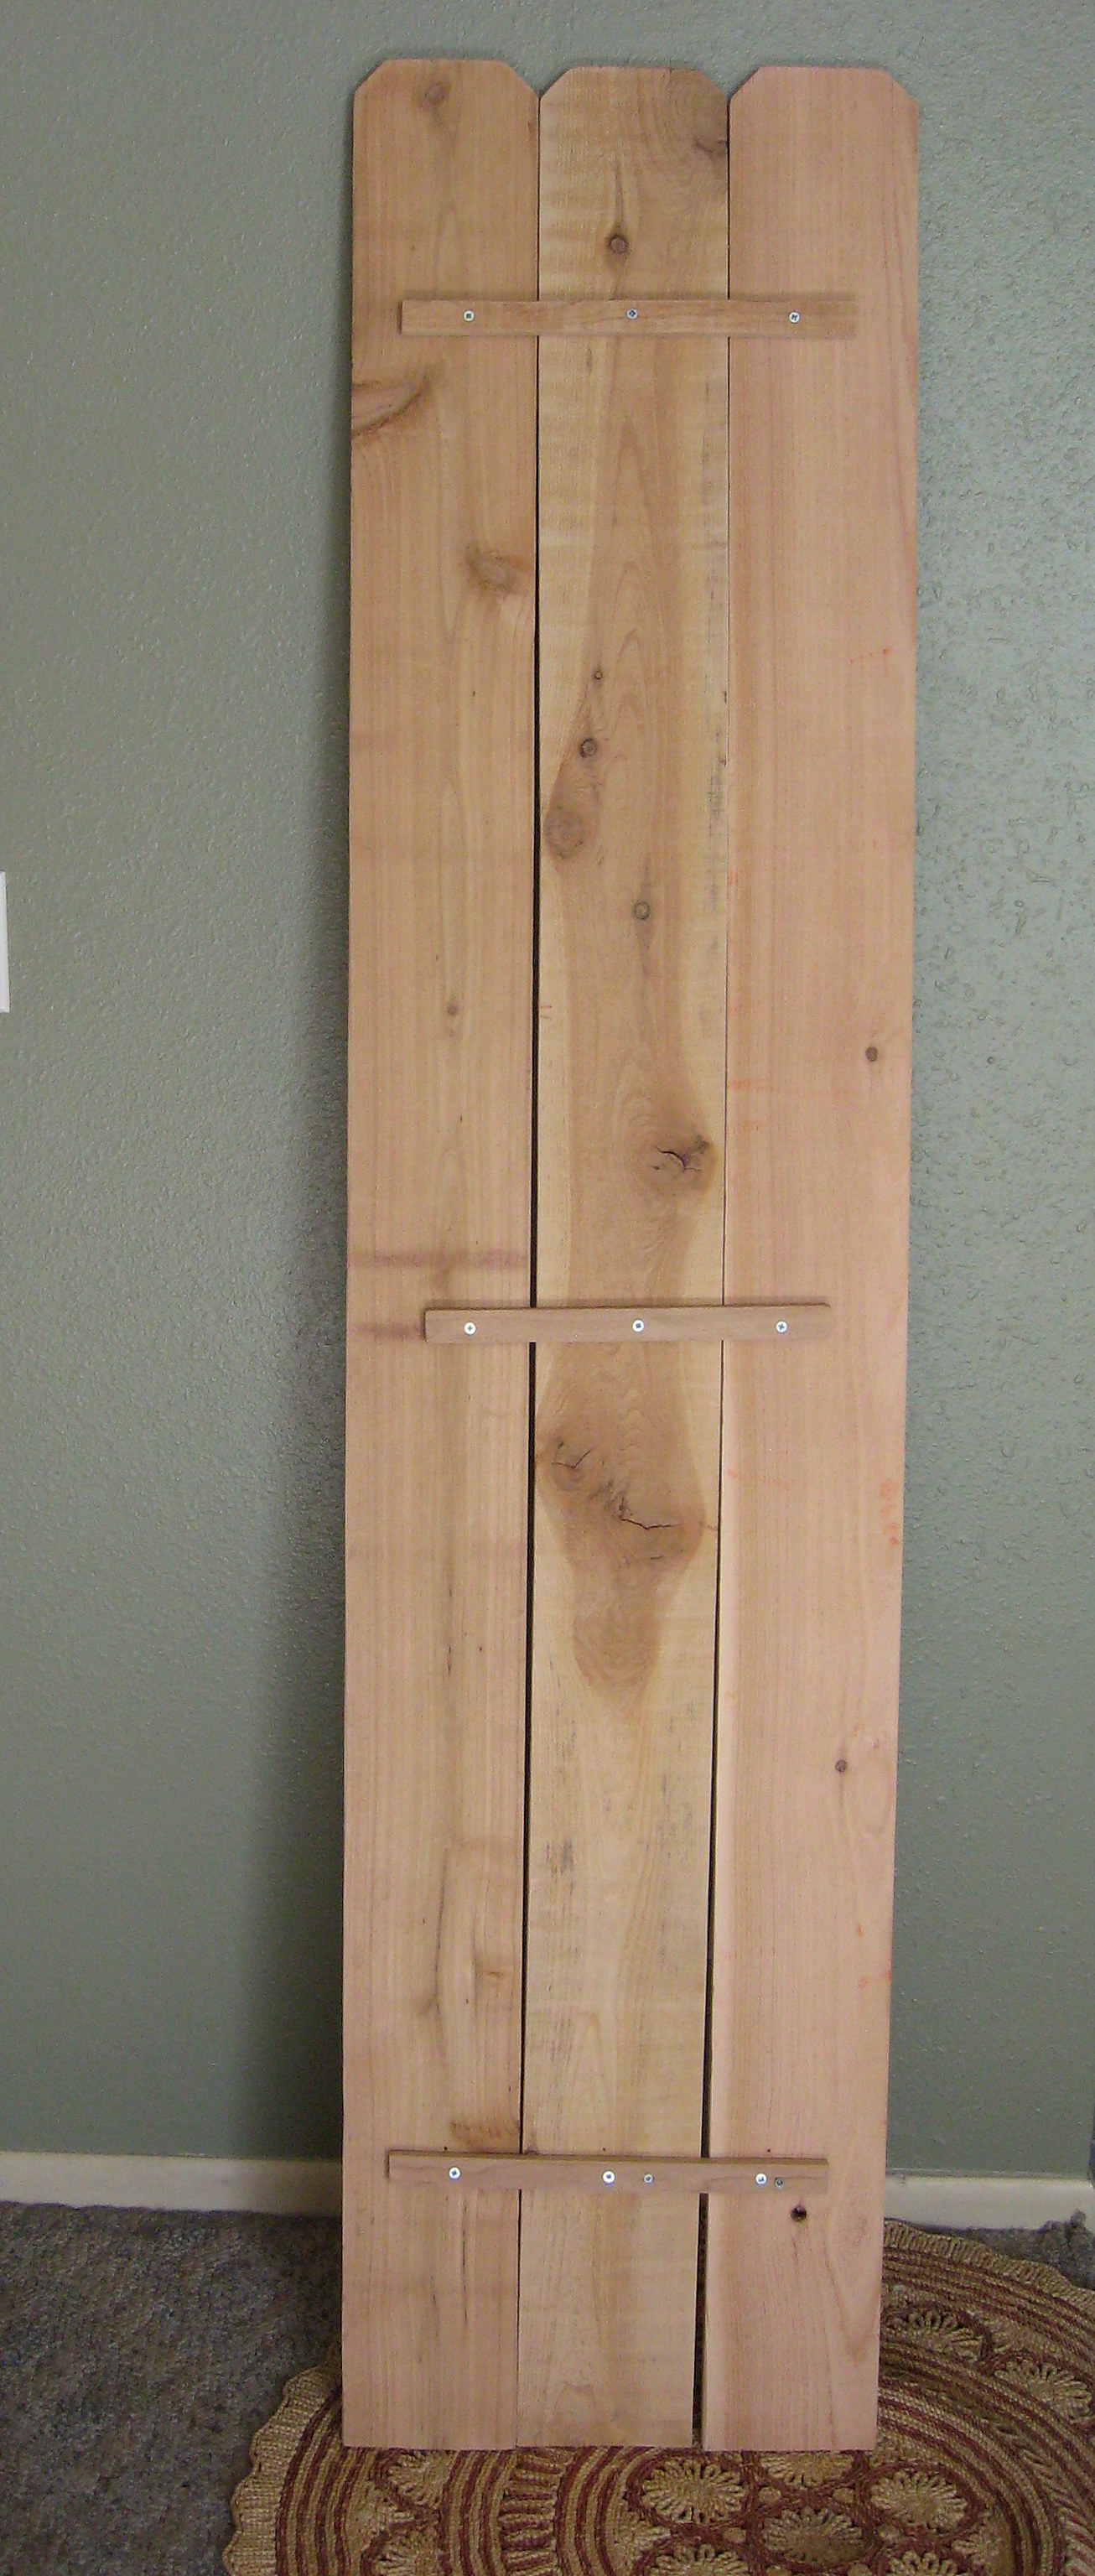
Here is what the back will look like when you’re all done:
Paint the boards in the color of your choice; I went with white and gave them a good sanding to distress them once it was dry.
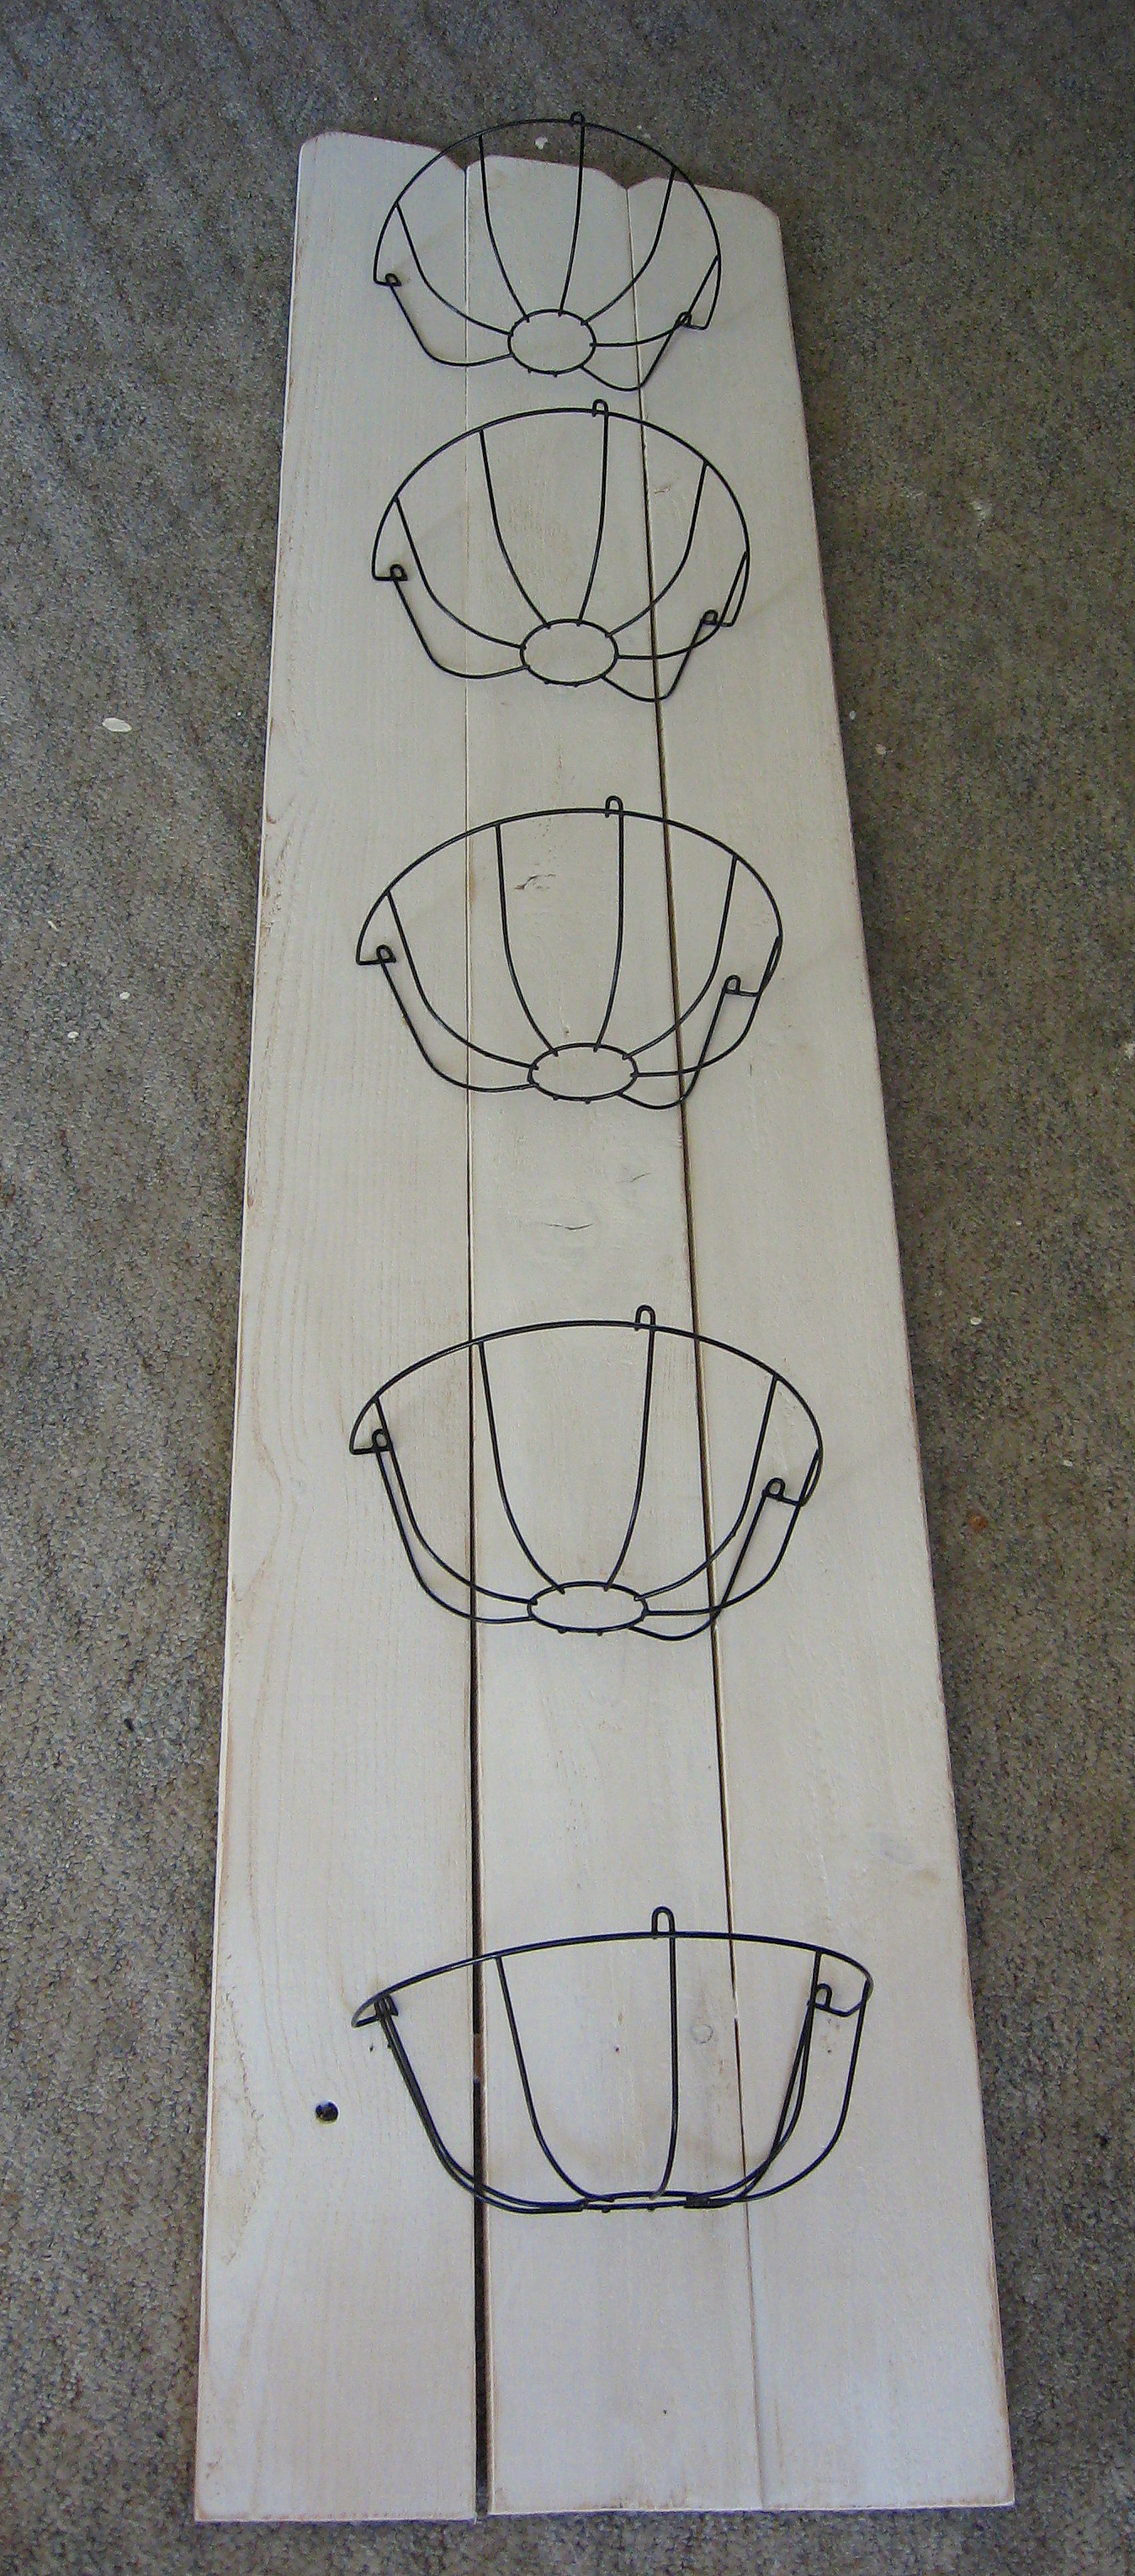
Now we will attach the baskets to the boards. Lay the boards out on the floor and decide where you want the baskets. I worked on this for a long time, getting them perfectly lined up and spaced evenly.
Then my son came home and moved them so that they were offset. After I freaked out, I looked at them again and realized I liked it better this way. Just make sure that once you know for sure where you want them, use a pen to mark the placement of each basket through the wire loop before they get moved again 😉 This marks where you will drill.
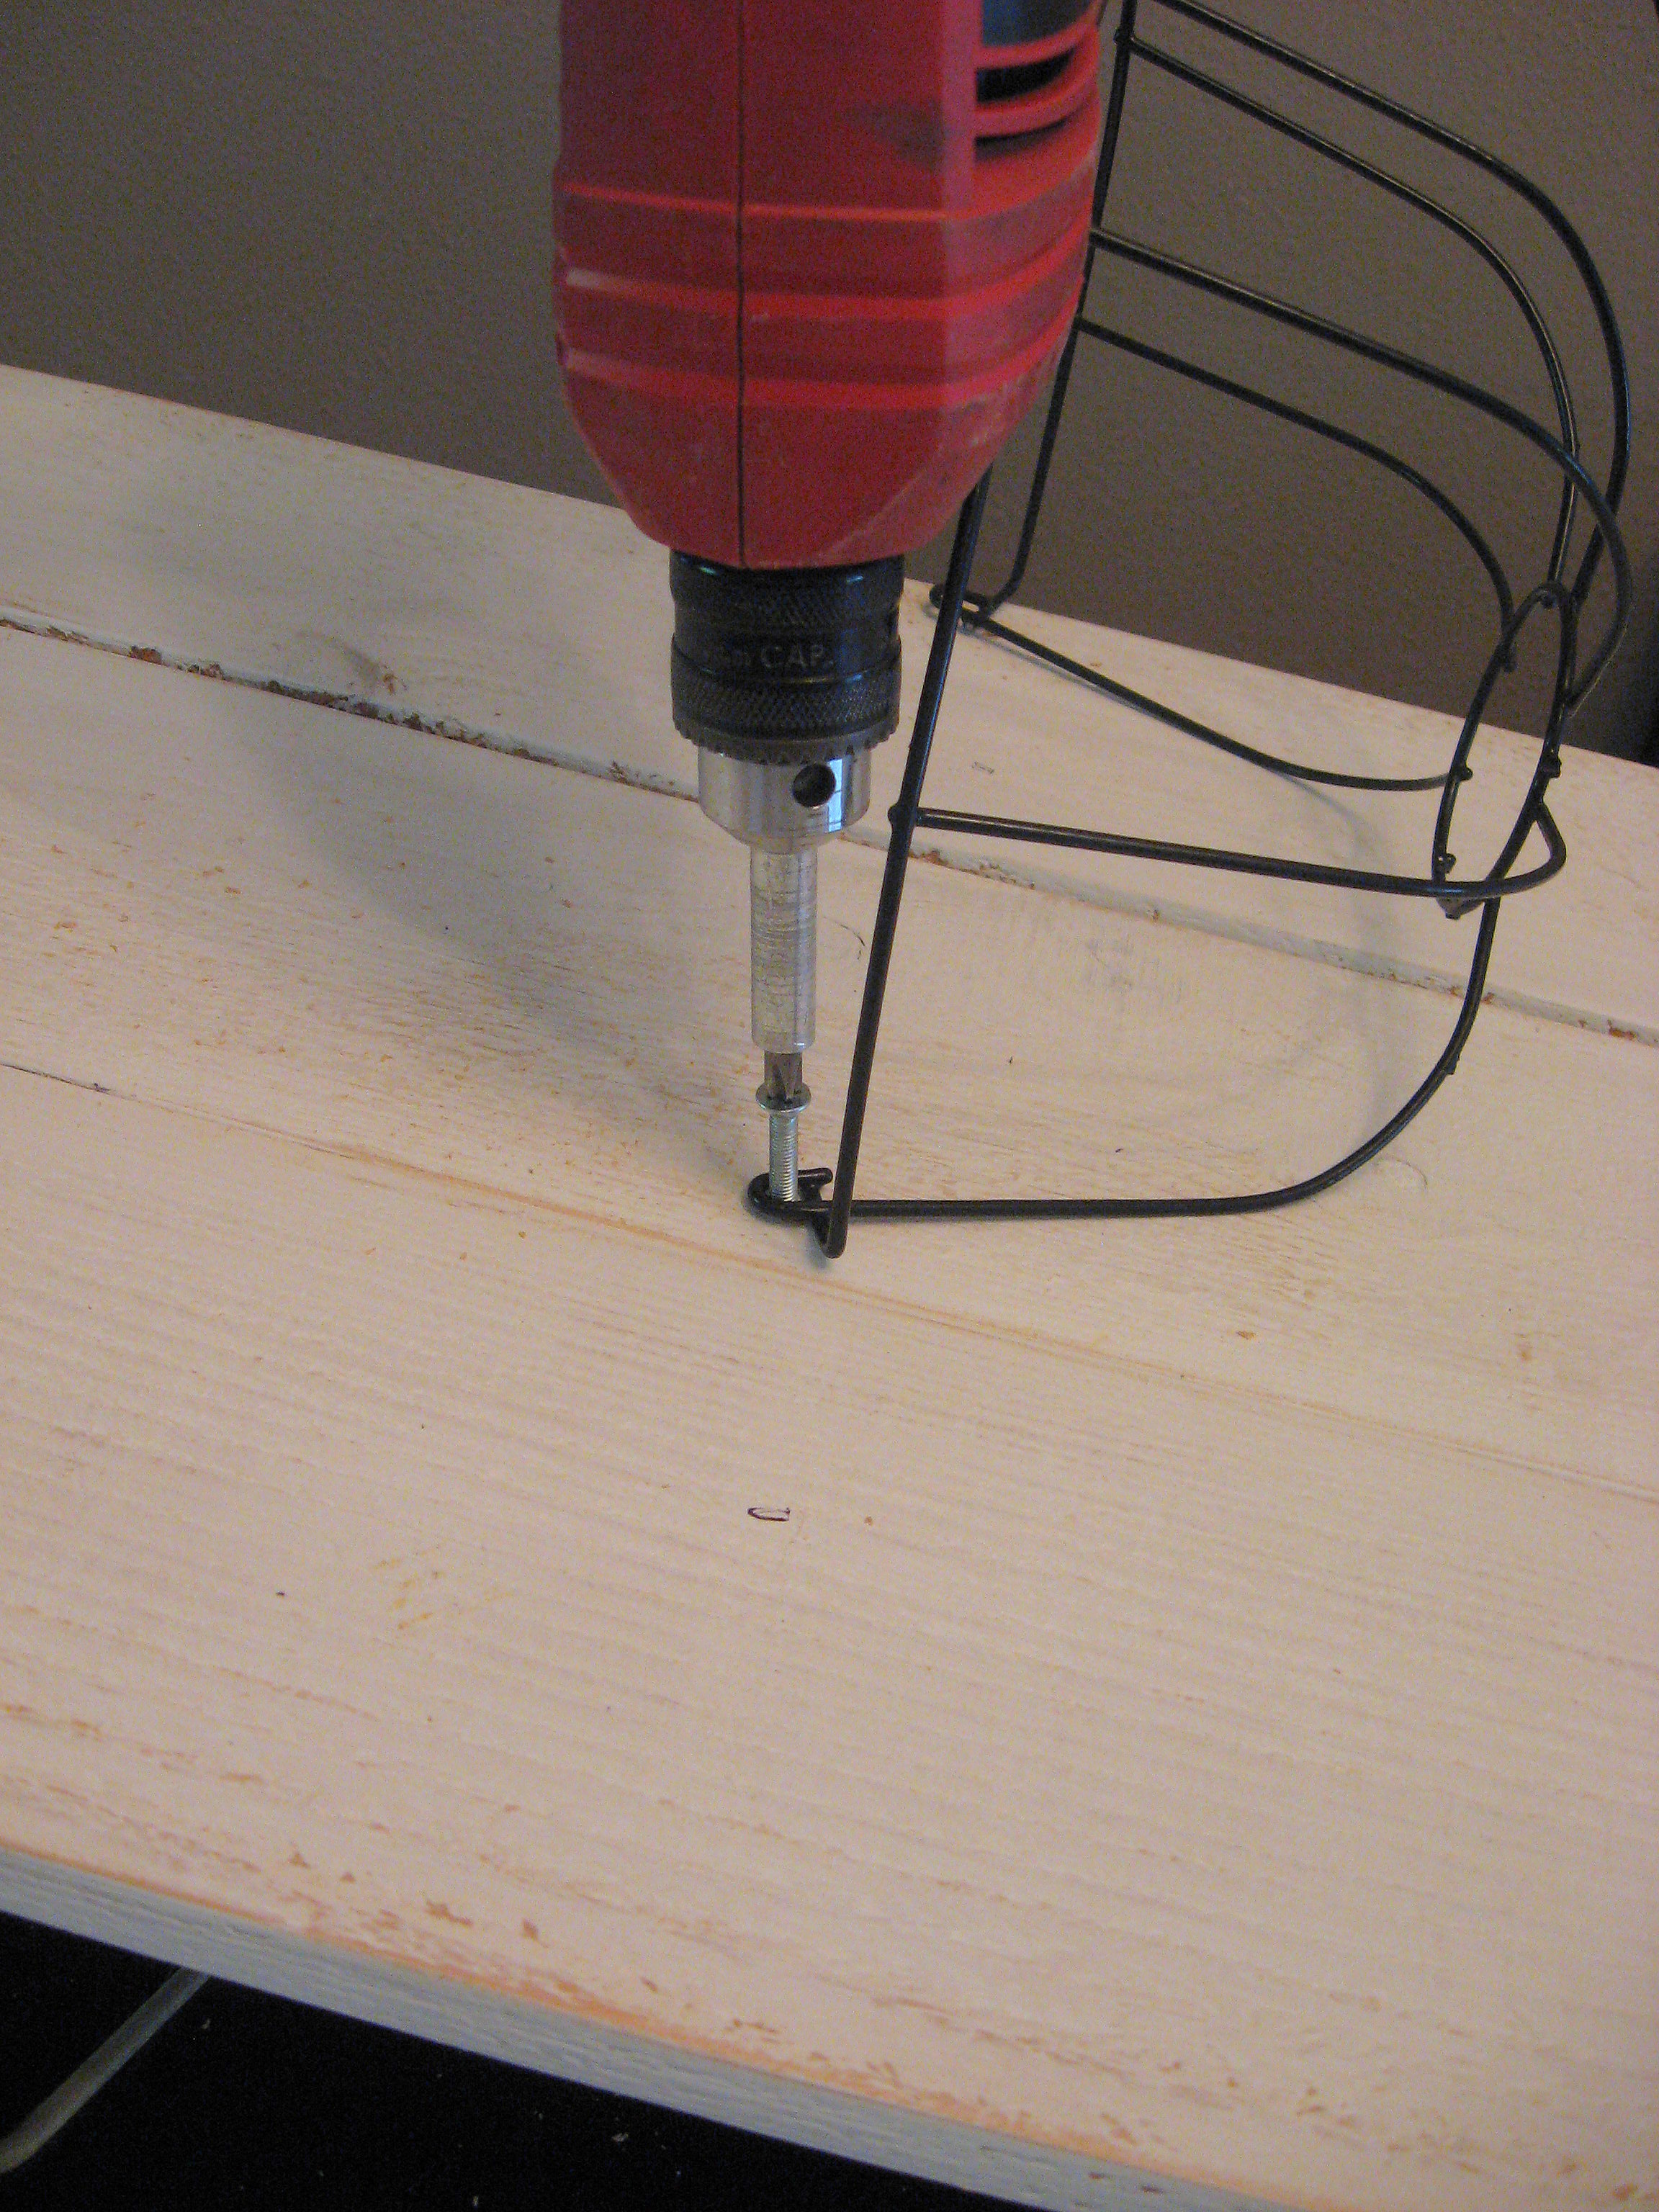
You could just use a screw into the wood, but since the baskets will get a lot of action, I decided I wanted them to be really secure, so I used a nut and bolt. Drill a hole just big enough for the bolt to go through on each of your markings. Then, hold each basket in place and screw the bolt through the wire loop on the basket and through the board.
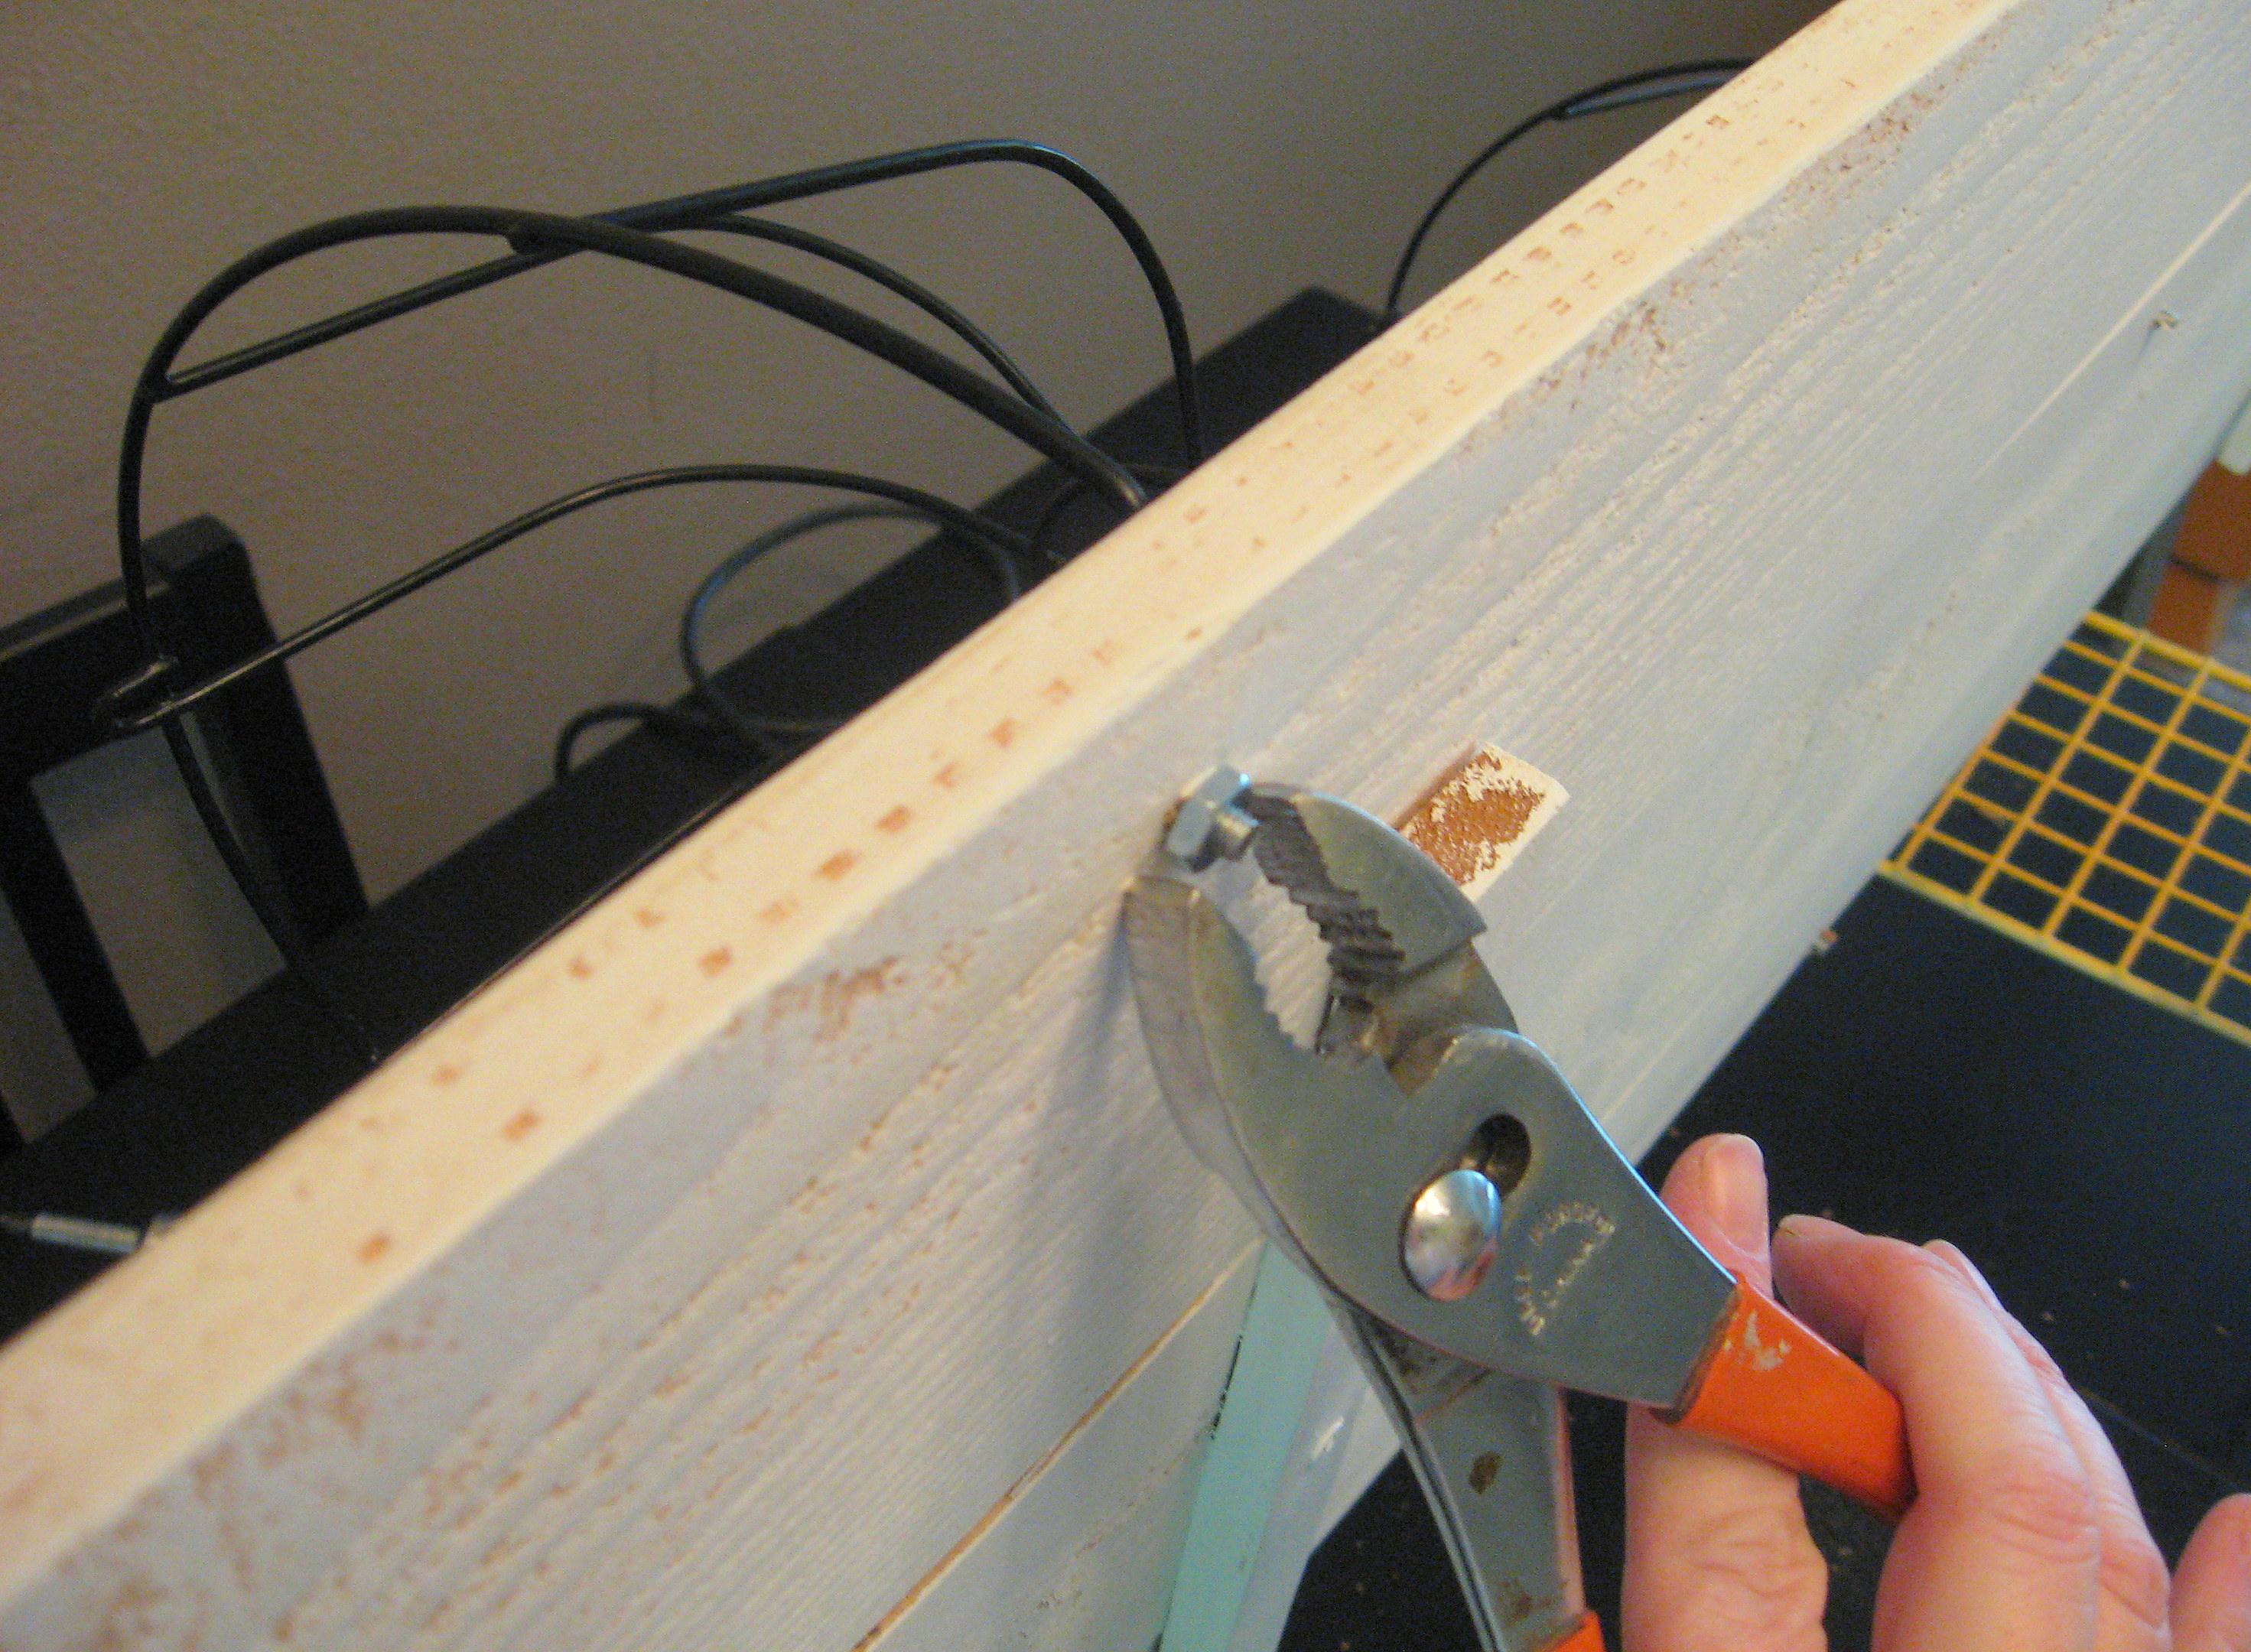
When all the baskets are screwed into place, flip the board onto its side and screw all the nuts into place using pliers or a…. ummm…. nut-tightening-tool (shoot!! What is that called?)
When you tighten all the nuts and bolts, it will make the baskets pop up away from the surface of the board.
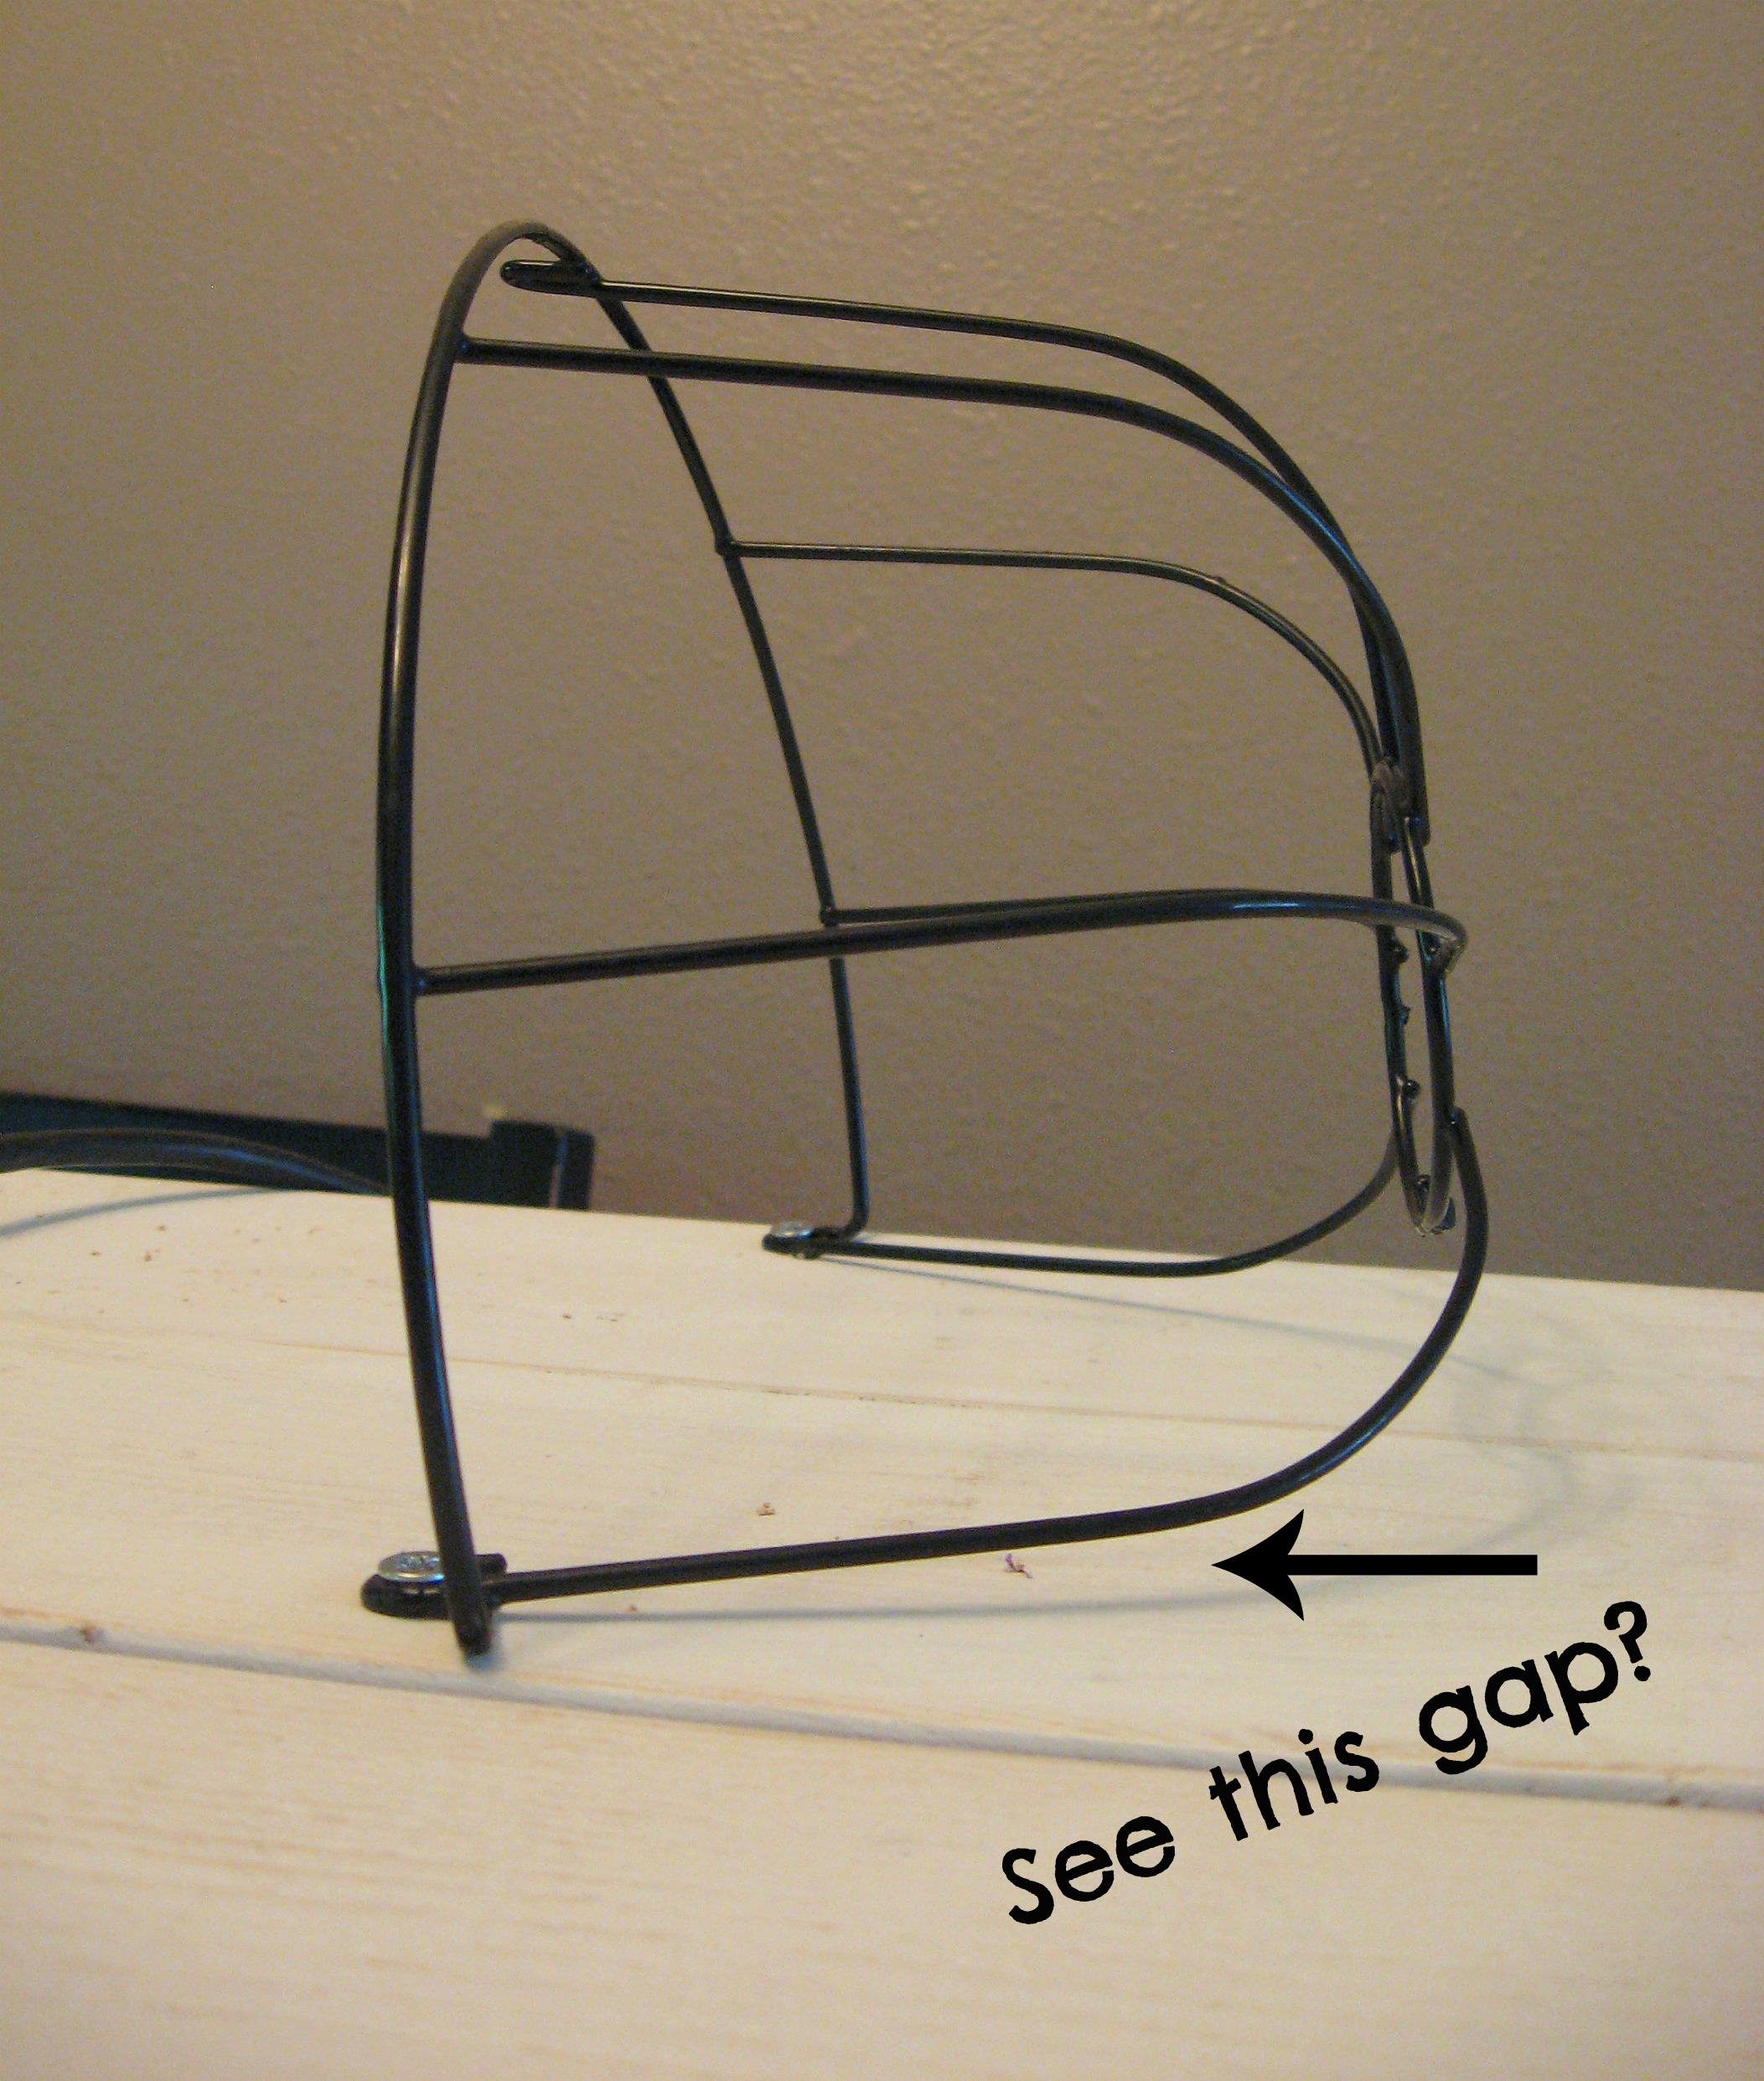
I’m sure it isn’t a big enough gap for the critters to fall through, but I didn’t like the way it looked. I found that if I just pushed it down against the board,
the wires of the basket would bend enough that the basket would sit flat against the board again.
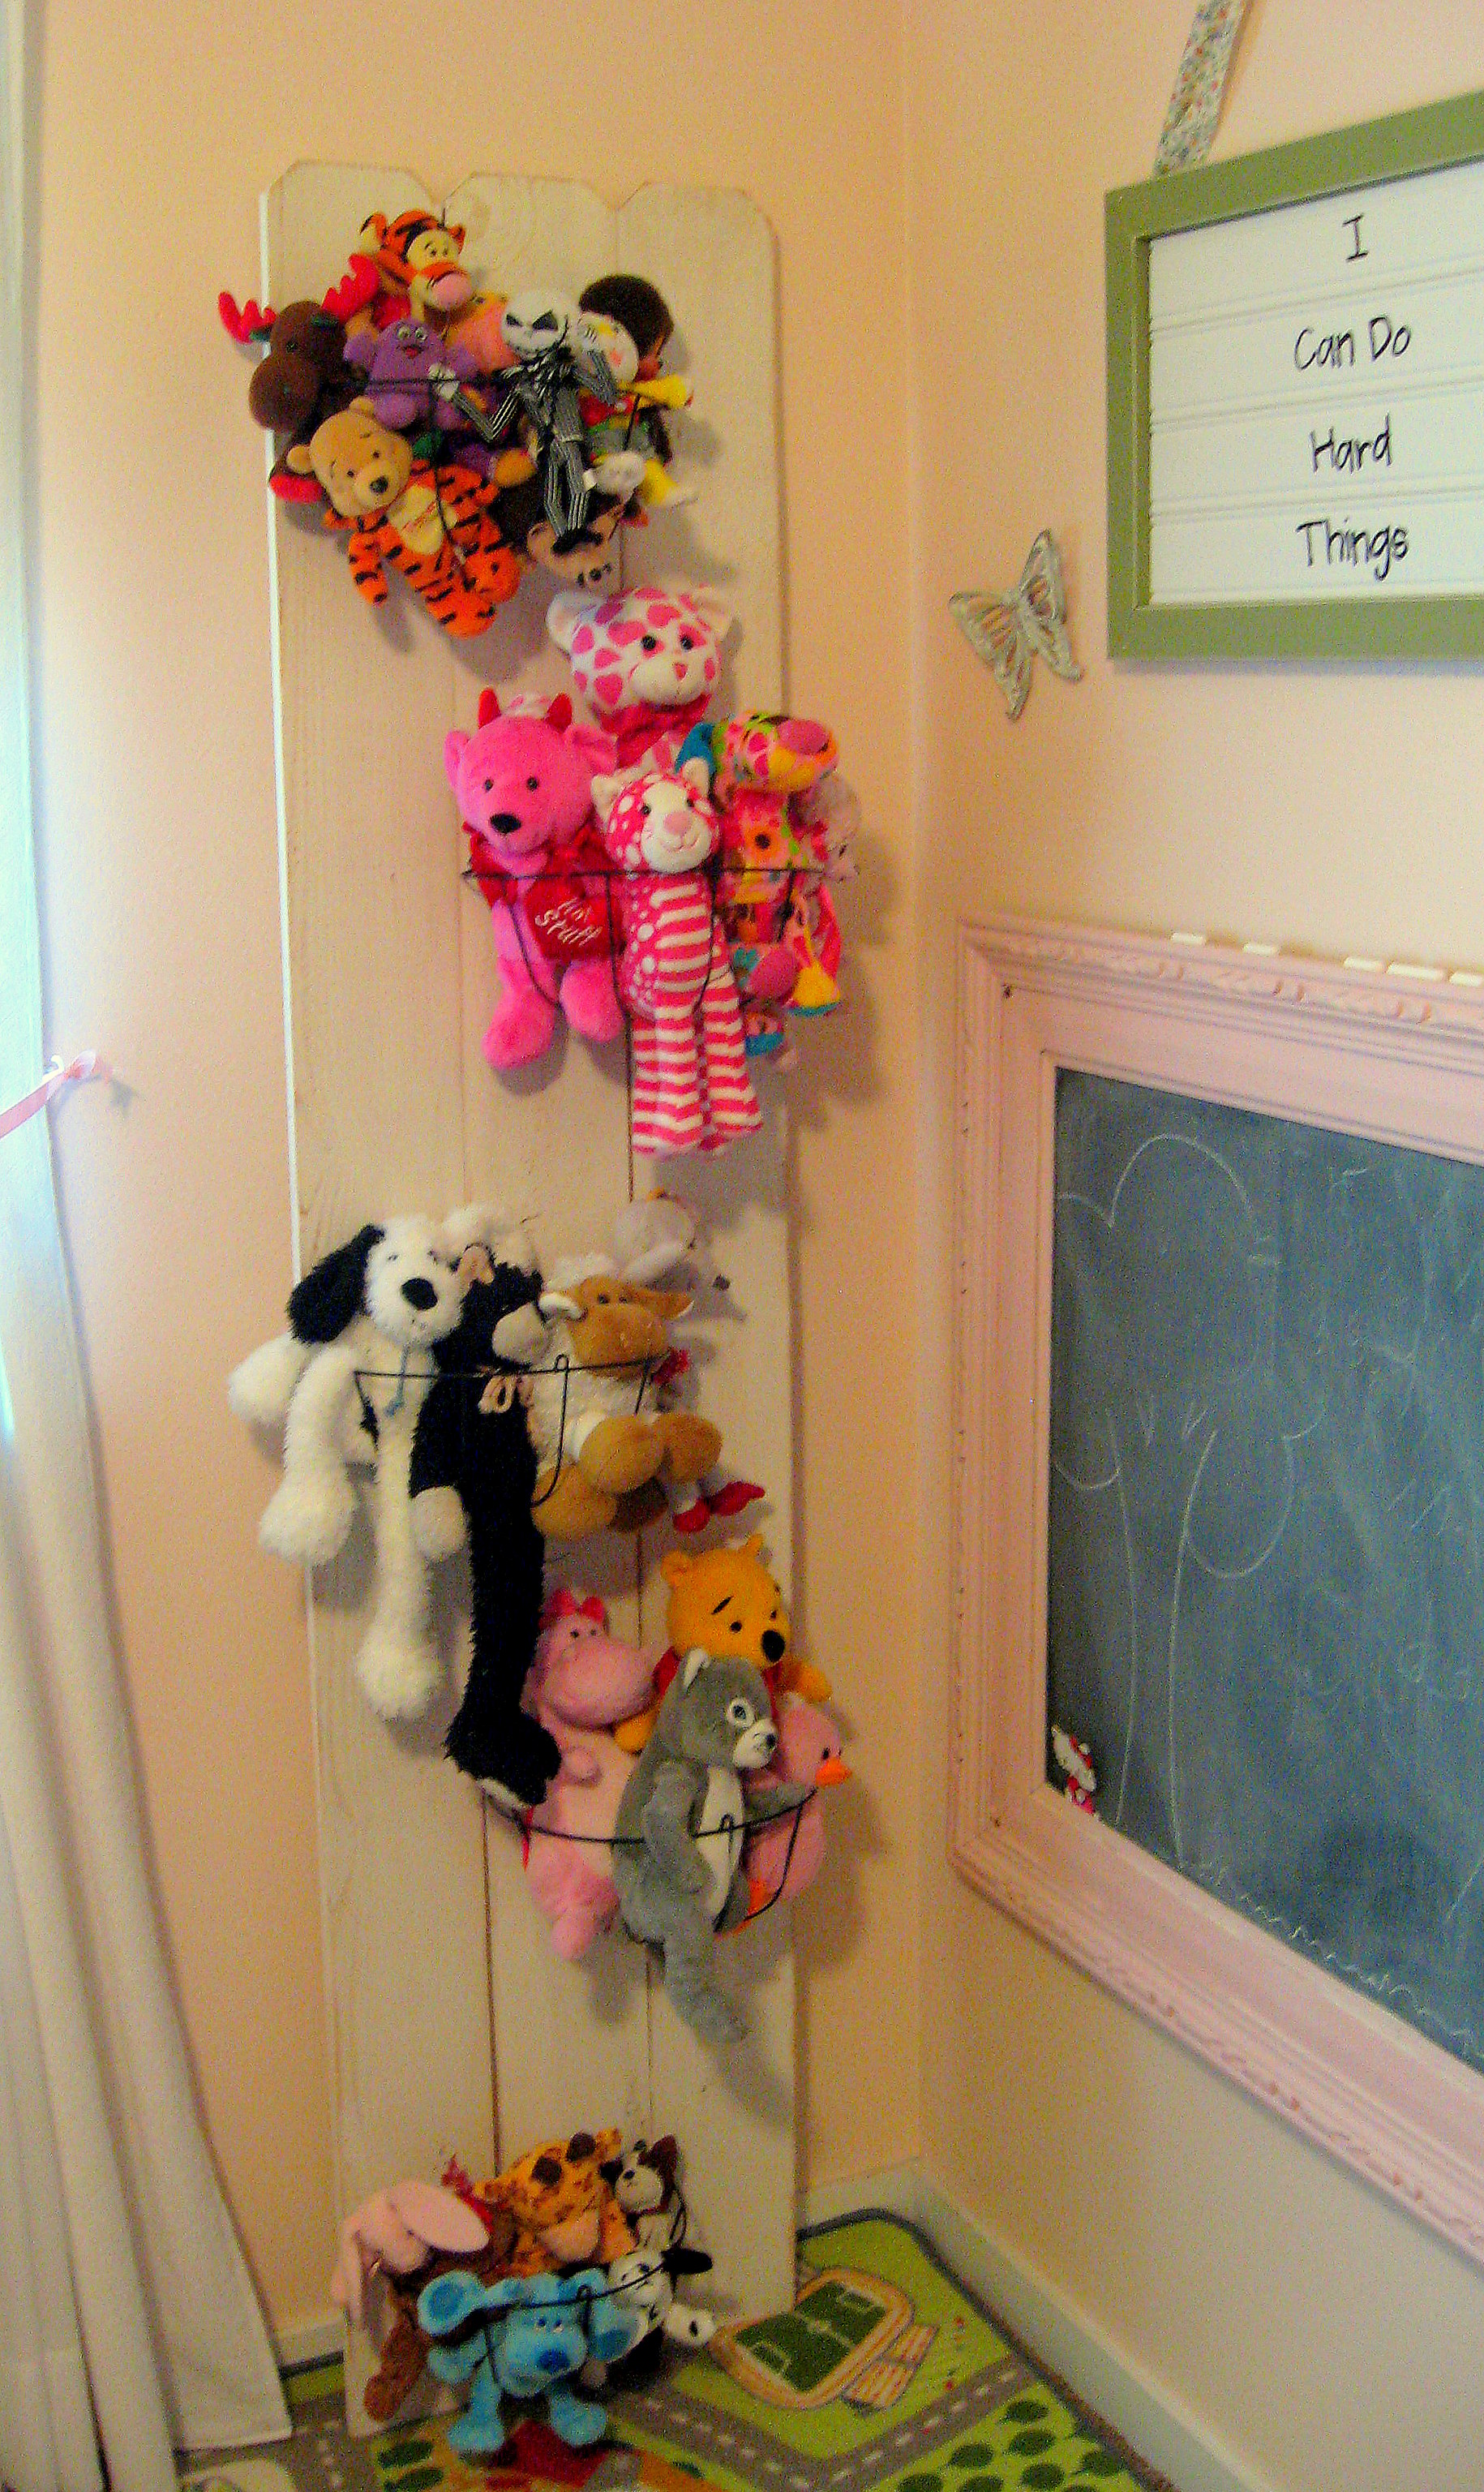
Here it is with all of the baskets attached:
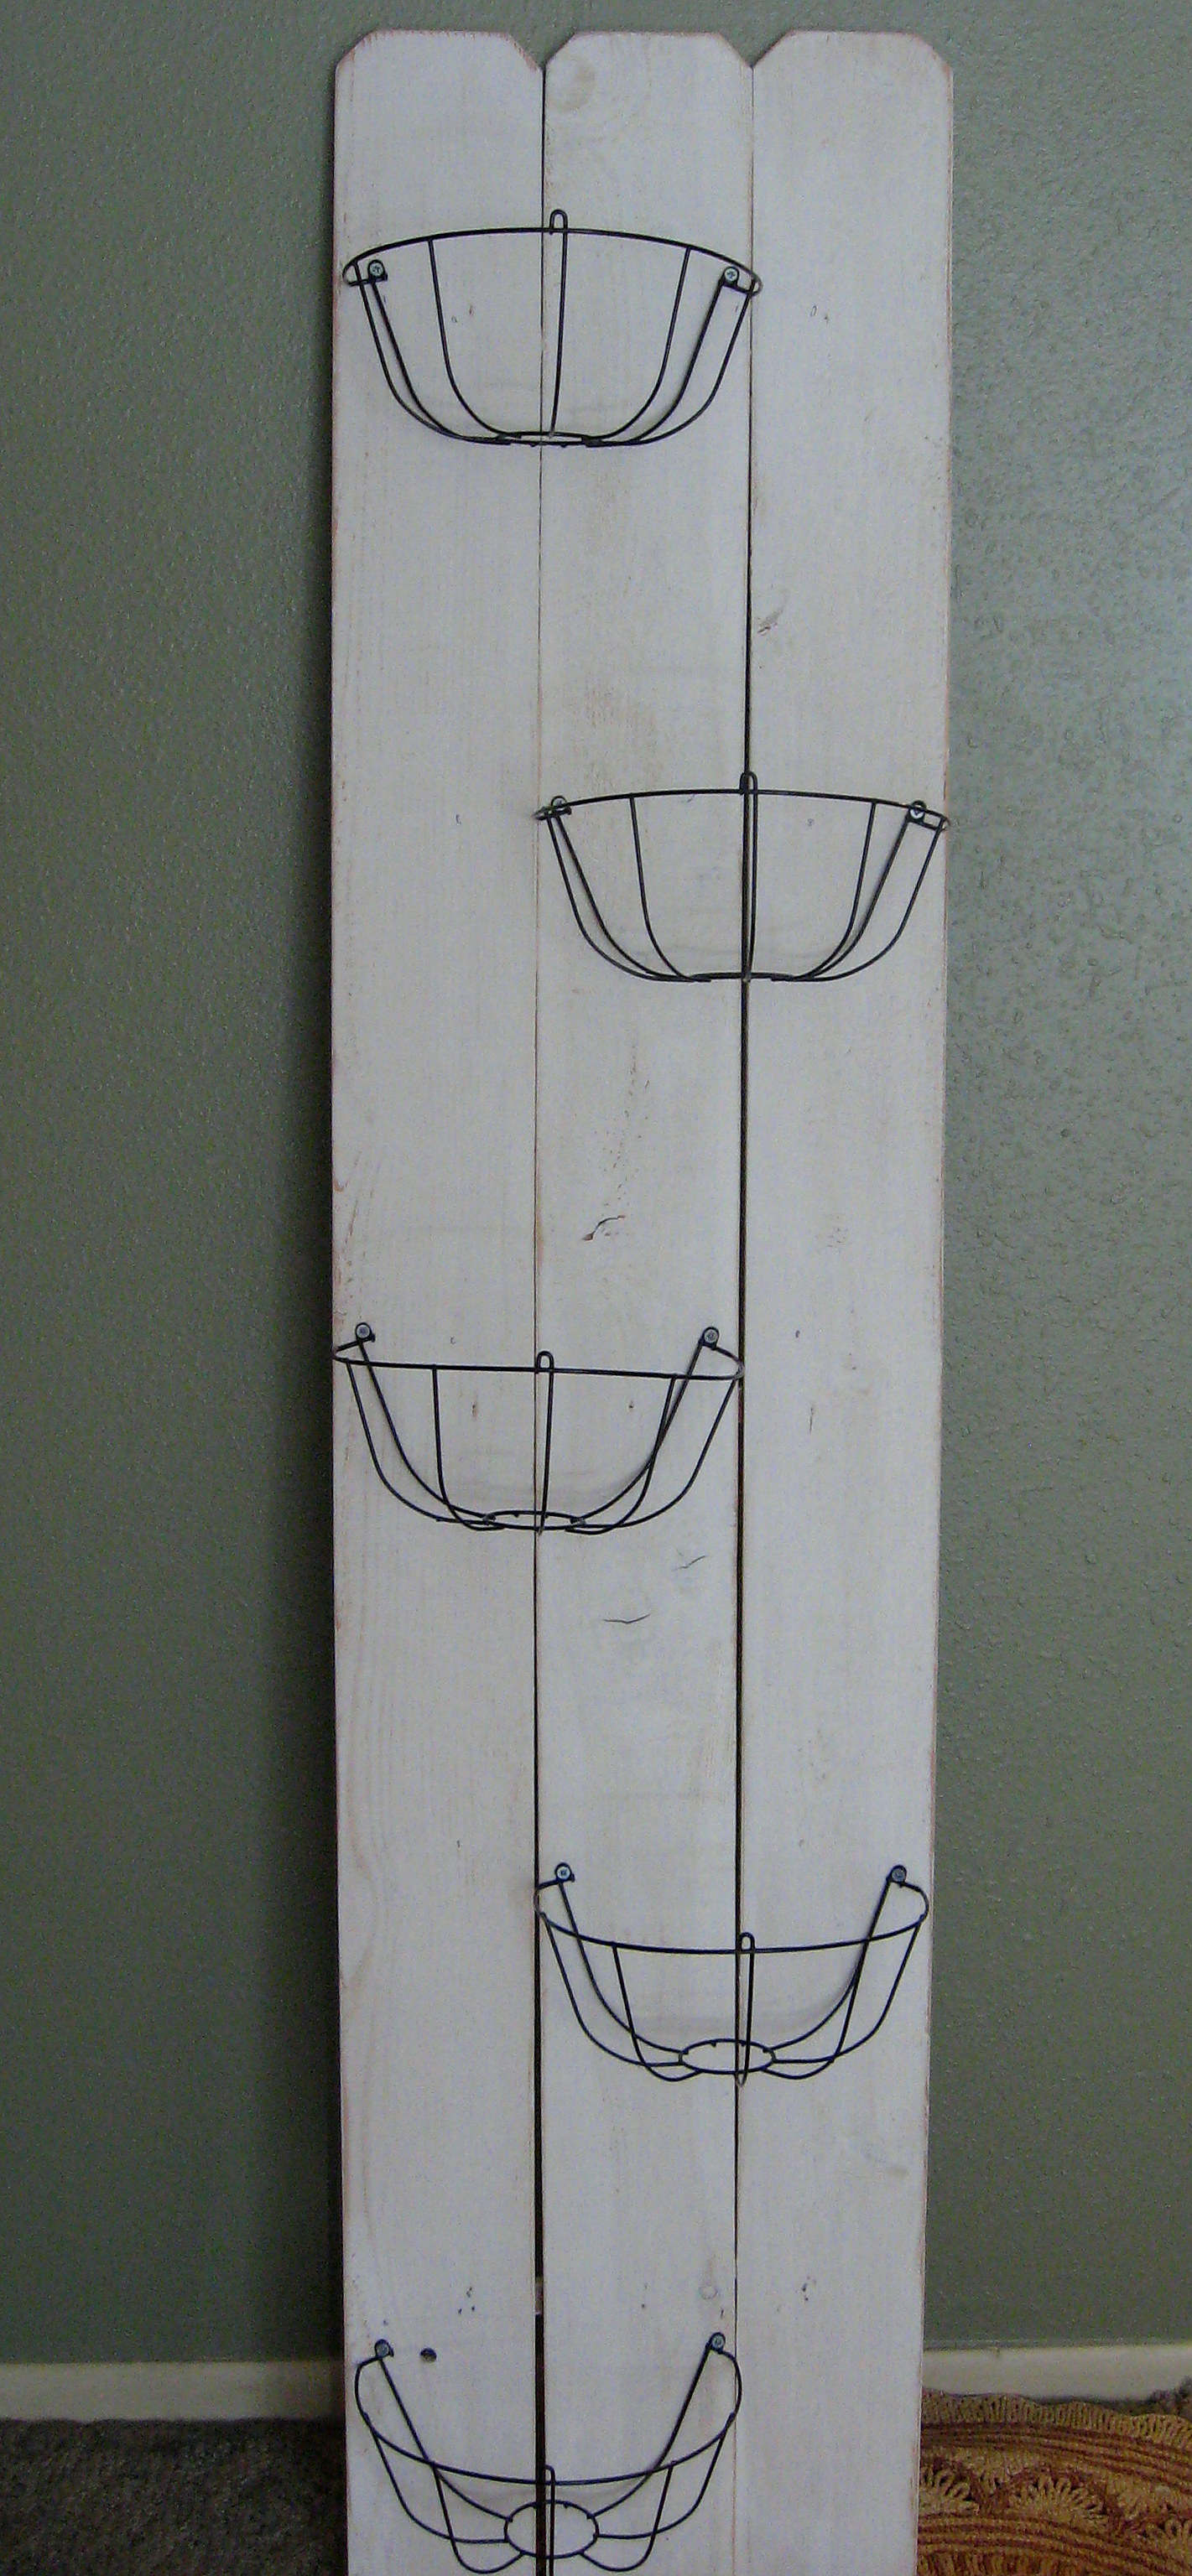
**NOTE – Once this is full of critters, it is very front heavy. My intention is to hang this on the wall as part of my daughters room redo this summer. In the pictures here it is just leaned against the wall. My daughter is old enough that I feel safe leaving it this way until her room is finished, but if your kids are small and you think they might pull this over on themselves, PLEASE attach it to the wall before you fill it!
And here it is all filled with critters.