
A PYP Best Blog! DIY Recipes: Homemade Meatballs!
Just in case you missed this DIY article on making homemade meatballs the first time we shared it a couple of years ago, we are republishing it. After Marne wrote this blog originally, we got an awesome response. This is one of the PYP Best Blogs!
Tuesday I picked up my 40 lb box of ground beef from Zaycon and needed to prep it. One of my favorite things to have ready in the freezer are homemade meatballs. I don’t particularly like making them, but I love having them all ready for meals. So I just remind myself of that. I made and froze 208 meatballs!! Holy cow.
Here is how I like to do homemade meatballs!
HOMEMADE MEATBALLS
1 1/2 lbs lean hamburger
3/4 cup quick oats
1 egg
1/4 cup finely diced onion
1/4 cup milk
1 tsp salt
1 tsp ground pepper (use another teaspoon of pepper if you love pepper flavor)
1 tsp Worcestershire sauce
2 Tbsp ketchup
1 Tbsp dry parsley
Put all ingredients into a large bowl (I love using glass bowls as they clean easily from all the germs from raw meat).
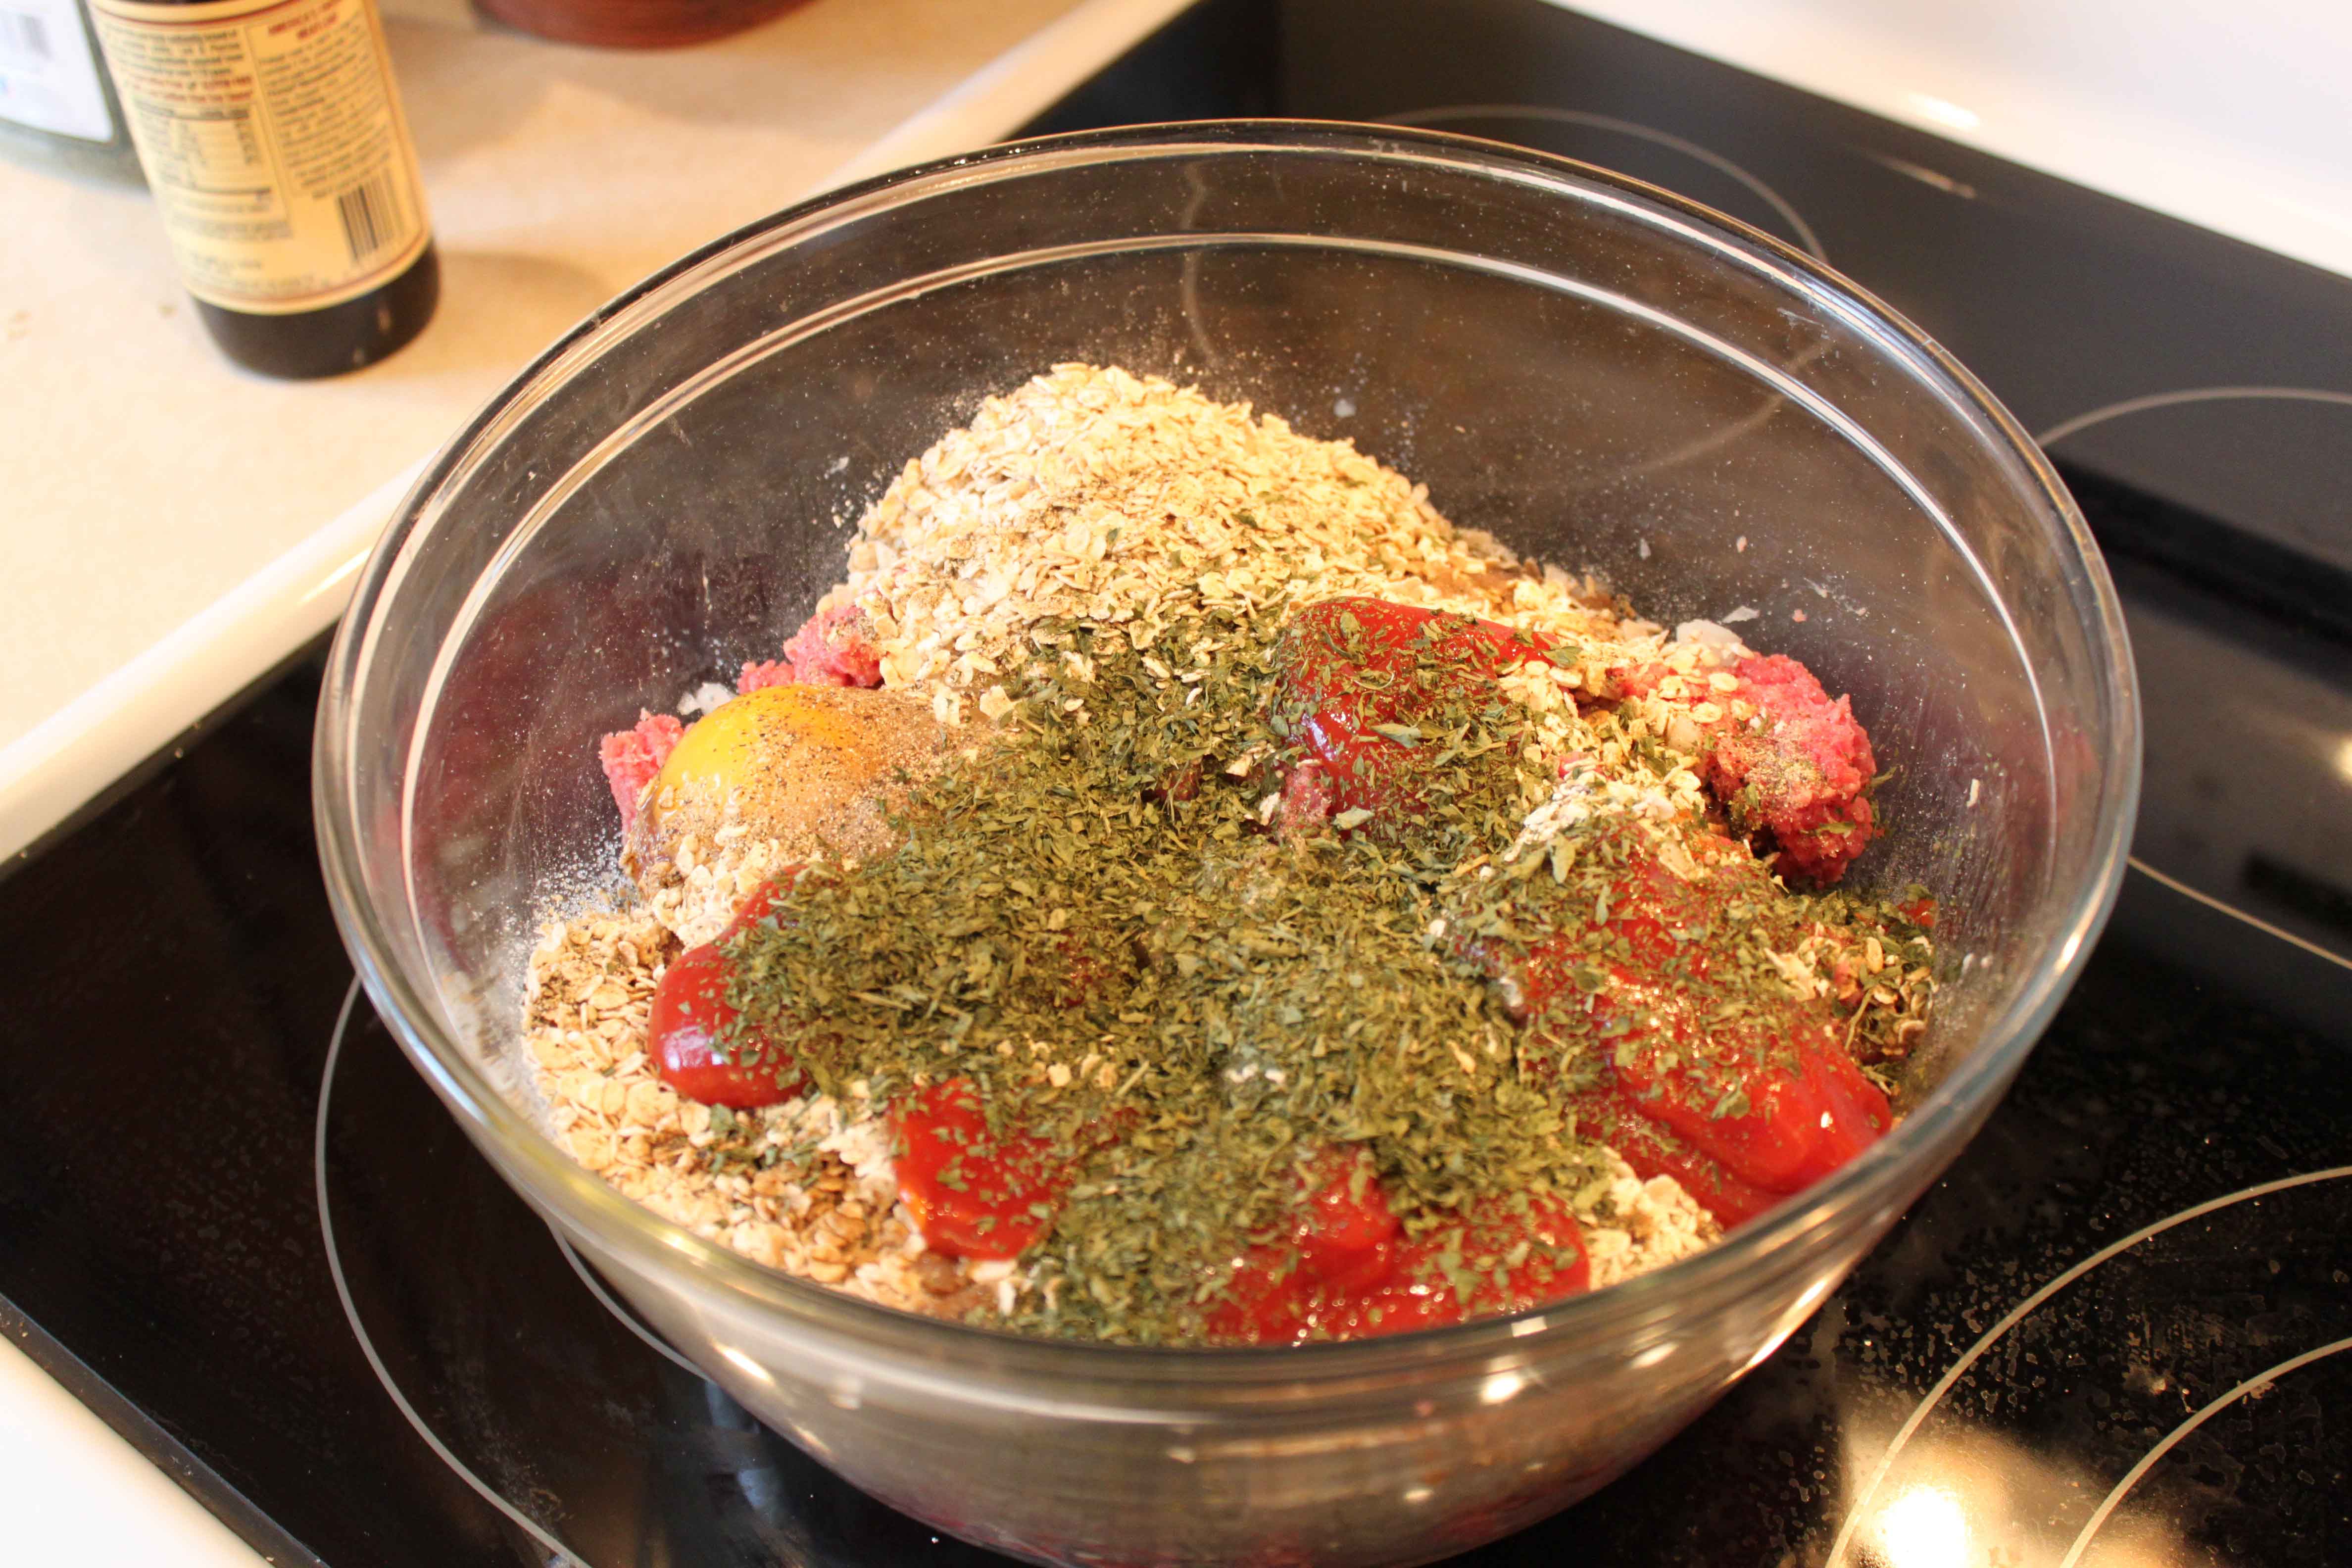
Mix all together WELL. Use your hands to make sure it is well-incorporated. Make sure you take any rings off. 🙂 It will look like this:
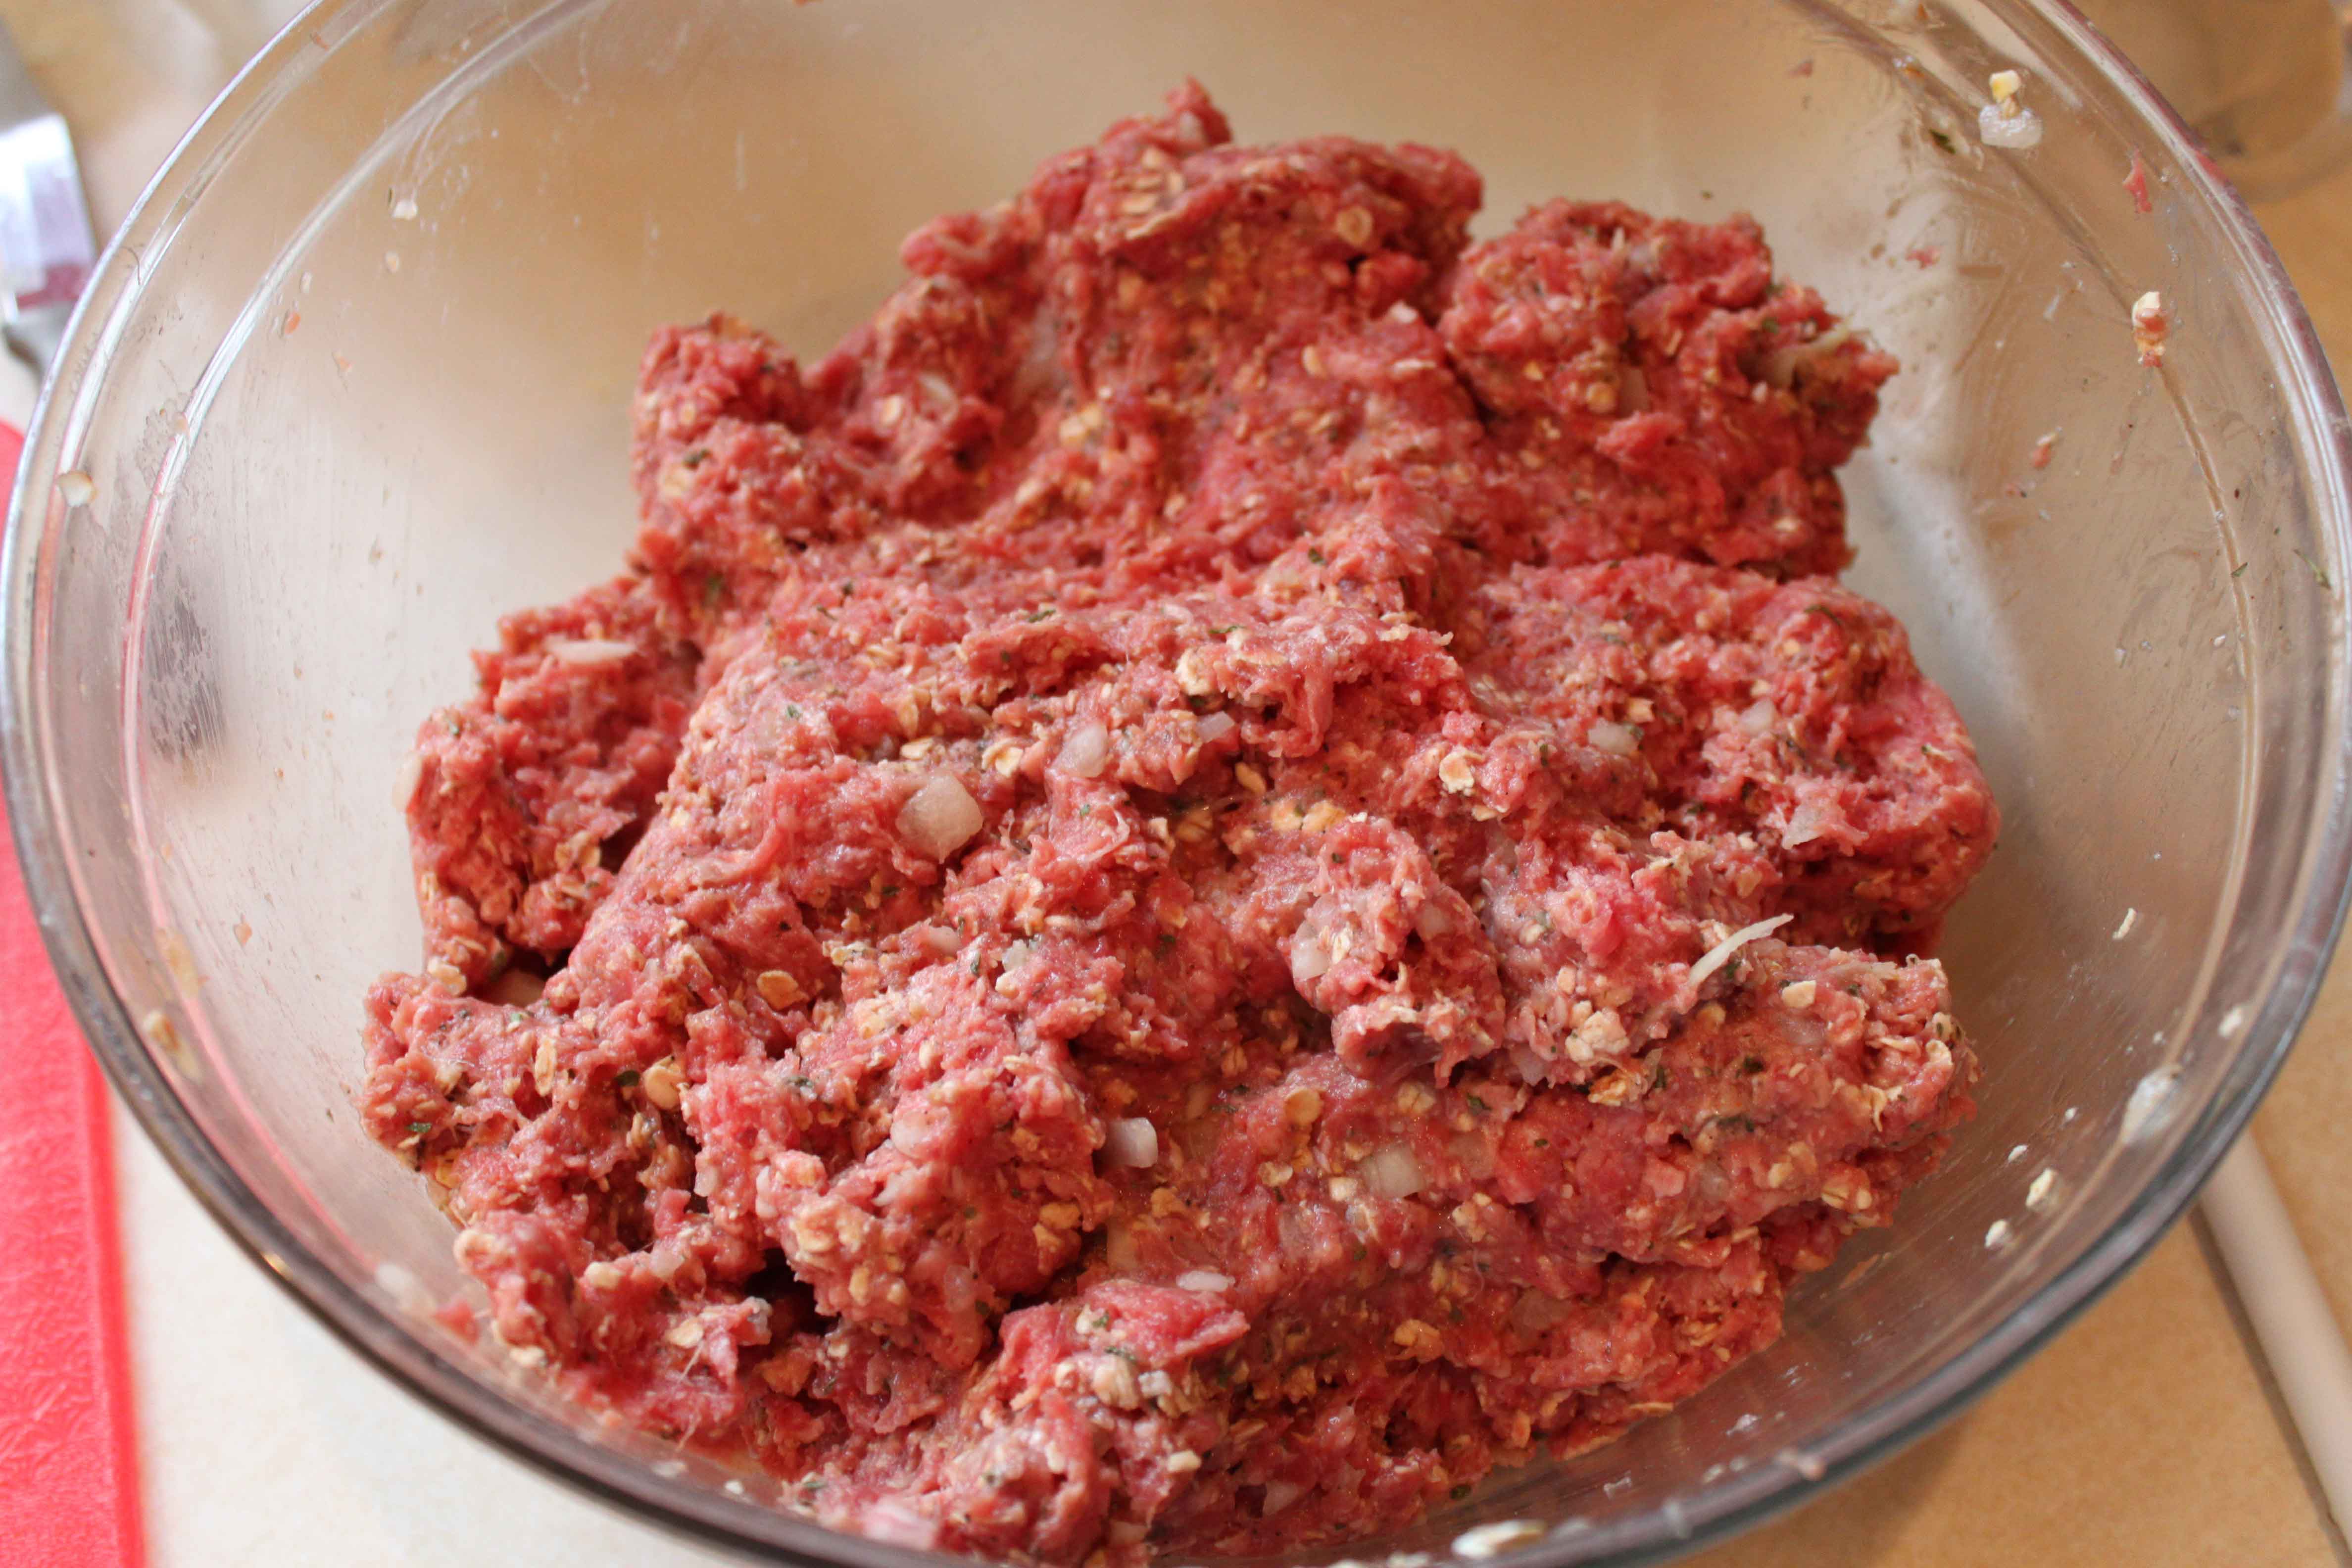
Now, form the meat mixture into balls and place on a cookie sheet lined with foil (it makes clean up a breeze! Bake at 400 for about 18 minutes, shaking or stirring occasionally.
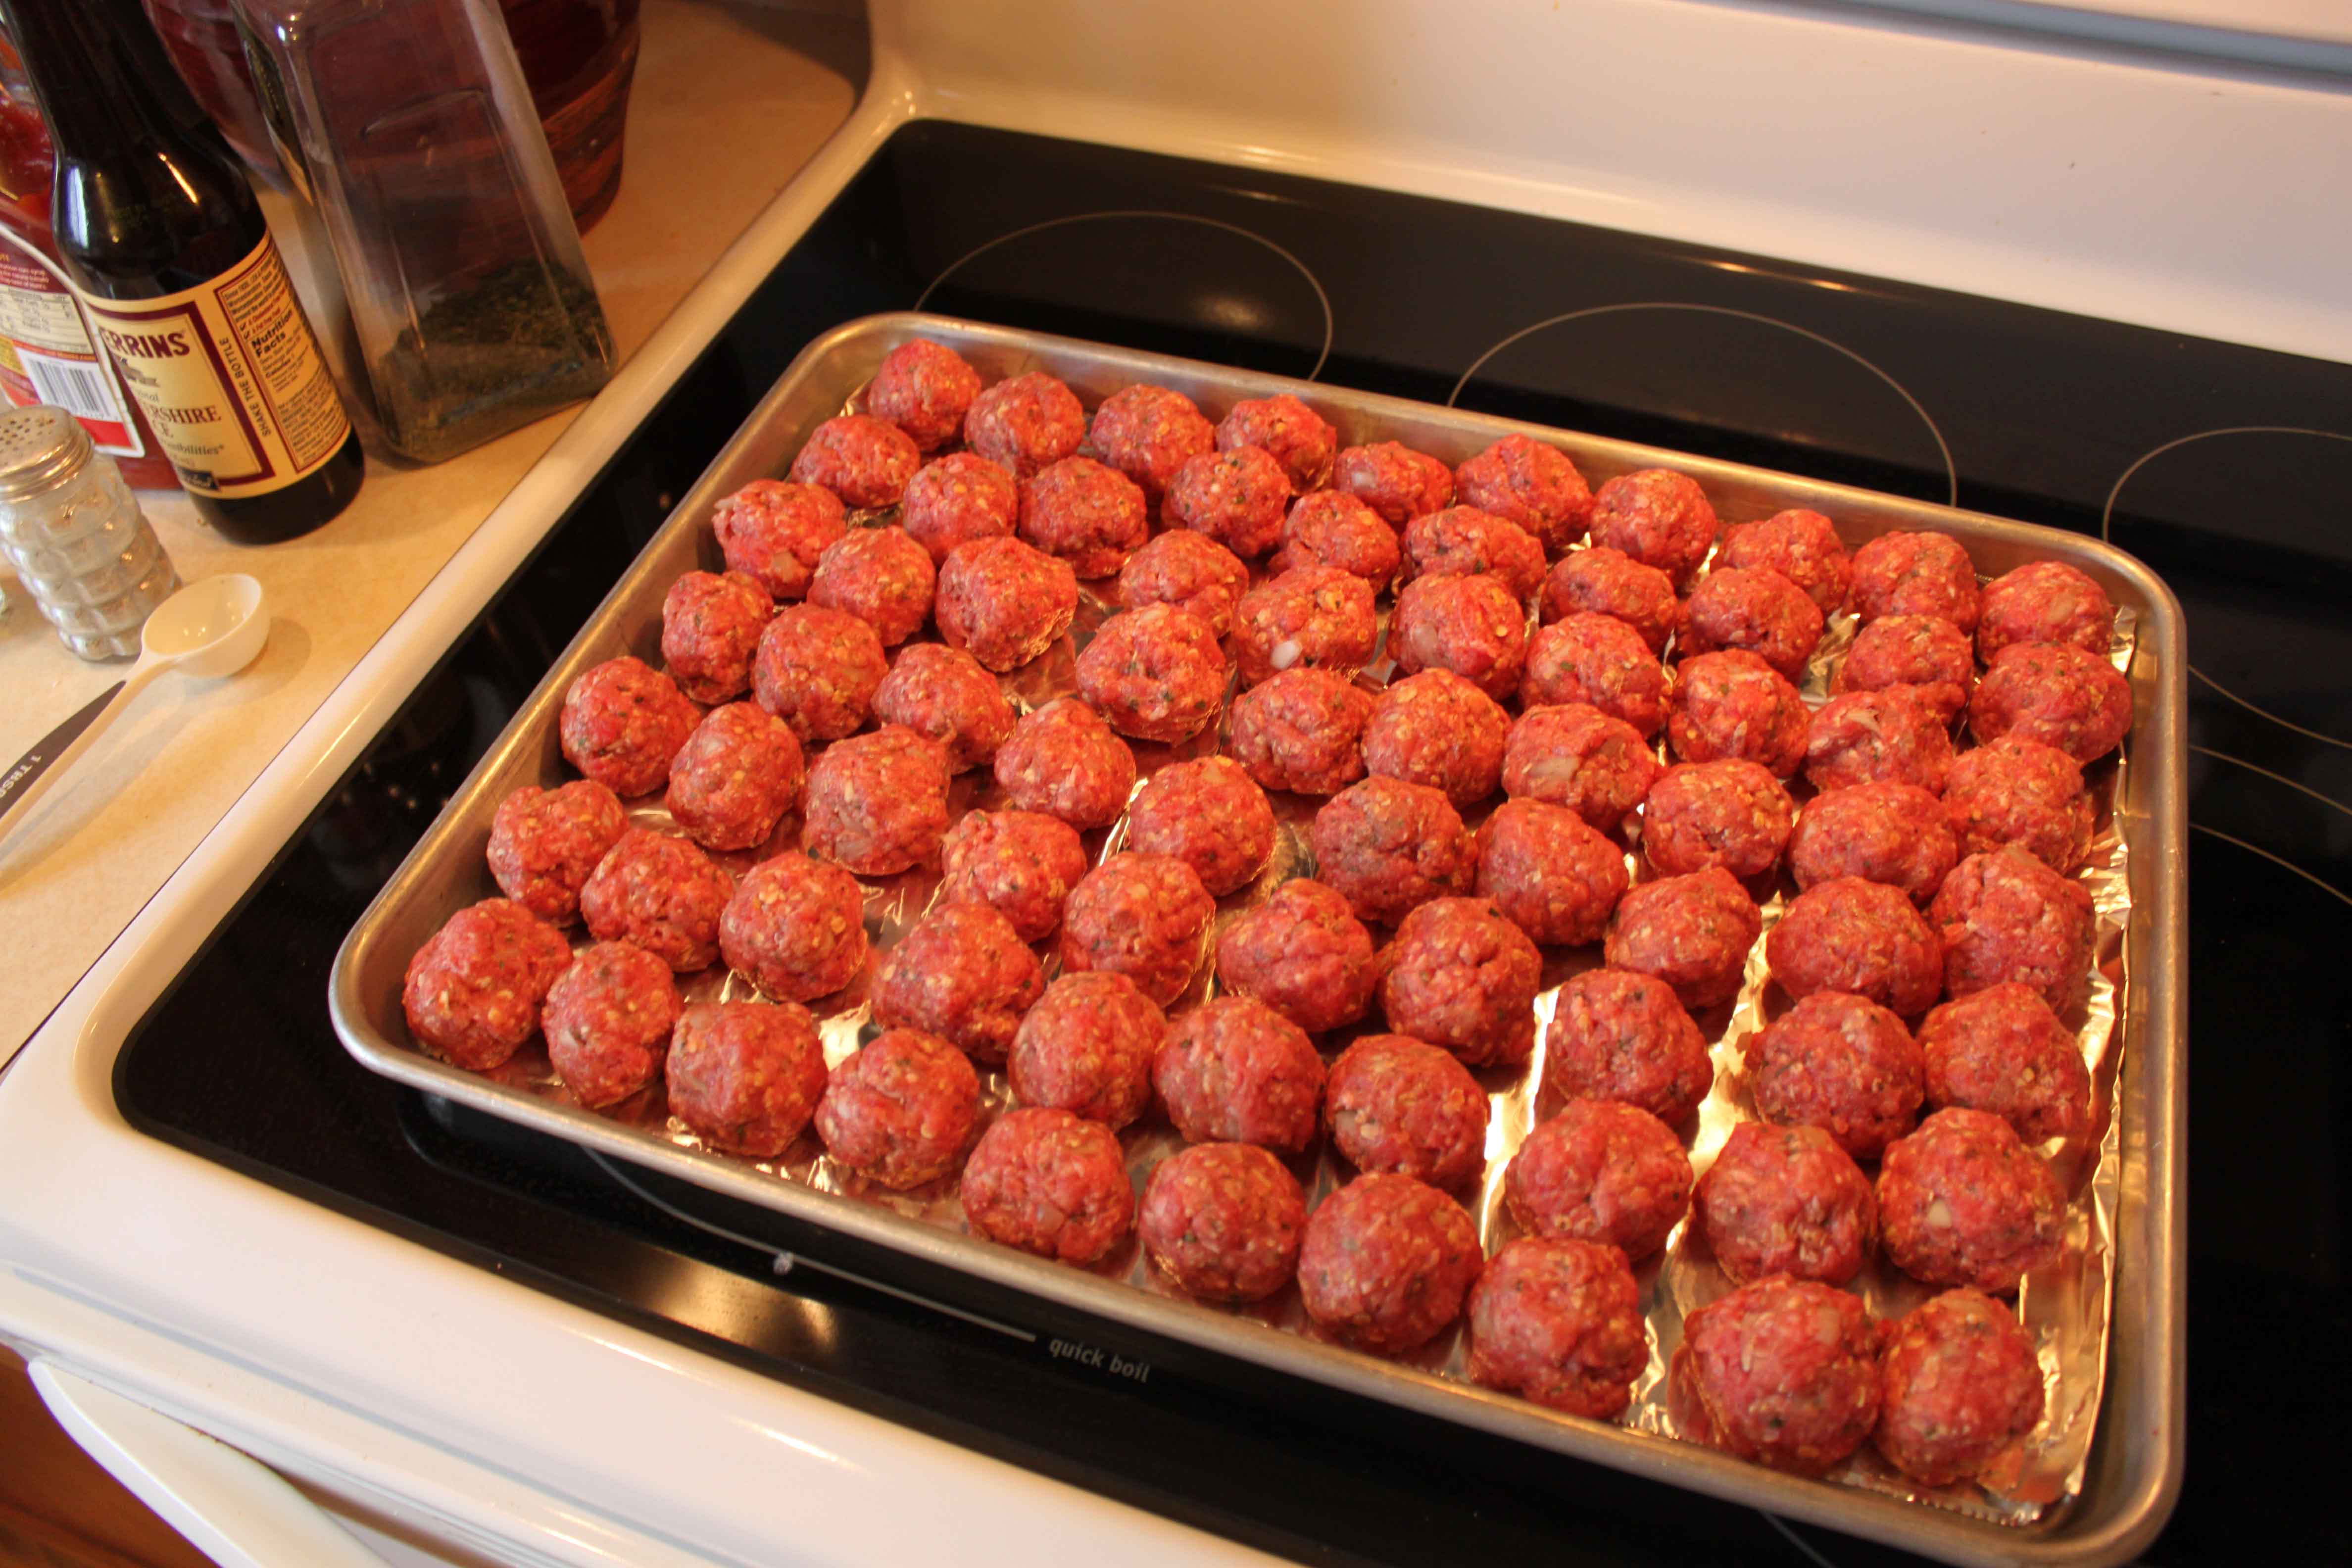
When they are done cooking, they look like this, and smell soooo good!

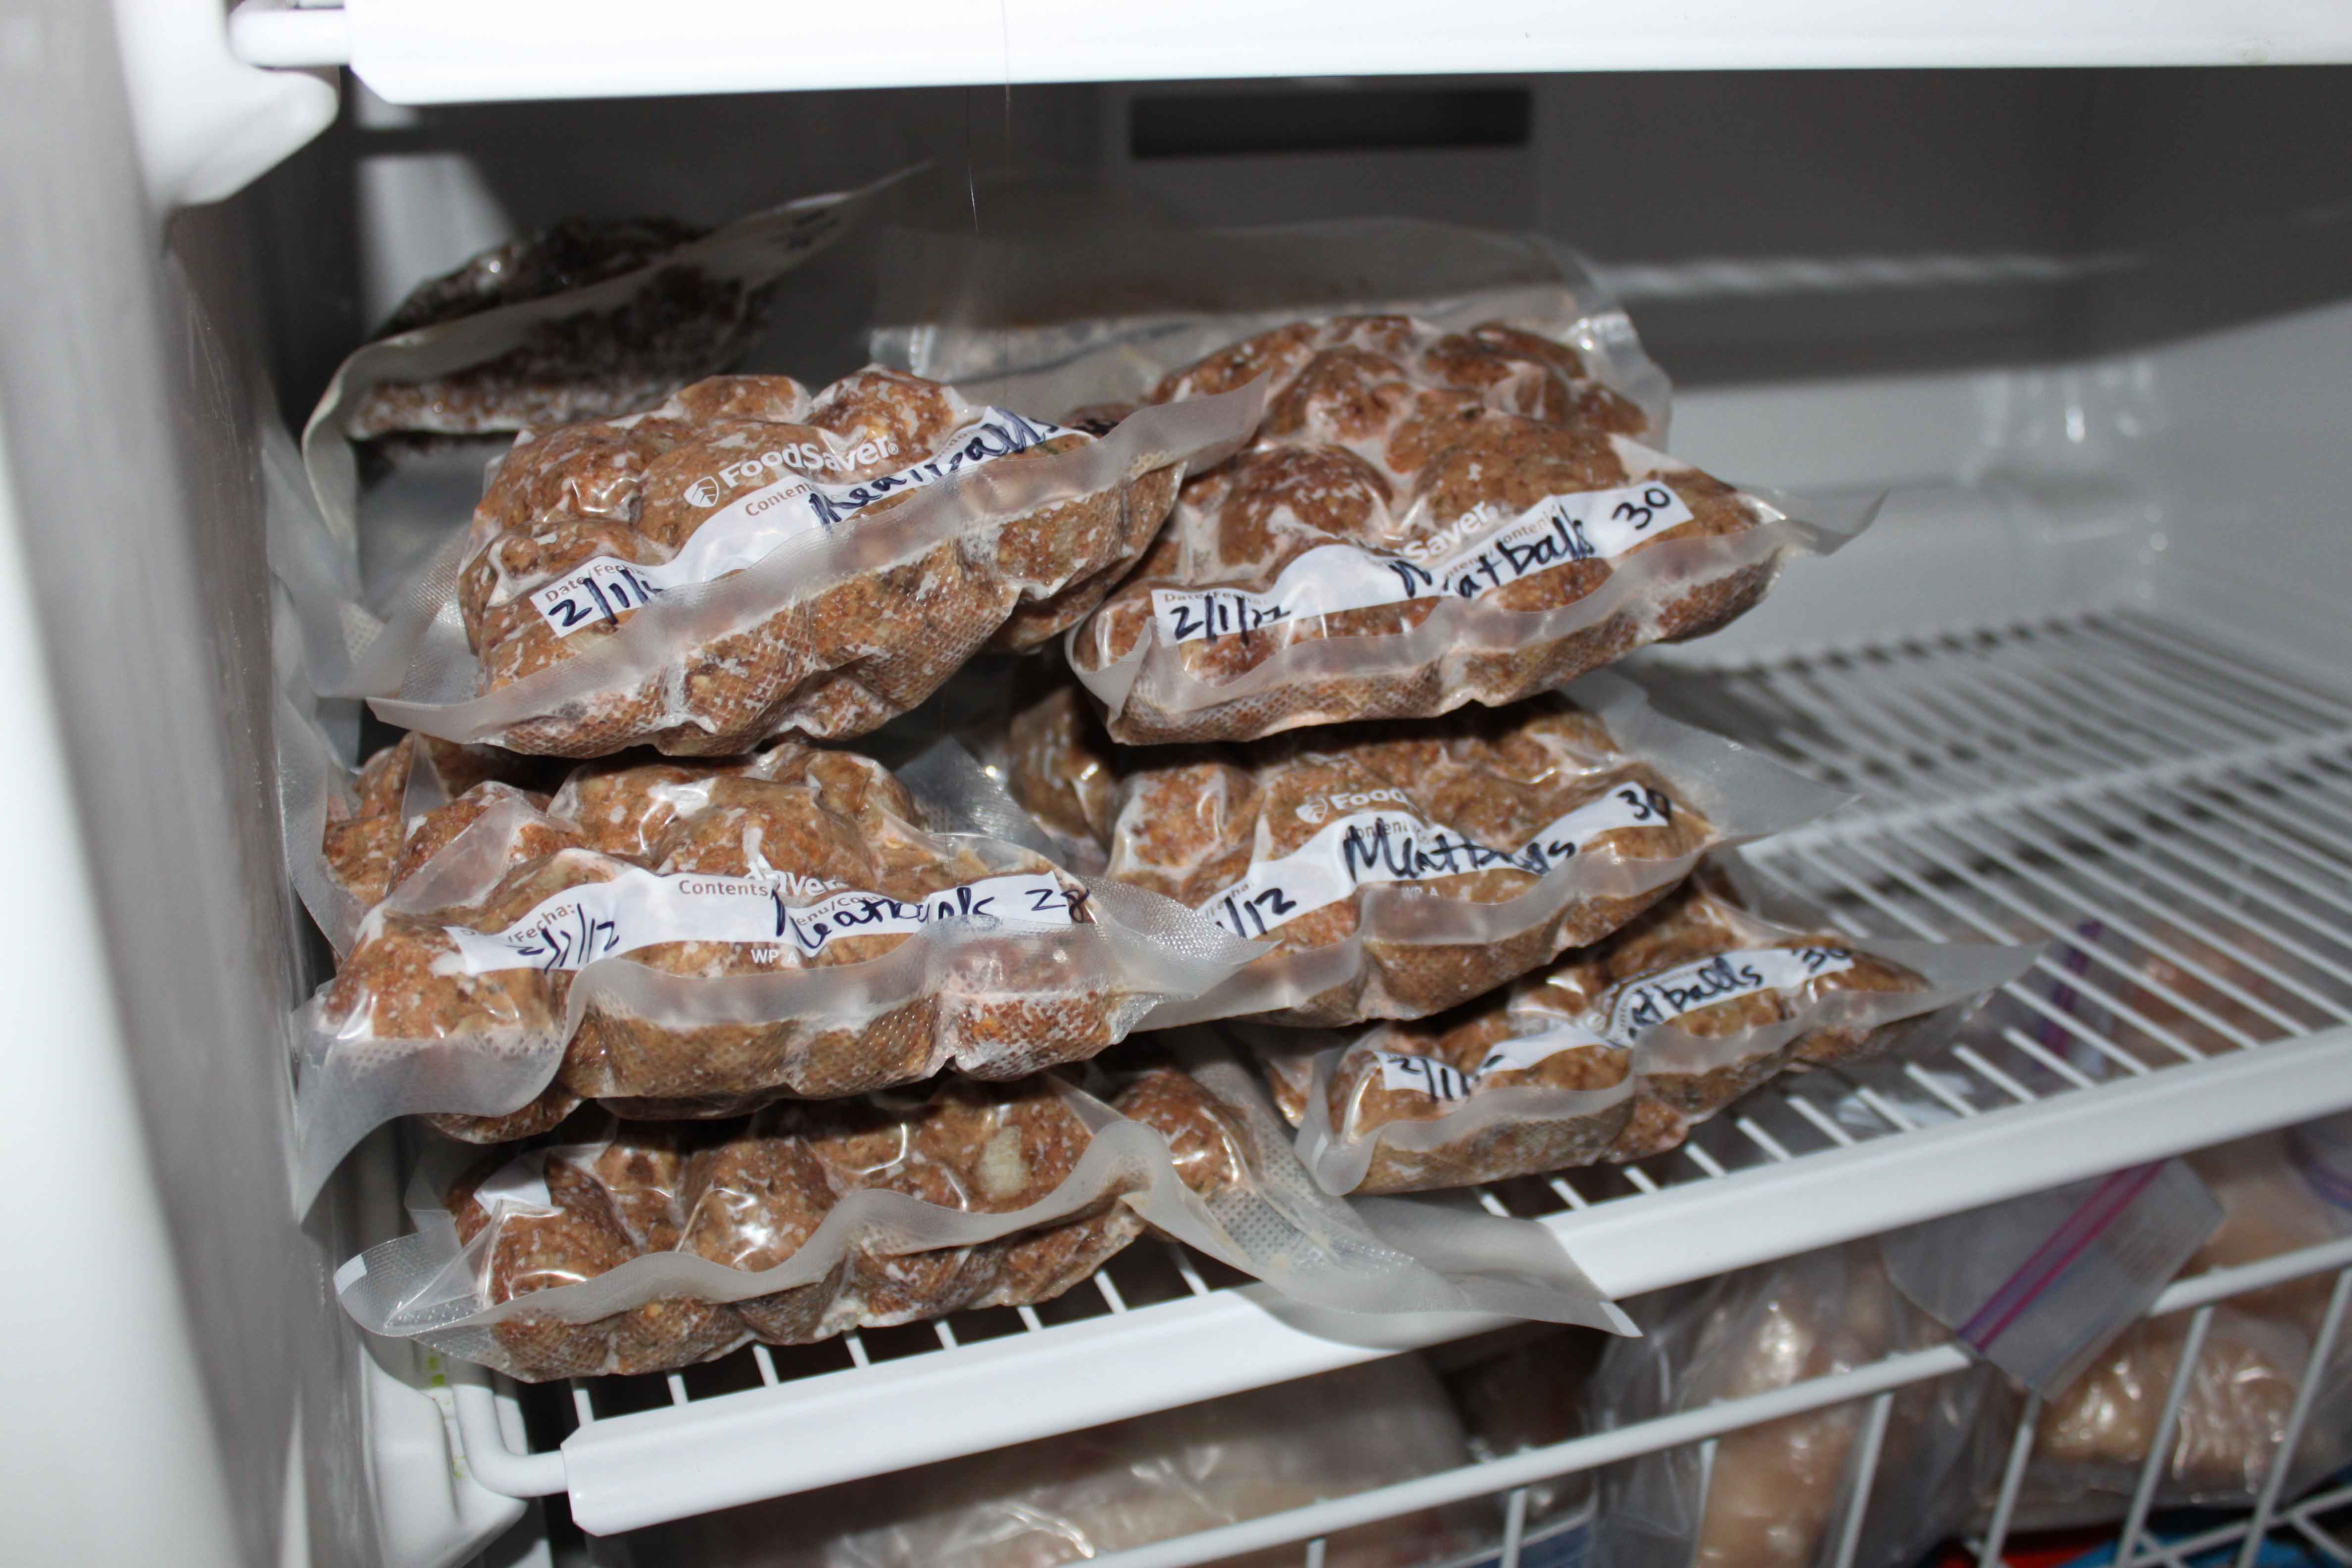
Then what I like to do is freeze them. I have a Foodsaver which is fantastic. It is totally worth the investment if you like to freeze foods. It really does help keep foods fresher longer! All the air is sucked out so there will be no freezer burn. Here are all the meatballs I froze yesterday.
I also cooked about 10 lbs into regular ground beef to use later in recipes. I froze that in Foodsaver bags too. After cooking 20 pounds of meat today, I still have 20 more pounds to cook up. Wish me luck!
A PYP Best Blog! The Little Ways to Save: Homemade ‘Drano’!
Just in case you missed this DIY article making your own homemade drano the first time we shared it a couple of years ago, we are republishing it. After Marne wrote this blog originally, we got an awesome response. This is one of the PYP Best Blogs!
As I posted last month, this year I am trying to do better on my grocery budget. I want to not only bring my cost down, I want to be more thrifty in how I feed my family. Make more things from scratch, eat out less, etc. In January I was very close to my goal and so far in February I have spent $343.14. A little more than where I was in January but this is all a process, right? A learning curve. For me, its not always about the exact penny spent but if I am improving in the way I feed my family. More on that later.
Not only am I wanting to save in the grocery budget department, I also want to save money in every way I can. Today I wanted to share with you an old trick. At least that is what I learned when I did some searching online.
If you have a slow or clogged drain, don’t go out and buy Drano (which is super expensive and contains hazardous chemicals), you can clear that drain with 3 simple things you already have in your house!

Here is what you will need:
1/2 box baking soda
1/2 c. white vinegar
1 qt. boiling water
1 washcloth
Take the baking soda and dump it down the drain as good as you can. Pour in the vinegar. IMMEDIATELY plug the drain with the washcloth so the foaming action stays in the pipe, and not in the sink.
Let sit for 30 minutes.
After the time is up, dump the boiling water down the drain. VOILA! A clear drain with haveing to buy drano. This works almost every time.
And I can vouch for this method. I did it this morning, and it worked fabulously! Try out your homemade drano and let me know what you think.
A PYP Best Blog: Making Custom Purses and Bags! One of my personal favorites!
Just in case you missed this article on making custom purses and bags the first time we shared it a couple of years ago, we are republishing it. After Sharon wrote this blog originally, we got an awesome response. This is one of the PYP Best Blogs!
I love purses. And bags. And totes. And purses. And bags. I may have a problem.
I am kind of picky about them though…if they don’t meet certain requirements, they find themselves on a one way trip to the local donation center sooner rather than later. For me, those criteria are that they:
- have to be roomy enough to throw in all the stuff required by a busy mom on the go (lotion, gloves, notebook, random medicine, books for waiting rooms, stuffties, snacks, kleenex…),
- have to have pockets to keep my keys and cell phone from joining the bottomless pit of aforementioned stuff,
- have a long enough shoulder strap to wear across my body,
- have to be washable,
- have to be affordable, and
- have to be cute.
That doesn’t seem like an unreasonable list to me, but I have found that it is difficult to find a purse that fits all of those criteria. Several years ago, I bought a pattern at the fabric store and decided to try my hand at making one on my own. Once I made that first one and saw how easy it was, I’ve been making my own bags ever since. I decide what I want and draw the basic pattern out on craft paper. I absolutely LOVE that they are endlessly customizable. My purses can all have pockets to fit exactly the things I need them to fit. Library bags don’t need pockets, but they do need to be sturdy, so I use a heavy fabric. A purse can get away with a less sturdy fabric, as long as it’s washable. I experiment with size, shape, inside and outside pockets, appliqued designs, flaps, closures, long straps, shorter straps – no two bags look the same and they all follow the same basic instructions and only a very beginning sewing ability. I now have a stack of patterns with different- and interchangeable – sizes and shapes of bodies and straps.
I will walk you through how I made my latest bag and then show you some examples of others to get your creative juices flowing. Once you understand the idea, you should be able to make a bag in a couple of hours. I didn’t use a pattern for this one, because I started with a skirt, but you will get the idea, and if you have any questions, ask!
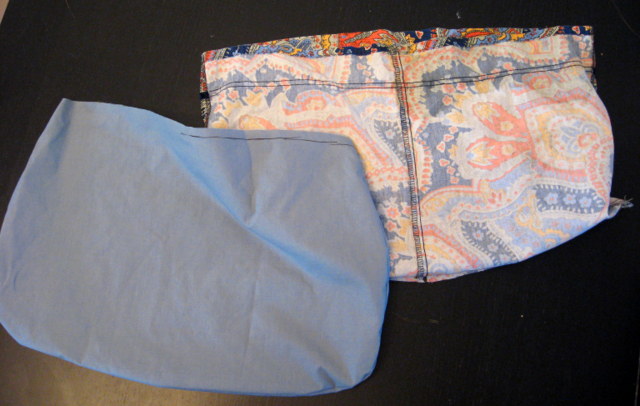
I started with this skirt that I picked up at a thrift store:
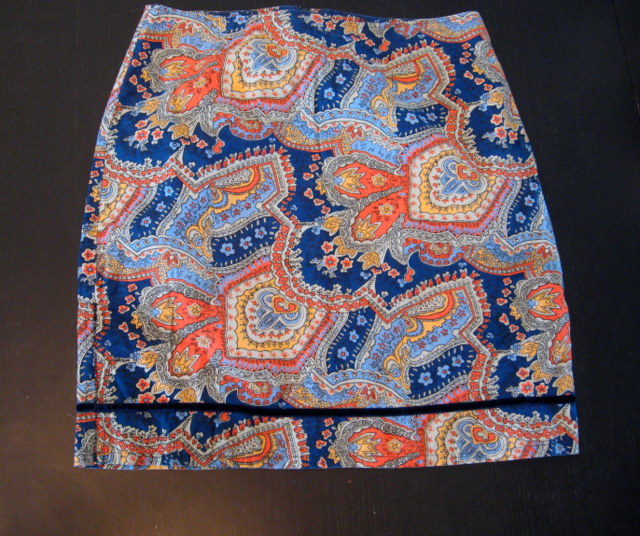
Much too small for me – and too short even if it did fit – but I just fell in love with the fabric. I toyed with the idea of making it into a pillow, but then decided it would be better as a purse.
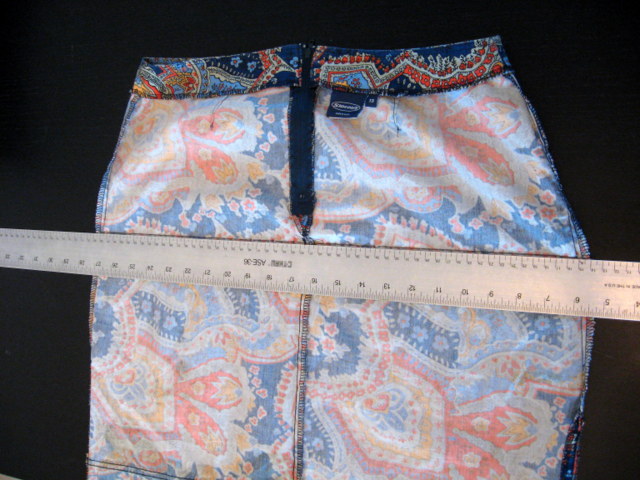
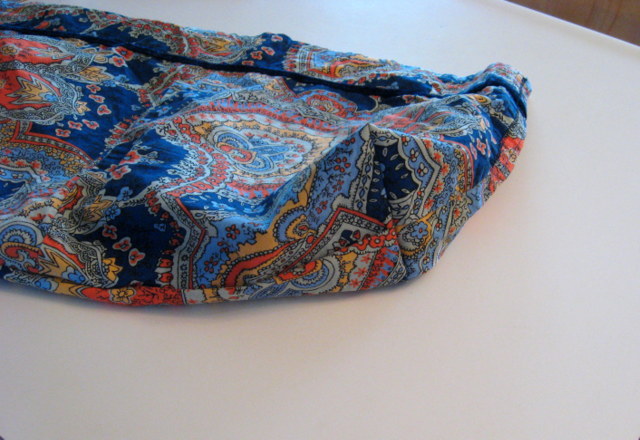
I turned it inside out and lined up a straight edge along the width of it, just under the zipper. Draw a line and cut – making sure that you keep the bottom hem even and straight. I discarded the top part, but you could use that fabric to make pockets.
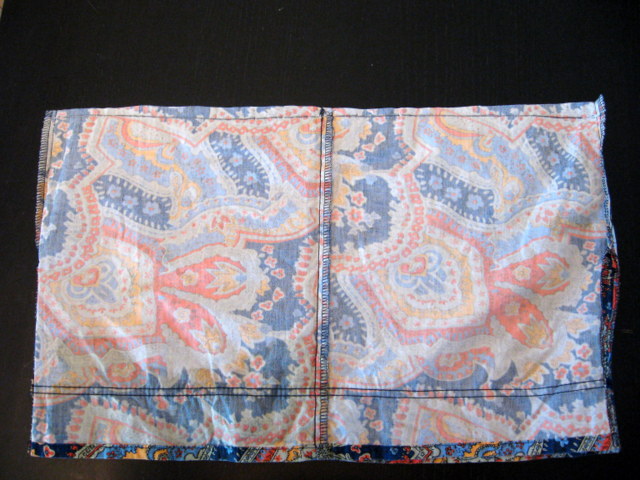
Sew straight across the newly cut edge, forming the bottom seam of your bag. I like to sew this seam twice, just to make sure it is strong.
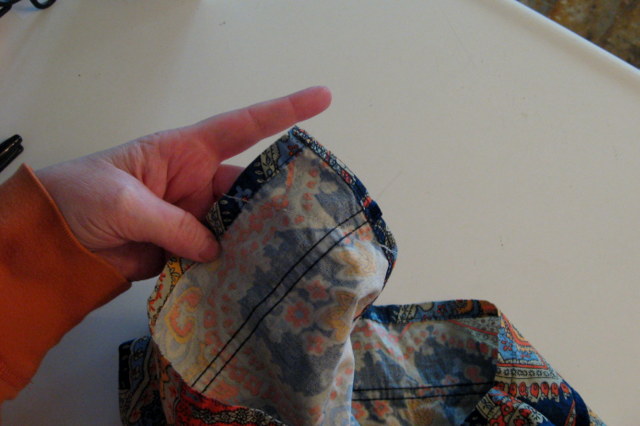
You can leave it like this if you want, but I like to sew across the corners to give the bag a little shape. Take one bottom corner and pinch it together then lay it out flat, being sure to line up the bottom seam and the side seam. Measure in from the point (I did 2 inches, but experiment with making it smaller or larger to change the look of the bag) and draw a line across it. Pin it in place, then sew along the line. Do this on both corners.

That leaves you with these little floppy ‘ears’
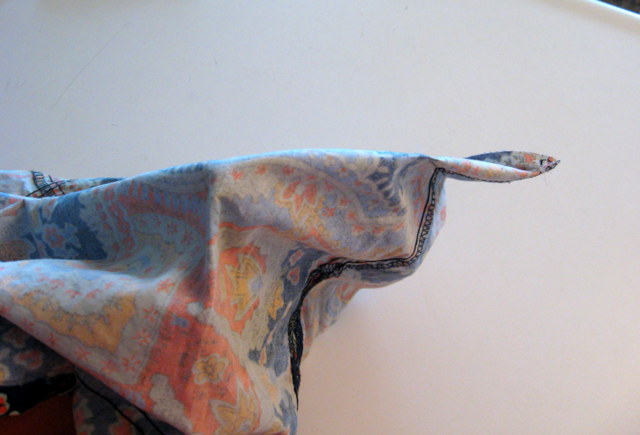
that make a nice, neat bottom when turned right side out.
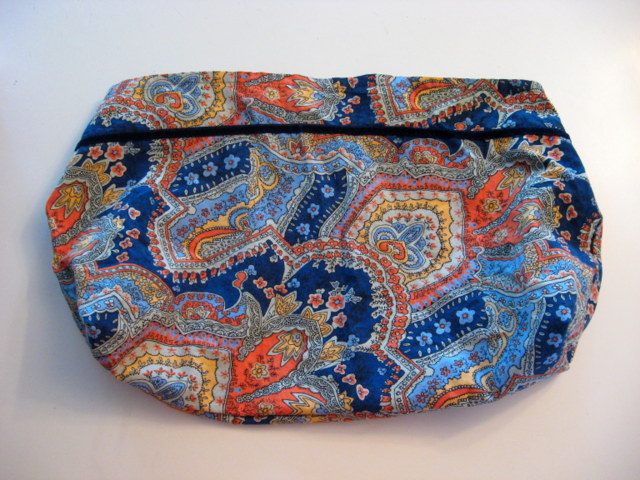
Again, you could stop here if you like the shape, but I thought it was too wide at the top, so I measured down the top inside seams a few inches on both sides and sewed a triangle to taper the top sides in a little, like this:
There; I like that shape better.
Now, if you don’t want your bag to be lined, you can stop there and add straps. I will leave the inside unfinished occasionally on tote bags or shopping bags, but generally, I prefer my bags to be lined and it really is quite simple!
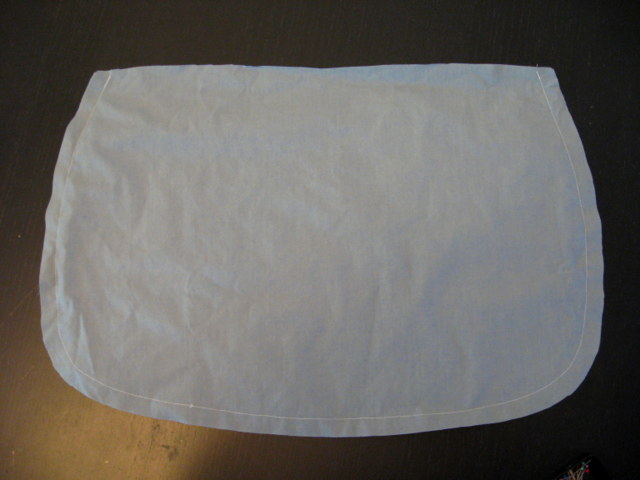
I folded my bag in half and layed it out on the fold of my lining fabric, then I drew around the shape of the bag and cut out two.
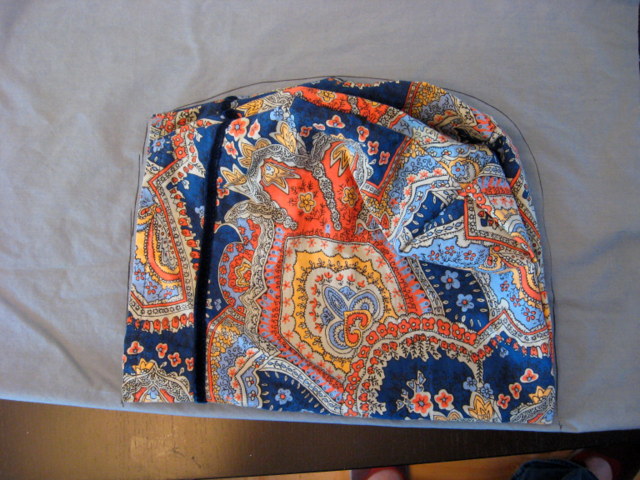
**If you are making your bag from scratch from flat fabric, then just cut out all four of these shapes at the beginning – 2 outside pieces and 2 inside pieces, all the same size.
Sew the two lining pieces together, all the way around, but leaving the top open. Make sure you have right sides together!
Now you have two fabric pouches that we will stitch together once we make the straps and pockets…
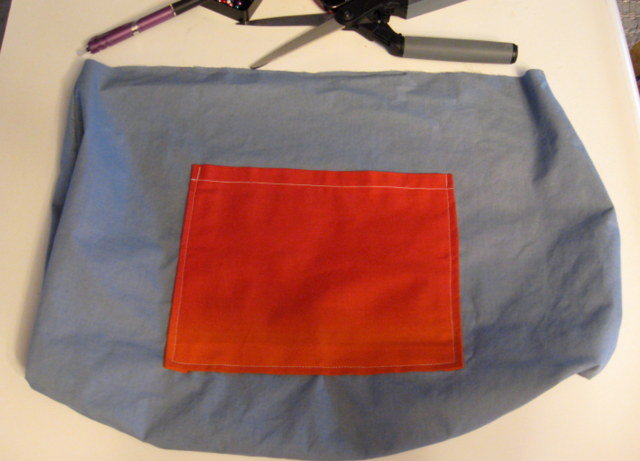
For my pockets, I like to make two; one big one on one side, to catch the random small stuff that tends to get lost in the bottom of my purse, and one on the other side, split into two pockets for my keys and phone. Decide how big you want your pockets to be, and cut the squares out of fabric – about an inch or so bigger than you want the finished pocket.
Press down a small seam on the top and stitch across it.
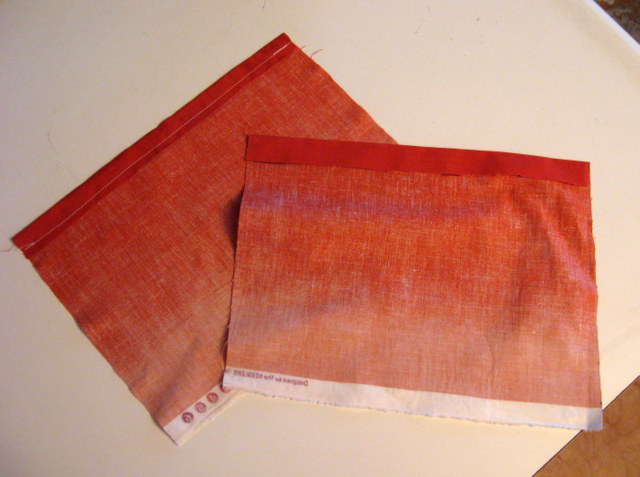
Then you will press a seam allowance on both sides and the bottom, but don’t sew it.

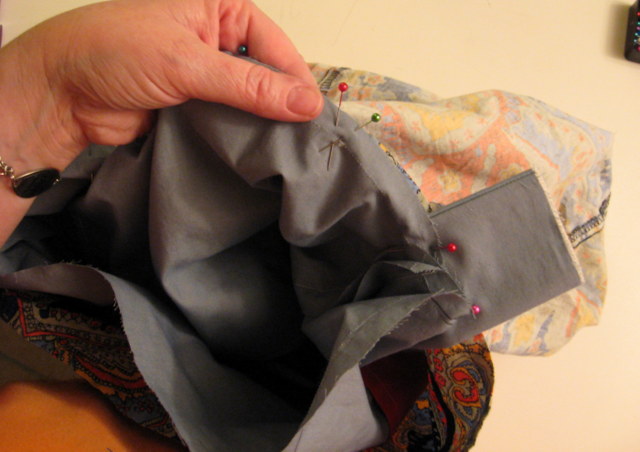
Pin the pocket centered in place on lining of the bag – make sure that the “up” side of the pocket is facing the “up” side of the bag. Also, don’t put it up too high…you will lose a little at the top of the bag when you sew the lining to the outside.
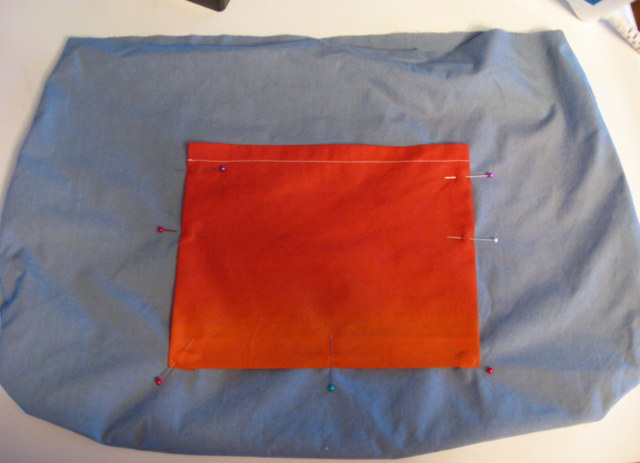
Sew the pocket onto the lining along the three edges, leaving the top open.
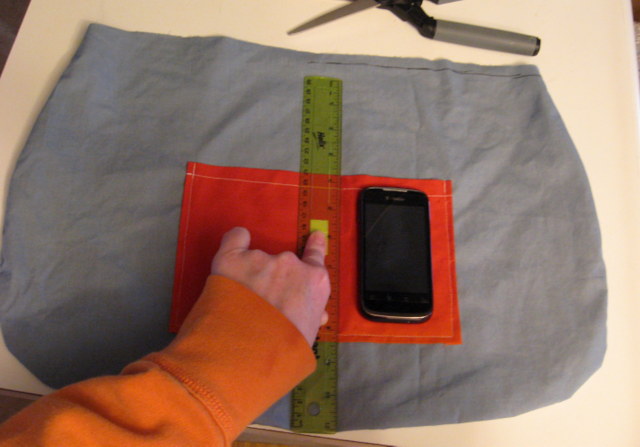
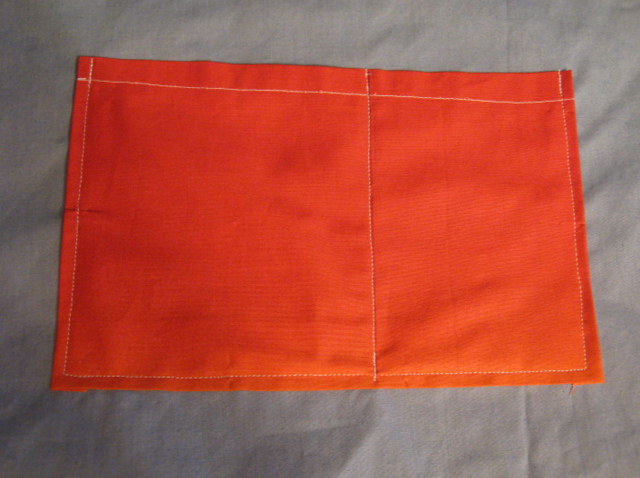
Now repeat with the pocket on the other side. Once it’s attached, you can just sew a line right down the middle to separate it into two pockets. I used my phone to decide exactly how big I needed it to be, since that is what will go in there!
Now for the strap. Determine how long of a strap you would like. The first couple of times might take some trial and error until you find exactly what you love. Use a bag you already have or have someone help you with a measuring tape to get a good measurement to start with. For me, I like a 42 inch strap – short enough to carry on my shoulder, but still long enough to sling across my body. I cut out a long rectangle of fabric about 4 inches longer than the finished size (so 46 inches long) and about 6 inches wide.
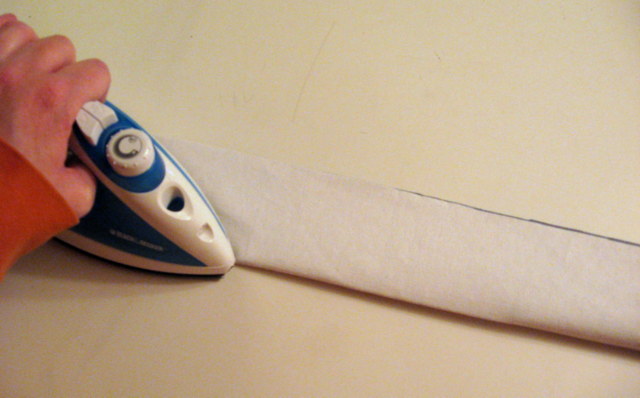
Again, depending on what you’re going for, you can decide how you want the finished strap to be. If it is a small or delicate bag, you might choose to use just one layer of fabric for the strap. If it is a heavy bag, you will want to make the strap heavier. You can do that by using iron on interfacing, or by just using two pieces of fabric, which is what I did here.
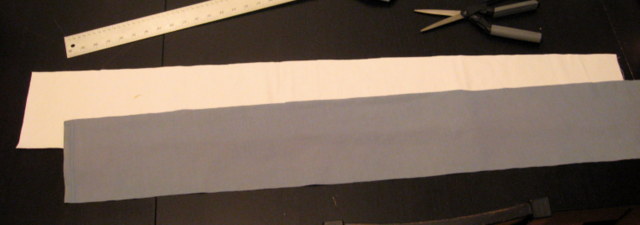
Lay them out on top of each other, and fold them in half lengthwise, with the right side of the outside fabric on the inside of the fold. Press it all flat, then sew up the long edge. Turn it all right side out, smooth it all flat and press it again.
Now, here comes the trickiest part – I still mess up on this part once in awhile if I’m not paying attention, so go slow, take a breath and think it through before you sew and you’ll be fine, I promise!
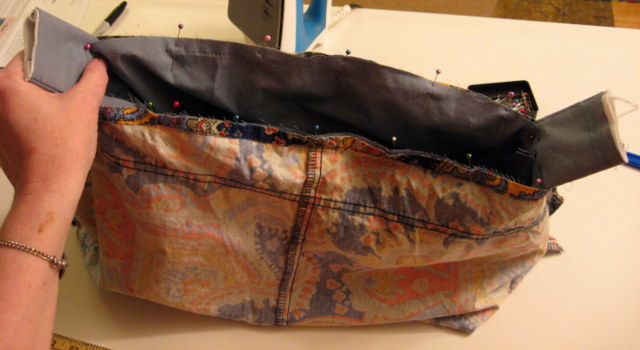
With the OUTSIDE pouch turned inside out, lay the strap along the bottom of the pouch and up the sides. Make sure that the strap isn’t twisted. Now check again. Really.
Center the strap with the side seam of the pouch and sticking up beyond the top about 2 inches and pin it. Now do the same on the other side. Now check again to make sure it isn’t twisted – just to be safe 🙂
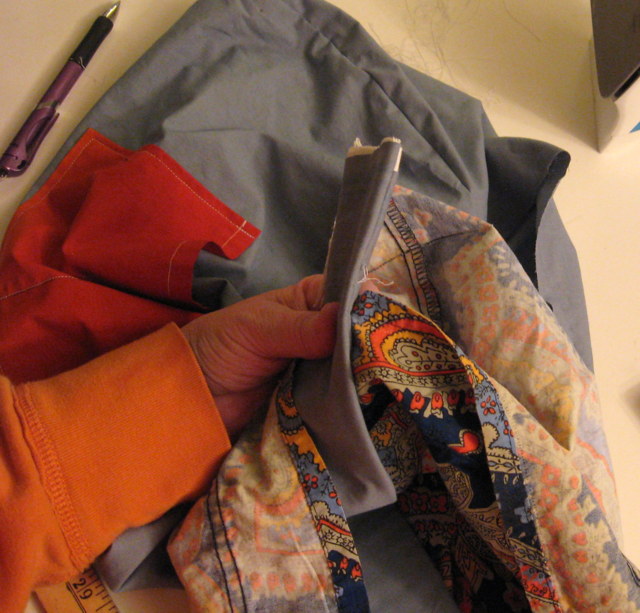
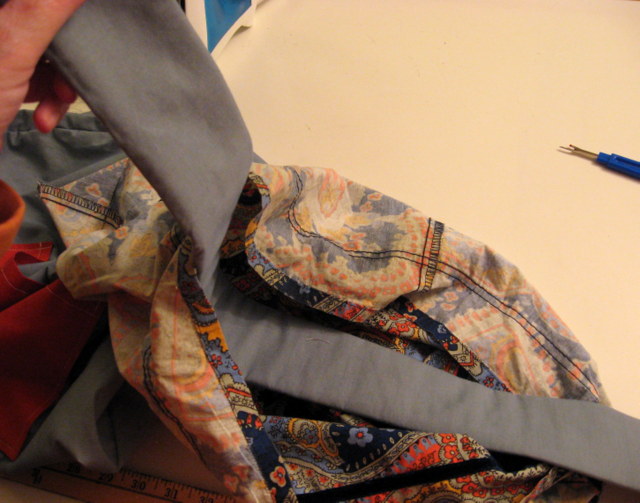
Now with the INSIDE pouch also turned inside out, put it down inside the outer pouch. So, you will have a “pouch sandwich” with the strap between them. Line up the side seams and the front and back centers and pin them together, stretching to ease in any excess fabric (you shouldn’t have a lot, but you will likely have a little). You will now sew around the whole top where you just pinned, but you will have to leave a space so that you can turn them inside out. The smaller the opening you leave, the harder it will be to get it turned, but the larger the opening, the more work you will have to do to close it up. I probably leave about 3 inches. I have been known to forget and just keep sewing, so when I pin, I will pin an X where I want to leave the opening just to remind myself.
Take a minute to look at it and make sure you have everything assembled the way it should be; it should look like this:
Then, sew around the top edge, backstitching at the beginning and end. Carefully reach into the opening that you left and pull out the strap, then work the rest of the purse through until the whole thing is turned right side out. Now press around the top where you just sewed, to make it look nice and neat, and press down the edges of the opening as you go. Slip stitch or blind stitch the opening closed by hand – or you can topstitch around the entire top edge, closing the opening in the process.
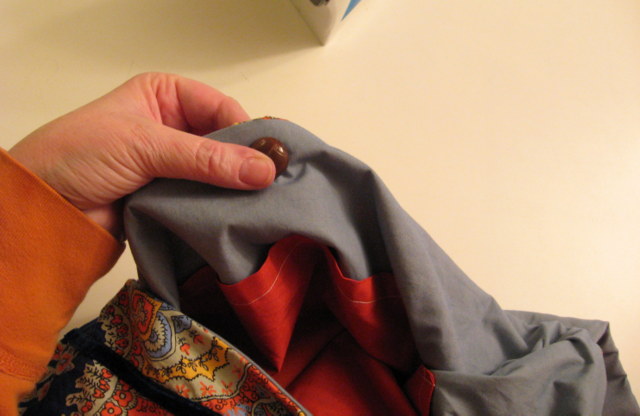
I chose to close this bag with a button, so I found the center of one side and attached a big vintage button, sewing it just to the lining so the stitches don’t show on the outside. Then I lined it up with the center on the other side of the bag and made a buttonhole.
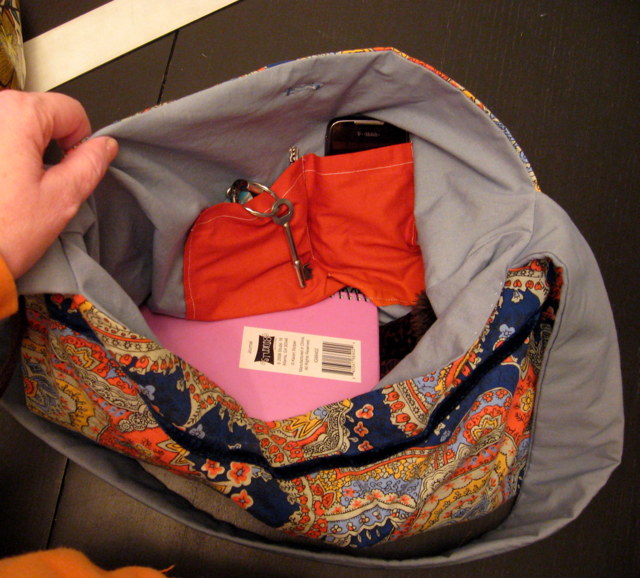
Here’s a shot of the inside of the finished bag:
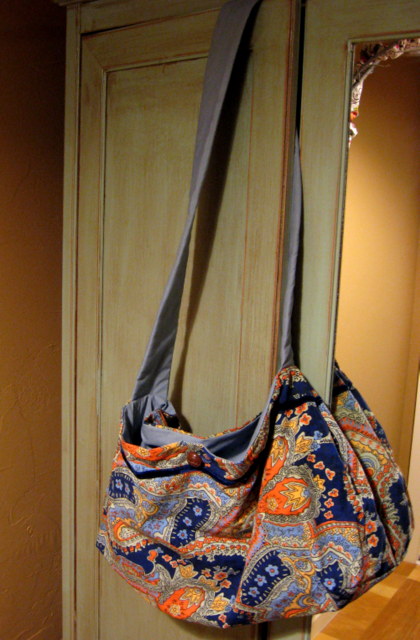
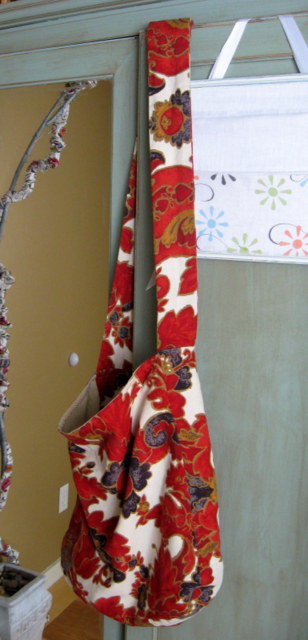
And the outside:
And a few of my other favorites…
My favorite overall tote bag, made from an old pair of curtains.
And a simple scripture bag: 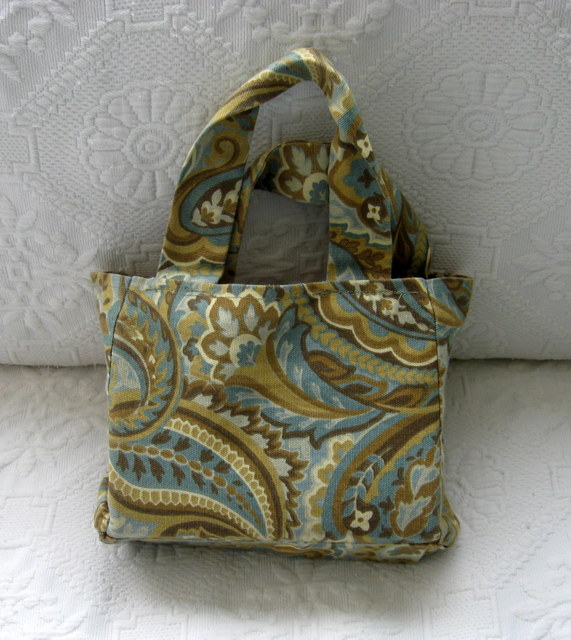
And my library bag – two straps instead of one – and made from a heavy duty upholstery fabric that I picked up for pennies on clearance.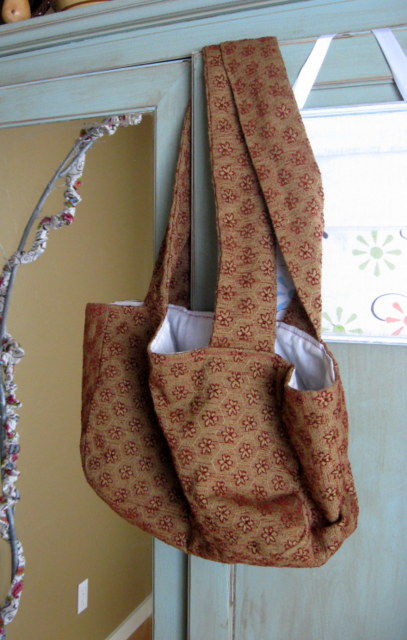
A PYP Best Blog! Easy, Healthy Homemade Granola Bars!
Just in case you missed this article on making homemade granola bars the first time we shared it a couple of years ago, we are republishing it. After Trish wrote this blog originally, we got an awesome response. This is one of the PYP Best Blogs!
For a variety of reasons I won’t go into here, I have started packing lunches for my kids and husband every day.
When I decided to make the switch from school lunch to brown bagging, I sought the advice of PYP members in the forums. I was looking for wholesome, healthy, non processed options.
One suggestion I received was a Mark Bitman recipe for homemade granola bars.
They have been a huge hit! And I’ve made them so many times now that I can make them in my sleep.
I wanted to pass them on for others to enjoy.
I would guess that the approximate cost for a full recipe is about $2 for 16 bars.
Considering that I know exactly what’s in them (Nothing I can’t pronounce or identify!) and can customize the granola bars according to our tastes, I think that they are a good value.
Chewy Granola Bars
adapted from a Mark Bitman recipe
1/2 cup nut butter (almond or peanut)
1/2 cup honey
1 cup crispy rice cereal
1 cup oats (instant, quick or old fashioned)
1/2 chopped unsalted nuts and/or seeds (any combination you like)
1/2 cup chopped dried fruit (any that you like)
1/4 teaspoon salt (optional)
Place nut butter and honey in a small saucepan and heat over low heat just until melted enough to combine thoroughly with a whisk.
Lightly oil a 9X9 or 8X8 cake pan.
Center a piece of plastic wrap that is about 3 times the size of the pan over the pan and smooth it out to line the pan allowing the excess plastic wrap to hang over the sides.
Put the dry ingredients in a bowl. Add the combined nut butter and honey. Stir gently until well combined.
Pour mixture into pan and distribute as evenly as possible with the spoon you used to stir with.
Now fold the plastic wrap over the mixture and press firmly and evenly into the pan.
Refrigerate for at least one hour.
Lift the plastic wrap and granola mixture from the pan all at once.
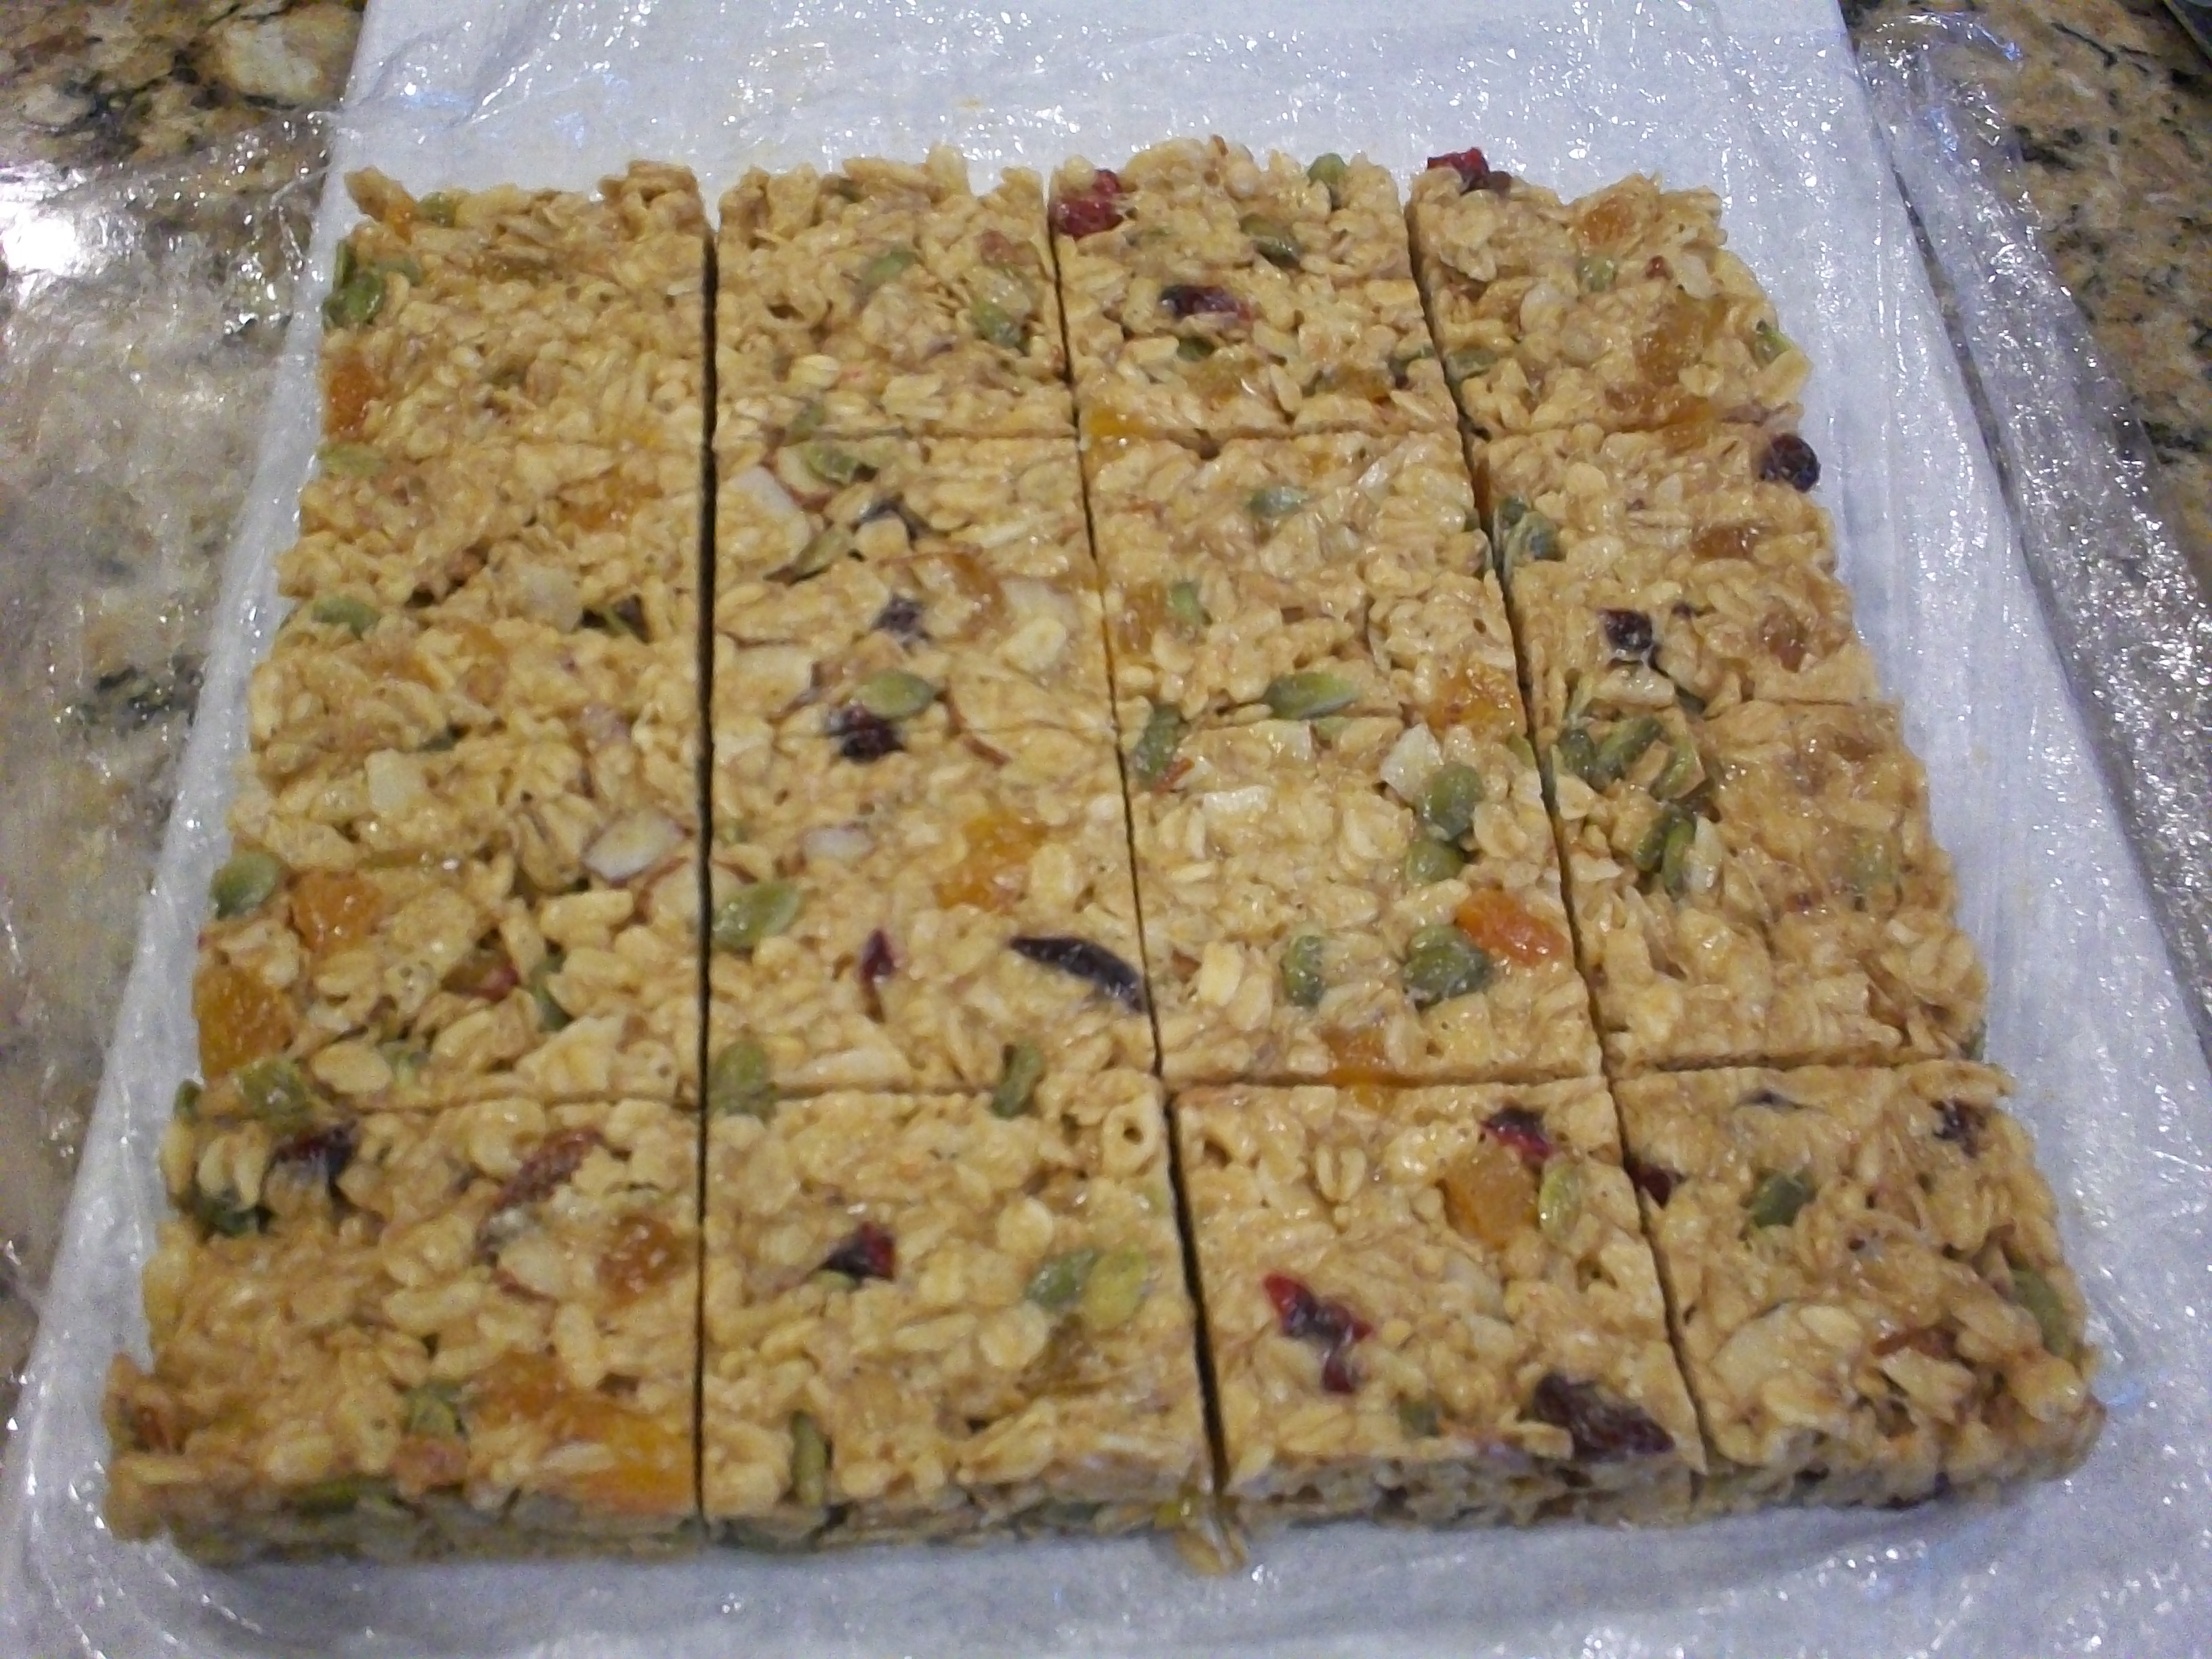
Place on cutting board and cut into 16 equal pieces.
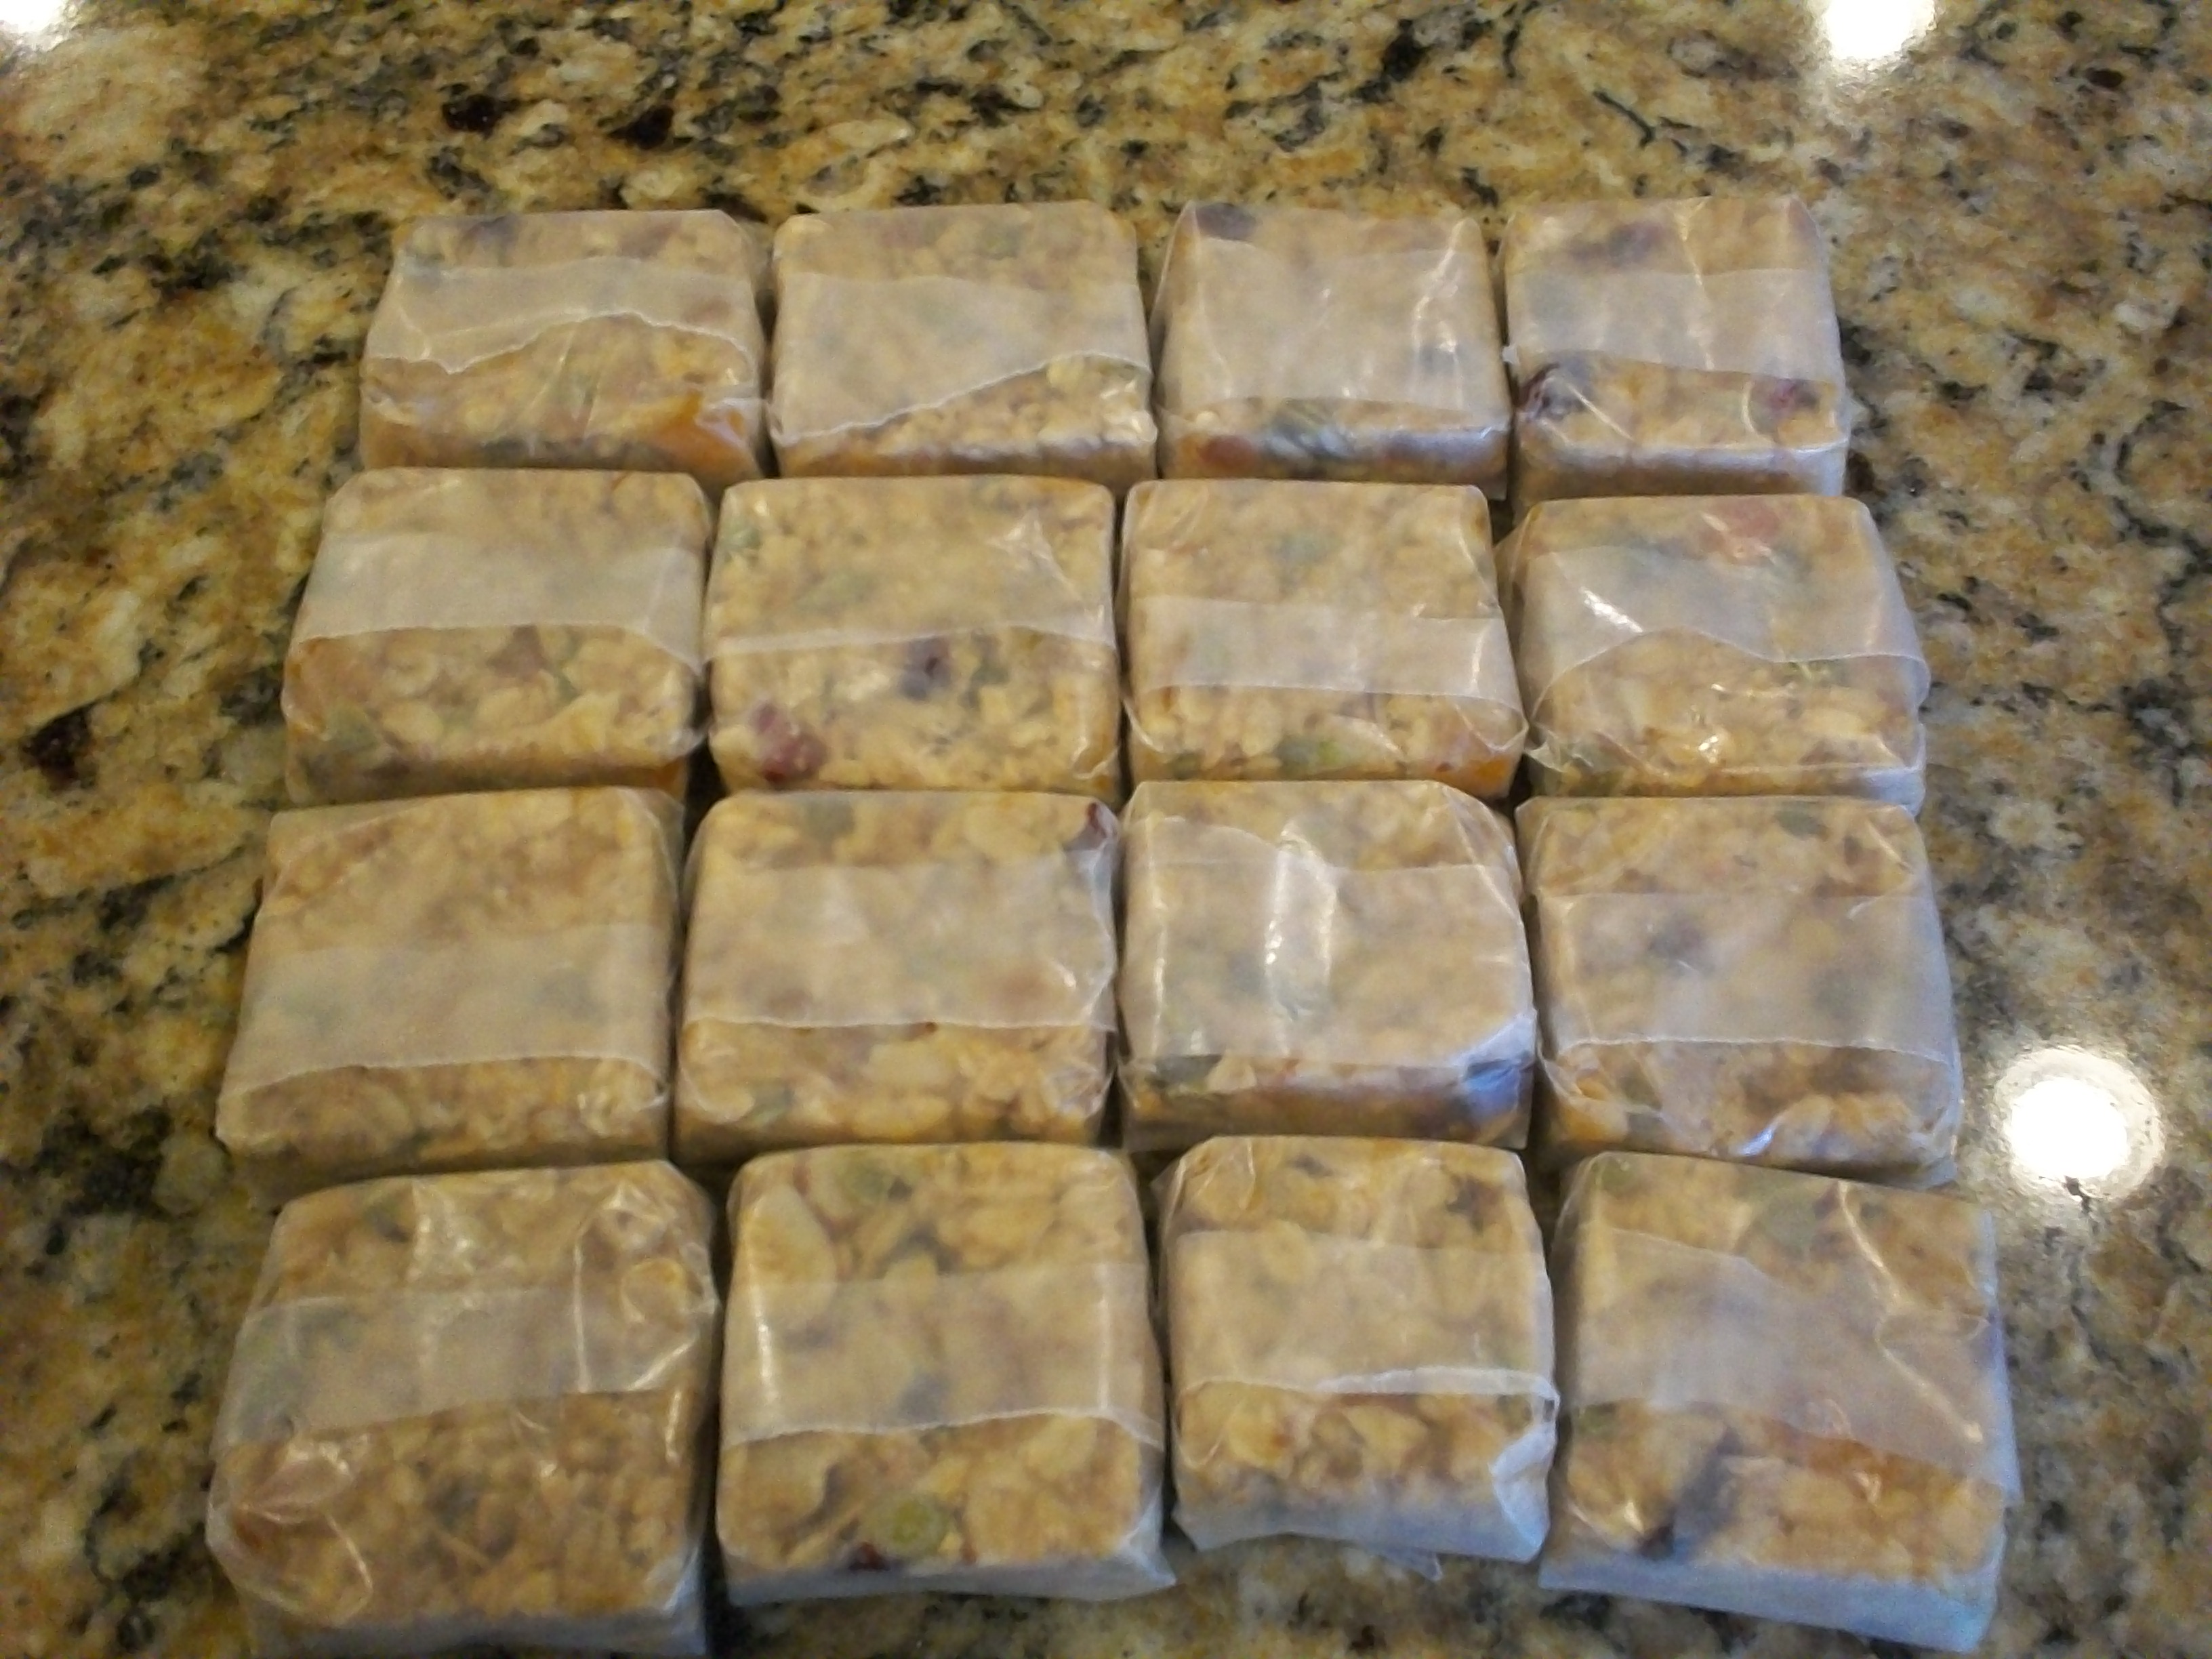
At this point I like to wrap each bar in waxed paper and put them into the freezer. When I’m packing lunches I can just grab one and add it to the lunches. It thaws perfectly for lunch.
For this batch I used natural peanut butter, almonds, raw pumpkin seeds, sunflower seeds, apricots and cranberries. YUM!
Pin It
Making Your Own Bug Spray

Making your own bug spray isn’t something that you’ve probably thought about before but we recommend that you start thinking about it. Not only can you save a ton of money but you can also ensure that your bug spray works. In fact, there are actually a few different household items that you can use in replacement of bug spray that tend to work very well. Interested in finding out what these items are? If so, scroll down and look at the list below!
Vinegar
We’ve heard a lot of success stories about vinegar and how much it can help you get rid of pests such as ants, flies, and even mosquitoes. Use it around your home but avoid using it indoors as it could actually attract more bugs than you already have. For best results, try mixing it 75/25 (mostly vinegar) with warm water and using a spray bottle to apply it.
Soapy Water
If you’ve ever messed around with homemade bug sprays before, this is a remedy that you have probably already heard of. Take some of your favorite hand soap and mix it with warm water at a 50/50 mix. Then, you can apply it to areas around your home to rid them of bugs. The best use for this mixture is against fleas and it’s safe to apply directly to your pets. If you don’t have hand soap, try the same mixture but with some type of lotion.
Tea Tree Oil
Think of this one as kind of a universal bug spray. It works well on almost any type of bug that you could possibly think. All you need to do is take some tea tree oil and mix it with distilled water and vegetable oil. Mix these as evenly as possible and spray around your home with a good spray bottle. This should last for a few months but if you notice that the effects of it are starting to wear off, feel free to apply more anywhere around your home.
Apple Cider
Finally, the last homemade bug spray that we have for you is made of apple cider. This may seem a little contradictory to what you’ve been told in the past as apple cider has a sweetness to it (we’ve all been told that bugs love sugar). Mix this with some mint leaves and you’ll quickly see it work its magic. This mix can be applied inside as well as outside.
So, the next time you have some pests in your home that you’d like to get rid of, you know a few remedies that will do the trick. Feel free to play around with any of these mixtures and see which one works best for you. The only way to find out if something works is to try it so don’t be scared to try them all even if one has already worked for you. Finally, please pass this along to your friends and family as everyone can benefit from homemade bug spray. Now, what are you waiting for? Let’s get out there and eliminate those pests!
DIY : Tub and Shower Cleaner
Cleaning the tub and shower is no where on my list of things I enjoy doing. It is however on my list of things that need to be done. Often my hubby jumps in and volunteers to do the scrubbing to which I respond by gladly handing over my cleaning supplies . He always does a great job and the bathroom looks brand new. Although I question the amount of cleaner he applies to the bathroom. We have even consulted the bottle for recommendations of the proper use of the product. The makers of the cleaning supplies love him because it’s the people like him that keep them in business. There is no doubt our bathroom is clean and germ free but the scent of chemicals lingering in the air of our home is not exactly what I would call a comforting smell.
In an earlier post I commented that I would like to find more natural ways to clean. I really do love a squeaky clean bathrooms. Professional premixed shower cleaners that I have used in the past have always done a great job leaving the shower and tub looking brand new. That’s why I love them. They do however have chemicals that make my arms itch and leave a suffocating smell in the air. So I am looking for ways to cut out the chemicals we use in our home.
I’m not sure that Dawn dish soap really counts as natural but vinegar does and it is no where near as harsh as some of the other cleaners we have used. With only 2 ingredients I easily made a simple homemade version of a tub and shower cleaner. To my surprise it worked just as well as the professional cleaning supplies I have been buying. For all of you penny pinchers out there, it only cost a fraction of the price that one would normally spend on cleaning supplies and who doesn’t love saving hard earned money. So if your in a pinch, looking to save a few pennies, are out of cleaner or just want to try something new, try mixing up a batch of your own tub and shower cleaner.
Simple Tub and Shower Cleaner Recipe
1 cup Dawn dish soap
1 cup White Distilled Vinegar
Pour into a spray bottle and shake until mixed well. Spray on surface to be cleaned, let sit for a minute and wipe away with a wet rag.