
Even More Interesting Ways You Can Use Dryer Sheets
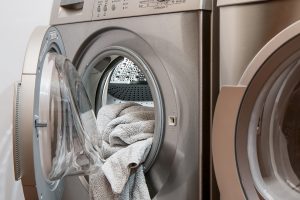
Yesterday we talked a bit about some weird ways that you can use dryer sheets outside of the laundry room. Today we are going to expand on that list a bit. Do you ever use dryer sheets for something other than their intended purpose?
If you are interested in seeing even more interesting ways you can use dryer sheets, look no further! These ones might surprise you!
Even More Interesting Ways You Can Use Dryer Sheets
Clean Burned On Food
Do you have pots and pans that have burnt on food? No judgments here, we have all had kitchen mishaps.I once read that If you fill up a pot or pan with warm water to the halfway point and put a dryer sheet on top of water and let it sit a while, it will turn your burnt mess into an easy to clean mess. From the looks of it, those burnt on stains will just wipe right away.
Keep Your Clothes Smelling Great
Slip dryer sheets into your dresser drawers to keep your clothing smelling fresh and clean. This works in the same way as a sachet might.
Bathroom Cleaner
Dryer sheets are great for wiping down your bathroom spaces. Showers, sinks and toilets will look brand new again after being wiped down with dryer sheets.
Insect Repellent
Want to spend some time on your back deck, but don’t want to deal with the bugs? Place a few dryer sheets strategically around your outdoor space and keep the bugs away!
Freshen Up Your Trash
Stinky trash? Put dryer sheets in the bottom of your trash can to fend off those stinky trash smells.
Revive Your Scissors
Got an old pair of scissors that don’t move quite like they used to? Rub the blades of your scissors with dryer sheets and you’ll be surprised to learn that your scissors do, in fact, have some life left in them.
What other ways have you found to use dryer sheets?
Weird Ways You Can Use Dryer Sheets
Do you use dryer sheets in your laundry routine? You may be surprised to learn this, but there are a lot of different ways you can use dryer sheets in addition to the drying cycle.
I personally don’t like using them all the time, but sometimes I just need to get rid of that static cling, you know? If you are interested in hearing all about the weird ways you can use dryer sheets, check out this list I created to teach you!
Weird Ways You Can Use Dryer Sheets
Attack Those Dust Bunnies
Dryer sheets are great at picking up dust! I have used them for this purpose before, especially when dusting things like my ceiling fan, etc, where I want to do more than just move the dust around.
Pet Hair
Do you have any pets at home? Do they shed continuously? I have a 7 month old husky/lab mix and I swear I deal with so much pet hair now! Of course I sweep and vacuum often, but it doesn’t get it all. Dryer sheets are great for picking it up!
Windshield Cleaner
Got dead bugs and other yucky stuff on your windshield? Use a dryer sheet to clean it! It works great.
Take Care of Those Smelly Shoes
I have two teenage athletes in my house and let me tell you, the shoes get smelly! I struggled for years to figure out how to fix the smell, only to discover that simply sliding a dryer sheet into the shoes at night does the trick!
Freshen Up Your Pillows
Okay, so because I’m pretty particular about the air I breathe, I probably wouldn’t do this one, but many people like to slide a dryer sheet inside of their pillow case for lovely smelling pillows. Have you ever freshened up your pillows this way?
I have a few more interesting ways to use dryer sheets that I will tell you all about tomorrow. Until then, have you ever used dryer sheet for something other than the dryer cycle?
Tips For A Healthy Holiday Poinsettia
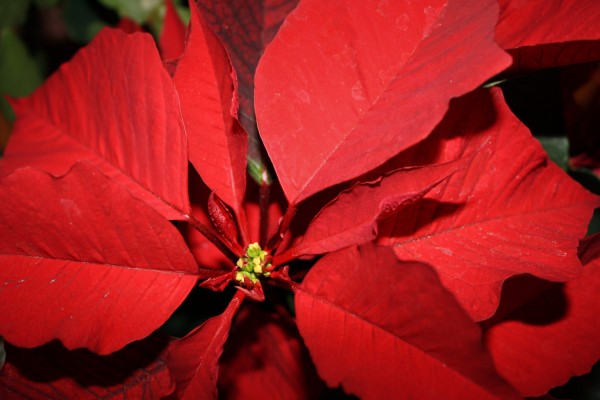
If you’ve been shopping lately you’ve noticed all the Christmas decorations gracing the isles of the store. ( It’s hard to miss them, they have been out since before Halloween?!) If your like me you’ve probably brought a few home. Most of them are rather durable and require little fussing over them to keep them looking their best. But the poinsettia is a different story. Each year I walk past the poinsettias and am sucked in by their beauty. The large red petals and the deep green foliage are just too pretty to pass up. After I take it home I immediately start worry how I will possibly keep this thing alive. Too little water, too much water, heat, cold, light and fertilizer, all effect the health of this holiday beauty. Sometimes I wonder if it’s worth all the work.
If you find yourself like me wanting to bring a poinsettia home this year follow these helpful tips. With a little luck, these tips will help you keep your poinsettia looking it’s best this holiday season.
Light – Like all flowers poinsettias need their daily dose of sunlight. They require about 6 hours of indirect sun light daily. Keep them in an area where they are exposed to light and protected from drafts.
Water – Water is a sensitive subject when it comes to the poinsettia. They enjoy their water but don’t like to soak in it. Avoid over watering them. Water this plant when the soil in the container has become dry about 2 inches deep.
Temperature – These flowers are sensitive to hot and cold. Drastic changes in the weather will show on the leaves and petals of this plant. For best results try to keep the room between 65 and 70 degrees during the day and 55 to 65 degrees at night.
Fertilizer – A little all purpose fertilizer applied once a week will feed your poinsettia and keep it happy and healthy through out the holidays.
Tips for Cleaning Fruits and Vegetables
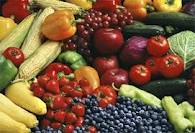
As spring sets in we enjoy more sunny days and warmer weather. Gardens and farms across the country begin to send their produce out and it will soon appear at the local farmers markets and produce sections of grocery stores. Their colorful displays call to me, begging me to take them home. I feel it’s important that we get our daily dose of fresh fruits and veggies. I enjoy purchasing fresh looking produce and I love it even more if it’s from a local farm.
Bringing home this colorful array of nature’s goodness always brings questions from my kiddos. “Can I eat that?” or “I’m hungry.” are just a few of the first things I hear as I try to put away the groceries. Sometimes I even find an open contain of strawberries or bags of grapes with about half missing before I can even get them into the fridge. I guess this is just to be expected living in a house with 4 growing boys.
I have to admit this makes my stomach turn a little when I see the fruits and veggies missing. I always think who touched that or what pesticides were on that? Maybe I’m a little OCD when it comes to cleaning my fruits and veggies but I really feel like it’s important.
It is estimated by federal health officials that nearly 48 million people get sick by contaminated food each year. This is often caused by produce that has been contaminated. There are many ways produce can become contaminated. It can happen during the growing season, by animals, by harmful substances in the soil and water, and by the many people that handle the produce as it is processed from one place to another. We can even contaminate produce after we purchase it by the way it is handled and prepared. All of this heightens my OCD about cleaning fruits and vegetables before they are eaten.
So here are a few tips I’ve picked up for and thought I would pass along.
1. Always wash your hands for about 20 second with warm soapy water before and after preparing produce.
2. Cut away any damage or bruised areas of the produce before preparing.
3. Always wash produce before you peel it. This prevents dirt or bacteria from being transferred from the outside of the fruits or vegetables to the inside.
4. Use a clean vegetable brush to scrub firm produce like melons.
5. Throw away the outer leaves of lettuce and cabbage.
6. Dry fruits and vegetables with a clean cloth or paper towel.
Follow these tips to enjoy healthy and cleaner produce.
Tackle Spring Cleaning- Tips For Mattress Cleaning
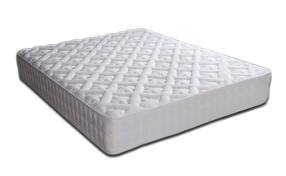
When I think of Spring Cleaning, I try to think of the things I have neglected to clean throughout the cold winter months. Making my list is a little discouraging, who would have thought I would have so much to do. I guess that is what happens when you hibernate all winter. Although my long list may be daunting with chores all over the house, I’m ready to tackle it.
The other day as I began pulling the sheets of the bed to wash I was greeted by a surprise. I found my 2 year old had left his sippy cup tuck between the covers of the bed, forgotten during our most recent game of hide and seek. This supposedly “no leak” toddler cup had left a small puddle of juice that soaked through the sheets and mattress pad and leaving it’s mark on the mattress. So now another task added to my list – clean the mattress.
I’m never quite sure where to start when it comes to cleaning the mattress so I turned to my ever trusted friend,the internet, for a little advice. Here is what I found.
Tips for Mattress Cleaning
A mattress should be cleaned about every six months.
Vacuum the top of a mattress with an upholstery attachment of the vacuum.
For stain removal use a damp cloth with a very small amount of upholstery shampoo. (Do this carefully to ensure that you do not damage the layers of the mattress or create an environment where mold can grow.)
Use a good mattress pad to protect the mattress from stains and dust mites.
Extra Tip:
To make sure the mattress wears evenly you don’t have to flip it. Just rotate it from head to toe every six months.
Helpful Microwave Hints
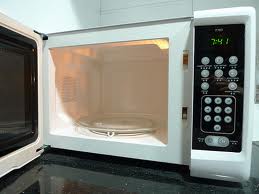
The microwave is one of those inventions that has changed the way we operate in the everyday kitchen. It saves me time everyday as I prepare dinner and fix lunch for the kids. I love that I can toss a bag of popcorn in and walk away to work on something else and come back to a bag of beautifully popped popcorn.
When we built our house the microwave was carefully planned into the kitchen design and cabinet layout. It’s shiny, reflective, stainless steel front adds a little bling to the kitchen and although I don’t use it for much it looks like it belongs. The most commonly used functions of the microwave in our house are defrost, reheat and the popcorn mode. Other than that it just sits and looks pretty.
The lack of use of the microwave for other tasks is because the user (me) isn’t educated enough to use it to it’s full potential. There are so many things you can do with the microwave. It’s part of the reason it is such a great invention.
I recently pick up a few tips for using the microwave. Some of them I had never thought of before. Although I’m not quite sold on baking or cooking in the microwave some of these tips might help if your in a hurry and need to get things done.
5 Helpful Microwave Tips
1. Meat & Vegetables – If your going to cook meat or vegetables in the microwave make sure to cut them into uniform shapes. Dicing the meat or veggies up evenly will help them to cook evenly too.
2. Cake Baking – I’ve never attempted to bake a cake in the microwave but it might be interesting to try. When baking a cake in the microwave use a round pan instead of a square one. It will bake more evenly and eliminate the problem of overcooked corners.
3. Refresh Snacks – Use the microwave to refresh stale snacks. Place a plateful of potato chips, crackers, cereal or other similar snack in the center of the microwave. Heat for 30 to 45 seconds and let stand for 1 minute to let crisp. (I’m not sure I would try this with foods after their best by date. But it might be good to try if you find the kids left the container open and the snacks are slightly stale.)
4. Scald Milk – Do your recipes ever call for scalded milk? You can use the microwave to scald milk. Place 1 cup of milk in the microwave and cook for 2 to 2 1/2 minutes. Stop each minute to stir.
5. Nuts – Place 2 cup of nuts in the center of a casserole dish with 1 cup of water. Cook for 4 to 5 minutes. Remove the nuts from the microwave crack the shells and the nuts should slip out whole.
Another way to use canning rings

Back in May, Candi shared with us a great way to cook eggs using canning rings. Here is a LINK to her post. I found another great idea on Pinterest. You can use canning lids on a sheet pan to hold paper cupcake liners, so you can bake more cupcakes/ muffins at one time. I LOVE THIS IDEA! I only have 1 cupcake pan and I frequently make lots of muffins to freeze. This idea will definitely save me time!
This time of year if you are like me you are probably making zucchini bread, did you know that you can pour your zucchini bread batter into muffin cups? LOVE IT! What a great way to freeze little breads!
Do you want to try it with banana bread? This recipe was shared by one of our PYP Mods, LazyBear! It is the BEST Banana Bread recipe EVER!!!
Lazy Bear’s Banana Bread
1 1/4 cups sugar
1/2 cup butter, softened in microwave
2 eggs
1 1/2 cups mashed very ripe bananas (3 to 4 medium)
1/2 cup – your choice – buttermilk or plain yogurt (my fav is sour cream)
1 teaspoon vanilla (my favorite is banana flavoring)
2 1/2 cups flour
1 teaspoon baking soda
1 teaspoon salt
1 cup chopped nuts – (pecans, walnuts or almonds)
1. Heat oven to 350°F. Grease bottoms only of 2 loaf pans.
2. Mix sugar and butter in large bowl. Stir in eggs until well blended. Add bananas, buttermilk and vanilla. Beat until smooth. Stir in flour, baking soda and salt just until moistened. Stir in nuts. Pour into pans.
3. Bake 1 hour to 1 1/4 hours depending on size of loaf pan.
I always use this method ~ until toothpick inserted in center comes out clean.
Cool 10 minutes. Loosen sides of loaves from pans; remove bread and place top side up on wire rack. Cool completely, about 2 hours, before slicing. Wrap tightly and store at room temperature up to 4 days, or refrigerate up to 10 days. Freezes well.
Halloween Slime
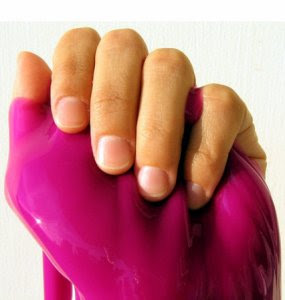 Are you looking for a fun craft to do with your children or in a classroom or maybe to hand out on Halloween? With Elmer’s Glue going for a great deal on Amazon.com right now, this is a fun one. Homemade slime/gak/whatever you want to call it. We’ve done it for Halloween, Harry Potter Potions Class, etc. It’s always a hit.
All you need is Elmer’s Glue & Borax along with some water and food coloring.
In one bowl combine 2 C of your glue along with 1.5 C of warm water and food coloring of your choice. In another bowl combine 1 1/3 C warm water with 2 teaspoons of Borax. Then you just mix the contents of the two bowls together. Mix well. You will have leftover liquid – just dump it and voila! Slime!