

A PYP Best Blog! DIY Roman Shade!
Just in case you missed this article on making a DIY roman shade the first time we shared it a couple of years ago, we are republishing it. After Sharon wrote this blog originally, we got an awesome response. This is one of the PYP Best Blogs!
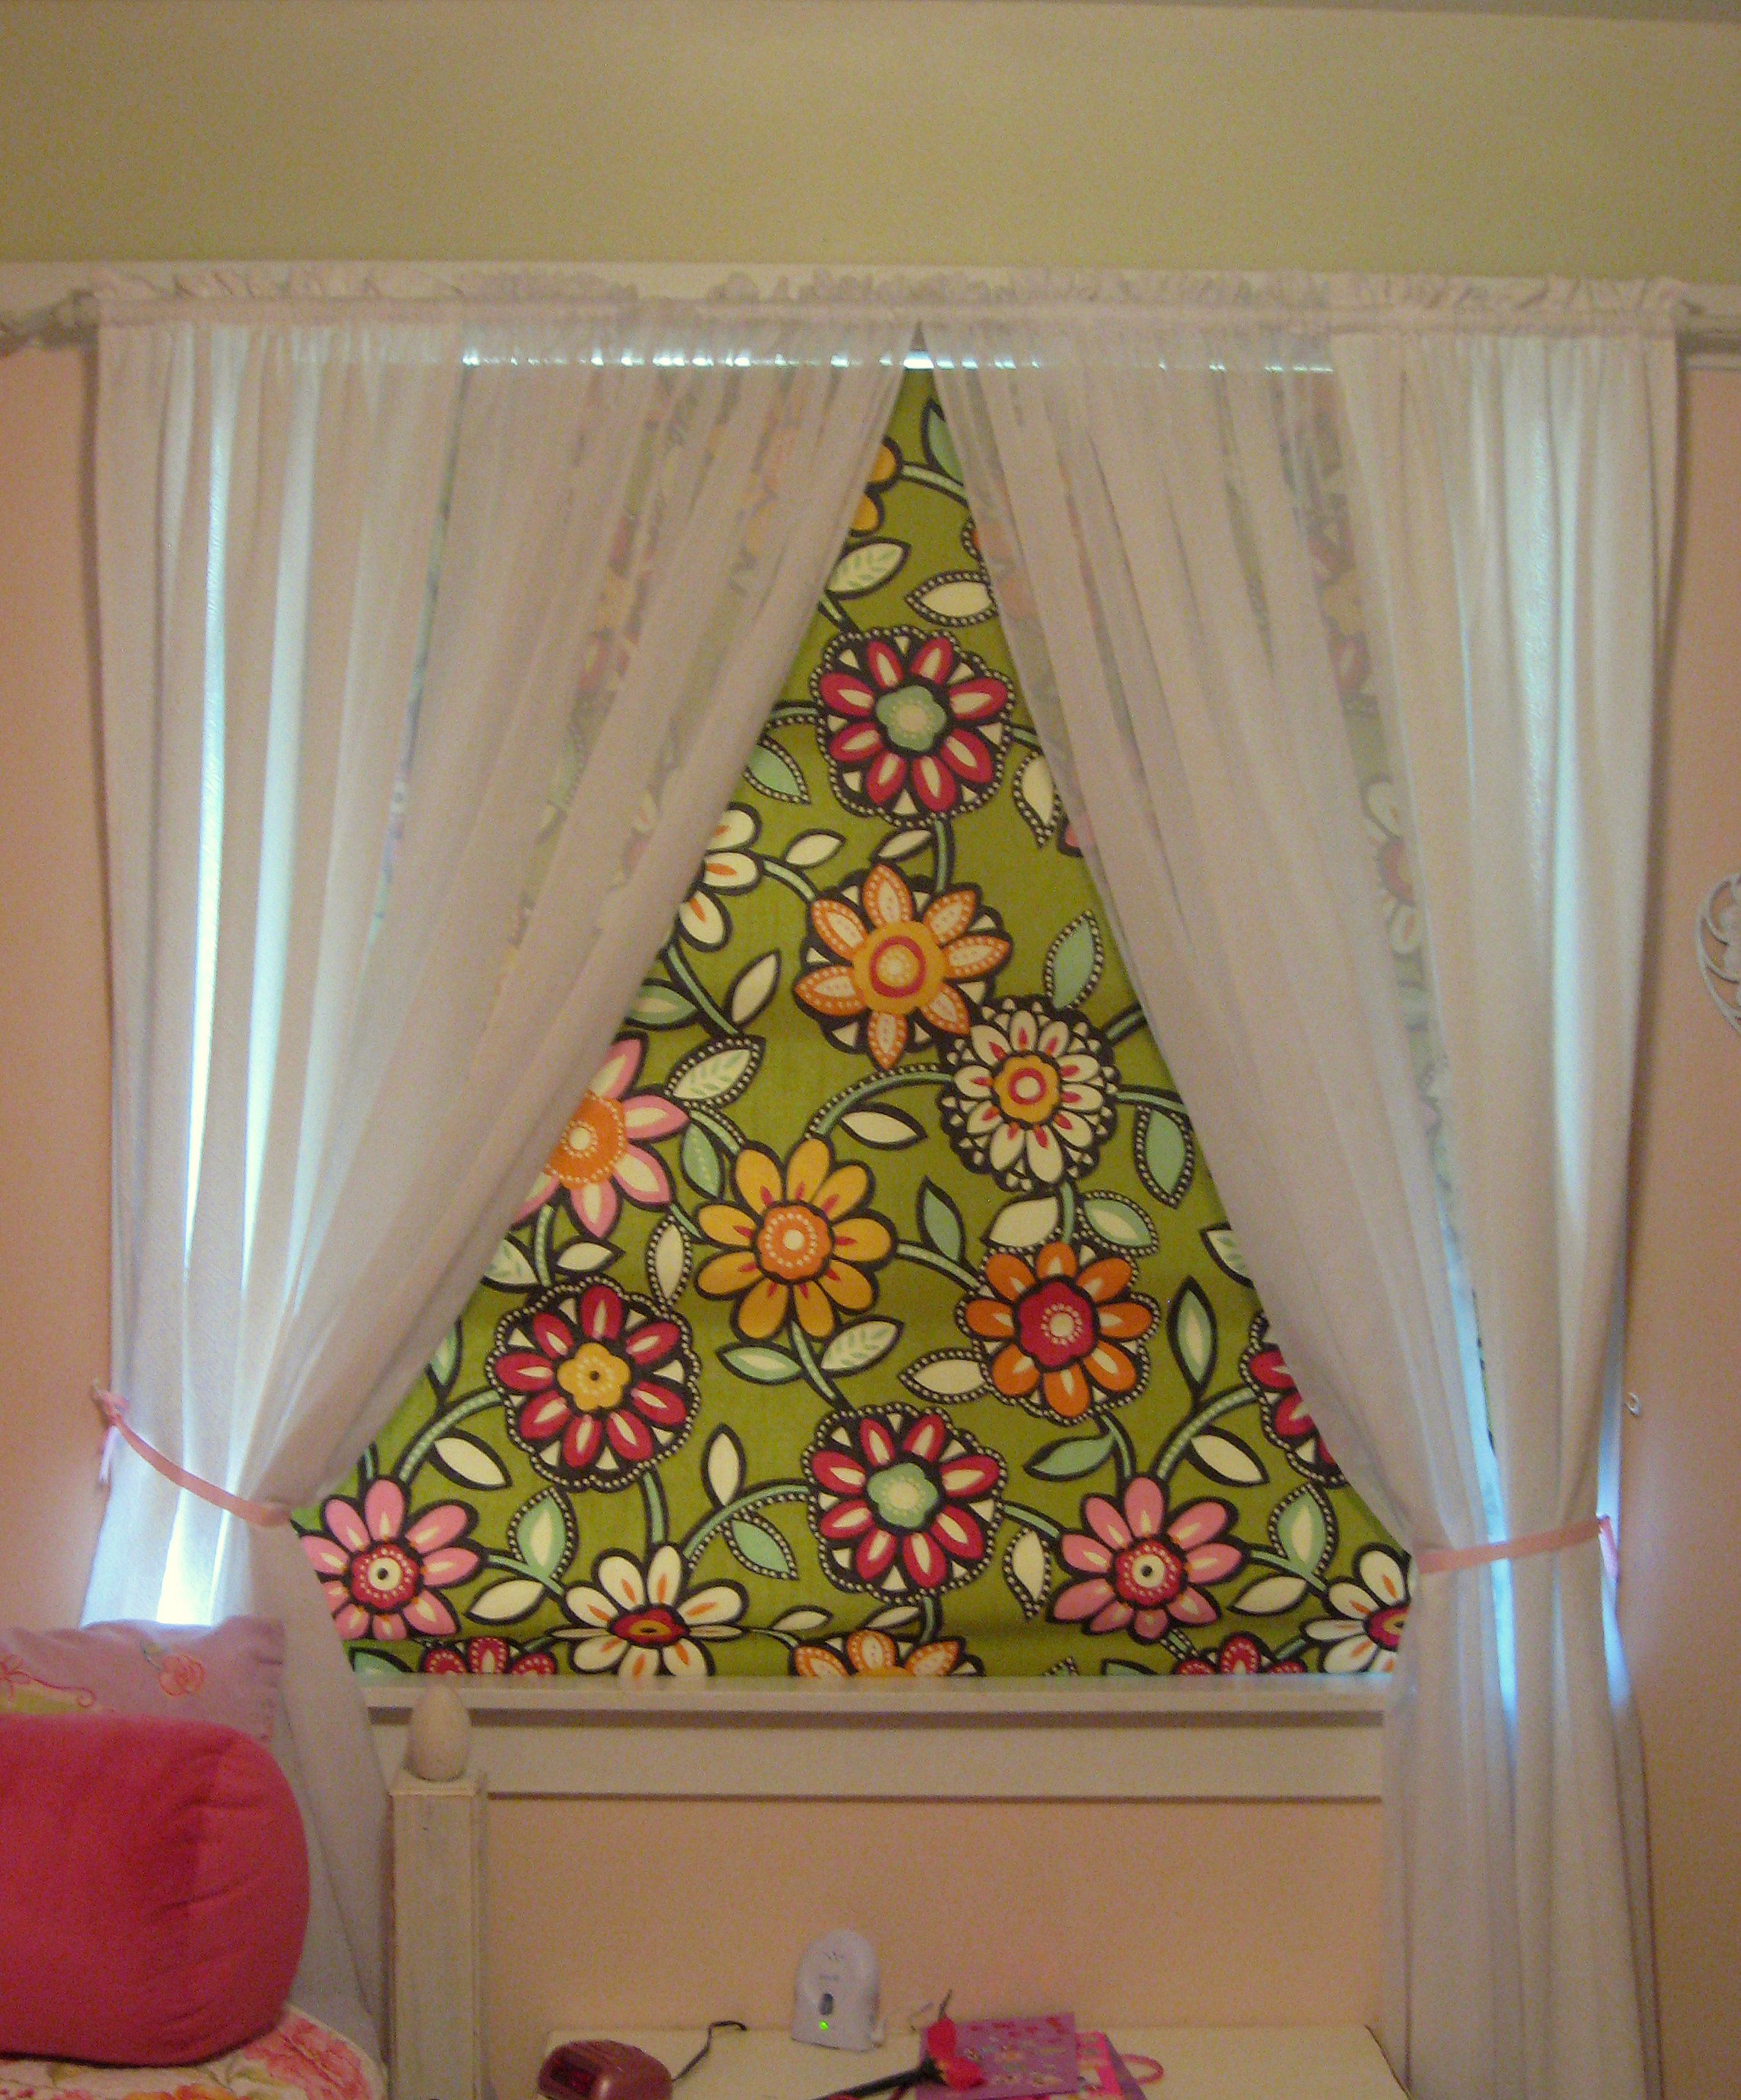
Summer wreaks havoc on my daughter’s sleep schedule; it is light when I put her to bed and the light in the morning gets her up much earlier than I want to join her! I purchased a black out shade a few summers ago from Ikea for my own bedroom and it works great – totally where I recommend buying them if you don’t want to go the DIY route – but since our Ikea is quite a drive, I just bought a $20 shade from Kmart for my daughter’s room. And it broke in a week. She does have blinds, but they just don’t block out enough light. I decided to use the broken black out shade and some decorative fabric to make my own Roman Shade.
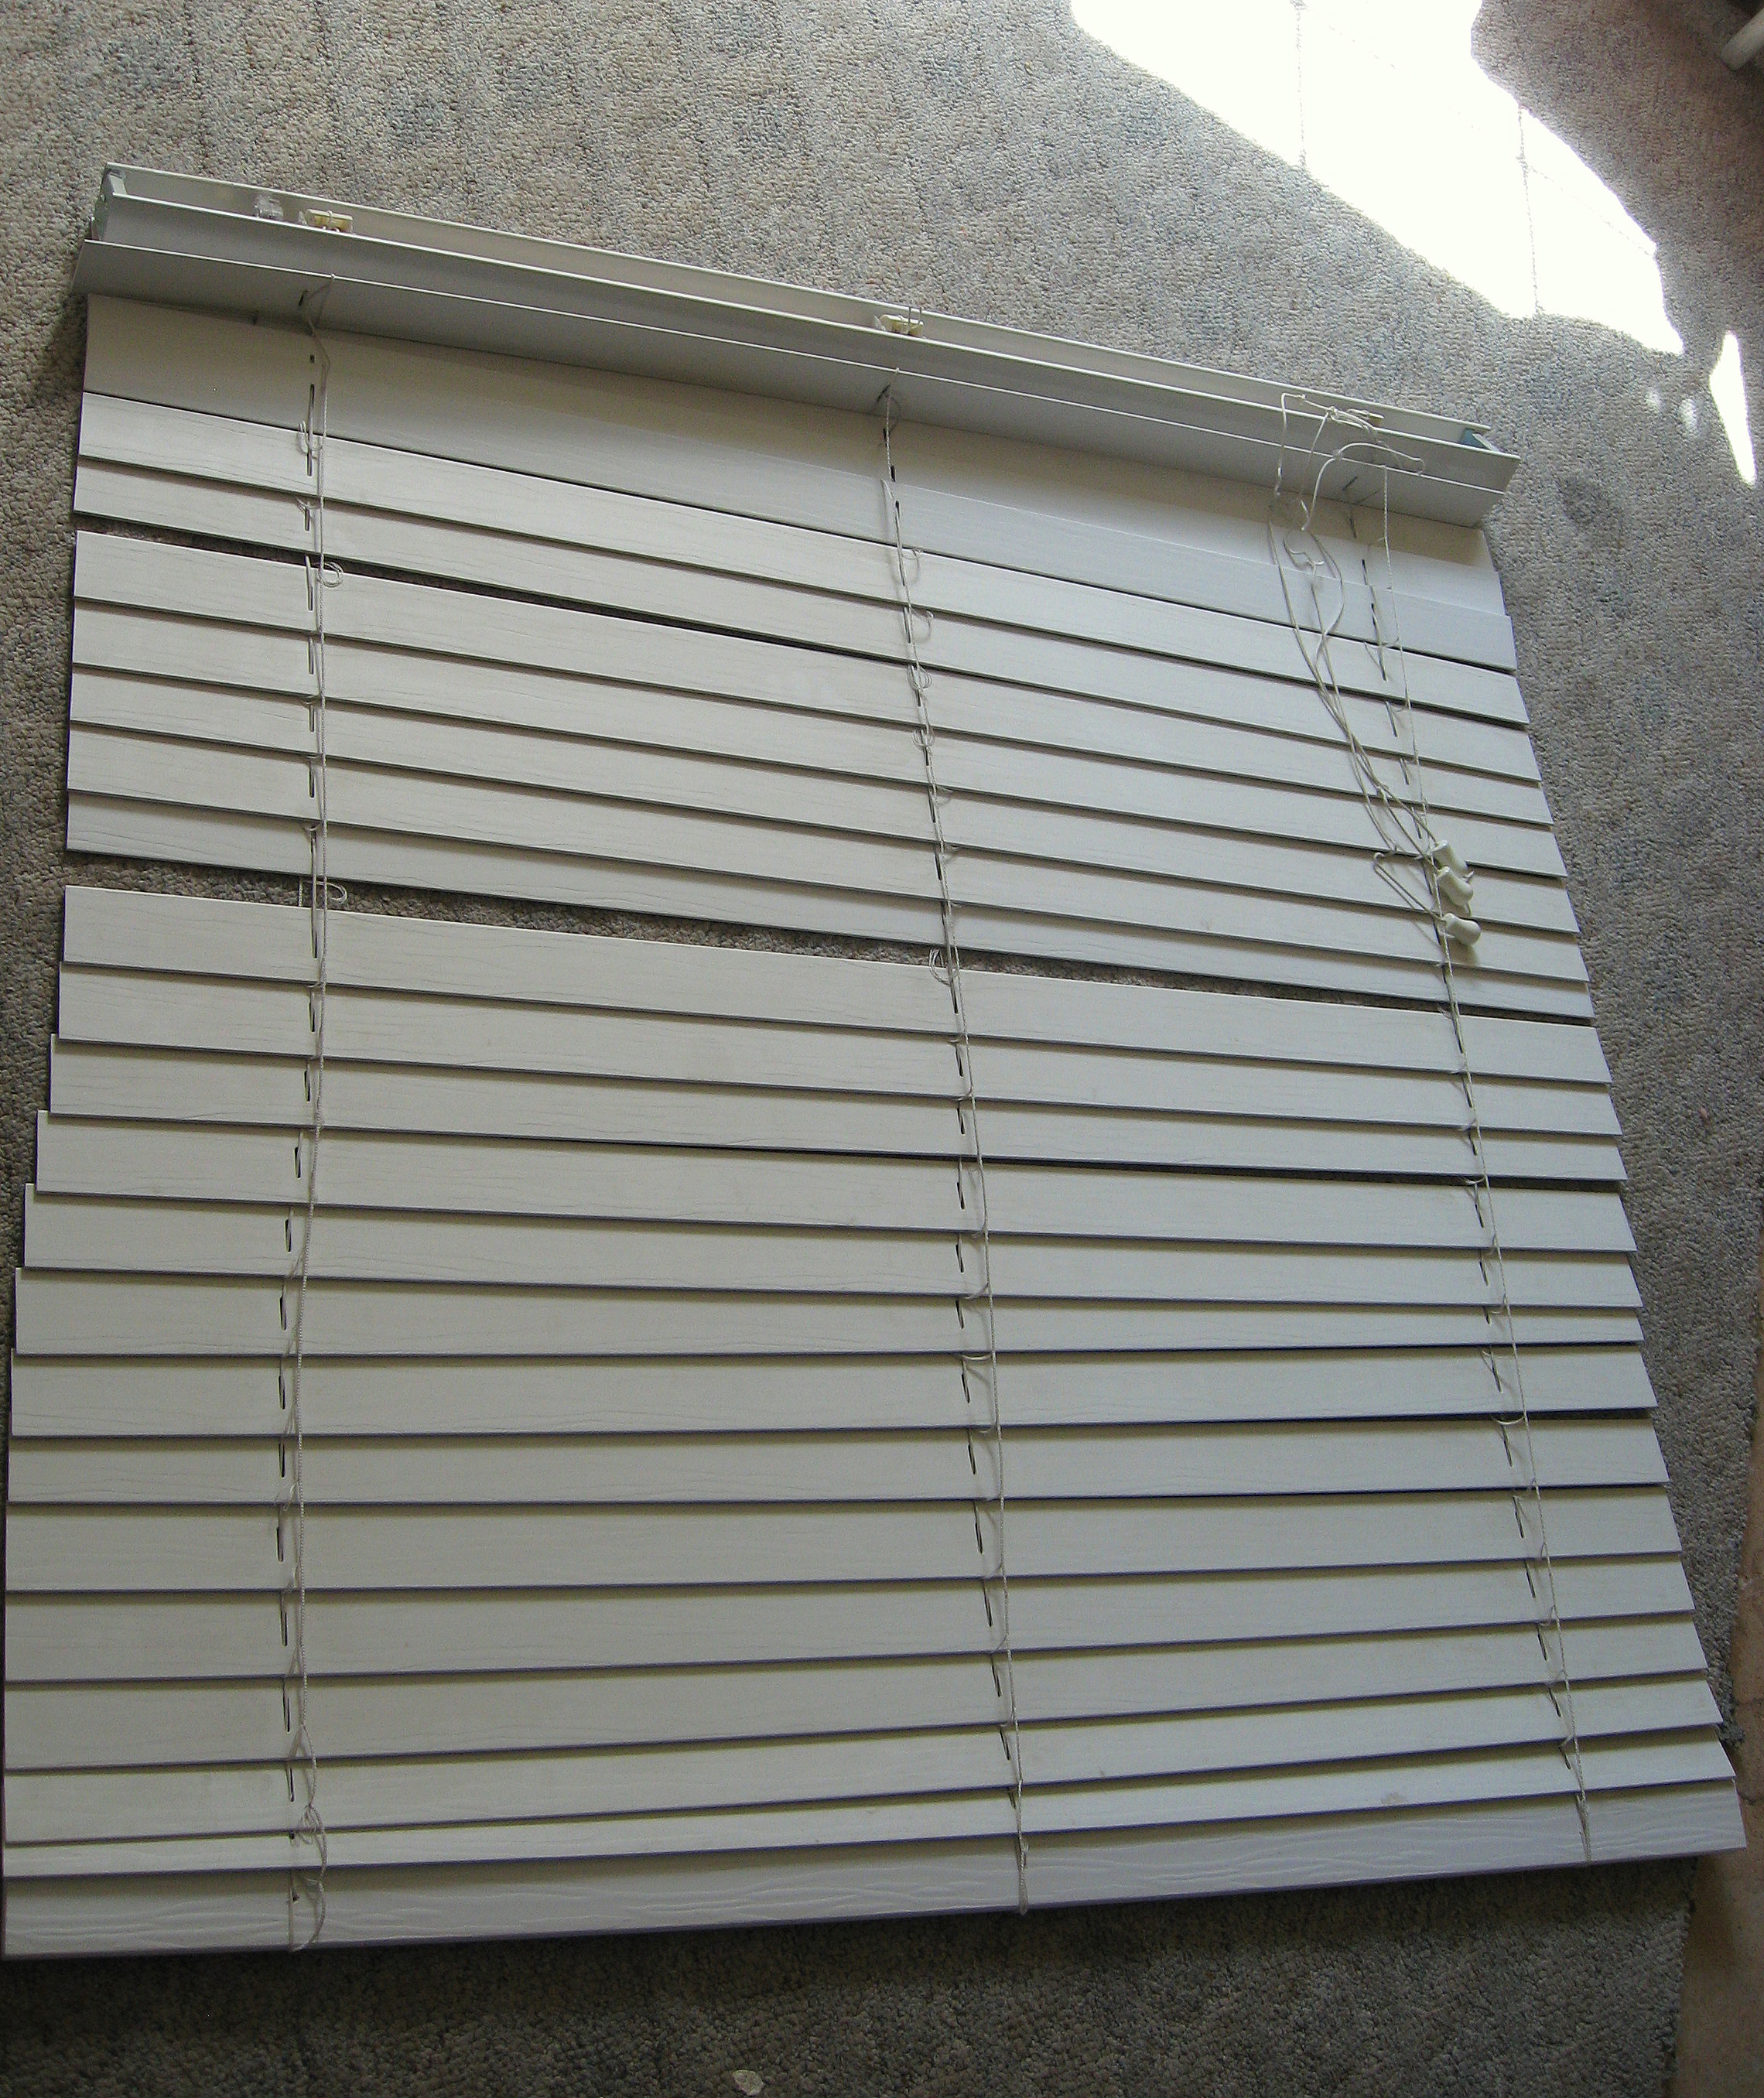
I used these blinds because that is what I had already, but you can follow these same instructions if you have the cheap mini-blinds. OR, if you are starting from scratch, mini blinds are super cheap at Walmart.
Take the blind, open them all the way and lay them out on the floor.
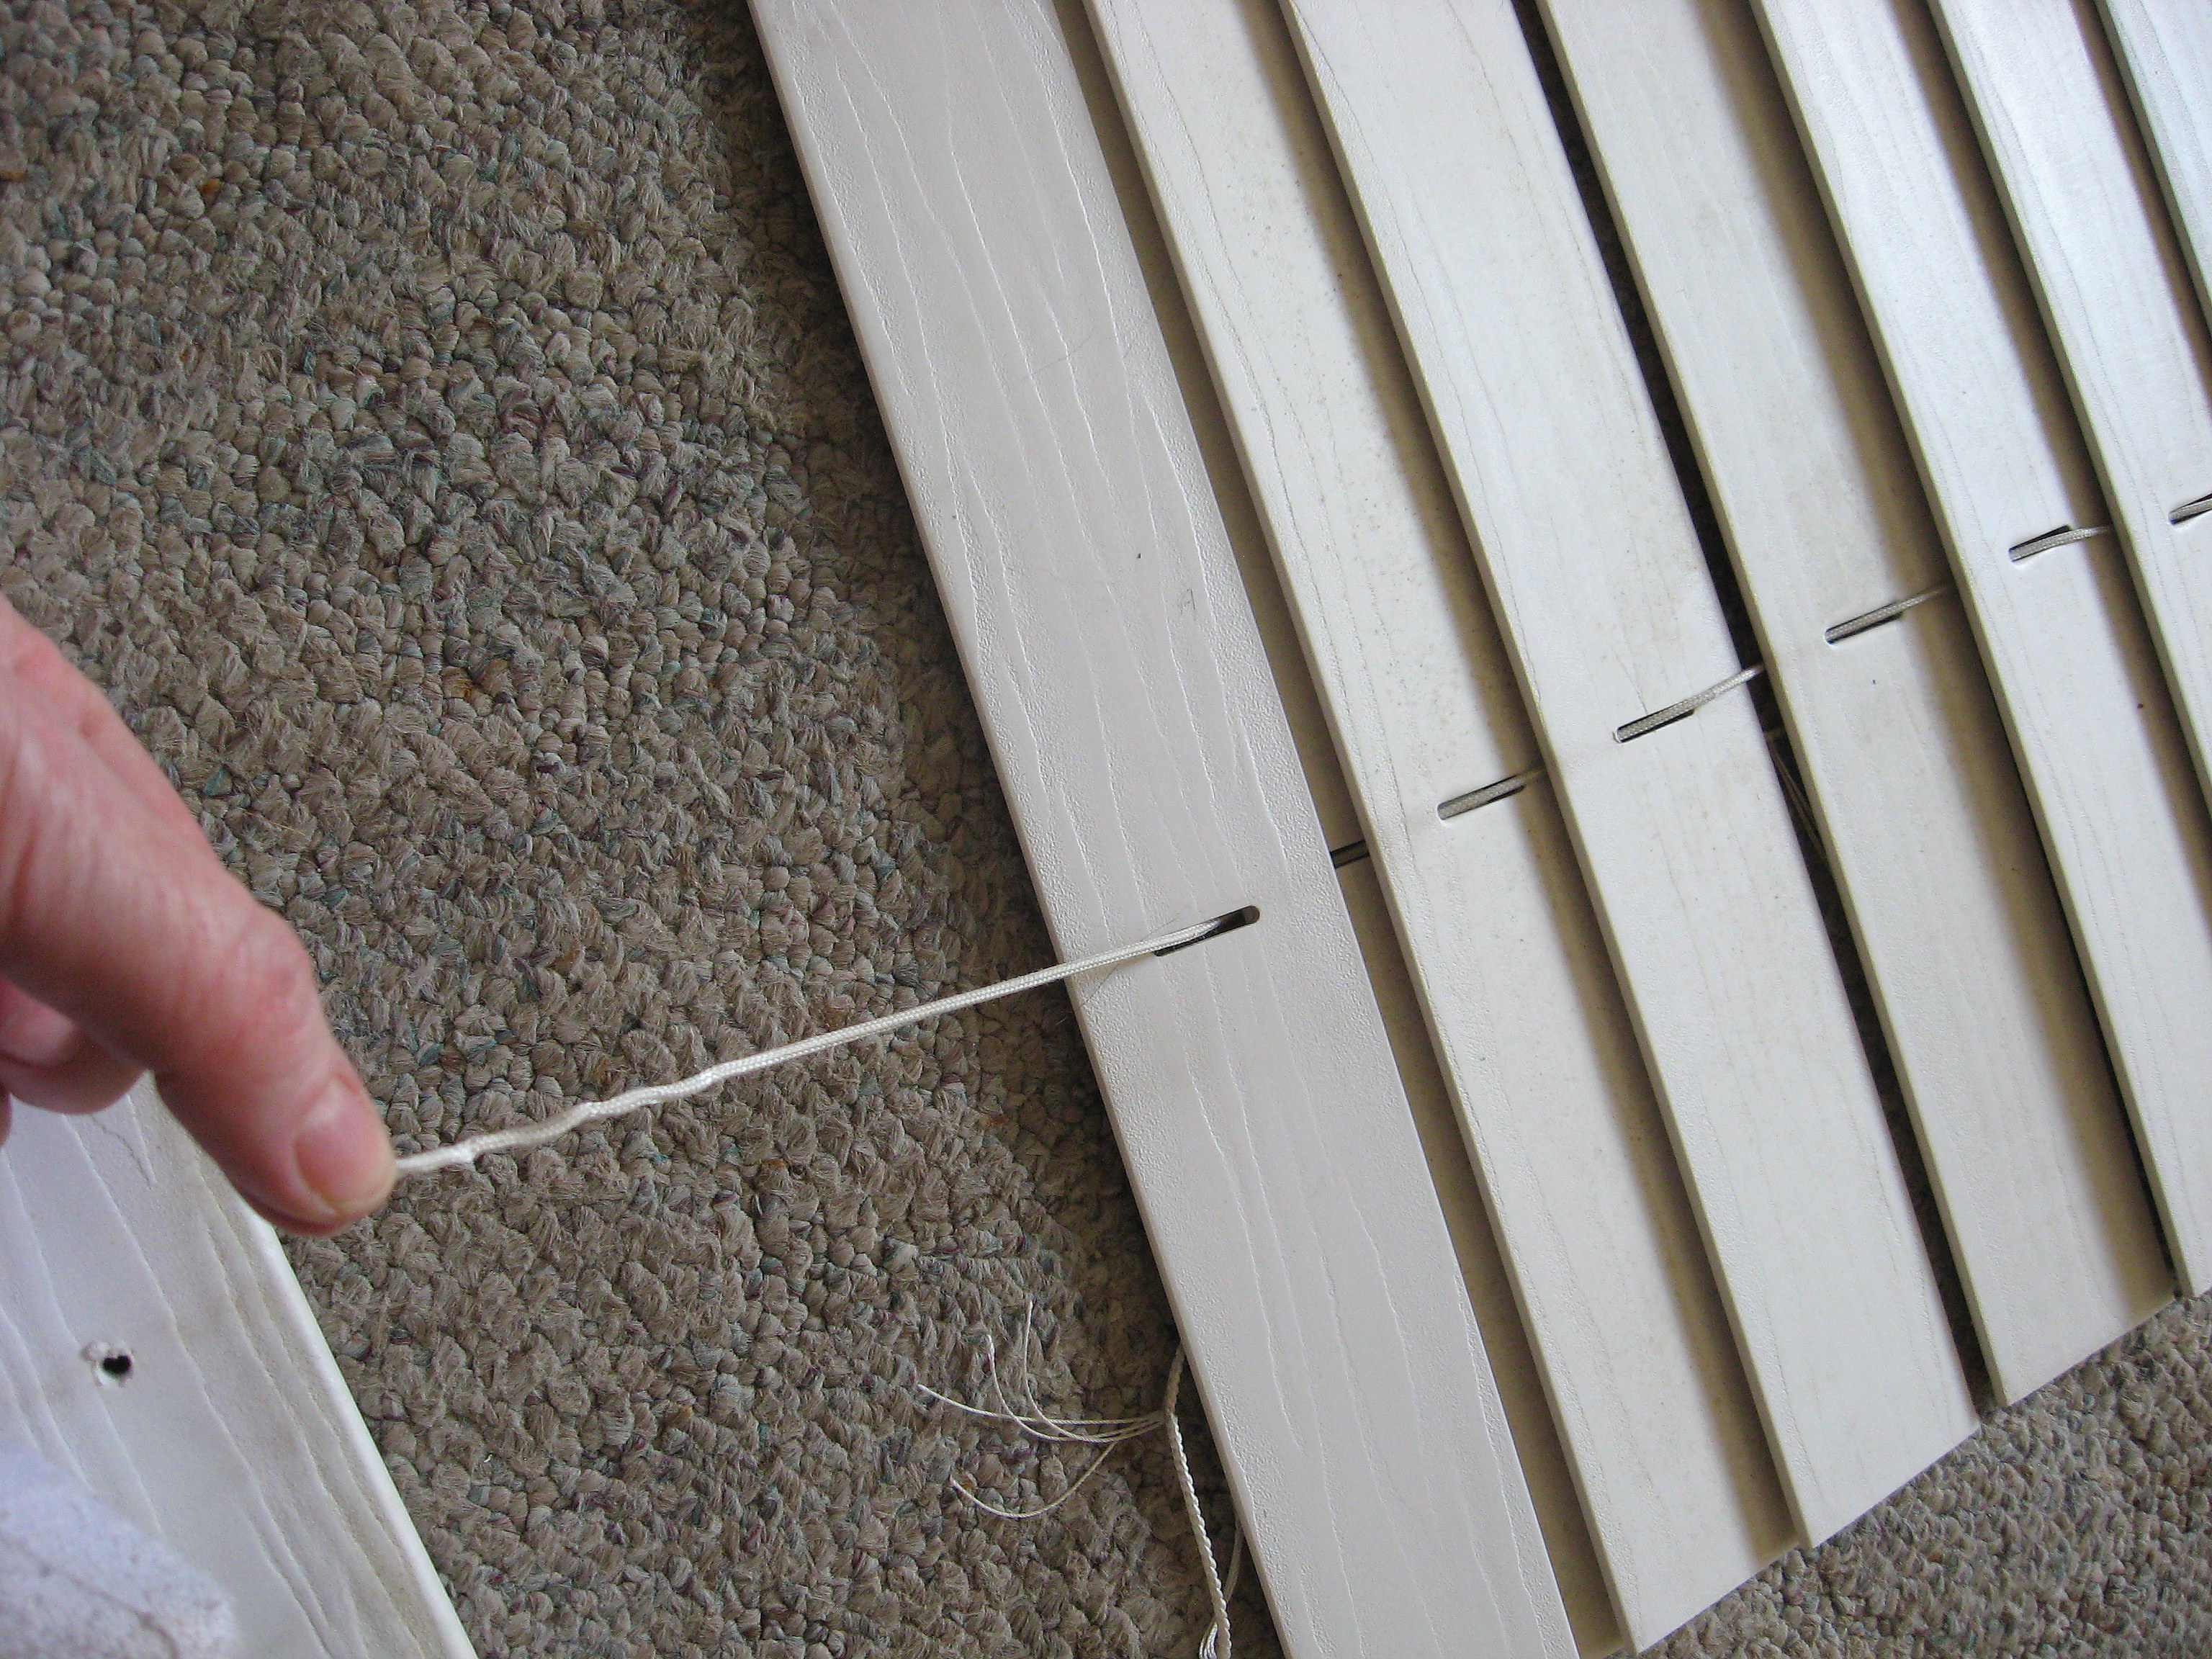
You will cut the thin strings that hold the slats in place – the ones that look like a ladder. DO NOT cut the heavier string that runs up through the holes in the slats – that’s the string that makes the shade go up and down.
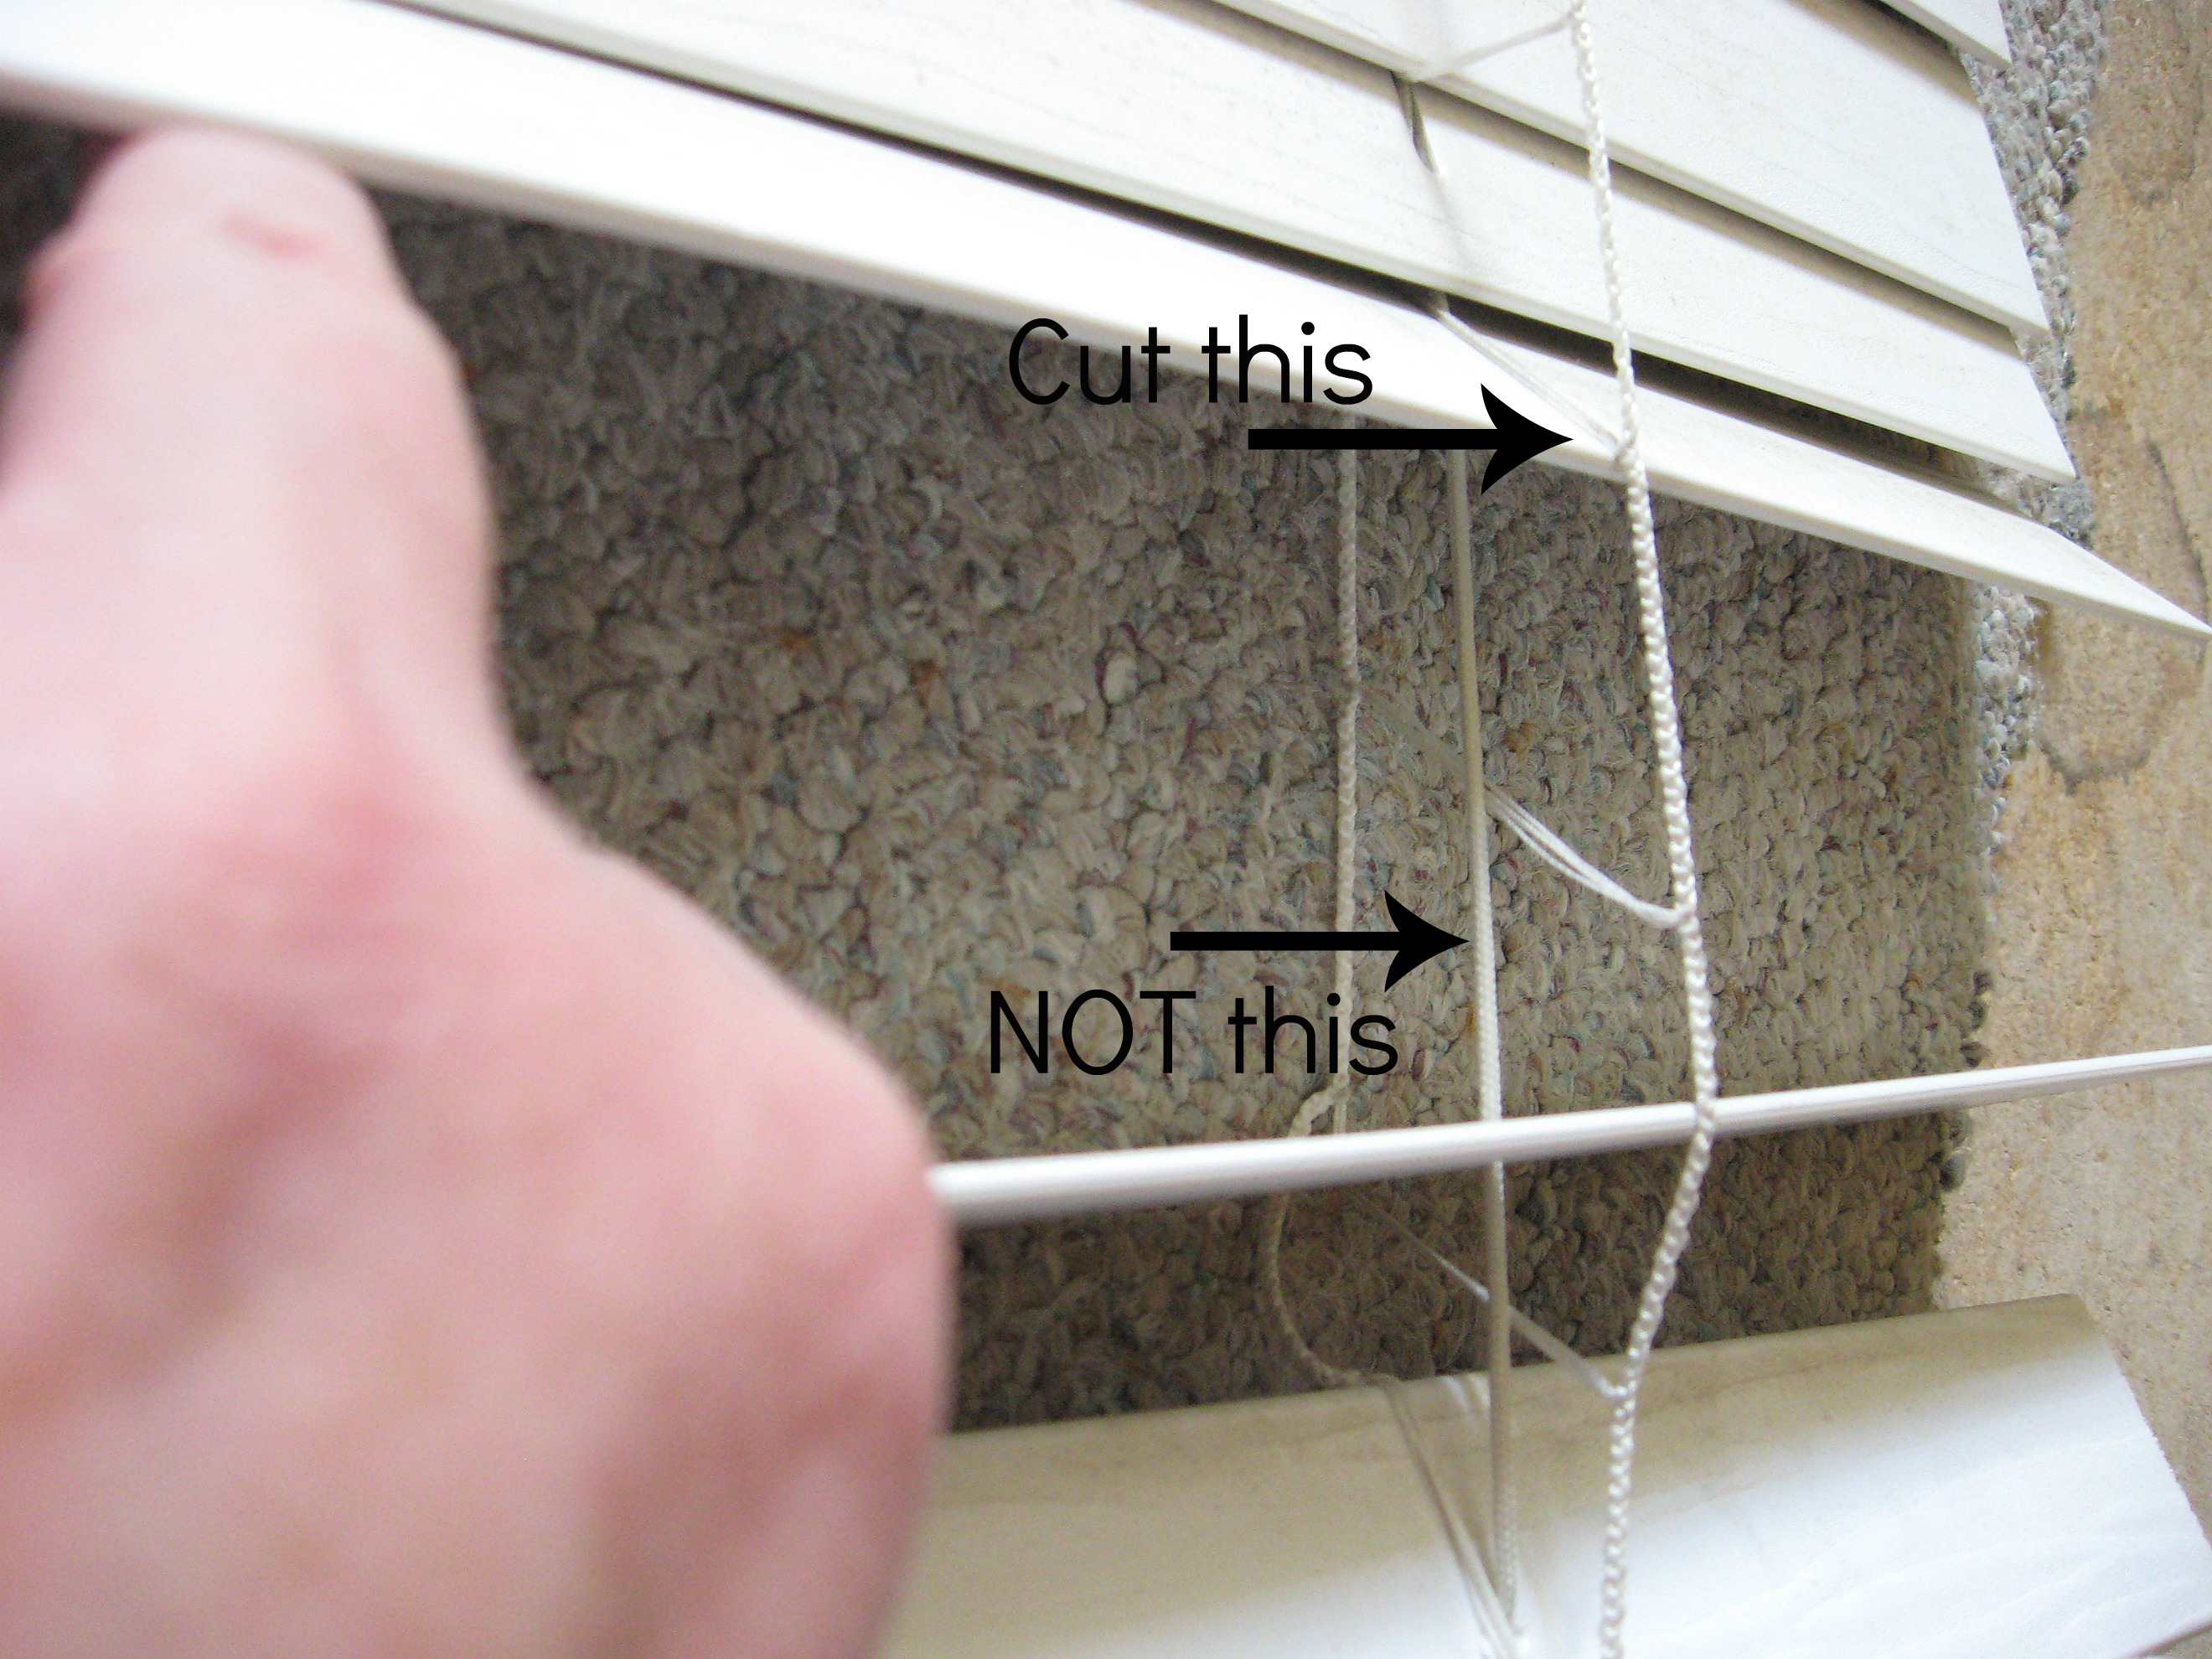
Cut them all the way, top to bottom.
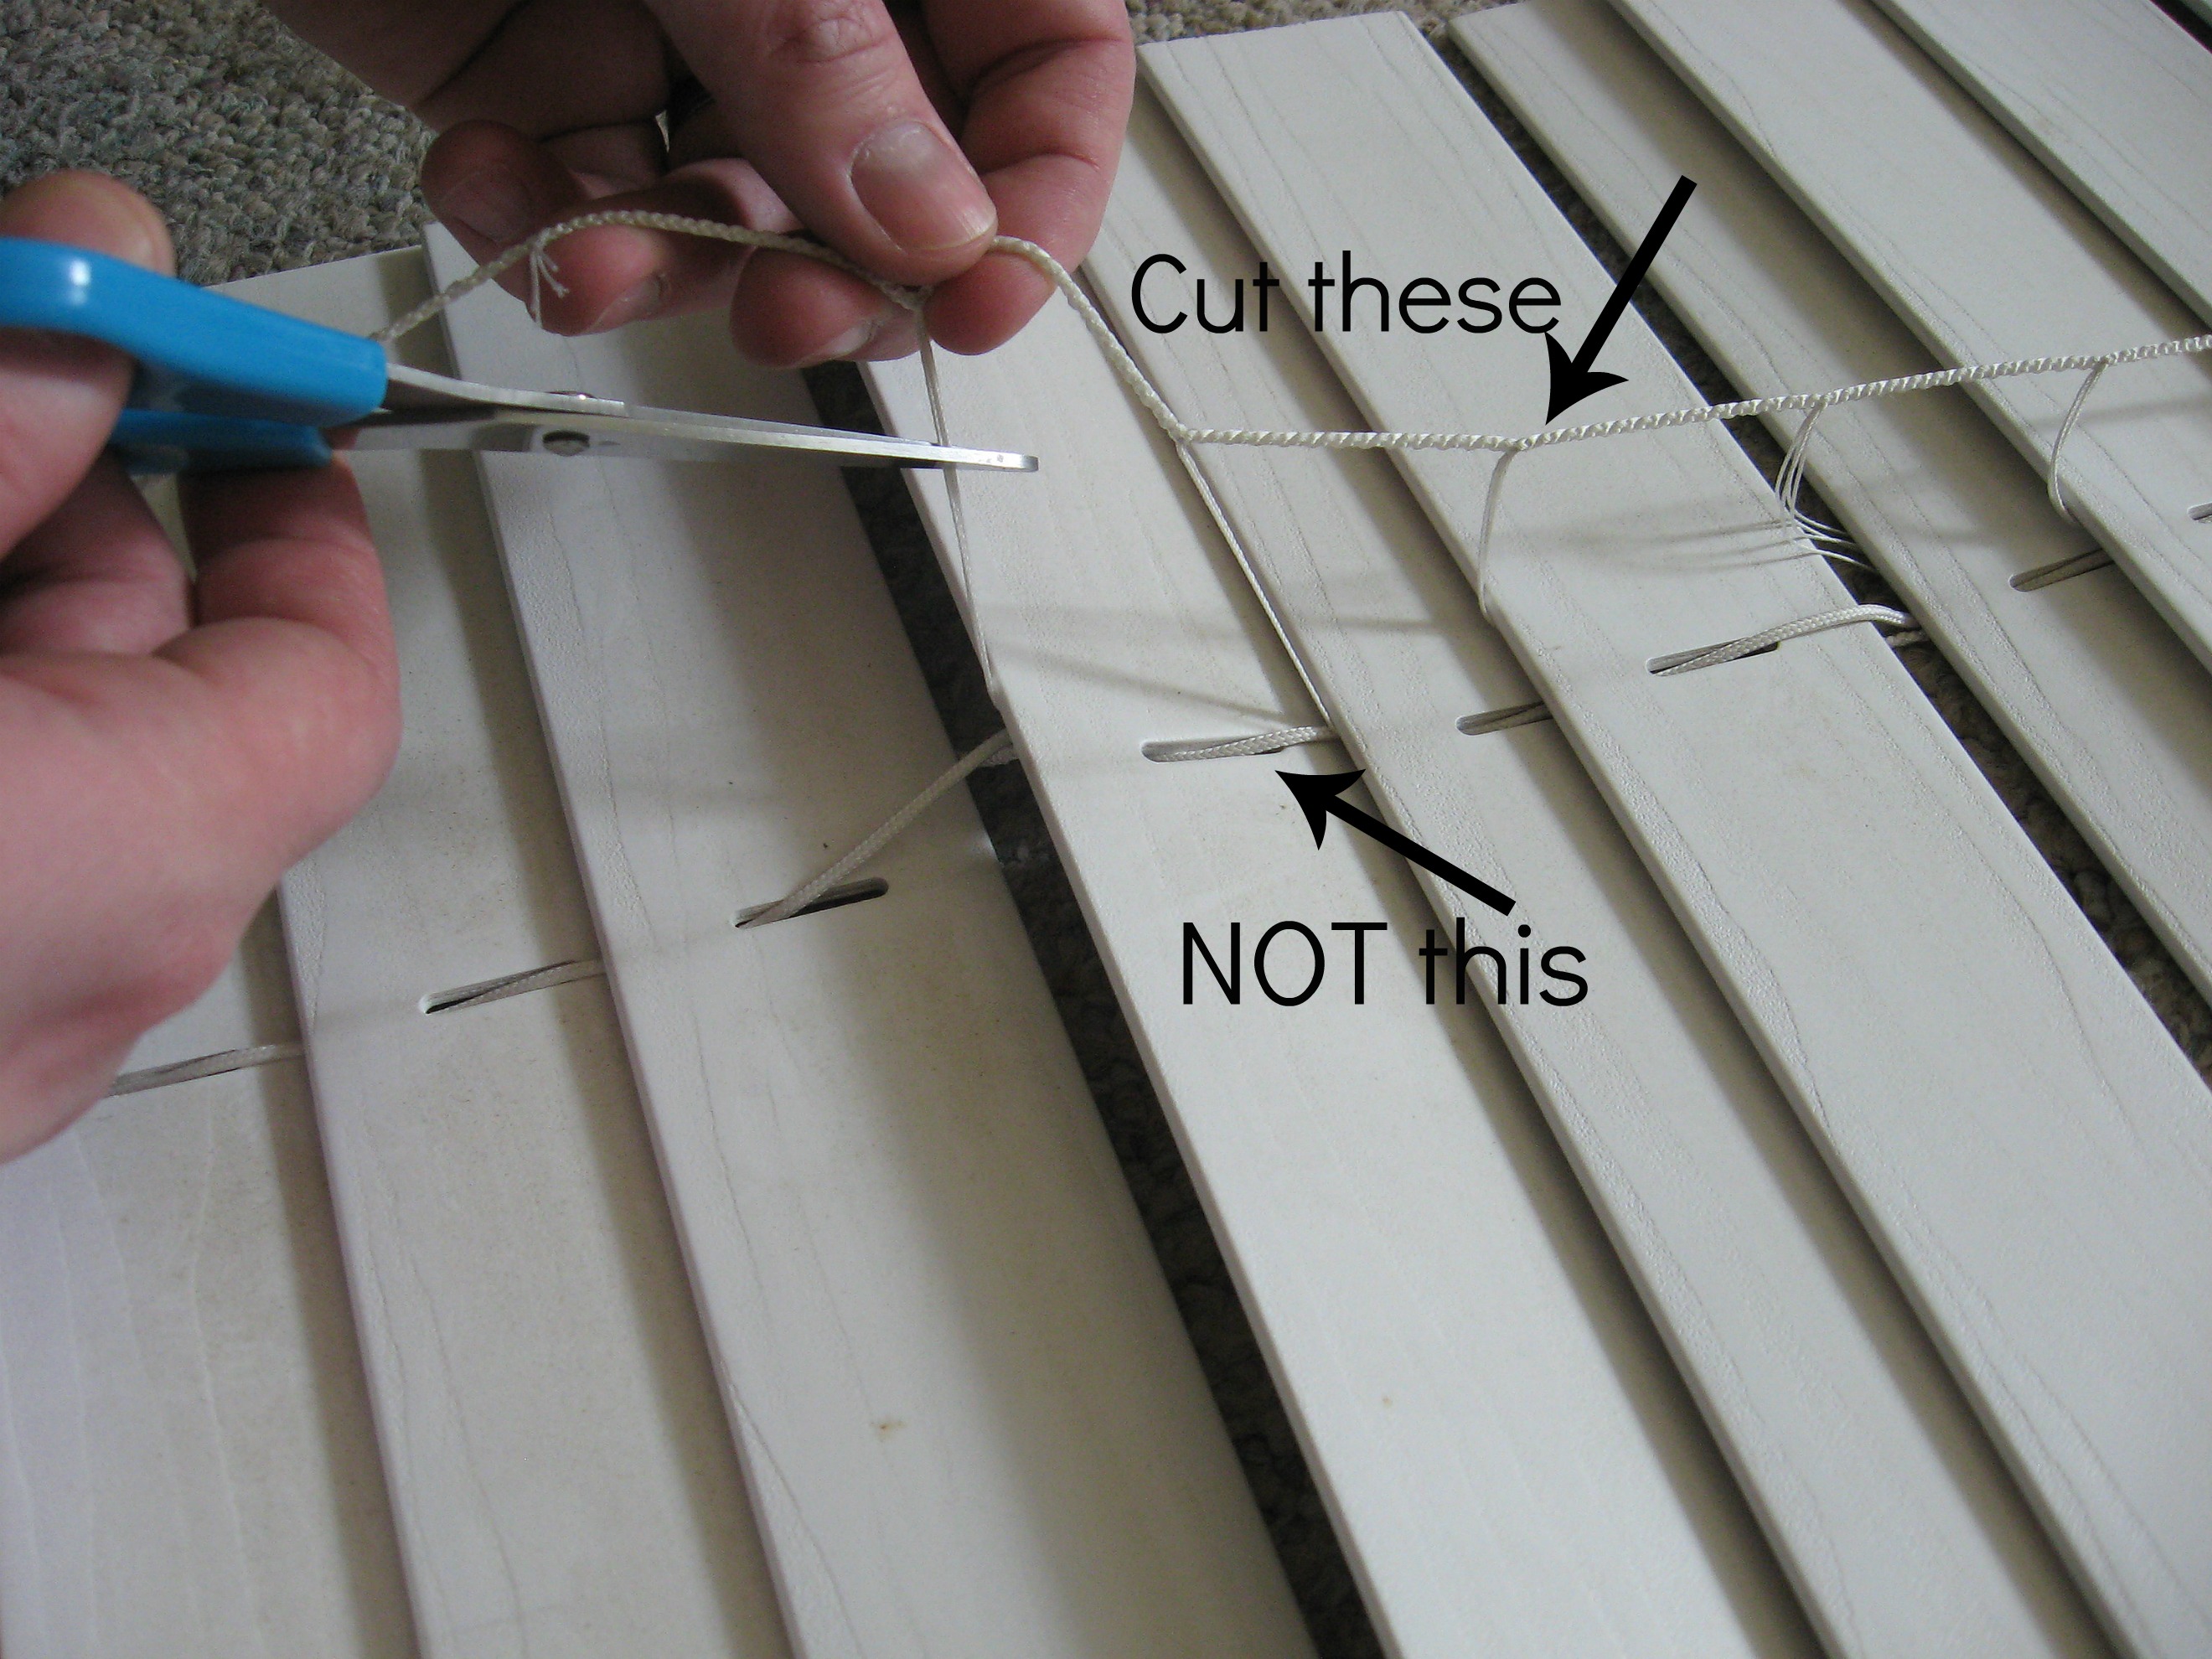
Now remove the little plastic plug at the bottom to reveal the knotty mess of strings there. Pull all the strings out – the knots in the thin strings that you just cut can just be cut away. Carefully untie the other string – the thicker one.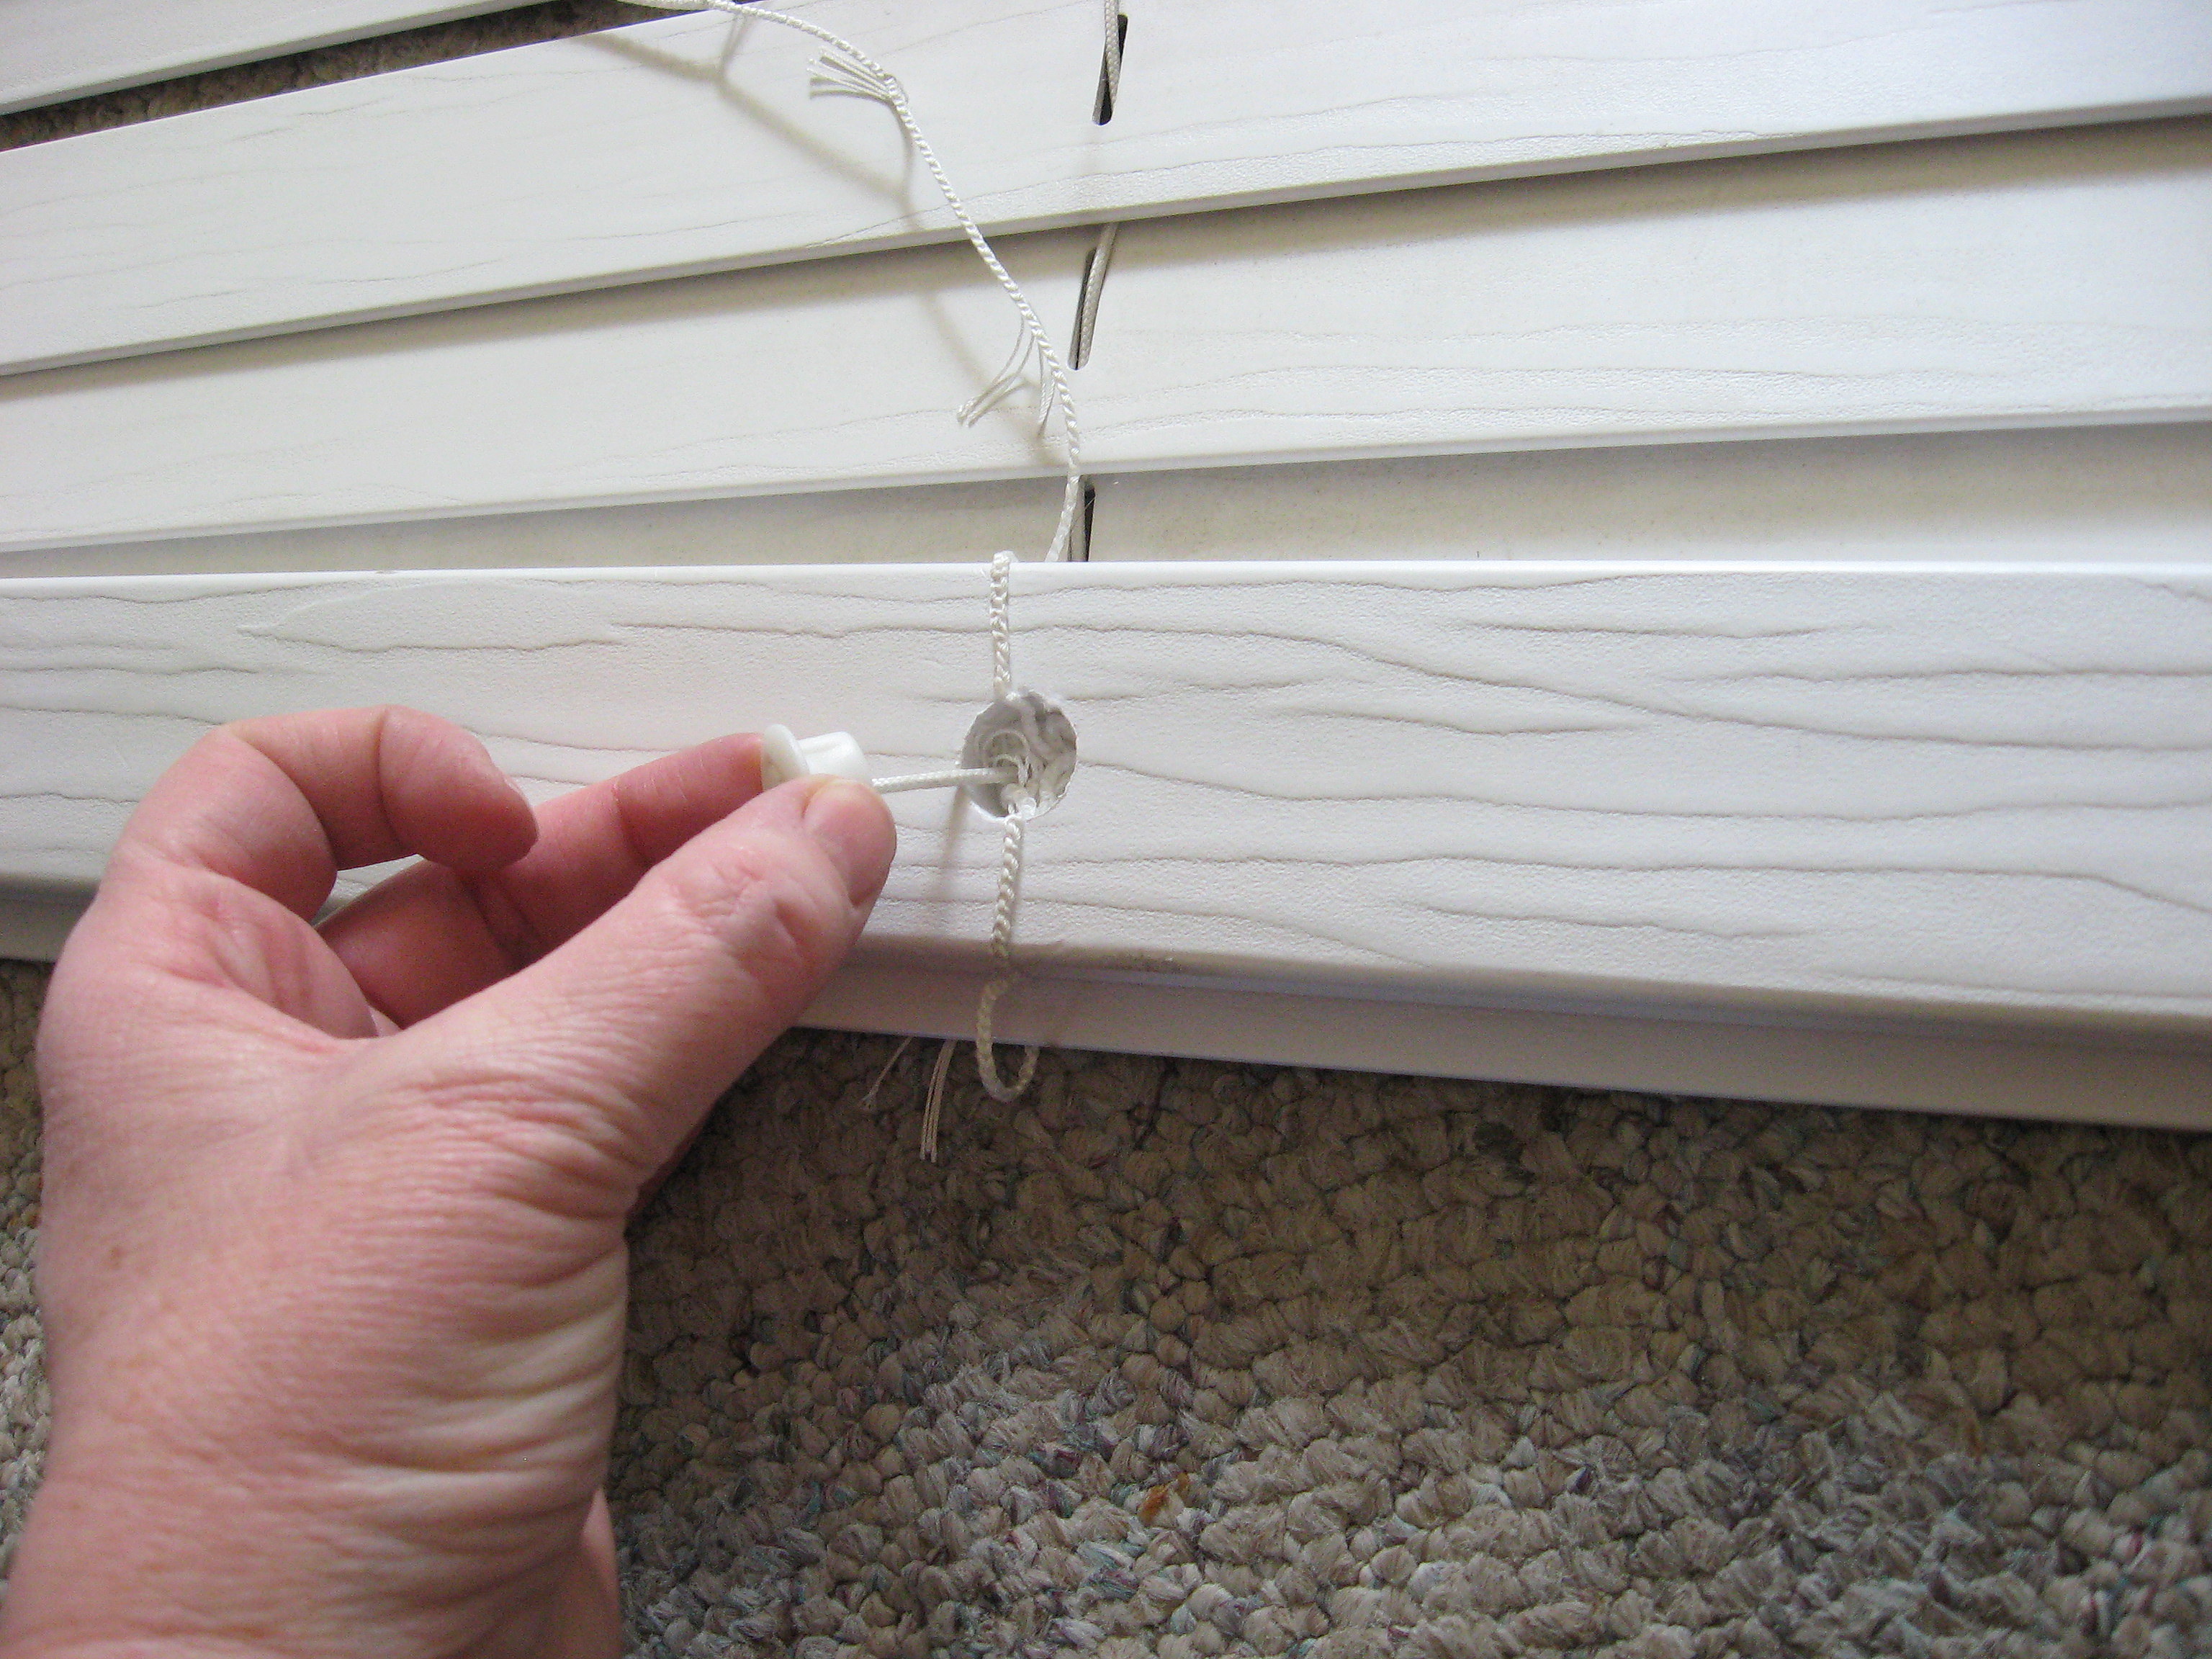
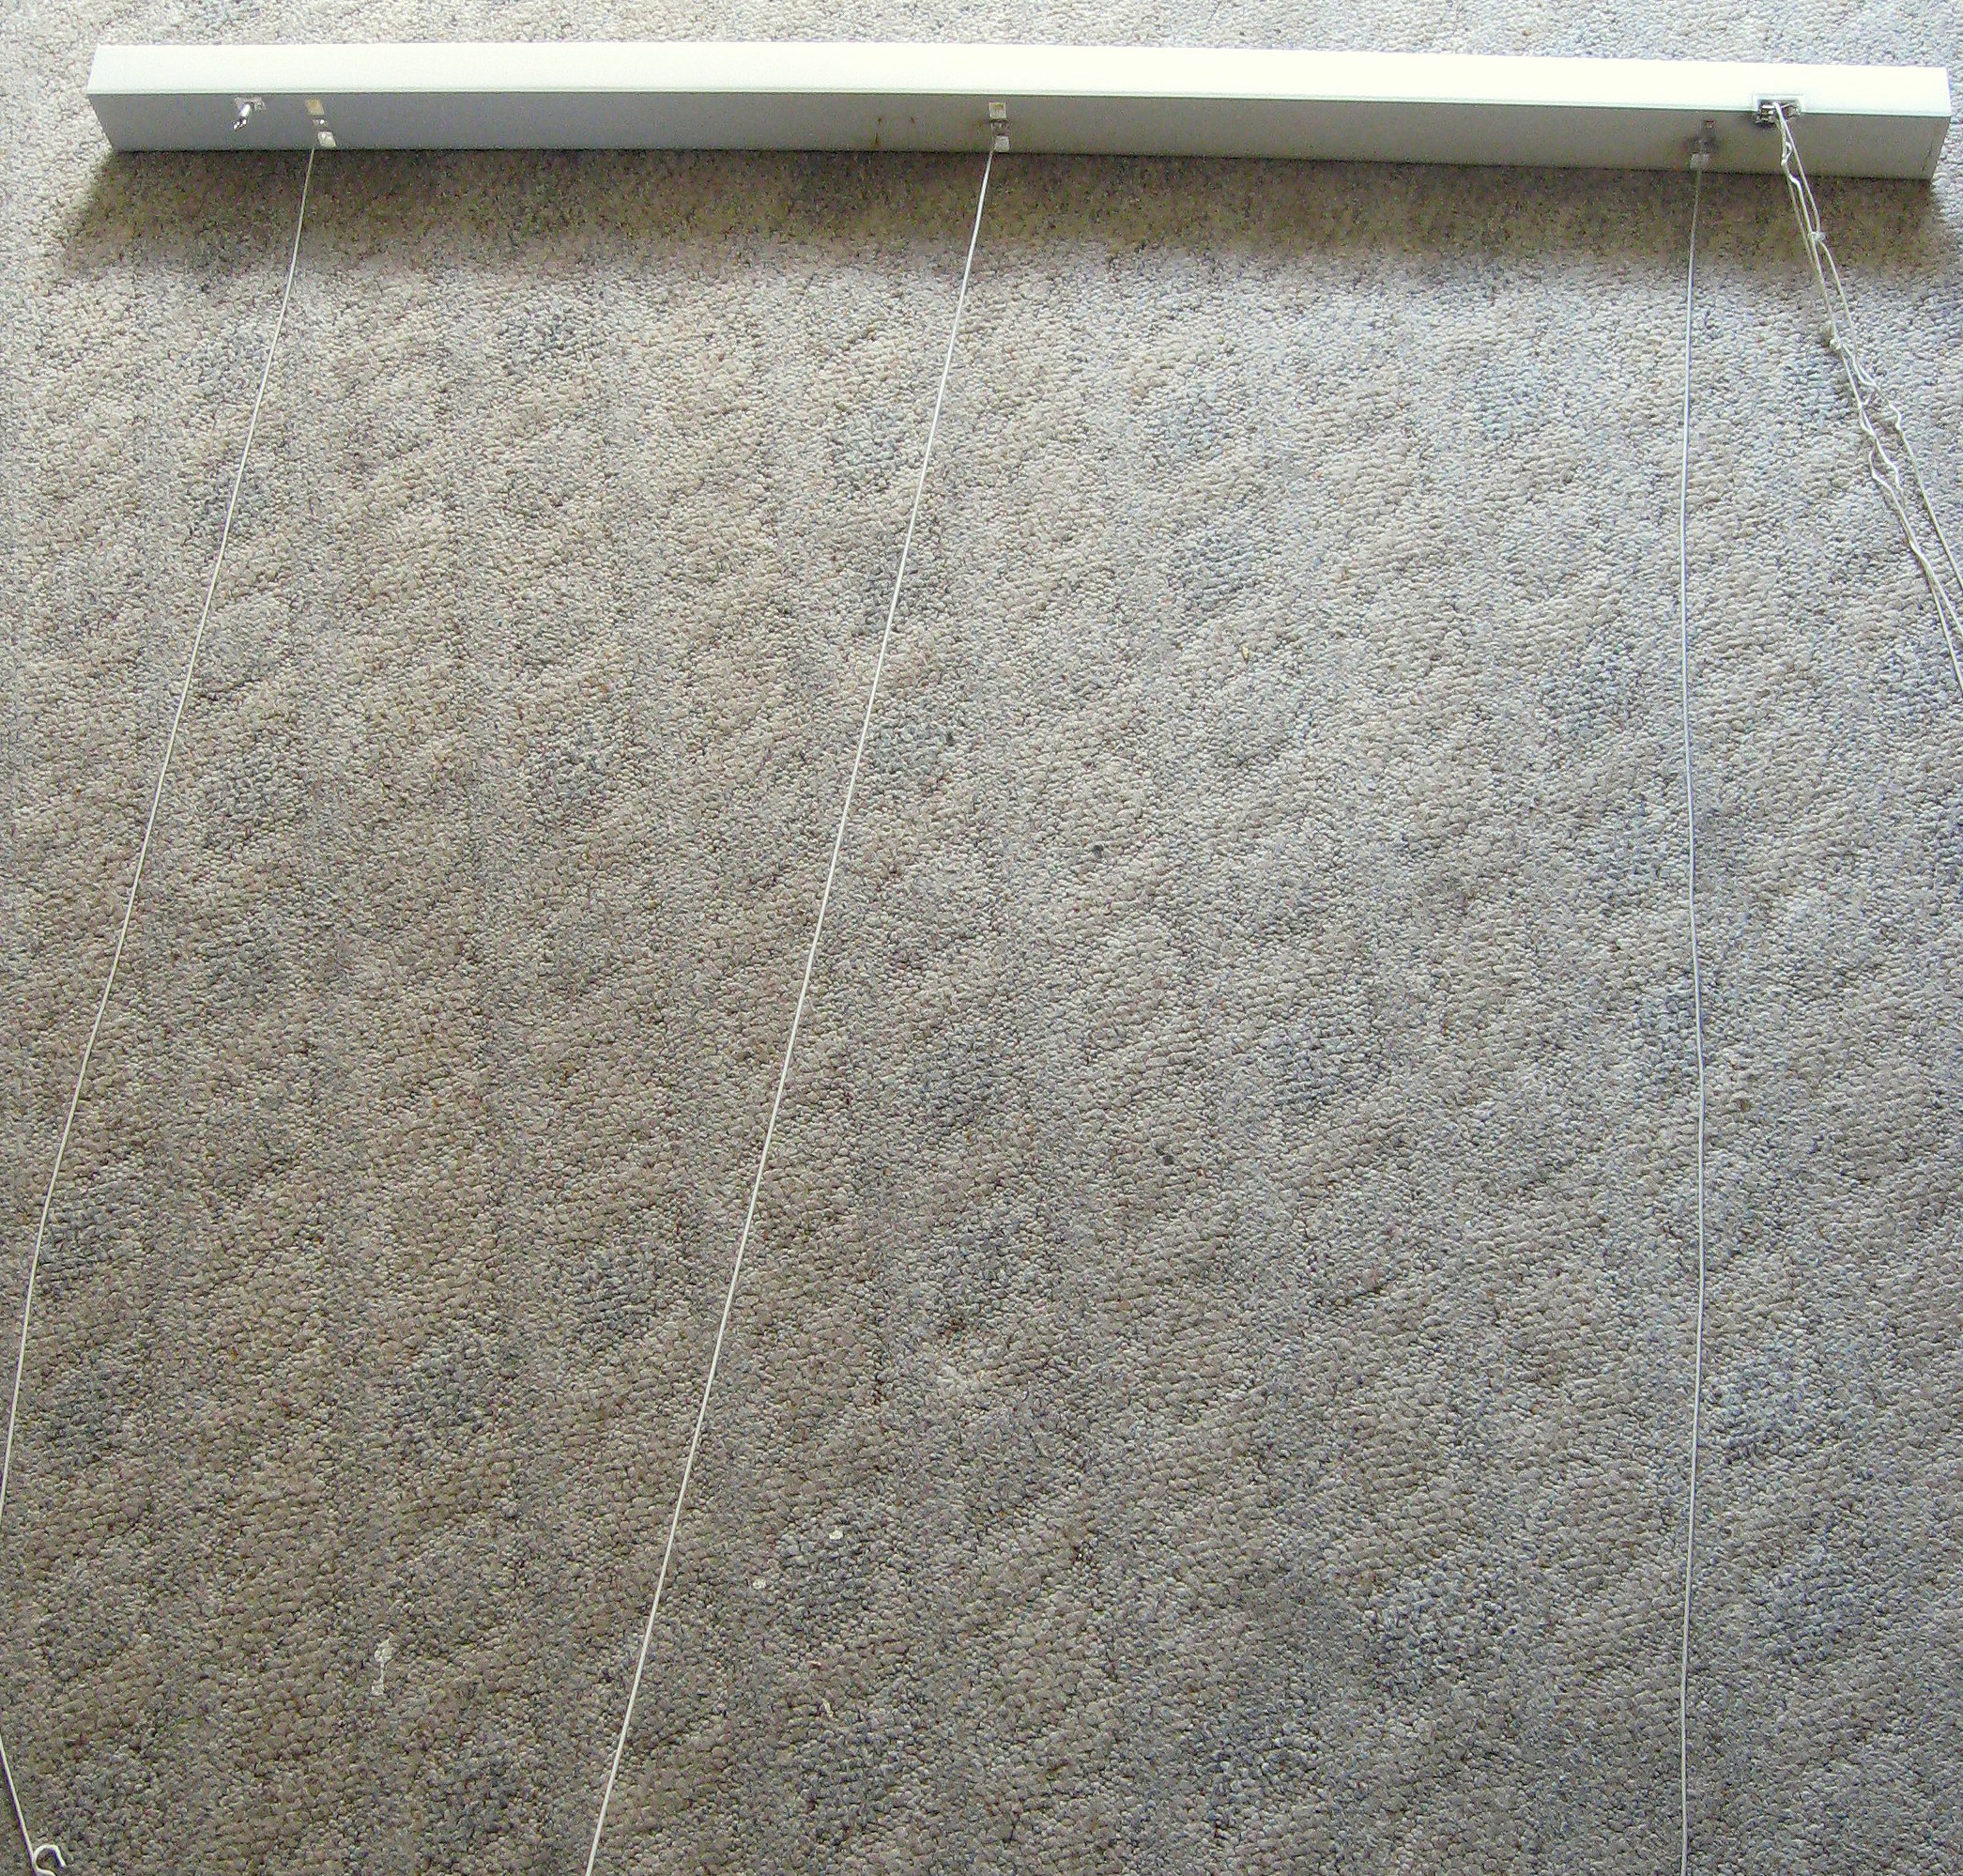
Now take that bottom board off and you will be left with the slats on the thicker string.
Remove all the slats and it will leave you with this:
Set this aside and prep the fabric.
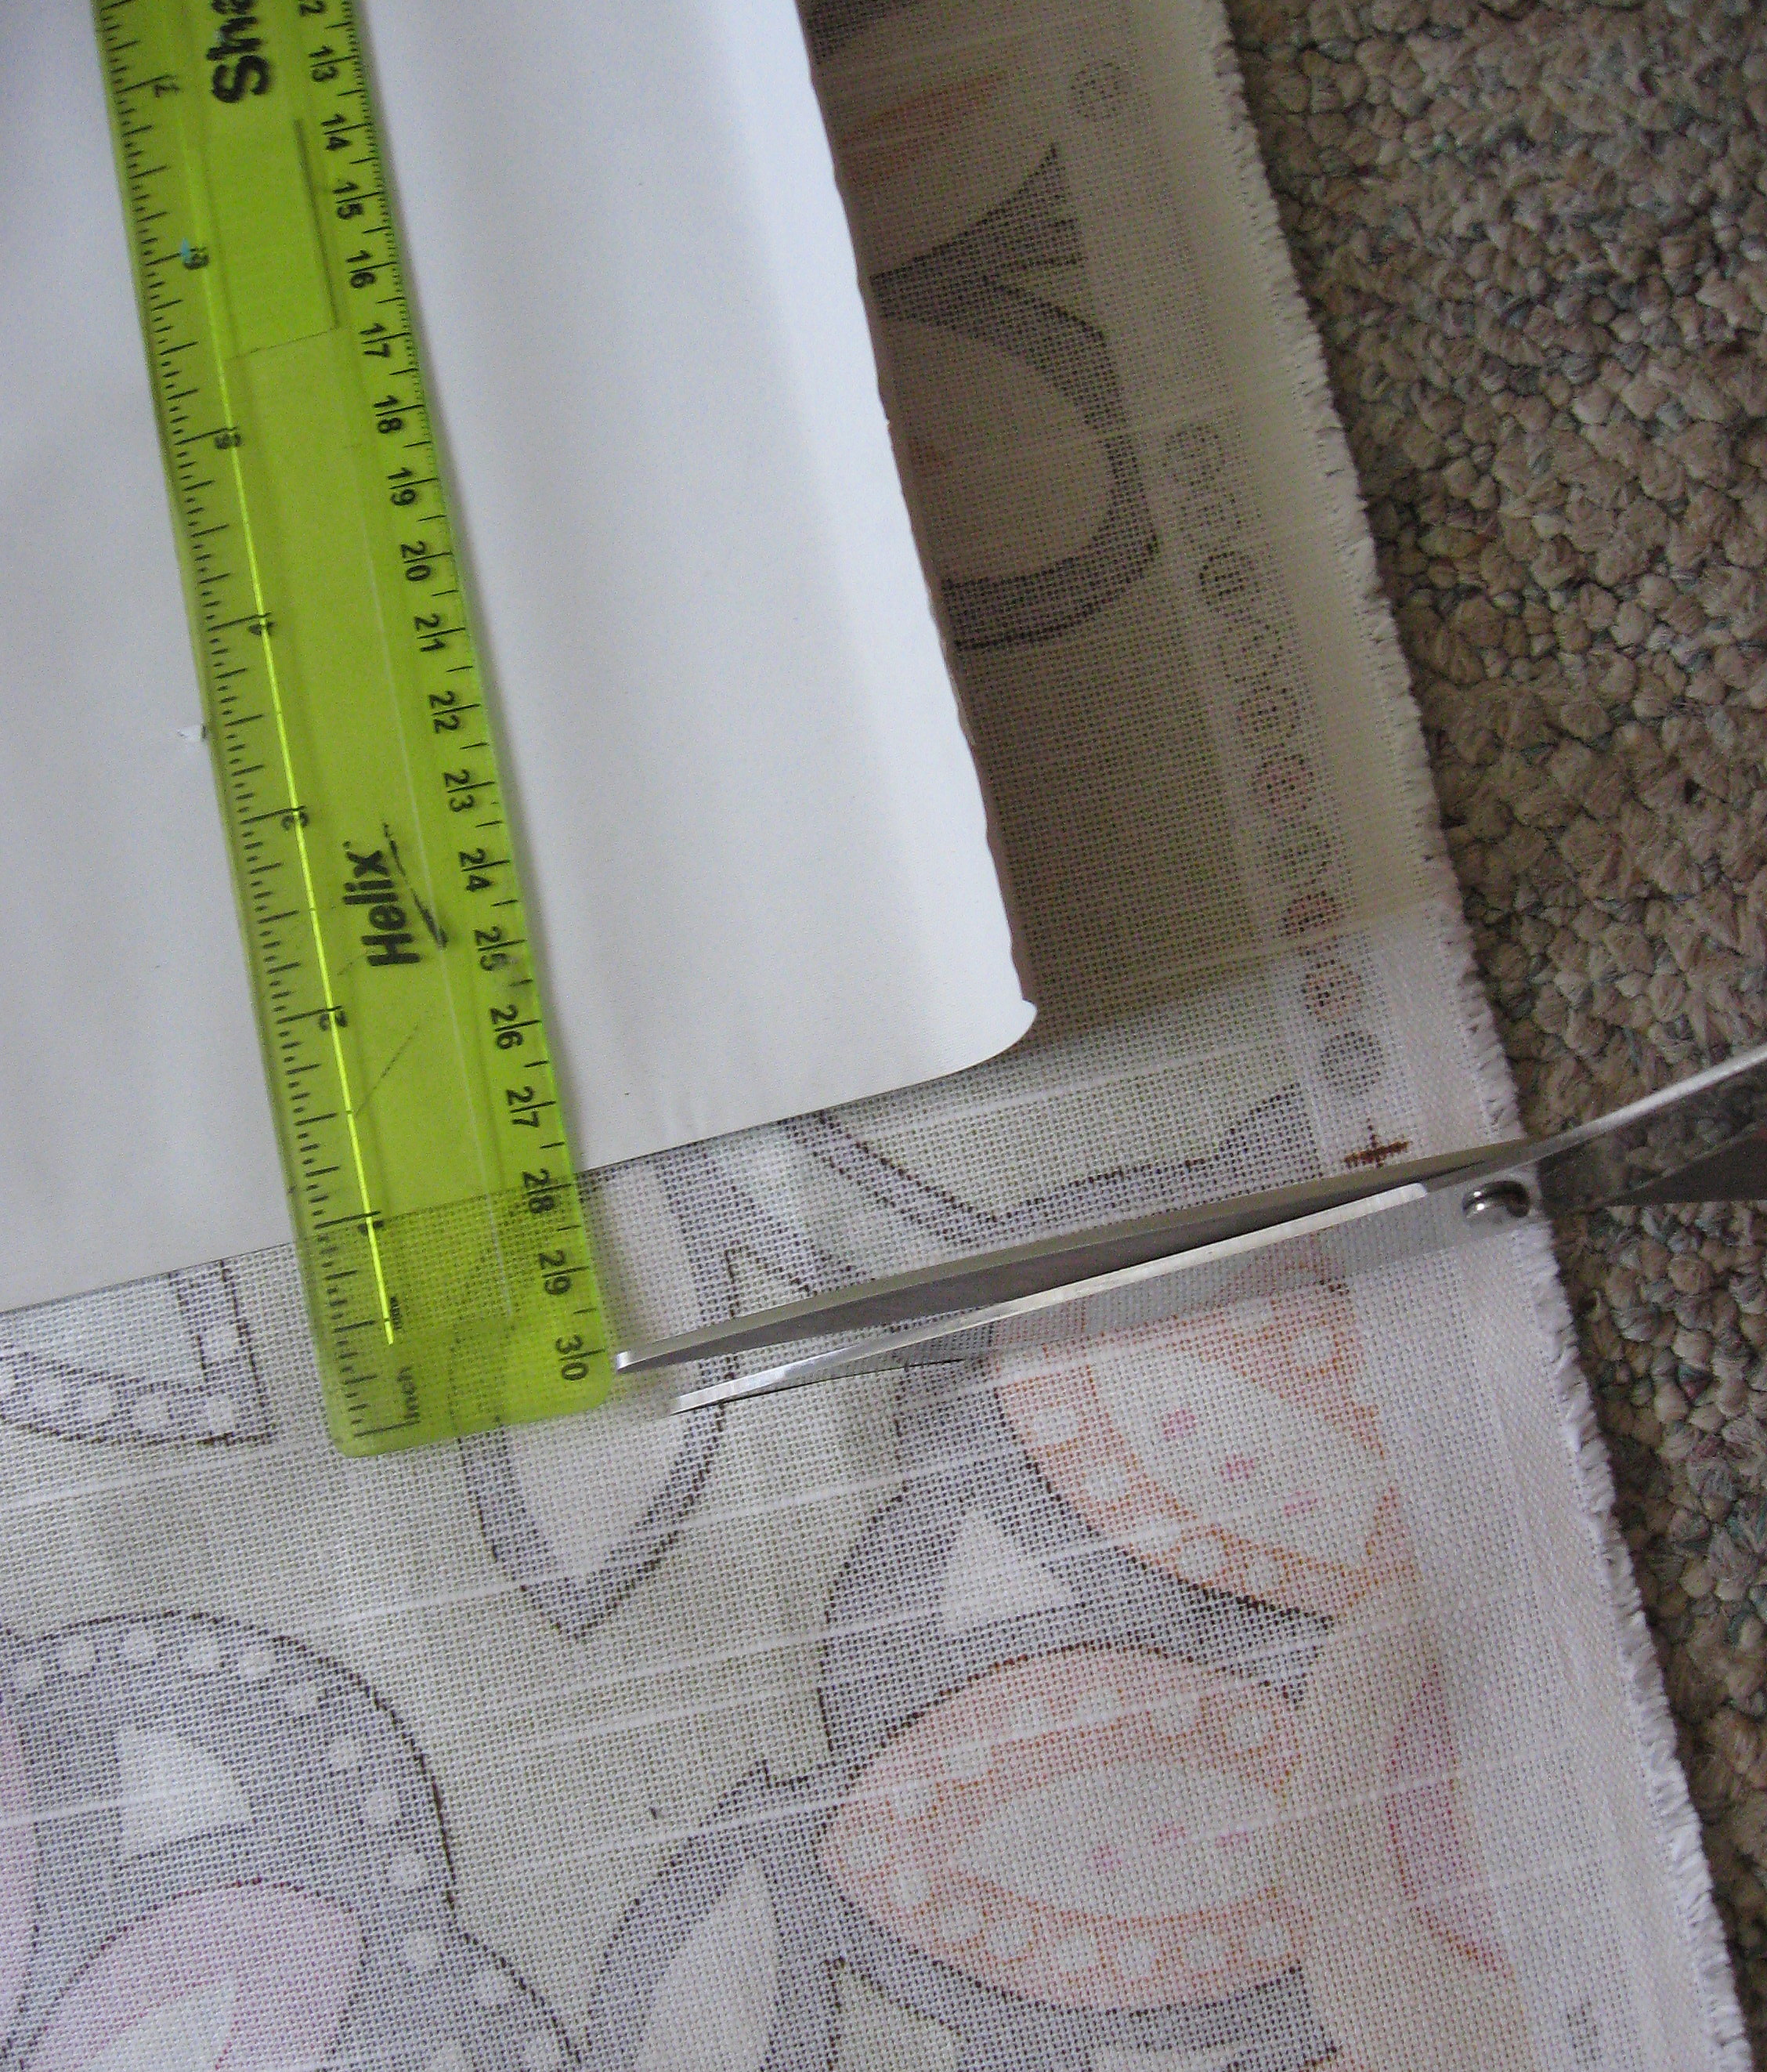
I am using a piece of fabric and the plastic from the broken shade. You can buy black out fabric, or you can use just the decorative fabric if your shade is more decorative than for light control.
First, you will cut the black out fabric -if you’re using it- to size for your window. Then cut the decorative fabric to size plus one inch on all sides.
Fold the decorative fabric over 1/2 inch on all sides and iron.
Then fold over 1/2 inch again and iron.
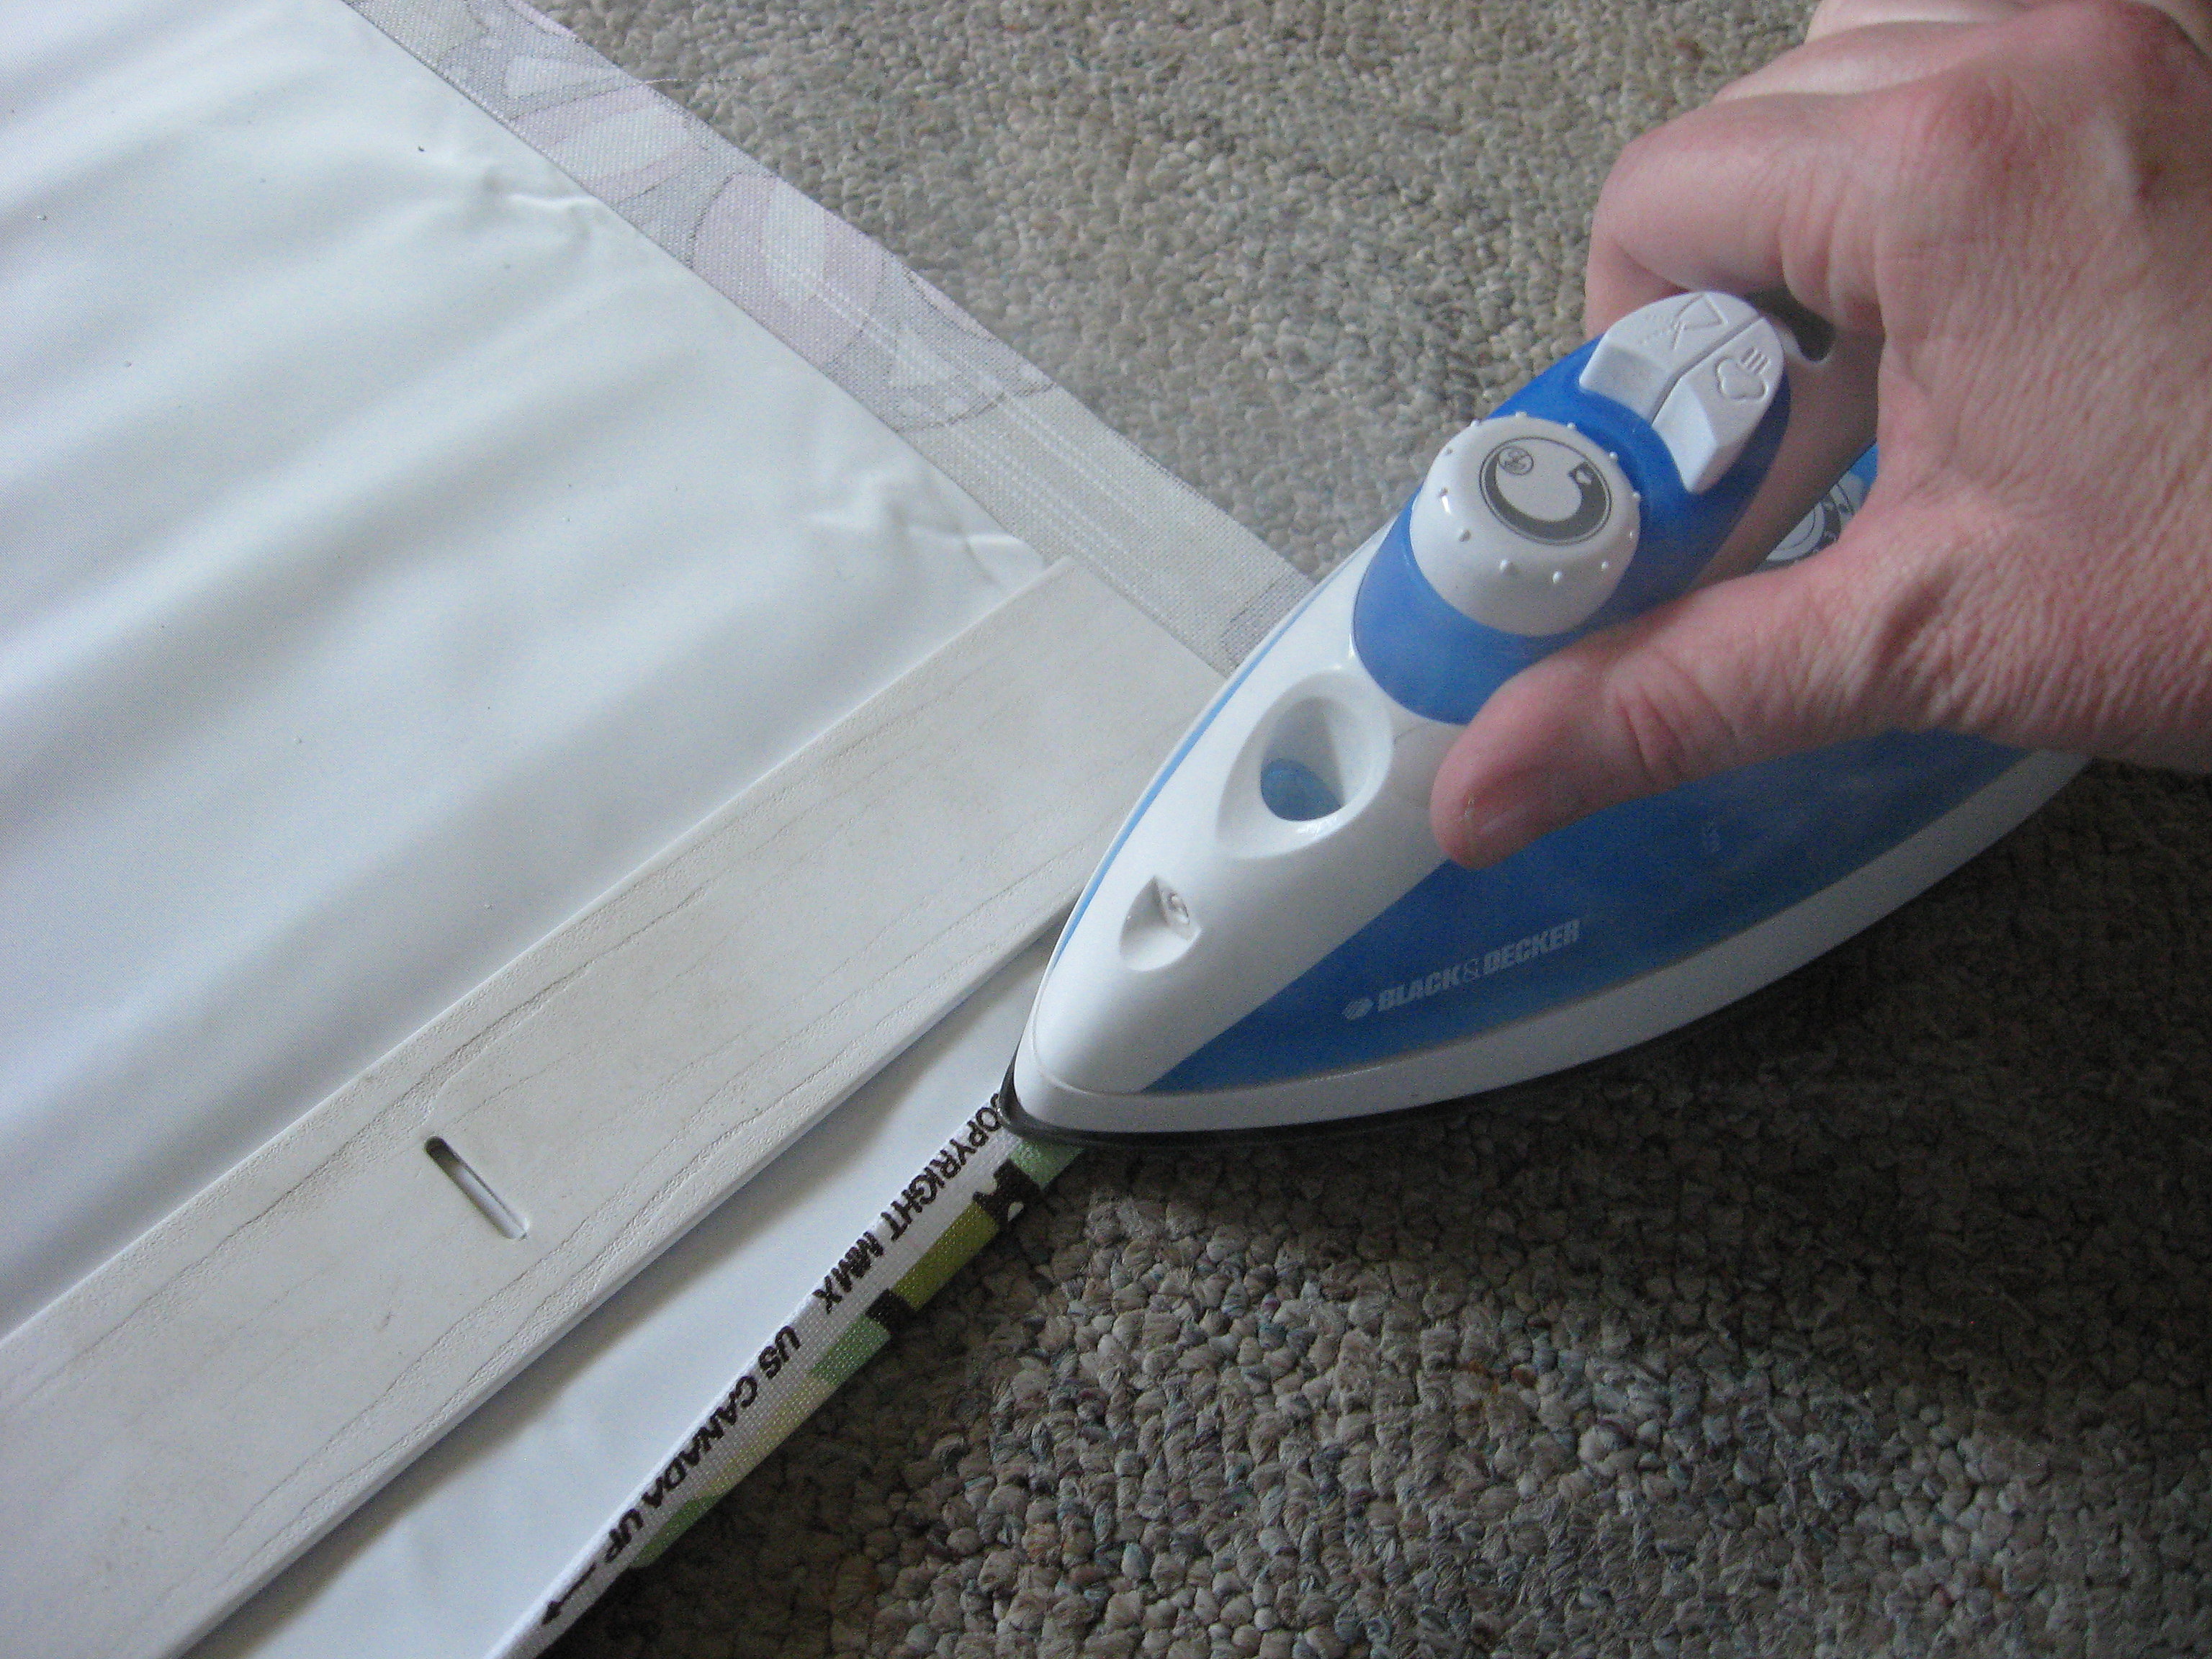
BE CAREFUL if you are using plastic that you don’t melt it!
Now use fabric glue to glue this hem down on all four sides – gluing it to the black out fabric if you are using it.
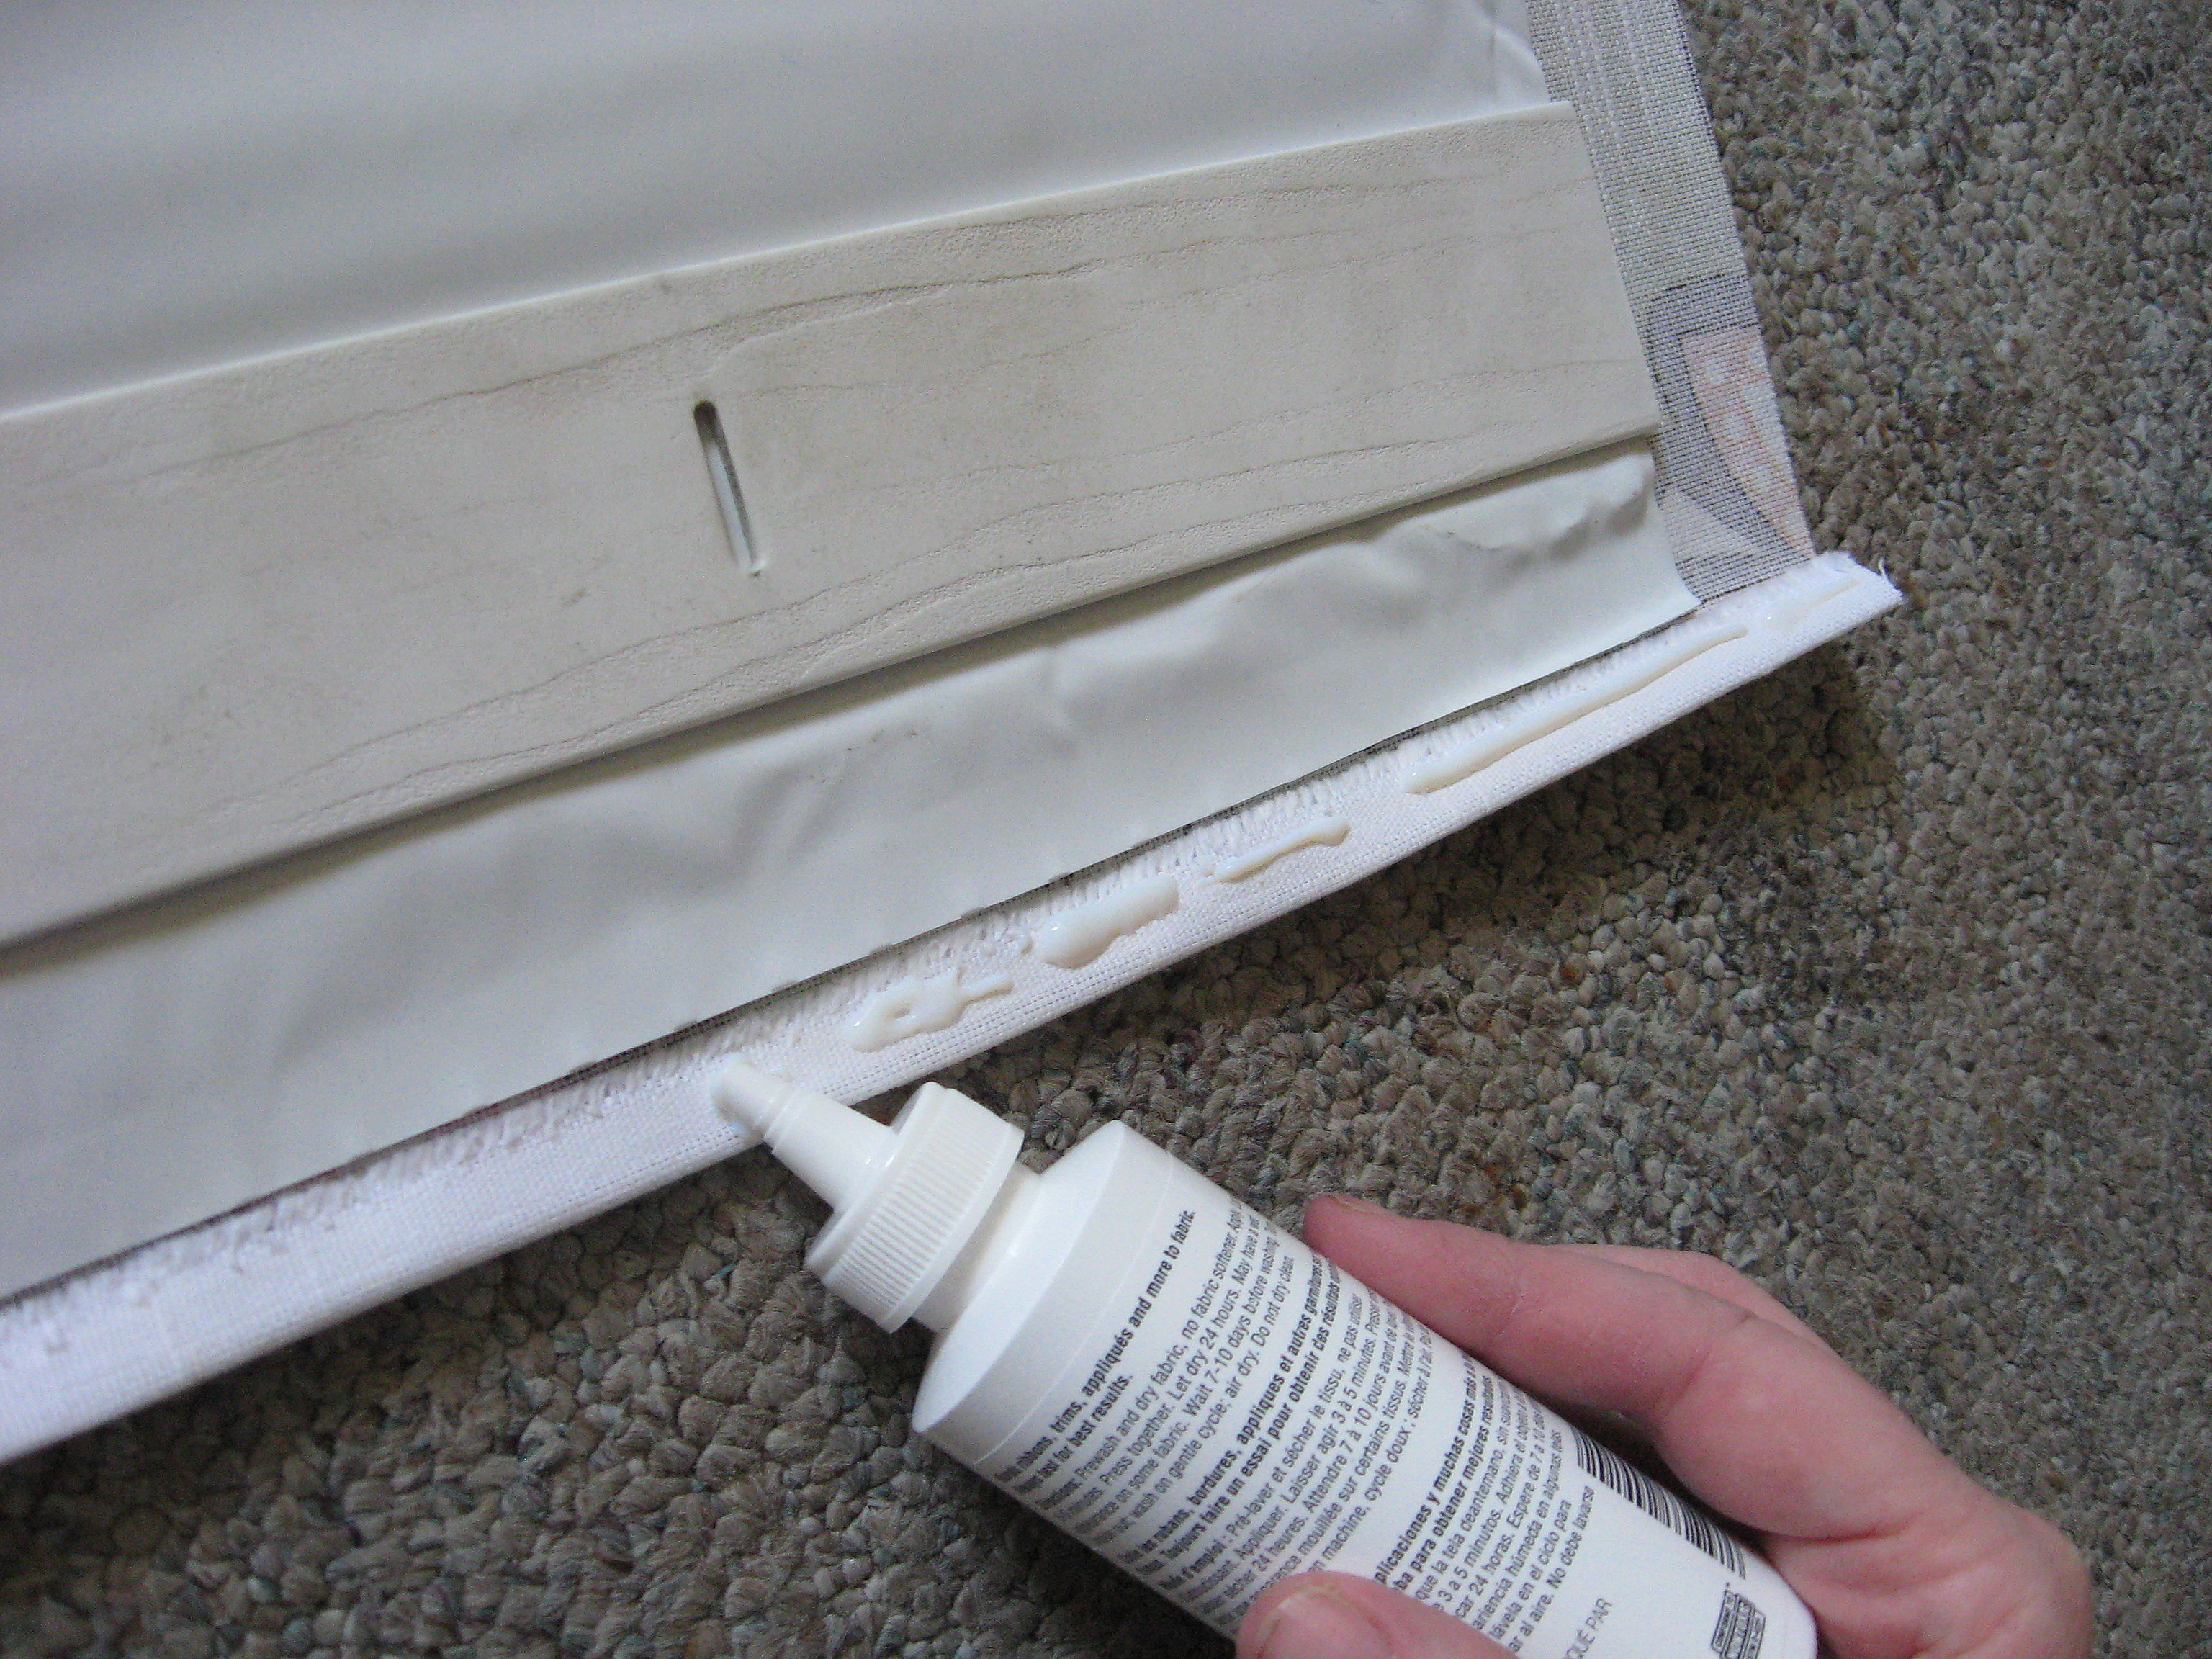
Glue it down on all four sides and weight it down while it dries (I used the slats from the blinds).

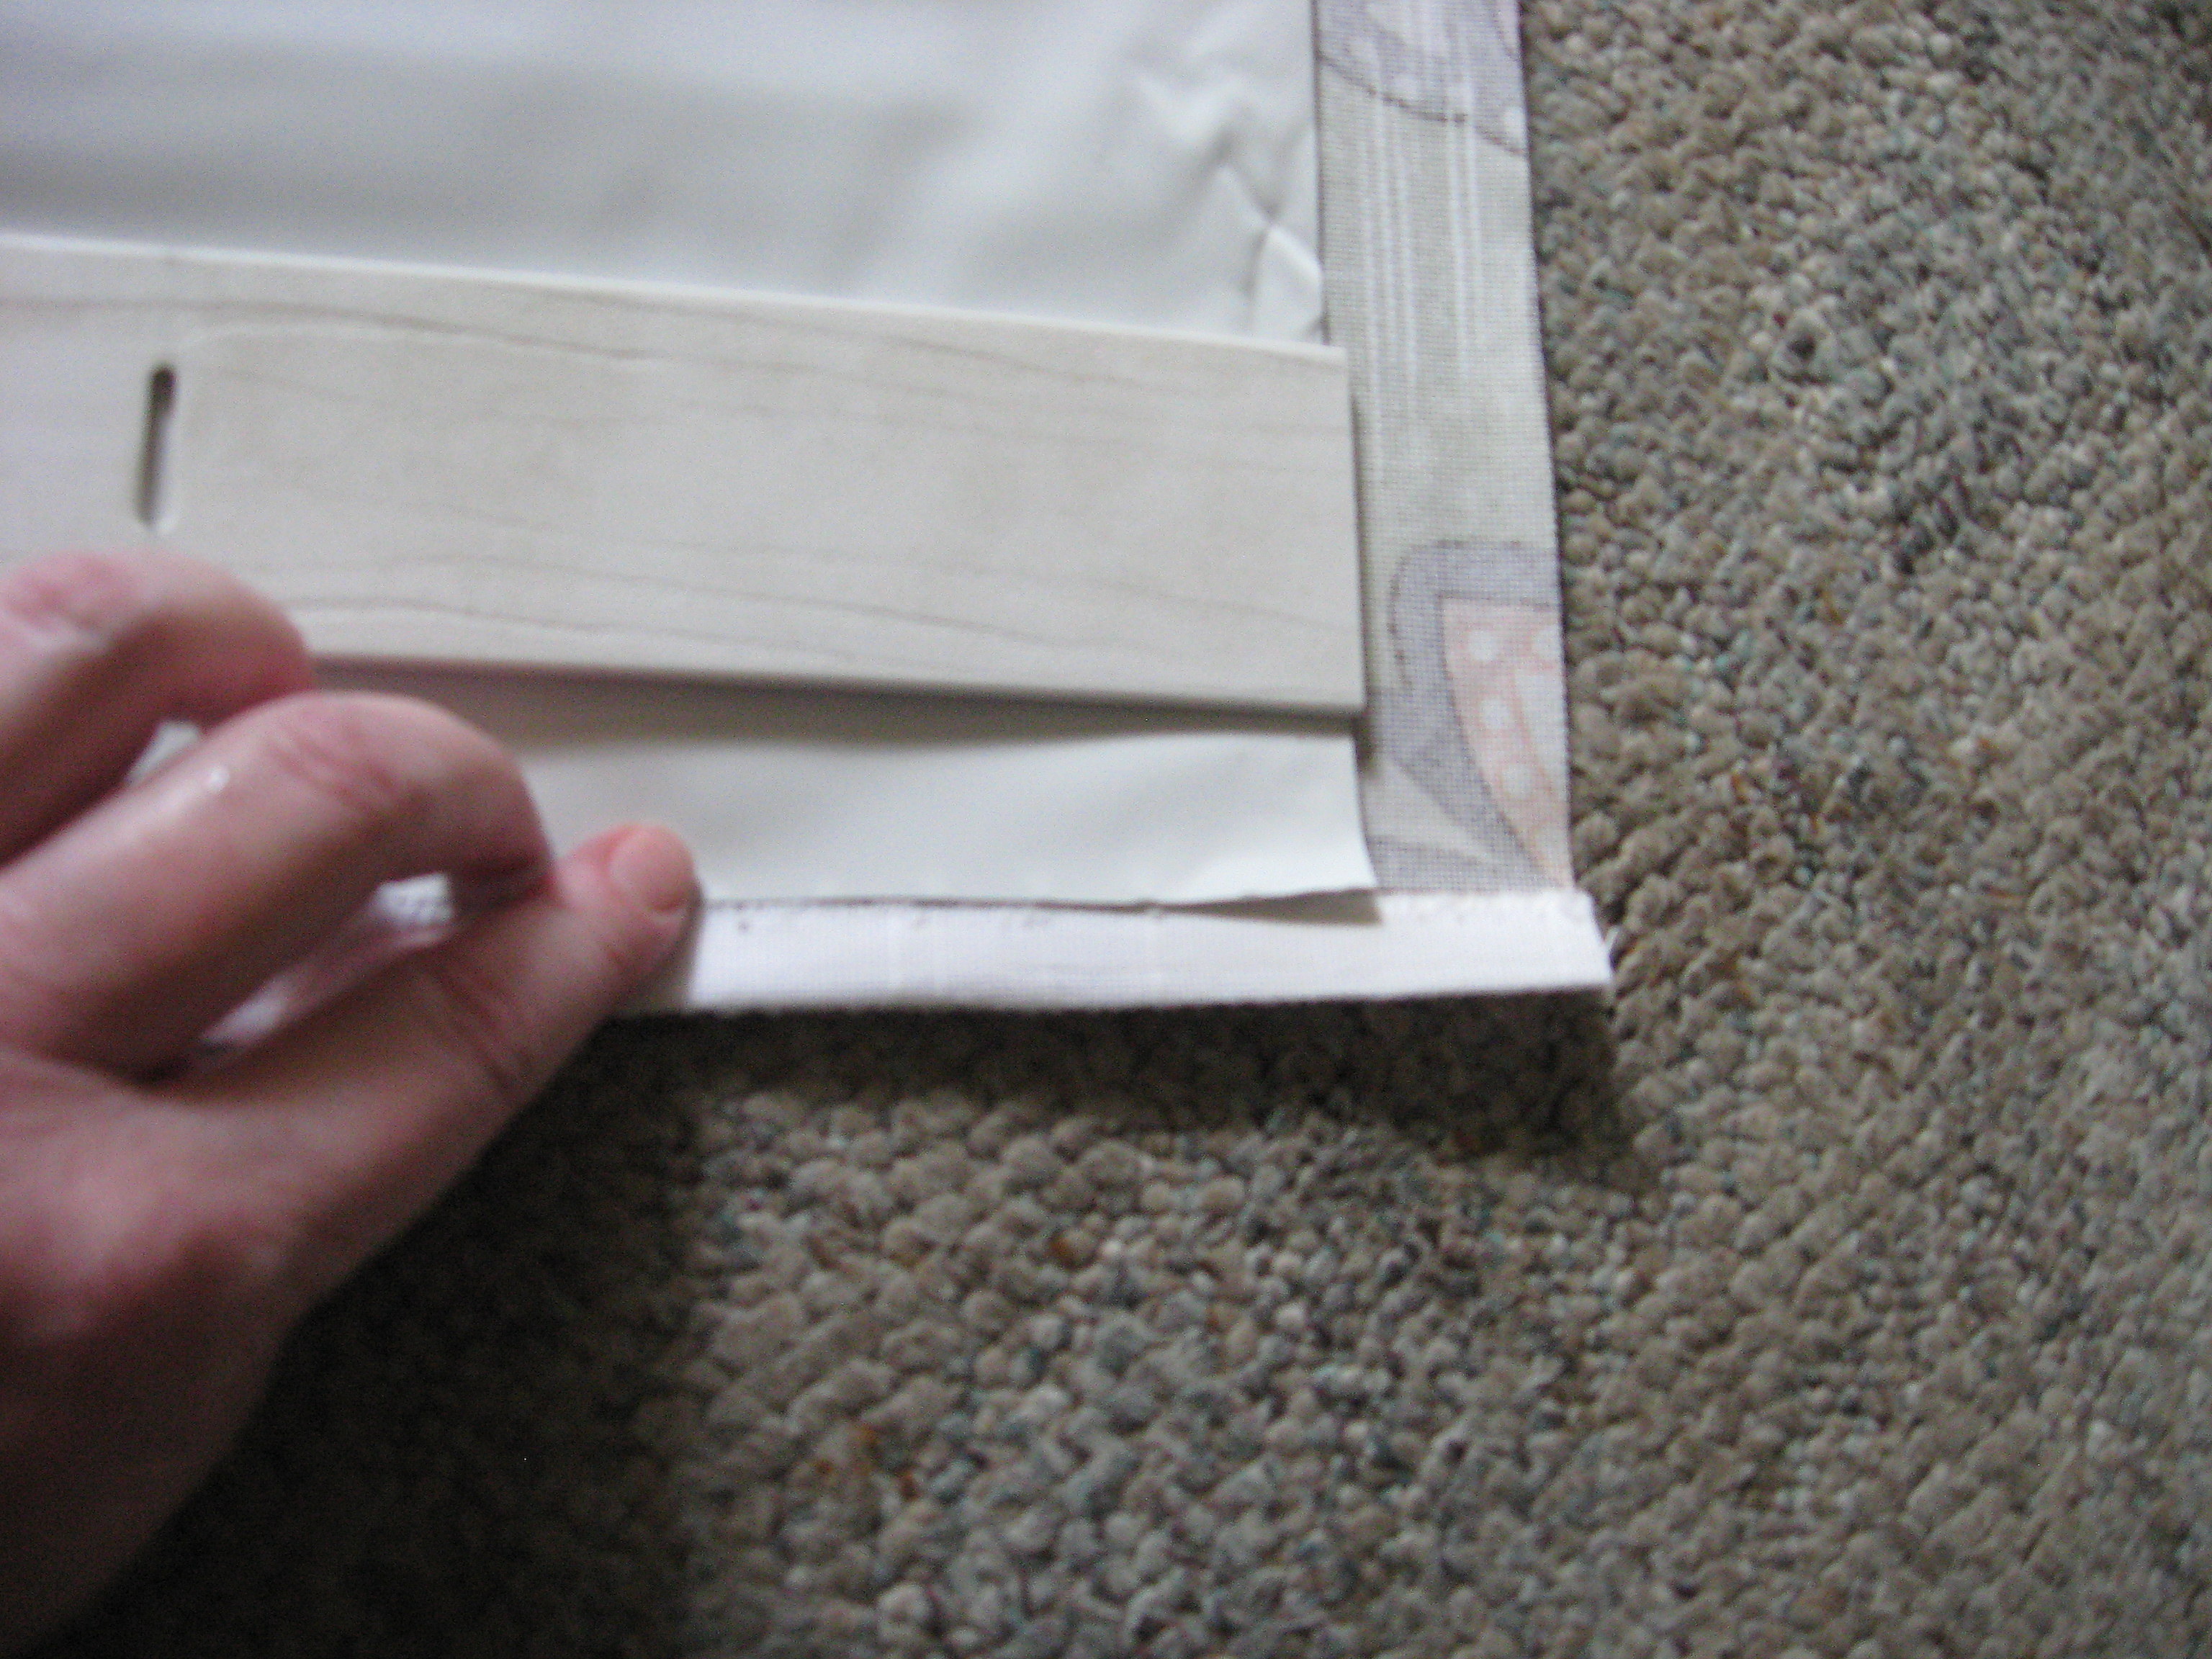
Once that’s dry, you will glue the top of the blinds to the top of the fabric. Stop the glue a couple of inches from the ends so that you can hang it back in the brackets when you’re done.
Line it up carefully, weight it down and let it dry. Make sure you don’t get glue on any of the strings.
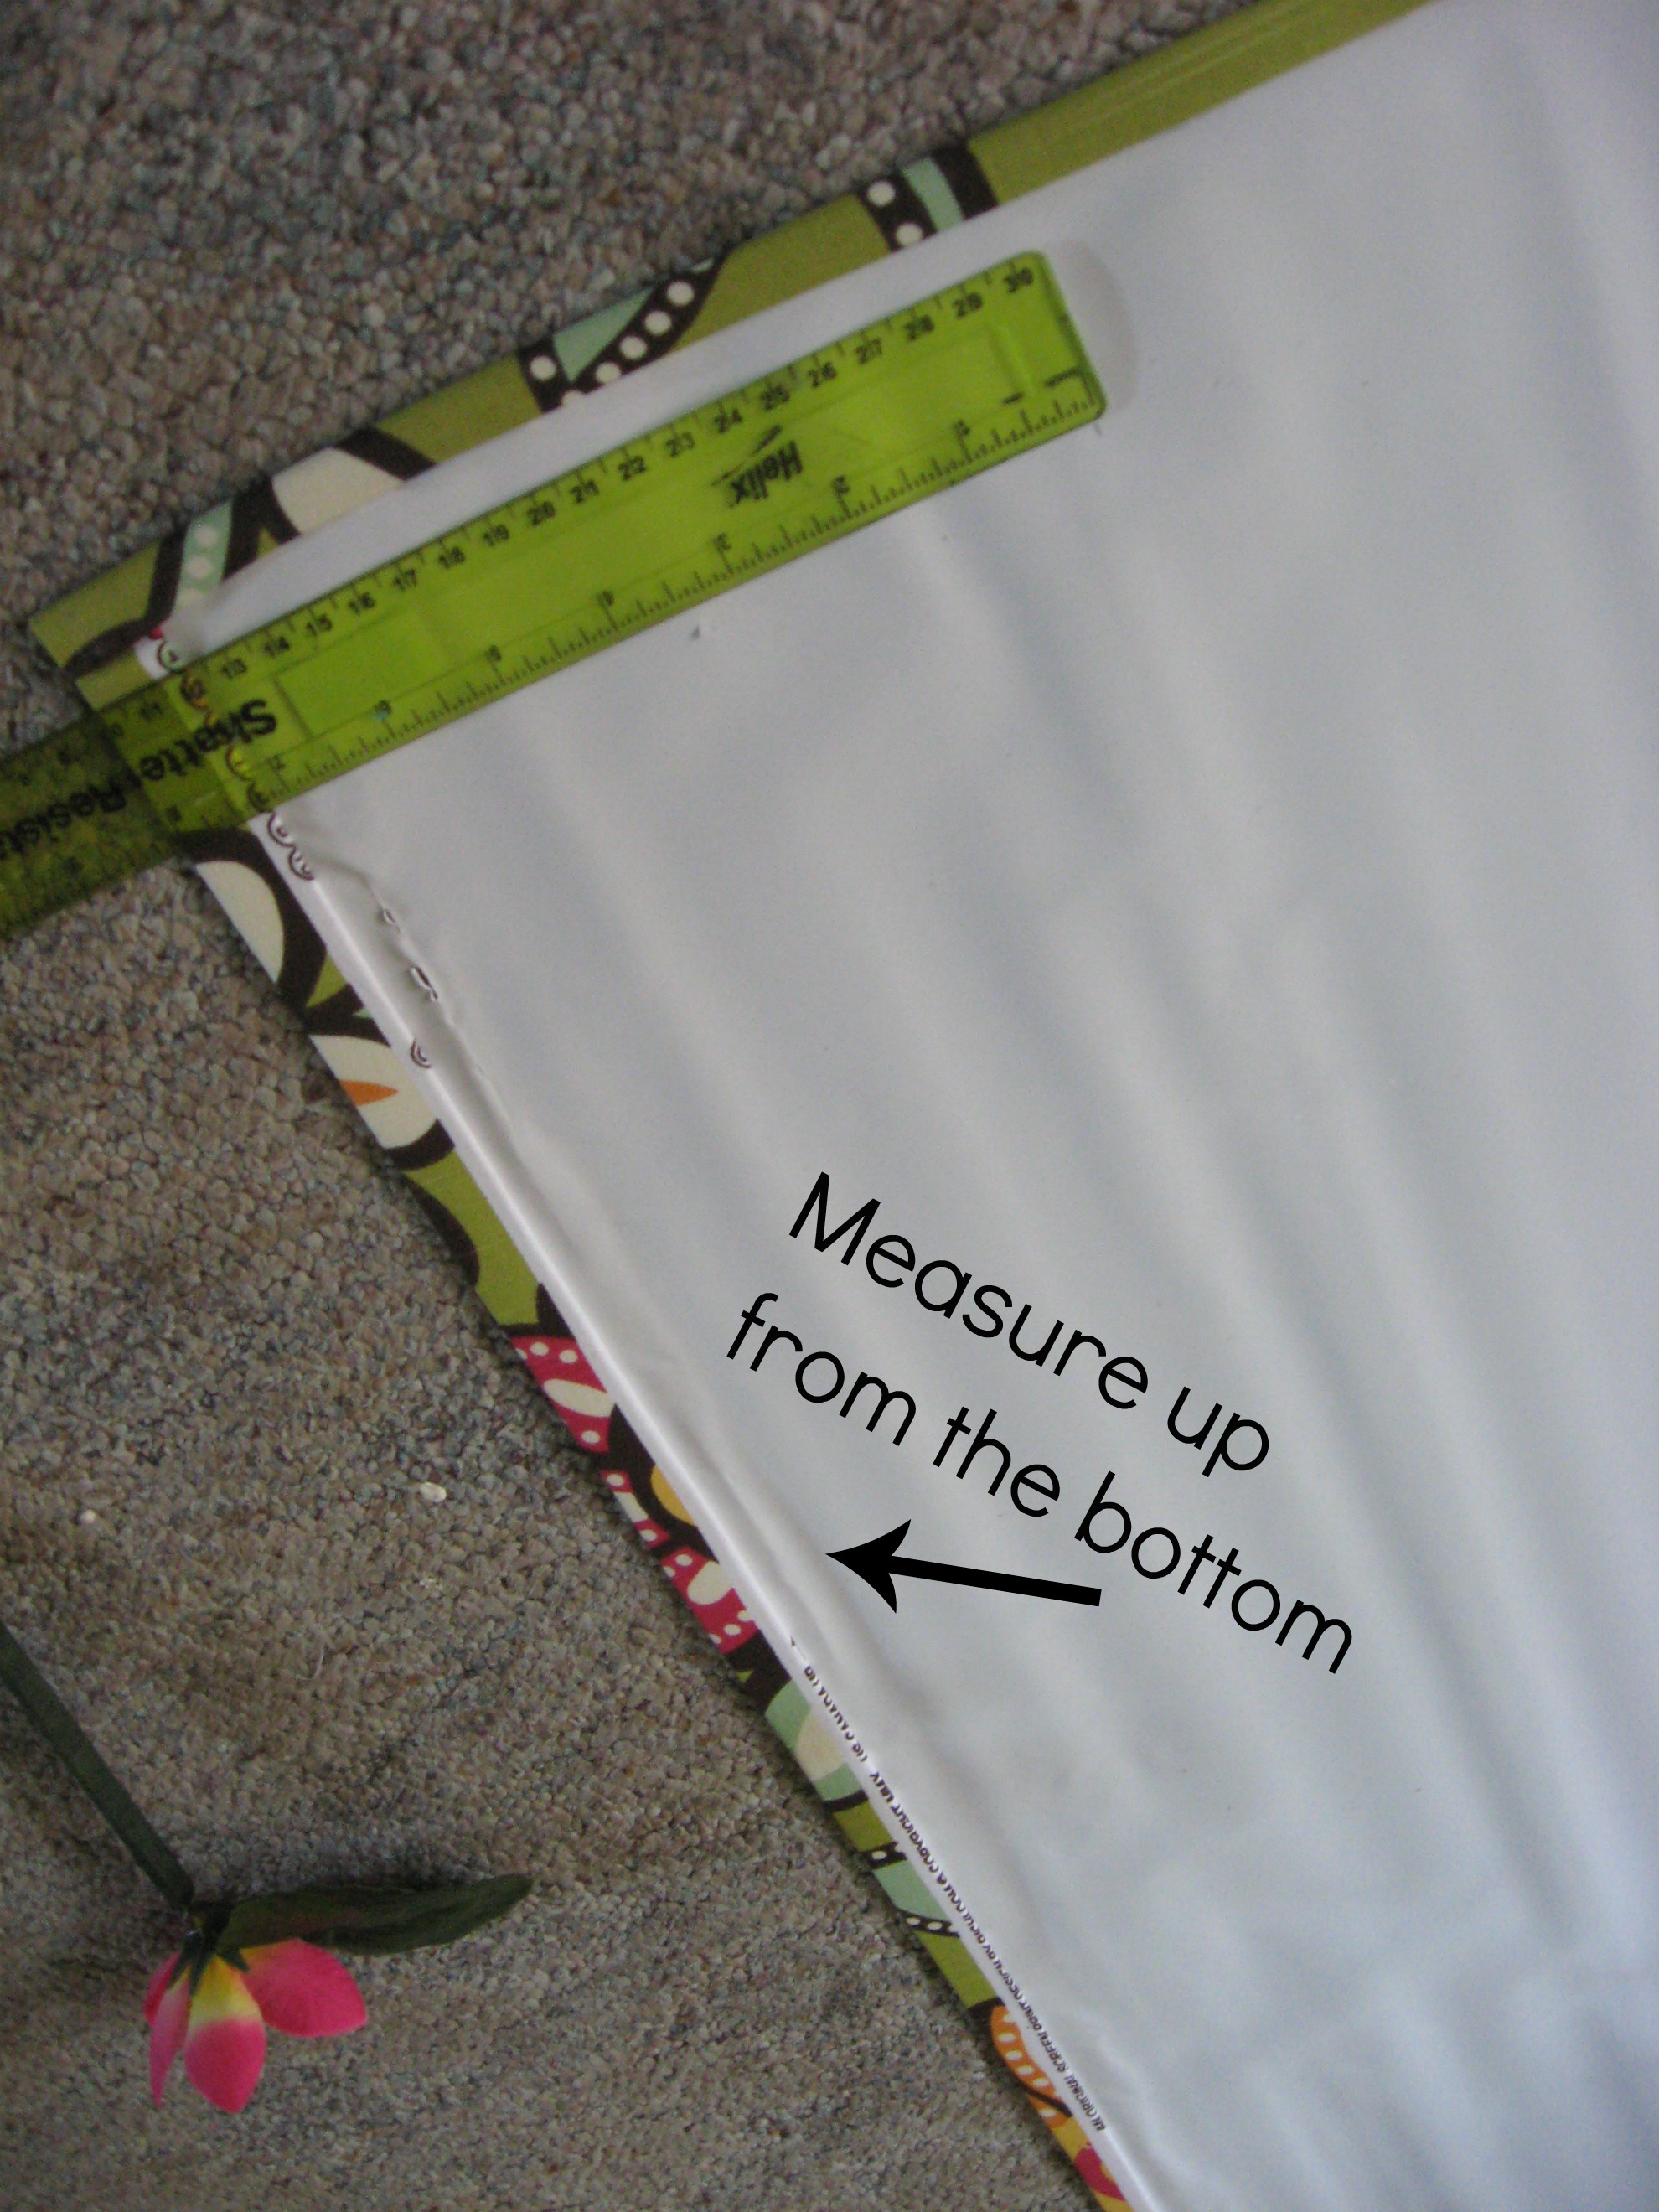
Once that’s dry, you will start to reassemble the shade. First, you need to decide how many folds you want in the shade when it opens. It’s totally up to you; I just measured the length of my shade and came up with a number that made sense to me; mine are about 9 inches apart.
Start at the bottom of the shade and measure up, making a mark on each side of the shade.
However many folds you want (however many marks you made) – that’s how many slats you will use. Slide them back onto the strings.

Put glue on the back of the slat – being careful to avoid the strings – and line it up with the marks you made.
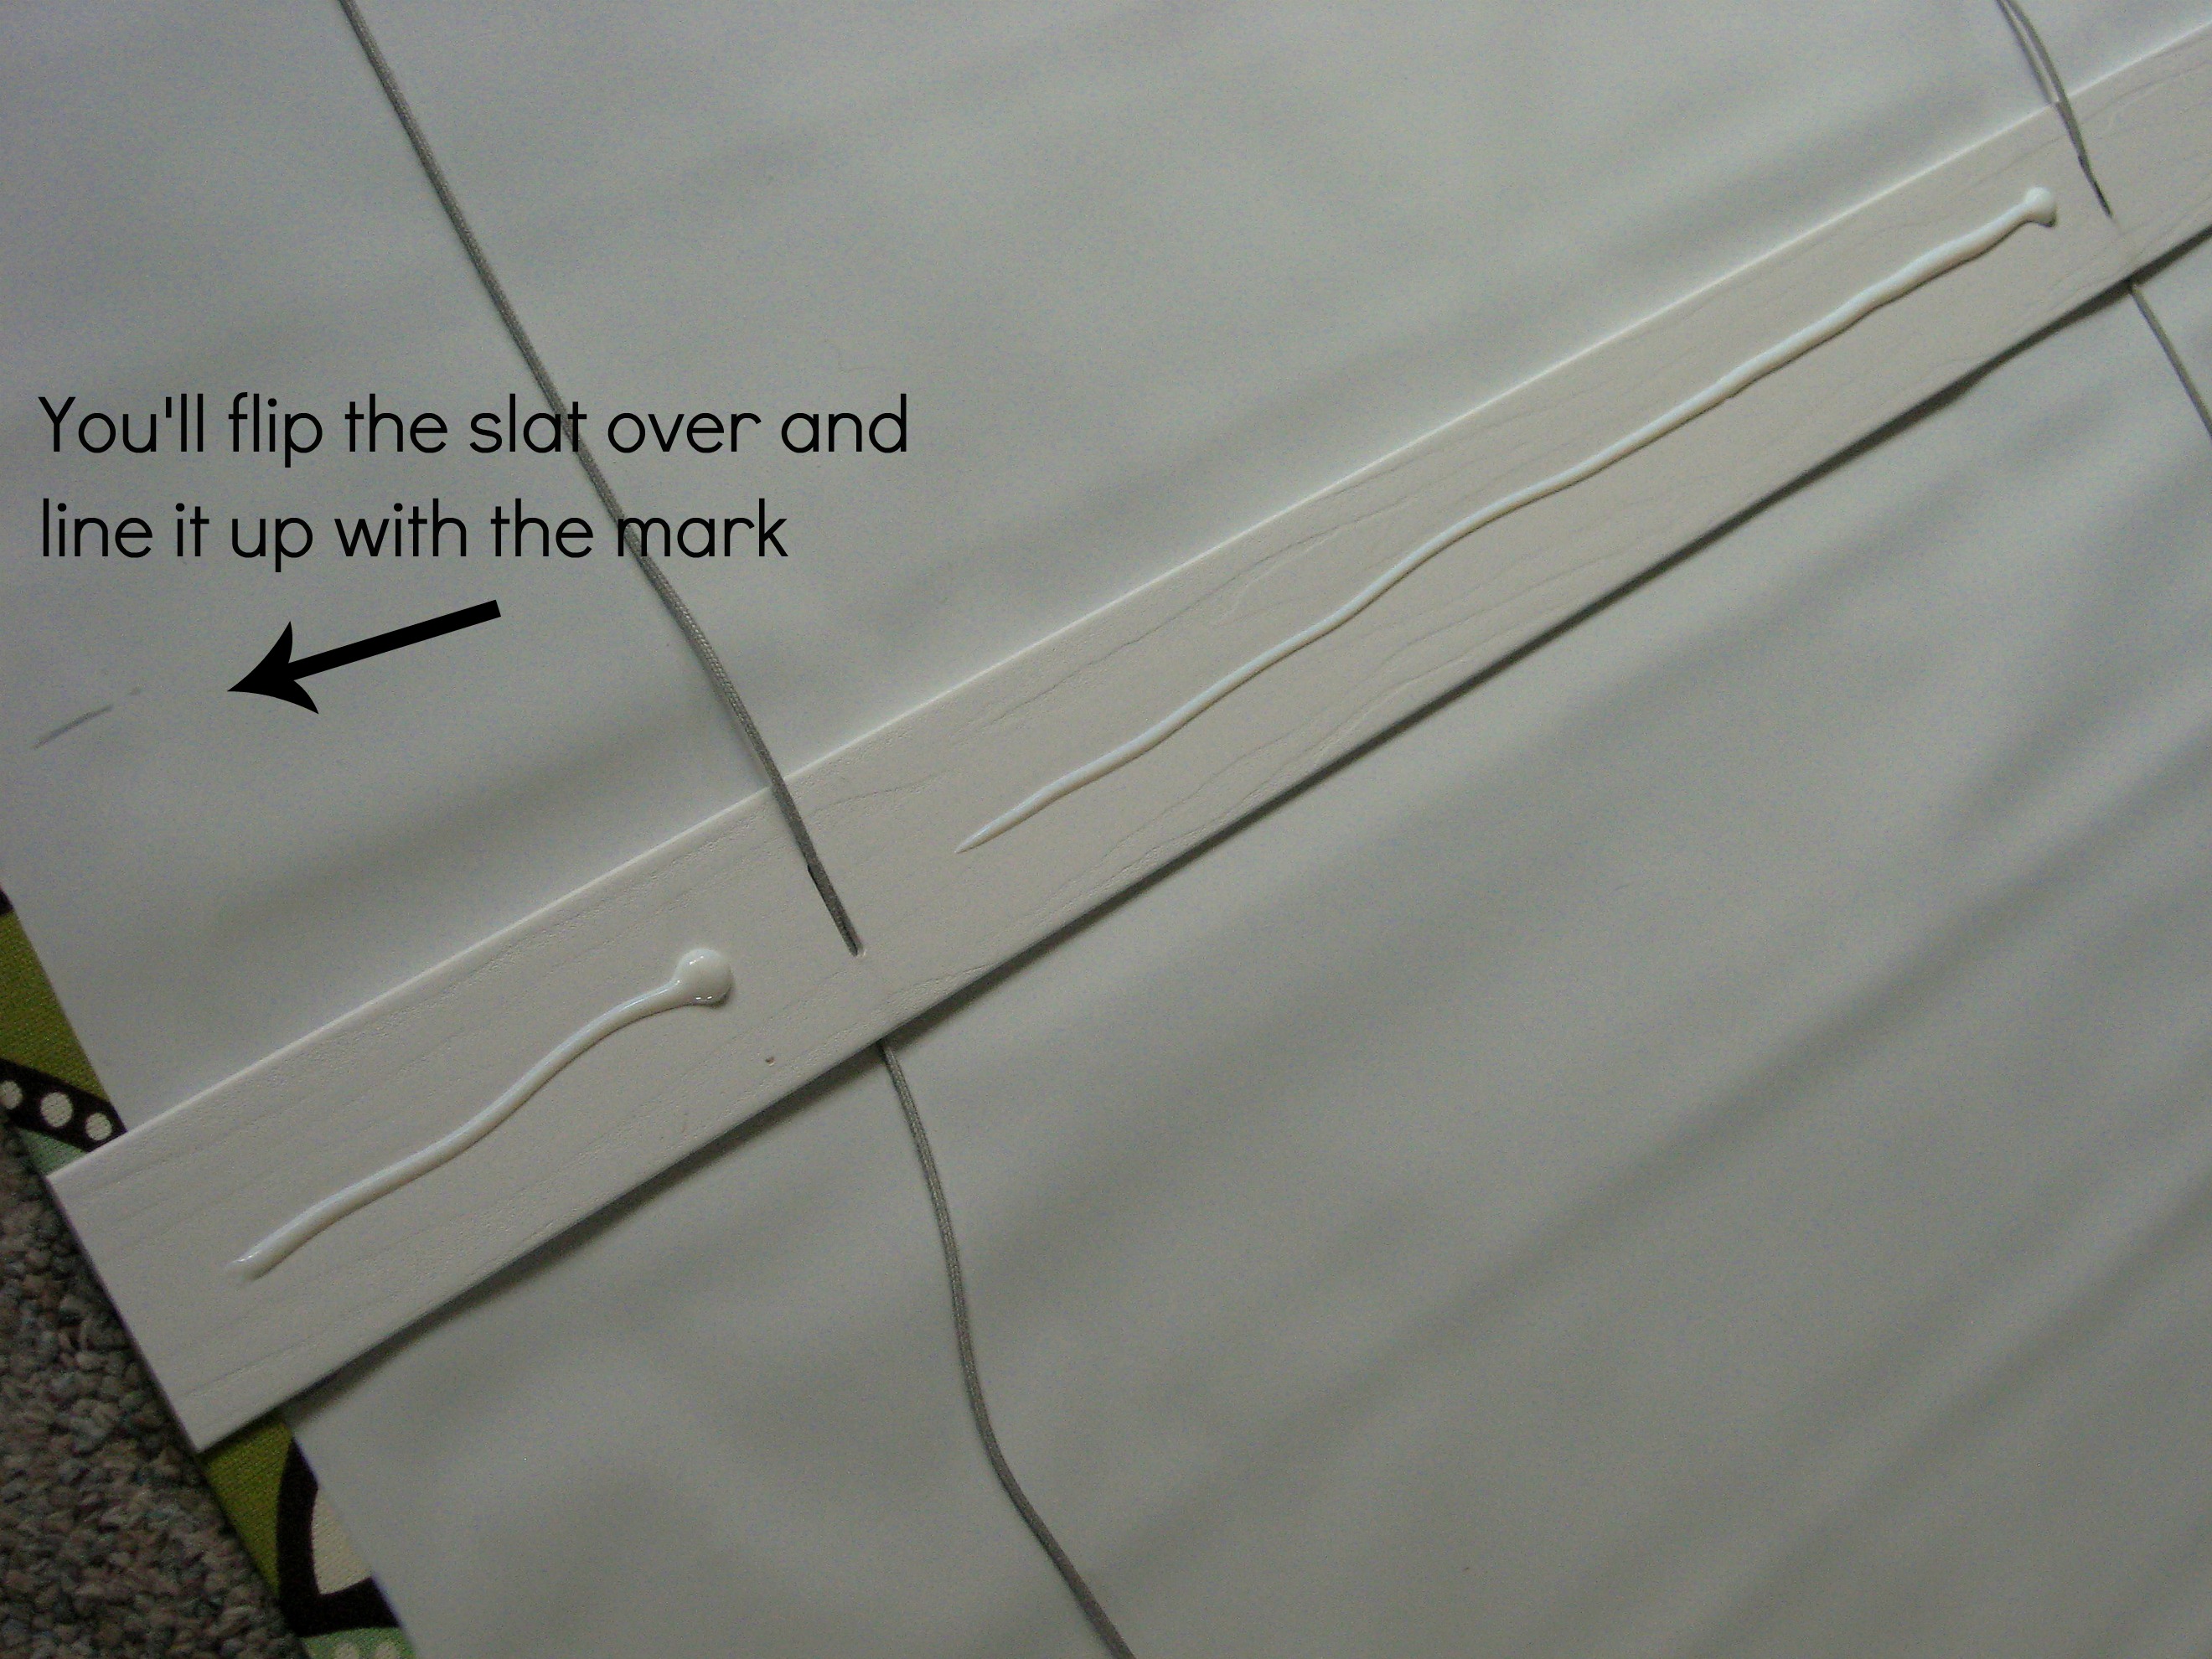
Repeat for all of the marks, weight them down and let them dry.
Now restring the bottom board back on, glue it to the bottom of the shade, and weight it down while it dries.

When everything is dry, retie the strings at the bottom and replace the little plastic plugs.
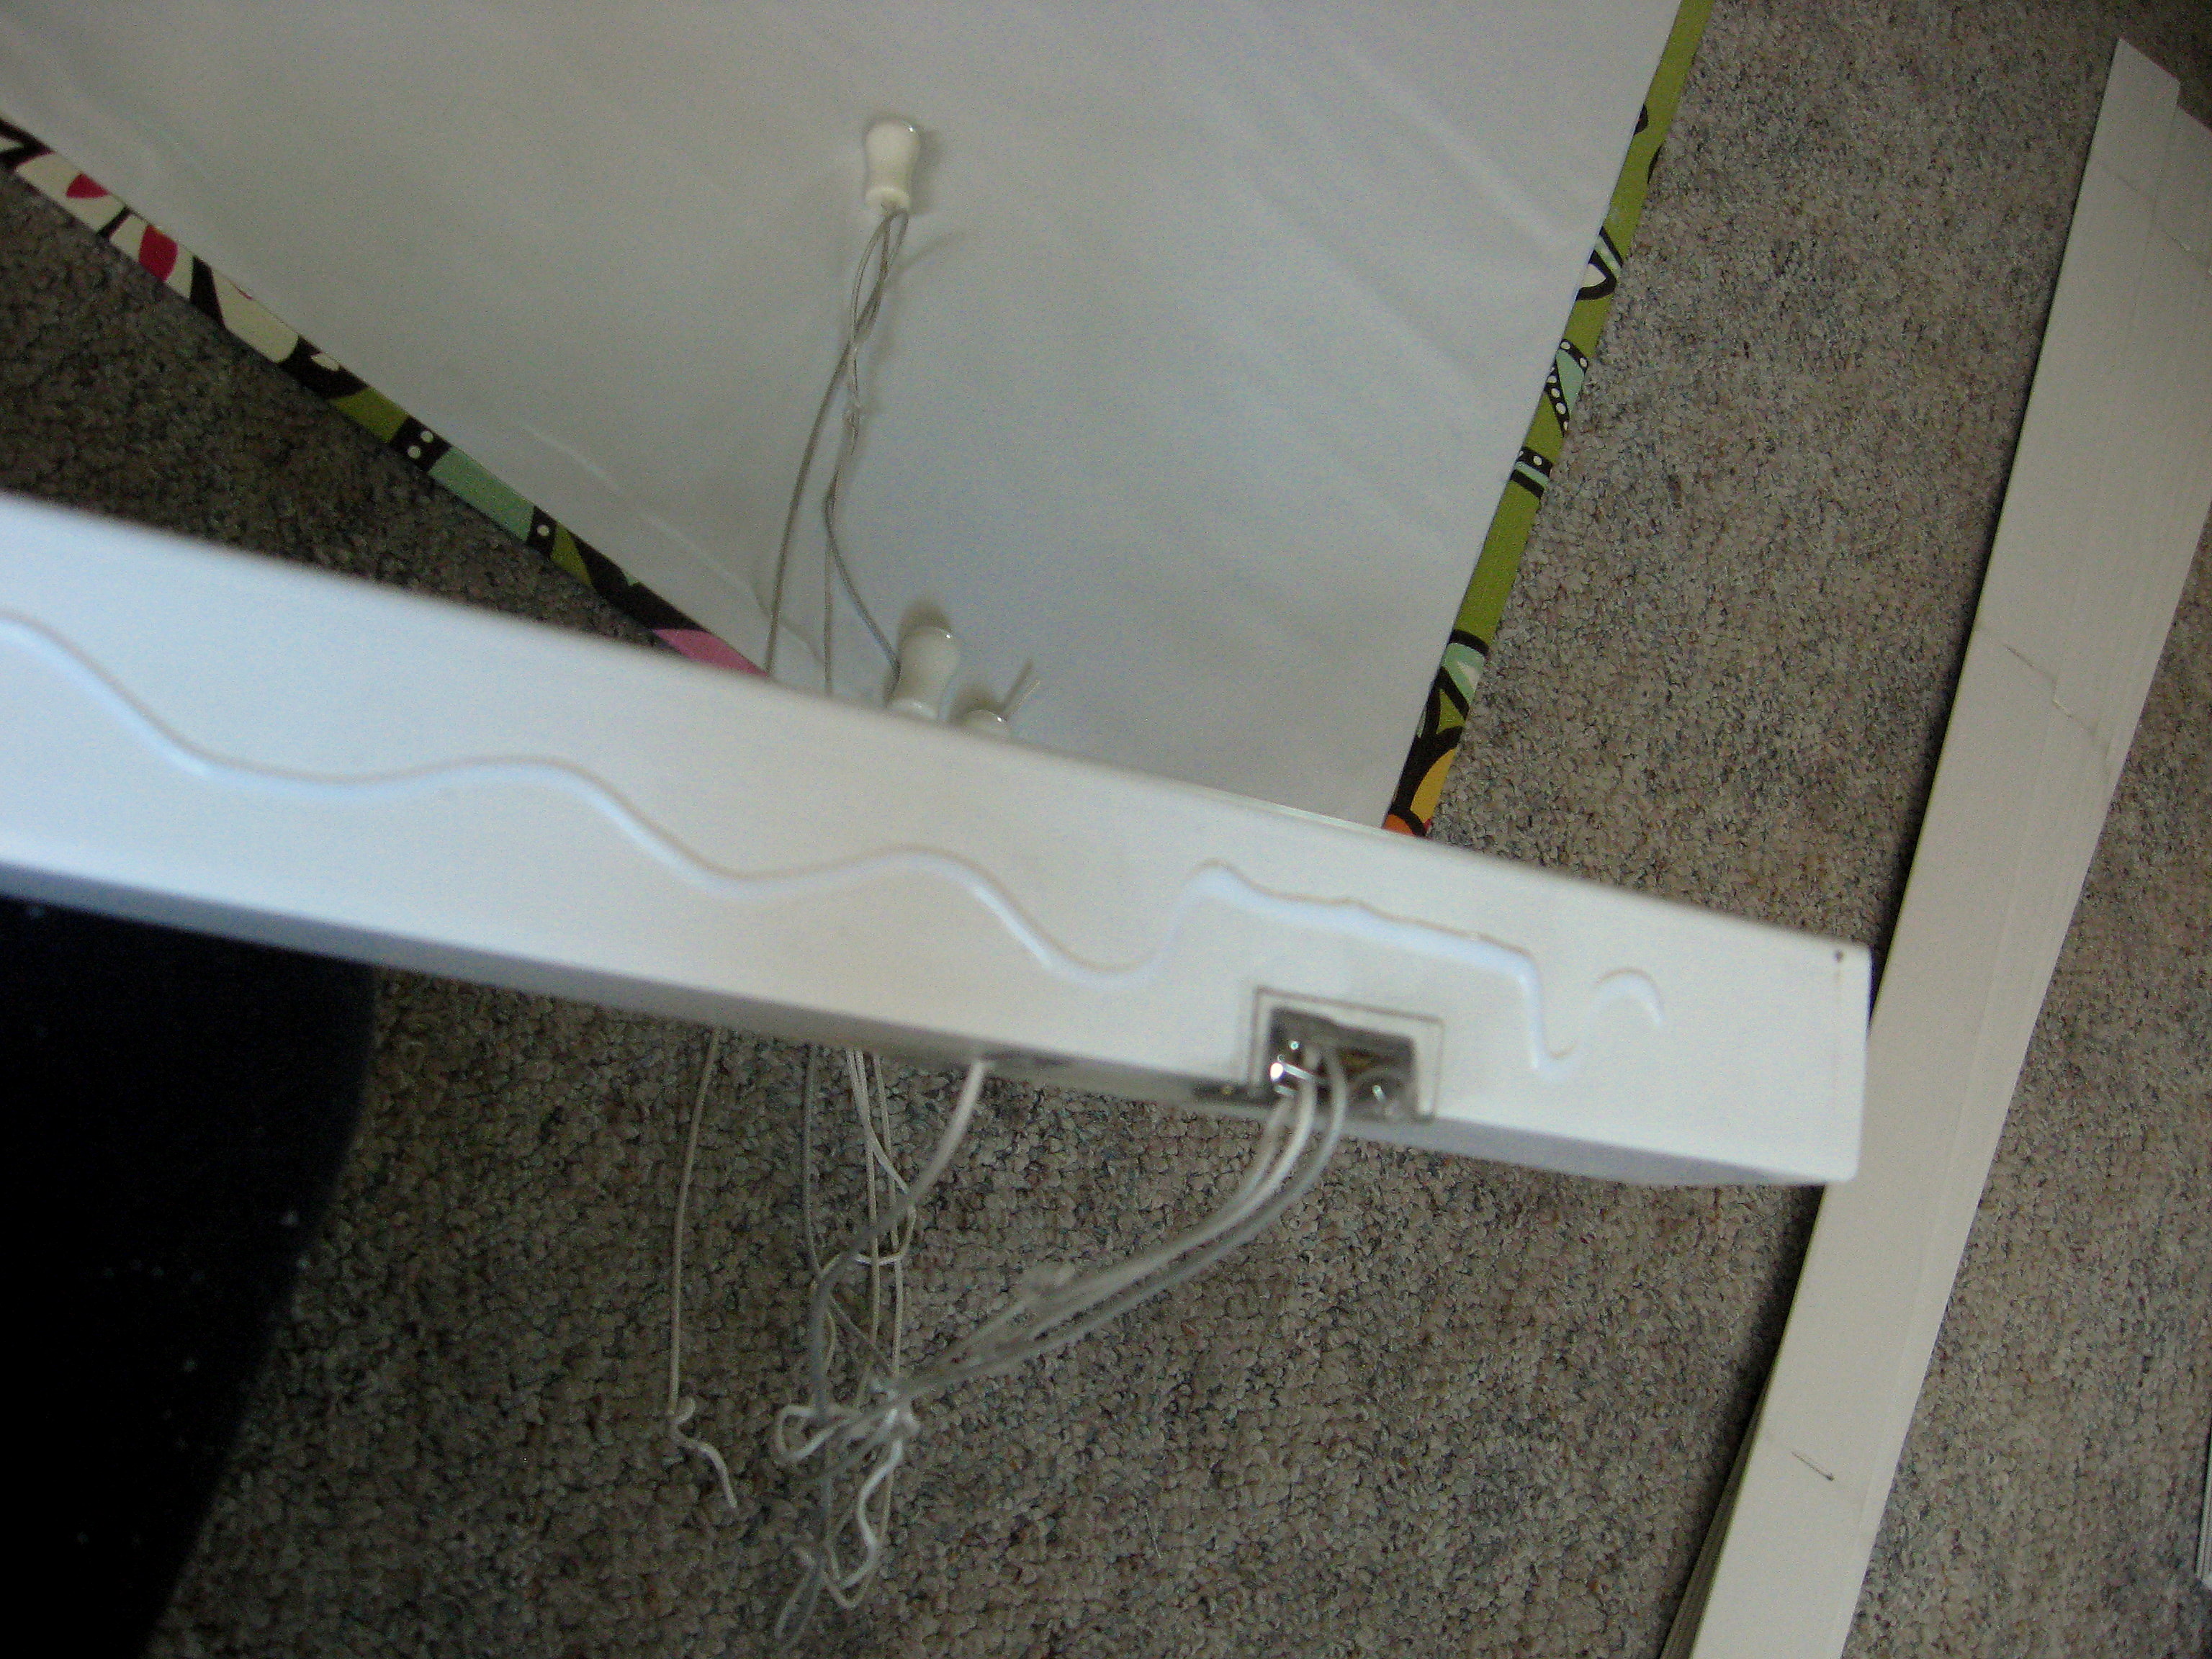
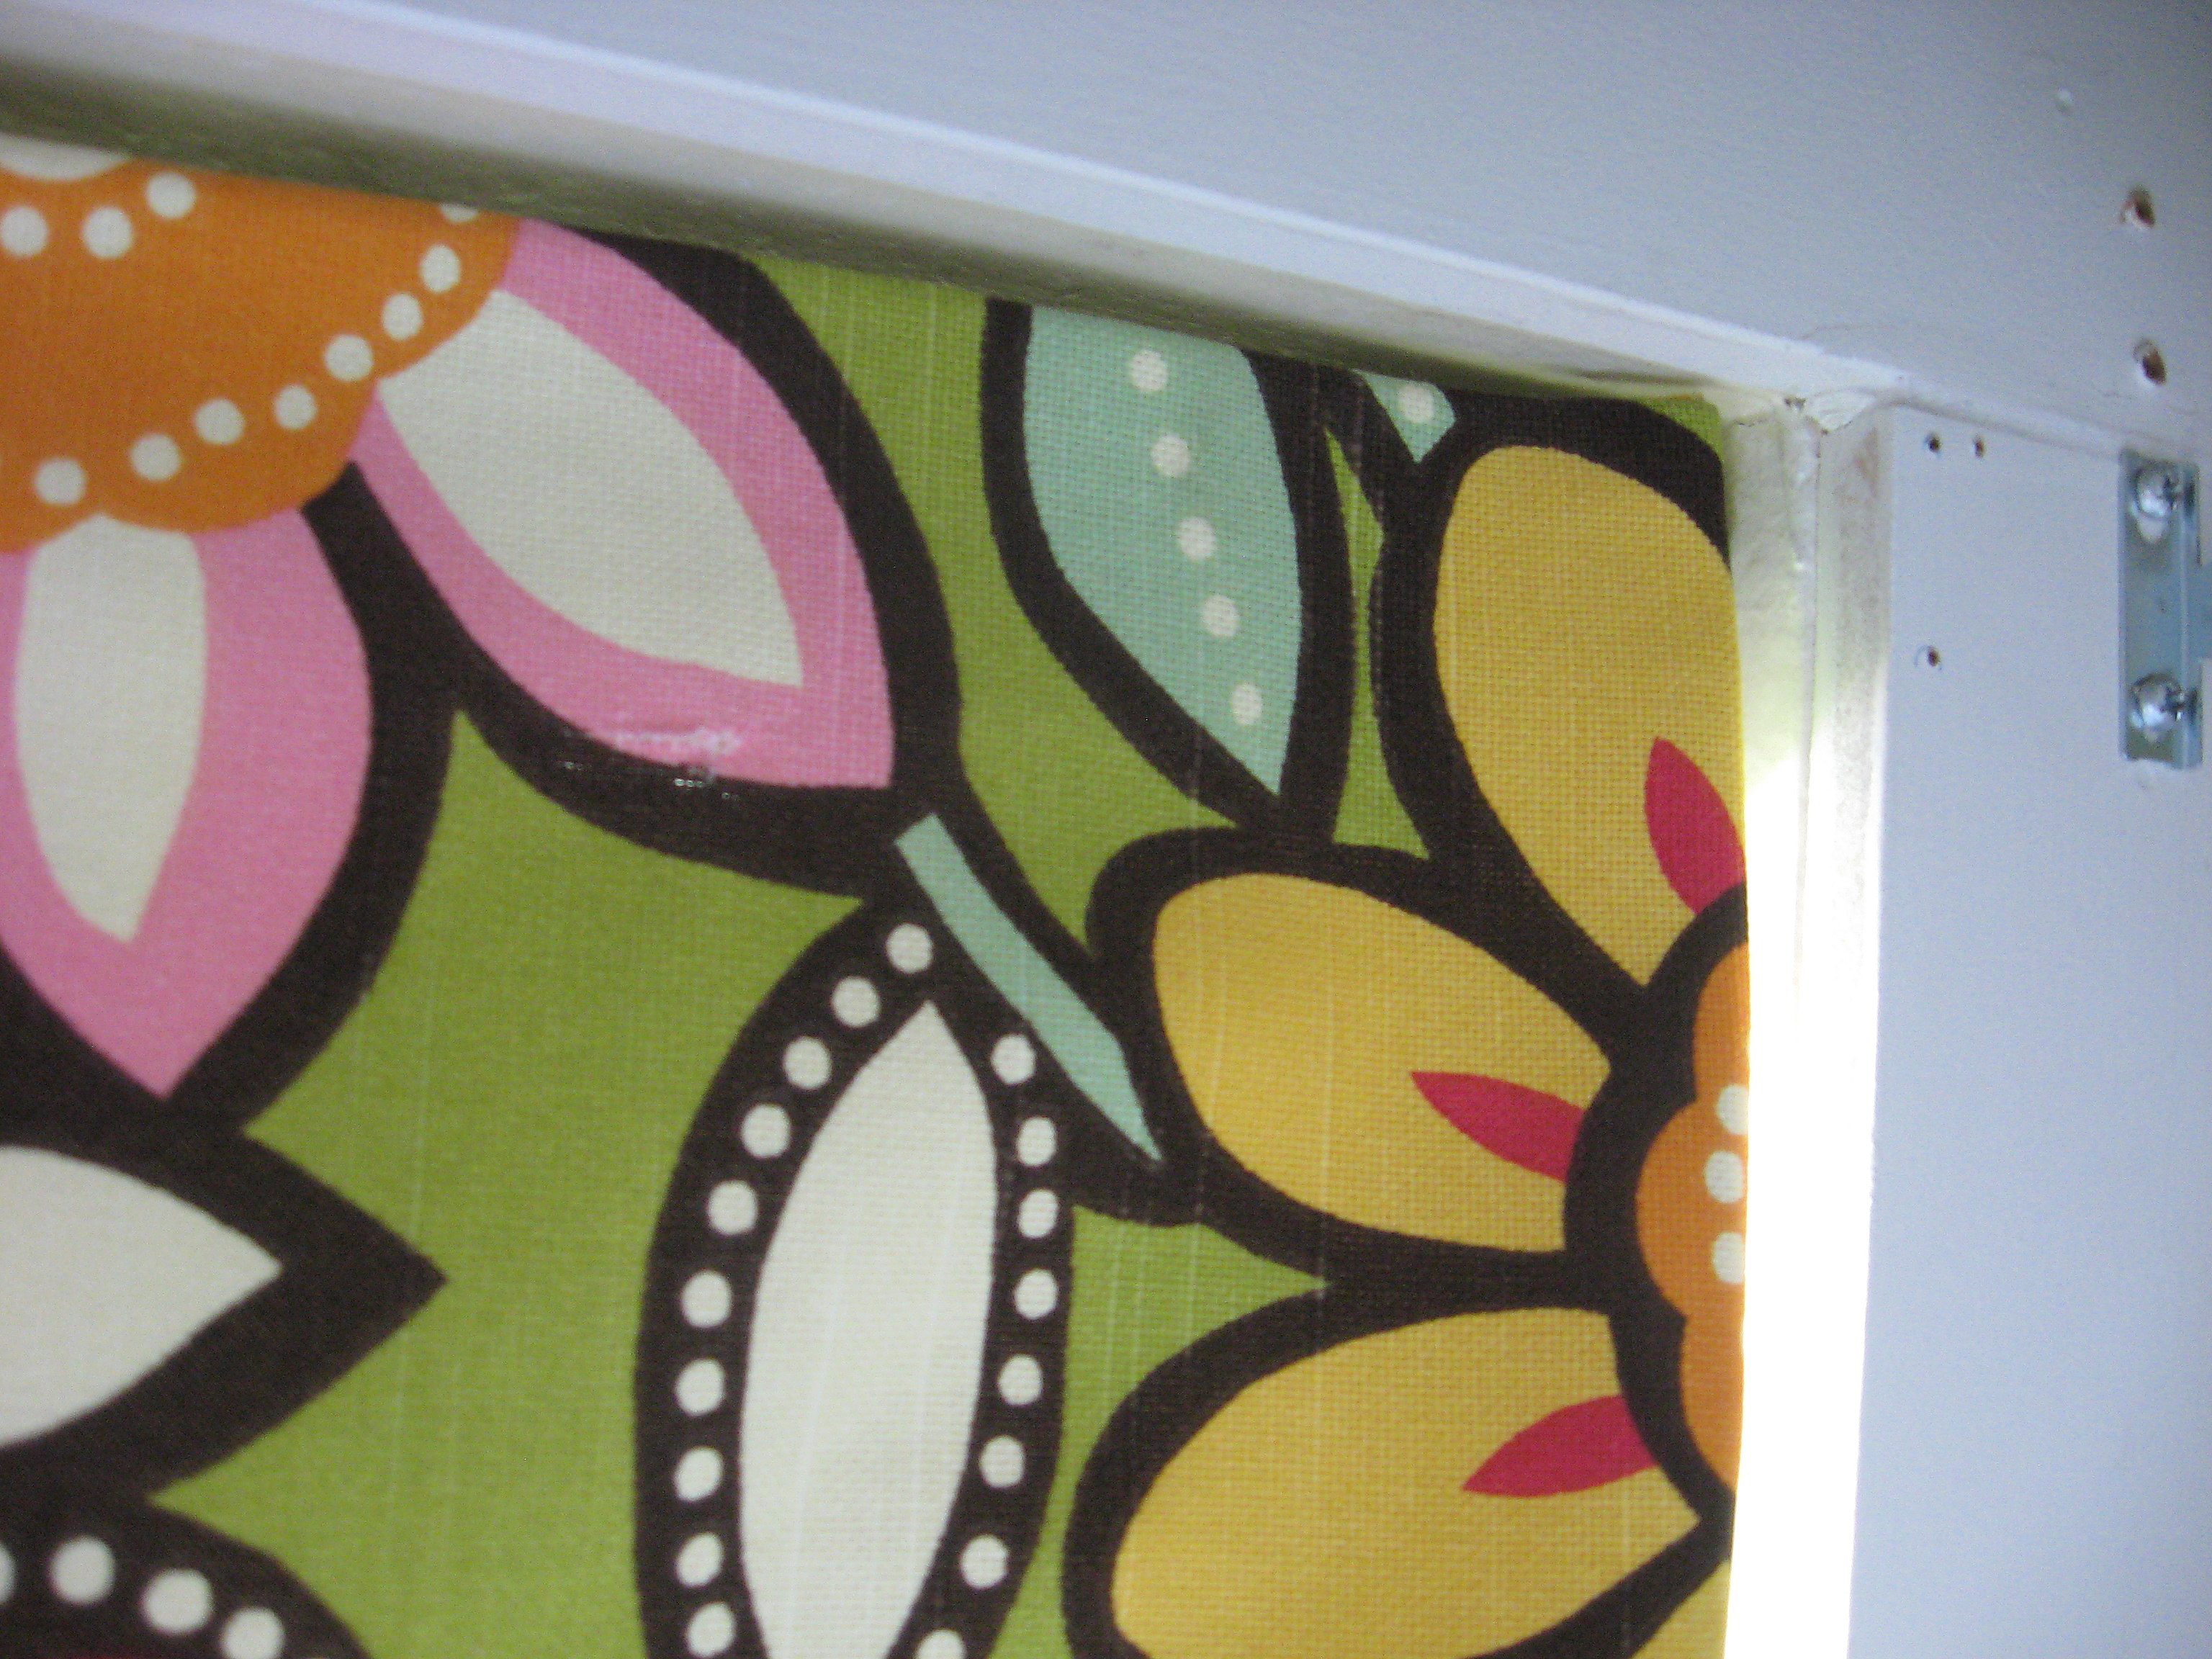
Now rehang the blinds in the brackets. You can see here how I left the fabric loose at the ends, so that I could lock the blinds back in the bracket properly.

But it lies nice and flat:
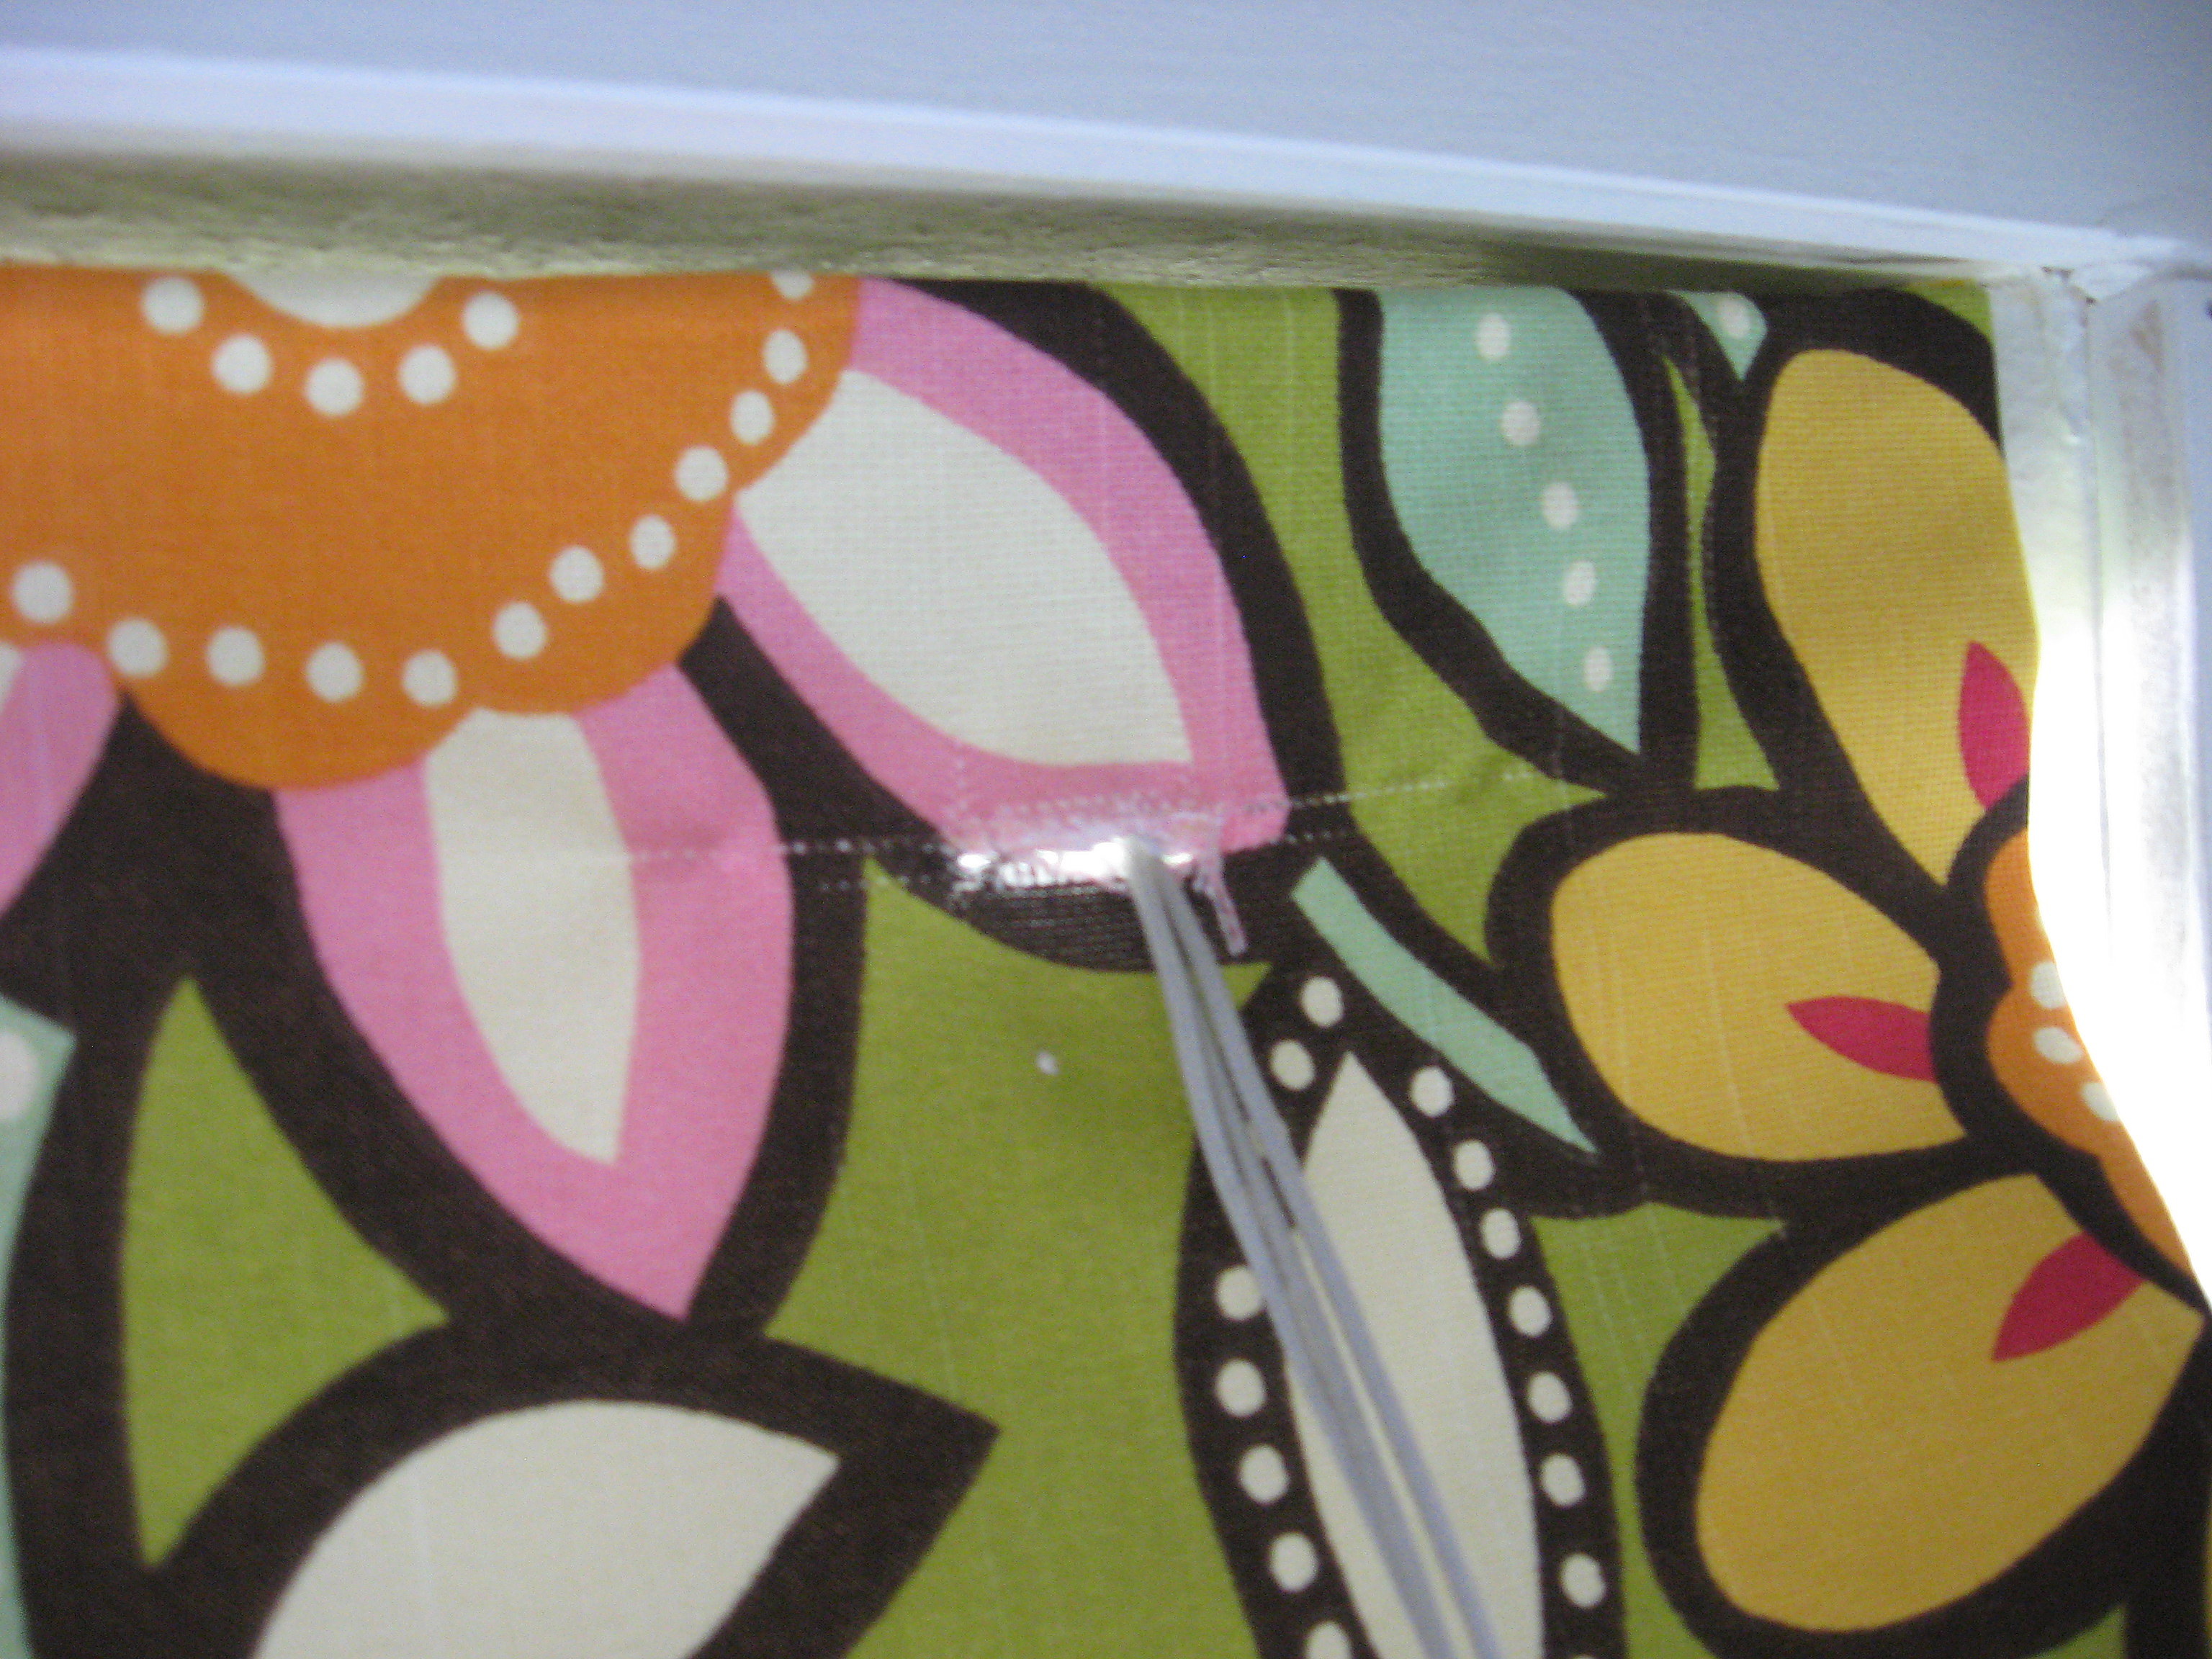
At this point the strings are behind the blind. I’ve seen people deal with this a couple of ways; I’ve seen a few people glue the fabric to the BACK of the top bar on the blinds, but I don’t like the way that looks. Most people seem to leave it behind – you can open and close the shade, but I think it’s inconvenient, and since this is in my little girl’s room I needed her to be able to do it on her own.
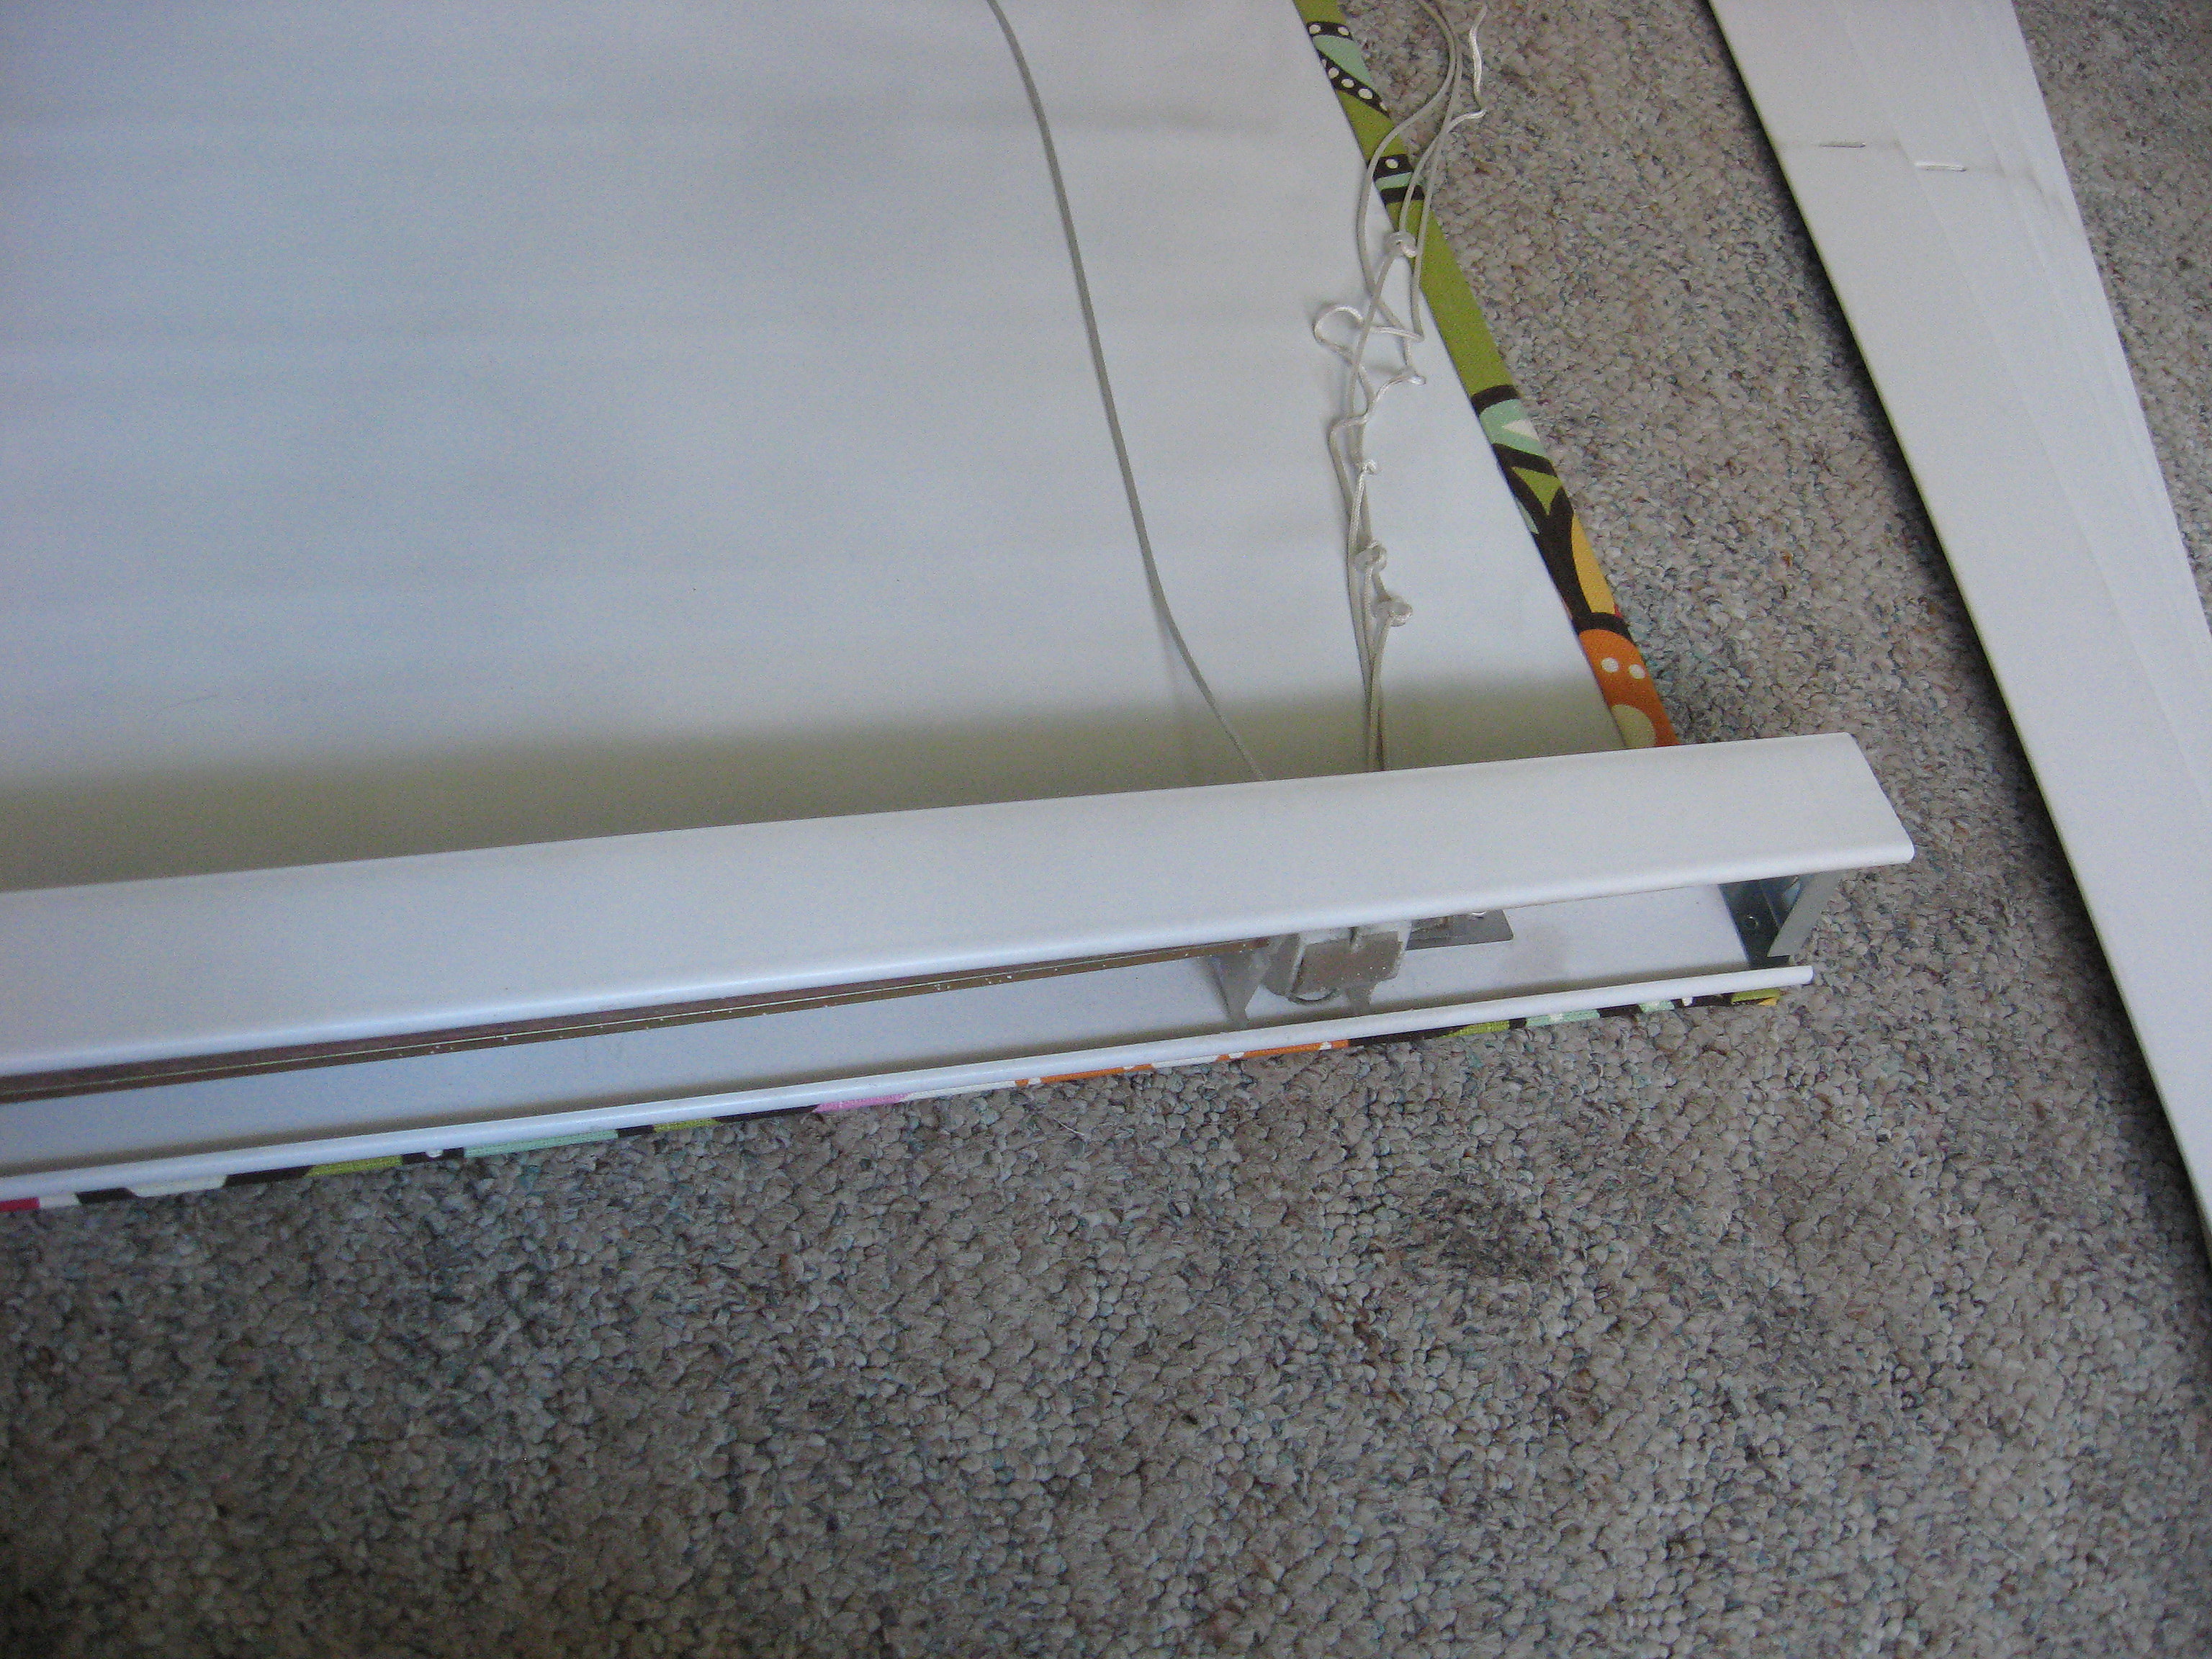
I opted to cut a slit in the shade right where the pull strings come out of the top bar. I threaded the pull strings through the slit to the front of the shade. Put a little fabric glue on the fabric around the slit so that it doesn’t fray or tear.
Here they are open:

And closed:
Much better!