

Check out the deals in today’s The Screaming Penny email newsletter!
 Check out the deals in today’s The Screaming Penny email newsletter!
WD – My Passport Ultra 1TB External USB 3.0 Hard Drive – $49.99!
FREE Nesquik Sample + $1.50 Coupon!

Head over and take a quick survey and get a free sample of Nesquik and a high value coupon! This sample pack includes five Nesquik stick packs and a coupon to save $1.50 on your next purchase of any size, any flavor of Nesquik powder.
A PYP Best Blog: Making Custom Purses and Bags! One of my personal favorites!
Just in case you missed this article on making custom purses and bags the first time we shared it a couple of years ago, we are republishing it. After Sharon wrote this blog originally, we got an awesome response. This is one of the PYP Best Blogs!
I love purses. And bags. And totes. And purses. And bags. I may have a problem.
I am kind of picky about them though…if they don’t meet certain requirements, they find themselves on a one way trip to the local donation center sooner rather than later. For me, those criteria are that they:
- have to be roomy enough to throw in all the stuff required by a busy mom on the go (lotion, gloves, notebook, random medicine, books for waiting rooms, stuffties, snacks, kleenex…),
- have to have pockets to keep my keys and cell phone from joining the bottomless pit of aforementioned stuff,
- have a long enough shoulder strap to wear across my body,
- have to be washable,
- have to be affordable, and
- have to be cute.
That doesn’t seem like an unreasonable list to me, but I have found that it is difficult to find a purse that fits all of those criteria. Several years ago, I bought a pattern at the fabric store and decided to try my hand at making one on my own. Once I made that first one and saw how easy it was, I’ve been making my own bags ever since. I decide what I want and draw the basic pattern out on craft paper. I absolutely LOVE that they are endlessly customizable. My purses can all have pockets to fit exactly the things I need them to fit. Library bags don’t need pockets, but they do need to be sturdy, so I use a heavy fabric. A purse can get away with a less sturdy fabric, as long as it’s washable. I experiment with size, shape, inside and outside pockets, appliqued designs, flaps, closures, long straps, shorter straps – no two bags look the same and they all follow the same basic instructions and only a very beginning sewing ability. I now have a stack of patterns with different- and interchangeable – sizes and shapes of bodies and straps.
I will walk you through how I made my latest bag and then show you some examples of others to get your creative juices flowing. Once you understand the idea, you should be able to make a bag in a couple of hours. I didn’t use a pattern for this one, because I started with a skirt, but you will get the idea, and if you have any questions, ask!
I started with this skirt that I picked up at a thrift store:
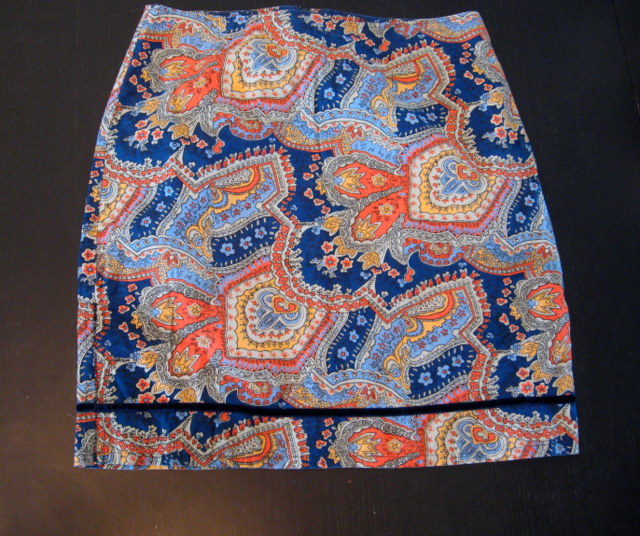
Much too small for me – and too short even if it did fit – but I just fell in love with the fabric. I toyed with the idea of making it into a pillow, but then decided it would be better as a purse.
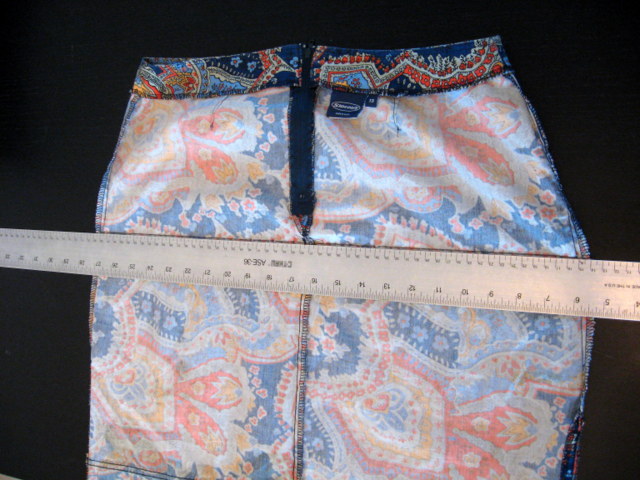
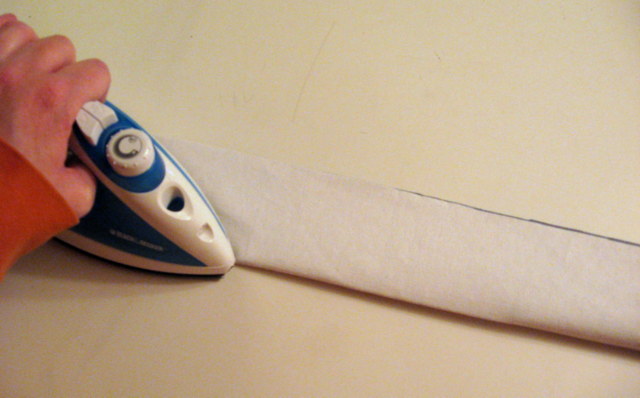
I turned it inside out and lined up a straight edge along the width of it, just under the zipper. Draw a line and cut – making sure that you keep the bottom hem even and straight. I discarded the top part, but you could use that fabric to make pockets.
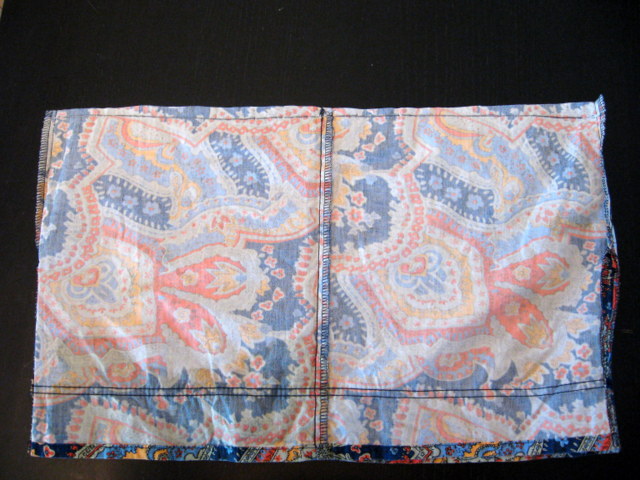
Sew straight across the newly cut edge, forming the bottom seam of your bag. I like to sew this seam twice, just to make sure it is strong.
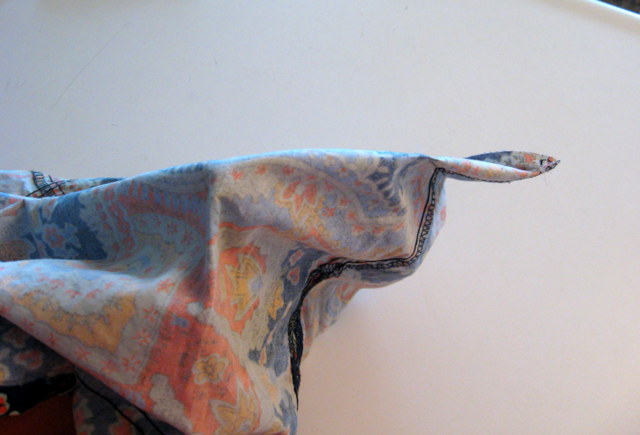
You can leave it like this if you want, but I like to sew across the corners to give the bag a little shape. Take one bottom corner and pinch it together then lay it out flat, being sure to line up the bottom seam and the side seam. Measure in from the point (I did 2 inches, but experiment with making it smaller or larger to change the look of the bag) and draw a line across it. Pin it in place, then sew along the line. Do this on both corners.

That leaves you with these little floppy ‘ears’
that make a nice, neat bottom when turned right side out.
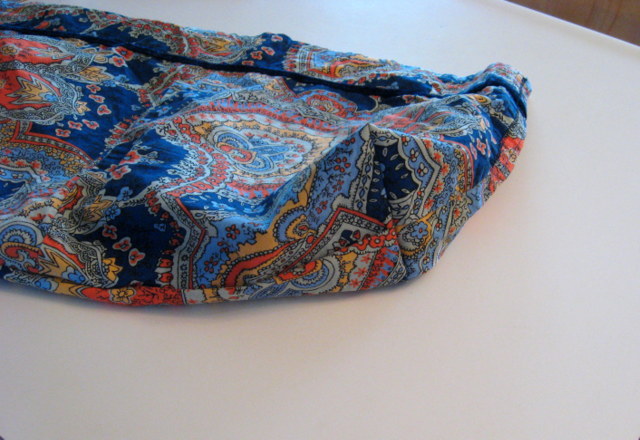
Again, you could stop here if you like the shape, but I thought it was too wide at the top, so I measured down the top inside seams a few inches on both sides and sewed a triangle to taper the top sides in a little, like this:
There; I like that shape better.
Now, if you don’t want your bag to be lined, you can stop there and add straps. I will leave the inside unfinished occasionally on tote bags or shopping bags, but generally, I prefer my bags to be lined and it really is quite simple!
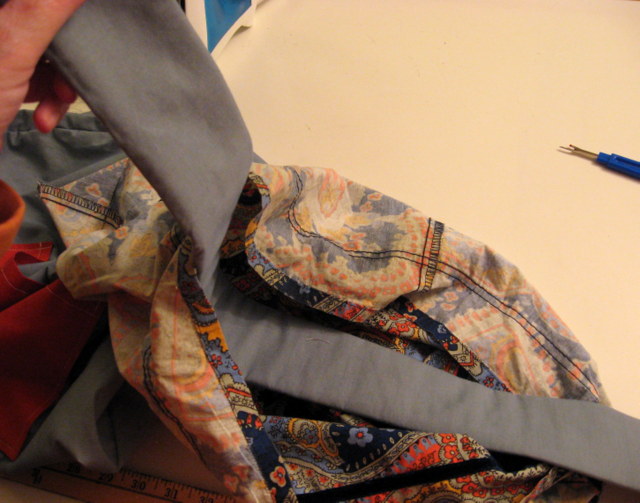
I folded my bag in half and layed it out on the fold of my lining fabric, then I drew around the shape of the bag and cut out two.
**If you are making your bag from scratch from flat fabric, then just cut out all four of these shapes at the beginning – 2 outside pieces and 2 inside pieces, all the same size.
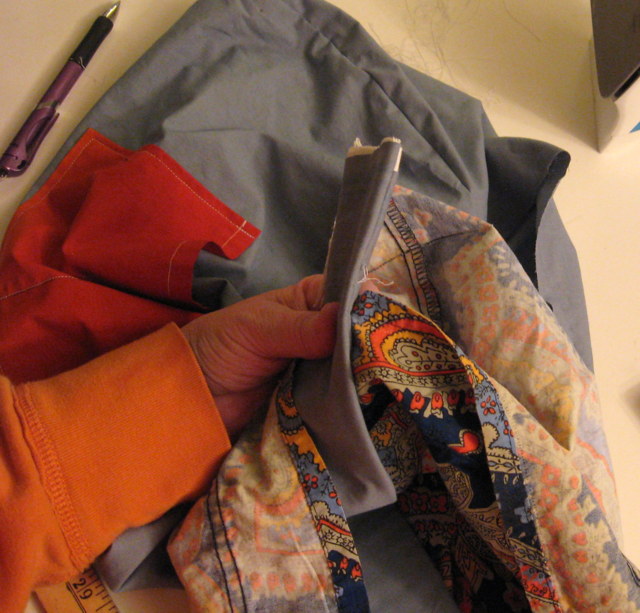
Sew the two lining pieces together, all the way around, but leaving the top open. Make sure you have right sides together!
Now you have two fabric pouches that we will stitch together once we make the straps and pockets…
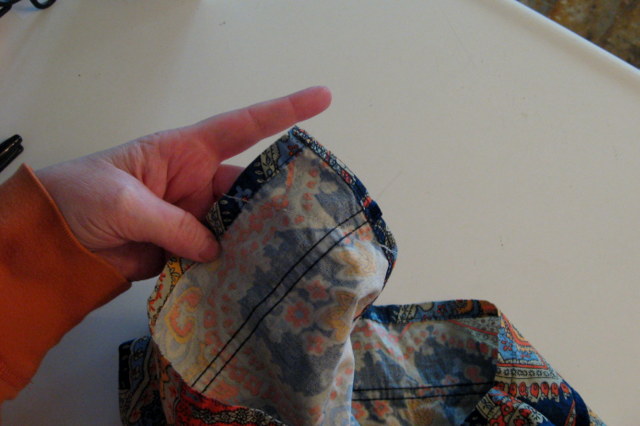
For my pockets, I like to make two; one big one on one side, to catch the random small stuff that tends to get lost in the bottom of my purse, and one on the other side, split into two pockets for my keys and phone. Decide how big you want your pockets to be, and cut the squares out of fabric – about an inch or so bigger than you want the finished pocket.
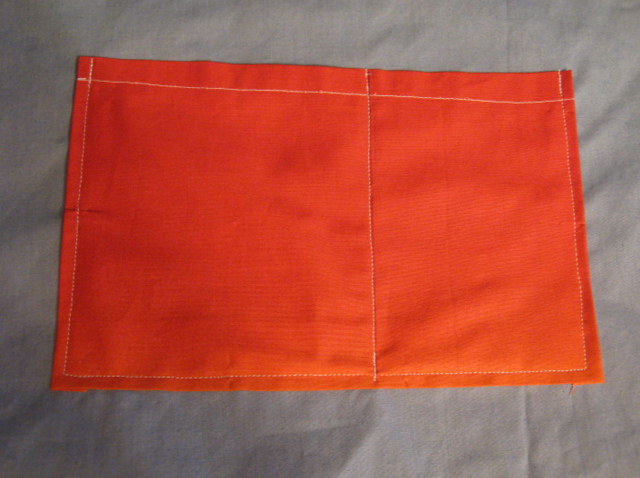
Press down a small seam on the top and stitch across it.
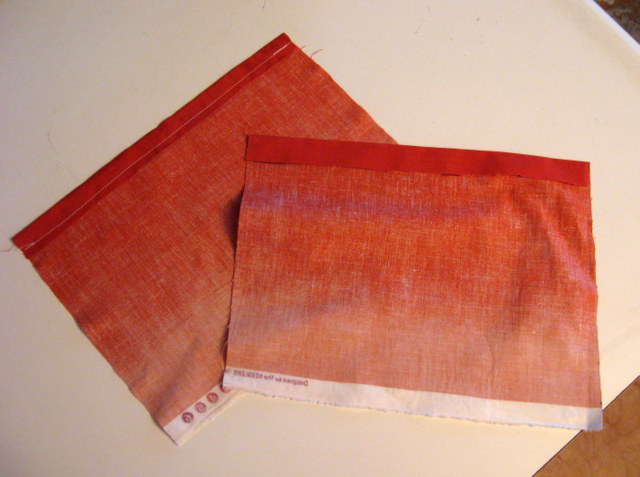
Then you will press a seam allowance on both sides and the bottom, but don’t sew it.

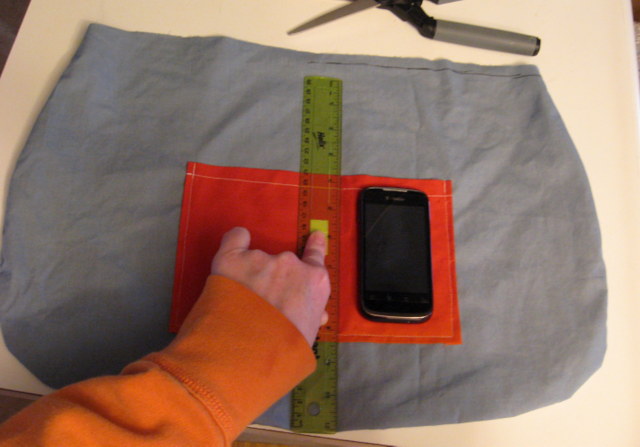
Pin the pocket centered in place on lining of the bag – make sure that the “up” side of the pocket is facing the “up” side of the bag. Also, don’t put it up too high…you will lose a little at the top of the bag when you sew the lining to the outside.
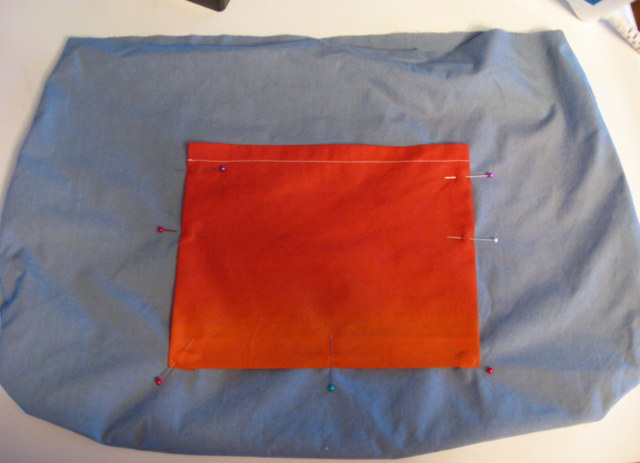
Sew the pocket onto the lining along the three edges, leaving the top open.
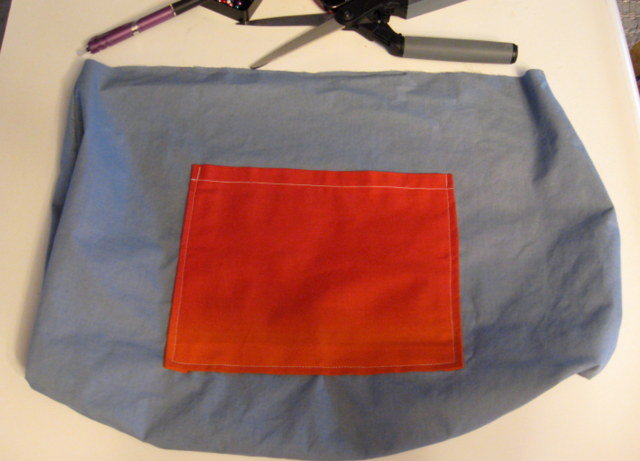
Now repeat with the pocket on the other side. Once it’s attached, you can just sew a line right down the middle to separate it into two pockets. I used my phone to decide exactly how big I needed it to be, since that is what will go in there!
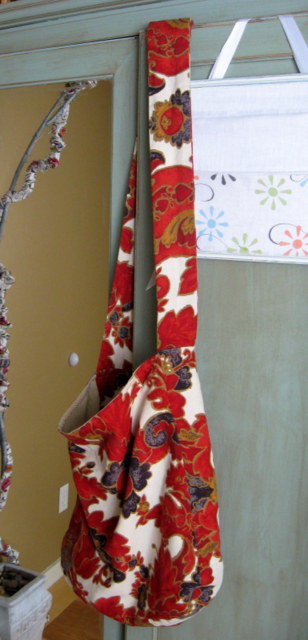
Now for the strap. Determine how long of a strap you would like. The first couple of times might take some trial and error until you find exactly what you love. Use a bag you already have or have someone help you with a measuring tape to get a good measurement to start with. For me, I like a 42 inch strap – short enough to carry on my shoulder, but still long enough to sling across my body. I cut out a long rectangle of fabric about 4 inches longer than the finished size (so 46 inches long) and about 6 inches wide.
Again, depending on what you’re going for, you can decide how you want the finished strap to be. If it is a small or delicate bag, you might choose to use just one layer of fabric for the strap. If it is a heavy bag, you will want to make the strap heavier. You can do that by using iron on interfacing, or by just using two pieces of fabric, which is what I did here.
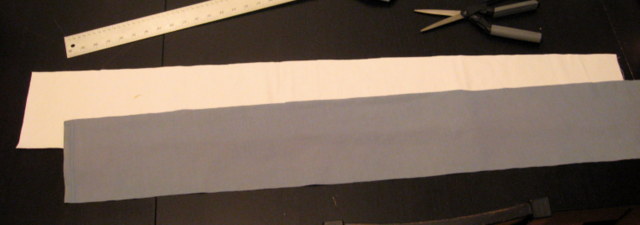
Lay them out on top of each other, and fold them in half lengthwise, with the right side of the outside fabric on the inside of the fold. Press it all flat, then sew up the long edge. Turn it all right side out, smooth it all flat and press it again.
Now, here comes the trickiest part – I still mess up on this part once in awhile if I’m not paying attention, so go slow, take a breath and think it through before you sew and you’ll be fine, I promise!
With the OUTSIDE pouch turned inside out, lay the strap along the bottom of the pouch and up the sides. Make sure that the strap isn’t twisted. Now check again. Really.
Center the strap with the side seam of the pouch and sticking up beyond the top about 2 inches and pin it. Now do the same on the other side. Now check again to make sure it isn’t twisted – just to be safe 🙂
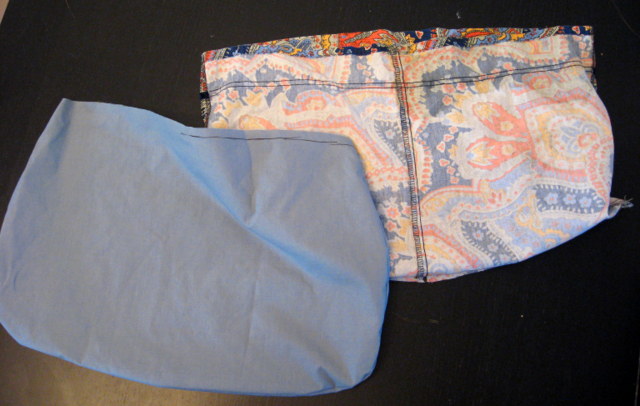
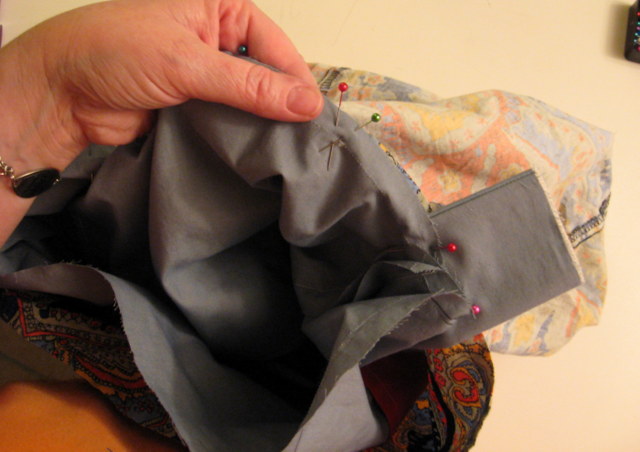
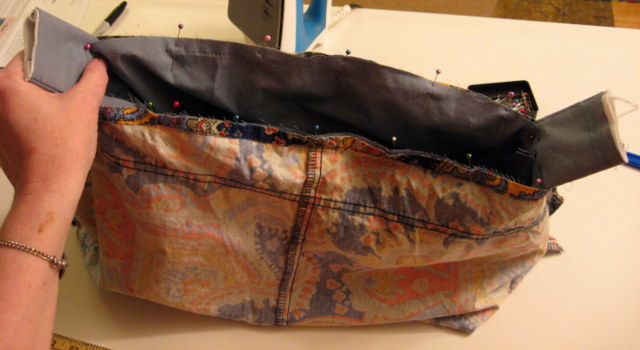
Now with the INSIDE pouch also turned inside out, put it down inside the outer pouch. So, you will have a “pouch sandwich” with the strap between them. Line up the side seams and the front and back centers and pin them together, stretching to ease in any excess fabric (you shouldn’t have a lot, but you will likely have a little). You will now sew around the whole top where you just pinned, but you will have to leave a space so that you can turn them inside out. The smaller the opening you leave, the harder it will be to get it turned, but the larger the opening, the more work you will have to do to close it up. I probably leave about 3 inches. I have been known to forget and just keep sewing, so when I pin, I will pin an X where I want to leave the opening just to remind myself.
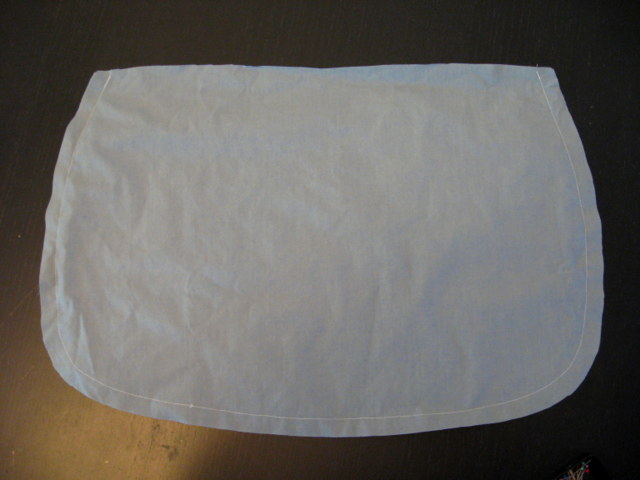
Take a minute to look at it and make sure you have everything assembled the way it should be; it should look like this:
Then, sew around the top edge, backstitching at the beginning and end. Carefully reach into the opening that you left and pull out the strap, then work the rest of the purse through until the whole thing is turned right side out. Now press around the top where you just sewed, to make it look nice and neat, and press down the edges of the opening as you go. Slip stitch or blind stitch the opening closed by hand – or you can topstitch around the entire top edge, closing the opening in the process.
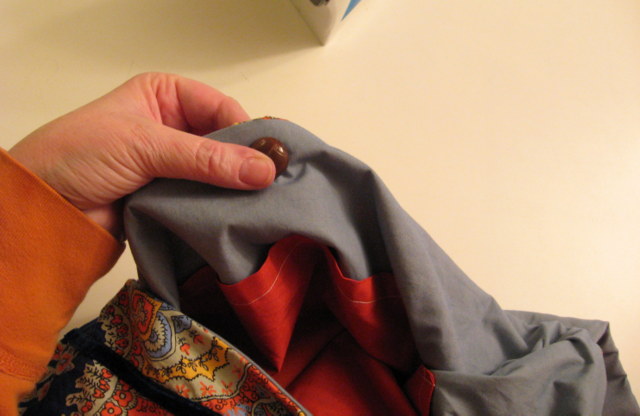
I chose to close this bag with a button, so I found the center of one side and attached a big vintage button, sewing it just to the lining so the stitches don’t show on the outside. Then I lined it up with the center on the other side of the bag and made a buttonhole.
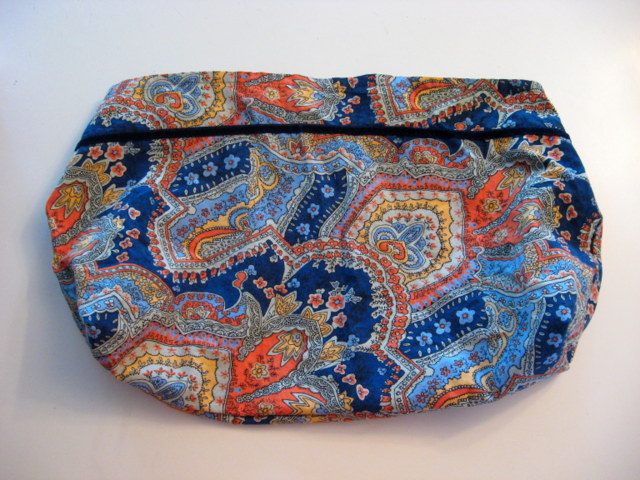
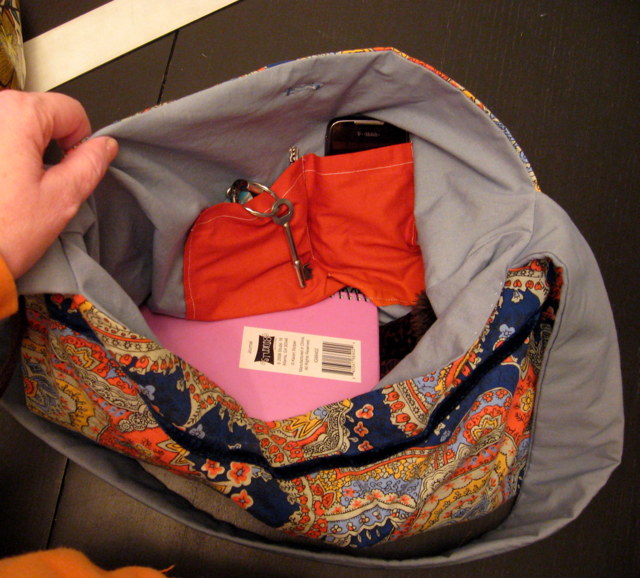
Here’s a shot of the inside of the finished bag:
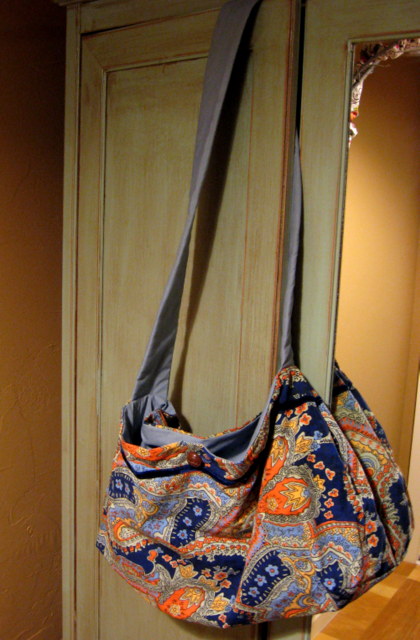
And the outside:
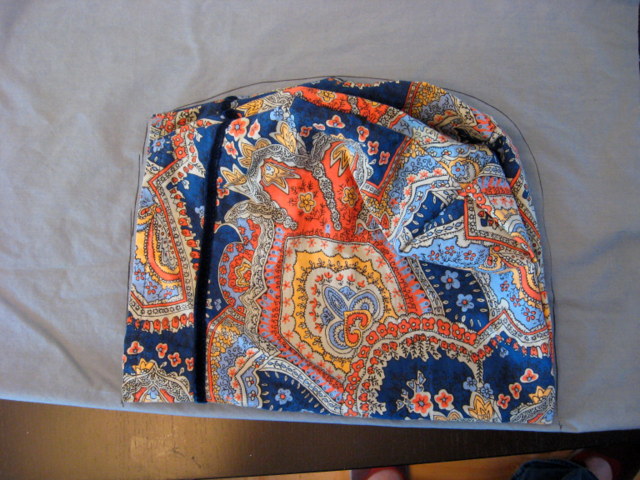
And a few of my other favorites…
My favorite overall tote bag, made from an old pair of curtains.
And a simple scripture bag: 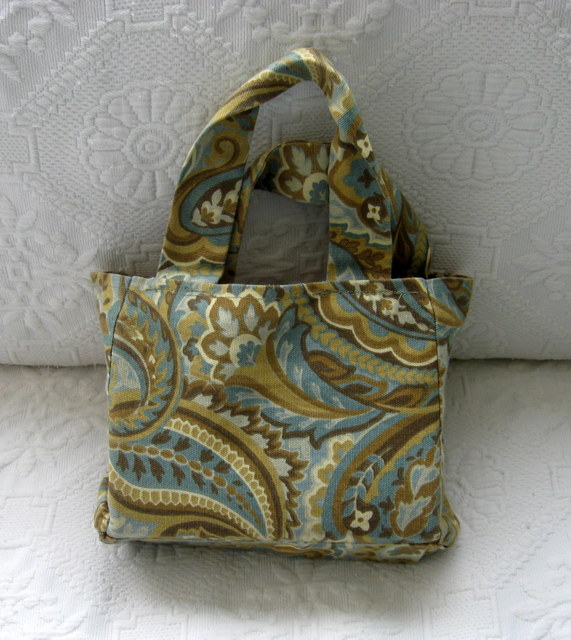
And my library bag – two straps instead of one – and made from a heavy duty upholstery fabric that I picked up for pennies on clearance.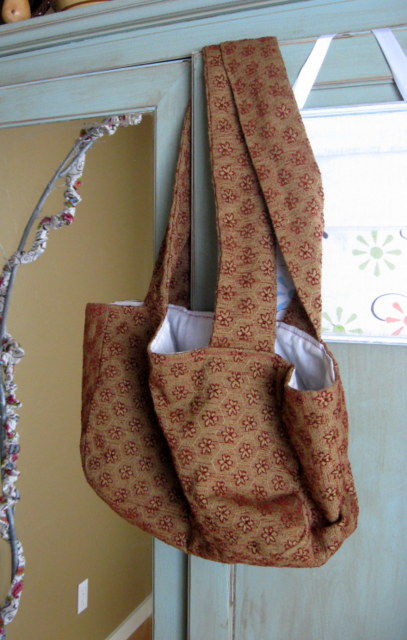
Starting 7/20: Right Guard Deodorant Just 50¢
Starting 7/20/14 at CVS, Right Guard deodorant will be 2/$6 and you’ll get $2 ECB when you buy two. Print a couple $1.50 off any ONE (1) Right Guard® Xtreme Clear® or Right Guard® Clinical Clear® Product coupons for some super cheap deodorant next week!
Buy (2) Right Guard Xtreme Clear @ 2/$6
- Use (2) $1.50 off any ONE (1) Right Guard® Xtreme Clear® or Right Guard® Clinical Clear® Product
- Pay $3 out of pocket
- Get $2 ECB
Final Price: 50¢ each!!
Lepow Moonstone Series 3000mAh Lithium Polymer Portable Charger – $9.99!
Great deal on a portable charger! Coupon code works only on green color.
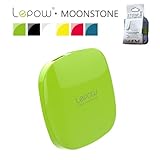 Lepow Moonstone Series 3000mAh Lithium Polymer Portable Charger
Price: $39.99
You Save: $21.00 (53%)
Sale: $18.99
Use coupon code 2JDA3K2Y to take $9.00 off.
Eligible for free shipping on $35+ orders or on ANY order with Amazon Prime.
Don’t have a Prime membership? Get a one month free trial! Click here for details!
High Output Dual USB Port Car Charger – $1.73!
Compatible with most USB enabled Devices, Dual USB port car charger, Input: 12-24V DC; Output: 5.0V DC 2.1Amp.
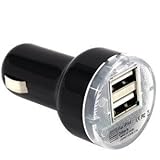 High Output Dual USB Port Car Charger
List Price: $12.99
You Save: $11.26 (87%)
Price: $1.73
Free shipping!
Don’t have a Prime membership? Get a one month free trial! Click here for details!
*HOT* New Printable Red Plum Coupons! (L’Oreal, Right Guard, Garnier, and more)

Here are some great new Red Plum coupons available to print right now:
SAVE $2.00 on ANY L’Oréal® Paris Cosmetic Face Product (excluding Magic Perfecting Base 0.17 FL OZ mini size)
SAVE $2.00 on any ONE (1) Garnier® Nutrisse® Haircolor
$1.00 OFF ON ANY SALLY HANSEN® NAIL COLOR (1.97 OR MORE)
SAVE $1.00 on any ONE (1) L’Oréal® OleoTherapy, EverPure, EverStrong, EverSleek, EverCrème, EverCurl Shampoo, Conditioner or Treatment Products
SAVE $2.00 on any ONE (1) Garnier® Moisturizer
SAVE $1.50 off any ONE (1) Right Guard® Xtreme Clear® or Right Guard® Clinical Clear® Product
SAVE $2.00 off any TWO (2) Tone® or Right Guard® Body Wash or 6-bar product
$0.50 OFF on any ONE (1) LUIGI’S® product Valid only on 24 Fl. Oz or larger.
SAVE $1.00 on ANY L’Oréal® Paris eye product
SAVE $0.50 on any ONE (1) Angel Soft® Facial Tissue item
SAVE $1.00 off any TWO (2) packages of Hefty® Slider Bags (12 count or larger)
SAVE $4.00 off ANY Centrum® Silver® Multivitamin (excludes trial/travel sizes)
SAVE $4.00 off ANY Centrum® Multivitamin (excludes trial/travel sizes)
25 Kids’ Kindle Books for $1 Each!

25 Kids’ Books for $1 Each
For a limited time, select Kindle kids’ books are available for $1 each. Offer valid through July 31, 2014.
New Coupons for Starbucks, Luigi’s Italian Ice, Carvel, and More!

Here are a few new coupons for you to print today!
$1.50 off ONE (1) Starbucks VIA Instant Beverage
$2.00 off Carvel ice cream cake 25 oz. or larger
$5.00 off Scotch Expressions Tape $10.00 or more
$2.00 off 2 ARM & HAMMER™ Laundry Detergents
$0.75 off TWO COBBLESTONE Breads, Buns or Rolls
2600mAh Portable Blue External Power Bank Battery Charger – $4.81!
Compatible with all mobile phones charged by USB port. Reliable Lithium-ion battery ensures high quality. Long lifespan, recharging for over 1000 times.
 2600mAh Portable Blue External Power Bank Battery Charger
List Price: $35.99
You Save: $31.18 (87%)
Price: $4.81
Free shipping!
Don’t have a Prime membership? Get a one month free trial! Click here for details!
Check out the deals in today’s The Screaming Penny email newsletter!
Check out the deals in today’s The Screaming Penny email newsletter!
Bissell 3-in-1 Vacuum $15.84
 Bissell 3-in-1 Vacuum
$15.84
Was $19.88
Free shipping when you spend $50 or more or free in store pick up!
Leaf Pendant Necklace And Earring Set $11.04 + Free Shipping!

Leaf Pendant Necklace And Earring Set With Free Shipping!
$12.99
*$11.04 after code
Extra 15% off Use code: PINCH15 exp 7/31

