
A PYP Best Blog! An Ombre Lamp Makeover! Ombre with Spray Paint!
Just in case you missed this article on using spray paint to create an ombre effect on an old lamp the first time we shared it a couple of years ago, we are republishing it. After Sharon wrote this blog originally, we got an awesome response. This is one of the PYP Best Blogs!
This makeover tutorial is a perfect study in why it is important to be flexible when you DIY. This didn’t go AT ALL like I had planned it, but I kept going and I love the final result!
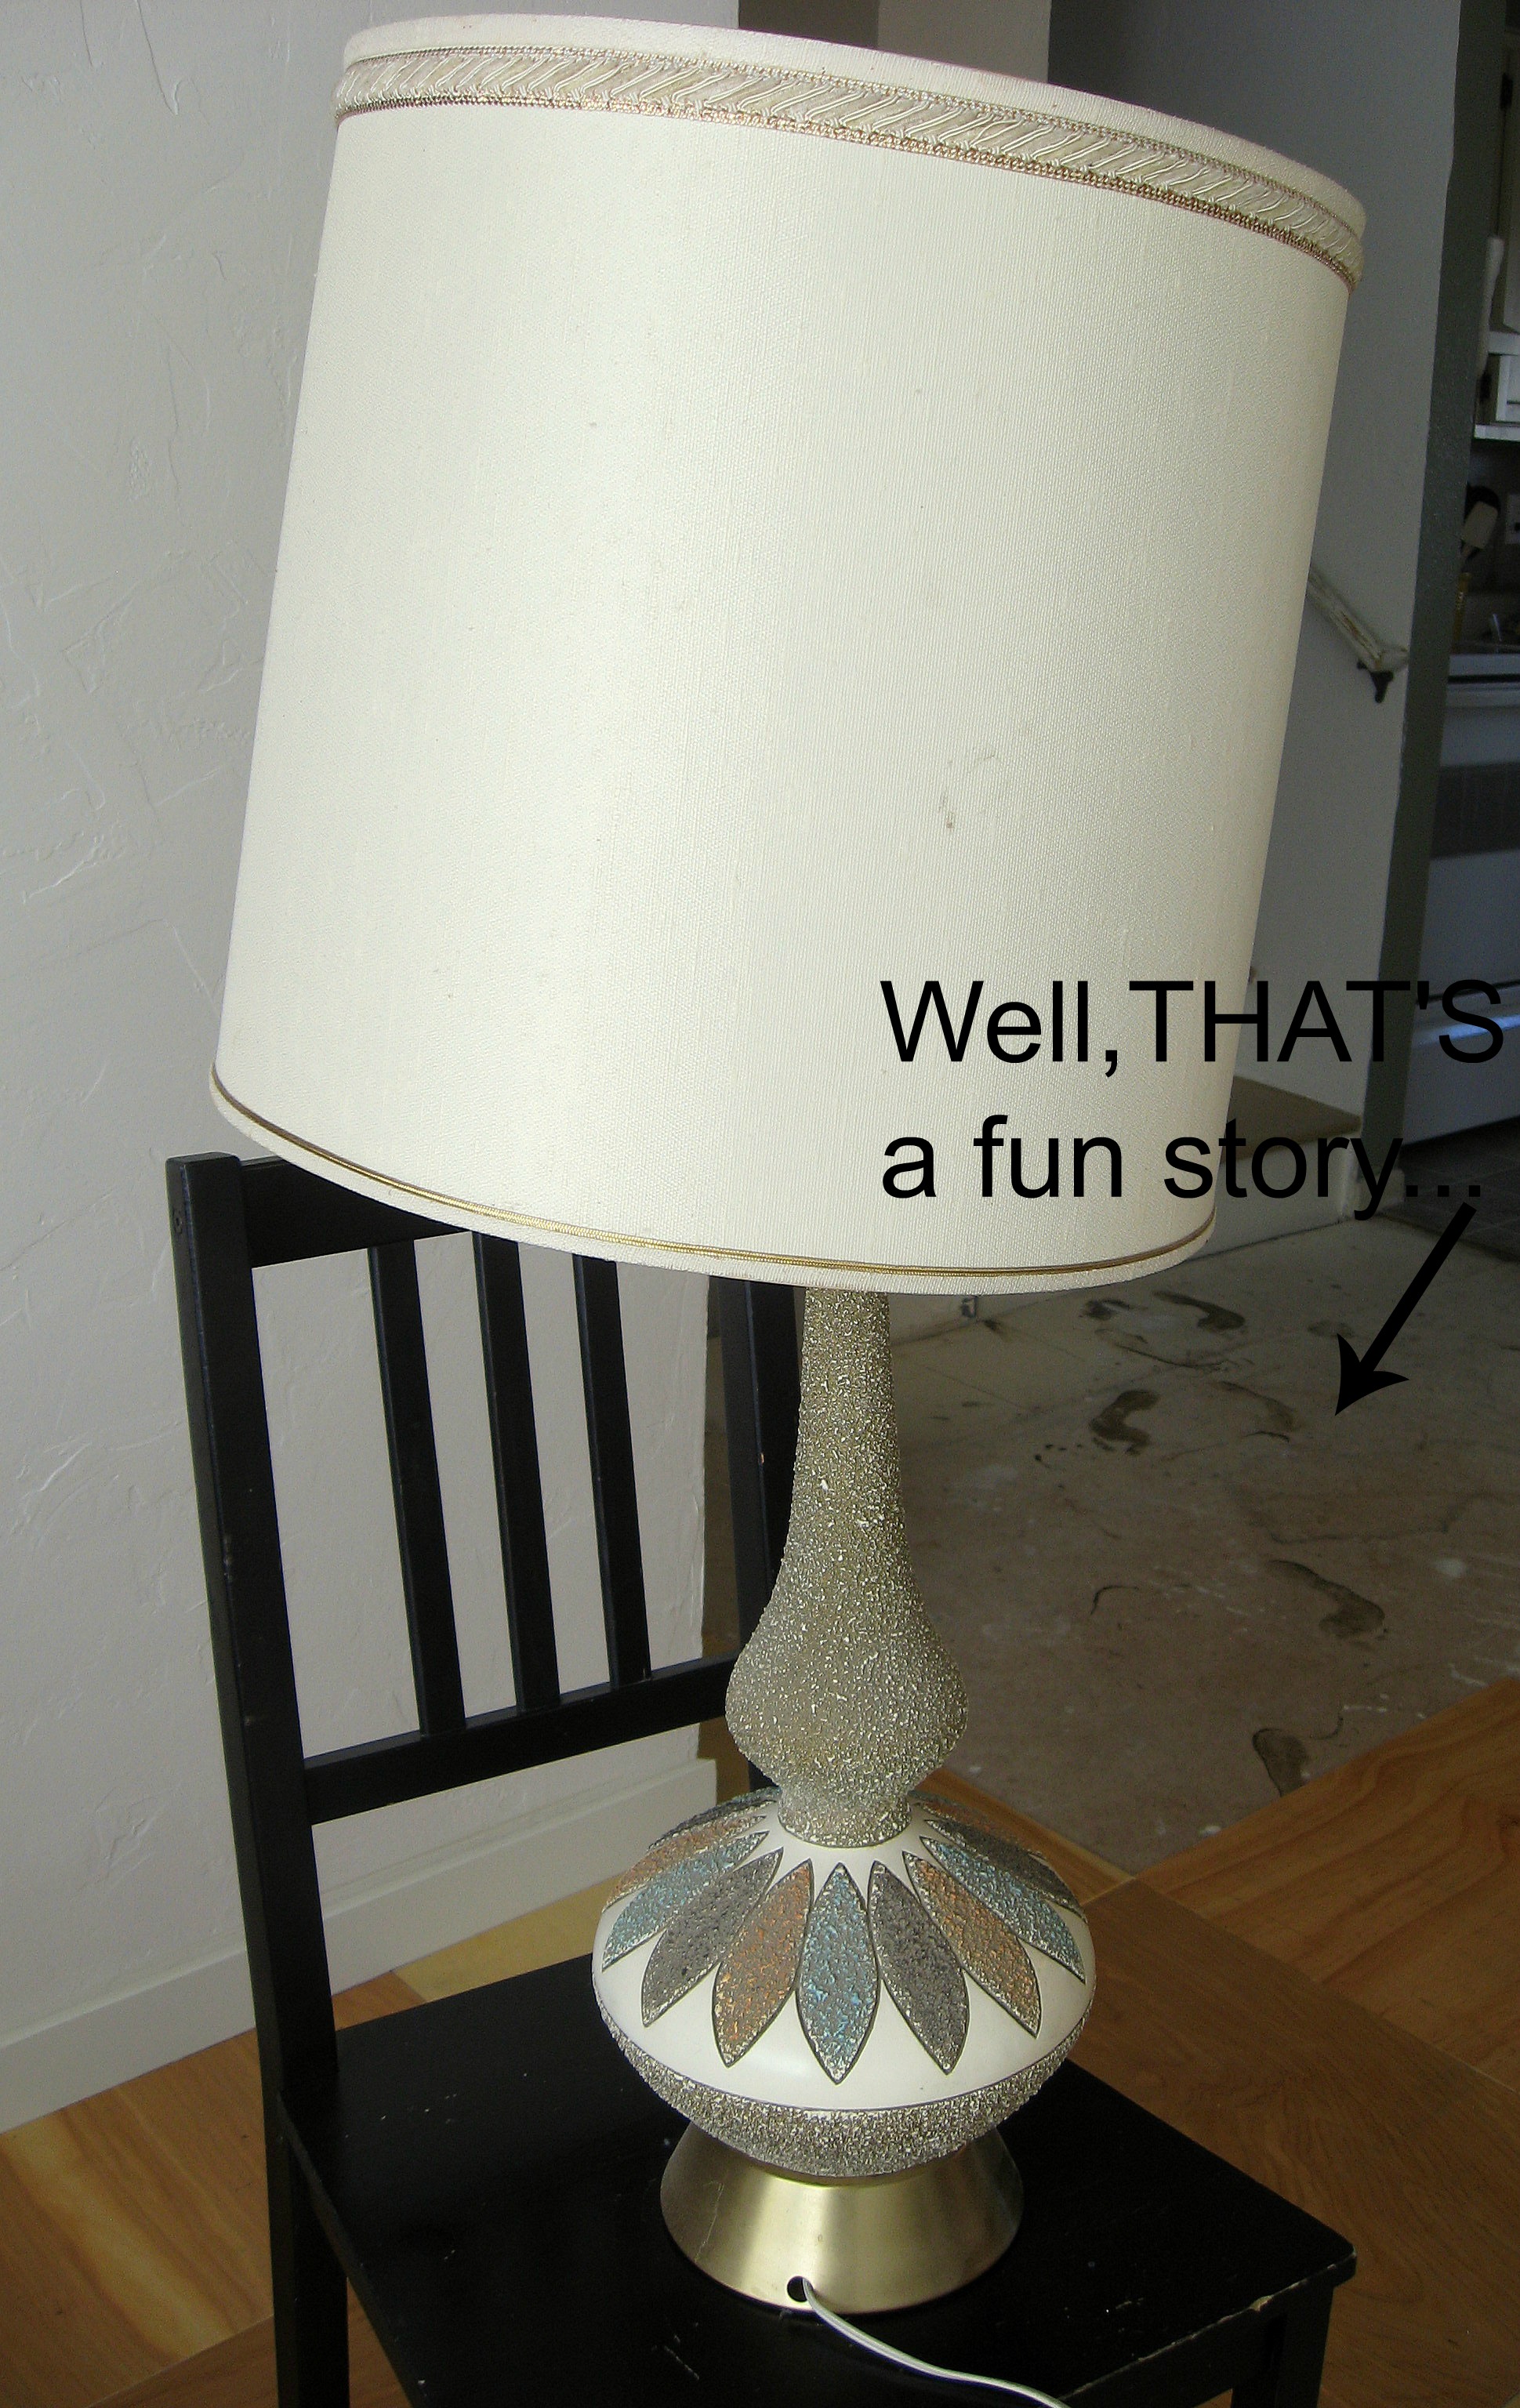
I came across this lamp as I was driving down the street one day past a house that had belonged to an elderly lady that had passed away. The family was cleaning out her garage, and there was a big pile of junk on the front lawn with a “FREE” sign. I asked them if the lamp worked, they said yes, and into my back seat it went.
Here’s a close up shot of the funky texture.
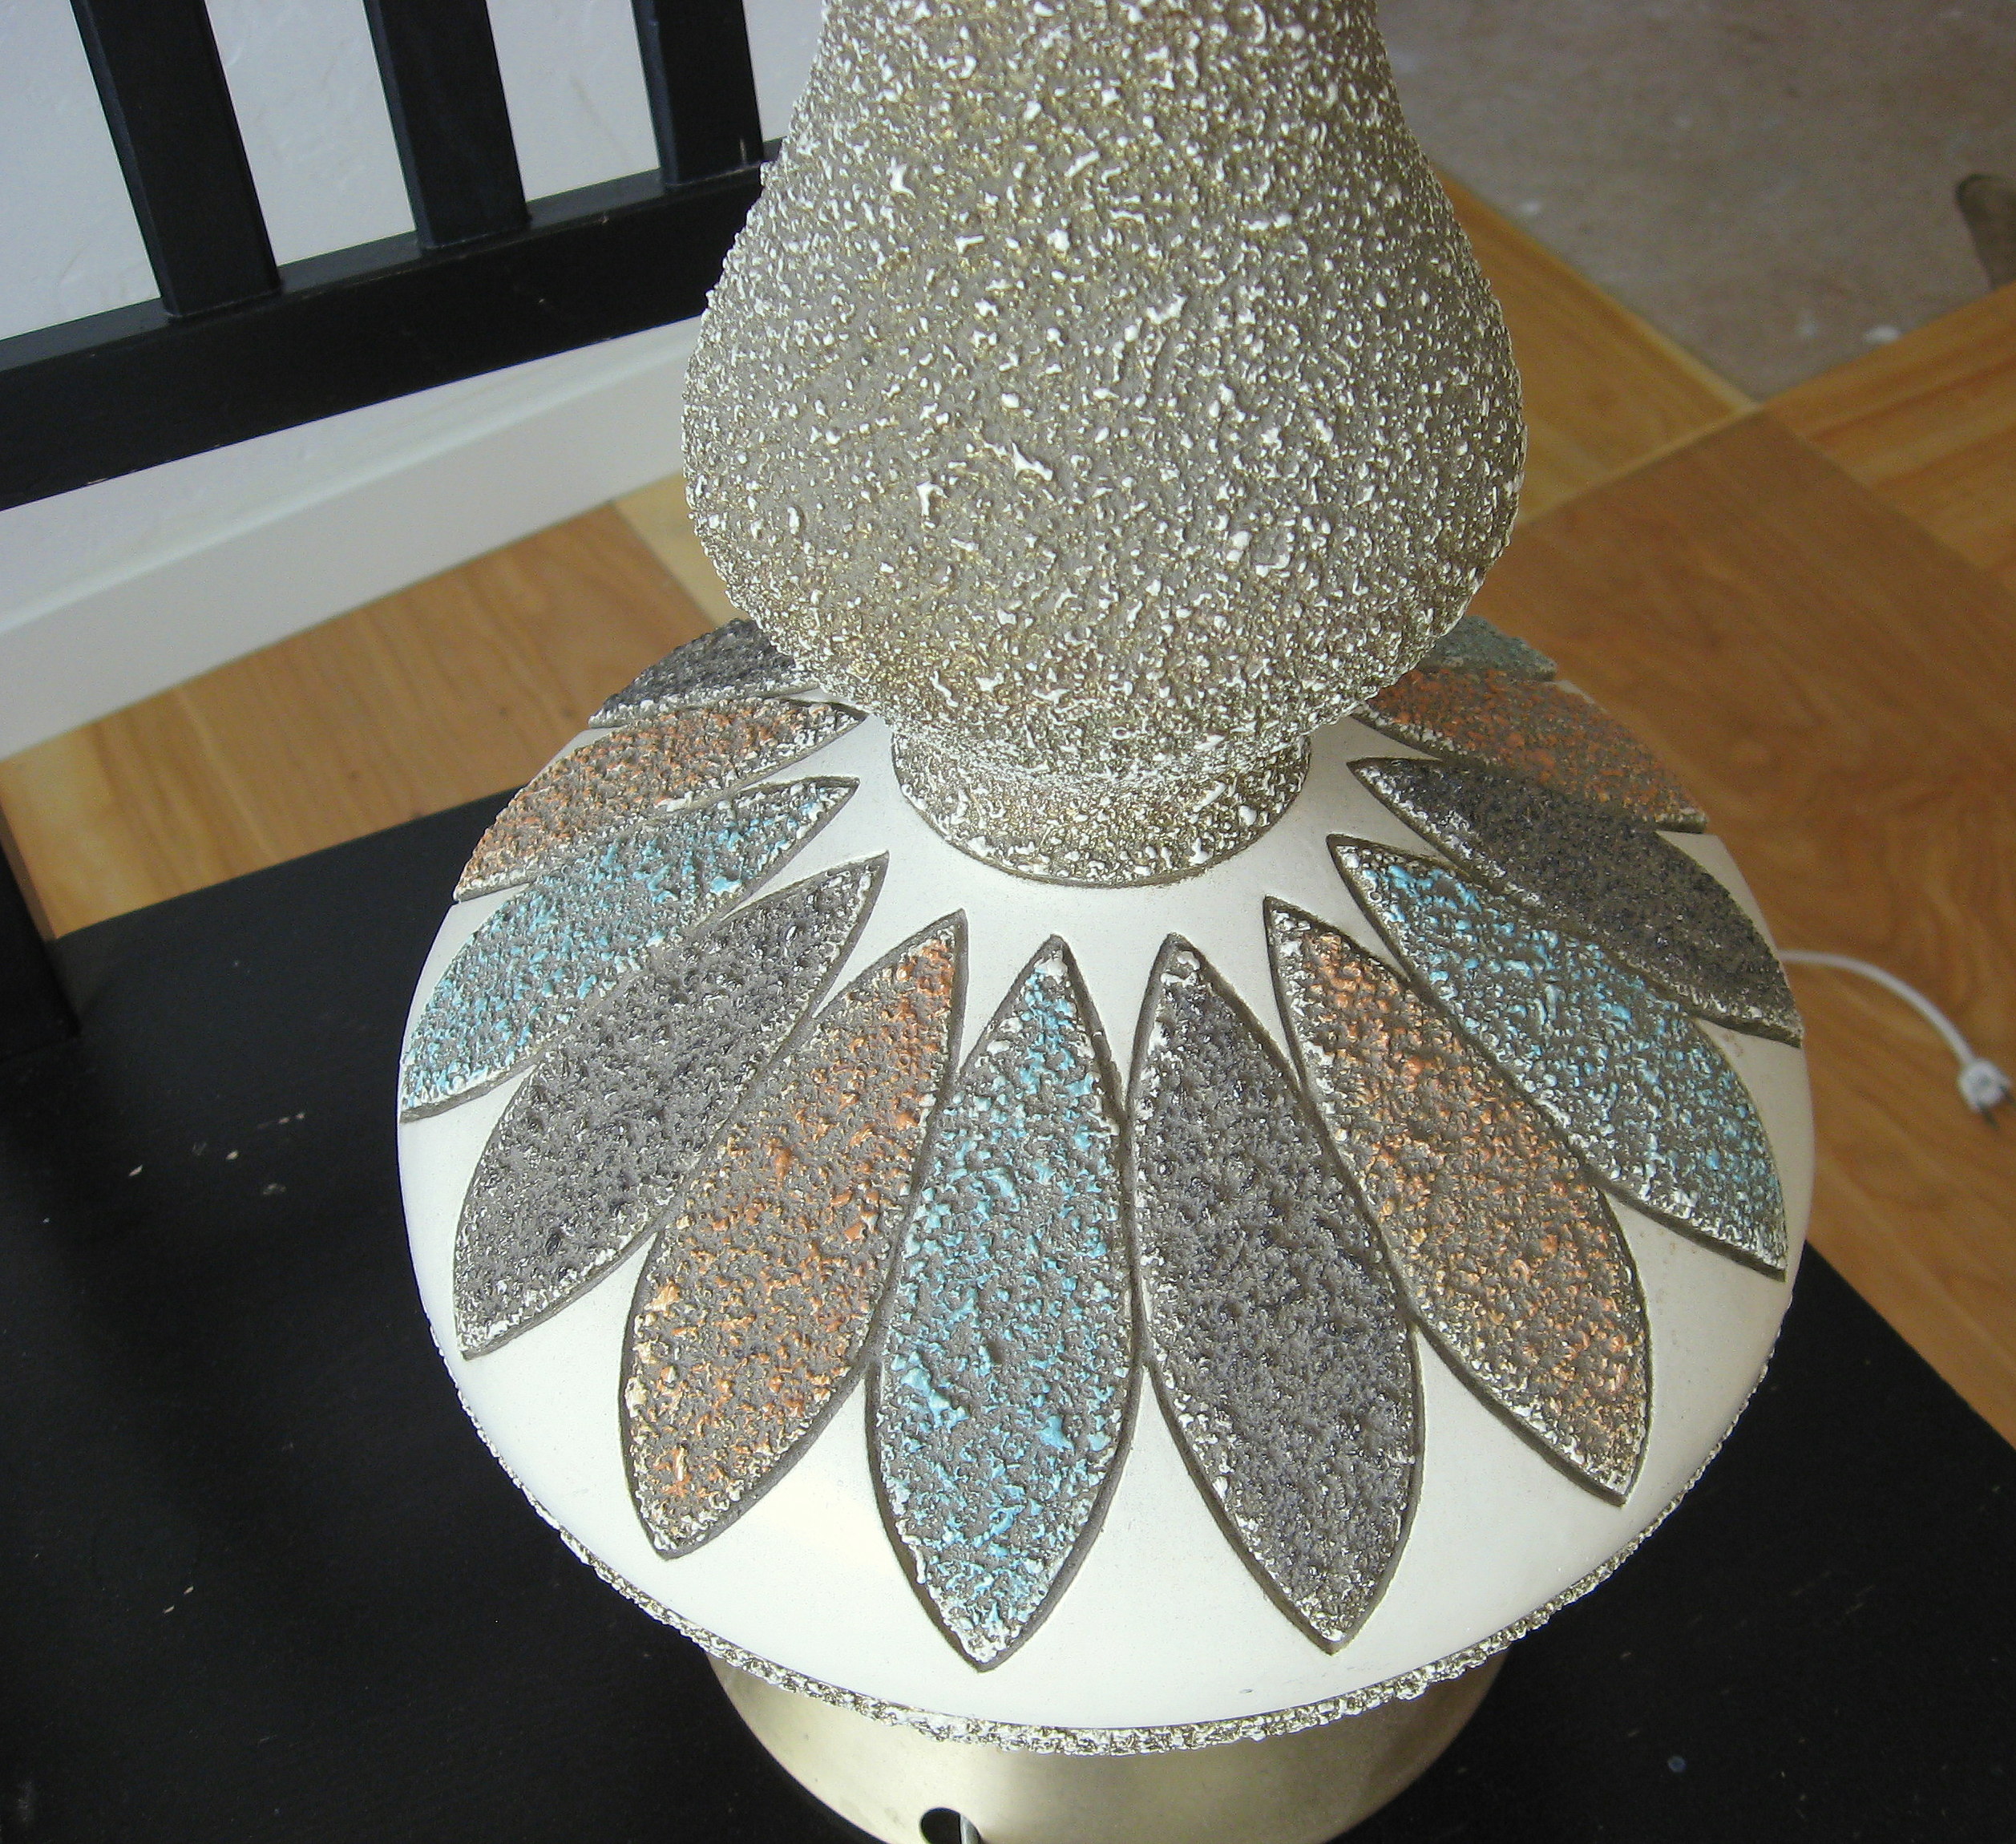
Check out that horrible 70’s awesomeness! The shade was pretty gross too, but structurally it was in perfect condition.
My first thought with this lamp was that I could just spray paint ombre over the texture, so I tried it! The best thing about items you get for free is that you can attack them with a “what have you got to lose” attitude. If it doesn’t work? You’re only out the price of the spray paint, right?
I pictured a faded ombre effect, starting with blue on the bottom and fading to a green on the top, so I grabbed the spray paint and went to work, taping off the cord and the light fixture at the top first.
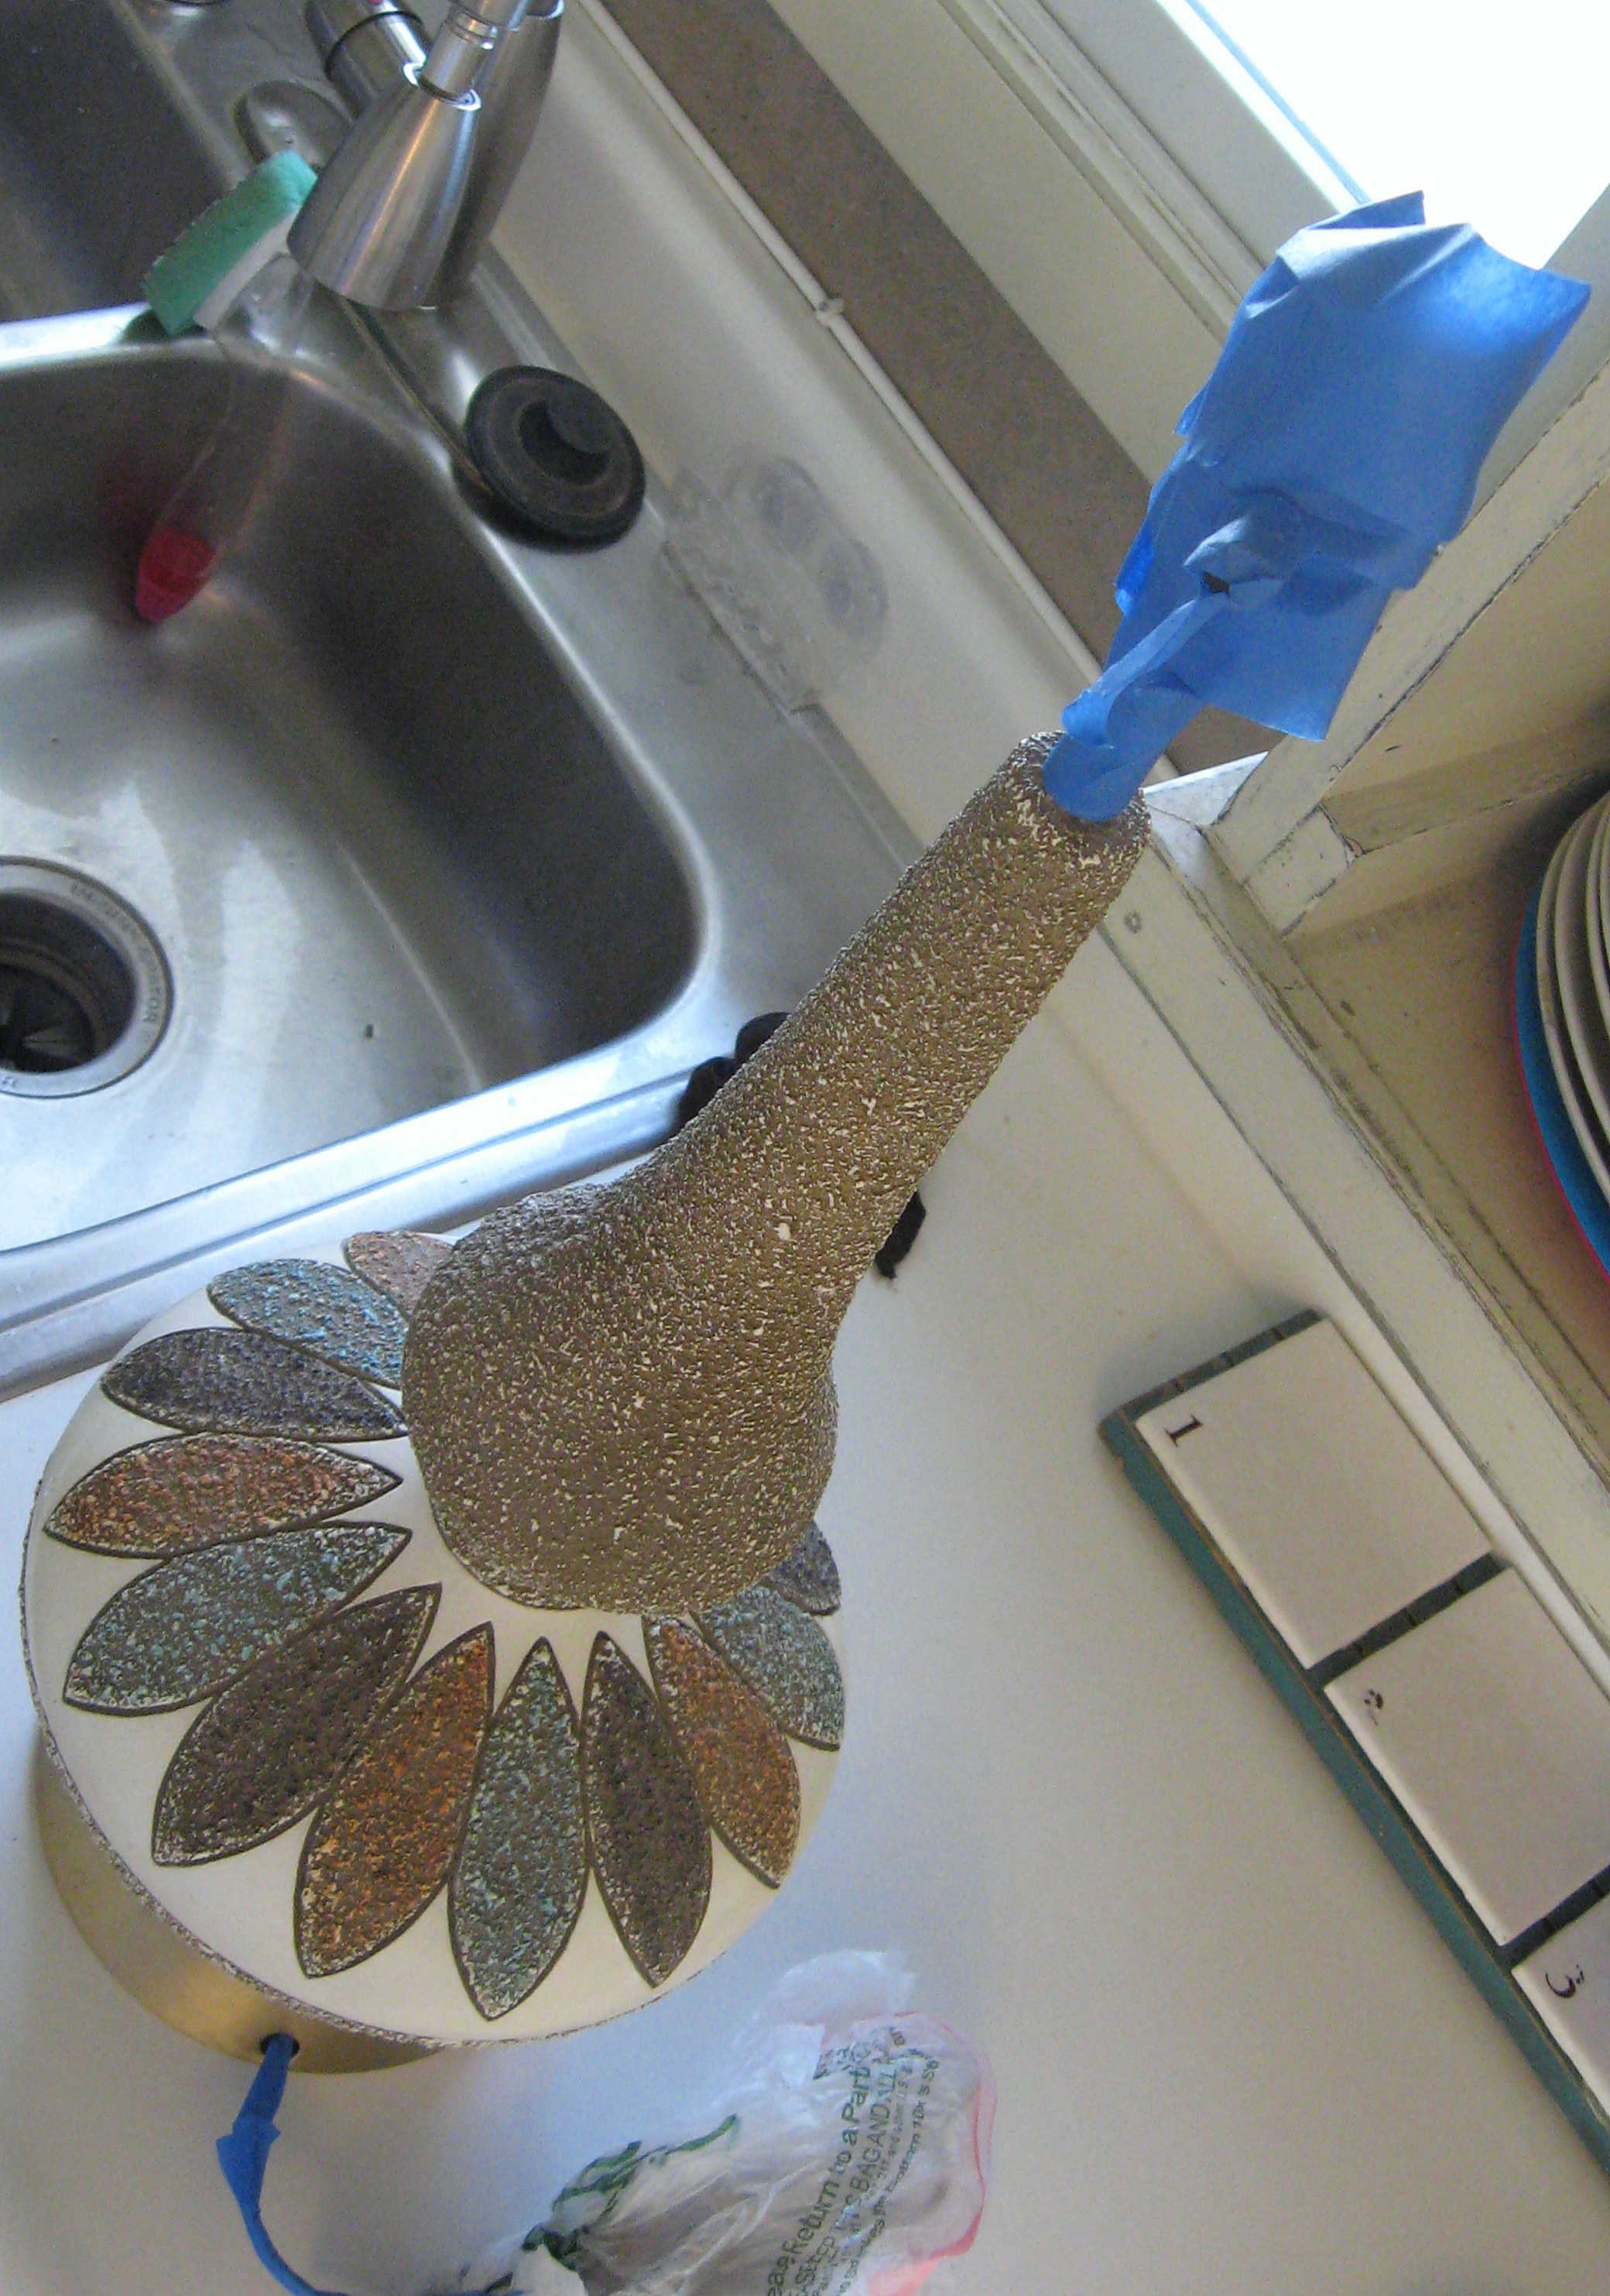
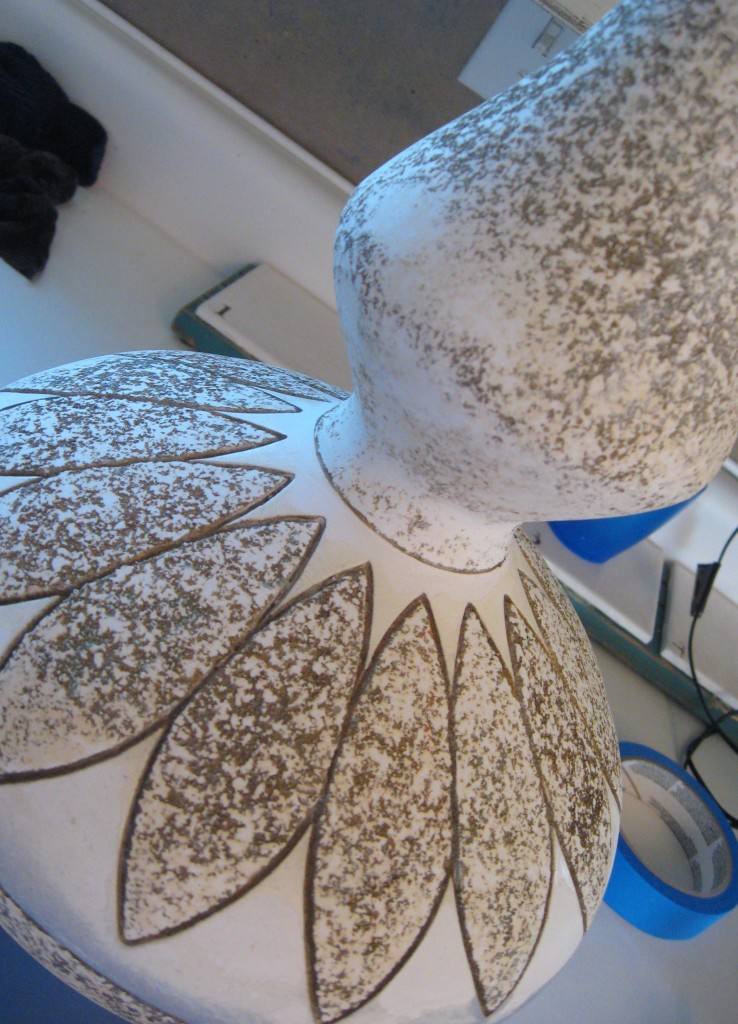
And I hated it. Really hated it. The texture was so thick that the spray paint was having a hard time covering it, and the finished effect just looked trashy. I wasn’t ready to give up yet – the lamp is the perfect size and shape for my living room – so I let the spray paint dry, then used my small detail sander on the textured parts to sand them smooth. It was MESSY and dusty and smelly, but relatively easy to do. Once the majority of the texture was flattened, I cleaned the surface well and tried again.
Getting an ombre effect with spray paint is pretty easy to do. I started at the bottom of the lamp with the blue and gave it several coats, each time going over what I’d already done, but going up just a little higher. I did the same thing with the green starting from the top. Once the top and bottom are solidly their respective colors, then spray each color in the middle – holding the can back a bit so that you get a misty-type spray that overlaps.
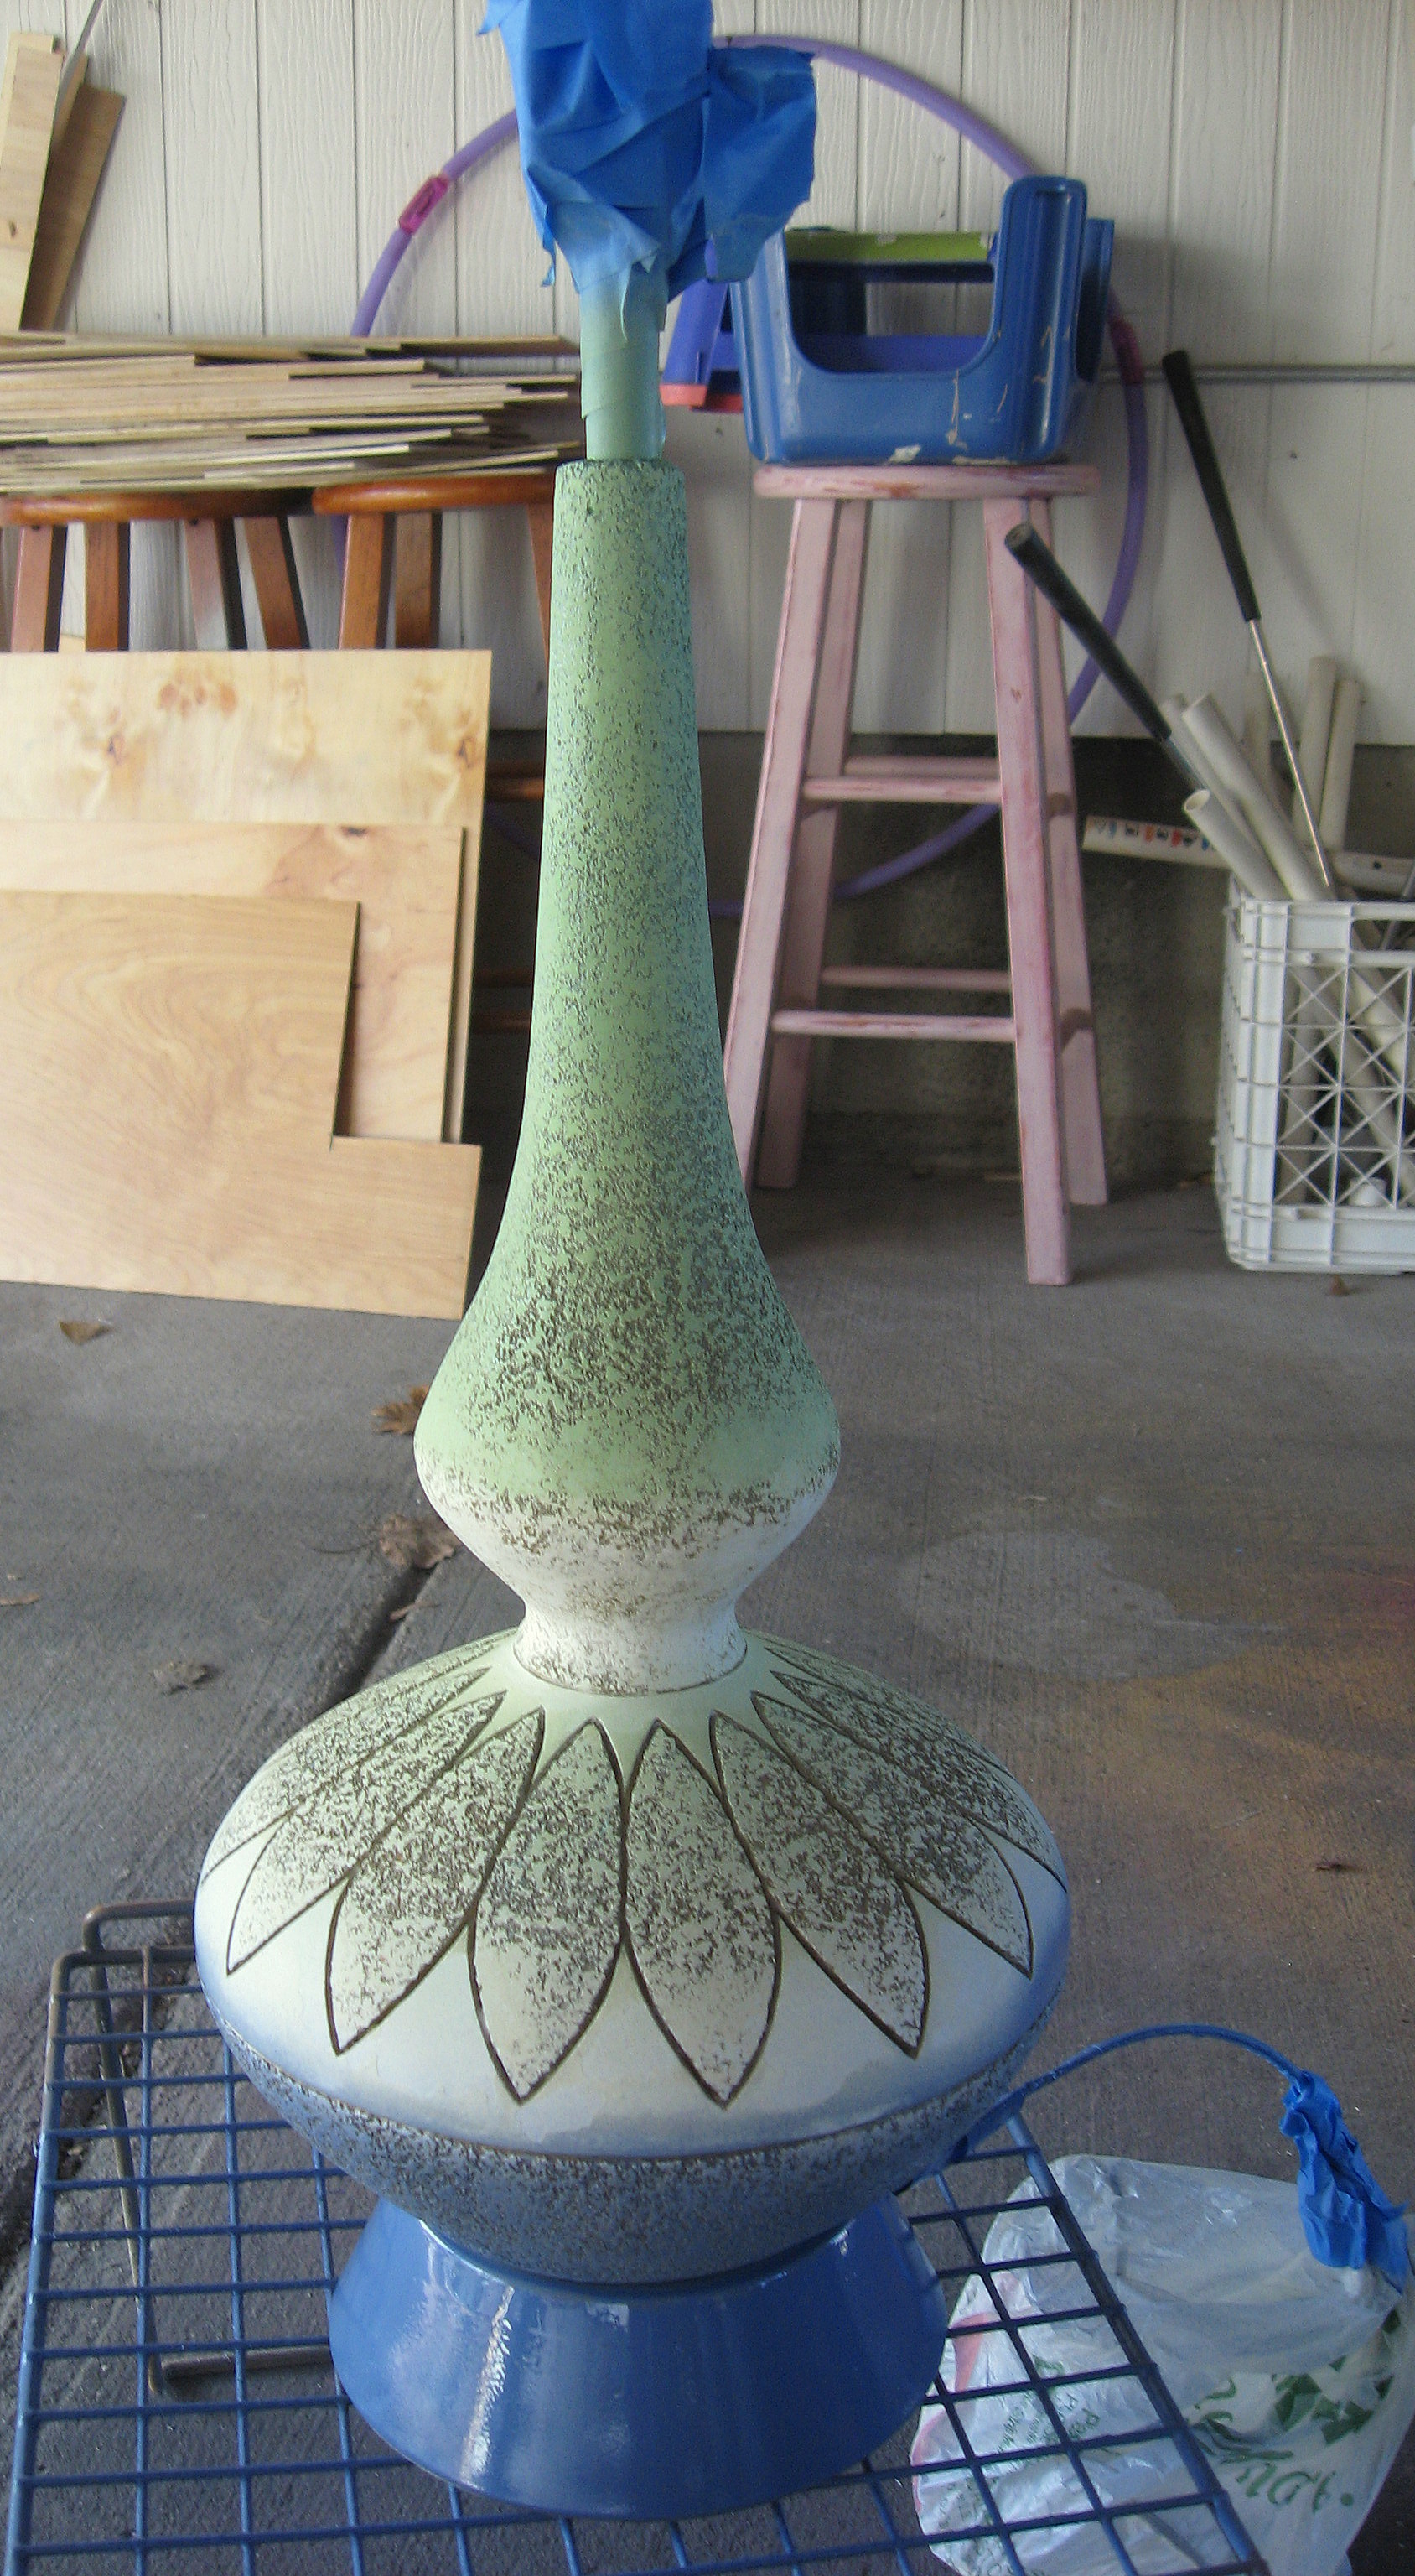
Problem #2 – I hated it again!! Before I had even finished , I knew that the blue/green ombre fade that looked so great in my head just did not look so great on the lamp. Still, I decided to have one more go at it before I gave up.
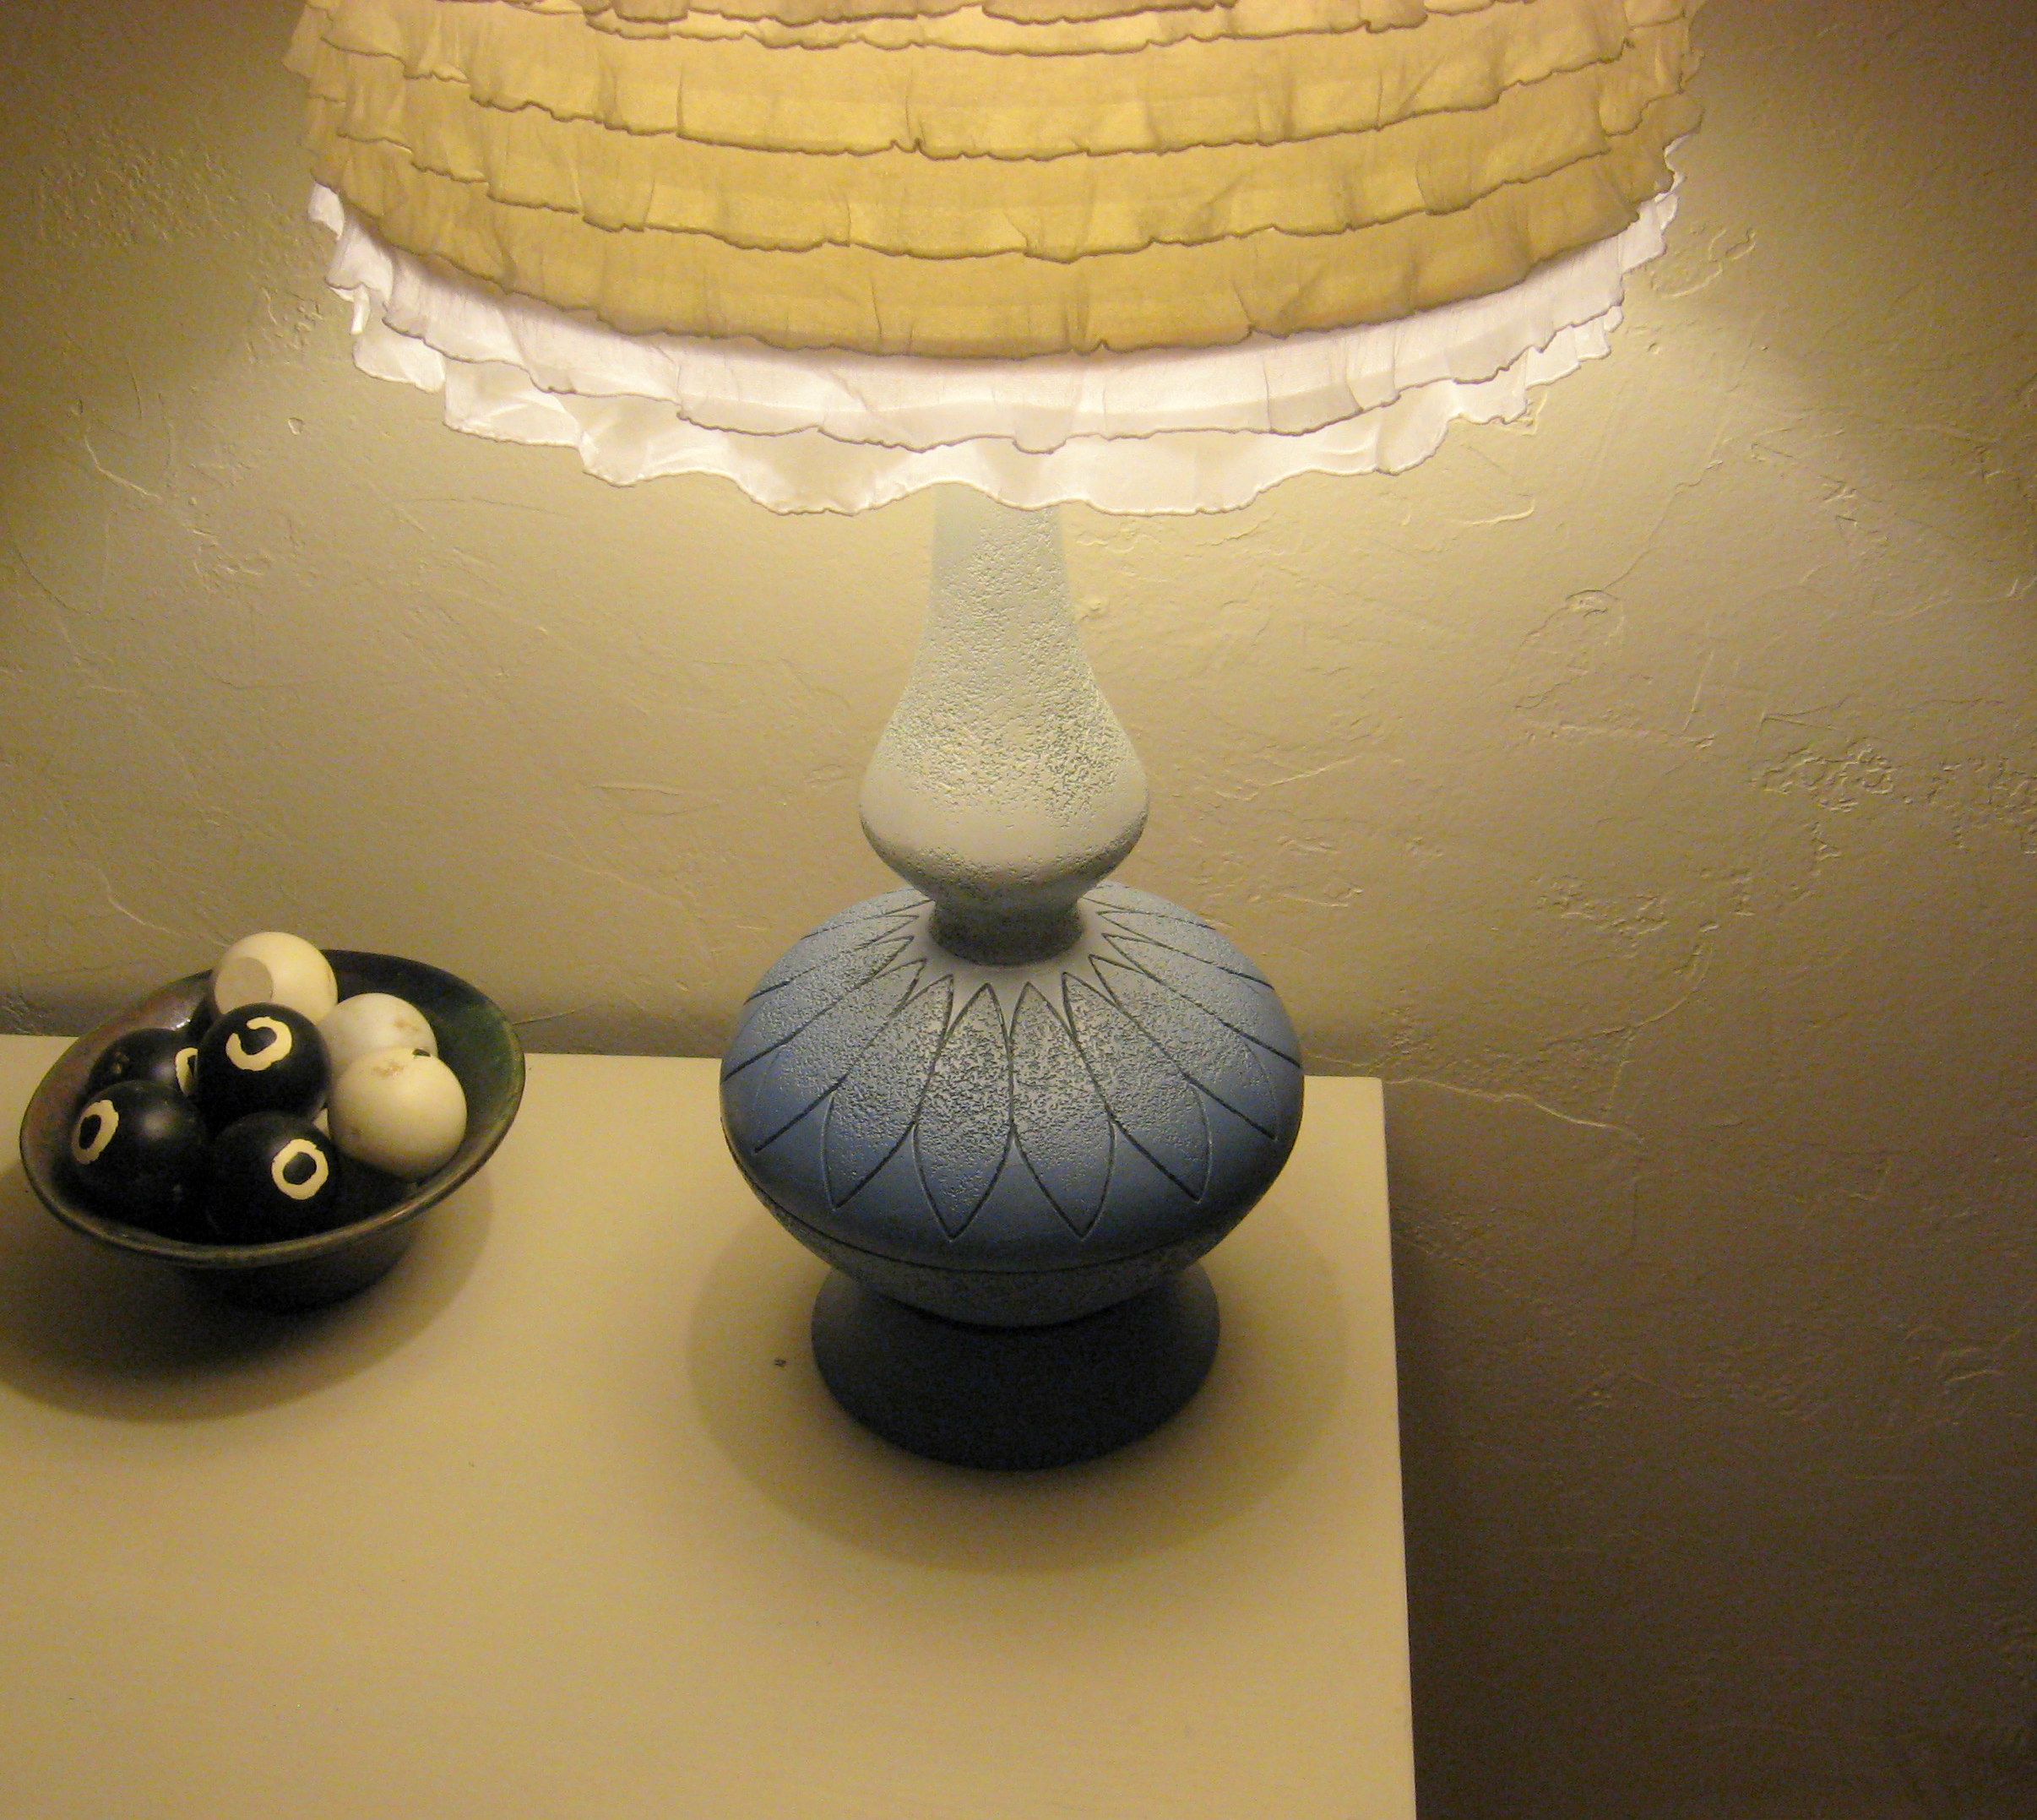
I grabbed a can of white spray paint and covered all the green, so now I had blue on the bottom, fading into white on the top. Perfect ombre! That was just what it needed.
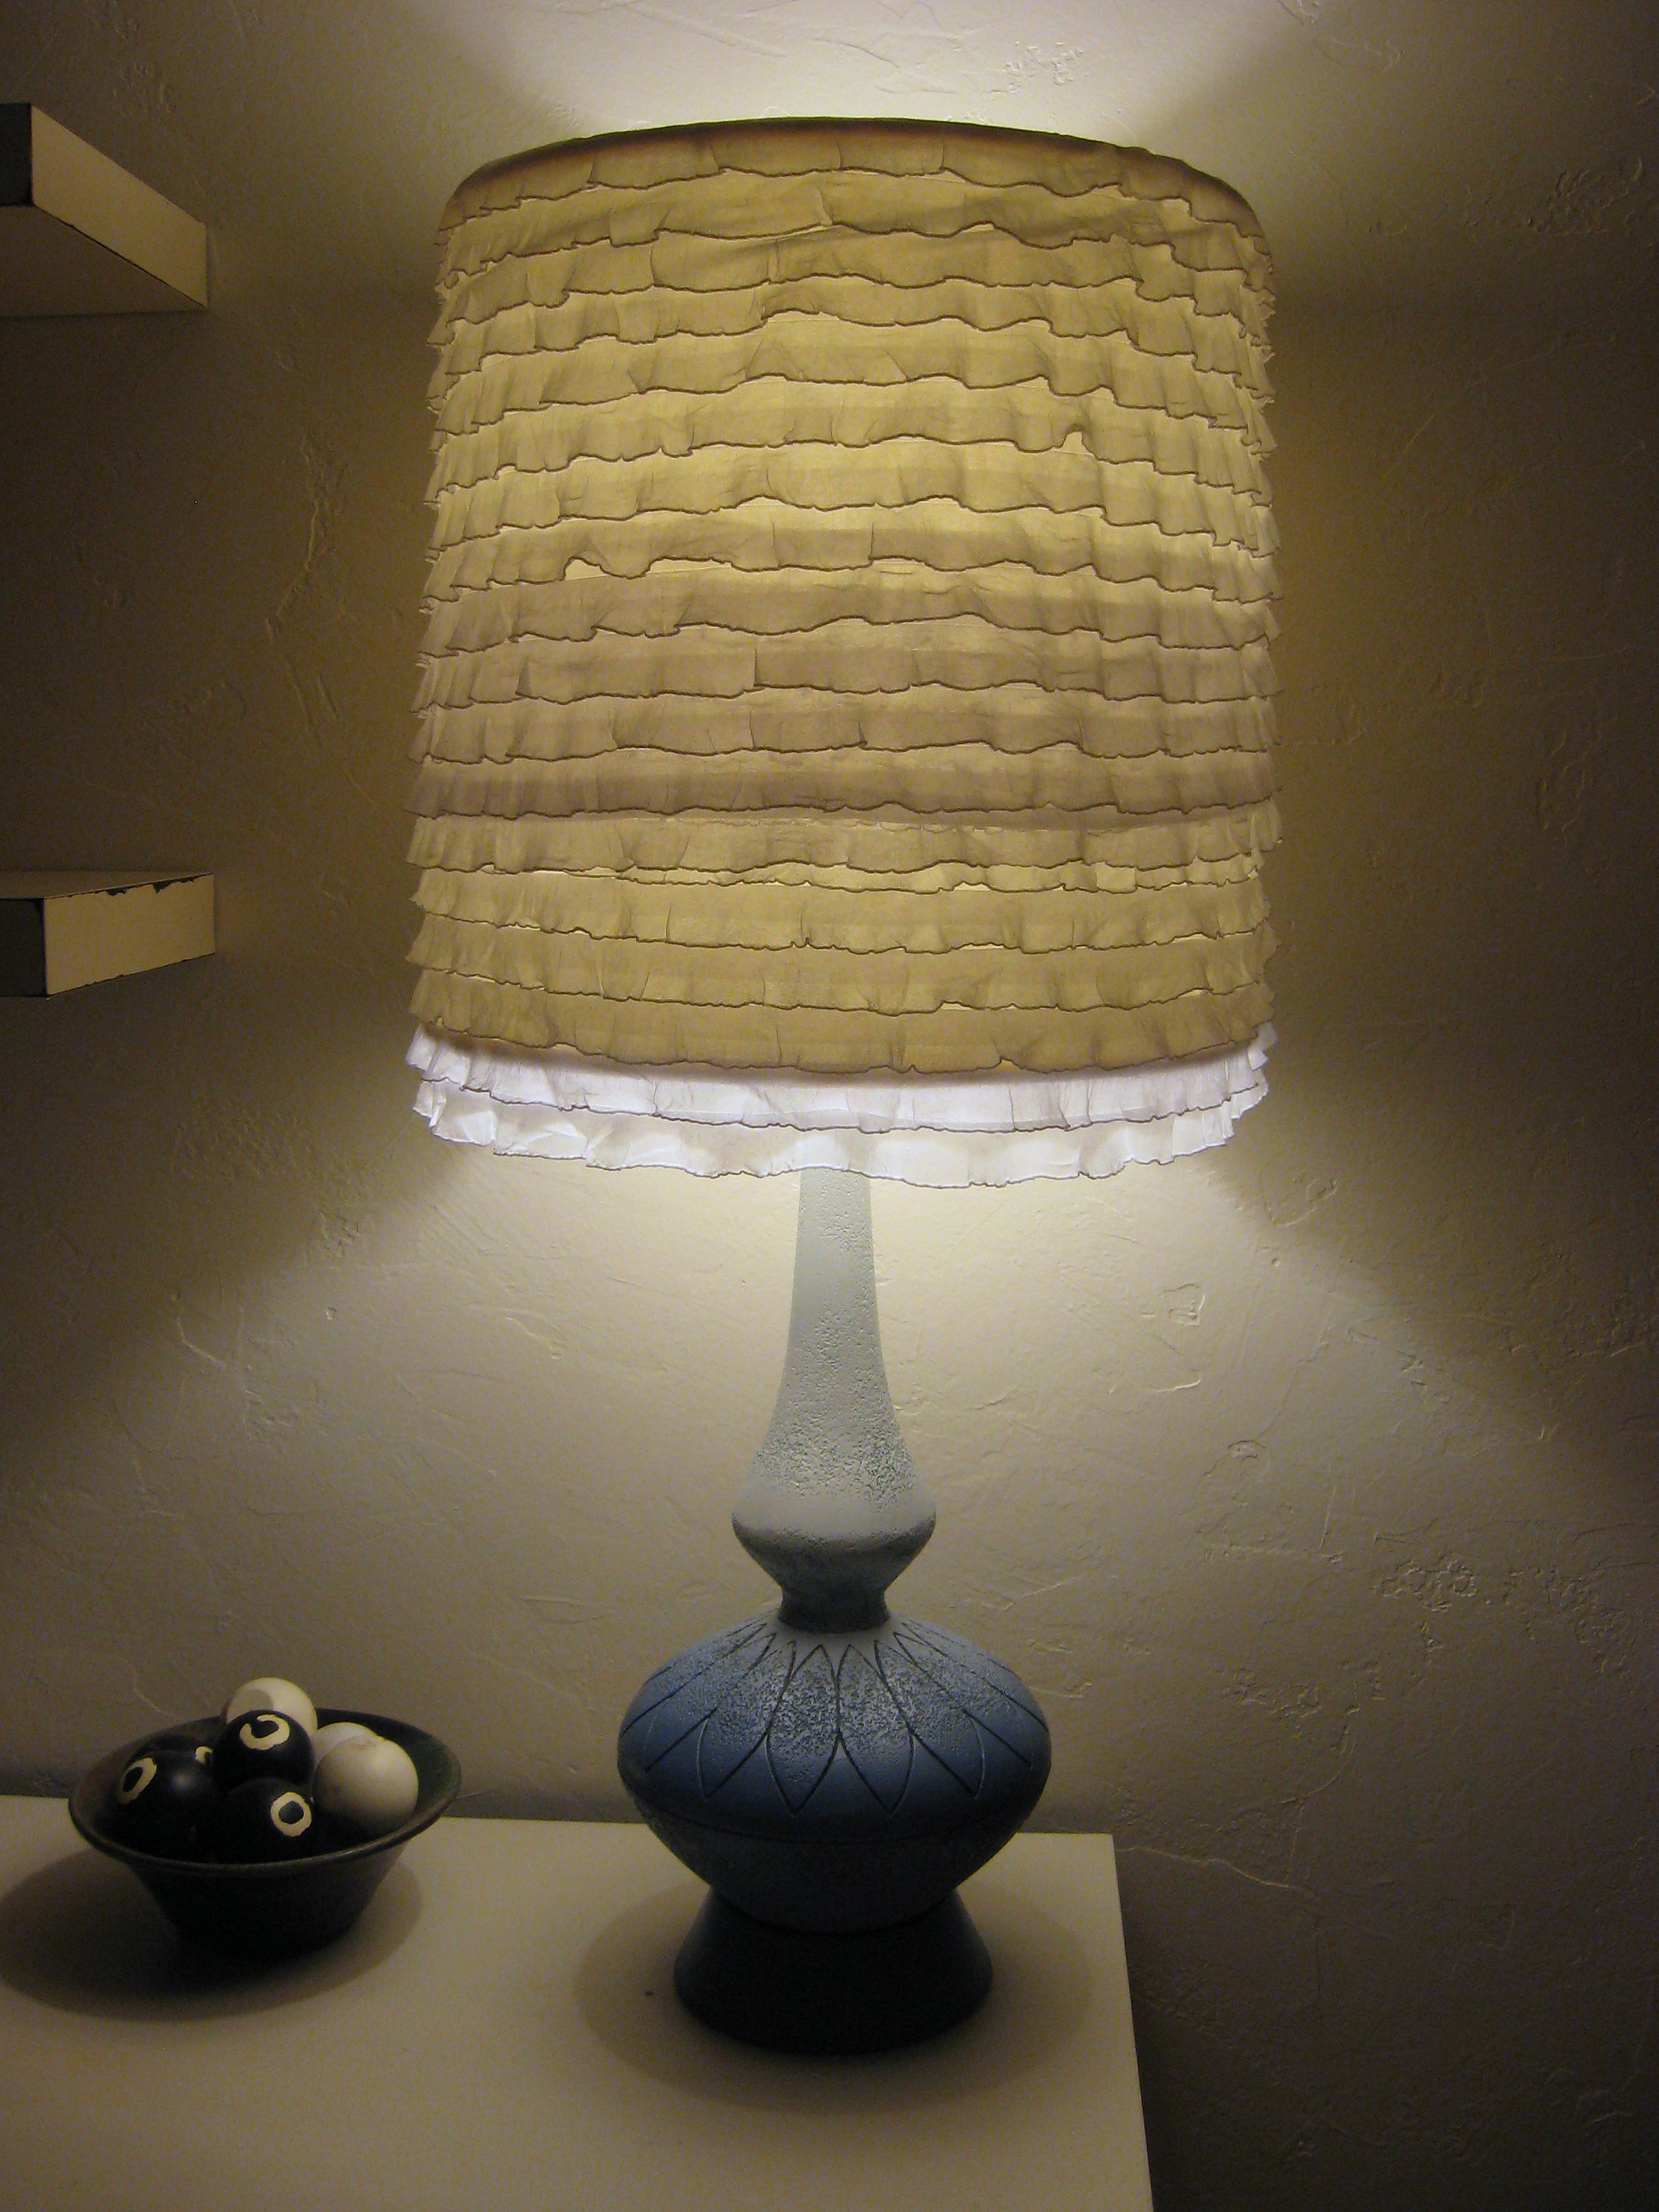
As for the shade, I ripped off all the old fabric and trim (gag! Really should have been wearing a mask…) and cleaned the shade form underneath. Then I just purchased a half yard of white ruffled fabric and hot glued it on. SO easy and fast (and only $5 with my Hobby Lobby coupon!)
A PYP Best Blog: Making Custom Purses and Bags! One of my personal favorites!
Just in case you missed this article on making custom purses and bags the first time we shared it a couple of years ago, we are republishing it. After Sharon wrote this blog originally, we got an awesome response. This is one of the PYP Best Blogs!
I love purses. And bags. And totes. And purses. And bags. I may have a problem.
I am kind of picky about them though…if they don’t meet certain requirements, they find themselves on a one way trip to the local donation center sooner rather than later. For me, those criteria are that they:
- have to be roomy enough to throw in all the stuff required by a busy mom on the go (lotion, gloves, notebook, random medicine, books for waiting rooms, stuffties, snacks, kleenex…),
- have to have pockets to keep my keys and cell phone from joining the bottomless pit of aforementioned stuff,
- have a long enough shoulder strap to wear across my body,
- have to be washable,
- have to be affordable, and
- have to be cute.
That doesn’t seem like an unreasonable list to me, but I have found that it is difficult to find a purse that fits all of those criteria. Several years ago, I bought a pattern at the fabric store and decided to try my hand at making one on my own. Once I made that first one and saw how easy it was, I’ve been making my own bags ever since. I decide what I want and draw the basic pattern out on craft paper. I absolutely LOVE that they are endlessly customizable. My purses can all have pockets to fit exactly the things I need them to fit. Library bags don’t need pockets, but they do need to be sturdy, so I use a heavy fabric. A purse can get away with a less sturdy fabric, as long as it’s washable. I experiment with size, shape, inside and outside pockets, appliqued designs, flaps, closures, long straps, shorter straps – no two bags look the same and they all follow the same basic instructions and only a very beginning sewing ability. I now have a stack of patterns with different- and interchangeable – sizes and shapes of bodies and straps.
I will walk you through how I made my latest bag and then show you some examples of others to get your creative juices flowing. Once you understand the idea, you should be able to make a bag in a couple of hours. I didn’t use a pattern for this one, because I started with a skirt, but you will get the idea, and if you have any questions, ask!
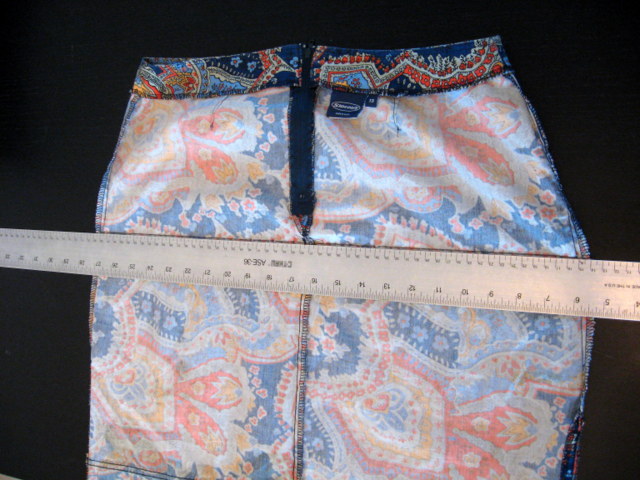
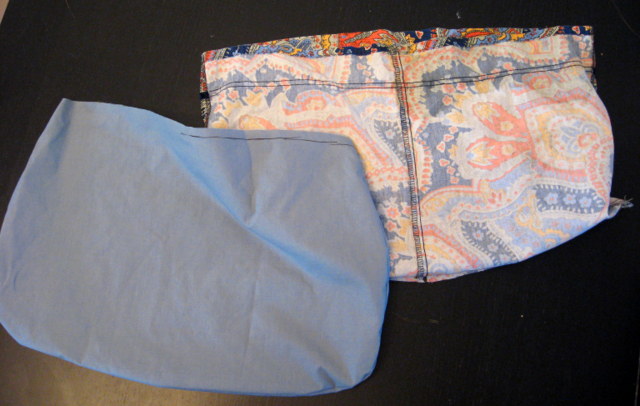
I started with this skirt that I picked up at a thrift store:
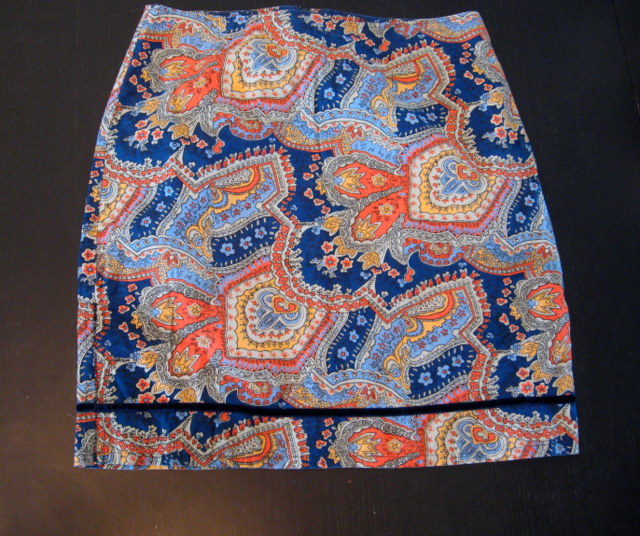
Much too small for me – and too short even if it did fit – but I just fell in love with the fabric. I toyed with the idea of making it into a pillow, but then decided it would be better as a purse.
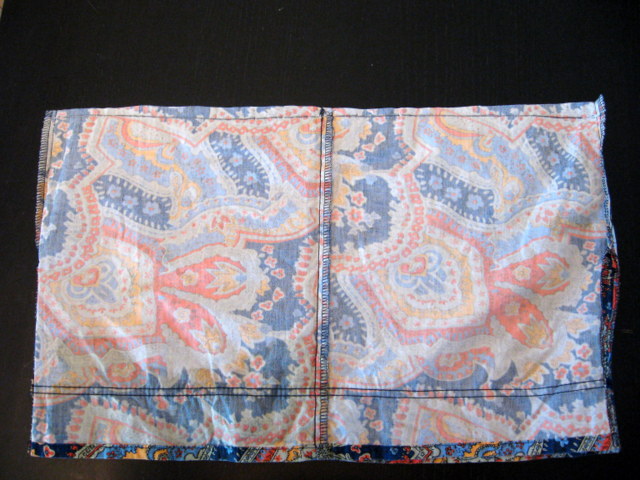
I turned it inside out and lined up a straight edge along the width of it, just under the zipper. Draw a line and cut – making sure that you keep the bottom hem even and straight. I discarded the top part, but you could use that fabric to make pockets.
Sew straight across the newly cut edge, forming the bottom seam of your bag. I like to sew this seam twice, just to make sure it is strong.
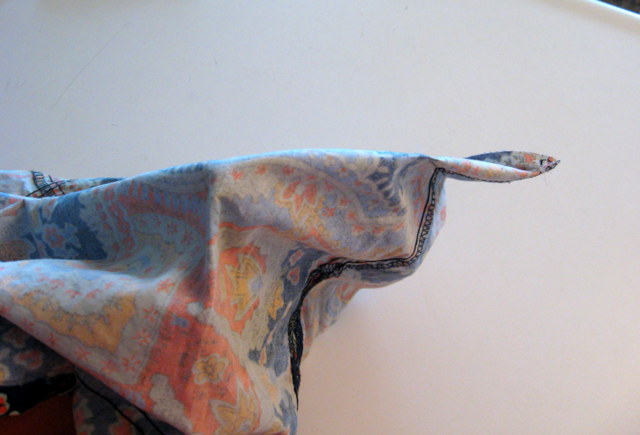
You can leave it like this if you want, but I like to sew across the corners to give the bag a little shape. Take one bottom corner and pinch it together then lay it out flat, being sure to line up the bottom seam and the side seam. Measure in from the point (I did 2 inches, but experiment with making it smaller or larger to change the look of the bag) and draw a line across it. Pin it in place, then sew along the line. Do this on both corners.

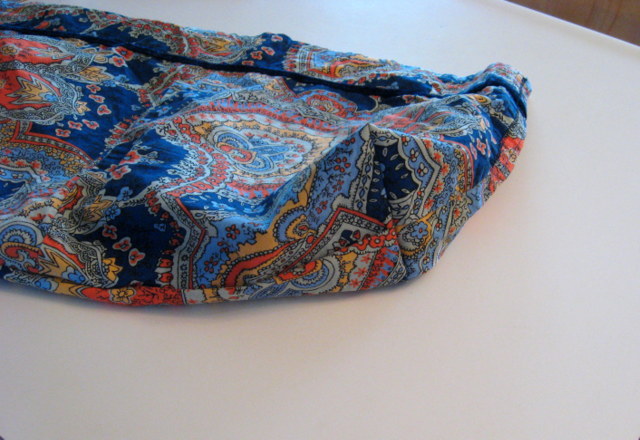
That leaves you with these little floppy ‘ears’
that make a nice, neat bottom when turned right side out.
Again, you could stop here if you like the shape, but I thought it was too wide at the top, so I measured down the top inside seams a few inches on both sides and sewed a triangle to taper the top sides in a little, like this:
There; I like that shape better.
Now, if you don’t want your bag to be lined, you can stop there and add straps. I will leave the inside unfinished occasionally on tote bags or shopping bags, but generally, I prefer my bags to be lined and it really is quite simple!
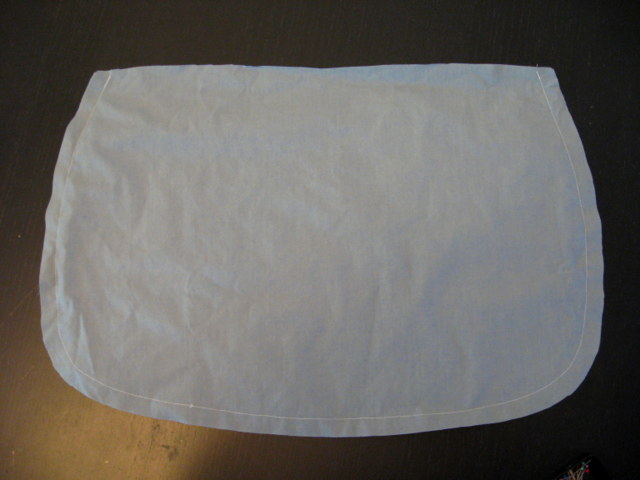
I folded my bag in half and layed it out on the fold of my lining fabric, then I drew around the shape of the bag and cut out two.
**If you are making your bag from scratch from flat fabric, then just cut out all four of these shapes at the beginning – 2 outside pieces and 2 inside pieces, all the same size.
Sew the two lining pieces together, all the way around, but leaving the top open. Make sure you have right sides together!
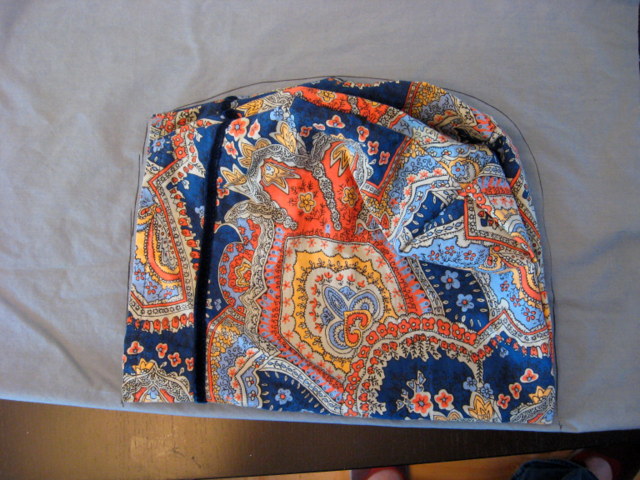
Now you have two fabric pouches that we will stitch together once we make the straps and pockets…
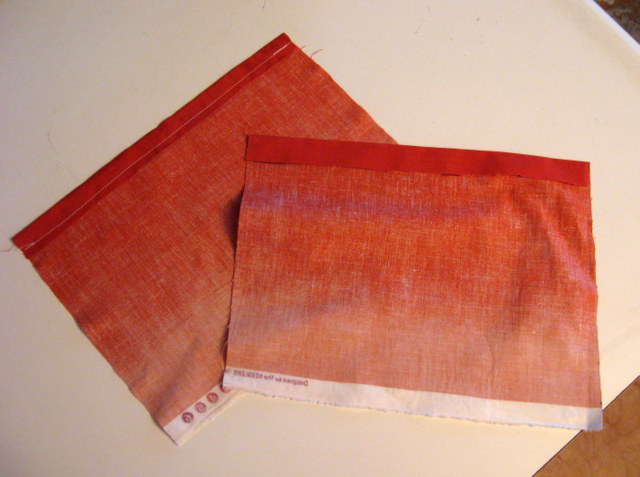
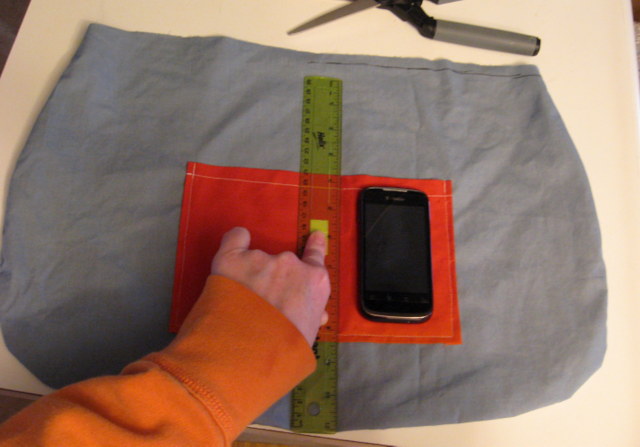
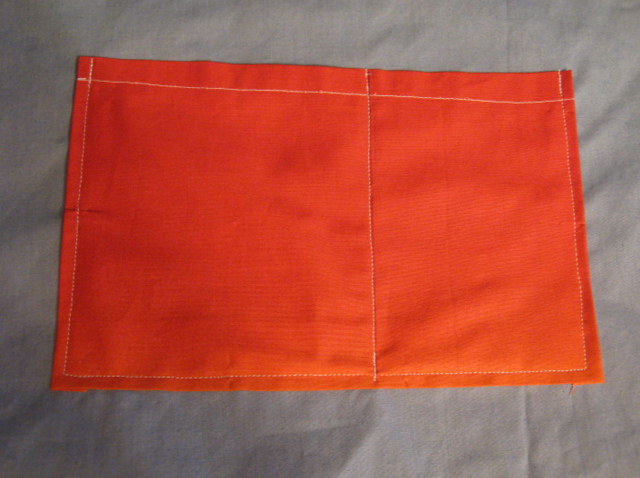
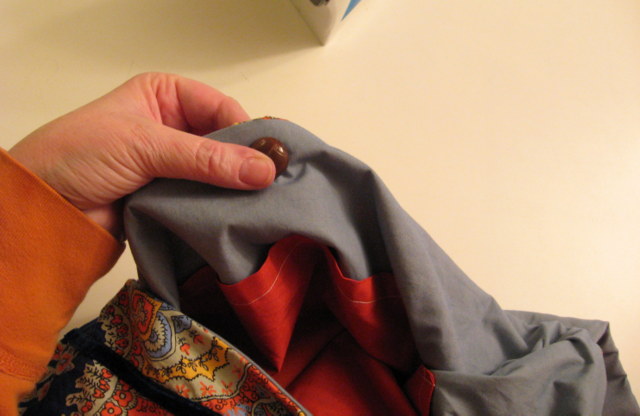
For my pockets, I like to make two; one big one on one side, to catch the random small stuff that tends to get lost in the bottom of my purse, and one on the other side, split into two pockets for my keys and phone. Decide how big you want your pockets to be, and cut the squares out of fabric – about an inch or so bigger than you want the finished pocket.
Press down a small seam on the top and stitch across it.
Then you will press a seam allowance on both sides and the bottom, but don’t sew it.

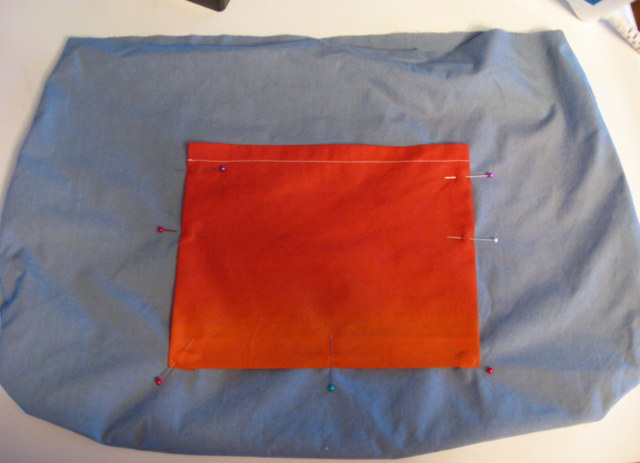
Pin the pocket centered in place on lining of the bag – make sure that the “up” side of the pocket is facing the “up” side of the bag. Also, don’t put it up too high…you will lose a little at the top of the bag when you sew the lining to the outside.
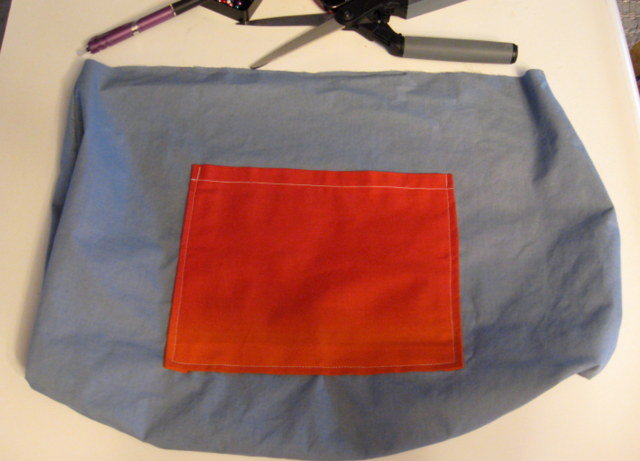
Sew the pocket onto the lining along the three edges, leaving the top open.
Now repeat with the pocket on the other side. Once it’s attached, you can just sew a line right down the middle to separate it into two pockets. I used my phone to decide exactly how big I needed it to be, since that is what will go in there!
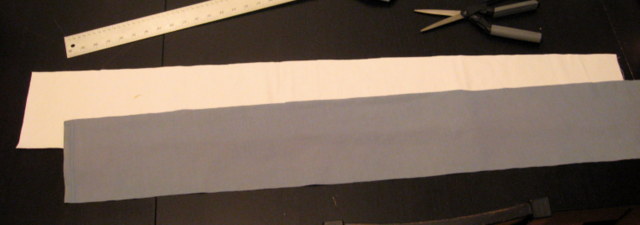
Now for the strap. Determine how long of a strap you would like. The first couple of times might take some trial and error until you find exactly what you love. Use a bag you already have or have someone help you with a measuring tape to get a good measurement to start with. For me, I like a 42 inch strap – short enough to carry on my shoulder, but still long enough to sling across my body. I cut out a long rectangle of fabric about 4 inches longer than the finished size (so 46 inches long) and about 6 inches wide.
Again, depending on what you’re going for, you can decide how you want the finished strap to be. If it is a small or delicate bag, you might choose to use just one layer of fabric for the strap. If it is a heavy bag, you will want to make the strap heavier. You can do that by using iron on interfacing, or by just using two pieces of fabric, which is what I did here.
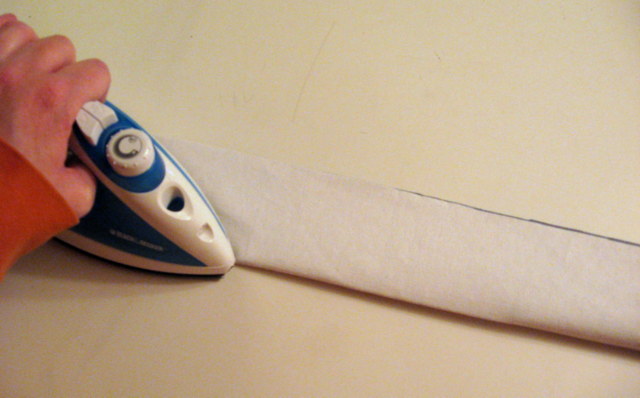
Lay them out on top of each other, and fold them in half lengthwise, with the right side of the outside fabric on the inside of the fold. Press it all flat, then sew up the long edge. Turn it all right side out, smooth it all flat and press it again.
Now, here comes the trickiest part – I still mess up on this part once in awhile if I’m not paying attention, so go slow, take a breath and think it through before you sew and you’ll be fine, I promise!
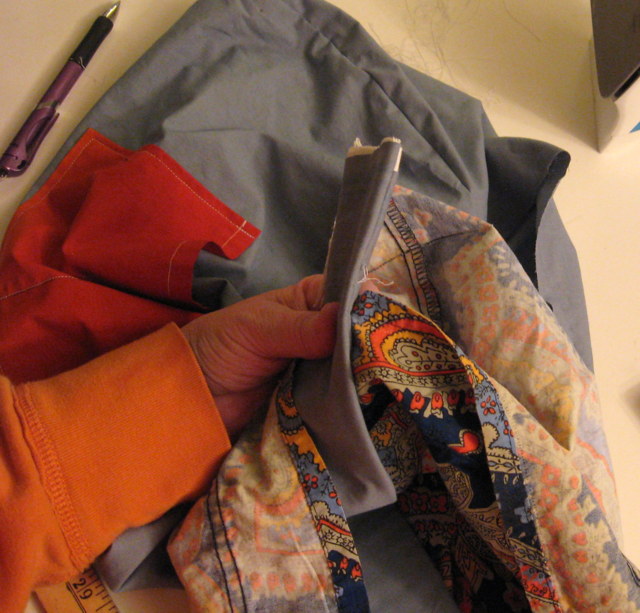
With the OUTSIDE pouch turned inside out, lay the strap along the bottom of the pouch and up the sides. Make sure that the strap isn’t twisted. Now check again. Really.
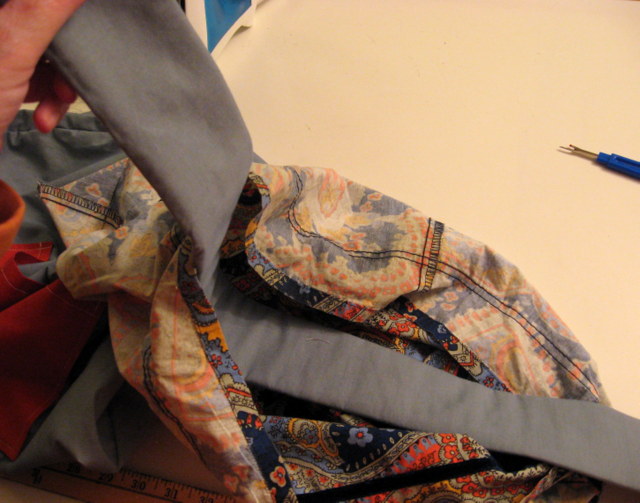
Center the strap with the side seam of the pouch and sticking up beyond the top about 2 inches and pin it. Now do the same on the other side. Now check again to make sure it isn’t twisted – just to be safe 🙂
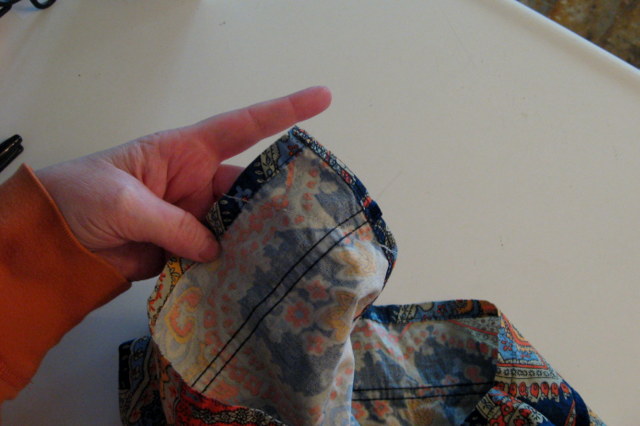
Now with the INSIDE pouch also turned inside out, put it down inside the outer pouch. So, you will have a “pouch sandwich” with the strap between them. Line up the side seams and the front and back centers and pin them together, stretching to ease in any excess fabric (you shouldn’t have a lot, but you will likely have a little). You will now sew around the whole top where you just pinned, but you will have to leave a space so that you can turn them inside out. The smaller the opening you leave, the harder it will be to get it turned, but the larger the opening, the more work you will have to do to close it up. I probably leave about 3 inches. I have been known to forget and just keep sewing, so when I pin, I will pin an X where I want to leave the opening just to remind myself.
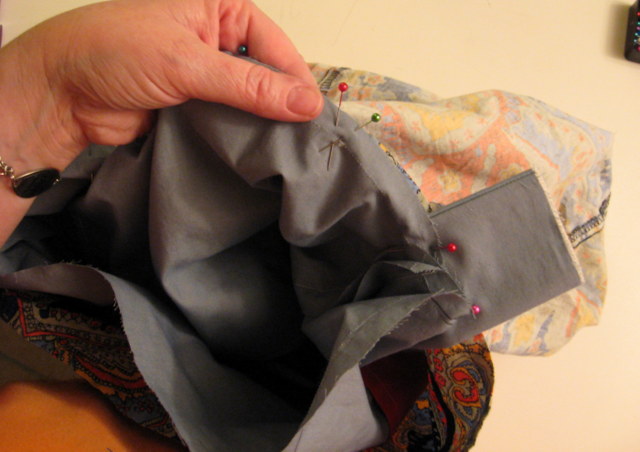
Take a minute to look at it and make sure you have everything assembled the way it should be; it should look like this:
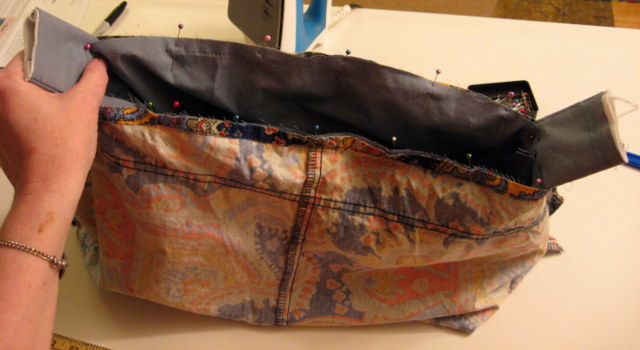
Then, sew around the top edge, backstitching at the beginning and end. Carefully reach into the opening that you left and pull out the strap, then work the rest of the purse through until the whole thing is turned right side out. Now press around the top where you just sewed, to make it look nice and neat, and press down the edges of the opening as you go. Slip stitch or blind stitch the opening closed by hand – or you can topstitch around the entire top edge, closing the opening in the process.
I chose to close this bag with a button, so I found the center of one side and attached a big vintage button, sewing it just to the lining so the stitches don’t show on the outside. Then I lined it up with the center on the other side of the bag and made a buttonhole.
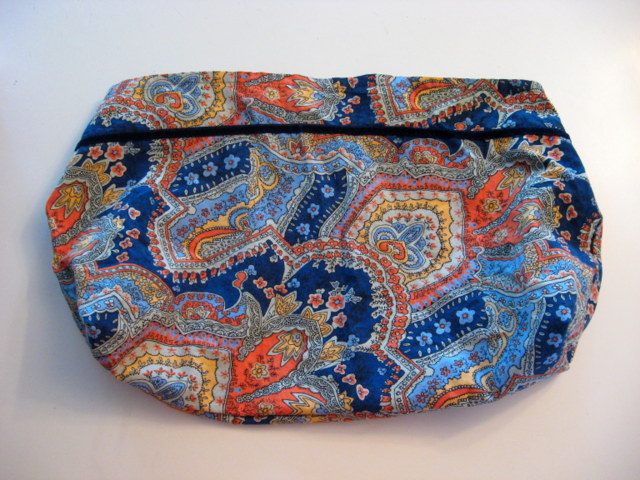
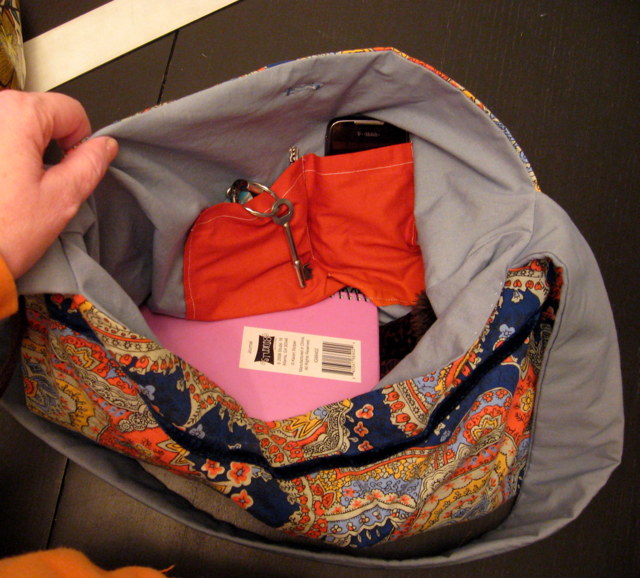
Here’s a shot of the inside of the finished bag:
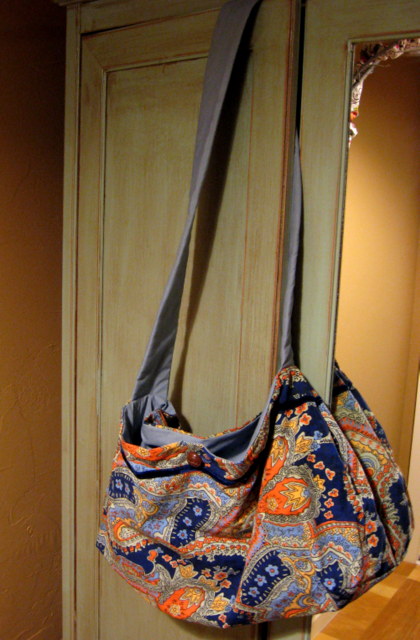
And the outside:
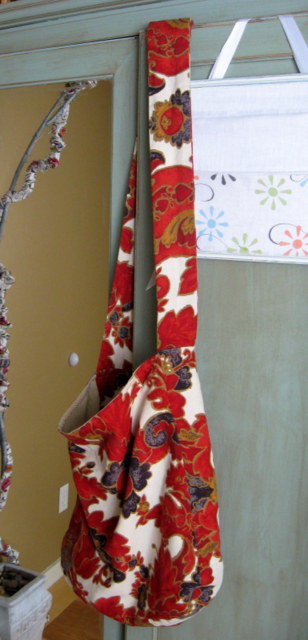
And a few of my other favorites…
My favorite overall tote bag, made from an old pair of curtains.
And a simple scripture bag: 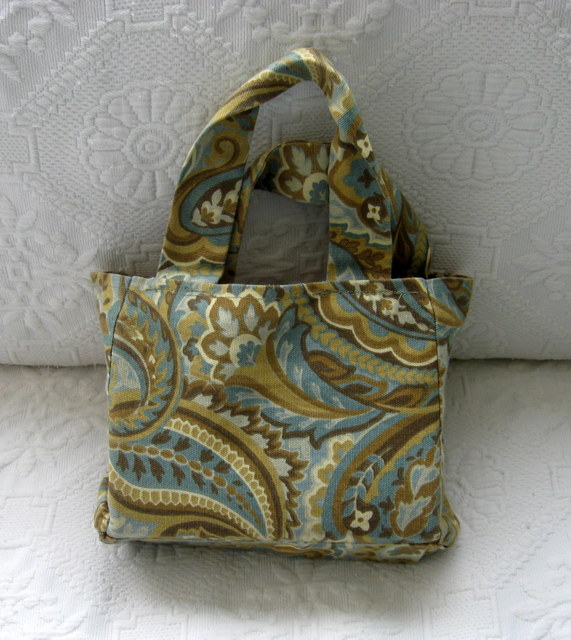
And my library bag – two straps instead of one – and made from a heavy duty upholstery fabric that I picked up for pennies on clearance.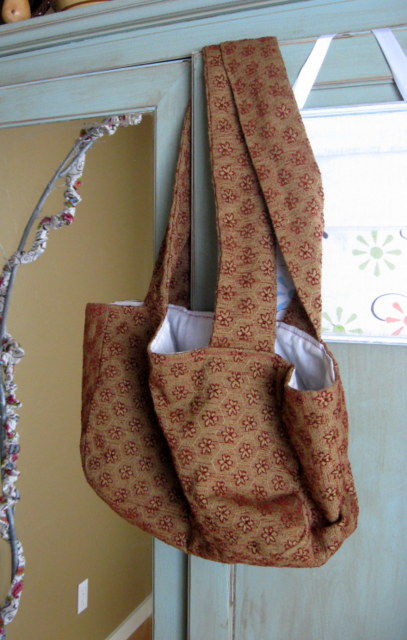
6-Foot Whiteboard or Chalkboard Wall Decal $10 Shipped!
 6-Foot Whiteboard or Chalkboard Wall Decal
REG PRICE: $39.99
DEAL PRICE: $6.99
SHIPPING: $2.99
Plus lots more!
$2.99 Tee Blowout, $3.99 Capri Leggings, DIY Banner, Mason Jar Shaker Lid & More!


More cute stuff available today! Low shipping prices!
Fashion Friday- All Home Decor 60% off & FREE SHIPPING from Cents of Style!

Fashion Friday- Home Decor 60% off & FREE SHIPPING with Code HOMEDEAL
Martha Stewart Living Magazine Just $12.74 for 1 Year!

Best Deal Magazines LINK
Martha Stewart Living Magazine Just $14.99 for 1 Year!
July 3rd Only – Use Coupon Code 15CJ0713 and Save an Additional 15%!
Buy one, get one free Energizer batteries!

Buy one, get one free Energizer batteries! Equal or lesser value. While supplies last. Offer ends 08/02.
Deals like:
Energizer Max Batteries, Alkaline, AA, 16 batteries
2 for $14.39
Free in store pick up!
3 Gallon Beverage Dispenser w/Infuser, Stand & 6 Glasses $39.99
 3 Gallon Beverage Dispenser w/Infuser, Stand & 6 Glasses
$39.99 $125.00 68% off List Price
$5 flat rate shipping
Woodcraft Magazine Just $5.94 for 1 Year!

Deal of the Day – Woodcraft Magazine Just $6.99 for 1 Year
July 1st Only – Use Coupon Code 15CJ0713 and Save an Additional 15%!
5 Easy & Inexpensive Home Updates
Oh how I wish I could just blow it up and start all over, but that is not in the budget! I have been working on some easy and inexpensive home updates. Just because it’s simple, isn’t costing you a small fortune and is not taking weeks to do doesn’t mean that it won’t make an impact. Sometimes just the smallest change can make a huge difference in the way your home looks and feels.
5 Easy & Inexpensive Home Updates
1- De-clutter –
Clutter is my number one enemy. Clutter happens, sometimes we don’t even realize how bad it is. We live with it and around it. If you want to refresh a room, the 1st thing I suggest you do is to get rid of clutter. Have a yard sale, donate to good will, throw it out, or find a better way to store/organize. It’s amazing how much different a room can look when you simply clear away the mess.
2 -Add some color with paint
I am not saying you have to repaint the whole room, but you can still easily update a space with paint. Whether you paint an accent wall, refinish a piece of furniture with a pop of color with spray paint or paint the inside of a book shelf, just a simple splash of color is one of the great inexpensive home updates. If you don’t want to take a chance with painting something you already own, just grab up something cheap at the thrift store or from freecycle. A can of spray paint goes a long way and it comes in AMAZING colors!
3- Pillows!
Pillows in bright colors and patterns can instantly add some pizazz to a couch that you are bored with. There are so many cute prints available now, chevron, nautical, polka dots & more. You can usually find great pillow covers from Jane.com. The fun thing with pillows is that you can let the season dictate the shades you choose — use bright vibrate colors & prints for a beachy summer feel or jewel tones & fall colors in the winter.
4- Rearrange your art
Move art around in your house. Hey, how about spray painting your frames! That’s a great update and a great way to add color. If you have a bunch of oak frames, paint them black for a modern look. I also recently found a great clearance sale on calendars. For inexpensive art, frame some pictures from calendars! Anyway, back to what I was talking about, just move things around to places they haven’t been before.
5- Upgrade your hardware
New knobs are an easy way to give a dated dresser, entertainment center or tired kitchen cabinets a whole new look. There are lots of budget family options available. For a fun look and conversation piece, consider grabbing some vintage knobs from a thrift shop or other second hand store. A few years ago I removed all my brass door knobs and took them outside and spray painted them. They are still holding up great.
There you have it – 5 easy & inexpensive home updates. What have you done to update your home on the cheap?
Duck Brand Zig-Zag Zebra Printed Duct Tape – Just $3.00!
Need some tape to go with that great duck tape idea book? Amazon has so many CUTE tape choices – check out the great styles and prices.
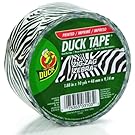 Duck Brand 280110 Zig-Zag Zebra Printed Duct Tape
List Price: $5.99
You Save: $2.99 (50%)
Price: $3.00
This is listed as an Add-on item, but this is a great deal so if you are already doing any shopping or want to get your order up to $35 for free shipping, it is a great time to buy! (The Add-on program allows Amazon to offer thousands of low-priced items that would be cost-prohibitive to ship on their own. These items ship with qualifying orders over $25.)
Eligible for free shipping on $35+ orders or on ANY order with Amazon Prime.
Don’t have a Prime membership? Get a one month free trial! Click here for details!
Eureka Portable Enviro Steamer, 30A – Was $69, Now Only $24

Eureka Portable Enviro Steamer, 30A – Was $69, Now Only $24
Free shipping when you spend $50 or more or free in store pick up!
Plus more great deals today like…
- Delta Crib and Changing Table, Cherry – Was $219.98, Now Only $129.98
- Faded Glory Women’s Shay Thong Sandal – Now Only $8
- Healthtex Toddler Girls’ Rainbow Wedge Sandal – Now Only $10
- Starter Boy’s Lightweight 3 Running Shoe – Now Only $11
- Avia Women’s Lynx Sneaker – Was $27.78, Now Only $22
- Save $50 on the Eureka AirSpeed Bagless Upright Vacuum, AS1000A – Now Only $79
- Hoover FloorMate Hard Floor Cleaner with Bonus 64oz Solution – Was $149, Now Only $99
- Hoover Elite Max Capacity Pet Bagless Upright Vacuum, UH72003 – Was $119.96, Now Only $79
- Hoover Whole House Bagless Upright Vacuum, UH71214 – Was $119.96, Now Only $89
- Electrolux UltraActive DeepClean Bagless Canister Vacuum, EL4305AZ – Was $499, Now Only $229
- Eureka AirSpeed Pet Bag Upright Vacuum, AS1051A – Was $139, Now Only $69
Free shipping when you spend $50 or more or free in store pick up!
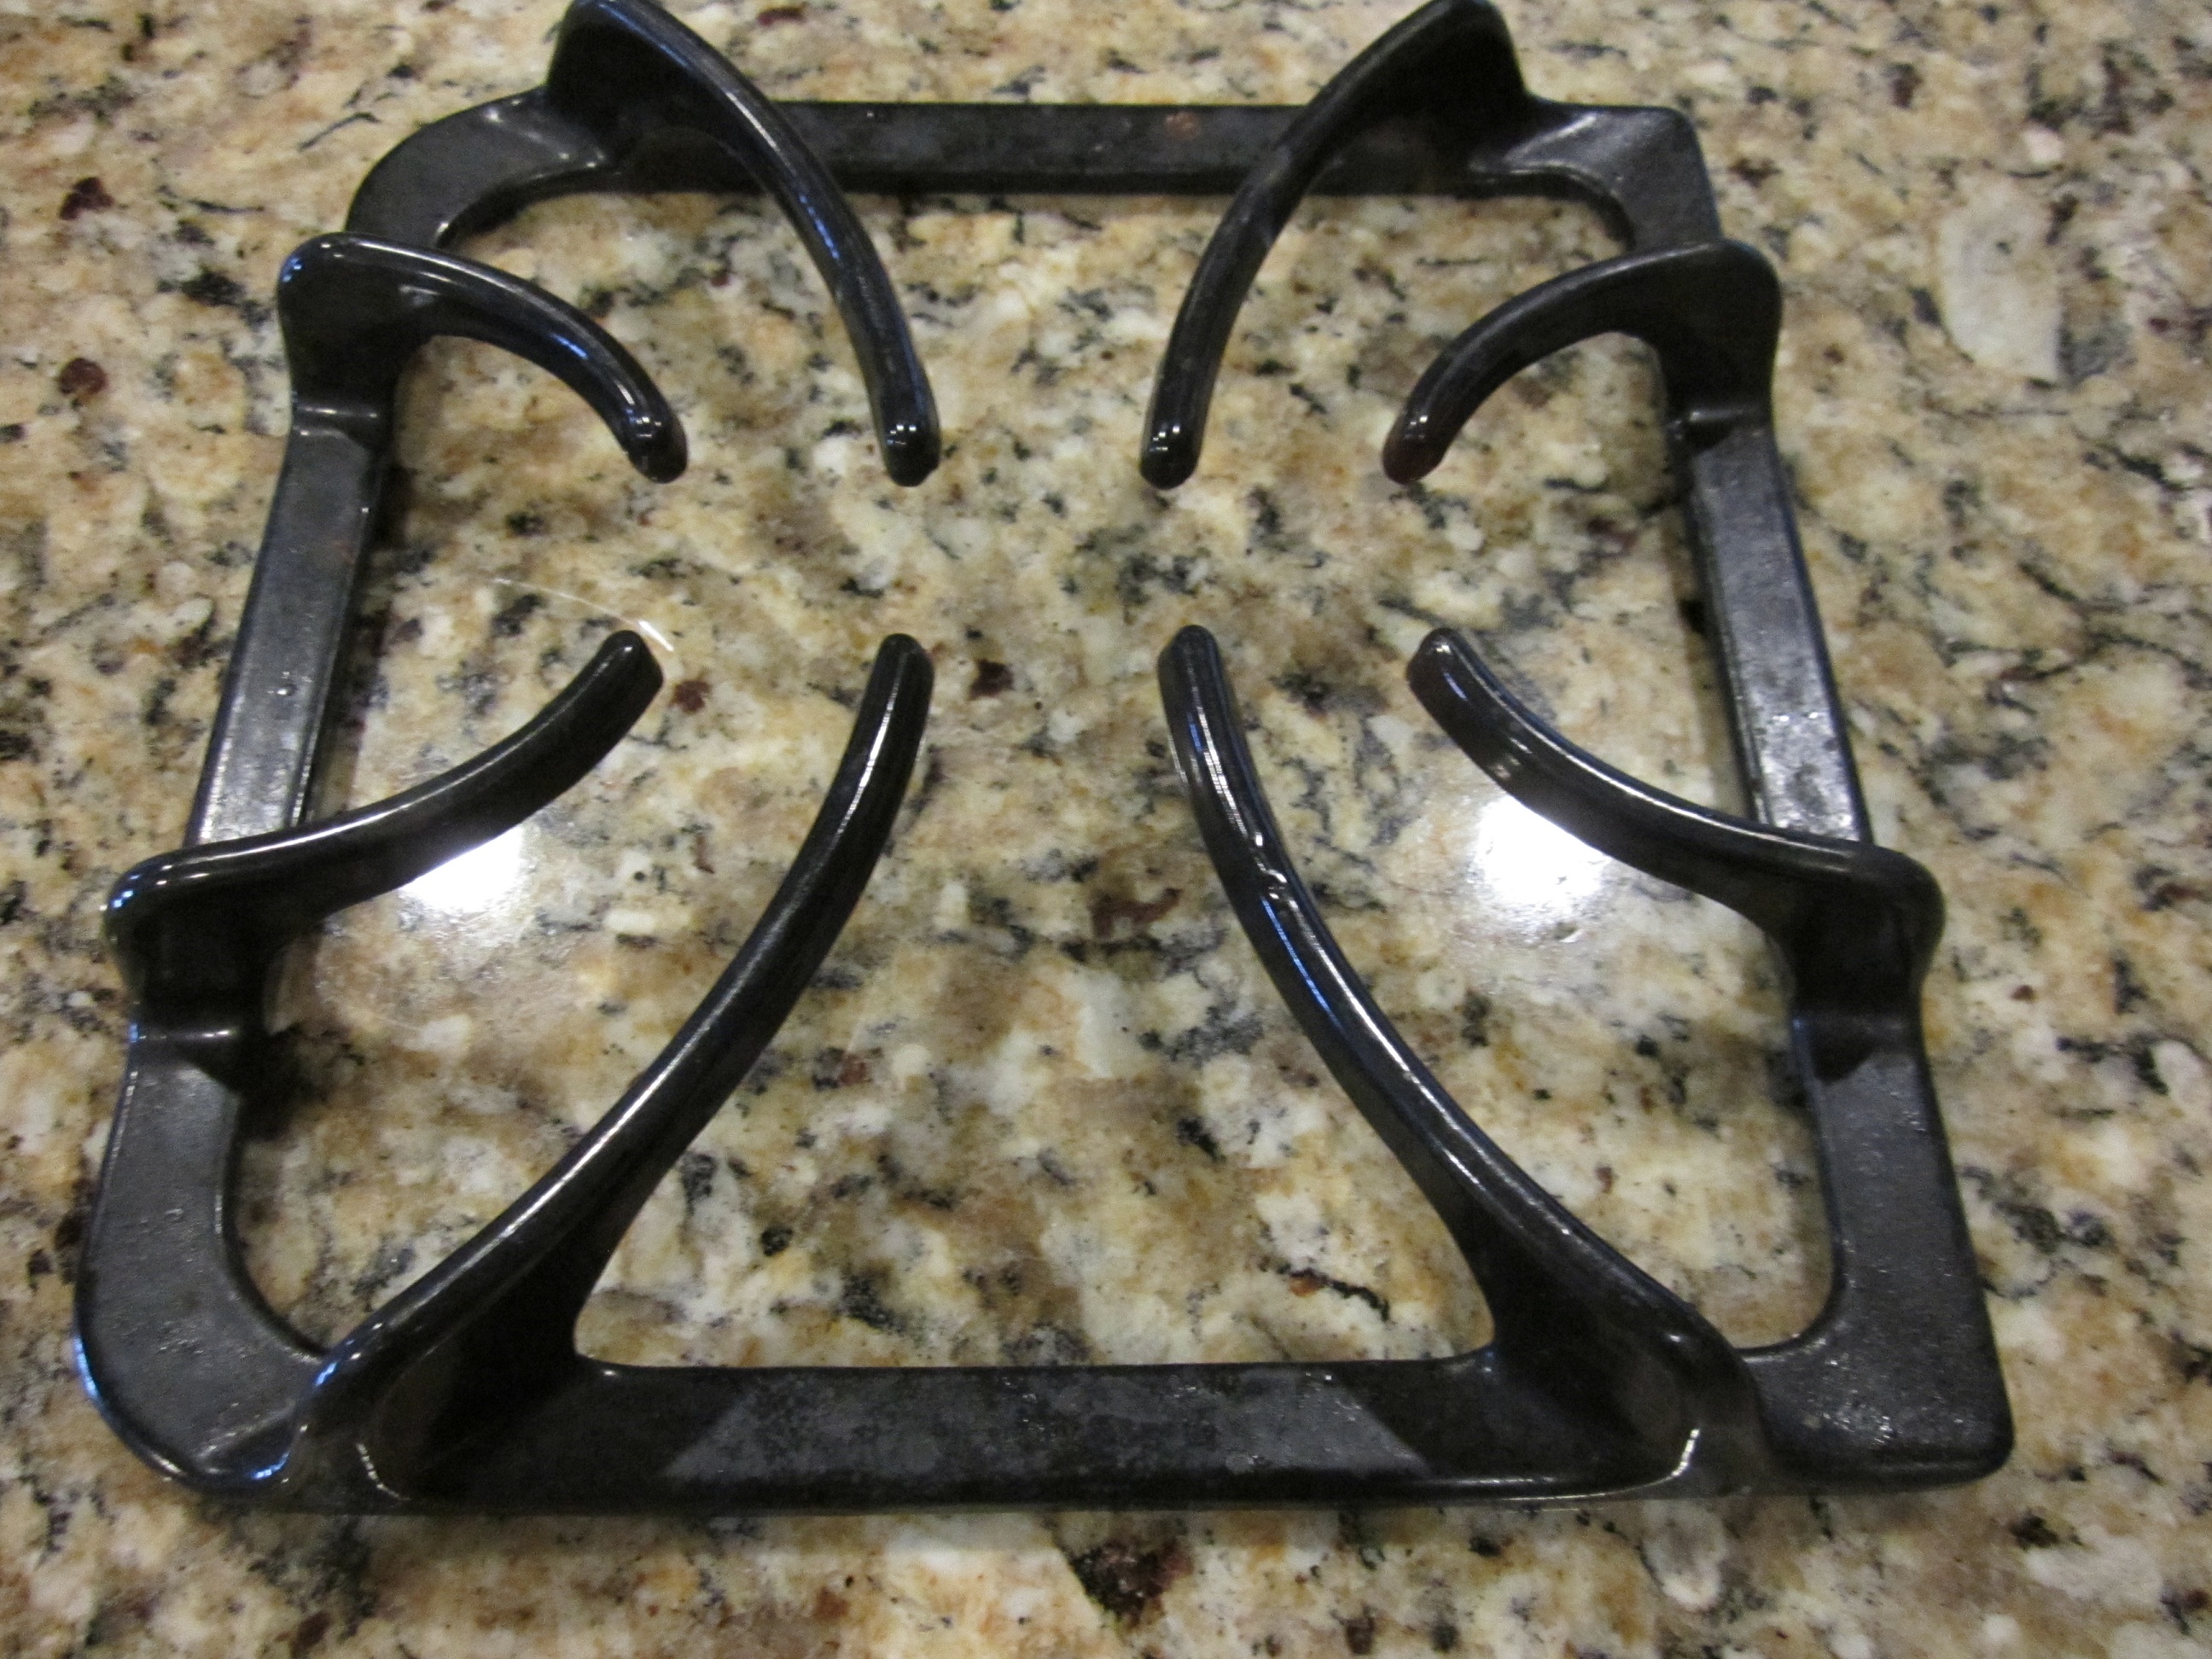
A PYP Best Blog! I saw it, I tried it: cleaning the grates on your gas stove.
Just in case you missed this article on cleaning the grates on your gas stove the first time we shared it a couple of years ago, we are republishing it. After Dori wrote this blog originally, we got an awesome response. This is one of the PYP Best Blogs!
I think I’ve tried everything to get my gas stove grates really clean. And most things work okay but it takes a LOT of elbow grease for mediocre results. So much in fact, that I tend to sort of ignore this chore.
I happened on a new idea on the good old internet though and I thought it was worth a shot.
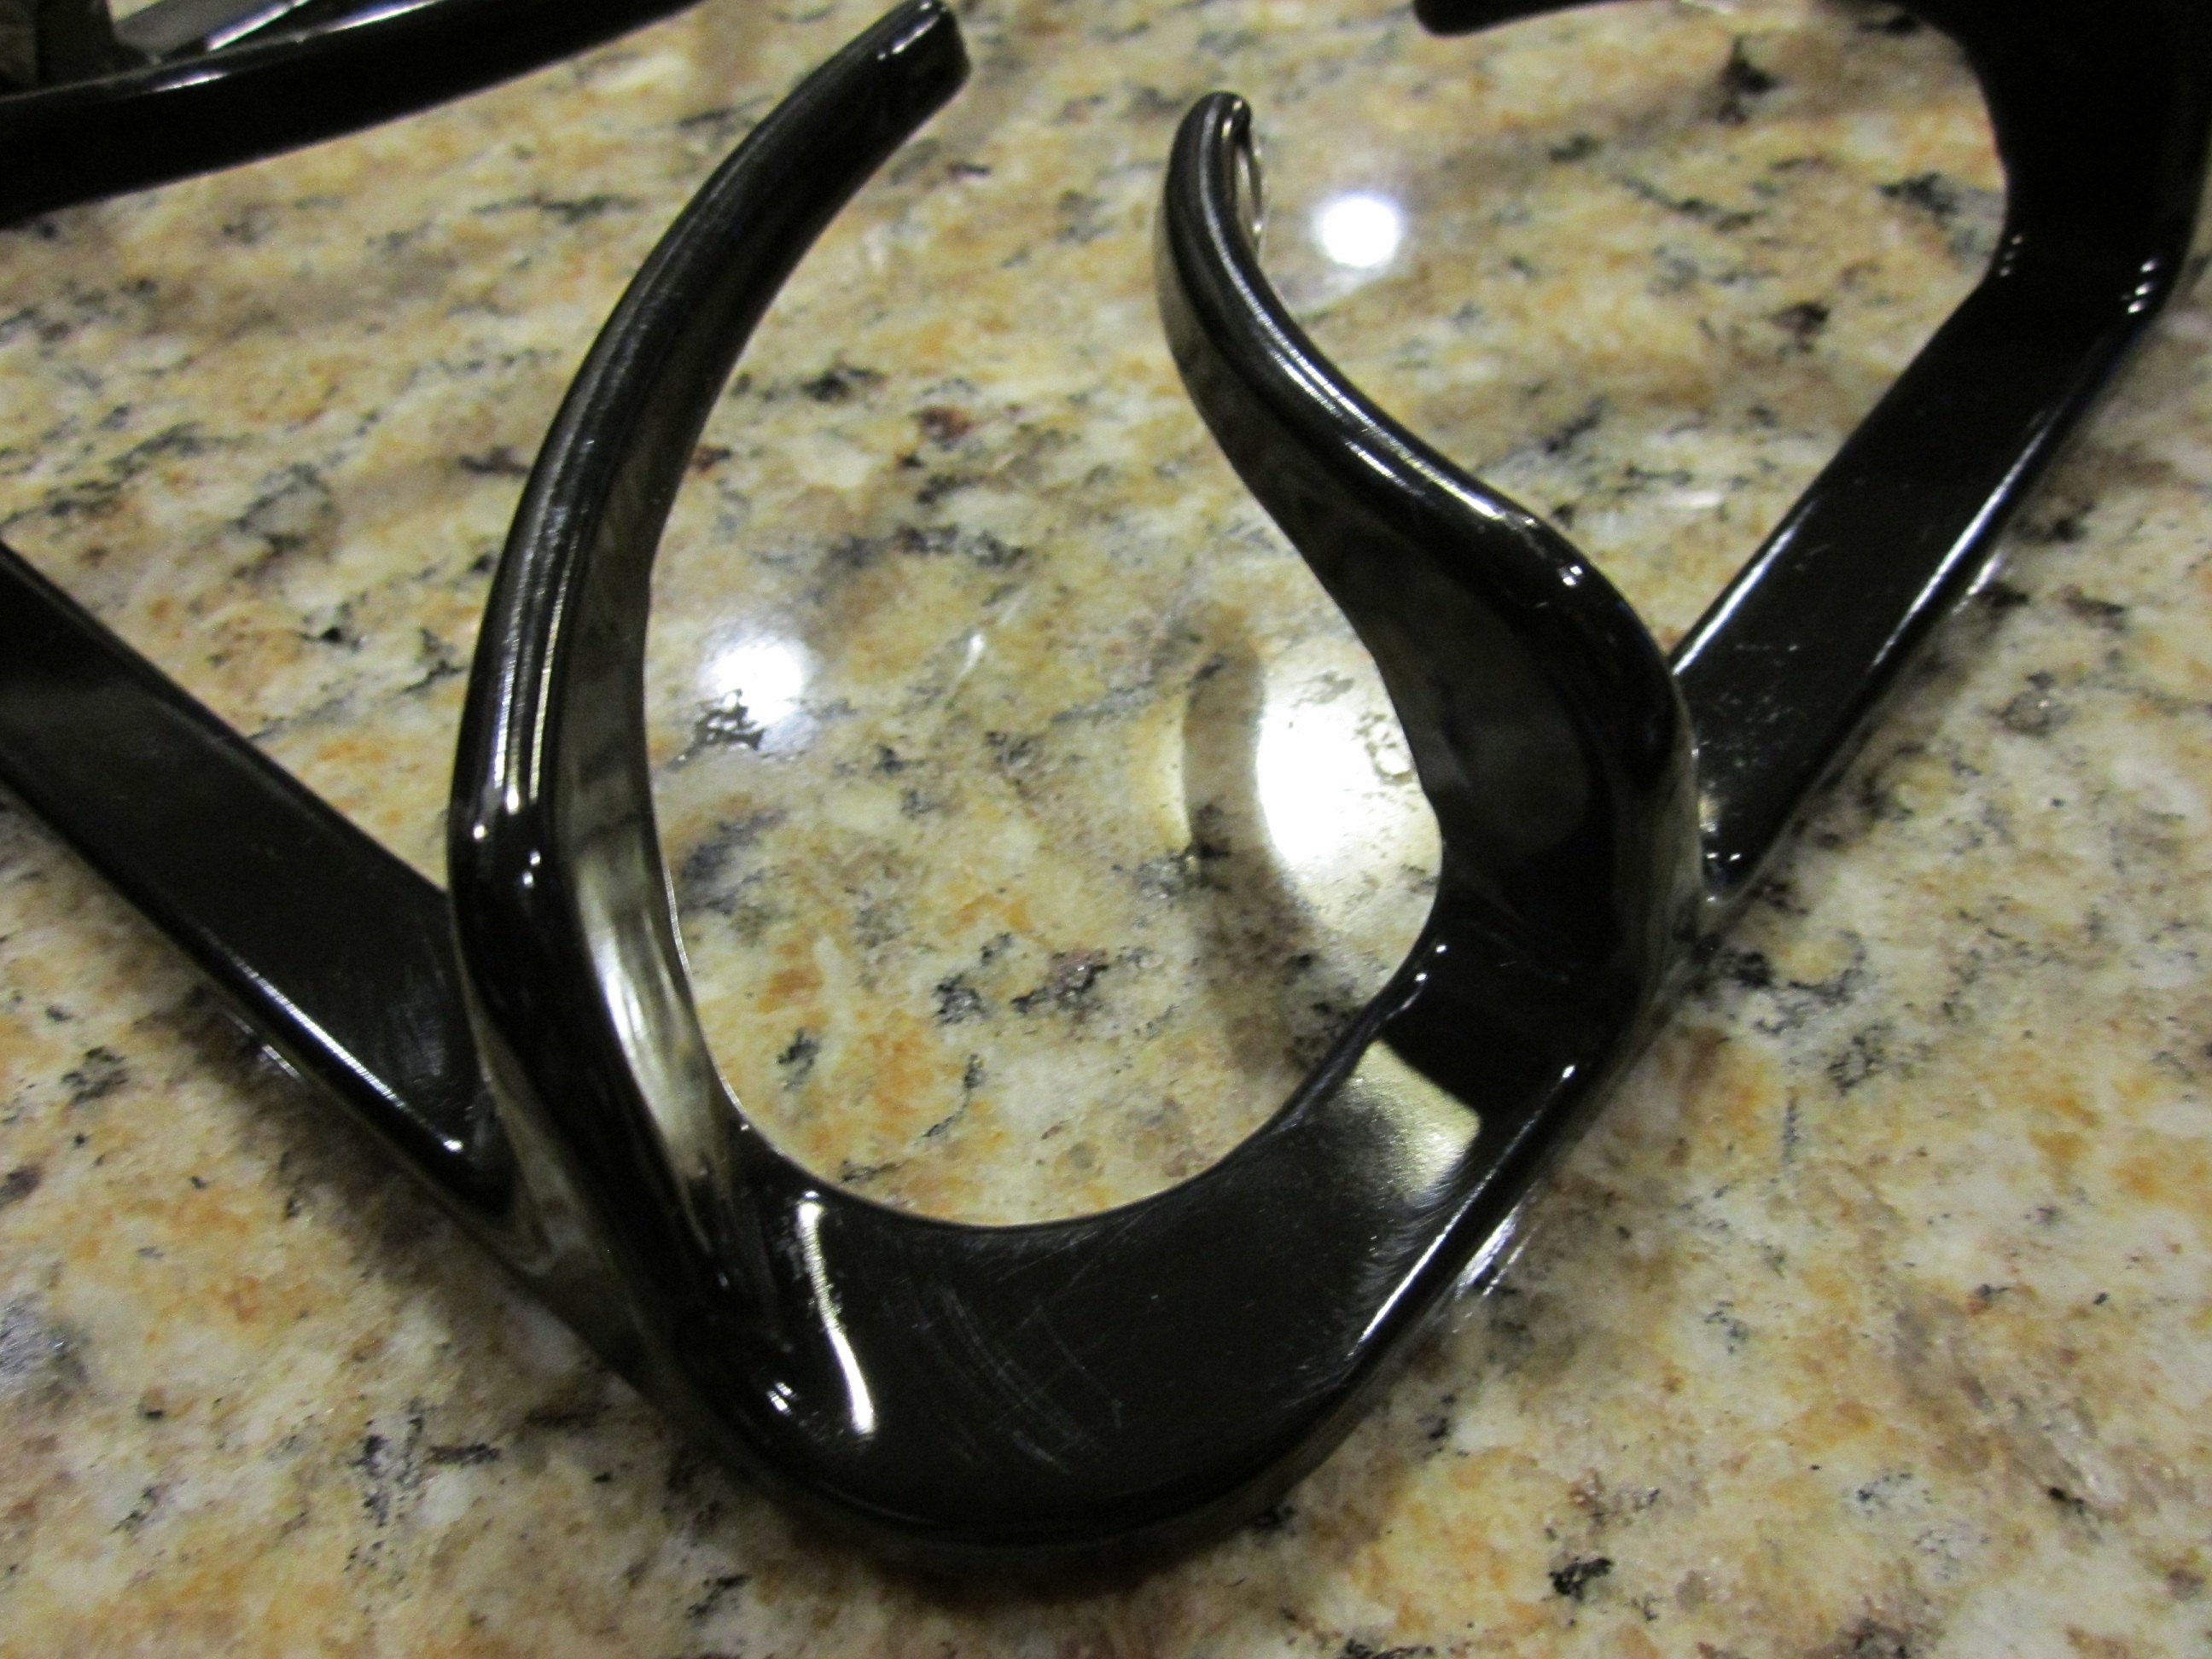
Take one of your nasty old grates…
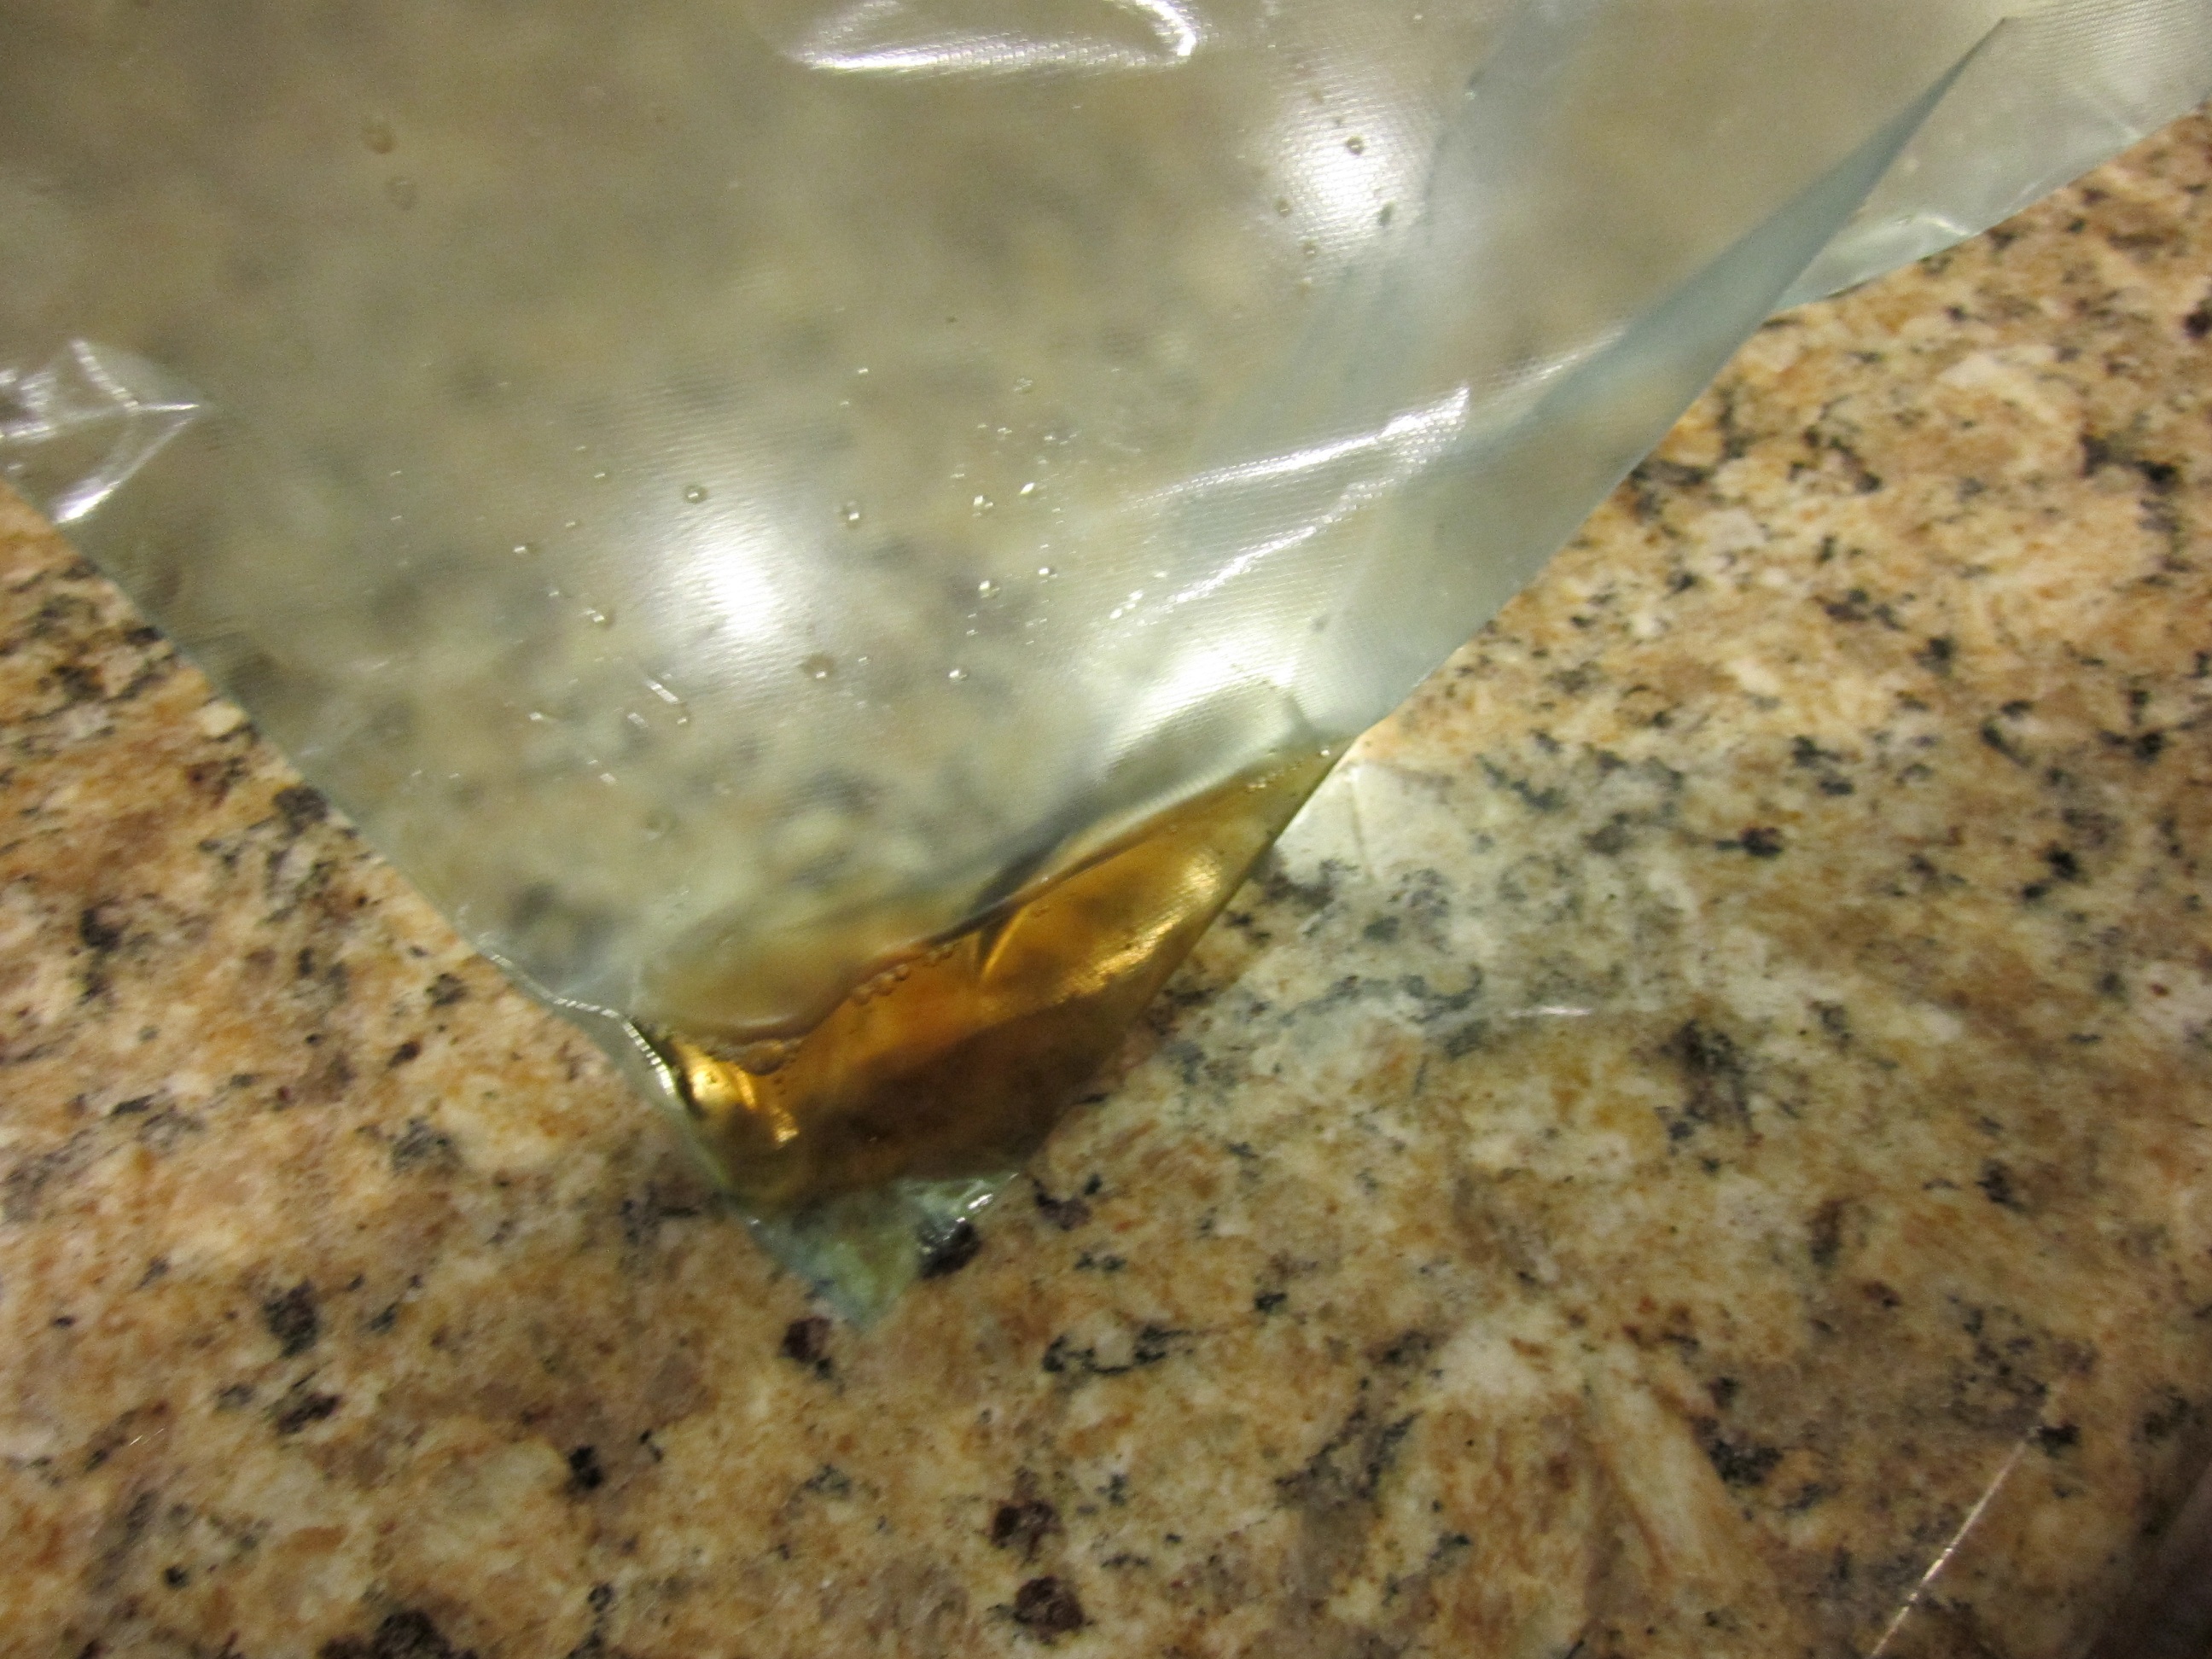
Slip it into a gallon size ziploc bag. Be careful not to put any holes in the bag.
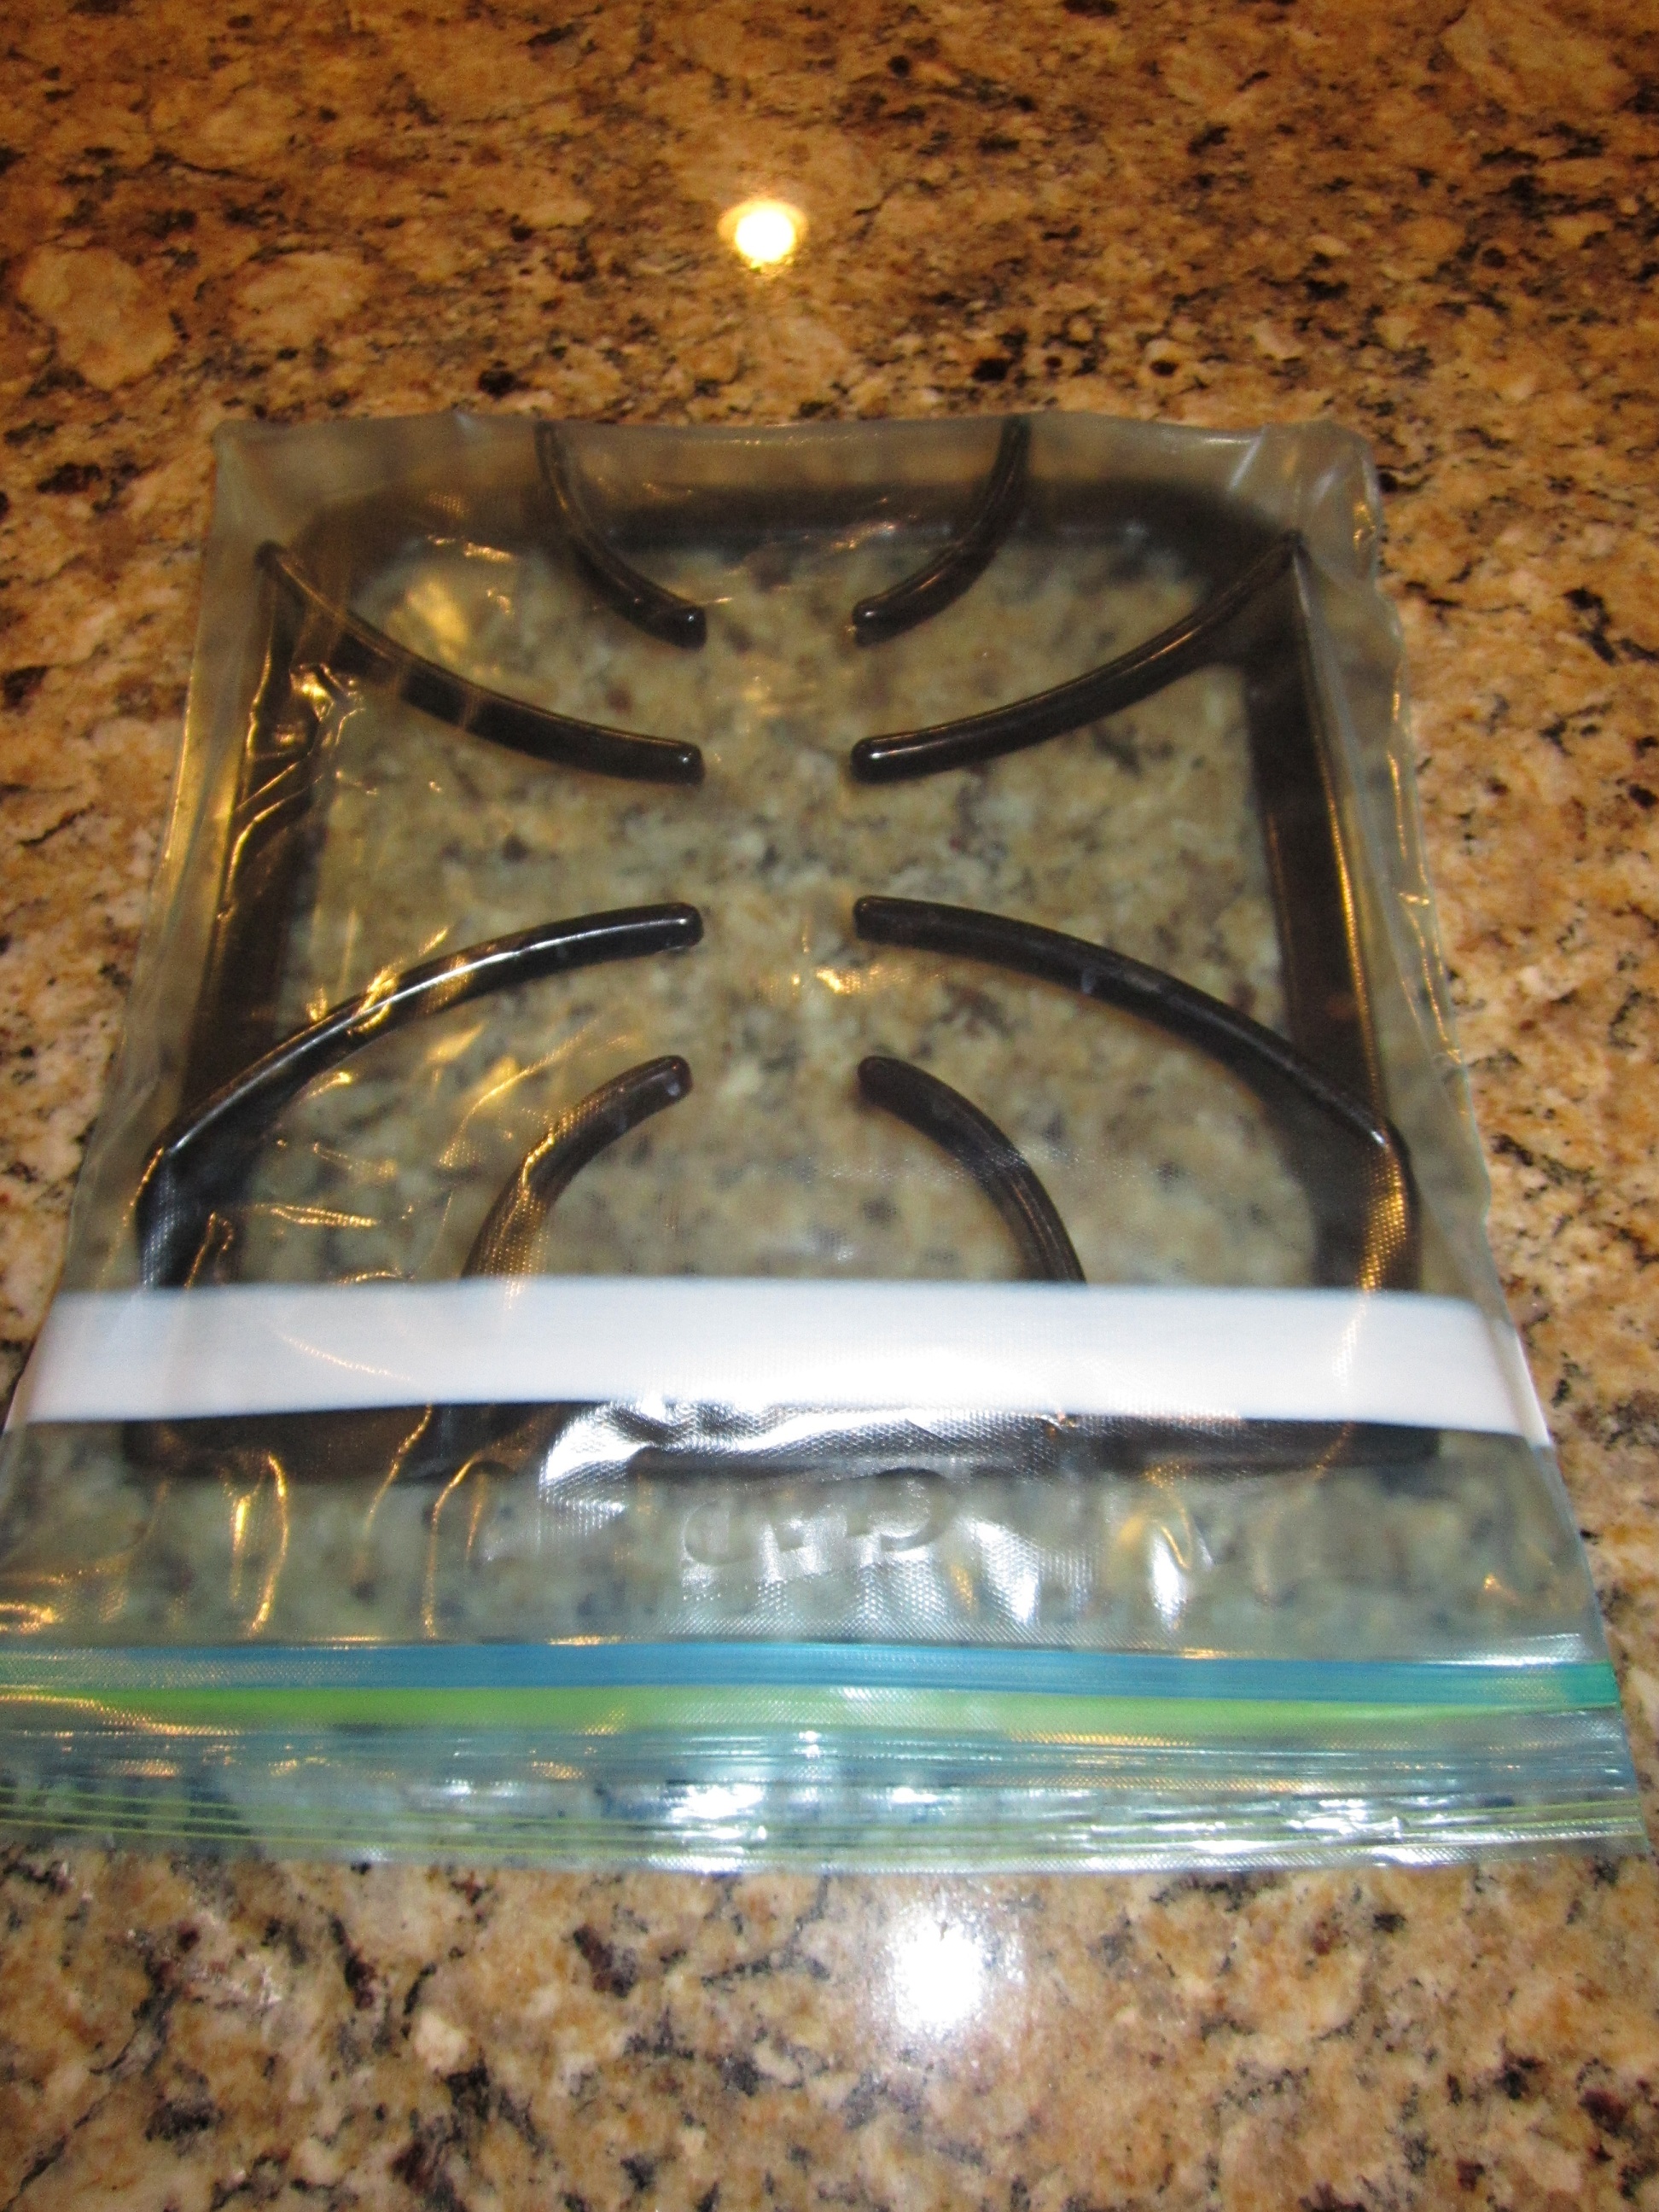
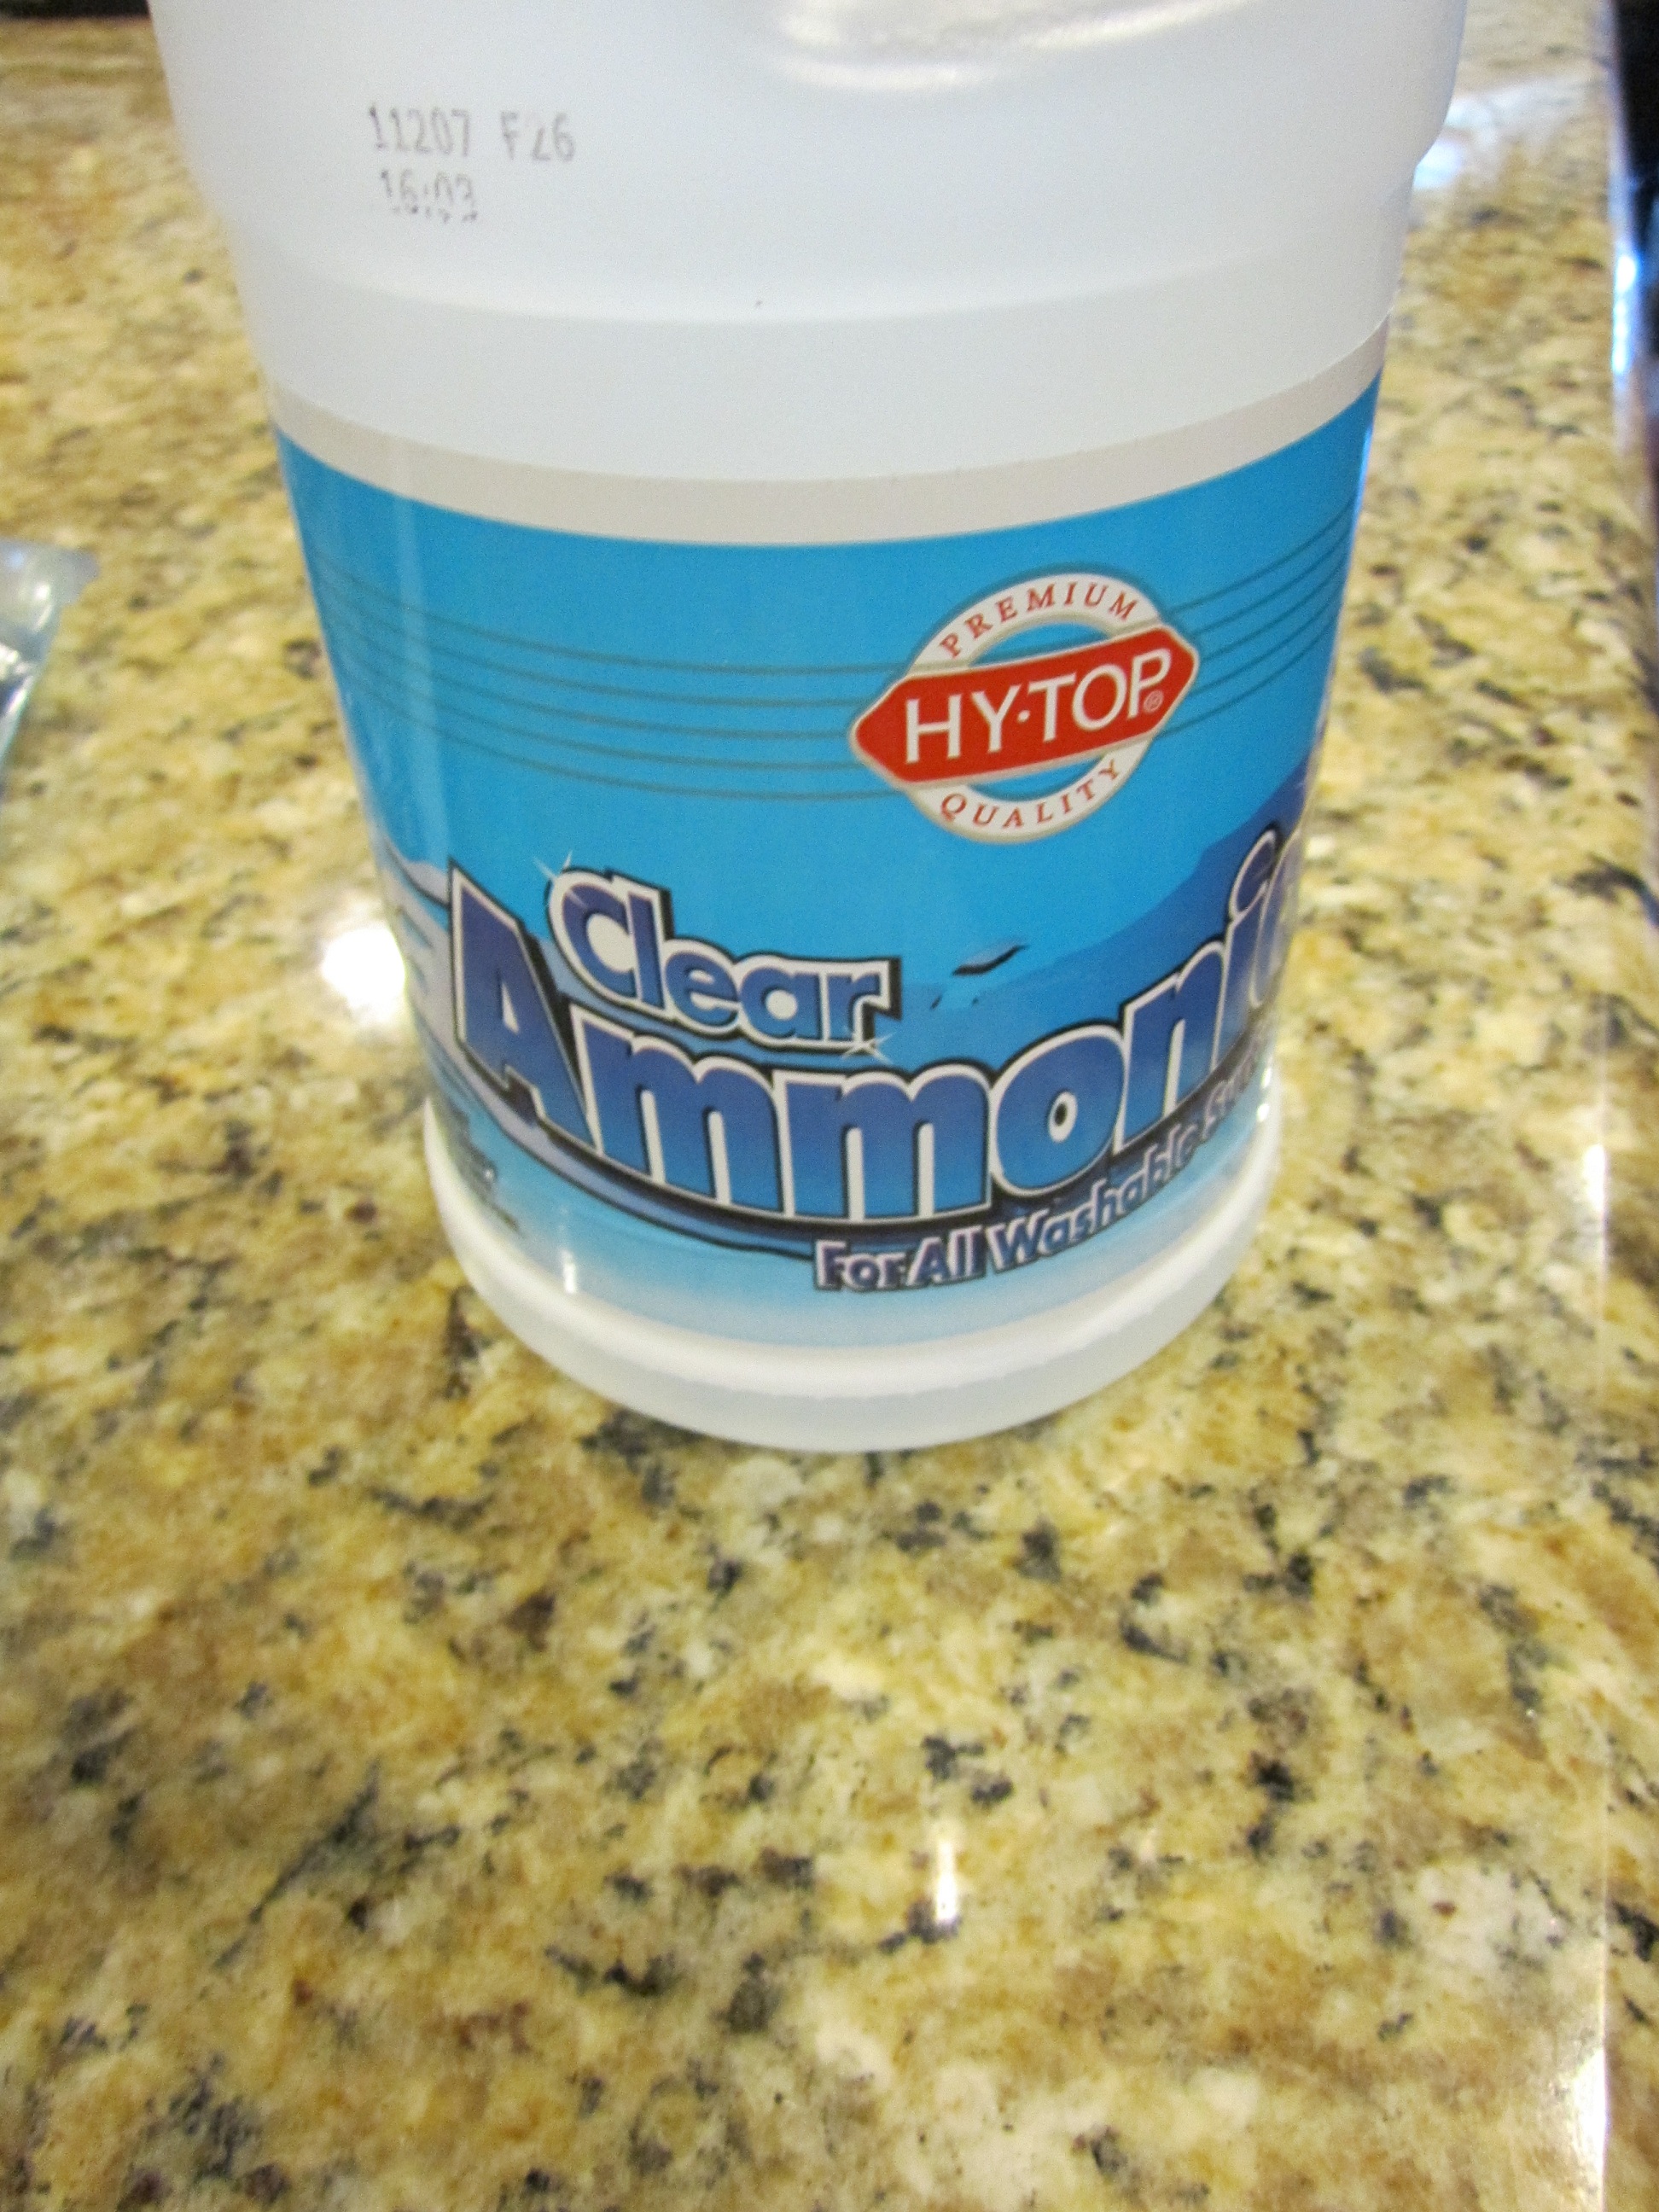
Pour 2 or 3 Tablespoons ammonia into the bag.
Seal the bag. And let it sit for 12 hours.
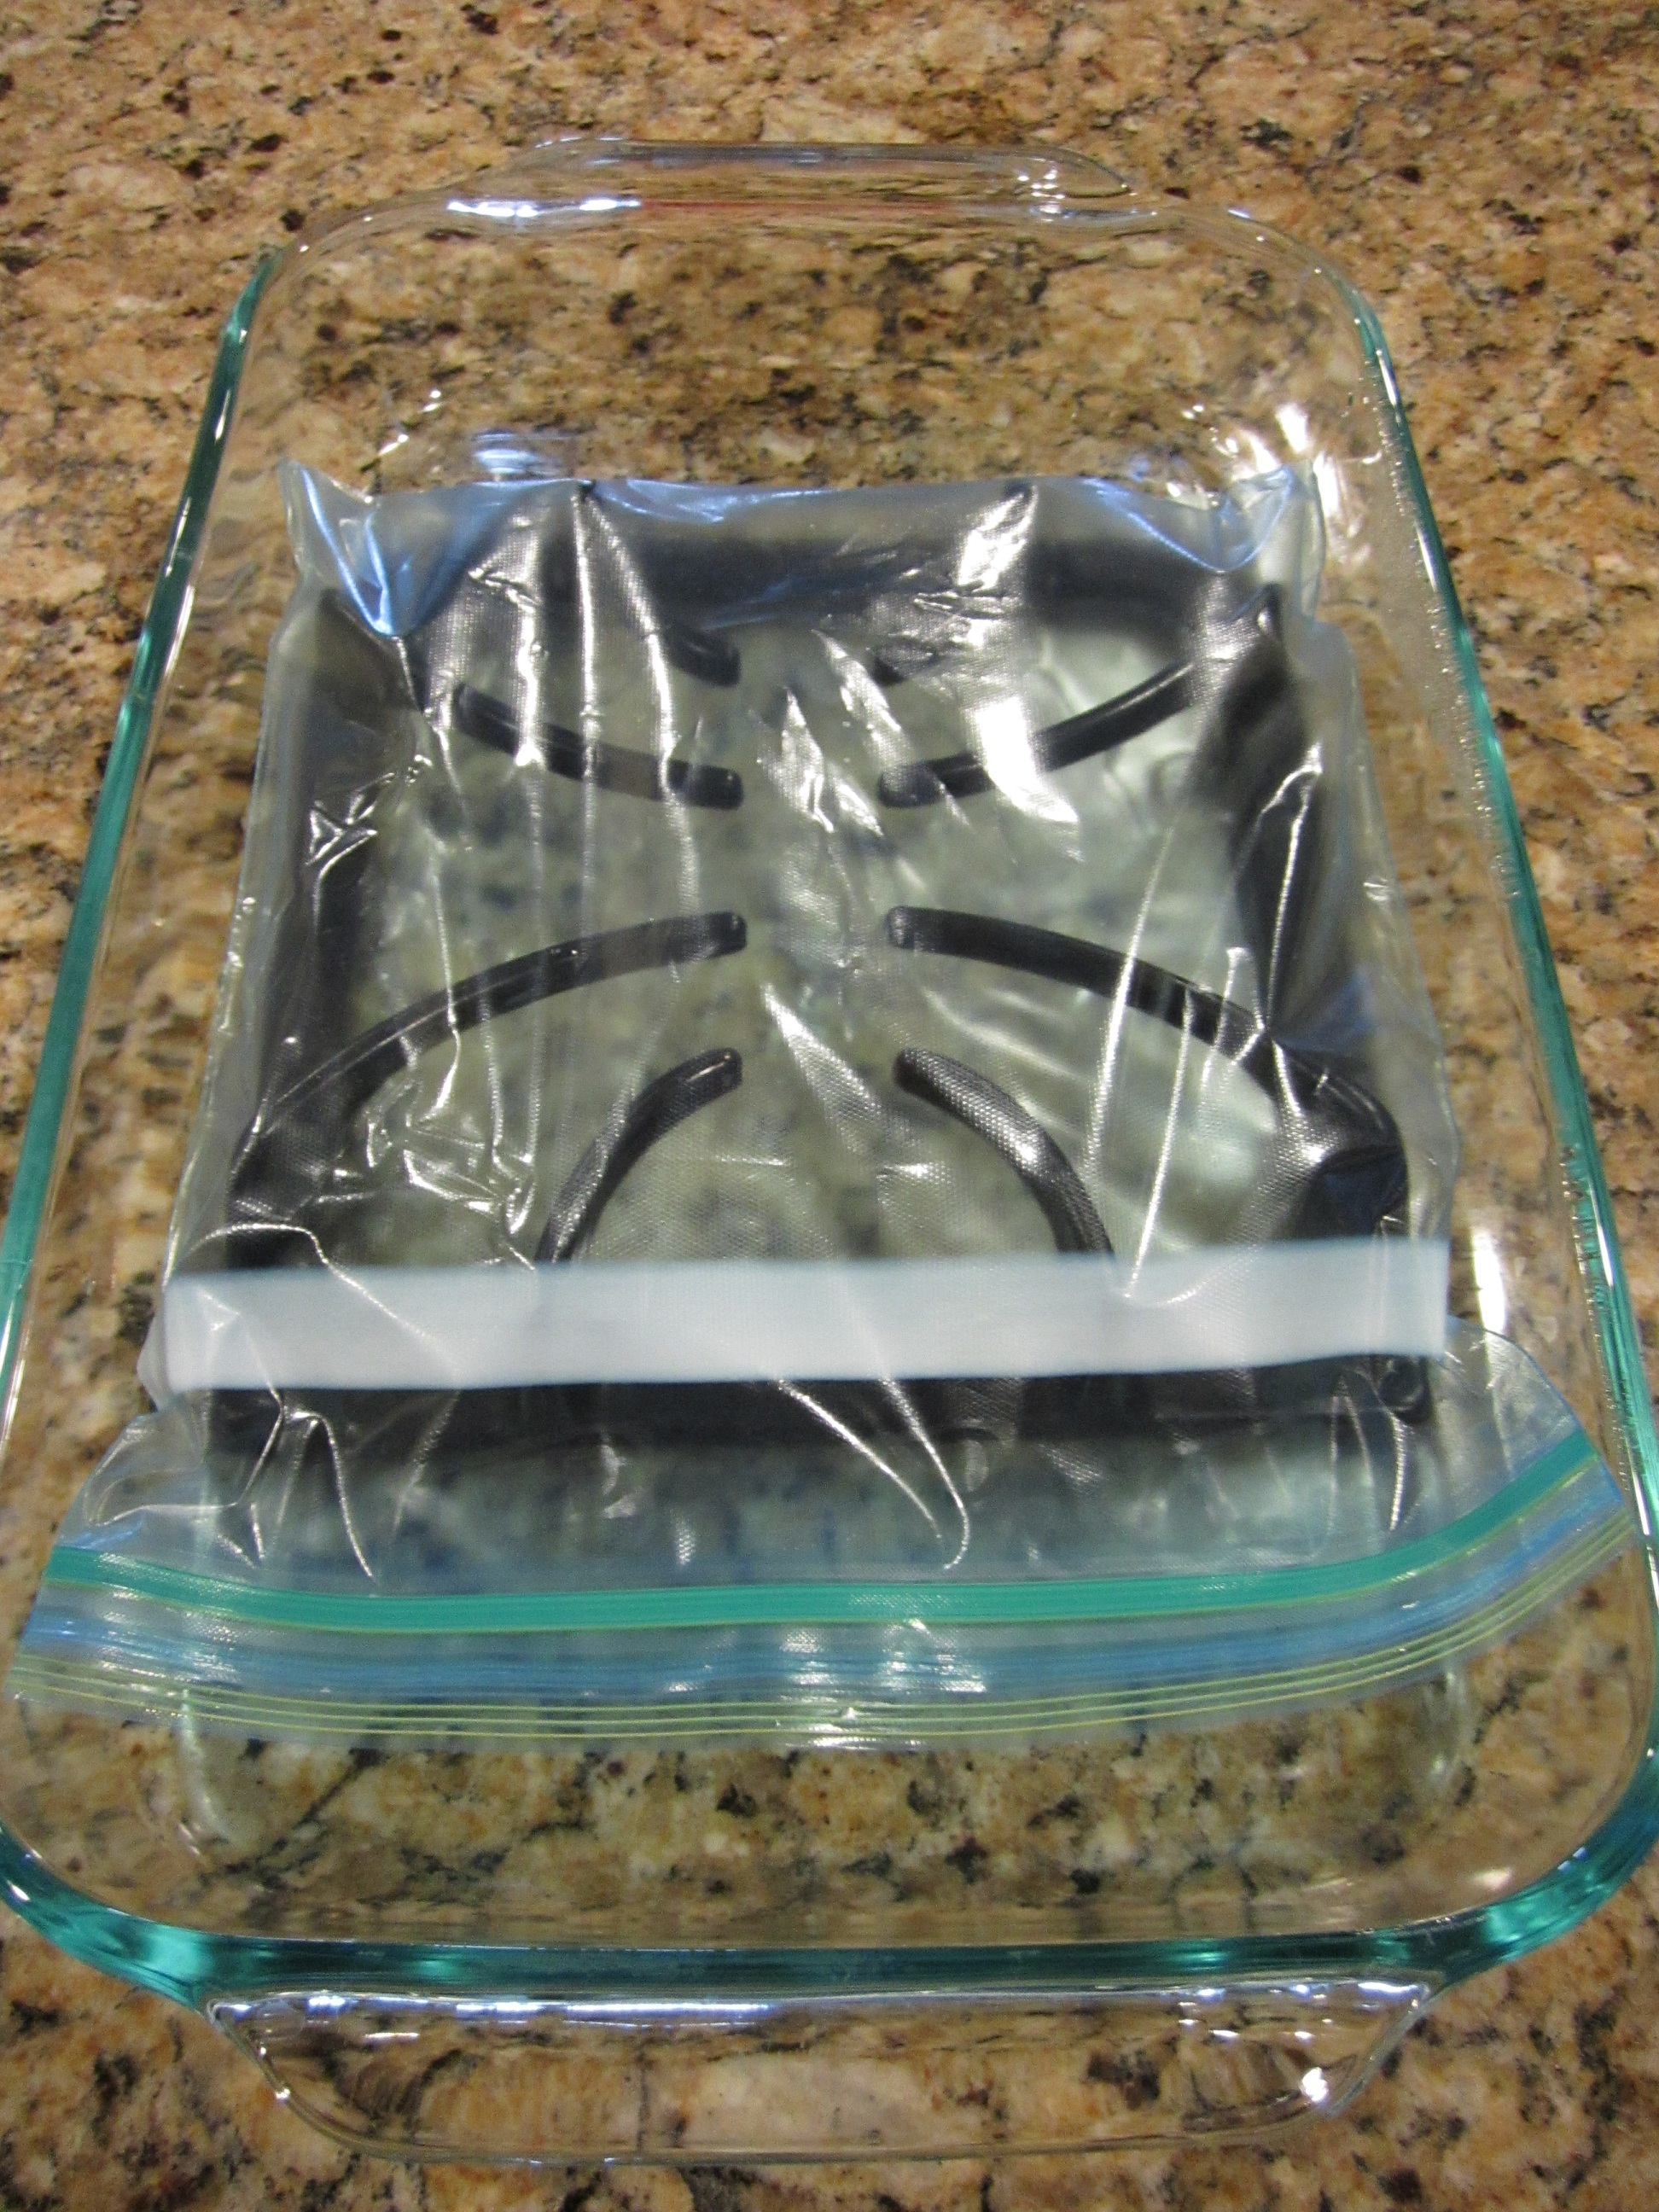
I put mine in a glass baking dish, just in case there were any leaks.

I only let mine sit for about 5 hours because I needed the stove to cook dinner. It’s probably best to plan to do this overnight.
Take the grate out of the ziploc bag. I did this in the kitchen sink.
Look at the yucky ammonia left in the bag…
Rinse the grate thoroughly.
At this point I used a green scrubby (technical term, you know what I mean?) and just very lightly wiped all the surfaces off. No actual scrubbing at all really.
And TA-DA!!
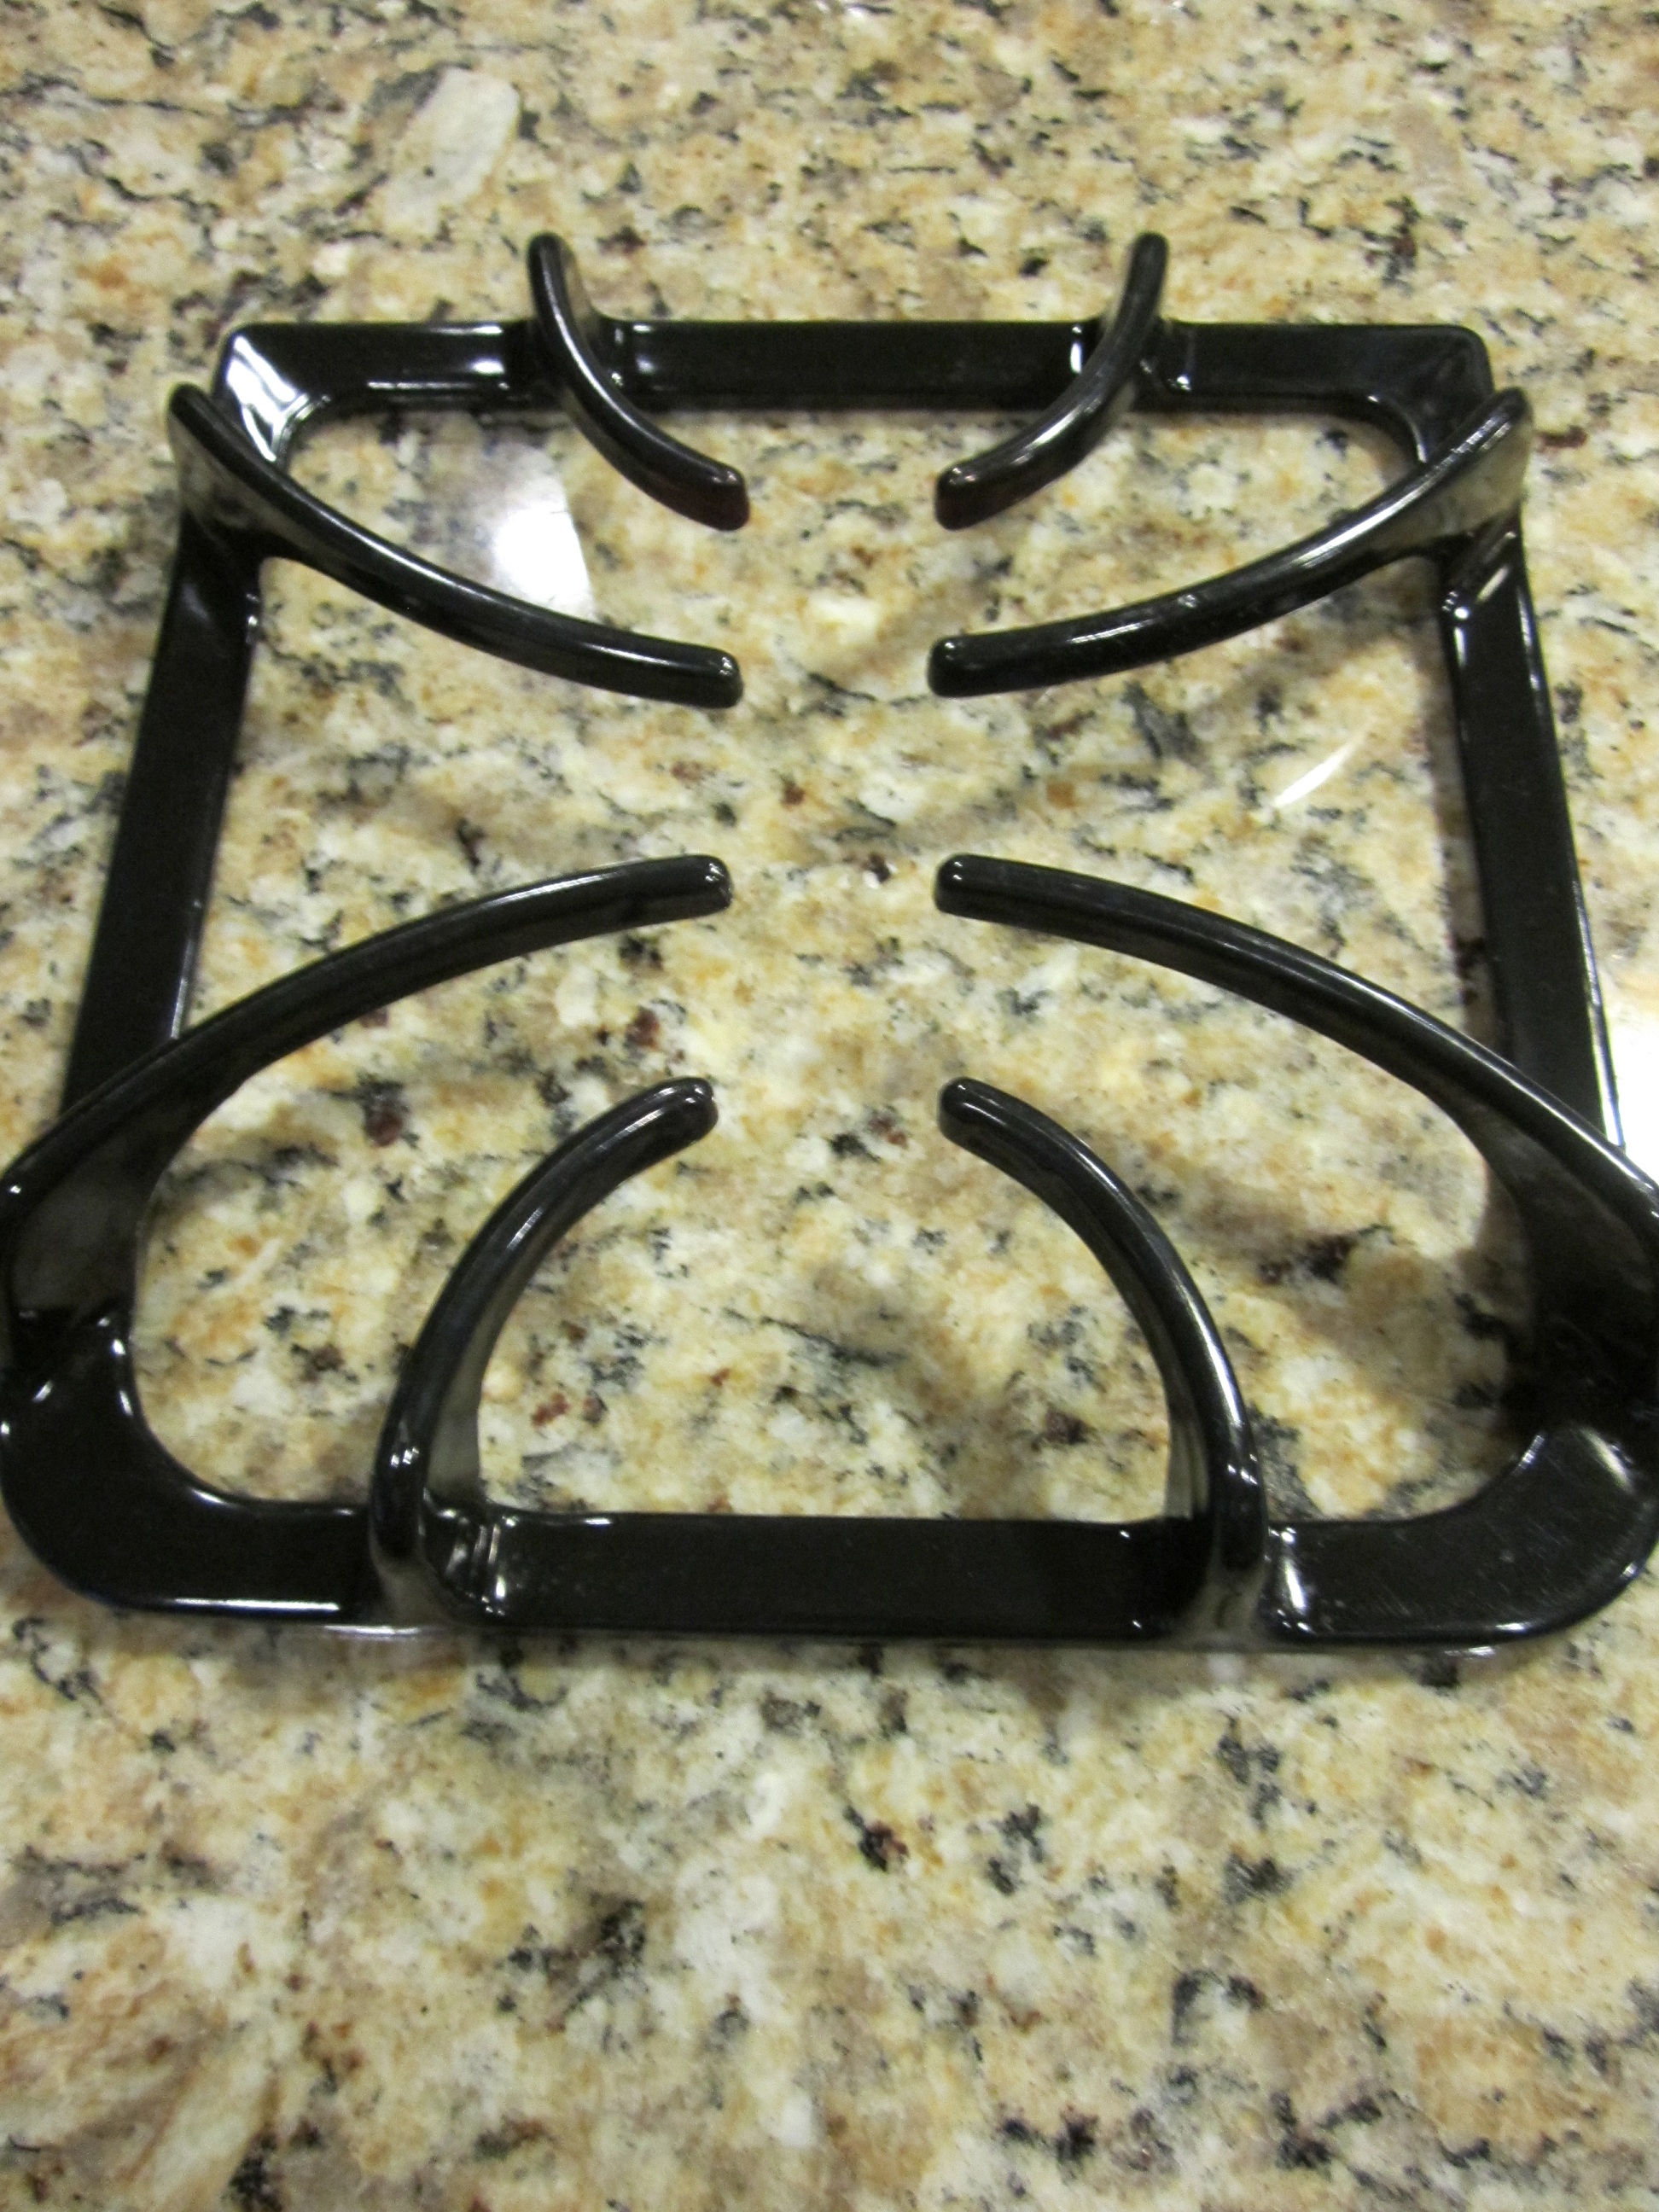
IT WORKED!!!
There are still a couple of tiny smudgy spots that probably would have been completely gone if I had let them soak for the full 12 hours.
This is definitely how I will clean them from now on. It was about $1.25 for a half gallon of ammonia. That’s a cheap and EASY clean if you ask me!
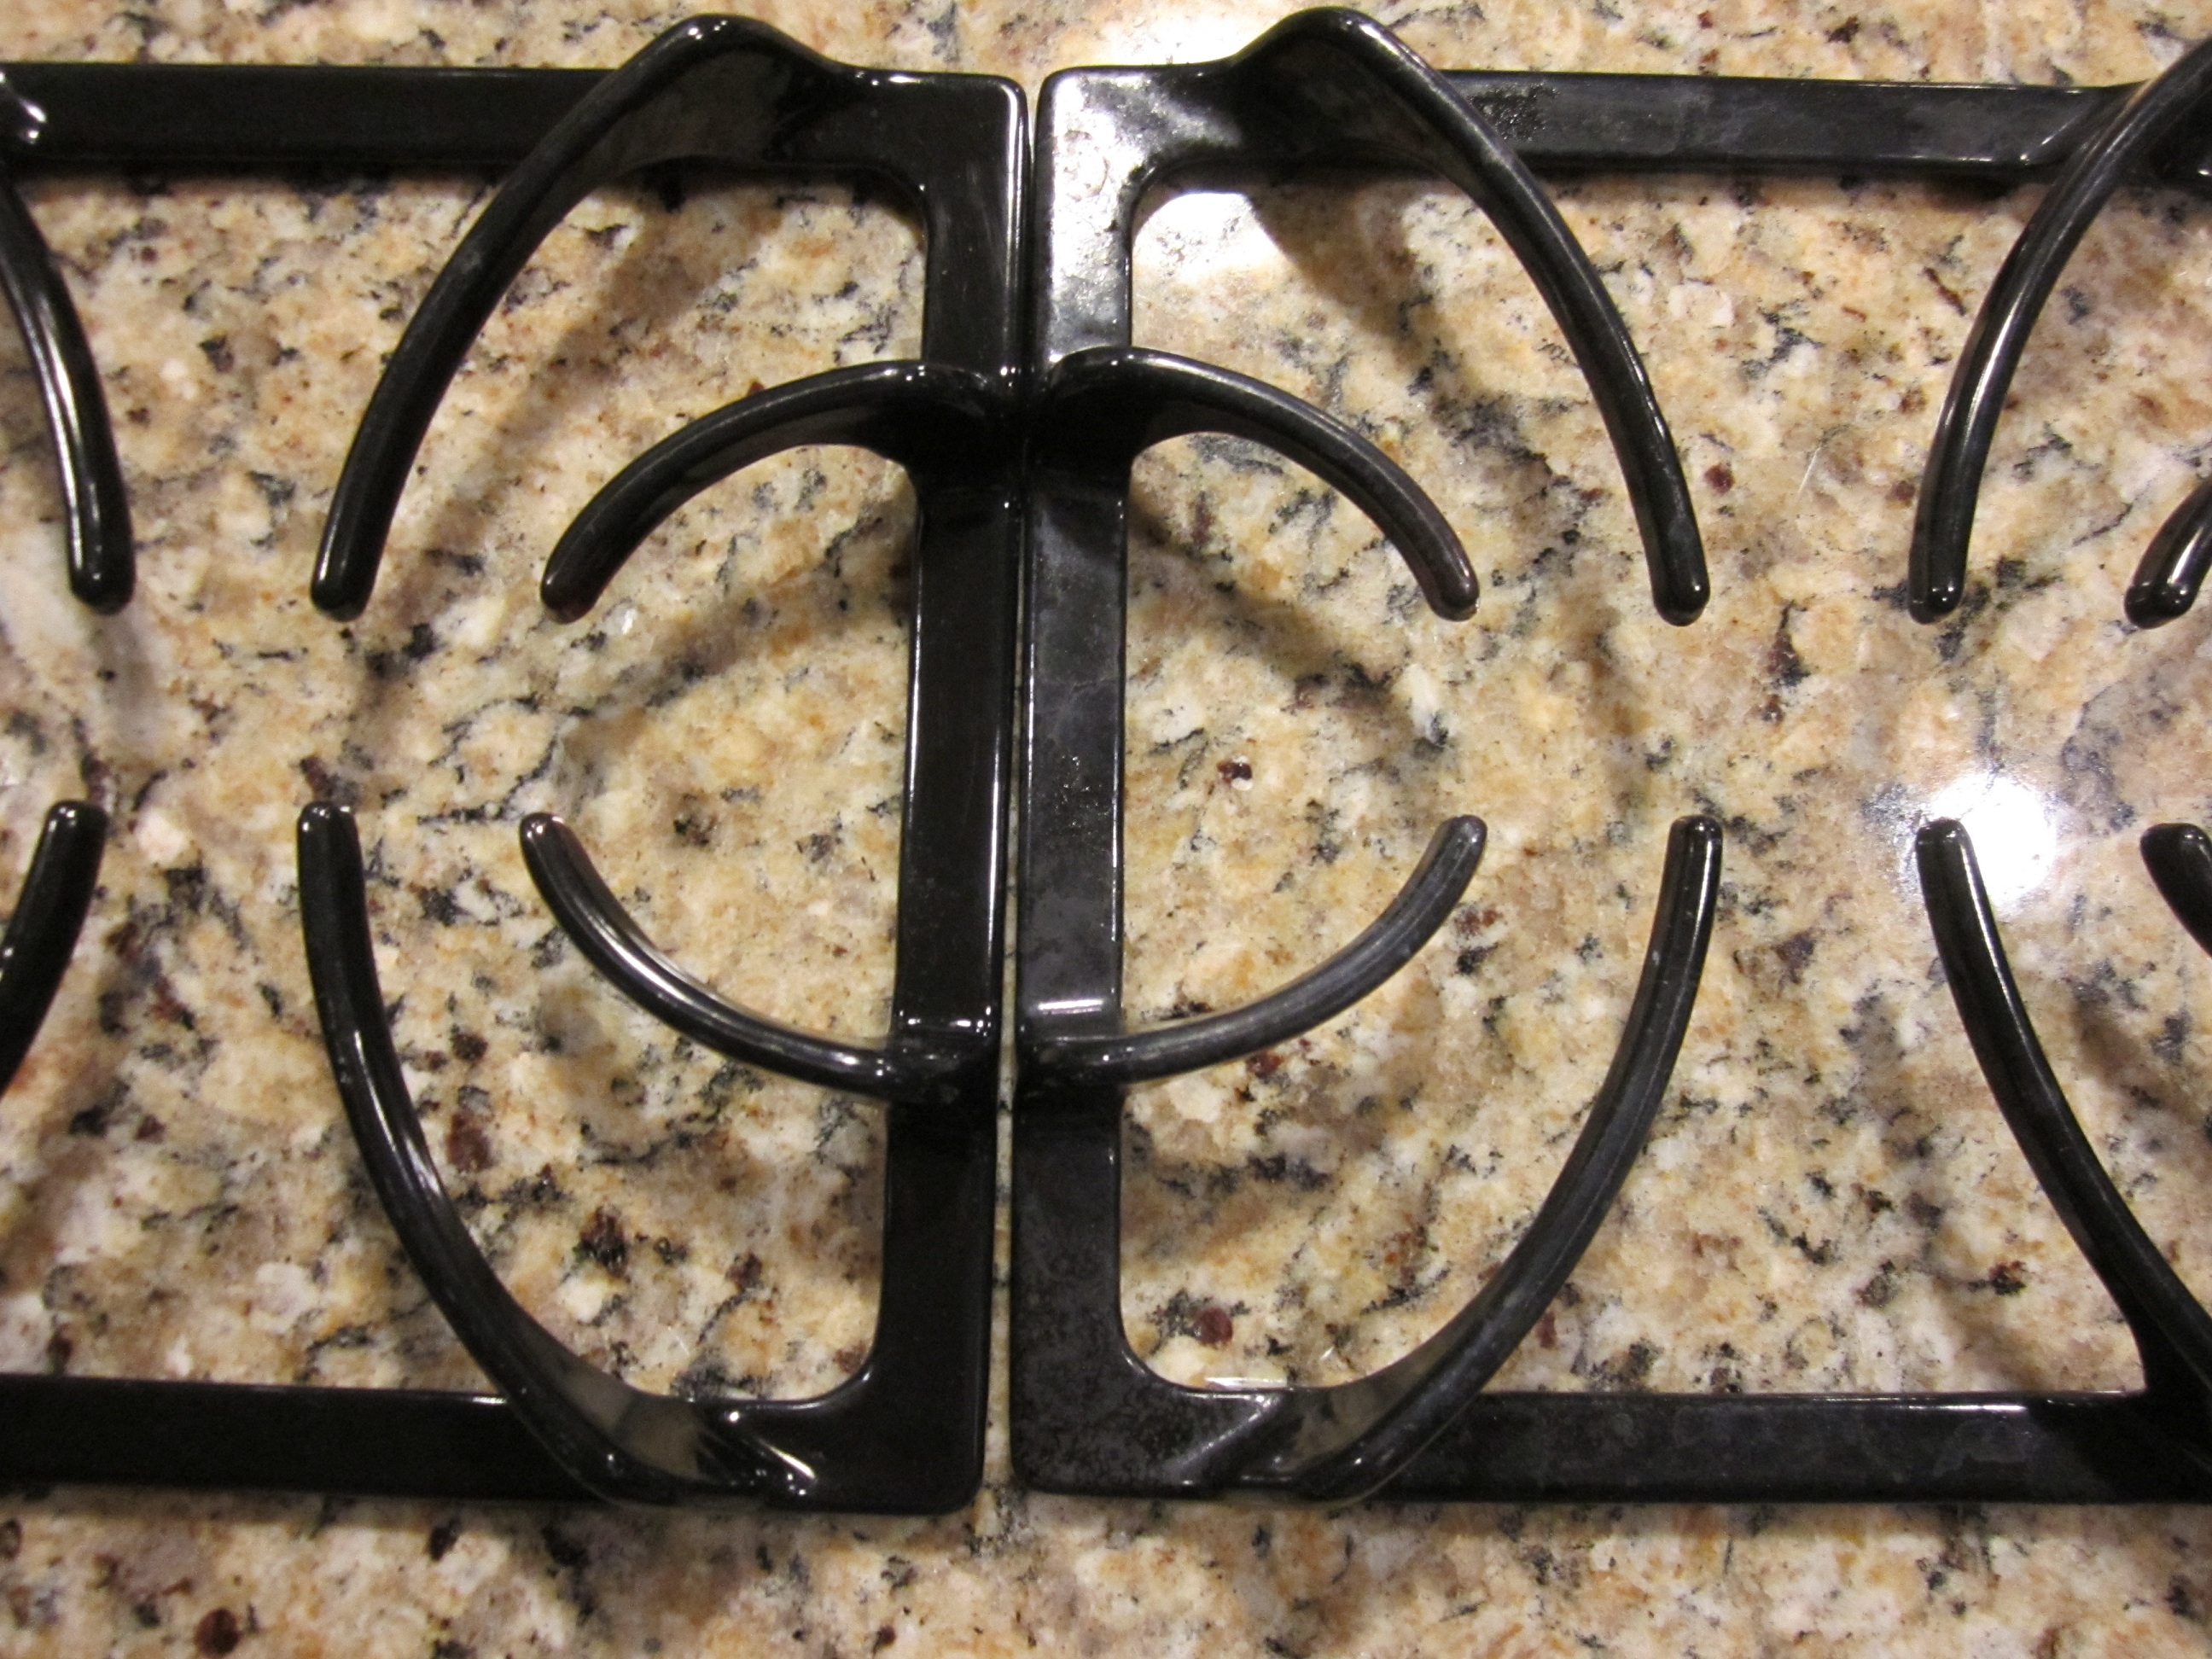
Side by side with one of the uncleaned grates.
Now I’m off to put the other 3 grates in to soak overnight.
Pin It
Black & Decker 4V MAX Gyro Rechargeable Screwdriver – $14.99! Free shipping!
!E9s2fDwijBRkTkdj4bg~~60_26.JPG)
Black & Decker 4V MAX Gyro Rechargeable Screwdriver
List Price $45.99
67% off list price
Sale Price $14.99
All eBay Daily Deals have FREE shipping!
Make your own laundry detergent!
Just in case you missed this article the first time we shared it a couple of years ago, we are republishing it. After Marne wrote this blog originally, I tried the laundry detergent. I love it and have used it ever since.
I used to be a HUGE couponer. My stockpile was massive with almost everything, most especially laundry detergent. I haven’t been such an avid couponer the past few years, and just last week I ran out of laundry detergent! First time in years. I haven’t bought laundry detergent for such a long time that I about DIED at the price when I went to the store. I just couldn’t bring myself to pay for a large container of good detergent! I did my research online and decided to make my own. I have thought about doing this for years, and decided now was the time.
There are a lot of recipes out there for homemade laundry detergent. I went with a recipe my friend Heather shared on her blog. It looked easy, which was key for me! Plus, it is supposed to make enough for 8-9 months, which I liked.
Here is what you need to make your own laundry detergent. All of these I found together at Walmart in the detergent asile.
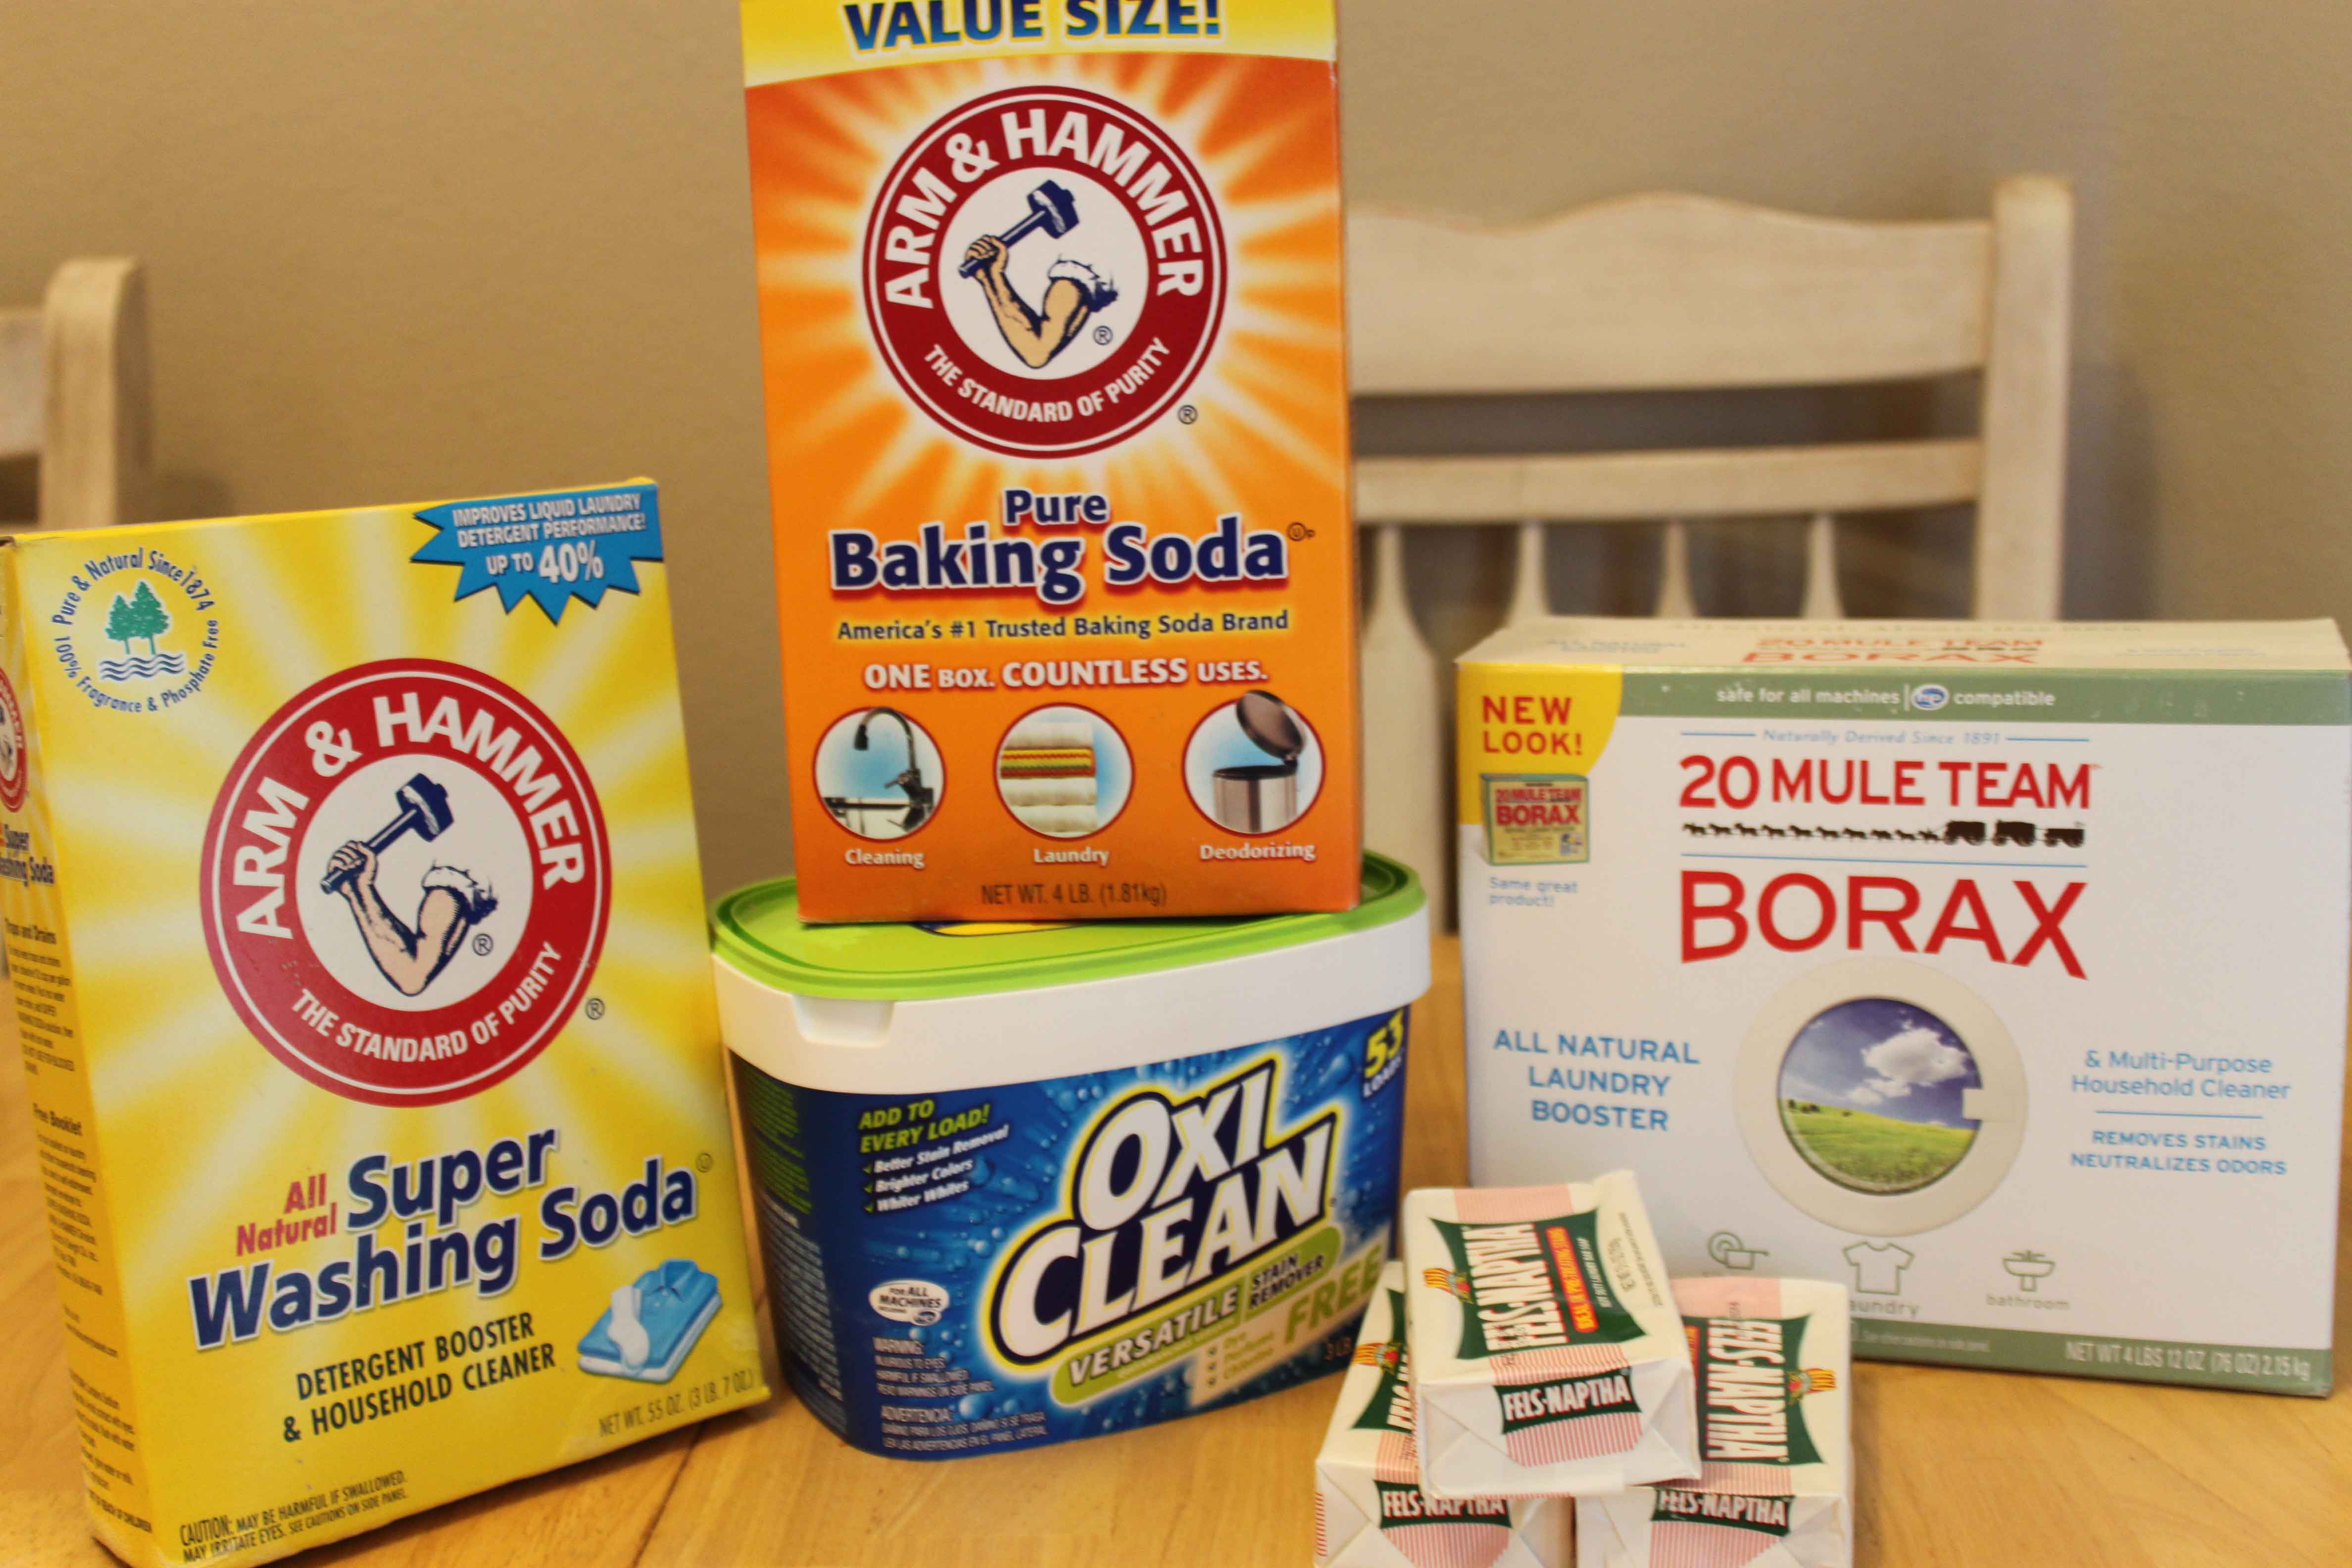
3 bars Fels Naptha Soap (grated)
1 three lb 7 oz box Washing Soda
1 four lb box Baking Soda
1 four lb 12 oz box Borax
3.5 lbs Oxi Clean (or the store brand equivilant)
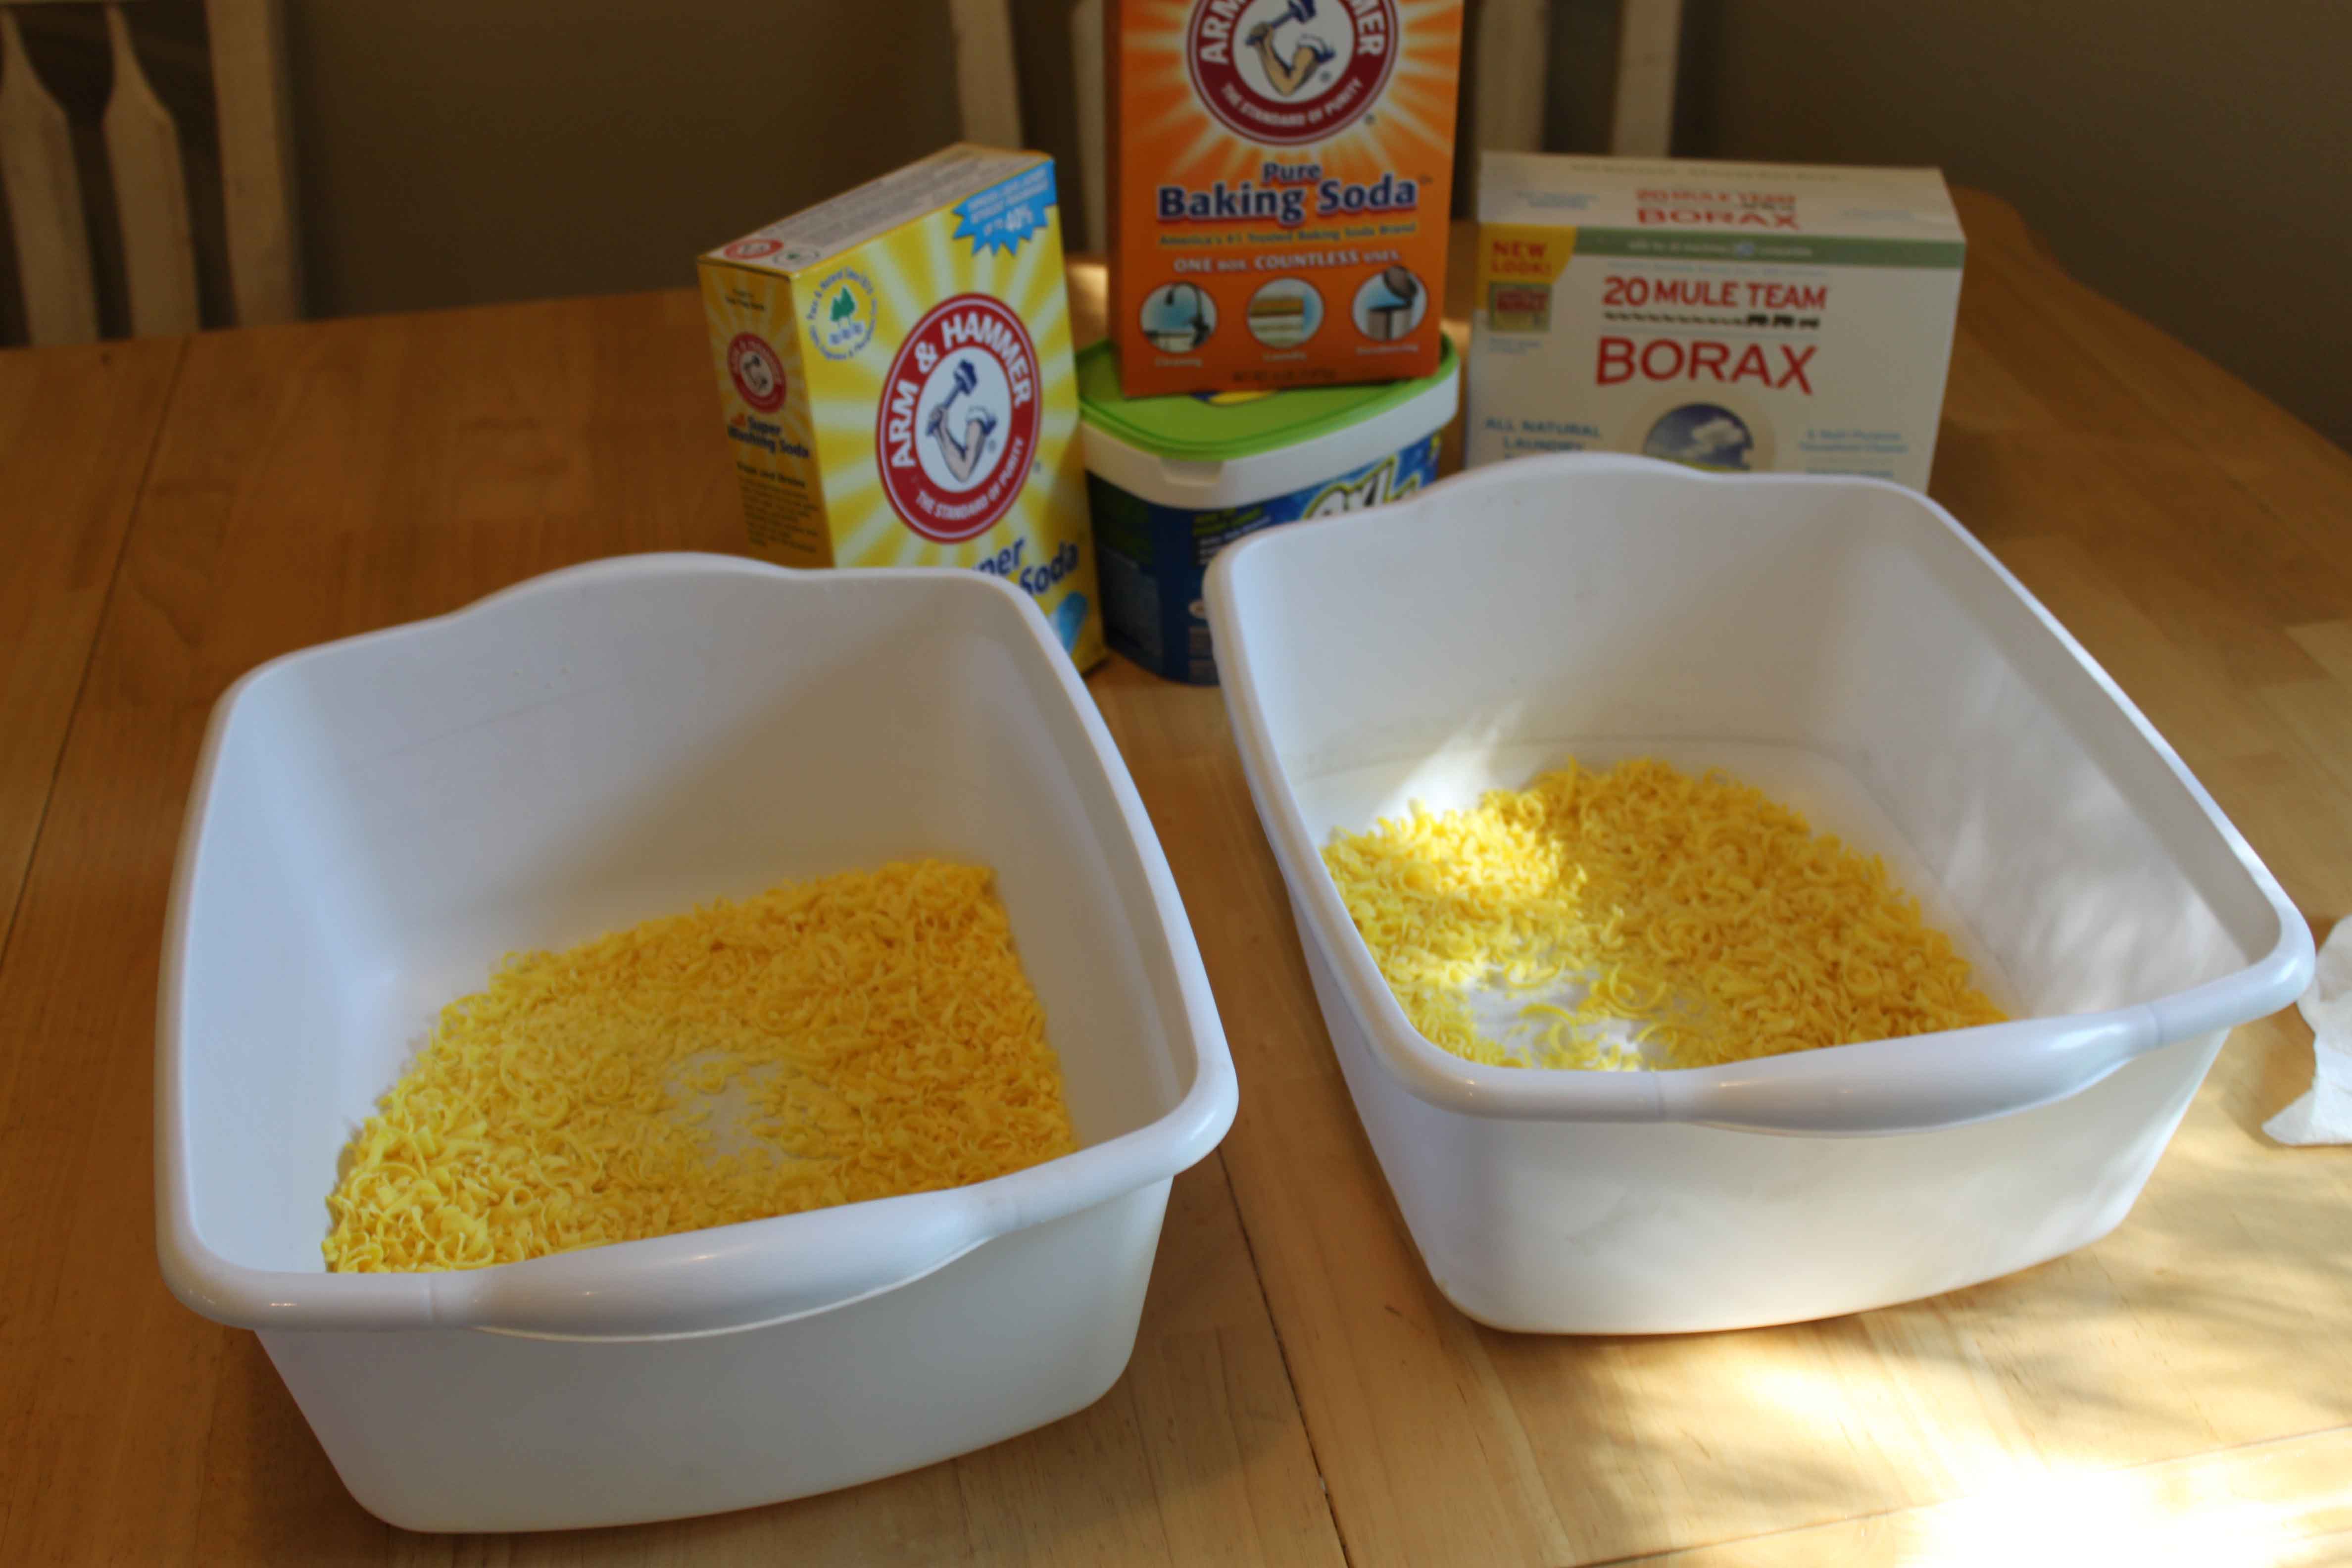
First, grate the Fels Naptha Soap. I used a hand grater, you could use a food processor. It smelled great and was really easy. Kind of looks like grated cheese! Don’t worry…it dissolves just fine in the washer. I usually use cold water and I have not had a problem.

Next, get a large bucket or container to mix everything in really well. I used two tubs and just divided everything up in half and mixed it up together really well. Worked great and smelled great!
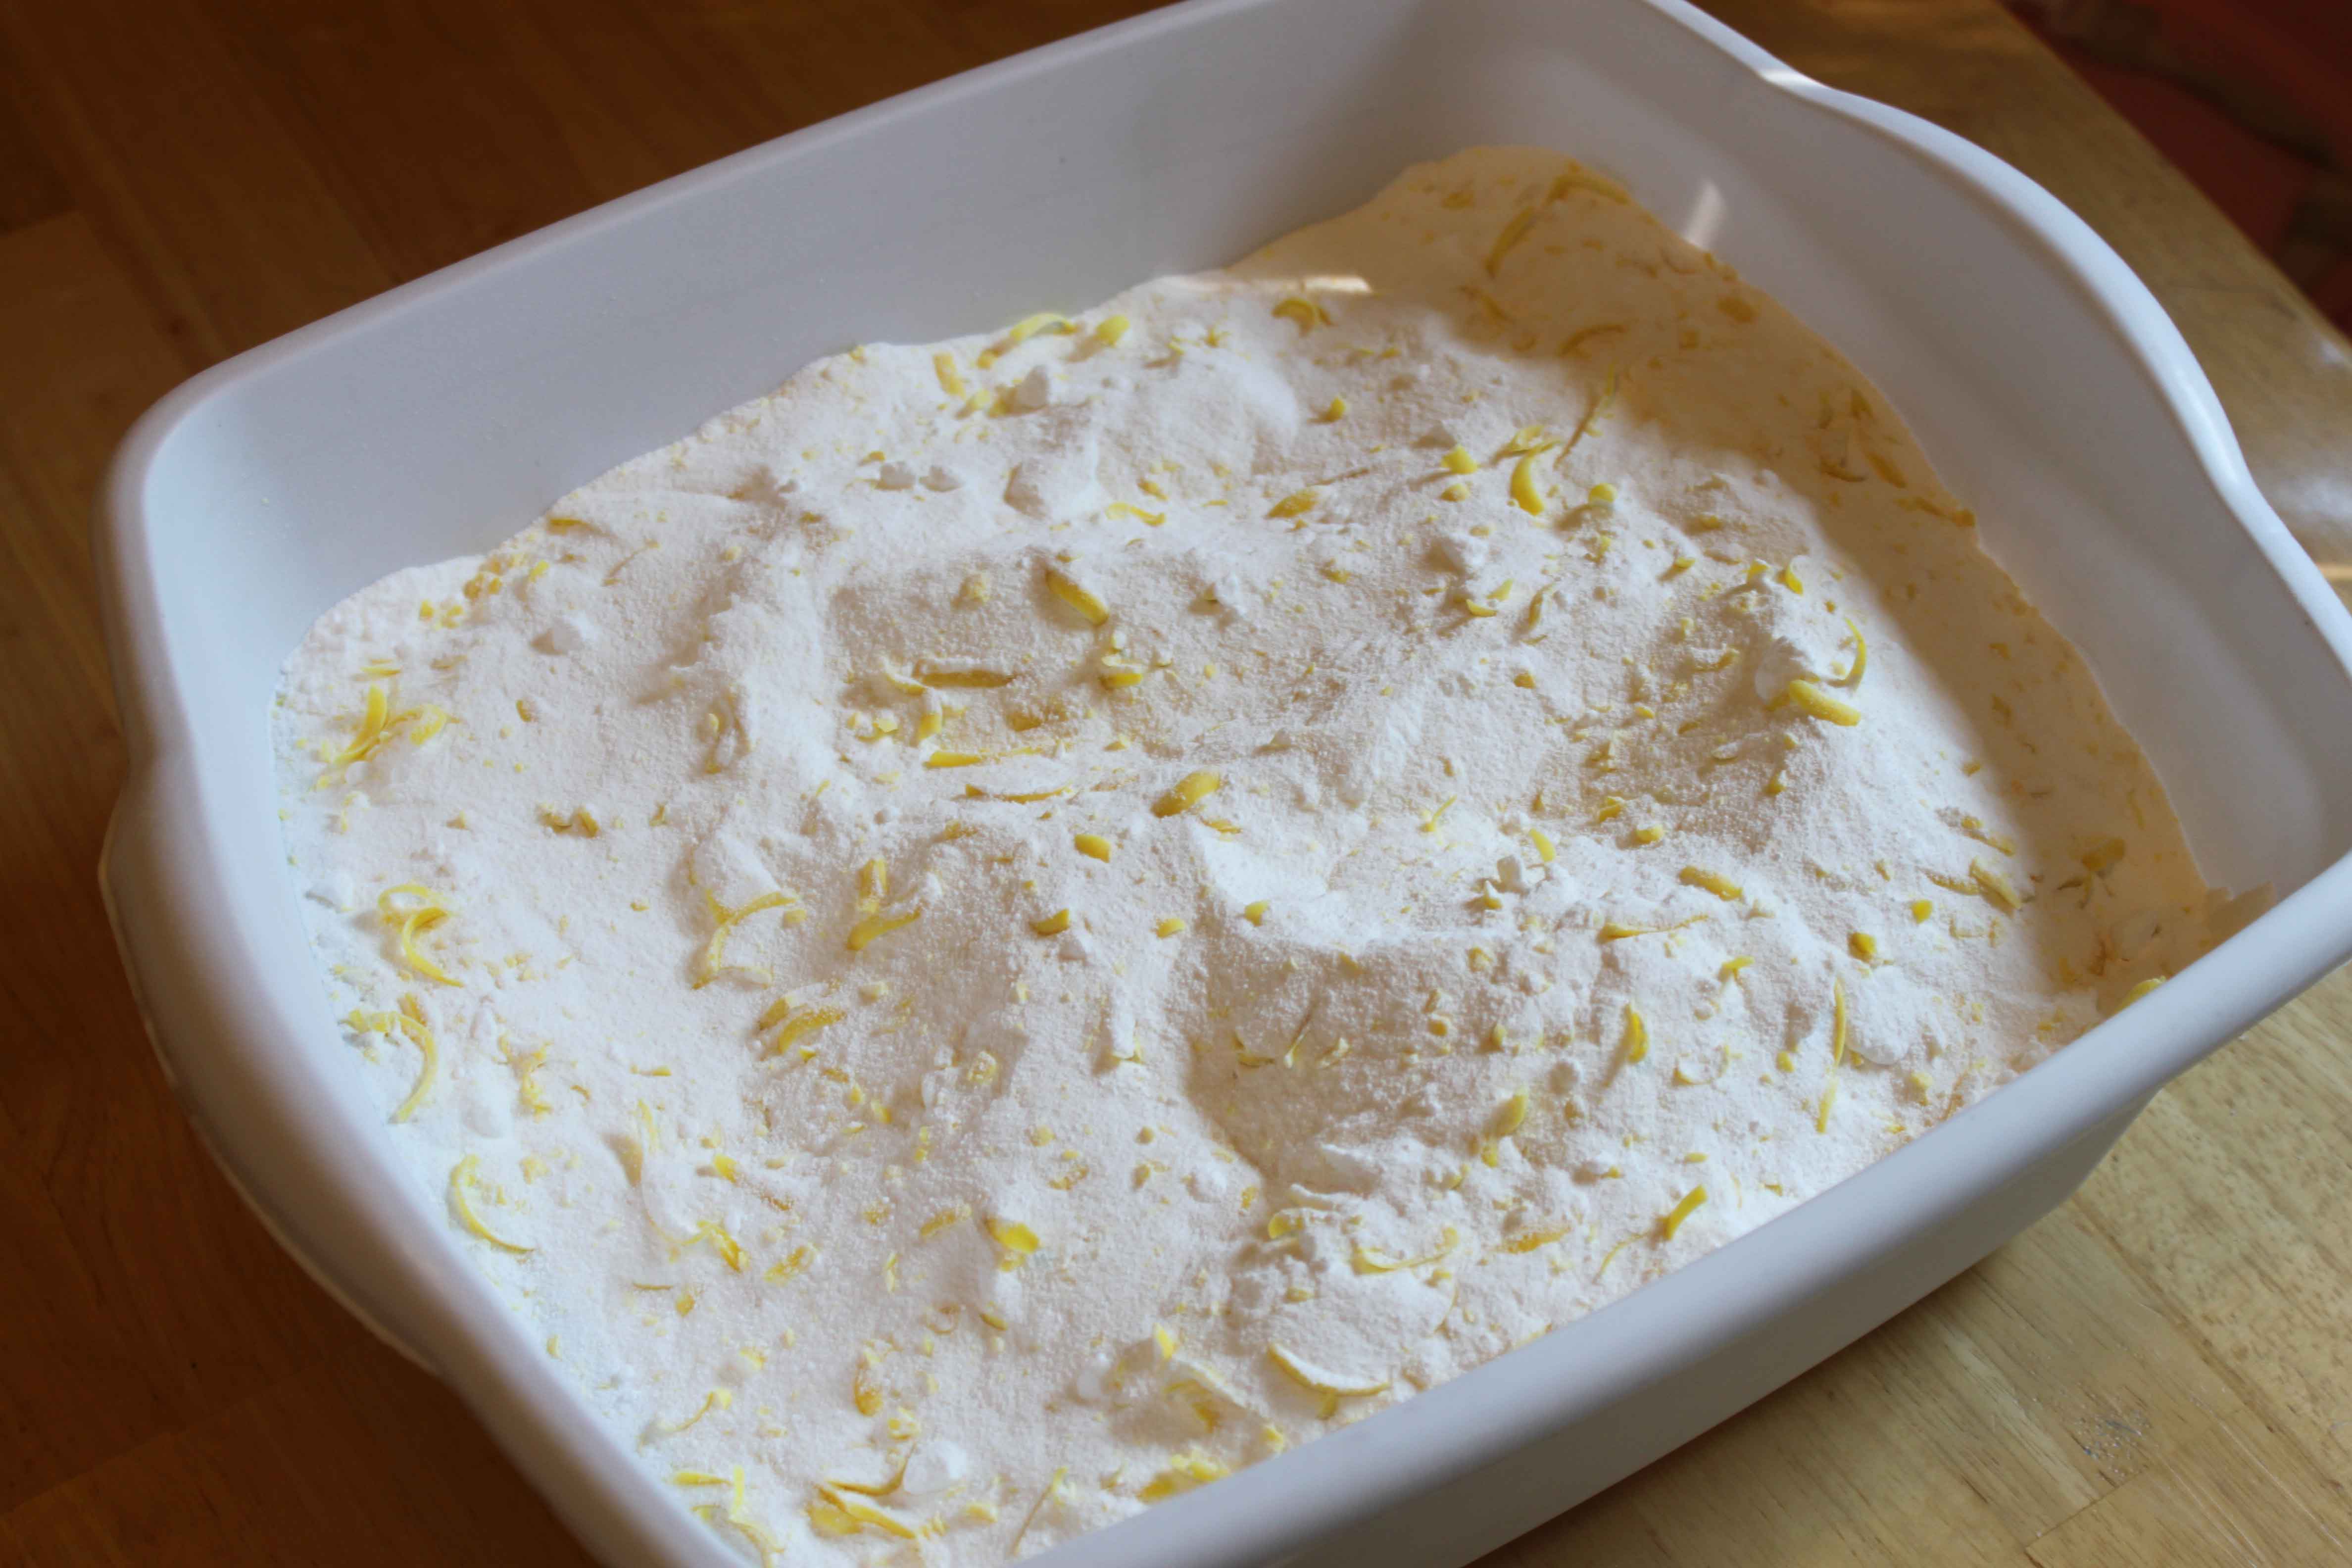
This is what it looks like when all mixed up.
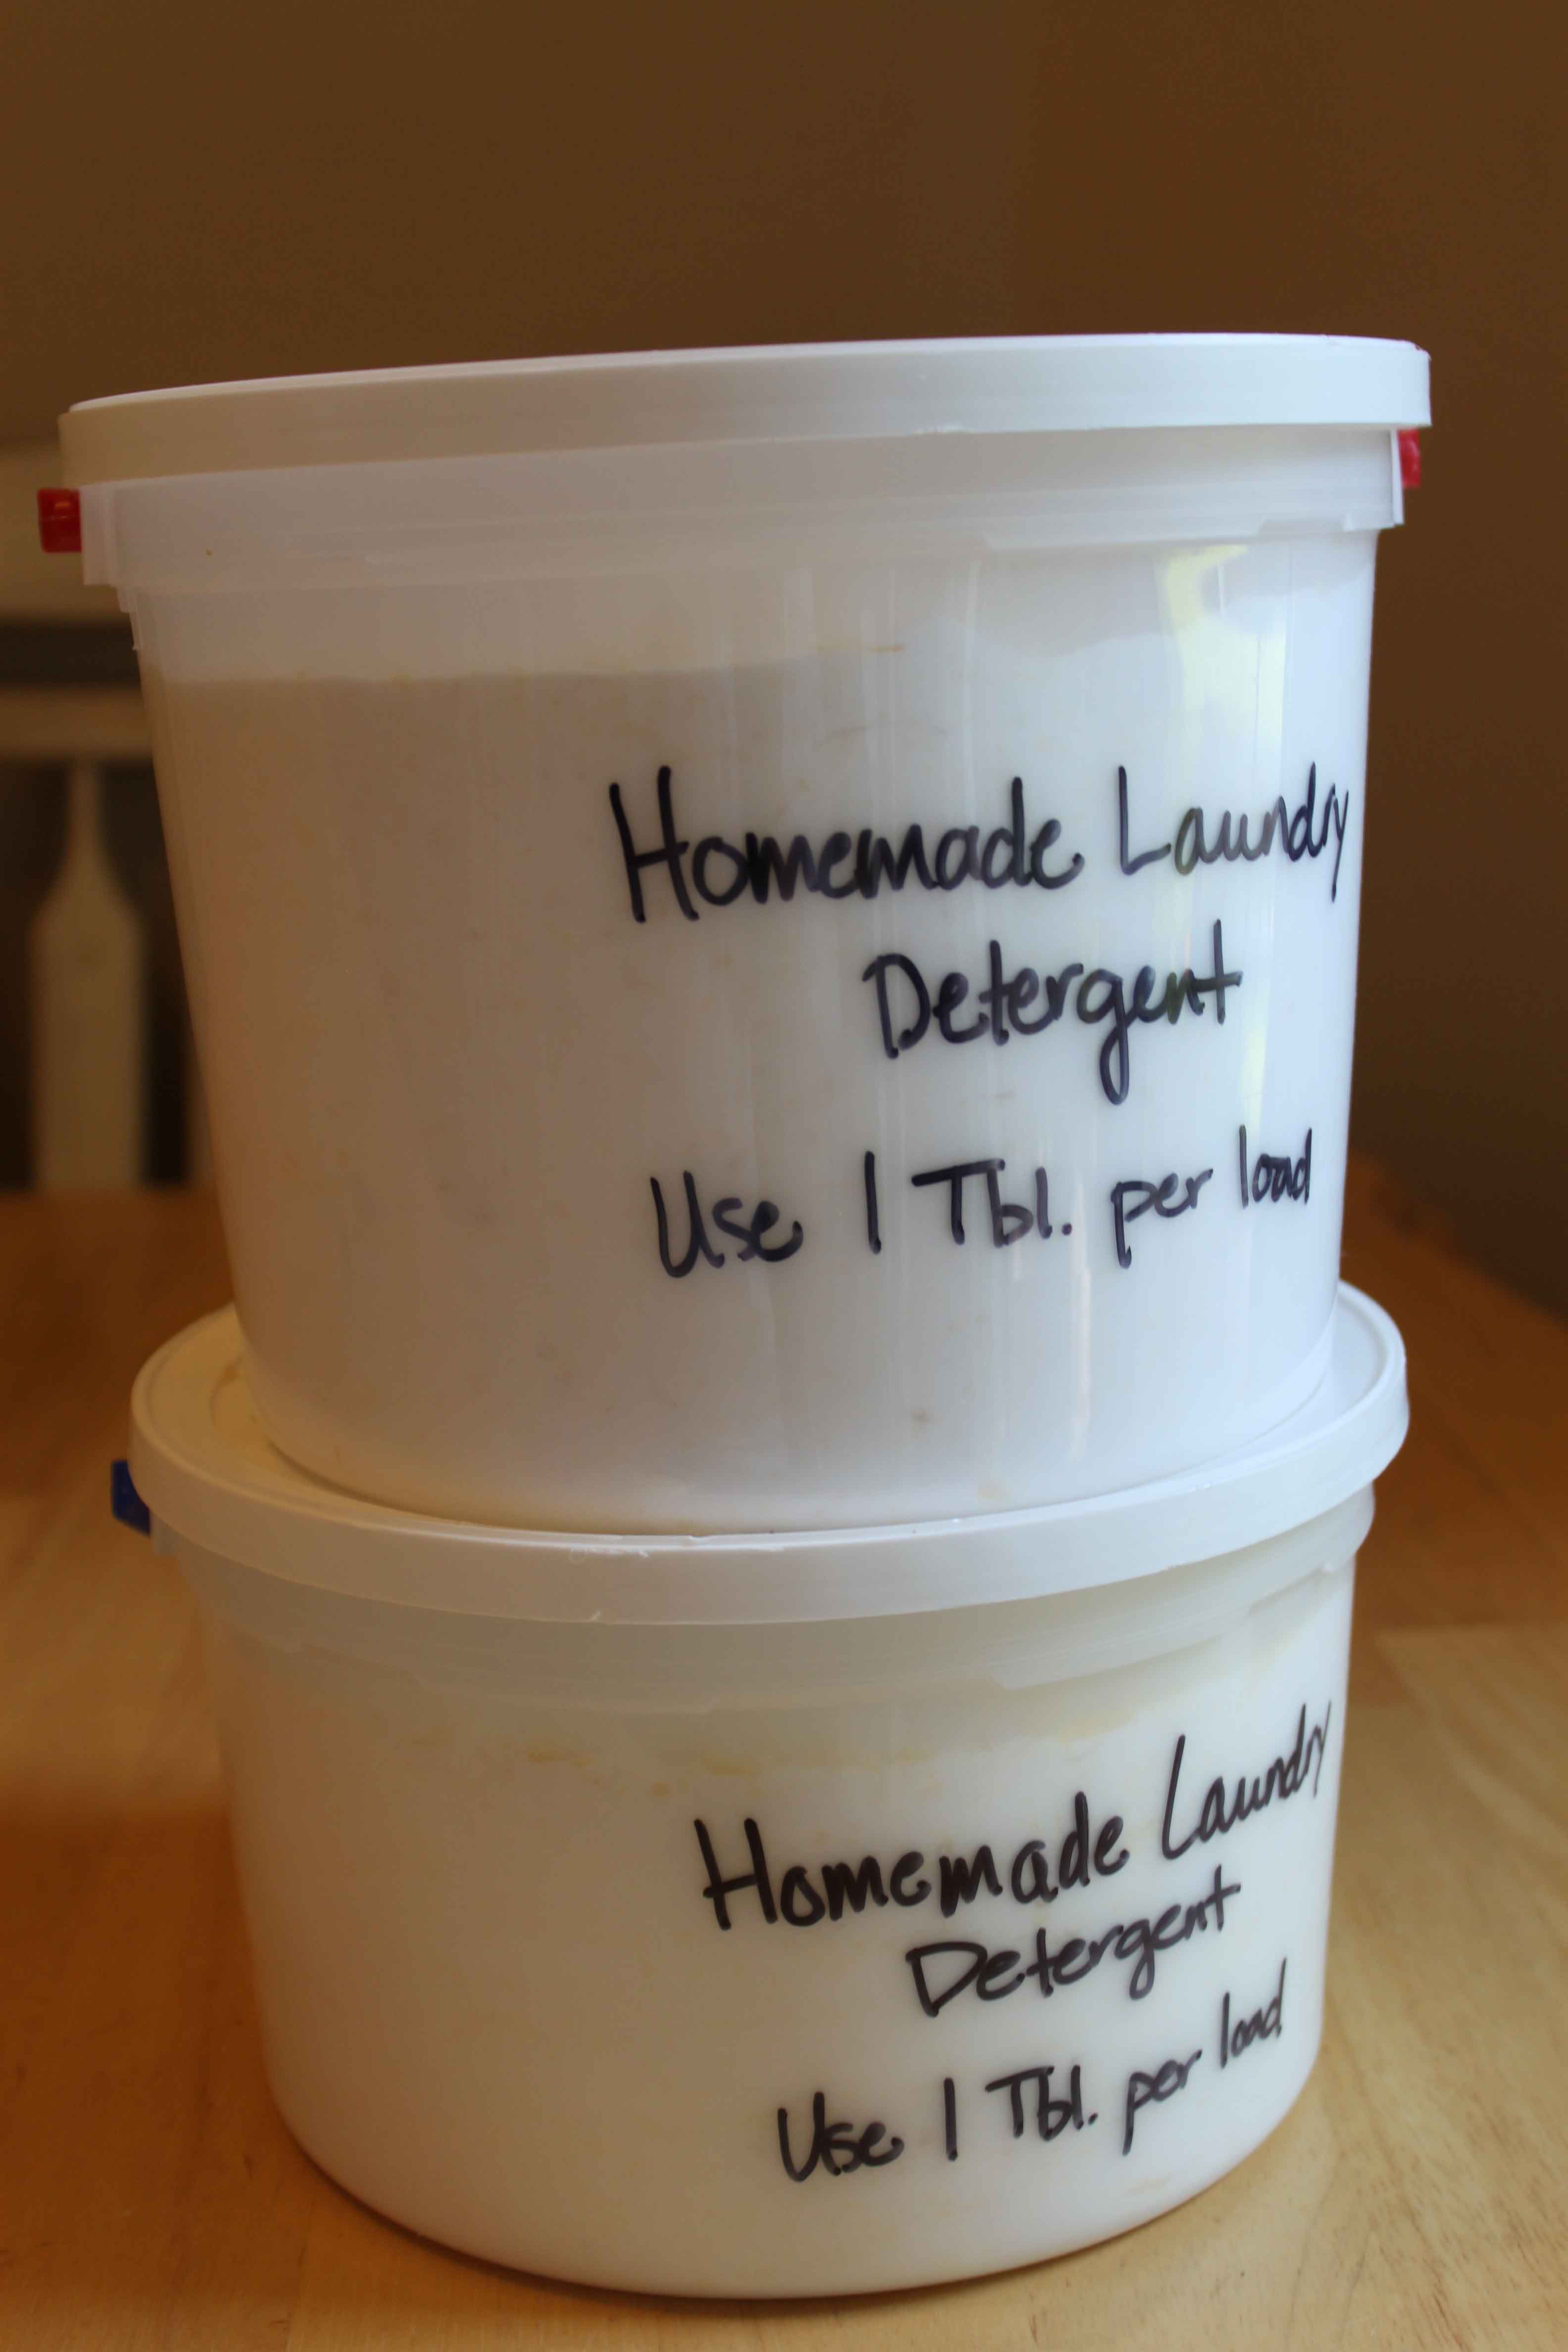
This recipe makes about 2 gallons of detergent. I didn’t want to spend extra money on a container, so I just used two empty ice cream buckets I had and labeled them with a sharpie. Walmart does carry 1 gallon glass containers if you want something prettier.
Now here is the best part….you only need 1-2 Tablespoons of detergent per load! Isn’t that amazing? Homemade detergent doesn’t have all the fillers that store bought does so it stretches much further. I have used this detergent this weekend 3 times in color loads and whites. The clothes have come out smelling great and are nice and clean! I am very pleased so far.
Here is the cost breakdown of this detergent recipe. I got everything at Walmart in the detergent asile.
3 bars Fels Naptha Soap (grated): .97 each, $2.91 total
1 three lb 7 oz box Super Washing Soda: $3.24
1 four lb box Baking Soda: $2.12
1 four lb 12 oz box Borax: (I already had this on hand, so I don’t have the exact price)
3.5 lbs Oxi Clean (or the store brand equivilant): $7.52
TOTAL: $16.74 (minus the Borax, but that is around $3)
So for about $20, you can have 8-9 months worth of detergent! It works out to be meager pennies per load. Now so you know, the Oxi Clean is an optional ingredient, but if your kids are messy or you have lots of stains and heavy washing I recommend adding it. My Walmart was out of the store brand Oxi Clean, which was cheaper.
I figured this was worth the investment to try it out. I do between 35-40 loads of laundry a month, and that is only increasing! Have you ever made homemade laundry detergent? How has it worked for you?