
Easy Last Minute Mother’s Day Gift Ideas
 Okay, it’s go time! Mother’ Day is Sunday. No need to stress if you haven’t got the perfect present yet. There is still time to get something for your Mom that shows how much you love her. Here are 5 ideas that are super easy that your Mom is sure to enjoy.
- Plant or Bush. Each year my mom asks for an annual or perennial or a bush that she can plant in her yard. So head to your local flower nursery and pick out one that would work in her yard. This is a fun gift that will last months! If your mom has flower pots or planters outside, you could also grab a few flowers and soil to fill that up too!
- Gift Card to a Spa or Massage Center. This is one of my favorite ways that I spoil myself. Most likely you could go online to a local spa and snag a gift card to give to your mom. Easy peasy, yet so fun!
- Sunglasses. This is something that most women forget to buy, but is SO needed. Grab a pair of cute sunglasses from Target and choose same day pickup so you can go grab those TODAY! You can pair these will a favorite treat or flowers. Get ready for summer!
- Make an outside space for your mom. This may seem daunting, but it can be super easy and fast. Think of a place your mom likes to sit outside, then make that space dreamy! Buy a rug and new outdoor pillows, or buy a planter with plants and an outdoor lantern. If your mom doesn’t have a place to be outside, then maybe start with an outdoor chair and a cute pillow. You can find them here at Home Depot. You can go over to your moms home and create this space as her gift. Being outside is so good for the body, so making a nice outdoor space would be a perfect gift.
- Jane.com Gift Card. Have you ever shopped Jane? There are SO many fun things to buy. They have a good variety that any mom would love.
5 Awesome Glow Stick Games Your Whole Family Can Enjoy!

Glow sticks are great for all ages. We love to hand them out during fireworks, late night games, Halloween and even taking them camping. Not only are they awesome to wear while you’re running around playing but they make some great games too. With just a few supplies and your glow sticks you can put these games together at your next gathering!
Ring Toss Game
Supplies – glow sticks, wooden dowels and rubber bands
To set this game up you’ll simply take one of your glow sticks and tie it onto your wooden dowel with the rubber bands. Then stick your dowel into the ground and step back. Each take turns tossing your glow sticks (link them together to form a ring with the bracelet attachments) towards the dowel/glow stick.
Tic Tac Toe
Supplies – glow sticks
It’s a simple yet fun game to play in the dark. You’ll attach your glow sticks together using the bracelet attachments that comes with your glow sticks. Create your tic tac toe board then make 5 of the X’s and 5 of the O’s out of glow sticks. This is a great one to play while camping or with neighbors.
Glow Stick Capture the Flag
Supplies – glow sticks (2 per player) 2 separate colors, 2 larger glow sticks (or connect multiple together) for your “flag”
The game rules are the same for if you were playing capture the flag but in the dark with glow sticks. Each player will have one glow stick around each wrist and all the players on that team will wear the same color glow stick. You are able to “hide” your glow stick while trying to capture the flag but you are not allowed to put them under your sleeve or shirt (you can find them behind your back).
Glow Stick Tag
Supplies – Glow sticks
For set up you’ll need to create one large circle by connecting two glow sticks together. This is for the person who is “it” to carry around with them. Everyone else will need to attach 1 glow stick to each of their wrists. (If playing with a large group you could just have each player use one glow stick). Then start then game – once a player has been tagged by the person who is “it”, they’ll need to remove 1 of their glow stick bracelets and hand it to the tagger. The tagger then adds that bracelet to their large circle and continues onward. (Note: no one else can be tagged until the tagger has added the bracelet to the larger circle) Game is over once the tagger has collected all the glow sticks.
Bowling
Supplies – Glow sticks, 6-plastic bottles, water, soccer ball or similar
To begin you’ll need to fill the 6 plastic bottles with water and activate your glow sticks and put them in each bottle (you might want to add 2 or 3 to each bottle to get a good glow). Then set up your water bottles and begin bowling! To make the game extra fun you can search for a glow in the dark ball.
Yummy Butterscotch Rice Krispie Treats Recipe
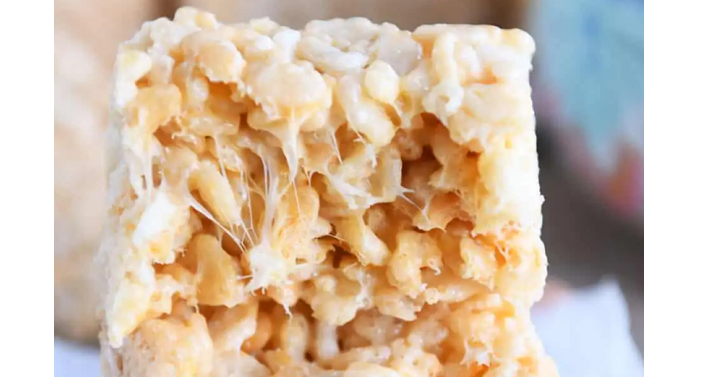
Yum. If you love Rice Krispie Treats, then you’re surely love this variation. I love these easy treats for after school when the kiddos get home, or for a lighter Sunday night treat. They are so easy to make even your kiddos can help you make them. This recipe and photo is by Mel’s Kitchen Cafe. She seriously has the best recipes.
Yummy Butterscotch Rice Krispie Treats Recipe
Recipe & Picture by Mel’s Kitchen Cafe
INGREDIENTS:
- 1/2 cup (8 tablespoons, 4 ounces) butter (I use salted)
- 16 ounces large marshmallows
- 1 teaspoon vanilla extract
- Pinch salt
- 8 cups (8 ounces) crisp rice cereal, like Rice Krispies
- 1/2 cup (3 ounces) butterscotch chips
DIRECTIONS:
- Butter the bottom and sides of a 9X13-inch pan. Set aside.
- In a large saucepan, melt the butter on low heat and let it cook until the solids start to turn golden brown and it smells caramelly and fragrant (here’s a browned butter how-to if you’d like a visual).
- Add the marshmallows and cook on low, stirring constantly until mostly melted, a few small lumps here and there are ok. Add the vanilla and salt and stir to combine.
- Remove the pan from the heat and add the rice krispies and butterscotch chips. Stir until evenly combined.
- Scrape the mixture into the prepared pan and using lightly greased or barely wet (with cold water) hands, lightly press the mixture into the pan (mashing them too hard and you’ll end up with very firm rice krispie treats – so use a gentle hand if you want them chewy). Let cool before slicing into squares.
Easy 4-Ingredient Cranberry Chicken Recipe
 I love fast and easy recipes to cook on busy school nights. This Easy 4-Ingredient Cranberry Chicken Recipe is one of our favorite recipes that take a matter of minutes to assemble. It may sound a bit interesting with these ingredients mixed together, but it truly tastes wonderful. We always get compliments with this recipe! Give it a try.
Cranberry Chicken Casserole
Recipe and photo by Recipegirl.com
Ingredients:
1 Cup bottled French Salad Dressing
1 Envelope Dried Onion Soup Mix
1 – 16 oz Can Whole Berry Cranberry Sauce
2 Pounds Boneless, Skinless Chicken Breasts
Instructions:
1. Preheat the oven to 350 degrees
2. Mix the salad dressing, onion soup mix, cranberry sauce and chicken breasts together
3. Cook for 45 min and check chicken to make sure it’s done
4. Serve with steamed rice
My Top 10 Items on Sale at Costco for April 14-May 9, 2021!
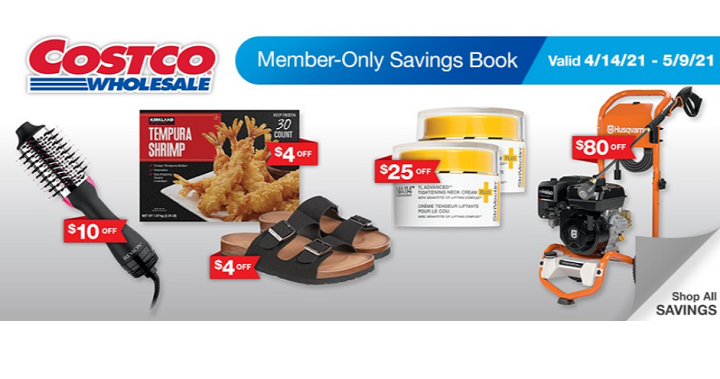 I love shopping Costco. They always have some great products on sale each month and I love shopping those deals! Here are my Top 10 Items on Sale at Costco for April 14-May 9, 2021! Remember, items may vary according to location. All of the items listed below are with the warehouse price, meaning you must go in-stores to get these prices. You can shop online for some of these items but the price may be a little higher.
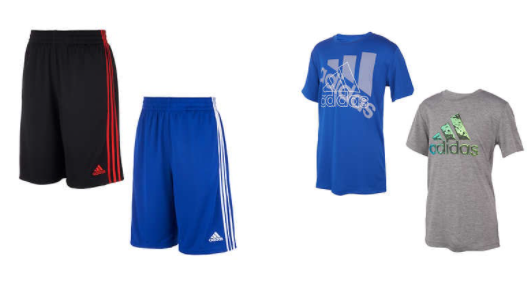
Adidas Youth 2 pack Shorts or Shirts Only $14.99 (Warehouse price)
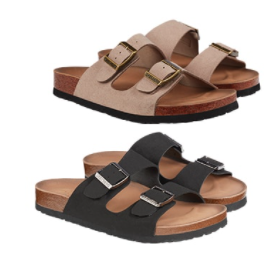 Skechers Ladies’ Two Strap Sandals only $15.99 (Warehouse price)
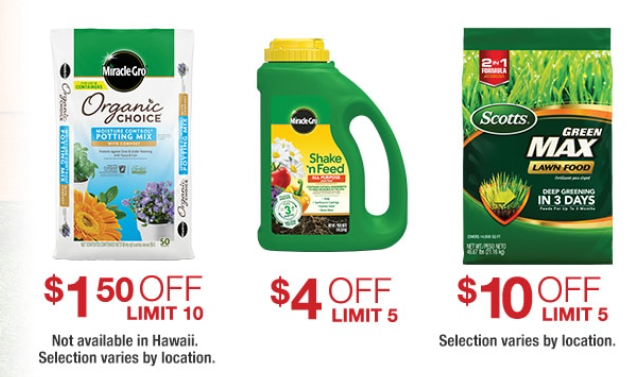
Lawn and Garden Care Items on Sale!
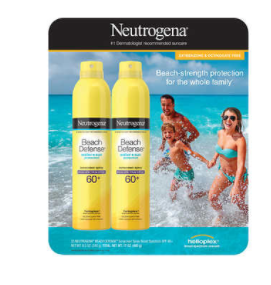
Neutrogena Beach Defense (2 pack) only $11.99 (Warehouse Price)
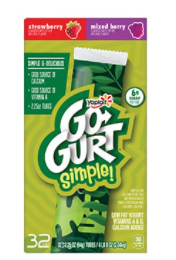
Yoplait Go-Gurt Variety pack take $3.50 off coupon (Warehouse only)
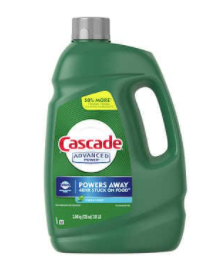 Cascade Dishwasher Detergent take $2.50 off coupon (Warehouse only)
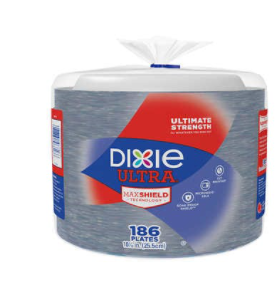
Dixie Ultra plates 186 count take $3.70 off coupon (Warehouse only)
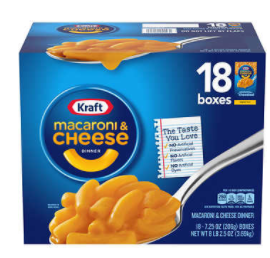
Kraft Macaroni & Cheese 18 boxes take $4.00 off coupon (Warehouse only)
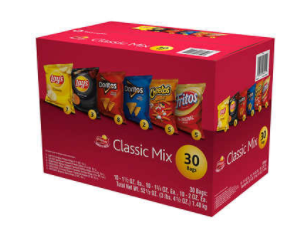 Frito Lay Classic Mix 30 bags take $3.90 off coupon (Warehouse only)
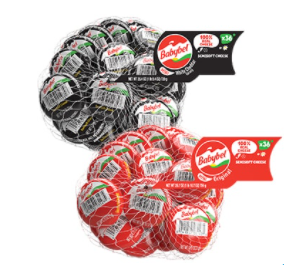
Mini Babybel cheese take $4.00 off coupon (Warehouse only)
There are a lot more items that are on sale. These are the items that are at great stock up prices.
The Top 10 Items That Add Clutter To Your Home!

Spring cleaning at my house doesn’t just mean cleaning, it also means time to declutter! I honestly love decluttering my home, probably a little to much my family might say but when I have less clutter my mind can think clearly. So here are my top 10 items that cause your home to look and feel cluttered.
- PAPERS – I think this is a given but take a look around at all the paper in your home. This is a great time to clear it out. I’ve honestly switched to a digital filling cabinet. So any medical/bank statement or important paper work is filled digitally on my phone. There are quite a few apps out there but for right now I’m just using my google drive. Don’t think about scanning in all the papers you have laying around right now, just start today. Set up a system that works for you and start “filling” those papers that come into your house digitally. Then you’re not worried about playing catch up.
- CORDS – we live with so much technology that everything comes with a charging/power cord now a days. These cords start to add clutter to your home if you’re not careful. We’ve found that having a basket in the main part of our home for all the charging cords has helps a ton. Then when our kids or ourselves need to charge a device, we know right where to look. I’ve also started using zip ties for the cords that run the computer and items on the kitchen counter. It’s cleared it up and makes it more appealing to the eye.
- ITEMS ON THE FLOOR – this one I’m a little OCD about. I don’t like things on the floor that don’t belong. I’m constantly having to pick up shoes or put away nerf gun bullets off the floor. (Please tell me I’m not alone on this?) But I’ve found even in a closet or the pantry, when I keep things off the floor the whole closet looks better. So clear up that space and leave it as empty as you can. You’ll be surprised just how much better that area looks with nothing on the floor.
- DECORATIONS – I have a weakness for decorate items, especially when I’m at Hobby Lobby. They’re just so cute. But the more items I add to my house the more it starts to look clutter. I’m all about less is more when it comes to decorating my wall space and shelving. Even stuff on the kitchen counter can start to make the area look cluttered if there’s to much. Take a look around your house and decide what you love and should stay and what you might be able to part with to help clear up the space.
- BATHROOM ITEMS – this takes up space and with all the little items laying around it can look cluttered. I recommend making it organized and easy to access but tucked away under the sink. I know those cute little trays they make for your makeup can look pretty, it can also make it look cluttered when left on the counter.
- REMOTES – We have about 3 different remotes in must our family room (on top of all the gaming systems controllers). So we made a basket for all these loose items to be stored it and it’s cleared up all the clutter. Then it’s a lot easier to find the remotes when we’re ready to sit down and relax.
- THE FRIDGE – I think there’s mixed feelings on this one. I prefer a cleared off fridge with nothing on the outside of it. I find it makes my kitchen feel less cluttered. Don’t worry the kids still have a place to hang their artwork and creations it just not on the fridge anymore. So if you can clear that off, you’ll see a big difference.
- PET TOYS – do you have a furry family member in your house? You’ve probably noticed they’re not that great a cleaning up after themselves causing more clutter. Find a cute basket or container that you can collect all their toys into when cleaning up. And keep them minimum. Just like kids, animals don’t need a lot of toys to keep them happy, a couple will do just fine.
- MAGAZINES – I know there’s so much good information in them but I promise you can find all the same information right online and avoid adding clutter to your house. Now if it’s just one or two and you rotate through I can see that not being bad but when they start to pile up and you’re having them all over the house it’s time to unsubscribe to all those magazines and get your house clutter free.
- CLOTHING & SHOES – does everything fit and do you wear everything in your closet? If not you probably find your closet cluttered and it’s time to clean out! Keep only the items that “spark joy” and toss the rest. You’ll find power in being able to make hard decisions and enjoy walking into your closet once you’ve cleaned it out.
Make Your Own Raised Garden Beds This Spring!
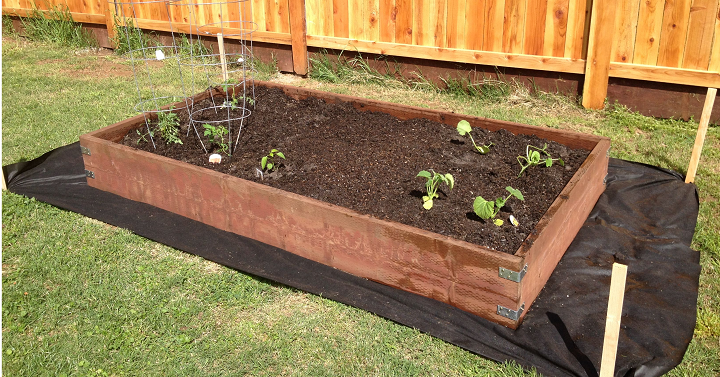
I have always loved the idea of being able to go out into my garden and pick a zucchini for lunch or snag a tomato for our hamburgers. And when the produce really comes on, it’d be great to preserve what we have or freeze what we want to use later. Unfortunately we had to tear out our garden beds to put in a shed a few years ago so this year I’m building my own raised garden beds. I’ve built some at our old house and learned a lot plus I’ve been to the nursery and talked with my mom enough to feel like I’m on the right track to having a great vegetable garden this year. So, here’s a few tips and tricks if you want to put together your own raised garden beds.
- Weed barrier – I HIGHLY recommend putting some type of weed barrier down, especially if you’re building your beds over grass. We went with a weed barrier I found on Amazon and have used in the past in our flower beds. It’s worked great there. You could also use cardboard boxes (all those Amazon boxes would work great). I put this down at our old house and they worked just as well and would break down over time.
- Make sure you build them high enough – this is especially important if you’re putting weed barrier down. I (and from the expert advice of the nursery workers) recommend not going any smaller than 8″ high. I went with the 10″ boards so that I have room to add dirty and other nutrience to the garden beds over the years.
- Wood – this is all a matter of opinion on what will work best for you. I wanted to try to make mine as cheap as possible so I looked as using wood fence posts which weren’t to pricey. The problem I was having was they wouldn’t last long and they’re super thin (which isn’t good once you add your dirt, they’ll start to bow). So, if you’re looking for a long time solution I recommend getting the good stuff from the get go. I went with treated lumber that was 10″ high and 10′ long (I was making 5’x5′ garden beds).
- Find the right dirty – this is where I stumbled and ended up with the wrong stuff (costing me more money than I wanted to spend). So make sure you do your research at your local nursery. Mine was awesome to work with but in doing research you’ll want to make sure you’re fill dirt has at least 1/3 blended compost, 1/3 peat moss and 1/3 coarse vermiculite. Luckily for me, my nursery had a great blend with these important ingredients in it.
- What to plant – this can depend on the area you live in. Around here, Utah, I’m able to put my lettuce and peas into the ground now (don’t forget your trellis) , they’re cold weather plants so they’ll do great. The rest of my veggie starts are inside and I plan on getting them into the garden beds around Mother’s Day. Make sure you also note how much room each plant needs. You can find this information on the back of the seed packet. I find square foot gardening to be the best way to use my space wisely. I just take string and some sticks to mark off each square foot that way I can see exactly where each plant needs to go.
I hope this gives you some ideas of what to think about when making your own garden beds and planting in them!
5 Fun Kid Friendly Outdoor Activities in St. George, Utah
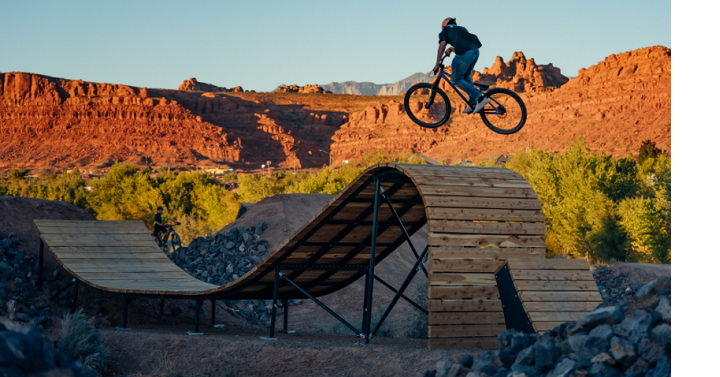 St. George, Utah is one of the most beautiful places to visit in Utah. We recently returned from St. George and absolutely loved it. It’s a place where we love to spend our time outside. There are a lot of fun things to do like biking and hiking or just playing at a unique park. Here are 5 fun places you could visit the next time you visit St. George, Utah.
- Snake Hollow Bike Park. This is a relatively new bike park that has some fun trails. There are hundreds of features and four skills zones: Rattler’s Revenge (dirt jump zone), Snake Den (pump track and skills loop), Venom Drops (gravity skills) and Sidewinder Slopestyle (gravity jump trails). This is such a fun place to visit. Our kids could have stayed there for hours.
- Thunder Junction Park. This park is the best that I’ve seen in the whole state! It’s fun for all ages. You can also ride a fun train around the park for a small fee. This is an all abilities park which is made for those who need accessibility to the park.
- Pioneer Park. This is seriously a favorite for our whole family. This isn’t the typical park. It’s a rock climbing adventure in open space. While there be sure to clip to the top and see the beautiful view down below. Make sure there is parental supervision while climbing. There are steep ledges, so you’ll want to climb together as a family. My little 3 year old even loved climbing around the red rocks. You can find the location here.
- Sand Hallow State Park. This state park has both sand and water. What more could you want? Bring your sand toys or small boats and enjoy this park with the family. If you are visiting during the summer months, this is a refreshing place to visit and cool off. You can find more information here.
- Red Cliffs National Conservation Area. If you want more of an outdoor, camping or hiking adventure, be sure to check out this area. There are camping areas that are absolutely beautiful. You can also do a day hike. We have been to Sand Cove and it was so fun. Bring your sand pails and play in the sand or go on little hikes around the natural beauty. More information can be found here.
Non-Sugar Easter Basket Filler Ideas
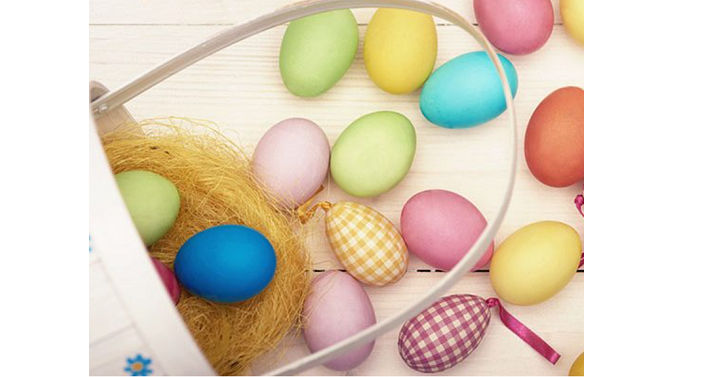
It’s almost Easter. Are you ready? This year I’ve decided to go with a lot less sugar in the Easter baskets. It’s nice to find some fun summer items to put in the baskets. That way the kiddos can use them a lot longer than candy. Here is a list of fun items to add to your baskets this year. You can search for these items on Amazon, Target, Walmart or your other favorite store.
- Books. I love finding some fun and unique books like these fun Usborne books.
- LEGO sets
- Play-doh
- Bubbles & Bubble blowers
- Crazy straws
- Puzzles
- Sticker sets
- Stamp sets
- Hair ties
- Earrings/Necklaces
- Chapsticks
- Jump ropes
- Water bottle stickers
- Nail polish
- Sunglasses
- Toothbrush
- Pocket Hand Sanitizer
- Face masks
- Paints, markers or crayons
- Card games- have you played this game called Taco, Cat, Goat, Cheese, Pizza?? It’s super easy to learn and a fun one to take on the go!
Ready to Bike this Summer? 3 Best Places to Get a Hitch/Towing Package for Your Vehicle
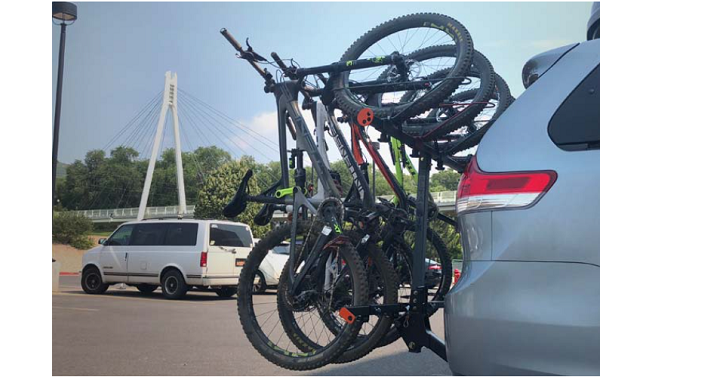
Ready to Bike this Summer? We sure are! However, our van does not have a hitch. If you are in the same boat as we are, then check this out. I’ve found the 3 Best Places to Get a Hitch/Towing Package for Your Vehicle. Be sure to call ALL of these places listed below, get quotes for your car and then you can decide which one to go with!
- UHAUL. Check out their website here to see what your car needs. Then you can call and make a reservation for them to install, or you can just order the parts and have them shipped to your home.
- Pep Boys. Here is another place to call and get a quote with your vehicle. Just like UHAUL, they have the option of just getting a hitch or getting the whole tow package.
- Your car mechanic. If you already have a favorite car mechanic then give them a call and see what their quote is. If they do it, then you may feel more comfortable working with them since you have in the past.
We always do the 3 quote rule where we get 3 quotes on any big purchase that we are looking into. So be sure to call ALL of these places near you and see which quote works best for your vehicle. Remember, you can start out with just a hitch if you don’t need the whole tow package, that will save you some money. Happy biking!
4 Fun & Easy St. Patty’s Day Activities Your Kids Will Love
 Are you ready for St. Patrick’s Day next week? My kids absolutely love that day. I’m not one to go over board on this holiday, but we do try it make it somewhat fun. I’ve found a few fun and easy St. Patty’s day activities that your kids will really enjoy.
- Fun St. Patty’s Day breakfast. We love making some pancakes and putting a little bit of green food coloring in the pancakes. Then put a little bit of whip cream on top and add some fun berries on top. If you want to make breakfast super easy then just grab some Lucky Charms! We actually have a box of those at the end of the treasure hunt, which is the next activity.
- Treasure Hunt. Set out a treasure hunt for the kids. You can have little gold coins making a path to an end treasure, or you can set up clues to get to the last treasure. Our kids love any type of treasure hunt. We usually have the Lucky Charms at the end for a fun treat.
- Dance Party. Put on some Irish music and dance the night away. There are some fun Irish songs that the kids would love.
- Shamrock Shake. End the night with a fun treat for the family. You can make a Shamrock Shake. It’s super easy to make and the family will love it.
5 Spring Skiing Safety Tips you Won’t Want to Forget
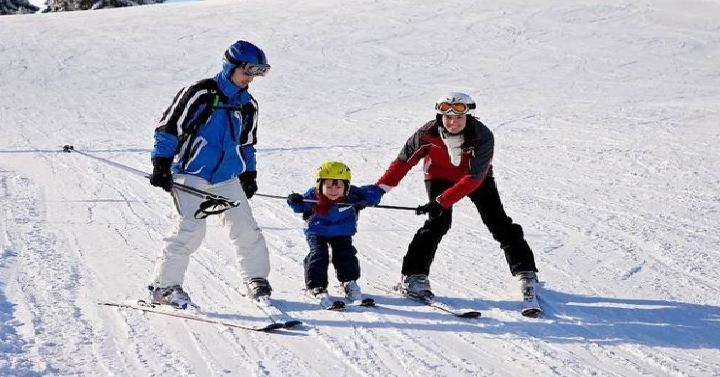 Can you guys believe it’s March? If you live in an area like me, then Spring can bring so many different weather patterns. We get nice sunny days as well as snowy cold days. March is one of my favorite times to ski. Why? Because the days are longer which means you can get more sun and the temperatures are usually more pleasant. If you’re like me and enjoy some spring skiing, be sure to check these safety tips as you hit the slopes.
Spring Skiing Safety Tips
- Lather on the sun screen, especially your face, including your nose, cheeks and ears. With the sun out more, you will most likely get a sun burn. This is something people forget, but it’s SO important. Also, be sure to bring lip balm! This is seriously a lifesaver.
- Watch weather conditions before you head to the mountains. Be aware of avalanche warnings and read all new signs and warnings at your resort. With changing conditions, trails may need to be maintained or even closed.
- Ski in layers. During the spring the days can start super chilly, get really warm, then end super chilly again. Be ready for all conditions with many layers that you can shed or add on throughout the day.
- Be sure to stay hydrated throughout the day. If it’s warmer out, you’re body is getting warmer which needs to be hydrated frequently. Bring a water bottle with you on your runs and drink as you’re heading up the hill.
- Take short breaks. This is important especially if you have little kids with you. Take short breaks throughout the day and get some rest, shade, re-apply the sunscreen and drink water.
Easy Ways to Save Money on Spring Skiing Gear & Tickets
 It’s time for some spring skiing which is my favorite time to ski. The weather is usually more enjoyable and the days are longer. Our kids are growing so fast that we ‘ve found it easier to rent their gear. We’ve also found some ways to save money on the ski gear and tickets! Check these easy ways you can save some money too.
- Check your local college/university. Did you know if you live in a skiing community some universities rent out gear? We went to Weber State University which is near where we live and we were able to rent skis for our kids for cheaper than any other ski rental shop. So cool!
- Shop on Facebook Market Place or local classifieds. If you want to buy some ski gear, then be sure to check these places first. Especially right now in the Spring, people will be selling items they didn’t use this year. So it’s a Win-Win!
- Ski Resort Spring Specials. Check out ski resorts for deals they may be running right now. Some resorts have fun deals like ski free in the spring if you buy a season pass for next year. They also may have discounts for the kiddos too. So check out your favorite resort and see what specials are going on now.
- End of year clearance sales. Did you know that a lot of store start putting their ski gear on clearance starting in March? That’s when I get my stuff to finish off the ski season now or to start the new ski season next Winter. It’s the best time to grab new clothing, coats, gloves, hats, skis and more. So shop your favorite brands and save!
Easy to Make High Protein Energy Bites Recipe
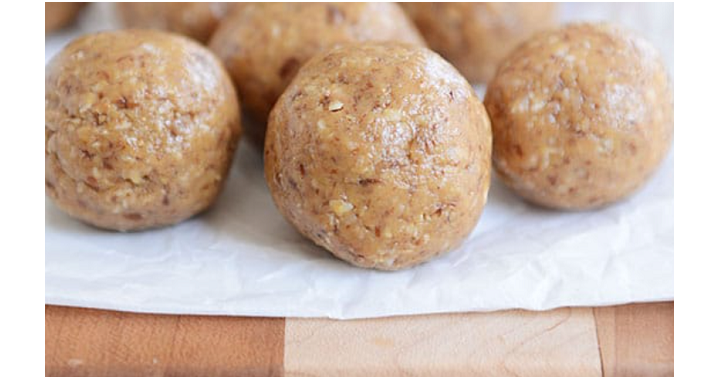 Are you looking for more protein in your diet? We sure are! My kids are hungry all of the time. We decided to add more protein in our daily eating and it makes such a difference. I found these super yummy high protein energy balls that my kids absolutely love. You can add them to lunches or have them for after school snacks.
THE BEST ENERGY BITES
By Mel’s Kitchen Cafe ( you can check all of her notes here on her site!)
INGREDIENTS
- 1 cup (3.5 ounces) old-fashioned oats
- 1/3 cup (1.25 ounces) ground flaxseed meal
- 2/3 to 1 cup (6-9 ounces) nut butter (see note)
- 1/4 cup (3 ounces) honey
- Dash of vanilla extract
- Pinch of salt (more to taste, if needed)
- Add-ins: mini chocolate chips, shredded coconut, chopped nuts, dried fruit, chia seeds, etc.
INSTRUCTIONS
- In a food processor, add the oats and process until coarsely chopped. If you don’t have a food processor coarsely chop the oats in a blender and add to a bowl.
- Add the flaxseed meal, nut butter, honey, vanilla and salt. Process/mix until the mixture comes together into a soft but not overly sticky ball.
- If the mixture is overly dry, add nut butter a tablespoon at a time and process/mix until the consistency is soft but not overly sticky or crumbly.
- Remove the blade from the food processor, if using. Add any add-in ingredients, and mix with your hands until evenly combined.
- Roll the dough into small balls (I use my small cookie scoop – #60) and place on a parchment-lined baking sheet or tray. Refrigerate until firm enough to stack in a lidded container or in a bag. The energy bites can be frozen for several months or refrigerated for a week or so.
Thoughtful Gift Ideas for Your Teachers this Valentine’s Day

I’m starting to get emails from my kids teachers with information about this years Valentine’s Day parties. It’s definitely a more laid back, easy going year with COVID-19 in the air. However, they are still able to have some sort of celebration for Valentine’s Day. This year, more than ever, I feel like it’s important to show our teachers how much we have appreciated them. Here are a few gift suggestions that are both thoughtful and somewhat easy to give to your teachers this year.
- Hand made notes from your students AND yourself. We asked our teachers what their favorite thing to receive from their students and the number one answer was a hand written note by their students AND their parents. A note of encouragement and praise goes a long way. I would suggest for sure doing this. You can pair it with an item below, but try to make them a note, it will definitely be appreciated.
- Gift Cards. This was a close second on the list of favorite items. It’s so nice to get a gift card to a favorite place nearby for the teachers. That way they can use it whenever it’s convenient for them. Attached a gift card to a handwritten note too!
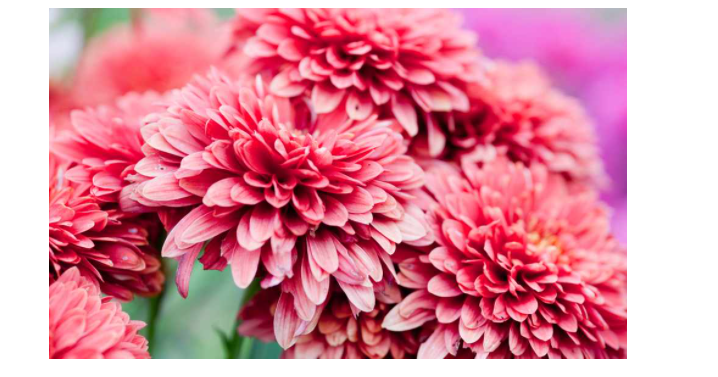
- Flowers. Right now on Groupon, you can score some awesome deals on flowers. Grab those gift cards and then order some flowers for your teachers. You can even look into real plants. This is a fun way to brighten their home or school classroom.
- Personalized Gift. Head over to Jane and shop their teacher options that have personalized items. Write their name on a cute board or bag. There are some super cute items to choose from.
- Board game. I know teachers love getting fun family gifts too. You can head to Amazon and check out these fun games they could play with their families. Add a handwritten note to make it even more special!