
5 Easy Ways to Show Appreciation to Your School Teachers
 I’ve talked to many teachers this year and they are having a hard time being both an in-class as well as an online teacher. It’s hard. It takes more time away from their families. It’s emotionally and physically exhausting. If we could help just a little bit to take away some heartache, then they would be a better teachers for our kids.
- Write notes to them. Words of affirmation mean more than anything. This could be an email, a hand written note by both you as the parent AND your student. You can get a group of parents and write notes. We did this for our school and put up the notes in the teachers break room. Words are powerful, and the teachers need these positive words daily.
- Don’t email or call unnecessarily. Can you imagine having 180 students like most Junior High school teachers have? Teachers are so busy as it is. If you could answer your own questions that will save them time and energy. Ask friends who are in the same class first before you email your teachers. See if you can figure it out first before asking questions.
- Gift Cards. If you know your teacher’s favorite place to eat, then why not get them a small gift card and tell them dinner is on you? I’ve noticed so many teachers at school WAY past dinner time trying to catch up on work. This would mean so much.
- Positive attitude. When circumstances change, which they will, then try and have a positive attitude. Chances are, the changes are not coming from the teachers, but from the district. So be understanding to your teacher and be positive when change happens.
- Teach your kids how to be respectful and helpful in the classroom. You may think, “well my kid IS respectful!” That’s great. But we can teach them to be even MORE respectful and helpful in the classroom. As a former teacher I know that students can be hard. If we teach our kids to really try and listen because the teachers are having a hard time this year, they might be a little more calm, a little more polite and a leader for others. Just by talking to them about being respectful and helpful in the classroom is huge. Every teacher would SO appreciate you talking to kids about this.
4 Things You Need to do NOW Before Prime Day & Target Deal Days
 Now that it is October, holiday deals are starting to take shape. We’ve heard that Prime Days & Target Deal Days are happening on October 13th and 14th, so now is the time to get ready for these deals and save a ton of money. There are 4 things that you can do before these big deal days that will help you get ready.
- Make a list for the holidays. Have each of your family members write down their holiday lists. I know it seems early, but because of the pandemic we may not have the typical Black Friday week like we have in years past. It sounds like it will be spread out more. So we are starting early. Writing down a list will let you have a feel for what you need to watch for.
- Set a Budget. This is always a good thing to do before the holidays. Get a number that you don’t want to pass when shopping. Hopefully these deal days will help you snag those items on your list for cheap, so you can get more for your money. Staying on budget will help you enjoy the holidays more and not stress!
- Sign up for emails and store cards. If you’re going to be shopping Target, Best Buy and Walmart a lot, then be sure to sign up for their emails and special offers like Target’s RedCard and Target Circle. Right now when you sign up for a RedCard you can get a $40 off a future purchase of over $40 when you’re approved for the RedCard. That’s free money right there. You can choose the debit card if you don’t want the credit version.
- Become a prime member. If you’re not an Amazon Prime member, then this is a great time to join. You can test out Amazon Prime for only $1.99 for one week period. You can see if you like the benefits. Then after that it’s the $12.99 per month. I use Amazon Prime almost weekly for household items, gifts and snacks. It’s a great place to find a good variety of items too.
5 Canning Tools You’ll Want to Buy
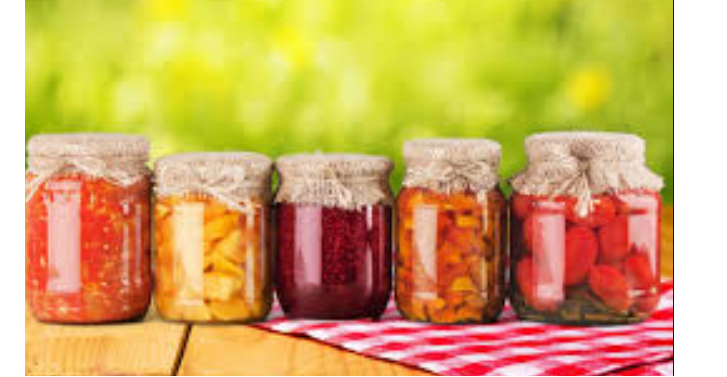
With the pandemic going on, canning is suddenly the new norm. I’ve heard many people say they want to start canning or they have already canned some fruits and veggies. If canning is new to you then you’ll want to check out these 5 canning tools that make it SO much easier and quicker. I’m all for that!
- Five-Piece Home Canning Kit. This set is awesome and will save you so much time. It includes a Canning Funnel, Magnetic Lid Lifter, Jar Lifter, Jar Wrench and Jar Cleaning Brush.
- Jar Labels. This is SO nice when you are making different kinds of jams or salsa. Especially if you have hot/spicy salsa or mild. You’ll want to know what is in each bottle. Grab these cute labels. They are easy to read from the shelf!
- Pressure Cooker. This makes canning so much faster. You could definitely do it the old fashion way, but the pressure cooker makes sure your food will be processed correctly. There are so many great pressure cookers, read the reviews and see which one sounds best for your canning.
- Canning bottles. These have been hard to find online, but you should be able to see them at your local Walmart. Grab these bottles for all of your canning needs. Choose the sizes you would like depending on what you are bottling.
- Canning Lids & Bands. Along with your bottles, you’ll want to get some lids and bands. I always like to have a few extra of these just in case they get ruined. Grab the correct size which would fit on your bottles.
4 No-Fuss Super Cute Little Girl Hairstyles You’ve Got to Try
 If you have a little girl, then you’ll know that doing their hair can become quite the chore! The hard part for me is just finding cute, yet easy hairstyles that I can do in a matter of minutes. My little girl only sits still for that long. So, I’ve found these 5 super cute hairstyles that really anyone can do! They take little time and look so cute.
Easy Homemade Pizza Sauce

Do you make homemade pizza at your home? We just started making our own during the quarantine months in the spring. I’ve had to do some trial and error recipes until we found one that we really like. It’s a mixture of a few recipes put together. Depending on how many people you are cooking for, depends on how much of the sauce you’ll want to make. I would error on more and then just fridge it until the next week!
Easy Homemade Pizza Sauce Recipe
Ingredients:
1 (14 1/2 ounce) can of tomatoes, undrained. I love the Centro San Marzano Tomatoes-get the peeled option
1 (6 ounce) tomato paste
1 tsp fresh basil
1 tsp fresh oregano
1/2 tsp garlic
1/2 tsp sugar
Salt to taste
Directions:
Put all of the ingredients into a blender or food processor and blend until smooth.
How to Make a Super Cute DIY Family Command Center on a Budget
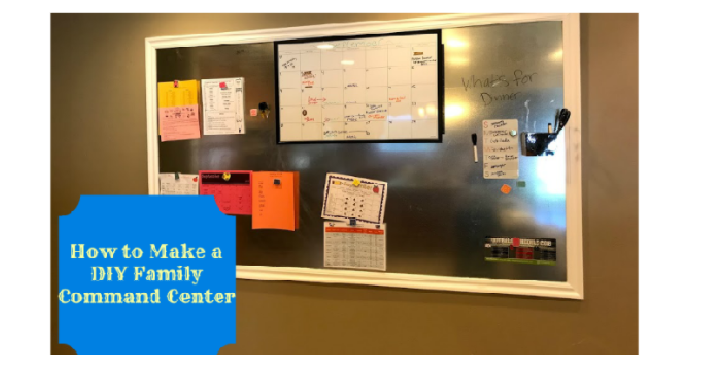 Staying organized can be quite the task when you have a family. Kids come home with papers, invitations, permission slips and more. I get so frustrated with papers! I’ve decided we need one central location where we can see these important papers and be organized all at once. These family command centers are awesome. You can have your papers, calendars, meal planning and more all in one place and in view. If you were to buy these out right you would pay a TON, so save some money and make your own. Here’s how we made ours:
Materials:
Galvanized Steel Metal Sheet- cut to the dimensions you want.
Moulding/Trim
Picture Hanging System
Construction Adhesive
Paint
Accessories: Calendars, Magnets, Meal Schedules, Markers.
Directions:
- Outline with painters tape where you want your board. Measure and order your metal sheet. We went through Metal Supermarkets.
- Measure lengths for moulding and purchase that at a home improvement store.
- Cut corners of moulding to make a picture frame. You could do this yourself or ask Home Depot or Lowe’s to do it for you.
- Paint your moulding to the color you want- we just did a normal white. Then let dry completely.
- Attach moulding to metal sheet with the constructive adhesive.
- Use clamps or heavy objects to weigh down the moulding so it sticks completely. Follow directions of the adhesive-may require 48 hours to dry.
- Follow directions of the picture hanging system and attach on the back of your sheet metal board.
- Hang board on the wall and add nails into the moulding at the bottom if you want. We added 2 at the bottom to make it completely flat against the wall. Then you can putty and paint over the nail holes.
- Add accessories and enjoy!`
**Tips- Be super careful with the sheet metal. It is really sharp, so you’ll want to wear gloves and keep kids away. Be sure to completely cover the metal with the moulding so no sharp edges are showing.
5 Must See Places Along the Oregon Coast
 We recently returned from a trip on the Oregon Coast and it was absolutely breathtaking. It was the perfect destination to escape the heat and see some really beautiful places. It was the first time for our kids and they loved the kite flying, star fish, jumping in the waves and searching for seashells. Along our trip we found some awesome beaches, and not so awesome ones. So, for your next trip, check out these 5 that we would definitely go to again!
- Cape Lookout State Park. This was by far our favorite beach to explore ocean life. Biggest tip for this beach is to go at LOW tide. Once on the beach, walk to the cliffs and look at the mussels and if you’re lucky you’ll see a starfish. We saw three! There is a cove to explore and a little waterfall coming off the cliffs. It’s absolutely beautiful. The beach has the perfect sand to play for hours. Spend some time collecting seashells too.
- Yaquina Head Lighthouse. I love lighthouses, so this was a must. With Covid-19 going on, this lighthouse was closed, but we could park about a mile from it and walk to it on foot. It was worth the walk. Look above at the beautiful picture we snapped. Definitely windy so bring your hoodie, but so pretty.
- Cape Perpetua/ Thor’s Well. This is a place you can go both LOW tide and HIGH tide. Let me explain. If you want to see Thor’s Well, then you need to plan on going at HIGH tide. That will give you the best view of the water going through the hole and splashing along the cliffs. If you want to see tide pools and walk along the cliffs, then go at LOW tide. Both are fun options. While there, be sure to do a hike at Cape Perpetua.
- Mike Miller State Park. This is located in South Beach. It has an educational hike that the kids absolutely loved. It was in trees and so pretty. Along the way they had markers that you could look up on your phone and read about the science behind that forest. Definitely worth it if you’re in that area.
- Depoe Bay. If you want to see whales this is the place to be. There is a wall at Depoe Bay that you can stand by and see the whales in the ocean, you don’t even need to be on a boat! Check out the cute town and candy stores. Fun little town to visit.
The BEST Peanut Butter Bar Recipe- The Perfect After School Treat
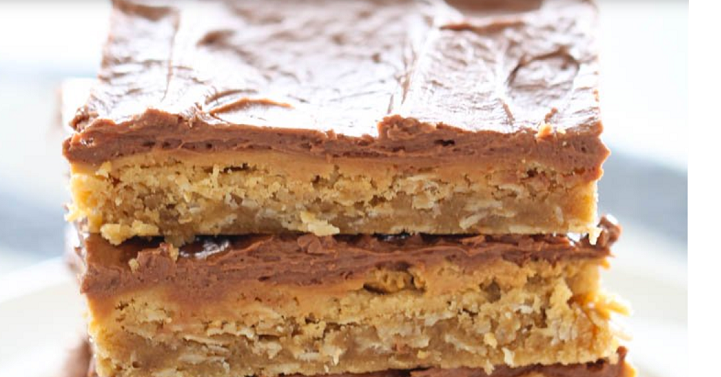 Do you guys remember in elementary school when you used to get homemade peanut butter bars? I sure do! We would get a bar and a carton of milk. I would always hope to get the biggest bar out of the group. Yes, they were that good. In today’s schools they don’t get these homemade bars anymore. They are pre-packaged treats that aren’t near as good. So, I’ve decided I need to make these as an after school treat for my kiddos. I found a recipe that I love. However, I’ve changed a few things and made a different frosting to make them absolutely delicious. I always get compliments on them. So thank you Six Sisters Stuff and Aunt Cindy for your recipes, because when you pair them together you get perfection.
Peanut Butter Bar Recipe: adapted from Six Sister’s Stuff and my Aunt Cindy’s recipe.
Ingredients:
- 1 cup butter, softened
- 1 cup sugar
- 1 cup brown sugar, firmly packed
- 1 teaspoon vanilla extract
- 2 large eggs
- 2 1/2 cups peanut butter, divided
- 2 cups old fashioned oats
- 2 cups flour
- 1 teaspoon baking soda
- 1 teaspoon salt
Directions:
- Preheat oven to 350 degrees F.
- In a large bowl, cream together butter, sugar and brown sugar together.
- Add vanilla, eggs, and 1 cup peanut butter; stir to combine.
- Add oats, flour, baking soda and salt and mix until well combined.
- Spray a baking sheet (half sheet jelly roll pan that is approximately 17.8 x 12.8 x 1 inch) with nonstick cooking spray and spread out dough in an even layer.
- Bake for 15 minutes and remove from oven.
- Drop remaining peanut butter by spoonfuls on top of warm bars and spread when peanut butter has begun to melt.
- Let cool until peanut butter has set up.
- Make frosting (recipe below) and spread on cooled bars
Frosting:
Ingredients:
- 3/4 Cup Butter
- 4 Tbsp Cocoa
- 1/3 Cup Evaporated Milk
- 3 Tbsp Karo Syrup
- 2 Tsp Vanilla
- 3 3/4 Cup Powder Sugar
Directions:
- Add Butter, Cocoa, Milk, and Karo Syrup to a pan and bring to a boil.
- Boil for 2 minutes whisking continuously.
- Remove from stove and add Vanilla and powder sugar.
- Beat with a beater until all combined.
- Spread over bars.
5 Tips to Find Affordable School Clothes
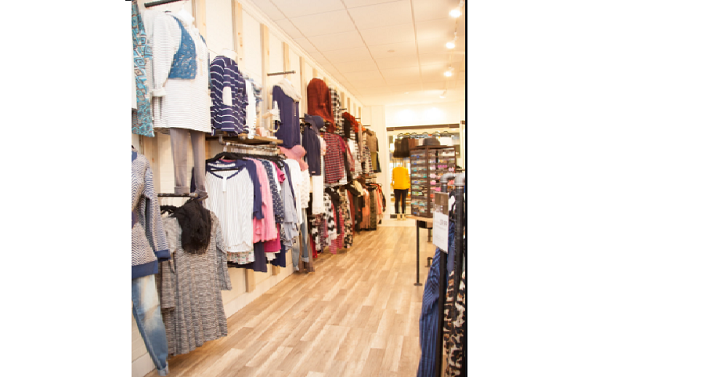 It’s that time of year when kids are getting (somewhat) ready for school. I know a lot of kids will be spending the first term home learning, but a good portion are still going in-person to school. That’s where the school clothes and accessories come into play. Are you ready? If you still need to do some clothes shopping, here are some tips to help you save some money.
- For clothes shopping, be sure to check the main site for stores you will be shopping. Most stores right now have some sort of coupon code or discount you can grab with your shopping. For example, Target has the $10 off $40 purchase. Plus, you can pair that with other Target Circle offers they have going on. This is a good weekend for shopping! Use those discounts for heavy savings.
- Try Amazon. Do a quick look for those certain items you may need for school. Maybe you need some gym clothes or band attire. Search for those items and see what they have available.
- Facebook Marketplace. For real. If you haven’t tried looking for clothes there, maybe you should. It’s especially great for younger kids or for specific items you might need. I love looking for shoes and little kids clothes on there. They are super affordable and often times brand new!
- Sign up for emails. If you have a store that you love shopping, then be sure to sign up for their emails or app savings. This is good for teens who have specific stores and brands that they love. Signing up for their emails will bring you added savings to the store. It adds up over time.
- Shop online. I’ve noticed over the last few months that there have been so many online promotions for school clothes, often times better than going in-stores. Look at our categories on the right side of freebies2deals and search for your favorite store, chances are we have posted a lot of deals from that store already!
5 Items to Buy Now that Will Help with At-Home School this Fall
 We just got final word that our kiddos will be having at-home school 3 days out of the week. Which means I’ve got to get organized and ready! Last school year we were thrown into the at-home school, but this time we have some time to get ready and make it as successful as possible. I’ve found there were a few items that helped the kids learn. Here are 5 items you might consider grabbing now so you can start off your school year right.
- Learning Space. If you have a large kitchen table or island that works for your kids, then go with that. If you need a separate learning space for your kids then now would be a great time to look into desks and workspaces for your kids. I’ve learned they need to have a space that has room for their laptops, notebooks and water bottles. Having a set spot helps them get focused and ready to learn. If it’s a new place everyday, their minds might be scattered. Target has some fun workspaces and desks to choose from. You could even go with a Lifetime table here.
- Headphones. This is a must for all of my kids. With three kids sitting around my table, they all needed their own set of headphones that work well. This way you don’t have loud music or teaching going on from all of your kids. You can find some good kid headphones from Target, Amazon, Walmart and Best Buy.
- Notebooks. For some reason in April I was scrambling to find notebooks for each of my kids. I thought I had plenty! Well, now I’m going to stock up a bit more for this school year. If you have younger kids that need the Kindergarten writing lines and spaces, then check out this writing paper, it’s awesome! For the rest of the kids, you could grab some notebooks from Walmart here, they are super cheap- some less than $0.25 each.
- Laptops. Hopefully your school will give laptops to each of your kids. However, I know many school districts where that just isn’t a possibility. It might be a good time to purchase a laptop for your kids. You could buy one and then rotate it between kids if needed. Do some research from Best Buy, Amazon and Walmart to find a good laptop.
- Snacks. This might sound funny, but boy is it a game changer! If I have some snacks ready and on hand for the day, the kids don’t get that hangry attitude. Check out this post with at-home snacks that you’ve got to try for school. Get ready, and things will go so much smoother.
Healthy Kid Snack Ideas- Perfect for Summer or At-Home School
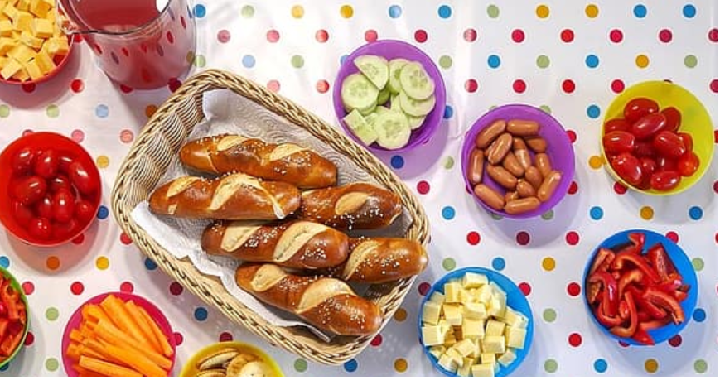 It’s summer and my kids keep telling me they are hungry. It’s exhausting. Anyone else feel that way? I’ve decided I need a long list of items that the kids can choose from and just go grab. Some items I have to make and prepare, but a lot of them are grab and go snacks- which is easy on everyone. These would be great for at-home school which is coming in a few weeks too. I notice if my kids aren’t hungry, they work and learn a lot better.
- Frozen Banana Yogurt Pops
- Granola Bars or Breakfast bars
- Applesauce packets
- Popcorn
- Crackers and cheese- make your own or buy them here.
- Crackers and peanut butter- make your own or buy them here.
- Ants on a log: Celery with peanut butter and raisins or chocolate chips on top
- Dried fruit– easy to eat when doing school
- Belvita breakfast biscuits– my kids LOVE these and they fill you up
- Fruit and veggie smoothies
- Protein energy bites
- Muffins/Breads freeze them and then just grab them out when needed
- Nutella and Banana Sushi
- Yogurt and granola parfait- add any fruit you have on hand
- Pirates Booty
- Hummus and crackers
- Chips and salsa
- Peanut Butter Cheerio Bars
- Fruit Snacks- either make your own, or buy them!
- Nuts/ Trail Mix
Pick a few each week and rotate them so the kids have something to look forward to. This might help their energy when they get tired doing their school work.
5 Yummy Salads to Make During the Summer
 It’s so hot where I live! We are getting into the 100 degree days which make me melt. Every day when it comes to dinner time, I hate turning on the oven. So, I try and find some cool and refreshing dinners that doesn’t heat up the house. Salads are the perfect solution. If your kids don’t eat the salad, then make these for lunches and have them for leftovers for yourself! Seriously, I could eat these everyday.
 1. Loaded Broccoli Salad by Six Sisters Stuff. This is one of my all time favorite salads. You can buy the big bag of broccoli from Costco and make this for a week! Yum.
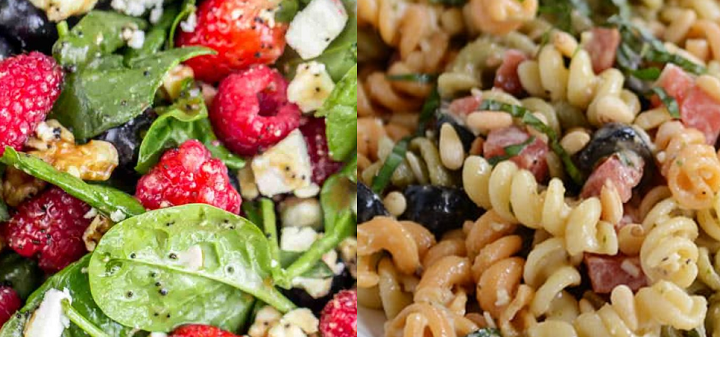
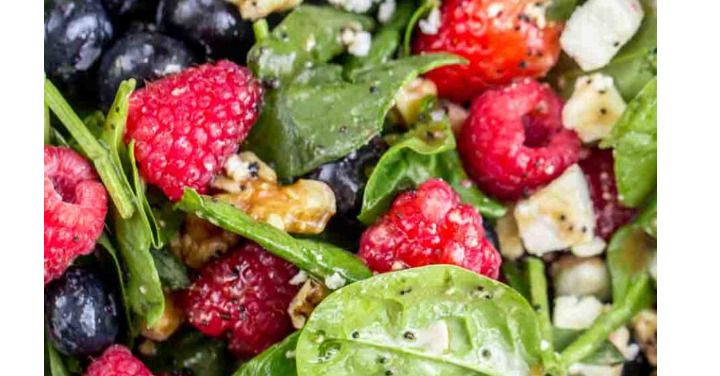
2. Summer Berry Fruit Salad with Honey Lime Glaze by serena bakes simply from scratch. If you need something cool and refreshing, this is the salad to make. It would be the perfect side to any grilling meal.
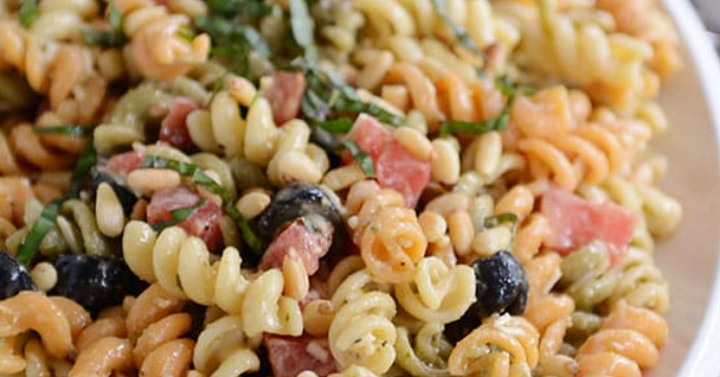
3. Tri-Color Pasta Salad by Mel’s Kitchen Cafe. A good pasta salad is the perfect meal during the summer. This could totally be eaten as a meal. If you want protein you can add a little canned chicken. Yum.
4. Strawberry Spinach Salad by Valentinas Corner. This is my mother’s all time favorite summer salad. It would be a yummy lunch one for you and your friends! Buy some yummy bread from your local bakery and this would be a hit.

5. Applebees Oriental Chicken Salad by Lilluna. Okay, if you haven’t had an Applebees Oriental Chicken Salad, then you’re missing out. Now you can make the copycat at your own home! If you want the super easy way, you can buy pre-made breaded chicken tenders and just throw them in this salad. A yummy summer dinner ready in just a few minutes.
Tips on How to Travel Safe During a Pandemic
 The year 2020 has been really hard for a number of reasons. I love to travel, but with the Covid-19 pandemic going on, traveling has been put on the back burner. Now that summer is going, people have been getting out and traveling a little more often. How can you stay safe AND travel during this time? It is possible, but you need to be careful and maybe change some of your normal travel plans. Here are a few tips that can keep you safe while you travel during a pandemic.
- Avoid transportation with people outside of your living space. The best way to travel during a pandemic is with people that you live with at your own home, limiting your exposure to new germs. Traveling in your own car is the best way to travel right now.
- Lodging. Limiting shared space is what you want to do when thinking about your lodging. Camping is a great vacation idea during a pandemic. Staying outdoors and away from a lot of people will keep you away from a lot of germs. You could also look into renting houses on VRBO or Airbnb. These places have mandatory cleaning protocols which will keep you healthy. I recently returned from Oregon, where they required a good 24 hour vacancy requirement for each rental. So besides the sanitizing and cleaning, they also had it vacant for that time, which is a great precaution. Staying away from busy city hotels is ideal.
- Eat outside and away from others. Most of the time when you travel you rely on eating out at restaurants and shopping at stores. Limit your exposure by grabbing take out and eating outside on the grass. Bring a blanket and enjoy eating your meals outside and away from people. You can also plan to bring most of your food items with you, if possible. If you do need to shop, try to limit it to just once on your vacation. If you are renting a house, then try to do most of your cooking at the house, limiting your outings to busy restaurants.
- Avoid crowded places. This is the best rule of thumb during a pandemic. You don’t need to be in crowded areas when you travel. When we travel we try to do limited stops on our way to our destination. At our new destinations we try and find new hikes to go on or new biking trails to explore.
How to Make a Yummy Fruit Pizza (The Perfect Summer Treat)

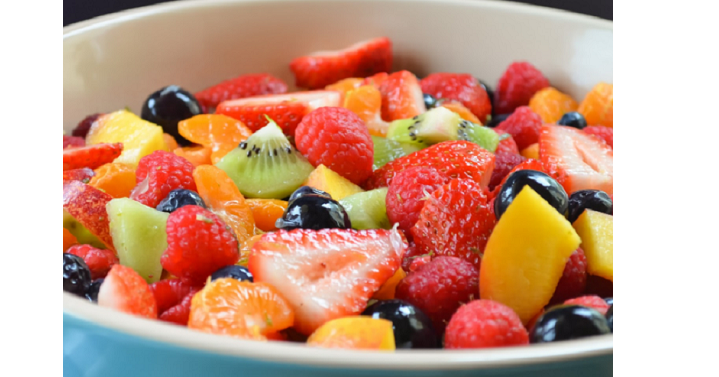
Now that summer is in full bloom, I’m seeing all of the yummy berries on sale. At our home, we go through berries SO fast. I’ve been wondering what to do with all of these fruits that I’ve been collecting. After seeing these fruit pizzas, I knew that’s what I had to make! It’s definitely a family favorite and one you can all enjoy.
This recipe & picture is by Simply Home Cooked. You can see her video and an easy step by step instruction on how to make it here.
Ingredients
Sugar Cookie Dough
- 1 3/4 cup all-purpose flour
- 1/2 cup granulated sugar
- 1/4 tsp baking powder
- 1/2 cup unsalted butter
- 4 oz cream cheese
- 1 teaspoon vanilla extract
Cream cheese frosting
- 8 oz cream cheese
- 2 tbsp unsalted butter
- 1 cup powdered sugar
- 1 tsp vanilla extract
Fruit
- Kiwi
- Strawberries
- Blueberries
- Raspberries
- Mandarin oranges (my kids love these!)
- Any other fruit you enjoy
Instructions
-
In a food processor, add 1 3/4 cup flour, 1/2 cup granulated sugar, 1/4 tsp baking powder, 1/2 cup of cold cubed unsalted butter, 4 oz cream cheese (also cut in cubes) and then a 1 teaspoon of vanilla extract.
-
Now snap the lid on and begin pulsing the blades. You’ll want to do about 5ish pulses or until the butter gets down to the size of a pea.
-
Now add the dough into a large bowl and begin working it into a ball using your hands. It might not come together at first but have patience. Keep working it in and it will take shape as the butter slowly warms up.
-
Now place your dough onto a sheet of plastic wrap and shape it into a disk. cover the plastic wrap around it and place it in the refrigerator for about 30 minutes.
-
Meanwhile, begin working on the cream cheese frosting. In a large bowl, add 8 oz softened cream cheese, 2 tbsp of softened unsalted butter, 1 cup of powdered sugar, and 1 tsp of vanilla extract
-
Using an electric mixer beat all the ingredients together until it’s all well combined. Then set it aside.
-
Now take your dough out of the refrigerator, remove the plastic wrap and place it on a well floured surface.
-
Then add another generous sprinkle of flour on top and begin rolling it out using a rolling pin. Roll it out to about 14 inches in diameter. The. transfer your dough into a 14-inch pizza pan.
-
Generously poke the dough with a fork. Then bake at 350 degrees Fahrenheit for 20 minutes.
-
Once the sugar cookie crust has cooled Evelyn spread the cream cheese frosting on top.
- Now add the sliced strawberries, kiwi, raspberries, and blueberries on top. Eat within a few hours.
5 Fun Ways to Celebrate the 4th of July While Social Distancing

The 4th of July is tomorrow! Are you ready? This year is totally different than in years past. We won’t be having parades, fireworks or bbqs due to the pandemic. However, we can still have a great holiday by being a little more creative. Here are 5 fun ideas you could do to celebrate the 4th!
- Go on a family hike or walk. Try finding one that you have never been on. Stay with your core family to stop the spread of the germs. If you live in Utah, you should totally try out Silver Lake up Big Cottonwood Canyon. It’s one of our family favorites. Bring some fun snacks and make it a fun time.
- Watch Fireworks from your car or park. Check your local city and see where you can go to see fireworks. I know they are limited this year, but we have a few options near us. I think it would be so fun to find a parking spot where you can see them and pull up your car or a truck and watch from there.
- Minute to Win it Games. We have the 4th of July tradition of doing Minute to Win it games with our extended family. This year we are not getting together, but you could totally still do this with your own little family. You could even do a zoom meeting and do the games together. They are always a hit!
- Social Distancing BBQ. If you plan to get together, then follow the CDC guidelines so we can all stop the spread of the Covid-19. Some ways you can do this is to have the BBQ outside, sit 6 feet apart, bring your own food as well as plates and utensils. Basically don’t share food and stay somewhat apart. If that’s not possible, consider postponing your BBQ.
- Make new patriotic foods. This is something that is super fun to do for any holiday. Check Pinterest and see what new foods you could try to celebrate with red, white and blue. Have the kids get into it as well and have them pick something.