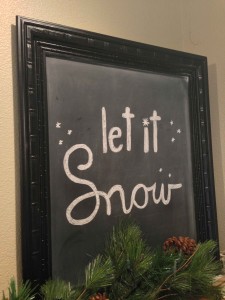
Chalkboard art is all the rage! I made a chalkboard last month and I love it. I saw this design on Pinterest yesterday and it looked easy enough to free-hand on my chalkboard. And it was! Took me about 10 minutes. There are more complicated designs out there, but I love the simplicity of this one.
If you want to make a chalkboard, here is what I did. I wish I would have taken photos to write a tutorial!
1. Measure the inside part of your frame where the board needs to fit in. Make sure it won’t be too loose, but not too tight.
2. Go to Home Depot and buy hardwood (comes in flat sheets 24″ long) and buy the 1/8″ thickness. Have them cut it to the size you want right there in the store!
3. At home, sand up the side a bit you are going to paint into the chalkboard.
4. Then prime it. (I used spray paint primer.)
5. Start painting with the chalkboard paint. Again, I used spray chalkboard paint. FOLLOW THE DIRECTIONS on the can carefully!!
6. After it has dried for 24 hours, ‘prime’ the surface of your chalkboard by taking a piece of chalk and color in the entire chalkboard with the side of the chalk. Then erase.
7. Insert into your frame, and make sure it is secure.
8. You are ready to go!
One thing I have learned is to use the right kind of chalk. ONLY USE chalk that has been made from calcium carbonate. Or it will ruin the chalkboard. This is a good kind to get, it is the kind I use and I love it.

