
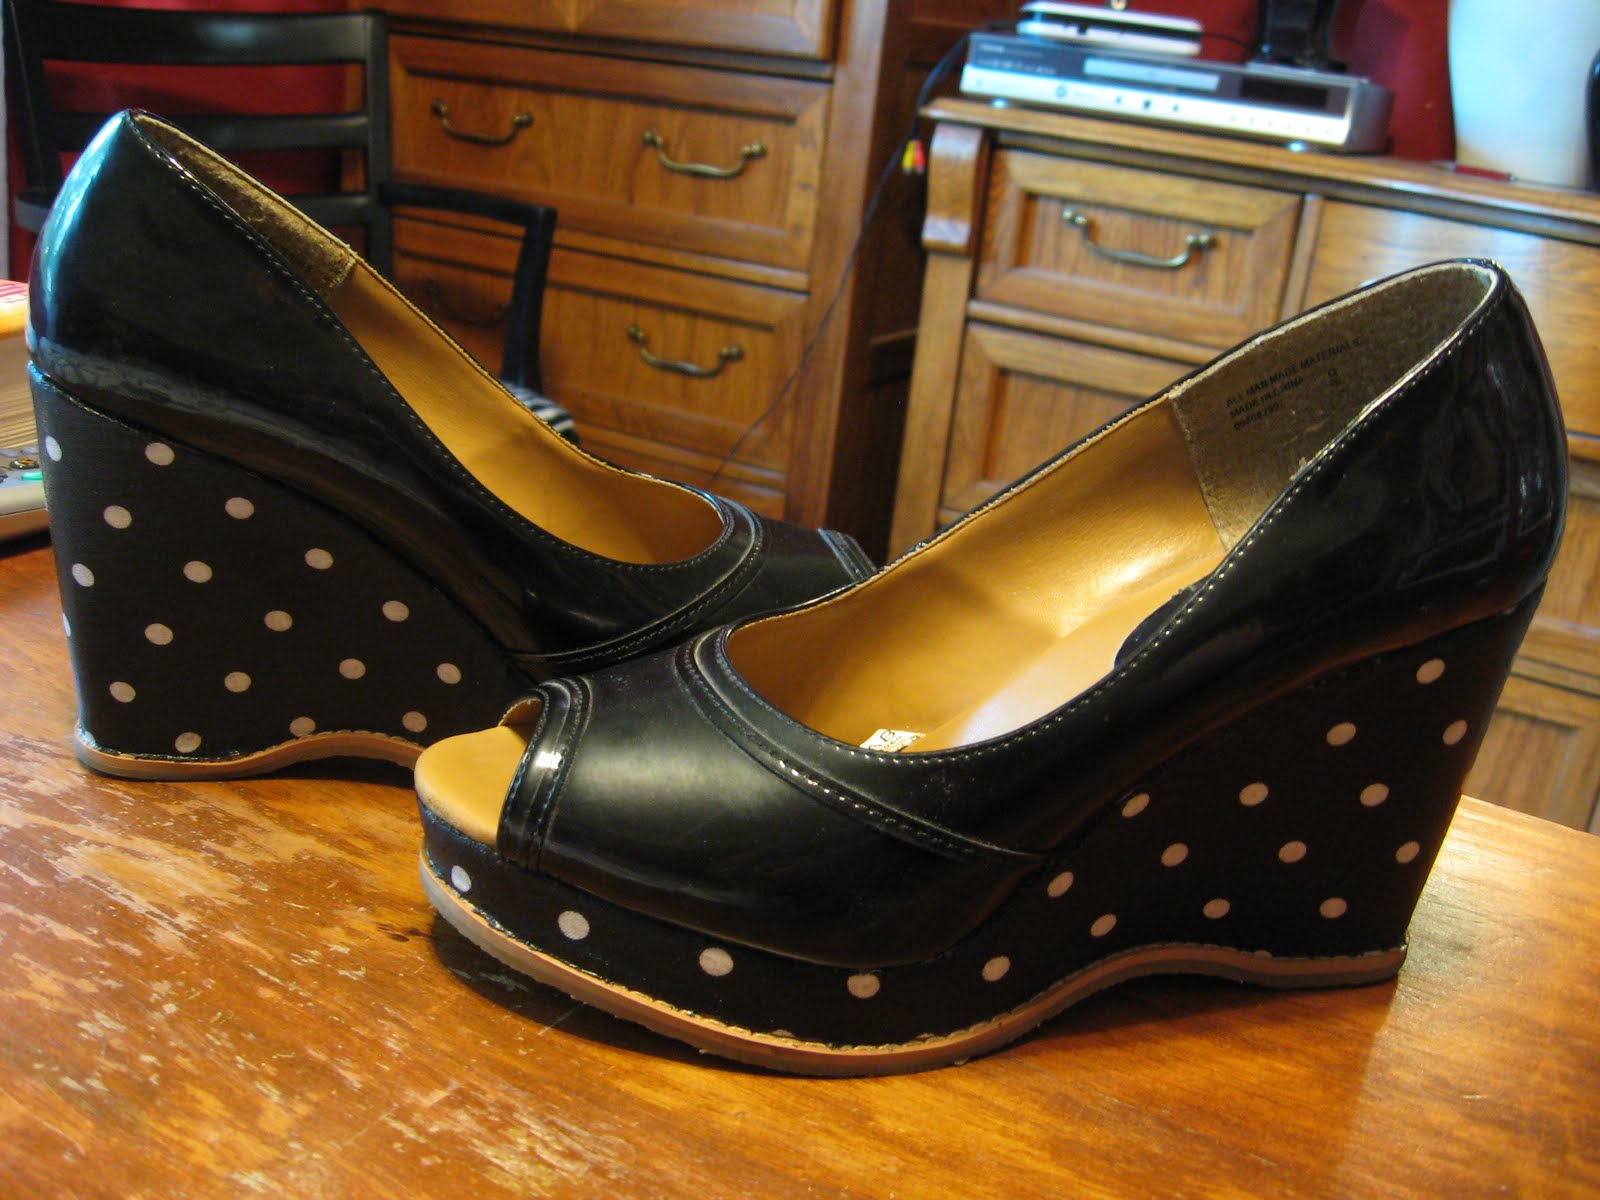
I bought these shoes years ago from Target. I was never totally in love with the black shoe/brown heel but they were cheap enough that I bought them anyway. Turns out they are super comfy-as in, I can wear them to work all day without them hurting-comfy. BUT, the brown part started scuffing and wearing off the first time I wore them, leaving those awful white marks, so they’ve sat in my closet for over a year, untouched. I wasn’t ready to throw them out, so I decided to see if they could be saved. Here is the finished product; I love them and now I wear them all the time!
What you’ll need:
Shoes
Fabric
Mod Podge
Paintbrush
Small, sharp scissors or x-acto craft knife
NOTE: I didn’t take pictures as I went along, because to be honest I didn’t think it would work. I’ve gone back now and taken some pictures to show you how I did it. Don’t let it confuse you that the “during” pix are being taken on the “finished” shoe.
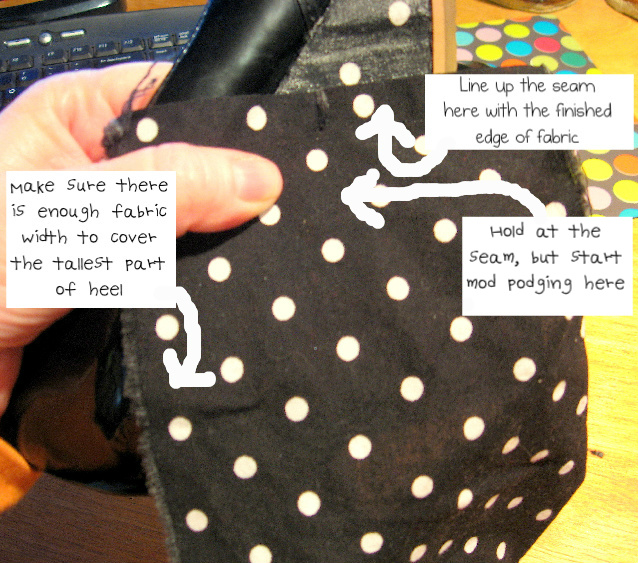
Start by cutting a piece of fabric into a strip that is wide enough to cover the tallest part of the heel and long enough to go all the way around your shoe.
Find the finished edge of your strip of fabric, and find the seam of your heel if there is one. You will start here, by lining them up (if you don’t have a seam, I recommend starting on the inside middle of your heel.) You want this nice straight line of fabric to be what shows when you are all done, so DO NOT mod podge it on yet. Hold it in place firmly with one hand, and move along the shoe a few inches and apply a little mod podge with the paint brush. Smooth the fabric down at that point, being careful to keep it in place (so that the seam is still lined up) and don’t let it slip. This is the hardest part; everything else goes pretty quickly.
 Continue on around the shoe, applying mod podge on an inch or two of the heel at a time, and then smoothing down the fabric. Just go slow and work it carefully with your fingers to make it lie smooth on the curves. Make sure you cover every bit of the area you are working on-top to bottom with the mod podge. Any loose pockets of fabric will not look nice and make it so the fabric doesn’t stay on the shoe as long.
When you get back to where you started, cut the fabric in as straight of a line as you can so that it will end just beyond the finished edge of fabric that you started with (remember how we didn’t stick it down yet?) Now mod podge down the cut end.
Then, mod podge down that finished edge of fabric. 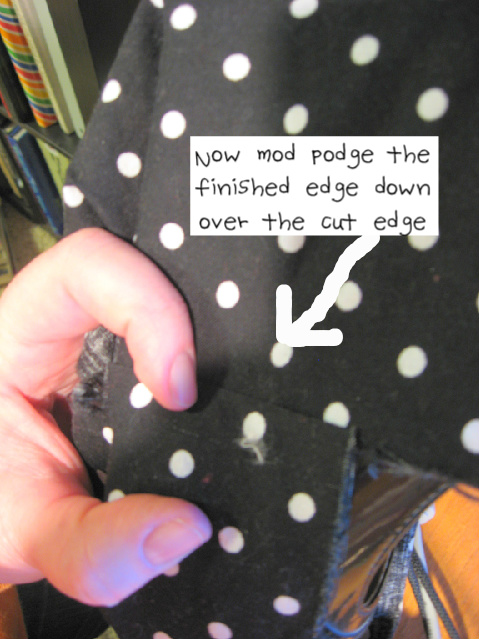
This will give you a perfect straight seam when you’re all done, like you see here.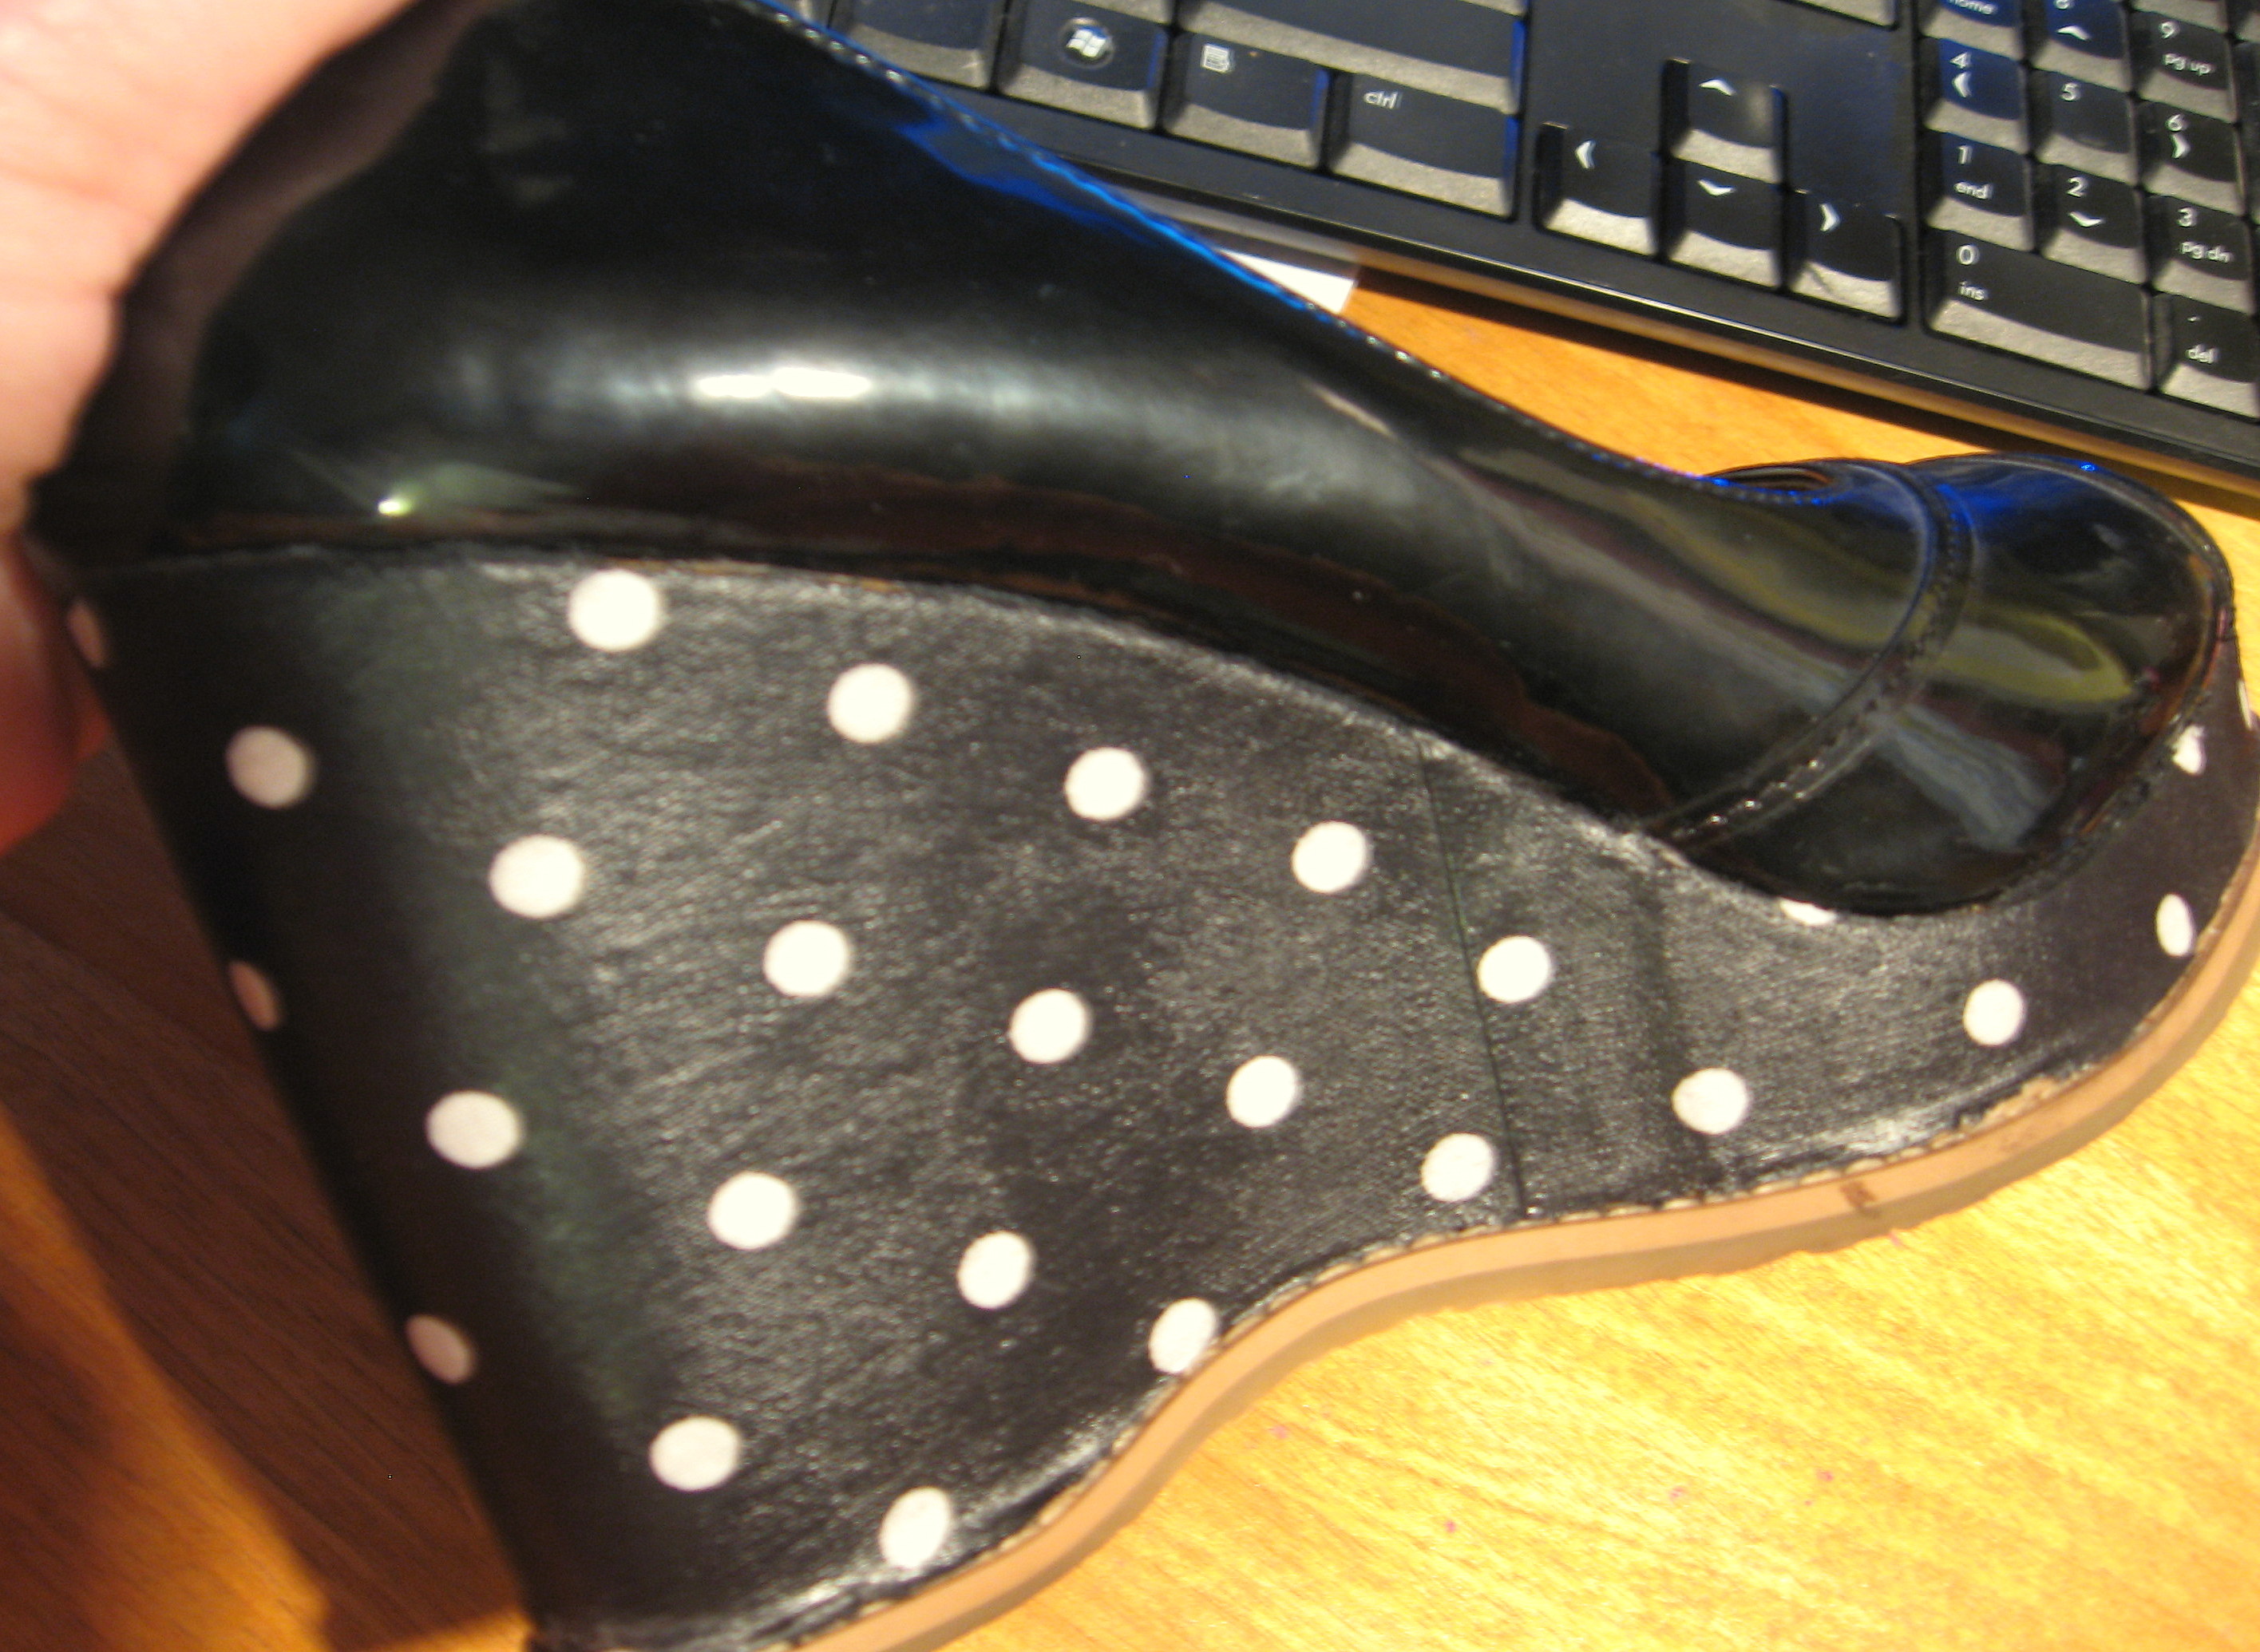
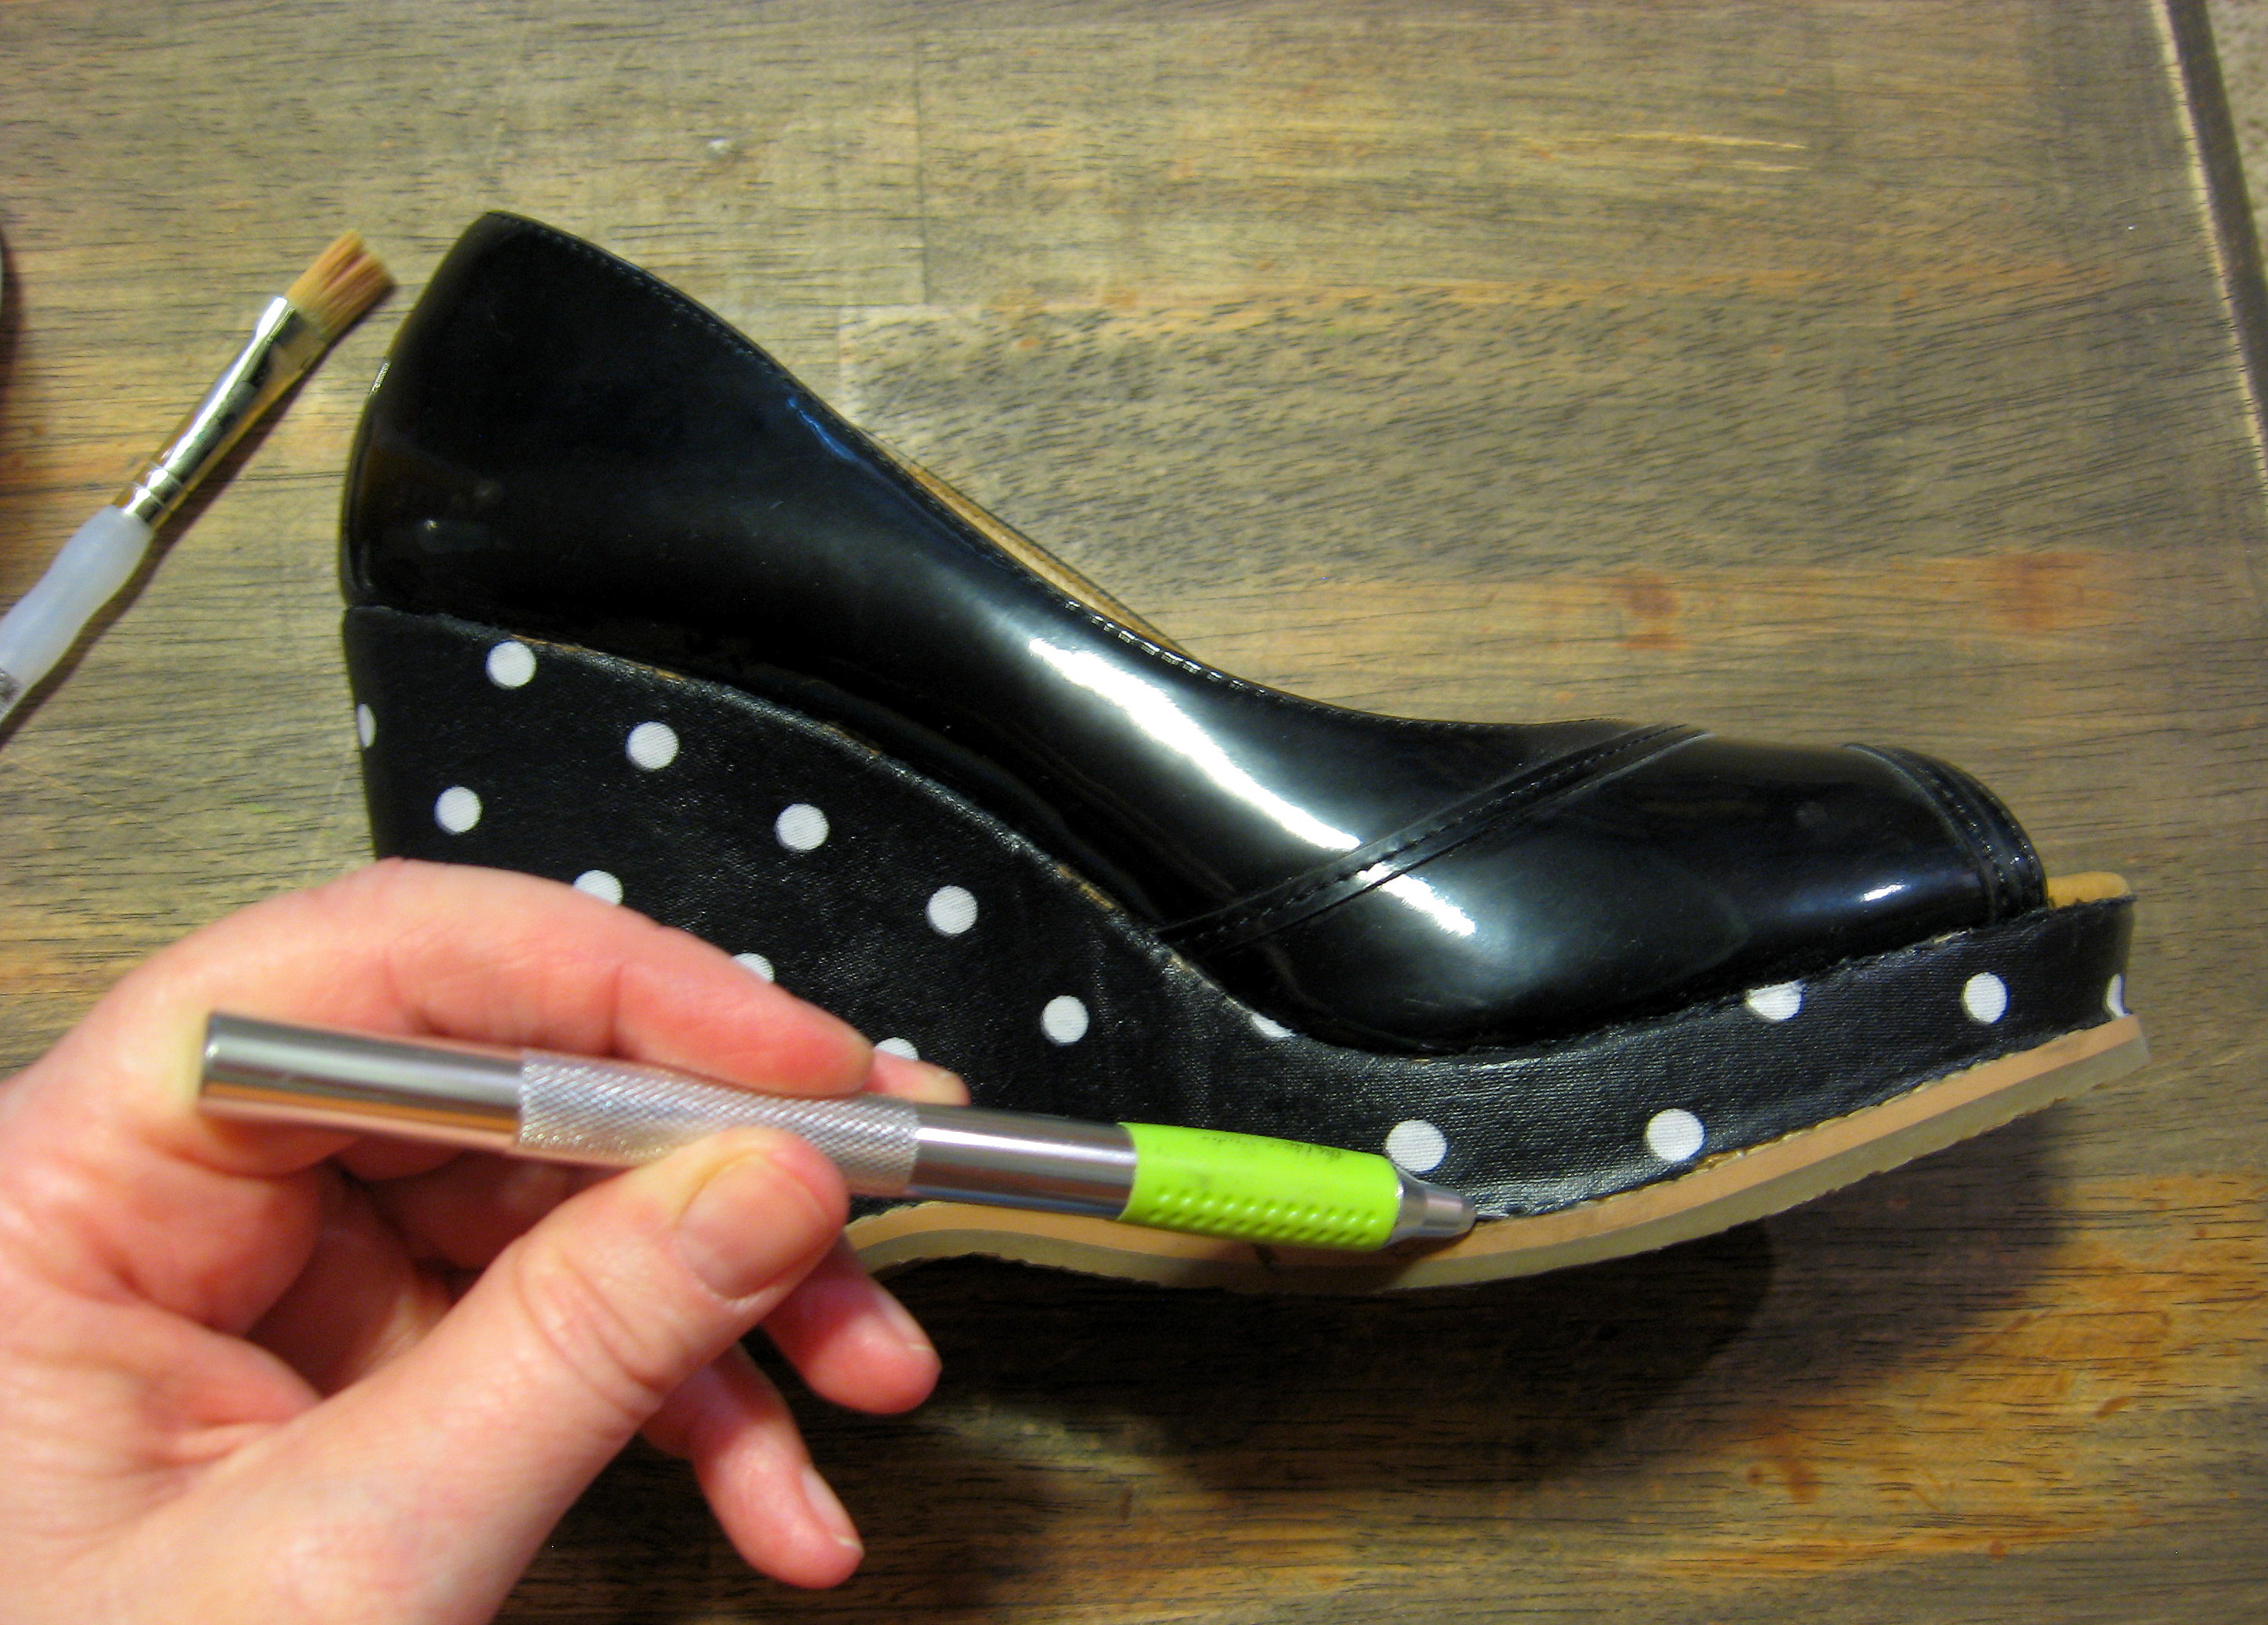
Let this dry well-probably about 20 minutes (good time to do the other shoe!) Once it is well dry, you will start cutting off the excess fabric. I used a pair of very sharp, small blade scissors, but you could also use a small x-acto blade.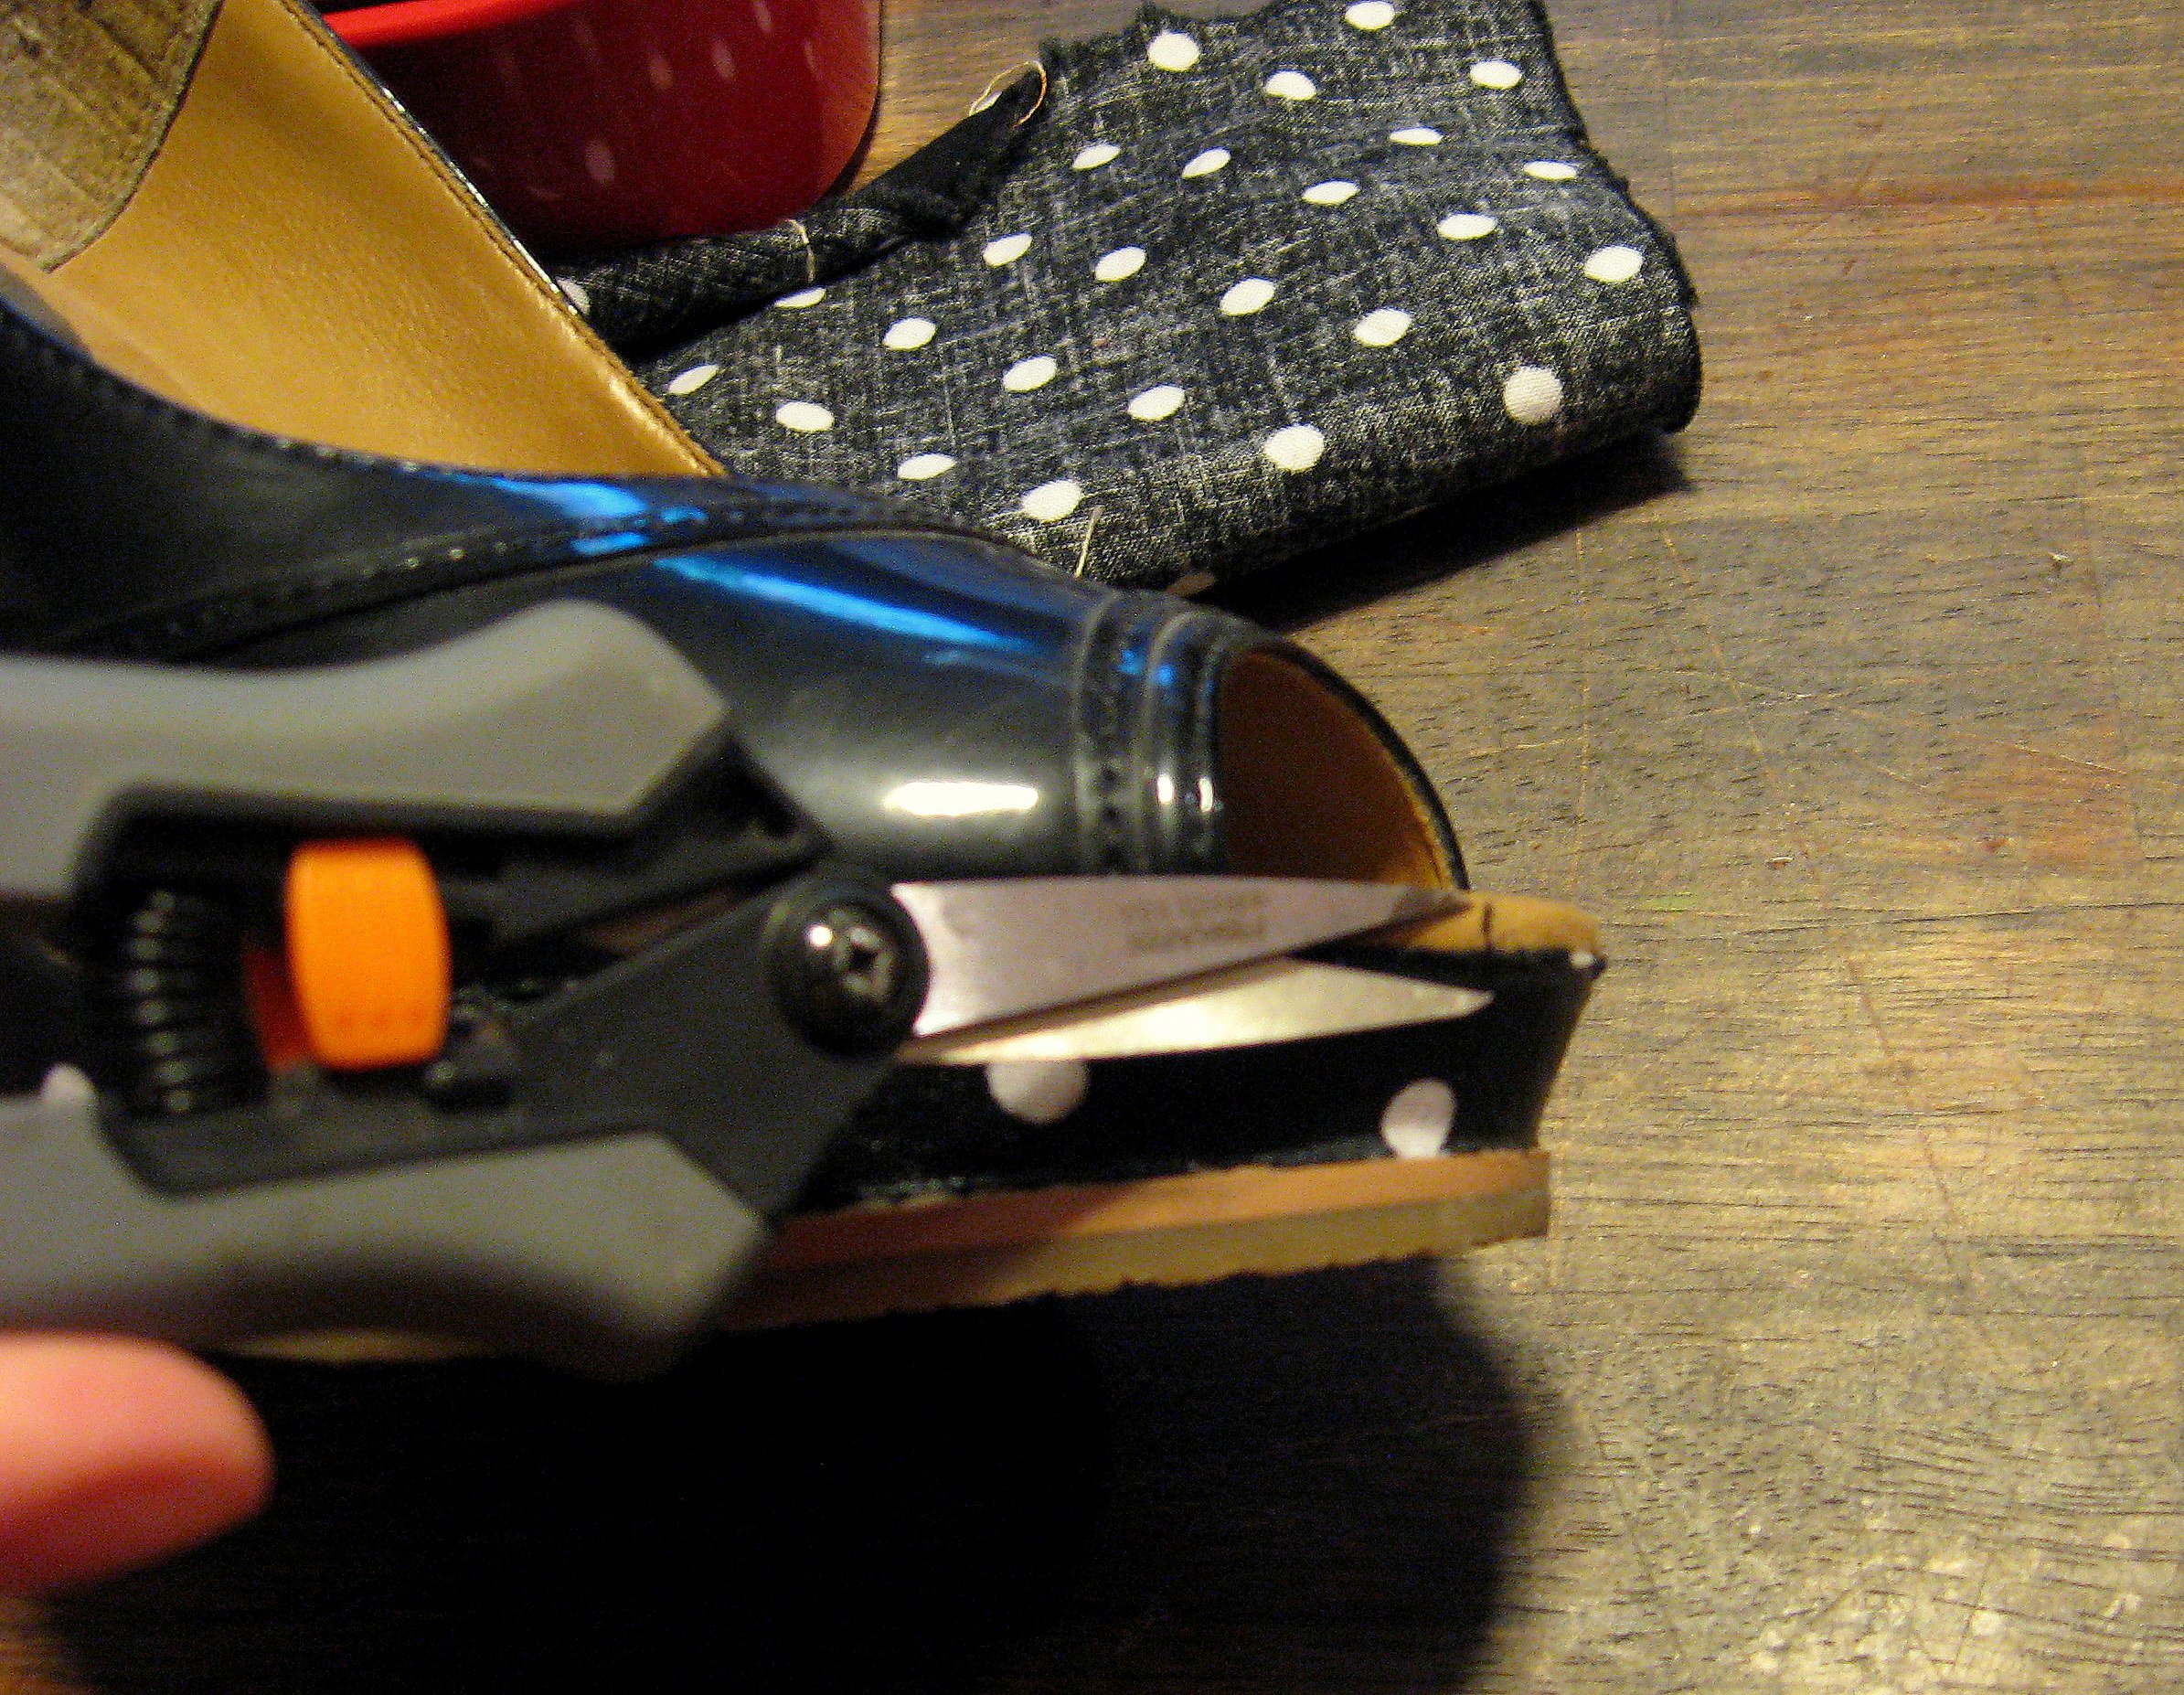
When all the excess fabric is cut off, you will go back and put two coats of mod podge on top of the fabric (let the first coat dry 20 minutes before you apply the second). This will dry hard and give you a nice, water resistant, wipeable surface.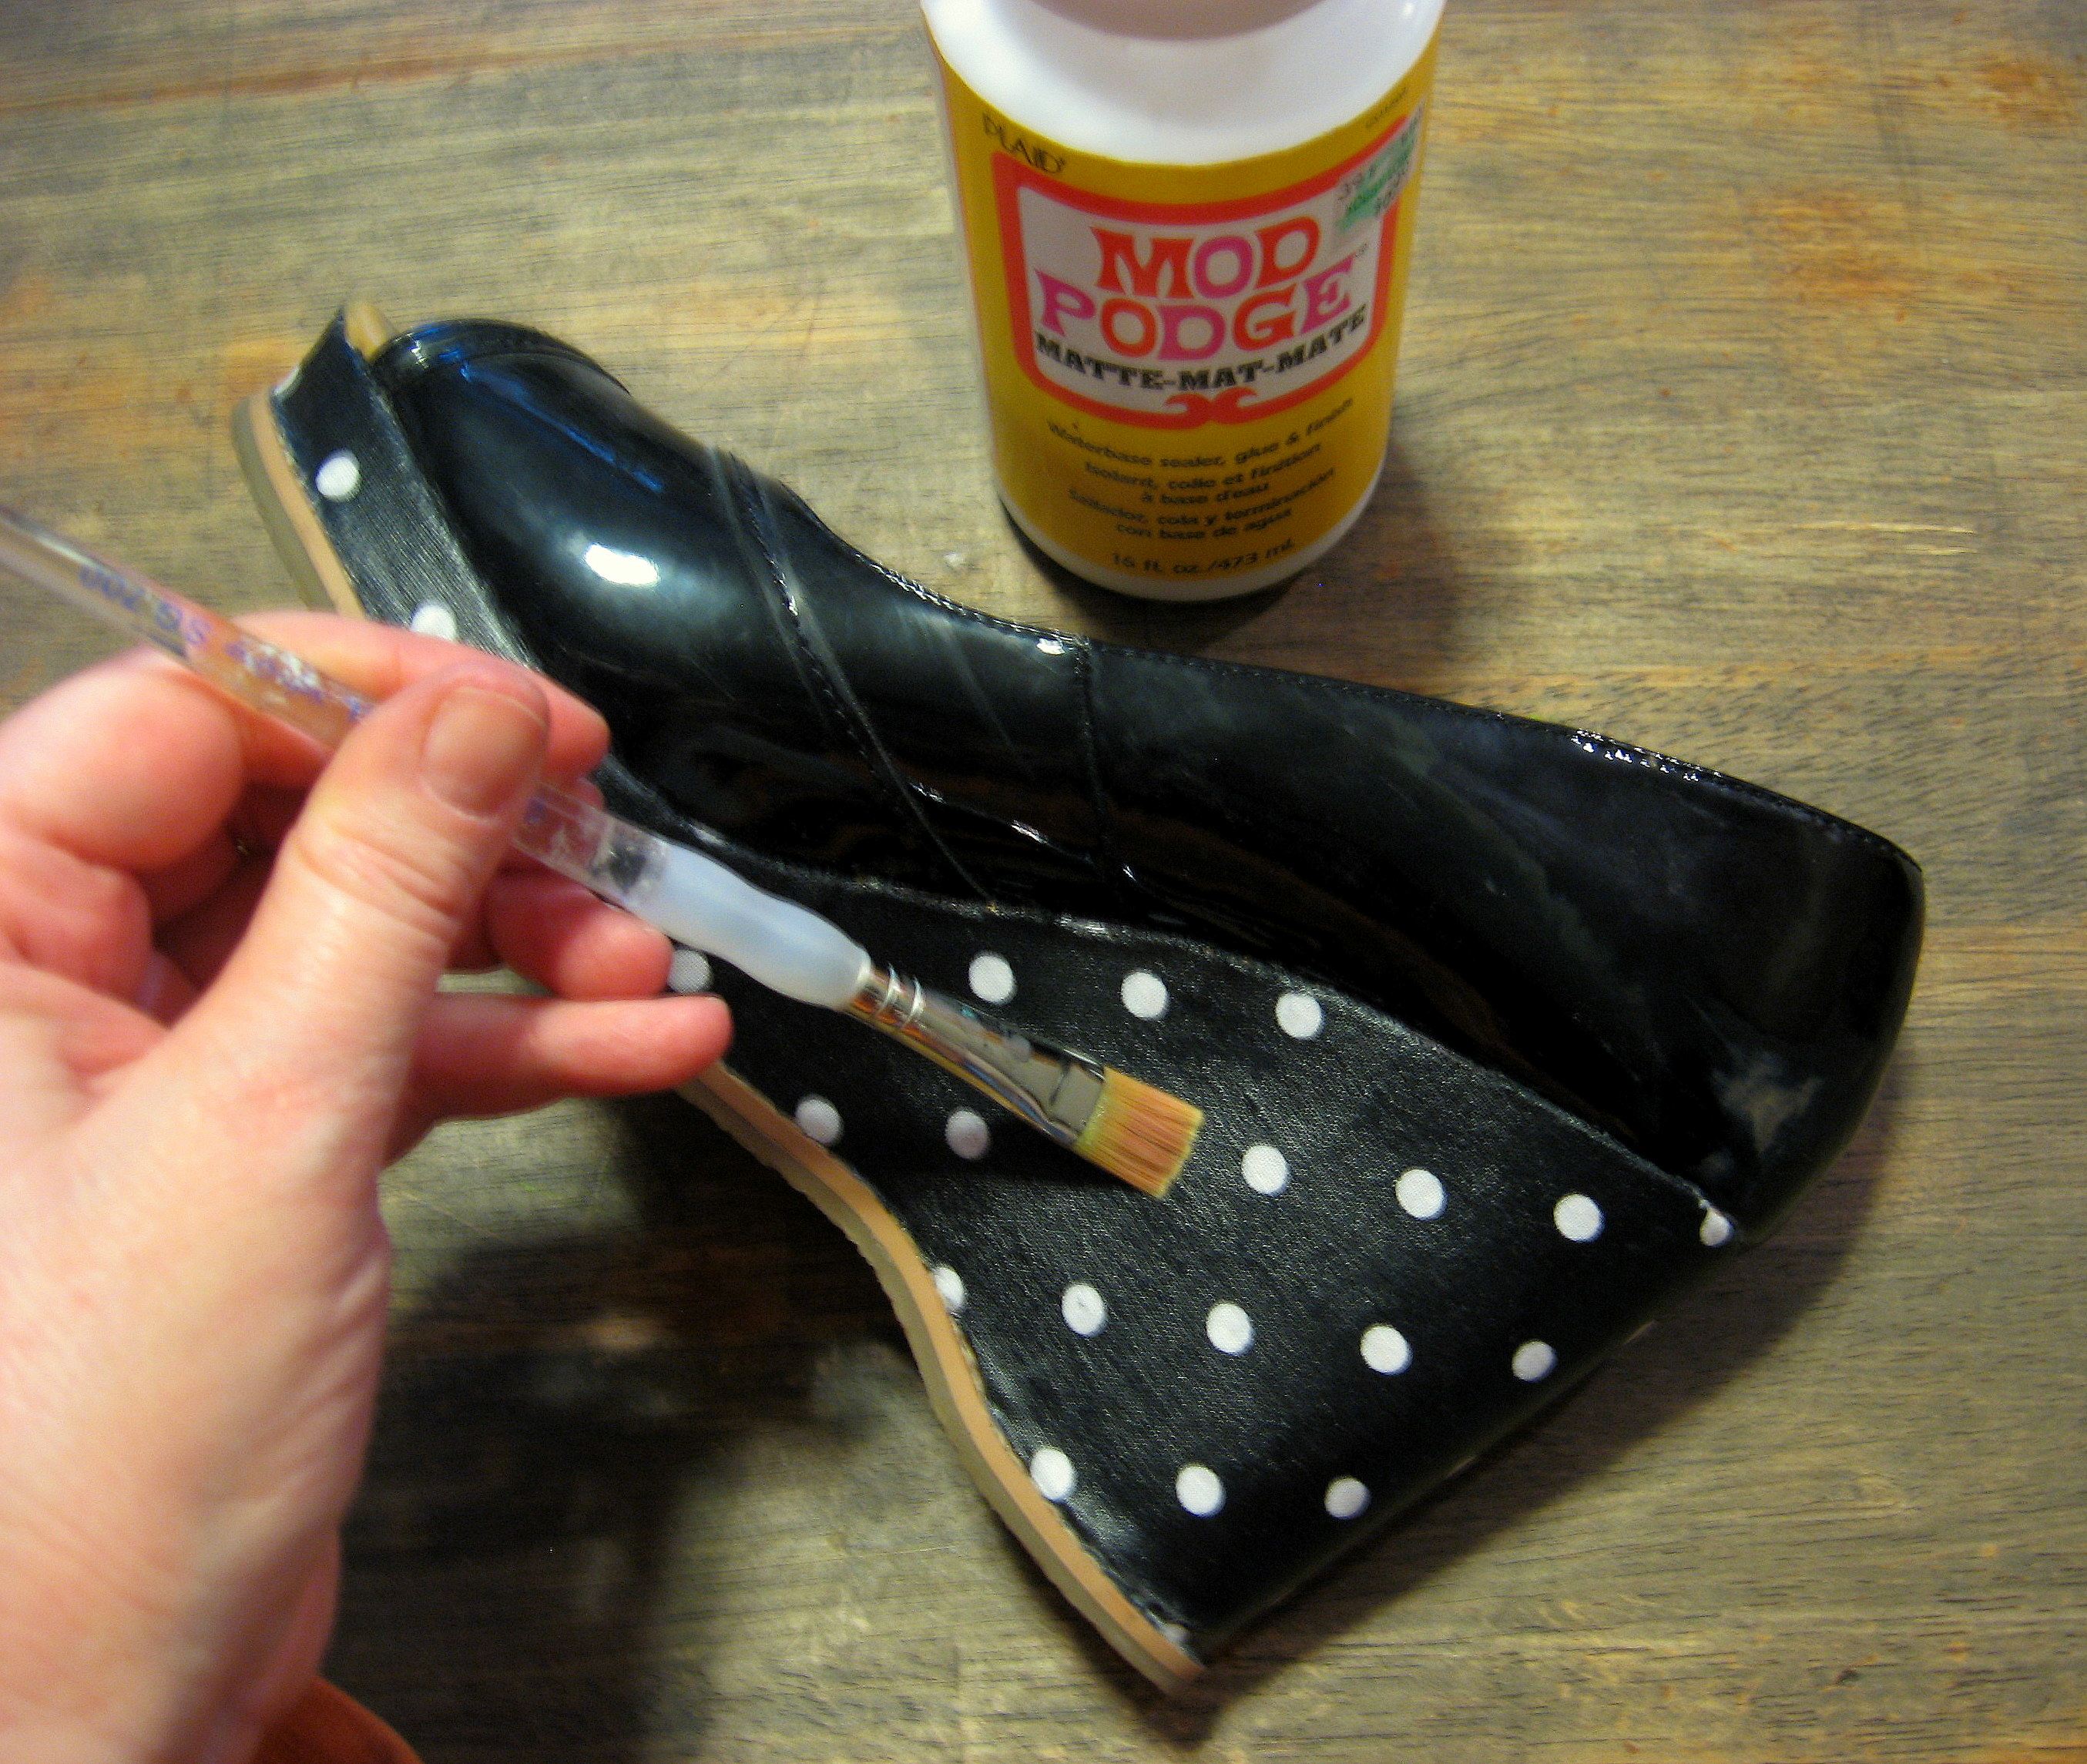
Wear and enjoy! 