
Bright orange pumpkins seem like the perfect fall squash. As we end October a variety of pumpkins have make their appearances and whether they become a jack-o lantern or a pie they are equally delightful. With the baking trend to make almost anything from bread to cookies out of pumpkins, there is no limit to recipes you can try. My college room mate even used to make some sort of pumpkin and spaghetti dish! All of these fun and sometimes exotic pumpkin recipes are waiting to grace your pallet this fall if you will just give them a try.
In our garden each year we tend to grow more than our fair share of pumpkins. Just how to use all these pumpkins is something I think about. I hate to admit it but often they are used for decoration until they rot. My kids then enjoy having a pumpkin smashing fest in the garden. When each pumpkin has been completely demolished, we then till them back into the pumpkin patch and let nature go to work. By the next fall we usually have another large pumpkin patch.
This year I was determined to do something more with our pumpkins. So I decided to try to make my own pumpkin puree to use in all the goodies I plan on baking. It is simpler than it sounds to make pumpkin puree and eliminates the need to purchase the canned pumpkin full of preservatives. Which makes me feel like I am giving my family something a little more healthy to eat. I just try not to think about any of the sugar, chocolate chips or whip cream I may be adding to them. 😉
Homemade Pumpkin Puree
Step 1. Start with a small pie pumpkin. You can find these in the produce section of your local grocery store.
Step 2. Clean the outside of the pumpkin by wiping it down with a damp cloth.
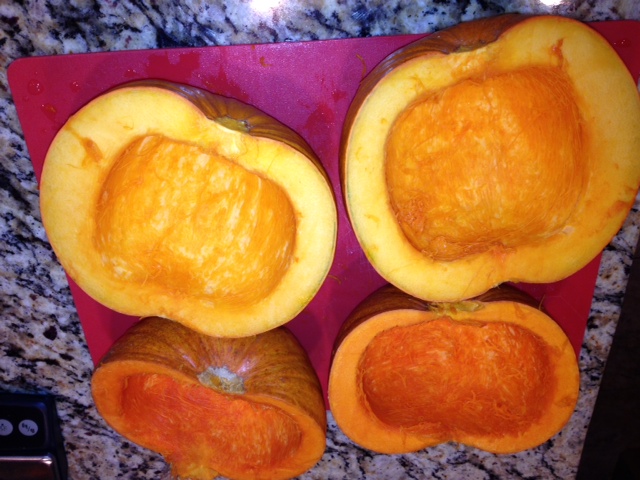
Step 3. Cut each pumpkin in half and scoop out the seeds.
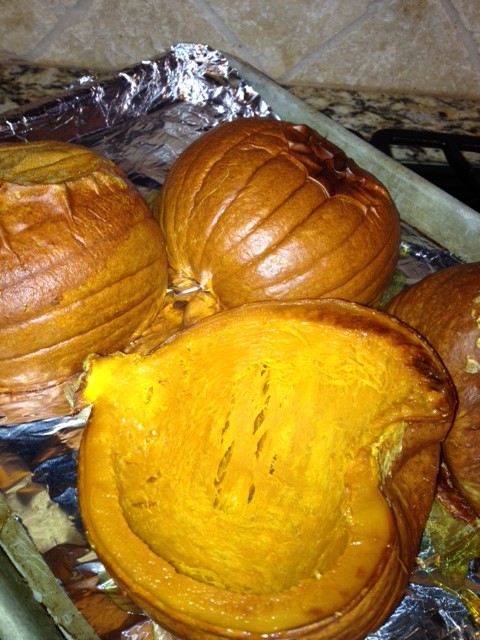
Step 4. Place flesh side down on a cookie sheet lined with foil.
Step 5. Bake at 350 degrees for one hour or until the insides are soft.
Step 6. Let cool until you can easily handle the pumpkins.
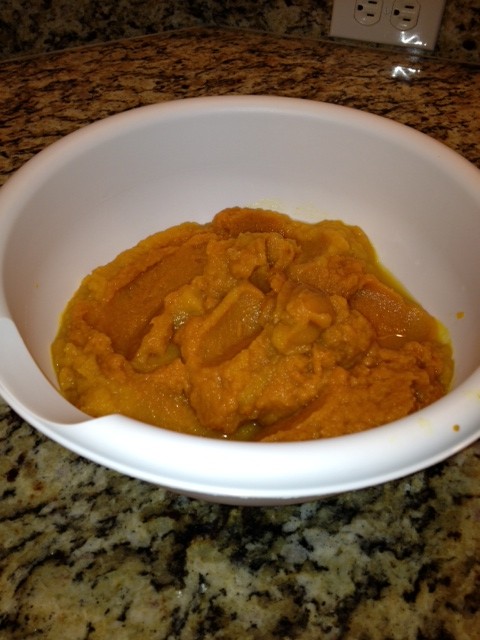
Step 7. Scoop out the inside of the squash with a large spoon. It should separate easily from the outer skin.
Step 8. Take the insides and blend with a blender, or mash them by hand until smooth.
Step 9. Store in freezer bags or containers in pre-measured amounts that will easily transfer to your recipes. I store mine in one cup containers. Mark them with the date and freeze until you need them for cooking.