
20-30% off Kohls! Kohls Cash! Nightowl and Earlybird Deals!
Take an extra 15%, 20%, or 30% off everything when you use your Kohl’s Charge!
Codes:
20% off everything using your Kohl’s Charge BBQWITH20 – exp 7/22
Save 20% Off with coupon code JULYGIFT
Can stack with:
Free shipping on ANY order MVCFREE4ME – exp 7/22
Free Shipping on $75. No code required.
 Earn $10 in Kohl’s Cash for every $50 you spend from 7/13-7/18.
Bonus Buys!
 Tek Gear Backpacks original $39.99 sale $17.99 *$12.59 after 30% off code plus earn $10 Kohls Cash for every $50 you spend! |
 Sterling Silver Crystal Jewelry regular $125.00 sale $55.99 *$39.19 after 30% off code plus earn $10 Kohls Cash for every $50 you spend! |
 Character Backpacks for Kids original $29.99 sale $15.99 *$11.19 after 30% off code plus earn $10 Kohls Cash for every $50 you spend! |
 Yak Pak Leopard Heart Lunch Tote original $19.99 sale $13.99 *$9.79 after 30% off code plus earn $10 Kohls Cash for every $50 you spend! |
 iLive Clock Radio & Docking Station regular $59.99 sale $39.99 *$27.99 after 30% off code plus earn $10 Kohls Cash for every $50 you spend! |
 2-pc. Pedestal Wall Shelf Set regular $49.99 sale $24.99 *$17.49 after 30% off code plus earn $10 Kohls Cash for every $50 you spend! |
Nightowl and Earlybird Deals!
 Black & Decker Crush Master Blender regular $39.99 sale $24.99 *$17.49 after 30% off code plus earn $10 Kohls Cash for every $50 you spend! |
 Black & Decker Classic Chrome 2-Slice Toaster regular $39.99 sale $24.99 *$17.49 after 30% off code plus earn $10 Kohls Cash for every $50 you spend! |
 SONOMA life + style Ultimate Performance Bath Towels regular $15.99 sale $6.99 *$4.89 after 30% off code plus earn $10 Kohls Cash for every $50 you spend! |
 The Big One 6-pc. Omni Striped Reversible Bed Set – Twin original $119.99 sale $54.99 *$38.49 after 30% off code plus earn $10 Kohls Cash for every $50 you spend! |
 Family Rules Canvas Wall Art original $59.99 sale $26.99 *$18.89 after 30% off code plus earn $10 Kohls Cash for every $50 you spend! |
 Fetco Pomeroy Floral Wall Decor regular $59.99 sale $26.99 *$18.89 after 30% off code plus earn $10 Kohls Cash for every $50 you spend! |
40% OFF everything at shopjustice.com!
Use coupon code 784 – exp 7/16
 Striped Crop Over Long Tank was $26.00 sale $15.99 $9.59 with 40% off coupon! |
 Side Cinch Shrug With Sequins was $24.00 sale $19.99 $11.99 with 40% off coupon! |
 Solid Flutter Sleeve 2fer Top was $29.00 sale $22.99 $13.79 with 40% off coupon! |
Use coupon code 784 – exp 7/16
Payless – End of season clearance! Plus code! Free shipping to store!
Payless End of Season clearance! Plus Code! Women’s Styles!
End of season clearance!
Take 20% off with coupon code 75055 – exp 7/15
Free Shipping to a store near you. $5.95 Flat Rate Shipping to your home or office.
 Women’s Madra Flower Wedge Reg. $24.99 $16.00 $12.80 after code! |
 Women’s Dream A-Line Slip-On Reg. $19.99 $15.00 $12.00 after code! |
 Women’s Cabana Sneaker Reg. $19.99 $10.00 $8.00 after code! |
 Women’s Maria Wedge Reg. $24.99 $12.00 $9.60 after code! |
 Women’s Canvas Sneaker Reg. $14.99 $10.00 $8.00 after code! |
 Women’s Shine Studded Sandal Reg. $12.99 $6.00 $4.80 after code! |
 Women’s Jenerr Side Bow Wedge Reg. $26.99 $17.00 $13.60 after code! |
 Women’s Senorita Wedge Reg. $27.99 $10.00 $8.00 after code! |
 Women’s Flynn Satchel Reg. $19.99 $10.00 $8.00 after code! |
Take 20% off with coupon code 75055 – exp 7/15
Free Shipping to a store near you. $5.95 Flat Rate Shipping to your home or office.
Claires Bonus Bucks! Get a $10 credit for every $20 spent at Claires.com
Get a $10 credit for every $20 spent at Claires.com. Make a purchase between July 12 and August 25 for $20; earn $10 in bonus bucks to redeem between August 26 and September 16 towards a purchase of $20 or more.
Clearance up to 75% off!
Deals like…..
 Fourth of July Flower Headband Was $5.50 Now $1.00 |
 Fourth of July Faux Nails Was $6.50 Now $1.00 |
 9 Pair Fourth of July Earrings Was $9.50 Now $1.00 |
 Zebra A Bling Holder Was $12.00 Now $2.00 |
 S Bling Holder Was $12.00 Now $2.00 |
 Treasure Dresser Was $25.00 Now $12.50 |
Free shipping on orders over $45!
Olympus VR-320 14MP Digital Camera $80! List $180
 Olympus VR-320 14MP Digital Camera, 720p, 12.5x Optical Zoom, 24mm Wide Angle Lens, 3.0” LCD, Dual Image Stabilization, Li-Ion, SDHC
$79.99
List $179.99
$5 flat rate shipping
Cookie Craving – Oatmeal Chocolate Chip Cookie Recipe

We love cookies at our house. Chocolate chip cookies and milk is just one of those comfort treats that can’t be beat. Most of the time I fall back to the tried and true Nestle Toll House Cookie Recipe when I go to make cookies. But I came across this recipe and have made a couple tweaks to it and I think it has become my families new favorite cookie recipe.
Oatmeal Chocolate Chip Cookies
1/2 C. Butter
1/2 C. Shortening
1 C. Sugar
1 C. Brown Sugar
2 Eggs
2 tsp Vanilla
1 tsp Salt
1/2 tsp Baking Powder
2 tsp Baking Soda
2 1/4 C. Flour
2 C. Oats
1 package Semi-Sweet Morsels
Cream together butter, shortening and sugars. Add eggs and vanilla and mix well. Add salt, soda, powder, flour and mix just until combined. Add oats and morsels and mix with a wooden spoon. Bake at 350 degrees for 10-12 minutes.
These are so good you can’t eat just one. I suggest sharing immediately to avoid over consumption. Enjoy.
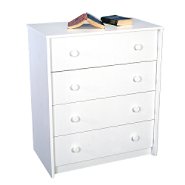
$39.99 YOUR CHOICE Essential Home dressers!
$39.99 YOUR CHOICE Essential Home dressers!
Free in store pick up!
Essential Home Four-Drawer Chest – 4 colors
was $59.99
$39.99
Essential Home Lingerie Chest – 4 colors
was $59.99
$39.99
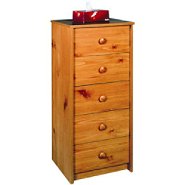
Free in store pick up!
The Great Find 14 Piece Bed Set Twin XL – $49.99! Back to dorm!
Perfect for the dorm! Free in store pick up!


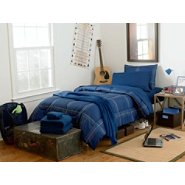

The Great Find 14 Piece Bed Set Twin XL
was $59.99
sale $49.99
14 Piece Set Includes:
Comforter
Sheet set
Sham
Fleece throw
2 Washcloths
2 Bath towels
Photo frame
Dry erase board
Desk lamp
Storage hamper

Coby 32″ Class LCD 720p HDTV $190 shipped!

Coby 32″ Class LCD 720p HDTV
Sale: $189.99
Reg. Price: $229.99
You Save: $40
*Free Shipping
Today’s Freebie Roundup 7/13

- FREE Meal at Chick-fil-A Today! (Dress like a cow)
- FREE Body Lotion at Bath & Body Works
- FREE Health Screenings at Sam’s Club Tomorrow
- Coupon for $5 off 50 4×6 photos from Target – Photos are supposed to be 10 for $1 so this makes 50 free photos.
- FREE Cupcake on Your Birthday at Sprinkles
- FREE Woolite Extra Dark Care Detergent Sample
- Free Shout Color Catcher SampleFREE Starbucks Refreshers Beverage Today!
- Shape FREE Workout Mix Music Downloads (July)
- FREE Mars Ice Cream Rise and Scream Wristband at Six Flags on July 15
- Get Free Laundry Samples from your favorite brands!
- Get Free Beauty Samples from your favorite brands!
- FREE Android App of the Day from Amazon is the Grill-It! app (This app qualifies for the MP3 Credit Below!)
- FREE $1 Amazon MP3 Credit for Android Users
- 7 Day Free Gym Membership Pass for 24Hour Fitness
- FREE 14 Day Epix HD Trial (Watch free movies – there are some pretty good ones)
- Stay One Night, Get One Night with Park Plaza Hotels & Resorts
- Great Survey Sites! Some pay $$ Some give rewards!
- Shell Spin To Save Instant Win Game
- Arthritis Study
- Spotify is a digital music service that gives you access to millions of songs. Download it for Free today!
- New lenses every day, and refreshing comfort all day long with every blink. Sign up for a 30-day Trial offer.
- Food on the Table – the better way to plan meals and save money. SPECIAL OFFER: Use promo code: SUMMERFREE, to get the Premium Service for FREE for life!
- Free trial of Hulu Plus
- One Month Free from Netflix
- audible.com Free 30 day trial!
- See if you qualify for Free Magazines
- UPS My Choice – Sign up for Free!
Today is Cow Appreciation Day!

Krispy Kreme: Buy a Dozen Get a Second Original Glazed Dozen for ONLY $0.75

Buy one dozen doughnuts and get a dozen Original Glazed Doughnuts for $0.75
Available while supplies last at participating U.S. and Canada Krispy Kreme retail shop locations only on July 13, 2012.
Krispy Kreme: Buy a Dozen Get a Second Original Glazed Dozen for ONLY $0.75
Preview! Starts tonight! 20-30% off Kohls! Kohls Cash! Stacking swim code tonight!
Take an extra 15%, 20%, or 30% off everything when you use your Kohl’s Charge!
Codes:
20% off everything using your Kohl’s Charge BBQWITH20 – exp 7/22 (starts later tonight)
Save 20% Off with coupon code JULYGIFT
Save 15% Off with coupon code SUMMER15 – exp 7/12
Can stack with this code for a brief time tonight:
EXTRA 15% Off All Swimwear for Women & Juniors SPLASH15 – exp 7/12
Free Shipping on $75. No code required.
Earn $10 in Kohl’s Cash for every $50 you spend from 7/13-7/18.
***Kohl’s Cash will not be credited on orders placed before the Kohl’s Cash promo is seen on the Kohl’s Homepage. This will be approx. 11pm MST tonight.
Please no posting of codes higher than 20%, as requested by Kohl’s.
Online Exclusive: 40-50% Off All Swimwear for Women & Juniors – Extra 15% Off with Code: SPLASH15
Apt. 9 Ruched Halter One-Piece Swimsuit
original $84.00
sale $50.40
*$29.99 after the swimwear code and the 30% off code plus earn $10 Kohls Cash for every $50 you spend!

ZeroXposur Striped Swim Separates
original $42.00-48.00
sale $25.20-$28.80
*$14.99-$17.14 after the swimwear code and the 30% off code plus earn $10 Kohls Cash for every $50 you spend!

Apt. 9 Chevron Crochet Empire Cover-Up Tunic
original $38.00
sale $22.80
*$13.57 after the swimwear code and the 30% off code plus earn $10 Kohls Cash for every $50 you spend!

Southpoint Kaleidoscope Swim Separates
original $44.00
sale $26.40
*$15.71 after the swimwear code and the 30% off code plus earn $10 Kohls Cash for every $50 you spend!

SO Double-Strap Halter Cover-Up Dress
original $30.00
sale $18.00
*$10.71 after the swimwear code and the 30% off code plus earn $10 Kohls Cash for every $50 you spend!

Hang Ten Swim Separates
original $30.00
sale $18.00
*$10.71 after the swimwear code and the 30% off code plus earn $10 Kohls Cash for every $50 you spend!

Follow along with us and see what other great deals we are finding HERE!
*HOT* Scotch-Brite Botanical Wipes B1 G1 FREE Printable Coupon!
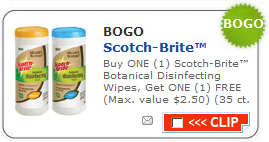 Print this Scotch-Brite Botanical Disinfecting Wipes, Buy 1 Get 1 FREE up to $2.50 quickly, before it disappears. My local Walmart has these for $1.97 daily, so just $0.99 after coupon! Remember, you can print each coupon twice.