
A PYP Best Blog! Free DIY pajamas!
Just in case you missed this article on making free DIY pajamas the first time we shared it a couple of years ago, we are republishing it. After Trish wrote this blog originally, we got an awesome response. This is one of the PYP Best Blogs!
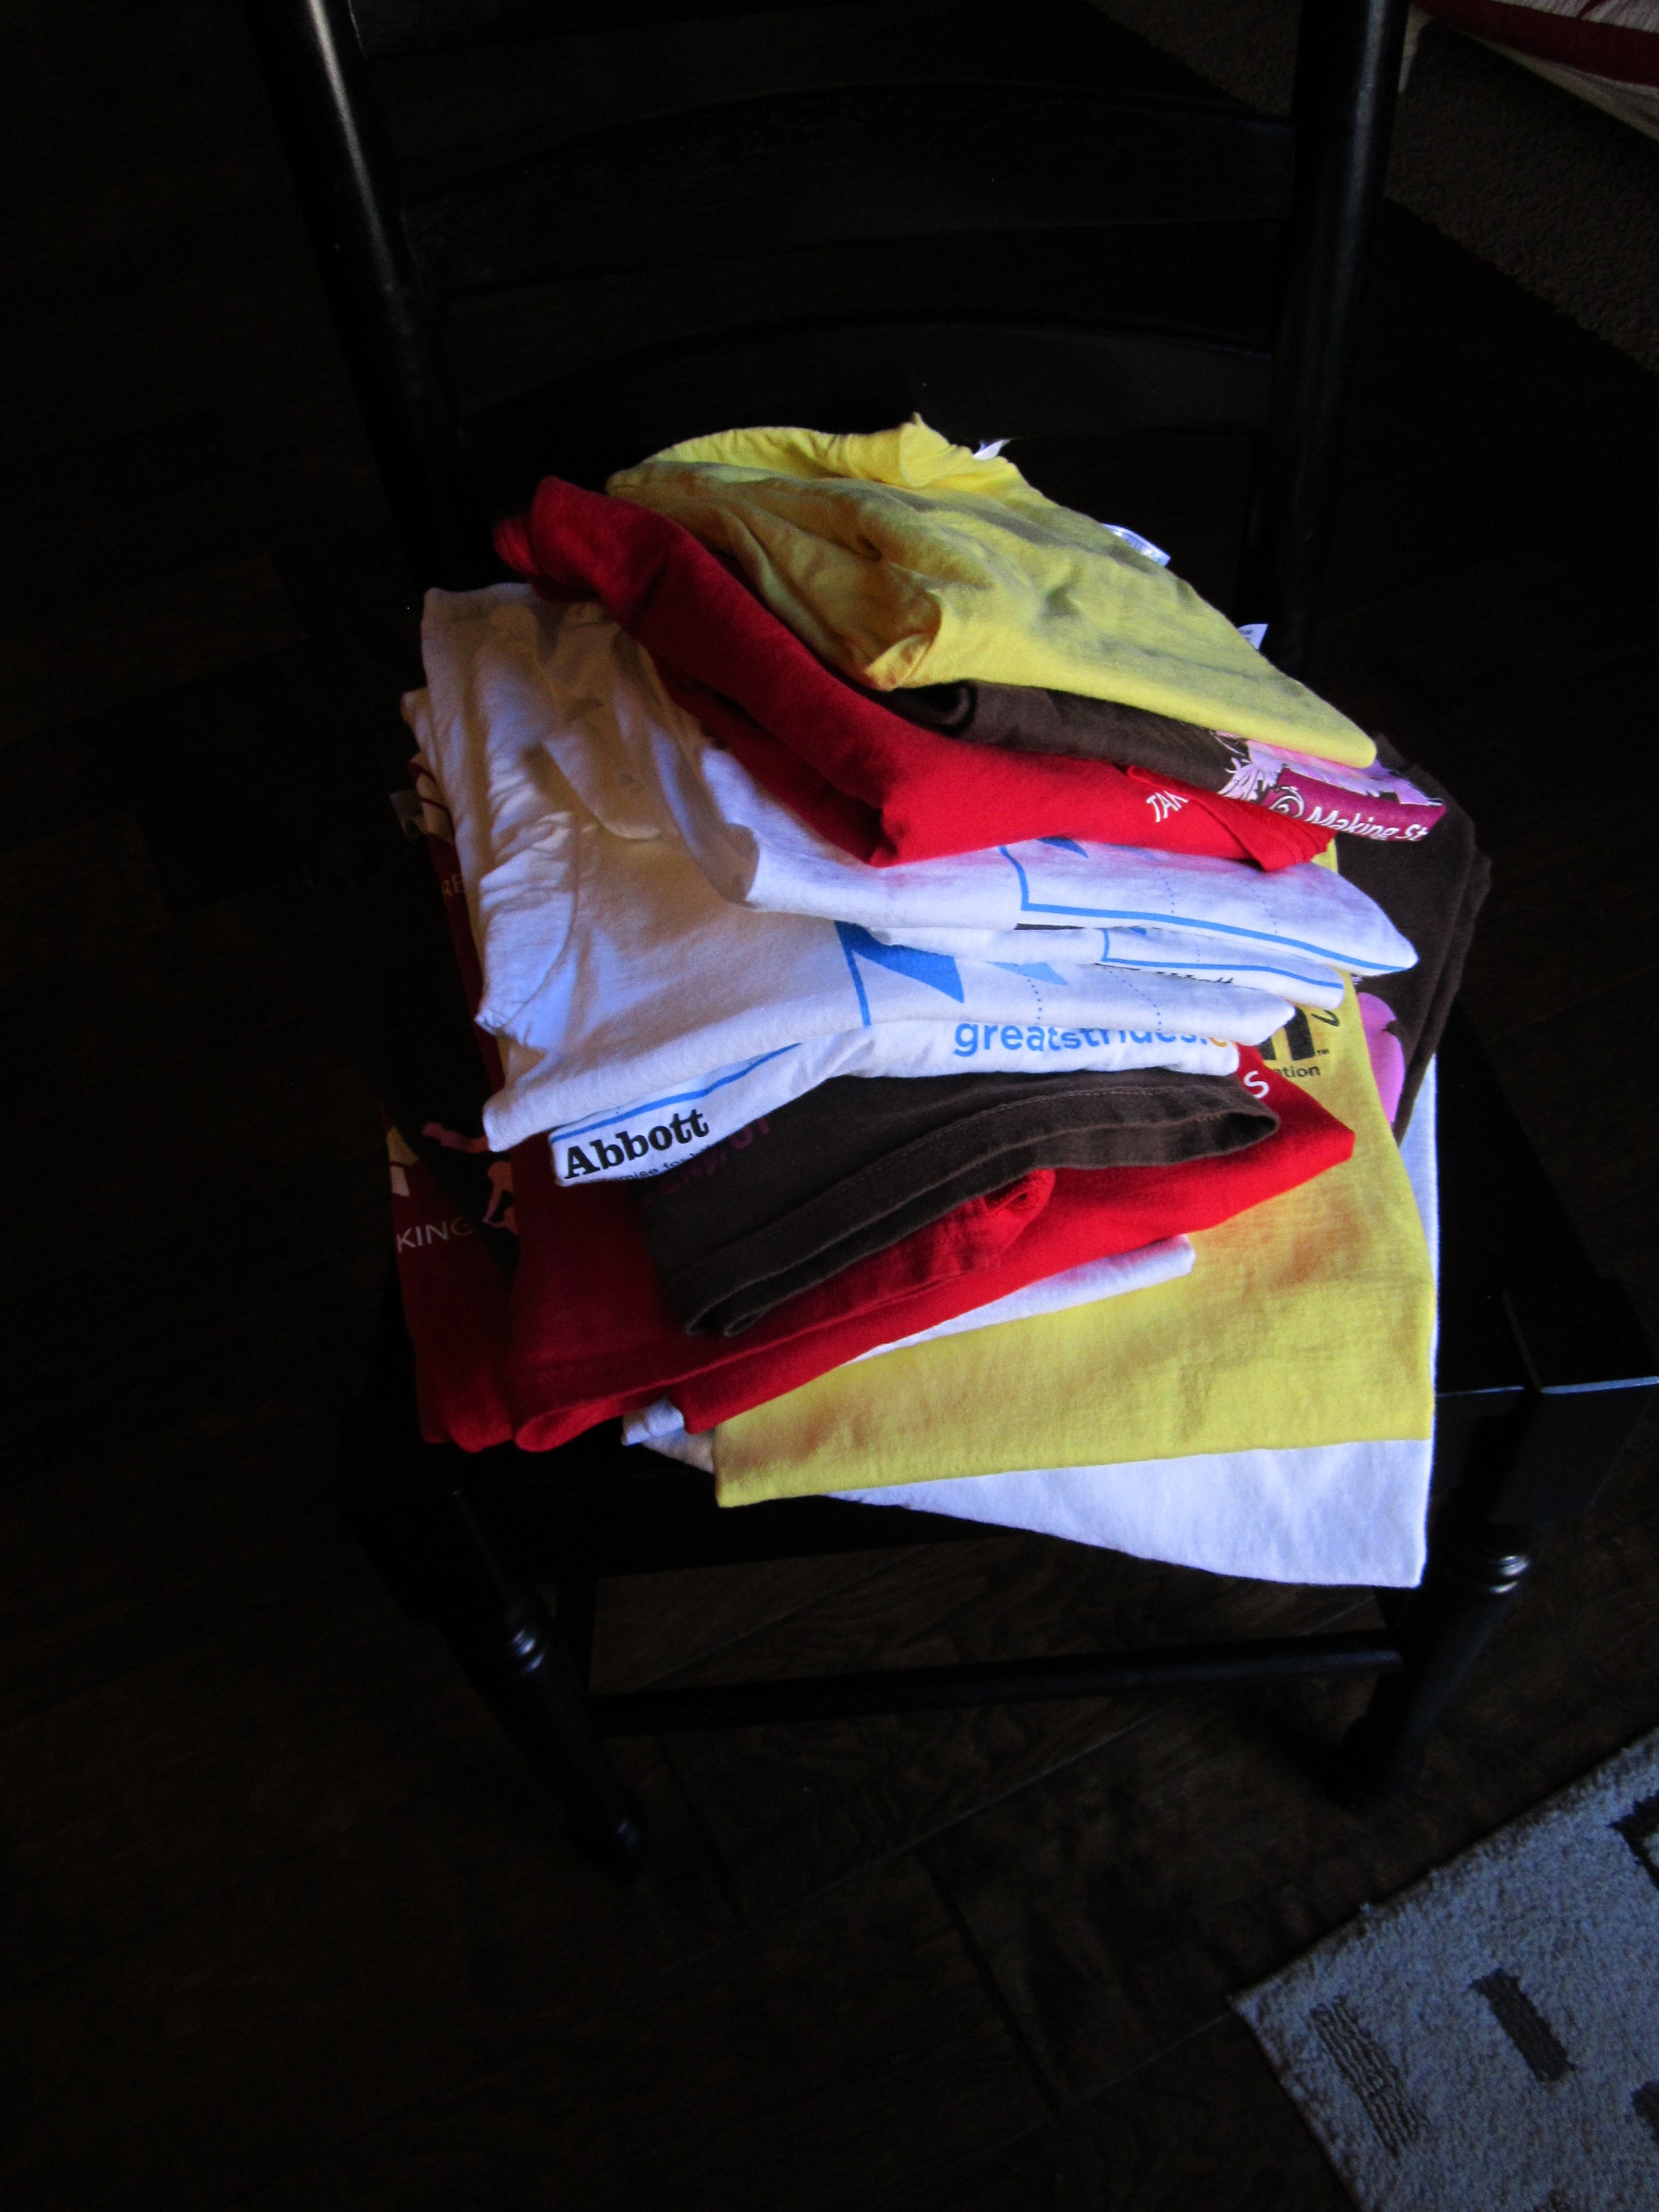
I’ve had a plan brewing for a while now to re-purpose a pile of t-shirts into pajamas for my son.
A few days ago I was making my way around blog land and came across an idea to make leggings for baby girls. So Cute! But I don’t have any sweet baby girls anymore. Just one 5 year old boy who is growing like a weed! All arms and legs!

Our family participates in a few company sponsored charity events each year. We always get at least one promotional t-shirt per family member for each event. Sometimes two! That adds up to a pretty large stack of t-shirts pretty fast.
I thought this would be a great way to put them to good use. I love a cute pair of PJs as much as the next mom, but let’s face it, all they do is sleep in them. Well, and occasionally they might get dragged to the store for an emergency milk run at 6 am in them. But still, pajamas don’t really NEED to be high fashion.
So, using that blog as a starting point, I decided to make some pajamas.
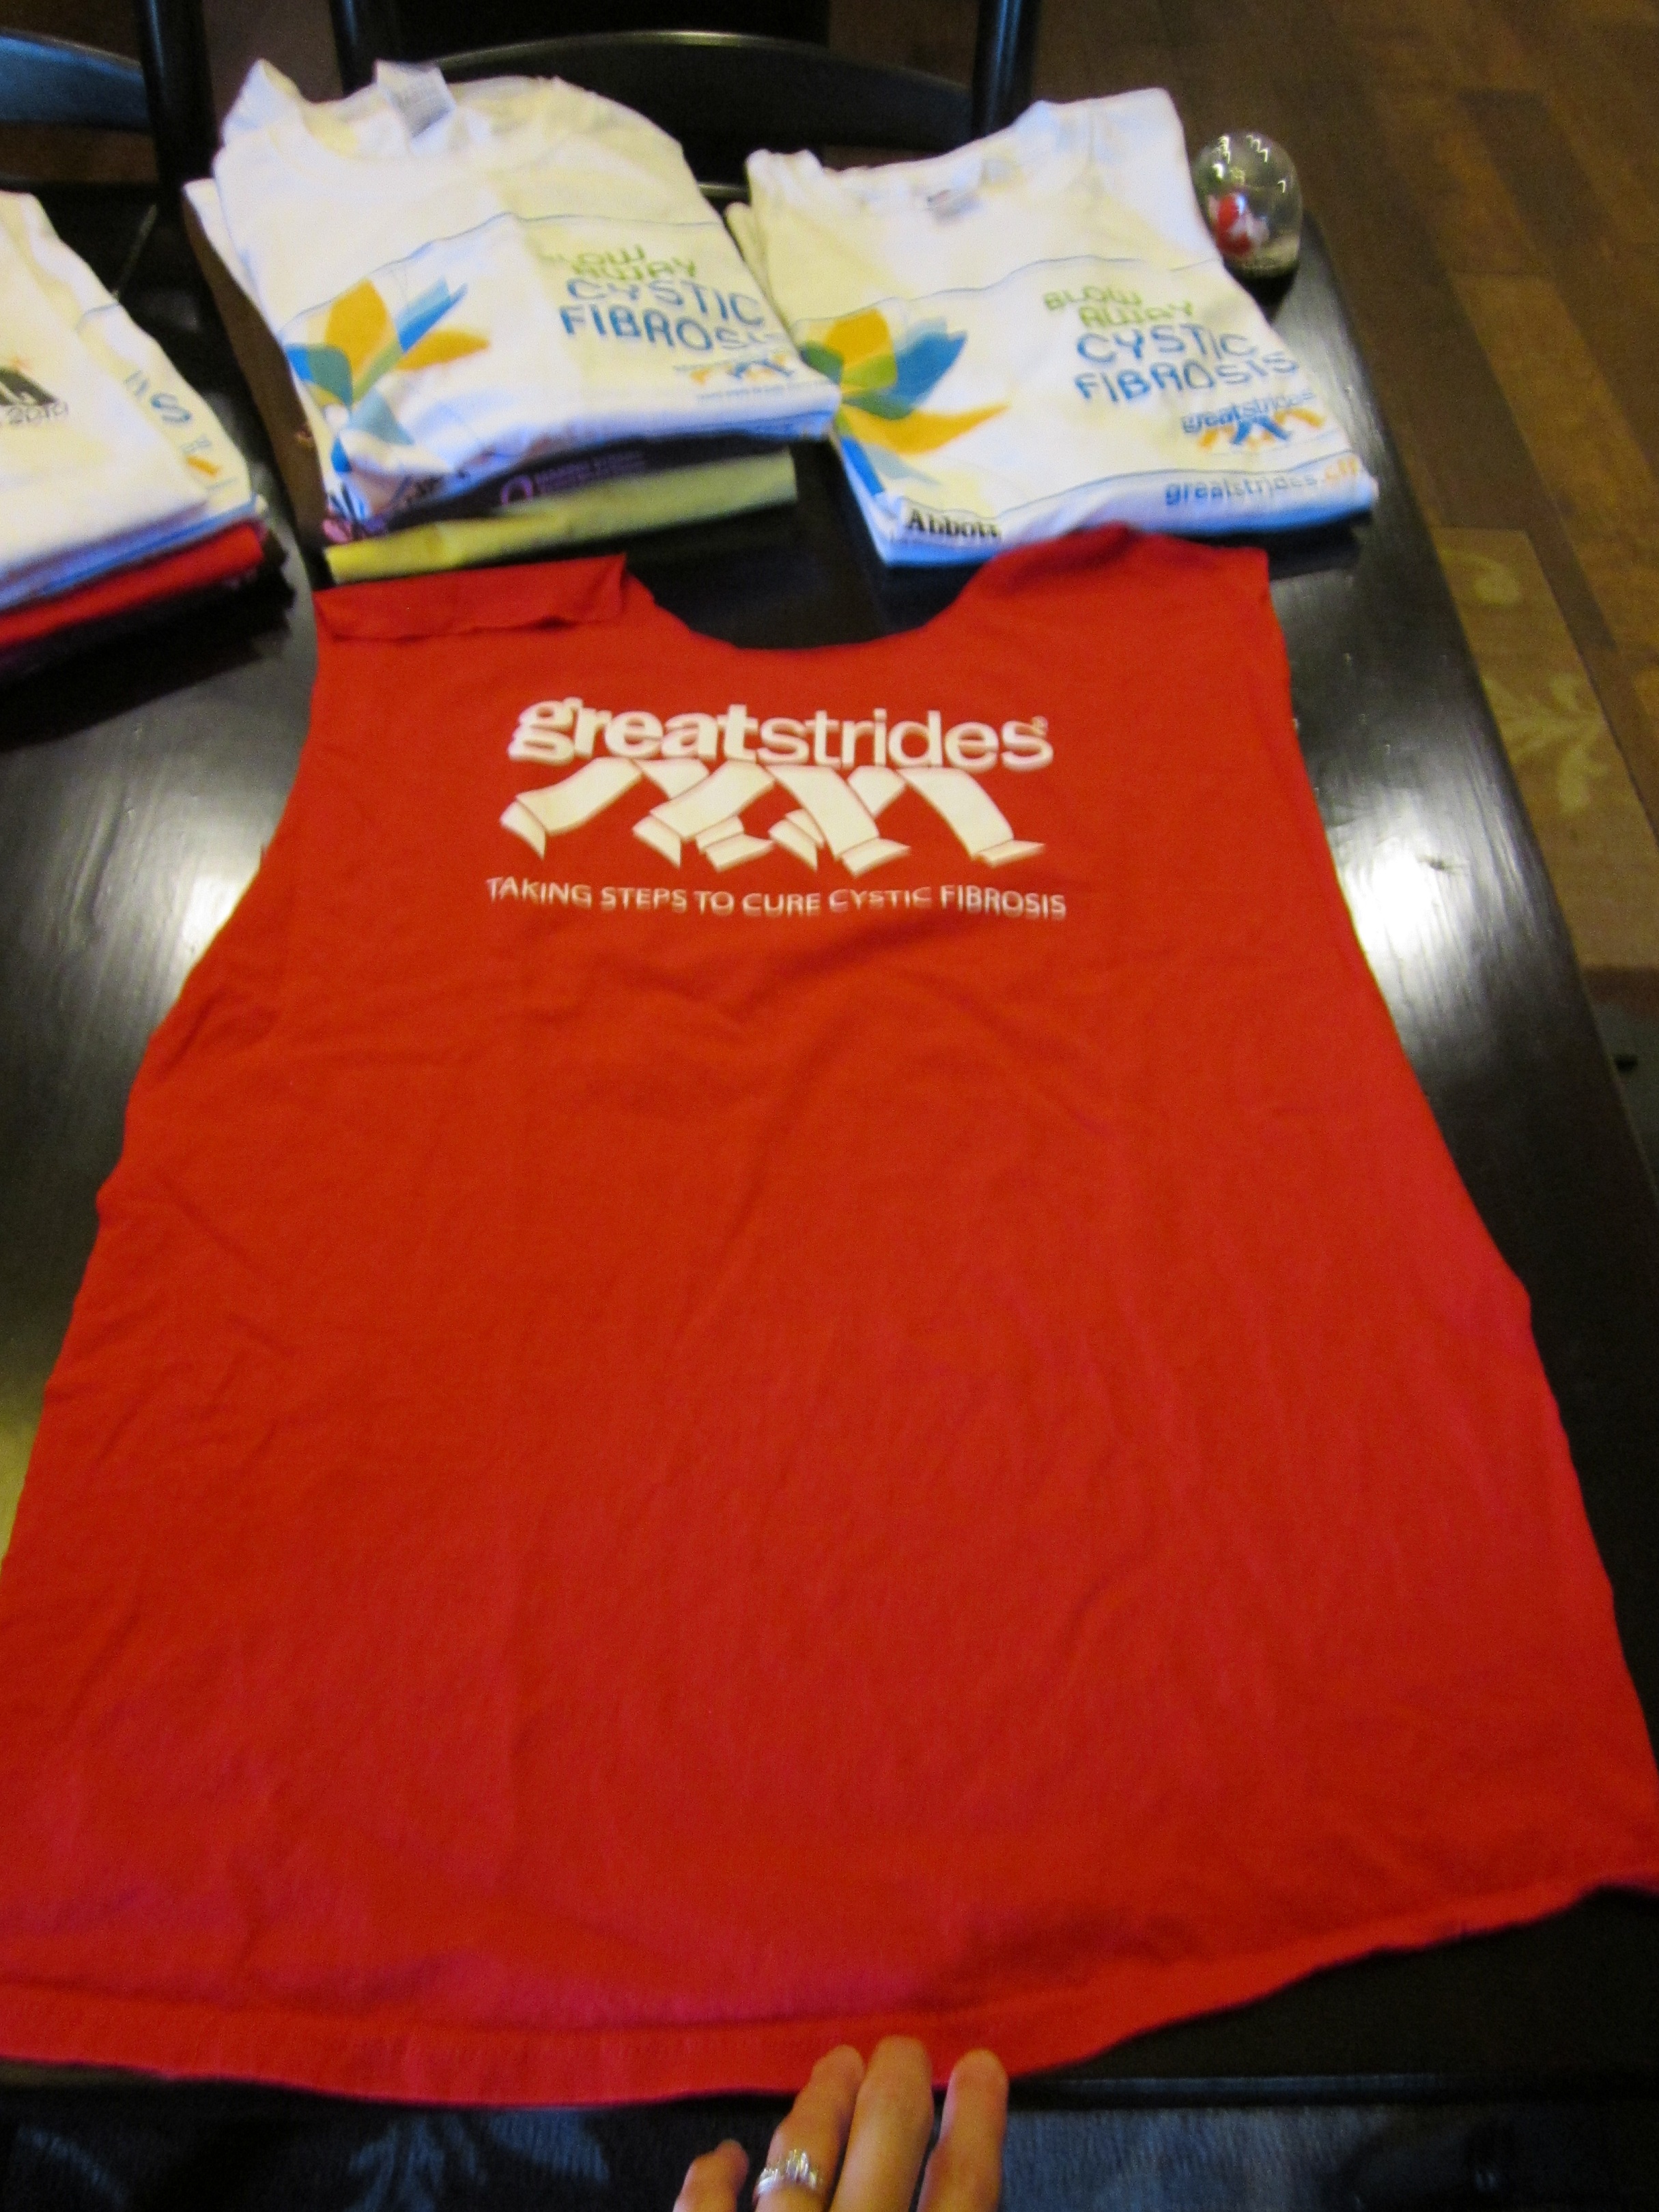
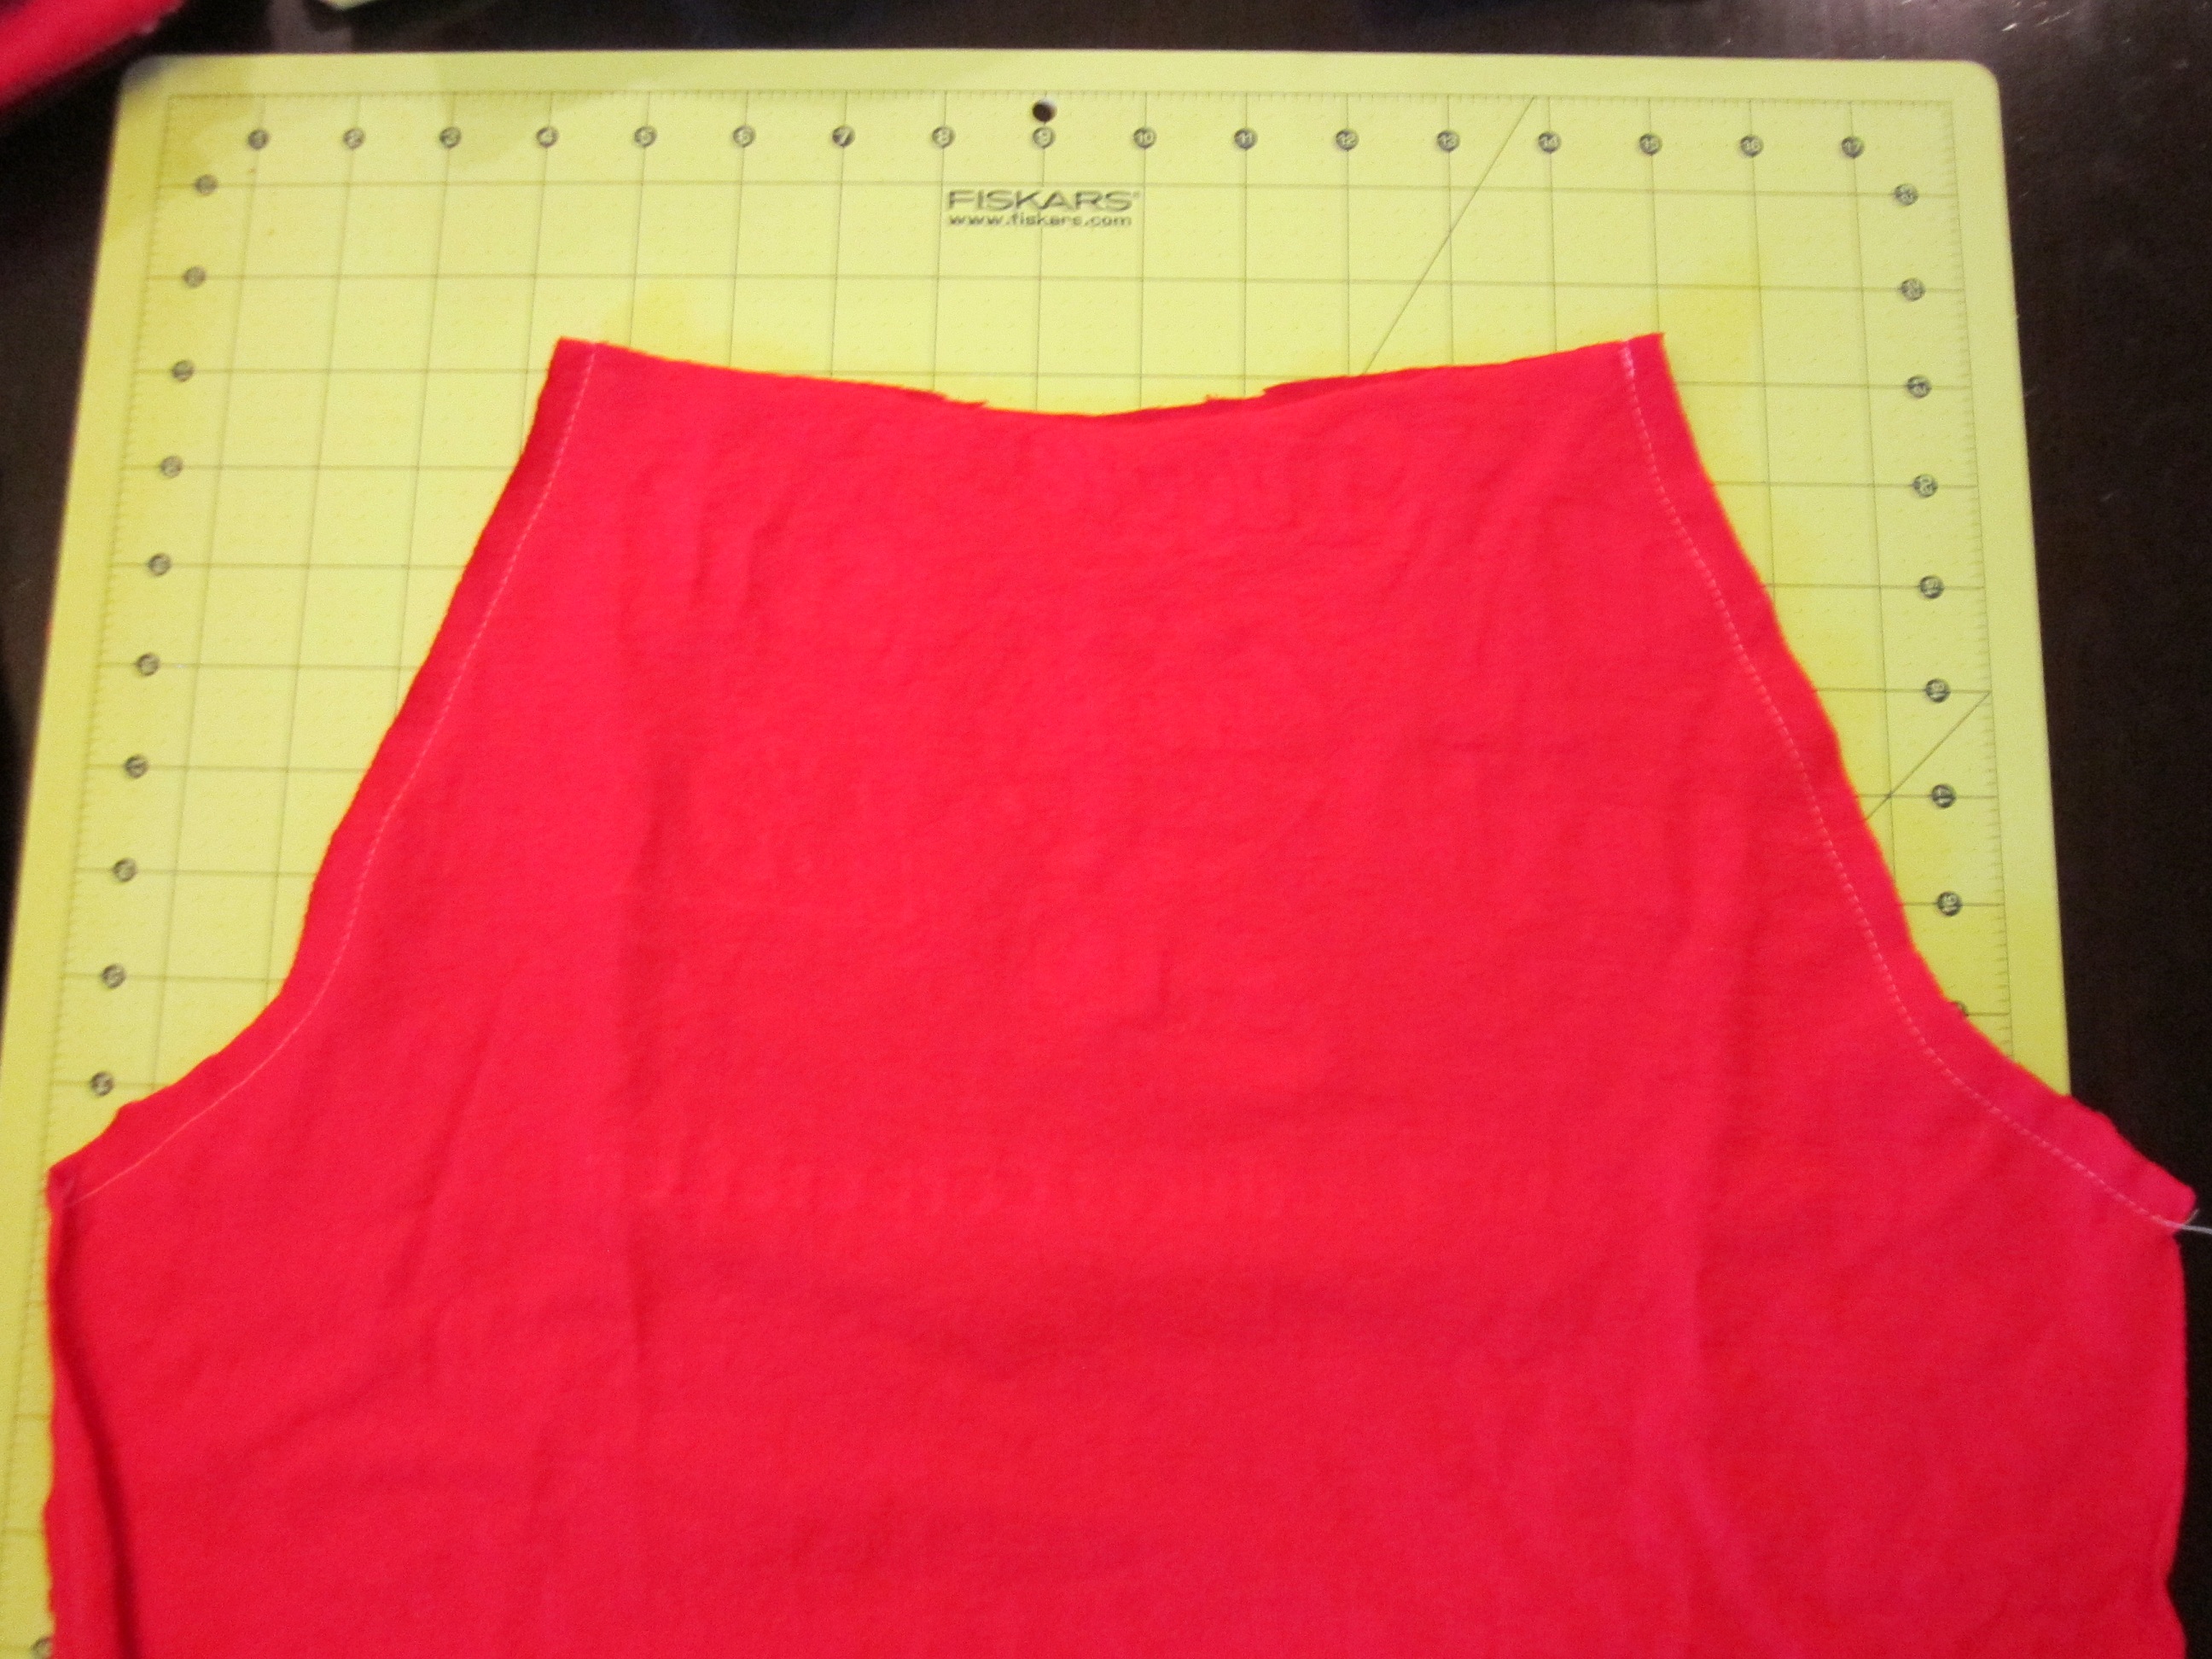
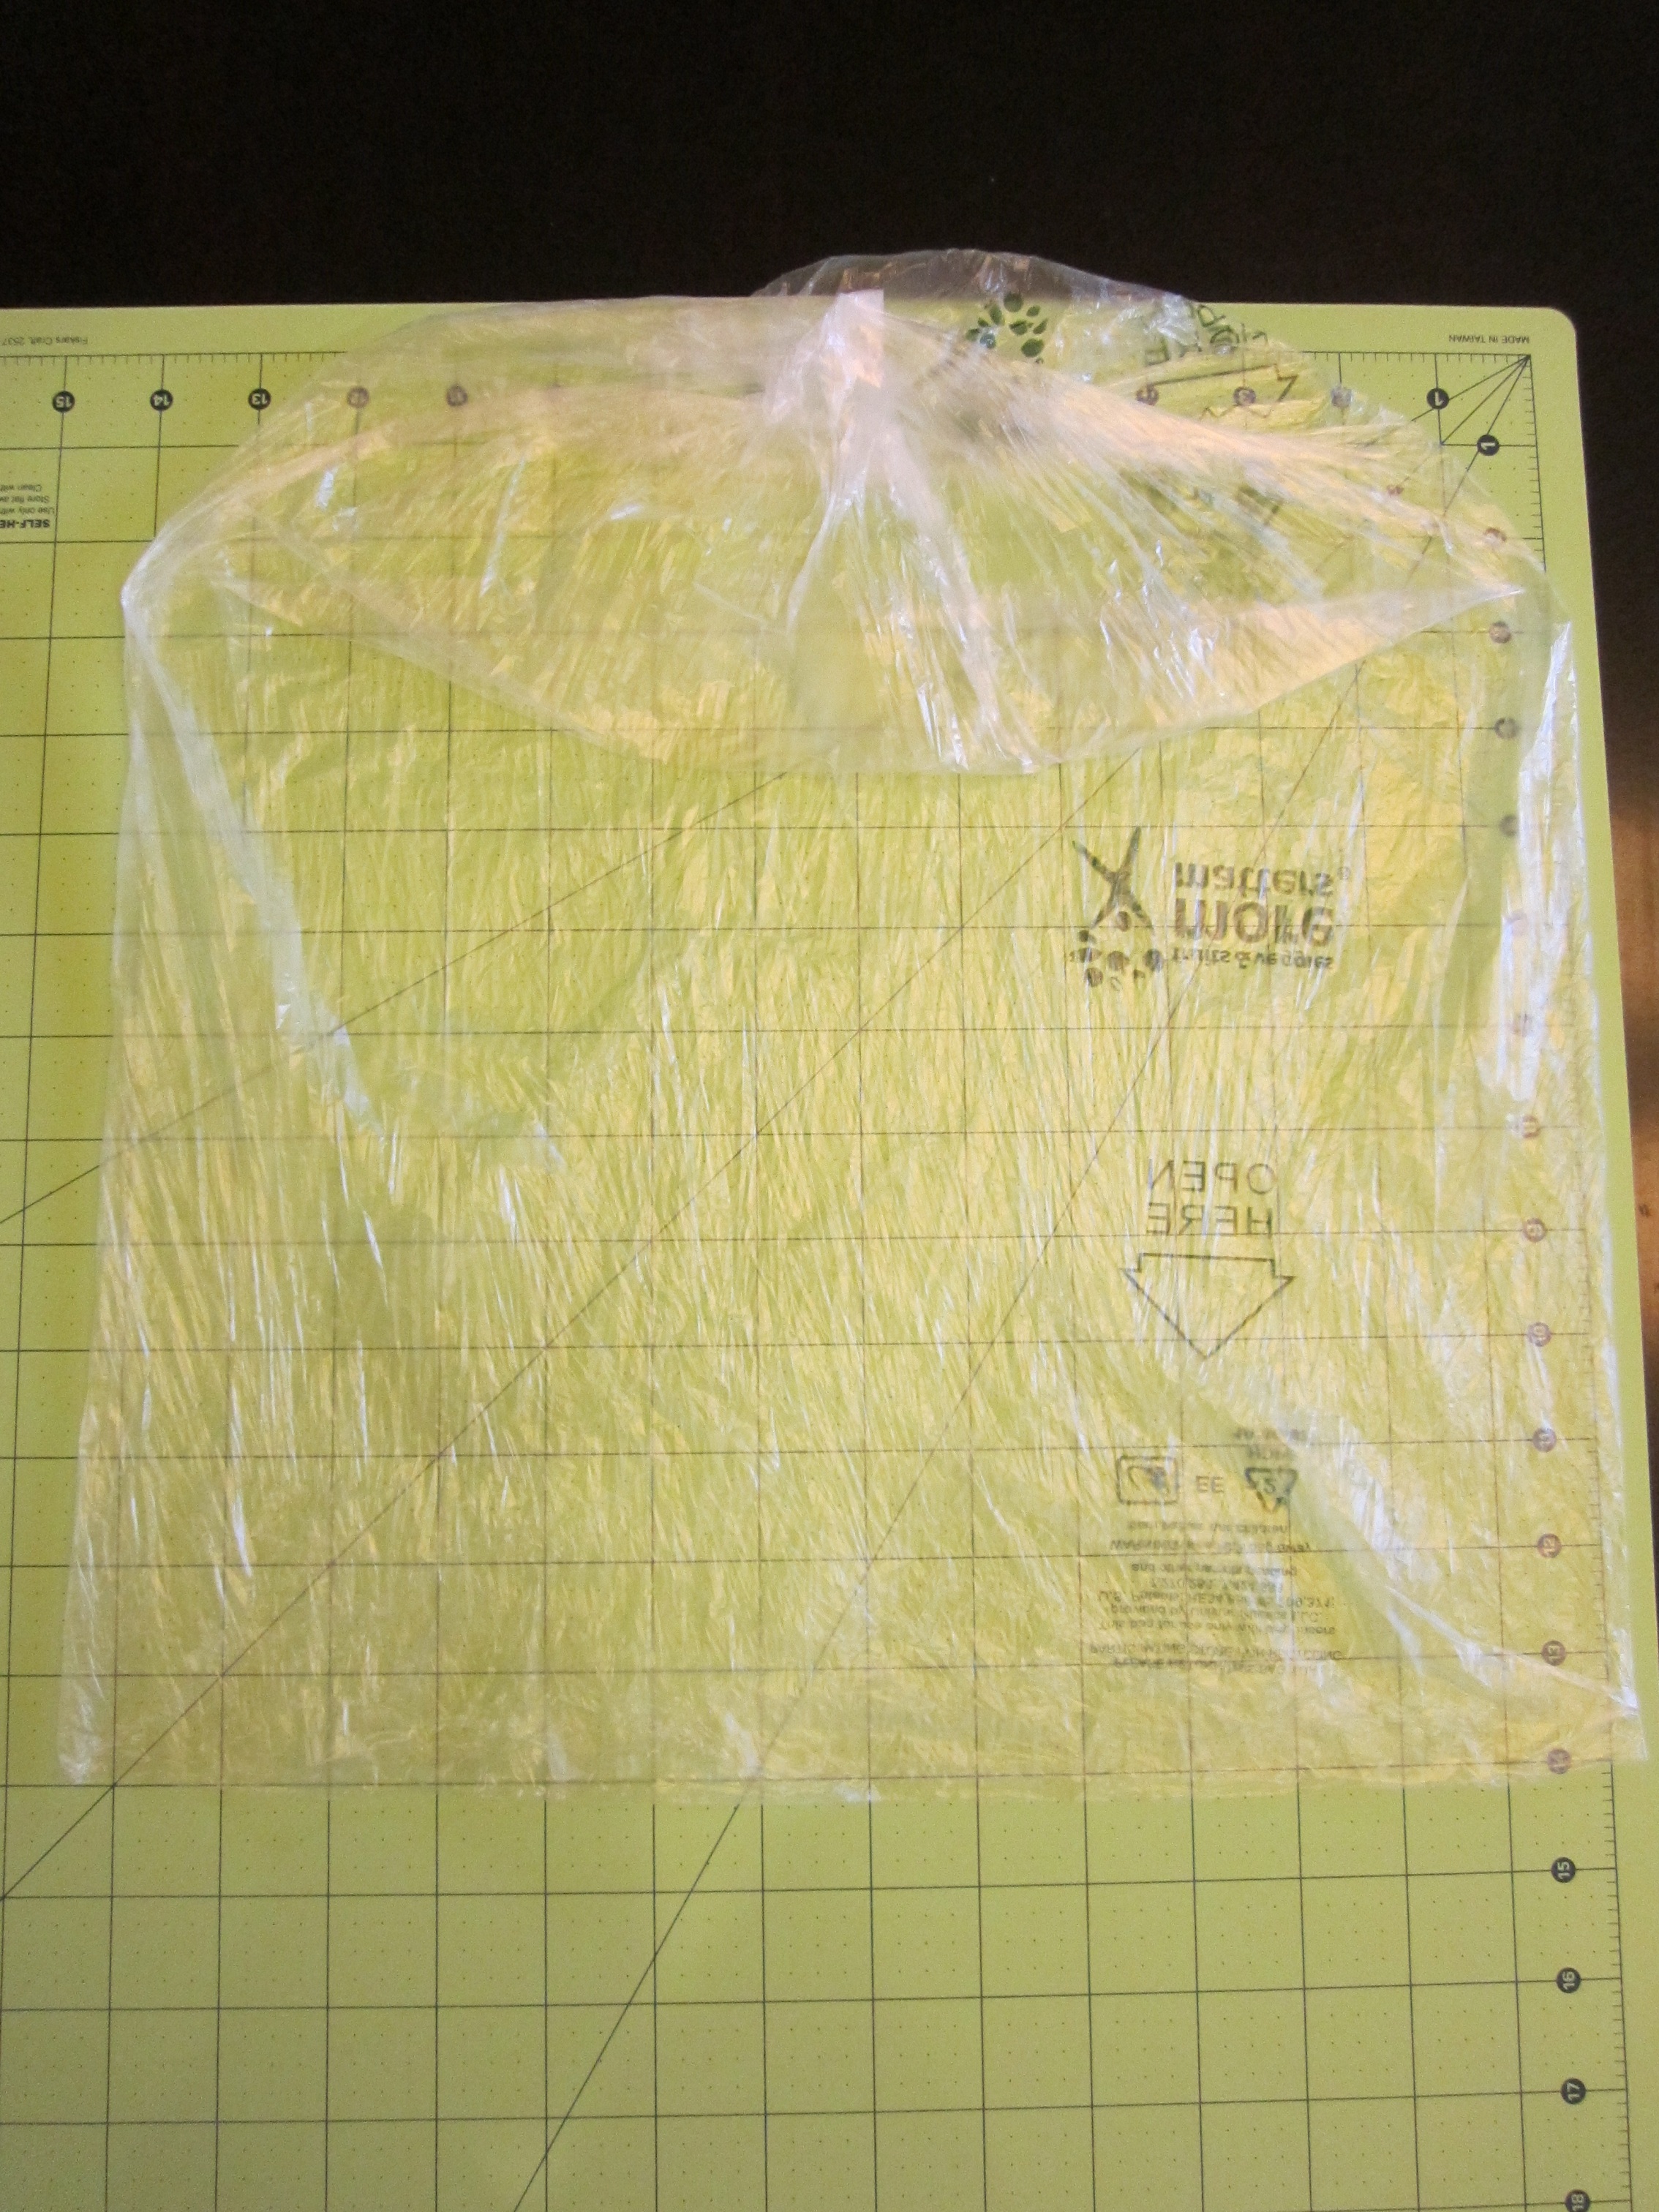
I took one of the largest t-shirts (Adult size L) and cut off the sleeves, neck and shoulder seams and then up each side of the shirt to harvest two pieces of fabric as large as possible.

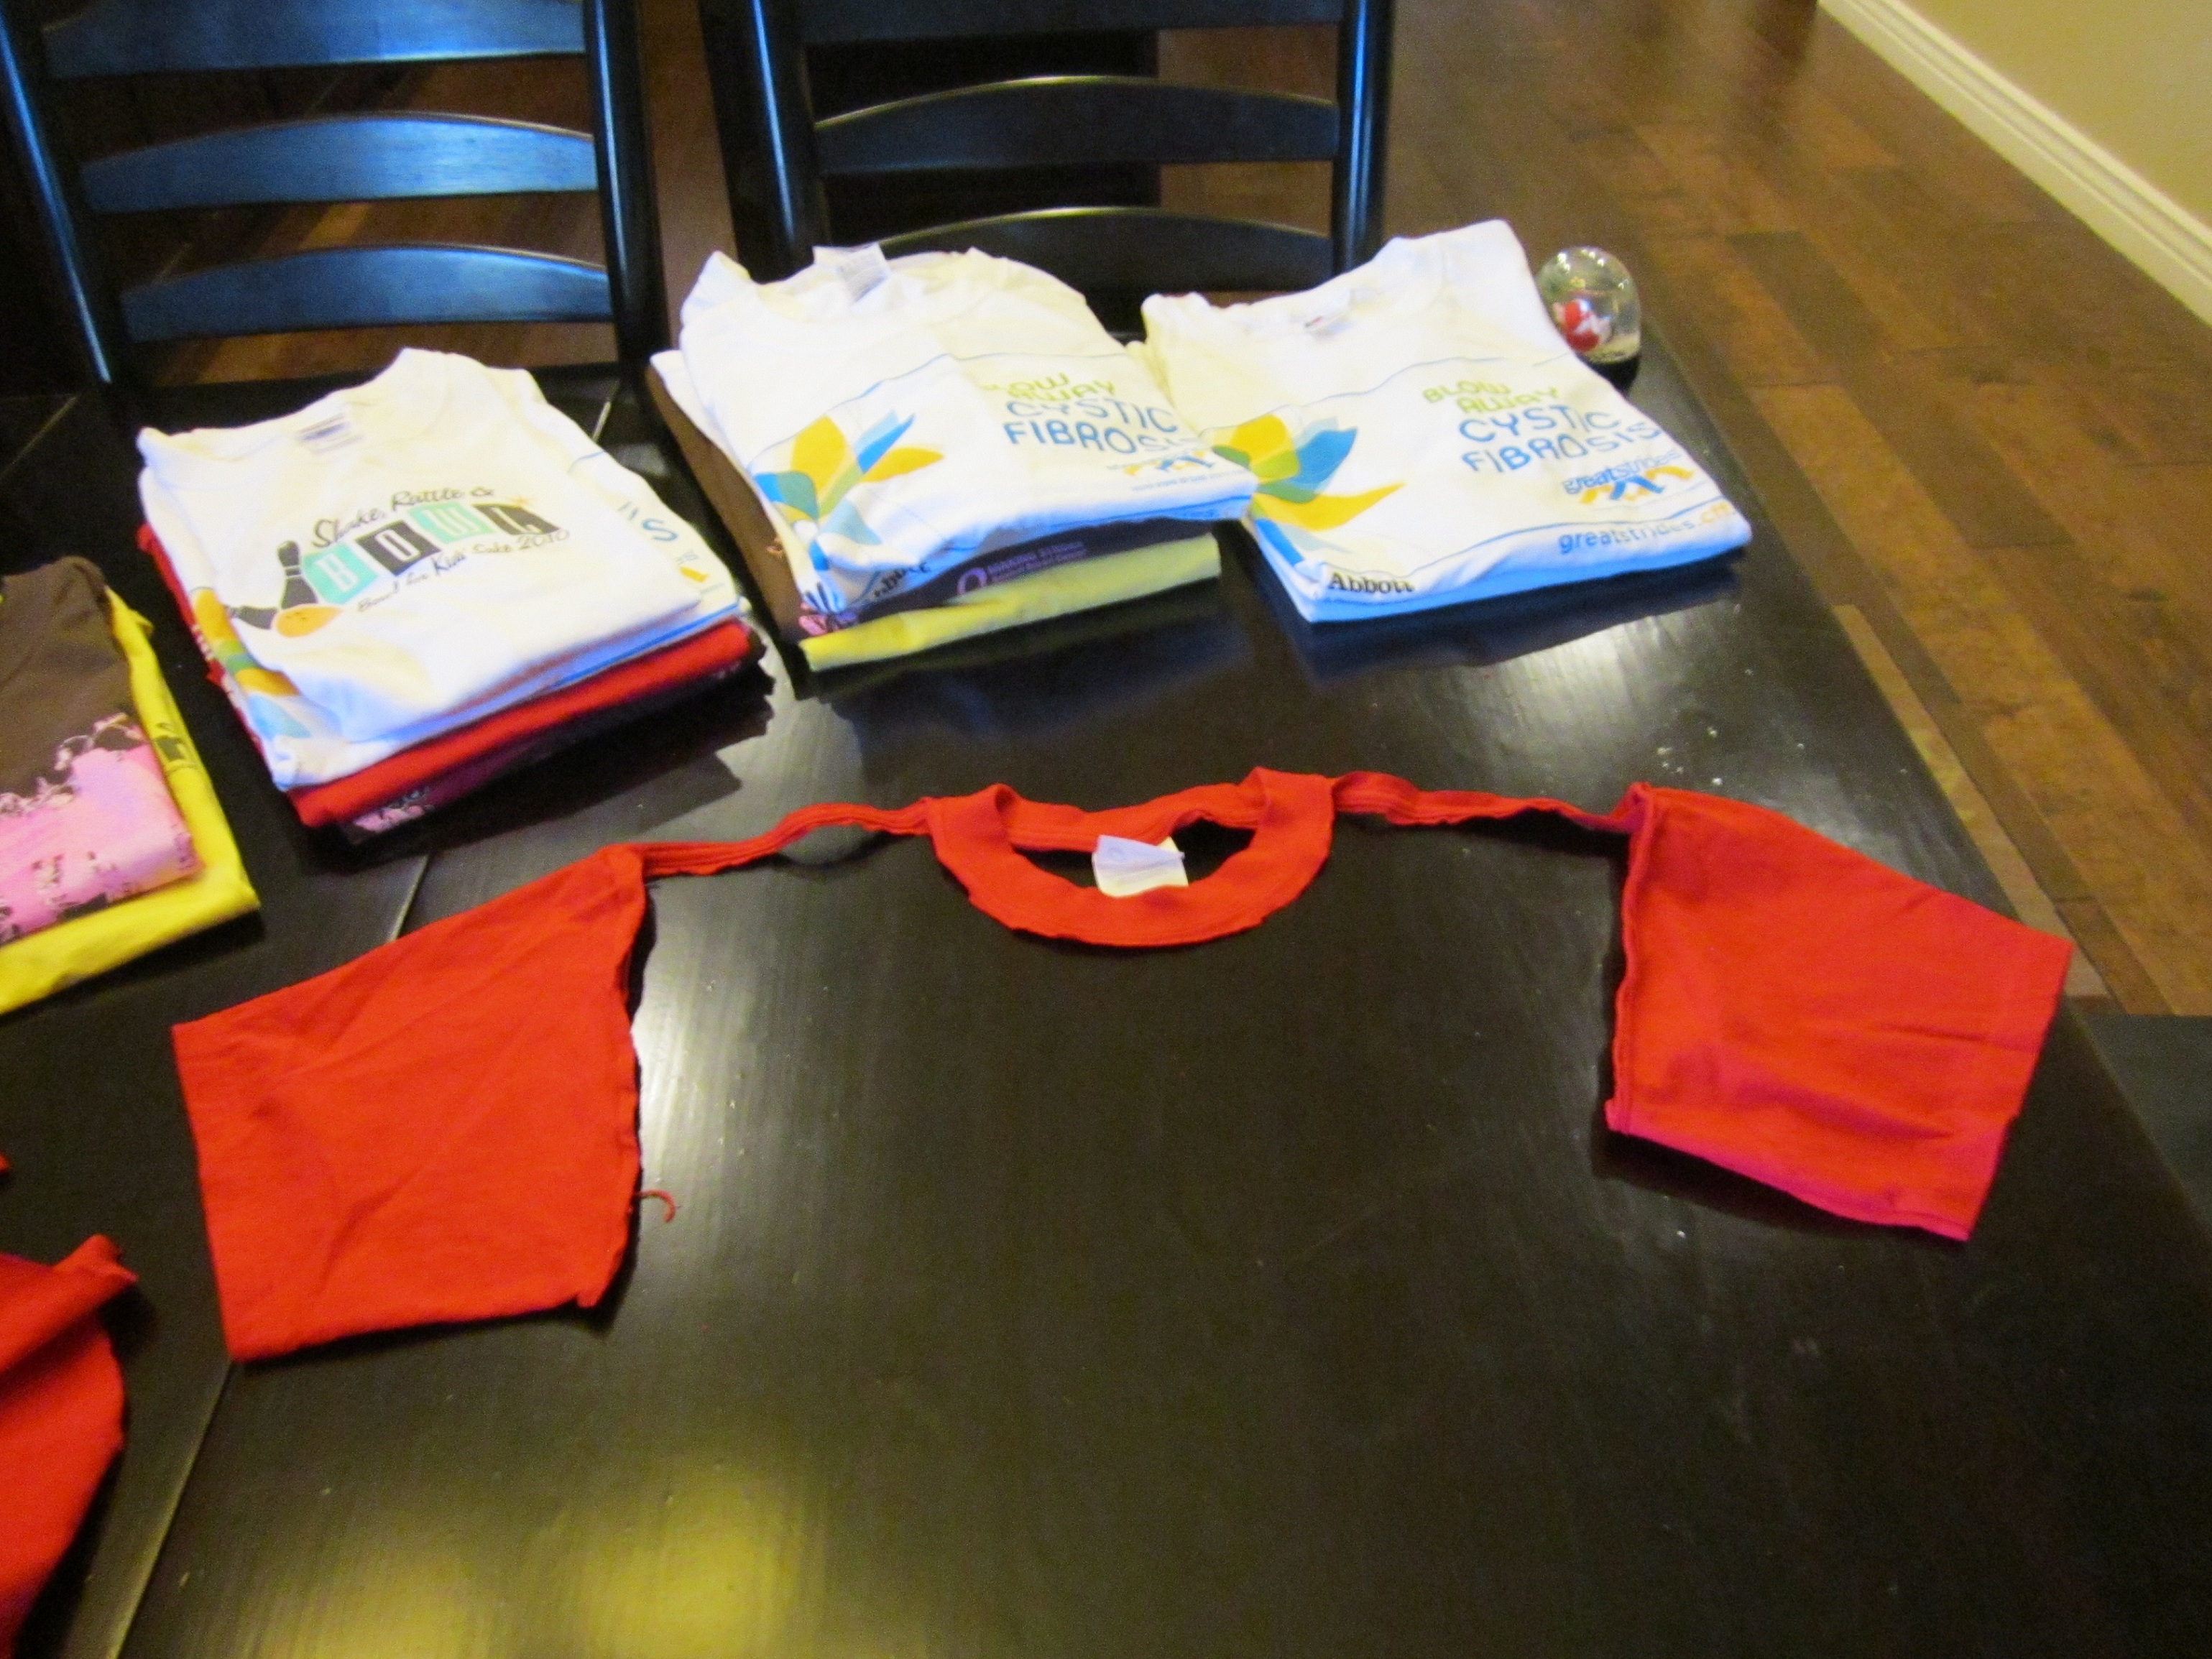
Now fold what was the back of the shirt in half with the right sides together and place it on a flat surface.
Next, fold what was the front of the shirt in half with the right sides together and lay it on top of the first piece with the folds lined up on top of each other. And the t-shirt hems lined up at the bottom.
I grabbed the pair of pajama pants that currently fit him best (But still too small! ugh!), fold them in half and line the straight side up on top of the folds of t-shirt fabric.

I wanted to take advantage of the hem at the bottom of the t-shirt and make it the hem of the pants. Less sewing for me! And you will need about an inch or so at the top to create a waist band later. This gave me some extra length for future growth. Perfect!
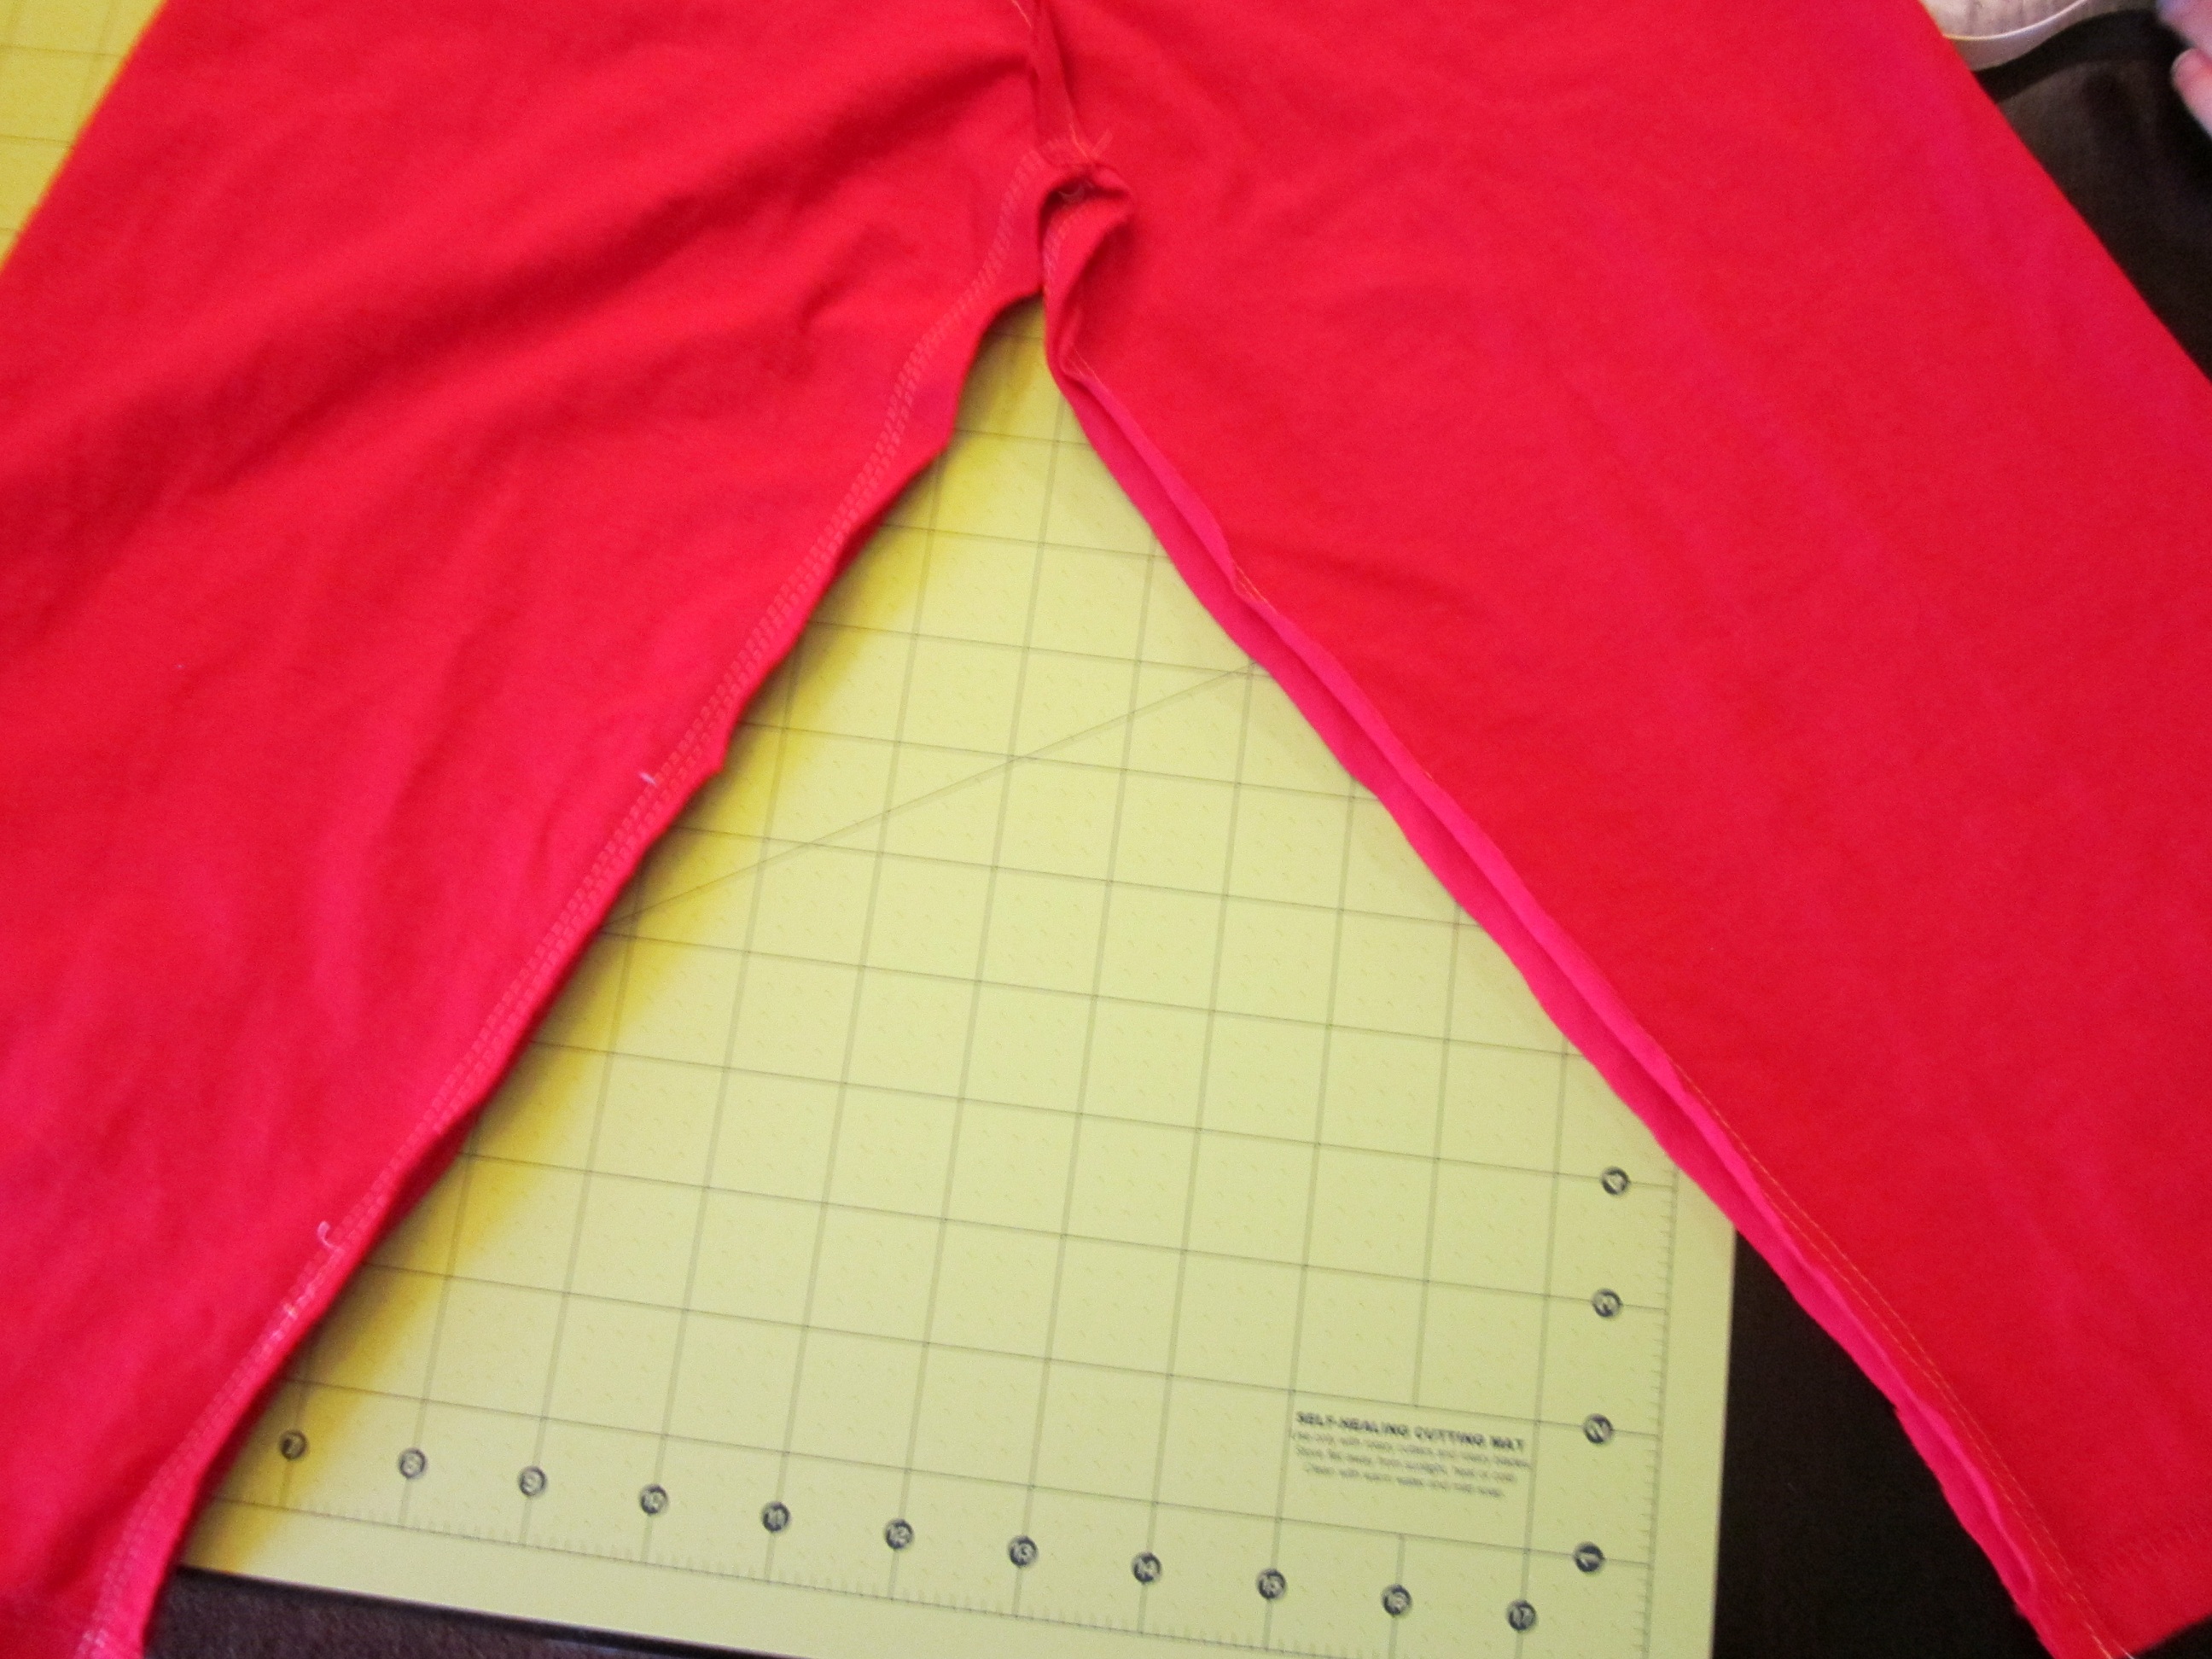
Now, being careful to make sure you’re always cutting through 4 thicknesses of fabric, just cut about an inch above the top of the pants and then all along the crotch side all the way down to the hem, leaving about a half inch for seam allowances.
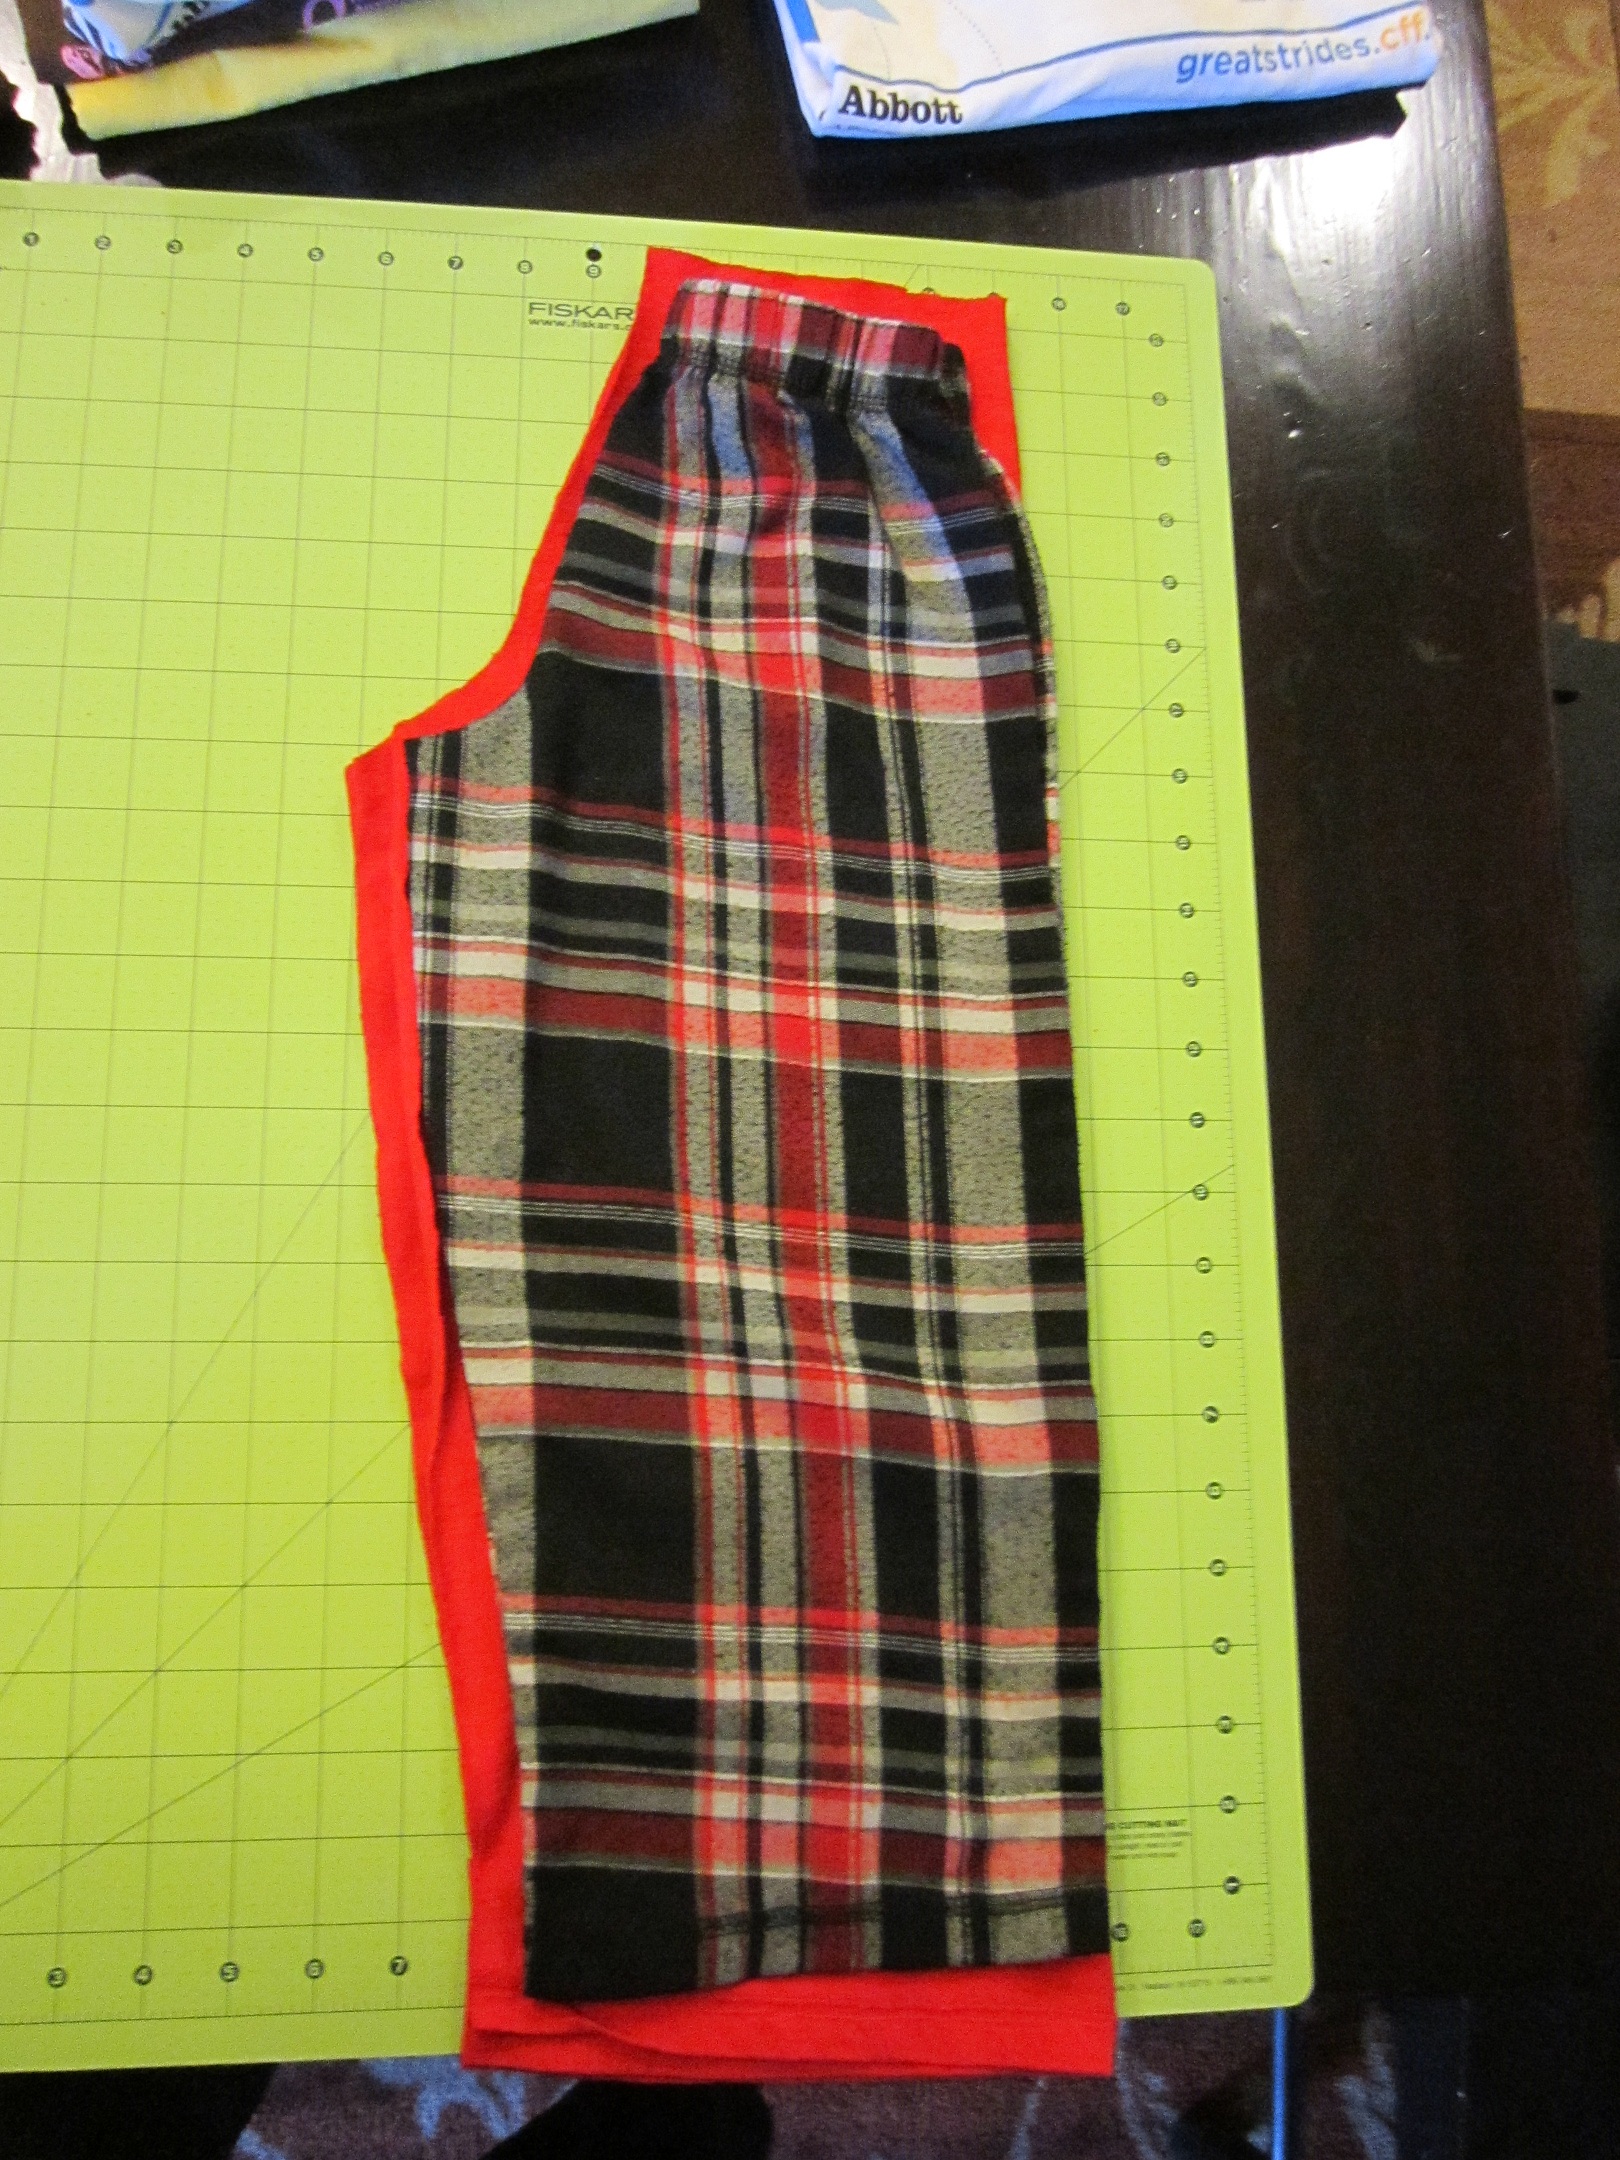
Open up the two pieces of fabric you just cut and line them up with right sides together. Stitch from the waist (top, unhemmed edge of pieces) to the crotch.
Next line the legs up and stitch the inseams. I made two lines of stitching for a little reinforcement. One at 5/8 inch and one at 3/8 inch.
For the waistband (forgot to take a picture of this step. sorry!) Just fold the cut edge down about an inch and stitch almost all the way around, leaving an opening for elastic. Cut a piece of 1/2 inch elastic to fit your child’s waist and insert it into the waistband casing you just created. Stitch the ends of the elastic together and then stitch the opening of the casing closed.
No need to finish any edges since these are made of t-shirt material and will not fray.
Matched up with the t-shirt that he had from the charity event, he now has a pair of pajamas that will last through another growth spurt or two so I can focus our clothing budget on school clothes! yay!

It took me about 20 minutes to make these, including time to take pictures.
He loves them!
Pin It
Bathroom Organization Tips

I am so late doing my Spring Cleaning… hahaha who am I kidding, it will be more like Fall Cleaning. There is one room in my house that can’t wait any longer. Here are some tips for bathroom organization.
Tips for Bathroom Organization
Organize the countertop clutter, by purchasing a plastic tub with a handle on top. Put all of your bottled accessories (such as hair spray and lotion) in the tub and place under the counter. Take the tub out when you are ready to use it, and put it back under the counter when you are finished with it.
Buy a caddy for your shower to put all the soaps & shampoos in. They have these at pretty much any discount store. There are ones that hang on the shower head or the curtain.
Buy a squeegee and keep it in the shower. When you are done taking a shower, just wipe down the doors and walls with the squeegee for a clean and dry shower door.
Get a sticky back magnetic strip and put it in your medicine cabinet or on the inside of the cupboard door below your sink and hang tweezers, nail clippers and scissors from it.
Do you have reading material in your bathroom, you don’t have to answer aloud. If you do, consider getting a decorative magazine rack to store it in. Be sure as you add new magazines & such that you take the old ones out and recycle them. Don’t let the rack getting cluttered & overflowing.
Throw away old or unused items in your bathroom. Yuck anyway! If you aren’t using it, if it’s expired get rid of it. If you are disposing of medication, be sure you do it properly.
If you need storage space for more towels, get a decorative basket and roll the towels up and keep them near the bathtub.
Pick up some easy to install hooks and put them on a wall or the back of your bathroom door for towels and robes. (don’t just buy them and let them sit, actually put them on)
Use drawer organizers. use them for brushes, hair ties, band-aids, etc… all the stuff that’s shoved in the drawers.
Place a shelving unit above the toilet for storing extra towels, washcloths and other accessories. Check out this one I found for $24 at Walmart.com
I hope some of these bathroom organization tips help you. How do you organize your bathroom?
A PYP Best Blog: Make Your Own Ketchup
Just in case you missed this article on making your own ketchup the first time we shared it a couple of years ago, we are republishing it. After Trish wrote this blog originally, we got an awesome response. This is one of the PYP Best Blogs!
This is a penny pinching recipe in that it cost me nearly nothing to make. My garden has been abundant with Roma tomatoes.
But, of course, time has a value and this does take an investment of time.
This was my first time making homemade ketchup and I really think the flavor is worth the effort. It’s not at all like store bought ketchup. Much more complex flavor, which is wonderful for me since I don’t much care for regular ketchup.
This is adapted from a Jamie Oliver recipe based on the ingredients I had on hand today.
For 2 pints of ketchup you will need:
3 pounds of peeled, diced, Roma tomatoes
(Roma are best for this because of their low water content. You can use others but you’ll need an extra pound or so and after chopping them, allow them to drain in a colander for a bit. I’d like to try this next time with some of the different colored heirloom varieties. I’ll bet the colors and flavors would be quite unique.)
1 1/2 cups water
1 stalk celery, coarsely chopped
1 large onion, coarsely chopped
one inch piece of fresh ginger, coarsely chopped
2 cloves garlic, chopped
1/4 teaspoon red pepper flakes
1/4 teaspoon fennel seeds
1 Tablespoon dried basil
1 teaspoon ground coriander
2 whole cloves
salt (start with 2 teaspoons and adjust later)
1 teaspoon ground black pepper
3/4 cup plus 2 Tablespoons red wine vinegar
1/3 cup packed brown sugar
2 Tablespoons olive oil
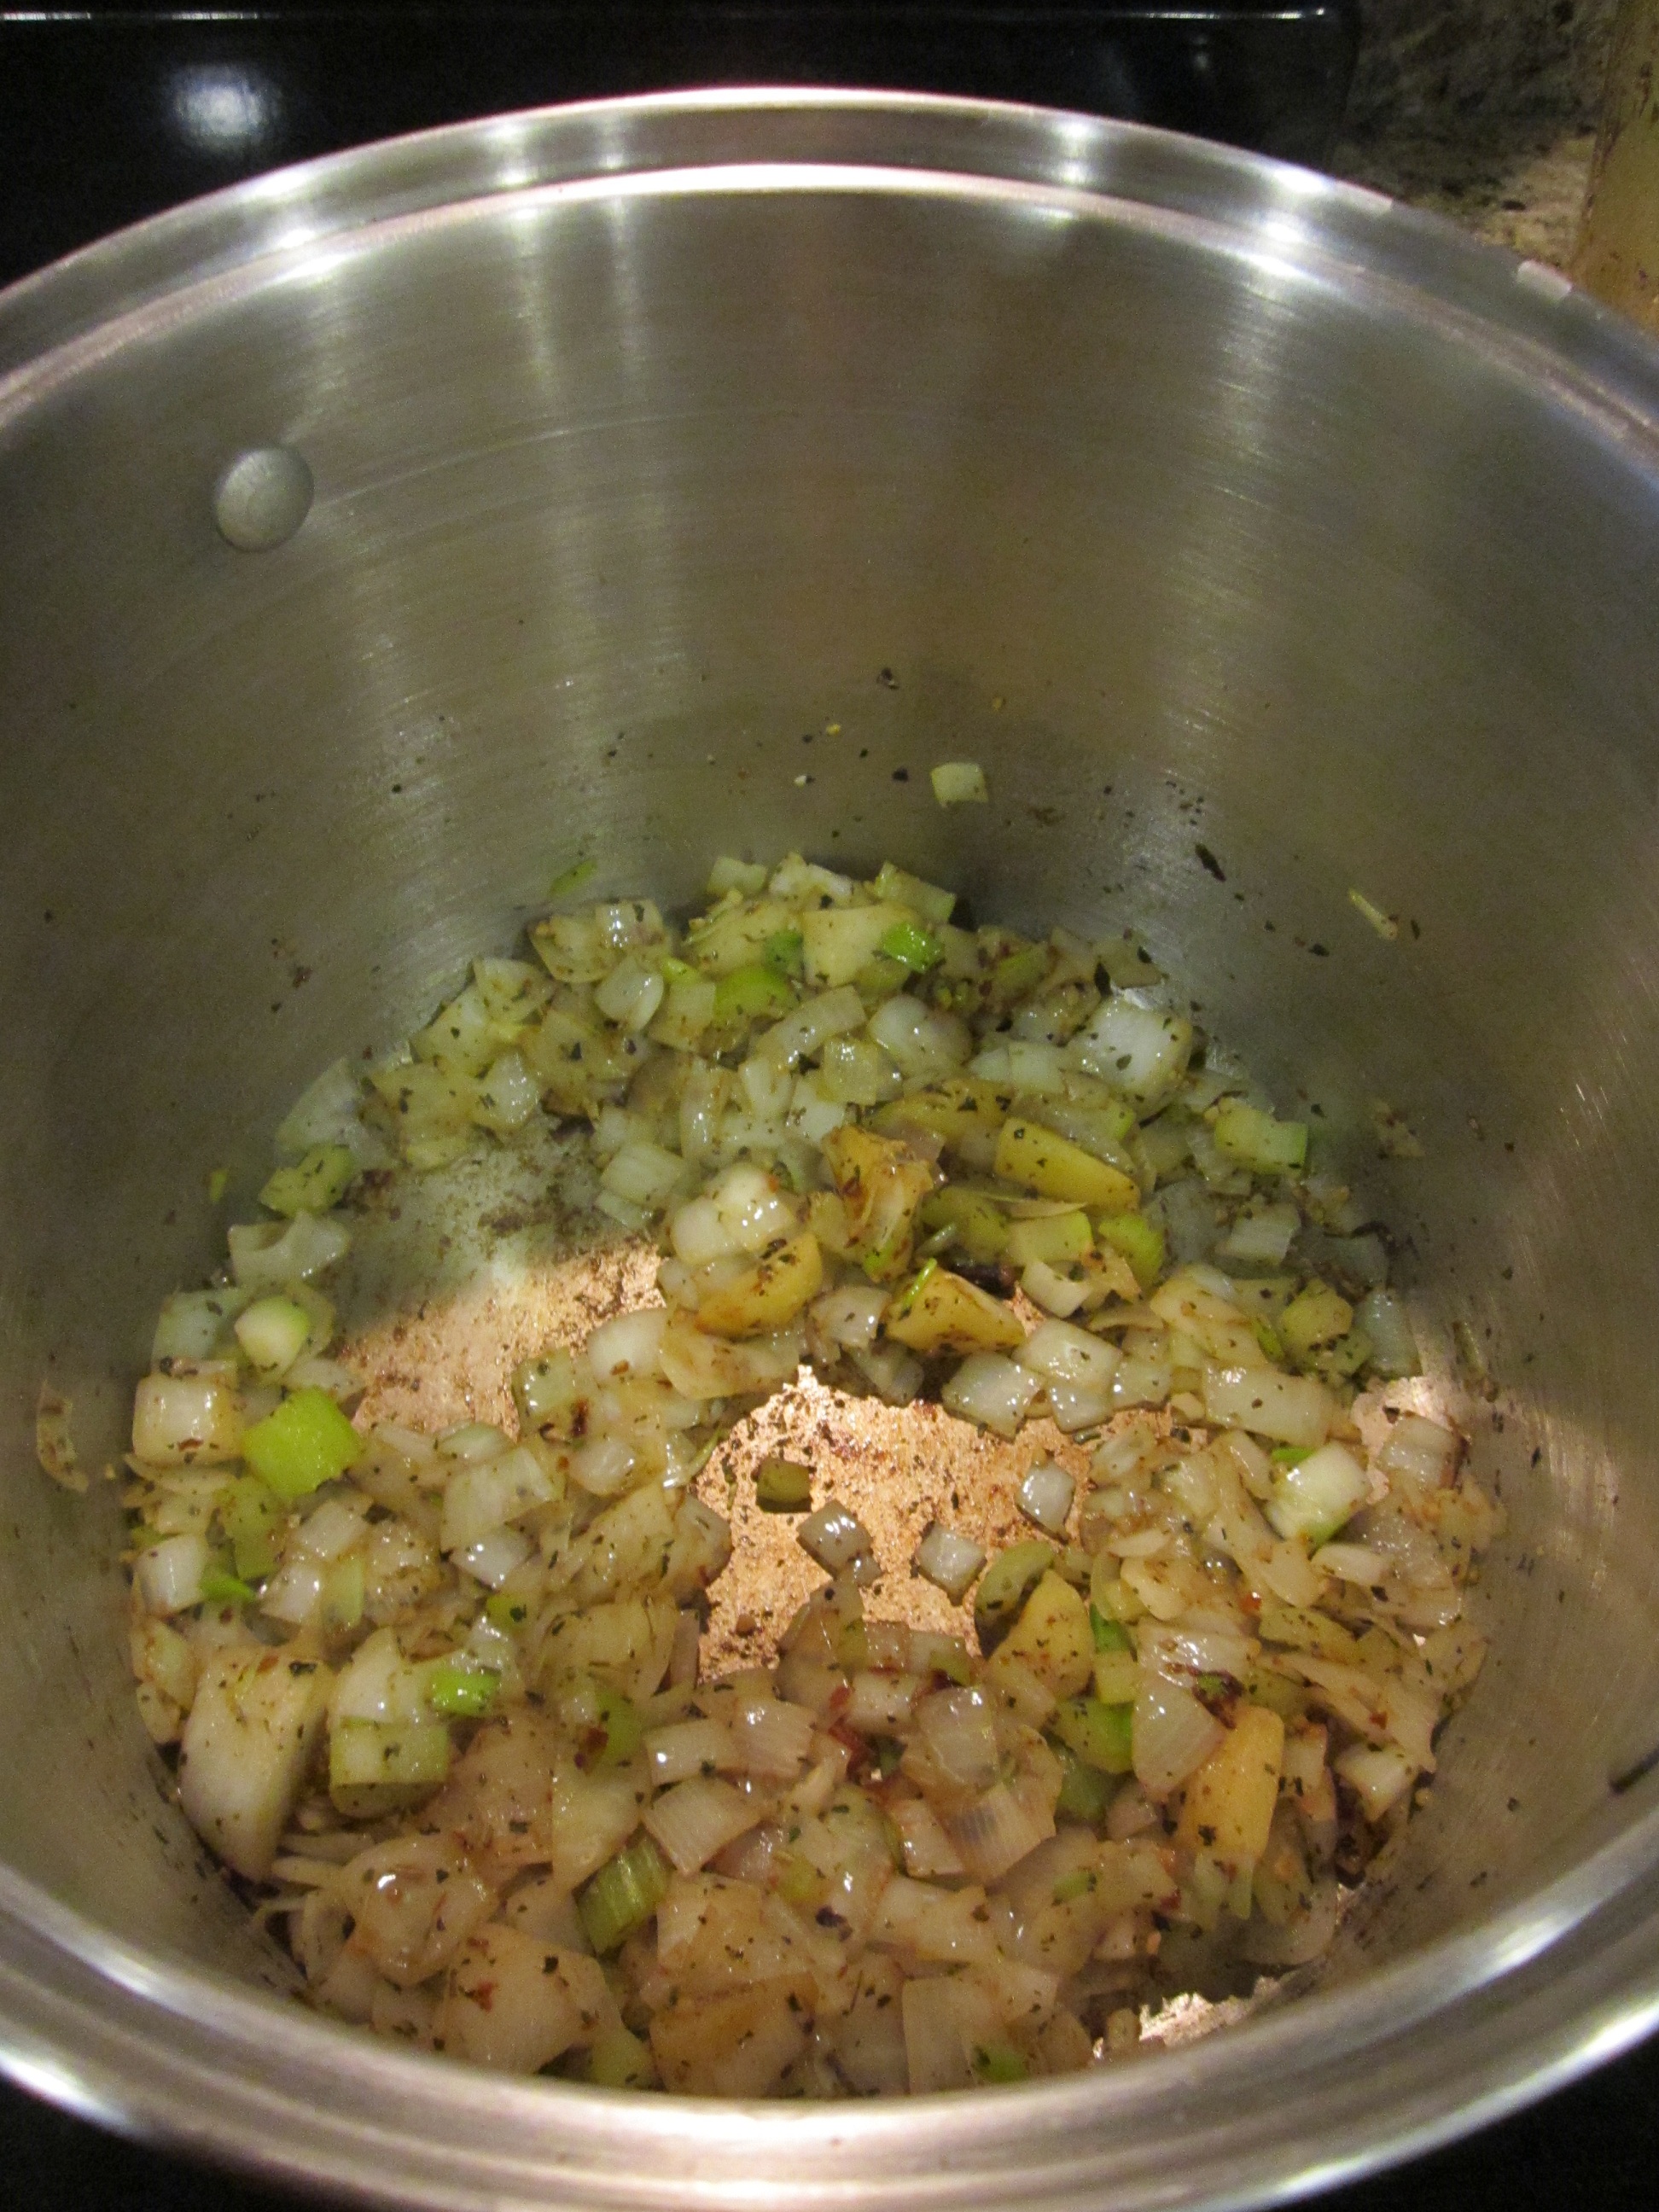
Heat the olive oil in a large stock pot, over medium heat. Add the celery, onion, ginger, garlic, red pepper flakes, basil, coriander, fennel, cloves, salt and pepper. Cook until veggies are soft, about 10 minutes.
It’s okay to let them brown a bit. That’s flavor!
Now add the tomatoes and the water. Stir, scraping the bottom of the pot to deglaze the pot and get all the flavor stirred in.
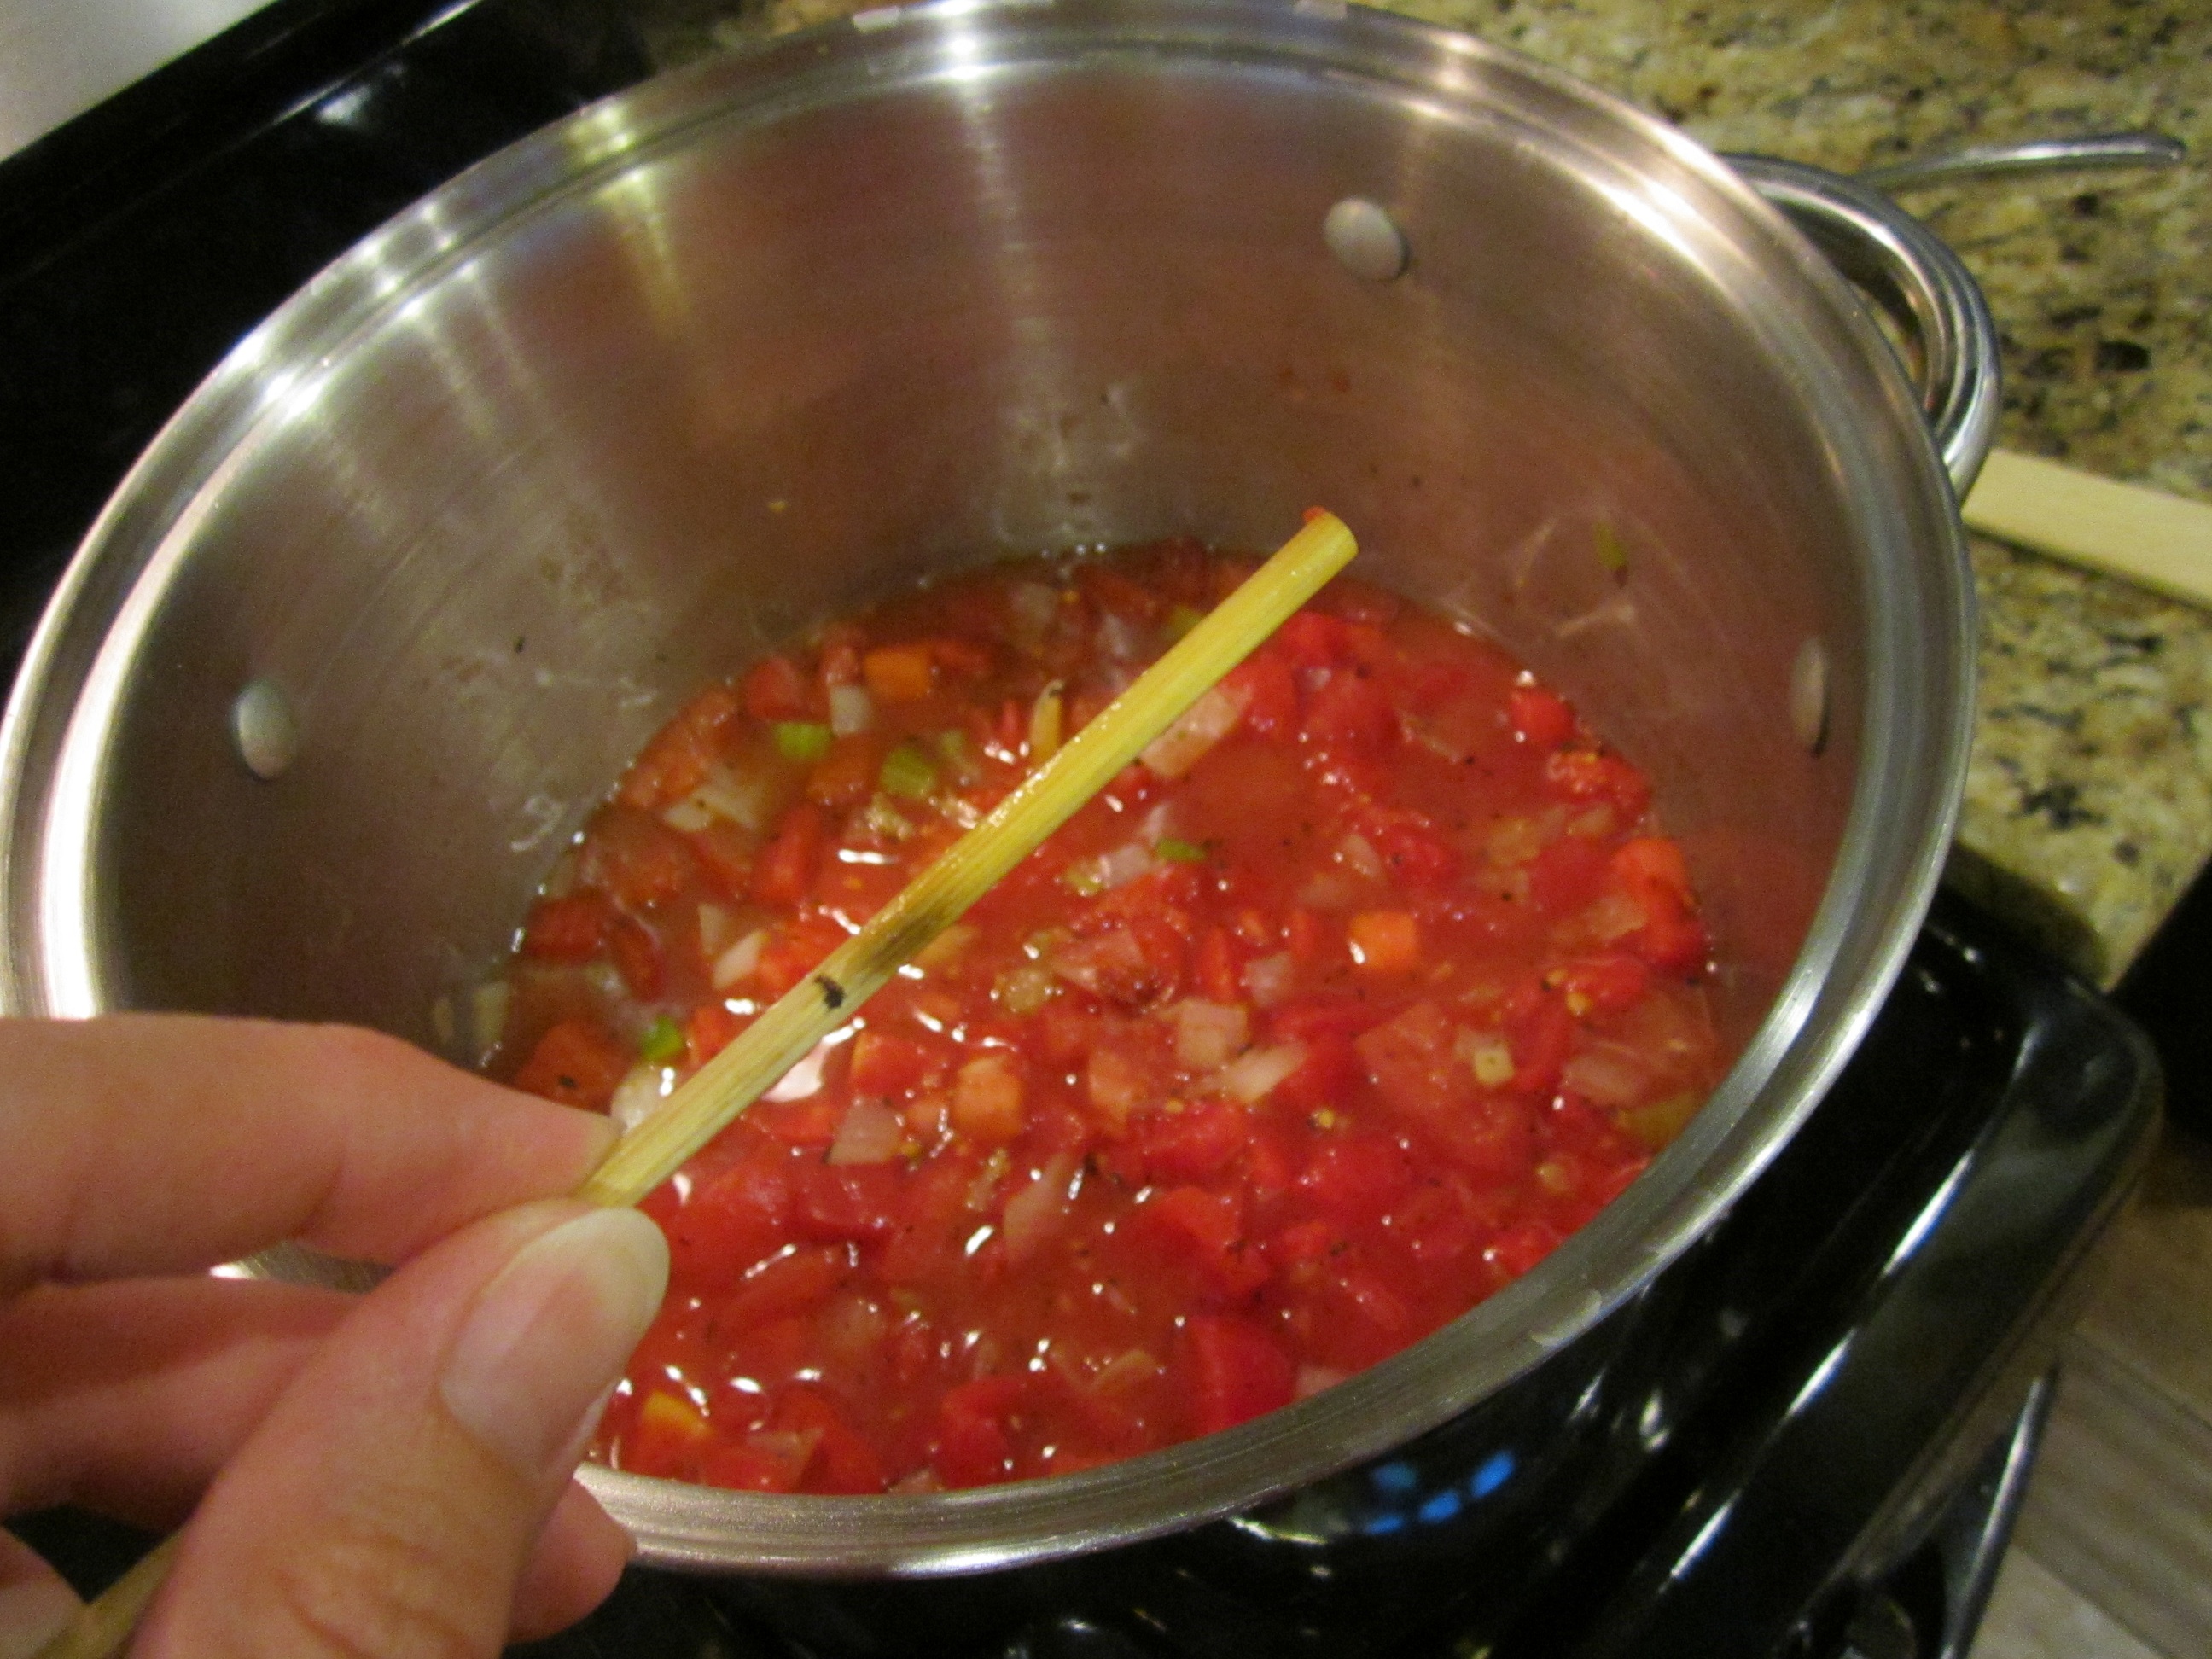
Now you will reduce this by half. Here’s a little (admittedly OCD) trick that I use to judge when it has been reduced by half.
Put a skewer into the pot, all the way to the bottom.
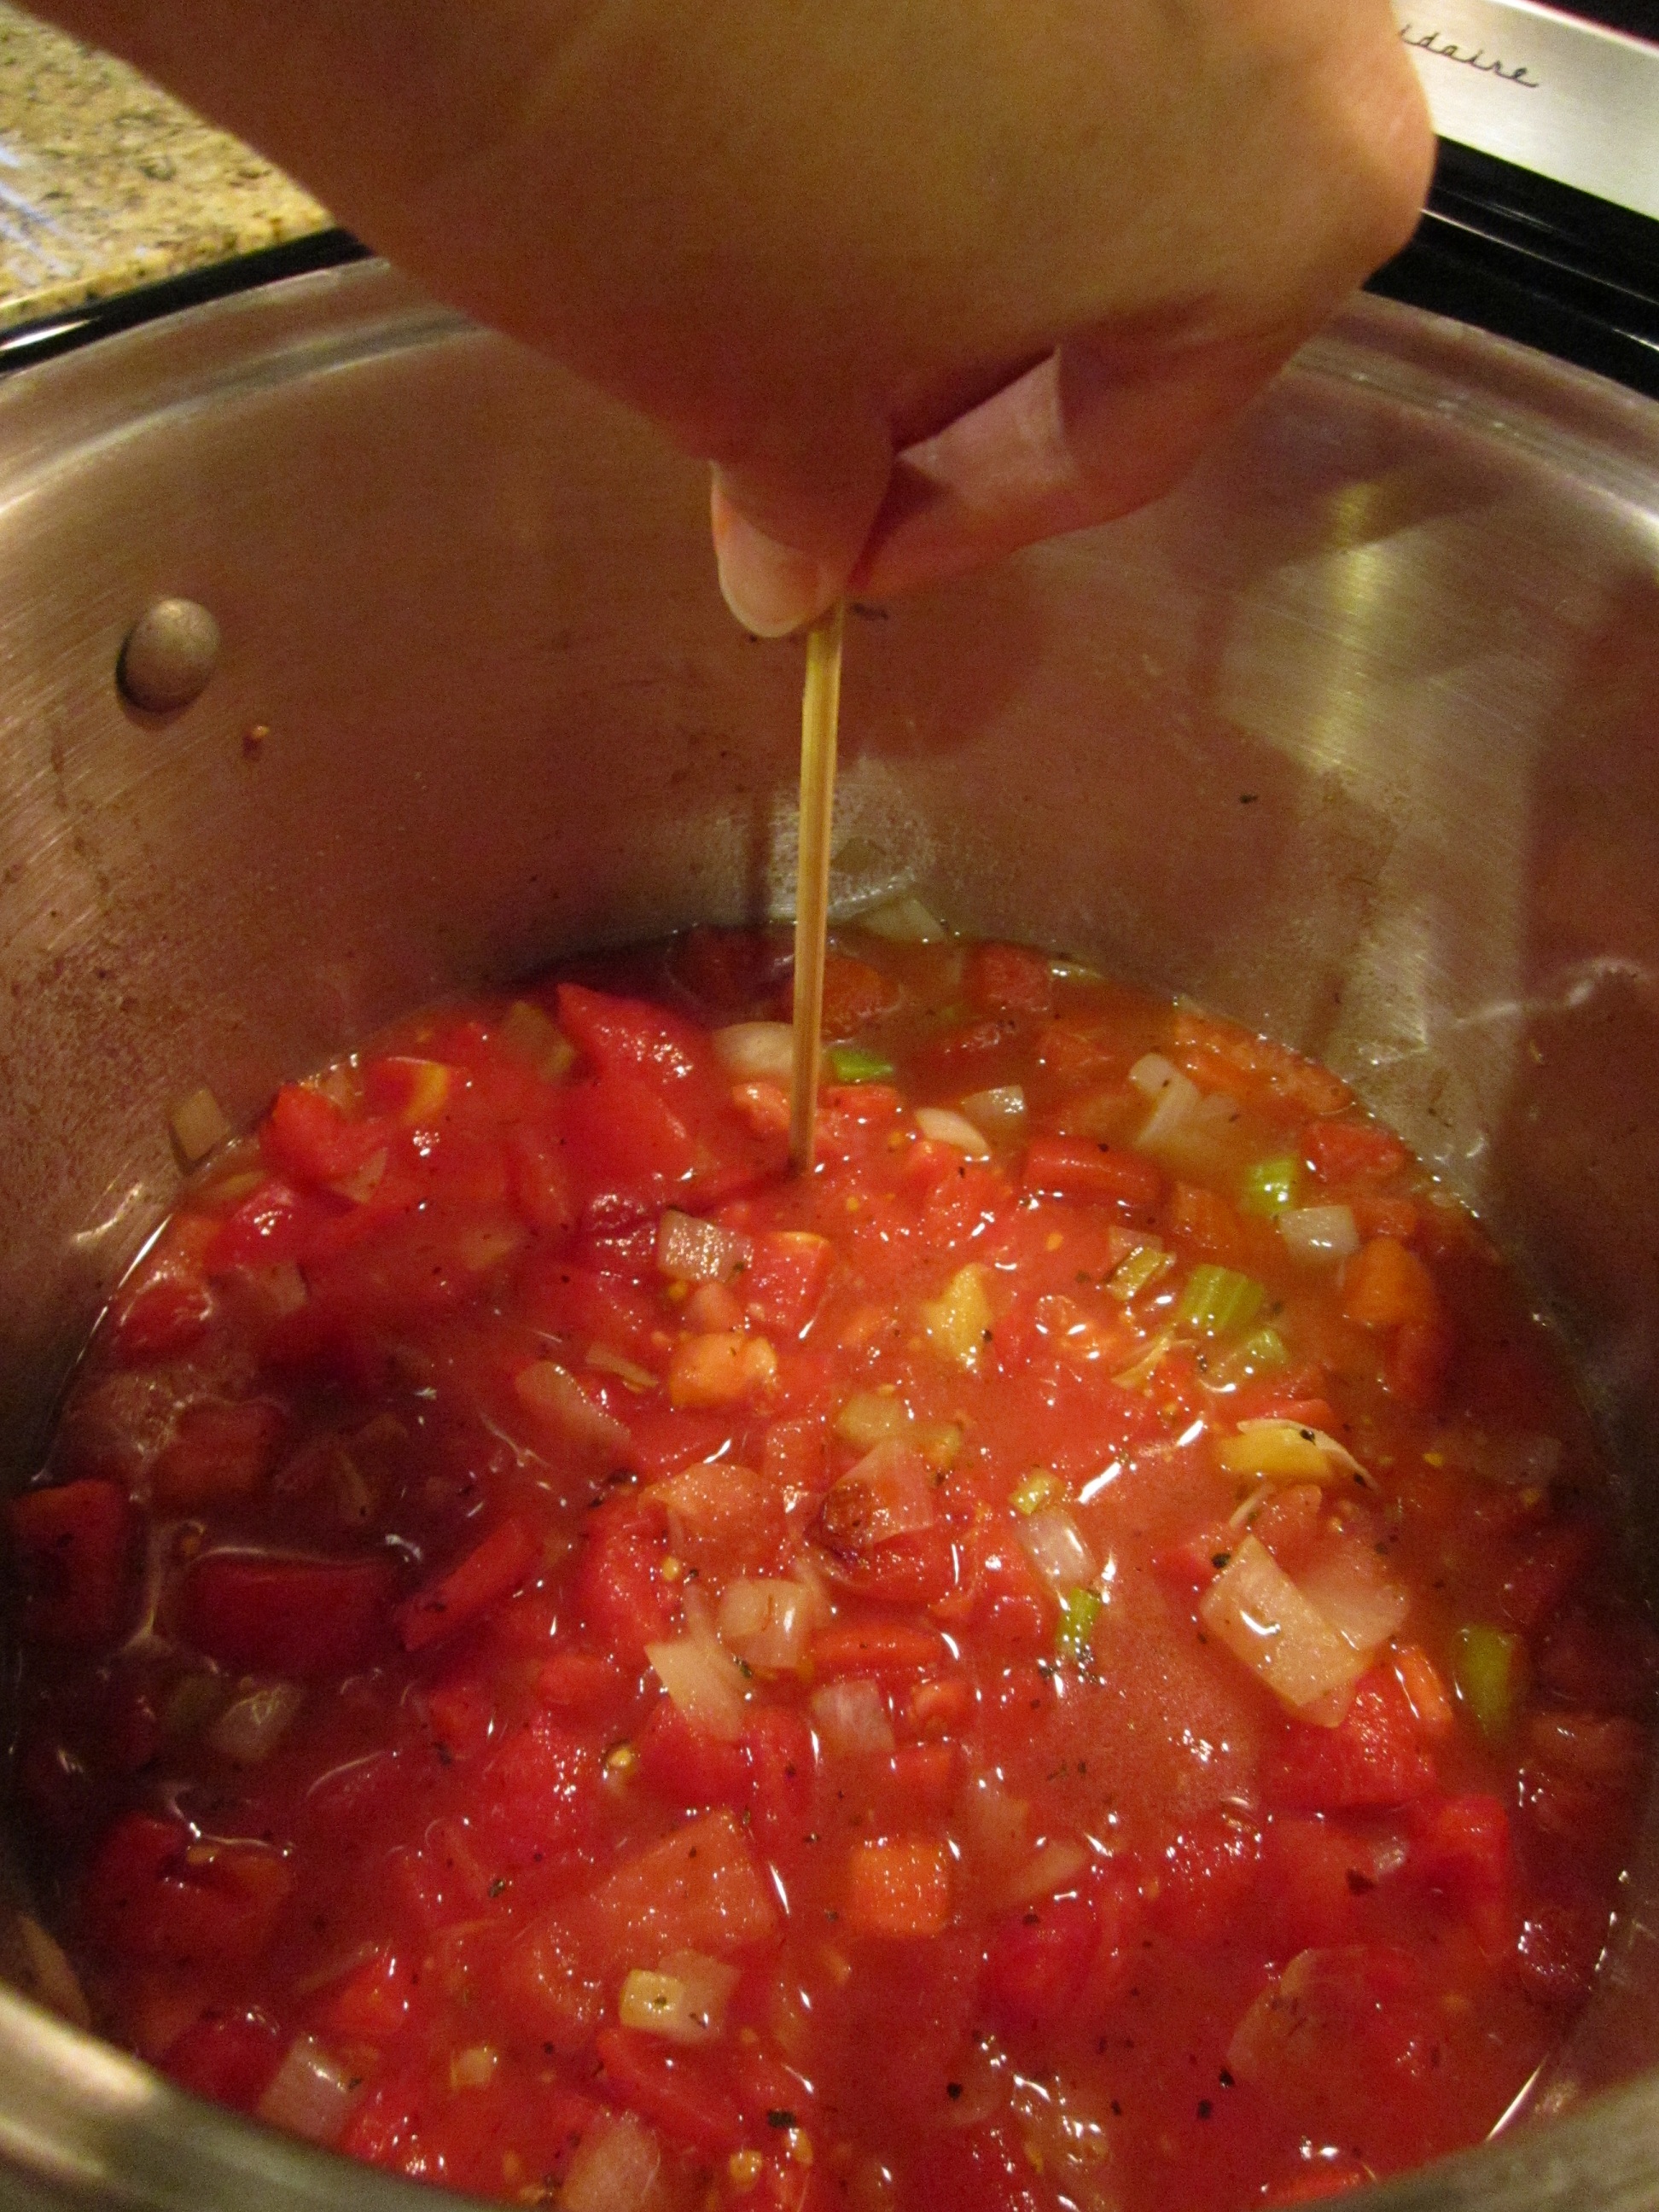
Now mark that skewer where the top of the sauce was so you’ll have a way to judge when it has reduced enough. I use a sharpie.
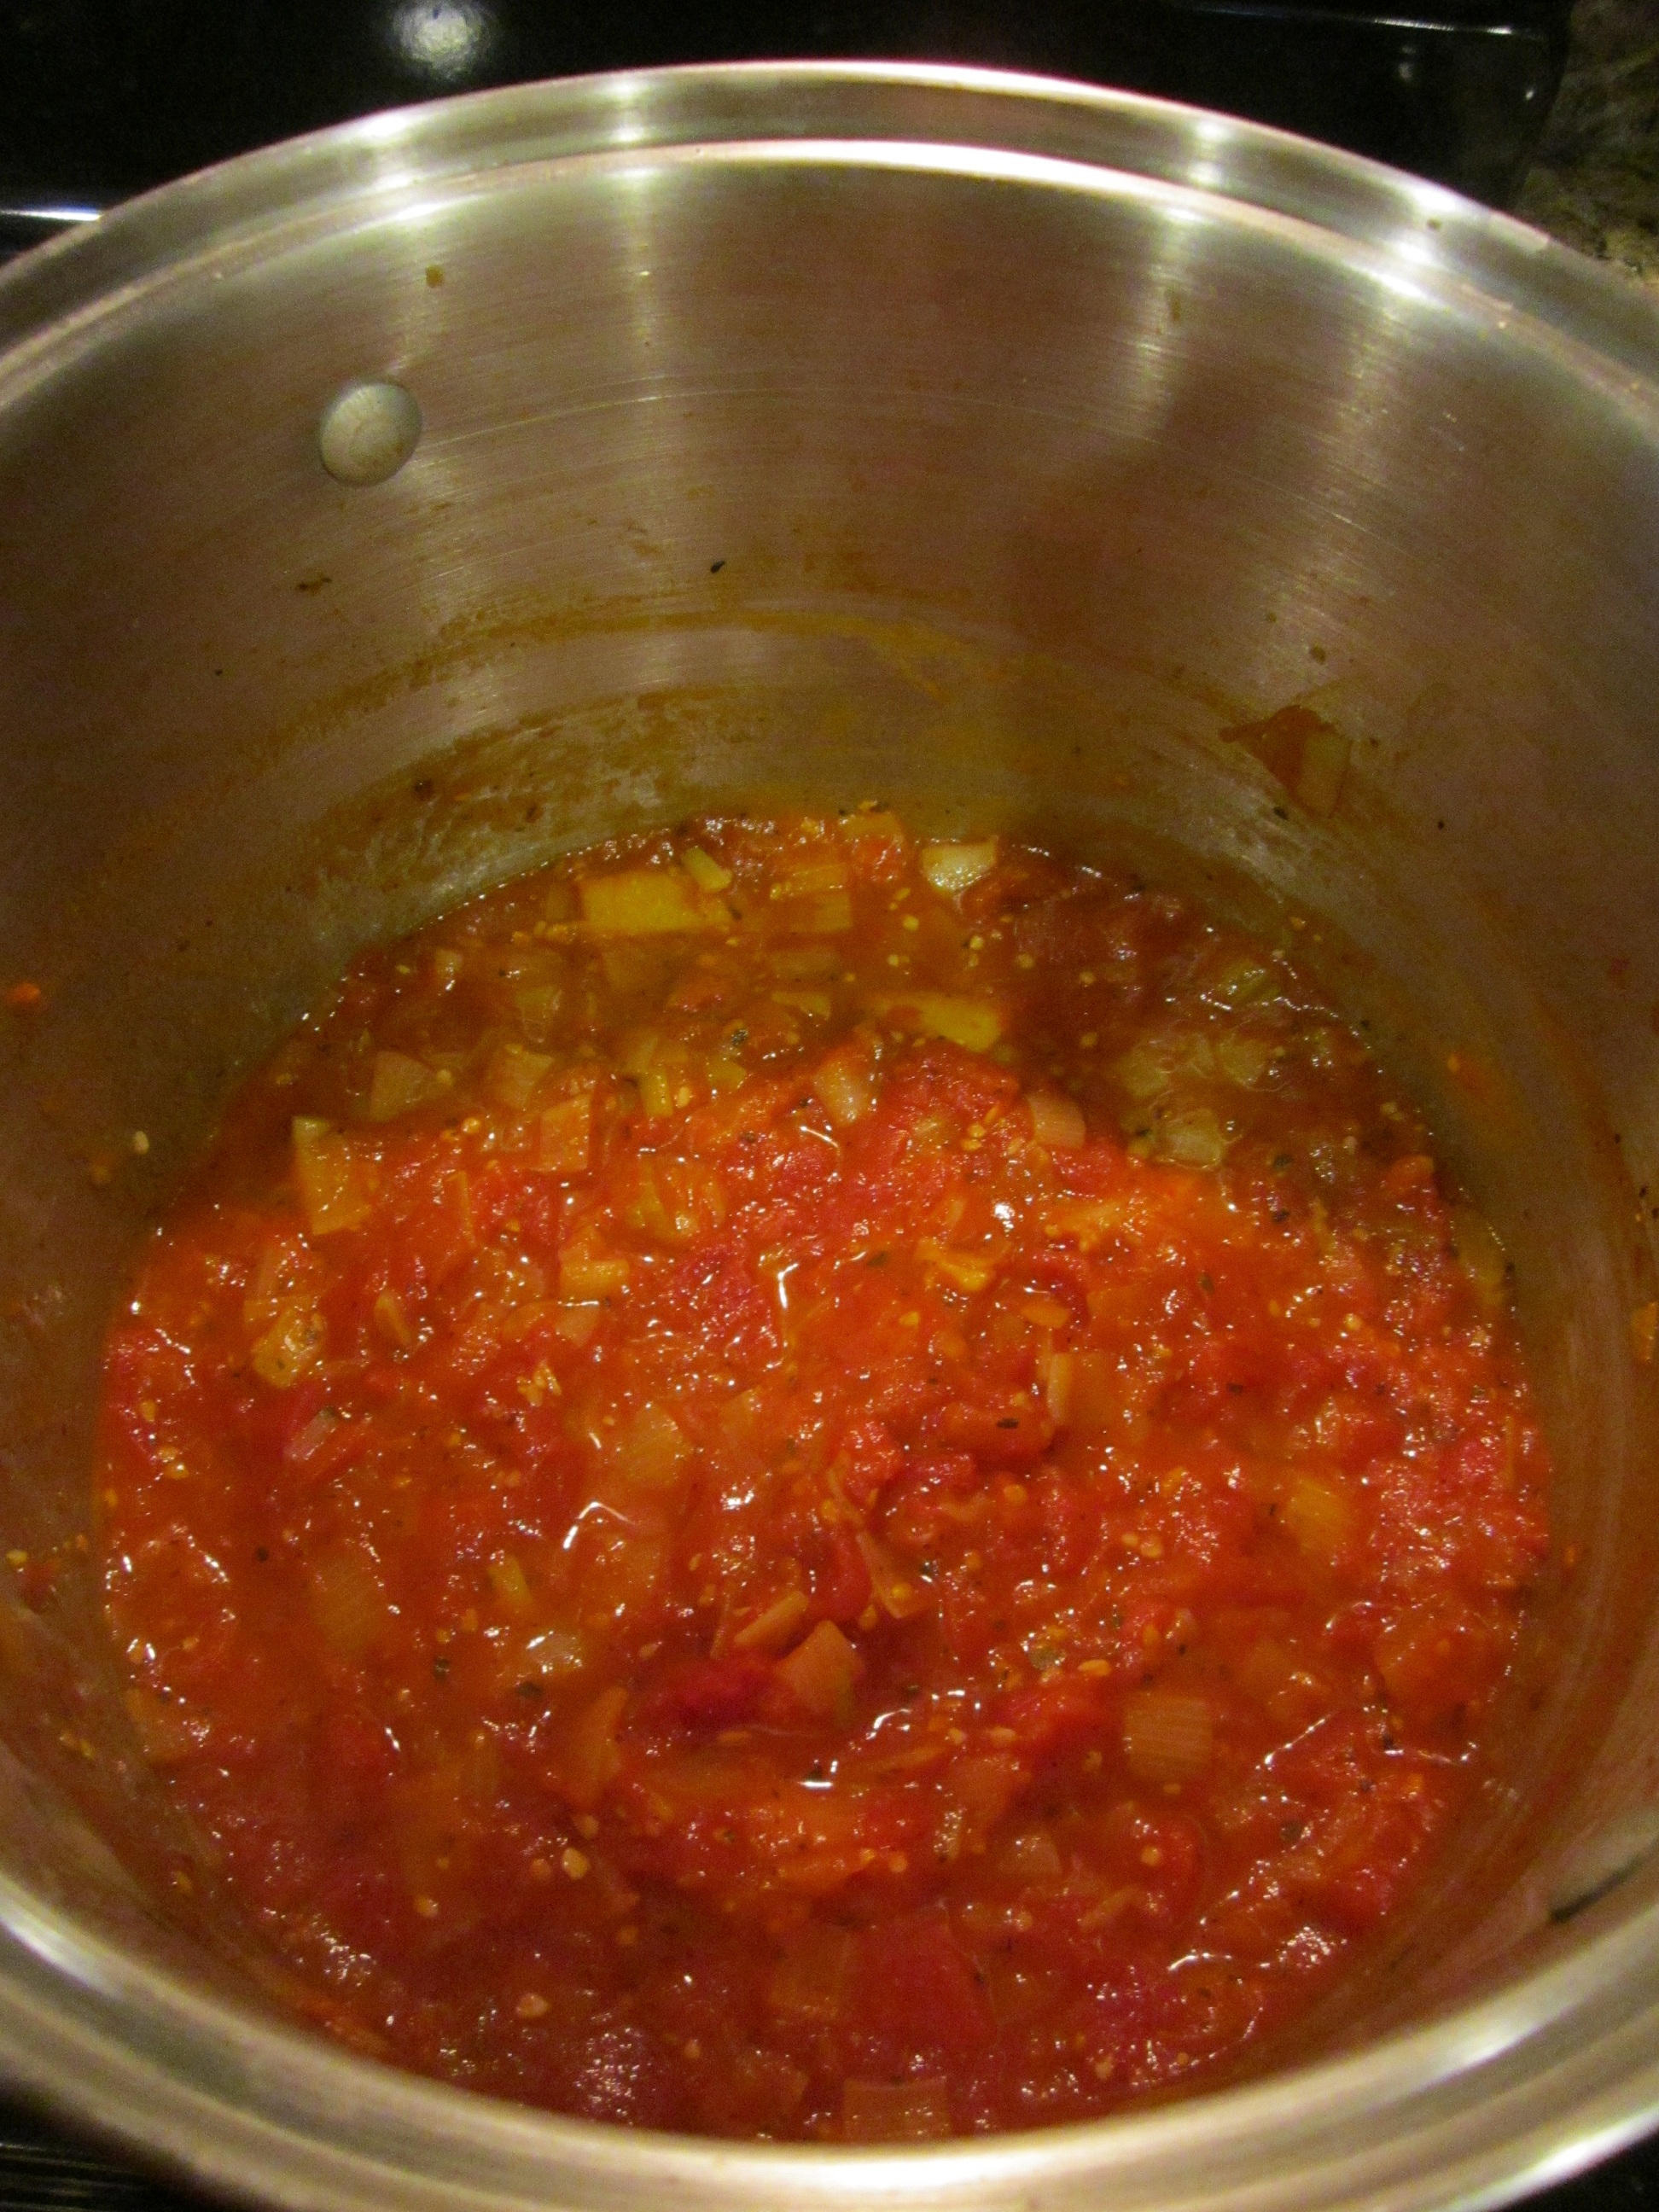
Bring the sauce to a boil over high heat. Reduce the heat and let it simmer, uncovered until it has reduced by half, stirring occasionally. This took abut an hour for me. And it looked like this when it was done.
At this point, you can push the sauce through a food mill or a fine sieve to make the sauce as smooth as possible and remove the fennel seeds and cloves.
I have a powerful blender and don’t have a problem with a little texture to my ketchup so I just put it through the blender, in two batches, until it was as smooth as possible.
Put the sauce into a clean pan and stir in the red wine vinegar and the brown sugar.
Mark your skewer again, because it needs to reduce by half again.
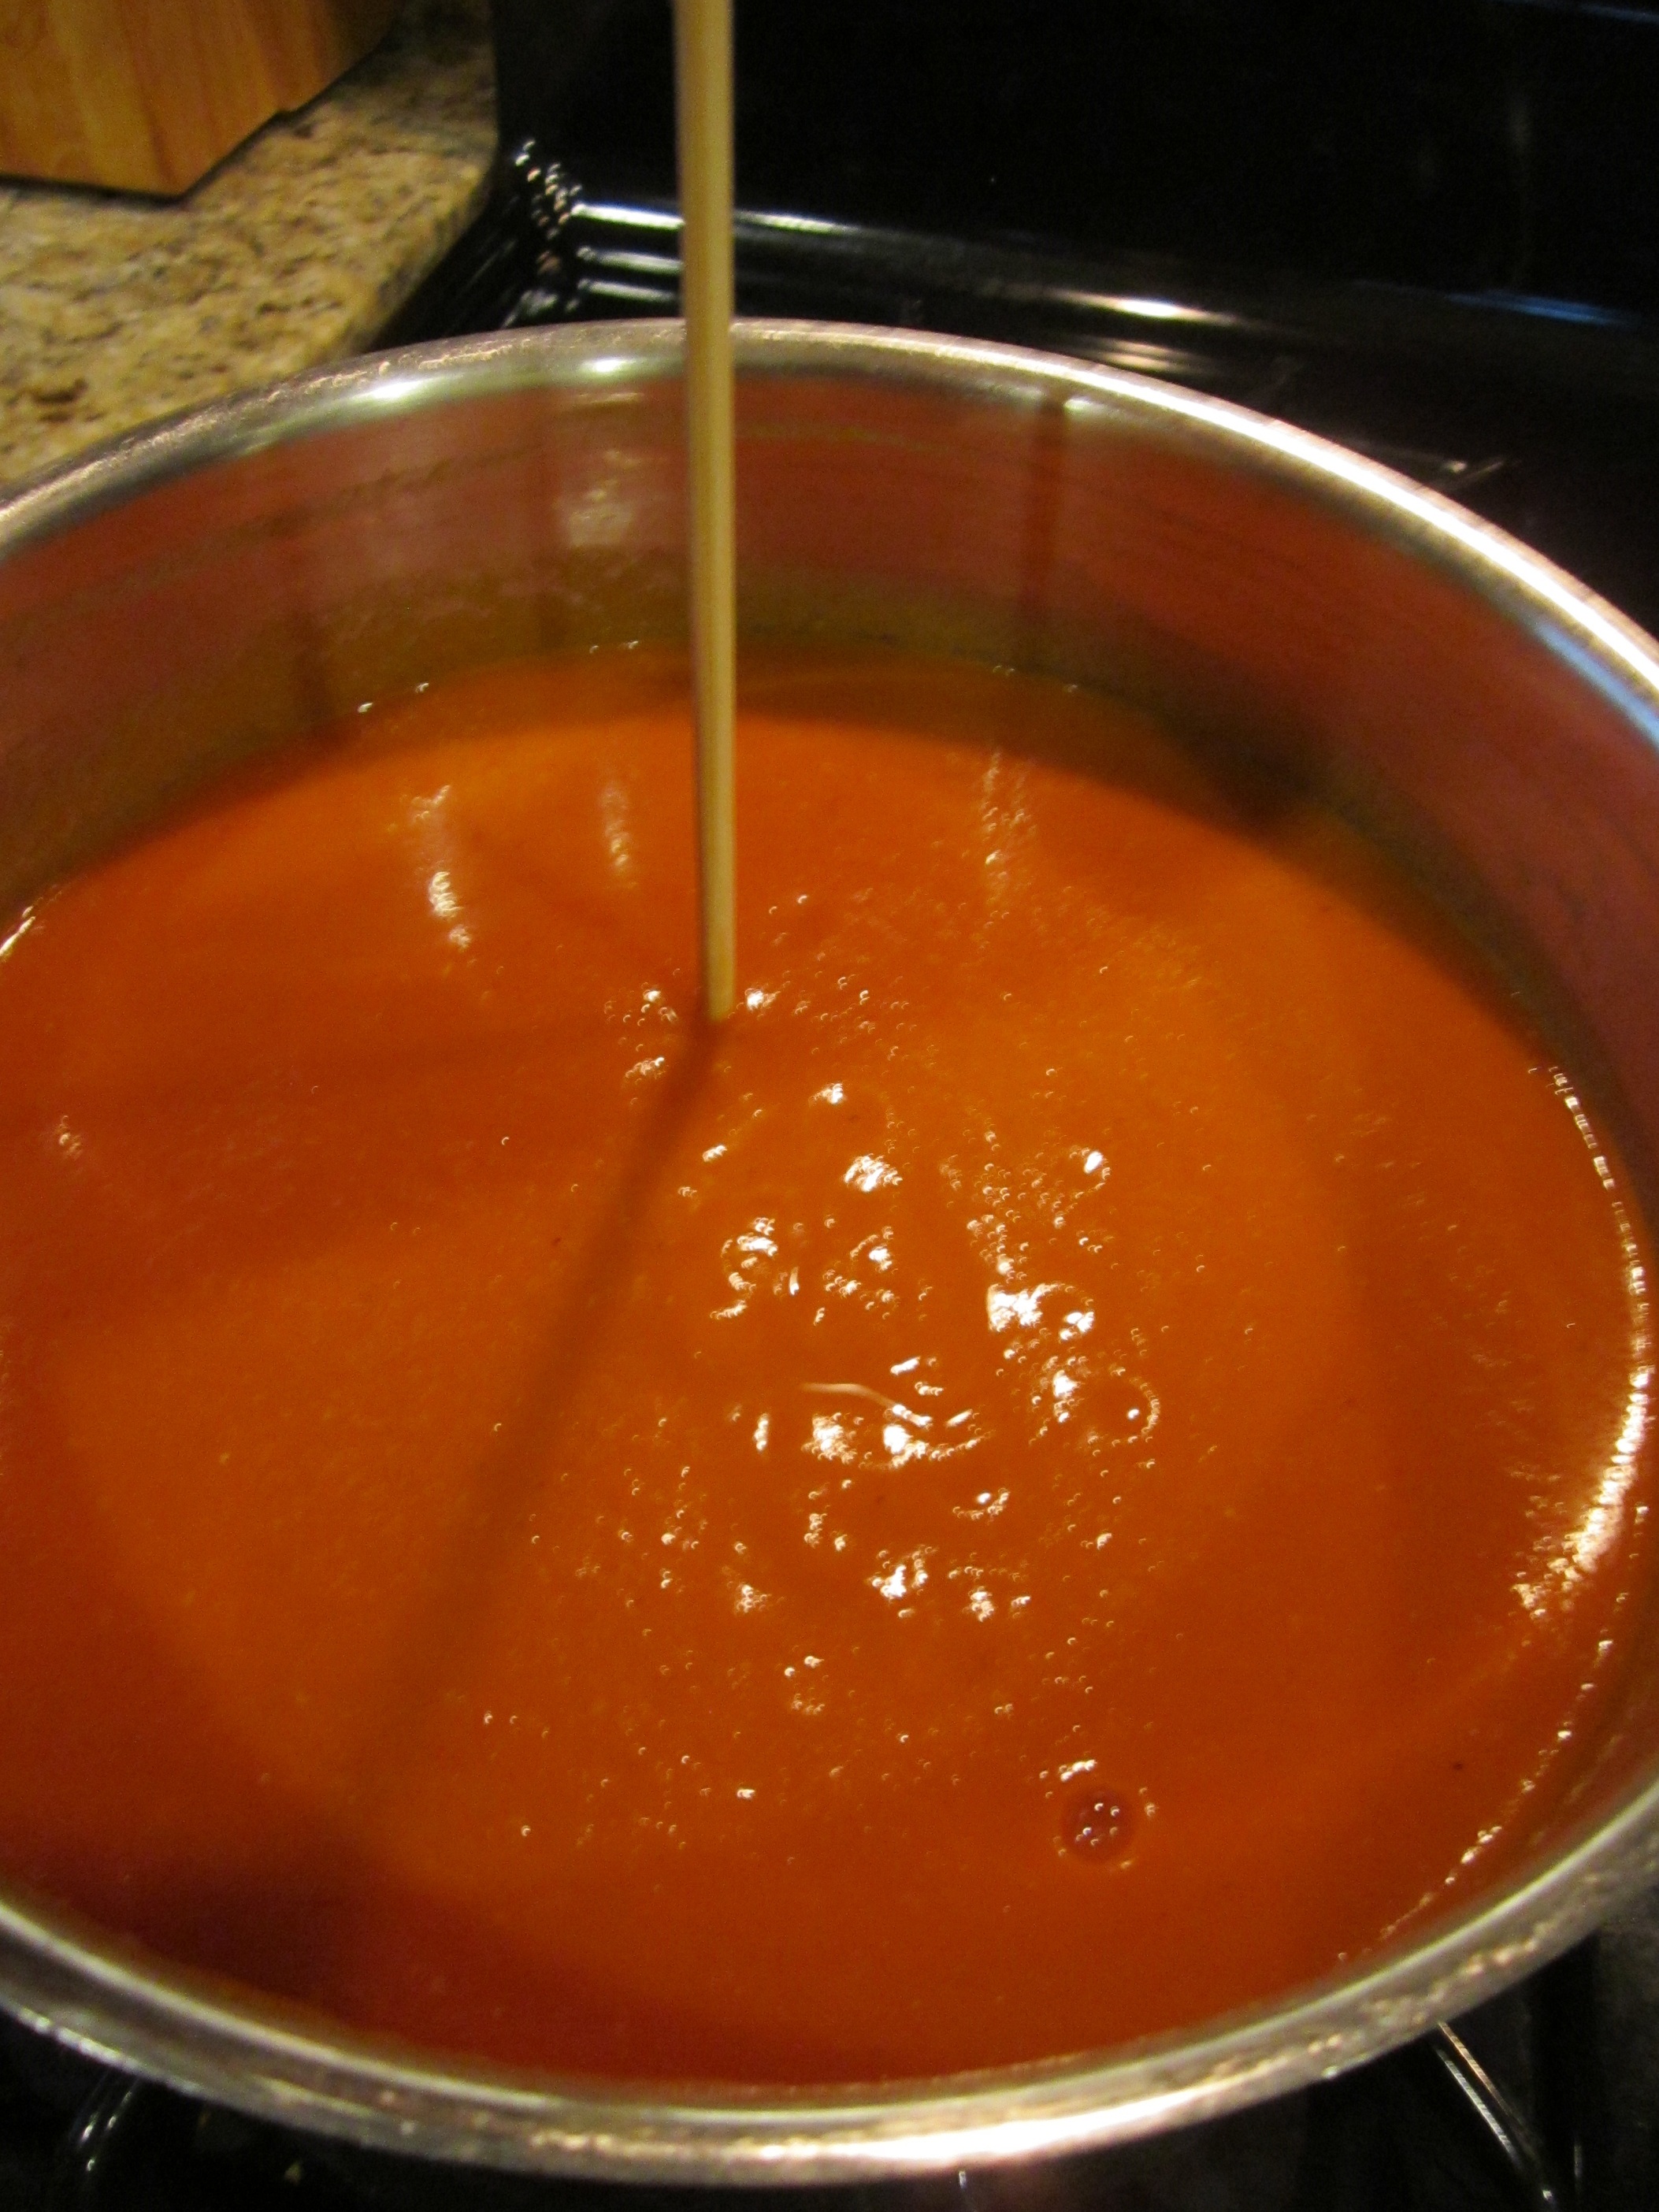
Bring the sauce to a boil over high heat, reduce heat and simmer, stirring occasionally until reduced by half or as thick as you want your ketchup to be. It will thicken a little more as it cools.
This is a good time to check for seasoning and add more salt if you like. If it tastes a little too tart form the vinegar, a little more salt will tone that down.
This took another hour for me and the last half hour needed more frequent stirring as it was getting very thick by that time.
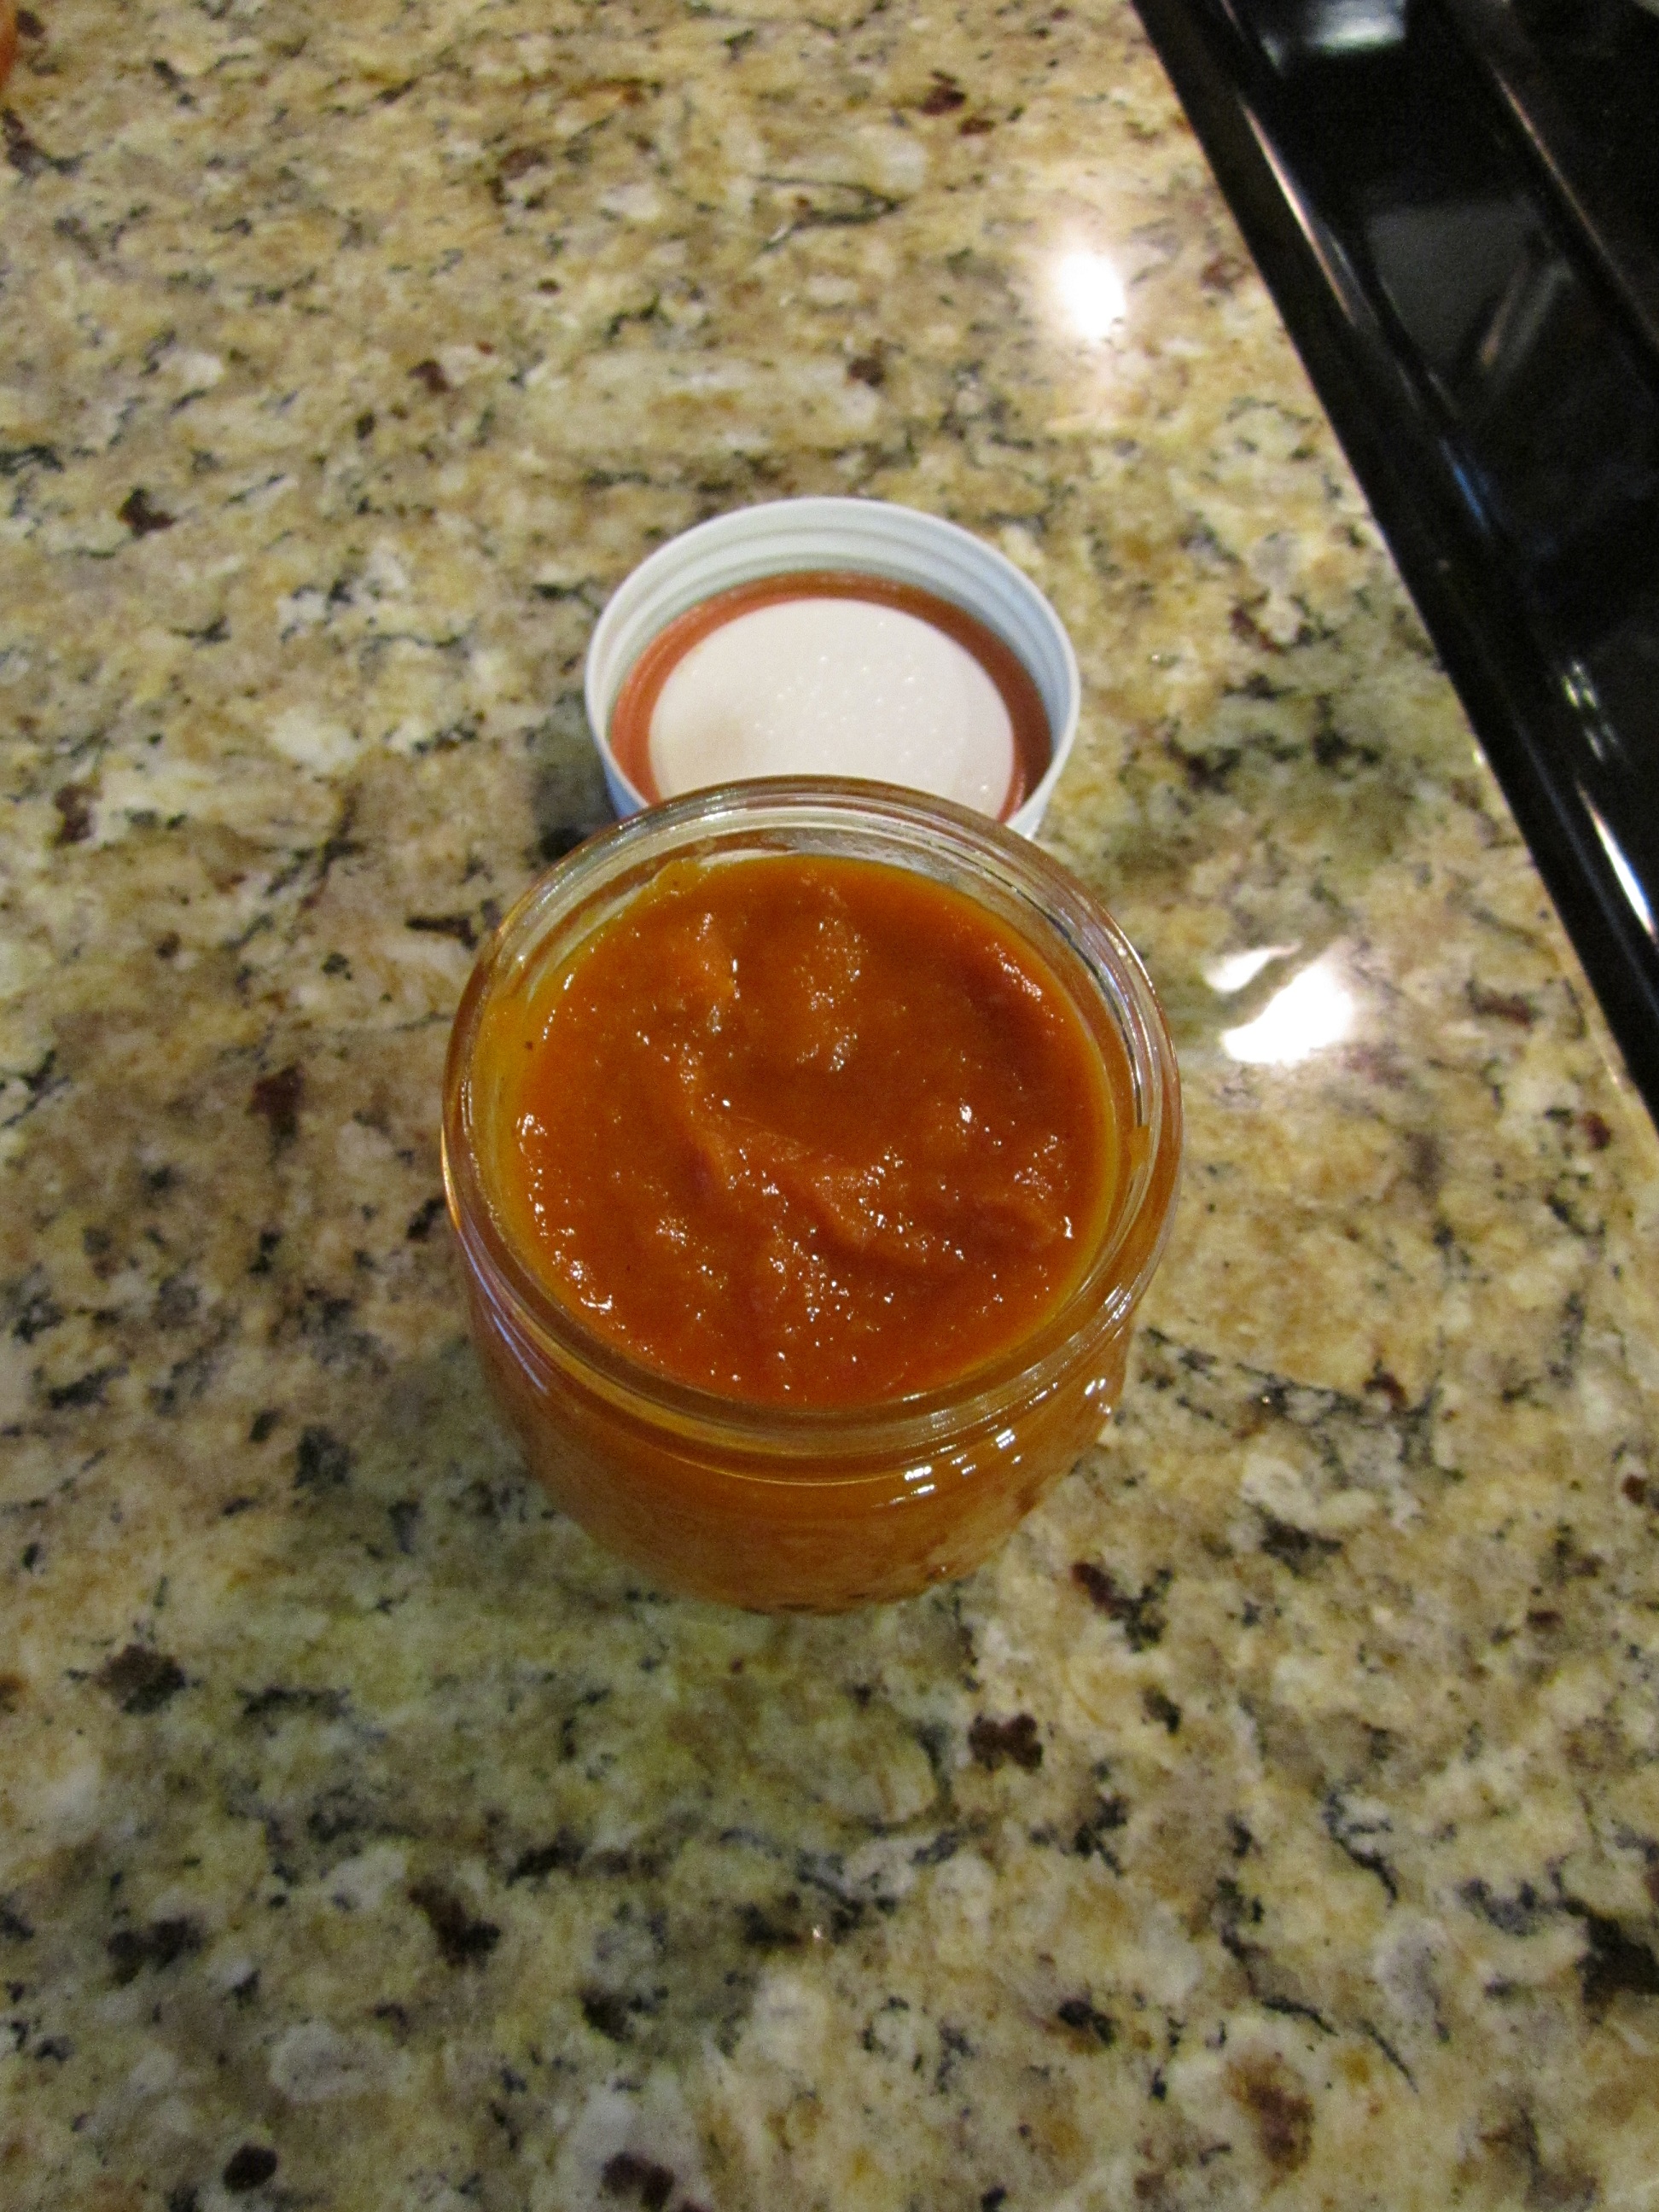
When the ketchup is finished, it can be kept in the refrigerator for several weeks.
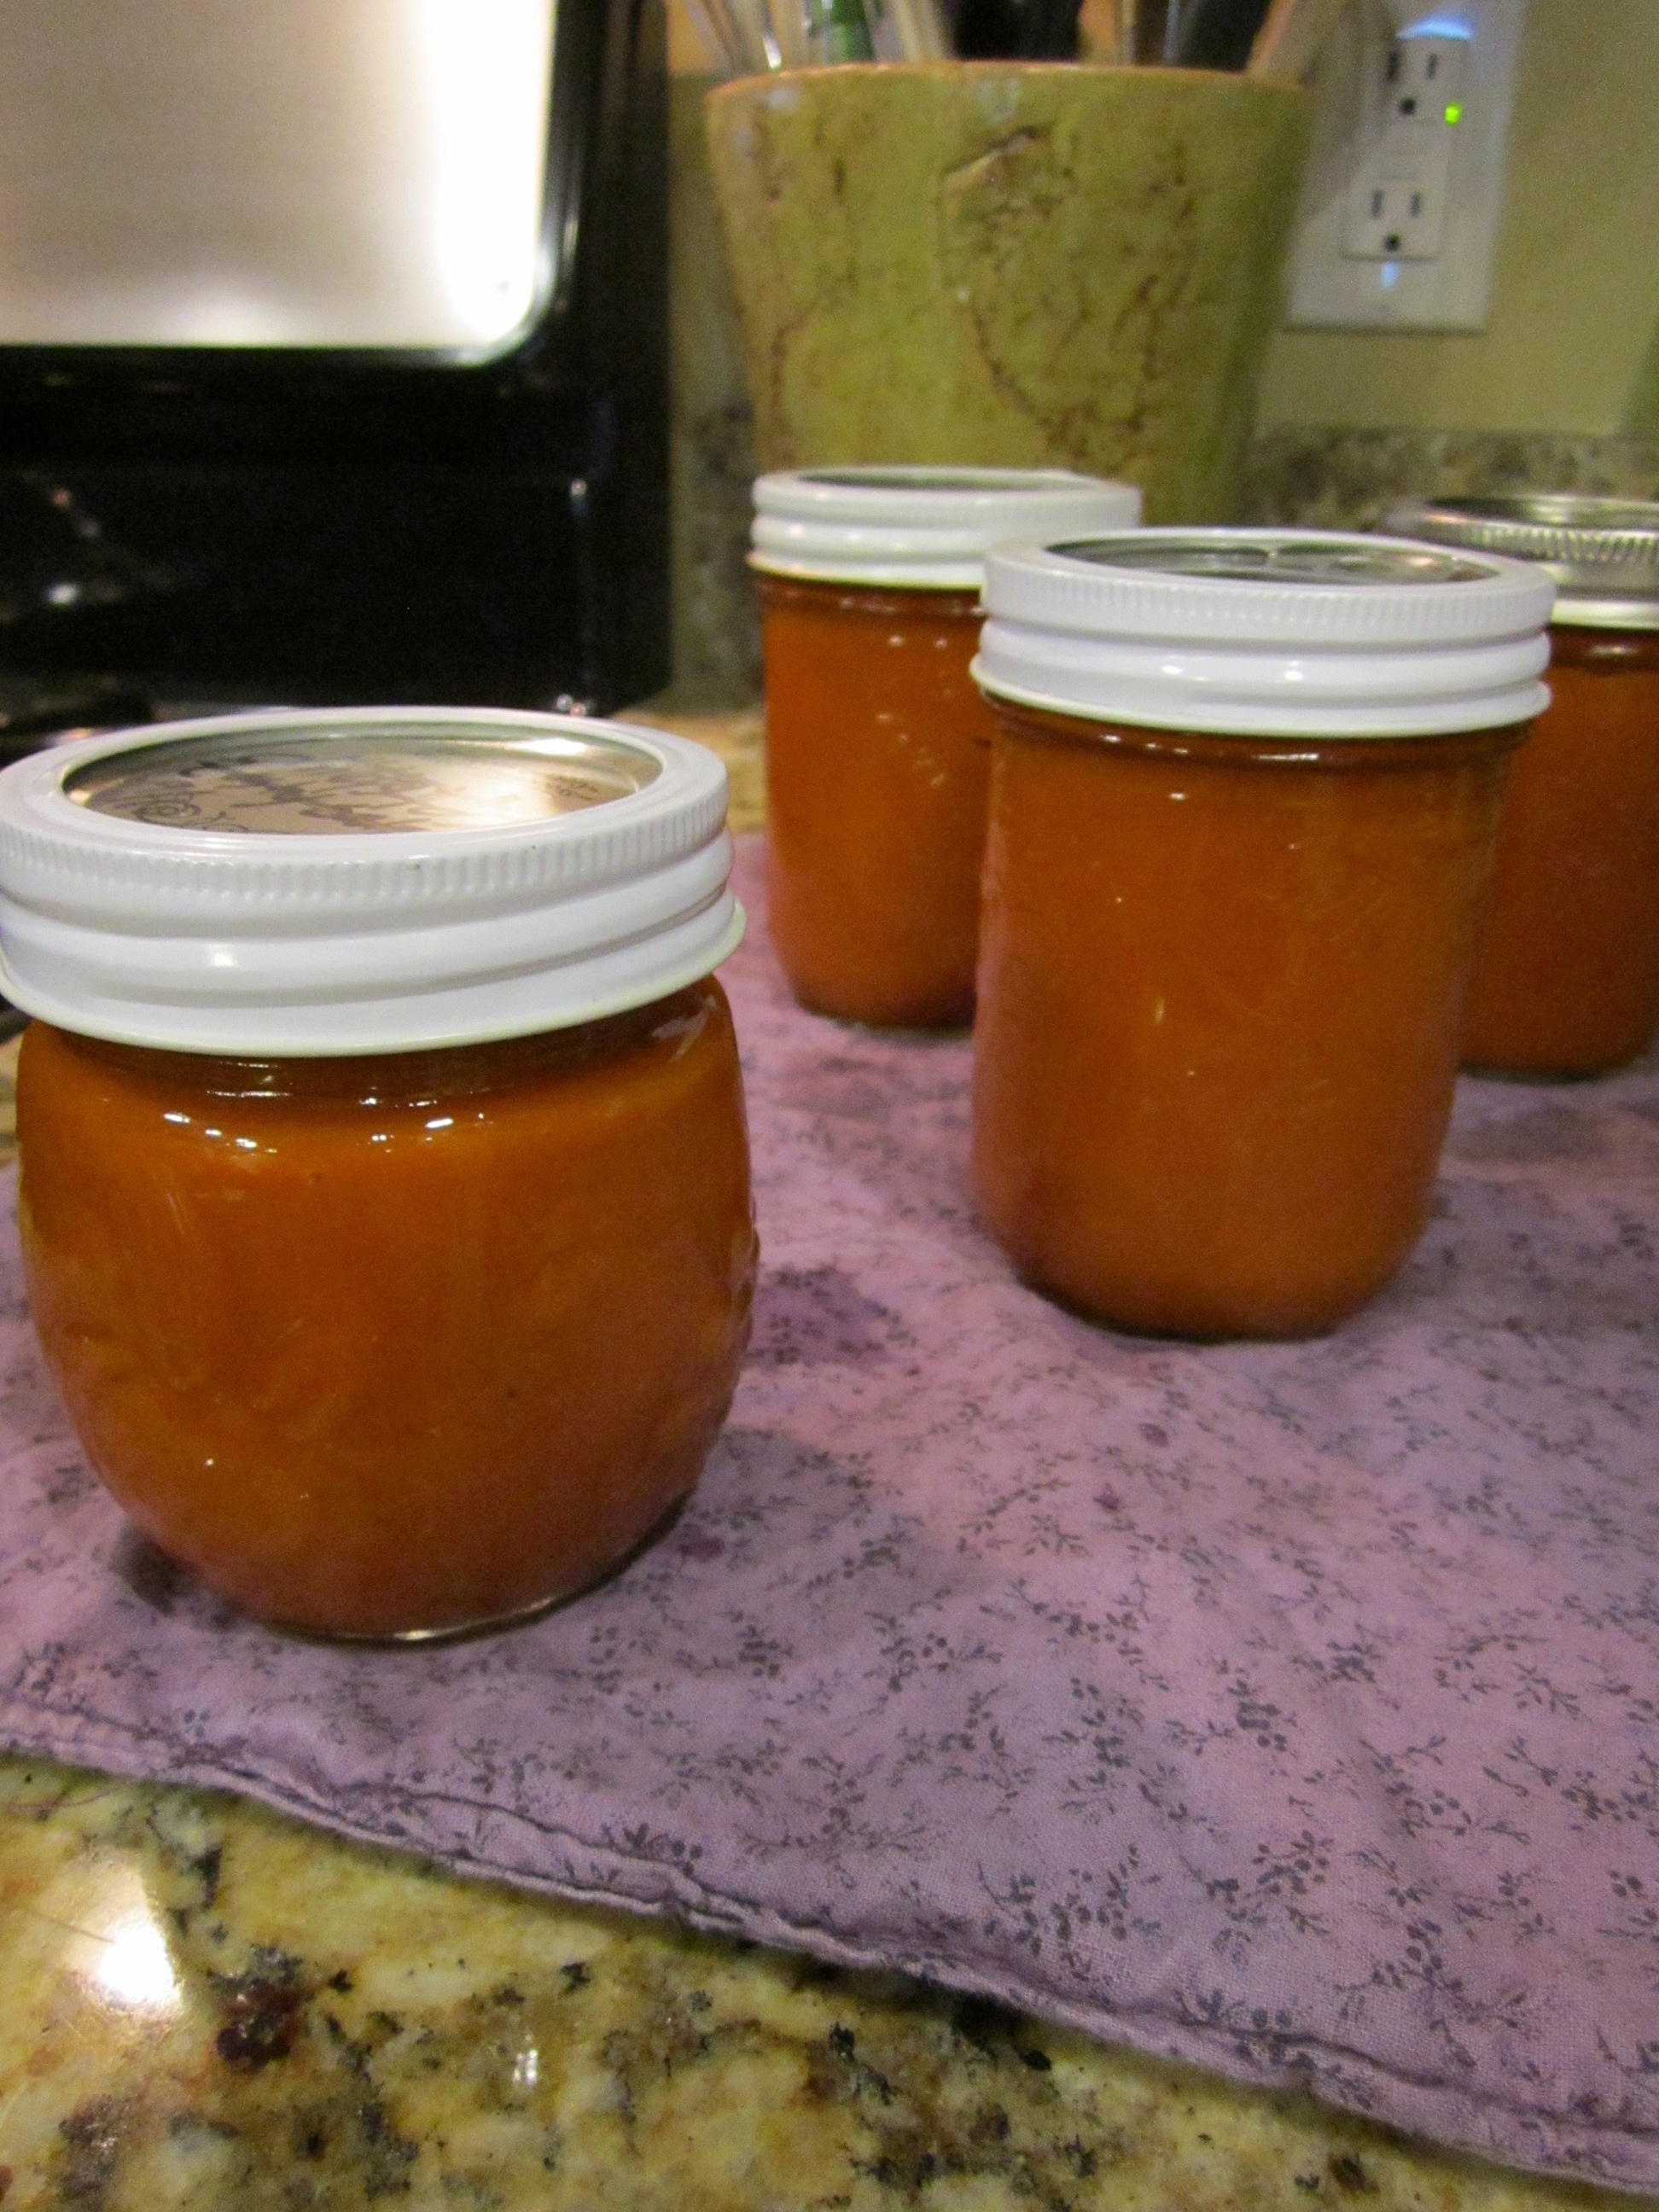
I have no delusions that my two kids will choose this gourmet delight over the shiny, bright red gel that comes from the store. So I chose to can mine. This recipe yielded 4 half pints. I processed 3 and put one in the fridge. I’m excited to get some gourmet burgers and fries on the menu this week for my ketchup’s grand premiere!
If you want to can yours, put your water bath canner on to boil during the last half hour of reducing the ketchup.
Heat jars and lids in simmering water until ready to use. Do not boil.
Ladle hot ketchup into hot jars leaving 1/2 inch headspace. Remove air bubbles. Wipe rim. Center lid on jar. Apply band until fit is fingertip tight.
Process jars in boiling water canner for 15 minutes, adjusting for altitude. Remove jars and cool. Check lids for seal after 24 hours. Lid should not flex when pressed in center. Enjoy!
Pin It
A PYP Best Blog! Make It Yourself: Buttermilk Ranch Dressing
 Just in case you missed this article on making your own ranch dressing mix the first time we shared it a couple of years ago, we are republishing it. After Trish wrote this blog originally, we got an awesome response. This is one of the PYP Best Blogs!
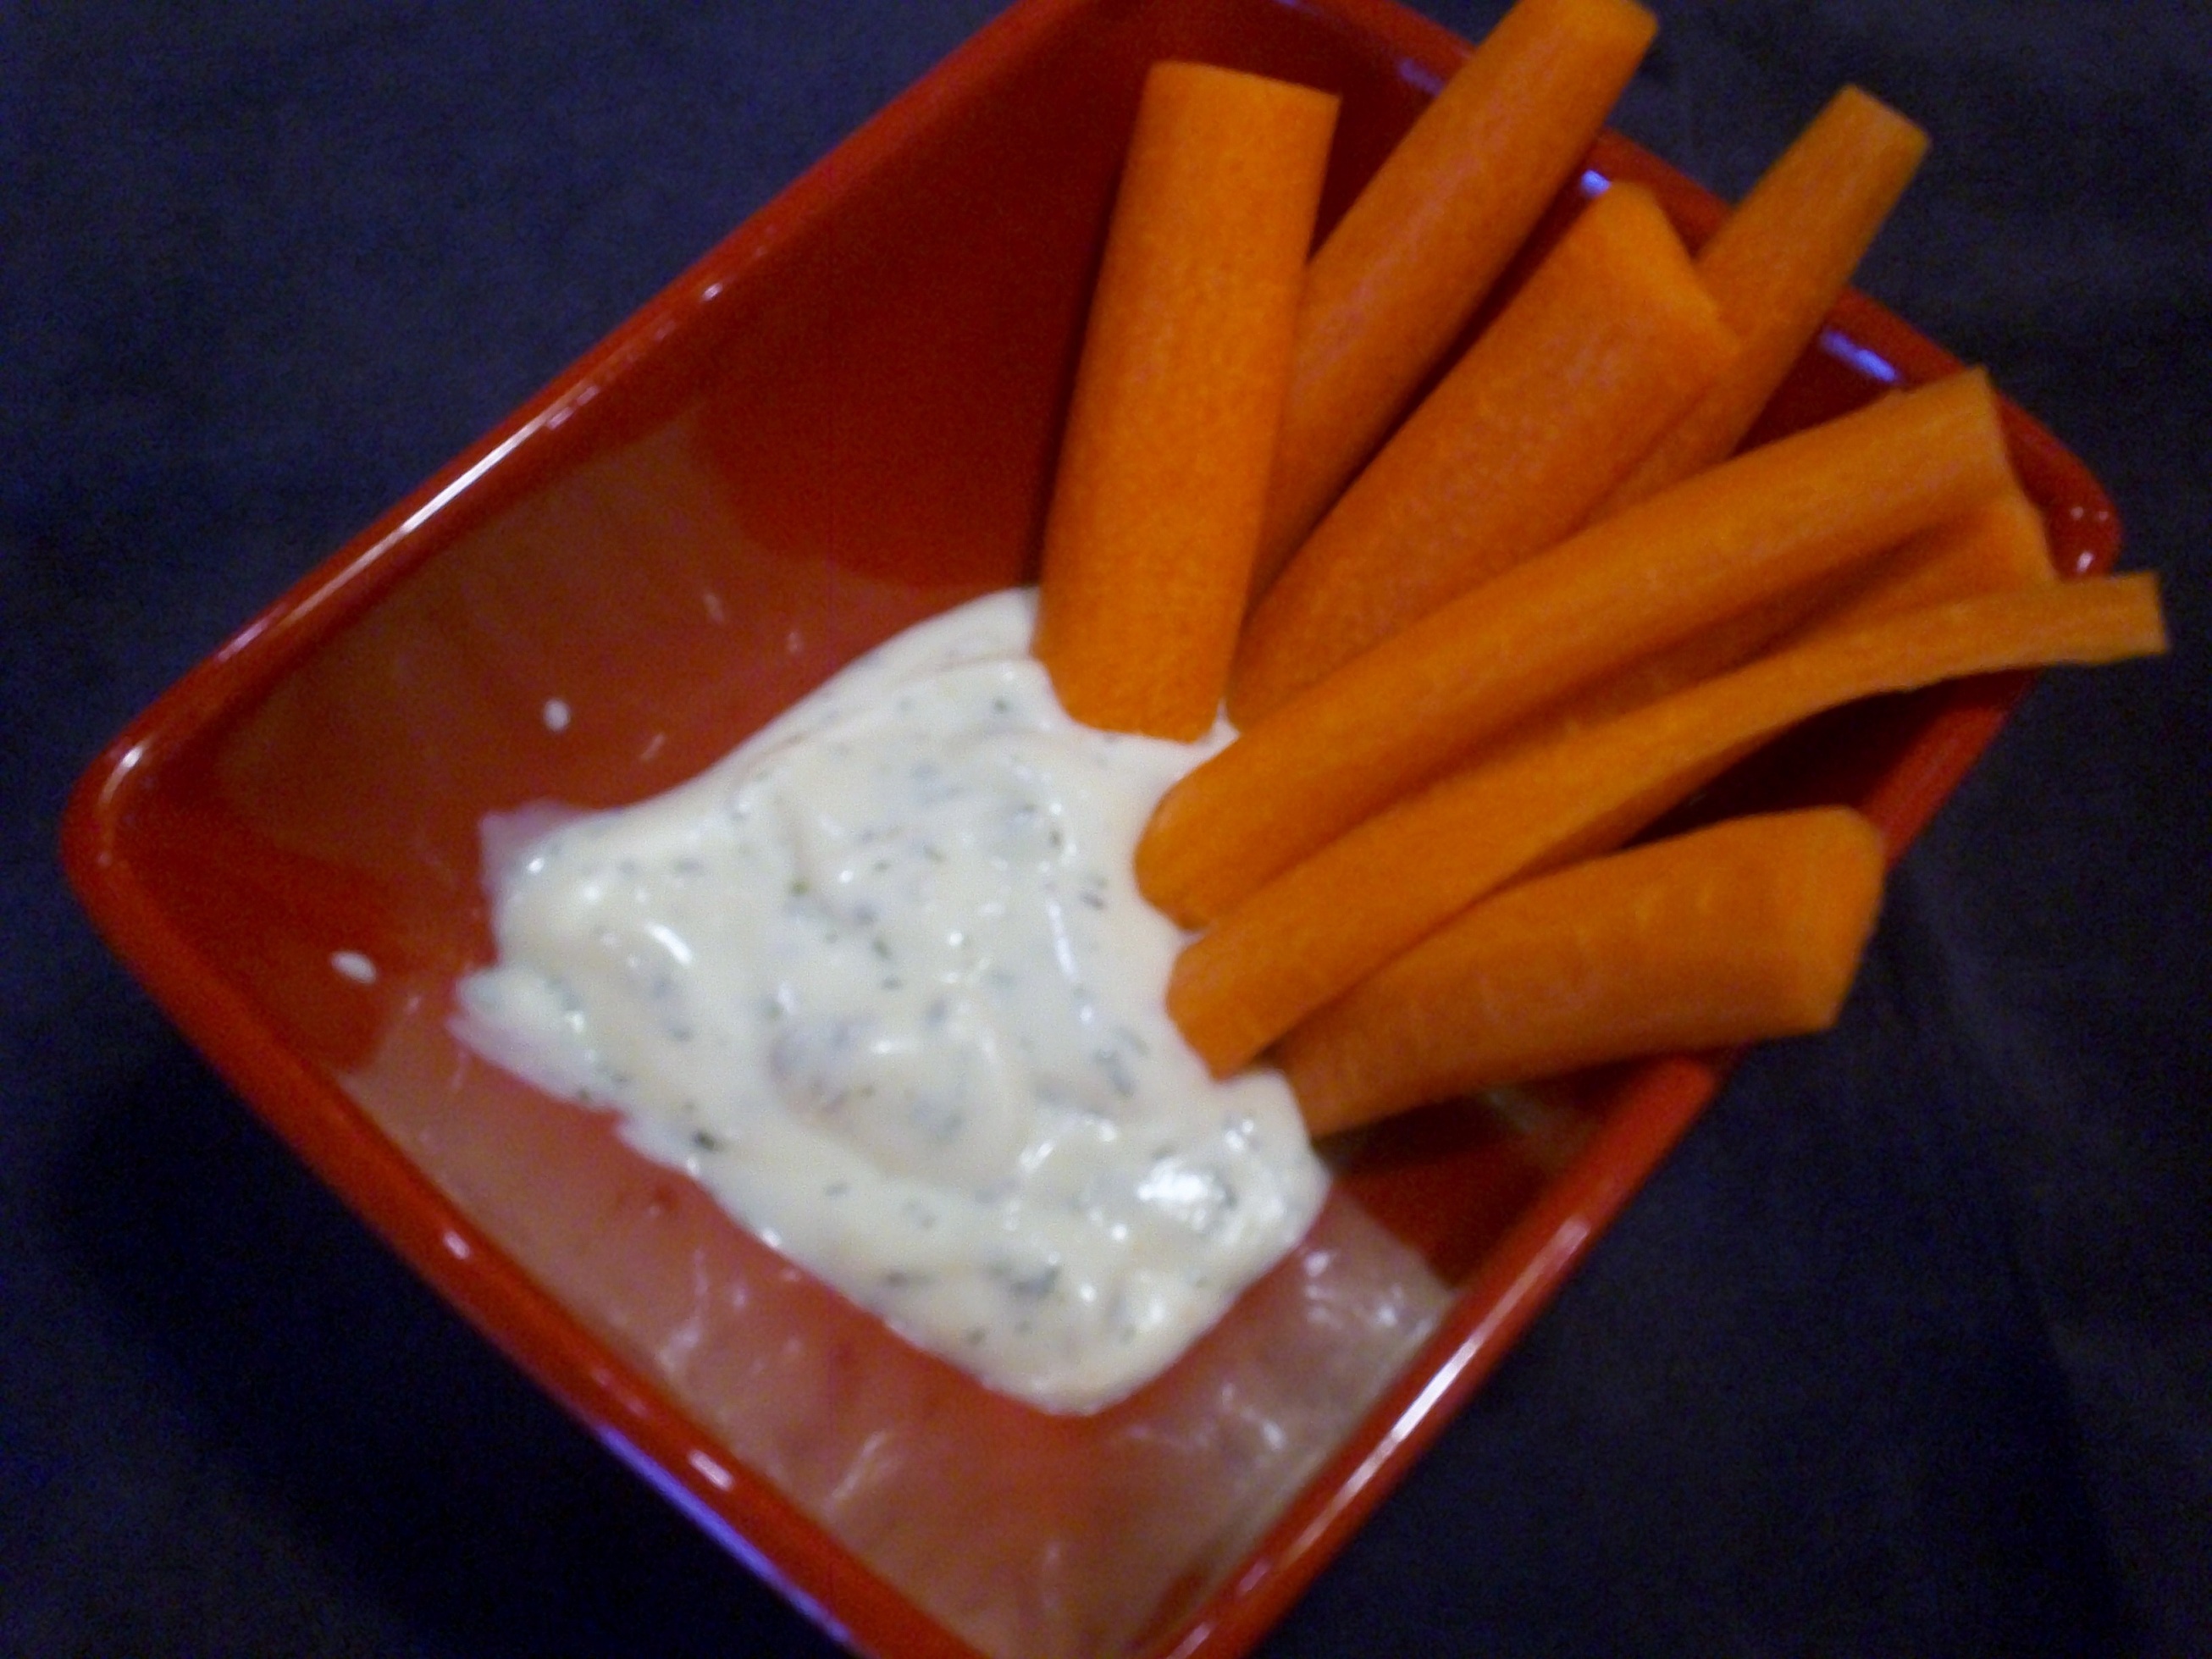
“Restaurant Ranch” is the preferred salad dressing/dip at our house.
It has to be Hidden Valley Buttermilk Ranch made from the packet, not the bottle.
I’ve got some discerning taste buds gathered ’round my table.
In my never ending effort to not buy anything that I don’t have to, I decided to finally ditch the little magic packet of ranch dressing mix and make my own.
After reviewing many recipes, I adapted several of them into this one. And it was a hit!
I had all the spices in my cupboard so the only costs were the buttermilk and mayo which I would have used to make the packet anyway. So about… $1 for 16 ounces of veggie dipping goodness. Saving myself the dollar something that the ranch dressing packet would have cost. And a trip to the store. Which would have meant getting out of my comfy pajamas. Who needs that?
I mix this up in a special shaker bottle that I got about a hundred years ago. It was part of a “bonus offer” when I bought a packet of Hidden Valley mix. But good news! The shaker is made by Tupperware. There are also lots of shaker bottles for sale everywhere from Amazon, to WalMart to Dollar Tree.
You could also just whisk it up in a bowl and store in the fridge in any container that suits your fancy.
Now let’s make some dressing!
It’s simple! Just put these ingredients in your shaker and shake! Or put them in a bowl and whisk!
Homemade Buttermilk Ranch Dressing
1 cup mayo (We use reduced fat)
1 cup buttermilk (We use lowfat, which is the most common kind you’ll see in the store.)
1/8 teaspoon paprika
1/8 teaspoon black pepper
1/4 teaspoon mustard powder
1/4 teaspoon salt
1/4 teaspoon onion powder
1/4 teaspoon dried dill
1/4 teaspoon garlic powder
1 Tablespoon dried parsley flakes
This will keep in the fridge for a couple of weeks.
Enjoy!
Pin It
A PYP Best Blog! Denture Tablet = Easy Cleaning!

Just in case you missed this article on cleaning with denture tablets the first time we shared it a couple of years ago, we are republishing it. After Trish wrote this blog originally, we got an awesome response. This is one of the PYP Best Blogs!
It’s worth keeping a box of denture tablets in your cleaning arsenal. Their job is to clean, deodorize and disinfect so put them to work!
~I like to clean my kid’s toothbrushes if they’ve been sick but the toothbrush is still fairly new. (I know! We penny pinchers have no problem getting cheap or free toothbrushes, but it just seems wasteful to me to toss a practically new toothbrush.) Drop a denture tablet into a glass of warm water and then soak the toothbrush in it overnight.
~Clean retainers the same way!
~Make diamonds and glass beads sparkle like new by soaking in warm water and a denture tablet.
~Clean that mineral build up line that you get in vases as the water evaporates. Fill the vase with warm water and drop in a denture tablet. Let it soak for a half hour and rinse.
~Drop a denture tablet or two in the toilet at night. Flush away the mineral build up the next morning.
~Clean the hair product build up from your combs and brushes. Fill a tall jar with hot water, drop in a denture tablet and soak combs and hairbrushes overnight. Rinse clean in the morning.
~Are your coffee or tea mugs stained? Fill them with hot water and drop in a denture tablet. Let soak for a bit. Rinse.
~Use them to unclog a drain. Drop to or three tablets into the drain. Pour a cup of vinegar over the tablets. Wait 15 minutes. Then pour very hot water down the drain to rinse away the loosened clog.
~Clean mineral deposits from a shower head. Fill a jar with hot water, drop in a tablet and soak the shower head. If you can’t remove your shower head, try this. First put a rubber band over the shower head and up to the pipe. Then fill a ziploc bag with hot water, drop a tablet in the bag and then place the bag on the shower head. Secure it with the rubber band. Let soak for 15 minutes and then run hot water through the shower head to rinse.
~Clean a crusty casserole dish. Fill it with hot water and drop in a tablet. Let it soak for half an hour and then rinse away the formerly crusted on food.
~Clean melted cheese from a dish. That stuff is like cement! Fill your sink with hot water, just enough to cover the dish. Drop in the tablet and wait 15 minutes. Now it should wipe right off.
~Clean teething toys and pacifiers. Fill a bowl with hot water, add a couple of tablets and the teething toys and pacifiers. Wait 15 minutes and then rinse clean with hot water.
~Whiten your fingernails. Mine get a little yellow looking from all the tomato canning I do. Blech! Fill a small dish with hot water, drop in the tablet and then soak fingertips for 10 minutes.
~Clean and deodorize reusable water bottles and hydration pack bladders. Fill with hot water, insert a denture tablet, wait 15 minutes and then rinse with hot water.
Pin It
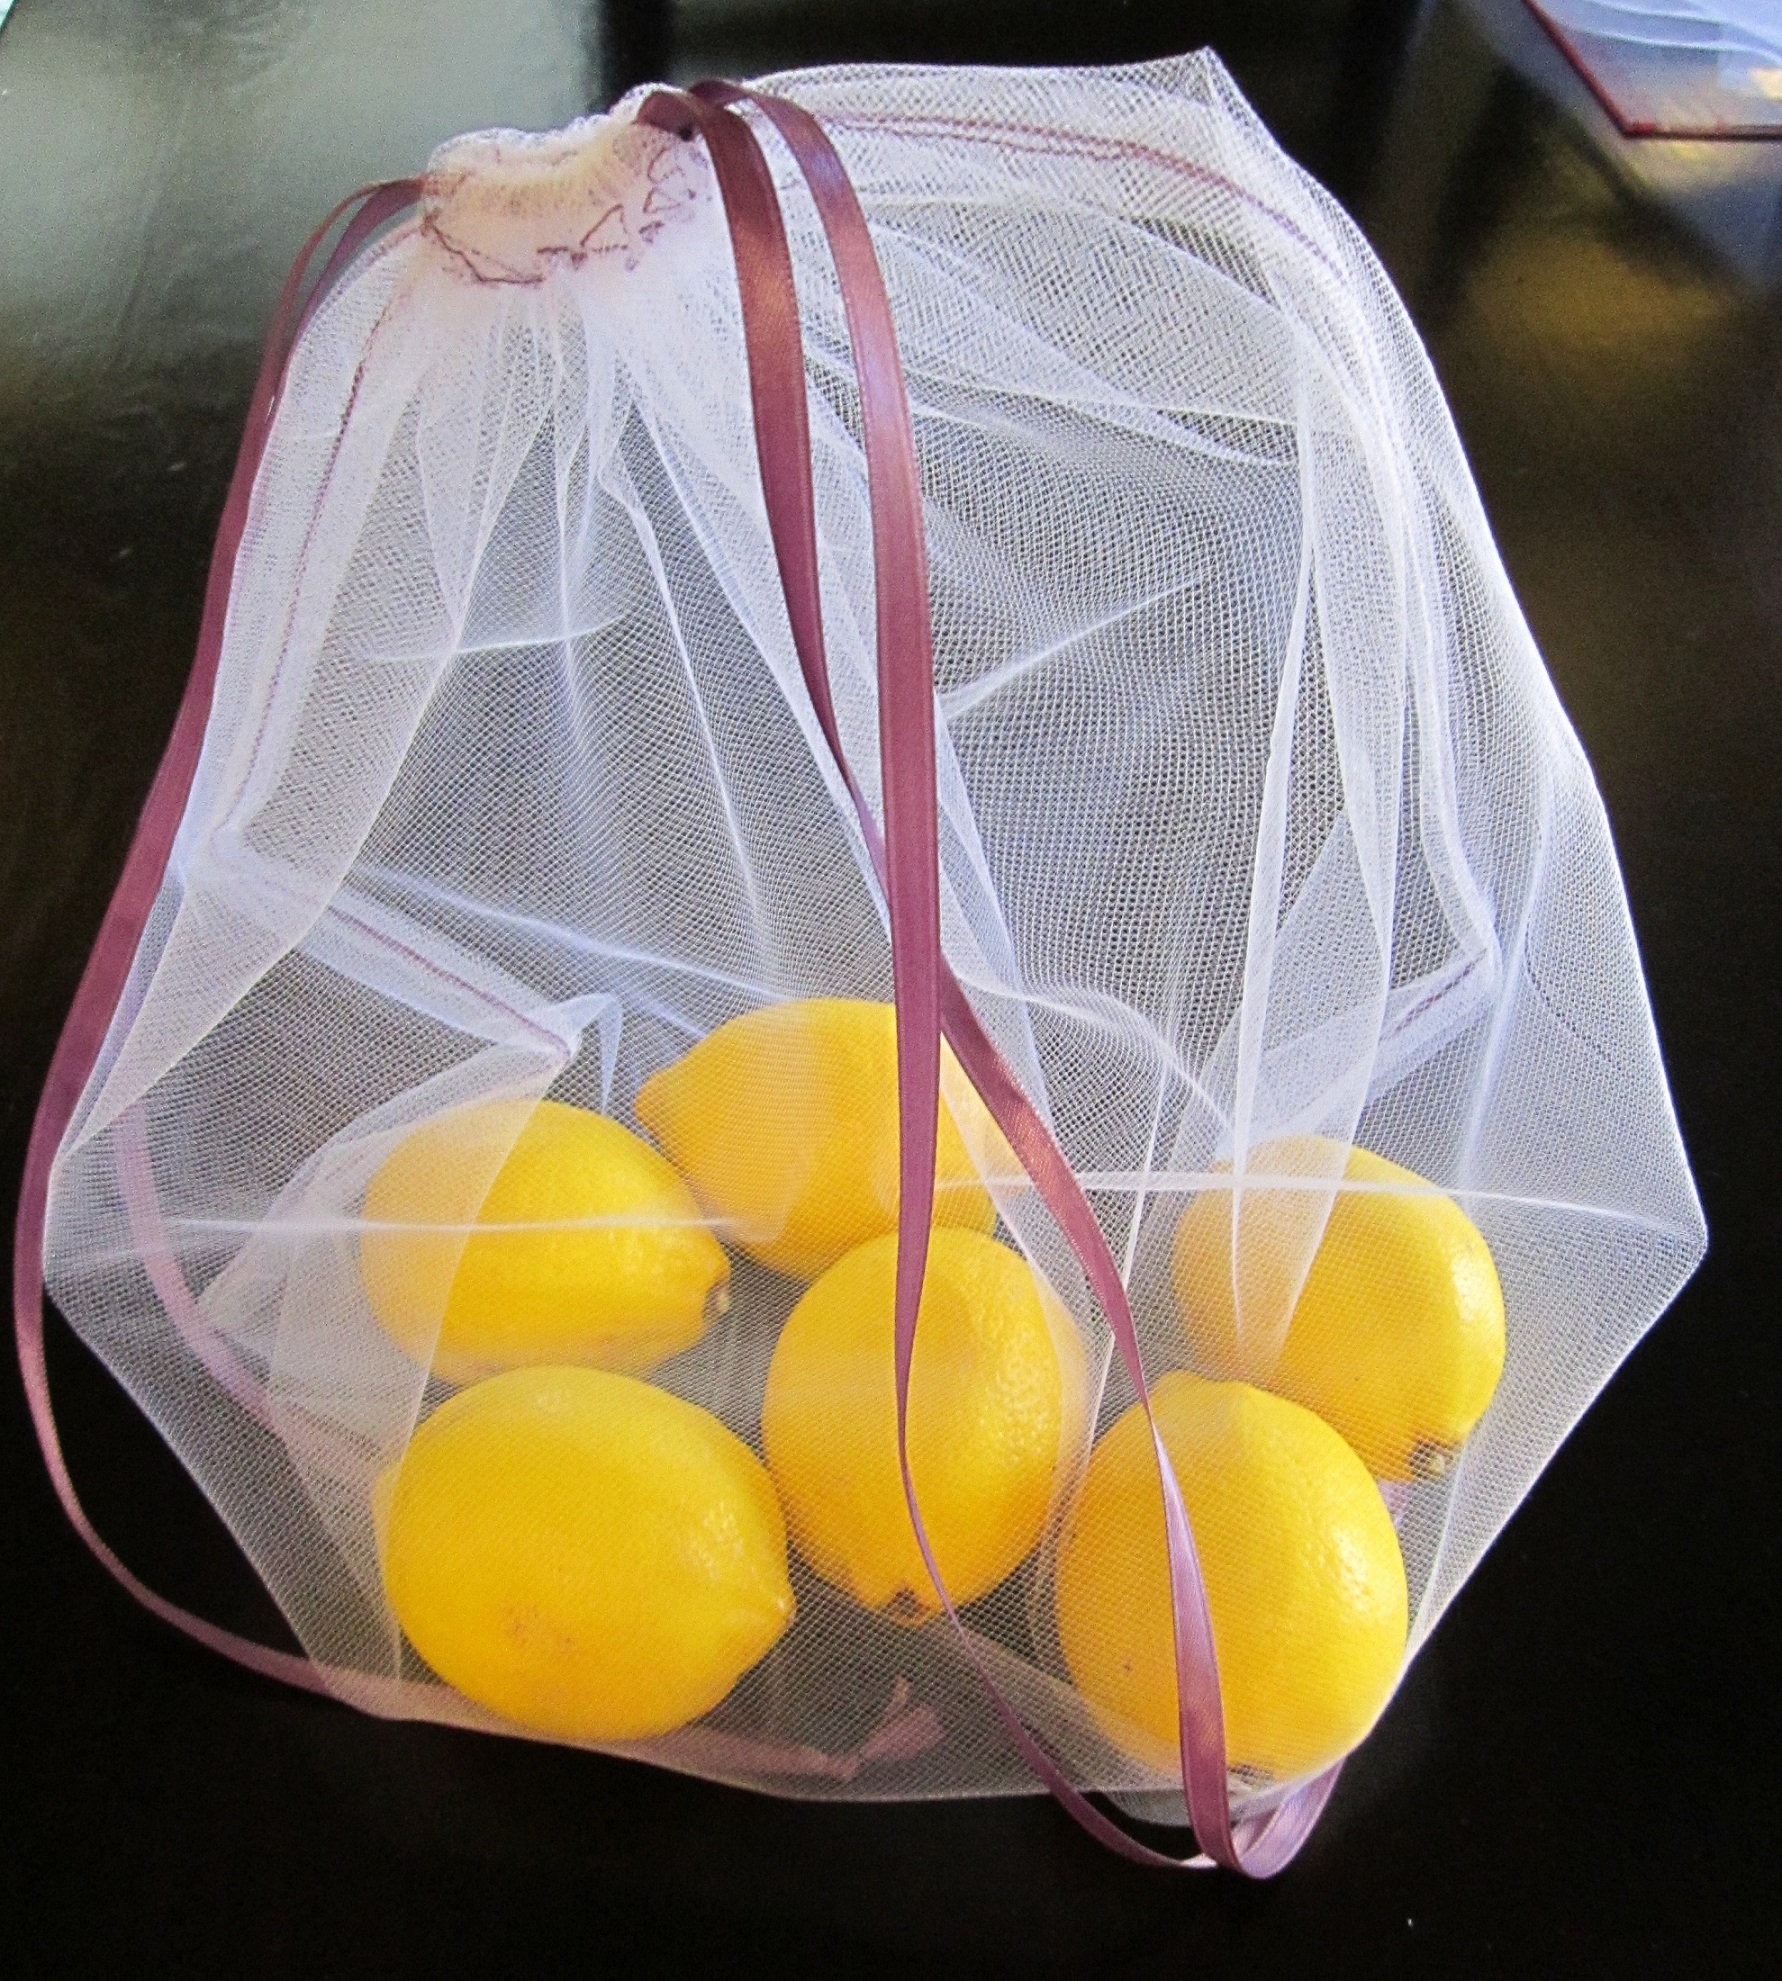
A PYP Best Blog! Make Your Own Reusable Produce Bags!
Just in case you missed this article on making your own reusable produce bags the first time we shared it a couple of years ago, we are republishing it. After Trish wrote this blog originally, we got an awesome response. This is one of the PYP Best Blogs!
One more way to eliminate the amount of waste coming into your home and going out to the landfill or recycling facility.
For four bags you will need one yard of tulle and 8 yards of ribbon.
These are super simple to make if you can sew a straight line.
I used tulle to keep them as lightweight and easy to clean as possible.
The yard of tulle that I purchased was 56 inches wide. I cut it into four pieces that were 18 inches by 28 inches to maximize the full yard of tulle.
Turn the long sides up about a 1/2 inch and stitch.
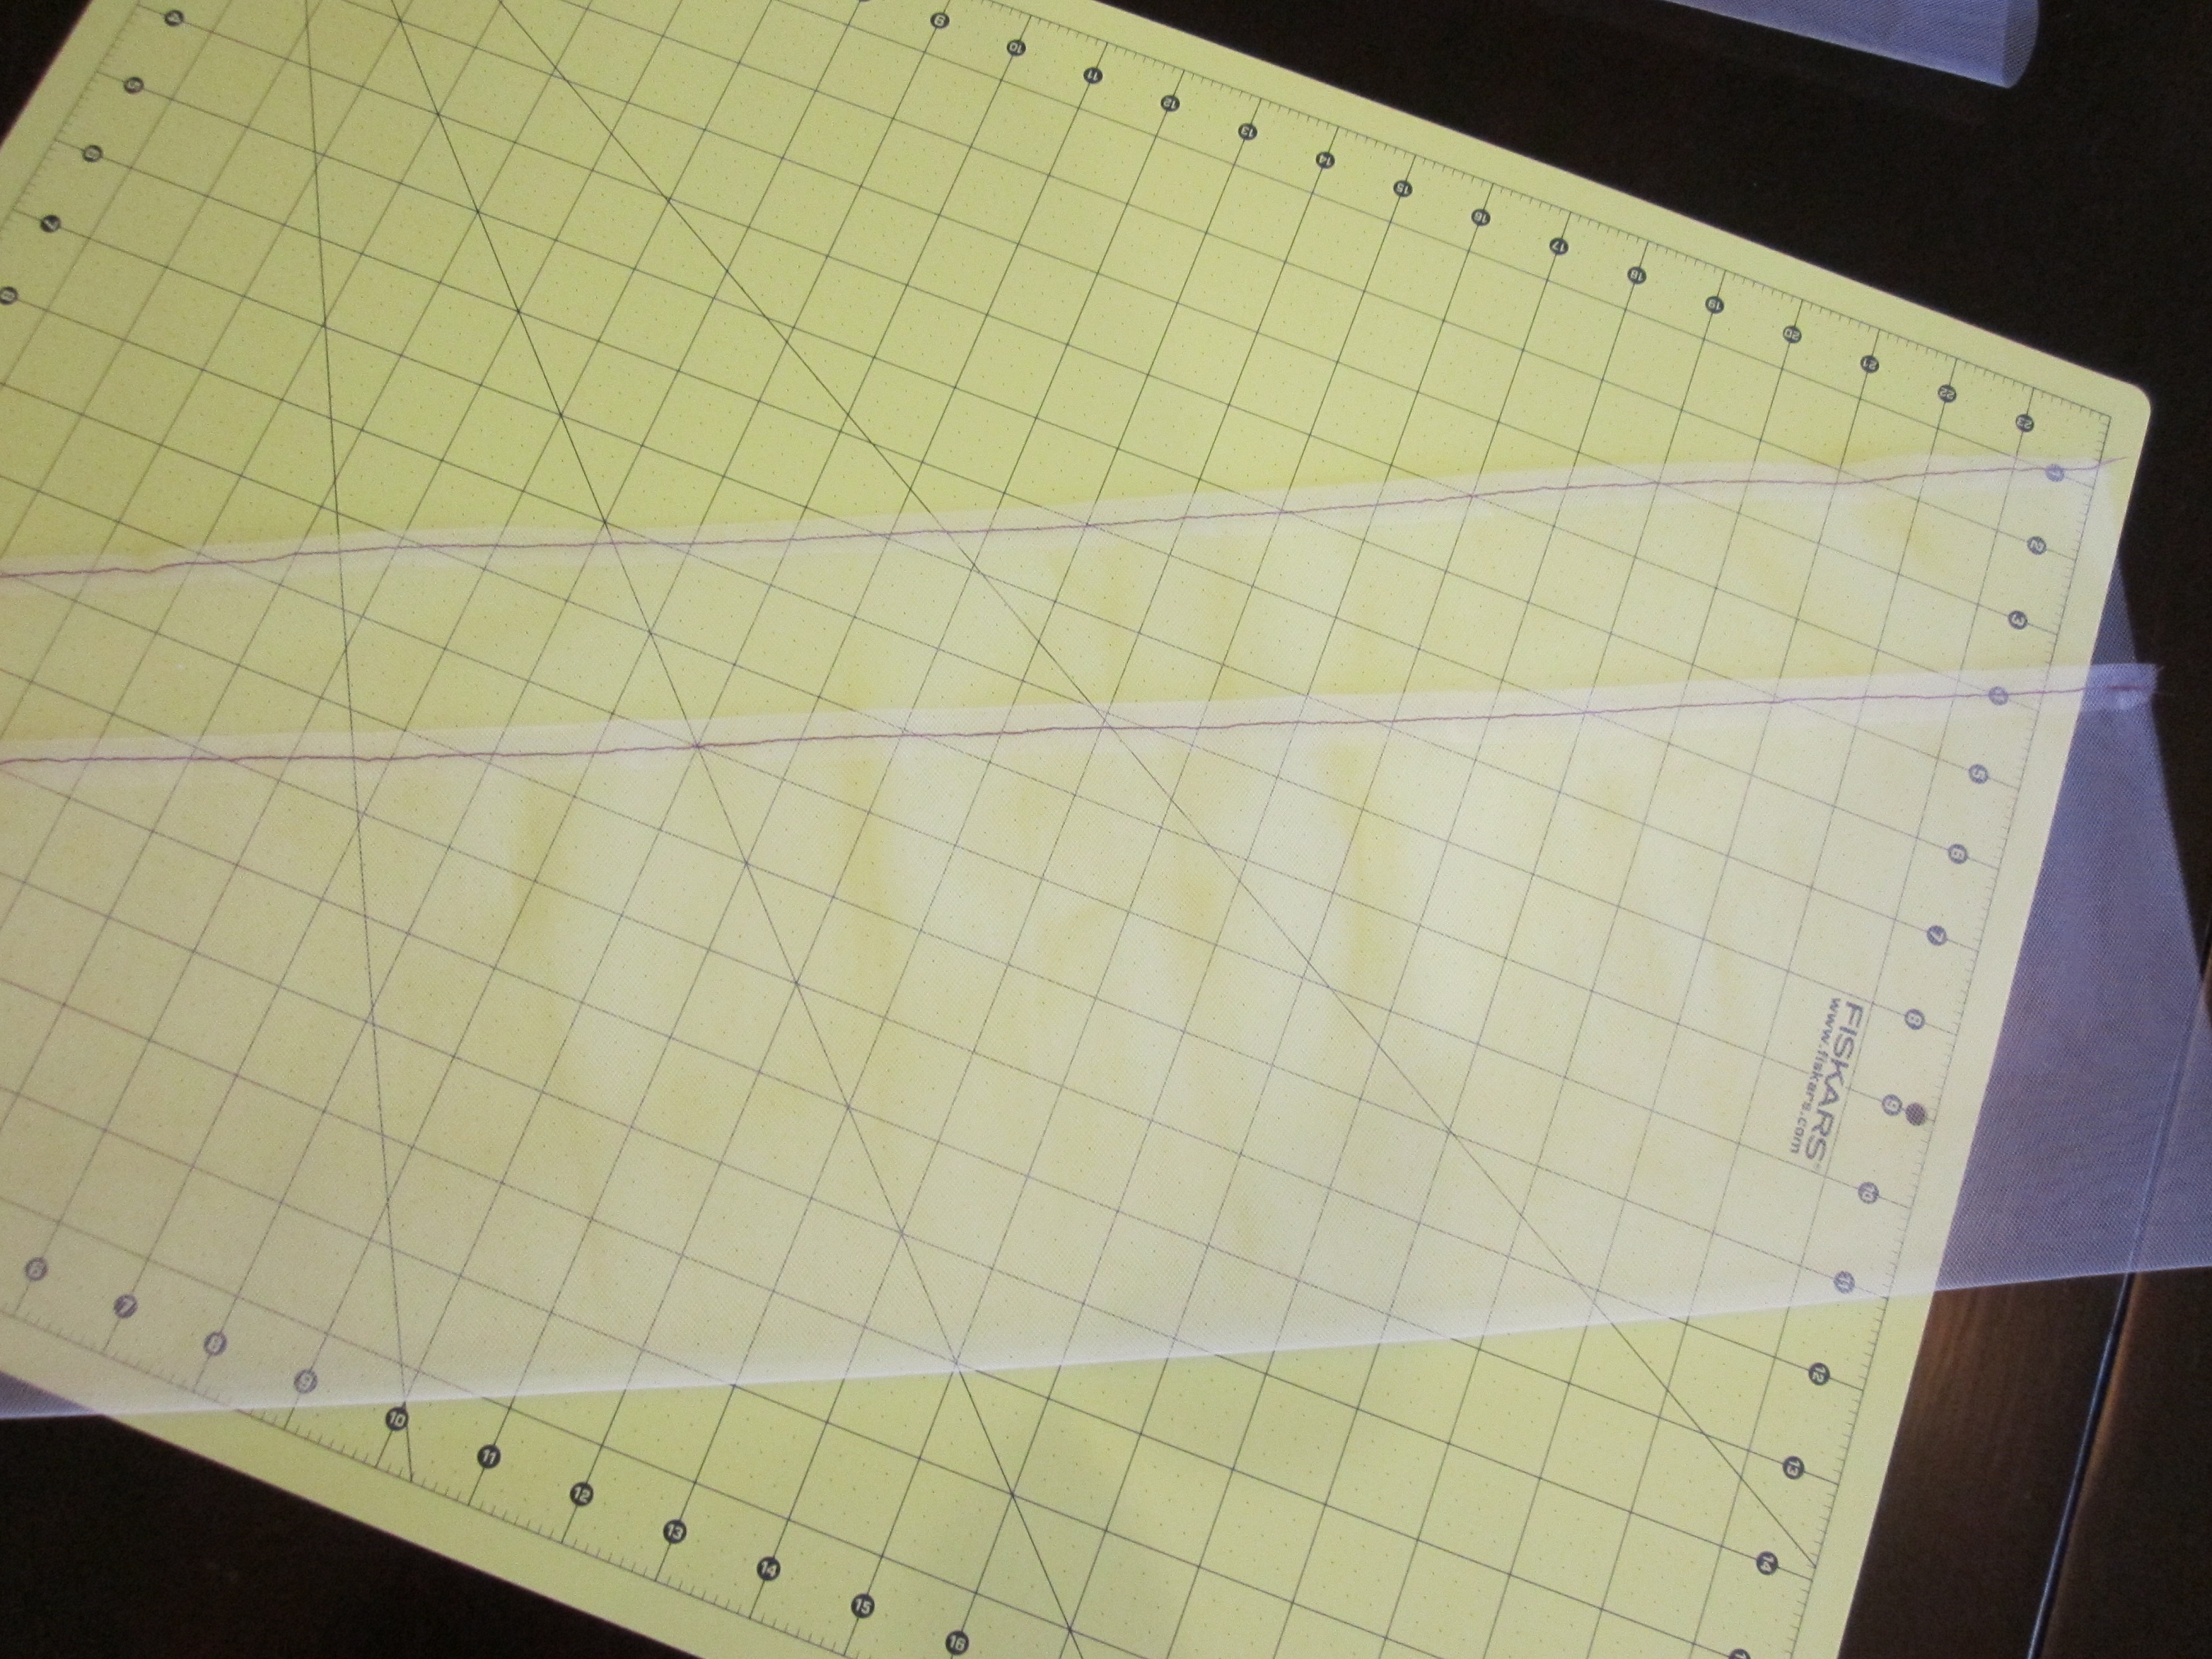
Turn the short sides up about 3/4 of an inch inch toward the same side of the fabric as you did the sides and stitch. This will make the casing for the drawstrings.
The side of the fabric that you turned those edges to is the WRONG side.
Fold the piece in half, with RIGHT sides together, so that the two short ends meet up. Stitch up the sides starting BELOW the casings you made previously and down to the folded edge. You need that casing to remain open to thread the drawstring through.
Repeat on the other side, exactly the same way.
Now turn your bag right side out.
Slip a safety pin onto the end of one yard of ribbon and thread it through one side of the casing and into the other, coming back out where you started.
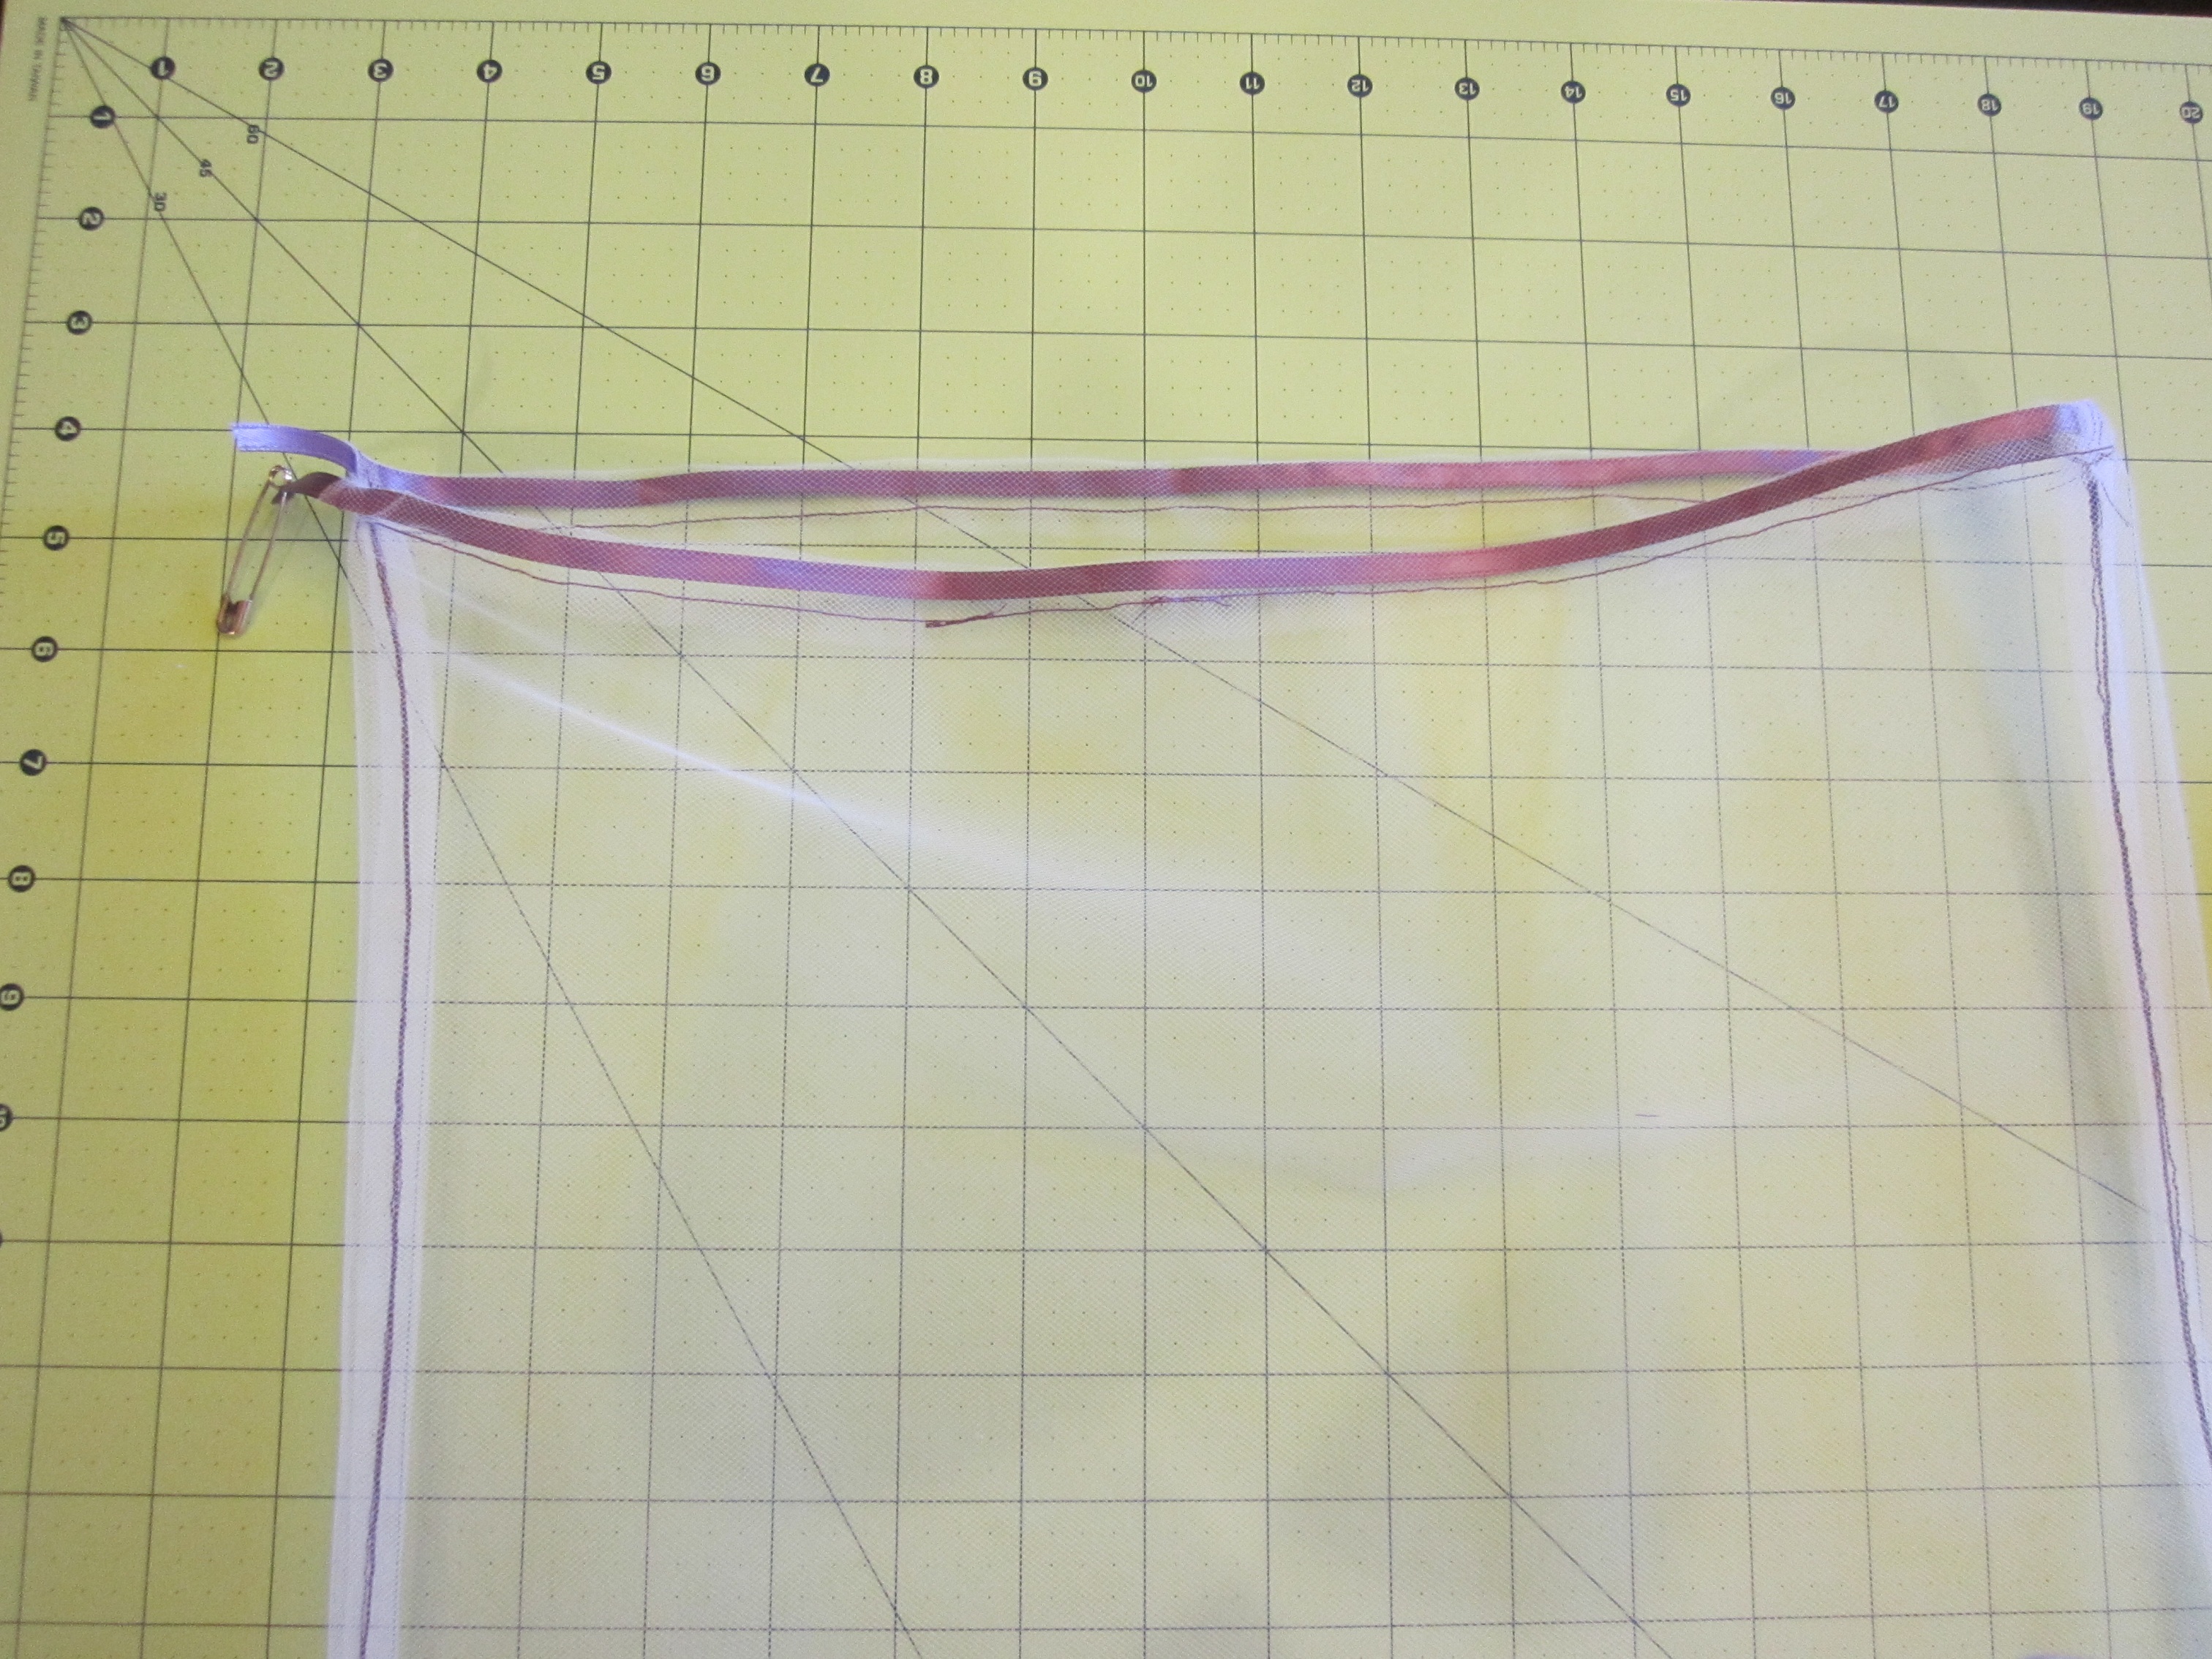
Tie those ends together in a knot.
Attach the safety pin to another yard of ribbon and feed it into the casing on the opposite side as before. Take it through the casing on one side and into the other, coming back out where you started again. Tie the ends together in a knot.
This makes the drawstrings cinchable.
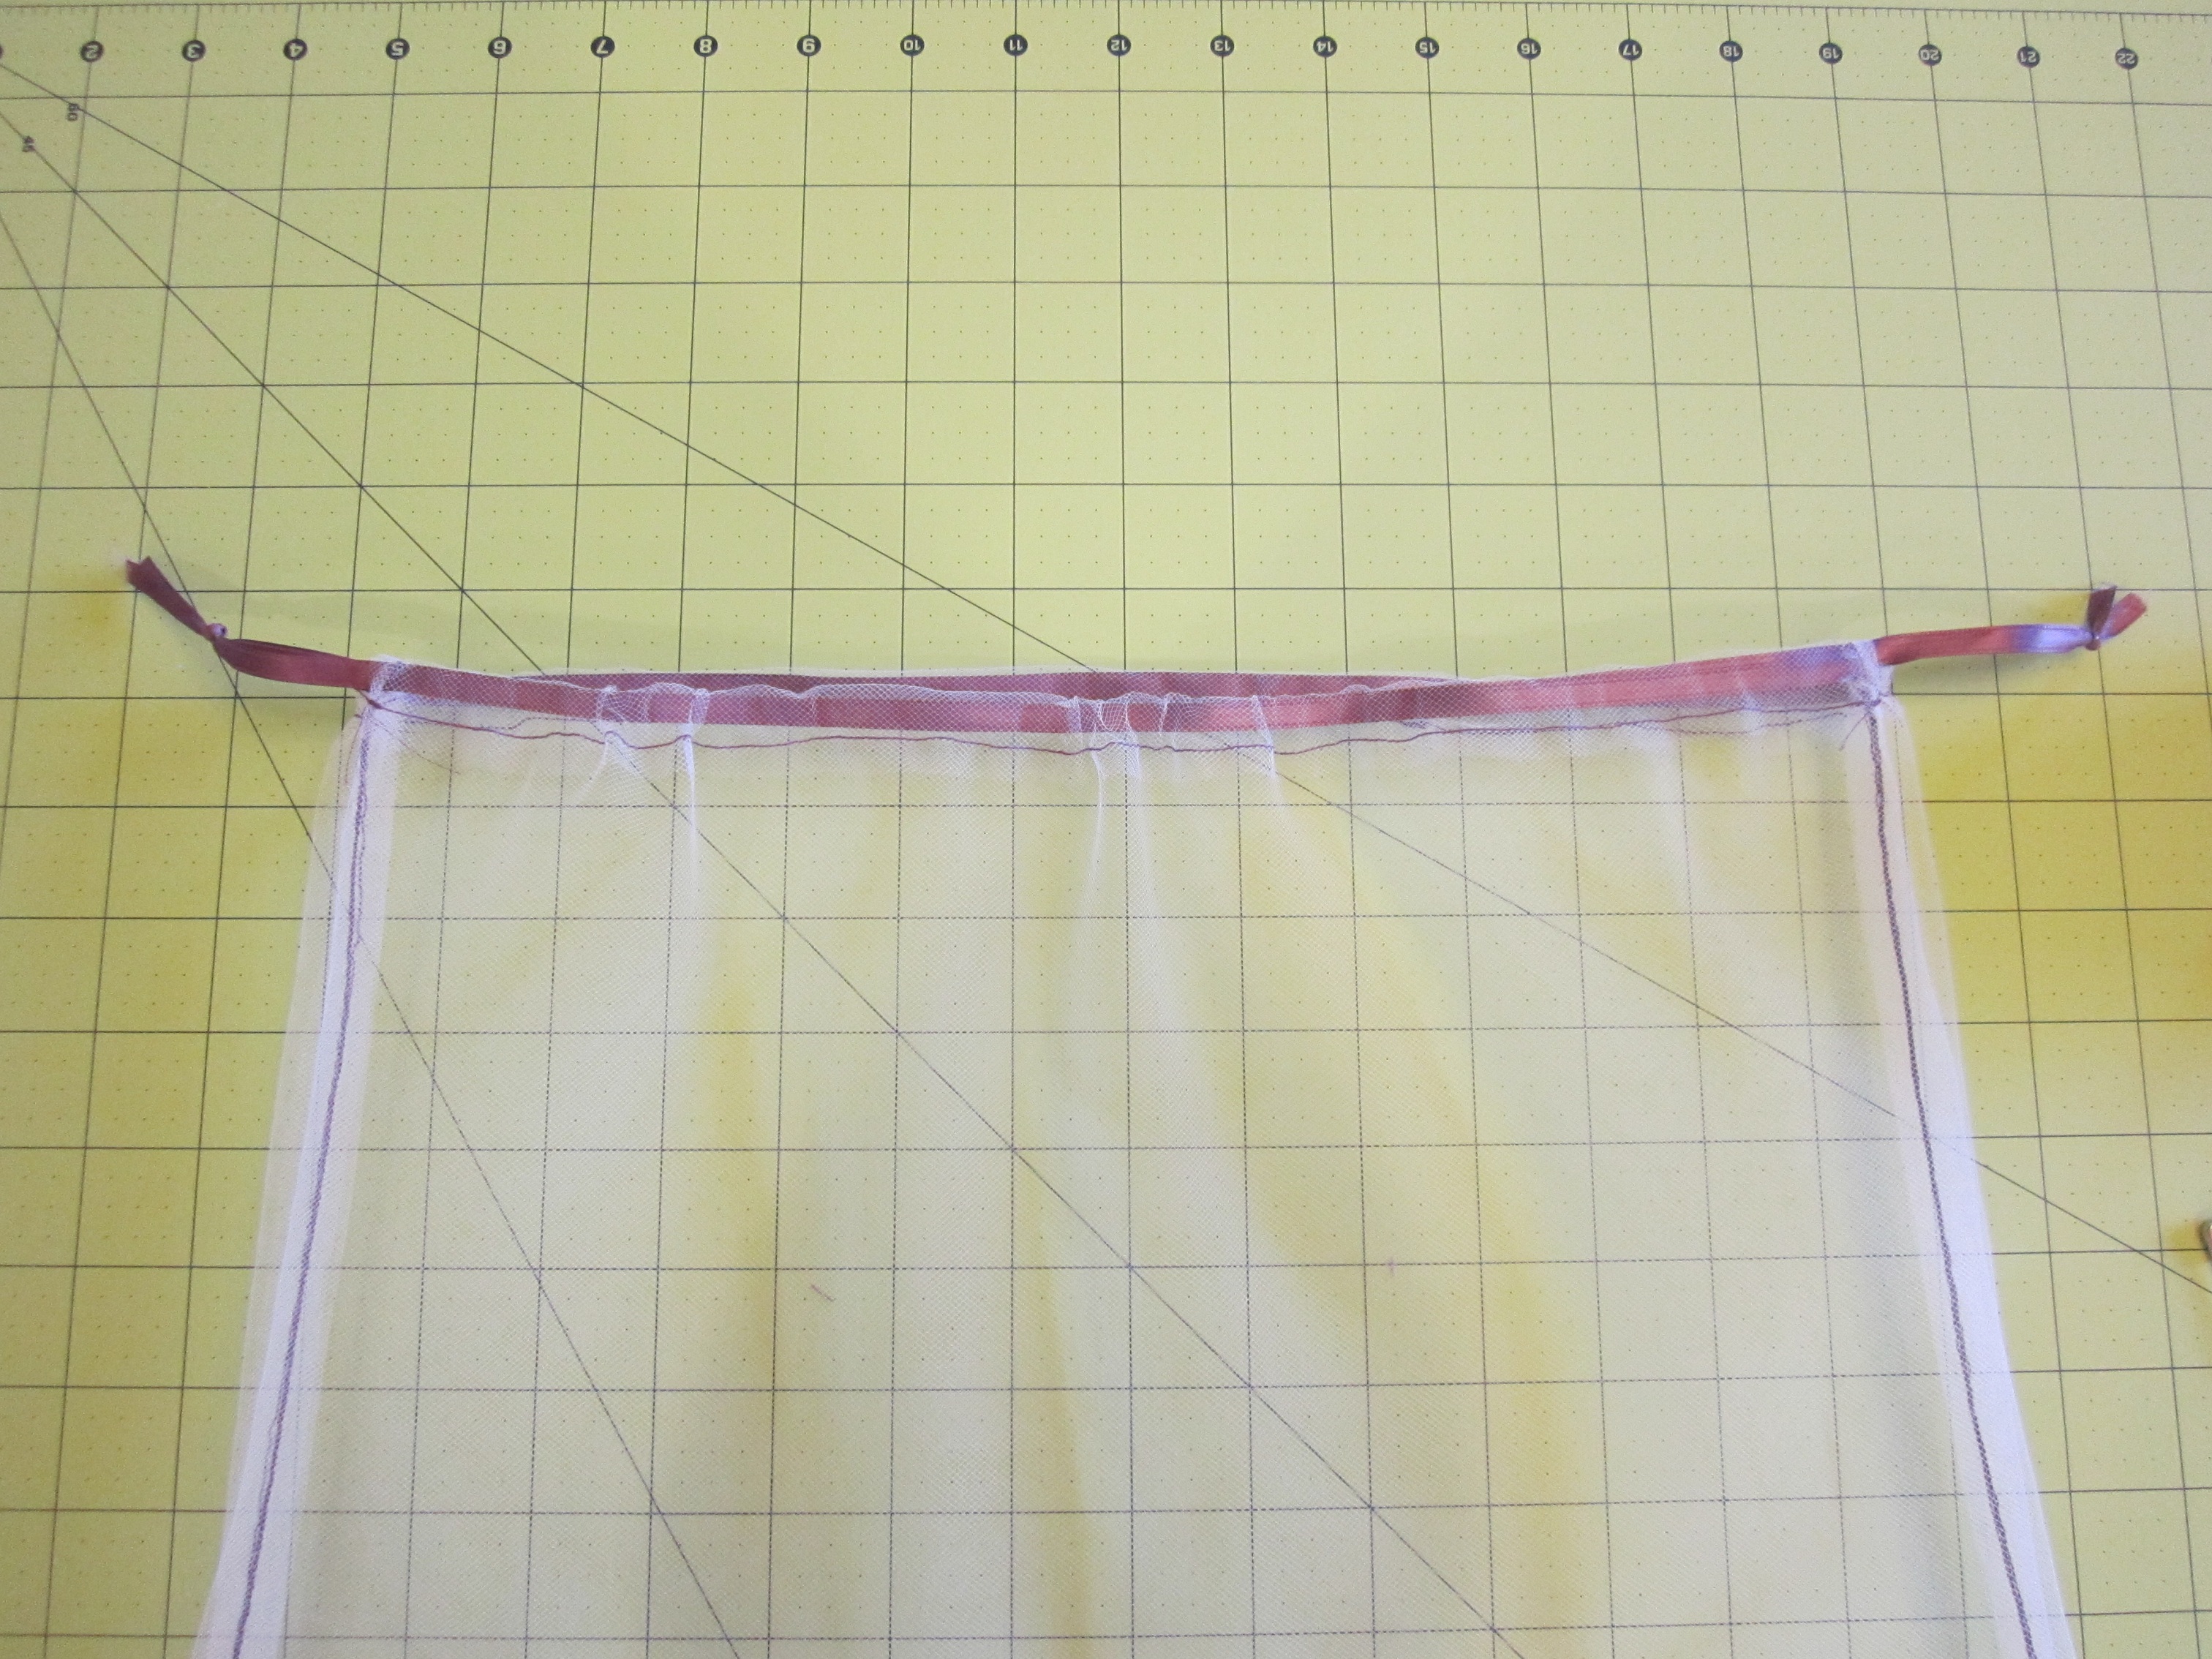
That’s it! You’re done!
I made four bags in just under an hour. I spent only $1 on the yard of tulle. I had the ribbon and thread on hand.

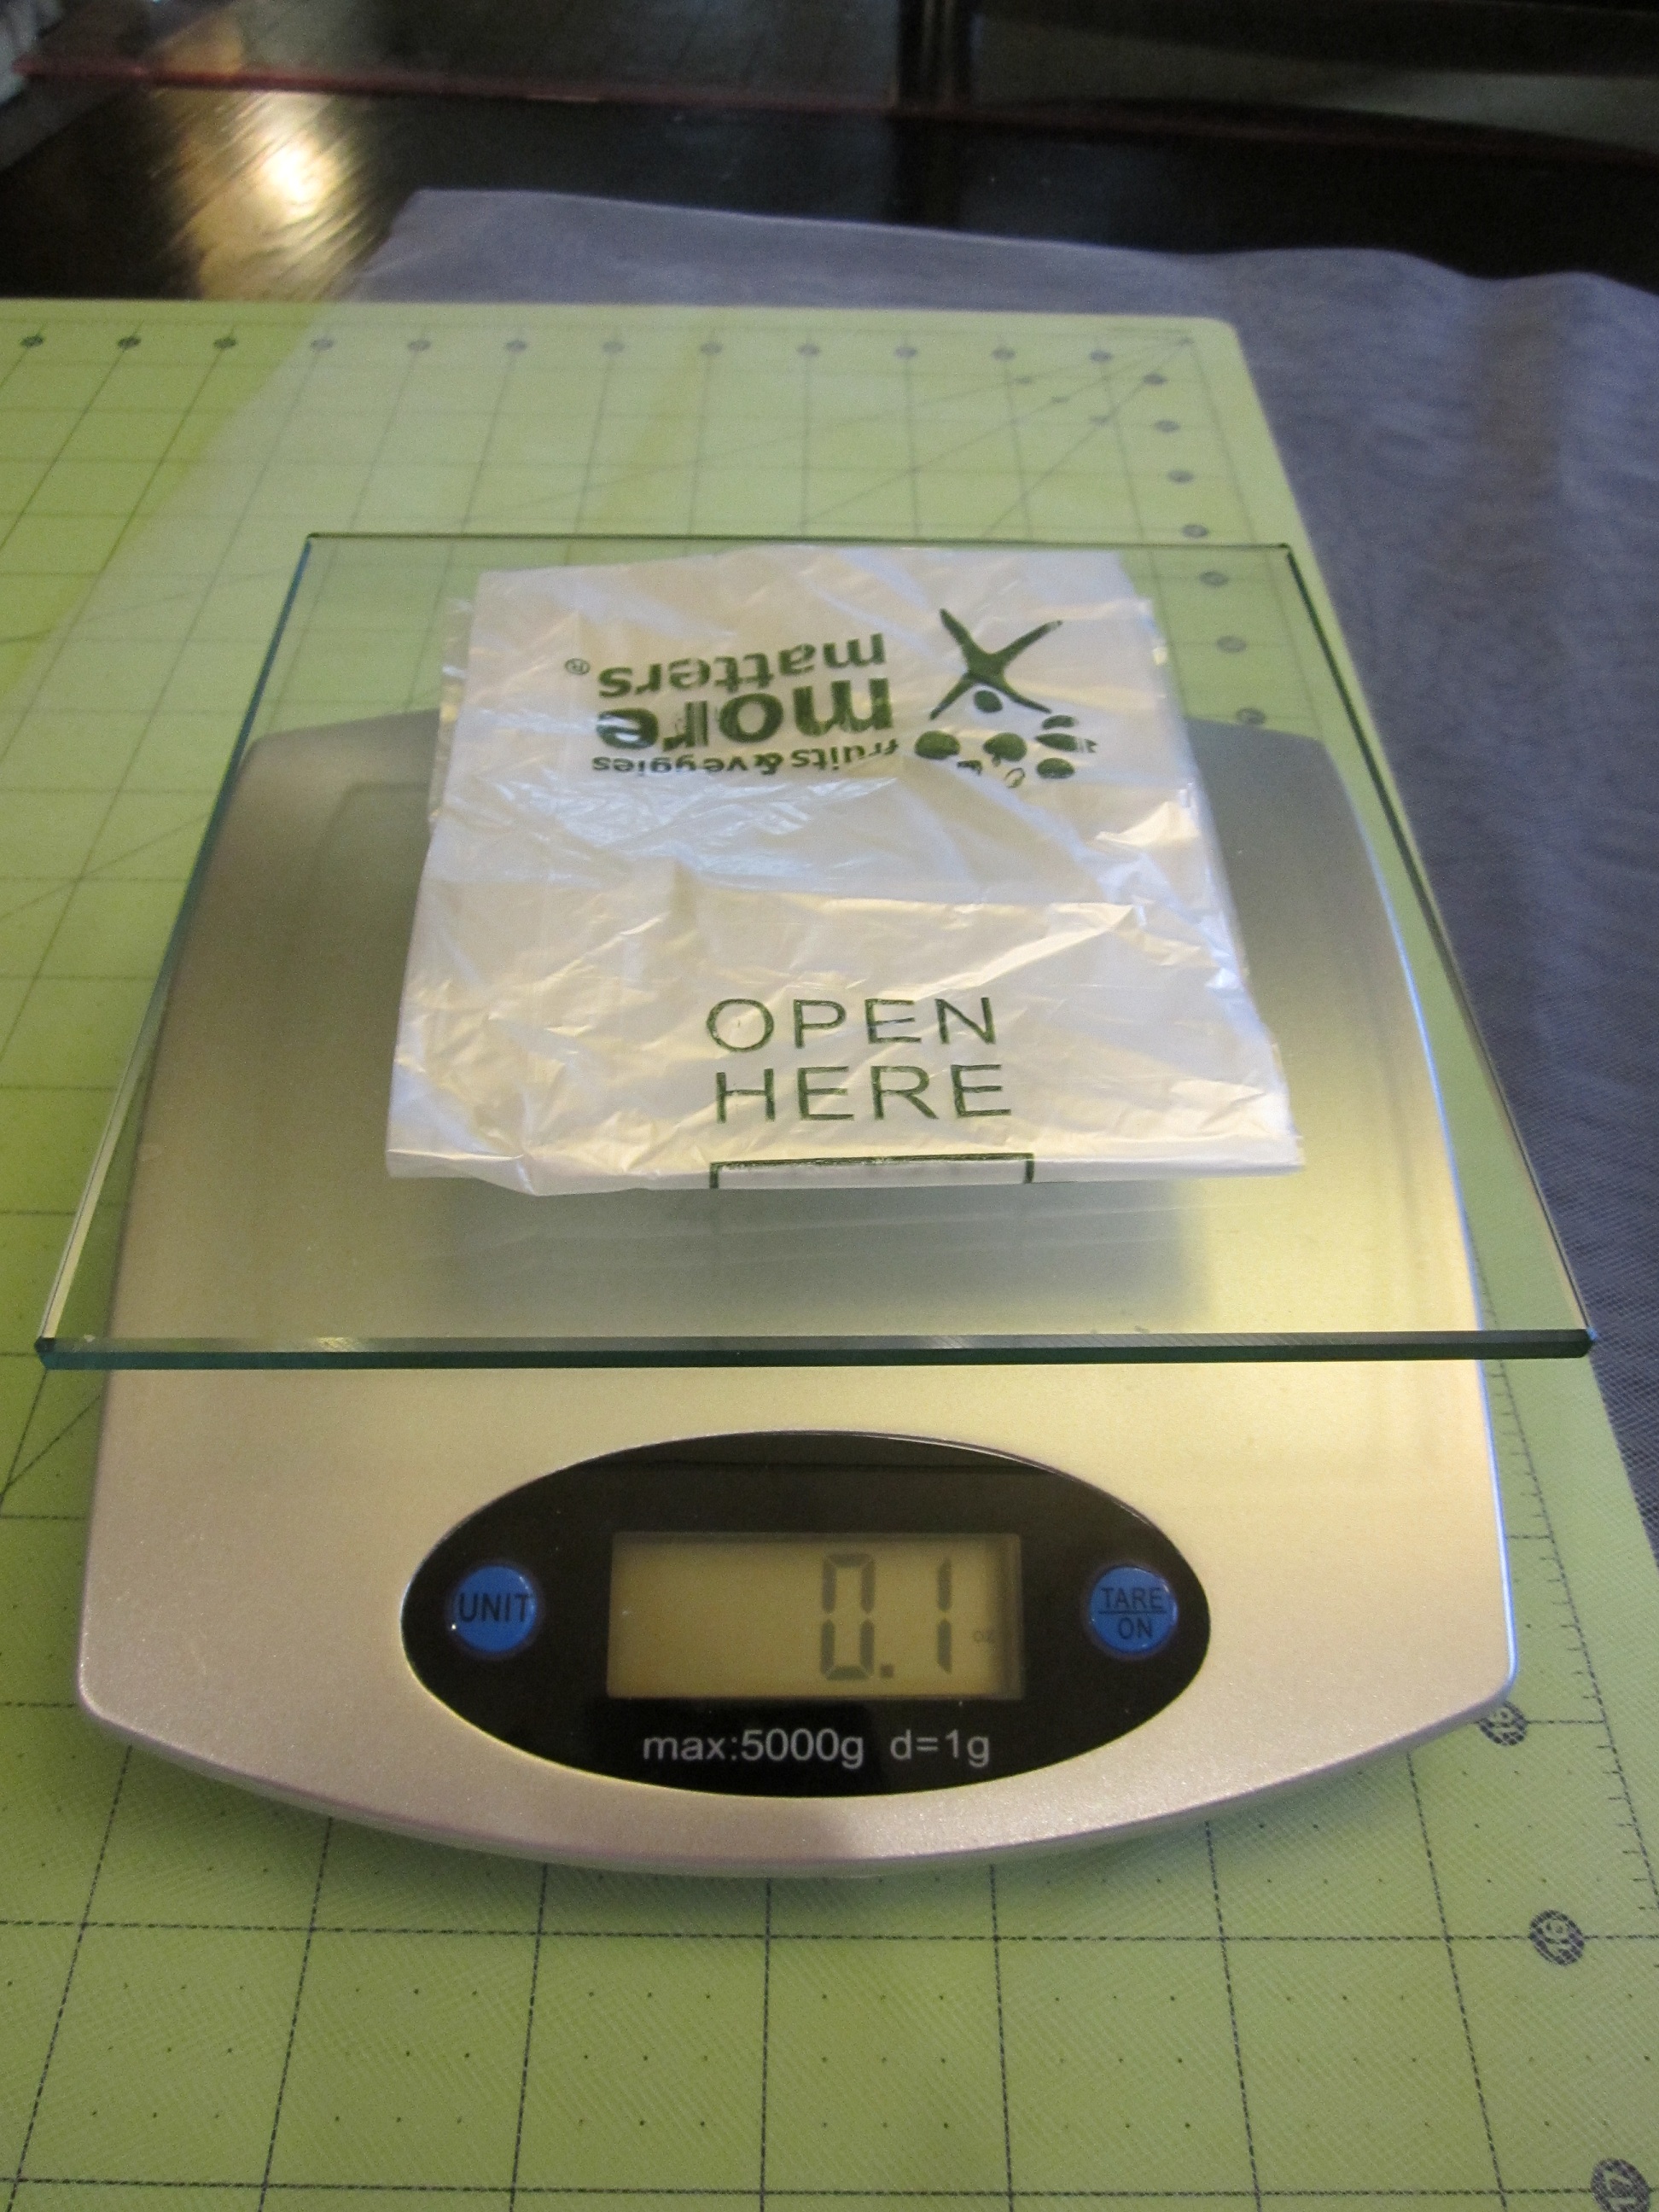
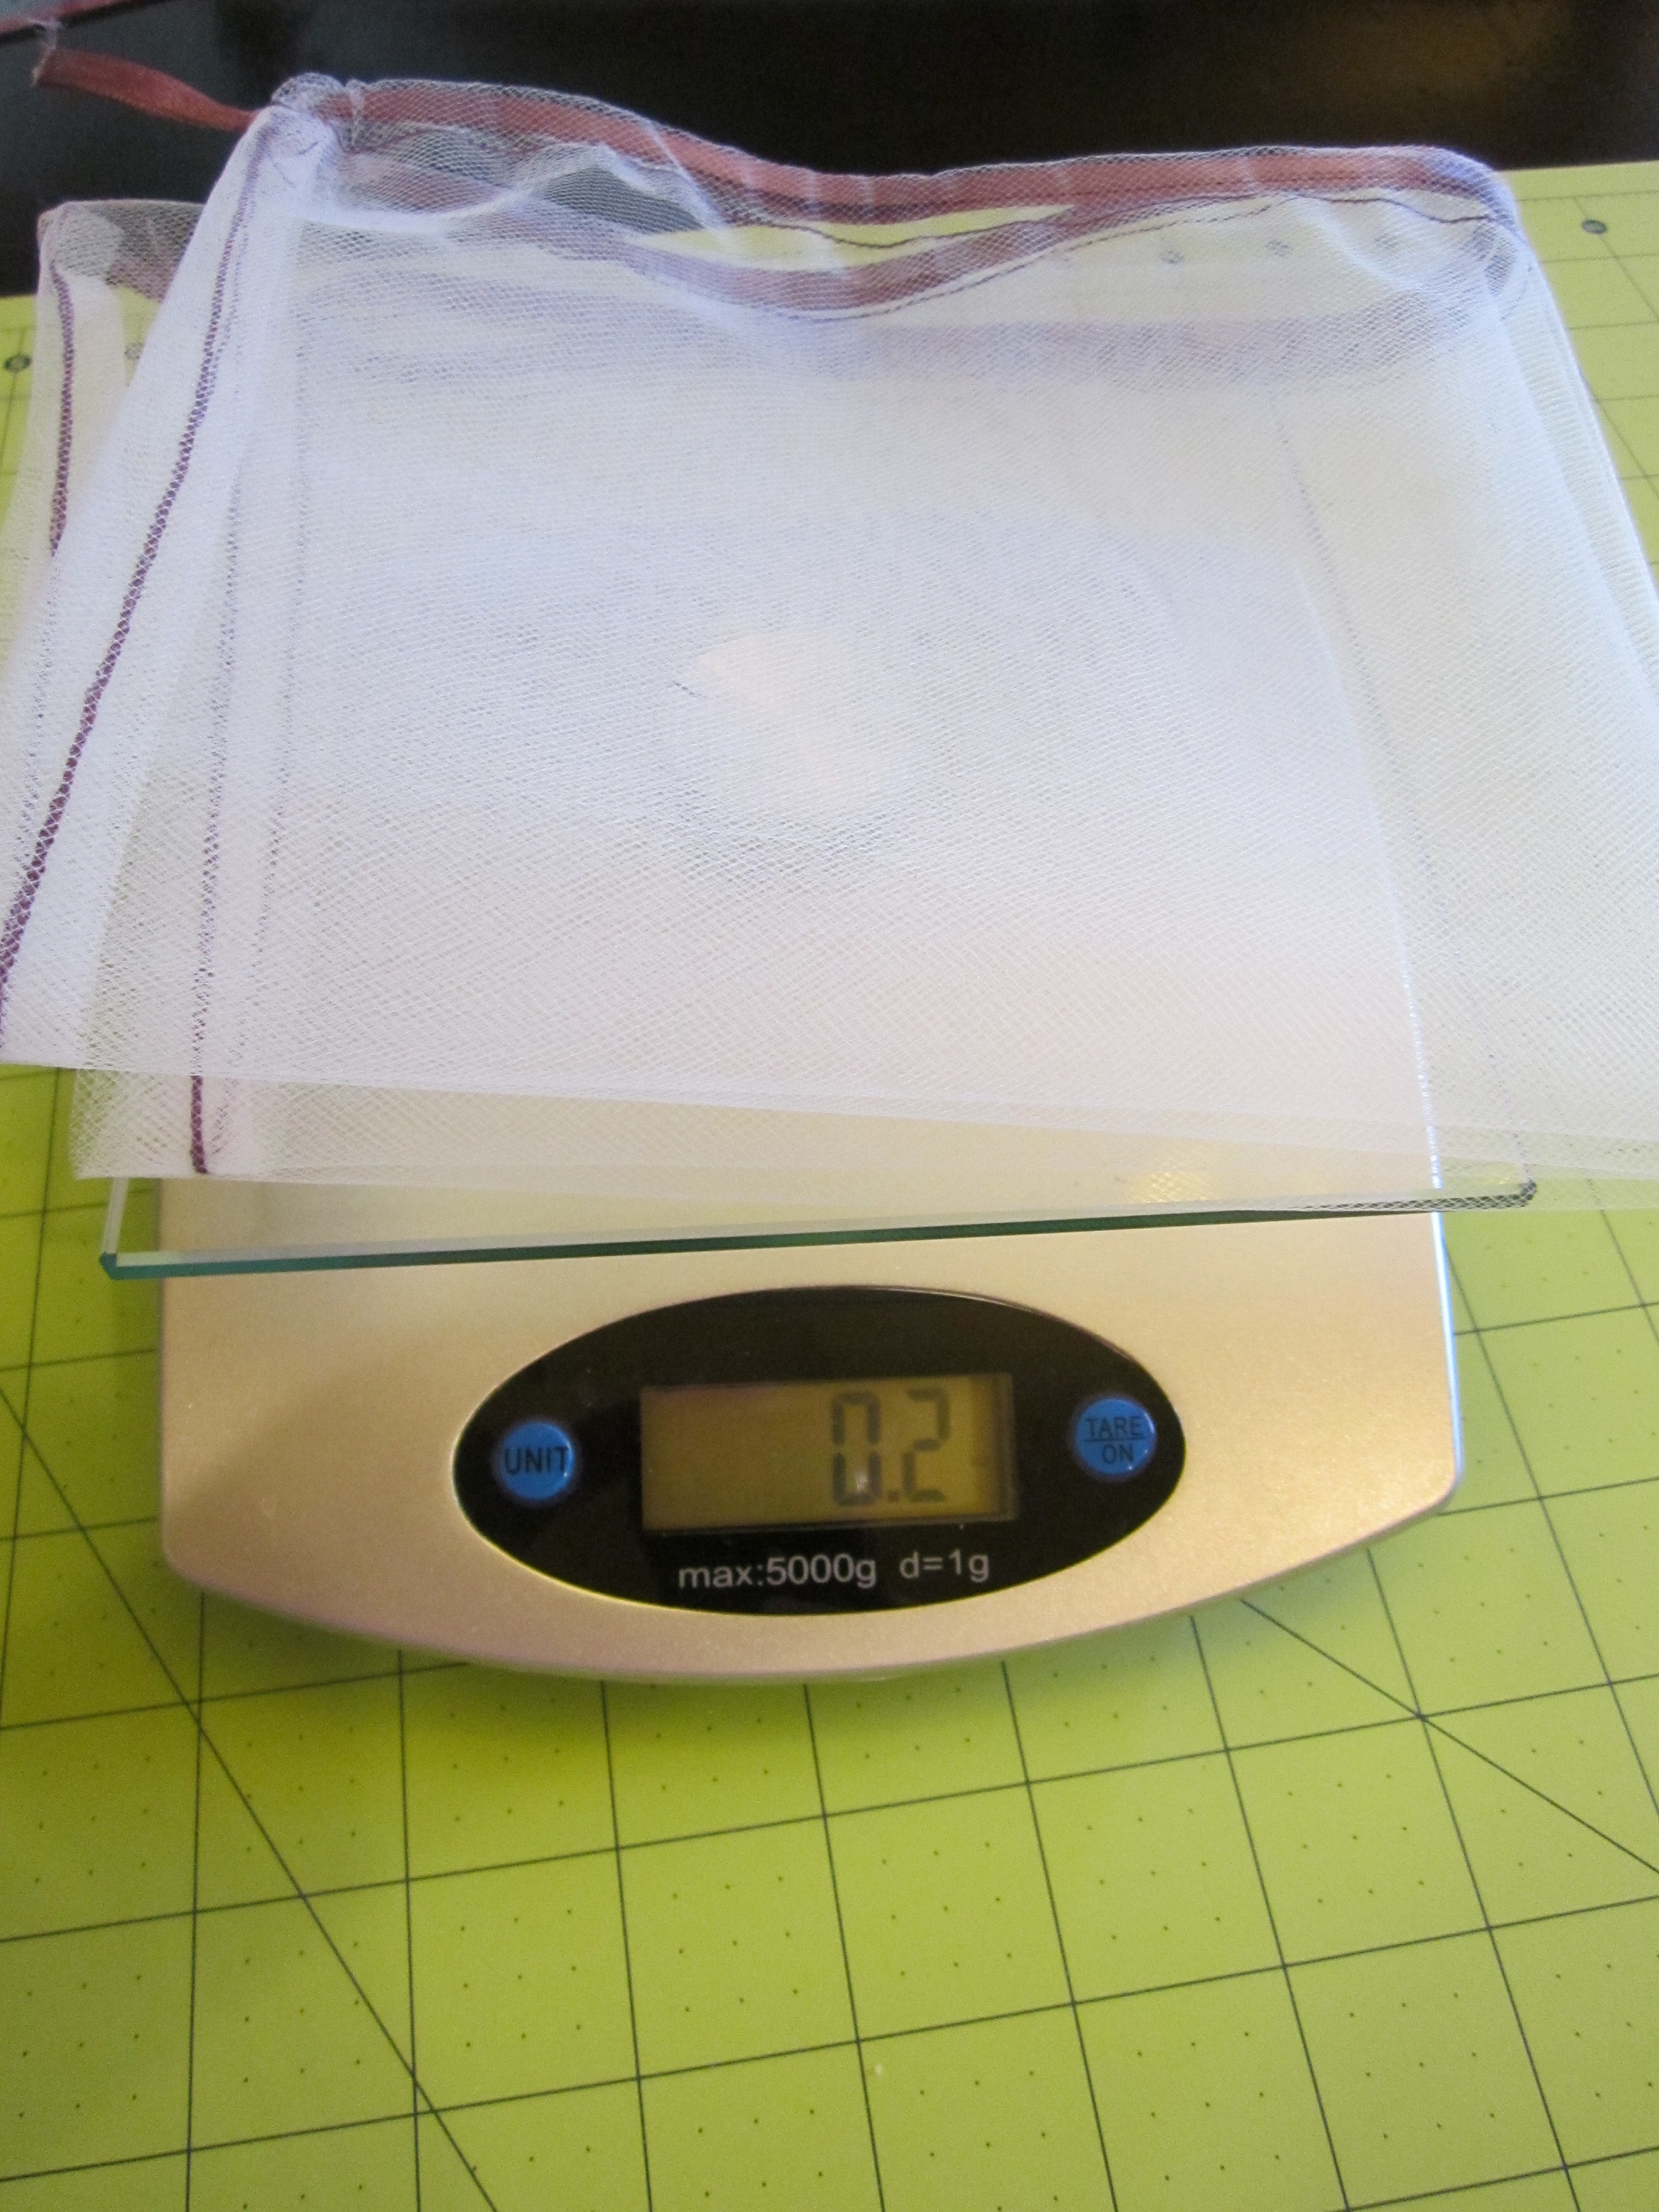
Here are the comparisons between the plastic and reusable bags.
The plastic bag from the grocery store weighs 1/10th of an ounce.
The reusable bag weighs 2/10ths of an ounce.
My scale is pretty sensitive and couldn’t decide between .1 and .2.
I snapped the picture at .2.
When fully opened, the size of the plastic bag is about 14 inches by 14 inches.
The reusable bag is about 13 inches by 16 inches.

Plastic bag: Can possibly be reused once or twice. Then it goes in the garbage. OR to the recycling bin where it will go to a recycling facility which may or may not be in the U.S. and will consume energy in the recycling process.
Reusable bag: Keep it and use it over and over again.
Tulle can be machine washed and tumble dried on low according to the care label on the bolt of fabric.
I think it would be just as easy to wash the bags in a sink full of soapy water, rinse, and air dry. Which won’t take long at all for the tulle.
Some of my reusable grocery bags have a zippered pocket inside them. I’ve never had a use for that pocket but now I think it will be the perfect place to store my produce bags until I need them in the store. 🙂
Pin It
All Entertainment Coupon Books only $8.99 + Free Shipping!
All Coupon Books only $8.99 + Free Shipping!
Still time to use these great coupons!
Save money by being in shape!
You can save money by being in shape.
As someone who has struggled to stay fit, I realize that eating healthy and being in shape is easier said than done. But for those who are in good shape, you can save a lot of money on life insurance and individual health insurance plans. And as an added bonus, you’ll feel better and have more energy.
Being is shape can benefit your health in many ways—reduced risk of disease, more energy and a longer life, just to name a few. But enjoying a healthy lifestyle and keeping fit could also lead to a healthier bank account.
While you may think that the road to fitness is an expensive one—personal trainers and gym memberships don’t come cheap, after all—working out at home and incorporating more activity into your daily routine will get the job done for a fraction of the cost. And the long-term savings add up, too.
Here are five ways being in shape can help save you money.
You can save money on clothes
If you find yourself going up and down a clothing size every six months, you know that the cost of new clothing can really start to add up. Whether you’re a size 6 or a 16, keeping your weight—and clothing size—consistent means that you’ll be able to wear your favorite pieces longer, and can avoid the financial stress of repeatedly replacing your wardrobe.
Plus, bigger clothes cost more.
You’ll spend less money on transportation
Get your energy boost in for the day by walking or riding your bike to your destinations. You’ll save on fuel, vehicle wear & tear, parking, etc…
You’ll spend less money on unhealthy vices
Whether your vice is smoking, alcohol, or fast food, cutting those things out of your life can not only help you to be healthy, but it will save you money! If you smoke a pack of cigarettes per day, you’re throwing away approximately $3,600 a year.
Giving up unhealthy vices can cut your heart attack risk after one year. You’ll also have more cash in the bank—and who could argue with that?
You’ll spend less money on medication
The cost of medications for chronic health conditions, like heart disease, high blood pressure and type 2 diabetes can really add up. Adults who participate in regular physical activity will decrease their risk of more than 25 chronic health conditions. Keeping illnesses under control means less trips to the pharmacy and, less money being spent on medication for chronic health conditions each year.
Do you frequently find yourself buying sleep aids or headache medication? Being in shape is also linked to better sleep habits, which may save you money .
You’ll save money on your grocery bill
Over the past couple of years I have lost over 60 pounds with Weight Watchers. One thing I have learned is that being in shape isn’t just about how far you can run or how much weight you can lift. To enjoy a truly healthy lifestyle, you need to keep your diet in shape, too. When you are trying to be healthy you find that spending money on take-out and unhealthy restaurant grub seems like less of a good idea. The notion that fast food is less expensive than making a fresh meal is a common mistaken belief. With a little meal planning and smart shopping, you can eat healthy homemade meals all week for less than you would spend to take your family to the local fast food shop. If you do go out, just make wise choices on what you order, both in health and the cost.
Improving credit score saves you thousands!
Of all the trouble-free ways to save money, improving your credit score is perhaps the most important. From home loans and car loans to credit cards and auto insurance, a good credit score can save you a lot of money over the years. Over a lifetime, the savings can easily reach tens of thousands of dollars. People with great credit scores can actually get lower interest rates on car loans.
If you have a low credit score don’t be fooled by the “pre-approved” offers you get in the mail. These offers are VERY easy to take advantage of, but more often than not they are taking advantage of you! Some of those have interest rates over 50%!
Here are a couple of tips for improving your credit score:
Take These Steps to Improve Your Credit Score
- Pay your bills on time. If you are 1 day late with your bills they can report this to the credit agencies. A great way to make sure you are paying on time is to set up automatic payments. (see below for a cash back option)
- Keep balances low on credit cards and other revolving credit accounts like store credit cards. Only use store cards if you can pay them off right away. I have a Kohl’s card so that I can get 30% off, but whenever I use it it’s only for something that I can afford to buy without the card, and I pay it right off.
- Apply for and open new credit accounts only as needed. We’ve all been there, a huge car repair bill, a medical bill, etc… those are times when getting a credit card night be needed. Just remember to pay them off as quickly as possible.
- Before buying something on credit ask yourself if it is absolutely something you need! Do you really need that new TV?
- Pay off debt rather than moving it around. Who hasn’t ever had to do this? Sometimes there are easier ways. Set a budget, call your creditors and talk to them. Don’t just pay off one bill with another. I have found in my life with a child with lots of medical issues, that it’s a lot easier and cheaper to negotiate medical bills with the doctor’s office, rather than putting it on a higher rate credit card. It doesn’t hurt to ask, right?
Be sure to teach your kids about using credit wisely!
If you have good credit, there are a several of cash-back credit cards that pay up to 5 percent on purchases or even give you points toward travel. It’s vital however, to use the card only for monthly bills and everyday expenses, not to charge things you don’t need. You can put monthly bills that accept credit cards on automatic payment, and use the card for everyday purchases such as groceries and gas. If you go this route make sure you are paying off your card every month. It would be horrible to mess your credit up by accident when you’ve been working so hard on it!
A PYP Best Blog! My favorite picture hanging tips. Share yours!
Just in case you missed this article on picture hanging in your home the first time we shared it a couple of years ago, we are republishing it. After Trish wrote this blog originally, we got an awesome response. This is one of the PYP Best Blogs!
I’ve been working on two gallery walls in my home recently and I thought I’d share some of my favorite tricks and see if others had some that they would like to share.
I know that Command Strips are all the rage these days and I do like them for some things. But for the most part, I do my picture hanging old school style. With nails. *gasp!* I know! But the holes!!! It’s okay. If I can’t touch them up later, I’ll have the perfect excuse to paint the whole room a new color. Hubby just LOVES that! 😉
First of all, I buy almost all my frames at thrift stores. The only time I buy new is if I get impatient and can’t find the right one at the thrift store fast enough. Or if I need it to be very specific.
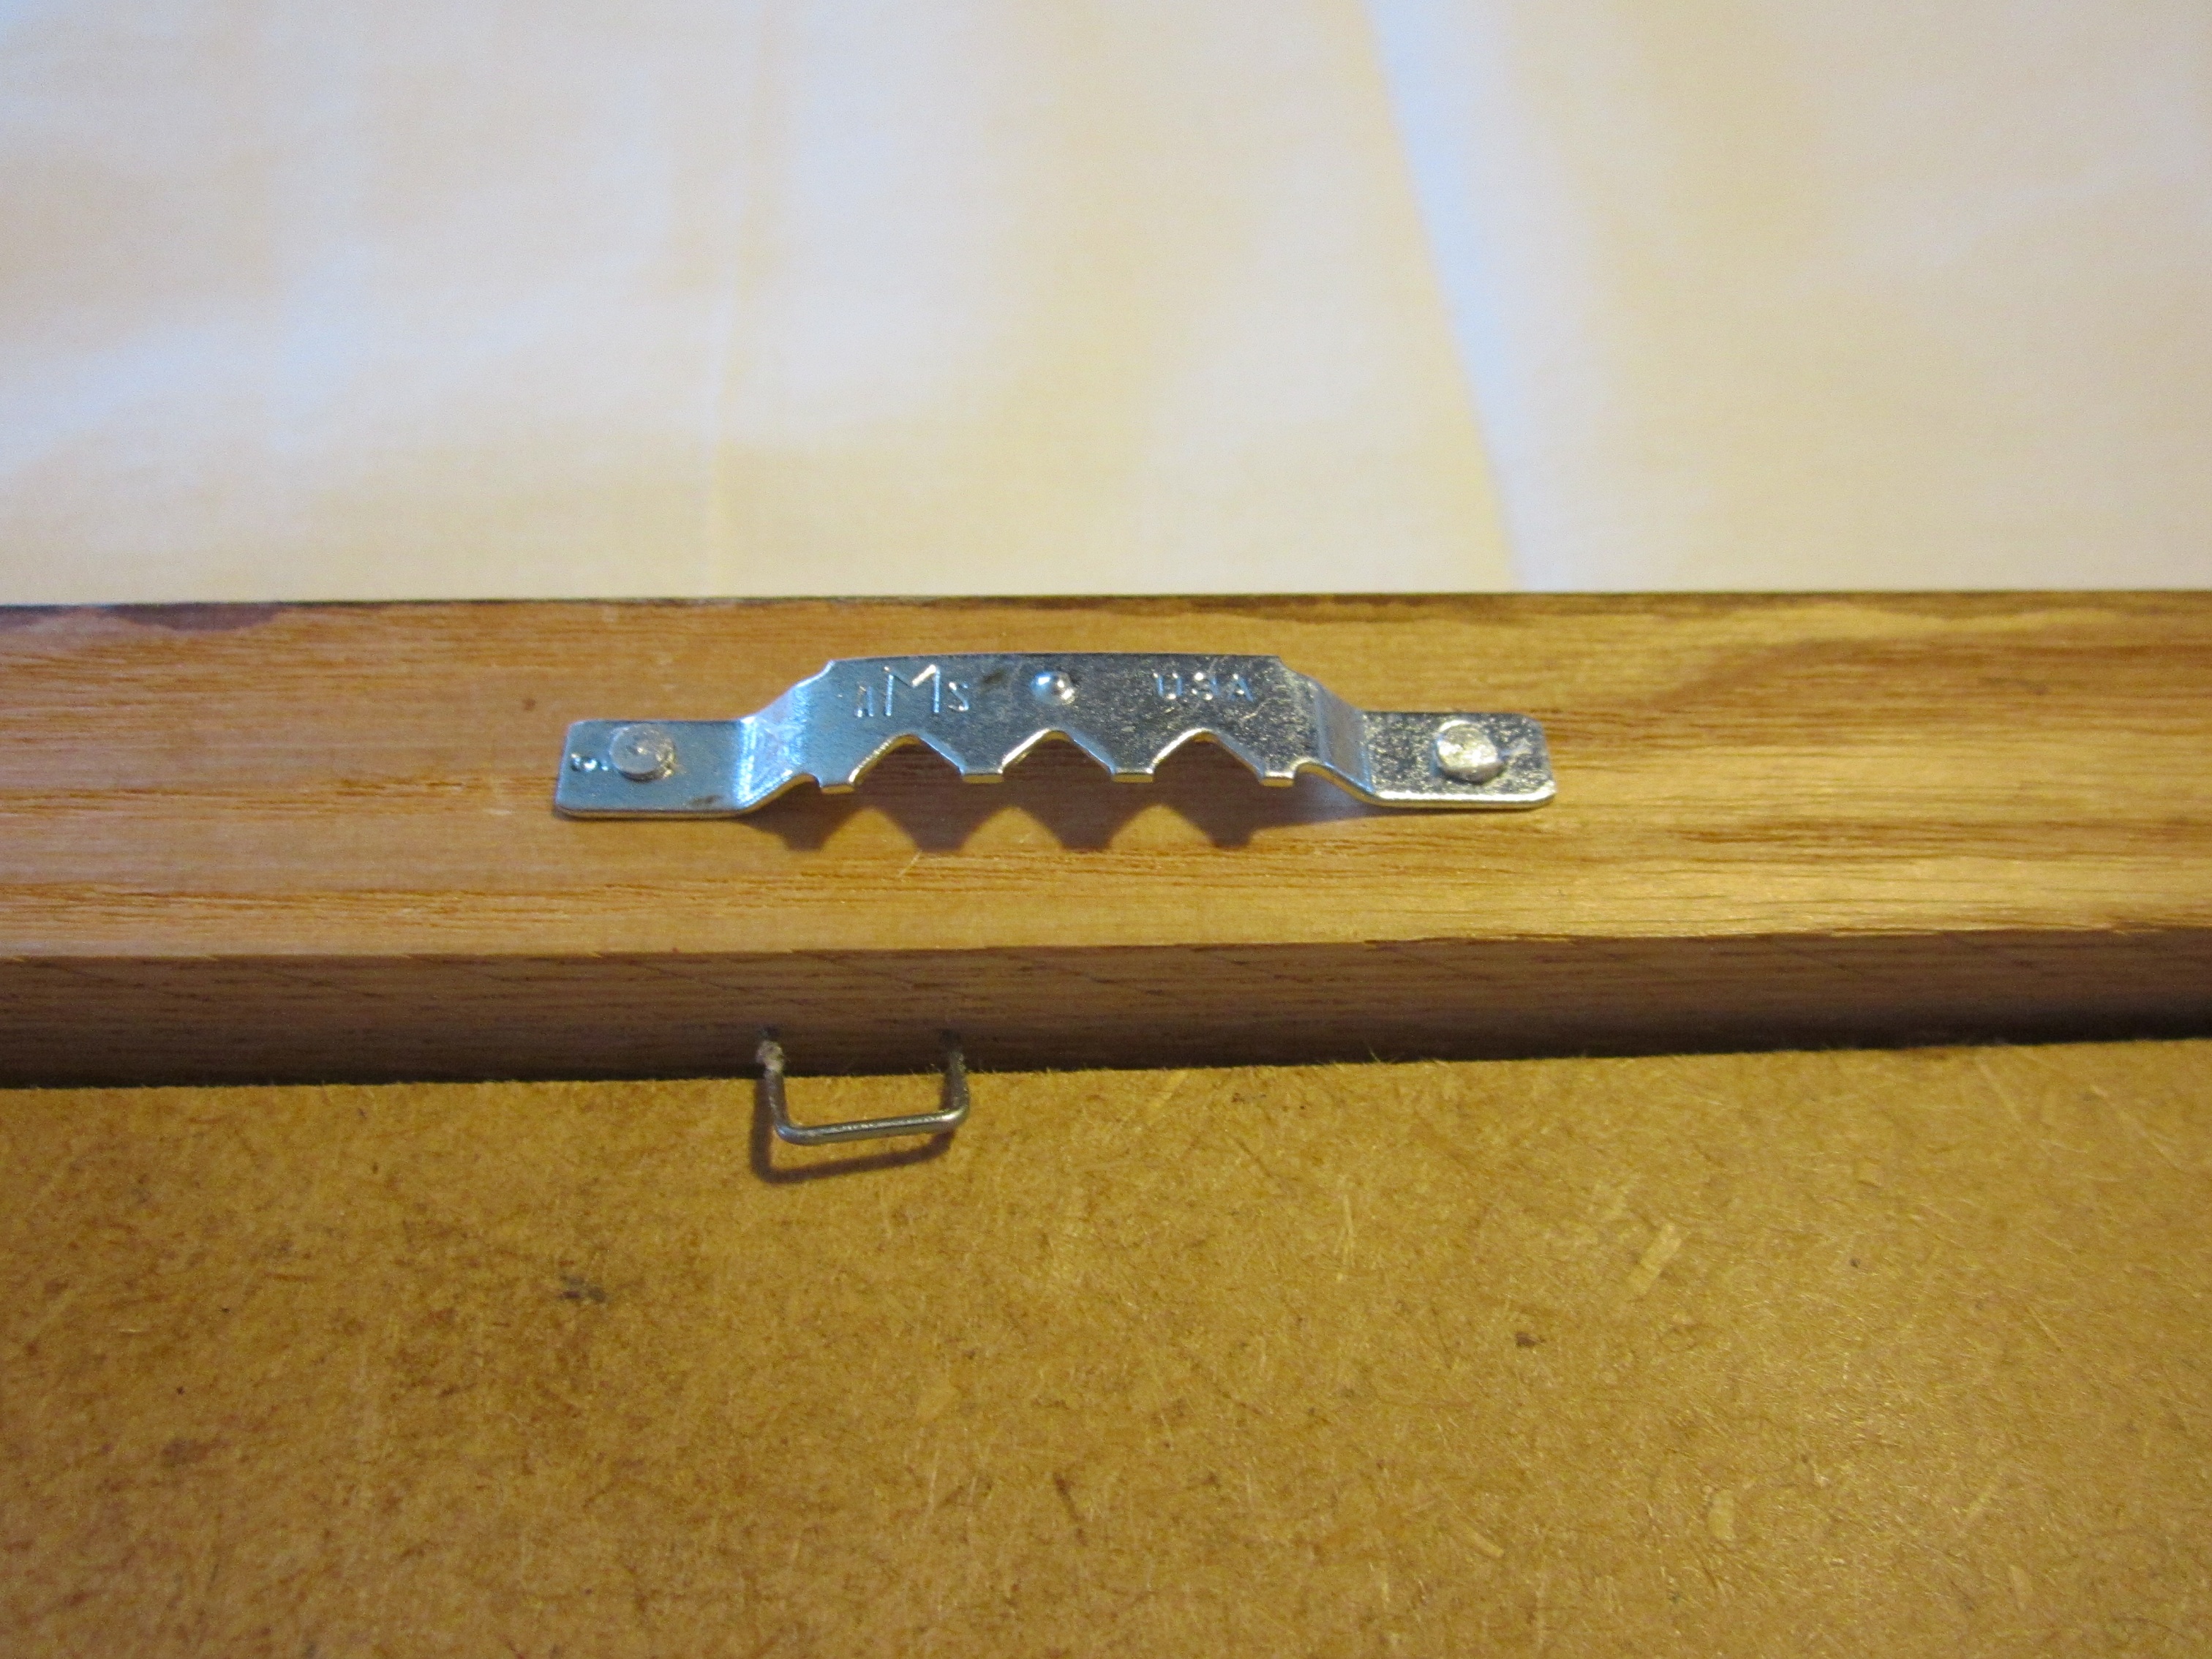
Have you ever had to put a sawtooth hanger on a frame so you can hang it?
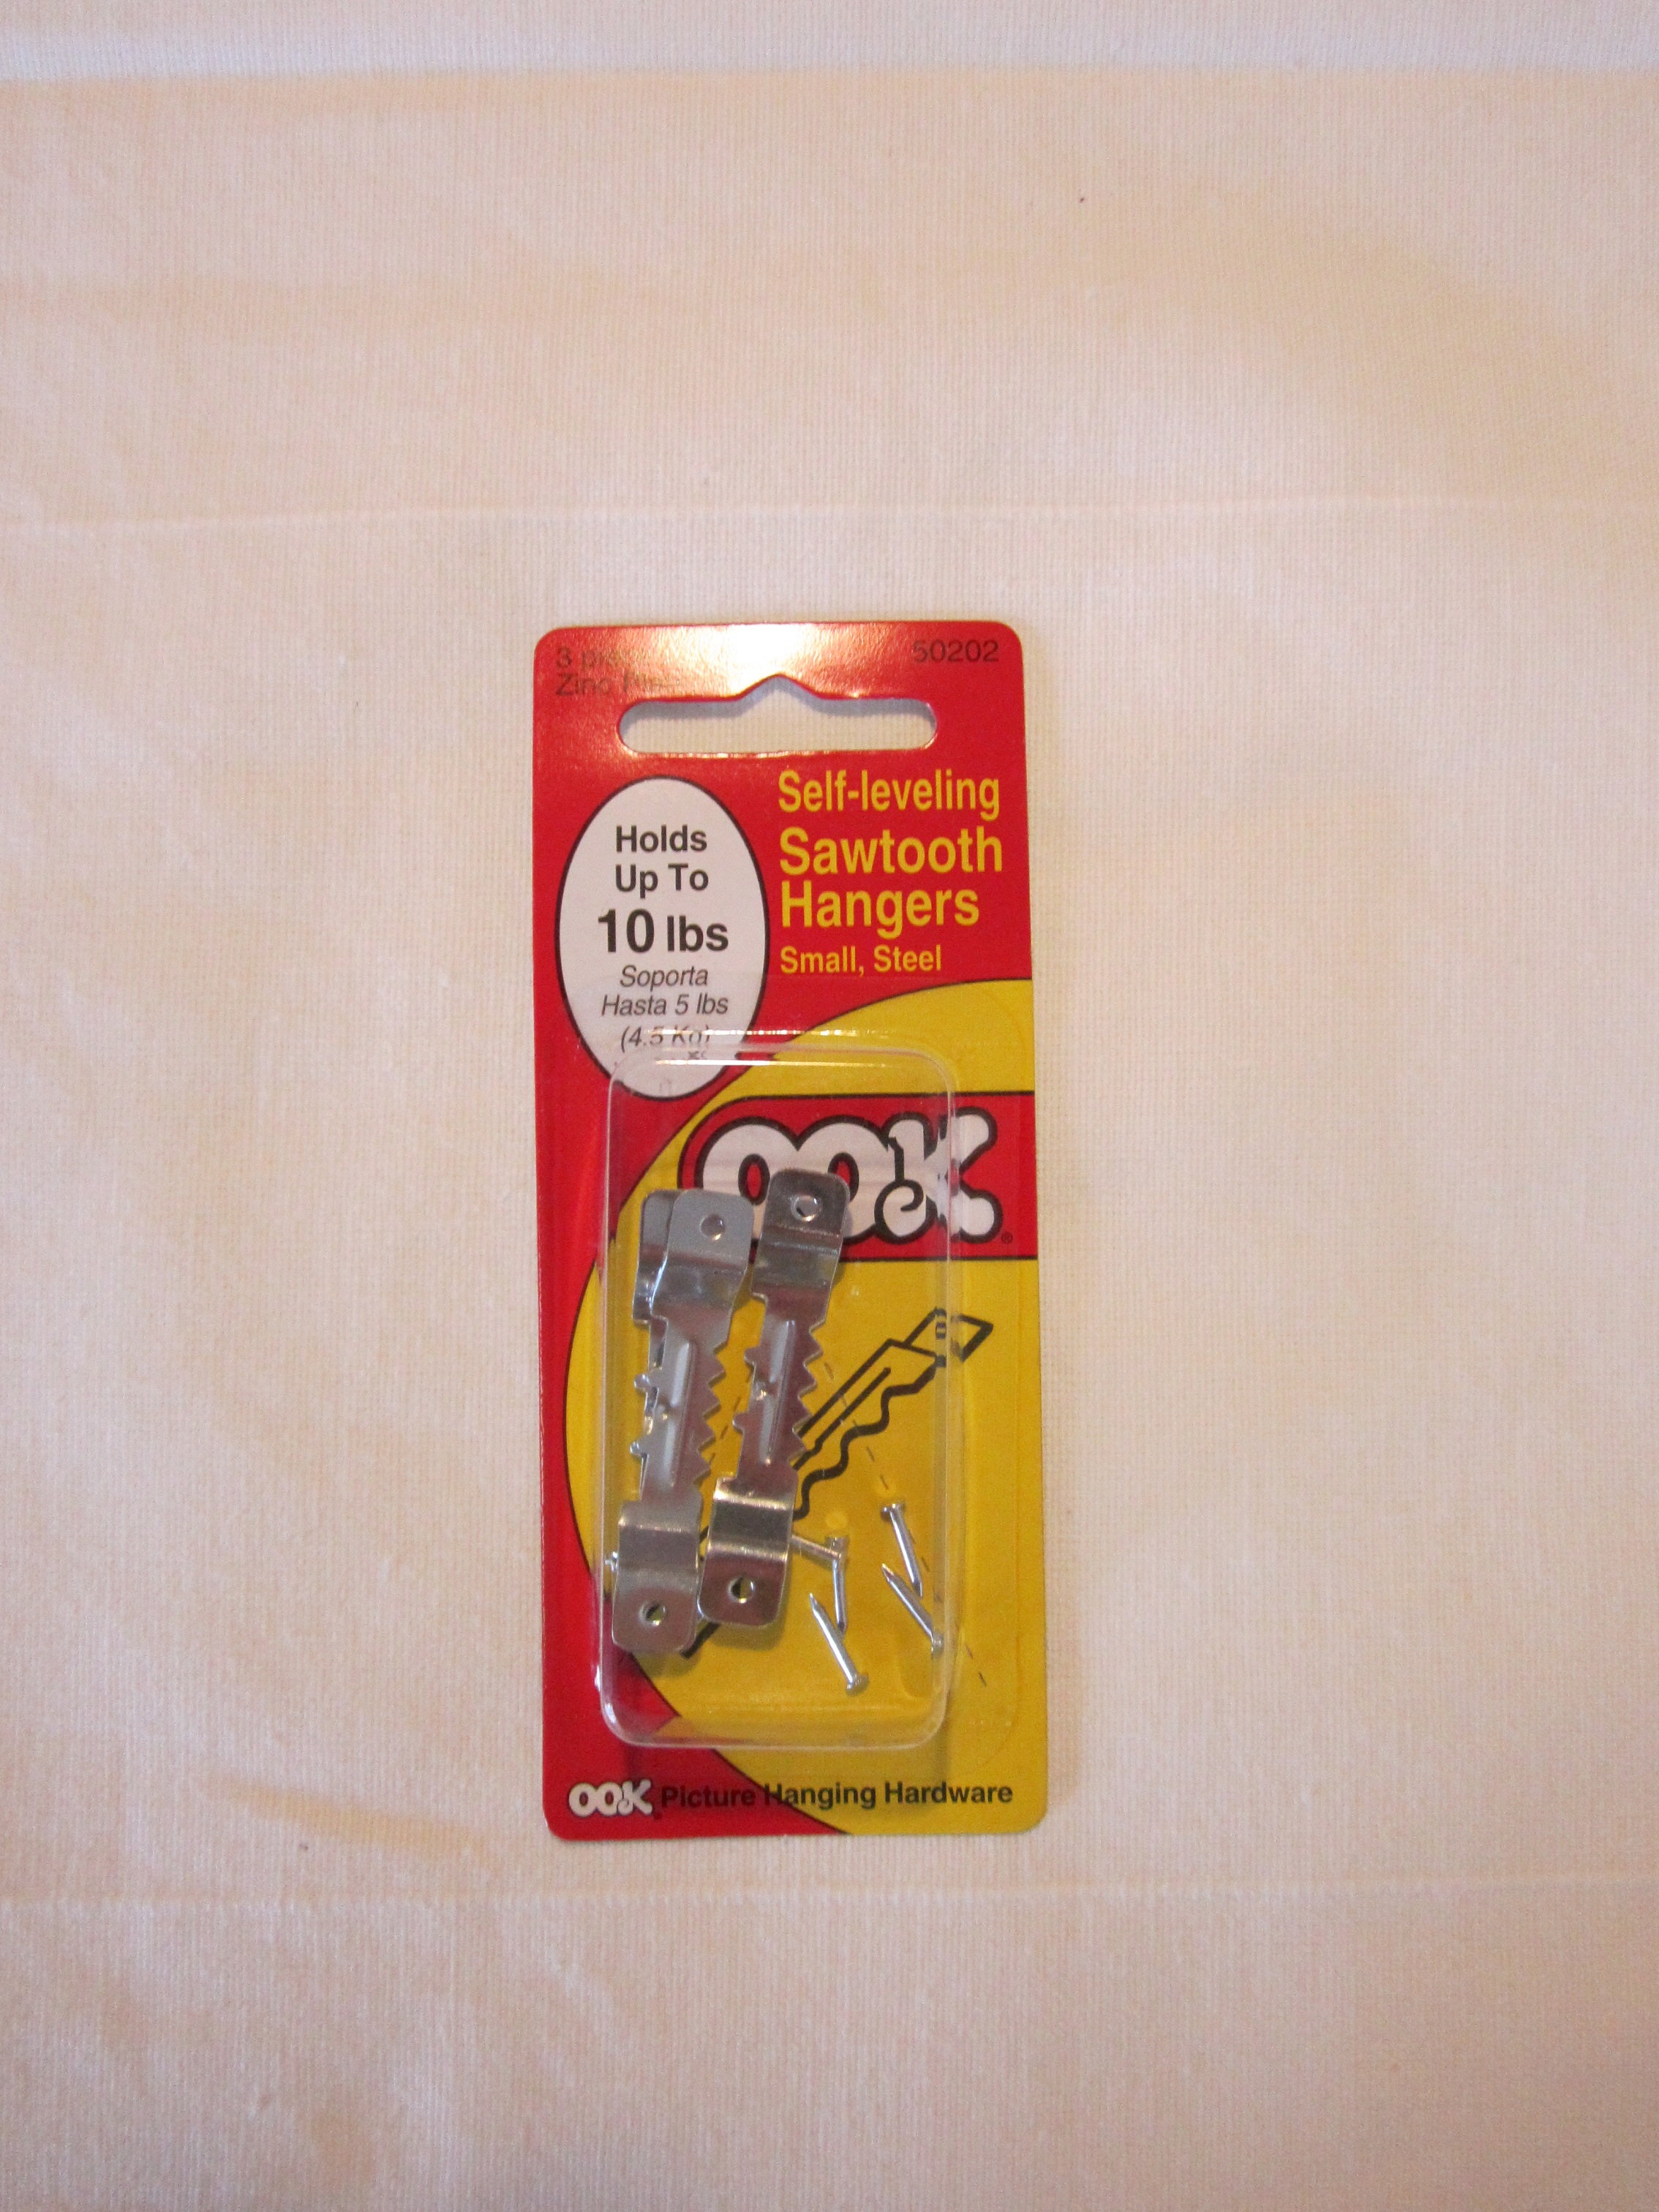
Do they make nails smaller than the ones that come with those?!?! Ugh! I used to hammer my fingers every time.
Now I use a couple of pieces of duct tape to hold the metal piece in place.
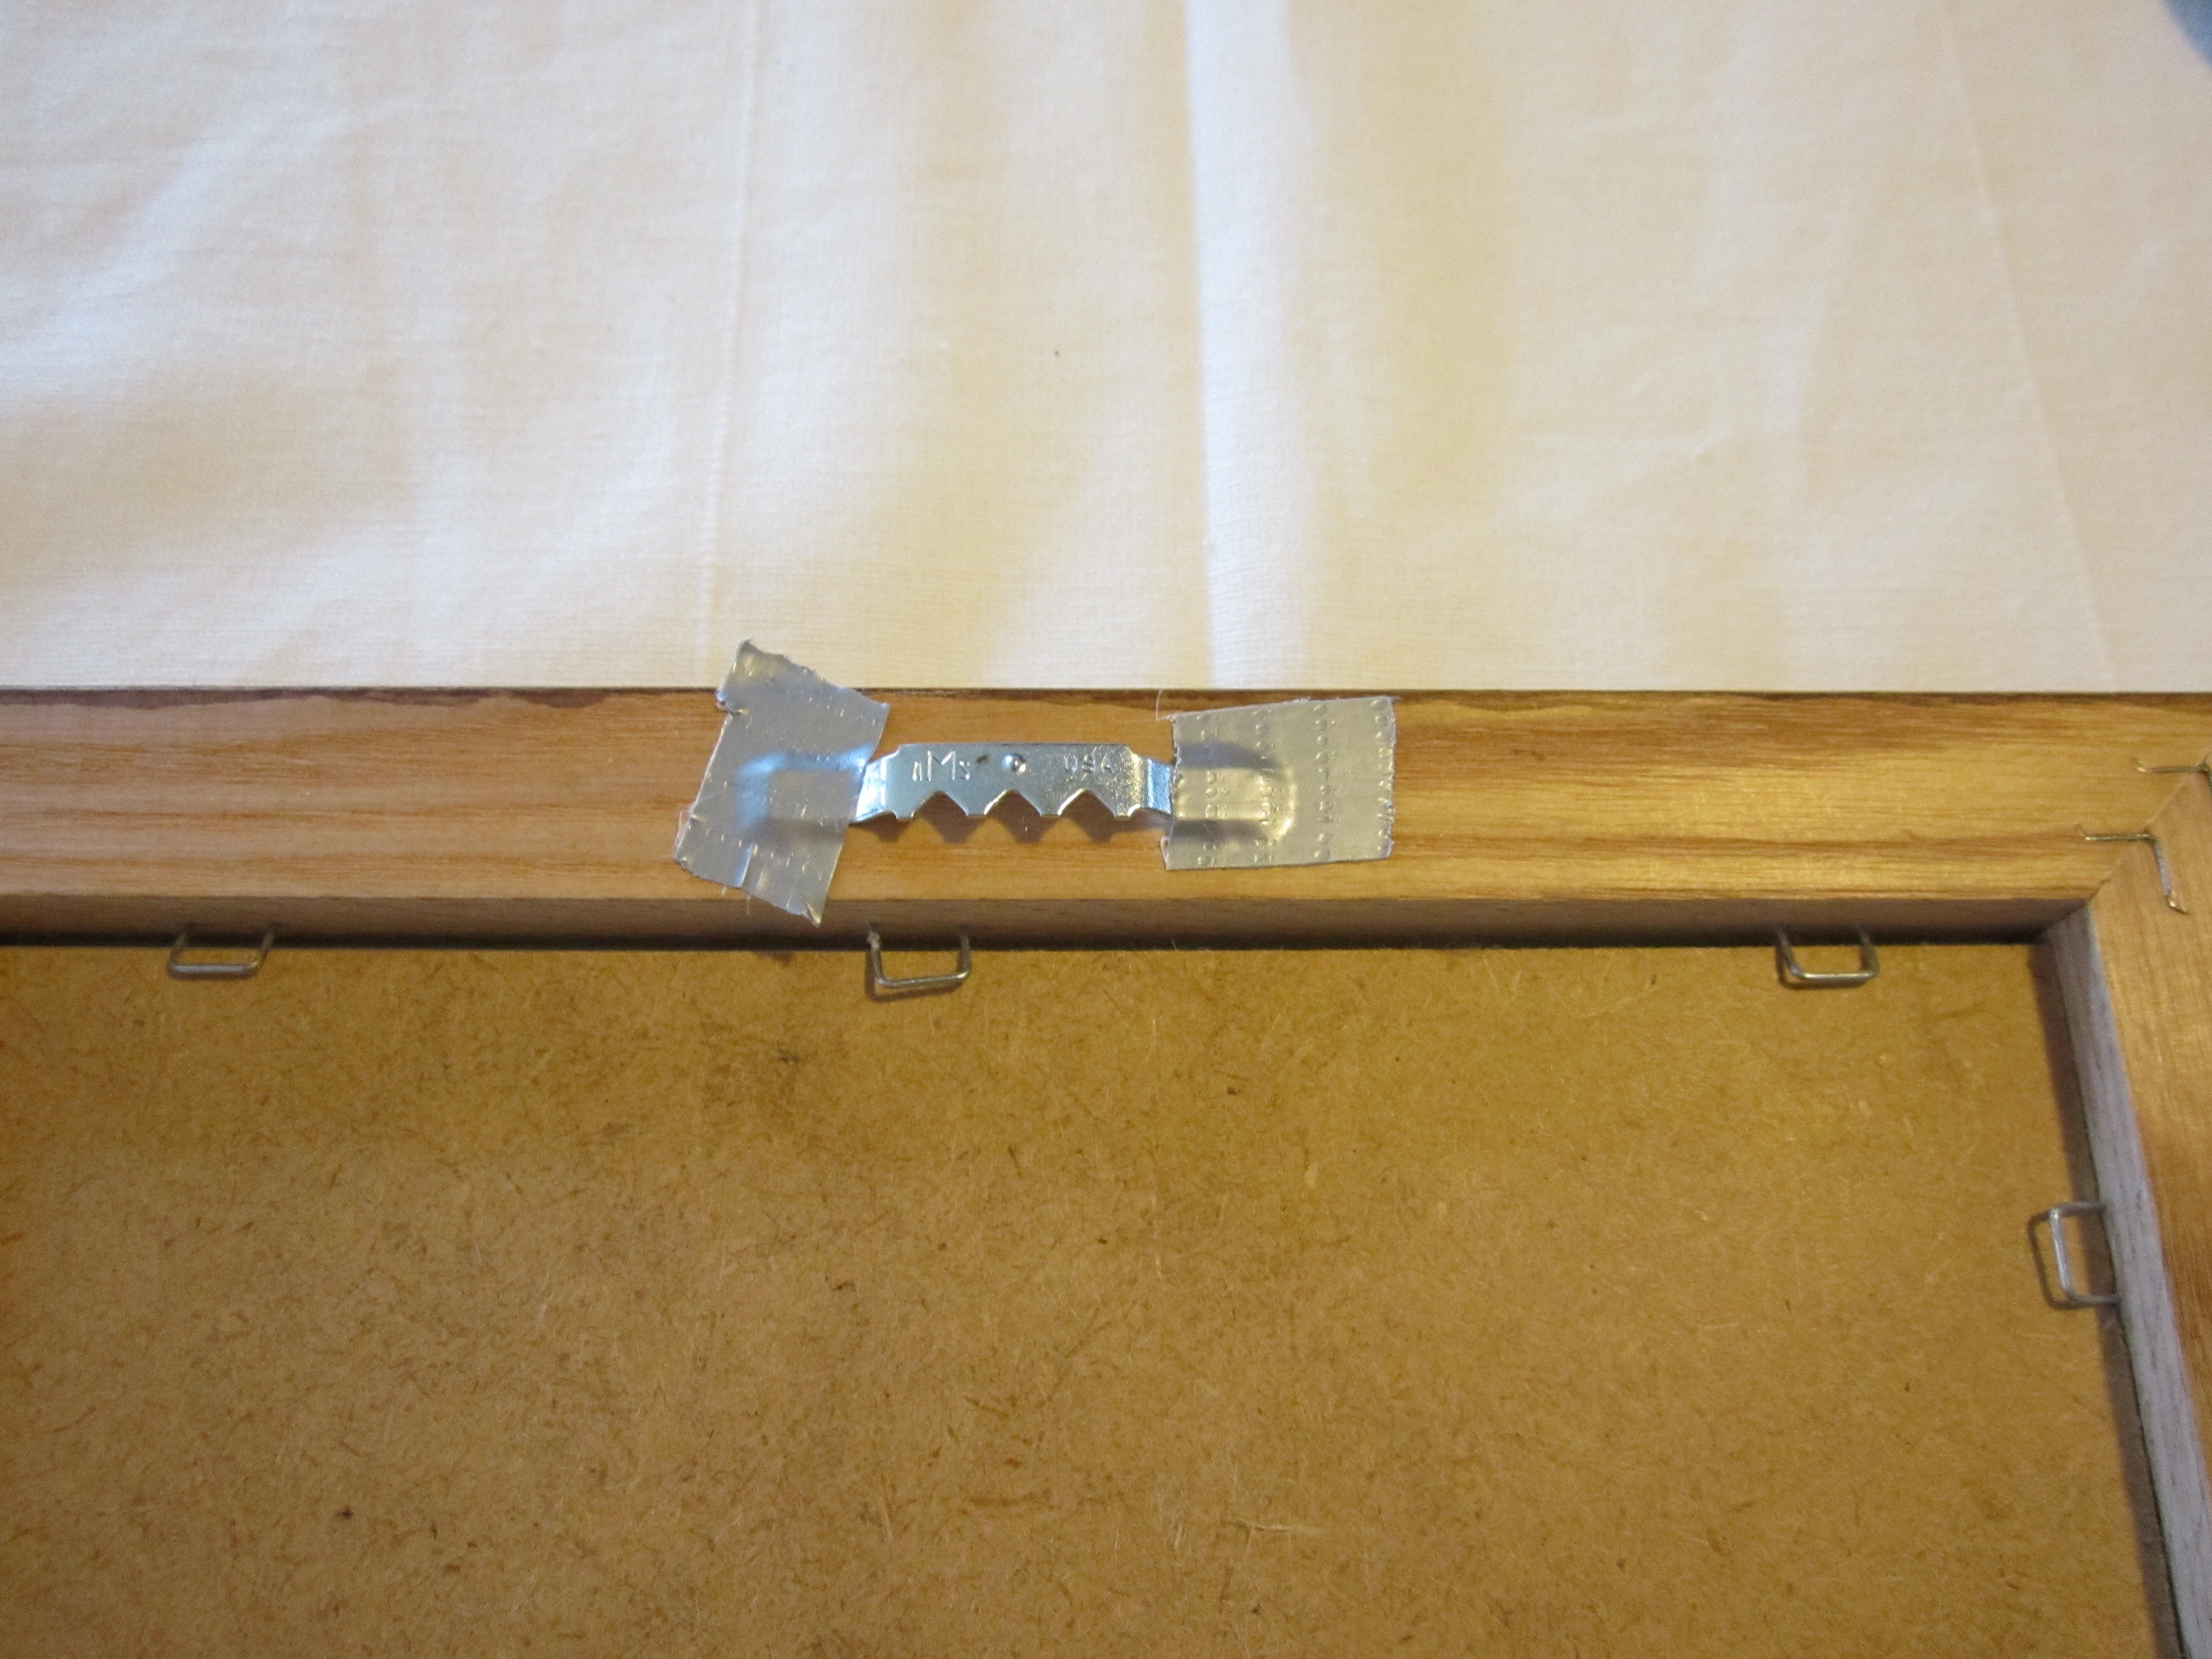
Then I just poke the tiny nails into the tape and they stay there all by themselves till I give them a tap with the hammer.
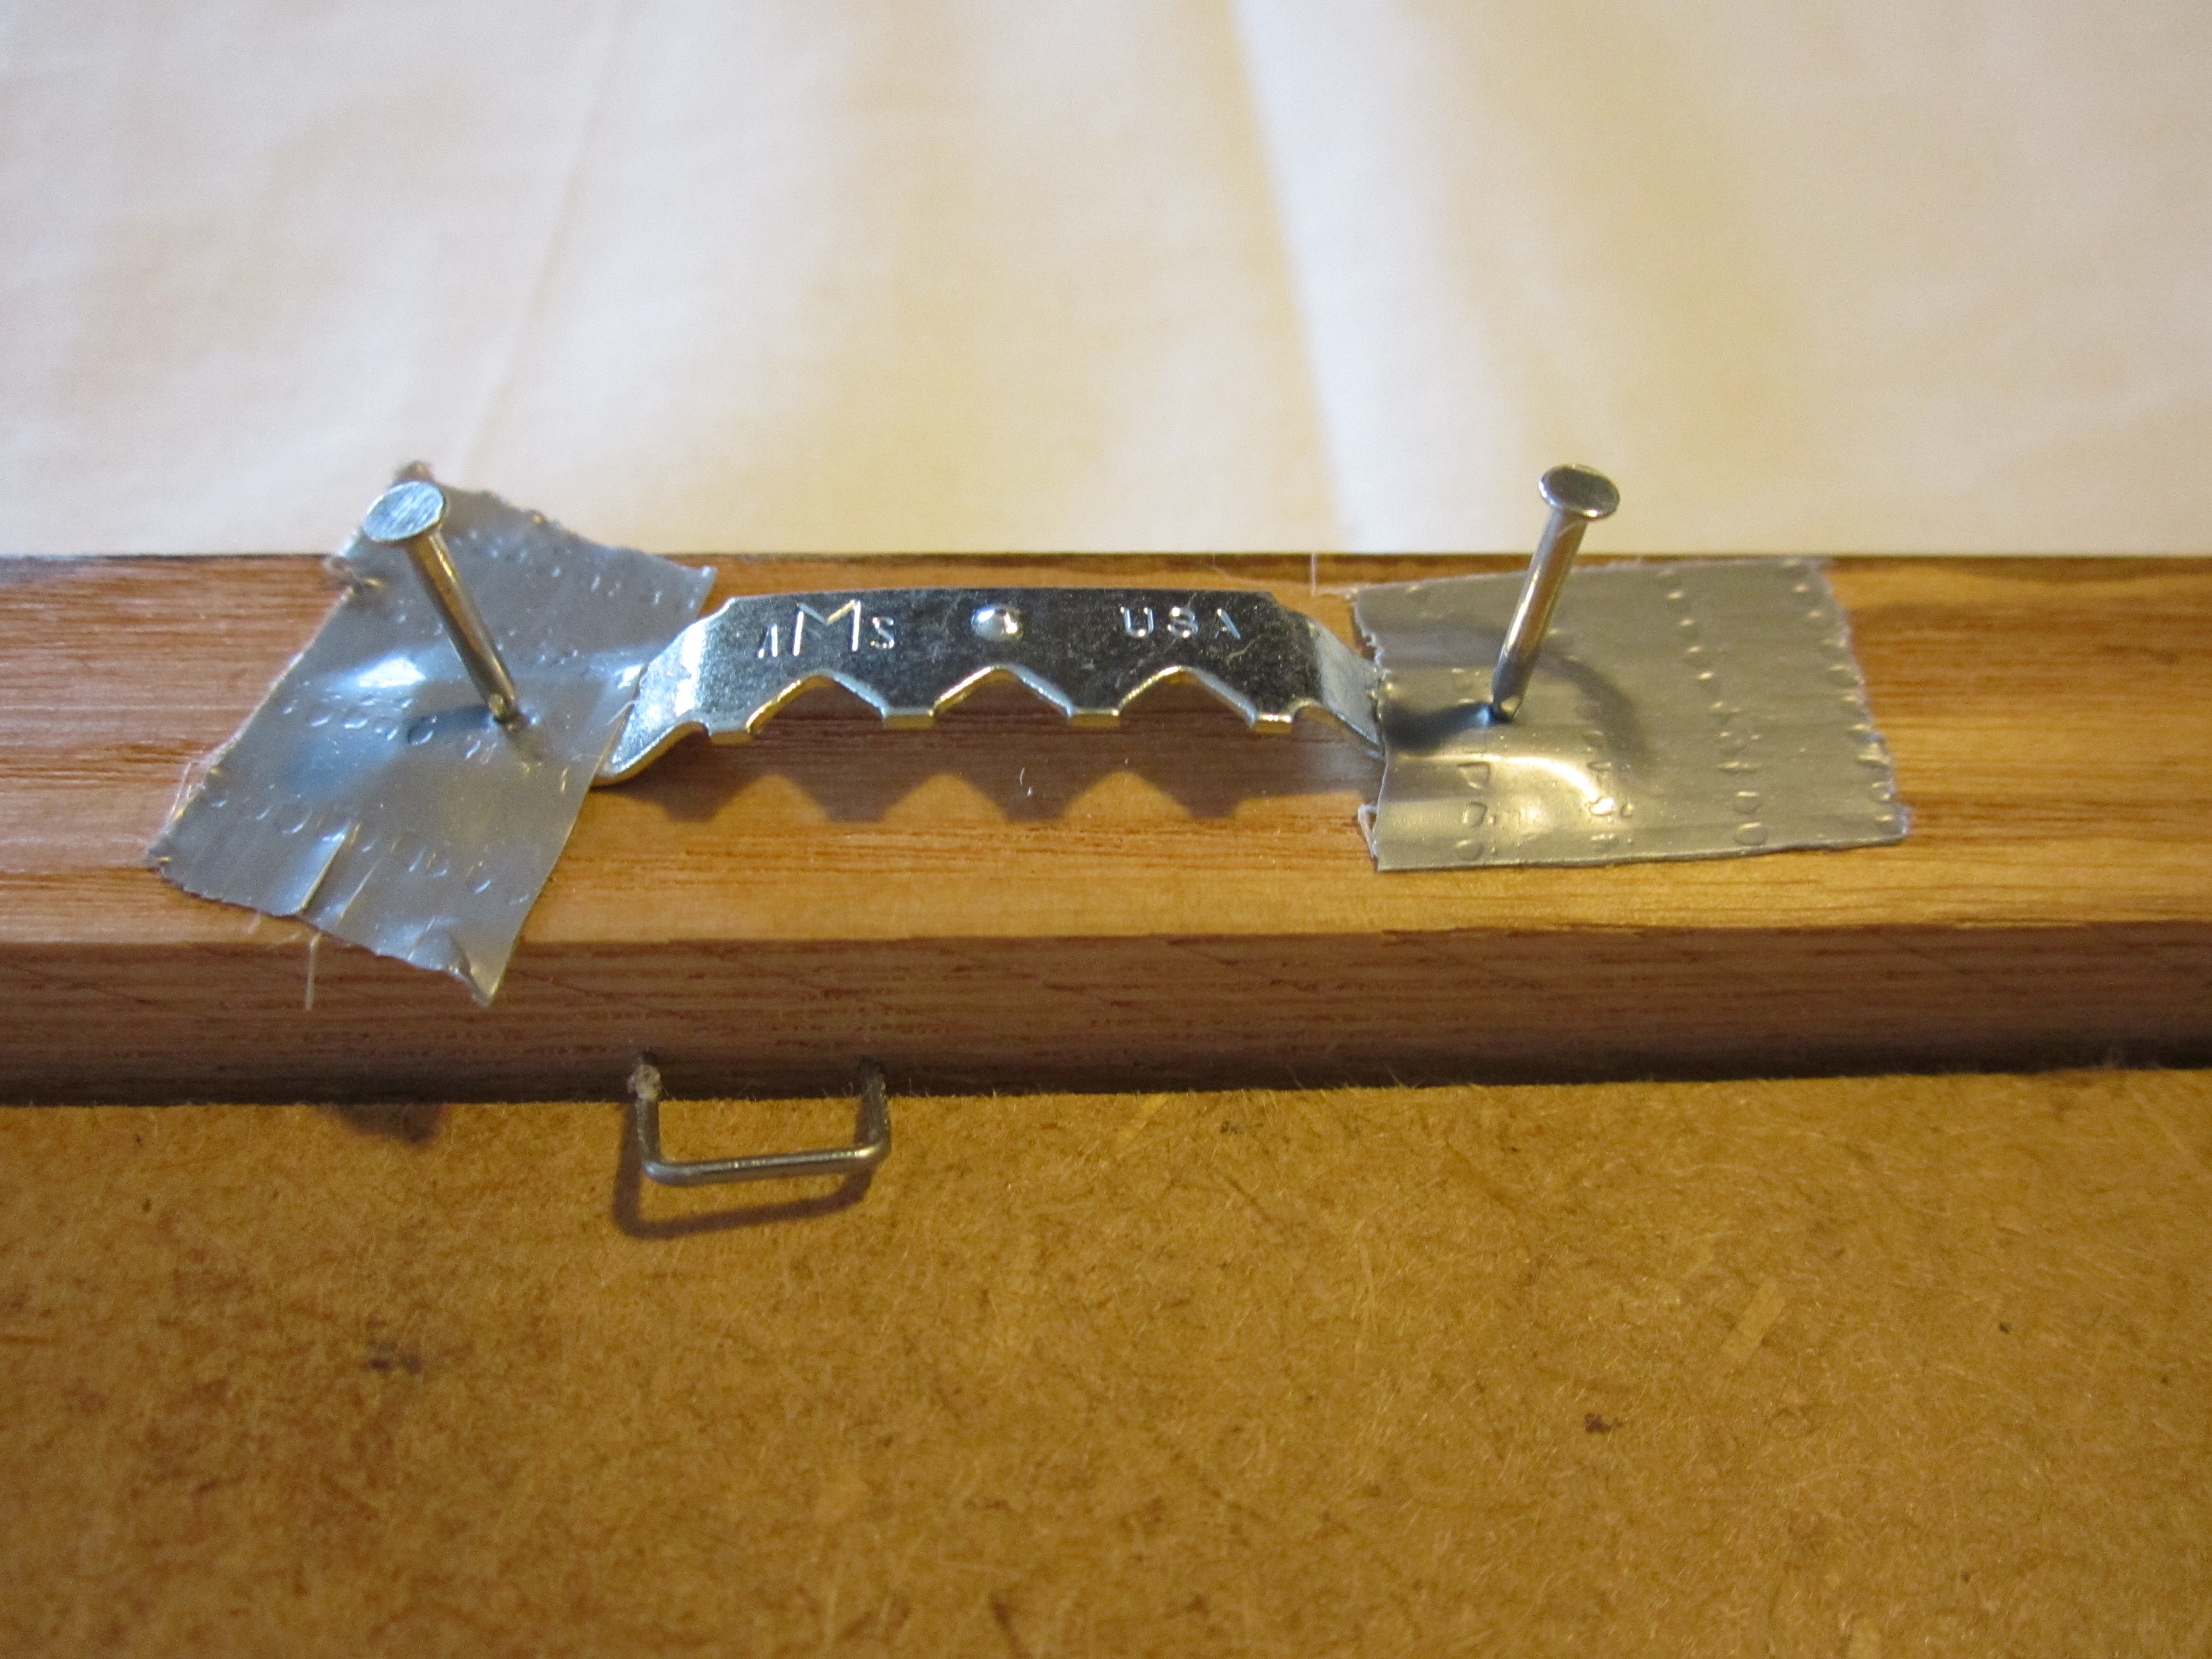
Then nail them in and peel away the tape.
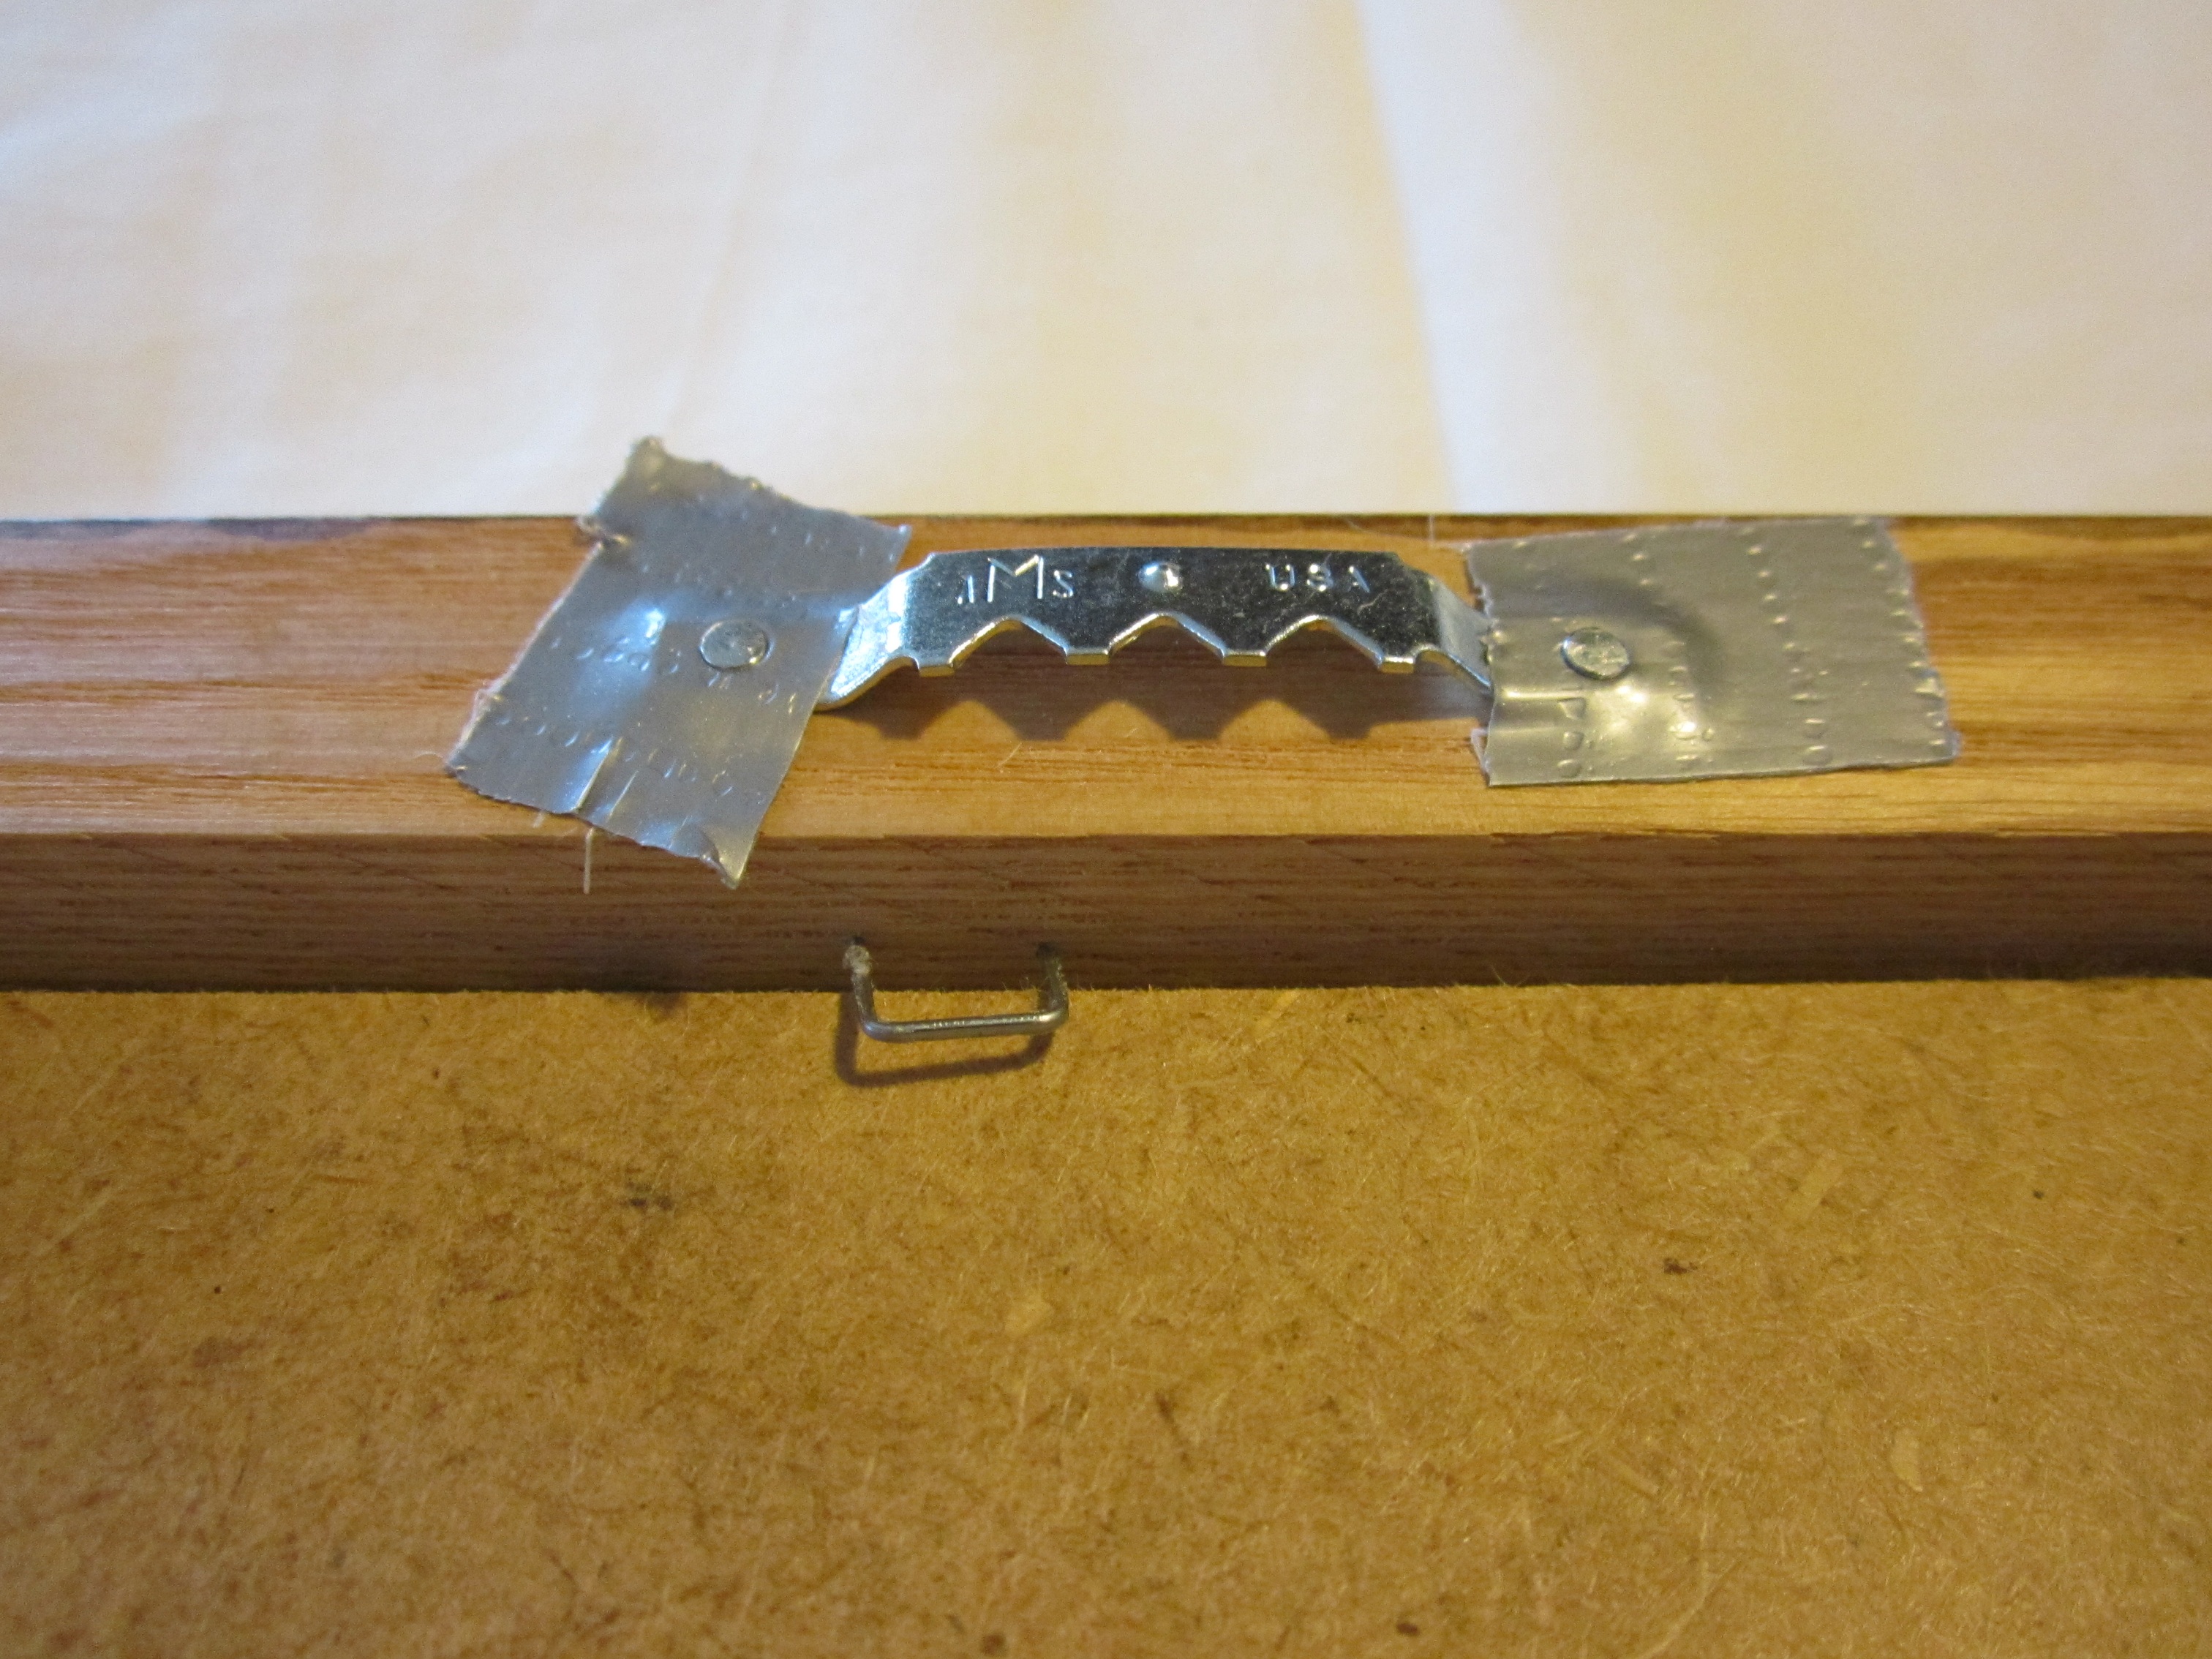
Easy peasy! No smashed fingertips.
This is my best friend for making sure that the pictures I hang on the wall STAY straight.
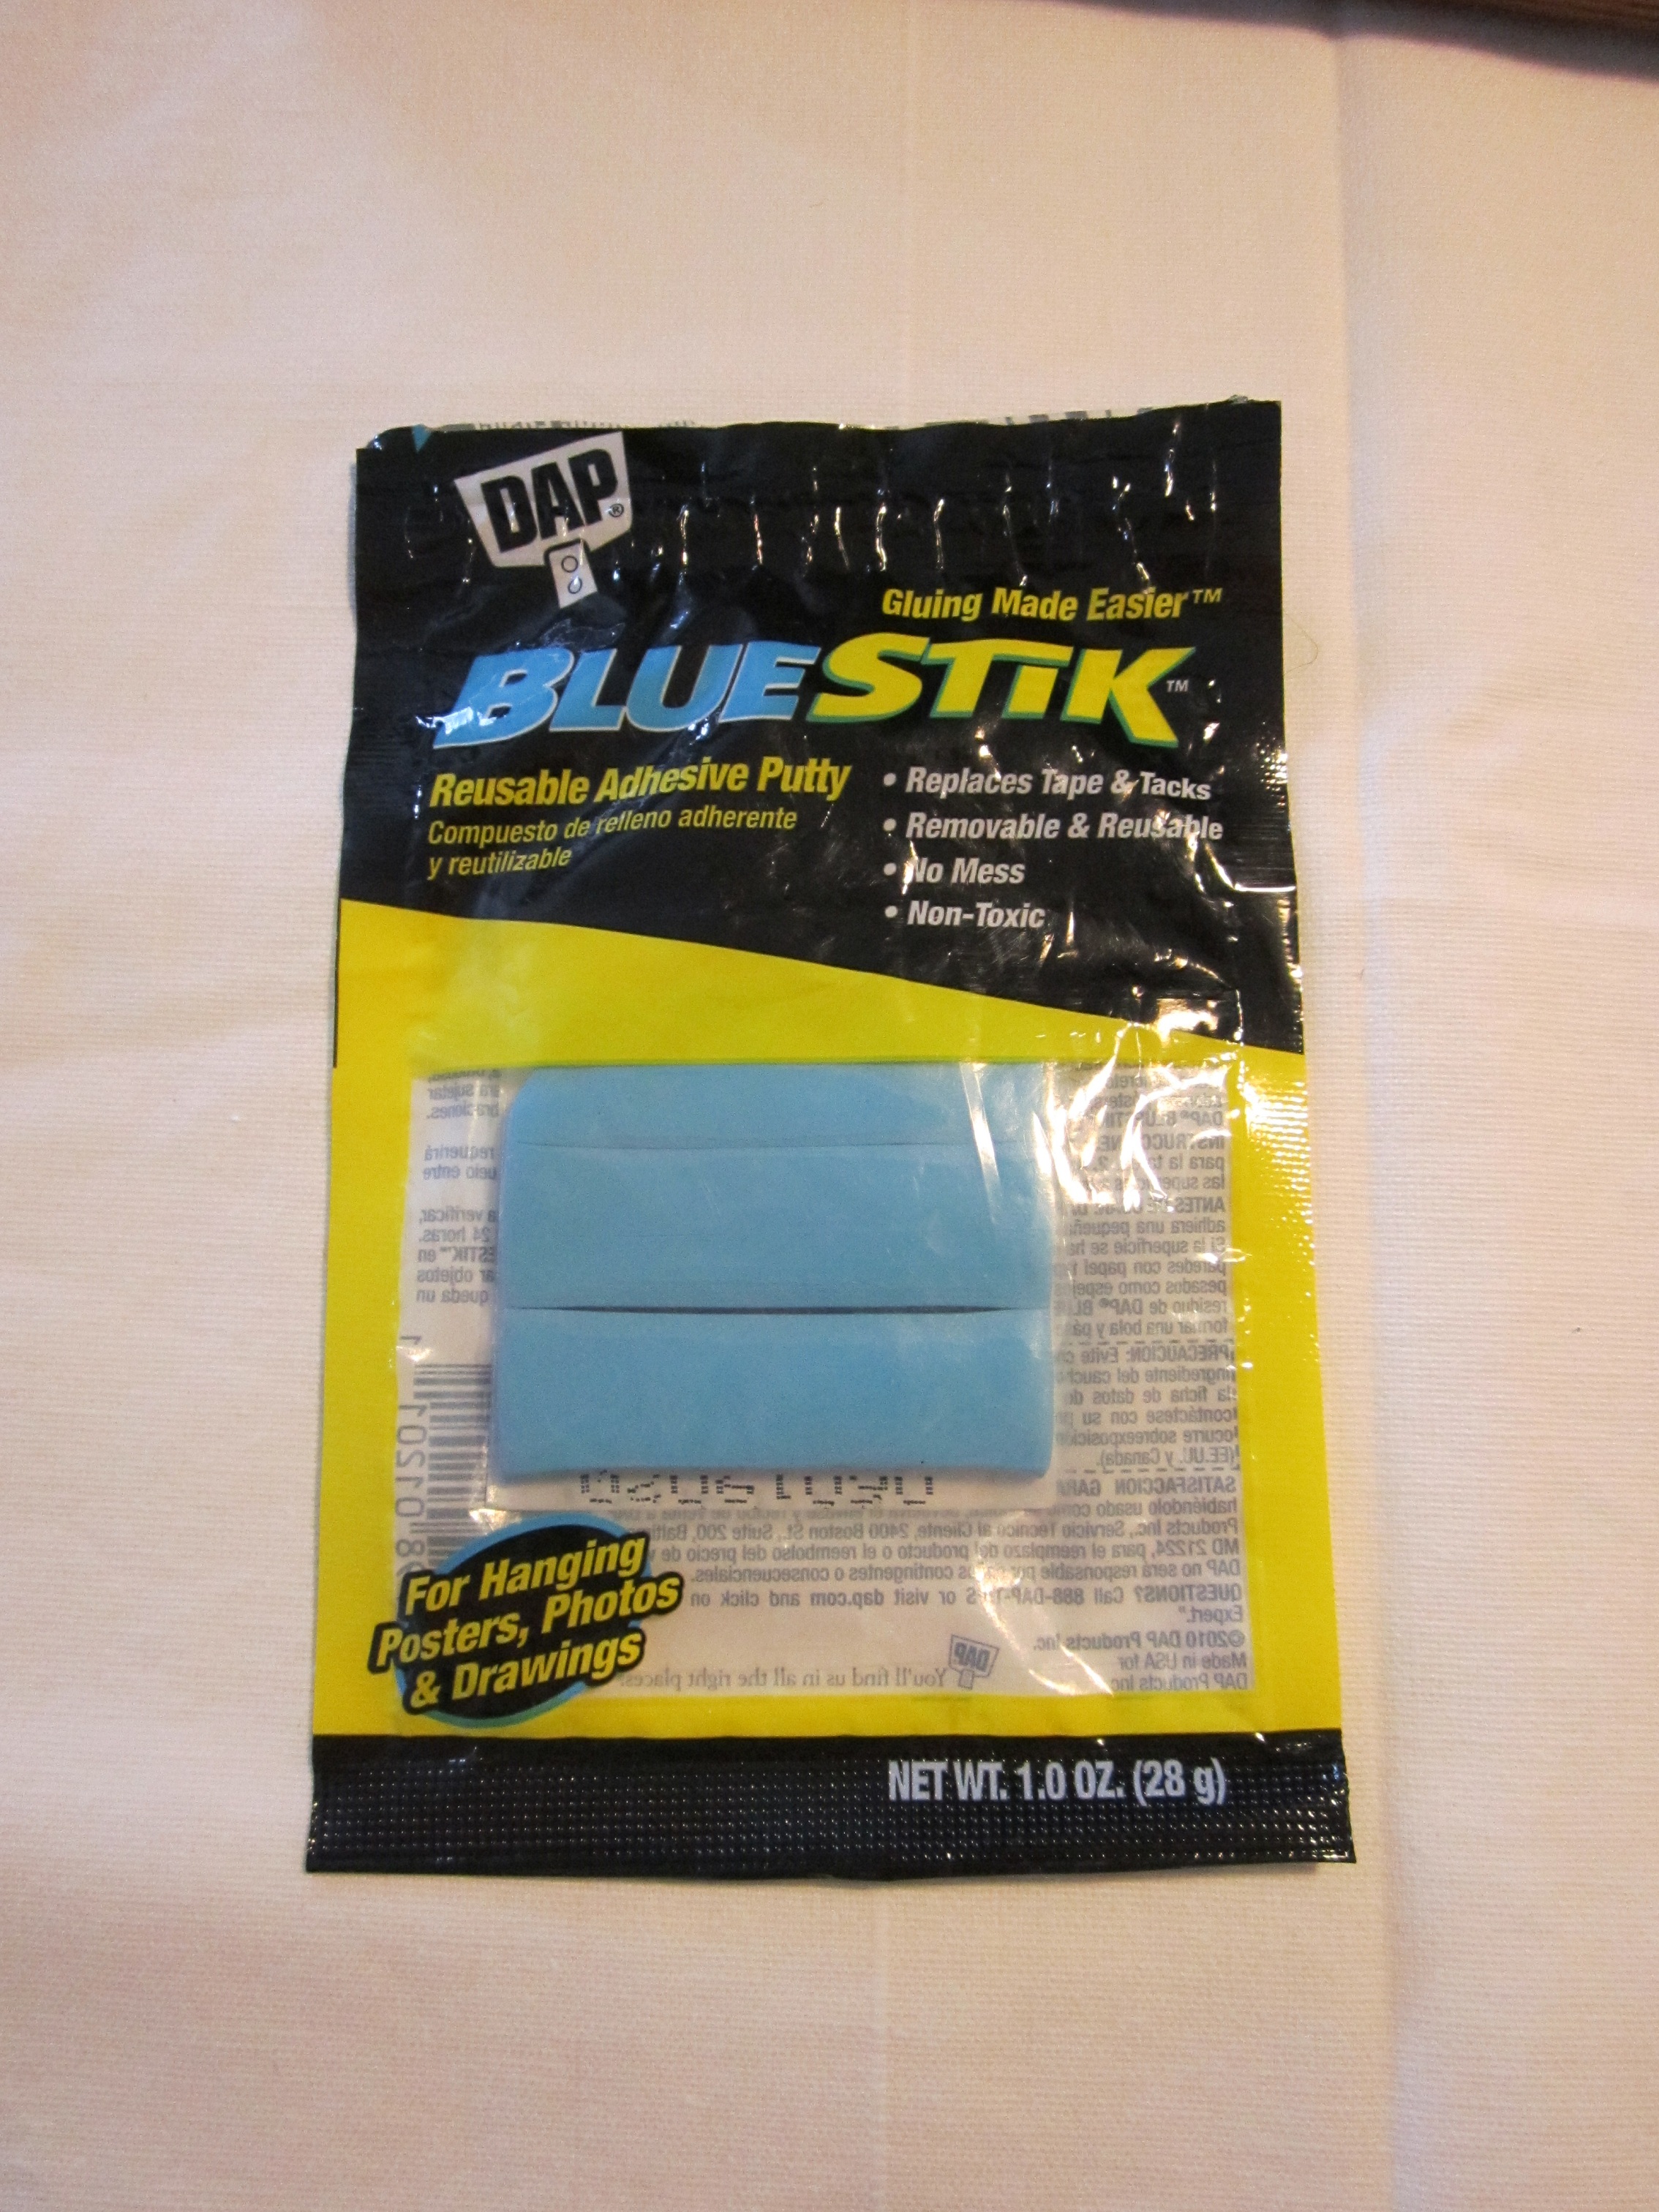
You can find it in most craft or home improvement stores. Usually near the other adhesives.
Just a tiny ball of it on each bottom corner of the frame does the trick.
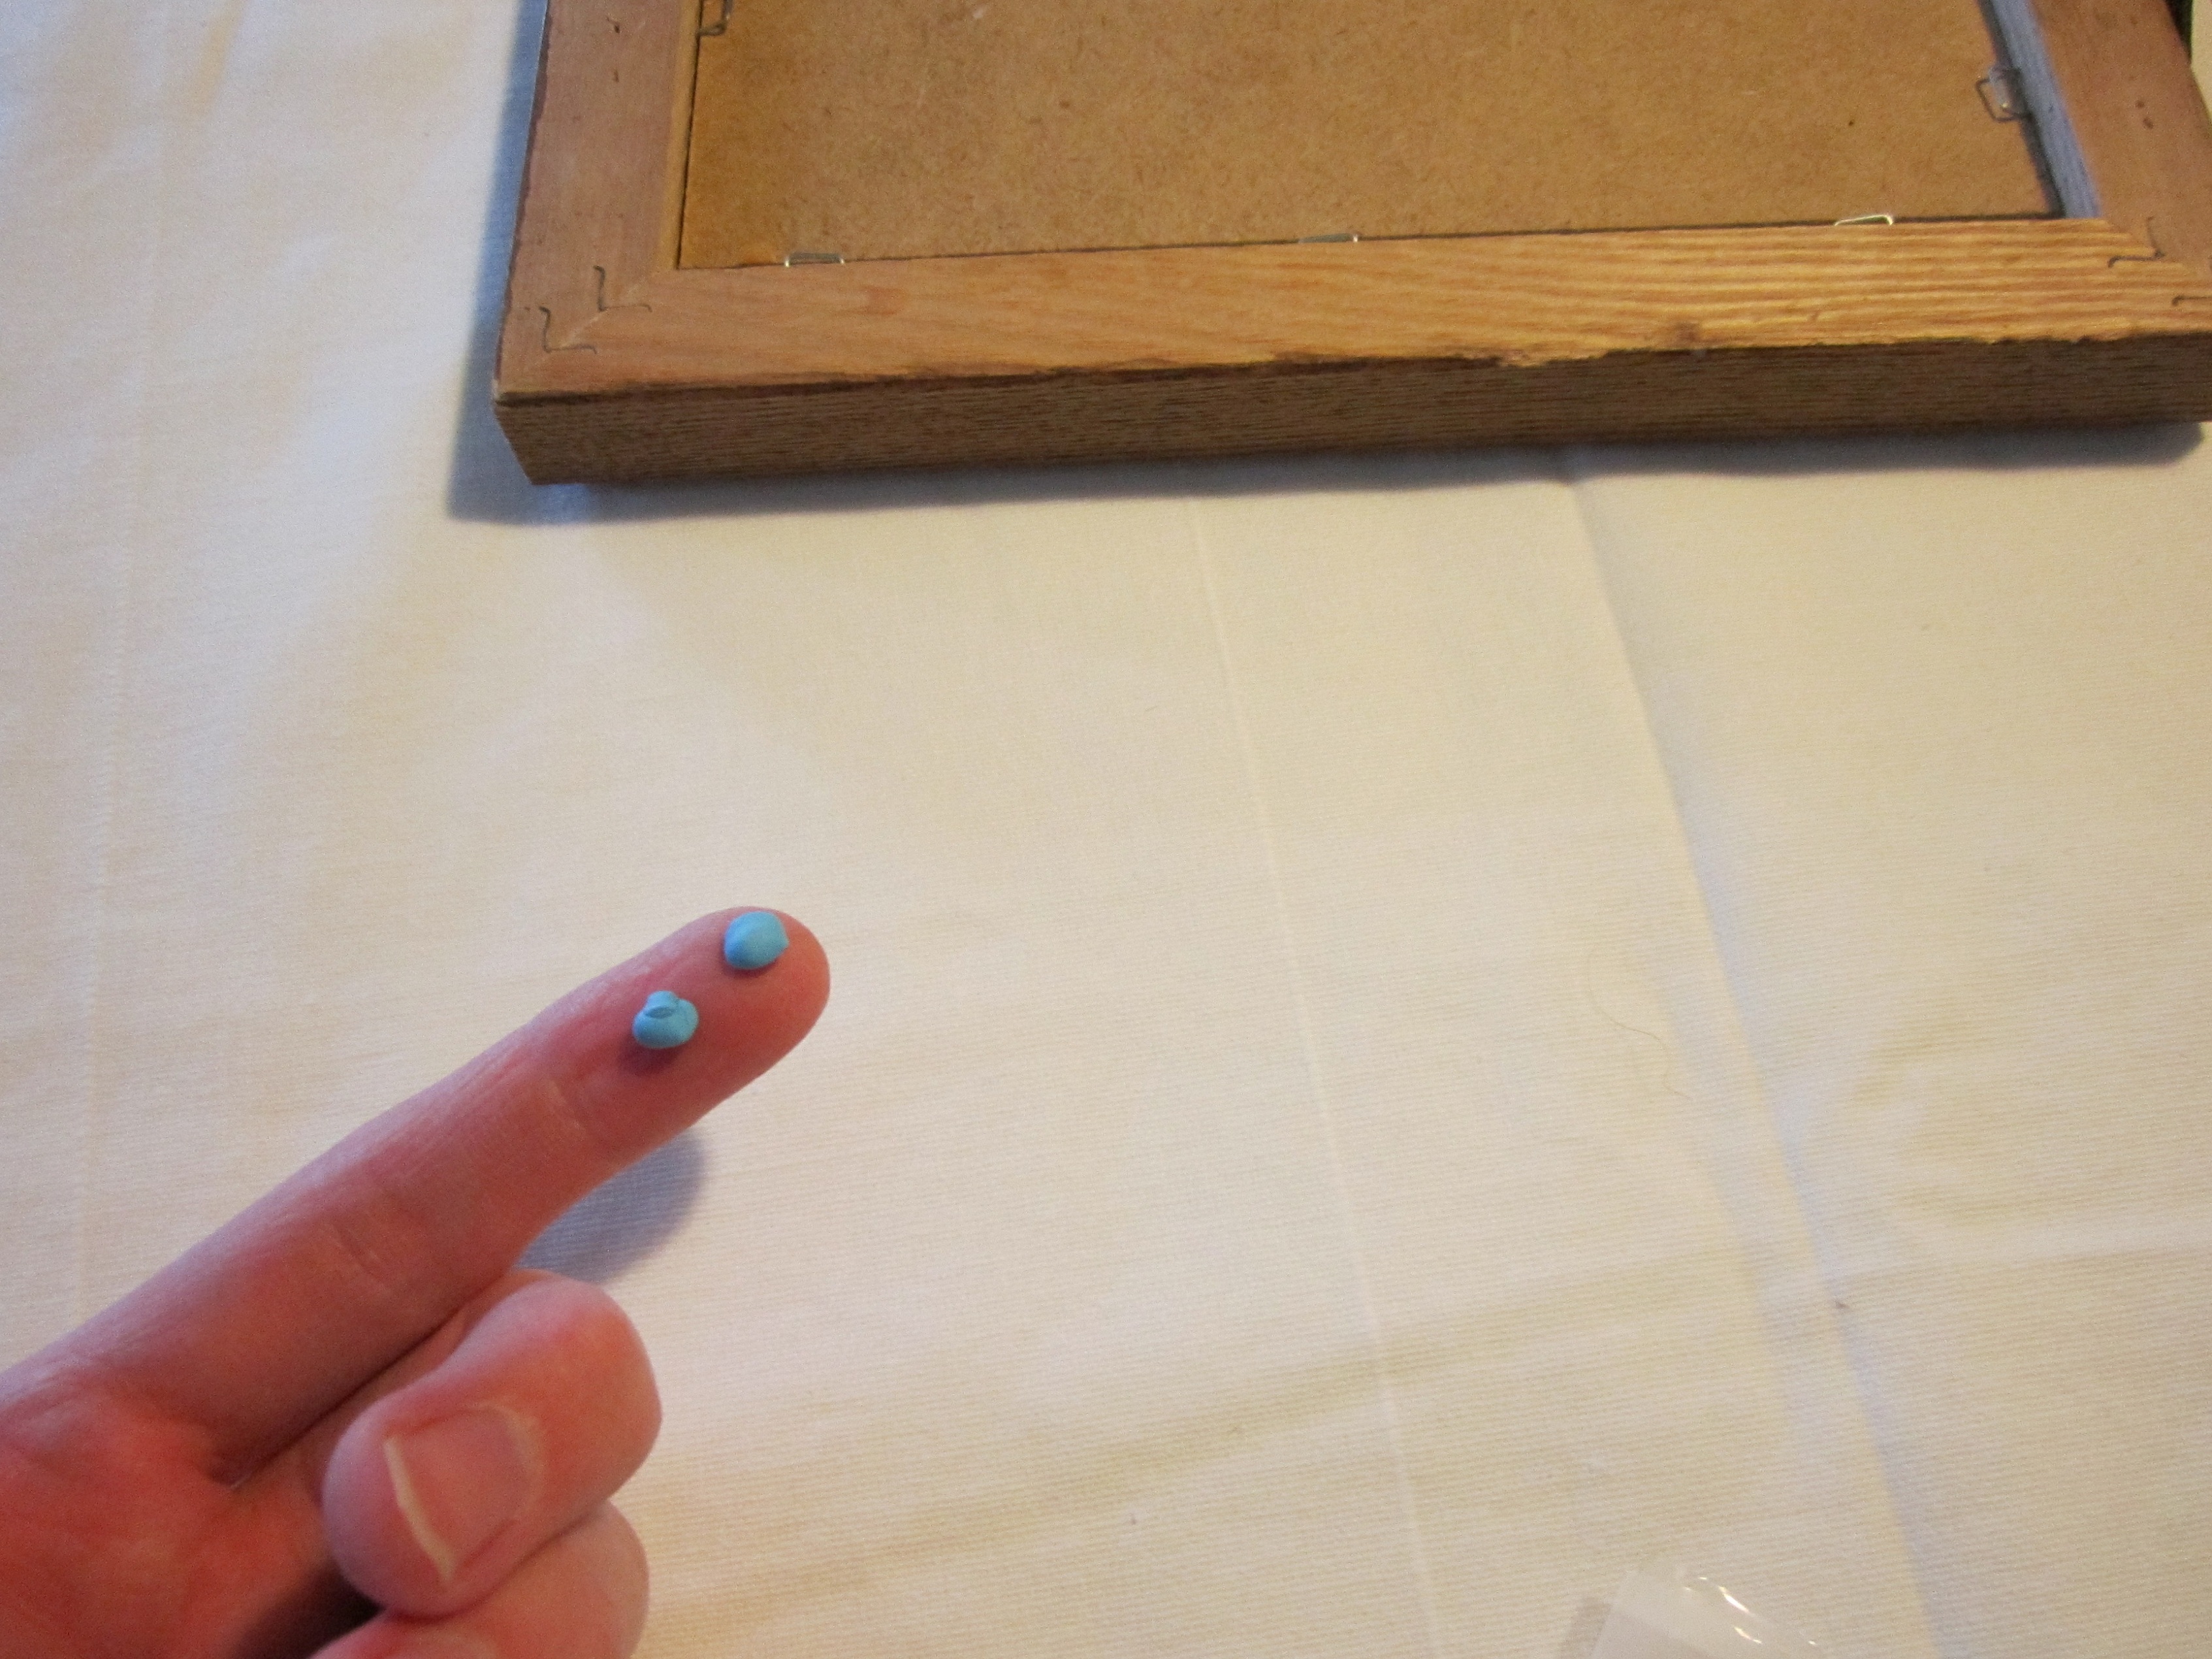
Hang the picture, use a small bubble level to get it level and then gently press those bottom corners to the wall.
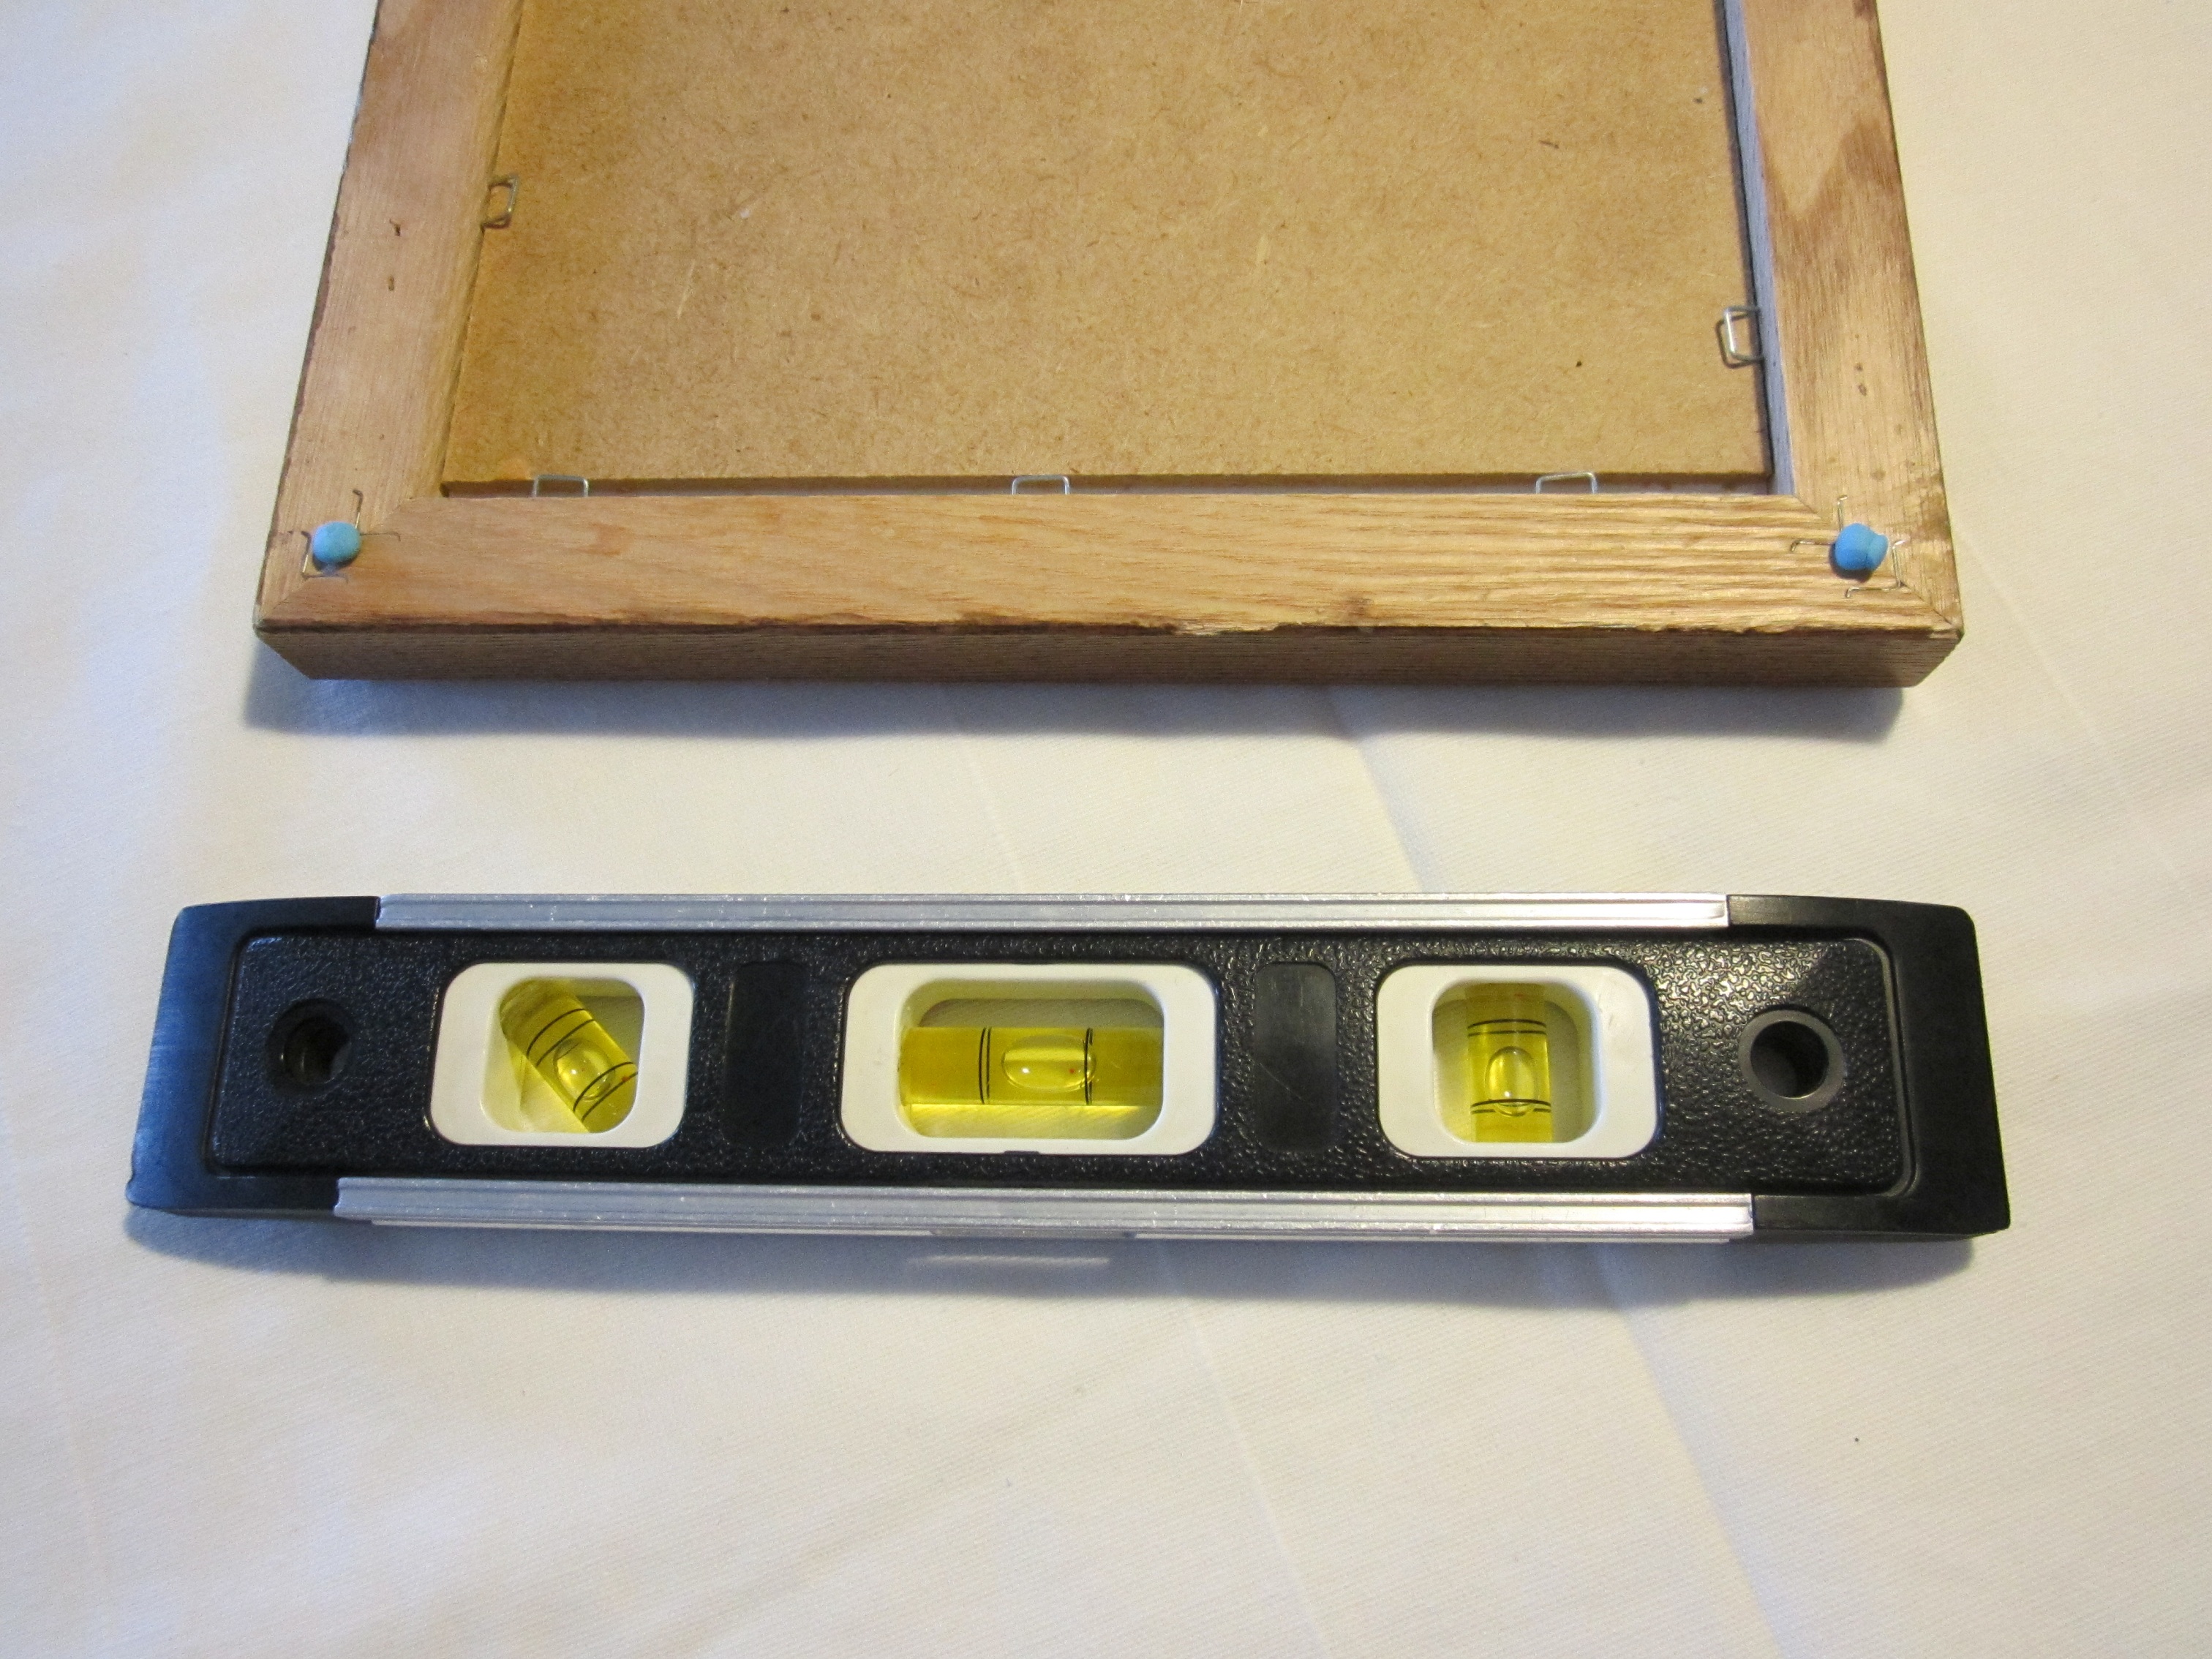
When you take the picture down, you just remove the putty and you can even reuse it!
Keeping the pictures level is especially important on gallery walls. Once a couple of the frames goes crooked, it just looks a mess.
Speaking of gallery walls, if you get all your frames collected and hung and then find that you don’t have exactly the right pictures to put in them yet, try using scrapbook paper that coordinates with the colors in the room or with the theme of the gallery. It’s a great way to hold the place until you collect just the right pictures.

Also notice that an empty frame is a nice way to camouflage a thermostat or some other nuisance that a builder may have put smack in the middle of the wall that was clearly meant to be your gallery wall!
Since I buy my frames from thrift stores, I’m not picky about the colors. I just do a lot of spray painting. I have found that a couple of wooden skewers placed under the frames when I spray paint them, prevents them from sticking to the surface I’m painting them on.

So, what are your handy picture hanging tricks?
A PYP Best Blog! How to pressure can chicken!
Just in case you missed this article on how to pressure can chicken the first time we shared it a couple of years ago, we are republishing it. After Candi wrote this blog originally, we got an awesome response. This is one of the PYP Best Blogs!
I first learned about canning meats when I was watching a show about surviving in Alaska, and the participants were catching salmon and canning it. Up until that time, for some reason it had just never even occurred to me that one could can meats, even though I had seen canned meats in the store plenty of times. My mother would can peaches and pears when I was little, but she never did pressure canning.
A year or so after watching that show, my local church asked me to help put together some ideas and plans for emergency preparedness for those who might be interested. I have to confess that I was not exactly an example of preparedness at the time. So I had to kinda learn it all from scratch. Some of the preparations we worked on involved having some food stored away in case of an emergency. And so I did more research on canning meats, and talked with a few people who had done it, and found it was a lot easier than I expected it to be. (Note: By “easy” I mean ‘not overly complicated’ rather than easy as in ‘quick’. Just want to throw that out there right now.)
I have since found that I really enjoy having canned meats around – they have been so helpful on nights when I need a quick and easy meal!
I usually can chicken when I can find it on sale in the 40lb boxes for about $1.30-$1.50/pound. Since we’ve had a few of those sales where I live recently, and with the Zaycon chicken deals being introduced into some new states and areas, I wanted to give you guys another option for storing/preserving all that chicken!
Now, I’m not going to go through all of the specific details for the actual canning part, because that will differ based on your particular model of pressure canner. So be sure to read through your canner’s instruction manual for the specifics. And for those who are new to pressure canning, please note that a pressure CANNER is different from a pressure COOKER (although a pressure canner can be used to pressure cook, a pressure cooker cannot usually be used to pressure can unless the manual specifically states that it is approved) – totally clear as mud?
For canning chicken using the raw-pack method (meaning that you don’t have to pre-cook the chicken), start by gathering all your supplies. You will need:
- pressure canner (this is NOT the same as a pressure cooker)
- chicken
- approved canning jars
- canning lids and rings (lids must be new, rings can be used)
- salt, preferably pickling salt if possible
- boiling water, chicken broth or chicken bouillon
You’ll also want to have some tools handy. Here’s what I use:
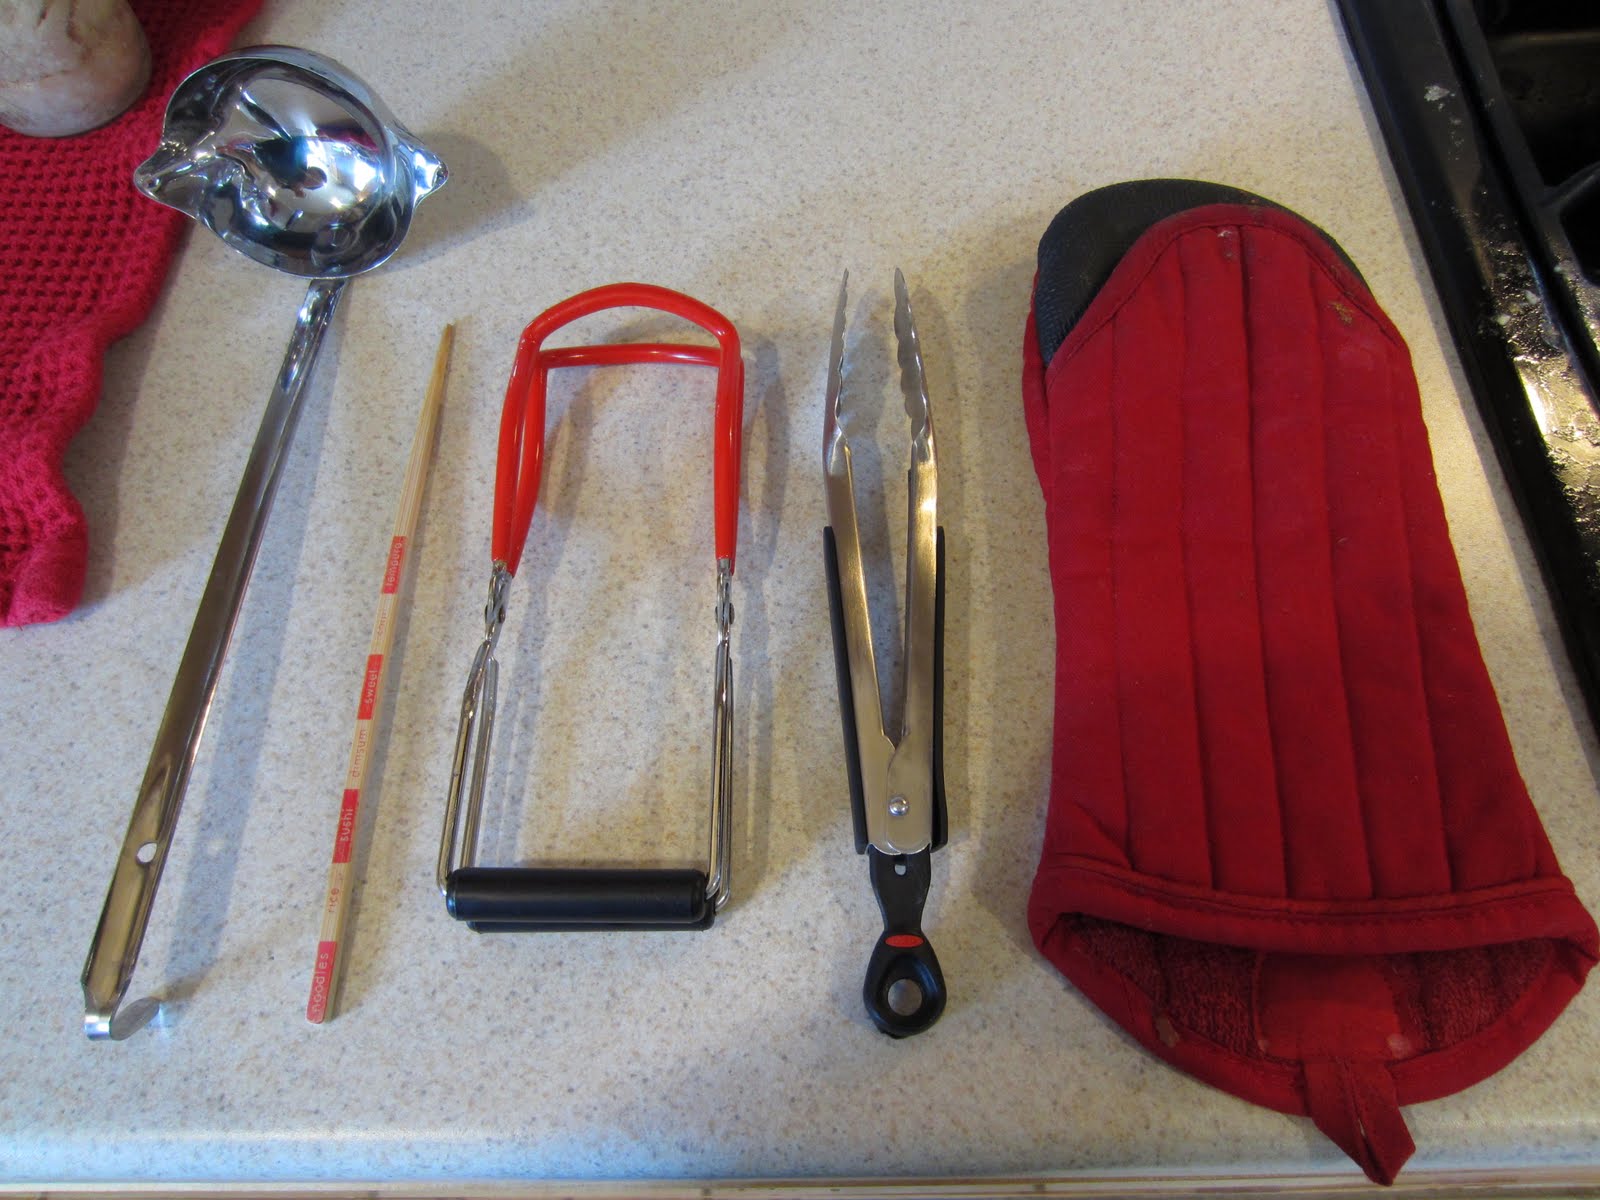
- ladle (for filling jars after chicken is in)
- wooden chopstick (for removing air bubbles from jars)
- jar lifter (for moving jars into and out of hot canner)
- tongs (for taking lids out of simmering water)
- hot pads or hot mitts
Start by preparing your jars. Wash and dry them. For chicken, I add 1/2 tsp of salt to each jar. (The official instructions say to use pickling salt, but I’ve used regular kosher salt in the past with no problems.)

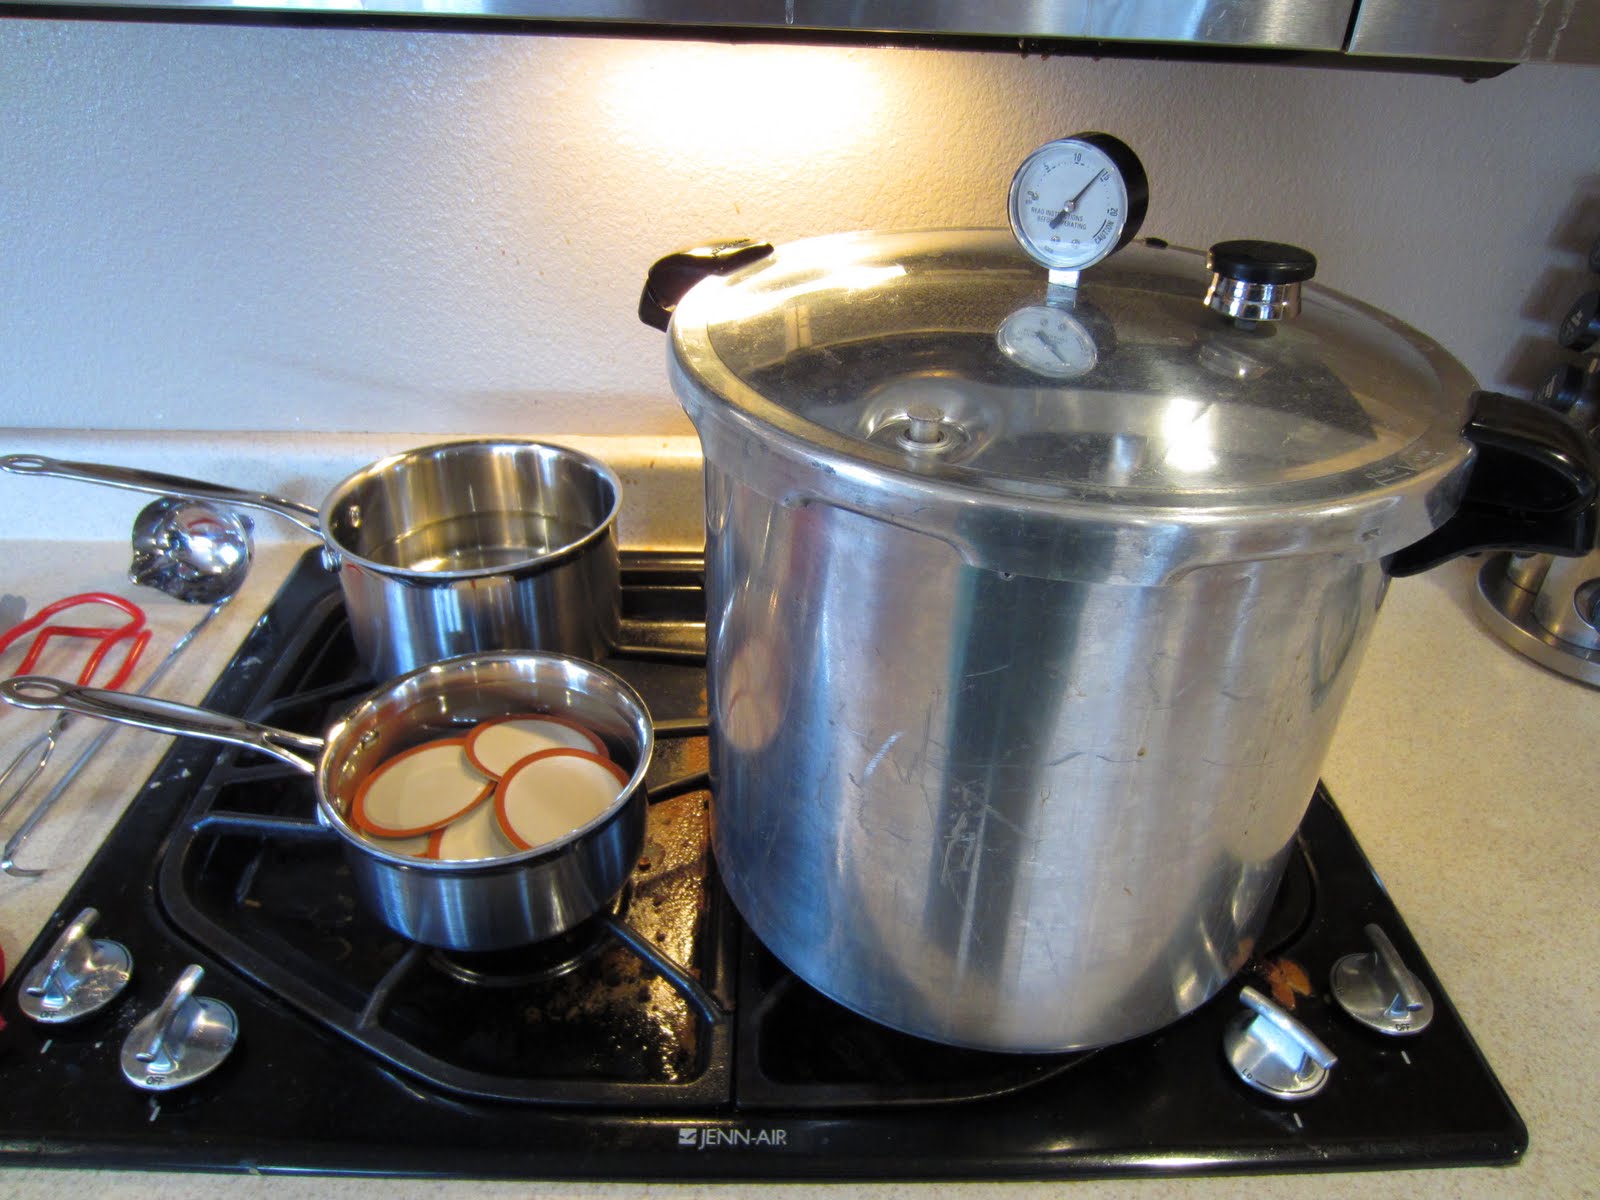
Then get your stove and pots all situated. You will need your pressure canner with the appropriate amount of boiling water (and vinegar to help reduce water spotting) – check your canner’s instructions for how much water you need. You will need another pot with boiling water (for adding to the jars), and a smaller pot with simmering water so you can heat the lids.
Here’s what my stovetop looks like on chicken-canning day:
Next, time to prep the chicken!
The big 40lb boxes pf boneless, skinless chicken breasts come with 4 bags inside. The breasts are butterflied, and have a little bit of fat on them which you’ll need to trim off.
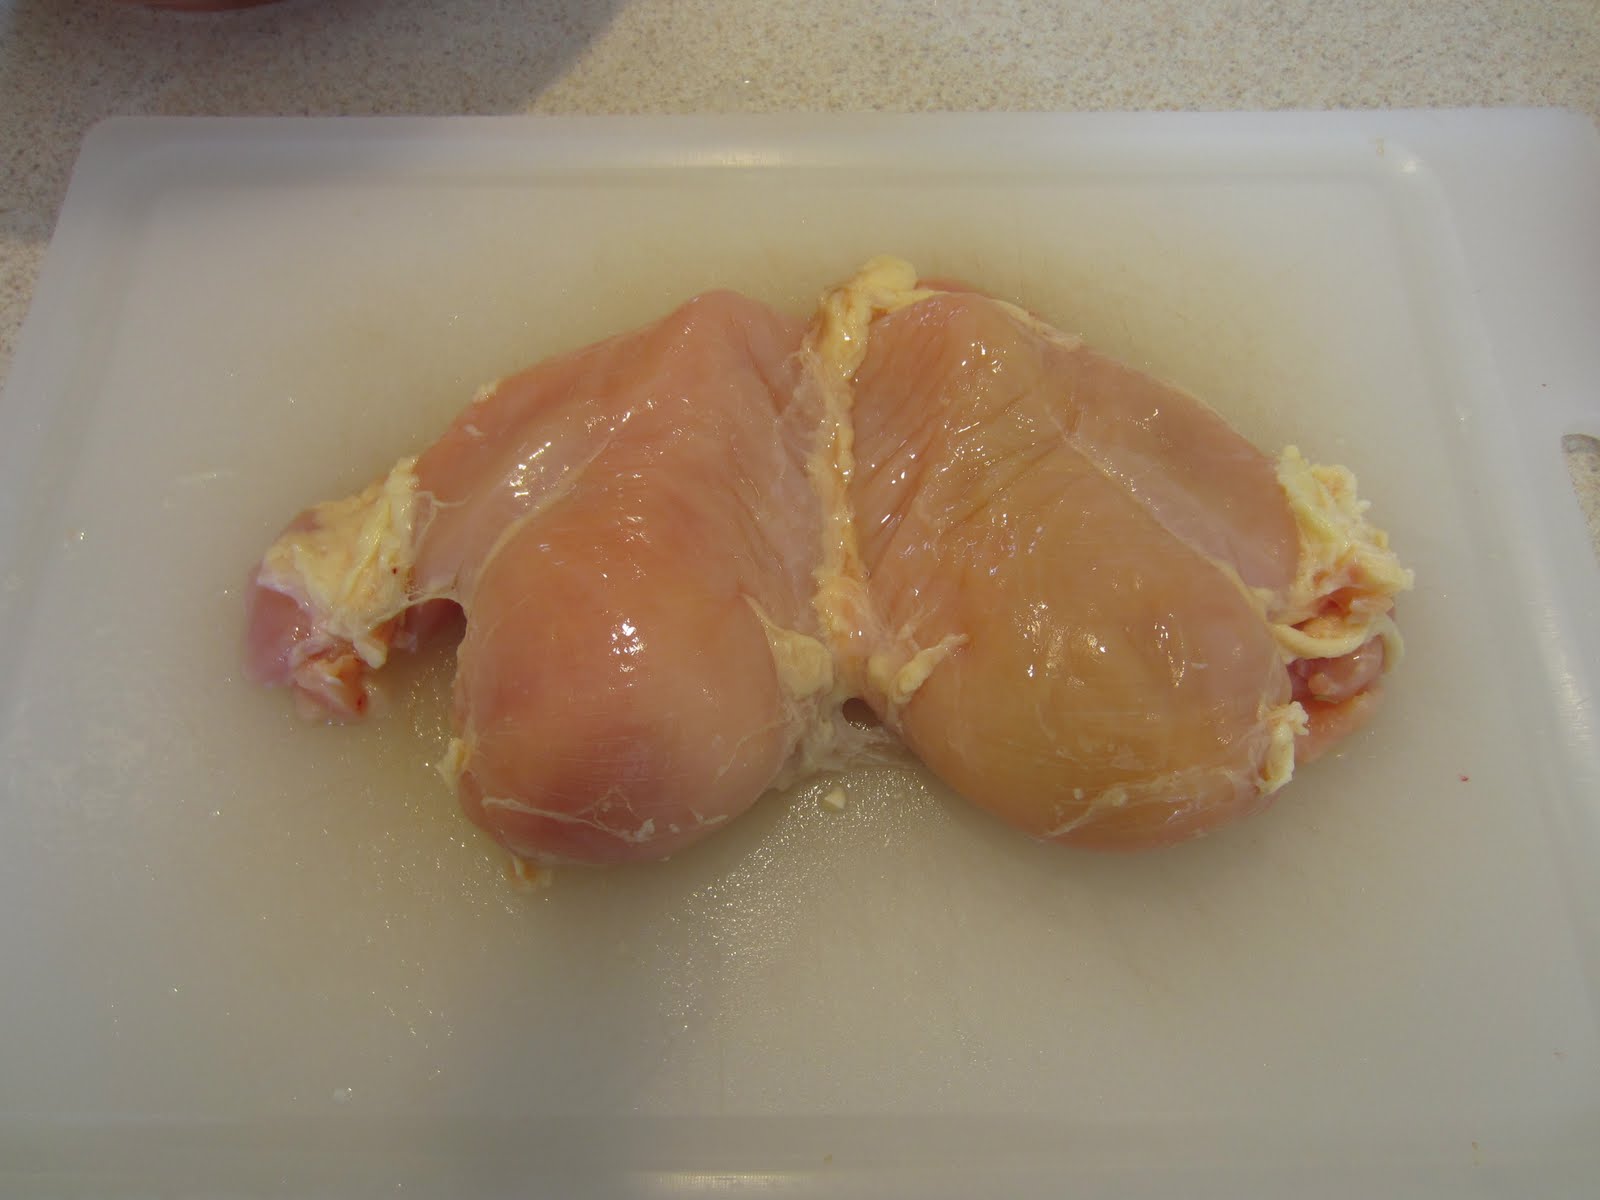
Cut the breast halves apart and trim any remaining fat. Keep the fat and trimmings in a separate bowl (you can use them to make chicken stock).
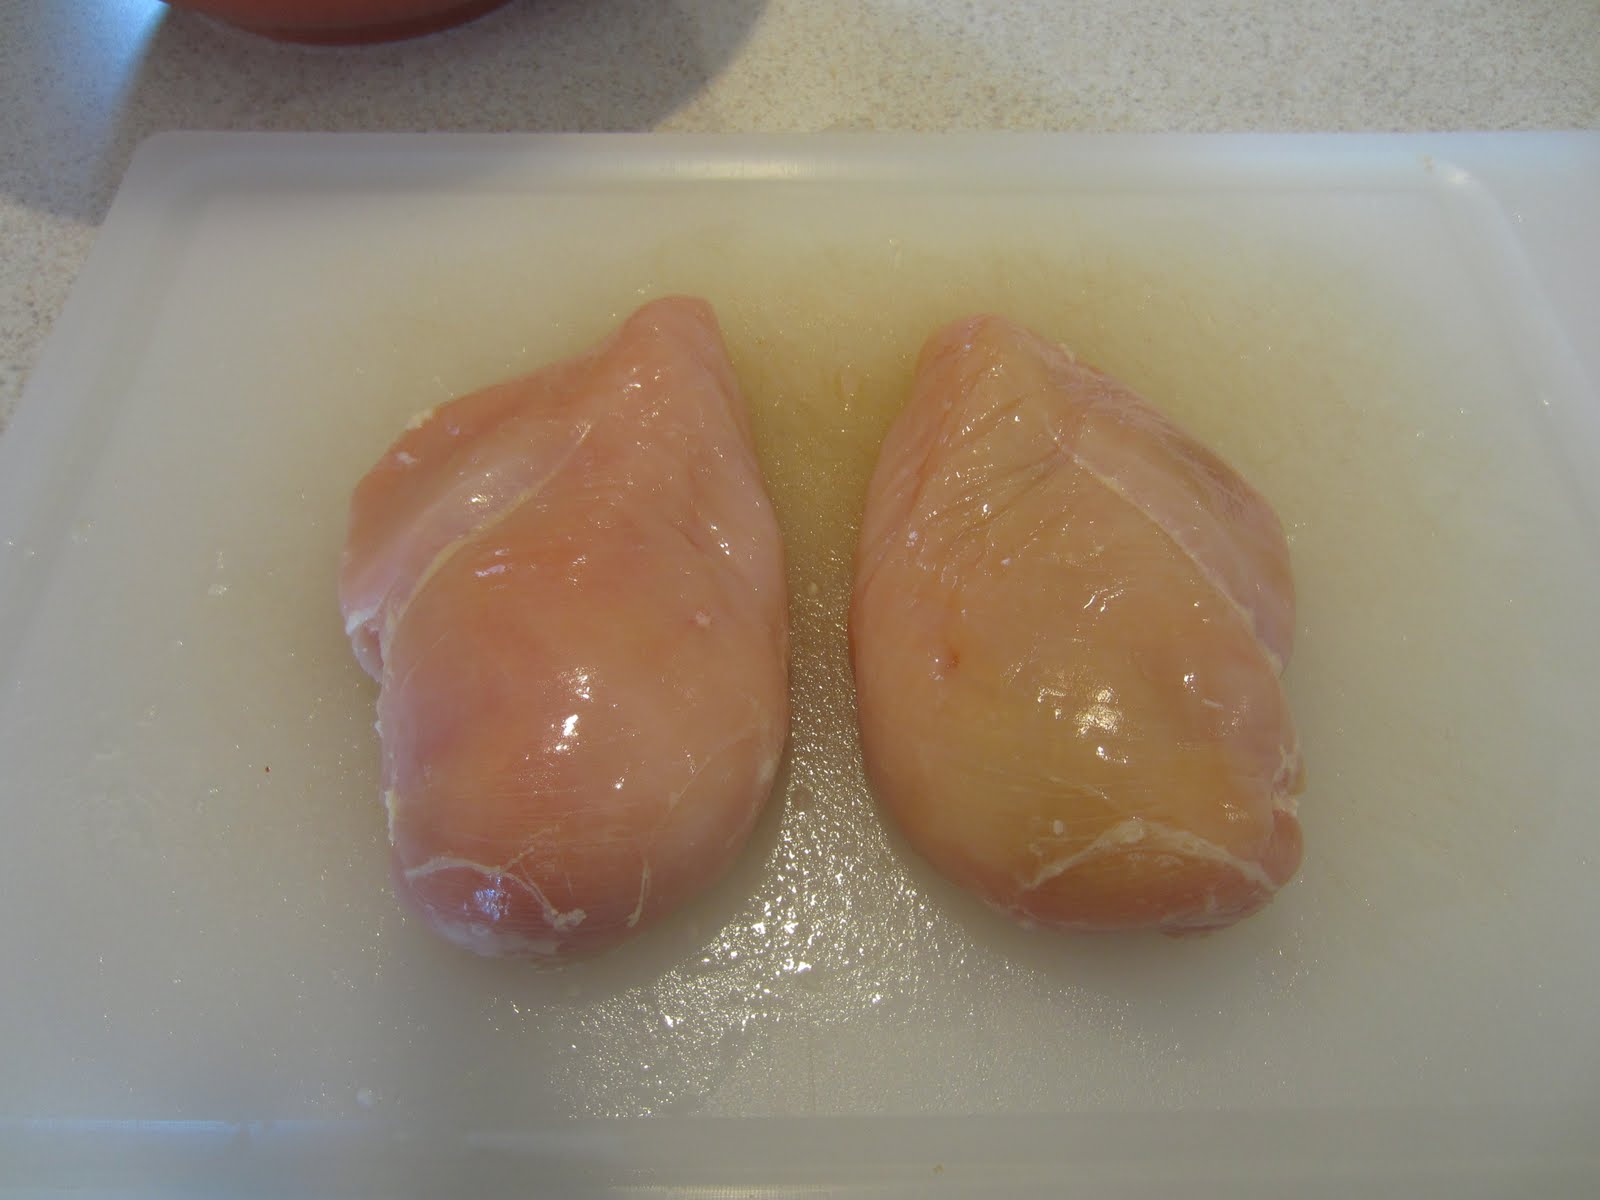
Cut each chicken breast into smaller chunks – doesn’t have to be precise, just so they are easier to stuff in the jars.
Pack the chicken pieces semi-loosely into the jars, leaving 1-inch of space between the top of the chicken and the top rim of the jar.
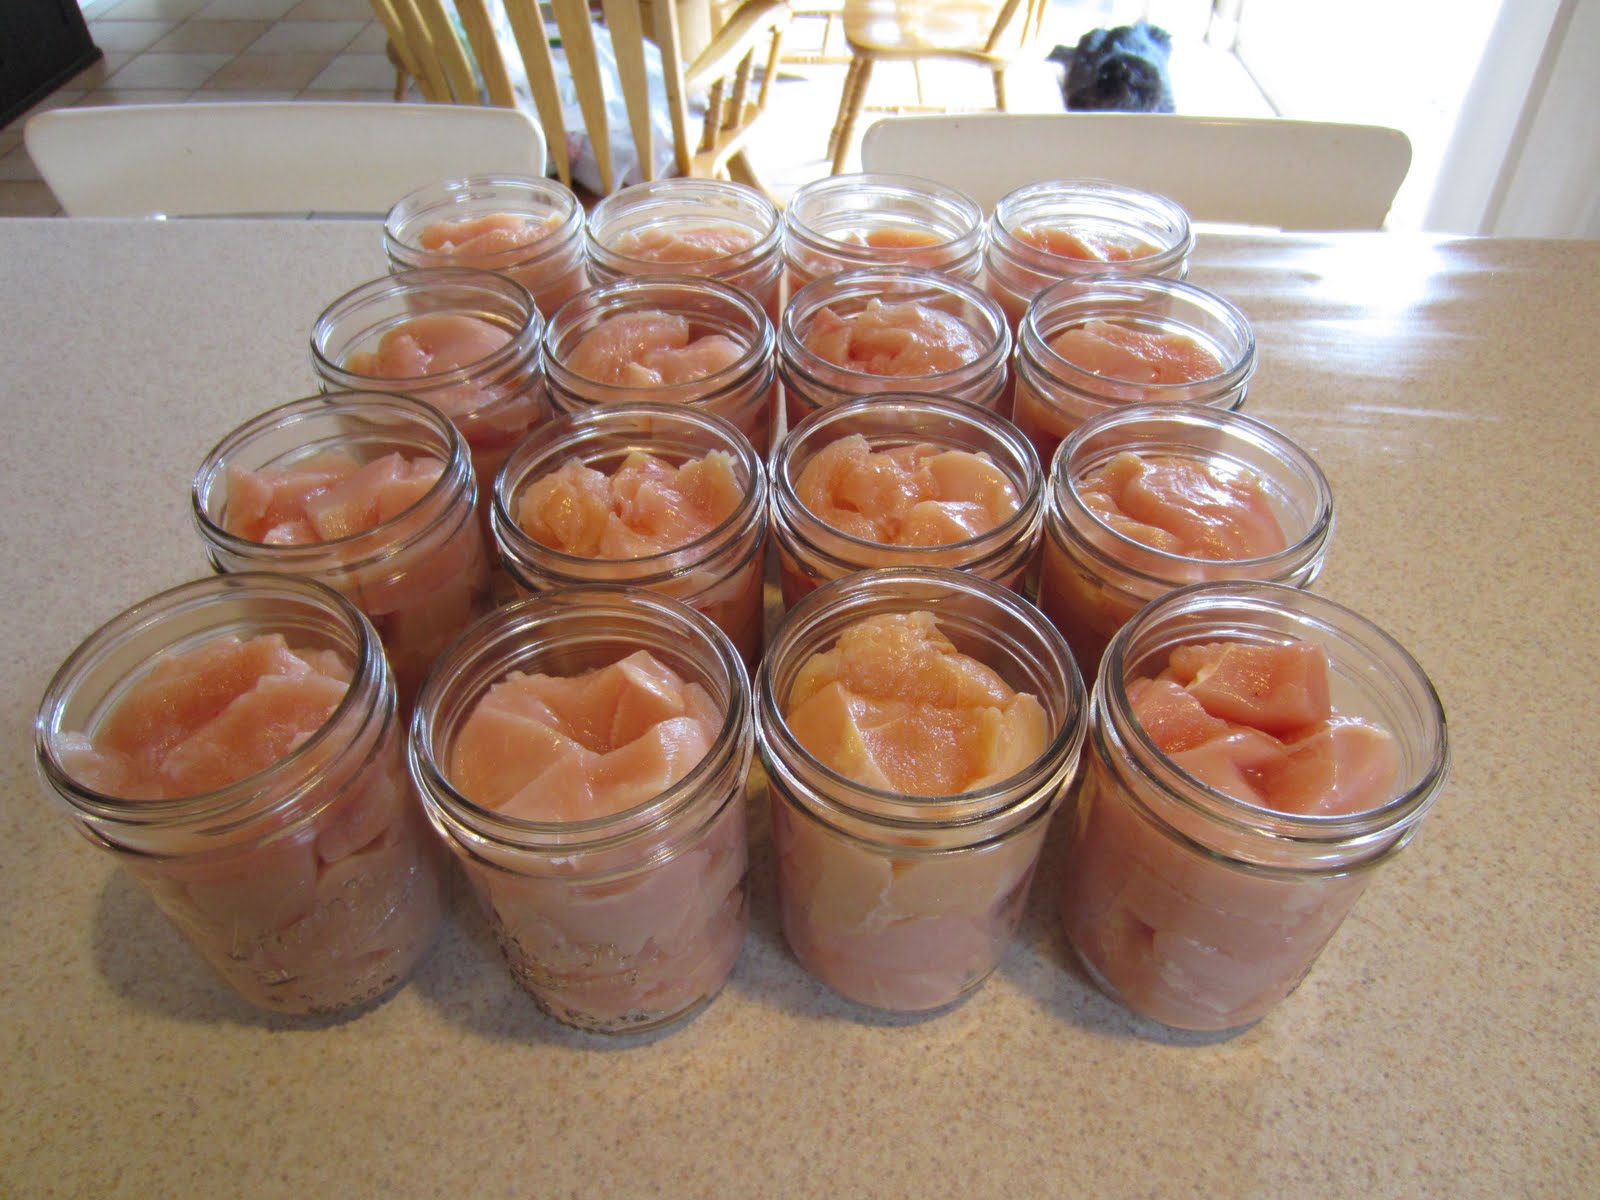
You don’t want a lot of big empty spaces, but you don’t want to smash it flat beyond recognition, either. The chicken will expand while processing, and then shrink. If you pack it too full, you may prevent the lid from being able to seal (more on that later).
Next, add boiling water (or you can use chicken broth if you’d like) to within 1-inch of the top rim of the jar. Pour some water in, poke around the sides with a spatula, plastic knife or chopstick, to help remove air bubbles, and then fill a little bit more if the water has settled below that 1-inch mark.
Once filled, take a clean wet rag or towel and wipe the rims of each jar to make sure they are clean and there is nothing there to impede the seal. Take a hot lid from your simmering pot, and place it on the jar, make sure it is centered, and then put on your ring.
Because the pressure canner uses steam that fills the entire container, you can double stack your jars in a pressure canner. Make sure the water in your canner is now at boiling. Place your jars in your canner according to the manufacturer instructions. Mine says to place the second layer of jars offset by half a jar, so the top jar rests on the edges of two bottom jars.
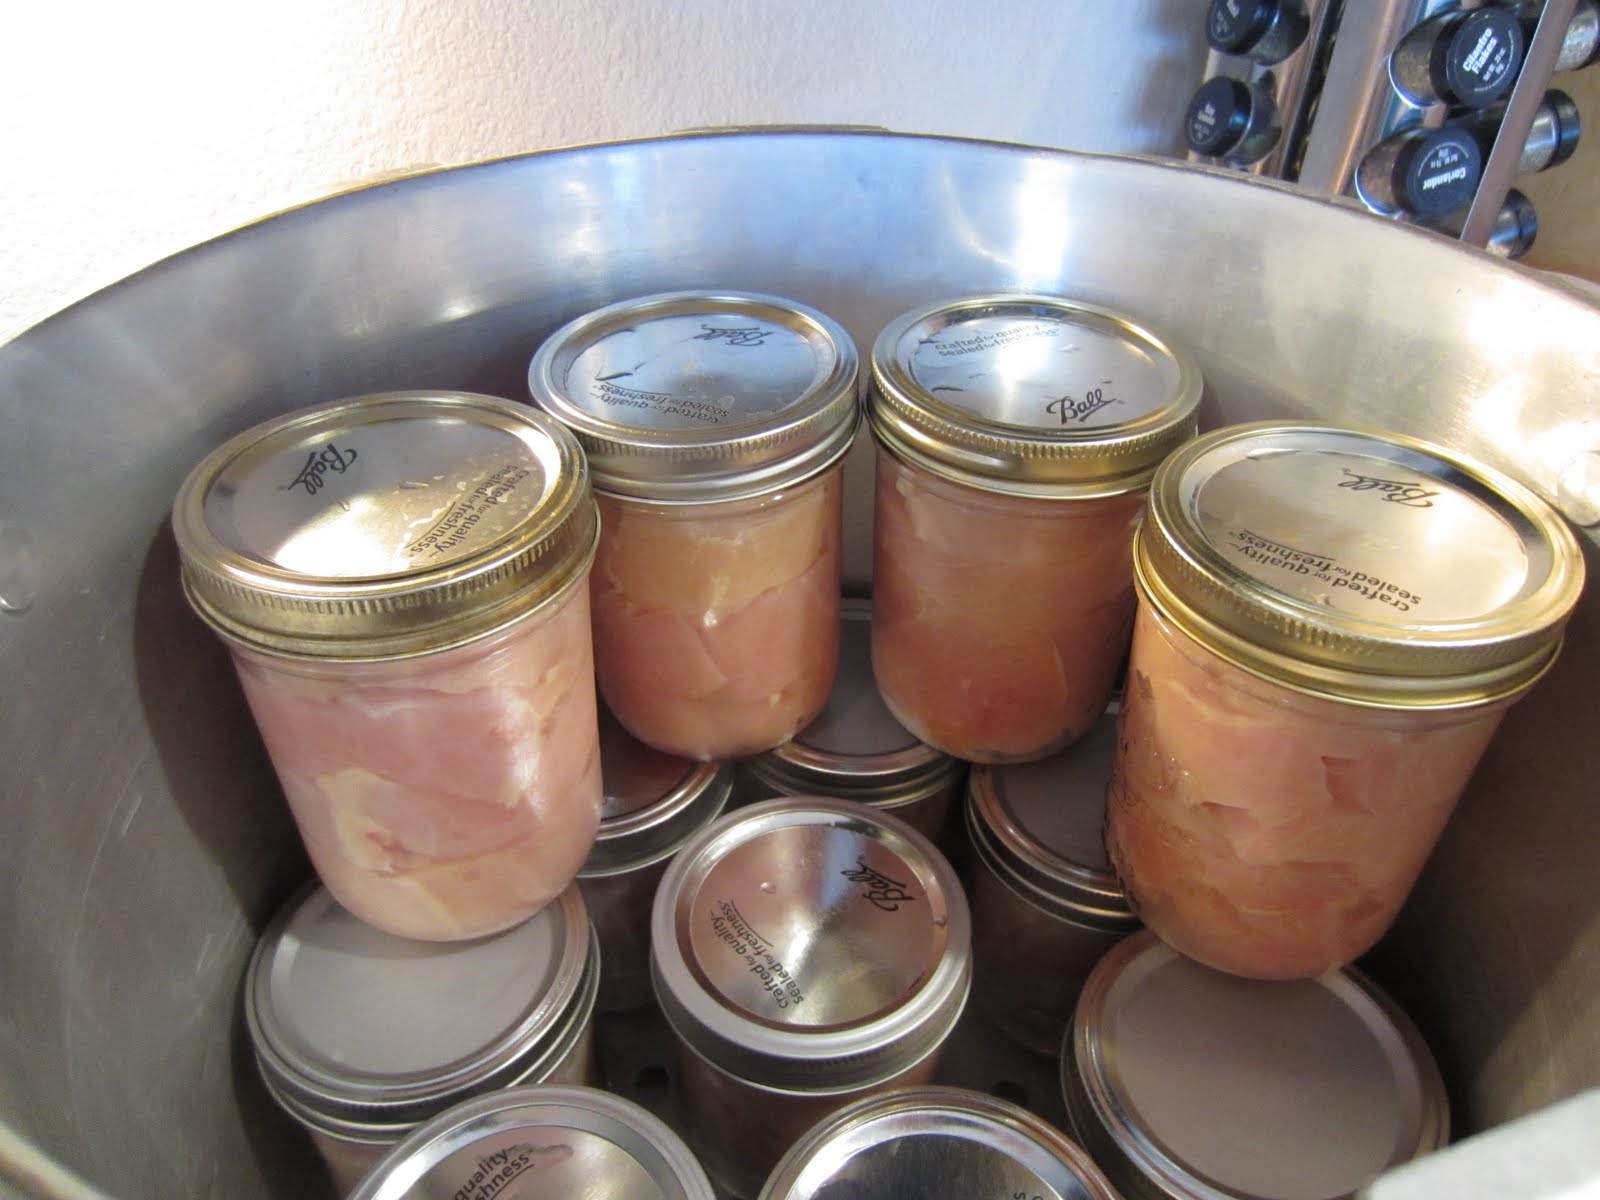
My particular model of canner can fit 16 pints jars at a time.
Once all your jars are in, put on the lid and process according to the instructions. (It’s basically a process of: create steam, let it vent for 10 minutes to get all extra air out, put on stopper/weight, bring to pressure, then hold at pressure for specified time, turn heat off after time is up, let pressure reduce to zero naturally, wait ten minutes, then open the lid and carefully remove jars.)
For chicken, the processing time is 75 minutes for pints, and 90 minutes for quarts. (One pint jar holds about 1lb of chicken, and a quart jar holds about 2lb.) You’ll need to look up in a canning book or in your canner manufacturer’s instructions to find out what pressure to can at – here where I live it is 13 psi. You must keep your pressure at that amount (or higher) throughout the processing time – if it dips below that, you’re supposed to start the time all over again. Because of that, I usually end up processing at 14 psi, because for the first little while the pressure will fluctuate as you get the heat settings figured out, and that way I have a few moments to adjust the heat before dipping below the 13 mark.
Once the jars are in, and you’ve vented the canner and brought it to pressure, there isn’t much to do but sit and wait. I usually bring a book with me and just sit in the kitchen so I can keep an eye on the pressure. You will need to adjust your burner settings periodically, as the heat and steam builds up and the pressure increases. I start out at high for getting to a boil, venting and getting to pressure. Once at pressure, I can turn down to med-high, then turn it down little by little every 10-15 minutes or so, until by the end I’m down to med-low for the last half hour or so.
Once your jars are out of the canner, leave them alone for 12-24 hours and then test for seal. Press the middle of the lid – if it flexes down, it isn’t sealed. If you can barely move it, then you’ve got a good seal. Any jars that don’t seal can be reprocessed (with a new lid) or moved to the refrigerator to be used soon. After 24 hours, you can remove the rings, wash the jars, label them with the date, and store them away!
[For specific instructions on the actual canning process, which I have not gone into here, I recommend the Ball Blue Book or the National Center for Home Preserving’s web site at https://www.uga.edu/nchfp/.]
Note: The canned chicken works best in recipes calling for diced/chopped or shredded chicken.
A PYP Best Blog! I saw it, I tried it: cleaning the grates on your gas stove.
Just in case you missed this article on cleaning the grates on your gas stove the first time we shared it a couple of years ago, we are republishing it. After Dori wrote this blog originally, we got an awesome response. This is one of the PYP Best Blogs!
I think I’ve tried everything to get my gas stove grates really clean. And most things work okay but it takes a LOT of elbow grease for mediocre results. So much in fact, that I tend to sort of ignore this chore.
I happened on a new idea on the good old internet though and I thought it was worth a shot.
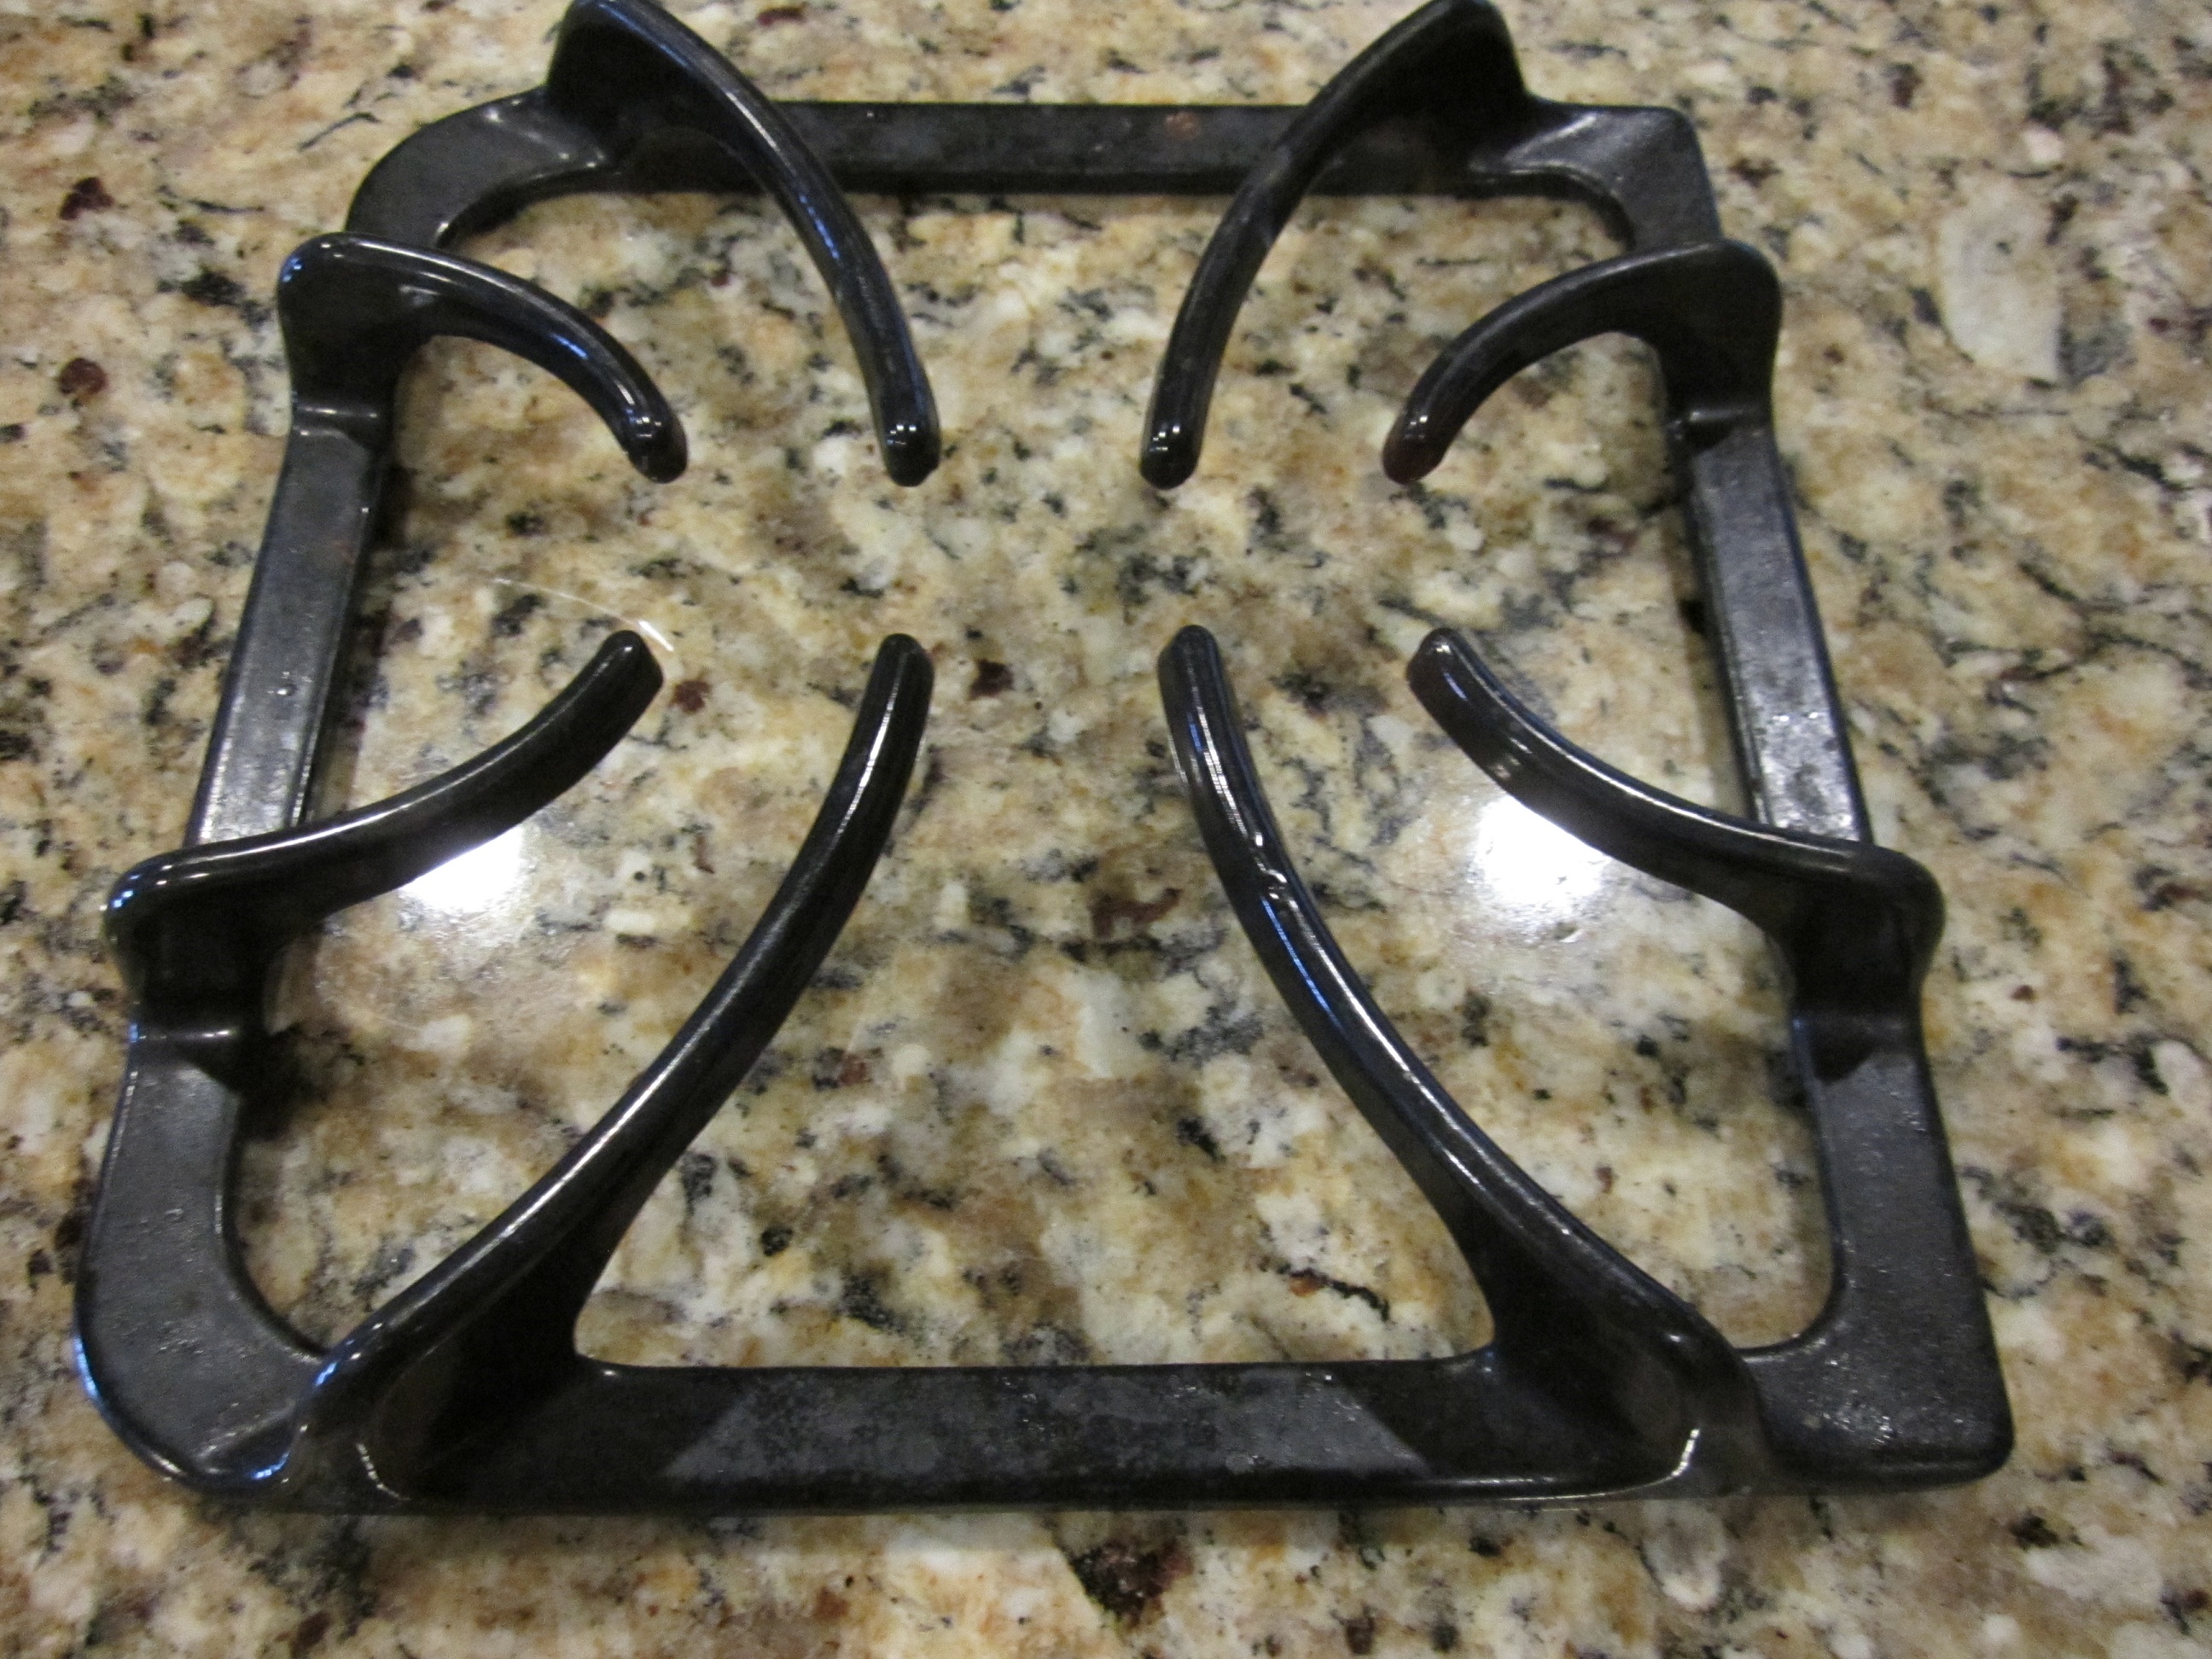
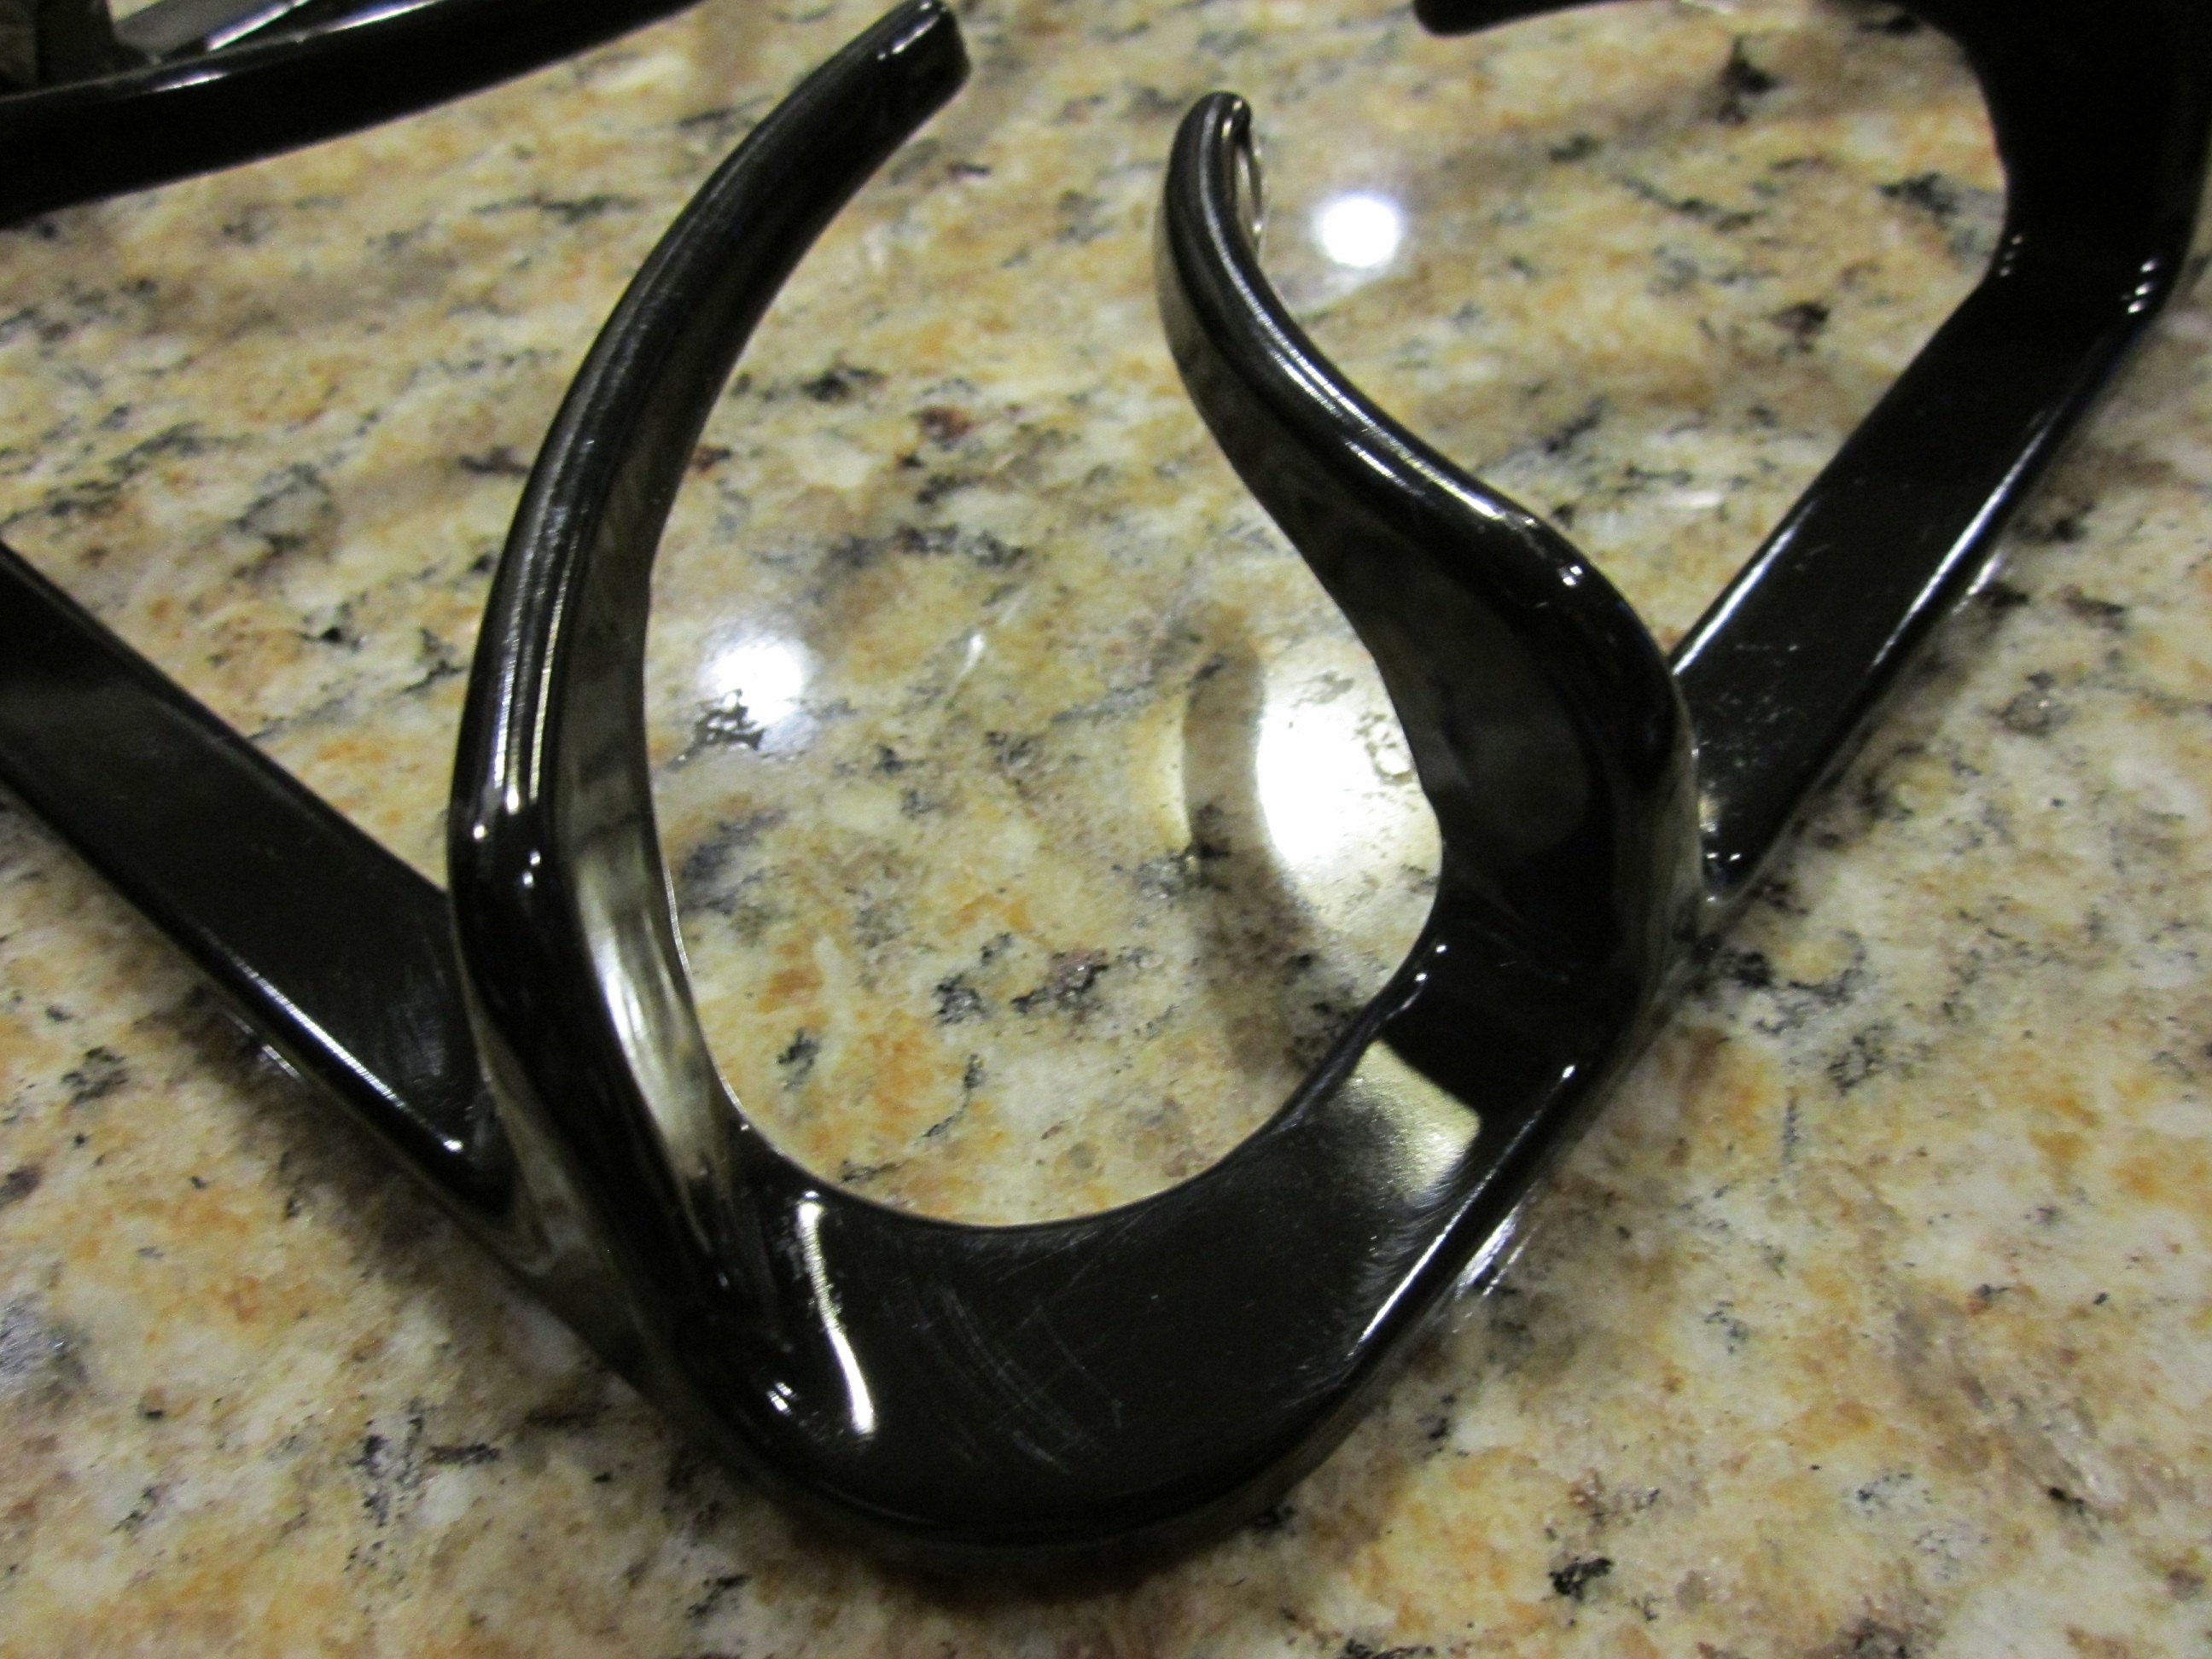
Take one of your nasty old grates…
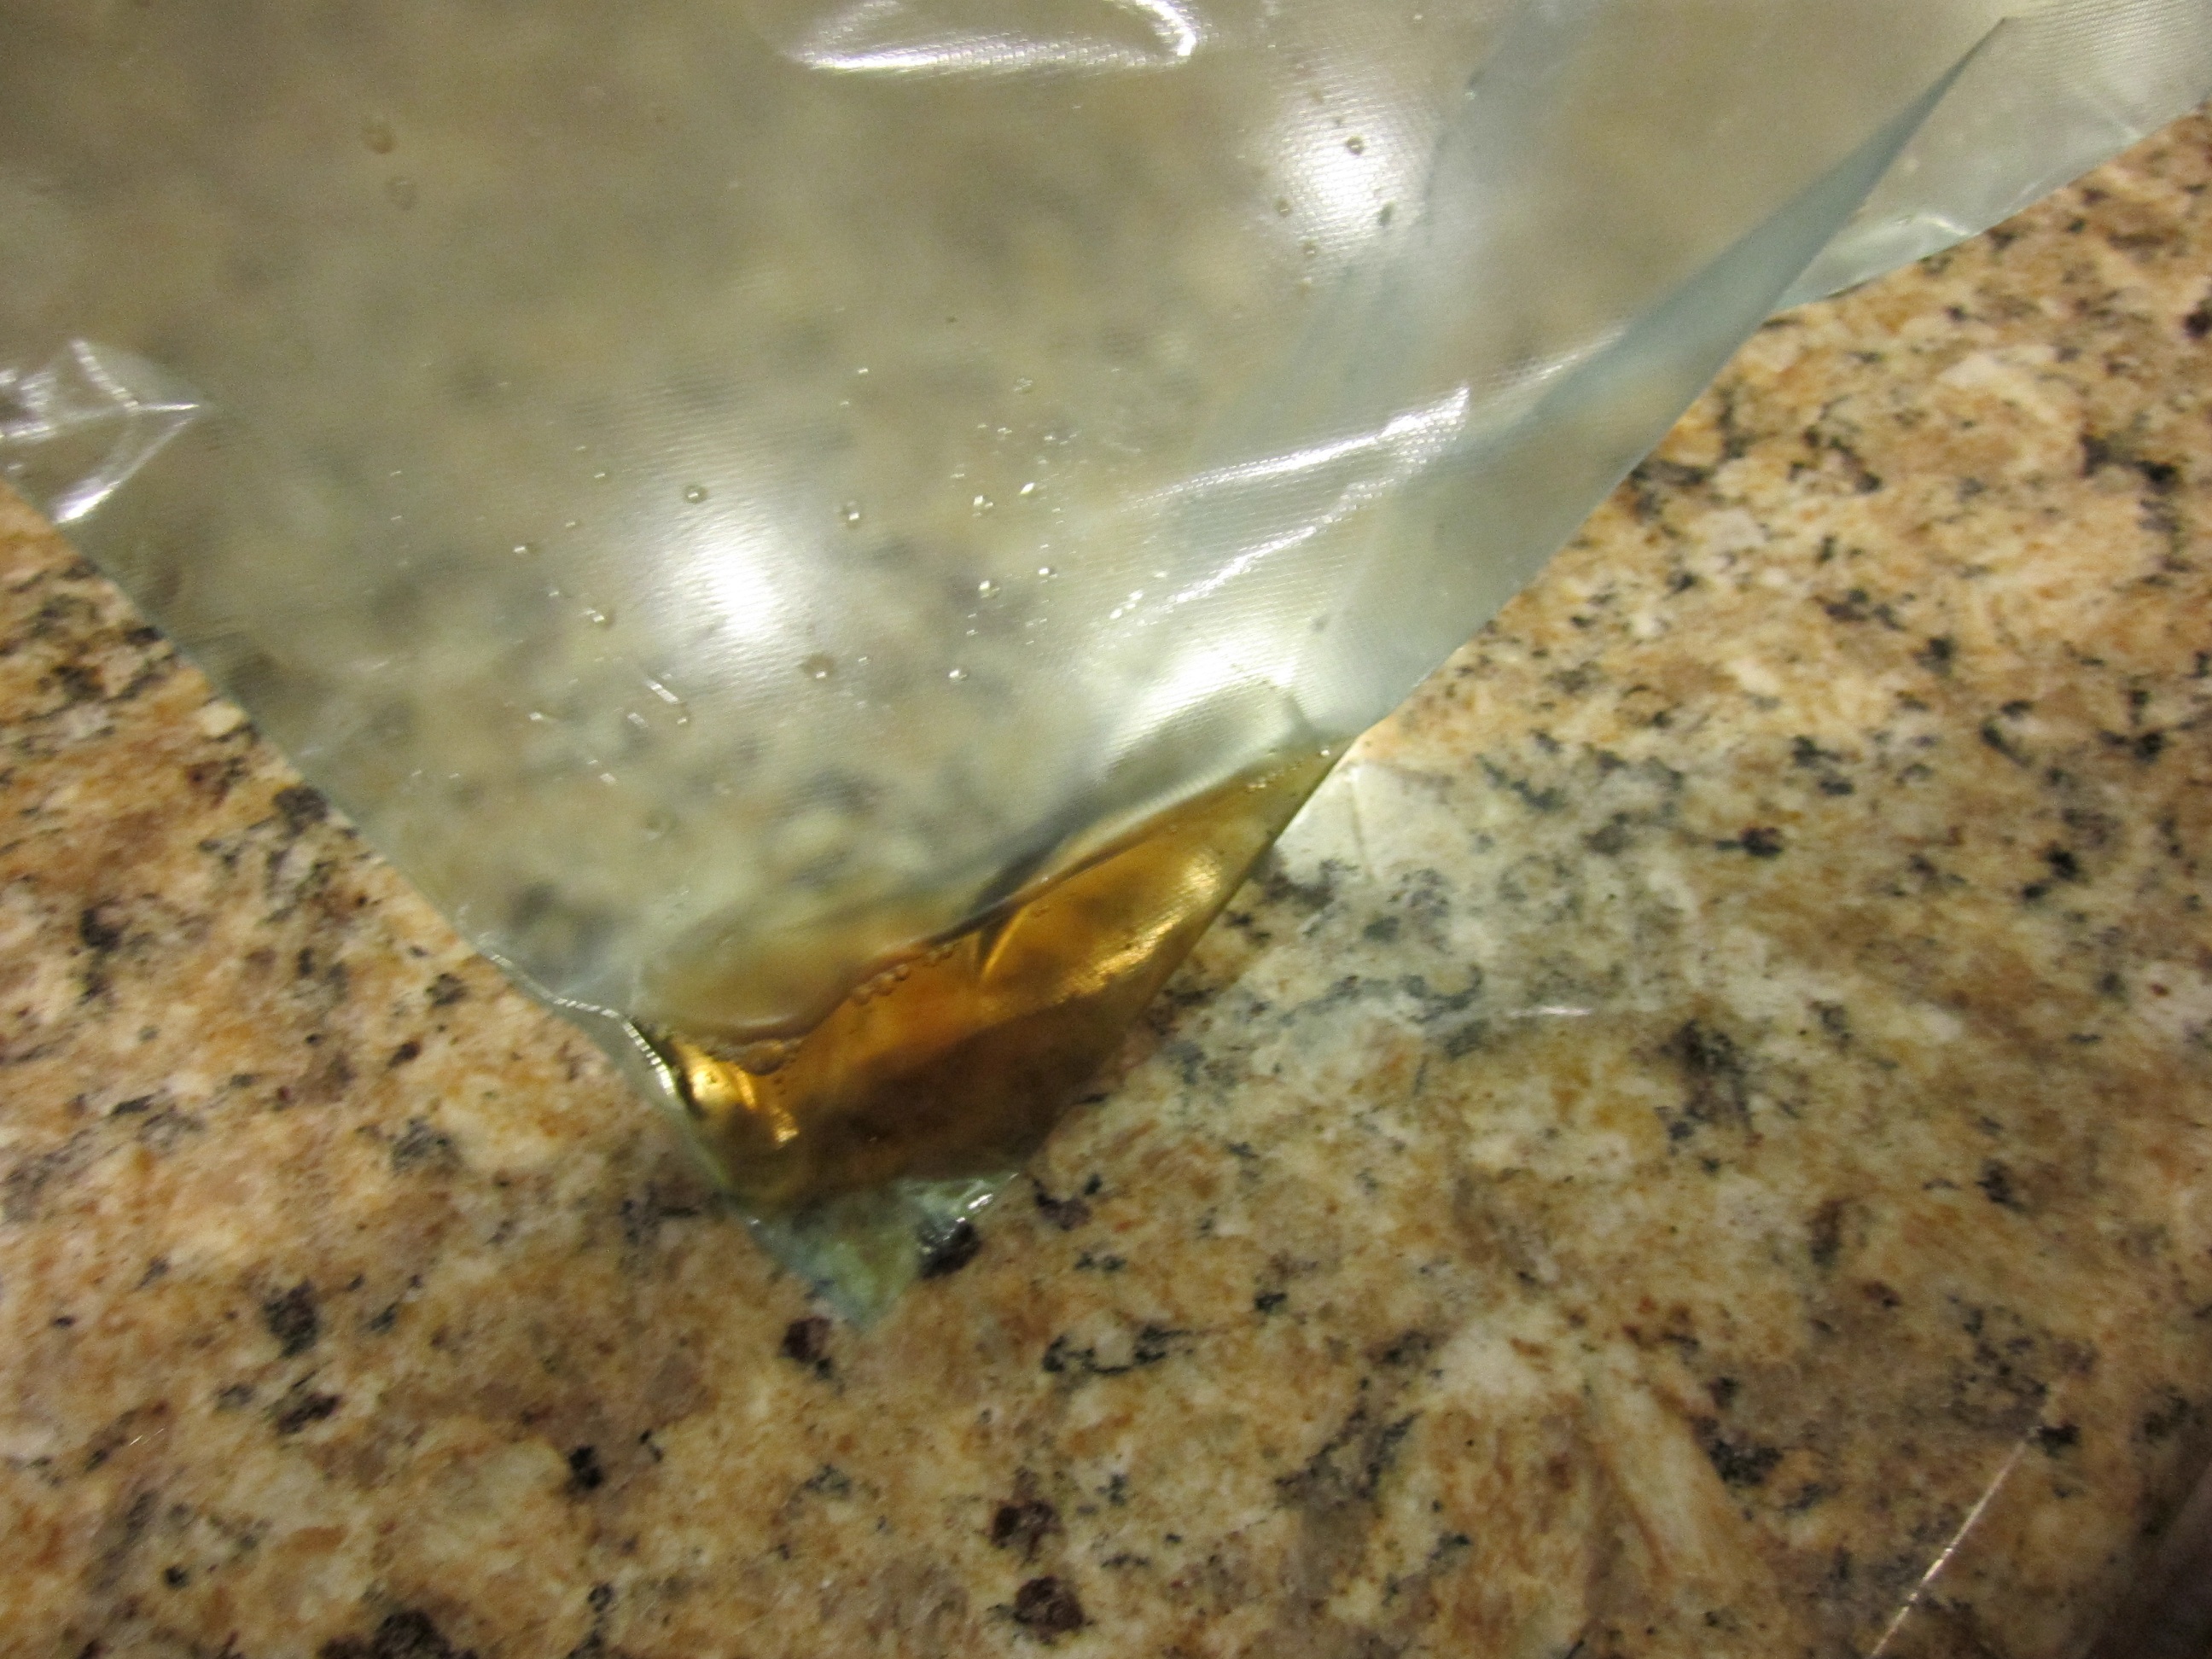
Slip it into a gallon size ziploc bag. Be careful not to put any holes in the bag.
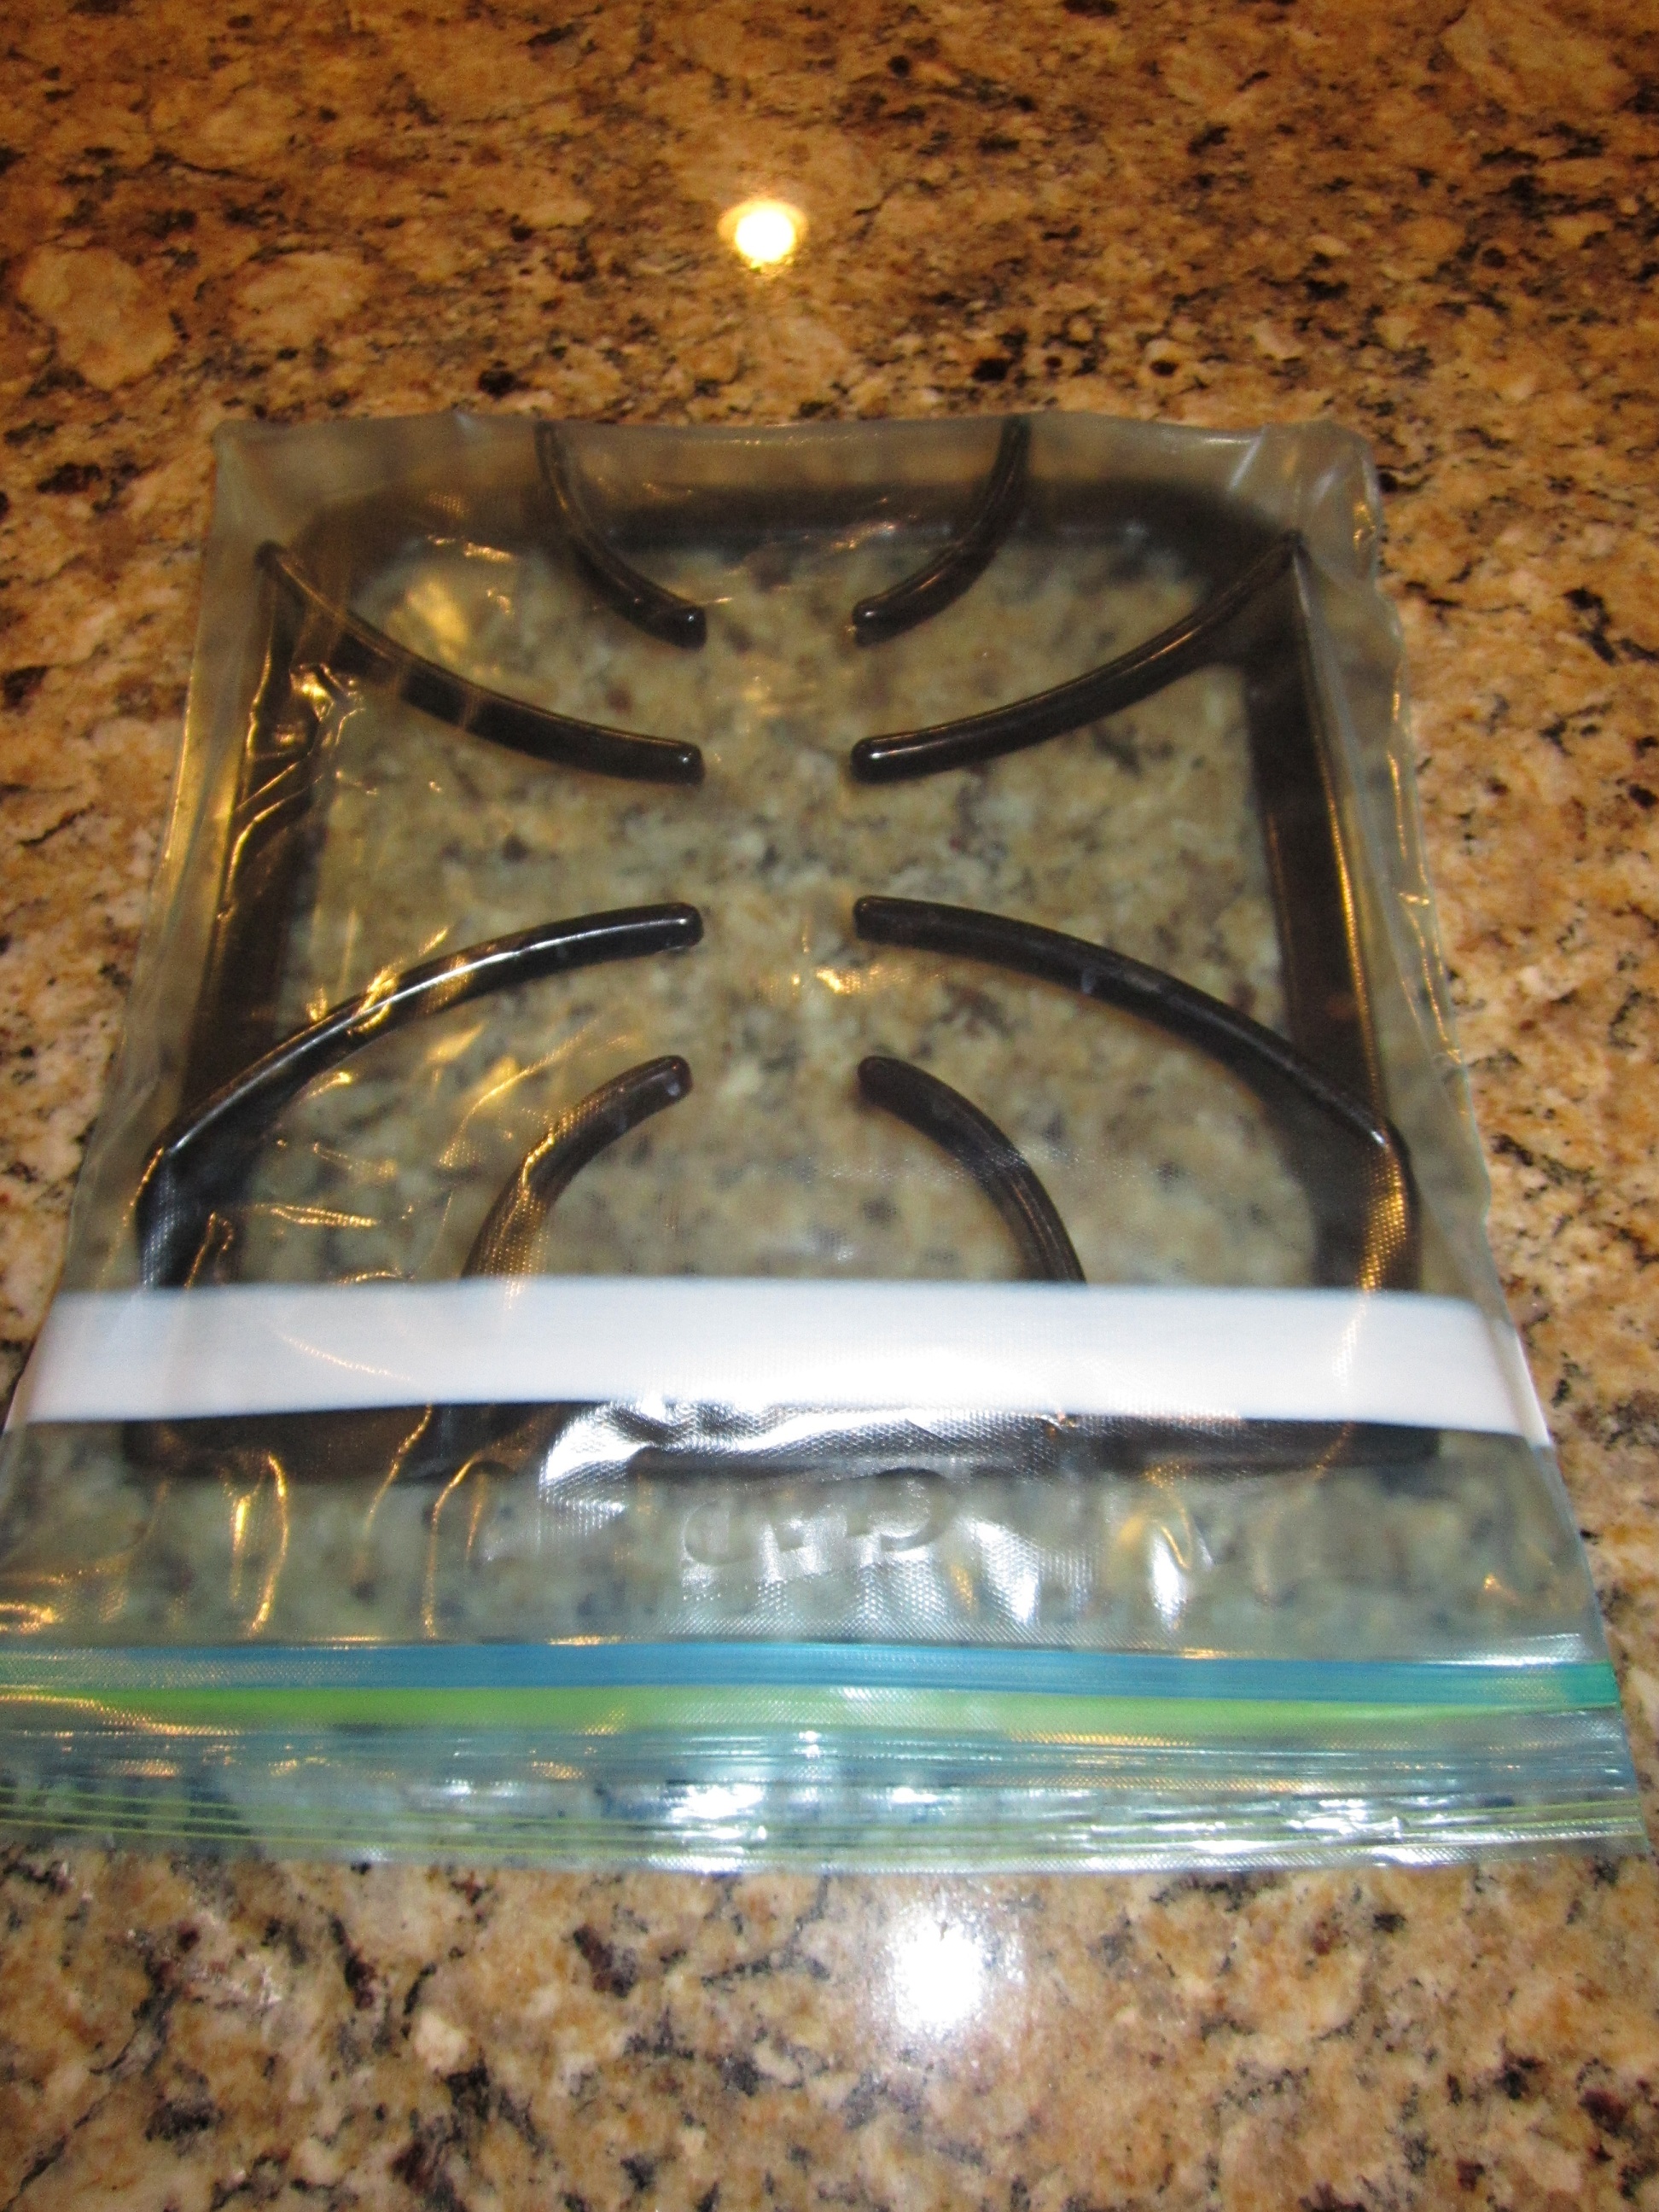
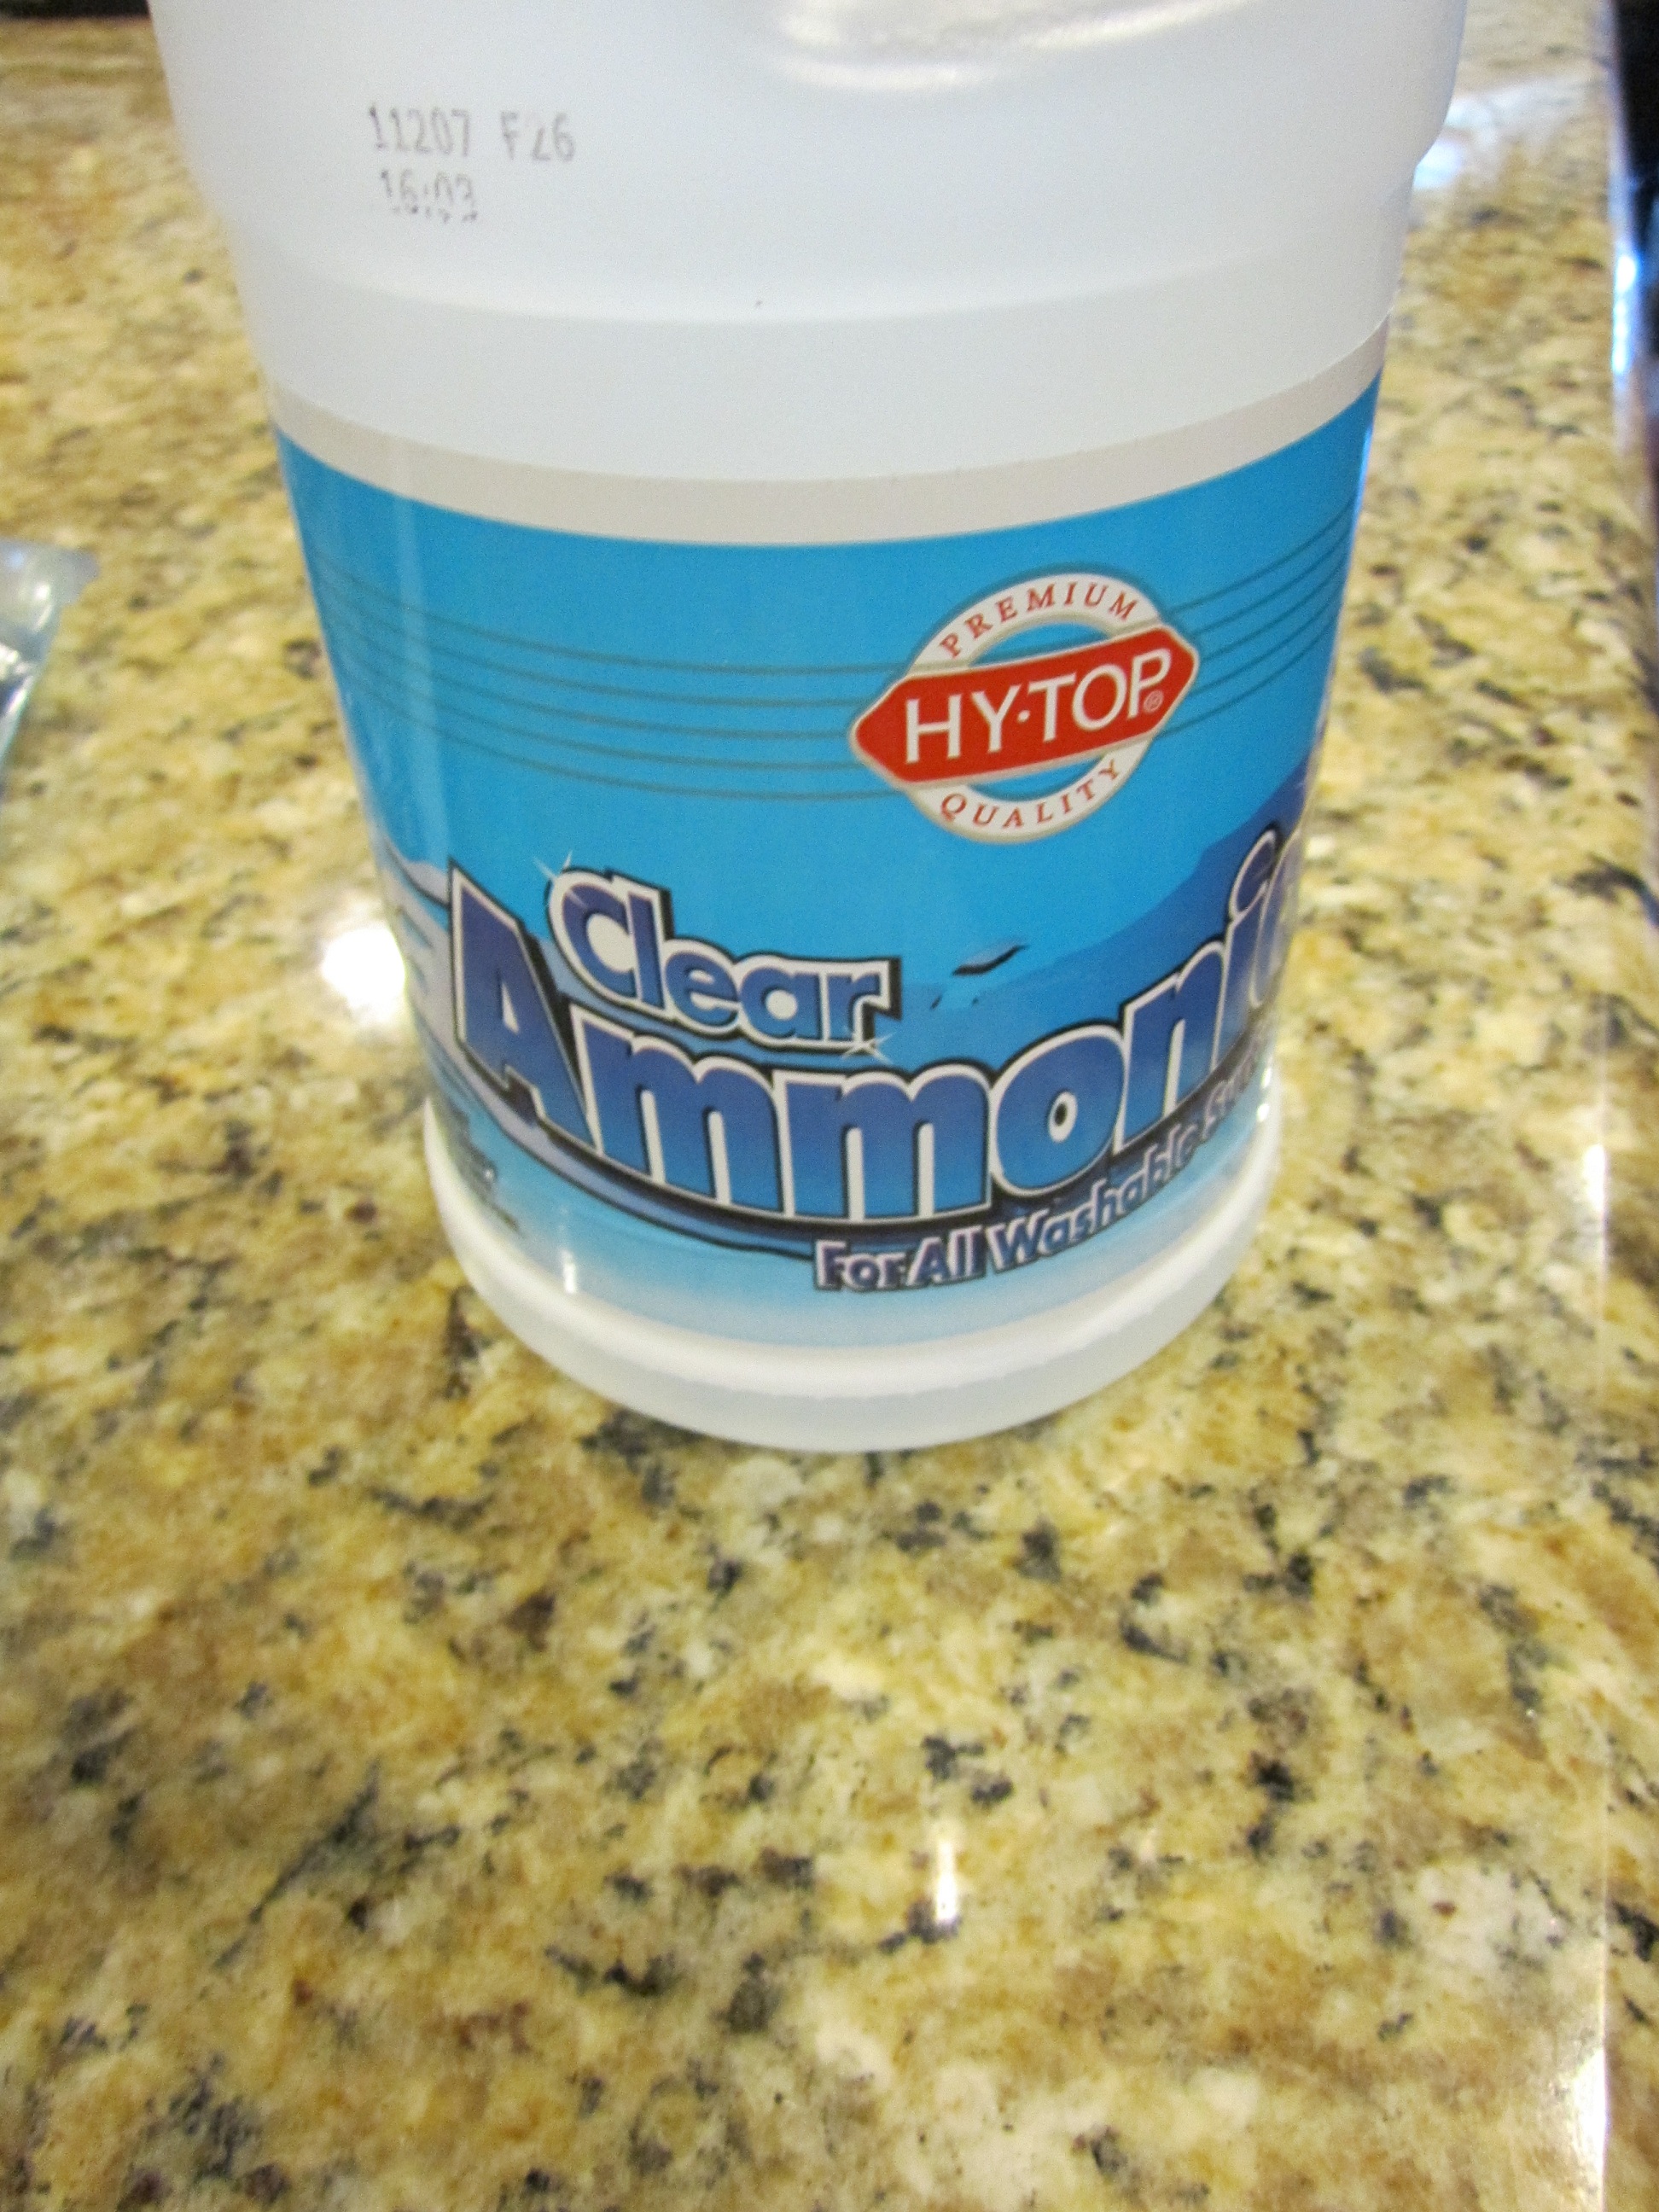
Pour 2 or 3 Tablespoons ammonia into the bag.
Seal the bag. And let it sit for 12 hours.
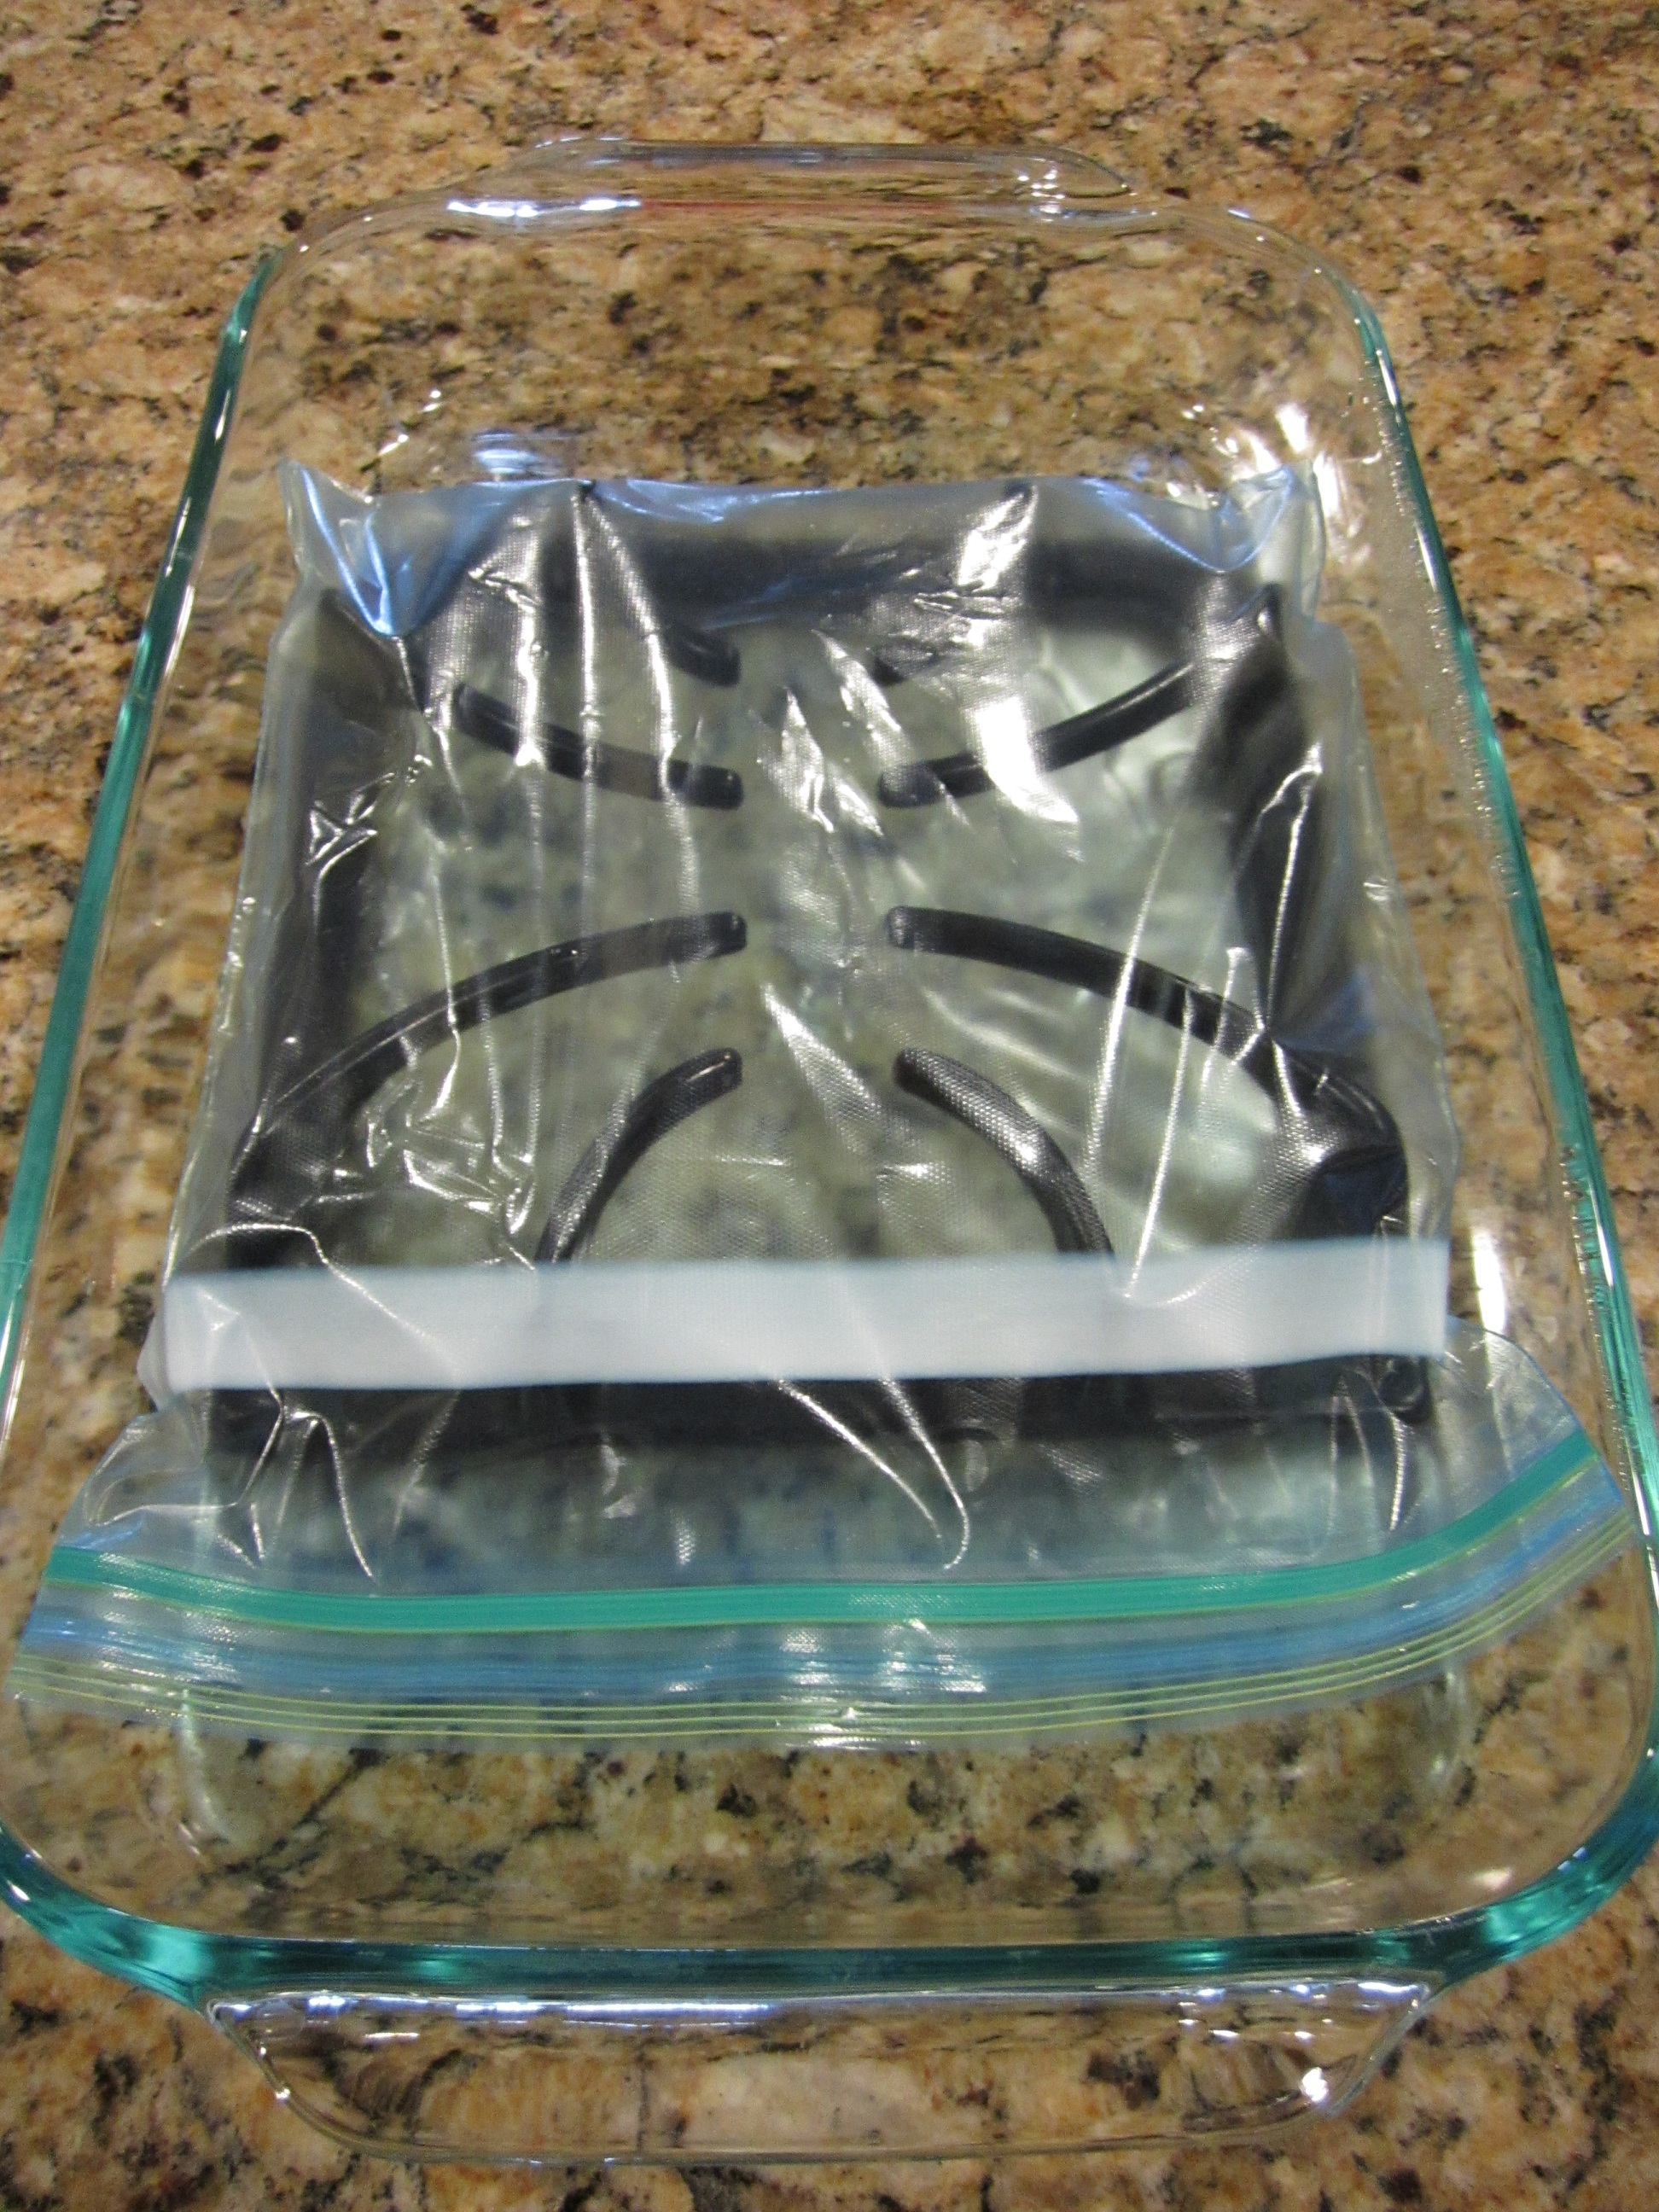
I put mine in a glass baking dish, just in case there were any leaks.

I only let mine sit for about 5 hours because I needed the stove to cook dinner. It’s probably best to plan to do this overnight.
Take the grate out of the ziploc bag. I did this in the kitchen sink.
Look at the yucky ammonia left in the bag…
Rinse the grate thoroughly.
At this point I used a green scrubby (technical term, you know what I mean?) and just very lightly wiped all the surfaces off. No actual scrubbing at all really.
And TA-DA!!
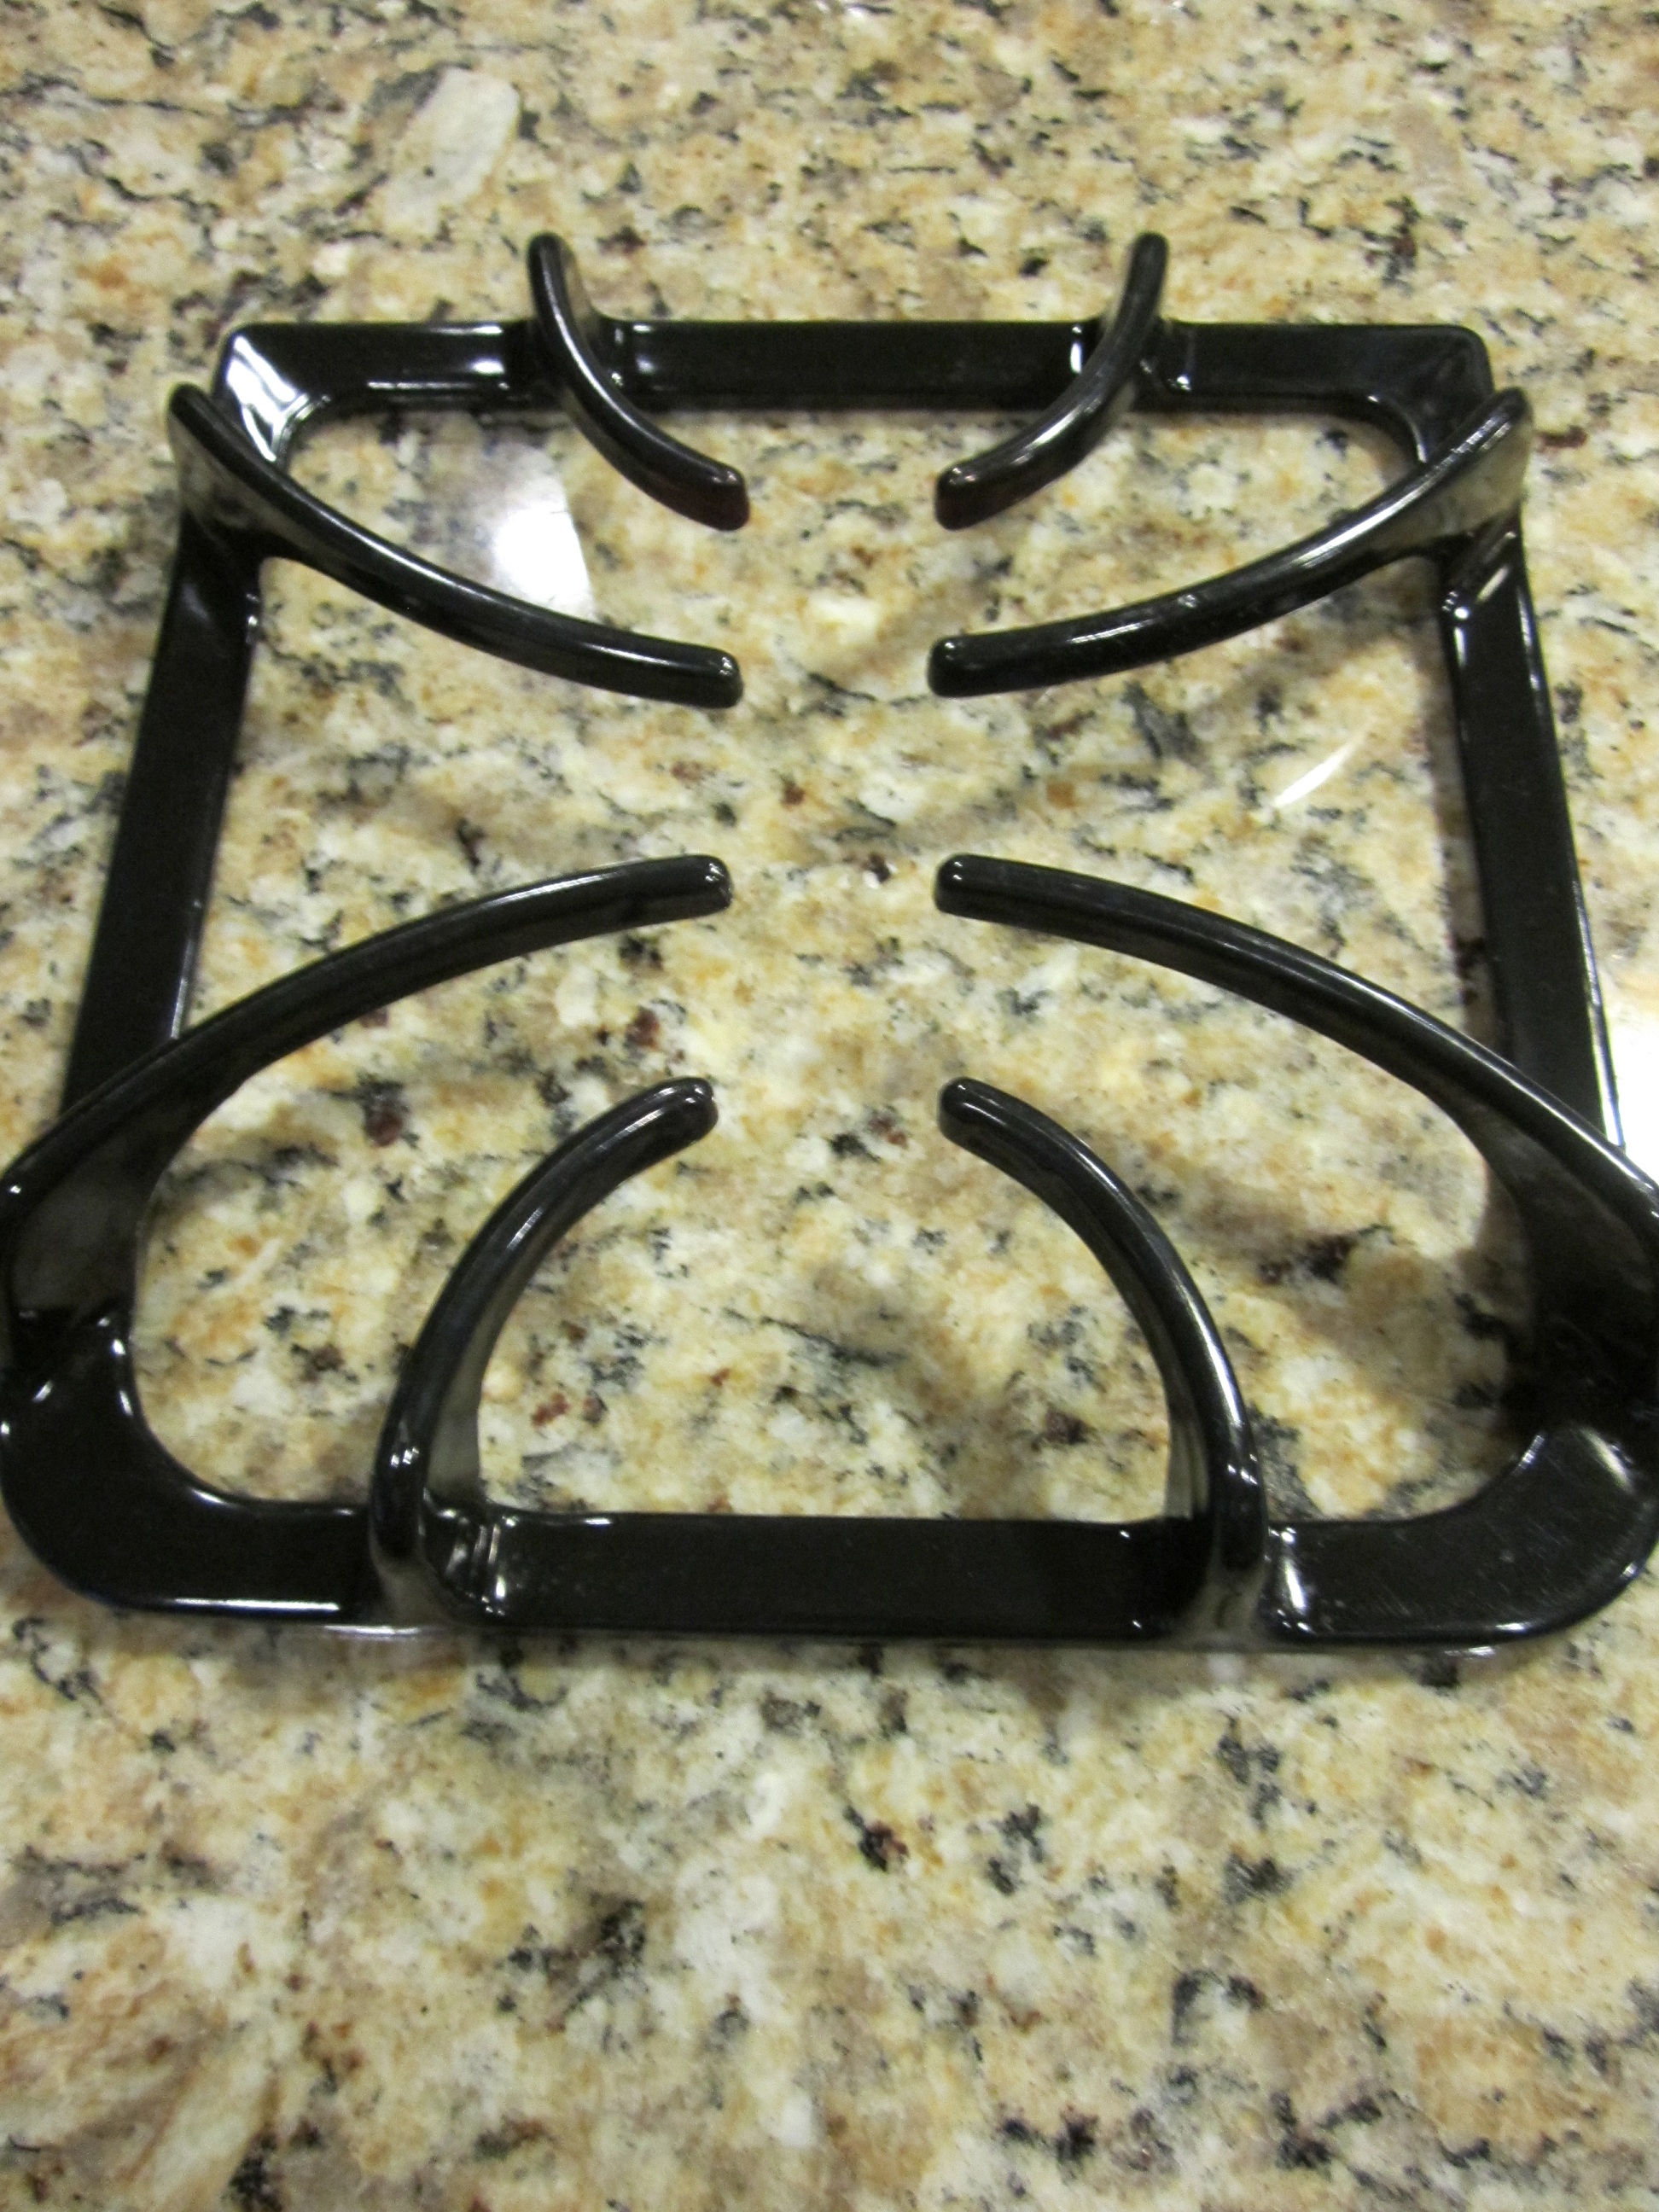
IT WORKED!!!
There are still a couple of tiny smudgy spots that probably would have been completely gone if I had let them soak for the full 12 hours.
This is definitely how I will clean them from now on. It was about $1.25 for a half gallon of ammonia. That’s a cheap and EASY clean if you ask me!
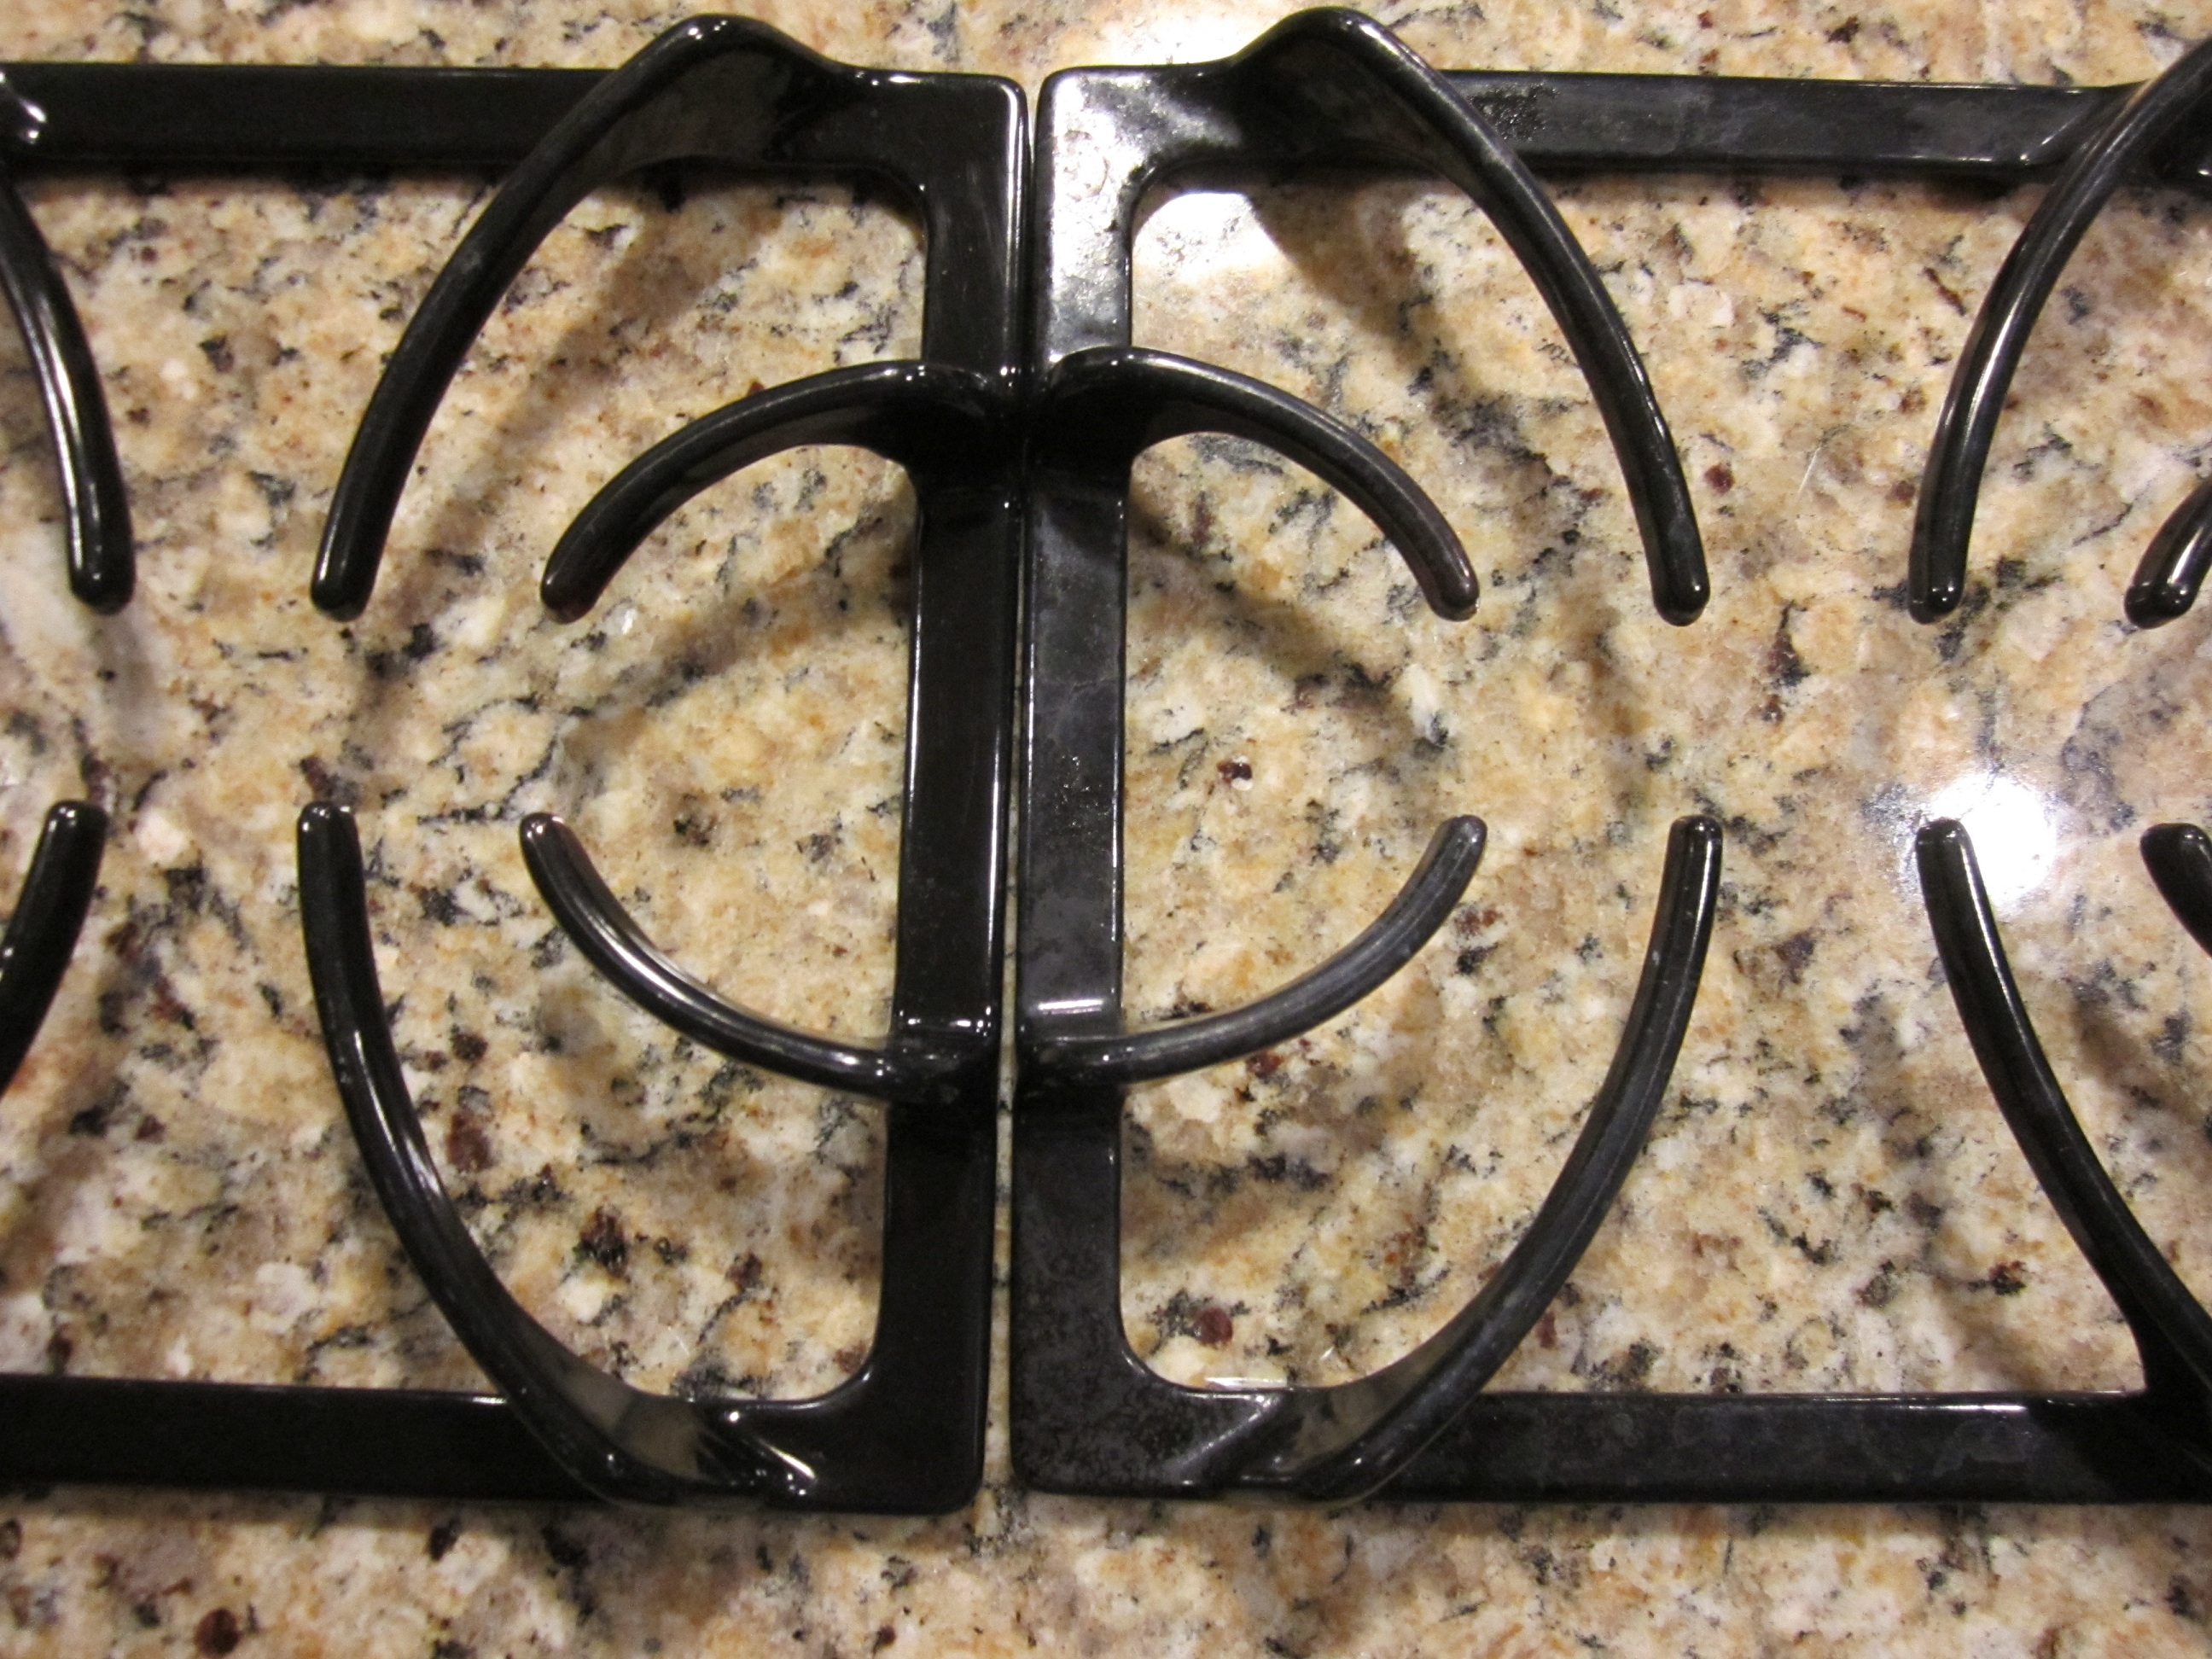
Side by side with one of the uncleaned grates.
Now I’m off to put the other 3 grates in to soak overnight.
Pin It
Make your own laundry detergent!
Just in case you missed this article the first time we shared it a couple of years ago, we are republishing it. After Marne wrote this blog originally, I tried the laundry detergent. I love it and have used it ever since.
I used to be a HUGE couponer. My stockpile was massive with almost everything, most especially laundry detergent. I haven’t been such an avid couponer the past few years, and just last week I ran out of laundry detergent! First time in years. I haven’t bought laundry detergent for such a long time that I about DIED at the price when I went to the store. I just couldn’t bring myself to pay for a large container of good detergent! I did my research online and decided to make my own. I have thought about doing this for years, and decided now was the time.
There are a lot of recipes out there for homemade laundry detergent. I went with a recipe my friend Heather shared on her blog. It looked easy, which was key for me! Plus, it is supposed to make enough for 8-9 months, which I liked.
Here is what you need to make your own laundry detergent. All of these I found together at Walmart in the detergent asile.
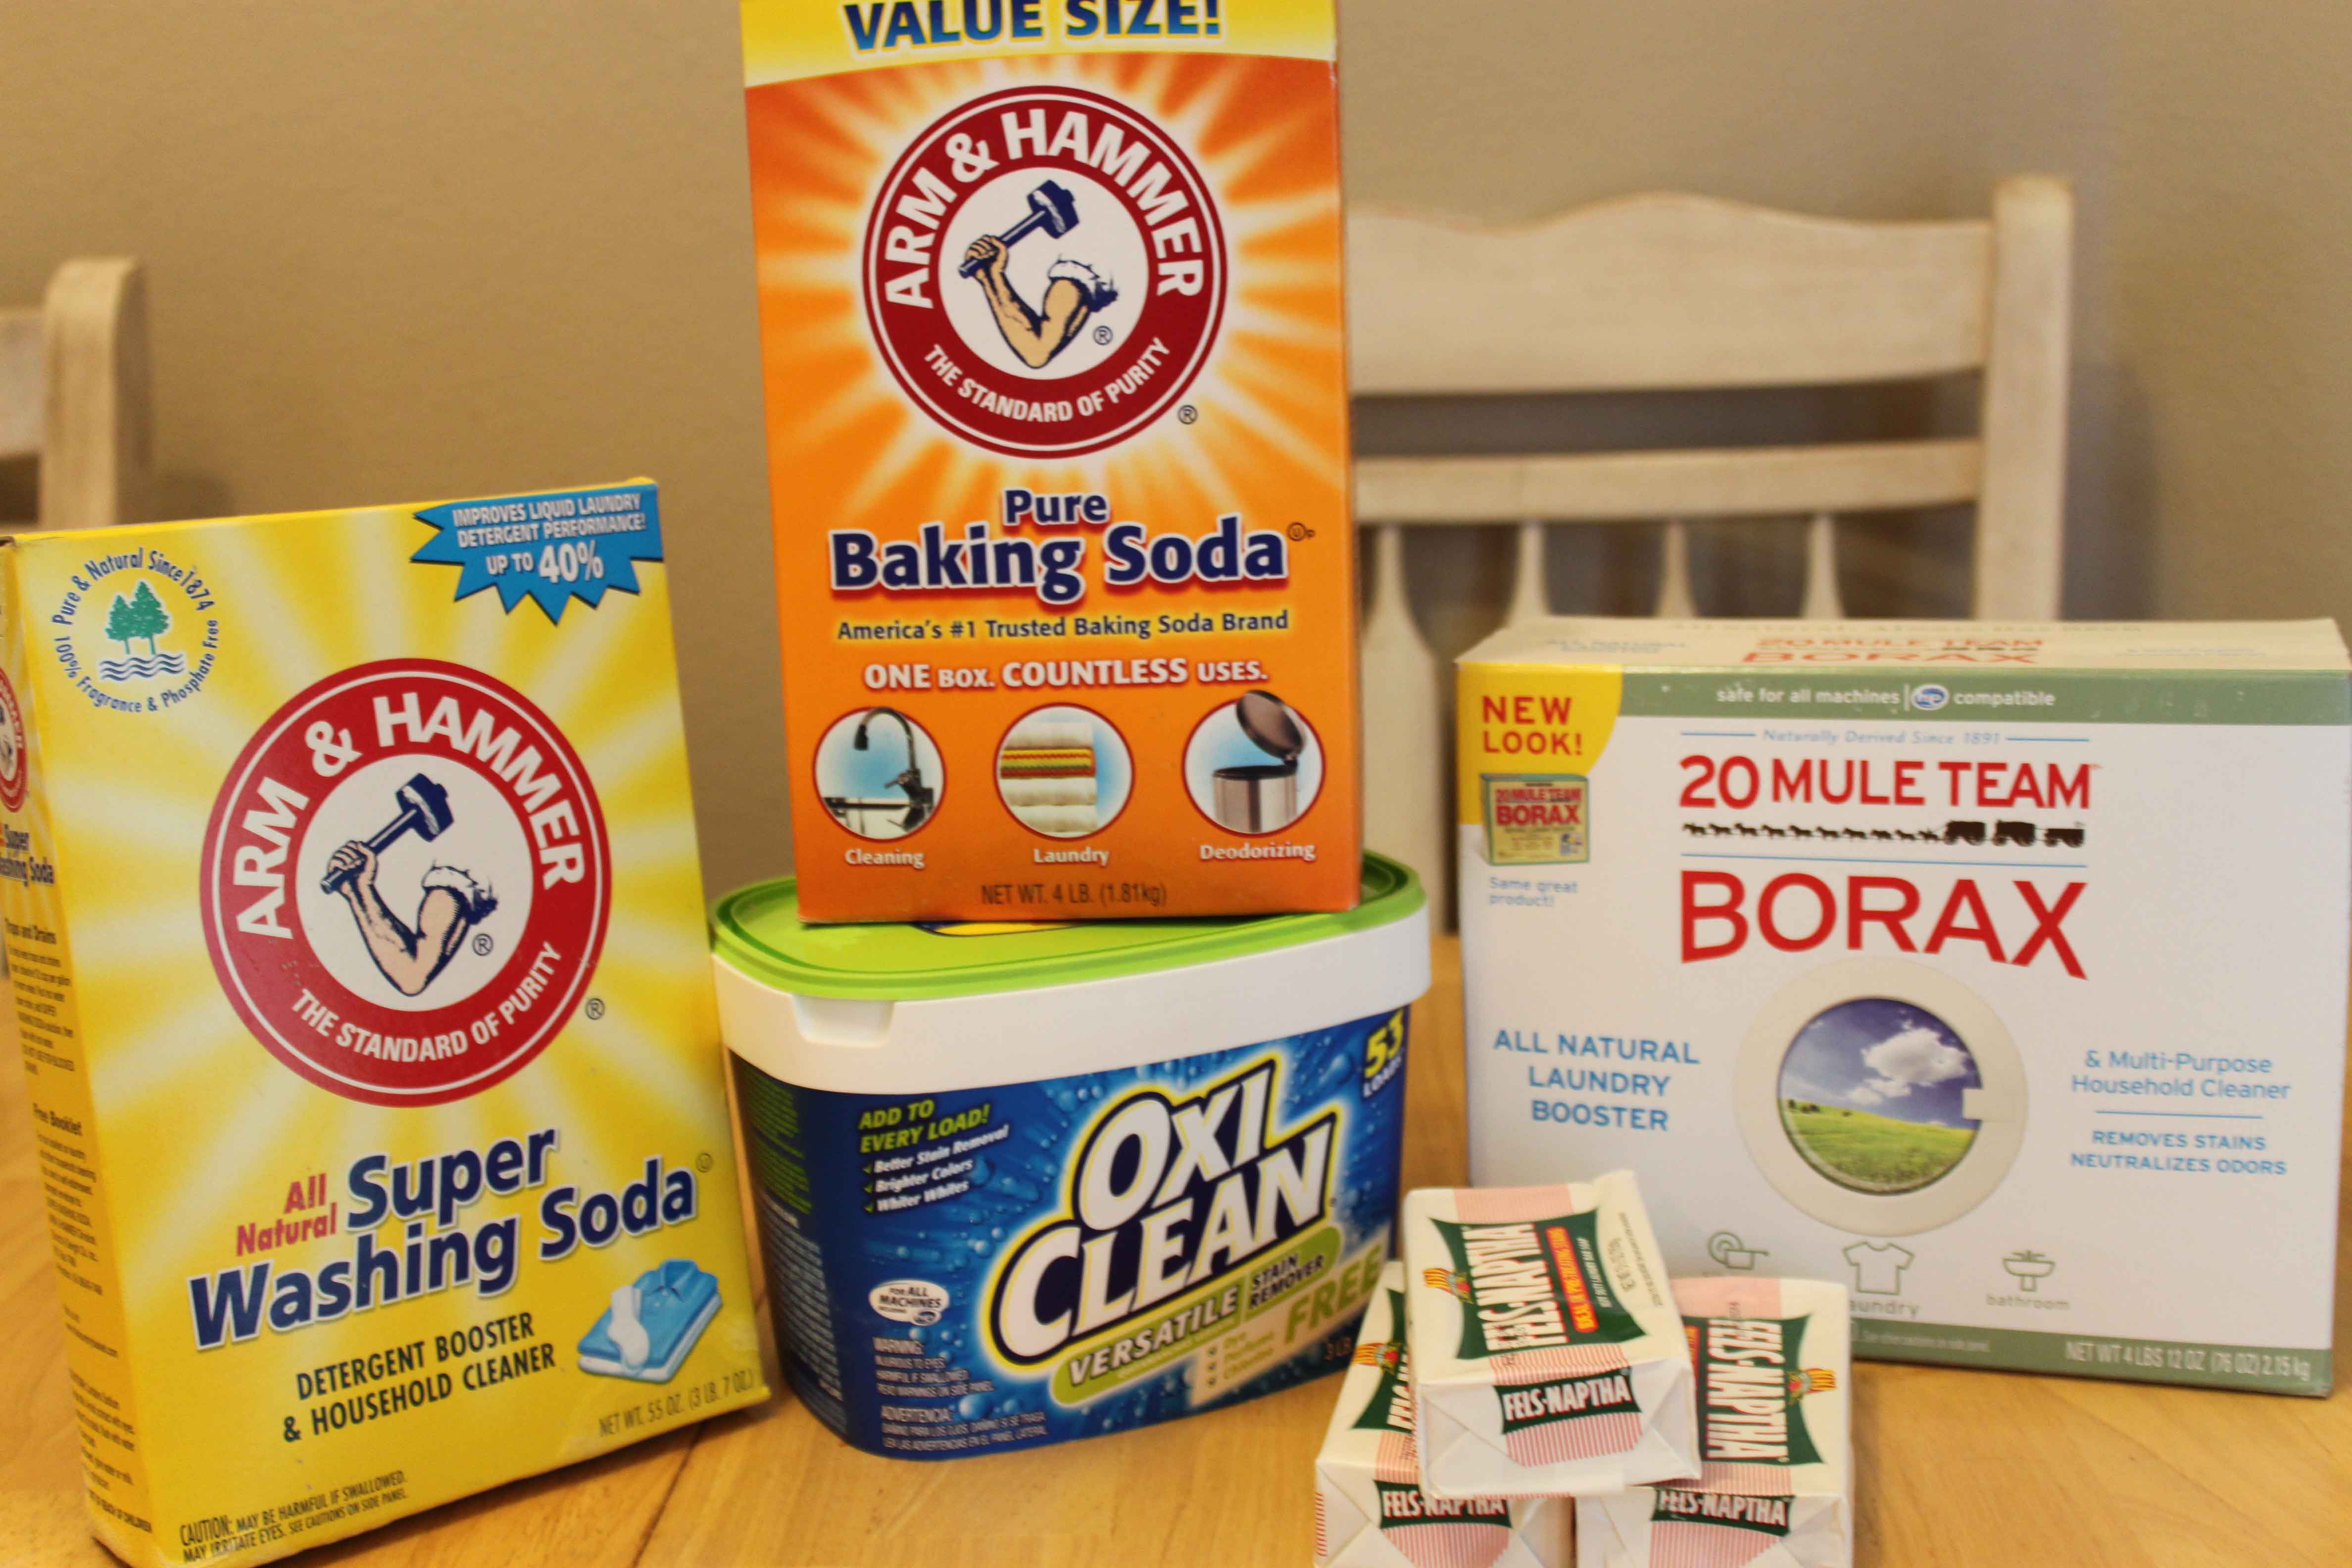
3 bars Fels Naptha Soap (grated)
1 three lb 7 oz box Washing Soda
1 four lb box Baking Soda
1 four lb 12 oz box Borax
3.5 lbs Oxi Clean (or the store brand equivilant)
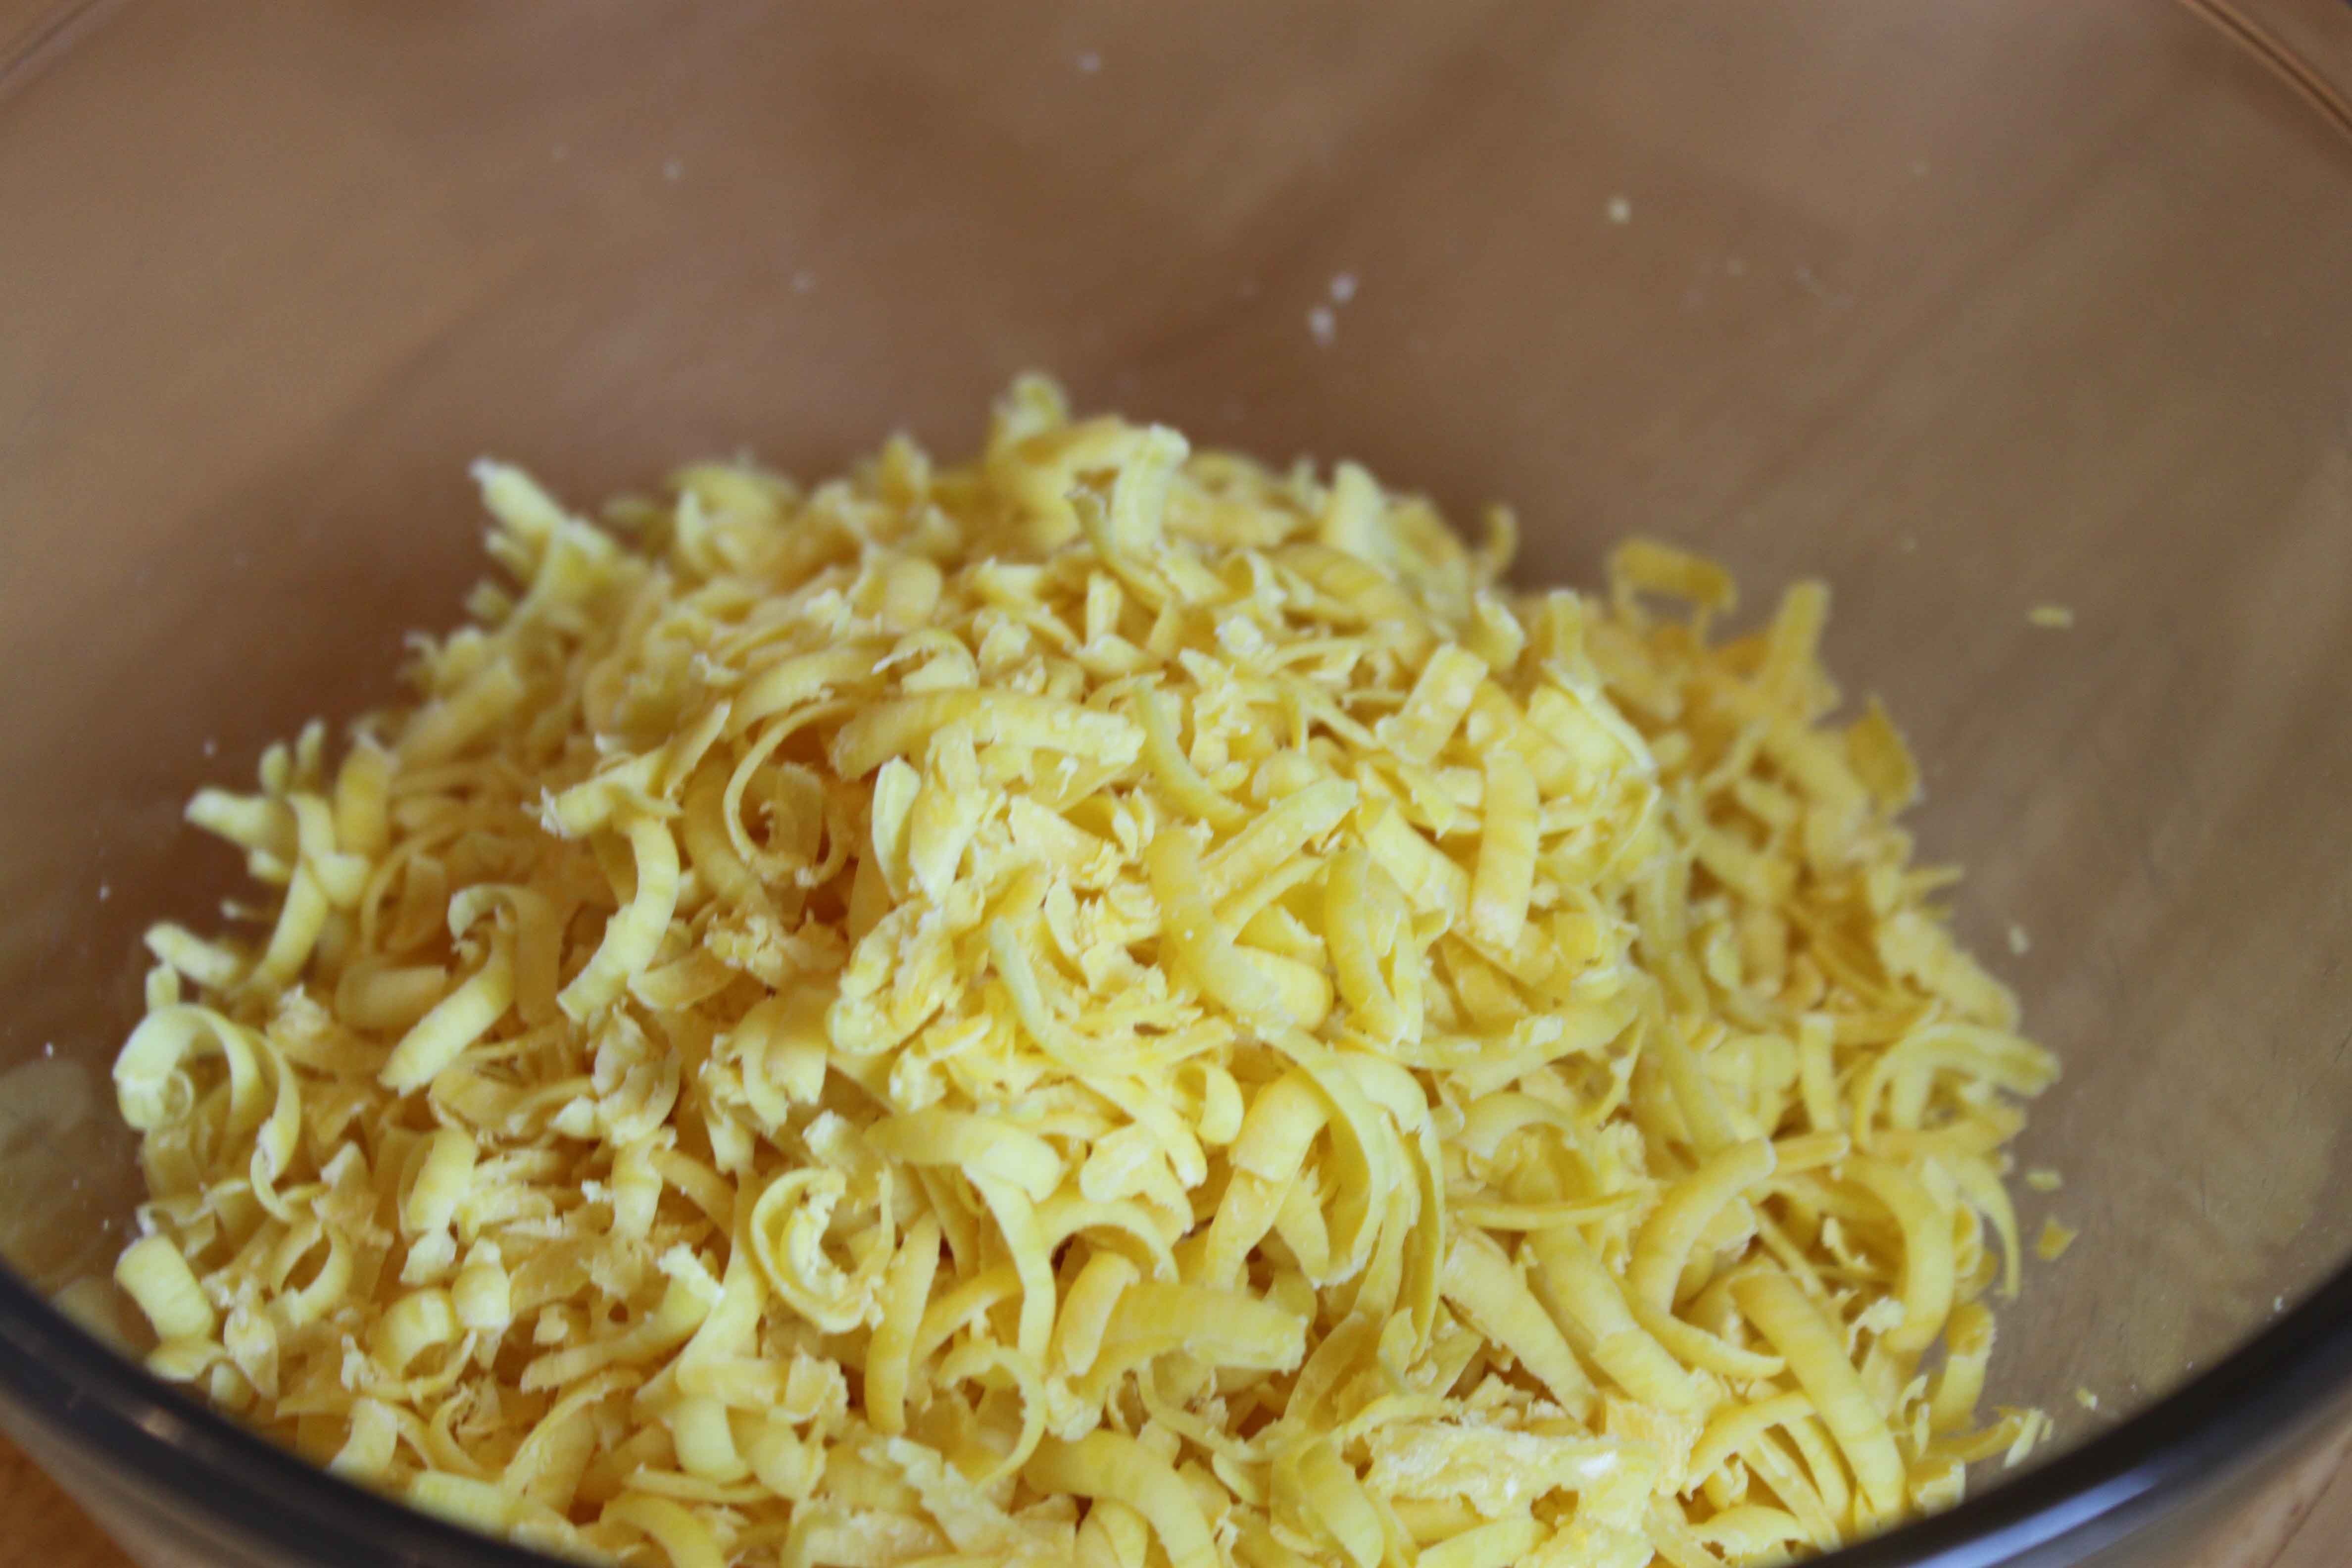
First, grate the Fels Naptha Soap. I used a hand grater, you could use a food processor. It smelled great and was really easy. Kind of looks like grated cheese! Don’t worry…it dissolves just fine in the washer. I usually use cold water and I have not had a problem.
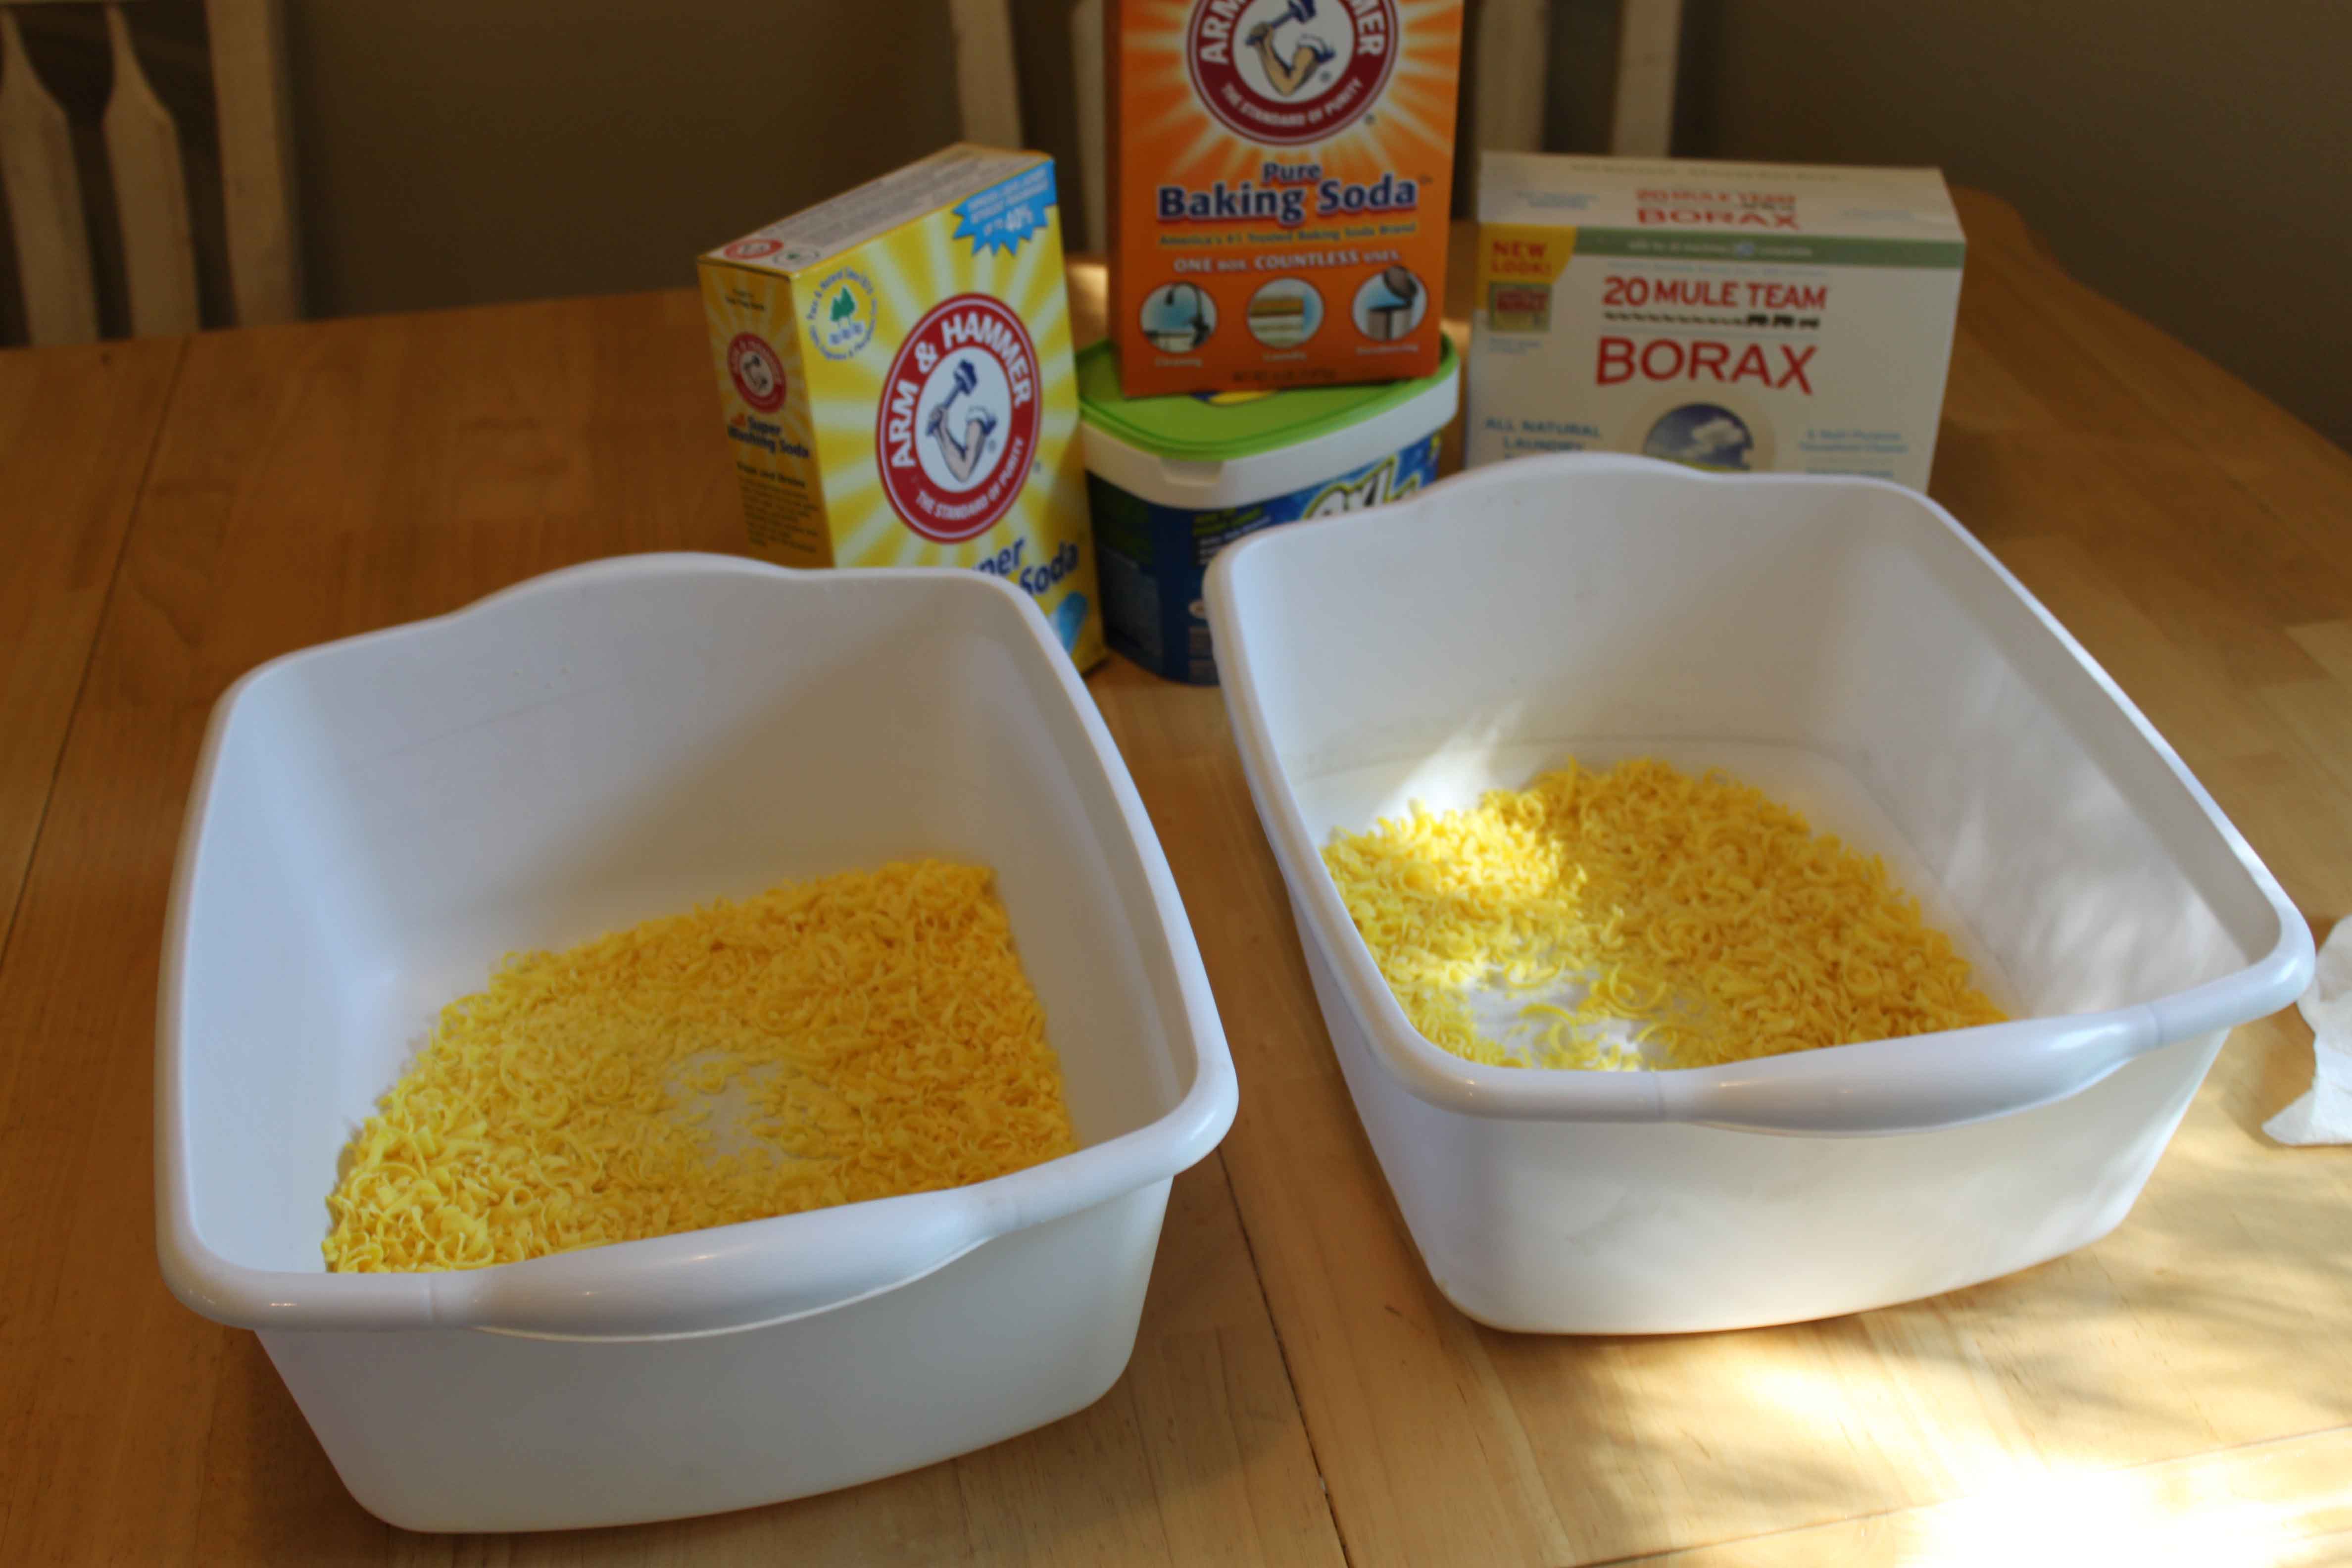
Next, get a large bucket or container to mix everything in really well. I used two tubs and just divided everything up in half and mixed it up together really well. Worked great and smelled great!
This is what it looks like when all mixed up.
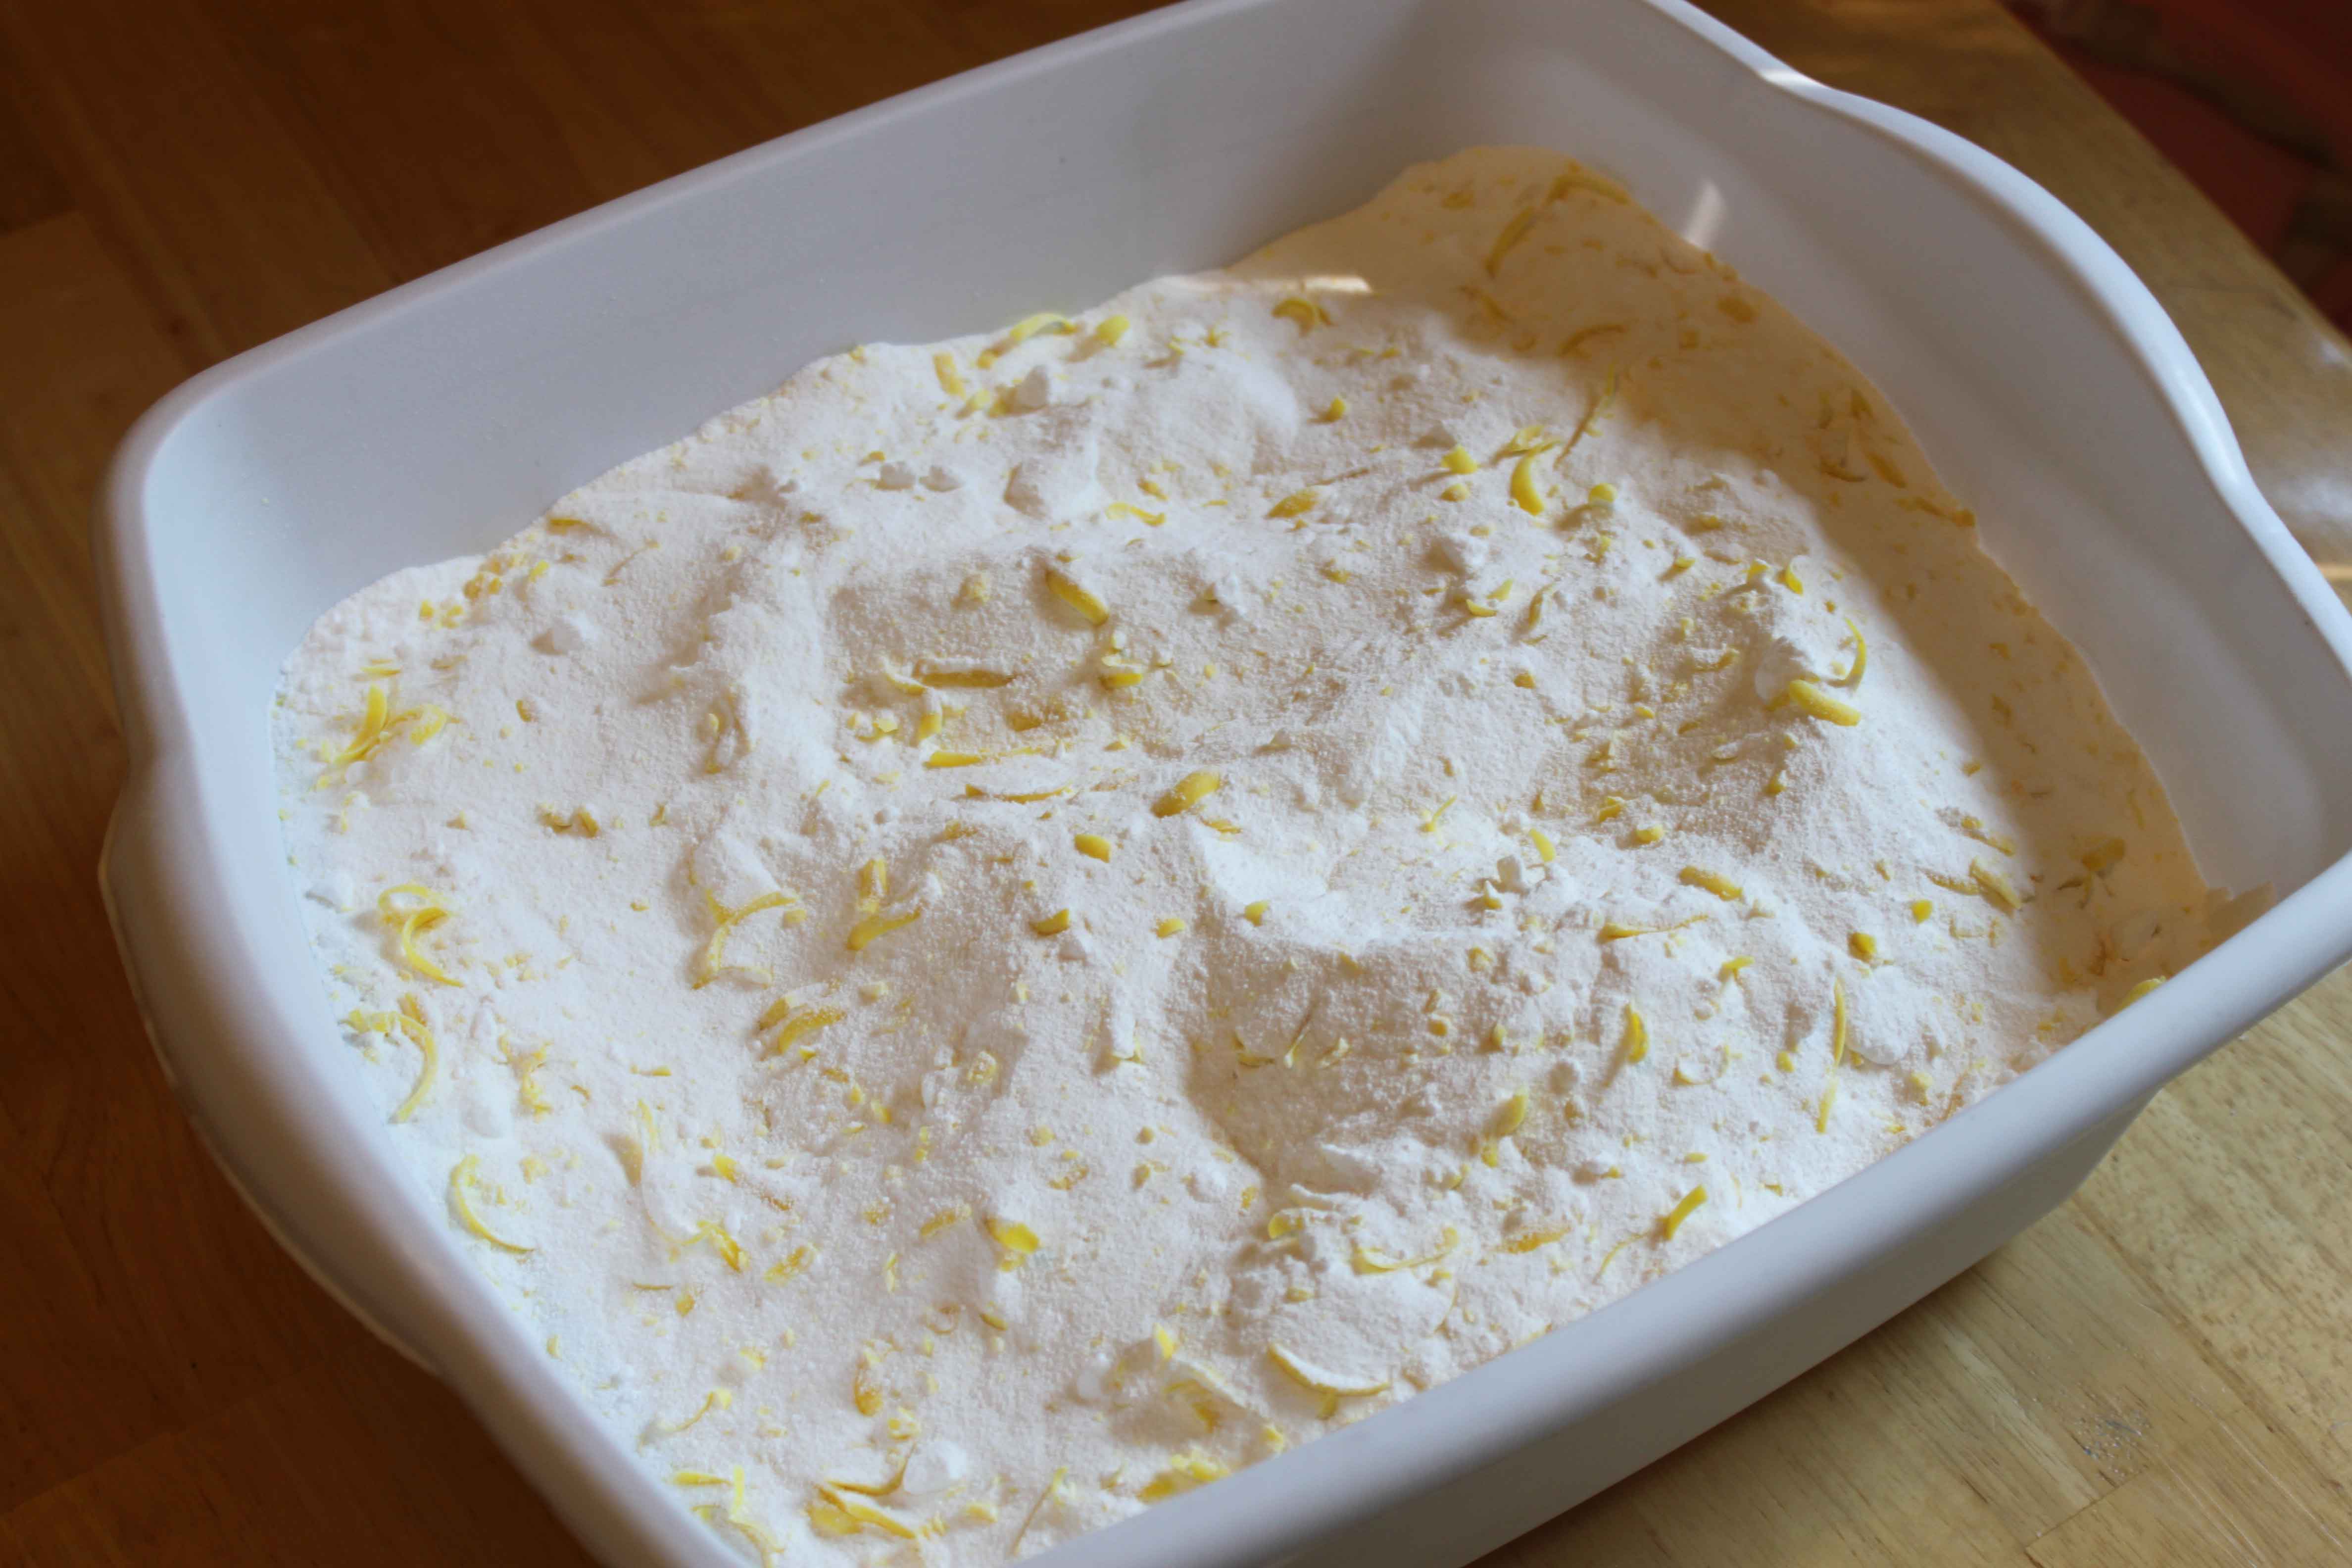
This recipe makes about 2 gallons of detergent. I didn’t want to spend extra money on a container, so I just used two empty ice cream buckets I had and labeled them with a sharpie. Walmart does carry 1 gallon glass containers if you want something prettier.
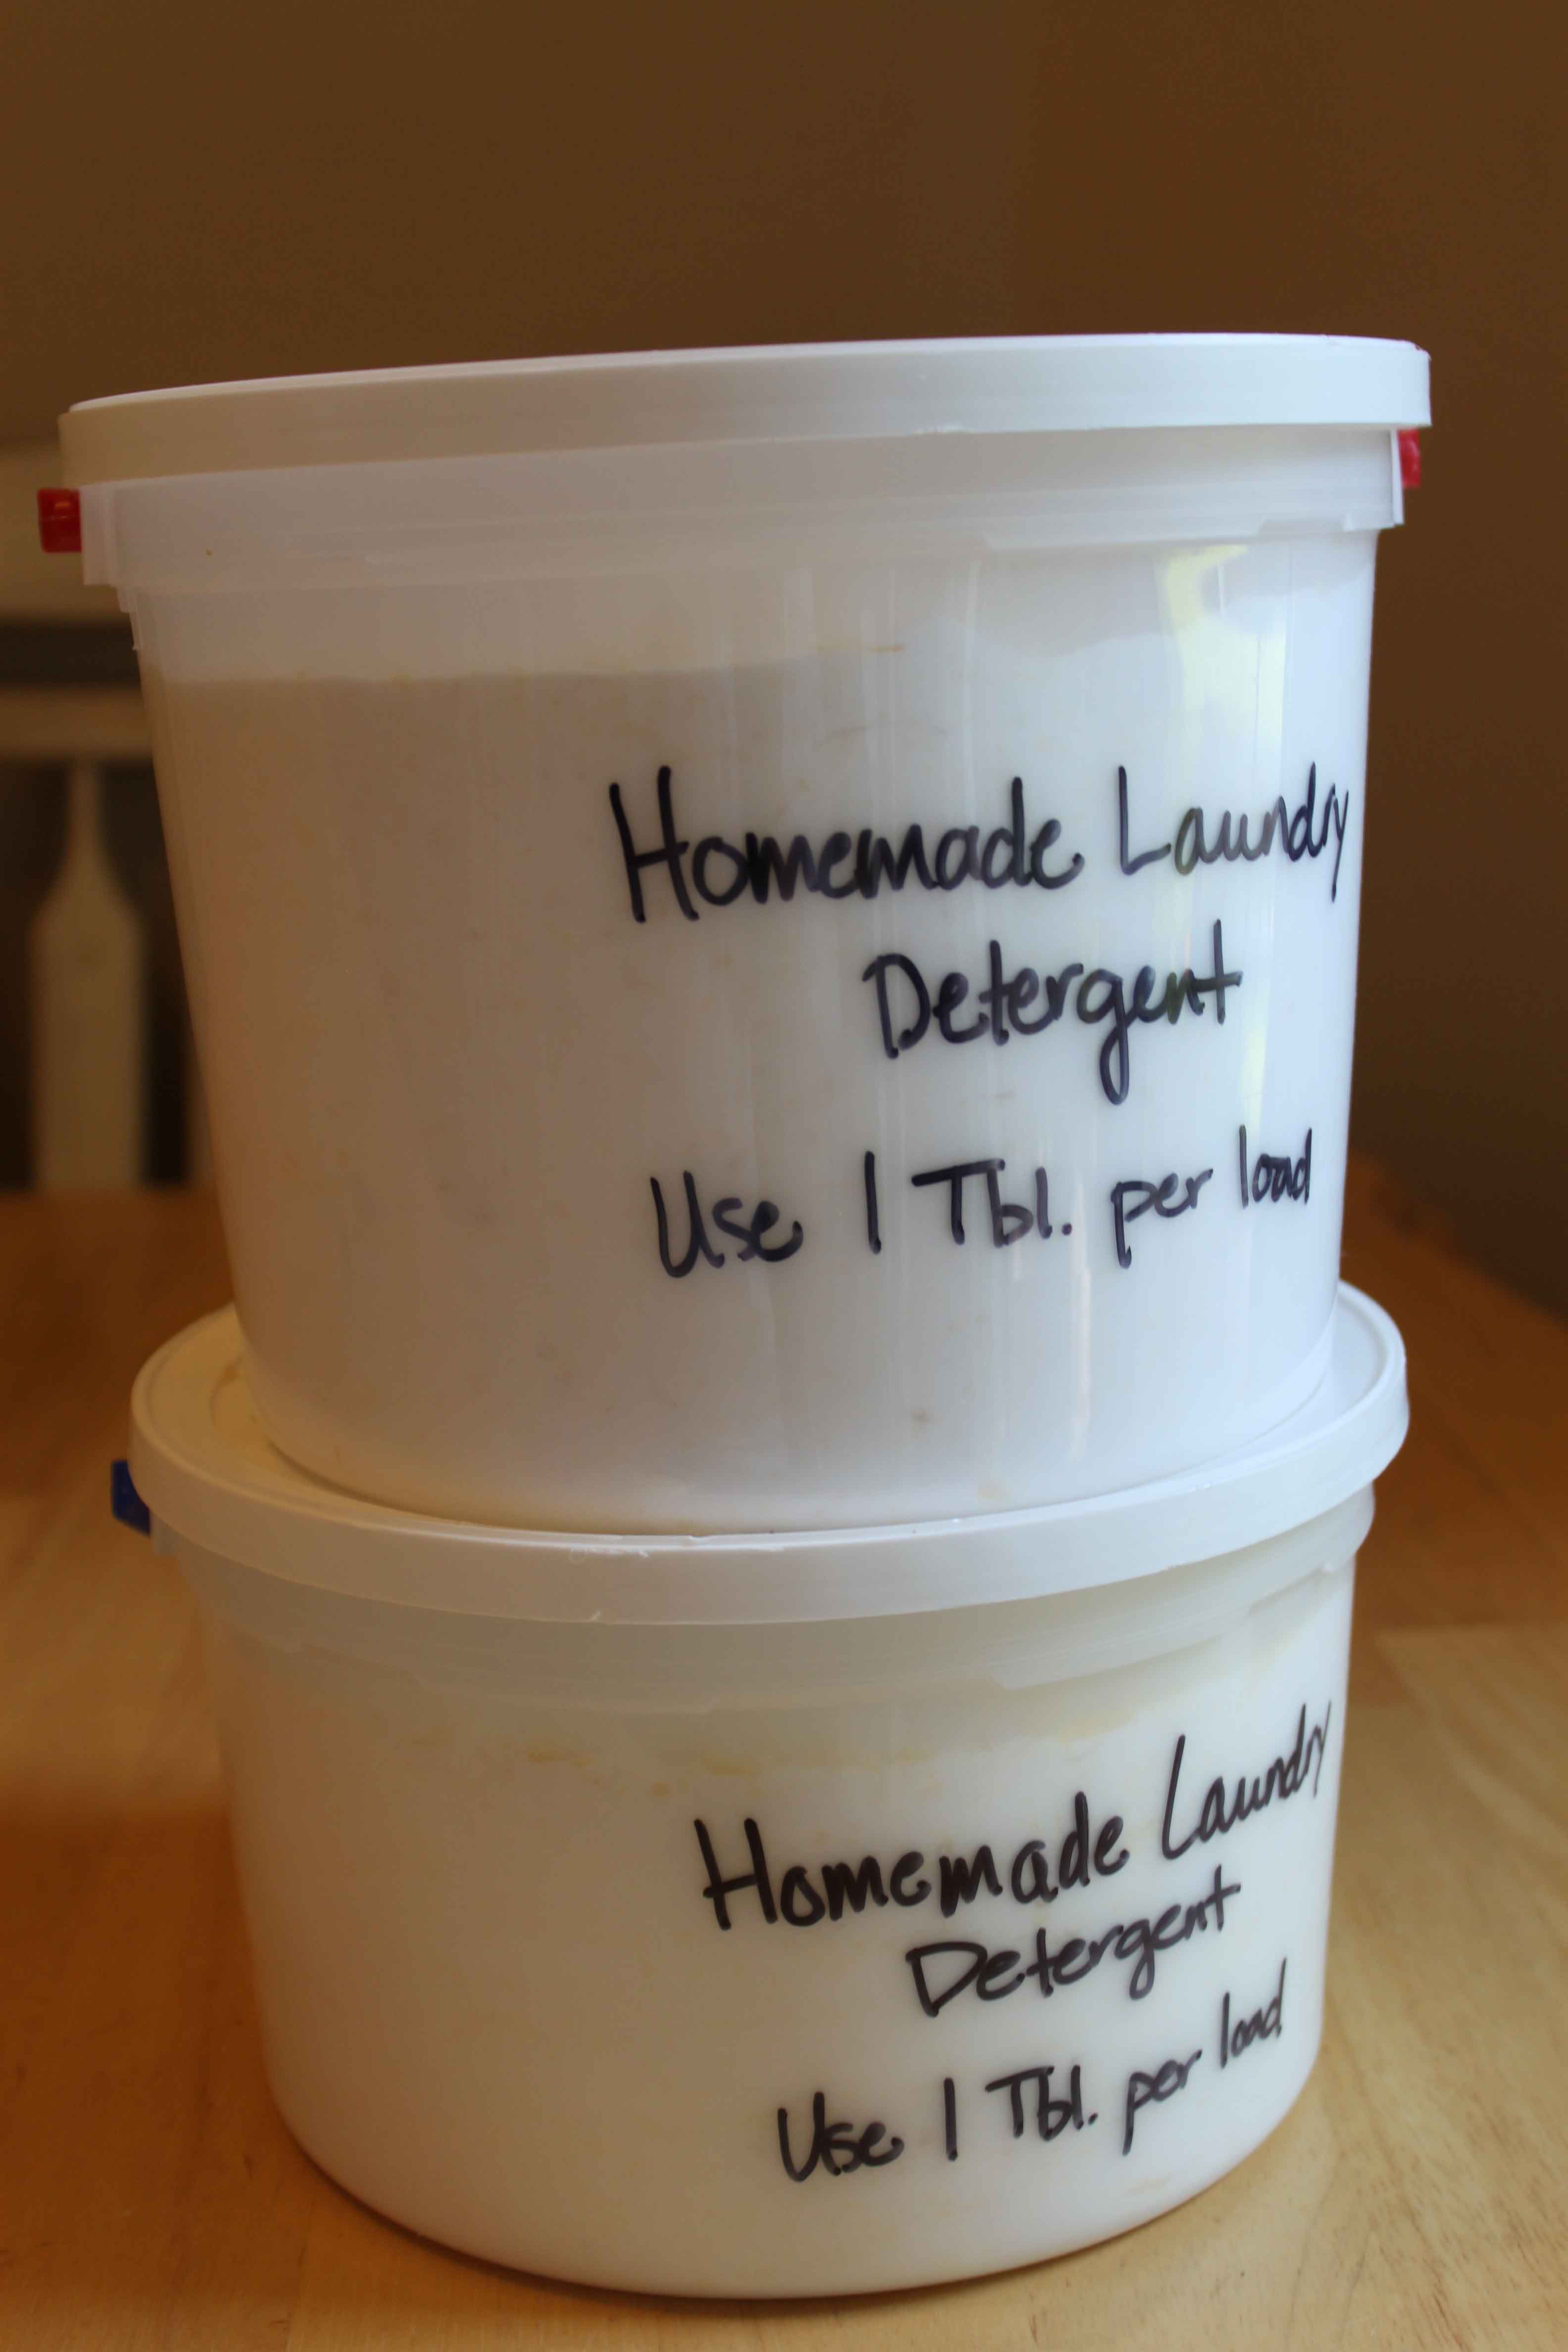
Now here is the best part….you only need 1-2 Tablespoons of detergent per load! Isn’t that amazing? Homemade detergent doesn’t have all the fillers that store bought does so it stretches much further. I have used this detergent this weekend 3 times in color loads and whites. The clothes have come out smelling great and are nice and clean! I am very pleased so far.
Here is the cost breakdown of this detergent recipe. I got everything at Walmart in the detergent asile.
3 bars Fels Naptha Soap (grated): .97 each, $2.91 total
1 three lb 7 oz box Super Washing Soda: $3.24
1 four lb box Baking Soda: $2.12
1 four lb 12 oz box Borax: (I already had this on hand, so I don’t have the exact price)
3.5 lbs Oxi Clean (or the store brand equivilant): $7.52
TOTAL: $16.74 (minus the Borax, but that is around $3)
So for about $20, you can have 8-9 months worth of detergent! It works out to be meager pennies per load. Now so you know, the Oxi Clean is an optional ingredient, but if your kids are messy or you have lots of stains and heavy washing I recommend adding it. My Walmart was out of the store brand Oxi Clean, which was cheaper.
I figured this was worth the investment to try it out. I do between 35-40 loads of laundry a month, and that is only increasing! Have you ever made homemade laundry detergent? How has it worked for you?
Can meal planning help save your budget?
 Have you ever asked yourself how can meal planning save your budget?
Does this sound at all familiar? It’s 7:00 pm and you just got home from picking your daughter up from dance and you just dropped your son off at basketball. The phone is ringing, the baby is crying and your husband wants to know what’s for dinner. You have nothing planned, the meat is frozen and you already had pancakes the night before. There is a fast food restaurant just around every corner so you decide that on the way back from basketball you will swing through the drive-thru and pick up some burgers, fries and drinks. For $32 you feed your family a meal full of nothing nutritious and you have spent ¼ of your grocery budget for the week.
With some simple planning this situation can easily be avoided. Meal planning is easily accomplished and can save you lots of money and feed your family healthy food.
There are several ways to plan your meals.
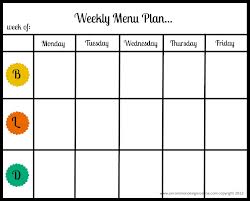
Most weeks in my house I have a chart of the wall with each day listed and what I am planning for dinner each day. I make my plan based upon 2 things: what is on sale at the grocery store this week and what I have on hand.
Another idea is to make a rotating schedule based upon what your family likes. Include your family in this plan. You can take a few minutes to devote to meal planning. Be sure to plan enough meals for a 2 week or 4 week rotation just by making a simple chart. Wouldn’t having a monthly plan help you at the grocery store? You would know exactly what you were eating and you would know exactly what to buy. This way when you see things on sale or you come across a coupon you can quickly decide if it’s worth it to you.
Have you ever thought of having “Taco Tuesdays?” If you’ve watched the LEGO Movie I am sure you know about Taco Tuesday! Every Tuesday you can have tacos. I am sure you can come up with a few “theme nights” of your own. My kids have come up with these ideas: “Meatball Monday” and “Waffle Wednesday.” Of course they don’t have to be fancy themes. Your meal planning could just be based on things like Chicken, Beef, Pasta, Crock pot, BBQ, etc… You know what your family’s needs are. Plan for leftovers too!
For me knowing what we are having and having it documented and posted somewhere that everyone can see is super helpful. I have found that when it’s planned and written down, we stick to it. My son who struggles with anxiety really liked it when he knows what is going on and this applies to meal planning too. AND if you are lucky enough your spouse and children might be able to help you!
One more note about meal planning. If I have a plan for meals it really helps me to be able to do a little prep work throughout the day. Then there is really no going back, because I refuse to waste the food!
How to correctly store your food
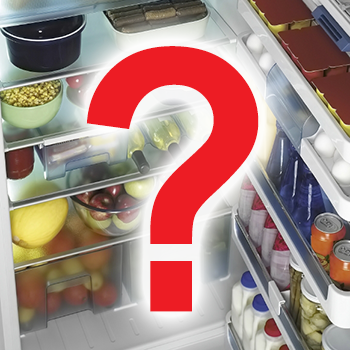 Have you ever come home from the grocery store with bags and bags full of groceries and wondered how to correctly store your food? This happens to me sometimes. I recently set out to see if I could find some decent guidelines and this is what I have been able to come up with:
What can I keep on the counter?
There are lots of things that you can store on your counter or in a cool dry place:
Things like garlic and onion are correctly stored on the counter for up to two weeks. I was surprised to read that tomatoes should be stored in a cool and dry place. I knew that potatoes and winter squash varieties should also be kept in a cool and dry place, instead of the fridge. The right place to keep bananas, oranges, lemons and melons are correctly stored on the counter, as well, as long as they are not cut. Bread, cakes and pies are correctly stored on the counter for a few days but if you are keeping them too long they should be moved to the fridge.
What should you keep in the pantry?
Dry goods like cereals, crackers, etc. can usually be stored in the pantry for up to six months, just watch the expiration dates, once a package is open, it’s best to move it to a container that can be closed up. Did you know that you can correctly store spices for about 2 years, in containers with a tight lid?
What about the fridge?
While it seems easy enough there are several things to consider if you want to correctly store foods in the fridge. Dairy products should be stored on the top shelves, because the temperature is more constant. The best way to store cheeses is to wrap them in waxed paper or cheesecloth and label them on the outside.
Do not keep eggs in the door and it’s not a good idea to remove them from their original cartons. All vegetables except the ones we talked about earlier should be stored the fridge. Mushrooms absolutely need to be kept in the fridge. It’s best to keep your veggies away from apples, mangoes & bananas, they produce a natural ethylene gas and that can rote your veggies quickly.
In order to correctly store fruits they should be kept in the fridge in a separate drawer if possible from the vegetables. Water quickens decomposition of fruits, so it’s best to not wash them until you are going to eat them. I have been washing my strawberries though, in a 50/50 mixture of white vinegar and water.
Meat & Fish of course need to be stored in the fridge. If you aren’t using them within a couple of days of purchase it’s best to freeze them and then thaw in the fridge not on the counter.
Meat and fish can be frozen in its original packaging.
I found this information from the USDA:
Maximum recommended freezer storage time:
- Beef and lamb is 6 months
- Veal, pork, and poultry – 4 months
- Fish can last in the freezer for up to 6 months, but fattier fish should not be frozen for over three months.
Also note that pies and pies crusts, cakes and stock can also be kept in the freezer for a couple of months.
I would like to say cookies can be frozen for a couple of months too, but seriously who has the willpower to freeze them and not eat them hot out of the oven?