
A PYP Best Blog! Making Shabby Wooden Fireworks!
Just in case you missed this article on making shabby wooden fireworks the first time we shared it a couple of years ago, we are republishing it. After Sharon wrote this blog originally, we got an awesome response. This is one of the PYP Best Blogs!
I was reading someone’s blog today and she said that for her, the hardest thing about blogging was coming up with the first sentence of a post…I didn’t realize how much I agreed until she said it…
SO! Let’s make some fireworks!
I started with this piece of wood that I found in my garage. It is about 1 1/2 inches square, but you could use square, round, bigger, smaller… whatever strikes your fancy! 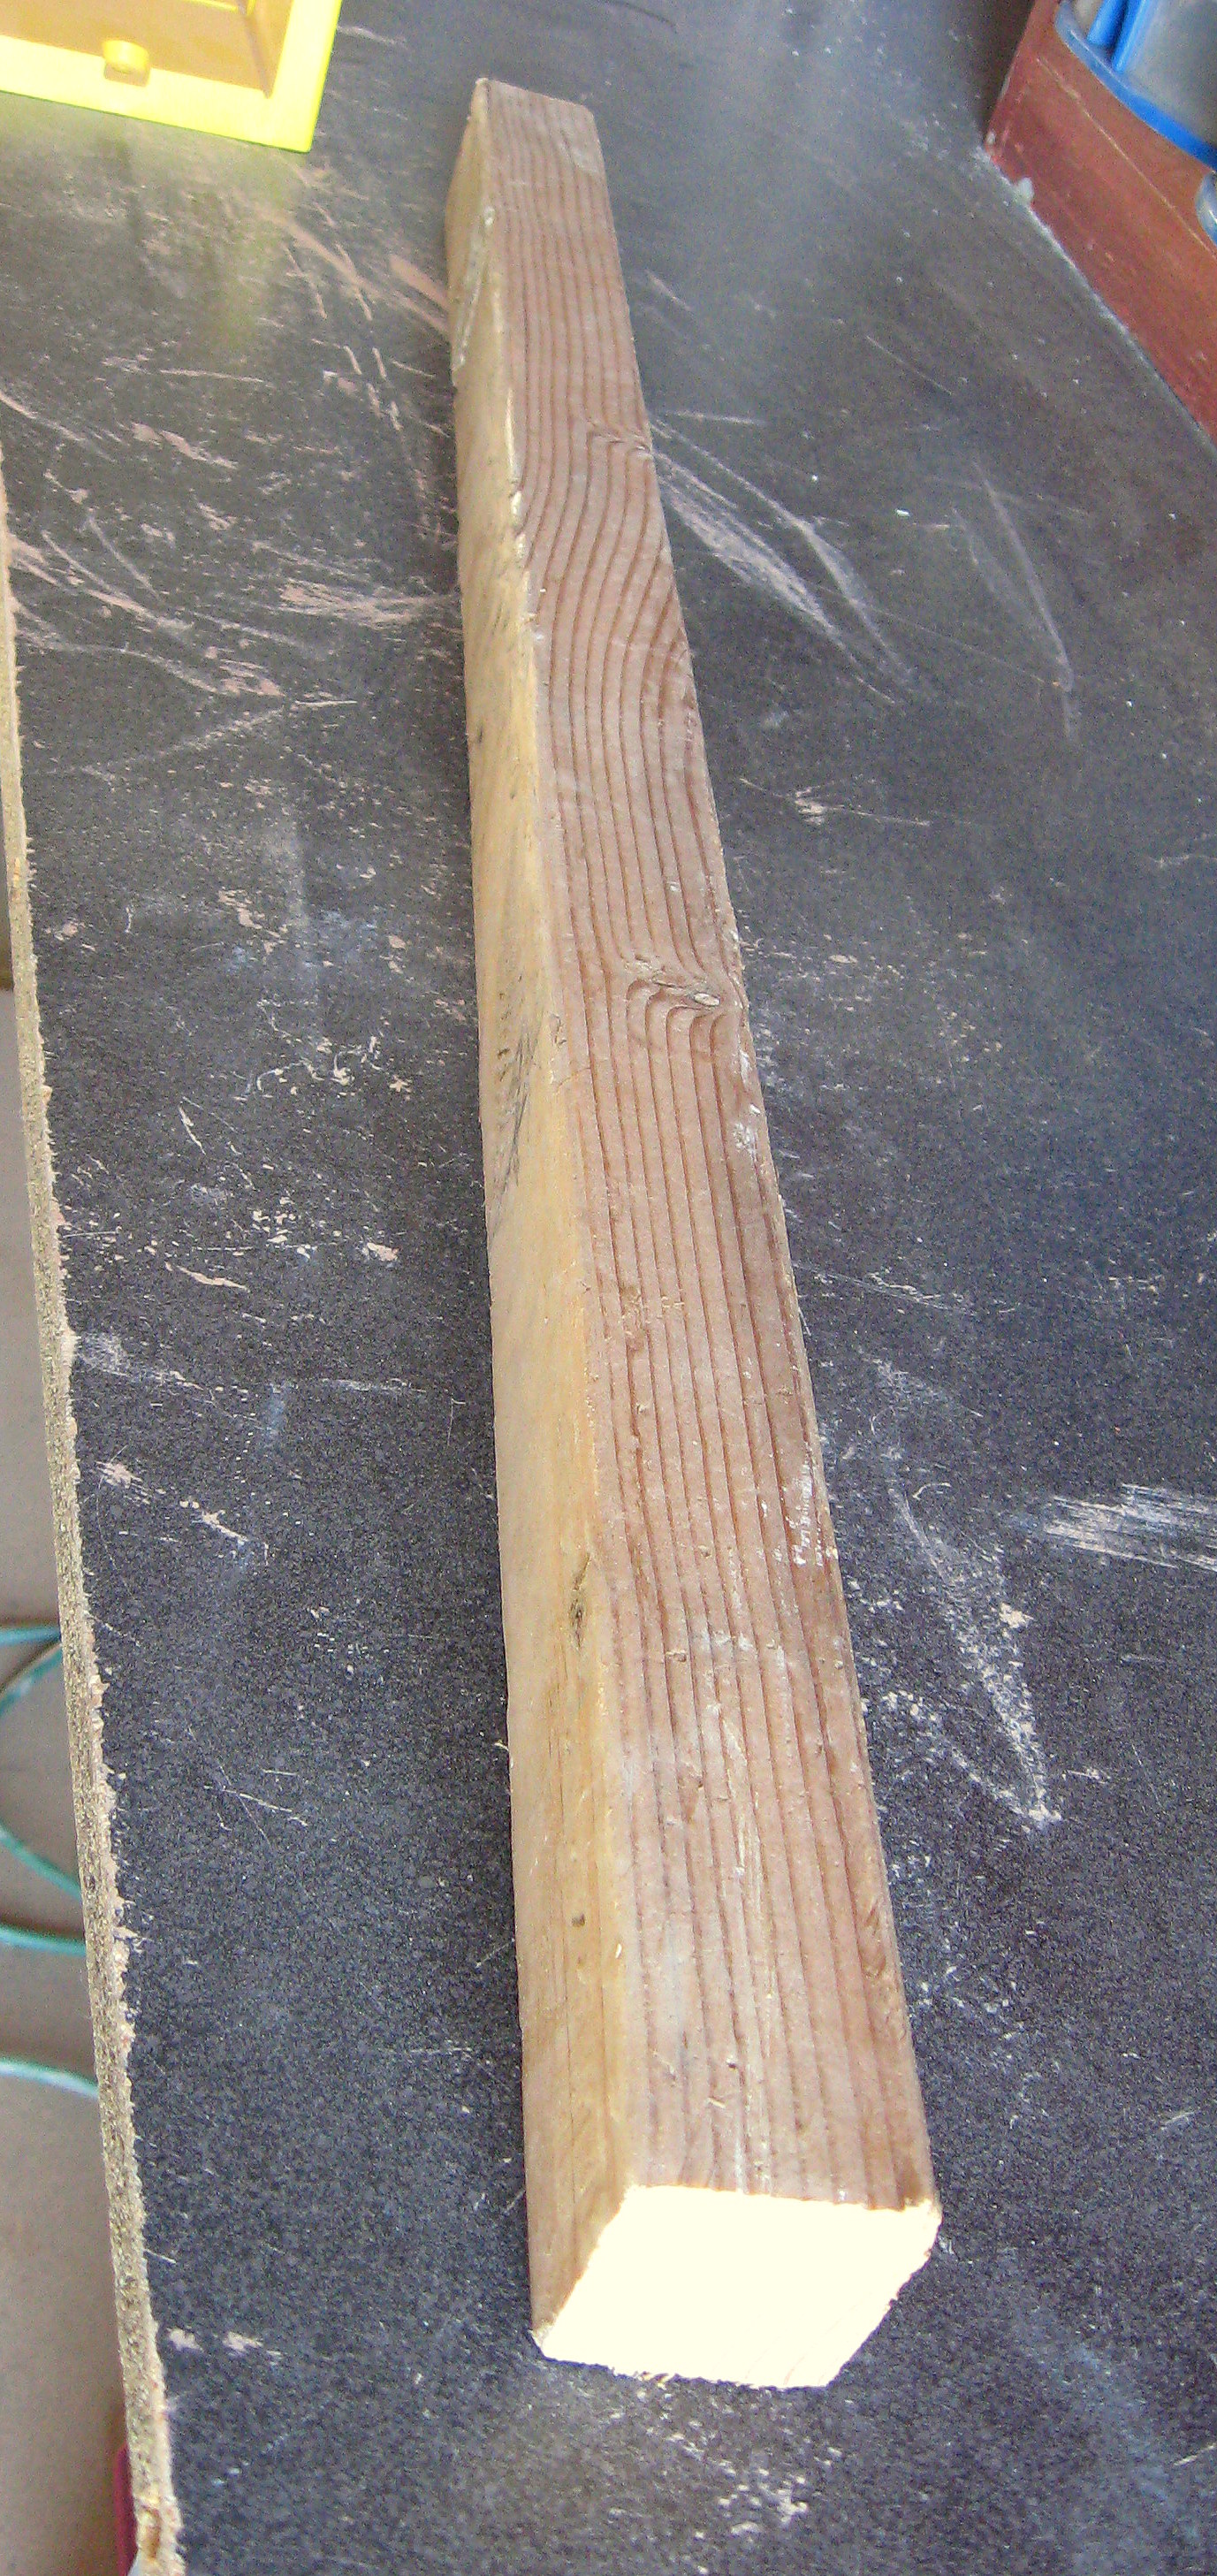
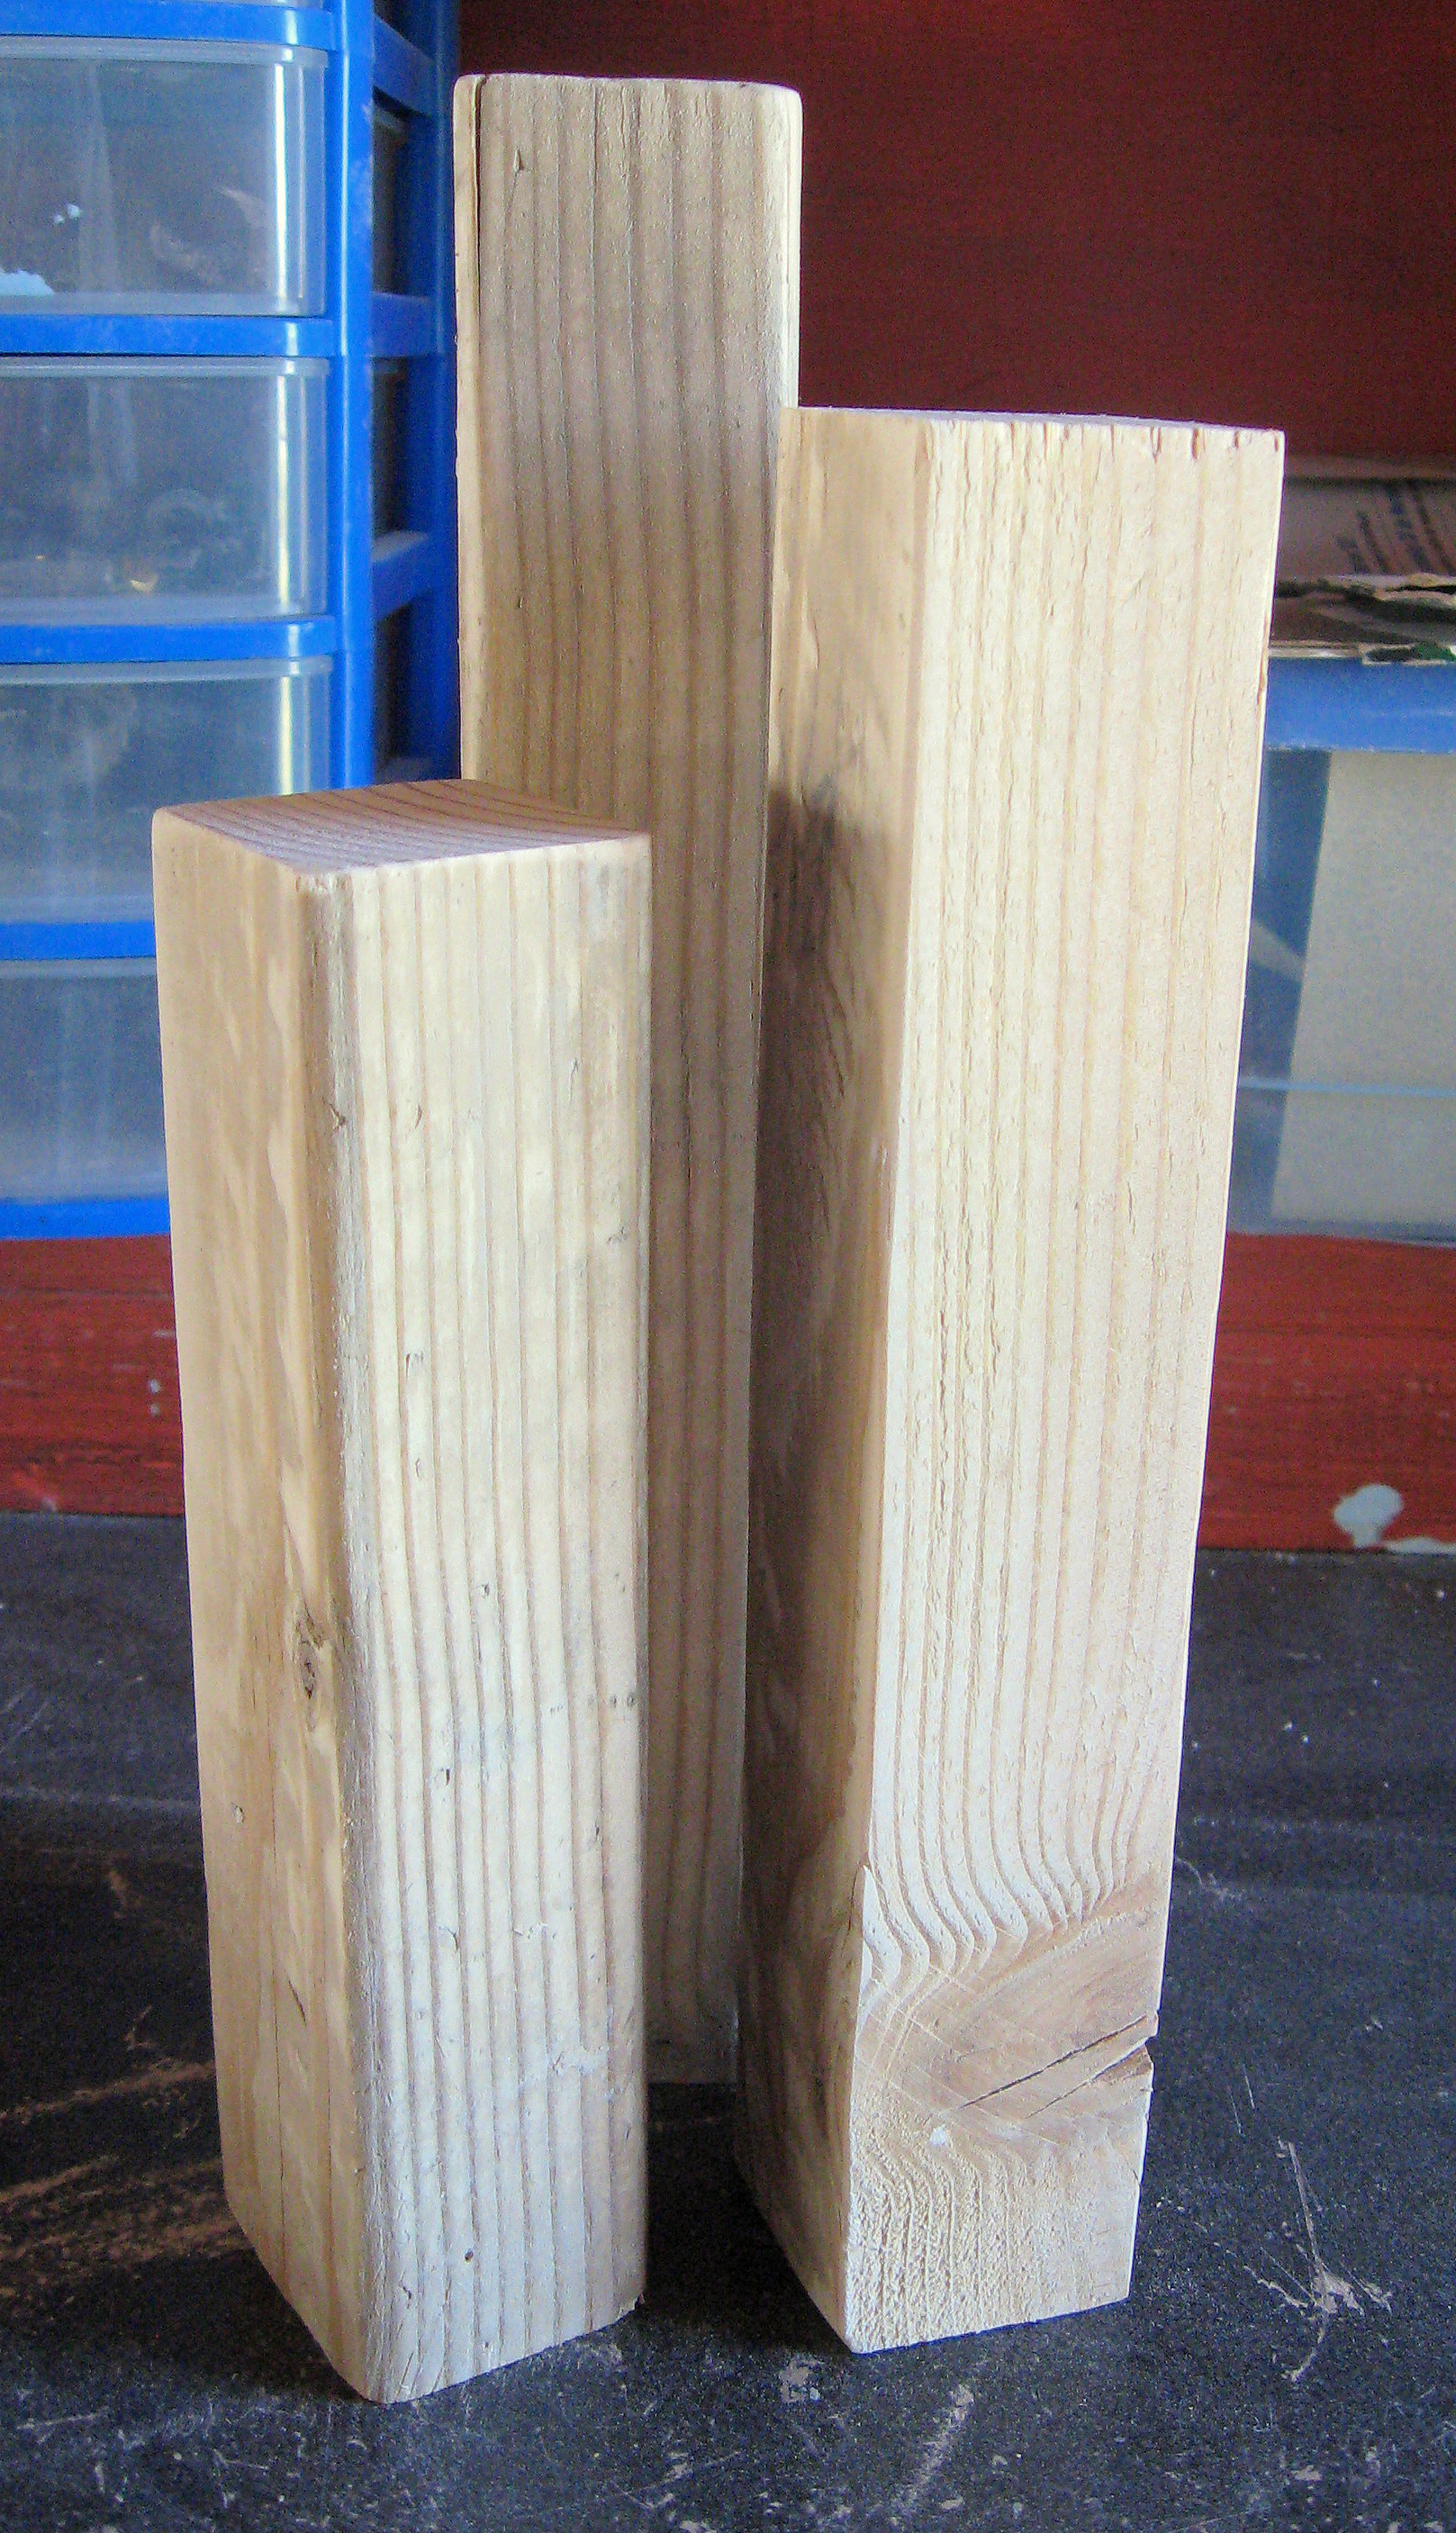
Cut into three pieces…I just eyeballed what I thought looked good – mine are about 10, 8 1/2 and 7 inches – and then give them a good sanding.
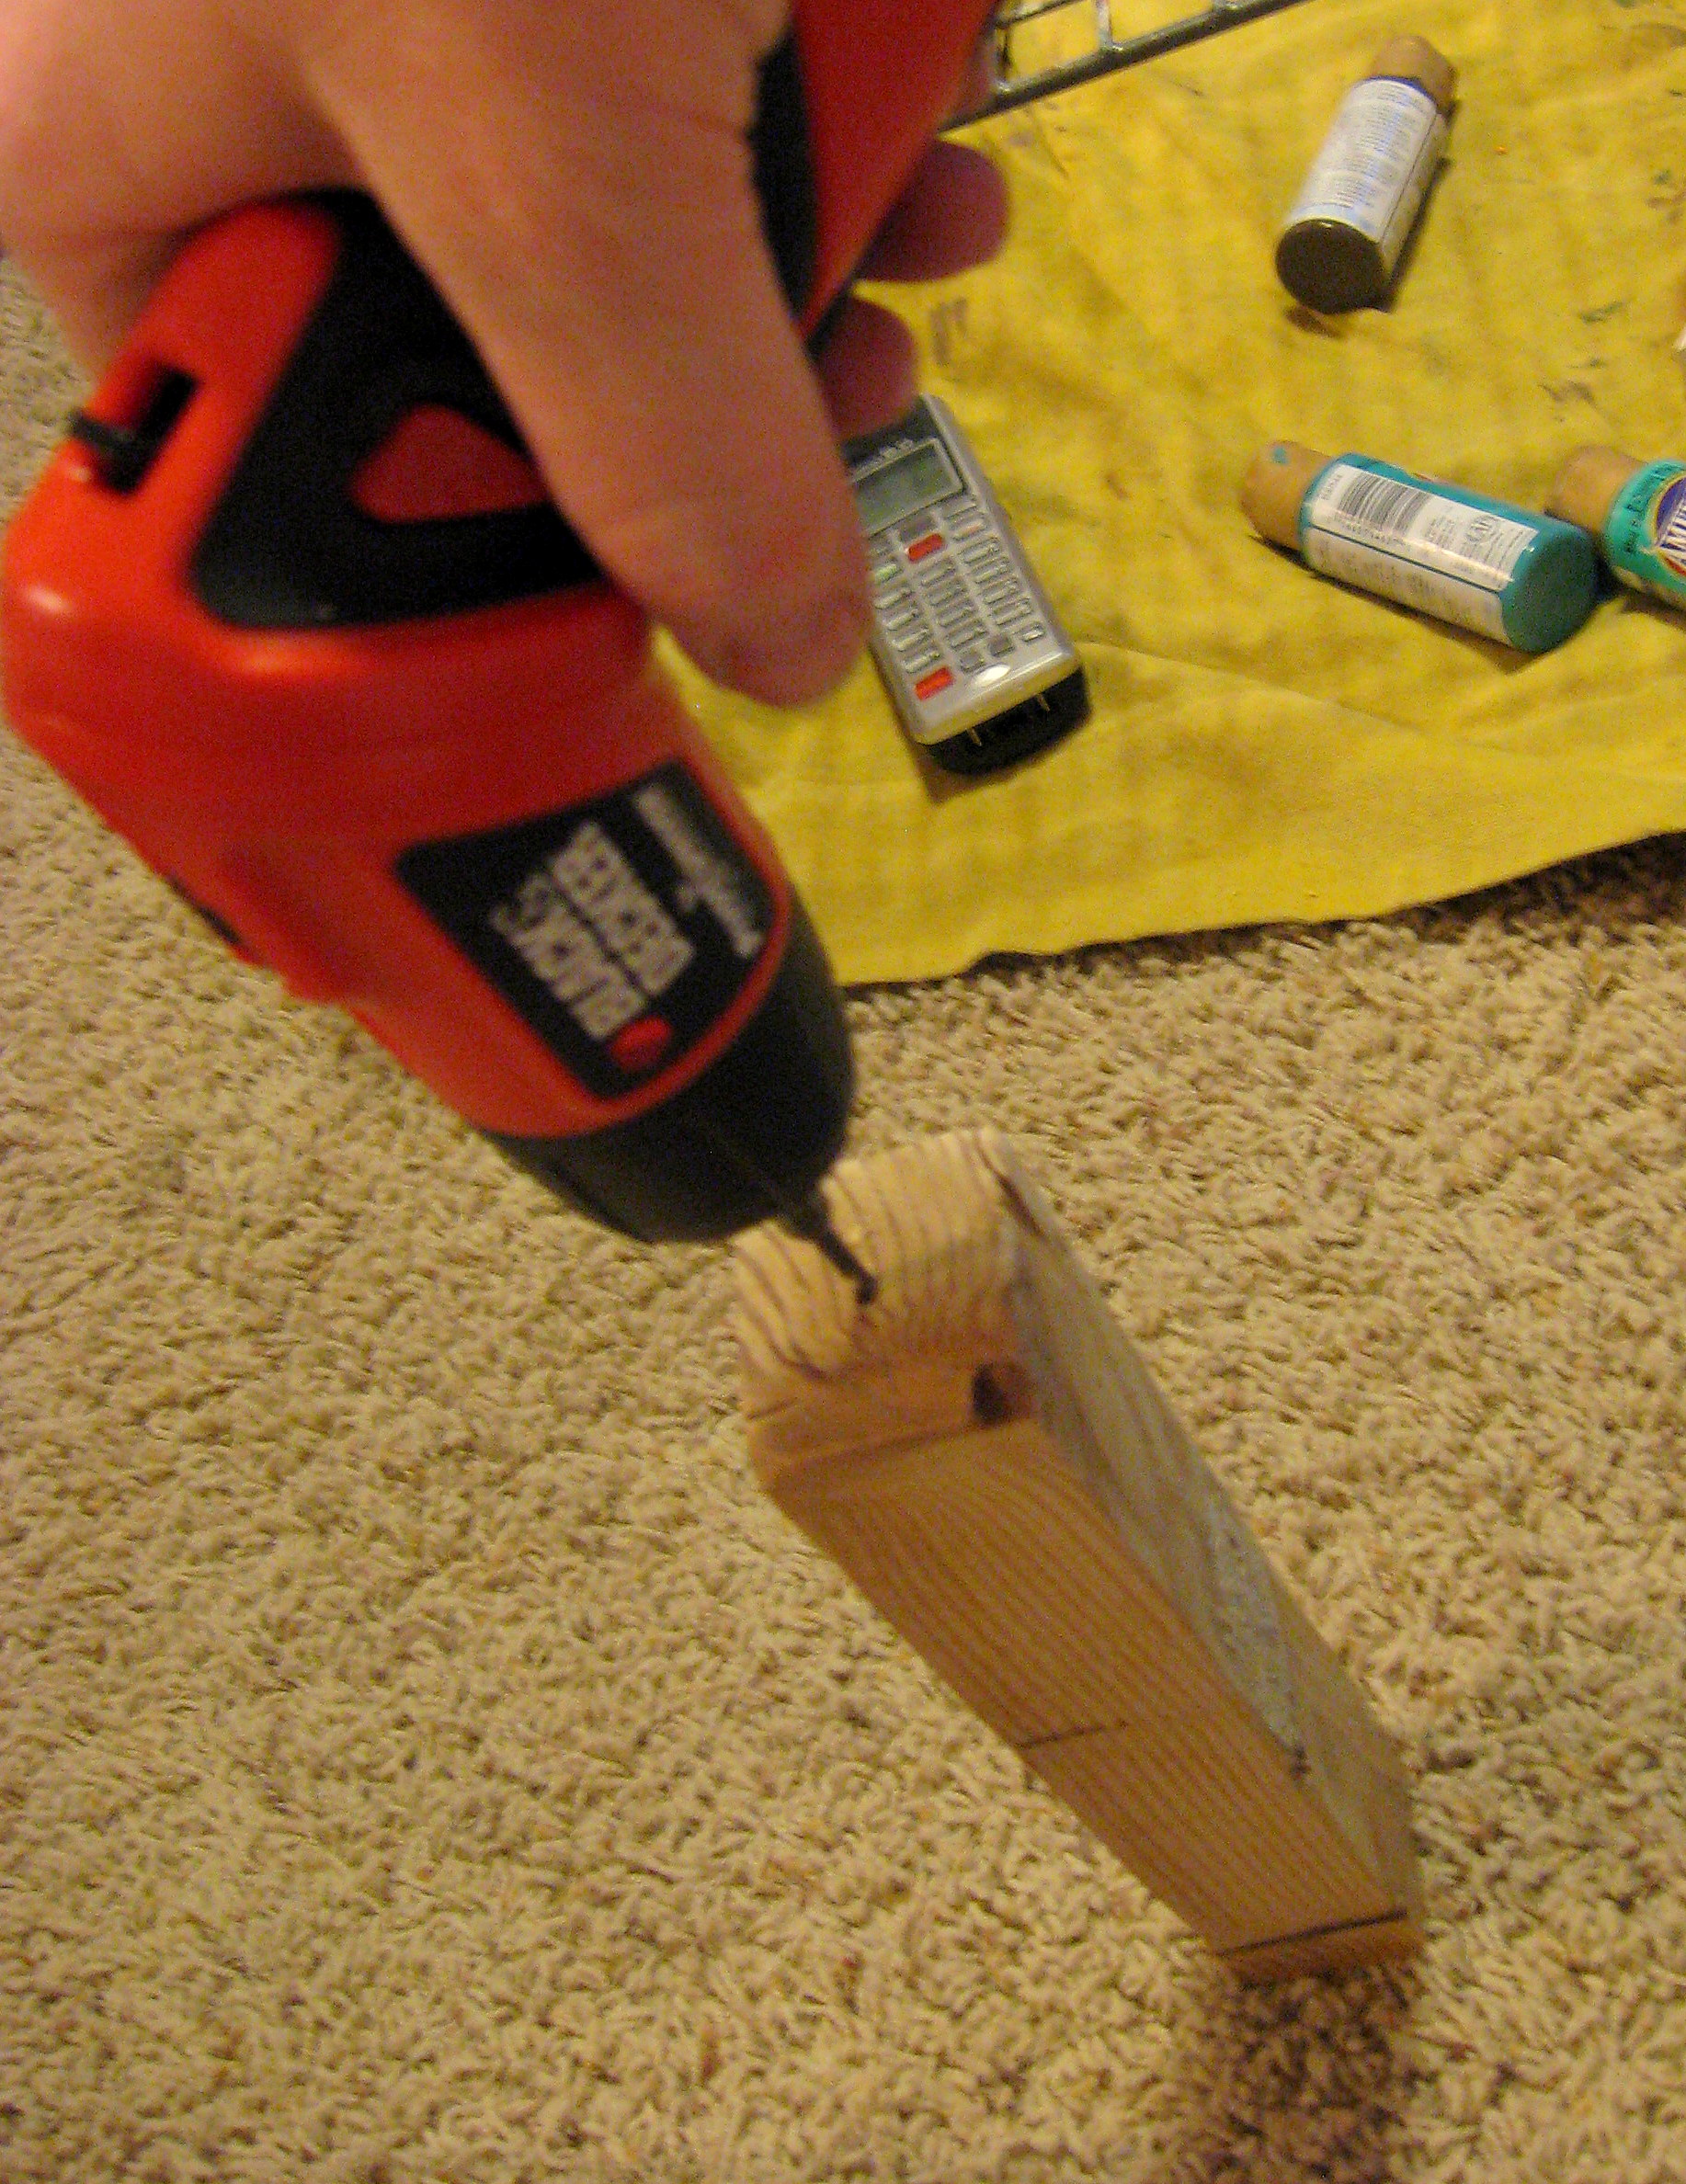
Drill a hole in the middle of the top of each stick – you will use this later for the “fuse” on the fireworks.
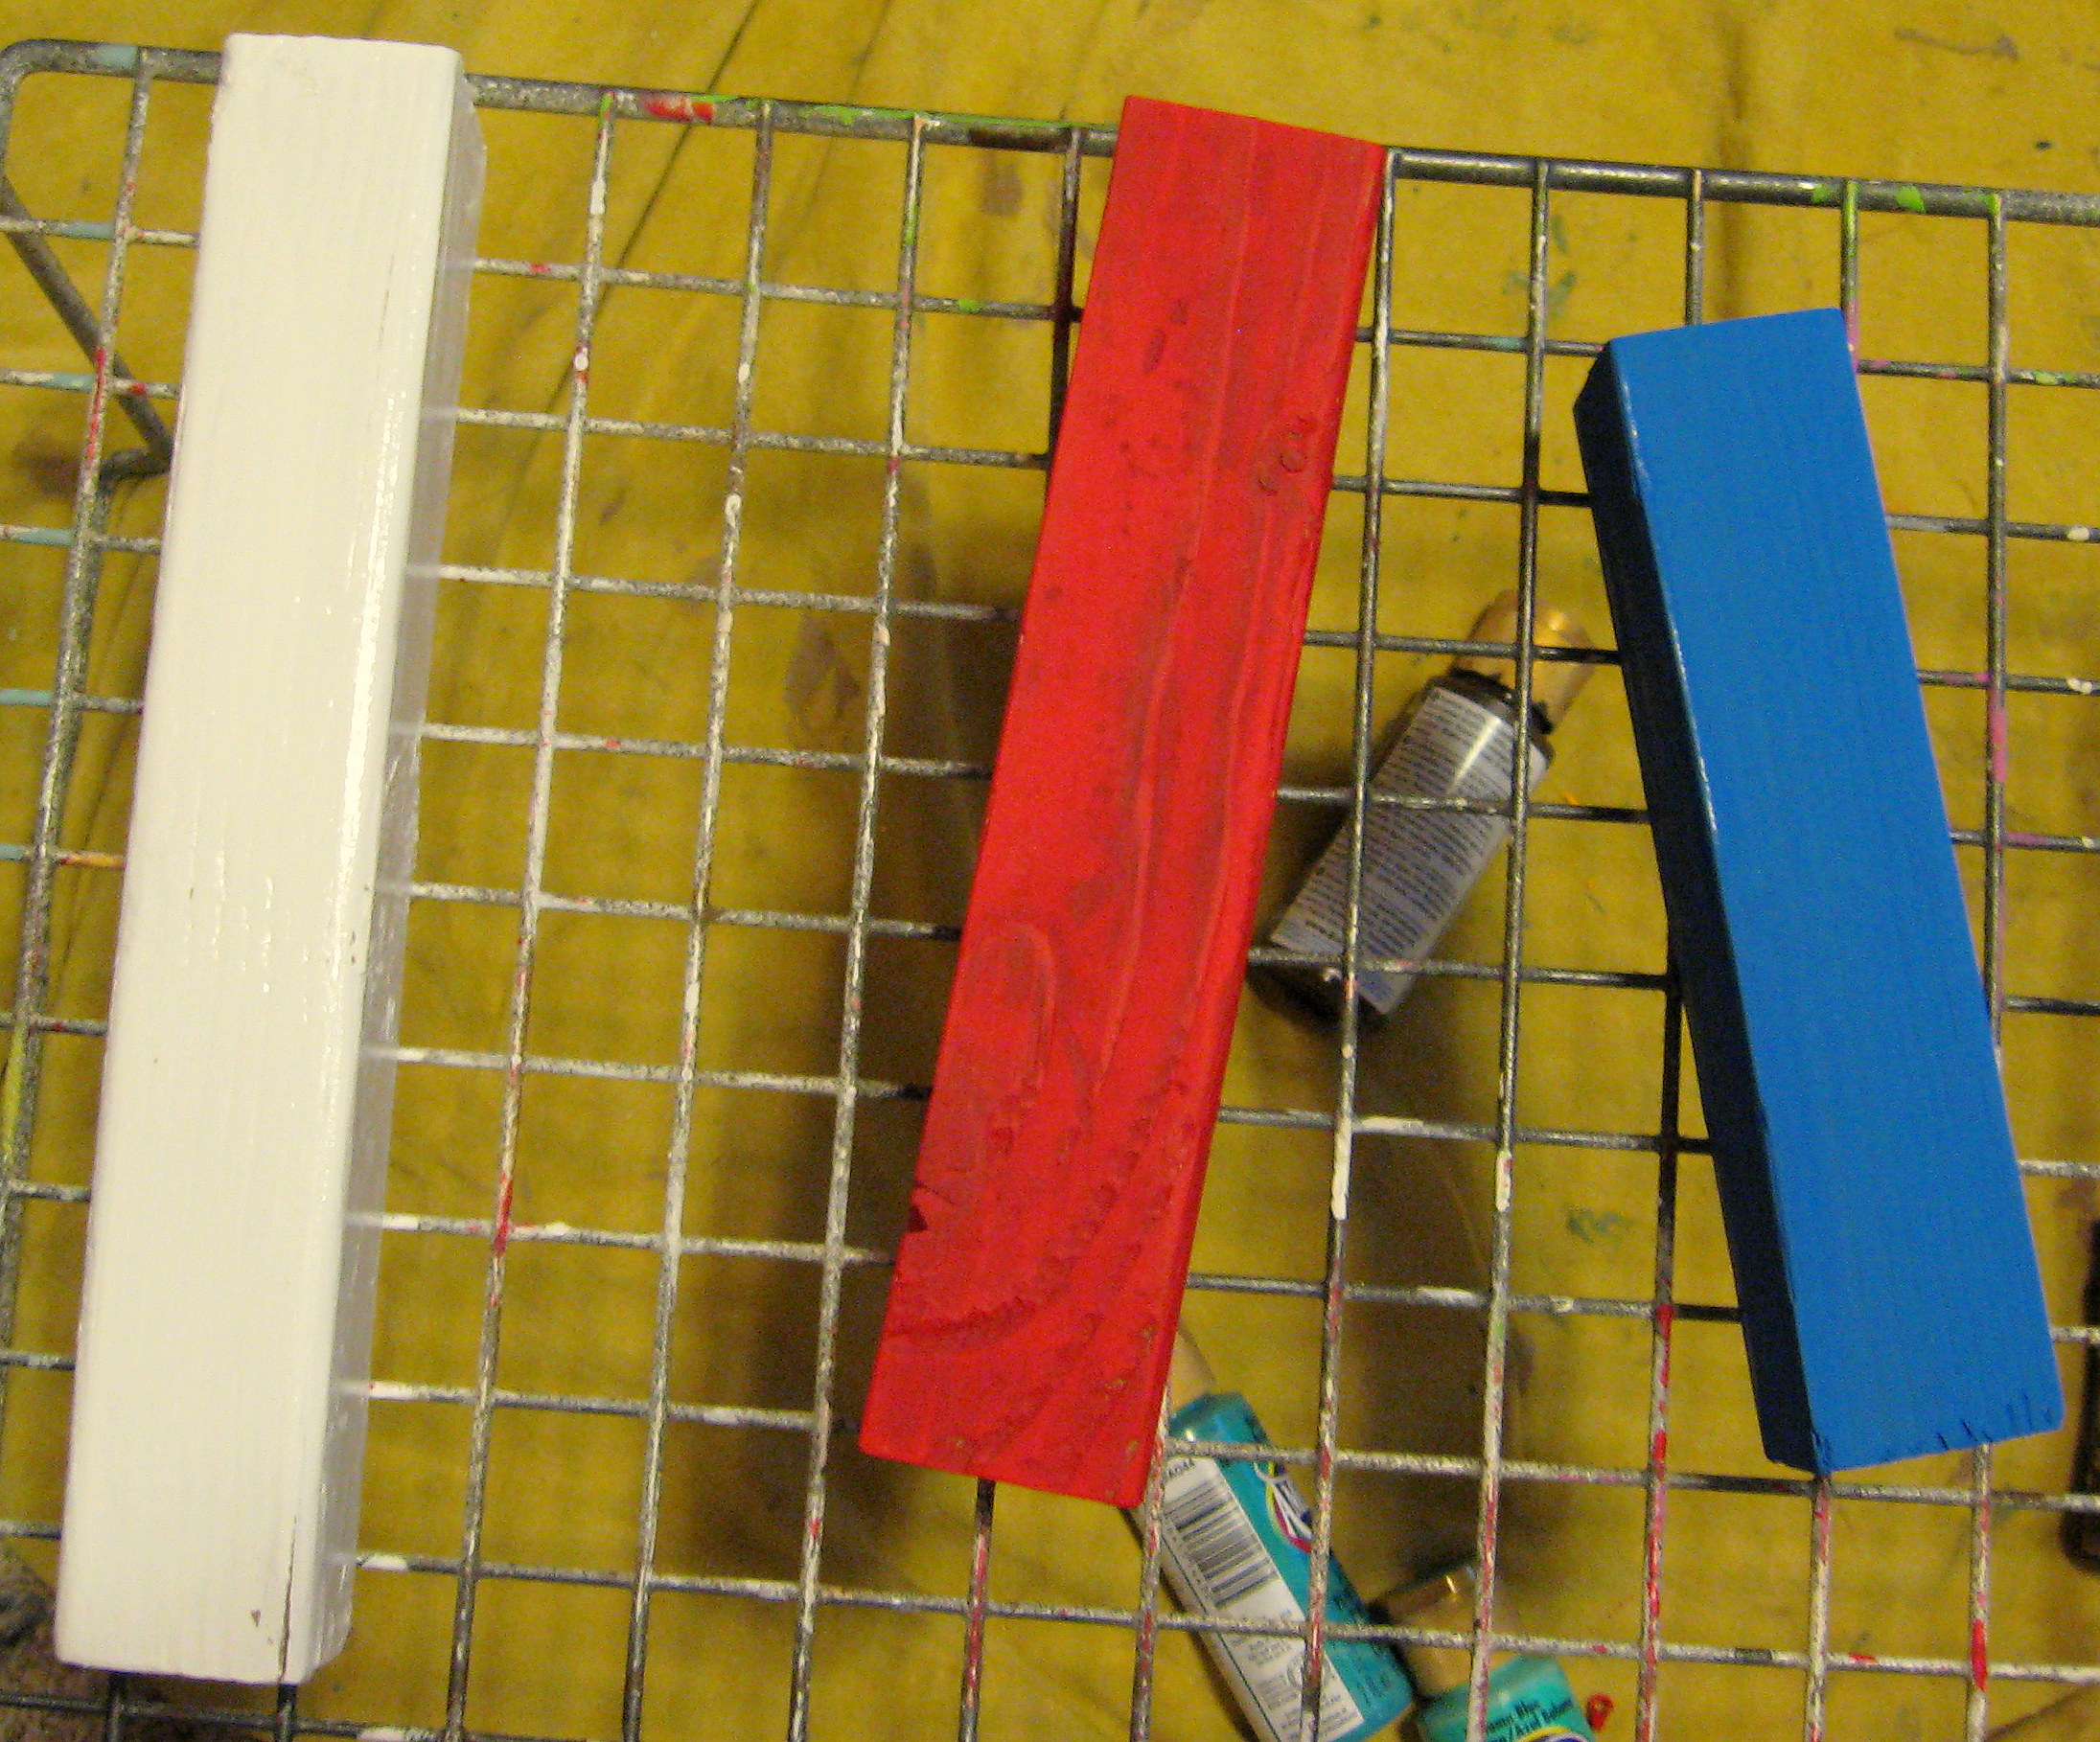
Now paint them and let them dry, then give the edges a light sanding to distress the fireworks a bit.
Next, cover each of the fireworks sticks with scrapbook paper. Cut a strip that is long enough to go all the way around and overlap just a little on the back.
Wrap it around the stick, using the edges to crease the paper, then take the paper off and make the creases sharp.
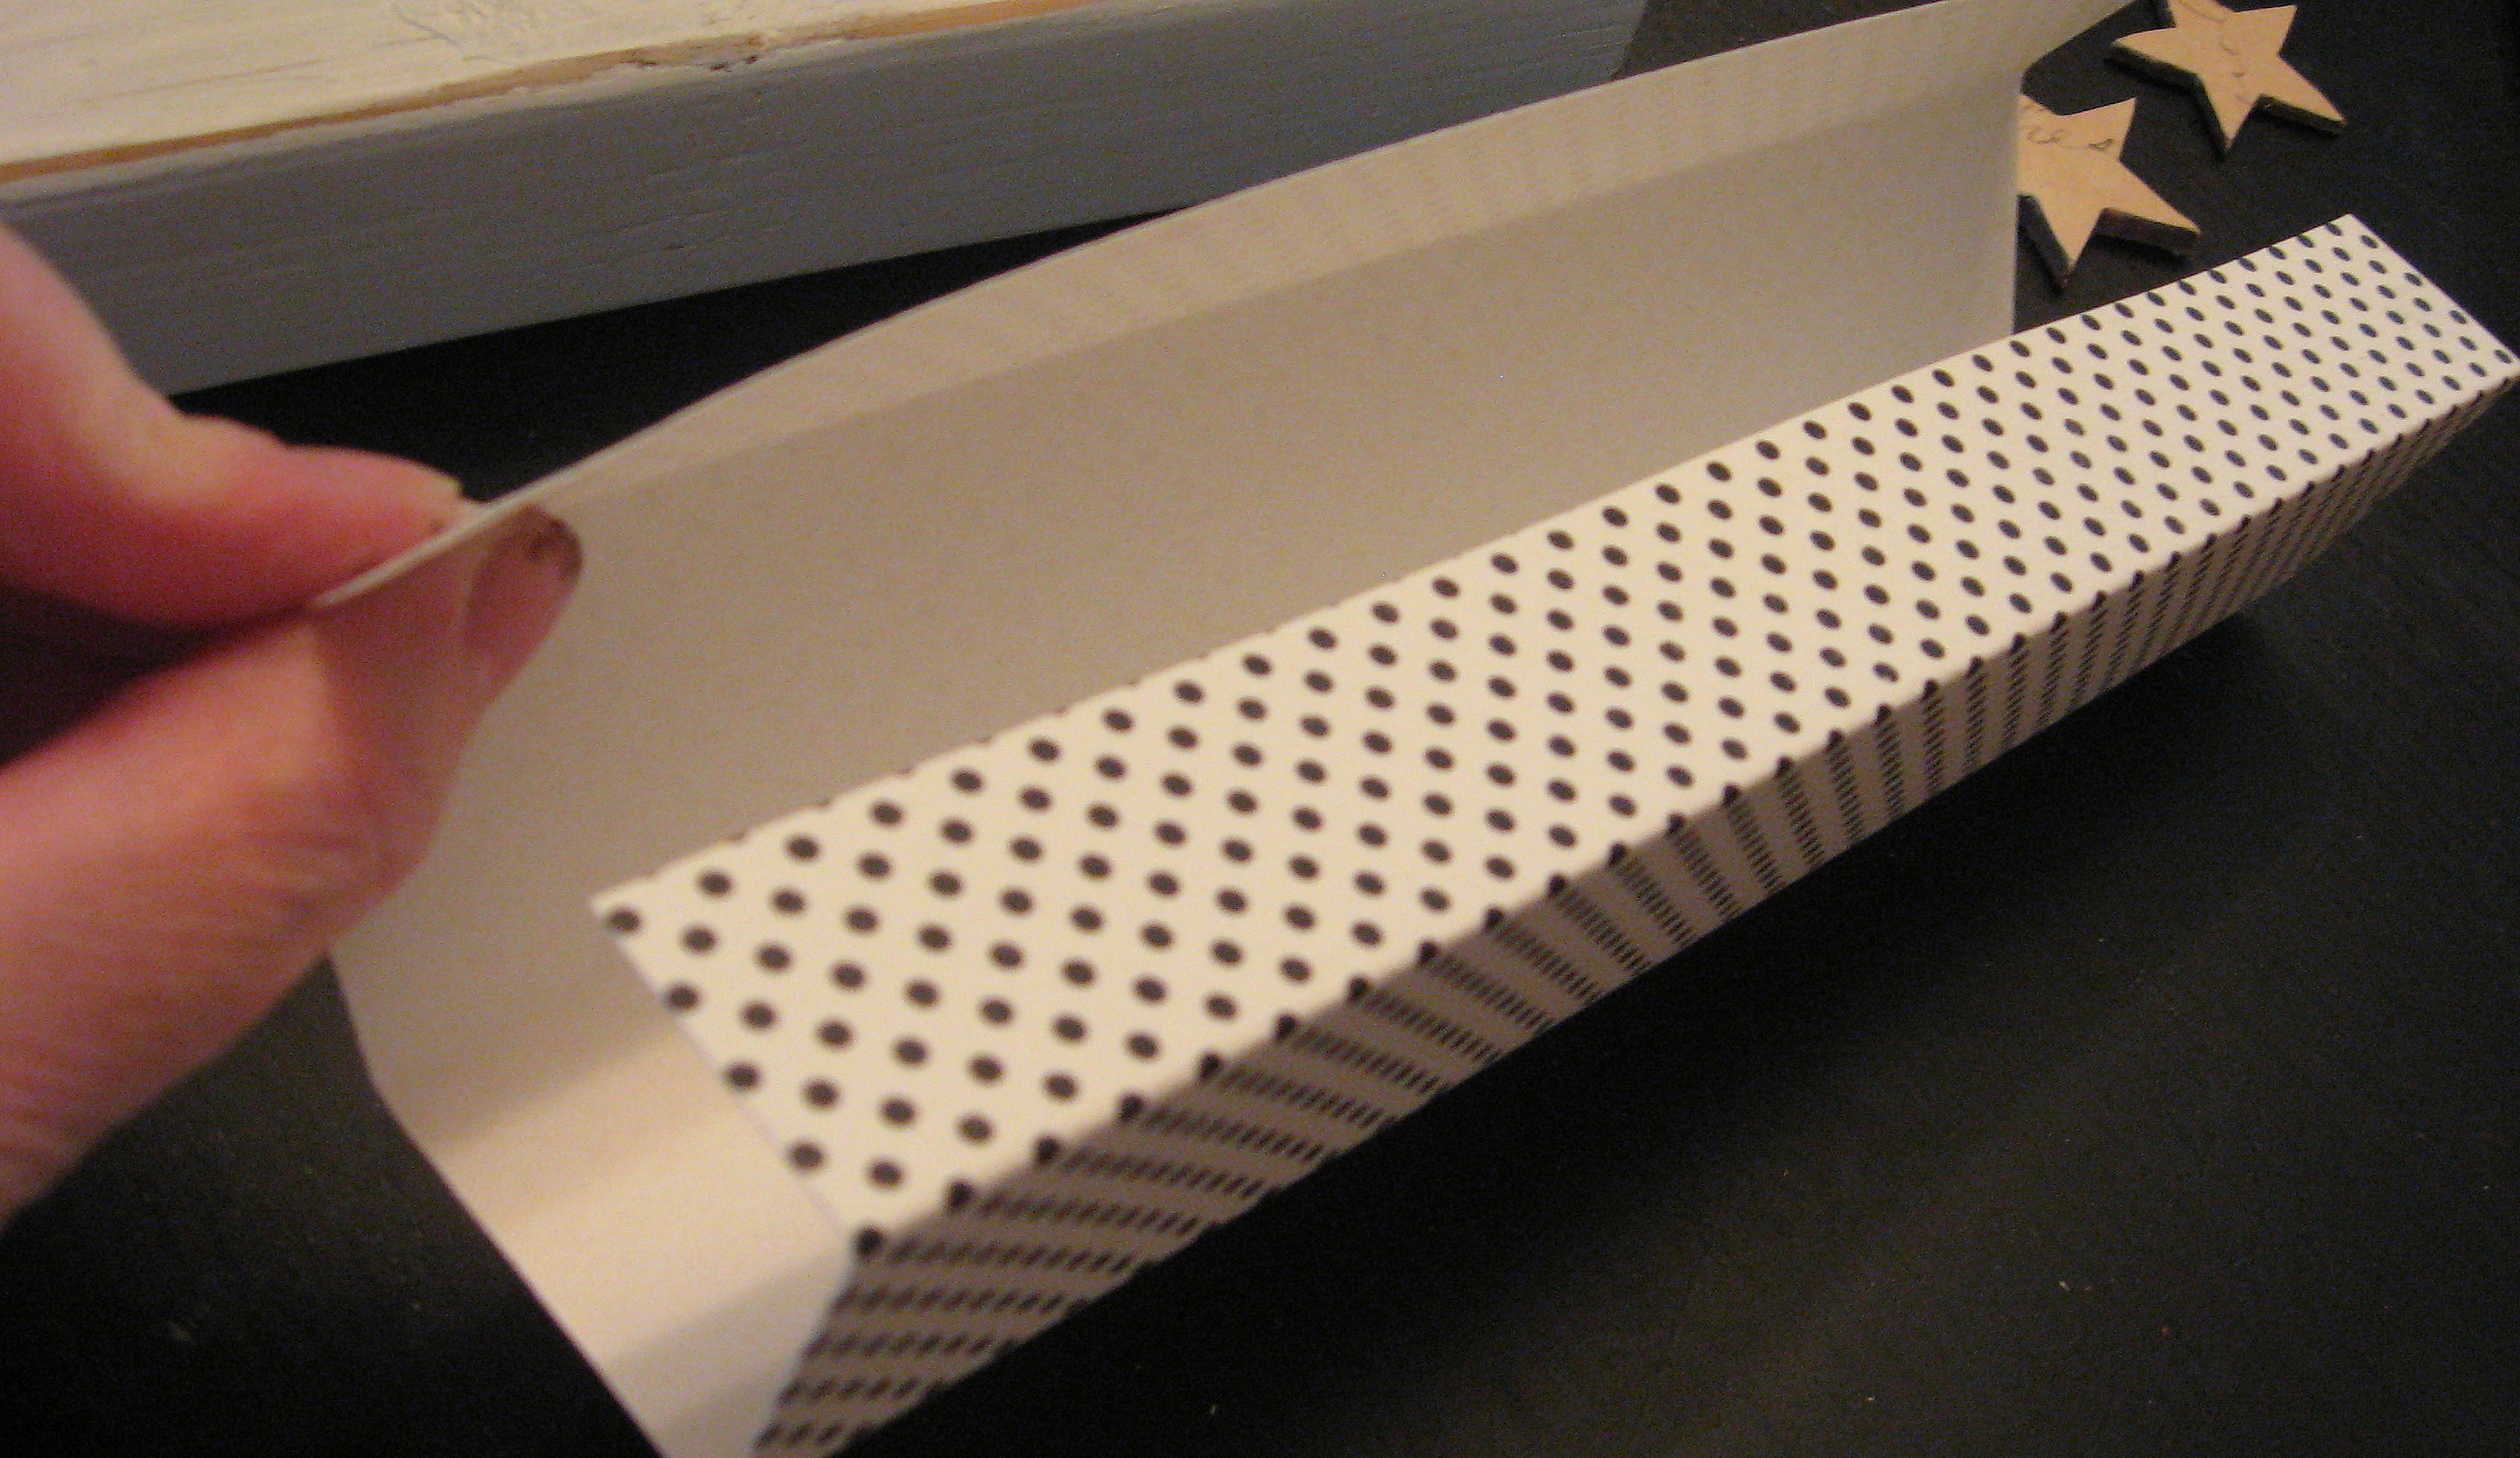
Mod Podge the paper onto the sticks and let dry. Once it’s dry, take sandpaper to the edges and corners to rough up the paper a little and give it that shabby, worn look. Just be sure to use a light touch – the paper will tear easily.
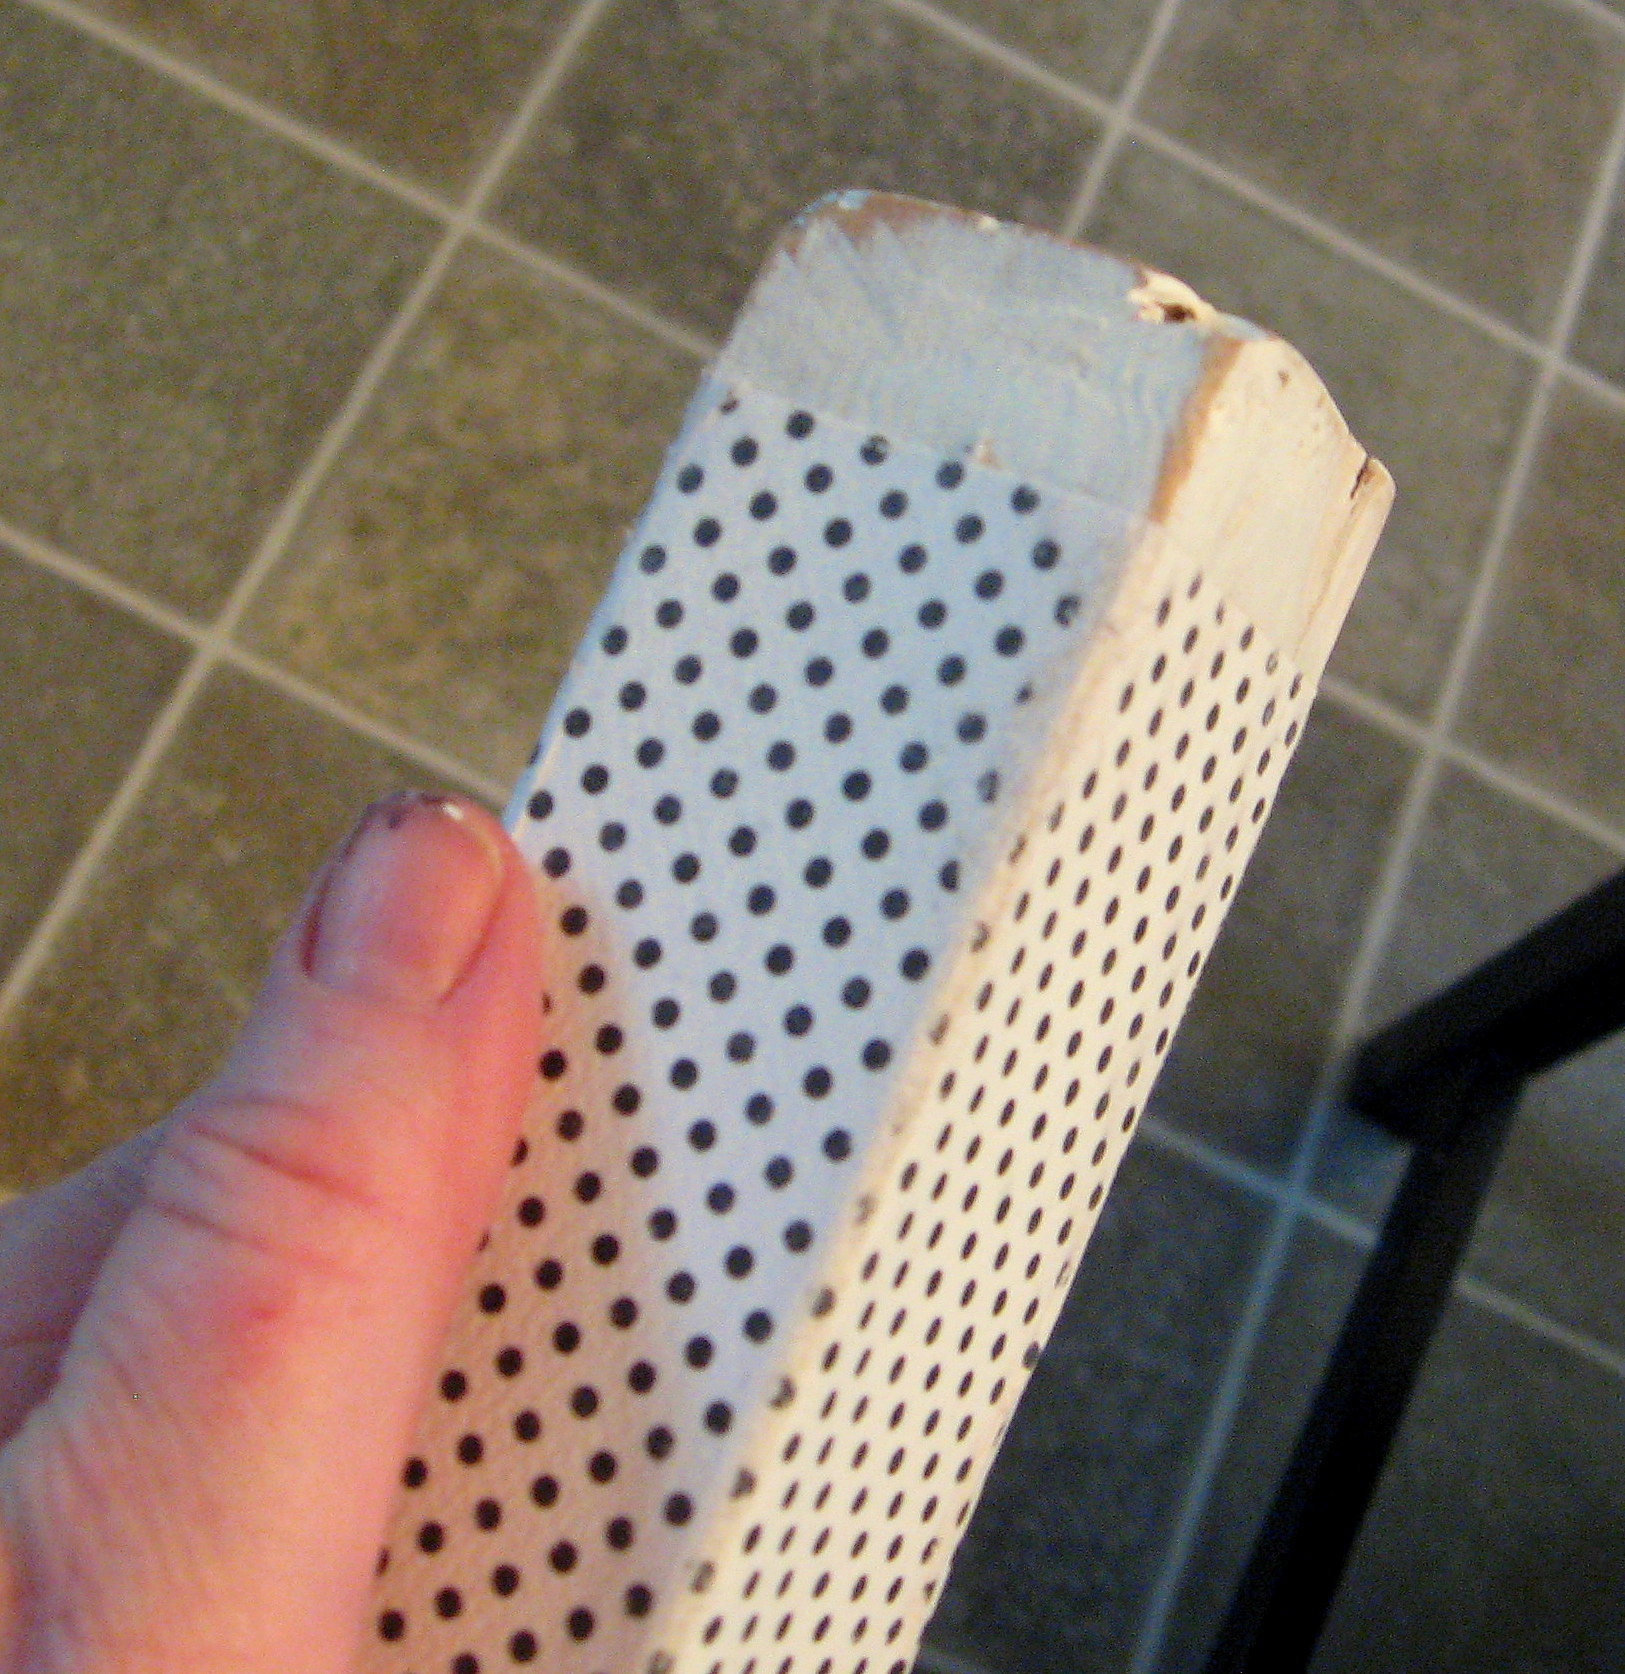
When the fireworks look just the way you want them, seal them with a coat of Mod Podge on top of the paper.
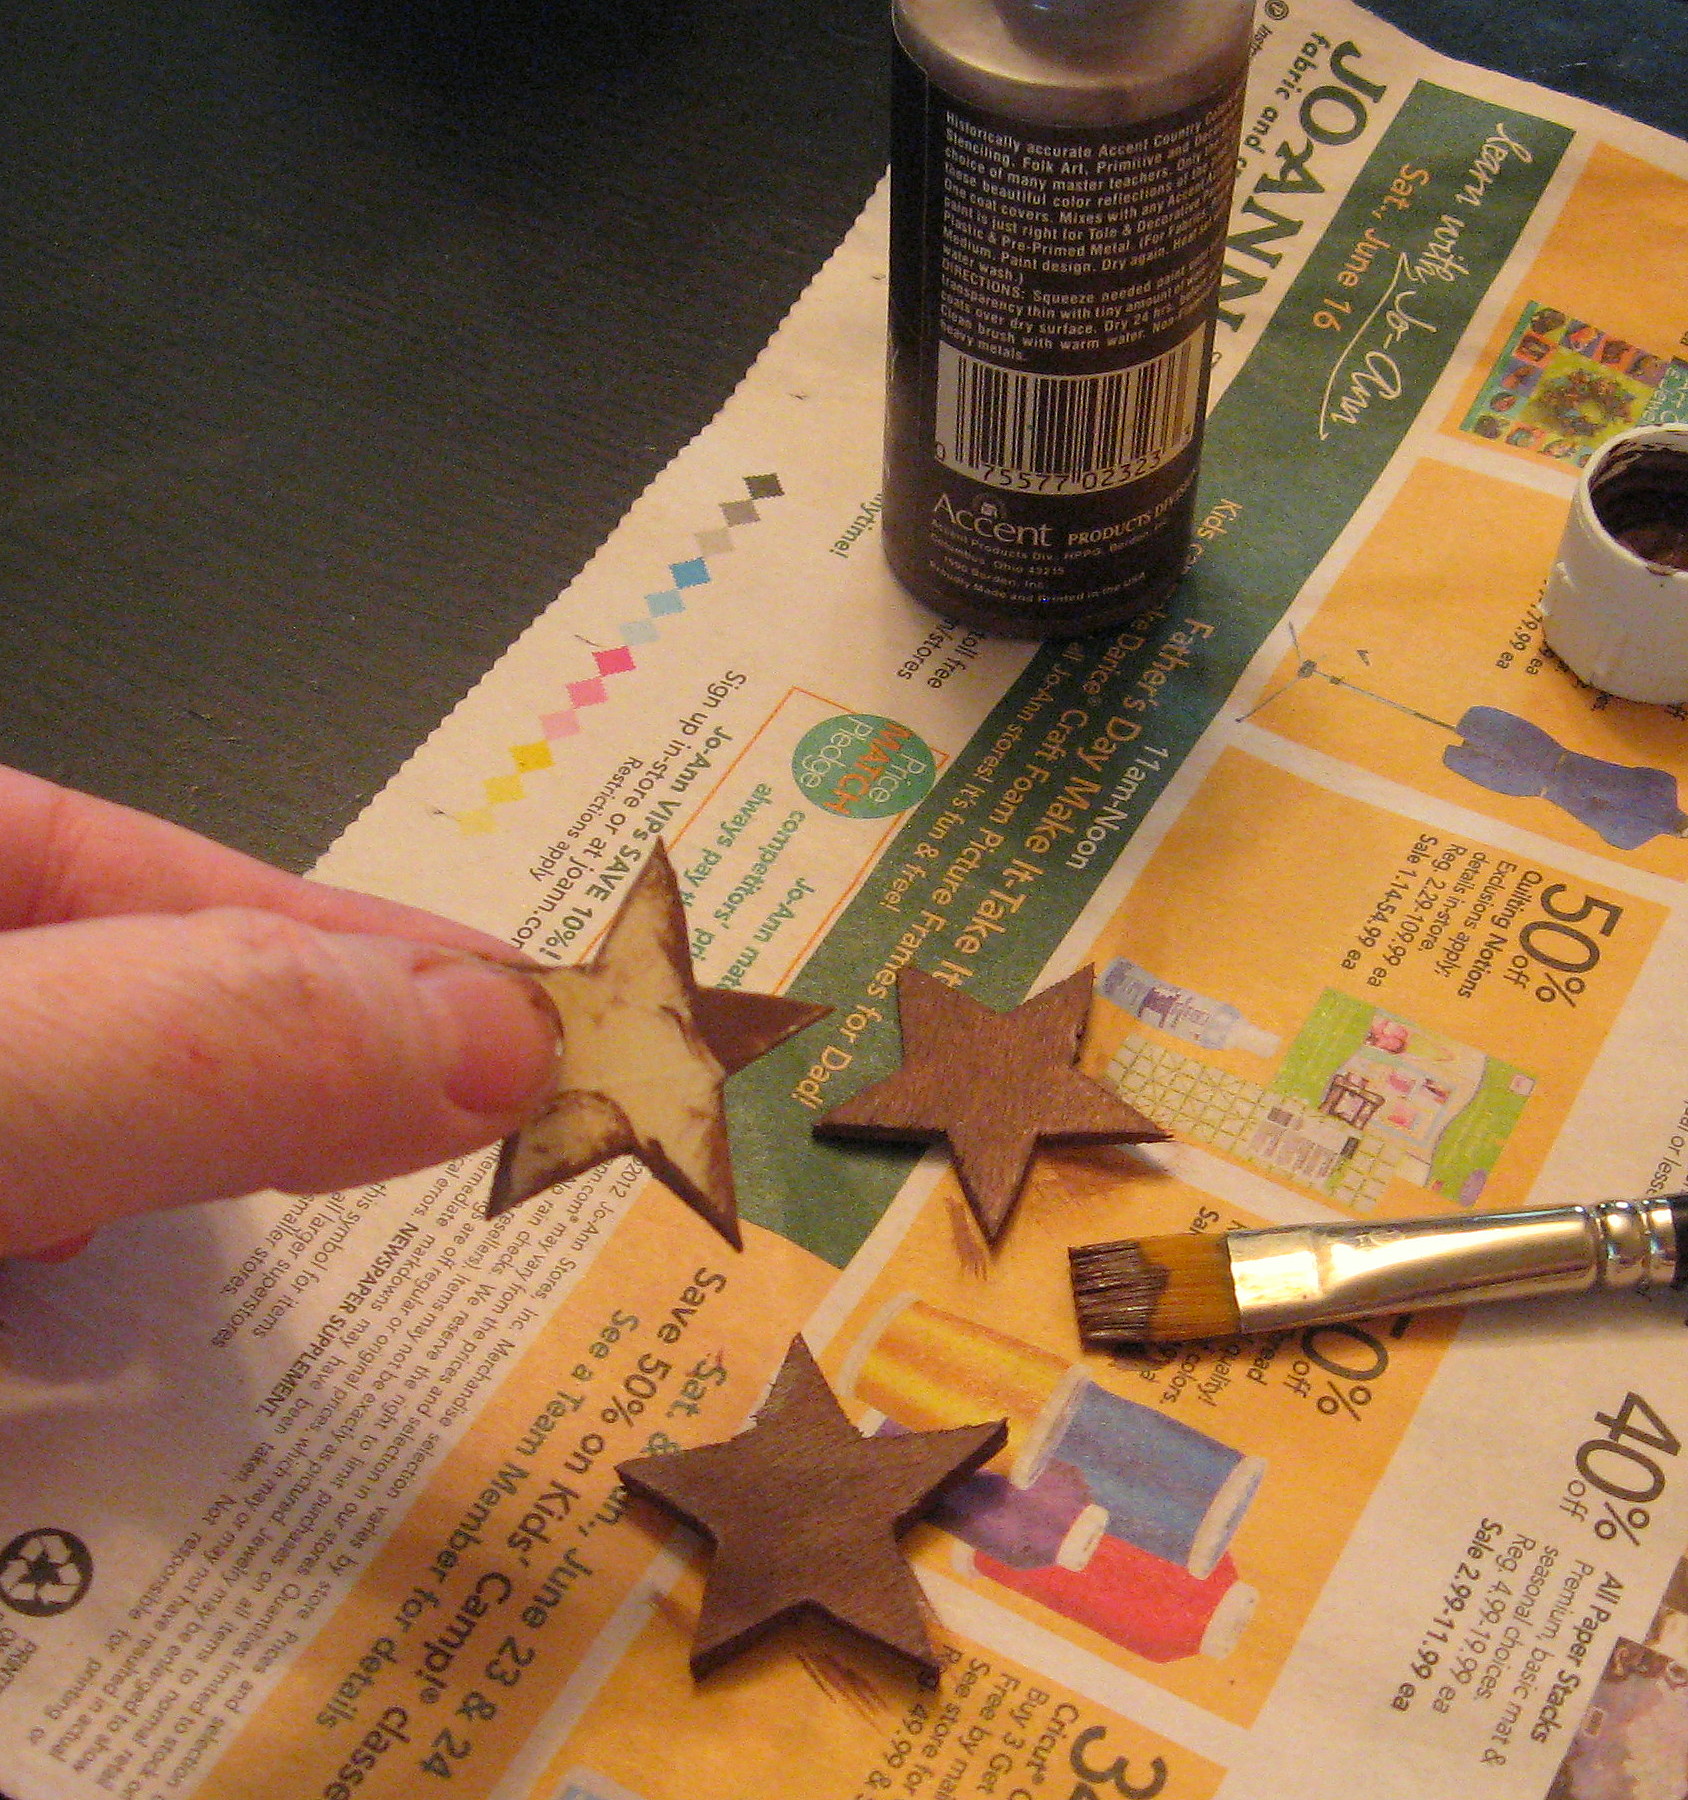
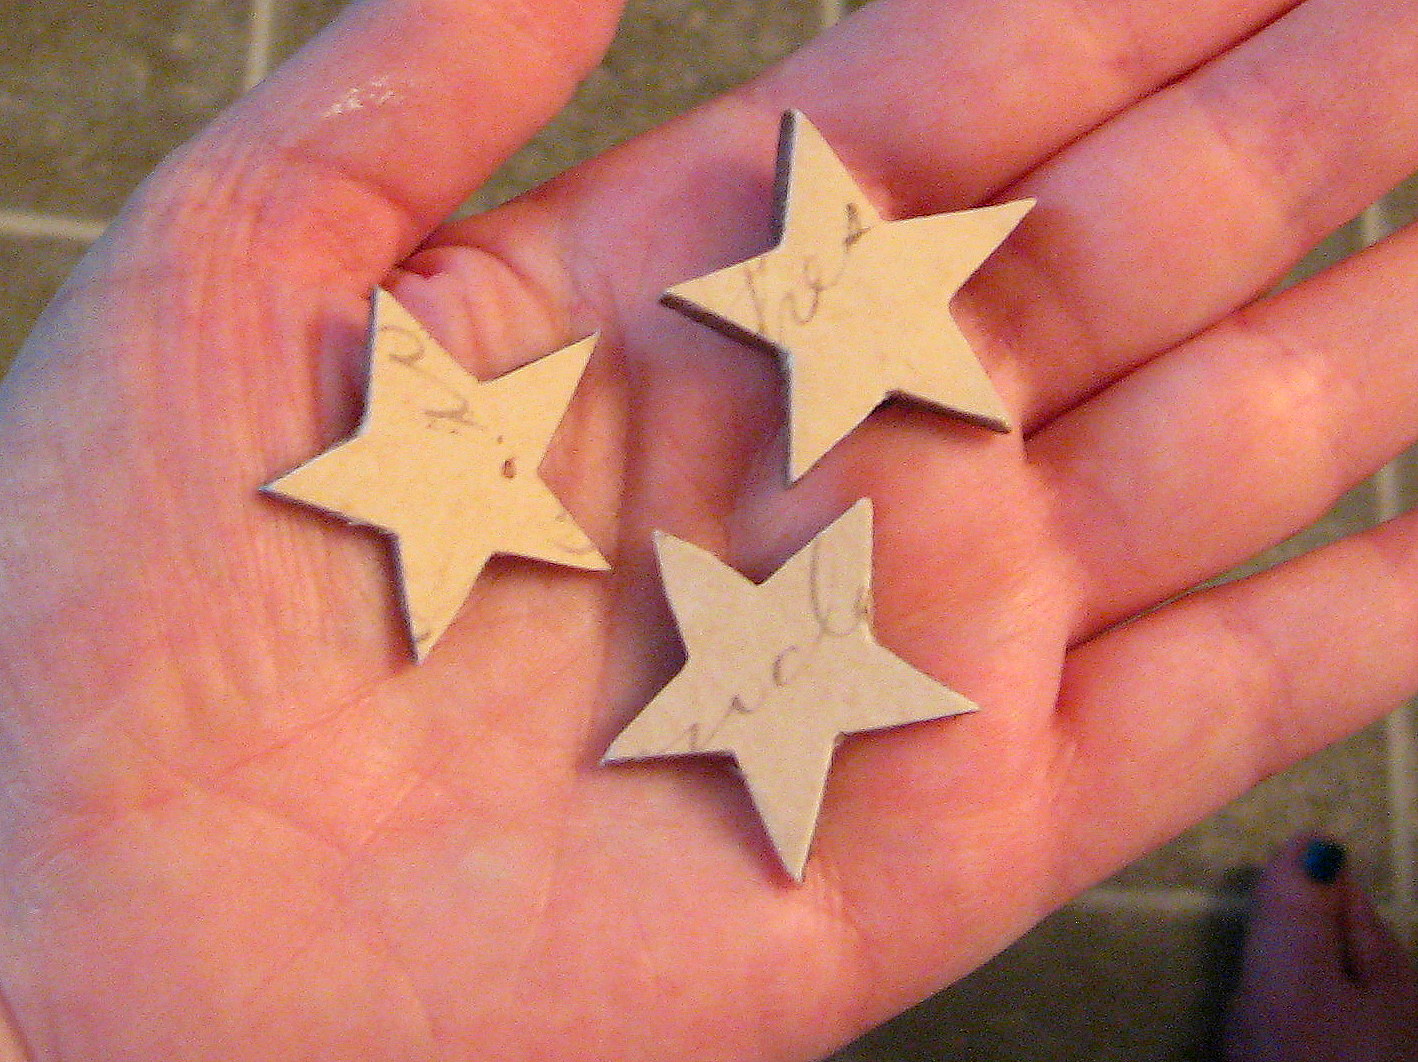
Next we will make the “fuse”. I started with three wood stars that I bought at a craft store. trace them onto a piece of scrapbook paper – mine is a creamy white with old-fashioned script writing on it – and cut them out. Cut them a little bit on the big side rather than trying to line them up exactly…you will see why in the pictures below.

Paint the edges and the backs of the stars with a coordinating paint color – I used brown –
and once that is dry, Mod Podge the paper stars onto the unpainted side of the wood stars. Notice in the picture below how the paper is bigger than the wood?
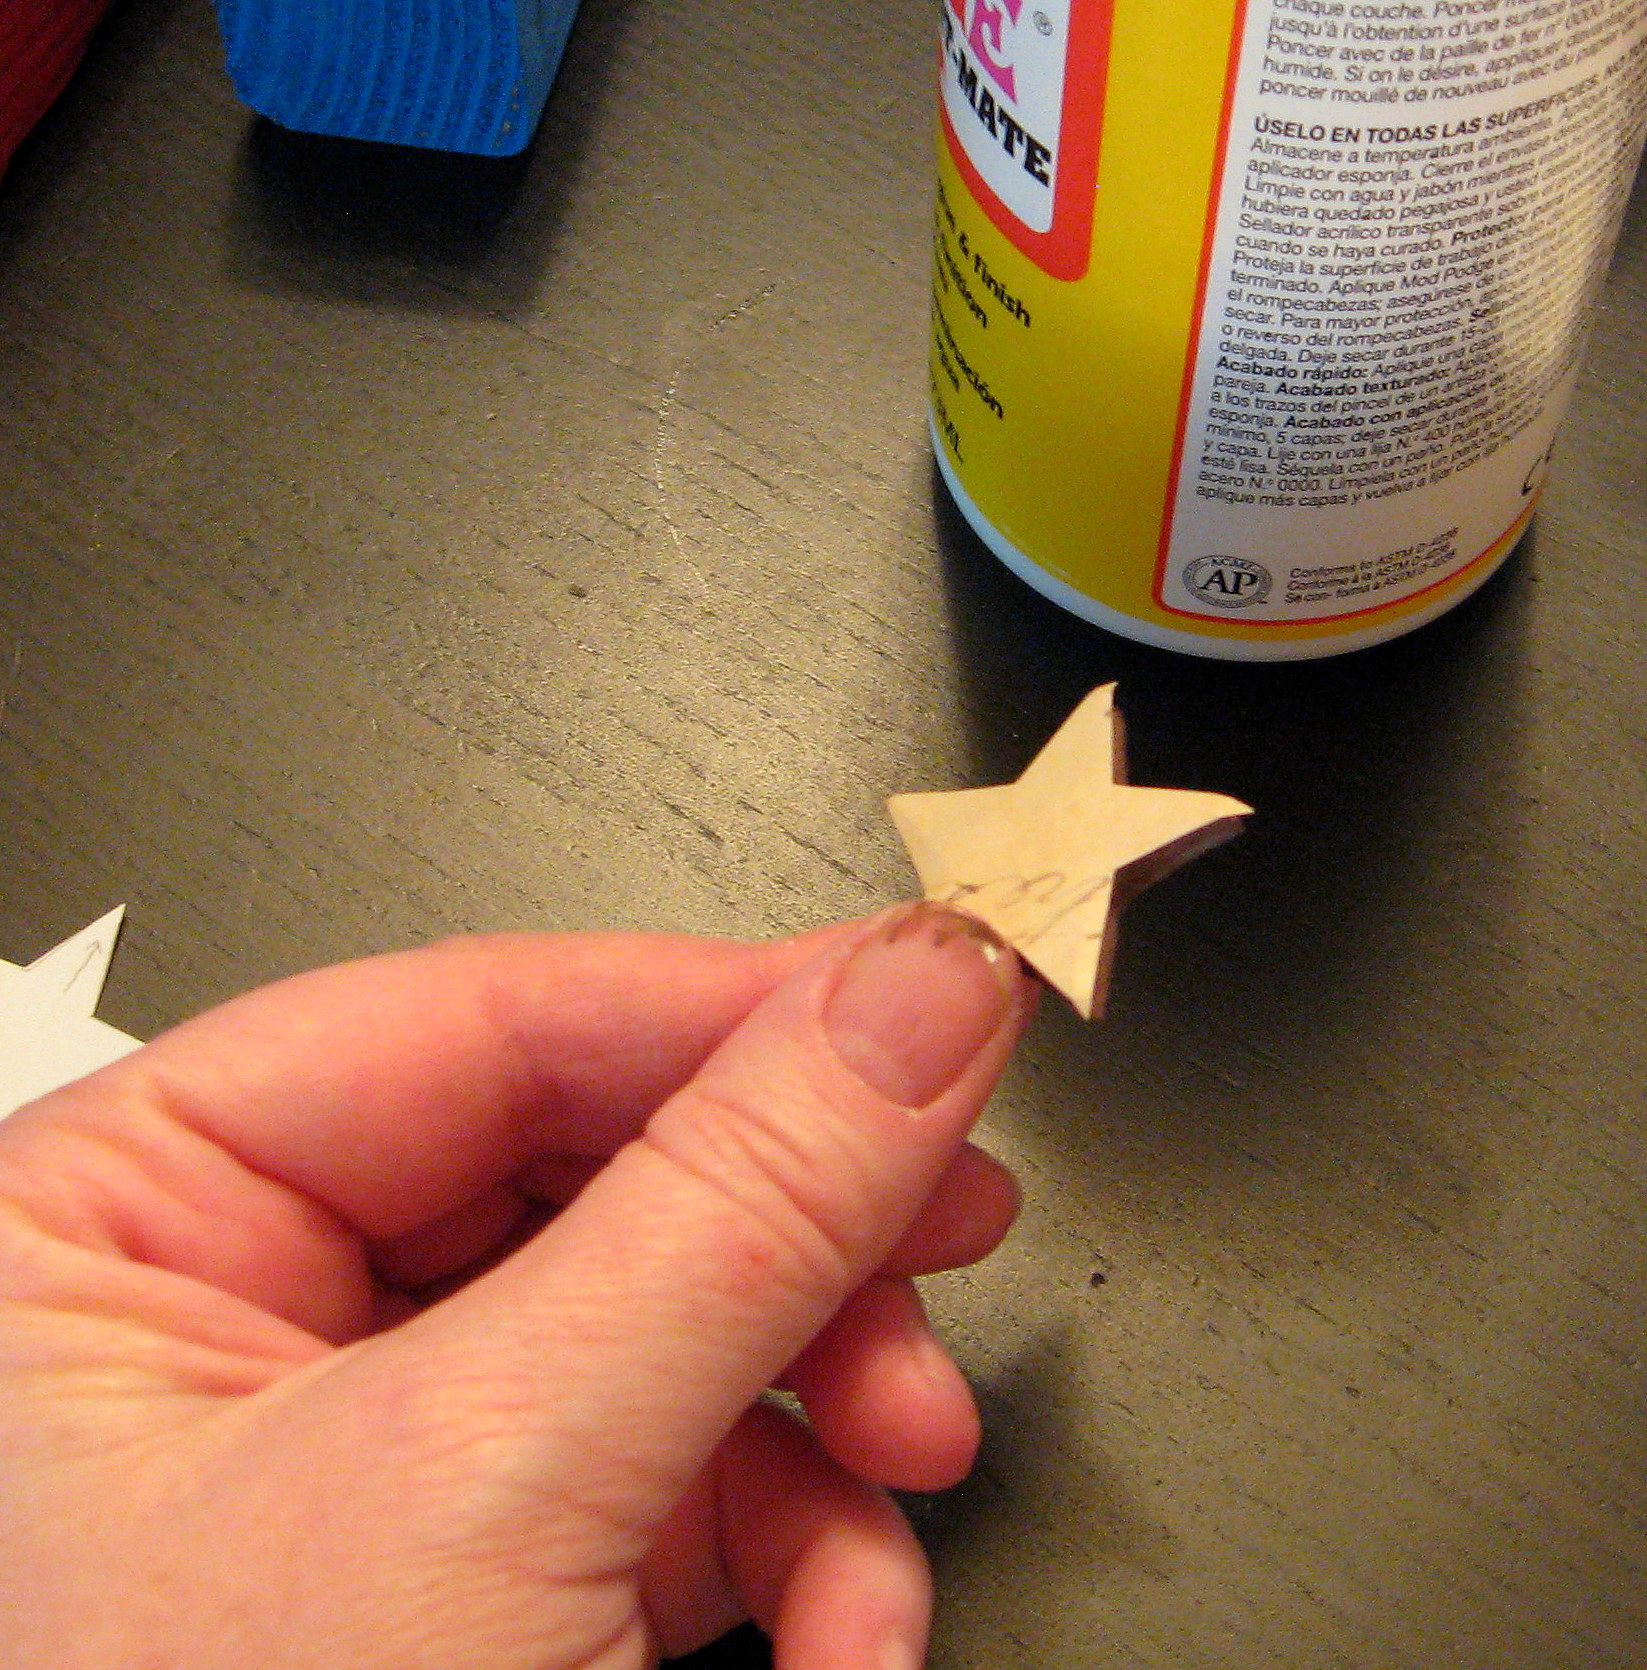
Using an emery board (I buy packs of them at the dollar store just for crafting!) or a piece of sandpaper, sand the overlapping edges of the paper off by holding the emery board perpendicular to the star and sanding in downward strokes.
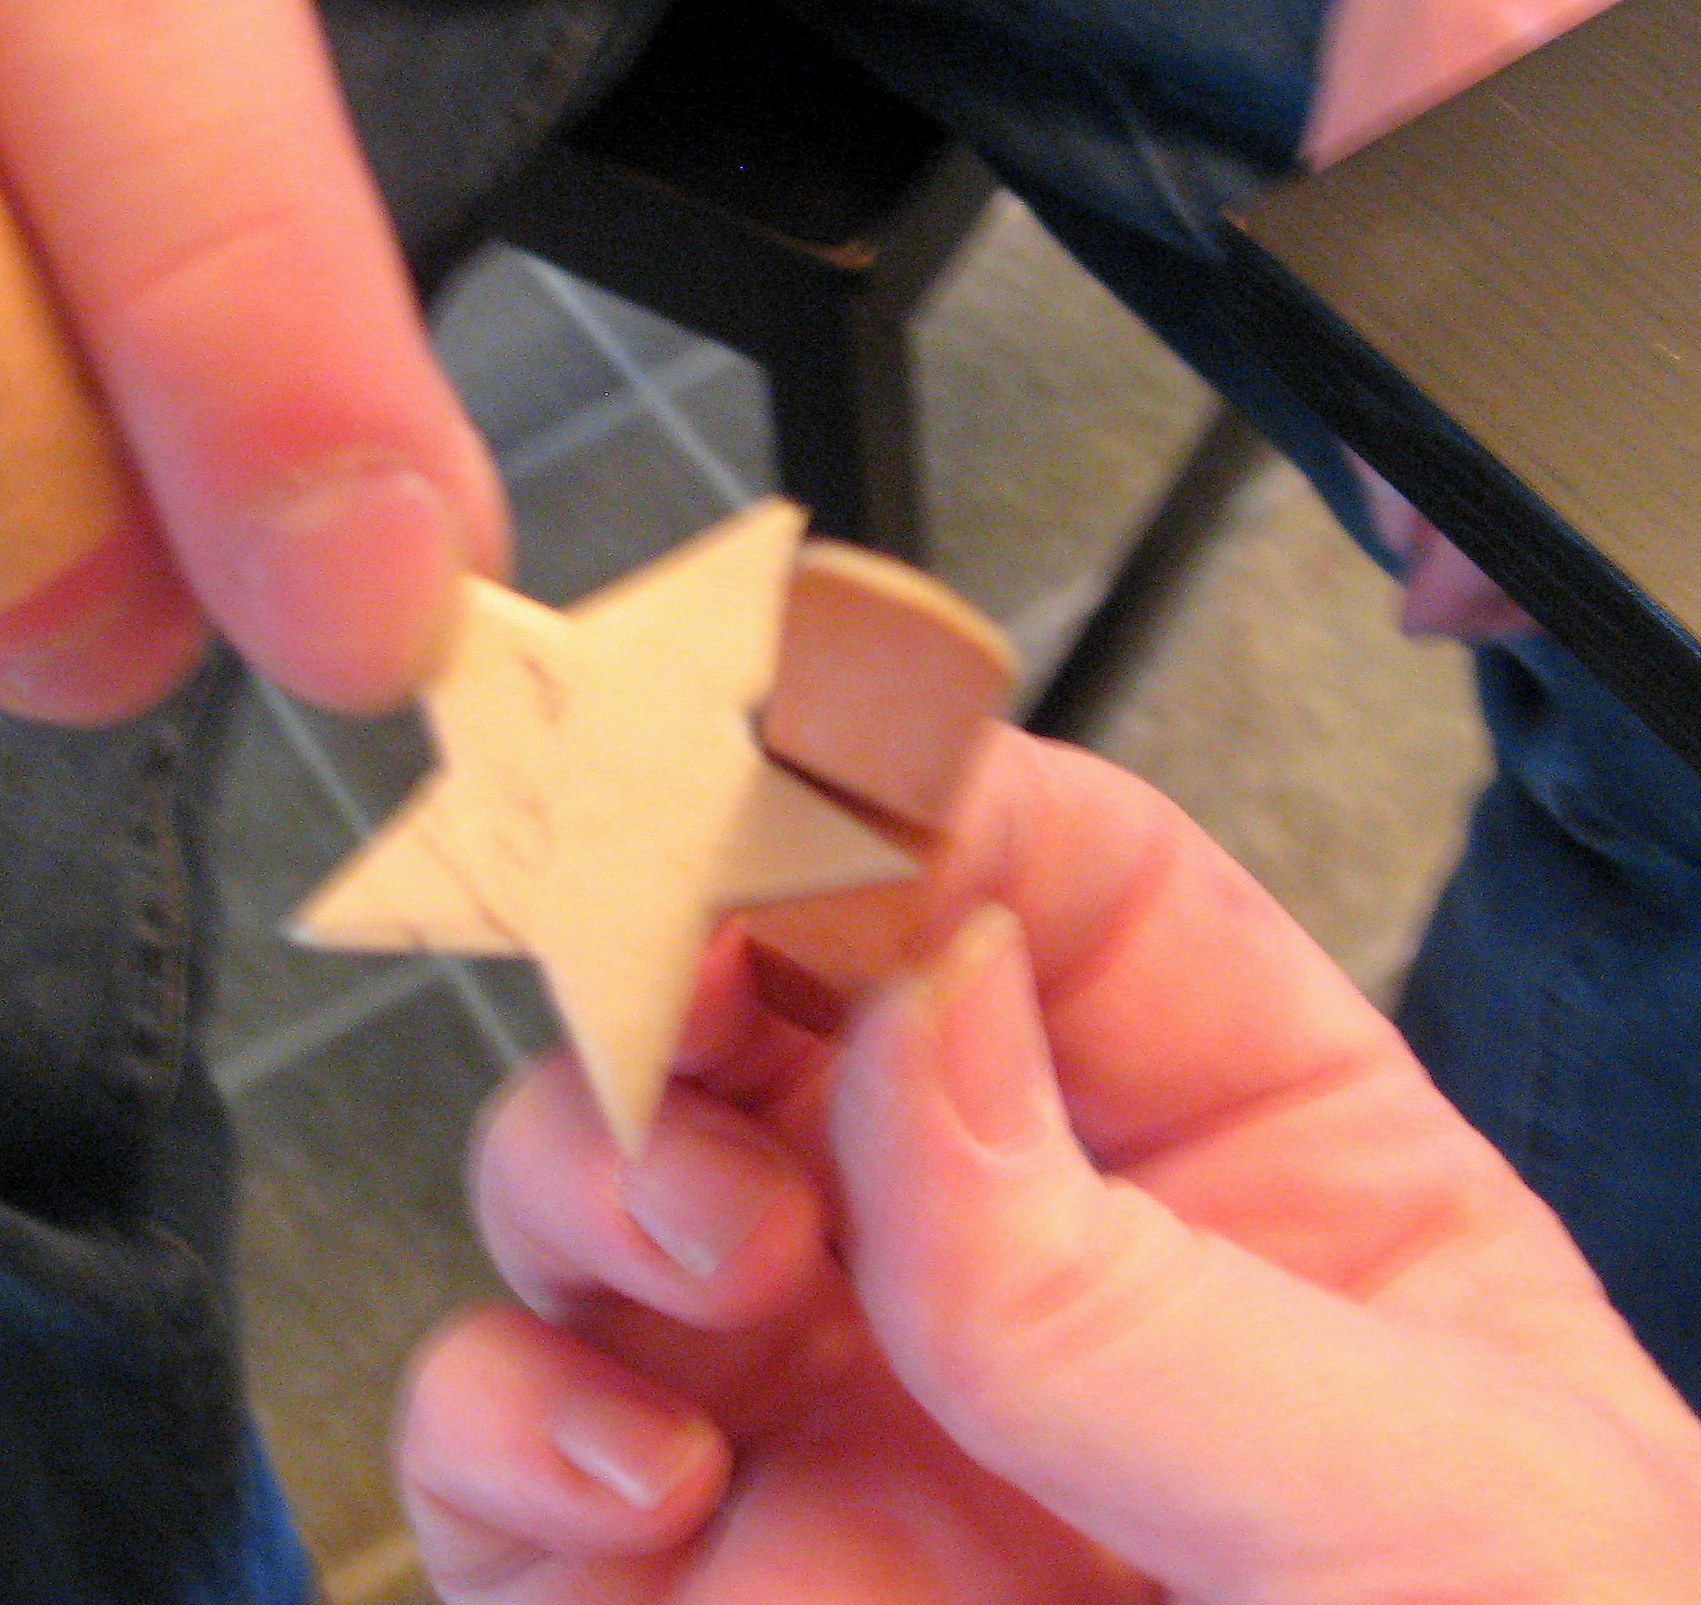
The paper will be cut off and you will end up with perfectly covered stars with perfectly crisp and even edges.
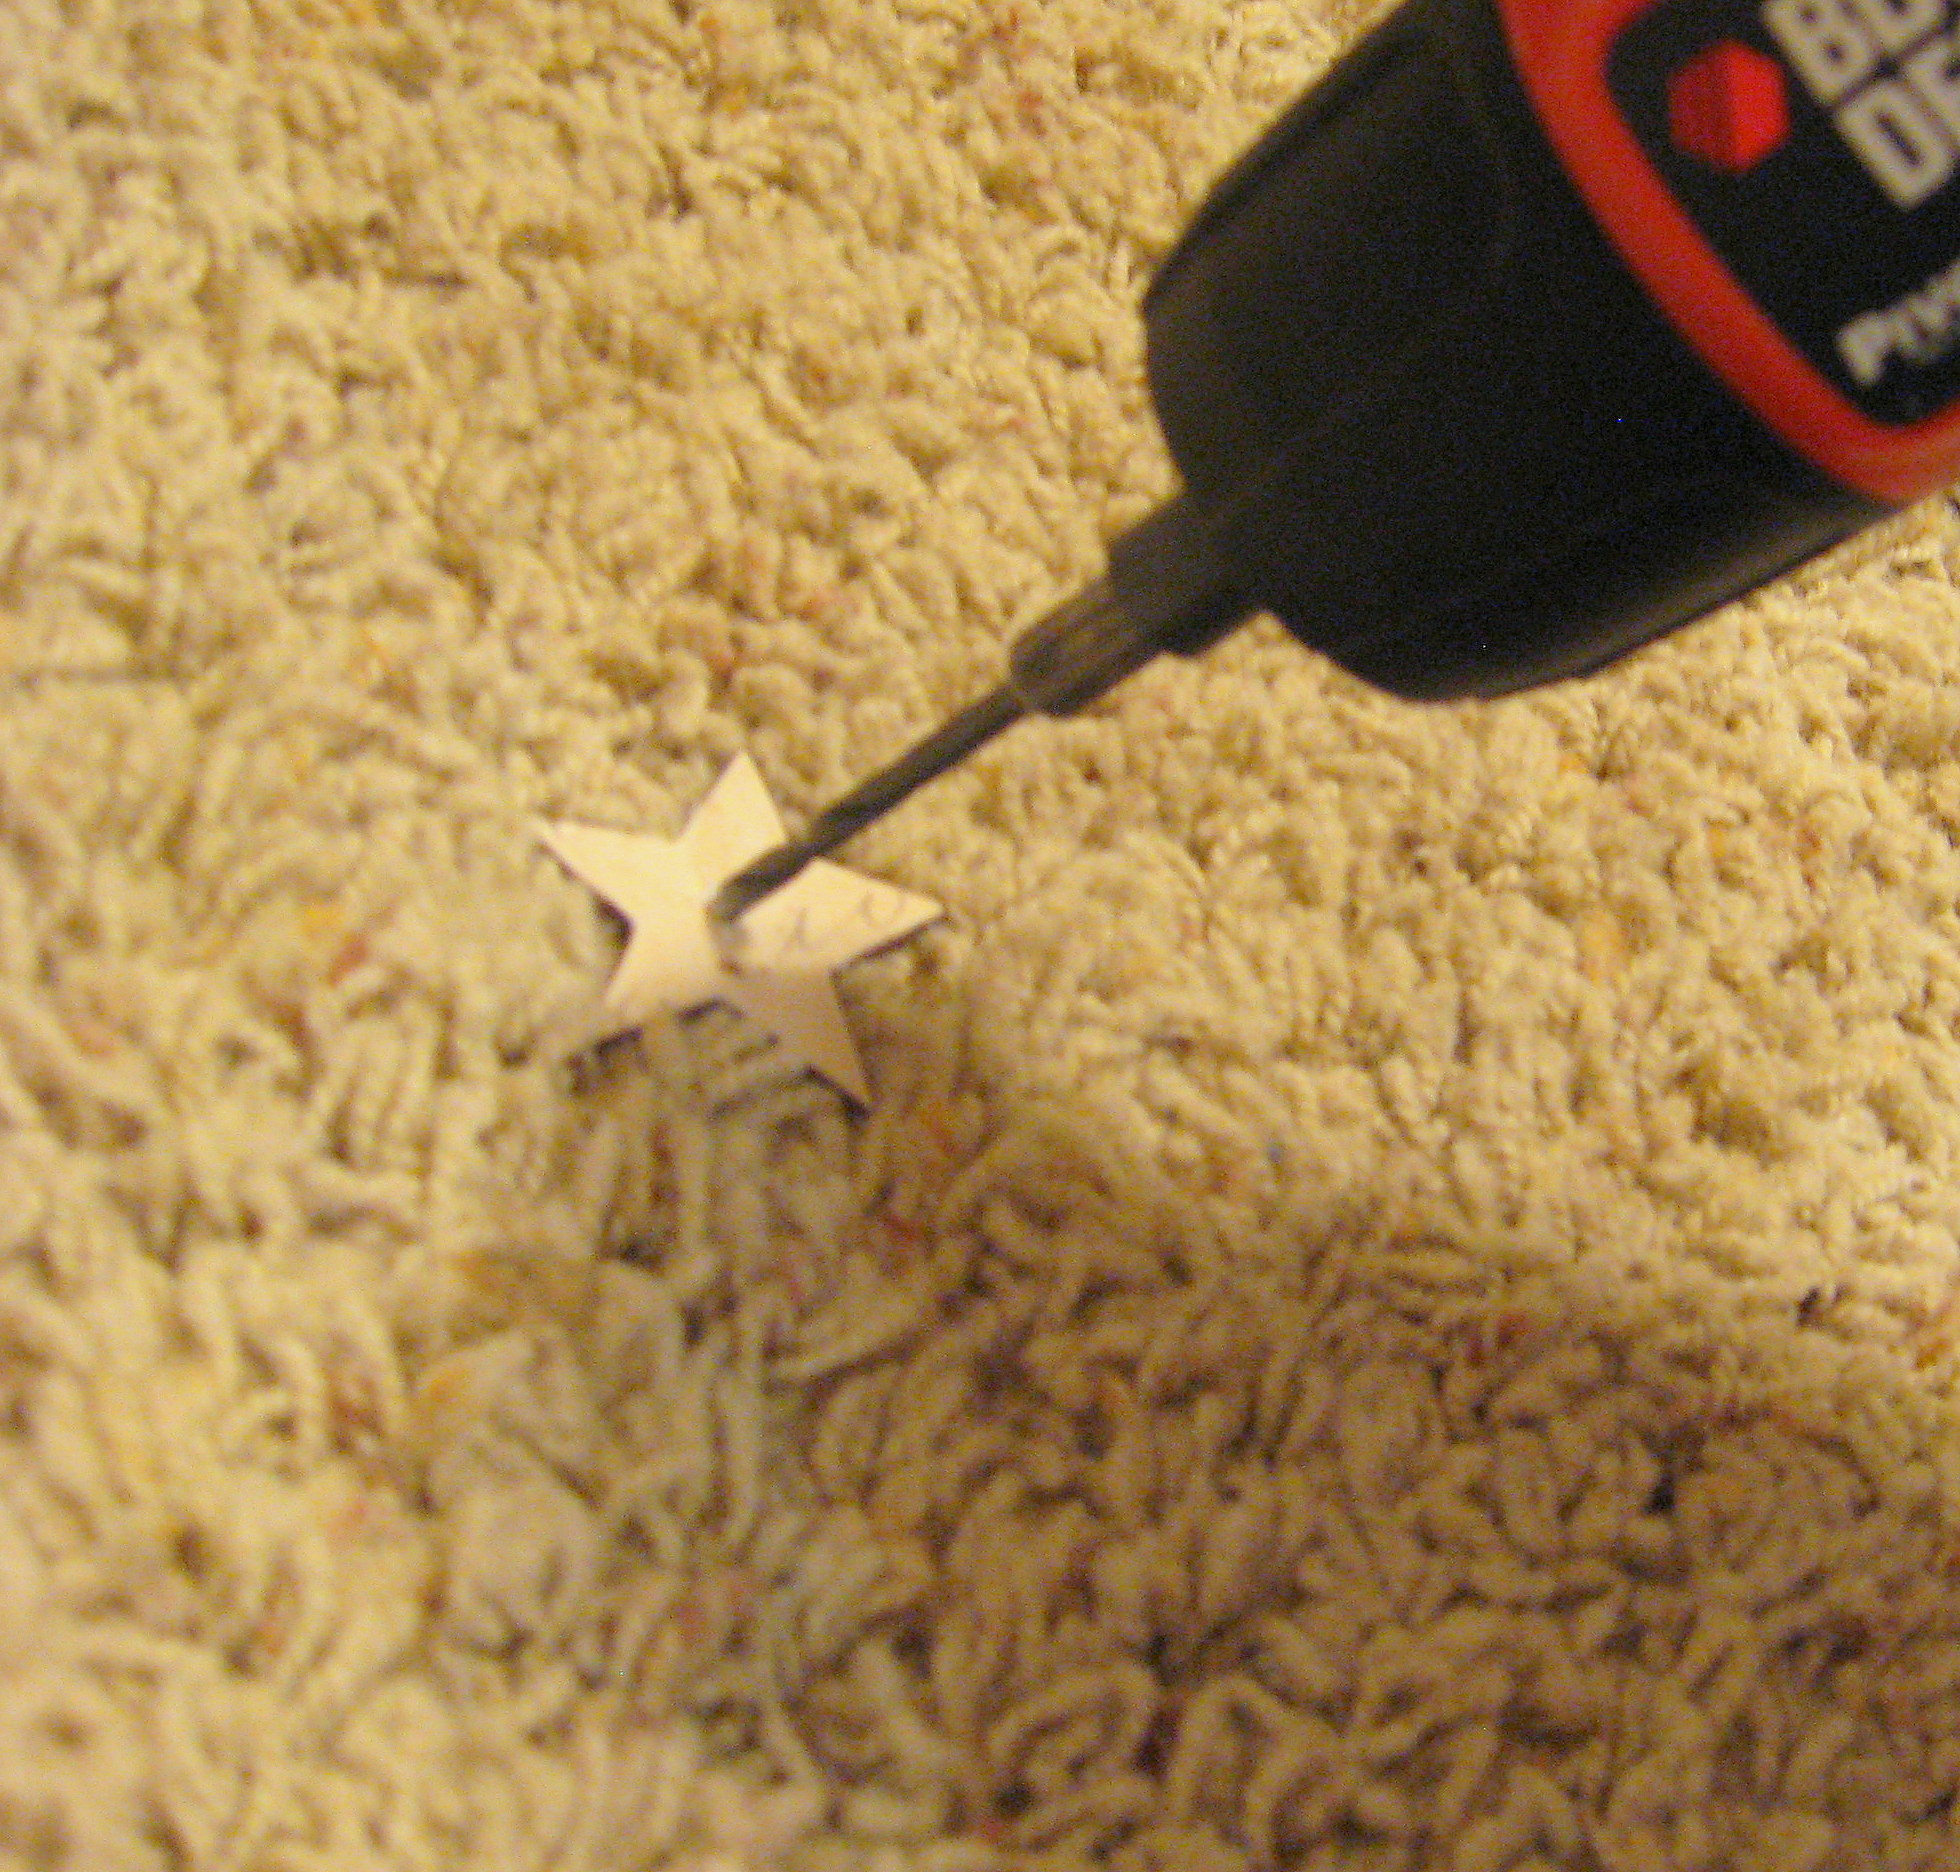
Seal the paper with Mod Podge and let them dry. Once they are dry, drill a hole through the middle of each star. BE CAREFUL! This wood will split easily, so go slow and don’t push too hard or you could break the whole star in half. Mine splintered off a little bit of wood on the back, so I just touched up the paint and it looks just fine.
Cut off a few inches of a heavy wire for each star. Using a pair of needle nose pliers, curl the end, then bend the curled part over about 90*
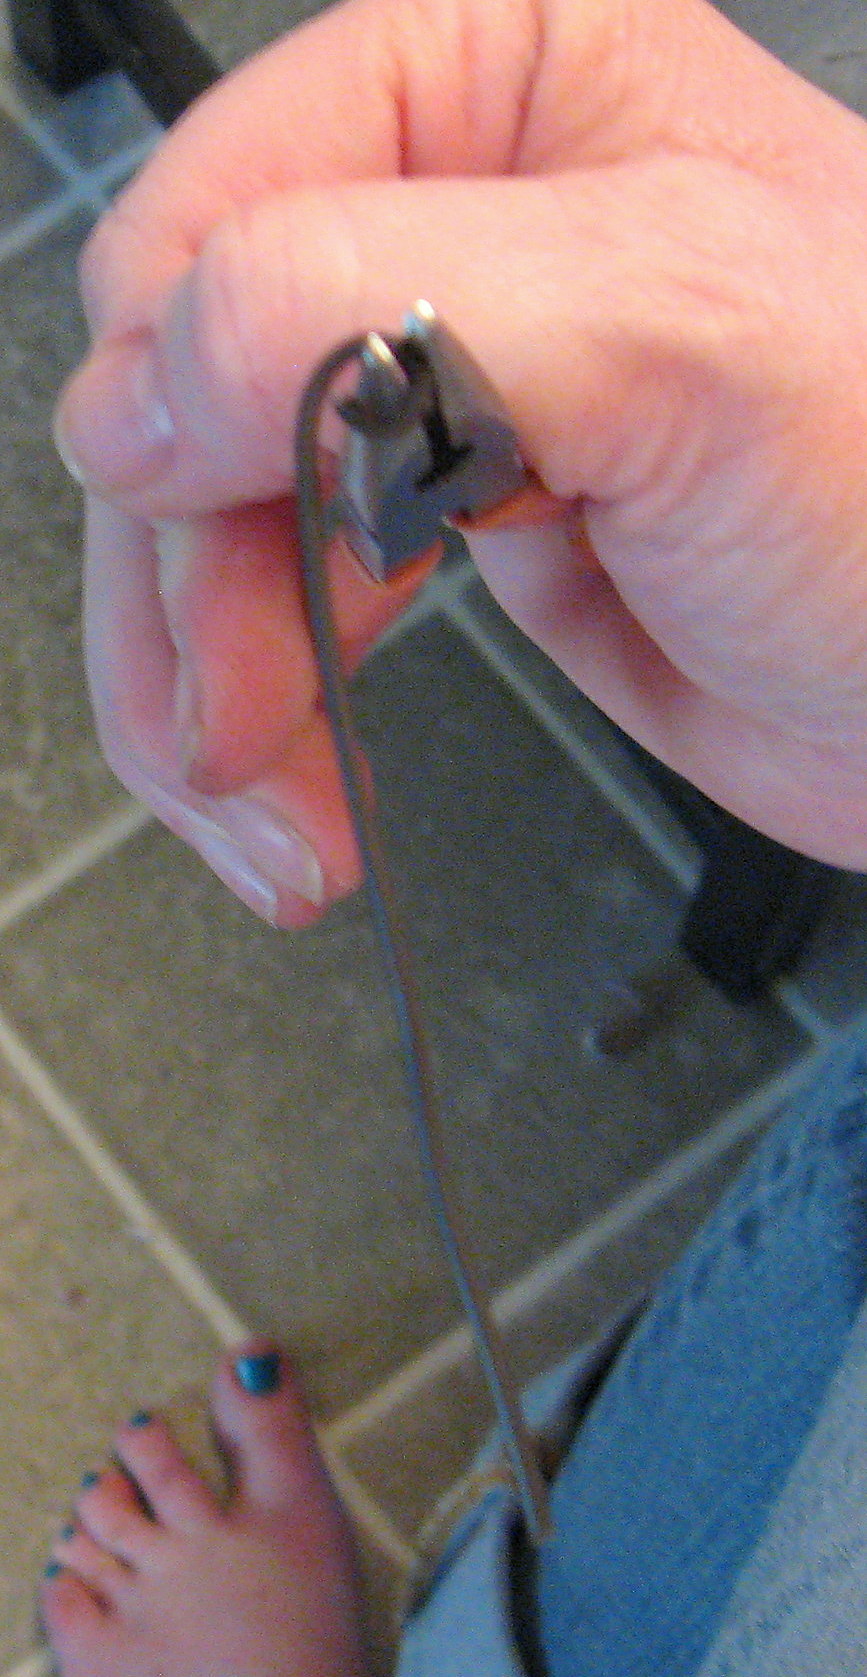
insert the other end through the hole in the star, position it how you want it, and – using the pliers – squeeze the wire together on either side of the star to hold it in place.
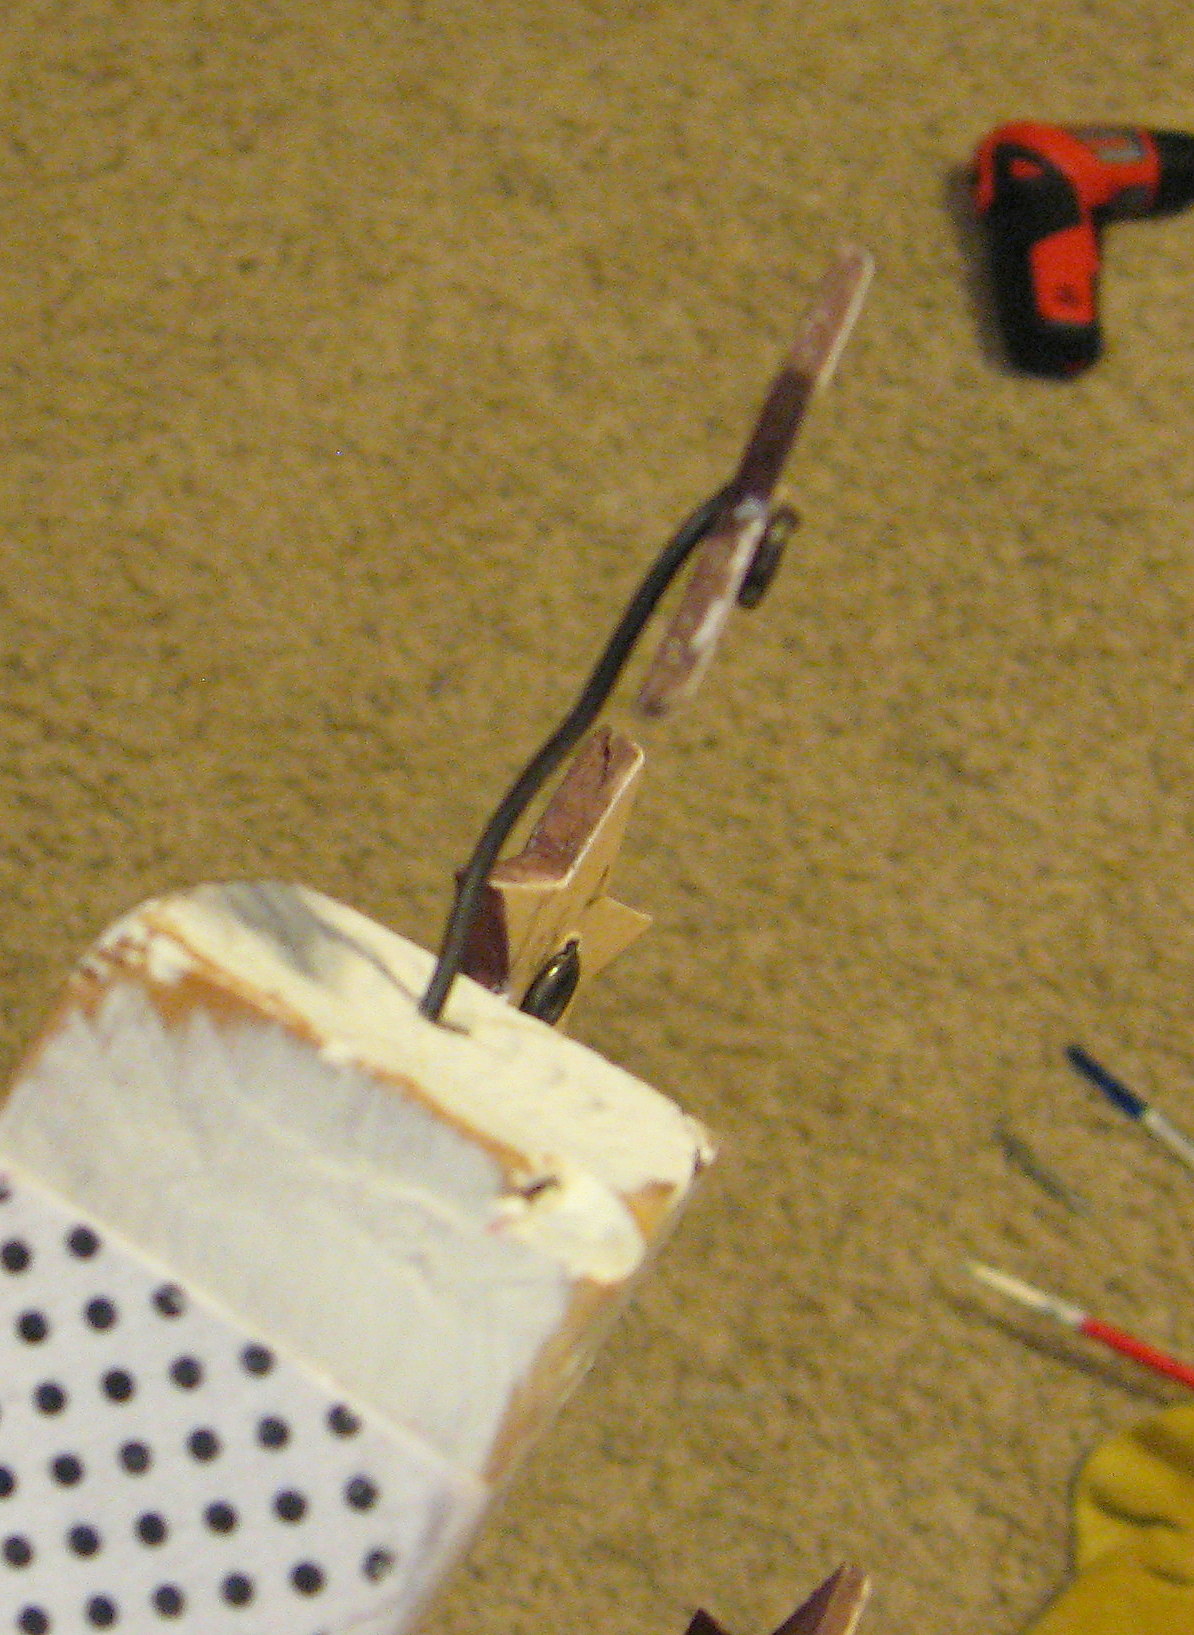
Cut the wire to the desired length, squirt a little glue into the hole you drilled in the stick and insert the finished fuse.
I stacked the three fireworks together and used a little dab of hot glue to hold them together so they wouldn’t shift around during this next step.
Wrap twine around them, leaving a tail, and using a dot of hot glue on the back to hold it in place.
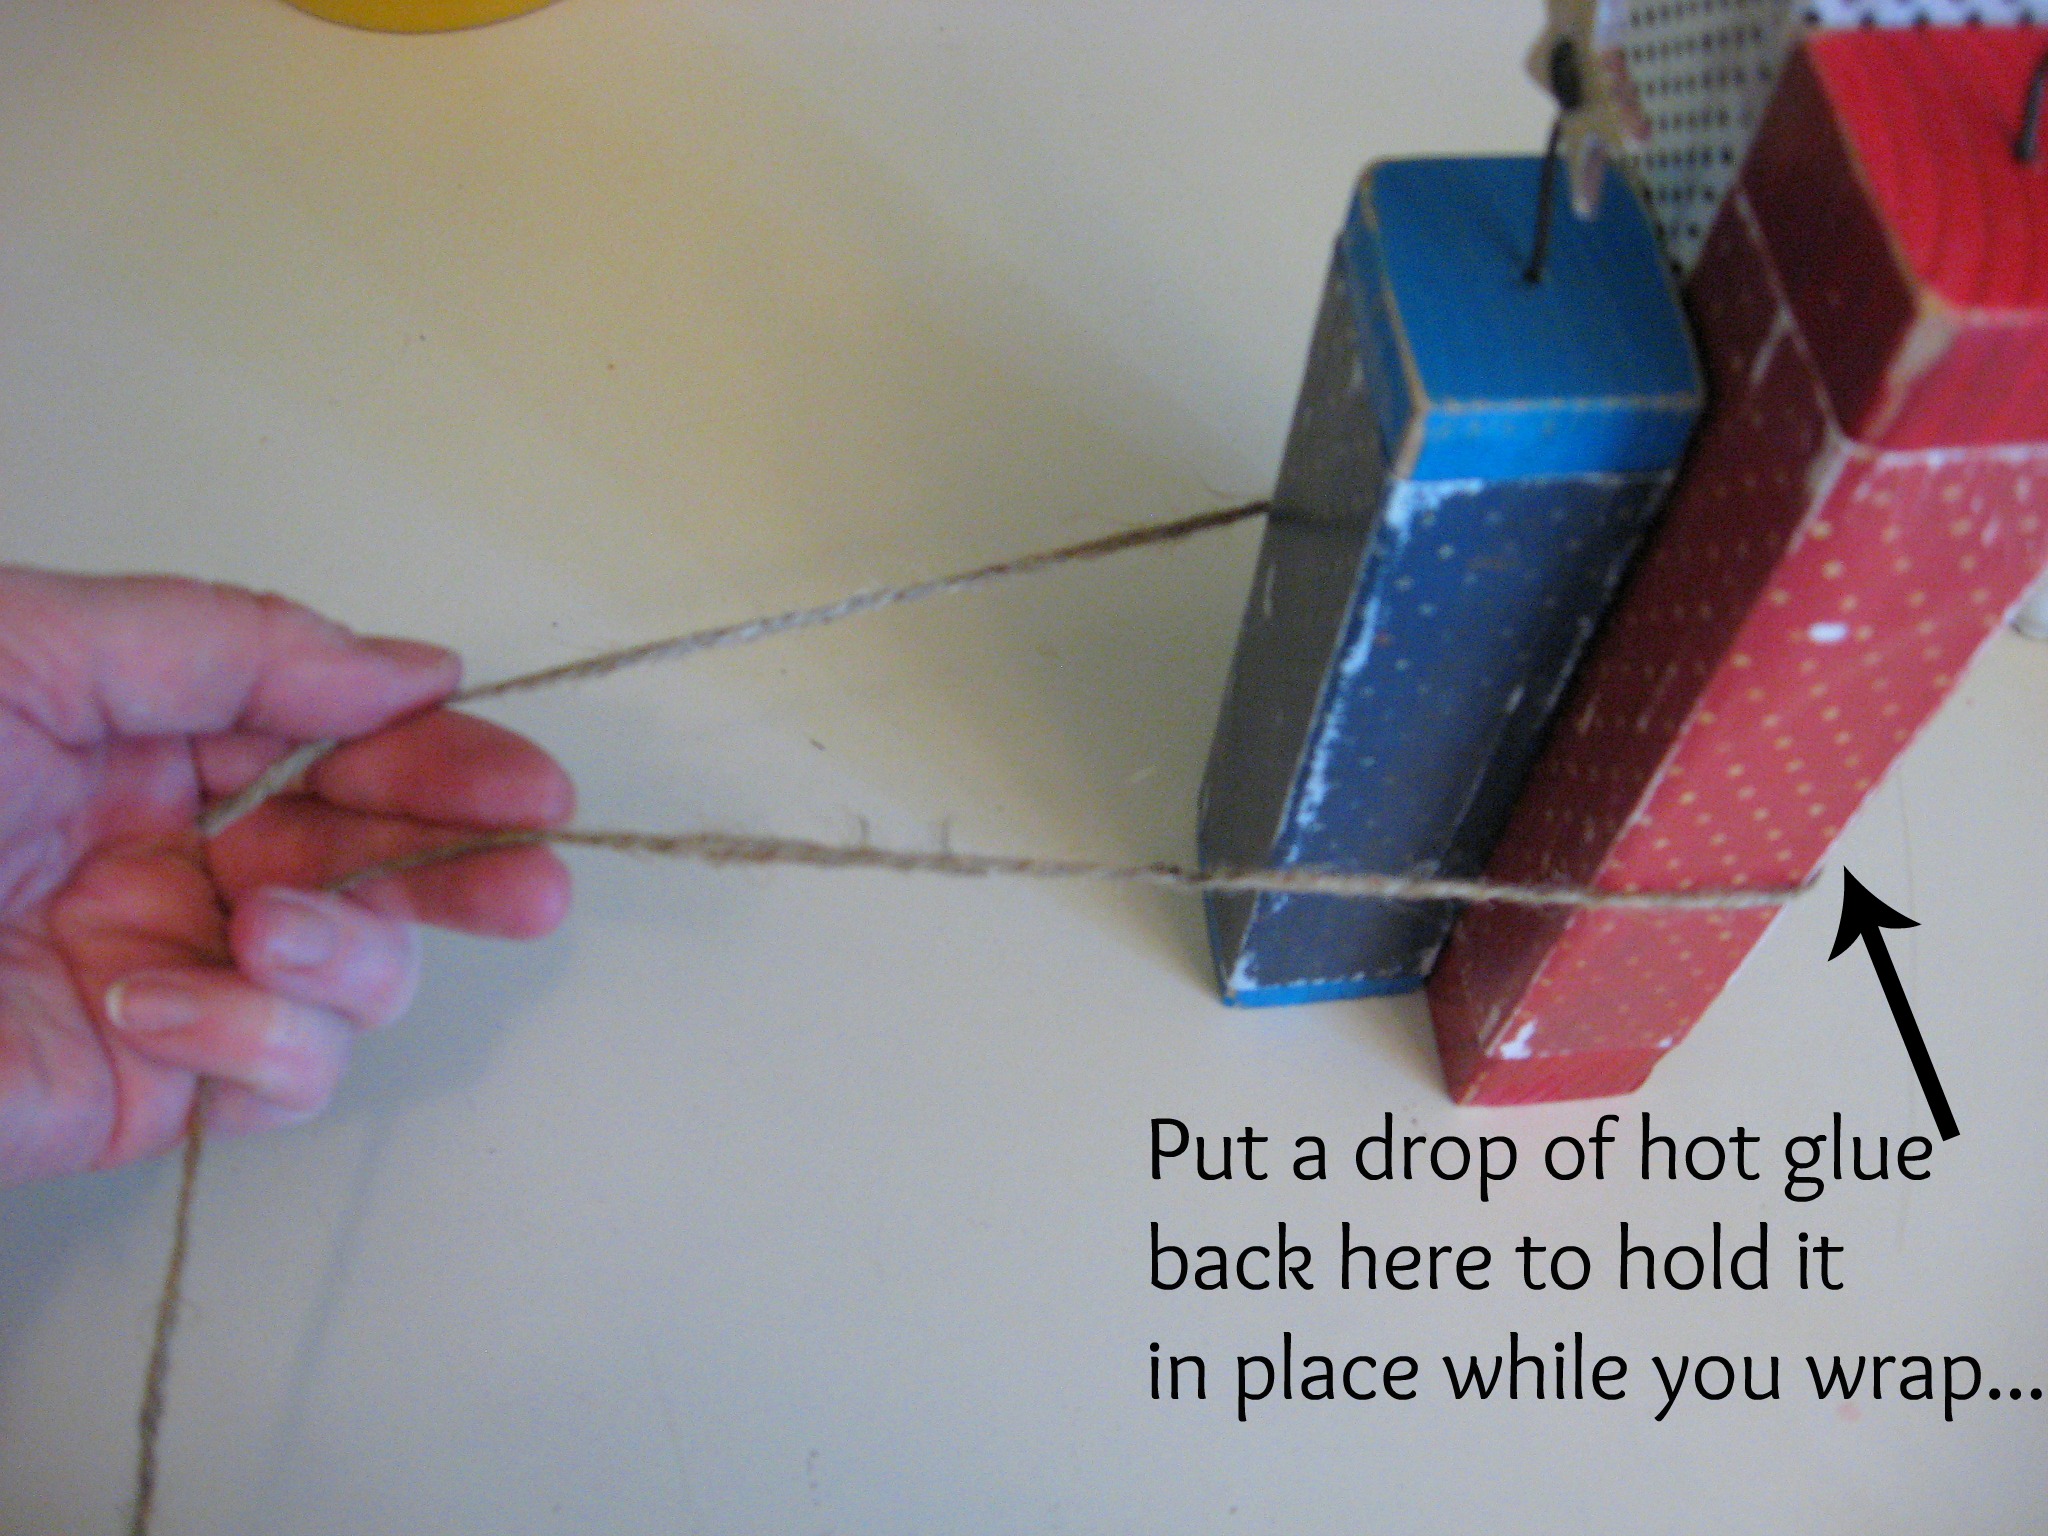
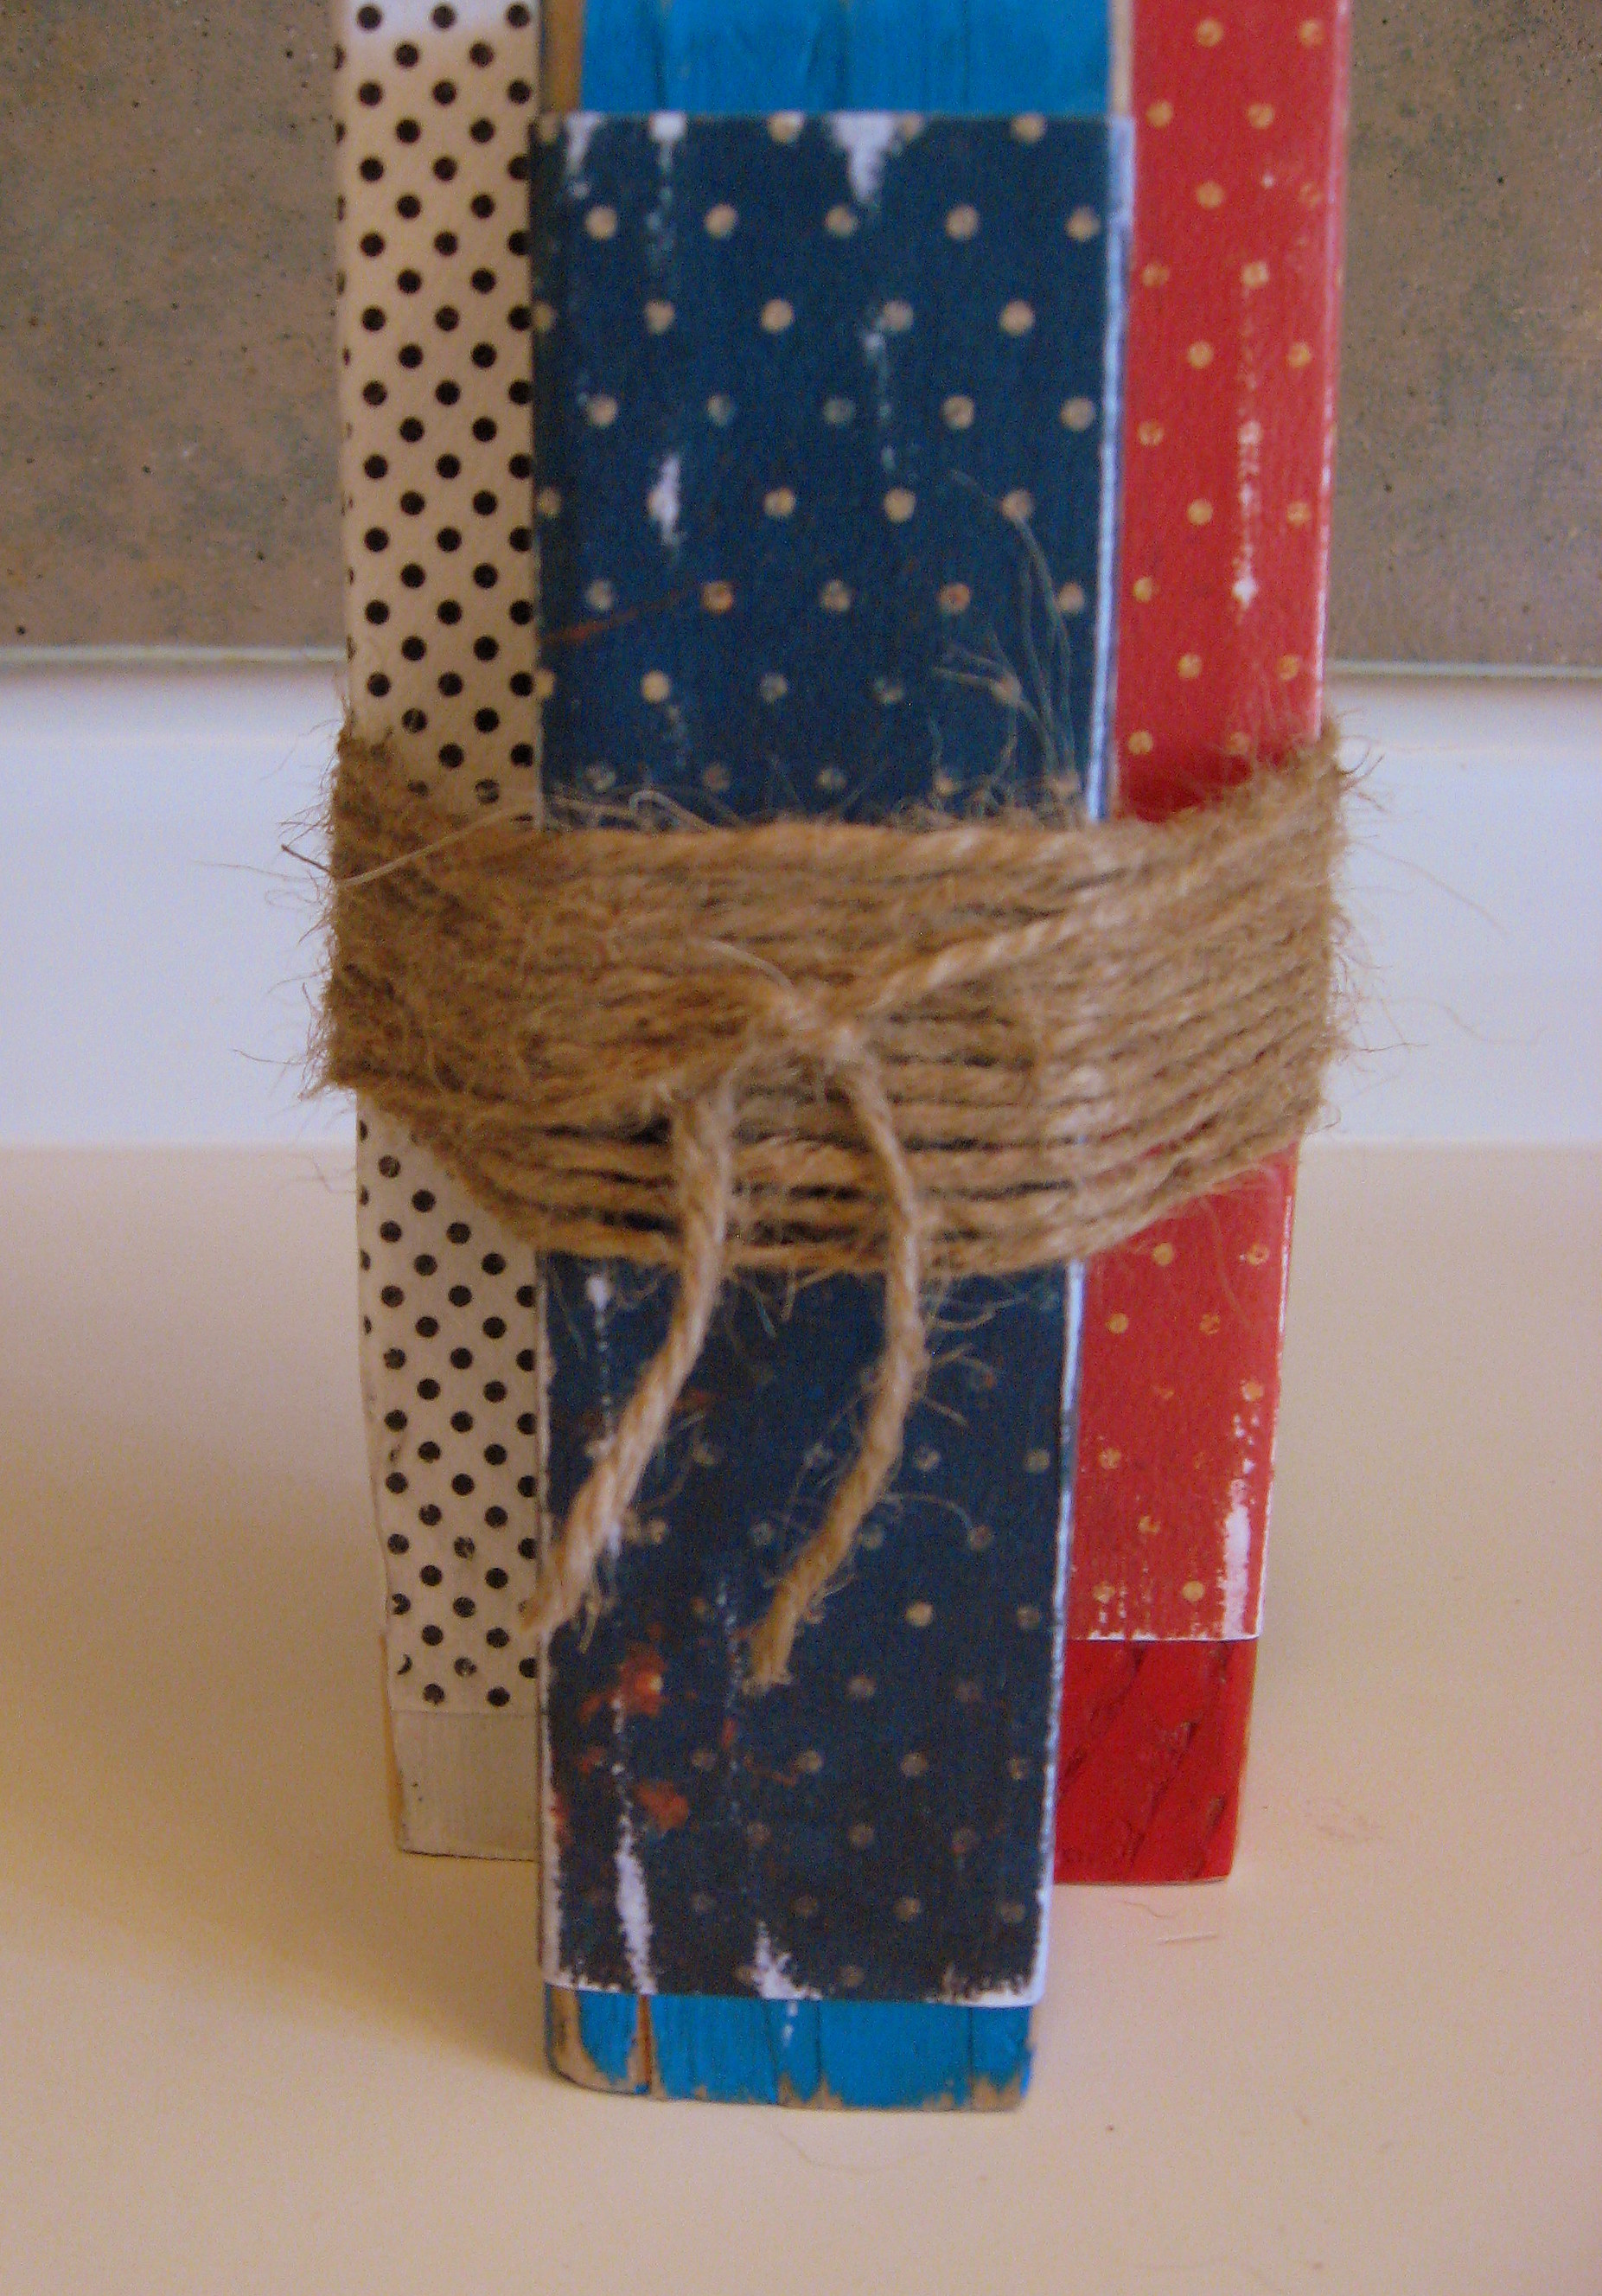
Wrap the other end of the twine around the whole bundle until it looks good, then cut the twine and tie the two ends together like this:
The last sentence is just as hard as the first….ummmm….
TA DA! Finished fireworks!

Freezing Summer Produce
 It’s that time of the year where the fresh produce is going to be in abundance for much of the United States. I love this time of year! Yes, I love when my neighbors bring me a zucchini or three! I love the summer produce so much that I need to put my freezer to work and start storing the summer produce for fresh tasting fruits and vegetables during the winter months! Be sure to keep up with your local Grocery Store Sales,Farmers Markets, Roadside Stands, Neighbor’s Gardens or even your own.
Here are some popular items you may like to keep all year long and how you can preserve them.
BANANAS
If your family has a love for bananas purchasing at the lowest price allows you to stock up. However, it can be a little tricky to store the soft fruit. One option is to dehydrate and create banana chips. Another option is to freeze bananas. Cut them up or freeze them whole on a cookie sheet and then transfer them to a freezer bag. They are yummy when eaten frozen right out of the bag, used in cookies or bread and even thrown into a smoothie! Here is a post we did a couple or years ago about making guilt free ice cream!
CORN
YUM, fresh corn on the cob! This is the food many think of when you think of summer. You can savor the taste of fresh sweet corn by freezing and the price is amazing! Here’s a great how to from the Utah State University Extension on freezing corn.
HERBS
Herbs have a short shelf life in the fridge so drying them out in the oven allows you to have fresh herbs all year round. To dry herbs in the oven place the oven on 180 degrees. On a cookie sheet lay out your herbs making sure they aren’t overlapping. Allow the herbs to dry for 3-4 hours, turning every hour.
If you have patience and time, you can air dry your herbs. Simply tie up a few stems on the ends and hang upside down…be sure to avoid direct sunlight. When the leaves of the herbs are completely dry they will flake or crumble off very easily. Simply store in an airtight container for best results.
ZUCCHINI
I know, I know! You get so sick of zucchini, but in December you might have a craving! Pick Your Own is a great resource for learning how to freeze all your summer squashes! I love this spiral cutter, perfect for making noodles from squash.
PEACHES
When fruits and veggies go out of season they become expensive and peaches are one of them! To enjoy peaches year round be sure to freeze your own and save yourself some money this winter.
ONIONS & PEPPERS
Onions and Peppers are probably one of the easiest veggies to freeze. You literally slice or dice them up and stick in the freezer safe container or baggie. Just portion them to your families needs so when you make fajitas, omelets or breakfast potatoes consider mixing a bag of green peppers and onions for ease!
PINEAPPLE
Do you love Smoothies? Pineapple is super easy to freeze. You simply core and dice the pineapple into chunks, lay them out on a cookie sheet and allow to flash freeze in the freezer before placing in a freezer appropriate bag to store long term.
Quick Tip:
When freezing make sure produce is completely dry or they’ll be mushy when they thaw.
These are just some really simple tips in savoring the best of summer through the winter.
I would love to hear how you save your summer’s best. Leave me a comment!
Amp up the taste of a boxed dessert mix!
Chances are if you have been using coupons for any amount of time, you might have a lot of boxed cake and brownie mixes in you food storage or pantry. Don’t let the ease of opening a boxed dessert mix simply taste like every other one you’ve made. Rather, kick it up a notch with a few simple extra ingredients you already have in your pantry.
General Tips and Tricks:
- If your boxed dessert mix contains cocoa powder or chocolate substitute the water for coffee. The coffee brings out the sweetness of the chocolate.
- Try substituting the oil with applesauce, canned pumpkin or even Greek yogurt!
- Once the batter is poured into the pan(s) tap lightly on a level surface to get the air out.
- Sift the dry ingredients first! This will ensure your batter isn’t clumpy and no air bubbles arise.
Brownie Mixes
There’s typically nothing special in the mix other than flour and cocoa as the main ingredients, making boxed brownies a little bland. To make your brownies super delicious once the batter has been mixed well add a cup full of semi sweet chocolate morsels and give one final stir before placing in a greased pan. Consider adding peanut butter once you’ve added into the pan, simply swirl the amount desired in.
For a added touch once your brownies have cooled sprinkle with a little powdered sugar for a extra sweetness. Mint flavored frosting can also pack a punch for delicious brownies
Cake Mixes
No matter what flavor of cake mix you purchase there’s several ways you can fool your guests into thinking you made your cake from scratch. By knowing these simple tricks your next cake will be eaten up in no time:
- My favorite thing to do is to actually skip the eggs and the oil and just add a can of diet soda to the cake mix. Try experimenting with flavors like orange soda with a white cake mix or Diet Cherry Coke with a chocolate cake mix.
- If using a white, yellow or chocolate cake mix substitute whole milk, coconut milk or buttermilk for the water. If using buttermilk you may need to add a extra splash or two to get the liquid consistency you’re looking for.
- Add 2 TBSP of all purpose flour, 1 egg and 1 TBSP Sugar to any cake mix. Doing so will result in a “heavier” type cake.
- If baking a chocolate or white cake mix throw in a cup of semi sweet chocolate morsels. This will make the batter a little more moist. You can also put mini semi sweet chocolate morsels or chocolate savings on top of the icing for an extra special touch!
- When whipping up a carrot cake mix leave out the shredded carrots that are provided and grate your own.
- To give a white cake mix extra depth, after the cooling process poke holes with a straw into your cake. Prepare a box of your favorite flavored Jell-O using 1 C cold water and 1 C boiling hot water. Pour half the mixture over the cake and let it sit for 4-6 hours.
- When using a chocolate frosting add 1 tsp of butter along with ½ tsp of vanilla extract to loosen up the icing and get a better flavor.
- Add a package of pudding mix right out of the box to make your cake moist.
What are some thing that you do to amp up the taste of a boxed dessert mix?
A PYP Best Blog: Lemon Mardi Gras Squares! Yummy!
Just in case you missed this article on making lemon mardi gras squares the first time we shared it a couple of years ago, we are republishing it. After Sharon wrote this blog originally, we got an awesome response. This is one of the PYP Best Blogs!
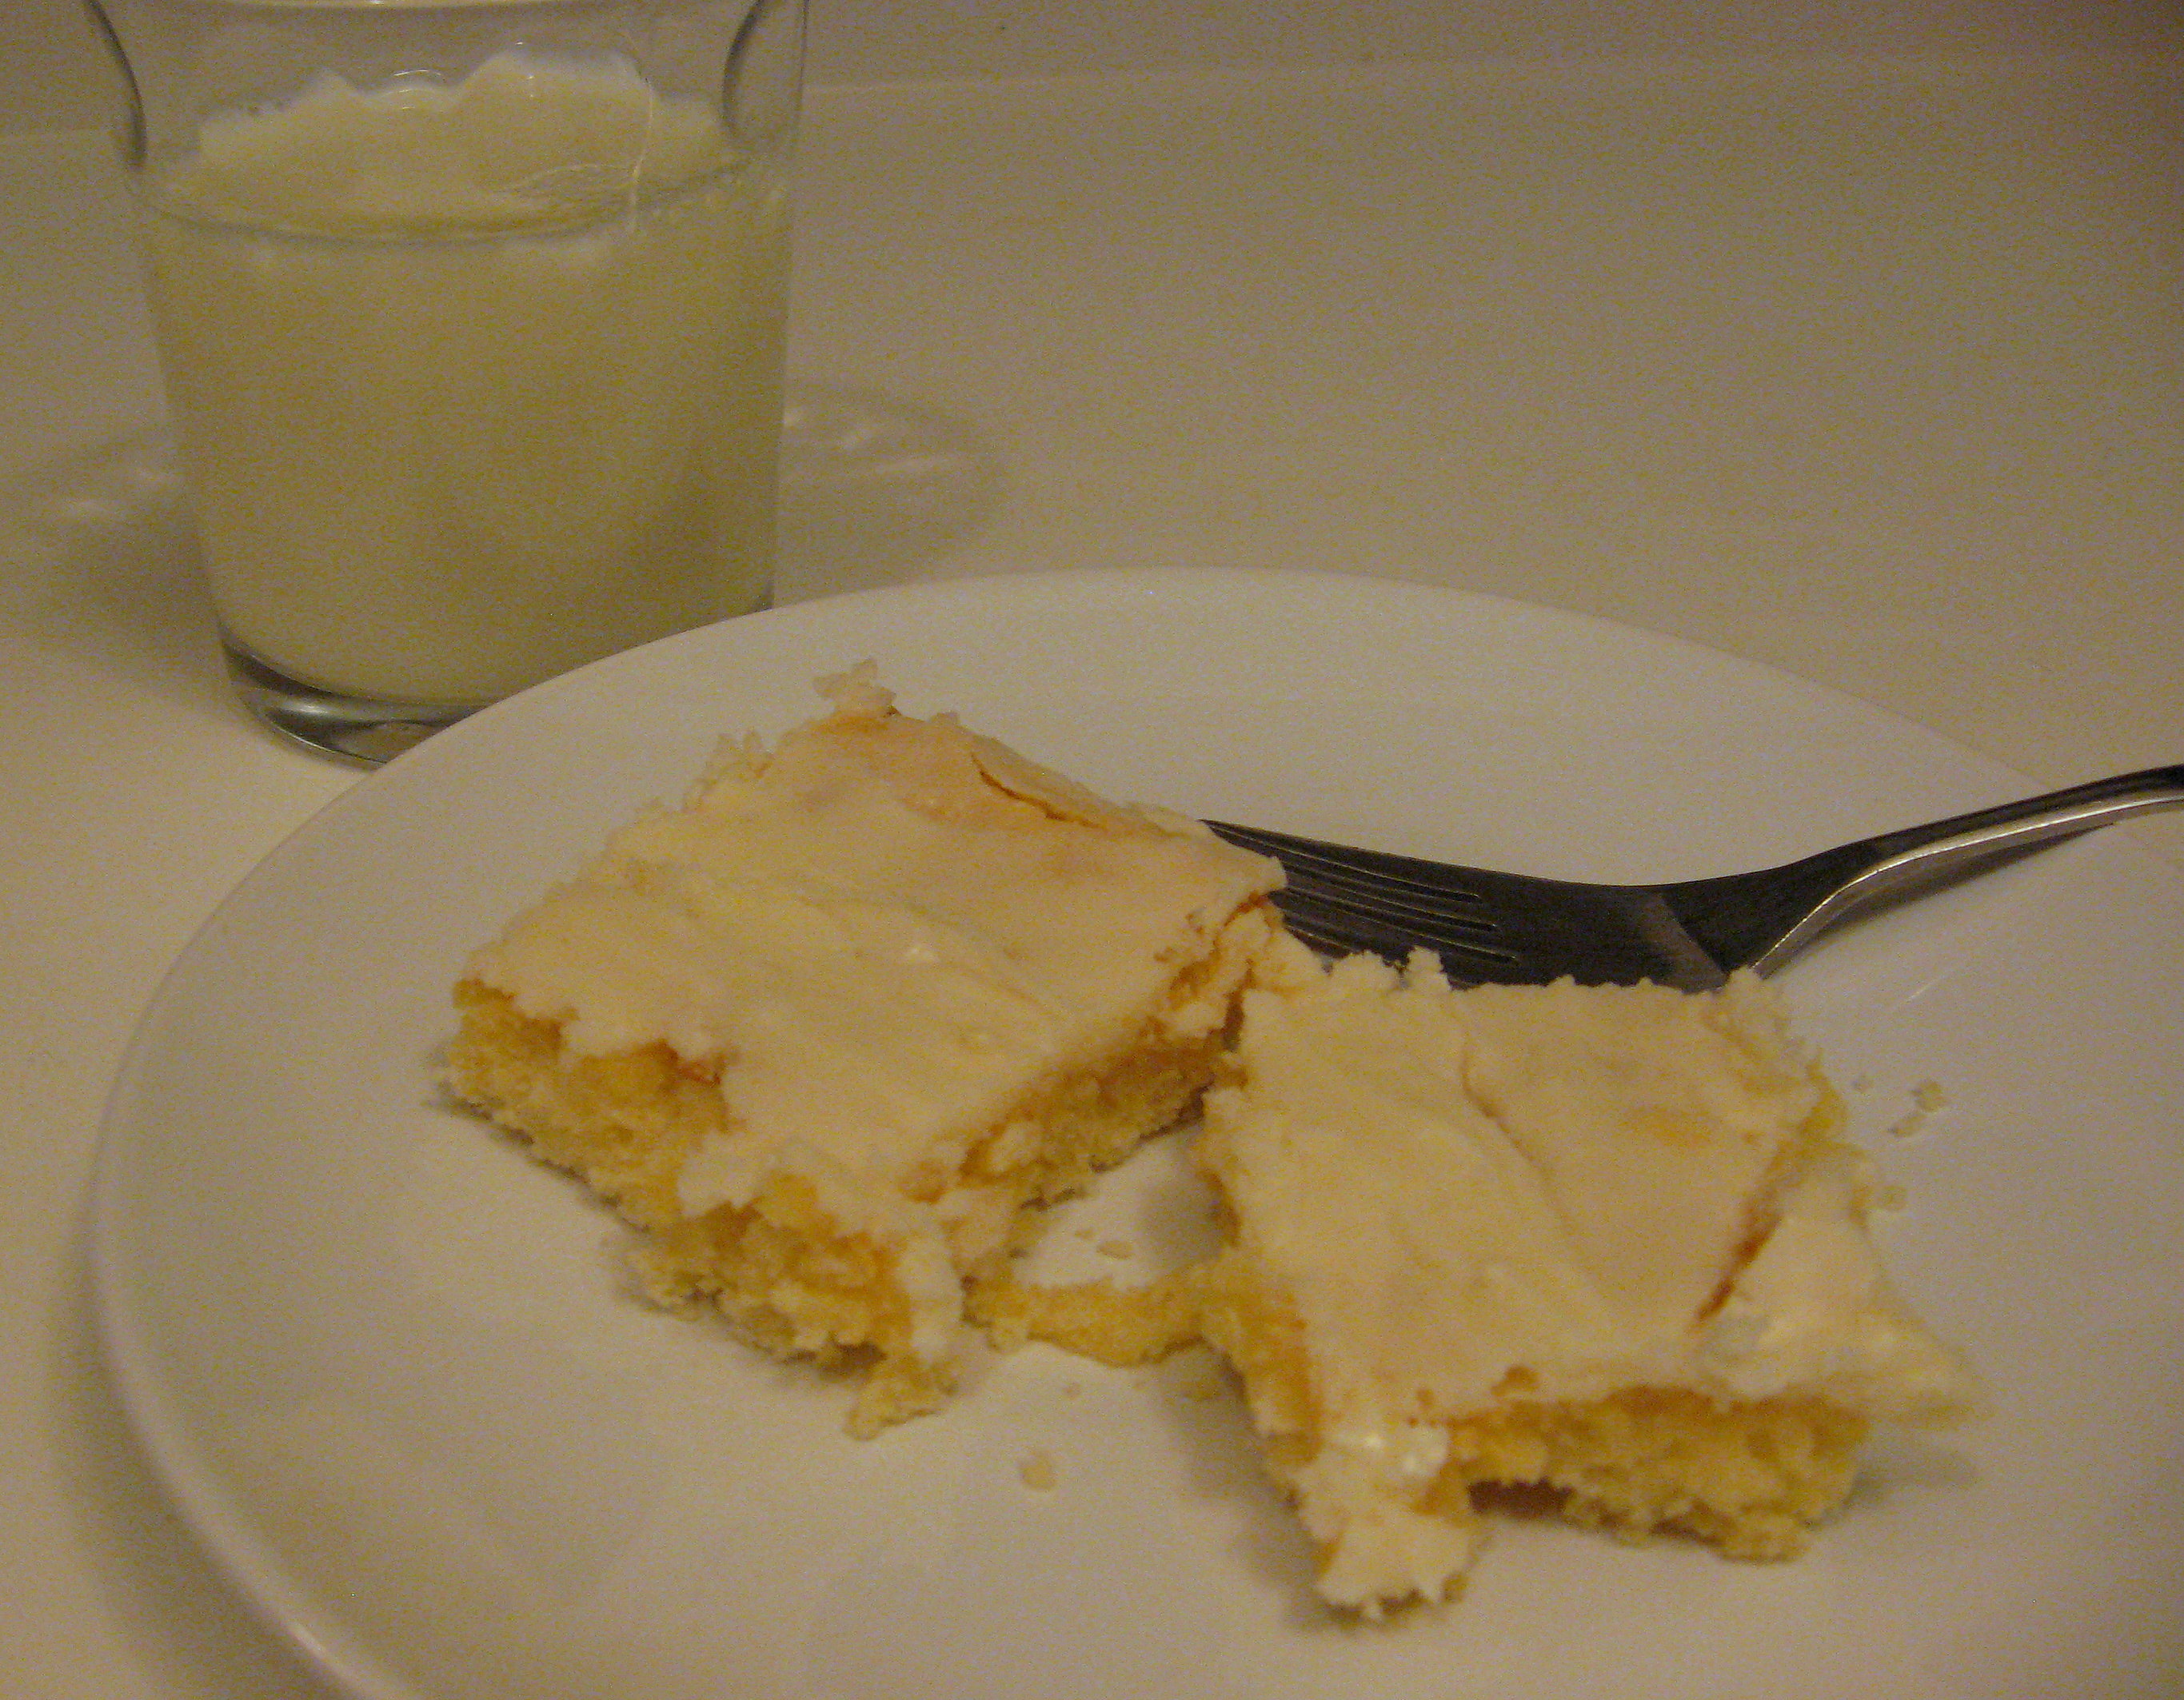
This is one of my favorite recipes from my childhood. I loved making them and I loved eating them. I dusted off the recipe recently and was thrilled to discover that my kids like them as much as I did do! This recipe is a little pickier than your typical dump and mix cookie recipe, but it certainly isn’t difficult. Although these are good right out of the oven, they are HEAVENLY the next day.
Lemon Mardi Gras Squares
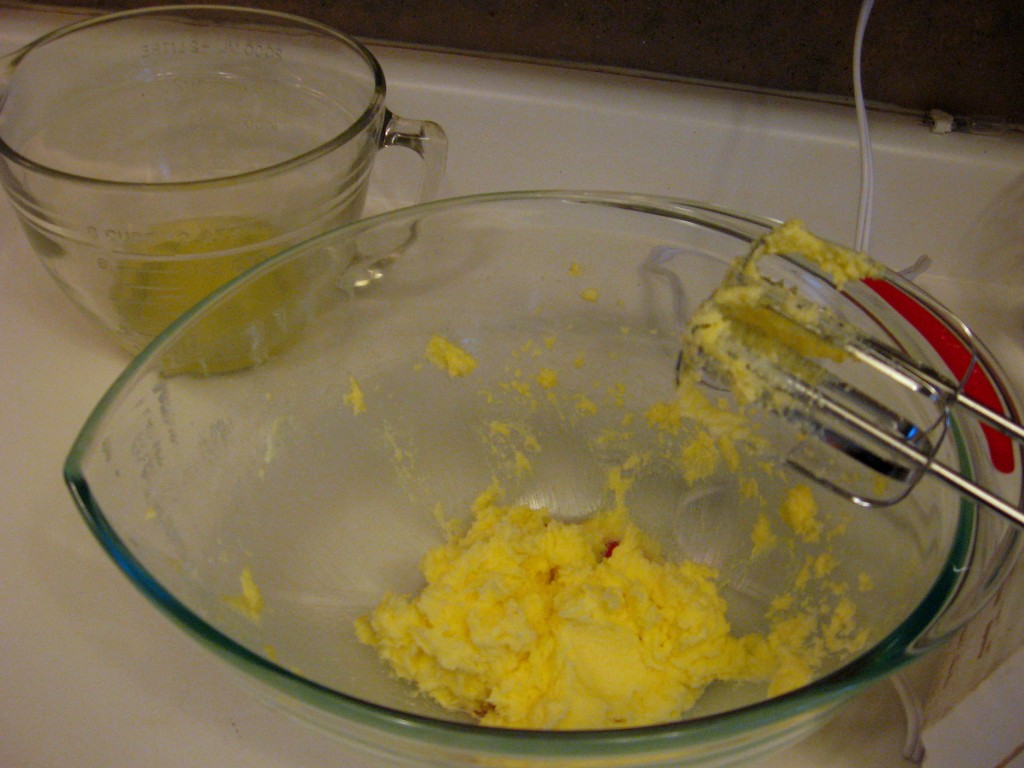
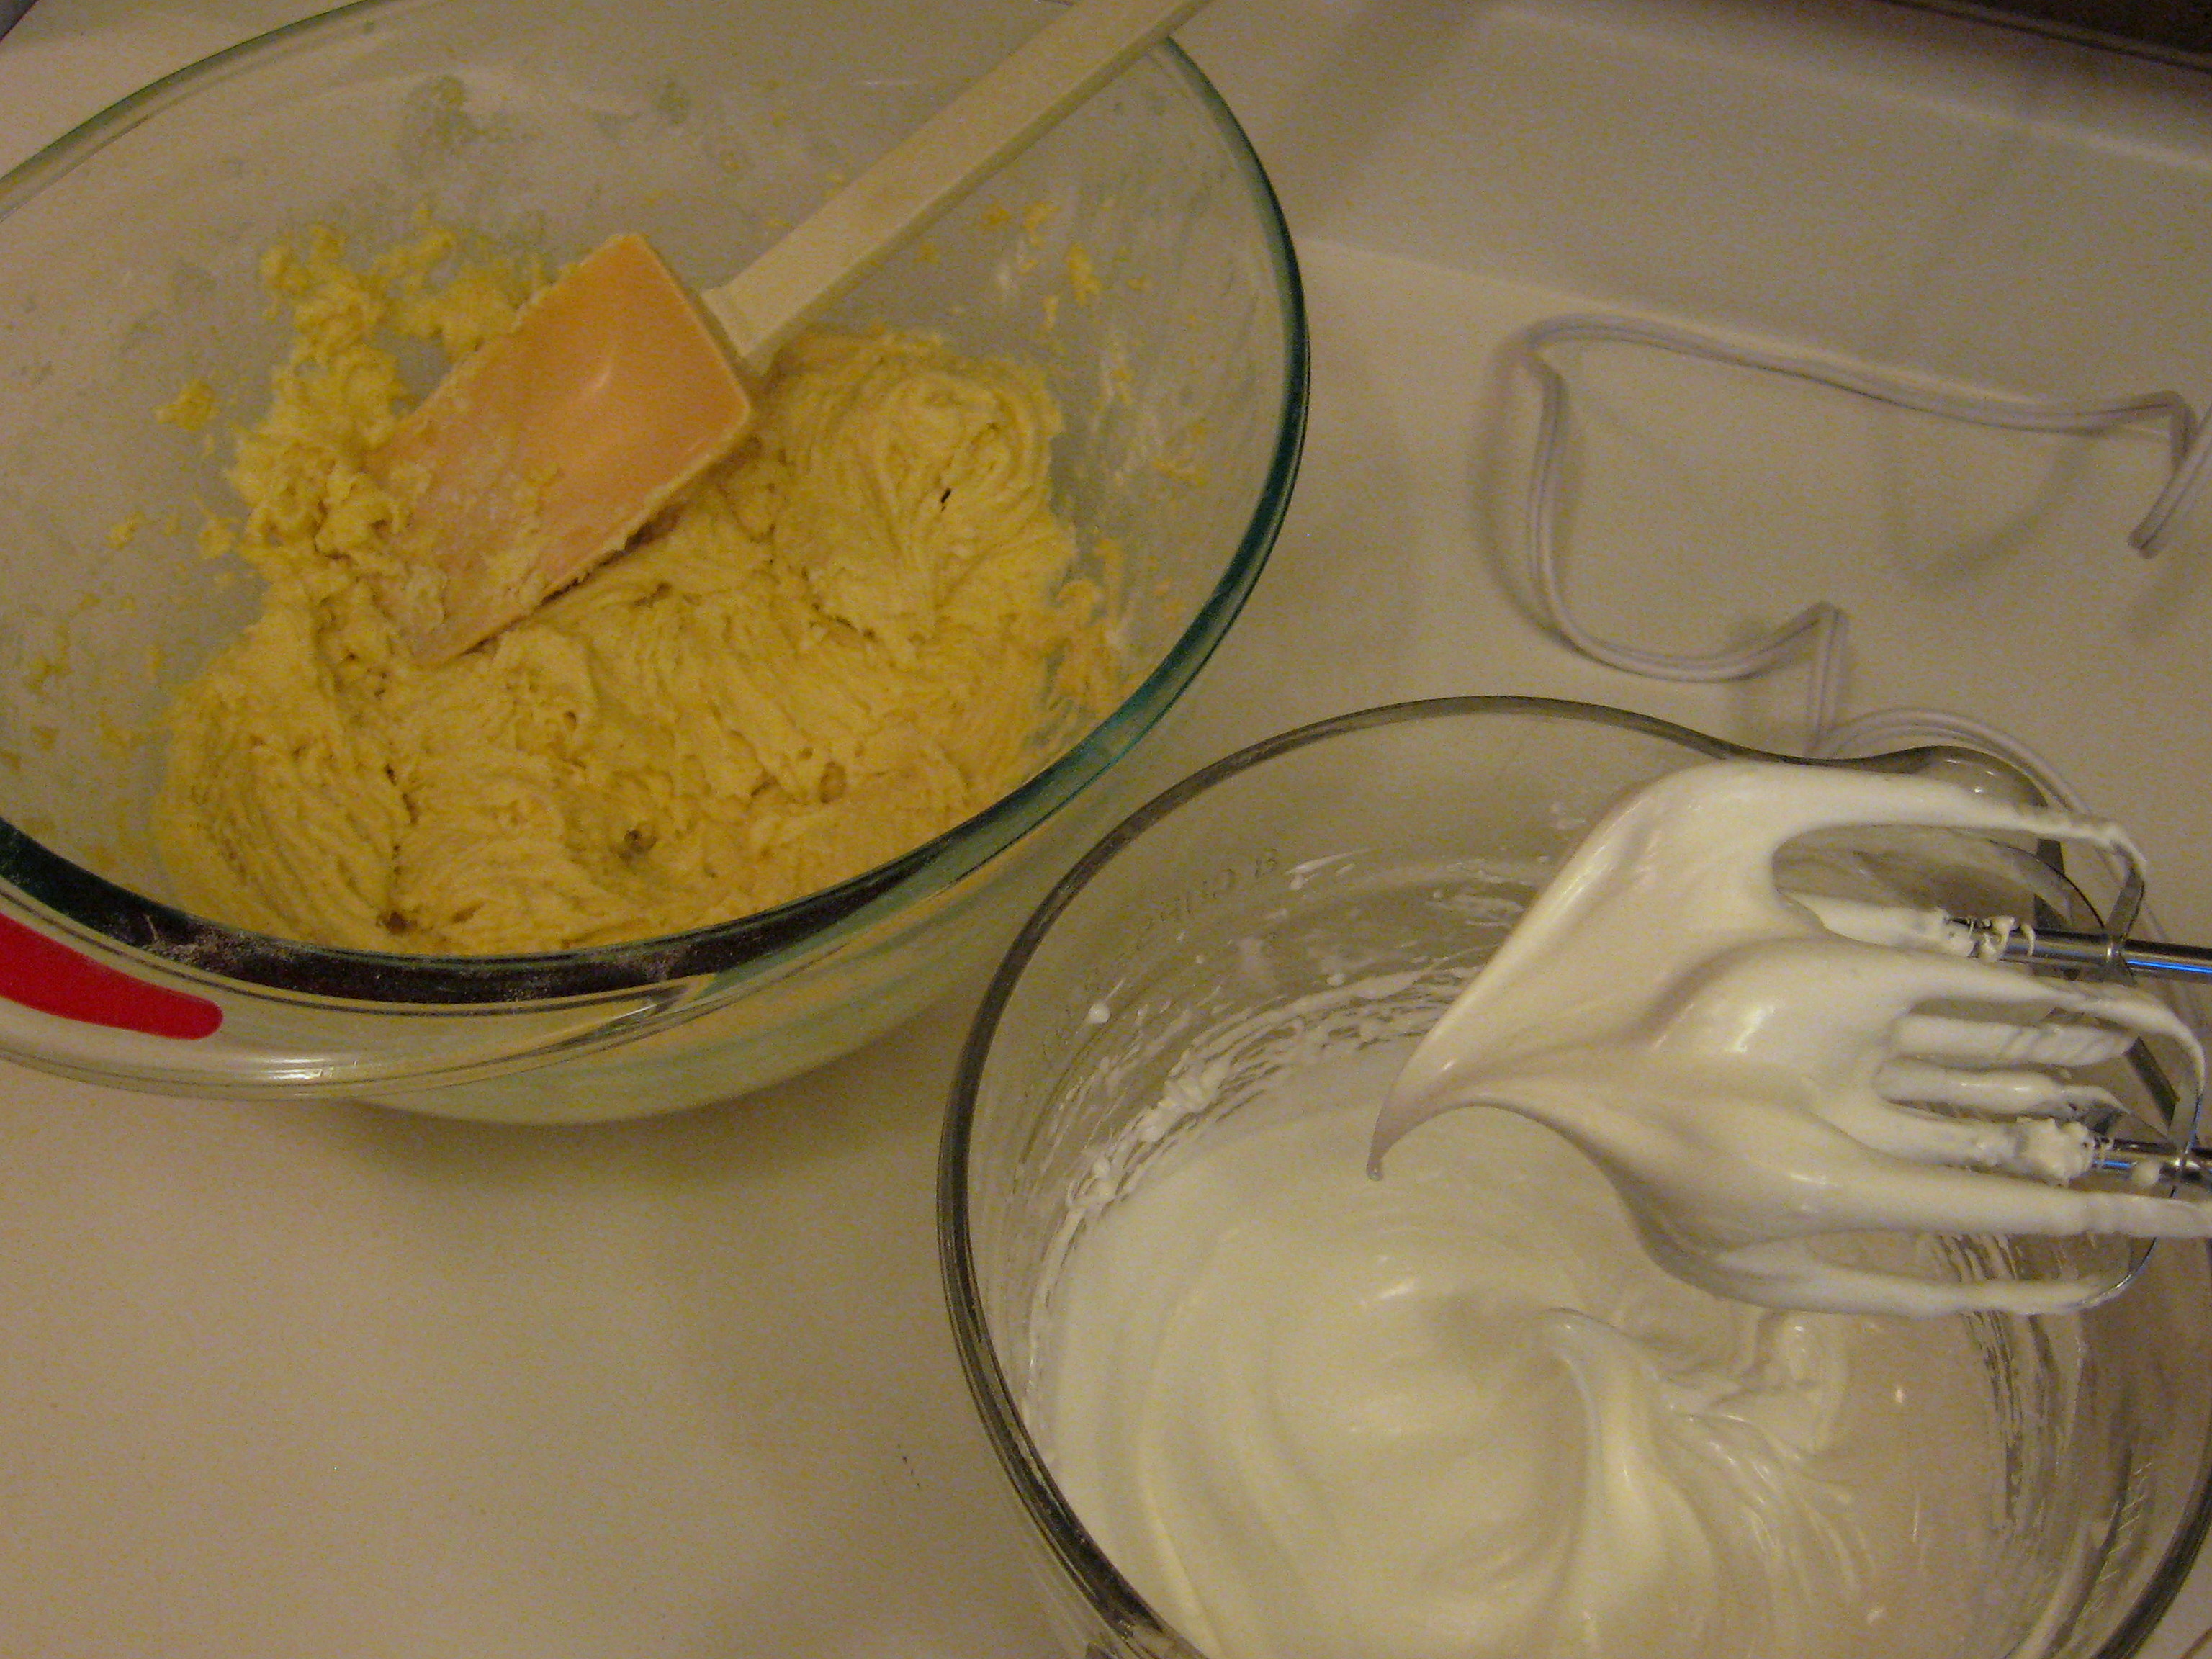
- Cream butter, then gradually add sugar, creaming well. Add egg yolks, one at a time. Beat for 1 minute.
- Mix together the dry ingredients. Add to creamed mixture alternately with the lemon juice, beginning and ending with the dry ingredients.
- Beat the egg whites into stiff mounds. Add powdered sugar and continue beating to stiff peaks. Fold into the lemon mixture, adding the pecans.
- Pour into a greased and floured 9X13 pan. Bake 25-30 minutes at 400*. Frost while warm.
- 2 T. Butter
- 1 C. Powdered Sugar
- 1 T. Cream
Just a few notes:
- Put the egg whites in the fridge while you are mixing the rest of the batter so that they stay cold until you are ready for them.
- One thing I’ve never liked about this recipe is that it tends to get a little too brown on the top before it is cooked through. When I made them last night, I cooked them at 375* for 30 minutes and thought they were perfect. You may want to play around with your oven temp.
- We are a frosting-loving family, so I usually 1 1/2 the frosting.
- I don’t use the pecans; I like nuts, but in this recipe I prefer them without.
- I thought about waiting until today to take the pictures but worried there wouldn’t be any left. And I was right…my boys had destroyed most of the pan before bedtime. YUMMY!
A PYP Best Blog! An Ombre Lamp Makeover! Ombre with Spray Paint!
Just in case you missed this article on using spray paint to create an ombre effect on an old lamp the first time we shared it a couple of years ago, we are republishing it. After Sharon wrote this blog originally, we got an awesome response. This is one of the PYP Best Blogs!
This makeover tutorial is a perfect study in why it is important to be flexible when you DIY. This didn’t go AT ALL like I had planned it, but I kept going and I love the final result!
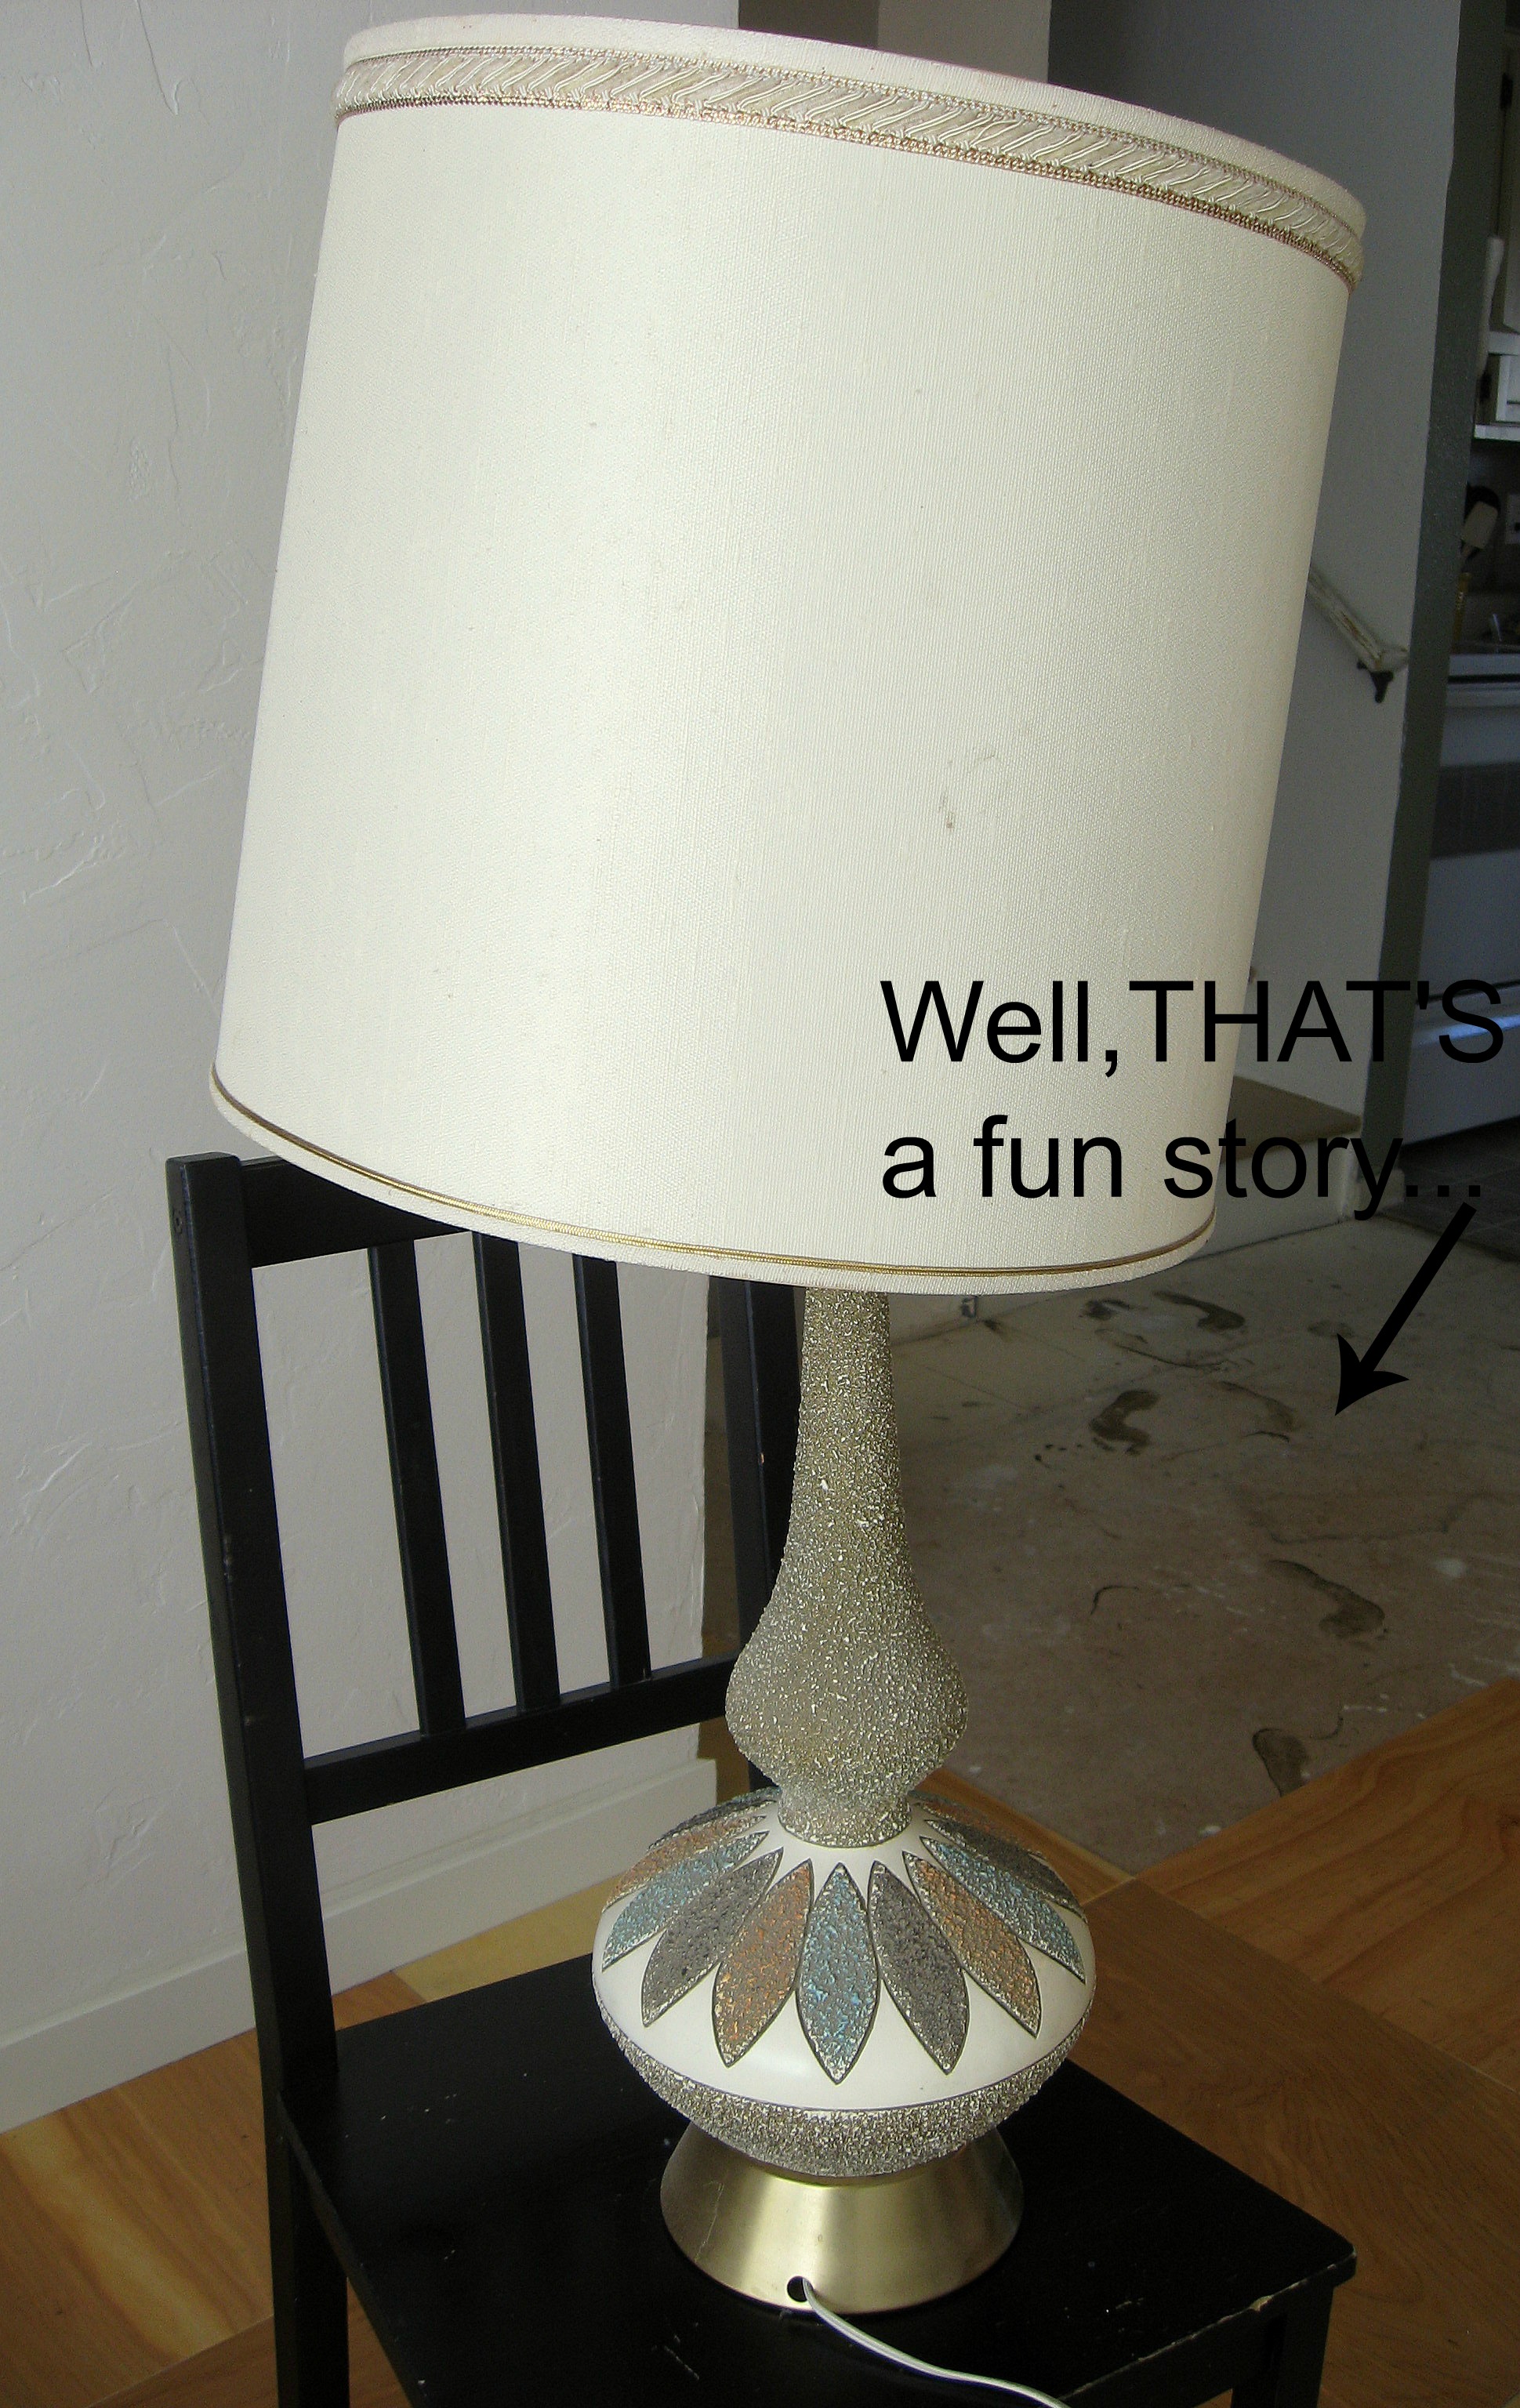
I came across this lamp as I was driving down the street one day past a house that had belonged to an elderly lady that had passed away. The family was cleaning out her garage, and there was a big pile of junk on the front lawn with a “FREE” sign. I asked them if the lamp worked, they said yes, and into my back seat it went.
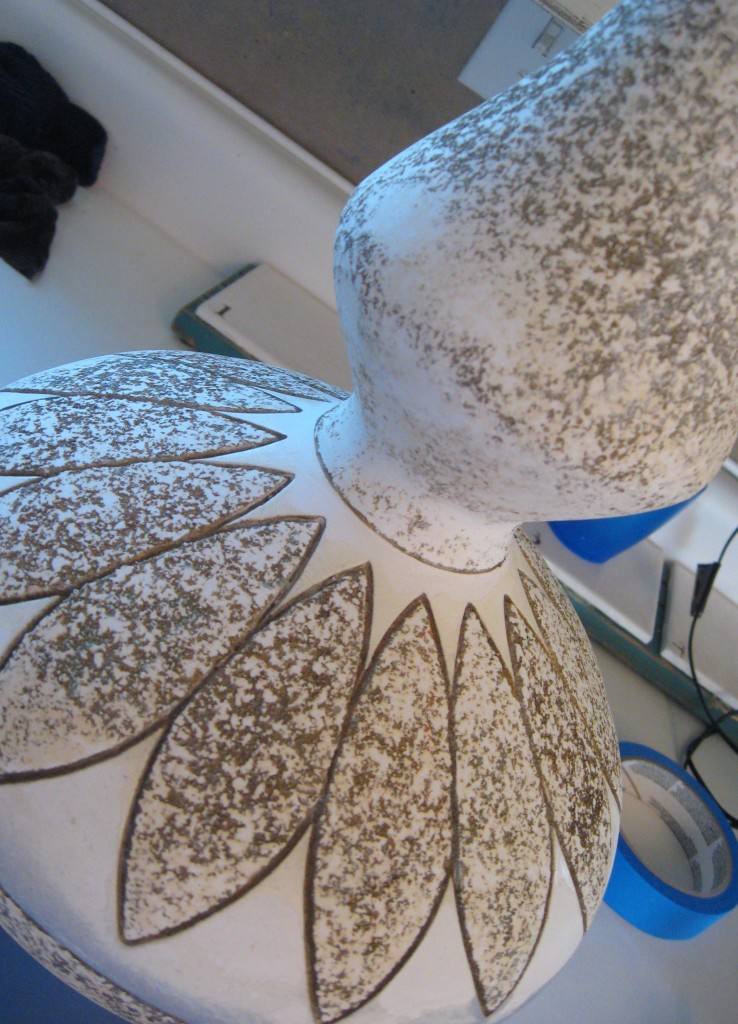
Here’s a close up shot of the funky texture.

Check out that horrible 70’s awesomeness! The shade was pretty gross too, but structurally it was in perfect condition.
My first thought with this lamp was that I could just spray paint ombre over the texture, so I tried it! The best thing about items you get for free is that you can attack them with a “what have you got to lose” attitude. If it doesn’t work? You’re only out the price of the spray paint, right?
I pictured a faded ombre effect, starting with blue on the bottom and fading to a green on the top, so I grabbed the spray paint and went to work, taping off the cord and the light fixture at the top first.
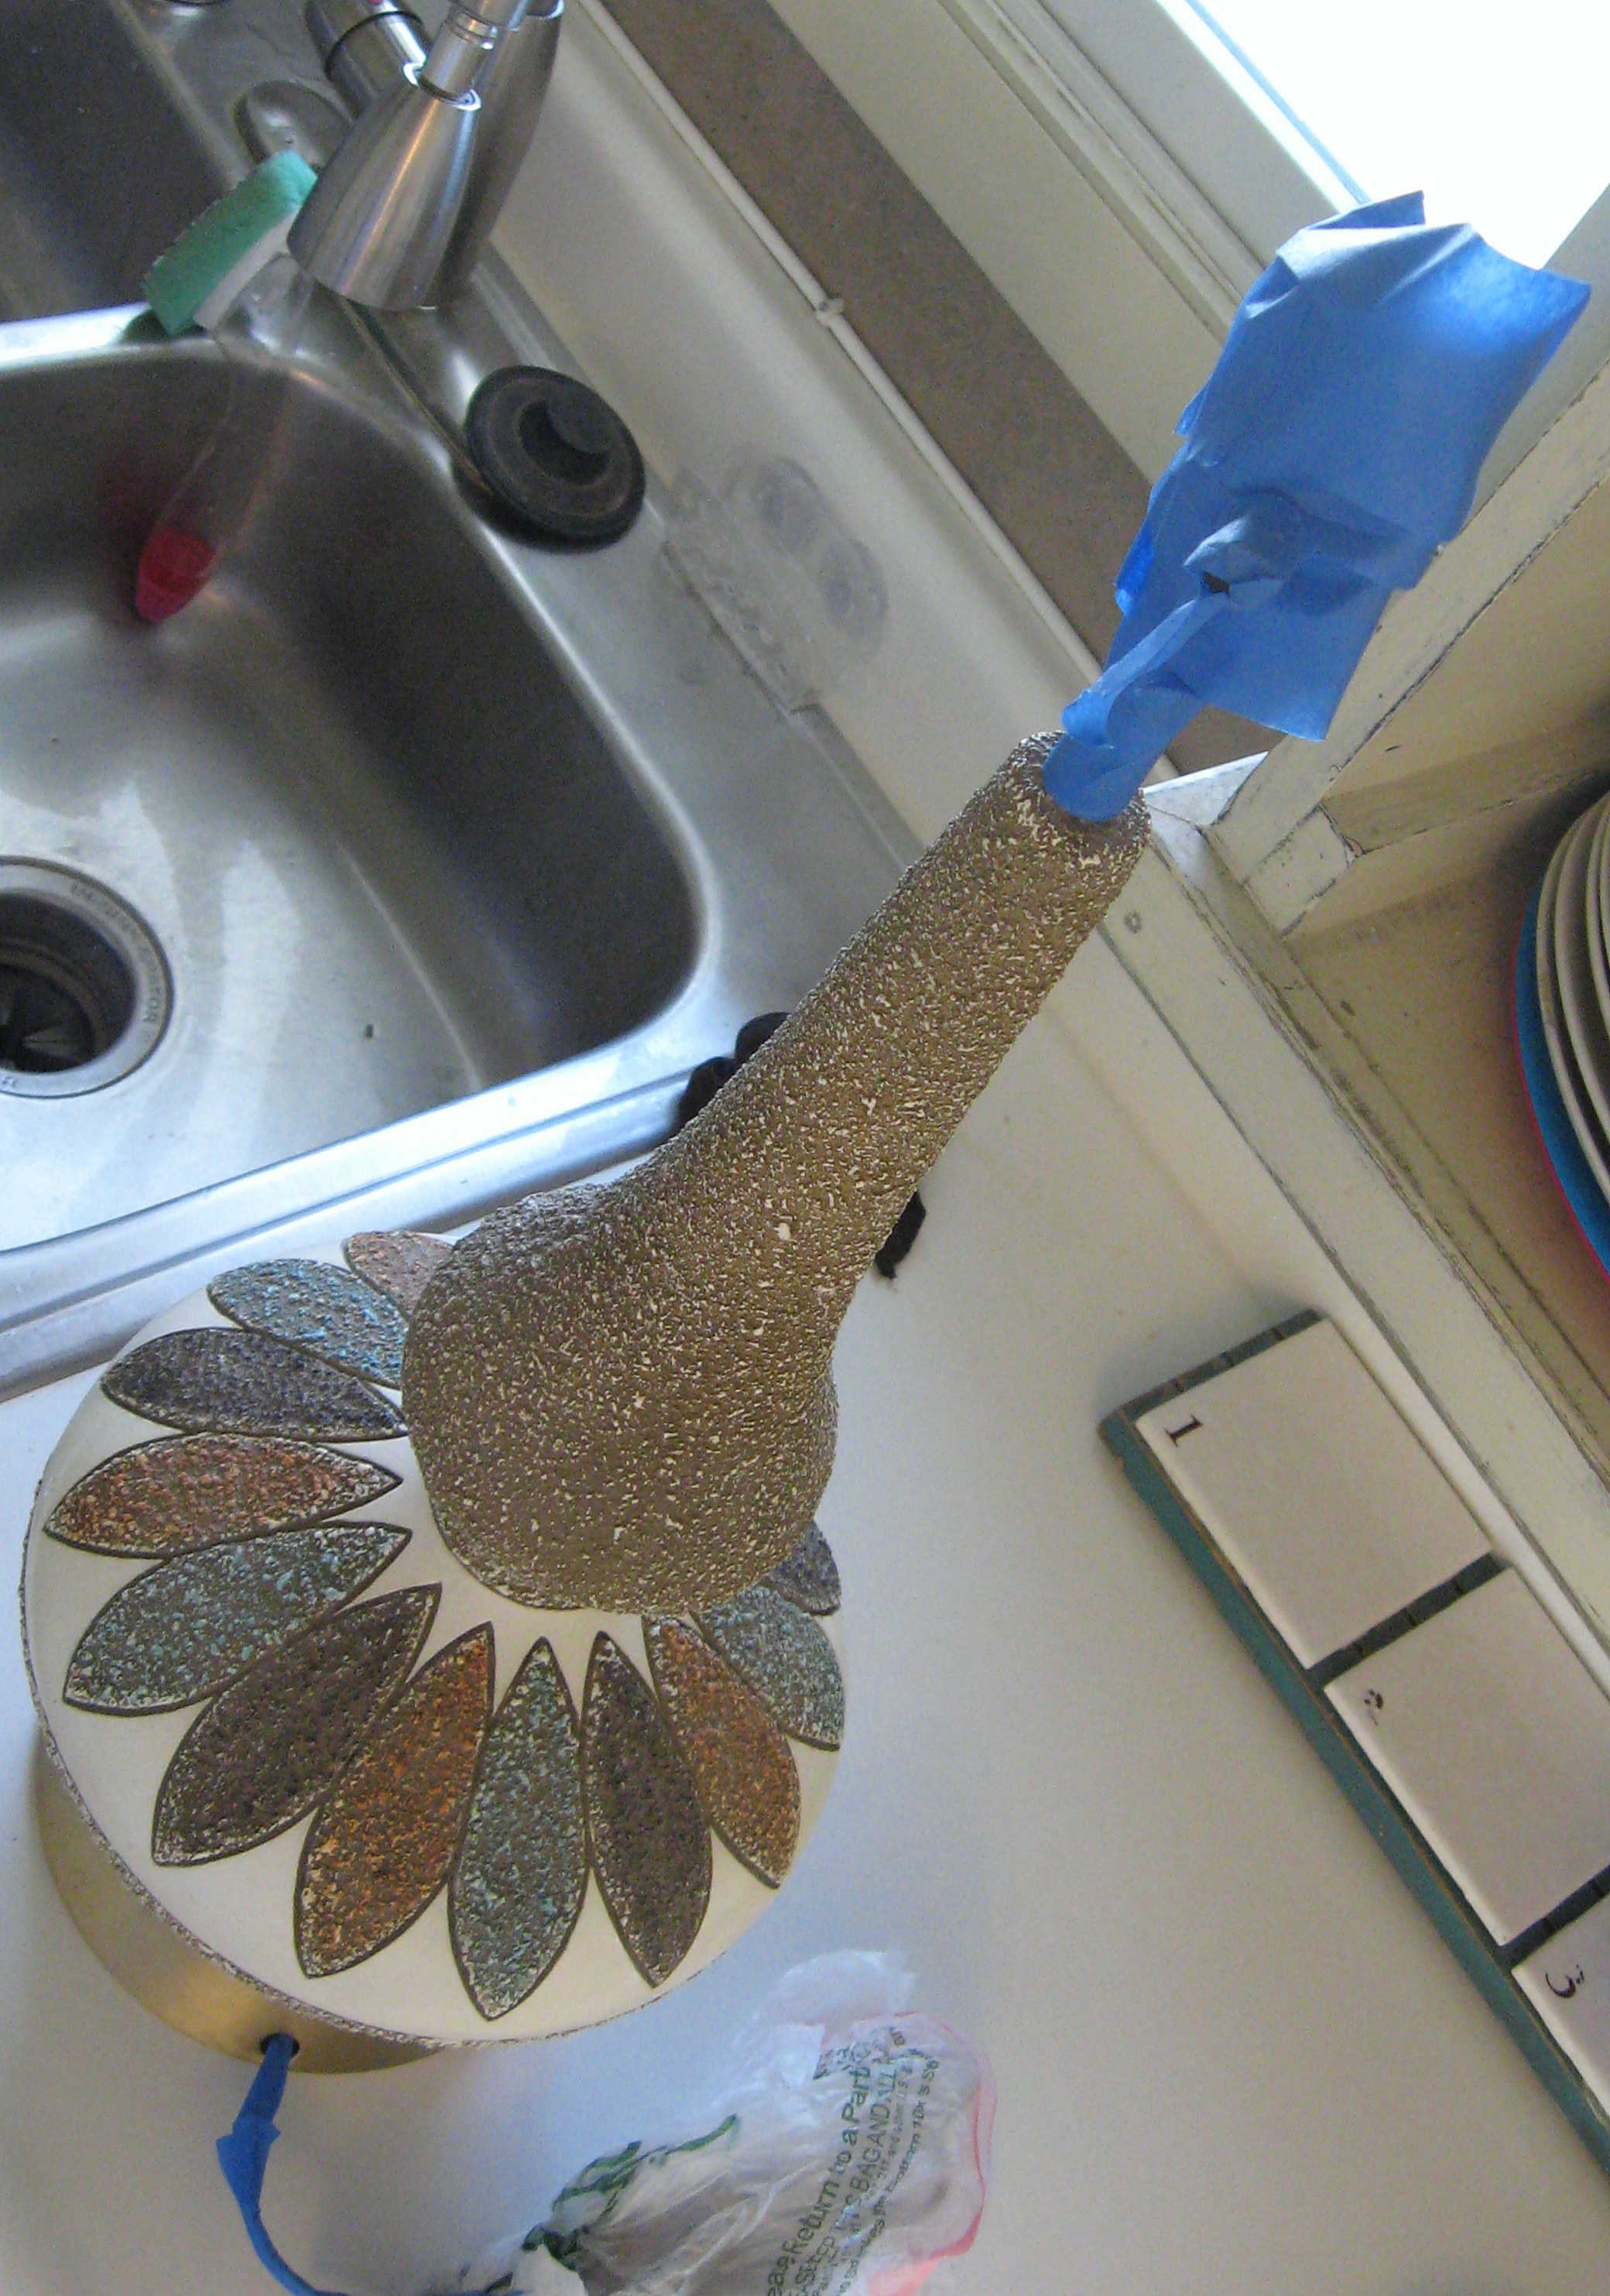
And I hated it. Really hated it. The texture was so thick that the spray paint was having a hard time covering it, and the finished effect just looked trashy. I wasn’t ready to give up yet – the lamp is the perfect size and shape for my living room – so I let the spray paint dry, then used my small detail sander on the textured parts to sand them smooth. It was MESSY and dusty and smelly, but relatively easy to do. Once the majority of the texture was flattened, I cleaned the surface well and tried again.
Getting an ombre effect with spray paint is pretty easy to do. I started at the bottom of the lamp with the blue and gave it several coats, each time going over what I’d already done, but going up just a little higher. I did the same thing with the green starting from the top. Once the top and bottom are solidly their respective colors, then spray each color in the middle – holding the can back a bit so that you get a misty-type spray that overlaps.
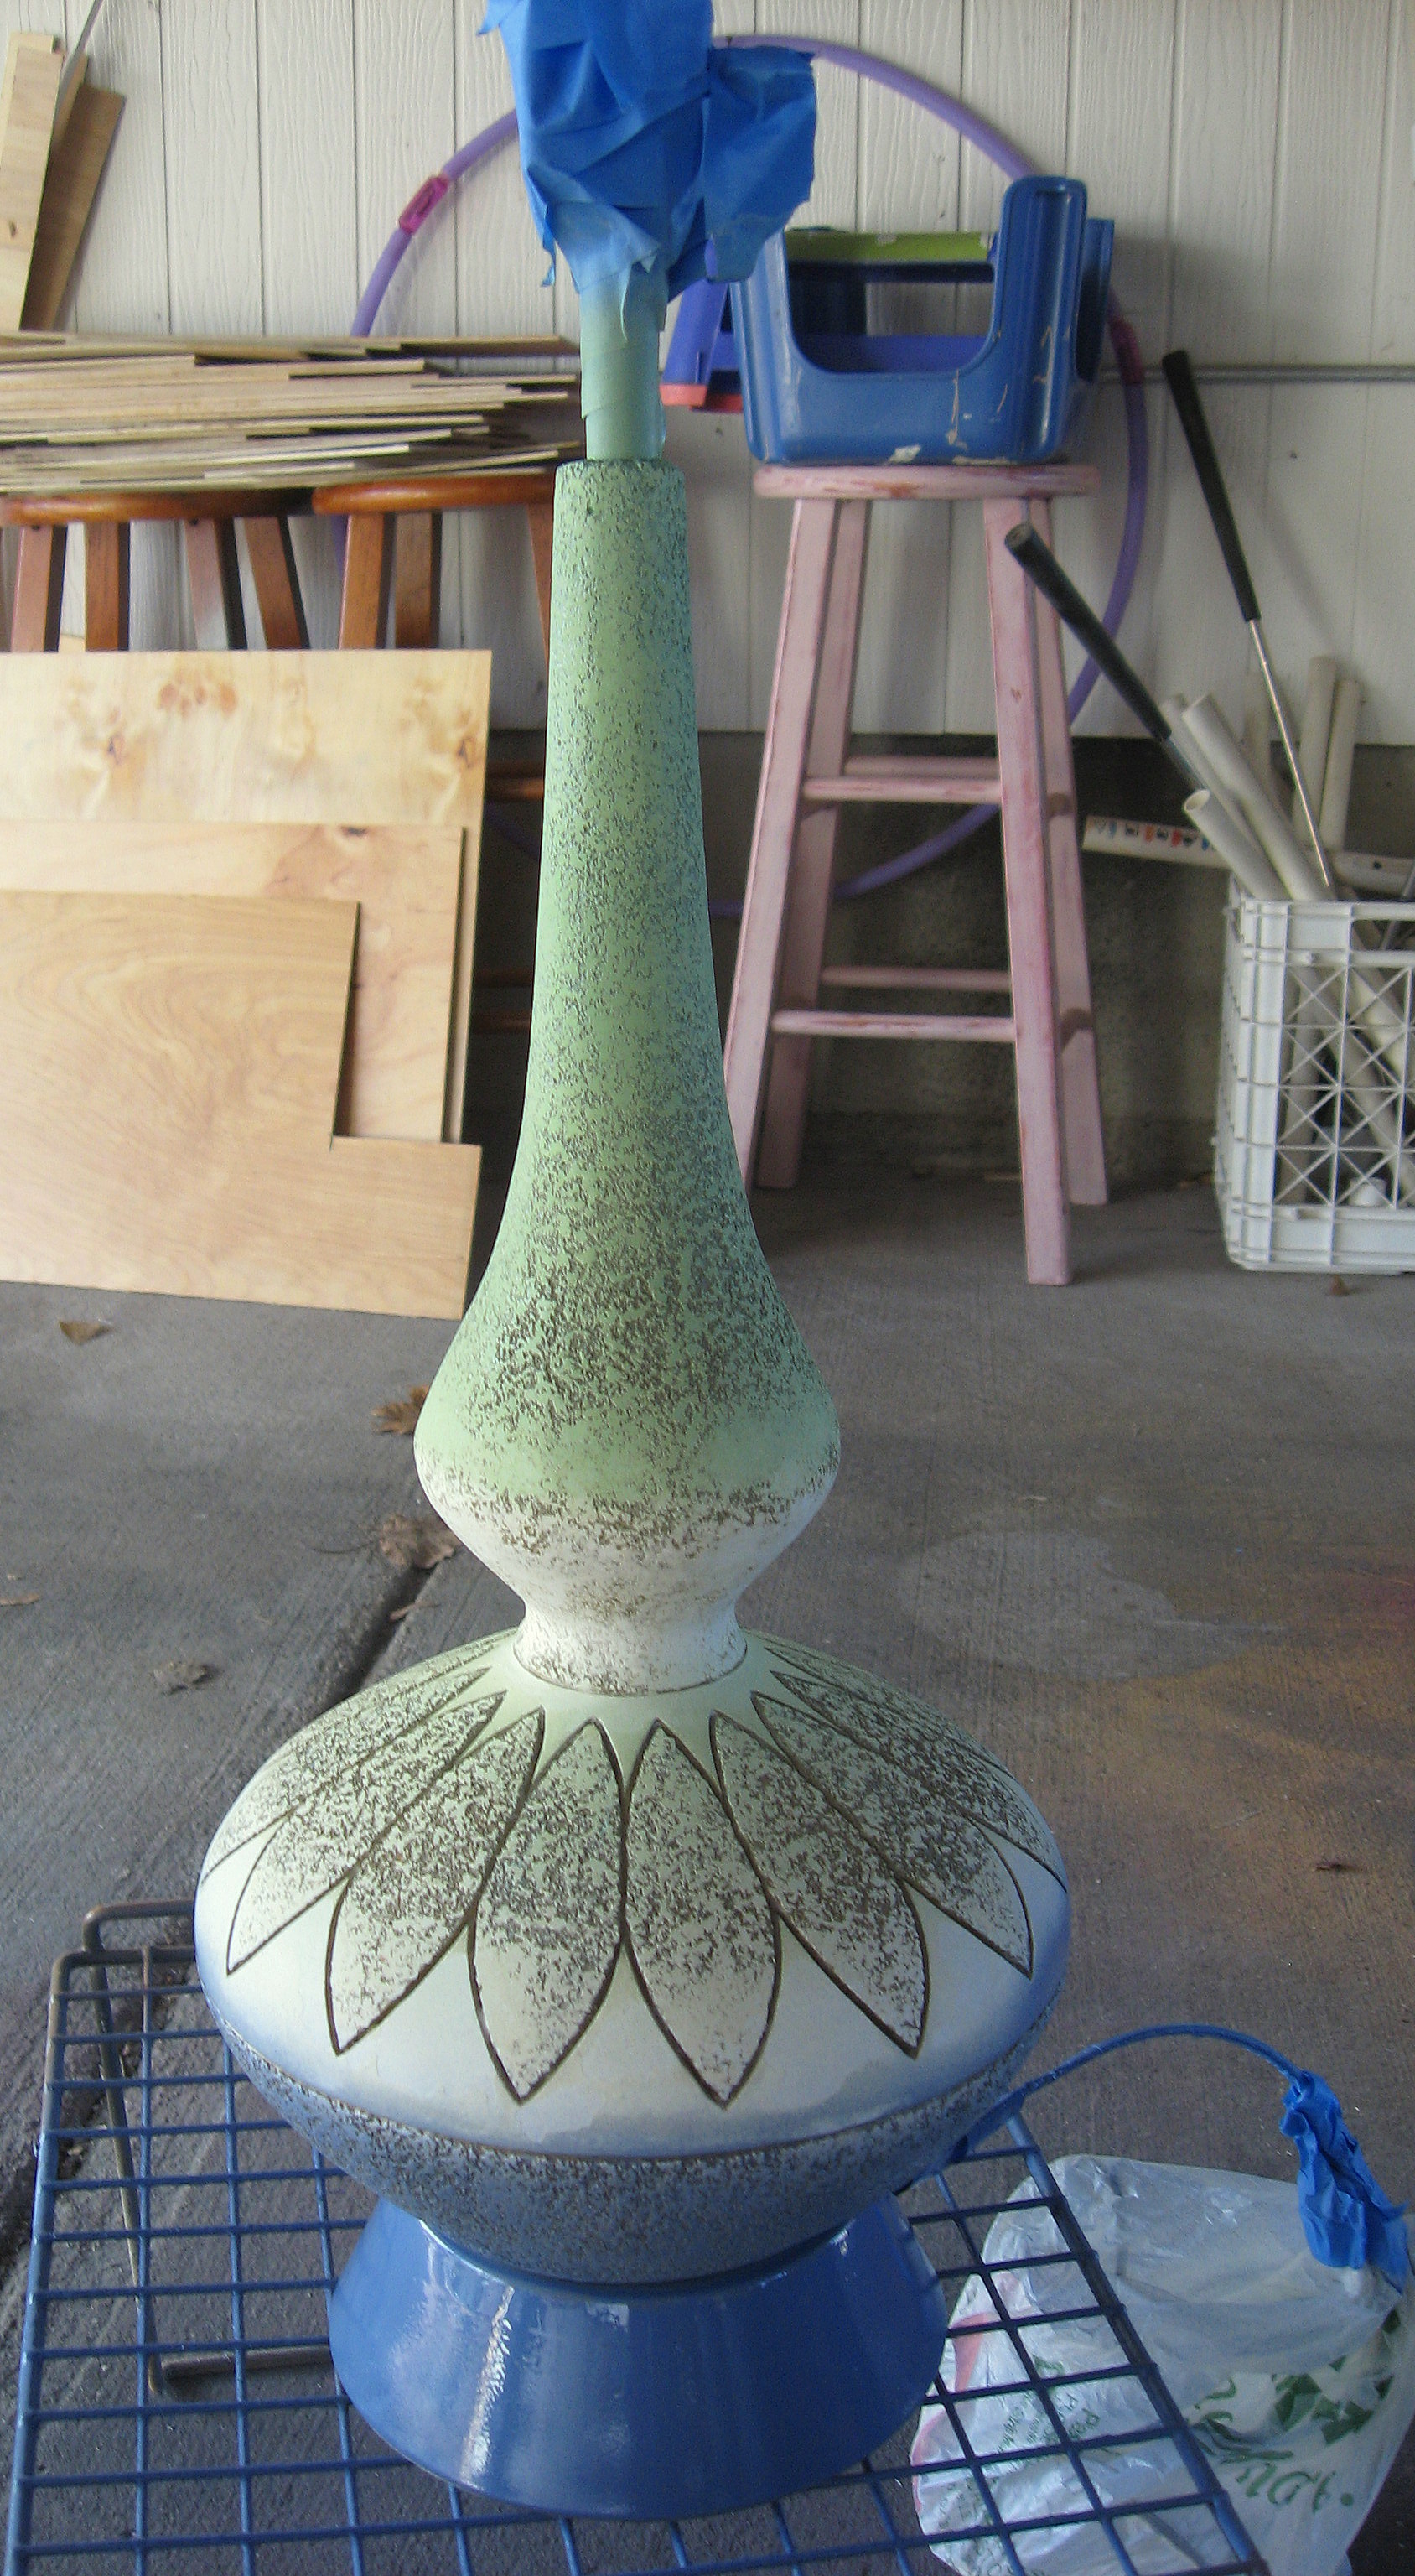
Problem #2 – I hated it again!! Before I had even finished , I knew that the blue/green ombre fade that looked so great in my head just did not look so great on the lamp. Still, I decided to have one more go at it before I gave up.
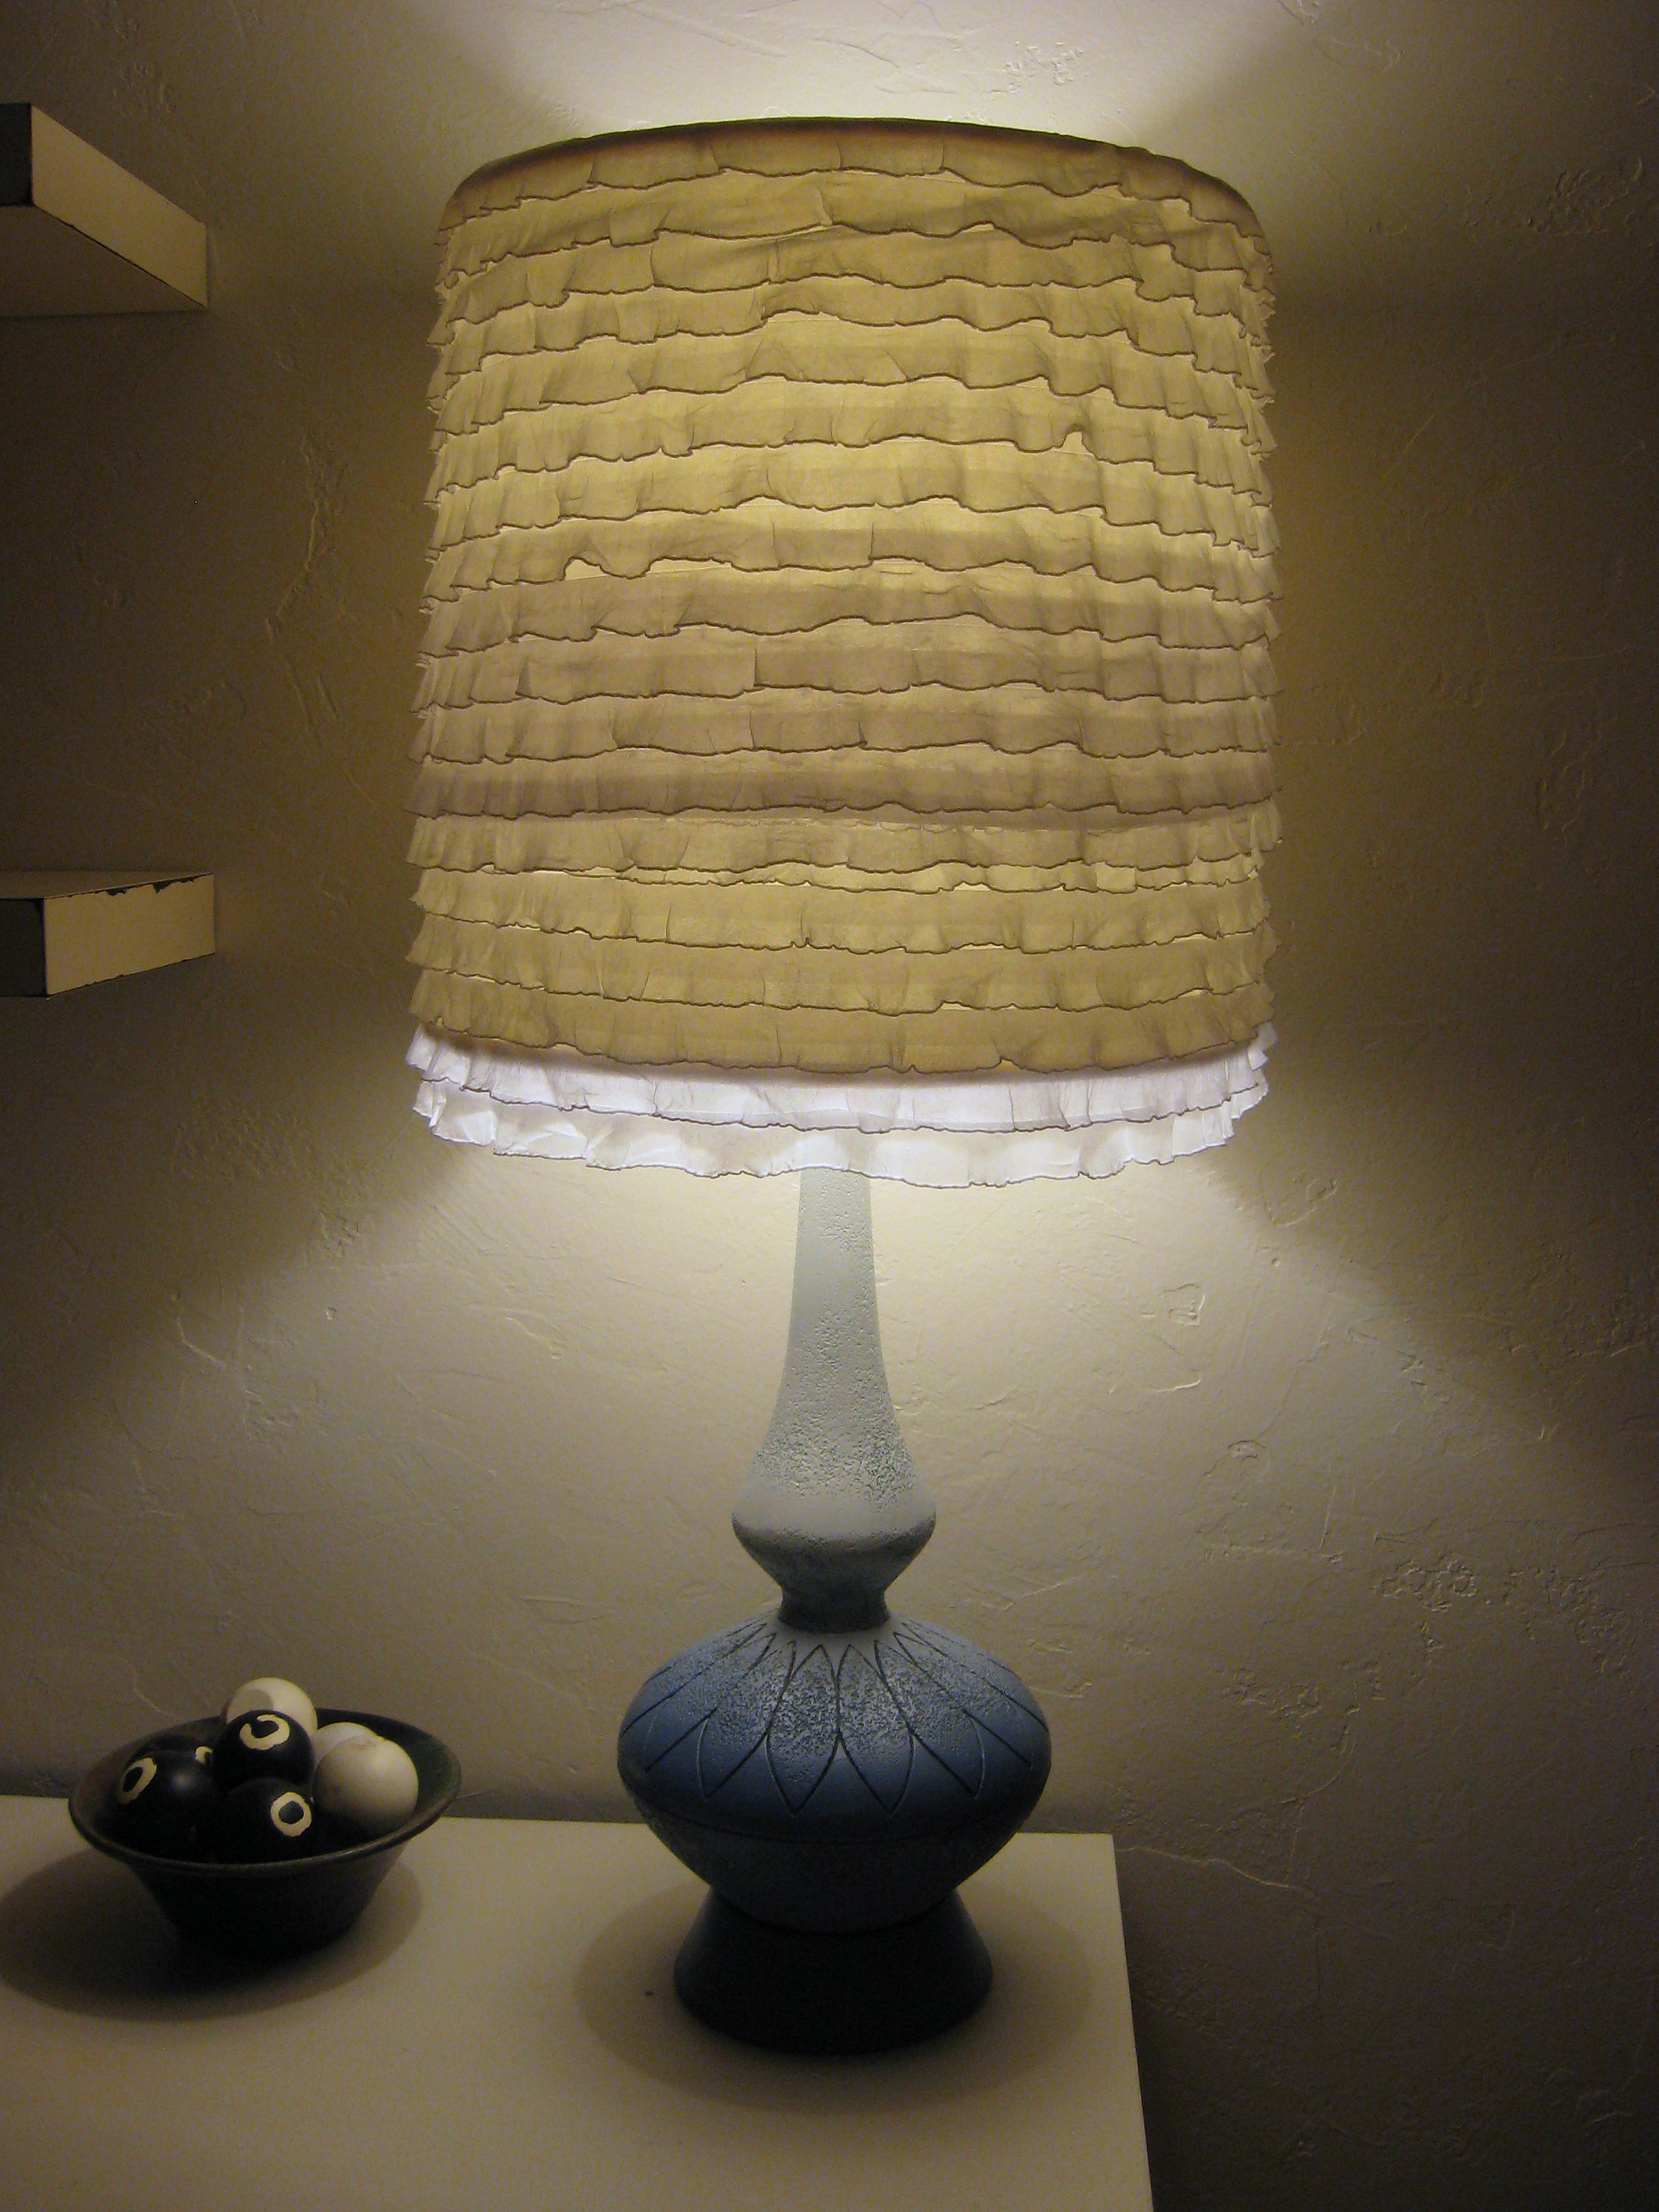
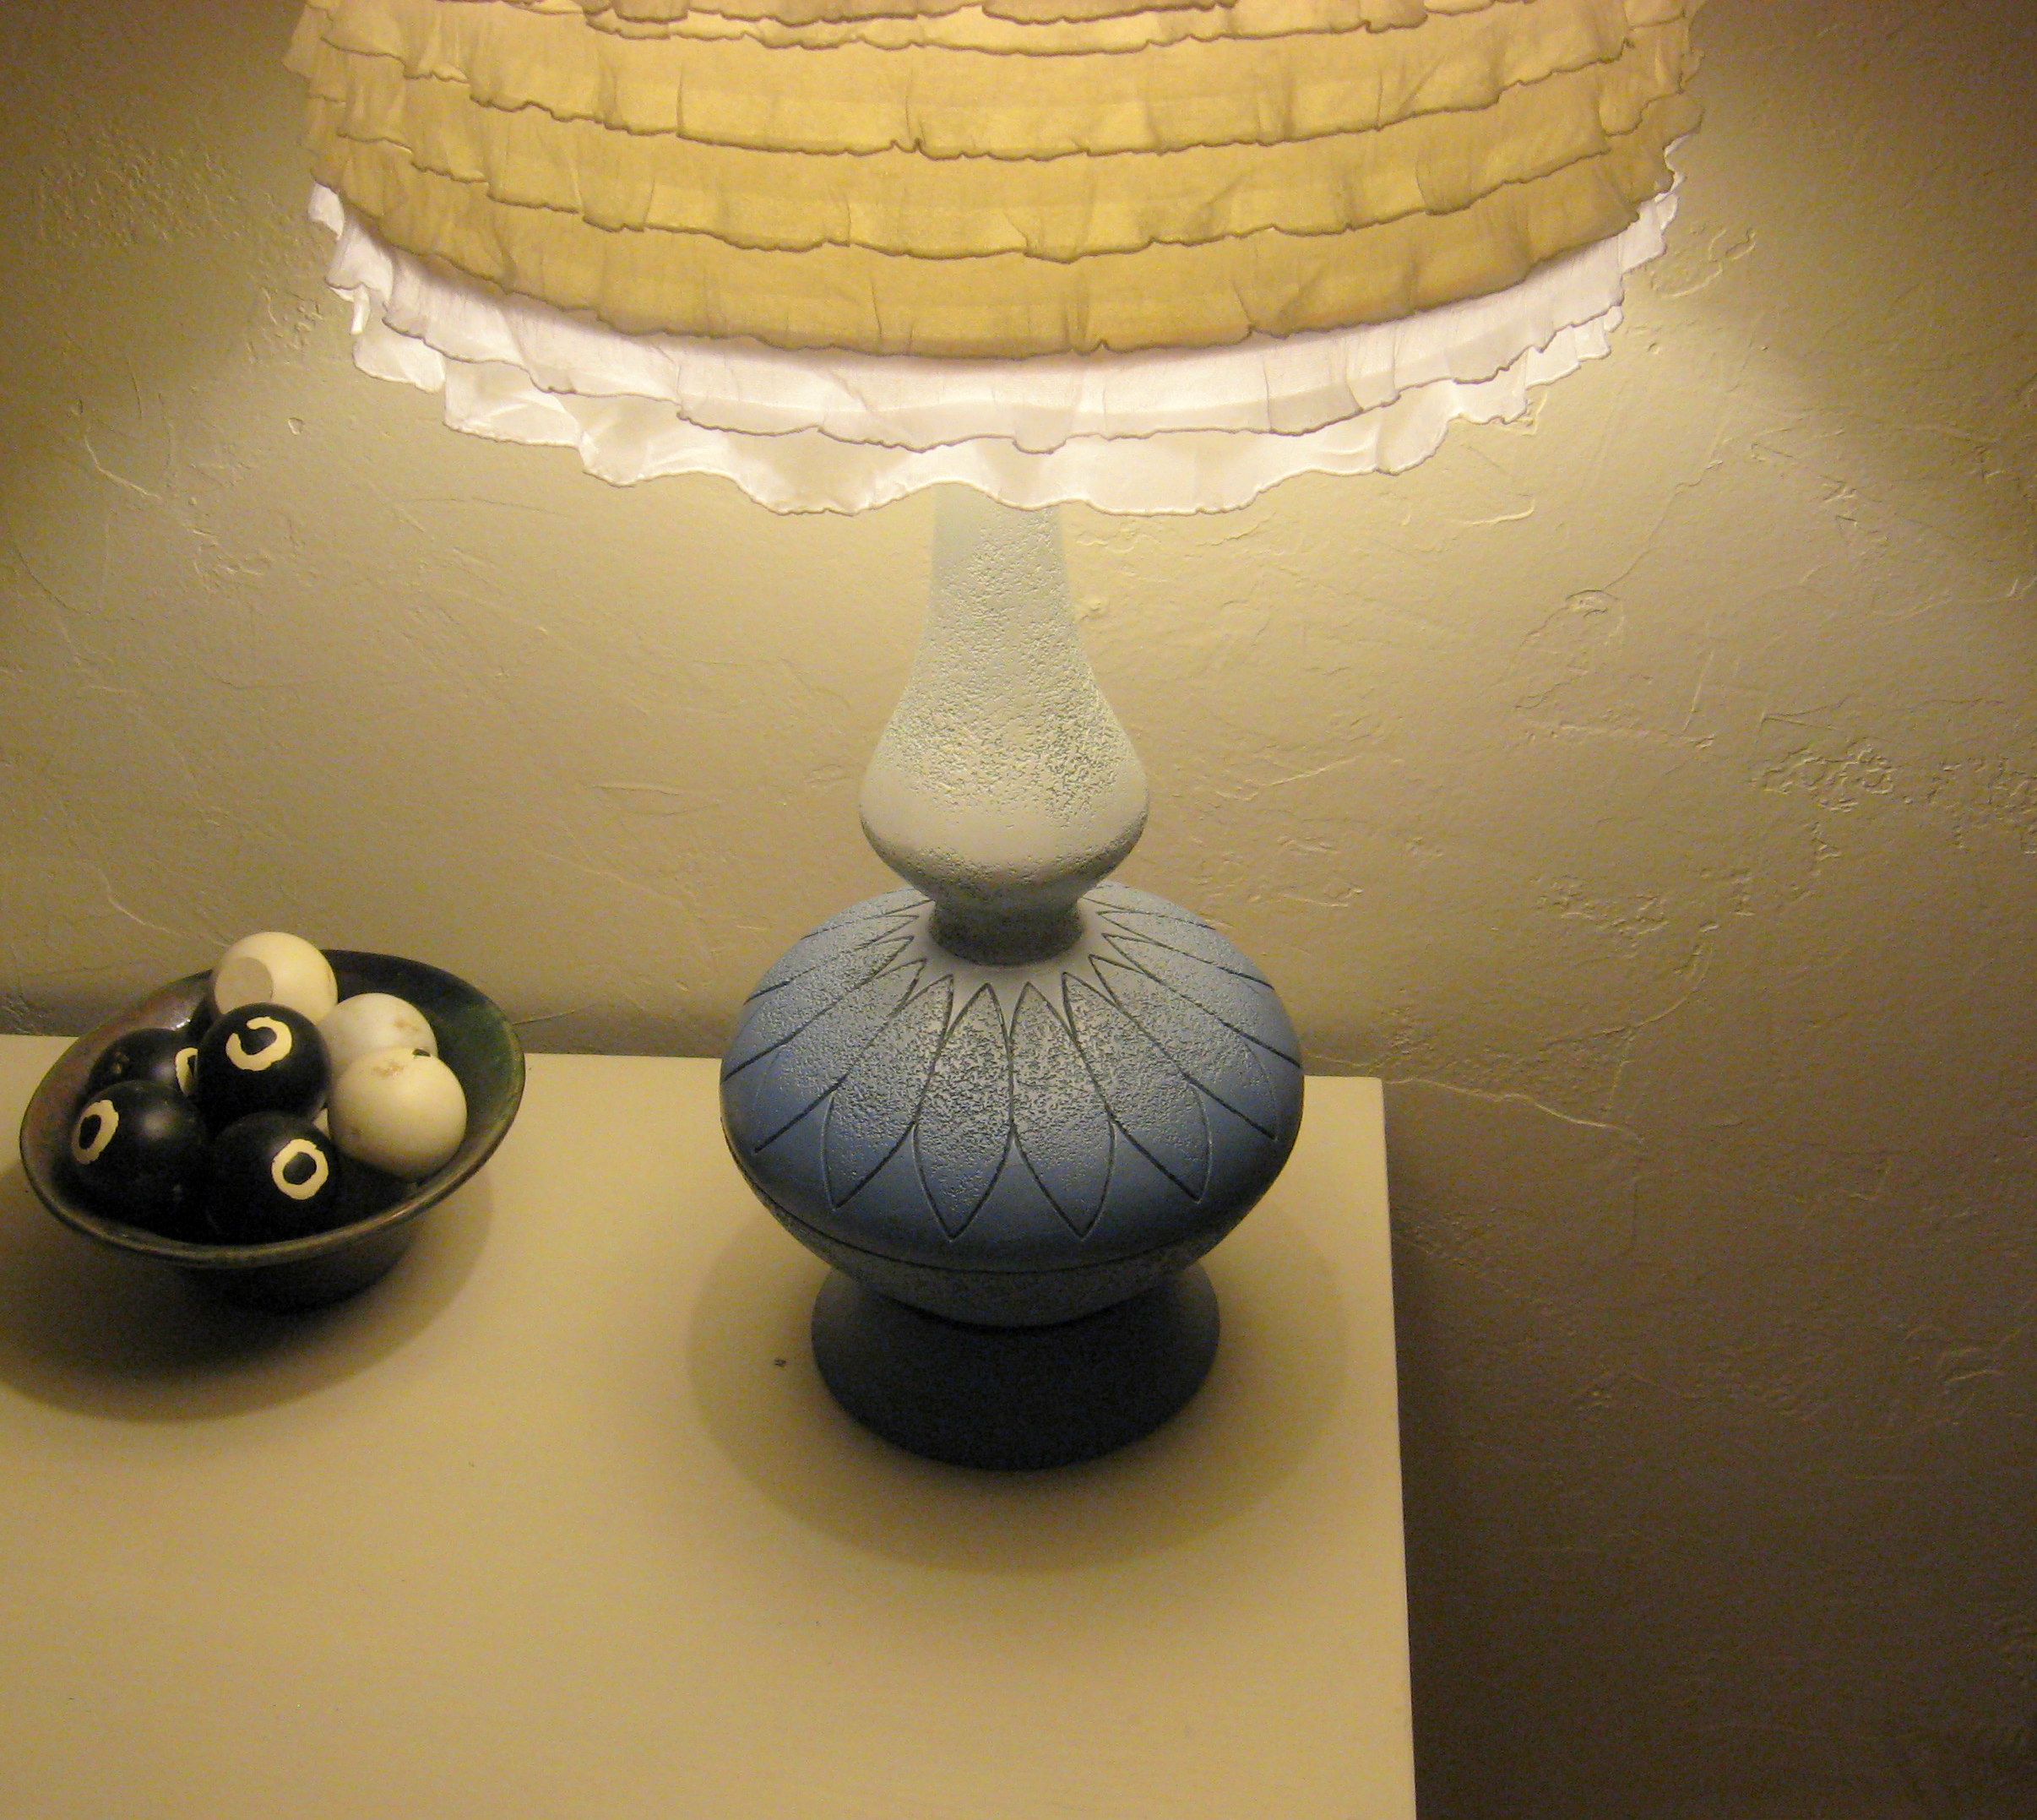
I grabbed a can of white spray paint and covered all the green, so now I had blue on the bottom, fading into white on the top. Perfect ombre! That was just what it needed.
As for the shade, I ripped off all the old fabric and trim (gag! Really should have been wearing a mask…) and cleaned the shade form underneath. Then I just purchased a half yard of white ruffled fabric and hot glued it on. SO easy and fast (and only $5 with my Hobby Lobby coupon!)
Dates on Food Labels
 Dates on food labels can be confusing to everyone. Have you every heard something like this at your house? “Hey honey, is this salad dressing still good?” Or, have you ever questioned whether or not it’s safe to feed your family something from your pantry?
After selecting food items, it’s up to you to take care of them properly. It’s important to read food labels to see how what you are buying should be stored and to pay attention to the dates and codes on the packaging. Heck, pay attention to the dates while you are shopping too, to minimize waste!
I have heard so many stories about people who either use expired foods and are fine and an equal amount of tales of people getting very sick from using food that is past the date.
I don’t know about you, but I get so confused by the wording and the codes on food labels. I found this food label definition information from Consumer Reports:
“Use by,” “best if used by,“ or “quality assurance” date:
The last date the product is likely to be at peak flavor and quality. One of these dates is often placed on foods such as cereal, which may decline in flavor and quality. It doesn’t mean the food is unsafe after that date.
“Sell by” or “pull”:
An indication, to the retailer, of the last day on which a product should be sold. It takes into account time for the food to be stored and used at home. You should buy it before the date, but don’t have to use it by then. You should be able to use milk, say, for up to about seven days after the sell-by date.
Pack or package date:
The date the food–fresh meat, for example–was packed or processed. Consumers can tell which package is fresher and choose that one. A pack date isn’t an indication of safety.
“Expiration”:
For most foods, this indicates the last date on which they should be eaten or used. Eggs are an exception: If you buy federally graded eggs before the expiration date (which must be no more than 30 days from when they were put in the carton), you should be able to use them safely for the next 3 to 5 weeks.
“Born on”:
Initiated by Anheuser-Busch, it’s supposed to let buyers choose the freshest beer. According to the company, its beer is freshest and tastes best within 110 days from the born-on date.
Coded date:
A series of letters or numbers or both used by the manufacturer to track foods across state lines and, if necessary, recall them. The code isn’t meant as a use-by date.
Other words to the wise:
As a rule, high-acid canned foods such as tomatoes can be stored on the shelf for 12 to 18 months; properly stored low-acid canned foods such as meat, fish, and most vegetables will keep 2 to 5 years. Don’t use a can that’s bulging. If perishable foods are packaged and frozen properly, they will be safe to eat after the expiration date, although the food may suffer freezer burn if it’s stored for a long time. And if a food bears a date without words? Unfortunately, you’ll have to guess what it means.
Here are a couple of valuable links to help with further questions:https://www.foodreference.com/html/tc…shelflife.html
Back to School, Thrift Store Style!

I actually love shopping at thrift stores. I love thrift stores more than I love yard sales! With back to school shopping starting up I always make it a point to visit my local thrift stores. In my area we have Deseret Industries, Savers and a few random thrift & consignment shops.
I know lots of people don’t even want to step foot into a thrift store. It’s funny cause I figured my sister was one who would never shop there, but then I found out that’s where she buys all of her purses. Too funny!
Well I refuse to pay full price for things (seriously!) I shop the sales, buy grocery’s from the ad prices, and use coupons. Contrary to popular belief thrift store are not all grubby & gross. You can buy lots of name brand items, frequently with tags still attached! I suggest if you haven’t gone in to dig through the treasures at the local thrift shop, you give it a try. You might be surprised.
Yes there are things that they sell at thrift stores that there is no way I could buy. I personally wouldn’t buy underwear, socks or shoes at thrift shops (call me crazy).
Jeans and coats are things that for sure we buy at thrift shops! For myself for the summer I went and bought a bunch of casual skirts that I can wear every day.
Here are a few tips to help you find some great cheap school clothes at thrift stores.
1. Investigate Your Local Thrift Stores
The first step to finding cheap school clothes in thrift stores is to know your local thrift stores. Do a little scouting before you do your heavy shopping to help you figure out which stores have the best finds. It’s also helpful to know what days thrift stores have sales and what their return policies are. Take a chance and ask your friends, chances are they are shopping there too! At our local Savers if you take in a donation they will give you a couple for 20% off your next purchase (I always find something to donate before I go shop).
2. EEK… Take your kids with you.
I know I know. I hate shopping with my kids too, but… it’s good to have them there with you so they can try on a few things. Most thrift shops have a no return policy. Another reason is that things might sell before you get back. On days where our stores have big sales they sell the good stuff quick! There’s no sense in buying school clothes – even super cheap school clothes – if they don’t fit. If you can’t or won’t take your child with you, for whatever reason, at least make sure you know their size, what looks best on them, and their likes and dislikes.
3. Inspected by #MOM
No one wants to look like they are wearing thrift store clothes. Watch for rips and stains. Again, since typically there is a no return policy you don’t want to buy something you just have to throw away – if you do, what is the sense of trying to pinch your pennies.
4. Go to college! (or at least away from home)
If you have older kids, I highly suggest shopping at thrift shops near universities. The students that are going home for the summer or graduating, don’t always want to pack everything up – they donate good stuff! Another thing is that if you have older kids they might be embarrassed to be in a thrift shop in your home town.
5. Don’t go crazy, set a budget!
Just like any other shopping trip you make, set a budget. Thrift shops have great prices, but you don’t want to go crazy – and you can also take this opportunity to teach your kids about value, saving and charity!
A PYP Best Blog! Homemade Smoothie Popsicles!
Just in case you missed this article on making homemade smoothie popsicles the first time we shared it a couple of years ago, we are republishing it. After we published this blog originally, we got an awesome response. This is one of the PYP Best Blogs!
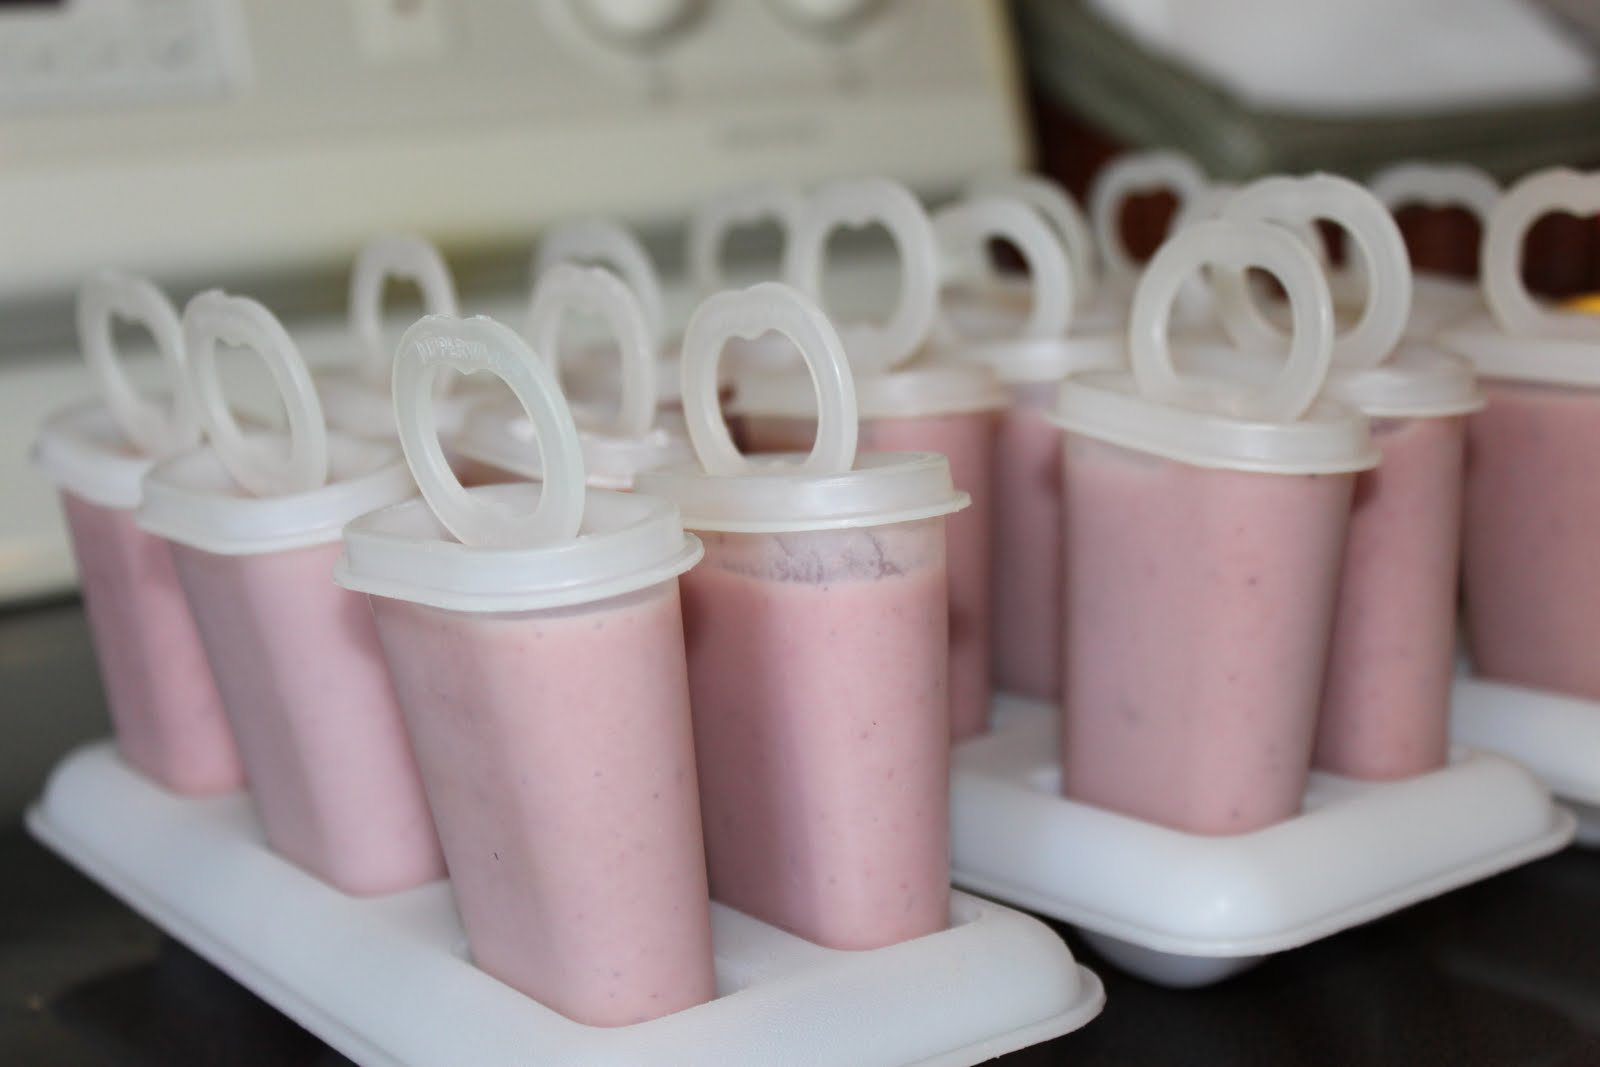
Warmer weather is upon us and it is time for cool snacks, like popsicles! What kid doesn’t like a popsicle? I really prefer to not give my kids Otter Pops and other cool treats that are just filled with sugar and coloring additives. So I make my own popsicles. Now you can just freeze juice or pudding, but blending up a mixture of fruit & vegetables mixed with yogurt or honey can make a really yummy snack…and much healthier too!
Here are some I made last week. They were gone in just a few days. My kids devour ’em!
I usually use whatever I have on hand, but I have written down a few of the smoothie recipes I make. Keep in mind these are only approximate portions, however, because I use what I have on hand or change my mind all the time. I never measure anything. It also depends on how much I want to make as to the portion sizes. They always turn out different, but good!
Orange Julius
1/4 c. orange juice concentrate
1 1/2 c. milk
1 or 2 bananas
3-4 raw baby carrots
handful of fresh pineapple
handful frozen peaches
half apple cut into chunks
1 c. vanilla yogurt
honey to sweeten (optional)
Blend until smooth! I use frozen fruit so I don’t add any ice. If you use canned or all fresh you will want to add ice. Can also add pears or any other yellow or orange fruit or veggie.
Purple Passion
1/2 c. vanilla yogurt
1 c. milk
handful of frozen blueberries & raspberries & strawberries
small handful raw baby spinach
3-4 baby carrots
1 banana
honey to sweeten
Blend until smooth! Like I said above, if you don’t use frozen fruit add ice.
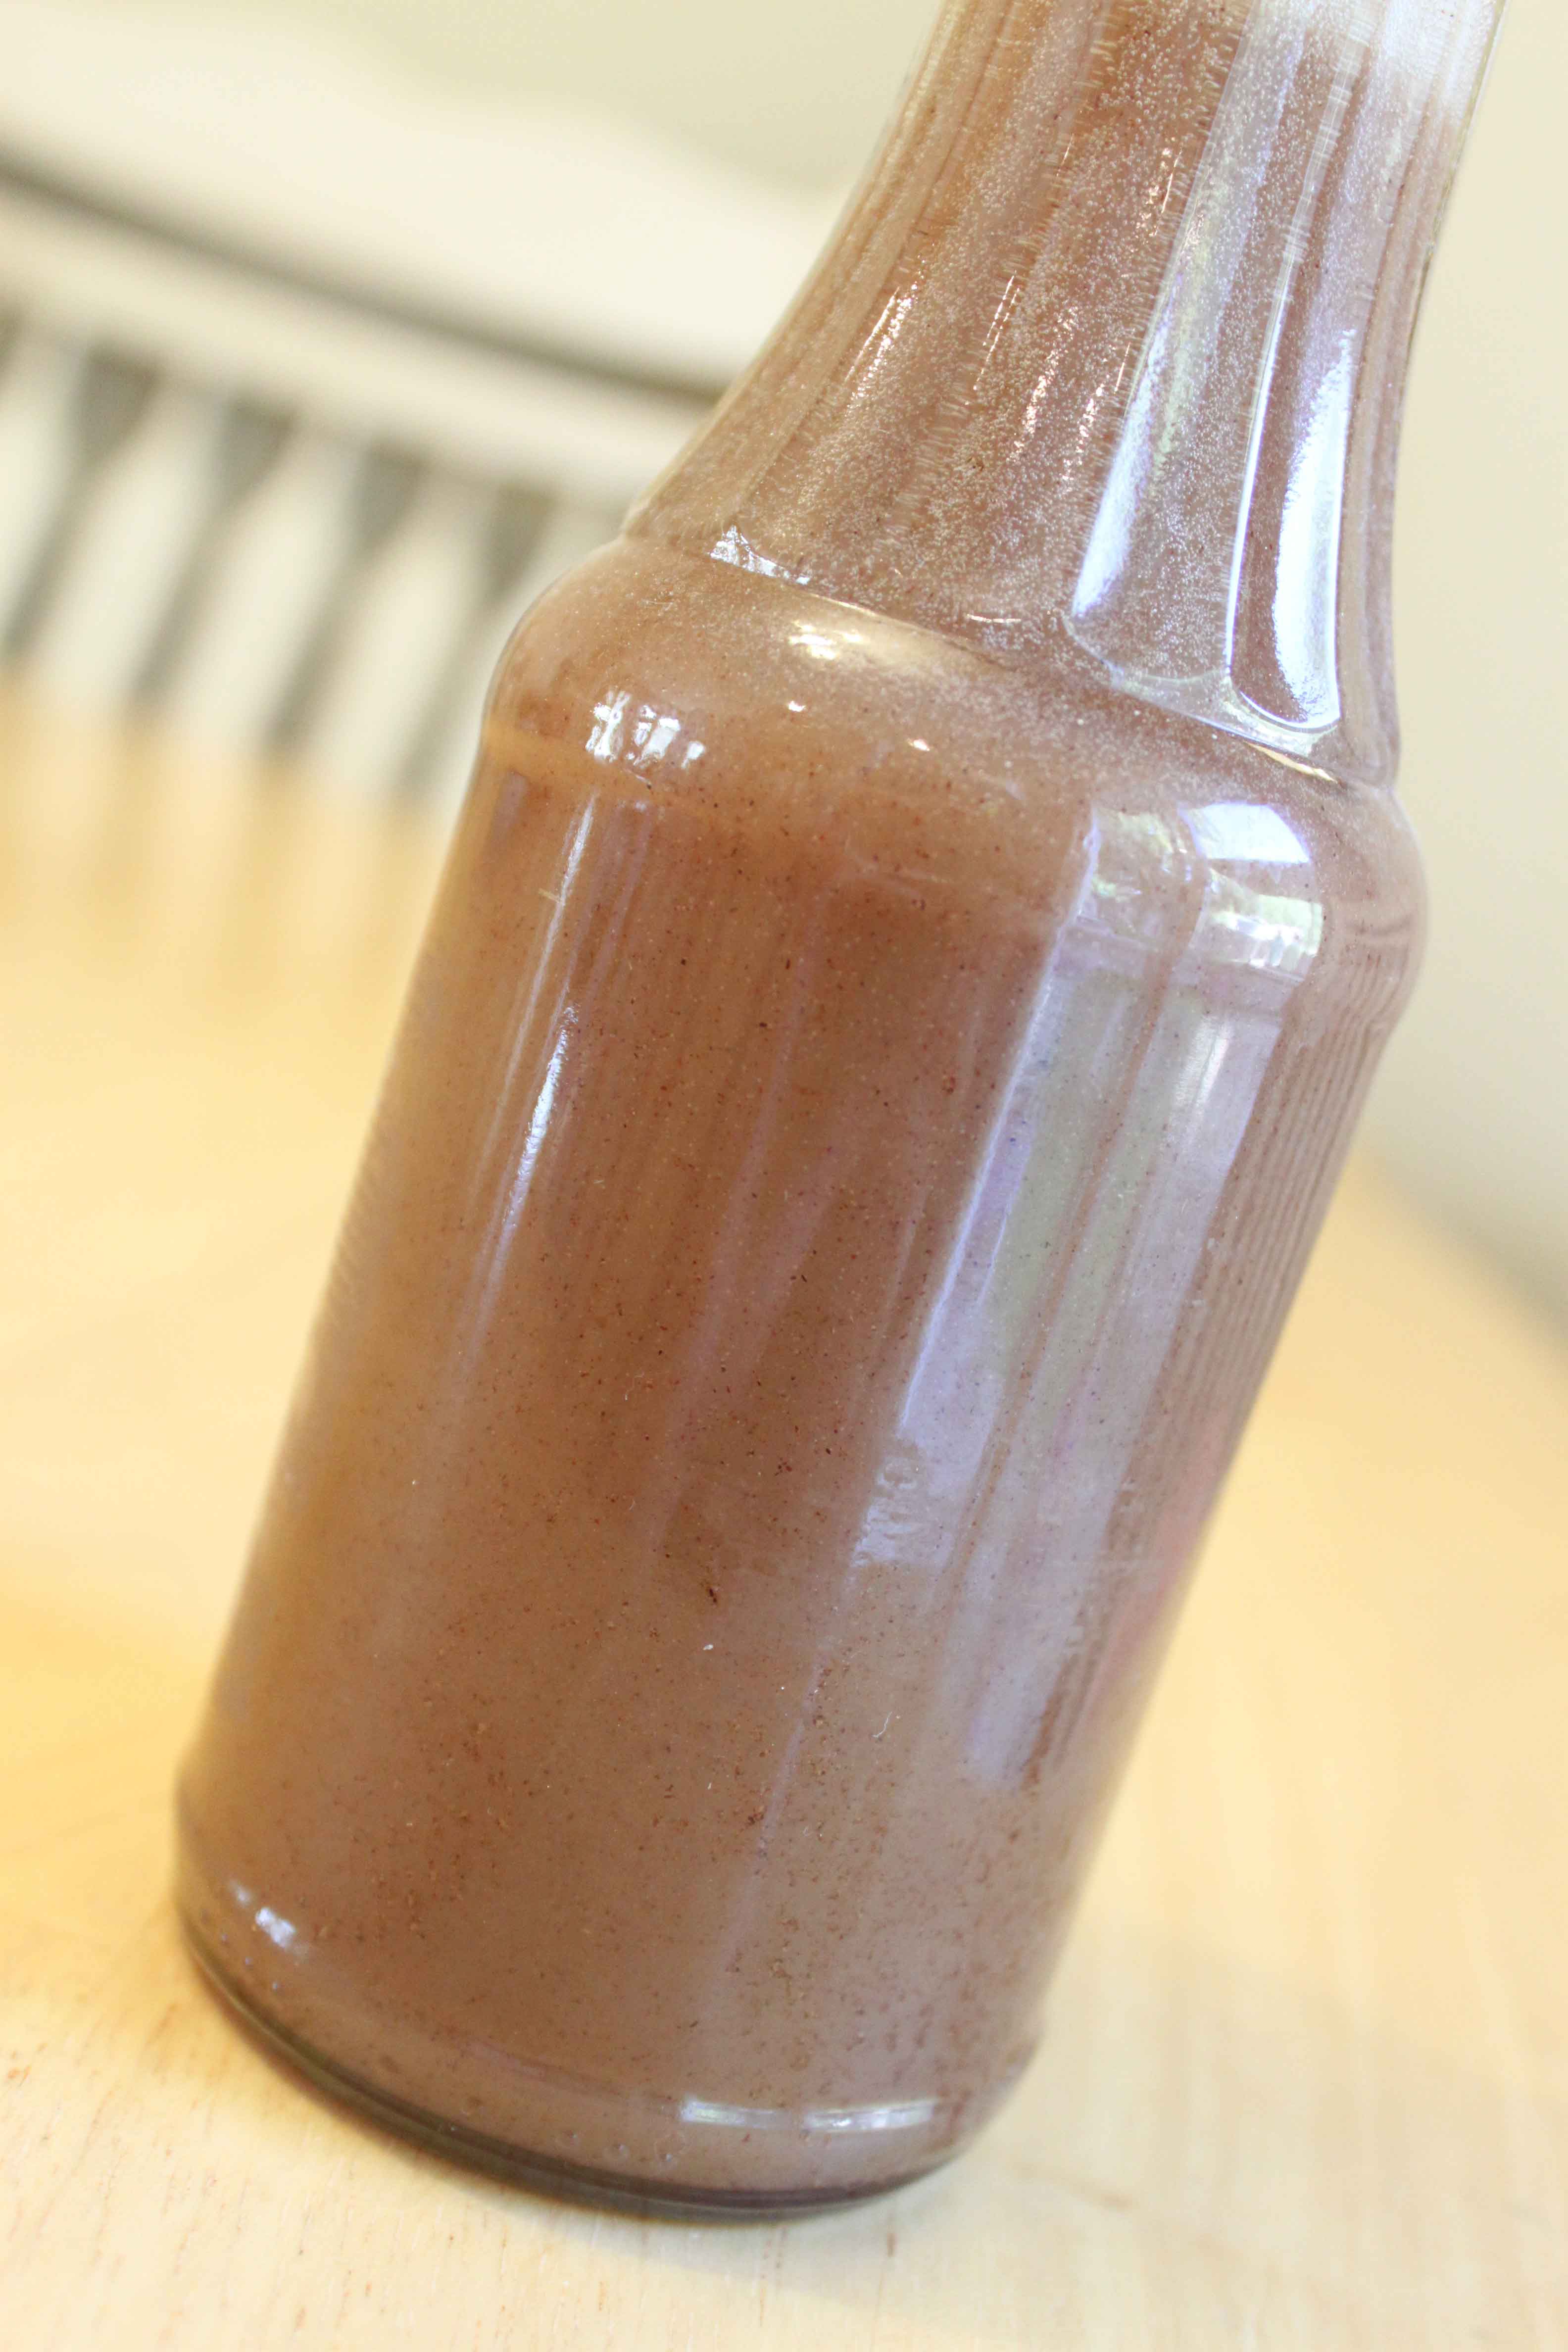
Peanut Butter Blast (this one is more of a yummy treat!)
1 c. milk
1/2 c. peanut butter
1 banana
chocolate syrup
small handful of graham crackers
ice
Blend until smooth.
Do you make homemade popsicles? Let us know what you do.
A PYP Best Blog! Recipes: Homemade Syrup – Lots of recipes!
Just in case you missed this article on making homemade syrup the first time we shared it a couple of years ago, we are republishing it. After Marne wrote this blog originally, we got an awesome response. This is one of the PYP Best Blogs!
When I was growing up, my mother made many different types of syrup for us to put on our pancakes and waffles. I wanted to share a few of those recipes with you today. These are a few of my favorites for the past 30 years or so. I hope you enjoy them as much as we do. Note: They do work out just find using reduced sugar.
Contrary to popular belief, Kneaders Restaurant did not invent cinnamon syrup! I have been eating it since the late-1970’s and my mom always made it from scratch!
CINNAMON SYRUP
1 c. sugar
1/2 c. corn syrup
1/4 c. water
1/2 to 3/4 tsp. cinnamon
1/2 c. evaporated milk
Combine sugar, corn syrup, water and cinnamon. Boil over medium heat stirring constantly. Cook and stir for 2 minutes more. Cool for 5 minutes removed from heat. Stir in evaporated milk. Makes 1 2/3 cups.
ORANGE SYRUP
1/2 c. butter
3/4 c. sugar
1/2 c. orange juice concentrate
Heat almost to boiling. Serve over pancakes or waffles.
PEACH SYRUP
5 cups peach puree
2 cups sugar
2 TBSP lemon juice
2 tsp vanilla
Over medium heat in a heavy pot, combine the peach puree, sugar, and lemon juice. Heat to boiling then reduce to a simmer. Simmer, stirring frequently for five minutes. Remove from the heat and add the vanilla.
You can water bath can this syrup, or you can freeze it. If you choose to can it, pour into the sterilized jars, leaving 1/4″ headspace at the top of each jar. Wipe all the rims with a clean cloth and center the lids. Add the bands and tighten to finger tightness, and process in a boiling water bath for 25 minutes (less time if you live at a lower elevation. Check the Ball canning regulations for specifics). Makes approx. 3 pints of syrup.
A PYP Best Blog! Easy, Healthy Homemade Granola Bars!
Just in case you missed this article on making homemade granola bars the first time we shared it a couple of years ago, we are republishing it. After Trish wrote this blog originally, we got an awesome response. This is one of the PYP Best Blogs!
For a variety of reasons I won’t go into here, I have started packing lunches for my kids and husband every day.
When I decided to make the switch from school lunch to brown bagging, I sought the advice of PYP members in the forums. I was looking for wholesome, healthy, non processed options.
One suggestion I received was a Mark Bitman recipe for homemade granola bars.
They have been a huge hit! And I’ve made them so many times now that I can make them in my sleep.
I wanted to pass them on for others to enjoy.
I would guess that the approximate cost for a full recipe is about $2 for 16 bars.
Considering that I know exactly what’s in them (Nothing I can’t pronounce or identify!) and can customize the granola bars according to our tastes, I think that they are a good value.
Chewy Granola Bars
adapted from a Mark Bitman recipe
1/2 cup nut butter (almond or peanut)
1/2 cup honey
1 cup crispy rice cereal
1 cup oats (instant, quick or old fashioned)
1/2 chopped unsalted nuts and/or seeds (any combination you like)
1/2 cup chopped dried fruit (any that you like)
1/4 teaspoon salt (optional)
Place nut butter and honey in a small saucepan and heat over low heat just until melted enough to combine thoroughly with a whisk.
Lightly oil a 9X9 or 8X8 cake pan.
Center a piece of plastic wrap that is about 3 times the size of the pan over the pan and smooth it out to line the pan allowing the excess plastic wrap to hang over the sides.
Put the dry ingredients in a bowl. Add the combined nut butter and honey. Stir gently until well combined.
Pour mixture into pan and distribute as evenly as possible with the spoon you used to stir with.
Now fold the plastic wrap over the mixture and press firmly and evenly into the pan.
Refrigerate for at least one hour.
Lift the plastic wrap and granola mixture from the pan all at once.
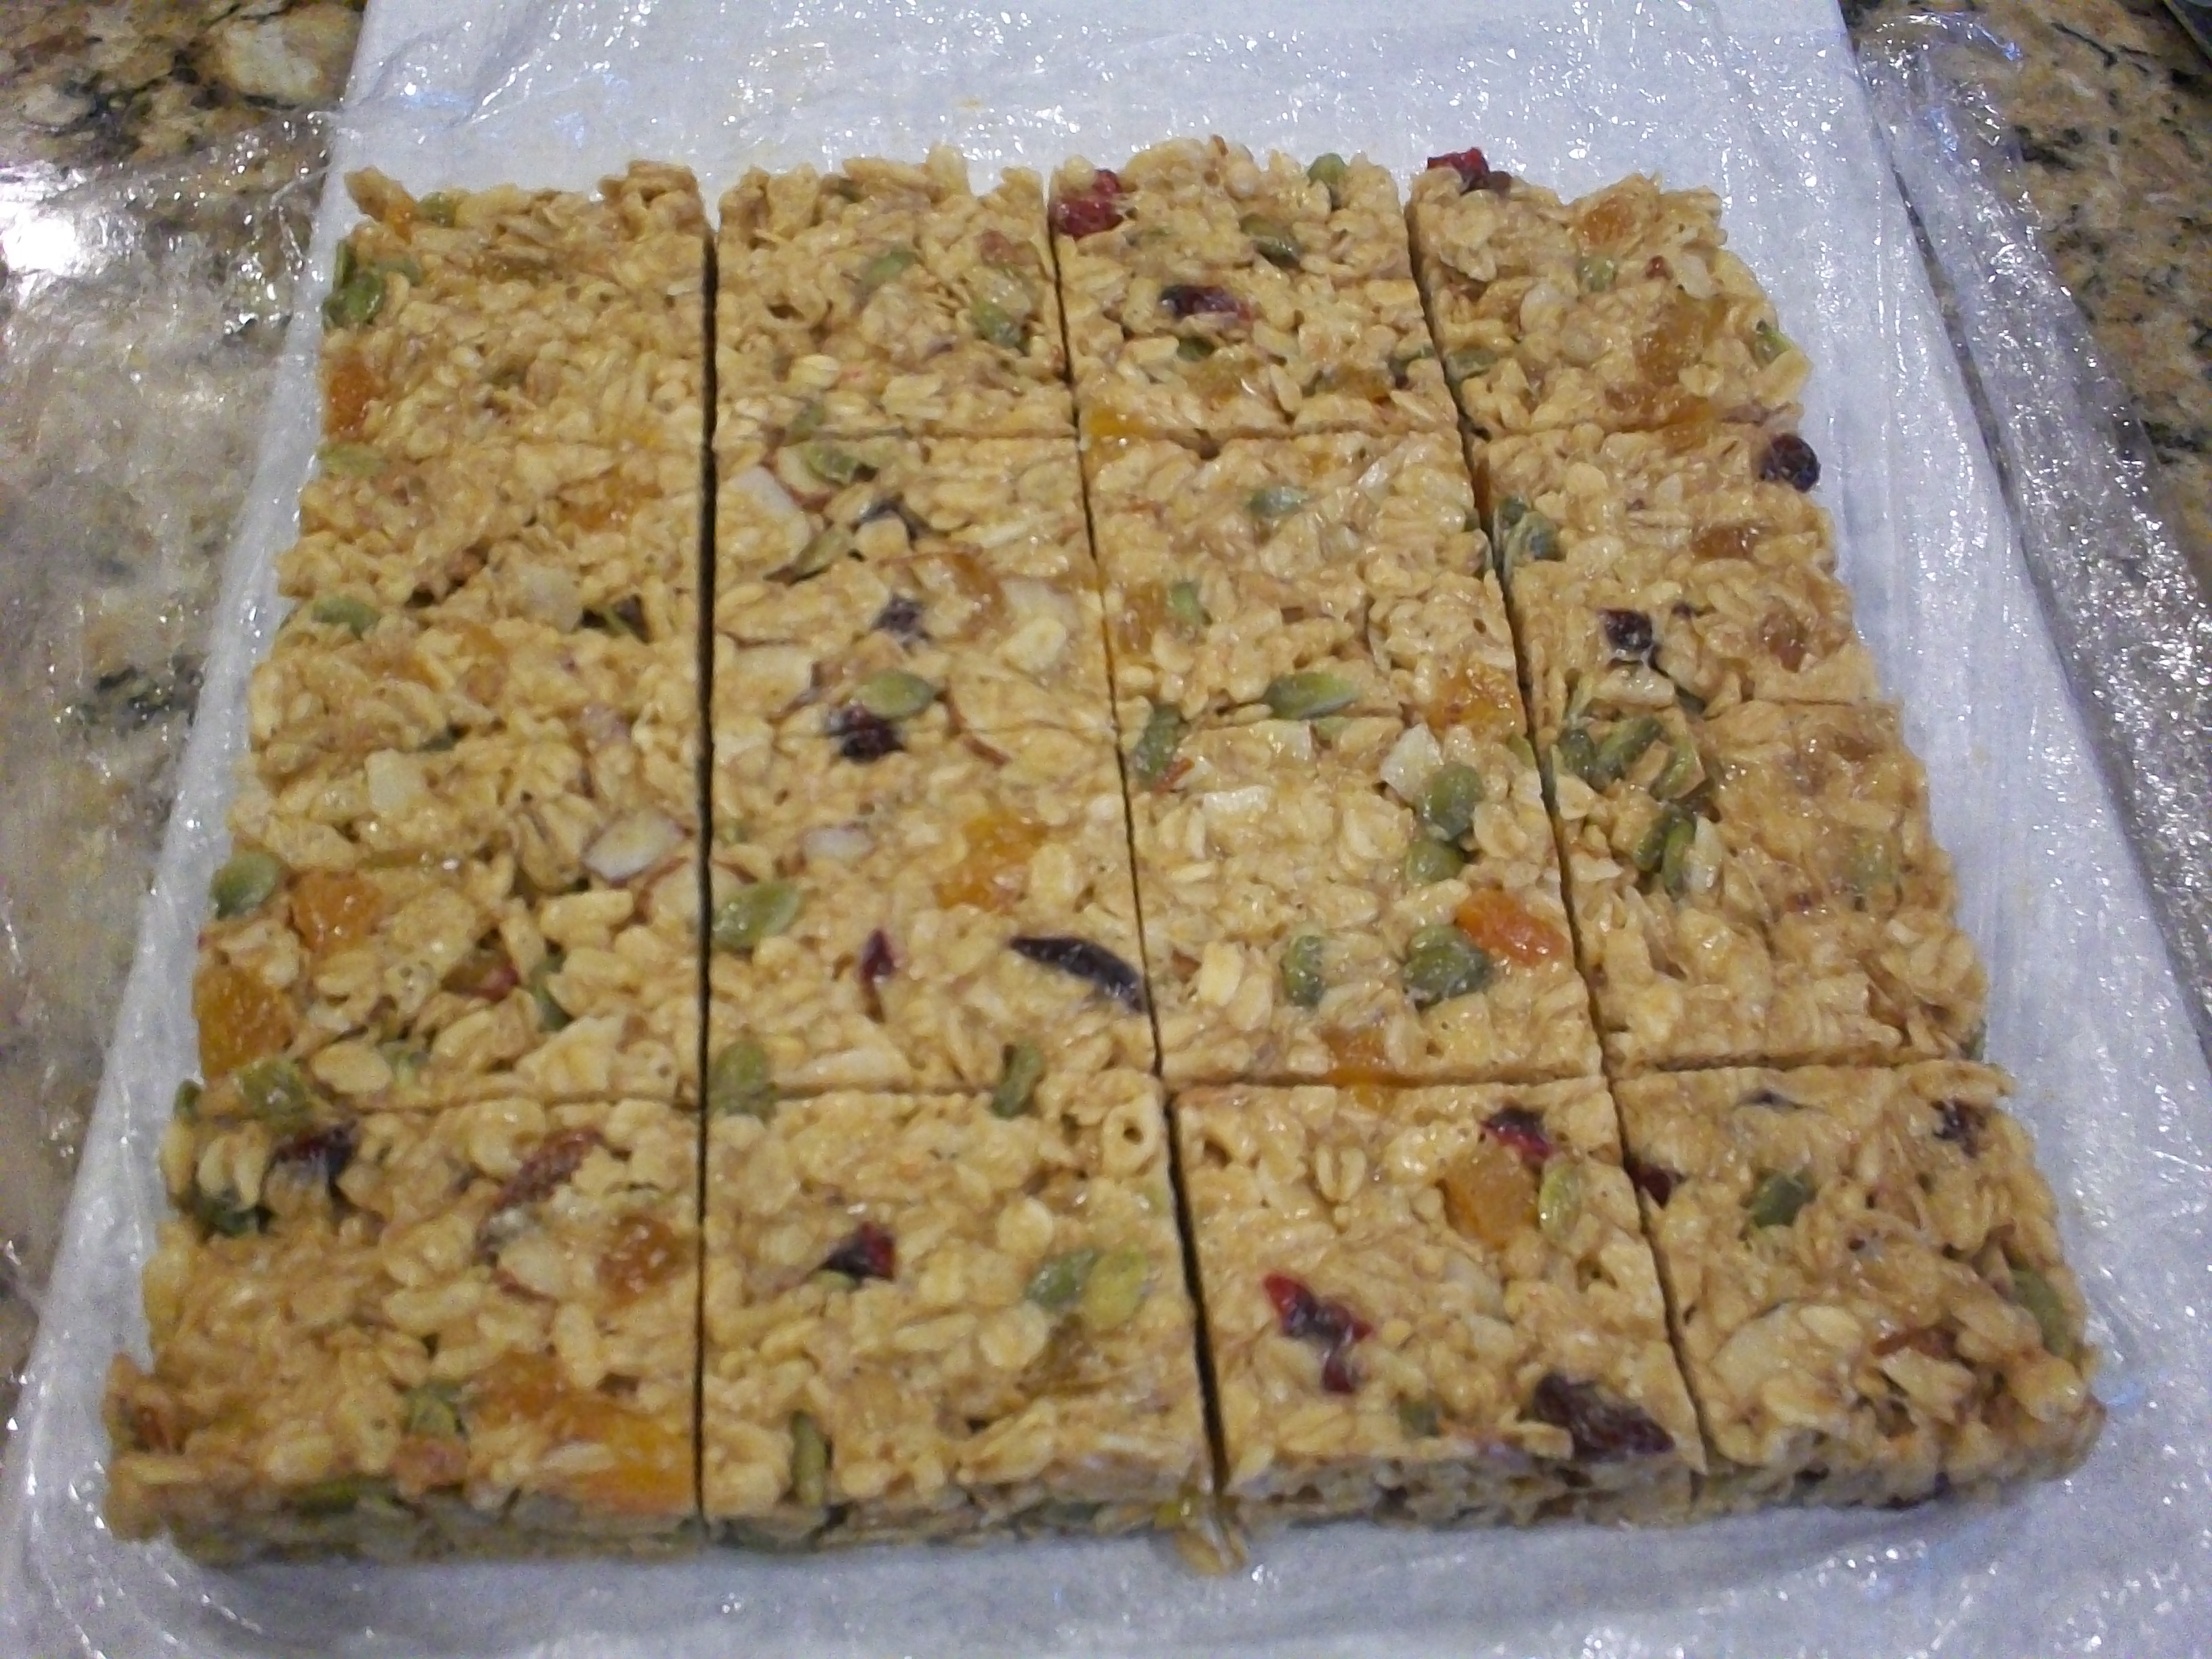
Place on cutting board and cut into 16 equal pieces.
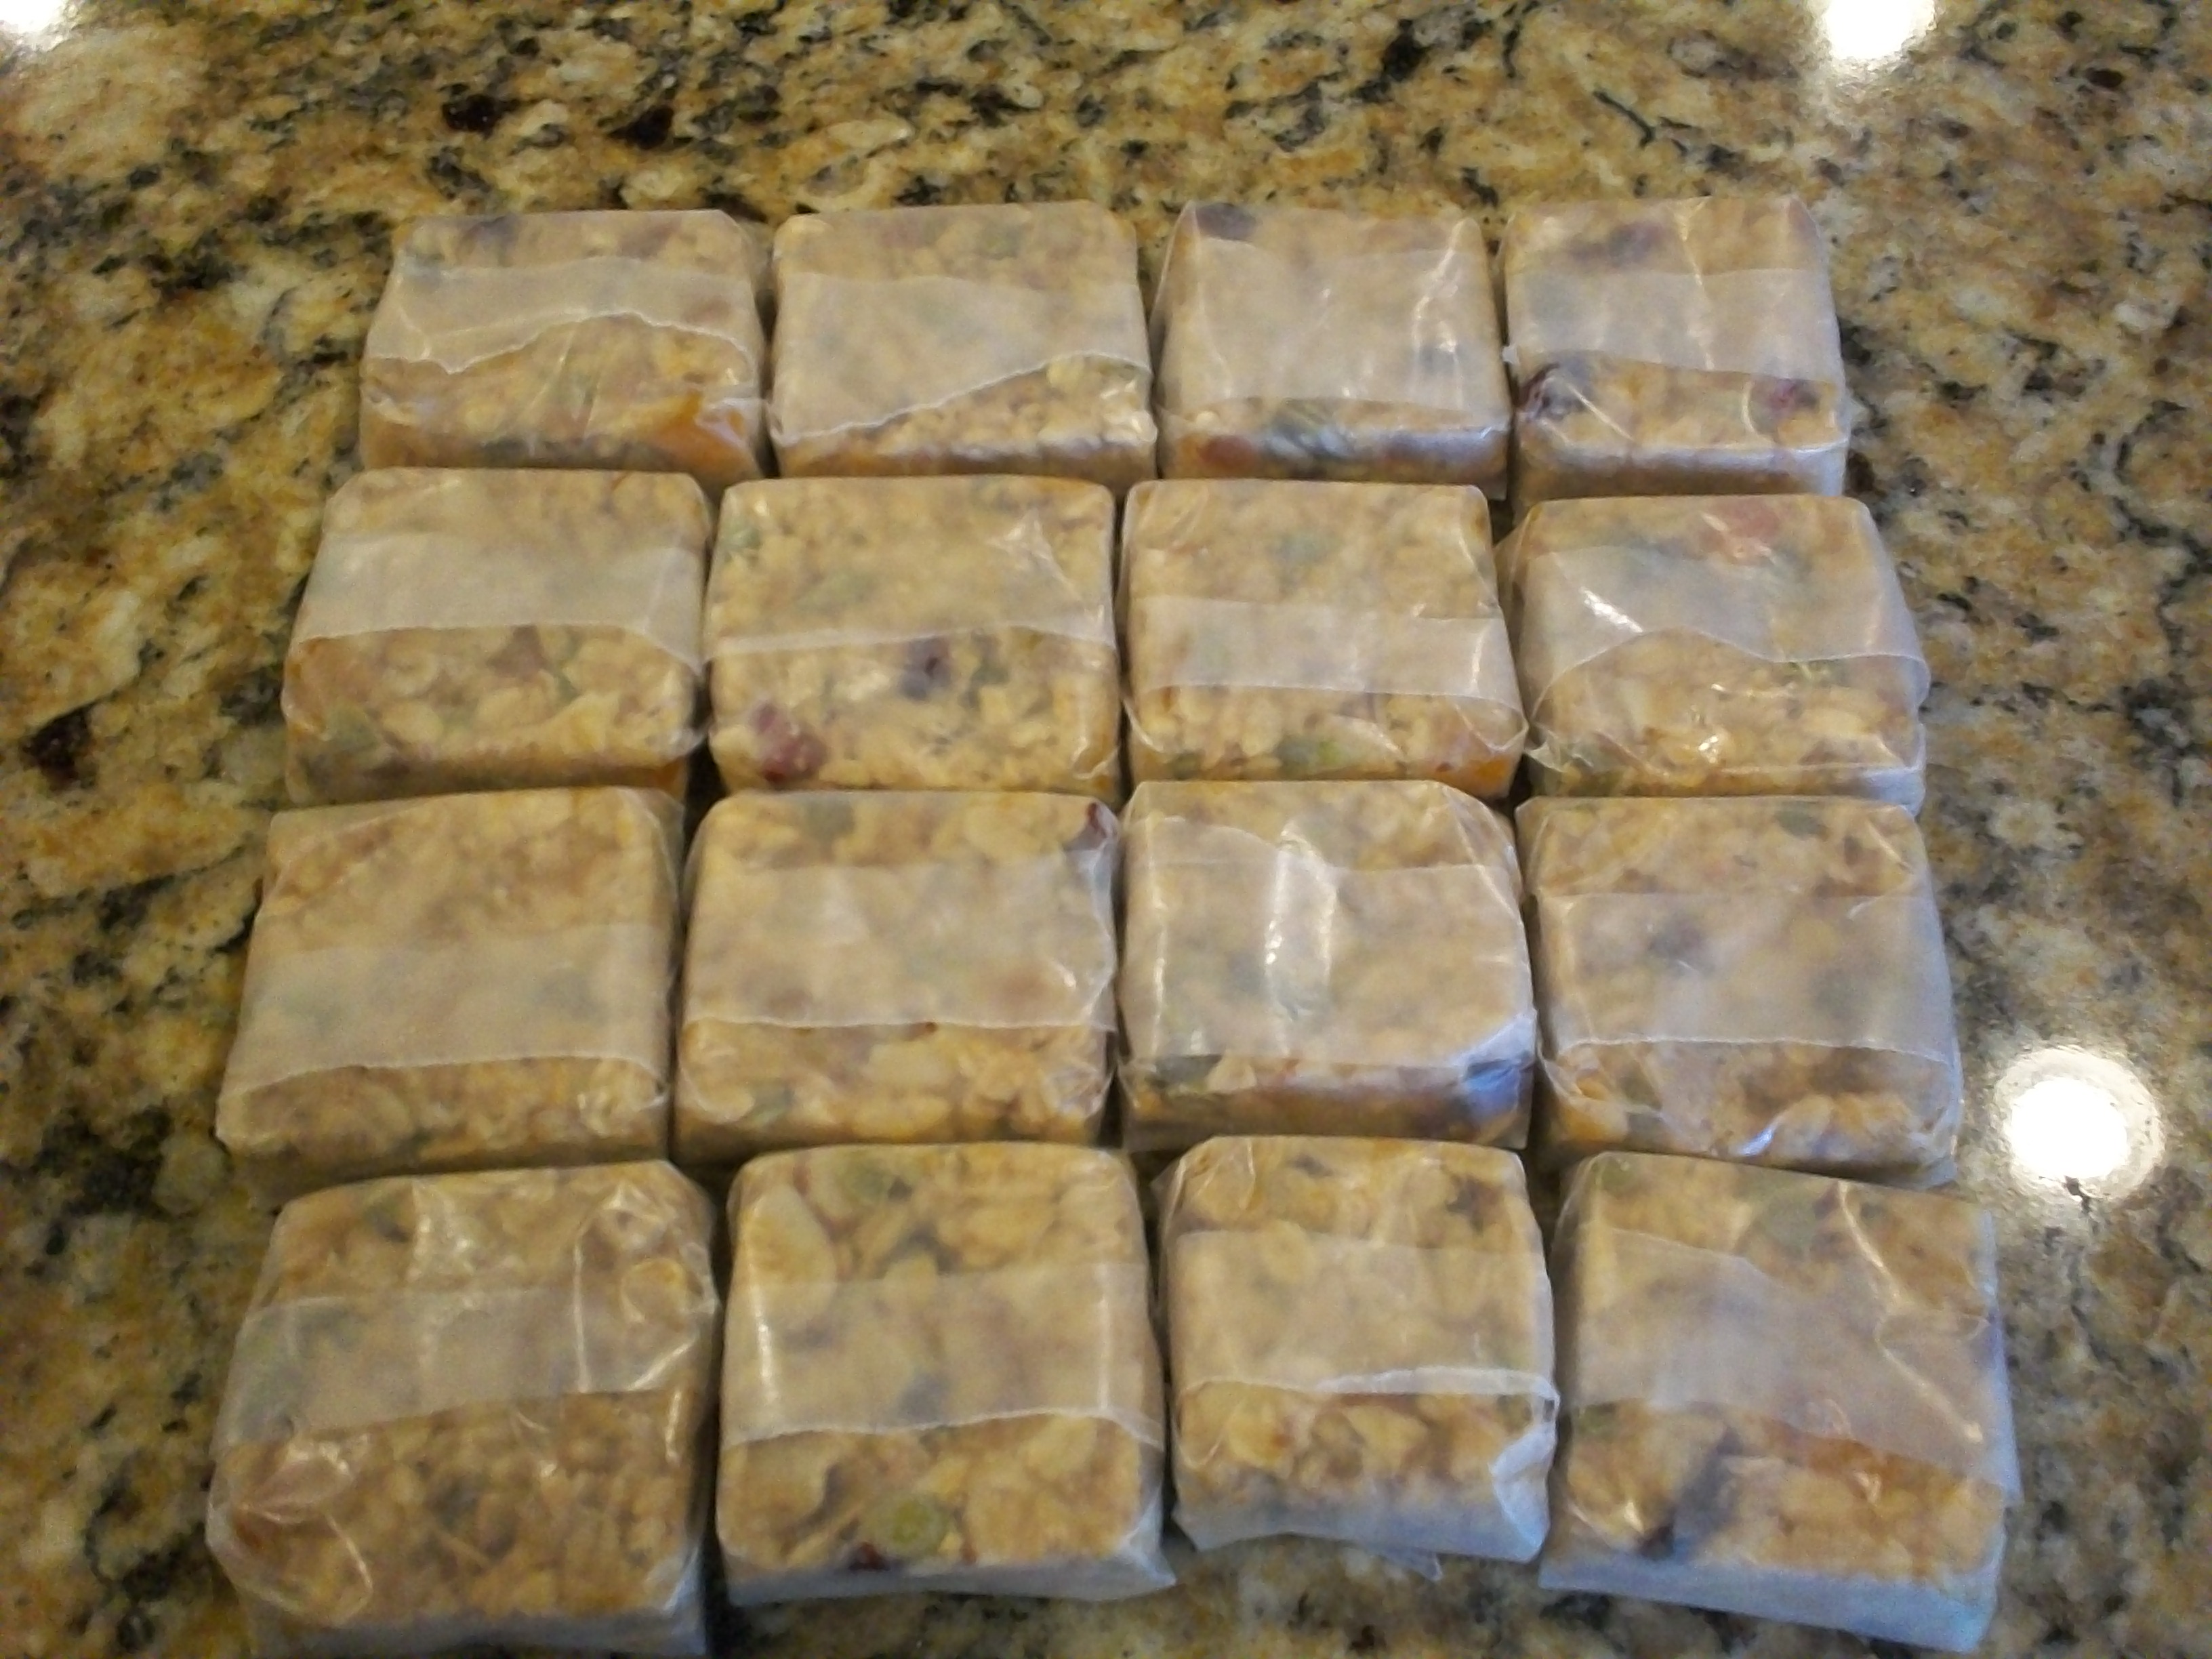
At this point I like to wrap each bar in waxed paper and put them into the freezer. When I’m packing lunches I can just grab one and add it to the lunches. It thaws perfectly for lunch.
For this batch I used natural peanut butter, almonds, raw pumpkin seeds, sunflower seeds, apricots and cranberries. YUM!
Pin It
Keep a Frost Free Freezer
 Yesterday I shared a post about keeping a freezer inventory. One way to make the most of the food you have stored in your freezer is to make sure you have a frost free freezer (say that 5 times quick).
I originally shared these tips a few years ago, but it bears repeating. I hate to see freezer waste!
A frost free freezer means just that, frost free.
In other words, you won’t have the task of having to thaw your freezer to chip off all the frozen ice when you have trouble closing the door properly because of the frost build up.
With a frost free freezer, there are heating elements in the freezer walls that cycle through – normally every six hours but can vary depending on the make, model and energy efficiency – in order to melt any ice. There is a thermometer in the freezer so that it won’t allow the freezer to get any warmer than freezing.
A frost free freezer is very convenient however, it isn’t quite as energy efficient as a manual defrost. A manual defrost will also ensure the temperature is steady rather than going through the heating and cooling cycles, which means that if you plan to store food in your freezer for months at a time, you may want to go with a manual defrost. But you will have to manually defrost every few months, something many people don’t really like doing!
It is up to you to decide which type of freezer you prefer, as each have pros and cons.
If your freezer ends to get a lot of frost build-up on the inside, it can be a pain and a waste of electricity – to spend the time defrosting it time and time again. But there are a few things you can do to ensure that your freezer doesn’t get a lot of frost building up.
Open your freezer for a short duration as possible. If you are grabbing multiple things from the freezer, grab them all at once rather than leaving it open while you grab each item out individually.
If you were delayed getting items into the freezer, wipe the outside of the packaging first, so you won’t be adding to the condensation into the freezer. So before you put that package of frozen peas or ice cream into the freezer, take the time to take a dry cloth to them and dry them off first.
Check your freezer’s gasket to make sure cold air isn’t escaping and warm air isn’t entering.
Every few months, clean your freezer’s gasket to ensure it will seal your freezer properly. These things get dirty quickly!!
Another thing to consider is the fuller your freezer is the less frost build up you will have! So there is another incentive for your once a month cooking.
A PYP Best Blog: Keeping a Freezer Inventory
 Just in case you missed this article on keeping a freezer inventory the first time we shared it a couple of years ago, we are republishing it. After I wrote this blog originally, we got an awesome response. This is one of the PYP Best Blogs!
Keeping a freezer inventory a vital step in getting the most out of your freezer cooking experience. It you don’t know what is in your freezer than you won’t be able to properly rotate.
You want to be sure you are getting a great value for all the hard work you go to in shopping, saving, and making your freezer meals.
I don’t like finding a chicken meal that I made a year ago or ground beef meal that has been there for 3 years. How do you keep track of what is in the freezer and how long it’s been there?
Creating a freezer inventory is a great way to ensure your food is still good quality when you eat, it should be a well organized, simple to follow and update. It’s a great way to remember what is in your freezer without even opening it.
My freezer inventory sheet is divided into 3 columns:
Item:
Your freezer inventory should include the item that was frozen and make sure you list how you did it. Did you freeze hamburger patties raw or cooked? Are they seasoned?
Quantity:
Not only do you need to know how much is in each package (like pounds or how many beef patties are in the package). You need to know how many like packages you have in your freezer. Don’t forget to include on your inventory the freezer meals, meats, vegetables, desserts and juices.
I my inventory form I put a little tick mark for each package and then when I use it I cross it out.
Date:
Make sure not only do you write the date on the inventory sheet but also on the package itself. I always try make sure I am using the oldest of the items first to insure great quality and to keep my frozen foods in proper rotation.
I like having the date on my inventory sheet so that when I am making a meal plan I can easily see what needs to be used first, without having to dig through the freezer to figure it out.
With keeping an inventory sheet you can also easily know what you are using the most and you can make an appropriate shopping list.
I have some freezer bins that I try to sort like items into. (Can you tell I hate digging in my freezer?)
Don’t forget to update!
After you go to the work of organizing your freezer and creating your inventory sheet, keep it up! Update your sheet eat time your go shopping. Mark off what you use each time you remove something. The initial task may seem overwhelming but once you have the basics down it is VERY easy to keep up with. The trick my be making sure that each of your family members remember to mark off what they take out.
A PYP Best Blog! Handpainting Signs! You can do it!
Just in case you missed this article on handpainting signs the first time we shared it a couple of years ago, we are republishing it. After Sharon wrote this blog originally, we got an awesome response. This is one of the PYP Best Blogs!
I love the posters and signs with messages on them. I love that you can customize and personalize them to fit you and your home. I do prefer to paint things like this by hand, though, and often get asked about my method for hand painting, so I thought I would share it here. I paint a lot and have been doing it for years; it does take some practice, but I think this is a pretty foolproof method for handpainting signs, even for a beginner!
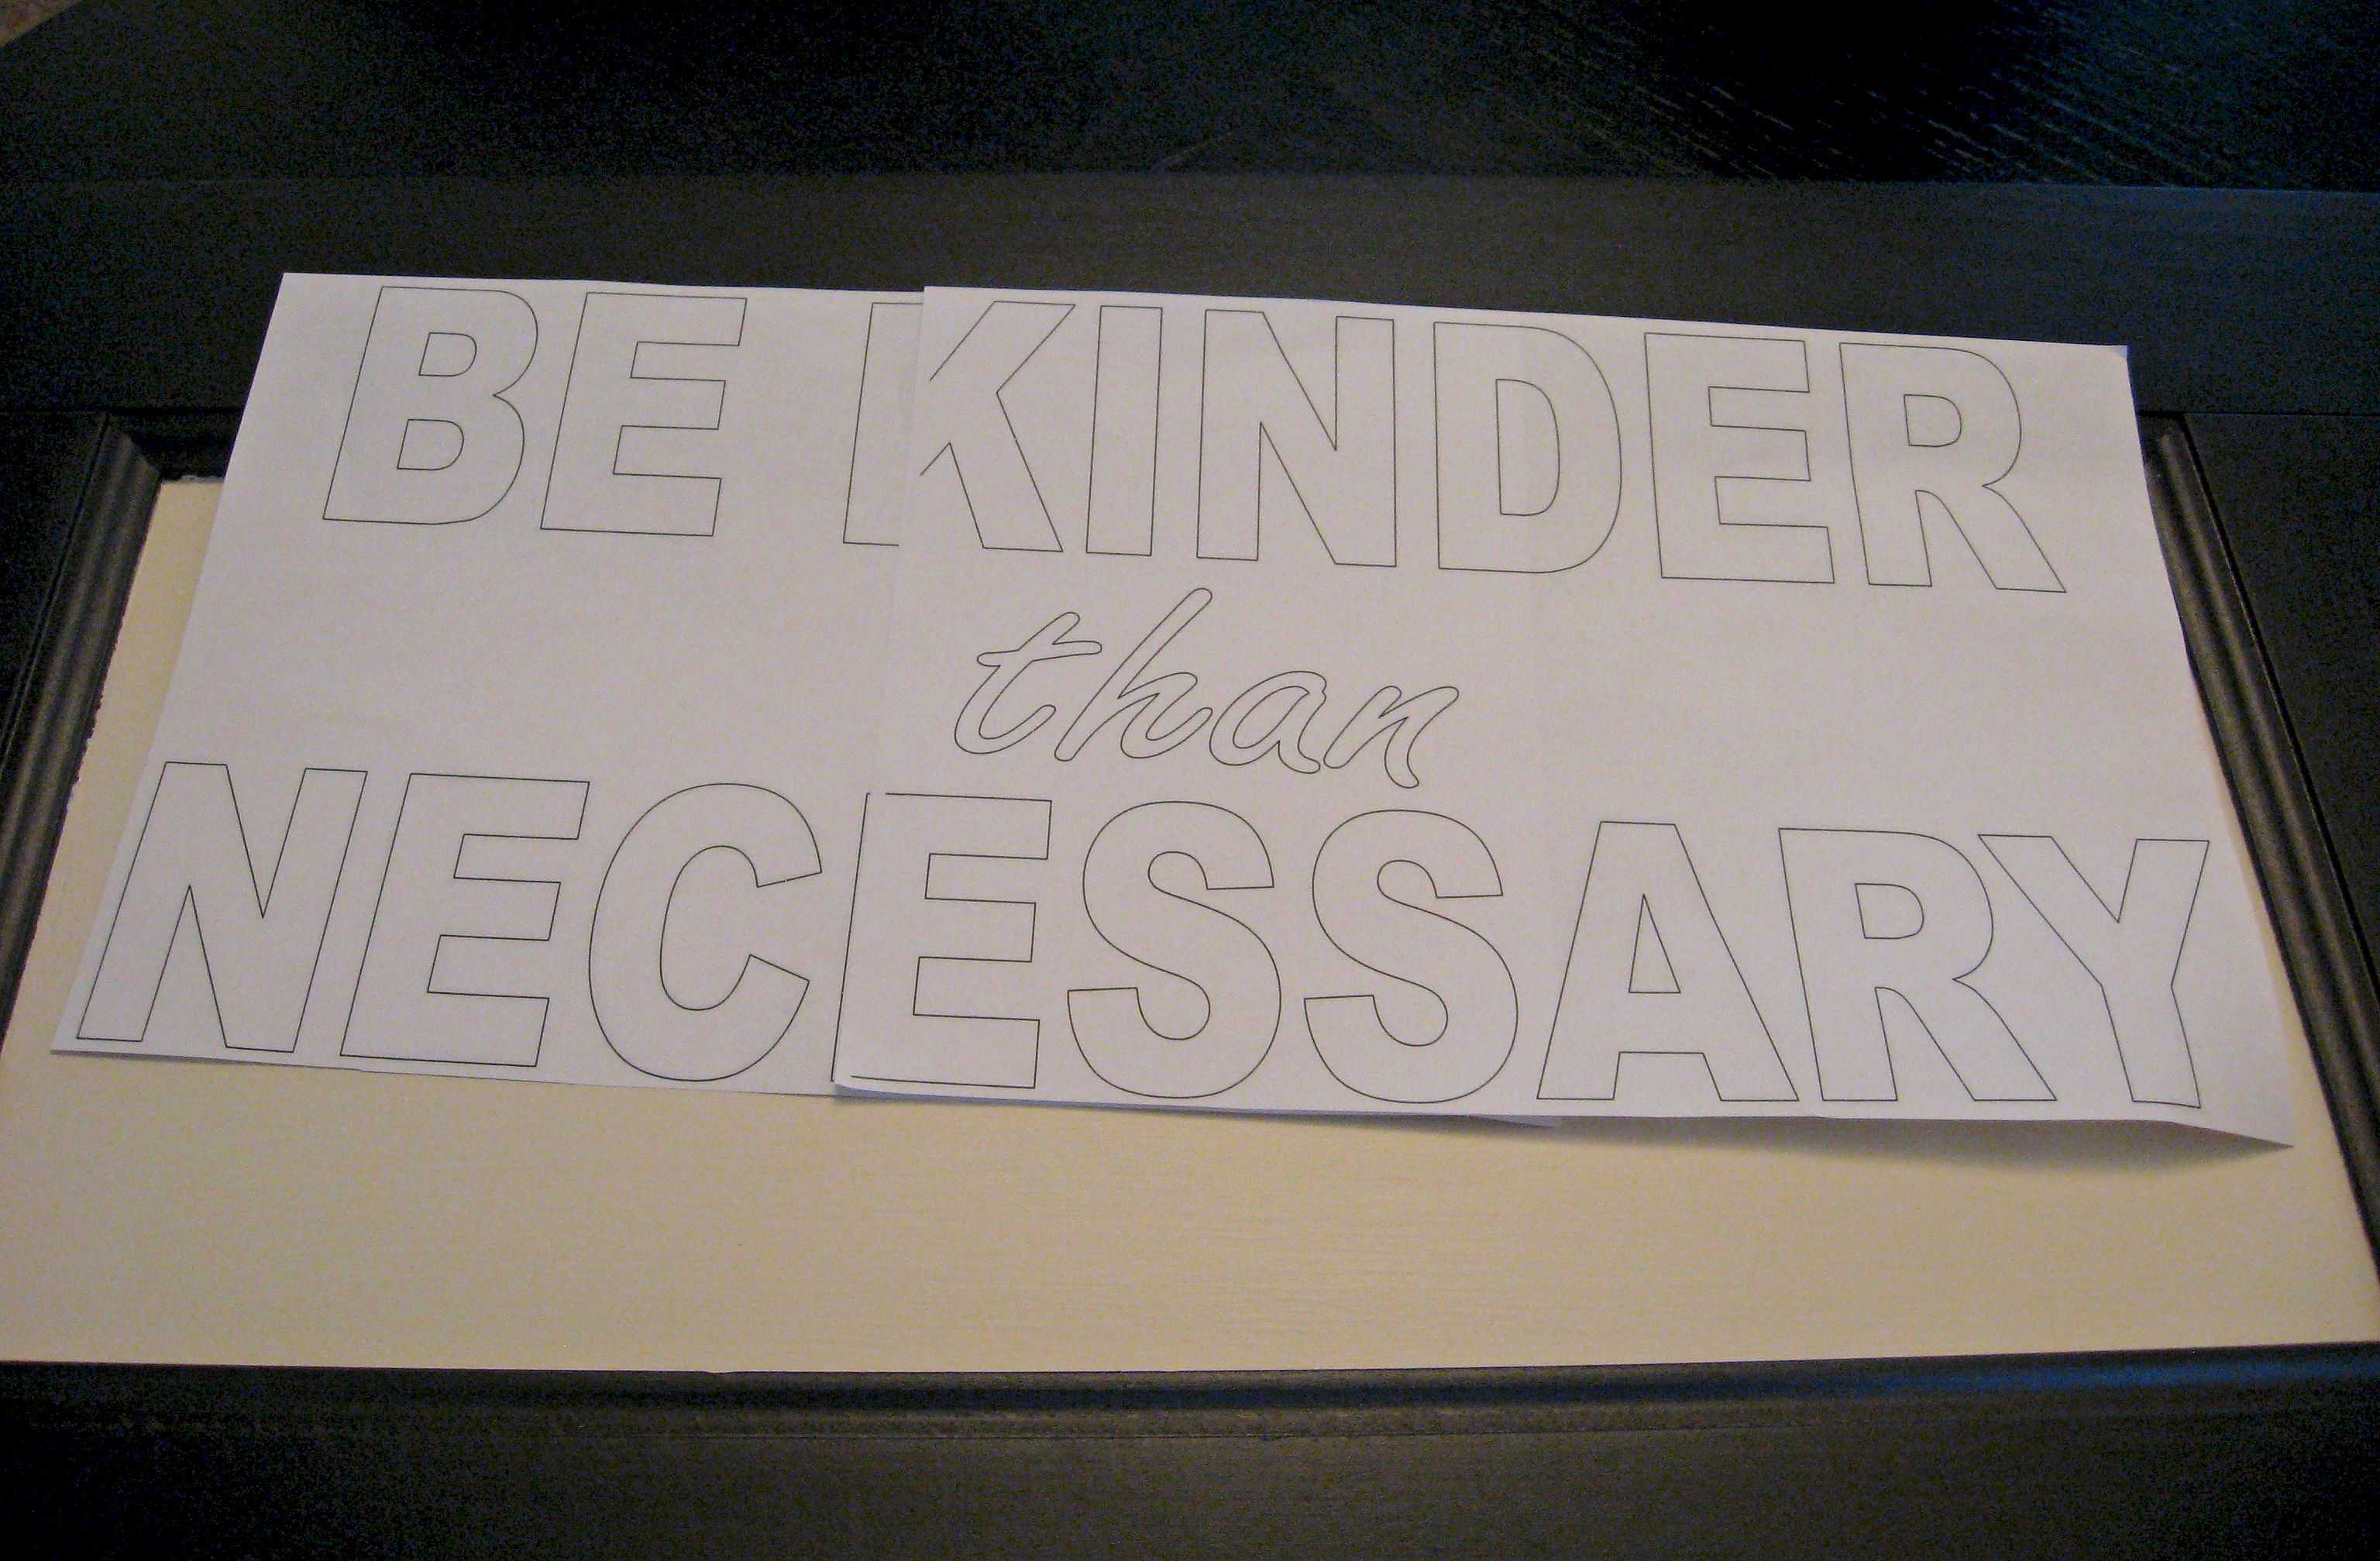
I start by printing out my finished words or design on the computer. If it’s bigger than one piece of paper, I just tape them together.
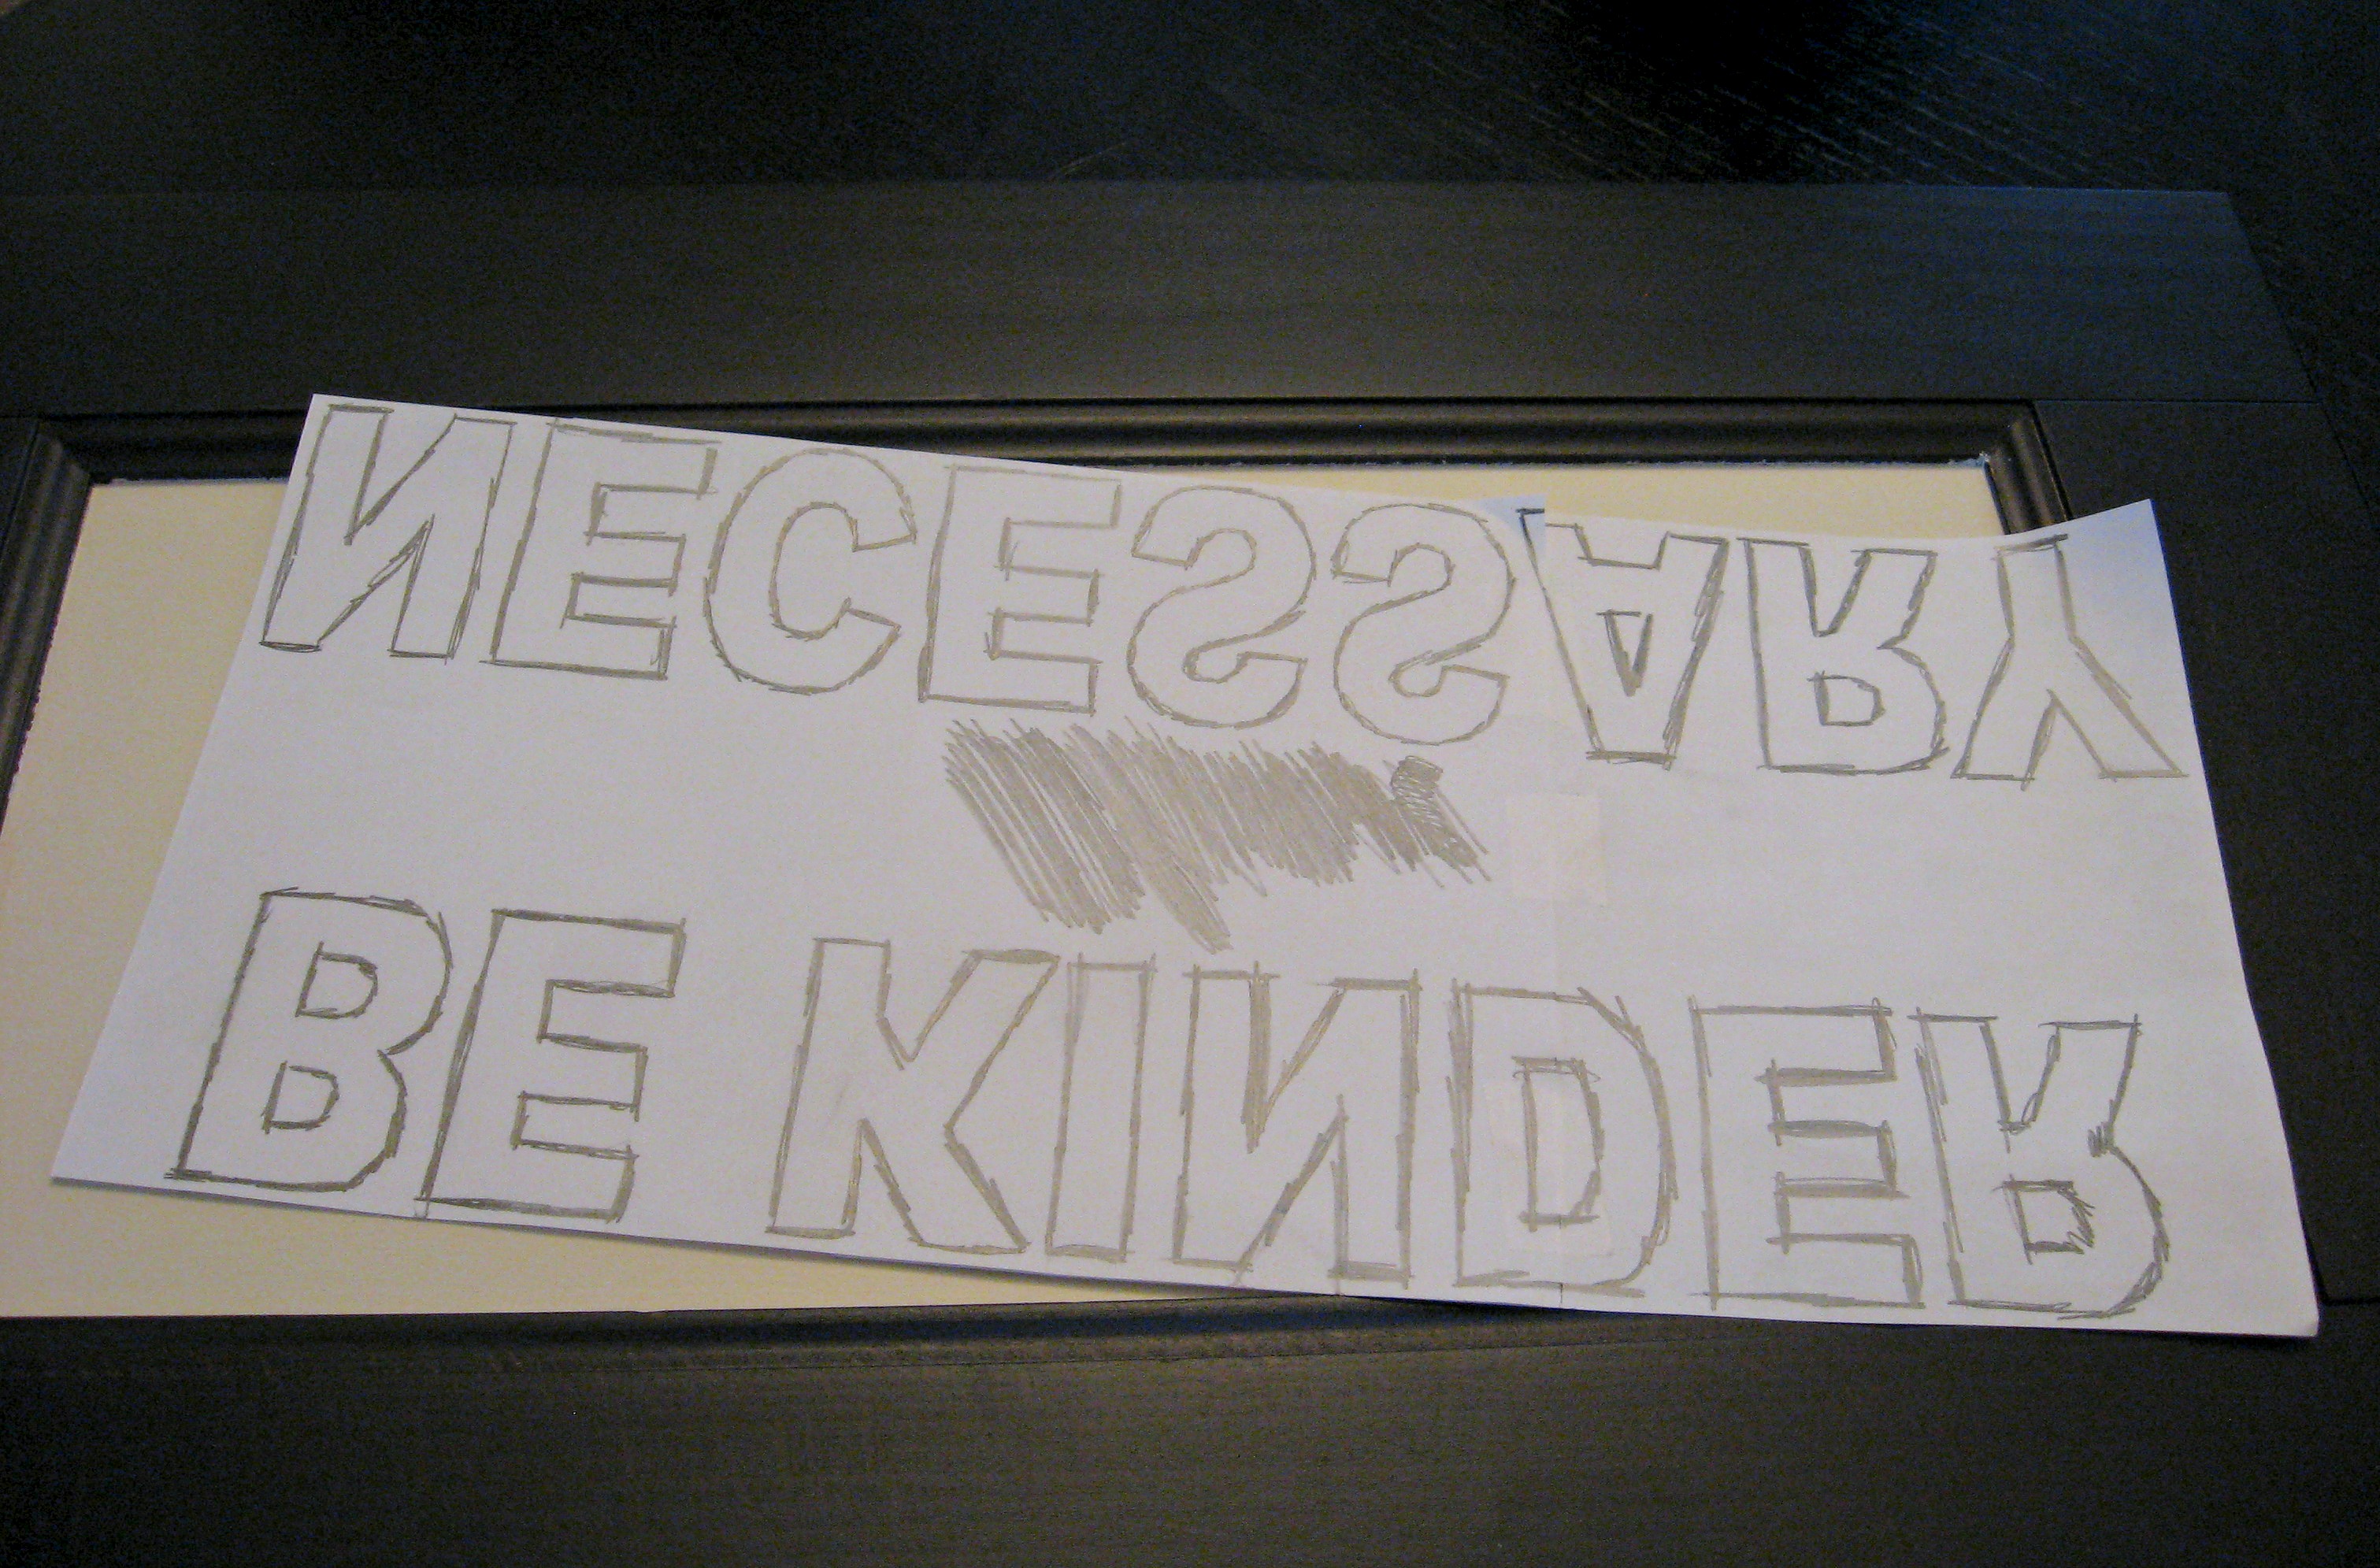
Now, I scribble over the lines on the BACK of the paper with a pencil. You could use actual carbon paper, but I just don’t see the point of the expense and mess when this works great.
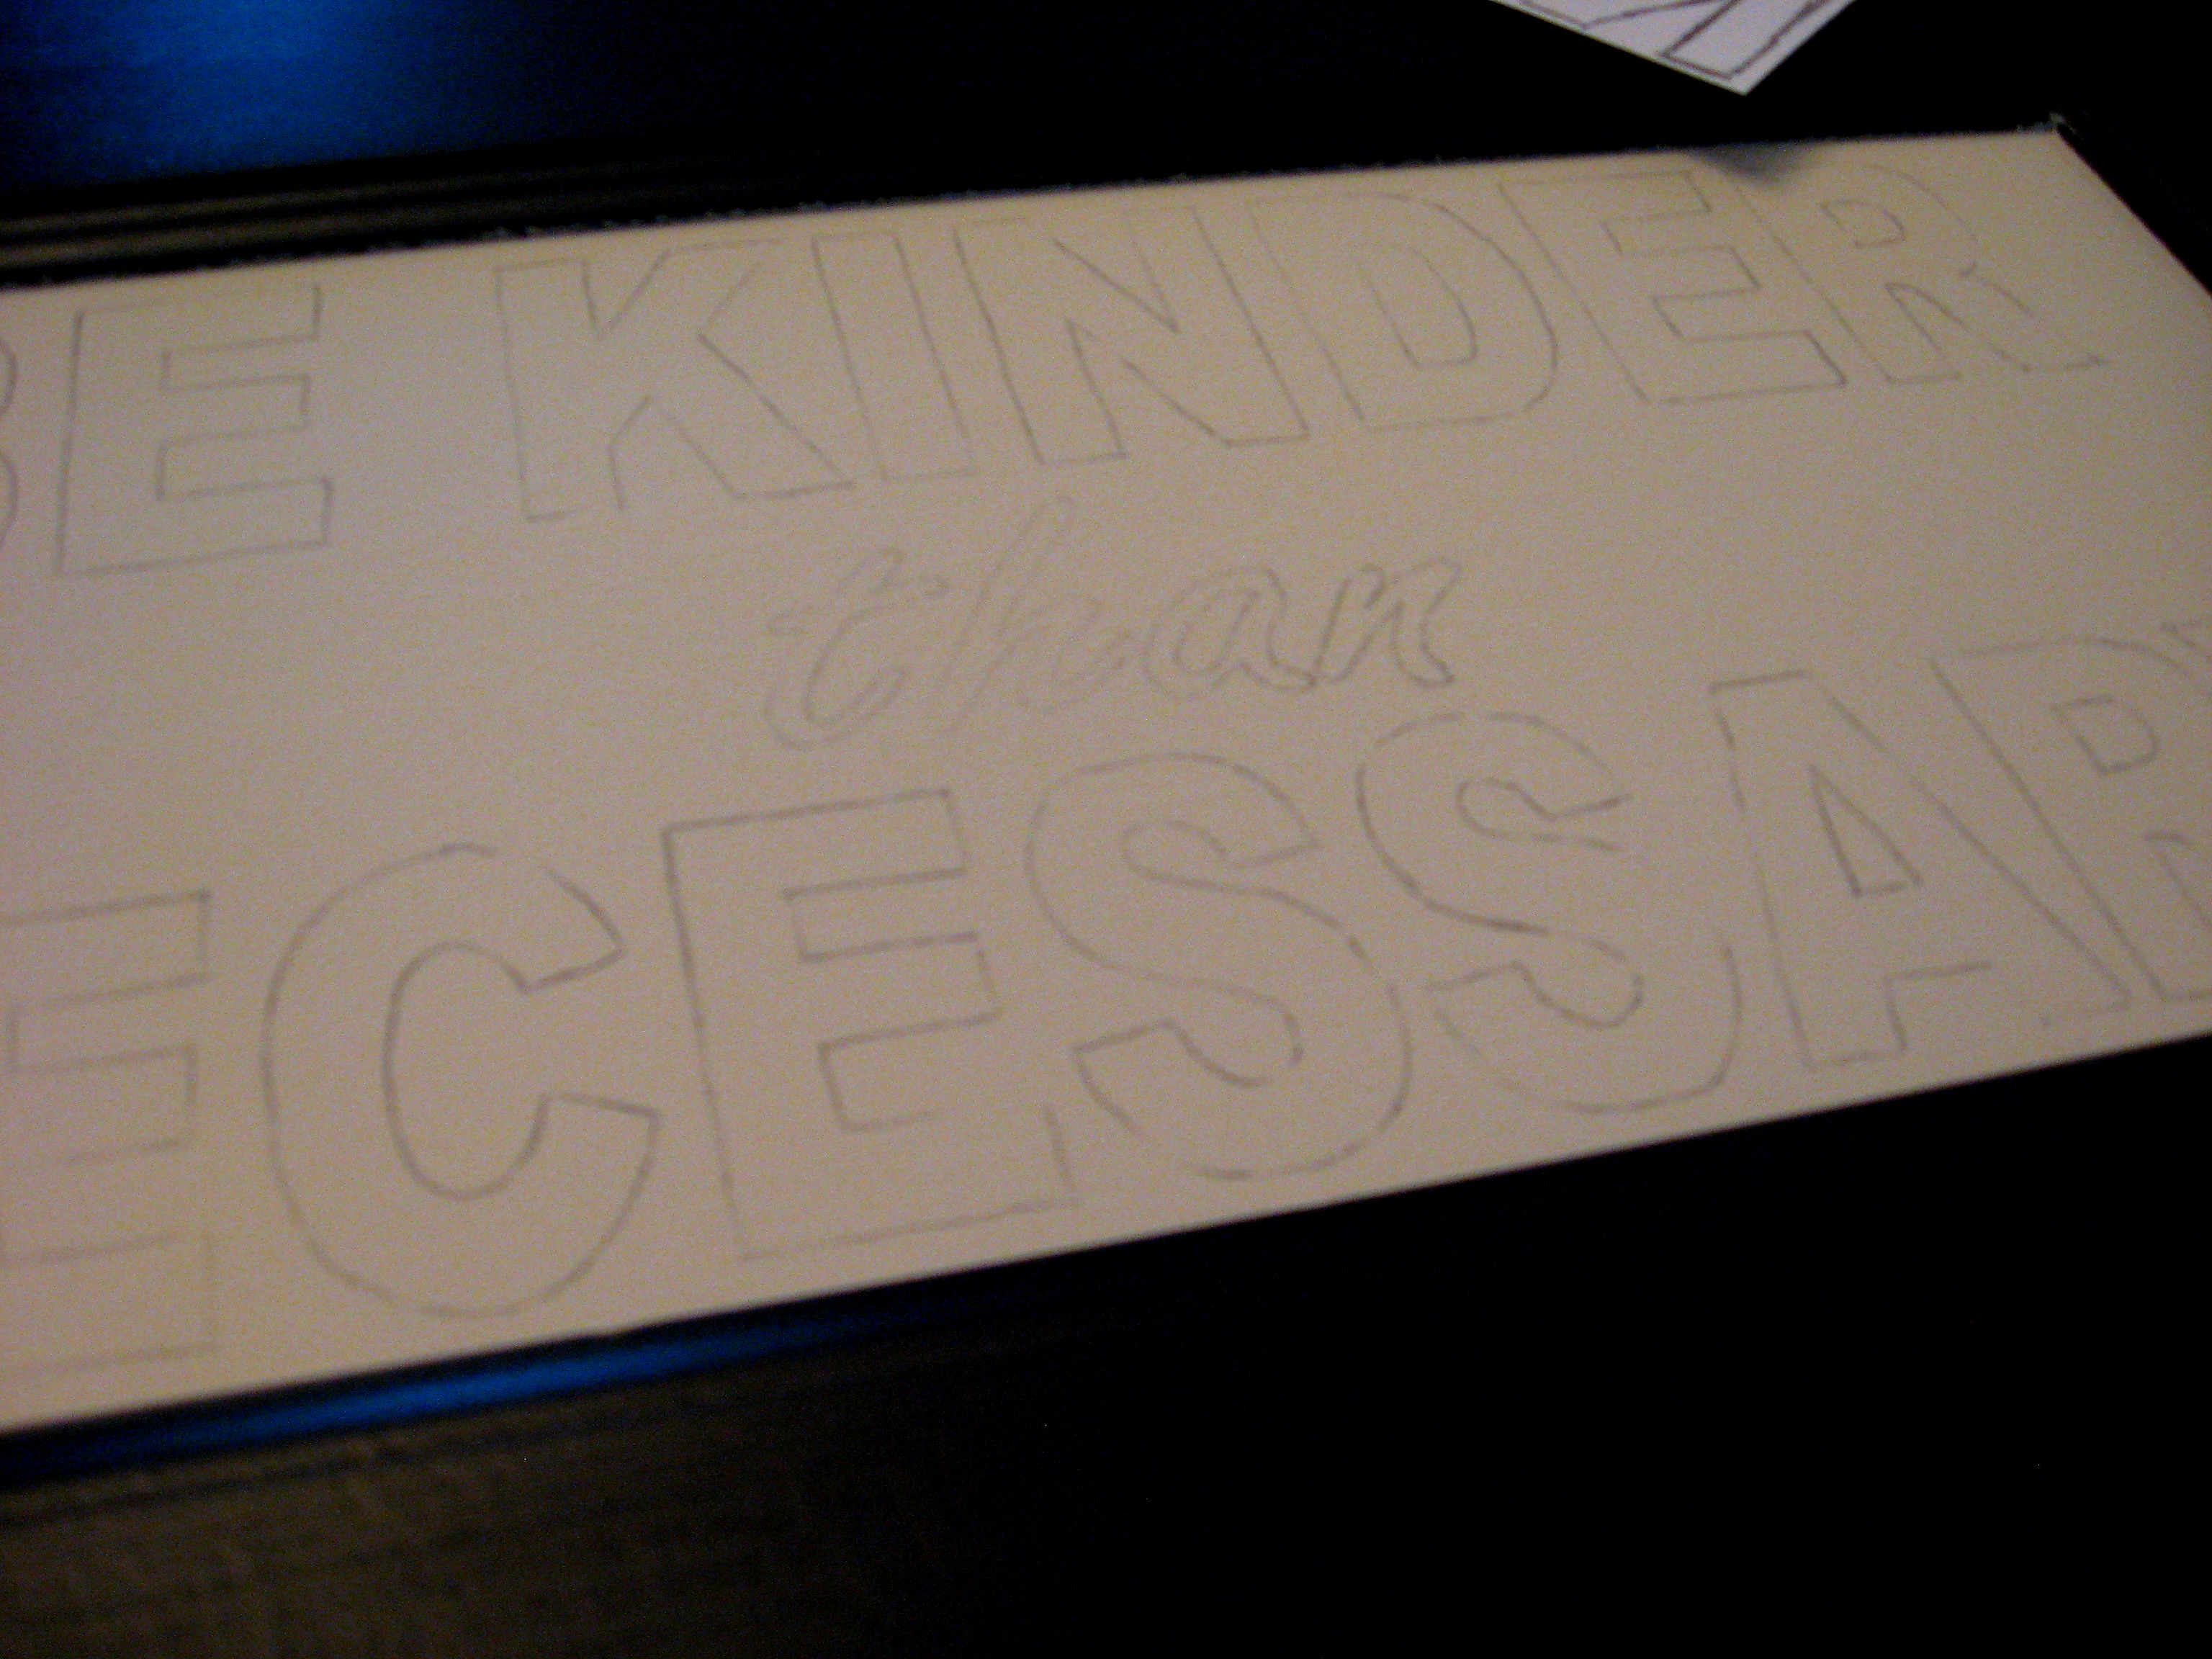
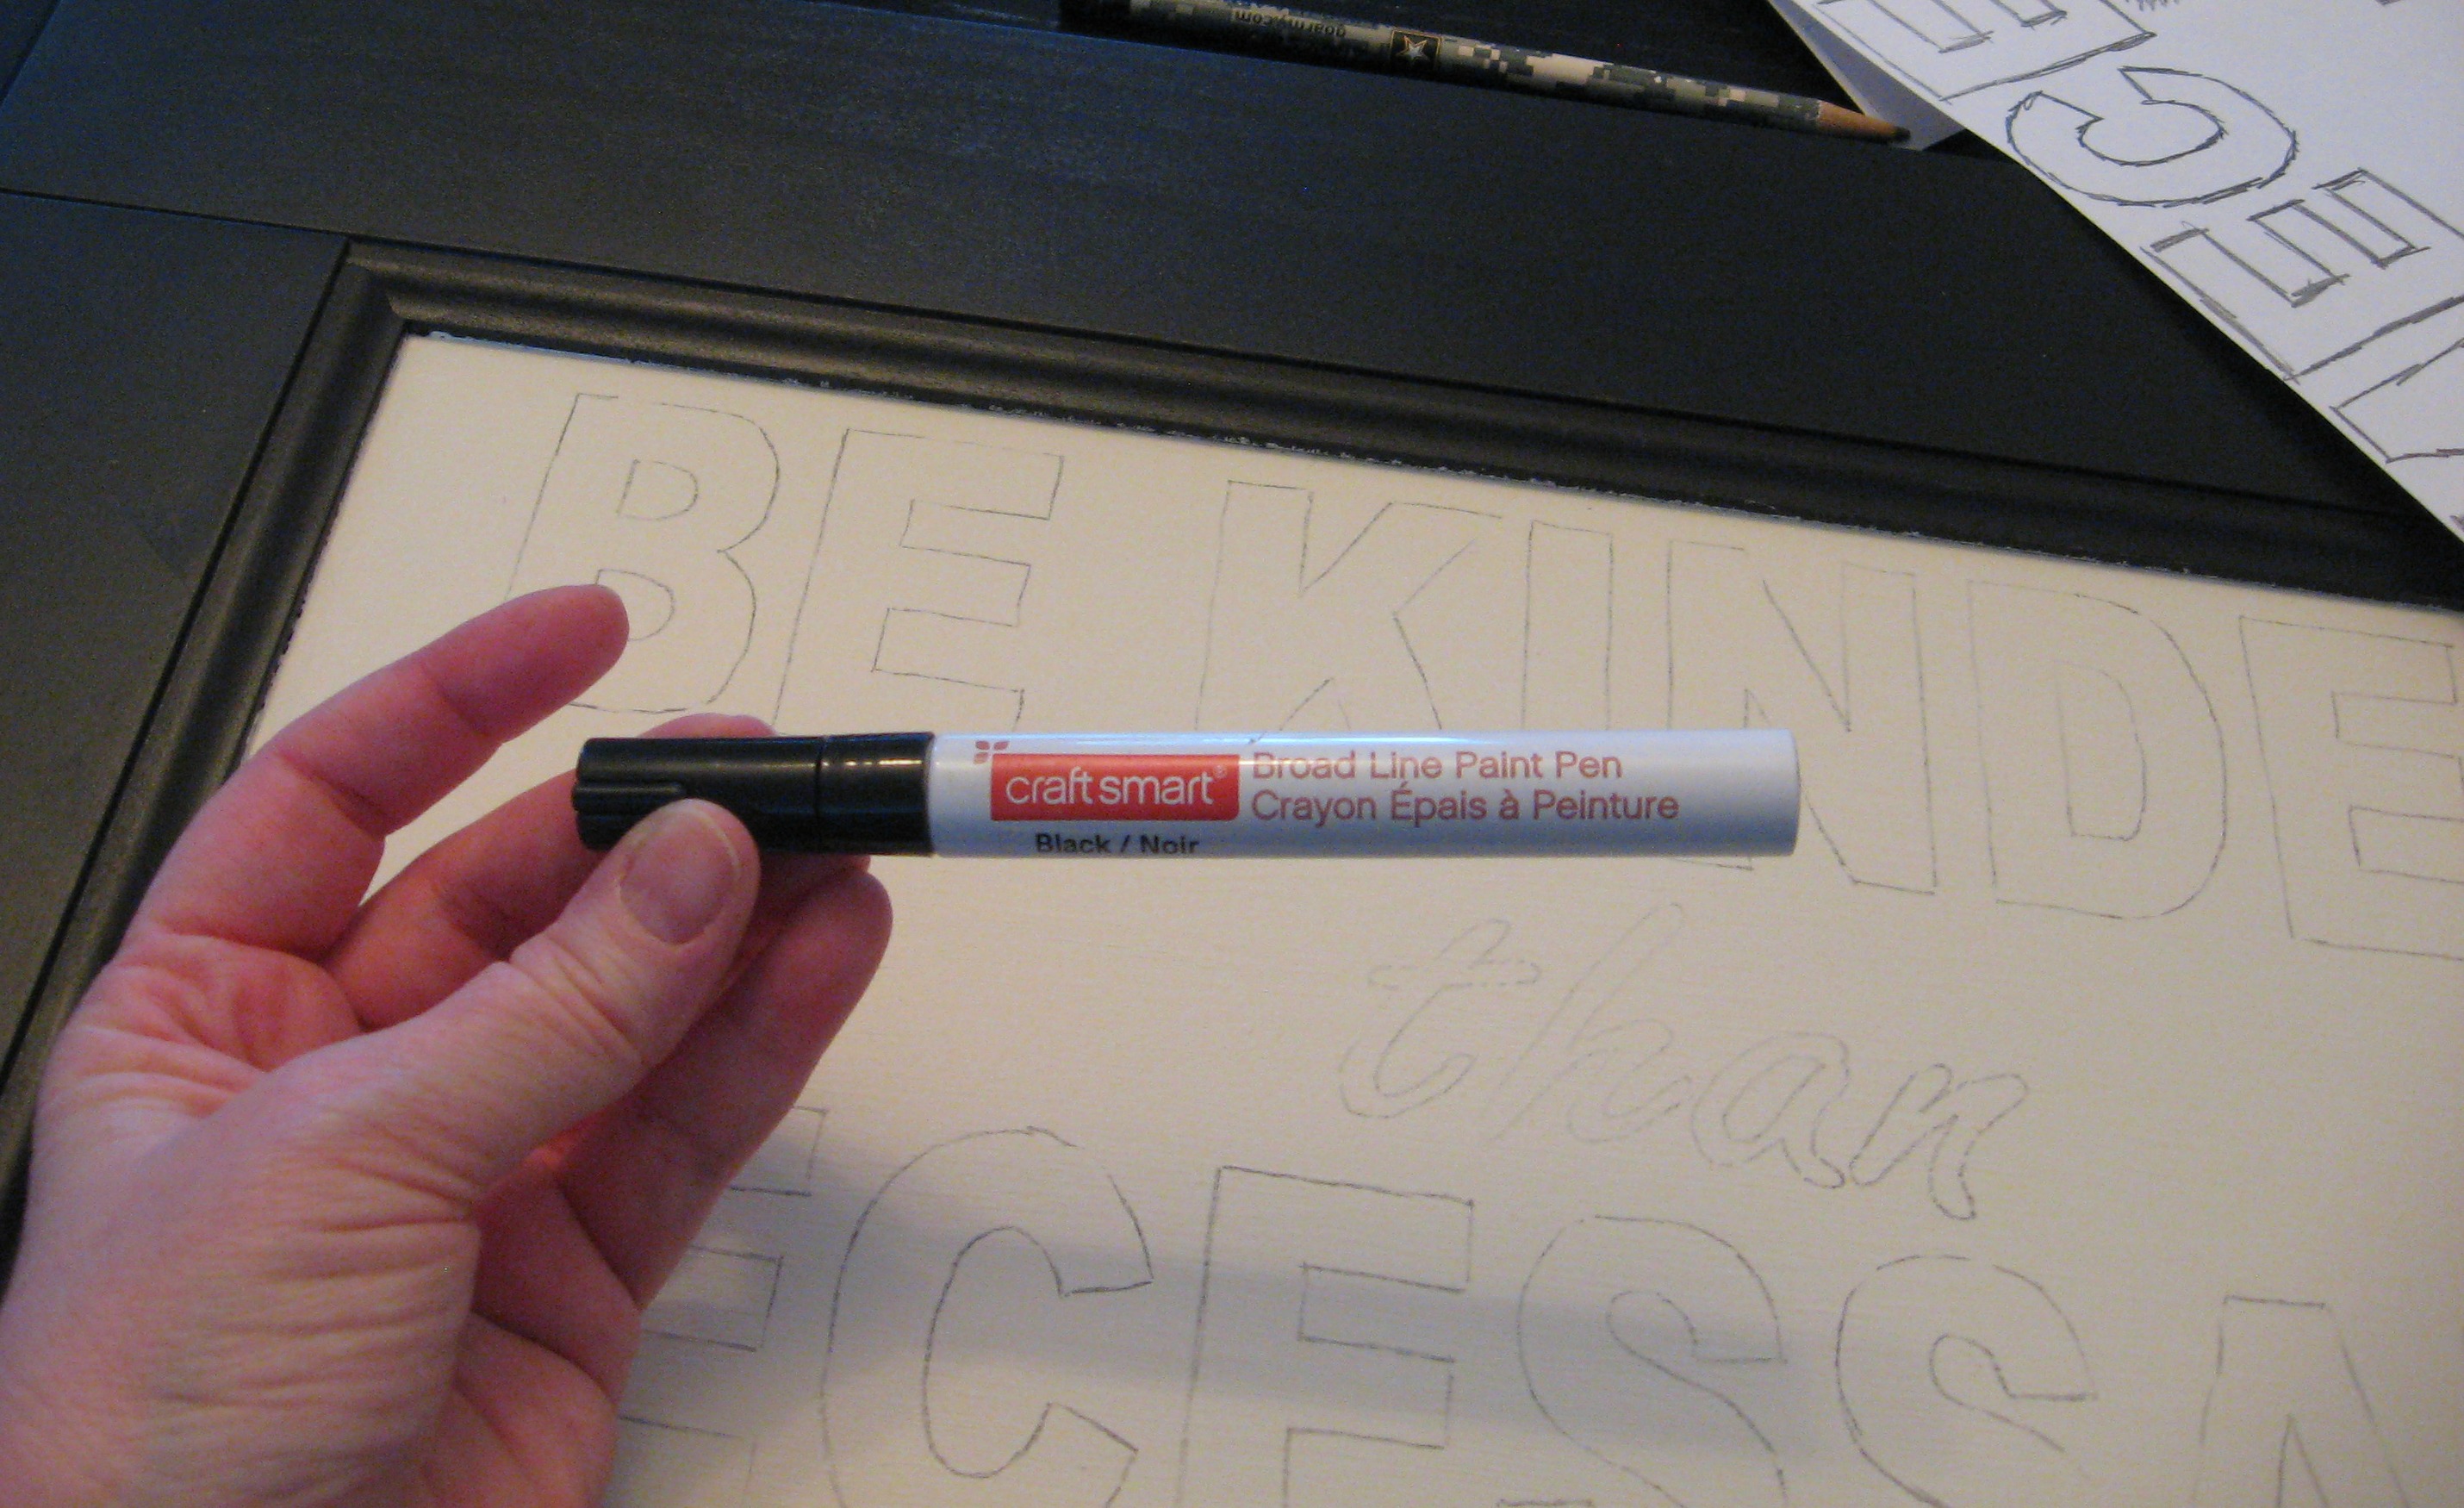
Position the pattern where you want it. Tape down the corners if you are afraid it will move around. Use a pen or pencil – whatever is more comfortable to you – to trace the design onto the surface you will be painting.

Now you have a perfect outline.
Next step, I outline everything with a paint pen. You can buy them at any craft store for a couple of dollars. I don’t have a favorite brand; this is one that came from Michaels.
Here it is with the letters outlined.

Then begin filling it all in with craft paint and a small brush. Depending on the color, quality of paint and surface you’re painting on, it will take 2-3 coats to get good coverage.

Use a small brush and the background color to clean up any mistakes. When it is all dry, you can sand it to get a distressed look.
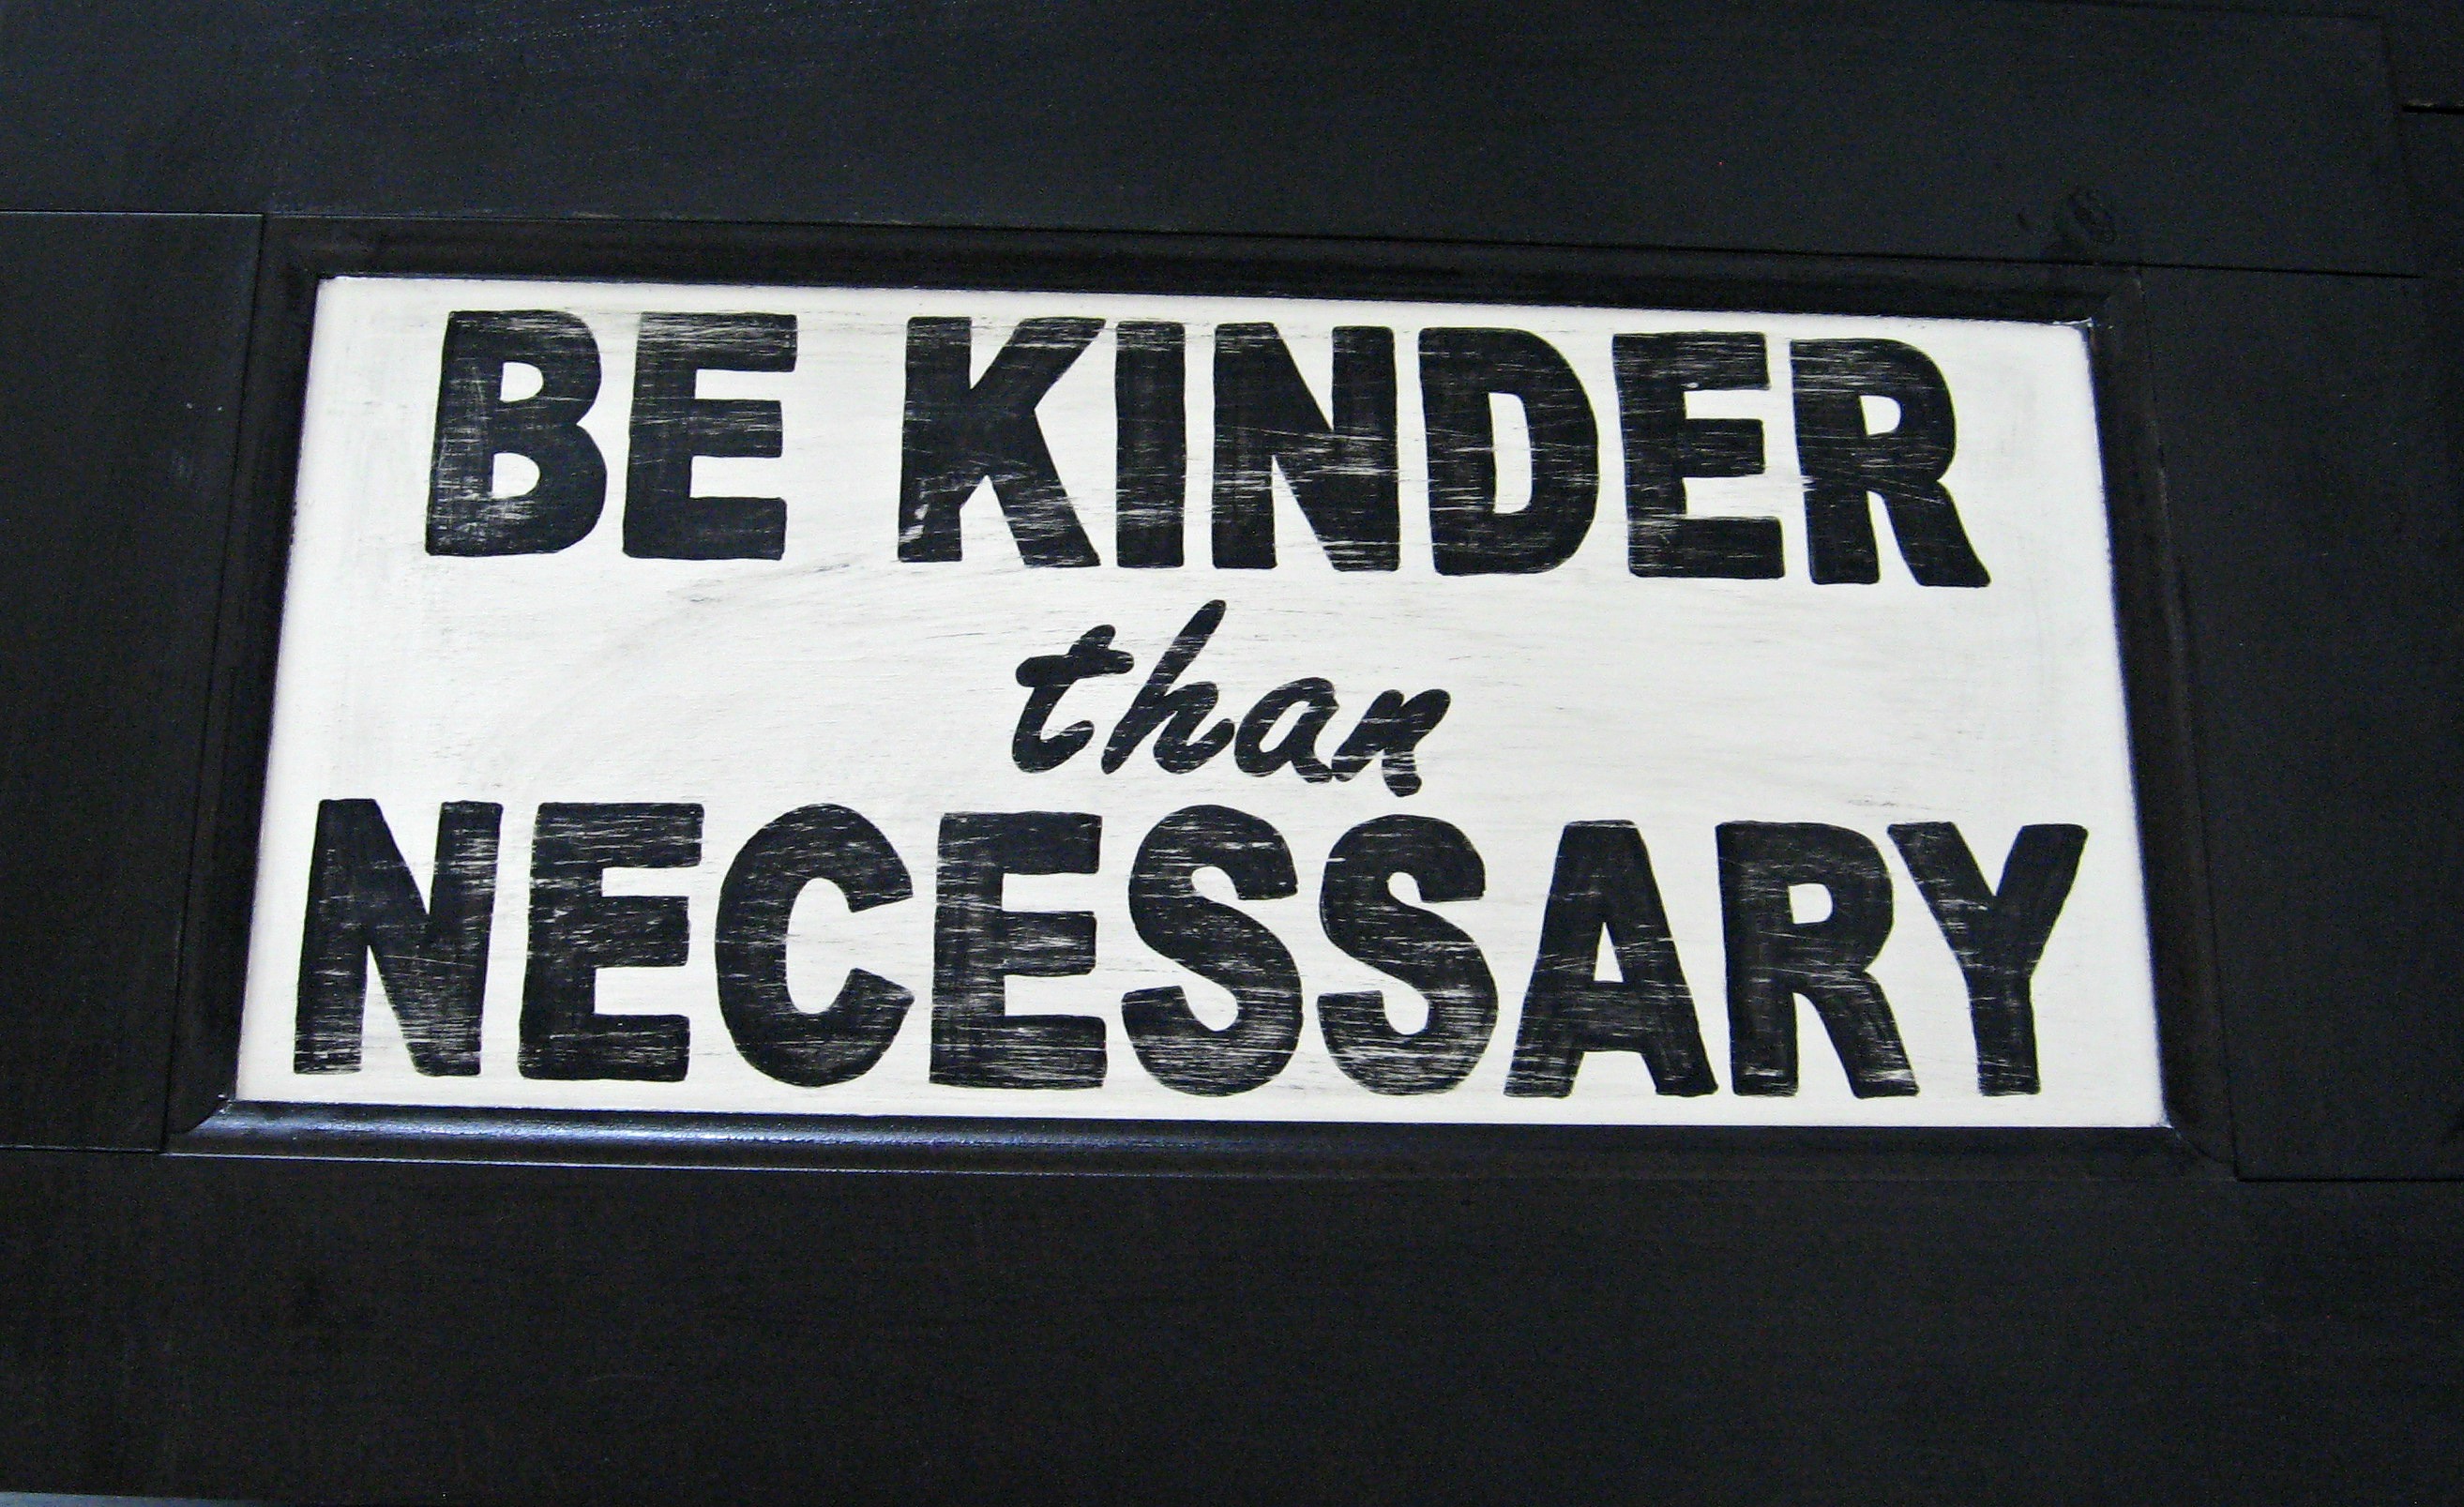
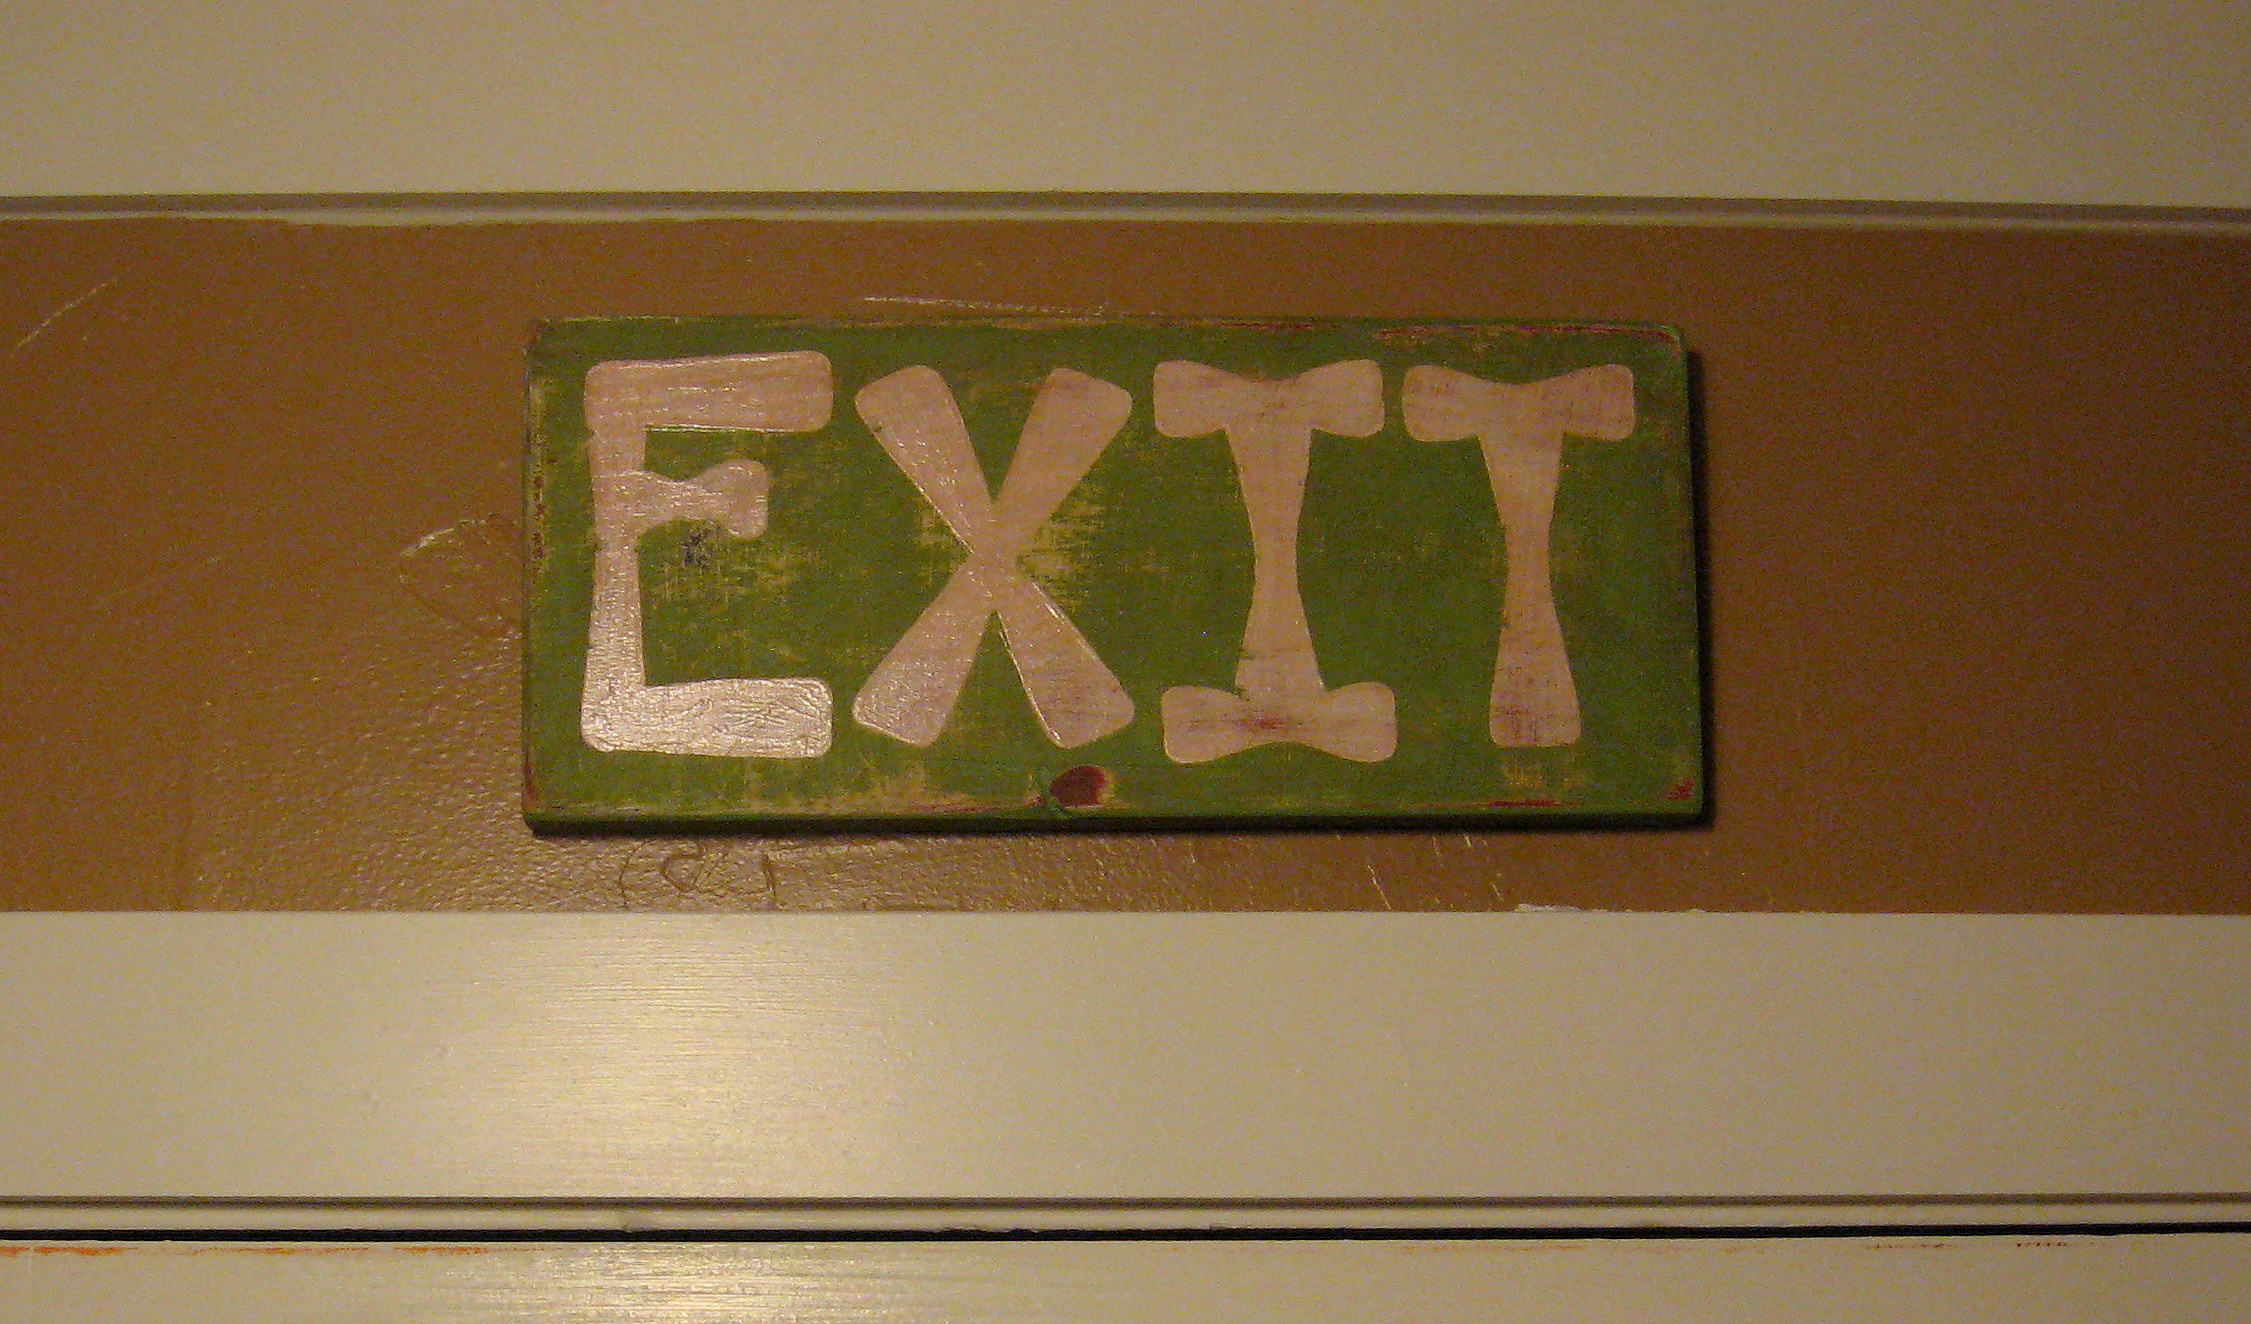
Handpainting signs is so much easier than it seems. It is a great way to create inexpensive decor and change things up for different holidays and season. Here are a few more examples of how much fun handpainting signs can be:


A PYP Best Blog: Dairy-free, egg-free vegan chocolate chip cookies!
Just in case you missed this article on making dairy-free, egg-free vegan chocolate chip cookies the first time we shared it a couple of years ago, we are republishing it. After Candi wrote this blog originally, we got an awesome response. This is one of the PYP Best Blogs!
We have diary allergies in my family. I inherited it from my dad, and then passed it along to all of my kids. For the most part, it hasn’t been bad – in fact, I made it all the way to 16 before I was officially diagnosed. My kids have had symptoms to varying degrees, although one has now outgrown it and does fine with dairy. And for most of my life, I have just lived with it and not worried about following a special or strict diet. I just could not give up cheese and ice cream! 🙂
Dairy-free, Egg-free Vegan Chocolate Chip Cookies
(I believe these would qualify as vegan, as long as you use vegan chocolate chips)
1/2 c granulated sugar
1/2 c brown sugar, packed*
2 Tbsp whole flax seeds**
3 Tbsp plain milk alternative (I used So Delicious unsweetened coconut milk, no hint of coconut flavor in the cookies)
2 Tbsp plain dairy-free yogurt (I used Silk soy yogurt)
1/2 tsp vanilla extract
1/2 tsp apple cider vinegar
2 c bread flour***
1/2 tsp baking powder
1/2 tsp baking soda
3/4 tsp salt
1 1/2 cups semi-sweet chocolate chips (I used vegan semi-sweet chocolate chips from Whole Foods Market)
A PYP Best Blog: A Freezer Meal Plan – The Chicken Edition
Just in case you missed this article on making 9 freezer meals in 3 hours for about $50 the first time we shared it a couple of years ago, we are republishing it. After Trish wrote this blog originally, we got an awesome response. This is one of the PYP Best Blogs!
My daughter had a baby this week and I had the opportunity to prepare a few freezer meals for her family. I took the time to write out a plan that I thought would be of interest to our readers.
Keep reading to get the details to prepare 9 freezer meals in 3 hours for about $50.
You’ll find a complete grocery list and detailed step by step instructions to load your freezer with 9 chicken based meals such as…
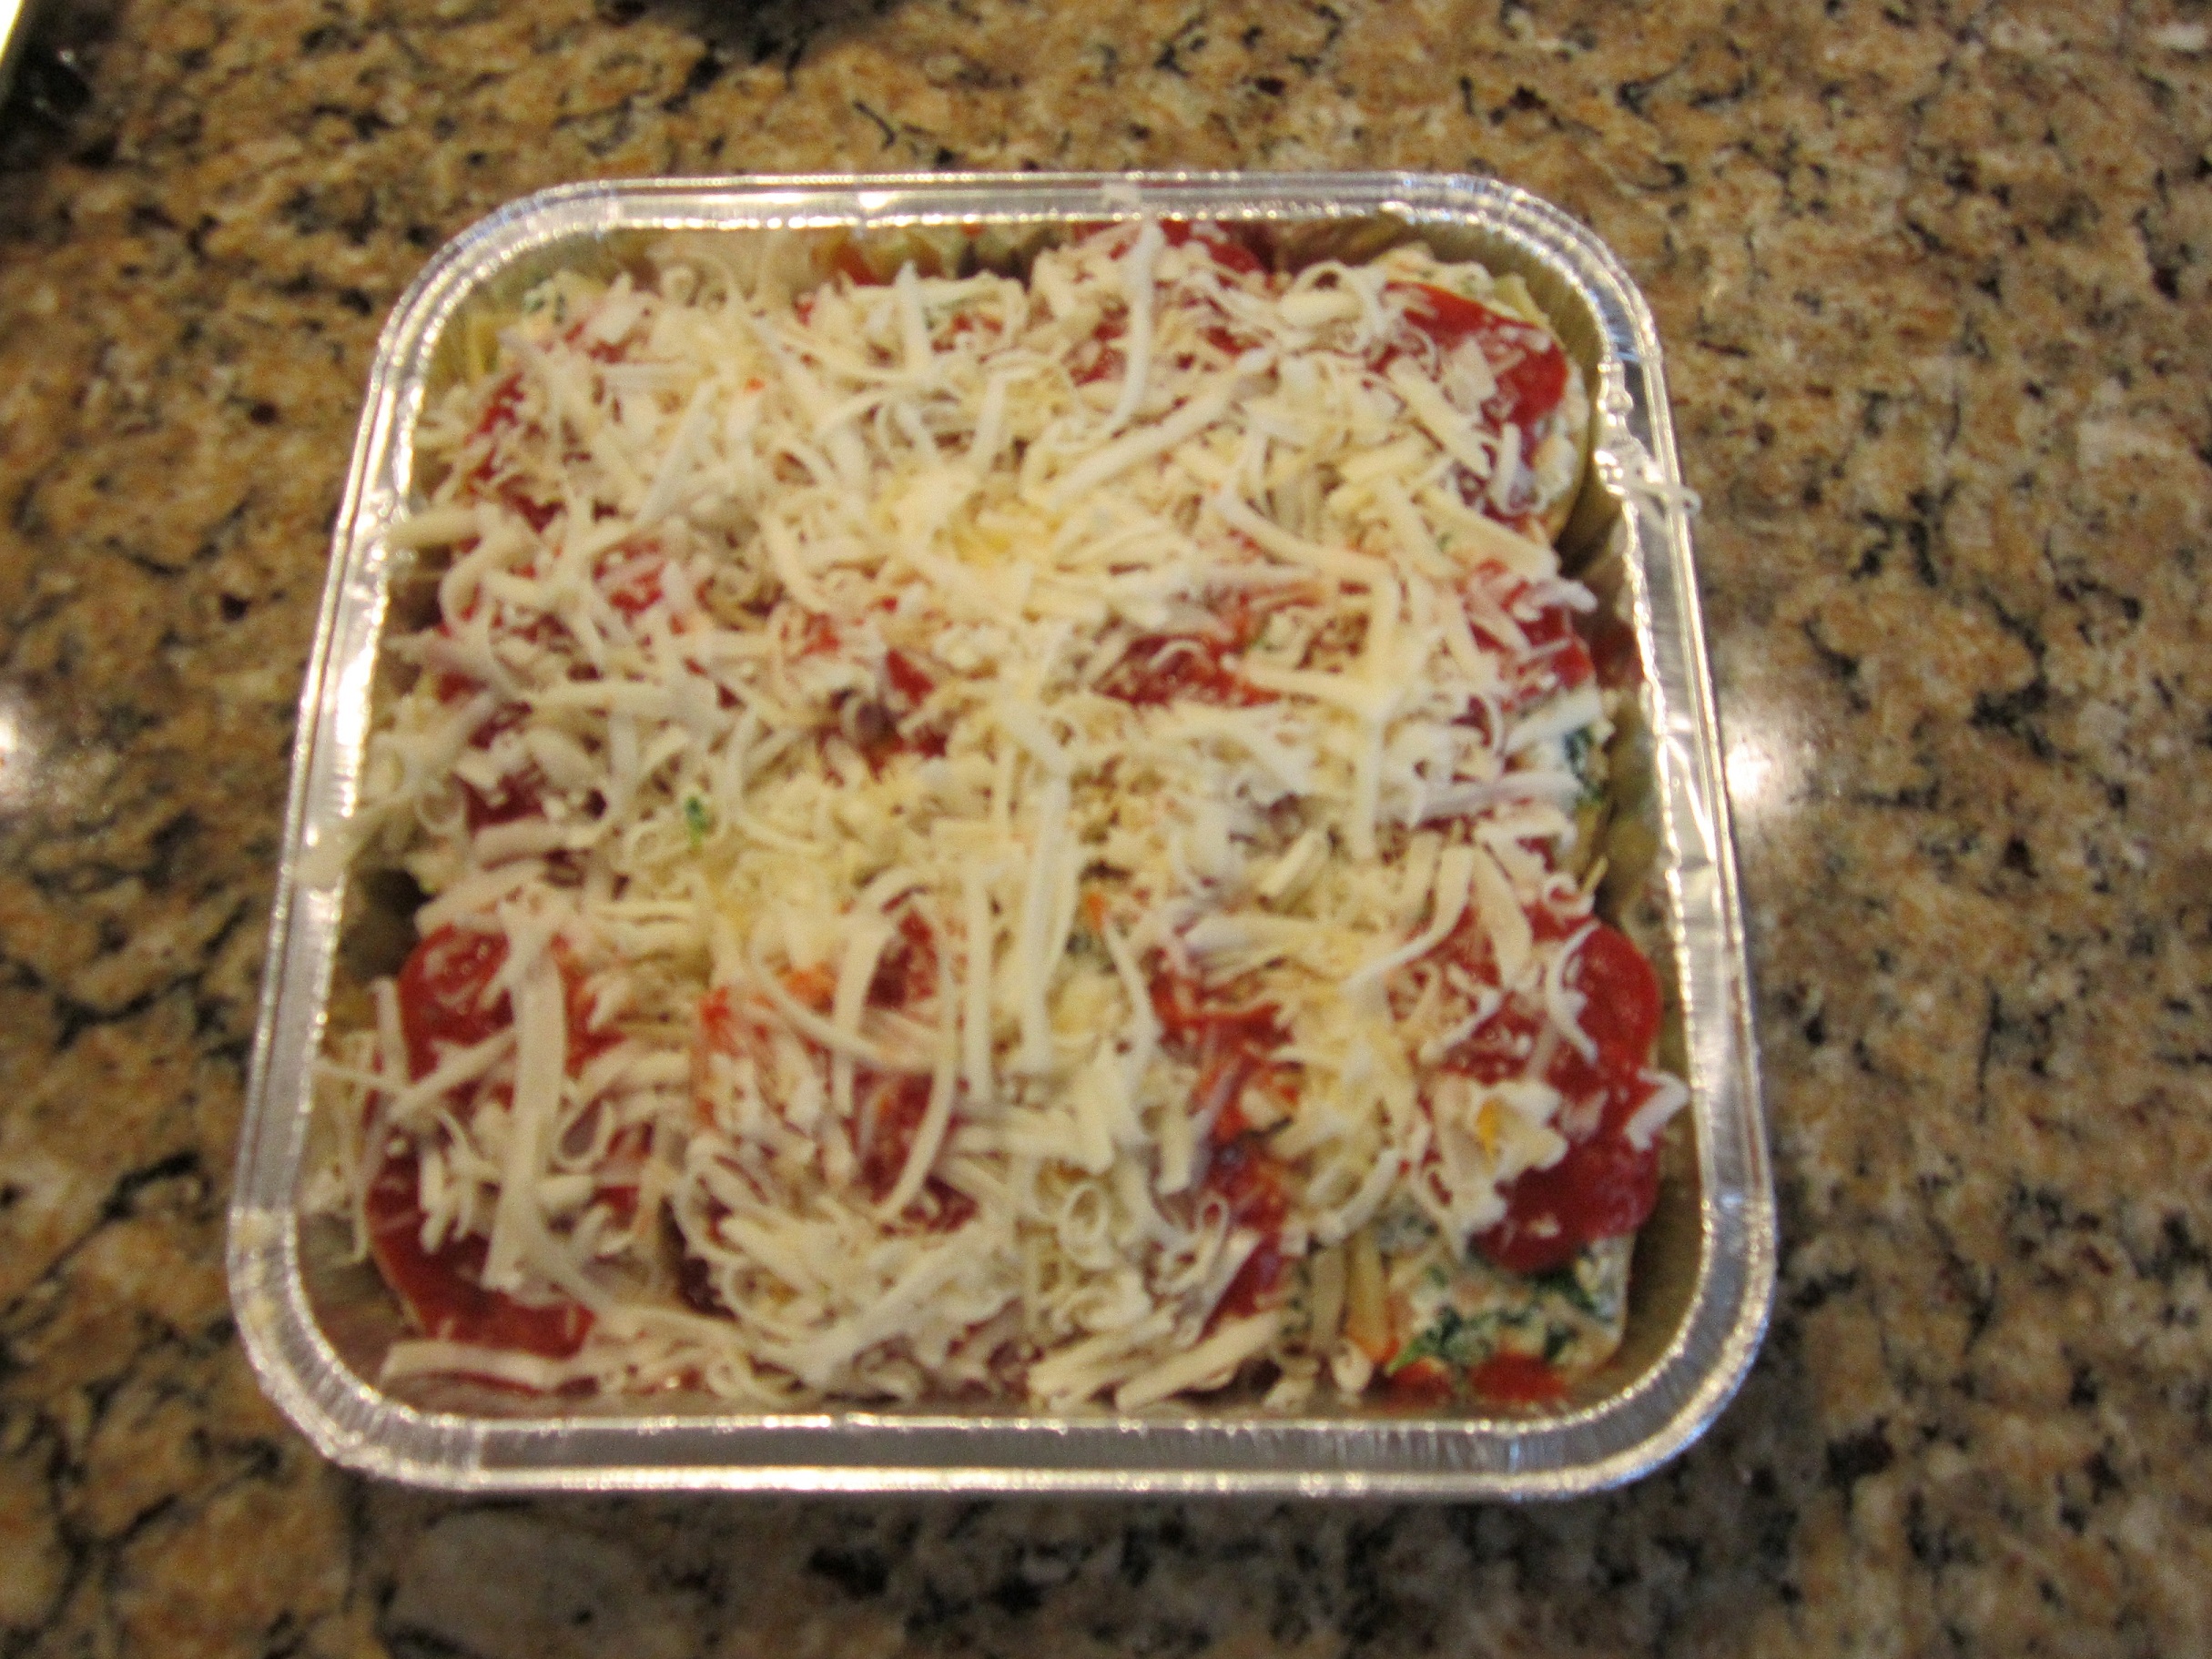
Cheesy Chicken Shells
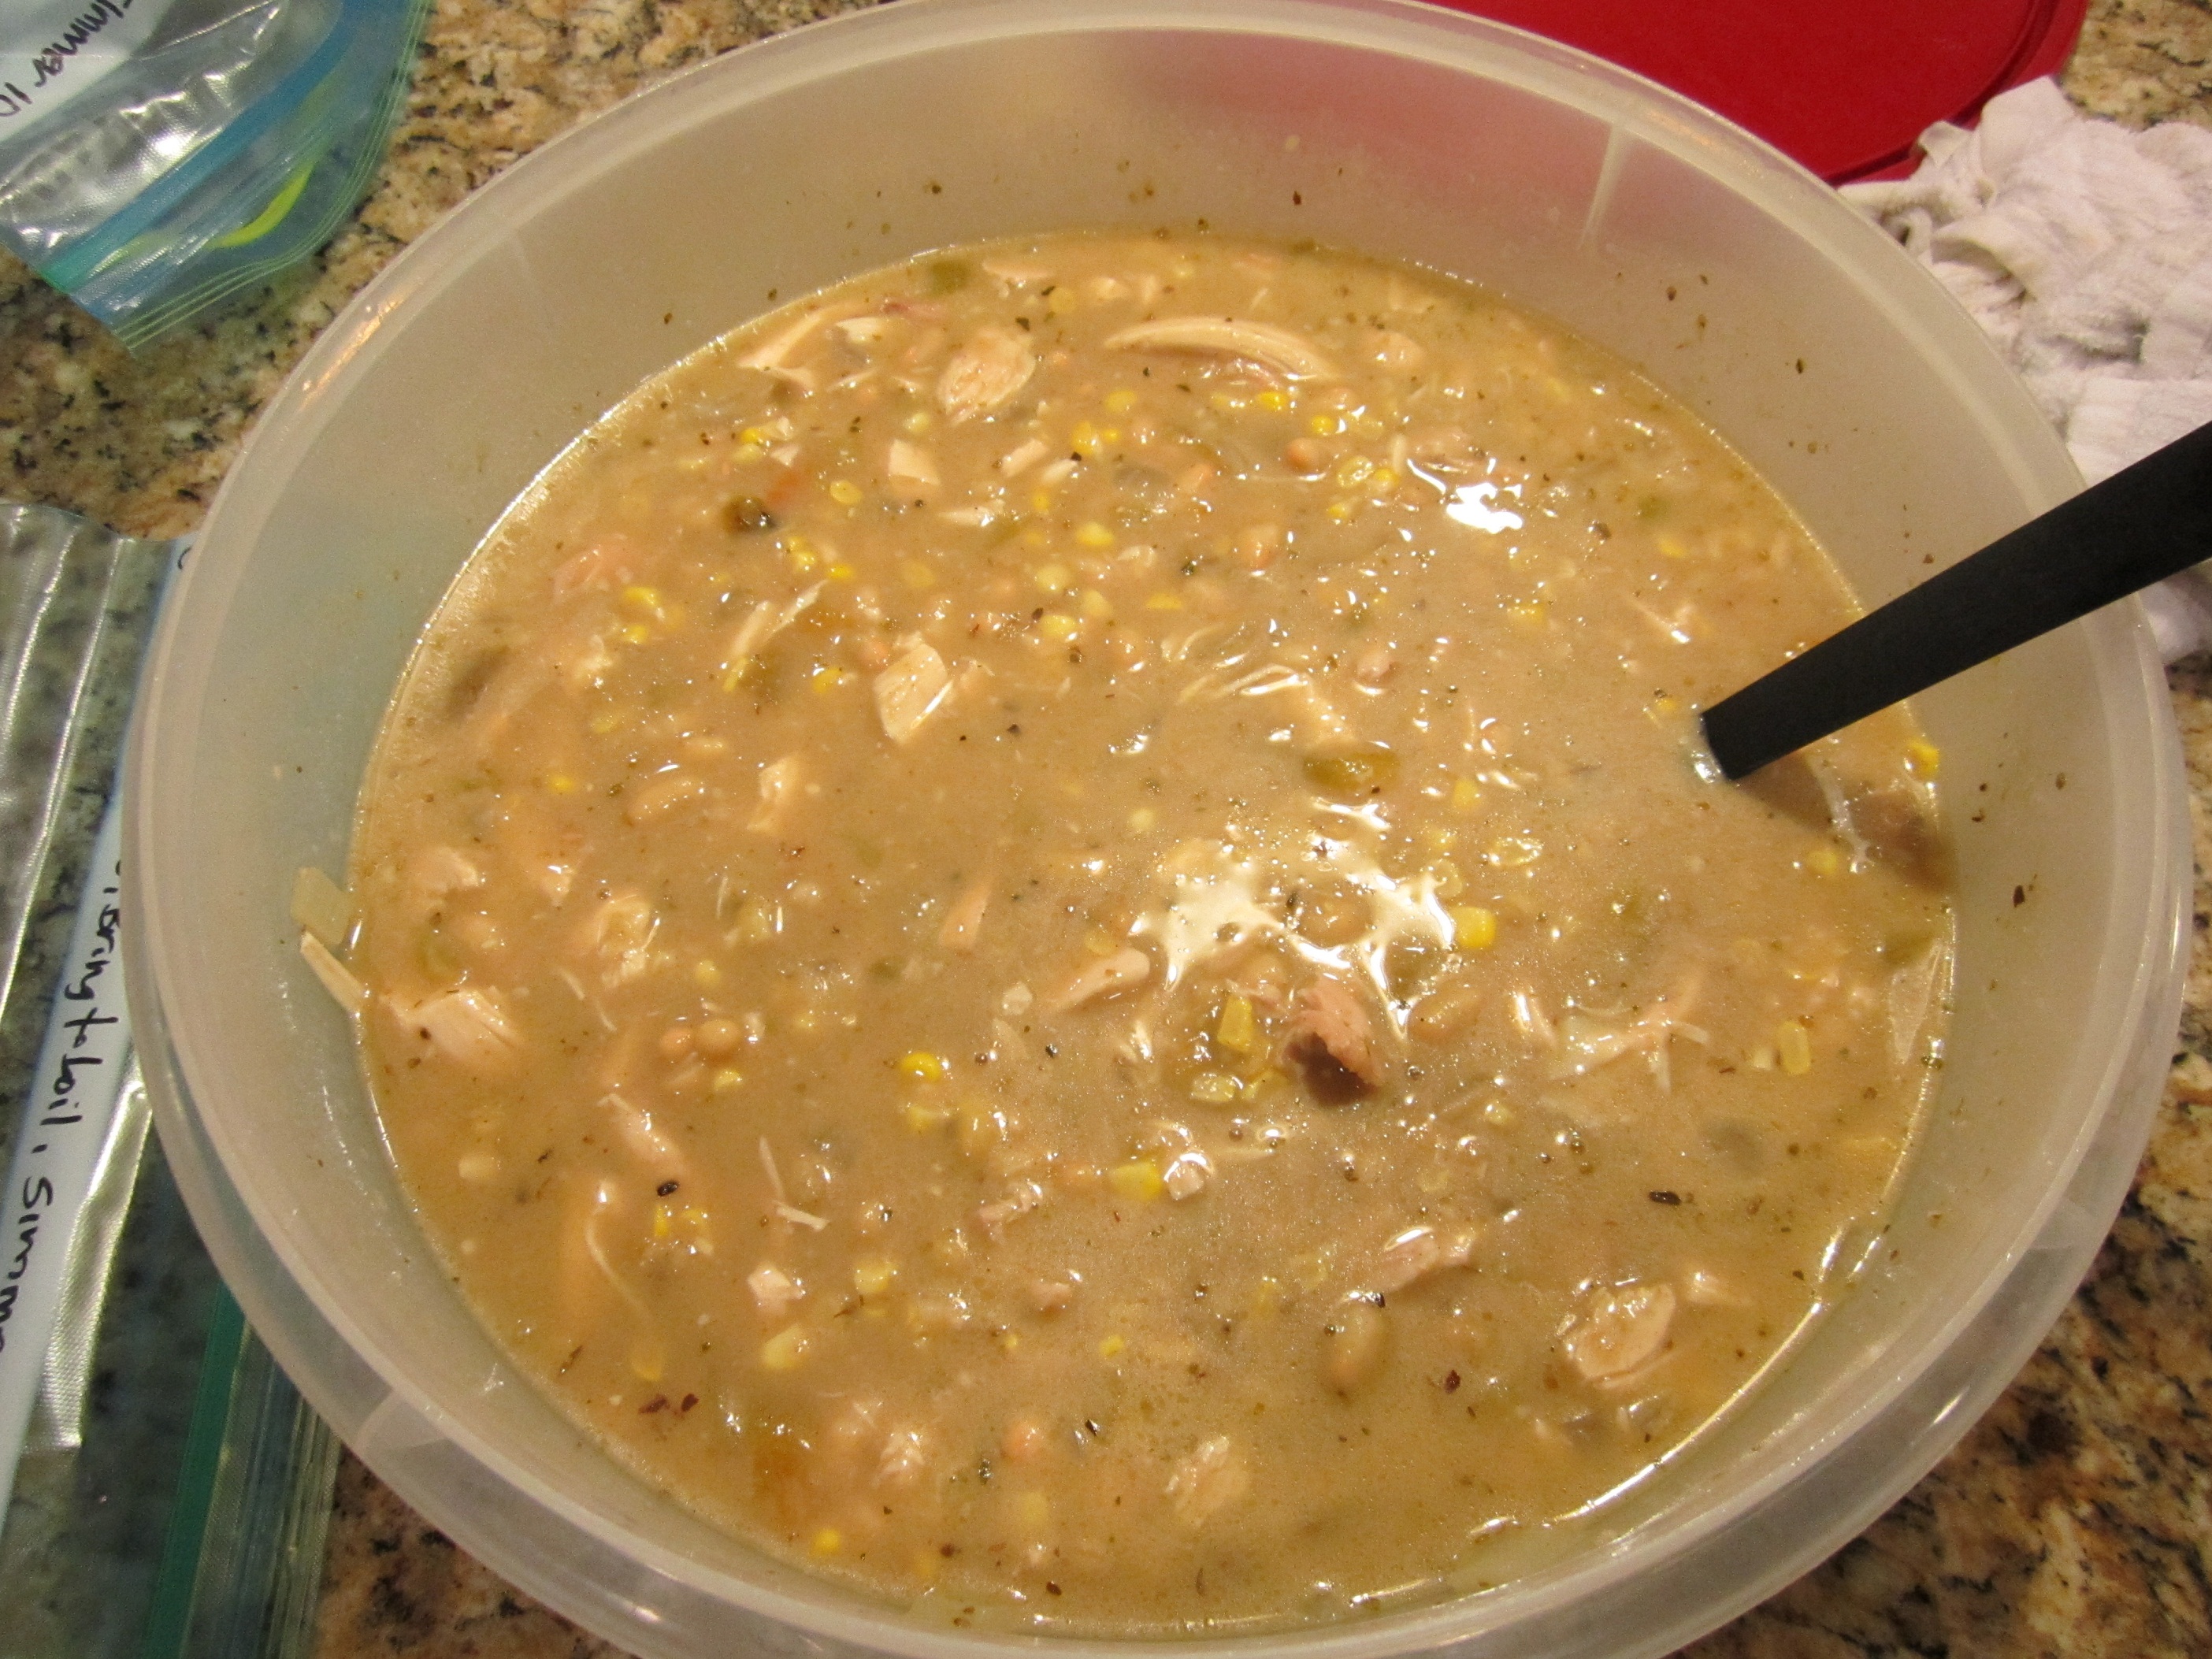
Chicken and Veggie Soup

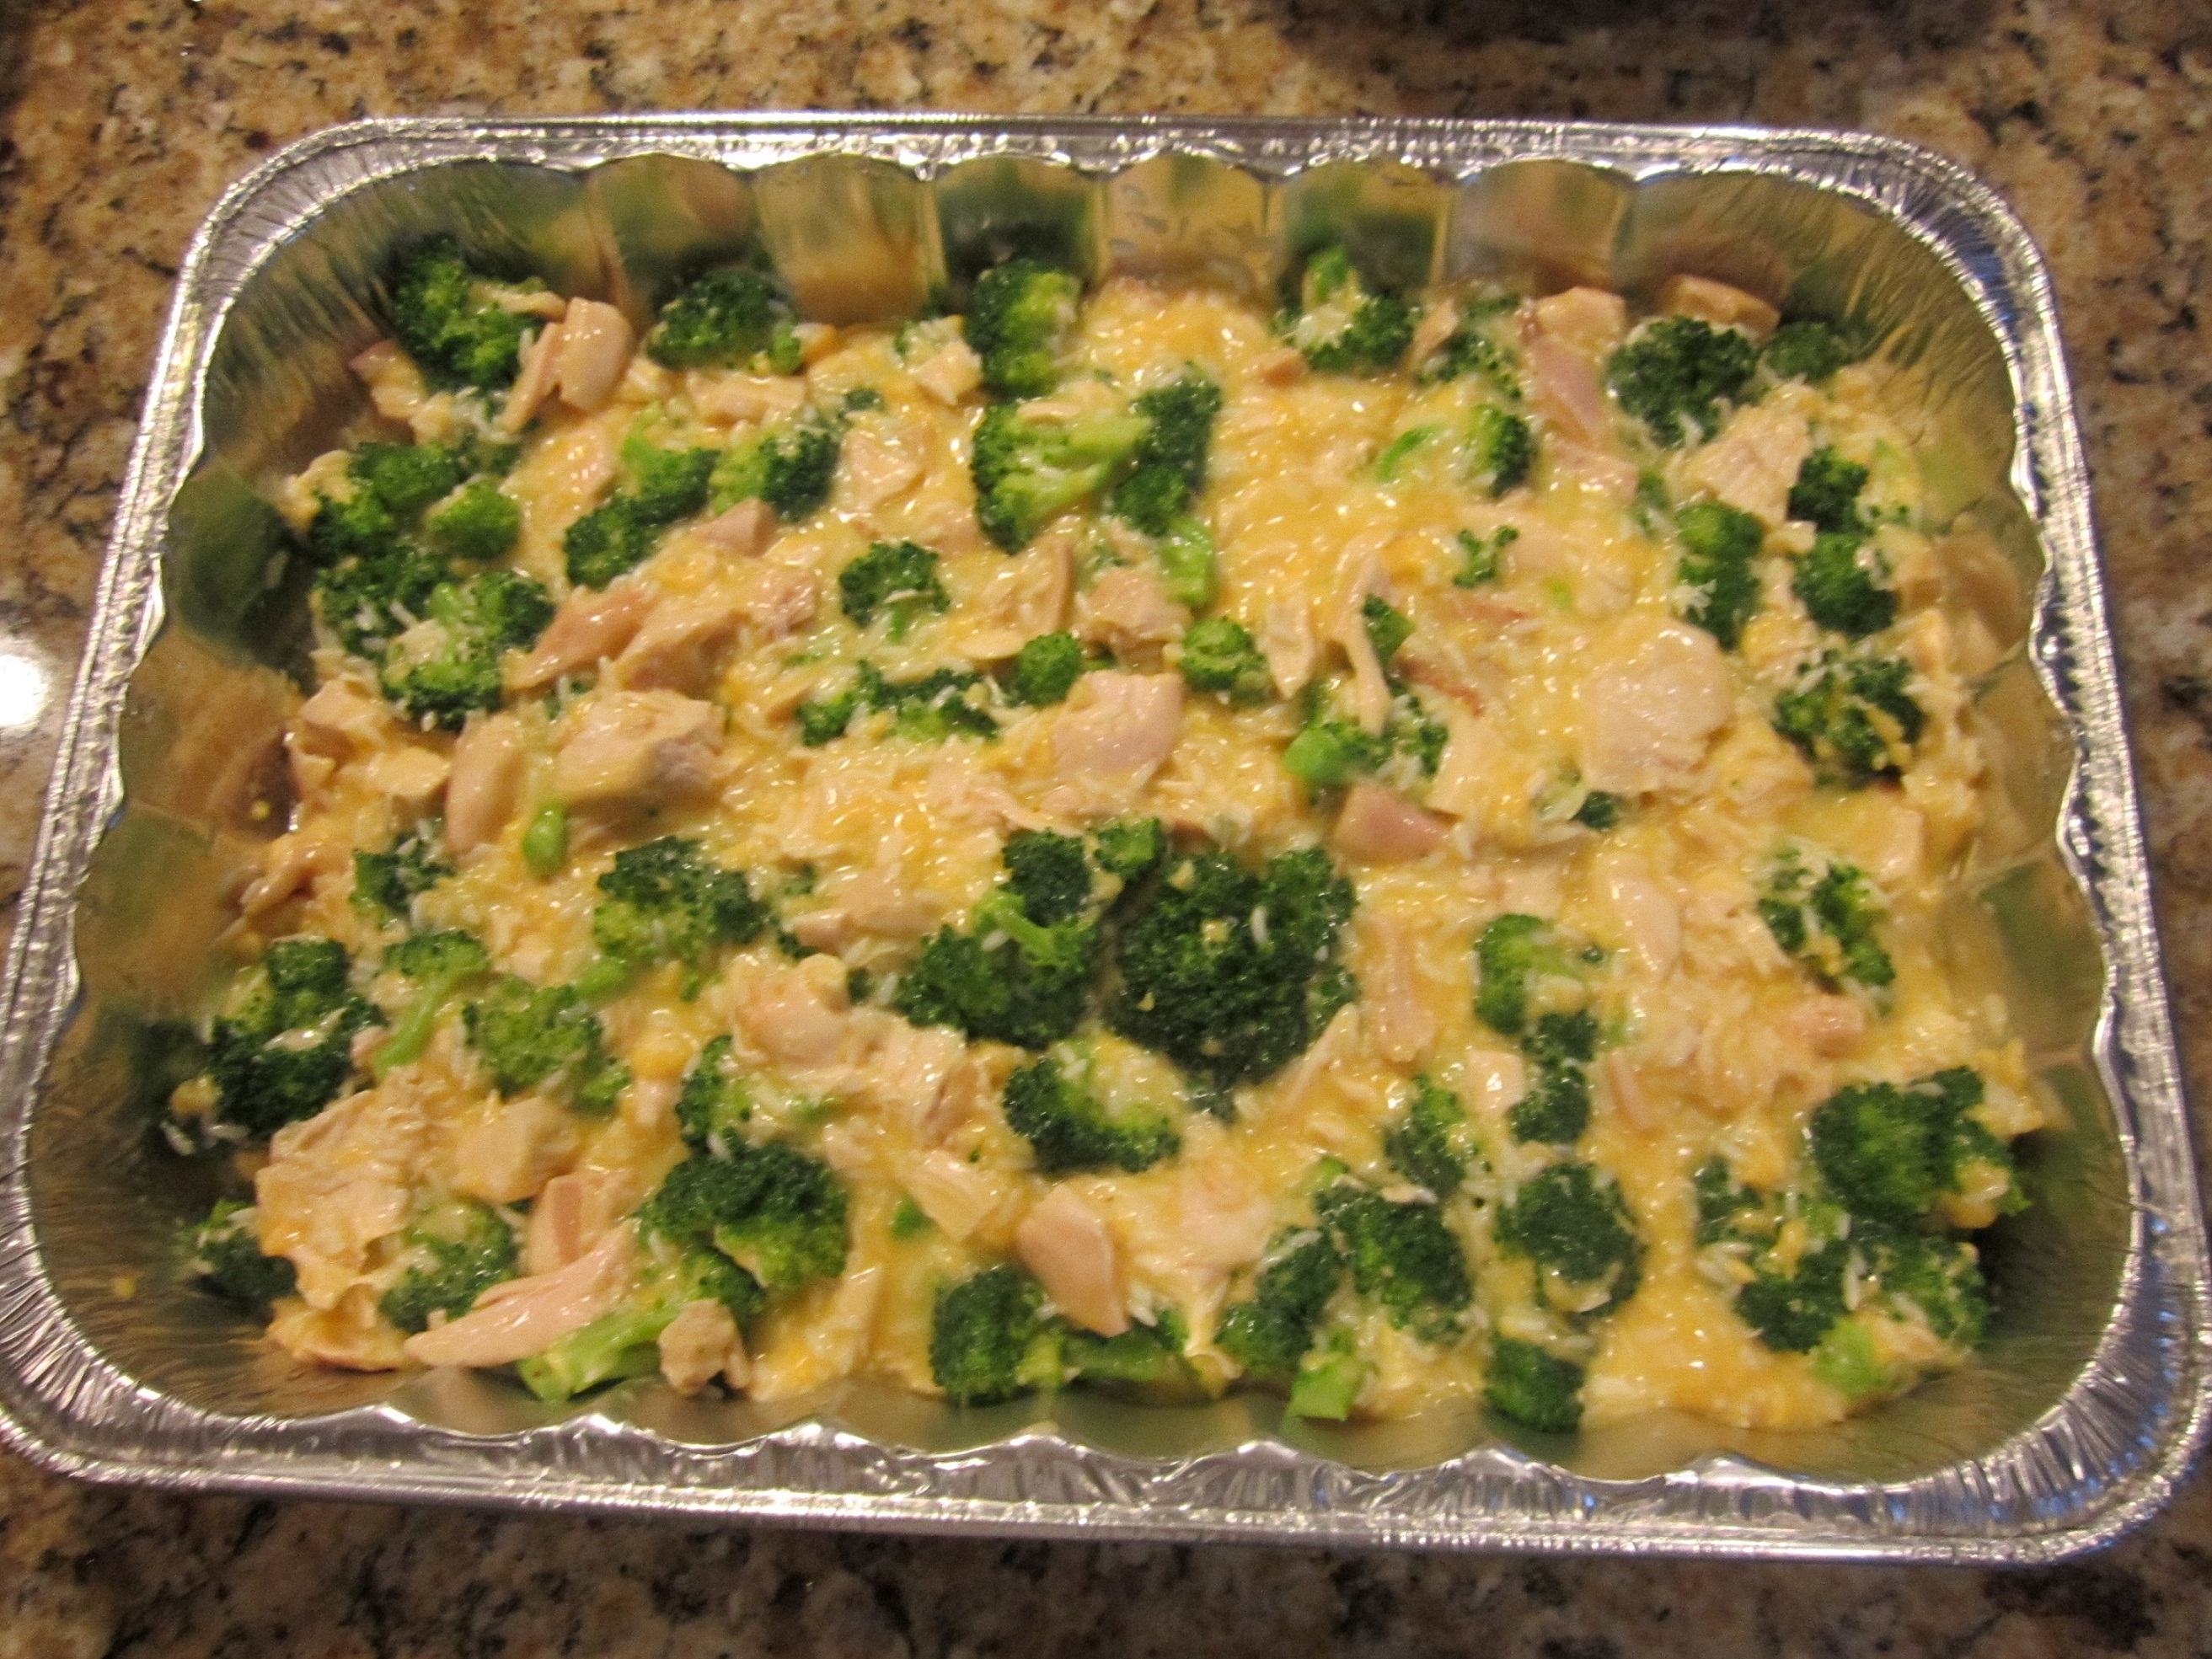
Cheesy Chicken and Rice Bake
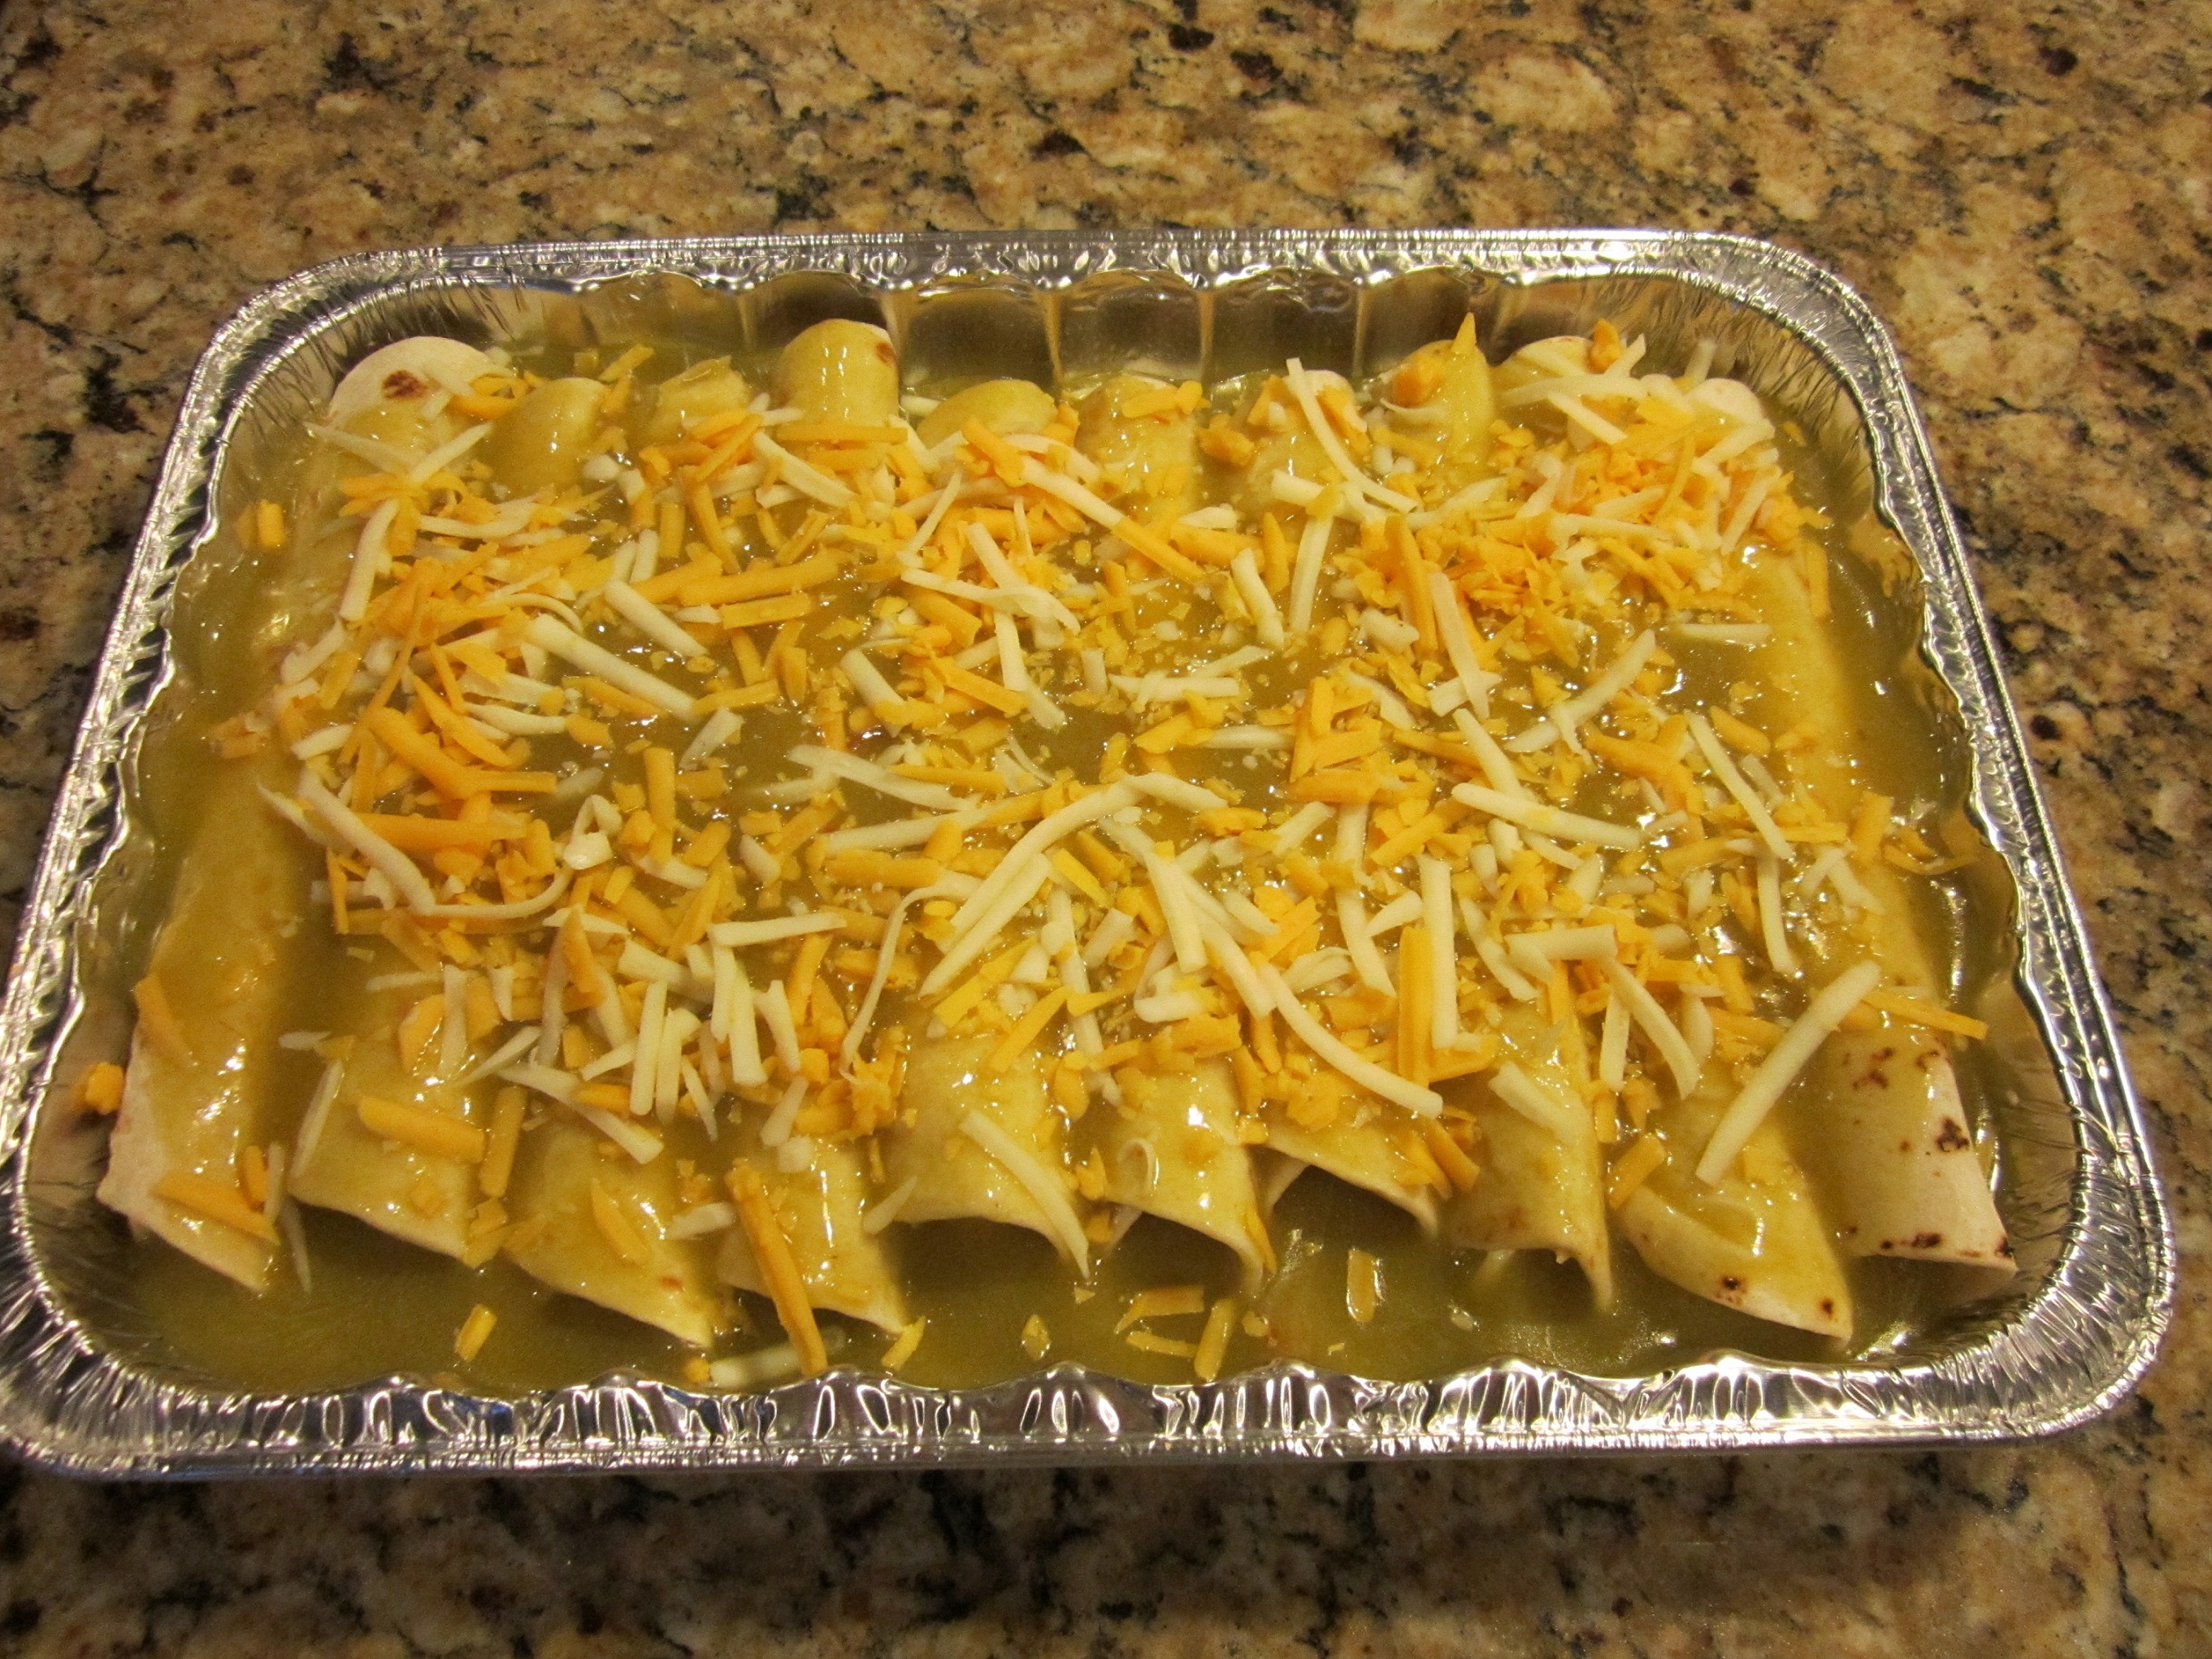
Honey Lime Chicken Enchiladas
Chicken Chili
The Grocery List:
3 whole roasting chickens (Approx 4-5 pounds each)
1/3 cup parmesan cheese
4 cups (1 pound) shredded cheddar cheese
¾ cup shredded mozzarella
4 cups (1 pound) shredded Monterey jack cheese
15 oz ricotta cheese
10 oz package frozen spinach leaves, thawed
5 cups assorted veggies of your choice, finely diced. Example: green beans, corn, peas, broccoli, zucchini, cabbage, mushrooms. Check your fridge and freezer. You might already have them!
Small bag (9 oz) of fresh baby spinach leaves.
½ lb broccoli florets
1 green bell pepper
1 red bell pepper
4 small onions or 2 large
2 or 3 stalks of celery
1 large carrot
2 limes
1 lemon
1/3 cup raisins
3 – 15oz cans of white beans. Navy or cannellini.
7 oz can diced green chilies
5 quarts plus 1 can chicken broth I used this homemade veggie broth powder. BIG money saver!
1 – 8.75 oz can apricots
1 large or 2 small cans green enchilada sauce
15 oz can tomato sauce
1 can condensed cheddar cheese soup
2 cans cream of chicken soup
½ pound dried pasta in small shapes (stars, mini shells, etc)
12 oz package thin spaghetti noodles
12 uncooked jumbo pasta shells
10 flour tortillas
1 ½ cups uncooked long grain rice
Check the pantry to make sure you have:
1 egg
garlic
honey
oil
Creole seasoning
Ground white pepper (black is fine if you don’t have white)
Cumin
Dried oregano
Cinnamon
Garlic powder
Seasoned salt
Cayenne pepper
Chili powder
Curry powder
Dried basil
Bay leaves
You’ll need a few gallon sized Ziploc bags and at least one 8X8 pan and one 9X13 pan that can go into the freezer.
For less stress and best results, start with a clean kitchen and an empty dishwasher.
You should be able to pull these all together within 3 hours or as soon as you can handle the chicken to remove it from the bones.
Preheat the oven to 400 degrees while you rinse and pat dry the chickens.
Place them in a large roasting pan. Rub them down with some olive oil or vegetable oil and sprinkle them with some Creole seasoning or seasoned salt, your choice. Just trying to give them a hint of flavor and retain the juices by crisping up the skin.
Place the chickens in the oven and roast for 30 minutes. Then reduce the oven temperature to 350 and continue roasting for 45 minutes to an hour, until juices run clear or thermometer placed in thickest part of thigh reaches 165 degrees.
When they’re done, remove from oven and place the pan on a cooling rack to help them cool off faster.
While the chickens are roasting and cooling put together each meal.
Meal 1 and 2:
Start the Chicken and Veggie Soup.
In a very large stock pot, heat 2 tablespoons of oil, over medium heat.
Chop one onion, the celery, the carrot, half of the green bell pepper and half of the red pepper. Toss them in the pot with the heated oil. Add 2 Tablespoons of minced garlic, 1 Tablespoon dried basil, 2 teaspoons Creole seasoning, and 2 bay leaves.
Sauté veggies for about 4 minutes.
Add the 5 cups of finely diced assorted veggies and a pinch of red pepper flakes. Sauté for 1 minute.
Add 3 quarts of chicken broth.
Turn off the heat and let stand.
Meal 3:
Start the Chicken Chili.
Heat 1 Tablespoon oil in large pot over medium heat. Add 1 chopped onion and 3 cloves minced garlic and sauté until onions are soft, about 5 minutes. Add the canned green chilies, 1 Tablespoon ground cumin, 1 Tablespoon dried oregano, ½ teaspoon cinnamon, dash of cayenne pepper and dash of white pepper. Saute 5 more minutes. Drain 2 cans of white beans and add them to the onion and spice mixture. Add five cups chicken broth.
Take the third can of white beans and puree the beans with their liquid in a blender or food processor. Add this to the pot. Bring to a boil.
Remove from heat, stir in 2 cups shredded Monterey jack cheese. Stir until cheese is melted.
Let stand.
Put a large pot of water on to boil for the pasta shells.
If you need a pot, you can put the chicken chili in a large bowl to cool and rinse and reuse that pot.
While you wait for the water to boil and the shells to cook…
Meal 4:
Mix the ingredients for the Cheesy Chicken and Rice Bake
In a large bowl combine the cheddar cheese soup, 2 cups water, 1 cup shredded cheddar cheese, ¾ cup uncooked long grain rice, ½ pound broccoli florets.
Set aside.
When the pasta shells are done, rinse with cold water and lay out on waxed paper so they won’t stick together.
Fill that pot with water again and bring to a boil for the spaghetti. Break the spaghetti into fourths and cook according to package directions. Do not overcook! When it’s done, drain and rinse with cold water.
While you wait for the water to boil and the spaghetti to cook…
Meal 5:
Make the filling for the Cheesy Chicken Shells
Squeeze the water from the thawed spinach and then chop it finely.
In a medium bowl, combine the ricotta, 1 egg (slightly beaten), the thawed spinach, 1 teaspoon garlic powder, and 1 Tablespoon dried oregano. Mix until well combined. Stir in ¼ cup parmesan and ¼ cup shredded mozzarella cheese.
Set aside.
Meal 6 and 7:
Make the Chicken Spaghetti
In a large bowl combine the 2 cans cream of chicken soup, 2 cups shredded cheddar cheese, the other half of the red bell pepper (chopped), the other half of the green bell pepper (chopped), one chopped onion, 2 cups chicken broth, 1 teaspoon seasoned salt, black pepper, pinch of cayenne pepper and the cooked spaghetti. Mix well. Set aside.
Meal 8:
Fruity Curried Chicken
In a medium saucepan, heat ¾ cup long grain white rice, 1 chopped onion and 2 ½ cups chicken broth to a boil. Stir, cover and reduce heat to low. Simmer on low for 18 minutes without lifting lid. Then turn off the heat.
While the rice cooks, it’s time to pick all that chicken off the bones. Get as much chicken off as you can and put it in a big bowl. No need to worry about the size for now. Just get it off the bones.
Save all the skin and bones for later. Just leave them in the roasting pan for now.
Now let’s finish a few things up.
Turn the Chicken and veggie soup back on. Bring it to a boil and add the ½ pound of small pasta. Continue to boil until the pasta is slightly underdone. Turn off heat.
Meanwhile, Grab a couple of handfuls of chicken and chop it in large chunks (1/2 to 1 inch sized pieces). Add 2 cups of the chunks to the Chicken Chili. Mix well.
Divide the Chicken Chili between two gallon size freezer bags. Seal tightly, expelling as much air as possible.
Label bags as follows – Chicken Chili: Thaw in fridge. Bring to boil, reduce heat, simmer 10 minutes.
Lay bags flat and place in freezer. Both bags = 1 meal. I like to tape the bags together since they are for one meal.
Back to the Fruity Curried Chicken –
Grab another couple of handfuls of chicken and chop it into large chunks. Put 2 cups of the chunks into the pan of cooked rice. Drain the can of apricots and cut them into chunks. Put the apricots, ¾ teaspoon salt, 1 teaspoon curry powder, ¼ teaspoon black pepper, juice from half the lemon, and 1/3 cup raisins in the saucepan with the rice and chicken. Gently stir till combined.
Place in gallon sized Ziploc bag. Seal tightly, expelling as much air as possible without smashing the rice too much. Flatten the bag to conserve freezer space.
Label bag as follows – Fruity Curried Chicken: Thaw, place in baking dish treated with non stick spray. Cover with foil. Bake for 1 hour at 350 degrees. Check the dish at 30 minutes. Add small amount of water if the rice is becoming too dry.
Place in freezer.
Finish up the Chicken and Veggie Soup –
Grab a couple of handfuls of chicken and chop into large chunks. Add 3 cups to the soup. Stir in the fresh spinach leaves until wilted. Let the soup cool while you finish other dishes.
Finish up the Cheesy Chicken Shells –
Grab one hand full of the chicken. Chop it very finely. Add 1 cup to the ricotta mixture and mix well.
In 8X8 baking dish (foil pan if you prefer) pour half the can of tomato sauce. Fill the cooked shells with the ricotta mixture. Place the stuffed shells in the pan, on top of the tomato sauce. Pour remaining tomato sauce evenly over the stuffed shells. Sprinkle ½ cup shredded mozzarella cheese and the remaining parmesan over the shells. Cover tightly with foil and label as follows – Cheesy Chicken Shells: Thaw, remove foil, bake 30 – 45 minutes at 350 degrees, until center shells are heated through.
Place pan in freezer.
Finish up the Chicken Spaghetti-
Grab a couple of handfuls of chicken and chop into smallish pieces, ½ inch or less. Add two cups of chicken pieces to the bowl of chicken spaghetti. Mix well. Divide in half between two 8X8 baking dishes (foil pans if you prefer). Top each pan with ½ cup shredded cheddar cheese. Cover tightly with foil. Label as follows:
Chicken Spaghetti: Thaw, Remove foil, bake at 350 degrees for 45 minutes or until hot and bubbly throughout.
Place pans in freezer.
Note: You can also put each half of the recipe into a gallon bag. Place the additional cheese for topping in smaller bags and tape one to each of the gallon sized bags.
Finish up the Cheesy Chicken and Rice Bake –
Grab two handfuls of chicken and chop it into large chunks.
Add 2 cups of chicken to the bowl of broccoli, rice and soup mixture. Mix well.
Place in gallon sized Ziploc bag. Seal tightly, expelling as much air as possible and flattening the bag to save freezer space. Label as follows:
Cheesy Chicken and Rice Bake: Thaw, place in 9X13 pan treated with nonstick spray, cover tightly with foil, bake 45 minutes at 375 degrees.
Place bag in freezer.
Note: This could also be frozen in a pan rather than a bag.
Meal 9: Make the Honey Lime Chicken Enchiladas.
Combine 6 Tablespoons honey, 4 ½ Tablespoons lime juice, 1 Tablespoon chili powder, ½ teaspoon garlic powder. Mix completely.
Chop the remaining chicken very finely. Add it to the above mixture and stir well.
Let that marinate while you package the Chicken and Veggie Soup.
Divide the Chicken and Veggie Soup evenly between two gallon sized freezer bags. Seal tightly, expelling as much air as possible. Label as follows:
Chicken and Veggie Soup: Thaw, Bring to a boil and simmer 10 minutes.
Each bag is one meal. Two bags = two meals.
Place bags in freezer.
Finish up the Enchiladas.
Pour half the large can (or 1 small can) enchilada sauce on the bottom of a 9X13 baking dish which has been treated with non stick spray.
Place 10 flour tortillas on counter top.
Evenly divide the marinated chicken among the tortillas.
Top each one with a bit of shredded Monterey Jack cheese, reserving about a 1 cup of cheese.
Roll each tortilla tightly and place in pan on top of enchilada sauce.
Pour remaining enchilada sauce on top of rolled tortillas.
Top with remaining Monterey Jack Cheese.
Cover tightly with foil and label as follows:
Honey Lime Chicken Enchiladas: Thaw, Remove foil, bake at 350 degrees for 30 minutes or until heated completely through.
You’re done!
Now, about those bones…you can turn them into delicious broth for the next time you do this. See this link for instructions.
If you don’t want to do that right now, you can put all the bones and the drippings from the pan into freezer bags and put them in the freezer to make broth another day.
Chicken and Veggie Soup – my original recipe
Chicken Chili – my original recipe
Honey Lime Chicken Enchiladas – posted by Wengmama and a popular favorite here on PYP
Cheesy Chicken and Rice Bake – adapted from a recipe here on PYP
Chicken Spaghetti – adapted from Pioneer Woman Cooks website
Cheesy Chicken Shells – adapted from a Weight Watcher’s recipe
Fruity Curried Chicken – from Once a Month Cooking by Mimi Wilson and Mary Beth Lagerborg