
Tips for Cleaning Fruits and Vegetables

As spring sets in we enjoy more sunny days and warmer weather. Gardens and farms across the country begin to send their produce out and it will soon appear at the local farmers markets and produce sections of grocery stores. Their colorful displays call to me, begging me to take them home. I feel it’s important that we get our daily dose of fresh fruits and veggies. I enjoy purchasing fresh looking produce and I love it even more if it’s from a local farm.
Bringing home this colorful array of nature’s goodness always brings questions from my kiddos. “Can I eat that?” or “I’m hungry.” are just a few of the first things I hear as I try to put away the groceries. Sometimes I even find an open contain of strawberries or bags of grapes with about half missing before I can even get them into the fridge. I guess this is just to be expected living in a house with 4 growing boys.
I have to admit this makes my stomach turn a little when I see the fruits and veggies missing. I always think who touched that or what pesticides were on that? Maybe I’m a little OCD when it comes to cleaning my fruits and veggies but I really feel like it’s important.
It is estimated by federal health officials that nearly 48 million people get sick by contaminated food each year. This is often caused by produce that has been contaminated. There are many ways produce can become contaminated. It can happen during the growing season, by animals, by harmful substances in the soil and water, and by the many people that handle the produce as it is processed from one place to another. We can even contaminate produce after we purchase it by the way it is handled and prepared. All of this heightens my OCD about cleaning fruits and vegetables before they are eaten.
So here are a few tips I’ve picked up for and thought I would pass along.
1. Always wash your hands for about 20 second with warm soapy water before and after preparing produce.
2. Cut away any damage or bruised areas of the produce before preparing.
3. Always wash produce before you peel it. This prevents dirt or bacteria from being transferred from the outside of the fruits or vegetables to the inside.
4. Use a clean vegetable brush to scrub firm produce like melons.
5. Throw away the outer leaves of lettuce and cabbage.
6. Dry fruits and vegetables with a clean cloth or paper towel.
Follow these tips to enjoy healthy and cleaner produce.
National Grilled Cheese Sandwich Day
 When two slices of buttery grilled bread are held together with a couple slices of perfectly melted cheese, I consider this comfort food at it’s best. Growing up the grilled cheese sandwich was a staple at our house. It was lunch on a cold day, a favorite of the school cafeteria and the quick and easy late night dinner of the working parents. But the grilled cheese sandwich deserves more credit than just a quick fix meal because over time I have develop a special place for it in my heart. Especially if it is served with tomato soup!
The ancient Romans are given credit with creating the first version of the grilled cheese sandwich and many other cultures have developed their own version as well. In the United States during the 1920’s when sliced bread and cheese were affordable the grilled cheese grew in popularity.
The grilled cheese is made with a little butter, bread and cheese. Only three ingredients are needed to make this ever popular sandwich. Although the original version of the grilled cheese is fairly simple and appeals to most peoples palates, don’t be fooled into thinking that it is best served only as a simple and quick lunch or dinner. Don’t be afraid to dress up your grilled cheese! Try different breads and cheeses, add a tomato or some ham, you might just be surprised at what you can create. My favorite is Sourdough with a few slices of garden fresh tomato and cheddar cheese, it reminds me of my visits to San Francisco. So if you haven’t eaten lunch yet, how about a grilled cheese and tomato soup?
DIY: Jewelry Cleaner Recipe
 Spring cleaning starts to become addictive. As I start to deep clean my house it is refreshed for spring and I see things in the new light of spring’s sunshine as the winter clouds fade away. Freshly organized kitchen drawers, recently cleaned out closets and sparkling bathrooms are a satisfying site. But now I will admit that some kind of spring cleaning bug has bitten me. What else needs to be cleaned? This question is constantly running through my mind. (unfortunately there is no shortage of answers to this question) As look over what else I can clean I am drawn to my jewelry box.
Rings, necklaces and earrings that have sat tuck away have also begun to lose their luster. Over time metal will oxidize and gather a dingy and dirty appearance. Even my well wore wedding ring bears signs of dirt that has magnetized it’s self to the band and I am carrying it with me every where I go. (yuck!) So I set out to find a way to bring back their sparkle and luckily this is an easy fix!
DIY jewelry cleaner is a simple solution that you can mix up right in your kitchen. Most of these household ingredients you will have on hand. It’s safe and friendly toward the environment. Follow these simple step to bring the sparkle back to your accessories.
DIY Jewelry Cleaner
1 TBS Salt
1 TBS Baking Soda
1 TBS Liquid Dish Soap
1 Cup Water
1 Piece Aluminum Foil
Small bowl
Step 1 – Heat the water in the microwave for about 2 minutes.
Step 2 – Cover the bottom of a small bowl with the aluminum foil.
Step 3 – Pour the hot water into the bowl. Add the salt, baking soda, and liquid dish soap to the water. Stir together gently.
Step 4 – Place jewelry on the top of the foil and let sit for 5 to 10 minutes. Rinse with cool water and dry with a soft cloth. Discard solution after each use.
Spring Break “Staycation” Ideas

This year with gas prices on the rise and people trying to hang onto their hard earned paychecks and many families are choosing to spend spring break at home. Treating spring break as a “staycation” doesn’t have to be boring. Your options are only limited by your imagination.
Spring break is a much needed break from the busy routine of school and work. If your not headed out of town you can still find time to take a break from the normal routine of everyday life. Take a minute to relax and look around your community. Odds are there are plenty of things you haven’t had time to explore.
Here are a few ideas for a Spring “Staycation.”
Picnic– Do you have a favorite park in town? Pack your favorite lunch and head over to the park for the afternoon. Throw in the rollerblades, skateboards or bikes for a little extra excitement.
A Trip to the Zoo– When was the last time you visited your local zoo? Make a day out of visiting the zoo. Many offer special deals during spring break so check the internet for current discount and coupons.
Local Hotels– If you just can’t get away for the entire week of spring break, think about spending one night at a local hotel. Swim in the pool, order room service or grab a pizza and take in a movie. Just the change of environment can help you to feel like you’ve had a vacation.
State Parks– Are you close to your state park? Hiking, camping, fishing and canoeing are all fun activities to participate in while exploring your local wilderness.
Block Parties – Chances are there are other families in your neighborhood who haven’t left home either. Throw a block party. Choose a theme, decorate and invite the neighbors out.
Backyard Camp Out – Pitch a tent in the back yard. Make some smores in the oven and watch the stars.
Historic Sites– Check out local historic sites and learn a little more about the area you live in.
These are just a few ideas for spending your spring break at home. I think we might try geocaching. How do you spend you spring break?
Tackle Spring Cleaning- Tips For Mattress Cleaning
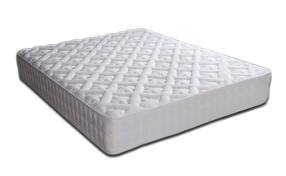
When I think of Spring Cleaning, I try to think of the things I have neglected to clean throughout the cold winter months. Making my list is a little discouraging, who would have thought I would have so much to do. I guess that is what happens when you hibernate all winter. Although my long list may be daunting with chores all over the house, I’m ready to tackle it.
The other day as I began pulling the sheets of the bed to wash I was greeted by a surprise. I found my 2 year old had left his sippy cup tuck between the covers of the bed, forgotten during our most recent game of hide and seek. This supposedly “no leak” toddler cup had left a small puddle of juice that soaked through the sheets and mattress pad and leaving it’s mark on the mattress. So now another task added to my list – clean the mattress.
I’m never quite sure where to start when it comes to cleaning the mattress so I turned to my ever trusted friend,the internet, for a little advice. Here is what I found.
Tips for Mattress Cleaning
A mattress should be cleaned about every six months.
Vacuum the top of a mattress with an upholstery attachment of the vacuum.
For stain removal use a damp cloth with a very small amount of upholstery shampoo. (Do this carefully to ensure that you do not damage the layers of the mattress or create an environment where mold can grow.)
Use a good mattress pad to protect the mattress from stains and dust mites.
Extra Tip:
To make sure the mattress wears evenly you don’t have to flip it. Just rotate it from head to toe every six months.
DIY : Tub and Shower Cleaner
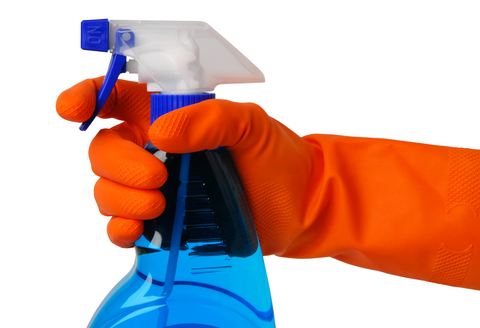
Cleaning the tub and shower is no where on my list of things I enjoy doing. It is however on my list of things that need to be done. Often my hubby jumps in and volunteers to do the scrubbing to which I respond by gladly handing over my cleaning supplies . He always does a great job and the bathroom looks brand new. Although I question the amount of cleaner he applies to the bathroom. We have even consulted the bottle for recommendations of the proper use of the product. The makers of the cleaning supplies love him because it’s the people like him that keep them in business. There is no doubt our bathroom is clean and germ free but the scent of chemicals lingering in the air of our home is not exactly what I would call a comforting smell.
In an earlier post I commented that I would like to find more natural ways to clean. I really do love a squeaky clean bathrooms. Professional premixed shower cleaners that I have used in the past have always done a great job leaving the shower and tub looking brand new. That’s why I love them. They do however have chemicals that make my arms itch and leave a suffocating smell in the air. So I am looking for ways to cut out the chemicals we use in our home.
I’m not sure that Dawn dish soap really counts as natural but vinegar does and it is no where near as harsh as some of the other cleaners we have used. With only 2 ingredients I easily made a simple homemade version of a tub and shower cleaner. To my surprise it worked just as well as the professional cleaning supplies I have been buying. For all of you penny pinchers out there, it only cost a fraction of the price that one would normally spend on cleaning supplies and who doesn’t love saving hard earned money. So if your in a pinch, looking to save a few pennies, are out of cleaner or just want to try something new, try mixing up a batch of your own tub and shower cleaner.
Simple Tub and Shower Cleaner Recipe
1 cup Dawn dish soap
1 cup White Distilled Vinegar
Pour into a spray bottle and shake until mixed well. Spray on surface to be cleaned, let sit for a minute and wipe away with a wet rag.
Spring Cleaning Success – Organize Your Cleaning Supplies

Freshening up the house with a good cleaning is almost a ritual at spring time. This week Spring has officially sprung and as I start to see the snow disappear and the first blades of grass appear, I too start feeling a need for change. I always look forward to opening the windows and airing the staleness out of the house that seems to gather in the corners of the rooms during the winter months.
Giving the house a good overall cleaning is a great way to move forward with Spring and makes me feel less guilty when I start spending more time outdoors. With all the coupons for cleaning supplies out right now, it makes me feel like it’s a good time to restock the cleaning items I may be running low on. I feel that one of the most important steps to have a successful round of spring cleaning is to be organized.
Some people keep cleaning supplies all over the house. Friends of mine keep a supply stocked in the kitchen and each bathroom. I prefer to keep all of my cleaning supplies in one location, in a portable container and something like Clorox Wipes in the kitchen and bathrooms to clean when you need something quick. This keeps my kids out of my supplies and I don’t have to worry about little ones getting into something they shouldn’t.
I hate running from room to room when I am cleaning. I usually leave to get something I need and then end up distracted by other things I need to do as I pass them along the way. I find myself feeling scattered and as if I never complete the job I started. So to keep things on track I like to have everything that I need on hand in one location (my cleaning bucket) in order to complete the job quickly.
There are a few items that I think are essential to my cleaning bucket. Keeping the core items together that I need to clean helps to keep me on task and saves me time.
My list of essentials for the cleaning bucket.
A bathroom cleaner – something with a sanitizer to disinfect the bathroom.
Multi – Surface Cleaner – This way I can clean all the counter tops in the house easily.
Toilet Cleaner– I prefer something with bleach.
Windex – To easily clean windows and mirrors.
Toilet Brush
Pumice Stone– To help scrub stains in the toilet bowl.
Hand Scrub brush
Magic Eraser – I love this for cleaning walls.
Old tooth brush – Great for cleaning in small spaces.
Micro Fiber Cloths or Paper Towels
Rubber Gloves – Save your hands from the harsh chemicals.
This is my current list of must have to clean the house. Although I am looking for more natural substitutions that clean just as well. What are your favorite cleaning supplies?
Microwave Caramel

Last week I wrote a post about microwave tips and it got me thinking about how I really don’t use my microwave for much. It just sits in my kitchen collecting dust for the most part. However the more I was thinking about it I remembered there is one recipe I make in the microwave. It’s the only recipe I have strictly used the microwave to prepare. From start to finish I make this recipe completely in the microwave with a little assistance from a bowl and a spoon. It is a caramel recipe. I know your probably thinking caramel in the microwave? Yes, I say, “Make caramel in the microwave.”
The more I thought about the caramels, the more I felt like the famous little mouse in Laura Joffe Numeroff’s children’s book, If You Give a Mouse a Cookie. Just like the cookie led the mouse into a series of domino like events, the thoughts of this caramel recipe have had the same effect on me.
I wrote a post about the microwave. The post about how little I use the microwave reminded me that I can make a caramel recipe in it. The thoughts of the caramel made me crave it. In order to make it and I began to look for the recipe. When I found the recipe, I dug through the pantry to find all of the ingredients. Once I had collected all the ingredients I pulled out a bowl and spoon and mixed them all together. After they were mixed well I placed the bowl in the microwave to cook it and with excitement stopped it every few minutes to stir the caramel. Once it was finish I poured it into a pan for it to set. After it was set I began to cut it, as I cut the caramel I remembered how pretty it is wrapped in wax paper. I found the wax paper and wrapped each piece. After I had wrapped the caramels they looked so pretty I thought I should share them with my friends. I rounded up the kids and we went around the neighborhood sharing our caramels. Arriving home I sat on the couch and ate a few too many of the caramels myself. Eating the caramels made me feel guilty and reminded me I should have exercised today. So I followed Jillian Michael’s through a 30 minute workout. After the exercise my muscles were sore. Having sore muscles I took a rice bag to heat it in the microwave. Looking at the microwave it reminded me of the caramels I can make in it……
They really are that simple and the best part is they taste just like you spent hours over the stove making a traditional caramel candy recipe. With just a fraction of the time you have very satisfying results. This is a really yummy recipe and if your a caramel lover like me beware the results of this recipe may be addicting.
Recipe:
Microwave Caramel
1 cup Margarine
1 cup White Sugar
1 cup Brown Sugar
1 cup Light Karo Syrup
1 can Sweetened Condensed Milk
In a large microwave safe bowl melt the margarine for 1 1/2 minutes. Remove from the microwave and add the rest of the ingredients. Mix well. Place back into the microwave and cook on high for 5 minutes. Take the bowl from the microwave and stir well. Continue cooking on high for an additional 5 minutes, remove and stir. Cook for 3 more minutes ( for a total of 13 mins.) Remove from the microwave, stir and pour into a 9 x 13 pan to set. Once caramel has set wrap in wax paper and store in an air tight container.
Stock The Pantry Shelves – Save $$$
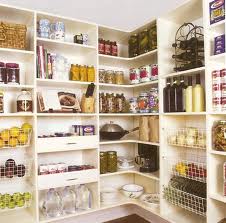
I hate when you walk into your kitchen wondering what to make for dinner only to find that your shelves are full but stocked with a whole lot of nothing. On occasion I have found myself with cookies, chips, fruit snacks, tomatoes and beans. I’m not sure that I am a talented enough cook to recreate my own version of the Food Networks Chopped in my very own kitchen. Although that could make for an interesting meal but it would probably lack in nutrition and I doubt anyone would care much to eat it, even if I were extremely creative.
While it might look like the pantry shelves are full with boxes and cans, spending a few minutes to figure out what you really have in the pantry on what one needs on hand will help make your pantry a well rounded resource of ingredients.
A simple way to save money is to stock your pantry with a few staple items in advance. This will make cooking from scratch easier and help you stretch your budget when it comes to meal time. Having a variety of essential ingredients on hand will prove to be a valuable way to plan healthy and well balanced snacks and meals. Having the basics for each food group on hand is a must. But where do you start? The following is a list of a few suggested ingredients that you might find useful to have in your pantry.
Grains
pasta
rice
rolled oats
all purpose flour
cornstarch
Canned Goods
Chicken Stock
Beans
Diced Tomatoes
Some sort of fruit in natural juices, (example: pineapple, pears or peaches)
Your choice of canned vegetables.
Spices
Salt
Pepper
Oregano
Basil
Garlic Powder
Cumin Powder
Ginger
Cinnamon
Vanilla Extract
Nutmeg
Cloves
Cayenne Pepper
Paprika
Old Bay Seasoning
Grill Seasoning
Condiments
Ketchup
Dijon Mustard
Olive Oil
Vegetable Oil
Soy Sauce
Worcester Sauce
Apple cider Vinegar
White Vinegar
Baking Supplies
White Sugar
Brown Sugar
Nuts
Raisins
Baking Soda
Baking Powder
Chocolate Chips
Other
Jams
Peanut Butter
Honey
St. Patricks Day – Free Fries @ Burger King

In honor of St. Patrick’s Day Burger King will be giving away 1 order of value fries to every customer. So if you have a craving this weekend for fries with their special St. Paddy’s sauce (green ketchup) make a stop a your local Burger King and pick some up. Offer valid Saturday and Sunday. No coupon needed.
A Clean Lint Filter Saves $$
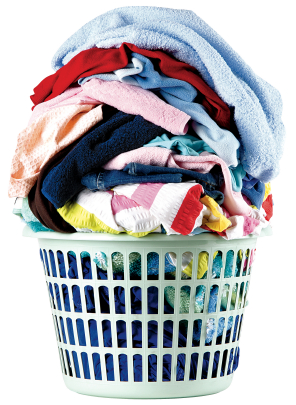 Laundry is always on my mind. It’s always there, even the days when I think I’m caught up the “laundry makers” leave presents for me and I find I have more laundry that night. It’s the never ending job and if your in charge of the laundry at your house I’m sure you feel my pain.
My dryer is older and is on it’s way out. I’m just waiting for it to die off so I have an excuse to buy a new set of front loaders. But until then I’m trying to make the most of the ones I’ve got. We’ve taken it apart several times in the last year trying to extend the life of it and lucky for us it is hanging in there.
Every dryer has a lint filter. This is the metal mesh like net that catches all the lint and fluff that comes out of your clothing when it is in the dryer. With each load of laundry the filter collects lint and fluff. I change the filter every time I do a load of laundry. As lint builds up in the filter it prevents the air from circulating out of the dryer.
As the filter builds up with lint the dryer has to work harder to dry the clothes. This can result in turning the dryer on multiple times to dry a load of laundry and will cause the dryer to use more electricity and work less efficiently. Each time that happens its costing you more money. So in order to save some money make sure to clean the lint filter each time you change a load of laundry. I’m sure many of you do this but did you know in order to help extend the life of your dryer you can scrub your lint filter? To help make sure your filter is clean take the time to scrub it with hot soapy water occasionally. This will help to remove residue left from fabric dryer sheets and help it work even more efficiently. Who knew a little elbow grease and hot soapy water could be a money saver?
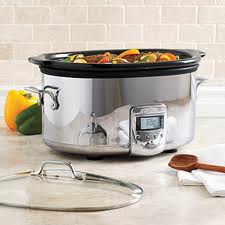
Crock Pot Dinners Save Time and Money
 Life seems to just keep getting busier and busier. It never really feels like we have time to slow down and enjoy the time we have. I know most of this is probably my own fault. I could choose to have the kids involved in less activities and make time to enjoy life’s simple pleasures but the truth is it just isn’t going to happen this week.
So instead of hurrying dinner along handing out a quick PB & J or grabbing take out on the way home, I’ve been looking for ways to have dinner ready to go when we walk in the door. Dinner time is about the only time we are all together and I love every minute of it. I’ve found the use of the crock pot to slow cook dinner is a great option for having dinner ready on the nights I know are going to be busy.
The crock pot is a great tool to have in the kitchen because it helps you make the most of the time you have. It makes me feel like I’m saving time because I am able to prepare a meal when I’m not in a crunch for time. Using a crock pot you can easily prep dinner ahead of time. In my free time the night before or in the morning I’ll prepare dinner, this will ensure that one can come home to a homemade healthy dinner ready to go. I love that it takes the stress out of the question, “What are we having for dinner?”, which I am sure to hear as soon as we get home. This is a welcomed thought on busy nights when we are running from tennis to scouts, basketball, swimming etc.
With careful planning the use of the crock pot can be a great money saving tool as well. On a busy week night the use of the crock pot keeps us on schedule. The small amount of preparation keeps me from having to make a stop for fast food and there by keeps money in my bank account. I can easily make dinner for much less than I would spend in the drive through and still have leftovers for tomorrow’s lunches.
Recipe for the Crock pot:
BBQ Pork for Sandwiches
Ingredients:
1 (14oz) can beef broth
3 pounds boneless pork ribs
1 bottle BBQ sauce
Directions:
Pour beef broth into the slow cooker and add the boneless pork ribs. Cook on high for 4 hours, or until the meat shreds easily.
Place meat in a skillet and add BBQ sauce.
Bake in a preheated oven for 30 mins or until it is heated through.