
Do you have a gift stash?

I don’t know about you but I absolutely love giving gifts to people – family, friends, kid’s parties, thank you gifts, you name it and I love to give gifts. In fact, I may love giving gifts more than I like getting them. Crazy, I know. The only drawback to this is that giving gifts can get expensive. I like giving really nice gifts, too. I love seeing someone wowed over I gift I gave or a present they received. So for me, this can get really expensive if I am not careful. What does a crazy gift giver like me do to avoid breaking the bank while giving all of these great gifts? I have a gift stash.
A lot of people have food storage or a stockpile. They buy shelf stable food items ahead of time and use them when they need them. They pay a great price now and use it later when it would be more expensive to buy it. This is a concept many people are familiar with and understand. I apply this same principle to gifts. I find great deals on awesome items now that I will use later as great gifts. It is what allows me to give crazy good gifts at discount store prices. It is easy to do and can help you save lots of money. A few tips can make this an easy thing to do.
Decide where you are keeping your gift stash and prepare a place.
This is a huge and very important tip. It is what will make your gift stash work well for you or drive you crazy. Whenever you purchase an item for the gift stash put it right where it goes. Hiding things all over the house leads to lost gifts and gifts being seen by the kids and spouses ahead of time. I have some large plastic totes on a shelf in my garage. The gift items go in the totes the same day I buy them.
Keep an inventory.
I’ll admit I don’t always do this. I will also tell you that it is 100x easier when I actually do keep a quick list of the items in my gift stash. You avoid overbuying and know what you can give before you even start looking through the items in your gift stash.
Know your gift recipient base.
Think about who you give gifts to and the situations in which you’ll be giving them. Think about relatives’ ages and likes. Think about the ages of friends and potential birthday parties. Knowing who you will be giving future gifts to will help you grab those bargains to use as great gifts later.
Know where and how to shop.
Have a favorite item to gift? Do you know when it goes on sale? Do you know where the sale and clearance departments are at your favorite stores? When you are out shopping, take a look at the clearance and sale items. Swing by the toy department and watch for clearance bargains. Don’t forget to shop online for your gifts. There are always great deals on Pinching Your Pennies that would perfect gift stash items.
When you have a really good grasp on building up your gift stash you’ll be great at spotting items for gifting events that are months away. This is why it is important to know your recipient base like I mentioned above. It is easy once you start.
Know your budget.
Don’t spend too much trying to build a gift stash quickly. Stick to all of the above tips and build your gift stash slowly. Overspending and breaking your budget will defeat the purpose of building up a gift stash.
Include giftwrap and cards.
Pretty simple tip but it can save you big. Pick up some extra wrapping paper, gift bags and cards when you see them on great deals or sales. Keep it all together with the gift stash or in another easy to find place.
Have fun and enjoy giving the gifts.
That’s the whole point of creating a gift stash. Enjoy giving your gifts and have fun buying them.
A PYP Best Blog! Keeping the Holidays Simple!
Just in case you missed this article on keeping the holidays simple the first time we shared it a couple of years ago, we are republishing it. After Marne wrote this blog originally, we got an awesome response. The holidays are a couple months away but these ideas for keeping the holidays simple are good to start thinking about now. This is one of the PYP Best Blogs!
We always have great aspirations of keeping the holidays simple, don’t we? Then when they get here it can be a different story. What is important to remember is that we are in control of our own environment. If those around us choose to make the holidays overly crazy and tiring, you don’t have to choose that. Simplicity is a choice, although not an easy one most of the time.
Here are a few things you can do to make the holiday season a little more stress-free, simple, and budget-friendly.
- Make gift giving simple. There are many ways to do this. Forgo the big extended family gift exchange and donate all the money that would have been used to a shelter or other needy establishment. You can decide to all give homemade gifts from the heart. Have a contest to see who can give the most meaningful gift. Instead of having a minimum for family gift exchanges, have maximums, ie, don’t spend over $10. These are fun and creative, not to mention less stressful approaches to gift-giving.
- More isn’t always better. Spending lots of money on countless toys and gifts that don’t mean anything to the recipient has two problems: wasted money on the giver’s part, and a receiver who doesn’t really want the gift. It is better to give one or two meaningful gifts (even to children) instead of several. I am a firm believer in not giving my children lots of toys at Christmas. Too much causes more chaos, fighting over the gifts, and just more gluttony…they always are looking for more. Teach them to appreciate what they do have, and less can become more.
- Forgo the Christmas cards. Going one year without sending out Christmas cards isn’t the most horrible thing you could do. It will be one less thing to worry about, and it really is no big deal. If sending out cards is important to you, then plan ahead so your holiday season can be less stressful. I keep a list every year and update it as I get new cards. This way I already know who I am sending cards to without hunting for names and addresses.
- Don’t do a lot of baking. I am not boycotting baking here, since I enjoy it at the holidays also. But it is one thing you can cut out to allow more time to spend with your family as well as save you calories on your waistline. If you really want to bake some goodies, try baking after Christmas, around New Year’s. It is still the holiday season but the rush of Christmas is over.
- Save ahead for your gifts. It is obviously too late this year for this tip, but try saving for Christmas all year. That way when it is time to go shopping, you have some money saved up. Much easier on the budget, and it will give you peace of mind as you shop. Always set a limit and don’t go over it.
Hopefully you can sit down and relax during this holiday season with a cup of hot chocolate by the Christmas tree. Take time to soak in the wonders of the holiday season and remember all the other stuff isn’t as important…but the feelings, traditions and memories created stay.
A PYP Best Blog! Cooking From Scratch!
Just in case you missed this article on cooking from scratch the first time we shared it a couple of years ago, we are republishing it. After Marne wrote this blog originally, we got an awesome response. This is one of the PYP Best Blogs!
I grew up with a mother who was always cooking from scratch. That is all I knew. Our home was consistently blessed with homemade whole wheat bread, granola, yummy casseroles, and what have you. My mom was ‘famous’ in our small town for her bread and rolls. Even things like maple syrup and other delicious syrups were homemade. Our family did a lot of canning and preserving too. I was jealous of some friends and kids that I babysat because they got to have store-bought macaroni and cheese, store-bought white bread, and other convenience foods. They were so lucky, I thought at the time.
I know differently now. I am so thankful my mother instilled in me the desire for cooking from scratch. Not that I do it all the time, mind you. I have to fight that desire to do the quick and easy thing. Cooking from scratch takes more time usually, but it is healthier for you and much cheaper. Nowadays with all the great nutrition information out there cooking from scratch is having a comeback. Everyone is realizing how great and simple and cost effective it really is!
When you are cooking from scratch it is important to make sure you have a well-stocked pantry with basic ingredients and spices. Then you are able to throw things together quickly and easily. Things that I always have in my cupboards or freezer are: oats, sugar, wheat, rice, butter, sour cream, spaghetti sauce, cream cheese, peanut butter, taco sauce, pasta, chicken & ground beef, eggs, onions, potatoes, cheese, and lots of various spices..just to name a few things.
I wanted to share with you today a few of my favorite recipes when I am cooking from scratch. If you have a few favorites, please comment and share what you do! We can all learn and benefit from each other.
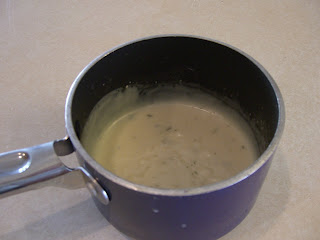
Homemade Cream of Chicken Soup
1 c. Magic Mix
3/4 c. Chicken Broth (either from a can, bouillon, or liquid from canned chicken)
1 t. Dry Parsley
Dash of Onion Salt
Mix together with wire whisk over medium heat, stirring constantly. Bring to a boil and remove from heat.
Magic Mix
2 1/3 c. powdered milk
1 c. all purpose flour
1 c. (2 sticks) butter, room temperature (NO margarine!)
Combine together in a mixer bowl. I use my Bosch. Whip up nice and thoroughly until the mixture resembles cornmeal. Put in the fridge and use for a variety of recipes, including condensed soups. (Using it for chocolate pudding is really good!) Will keep in the fridge for several months.
Banana Muffins
1 3/4 cups flour
1/2 c. white sugar + 1/4 c. brown sugar
1 teaspoon baking powder
1 teaspoon baking soda
1/2 teaspoon salt
1 egg
1/2 cup vegetable oil
1/2 cup plain yogurt or sour cream (I use sour cream)
1 teaspoon vanilla extract
1 cup mashed ripe bananas (about 2 large or 3 small)
*In a large bowl combine flour, sugars, baking powder, baking soda and salt. In another bowl, combine and stir the egg, oil, yogurt (or sour cream) and vanilla. Stir into dry ingredients just until moistened. Fold in mashed bananas. Try not to overstir. Just moisten all ingredients. Can add chocolate chips. (We like them better without chocolate chips.) Fill greased or paper-lined muffin cups two-thirds full. Bake at 350 degrees F for 22-25 minutes or until a toothpick comes out clean. Cool for 5 minutes before removing from pans to wire racks.
Here are some other recipes that I make from scratch that I LOVE and make all the time. Some I have posted here on PYP before.
Drop Biscuits
Whole Wheat Banana Chocolate Chip Muffins
Whole Wheat Bread
Oatmeal Chocolate Chip Cookies
Oatmeal Pancake Mix
Chicken Ranch Pizza
Homemade Granola Bars
Homemade Crunchy Granola
No Prescription Drug Insurance Coverage?
The first time we shared this post on Resources for Those without Prescription Drug Insurance Coverage we got a great response making it a PYP Best Blog Post.
This past year my family experienced a job loss and changeover, and we found ourselves without prescription drug insurance coverage. This was a shock for my family and our wallet as on average we were spending hundreds/month on co-pays from our previous insurance plans (we have medical conditions amongst family members that need to be managed). So now what?
Here is my story of how I trimmed my family’s medicine budget AND found resources available for those (including me!) who do not have prescription drug insurance.
1.Take inventory. You must know all of your prescriptions are before you can see what options you have. Write them down, including dosage, frequency and results from current medications. Once you know your medicine profile, you can start to seek alternatives and facilitate changes.
*Please note, do NOT do the following without consulting your prescribing physicians, first.
2.Seek alternatives. Contact your prescribing physicians and see if there is a cheaper alternative or a generic version of prescribed medication.
3.Double your Dosage & Split. Ask your doctor if he/she will double your monthly dosage, then you slice your tablets into half- thus doubling your supply, while reducing your cost. This option does require homework and footwork: check pricing with pharmacy to make sure it is a cost-effective option and if your physician will do this.
4.Seek Over The Counter or Herbal Options. Again, check with your doctor to see if this option for you. For my family, over-the-counter Prilosec proved to be a cost-friendly option for treating Acid Reflux. (see IF there are coupons available, too!)
5.Check out money saving programs from pharmaceutical manufacturers. Most major drug makers offer some sort of discount savings card (please note, these are NOT insurance cards). A great starting point is Glaxo Smith Kline’s site. One that I joined is Together RX Access and save 25% off my Imitrex.
6.Compare shop your local pharmacies. This option does require a bit of research, but the savings can be HUGE! For example, I take Topamax for migraine prevention. At a retail chain pharmacy, this cost me $60/month on my insurance plan and a few hundred without (yes, sticker shock!). I called area pharmacies looking for options when I came across a neighborhood pharmacy that had a pharmacy discount card that I was eligible for and my Topamax cost me only $30. HUGE savings!
7.Ask for Physician samples. Swallow your pride and ask your doctor if she/he happens to have any samples of either the medicine you need or an alternative that would work for you. That is what they are for! And your doctor would rather give them to you then see them go to waste.
8.Visit your prescribed medicine’s website. Many times there are discounts, coupons or instant rebates offered to users. Check out internetdrugcoupons for links to many medicines. Here’s my success story… my husband needs the ulcer medicine, Nexium. We have tried the cheaper option of Prilosec, but it was like putting a band-aid on a gunshot wound. So I visited purplepill.com and found that we could get a month’s medicine for $50 with Nexium’s saving card. Add a request to the doctor to double the prescription’s dosage for two months, and we are spending $25/month vs. $168 cash only.
9.Use pharmacy coupons to offset the costs. Many retailers offer store gift cards if and when you bring a new or transfer a prescription to their store’s pharmacy. These coupons usually appear in the Sunday ads. Check out the PYP boards for announcements.
It does take a lot of work and hoop-jumping to save money in any area, and prescription drugs are no exception. Above are proven suggestions that I know work! I have done it and managed to maintain the medicines that are necessary to keep us healthy without going into debt.
Do you have any other ideas that might benefit others?
A PYP Best Blog! Grocery Budget Crack-Down Plan: Menu Planning!
Just in case you missed this article on menu planning the first time we shared it a couple of years ago, we are republishing it. After Marne wrote this blog originally, we got an awesome response. This is one of the PYP Best Blogs!
Menu planning has always been daunting to me. I go through phases when I do it, and don’t do it. I am always glad when I have it done, though. Over the years I have learned a few things about menu planning that work for me and my family.

1. Simple is best. Sure…trying new recipes is fun but simple, basic recipes is when my family is happiest. That means mom is happy too.
2. Involve children in menu planning. They are more apt to not complain when they have a say in what is being eaten. There can be a kids choice night, they can help you decide the month in advance, or you can schedule fun food nights. No matter how you do it they will know you are thinking of them.
3. Prep more than one meal at once. If you are cooking hamburger for tacos one night, cook double and freeze the rest for your soup later in the week. Saves so much time.
4. Plan meals around leftover ingredients in your fridge and what you have in your food storage. If you are planning simple. basic meals that don’t have a lot of fluff you will most likely have everything you need on hand, except perishables. Making a quick weekly trip to the store for perishables is much easier than huge stock-up trips.
I have tried many different ways to menu plan over the years. I have spent hours and hours online looking at menu planning websites, cooking blogs, and recipe sites to get ideas. Sure, I was reading lots of great ideas but it was only overwhelming me not helping me. Binders, boxes, files….ACK!!! I decided that I was making things too complicated….and I just need to keep my menu planning simple, easy, and clean.
I started by going through my recipes and writing down lists of everything we like to eat…soups, meats, chicken, sides etc, so I had an idea of where to start with my meals.
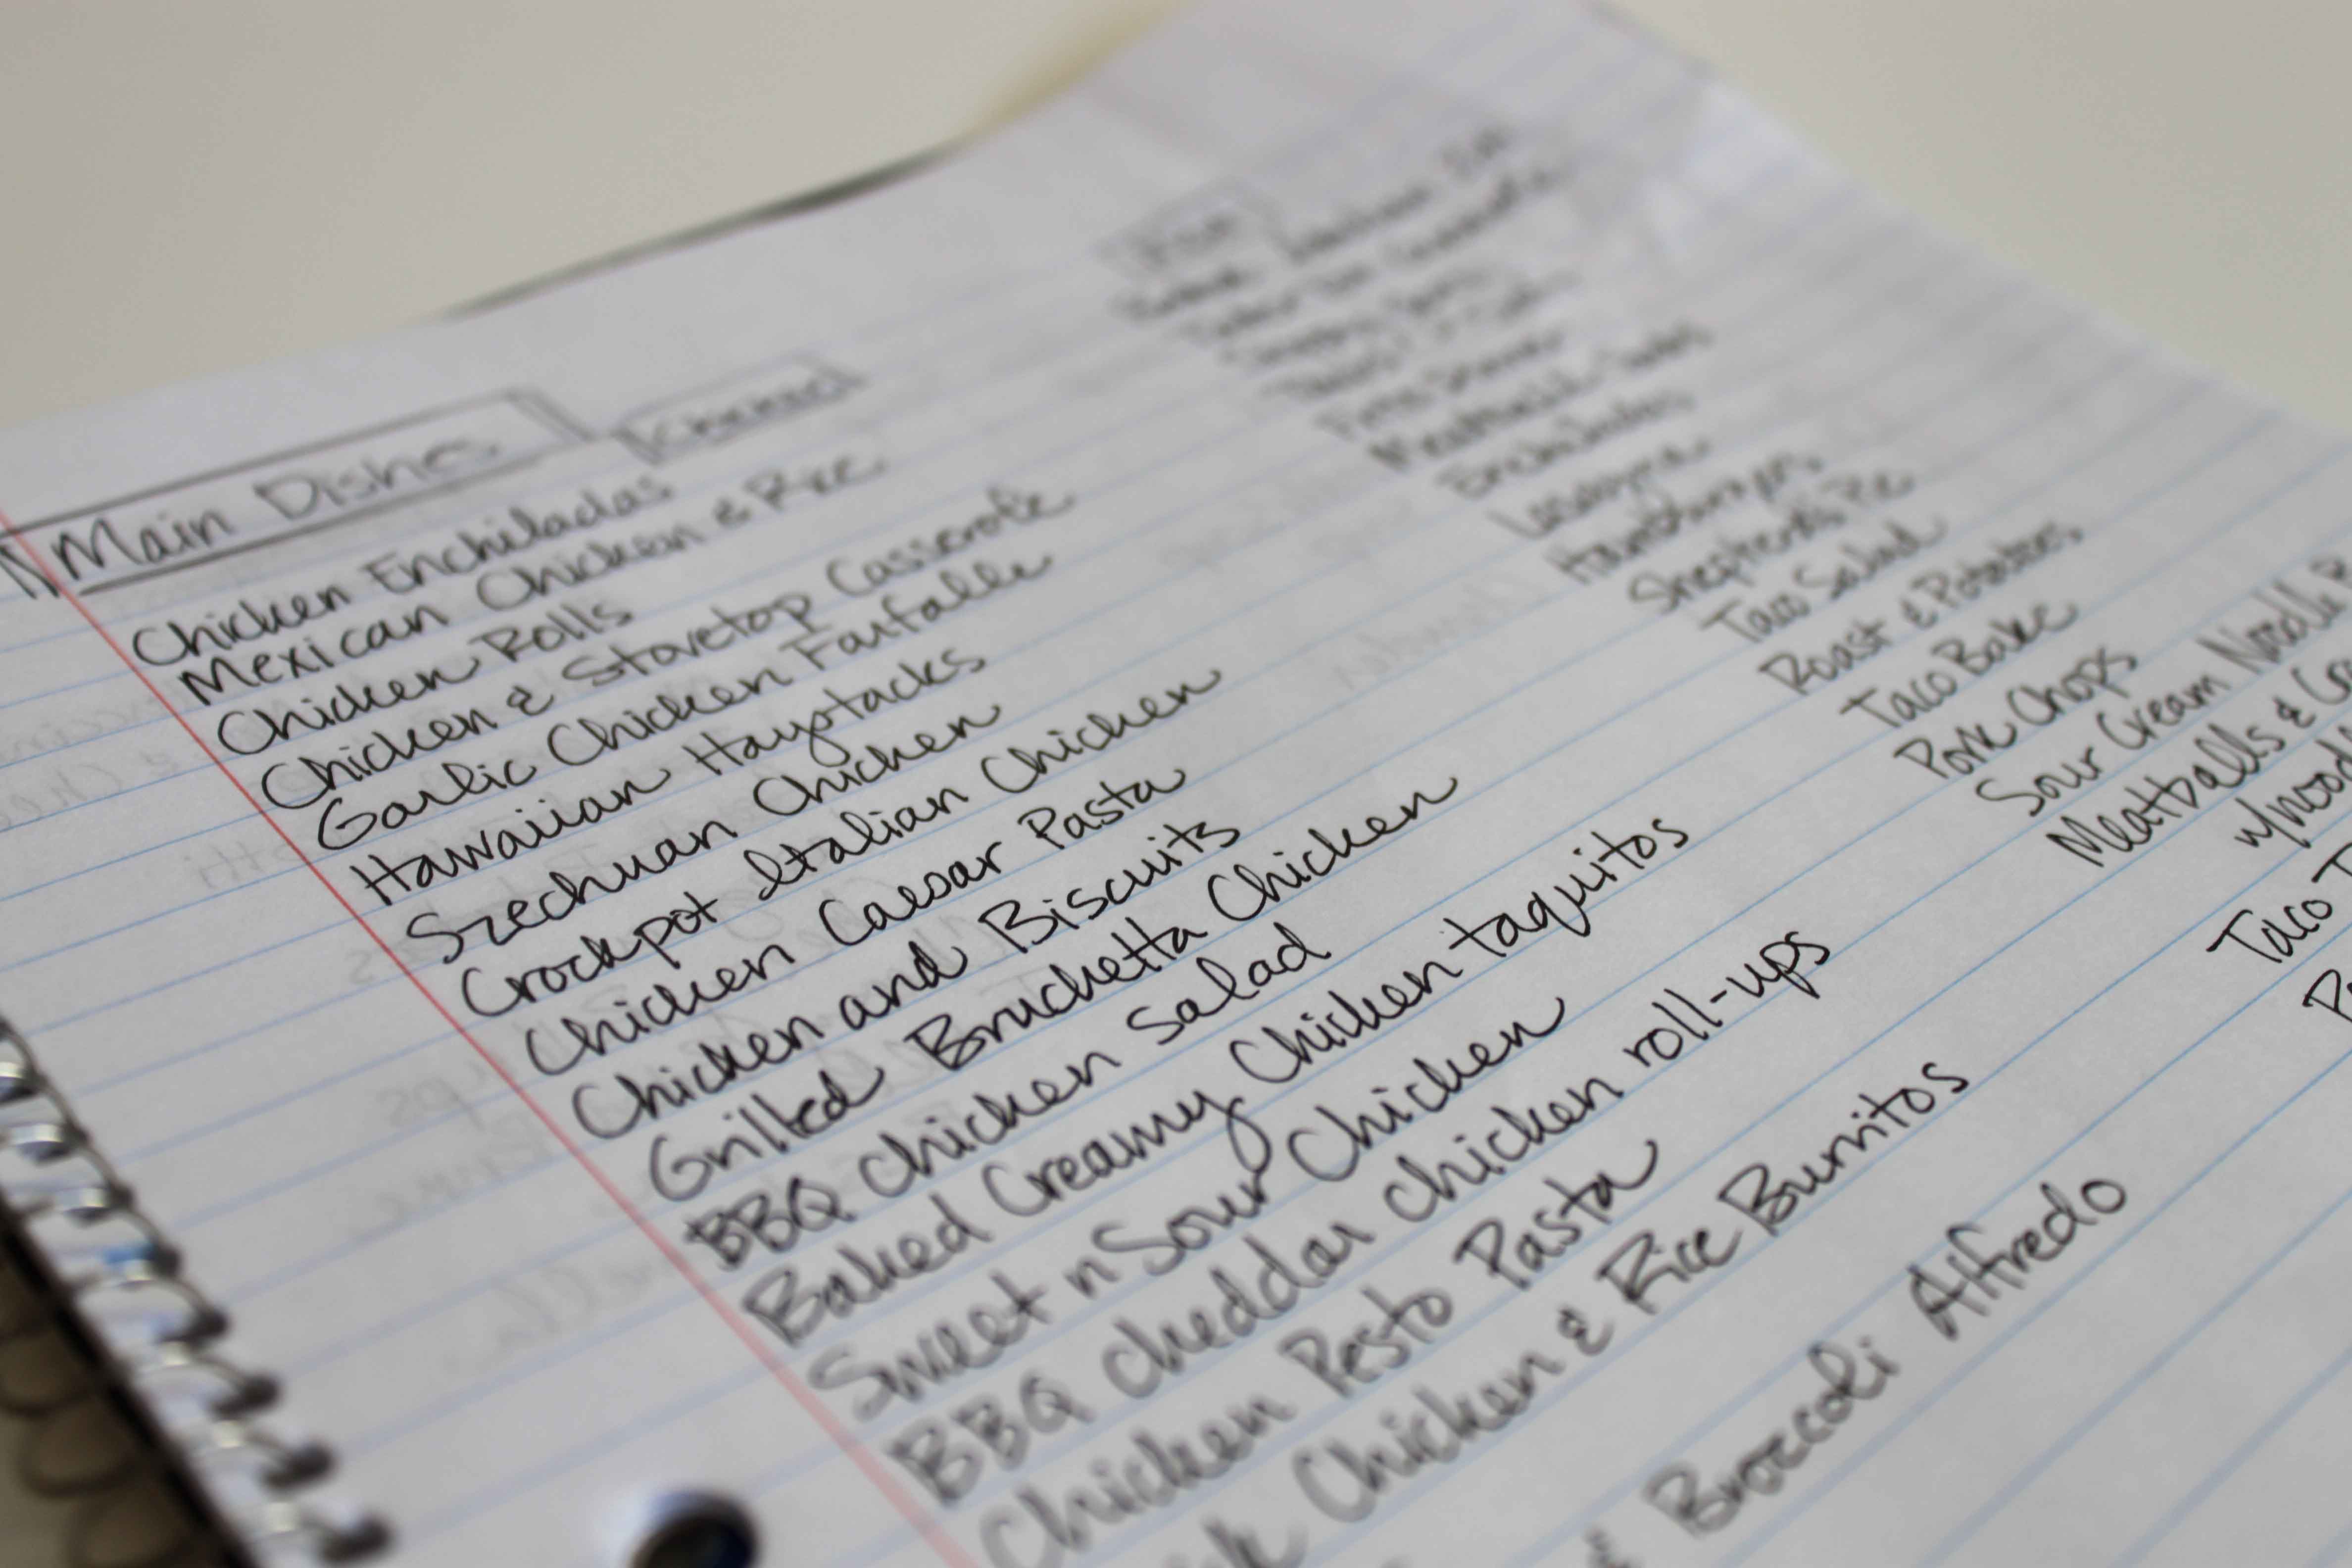
For now, I will be planning on a monthly basis. I am first beginning with dinners, as that seems to be the most difficult. I left a spot at the bottom to write in treats I want to make during the month and breakfasts I want to make. I will fill those in later and as I see fit.
Earn Cash Back from your Groceries with Checkout 51
Checkout 51 is the easiest way to save money on the brands you love! We’re currently saving over half a million Americans and Canadians money every day and have much larger plans for expansion!
All our members have to do is follow these simple steps:
- Browse the offers that are updated every Thursday
- Buy the products from any store
- Take a photo of your receipt to redeem your deal
- Get cash back!
A PYP Best Blog! Make a Menu Planning Binder!
Just in case you missed this DIY article on making a menu planning binder the first time we shared it a couple of years ago, we are republishing it. After Marne wrote this blog originally, we got an awesome response. This is one of the PYP Best Blogs!
I have lots of cookbooks. I have a recipe box. I also have a large binder chuck full of recipes I have printed off the internet.
Even when I menu plan I have to look through ALL those recipes to find the ones I need, and sometimes that is a real pain! Every now and then I can’t find the recipe…which poses a slight problem..if you know what I mean. And since I am trying to cut my grocery budget, I want to be organized.
So this time I decided to do something different. I got an empty binder I wasn’t using and made tabs for the first 6 months of the year.

Behind each menu month, I am placing all my recipes that I need for that month. Now I have them all in the same place, so there is no frantic search at the last minute or printing it again from the internet.
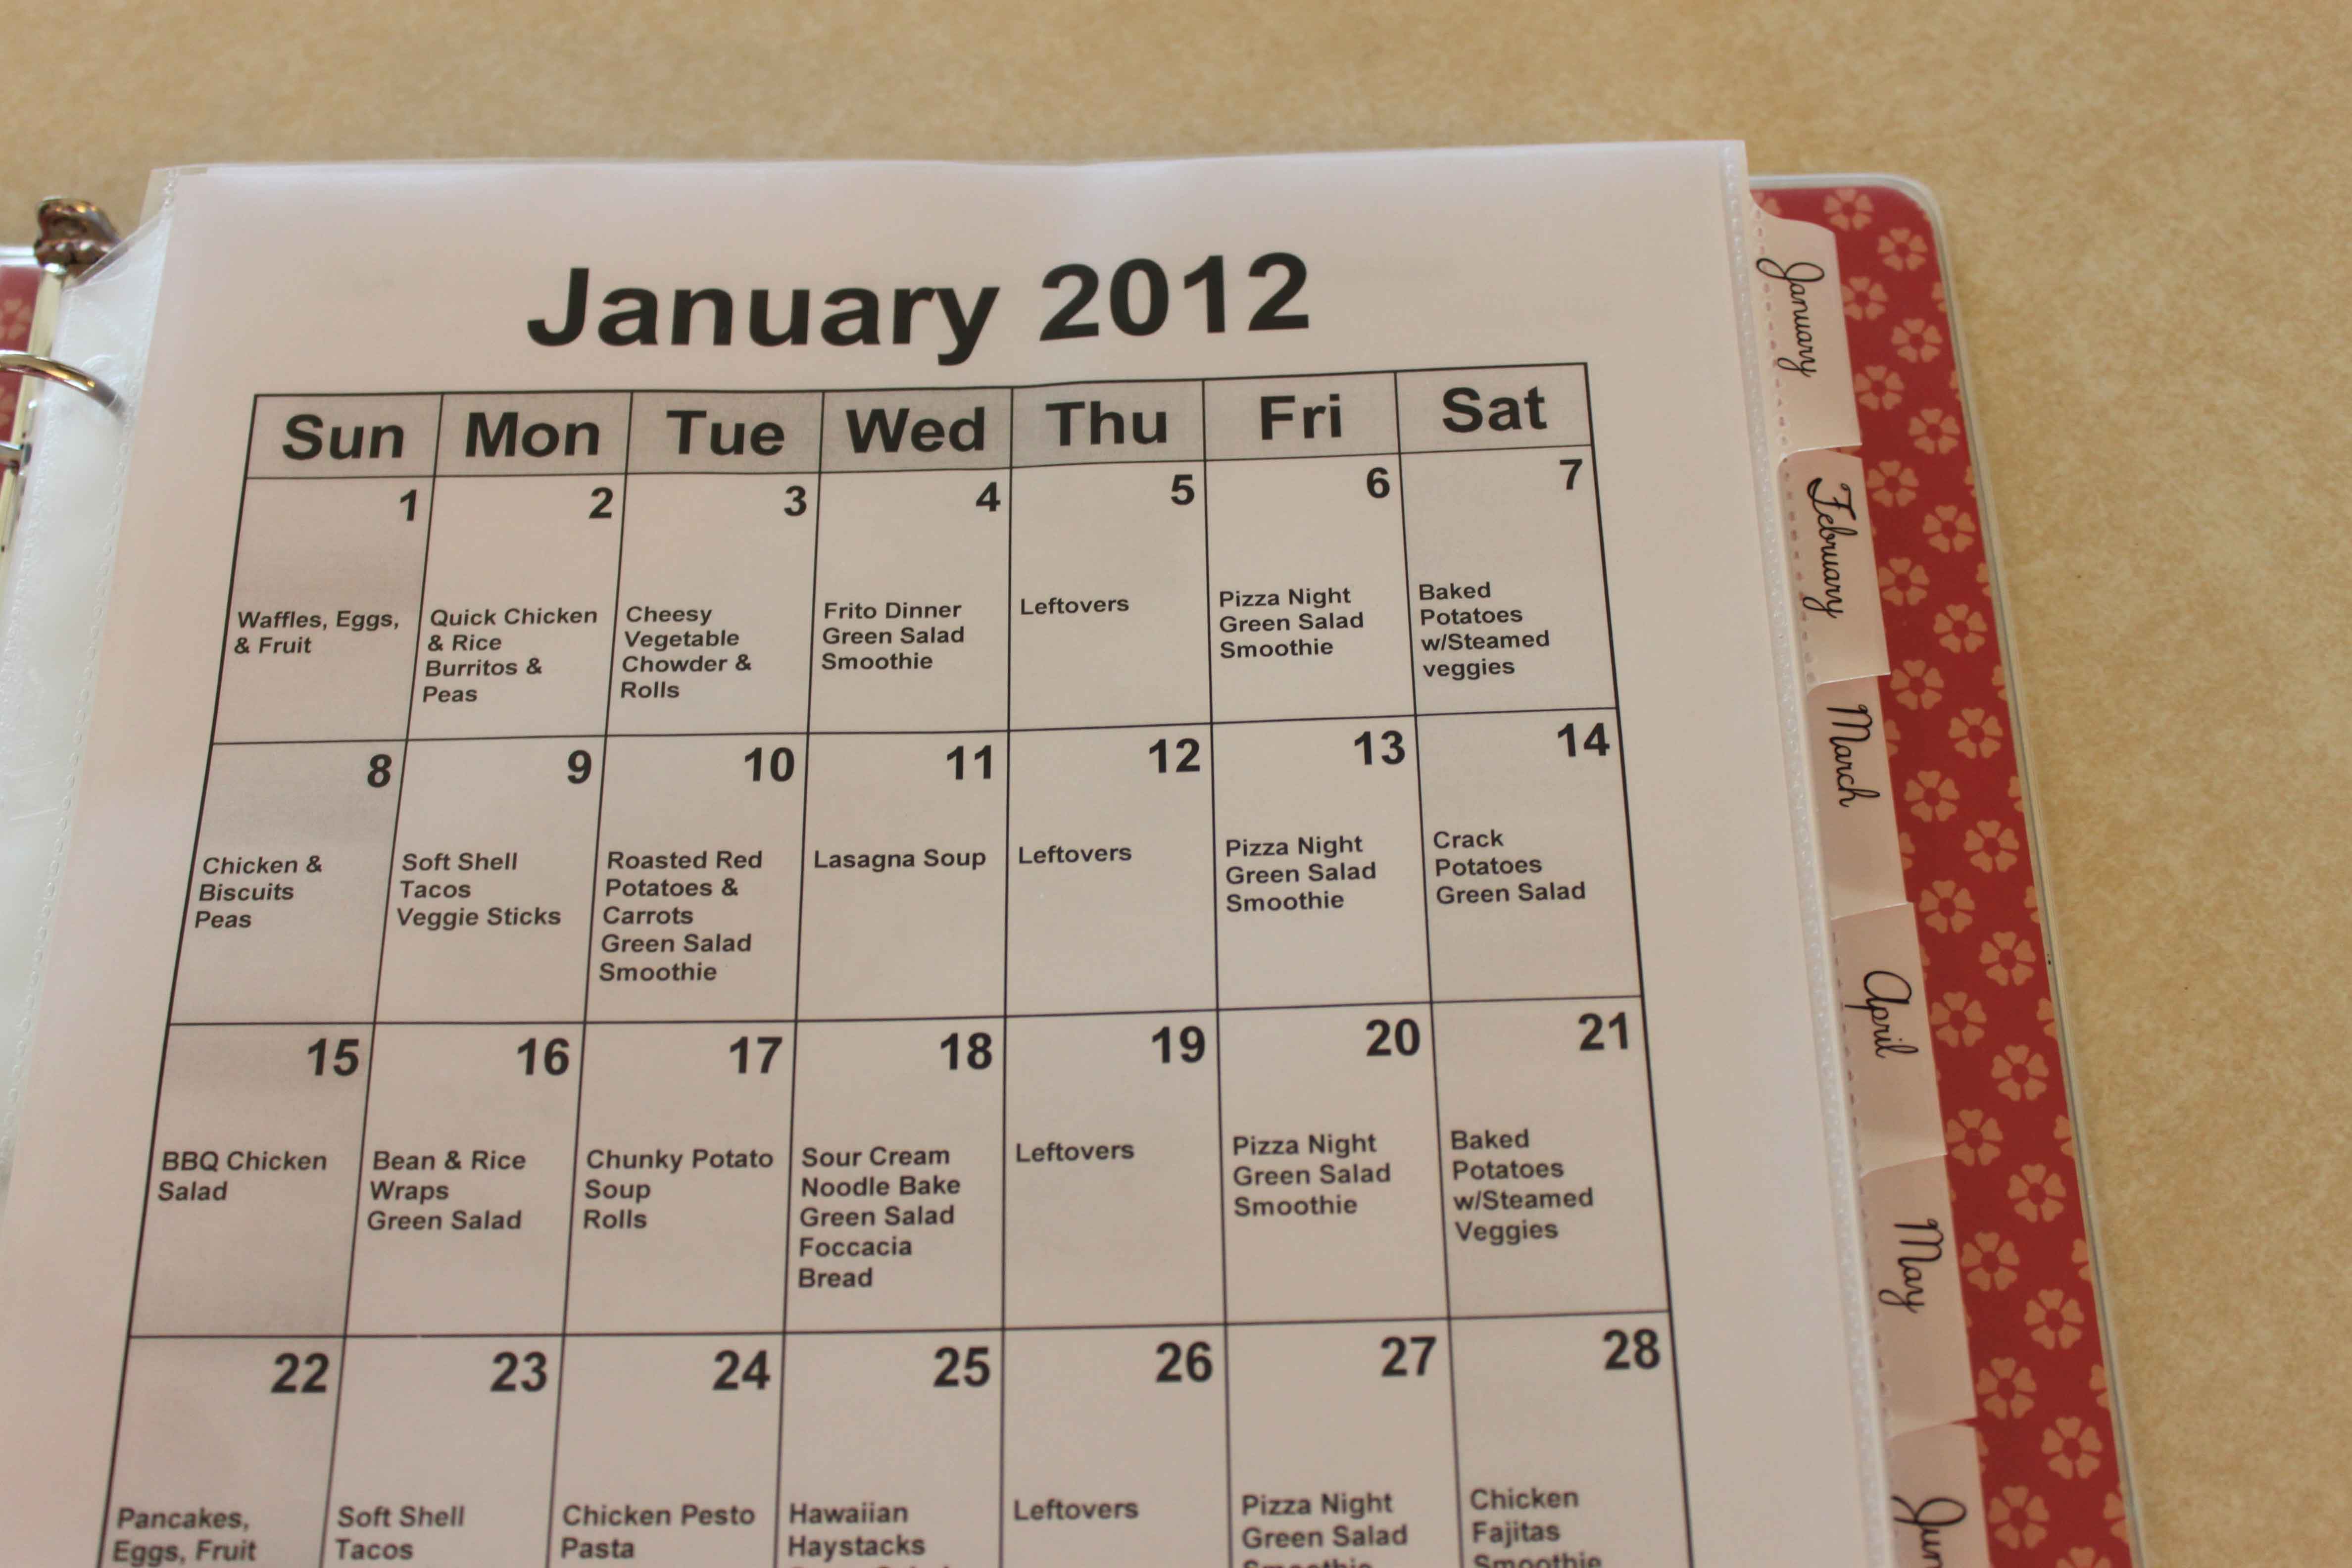
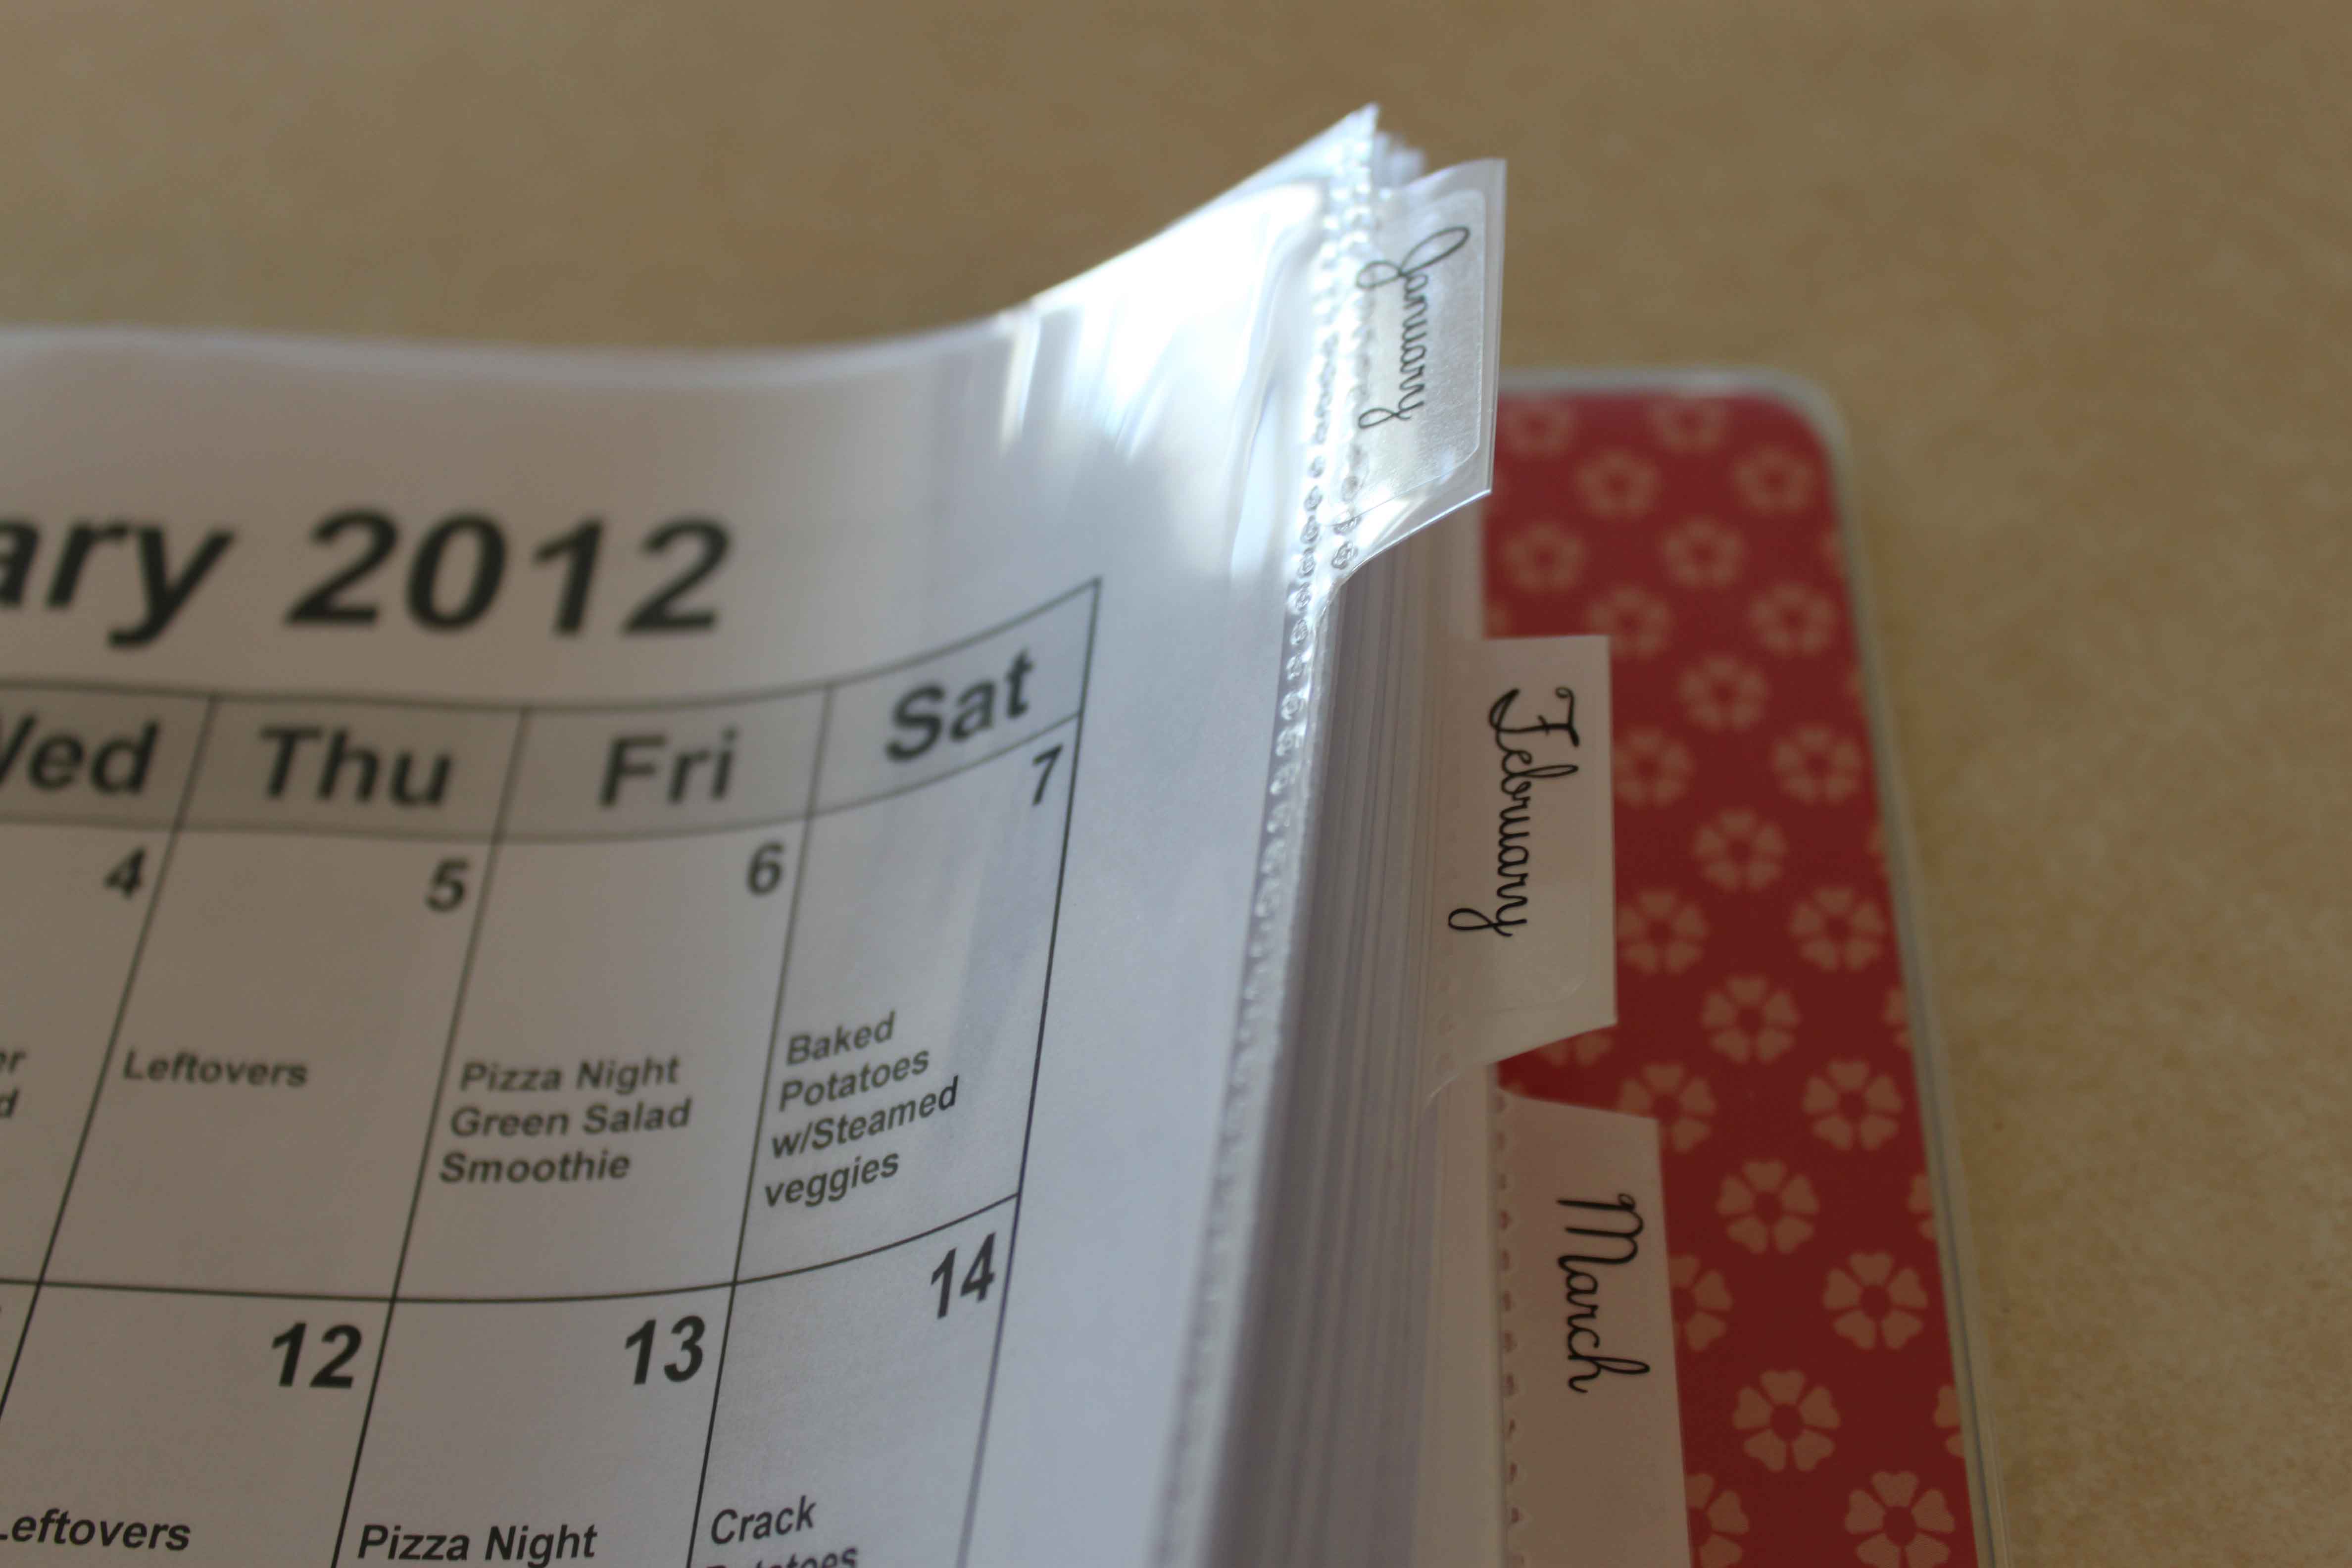
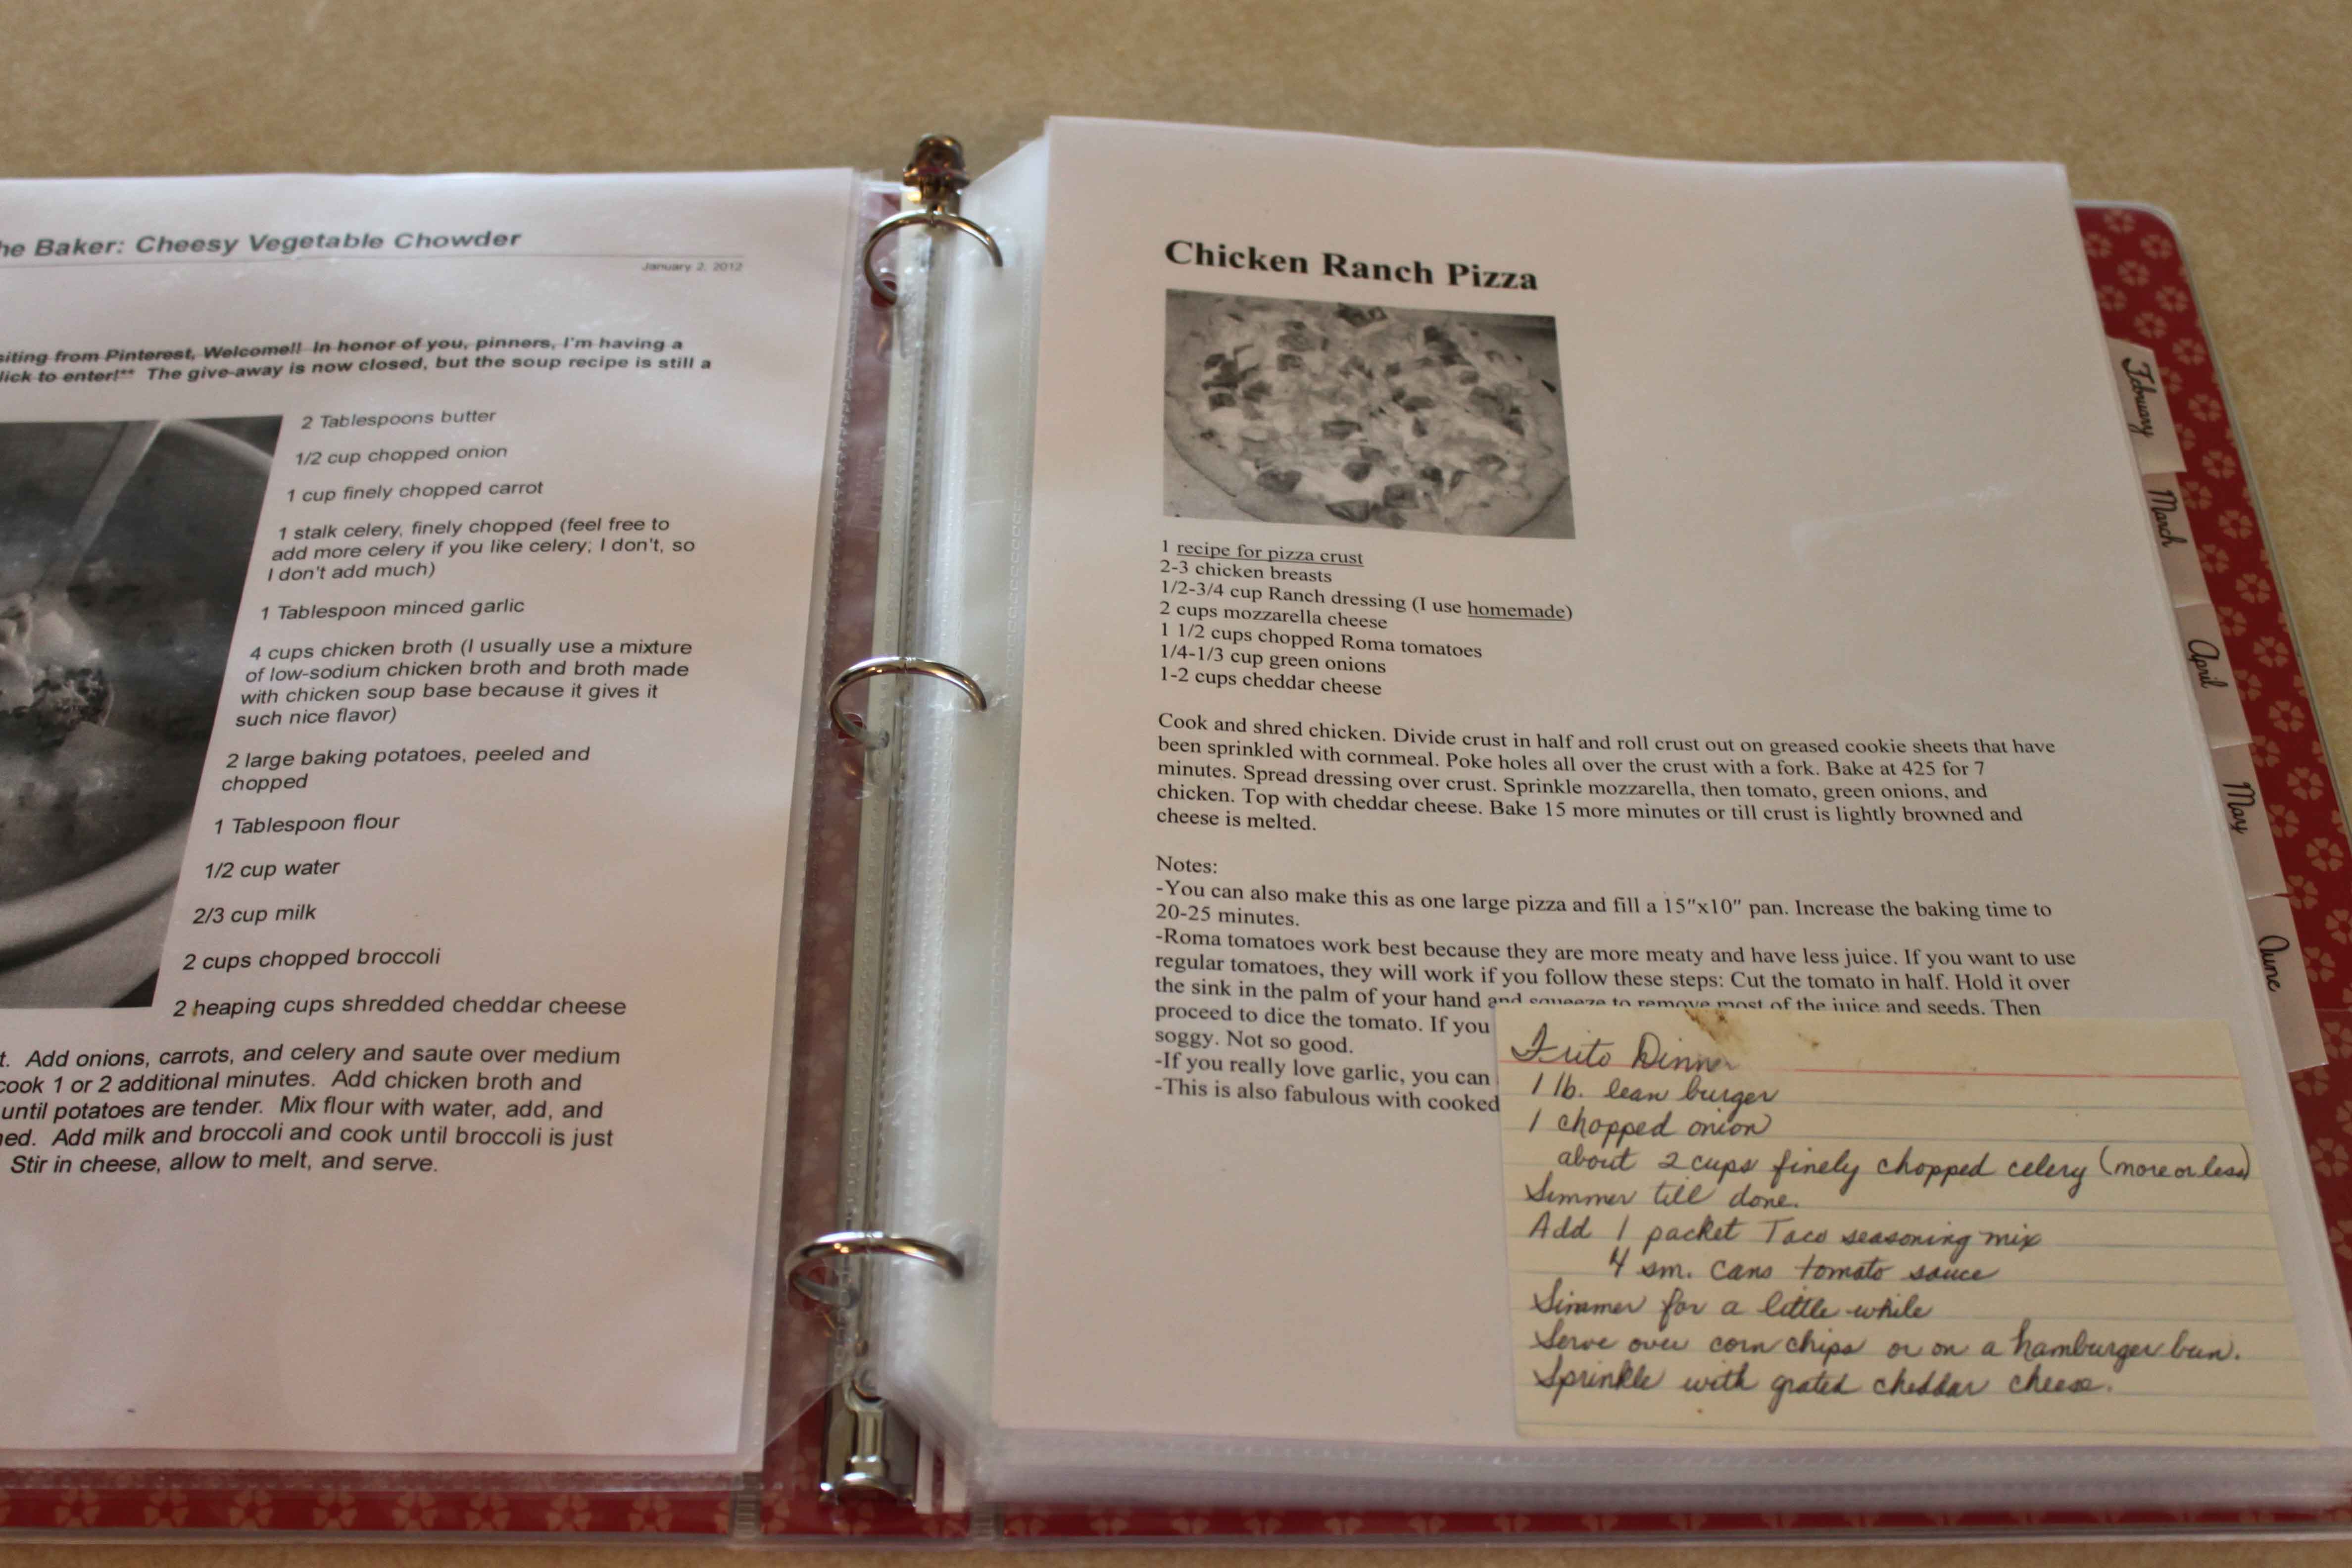
I also have some blank shopping lists behind each month so I can write down what I need to buy for those recipes. I usually only purchase any perishables and anything else I need to stock up on. It is really helpful to have the paper right there to write things down as I am going over things at the beginning of each week.
Now I have everything I need for the month in ONE PLACE in my menu planning binder. I don’t have to search all over. This will make it a whole lot easier!
Here is what you will need to make a menu planning binder for yourself:
binder (I used one I already had at home)
sheet protectors (to keep your recipes clean)
dividers for each month
blank shopping lists (or just plain lined paper works good too)
Check out these other posts if you haven’t already. Join me in cutting your grocery budget this year!
2012 Grocery Budget Crack-Down Plan
2012 Grocery Budget Crack-Down Plan: Menu Planning
A PYP Best Blog! Make your own Eggo waffles!
Just in case you missed this DIY recipe article on making your own frozen Eggo waffles the first time we shared it a couple of years ago, we are republishing it. After Marne wrote this blog originally, we got an awesome response. This is one of the PYP Best Blogs!
Last summer I posted about making your own “Eggo” waffles. I’m sure most of you already do this. I thought I would post it again because maybe there is someone out there who could use this idea.
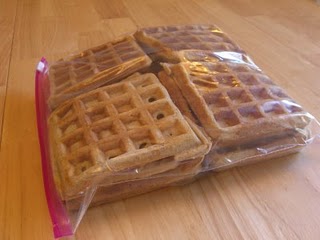
When you make homemade waffles or pancakes for breakfast, double or triple the batch on purpose. That way you can freeze some for later. Whalla! Homemade “Eggo” waffles.
We had homemade wheat waffles with cinnamon syrup for breakfast this morning. I made 20 extra waffles, fit them in this Ziploc bag, squeezed out the extra air, and now I have a few breakfasts done during the next few weeks. I love it!
Doing this does take a little extra time, but it’s worth it! Your family is getting homemade goodness instead of the stuff from the store that is full of high fructose corn syrup, hydrogenated oils, and artificial colors/flavors. You know what is in these…you made them! And, it really does save money. You may think that box of Eggo waffles at Costco is a good deal, but if you make waffles from scratch and freeze them yourself, it is still much, much cheaper.
A few tips shared before that will help with the freezing process:
Put some wax paper in between the waffles before freezing them. This will help when taking them apart.
Warm them up for a few moments in the microwave after taking them out of the freezer. This helps them come apart easier.
Put in the toaster for a crispy taste, or warm up in the microwave for a softer taste.
A PYP Best Blog! DIY Recipes: Homemade Meatballs!
Just in case you missed this DIY article on making homemade meatballs the first time we shared it a couple of years ago, we are republishing it. After Marne wrote this blog originally, we got an awesome response. This is one of the PYP Best Blogs!
Tuesday I picked up my 40 lb box of ground beef from Zaycon and needed to prep it. One of my favorite things to have ready in the freezer are homemade meatballs. I don’t particularly like making them, but I love having them all ready for meals. So I just remind myself of that. I made and froze 208 meatballs!! Holy cow.
Here is how I like to do homemade meatballs!
HOMEMADE MEATBALLS
1 1/2 lbs lean hamburger
3/4 cup quick oats
1 egg
1/4 cup finely diced onion
1/4 cup milk
1 tsp salt
1 tsp ground pepper (use another teaspoon of pepper if you love pepper flavor)
1 tsp Worcestershire sauce
2 Tbsp ketchup
1 Tbsp dry parsley
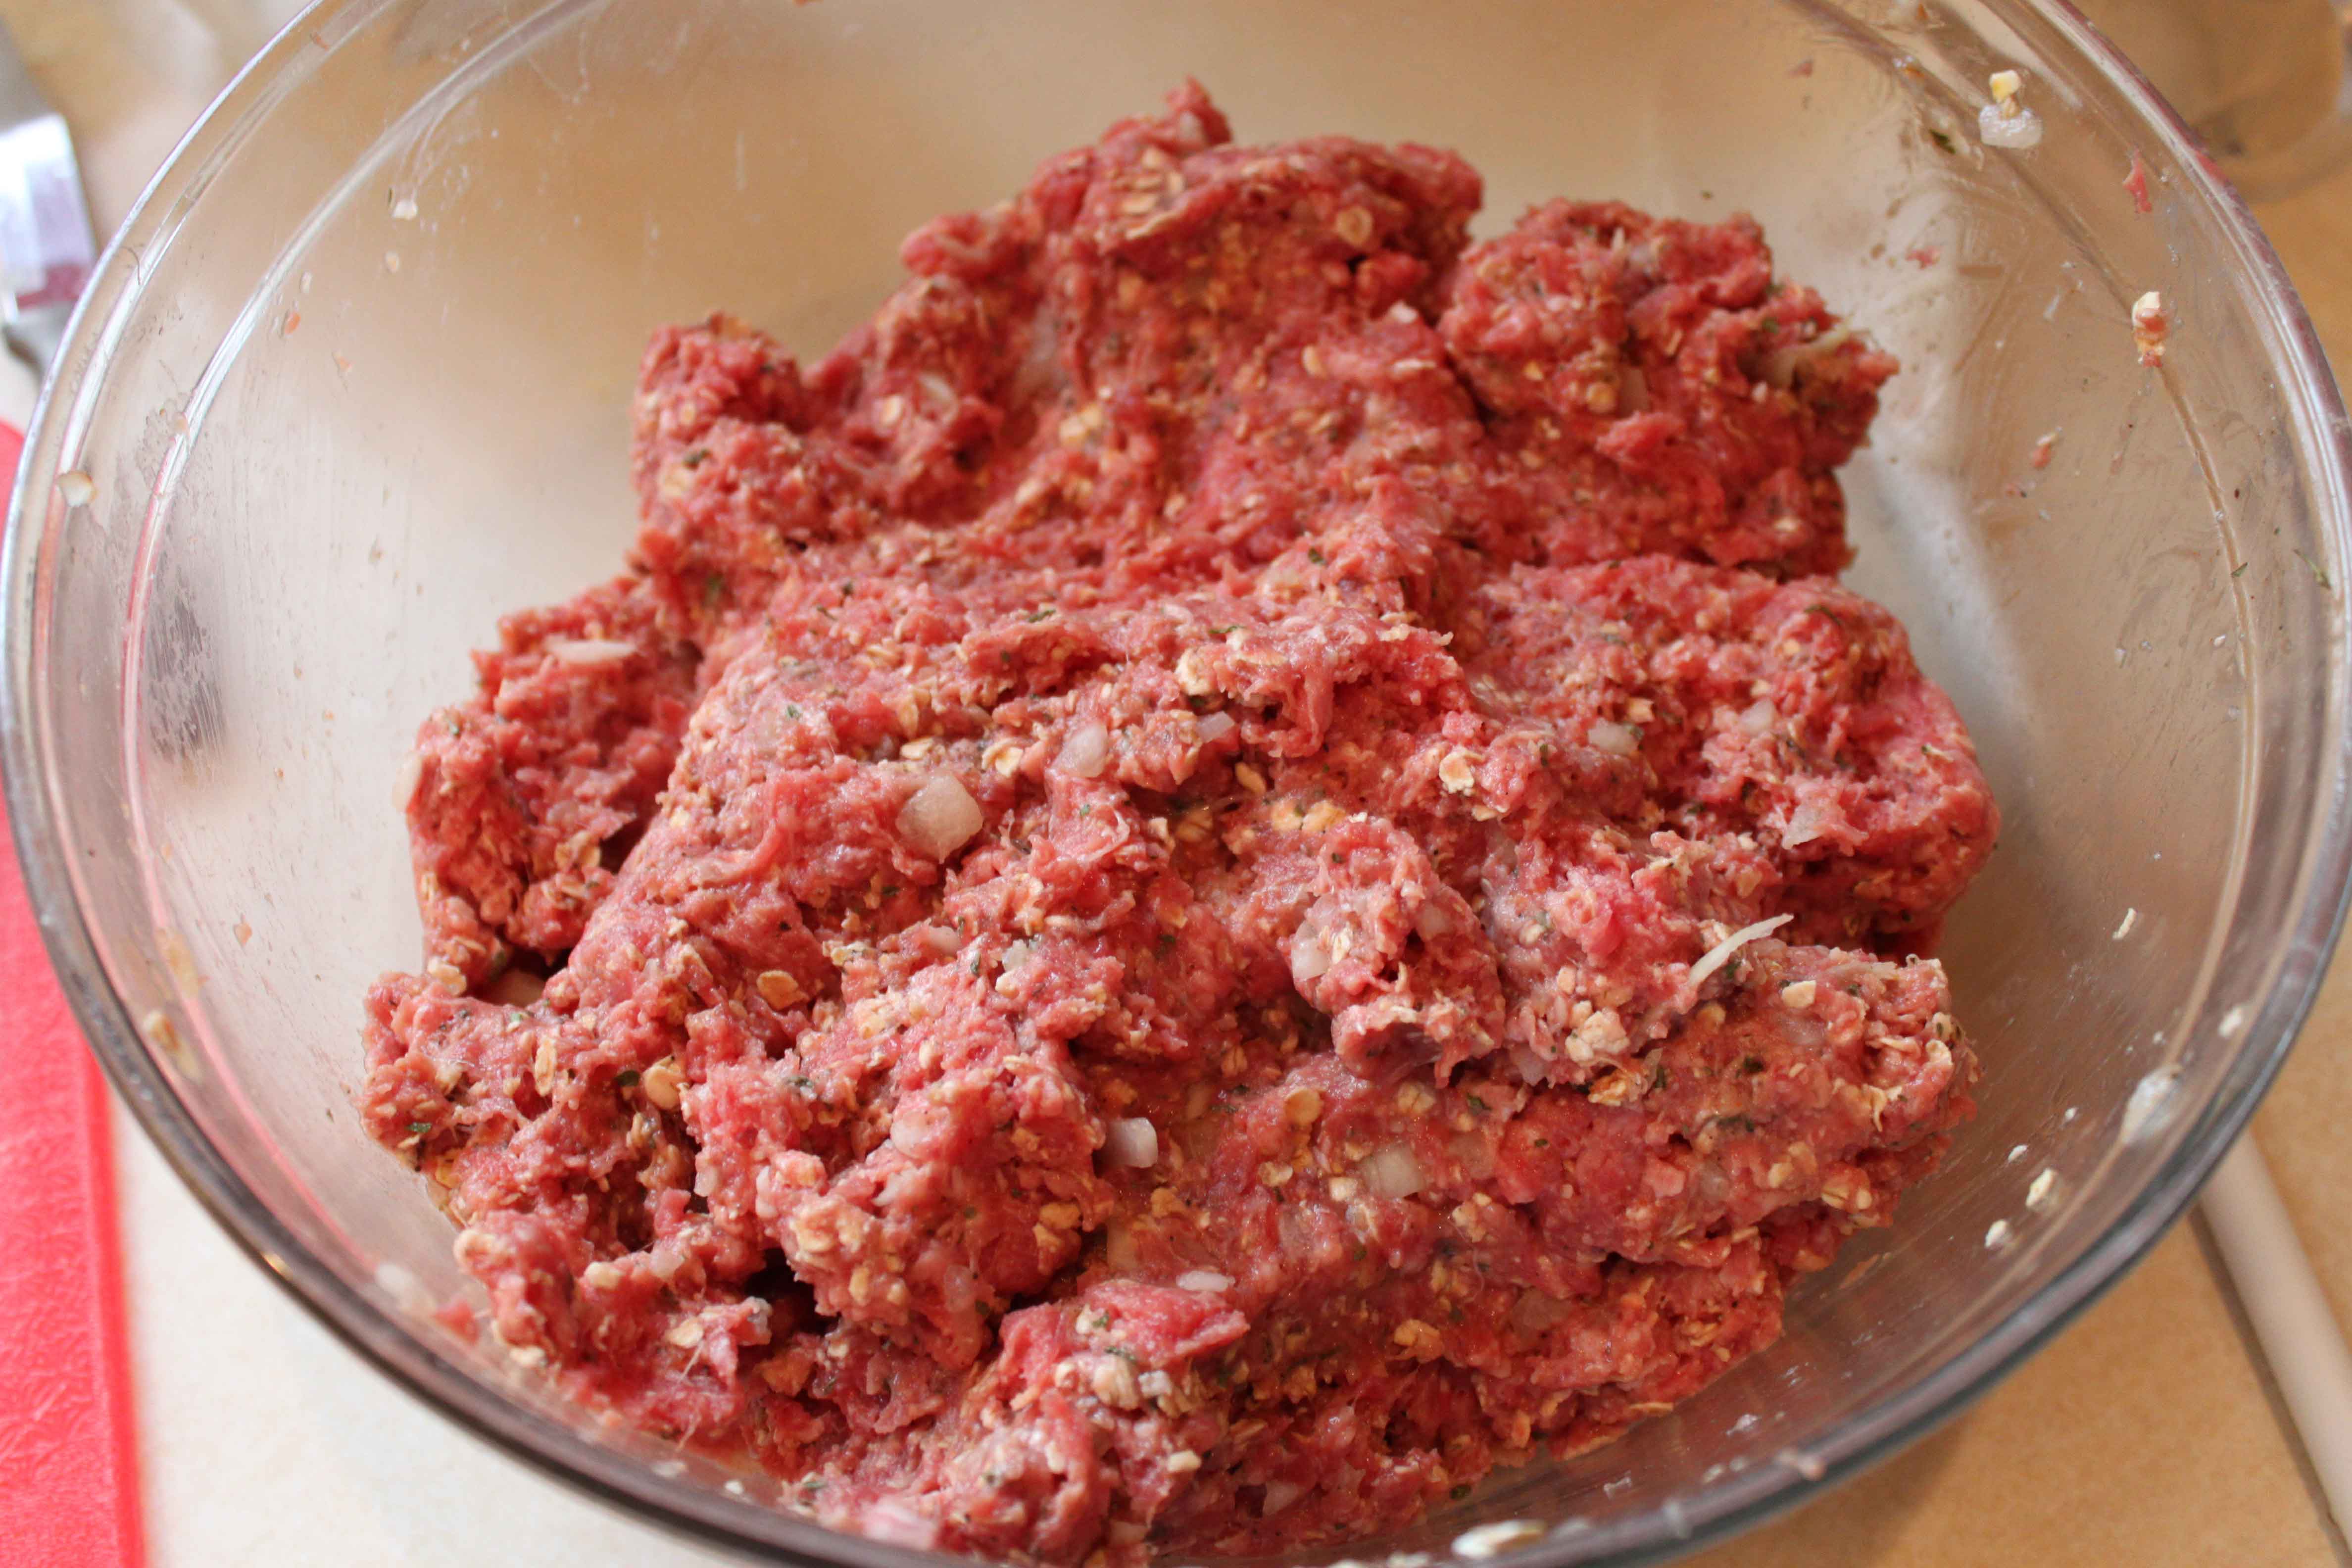
Put all ingredients into a large bowl (I love using glass bowls as they clean easily from all the germs from raw meat).
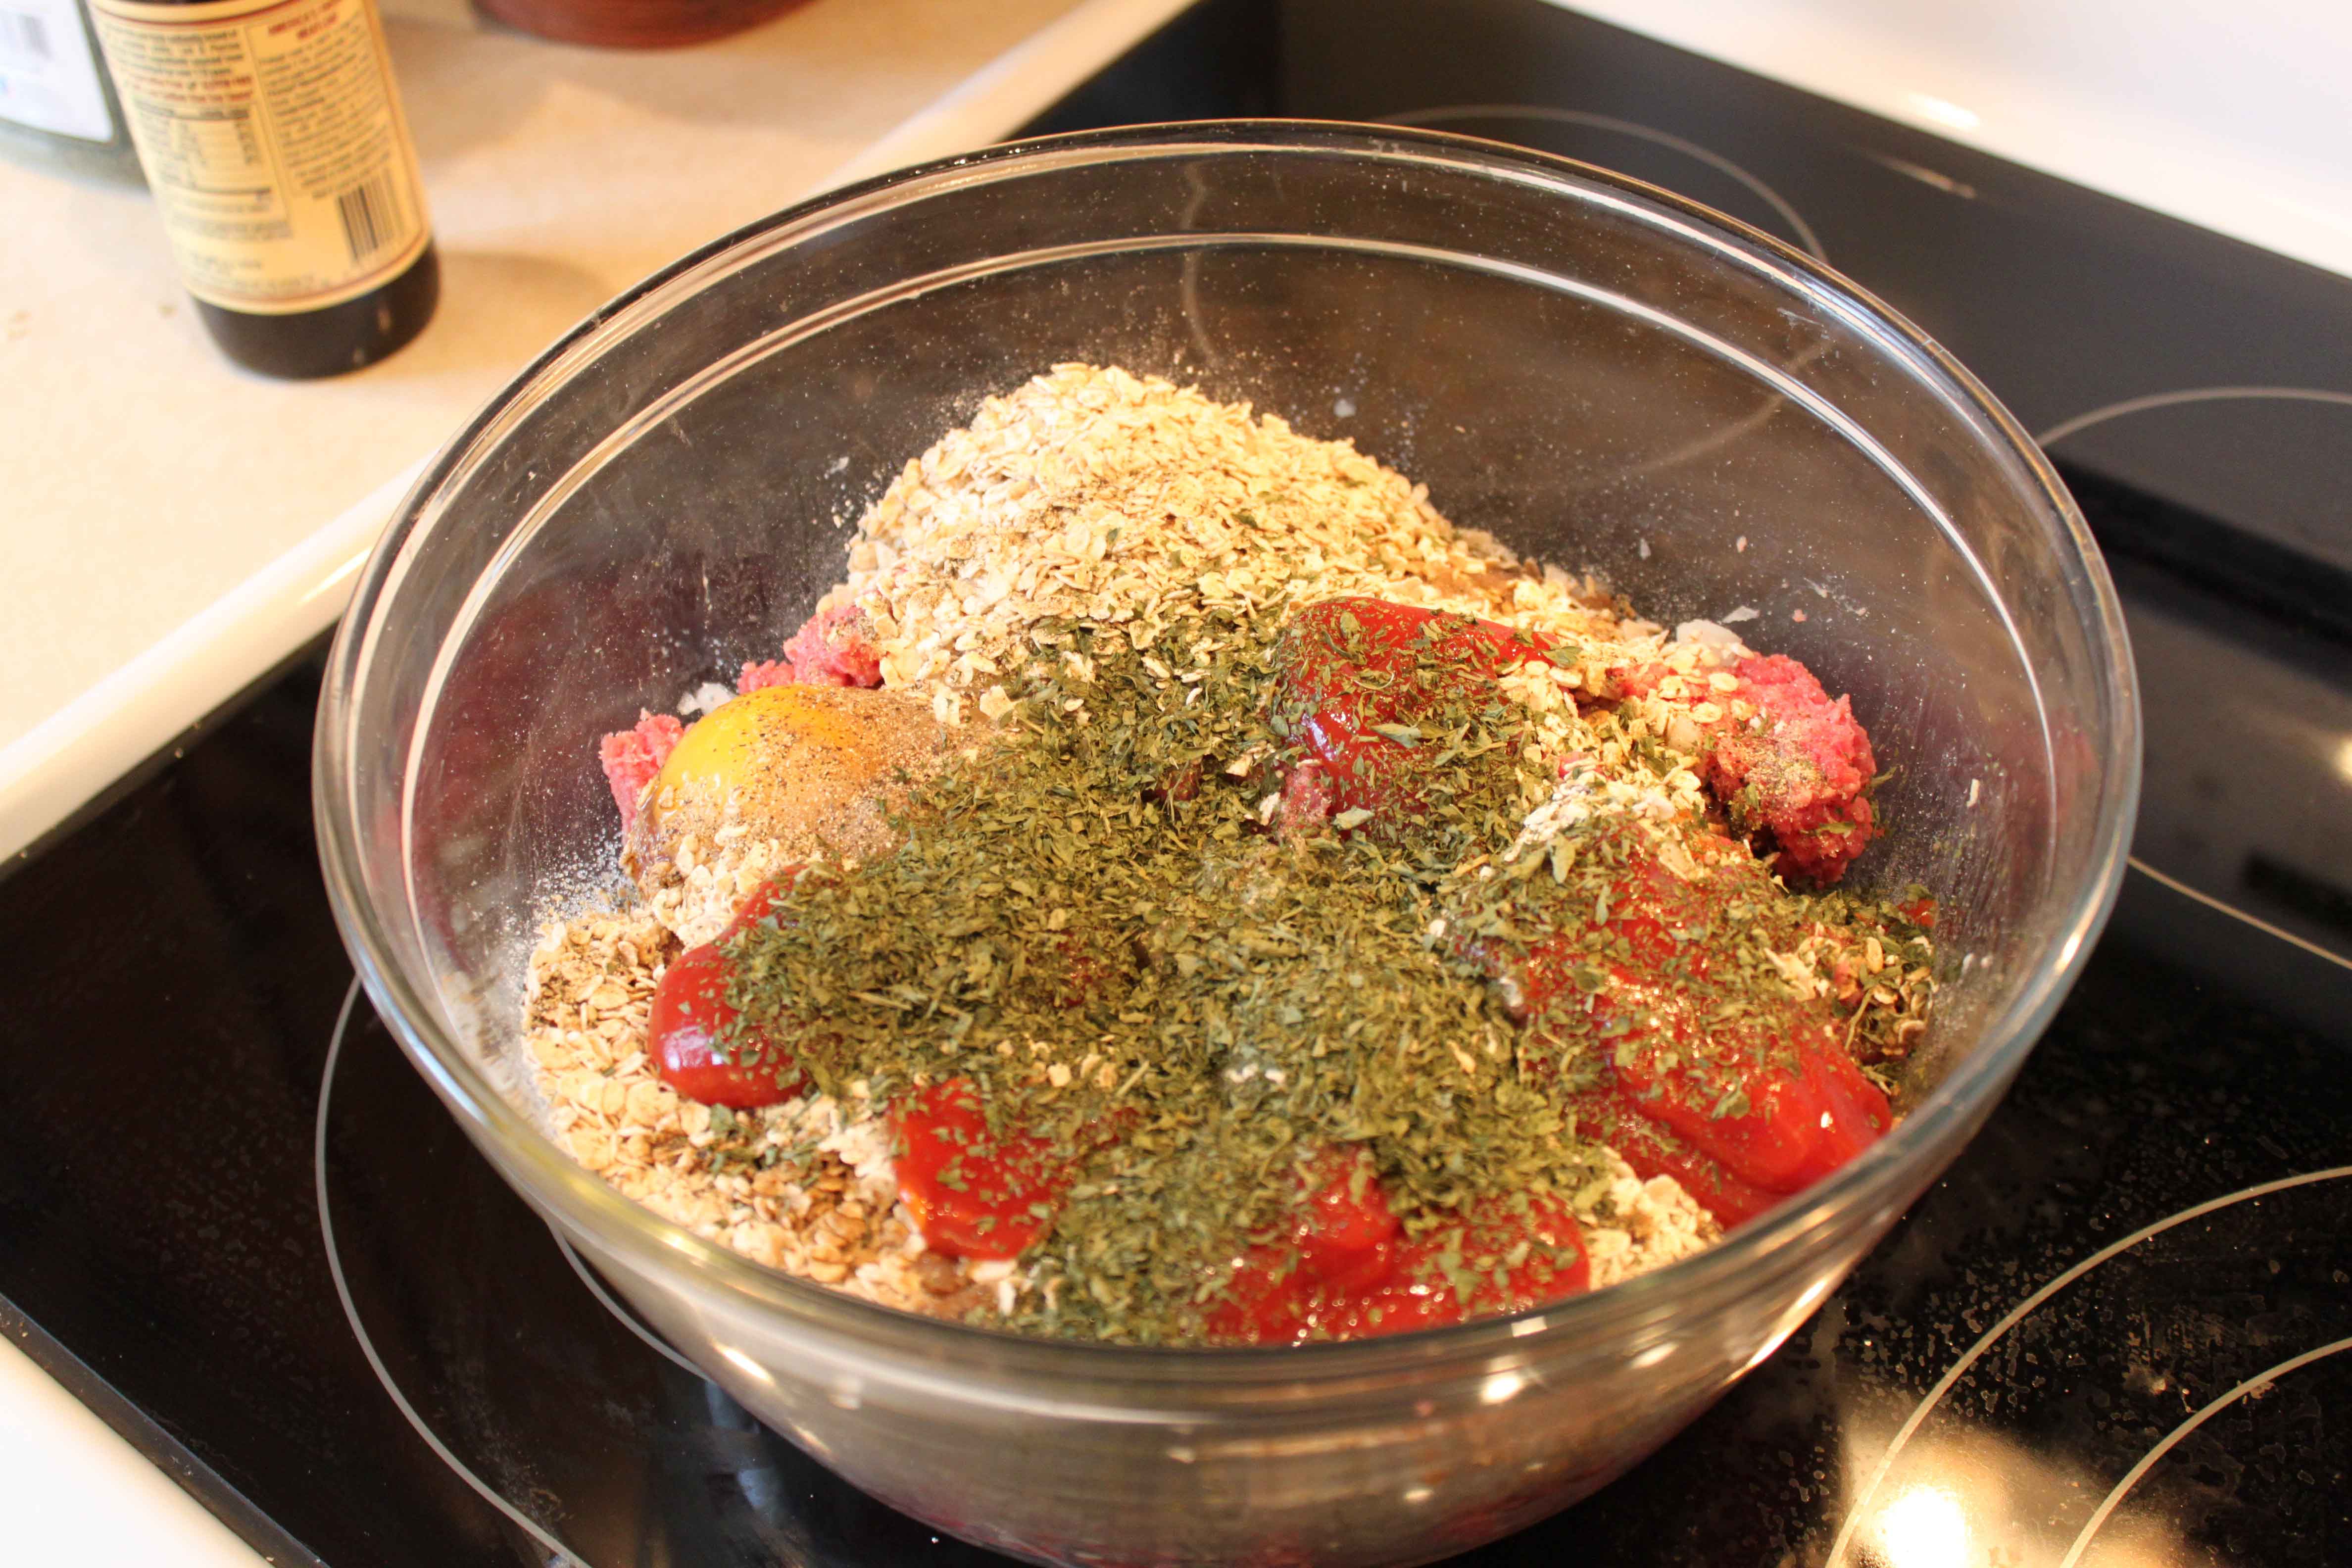
Mix all together WELL. Use your hands to make sure it is well-incorporated. Make sure you take any rings off. 🙂 It will look like this:
Now, form the meat mixture into balls and place on a cookie sheet lined with foil (it makes clean up a breeze! Bake at 400 for about 18 minutes, shaking or stirring occasionally.
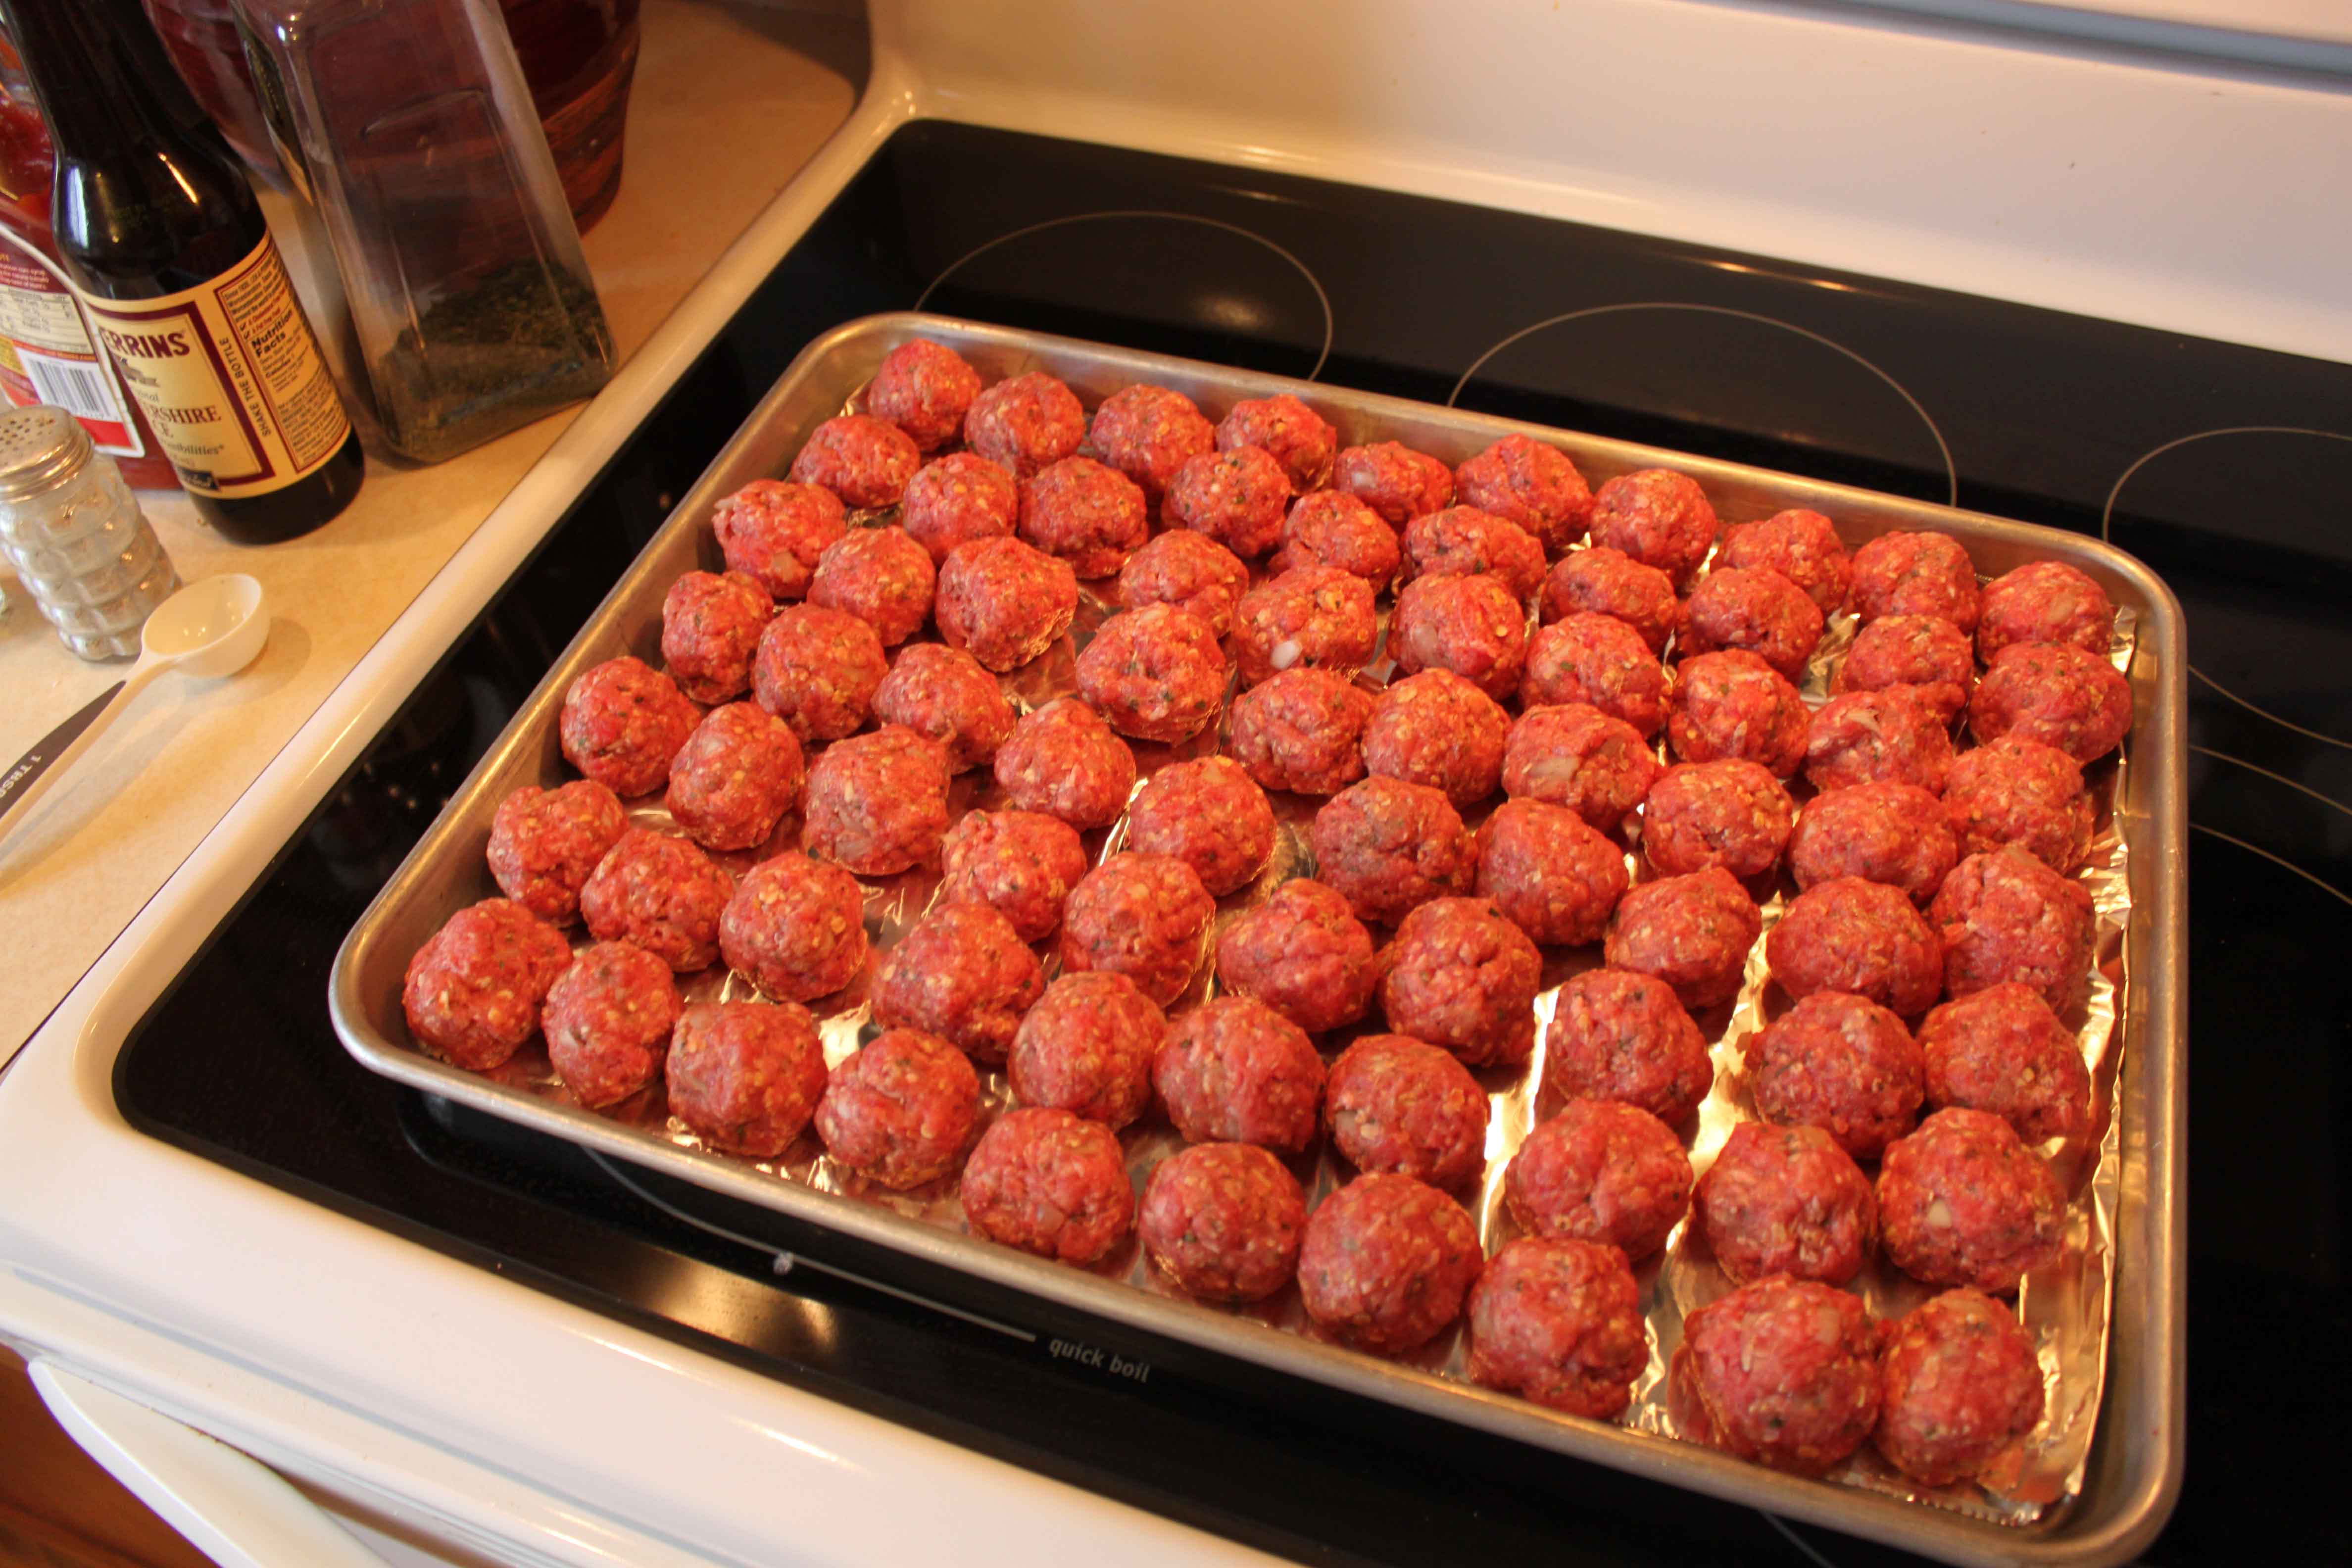
When they are done cooking, they look like this, and smell soooo good!

Then what I like to do is freeze them. I have a Foodsaver which is fantastic. It is totally worth the investment if you like to freeze foods. It really does help keep foods fresher longer! All the air is sucked out so there will be no freezer burn. Here are all the meatballs I froze yesterday.
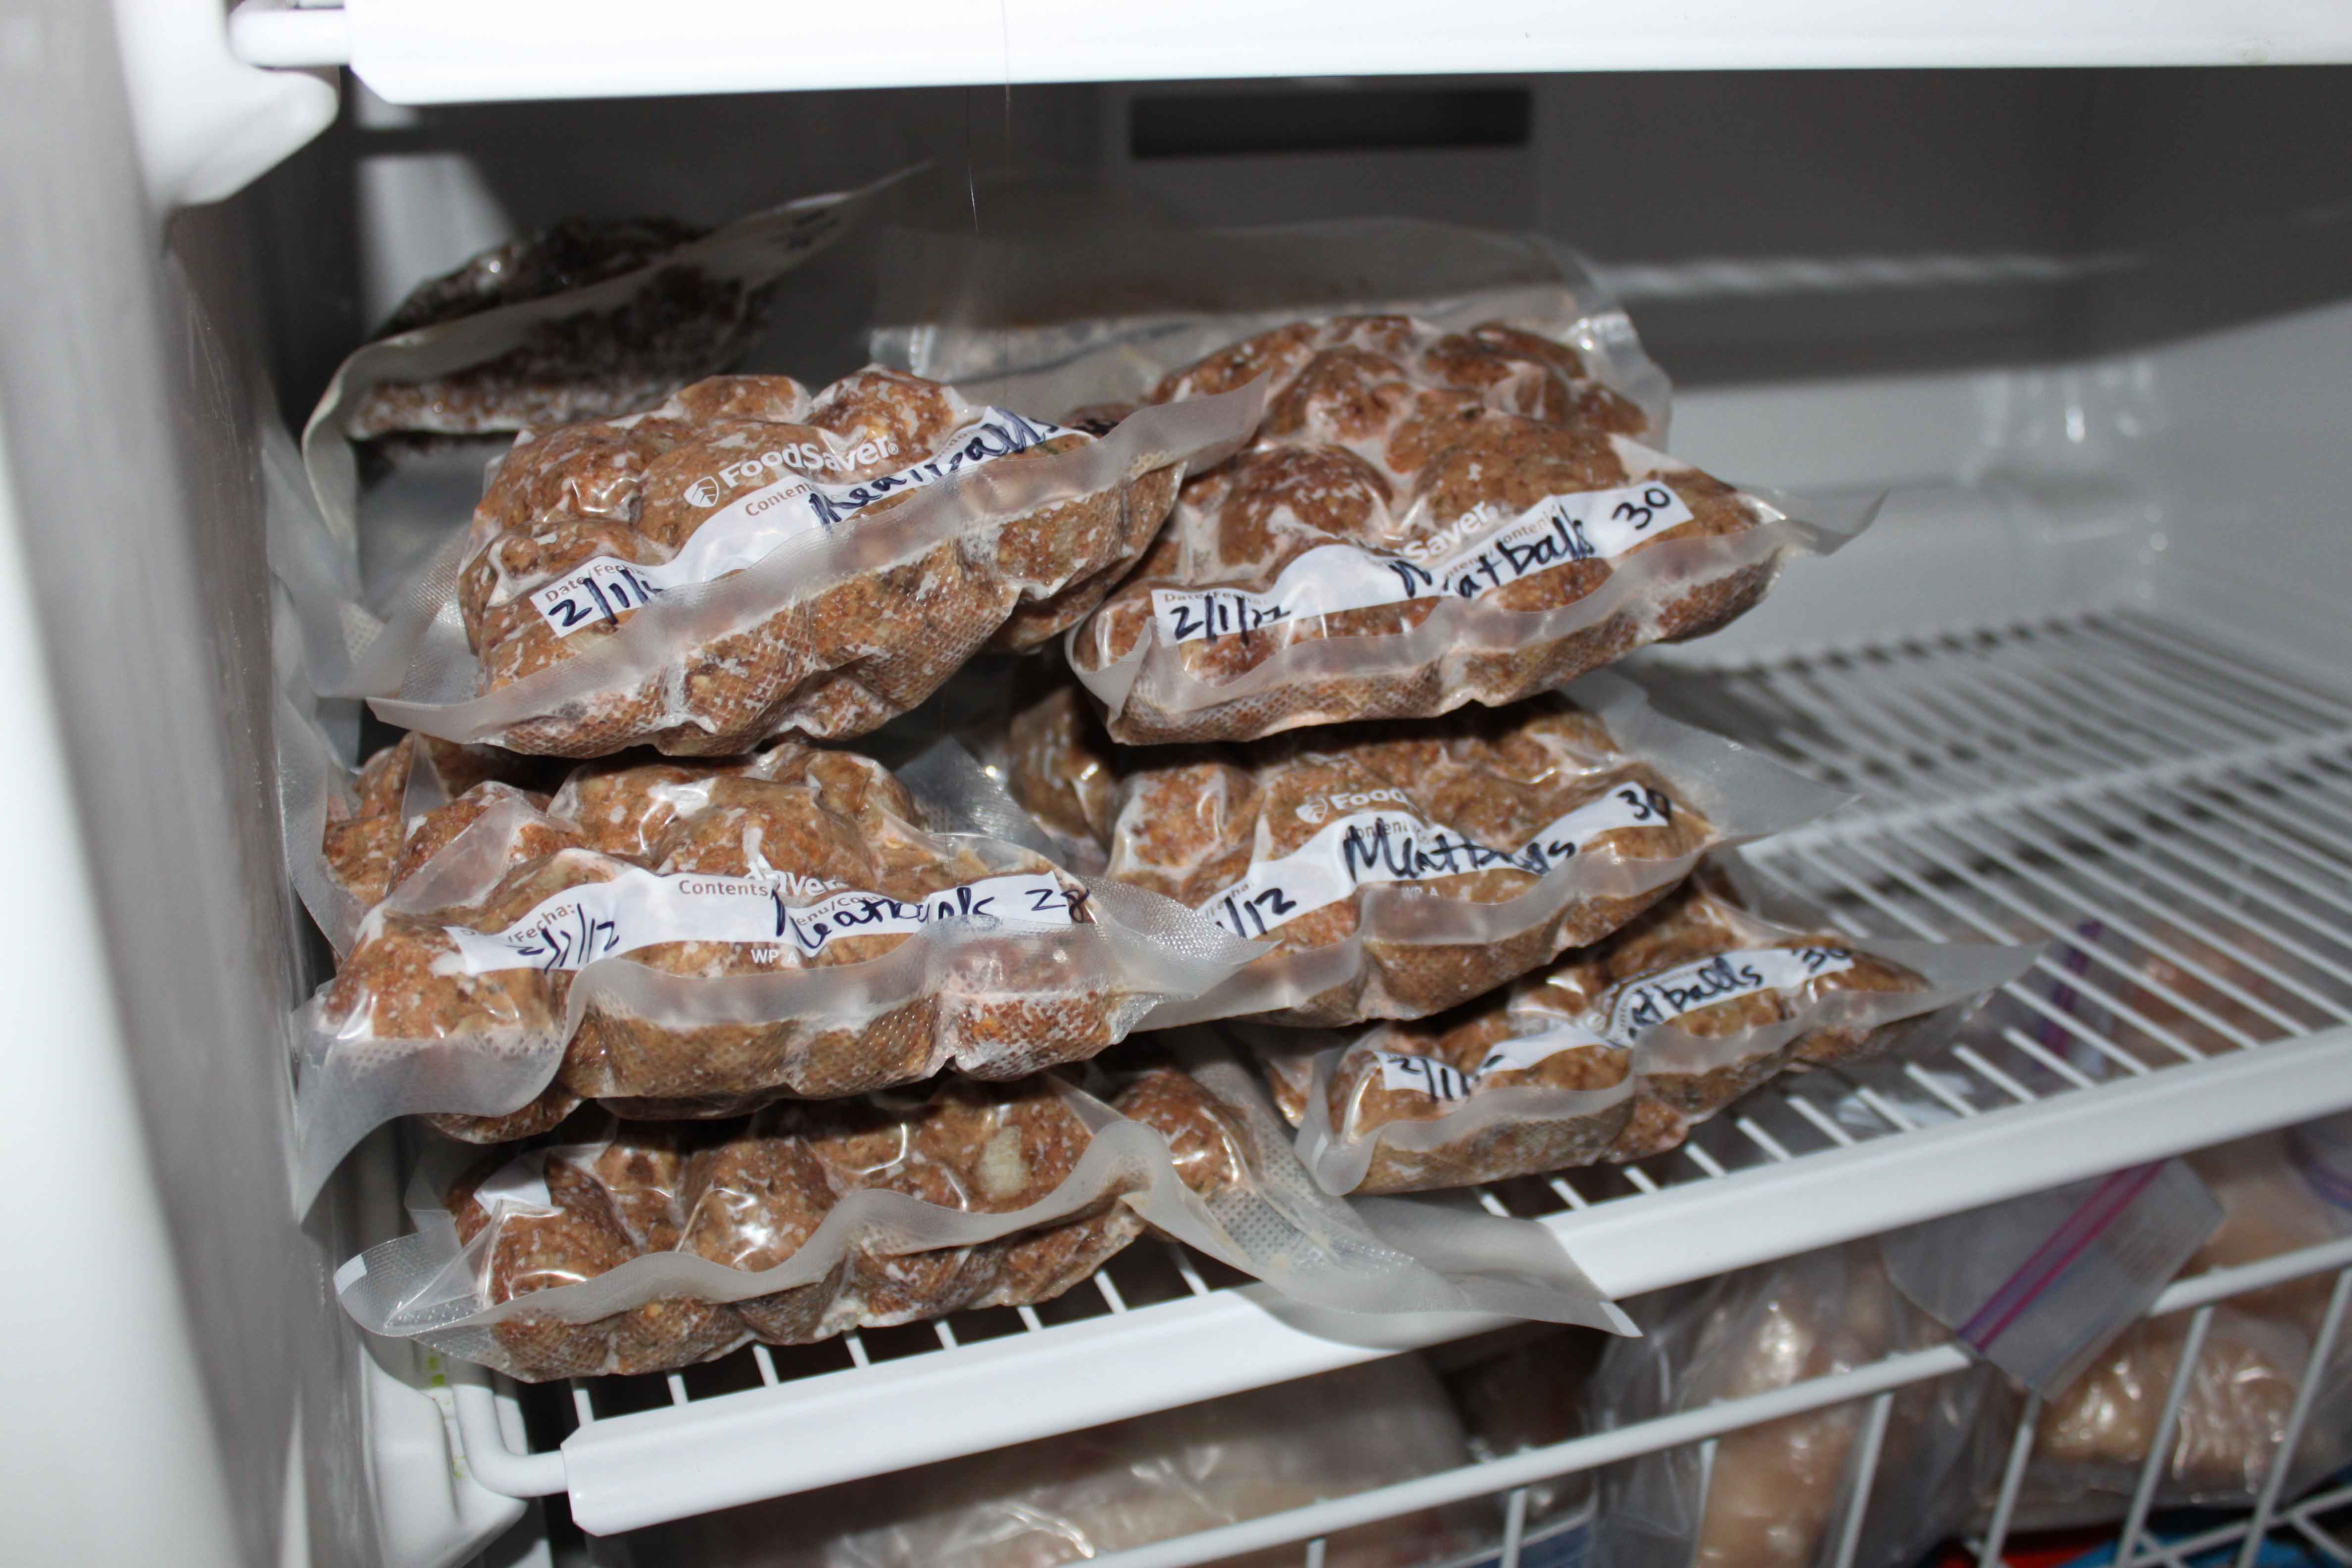
I also cooked about 10 lbs into regular ground beef to use later in recipes. I froze that in Foodsaver bags too. After cooking 20 pounds of meat today, I still have 20 more pounds to cook up. Wish me luck!
Life Extension Magazine Just $3.99 for 1 Year!

Best Deal Magazines LINK
Deal of the Day – Life Extension Magazine Just $3.99 for 1 Year at Best Deal Magazines, September 23rd Only!
A PYP Best Blog! Making a jewelry organizer!
Just in case you missed this DIY article on making a jewelry organizer the first time we shared it a couple of years ago, we are republishing it. After Marne wrote this blog originally, we got an awesome response. This is one of the PYP Best Blogs!
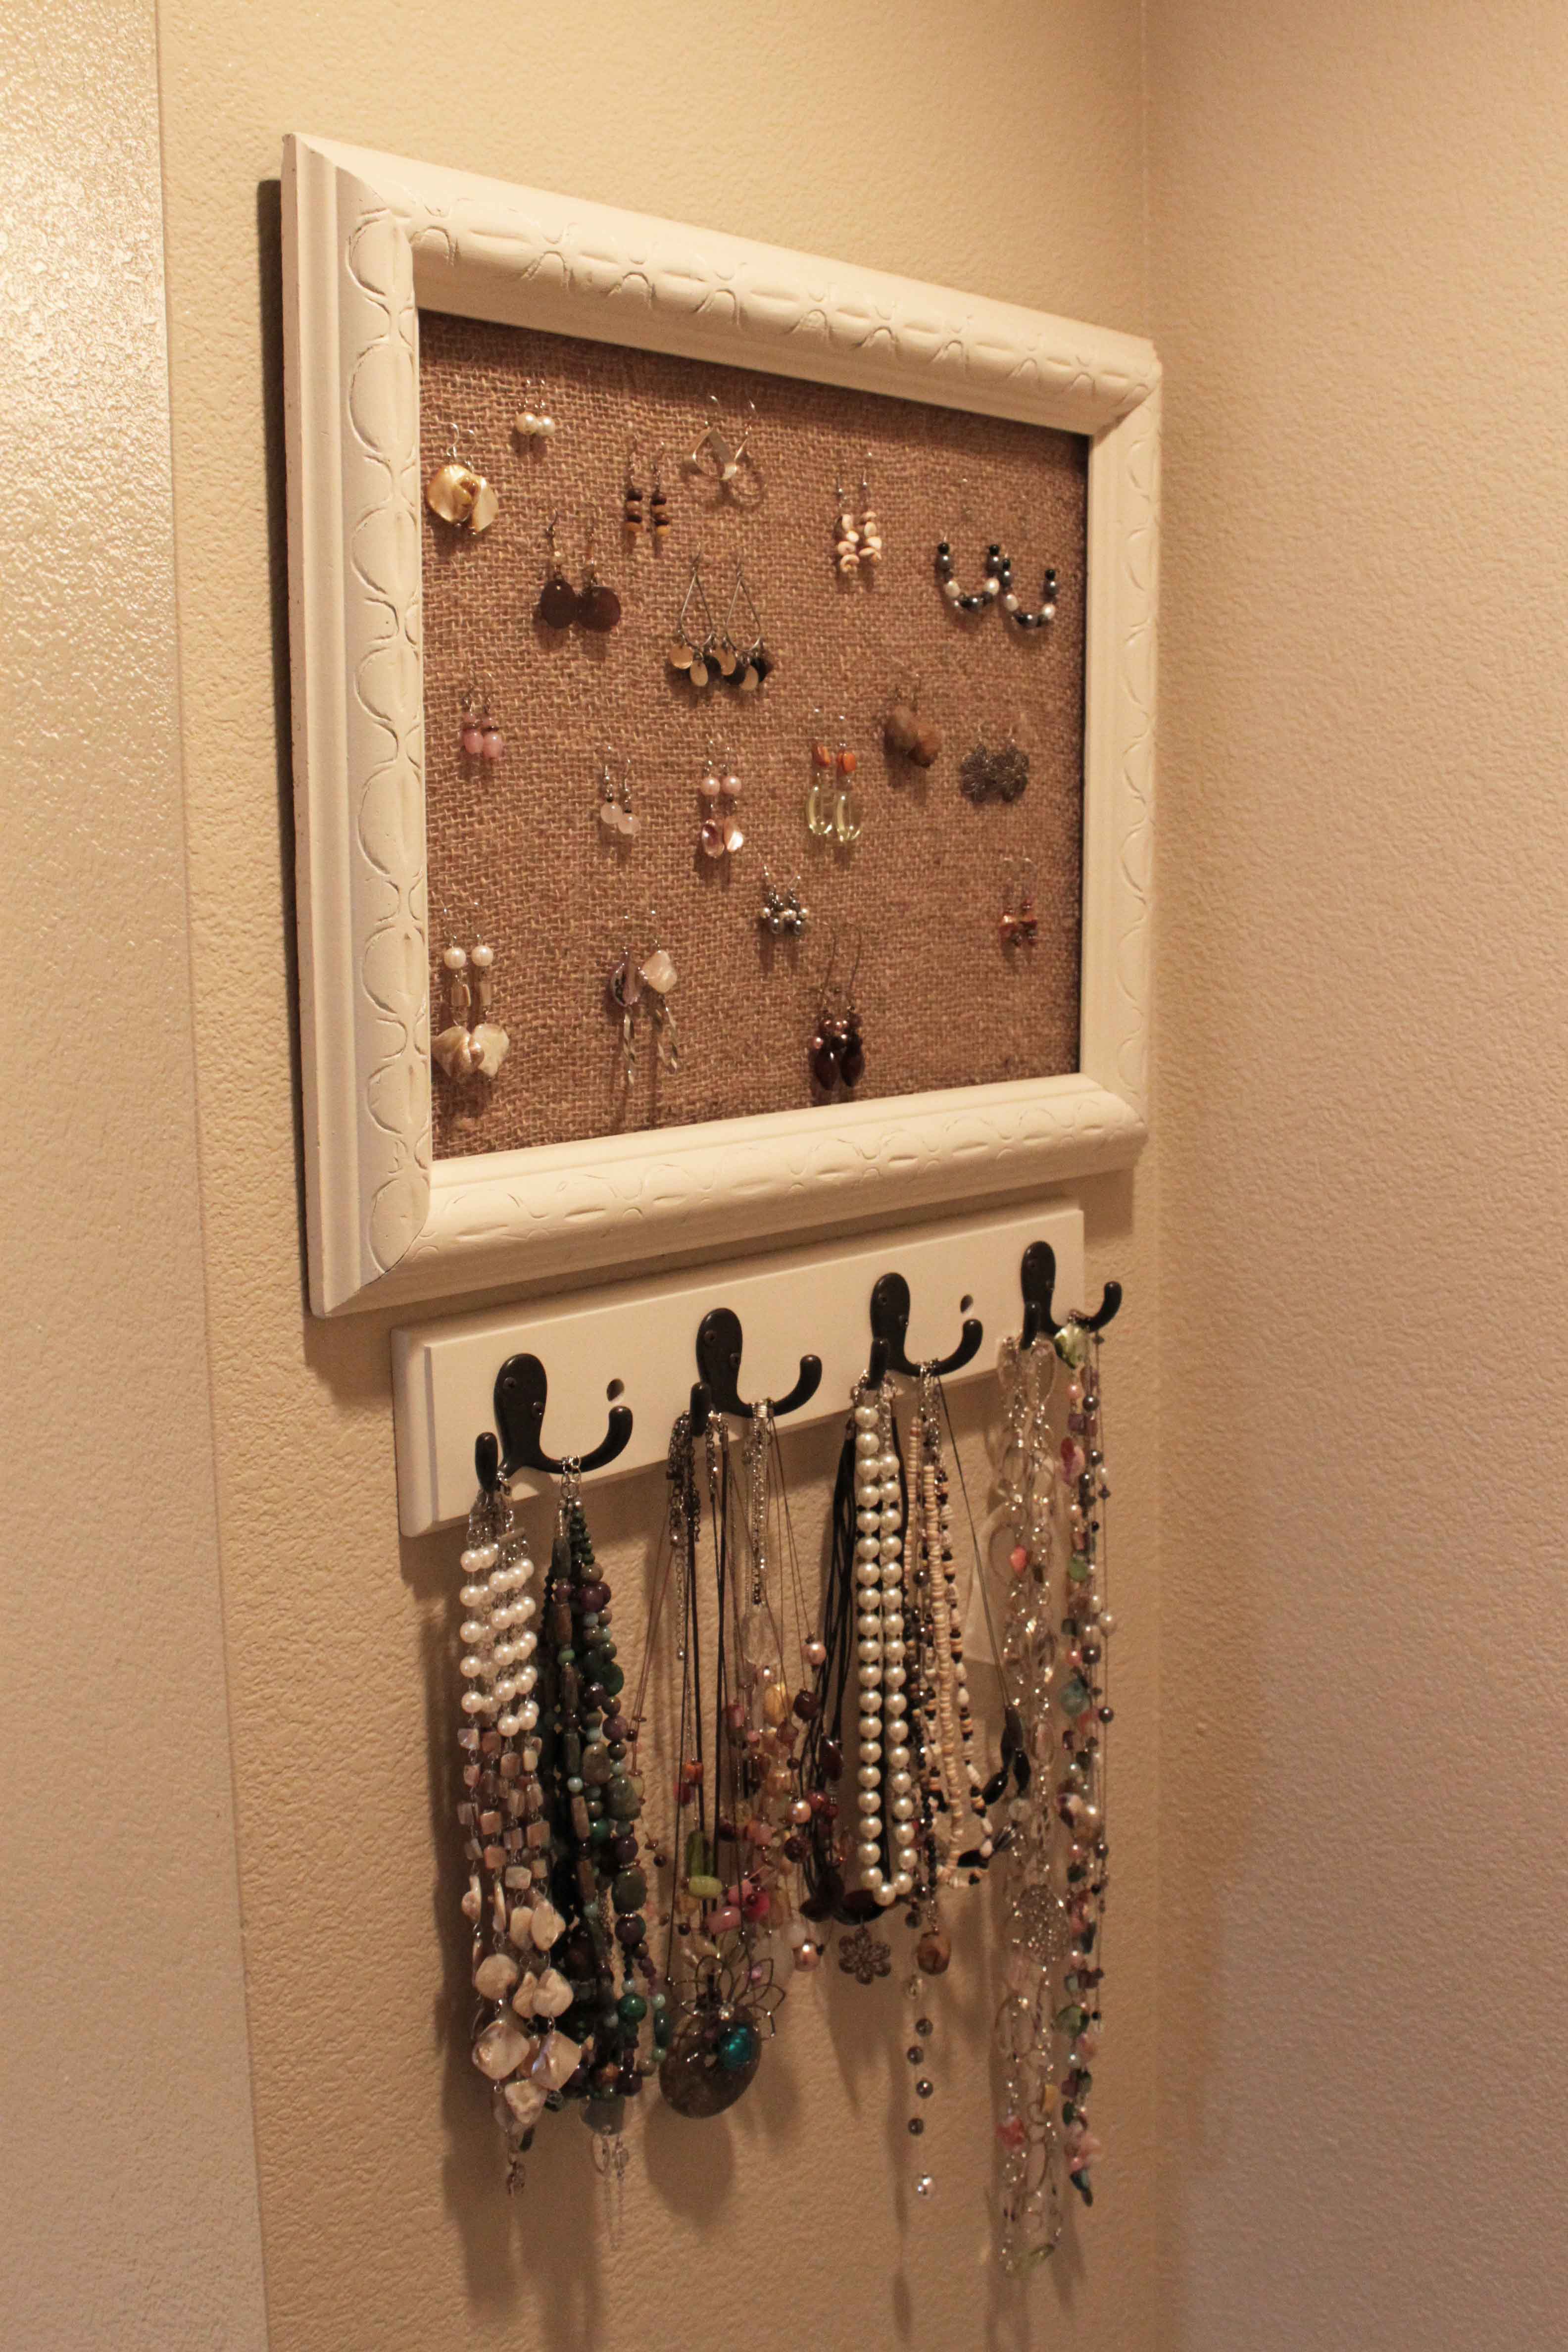
I have been wanting to organize my jewelry for awhile. It has been a heaping mess for quite some time! Here is what I came up with – a fun and easy jewelry organizer! Sorry, I didn’t take any before photos, but I can tell you what I did, it was really easy!
Supplies
Old empty frame ($1.49 at Goodwill)
Burlap sack (already had)
spray paint (already had)
hook thing for my necklaces (already had)
staple gun
screwdriver
First I spray painted primer on my frame. It was a really ugly blue. Then I did a couple coats of my favorite spray paint, Rustoleum Antique White, that you can buy at Lowe’s. Then I cut up an old burlap sack I’ve had in my garage for years (yes, I did wash it first!). I stretched it tight behind the frame then used the staple gun to secure it. Easy and fast!
Then the holder my necklaces are on I have had in my garage for a few years, it was an ugly cherry wood color. It used to be used to hang coats on before we redecorated our family room. So all I did is use a screwdriver to take off the hardware, spray paint with Antique White, then put the hardware back on. Super easy!
I LOVE how my jewelry organizer looks! Fits my style and my budget! Talk about pinching your pennies. Look around your house to see what you already have before starting a project. You might be surprised to find things that will work, with a little spray paint and imagination.
A PYP Best Blog: Crock Pot Dinners Save Time and Money
 Just in case you missed this post on Crock Pot Dinners Saving Money the first time we shared it a couple of years ago, we are republishing it. After Tiffany wrote this blog originally, we got an awesome response. This is one of the PYP Best Blogs!
Life seems to just keep getting busier and busier. It never really feels like we have time to slow down and enjoy the time we have. I know most of this is probably my own fault. I could choose to have the kids involved in less activities and make time to enjoy life’s simple pleasures but the truth is it just isn’t going to happen this week.
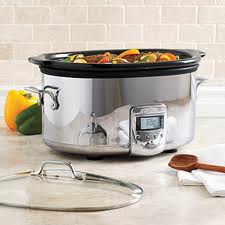
So instead of hurrying dinner along handing out a quick PB & J or grabbing take out on the way home, I’ve been looking for ways to have dinner ready to go when we walk in the door. Dinner time is about the only time we are all together and I love every minute of it. I’ve found the use of the crock pot to slow cook dinner is a great option for having dinner ready on the nights I know are going to be busy.
The crock pot is a great tool to have in the kitchen because it helps you make the most of the time you have. It makes me feel like I’m saving time because I am able to prepare a meal when I’m not in a crunch for time. Using a crock pot you can easily prep dinner ahead of time. In my free time the night before or in the morning I’ll prepare dinner, this will ensure that one can come home to a homemade healthy dinner ready to go. I love that it takes the stress out of the question, “What are we having for dinner?”, which I am sure to hear as soon as we get home. This is a welcomed thought on busy nights when we are running from tennis to scouts, basketball, swimming etc.
With careful planning the use of the crock pot can be a great money saving tool as well. On a busy week night the use of the crock pot keeps us on schedule. The small amount of preparation keeps me from having to make a stop for fast food and there by keeps money in my bank account. I can easily make dinner for much less than I would spend in the drive through and still have leftovers for tomorrow’s lunches.
Recipe for the Crock pot:
BBQ Pork for Sandwiches
Ingredients:
1 (14oz) can beef broth
3 pounds boneless pork ribs
1 bottle BBQ sauce
Directions:
Pour beef broth into the slow cooker and add the boneless pork ribs. Cook on high for 4 hours, or until the meat shreds easily.
Place meat in a skillet and add BBQ sauce.
Bake in a preheated oven for 30 mins or until it is heated through.
A PYP Best Blog: Recipe – Pumpkin Muffins from scratch!
Just in case you missed this article on making pumpkin muffins from scratch the first time we shared it a couple of years ago, we are republishing it. After Marne wrote this blog originally, we got an awesome response. This is one of the PYP Best Blogs!
For quite awhile I have been trying to do all my baking with NO store-bought mixes. I make muffins several times a month for breakfast and school lunches so I am always on the lookout for a good muffin recipe. This one is fantastic! I haven’t found a good pumpkin muffins from scratch recipe until this one. Try it! It is easy and delicious. I make a double batch and freeze a bunch for school lunches. Plus, I use whole wheat flour instead of white and the pumpkin muffins turn out great. It’s an easy way to increase the nutrition.
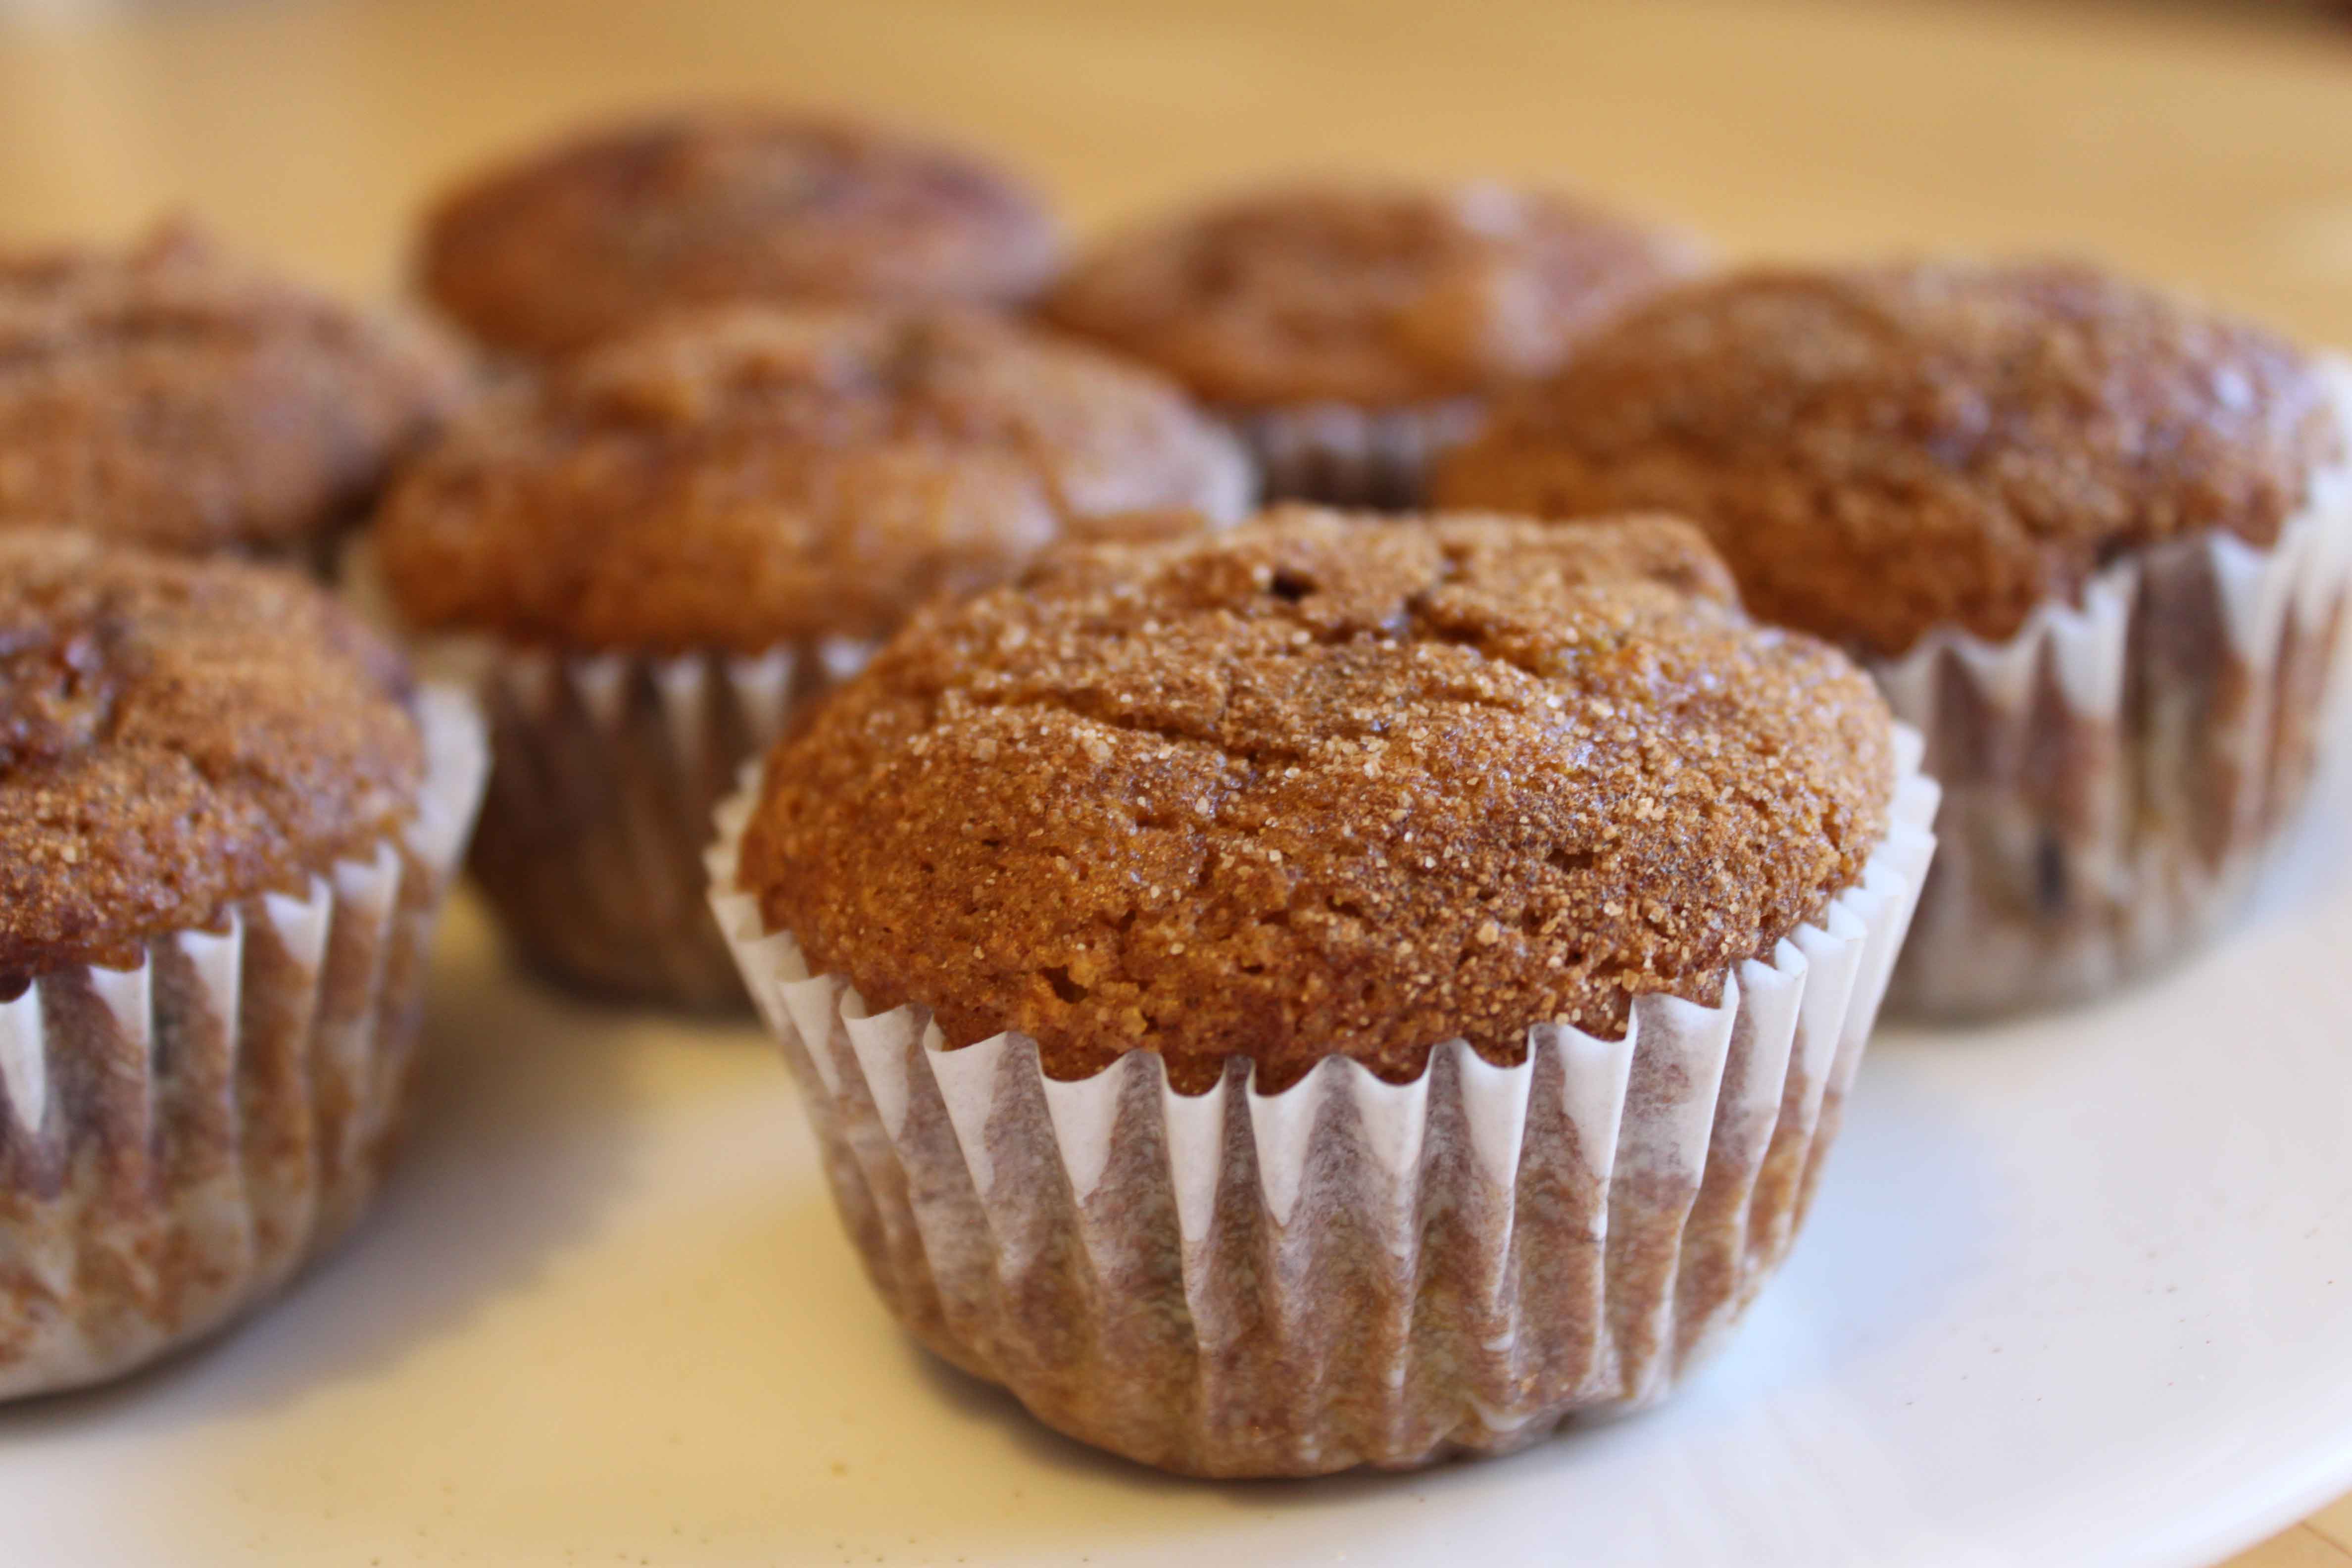
PUMPKIN MUFFINS
original recipe source
1½ cups all-purpose flour (I use whole wheat flour and they turn out great!)
1 teaspoon baking powder
1 cup canned solid-pack pumpkin
1/3 cup vegetable oil
2 large eggs
1 teaspoon pumpkin-pie spice
1¼ cups (plus 1 tablespoon) sugar
½ teaspoon baking soda
½ teaspoon salt
1 teaspoon cinnamon
1/2 cup chocolate chips (optional)
Preheat oven to 350°. Put liners in muffin cups.
Whisk together pumpkin, oil, eggs, pumpkin-pie spice, 1¼ cups sugar, baking soda, and salt in a large bowl until smooth, then whisk in flour and baking powder until just combined.
Stir together cinnamon and remaining 1 tablespoon sugar in another bowl.
Divide batter among muffin cups (each should be about three-fourths full), then sprinkle tops with cinnamon-sugar mixture. Bake until puffed and golden brown and wooden pick or skewer inserted into the center of a muffin comes out clean, 25 to 30 minutes.
Cool in pan on a rack 5 minutes, then transfer muffins from pan to rack and cool to warm or room temperature.
A PYP Best Blog! The Little Ways to Save: Homemade ‘Drano’!
Just in case you missed this DIY article making your own homemade drano the first time we shared it a couple of years ago, we are republishing it. After Marne wrote this blog originally, we got an awesome response. This is one of the PYP Best Blogs!
As I posted last month, this year I am trying to do better on my grocery budget. I want to not only bring my cost down, I want to be more thrifty in how I feed my family. Make more things from scratch, eat out less, etc. In January I was very close to my goal and so far in February I have spent $343.14. A little more than where I was in January but this is all a process, right? A learning curve. For me, its not always about the exact penny spent but if I am improving in the way I feed my family. More on that later.
Not only am I wanting to save in the grocery budget department, I also want to save money in every way I can. Today I wanted to share with you an old trick. At least that is what I learned when I did some searching online.
If you have a slow or clogged drain, don’t go out and buy Drano (which is super expensive and contains hazardous chemicals), you can clear that drain with 3 simple things you already have in your house!

Here is what you will need:
1/2 box baking soda
1/2 c. white vinegar
1 qt. boiling water
1 washcloth
Take the baking soda and dump it down the drain as good as you can. Pour in the vinegar. IMMEDIATELY plug the drain with the washcloth so the foaming action stays in the pipe, and not in the sink.
Let sit for 30 minutes.
After the time is up, dump the boiling water down the drain. VOILA! A clear drain with haveing to buy drano. This works almost every time.
And I can vouch for this method. I did it this morning, and it worked fabulously! Try out your homemade drano and let me know what you think.