
TWO PYP Best Blogs! Making crinkly fries and using leftover uncooked pasta! Dinner saving ideas!
Just in case you missed these articles on making crinkly fries and using leftover pasta the first time we shared them a couple of years ago, we are republishing it. After Marne wrote these blogs originally, we got an awesome response. These are two of the PYP Best Blogs!
Making crinkly fries!
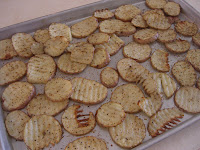
My kids like making snacks every now and then. These crinkly fries are easy and fun to make, and much better than potato chips from the store!
Crinkly Fries
3 baking potatoes
3 Tbl butter
any type of seasoning salt, for example: Mrs. Dash, lemon pepper seasoning, herb seasoning, etc.
Preheat oven to 450 degrees. After scrubbing potatoes with a vegetable brush, cut with a crinkle cutter or a sharp knife leaving the peel on. Put the potato slices into a large Ziploc bag. Melt the butter and add seasoning to it, mix together. Pour into the bag and mix with the potatoes to coat. Add as much or as little seasoning as you want. Shake well.
Layer the potatoes on a shallow pan or cookie sheet in a single layer. Put in oven and bake for about 25 minutes or until lightly brown and tender. Longer if you want them crispy. Turn the potatoes halfway through the baking process. End result = yummy crinkly fries.
Nutrition Facts per serving: 144 calories, 7 g total fat (1 g sat. fat), 0 mg col., 153 mg sodium, 19 g carbs, 2 g fiber, 3 g protein
Use up that leftover uncooked pasta!
If you you like me, then periodically you find yourself with several boxes of pasta with only about 2/3 or less in the box. Lots of different varieties. None is enough to make for a meal. Here is what I do to make sure I still use up what I have and not waste anything.
On Tuesday night I had these 3 boxes of pasta in my cupboard needing to be used:
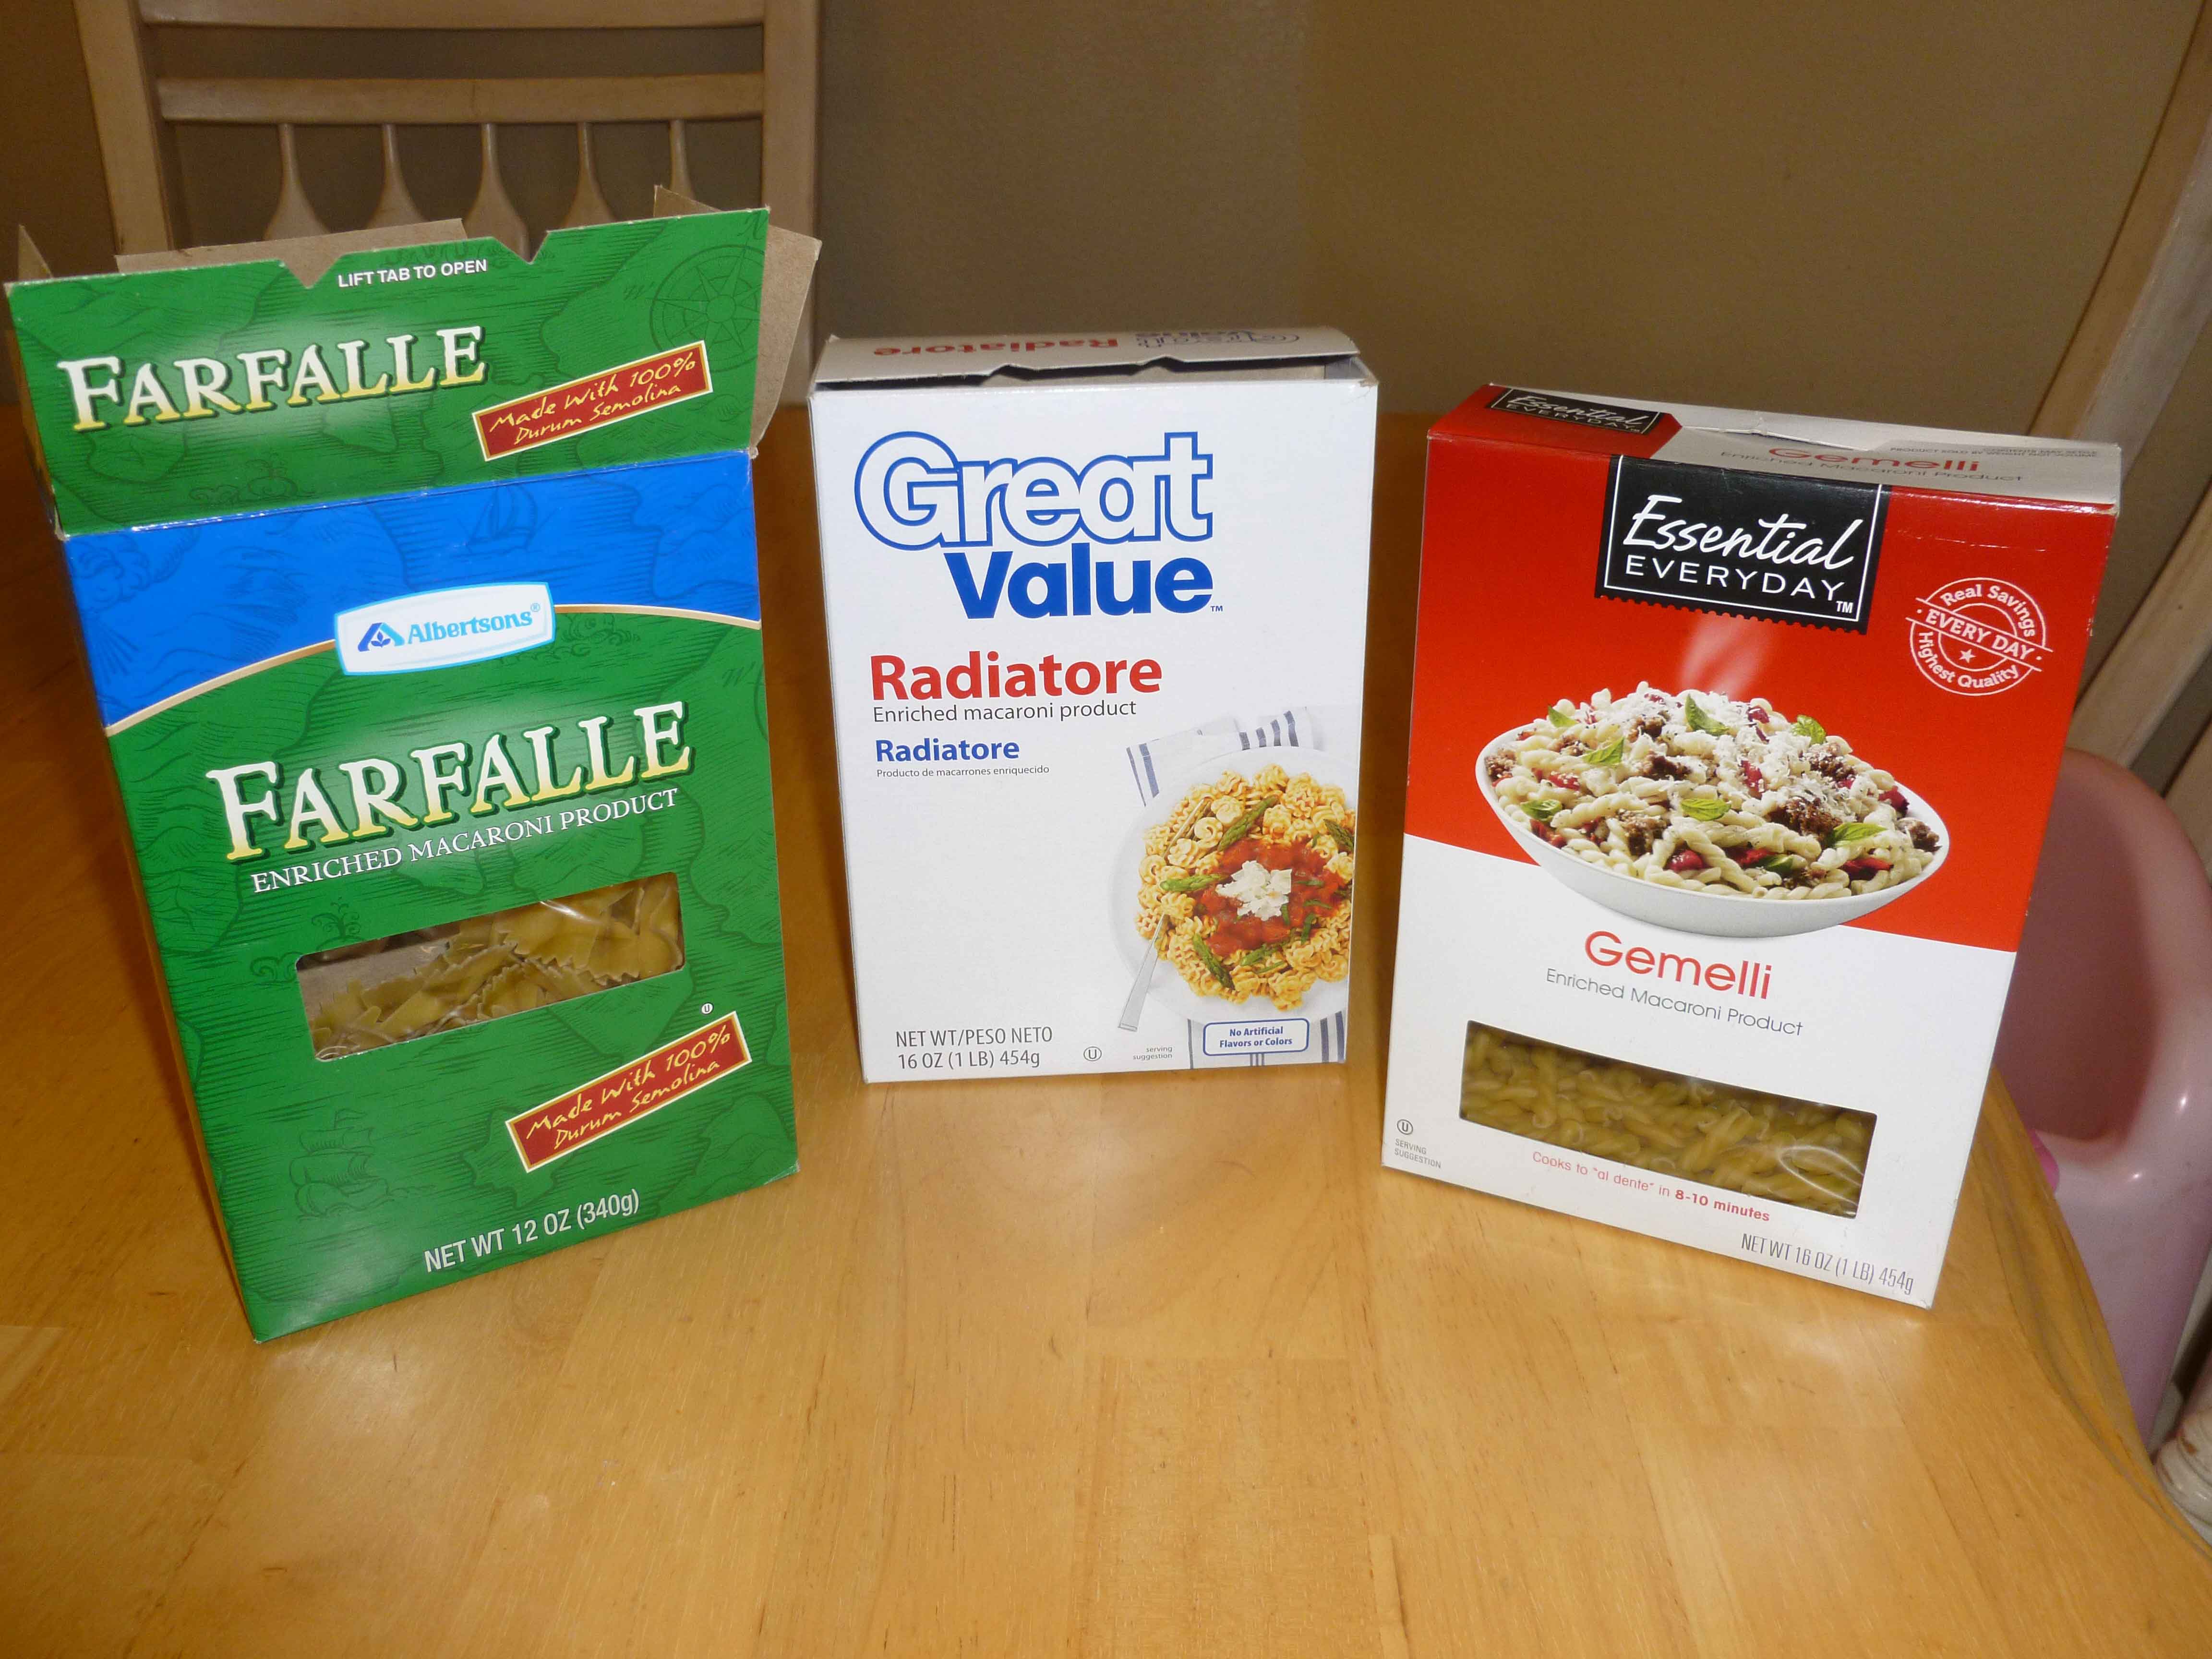
We were having Garlic Chicken Farfalle for dinner (SO GOOD!) so I decided to use all 3 kinds of pasta. But I didn’t want to be cooking them in different pots. So read the back of the boxes and start cooking the pasta that takes the longest.
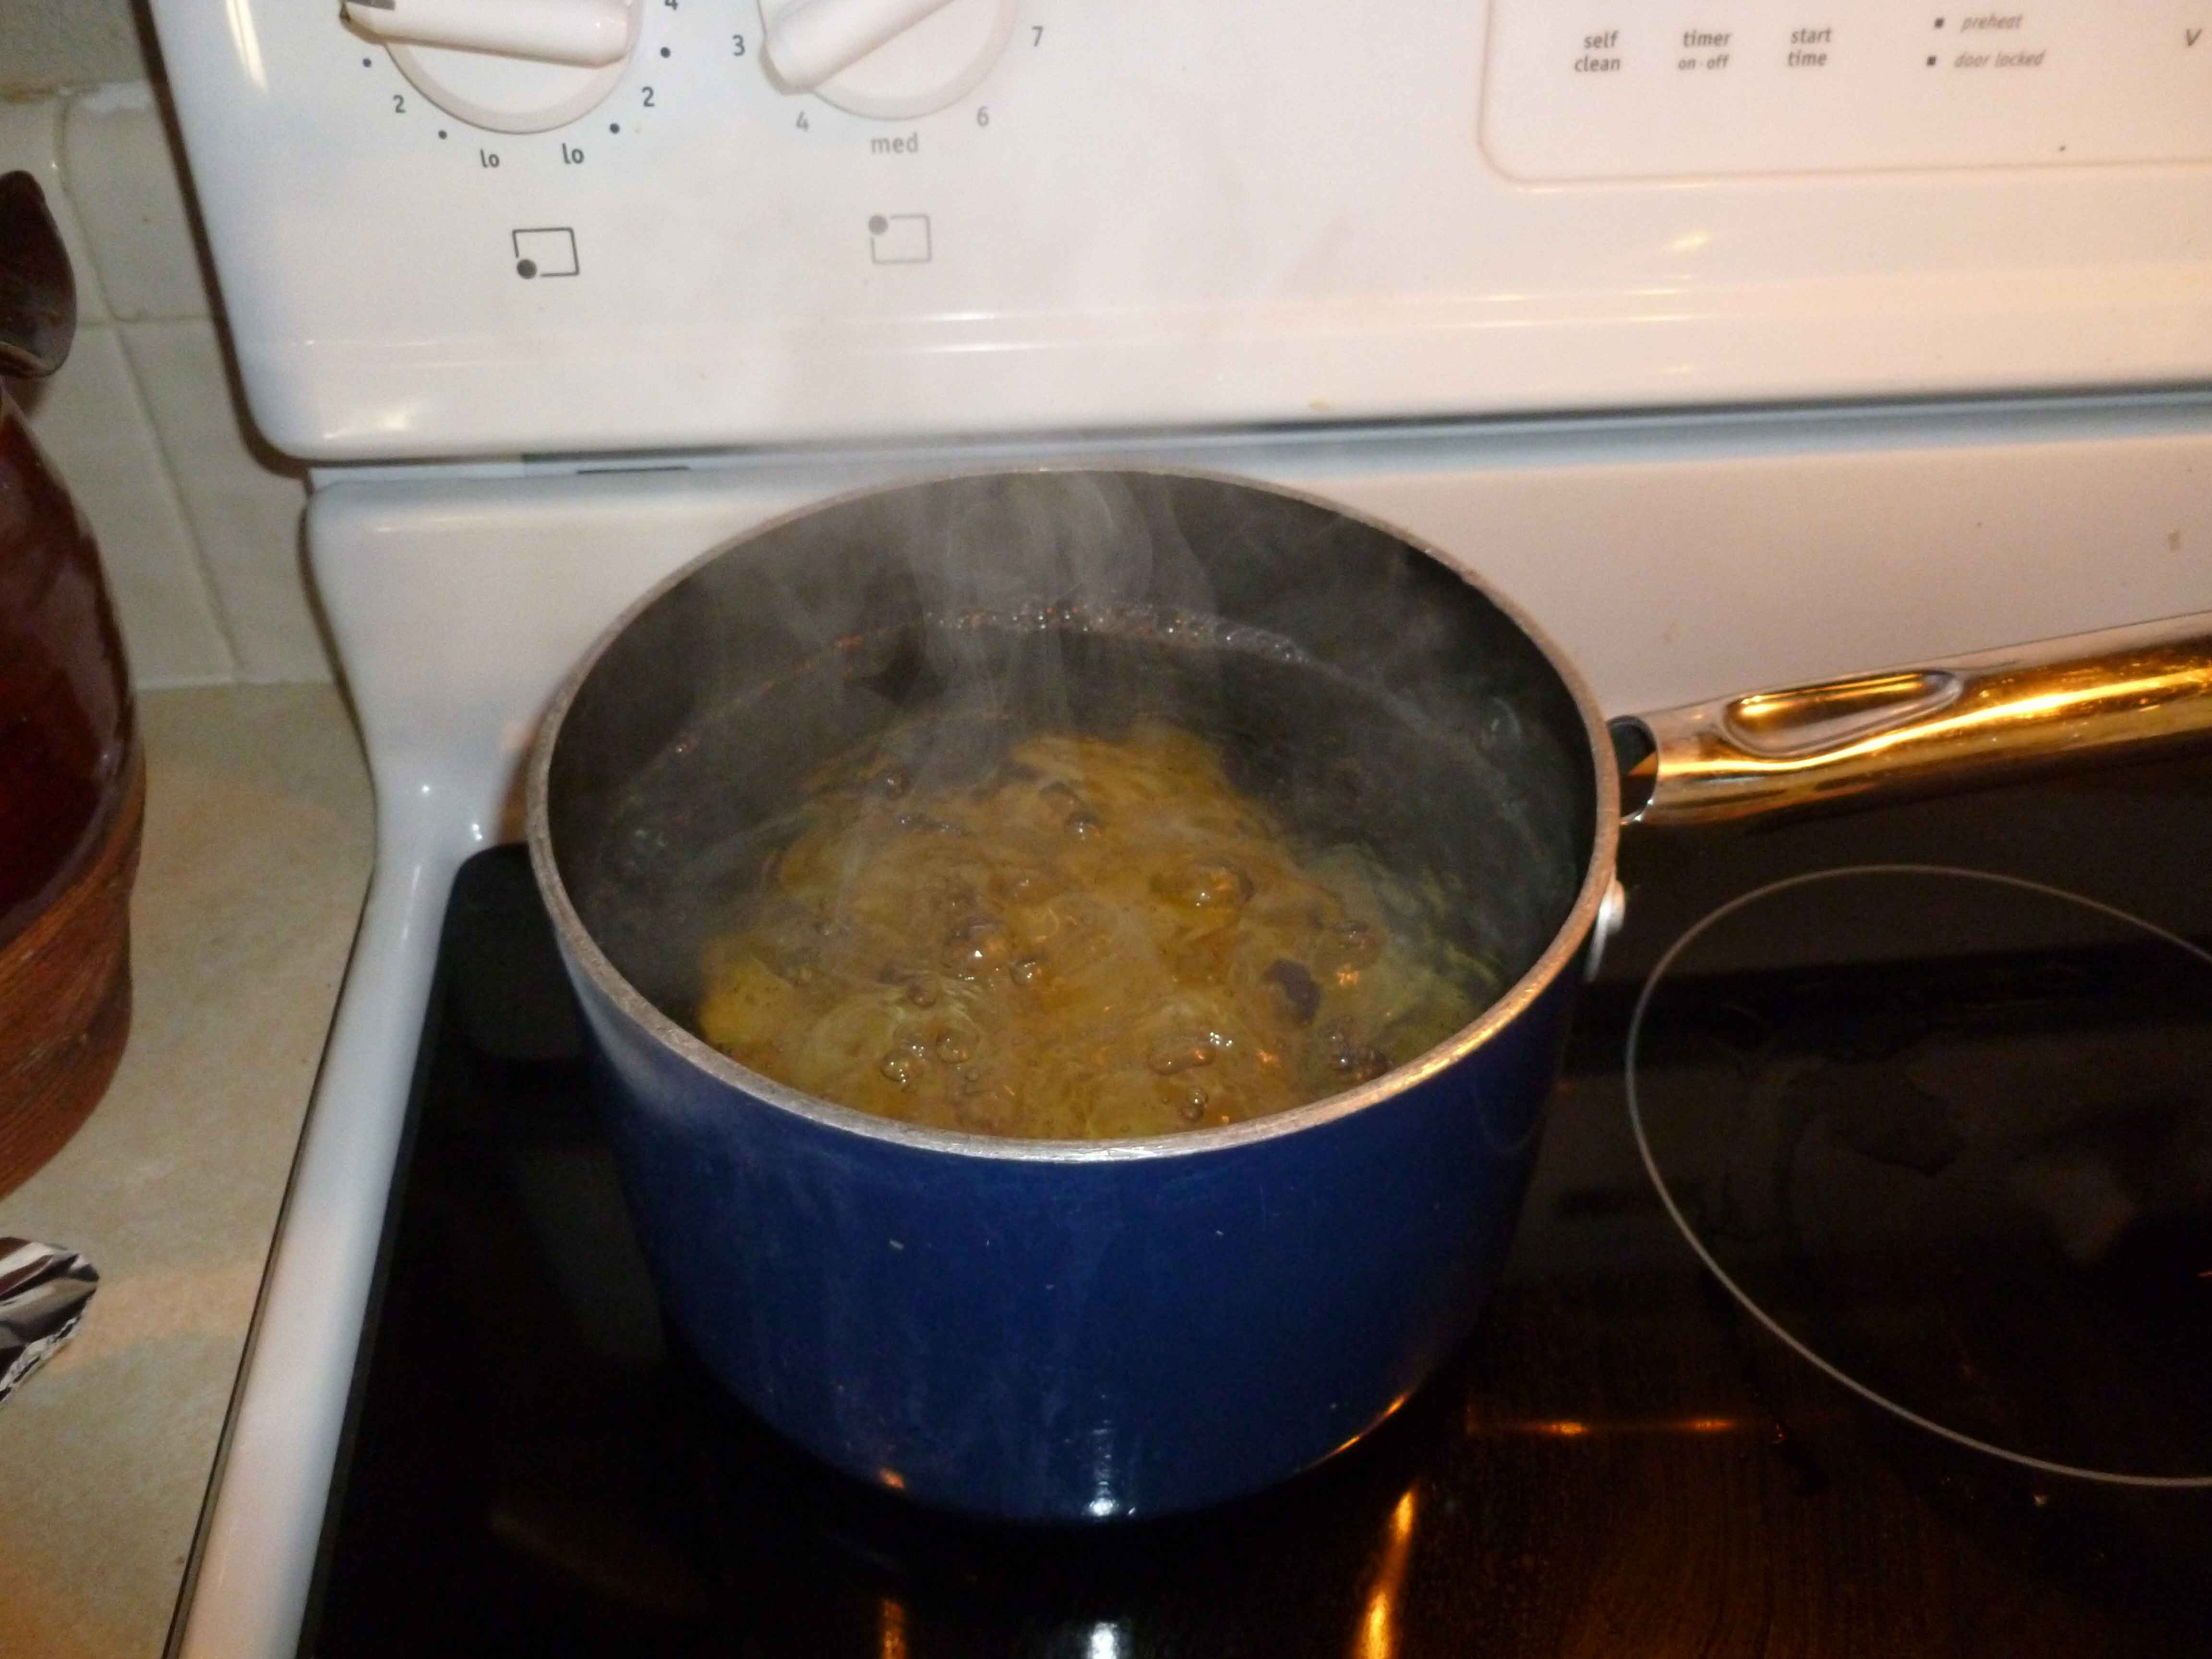
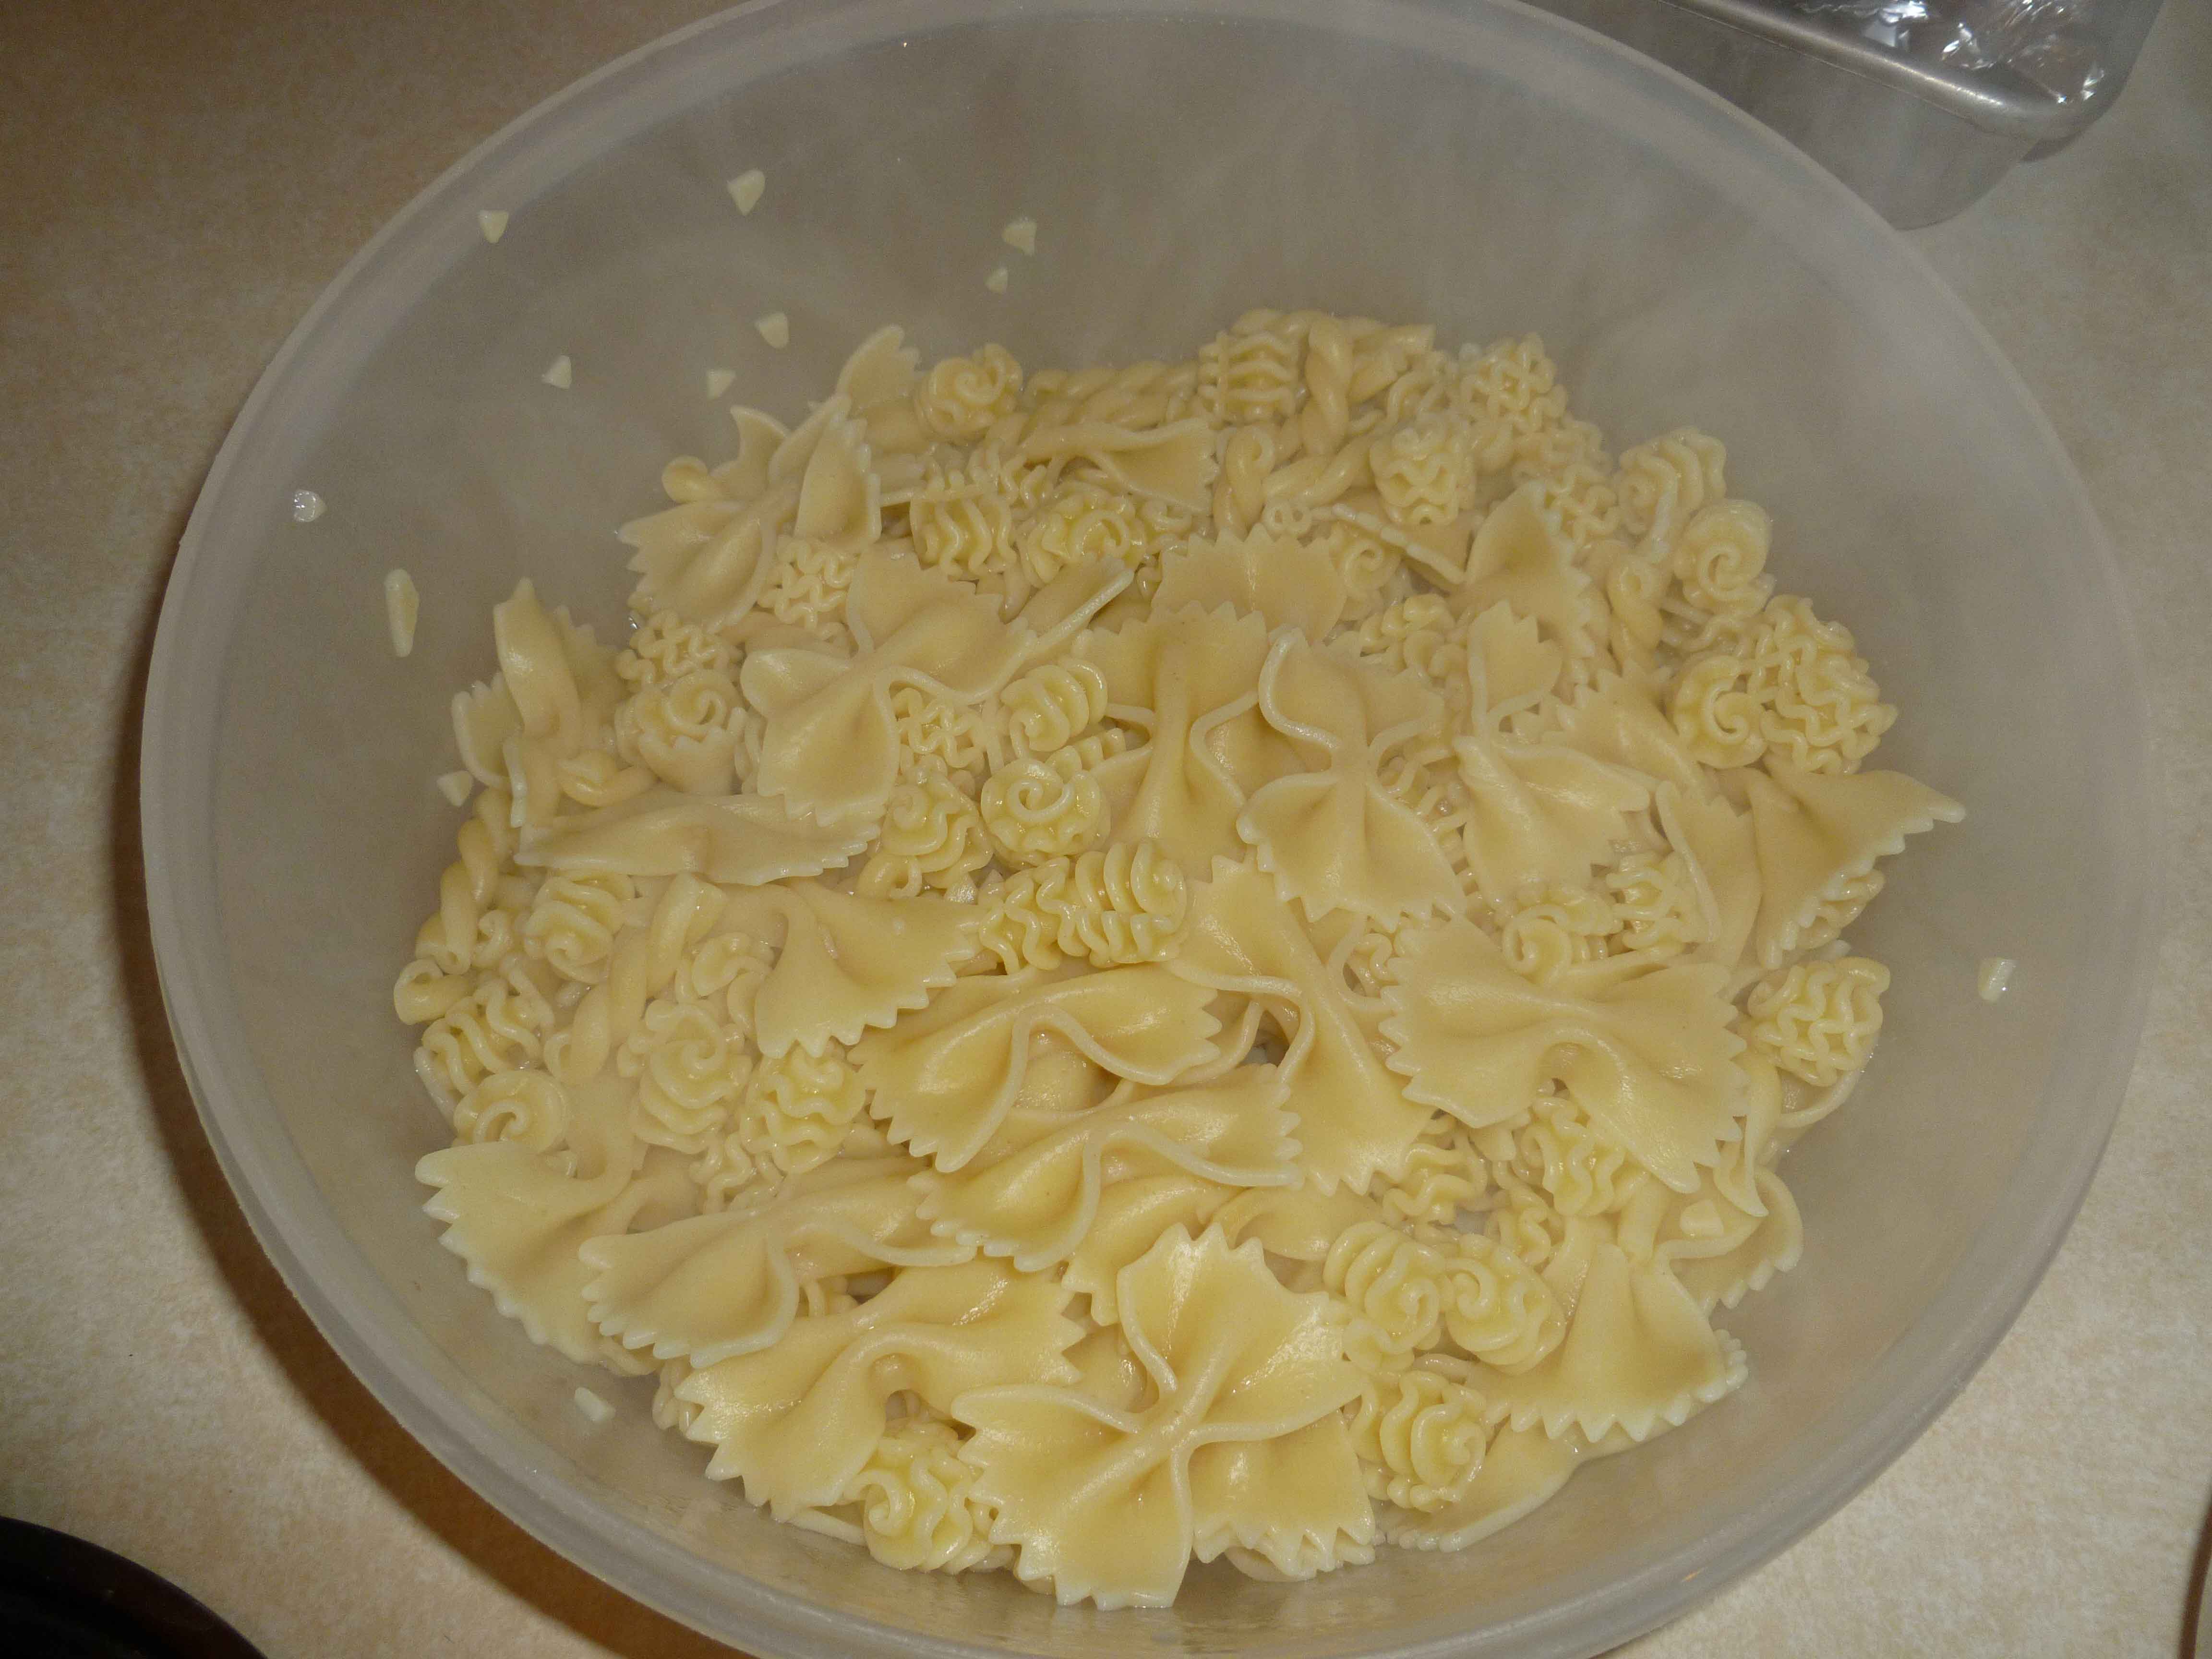
Then I set the timer and added the next pasta four minutes later, then the last pasta 1 minute later. Each pasta cooked for the right amount of time, and I was able to cook them all at once. I ended up with a nice batch of pasta for dinner!
What do you do with your small amounts of pasta?
A PYP Best Blog! Yummy Recipe: Apple Pie Bars!
Just in case you missed this article on making apple pie bars the first time we shared it a couple of years ago, we are republishing it. After Marne wrote this blog originally, we got an awesome response. This is one of the PYP Best Blogs!
Even though Spring is coming, I think there is still enough chill in the air for a winter dessert like this. If you like apple pie, you can get your fill without the fuss! I can my own apple pie filling each year and if you do too, this is a great way to use it up! My family says these apple pie bars taste better than apple pie! You make them and be the judge.
I found this recipe online a few years ago and altered it to meet my families needs. This recipe make half a baking sheet. So if you want to make a full sheet (or jelly roll pan size) then double this recipe.

Apple Pie Bars
Crust:
3/4 c. butter, softened
6 Tbl. sugar
1 1/2 c. all purpose flour
1/8 tsp. nutmeg
1/4 tsp. cinnamon
1/4 tsp. salt
Topping:
1 1/2 c. quick oats
1 c. all purpose flour
3/4 c. light brown sugar
1/2 tsp plus 1/8 tsp cinnamon
1/4 tsp baking soda
1/4 tsp salt
3/4 c. cold butter, cut into small cubes
Prepare the crust: Preheat oven to 375 degrees. Line a 13×9.5 jelly roll pan with foil or parchment paper. Using an electric mixer, beat the butter and sugar until light and fluffy, about two minutes. At low speed, beat in the flour, spices, and salt until a soft dough forms. Press the dough over the bottom of the prepared pan. Bake in the center of oven for about 15 minutes or until golden and set. Set on wire rack to cool slightly.
Prepare the topping: In a large bowl, mix the oats and the flour, brown sugar, cinnamon, baking soda and salt. Using your fingers or a pastry tool, put the butter cubes into the oat mixture and crumble together until the mixture resembles a coarse meal. Press the mixture into clumps.
Dump on the quart bottle of your apple pie filling and spread evenly over the crust. Scatter the crumb topping on top, pressing it lightly into the mixture. There will be a lot of topping, don’t worry. It will fit. Bake for 30 minutes or until the topping begins to look slightly crispy on top. Let cool and enjoy!
A PYP Best Blog! Make a Ding Dong Cake!
Just in case you missed this article on a yummy copycat recipe for a ding dong cake the first time we shared it a couple of years ago, we are republishing it. After Marne wrote this blog originally, we got an awesome response. Many of you told us you tried this recipe and it became a new family favorite! Cooler temperatures are here and baking sounds fun again. Try this recipe out and let us know what you think. This is one of the PYP Best Blogs!
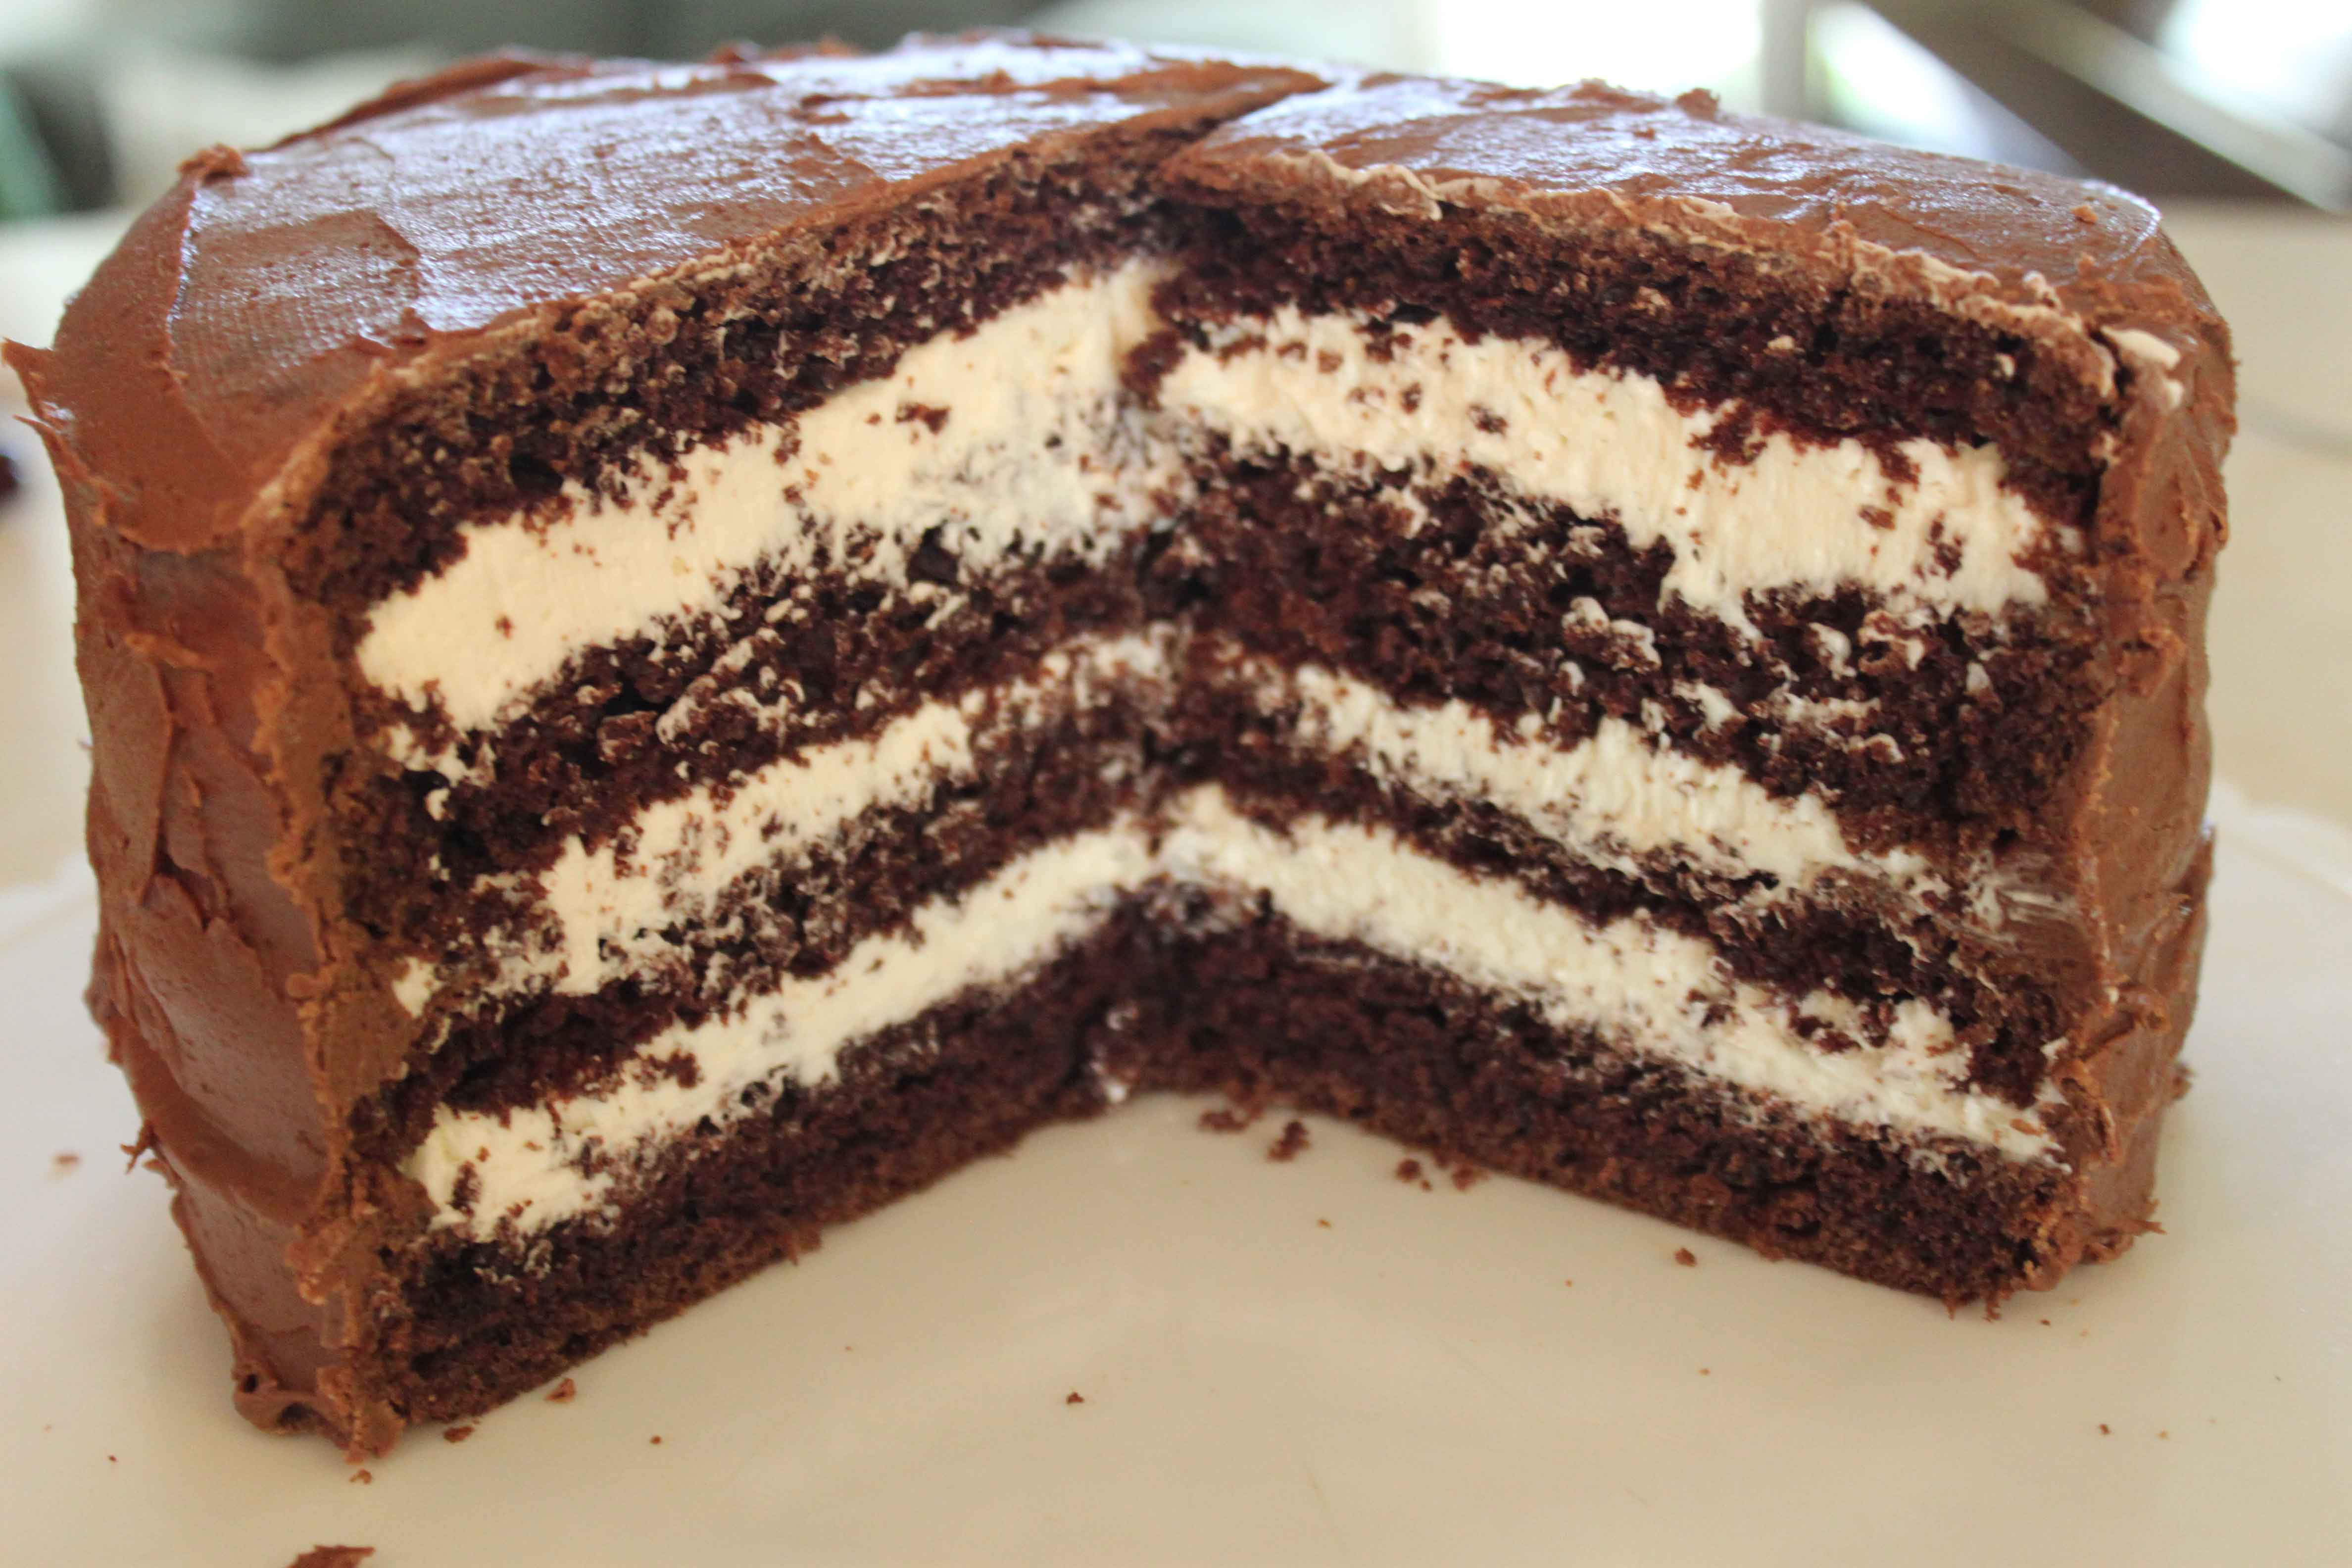
I tried a copycat recipe for a ding dong cake last week, and it turned out fantastic! Really was easy too. I made a slight change to the original recipe and it was a crowd pleaser! The filling in the middle is really like a ding dong…nice and fluffy, with the right amount of sweetness.
Ding Dong Cake
1 box Devils Food cake mix
FILLING
1 cup milk
4 tablespoons flour
1/2 cup butter
1/2 cup shortening
1 cup sugar
1 teaspoon vanilla
ICING
1 tablespoon butter
1 teaspoon vanilla
3 tablespoons milk
2 tablespoons cocoa
powdered sugar, to desired consistency
1. Bake the cake according to the instructions on the box. Bake using two 8 or 9 inch round baking pans. Cool on rack in the pan for 10 minutes, then take cake out of pan to completely cool. While the cake is cooling, mix up the ingredients for the filling. Combine milk and flour. Cook until thick, then cool. Mix butter and shortening for 4 minutes. Add sugar and vanilla and mix 4 more minutes. Add flour mixture and beat 4 minutes more.
2. When cake is cooled, cut each round in half, so you end up with 4 smaller round cakes. Start spreading the icing inbetween the layers of the cakes and stack.
3. Mix up the ingredients for the icing. Combine butter, vanilla, milk, cocoa and mix. Add powdered sugar until quite thick. Spread over the cake.
ENJOY!!
Costco Wholesale Membership + Bonus $20 Costco Cash Card and Coupons – Just $55.00!
 Costco Wholesale Membership + Bonus $20 Costco Cash Card and Coupons – Just $55.00!
Weight Watchers Chips & Salsa – A PYP Best Blog!

Yesterday I shared with you my favorite Weight Watchers taco soup recipe. Today I wanted to share with you a couple of other great Weight Watchers recipes that you may have missed the 1st time we posted them.
My favorite WW swap is making this yummy chips & salsa recipe that Whit shared with us. She said, “I’ve had Mexican food on the brain lately. I grew up in AZ and sometimes I just crave chips & salsa. Not exactly a healthy option on Weight Watchers. UNLESS you bake your own chips.
What I do: Take 2-3 delicious corn tortillas (I prefer white corn) and use a pizza cutter to cut them into strips. You can cut them into triangles like the photo, I just think it’s easier to cut them into strips and I also prefer dipping/eating them that way. Put your tortilla strips into a bowl and drizzle your healthy oil on top of them. Rub the oil into the strips and put onto a baking sheet. You can also use cooking spray for this step. Bake at 450* for about 5-7 minutes on each side. Flip them when the top side has browned. They are done when the second side has browned and they are crisp.
For my hot sauce, I take some Pace Salsa (or whatever I bought on sale) & blend it (just in my blender) with some El Pato Jalapeño Salsa (you can usually find this in the Mexican food section of your local grocery store and it’s worth looking for). The more El Pato you use, the hotter your sauce, so pour it to taste. This makes for some yummy hot sauce!
Then I have a bowl of black beans (maybe a little lime juice on top) with my chips and salsa and I’ve eaten a nice low point Mexican food meal! Points Plus values depend on the tortillas that you purchase. You can find tortillas that are 1-1.5 points/each. The hot sauce is FREE and the black beans are also free if you’re doing the Simply Filling Technique. Black beans are 2 PP for 1/2 C if you’re not doing SFT.”
What goes great with chips & salsa? Ice cream. Here is a great way to enjoy ice cream while doing Weight Watchers:
Simply take frozen fruit (I prefer either sliced up ripe bananas or peaches) and put it into your favorite blending appliance. This appliance needs to be able to really chop through frozen fruit. For one portion of fruit (i.e., 1 banana or peach frozen) you will add about 1-2 Tablespoons of skim milk or coconut milk or almond milk or whatever you prefer (you can add chocolate almond milk to the bananas – delicious!) and a dash of vanilla. Blend all of this until it is the consistency of soft serve ice cream. Add more liquid as needed.
You can add whatever you you want to count points for (or 0 points items like cocoa powder!) into your ice cream or on top of your ice cream. I just purchased peanut butter powder to add in with my banana ice cream. Mmmmmmm!
Leave a comment and let me know what combination is your favorite.
.
Shop Smart Magazine Just $14.99 for 1 Year!

Deal of the Day – Shop Smart Magazine Just $14.99 for 1 Year!
September 14th Only!
Weight Watchers Taco Soup
Fall is in the air here in Northern Utah. For me that means it’s time to be making soup. I love rich hearty creamy soups, but since I do Weight Watchers it’s not the best choice for me. My go to soup for fall is a super simple taco soup. In fact it’s just 2 points plus on Weight Watchers. It’s hot, delicious, and extremely filling. Everyone that I have shared this taco soup recipe with absolutely loves it! One of the best parts of this taco soup is that it is also extremely easy to make and it’s very easy on the budget. I make this probably every 10 days or so and it feeds my family of 4, plus gives me 4-5 more servings for lunches.
Ready to take a look and get started? Take a look at the ingredients below!
- 2 Cans of Cut Corn
- 1 Cans of Black Beans
- 1 Can of Kidney Beans
- 1 Can of Great Northern Beans
- 1 Can of Fat Free Re-fried Beans
- 2 Cans of Diced Tomatoes
- 2 Cans of Broth of your choice
- 1 Can of Diced Chiles
- 1 Onion
- 1 Garlic Clove
- 1 Packet of Taco Seasoning
Simple right? Good! These are the only ingredients that will need unless you like to top your soup with crackers, sour cream, cheese, tortilla chips, or whatever you like. Of course adding things to the top will increase the points plus per serving. I use fat free cheese and sour cream.
Not only are the ingredients easy, it’s super easy to make! Just dice the onion and sautee it up in your stock pot. Add the crushed garlic. Then just start opening cans and dumping everything in. I always end with the re-fried beans. They really thicken it all up.
Bring it all to a boil and then reduce the heat and allow it to simmer for about 30 minutes.
Just another tip – buy reduced sodium beans & broth. You don’t need all the sodium!
Get to the grocery store or wherever it is that you shop so you can get your hands on everything needed to make this affordable taco soup. Anyways, we hope you like this recipe!
If you a doing the Simply Filing program on Weight watchers you won’t need to count any points for this taco soup. Enjoy!
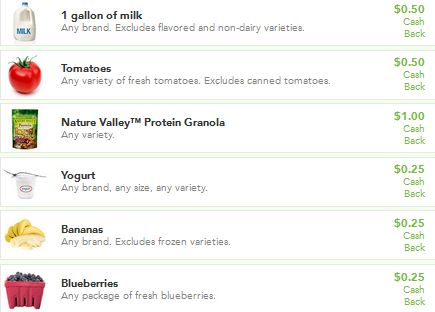
Get cash back this week WYB milk, blueberries, bananas, yogurt, tomatoes & more
Get cash back on your groceries! To save money with Checkout 51, all you have to do is…
- Browse the offers that are updated every Thursday
- Buy the products from any store
- Take a photo of your receipt to redeem your deal
- Get cash back!
This week’s offers include these & more:
Checkout 51 LINK
A PYP Best Blog! Make Your Own Quote Wall!
Just in case you missed this DIY article on making your own quote wall the first time we shared it a couple of years ago, we are republishing it. After Marne wrote this blog originally, we got an awesome response. This is one of the PYP Best Blogs!
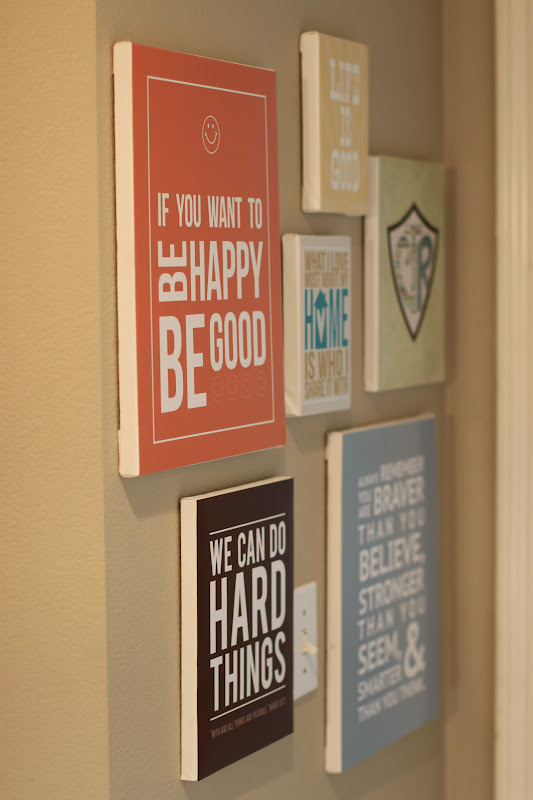
I love quotes and inspirational thoughts. They lift me up and help inspire me to be a better person. I have seen ideas online on creating a quote wall, so I decided to improvise and make my own. There was a small blank wall by my kids’ bathroom and it was the perfect spot.
Instead of buying frames, I used canvases that I already had, except the 5×7 sizes. They had been under my bed for several years, so I knew they would be perfect! And I was able to use what I had a home. Love that. I got the 5×7 canvases for $1.99 each last week at Micheal’s at 60% off.
I printed my prints at Costco, high quality and the best price around. Then I just modge poged the prints onto the canvas…easy peasy. I didn’t put anything on top of the print. Then I stuck them to the wall with a 3M product…you know those one that come off clean and don’t damage the wall? It was a really fast project to do.
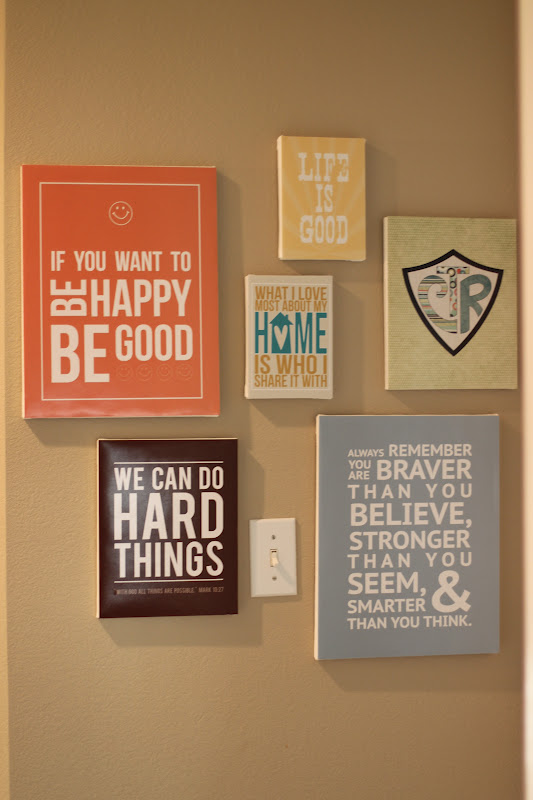
I am really pleased with it and my kids really like it. I heard them telling their friends the other day, “If you want to be happy, be good!” I love having positive quotes on the wall and reminders. The kids see them everyday and we talk about what they mean.
Here are where I got the free prints on my wall in case you are interested. There are so many places online where there are free prints to download!
CTR print..Choose The Right (free)
We can do Hard Things (free)
Home print…Eighteen25 (free)
The other 3 prints were not free, but very reasonably priced at Simply Fresh Designs.
A PYP Best Blog! Make Your Own Brownie Mix!
Just in case you missed this DIY article on making your own brownie mix the first time we shared it a couple of years ago, we are republishing it. After Marne wrote this blog originally, we got an awesome response. This is one of the PYP Best Blogs!
With one recipe of this homemade mix, I figure it is like having about 4-5 box mixes from the store. You can make several batches of things with one mix recipe. Besides brownies, you can also make fudge sauce and crinkle cookies. I made the brownie crinkle cookies yesterday and got 3 dozen cookies. With the cost of the ingredients figured in, I estimate the cost for a batch of brownies with this mix to be approximately about .30 cents . Not too bad, eh?
Plus, you are getting the satisfaction of knowing you are making something that you feel good about. You know what goes in there. There is so much crap in those box mixes, so much stuff that is really bad for us.
8 cups sugar (I do less, but that is just me)
4 cups all-purpose flour
4 tsp. baking powder
4 tsp. salt
2 1/2 c. baking cocoa
2 cups shortening
In a large bowl, combine the sugar, flour, cocoa, baking powder, and salt. Cut in shortening until the mixture resembles coarse crumbs, like this:
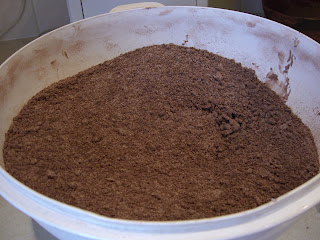
Store in an airtight container in a cool dry place for up to 6 months. I put mine in Tupperware, label it like so and stick it in my fridge in the garage. Yield: 18 cups.
Here are the recipes for the other treats from this mix:
Fudge Sauce
1 c. Brownie mix
2/3 c. water
In a saucepan, bring the brownie mix and water to a boil. Reduce heat, simmer for 1-2 miinutes or until thickened. Serve over ice cream.
Brownie Crinkle Cookies
4 c. Brownie Mix
2 eggs
2 tsp vanilla extract
In a mixing bowl, combine the brownie mix, eggs, and vanilla and mix well. Drop by tablespoonfuls 2 inches apart onto greased baking sheets. Bake at 375 degrees for 8-10 minutes or until the tops are cracked. Cool 2 minutes before removing from pans to wire racks to cool. Makes 3 dozen.
Walnut Brownies
4 c. Brownie Mix
4 eggs
2 tsp vanilla extract
1 1/3 cups chopped walnuts
1 c. semi-sweet chocolat chips
In a mixing bowl, combine the brownie mix, eggs, and vanilla; mix well. Fold in the walnuts and chocolate chips. Pour into a greased 9×13 pan. Bake at 350 degrees for 35 minutes or until a toothpick inserted near the center comes out clean. Cool on a wire rack. Makes 2 dozen.
A PYP Best Blog! Preserving & Freezing Fresh Corn!
Just in case you missed this article on preserving & freezing fresh corn the first time we shared it a couple of years ago, we are republishing it. After Marne wrote this blog originally, we got an awesome response. This is one of the PYP Best Blogs!
We love corn on the cob at our house. LOVE it. We look forward to August each year so we can chow down! Each year we also find a great deal on corn and cook and freeze it for later. Then we can enjoy the fresh taste of summer all winter long!
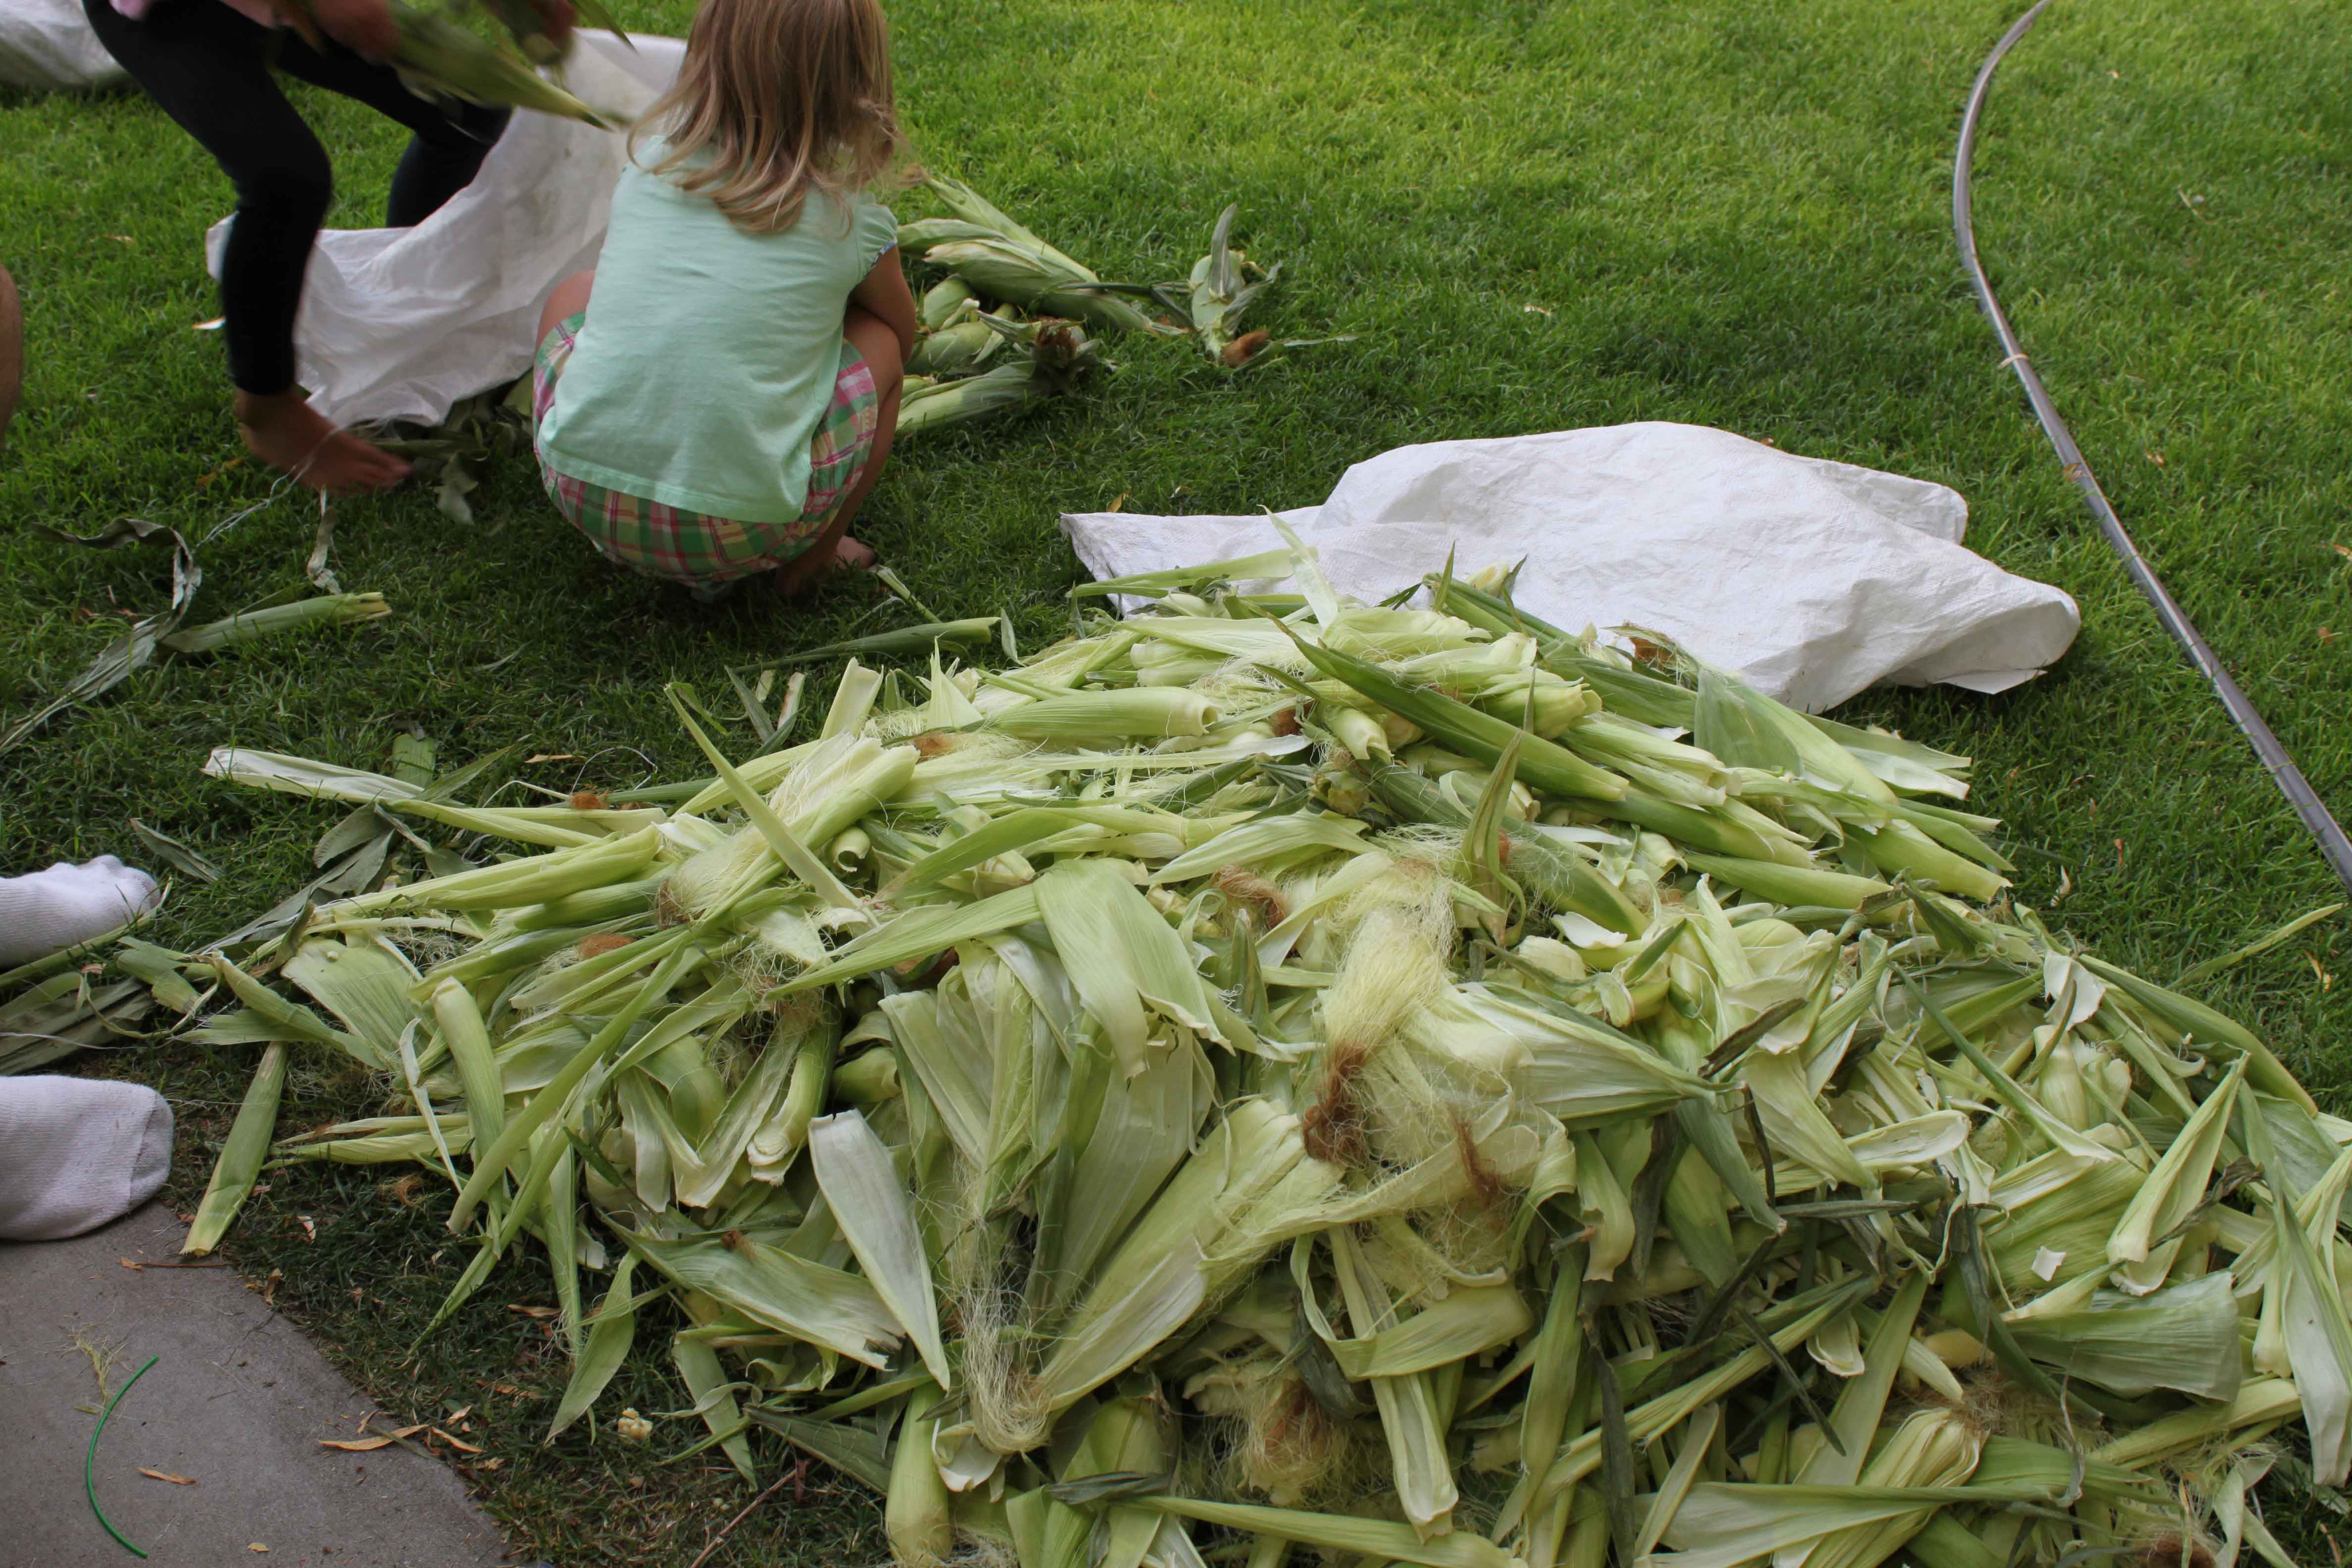
First….obviously…shuck your corn. Last night we had a fun family night teaching the kids about the importance of hard work and self-reliance while doing all this corn. We had 9 dozen to shuck. They had a good attitude about it!
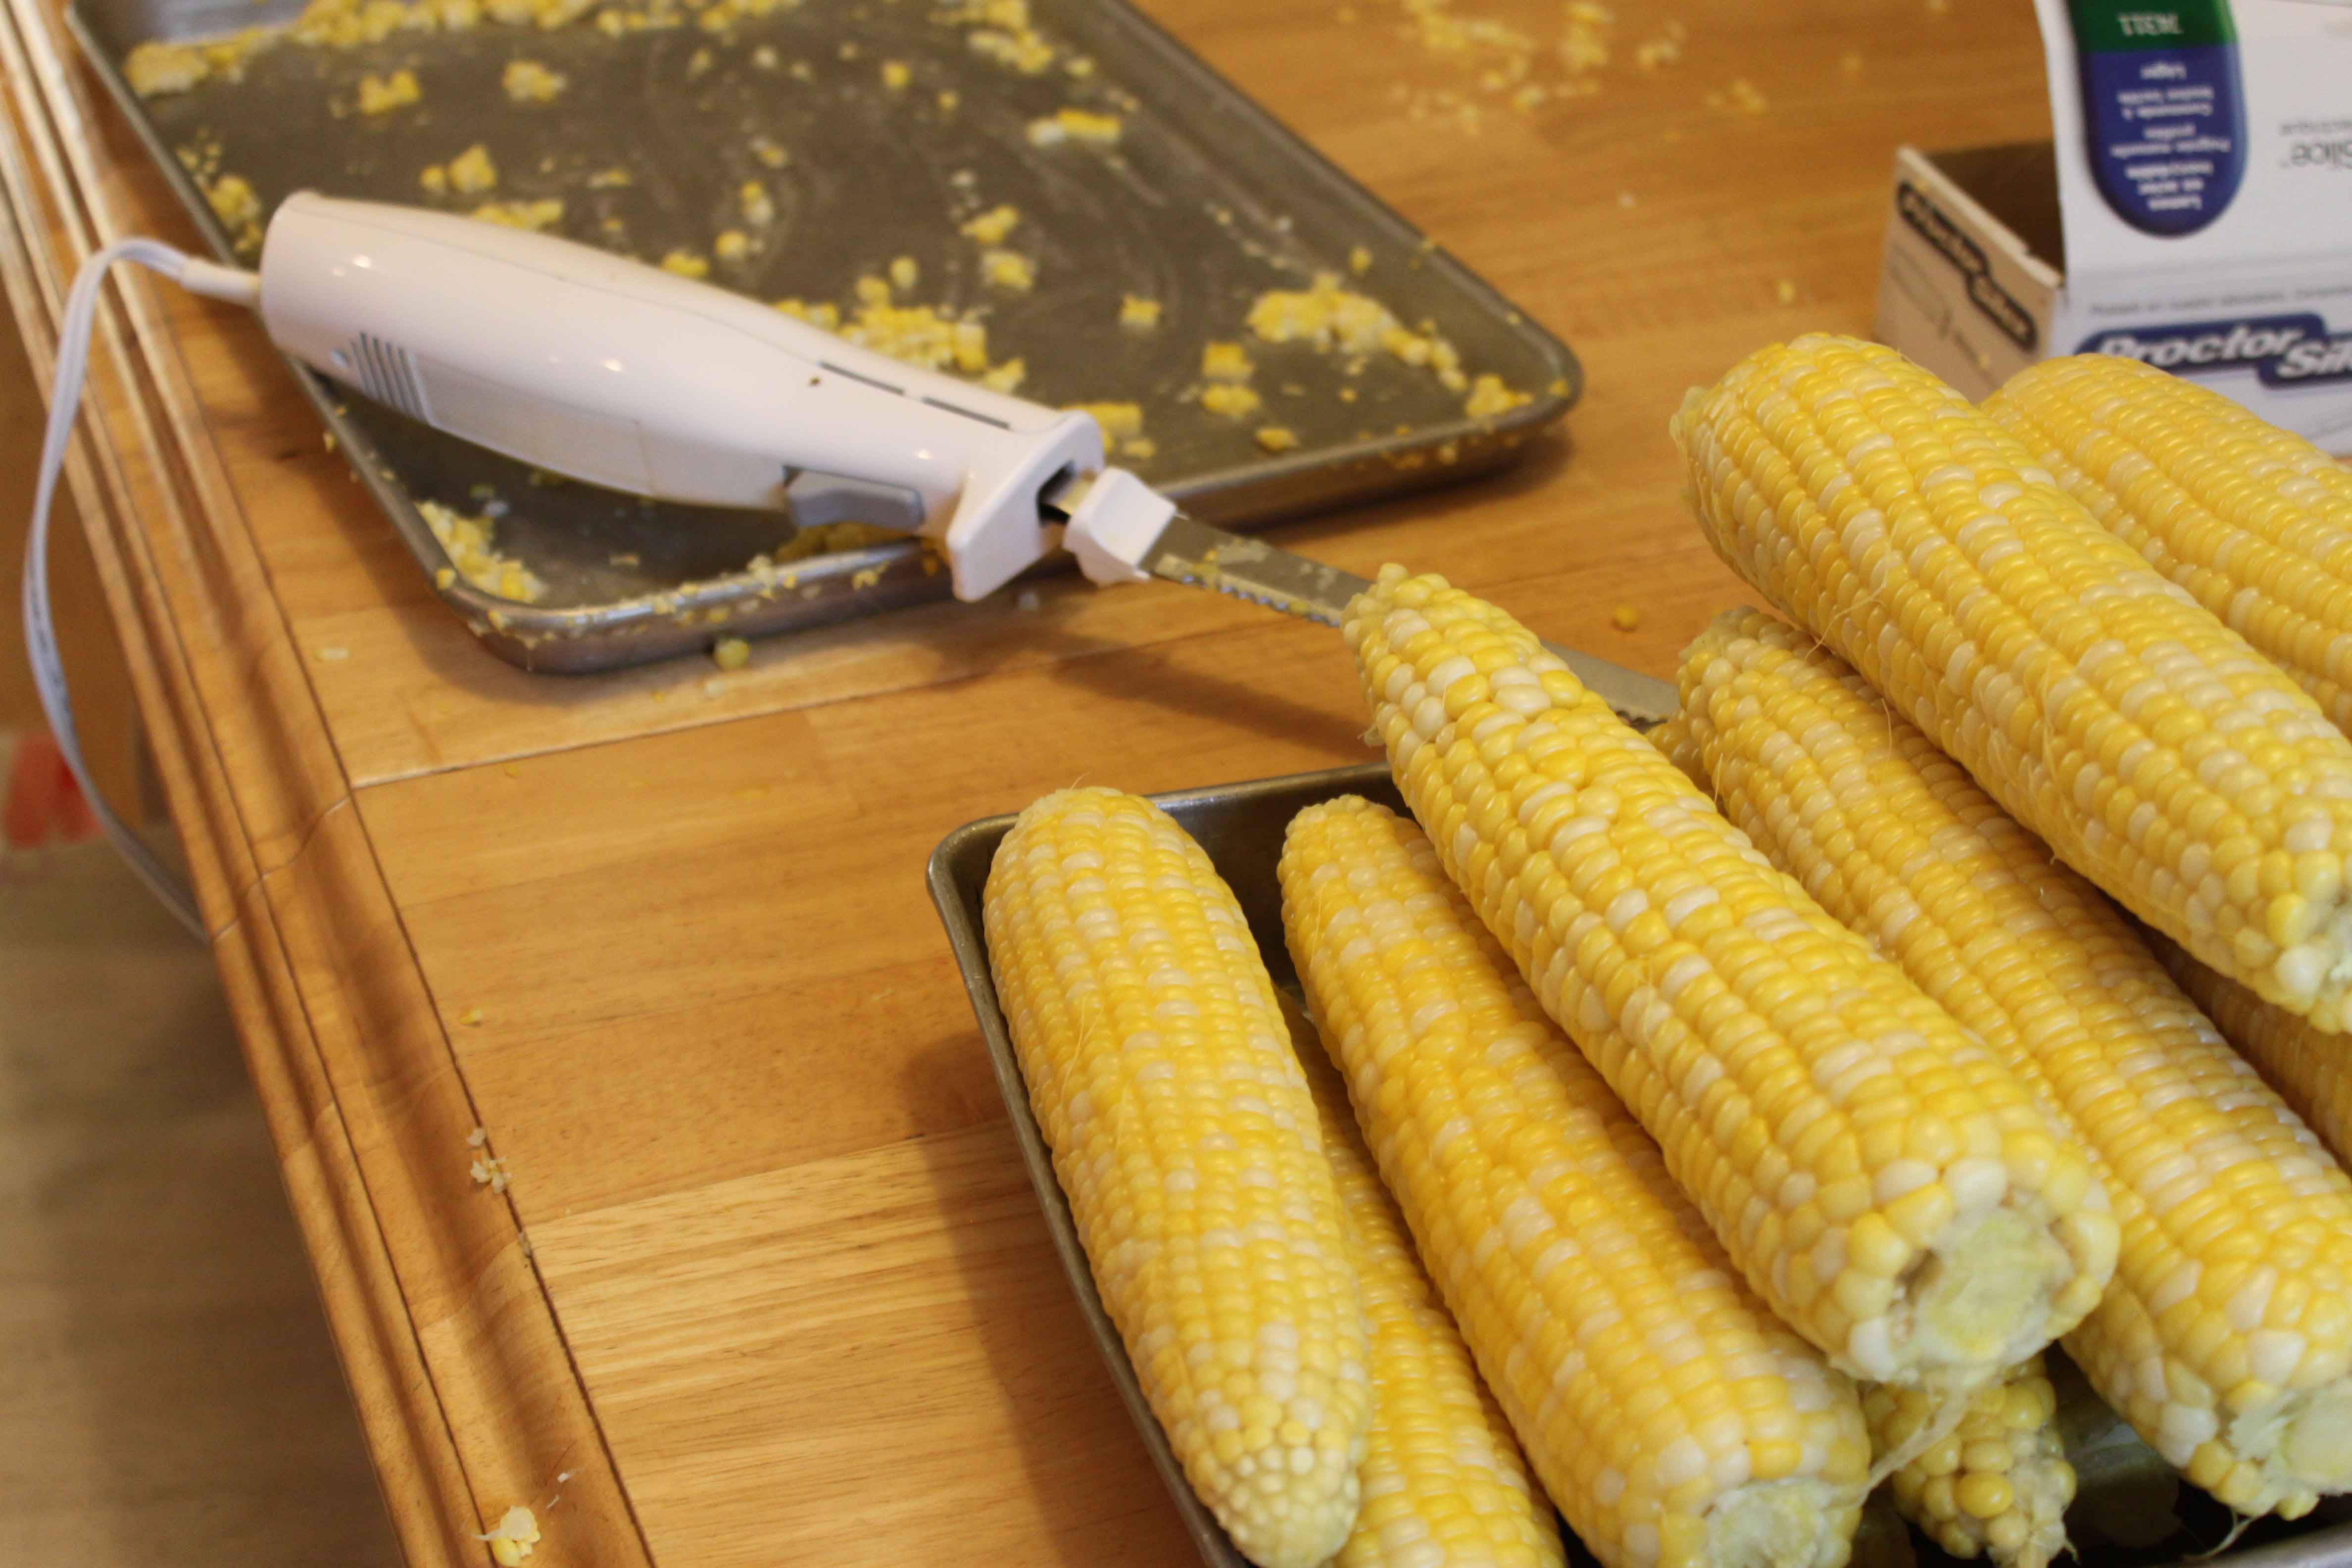
After shucking the corn, we bring it in the house and wash it, then boil it for about 3 minutes each.

After they cool a bit where we can handle it, we cut the corn off the cob with our electric knife. Cooling the corn not only makes it better to touch, but it makes it easier to cut off the cob as well. This is my husband’s job…he is really good at it.
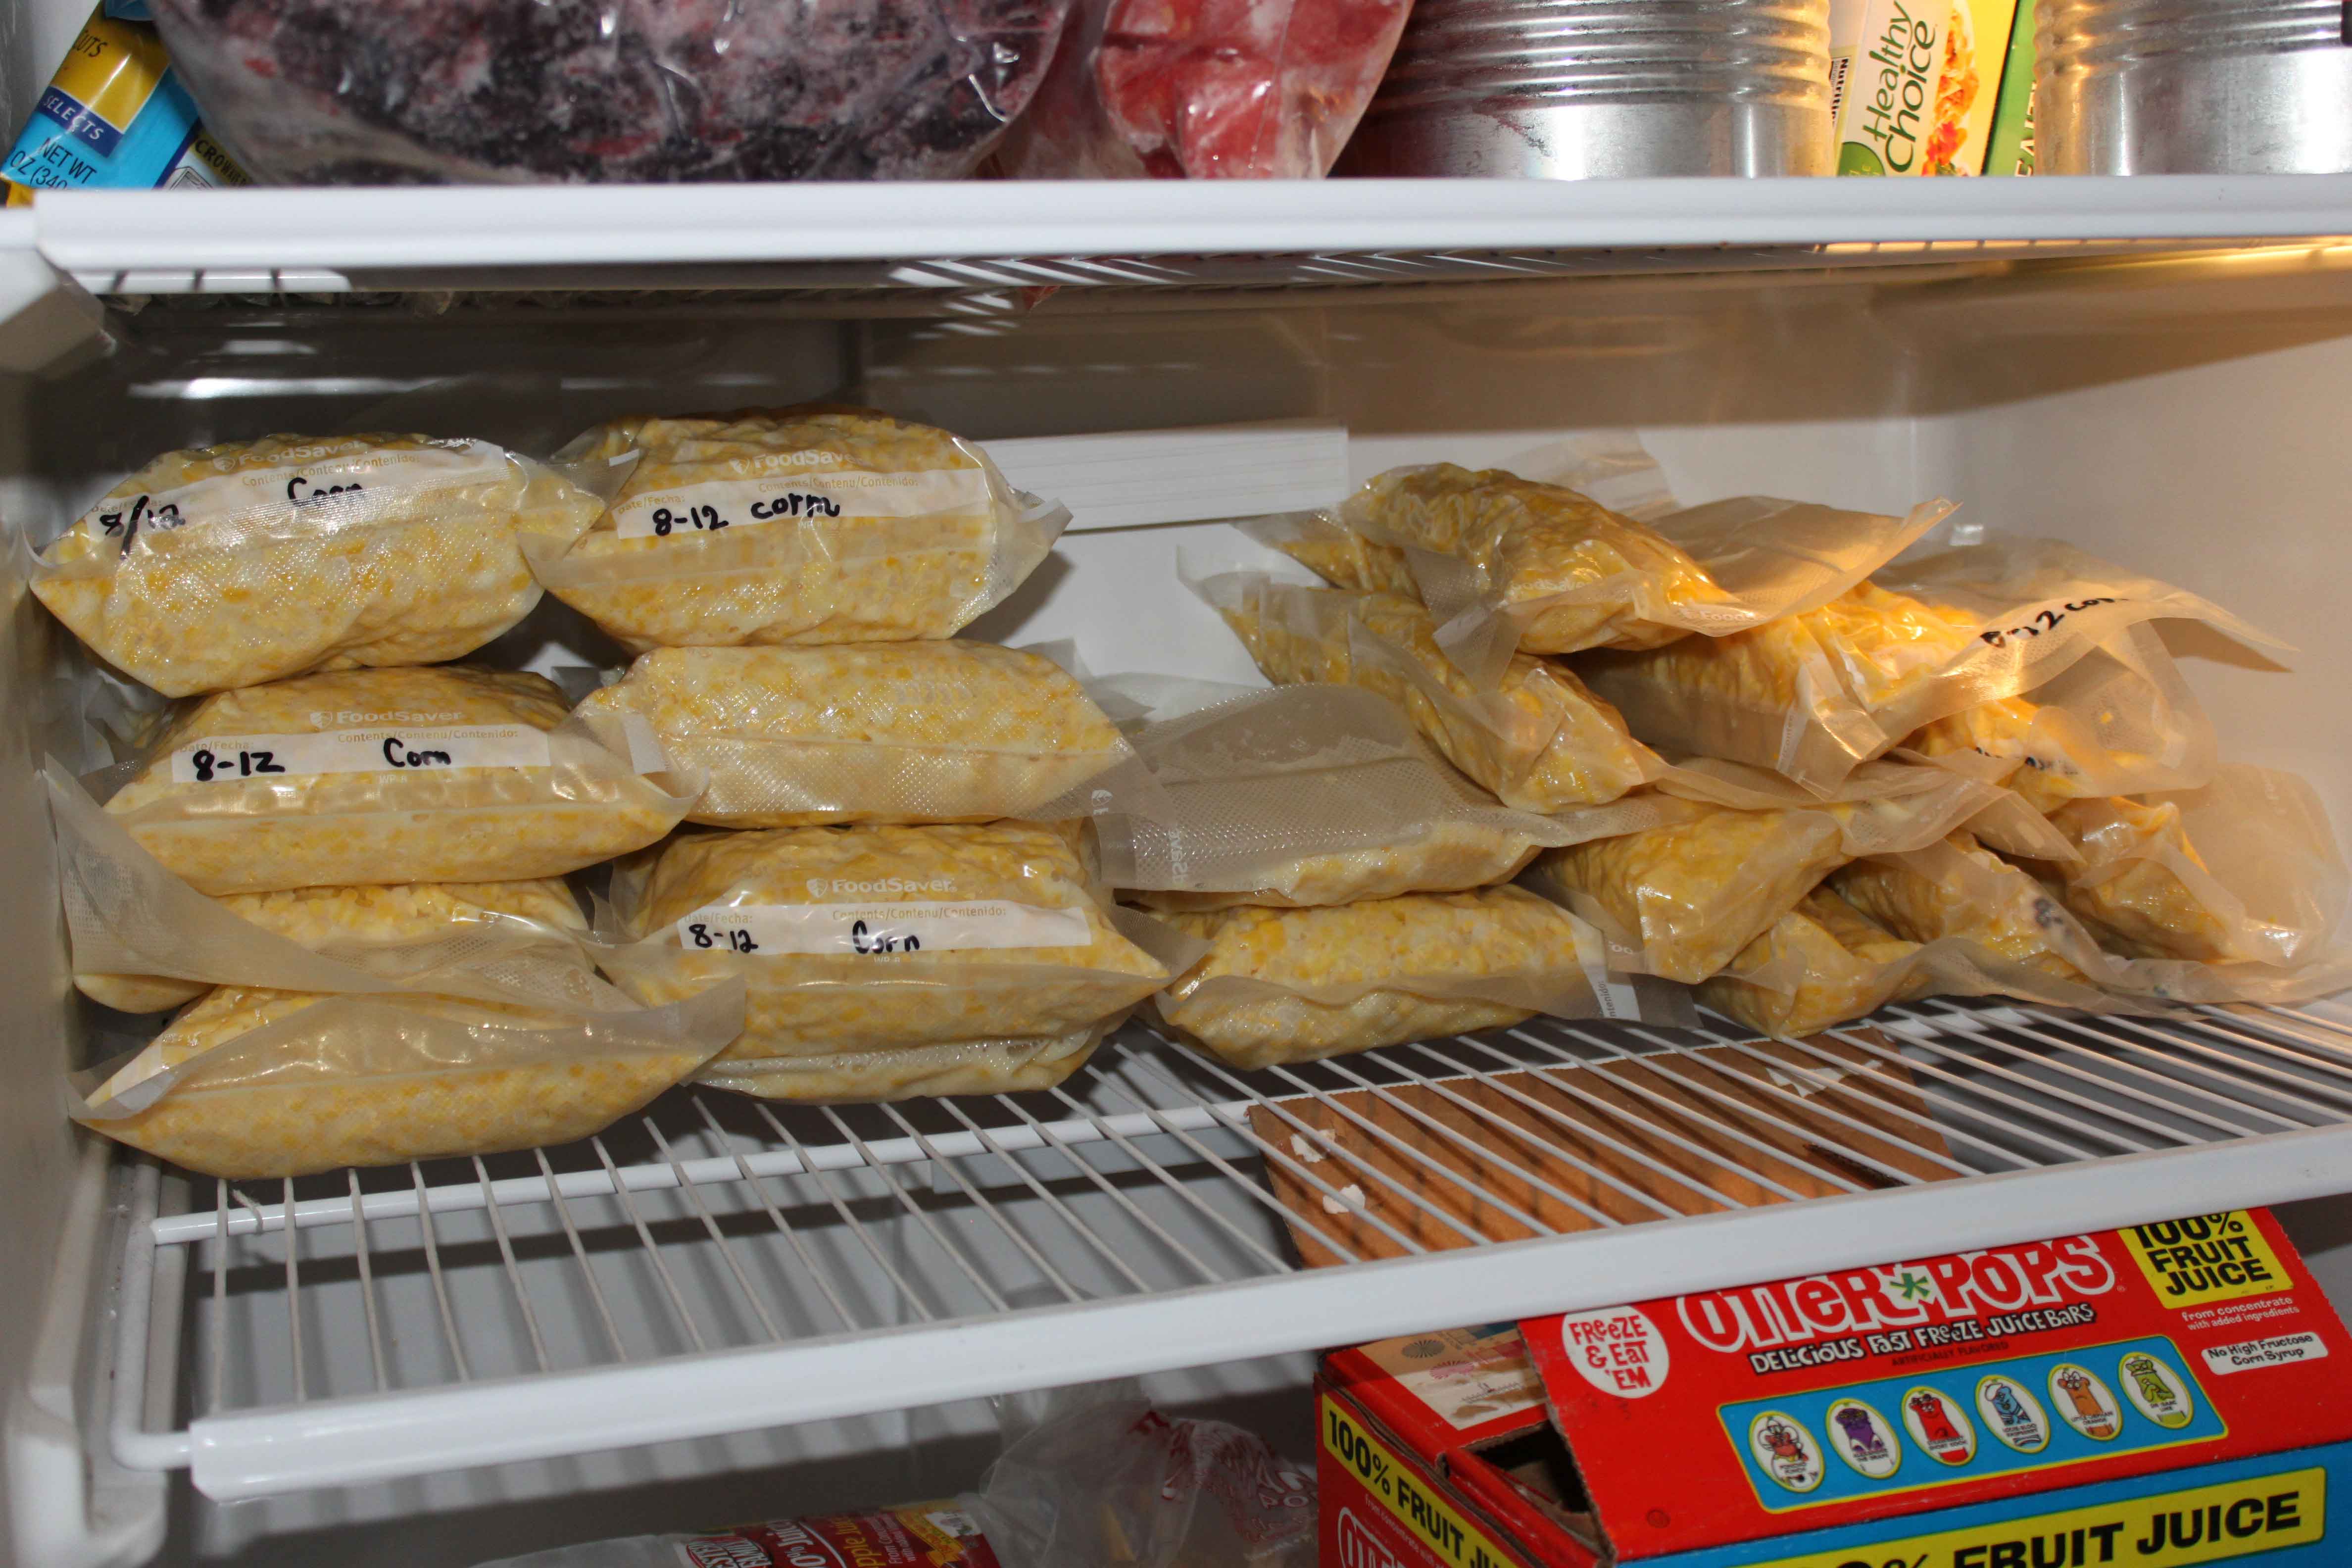
After cutting the corn off the cob, we fill the Foodsaver bags and seal up tight! I love my Foodsaver. It keeps the food fresh for a long time in the freezer. I have a large bag of Foodsaver bags that I buy at Costco, you get the best price there that I have found anywhere.

My kids did a great job helping us last night cook and freeze all this corn! Here is what 9 dozen look like in my freezer. It is nice to have that done and know that this winter, we will have some yummy corn to eat!
A PYP Best Blog! Stop! Don’t throw out those glass jars!
Just in case you missed this article on re-purposing glass jars the first time we shared it a couple of years ago, we are republishing it. After Trish wrote this blog originally, we got an awesome response. And it landed her a quick spot on Good Things Utah. This is definitely one of the PYP Best Blogs!
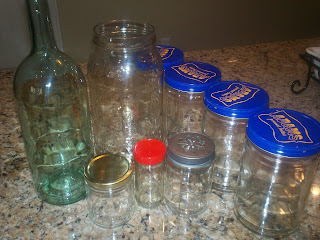
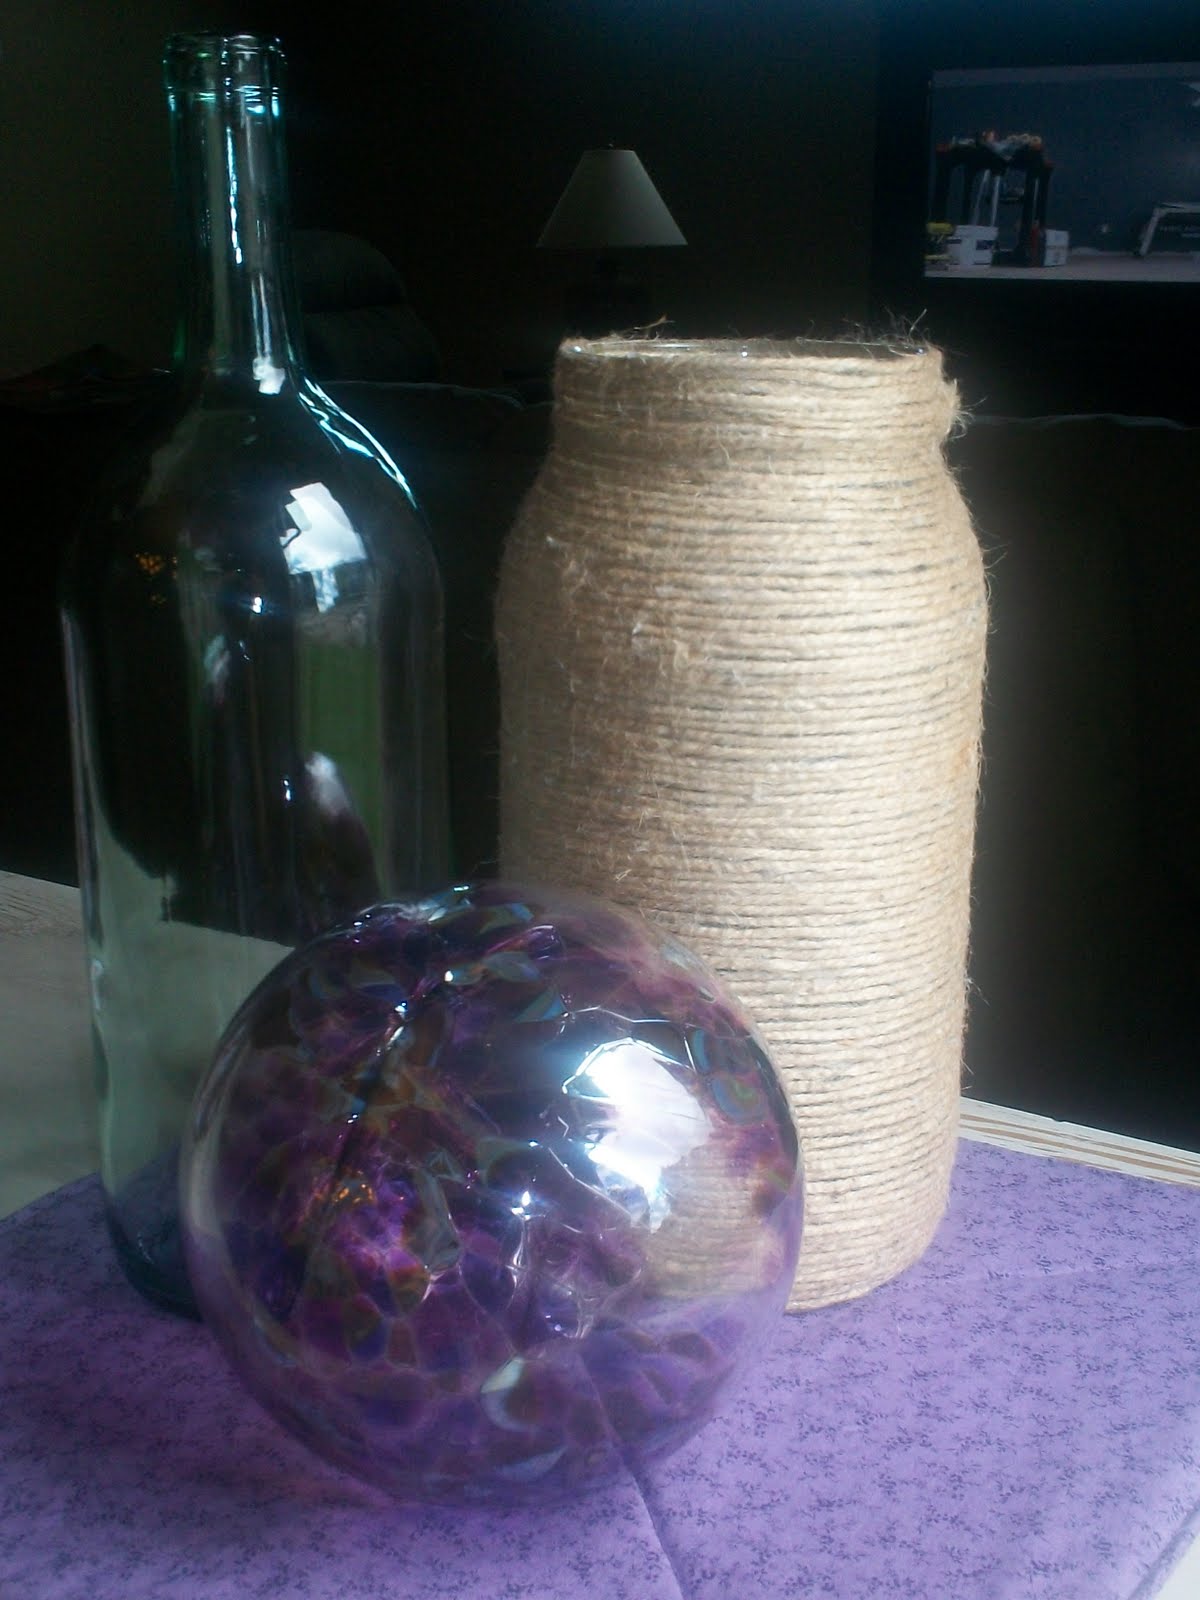
Our curbside recycling program does not accept glass at this time. So I often find myself pausing at the trash can, trying to think of a new purpose for these glass bottles.
I have started holding onto them, waiting for inspiration to strike. I figure that if I can’t find a use for them, I can deliver them to a recycling center myself.
The straight walled, wide mouthed peanut butter jars, in particular, have really been on my mind lately.
For one thing, the peanut butter is pretty pricey! I’m a penny pincher so I know I could get Skippy or JIF for less, especially using coupons. A LOT less. But the Adams ingredient label appeals to my efforts to feed my family healthier foods so I pay a little more for it. We go through a jar every three weeks or so. I’m accumulating a good collection of them.
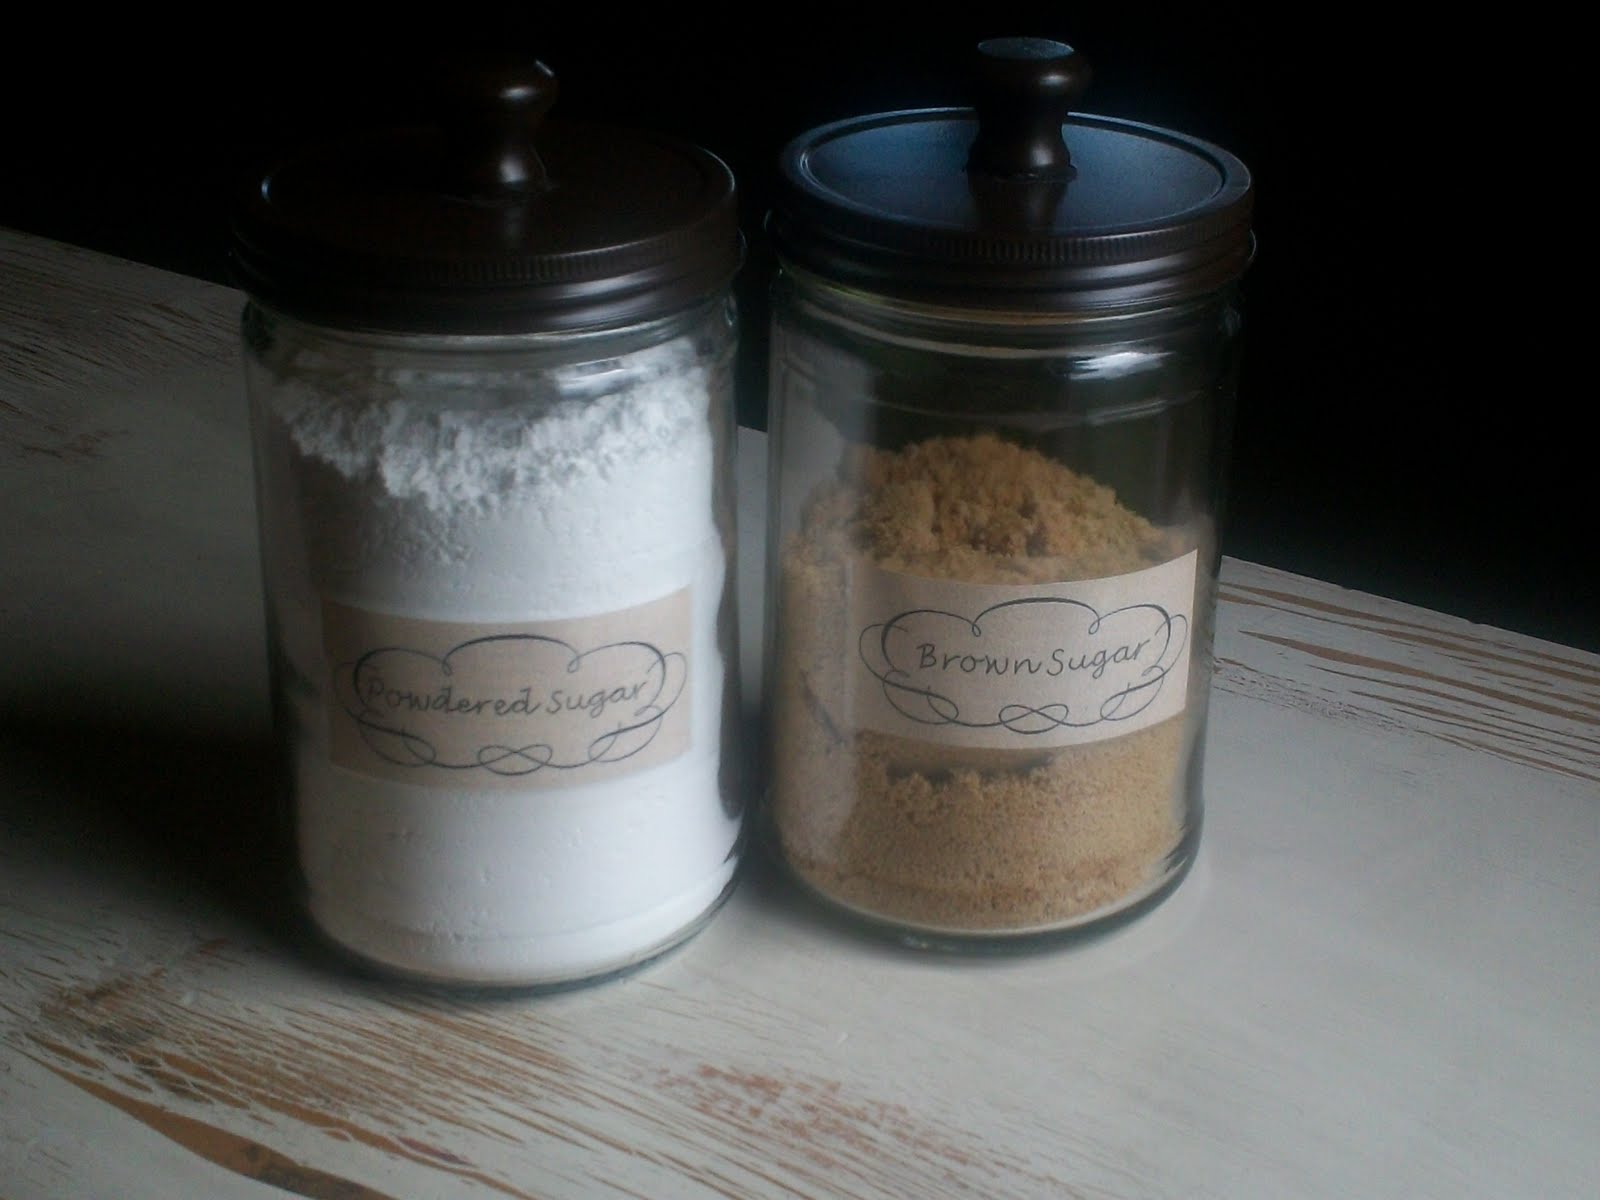
Because of their size, I thought they might make good canisters for the pantry. And finding a useful purpose for them might take a bit of the sting from the price of the peanut butter away.
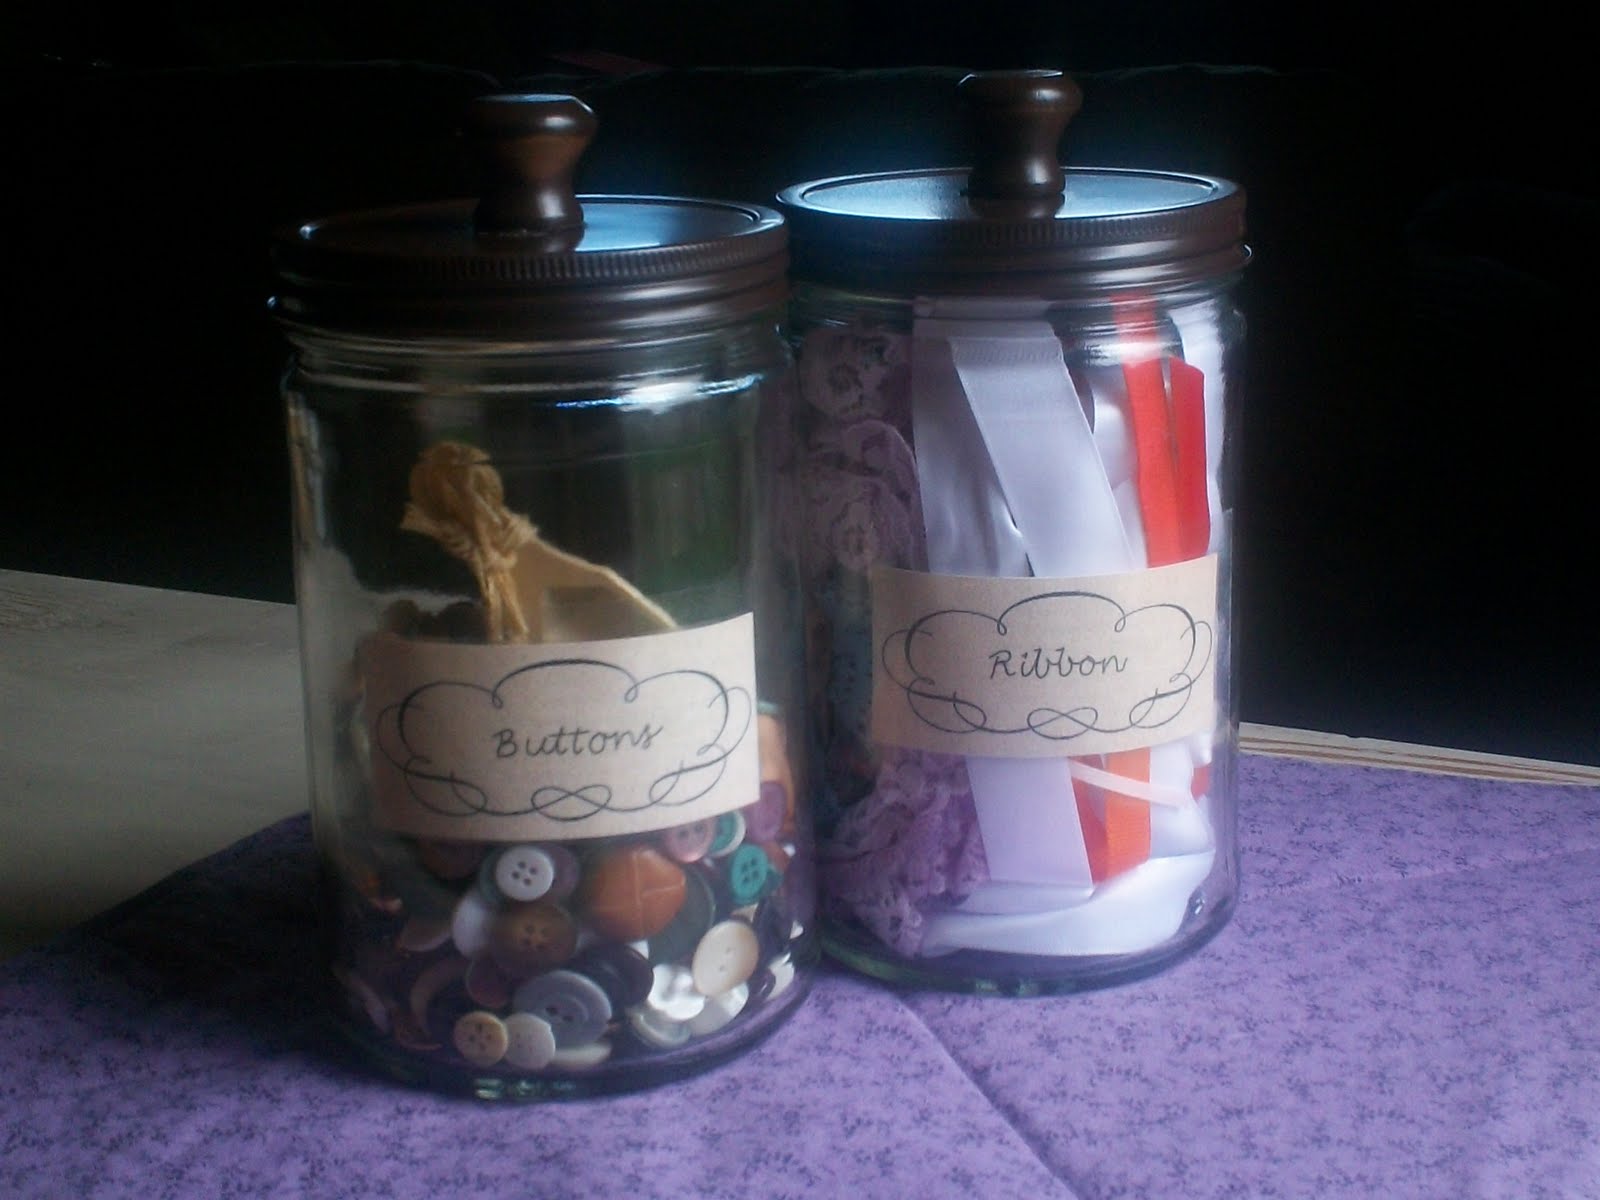
After a little spray paint and some old dresser drawer knobs, I’m pretty happy to replace my 30 year old Tupperware canisters with these.
I’ll recycle the Tupperware of course! Or re purpose it somewhere.
I wonder what a set of vintage pea green Tupperware canisters is going for on Ebay?
Where was I?
A PYP Best Blog: Make Your Own Butter
Just in case you missed this article on DIY an update on making your own laundry detergent the first time we shared it a couple of years ago, we are republishing it. After Candi wrote this blog originally, we got an awesome response. This is one of the PYP Best Blogs!
There are many reasons why you might want to learn how to “churn” your own butter – self-reliance, avoiding preservatives, just for the fun of it, etc. 🙂
It’s actually pretty easy (although not necessarily any cheaper than buying it already made). Anyone remember doing this as an experiment in elementary school – passing around the glass jar with the cream and having everyone shake it until it turned into butter?
This is only my second time doing my own butter, but I thought I would take some pictures through the process in case it might help anyone else.
Here’s the skinny on the butter-making. The basic instructions? Take your cream and whip (churn) it until you can no longer do so. That’s it. 😉
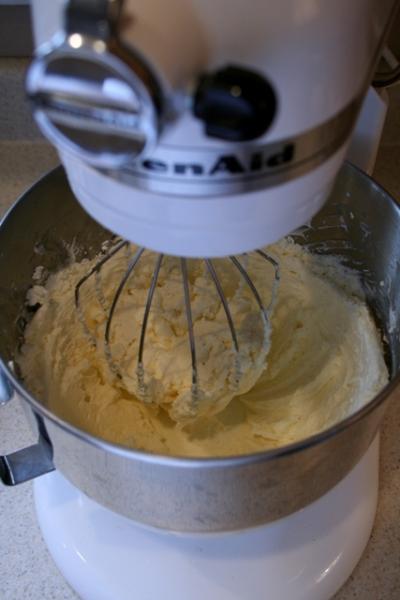
I did mine in my KitchenAid, but you could also use a handheld mixer, or even do it by hand or in a glass jar (add marbles) if you wanted to. The instructions below will assume you are using a mixer of some kind. (If you’re doing it in a glass jar, just shake until you can’t shake any more.)
Start with this, just as if you were going to make whipped cream (but do not add any sugar or vanilla):
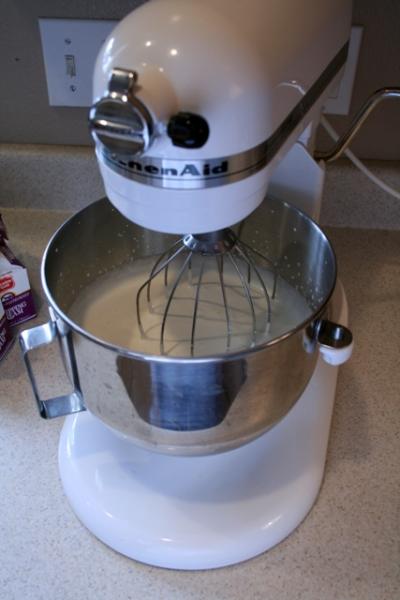
(I had actually whipped this for about a minute before I stopped to take a picture)
You’ll get to what they call the soft-peak stage:
Then the stiff-peak stage:
You’ll go through those first steps quite quickly. Just keep whipping…
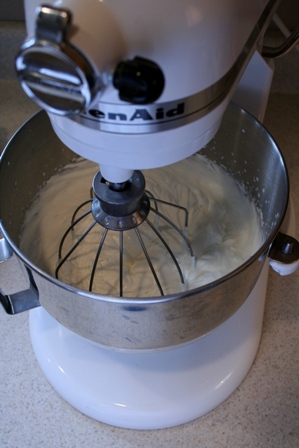
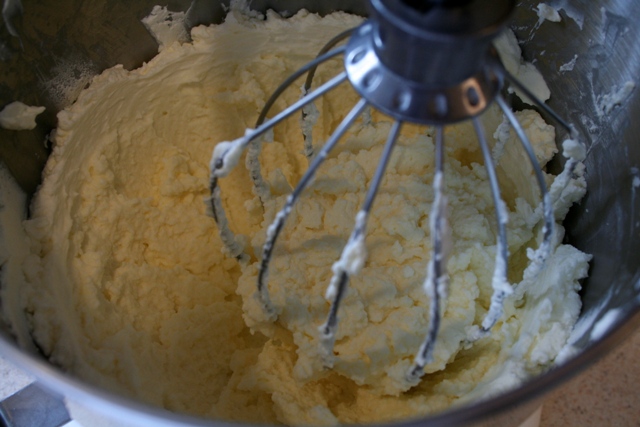
Then the cream will start to turn from white to a pale yellow:
It will start to look like really thick whipped cream (clotted cream anyone?) and will start to cling thickly to the sides of your bowl:
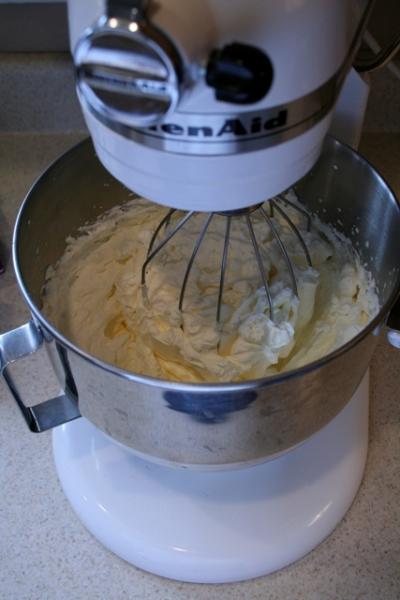
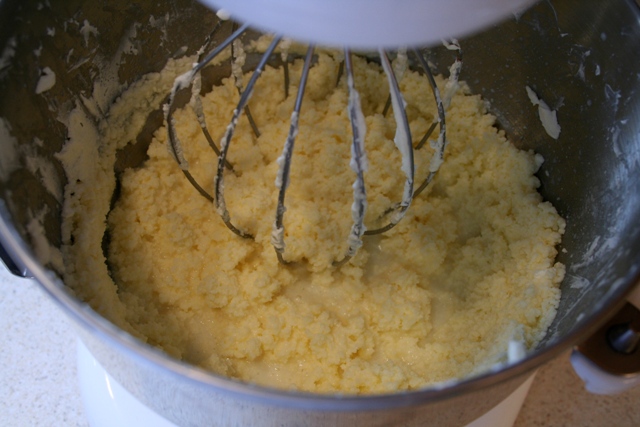
Keep going. (You might want to stop every few minutes to scrape down the sides of your bowl.) As you continue, you’ll start to see it turn a little grainy:
…and get grainier:
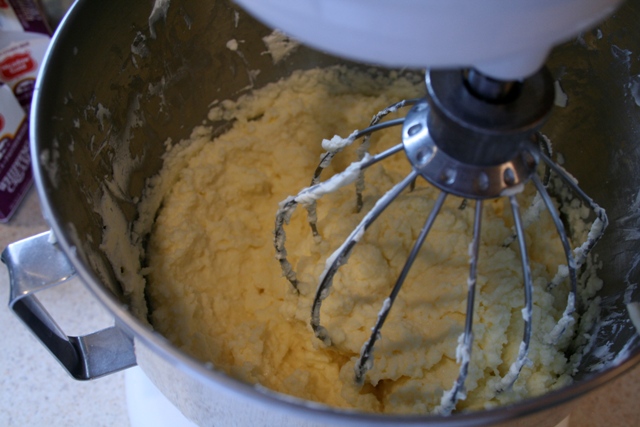
…and grainier. And you’ll start to see a little bit of “shine” on the top – it will begin to look “wet”:
(you can sortof see little spots of “shine” in the picture – that is the liquid being squeezed out as the fats and proteins coagulate)
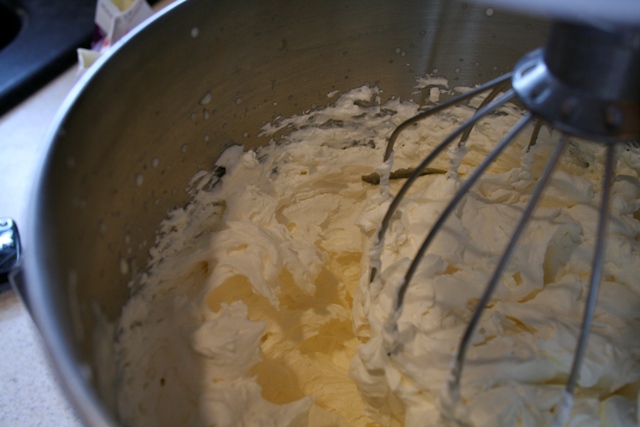
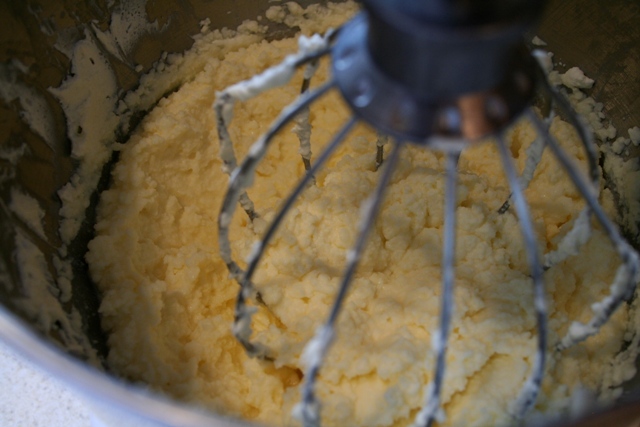
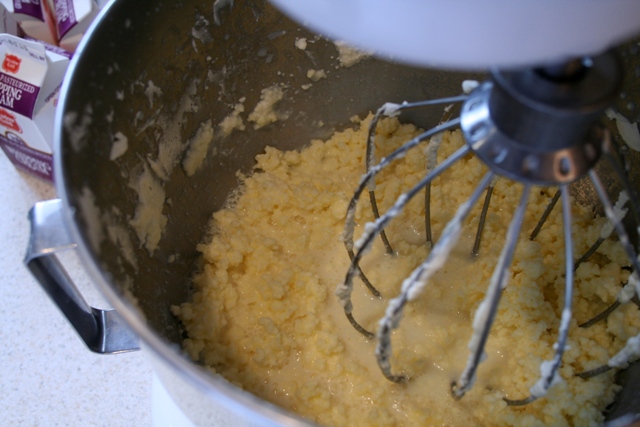
It will start to look almost like bread crumbs or cottage cheese or when you cut-in butter to a crumb topping:
At this point you’ll want to turn your machine down a bit (I turned mine down from 10 to about 7 or 6) because it will start to spit liquid at you. [These last steps happen very quickly, and you’ll go from the crumb topping look to a big chunk of butter in a puddle of buttermilk in about 5 seconds, literally. If you’re machine is still zipping away at highest speed, you’ll slosh buttermilk all over the kitchen before you have time to turn it off.]
You’ll start to see more and more liquid accumulate on the top:
Keep going for another minute or two, at a medium speed, and watch carefully because in a matter of about 5 seconds it will go from the picture above, to THIS:
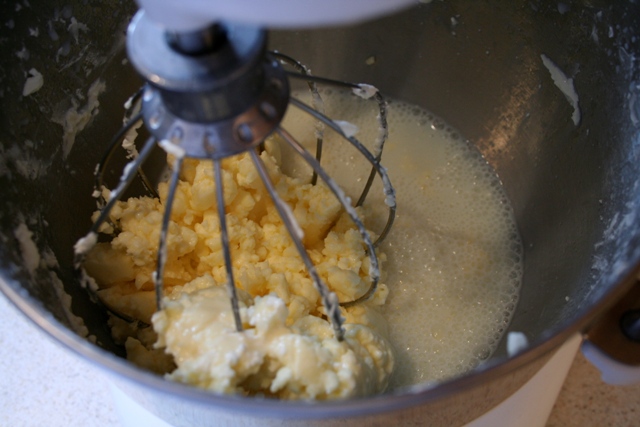
It will clump up all together in your whip attachment and you wont be able to whip it any longer. You’re now done (with the churning part, that is)!
You can now either pour off the buttermilk and save it (think cornbread, buttermilk pancakes, buttermilk biscuits, etc.) or you can just discard it.
With clean hands, press all of the butter solids into a ball. Squeeze it a little to get more buttermilk to drain out.
You can put it in a container in the refrigerator at this point, but I’ve read that it can still have buttermilk in it and that can tend to make it go rancid, so many places suggested to wash it.
I filled my mixed bowl with cold water (if you use warm you’ll melt the butter) and then kneaded it a few times under the water. Pour off the water, and repeat one more time, or until you feel like you’ve gotten most of the buttermilk out.
You’ll then end up with this:
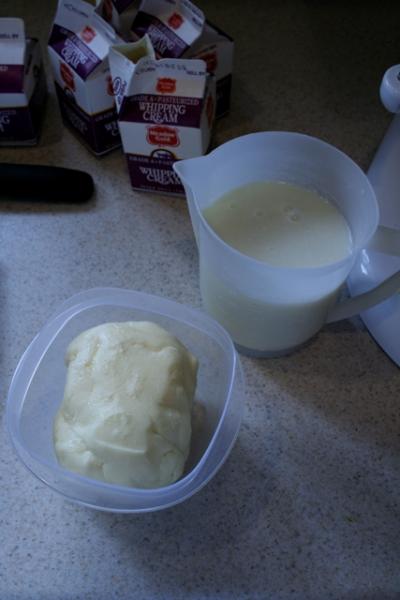
I started with 2.5 pints of whipping cream, and ended up with 11.2 ounces of butter and just under 2 cups of buttermilk. If you use heavy whipping cream (with a higher fat content) you’ll get slightly more butter.
The half-pints of whipping cream were .50 each on clearance after Christmas. I used 5 of them, for a total of $2.50. Extrapolating that out would give me the equivalent of 1 lb of butter for $3.63, definitely not cheaper than just buying it already made at the store. BUT, I also got buttermilk out of it, so I think when you add in that I’d have to buy that at the store as well, I think I come out about even, maybe just a little higher than the store-bought option.
If you have a source where you can get shelf-stable boxed whipping cream (Ultra High Temperature pasteurized), like through Gossner’s here in Utah, you can use that in place of the fresh stuff from the store, with the same results. However, you cannot use whipping cream that has been previously frozen (it denatures the proteins and fats and they will no longer coagulate or “whip” once thawed).
Have any of you ever tried making your own butter? What advice would you give to us newbies? Does anyone make specialty butters this way by adding additional ingredients? I’d love to hear about some of the possibilities!
A PYP Best Blog! Making popsicle stick bracelets! Plus bonus organizing tips!
 Just in case you missed this DIY article on making popsicle stick bracelets, the first time we shared it a couple of years ago, we are republishing it. After we first published this blog originally, we got an awesome response. This is one of the PYP Best Blogs! (I also included a couple oldie but goodie organizing tips! Perfect for all the back to school clutter and chaos!)
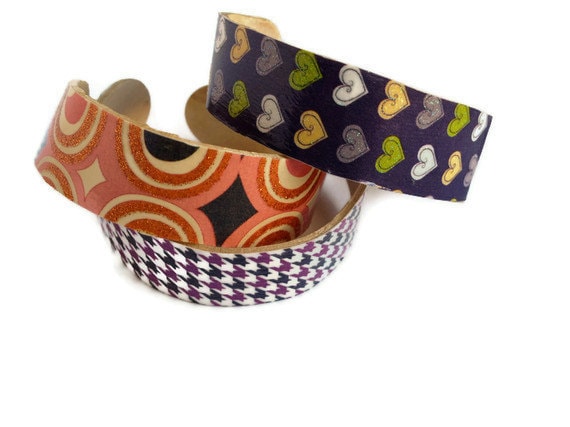
These are so much fun to make! You can recycle your popsicle sticks from the Summer – or purchase jumbo craft sticks to make these. They are so cute and simple to make and decorate.
What you need: Craft sticks (or popsicle sticks); modge podge; craft paper; paints; whatever you want to use to decorate your bracelets! You are only limited by your imagination. You will also need drinking cups/glasses, rubber bands (optional) and an emery board or some sandpaper.
Boil a pot of water and add your craft sticks to the water. Some sticks will break so make sure you boil more bracelets than you actually want/need. Let sticks boil for 30 minutes. Take off the heat and let sit in the pot of hot water for another 30 minutes.
Form your craft stick bracelets around cups or glasses or vases (measure wrists to get the right sizes!) and rubber band around. You can also form the bracelets inside the containers and you will not need rubber bands. Let dry overnight. Sand the bracelets with an emery board or sandpaper as necessary and…
Decorate!
~~~~~~~~~~~~

Back to school means back to school hair! Here’s an organizing tip you NEED if you’re not doing it already. Just purchase an inexpensive carabiner and voila – instant organization for one of the messiest things in the bathroom, your ponytail holders!
~~~~~~~~~~~~

With all of the white sales going on this week I was reminded of a project that I’ve been wanting to do. I’ve seen this idea in several places online and I’m sure I’ve pinned it at least once! This is such a simple way to organize scarves. You just put shower curtain rings on a hanger and voila, instant scarf organizer! This could be used for ties as well. This is one I need to do today! You could spend $14 and buy one, but you can make it yourself for so much cheaper.
A PYP Best Blog! Making file boxes from cereal boxes!
Just in case you missed this DIY article on making file boxes from cereal boxes the first time we shared it a couple of years ago, we are republishing it. After we published this blog originally, we got an awesome response. This is one of the PYP Best Blogs!
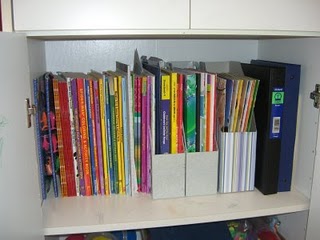
My kids love, love, love anything that has to do with art, coloring, drawing, etc. We have tons of coloring books, how-to-draw books, workbooks…you name it! But I get frustrated with the mess it can create…books all over the place! This isn’t even all of them!
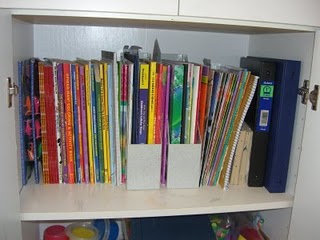
As you can see in the photo, I have a couple of plastic file boxes. I love organizers of any kind! I am working on organizing all these books, and I want more file boxes. But I am too thrifty to just go spend $7+ dollars on several more organizers….so I am making my own! We all have empty cereal boxes around the house. Here is one way to use them.
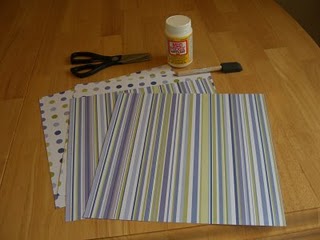
Supplies you will need:
a large cereal box (large enough to fit the books inside)
modge podge
brush
scissors
scrapbook paper to cover the cereal box
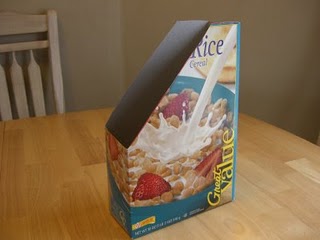
 You can see on the cereal box I took a permanent marker and drew the lines where I wanted to cut the box. I just used my current file boxes as a template. You can eyeball it with a ruler too.
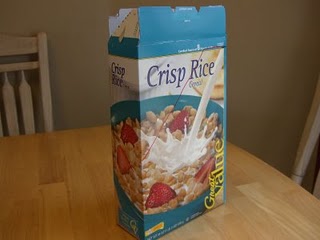
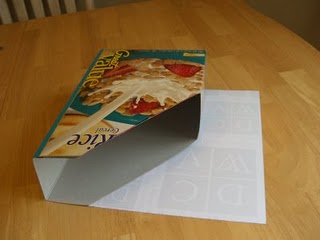
Then cut your box on the lines you drew. Here is what mine looked like after I cut it:
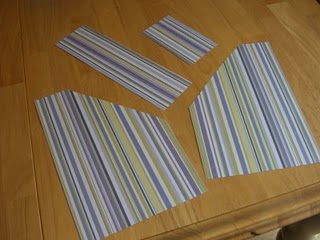
Then you will want to take your scrapbook paper and trace to cut.
At first I was going to use a couple of different kinds of paper on the box, but then I changed my mind. Here are all the paper pieces, ready to be put on the box.
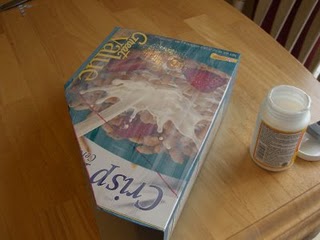
Take your modge podge and paintbrush and cover one side at a time. Line up the paper pieces that fit on that side and press firmly. Get out all the air bubbles and smooth out.
When you are all done with each side here is what it looks like. Pretty cute, huh!
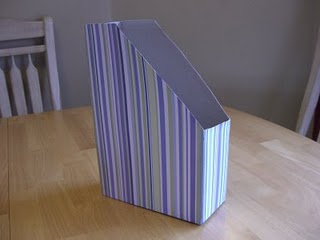
After it dries for a bit, take your paintbrush and paint modge podge over the edges and corners to reinforce durability.
Now you have a cute file box! I put it in the cupboard…and it looks great! Now I need to make a few more. I will also label them with the book contents to make it easier for the kids to put things back where they belong.
 I already had all my supplies on hand for this project, so I didn’t have to spend any extra money to start organizing my kids workbooks. Next time you need to do some organizing, think thrifty and pinch your pennies!