A PYP Best Blog! DIY Cleaner for Kitchen Cupboards!
Just in case you missed this article on DIY cleaner for kitchen cupboards the first time we shared it a couple of years ago, we are republishing it. After Marne wrote this blog originally, we got an awesome response. This is one of the PYP Best Blogs!
I am embarrassed to admit how dirty my kitchen cupboards are. So dirty! I decided to try a recipe that I found on Pinterest yesterday, and it worked great! I wanted to share it with you today.
I actually tried two different cleaners. The first one was a mixture of:
one part canola oil
two parts baking soda
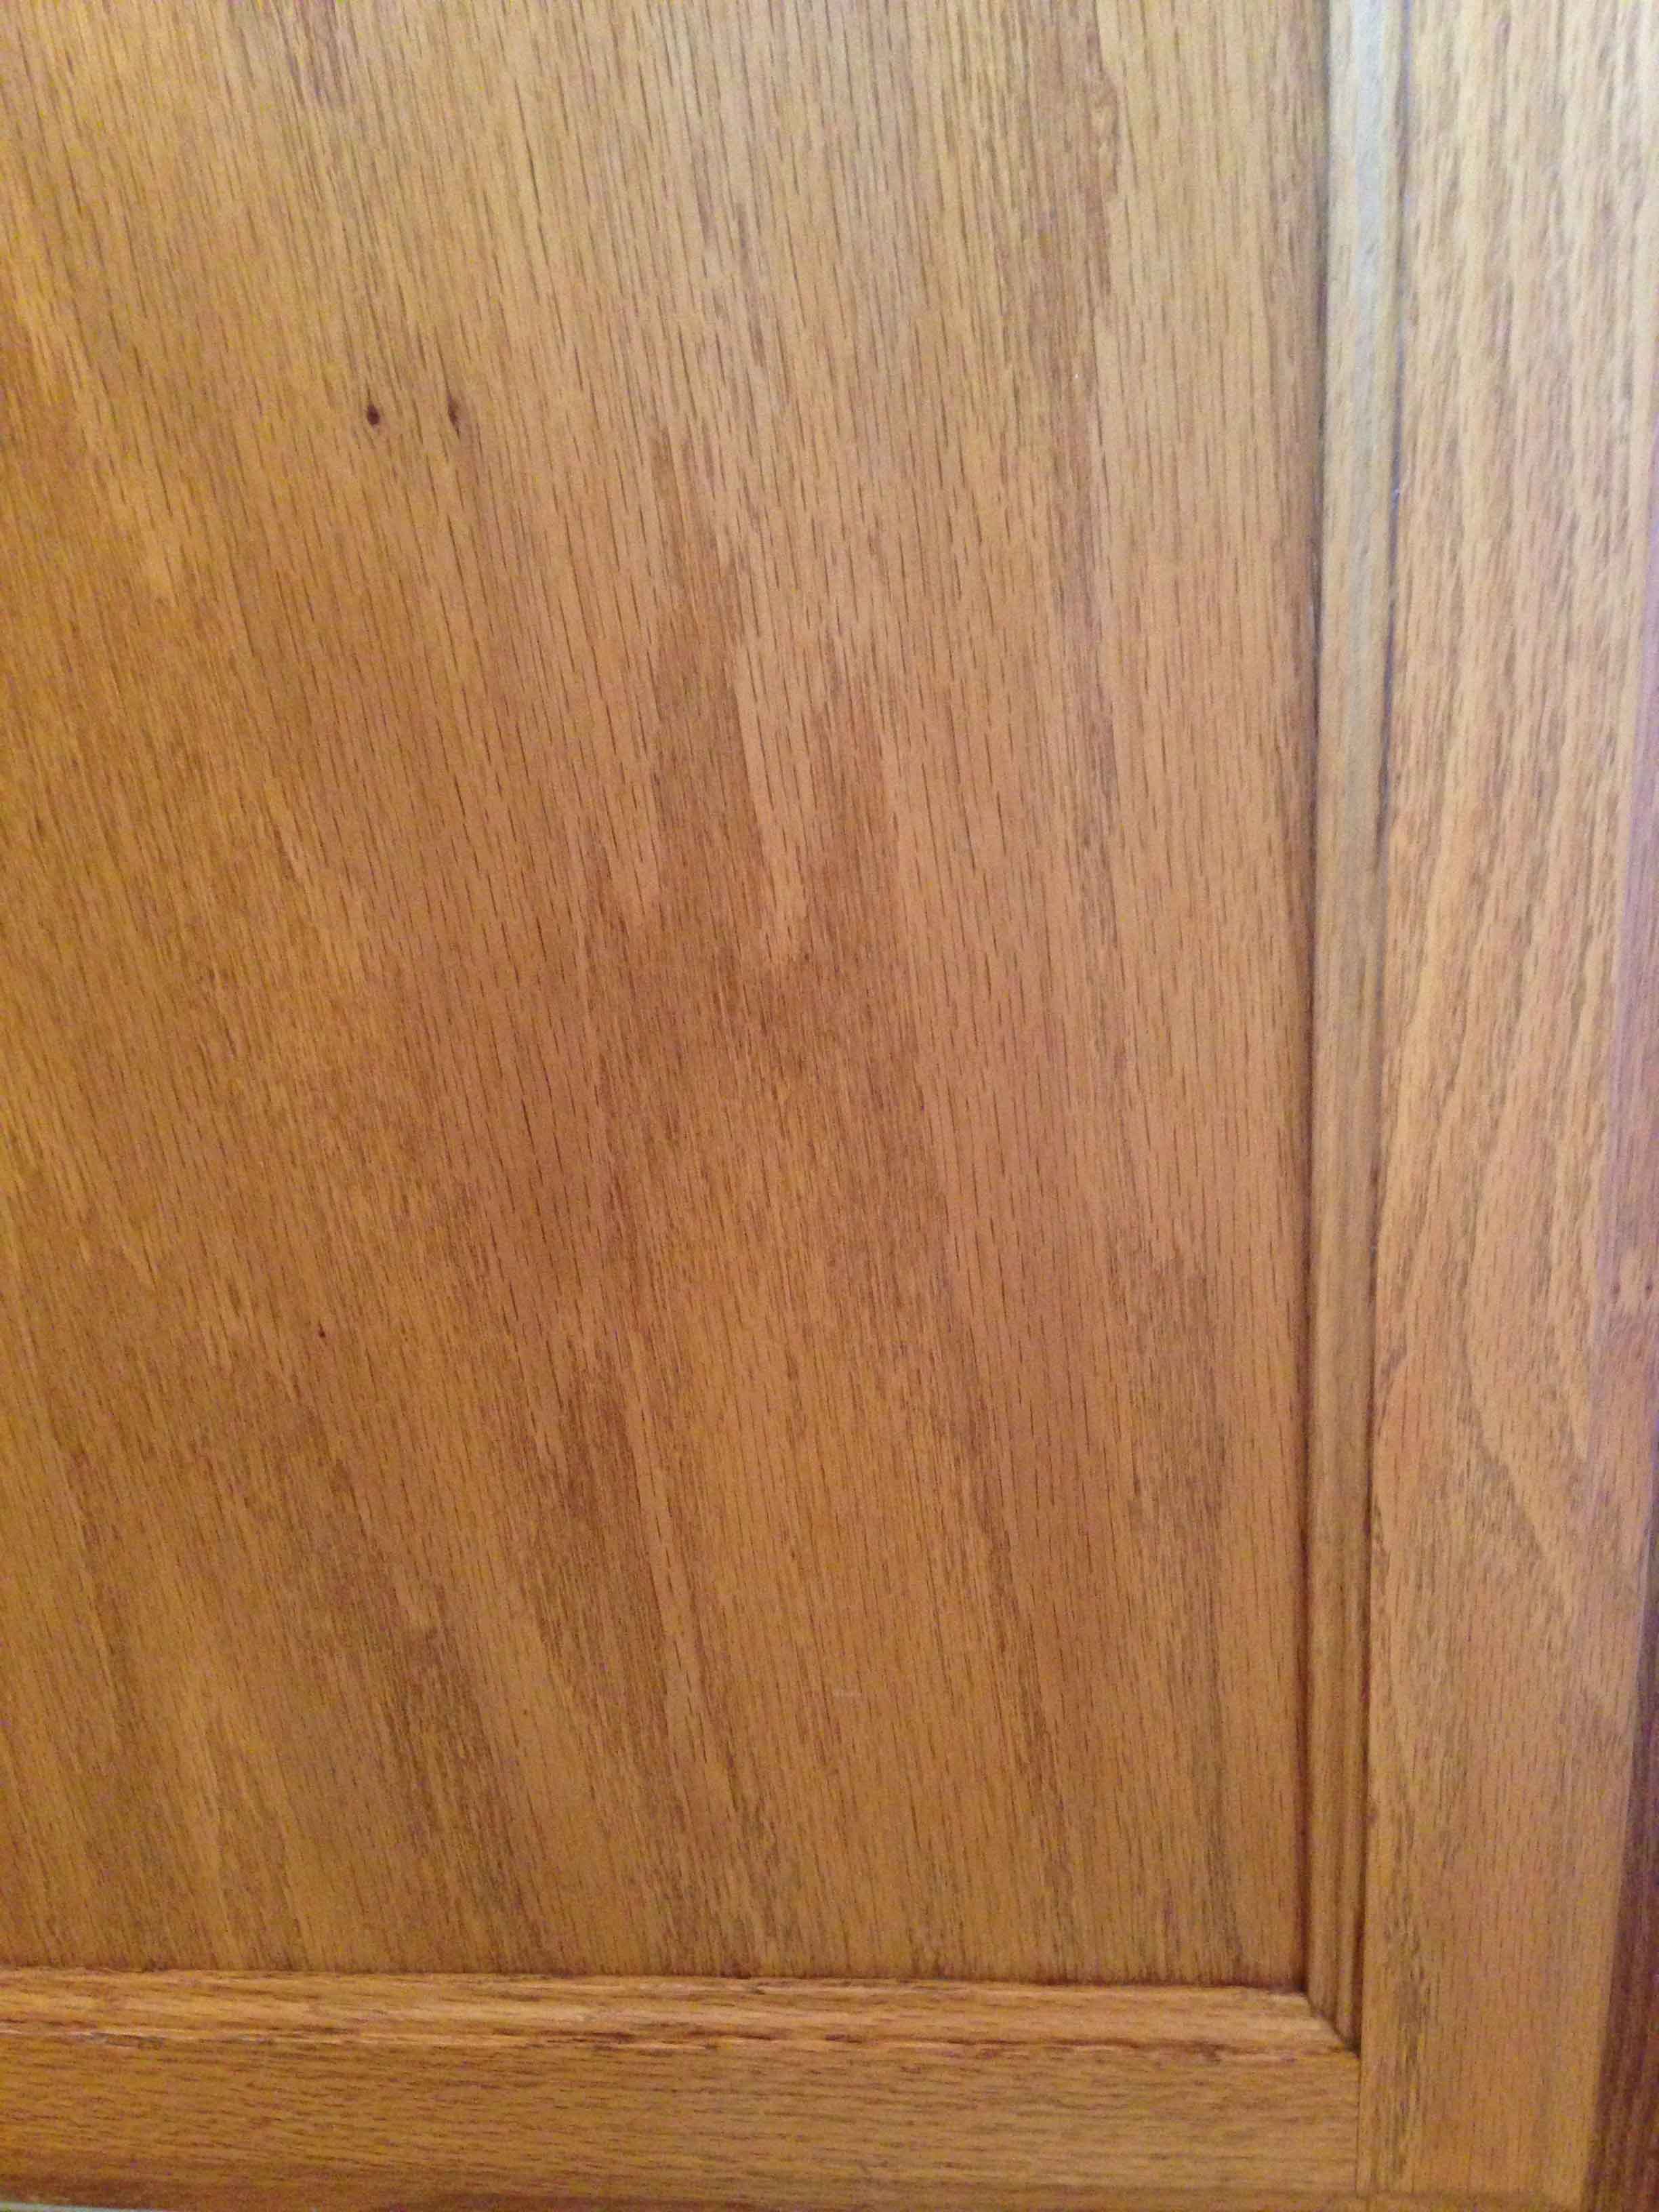
Mix up until a thick paste, then use a cleaning toothbrush to scrub the crevices and outside of your cupboards. It is really thick, and kind of balls up while you are using it. The paste will turn dark with the grime. Here is a side by side comparison.
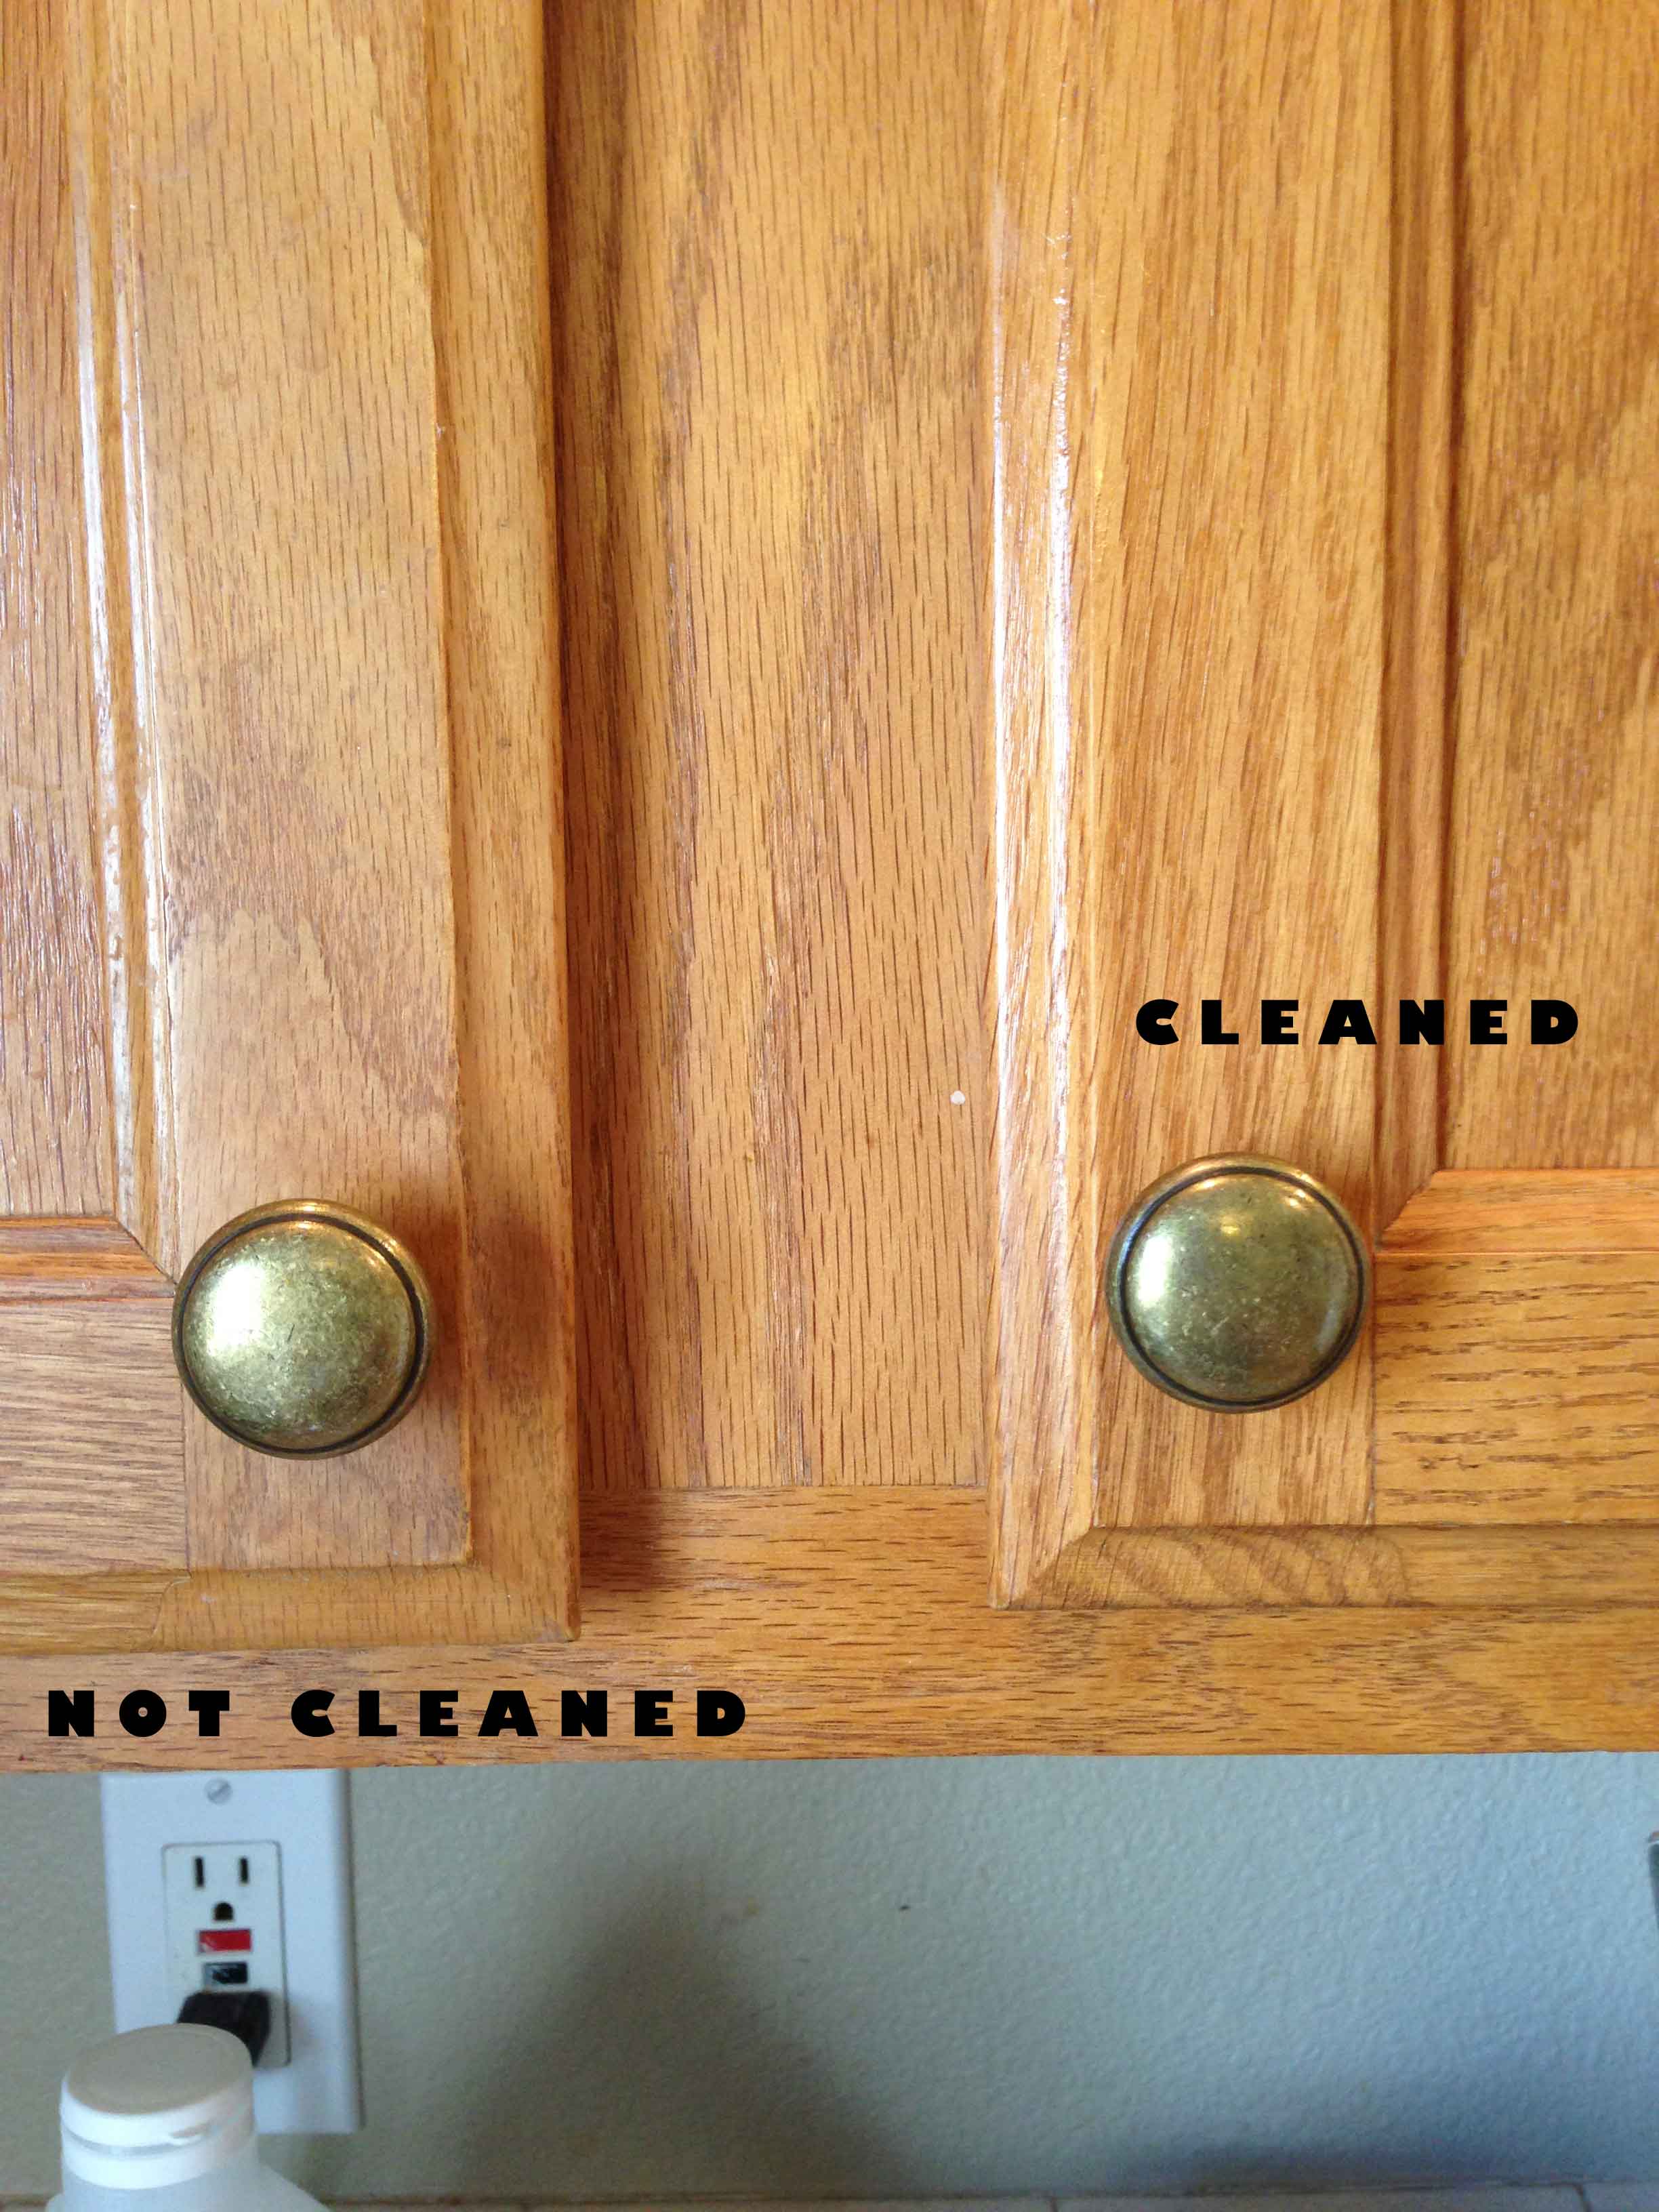
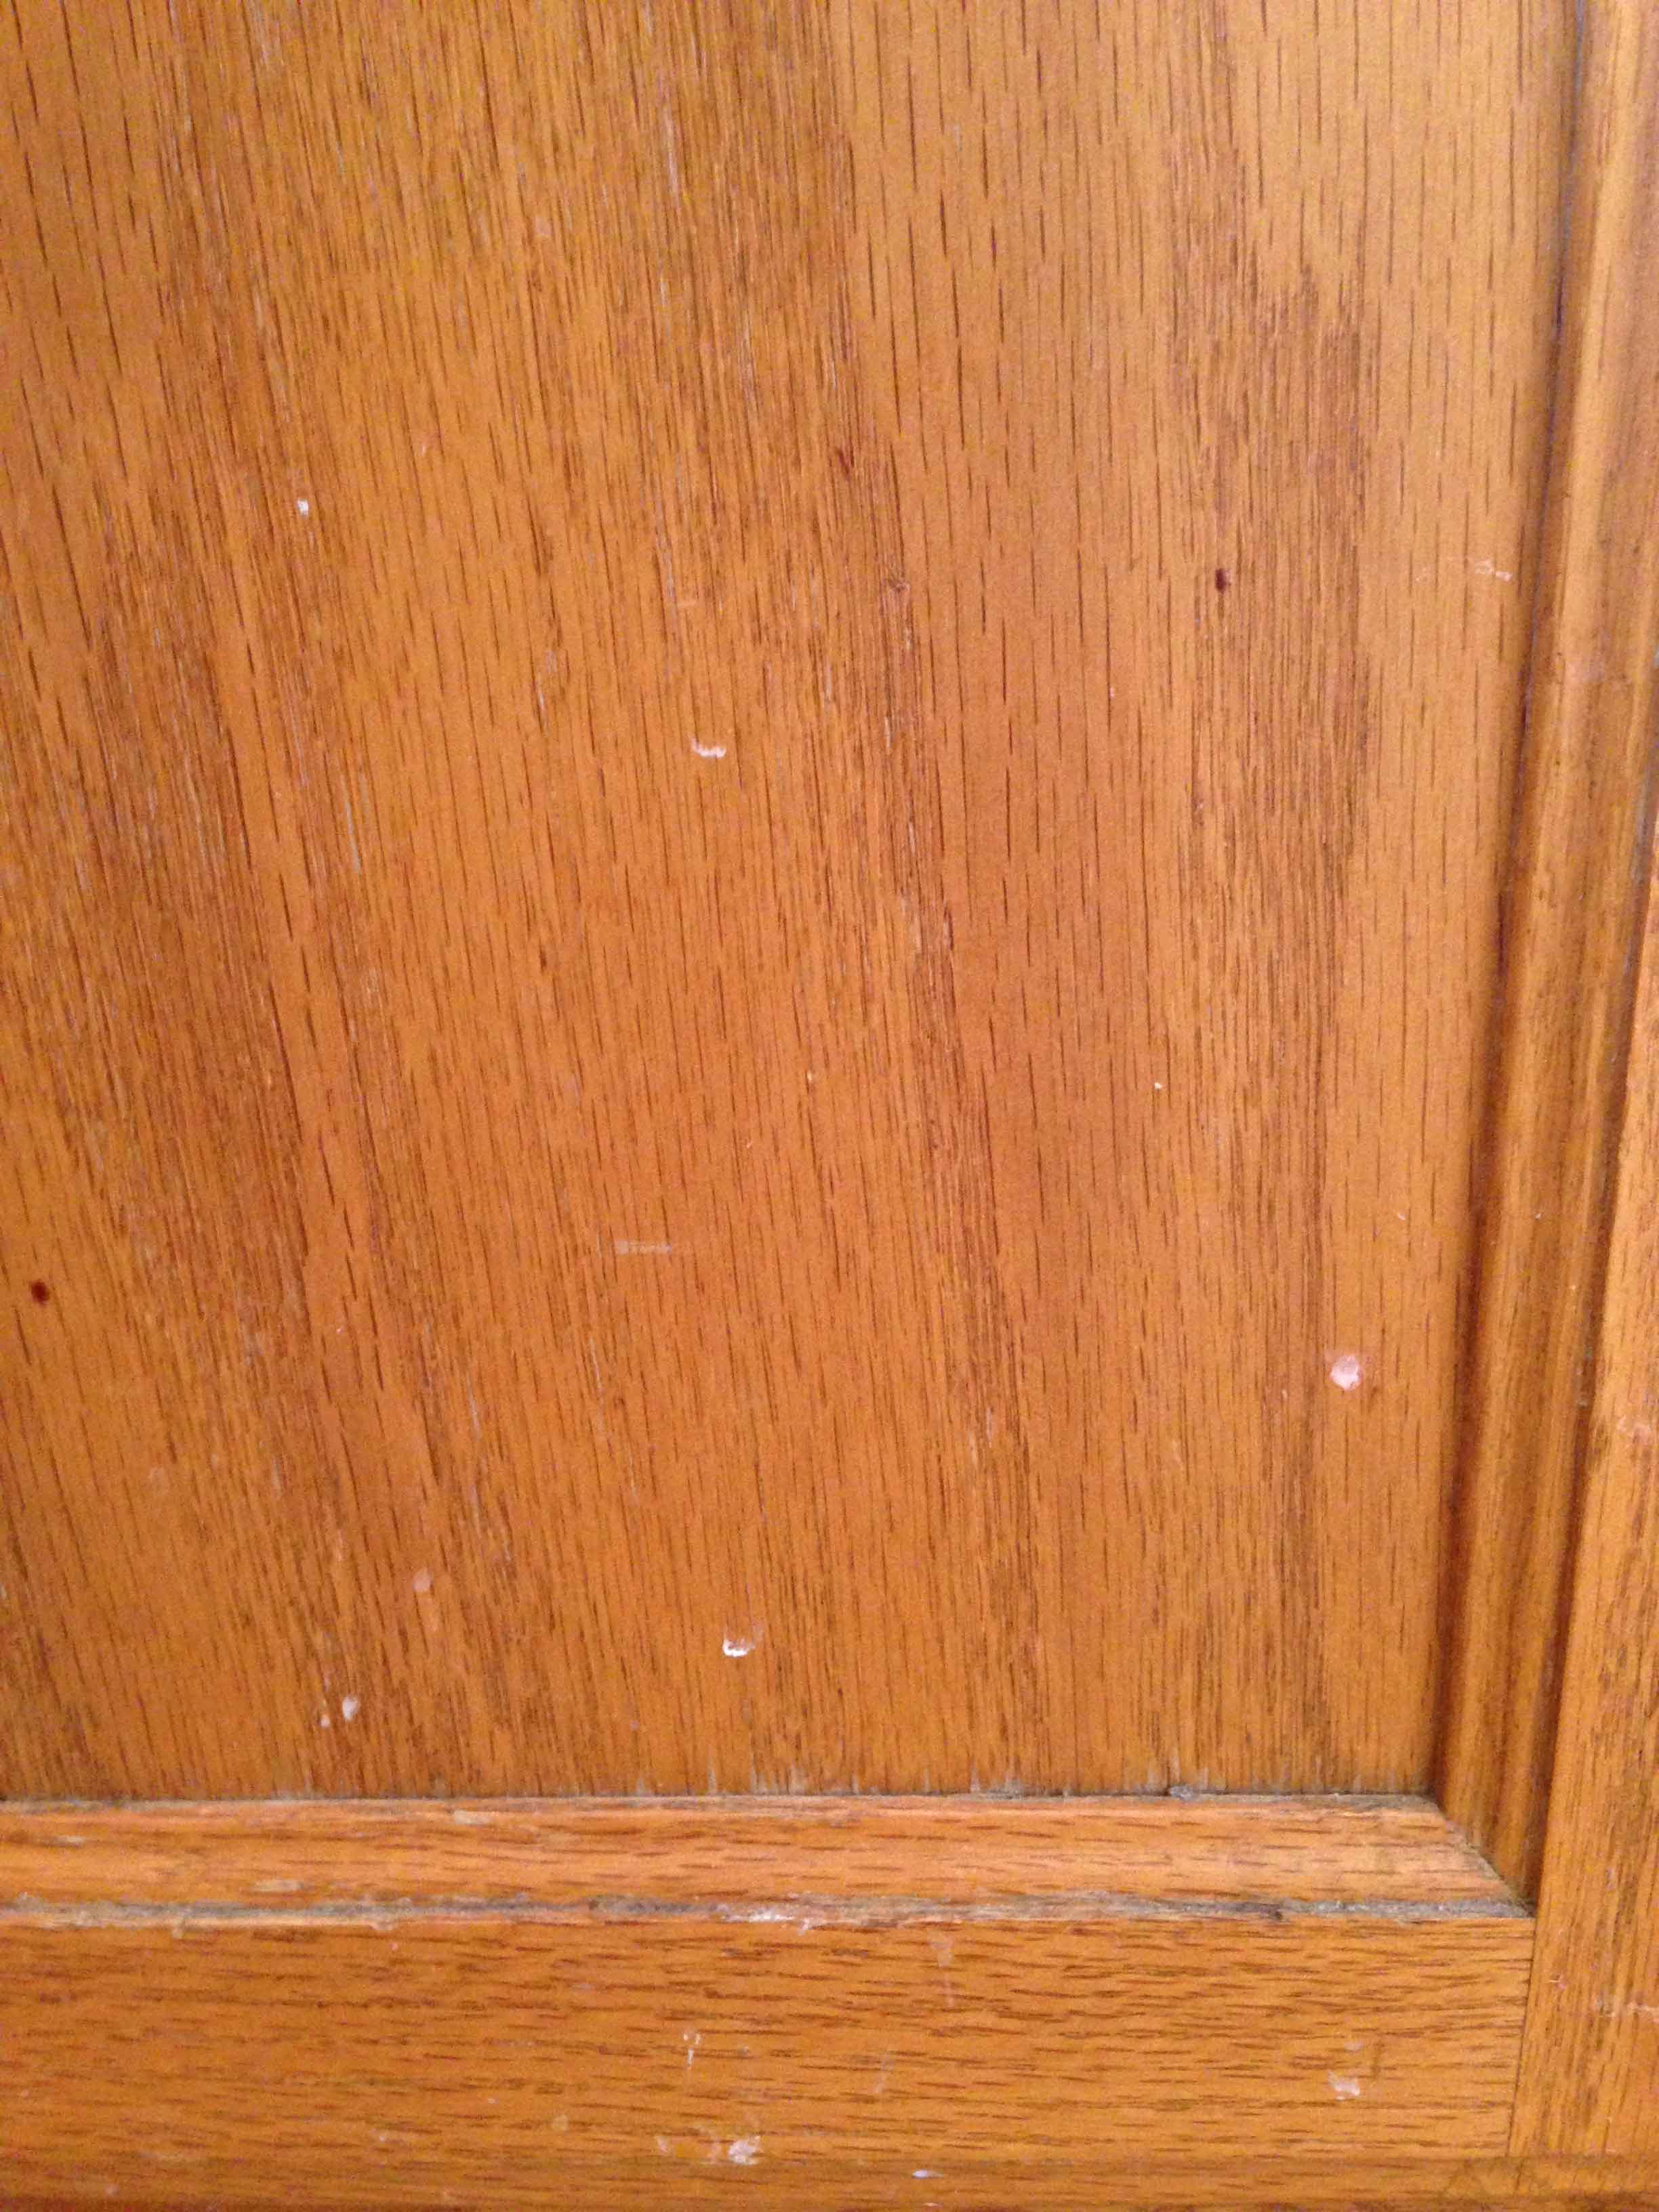
There is obviously a difference, but these cupboards were not as dirty as the ones below. It is just me or do the cupboards on the lower level get filthy? Since these cupboards were much dirtier, I tried an additional solution besides the baking soda and oil. For this one, I mixed:
about 1/2 c. white vinegar
2 cups warm water
4 TBL. baking soda
a few drops of dish-washing liquid
I scrubbed that on with the toothbrush as well. This solution worked great on the caked-on grime. Here is a before and after using that:
Now you have to admit that those pictures definitely speak for themselves! I can’t believe how clean they got. I am sold on cleaning my cupboards using these two solutions. I was able to clean several yesterday and I will finish more today. This is a very cost effective way to clean your cupboards and most likely you already have everything in your pantry to do the job!
A PYP Best Blog! DIY Common Sense Appliance Repairs!
Just in case you missed this article on DIY common sense appliance repairs the first time we shared it a couple of years ago, we are republishing it. After Marne wrote this blog originally, we got an awesome response. This is one of the PYP Best Blogs!
Have you ever found yourself calling a repairman for a home appliance problem? Then when they get there & inspect the issue, you find out the repairs are a simple fix? Then you are stuck paying a large service call fee when you could have fixed the problem yourself.
Here is an example. For a week or so I have noticed that our refrigerator wasn’t getting as cold as it should. We turned up the temperature but it was not getting colder. My husband said he would look at it. The next morning as I got the milk out it was very cold! After talking to my husband, I learned there were no big, hard repairs. It was a simple, quick fix.
The fridge and freezer work together to keep the temperature regulated properly. See this vent? It is in the top left of the fridge, and it goes to the freezer on the other side.

The problem was this: That bag of bacon bit was standing up blocking the flow vent. That’s it! Once my husband folded down the bag the fridge started to become colder within the hour. If we had called a service man to diagnose and make the repairs we would have paid at least $75 for him to just tell us that.
If you have something wrong with an appliance, toilet, or other item in your home, take some time to check into what might be wrong and see if you can make the repairs before you pick up the phone to call a repairman. My husband is handy, but if you are not maybe you know someone who is that could give you some tips. It just might save you lots of cash.
A PYP Best Blog! Giving Your Kids Jobs or Chores!
Just in case you missed this article on giving your kids jobs or chores the first time we shared it a couple of years ago, we are republishing it. After Marne wrote this blog originally, we got an awesome response. This is one of the PYP Best Blogs!
Most of us try to enlist our children with doing chores around the house. We feel it is something that will develop a strong work ethic for them, as well as teach them basic principles of how to take care of themselves and be a decent, clean and orderly human being. Am I right?
I have read that children who help out at home or have regular chores may have some of the following characteristics:
*can be better behaved when they are away from home
*can have more self-confidence
*may be able to be more self-disciplined when they live away from home
*could take initiative when it comes to taking care of themselves when they move away from home
*may be better at multi-tasking
*learn how important it is to keep themselves and their environment clean and orderly (and how that can affect their behavior)
Granted these may not apply to all children, but I do think it is true to a degree. I have seen it with chores and my own four children.
We all will also agree on the fact that is sometimes if more like babysitting or pulling teeth when it comes to getting our kids to help around the house and get their chores done! We started something in our house a few months ago that seems to be working. Granted, I don’t follow this religiously as life does happen…either we forget or we are out and about so much there is no time….but when we do use it with our chores, it does work!
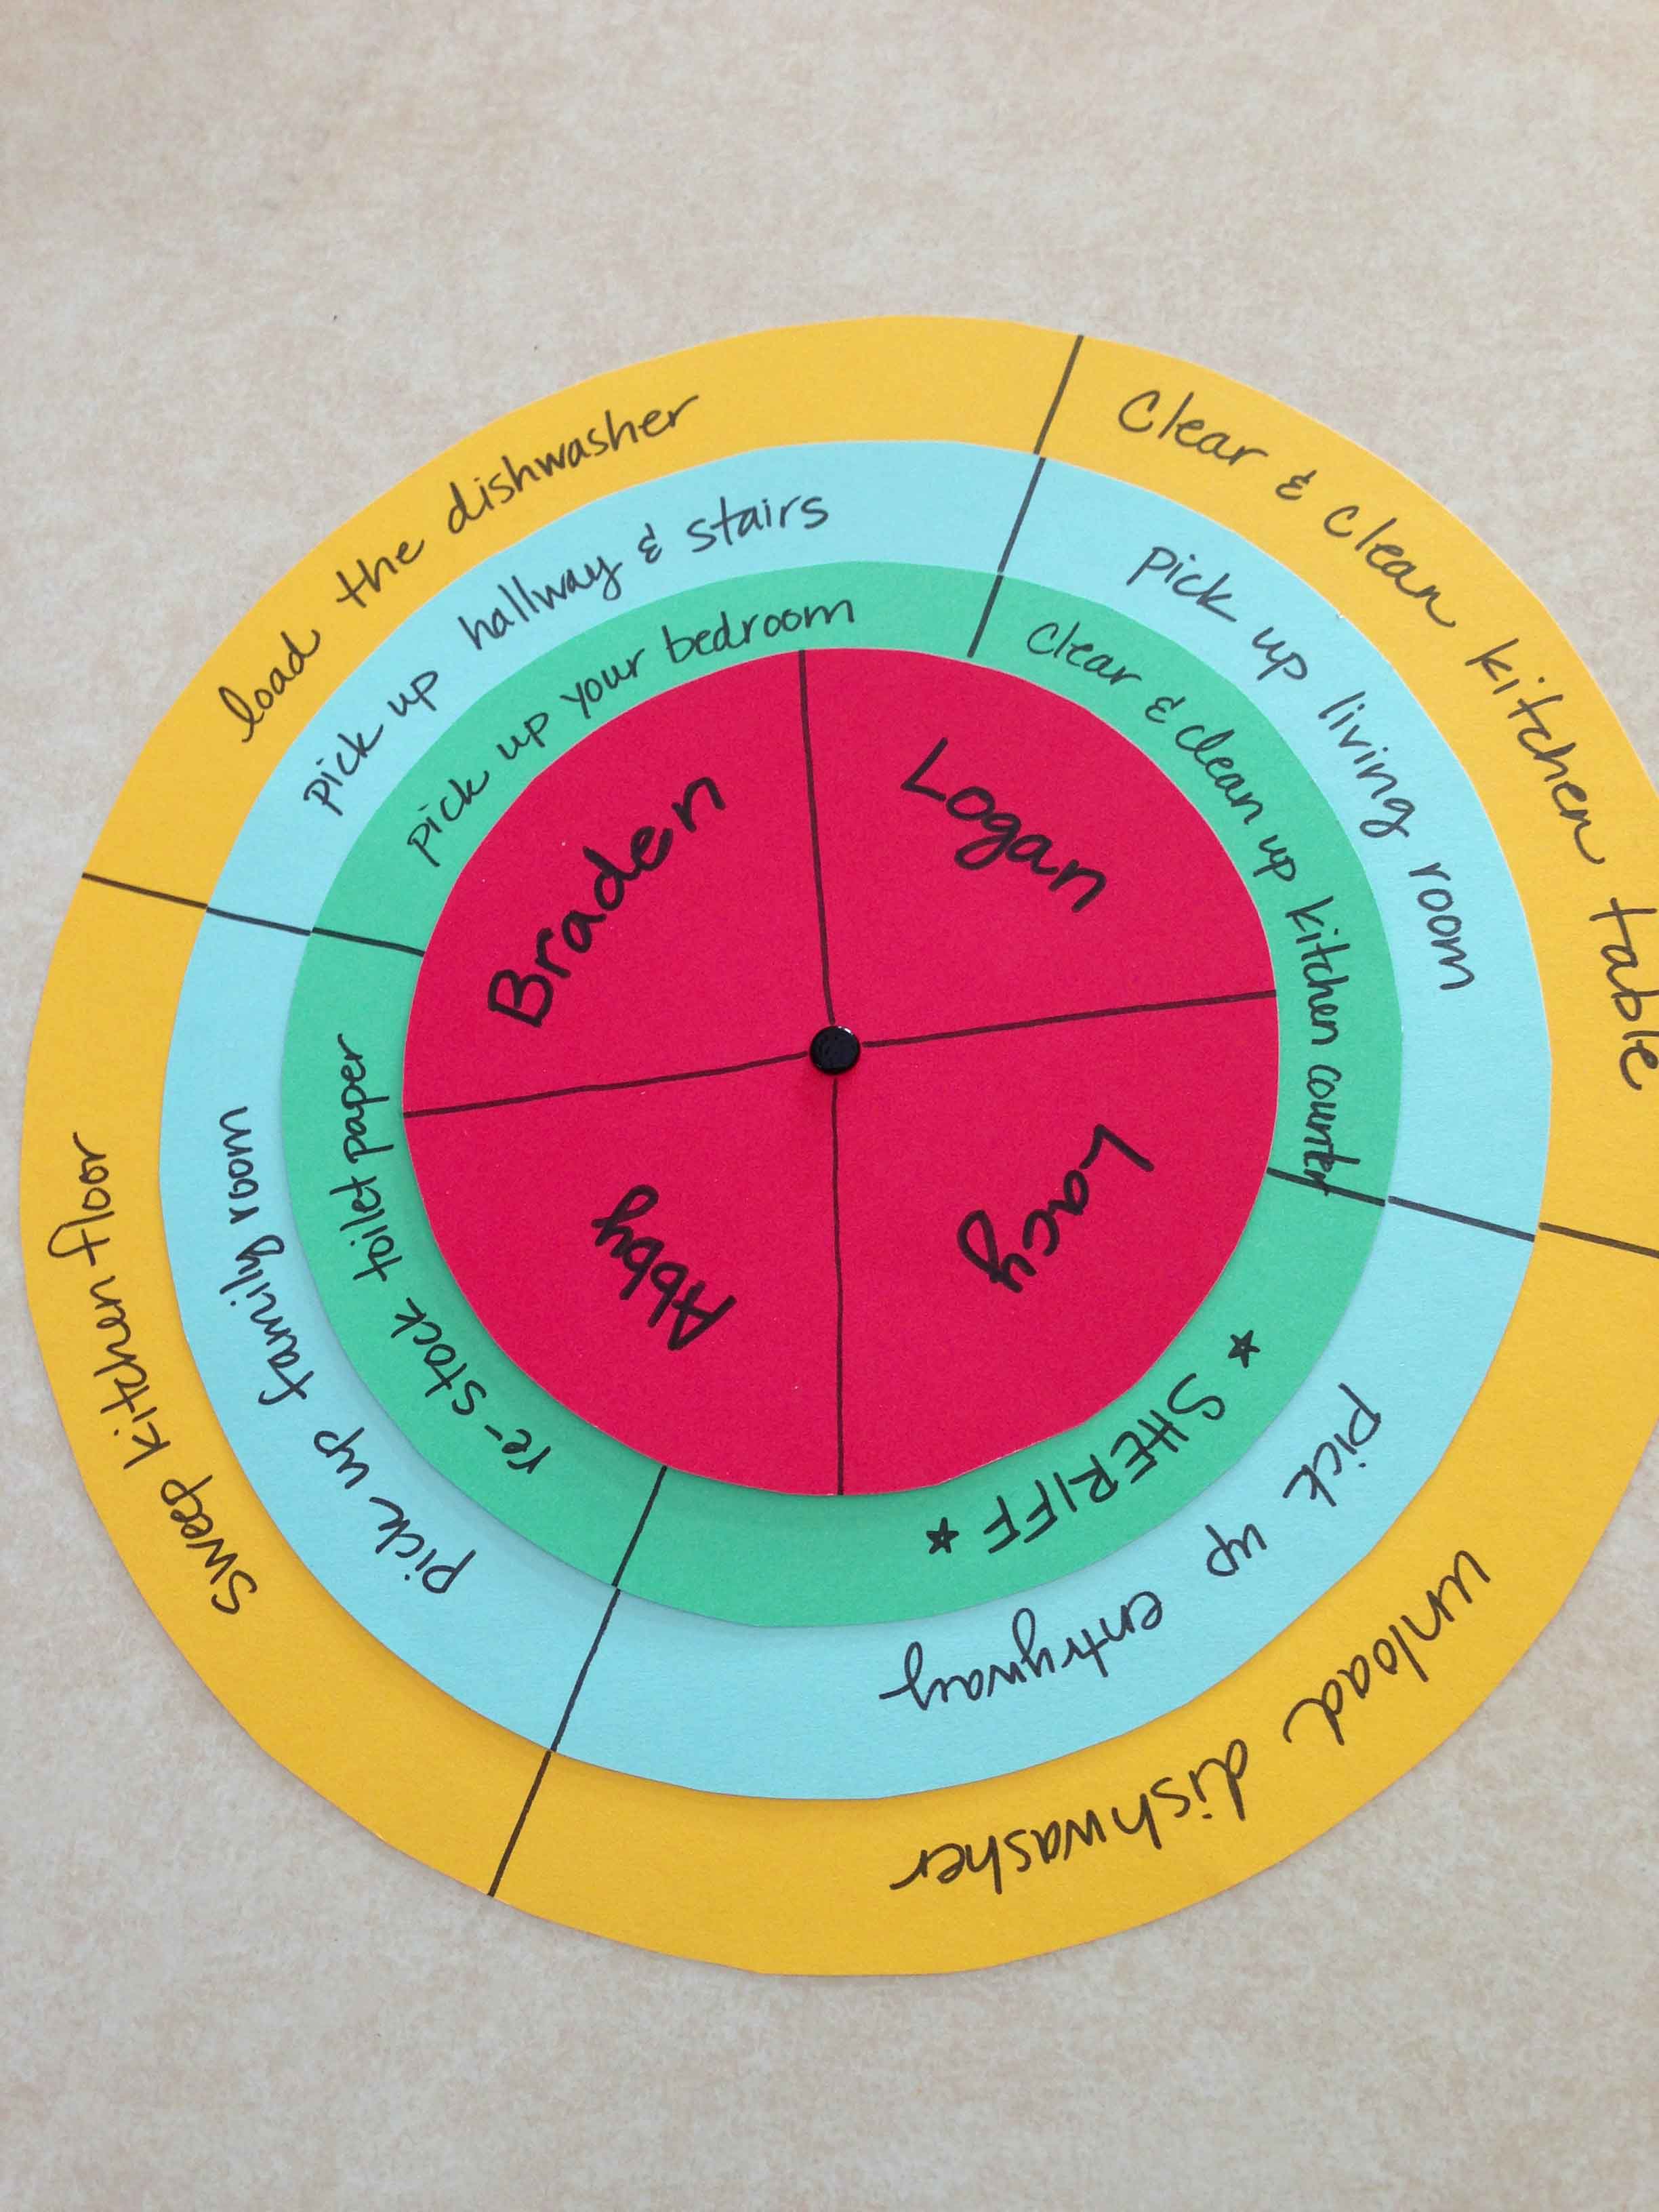
I made a wheel out of card stock (I just traced them using different items in my kitchen for the circle) and attached them with a large brad. Then I used a Sharpie to write on the assignments. We agreed to do these things each evening before bed. Each child is assigned a “zone” to work on (the first two colors) then the inside color (green) are a few random quick jobs to do. My kids LOVE the idea of being a sheriff! I had a hard time coming up with another job, then I thought of having one of them be the person who helps those who need it, checks up on them, and makes sure the job is done. So far it has worked beautifully! The kids aren’t perfect of course, but for the most part they are really good about helping out, and they know what is expected of them.
What I like about this system most is that:
*it is easy, quick, and everyone understands
*simple to put together with supplies almost everyone has on hand
*kids can be involved creating it
*you can rotate the wheel to mix it up to any combo you like
If you are needing to change your current chore system or want to start one, this idea is a great one! Tweak it to how it will work for you. It has sure worked for us.
A PYP Best Blog! Making a DIY Bandana Tablecloth!
Just in case you missed this article on making a DIY bandana tablecloth the first time we shared it a couple of years ago, we are republishing it. After Marne wrote this blog originally, we got an awesome response. This is one of the PYP Best Blogs!
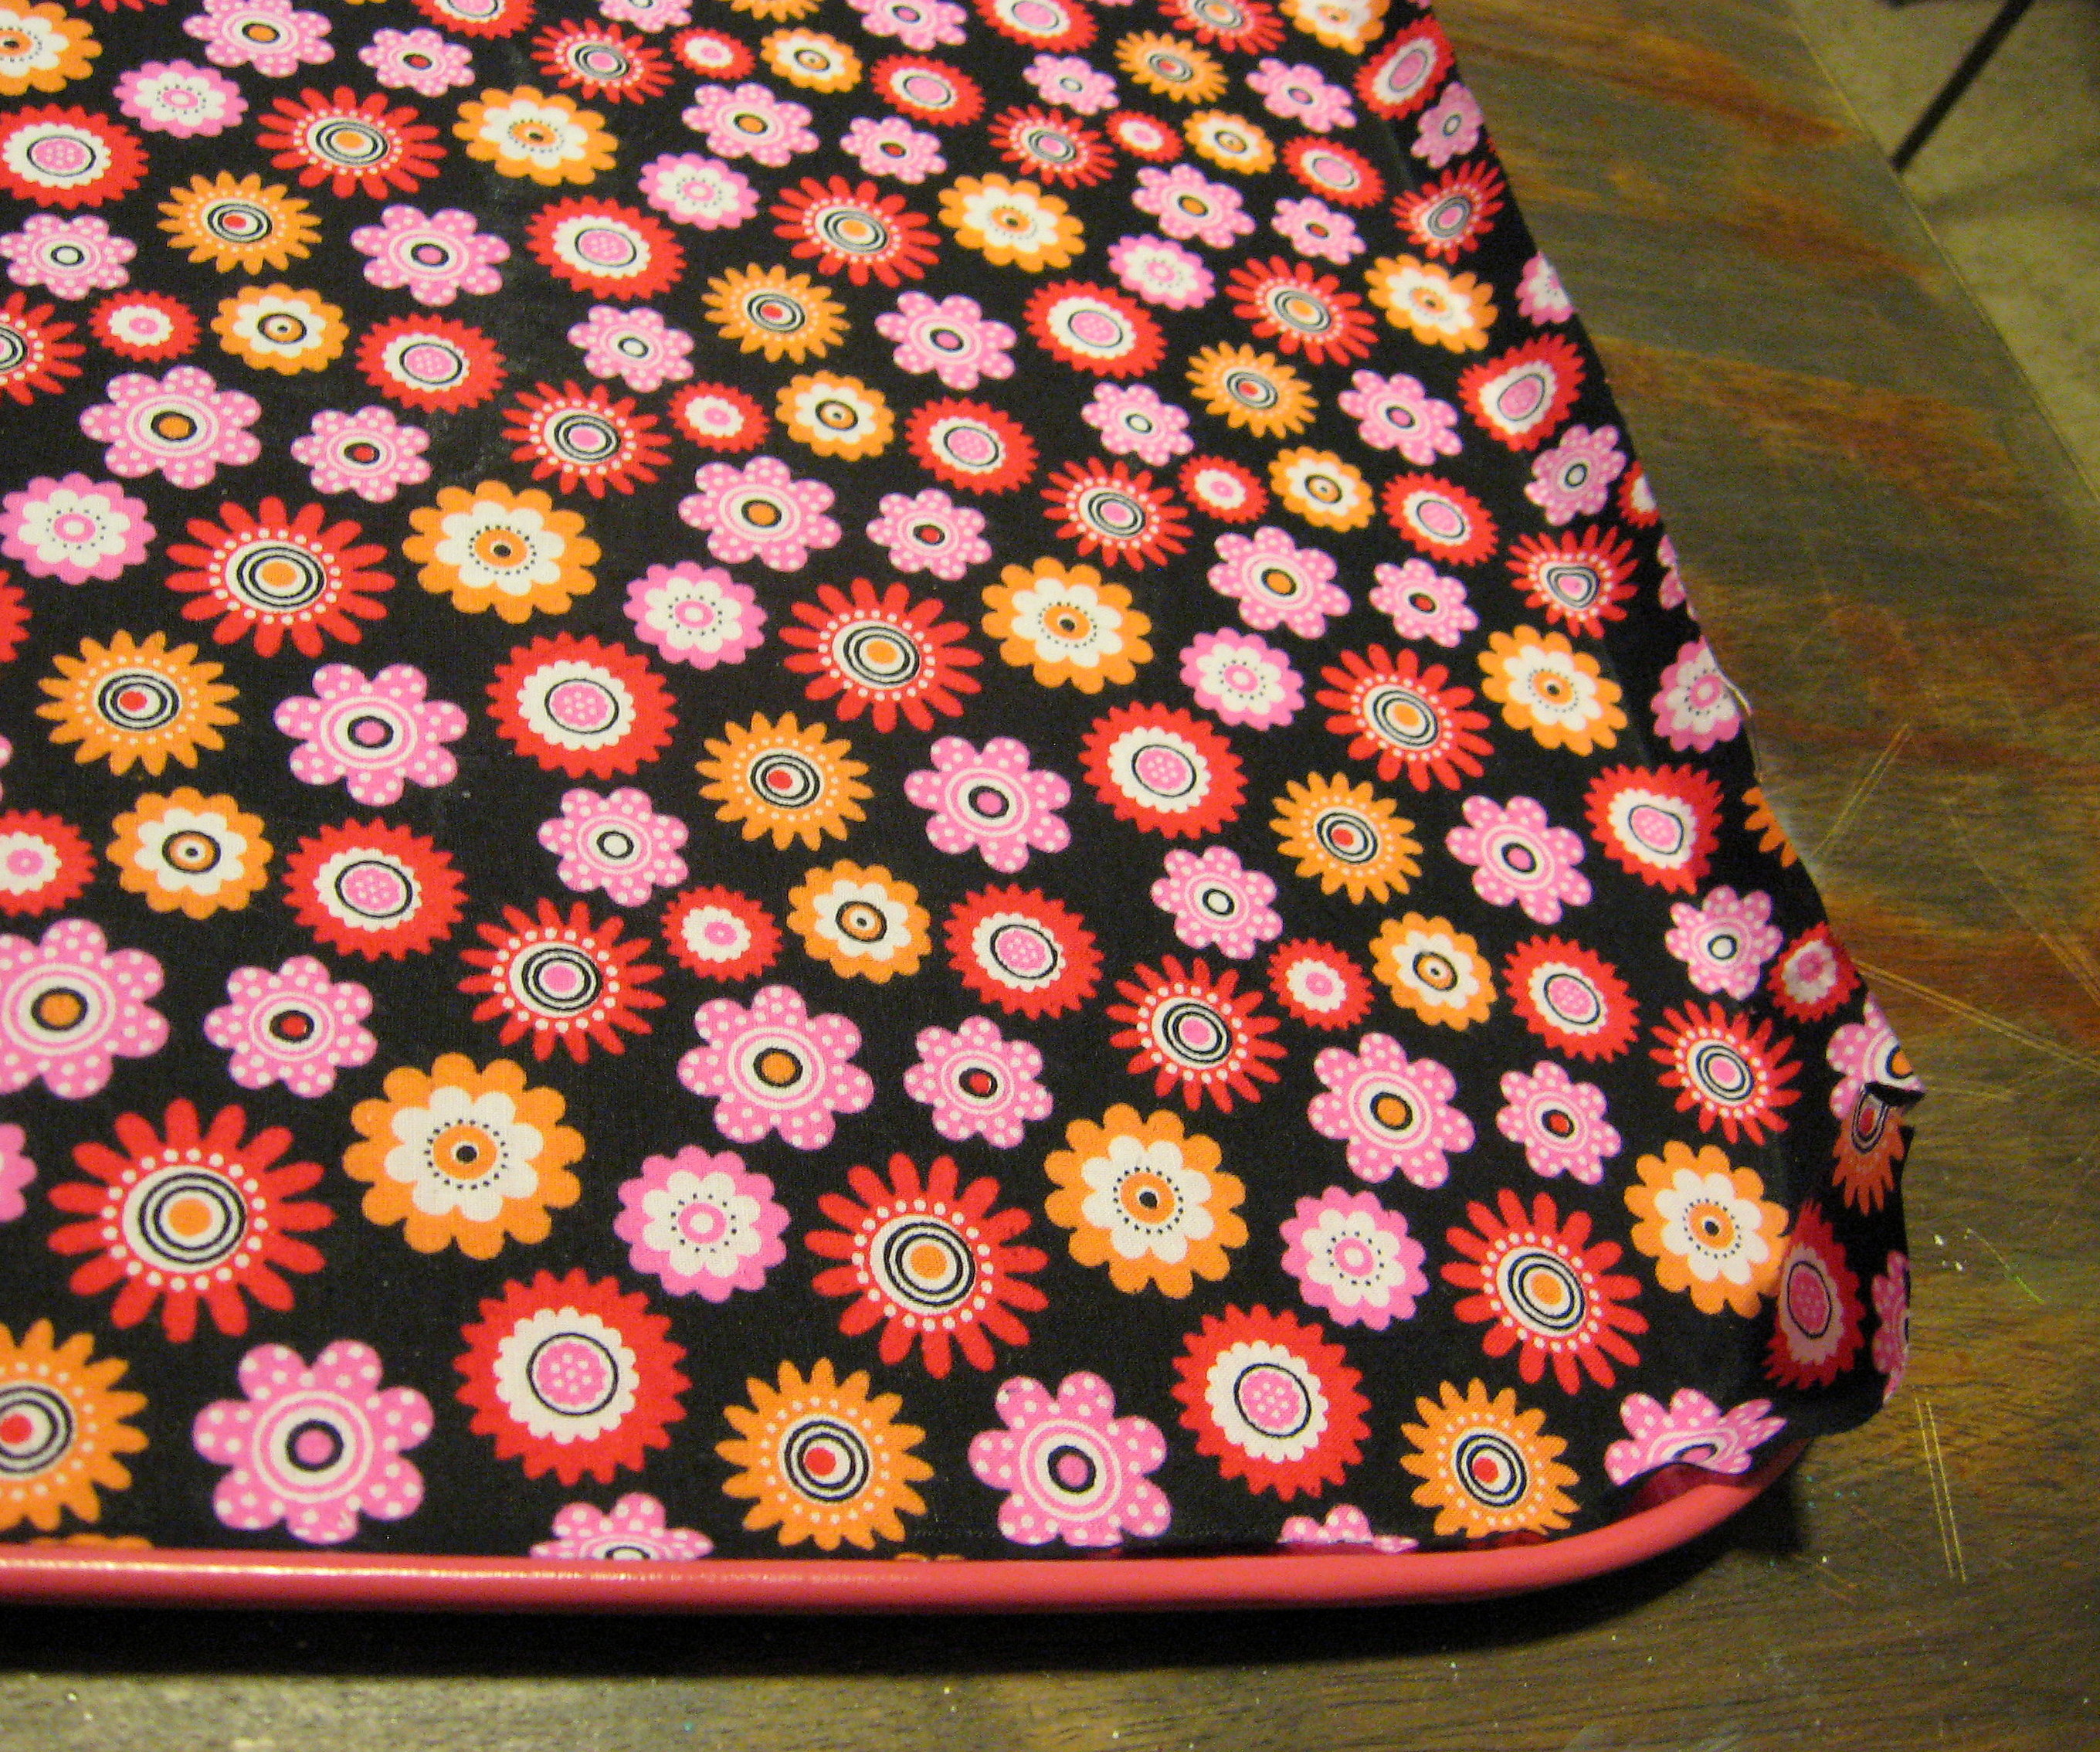
I have been wanting to make a bandana tablecloth, and I finally did! It was so easy that I wanted to share with you how I did it. I chose to make one for the 4th of July, and I LOVE IT! It turned out just like I wanted.
You will need:
bandanas in the color of your choice, I needed 12 (I got them at Walmart for $1 each)
sewing machine
iron
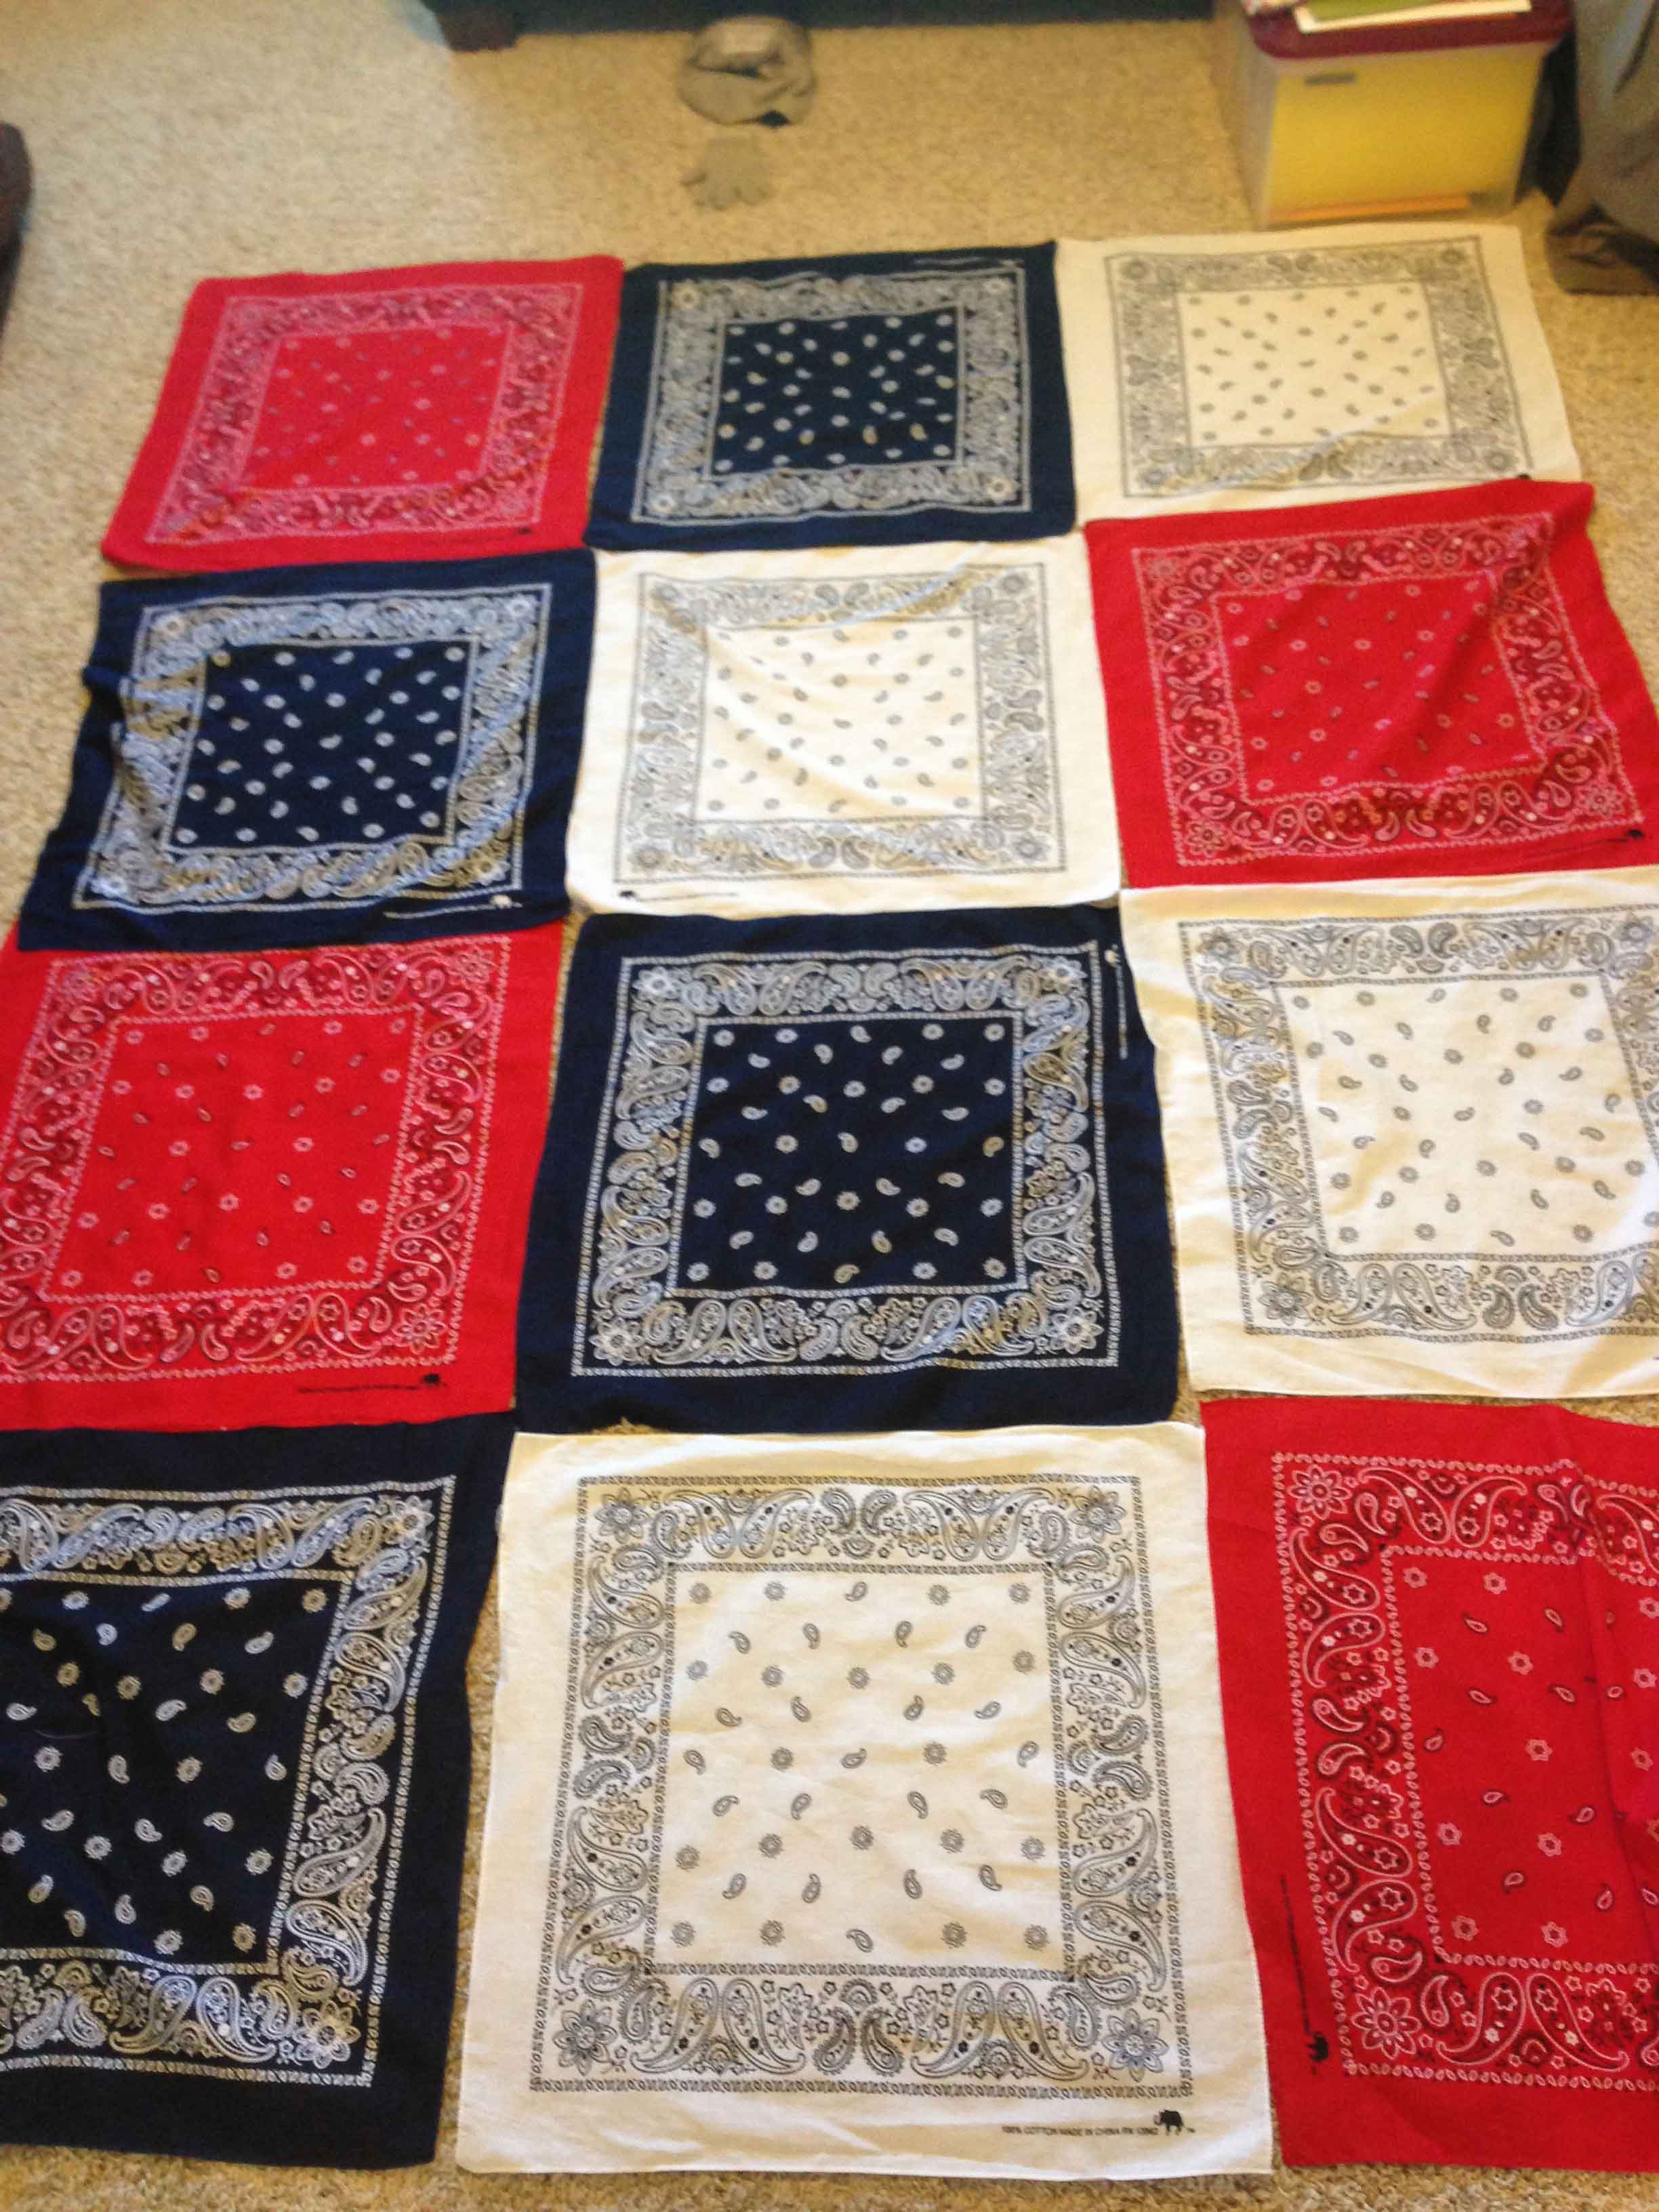
Wash, dry, and iron your each bandana. Then lay them out on the floor how you want the finished product to look.
After you are finished with that, take them 3 at a time and sew them in order of how you placed them. Make sure you are sewing each bandana wrong sides together so they will all be uniform. I used a 1/4 inch seam allowance.
I sewed 3 bottom together, the next 3 together, then I did the two top rows of three. Then my last row of sewing was the middle when I sewing the two sections of six together. Make sense?
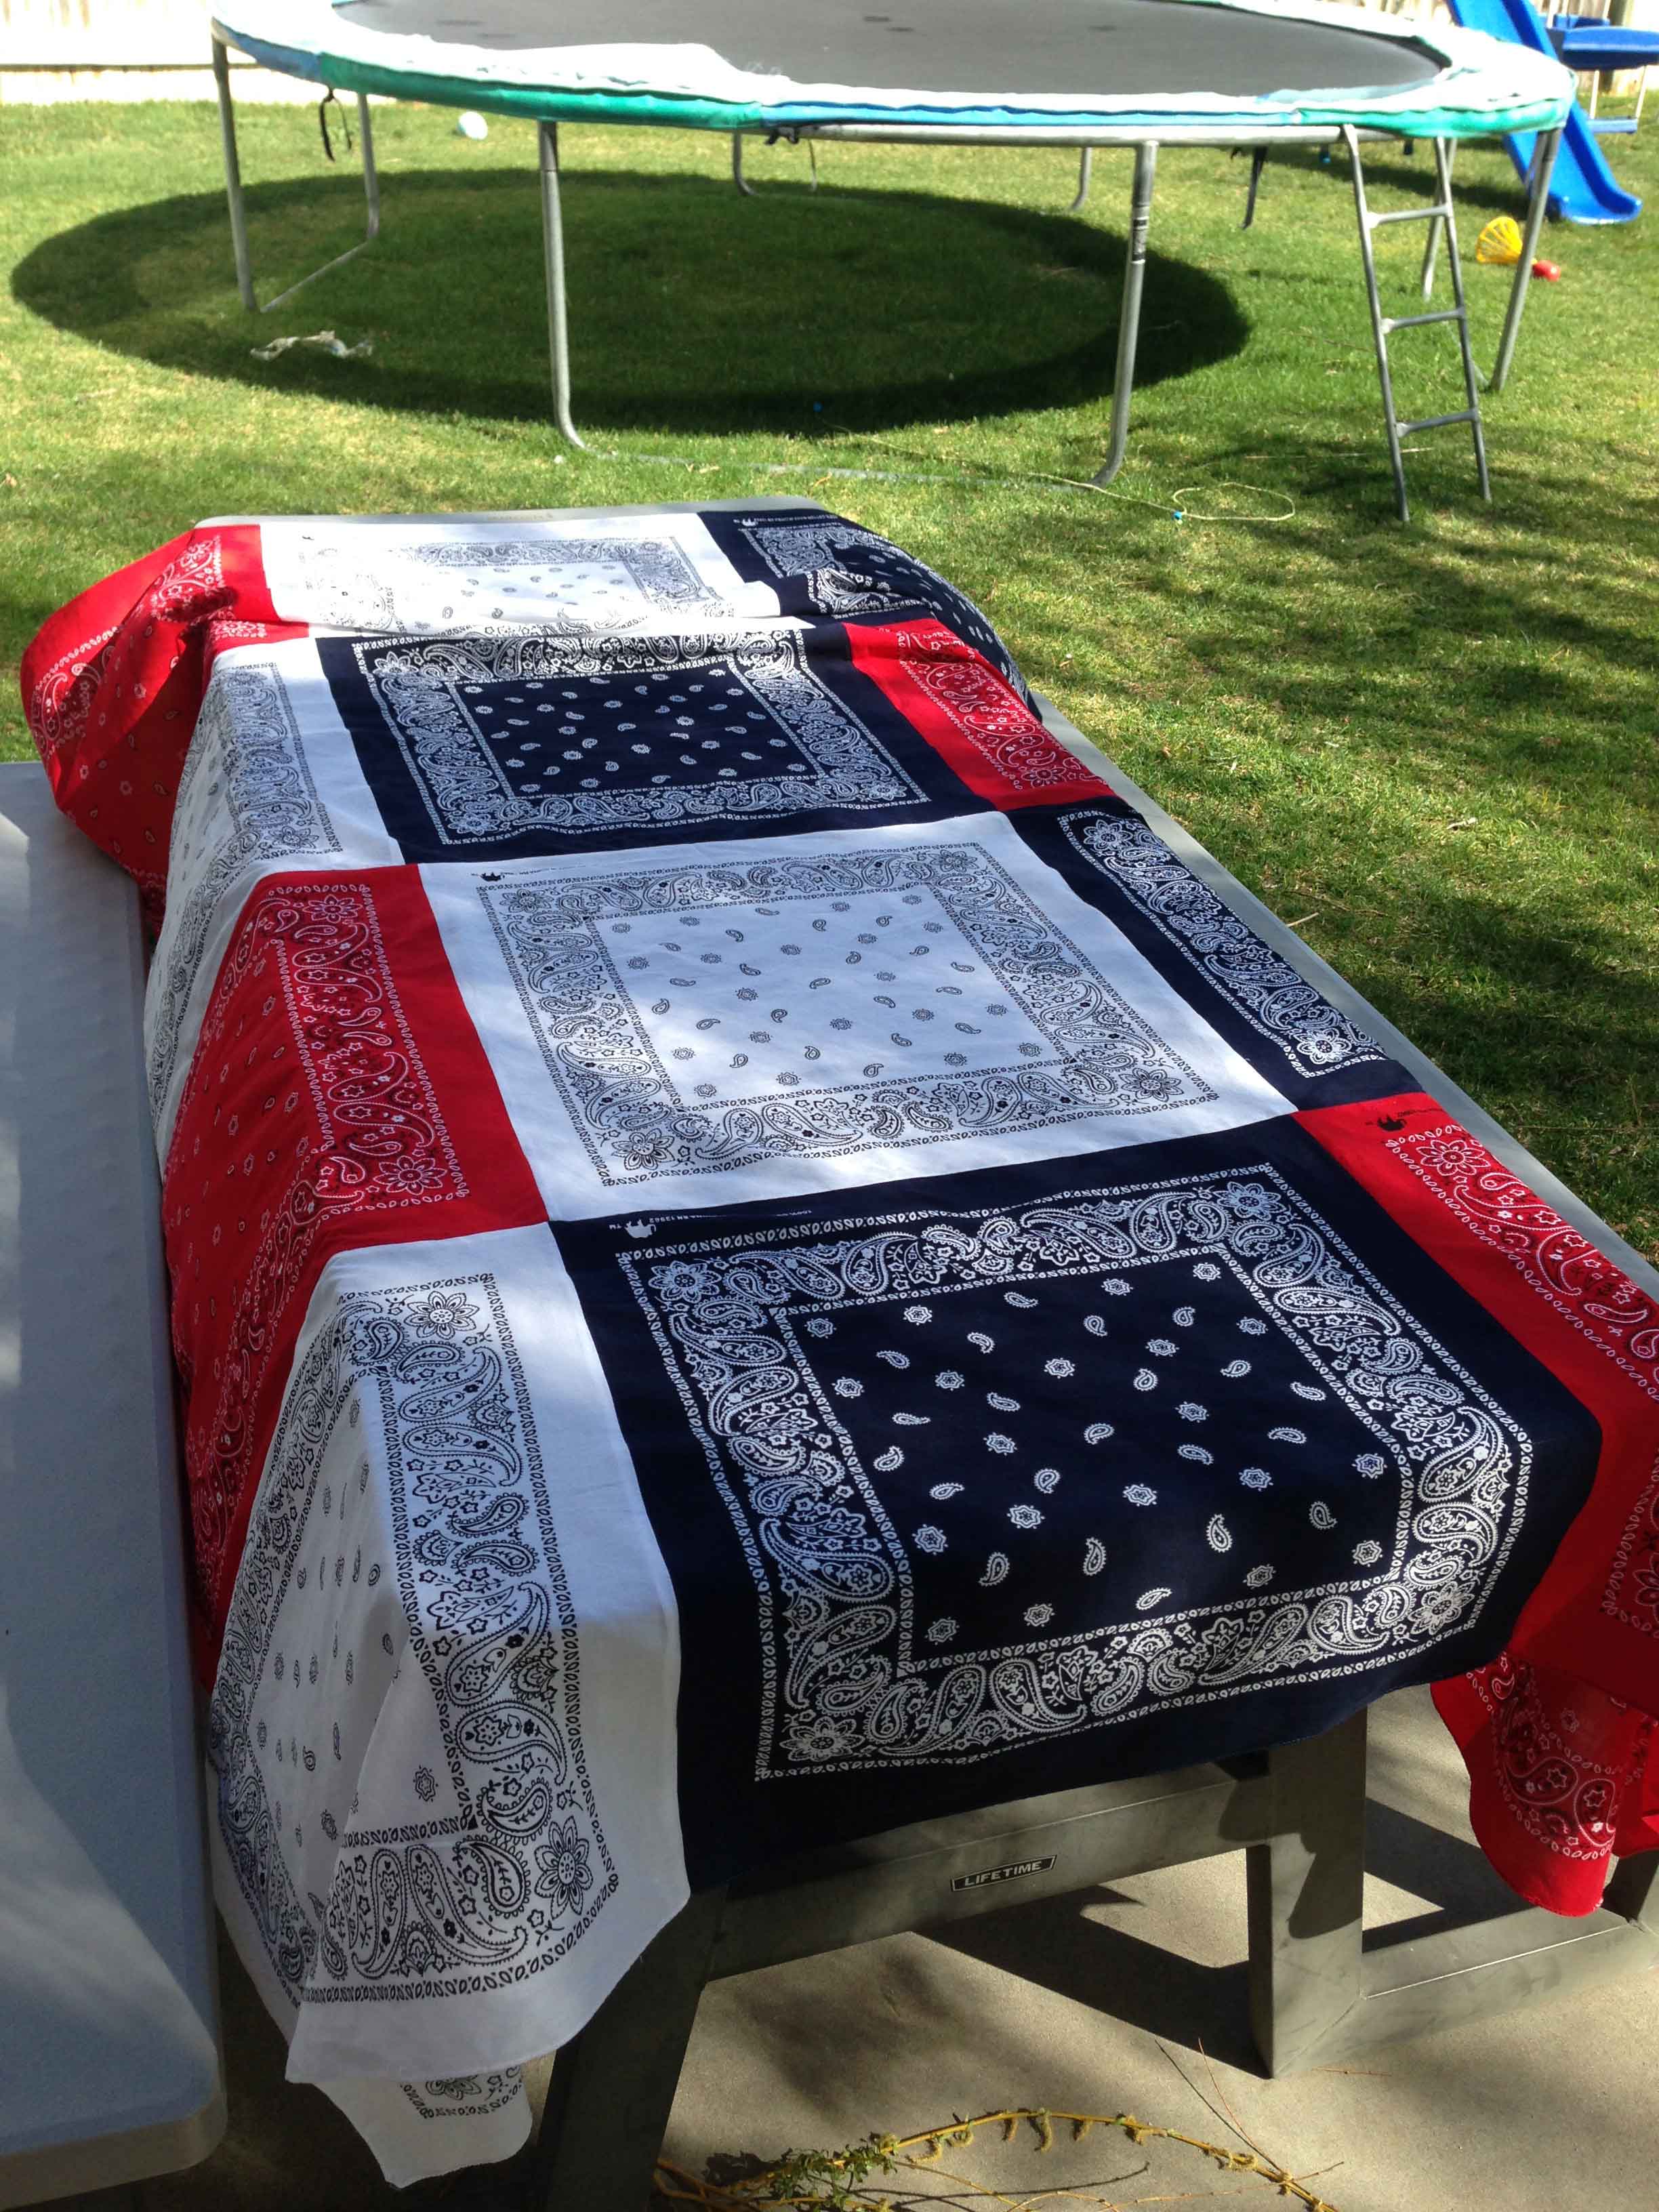
I have a picnic table in the backyard I was making this for, so I knew that I needed 12 bandanas. You can make yours as small or any size you wish! The possibilities are endless. Here is what mine looked like when I finished. I’m excited to use it soon!
NOTE: You can purchase bandanas at the dollar store for 2/$1, but they are very thin and not as good of quality. I recommend purchasing them for at least $1 each so the table cloth will be more durable.
A PYP Best Blog! How to Paint Bunkbeds!
Just in case you missed this article on painting bunkbeds the first time we shared it a couple of years ago, we are republishing it. After Marne wrote this blog originally, we got an awesome response. This is one of the PYP Best Blogs!
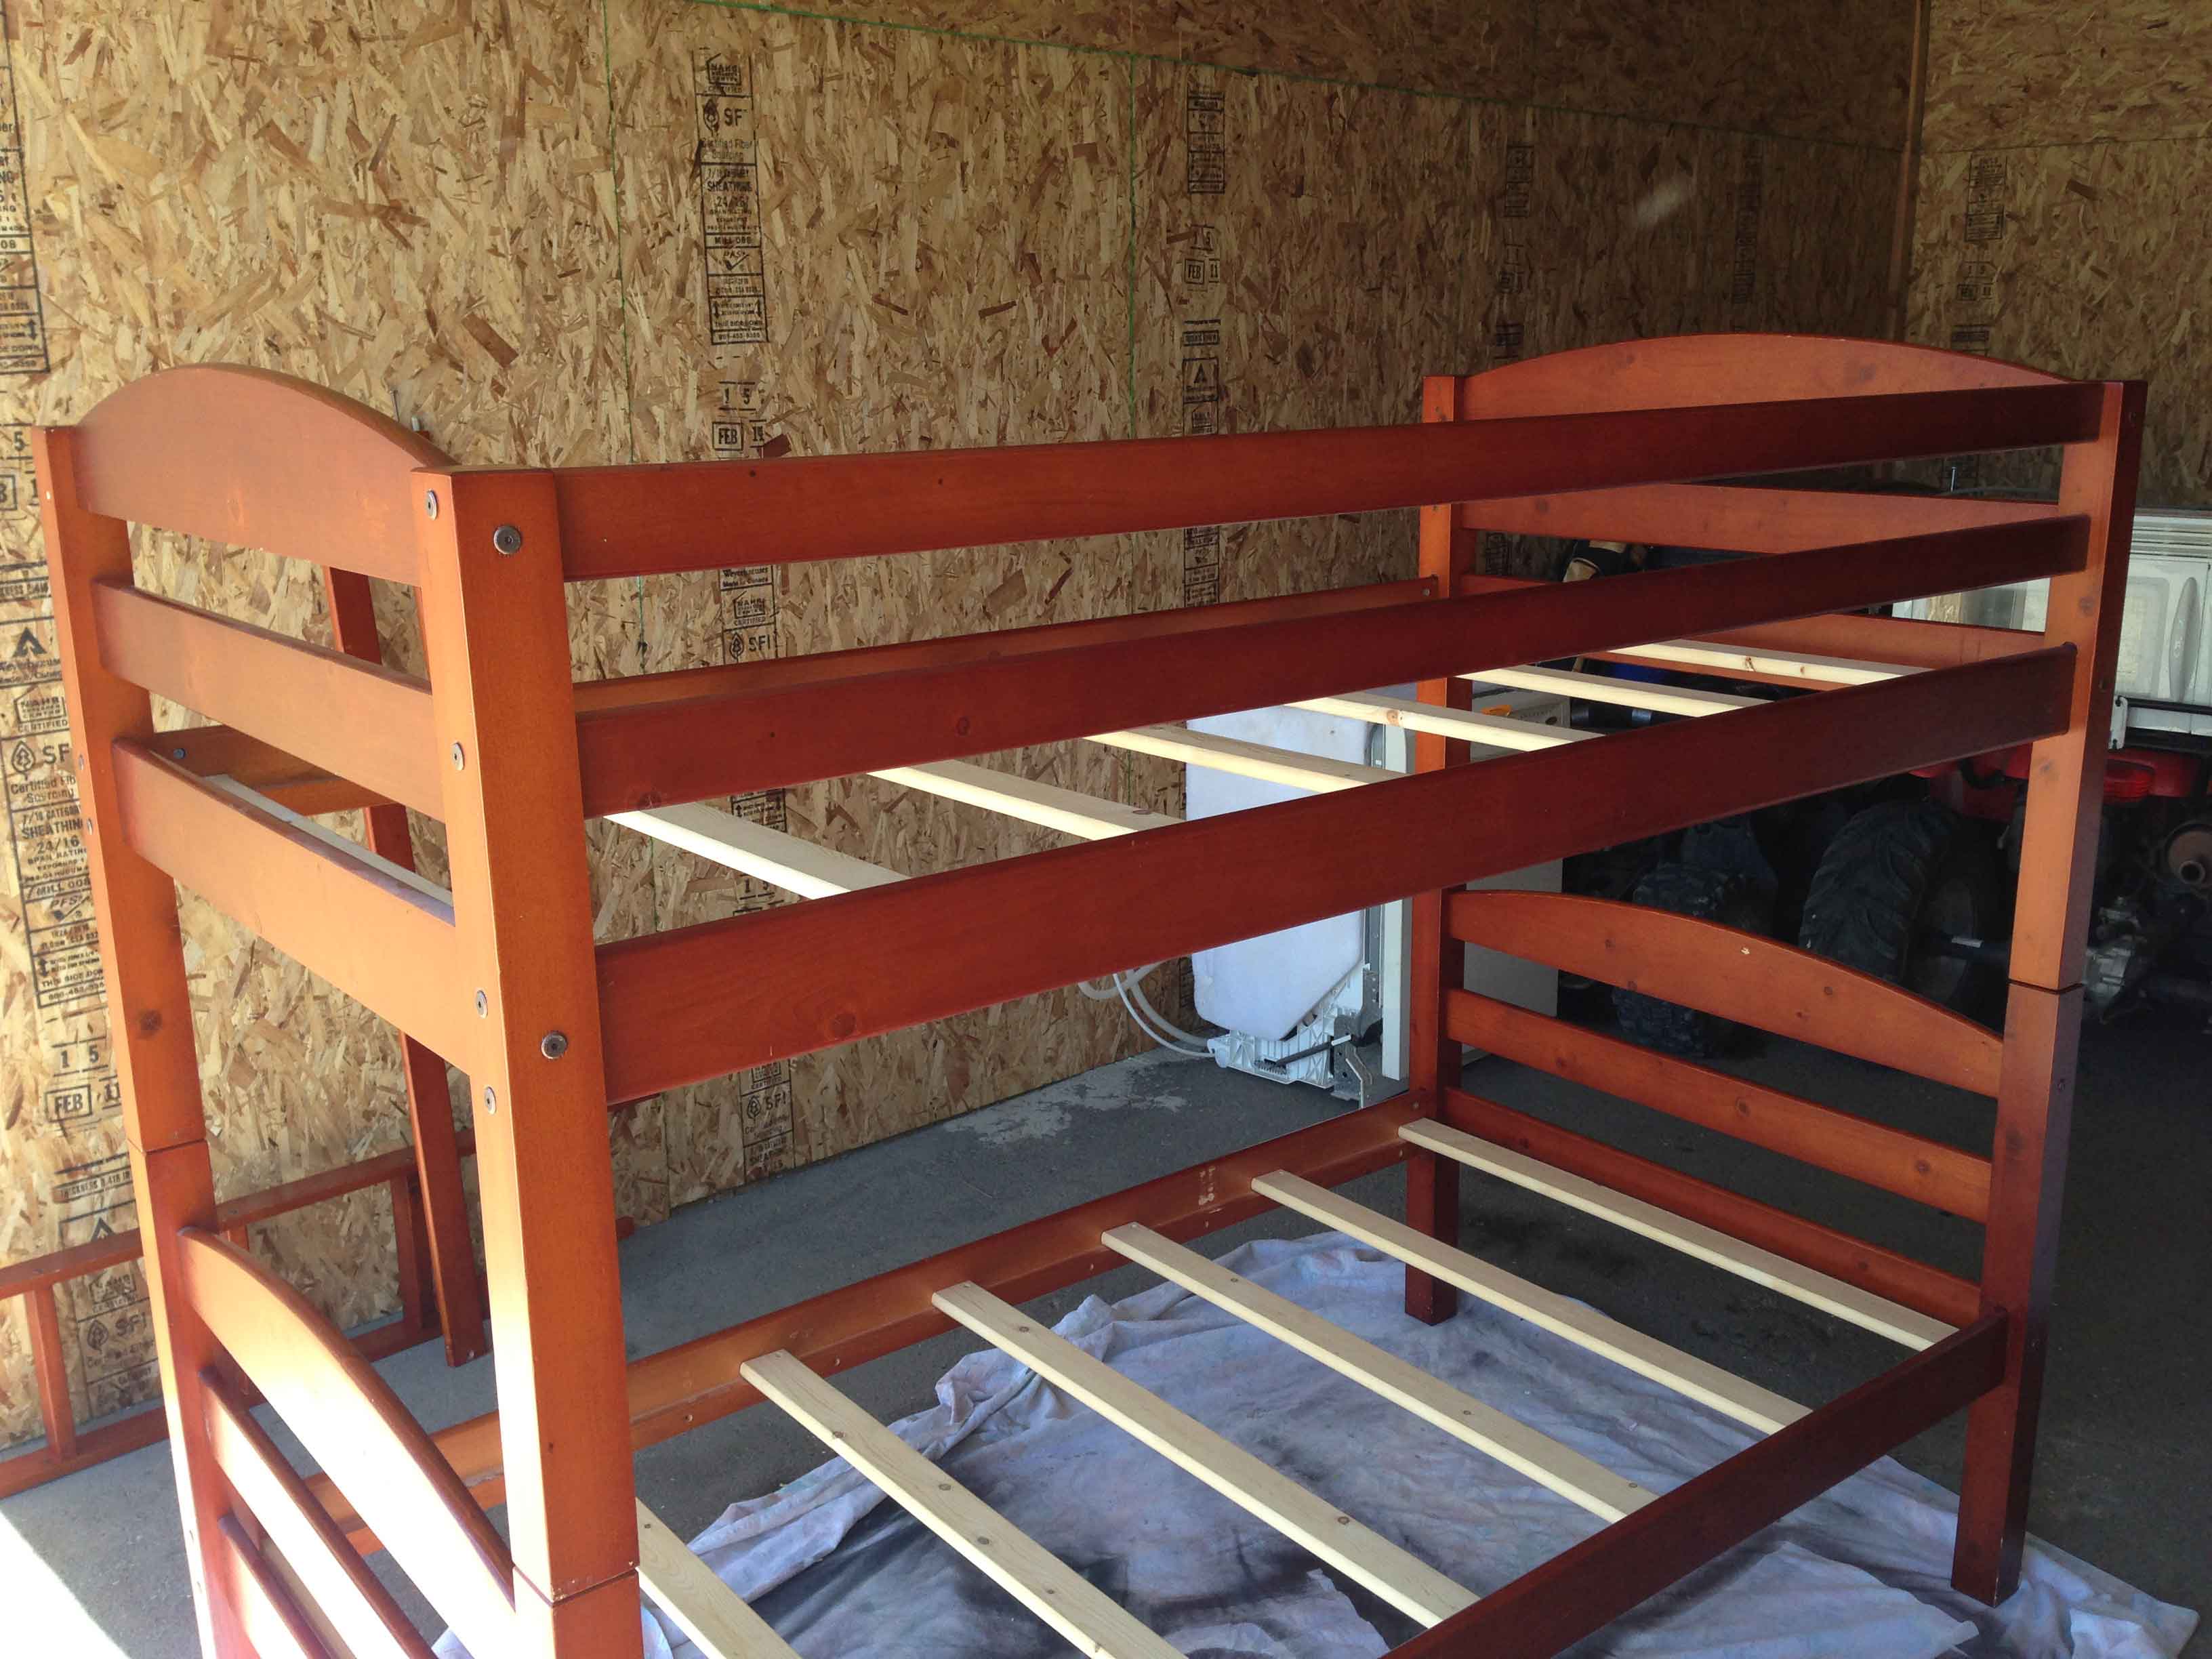
I recently decided to paint some bunkbeds that I found on Craigslist for my daughters’ bedroom. It was quite the undertaking, and I learned alot in the process. I consulted the internet and friends of mine who know how to refinish furniture. I want to share with you the process that I did, and hopefully it can help someone!
Before beginning, make sure you:
1. Take the bunkbed apart to paint. You will get better coverage, and will be glad in the long run! Make sure you save the screws and all parts and label them if needed.
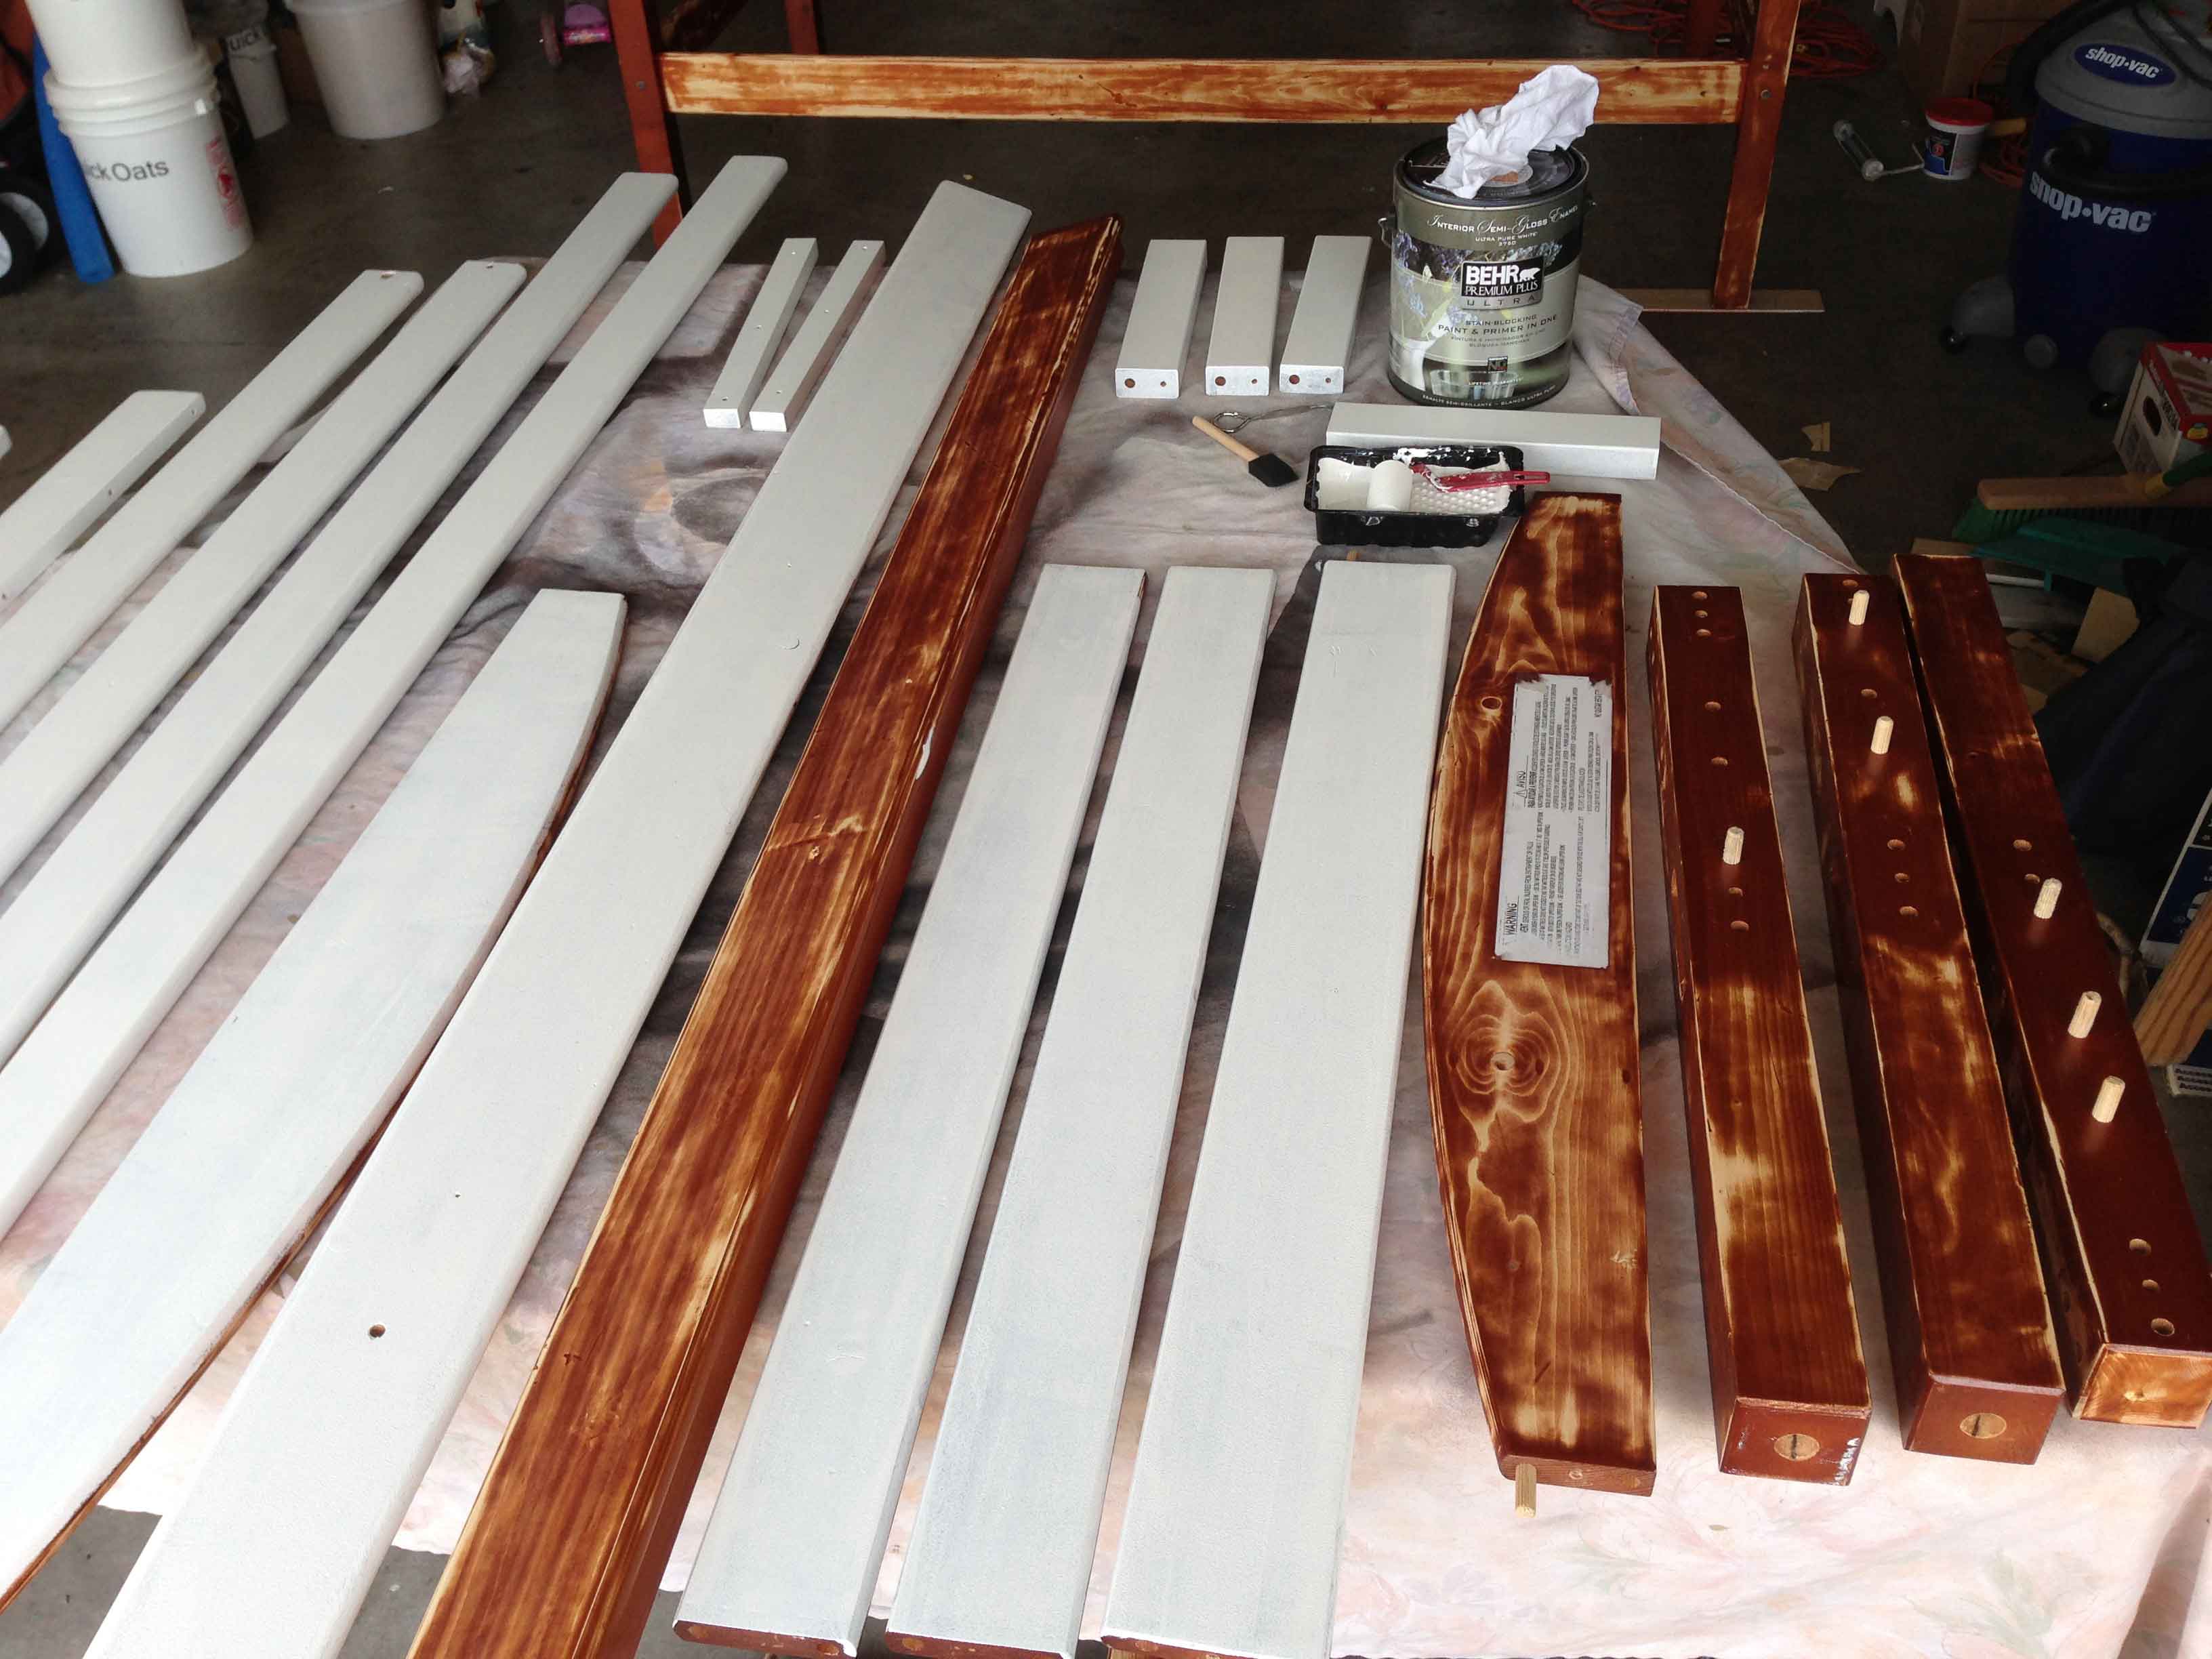
2. Pick out a good quality paint (I used Behr Paint Plus Primer in Decorator White)
3. Have all your supplies ready: sander, rags, small foam rollers, high quality paint brushes, etc
Have a workstation ready to do the painting. I covered some long tables with cloths to paint. Worked great.
1. First figure out what kind of wood you are dealing with. Mine were pine with a cherry finish. If it isn’t real wood, you may want to google different options. I am not a paint expert, but that is what I was told.
2. Give your wood a good roughing-up. I used a sander with 220 grit sandpaper on it. In these photos here you can see that I got down to the bare wood in some areas. I did sand a little too much. All you need to do is rough it up so the paint has something to stick to.
Another option is liquid sandpaper. I used liquid sandpaper on part of the bunkbed when I got tired sanding. If I were to do this over again, I think I would do liquid sandpaper on the entire project. It was just as effective and easier.

3. After sanding, make sure you wipe down the bed really well. You don’t want any fine sand in your project.
Use rags that are lint-free.
4. Now you are ready to begin priming your project! If you are using a Paint + Primer, you may not need to use regular primer. A good primer to use is Kilz or Zissner. Primer it well with a high-density foam roller. After it has dried, sand with a 320-grit sanding block to smooth it out before painting. Wipe down good again to clean off.
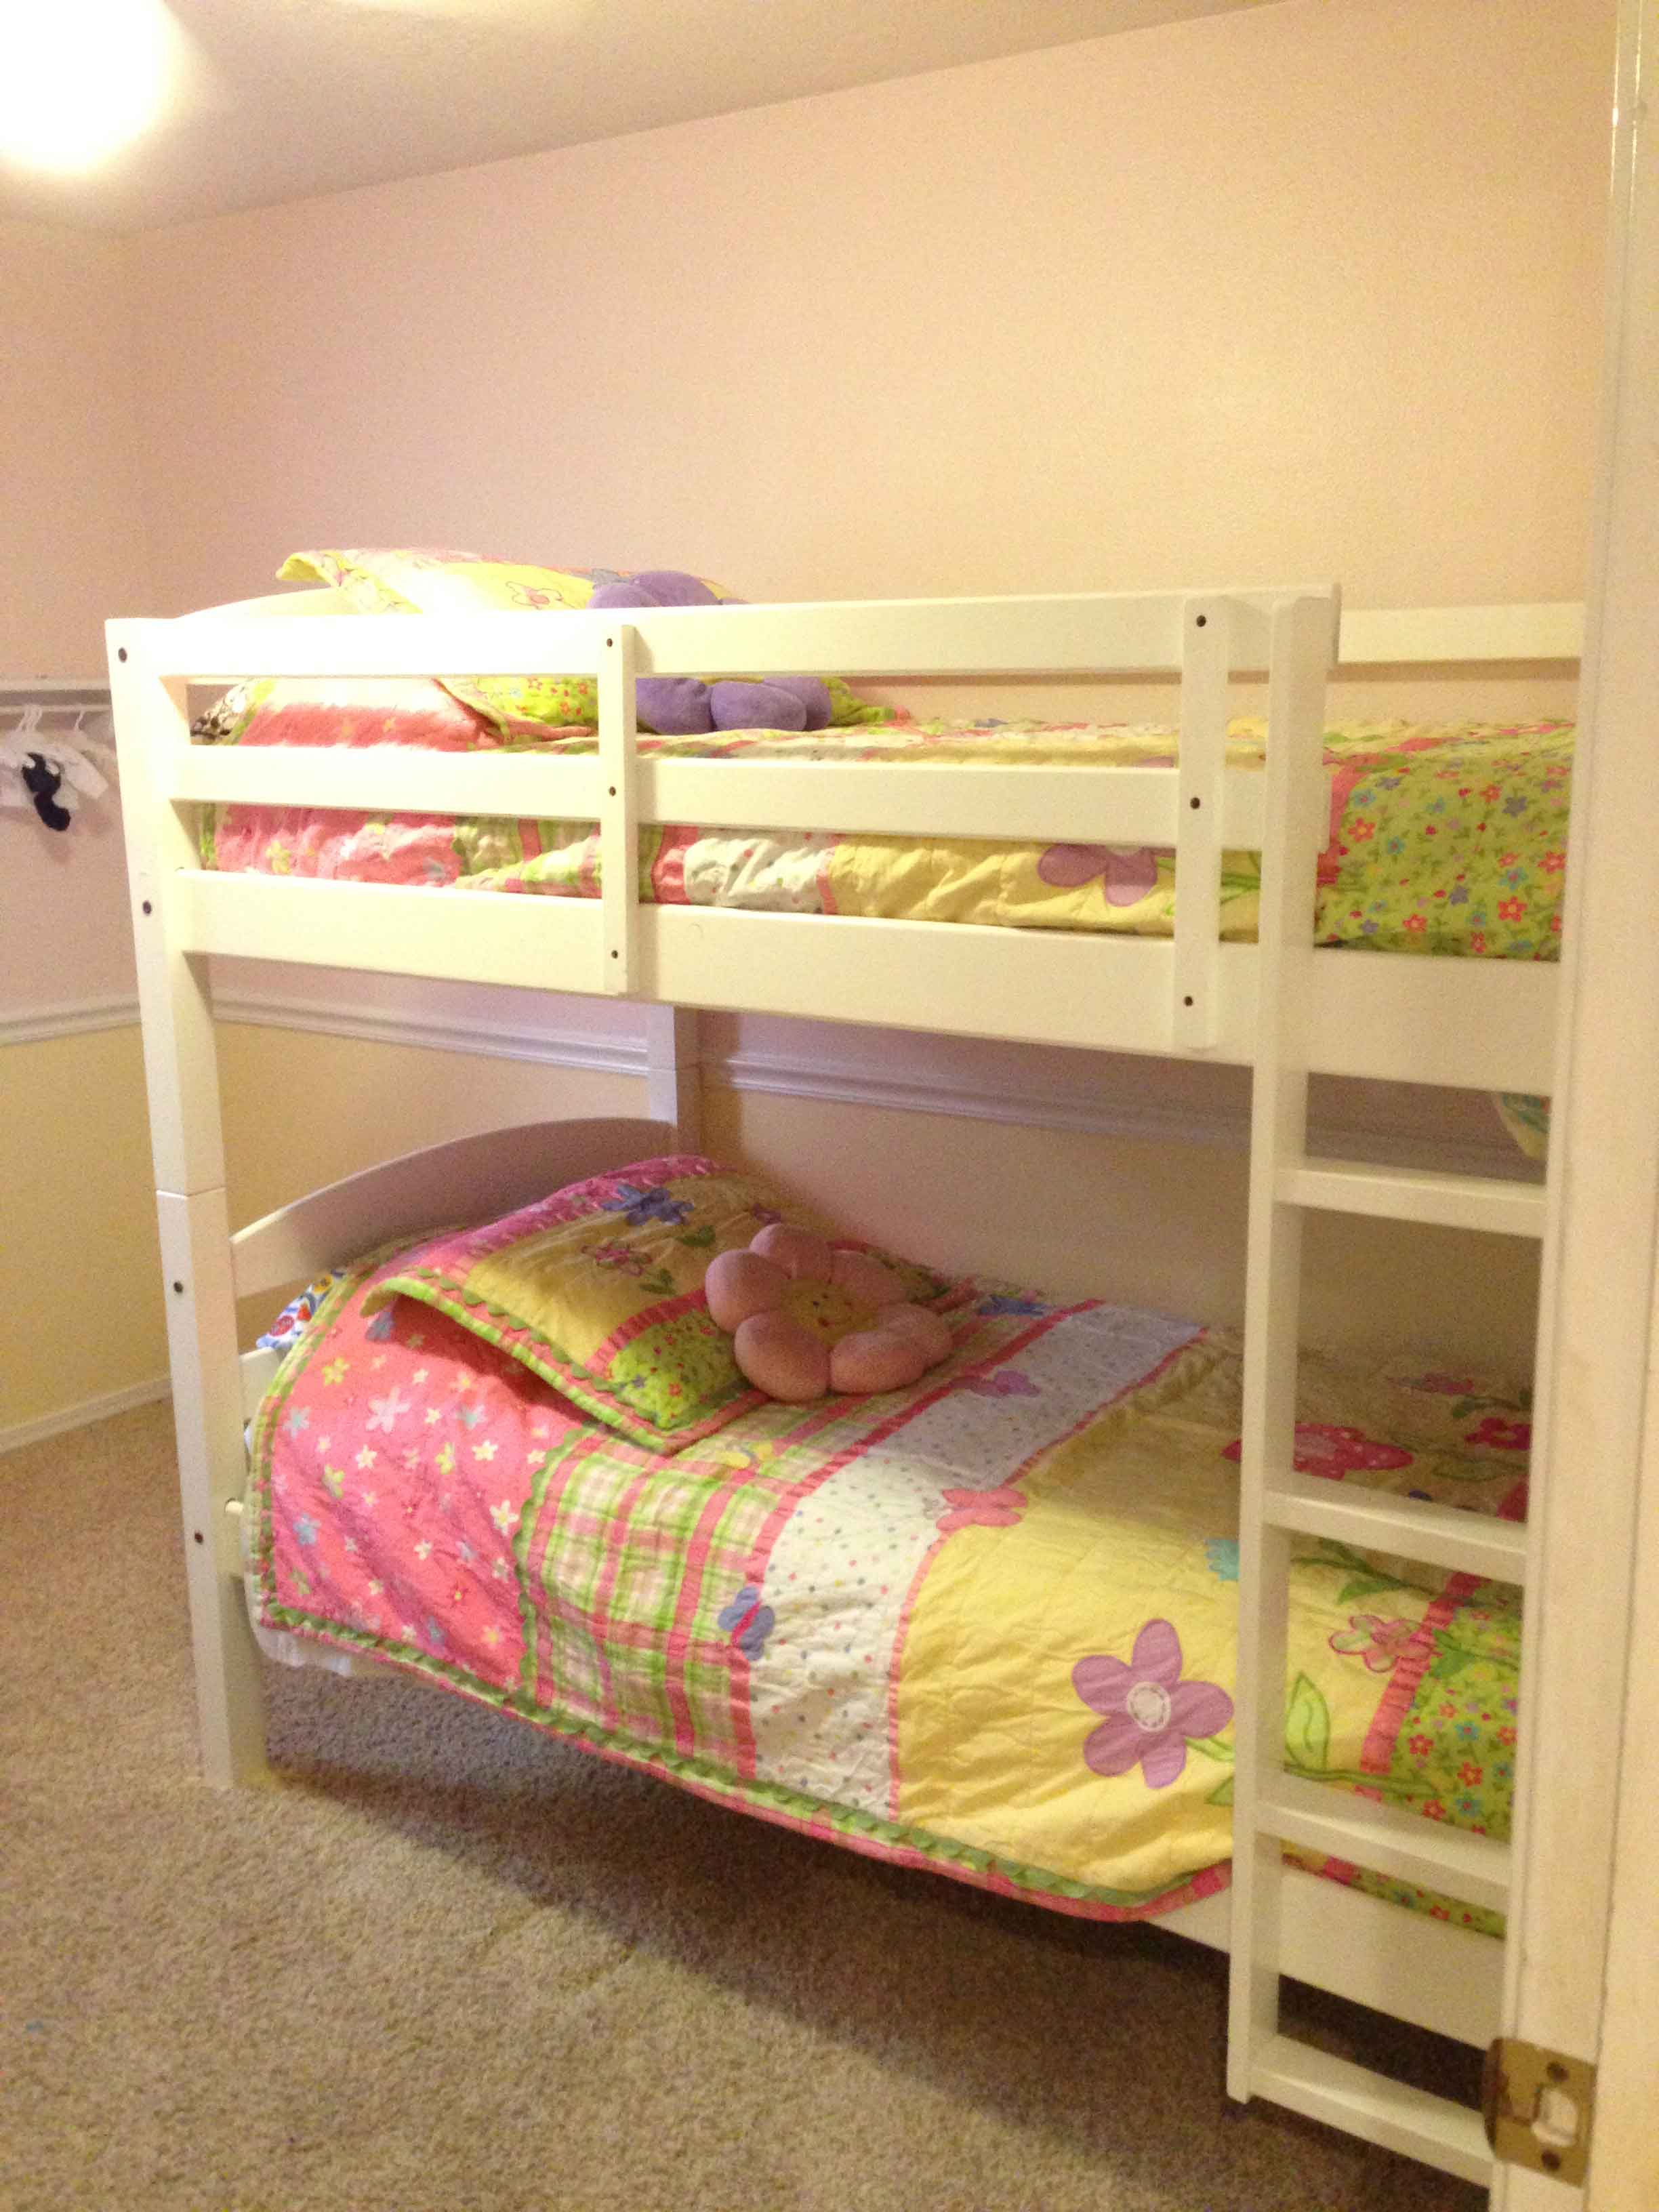
5. Now you can paint! For my bunkbed, I ended up using 3 coats of paint. It sounds like a lot, but since the boards are small it wasn’t. Judge for yourself on how it looks to know if you want to do more coats. Let dry on each side before turning over to paint on the other side.
6. After you are done with the final coat of paint, give it another light sanding with the 320 grit sanding block to smooth it all out. You will be more happy with it if you do!
7. Now you are ready to put on the Polycrylic coat. This will help seal the paint, make it more durable, and in my case since I was using white paint, it will keep my paint from yellowing over time. Make sure you get polycrylic, NOT polyurethane! Polycrylic is water-based, it doesn’t stink and cleans up easily with water. It also dries quickly so make sure you apply it according to the directions on the can. Use a high quality paint brush to apply, like Purdy. You will notice a difference!

8. Let the paint cure for several days before putting together. Then you have a wonderful finished masterpiece to be proud of!
Jane: Leggings, Sports Mom Tees, Elastic Lace, DIY Chalk Paint & More!


Today’s deals include…
- $6.99 CURVY SIZING! Comfortable, In Control, Fleece Lined!
- $3.99 Capri Leggings – 17 Colors
- $5.99 DIY Chalk Paint
- $2.49 Stretch Elastic Lace Trim – 5 yards! You Choose Colors
- $3.99 Pajama Bottom Cotton Shorts!
- $12.99 Rhinestone Sports Mom Fitted Tees – 19 Sports
More cute stuff available today! Low shipping prices!
A PYP Best Blog! Being Frugal and Saving Through the Little Things!
Just in case you missed this article on being frugal and saving money the first time we shared it a couple of years ago, we are republishing it. After Marne wrote this blog originally, we got an awesome response. This is one of the PYP Best Blogs!
Recently I went for a visit to my parents’ house. The house where I grew up. It had been a few years since I had been there and just walking in the door made me remember moments, events, and holidays. Isn’t it amazing how smells, items, and places do that to us? I was flooded with so many emotions that I didn’t know where to begin.
One thing I noticed was how frugal my parents still are. They passed that gene onto me, but I am not as frugal as I could be. They pinch pennies till they scream. Me…not so much. I suppose I go through phases like anyone else, but my parents never seem to falter. They are always able to get by with less and be happy. As I thought about this while I was visiting, I came up with some things I wanted to remember and implement better in my own life. Things I already know but don’t practice. Or things that I think I knew, but really didn’t understand as much as I thought.

1. Always be thankful for what you have, not what you don’t have. This is something we are taught from toddler ages, but I think it all sinks in differently for each of us. For me, actions spoke louder than words. My parents LIVE this principle, they didn’t just teach it. I am living debt-free today because this principle has been ingrained in me. I can do a better job at not complaining, however. My mom never complained. Ever. Art least not in front of me.
2. Make do with what you have, or do without. Now, this is easier said than done. But I really believe that there are many times I just throw something away that could be re-purposed. Or just buy new pants instead of fixing the hole on the old ones. My parents rarely bought anything without using the current item down to it’s threads. I never had new clothes unless I really needed them. How many of us can say that now? Trying to differentiate between a need and a want can be tricky, but being honest with yourself will help you see what you truly need or don’t need. I was shocked to see my mom still has clothes from when I was in high school (18 years ago). She truly doesn’t waste anything. The decor is the same. Looks the same as 20 years ago. And I like it that way too. If I went home to a newly decorated house it wouldn’t mean as much to me.
3. Find new purposes for everyday items. My parents were really good at this one. I was born in 1976, so obviously the internet was not there for ideas like it is now. Pinterest and Google didn’t exist. Mom and Dad came up with ideas or solutions on their own, or talked to friends and family. I thought it was normal to use empty shoeboxes to organize my drawers, use empty oatmeal canisters for my toys, and toilet paper rolls as cord holders. As I grew I realized not many people did those things, but it really helped me know that most needs can be met with what we already have on had. No need to spend lots of money or organizing bins or fancy tie holders. Just use a little creativity and imagination and we can solve our need without spending a dime.
4. Try making it homemade. This is beginning to become more popular thanks to Pinterest and the desire to stop eating processed foods. But it is true: making food from scratch saves lots of money, and it is healthier for you. Period. I won’t even tell you how old I was before I ate pizza that wasn’t homemade or mac and cheese from the box. My mom made everything and it was delicious!
These are not new concepts. Just tried and true that we all need to remember if we want to spend less and have a better quality of life.
Frozen Nightgowns, Fall Skirts & Leggings, Minky Pillows, DIY Crafts & More!


- $12.99 Princess Inspired Nightgowns
- $12.99 Summertime Christmas- Unfinished Snowman Decor
- $16.49 Custom Minky Pillow, Insert Included!!
- $8.99 Cable Knit Fleece Lined Leggings! 9 Colors!
- $8.99 Solid Fall Color Maxi Skirts
- $3.99 Baby Burp Cloths – New Designs!
More cute stuff available today! Low shipping prices!
A PYP Best Blog! Family Organization Calendar!
Just in case you missed this article on creating a DIY family organization calendar the first time we shared it a couple of years ago, we are republishing it. After Sharon wrote this blog originally, we got an awesome response. This is one of the PYP Best Blogs!
With a family of 5 constantly going in 5 different directions, I need an easy way to keep everyone’s schedules organized. We used a large paper calendar for a long time, but I decided I needed something bigger that provided a large visual for me to see the week at a glance.
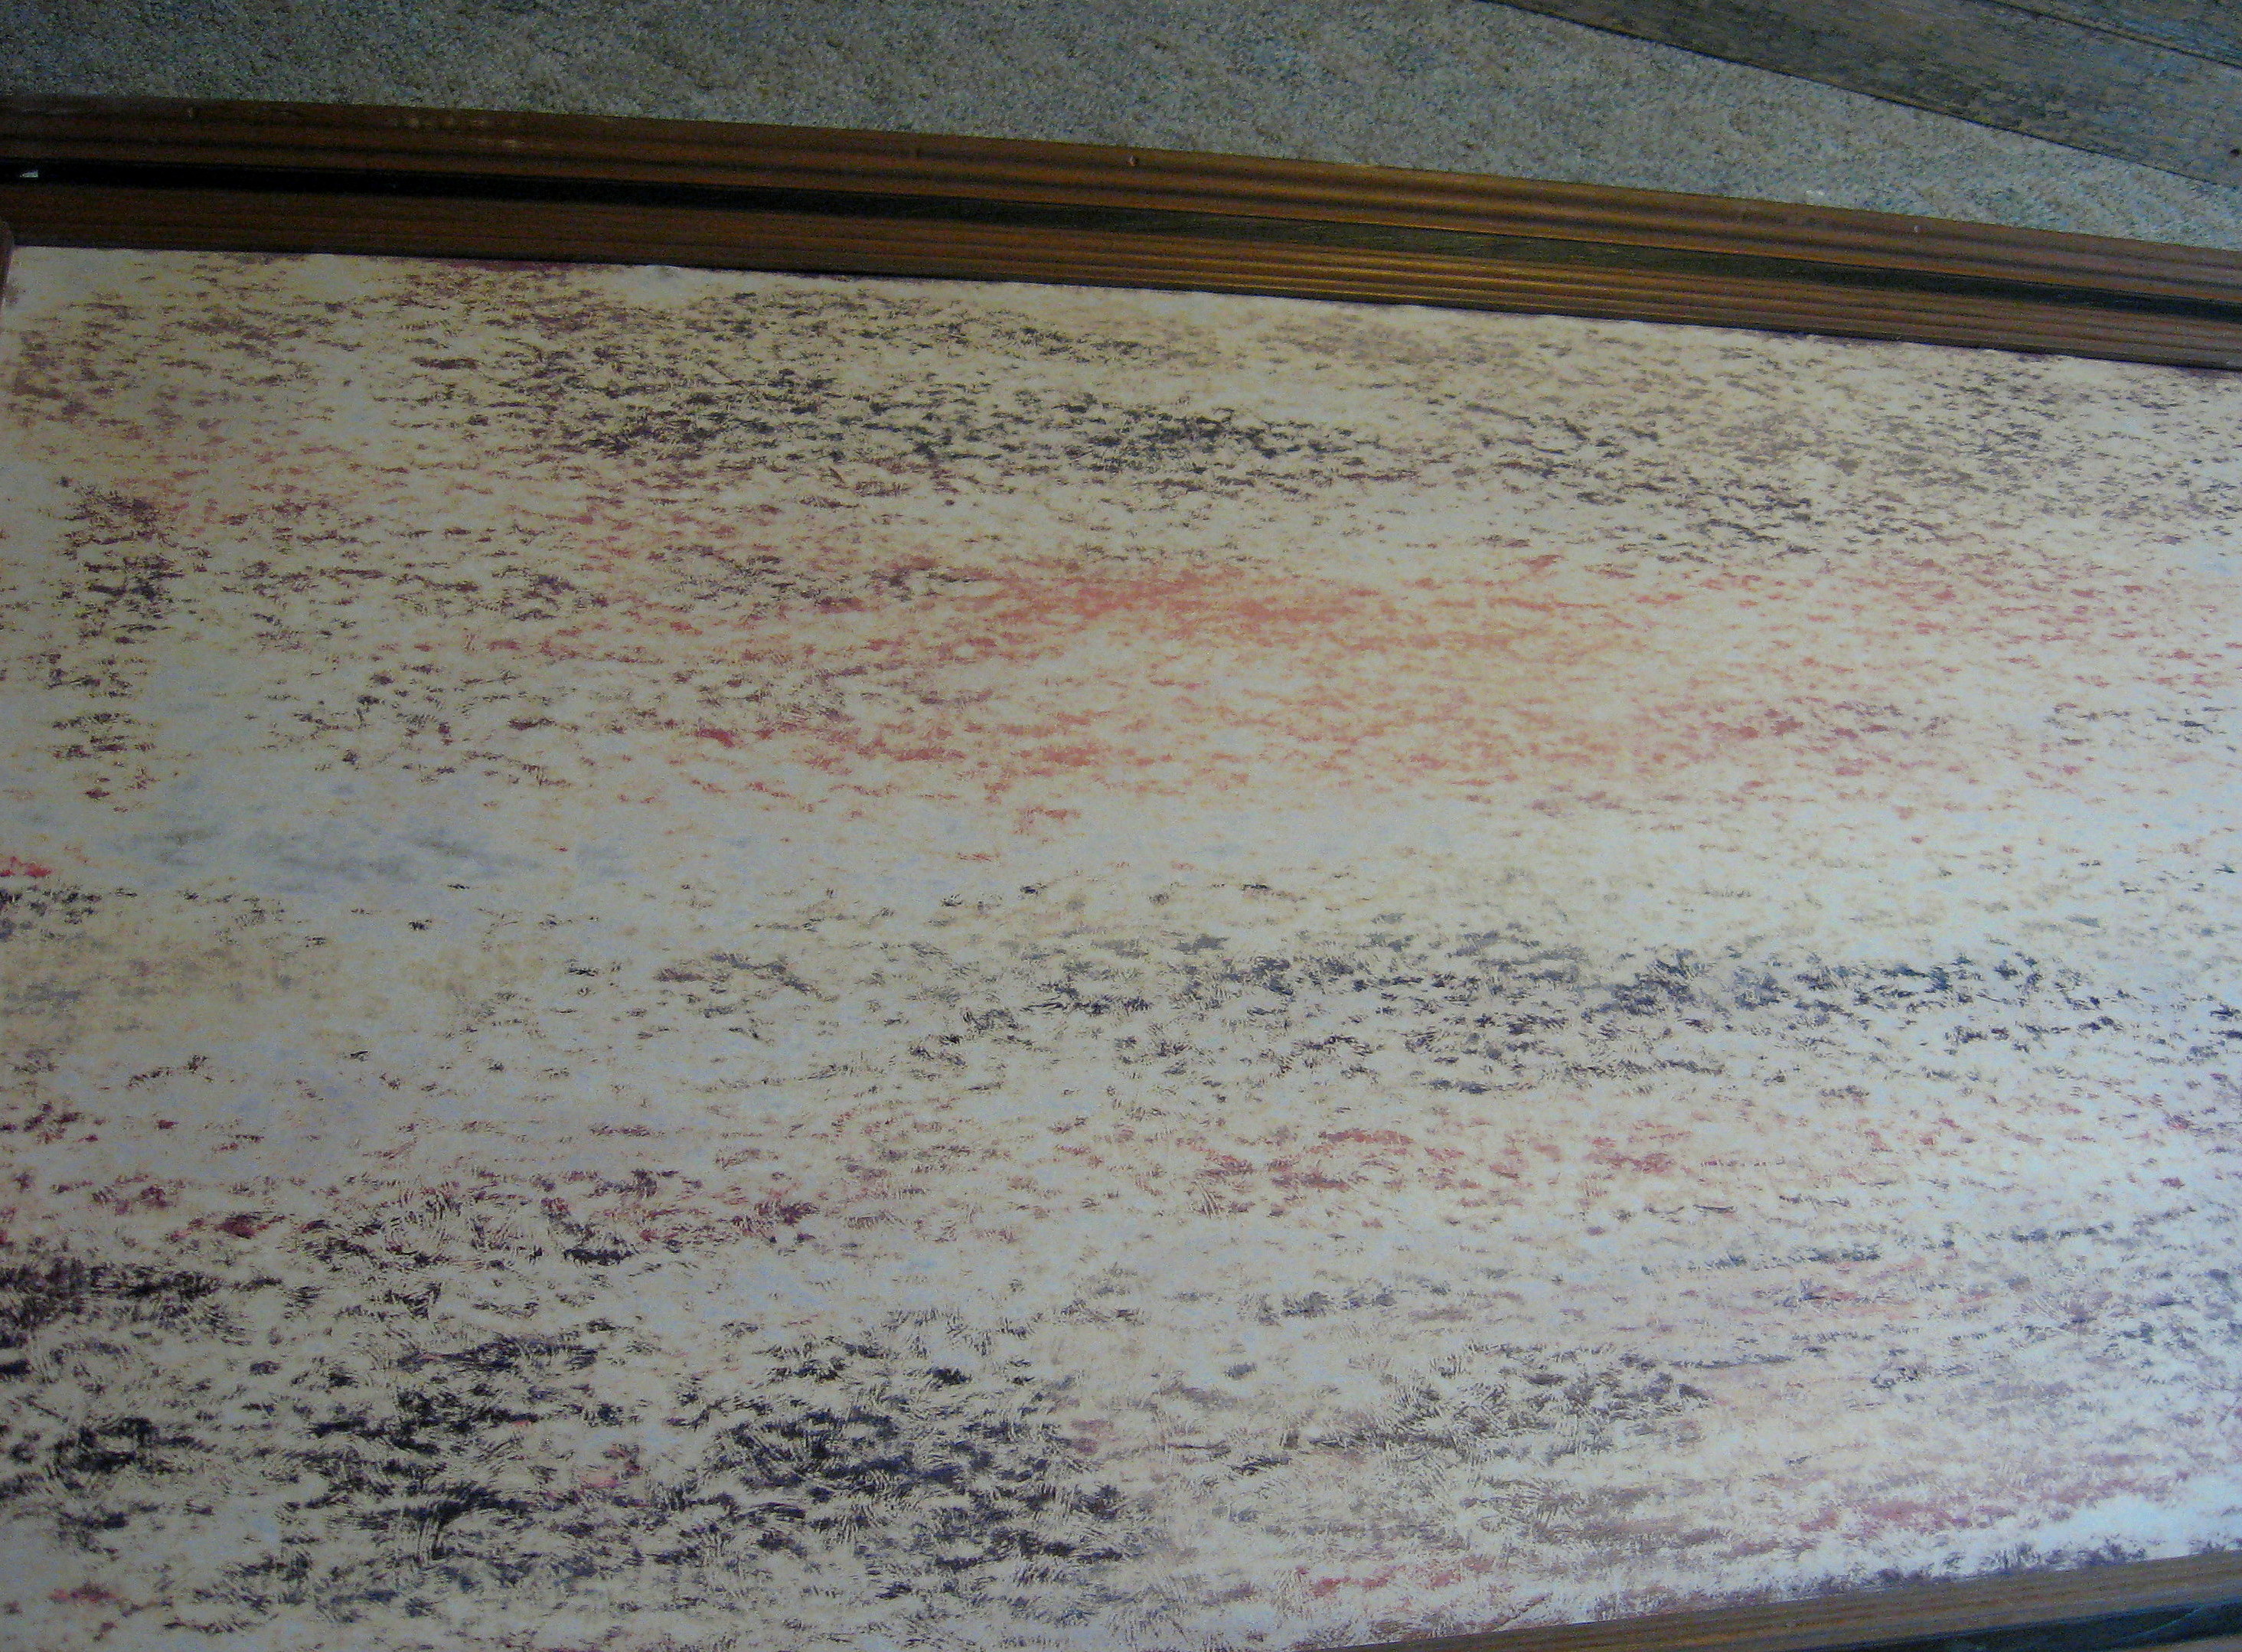
I found this frame for $5 at my local thrift store. $5 is a great price in my area for a frame this size, so I snapped it up.
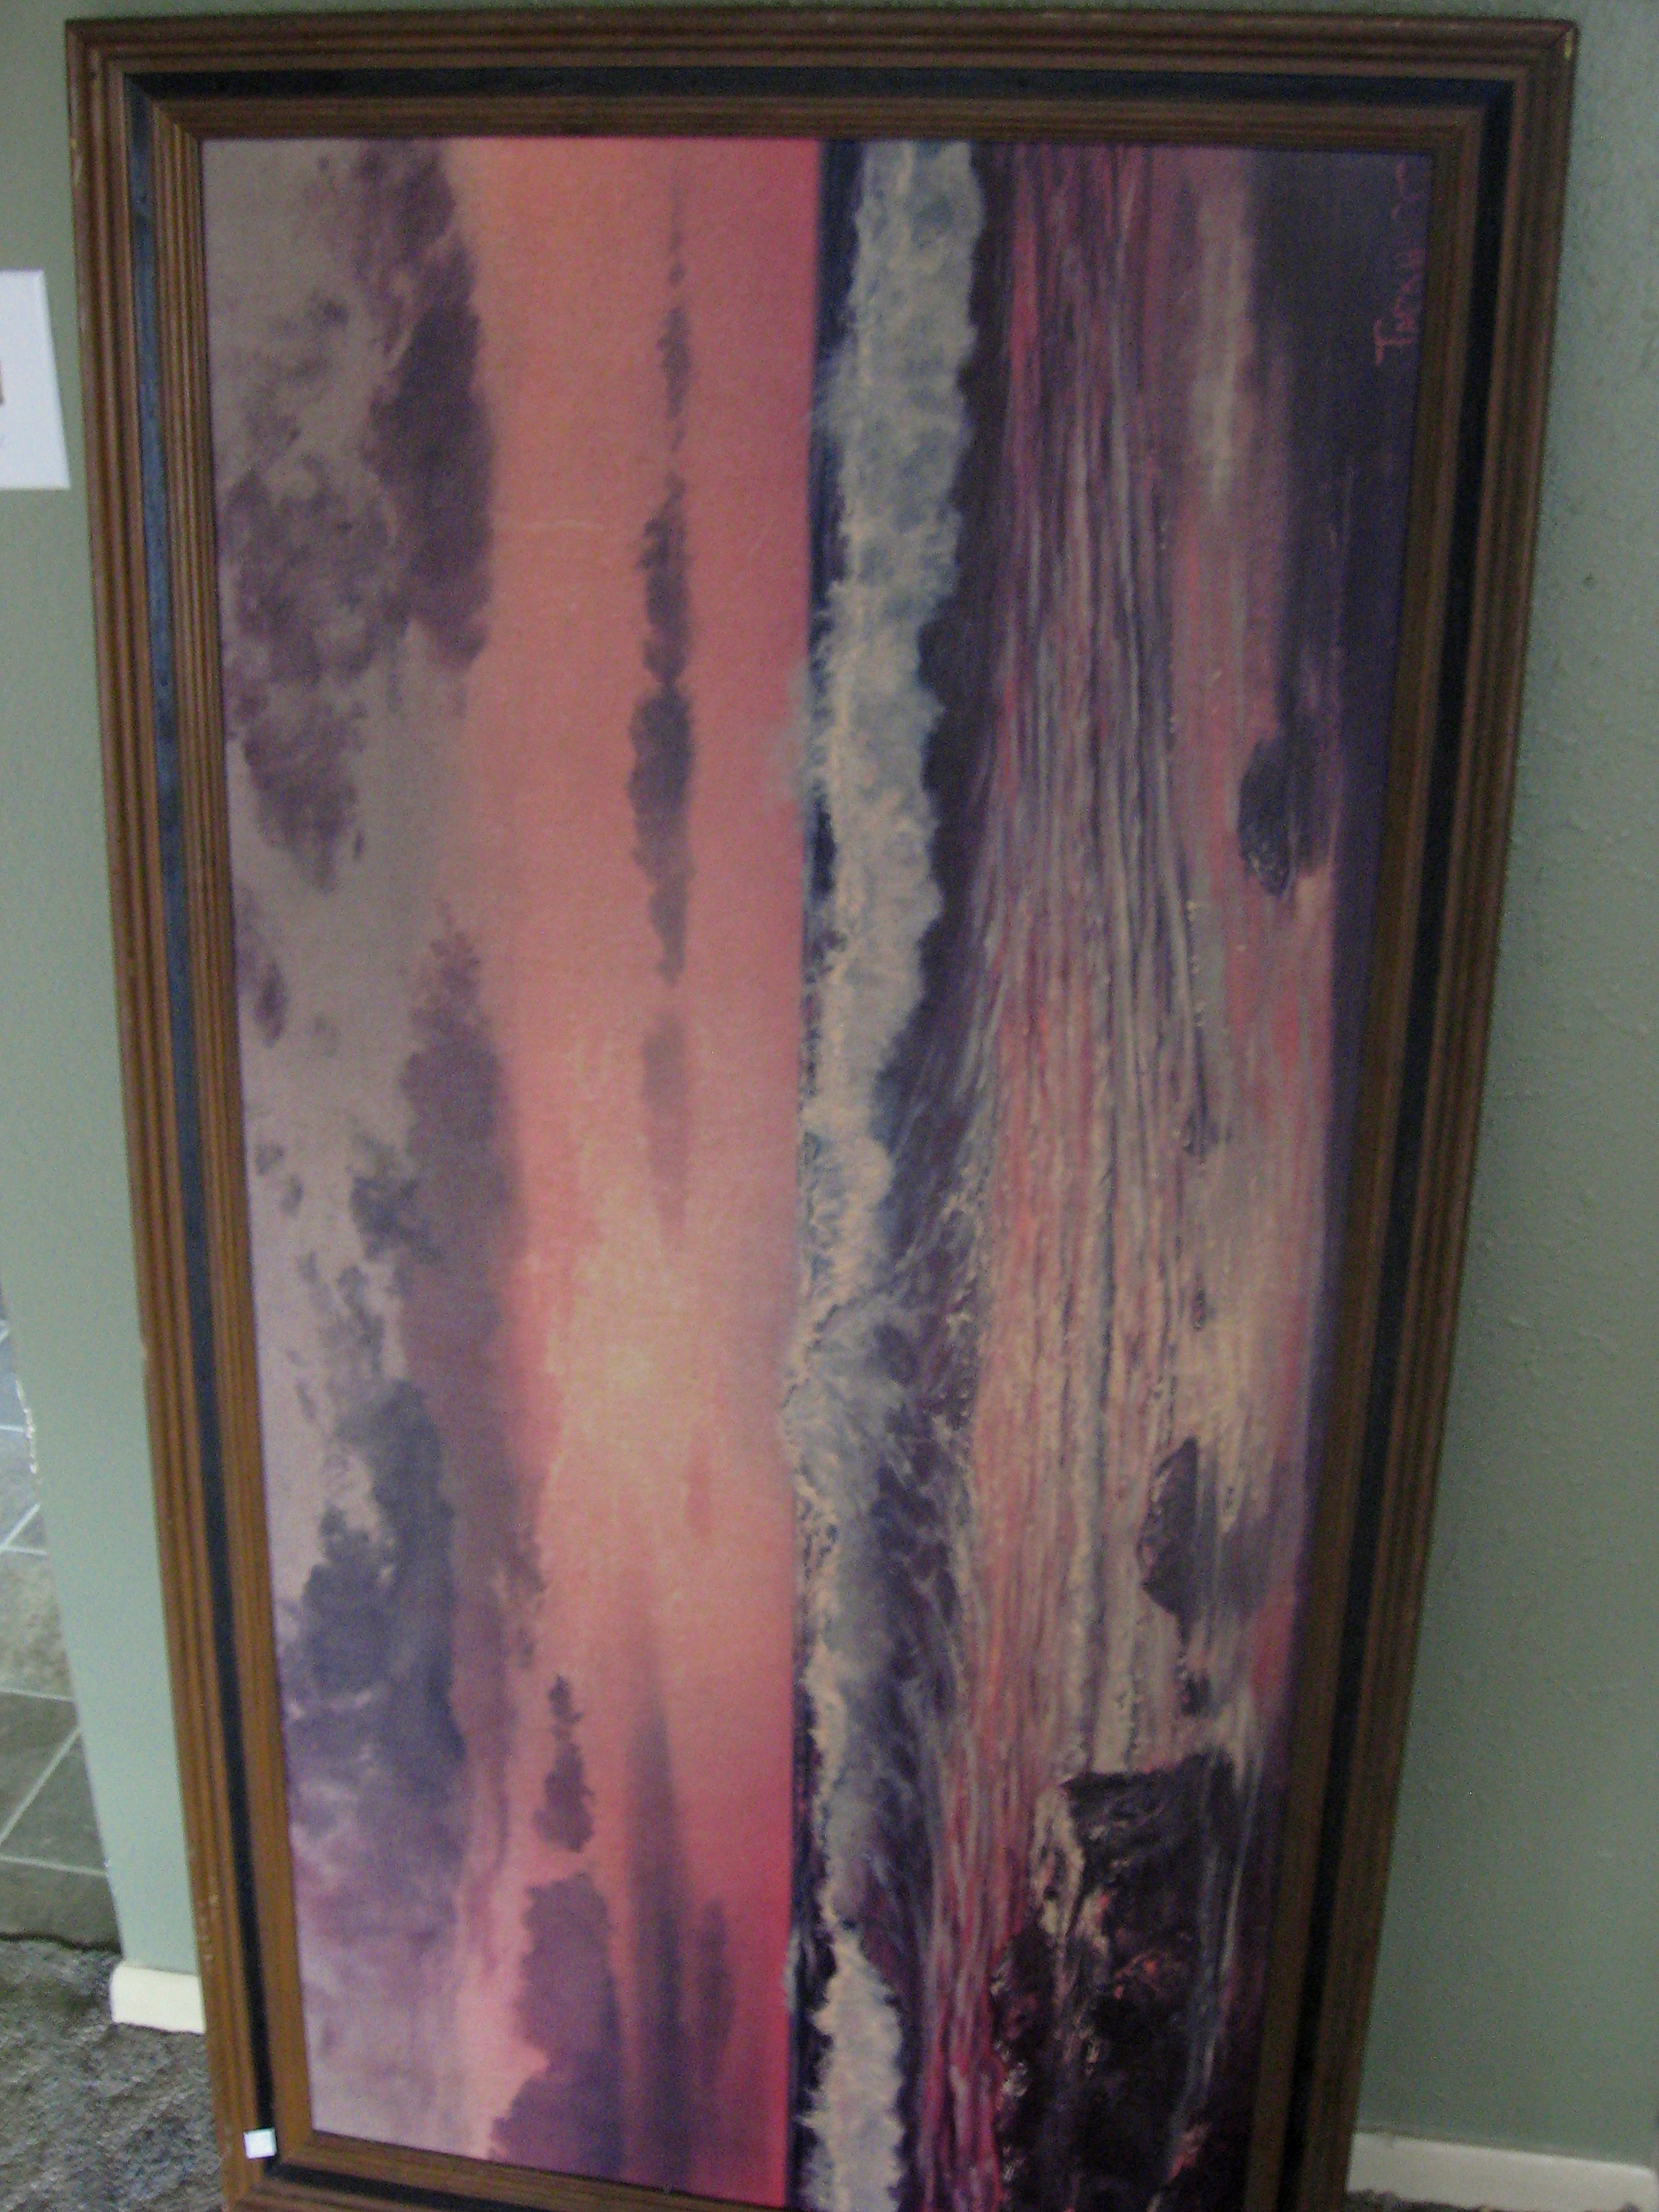
My original plan was to buy a sheet of dry erase board at a home improvement store and have it cut to fit in the frame. When I went to take this print out of the frame, I saw that it was stapled in VERY well and I started to think that maybe I could just use what was there. I knew I had some chalkboard paint in my garage – I wasn’t sure if painting this surface would cause it to warp, but I decided for free, I might as well try it.
This surface had a very slight texture to it, so I started by sanding it down. It is basically just a dense cardboard kind of material, so I sanded carefully with a fine grit sandpaper, then vacuumed the dust and wiped it down with a barely damp cloth.
Now paint the frame. I like to add just a little Plaster of Paris to my craft paint; not necessary, just my preference. It makes the paint act like expensive chalk paint; it covers well (sometimes in just one coat)
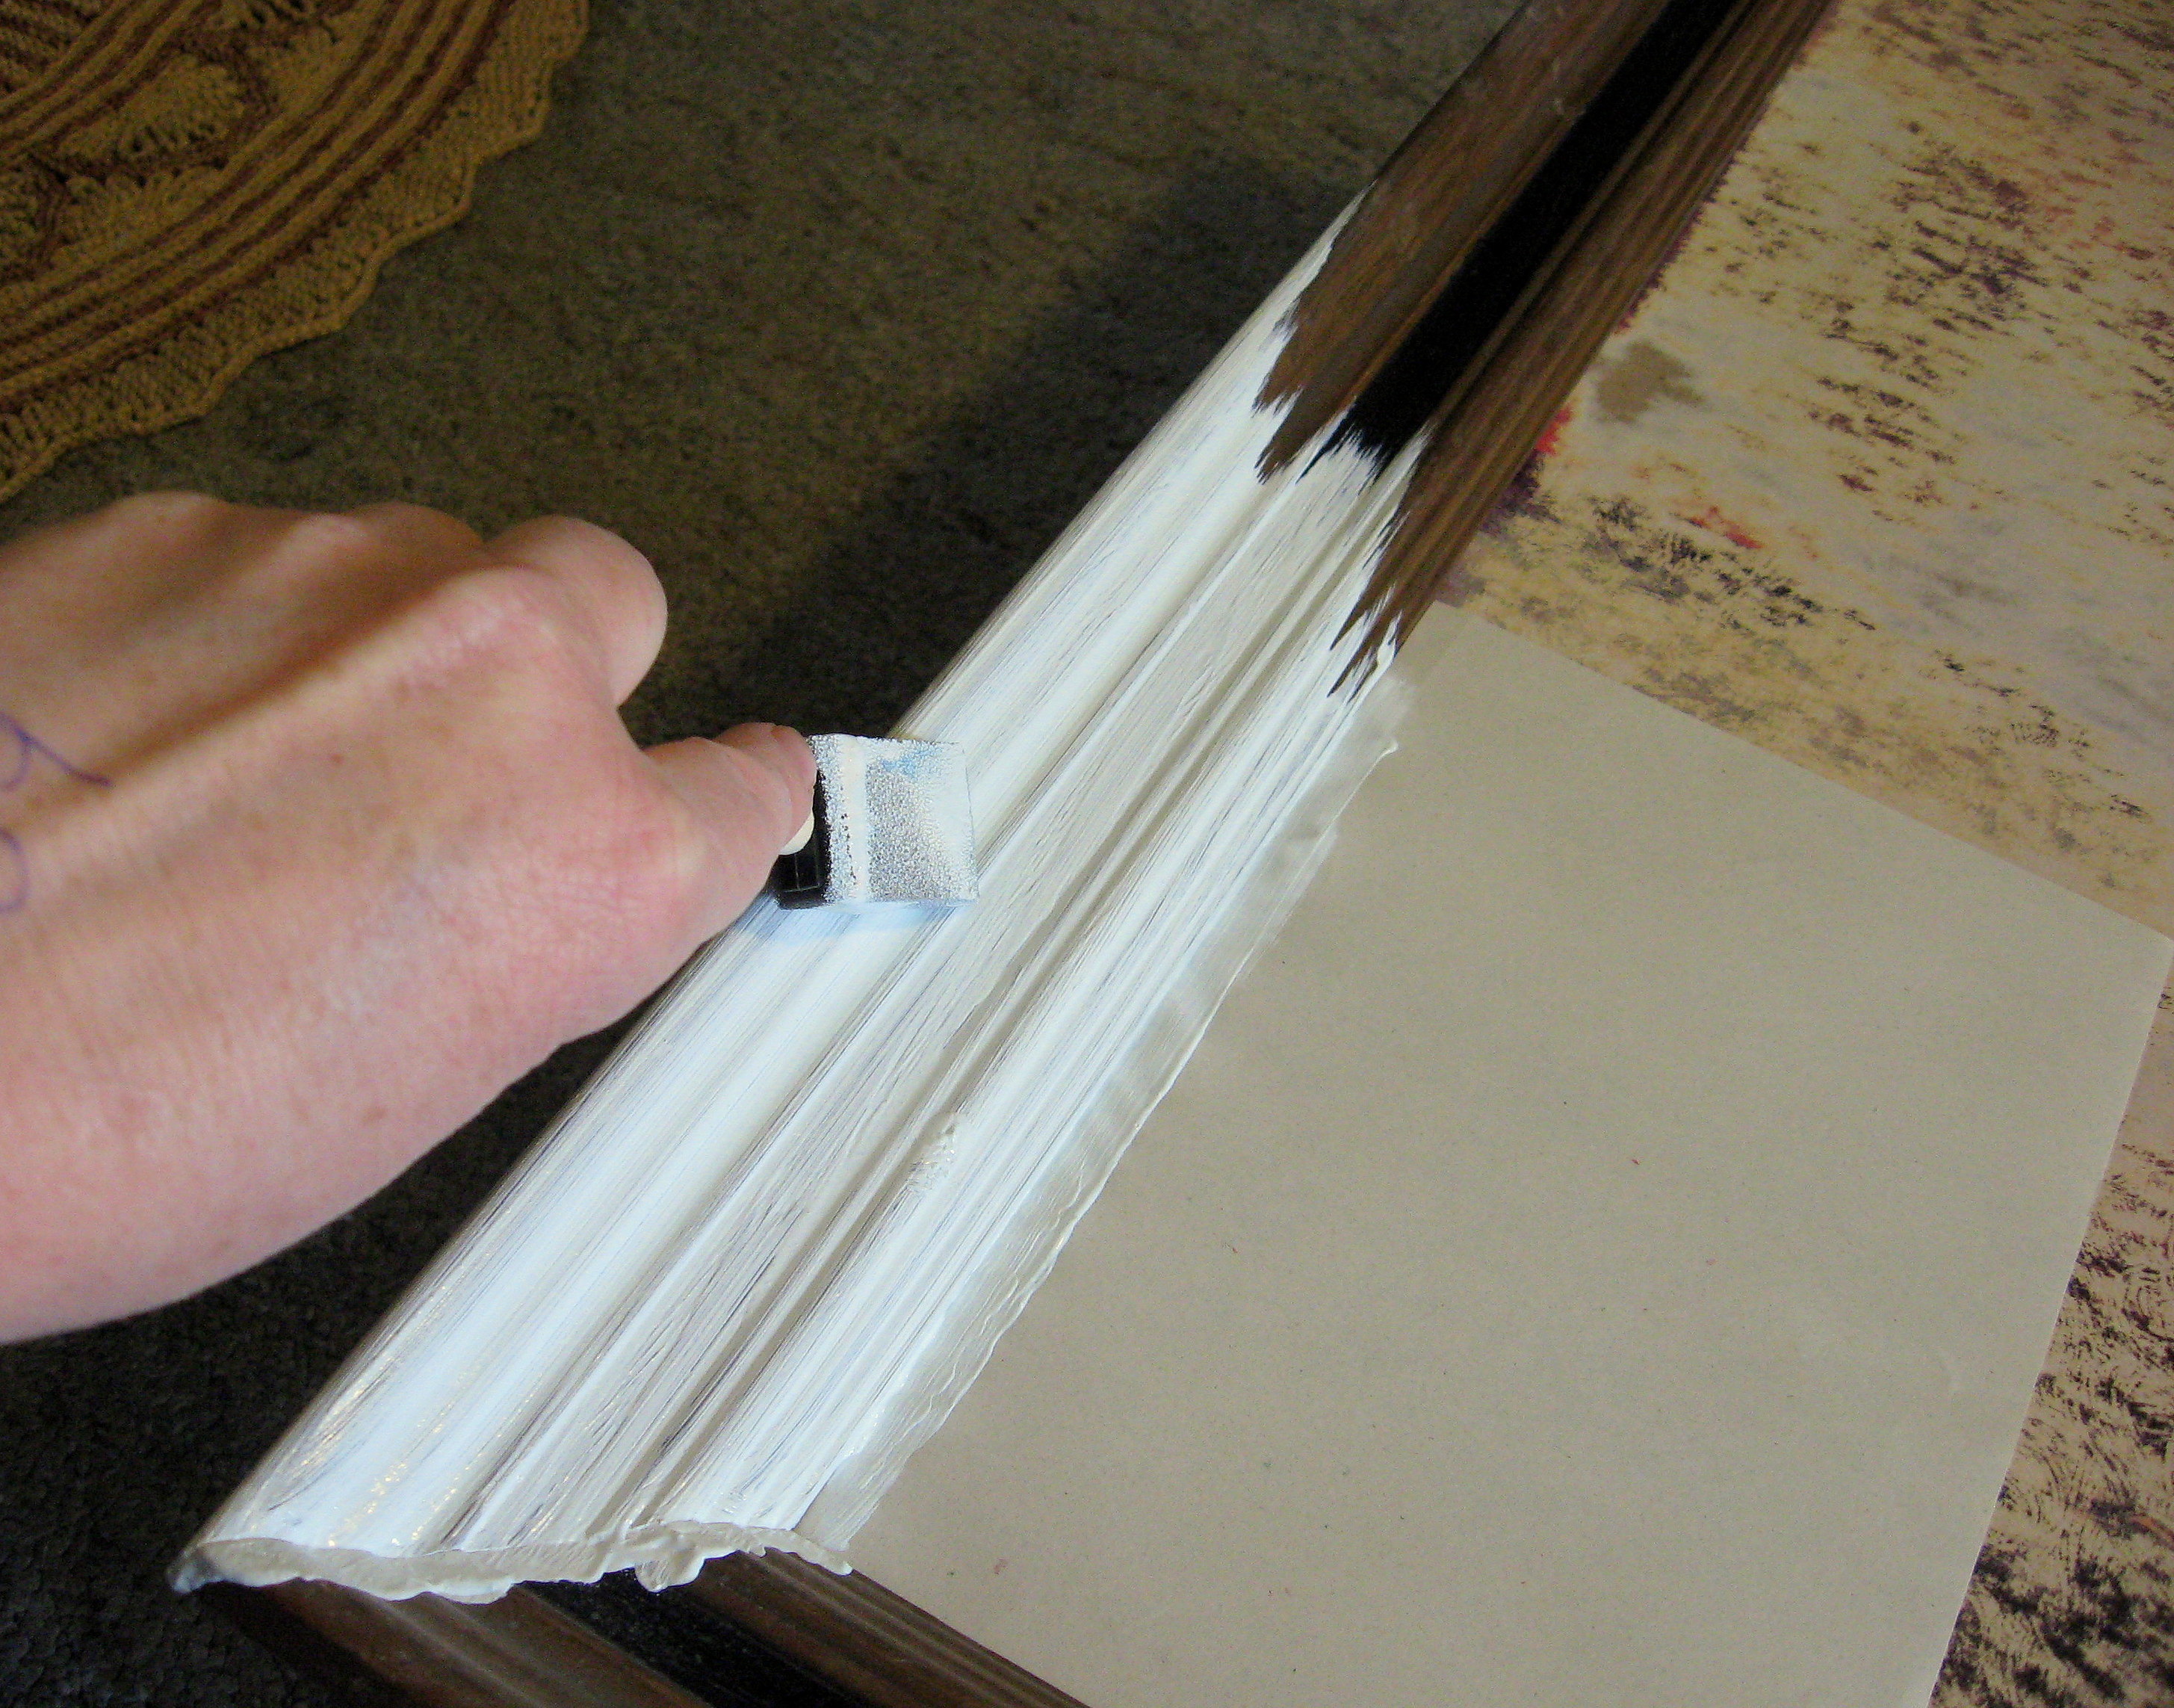
and it distresses very easily with sandpaper. Here is the frame all painted:
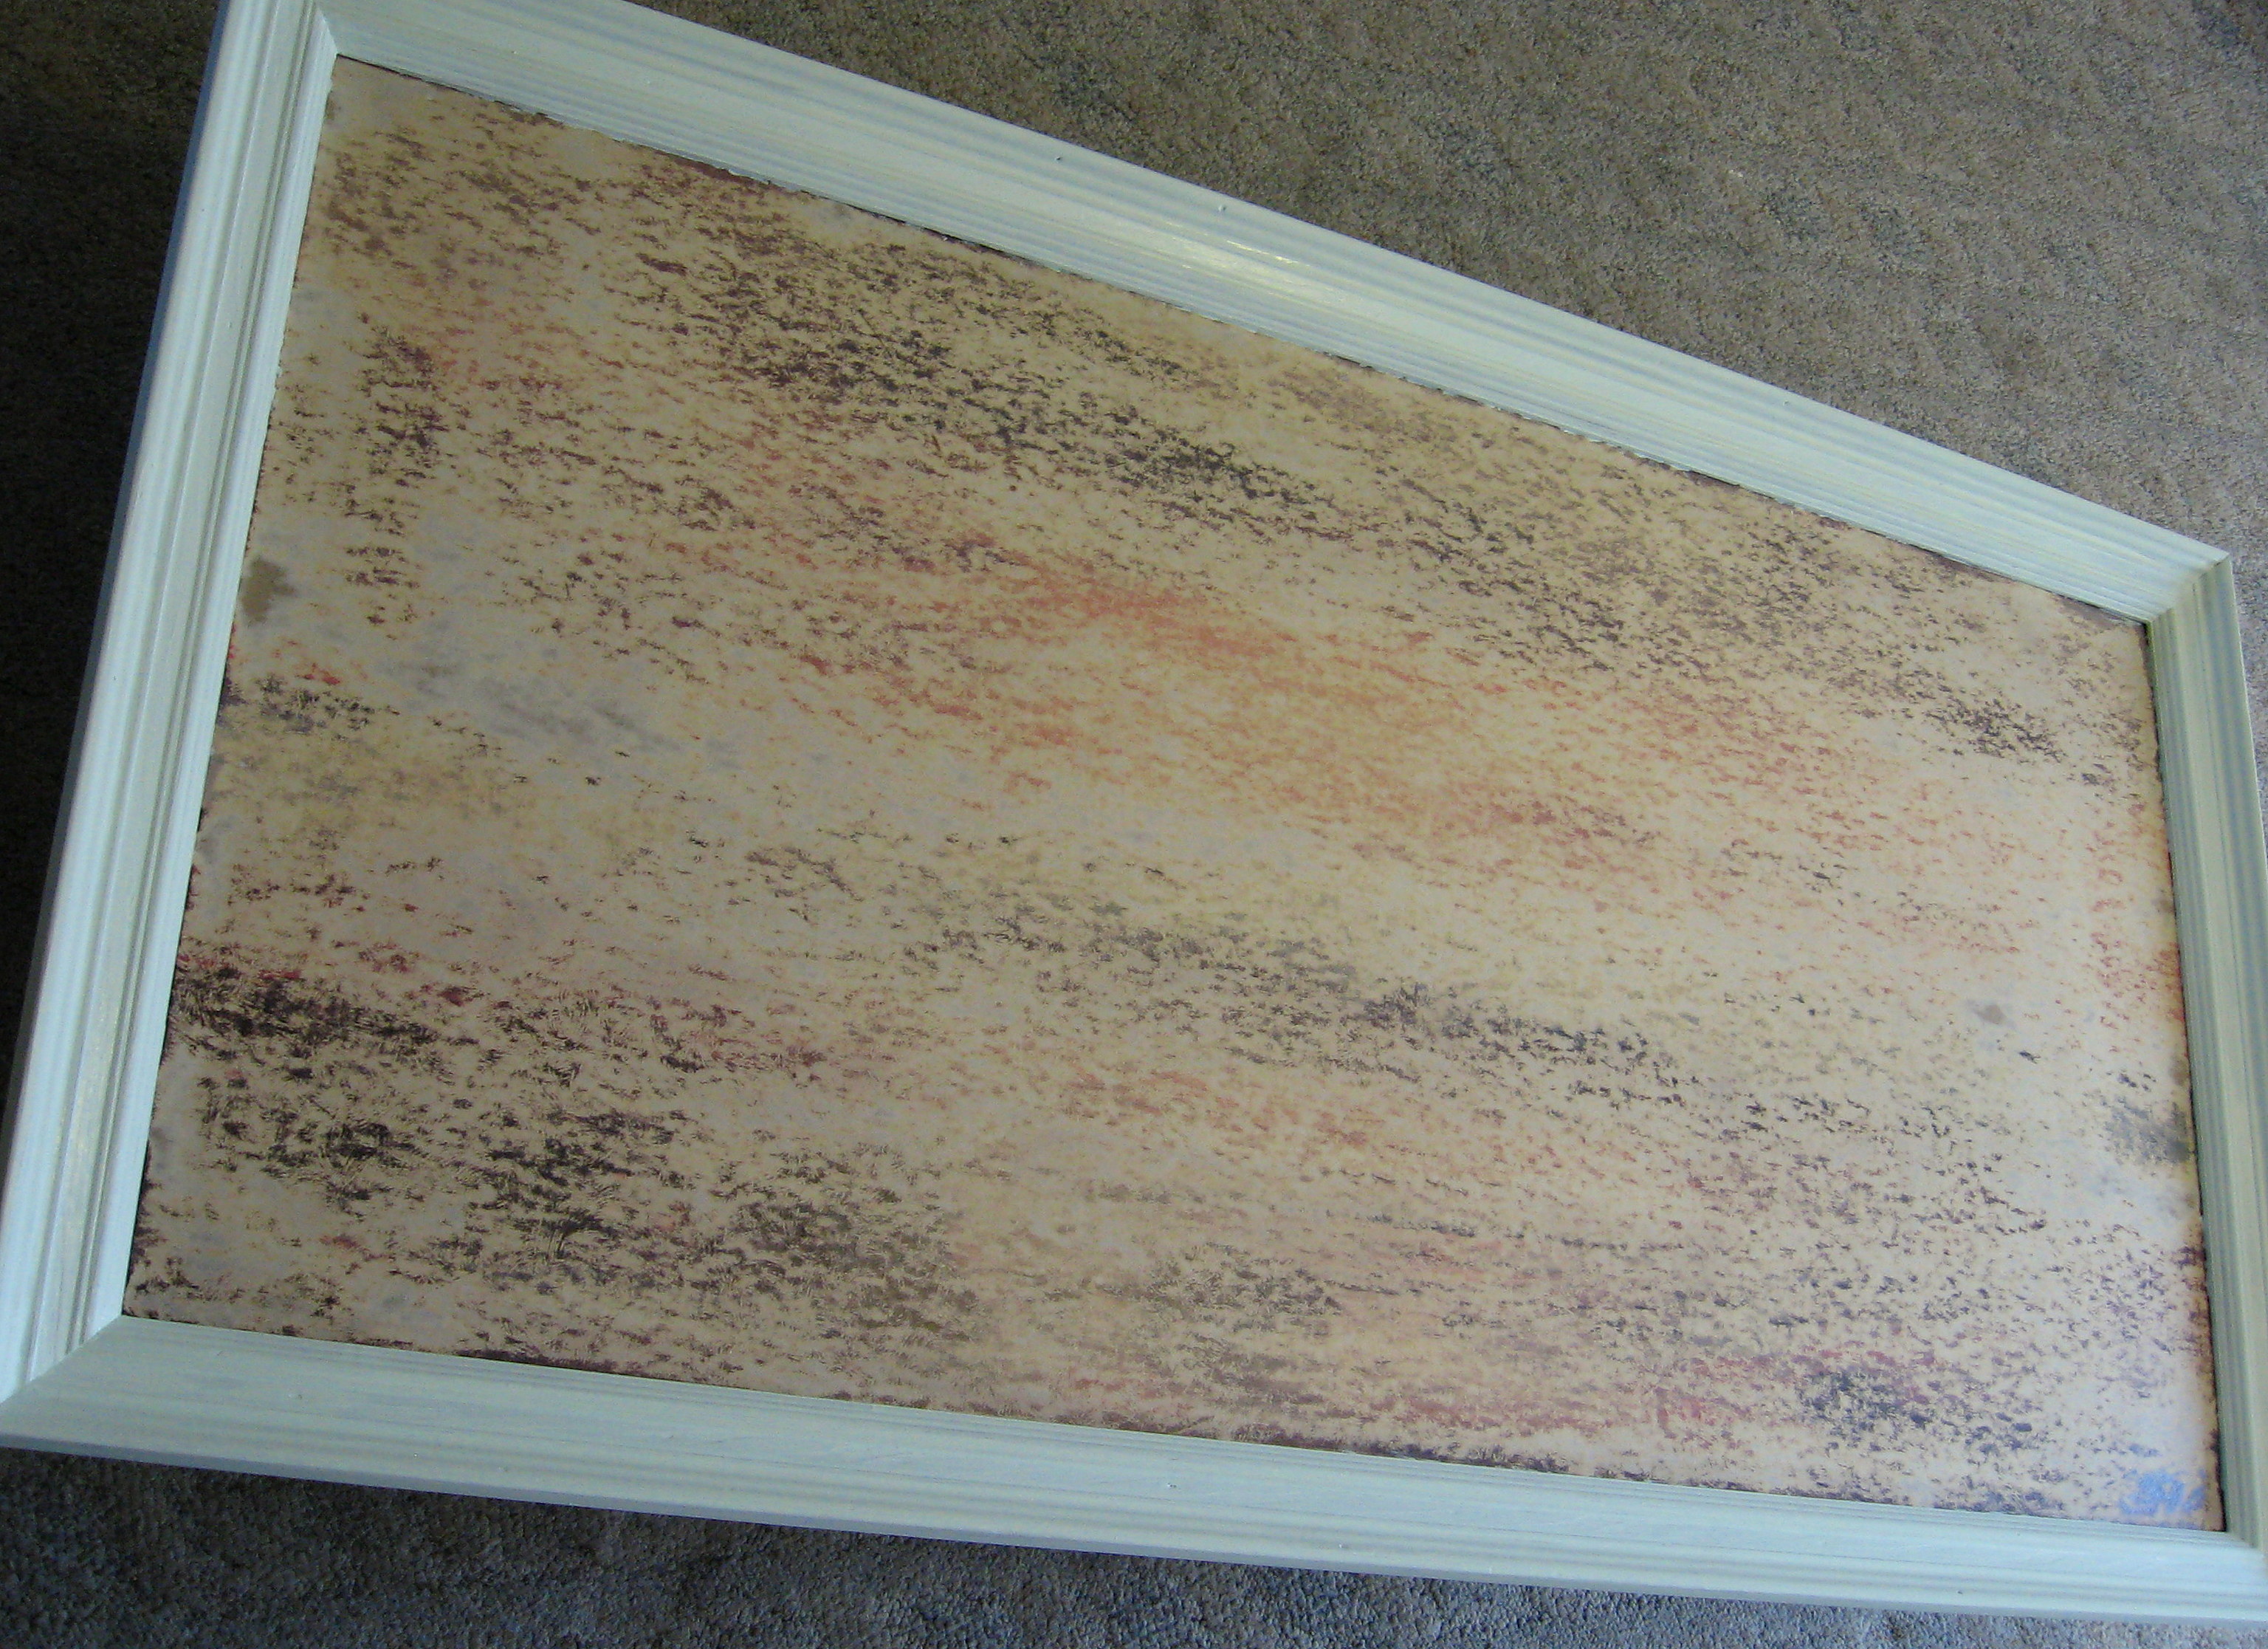
and then lightly sanded:
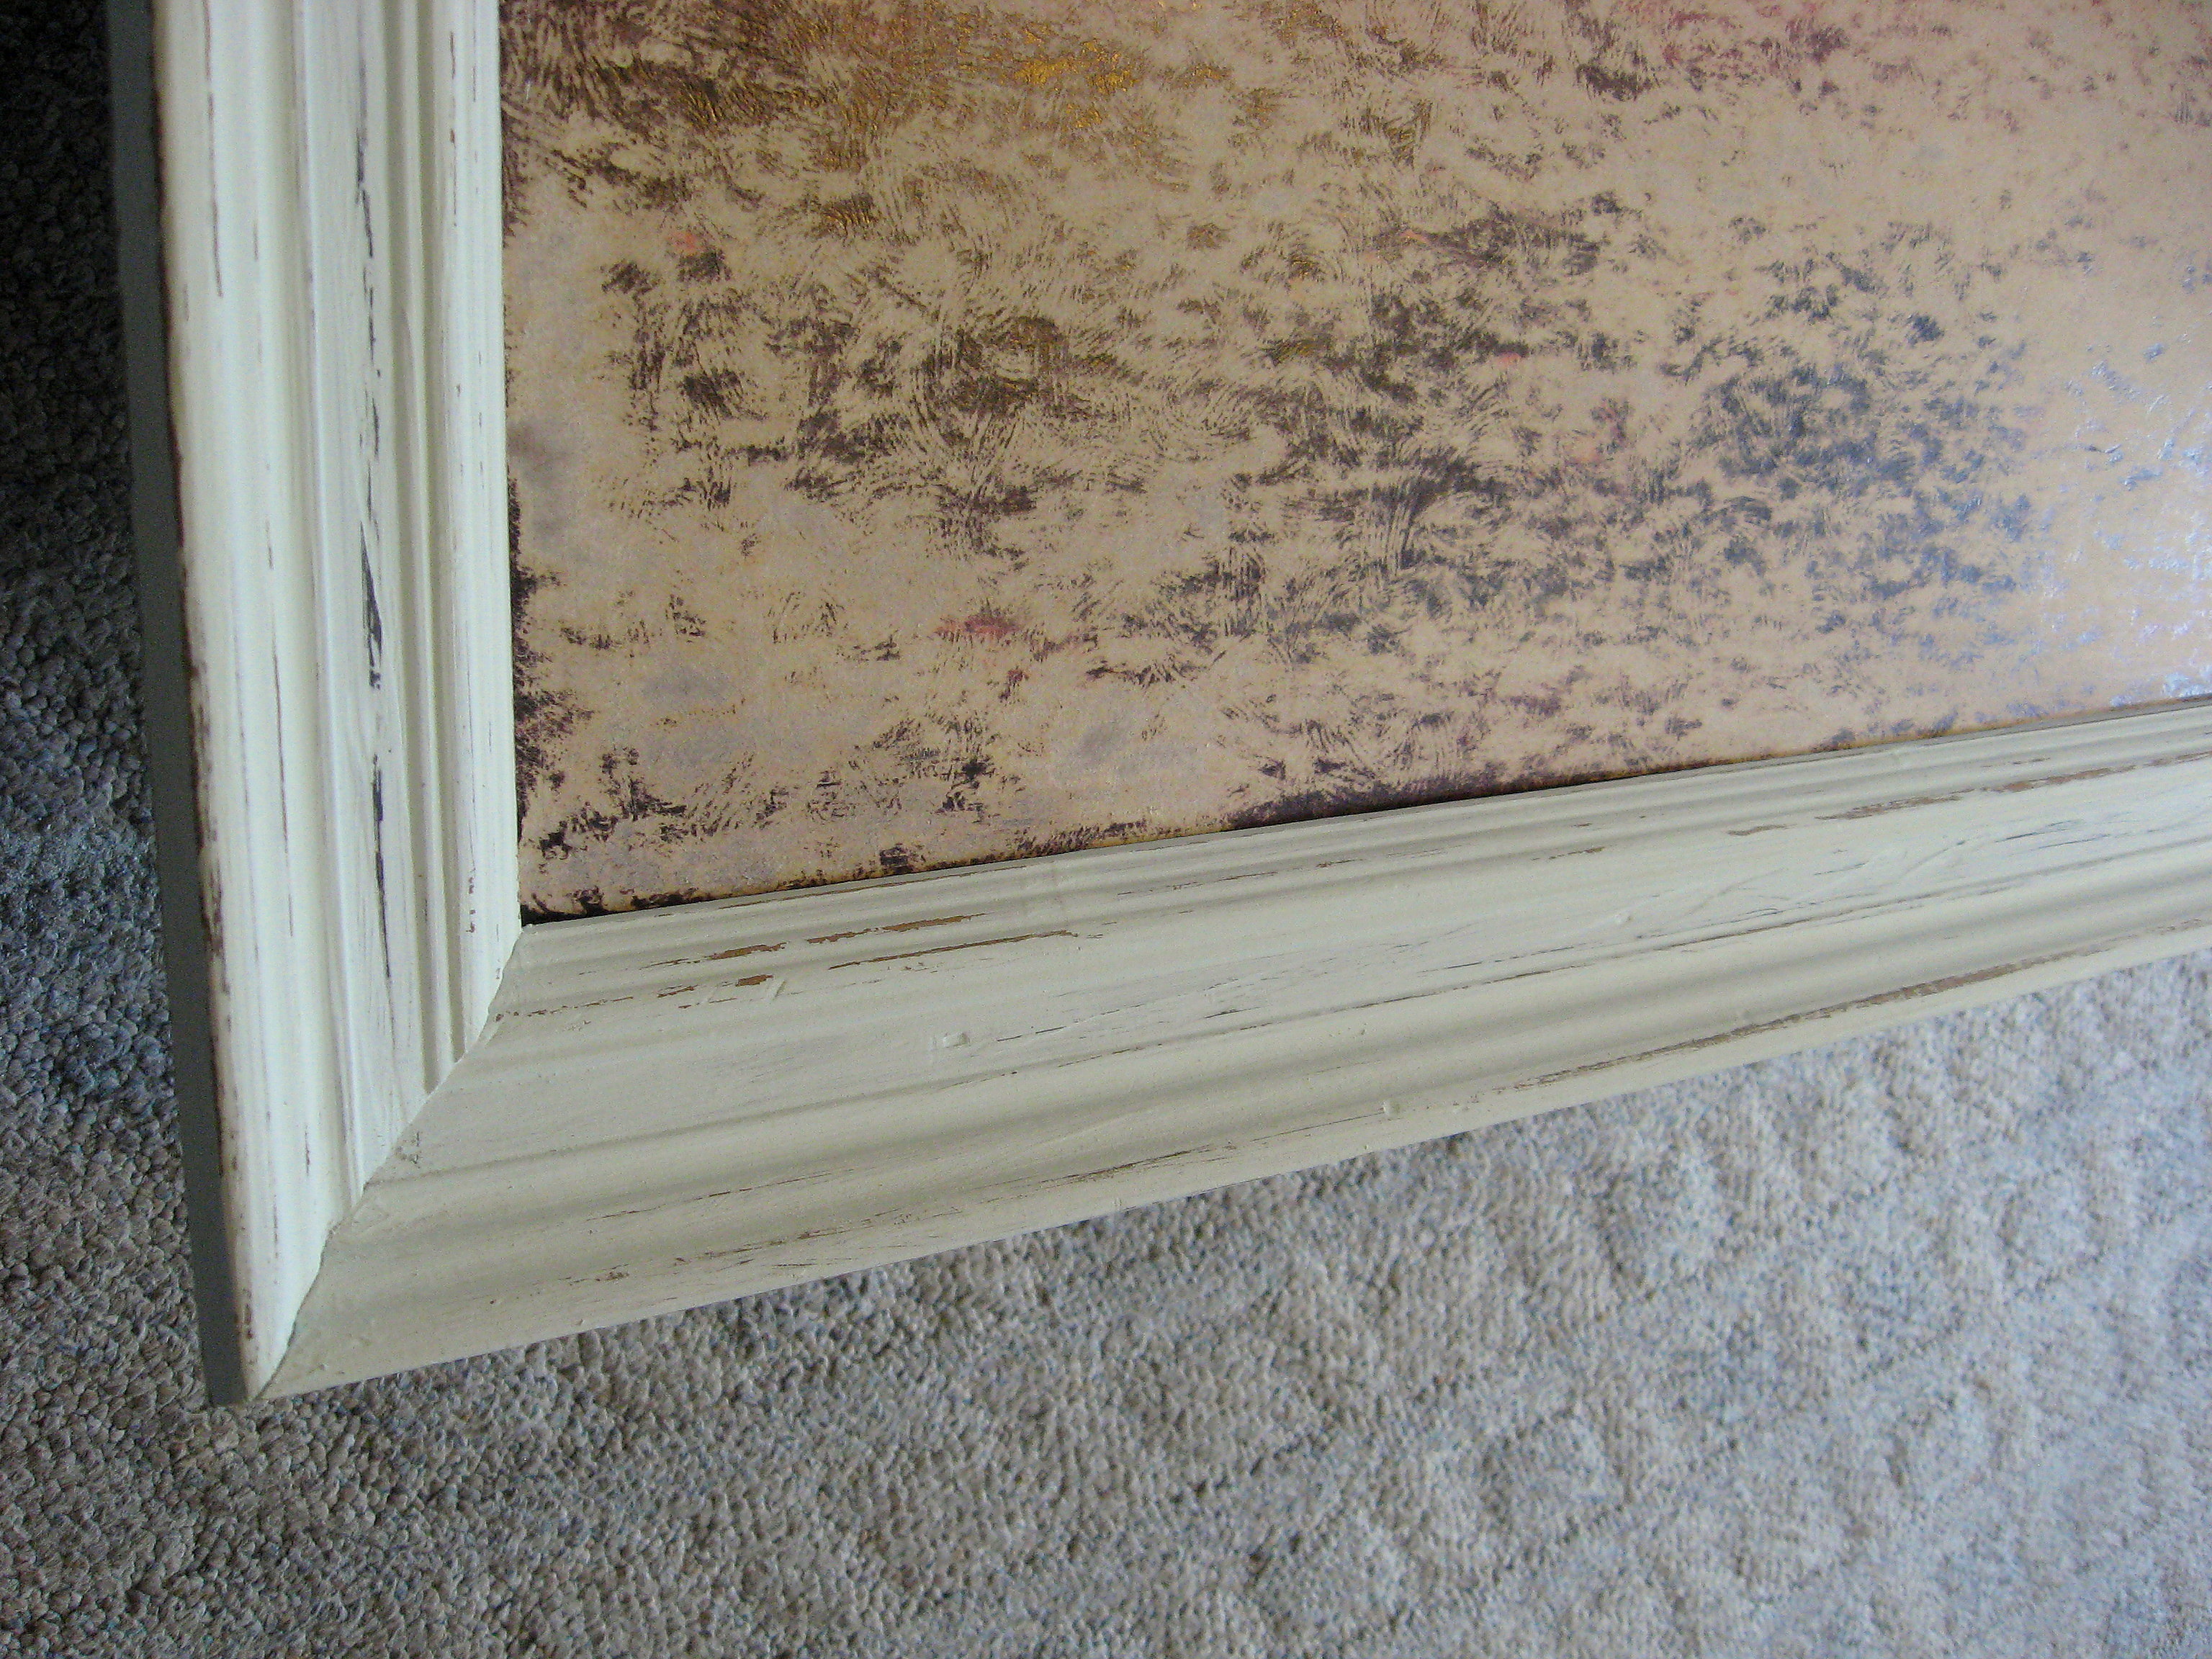
Now let’s paint the inside surface.
*Note – I lucked out and found a frame with a print in it that I could just paint over. If your frame doesn’t have this, I would recommend buying a piece of masonite from a home improvement store. They will even cut it to size for you. Masonite is inexpensive and easy to work with and provides a perfectly flat and smooth surface. Just paint it first, then staple or nail it into the frame when it’s dry.
I decided to start with magnetic paint so I could stick things to the calendar – bills to be paid, coupons needed, permission slips to turn in, etc.
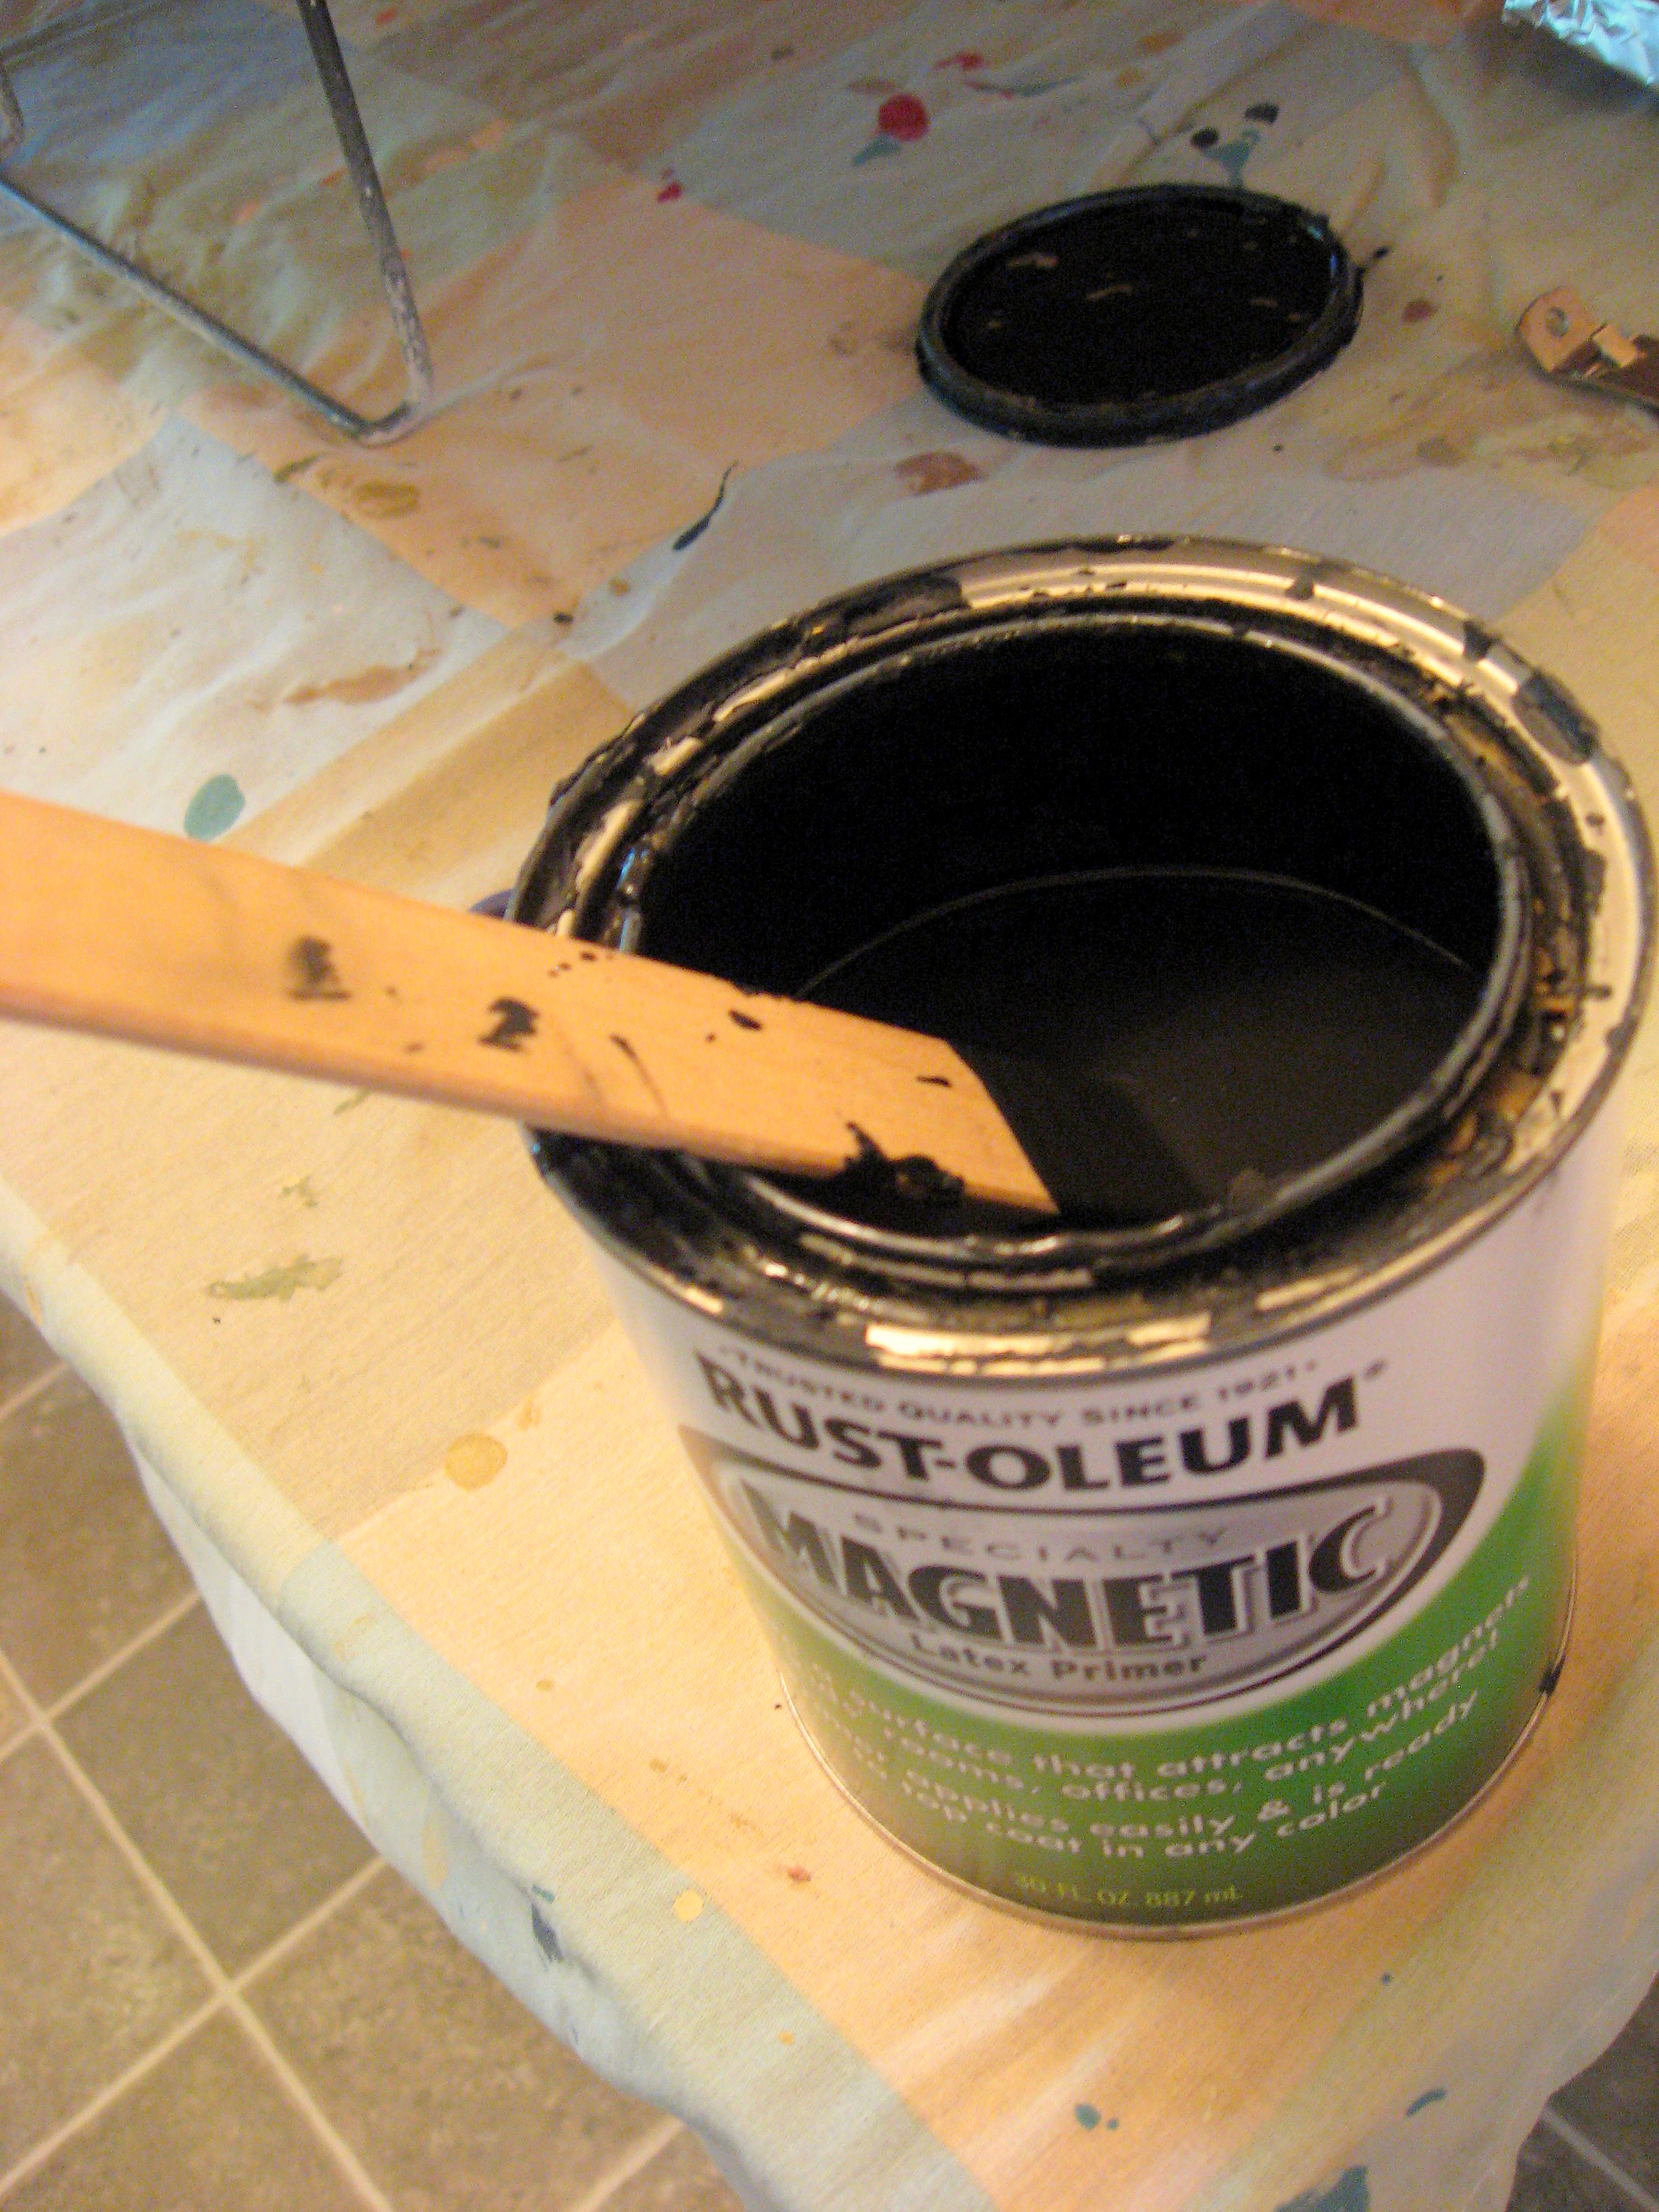
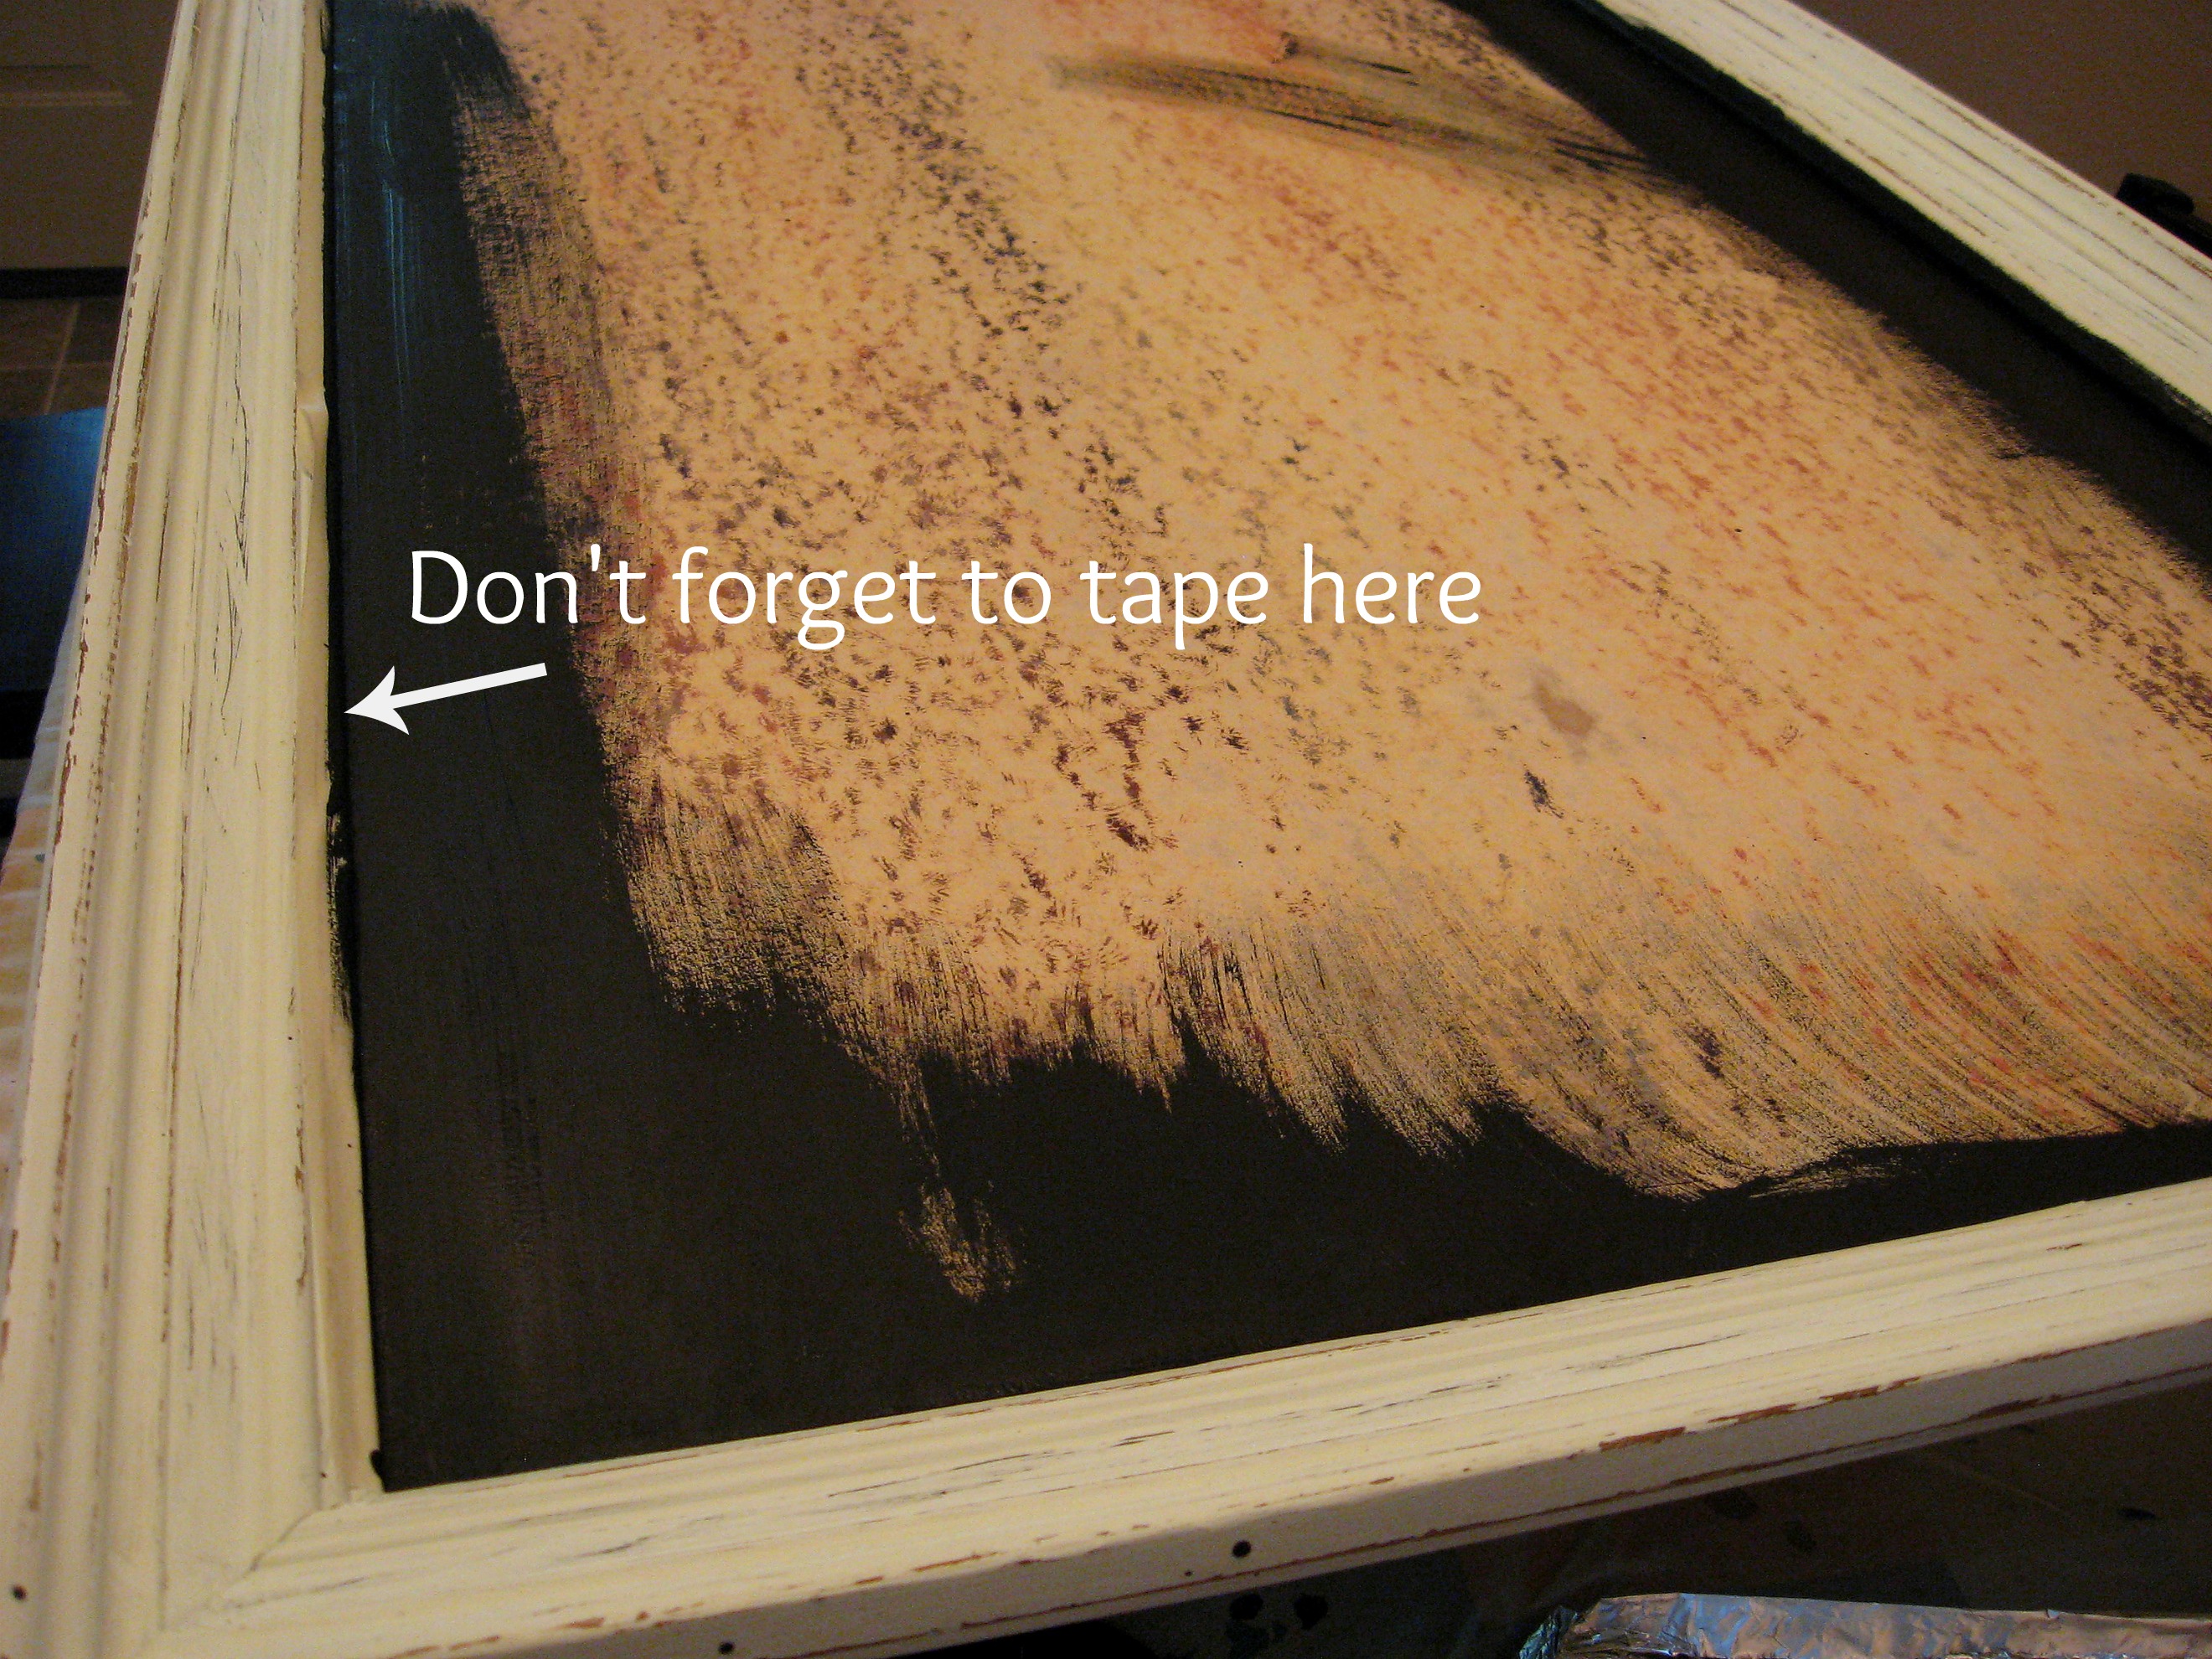
Tape around the inside edge of the frame and start stirring your magnetic paint. Magnetic paint is really just black primer with tiny flecks of metal in it. It is very thick and hard to stir, so if you are buying it from the store be sure to ask them to shake it in their paint mixer. If, like me, you have some sitting around the house, you’ll need to stir it for at least 10 minutes.
Start painting by cutting in around the edges,
then rolling it on in the center.
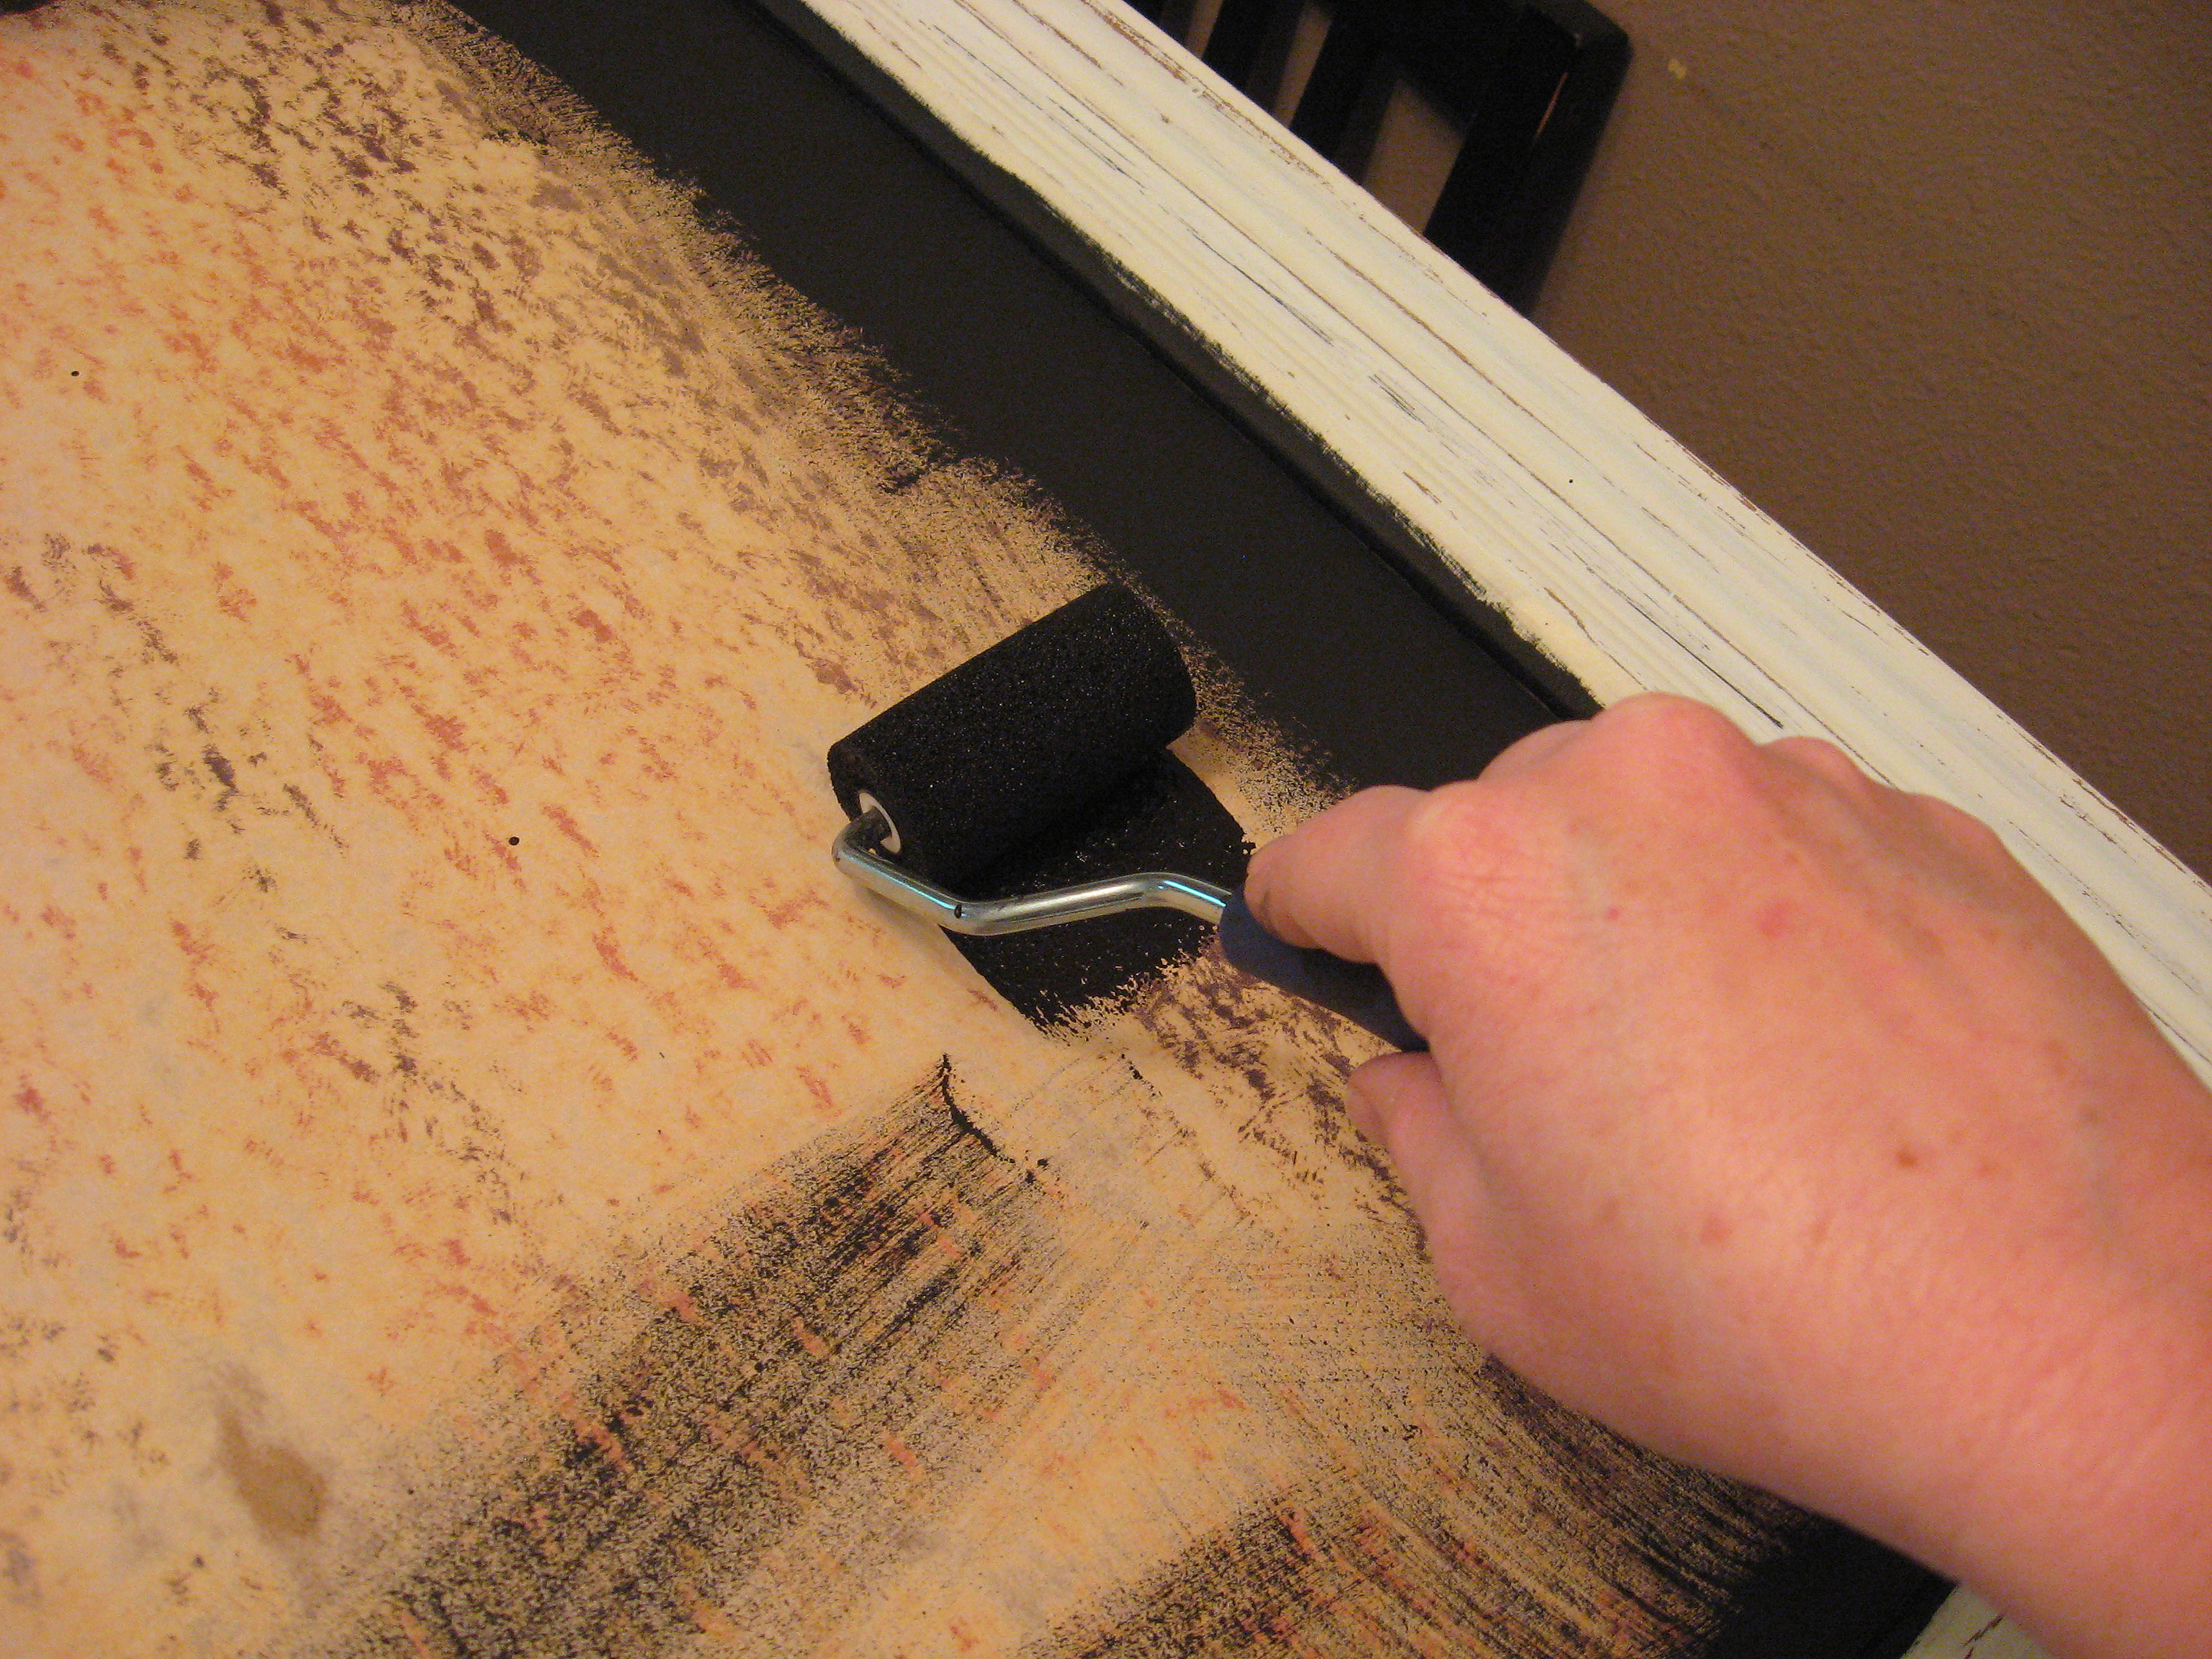
It is pretty important to use a foam roller. You want as smooth of a surface as possible. The can says that three thin coats are better than a heavy coat, so that is what I did, allowing each coat to dry for 30 minutes in between and then for 4 hours after the last coat. Wrap the roller in foil in between coats so it doesn’t dry out, then wash it out well after the last one so you can use it for the chalkboard paint too. You’ll probably want to just throw it away after the chalkboard paint, so I would use a disposable foam brush, too, instead of a nice paintbrush.
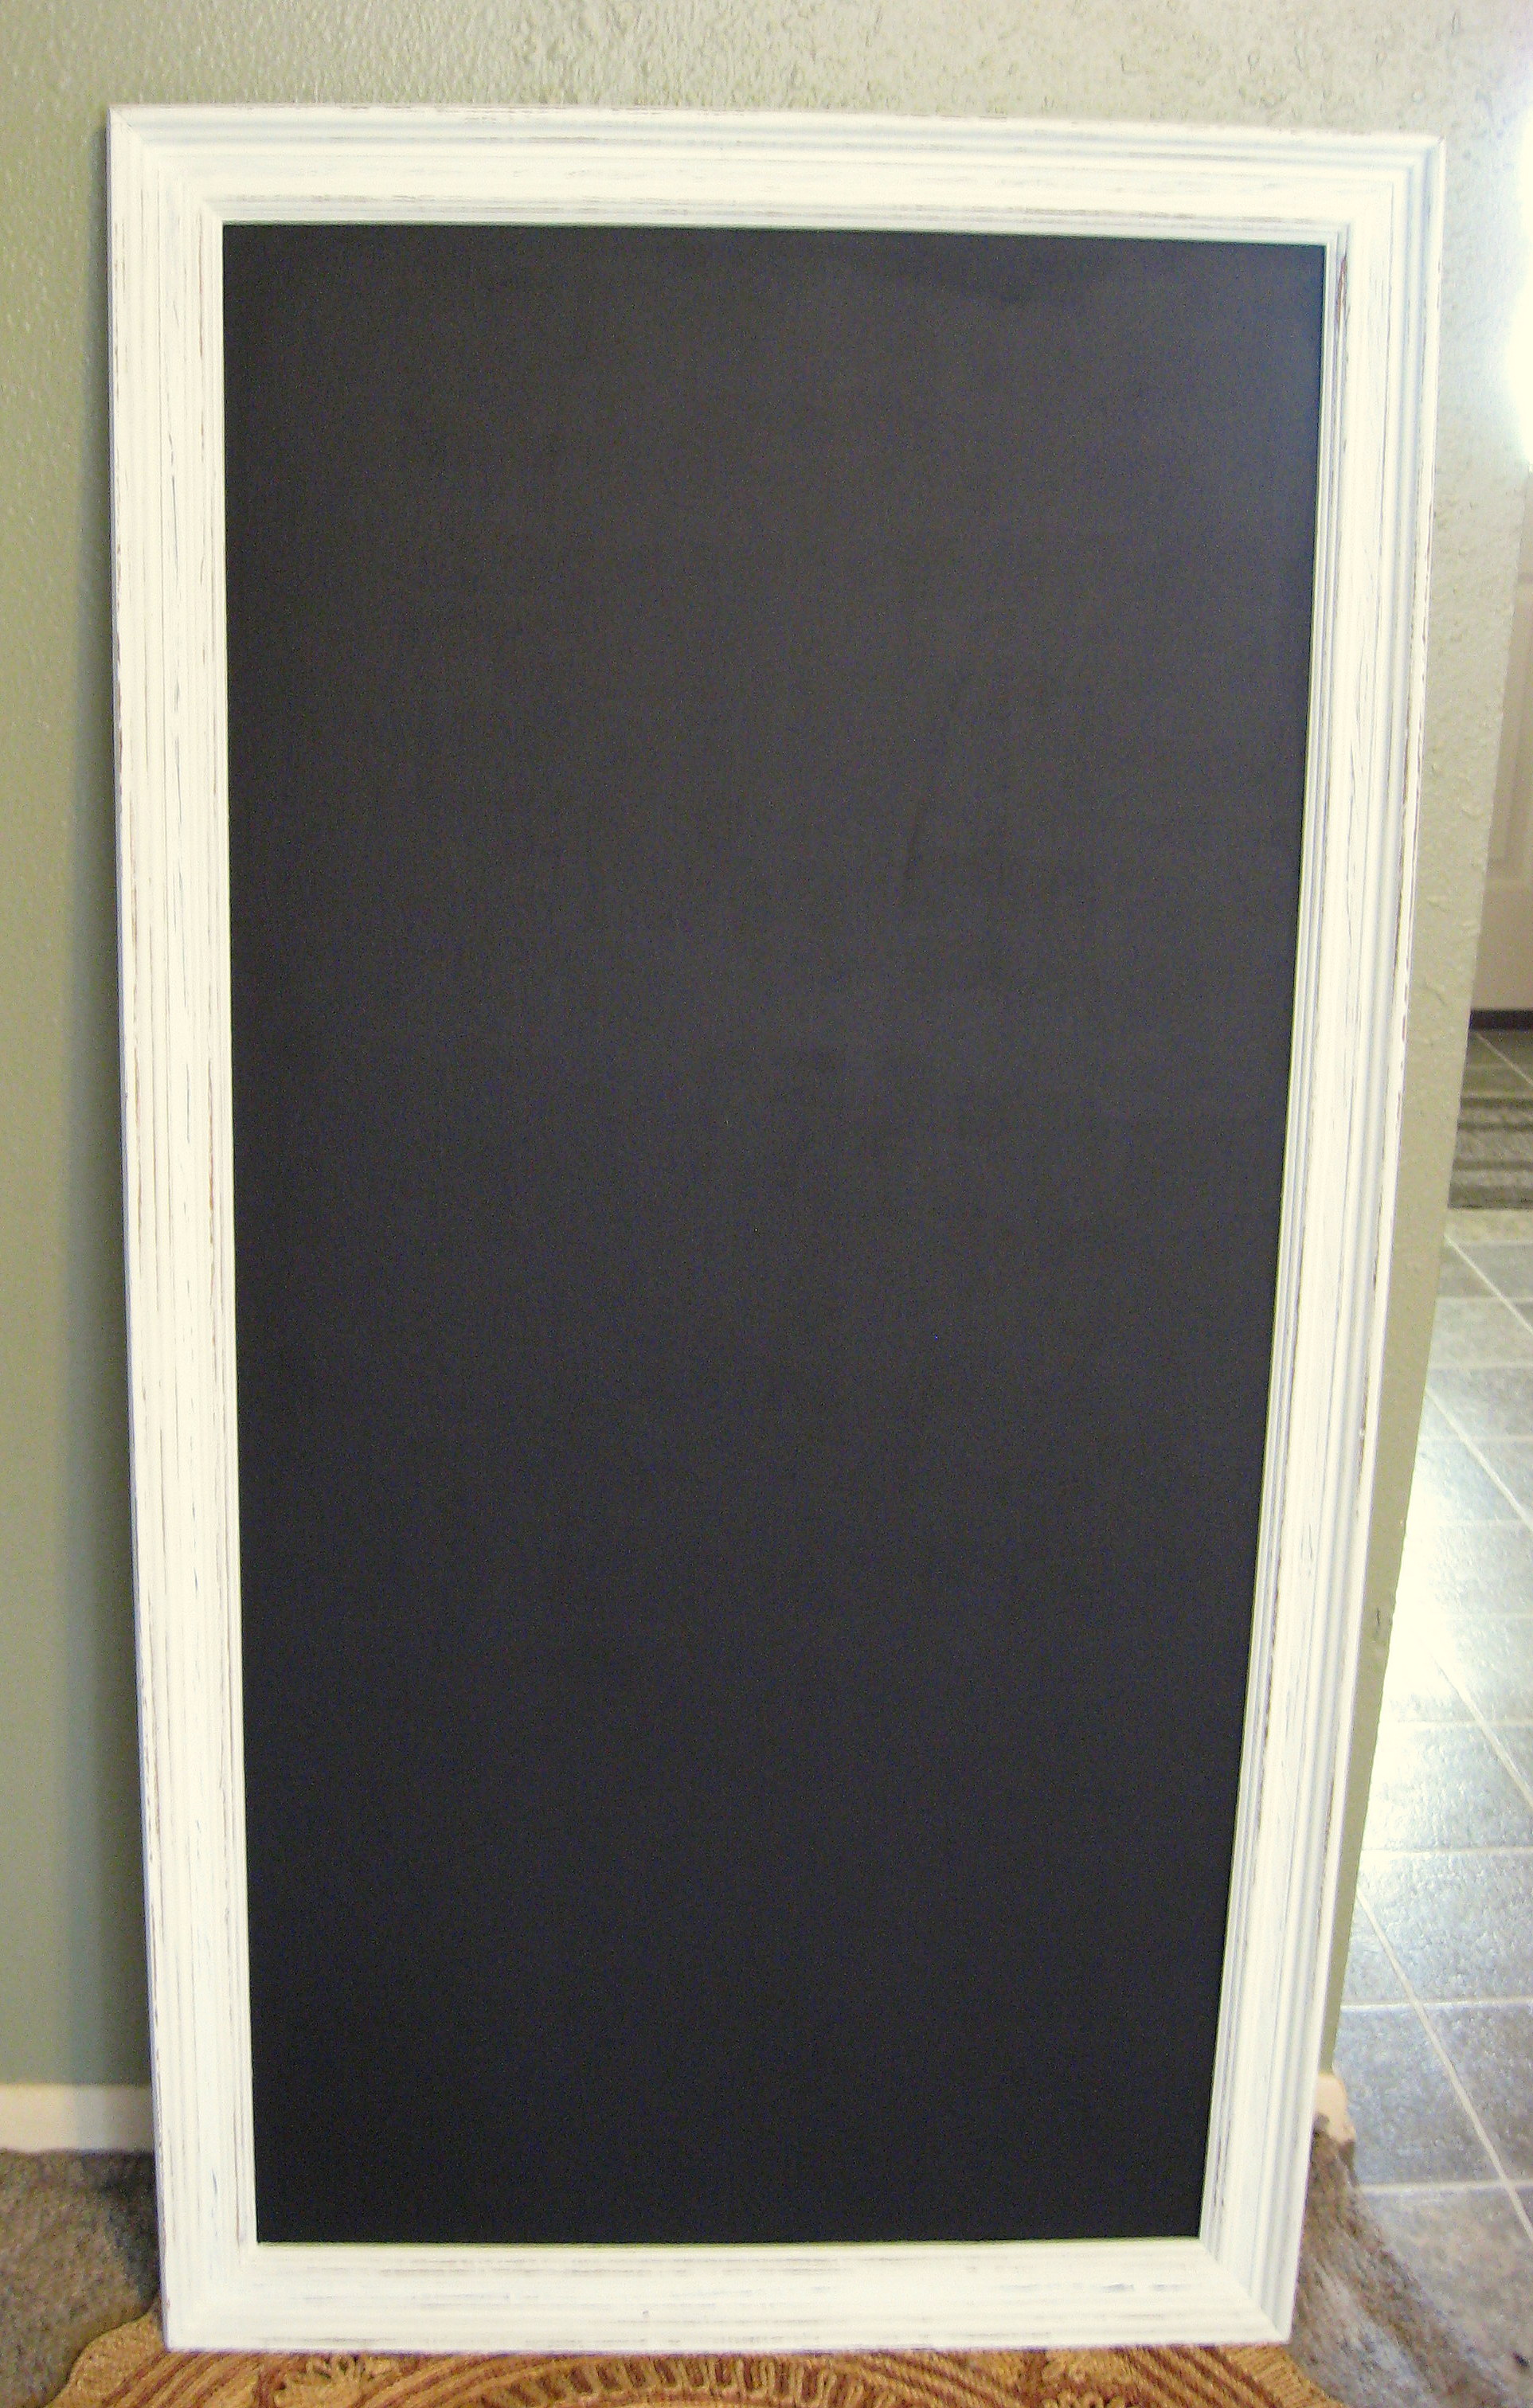
After the magnetic paint is dry, you will want to do the same thing with the chalkboard paint. Do at least 2 thin coats, rolling vertically on one coat and horizontally on the other. I didn’t take pictures of this step because I used black chalkboard paint and you wouldn’t be able to see a difference, but chalkboard paint is available in all kinds of fun colors!
Remove the tape CAREFULLY. Here it is all painted:
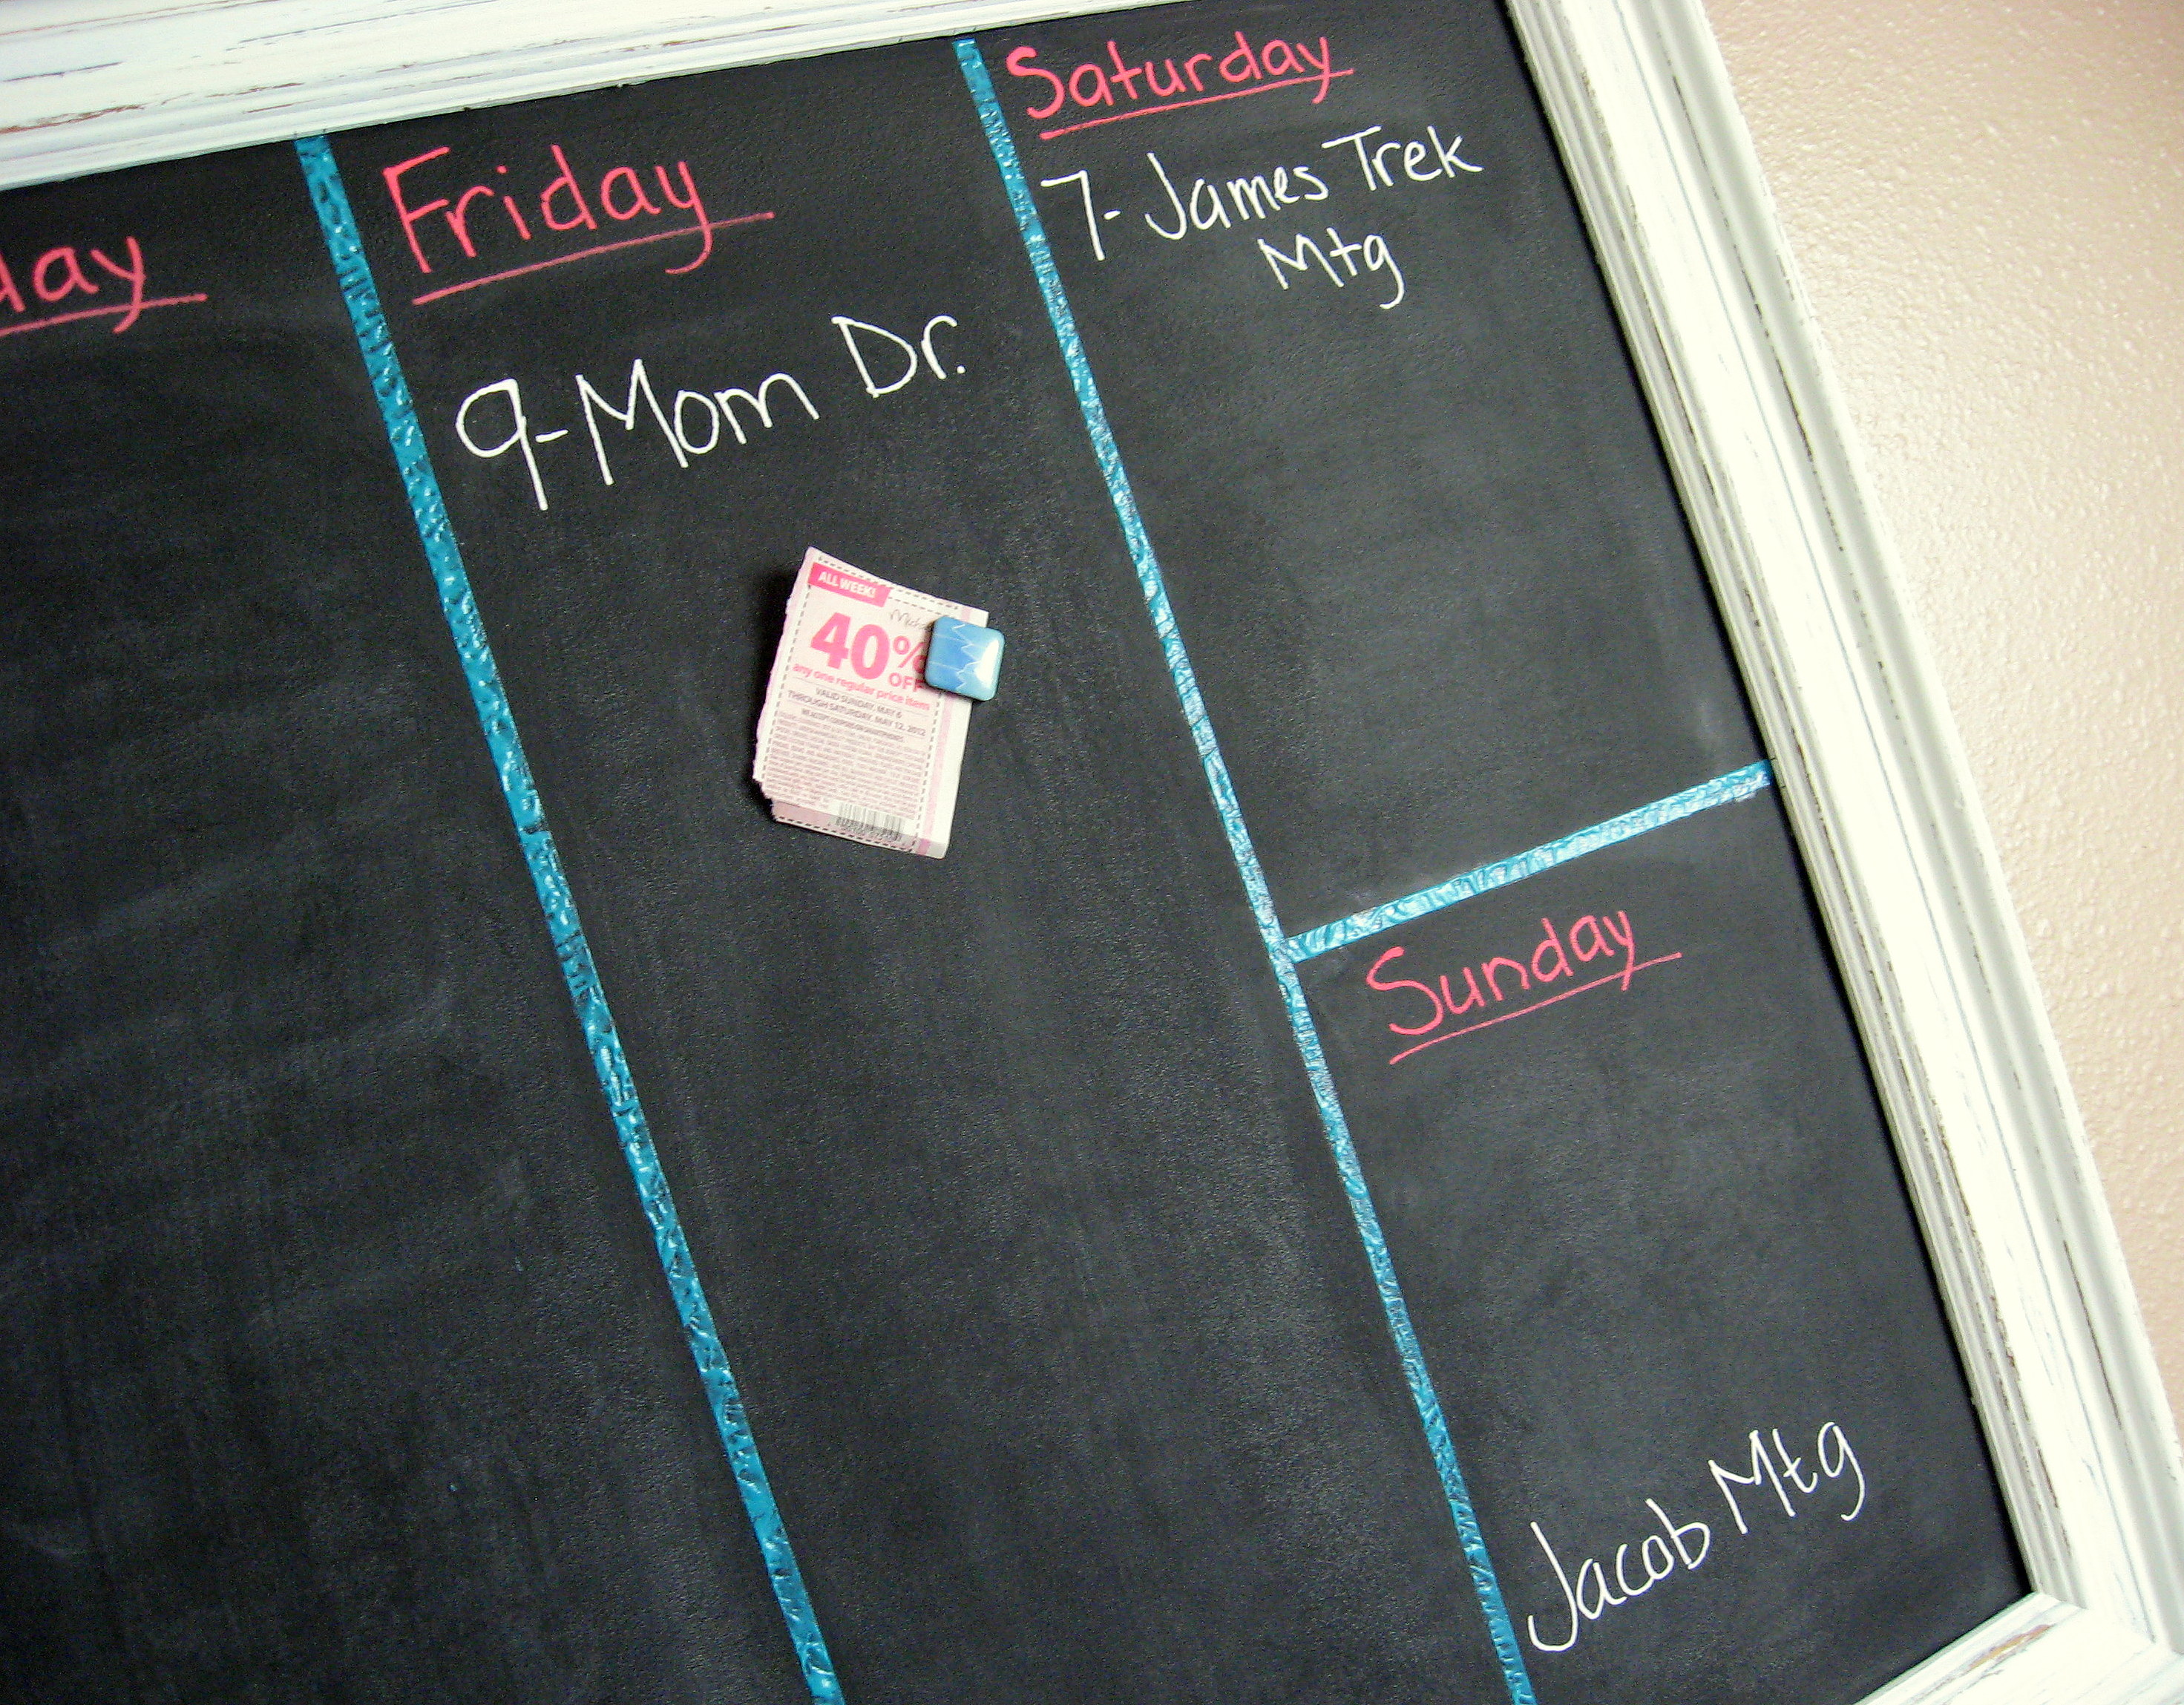
Now let’s turn it in to a calendar. Decide how you want yours to look, and then measure and figure out how big each section will be. For me, I wanted just a week long calendar and instead of 7 sections, I only did 6, with Saturday and Sunday sharing the last section since those days tend to be less scheduled for my family. I decided to make the lines between each section 1/4 inch wide, so I grabbed a measuring tape, a ruler, a piece of scrap paper, a calculator – and then finally my high school son 😉 – and figured out how big each section should be.
I wanted something to separate the sections that would be permanent – no chalk lines that would just be erased. I considered using tape or vinyl. That would work, but I thought the edges would get dirty as the board got erased, so I came up with using slick fabric paint.
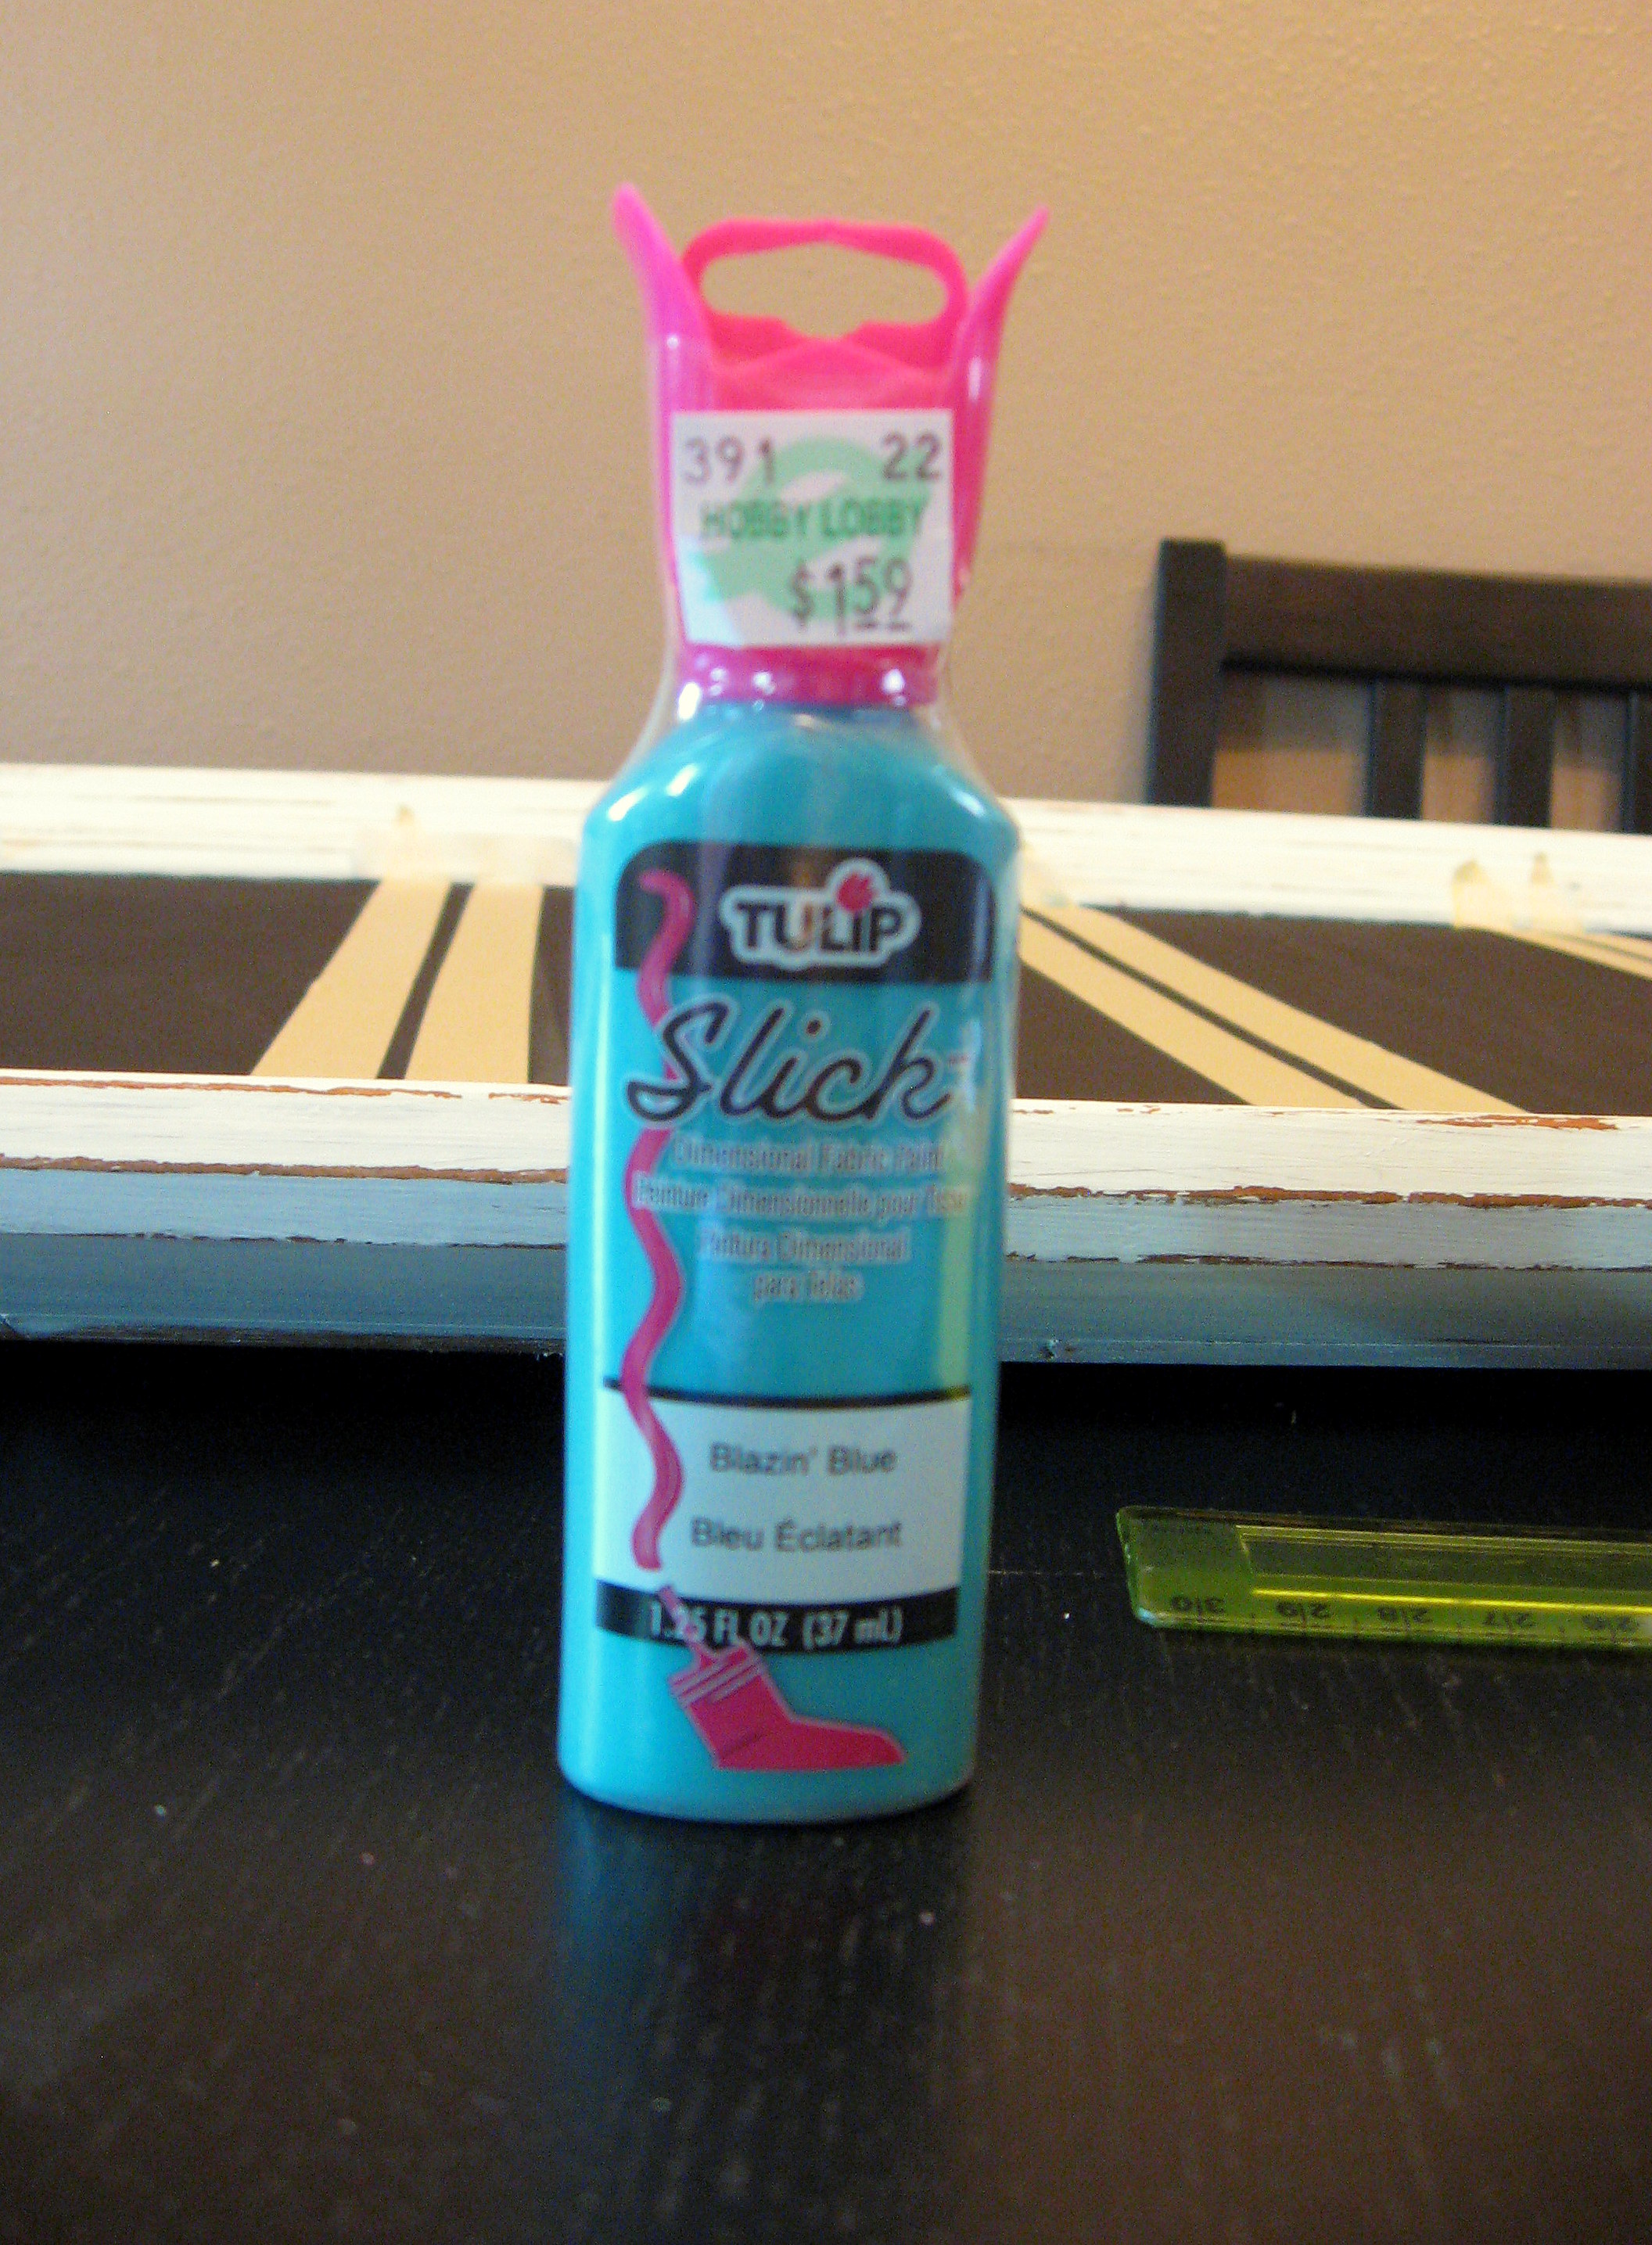
If you get the slick kind, it dries to a glossy, almost hard finish and it is available in dozens of colors, it is inexpensive, readily available and easy to work with.
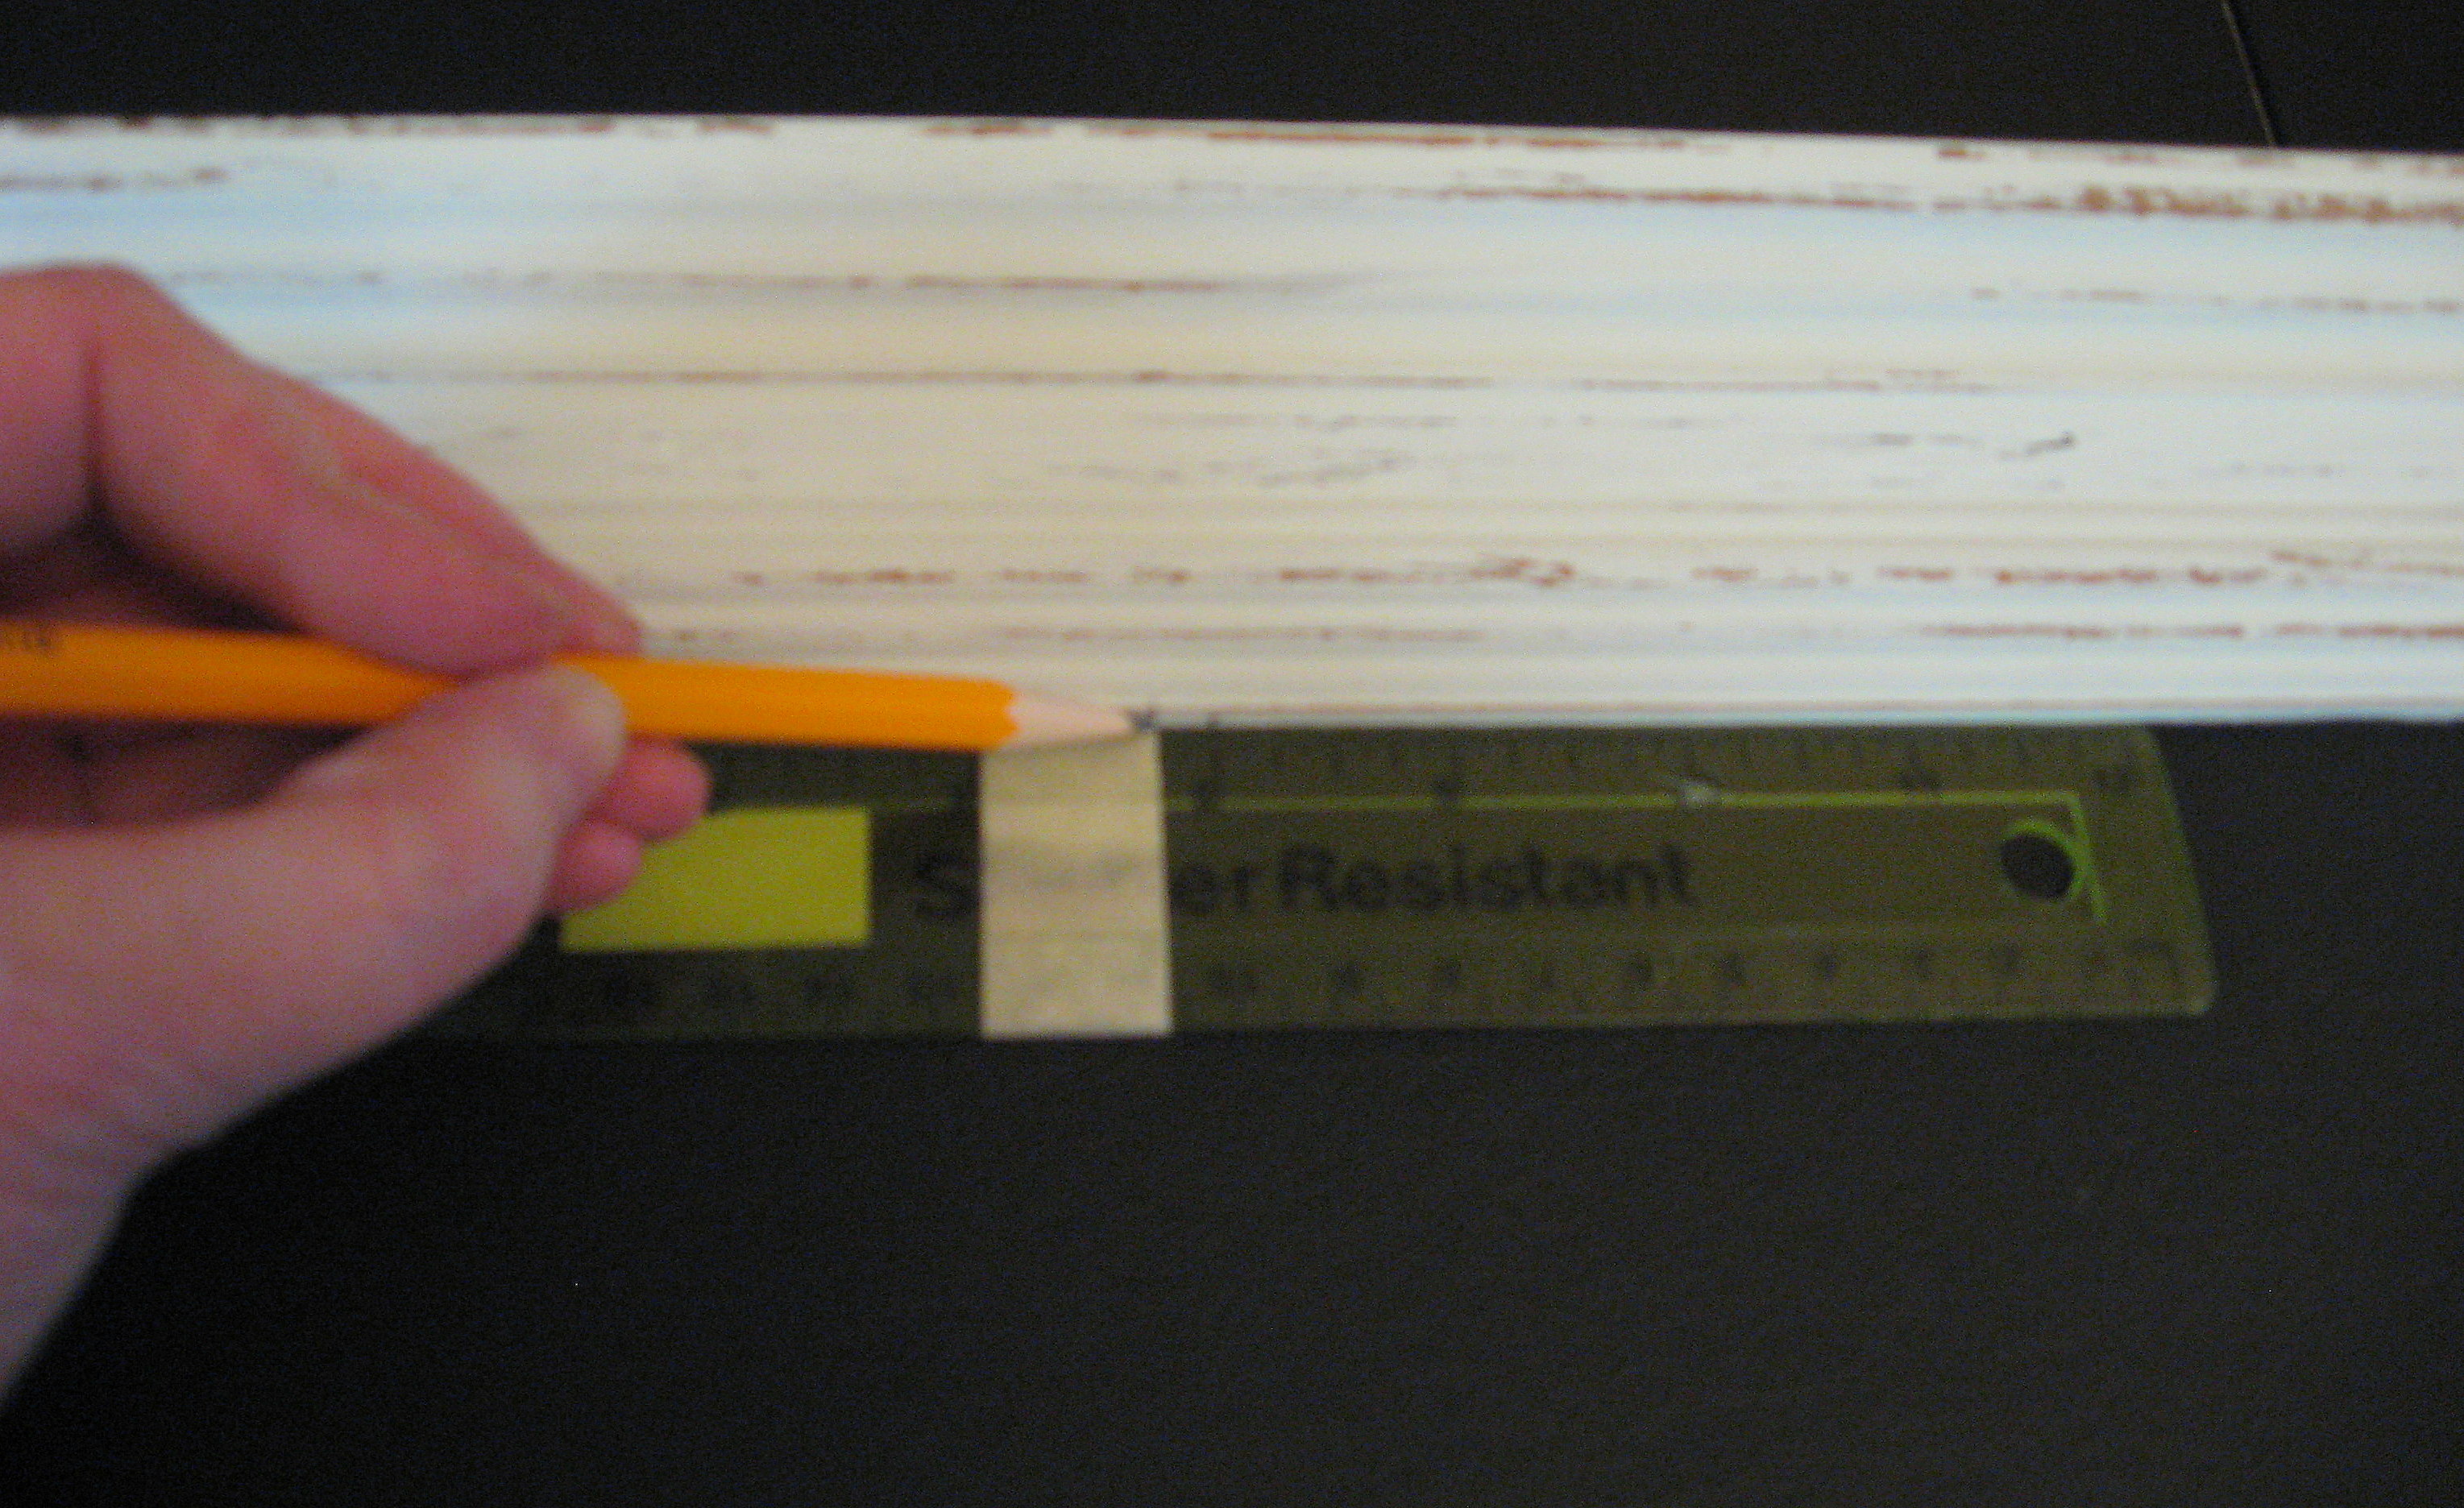
In order to make the lines of paint straight, you will tape off a line to paint in. Make small marks on the inside edge of the frame with a pencil. I made two marks to indicate where the 1/4-inch thick line will be. Measure and mark on both sides of the frame, all the way across.
Then connect the dots with tape; press the edges of the tape down well so you don’t get bleeding under the tape.
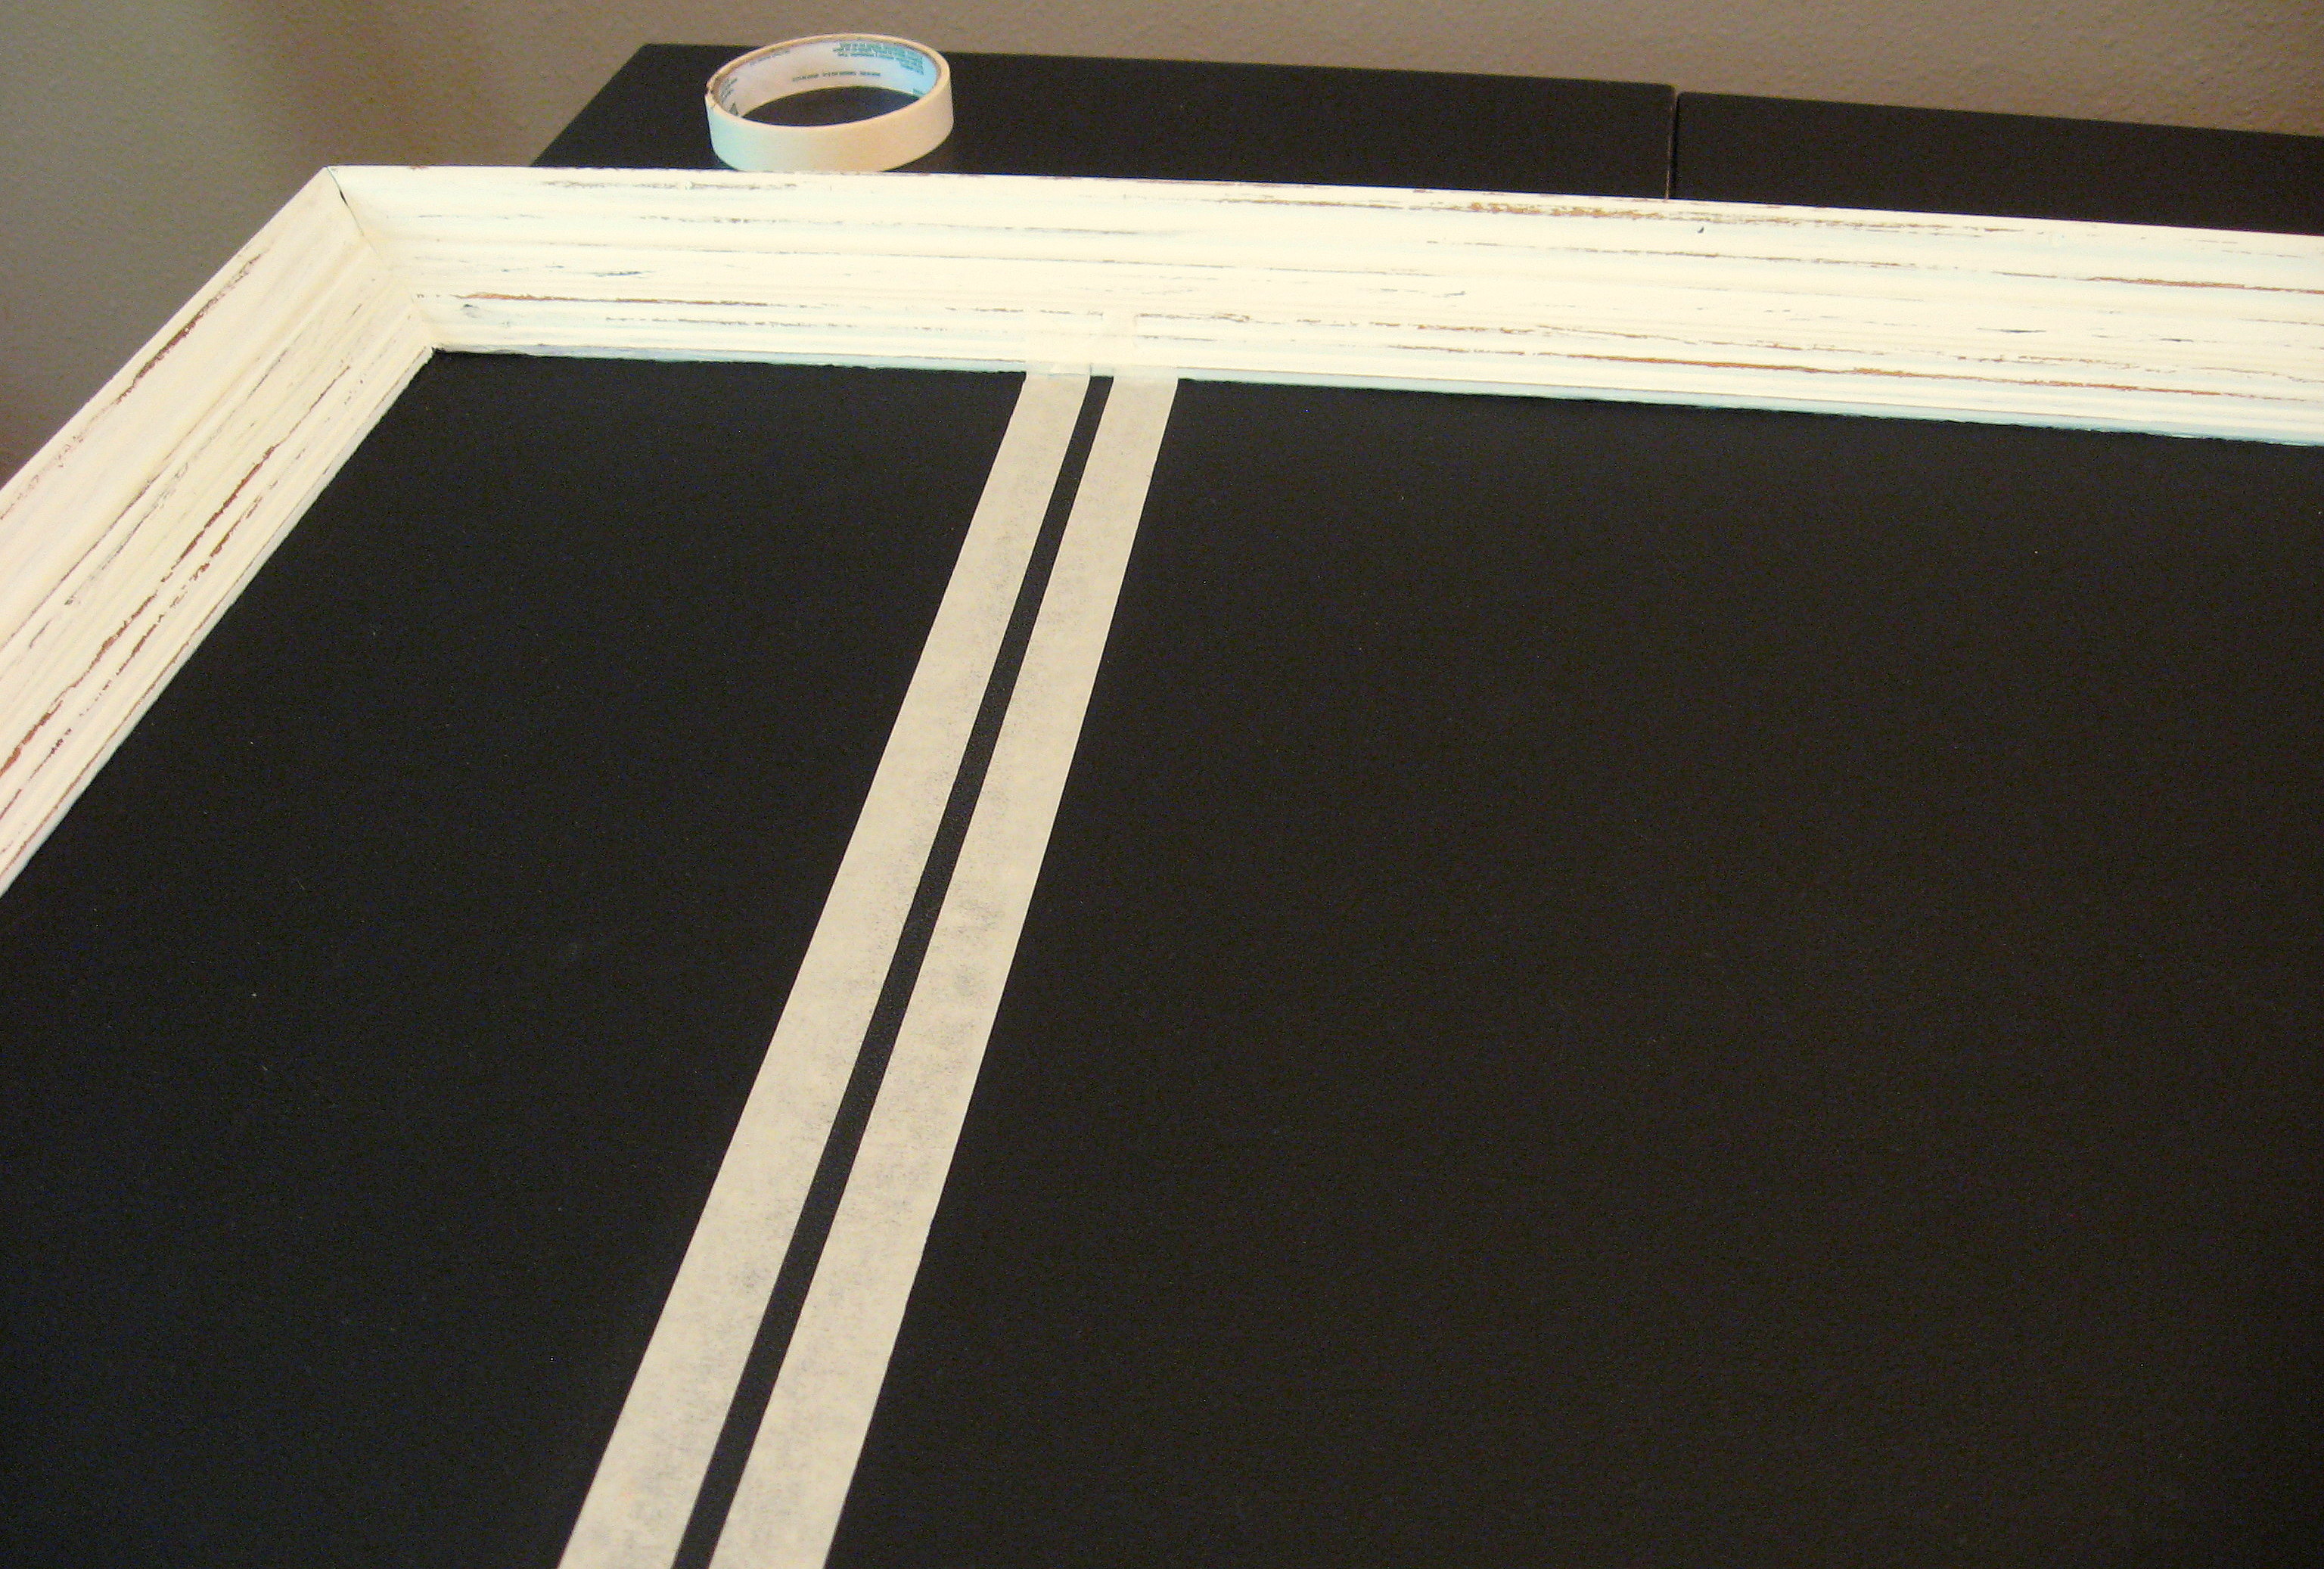
Here it is with all the sections taped off:

Squeeze the paint out in a line inside the tape
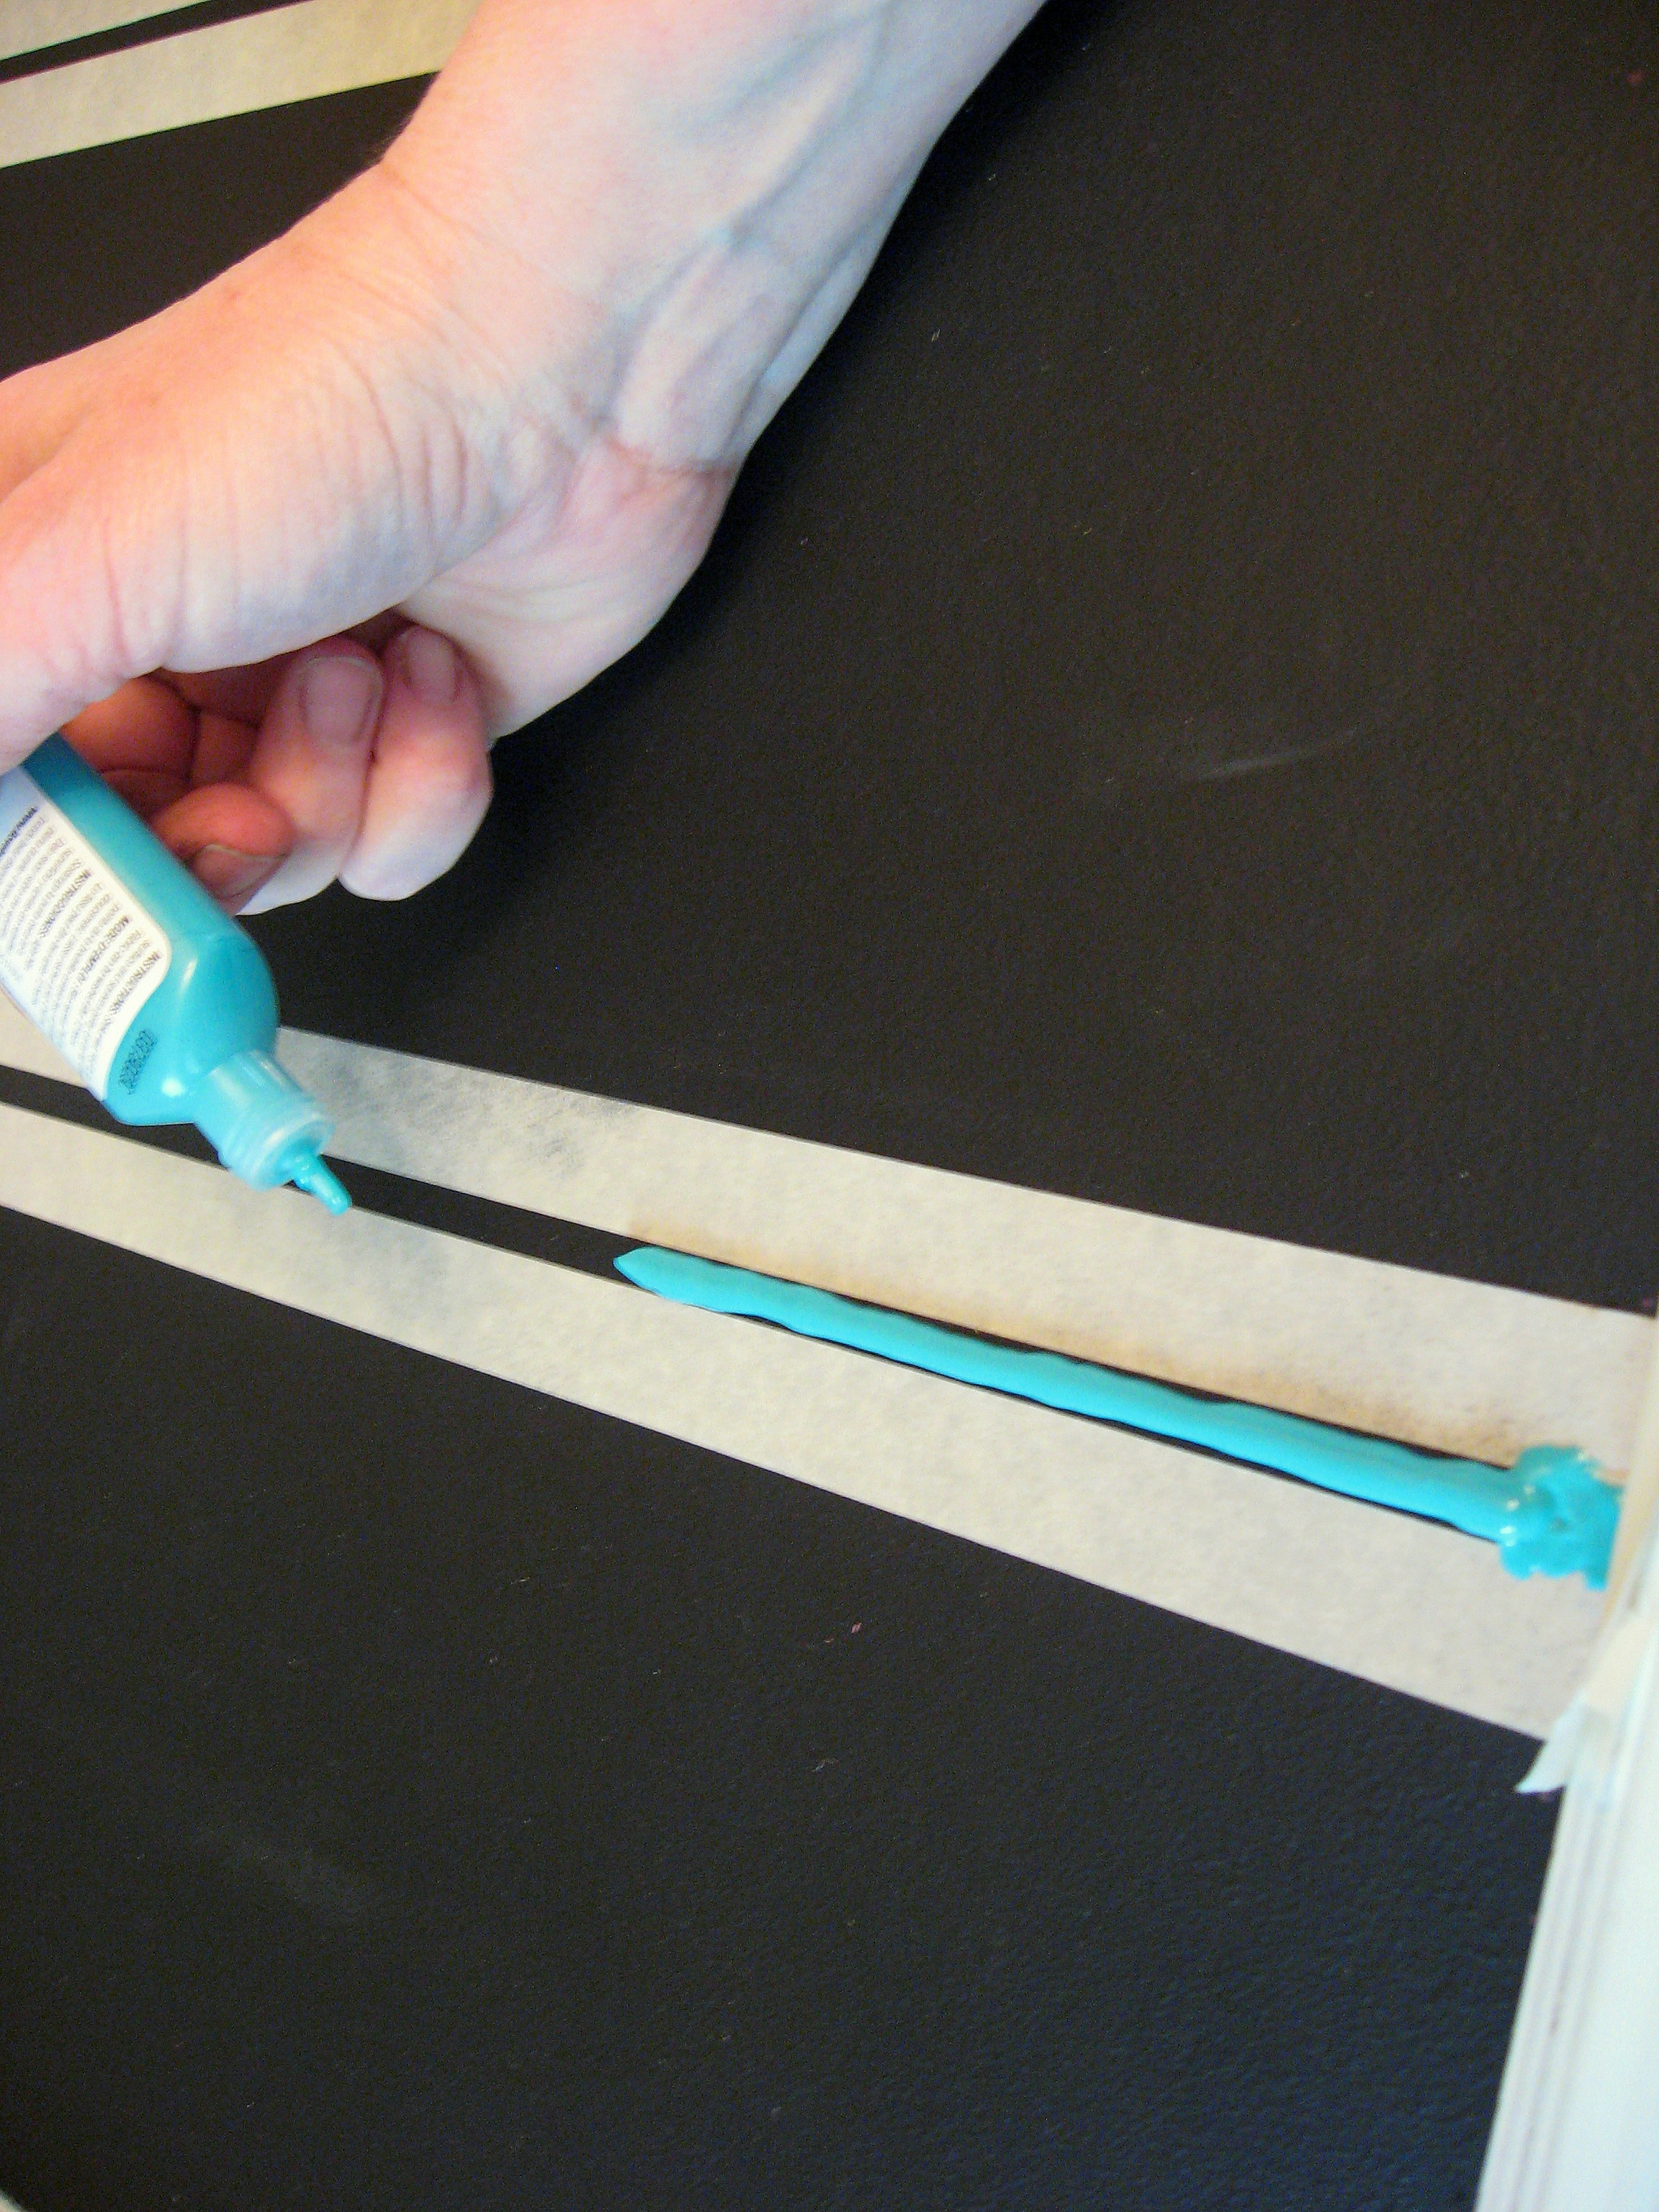
Then just kind of smoosh it flat with a paintbrush.
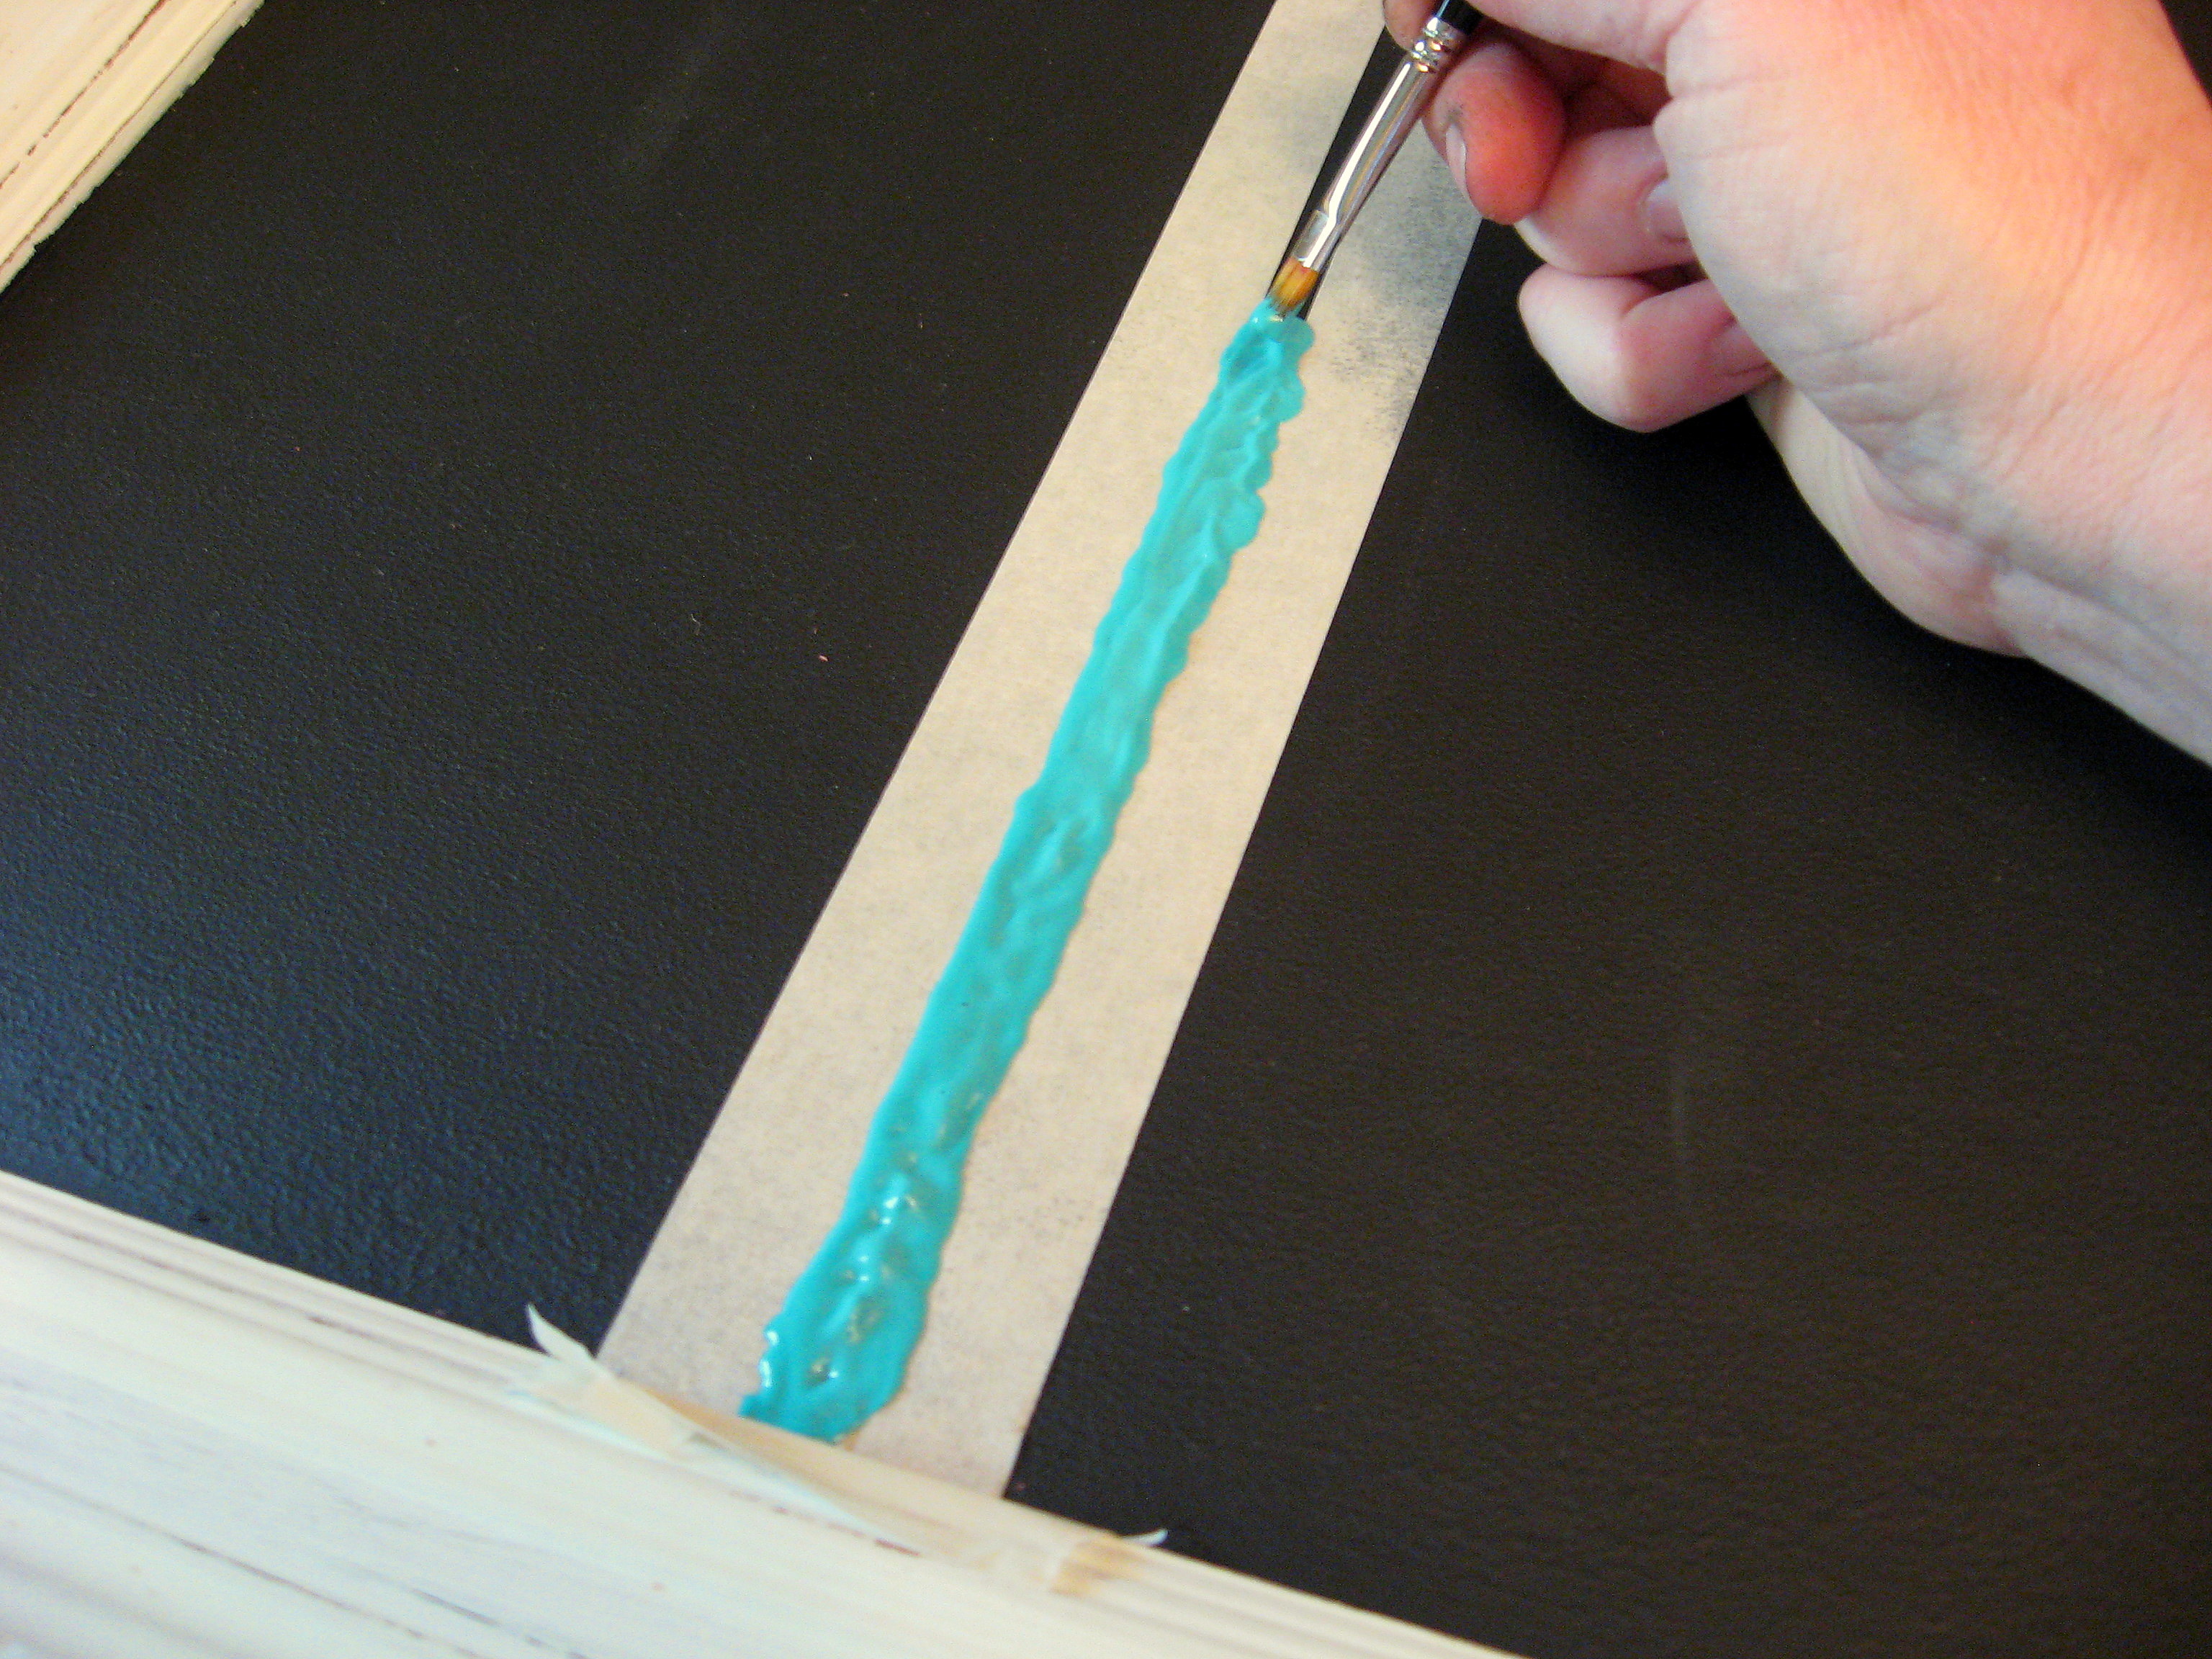
I liked the way it looked textury and bumpy, but if you wanted it to be smooth, you could do it that way too; it will probably take a second coat, though.
Here is is all finished:
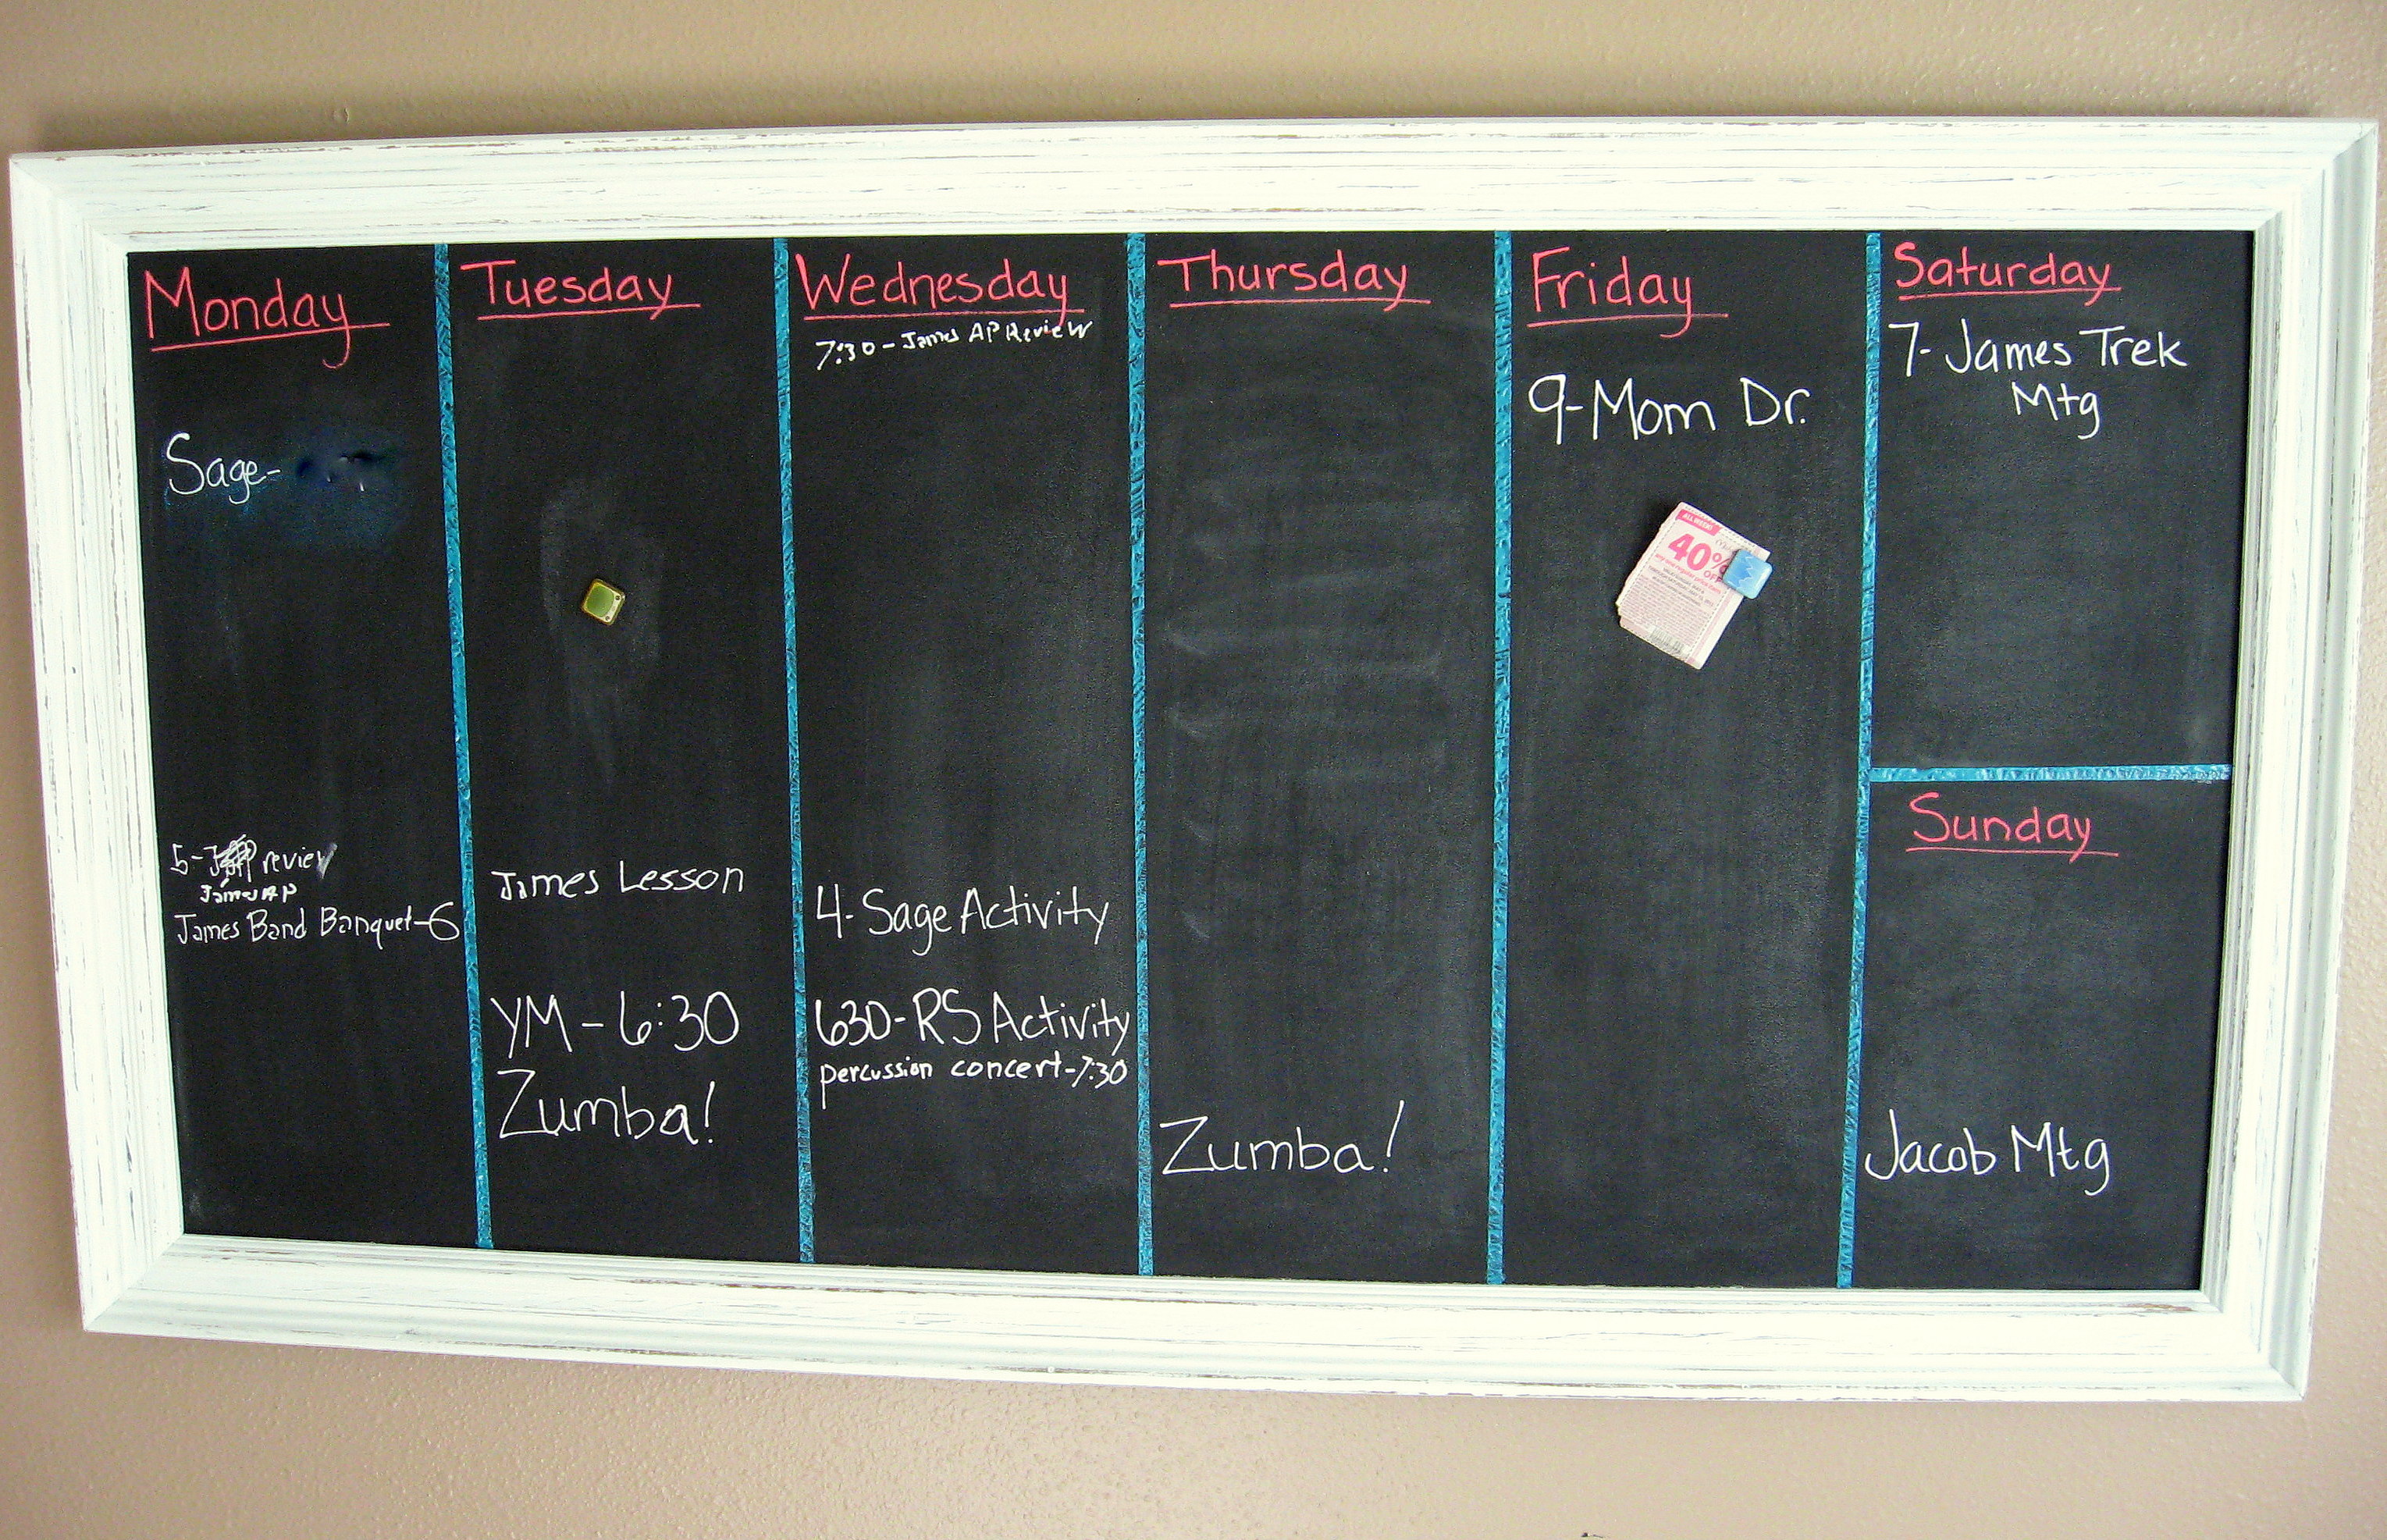
And a close up:

It works just fine with regular chalk, but I like the chalk markers (also called Bistro markers). They write brighter and tighter more like a marker, and they aren’t dusty, like regular chalk. They don’t erase with a regular eraser – you have to clean it off with a damp cloth – and they are a little more expensive, but for me it was worth it. I found them at Hobby Lobby, so be sure to use a 40% coupon!
Here is a final close up showing a magnet:
A PYP Best Blog! Shopping List Dry Erase Board!
Just in case you missed this article on creating a DIY shopping list dry erase board the first time we shared it a couple of years ago, we are republishing it. After Sharon wrote this blog originally, we got an awesome response. This is one of the PYP Best Blogs!
“Next time you’re going to Wal Mart, could you pick me up a notebook?”
“Next time I’m at the store, I have to remember we need baking soda.”
“When are you going to Lowe’s? I need some sandpaper.”
“I need new socks!”
There’s no way I can remember all the shopping requests that get hurled my way every week, and having them written down usually results in the bottom of my purse being littered with enough Post It notes and scraps of paper to ensure that something was always being missed. What I needed was a master shopping list all in one place. For my family, the refrigerator door is the best place, and it is so effective that it only took a week or two to have everyone trained to write their needs on the list on the dry erase board.
“Did you get my socks?”
“Did you write it on the list?”
Problem solved.
I started with a frame from the thrift store that was the right size to fit my freezer door. It needs to have glass or plastic in it to act as a dry erase board. I waited to find one that had plastic in it so it wouldn’t be so heavy. Just make sure it isn’t scratched up.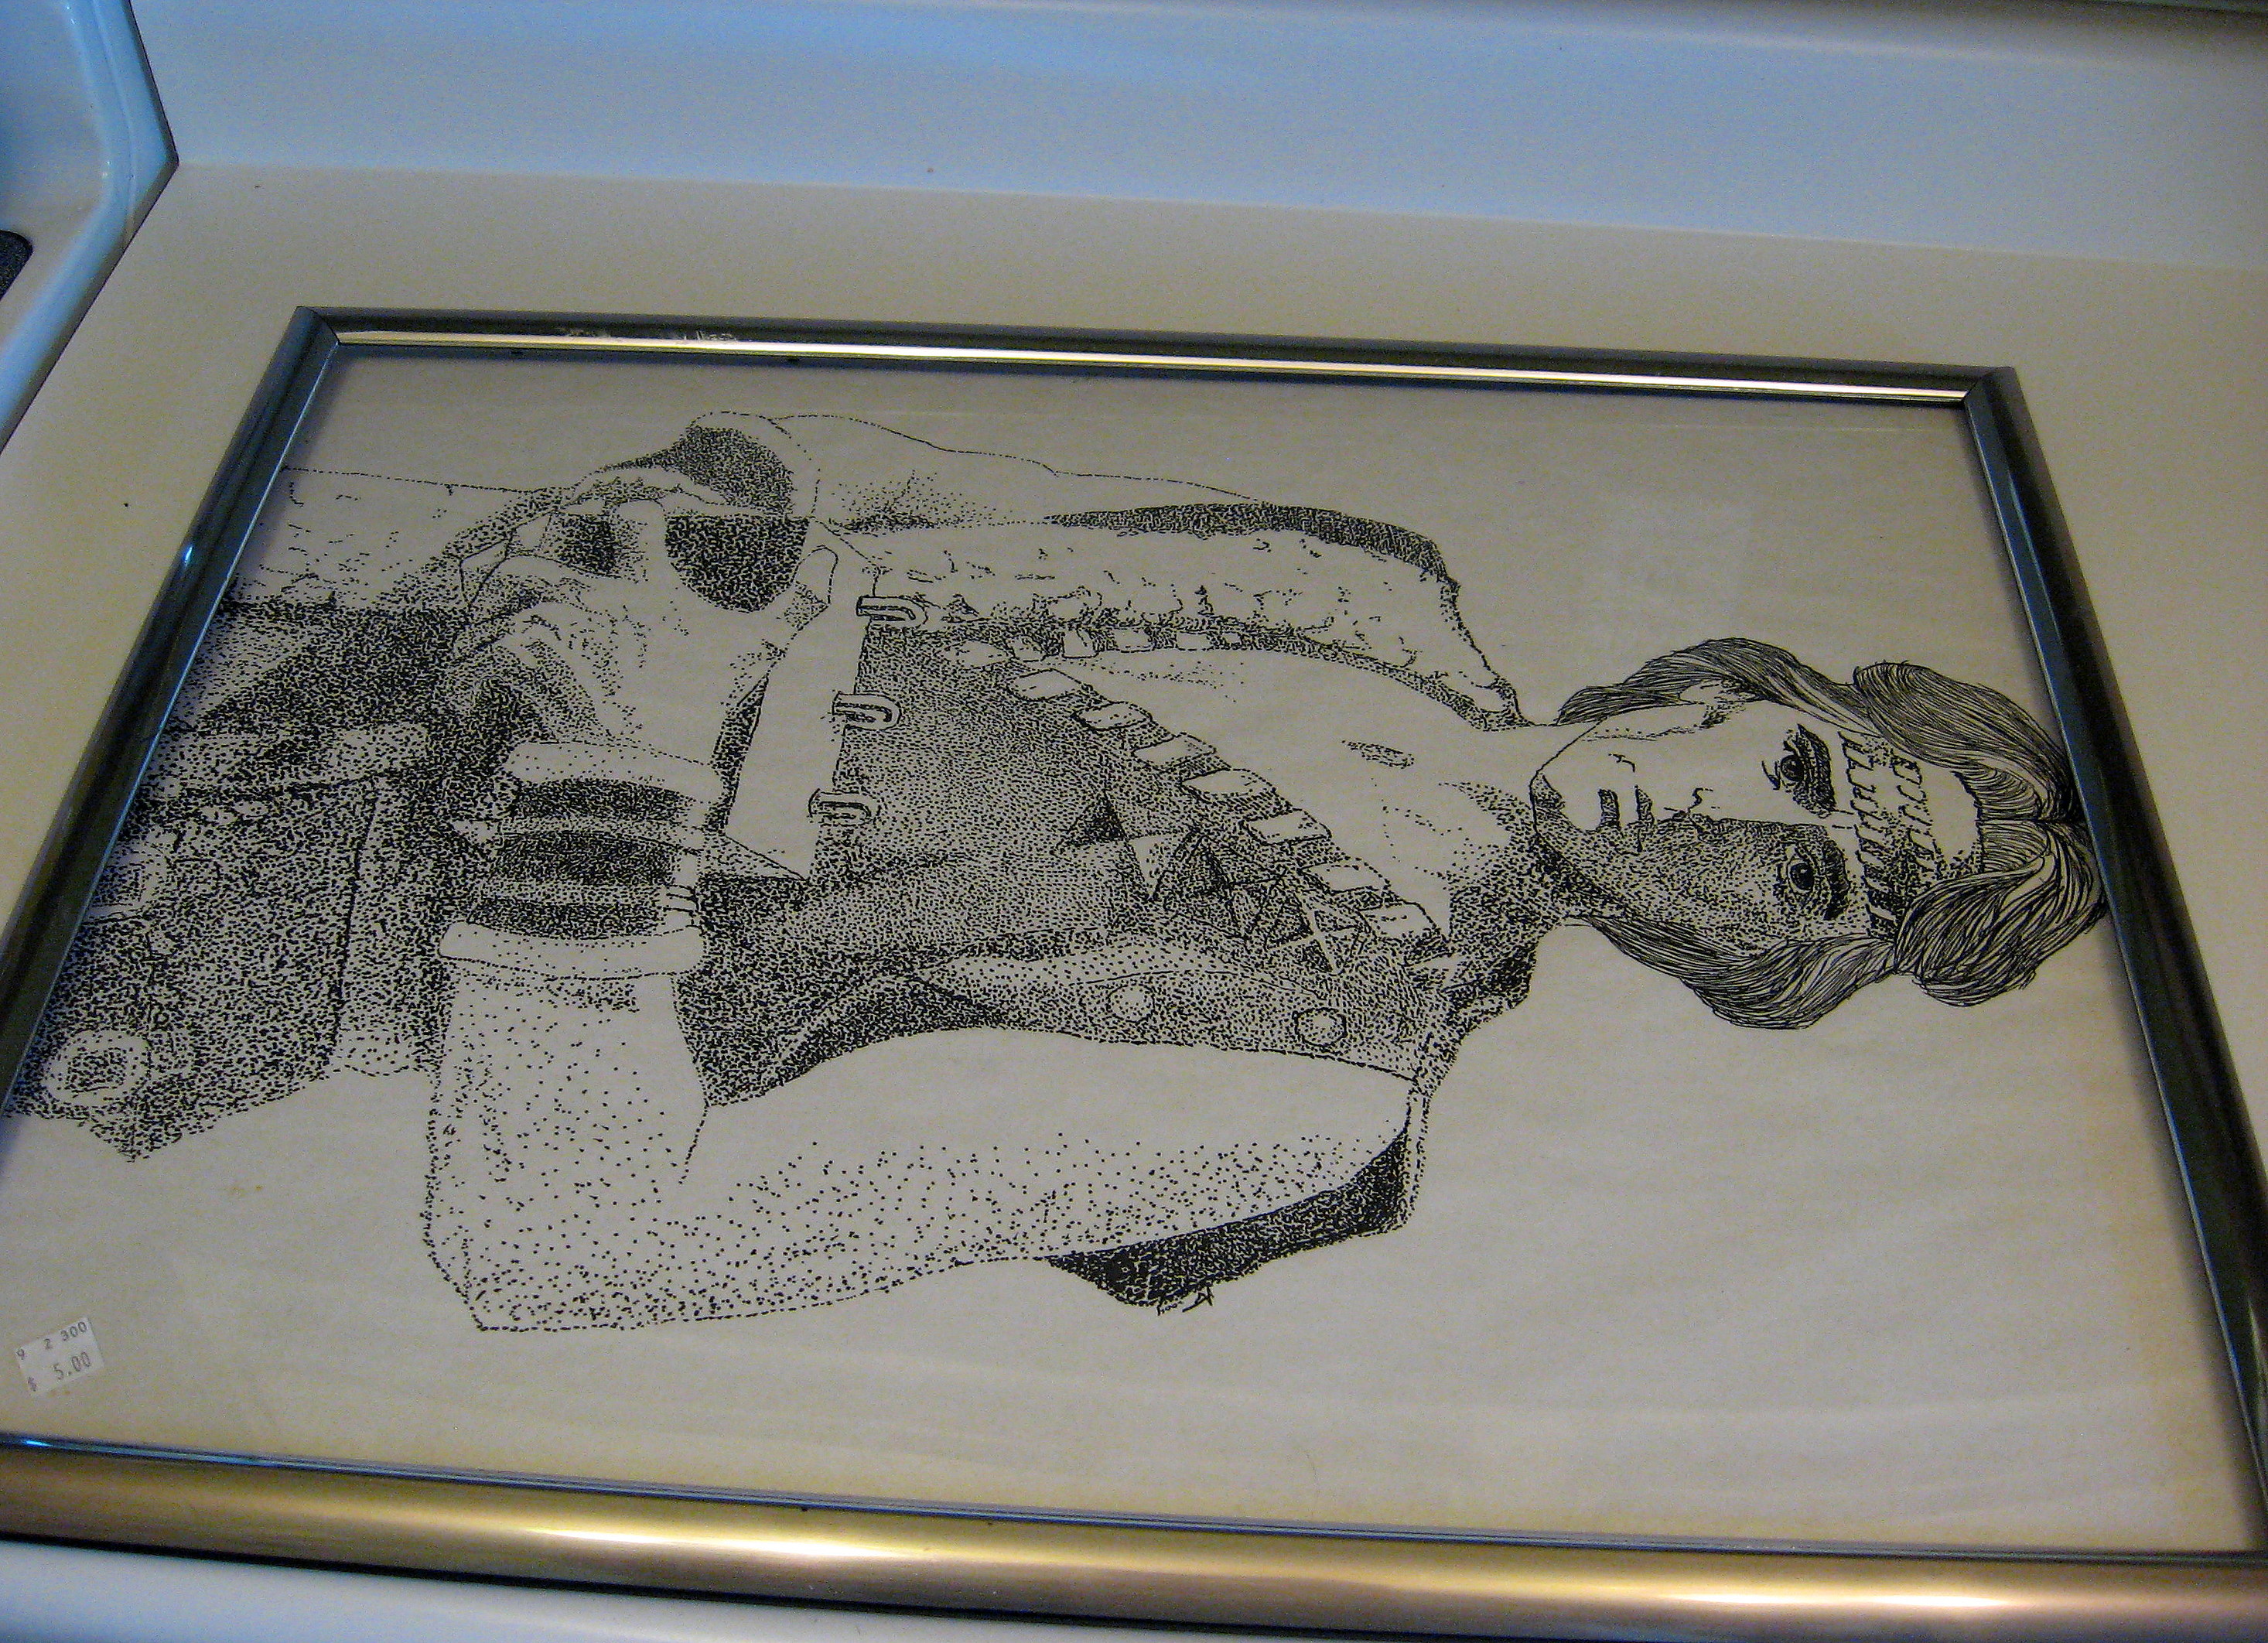
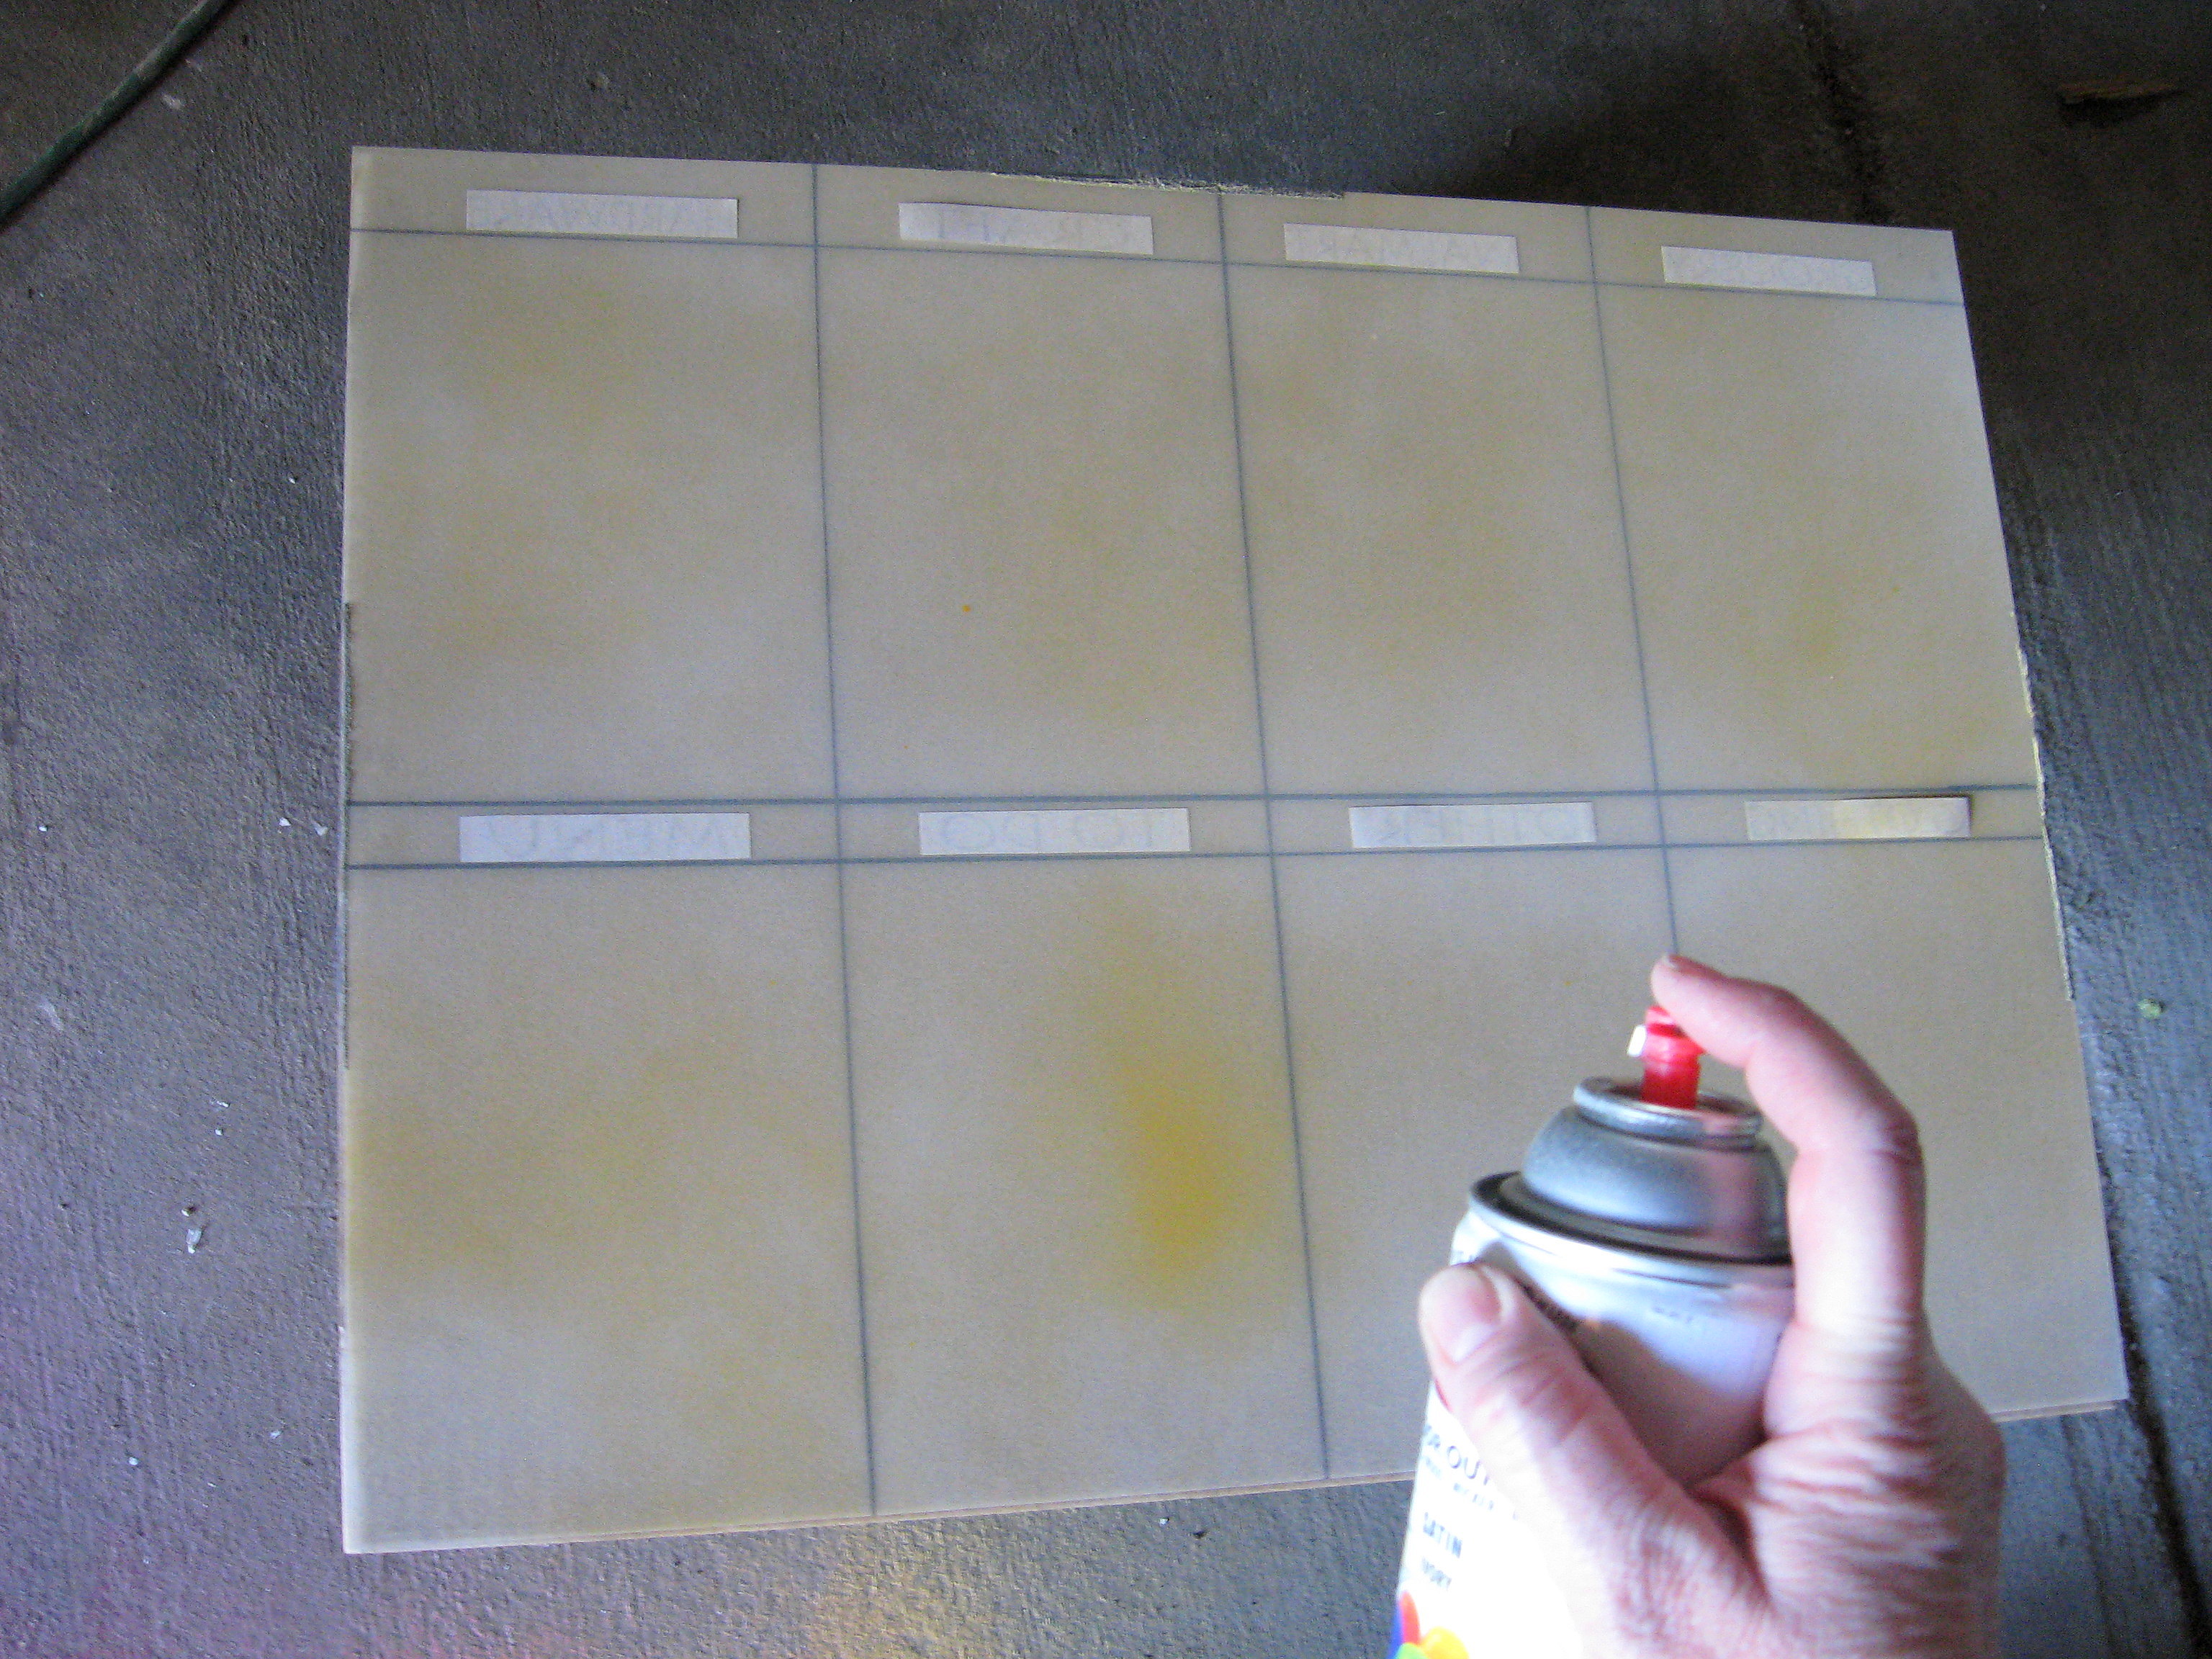
Take the back and the glass out (I will continue to say “glass” here even though mine is plastic. You know what I mean!) If the artwork in it is in good shape, be sure to donate it back to the store; someone obviously worked hard on this one! Paint the frame if you like; I spray painted mine orange. If yours is a plastic frame like mine was, I recommend a high quality spray paint made for plastic, like Krylon Fusion.
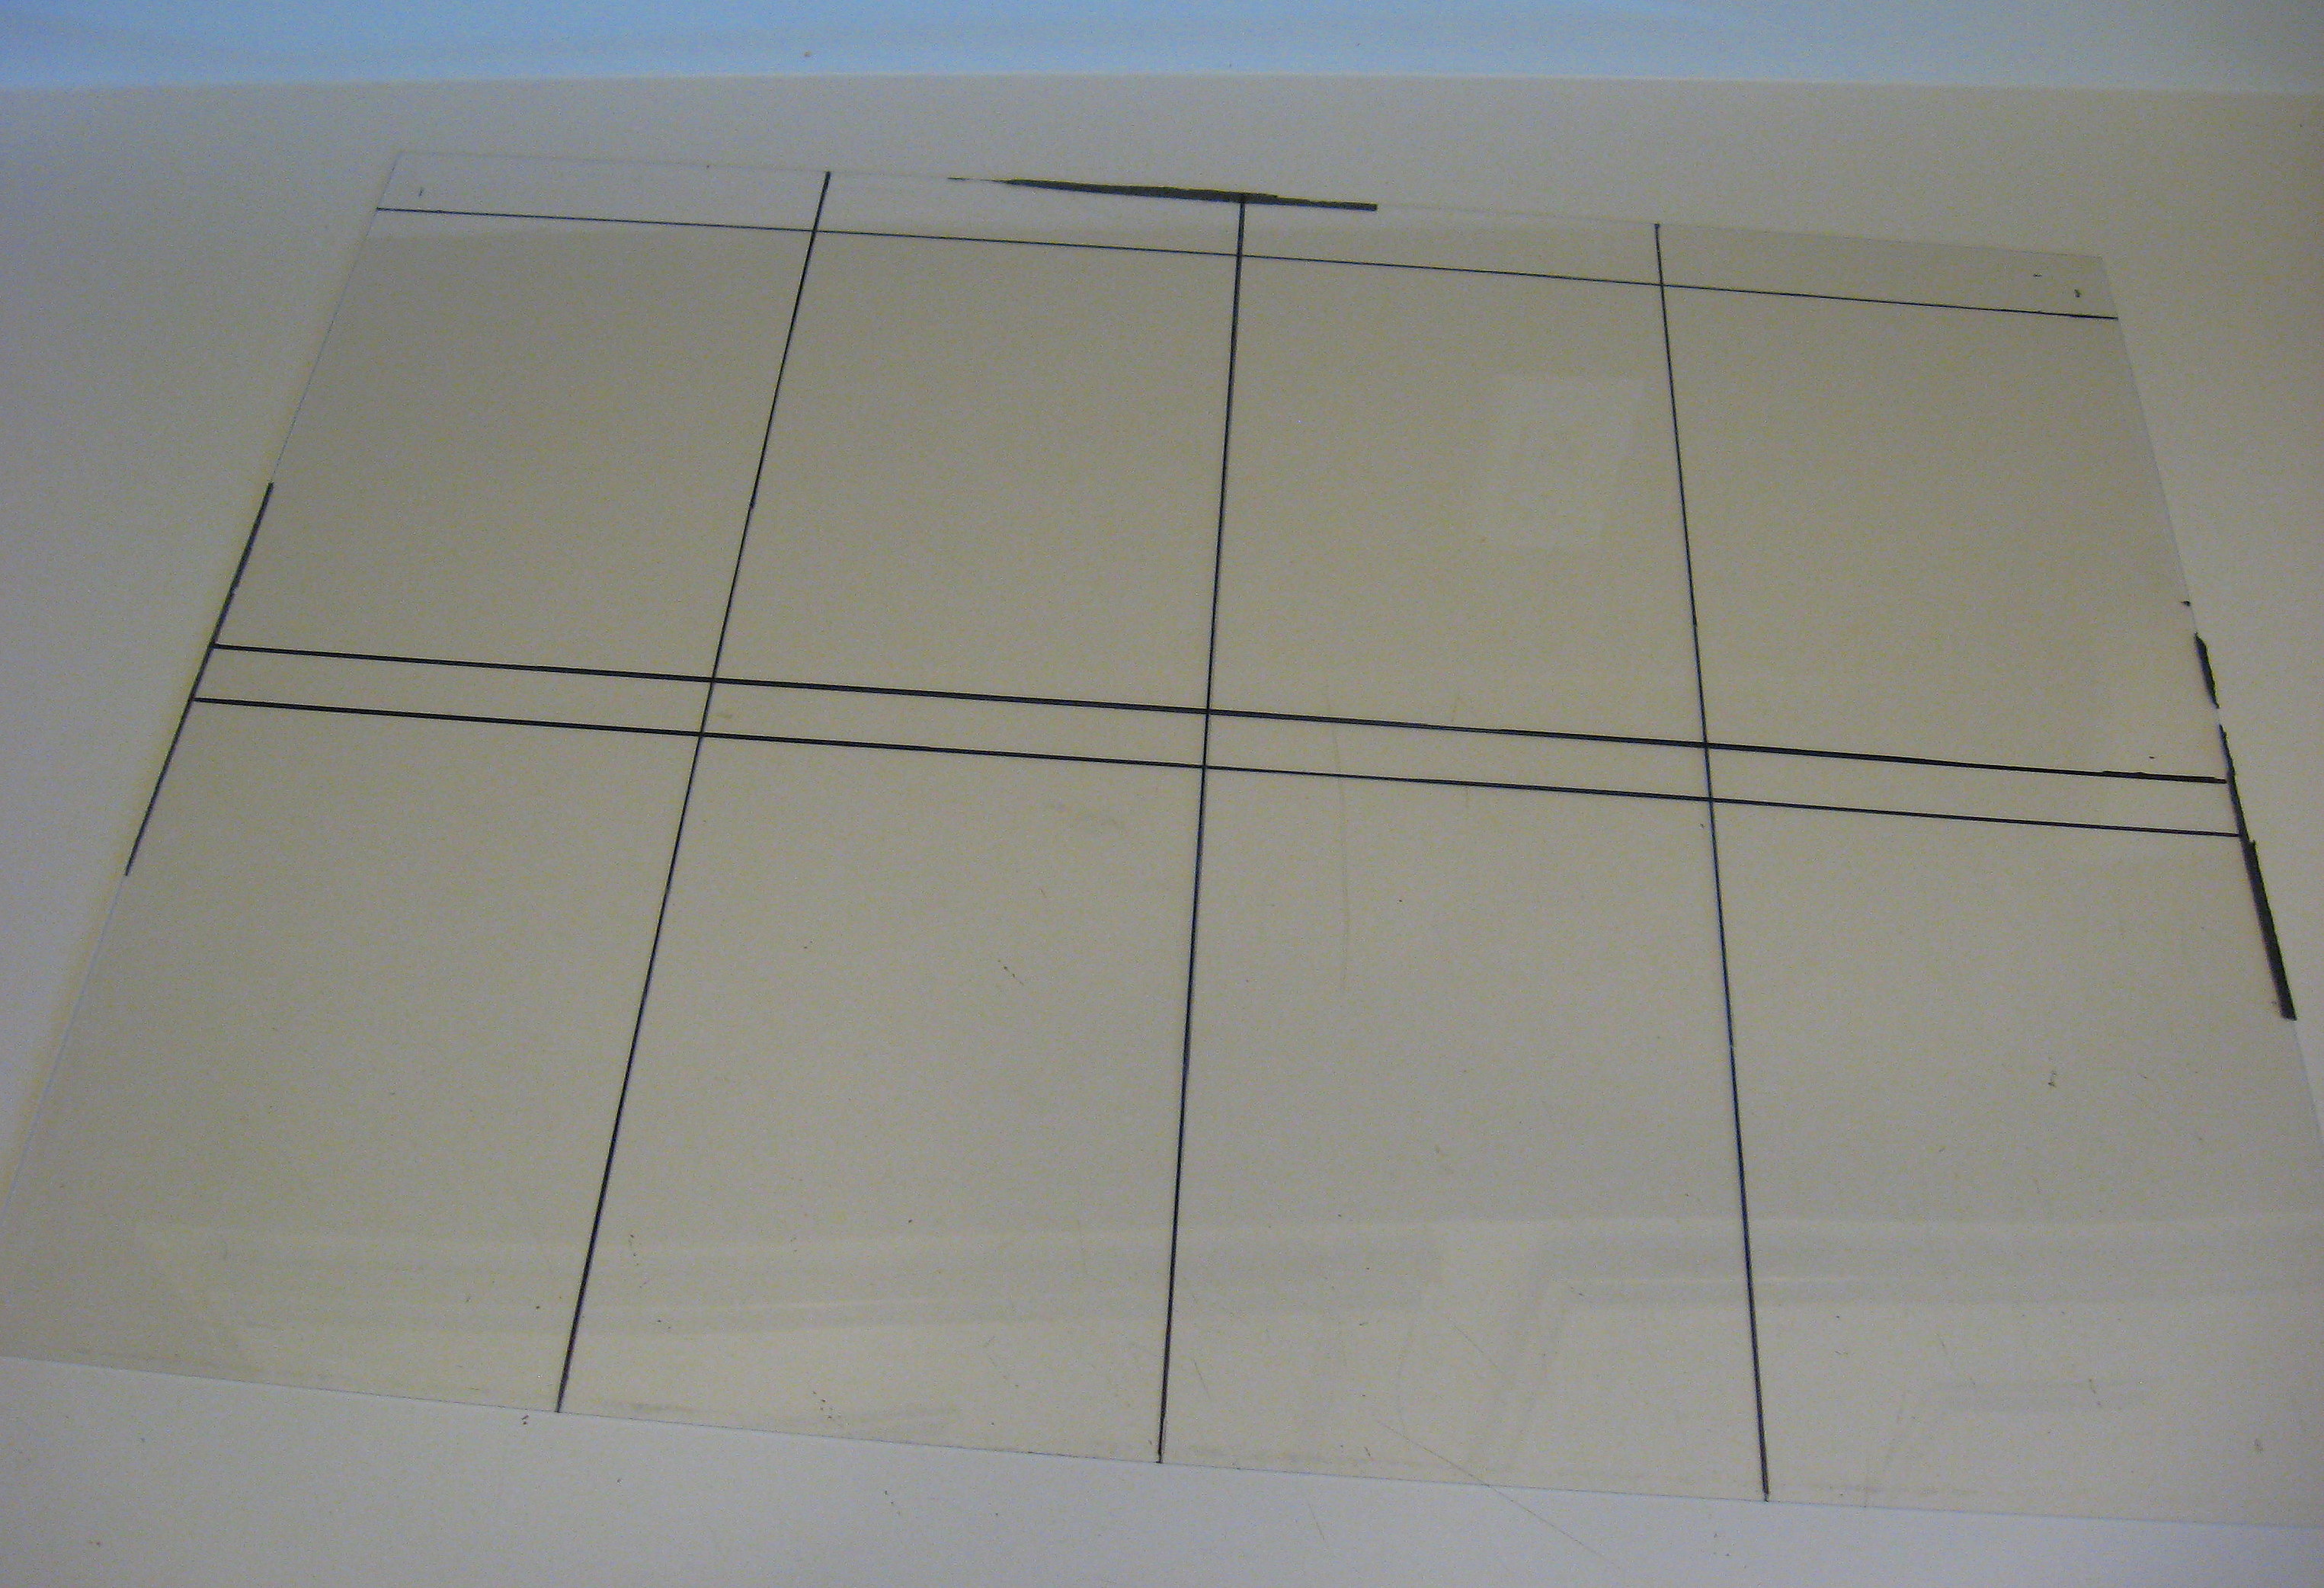
Decide how many different sections you want on your dry erase board, measure them out and use a straight edge and a Sharpie to draw the lines on the back side of the glass. I made 8 sections on my dry erase board, with an inch wide section at the top of each for the category title.
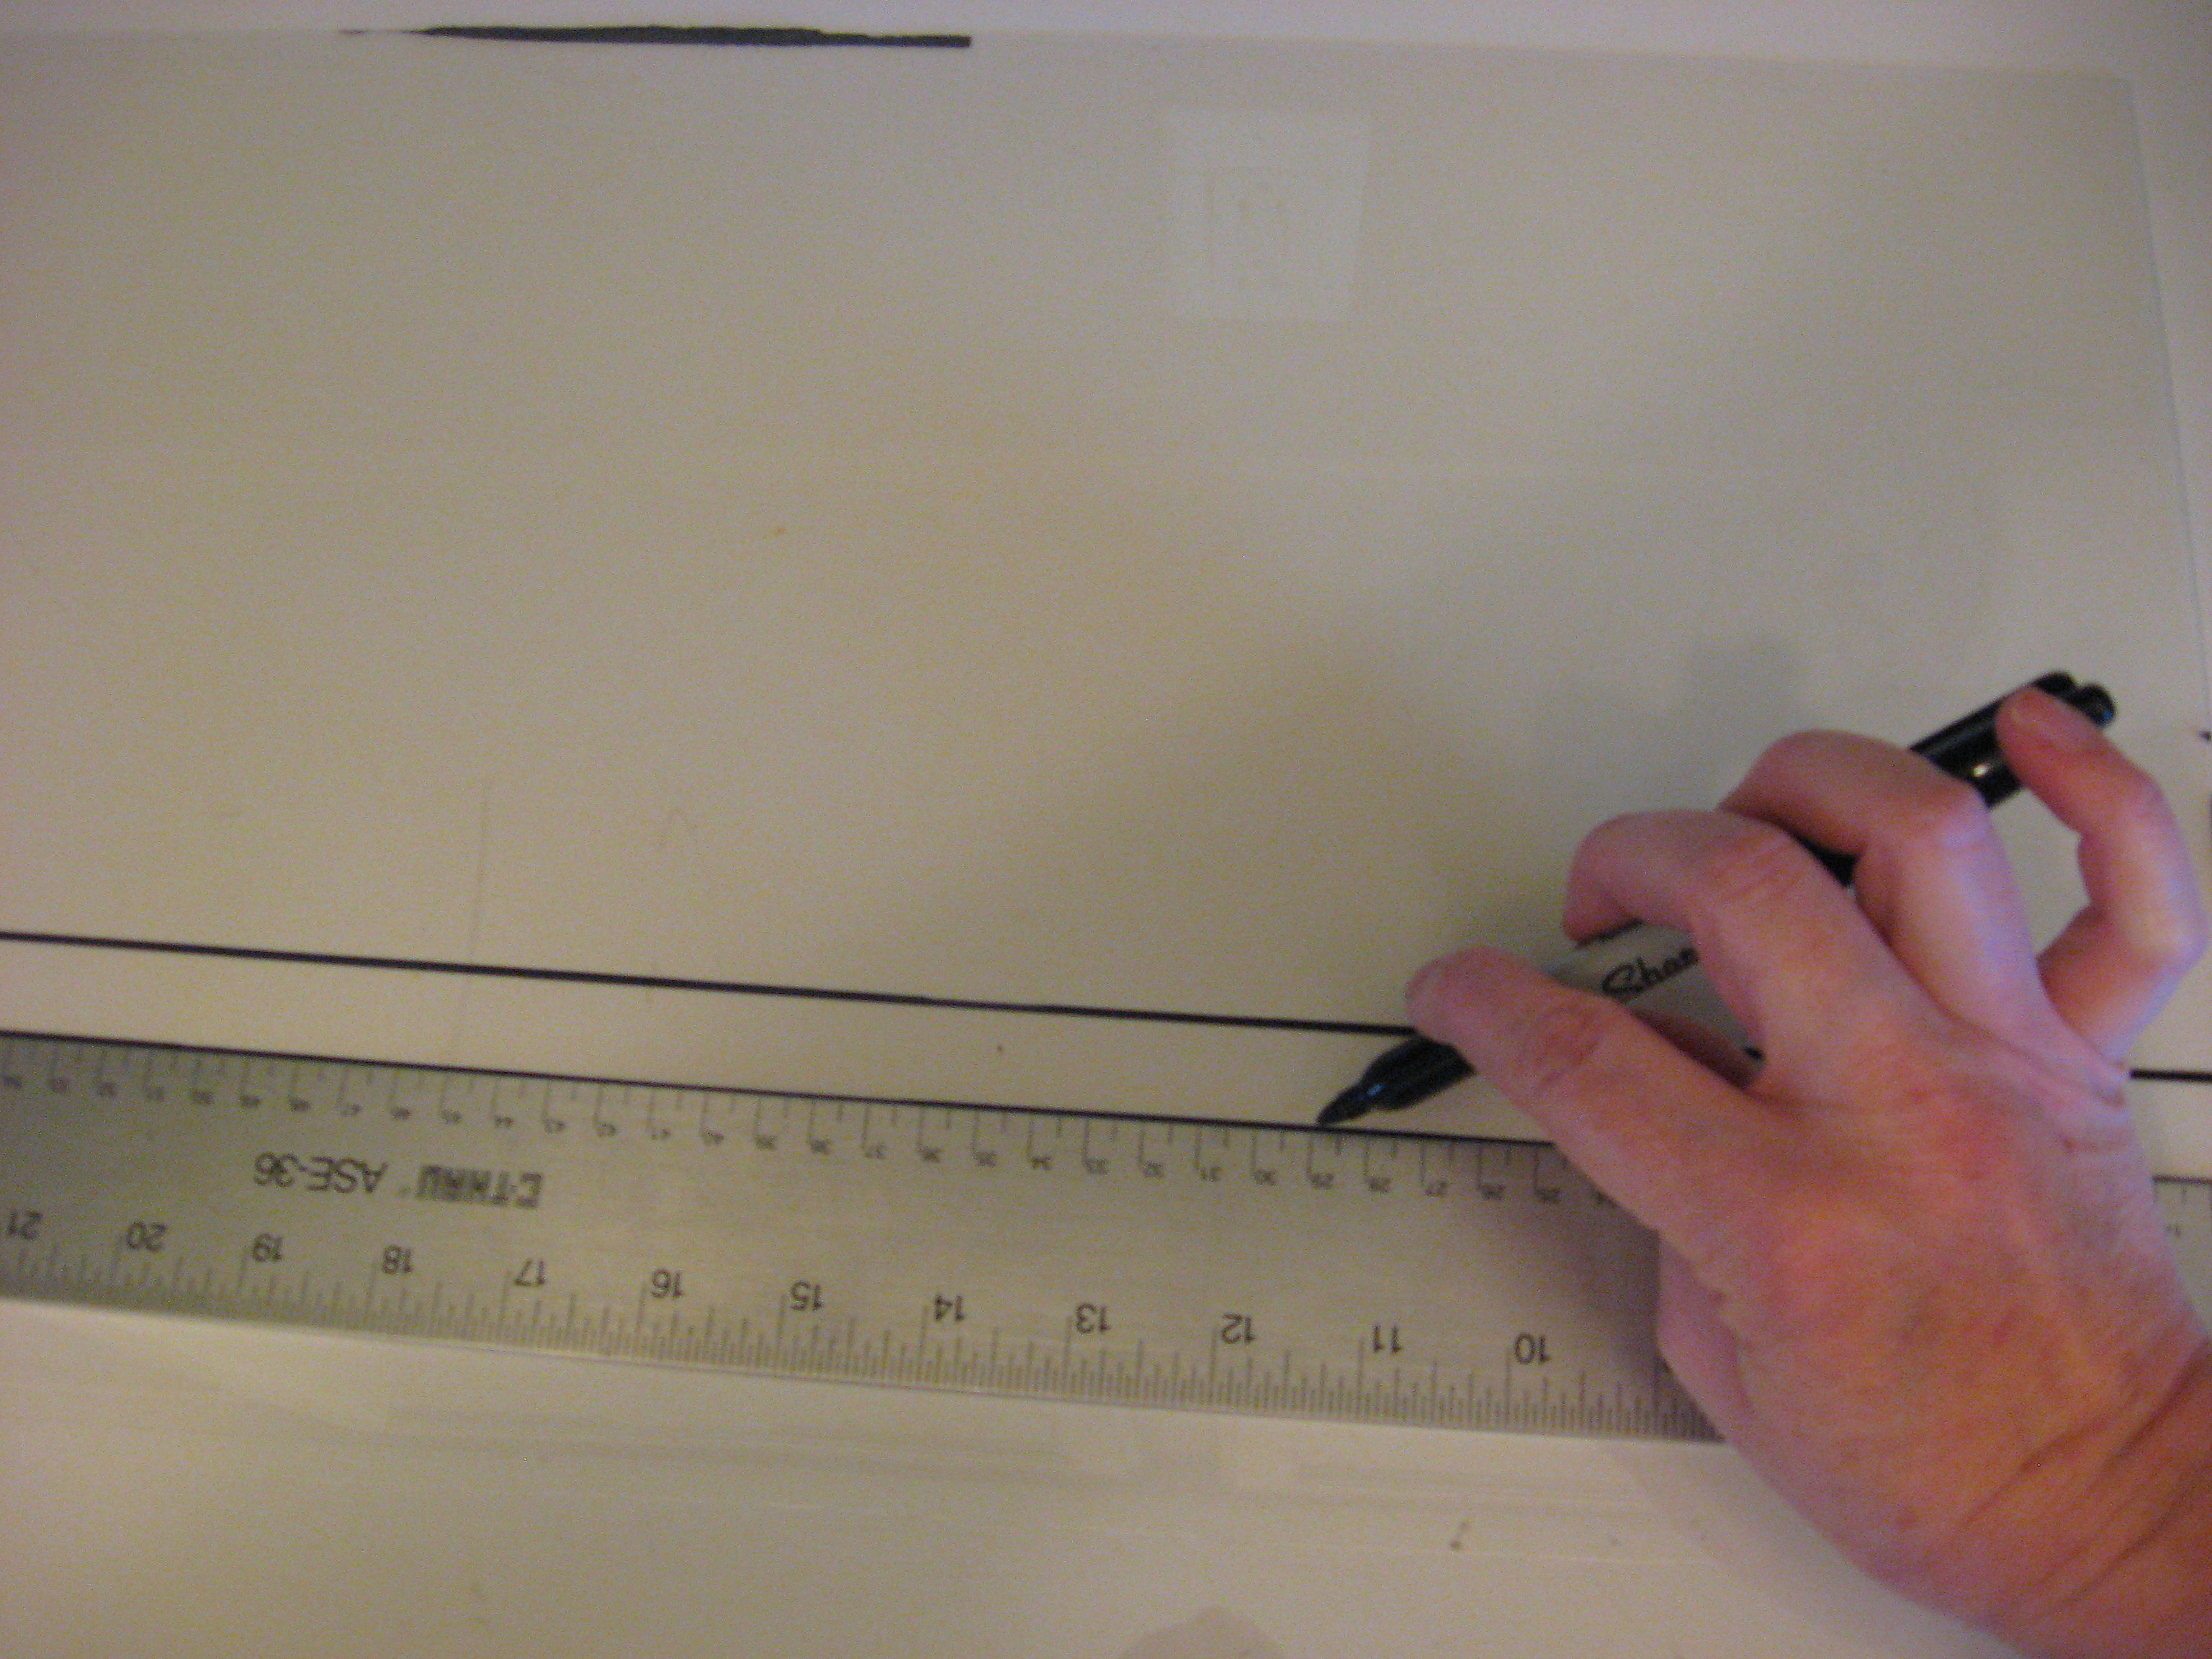
Like this:
I printed out the categories I wanted onto pieces of paper, but you could also use vinyl, or even write them on the back of the glass with the marker (you’d have to write backwards, but you could print out the words, lay them under the glass and use them to trace.)
I cut out each title, and sprayed them with some craft fixative. I didn’t use an actual adhesive; I think it’s too messy. I just needed something that would dry clear and that would hold the paper in place well enough for the next step without interfering with the spray paint.
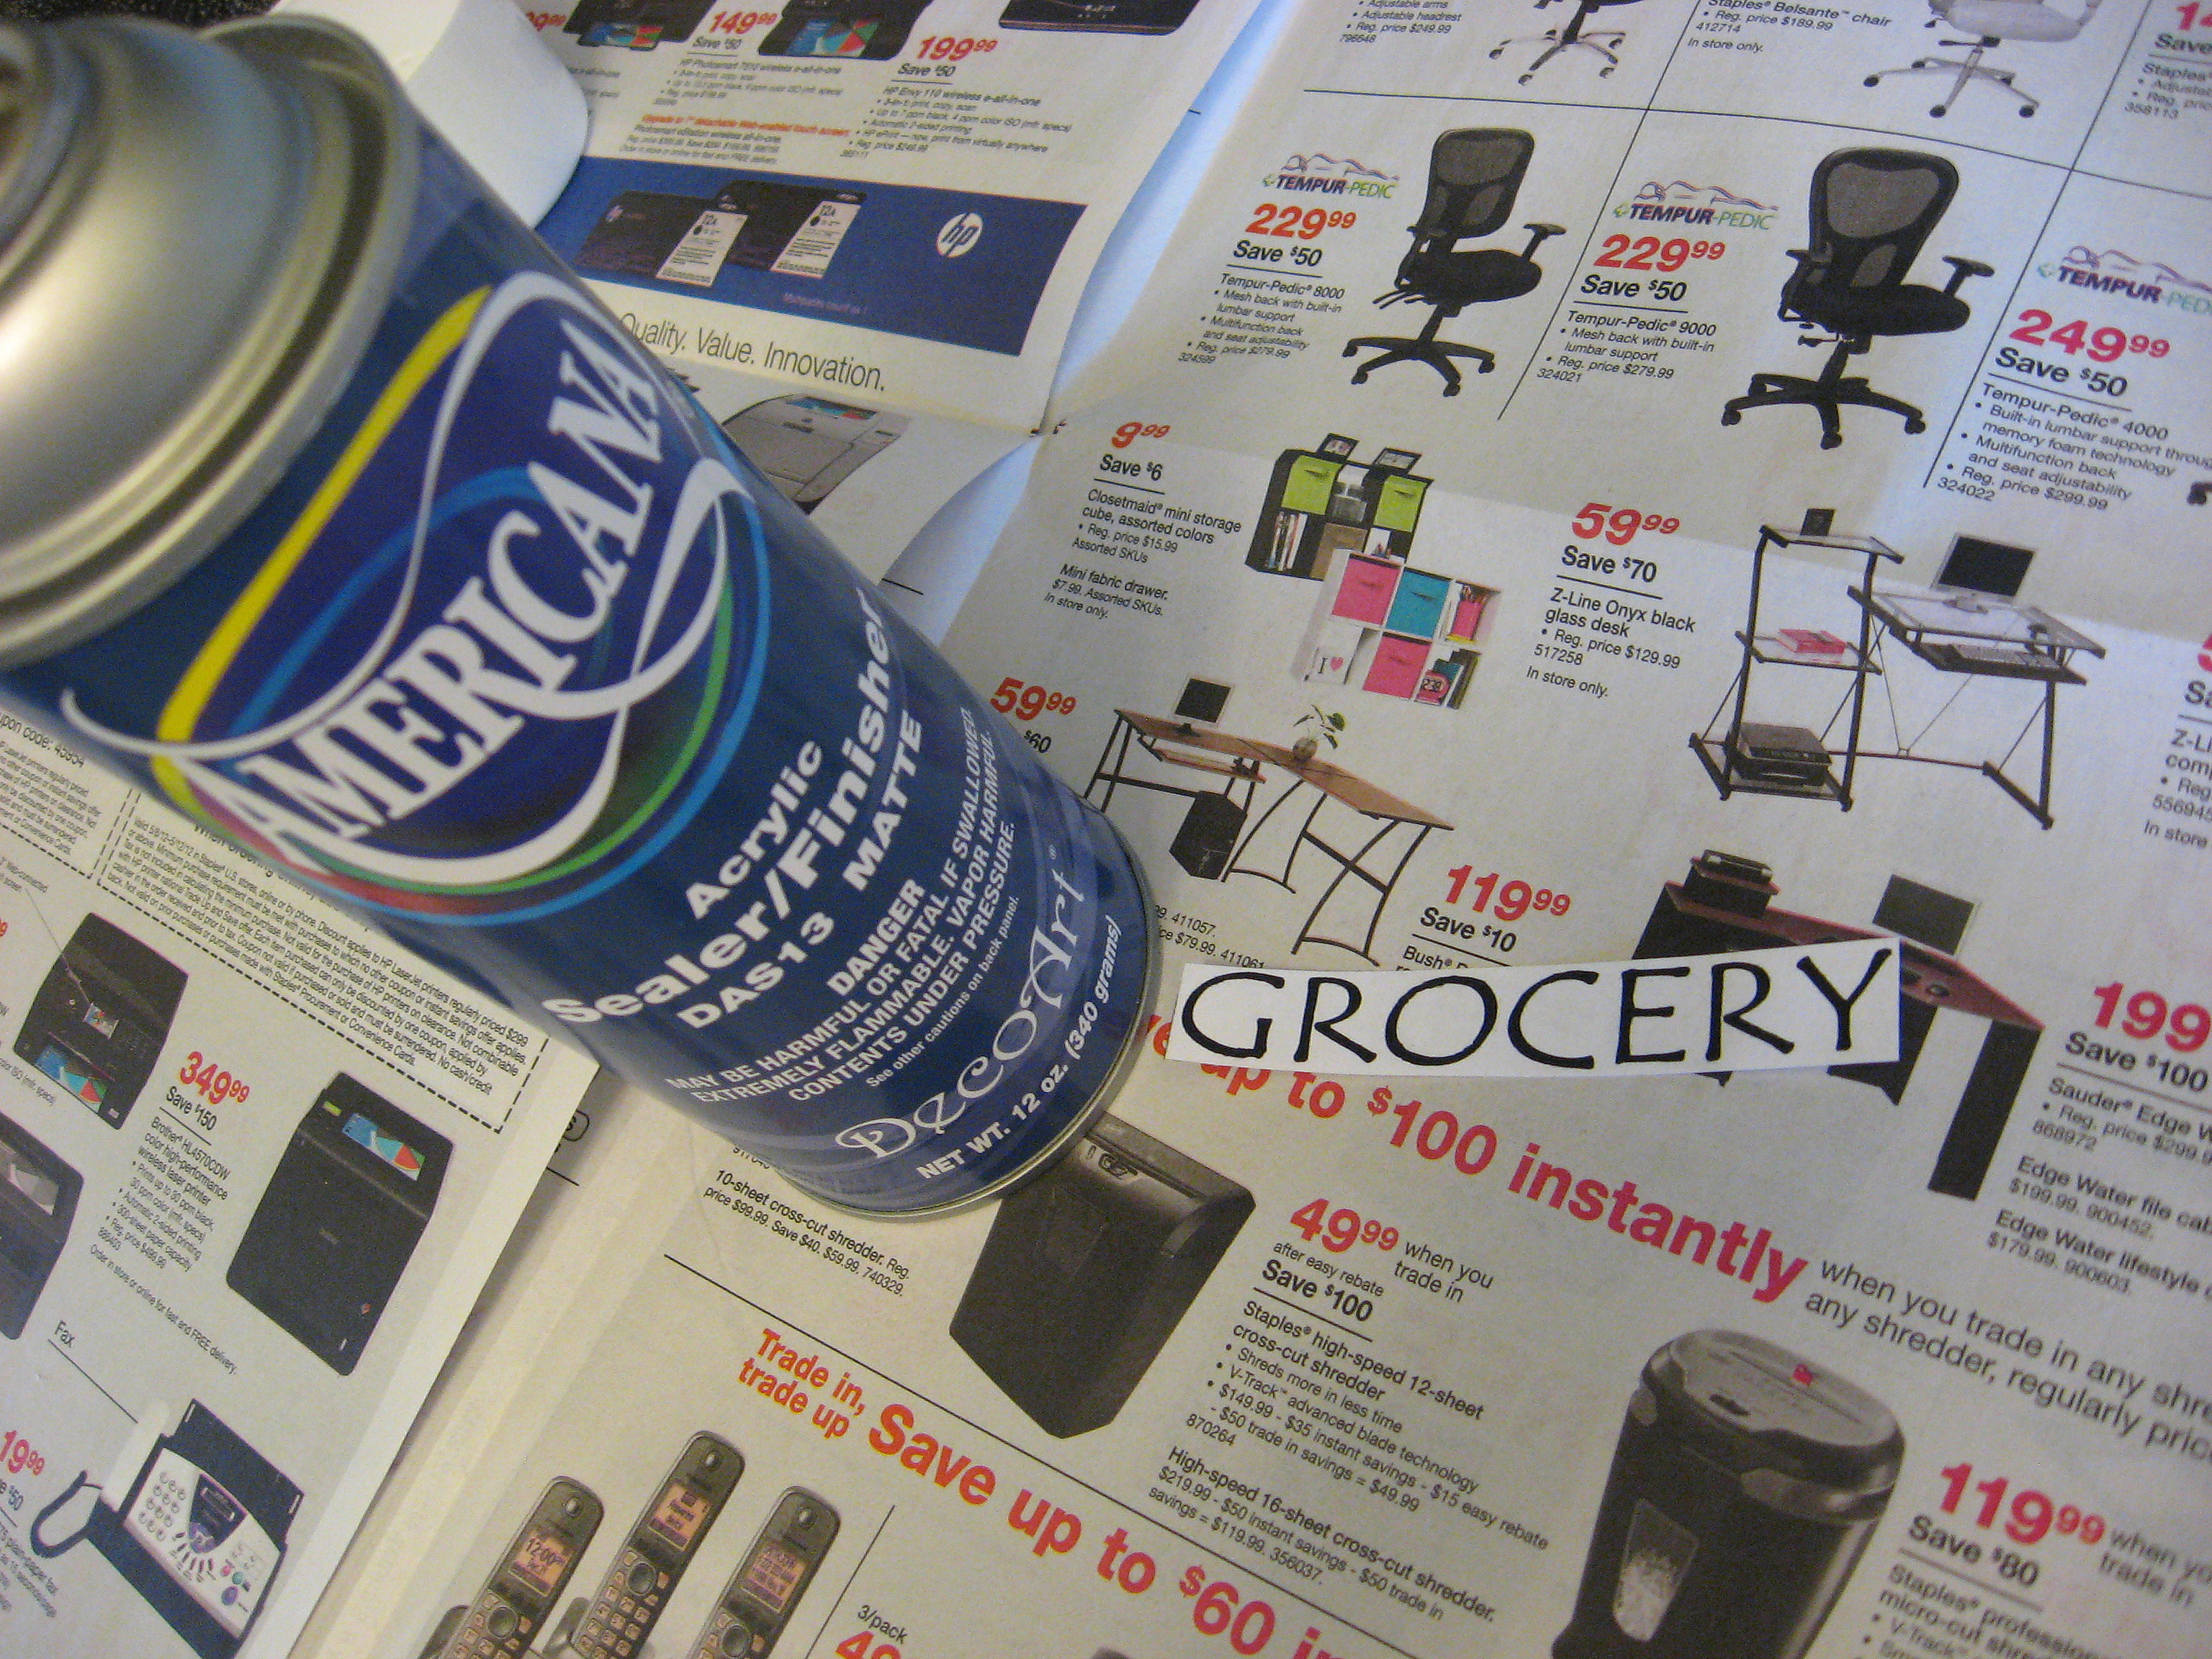
Here they are, attached face down to the back of the glass.
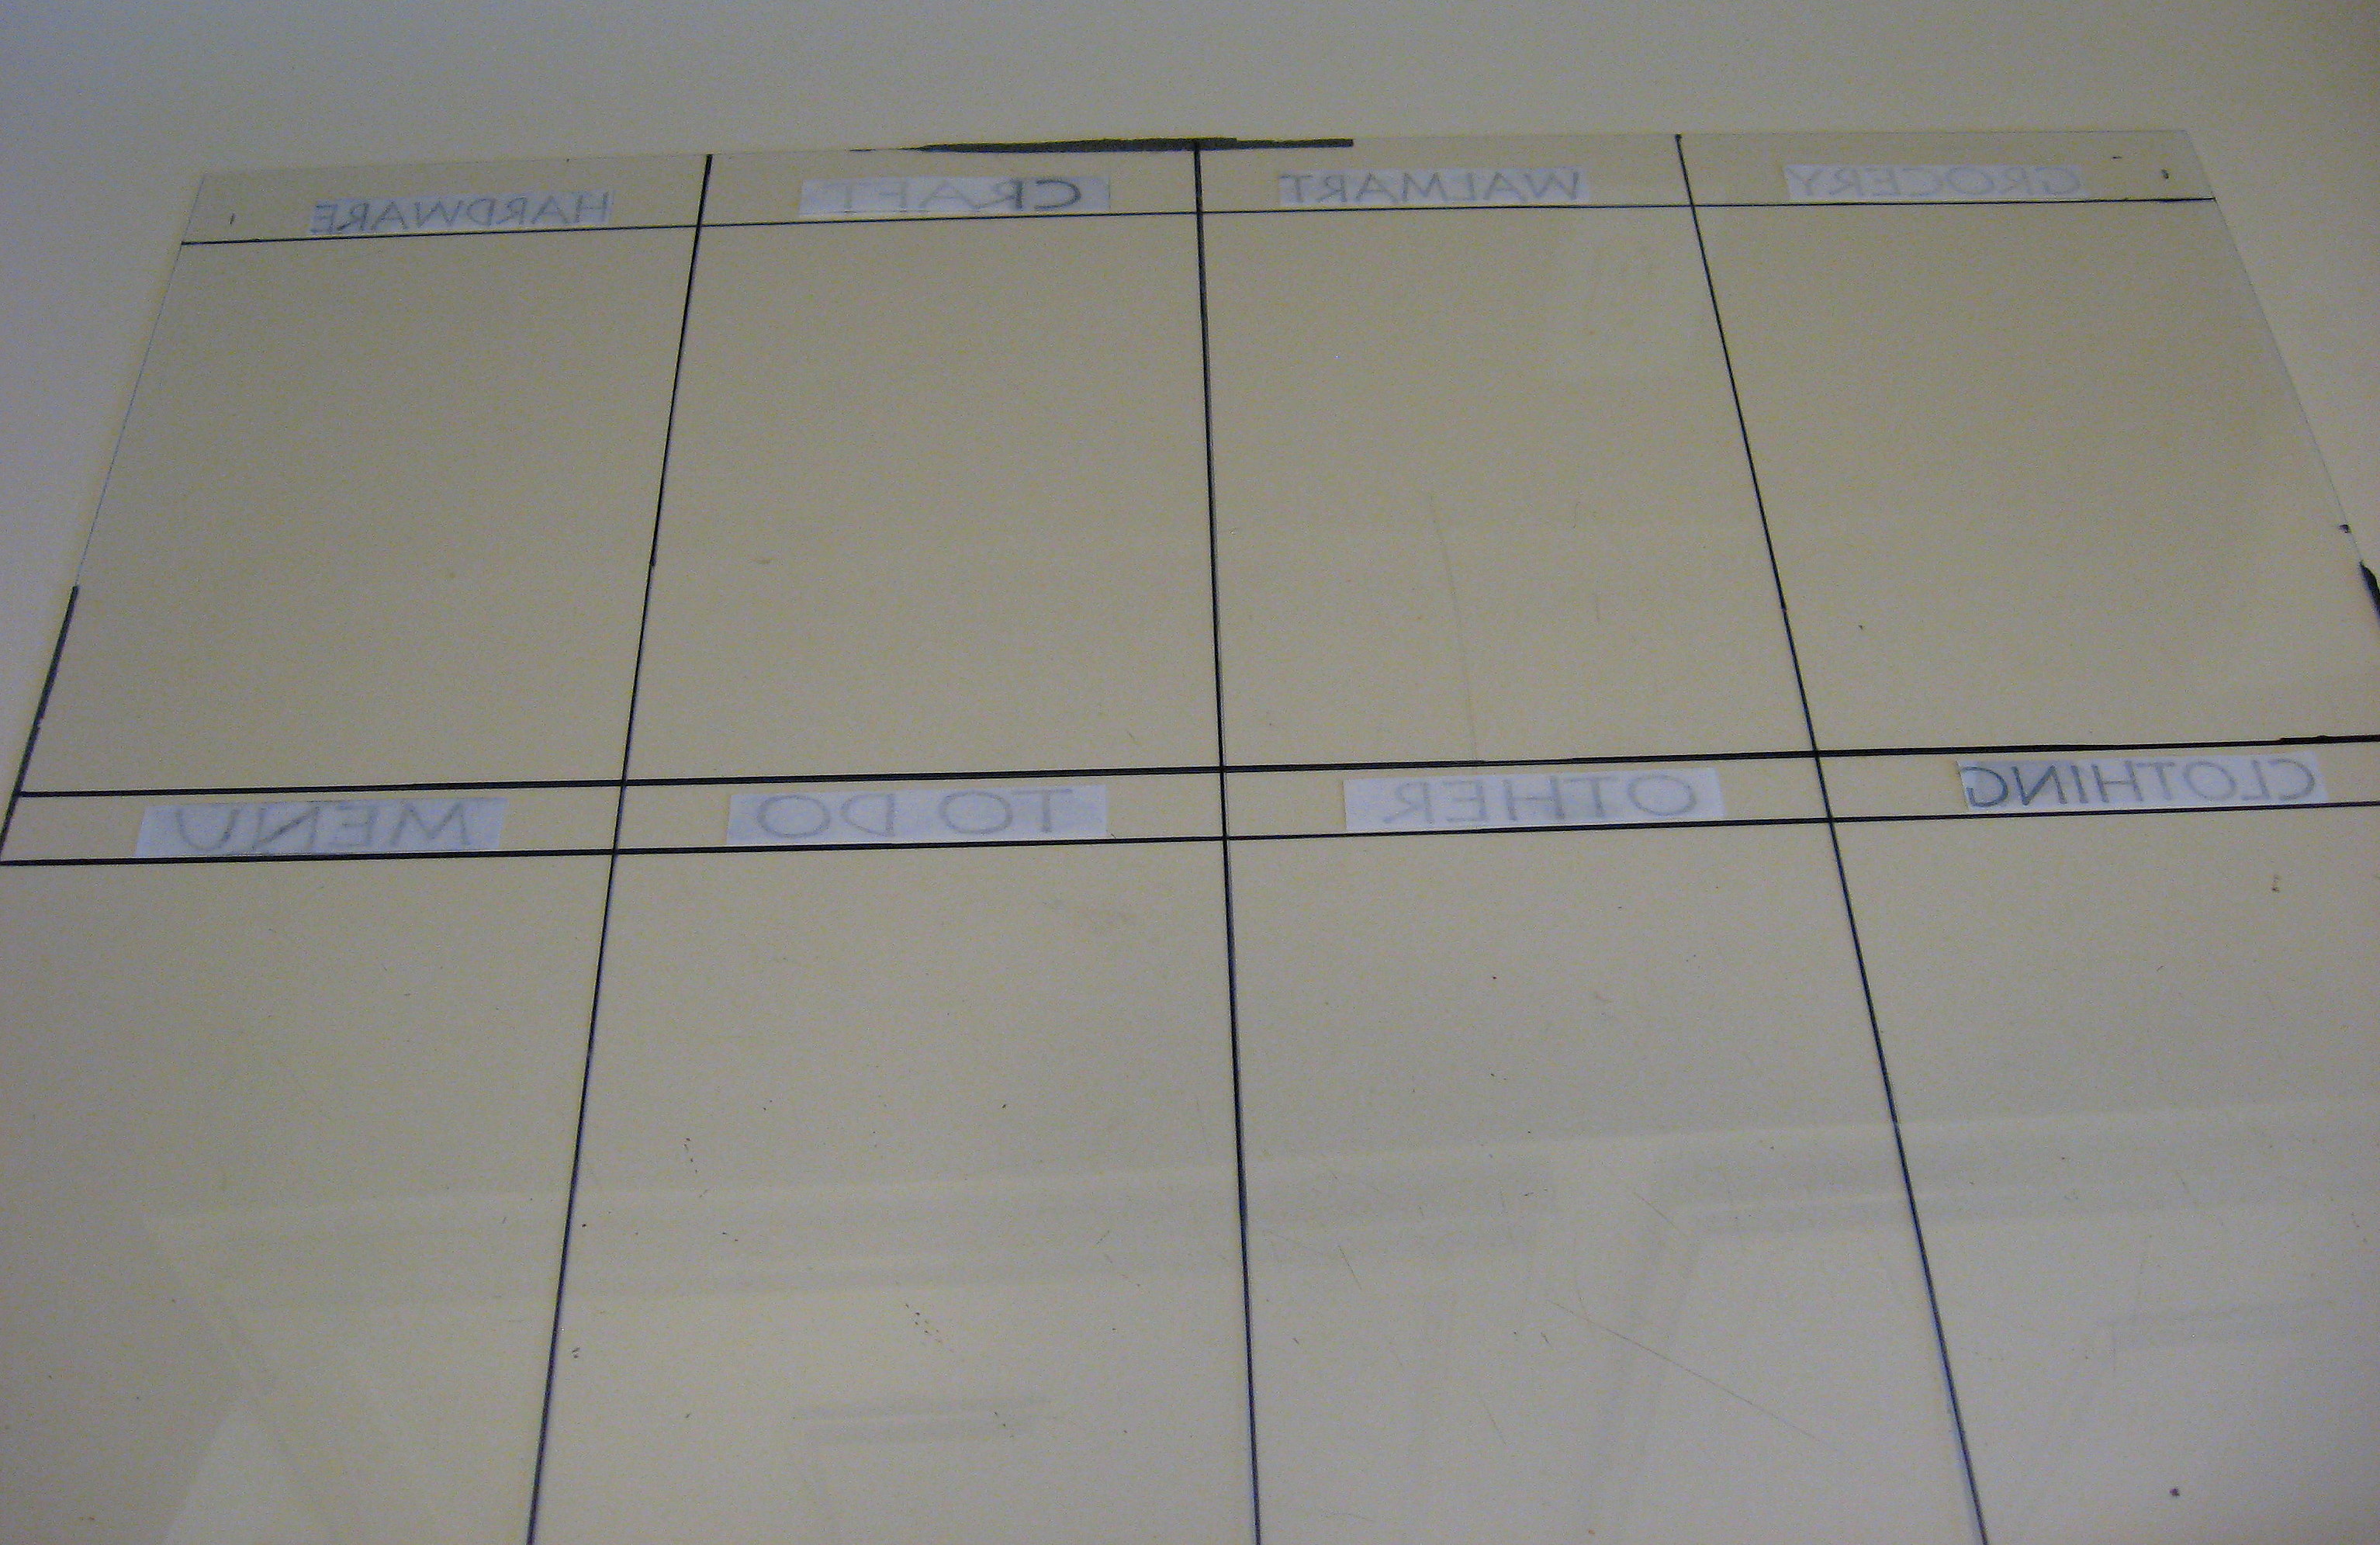
Now I spray painted over the whole back of the glass. I still wanted my dry erase board orange, but not as dark as the frame, so I sprayed on thin layers of white and orange until it was well covered. You could also just cover the cardboard that came with the frame with paper (think wrapping paper to get a big enough piece) or fabric.
Once that’s dry, put it all back in the frame, and use a good adhesive (I used E 6000) to glue very strong magnets onto the back of the frame.
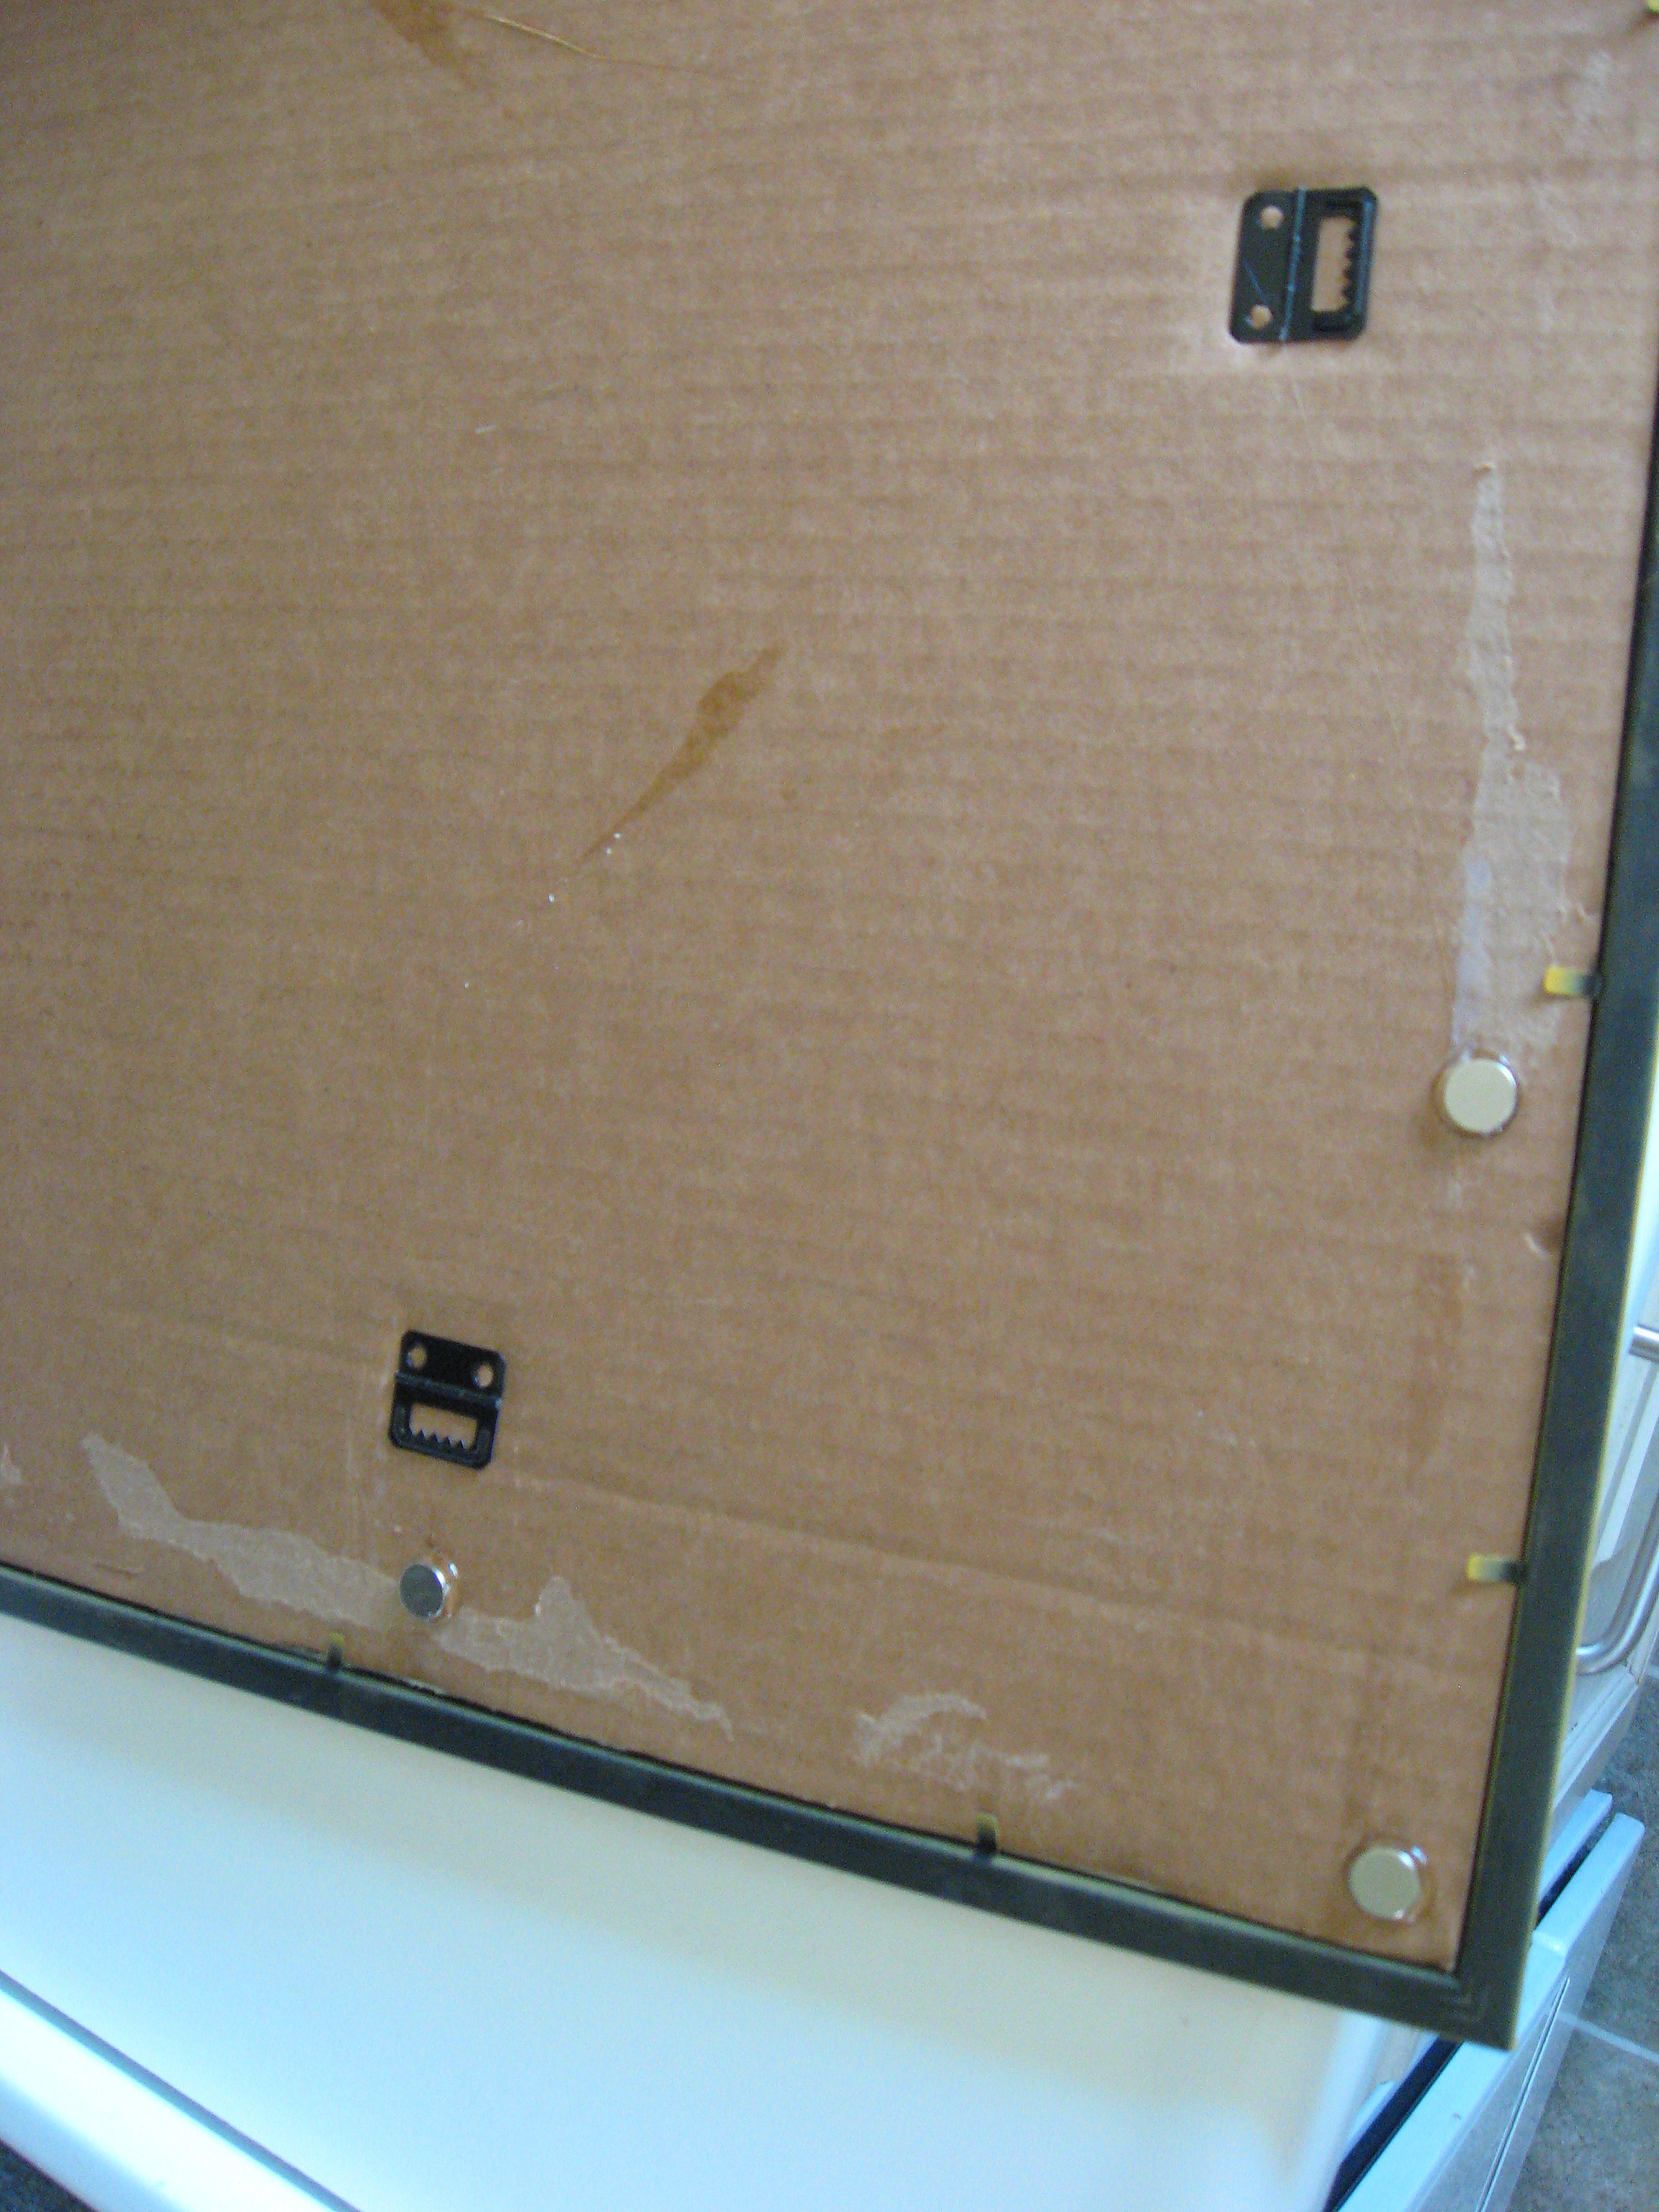
Once the glue is completely dry, the dry erase board is ready to hang.
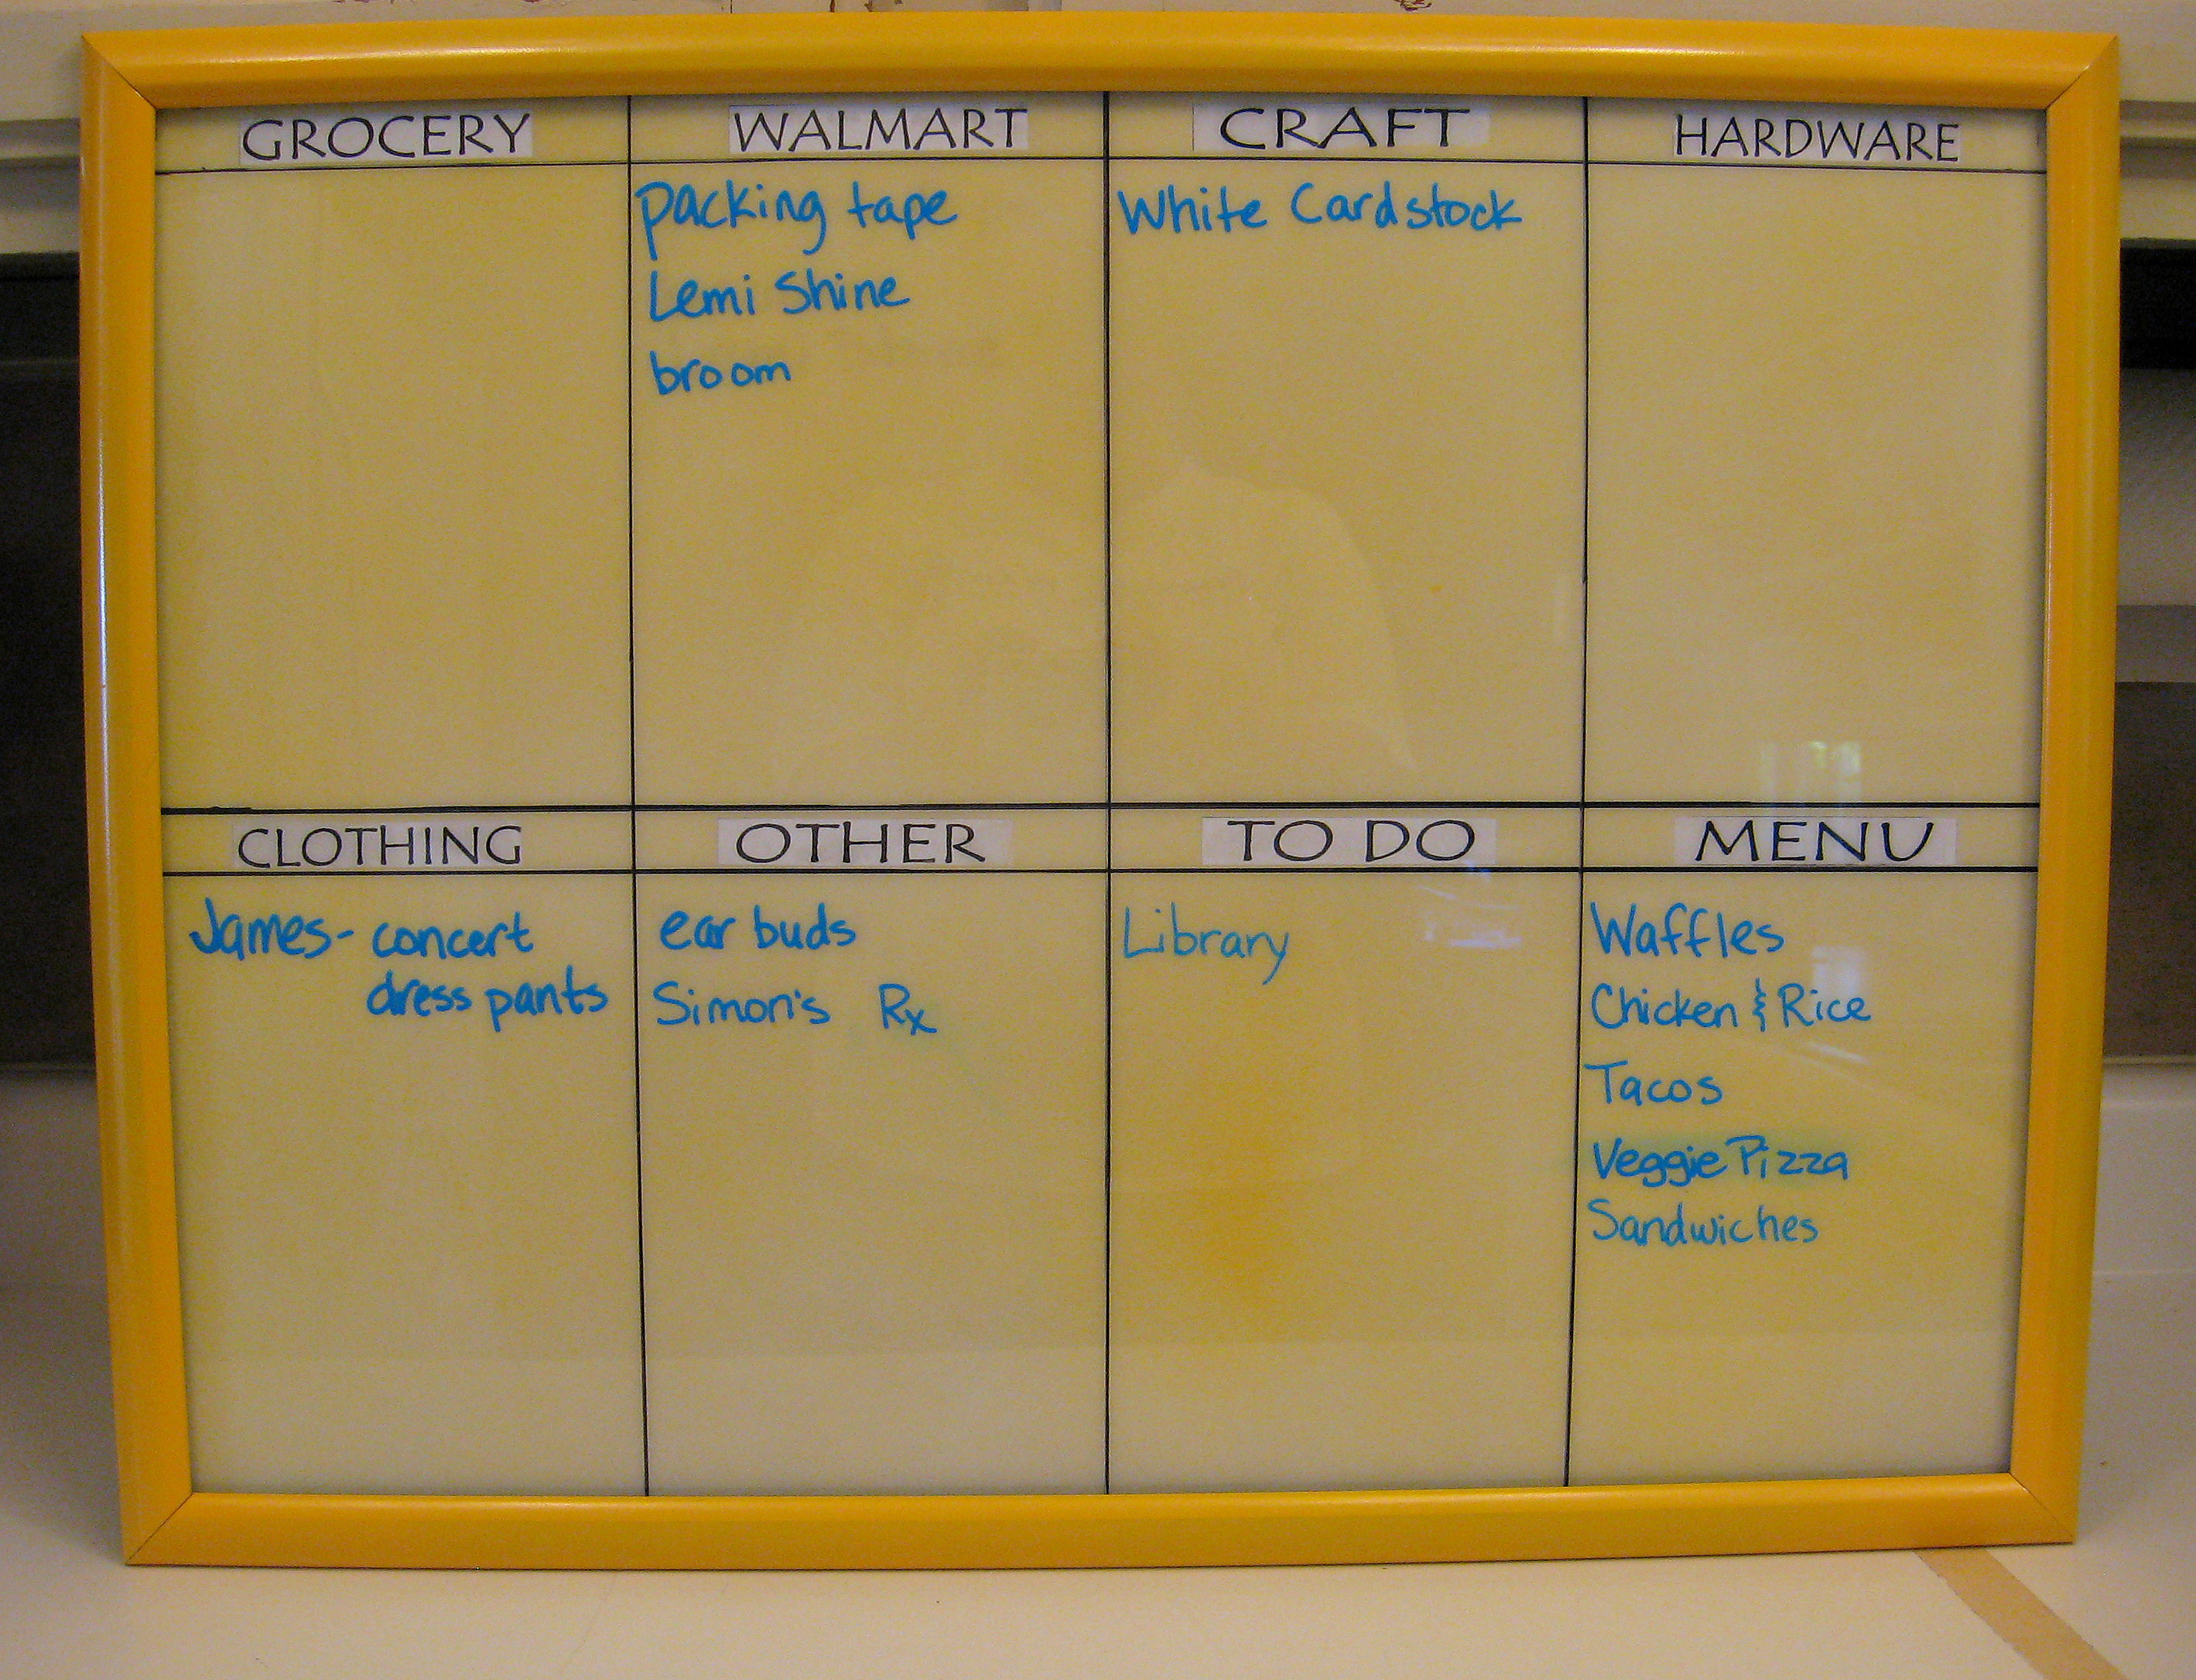
Since everything is on the back of the glass, you don’t have to worry about the lines and category titles on the dry erase board getting erased or messy. Remember the Bistro markers from the last project? They work great for this too, and erase easily with a standard chalkboard eraser.
A PYP Best Blog! DIY Magnet Board!
Just in case you missed this article on making a magnet board the first time we shared it a couple of years ago, we are republishing it. After Sharon wrote this blog originally, we got an awesome response. This is one of the PYP Best Blogs!
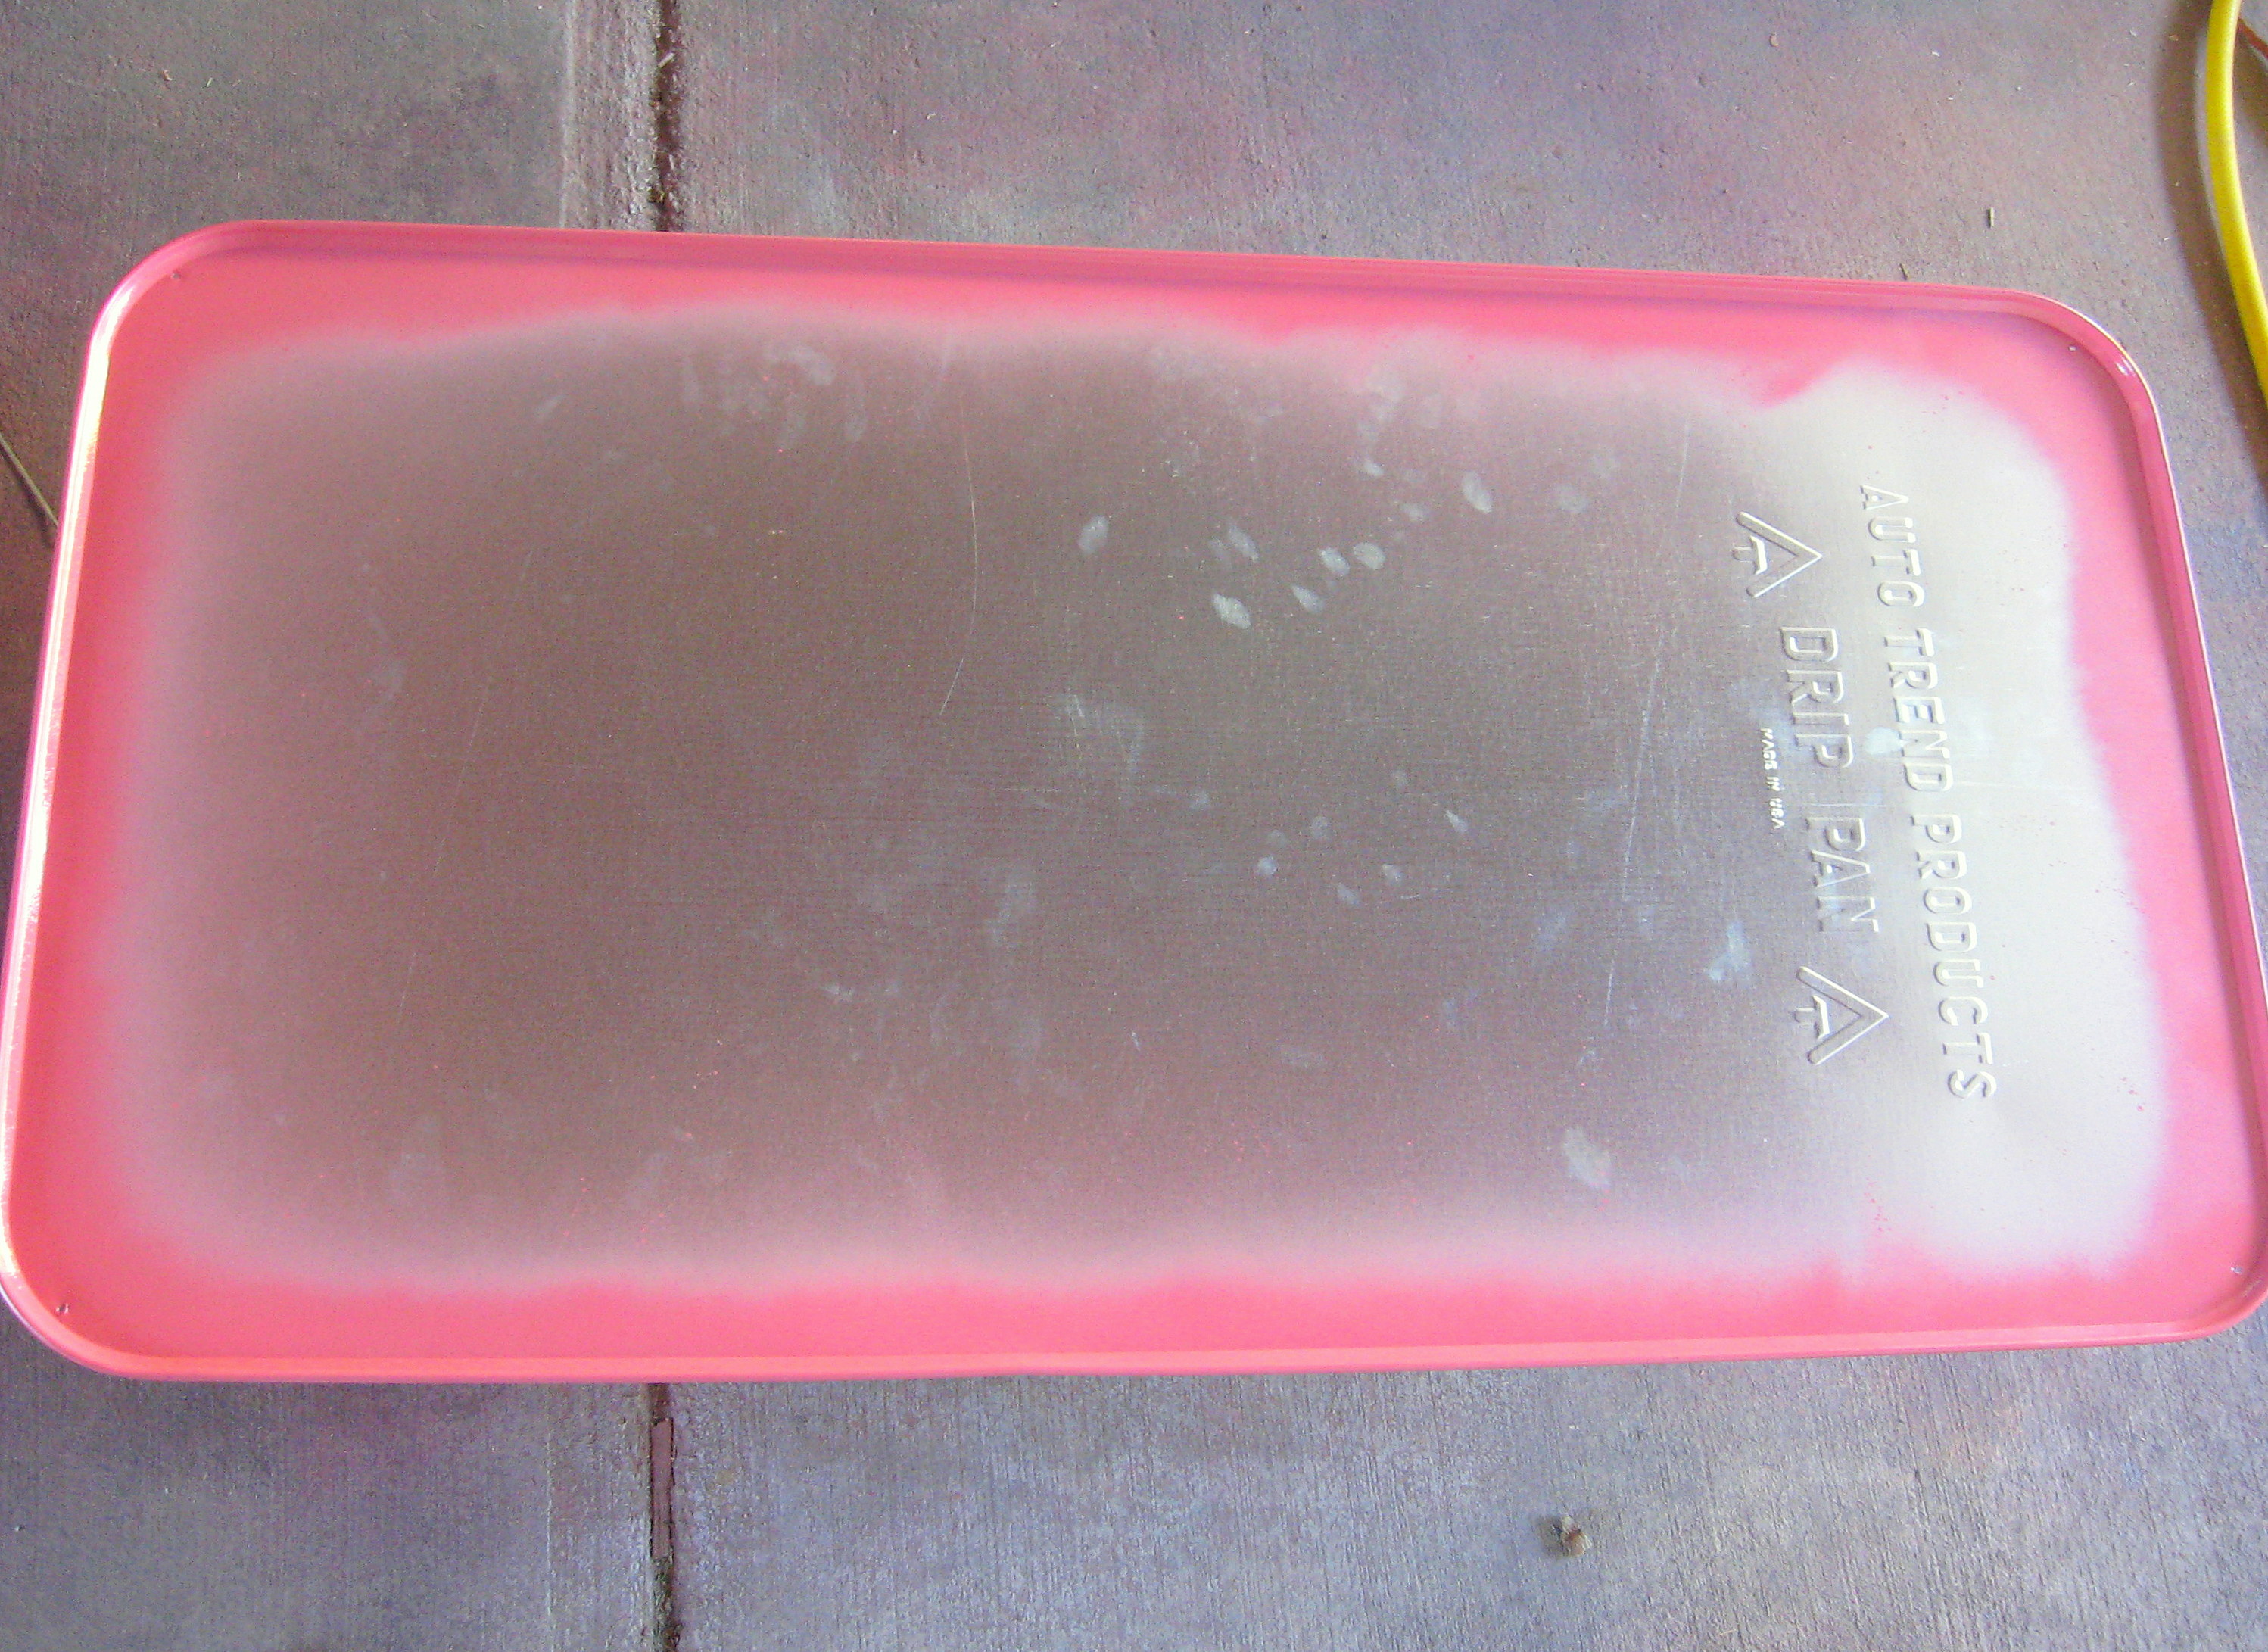
Have you seen these?
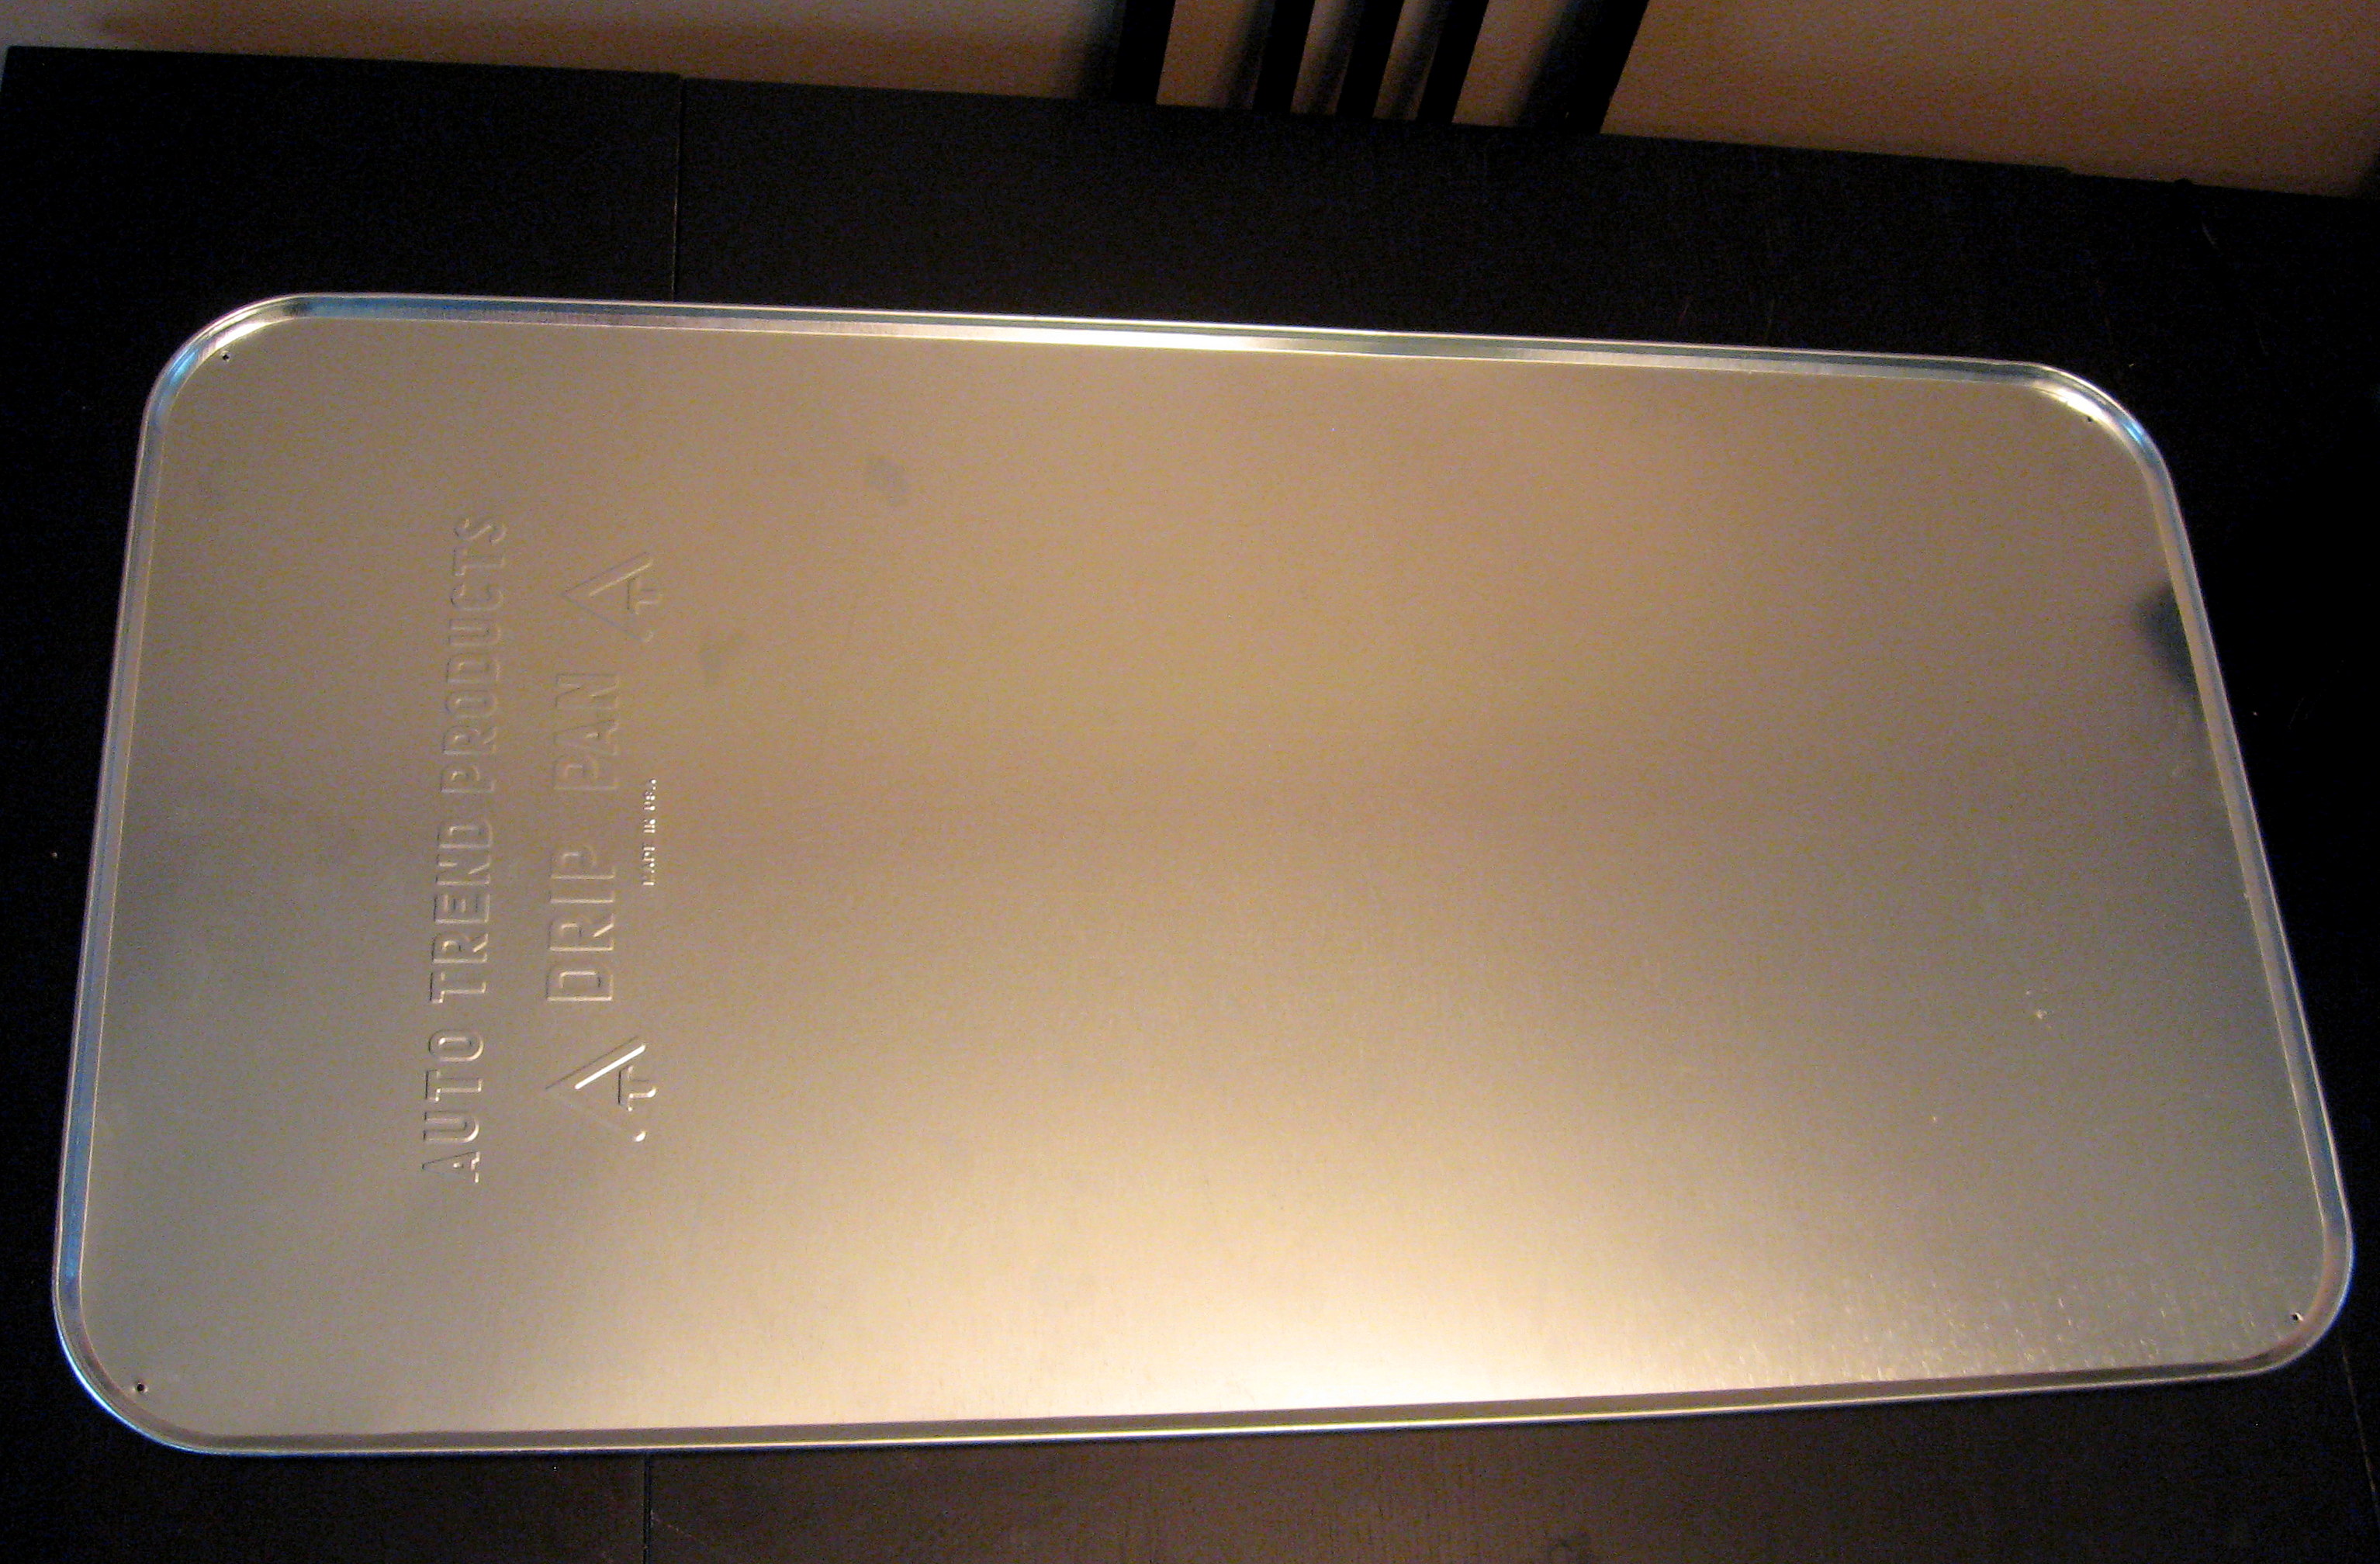
They look like an enormous cookie sheet, but they are drip pans to put under your car. They are big – about 2′ X 4′ – and you can get them at Walmart for about $11. I have had one in my craft area for awhile that I use as a magnet board. I needed one for my daughter’s room, and loved the size of these, but I knew the silver wouldn’t work in her pink room, so I pulled out my trusty Mod Podge and went for it!
You’ll need:
Drip Pan
Spray Paint
Fabric
Mod Podge
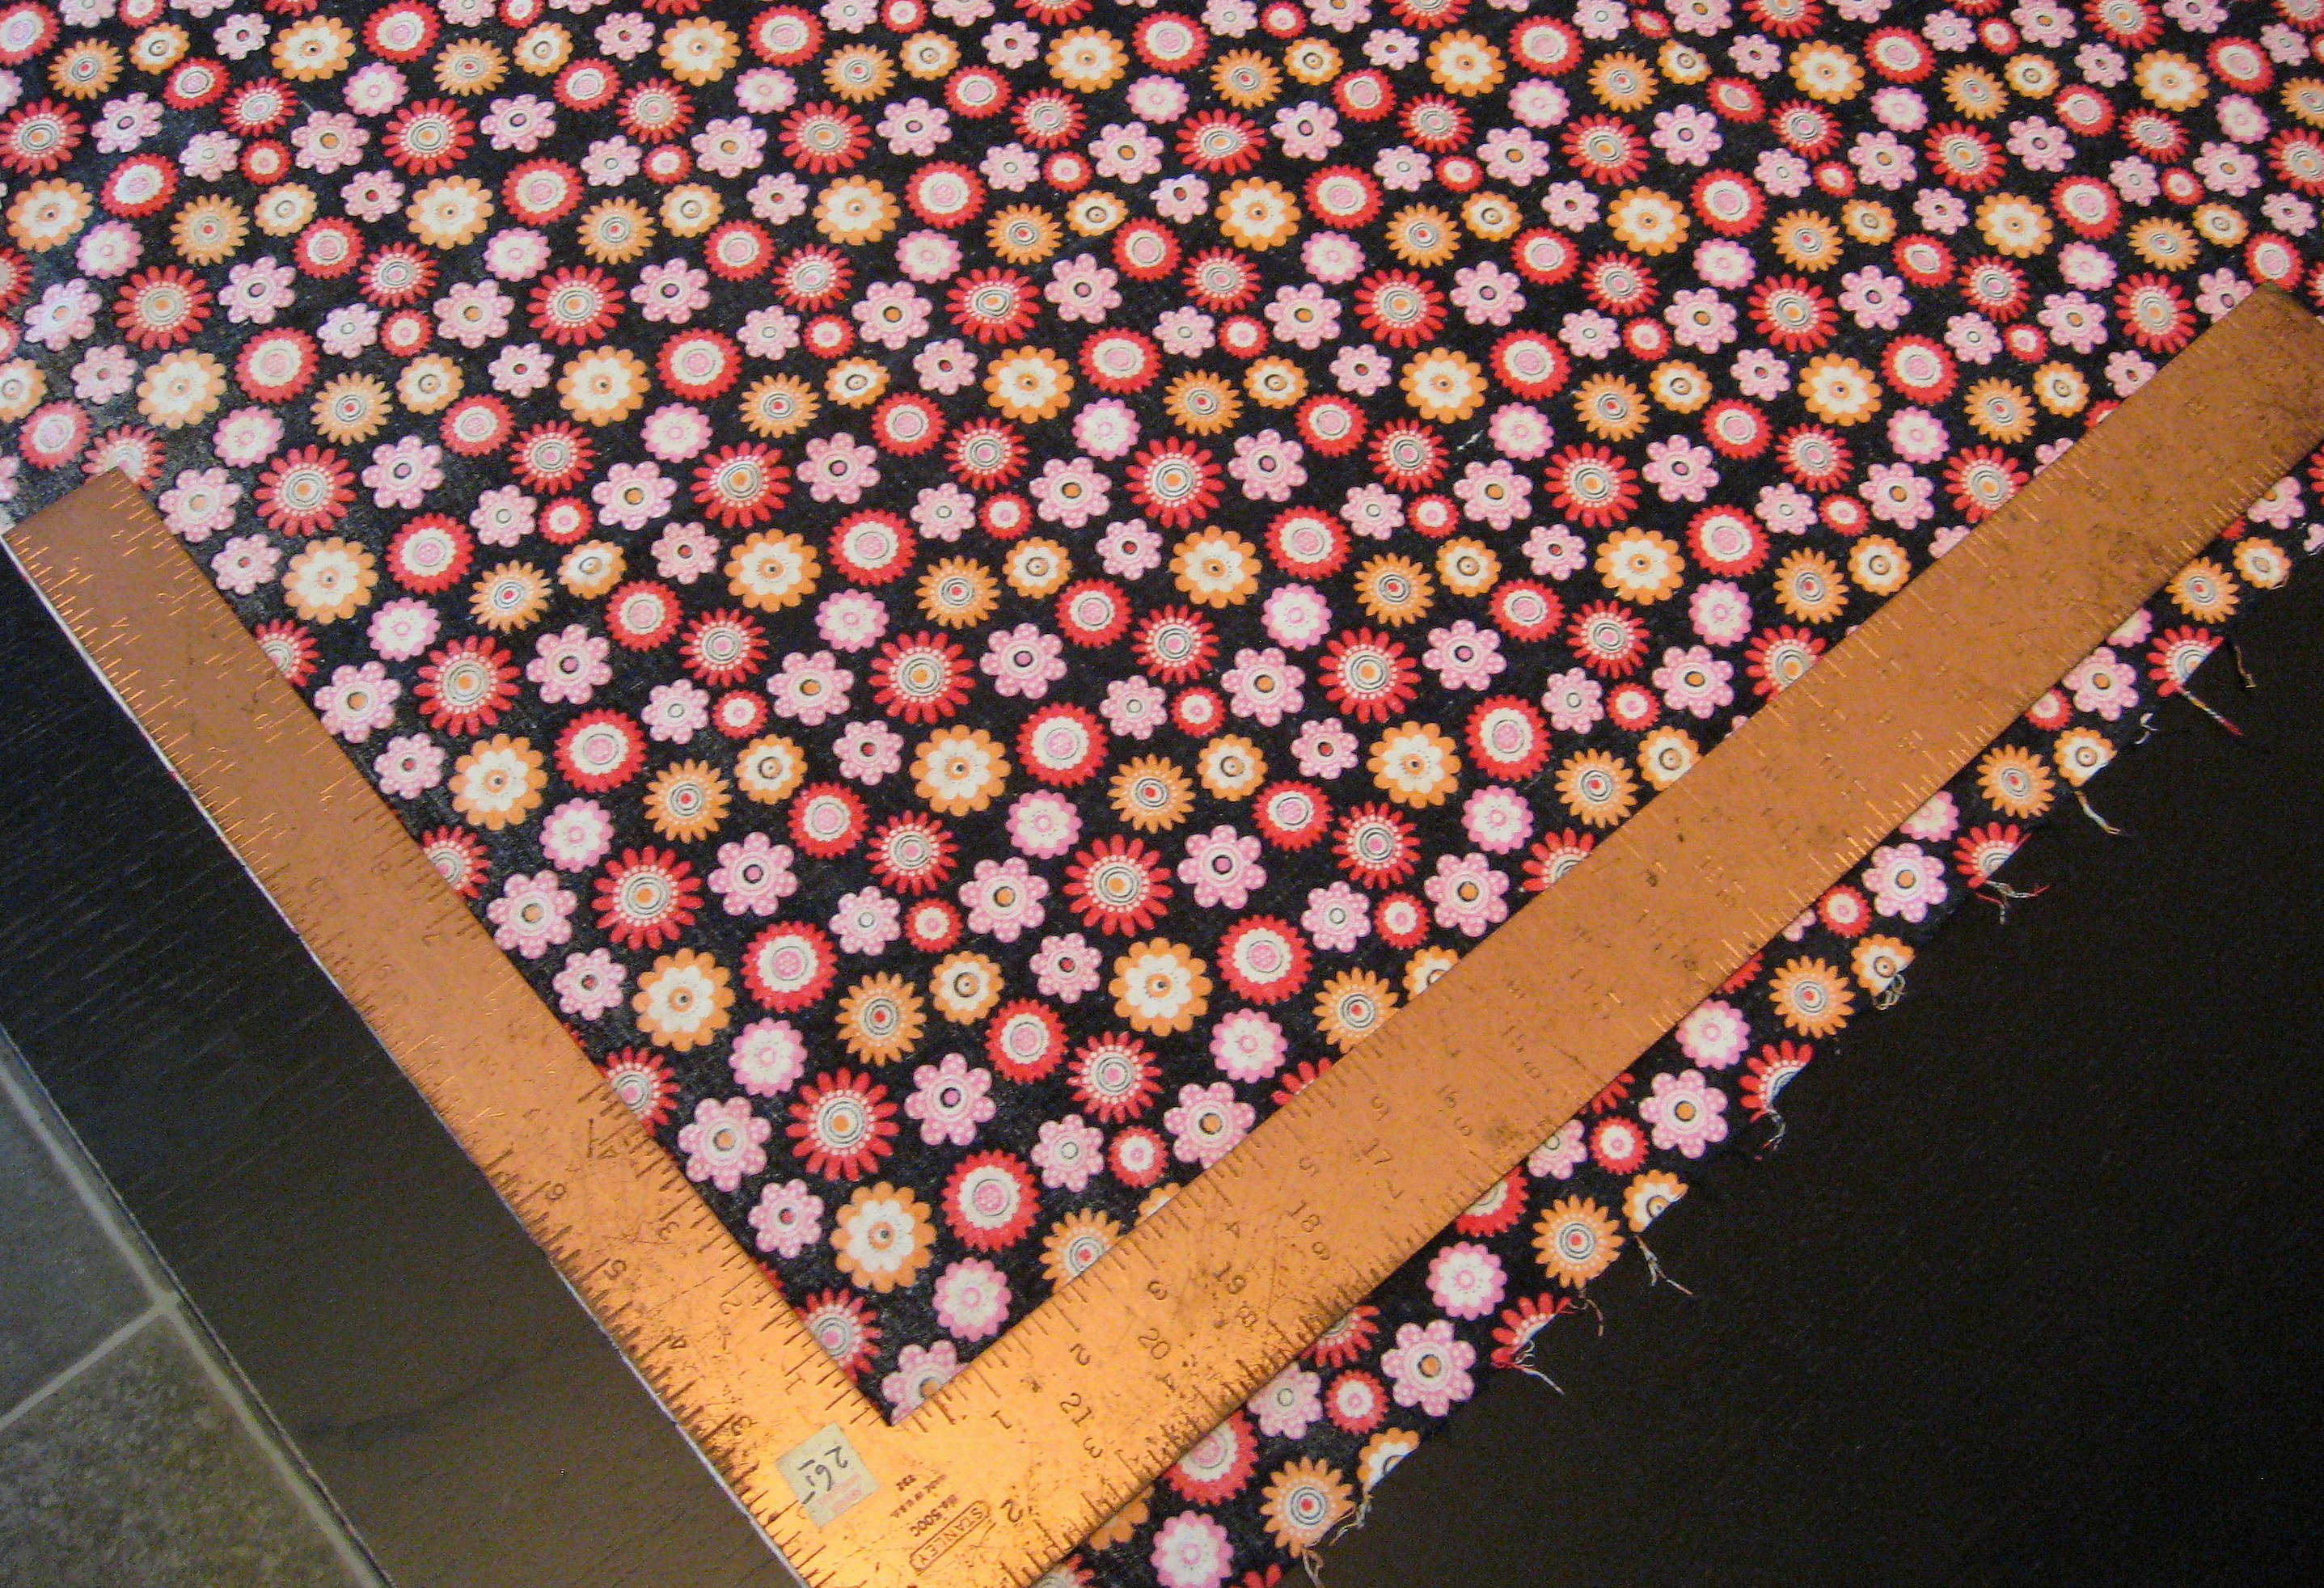
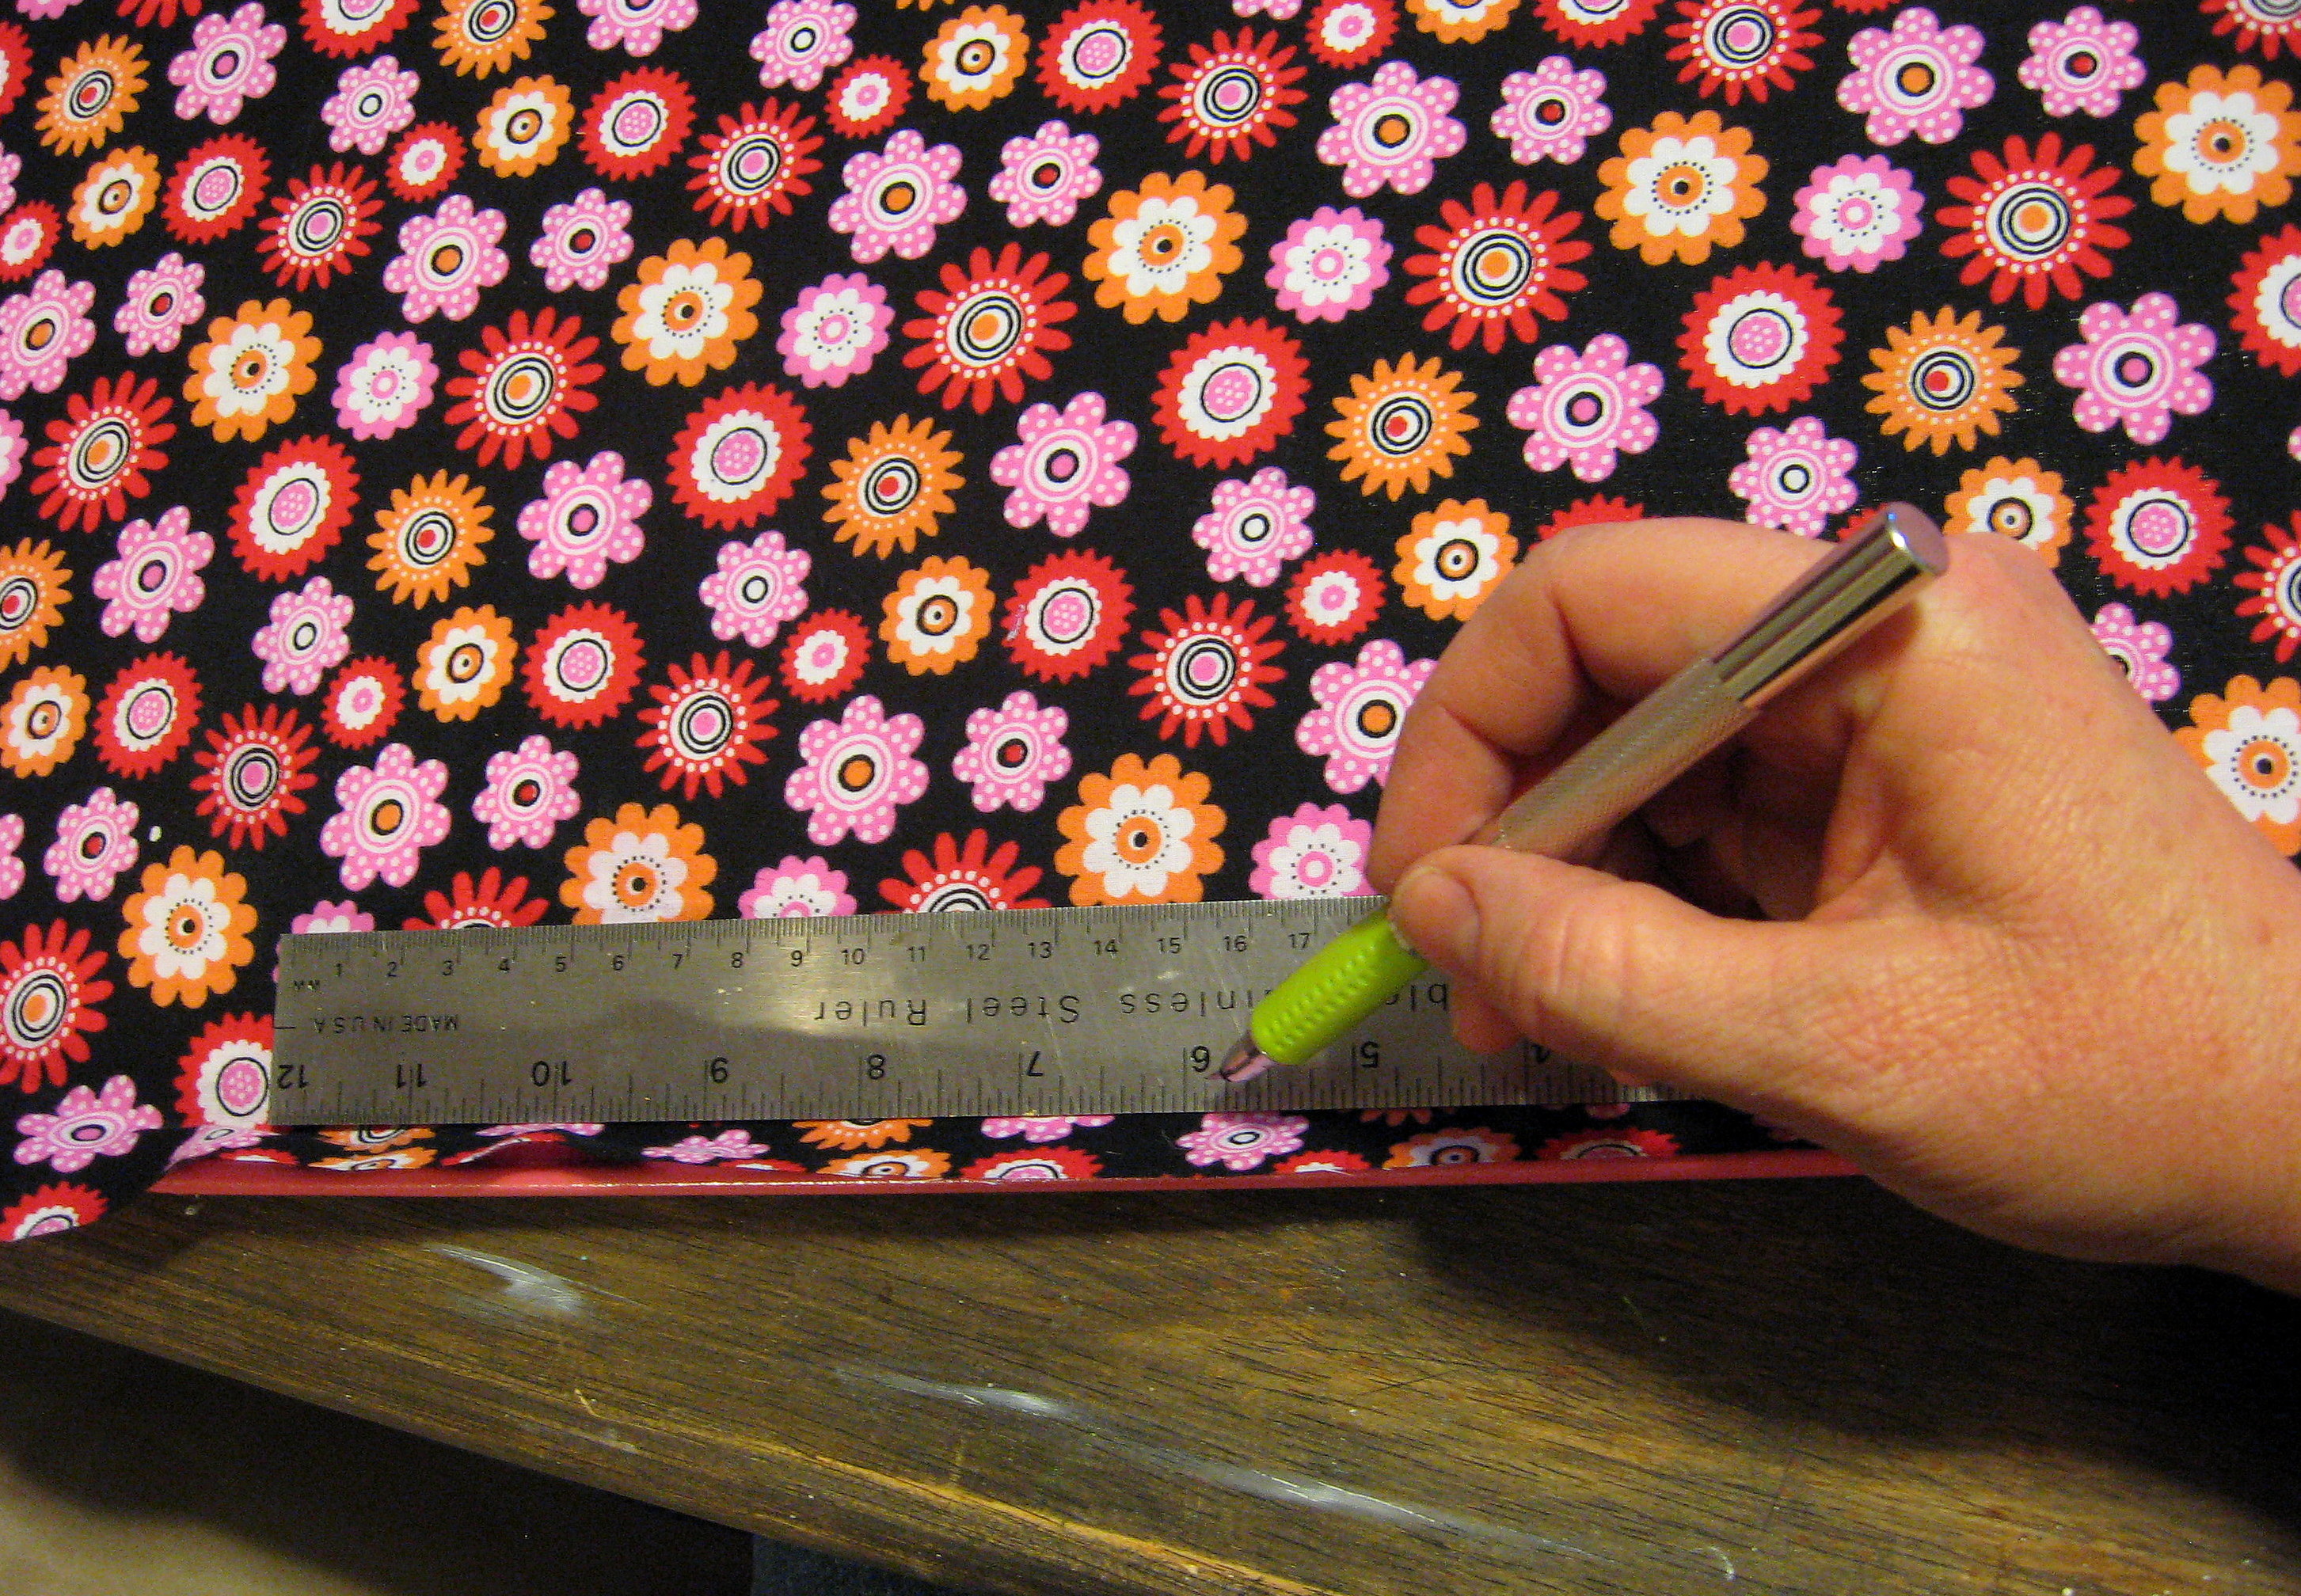
I started by cutting my fabric into a rectangle just a little bit larger than the dimensions of the drip pan – maybe an inch or so. The fabric will stretch a little as you Mod Podge it on, and you will cut off the extra when you’re finished, so you really only need to make sure that two adjacent sides are square and straight. If you have a rotary cutter and mat, you’ll want to use that. I don’t, so I used a carpenter’s square to mark it, then cut with scissors.
Put the fabric aside and paint the edges of the pan (you could save yourself this step by wrapping the fabric all the way around the edges to the back of the pan if you wanted to.)
You only need to do the edges, since the middle will be covered with fabric. I recommend using a high quality paint to lessen the chance of it scratching off of the metal. I like Krylon.
Once the paint is dry, find a big work space, make sure your kids are occupied and pop in a movie. Mod Podging fabric is a little trickier than paper and will take a little time and patience to get it all straight.
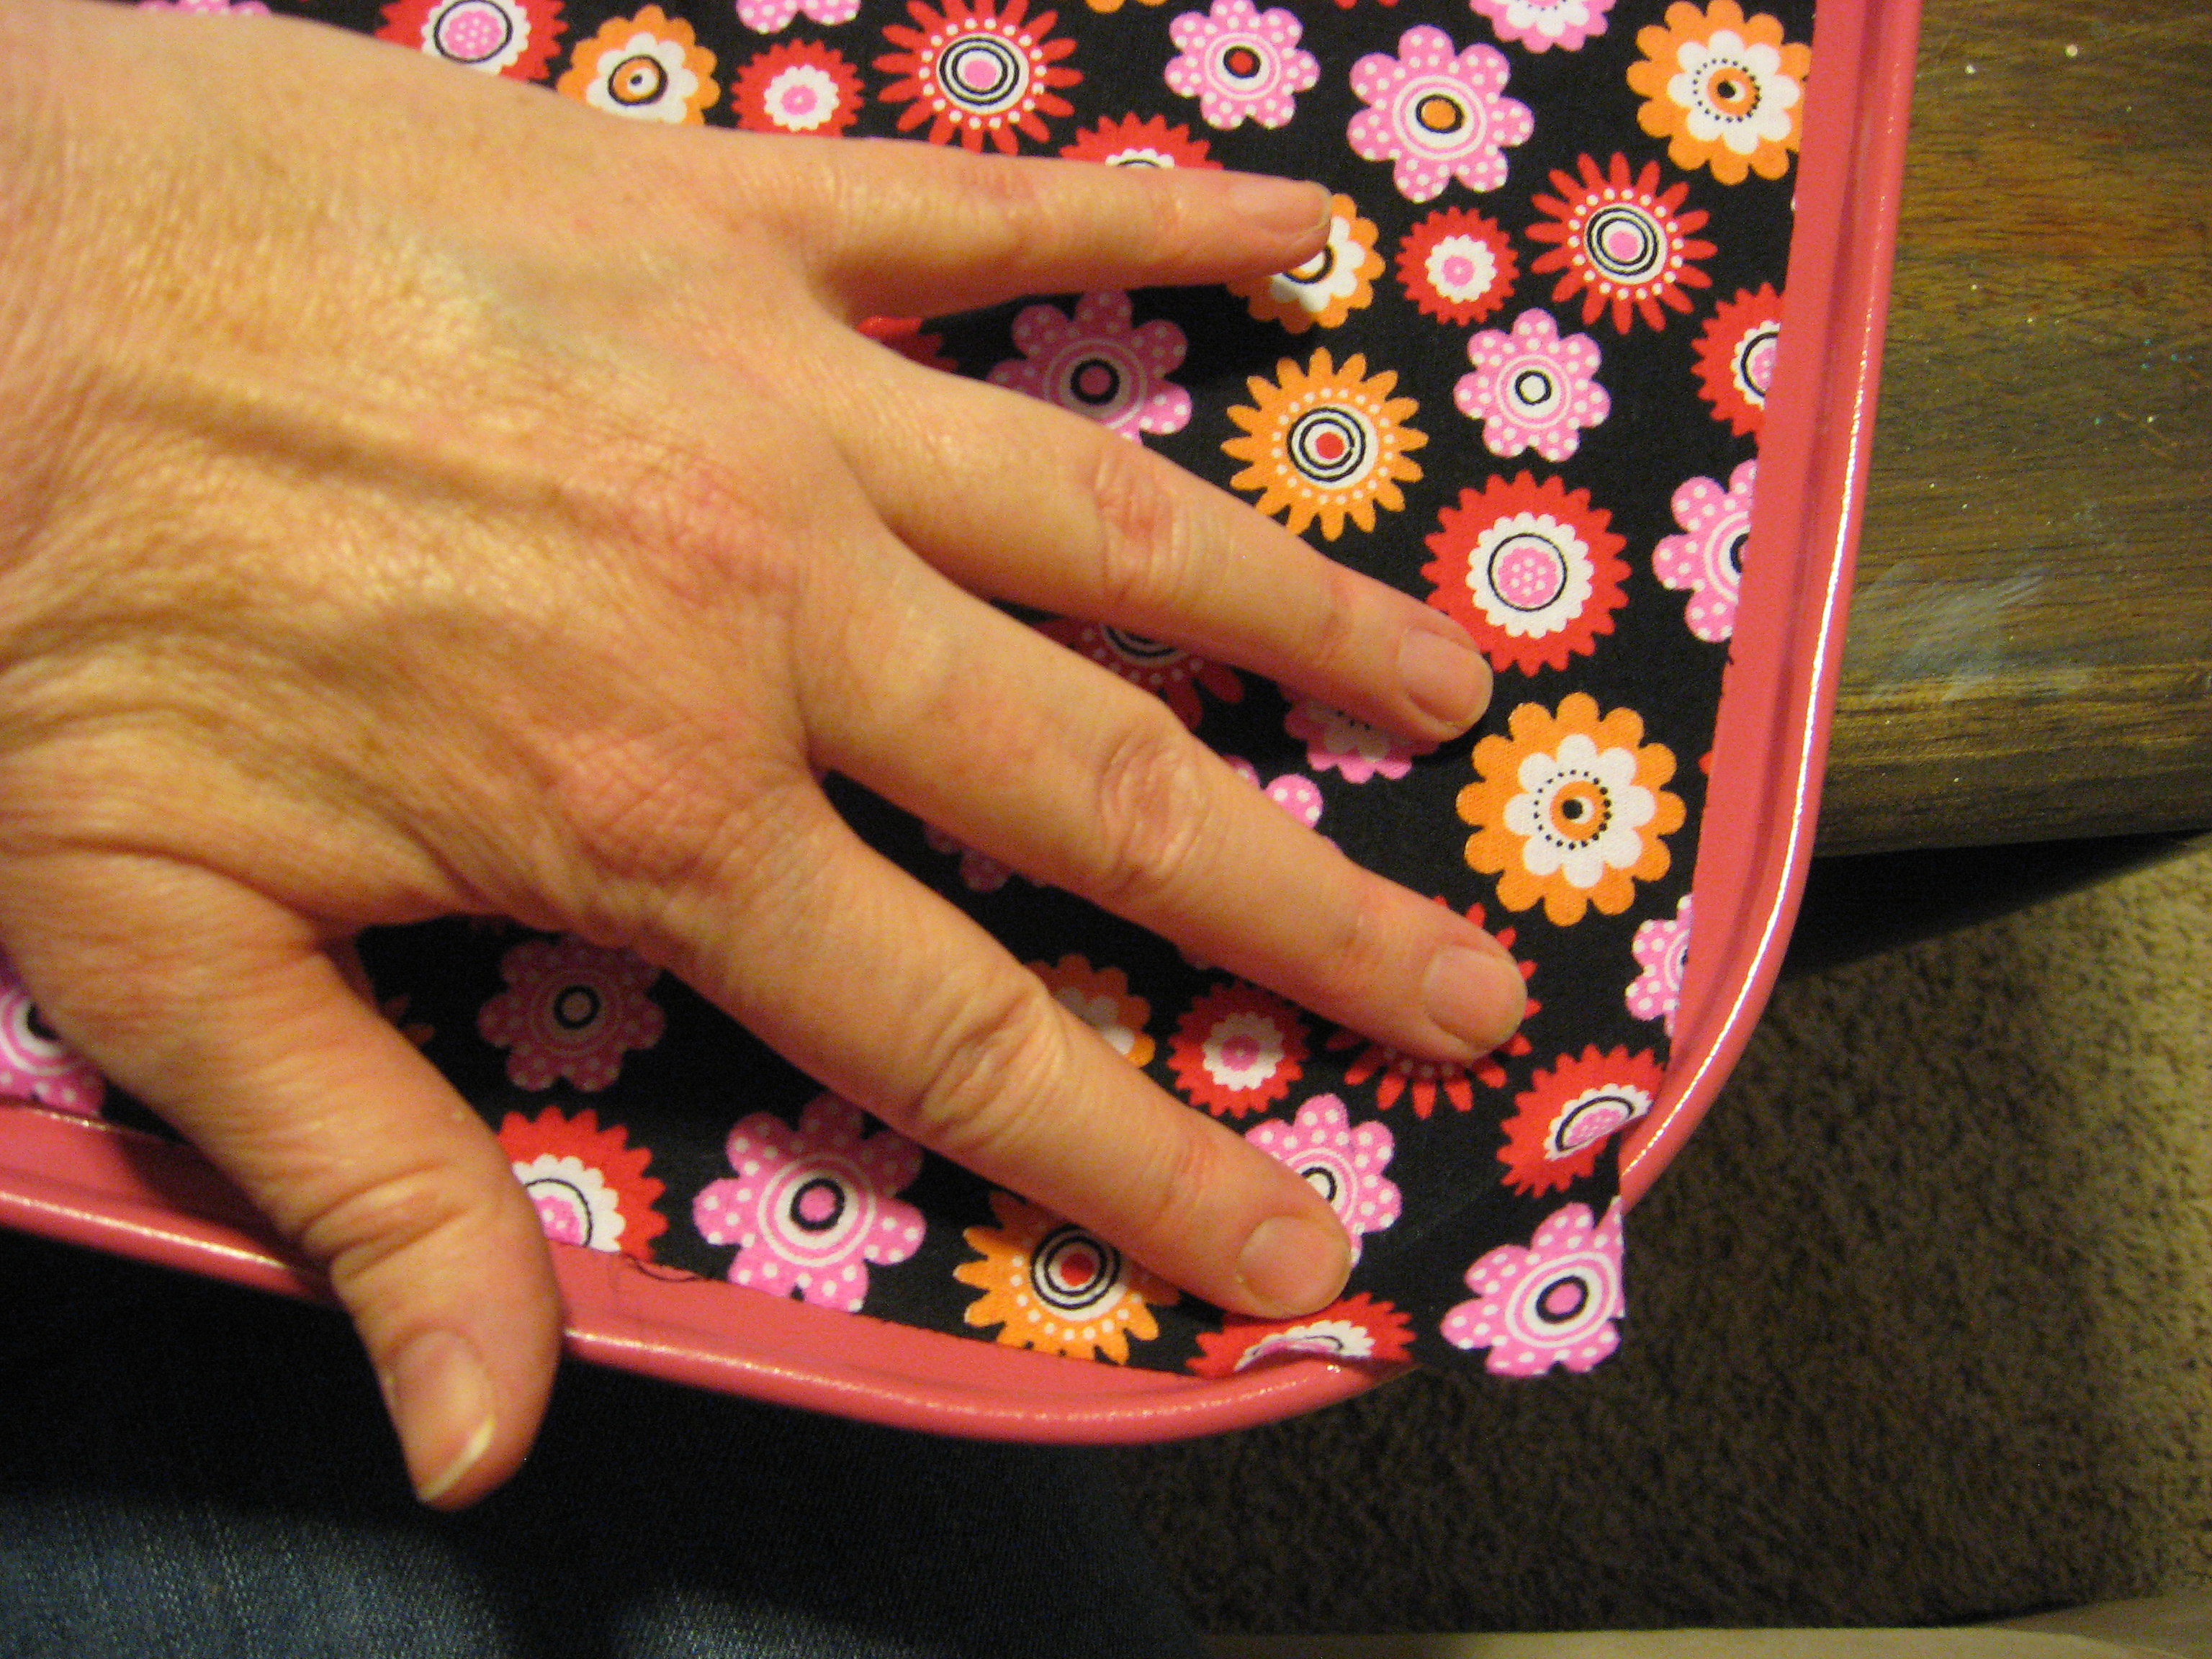
Start by lining up the two edges of your fabric that you cut straight with two adjacent sides of the pan. The corner will extend over; don’t worry about that yet.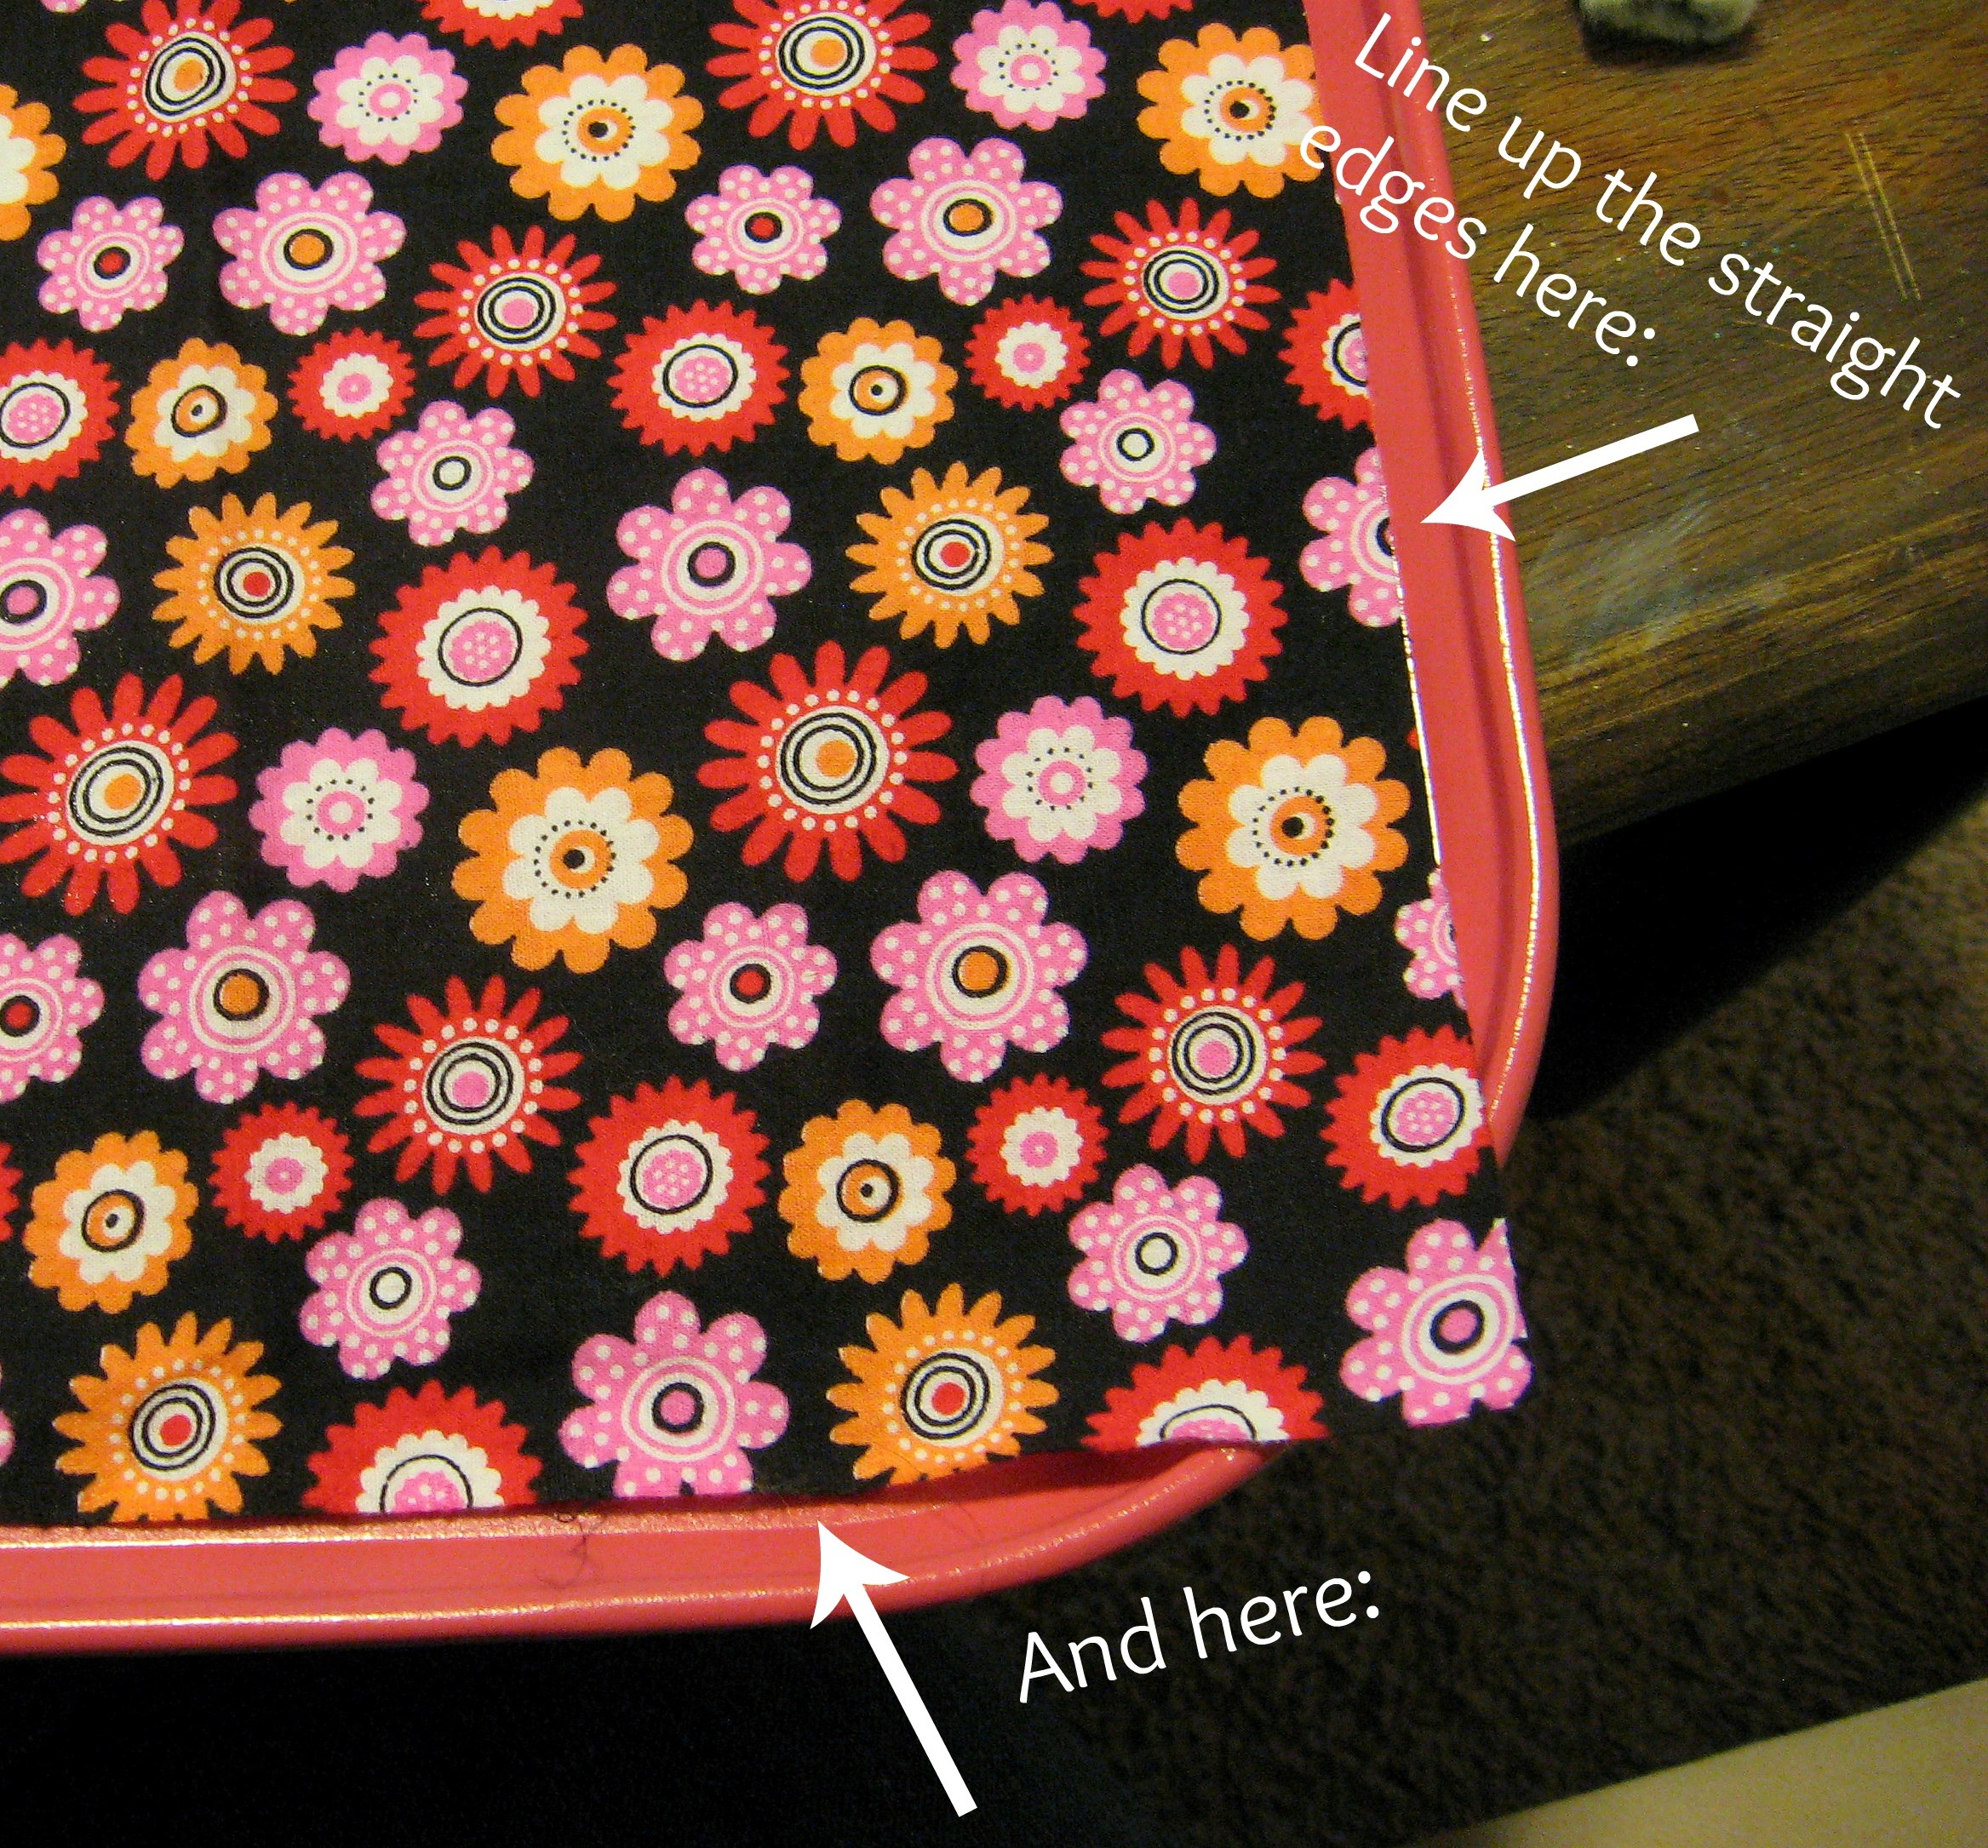
Once the fabric is all laid out and lined up with the edges, gently fold back the end and start applying the Mod Podge to the tray.
Start with the corner that you just lined up, then work your way across the short end of the tray until you get the fabric on that whole end adhered. Apply a few inches of the Mod Podge, then rub it down with your fingers until it is stuck.
Then gently fold back more fabric, apply more Mod Podge, rub and repeat. Make sure you are not leaving any spots under the fabric without Mod Podge. Once you get a strip across the whole short end adhered, leave it for 15 minutes to dry before you continue. If that first strip is lined up and attached well, the rest of it will be easier. Continue rubbing it with your hands (or a brayer) as it dries to make sure it dries flat and smooth.
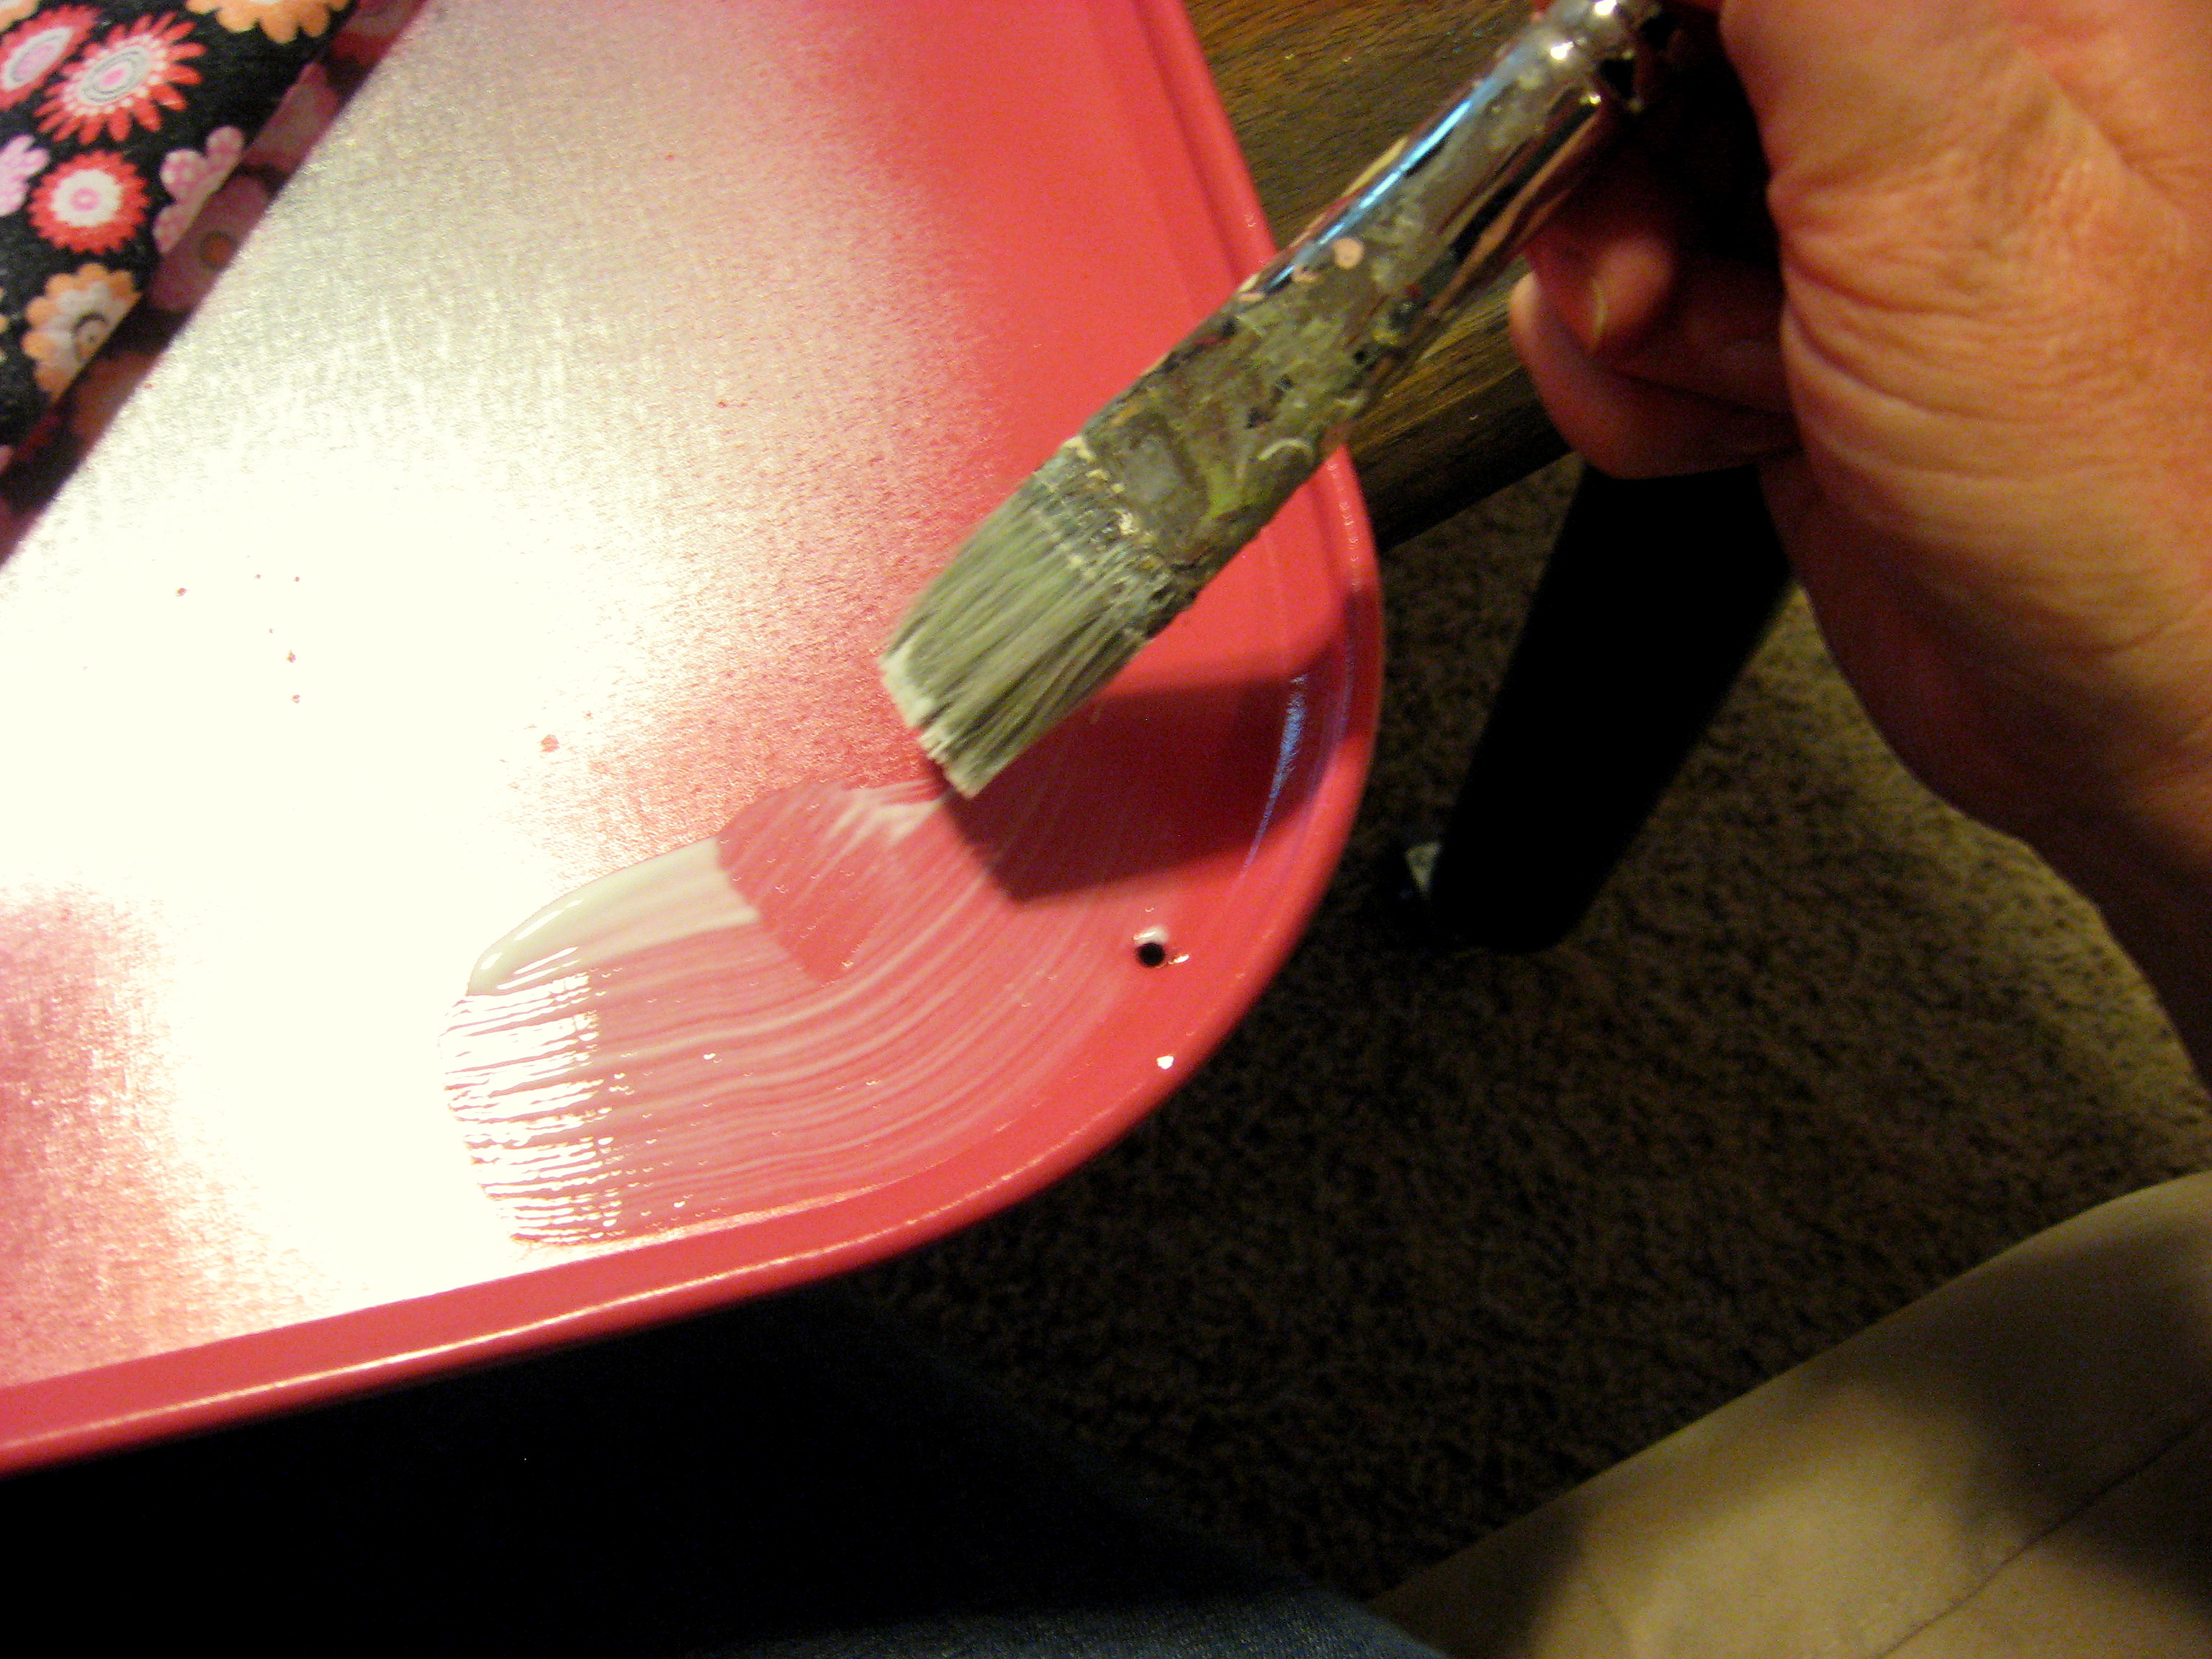
Once that first strip is dry, you can work the rest of the way down the pan in strips. Fold the fabric back, apply enough Mod Podge to cover 4 or 5 inches. I just poured it on
and then spread it with a paint brush.
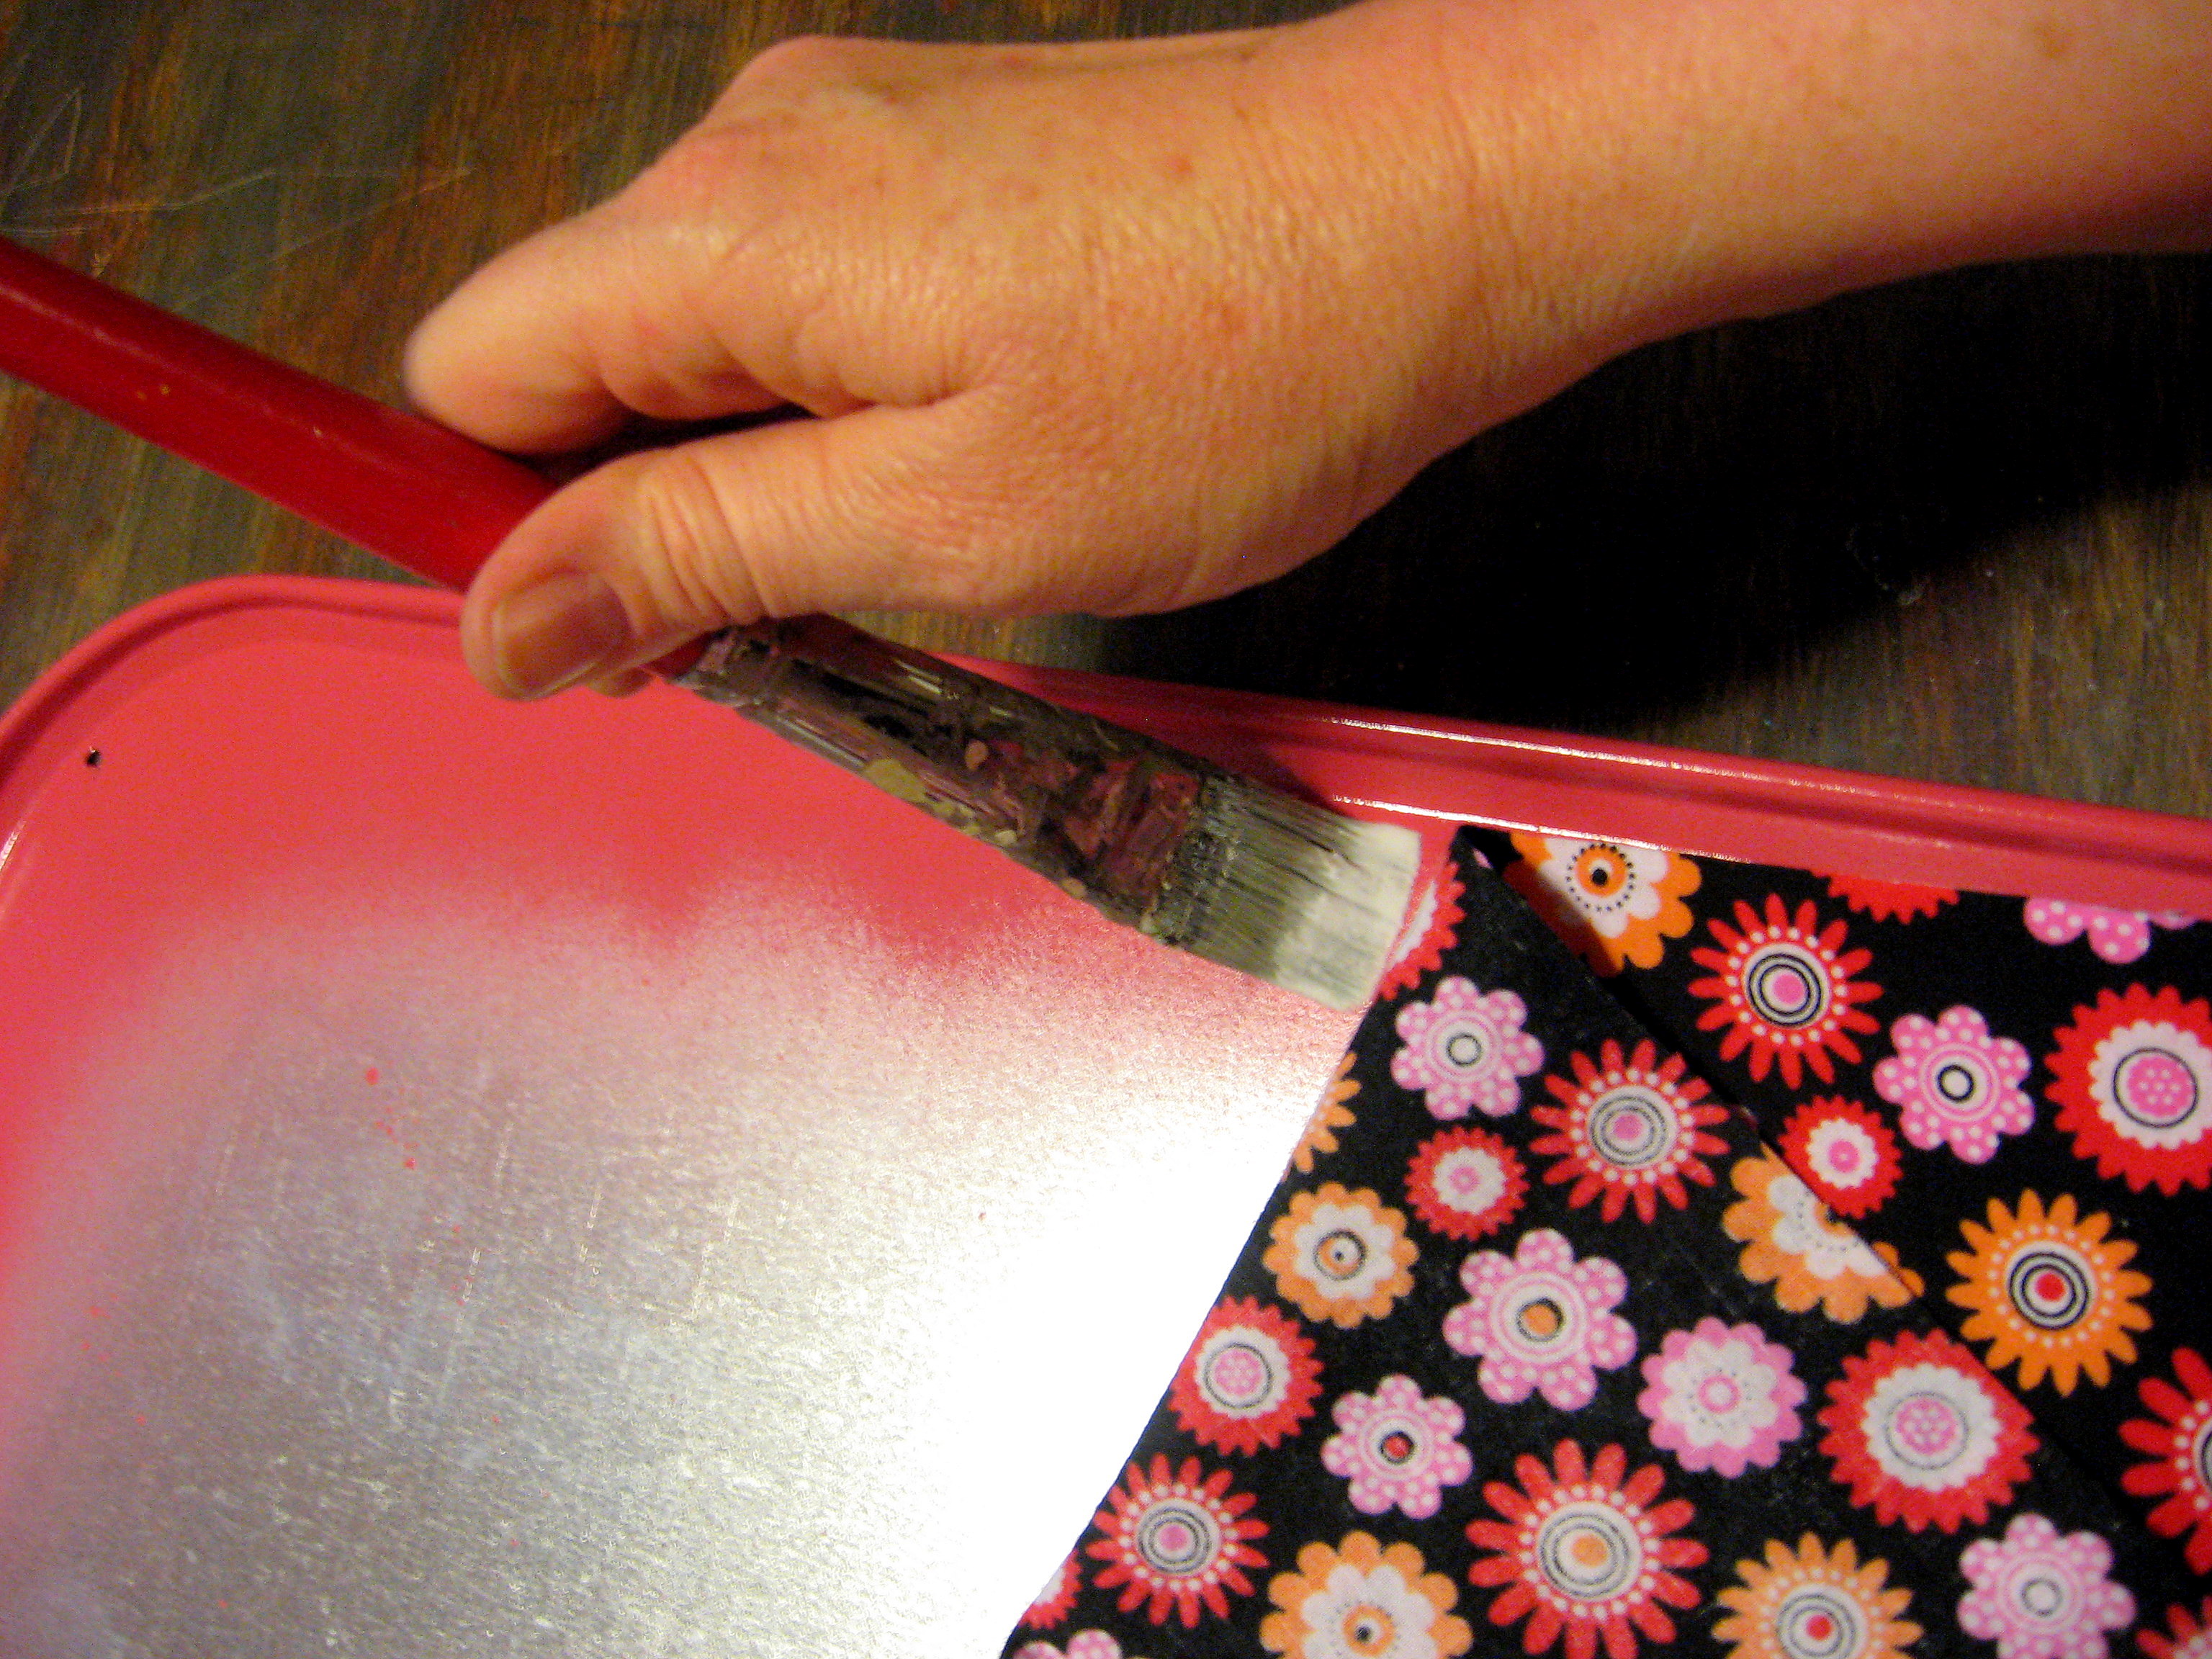
again, making sure not to miss any spots. Fold the fabric over the Mod Podge – carefully lining up the straight edge (remember the other edge will extend over at this point) and rub until it starts to dry.
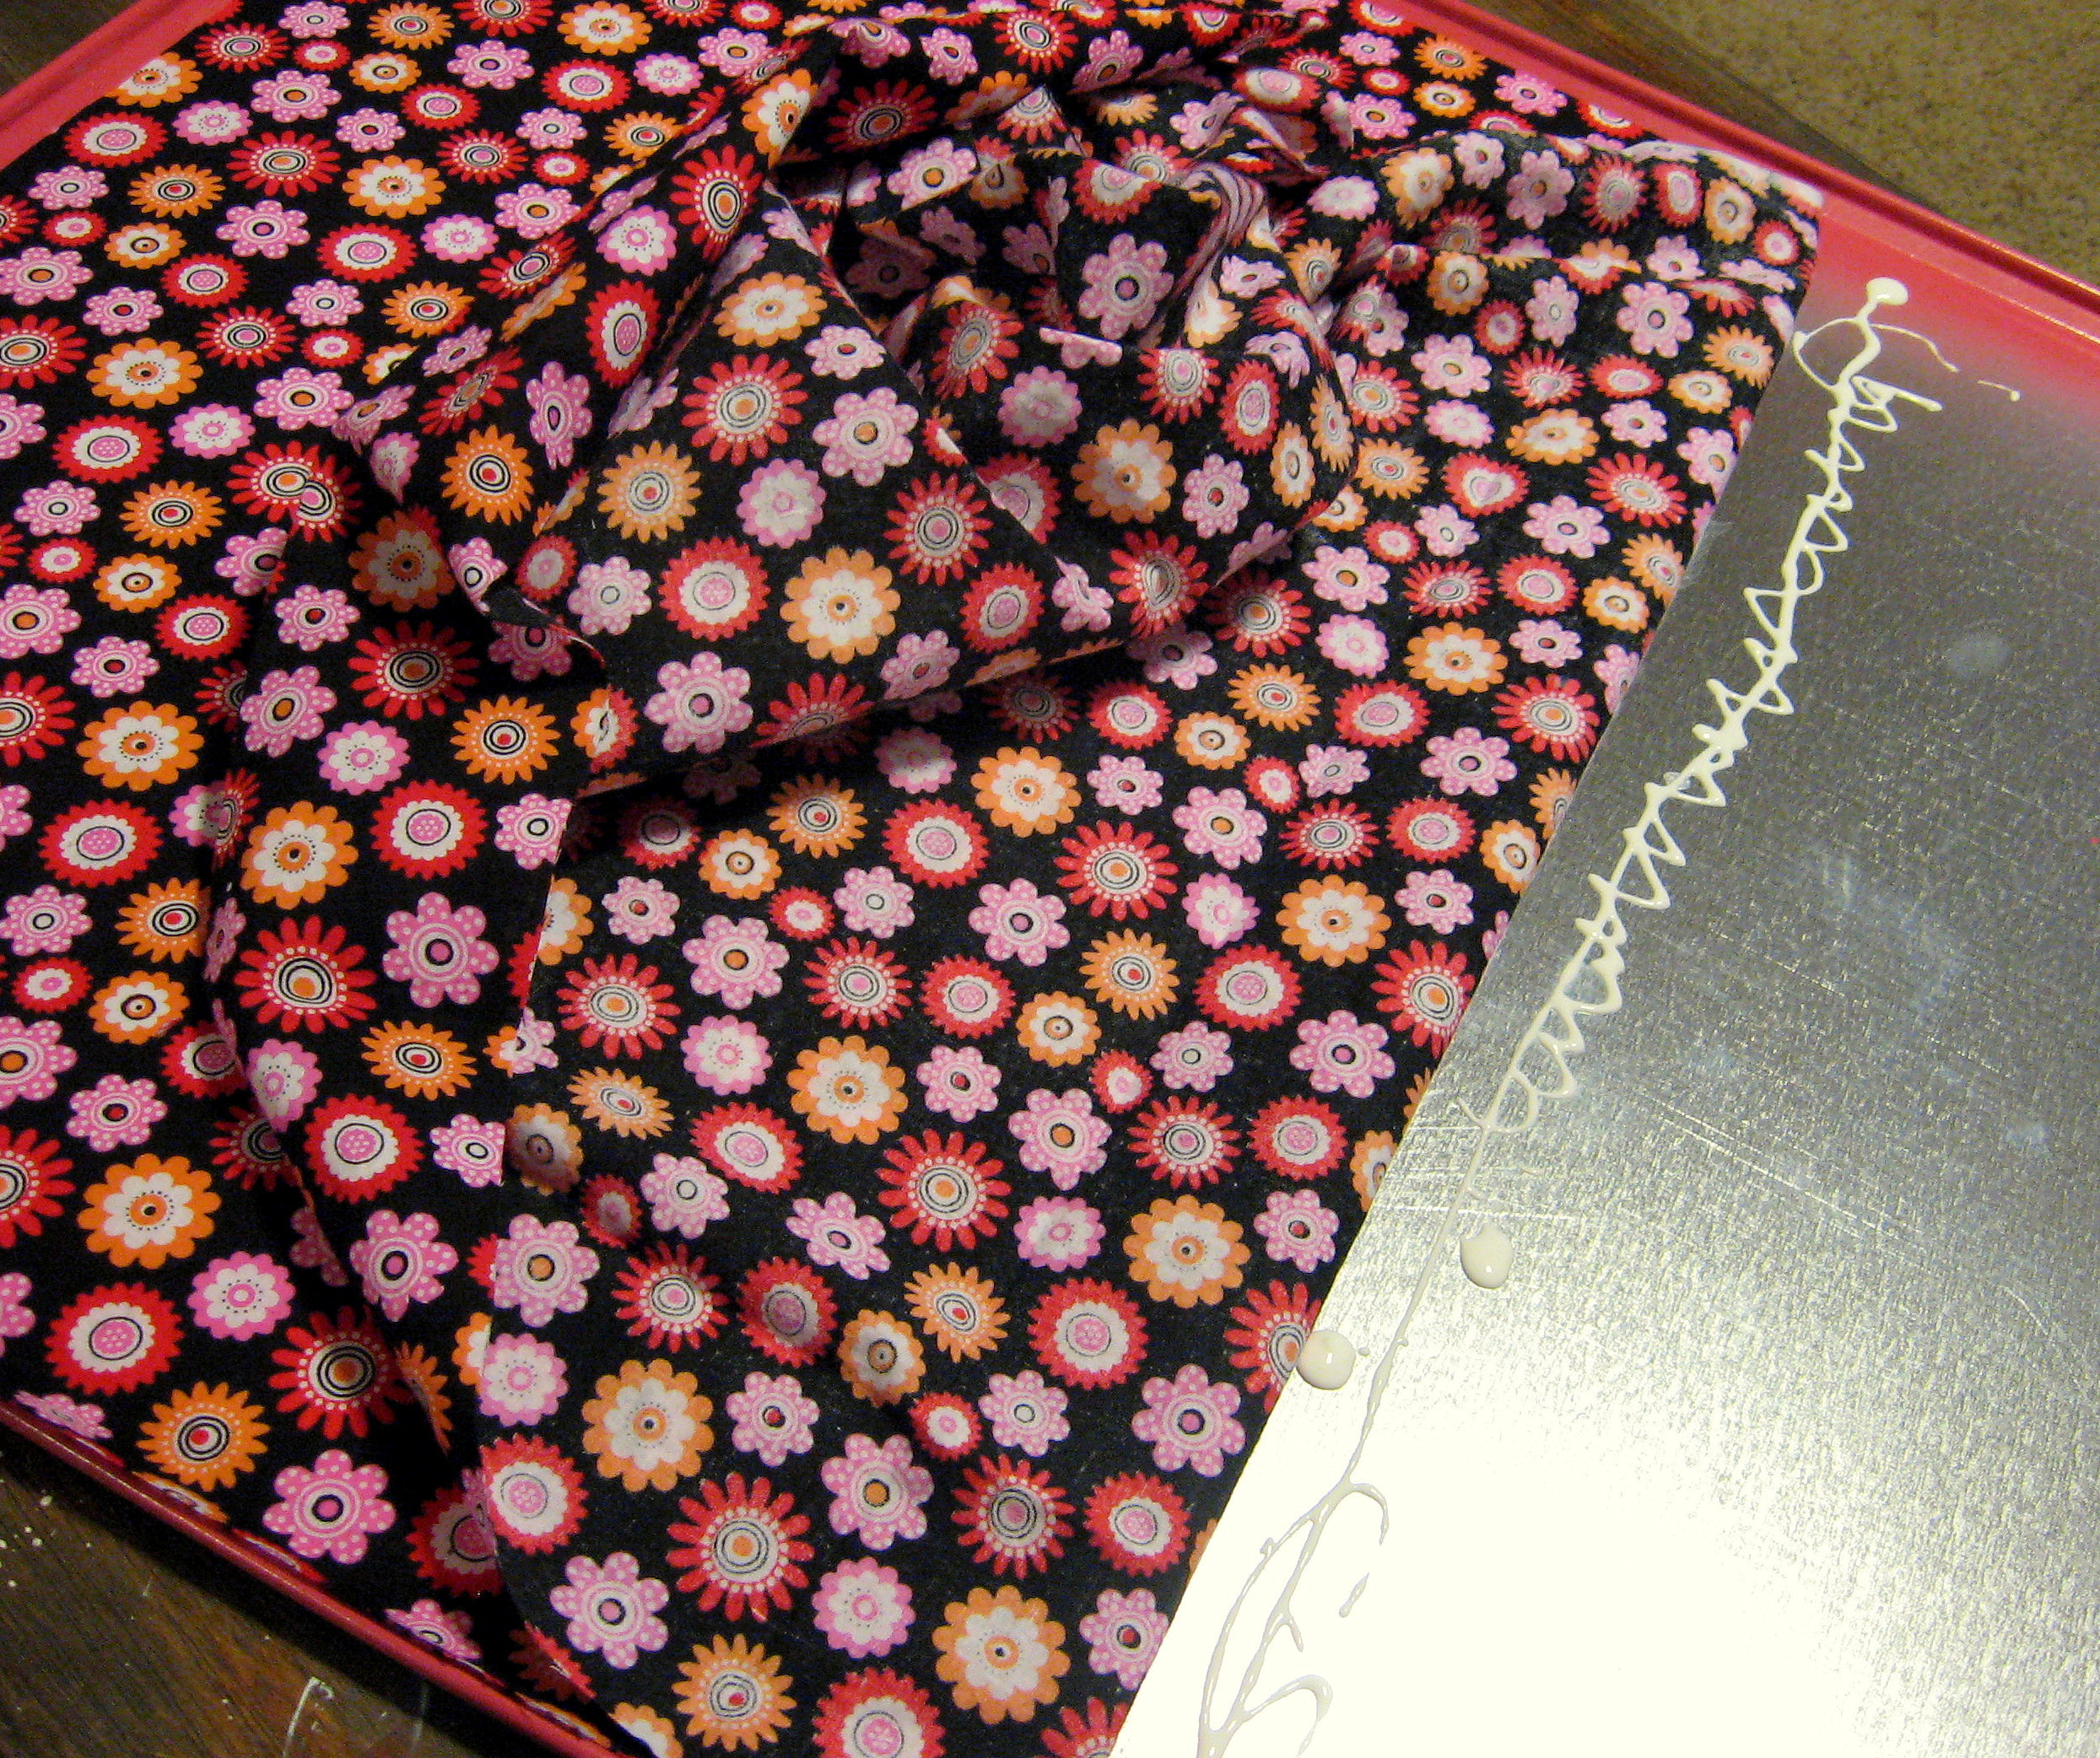
Let that dry thoroughly, then you are ready to cut off the excess fabric. I used an exacto knife and a metal straight edge on the straight parts, but I just free handed it around the curved corners.
Once I pulled the excess fabric off, I discovered this:
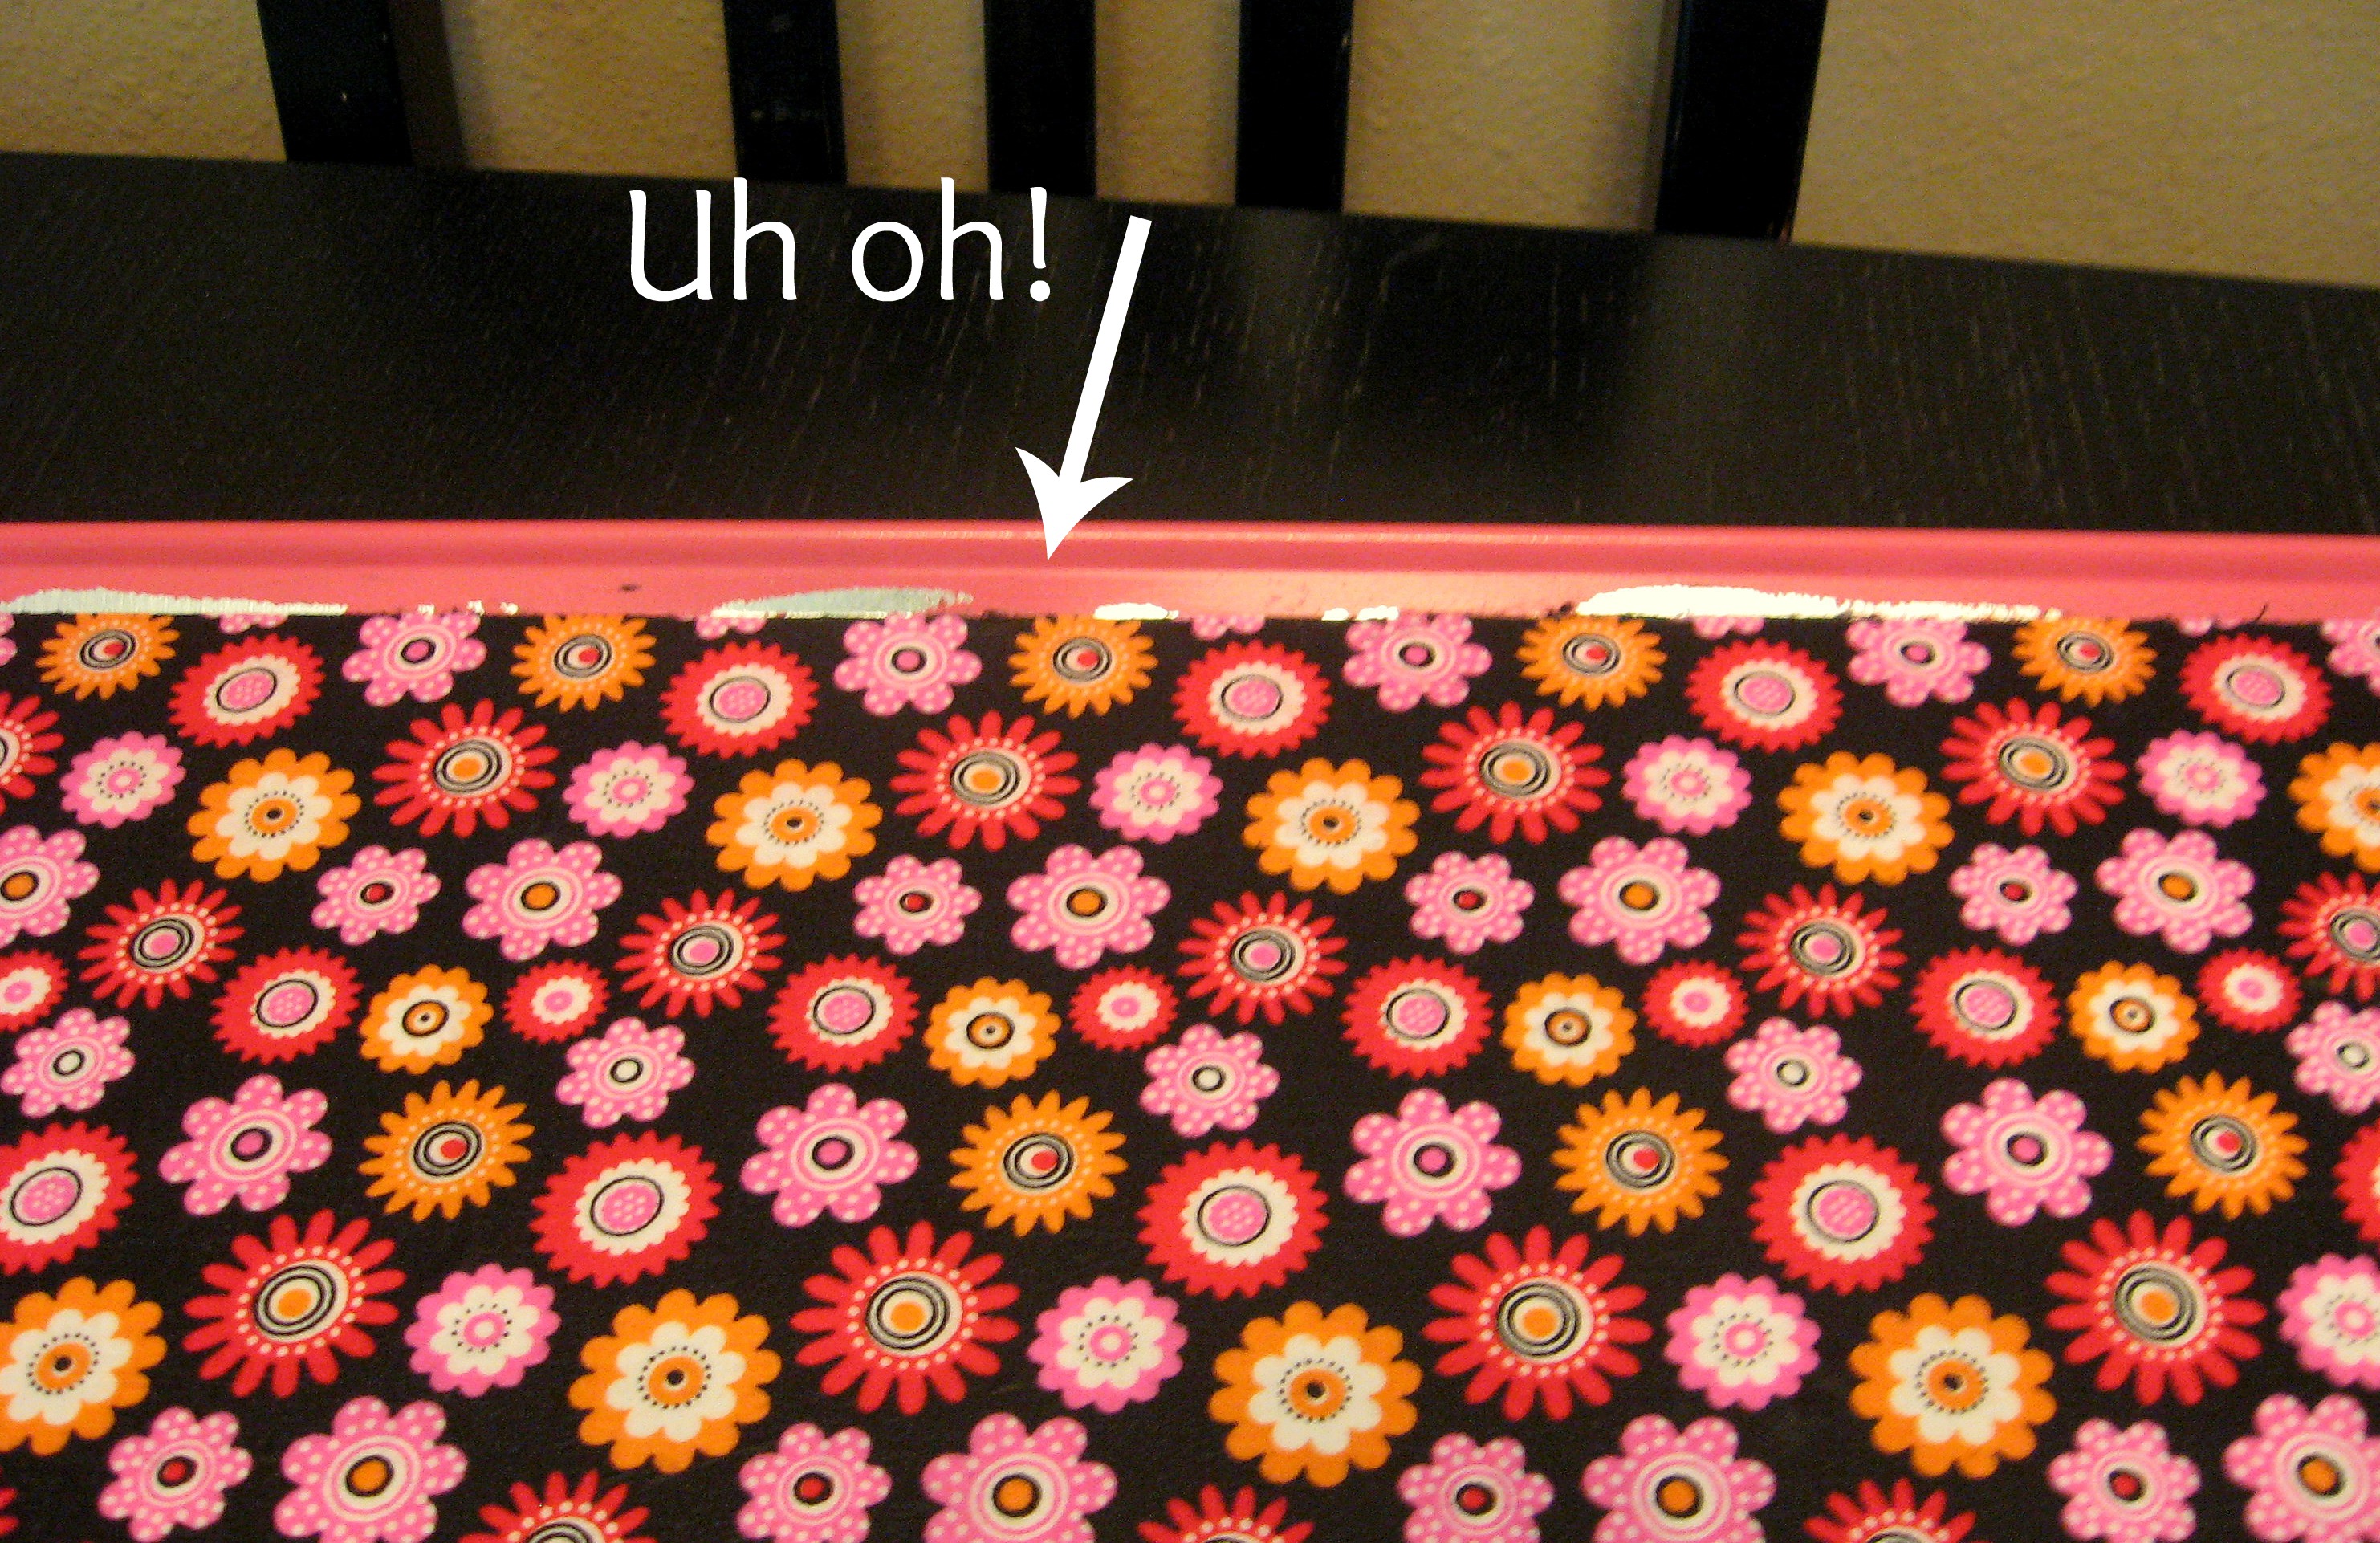
Oops. Fabric pulled the spray paint off with it in some spots.
SO – learn from me when you make yours and either 1) Mod Podge the fabric on first, then tape it off well and spray paint second. or 2) Be very careful as you are brushing the Mod Podge on and don’t let it go up the sides of the pan.
But, in case you find yourself in a similar place and need to fix it, this is what I did. I sprayed some spray paint into the bottom of an empty butter tub- hold it close to the bottom and spray for a minute so that you get a really concentrated stream and end up with some liquid paint. Then I just used it like regular paint with a small paintbrush to paint over the mistakes.
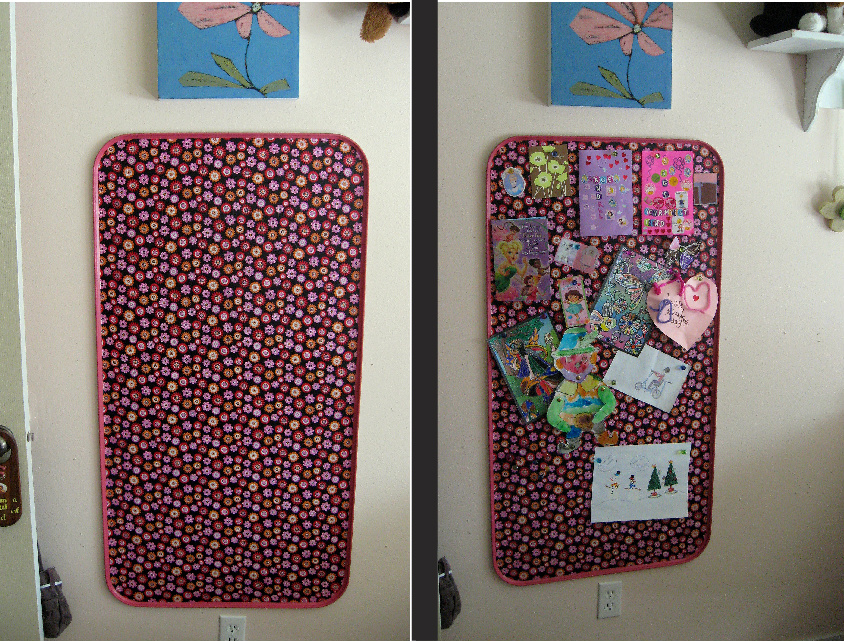
Once that’s dry, give the entire pan a top coat of Mod Podge. Be sure you go up on the sides of the pan too to protect the paint from scratching off.
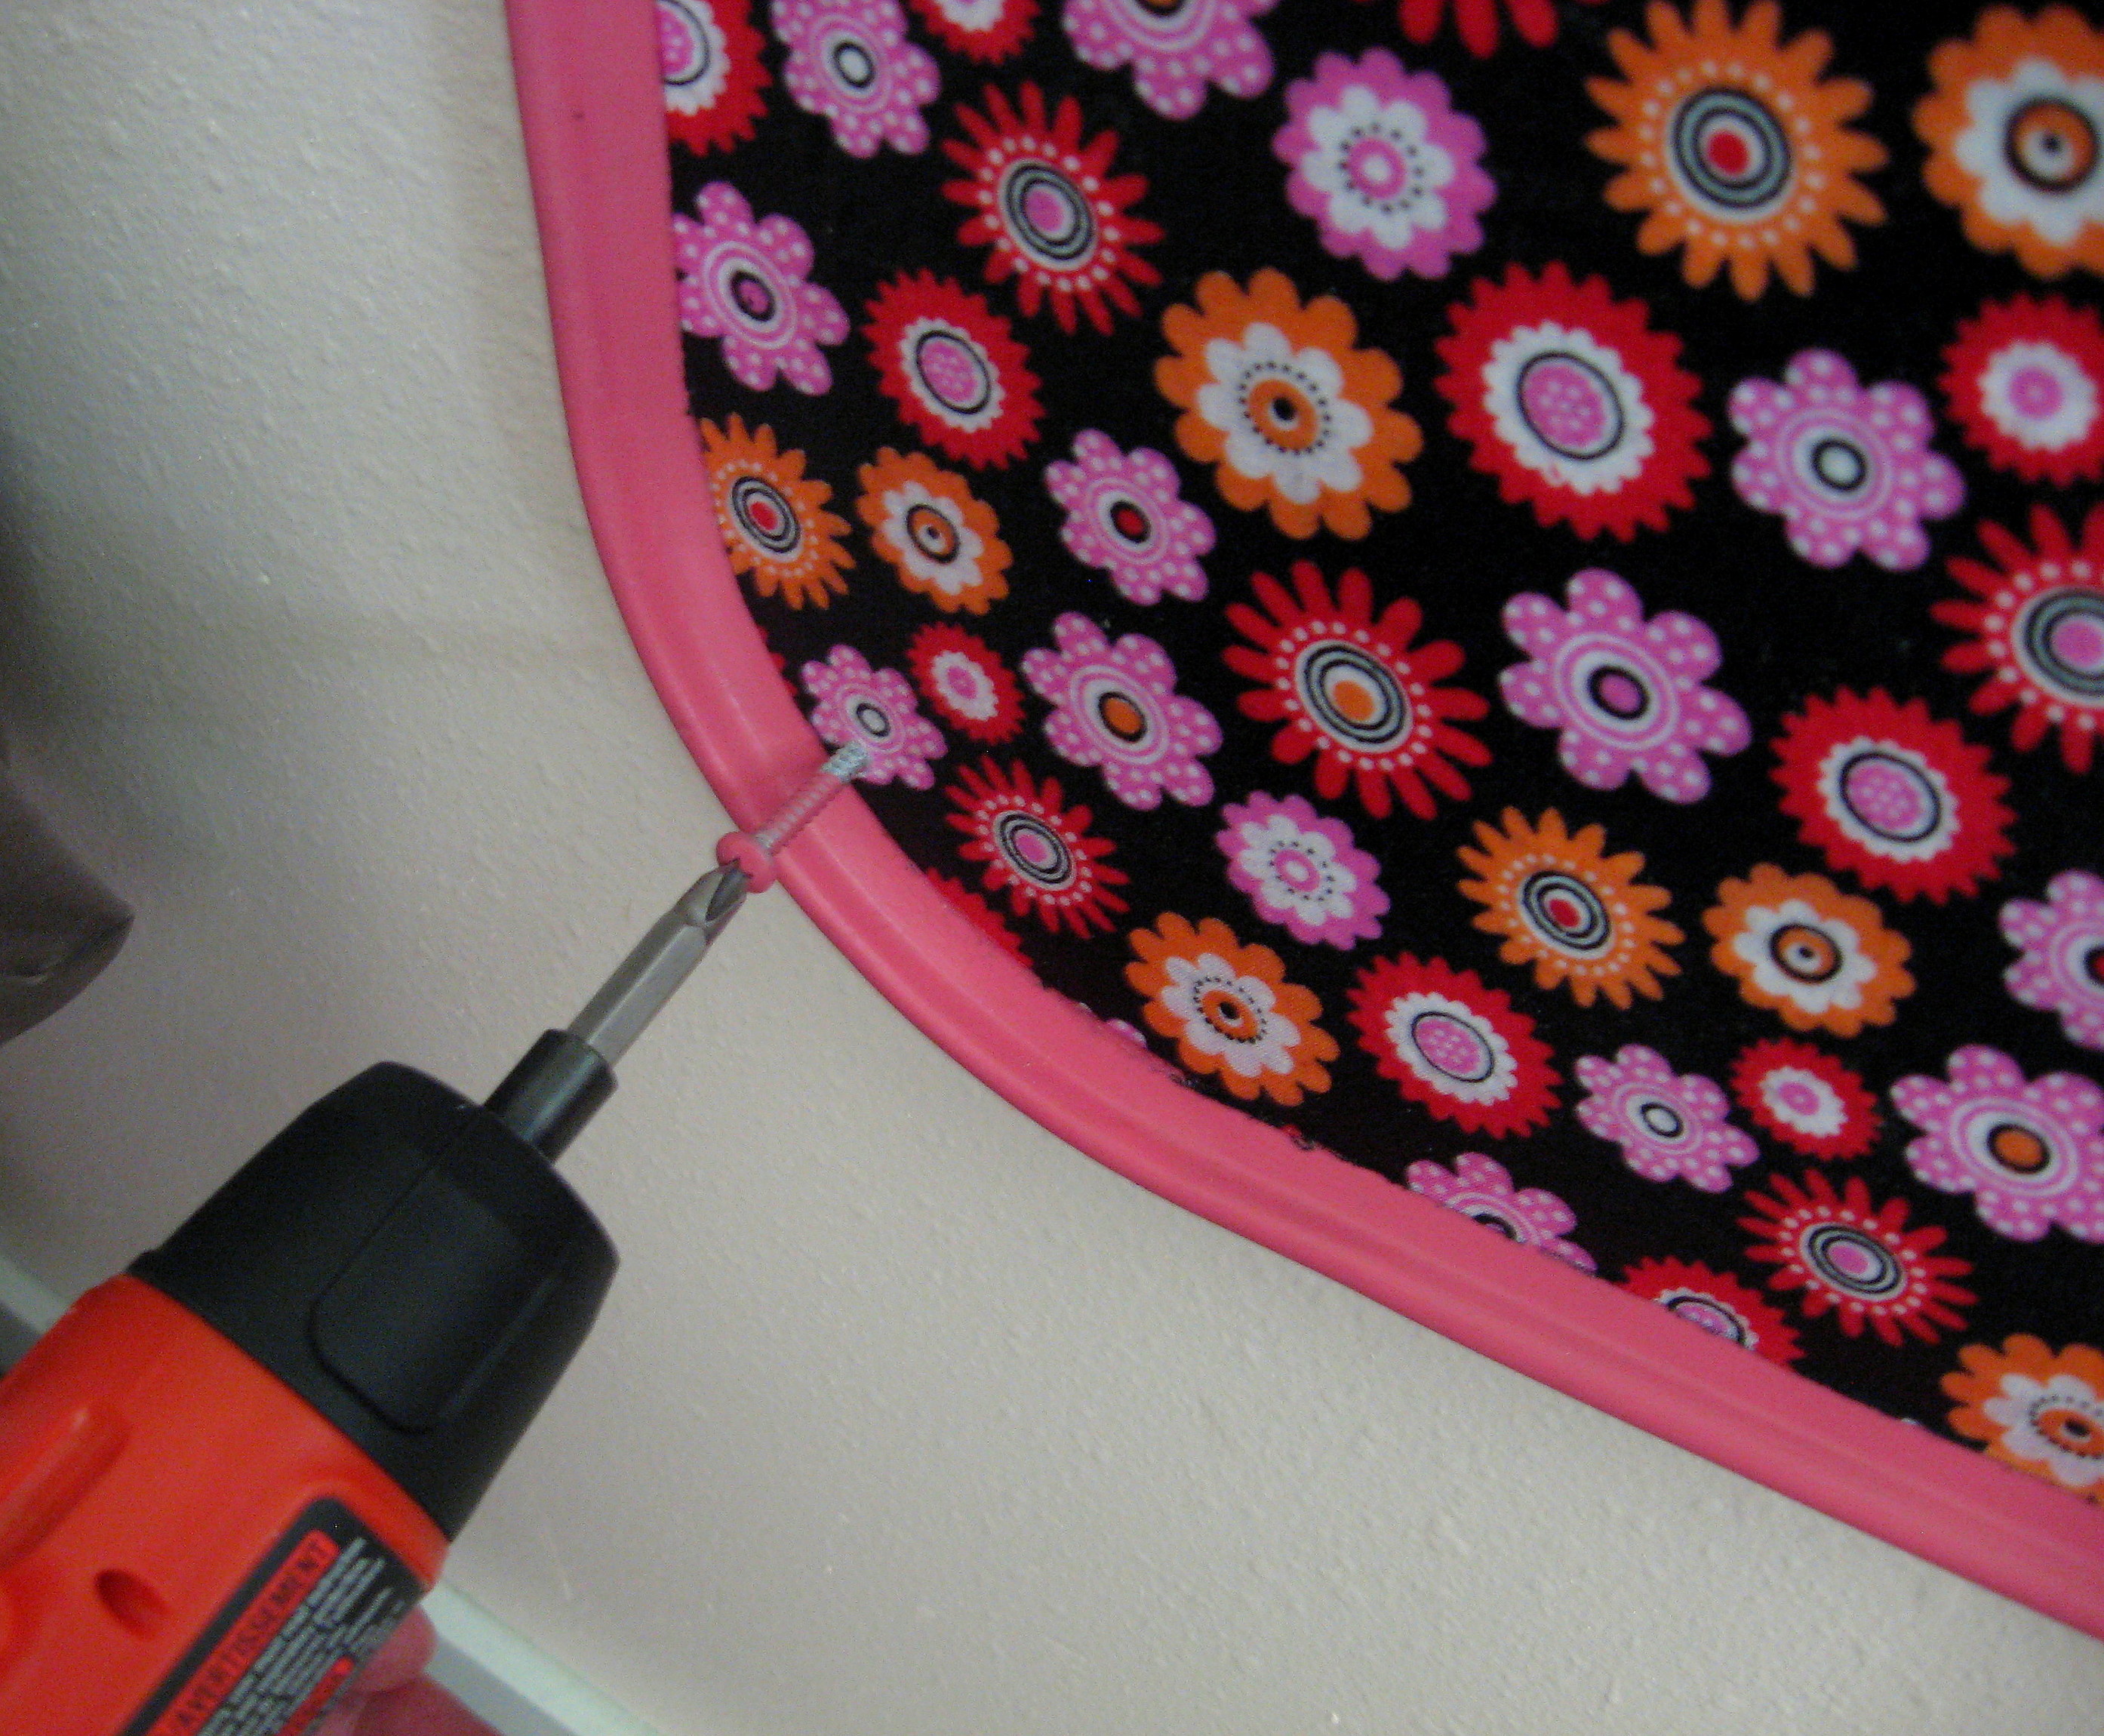
I spray painted the heads of the screws so they would match
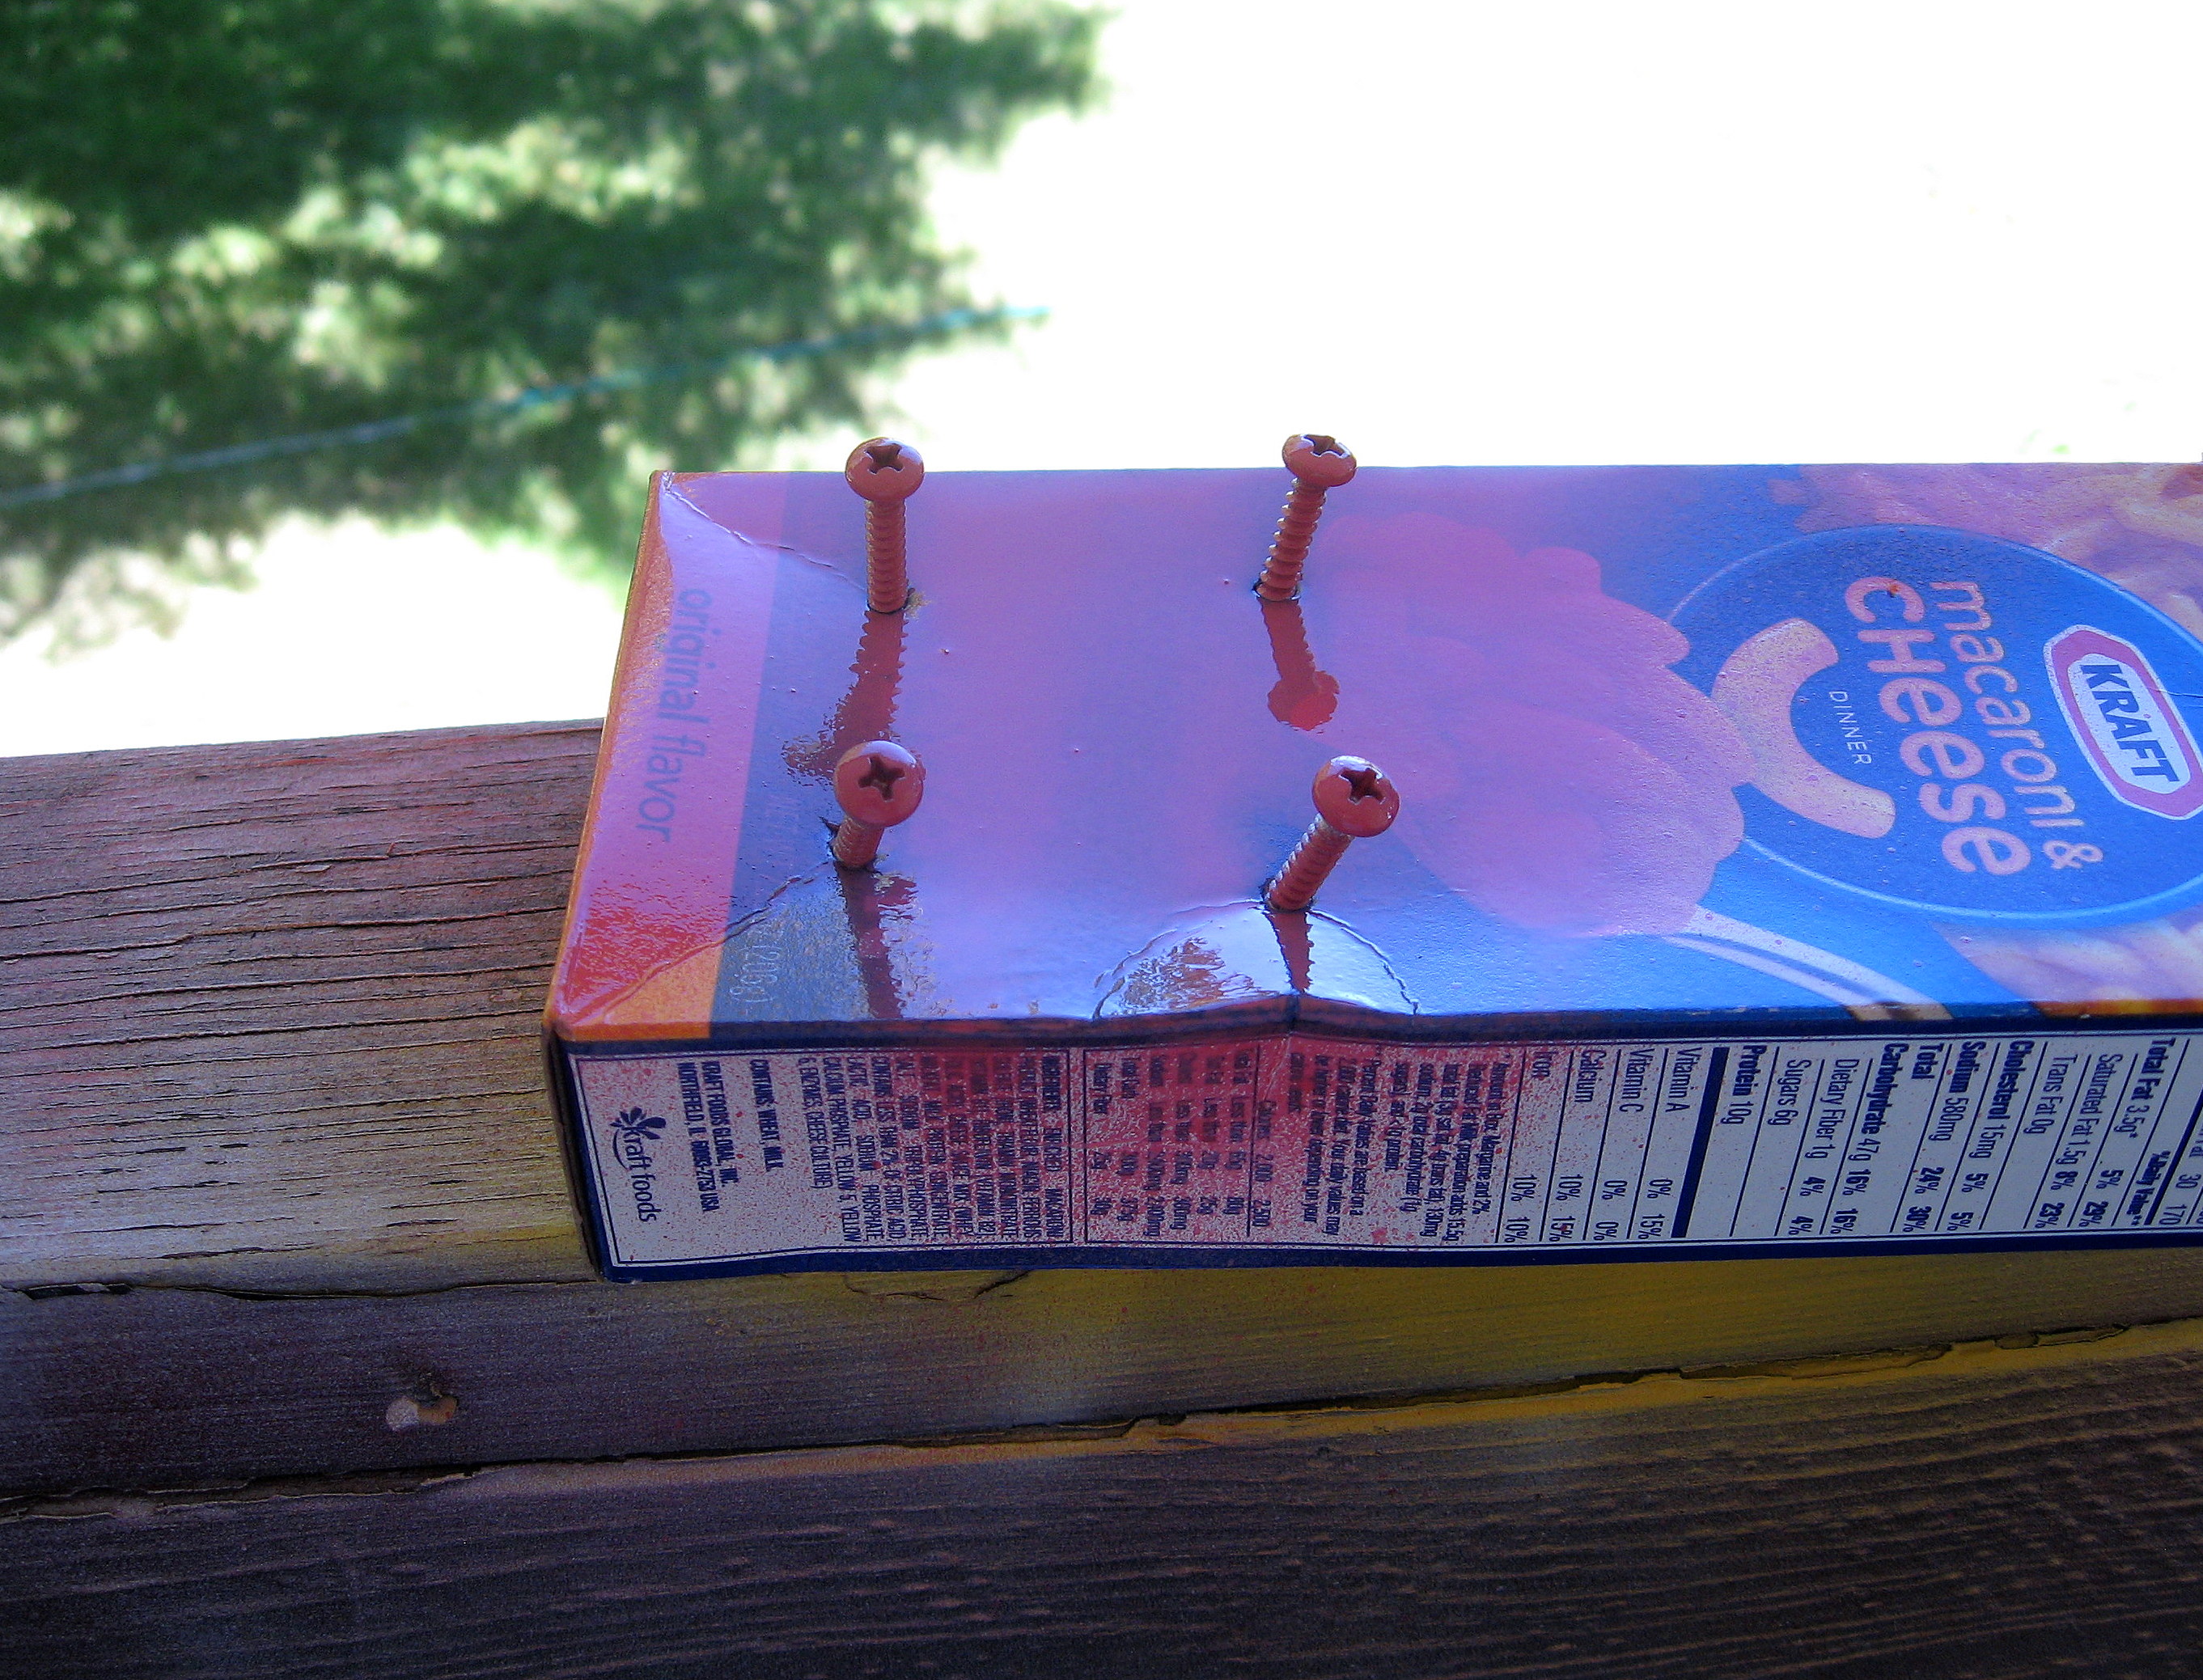
then just screwed it into the wall (a drill bit in an electric drill will go right through the soft metal of the drip pan).
Done! I was worried that the layer of fabric would compromise how strong of a bond I would get with the magnets, but it didn’t; even the heavy birthday card from Grandma that plays that annoying charming and delightful song stayed put.

Washi Tape, DIY Earring Kits, Back to School Love Notes, Baby Shower Banners & More!


- $1.89 | NEW DESIGNS ADDED!! Washi Tape Favorites!!
- $6.95 | DIY Earring Kits – Introductory Pricing!
- $12.99 | Liquid Chalk Markers with Both Chisel & Bullet tips
- $5.95 | Back by Popular Demand! Back to school – Deluxe LOVE NOTES – new items added!!
- $4.99 | Baby Shower Onesies Banners
- $1.99 | BACK TO SCHOOL – Kid’s Zipper Bracelets!
More cute stuff available today! Low shipping prices!
A PYP Best Blog! Make an Outfit Hanger for Back to School!
Just in case you missed this article on making a outfit hanger the first time we shared it a couple of years ago, we are republishing it. After Sharon wrote this blog originally, we got an awesome response. This is one of the PYP Best Blogs!
Boring title? Yes. The discussion that took place in my house about what to call this project may have lasted a long time and just might have gotten a little heated. Never mind, call it whatever you like – I LOVE this project!
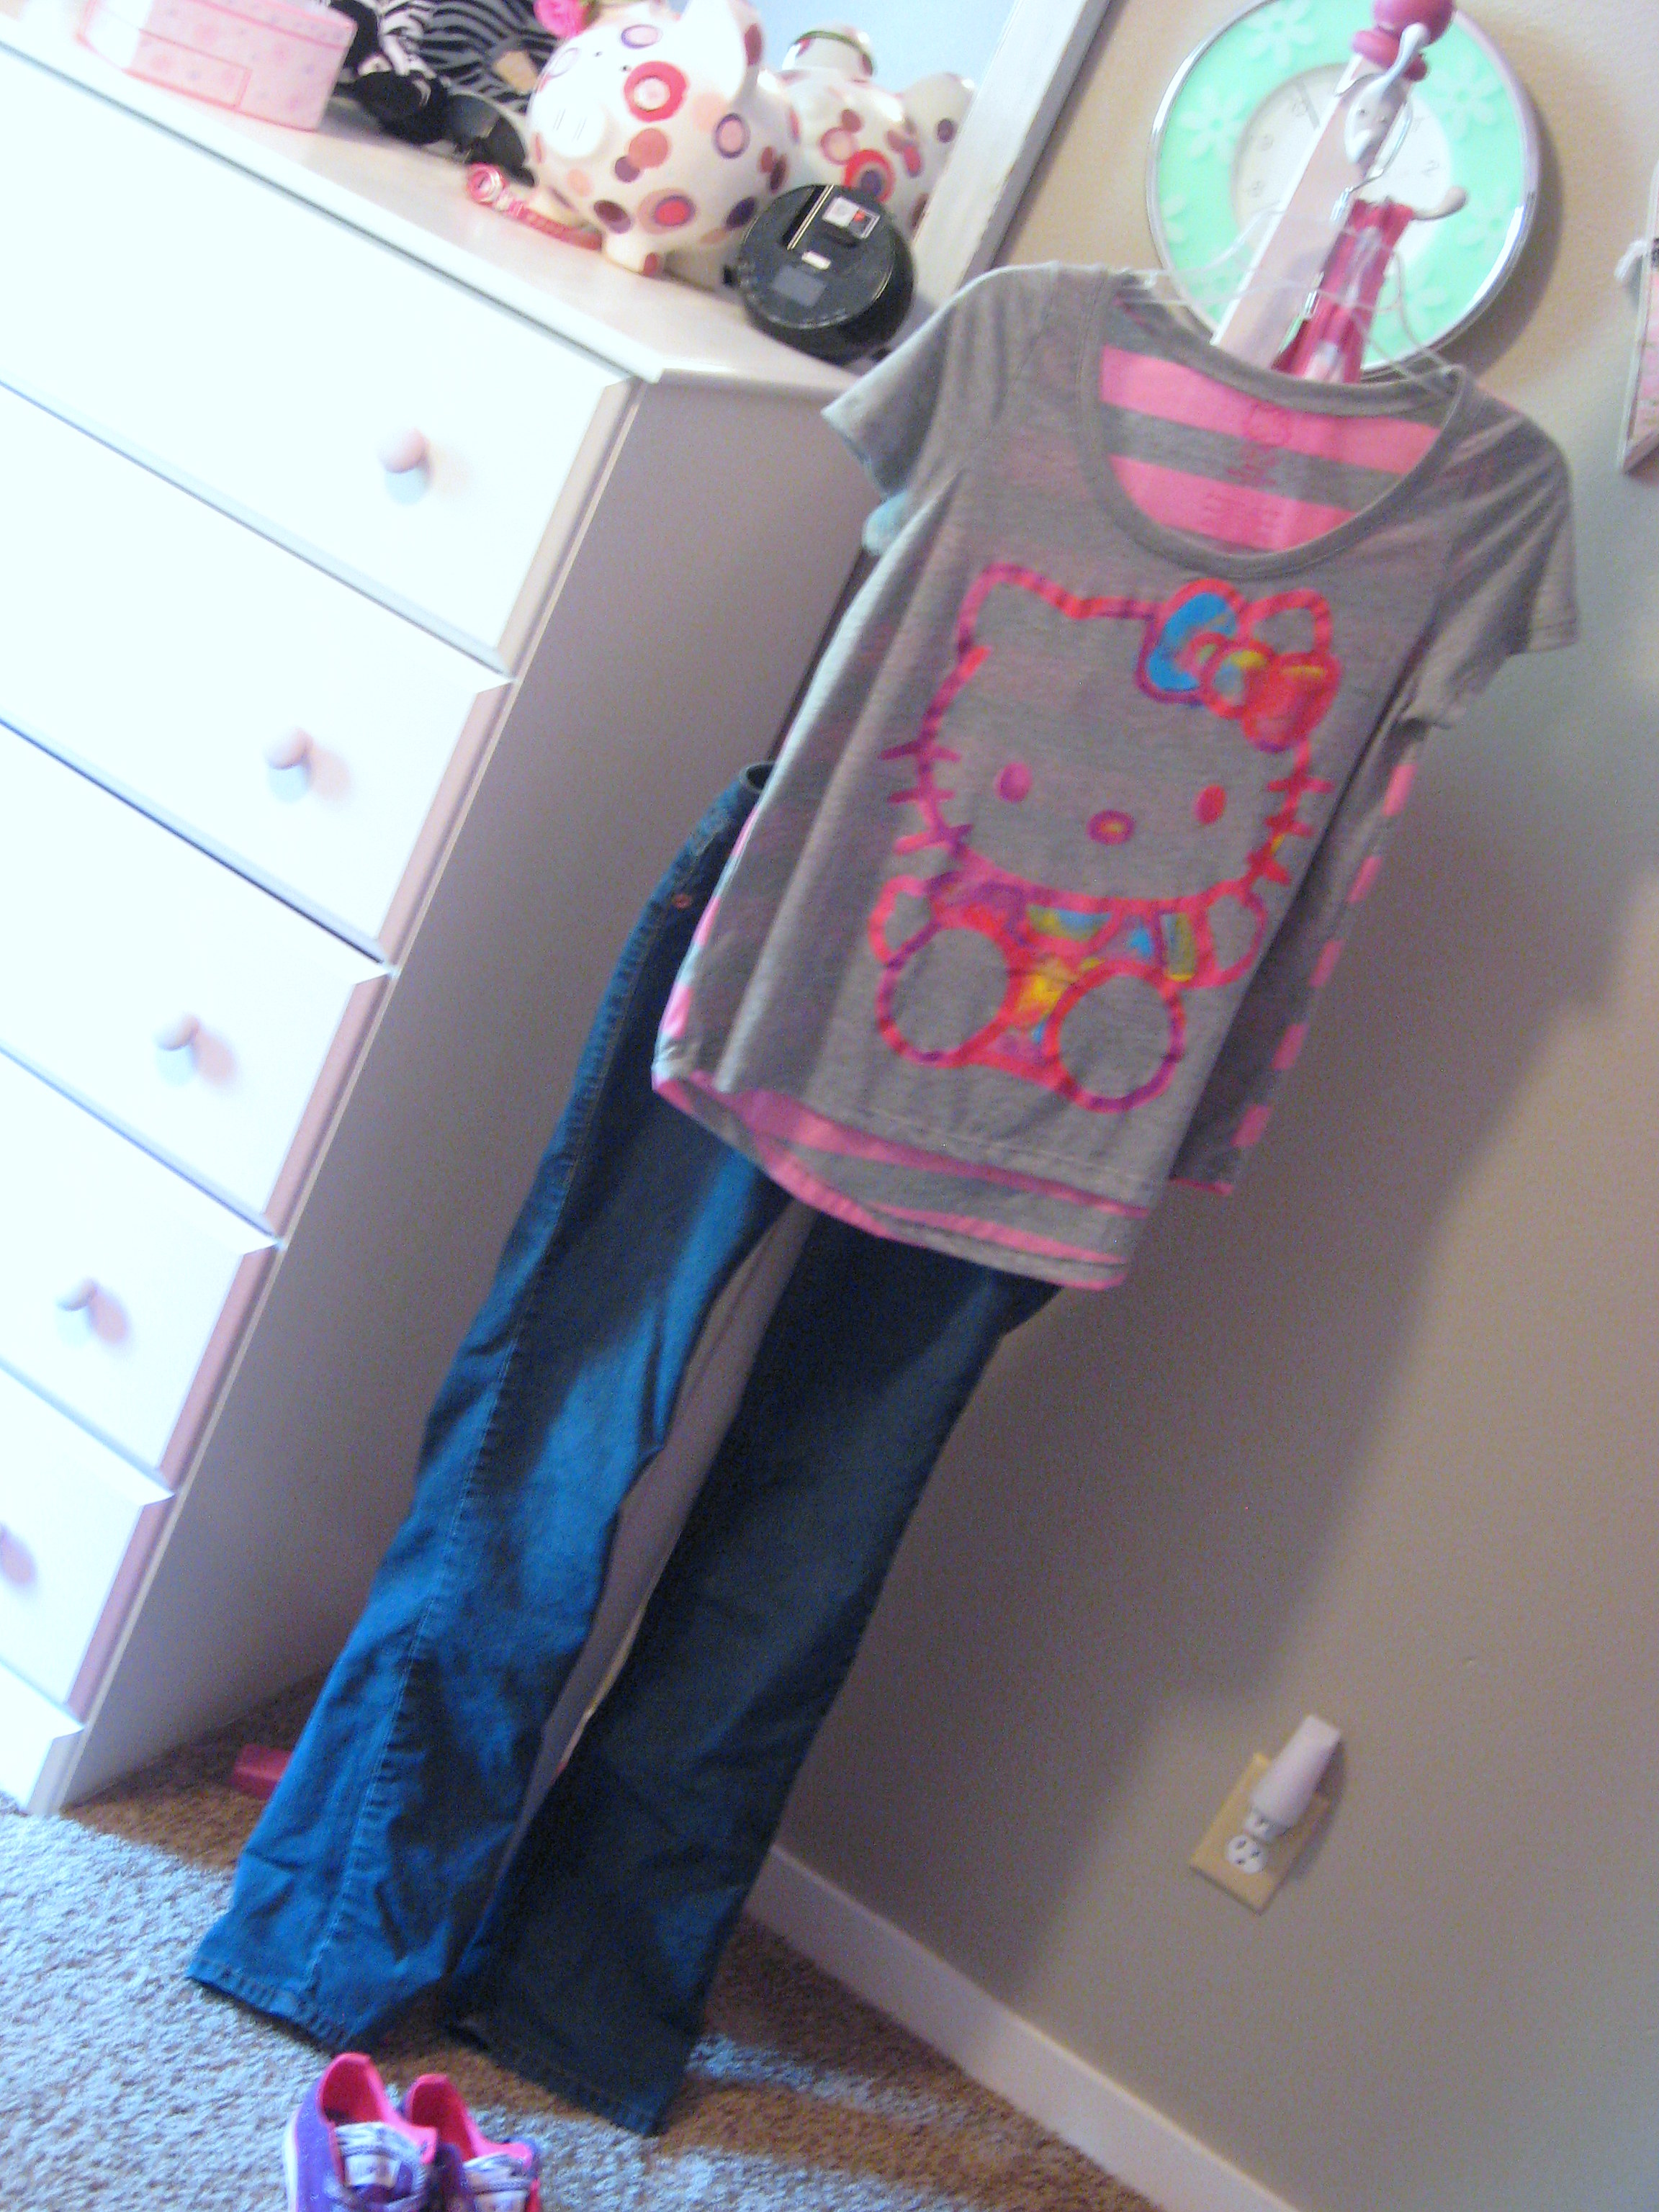
My daughter started middle school this year, and as we all know – wardrobe and outfit choices are of UTMOST importance. We were spending time at night picking out an outfit, only to find out the next morning when we put it on, that maybe it didn’t quite look as good together as we wanted it to, and I thought how nice it would be to have somewhere in her room for the complete outfit to hang. You can easily finish this project in a day and it is very inexpensive.
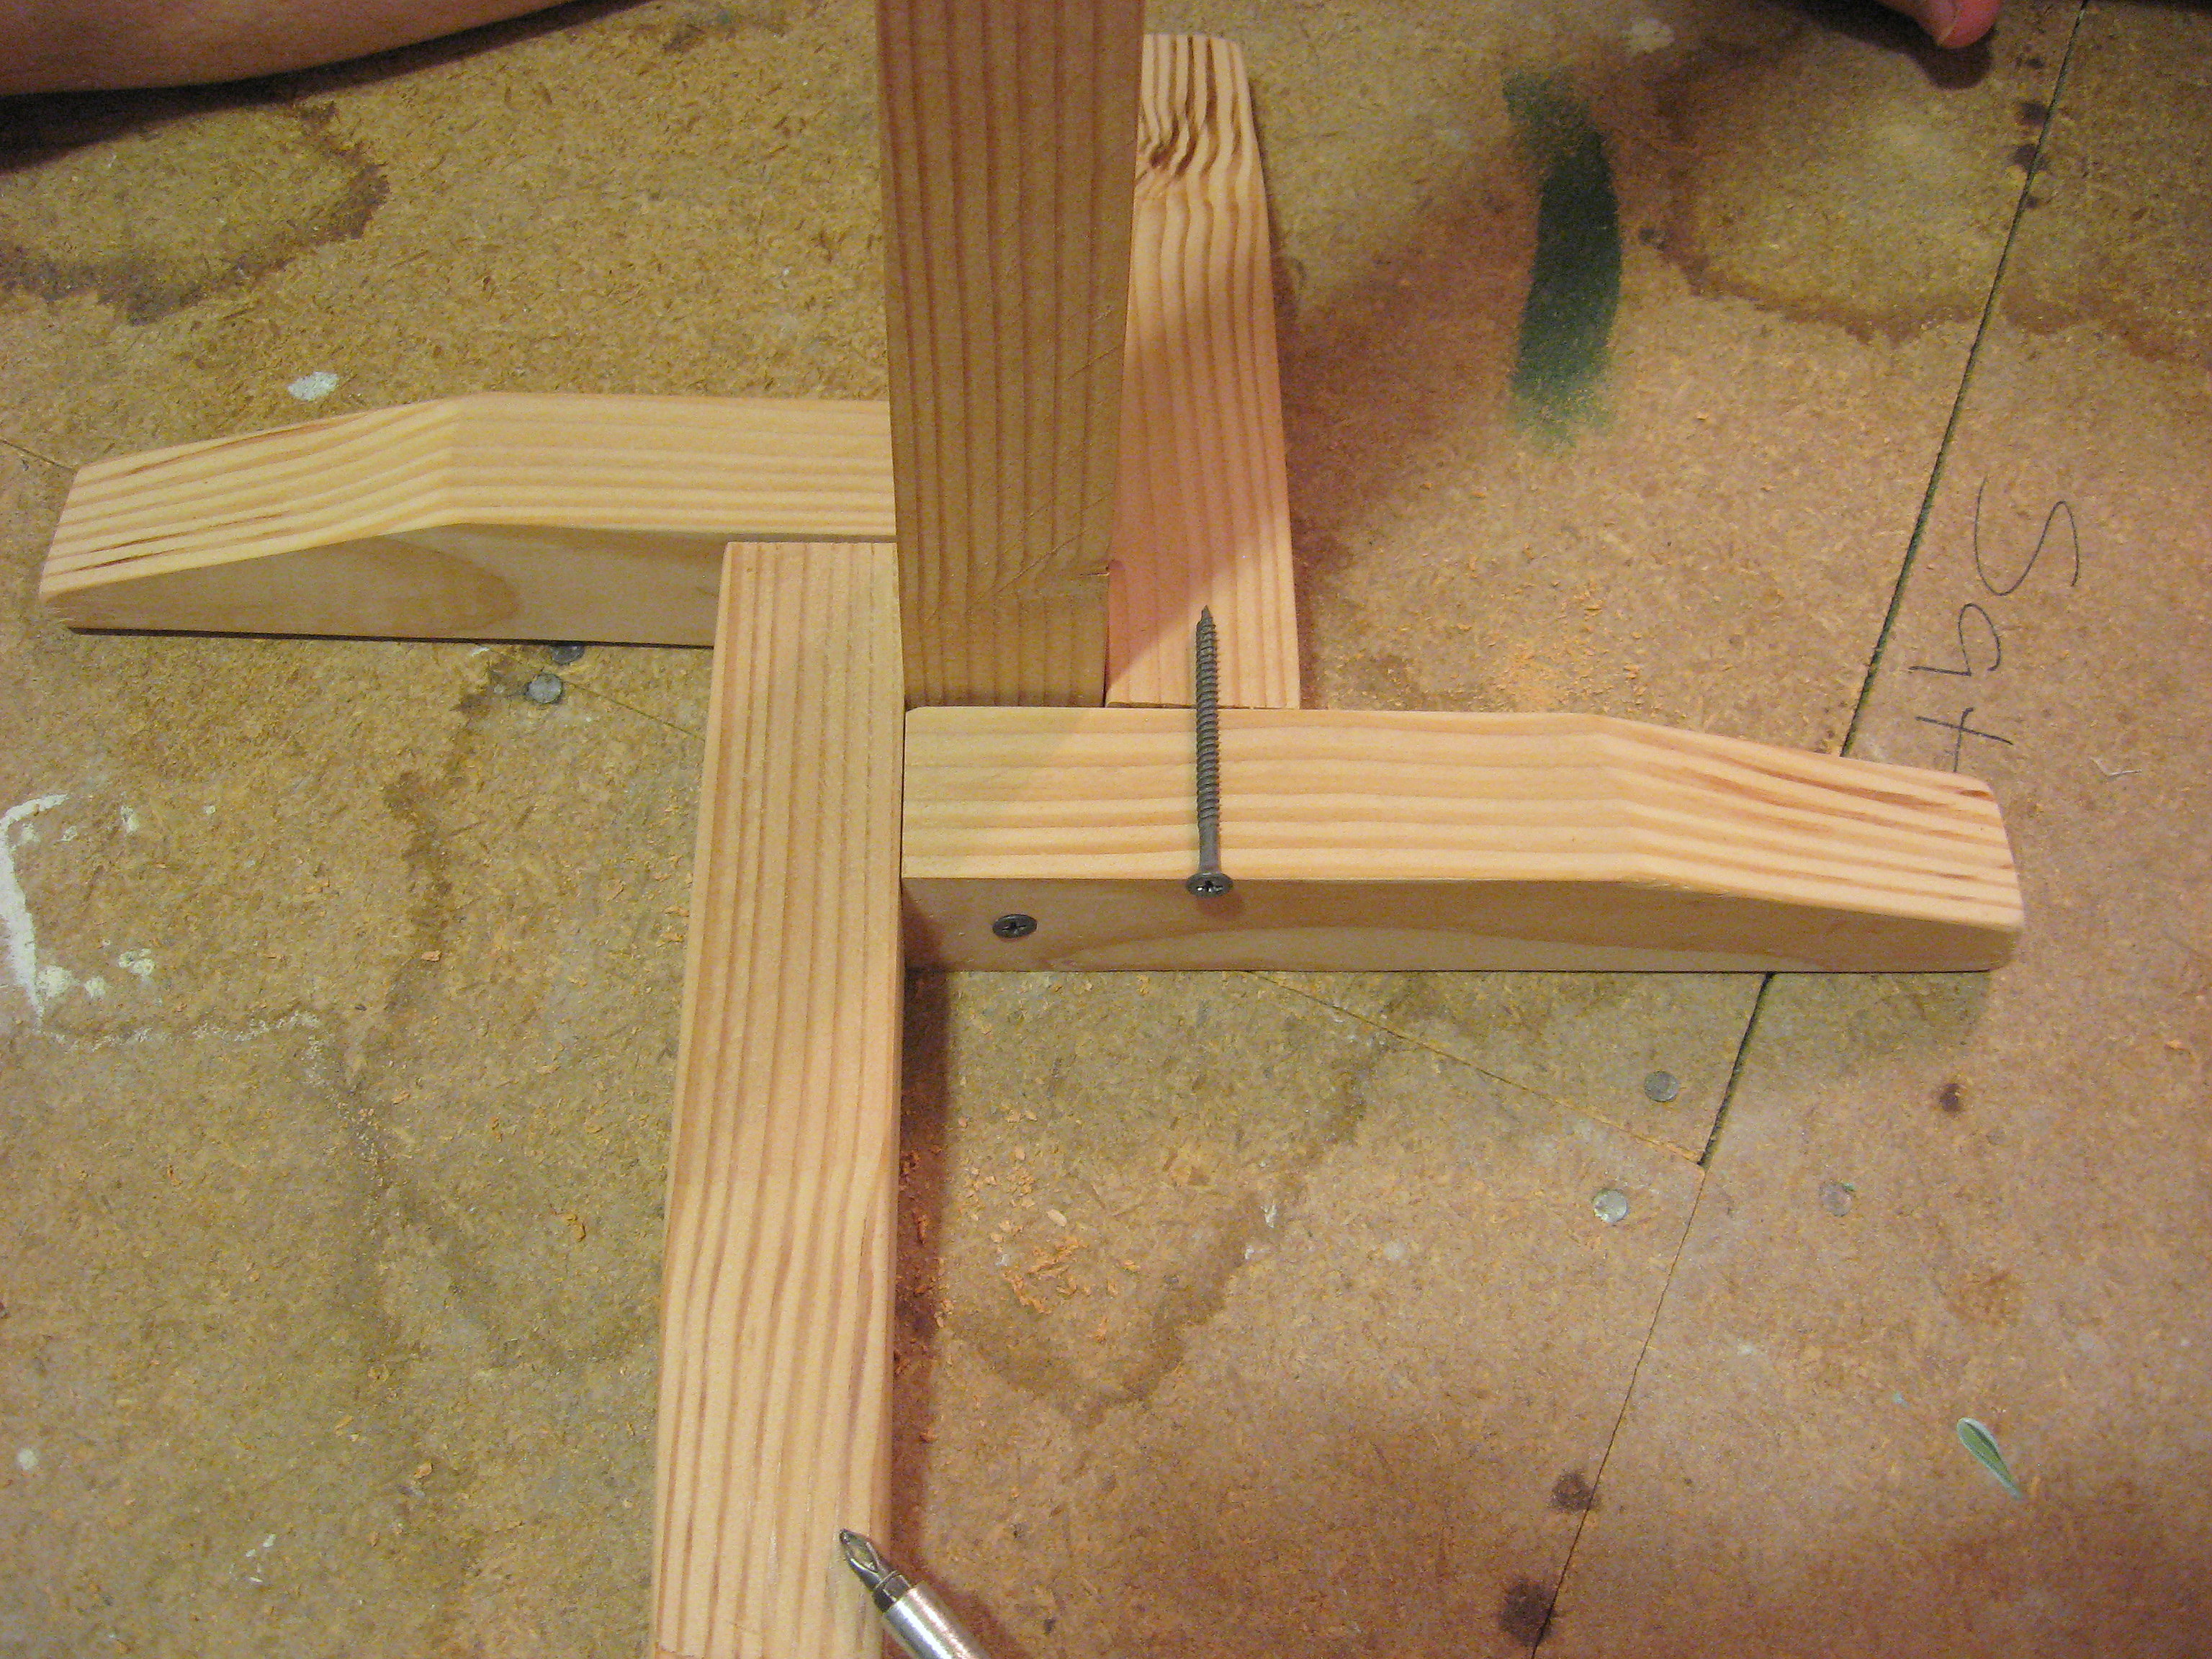
Start with a board like this from a home improvement store. It is 2 inches square by 8 feet long and cost less than a dollar. They can often be very bowed, so take your time to find one that is pretty straight.
Cut it into 5 pieces – one is 5 ft. long and the small pieces are each 9 inches long. If you are making this for someone taller or shorter, you could adjust your measurements to better reflect the size of their clothes. Sand everything down to get rid of any rough spots.
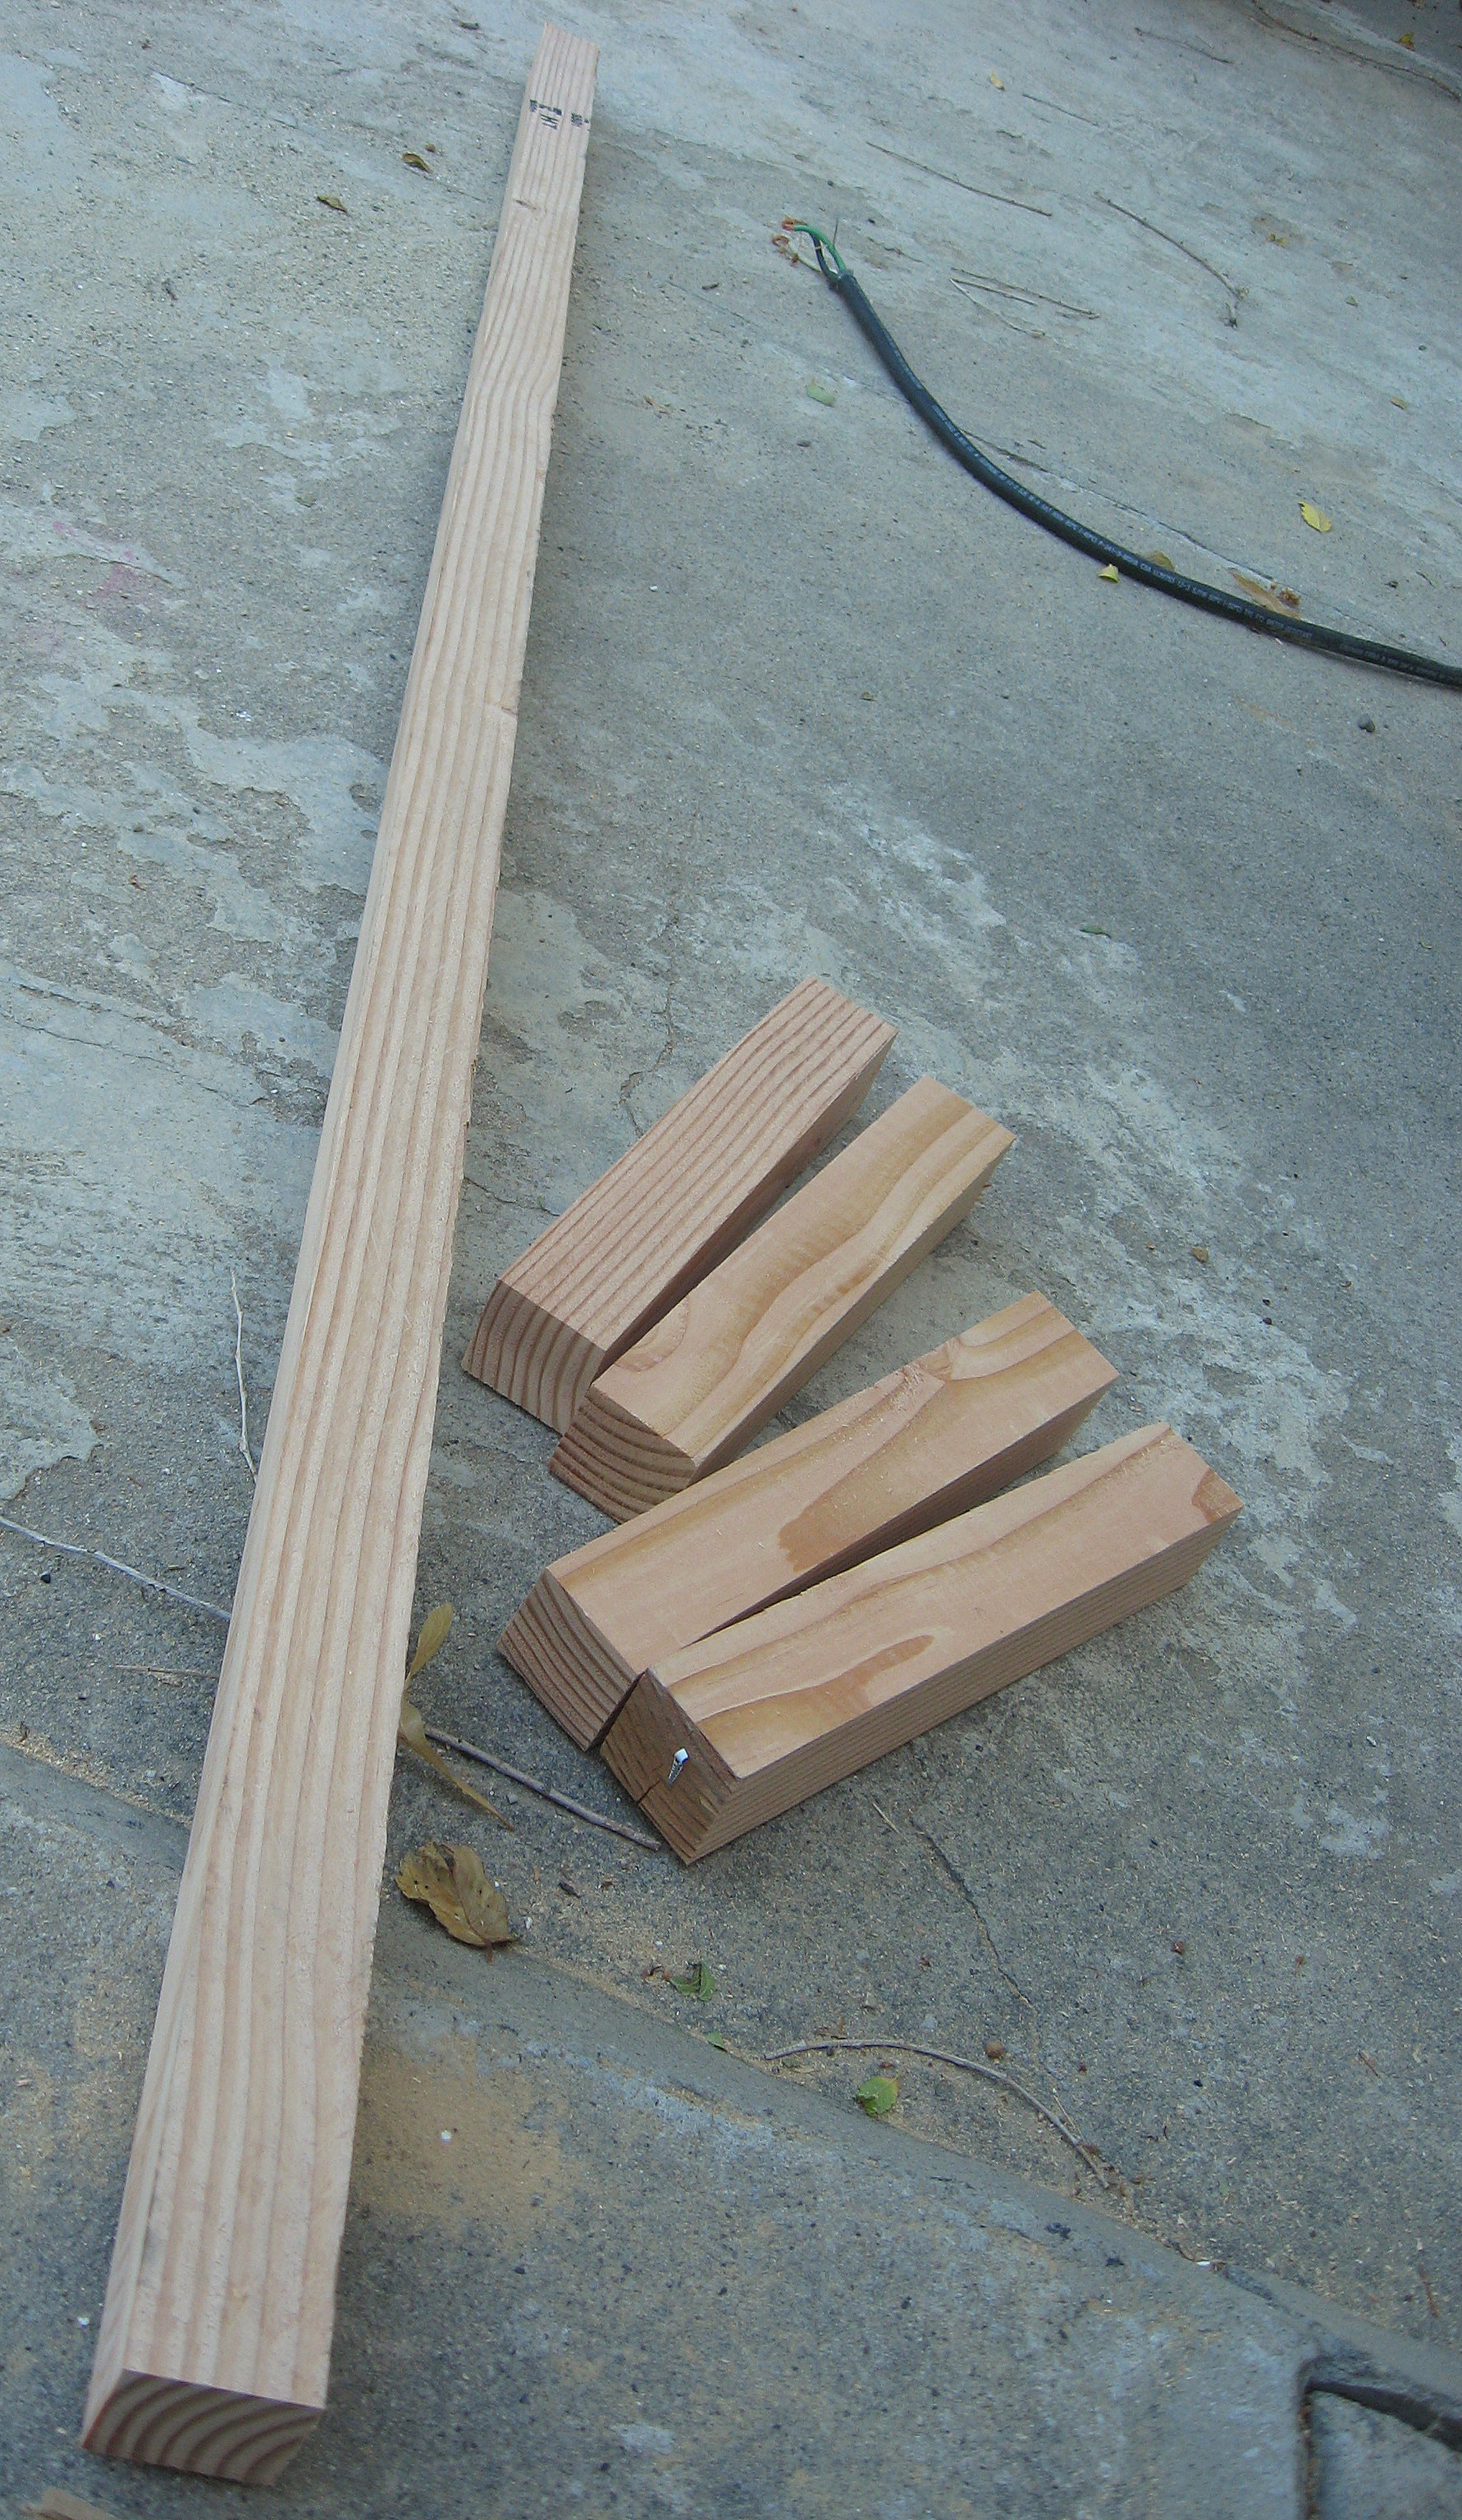
I cut my feet so they tapered at an angle, as you can see in the photo below, but that isn’t necessary if you don’t want to do it.
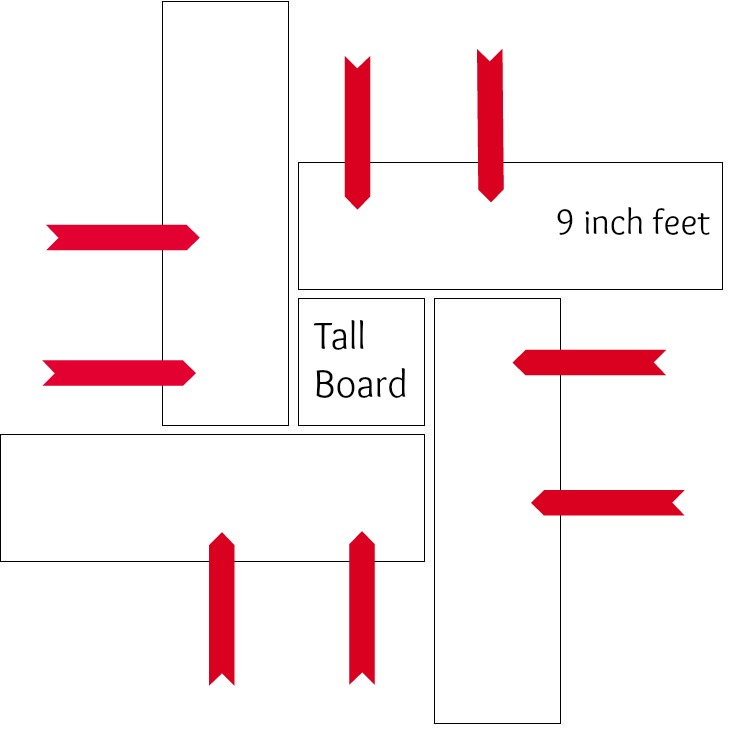
Now you will start attaching the feet to the longer board. Here is a diagram that shows what it would look like if you looked at it from the bottom. The red arrows indicate where you will put each screw.
Pre drill the holes to make it easier, and counter sink the screws in. The first two feet were pretty easy to attach, but for 3 and 4, it will help to have a second person. Keep checking to make sure that you are keeping it level so that it will sit flat on the ground when you’re done.
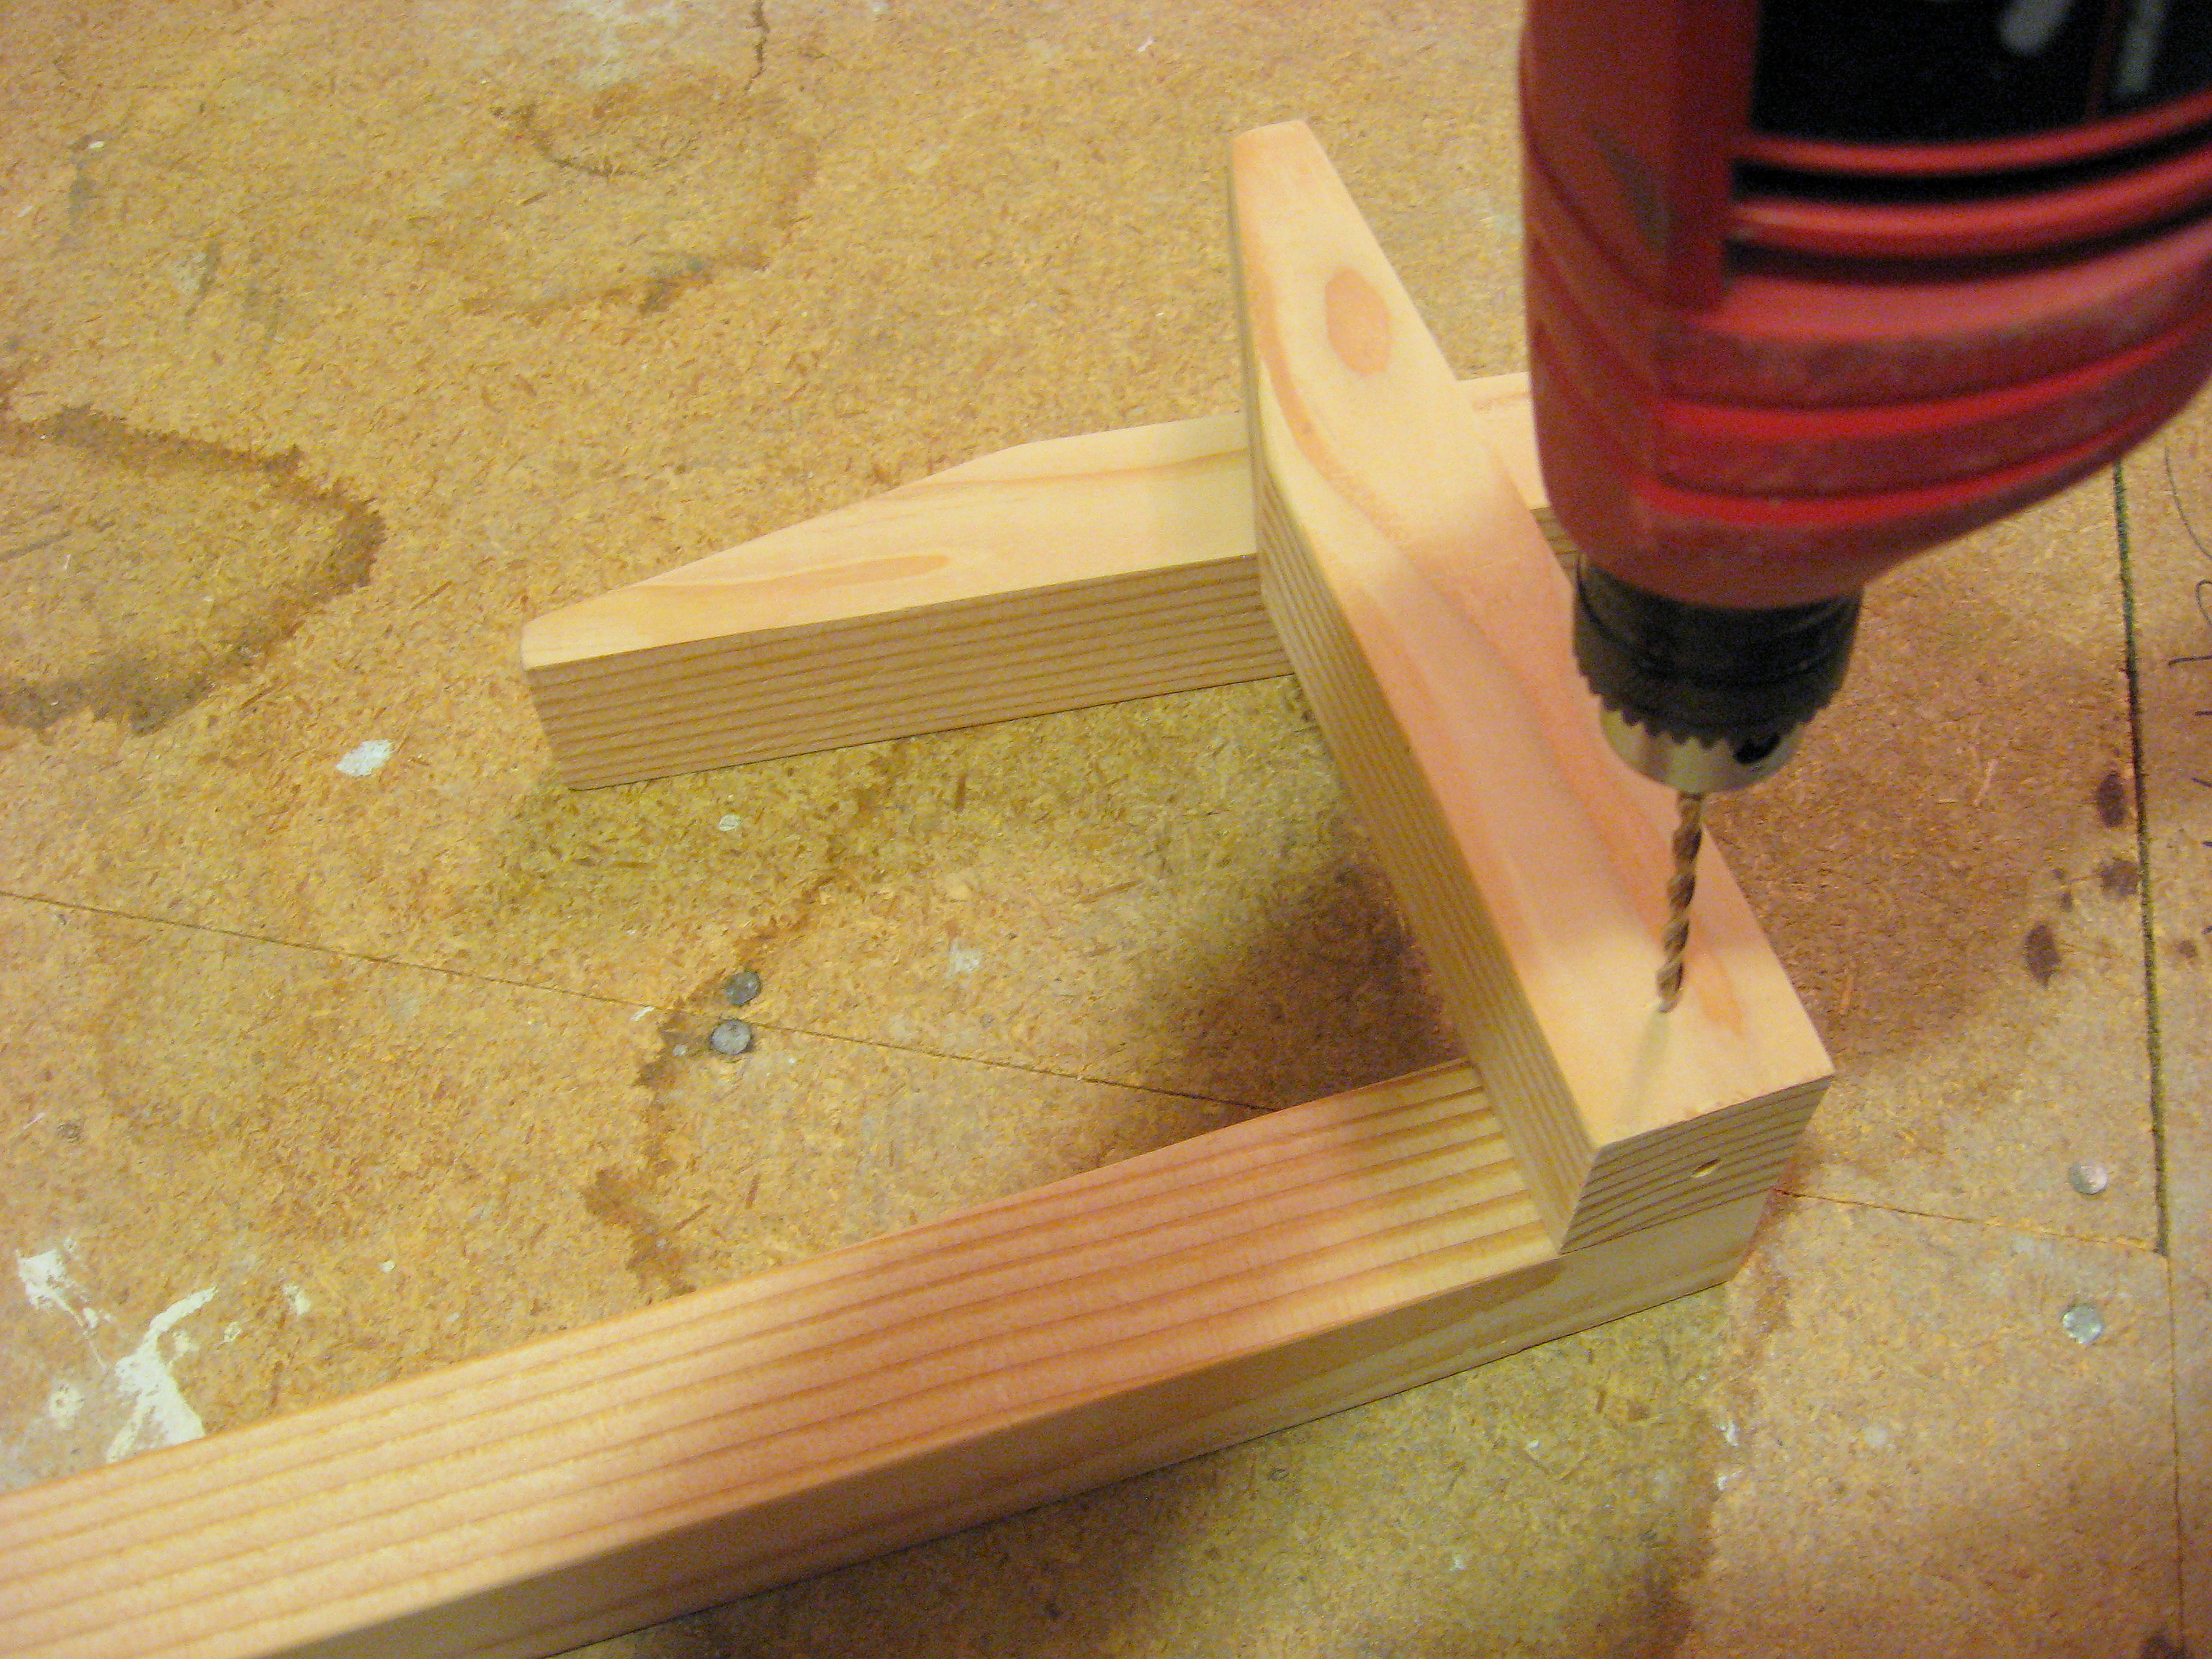
Here’s a view just as I’m about to put in the last screw. It is lying on top to show you kind of where it will go.
At this point, double check the whole thing for stability and levelness. Make any adjustments needed to the screws and make sure everything is good and tight.
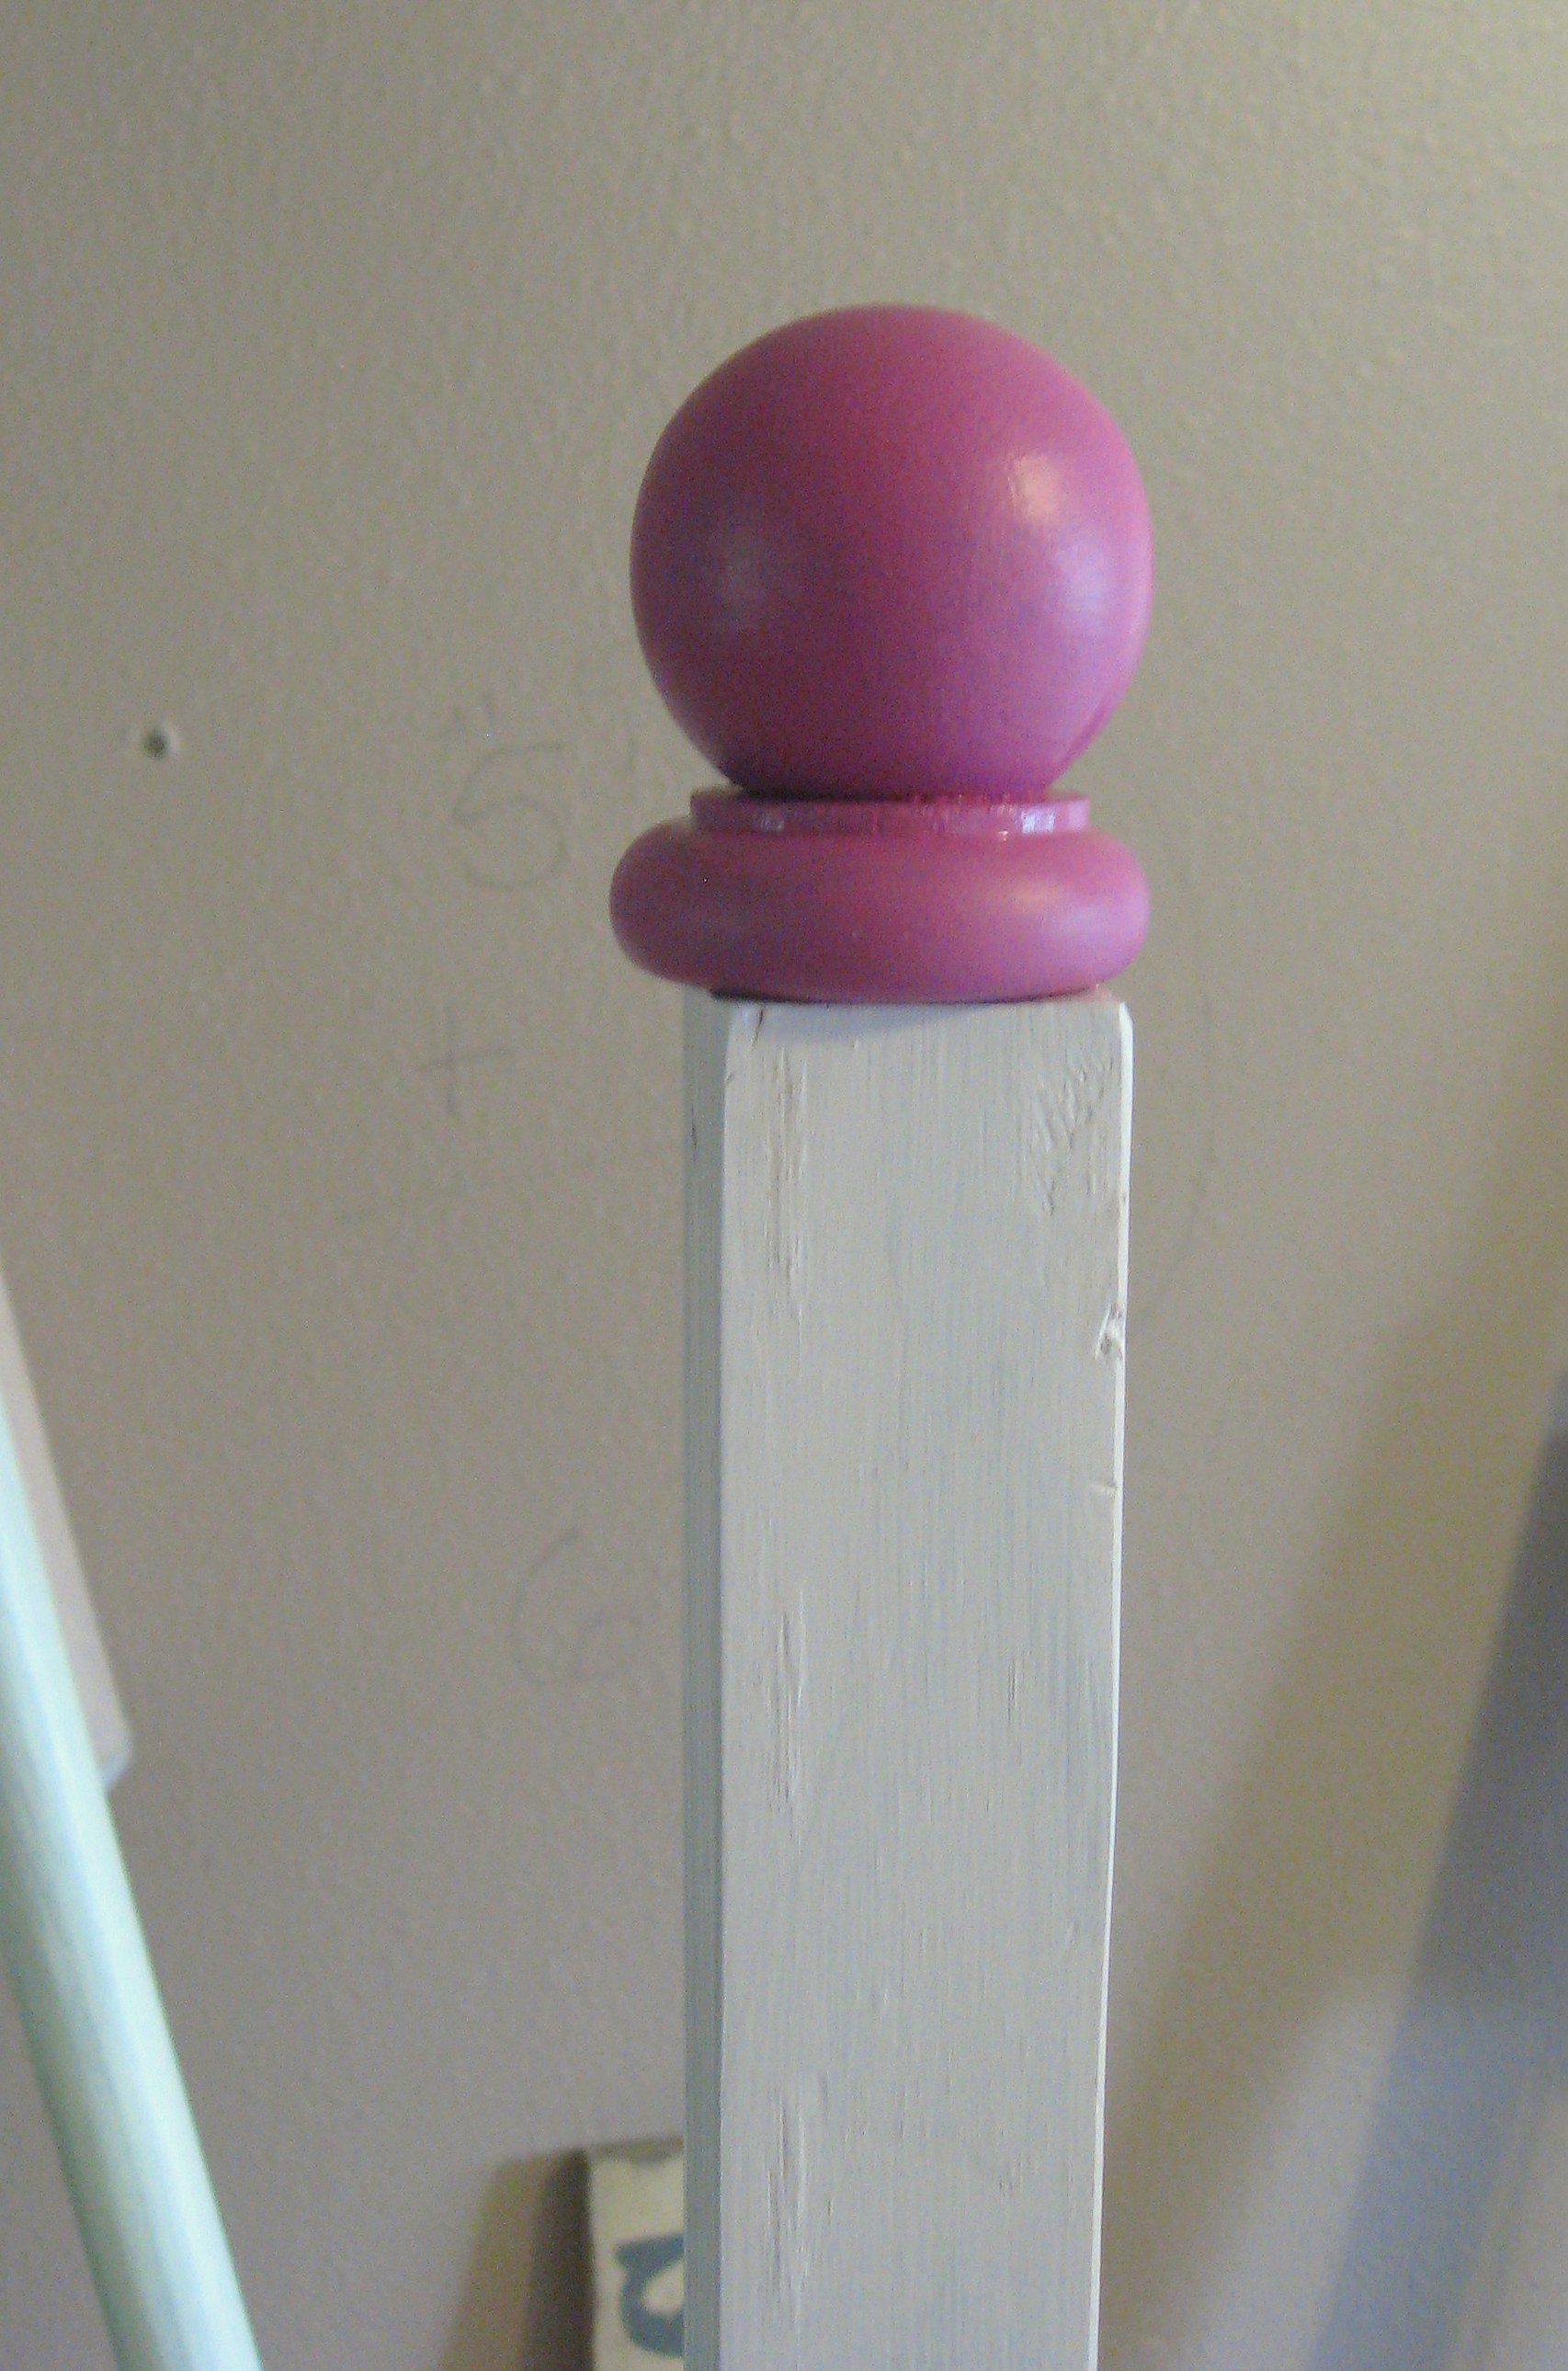
Now you can paint it. I chose to paint the long board white and the feet a dark pink. I also decided I wanted something to embellish the top, so I made a finial to go there. You can easily buy a simple finial – or even just a wood ball – at any craft store to finish it off, but since I had these parts on hand, I just put them together
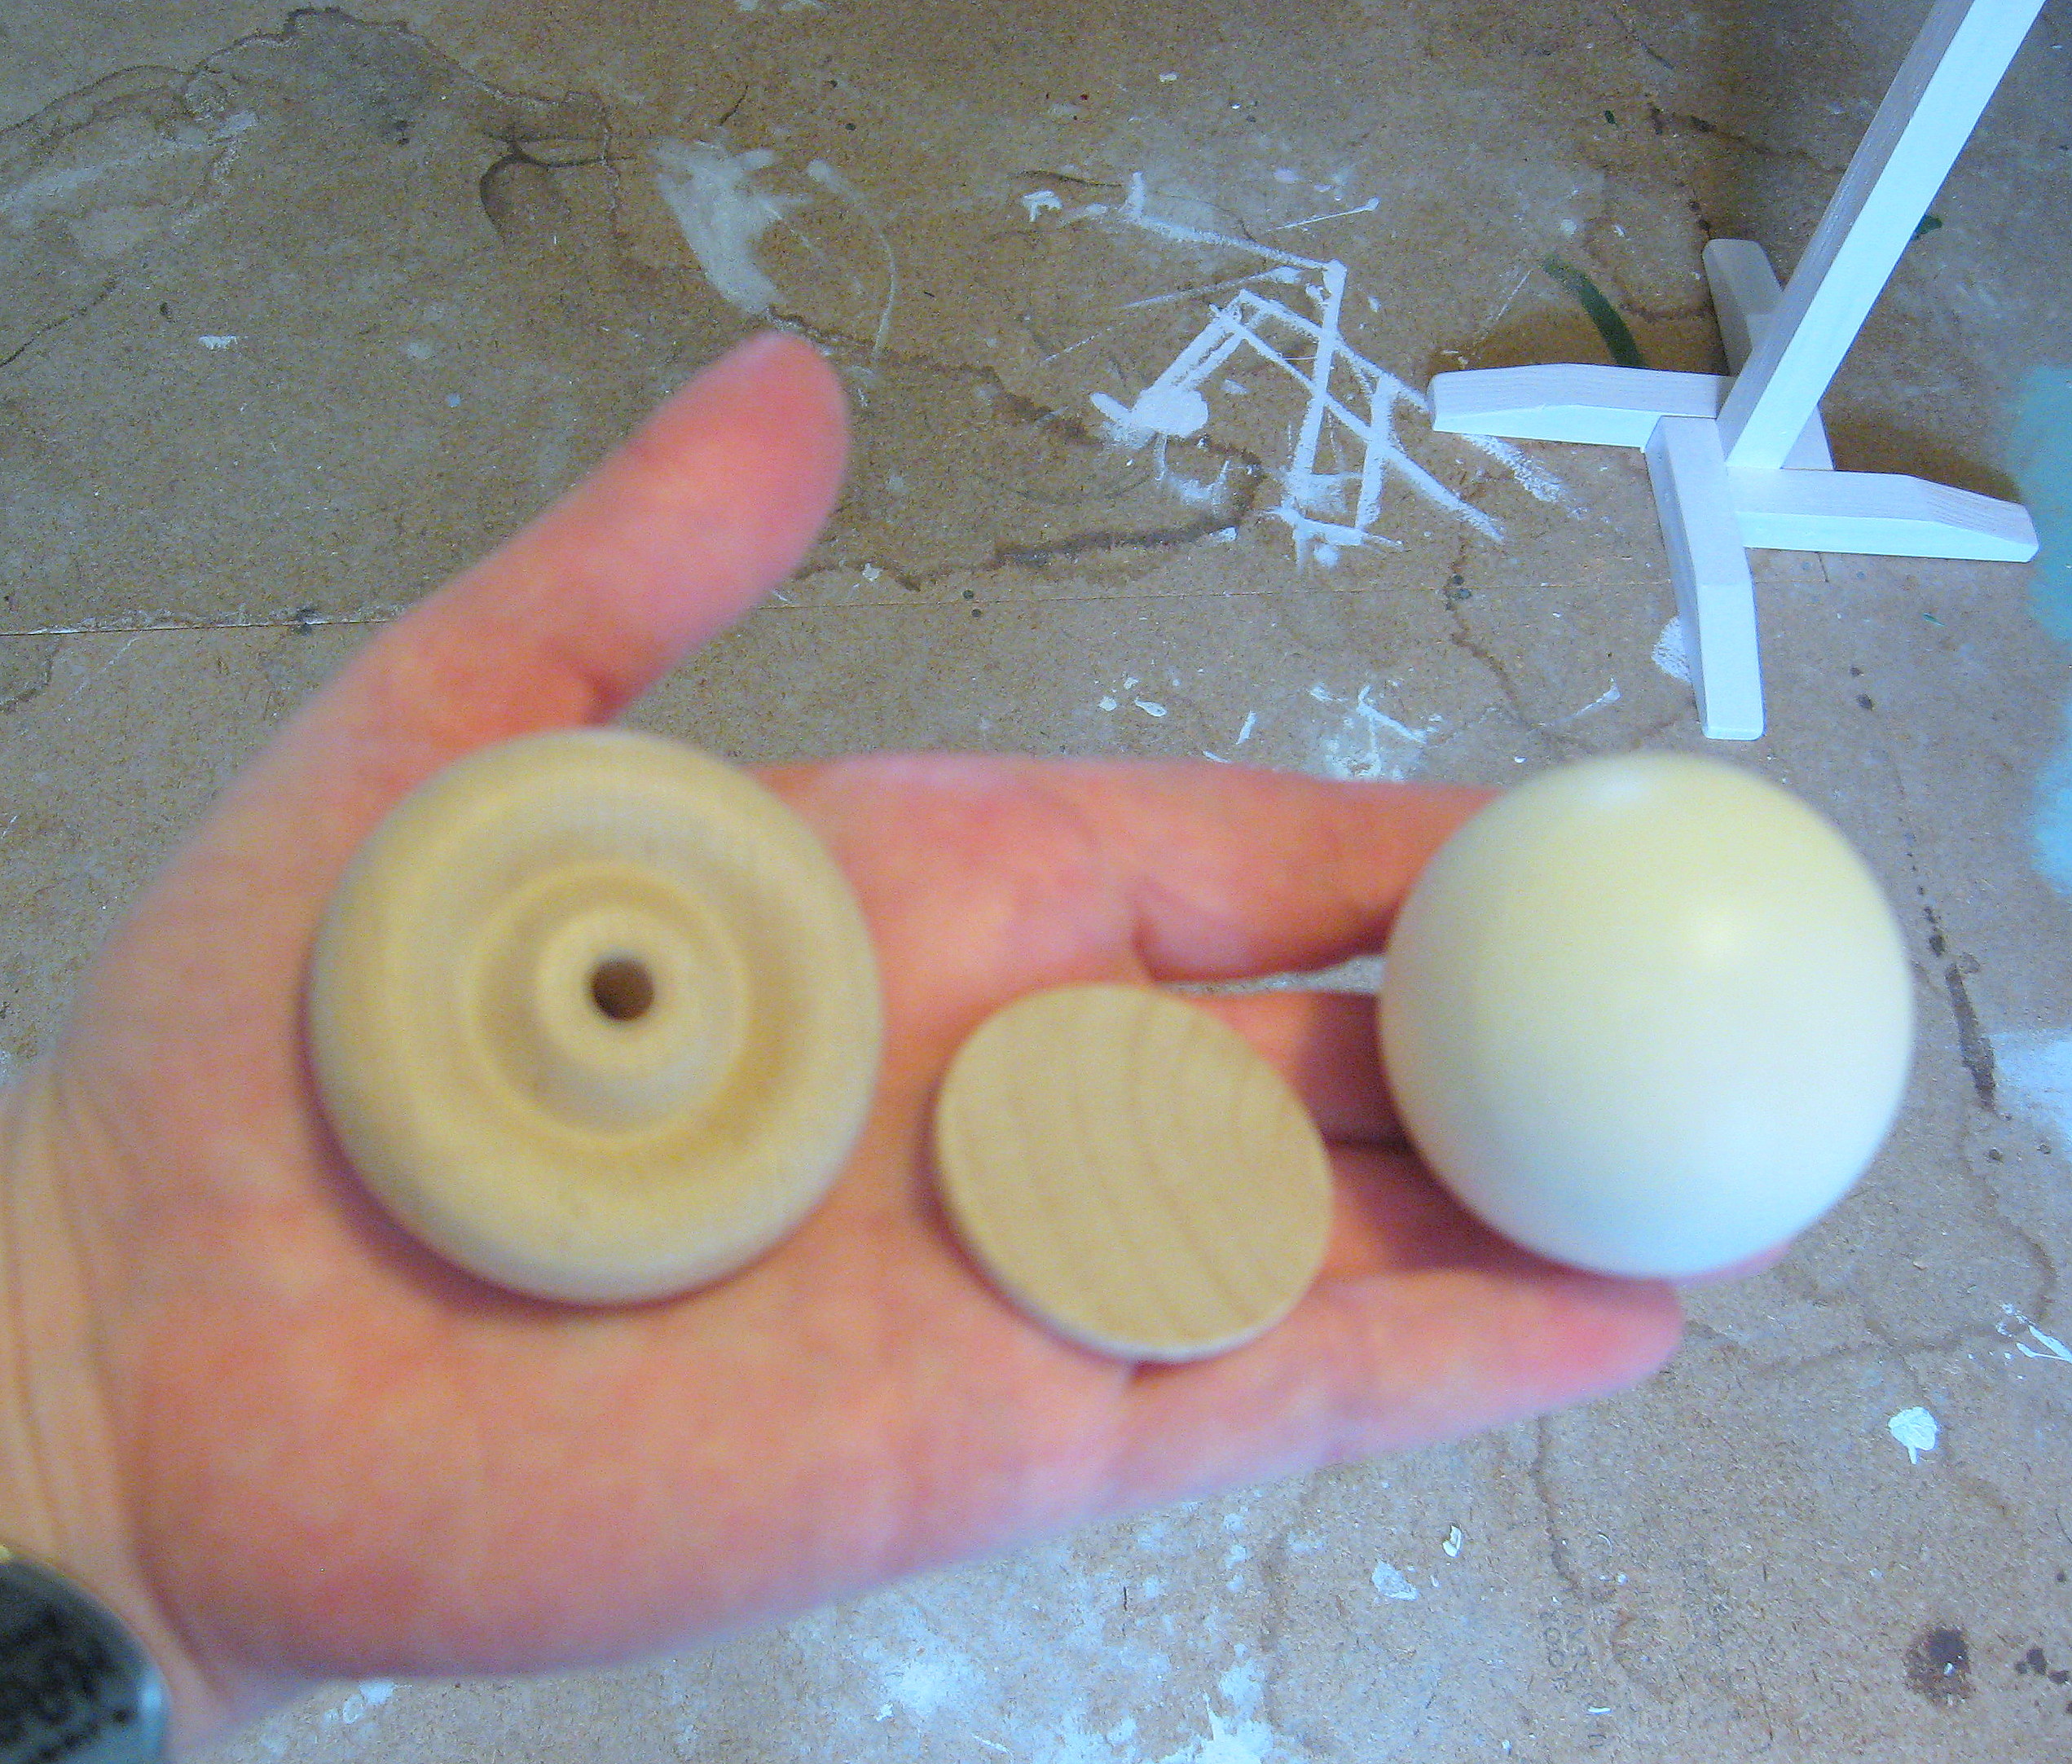
and attached them with Gorilla Glue. Once they are dry, you can paint it and once that’s dry, drive a screw part way into the bottom.

Drill a hole (large enough to accommodate the head of the screw) centered into the top of the long board. Apply some gorilla glue to the screw and bottom of the finial (sorry for the fuzzy pic)
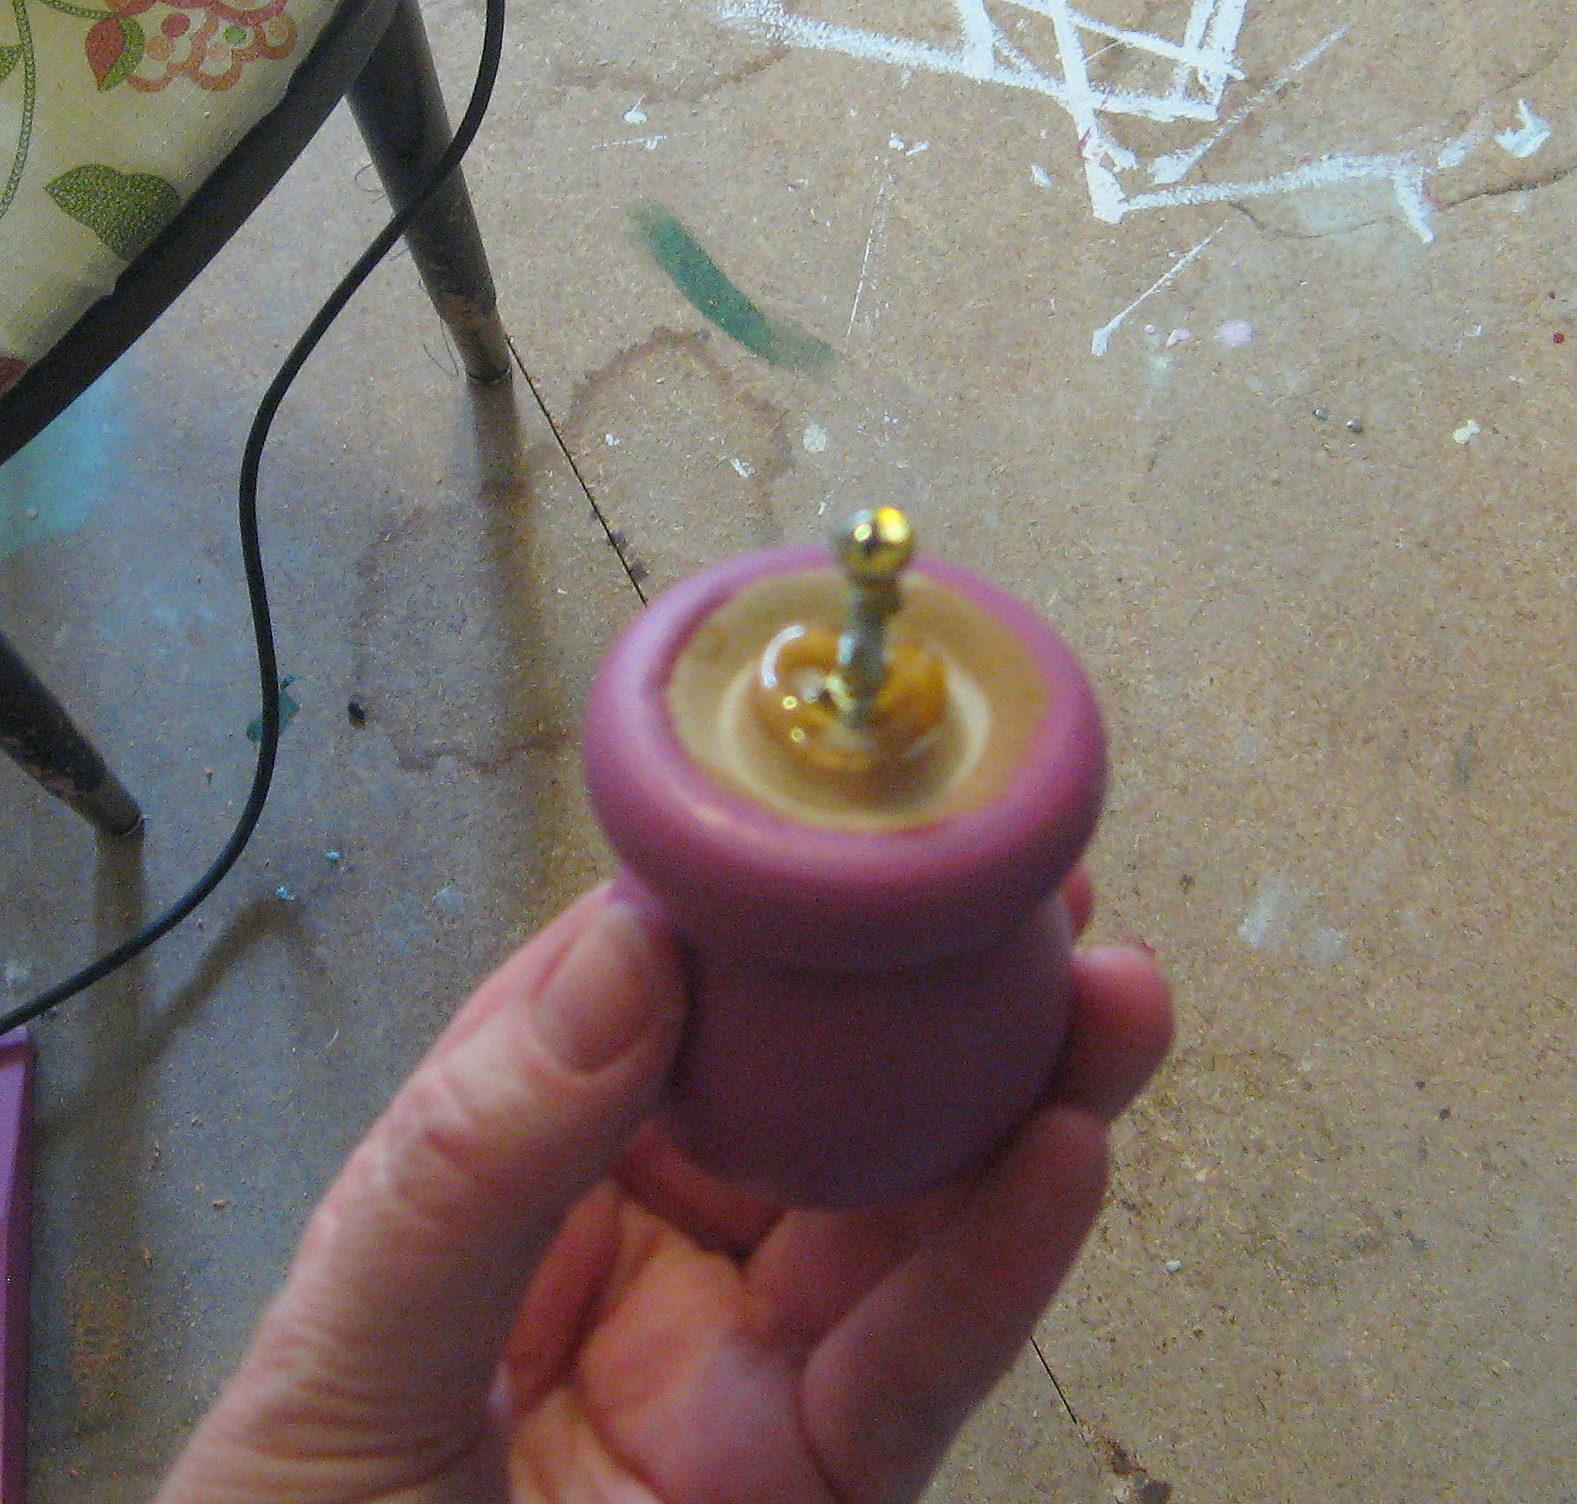
and insert the screw into the hole. Once that glue sets that should be all you need to keep it in place.
Now you will need some hooks to hang the clothes from. I used white metal coat hooks, because that is what I had leftover from another project. I grabbed some of my daughters pants – hung them on a clippy pants hanger – and held them up to the board to determine where I wanted the hook for the pants. Drill it in, then do the same for the top hook for the shirt.
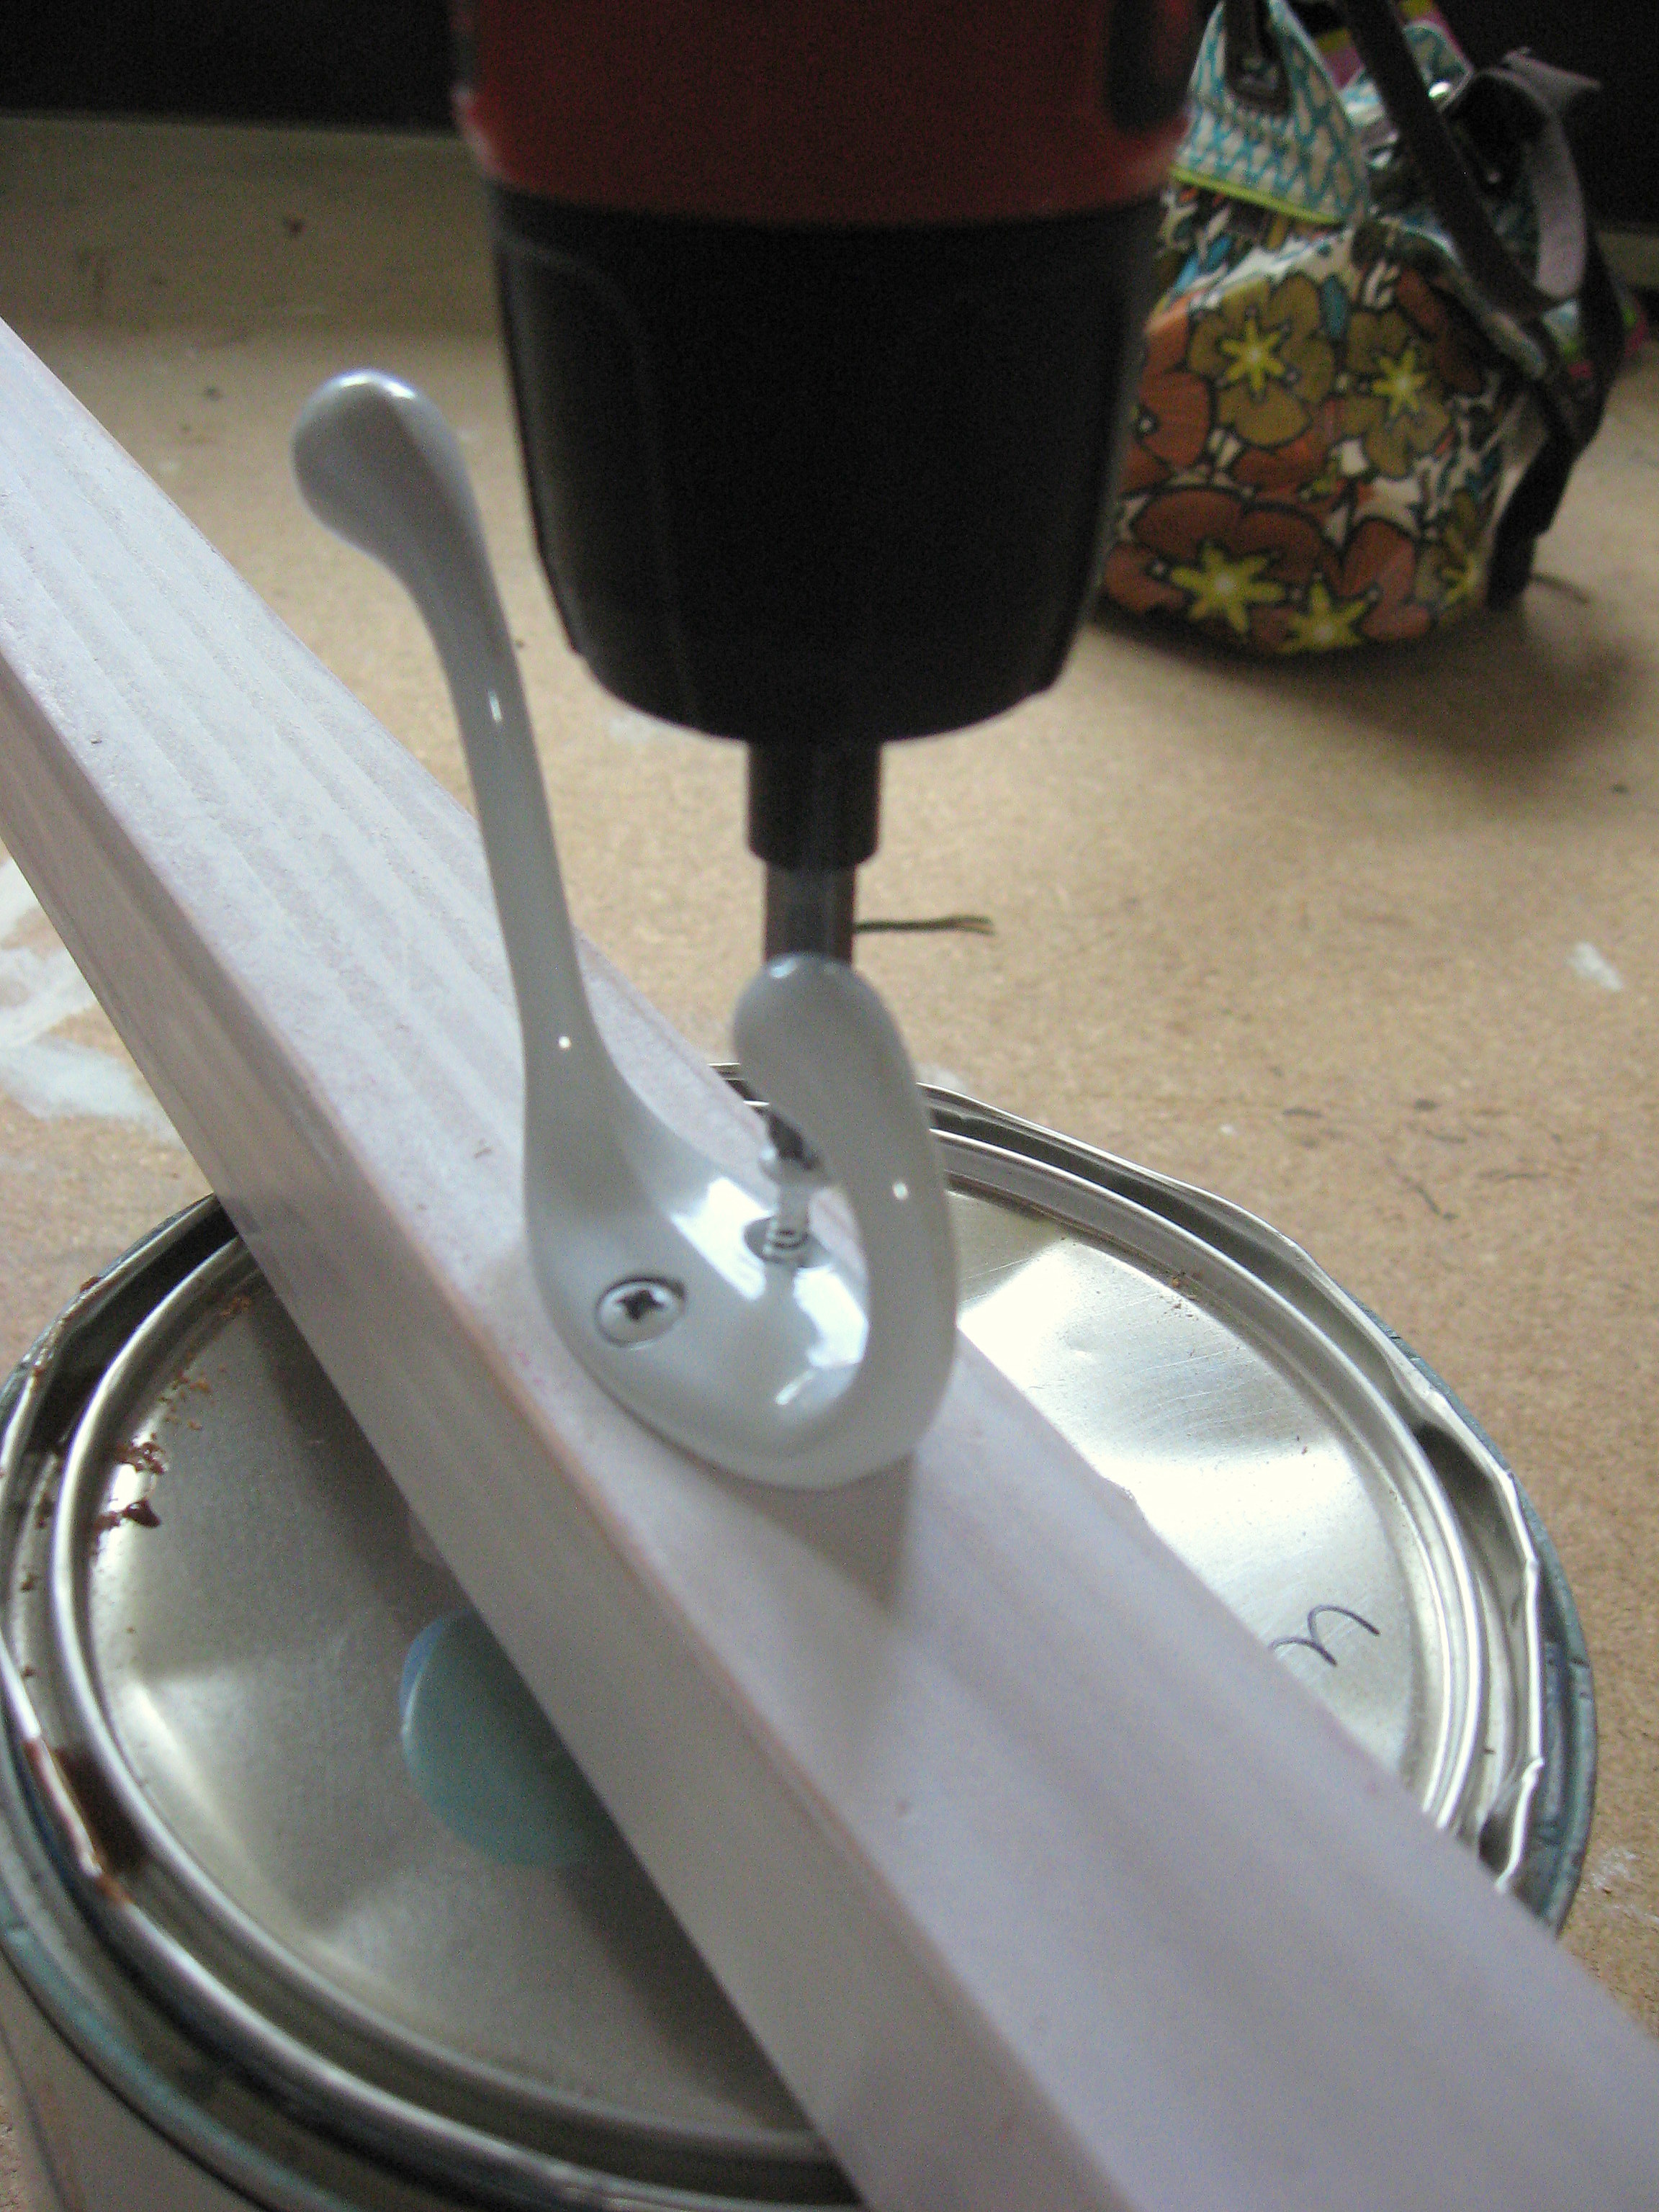
I added a third hook on the side, which she uses to hang anything else she needs for the outfit – tanks or camis to go under the shirt, belt, etc.
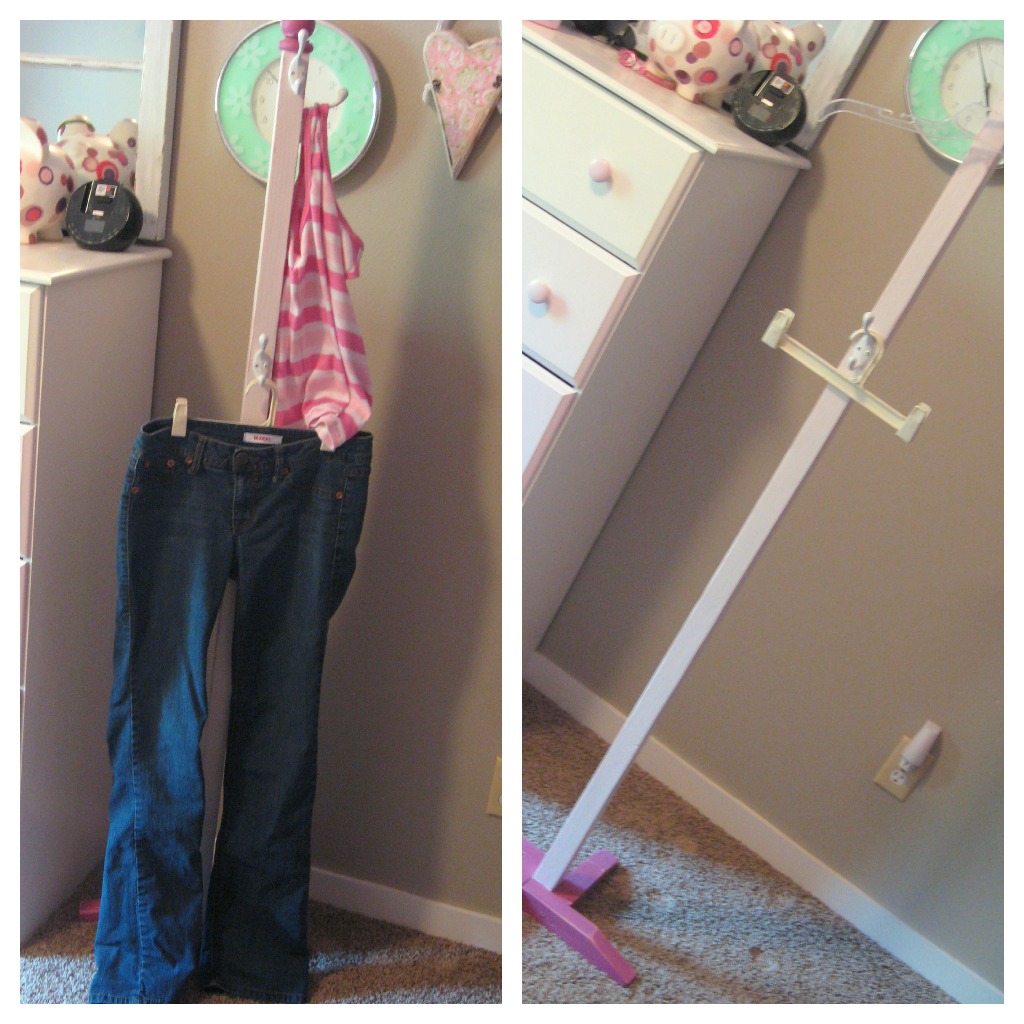
Everything is ready to go the next morning and she can get dressed quickly knowing that it will look great.
ALEX Toys – Do-it-Yourself Wear! So Many Headbands! – $12.00!
Wrap and stick, Make 10 fun headbands, Decorate any way you want!
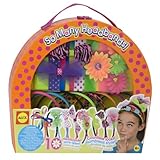 ALEX Toys – Do-it-Yourself Wear! So Many Headbands!
List Price: $29.99
You Save: $17.99 (60%)
Price: $12.00
Eligible for free shipping on $35+ orders or on ANY order with Amazon Prime.
Don’t have a Prime membership? Get a one month free trial! Click here for details!
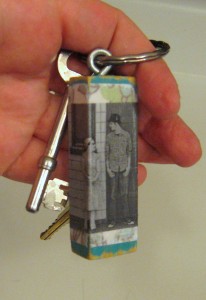
A PYP Best Blog! Make a Jenga Block Photo Keychain!
Just in case you missed this article on making a Jenga photo block keychain the first time we shared it a couple of years ago, we are republishing it. After Sharon wrote this blog originally, we got an awesome response. This is one of the PYP Best Blogs!
I was helping someone move recently and we found a handful of homeless Jenga blocks in the bottom of a closet. I rescued them back out from the garbage; I knew I could find something fun to do with them! This project was basically free, as I had all of the supplies on hand already, but if you need to purchase anything, it shouldn’t be much at all.
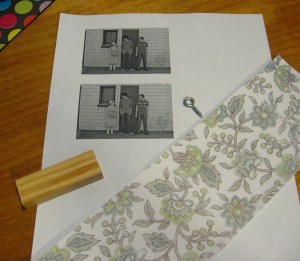
You’ll need a Jenga block or similar sized piece of wood, some scrapbook paper (paper will work better than cardstock), a little paint, a small eye screw, a drill and some Mod Podge.
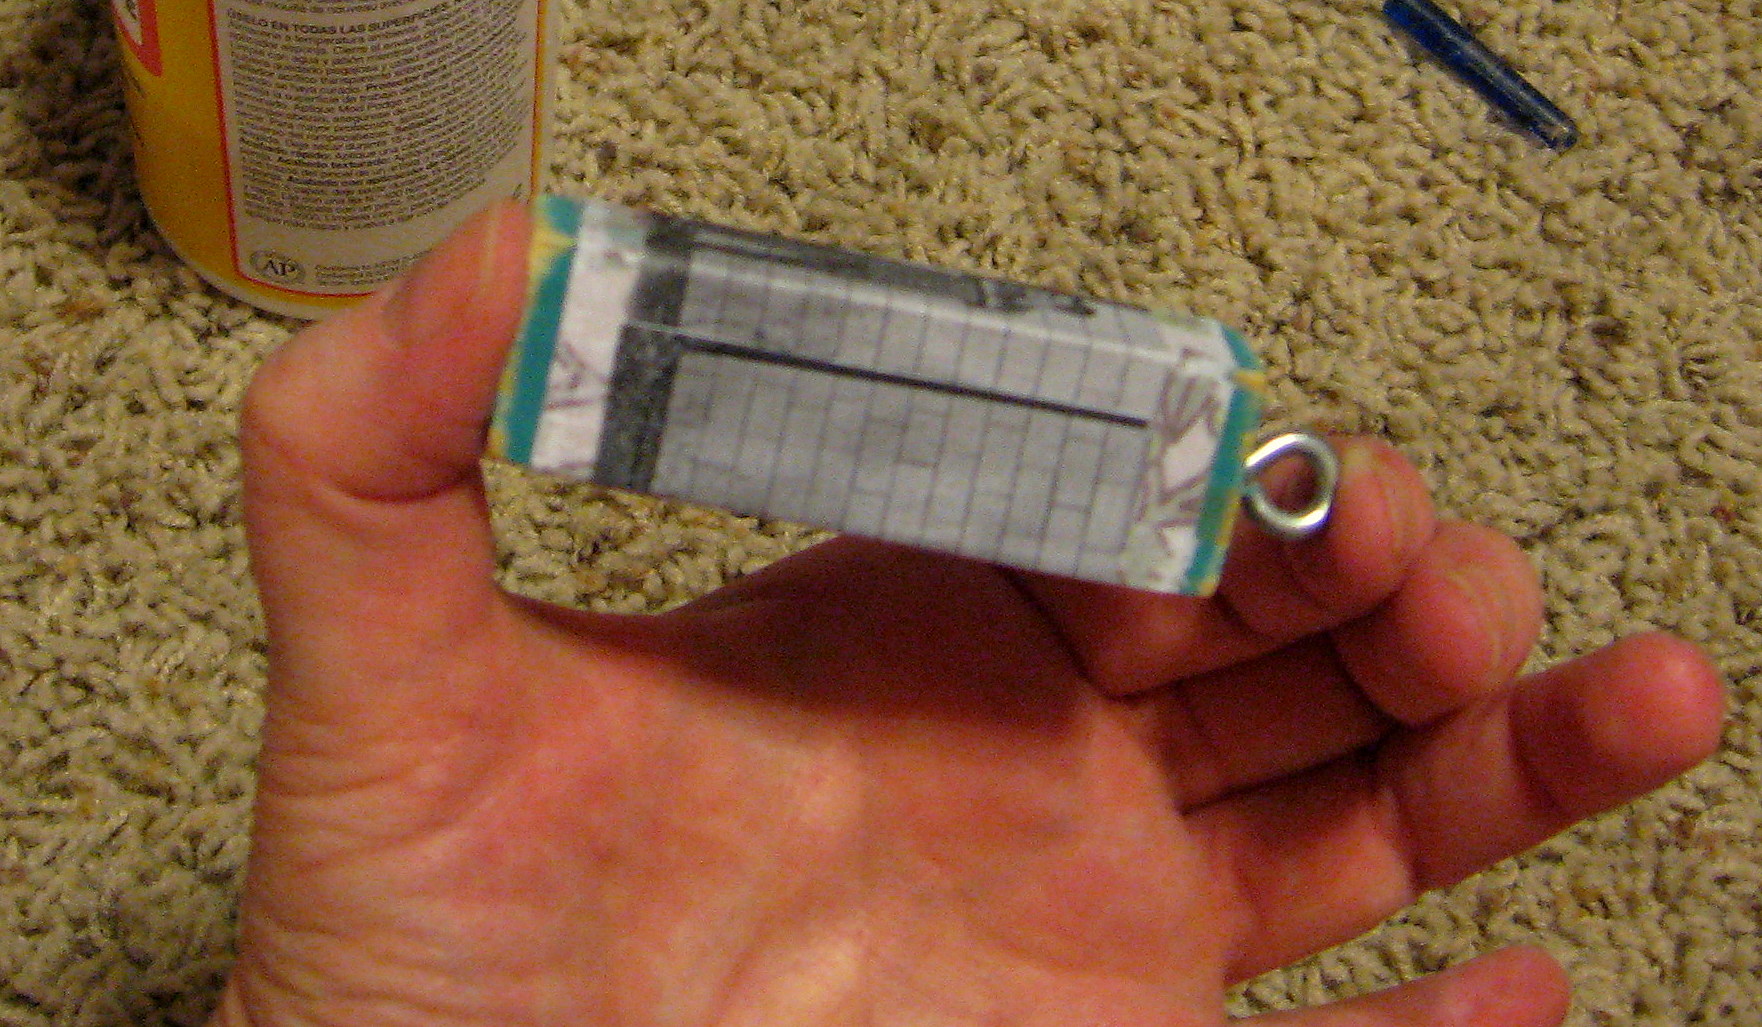
You’ll also need a photo of your choice printed with a laser printer. If you print it on an inkjet printer, the Mod Podge will likely smear the ink in the photo, although if that is your only option, I have had luck with spraying the photo with a clear craft sealer and letting it dry well, then use the Mod Podge on top. Use the Jenga piece to decide about how big you want your photo to be and just print it on plain white paper.
*You only need one photo. I printed 2 in case I made a mistake!
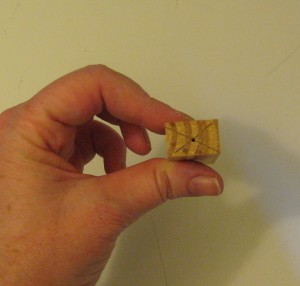
Draw an X on one end of the Jenga block and drill a small hole where the lines meet. This is where you will screw in the eye screw later.
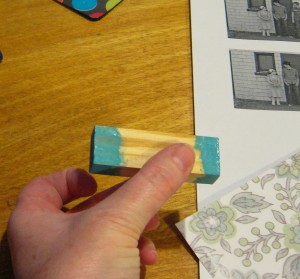
Now paint the ends of the Jenga block in the color of your choice. You only have to paint the ends because the middle will be covered with paper.
Once the paint is dry, it is time to Mod Podge on the scrapbook paper.
Cut a small piece of paper to the right height (just eyeball what looks good to you – it is up to you how much of the painted wood shows underneath!) and long enough to wrap around the Jenga block and just slightly overlap in the back.
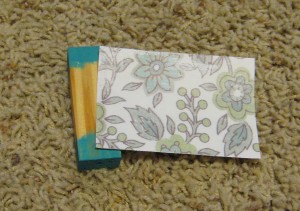
I found that it was easiest to Mod Podge the paper down one side at a time; it was pretty easy and gave me a nice crisp finish. Apply Mod Podge to one side of the Jenga block with a paintbrush and line the paper up so it is even with the edge of the Jenga block. Rub the paper with your fingers until it adheres and starts to dry, then move on to the next side, folding the paper tightly around the corners.

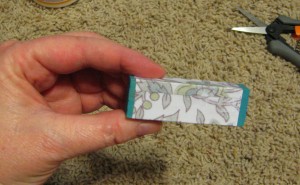
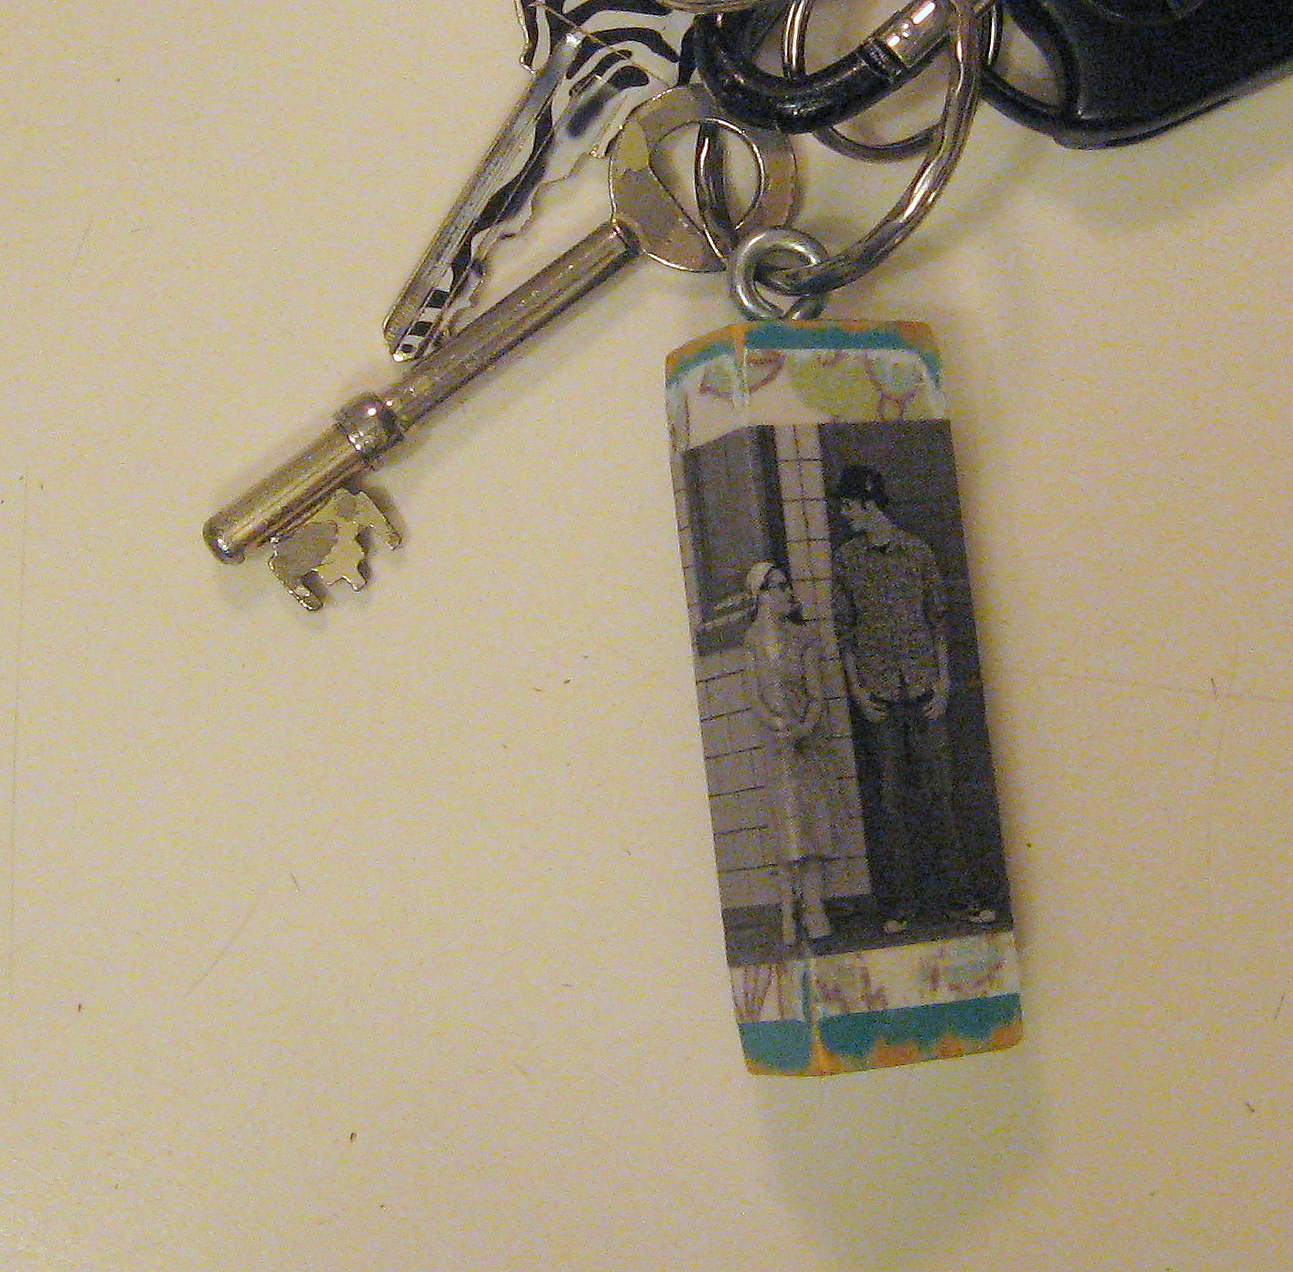
Once that’s dry, you can scuff up the paint and paper a little with some sandpaper if you like that look – or just leave it if you don’t! Now is a good time to put in the eye screw, as it gives you something to hold on to in the remaining steps.