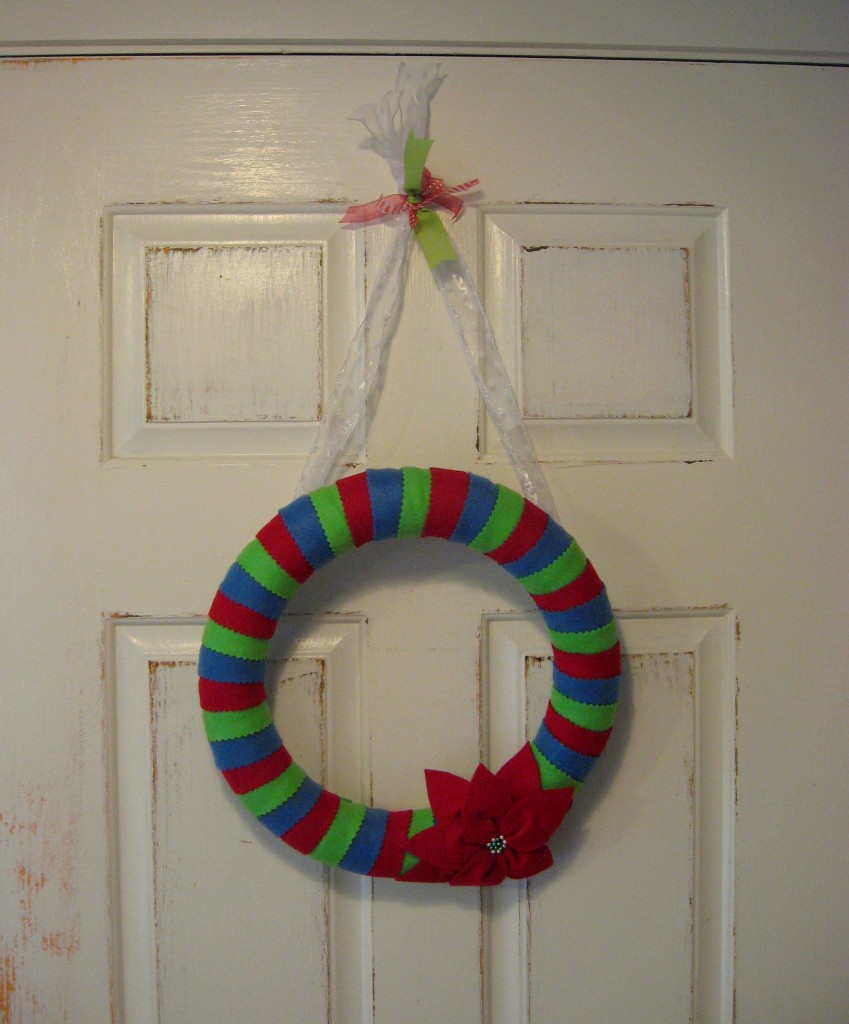
Christmas Wreath
This wreath is a great addition to your indoor Christmas decor.
I cut the strips with pinking shears, but it would look great if you cut wavy line, scallops or straight, too. This part takes the longest, so gather your peeps and stick in a Christmas movie.
Once all the strips are cut out, just start wrapping them around the form and securing them in back, slightly overlapping them. You could use hot glue, but I used straight pins. Super simple and no mess (you may need a thimble by the time you’re done, though.)
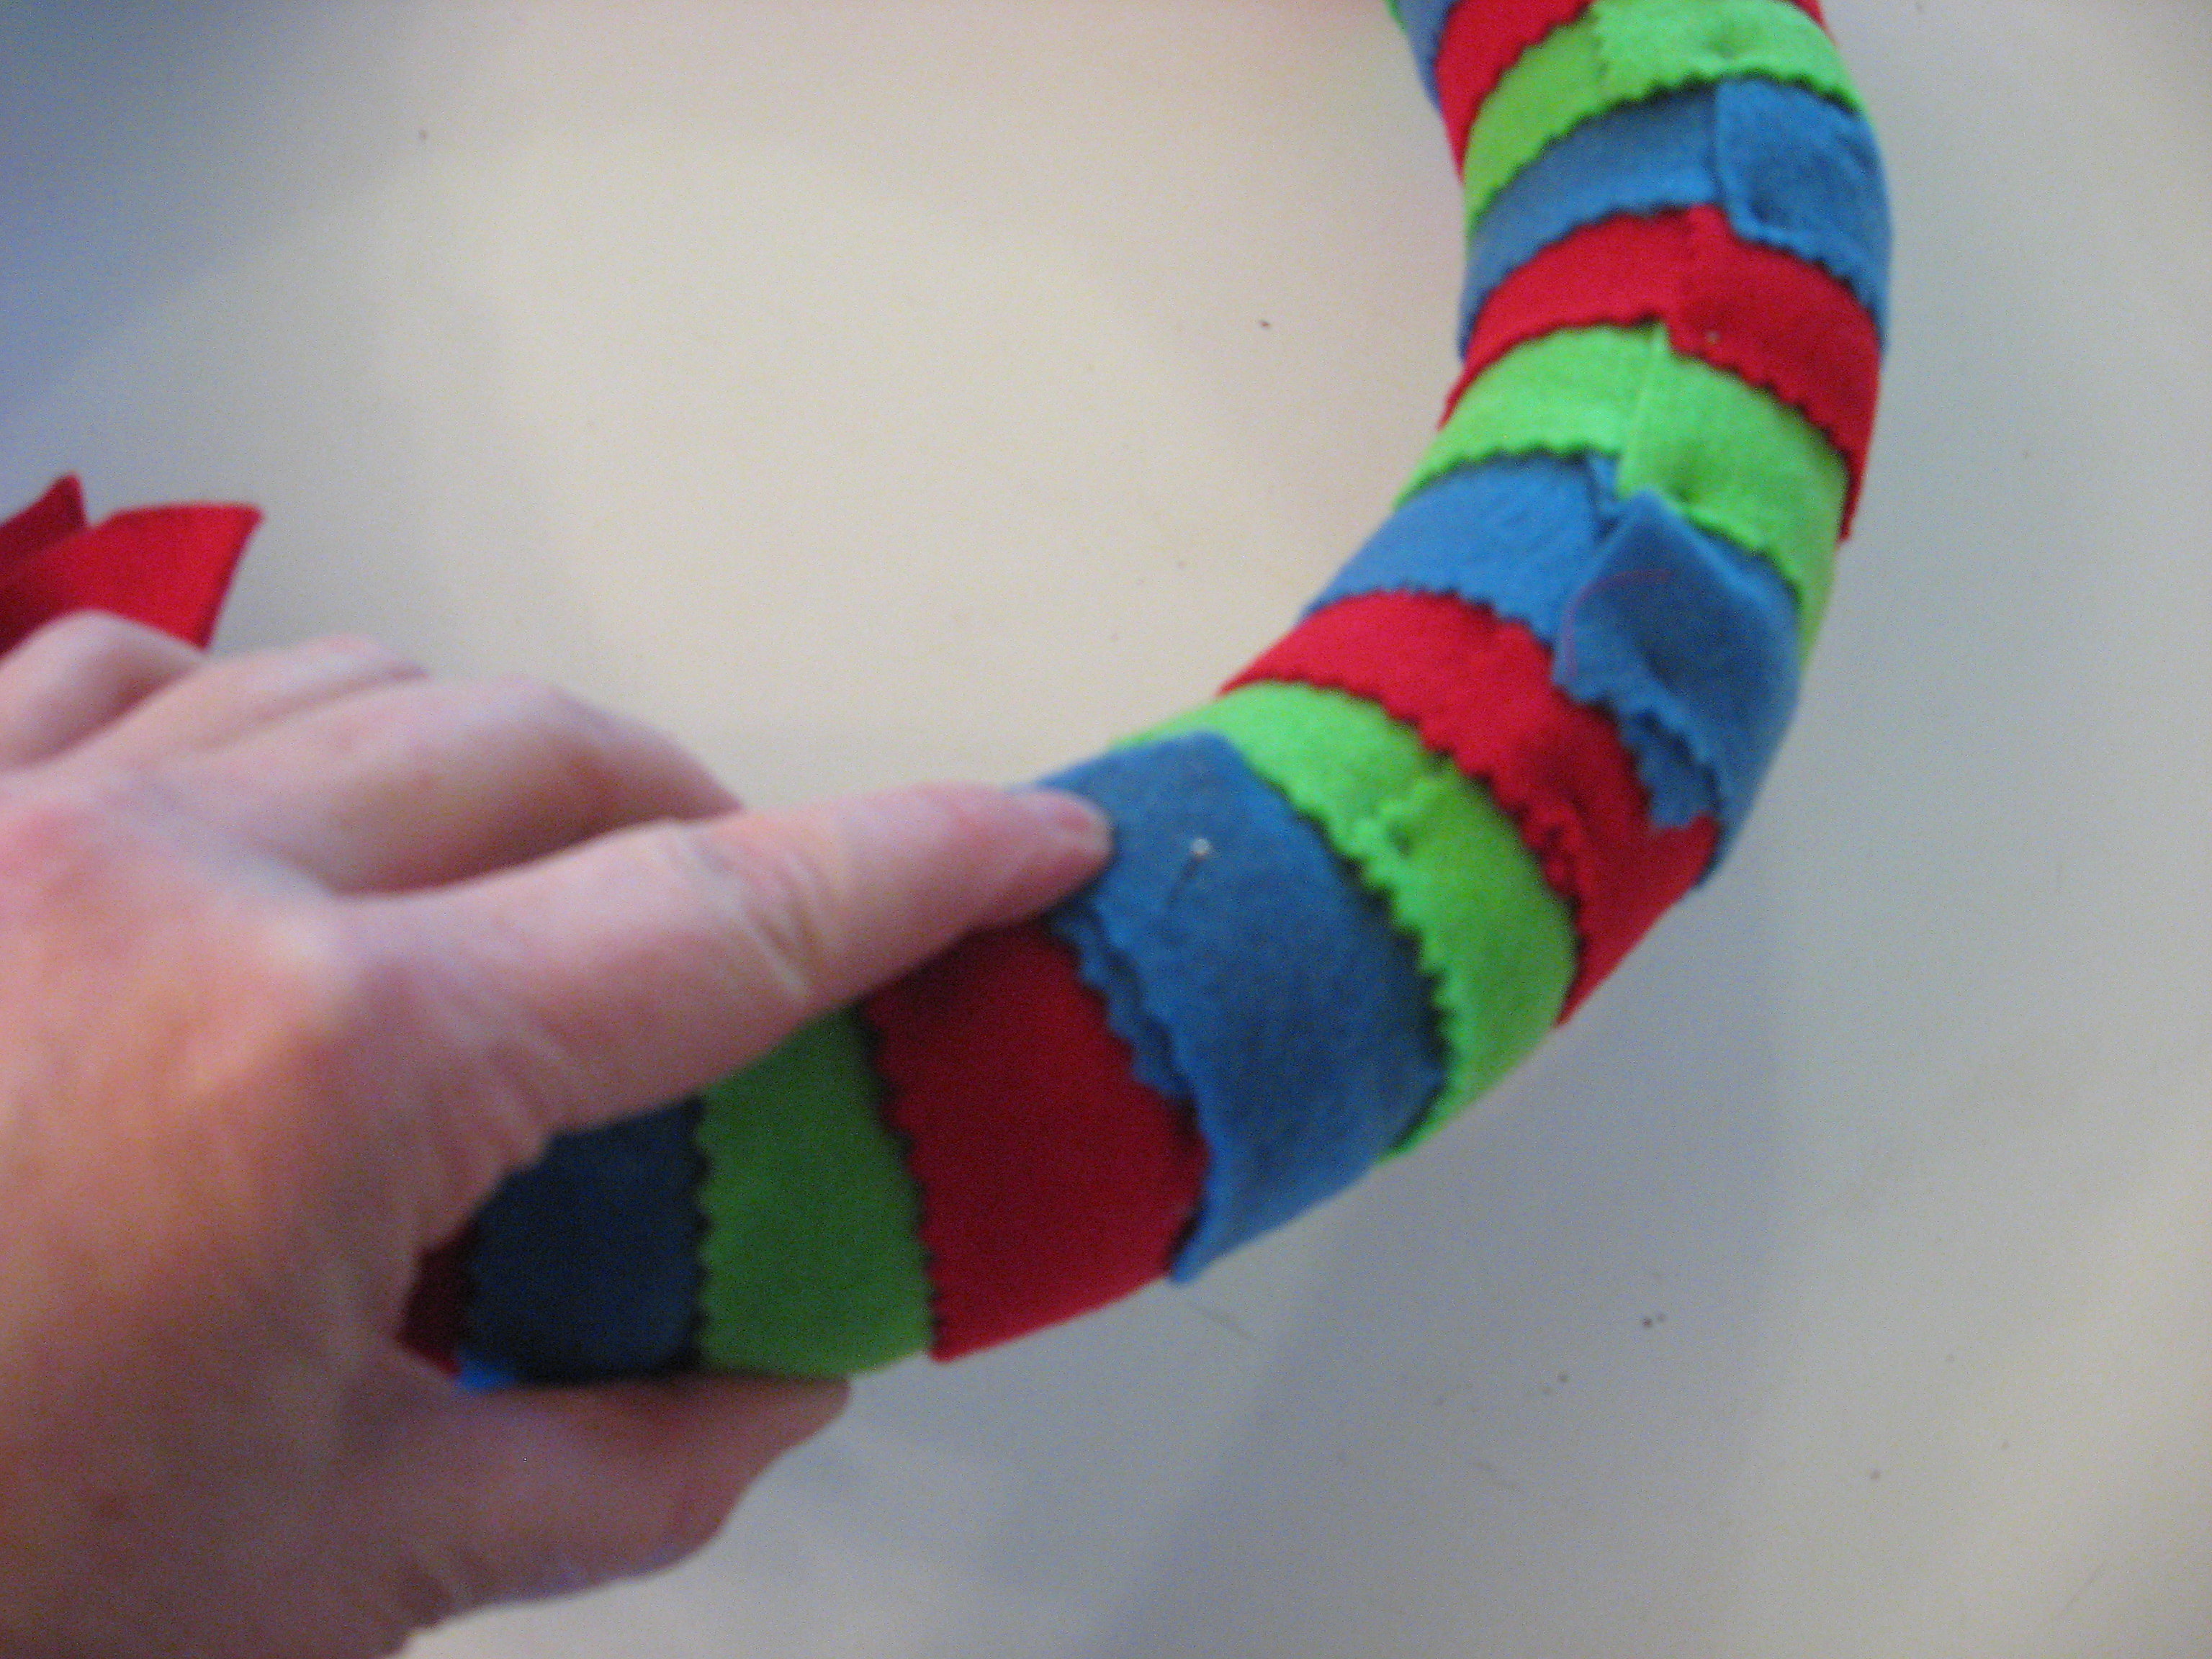
When you get all the way around, it will look kind of messy where they meet back up, so this is where you’ll put an embellishment. This poinsetta is just made of 10 leaf shapes cut from the felt – one layer of 5 leaves on the bottom and another layer of 5 leaves on top. On the top layer, kind of pinch the fat end to create a tuck and give the flower a little dimension. Again, I didn’t even glue it or anything. I just used white and green ball-headed pins to secure it and add some interest in the center.
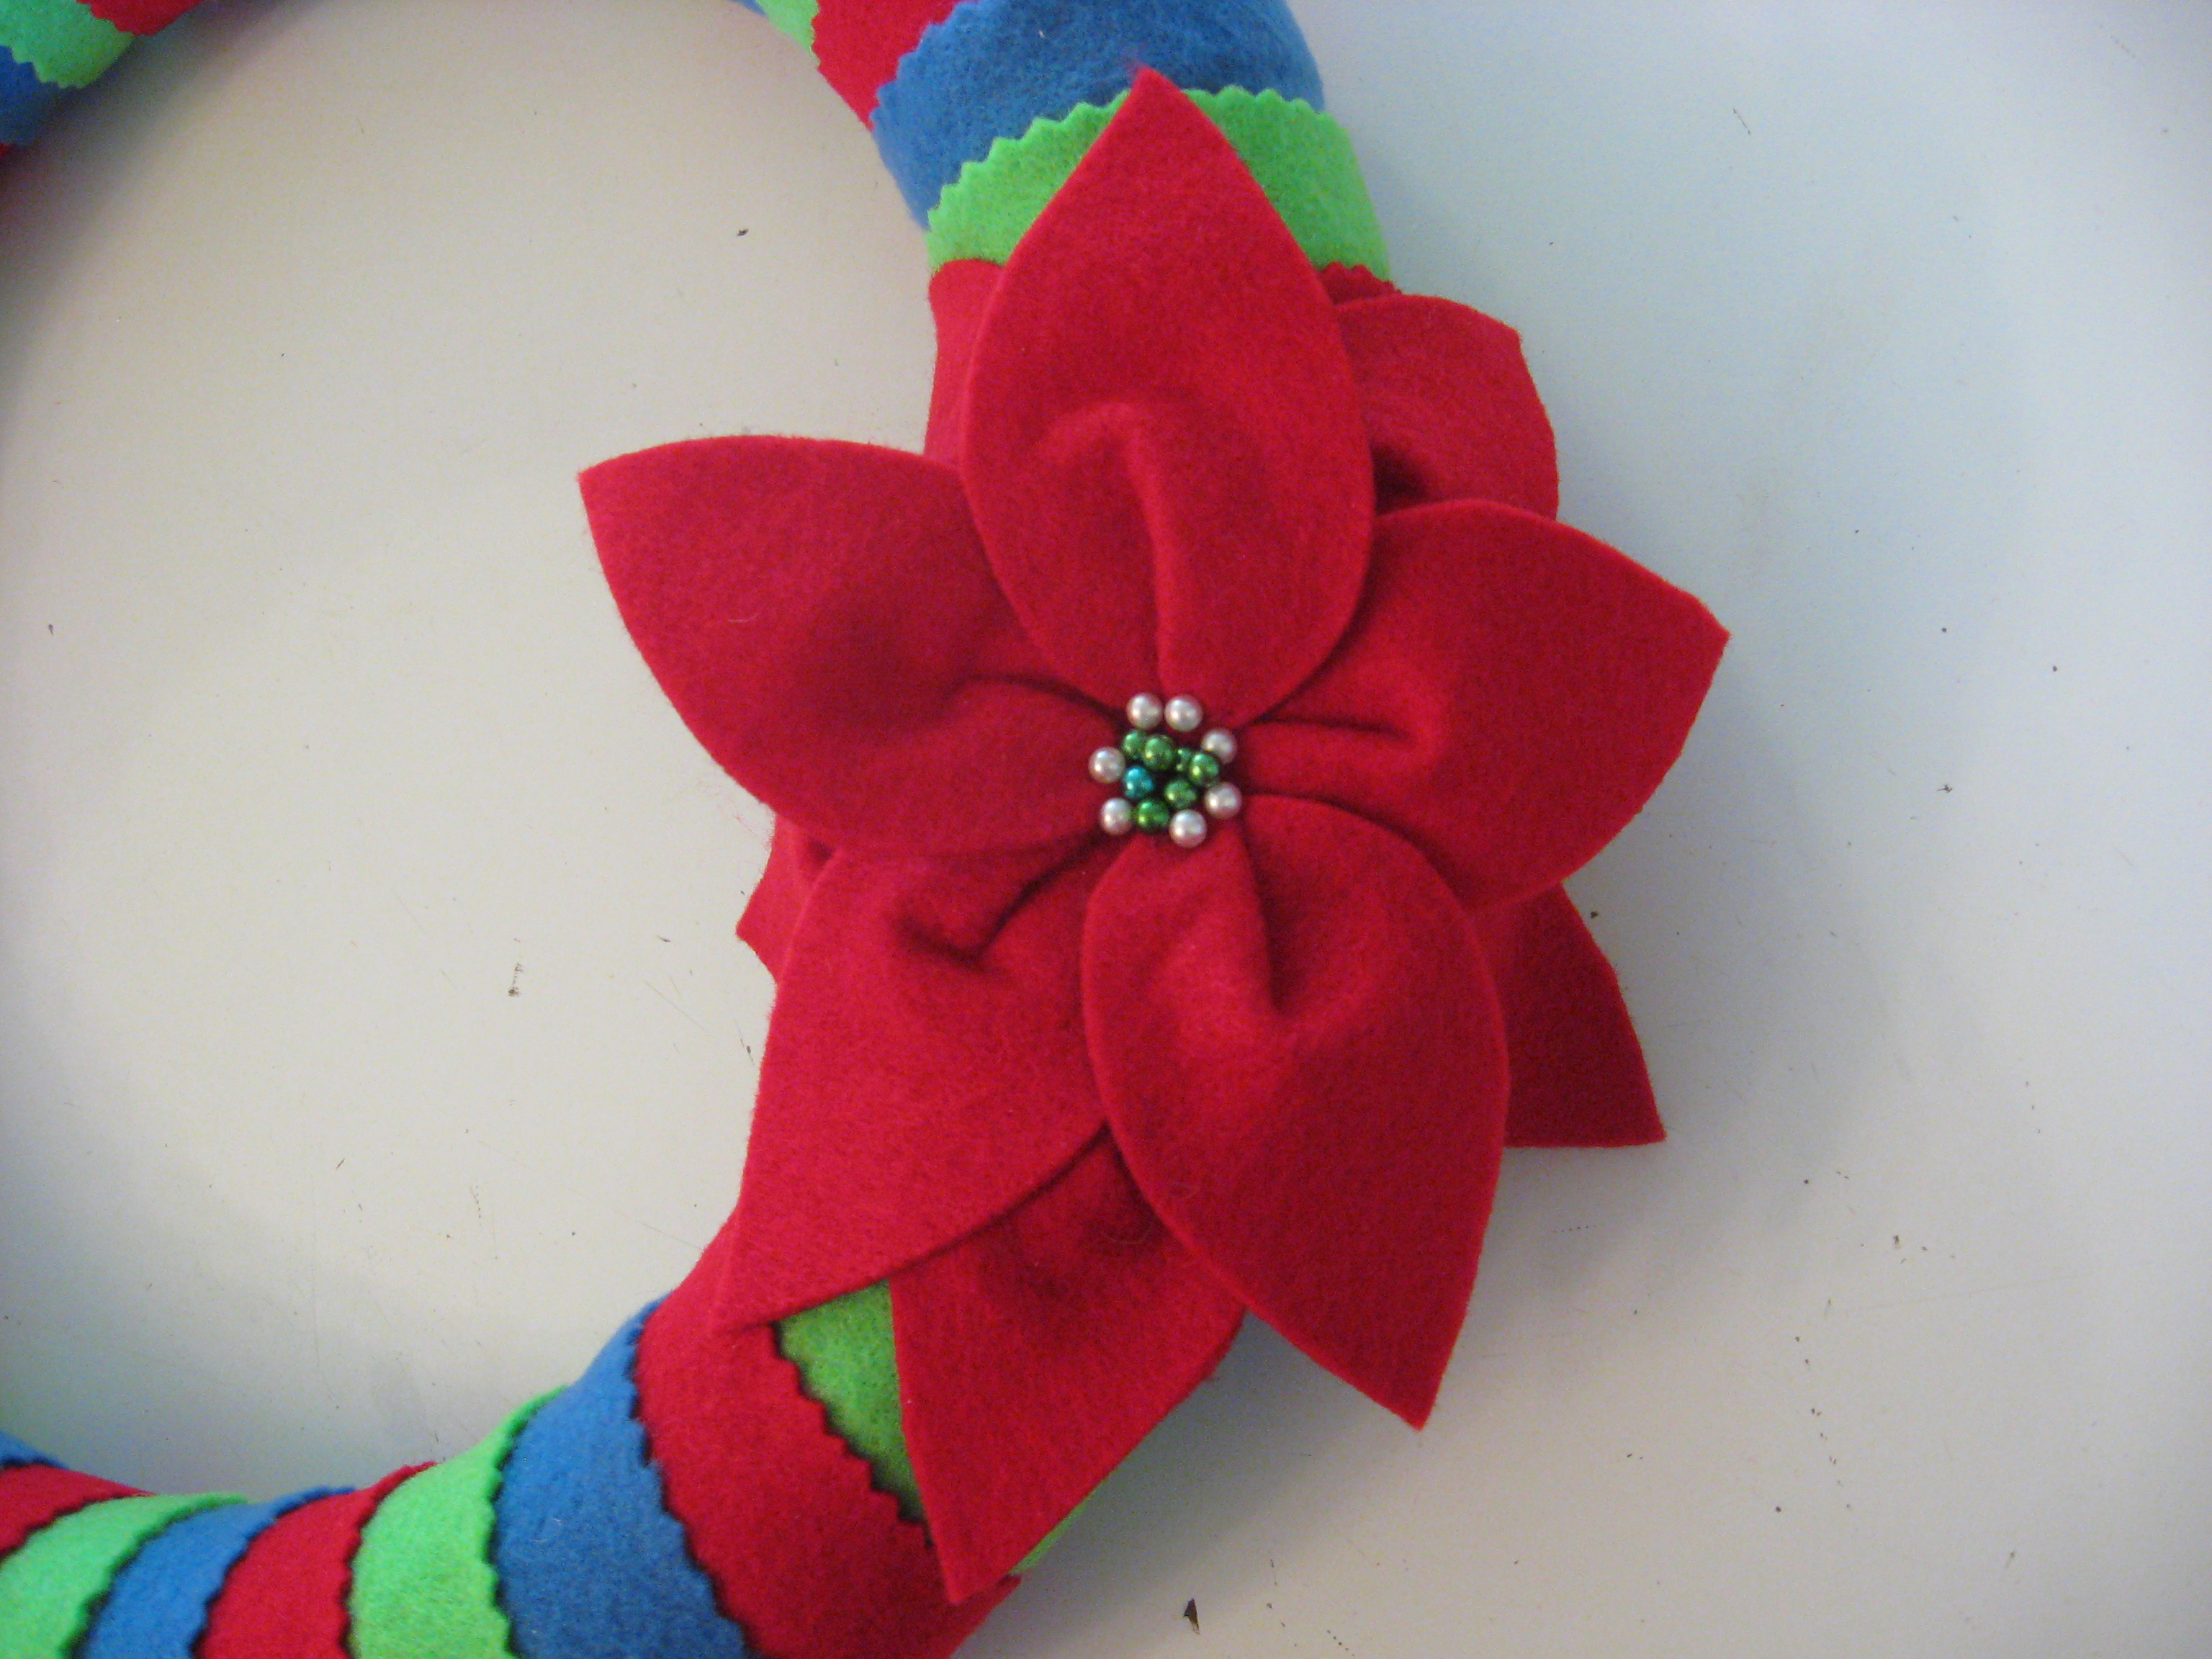
Hang with ribbon attached to the back with more pins.
Easy, right? Think of the possibilities for other seasons as well.
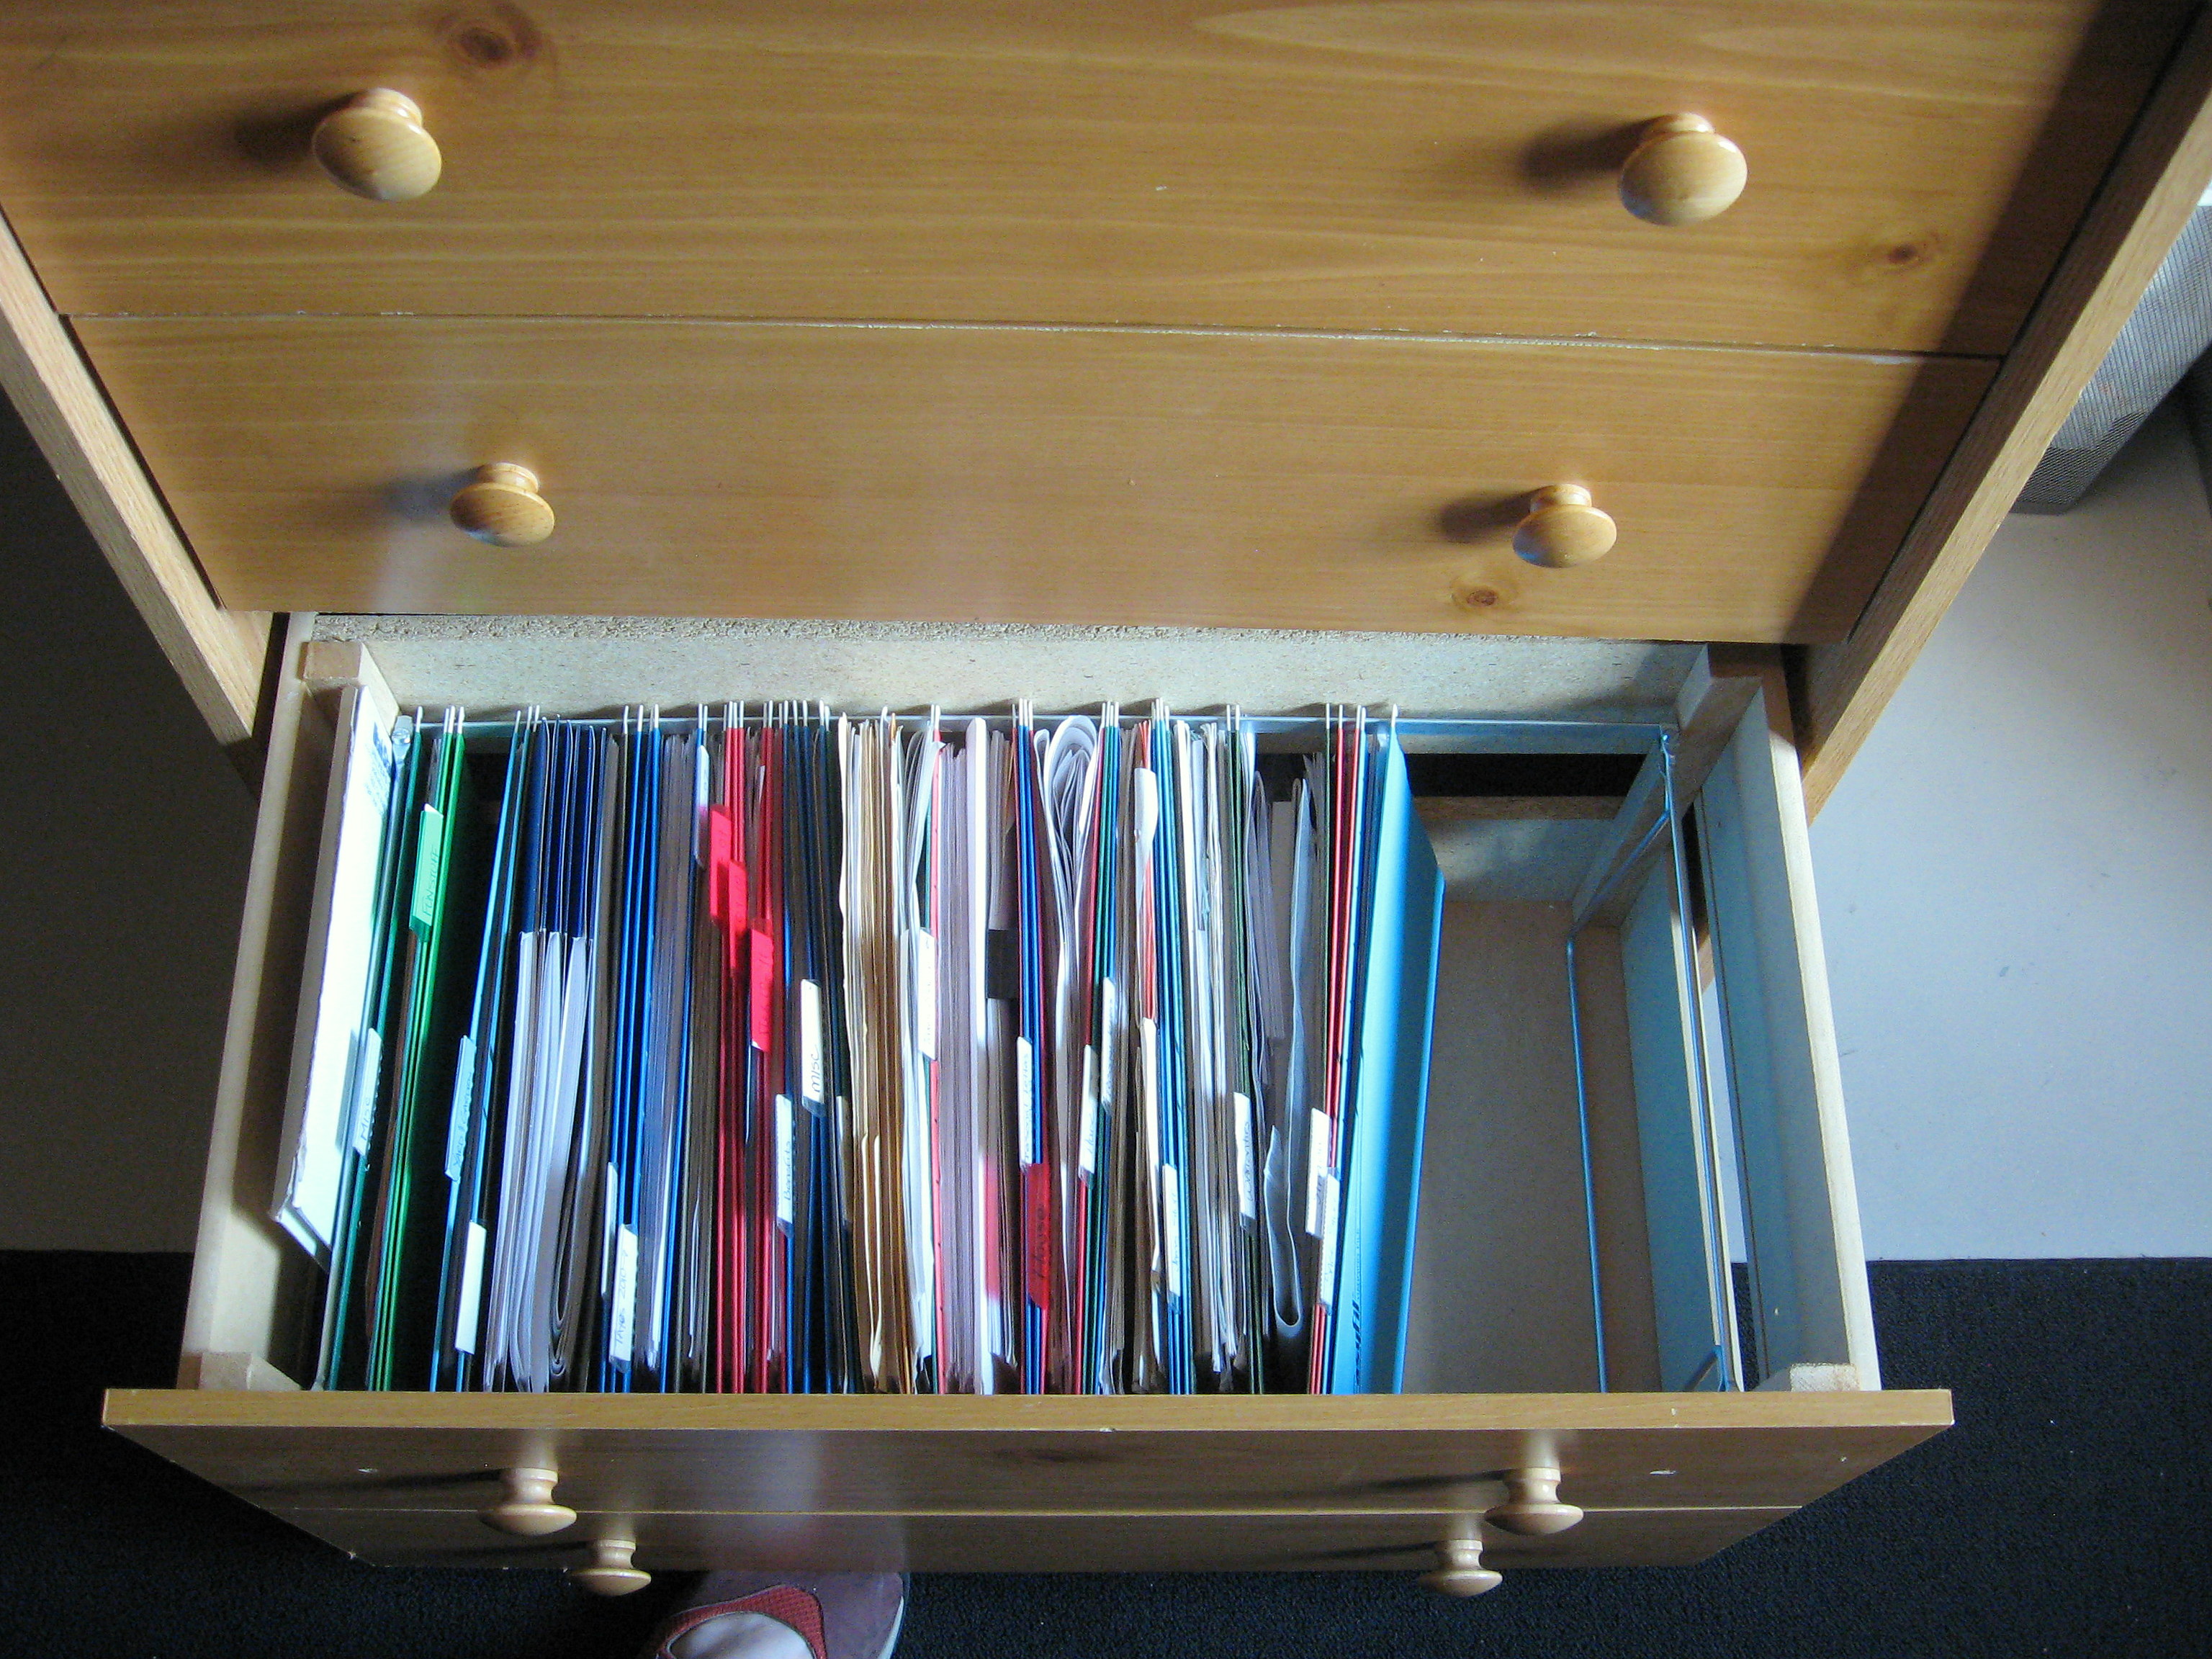
File Cabinet Drawer
Disclaimer: this room is still very much in the “there for function” stage of existence, NOT the “there to look nice” stage. Judge accordingly!
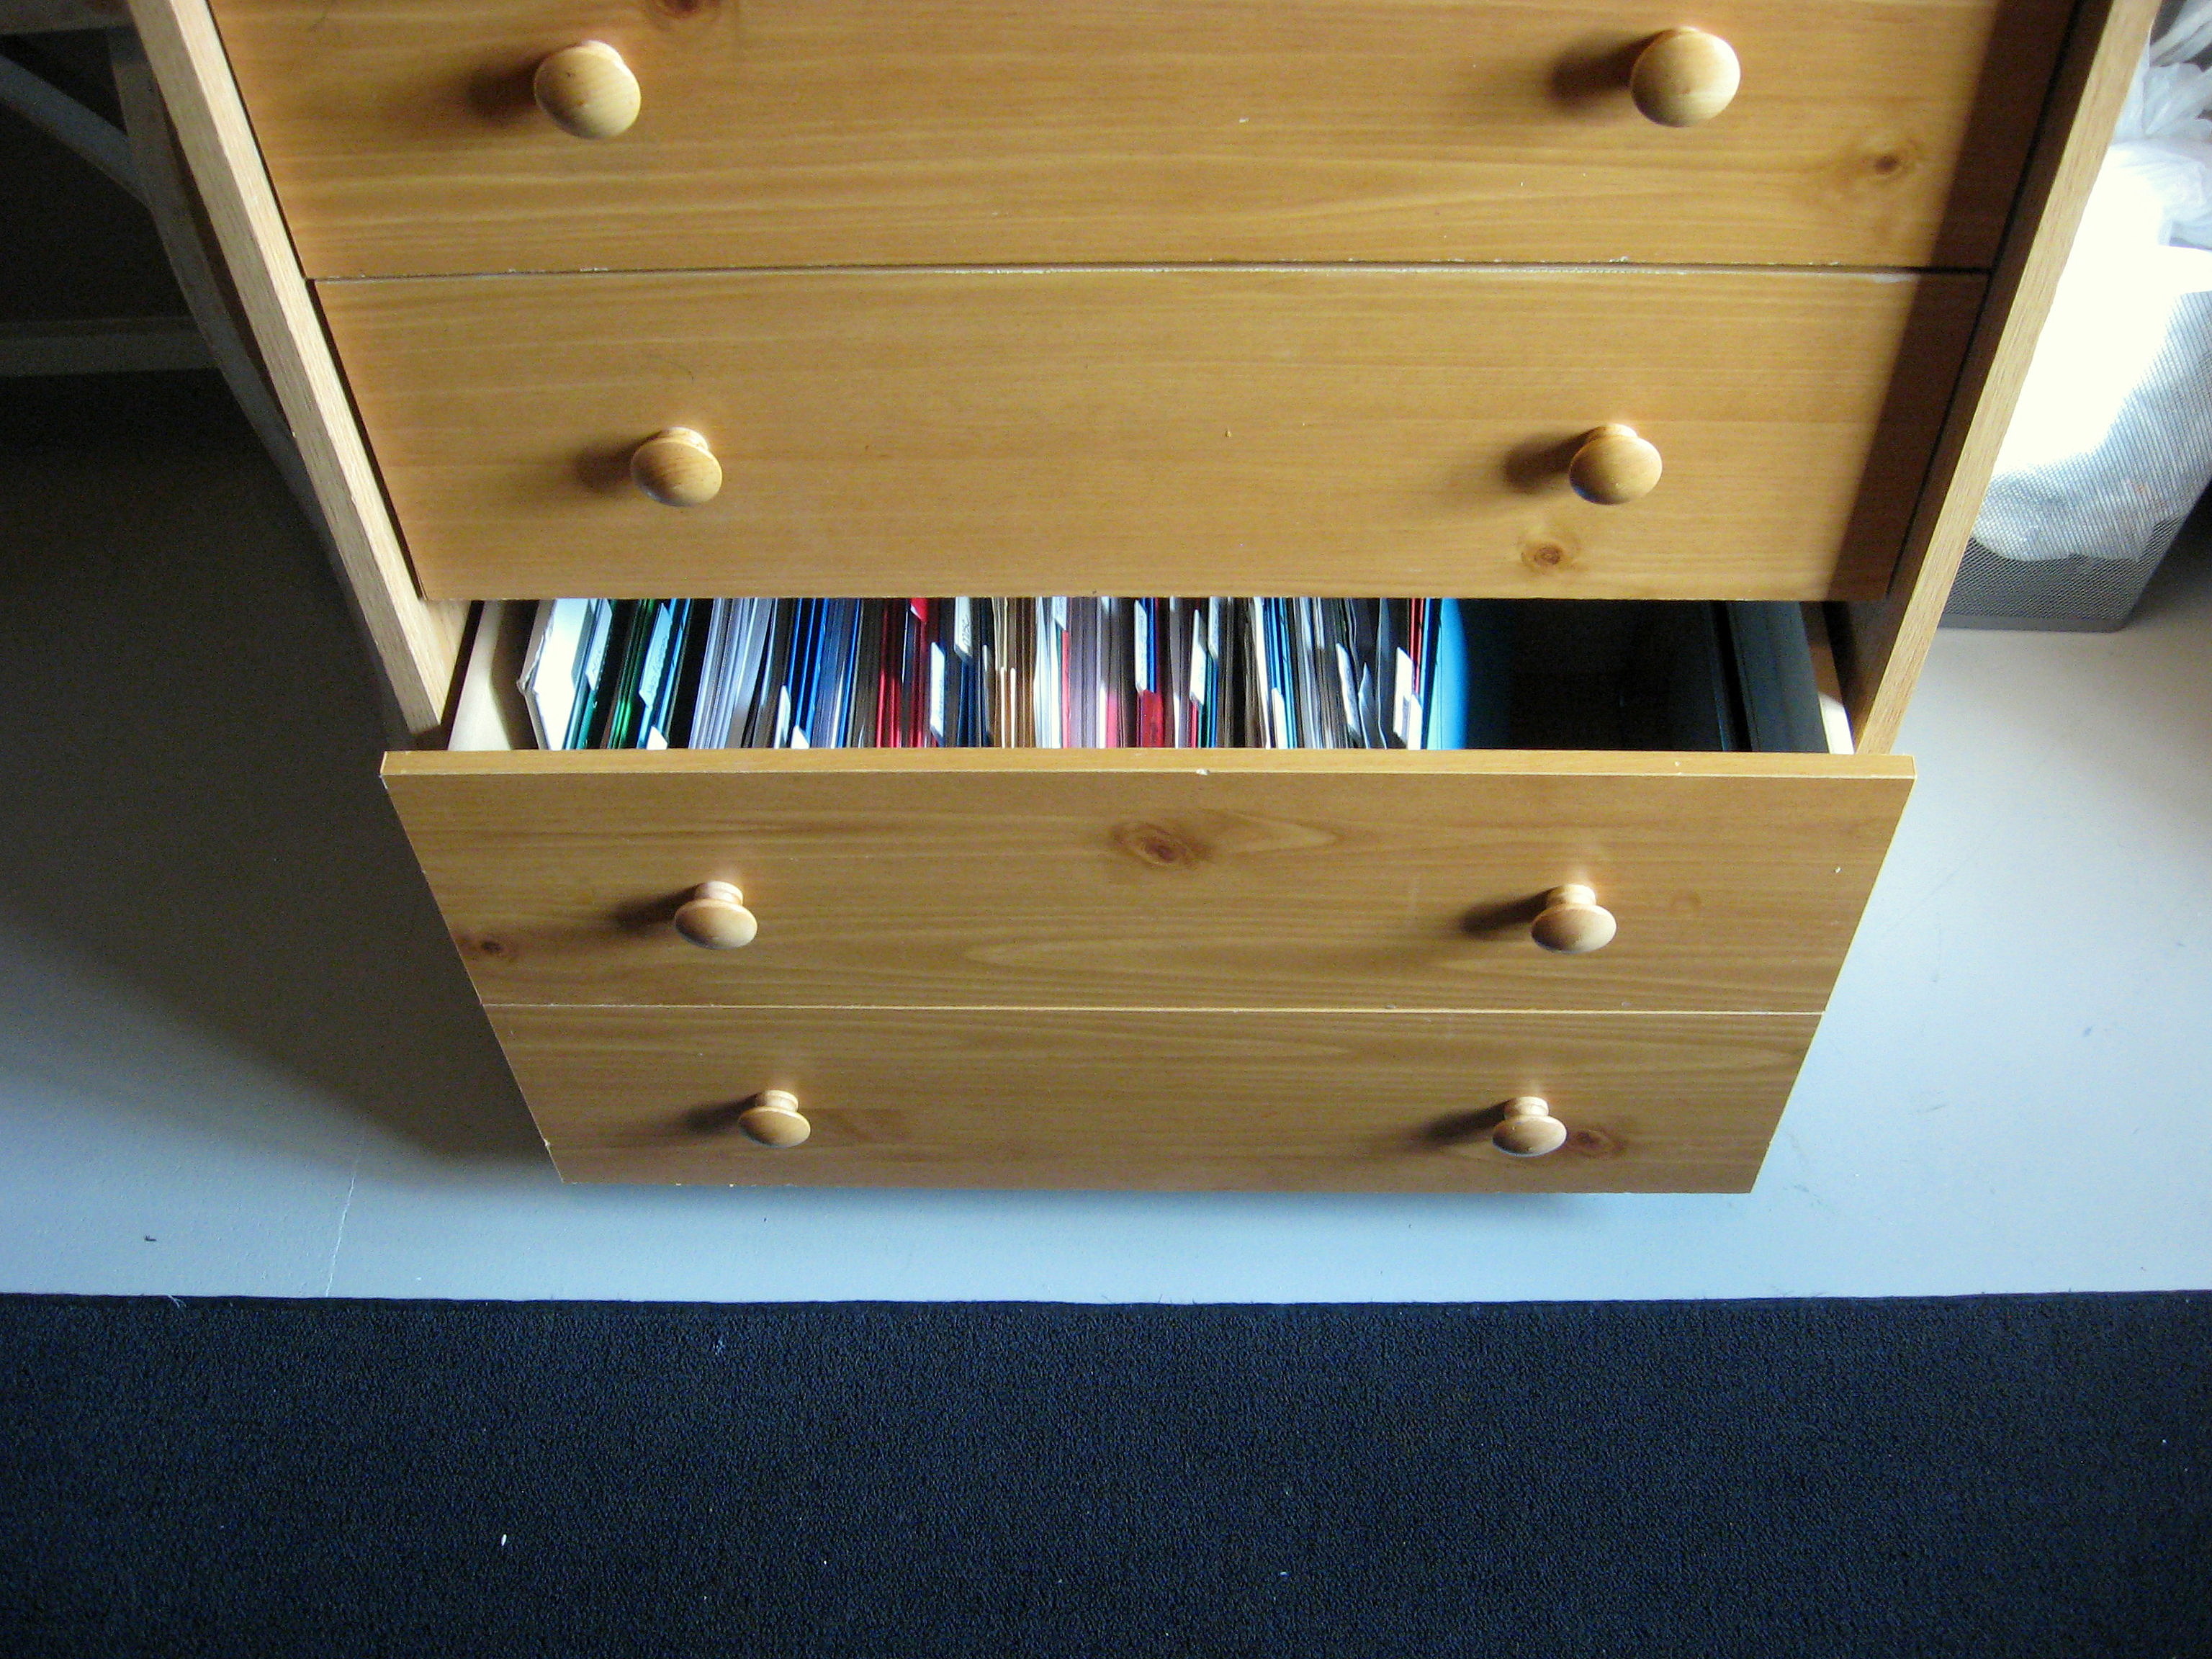
I had an old, beat up file cabinet that I bought from WalMart when I was in college. To say that it was an eyesore is an understatement! It served it’s purpose, but I just could not stand it and wanted it out of my way. I don’t have a ton of files, but just enough that I couldn’t get rid of the cabinet outright. Our “desk” in our office is an old door propped on two small dressers that hold our office supplies. With just a little purging and consolidating, I managed to free up two of the drawers to be converted into one big file drawer.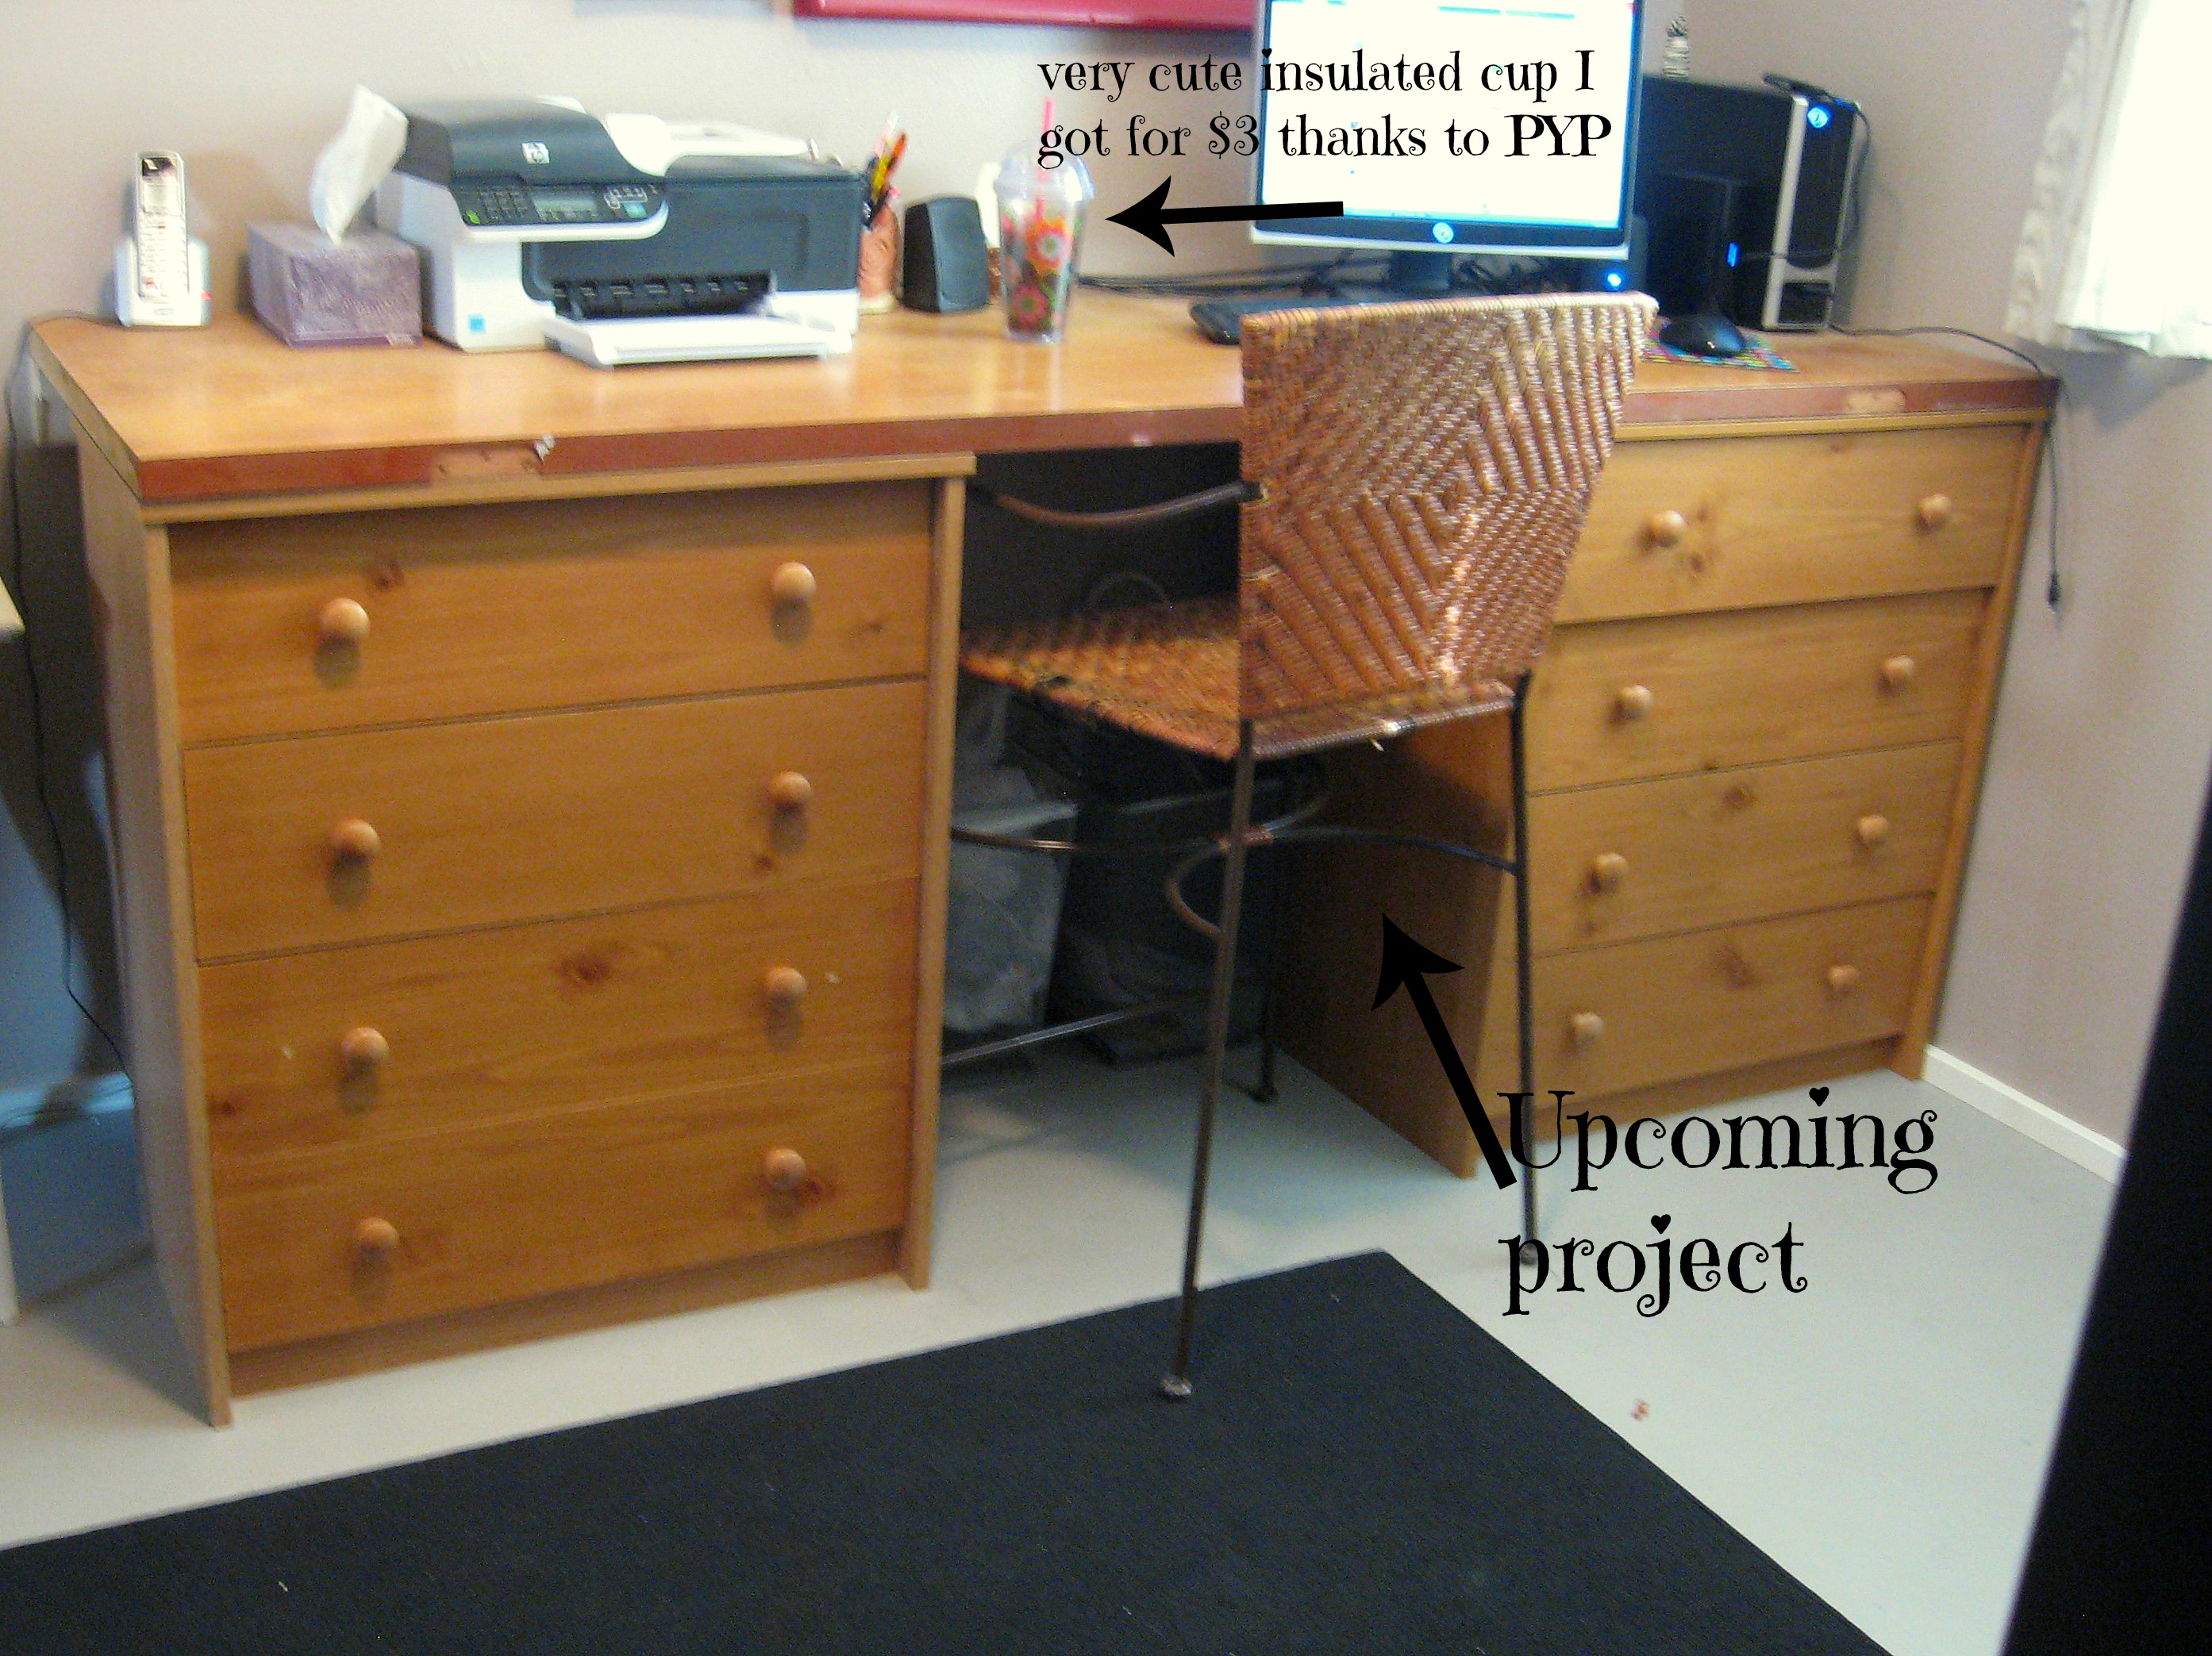
I had planned to do a proper tutorial for this project, but my wonderful husband knew I wanted it done and surprised me by doing it for me one day while I was gone. It’s a pretty easy concept, though, so I’ll show you what he did.
Take out the 2 drawers, and remove the bottom of the one that will go on top. Line them up, and cut four pieces of wood (we used 1 inch square pine) to length to fit in the corners. When the drawer fronts are lined up, you will probably have a gap in the back. Use some sturdy pieces of wood as spacers to hold them while you work.
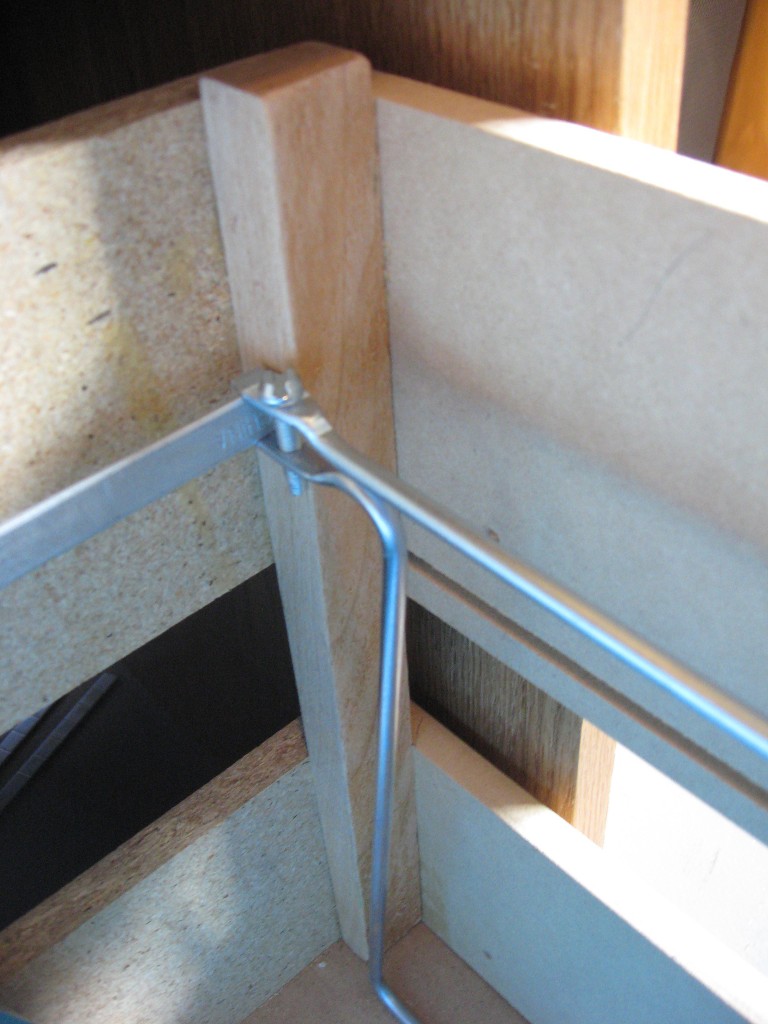
Glue them in using a strong glue (we used Gorilla Wood Glue) and clamp them into place while the glue dries. If you feel like that is not sturdy enough, throw in a couple of screws to reinforce it. We didn’t though, and have been using it for months. It is holding together perfectly and feels very sturdy when we open and close it.
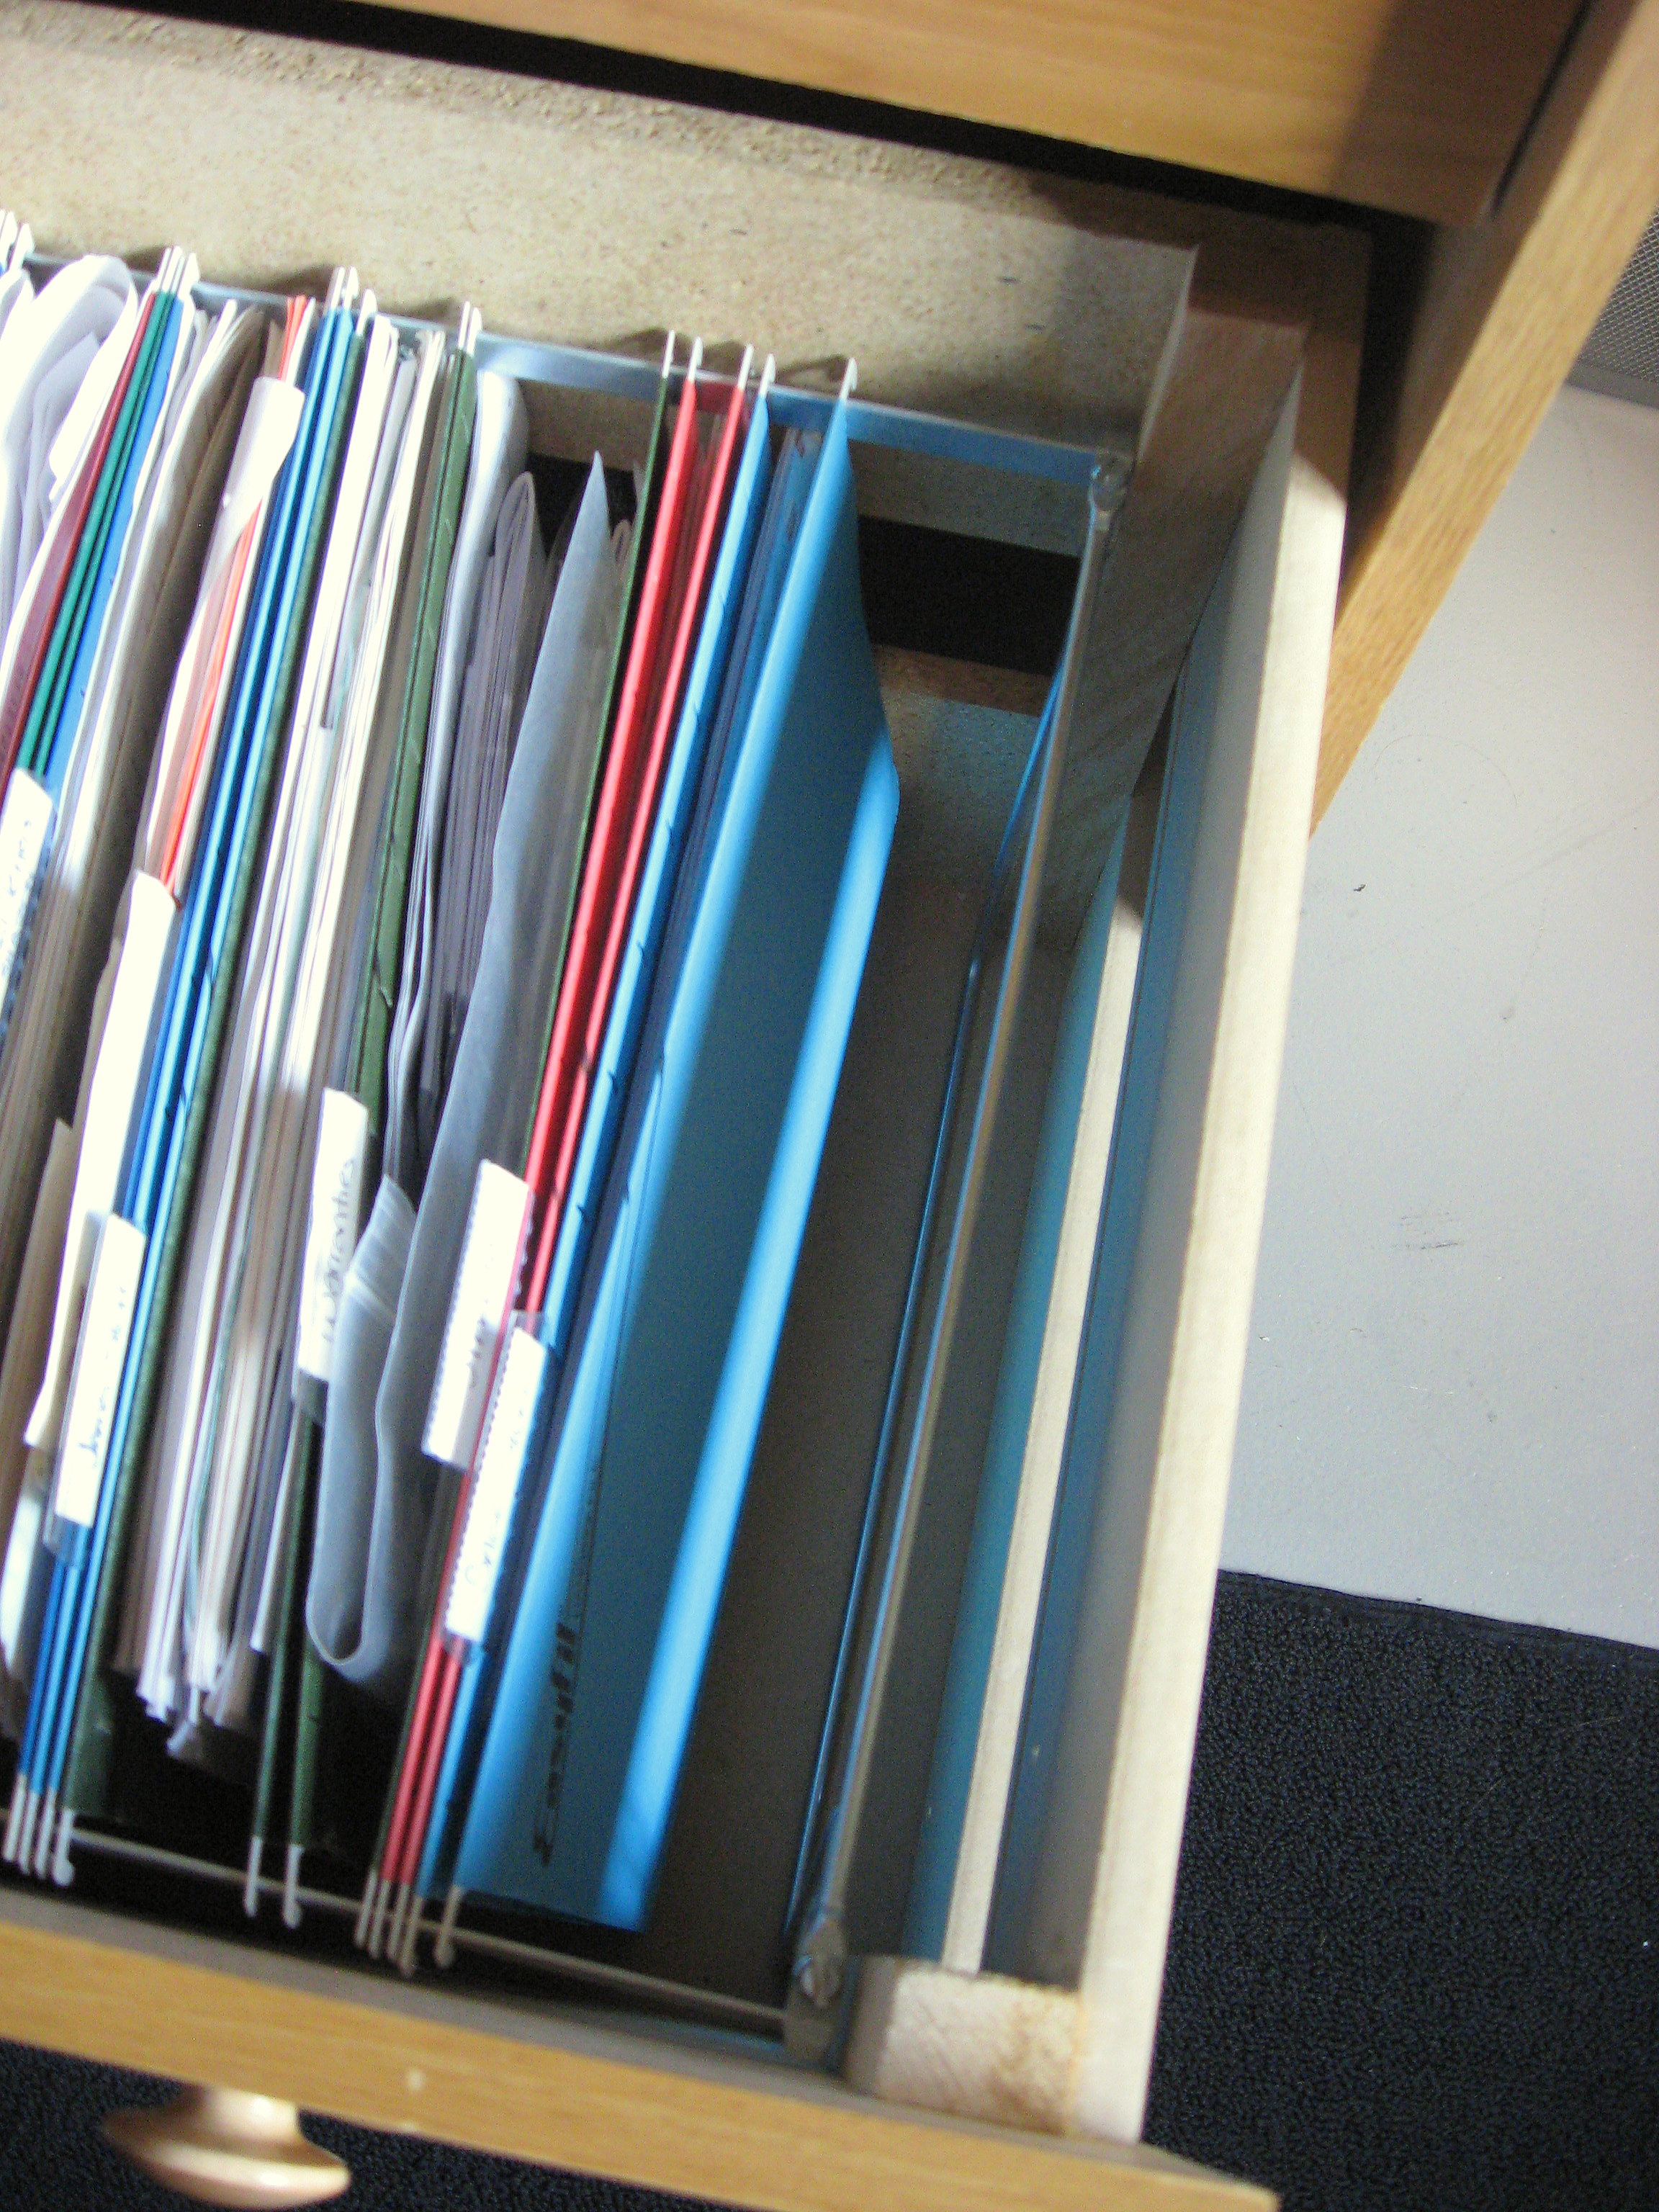
We purchased the metal hanging system from Staples for about $12. You cut it to size, and it just sits on the bottom of the drawer.
Much better.
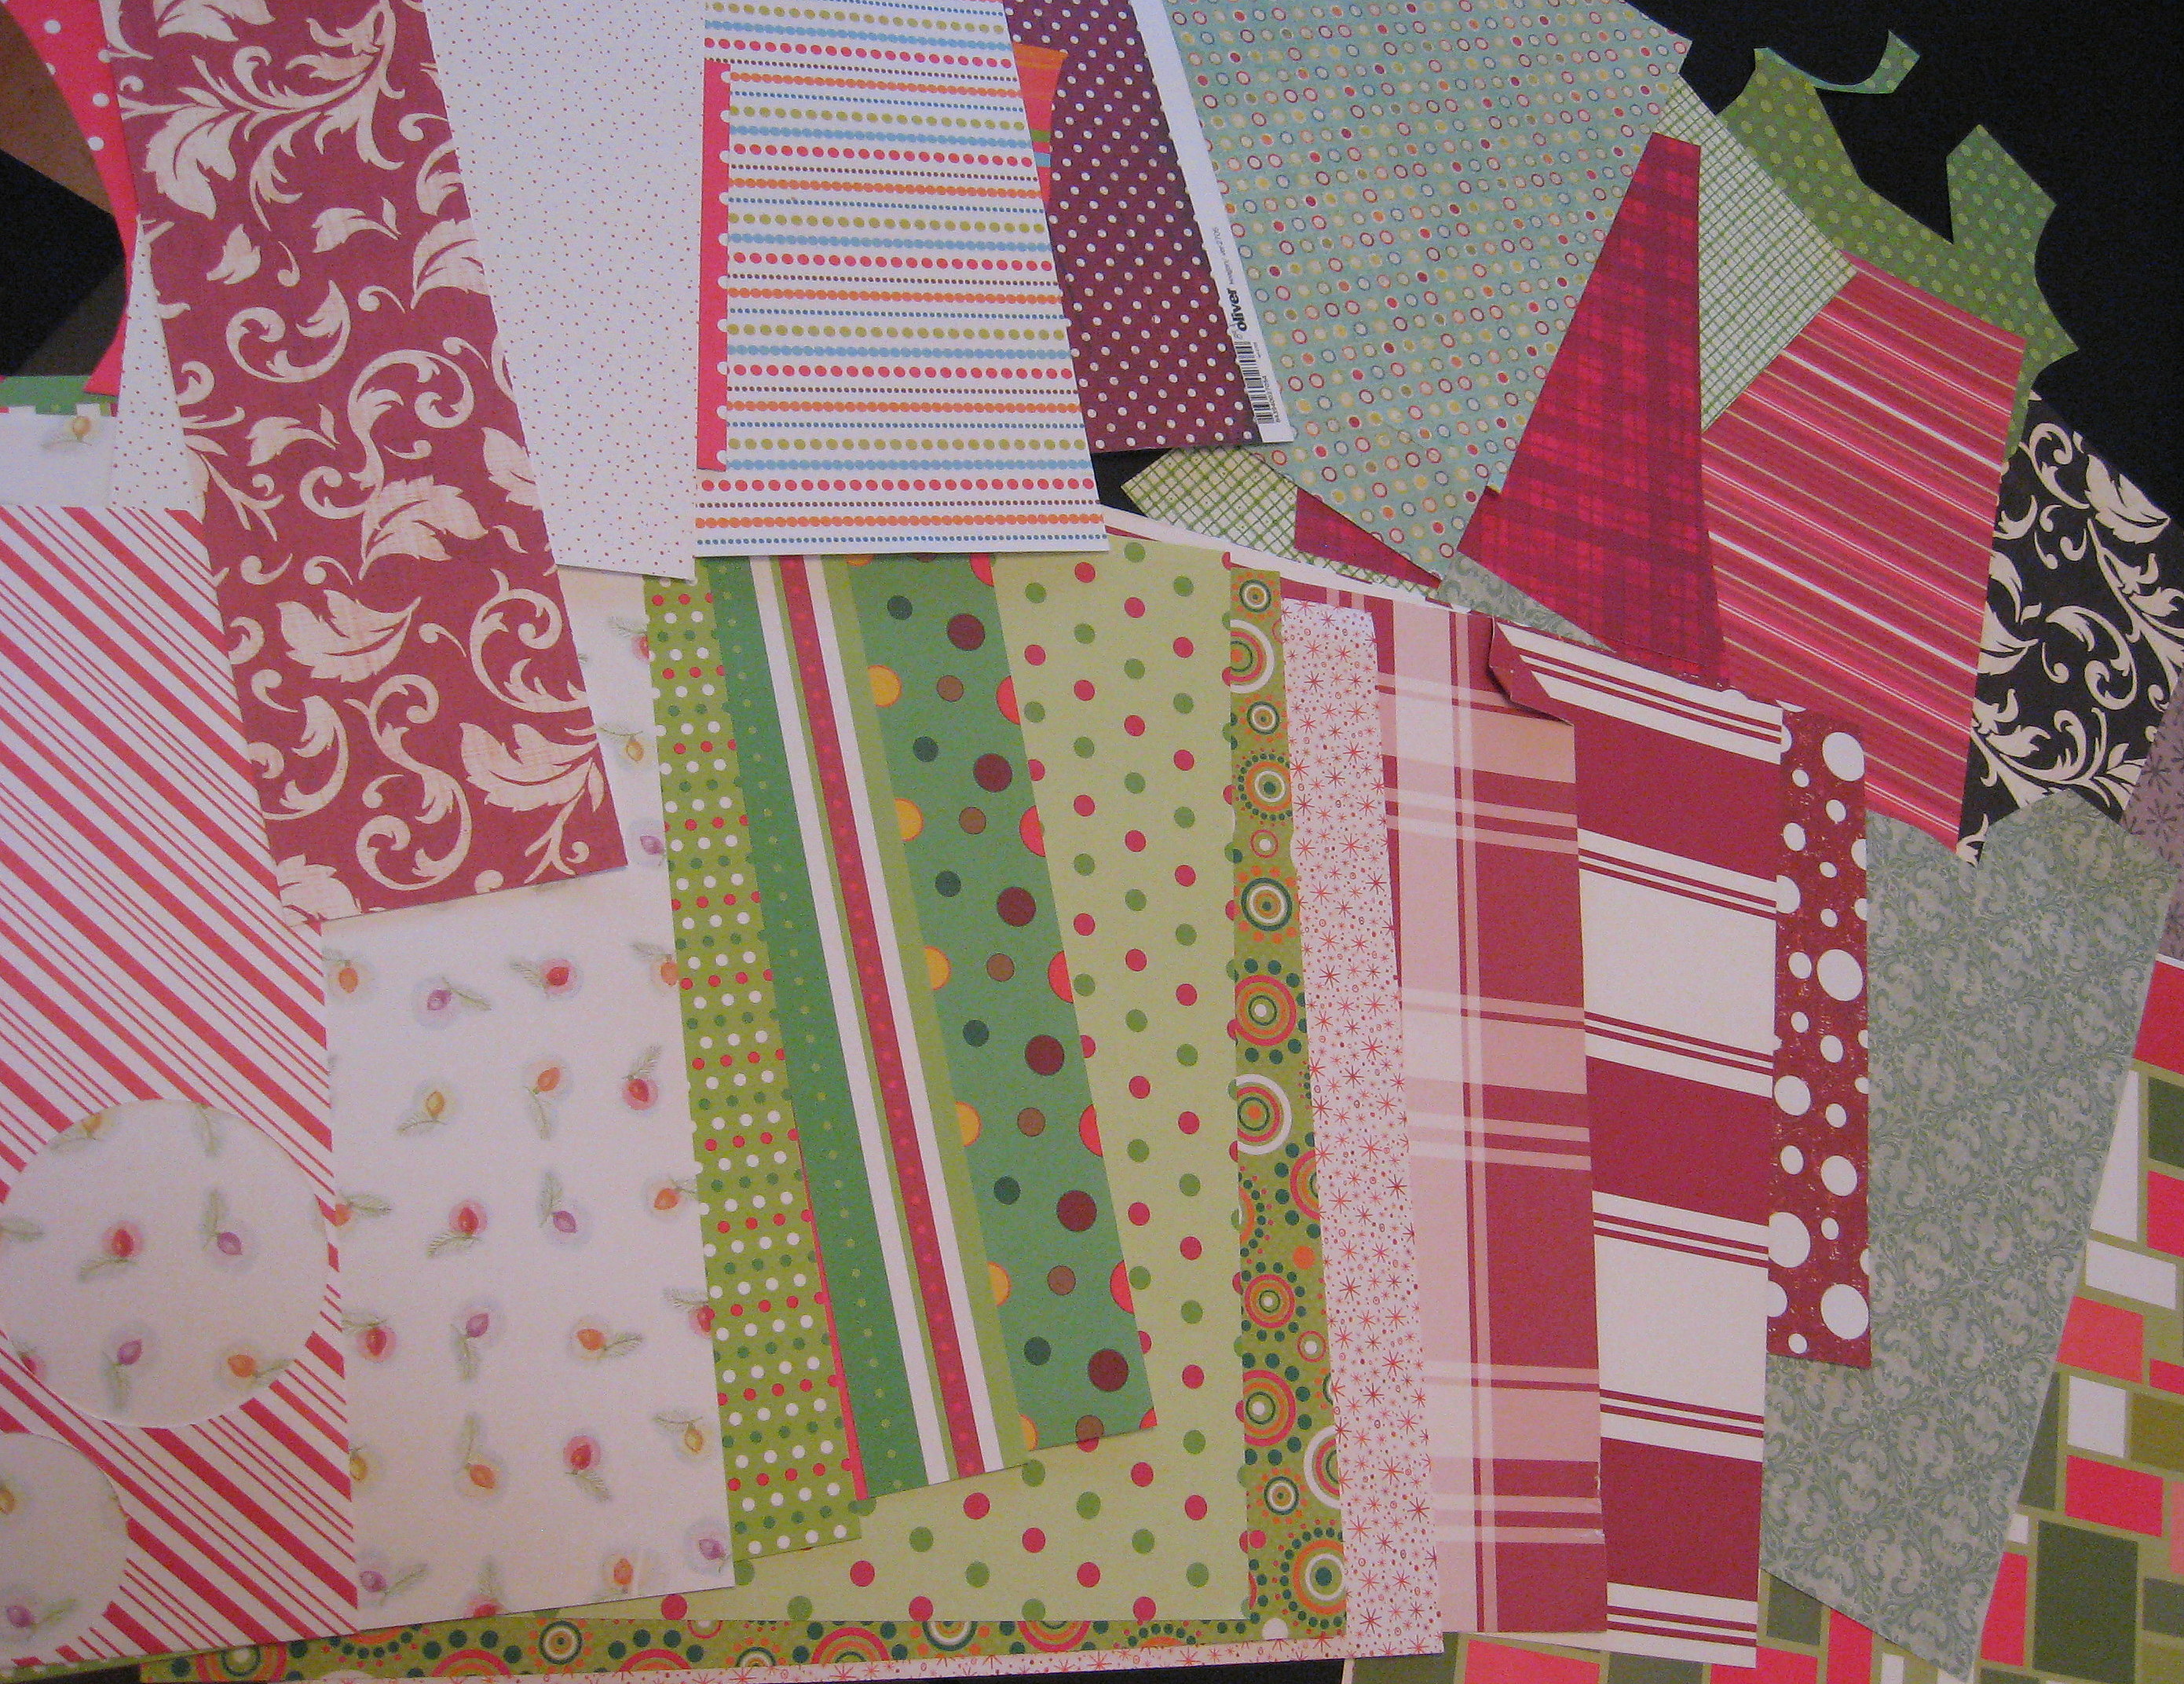
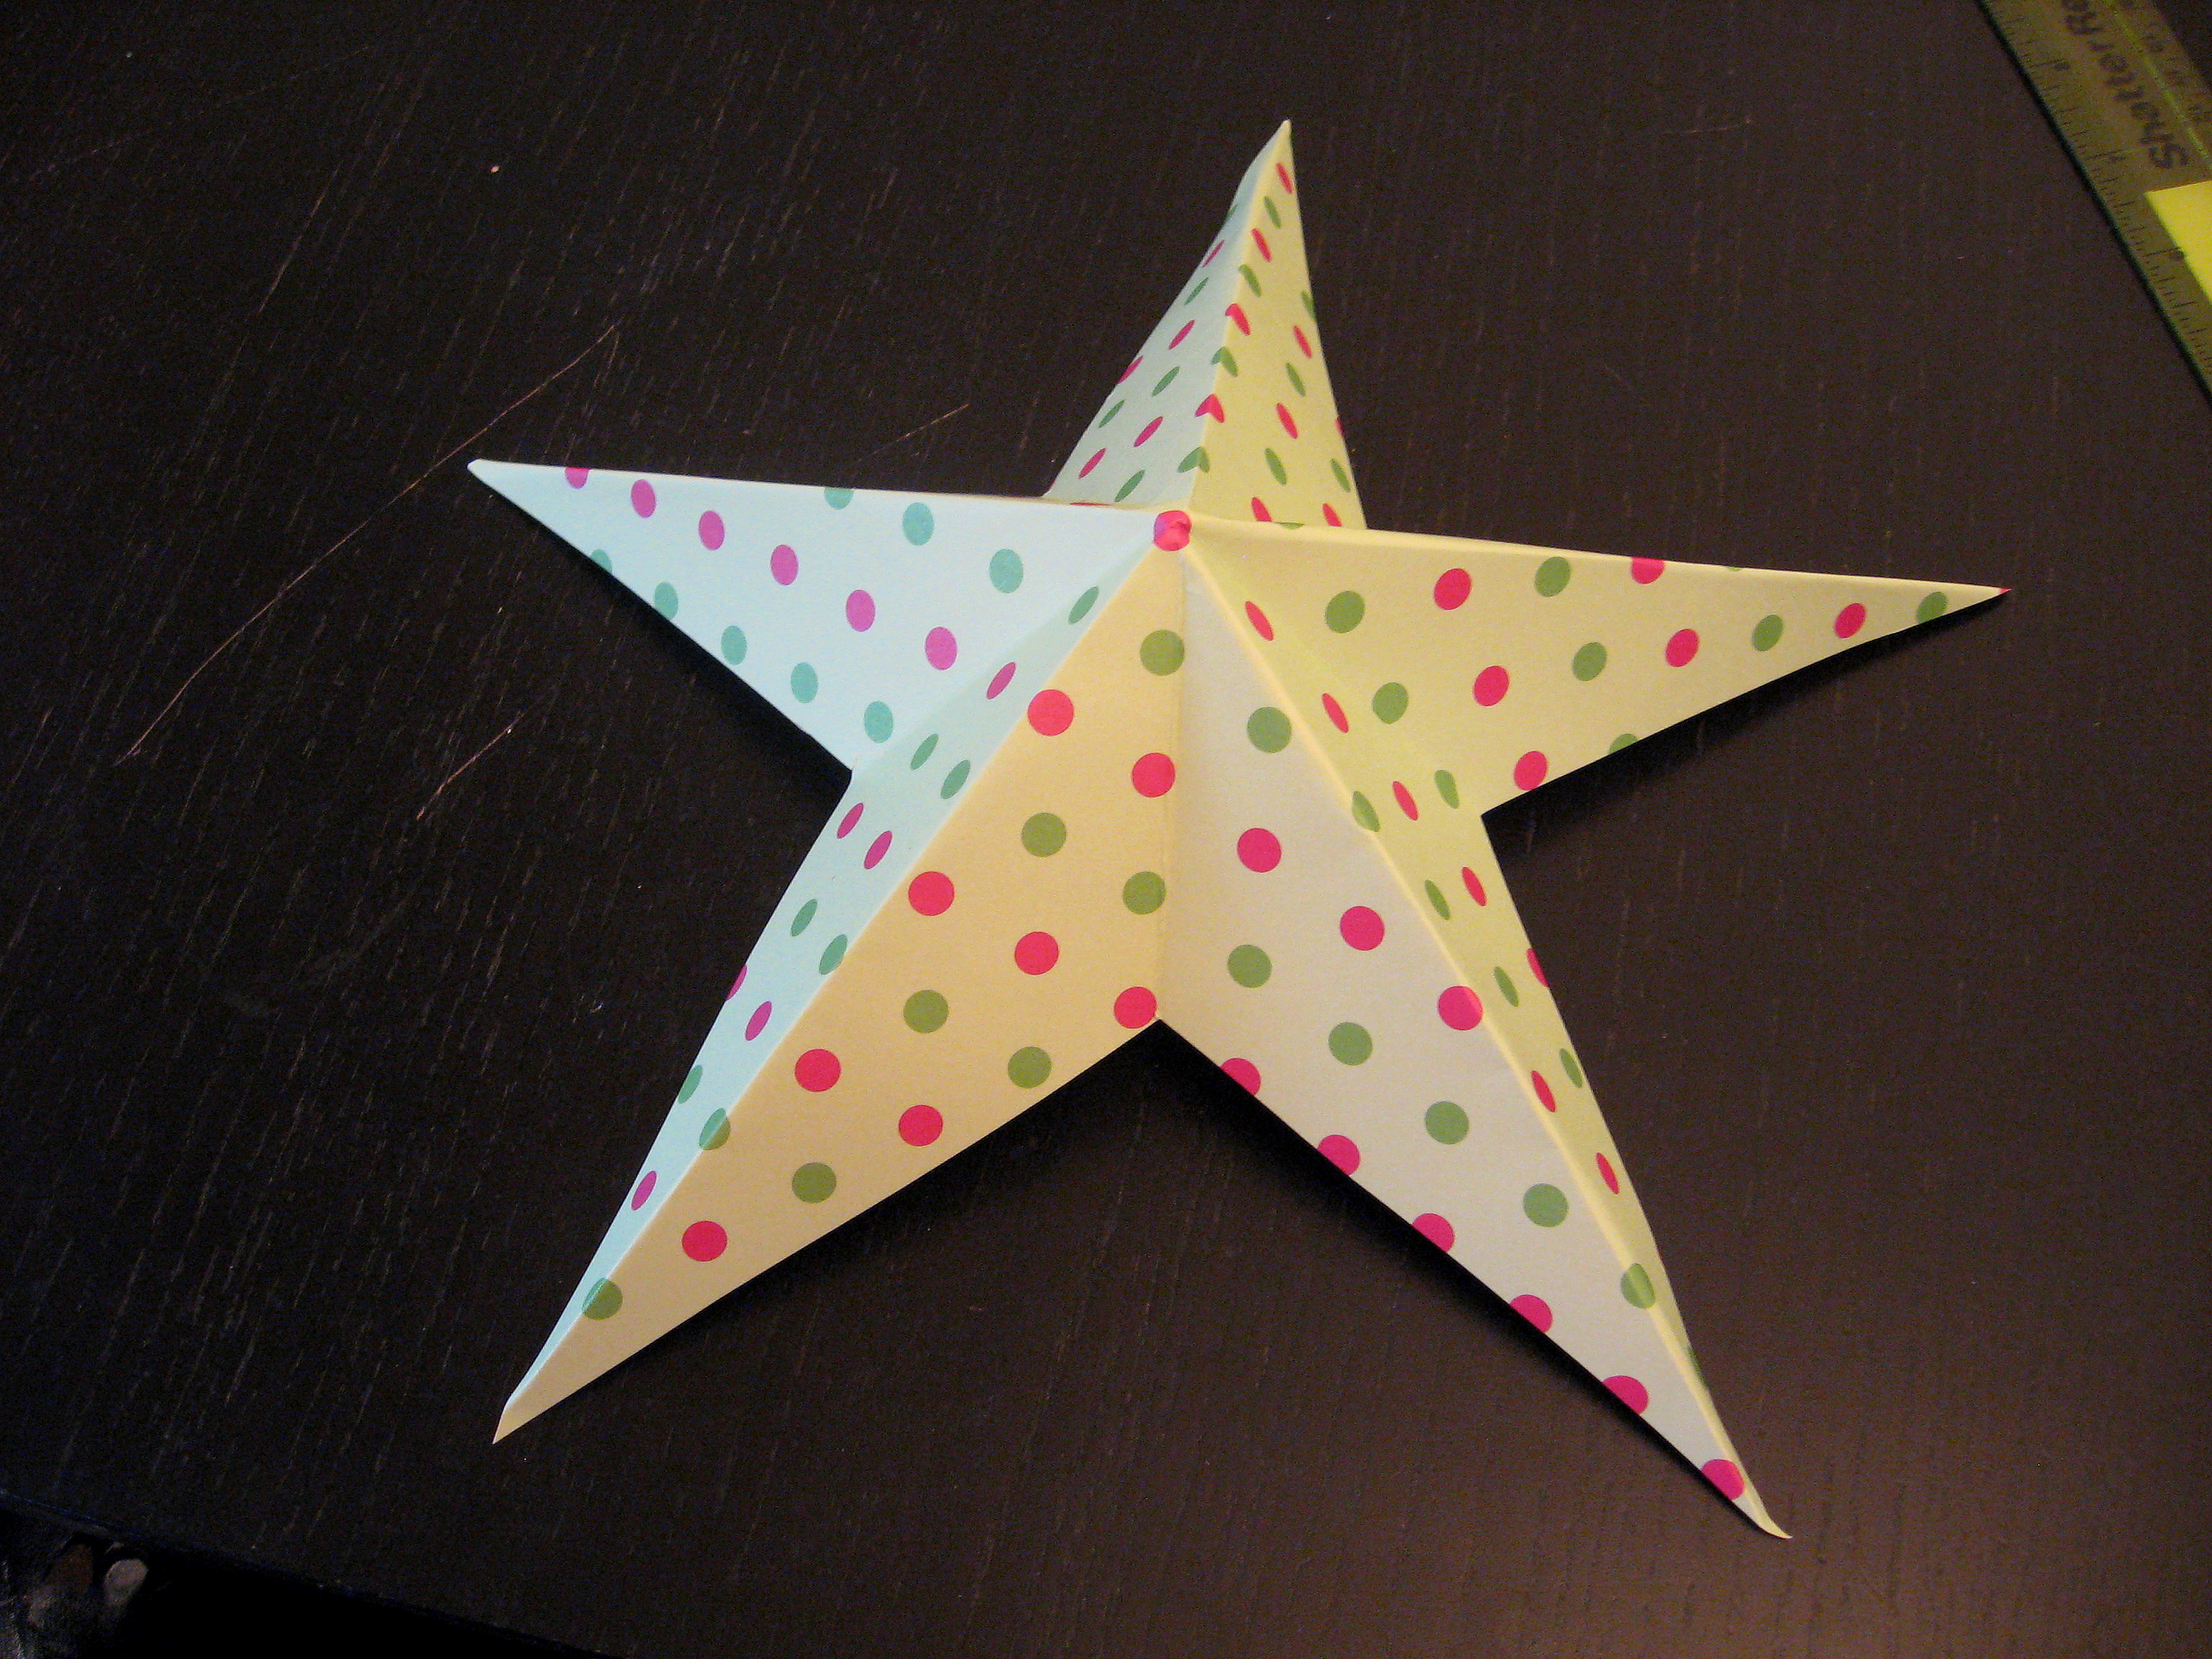
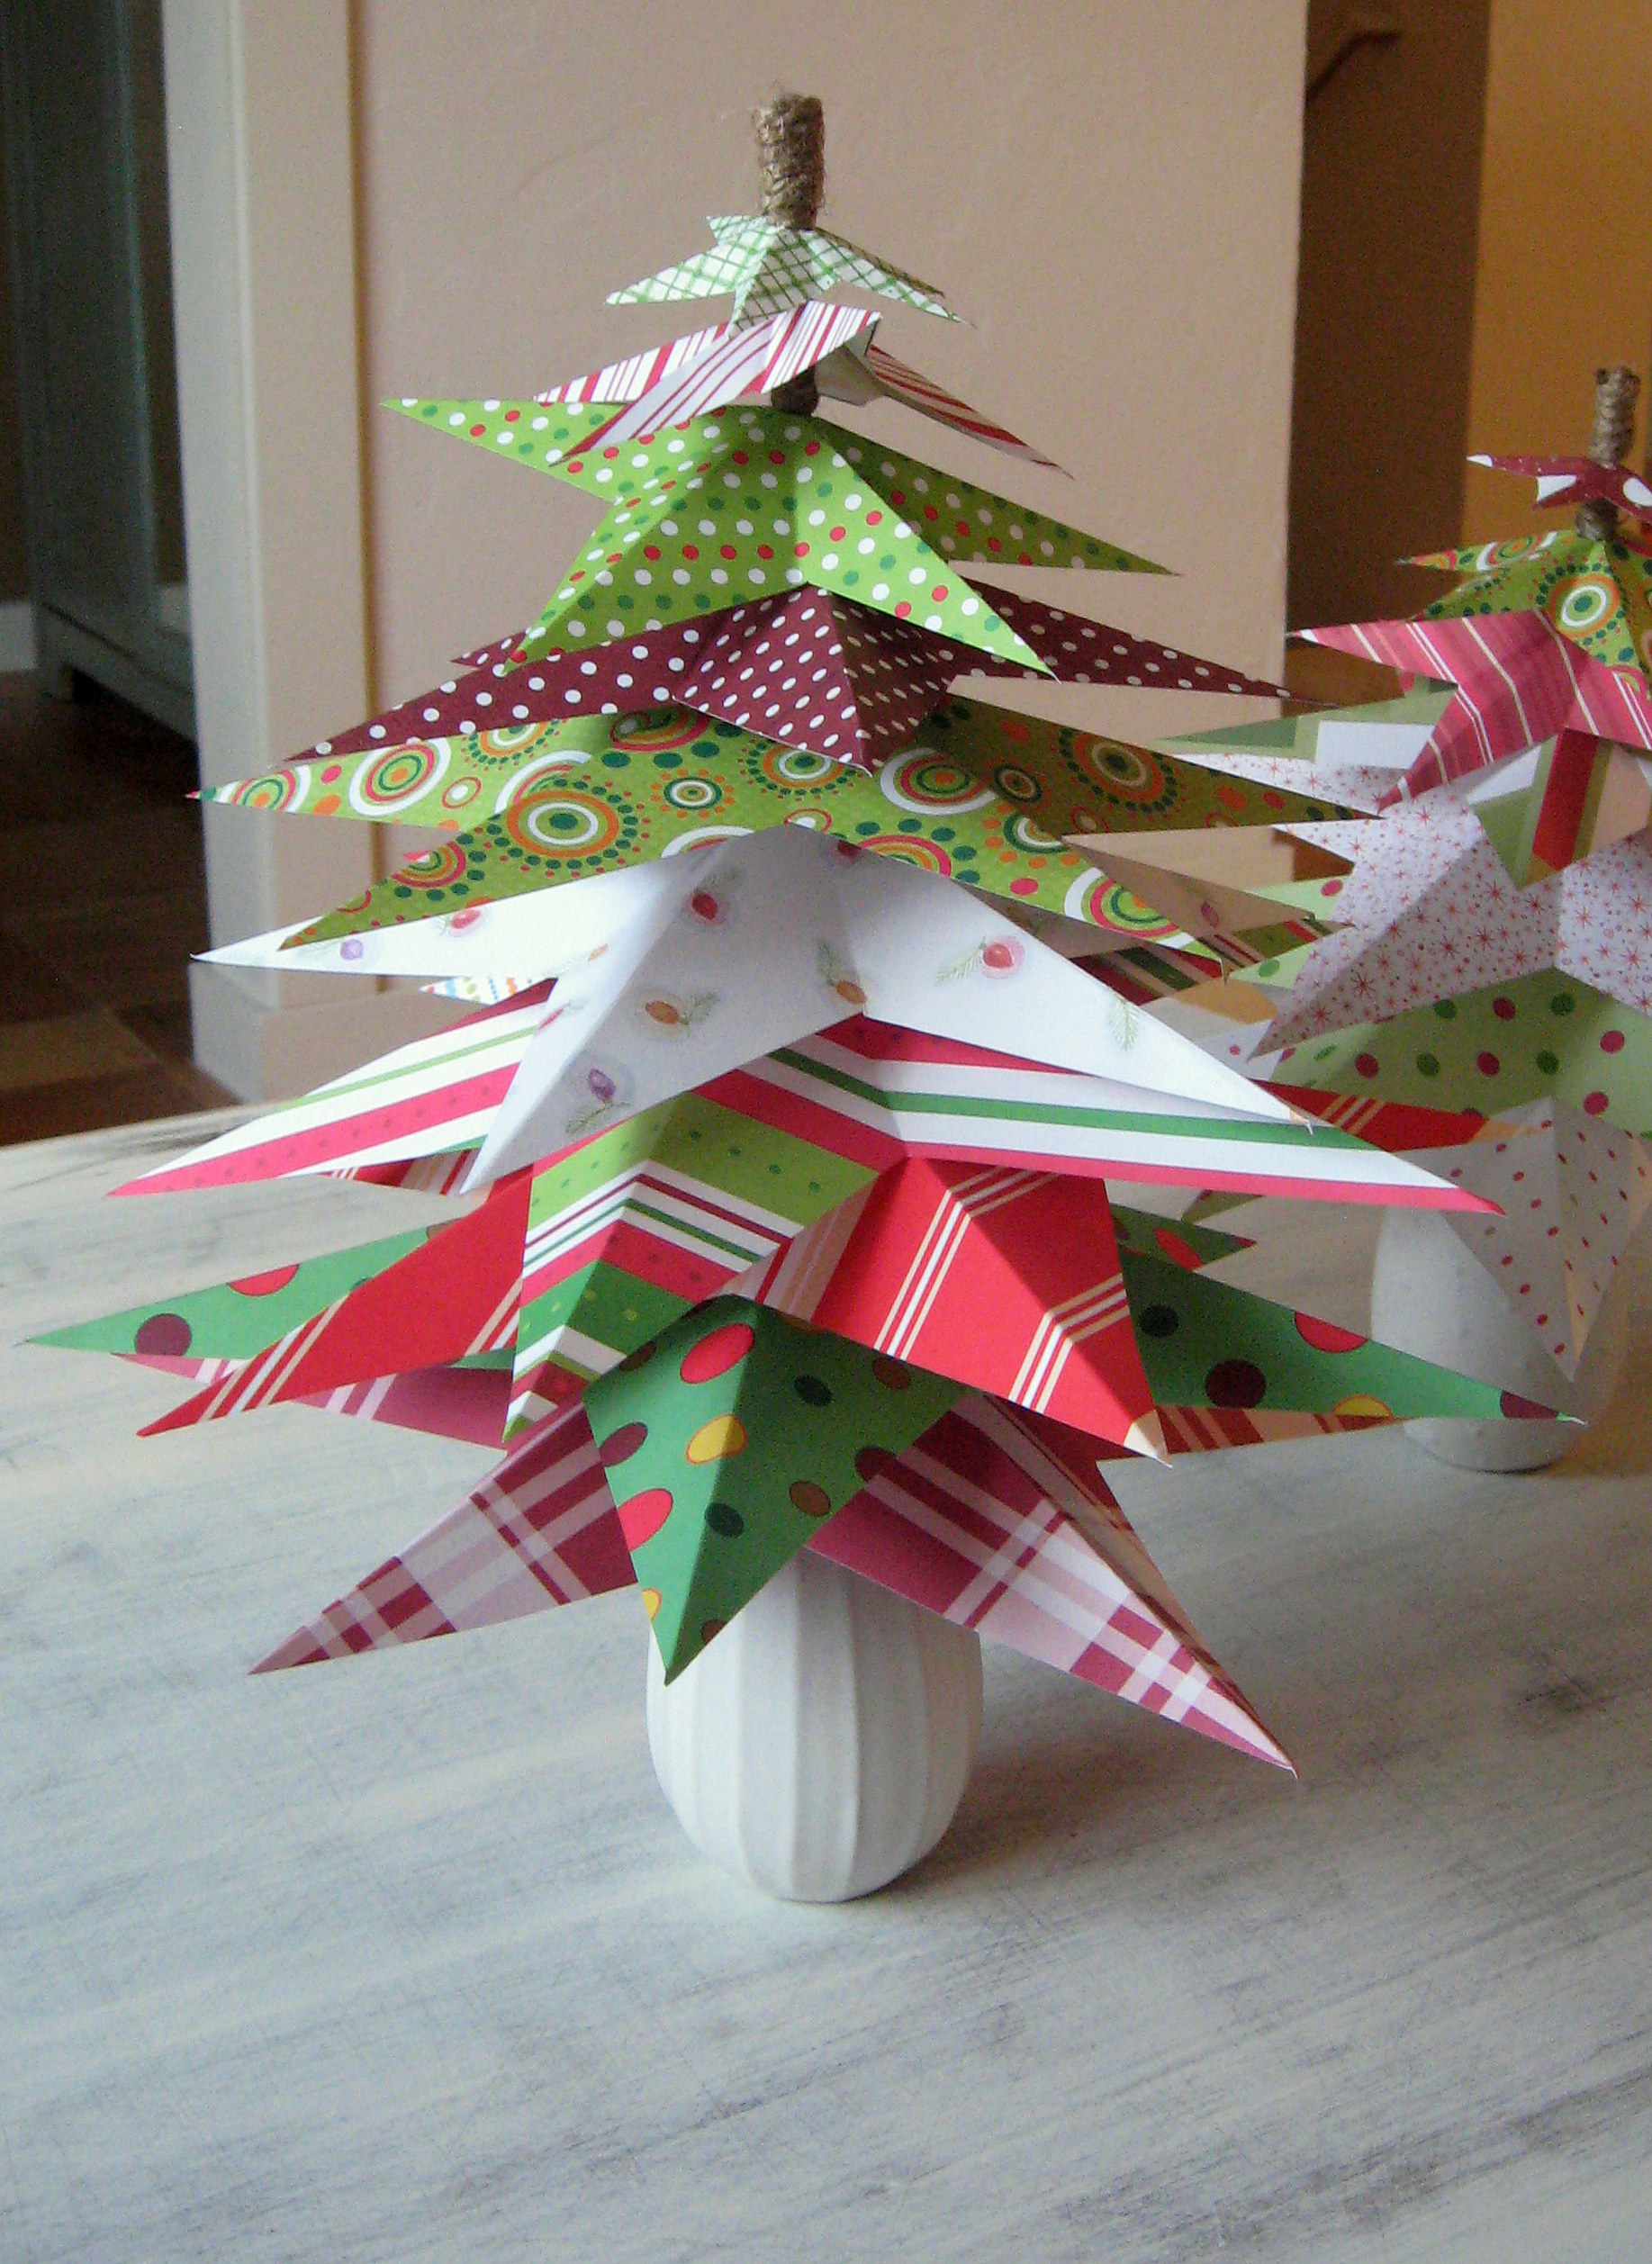
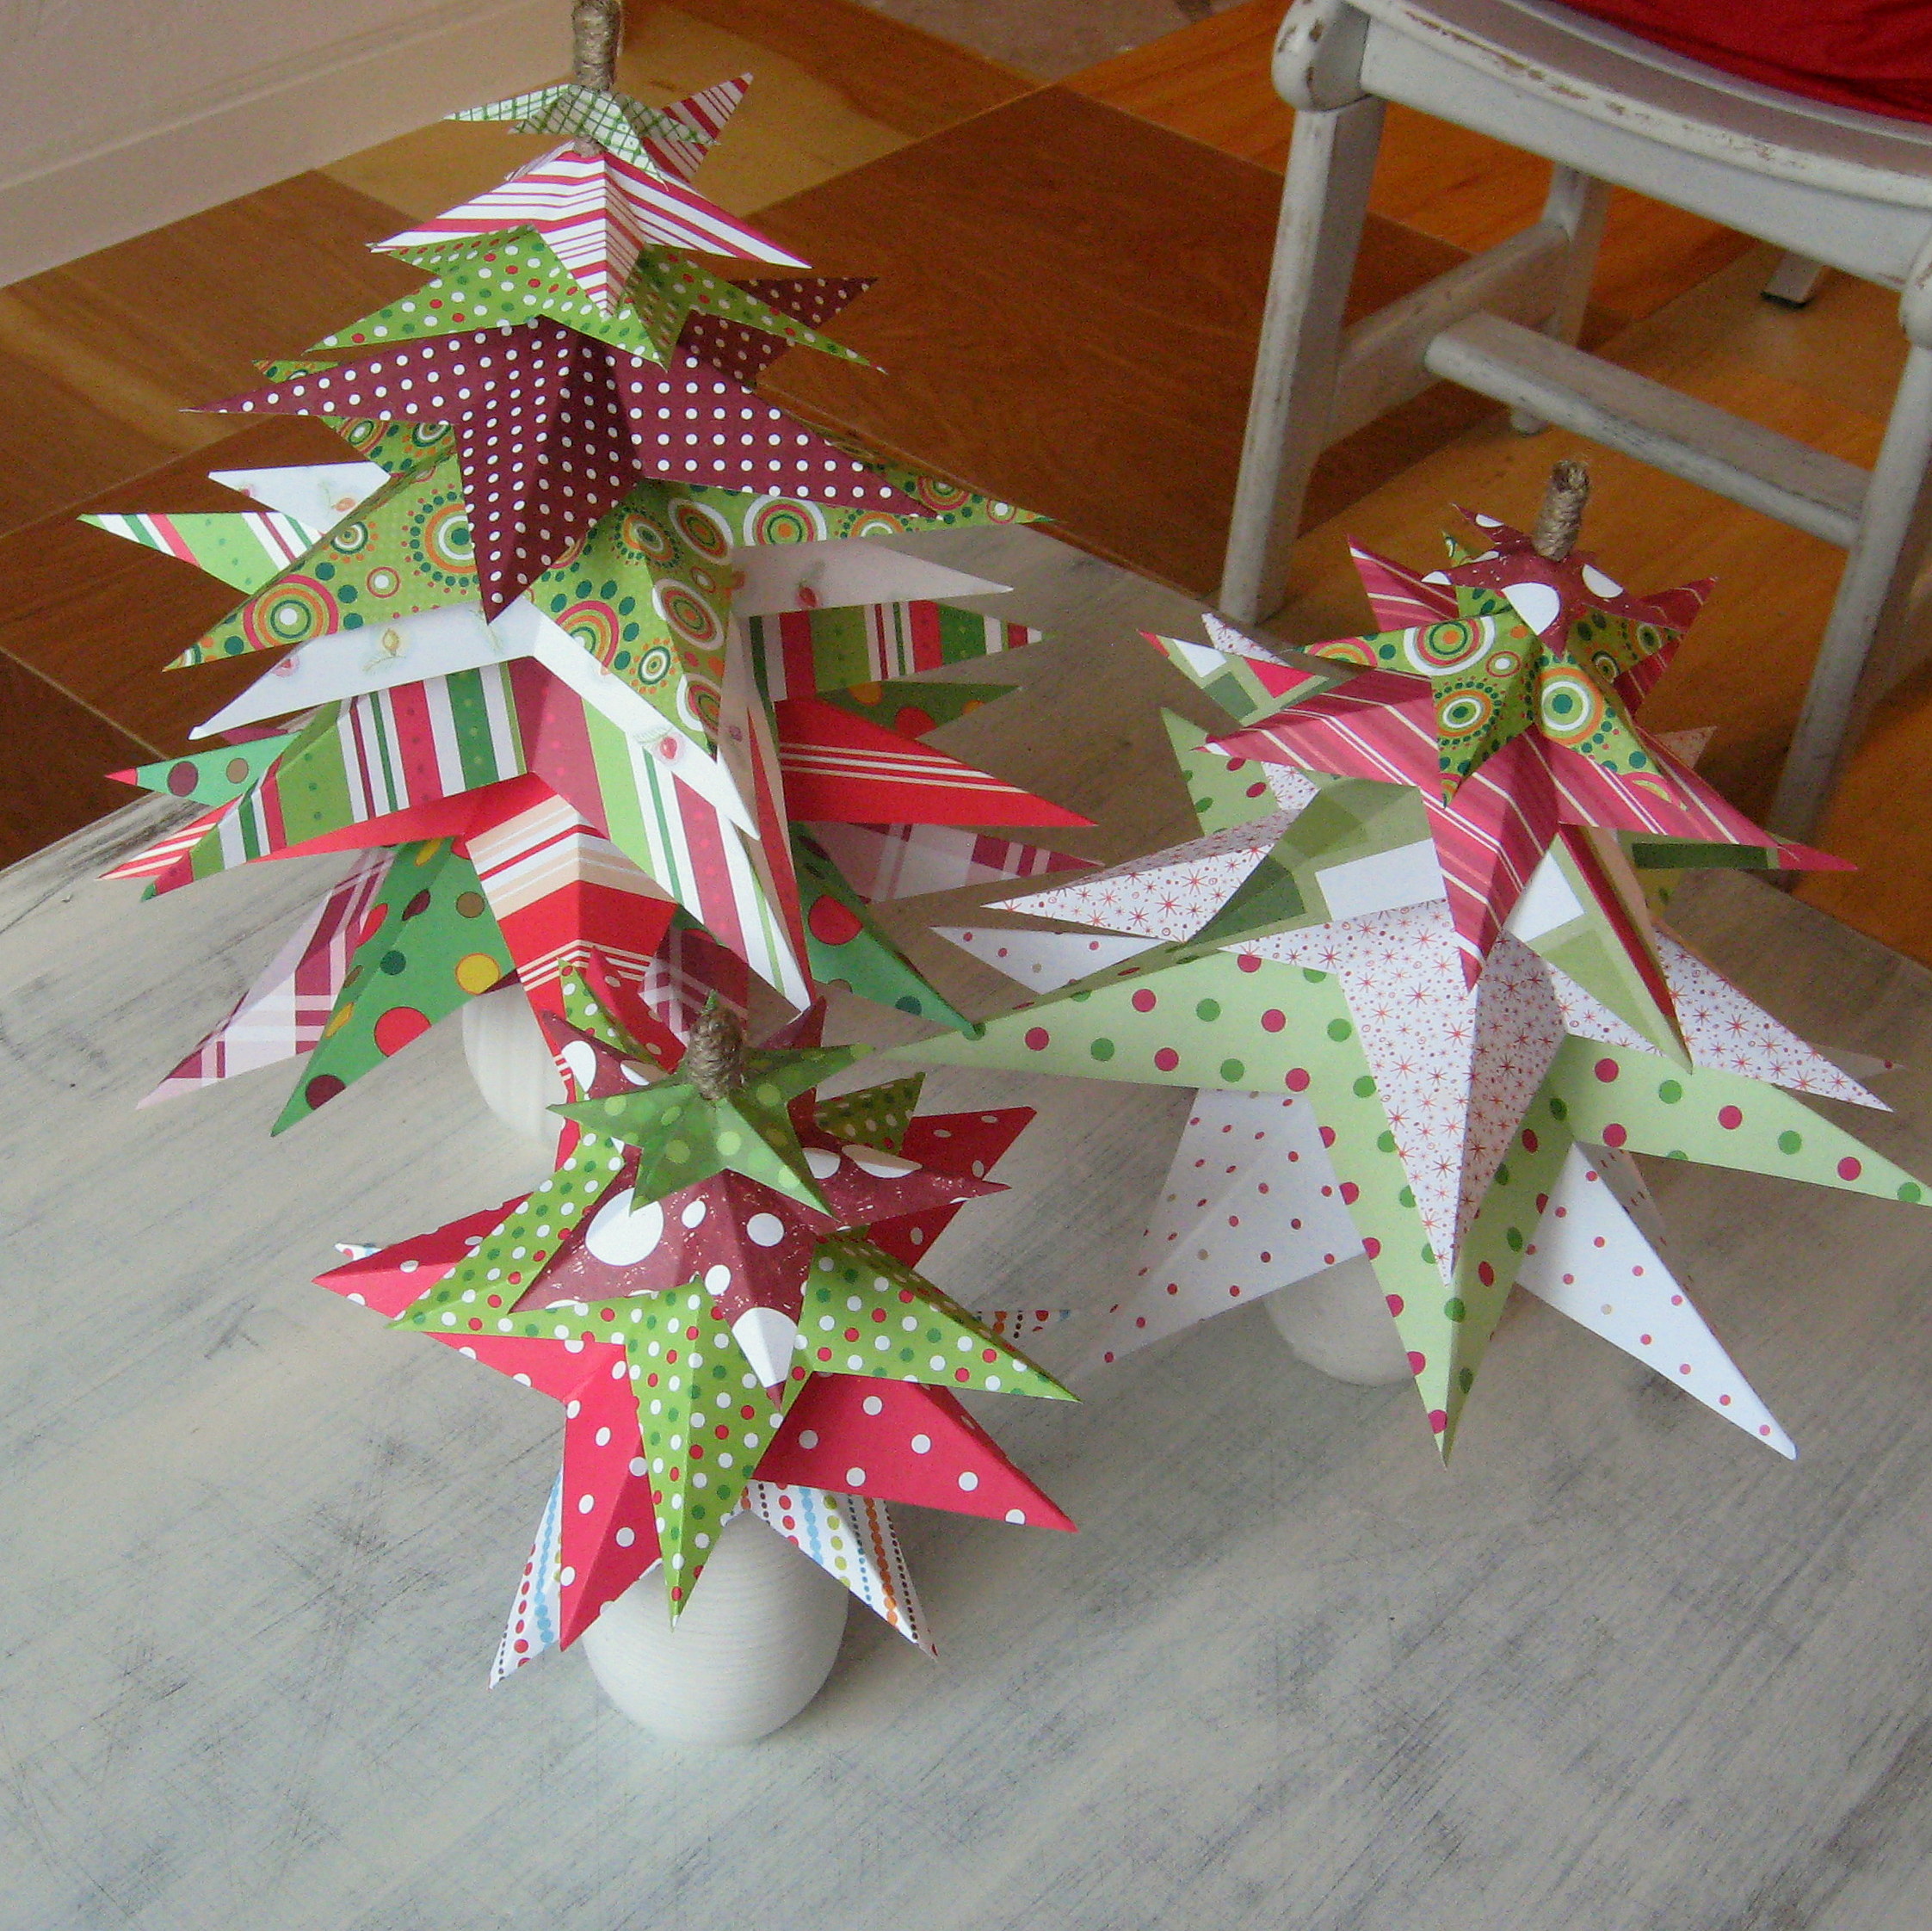
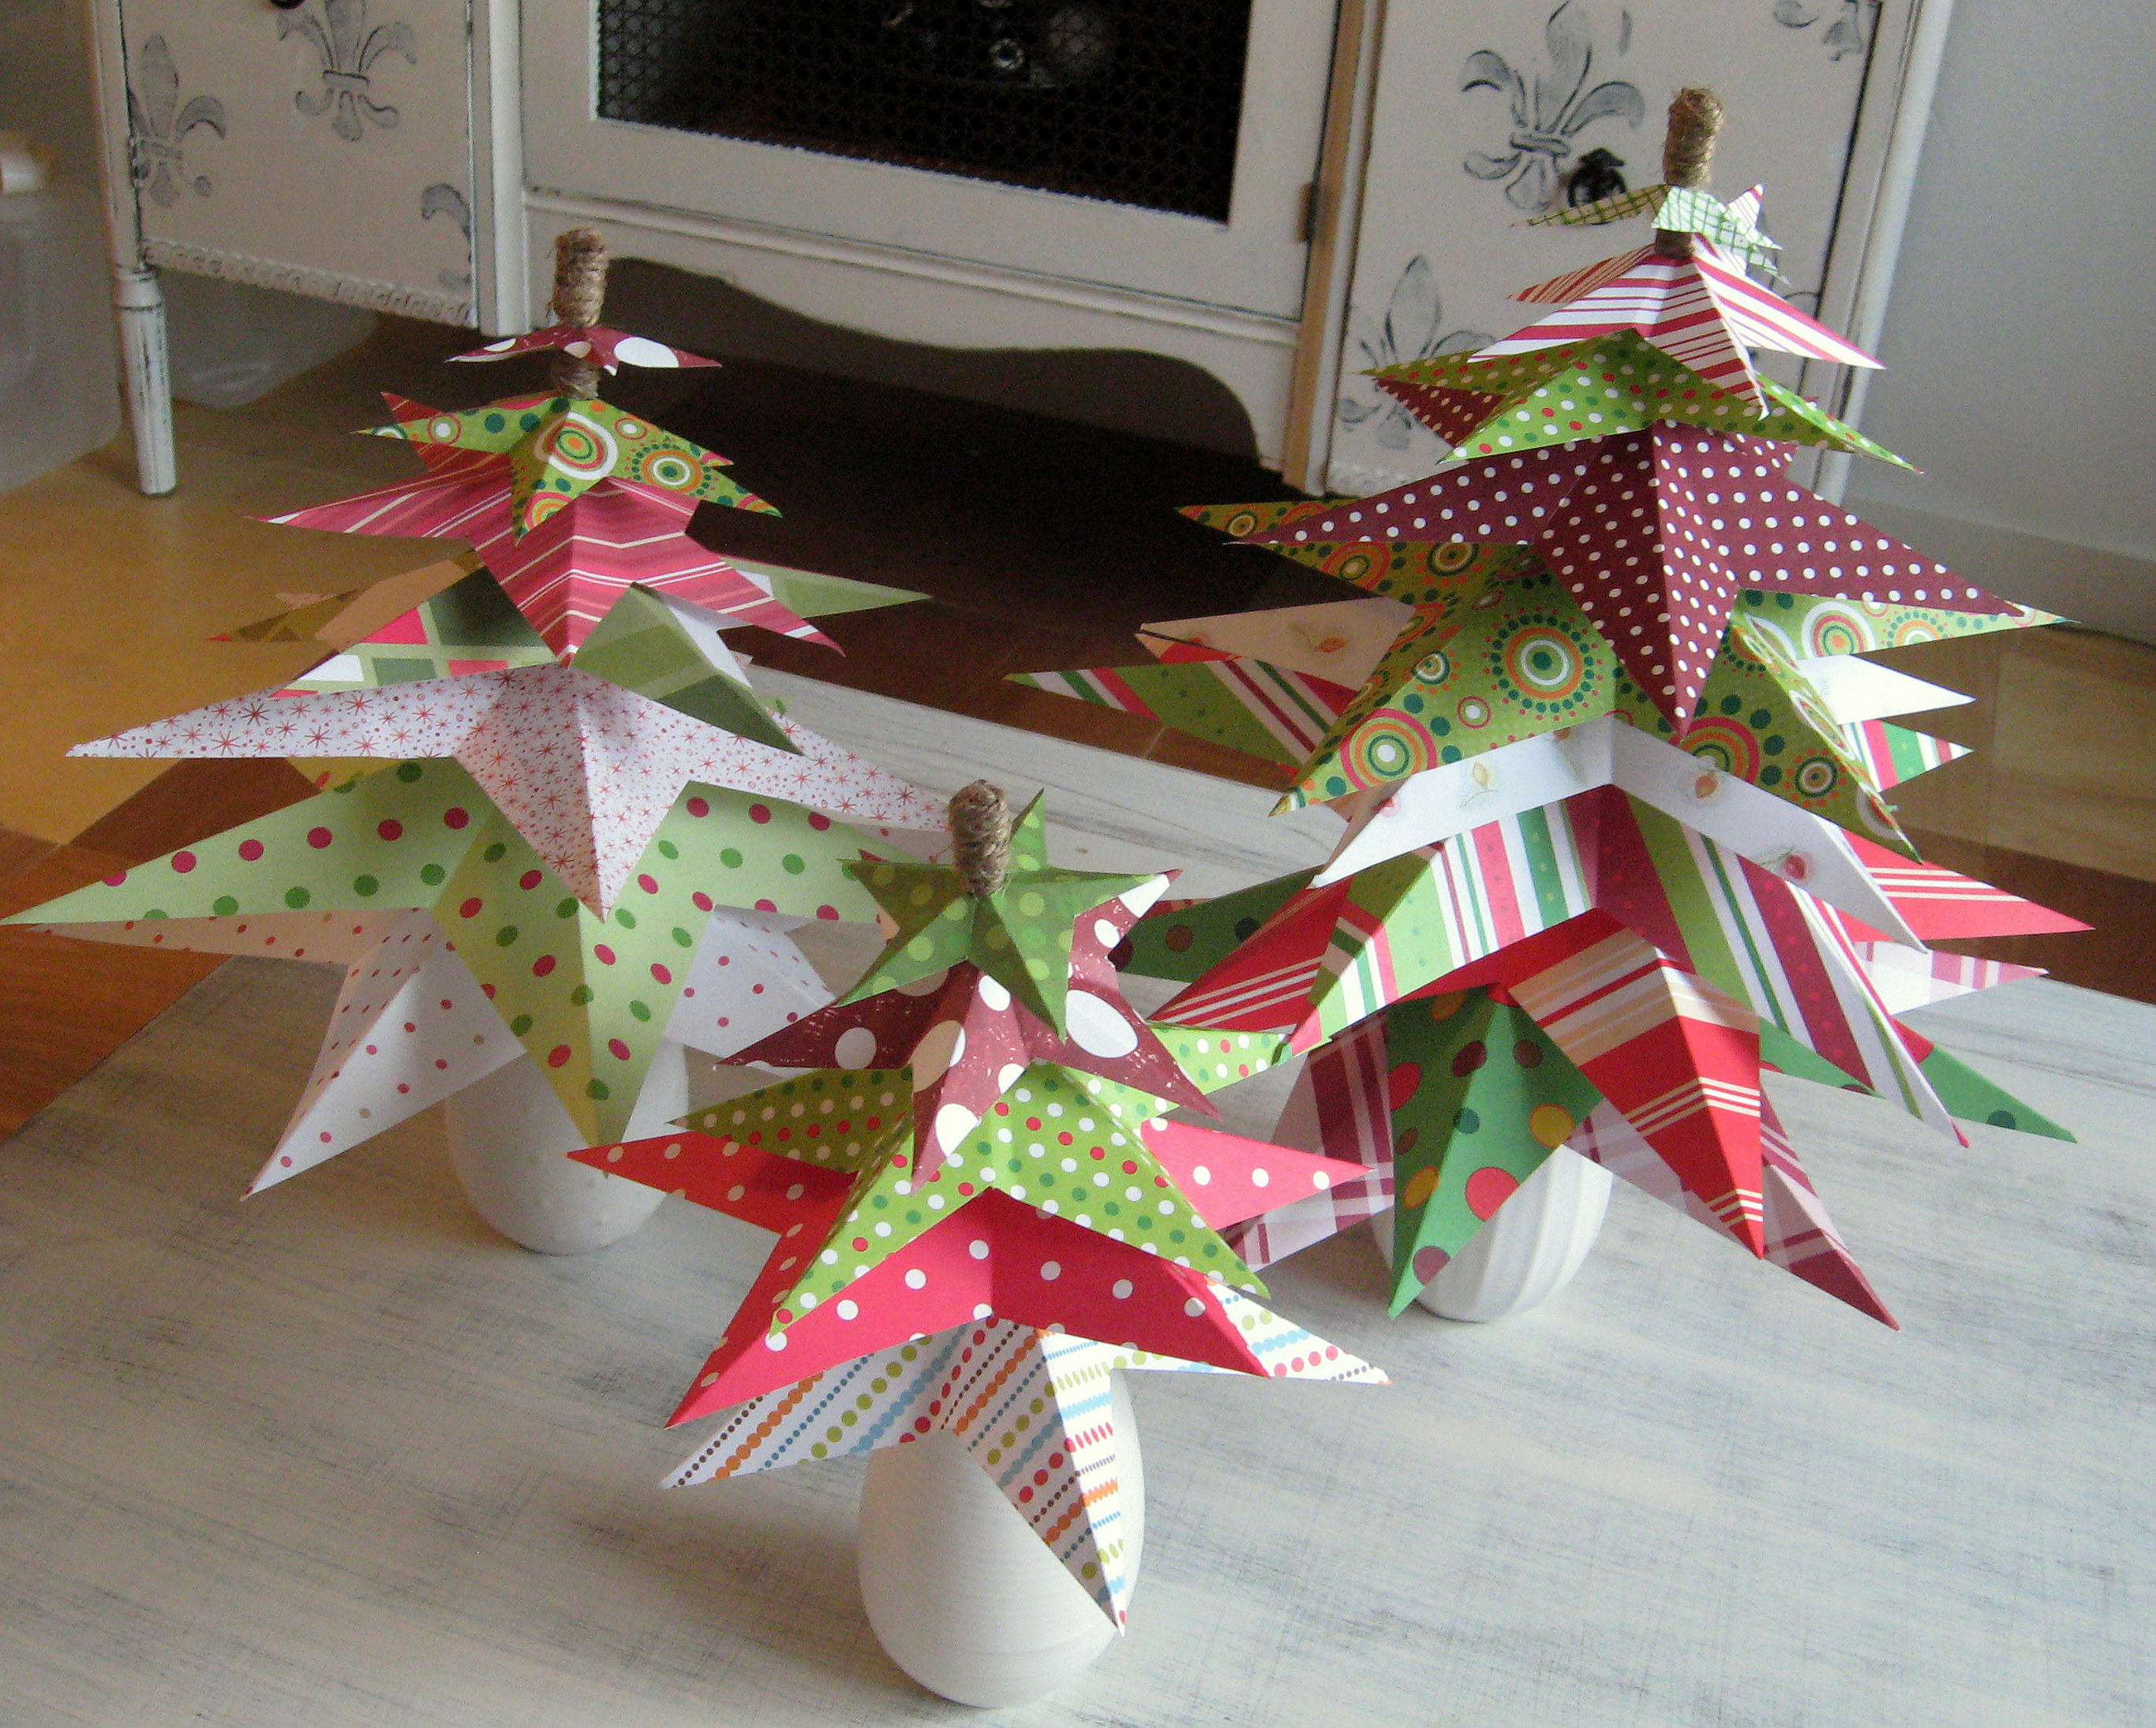
Paper Star Christmas Tree
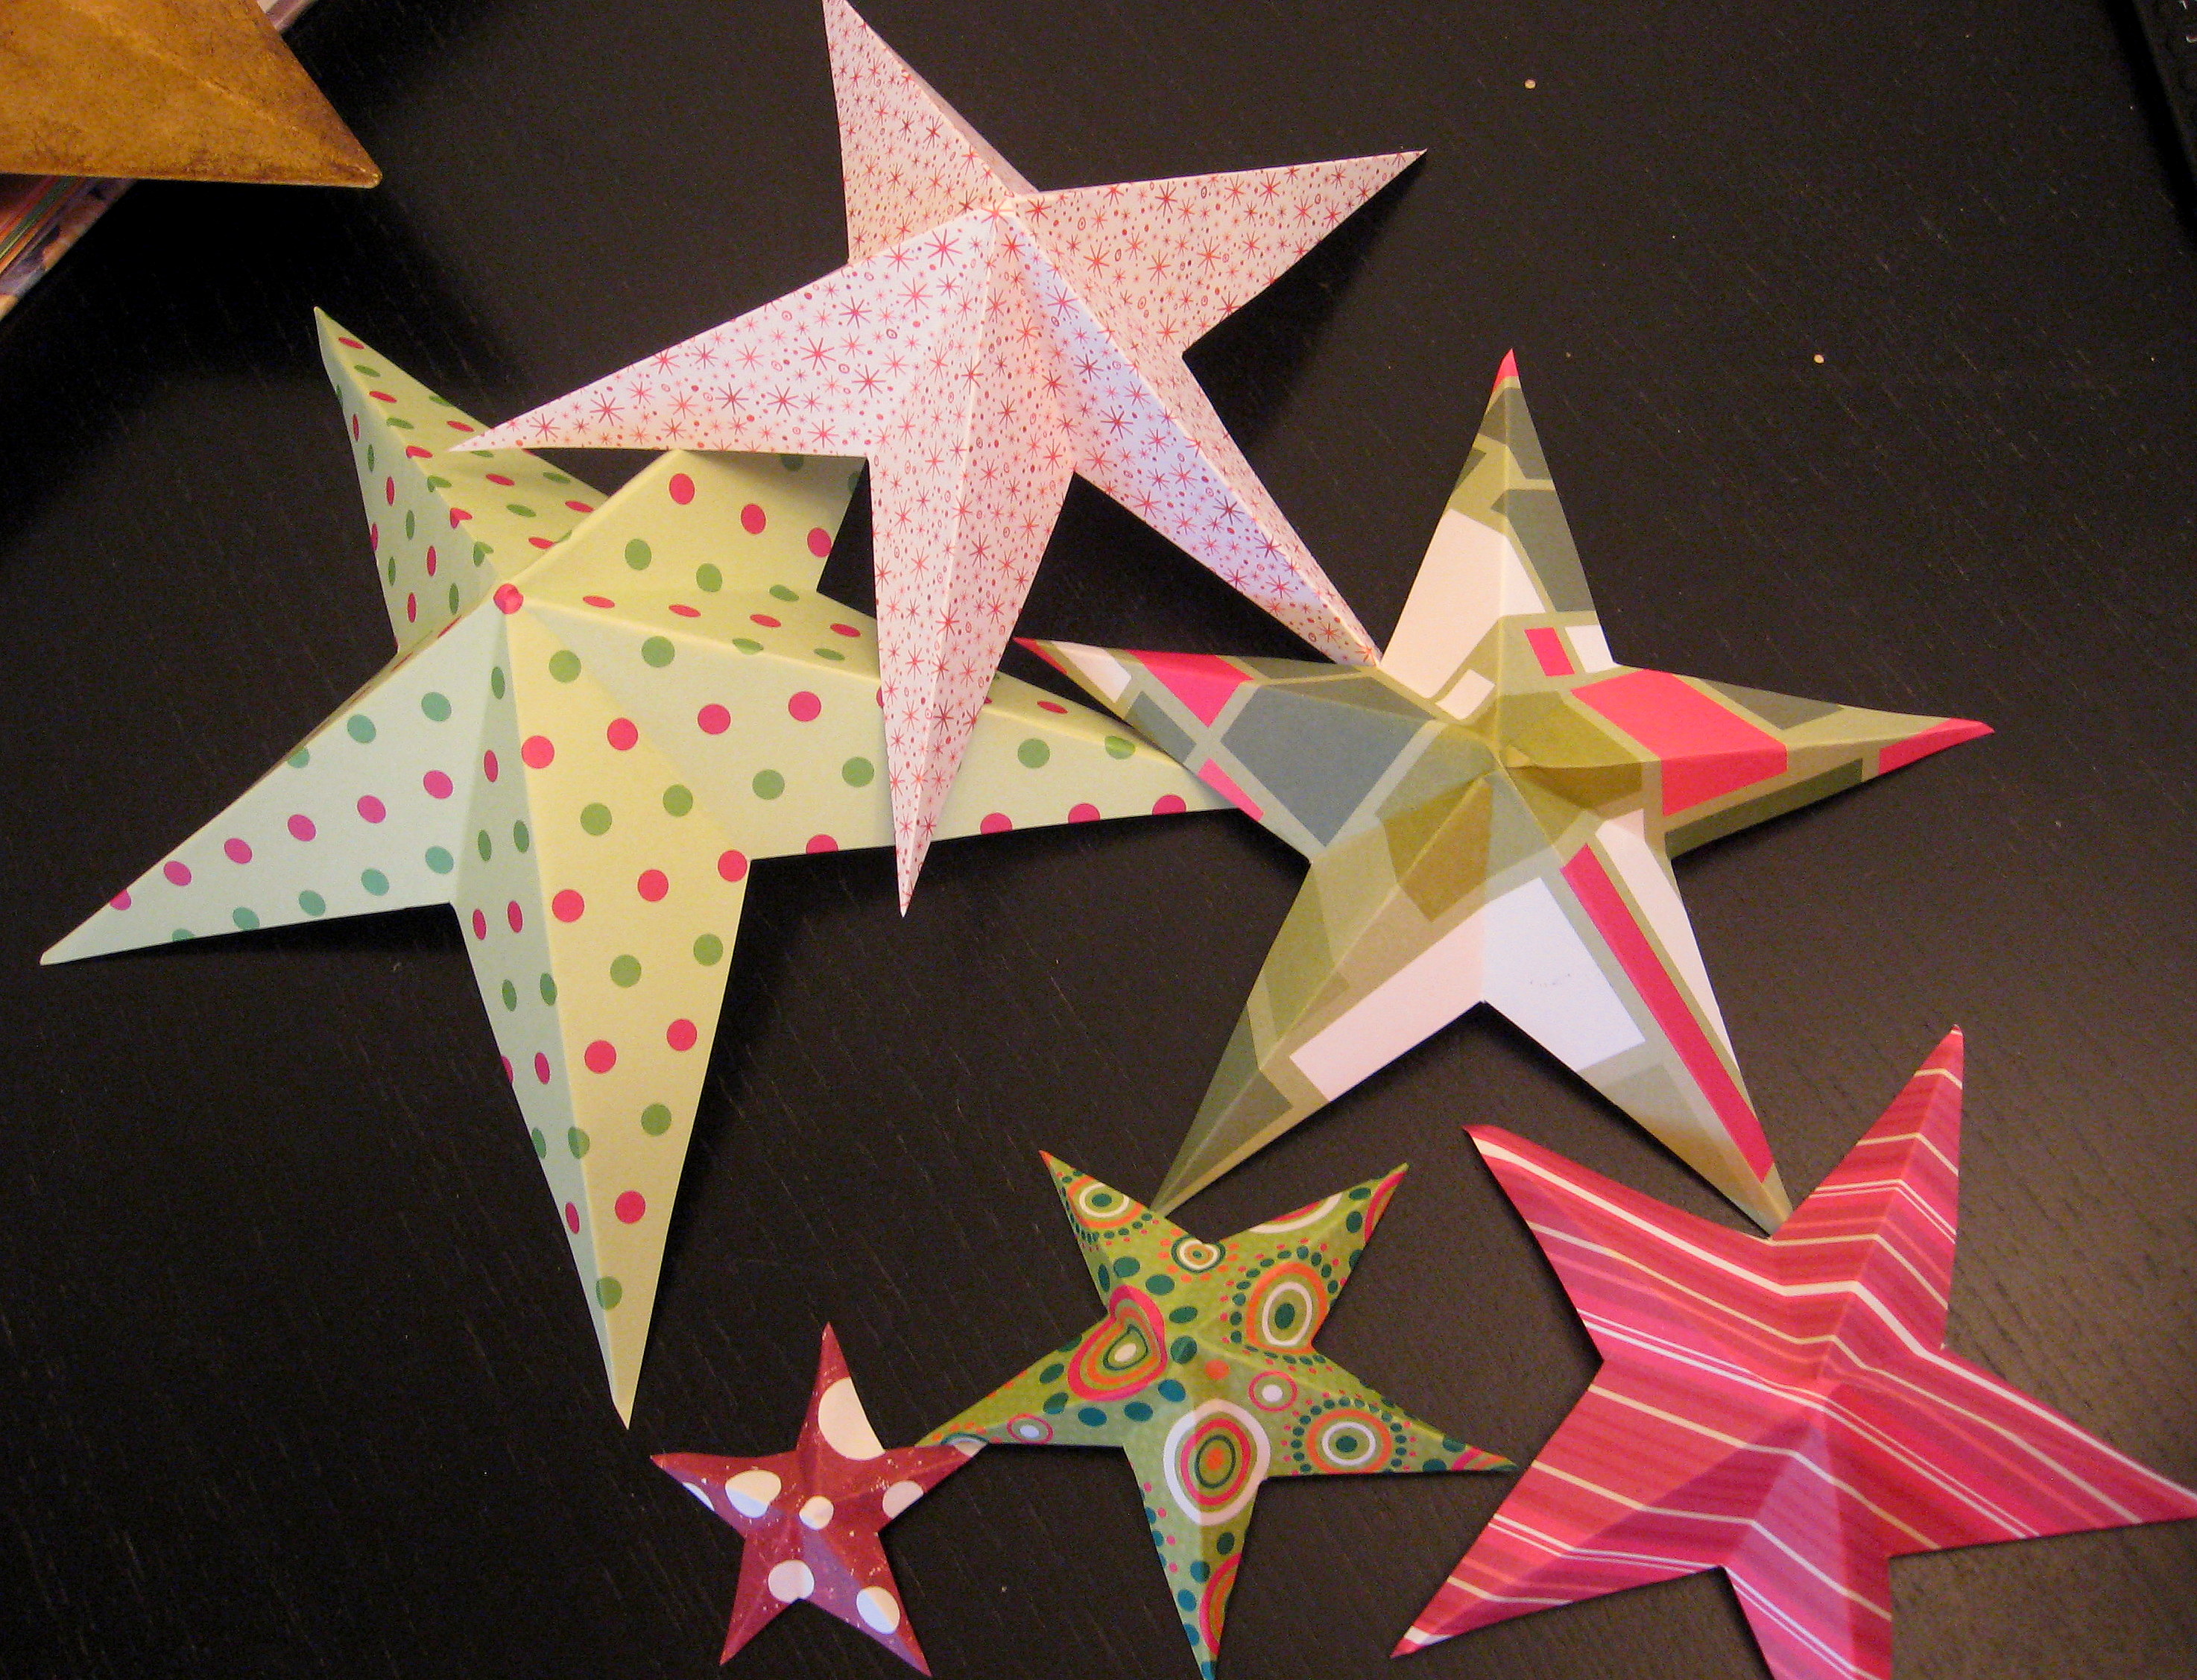
These sweet little paper trees will add a punch of Christmas color to your home and they’re fun to make; when I started I had only planned to make one, but I just couldn’t stop!

I – mostly – alternated the layers in red and green, but there are endless ways this would look cute. Start by gathering they scrapbook papers you think you might use, and spread them out so you can see what you have. You will need a full 12 x 12 sheet for the bigger layers, but as you get smaller, you can use up scraps.
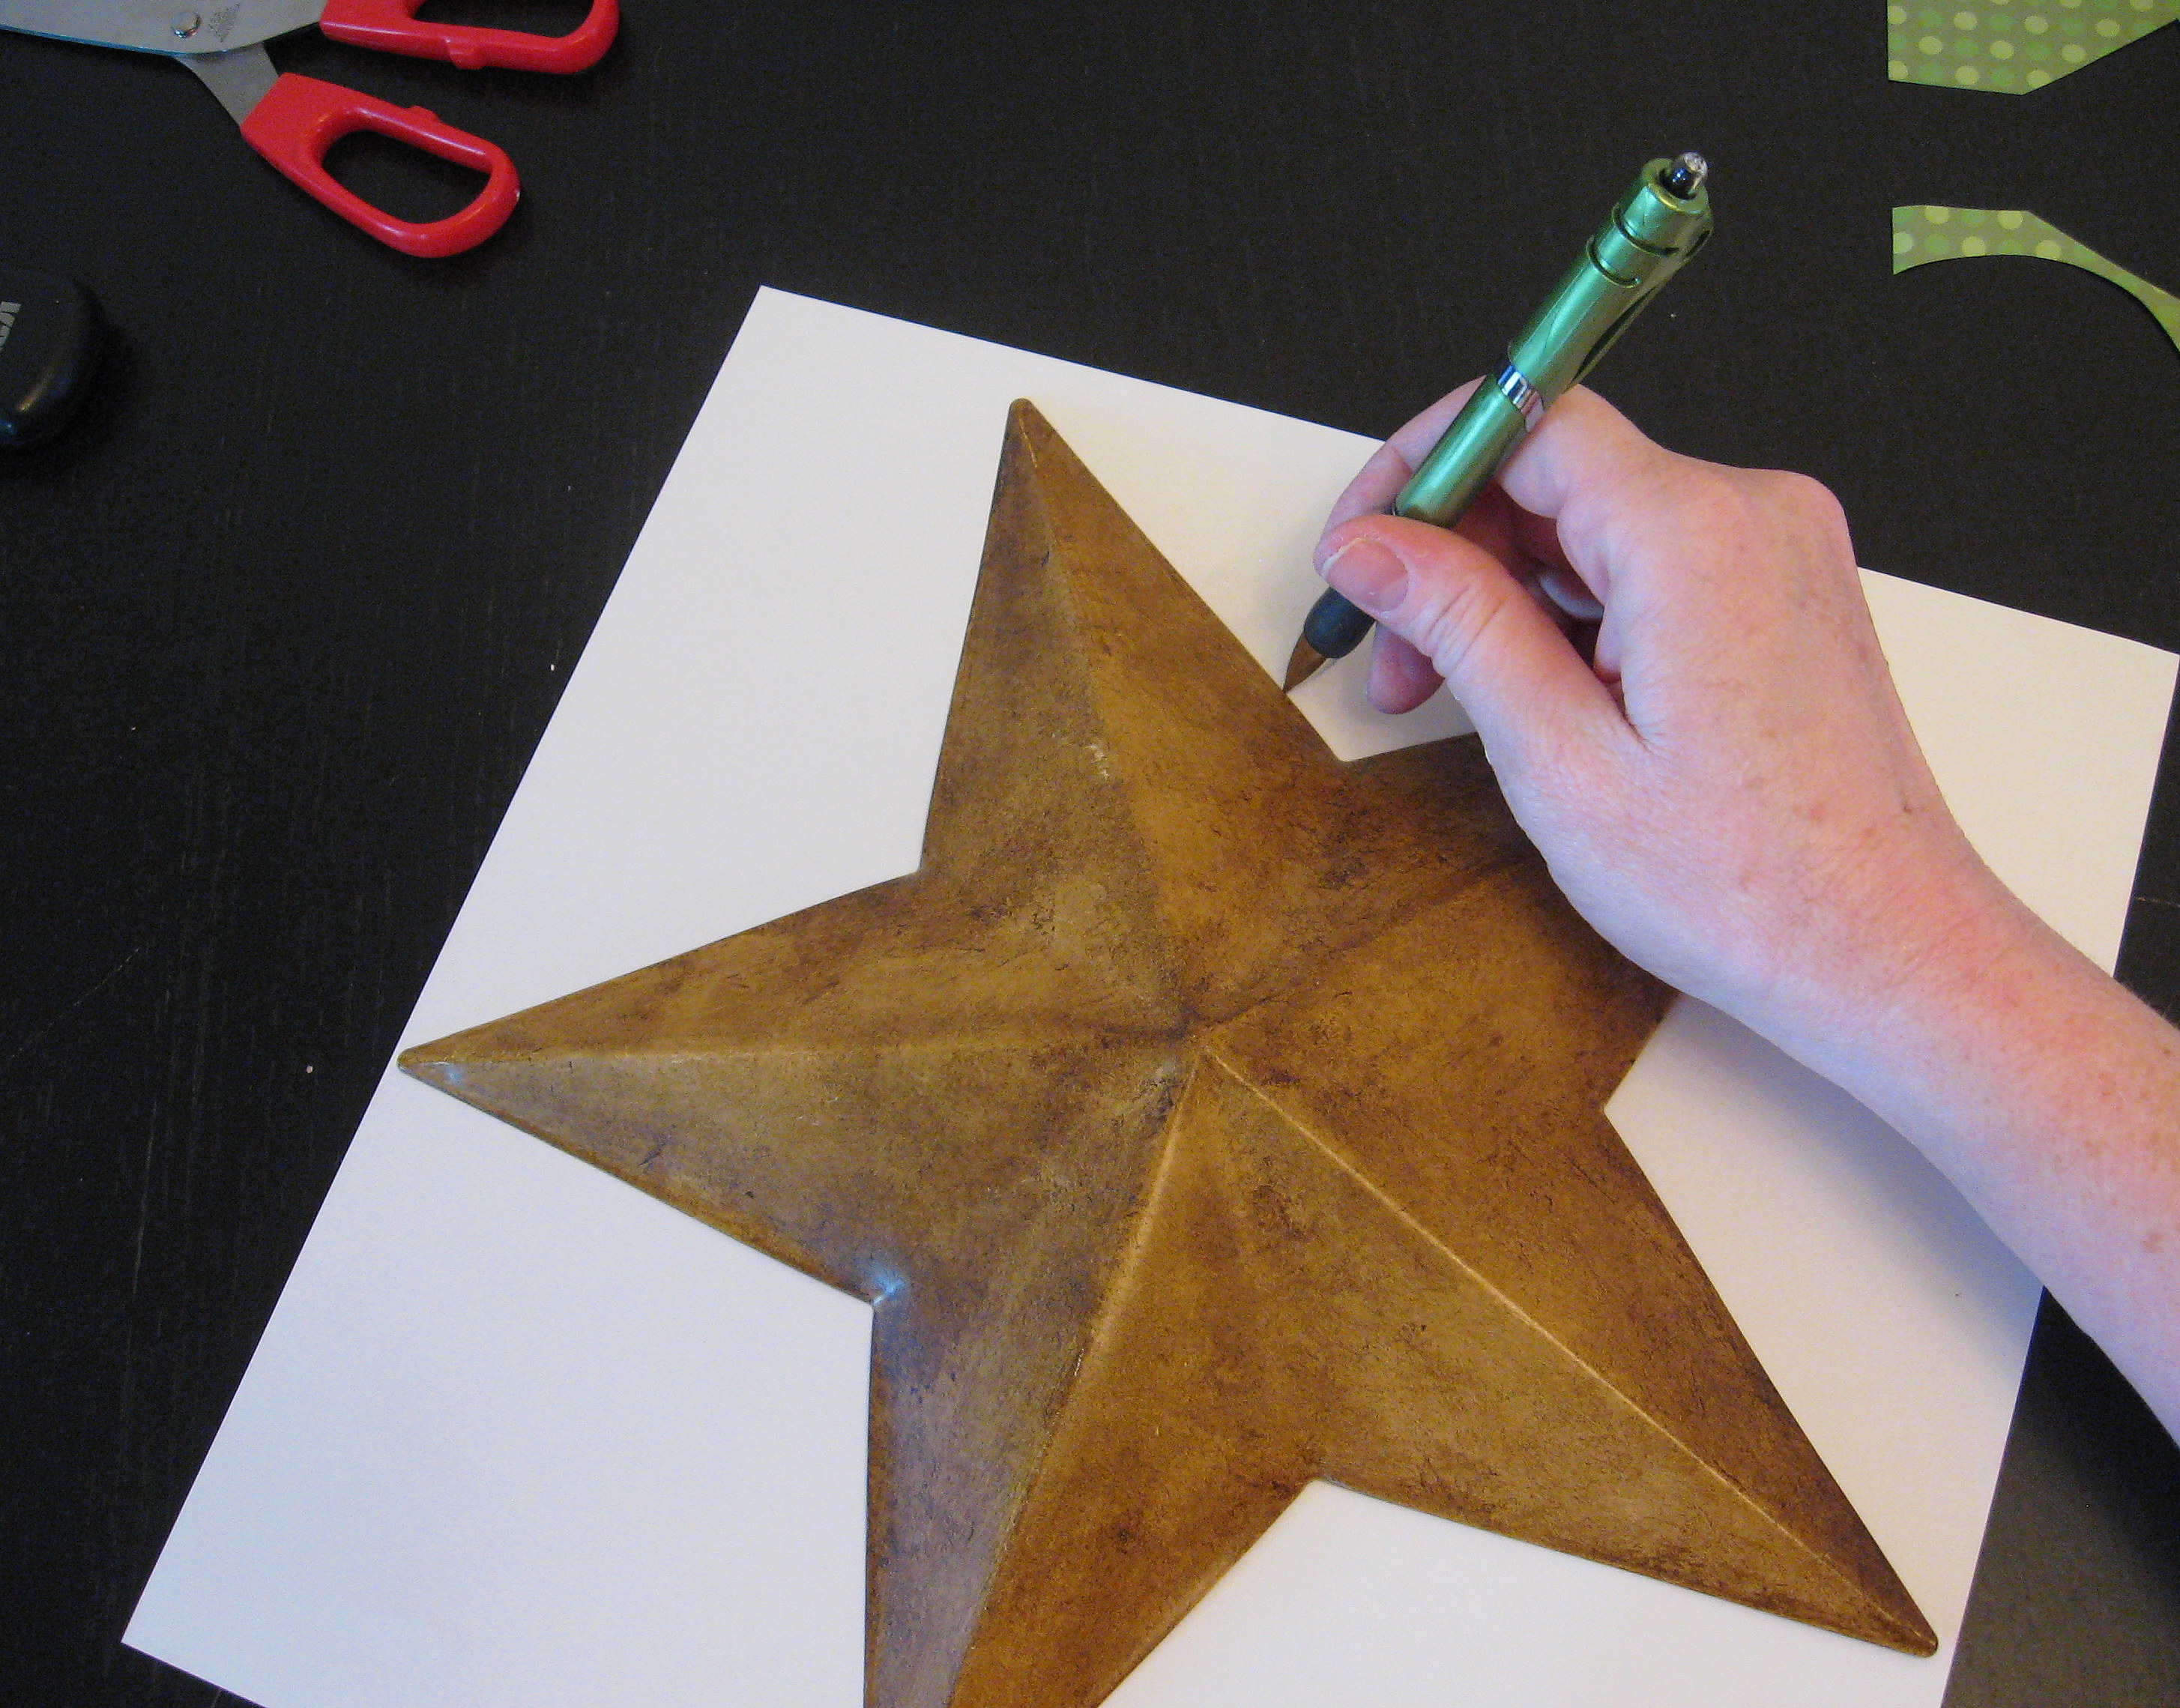
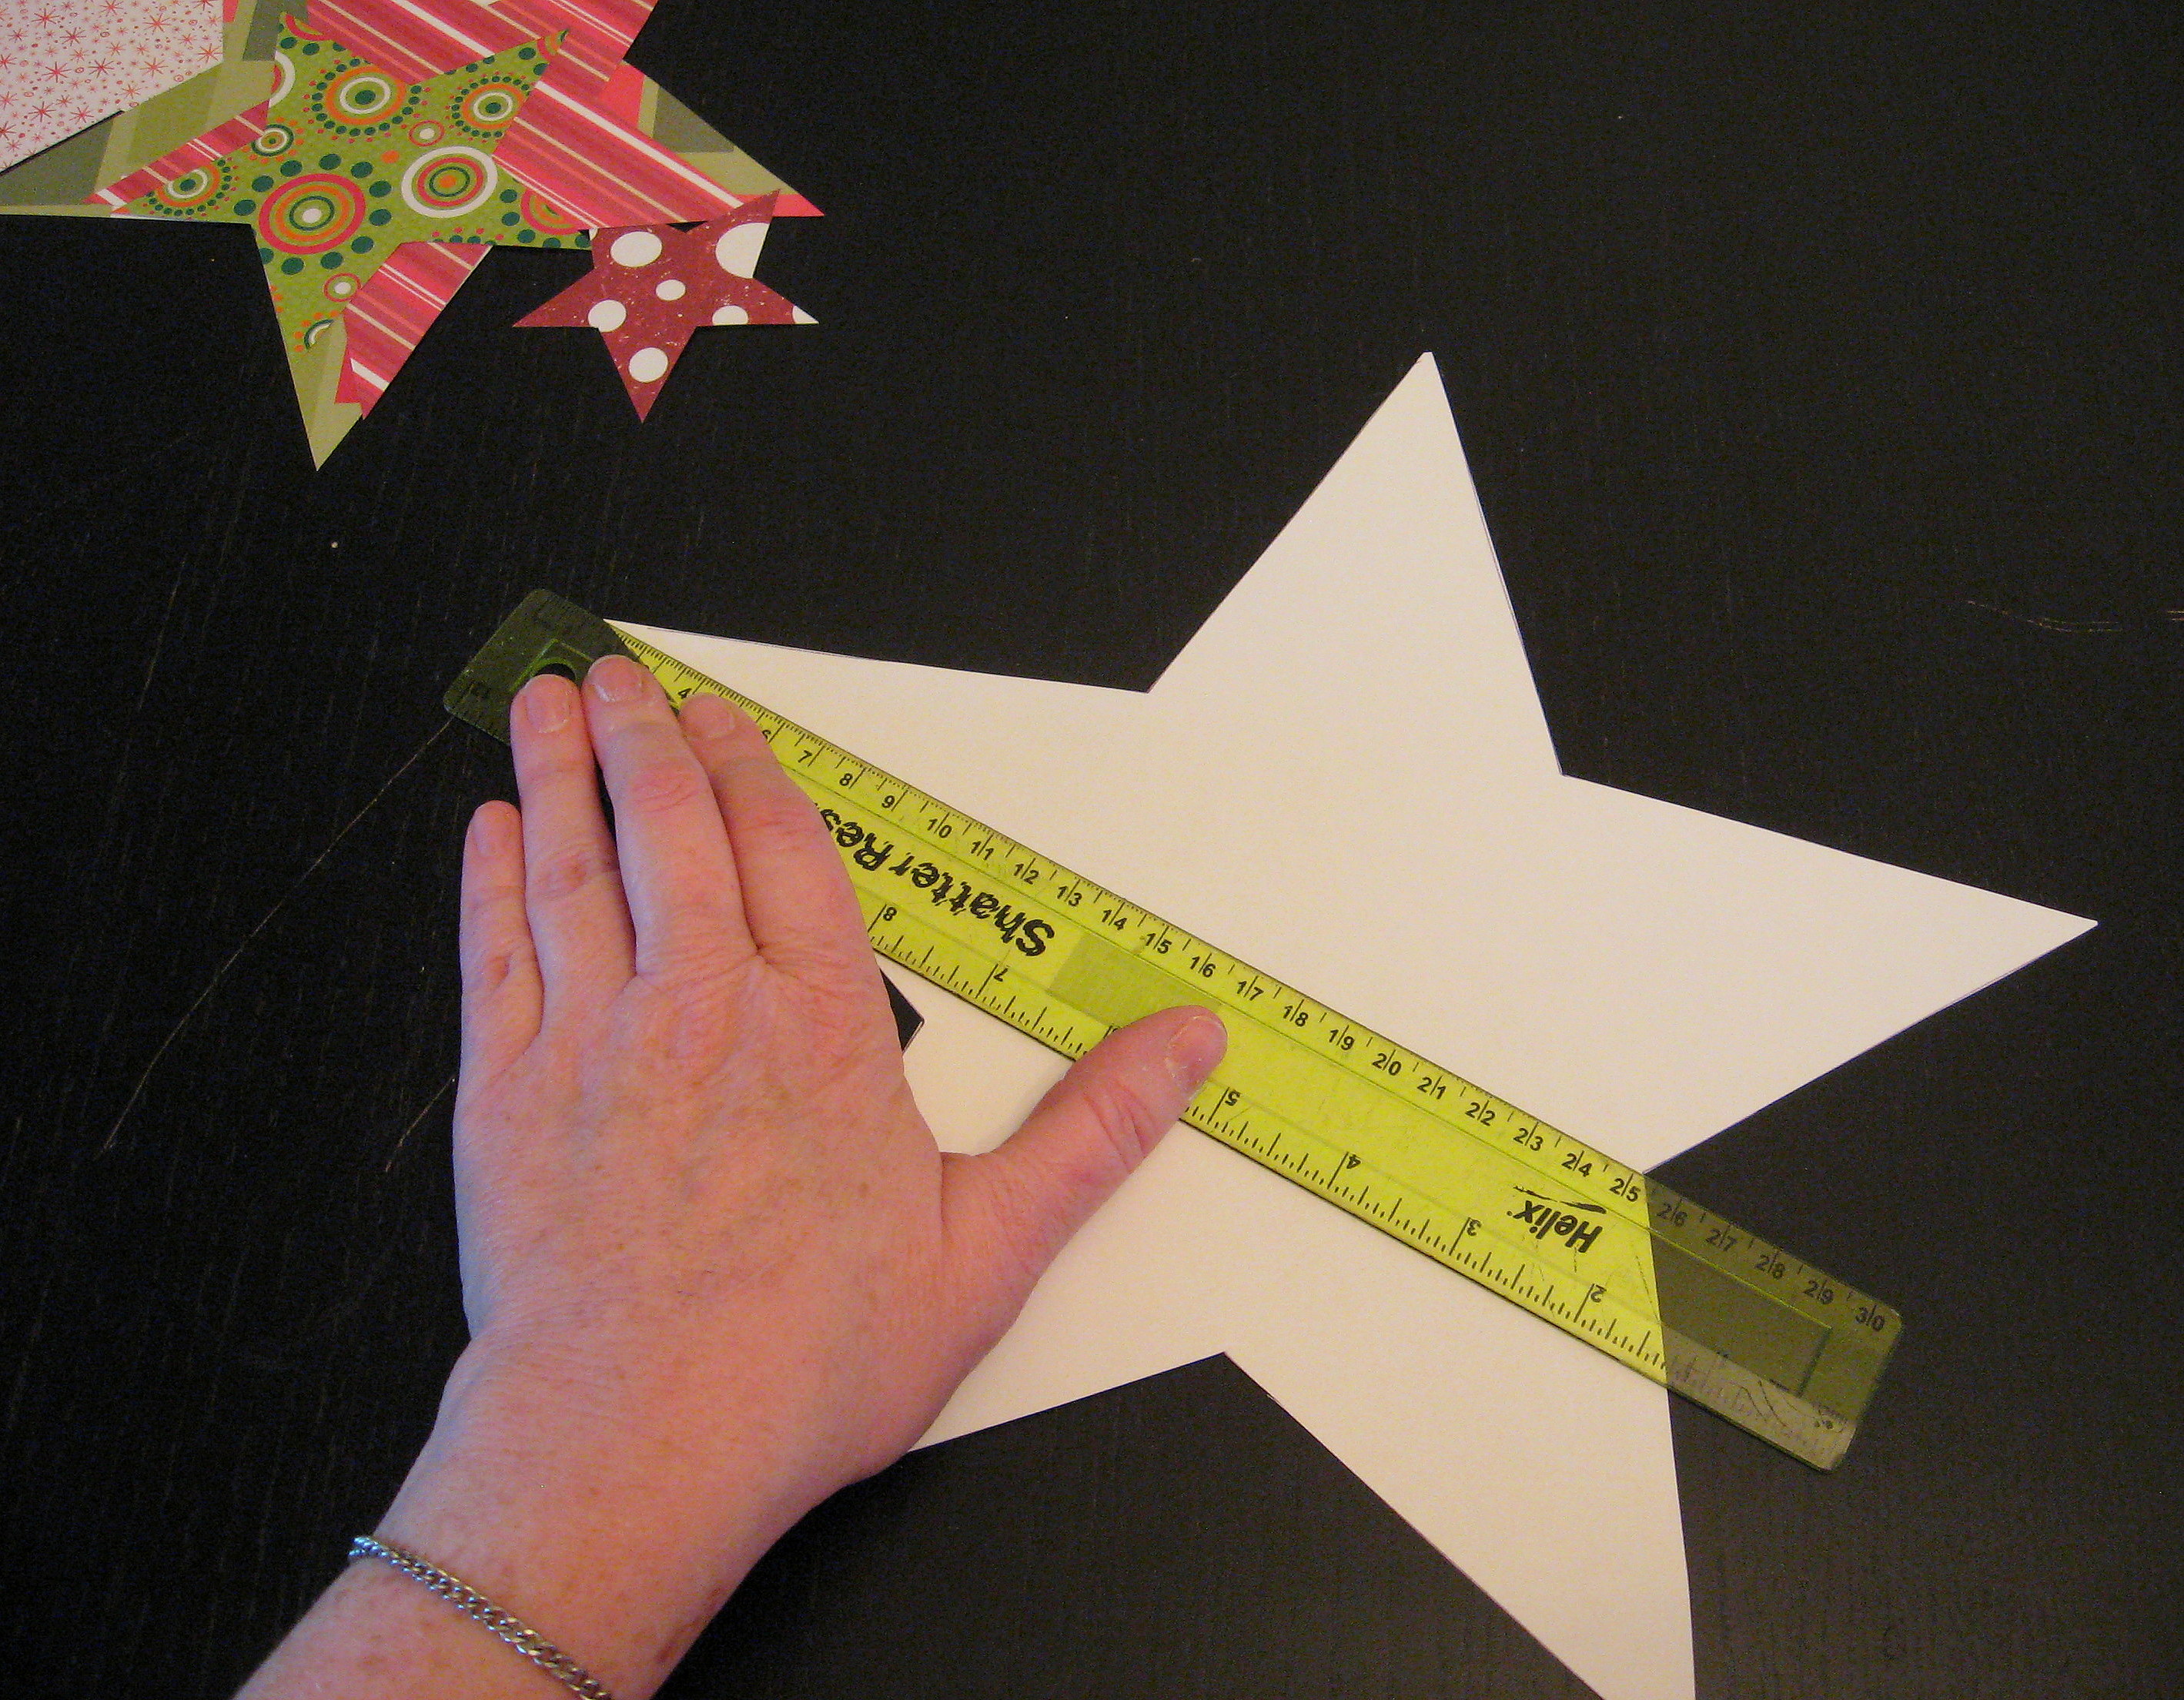
Start by tracing a star that fills the 12 inch paper. I used a metal star as a template, but if you don’t have something on hand to trace, you can look for a shape online. Cut out the star.
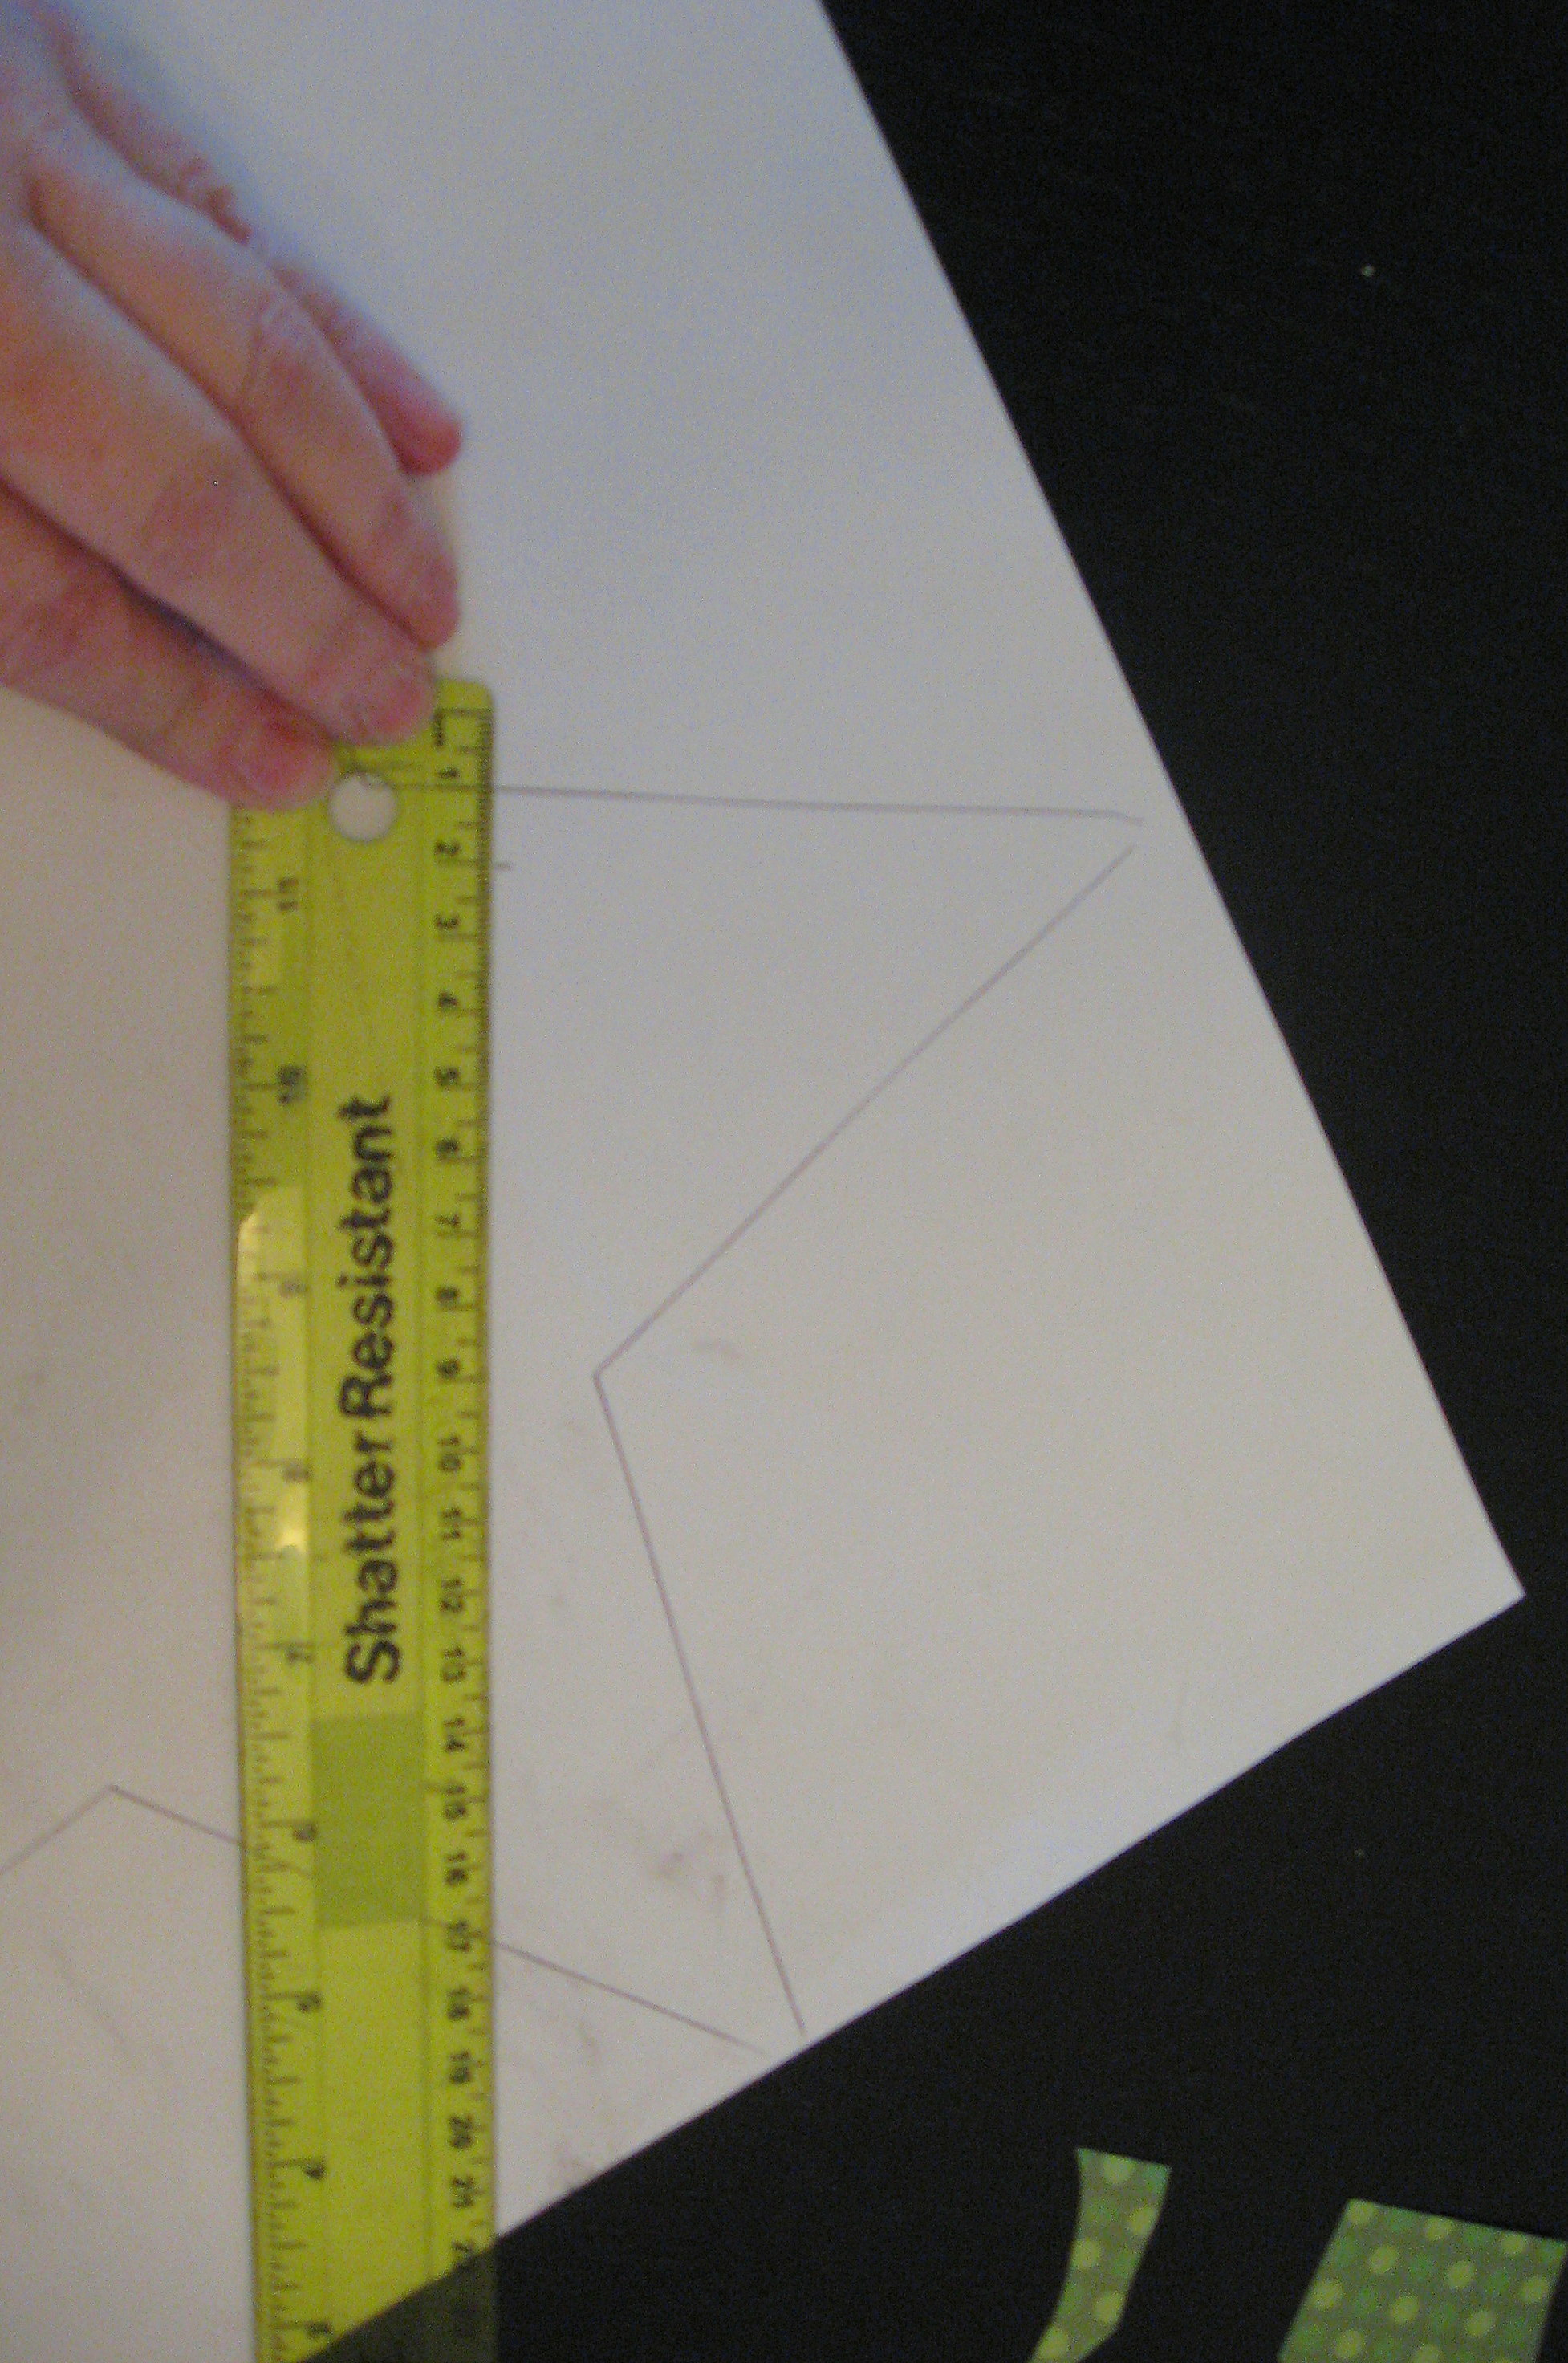
Once you’ve gone all the way around, cut out the smaller star.
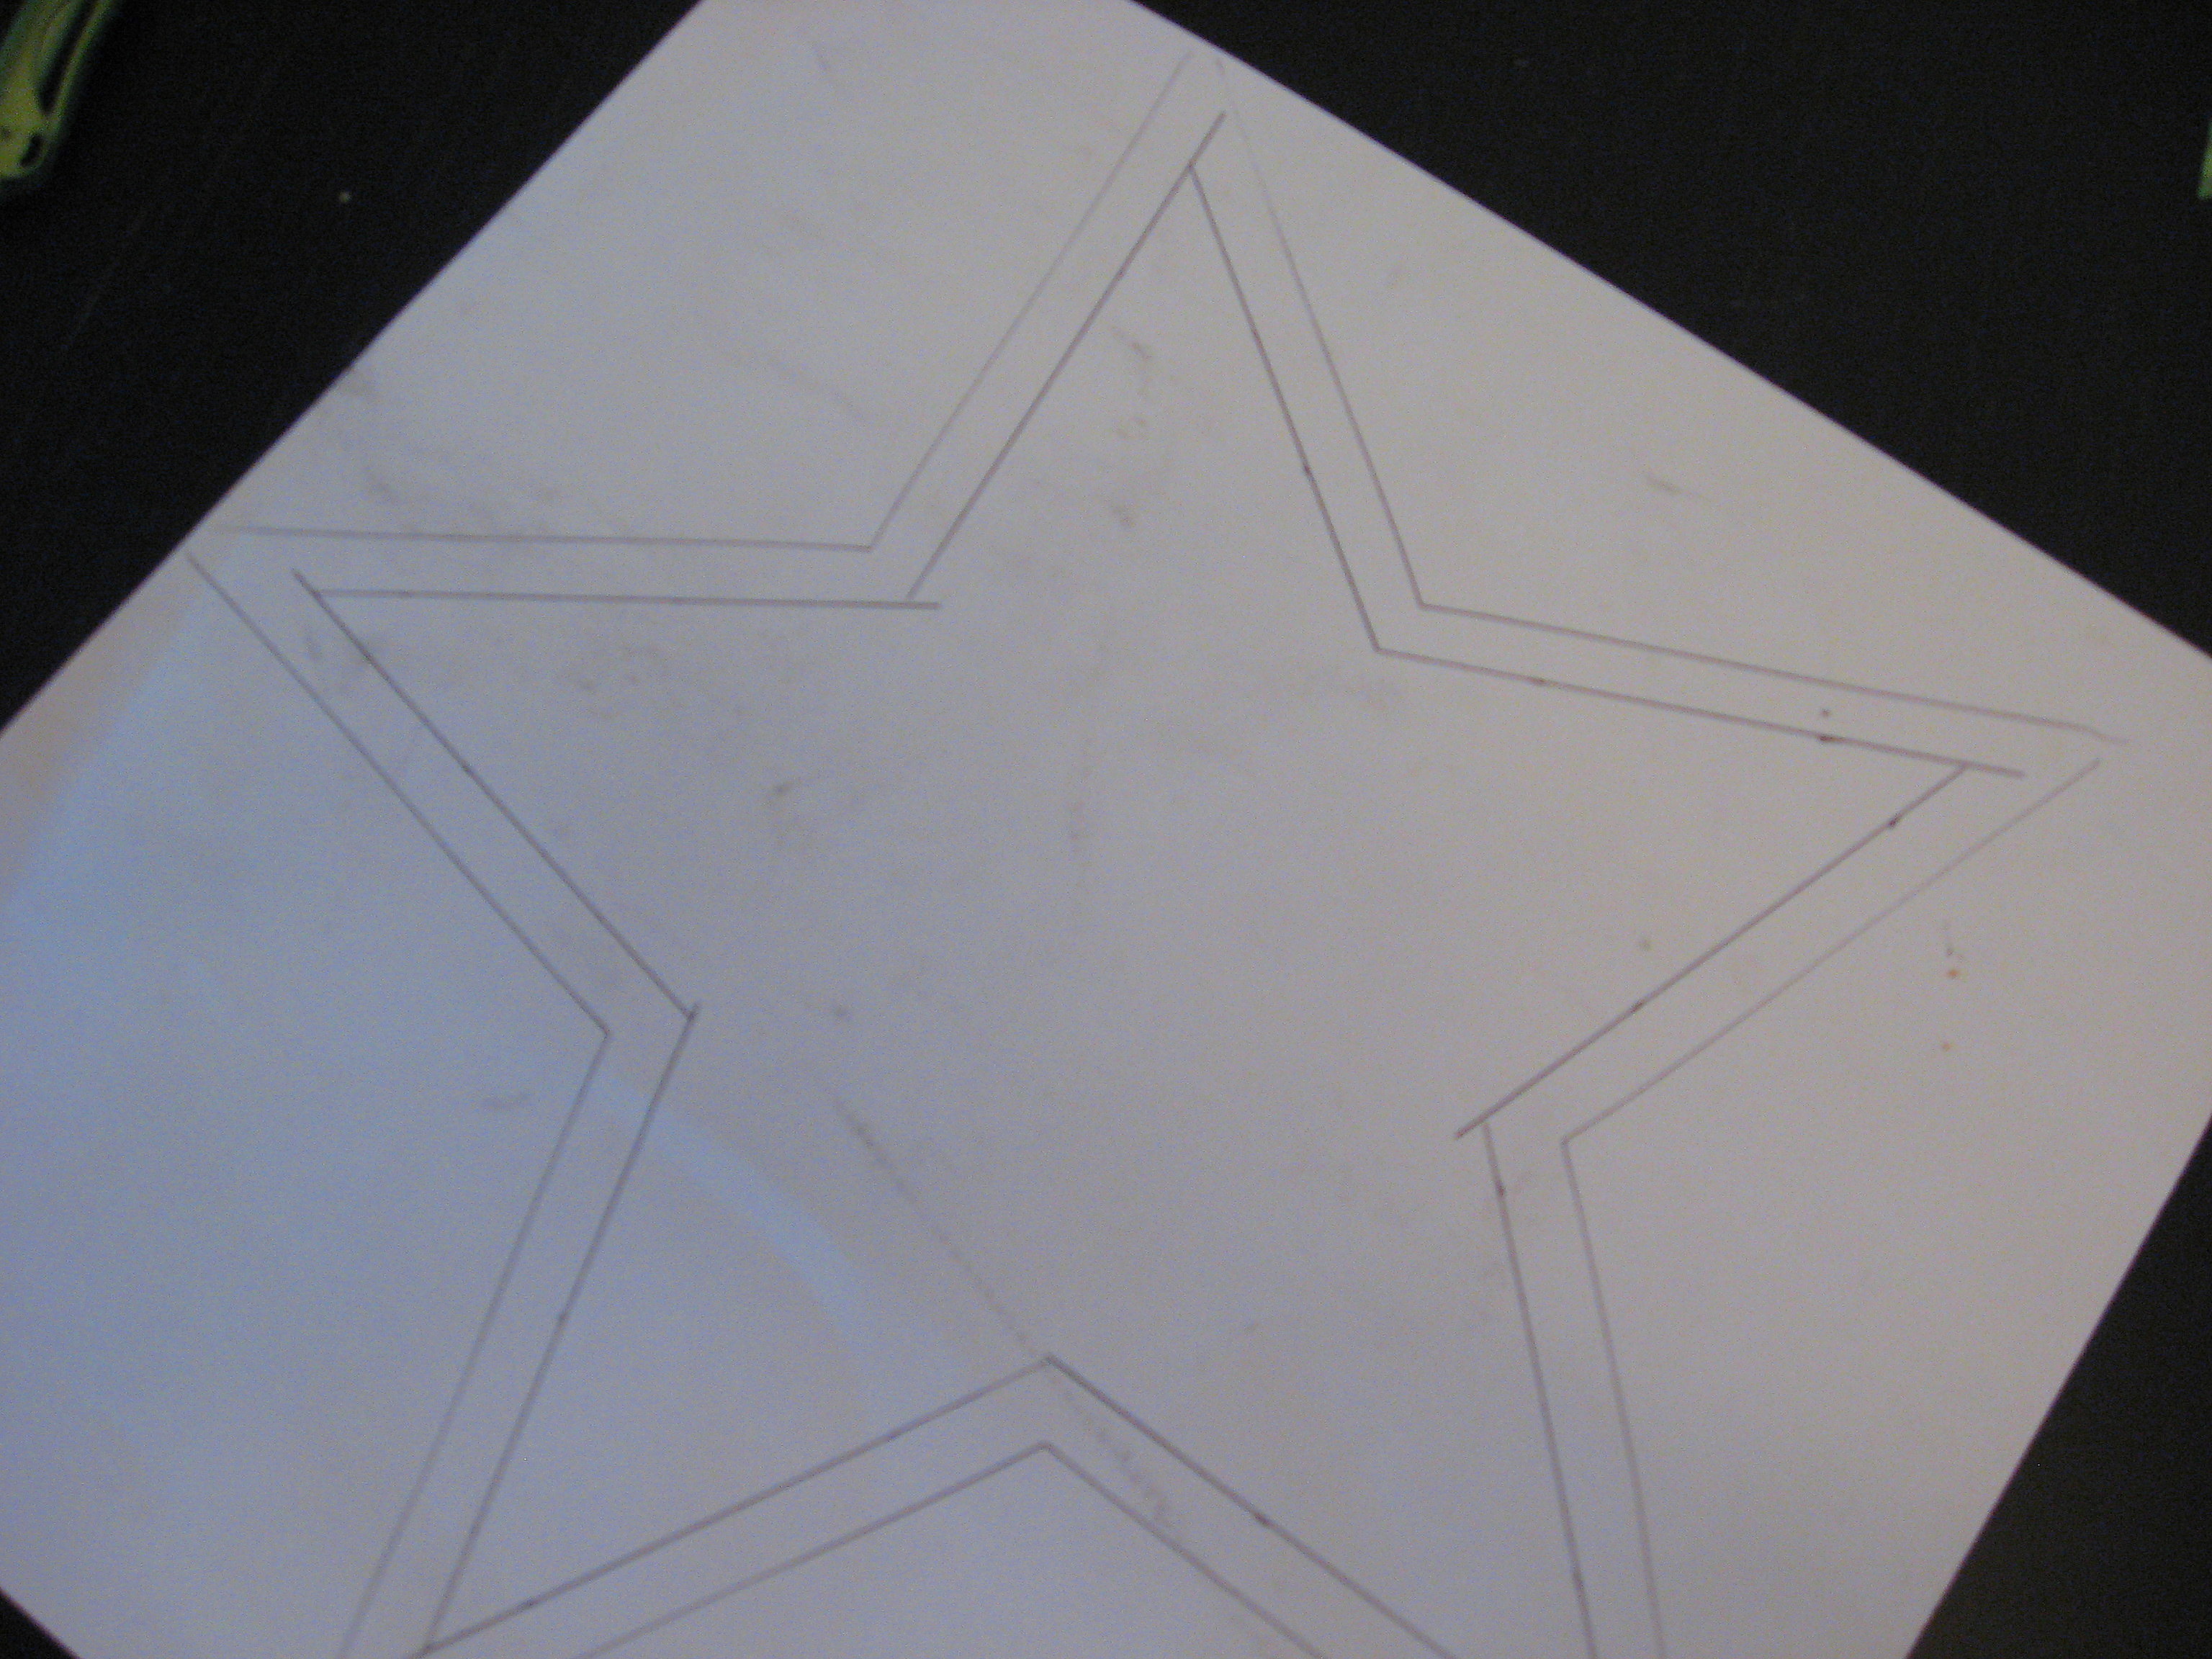
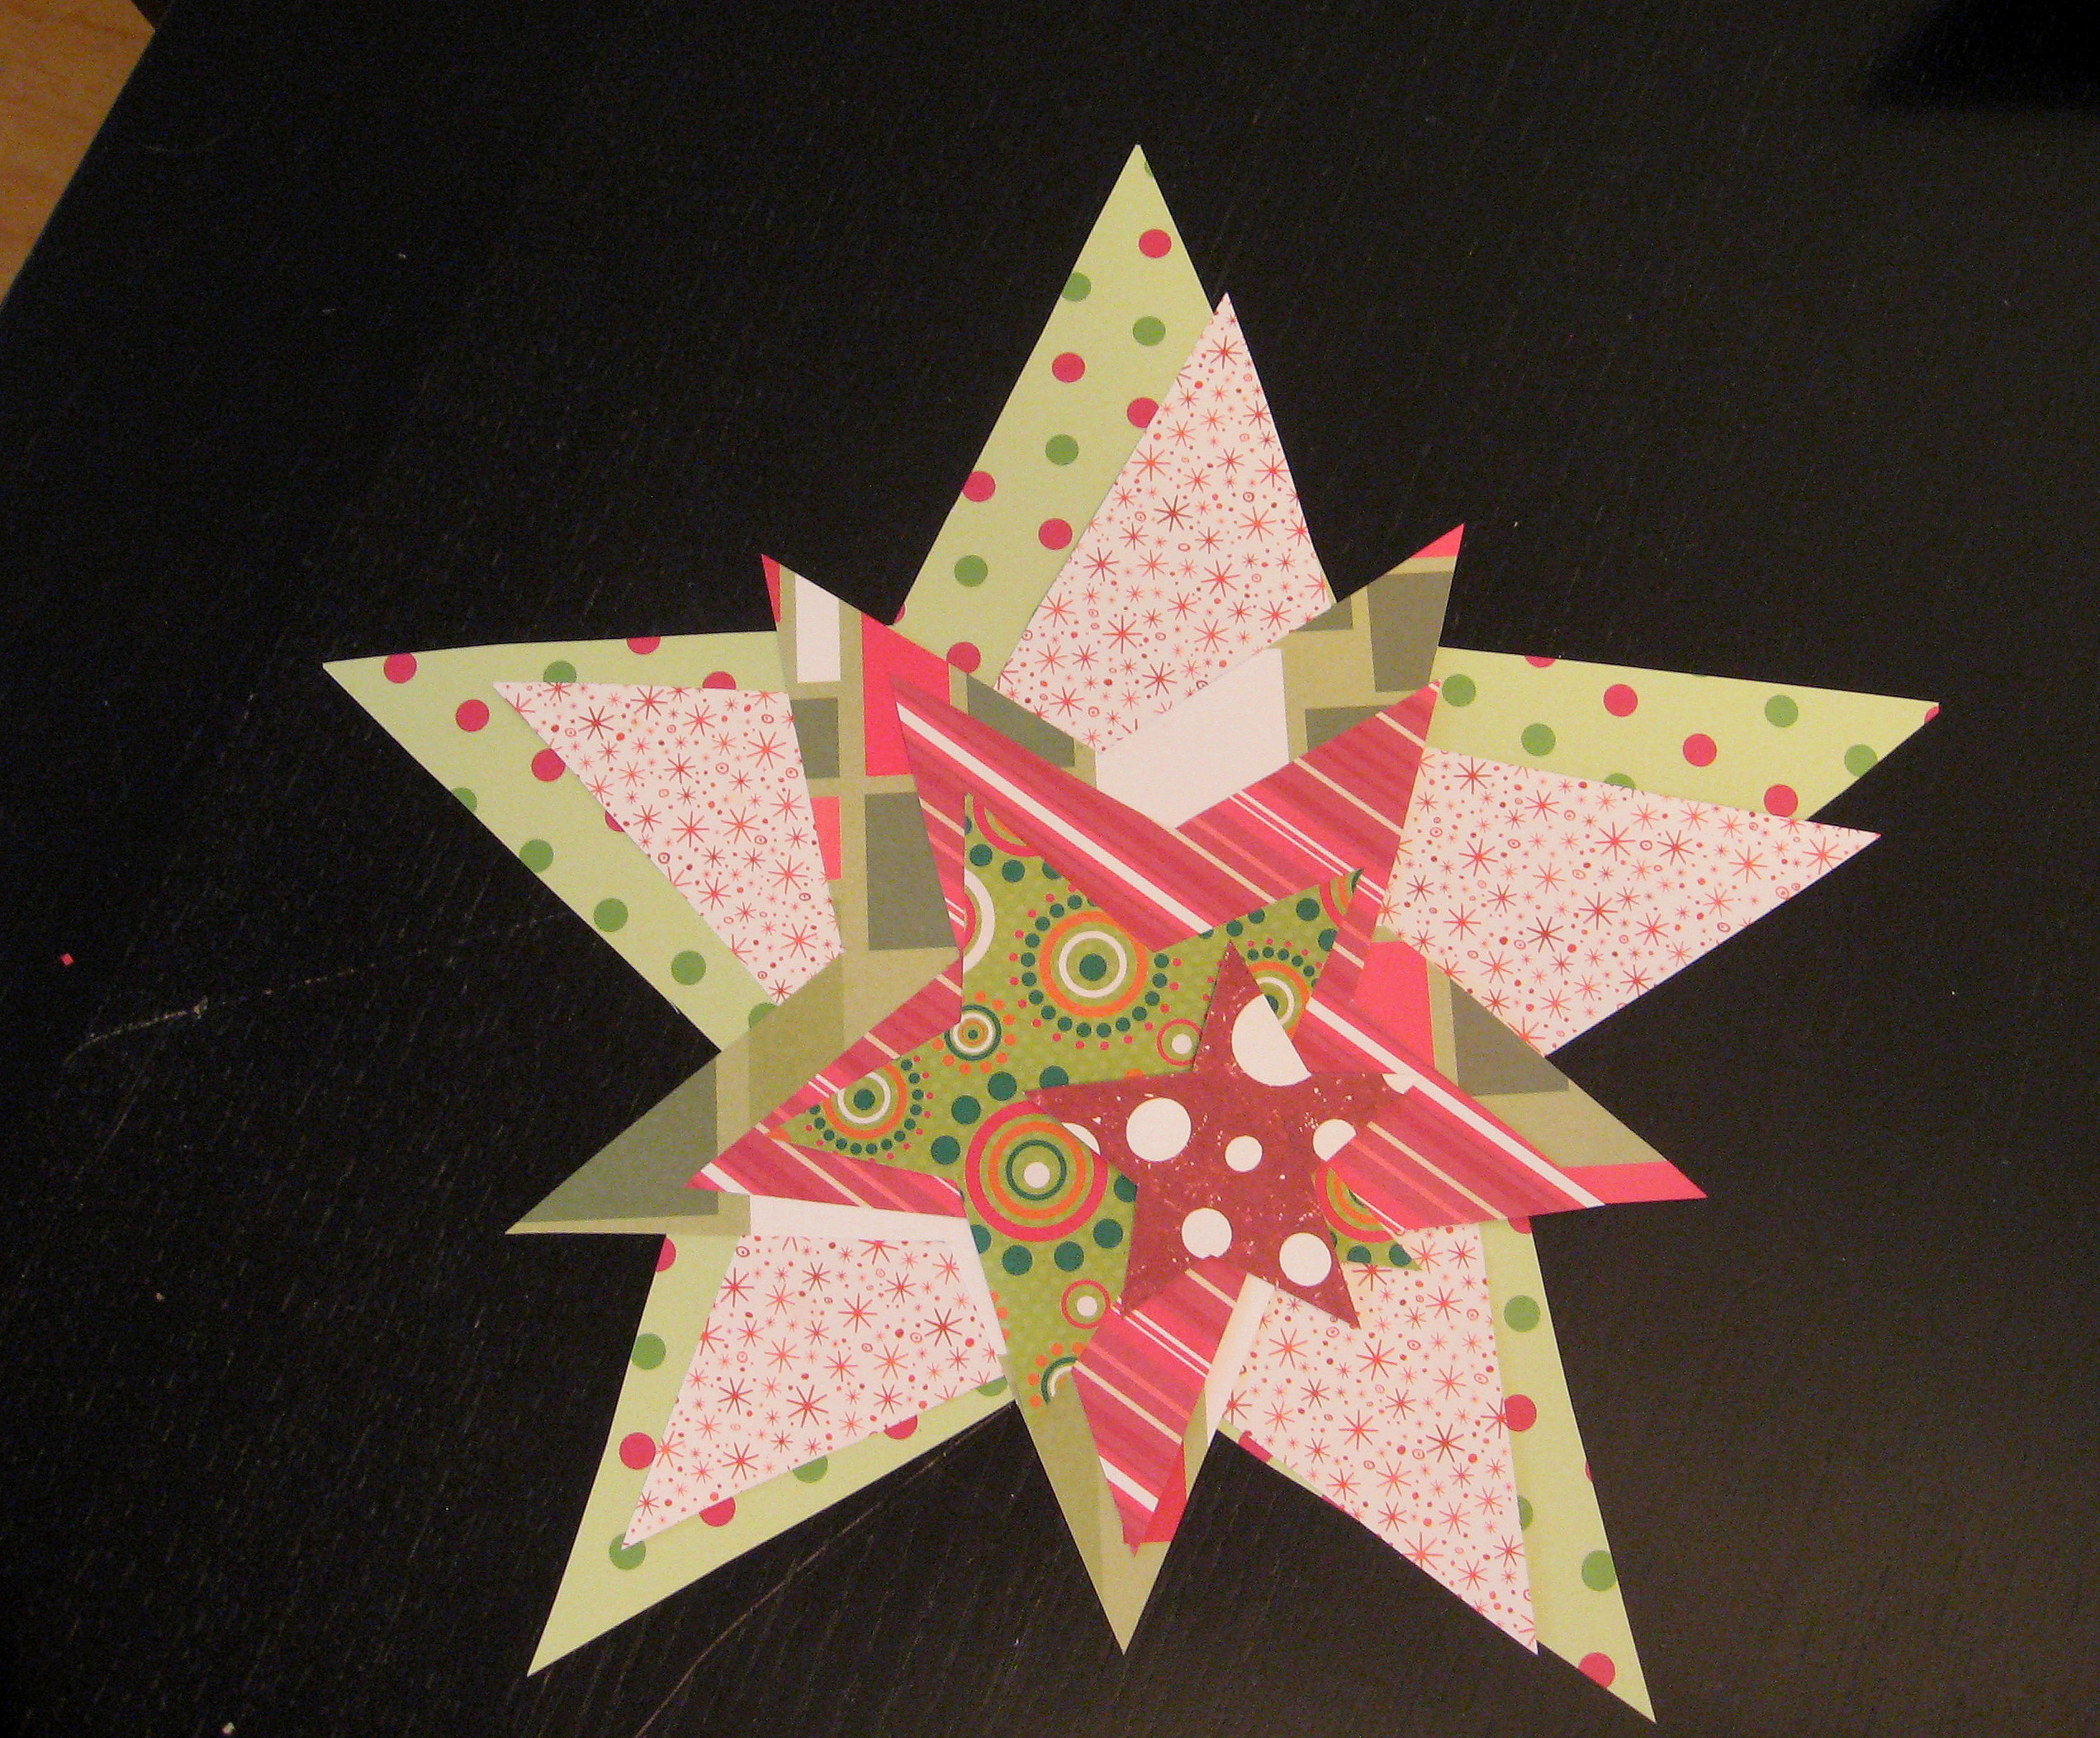
When you are finished, you will have a stack of paper stars, in descending size.
The next step is to fold them into a 3D shape. Use a straight edge on the back to connect each point with the valley across from it, and score a fold with your finger. (if you need more detailed directions, see here.)
Repeat that step for all of the stars.
Now grab a dowel – this one is square, but it doesn’t need to be – and is about 12 inches long.
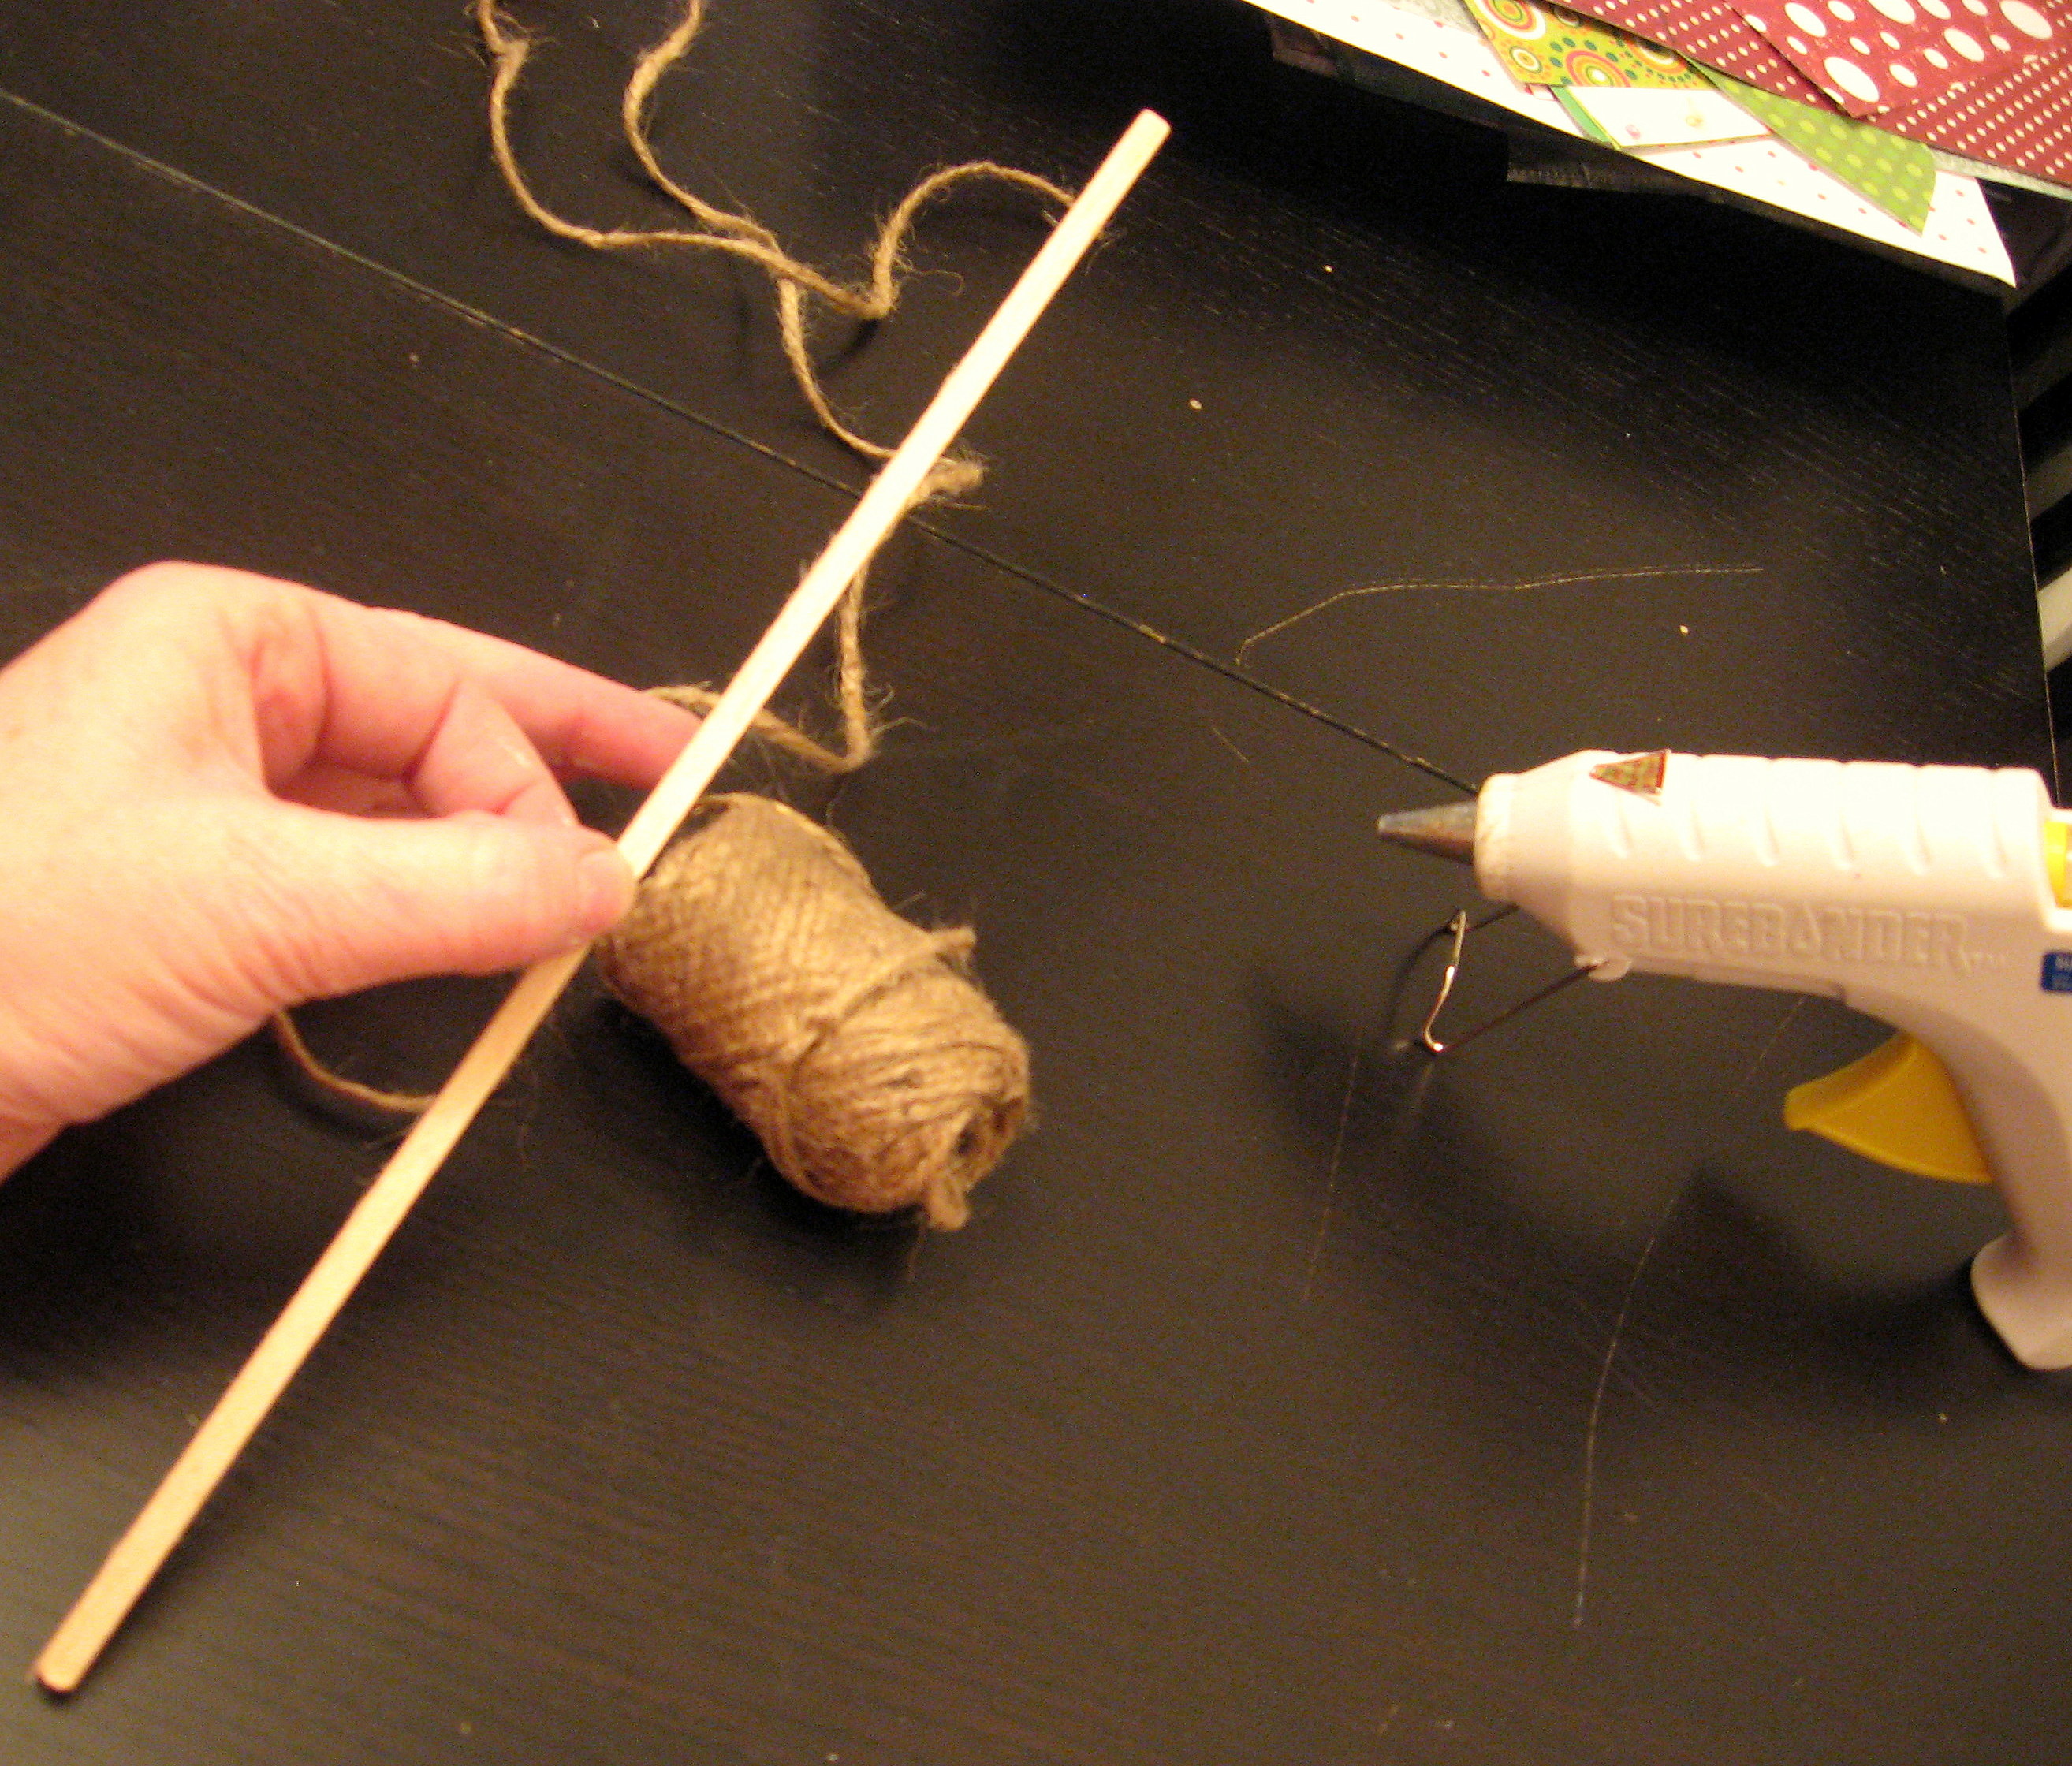
Using hot glue to keep it in place, wrap twine around the tip of the dowel.

Cut a small X in the middle of the paper star – don’t cut too big, you want the paper to fit tight onto the dowel to help keep it in place – and then push the dowel through.
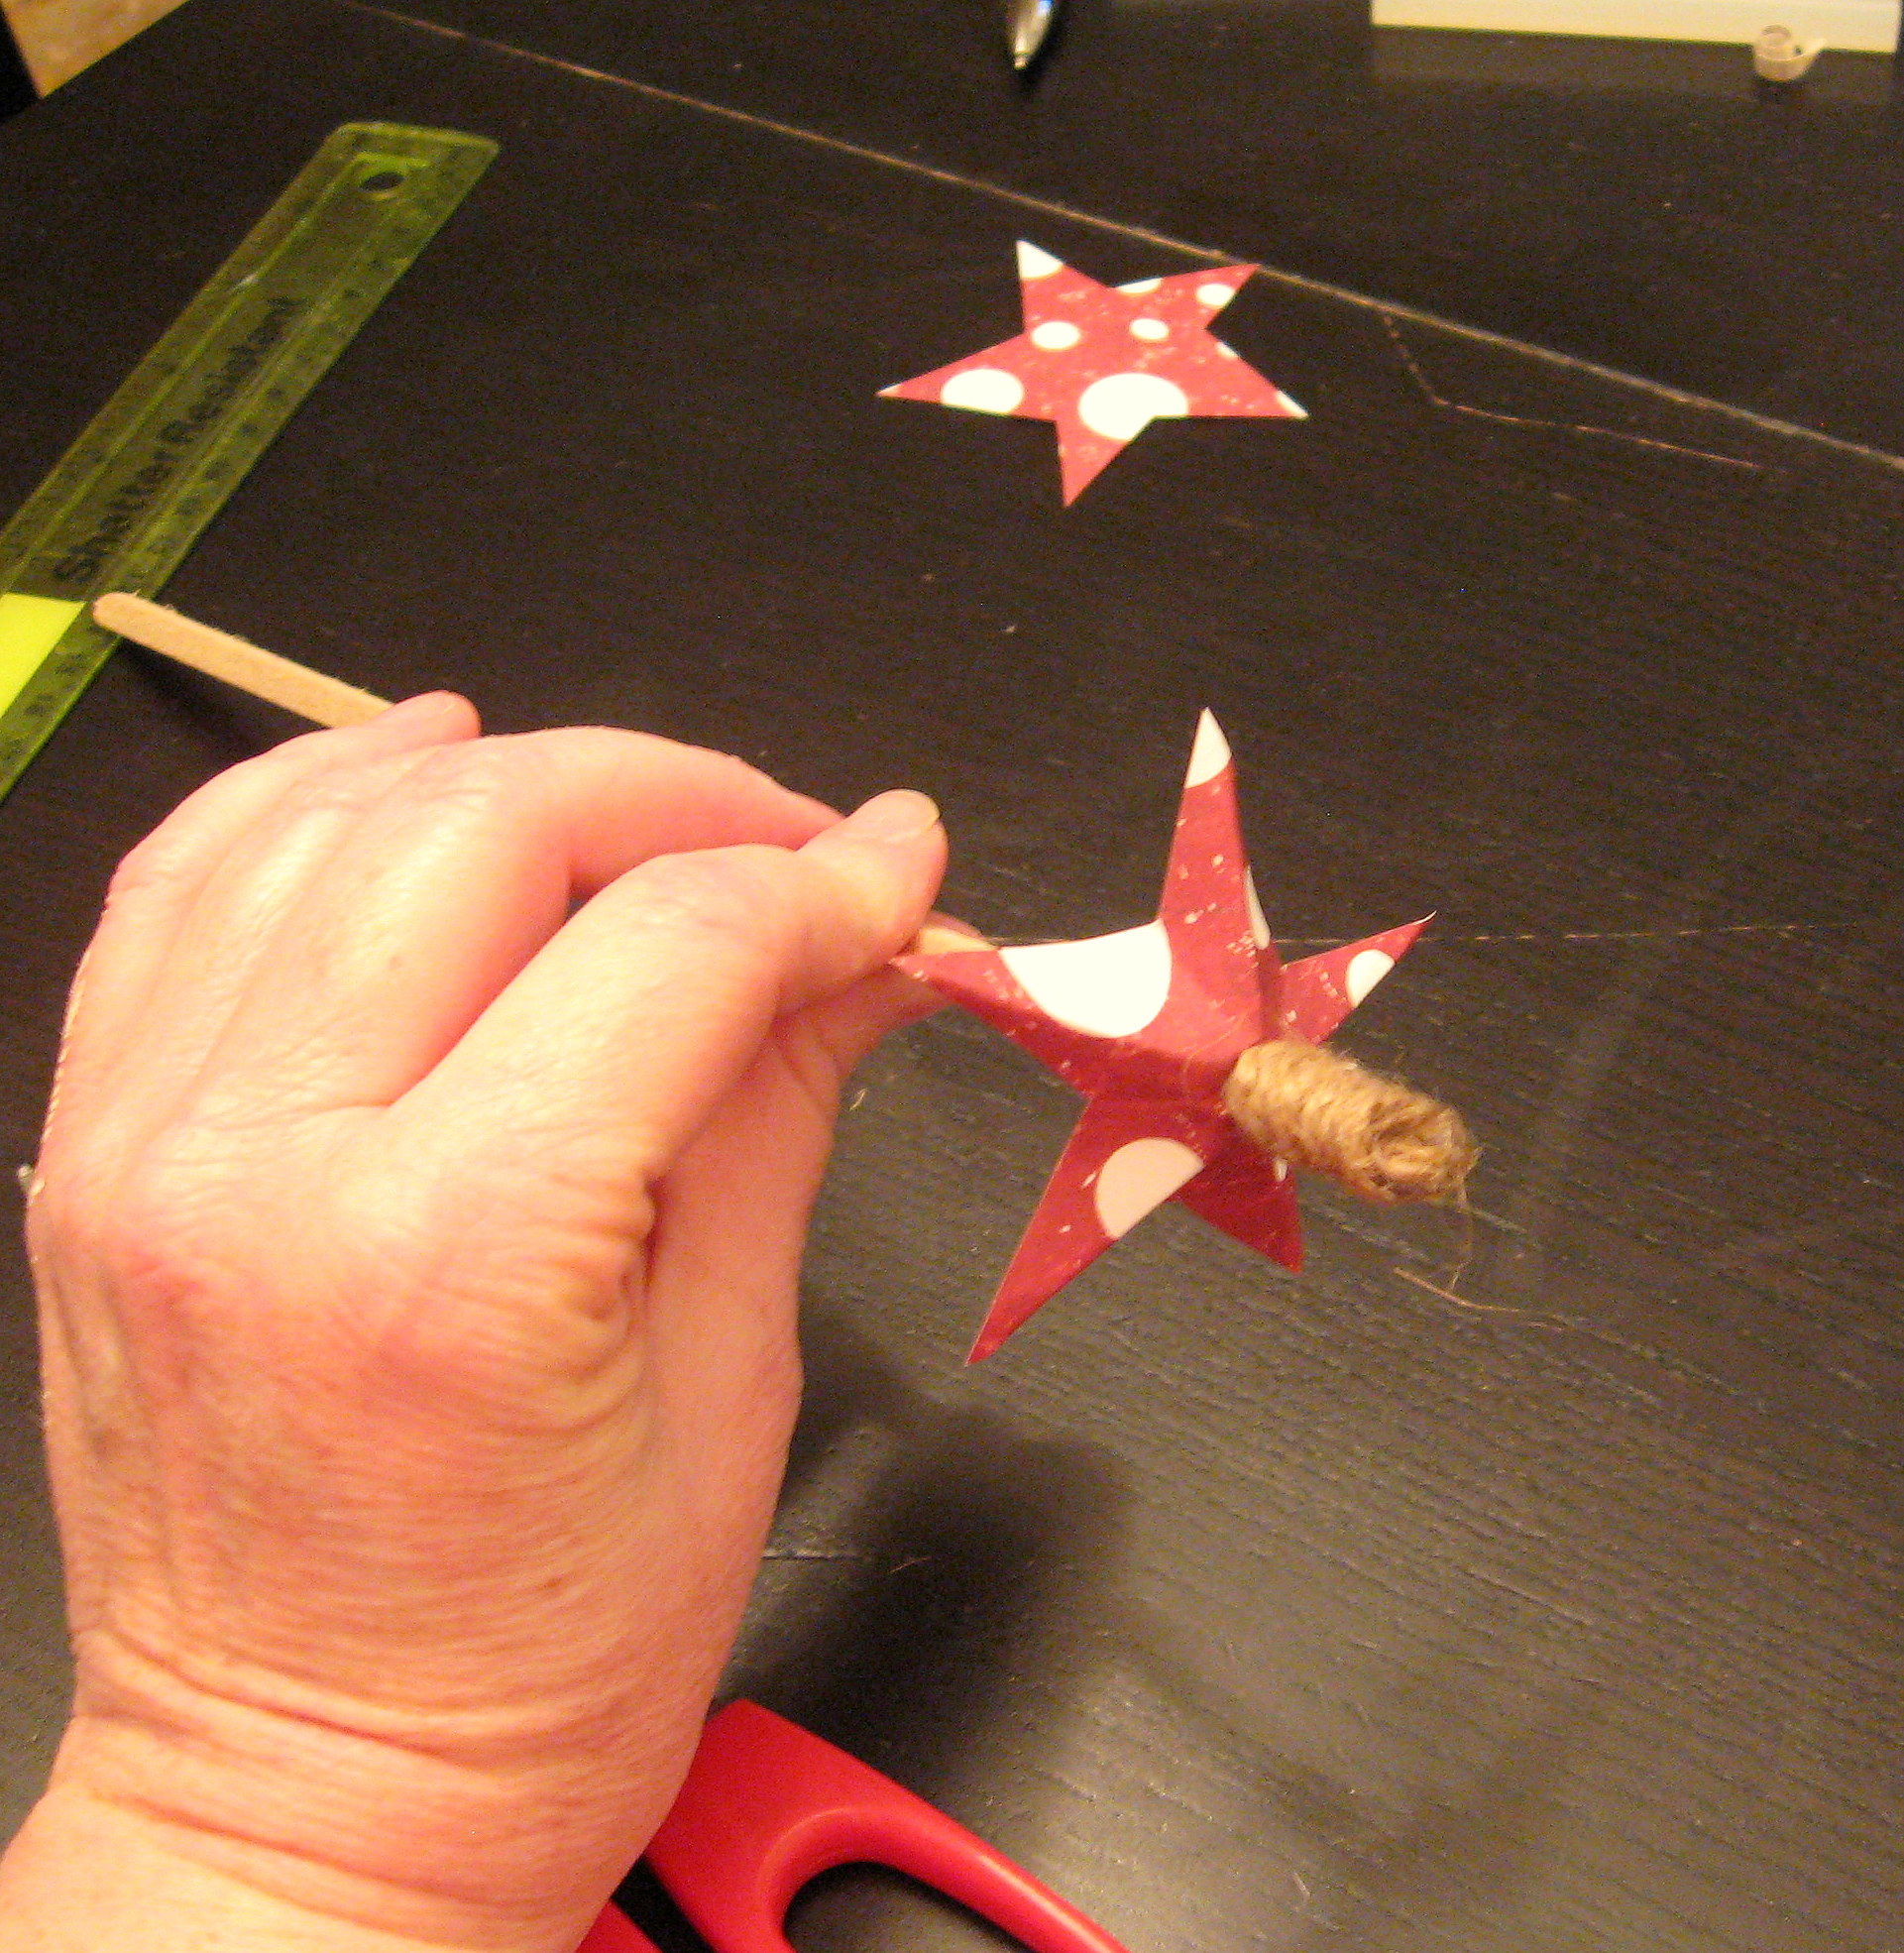
Repeat this process all the way down, alternating wrapped twine and stars, finishing with twine to keep everything in place.
For my medium sized tree, I used 7 stars. For the bigger tree, I used 10 stars, using 4 of the same size on the bottom. For the smaller tree, I used the 5 smallest stars. When they were all done, I plopped them into white Ikea vases to display, using some blue tack in the bottom of the vase to hold them in place.
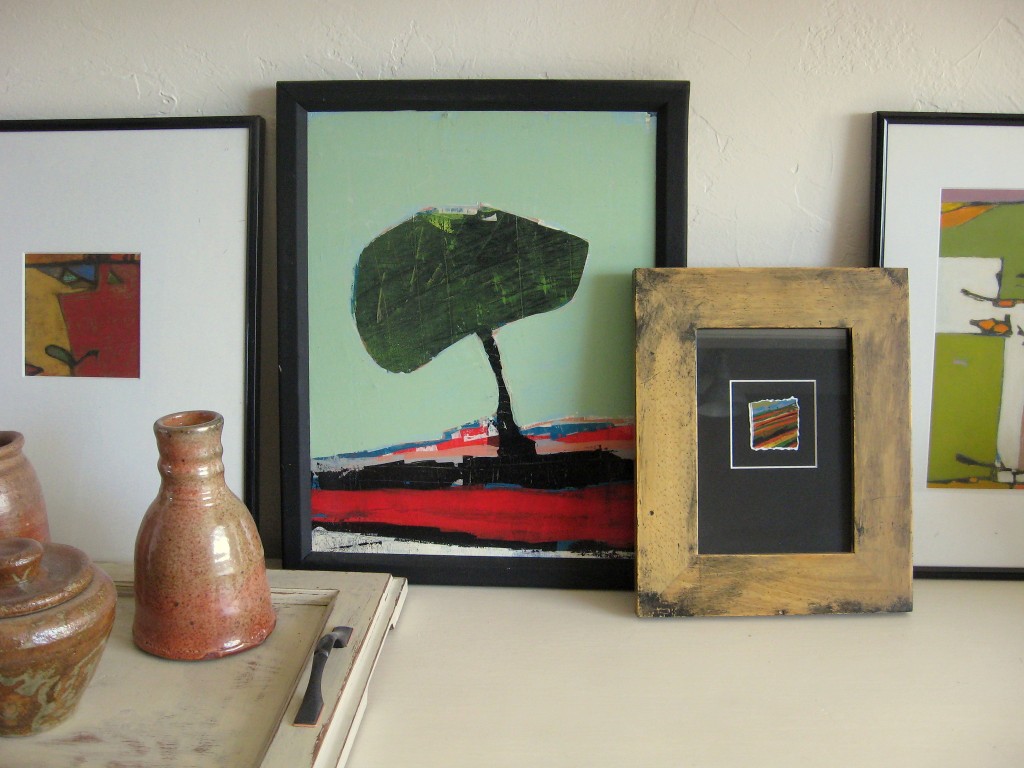
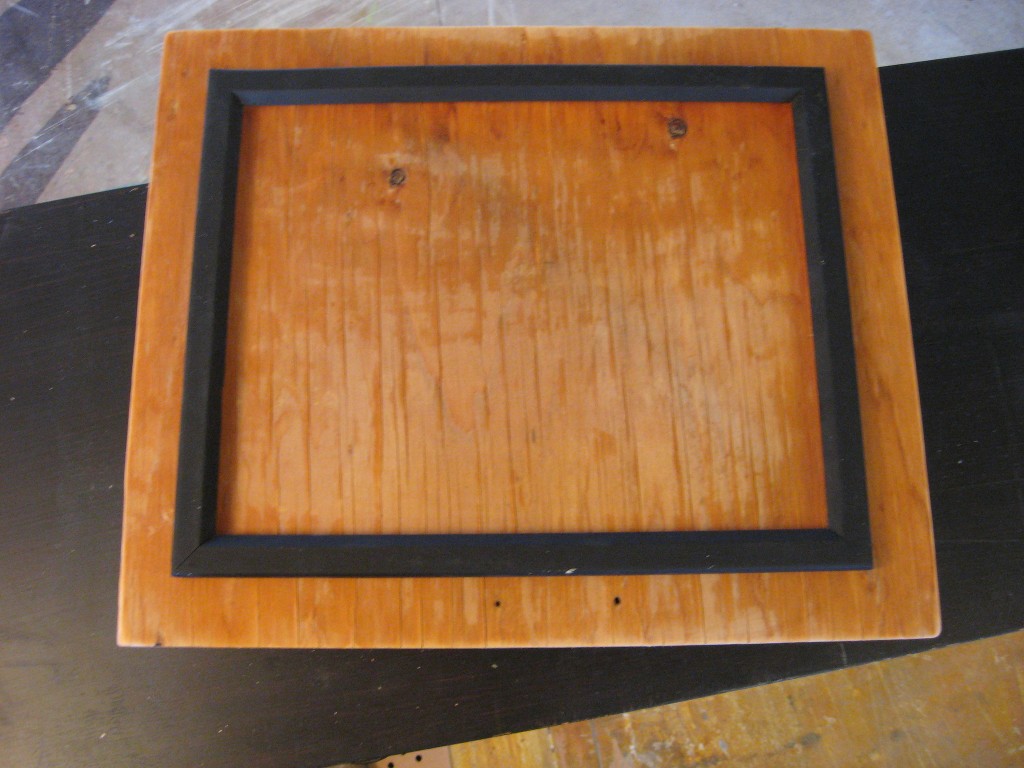
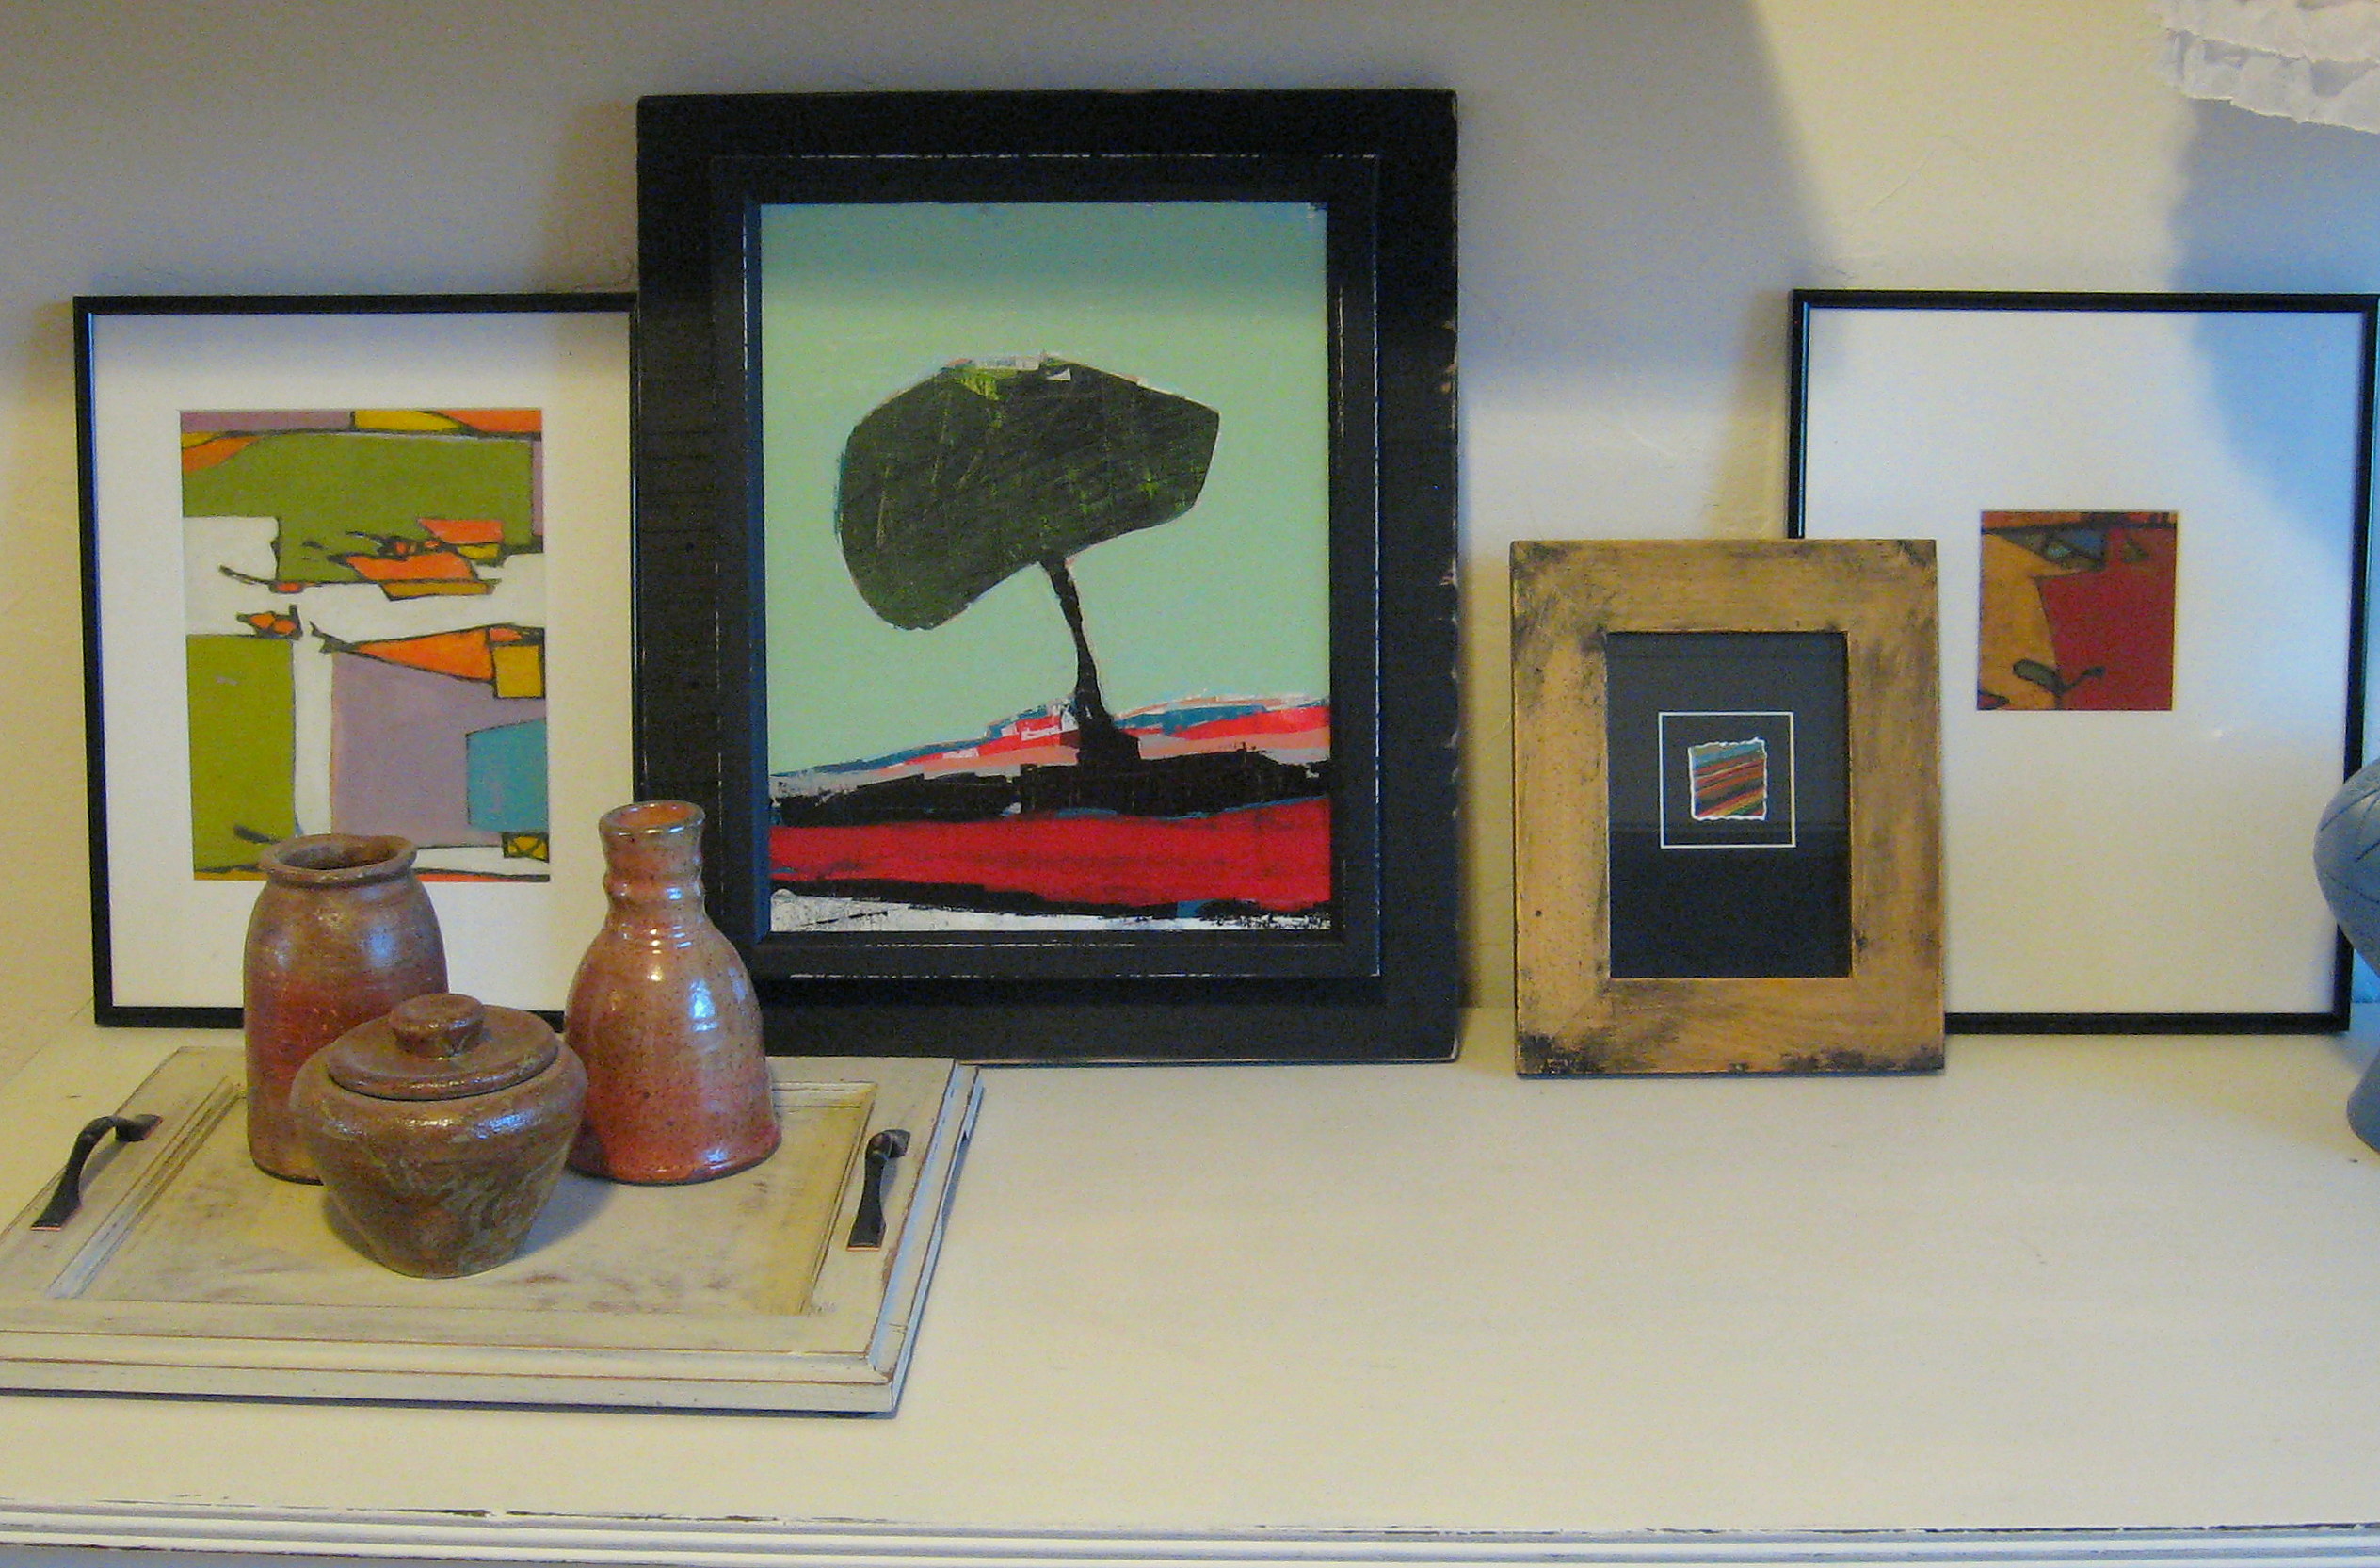
Cheap and Easy Chunky Picture Frame
This is a very cheap and easy upgrade to a boring frame. I had this painting in a simple black frame and it looked just fine where it was hanging before, but when I moved it into this grouping, everything was too much the same size-boring!
Rather than spend my afternoon chasing down an overpriced picture frame, I just mounted the existing frame on a bigger piece of wood painted to match the frame.
I started by cutting an old weathered piece of plywood down so that it was 2 inches bigger than the frame on each side.
This rough piece of wood works for the way I decorate, but you could easily find something more polished for cheap in a home improvement store and they will cut it to size for you. This same method is adorable using a piece of beadboard.
Sand the wood down and paint it the same color as the frame – this is a good time to touch up the frame too if it needs it.
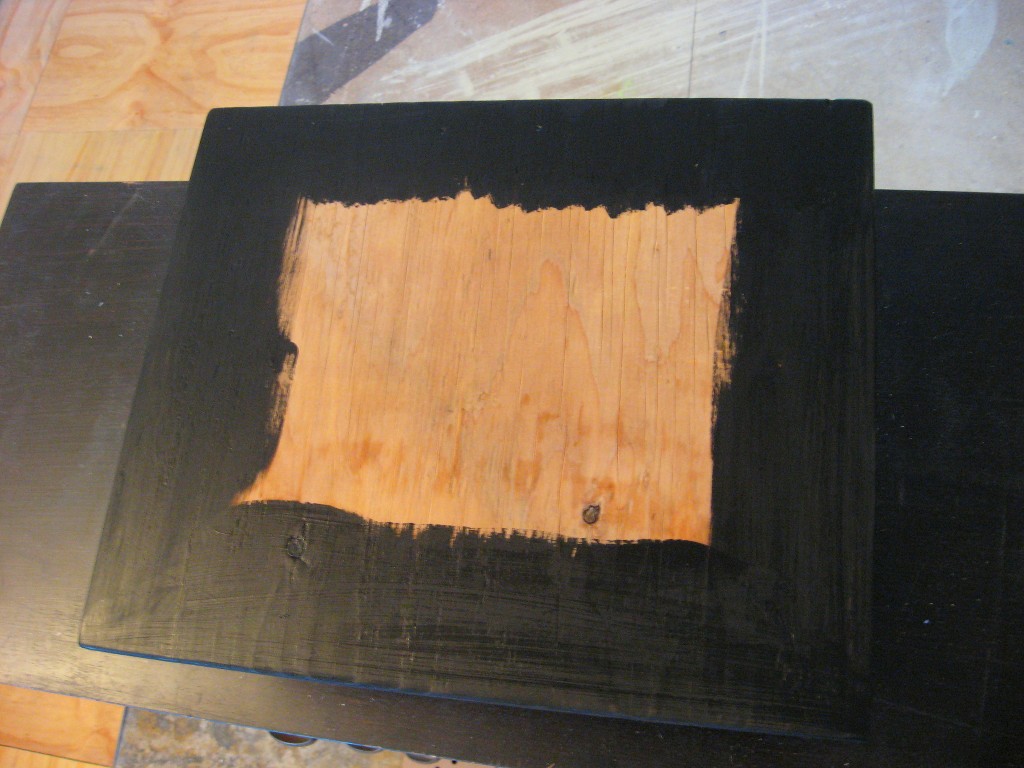
Once the paint is dry, put the art or photo back in, then attach the frame centered on the board. I used hot glue because I want to be able to remove it later.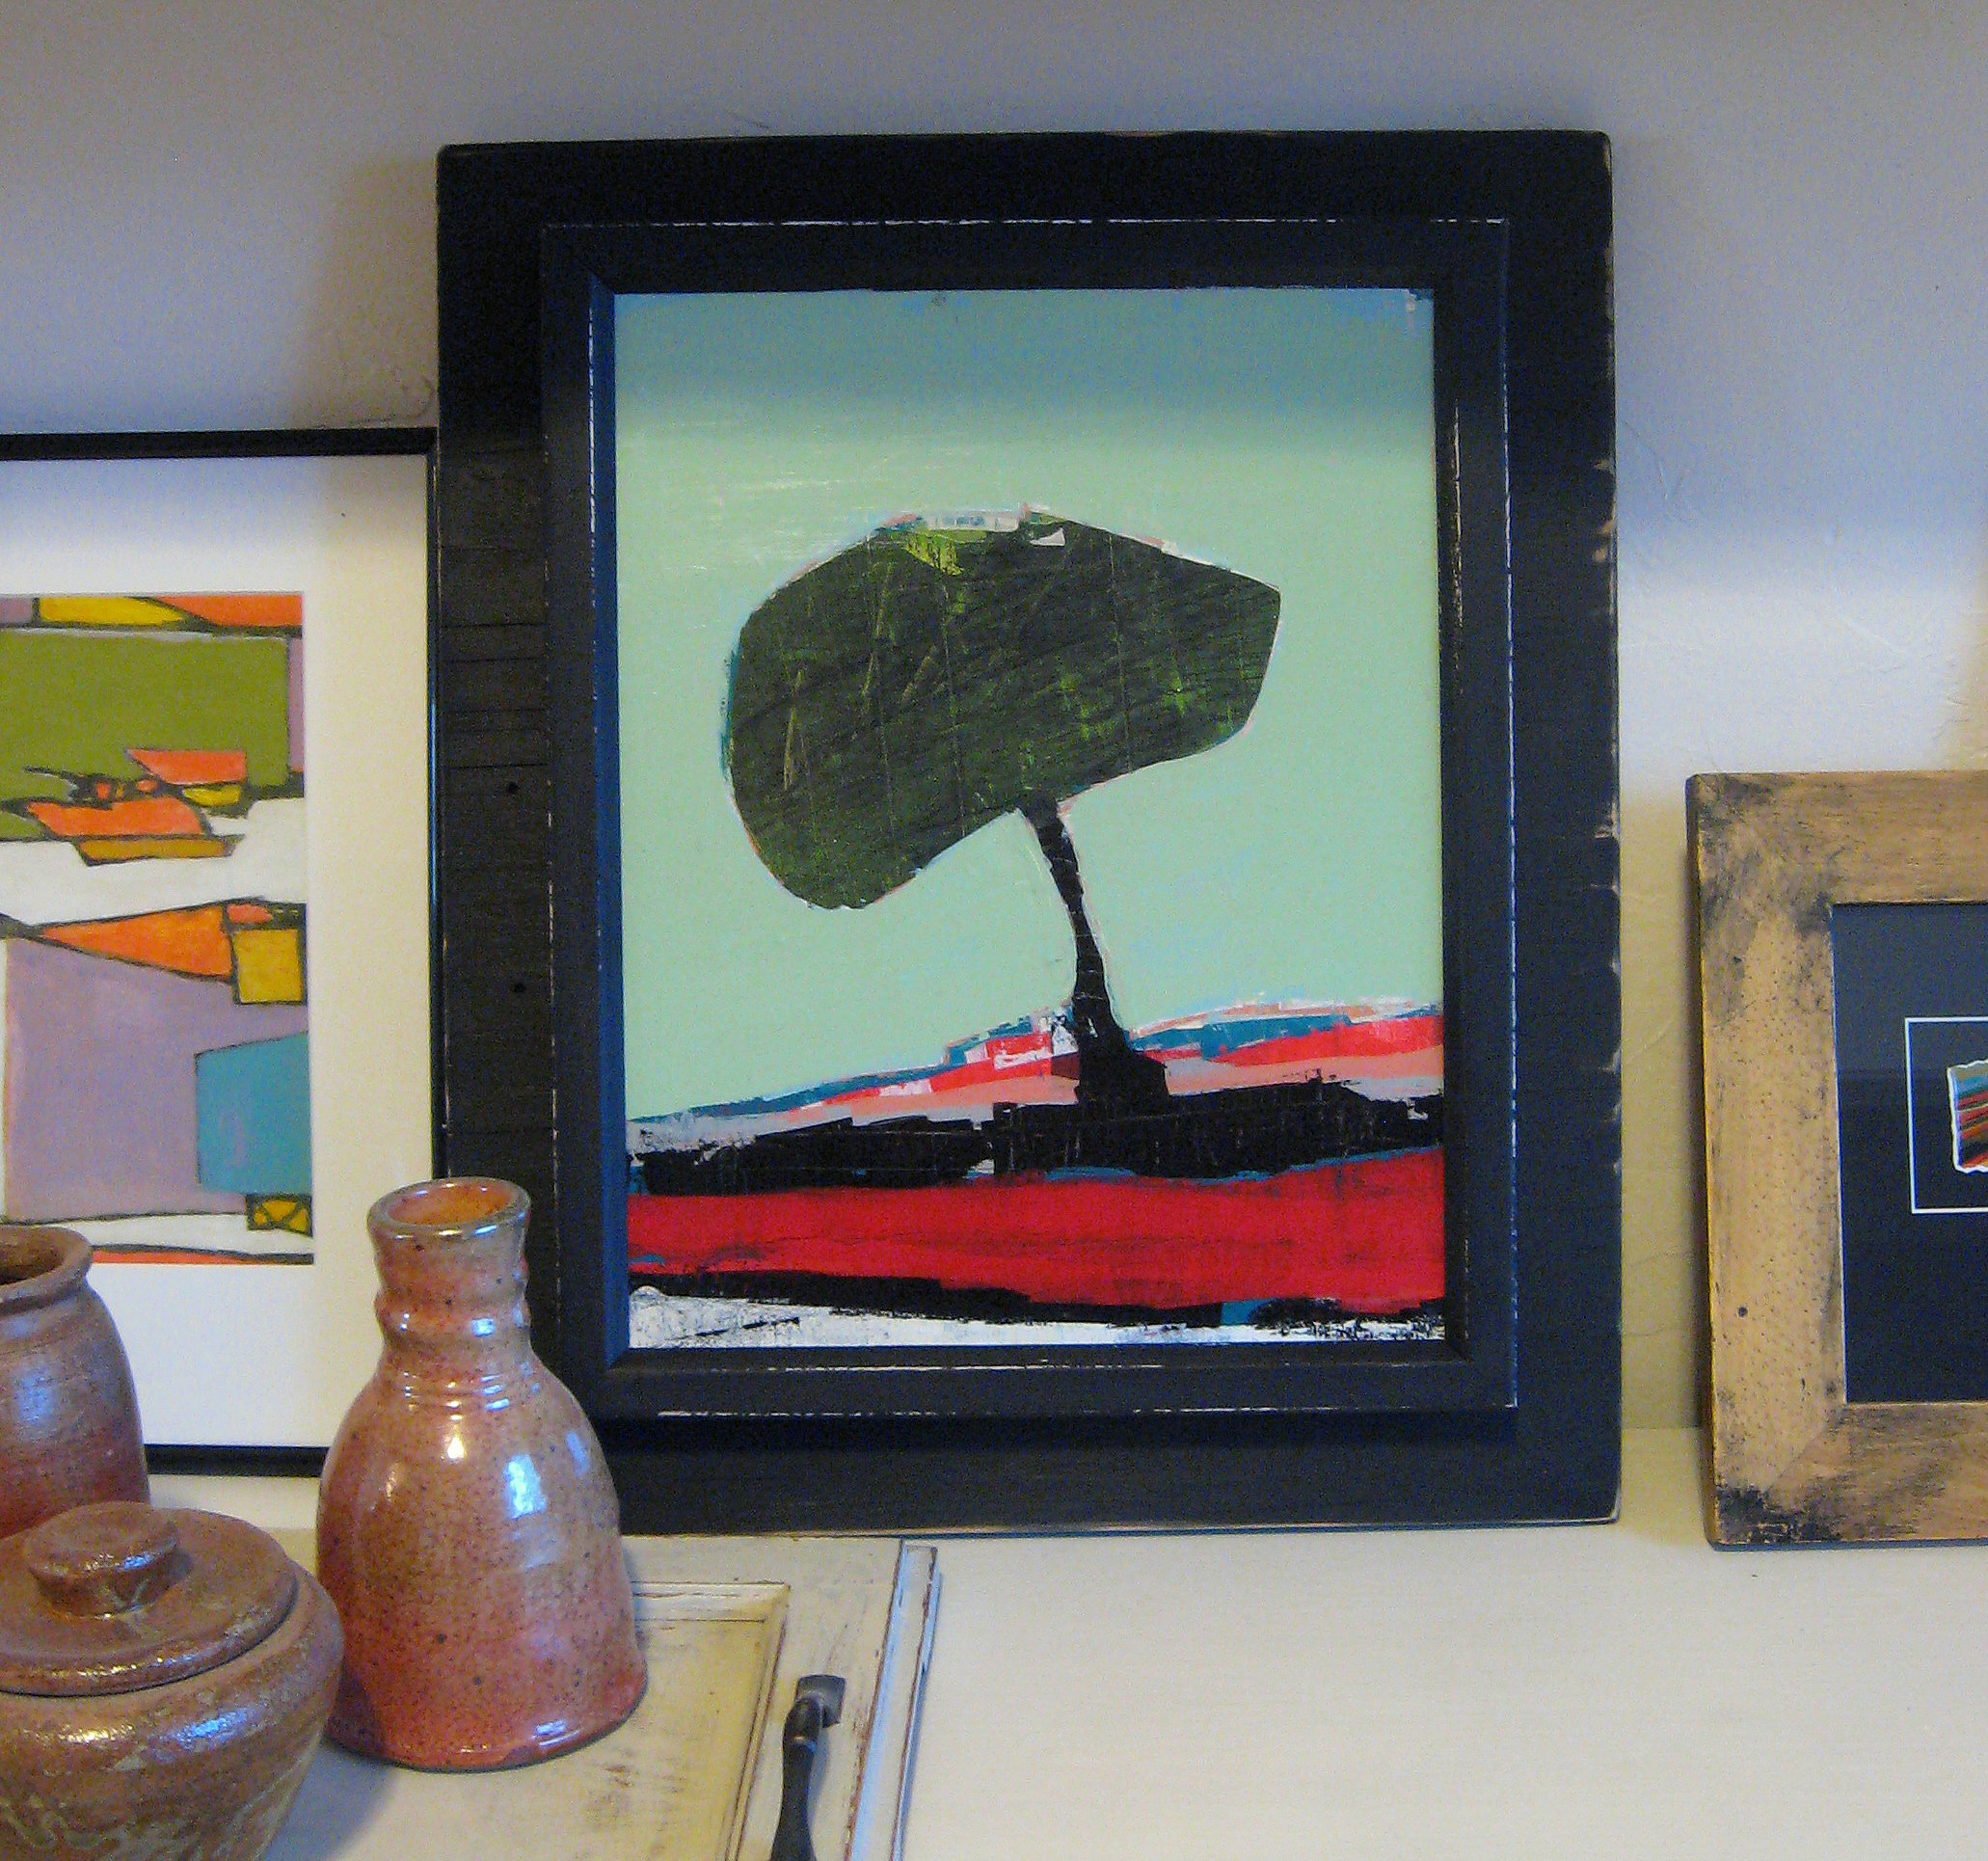
One hour upgrade; cost to me? Nothing!
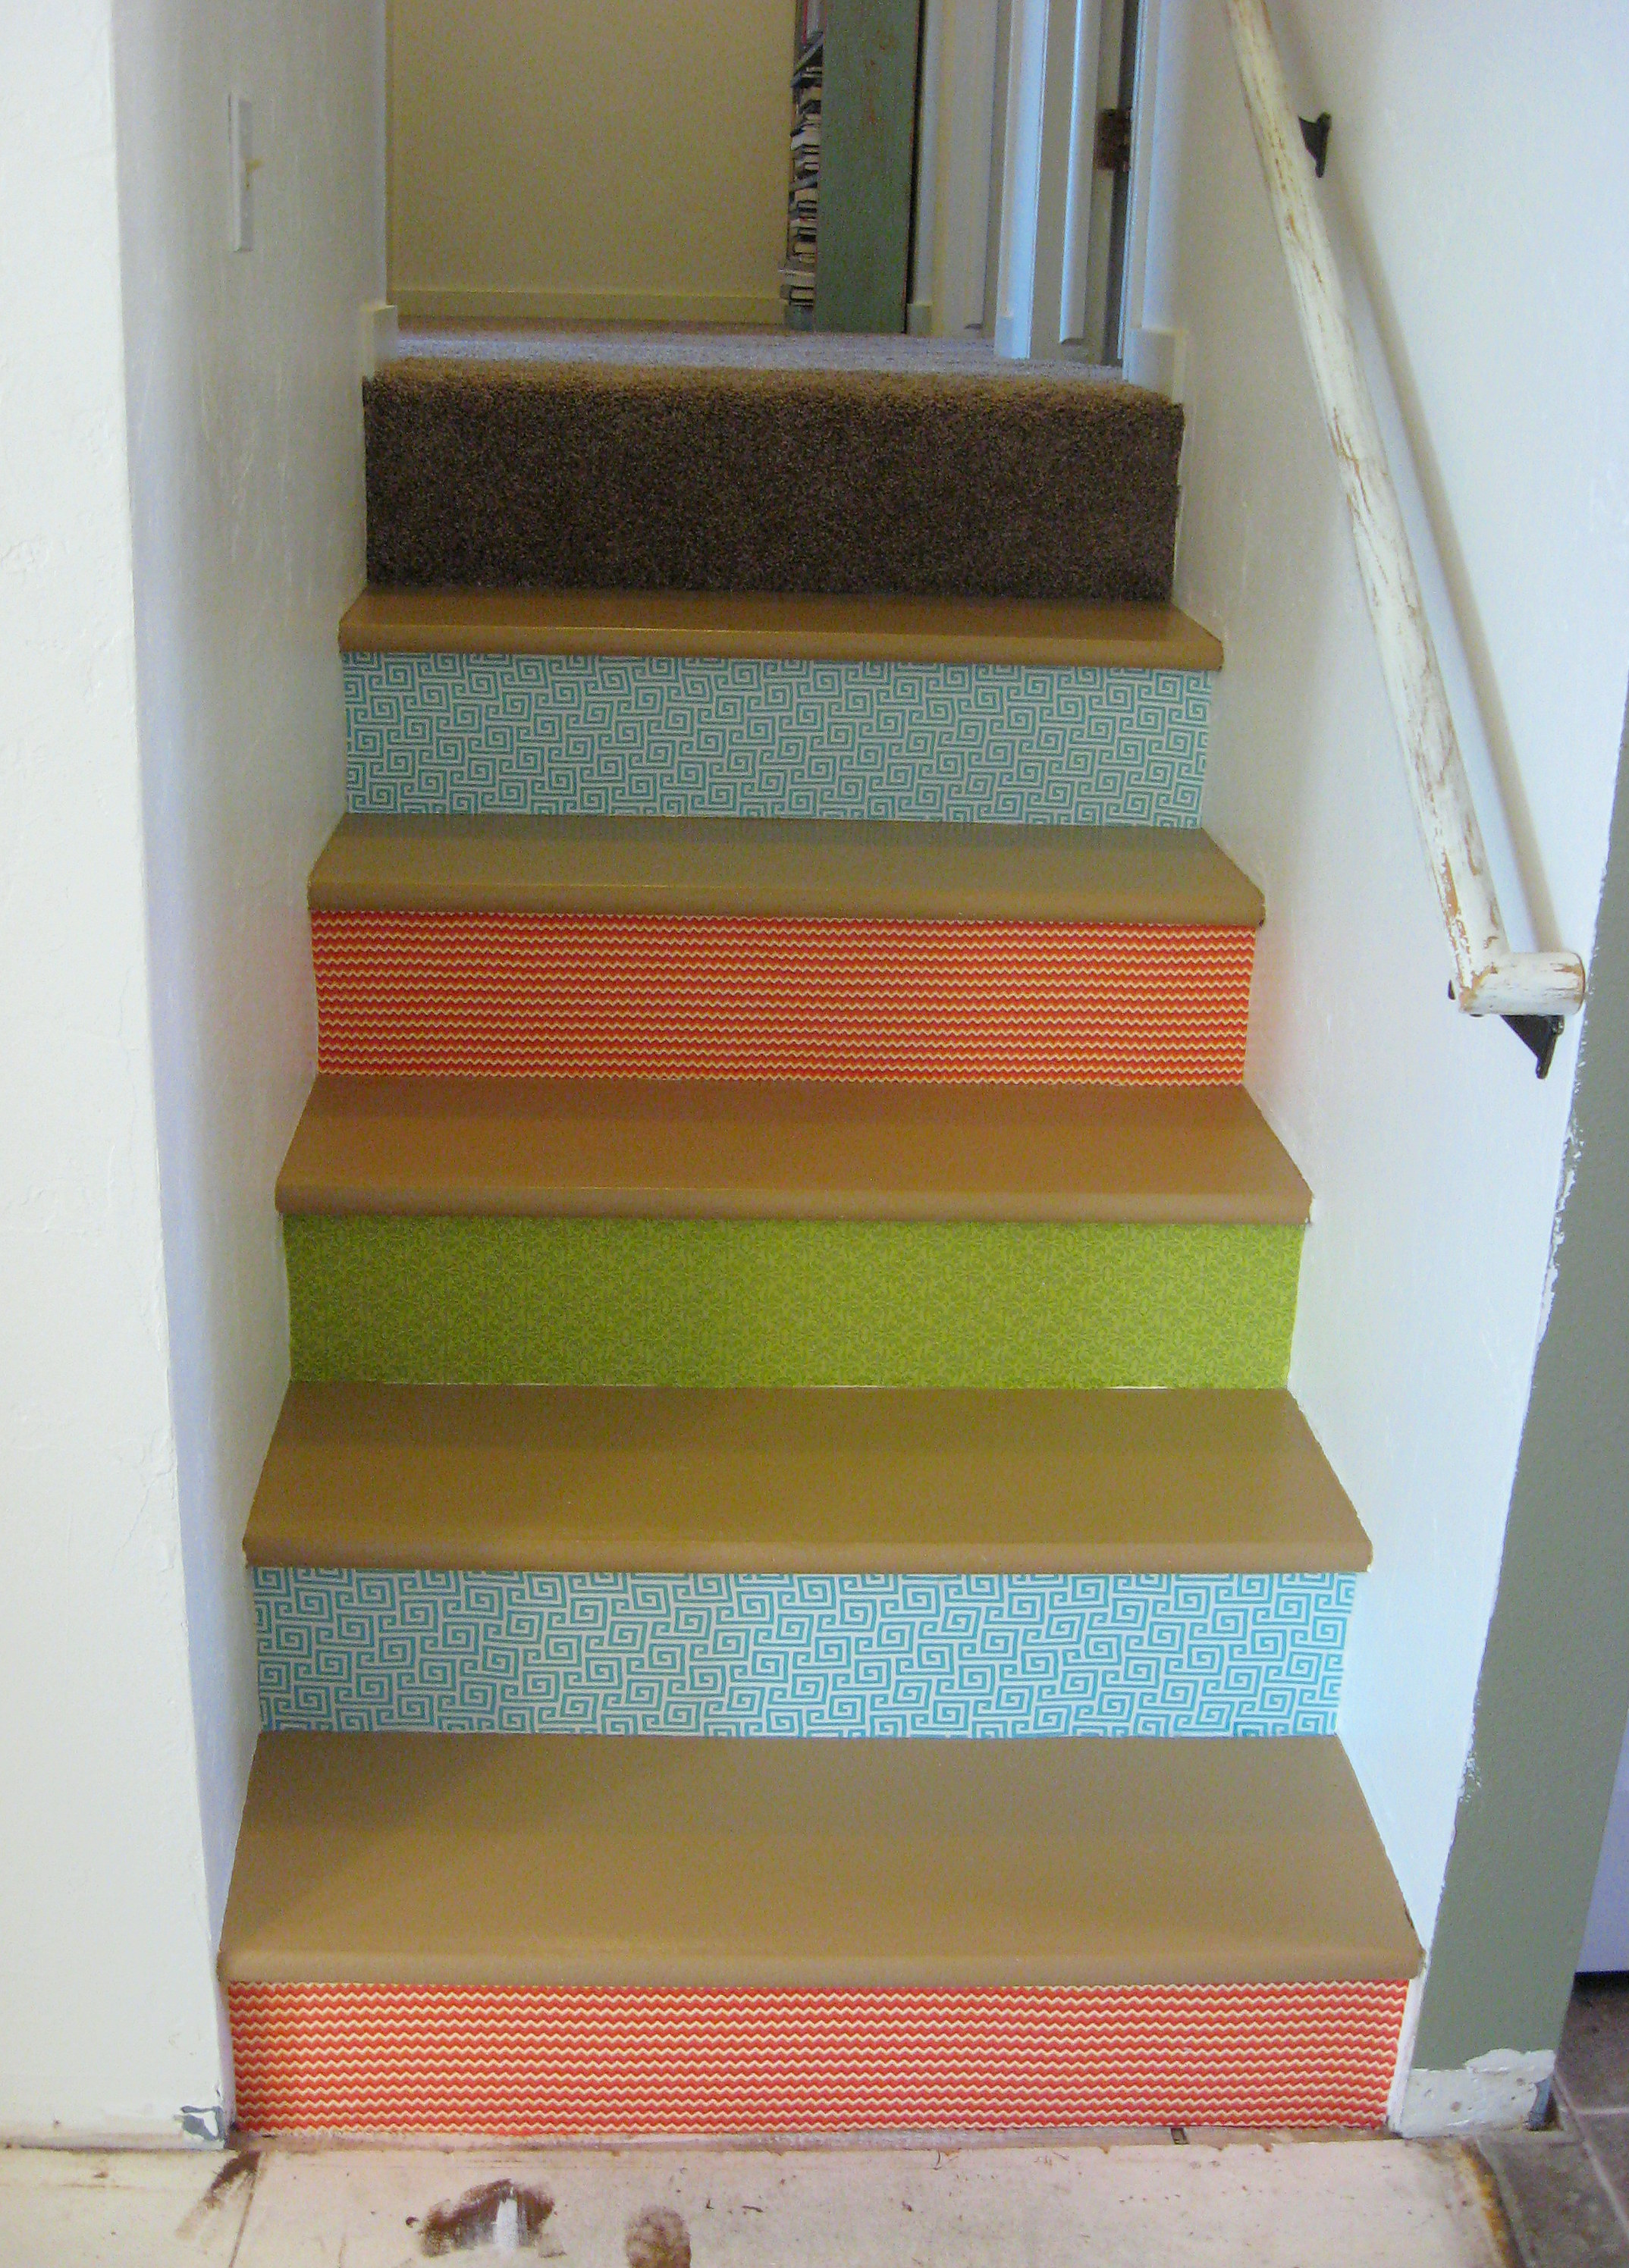
Adding interest to Stairs
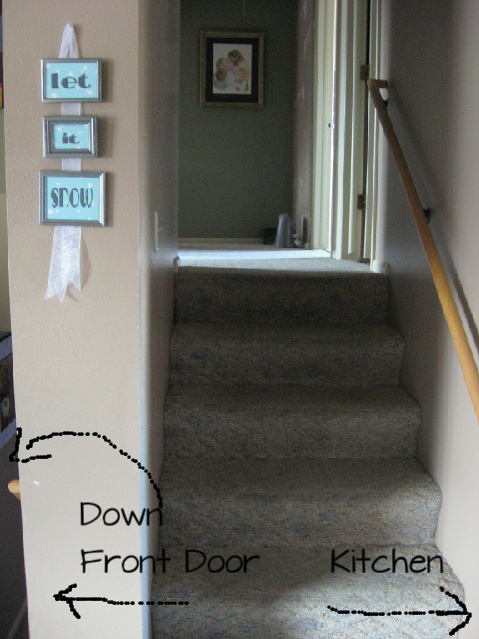
Here is a “before” picture of my stairs – ugly nasty carpet. EW! (uh…nevermind the arrows…I can’t find the original un-commented-on version of this picture.)
I ripped the carpet off and had new carpet installed in the hall, but I really didn’t want carpet on the stairs again. I sanded them down and painted them, but they were way too plain.
I thought about stenciling or painting on the risers, or maybe even mod podging on some scrapbook paper, but those seemed like pretty permanent projects that I would regret someday when wanted to remove them.
I decided to go with temporary fabric – attaching it to the risers with starch. Super simple, very forgiving and totally removable. You can use liquid starch that you purchase in the laundry aisle, but I made my own. You can use this same technique to cover an entire wall, or to cut out shapes and use them to decorate. When my boys were little, I had red and blue fabric stars starched around the perimeter of their room in our rental house. When we moved out, they removed completely.
To make your own starch “glue”, put 1 cup of cornstarch into a large pan. Slowly whisk in one gallon of hot water. Heat the mixture over medium-high heat until it just starts to boil, thickens and turns clear. When you first mix it together, it will look like skim milk and the cornstarch will separate out quickly. Keep stirring it constantly to keep it from separating or from burning.
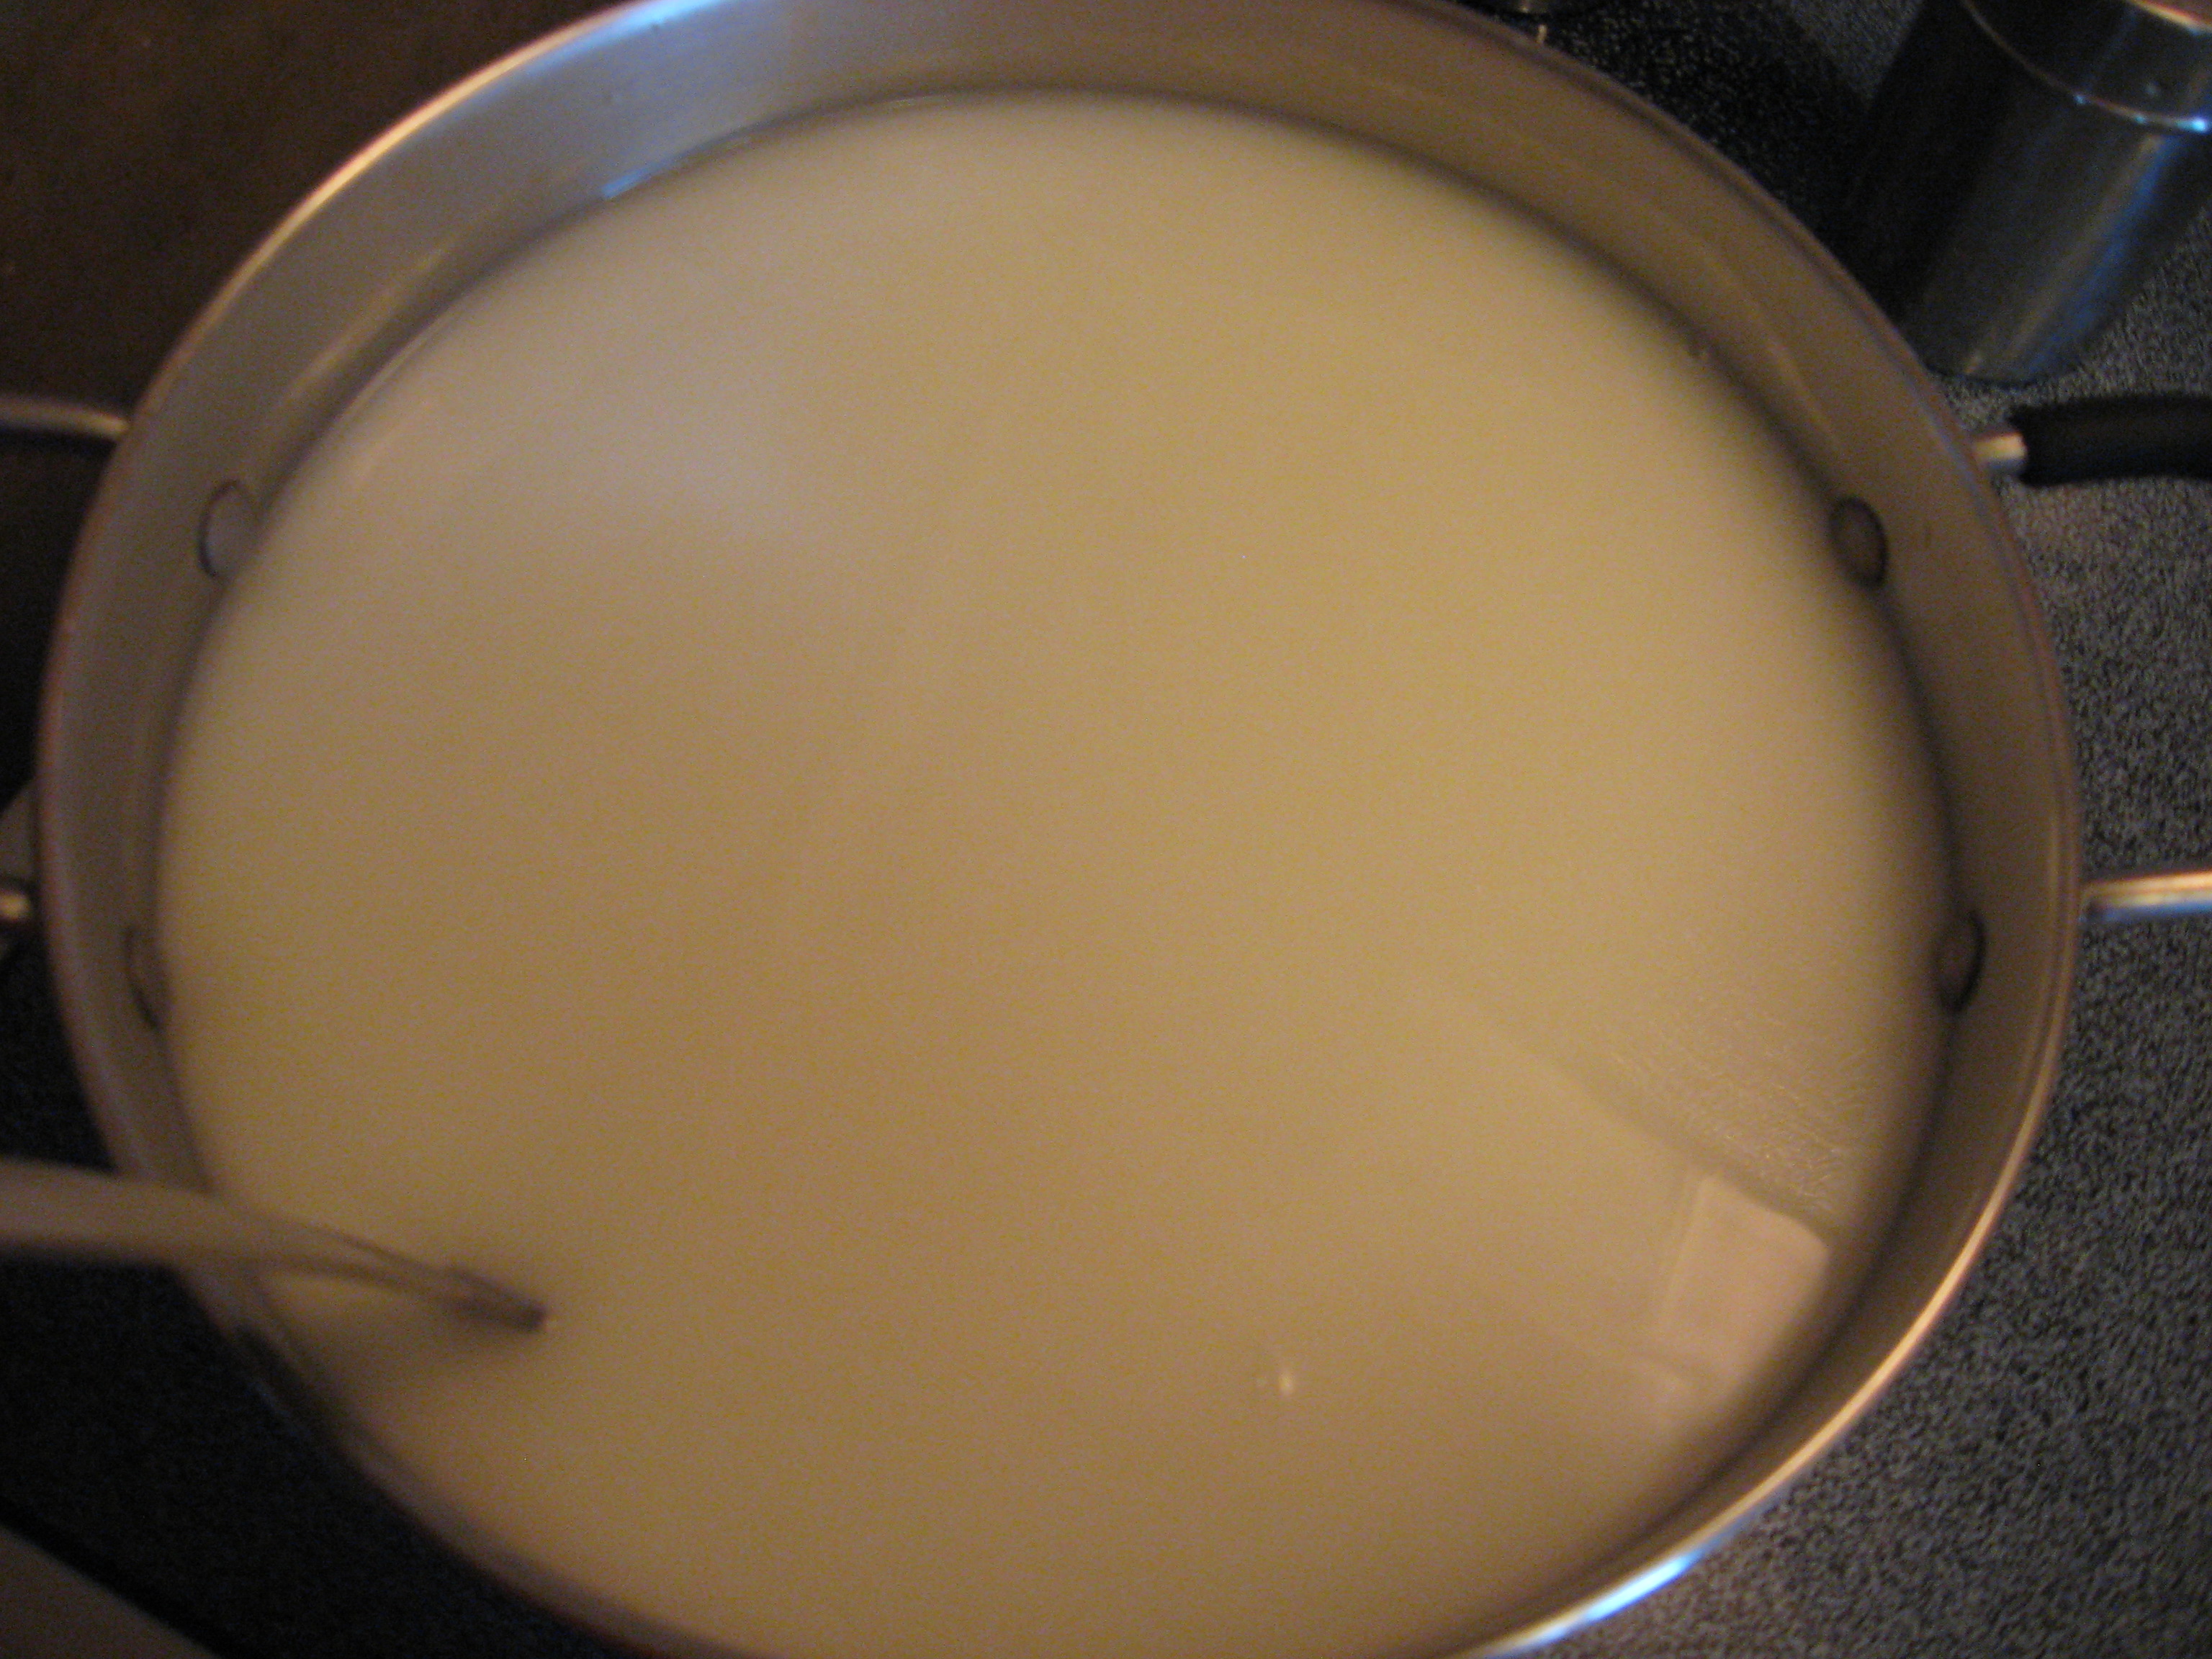
It won’t turn completely clear, but you can definitely see the change when it is done… it will be thick and sort of gelatainish (what? that’s totally a word.) Also, this makes A TON. I would use this recipe as is if you are doing a whole wall, but in hindsight I should have halved it for what I was doing.
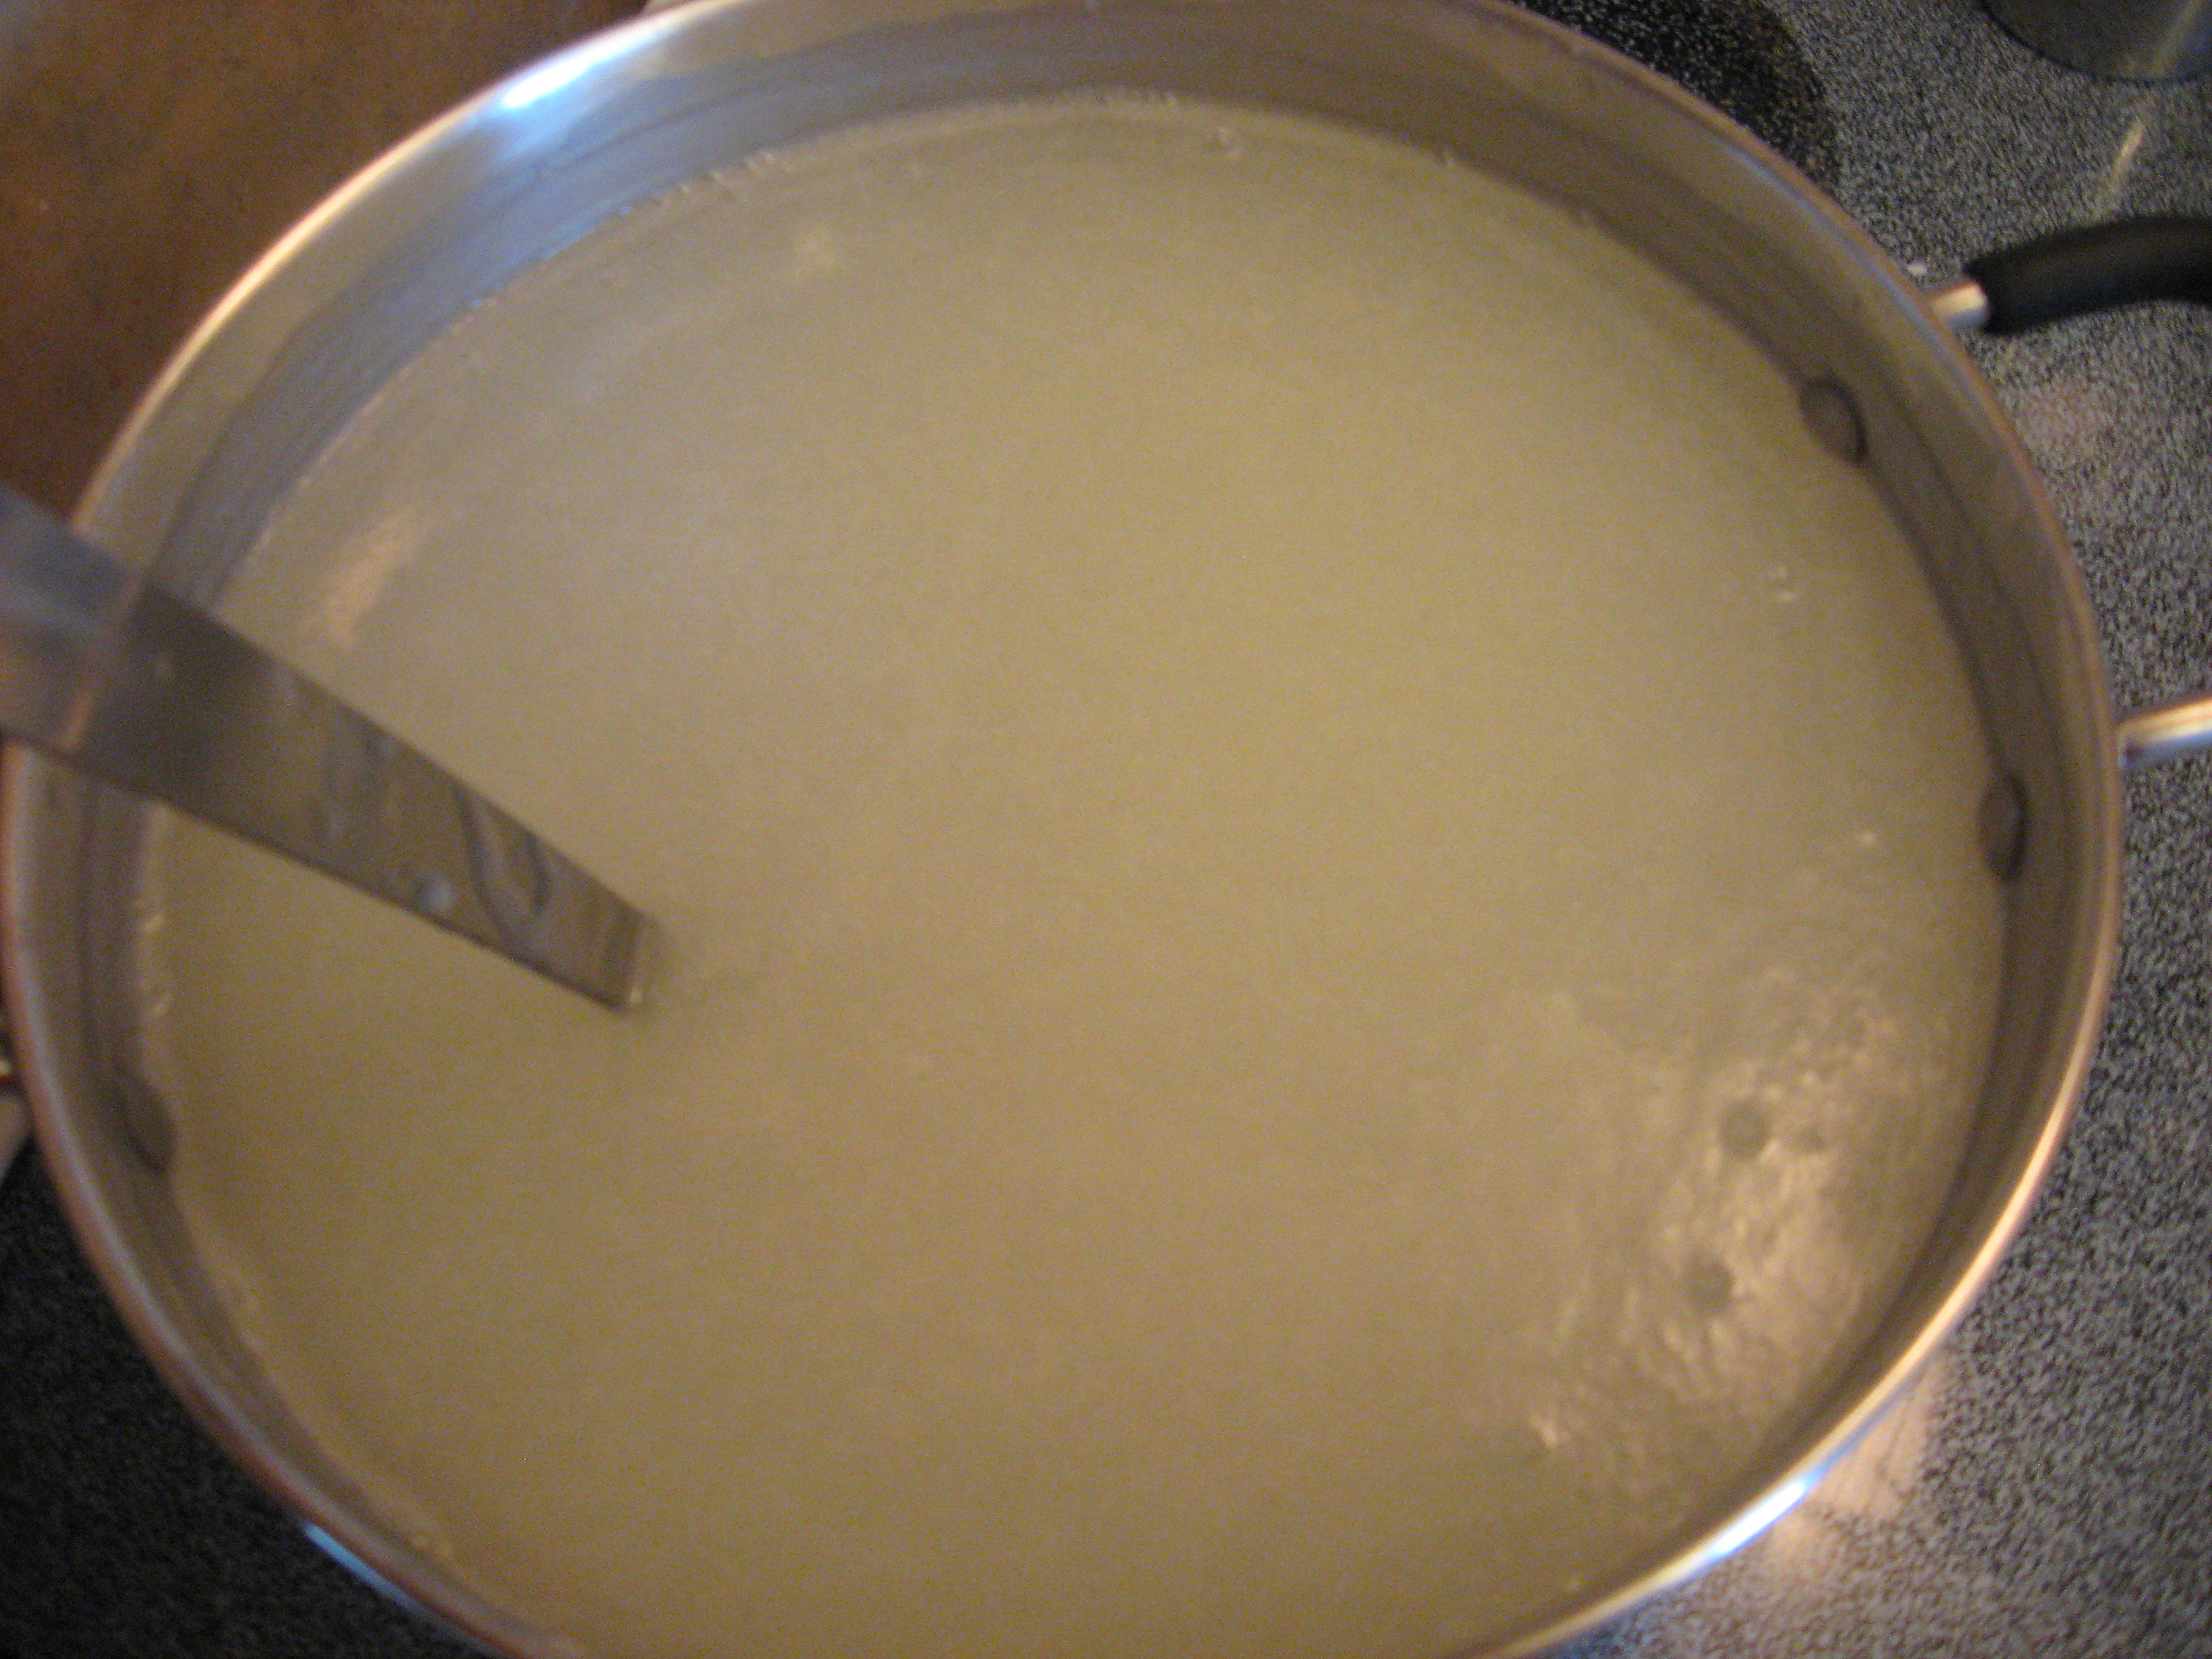
Set that to the side until it is cool enough to work with.
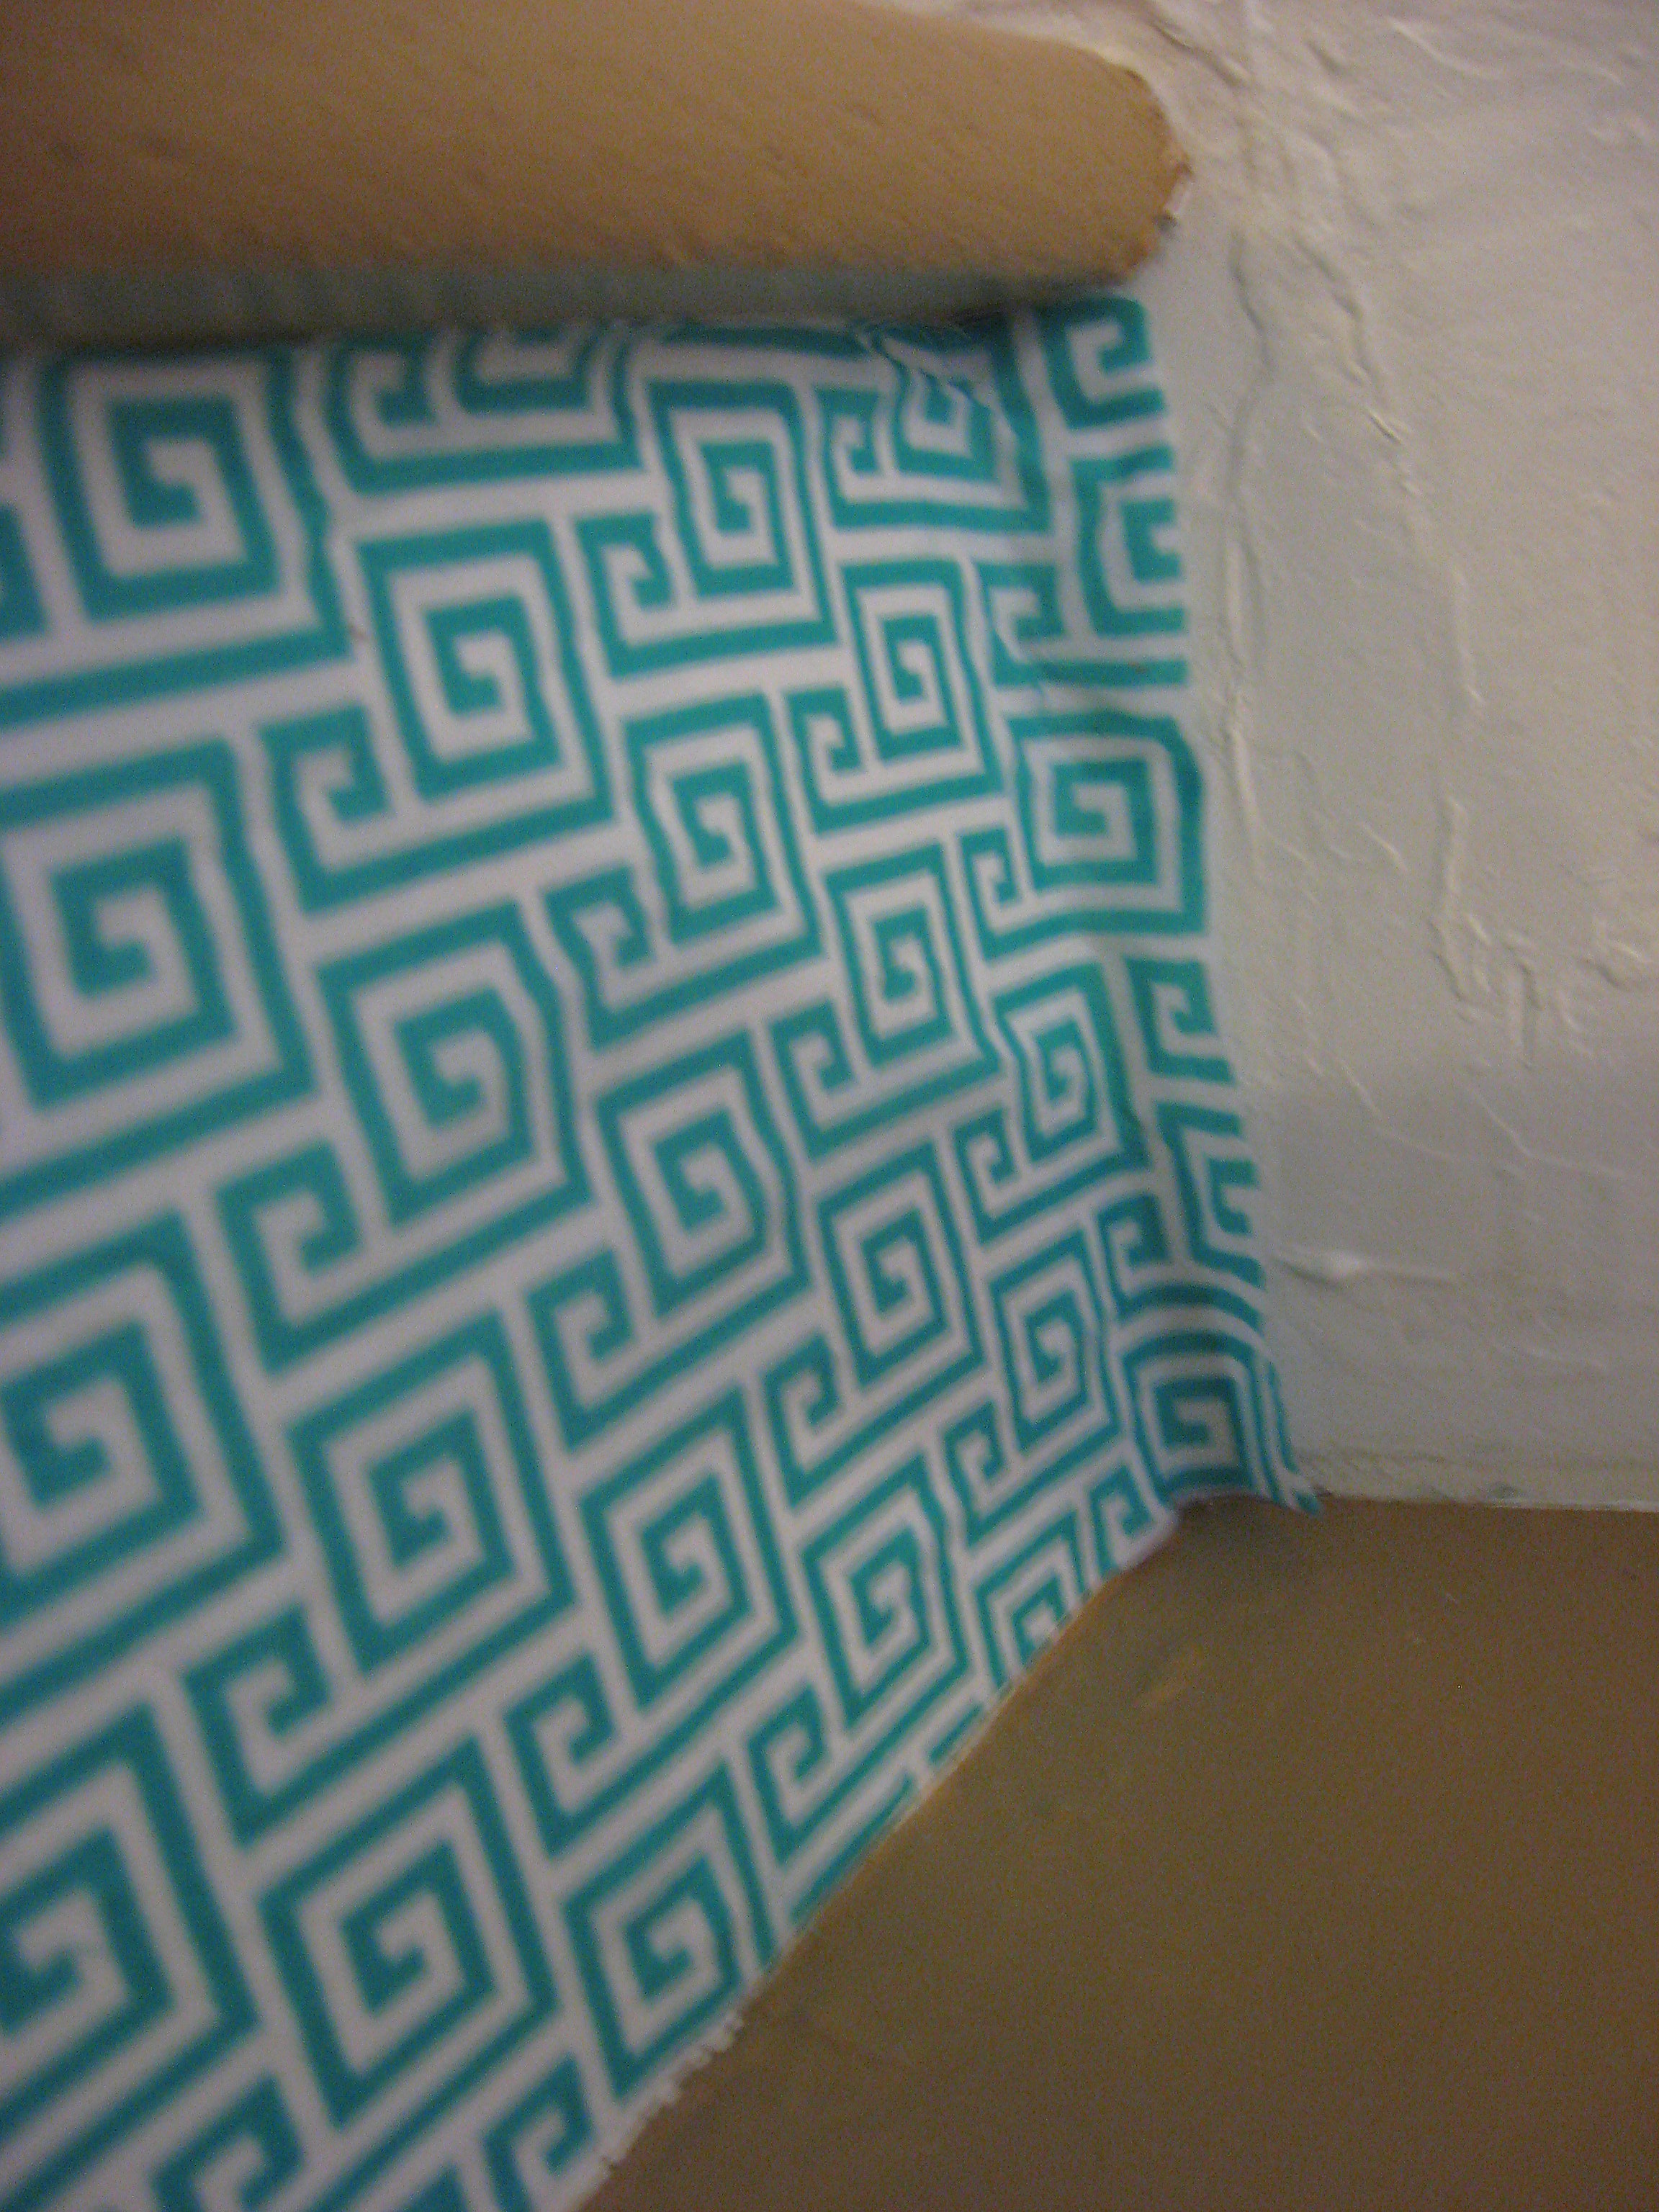
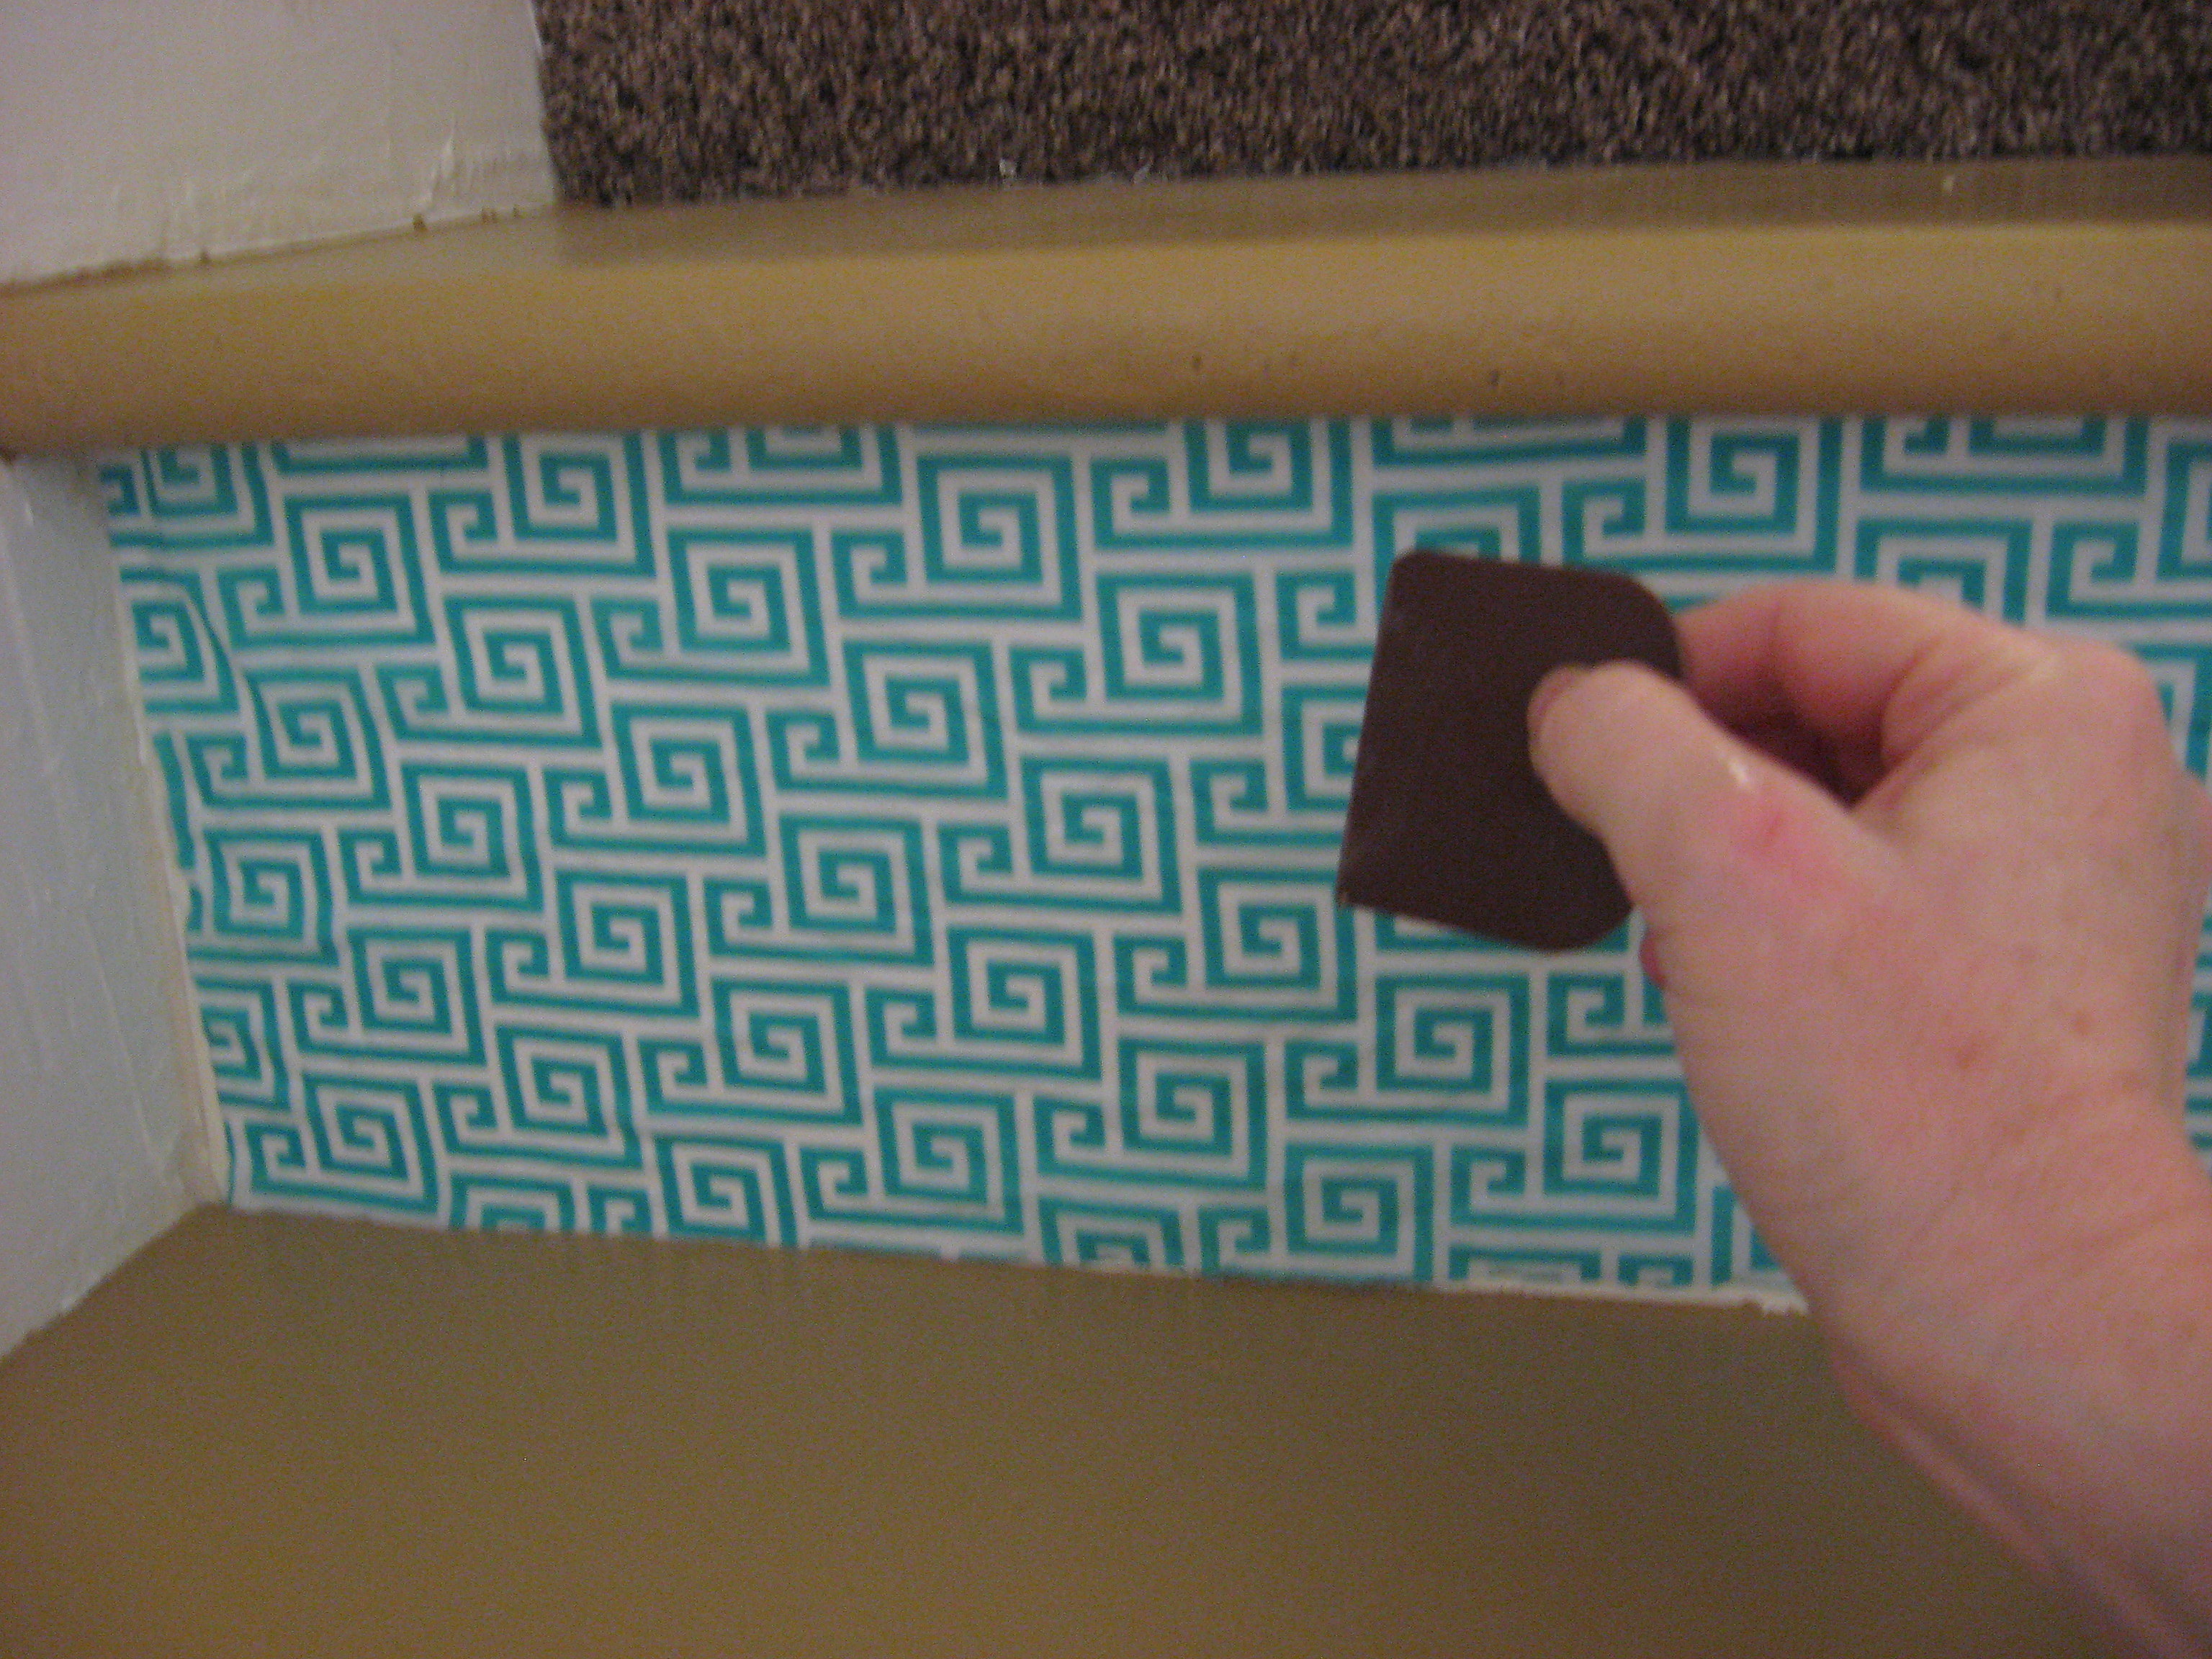
In the meantime, prep the fabric for your stairs. I measured the riser of the stairs, and then cut the fabric to that size. You can go just a touch bigger if you want to be safe, but remember that once the fabric is wet it will stretch.
Once the starch is cool enough that you can touch it, it’s time to apply the fabric to the stair risers. If you’ve never done this before, I think you will be pleasantly surprised how easy it is, and how quickly this goes! You’ll want to have a couple of towels to wipe your hands on, as well as some sort of scraper. I used a Pampered Chef brown scraper, but you could use a taping knife or a small ruler or anything small enough with a straight, smooth edge.
Using a large paintbrush, paint a coat of the glue onto the area you will be covering. Then, immerse the fabric into the glue, getting it totally covered, then wring it out. It’s fine that it gets all wrinkly…it will smooth out just fine.
Position the fabric onto the stair riser, starting at one edge and lining it up in the corner. Smooth it out with your hands, and it should stay in place. Now, start at the edge and smooth across the whole surface with the scraper, working towards the other edge, getting out all the wrinkles as you go. If you get too much fabric bunched up, just pull it away from the riser, re-position it and keep going.

Remember that the fabric will stretch, so you will probably end up with extra fabric when you get to the other edge. That is ok! Just use the scraper to press the fabric right up into the corner, and leave the extra alone for now.
 Keep going like this until all the risers are covered, then leave them to dry completely. Save the leftover glue in an airtight container until you are done with the whole project.
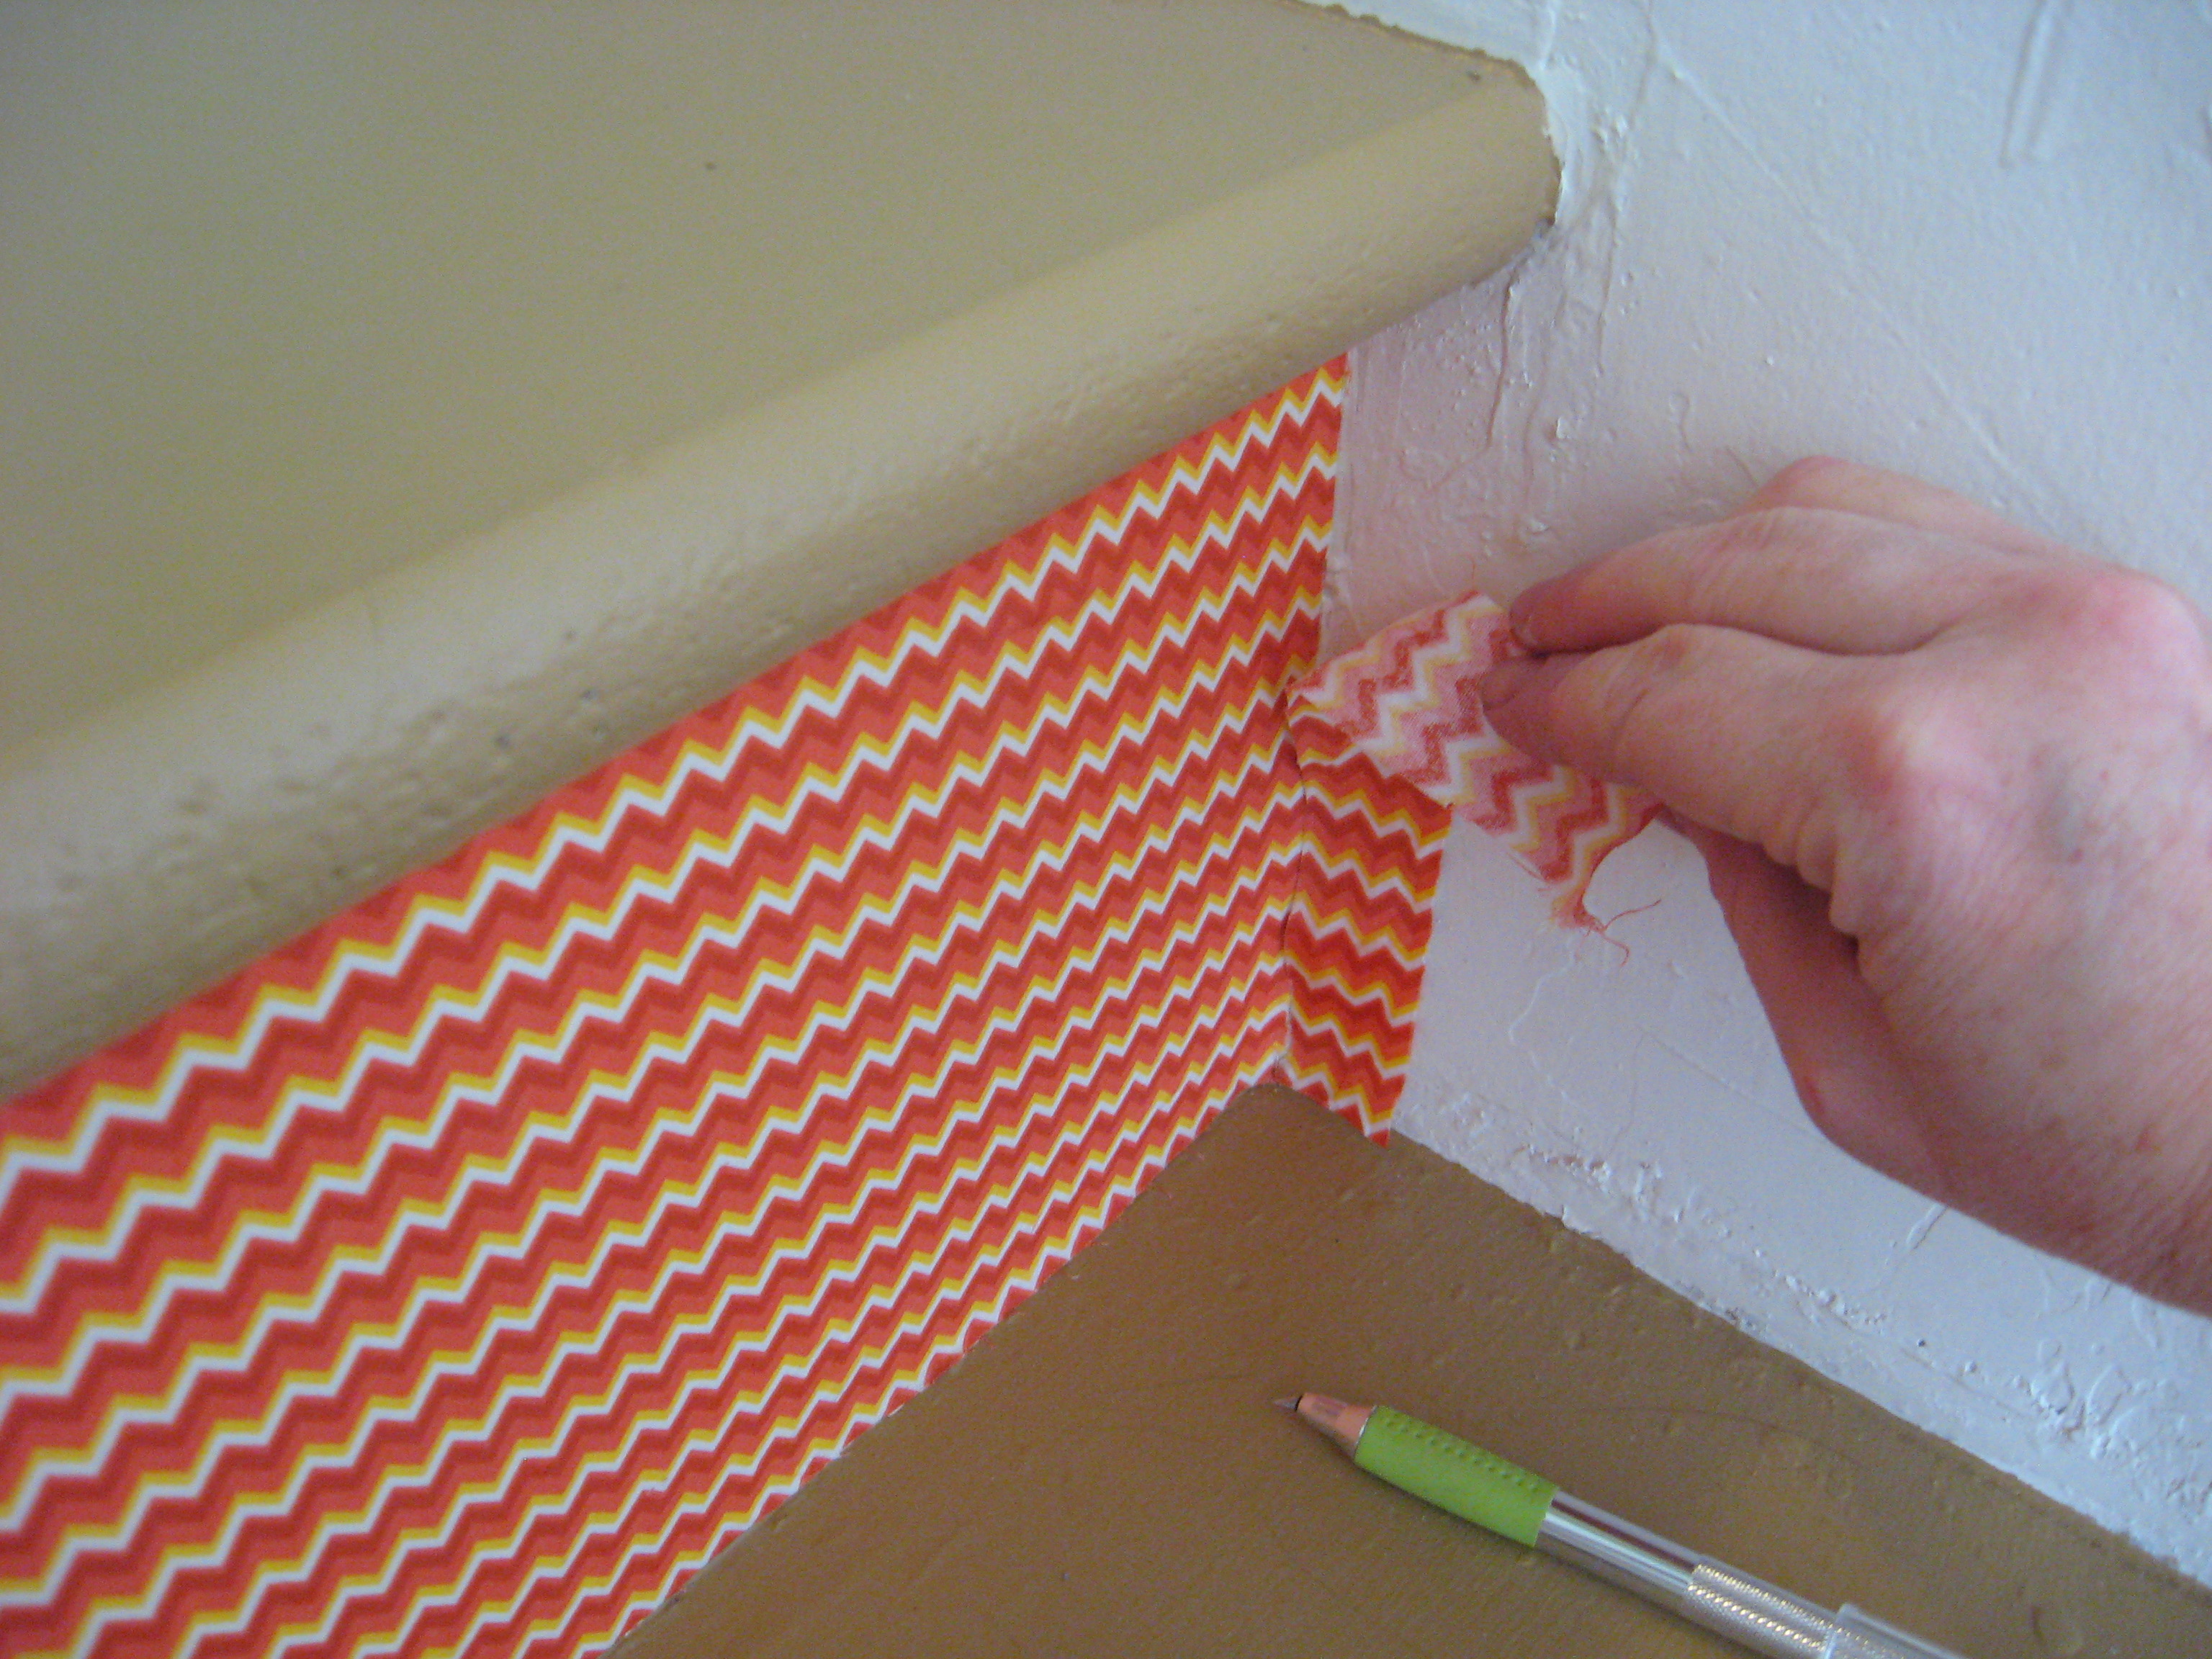
Once it’s all dry, you will want a metal straight edge – I thought a 4 inch taping knife was perfect for this – and a sharp X-acto knife. Push the straight edge up into the corner, and using it as a guide, cut off the extra fabric.
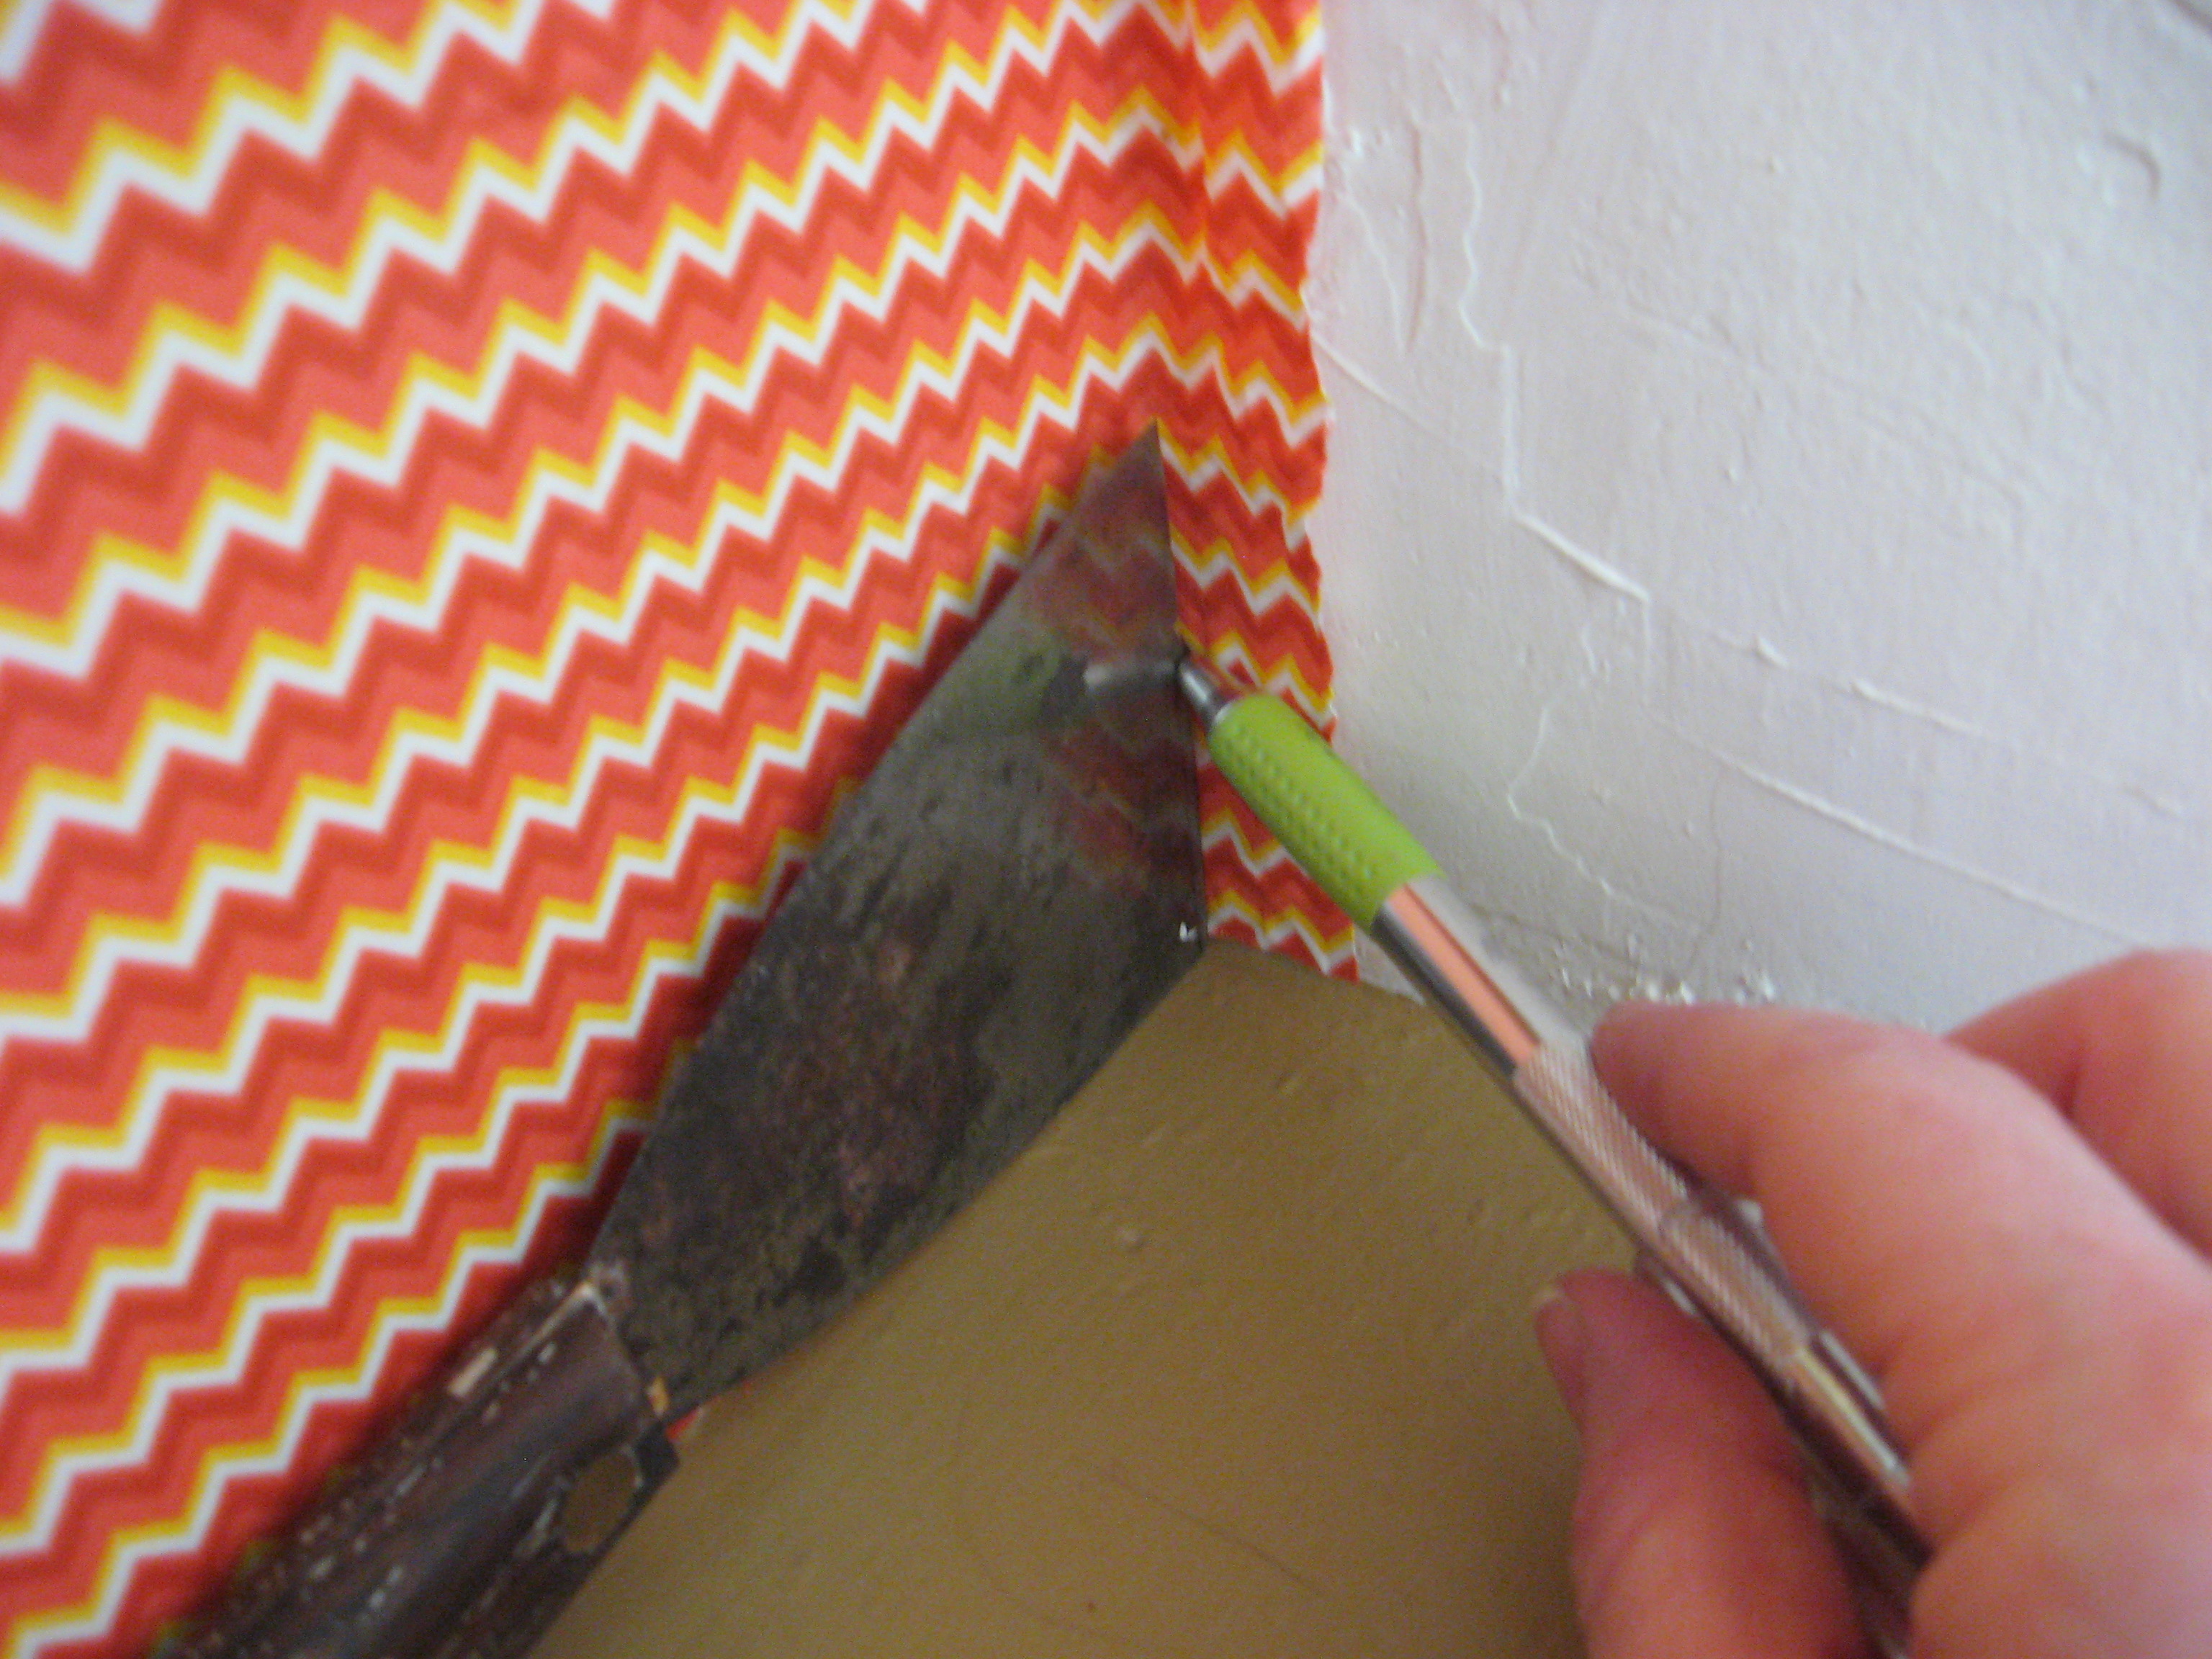
Now that extra strip will just pull right off. Trim up any other edges that aren’t quite straight in the same way.
You shouldn’t have any trouble if you always remember to hold down the edges of the fabric with the straight edge, but if you find that any of it pulls up, just use a little of the glue to stick it back down.
When you want a new look, just peel off the fabric and wipe the starch residue off with warm soapy water.
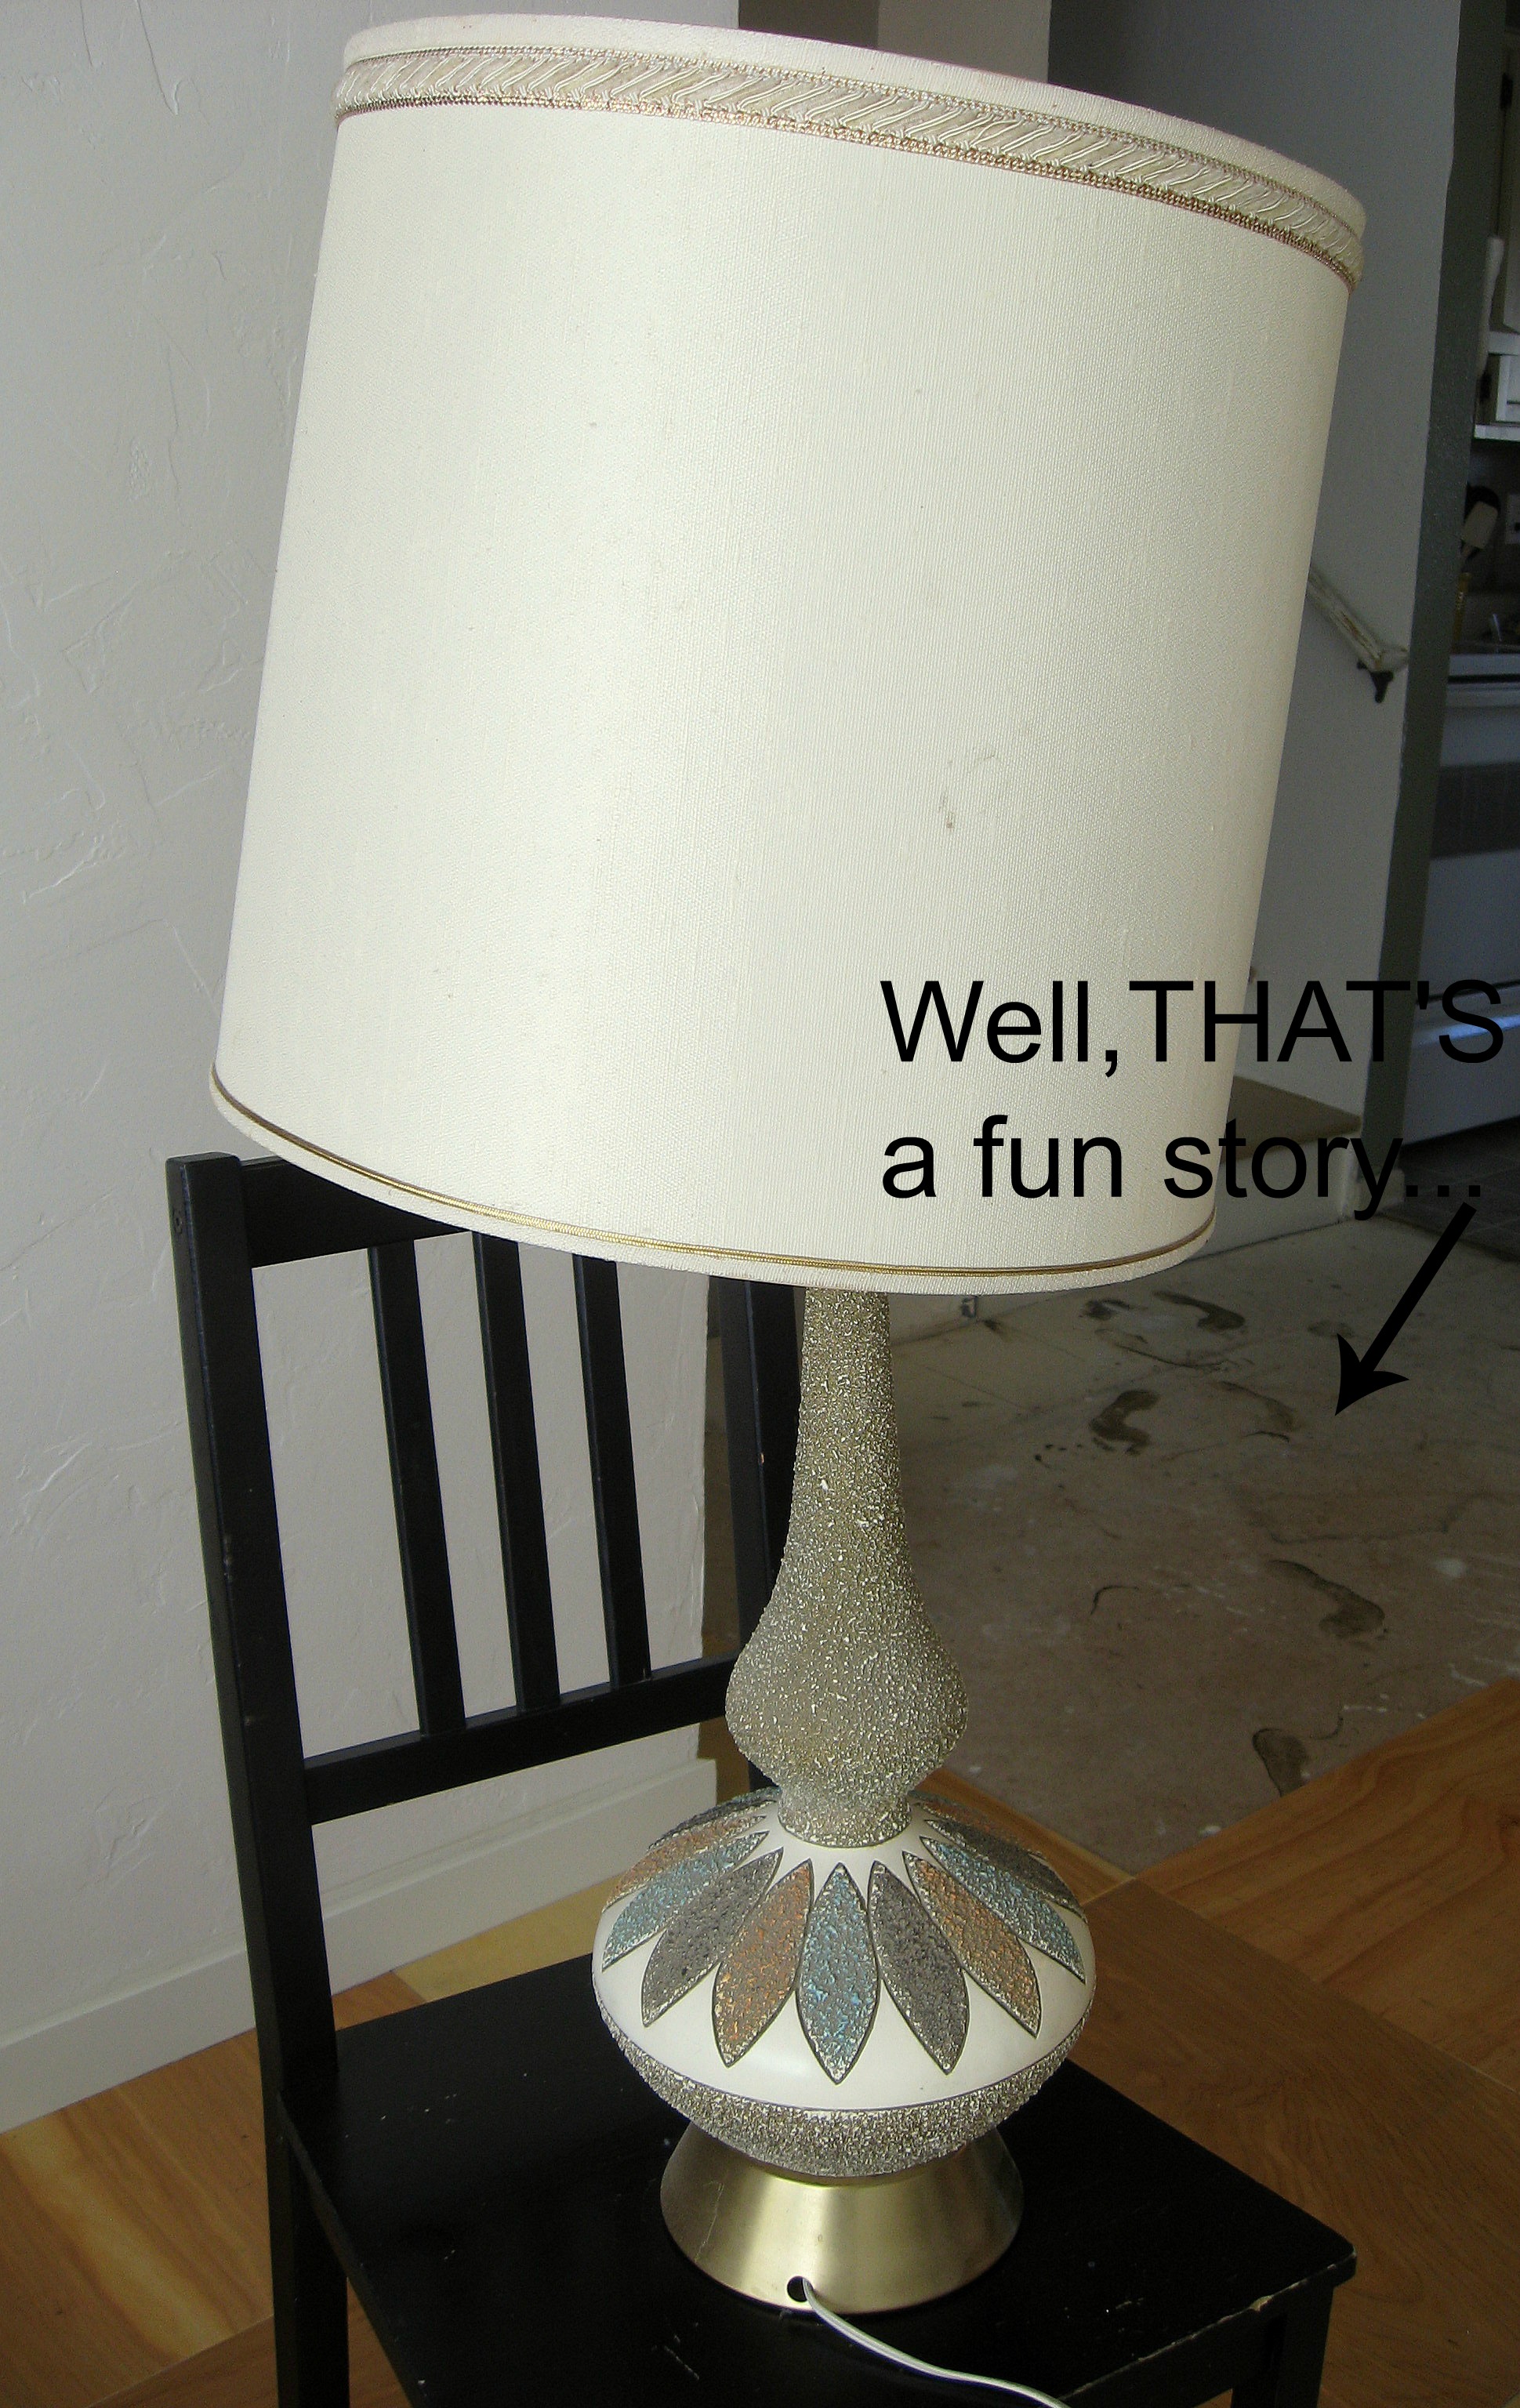
Ombre Lamp Makeover
This makeover tutorial is a perfect study in why it is important to be flexible when you DIY. This didn’t go AT ALL like I had planned it, but I kept going and I love the final result!
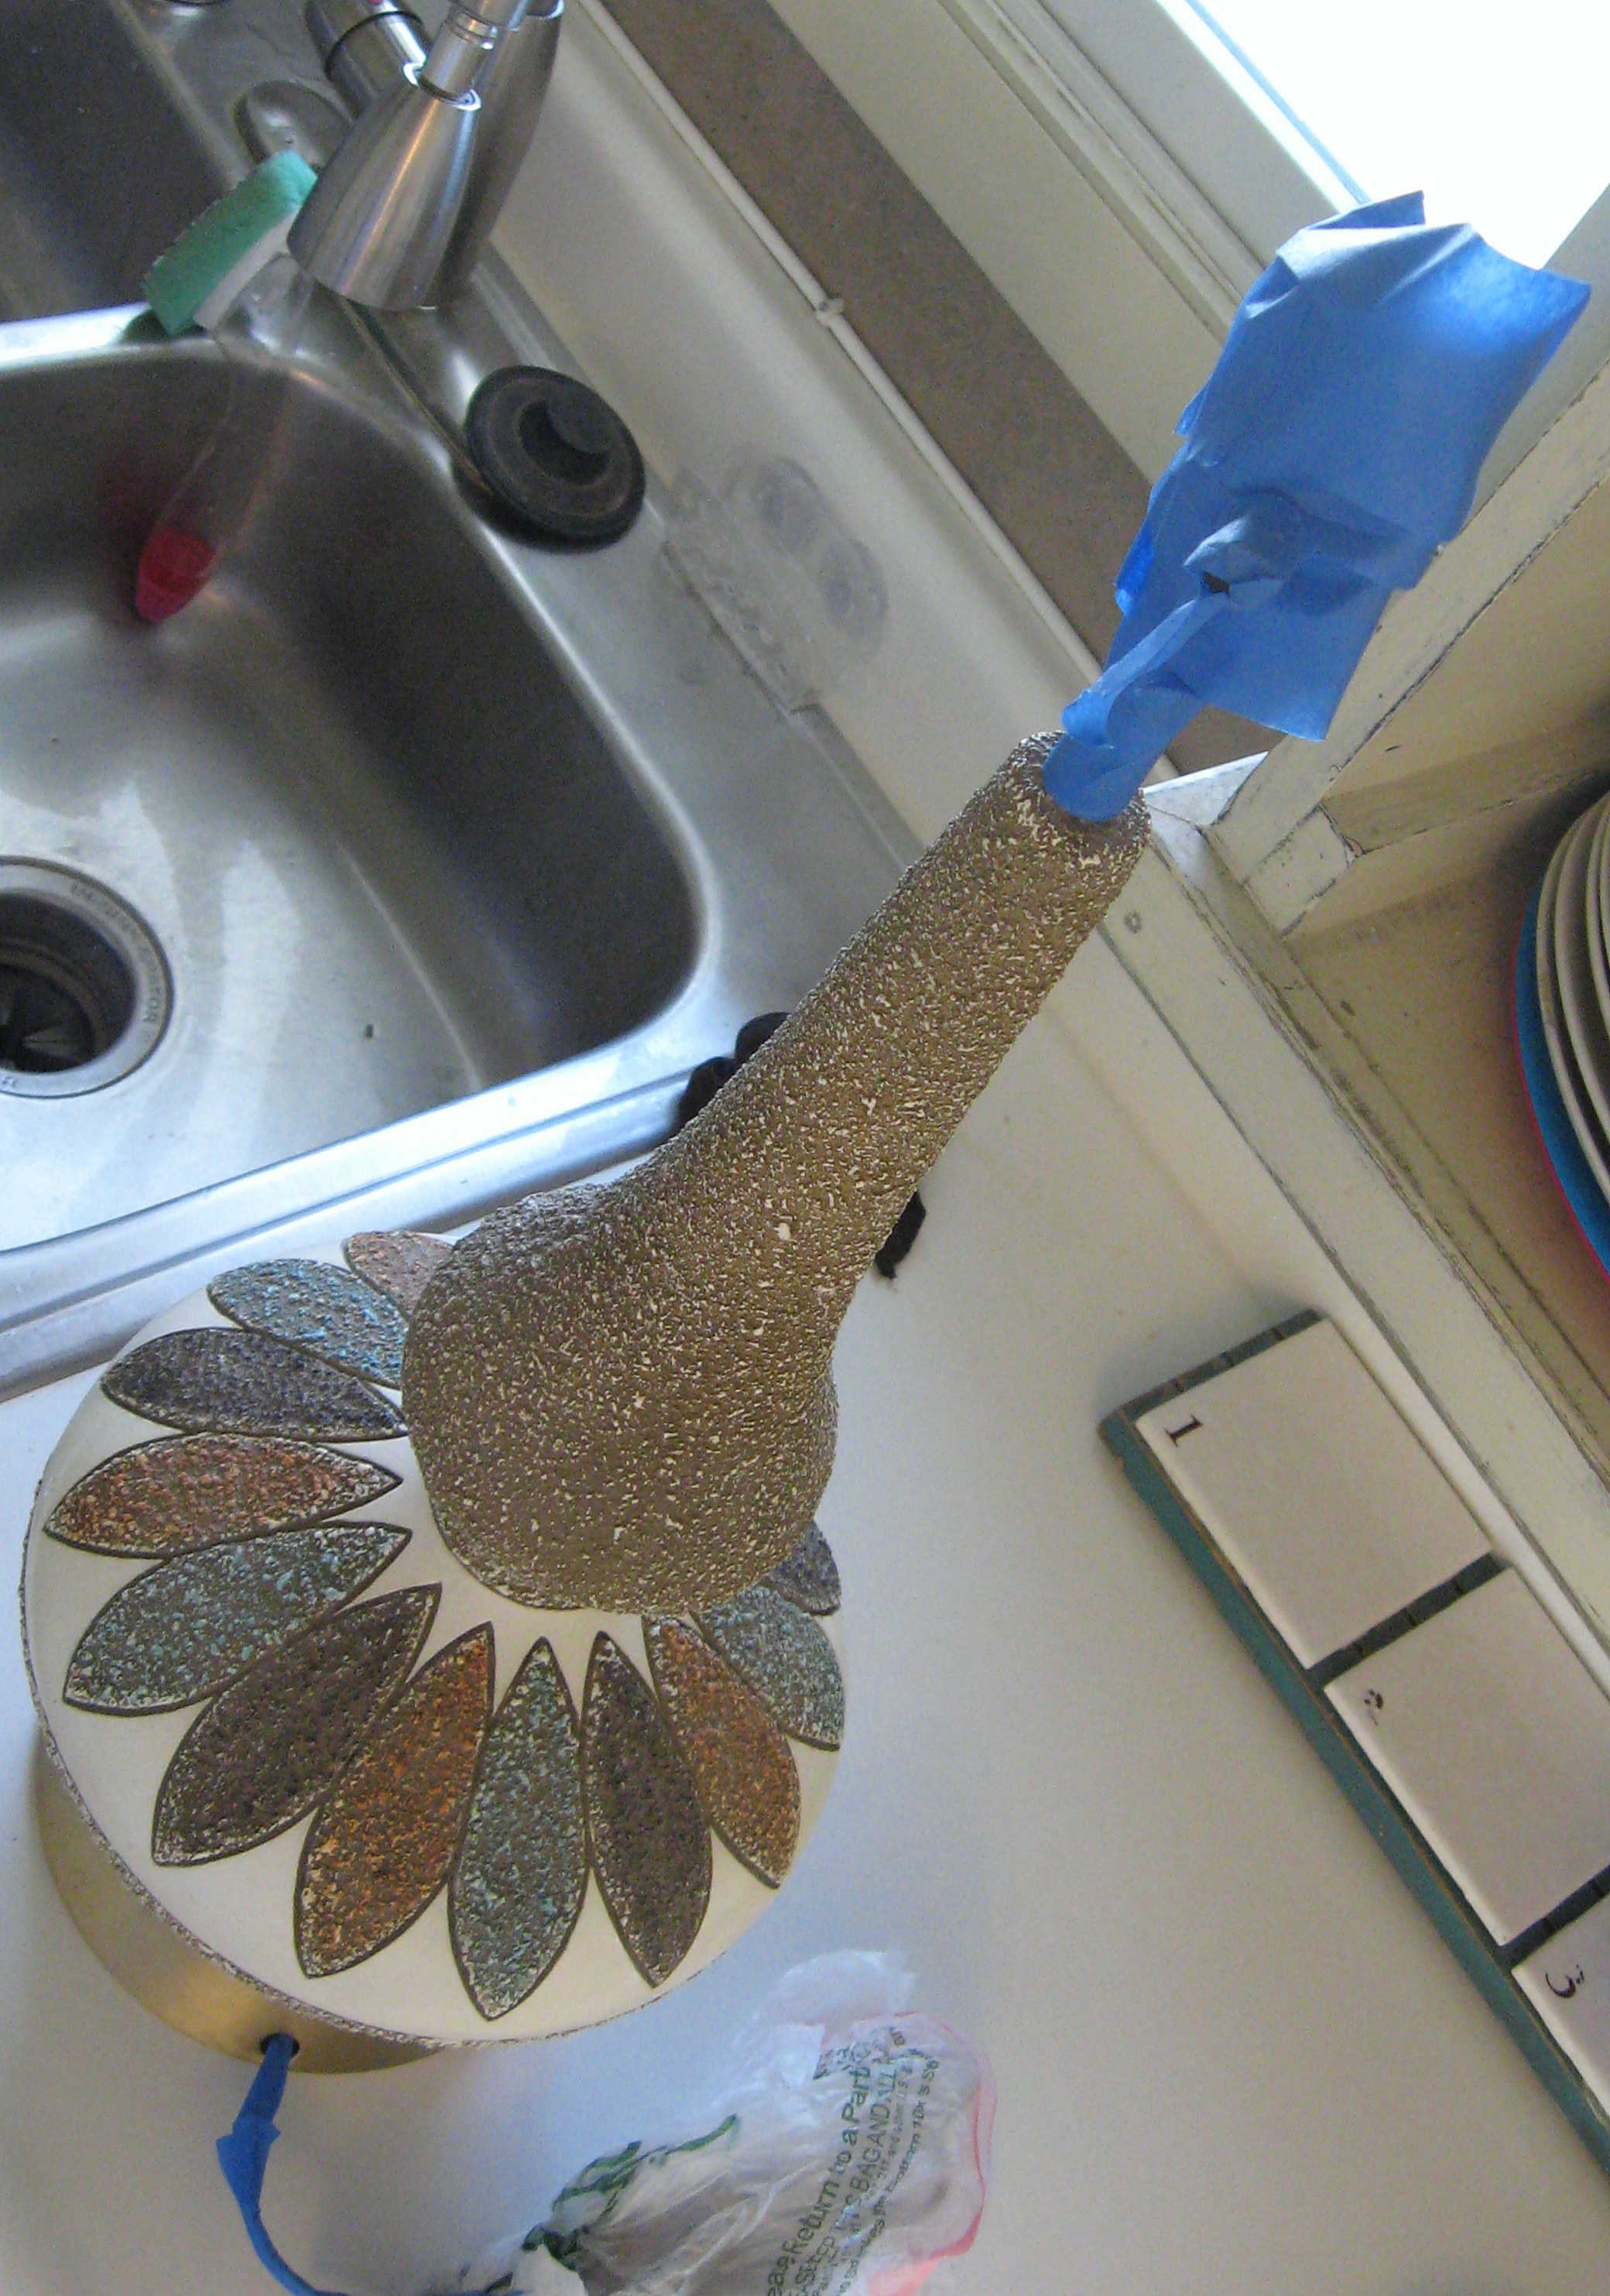
I came across this lamp as I was driving down the street one day past a house that had belonged to an elderly lady that had passed away. The family was cleaning out her garage, and there was a big pile of junk on the front lawn with a “FREE” sign. I asked them if the lamp worked, they said yes, and into my back seat it went.
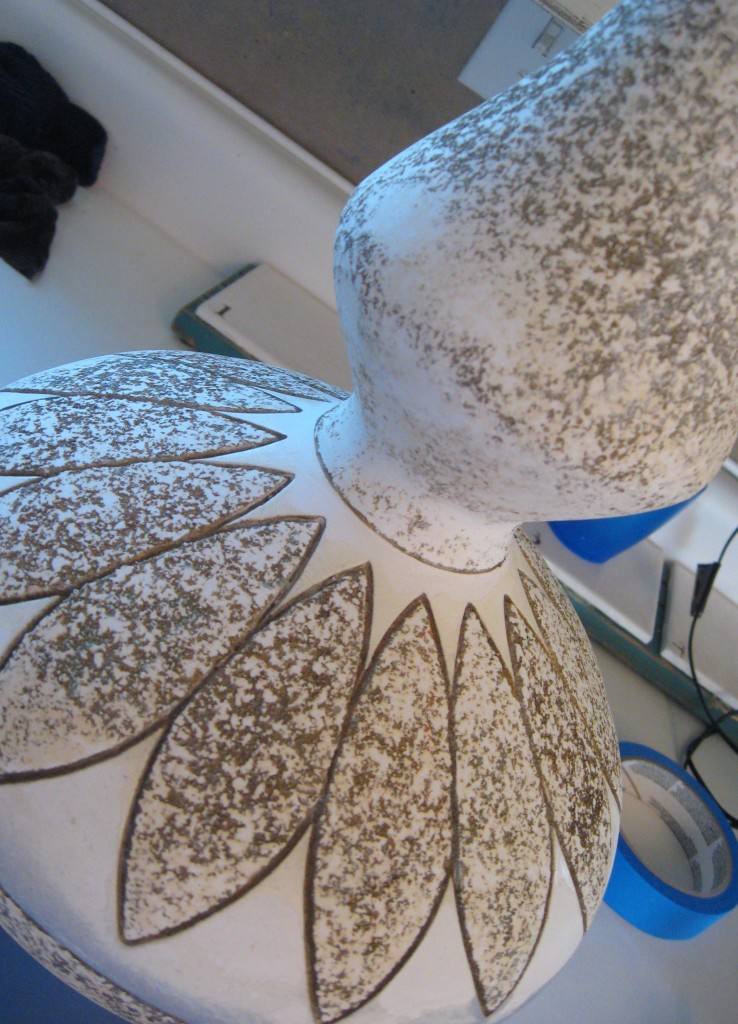
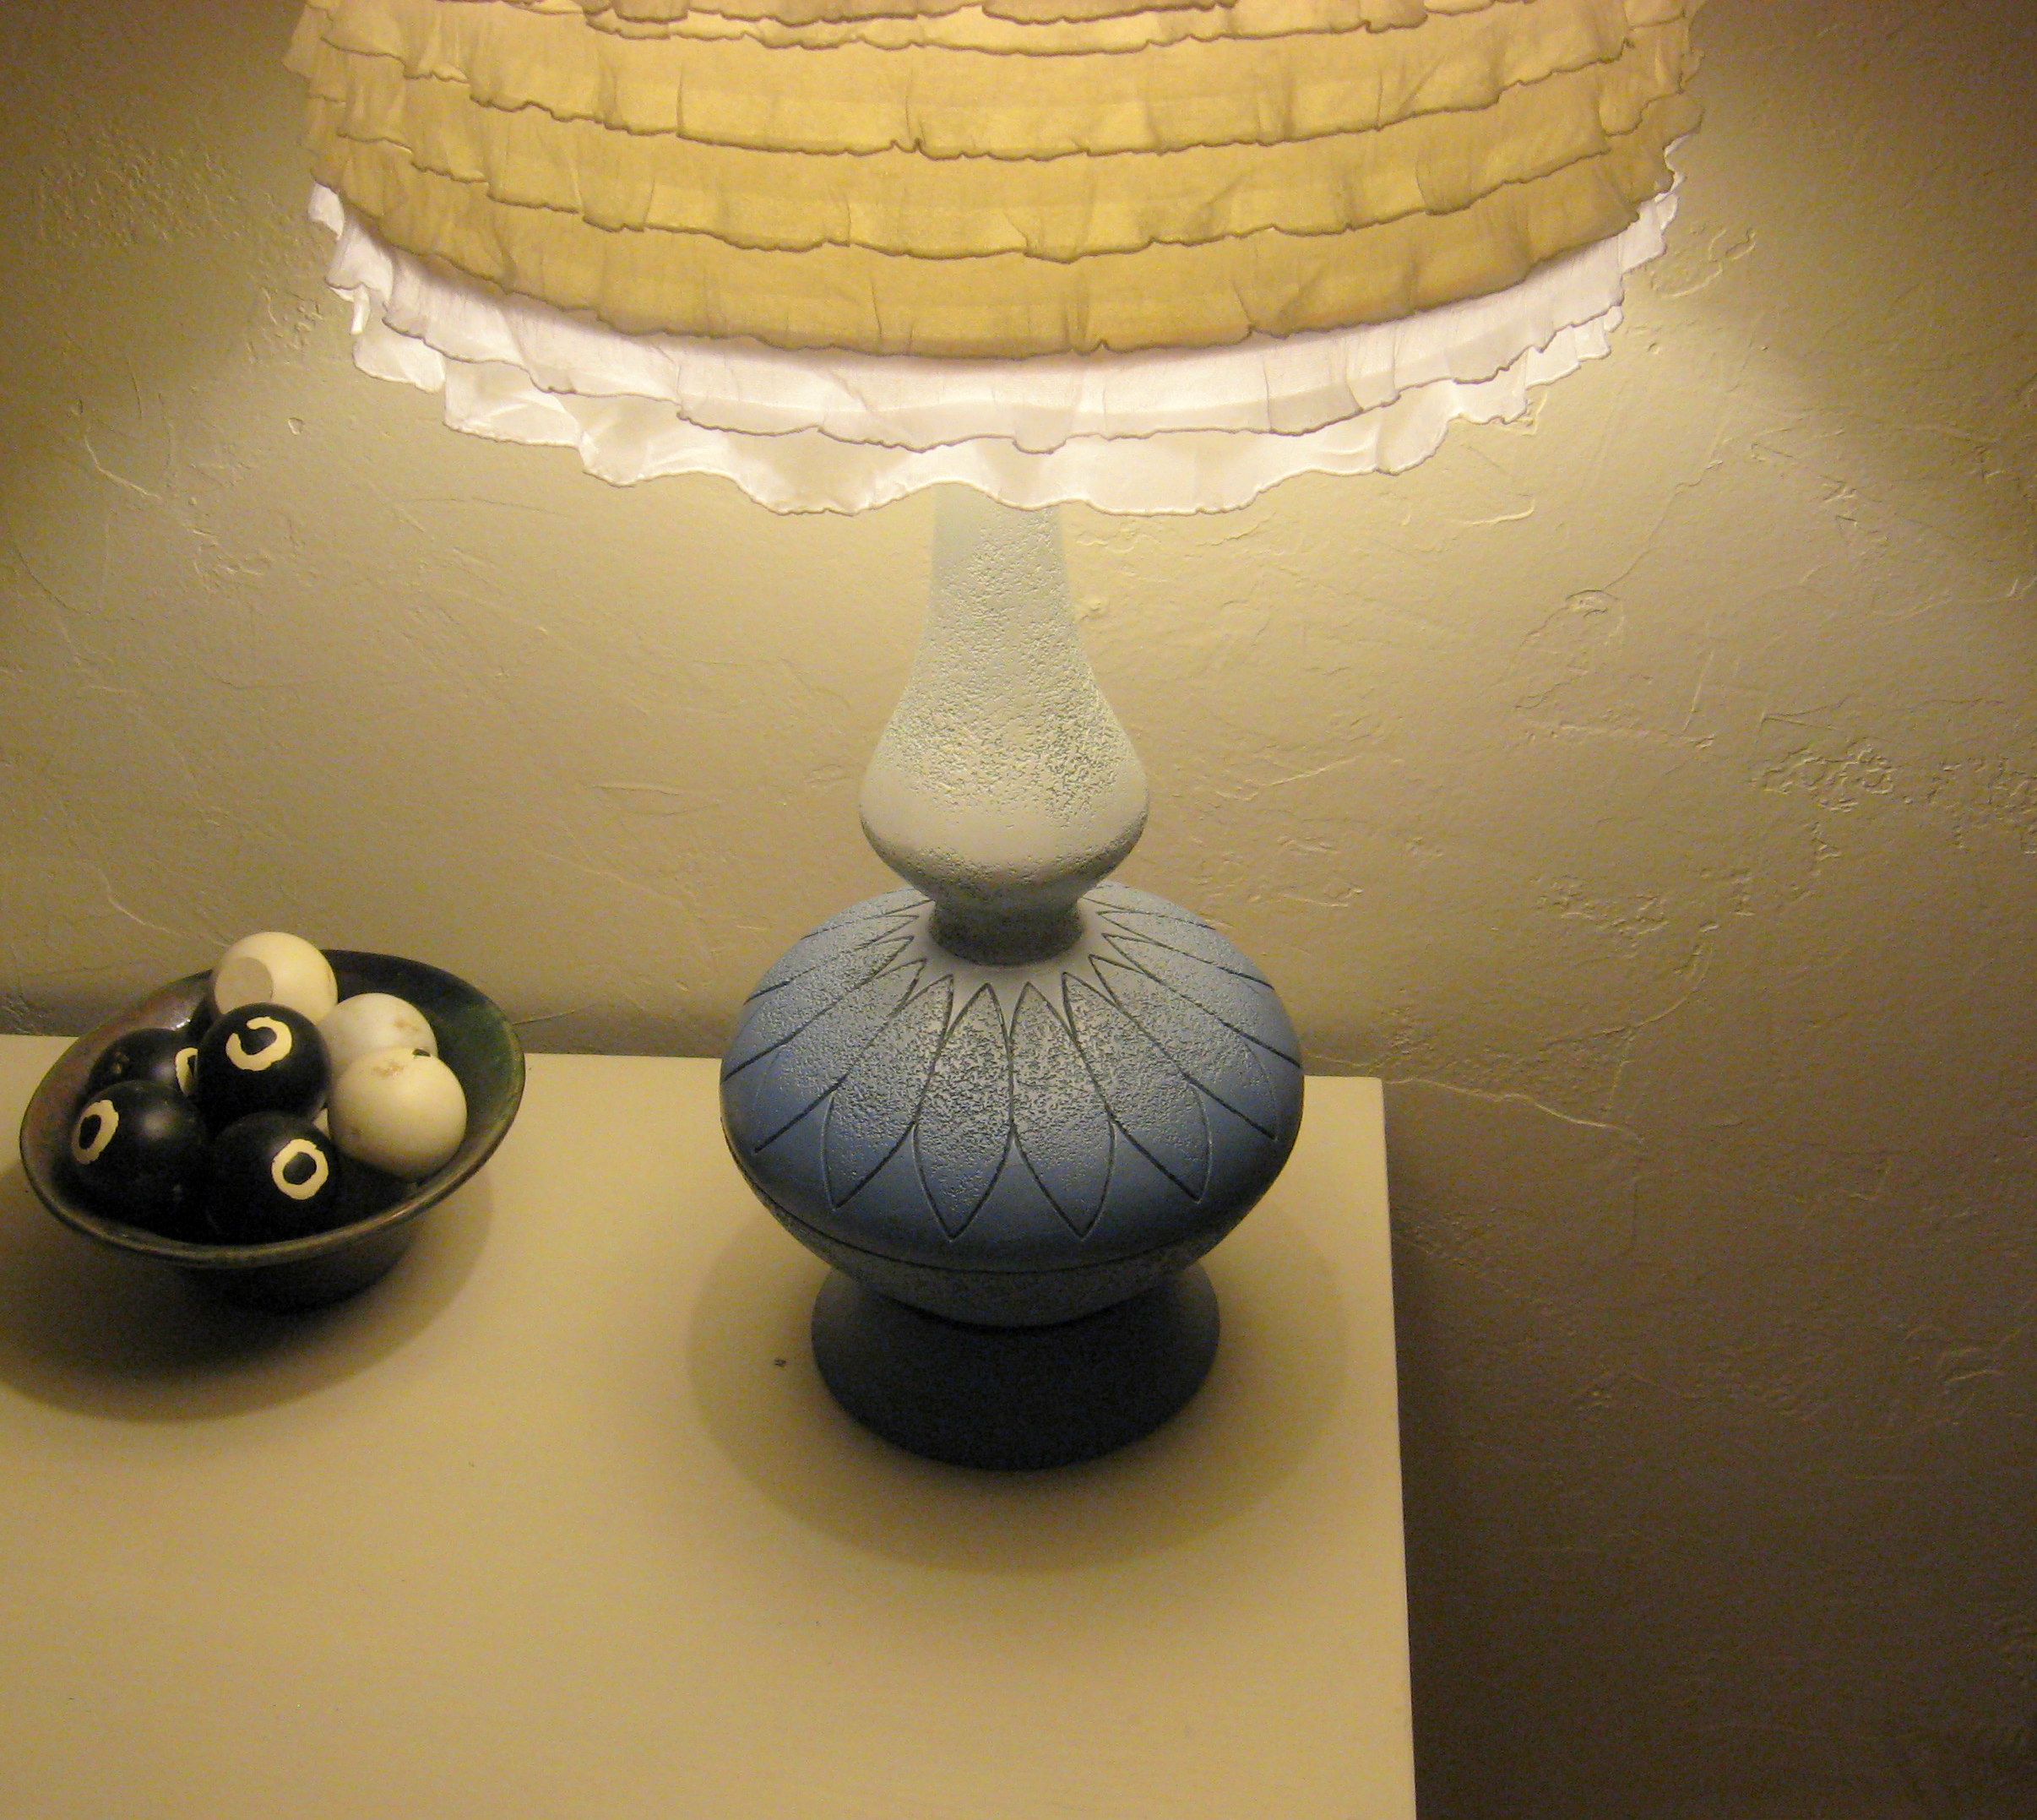
Here’s a close up shot of the funky texture.
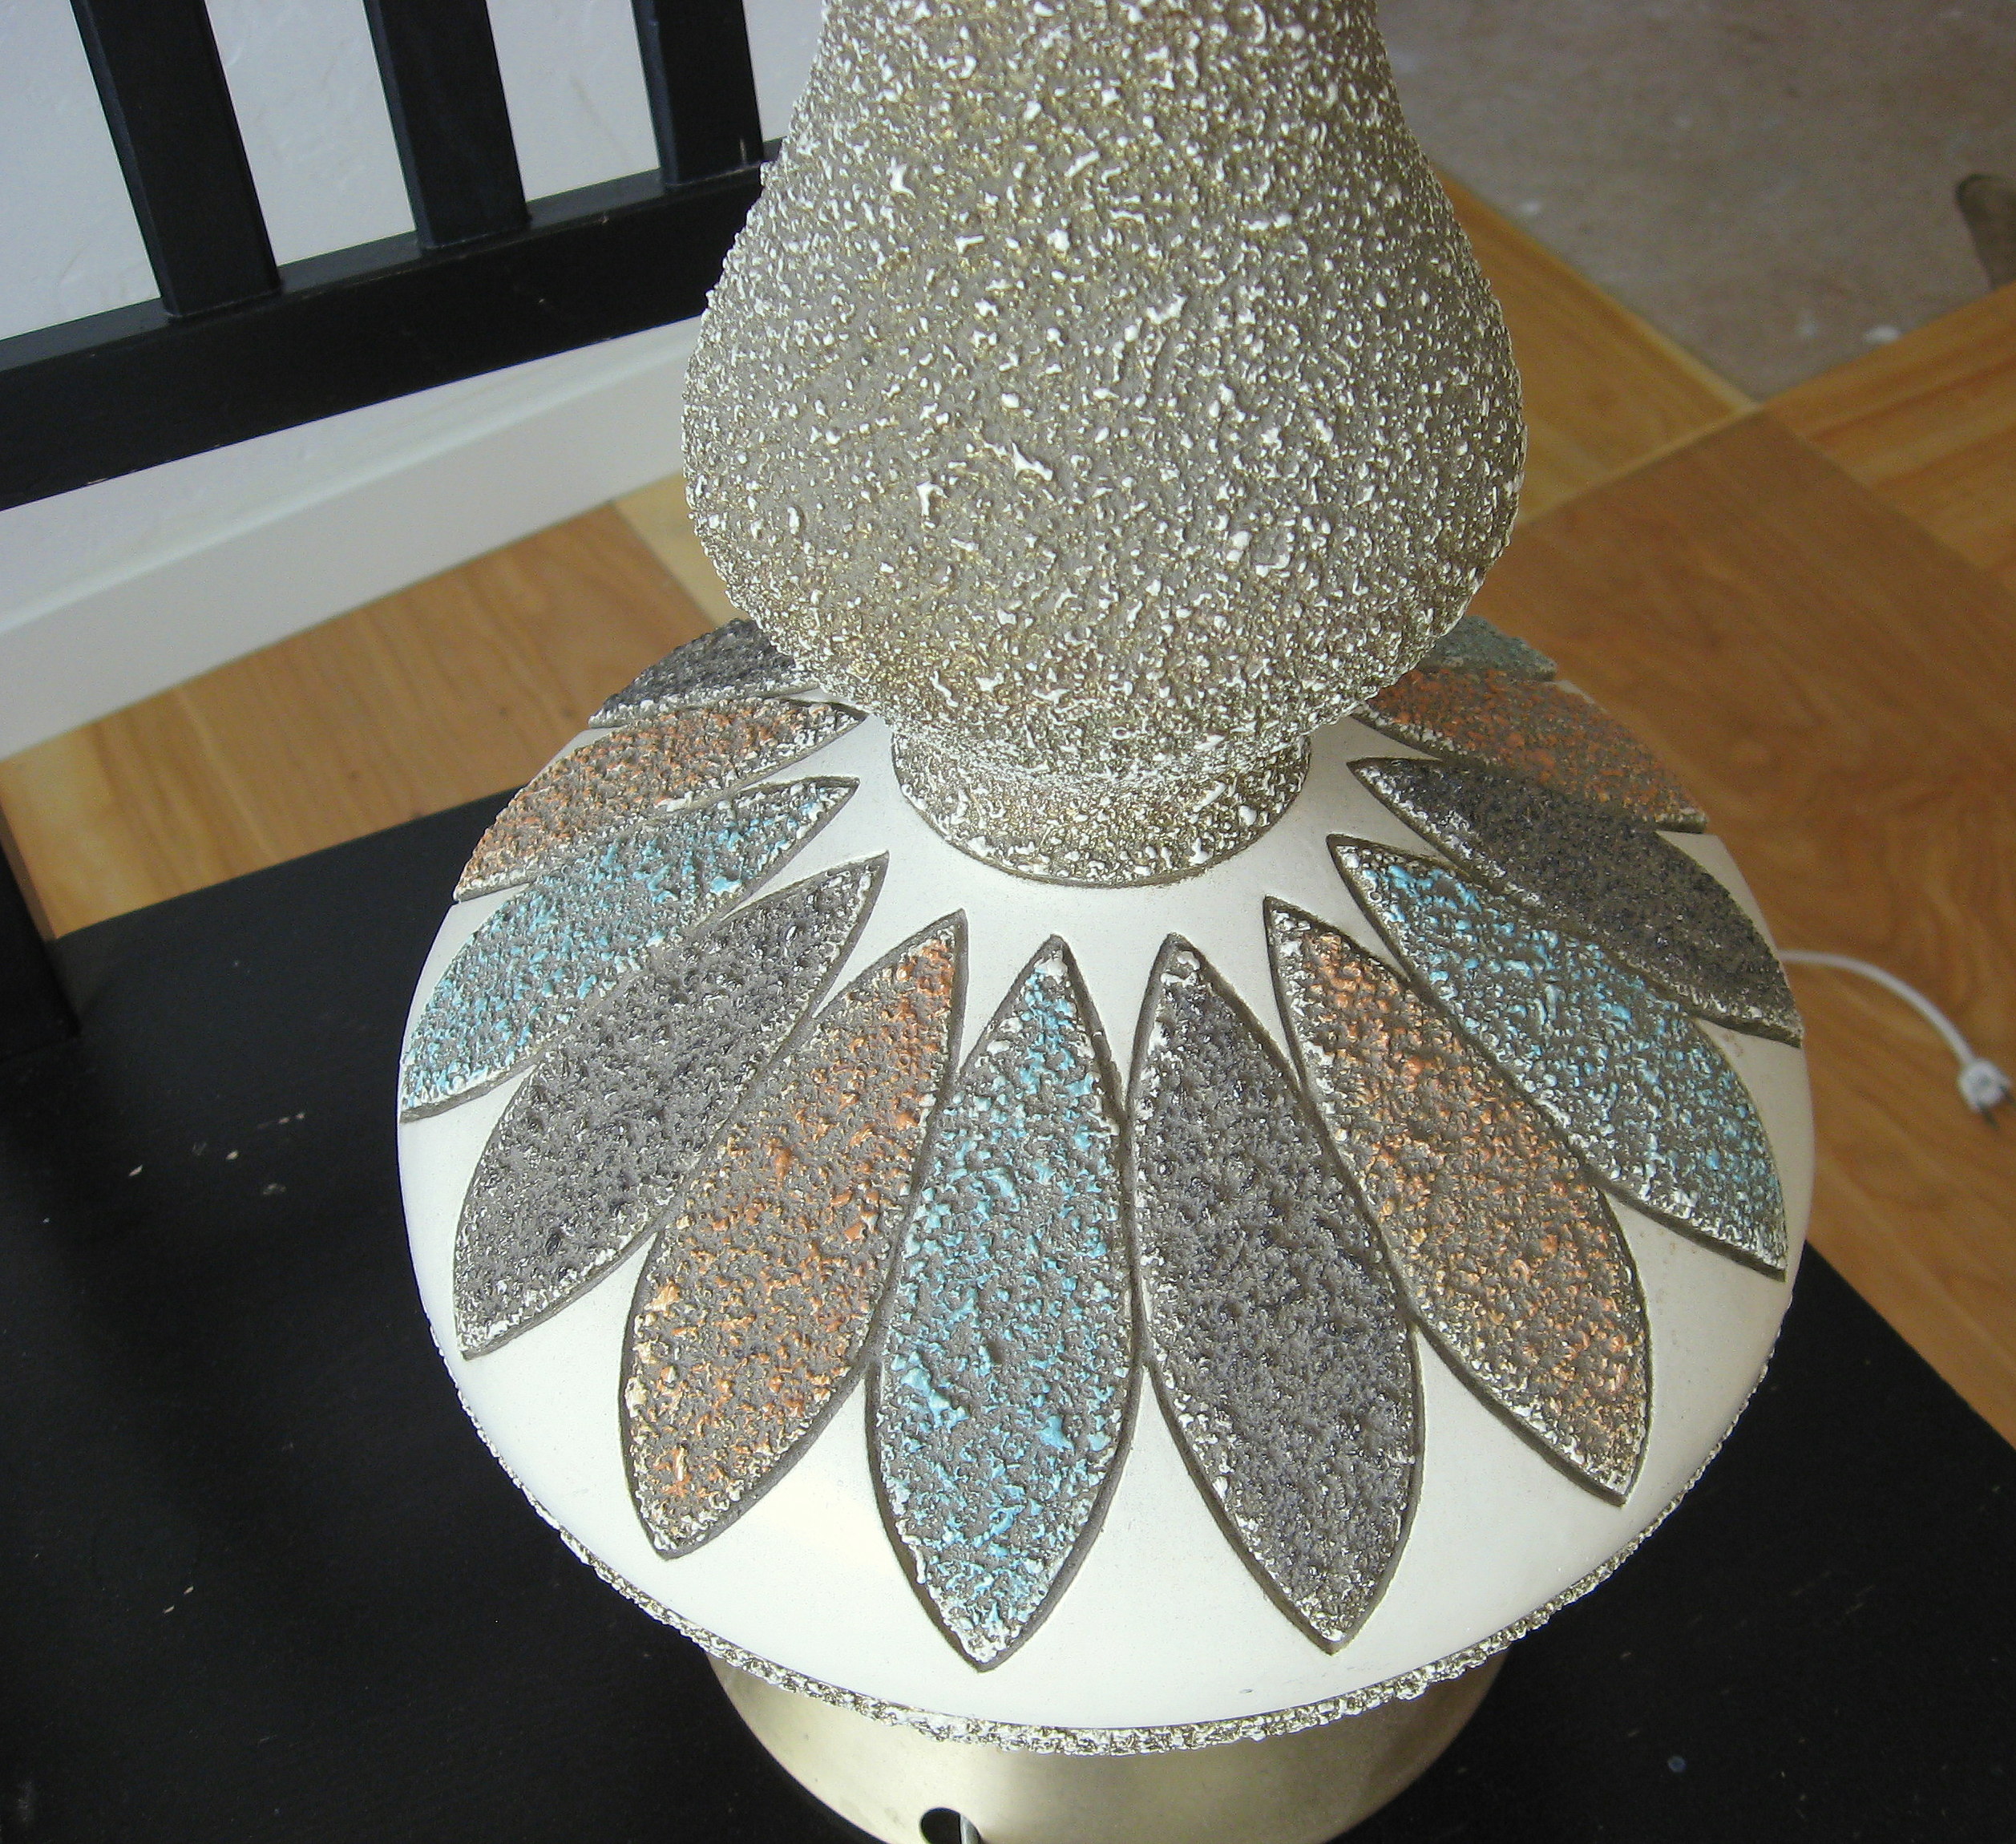
Check out that horrible 70’s awesomeness! The shade was pretty gross too, but structurally it was in perfect condition.
My first thought with this lamp was that I could just spray paint over the texture, so I tried it! The best thing about items you get for free is that you can attack them with a “what have you got to lose” attitude. If it doesn’t work? You’re only out the price of the spray paint, right?
I pictured a faded ombre effect, starting with blue on the bottom and fading to a green on the top, so I grabbed the spray paint and went to work, taping off the cord and the light fixture at the top first.
And I hated it. Really hated it. The texture was so thick that the spray paint was having a hard time covering it, and the finished effect just looked trashy. I wasn’t ready to give up yet – the lamp is the perfect size and shape for my living room – so I let the spray paint dry, then used my small detail sander on the textured parts to sand them smooth. It was MESSY and dusty and smelly, but relatively easy to do. Once the majority of the texture was flattened, I cleaned the surface well and tried again.
Getting an ombre effect with spray paint is pretty easy to do. I started at the bottom of the lamp with the blue and gave it several coats, each time going over what I’d already done, but going up just a little higher. I did the same thing with the green starting from the top. Once the top and bottom are solidly their respective colors, then spray each color in the middle – holding the can back a bit so that you get a misty-type spray that overlaps.
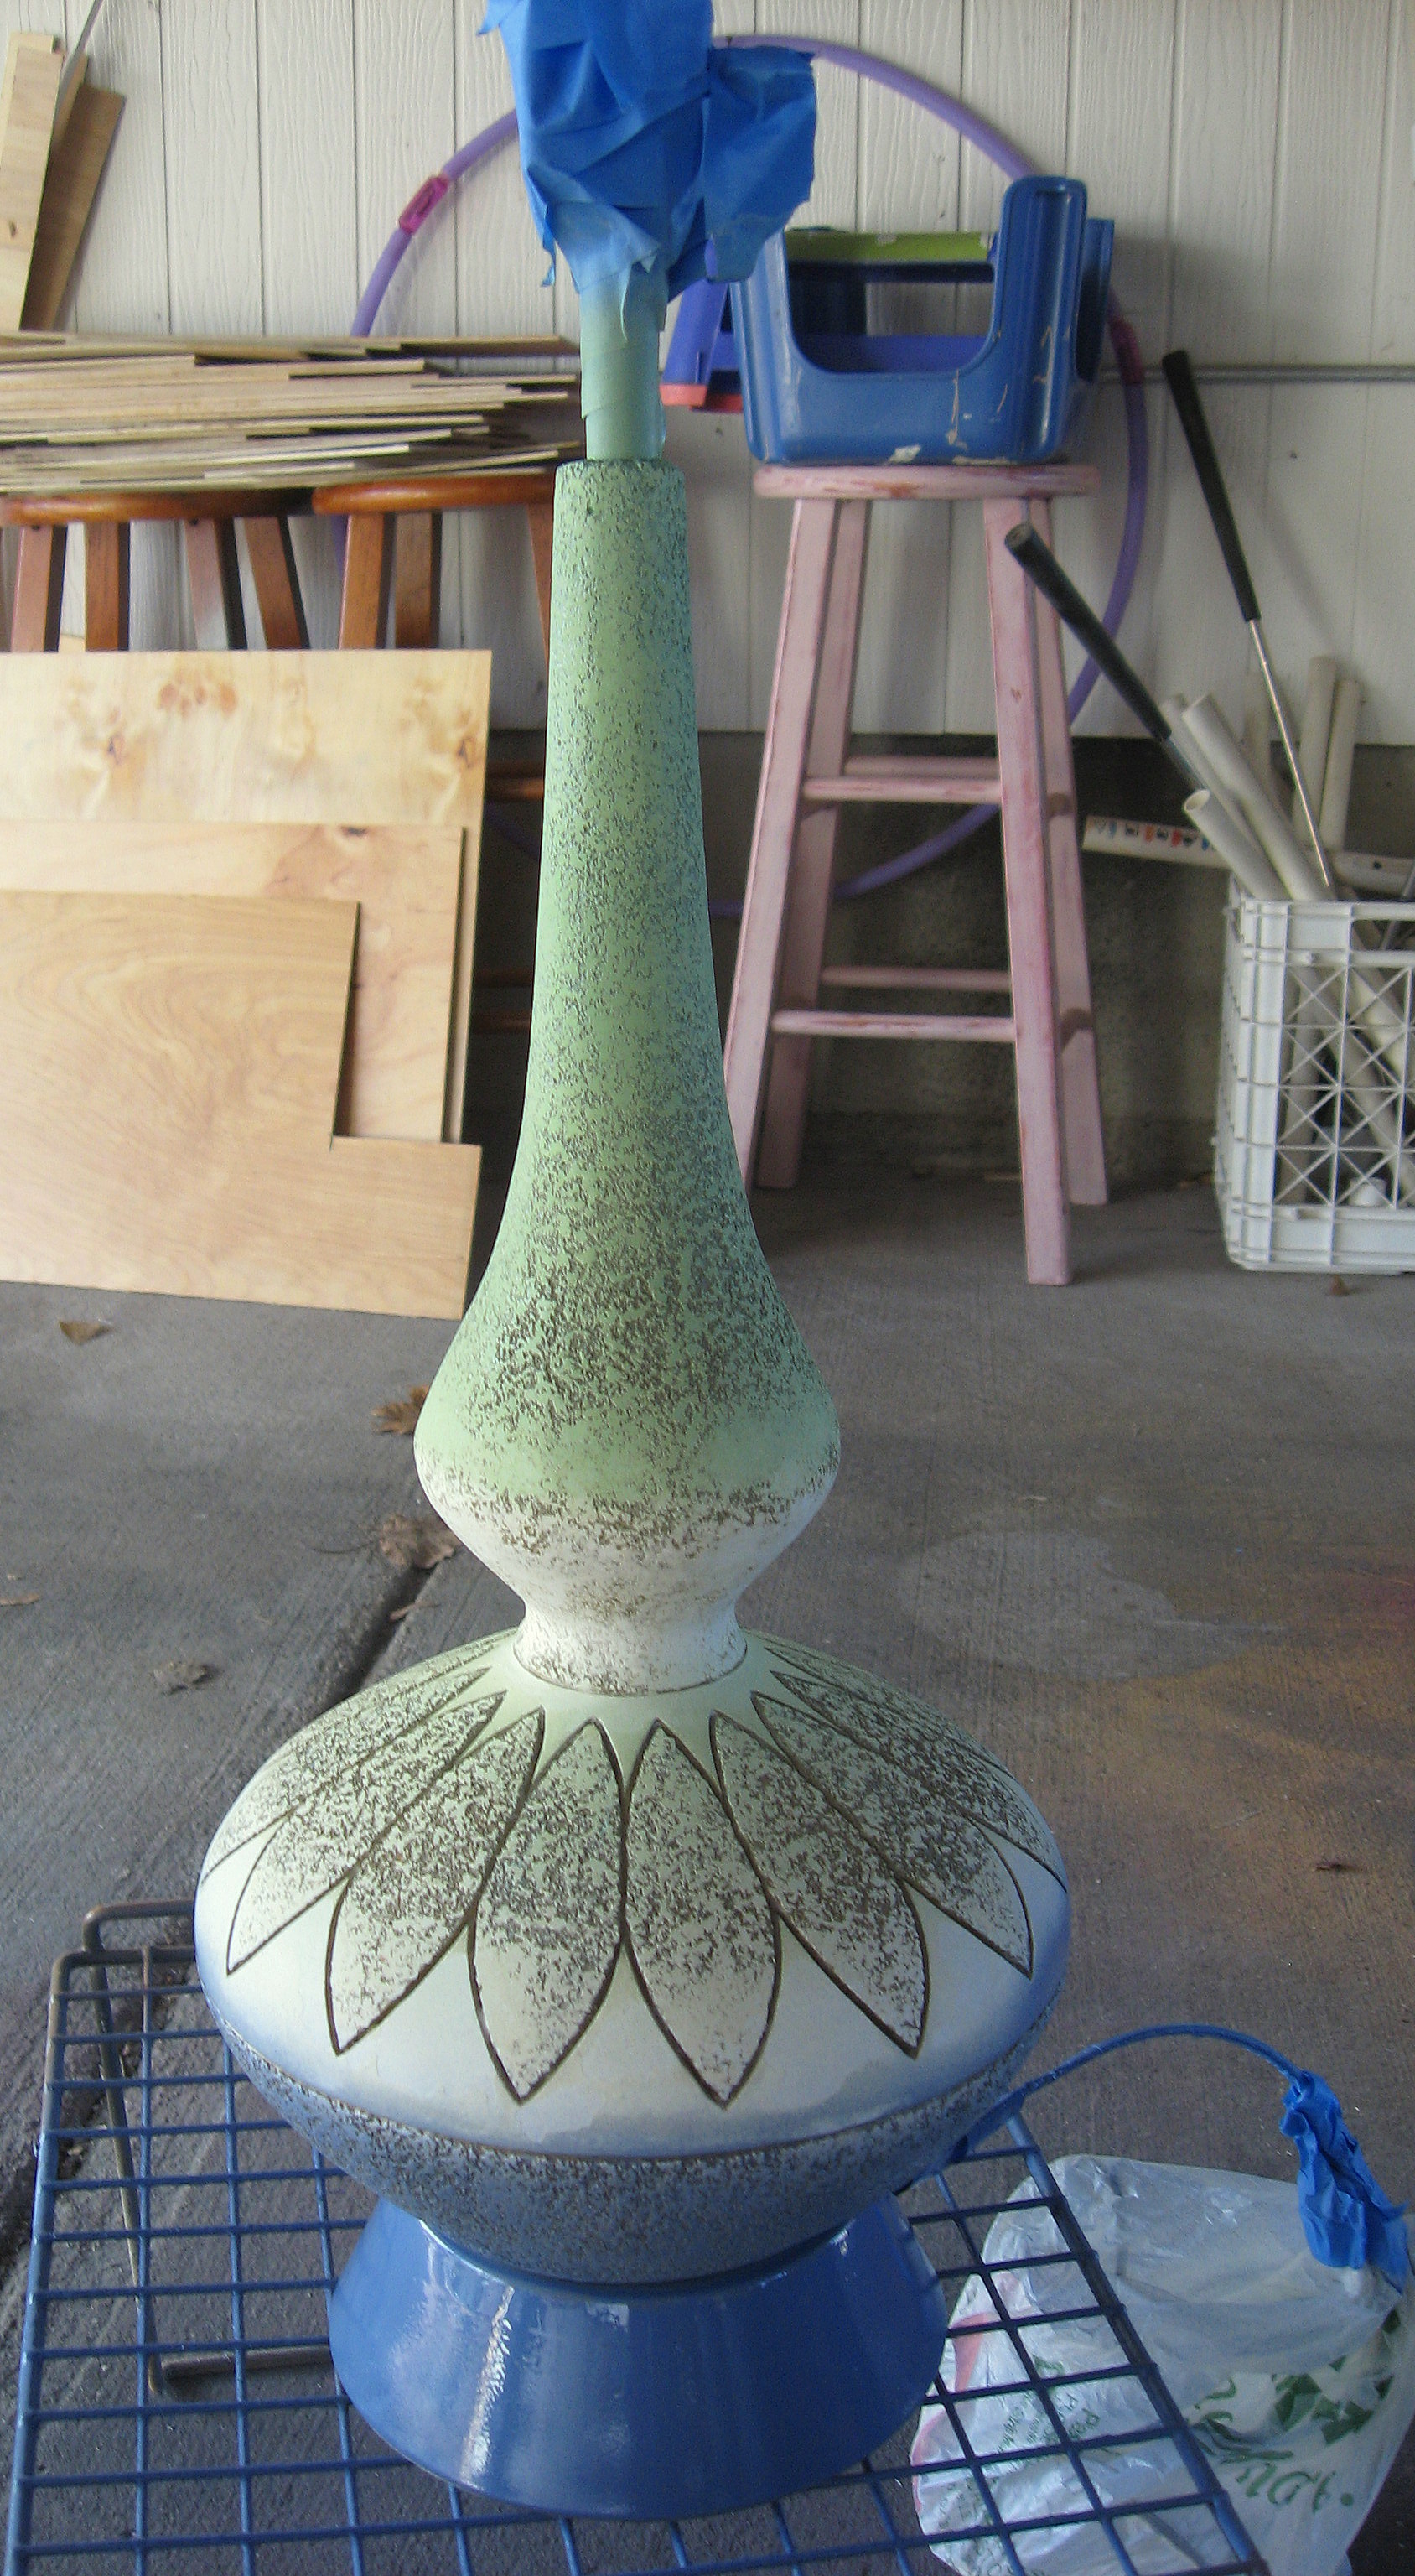
Problem #2 – I hated it again!! Before I had even finished , I knew that the blue/green fade that looked so great in my head just did not look so great on the lamp. Still, I decided to have one more go at it before I gave up.
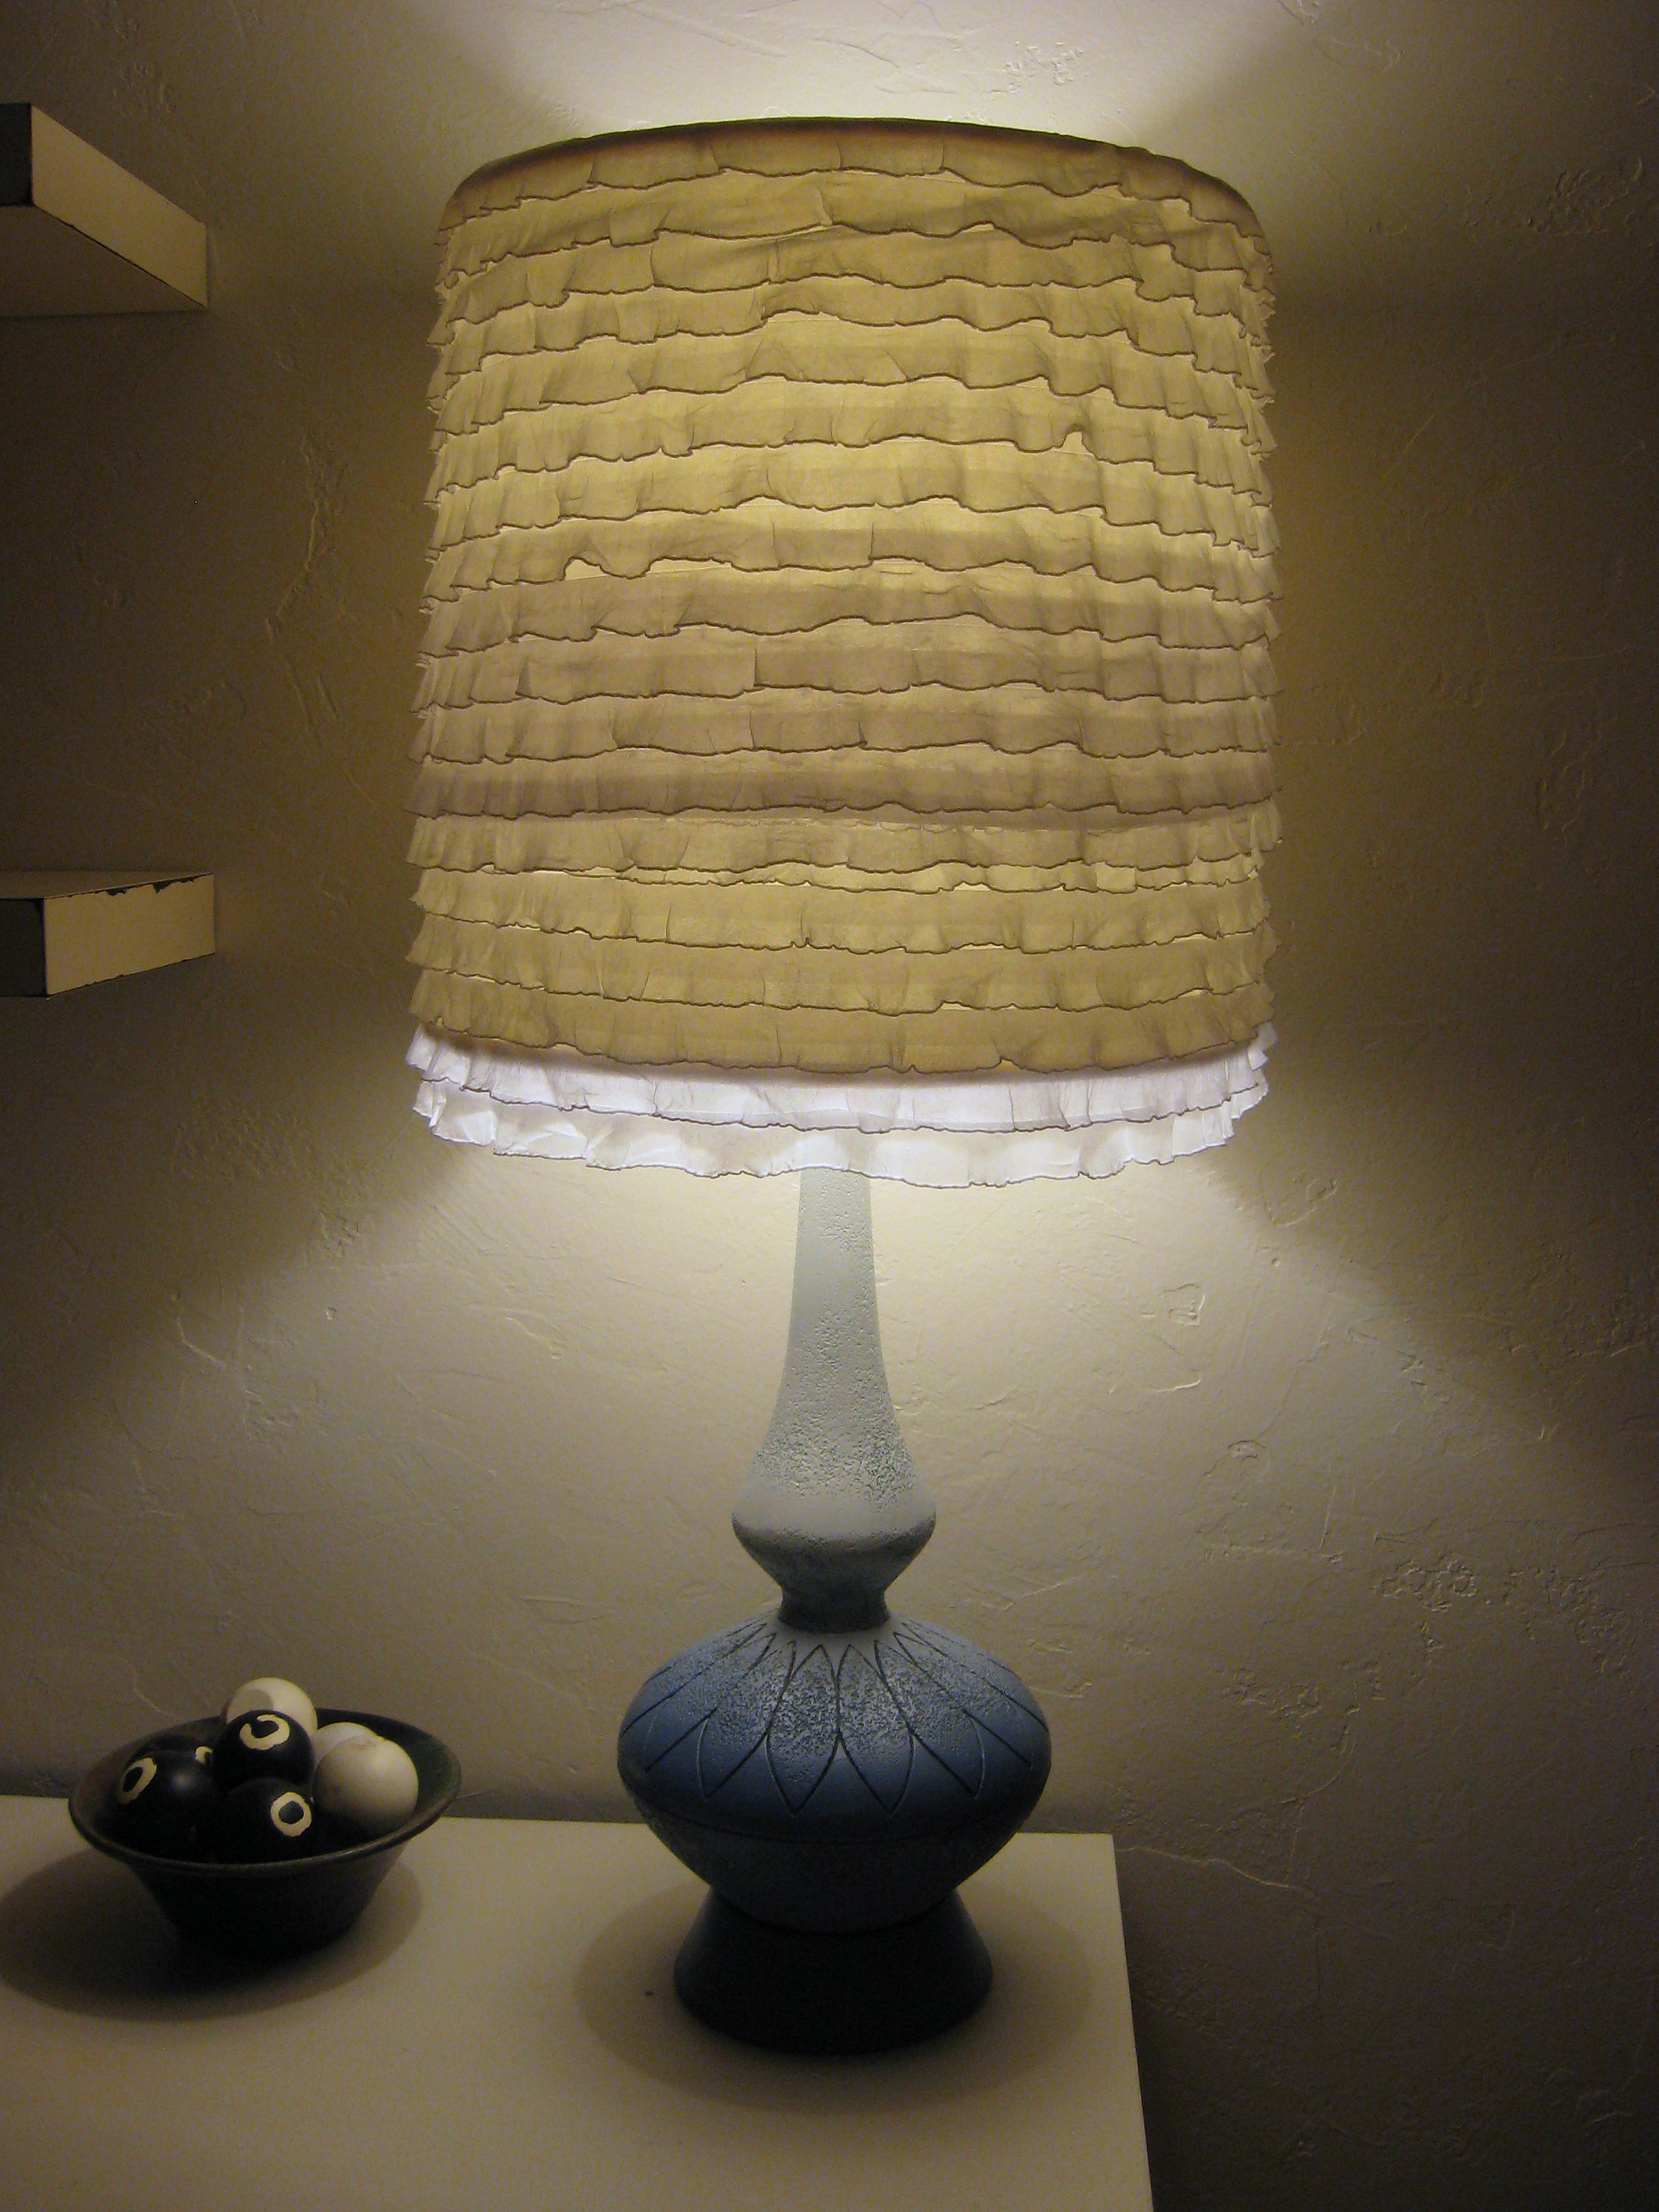
I grabbed a can of white spray paint and covered all the green, so now I had blue on the bottom, fading into white on the top. Perfect! That was just what it needed.
As for the shade, I ripped off all the old fabric and trim (gag! Really should have been wearing a mask…) and cleaned the shade form underneath. Then I just purchased a half yard of white ruffled fabric and hot glued it on. SO easy and fast (and only $5 with my Hobby Lobby coupon!)
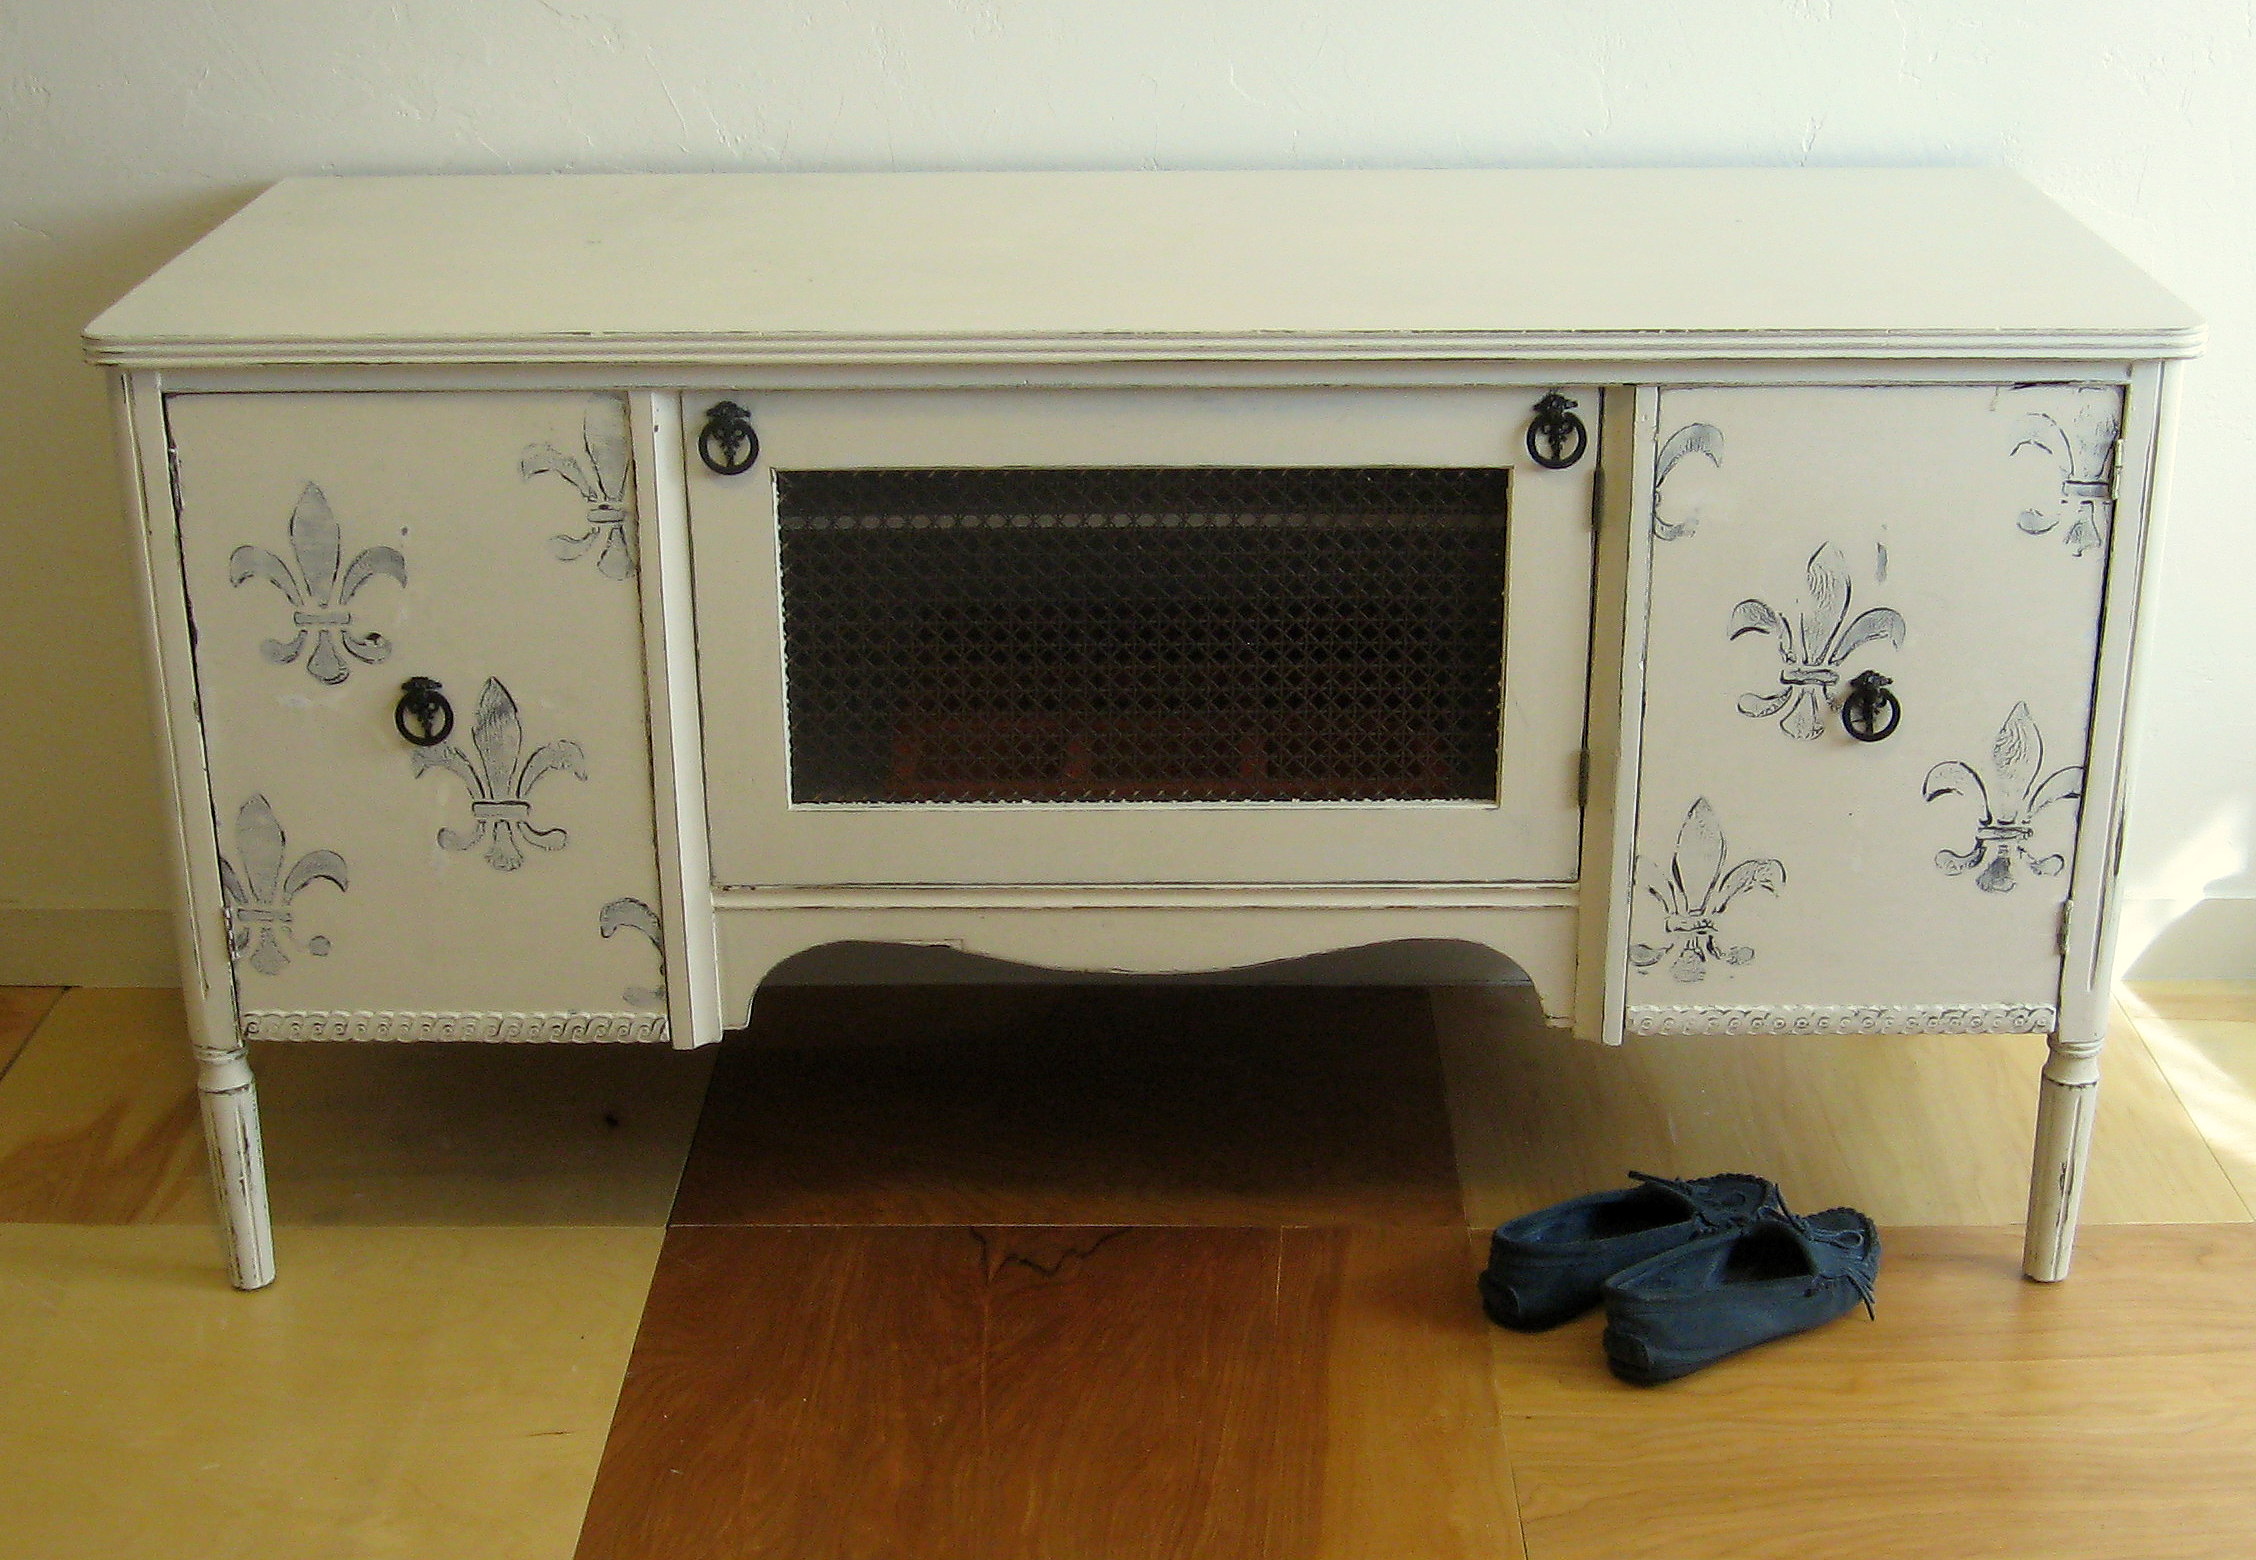
Credenza Makeover
We inherited this credenza from my husband’s grandparents several years ago. I absolutely fell in love with the shape of it, but the color wasn’t so great. I knew I wanted to paint it and finally this week I got around to getting it done.
I need some sort of intervention to help me remember to take a proper before picture!! But, all I had done at this point is remove one of the doors. Note the diamond shape on the remaining door on the right – it was what drove the final finished design.
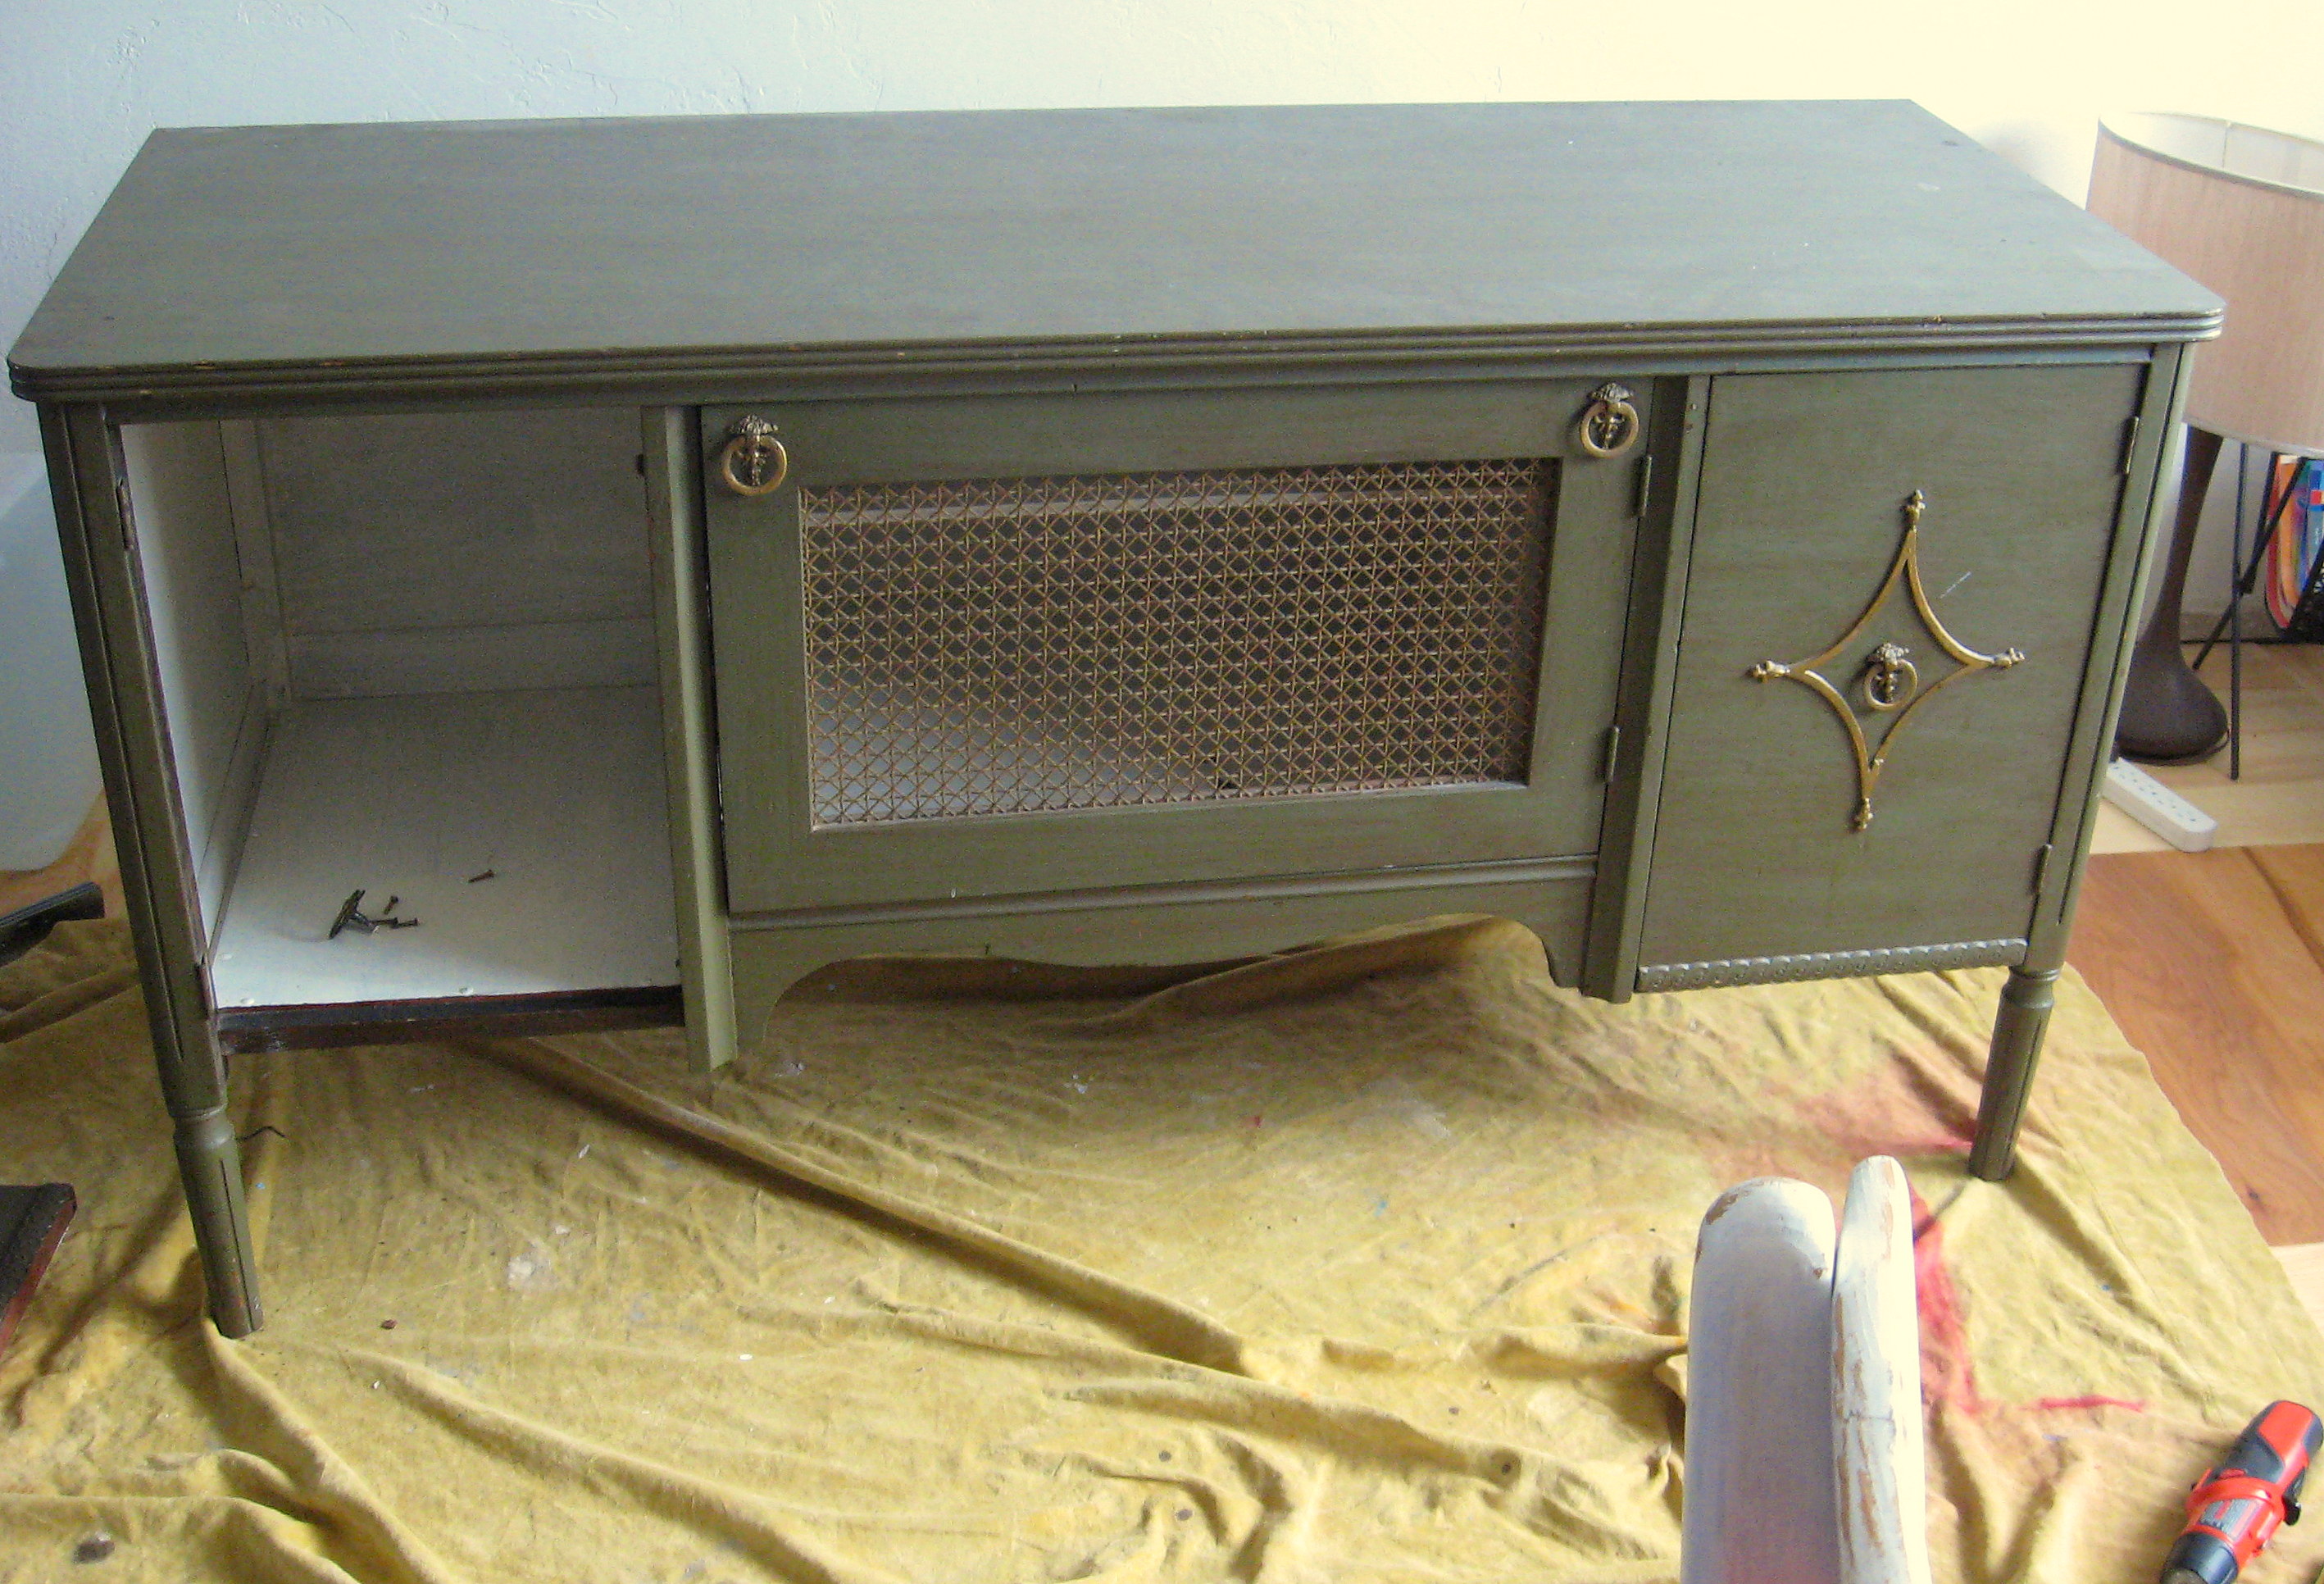
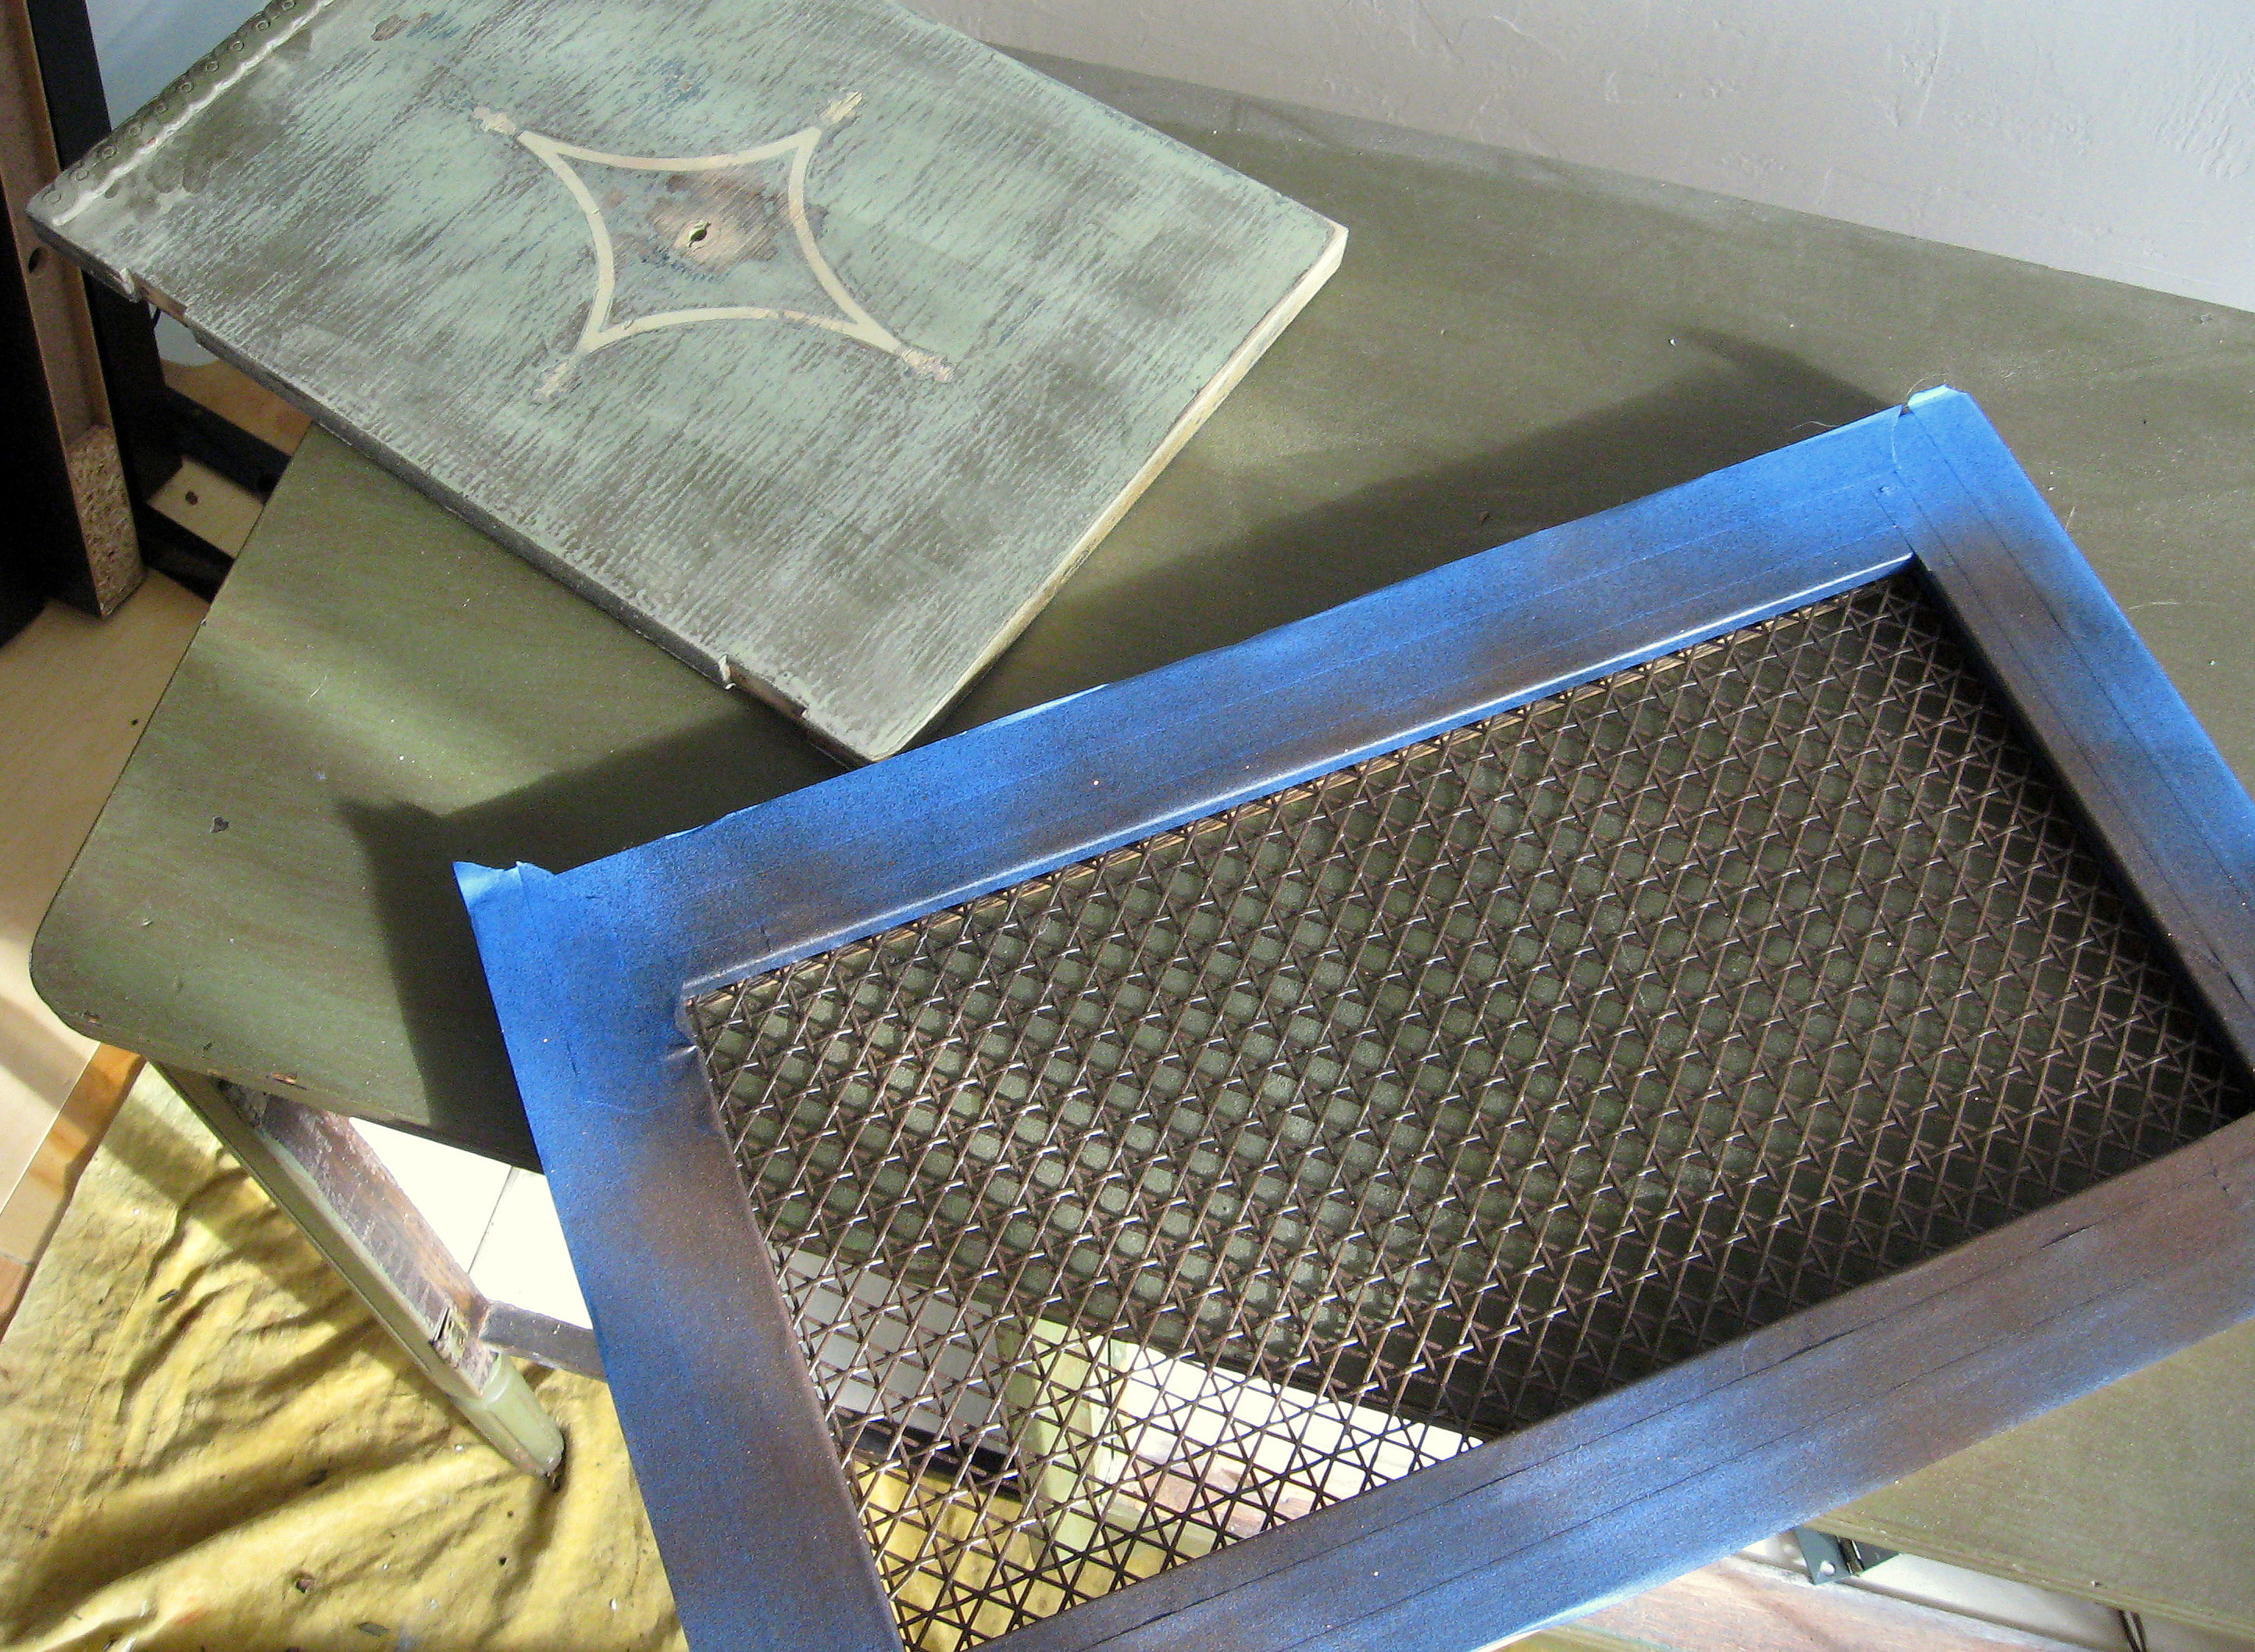
I removed all the doors and went over everything lightly with a sander. I knew I wanted the finished product to be pretty shabby, so I didn’t sand too much-just enough to roughen up the glossy surface. Then, I taped off the wood on the center door and spray painted the metal screen with black and copper. I also spray painted all of the original handles with black spray paint and rubbed them gently with a paper towel while they were still wet – just enough that they looked a little worn.
Next up was to try and figure out what to do with the diamond shape. Originally, I thought I could keep it and just paint around it so that it wasn’t gold. On closer inspection, I found that they had clearly been painted over numerous times and the paint was very thick and messy. There were also a couple of places where the diamond was chipped, so I decided to go ahead and just remove them – thinking that it was probably just a plastic embellishment. Wrong!
I tried to get a screwdriver under the diamond, expecting to pop it right off, but it turned out to be made of wood and VERY well attached to the door. I chipped it all off and sanded, but was still left with an impression of the diamond shape.
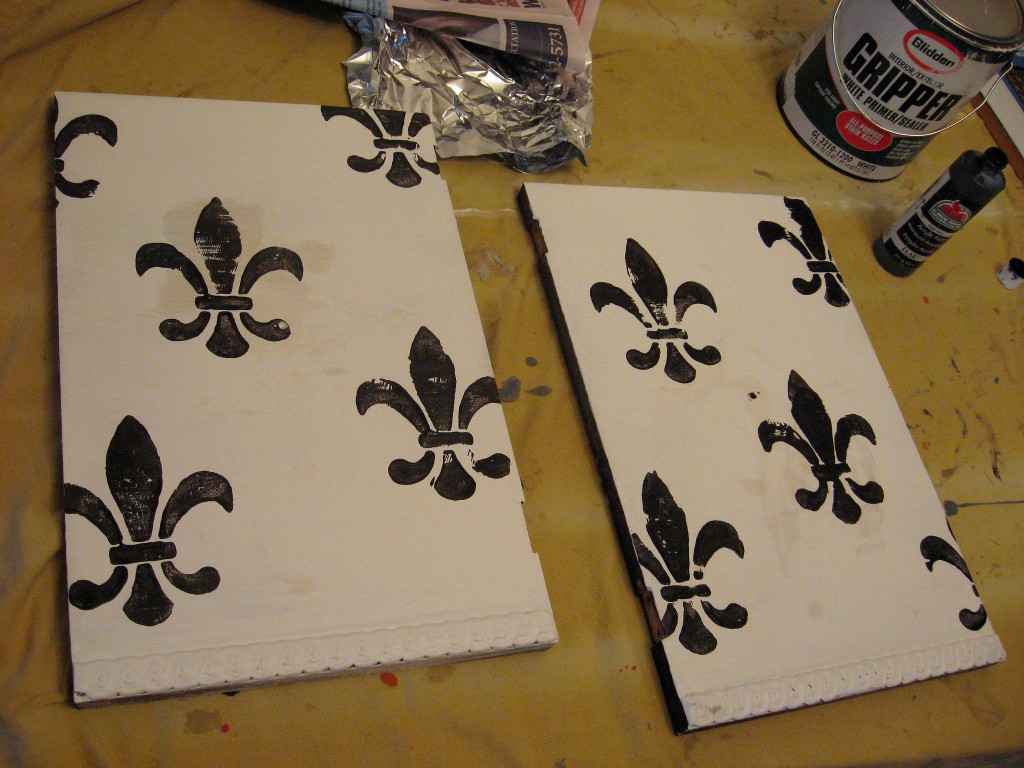
My original plan for the credenza was to paint everything white, then to stencil or paint a design on the top. Since I couldn’t get the diamonds to completely disappear, I decided to go for disguise and chose to put the design on the doors instead. I call this a happy accident because I just adore the way it turned out!
I painted everything with Gripper primer (see this post here if you’re not sure what that’s about). Once that was dry, I painted with two coats of matte white indoor house paint. Since the body of the credenza is pretty straightforward – just painted it with a brush – I’ll focus on what I did differently on the doors.
I painted the two outside doors with one coat of primer. Once that was dry, I used an inexpensive foam Fluer De Lis stamp and some black craft paint to stamp a design on the doors.

Let that dry THOROUGHLY, then paint over the whole thing with a coat of white paint.

Once that is completely dry, start sanding the white paint back off, especially focusing on the areas where the black design is. I ended up doing this twice – sanded, re-stamped, re-painted with the white then sanded again – before I was happy with how it looked.

Give the rest of the piece a good, rough sanding as well, to make it look shabby and aged. Reassemble the doors.
If you are looking for it, you can still see the faint outline of the diamond on the left; you can’t see it at all on the right. But the fluer de lis design is what you notice first, so you no longer notice the flaw unless you are really trying to see it.
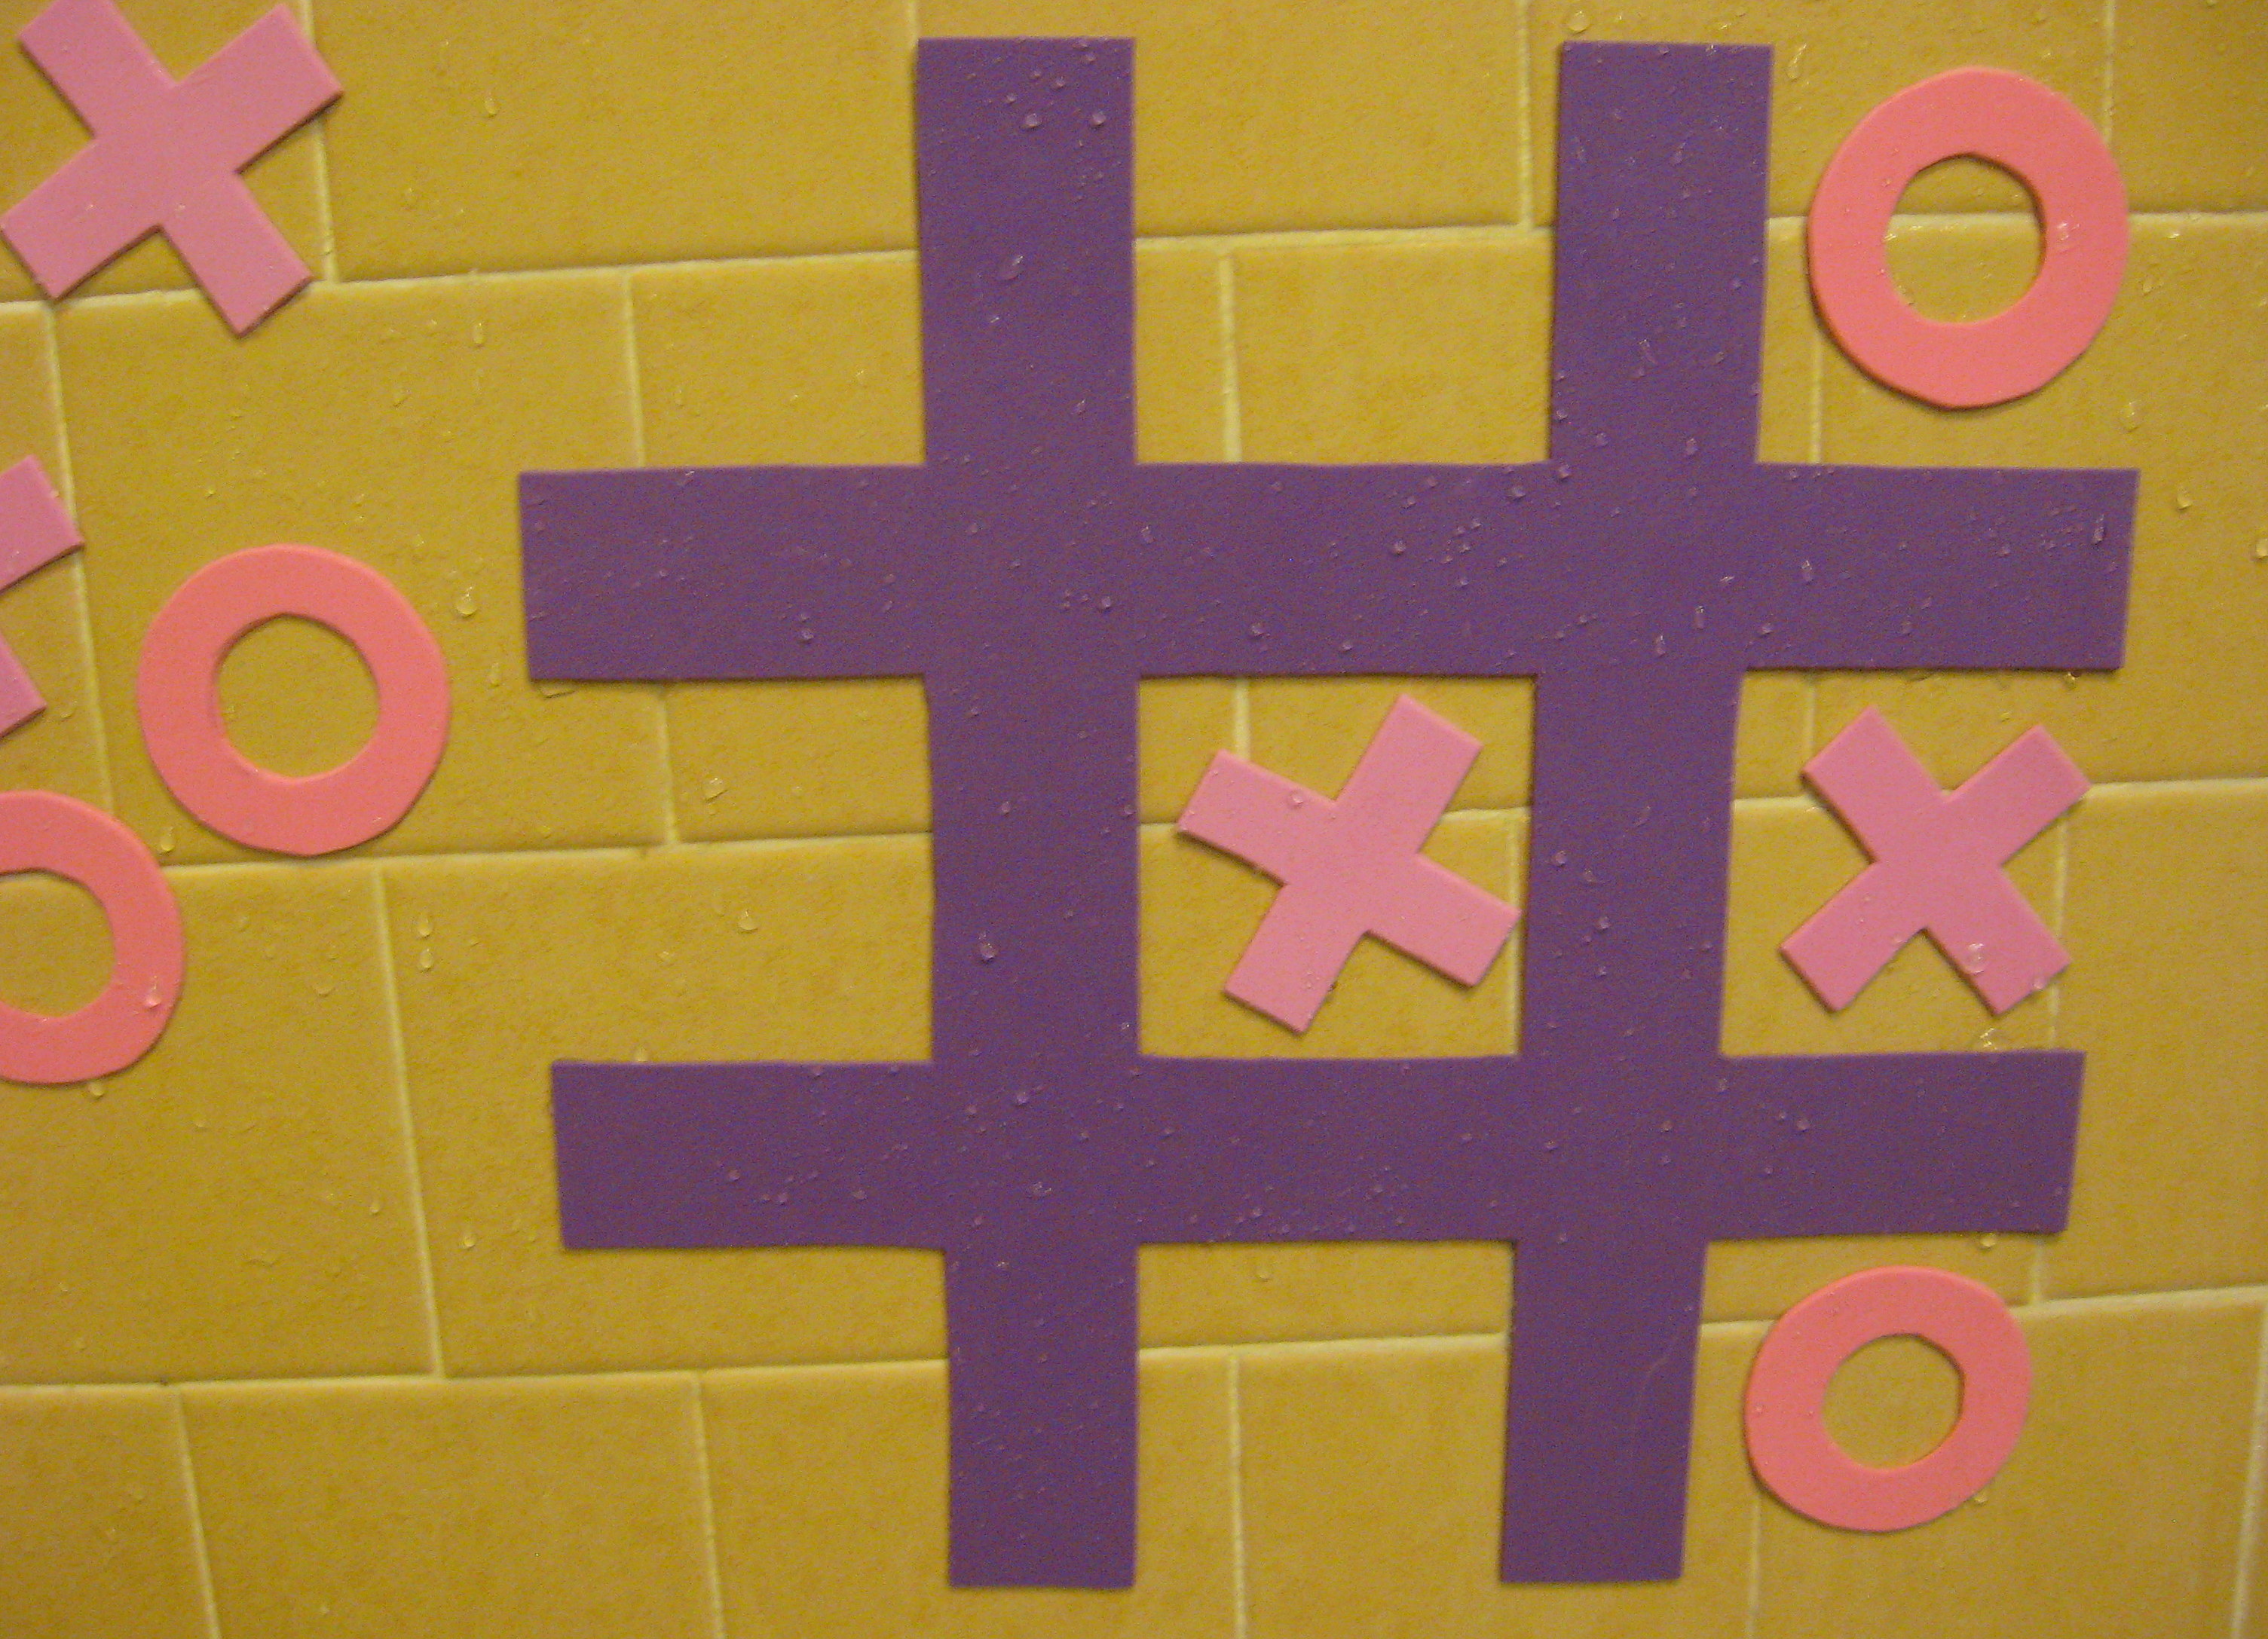
Craft Foam Bath Games
Did you know that craft foam sheets stick to the wall of your bathtub when they are wet? Craft foam is available in many colors and patterns at any craft store or the craft section of Walmart for super cheap. You can buy it in sheets – individually or in a pack – as well as in precut shapes, making the possibilities for bathtime fun only limited to your imagination.
I bought this foam from Hobby Lobby. The large sheet was $.89 and the pack was $5.99 (minus 40% with my coupon).
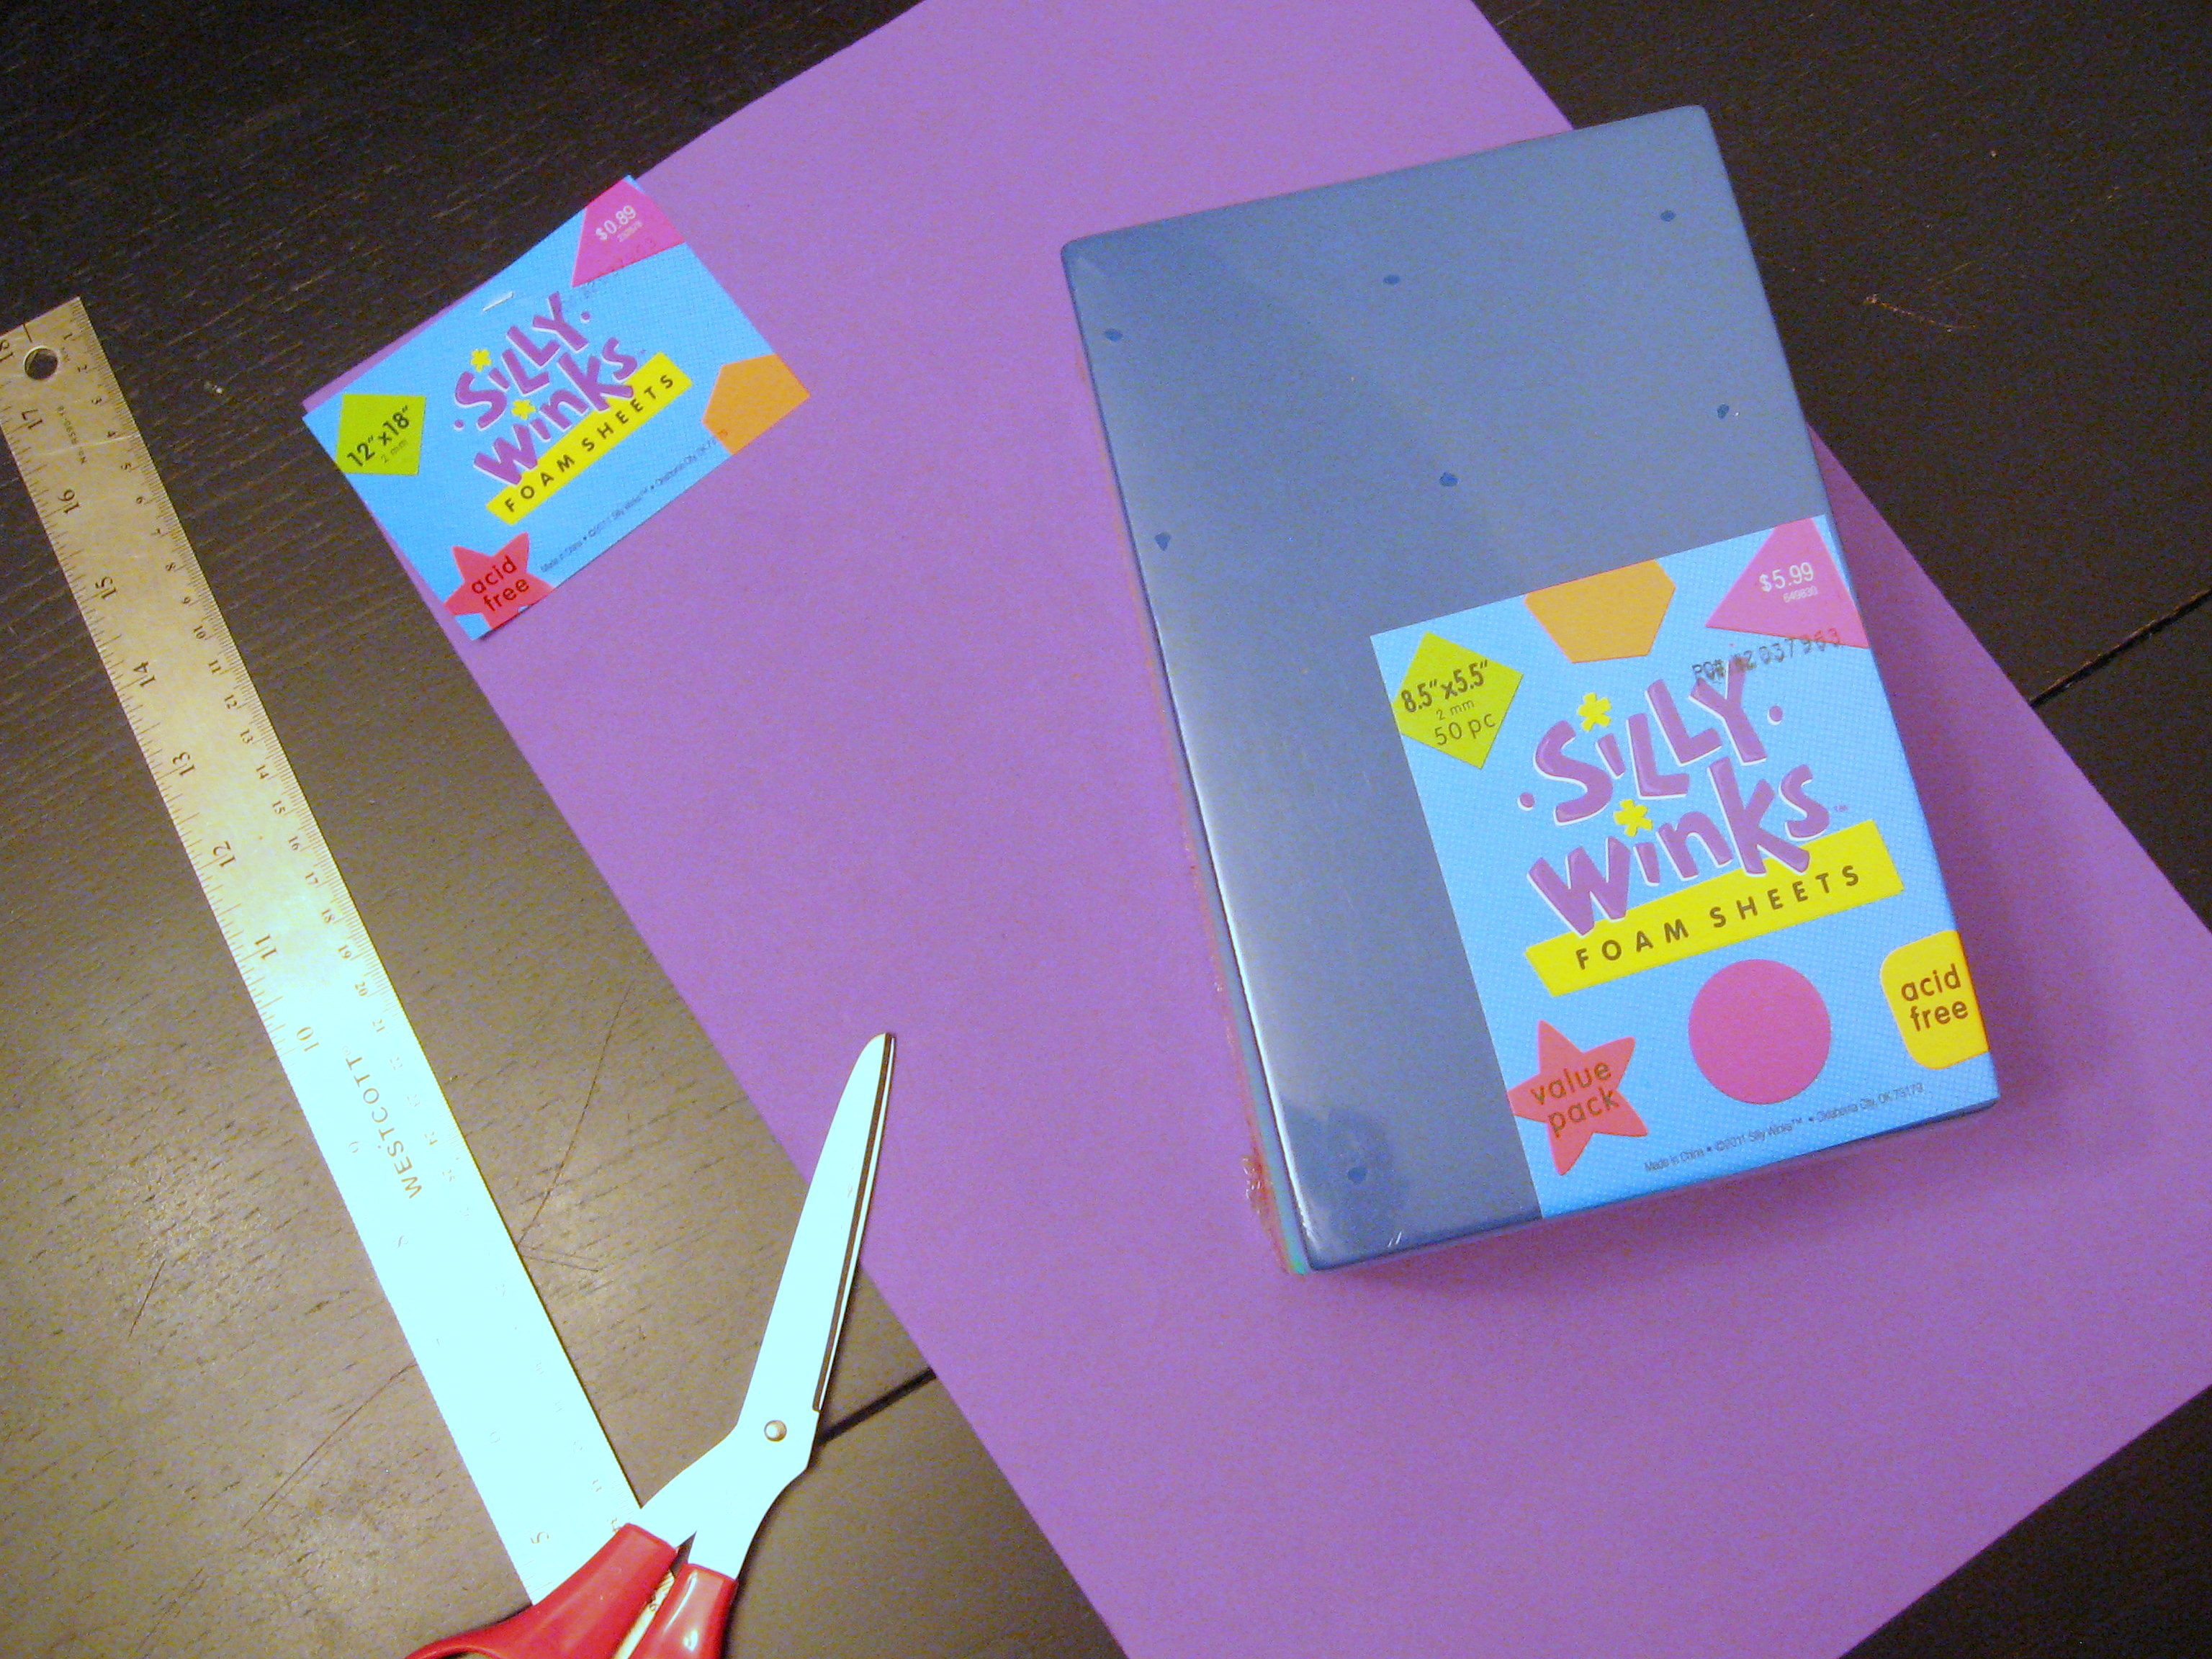
I trimmed the large sheet into a square, then used a ruler to measure out a tic tac toe board pattern, and cut it out. It cuts very easily with scissors. Then, using some of the smaller sheets, I cut out X’s and O’s to the right size.
Done; my daughter loves it!
I think next I’ll try my hand at making a Mr. Potato head. What about “paper” dolls? If you try it, I’d love to see pictures of your finished project!
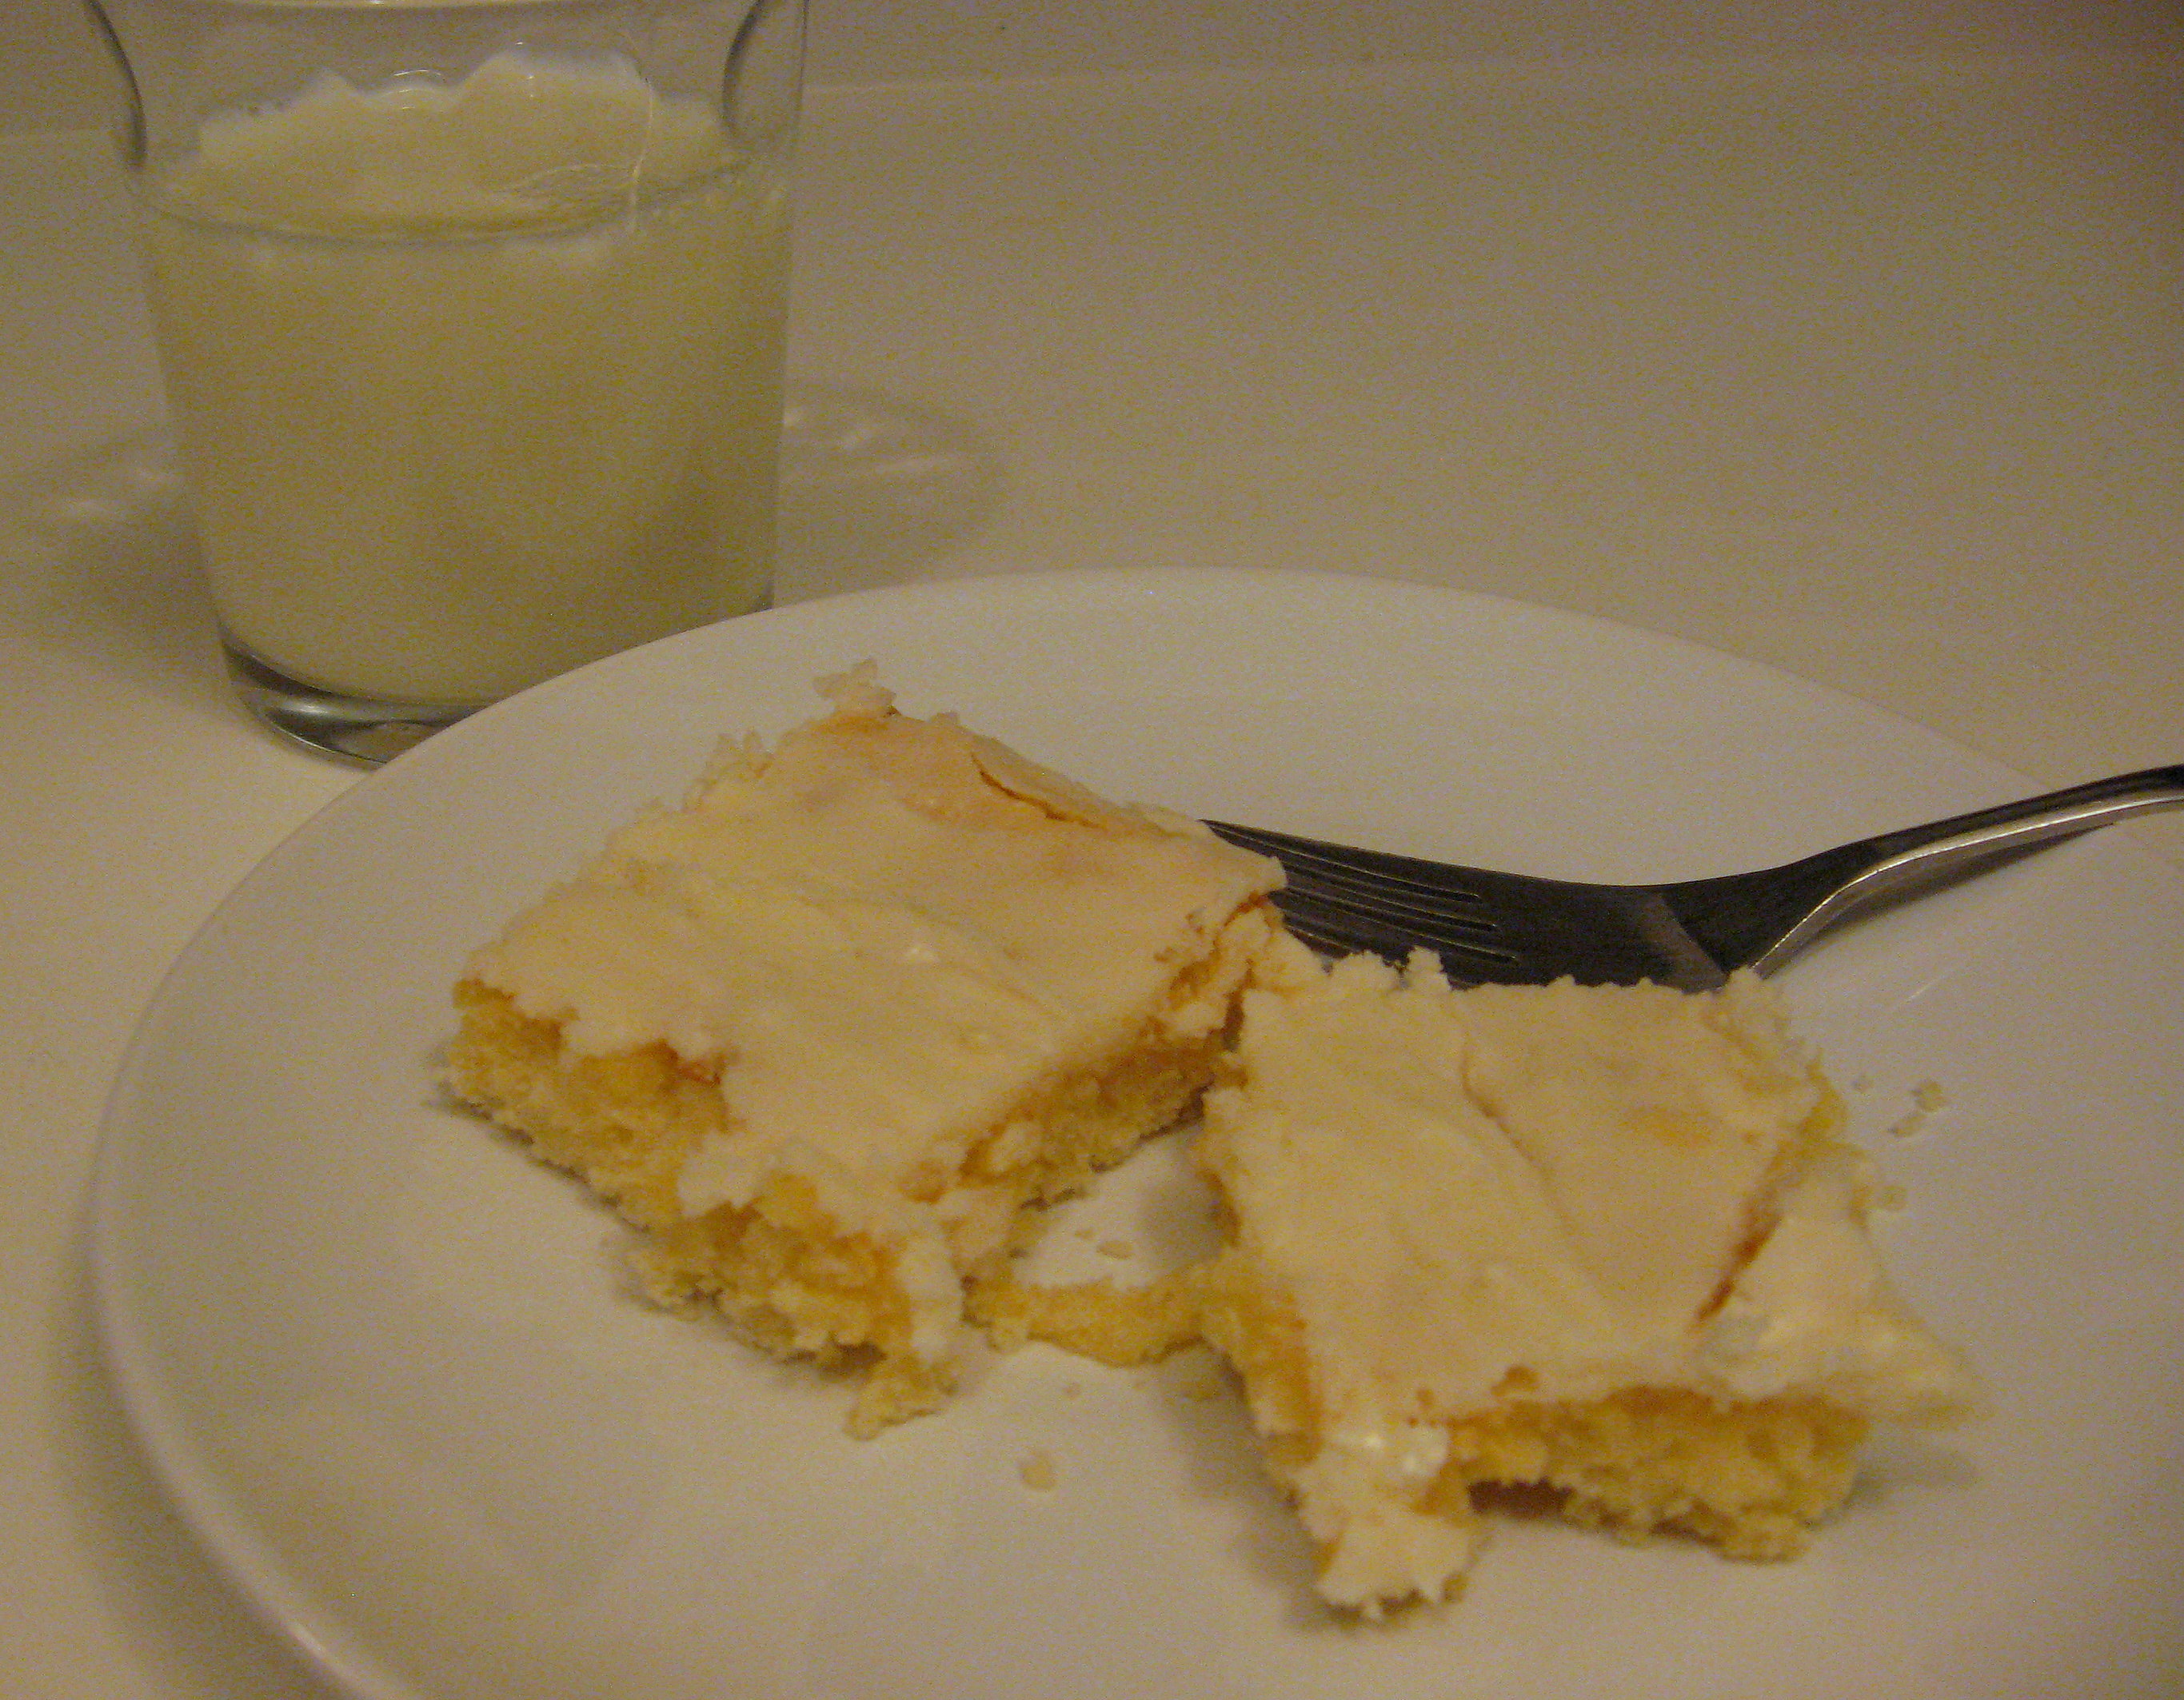
Lemon Mardi Gras Squares
This is one of my favorite recipes from my childhood. I loved making them and I loved eating them. I dusted off the recipe recently and was thrilled to discover that my kids like them as much as I did do! This recipe is a little pickier than your typical dump and mix cookie recipe, but it certainly isn’t difficult. Although these are good right out of the oven, they are HEAVENLY the next day.
Lemon Mardi Gras Squares
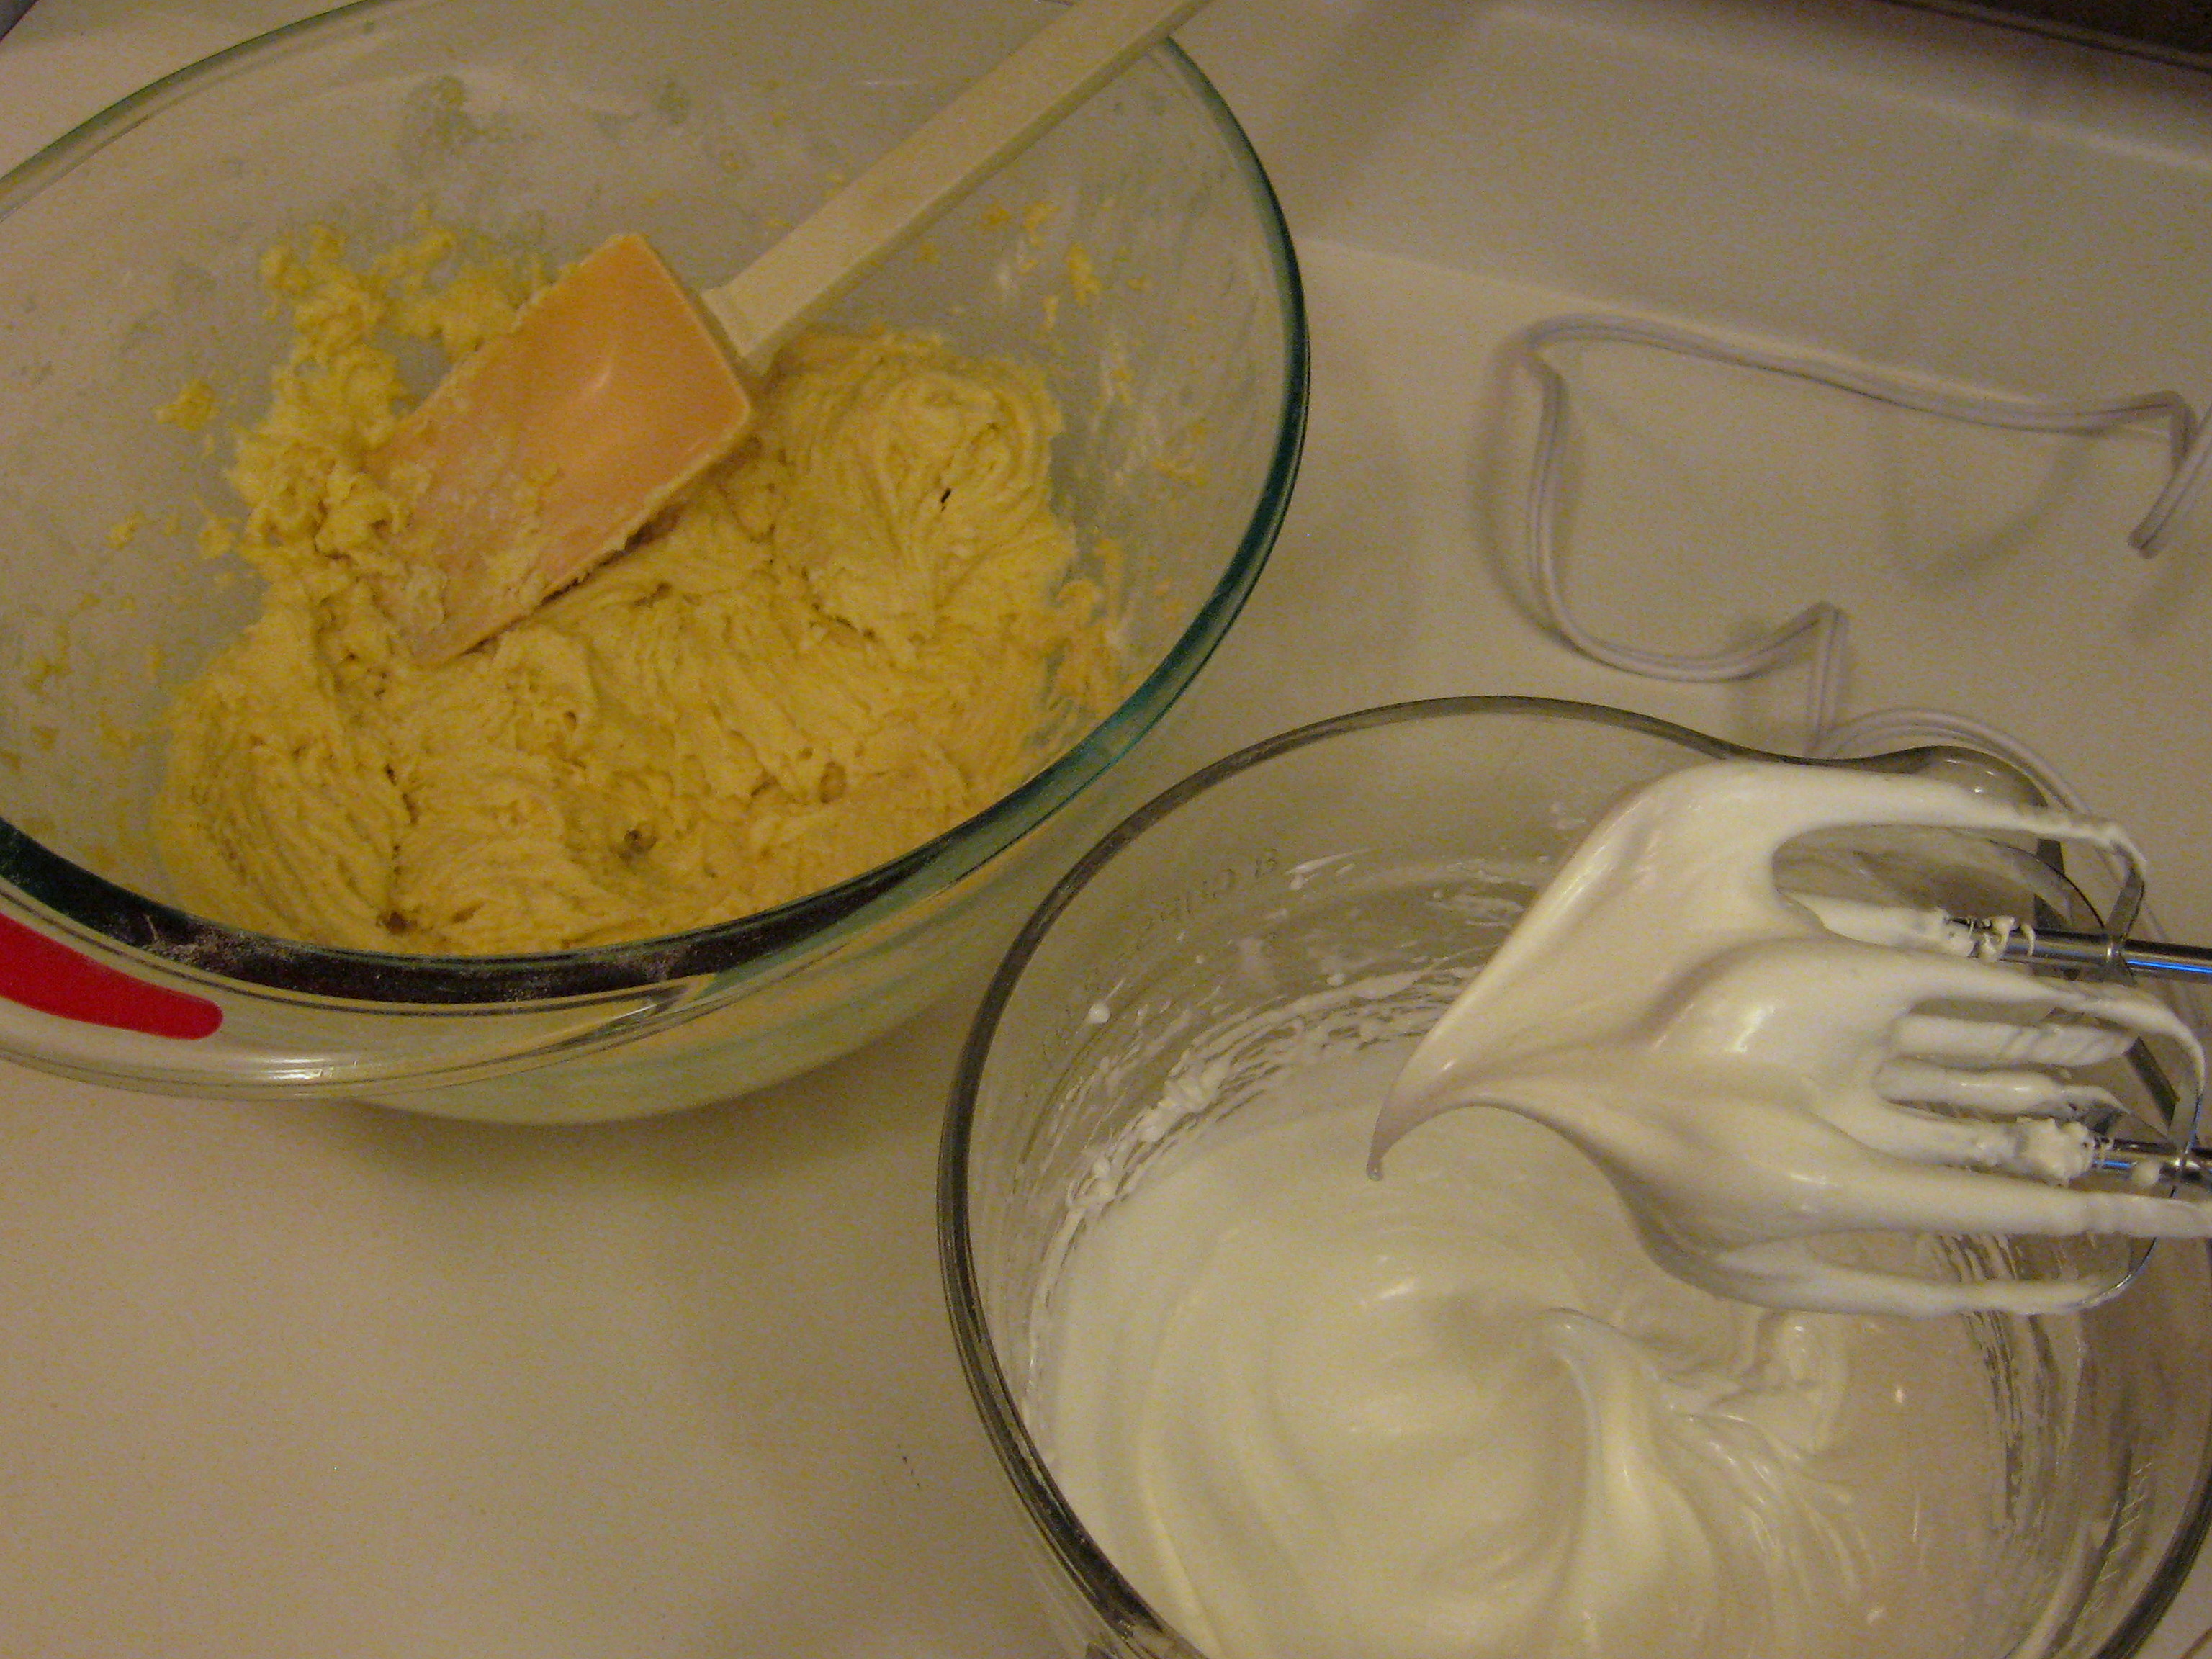
- Cream butter, then gradually add sugar, creaming well. Add egg yolks, one at a time. Beat for 1 minute.
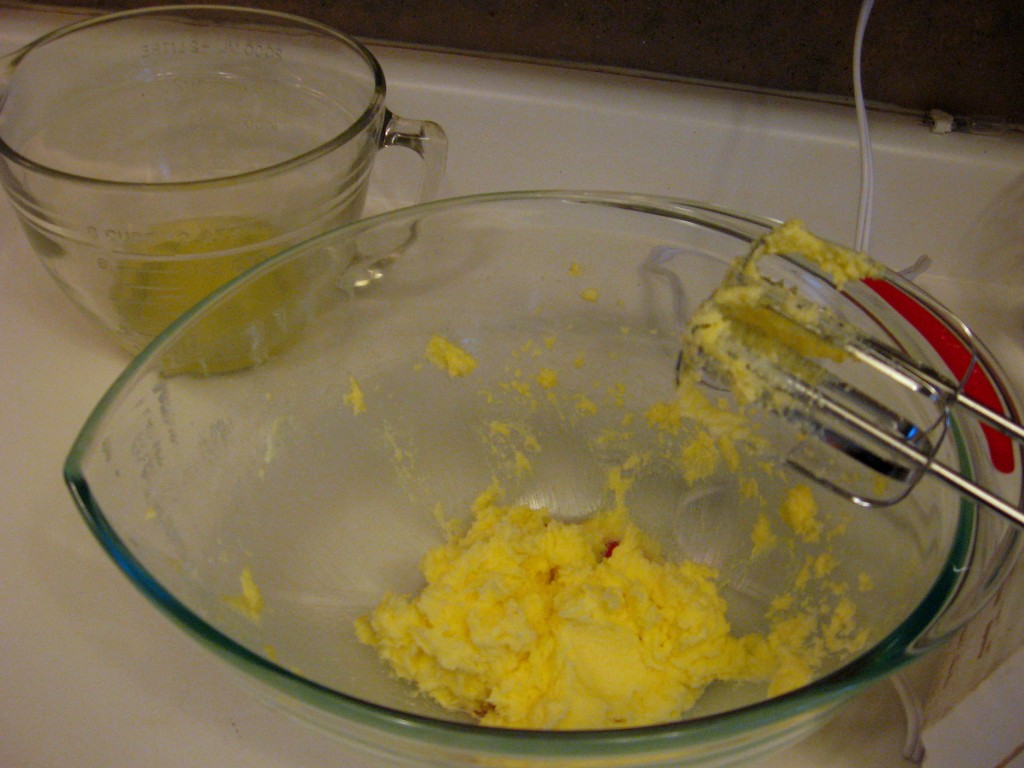
- Mix together the dry ingredients. Add to creamed mixture alternately with the lemon juice, beginning and ending with the dry ingredients.
- Beat the egg whites into stiff mounds. Add powdered sugar and continue beating to stiff peaks. Fold into the lemon mixture, adding the pecans.
- Pour into a greased and floured 9X13 pan. Bake 25-30 minutes at 400*. Frost while warm.
- 2 T. Butter
- 1 C. Powdered Sugar
- 1 T. Cream
Just a few notes:
- Put the egg whites in the fridge while you are mixing the rest of the batter so that they stay cold until you are ready for them.
- One thing I’ve never liked about this recipe is that it tends to get a little too brown on the top before it is cooked through. When I made them last night, I cooked them at 375* for 30 minutes and thought they were perfect. You may want to play around with your oven temp.
- We are a frosting-loving family, so I usually 1 1/2 the frosting.
- I don’t use the pecans; I like nuts, but in this recipe I prefer them without.
- I thought about waiting until today to take the pictures but worried there wouldn’t be any left. And I was right…my boys had destroyed most of the pan before bedtime. YUMMY!
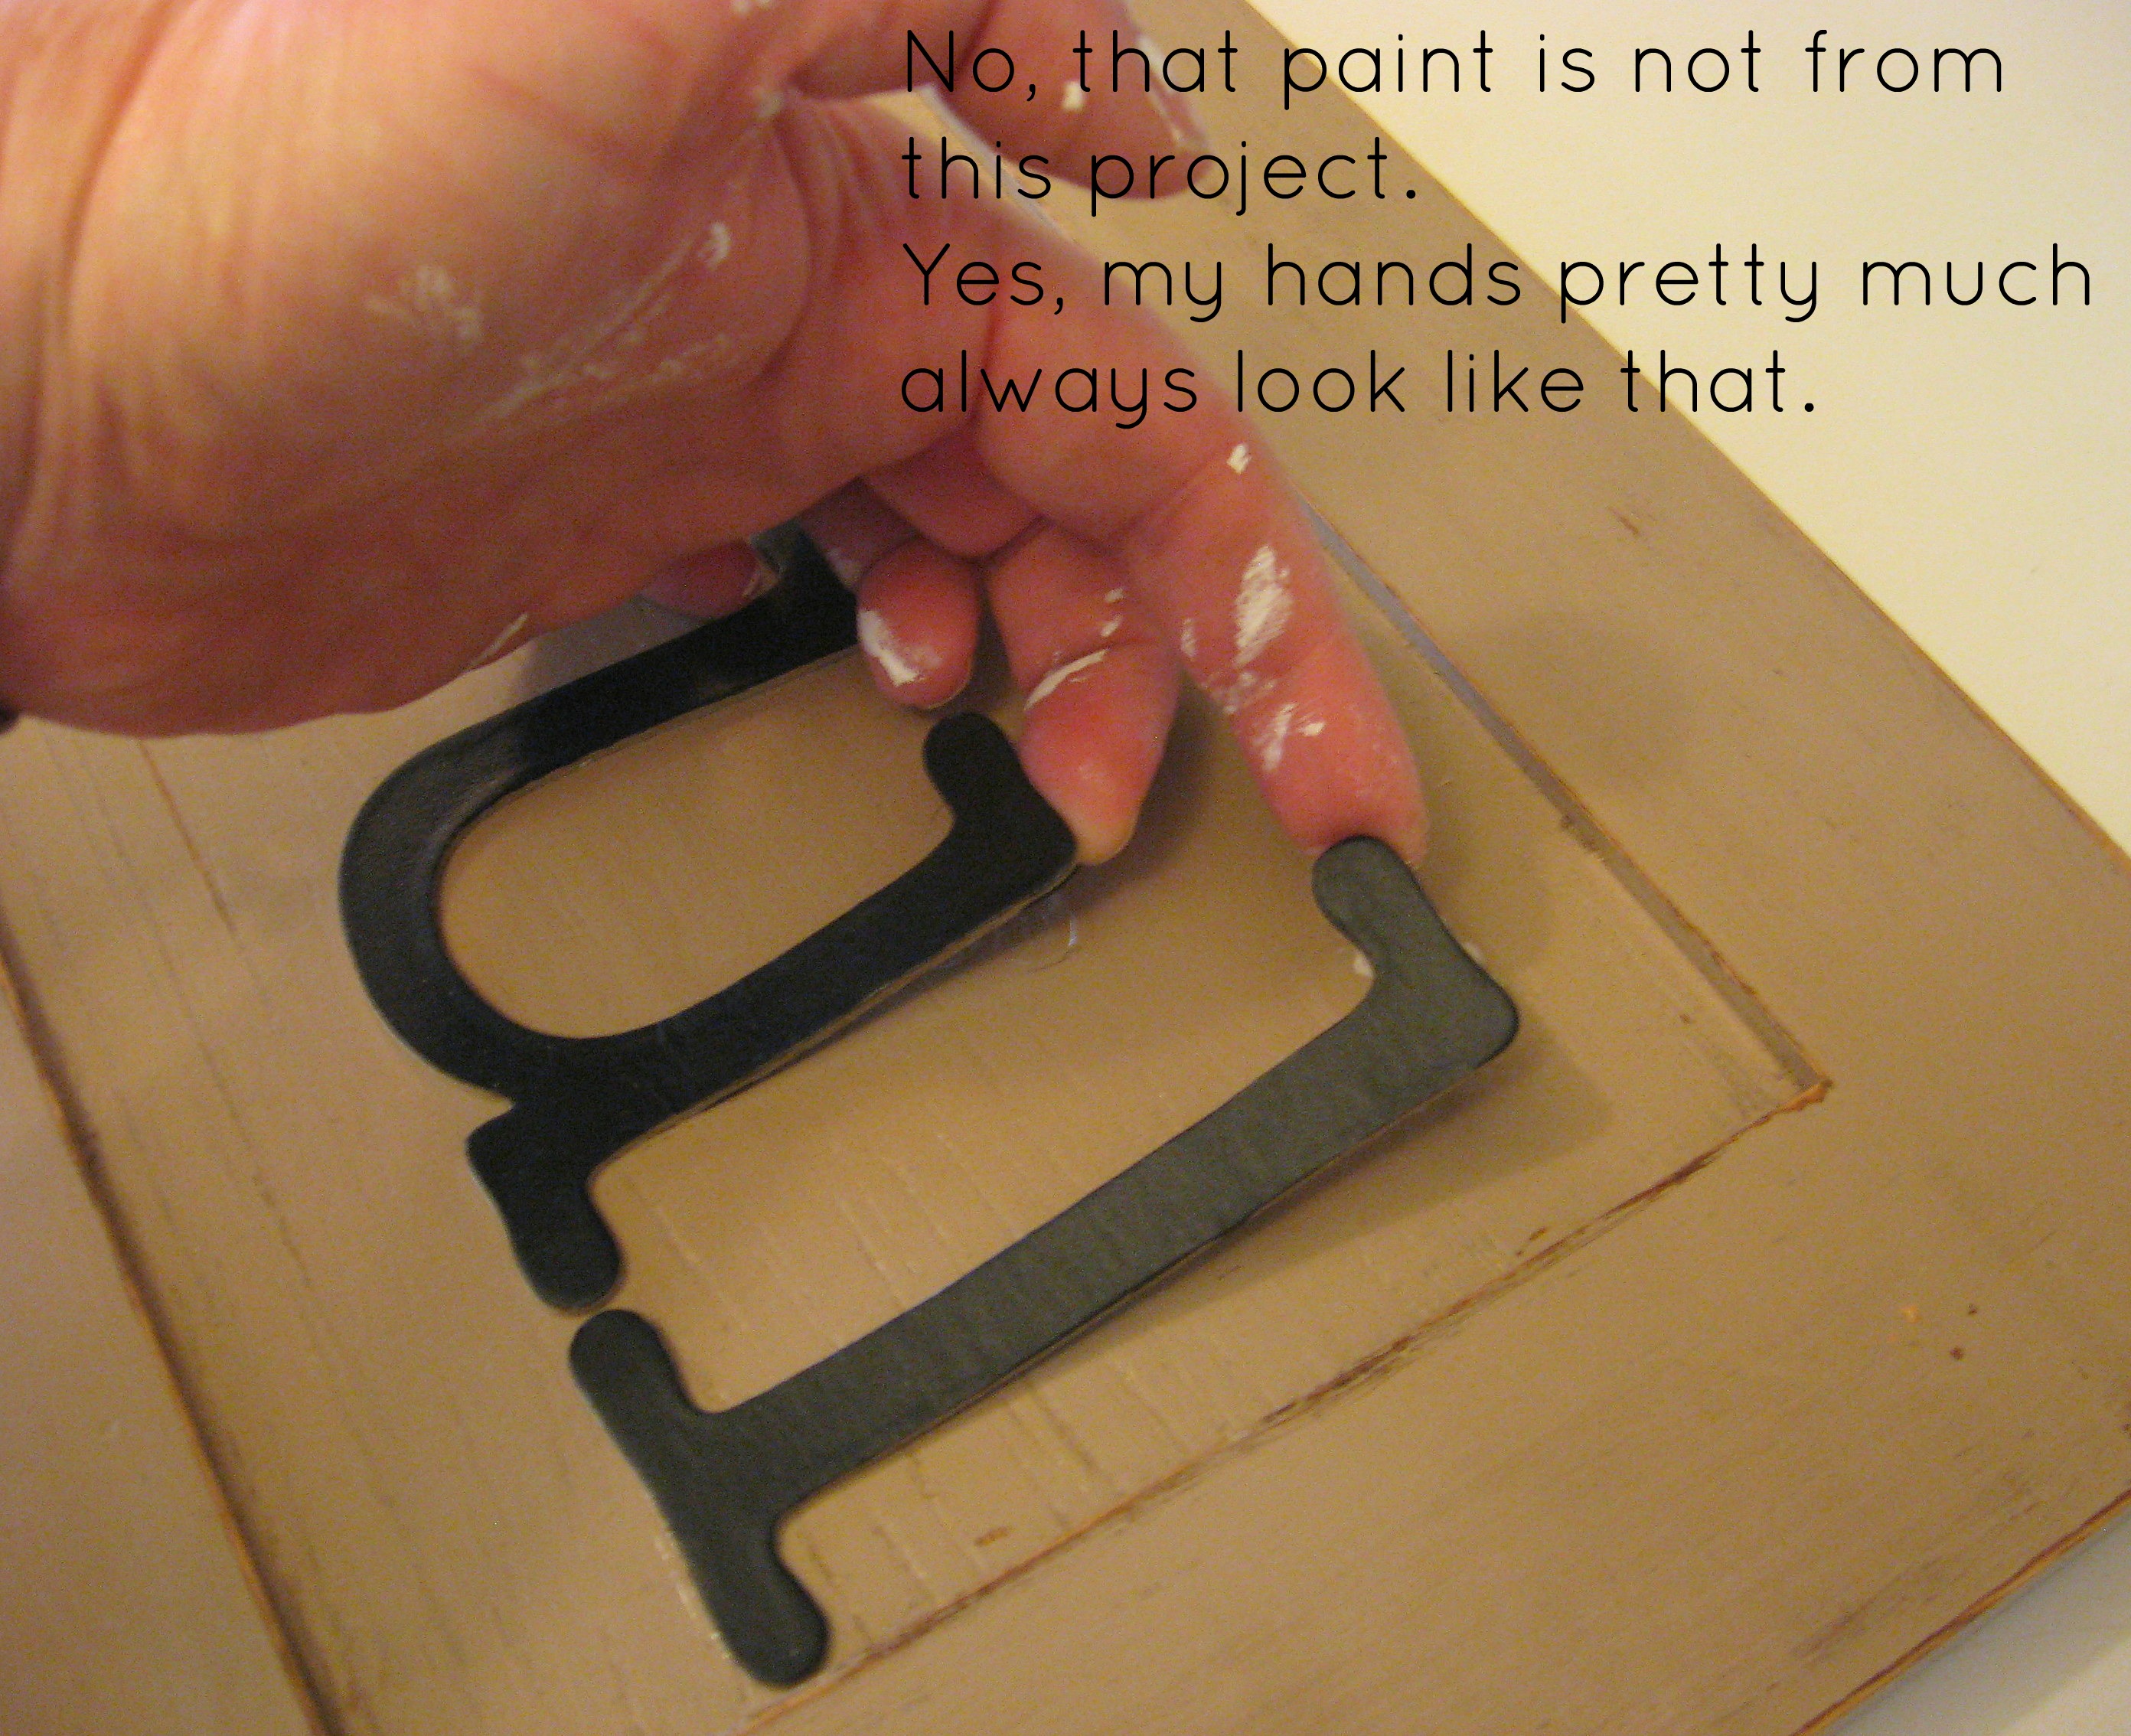
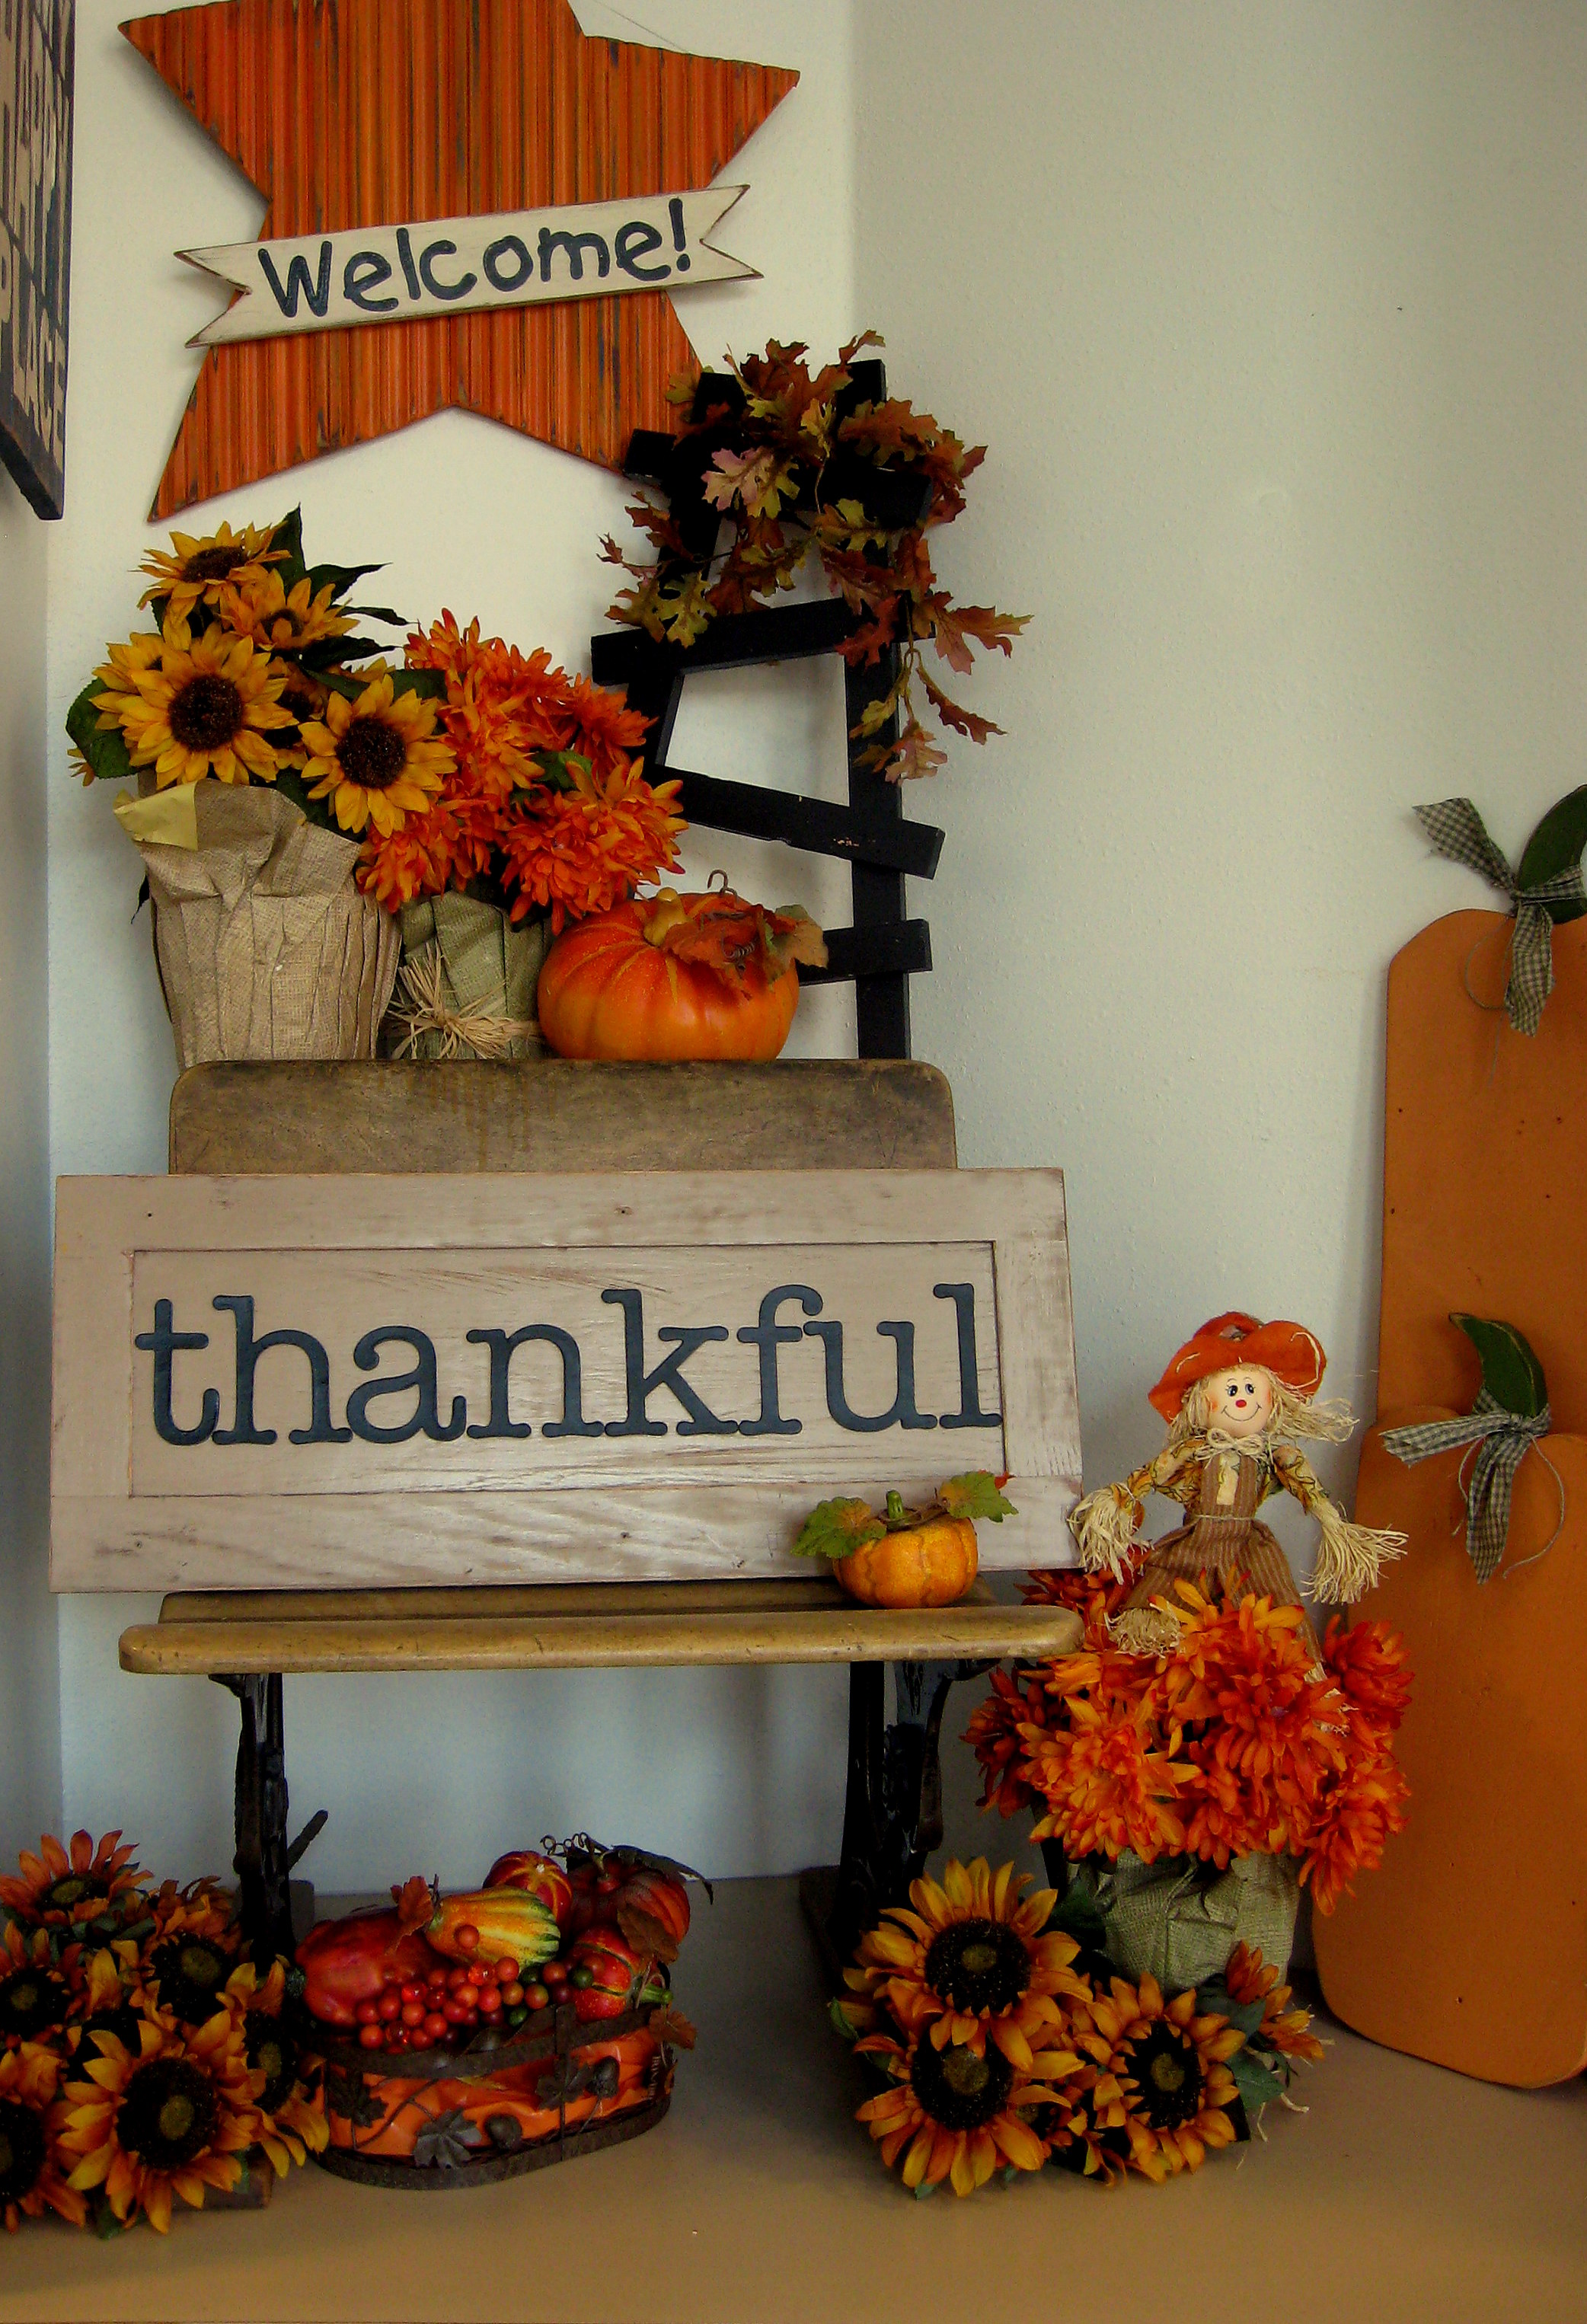
Thankful Cabinet Door
Here is a bonus cabinet door project; I had completely forgotten about this one until this weekend when I put away the Halloween decor. No real tutorial – it’s pretty easy! This door is actually the brother of the door I painted blue and attached my house numbers to (blech. Fuzzy pic…).
I painted this one a basic neutral tan. I painted chip board letters from the craft store with black craft paint and a foam brush, then stuck them on to spell “Thankful”. Play around with your arrangement before you stick them down and make sure your words will fit. I originally wanted this sign to say “give thanks” but it was too long. Thankful was just right though, so that’s what it became!
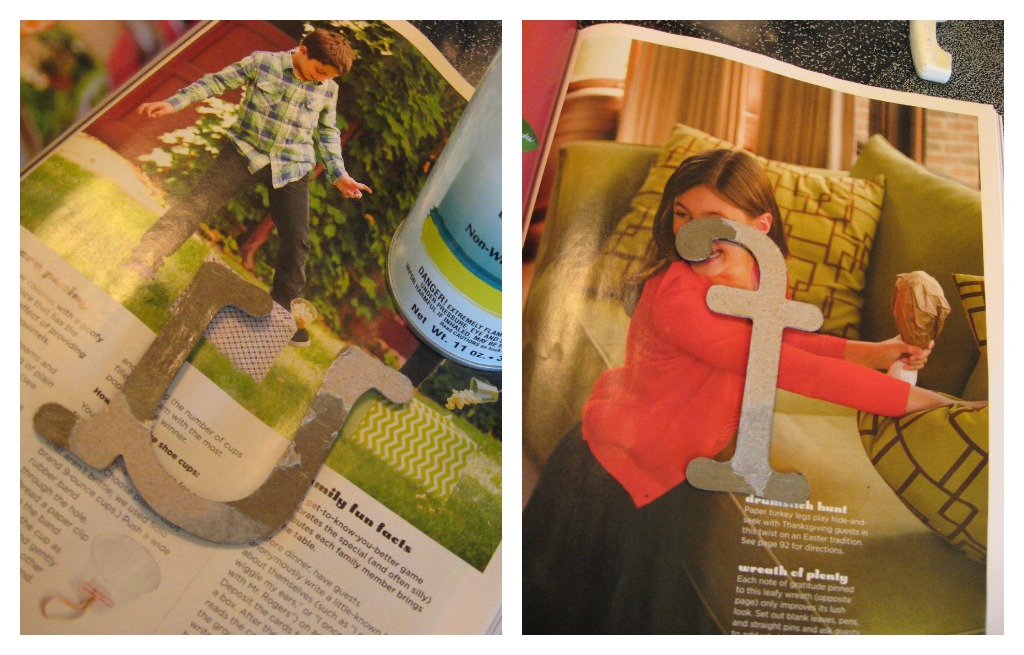
These letters are self stick, and by the end of the season last year, they were starting to pull up.
I scraped them all up carefully with a spatula and used spray adhesive on the back. Save yourself some work and just use the spray adhesive to begin with!
Spray adhesive is SO messy, but sometimes it really is just the best way to go. When I am spraying a lot of little pieces like this, I will just pull a magazine or newspaper out of the recycling bin, lay it out, spray and adhere one piece, turn the page and spray the next one. Keep going with a clean page or sheet of paper for each item you are spraying and you won’t get glue on the front of anything, and you can just pick the whole mess up and throw it away when you’re done.
Here it is in its place in the front entry display at my school.
Tree Branch Lamp
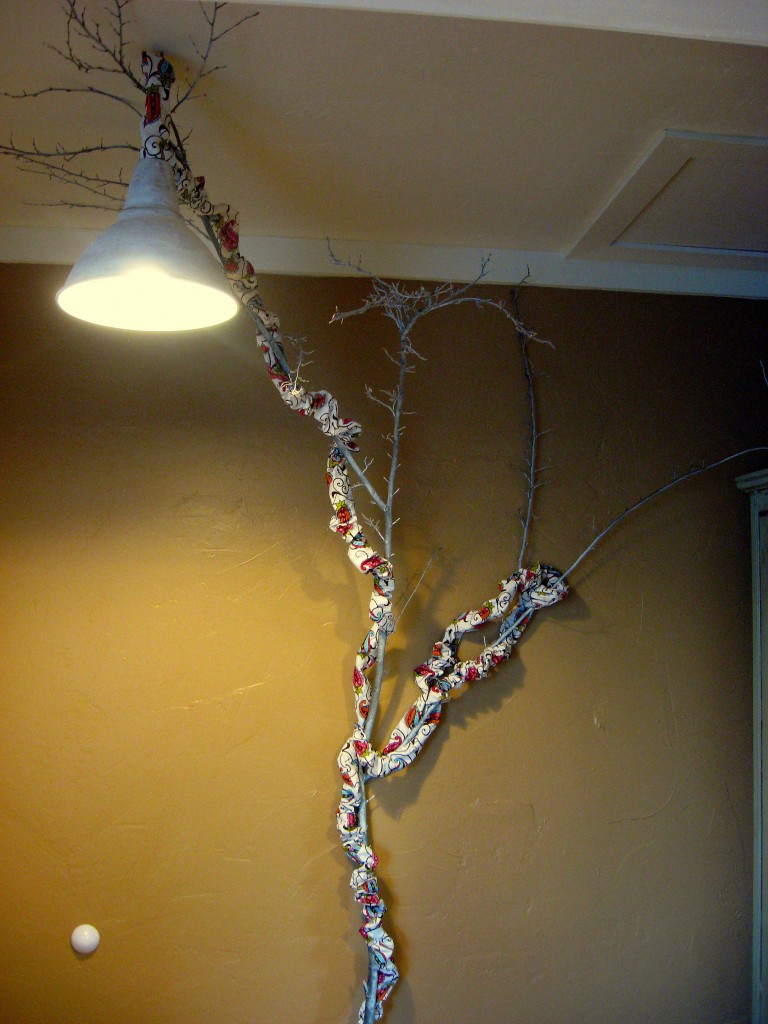
As part of our recent remodel, we sectioned off a separate entryway that wasn’t there before, so now that area is very dark and has no overhead light. When we are a little further into the remodel, we will call an electrician to handle all the electrical issues, and will have him drop a proper light into this area, but I really needed something in the meantime. I considered a table lamp, but I REALLY didn’t want to put a table here. I thought and thought, and came up with what I think is a stunning solution!
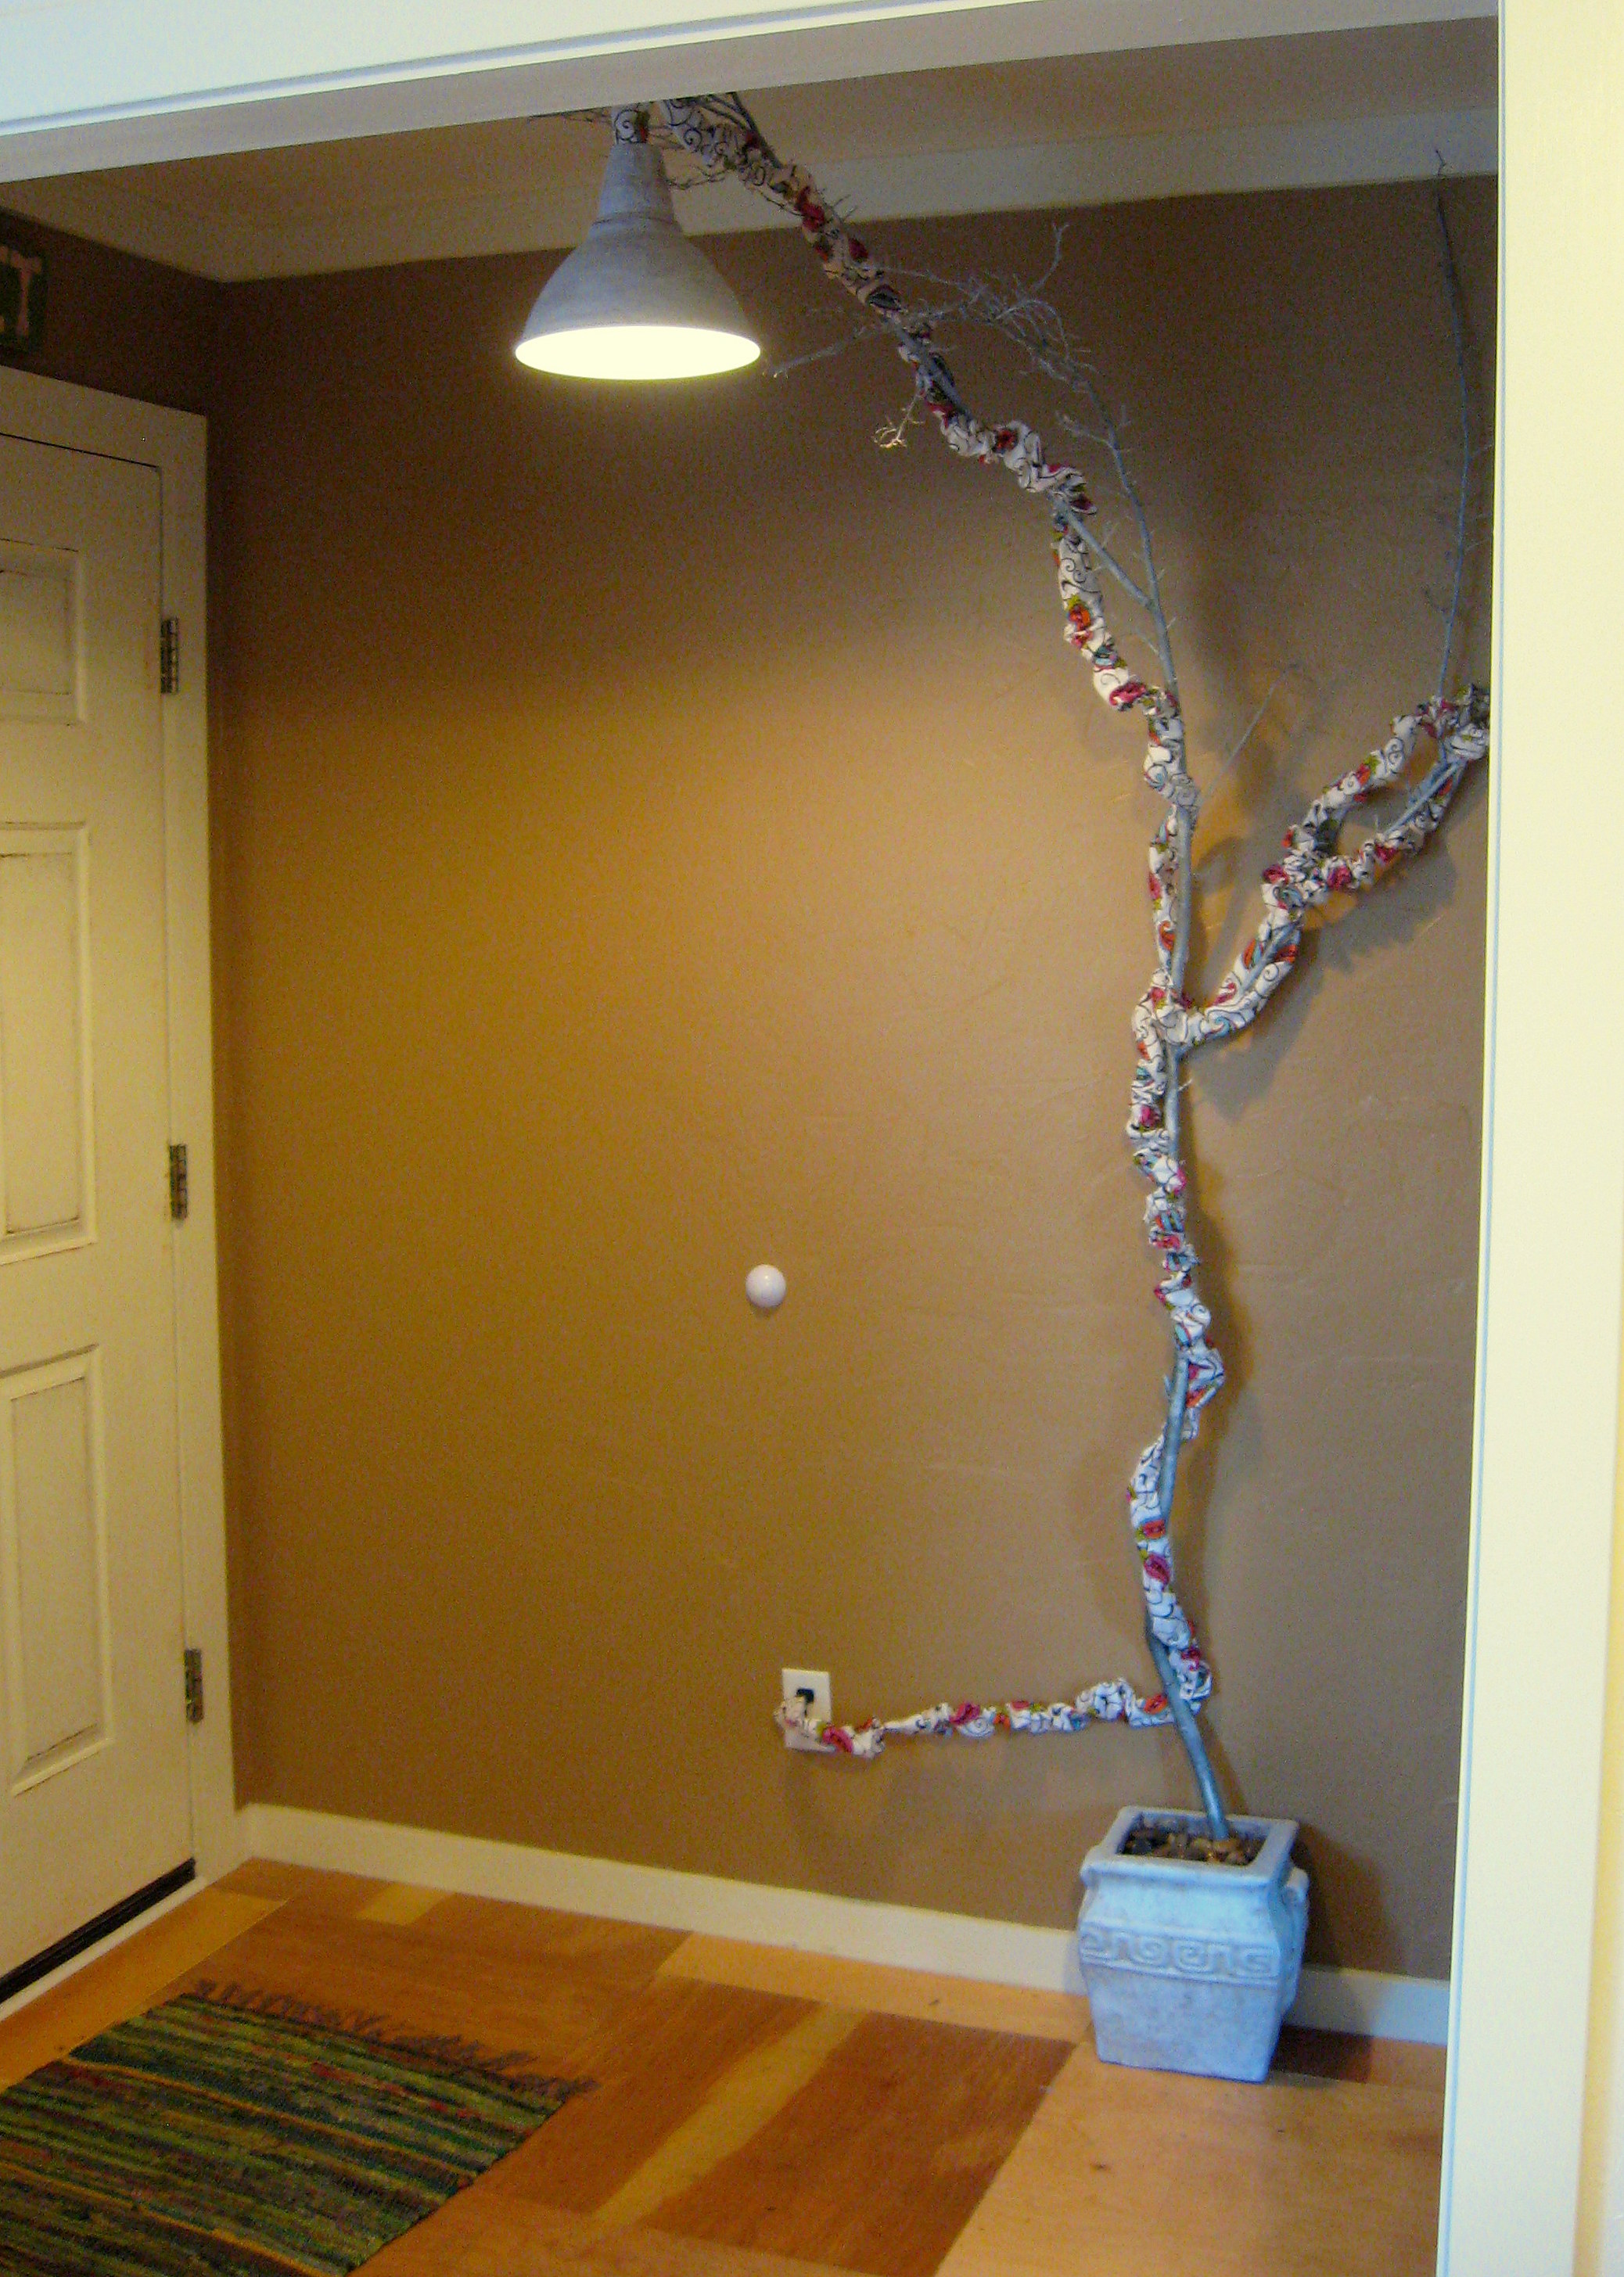
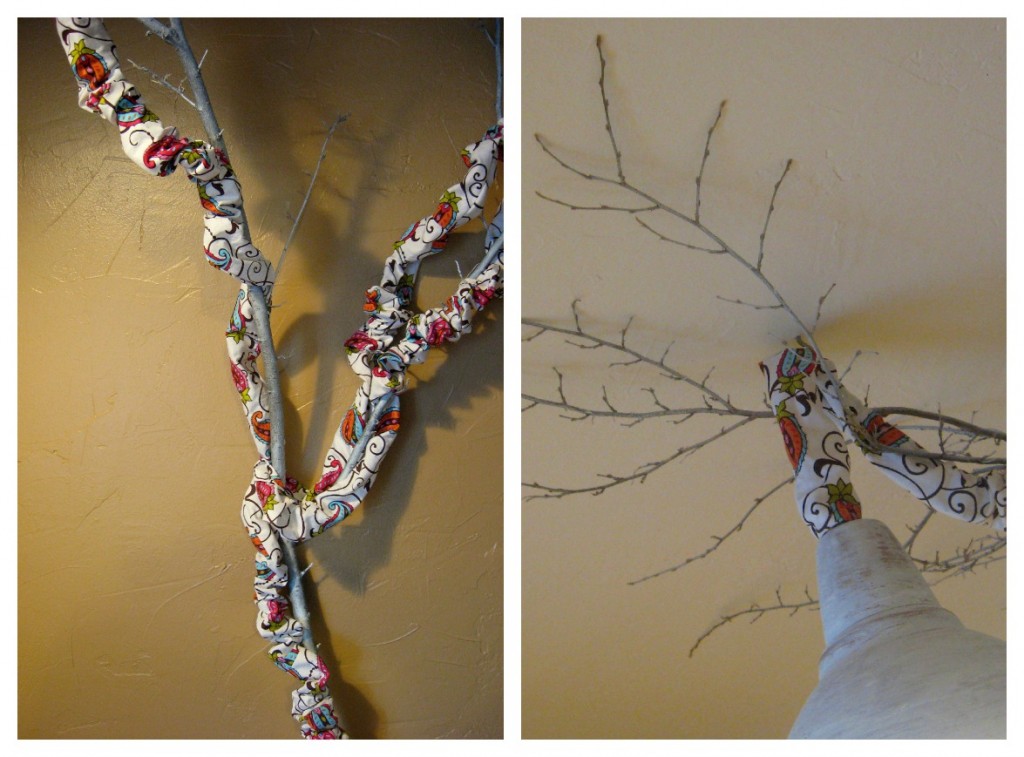
I scouted for the perfect branch in my backyard and cut it down. I brought it inside and had my husband hold it up against the wall in a big vase as I trimmed the extra branches away until it was perfect. Then I took it back outside and sprayed it (and the pot) with white spray paint.
Once that dried, I had my husband position the branch in the pot again, and I hammered two long nails through the main branch and into the wall to hold it in place. I filled the pot around the branch with crumpled up newspaper, then filled in the top layer with river rocks to hide the paper.
Next step, I found a light that I wasn’t using (this one, from Ikea) and painted it white, then scuffed it up a little with some fine sandpaper. This light is perfect for this project because it has a really long cord, but you could also do it using an extension cord if you needed to.
Pull some fabric out of your stash, or buy about a yard of it, and make a cord cover for your light. Cut the fabric into 5 inch strips (you’ll want the finished cord cover to be 1 1/2- 2 times longer than the cord you are covering) . Sew the strips together end to end to create one long strip, then hem each end. Now, with right sides together, sew all the way up the long edge, forming a tube. Turn the tube back right side out, and thread the light cord through it, using the extra length to make it bunchy.
Determine where on the ceiling you want the light to hang, and install a cup hook. Hang the light from the hook, then begin winding the rest of the cord around and down the branch. Play with the cord and the bunching until it looks perfect.
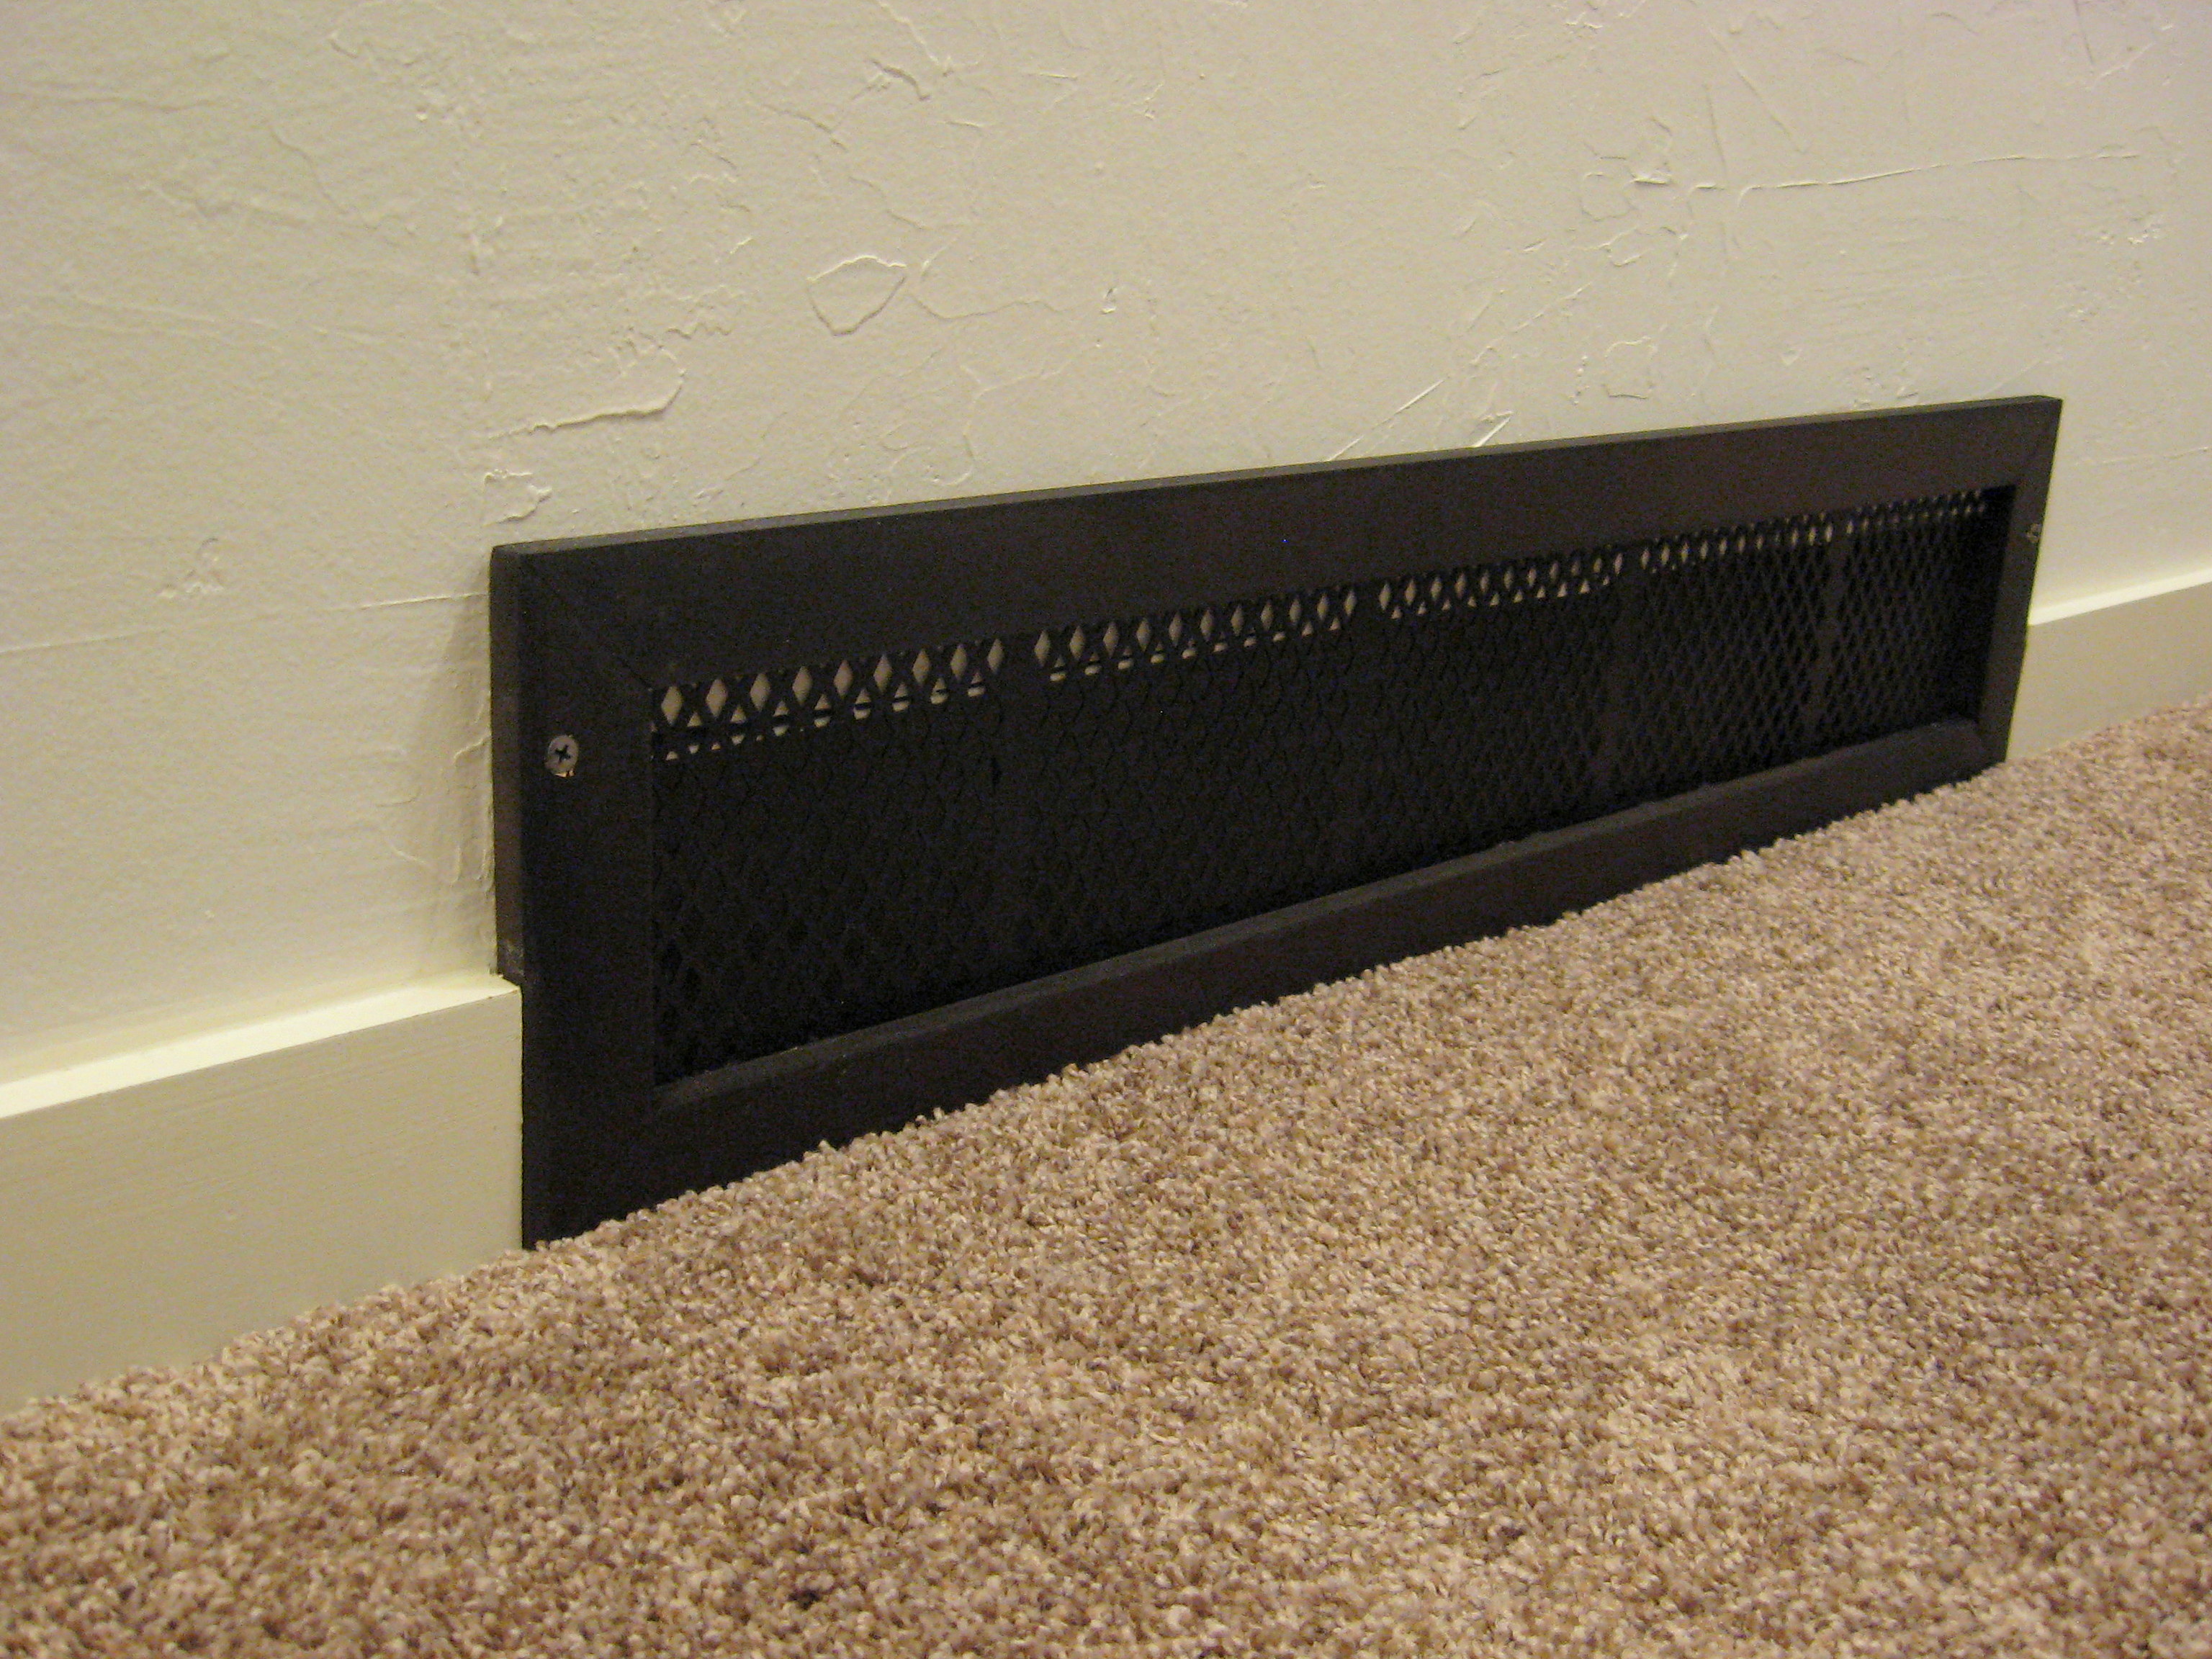
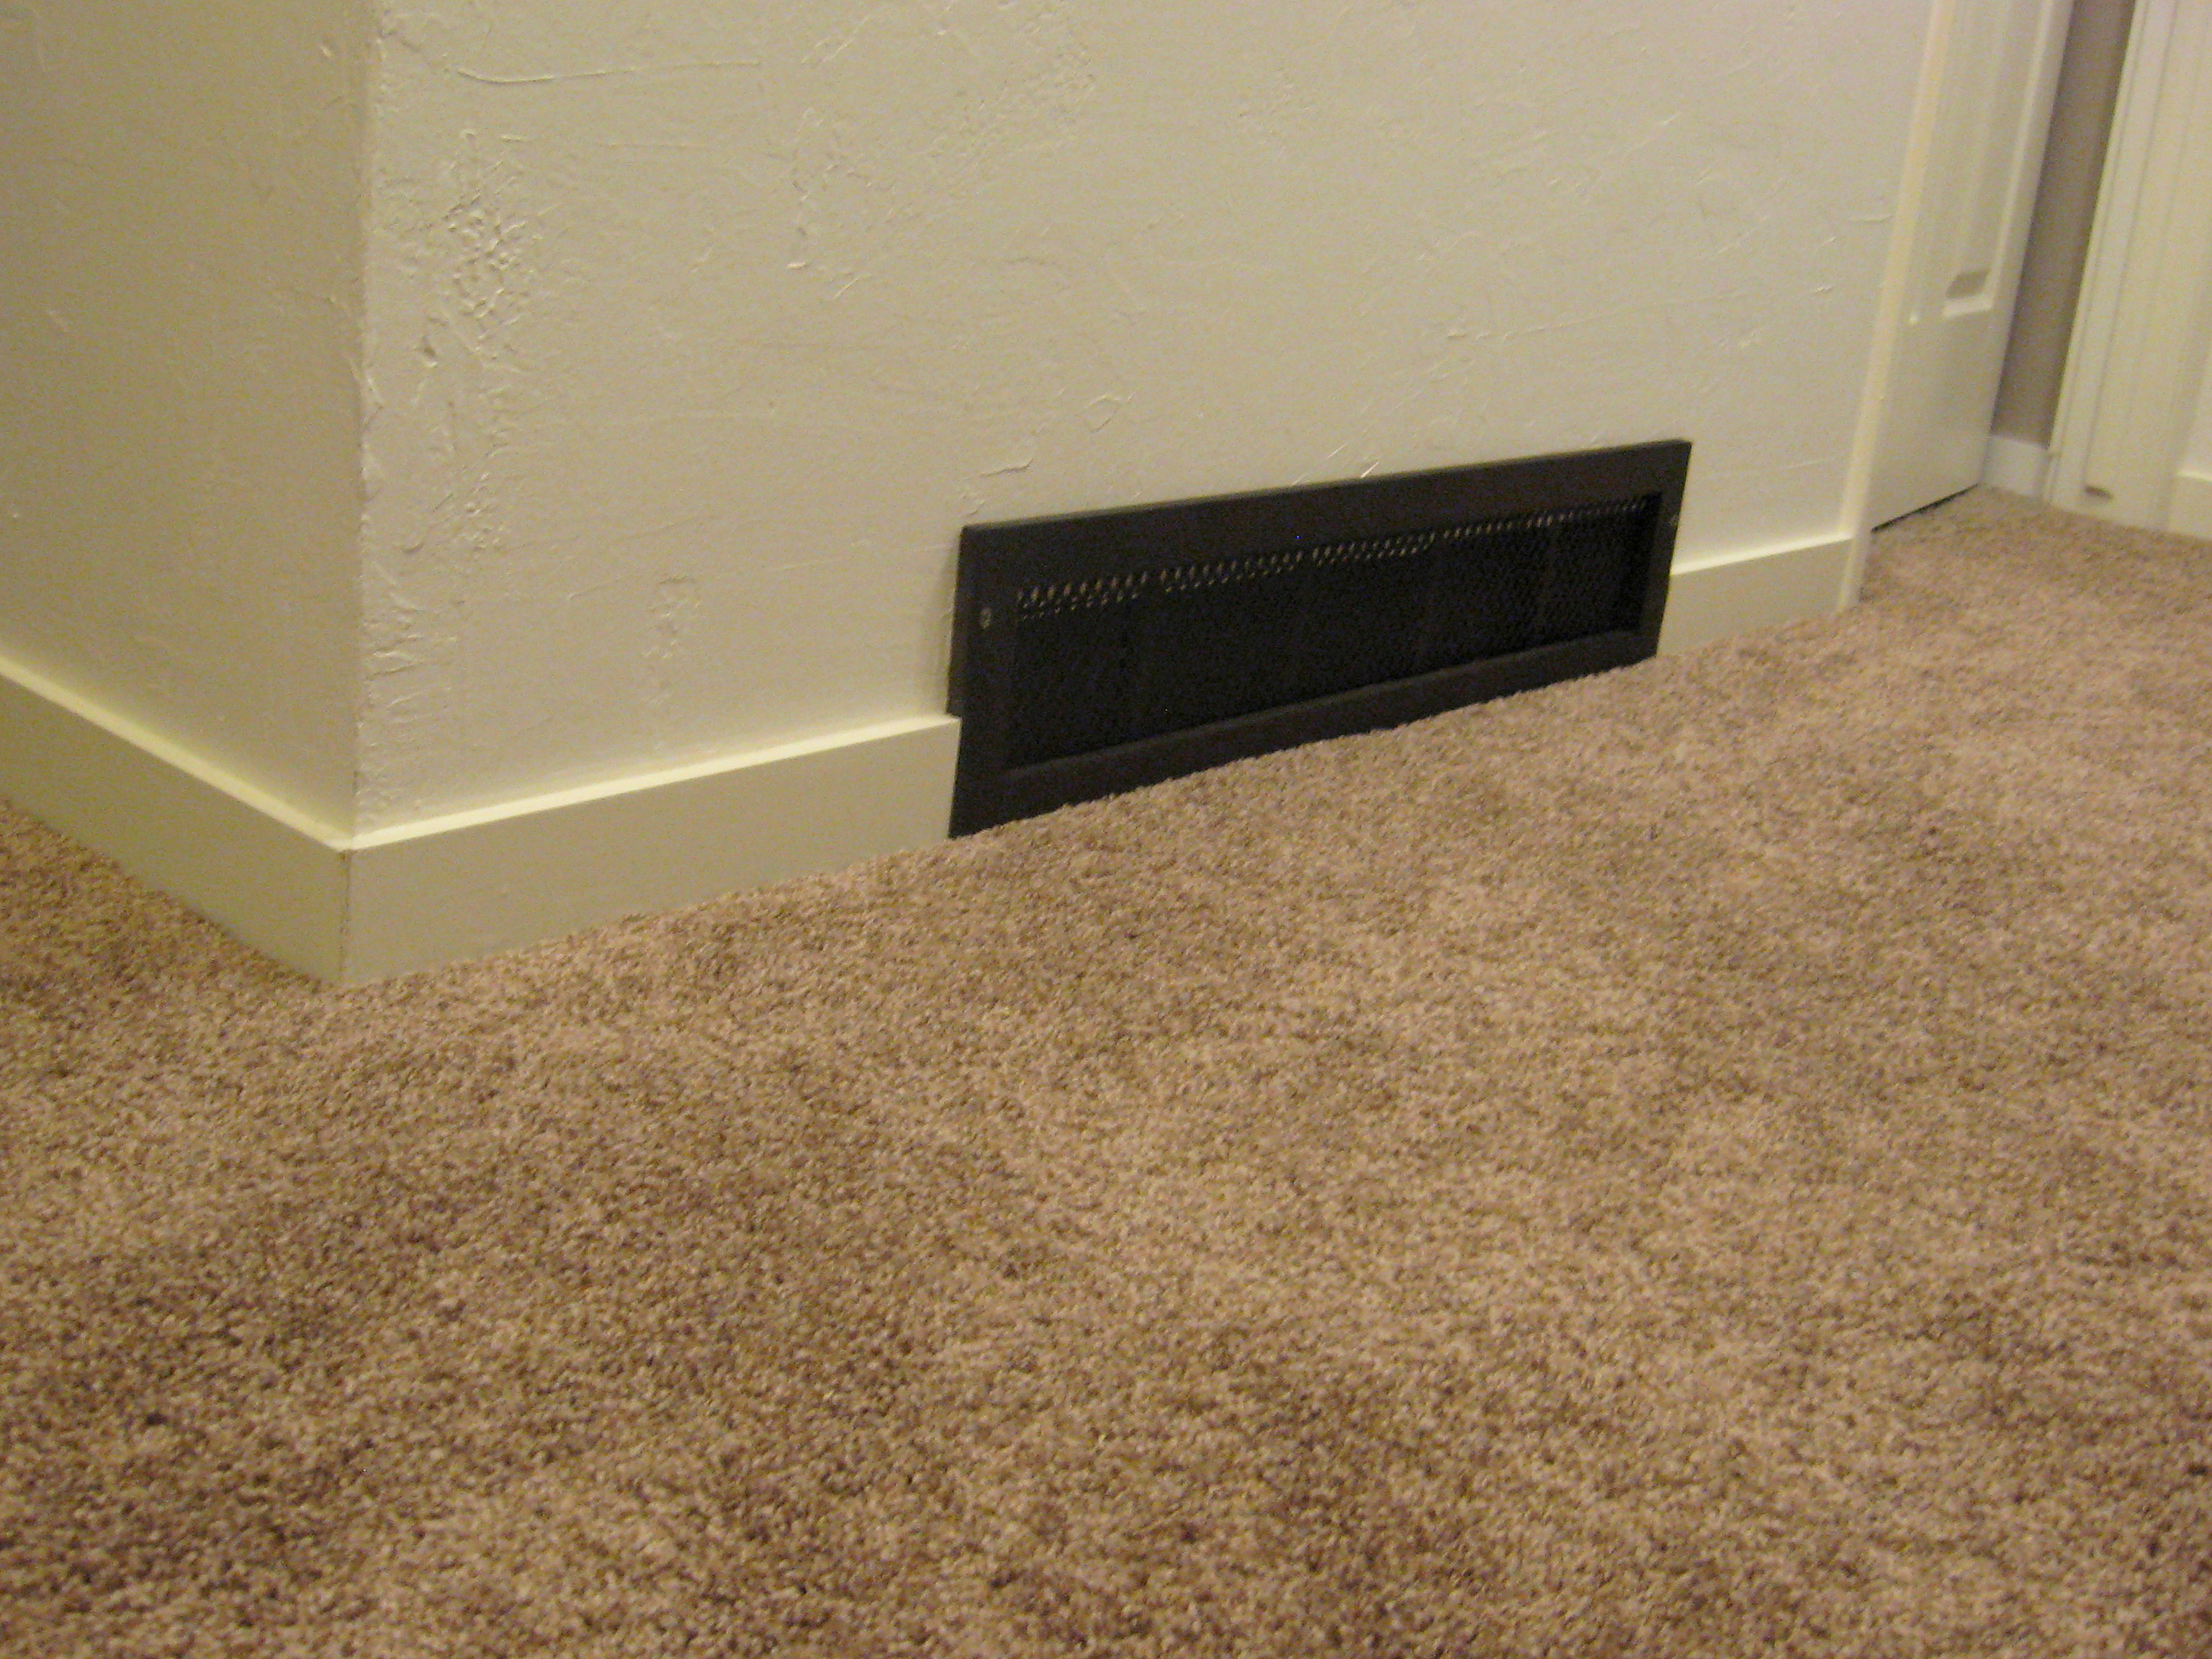
How to Fix an Ugly Air Intake Vent
We have an ugly air intake vent on the wall in our hallway – I didn’t get a before picture of it in place, but you know the kind… used to be white, metal, dented from years of abuse and ugly! After I painted the hallway, installed new baseboards and carpet, I just couldn’t bring myself to re-install the old vent cover. I looked for a new one, but even to get a new, clean plain one was pricey – never mind the cost on the fancier ones.
As I wandered the aisles of my local Home Depot, I came across some plastic gutter screens with a cool pattern. They were on clearance for $. 78, but even the regular priced ones were only a dollar, so I picked up a few. Here it is on the left, with the old vent cover on the right.

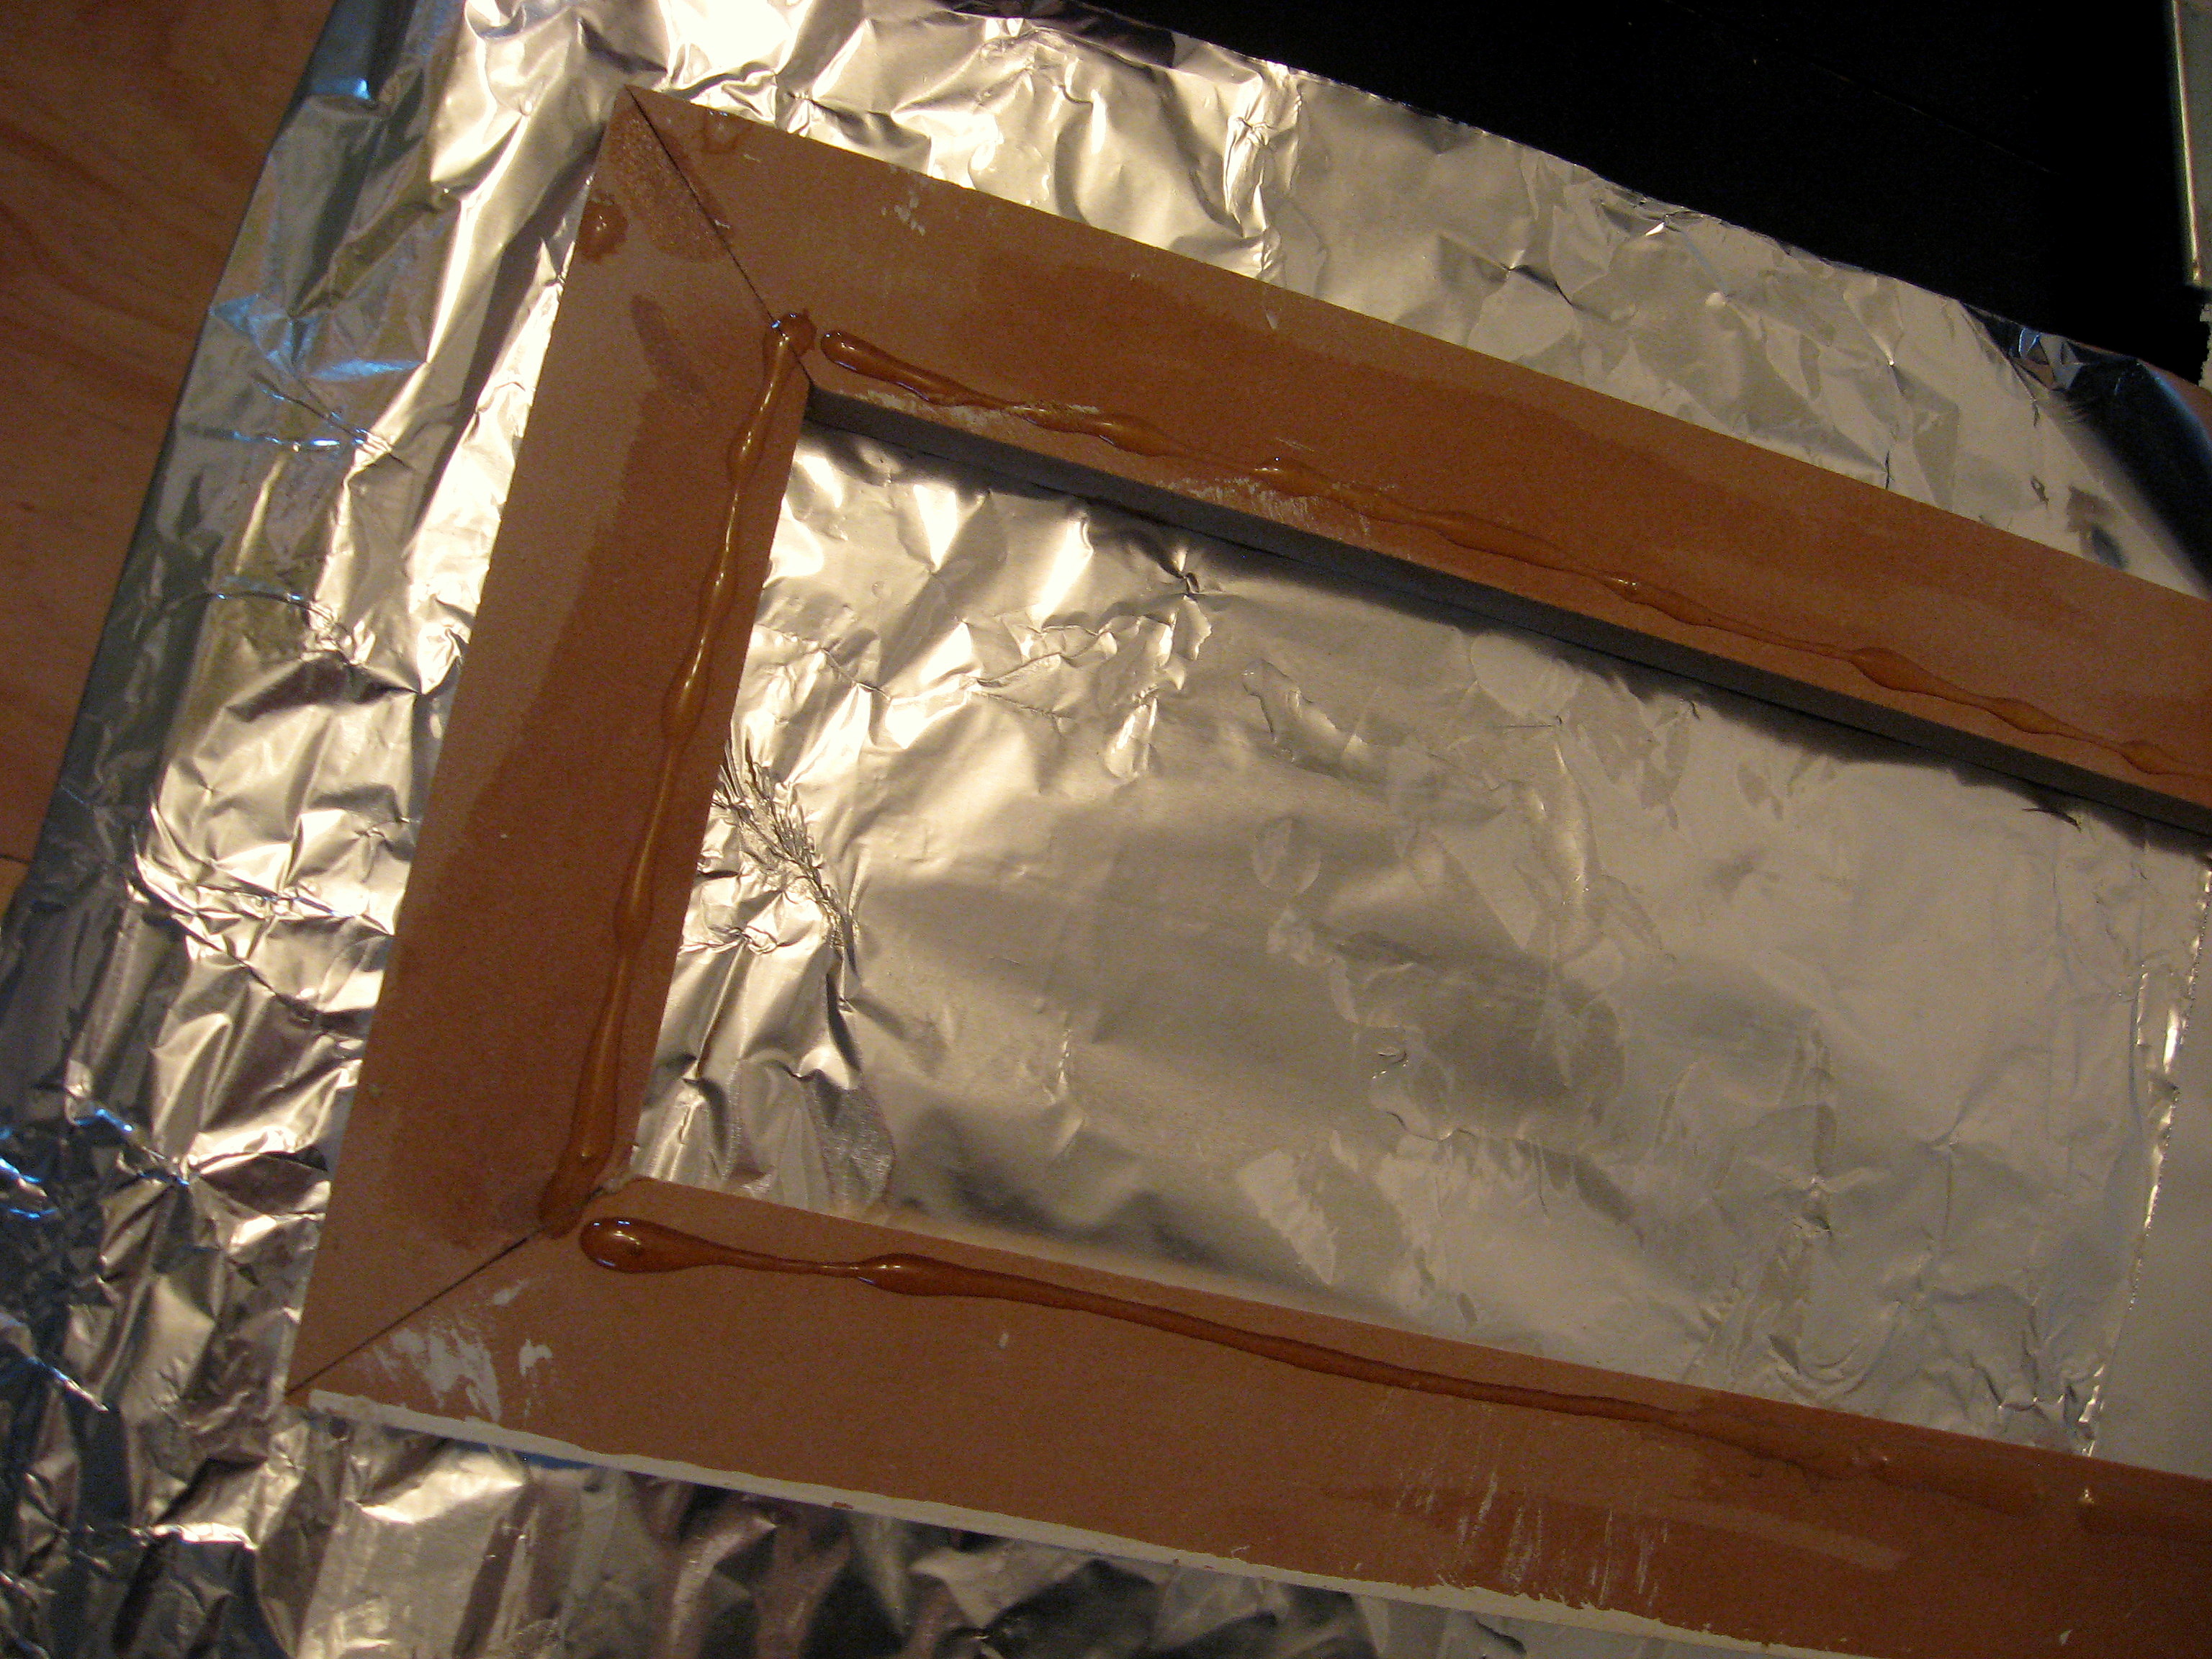
It had some metal mesh screen on it, but it just pulled right off. Then, I made a simple wood frame out of moulding, using the old vent cover as a guide to cut the pieces to size.

I glued it together with Gorilla Glue and used clamps to hold it in place. I put a piece of foil under since Gorilla Glue expands; I didn’t want to end up with it stuck to my table! Don’t squeeze the clamps too tight, or the mitered corners will slide. Once I had the clamps in place and everything lined up perfectly, I put a heavy can on each corner and threatened my family with bodily harm if anyone touched it…
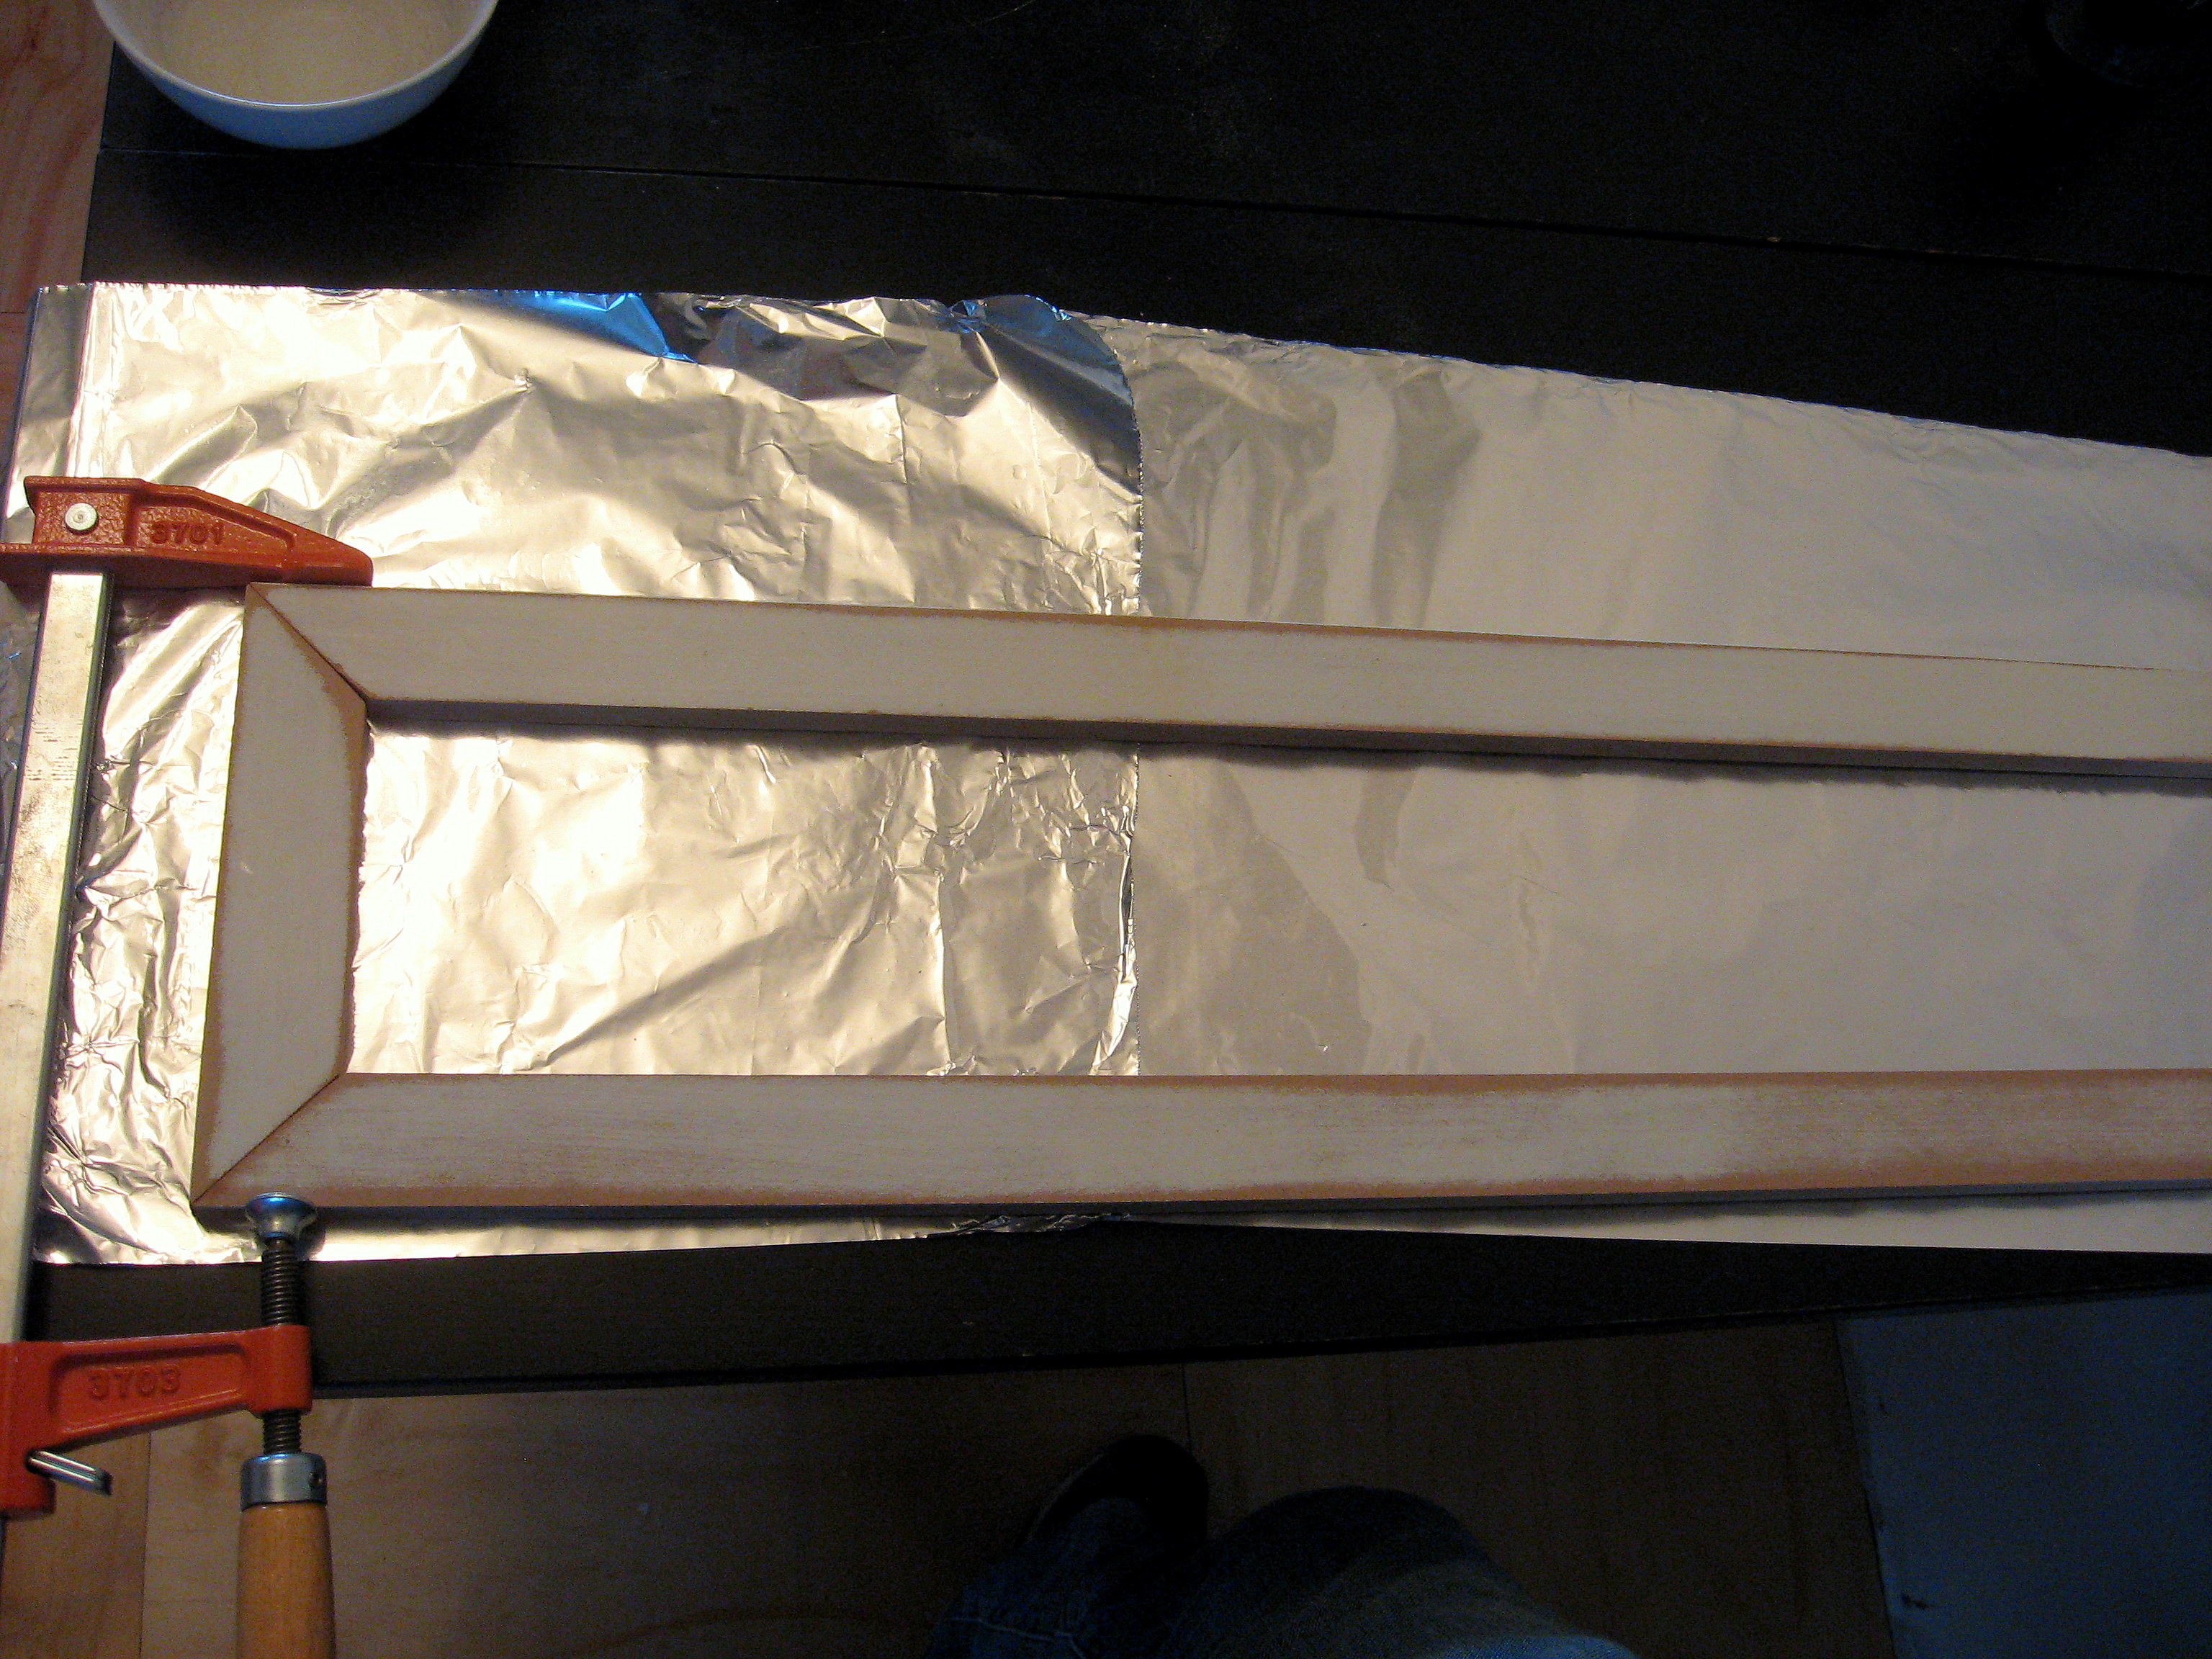
Once that was dry, I turned it over and ran a bead of glue around the edge of the frame on the back,
then centered the plastic cover in place. (The plastic cover was a little too long, but it cut easily with scissors.) I came back every 5 or 10 minutes at first and used my fingers to push the plastic down into the glue. Once the glue began to set, I just left it to dry.
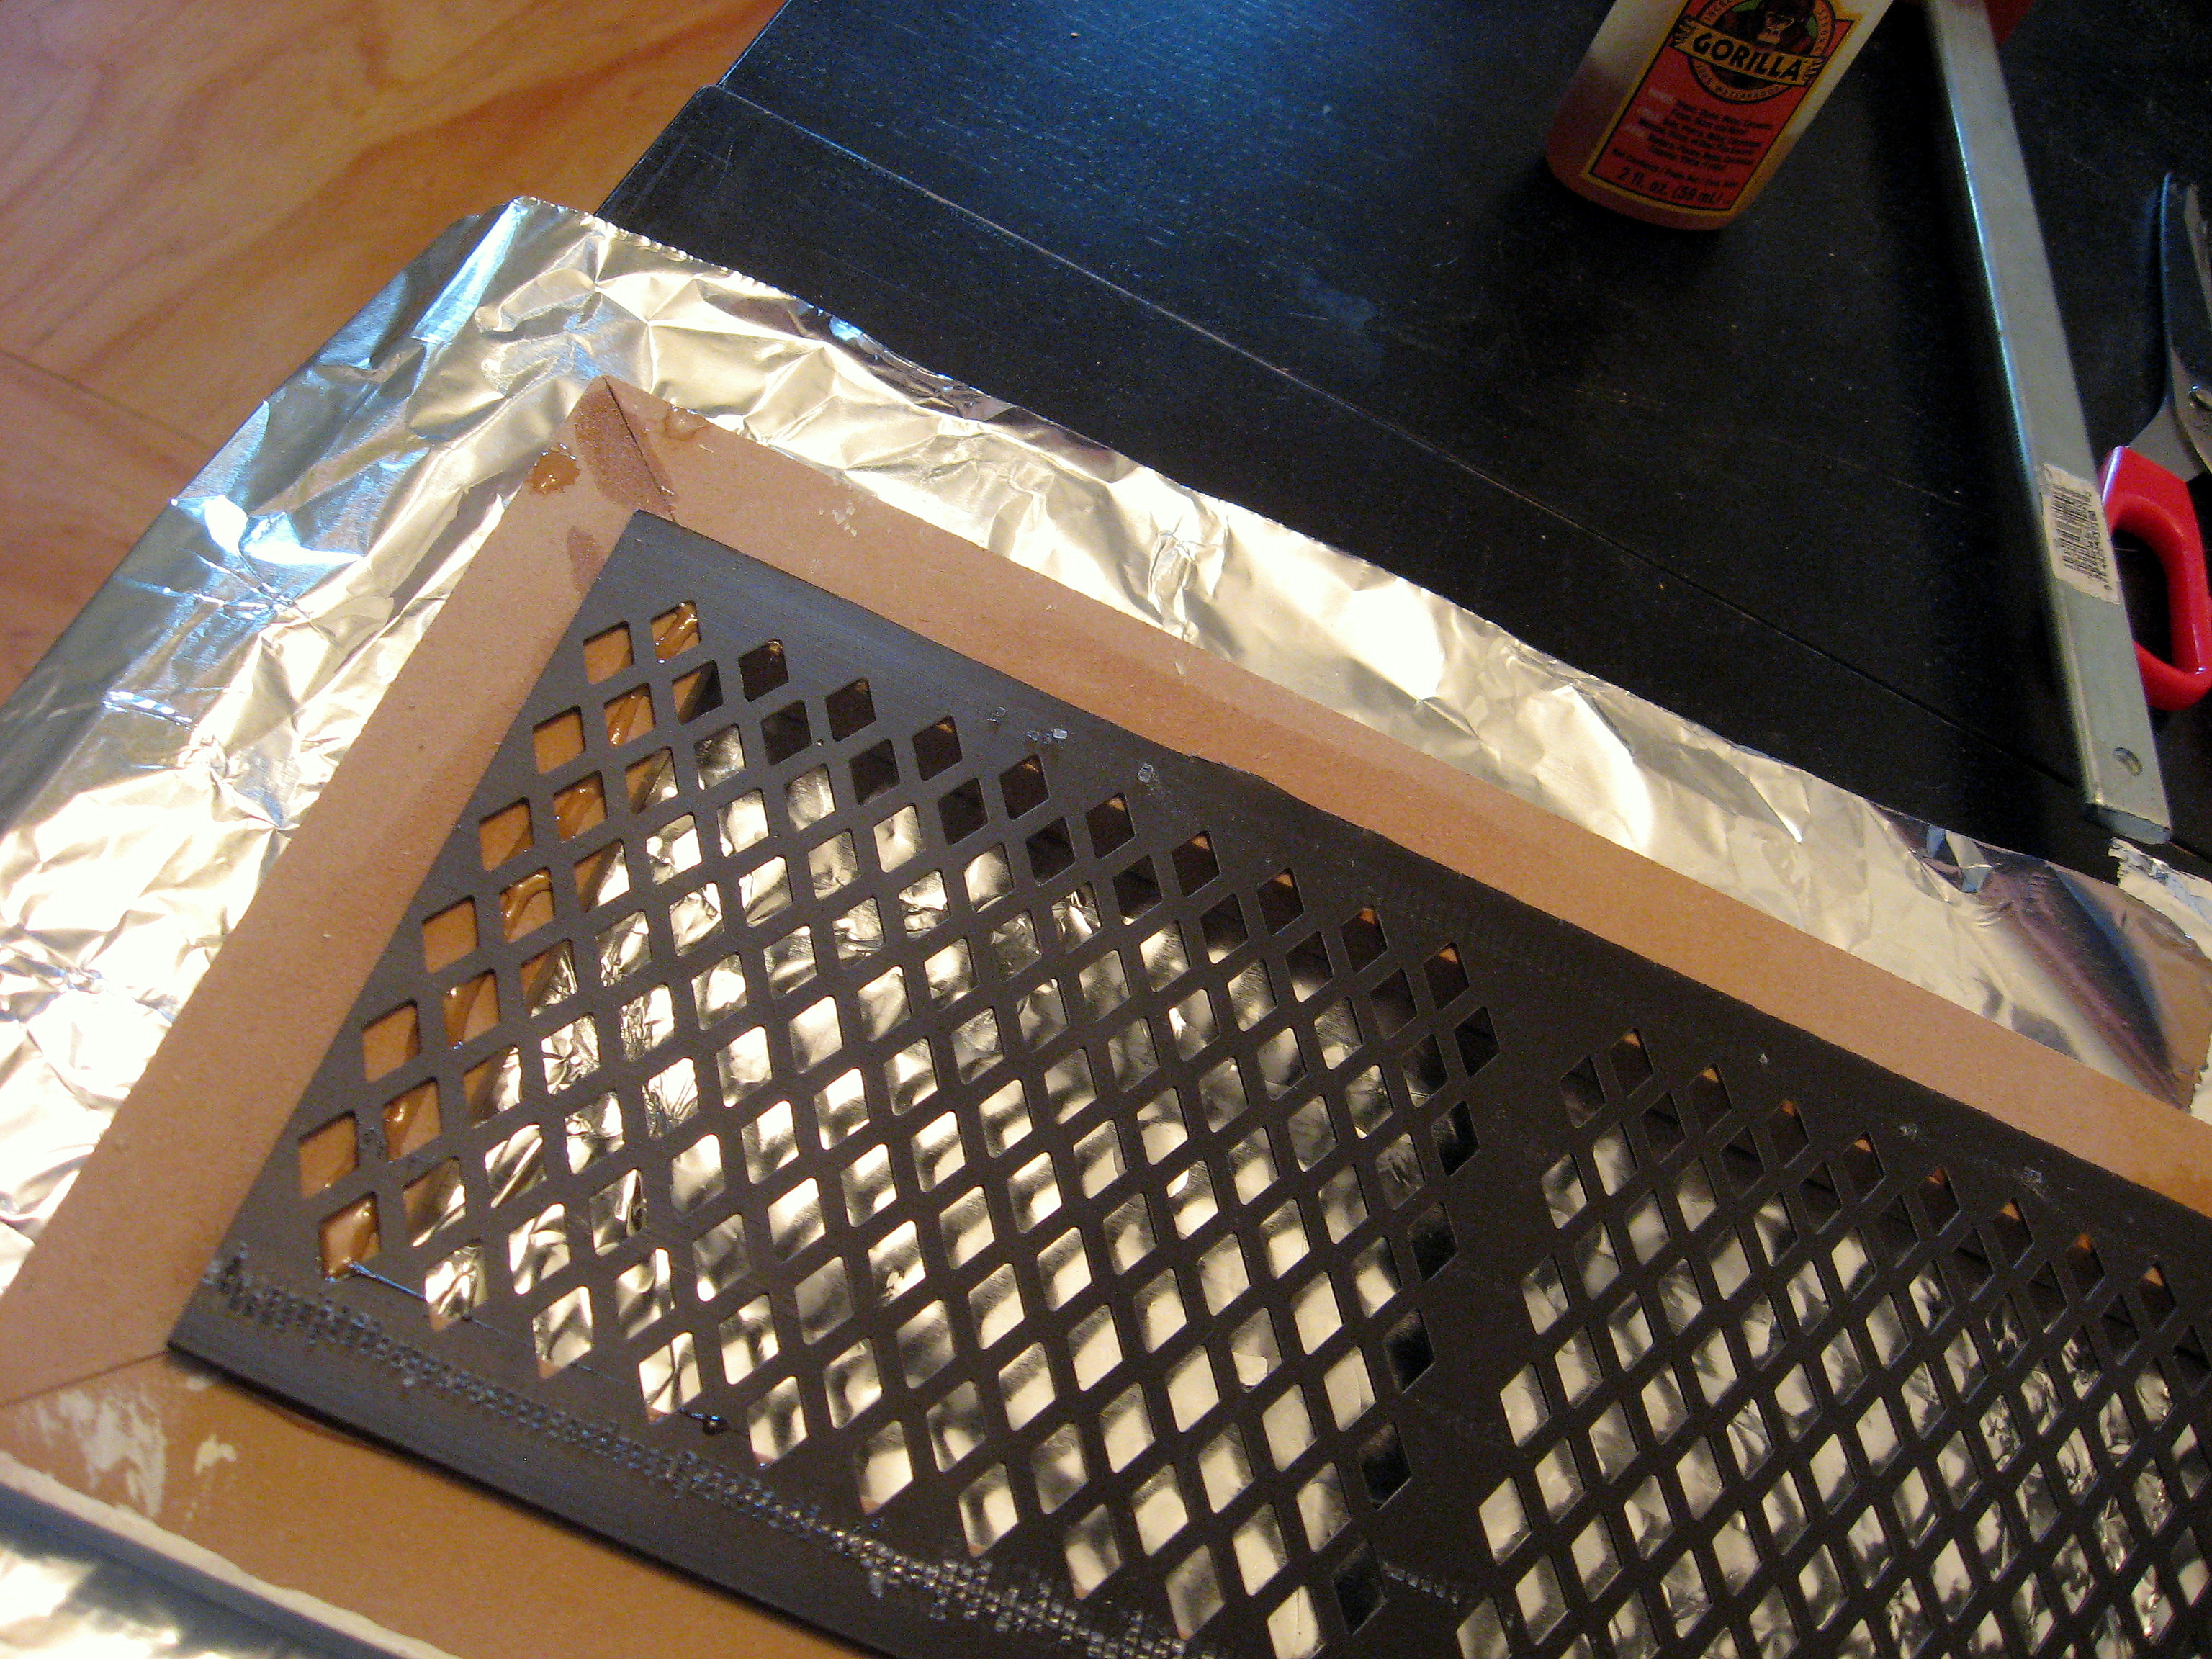
Once it’s dry, you may see that the glue has foamed up and is visible on the front side. I just used a small taping knife to scrape it off, no problem.

Now just spray paint the entire thing in the color of your choice. Personally? I like a layered combination of matte black and metallic copper.
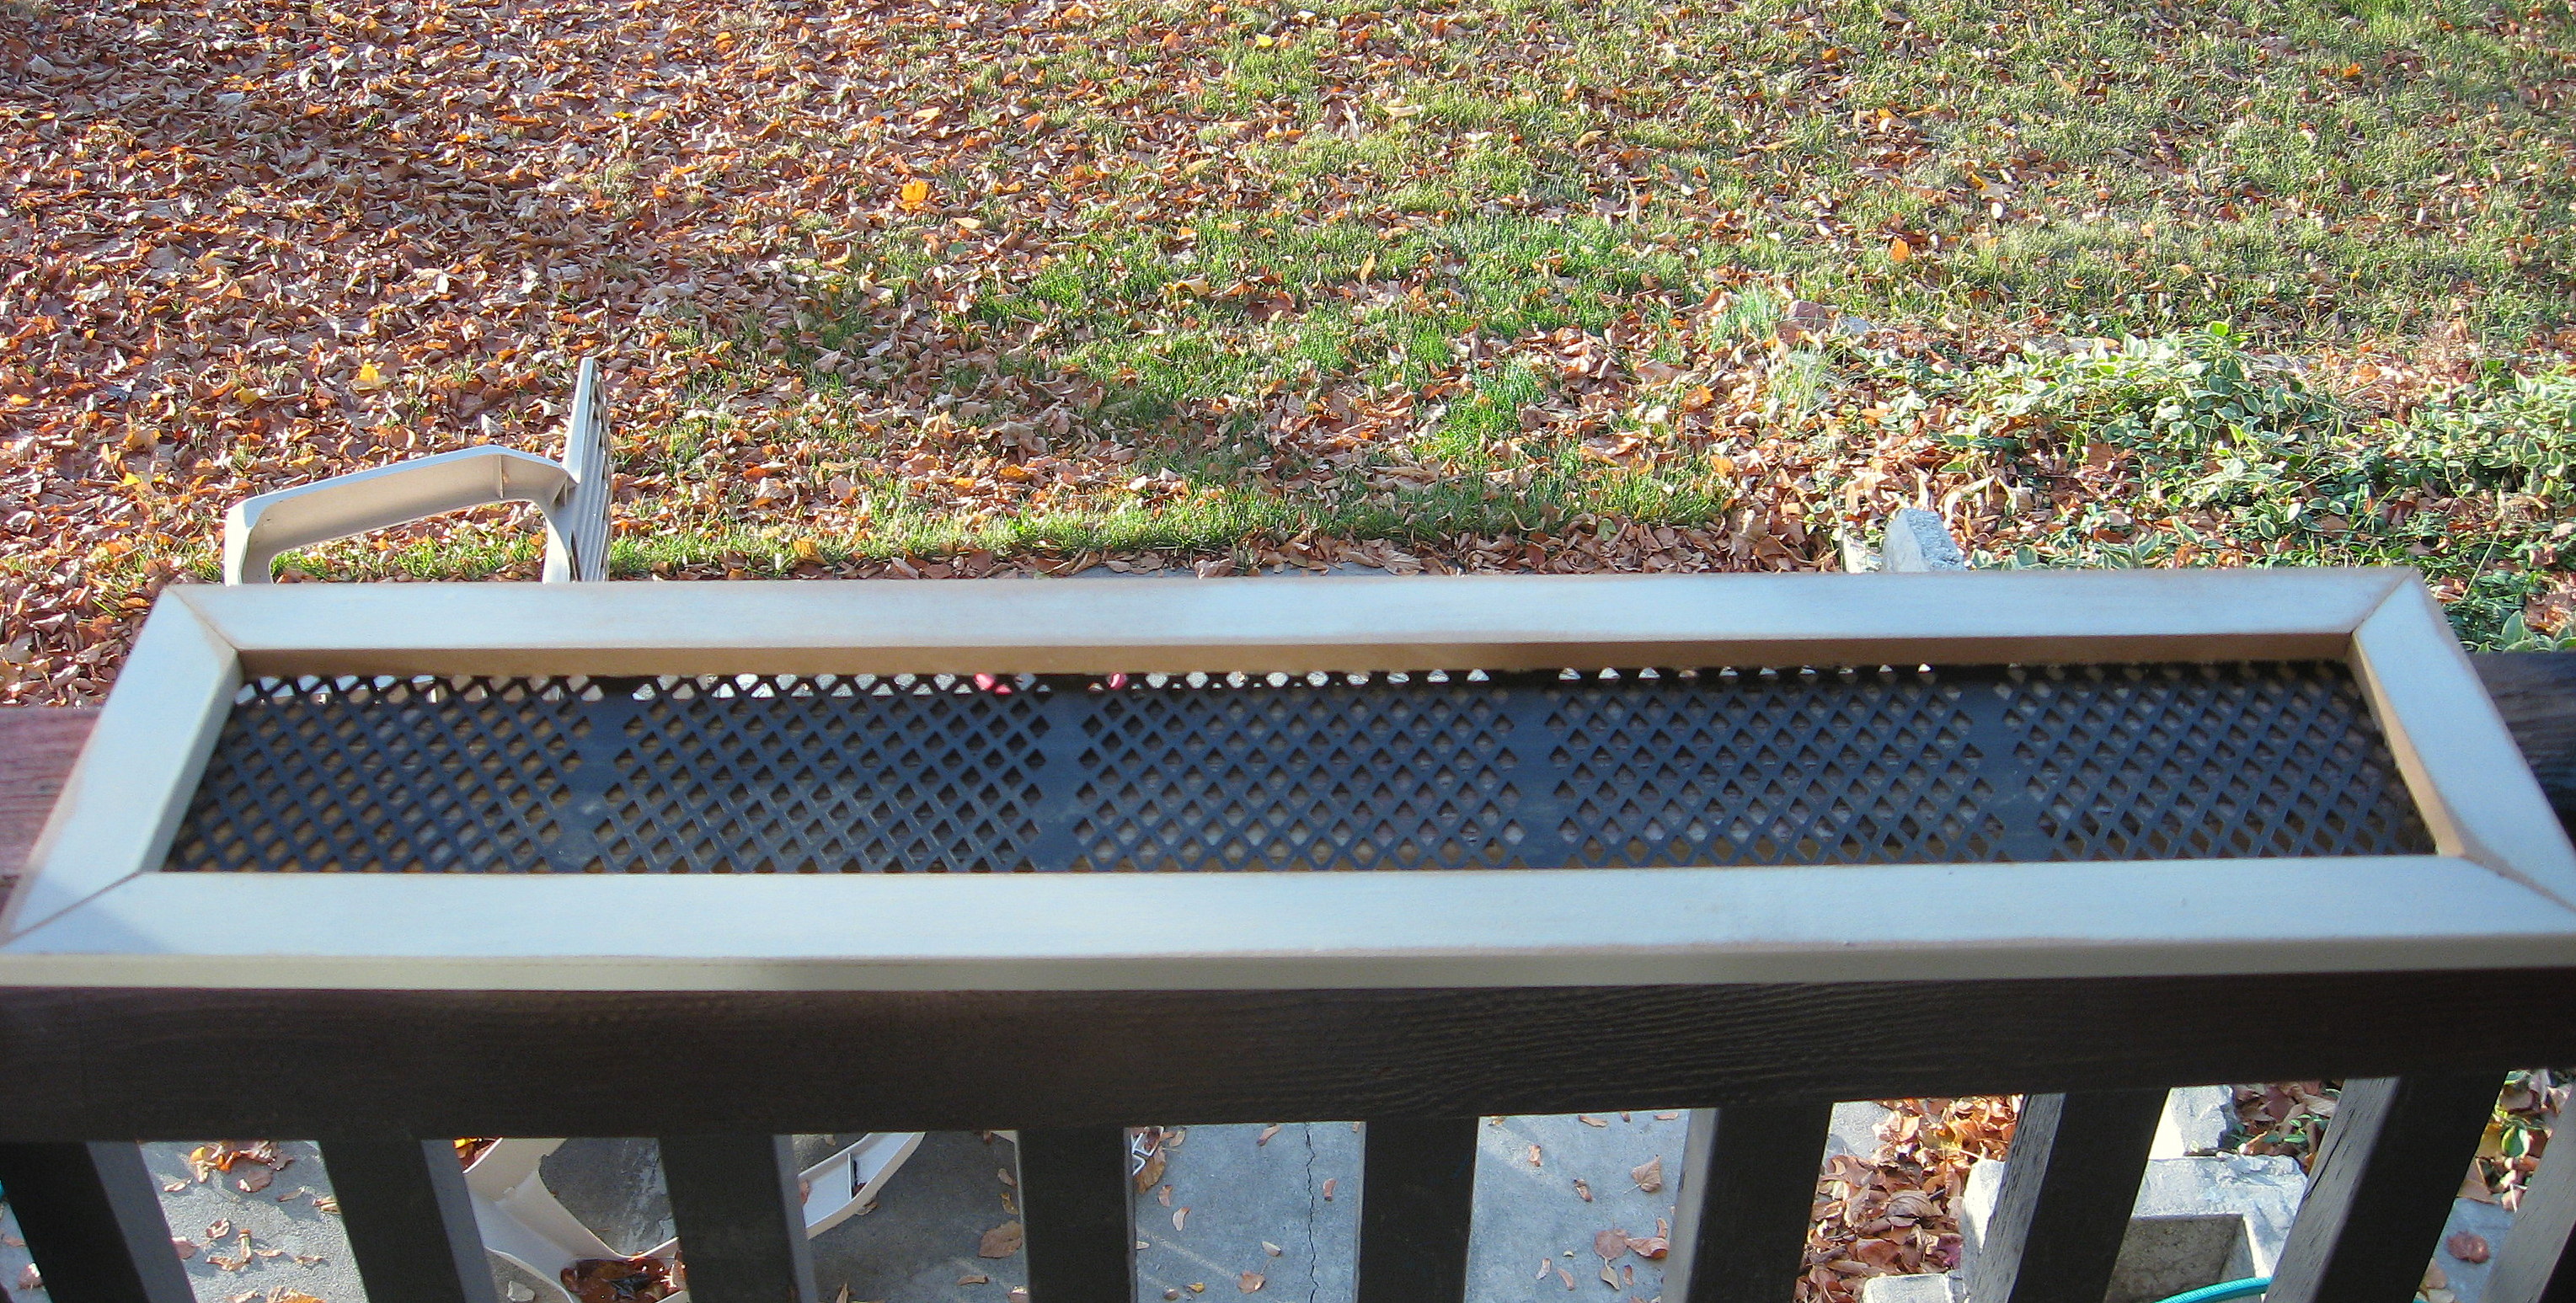
Drill holes in the wood and screw back into place.