
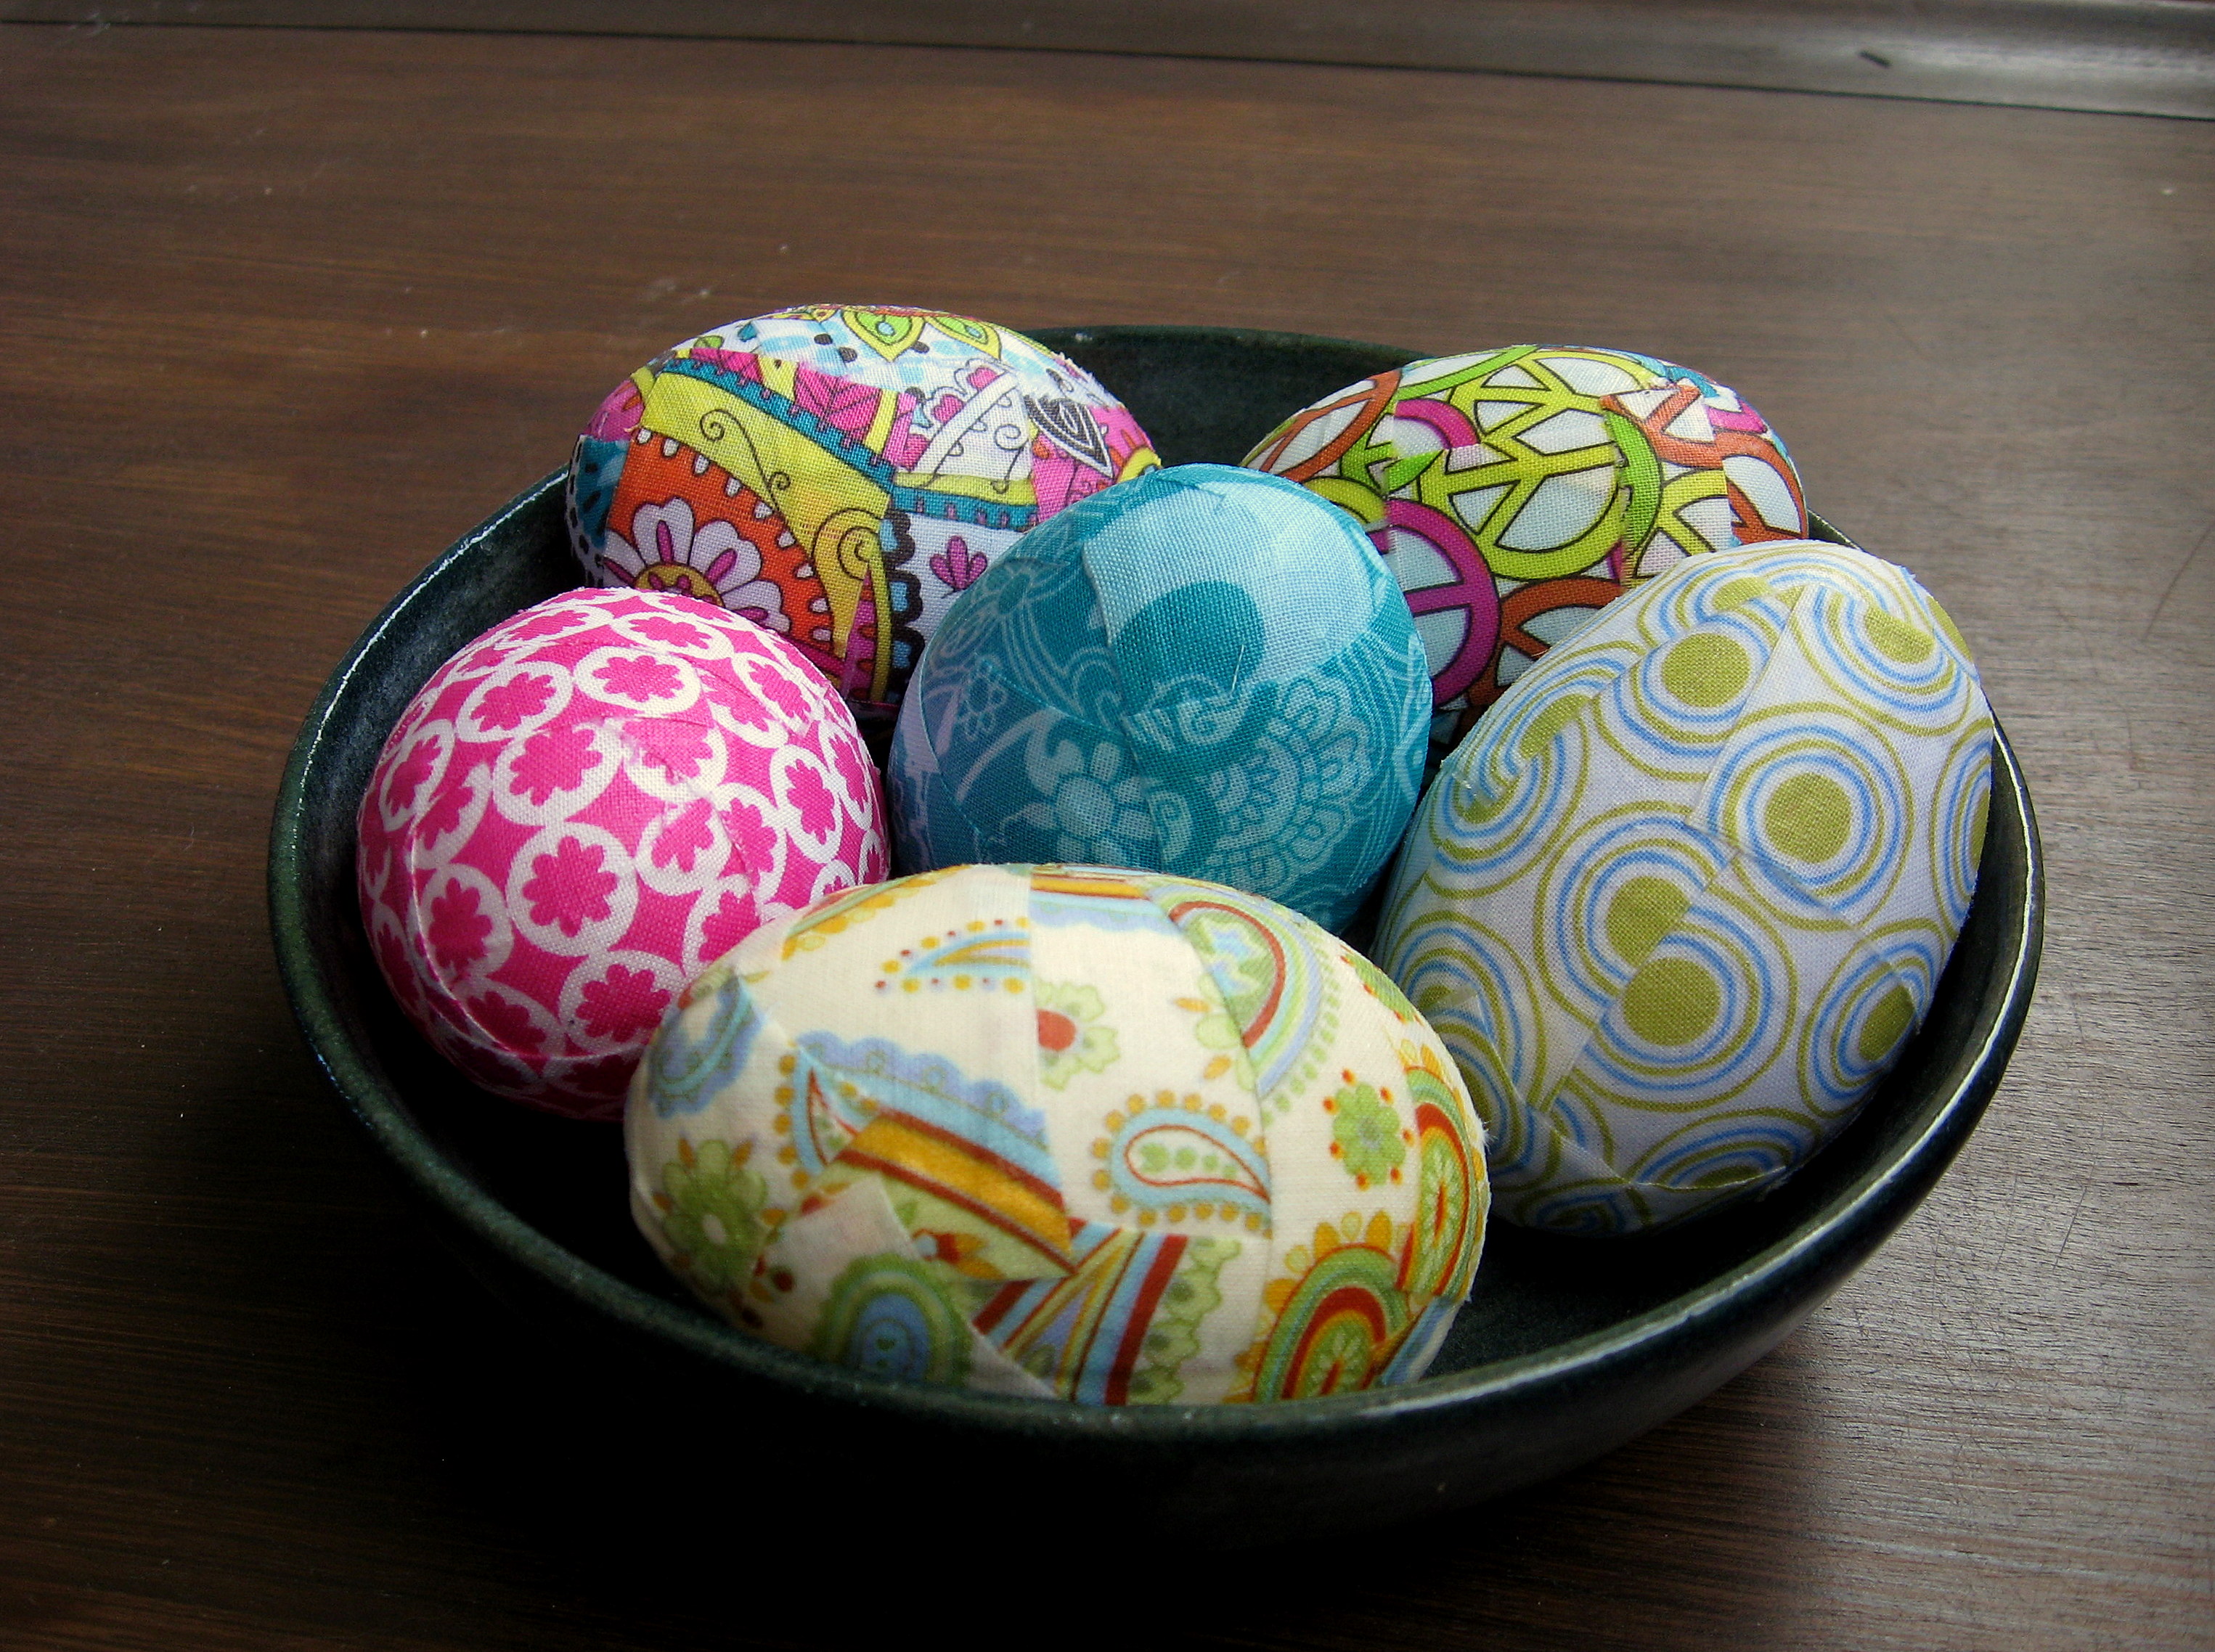
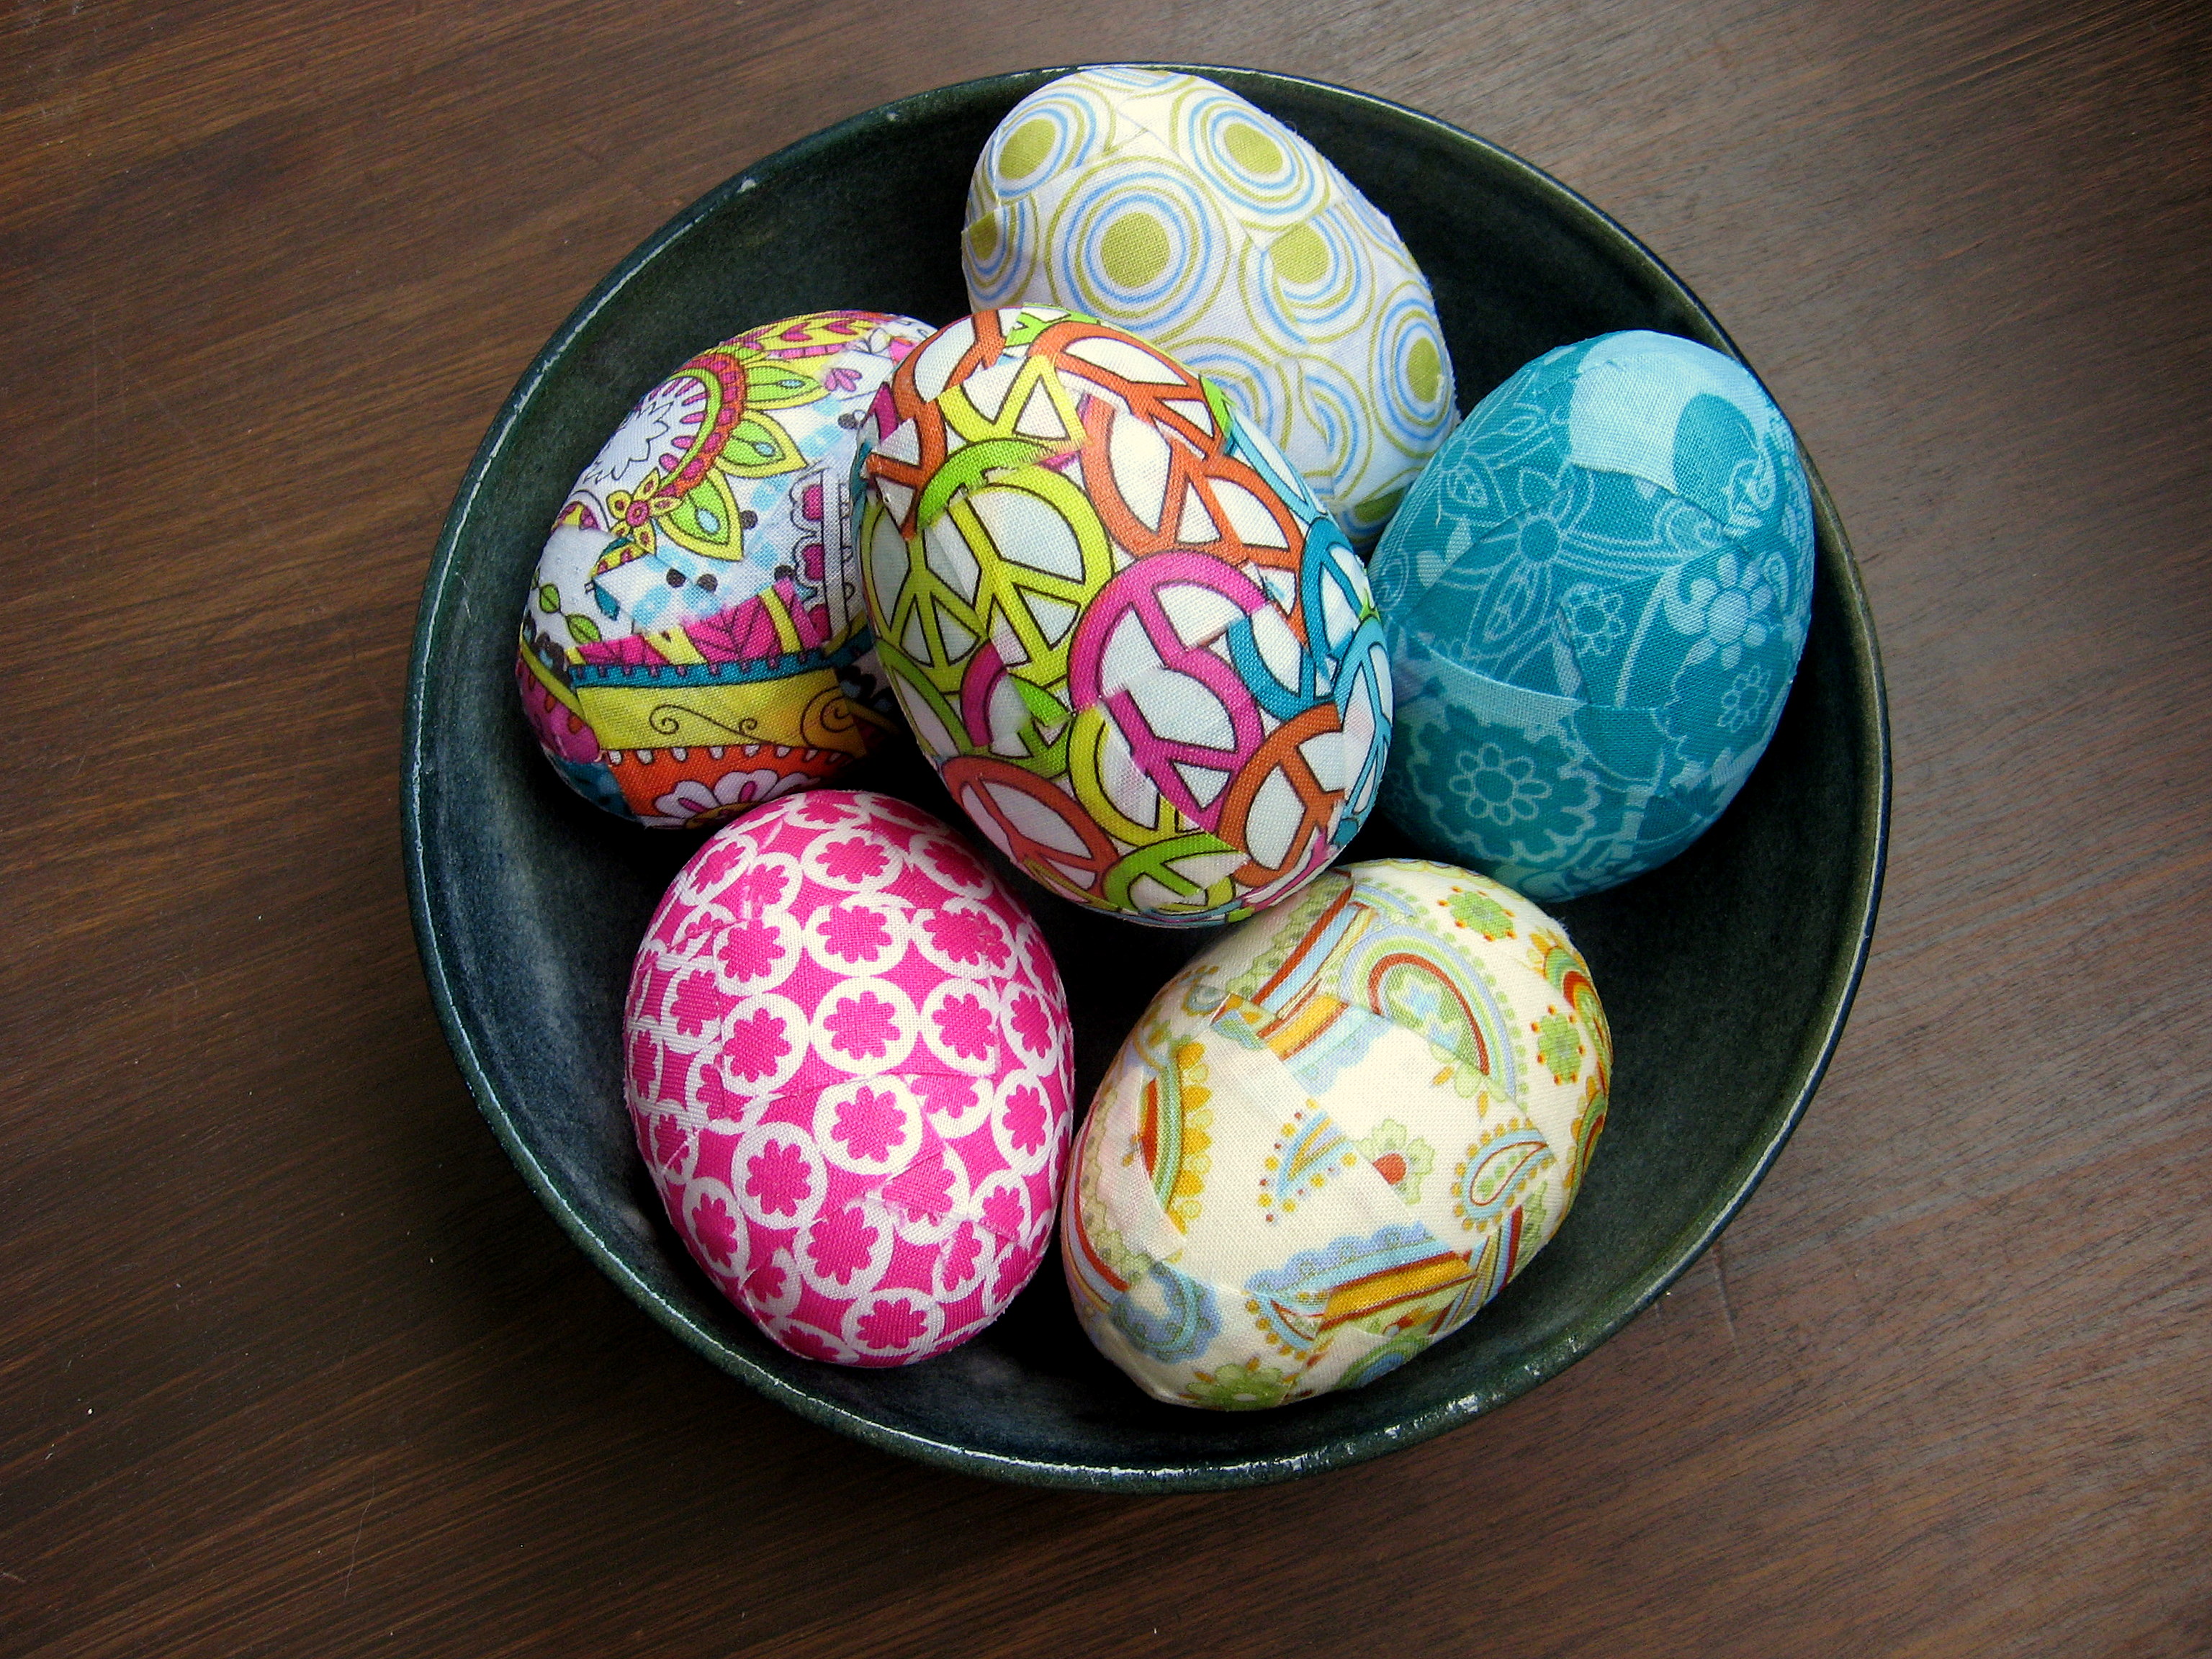
Fabric Covered Easter Eggs
One last post about Easter Egg decor, and you’ll be all set for the big day!
Materials needed:
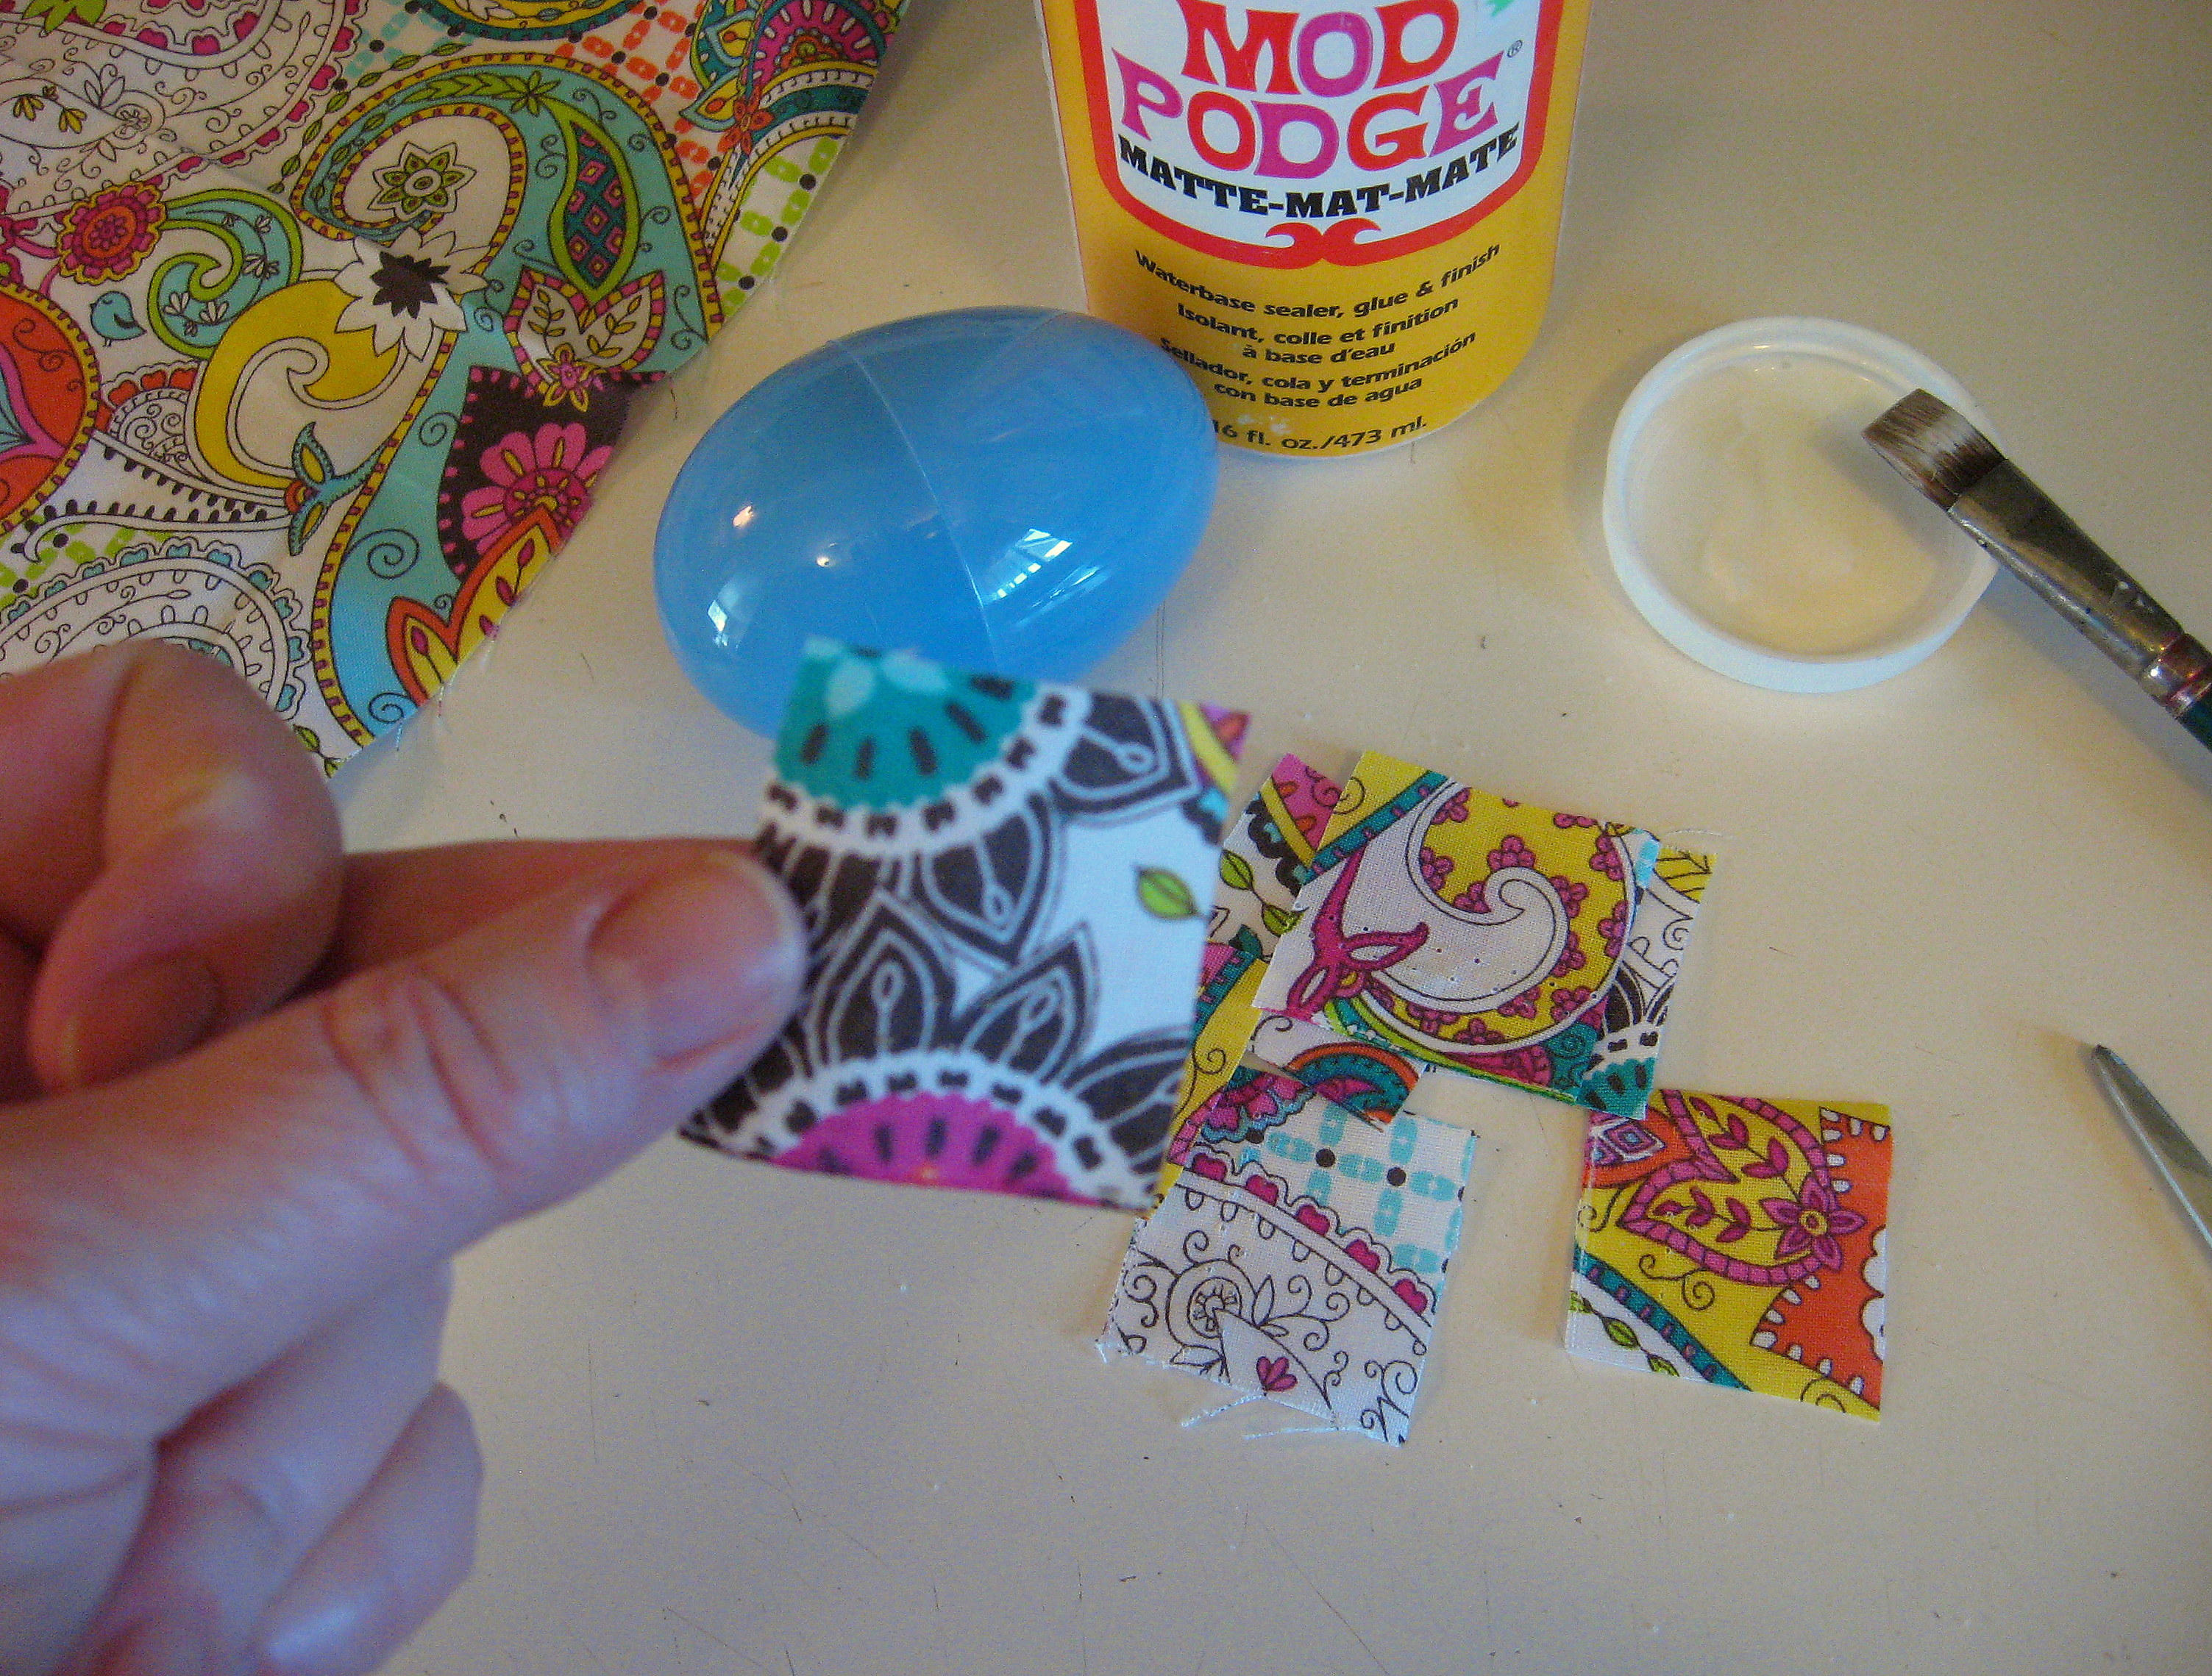
Fabric; it only takes a small bit to cover an egg, so this is a great project for using up those fabric scraps!
Mod Podge – comes in matte or glossy finish, so whichever you prefer. These are matte.
Paintbrush
Plastic Easter Eggs
Start by cutting the fabric into squares about an inch square. Don’t measure – just eyeball it. You are going for a casual patchwork look; you don’t need to be exact at all.
With the paintbrush, brush Mod Podge onto the egg in a square. Make the Mod Podge bigger than the fabric; you don’t want to have any part of the fabric squares that don’t get Mod Podge on them. Don’t worry about extra Mod Podge; it will all dry and work out in the end.
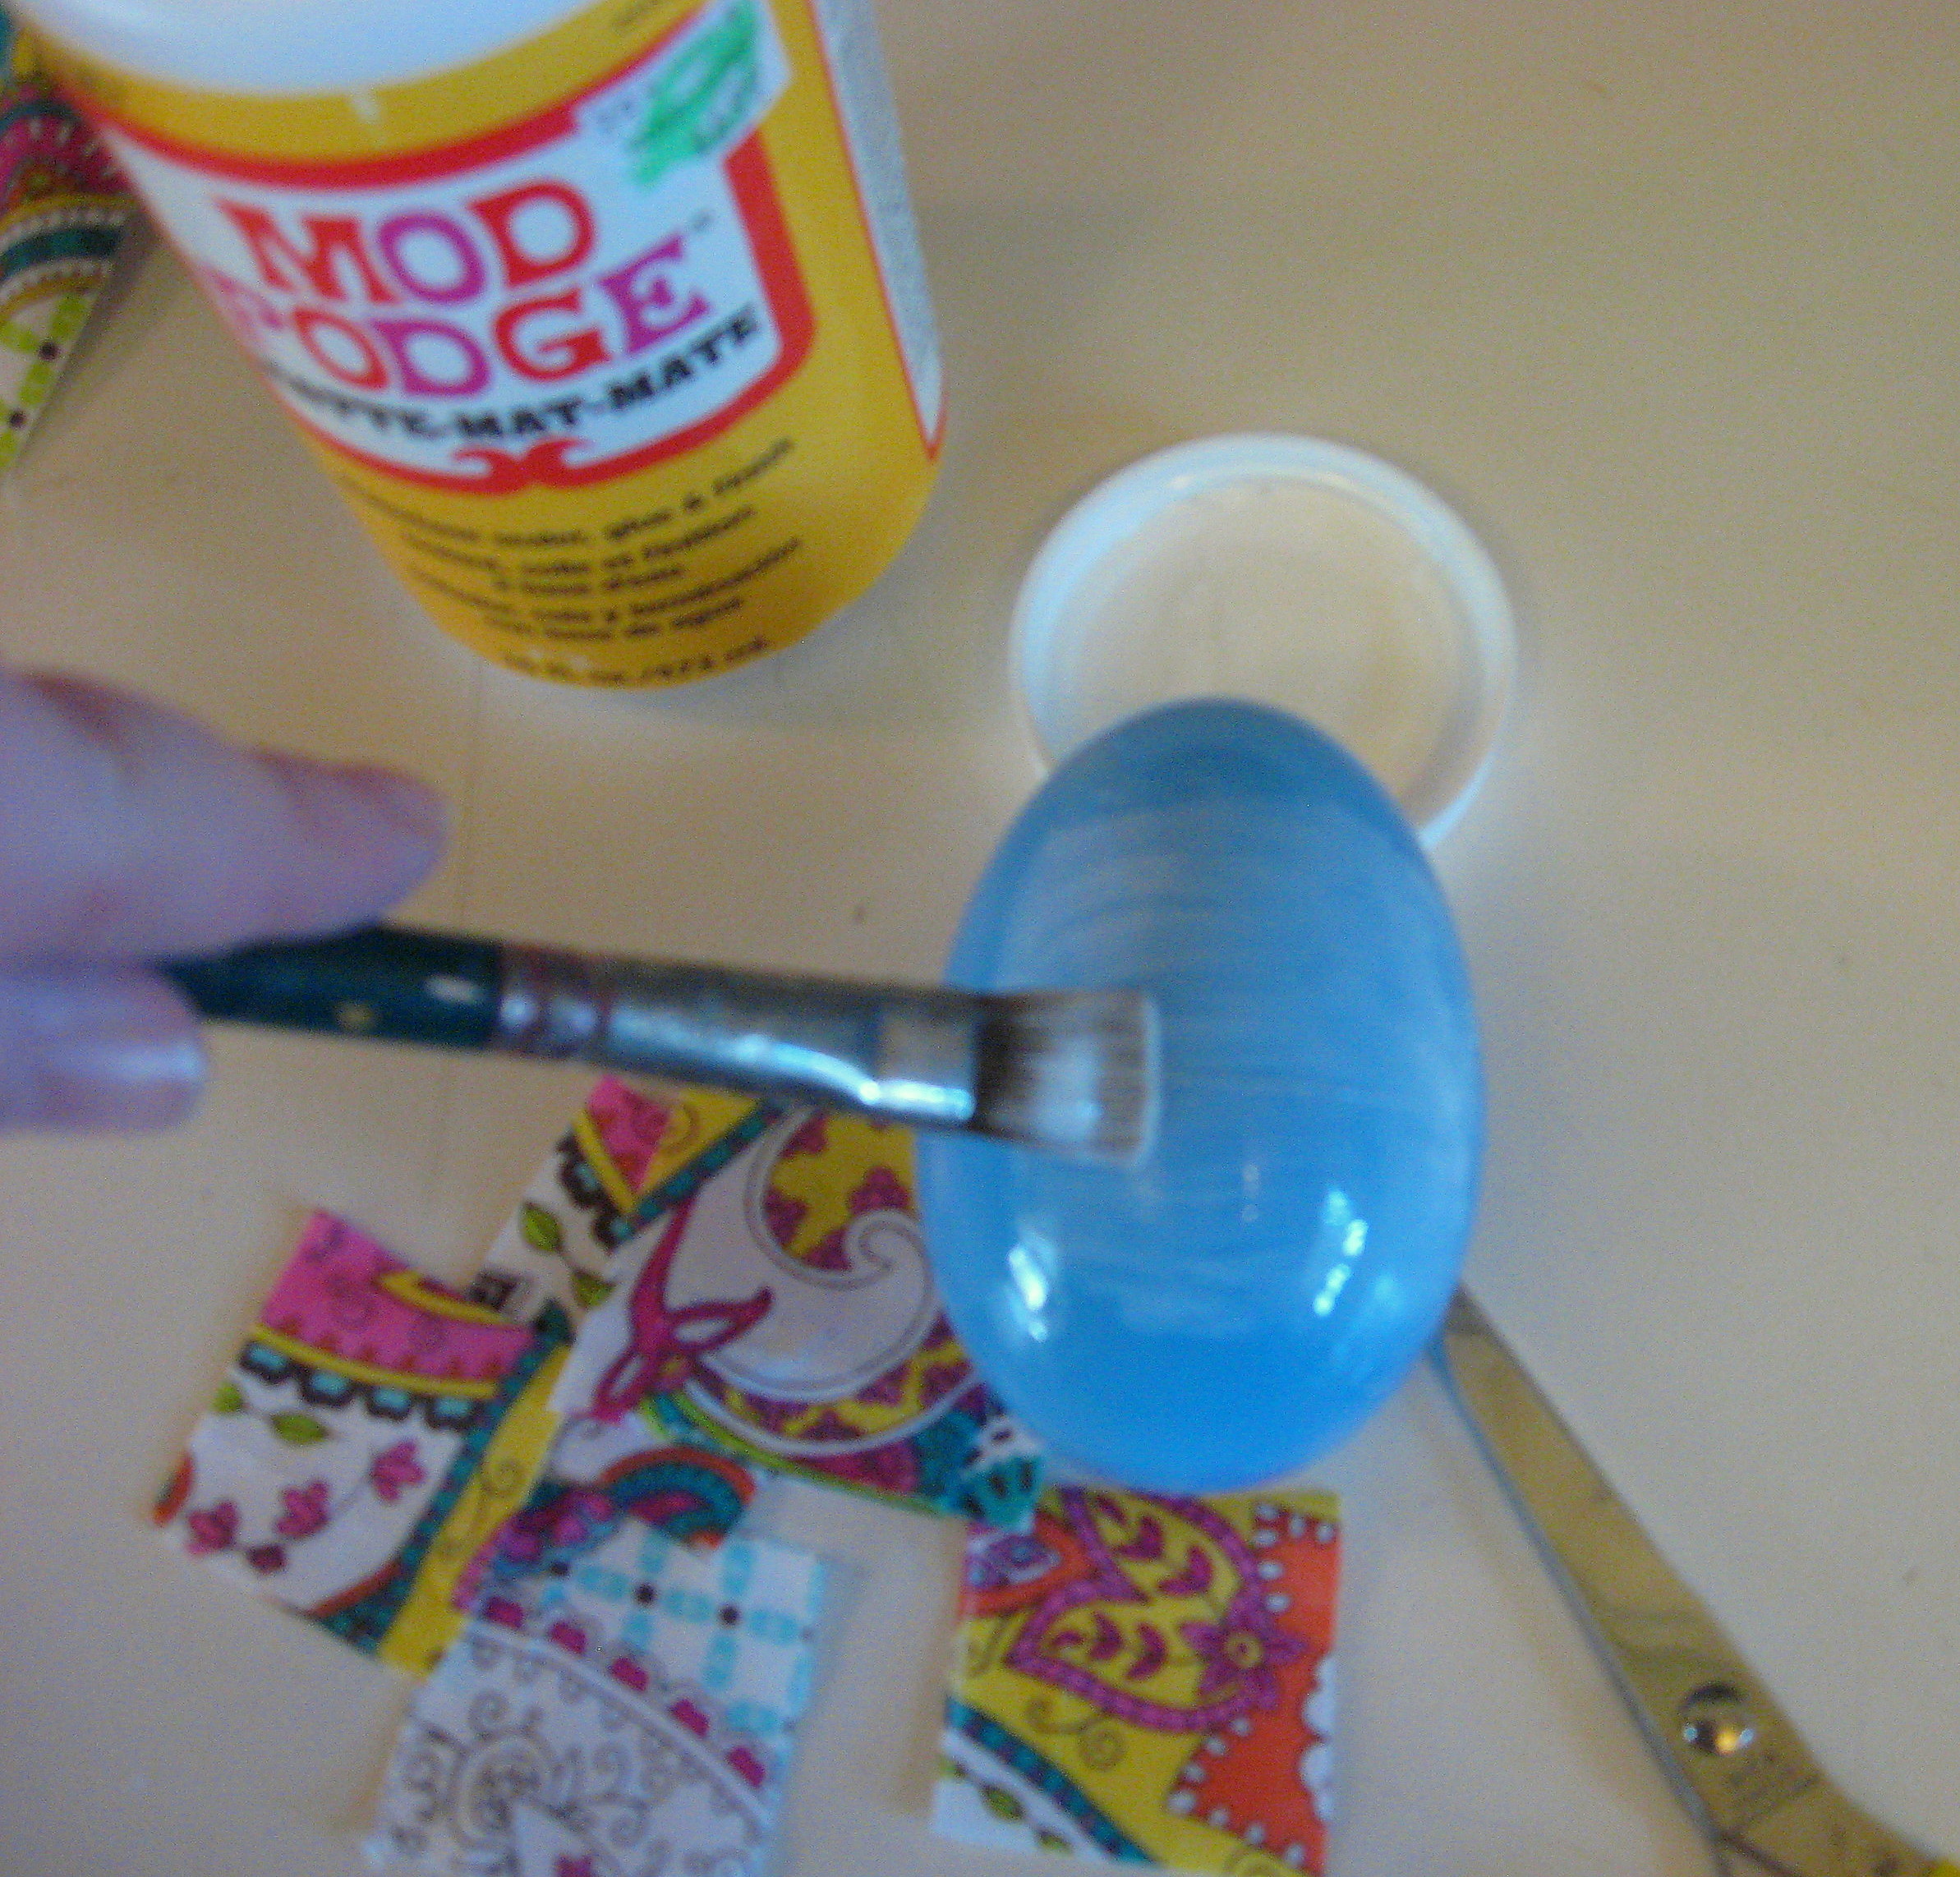
Lay a fabric square on top of it and smooth it flat with your fingers, making sure to go all the way to the edges to make sure it all sticks. The fabric is pliable enough that it will lay flat on the curves of the egg with no bubbles or wrinkles as you work it with your fingers, everywhere but the very ends of the egg.
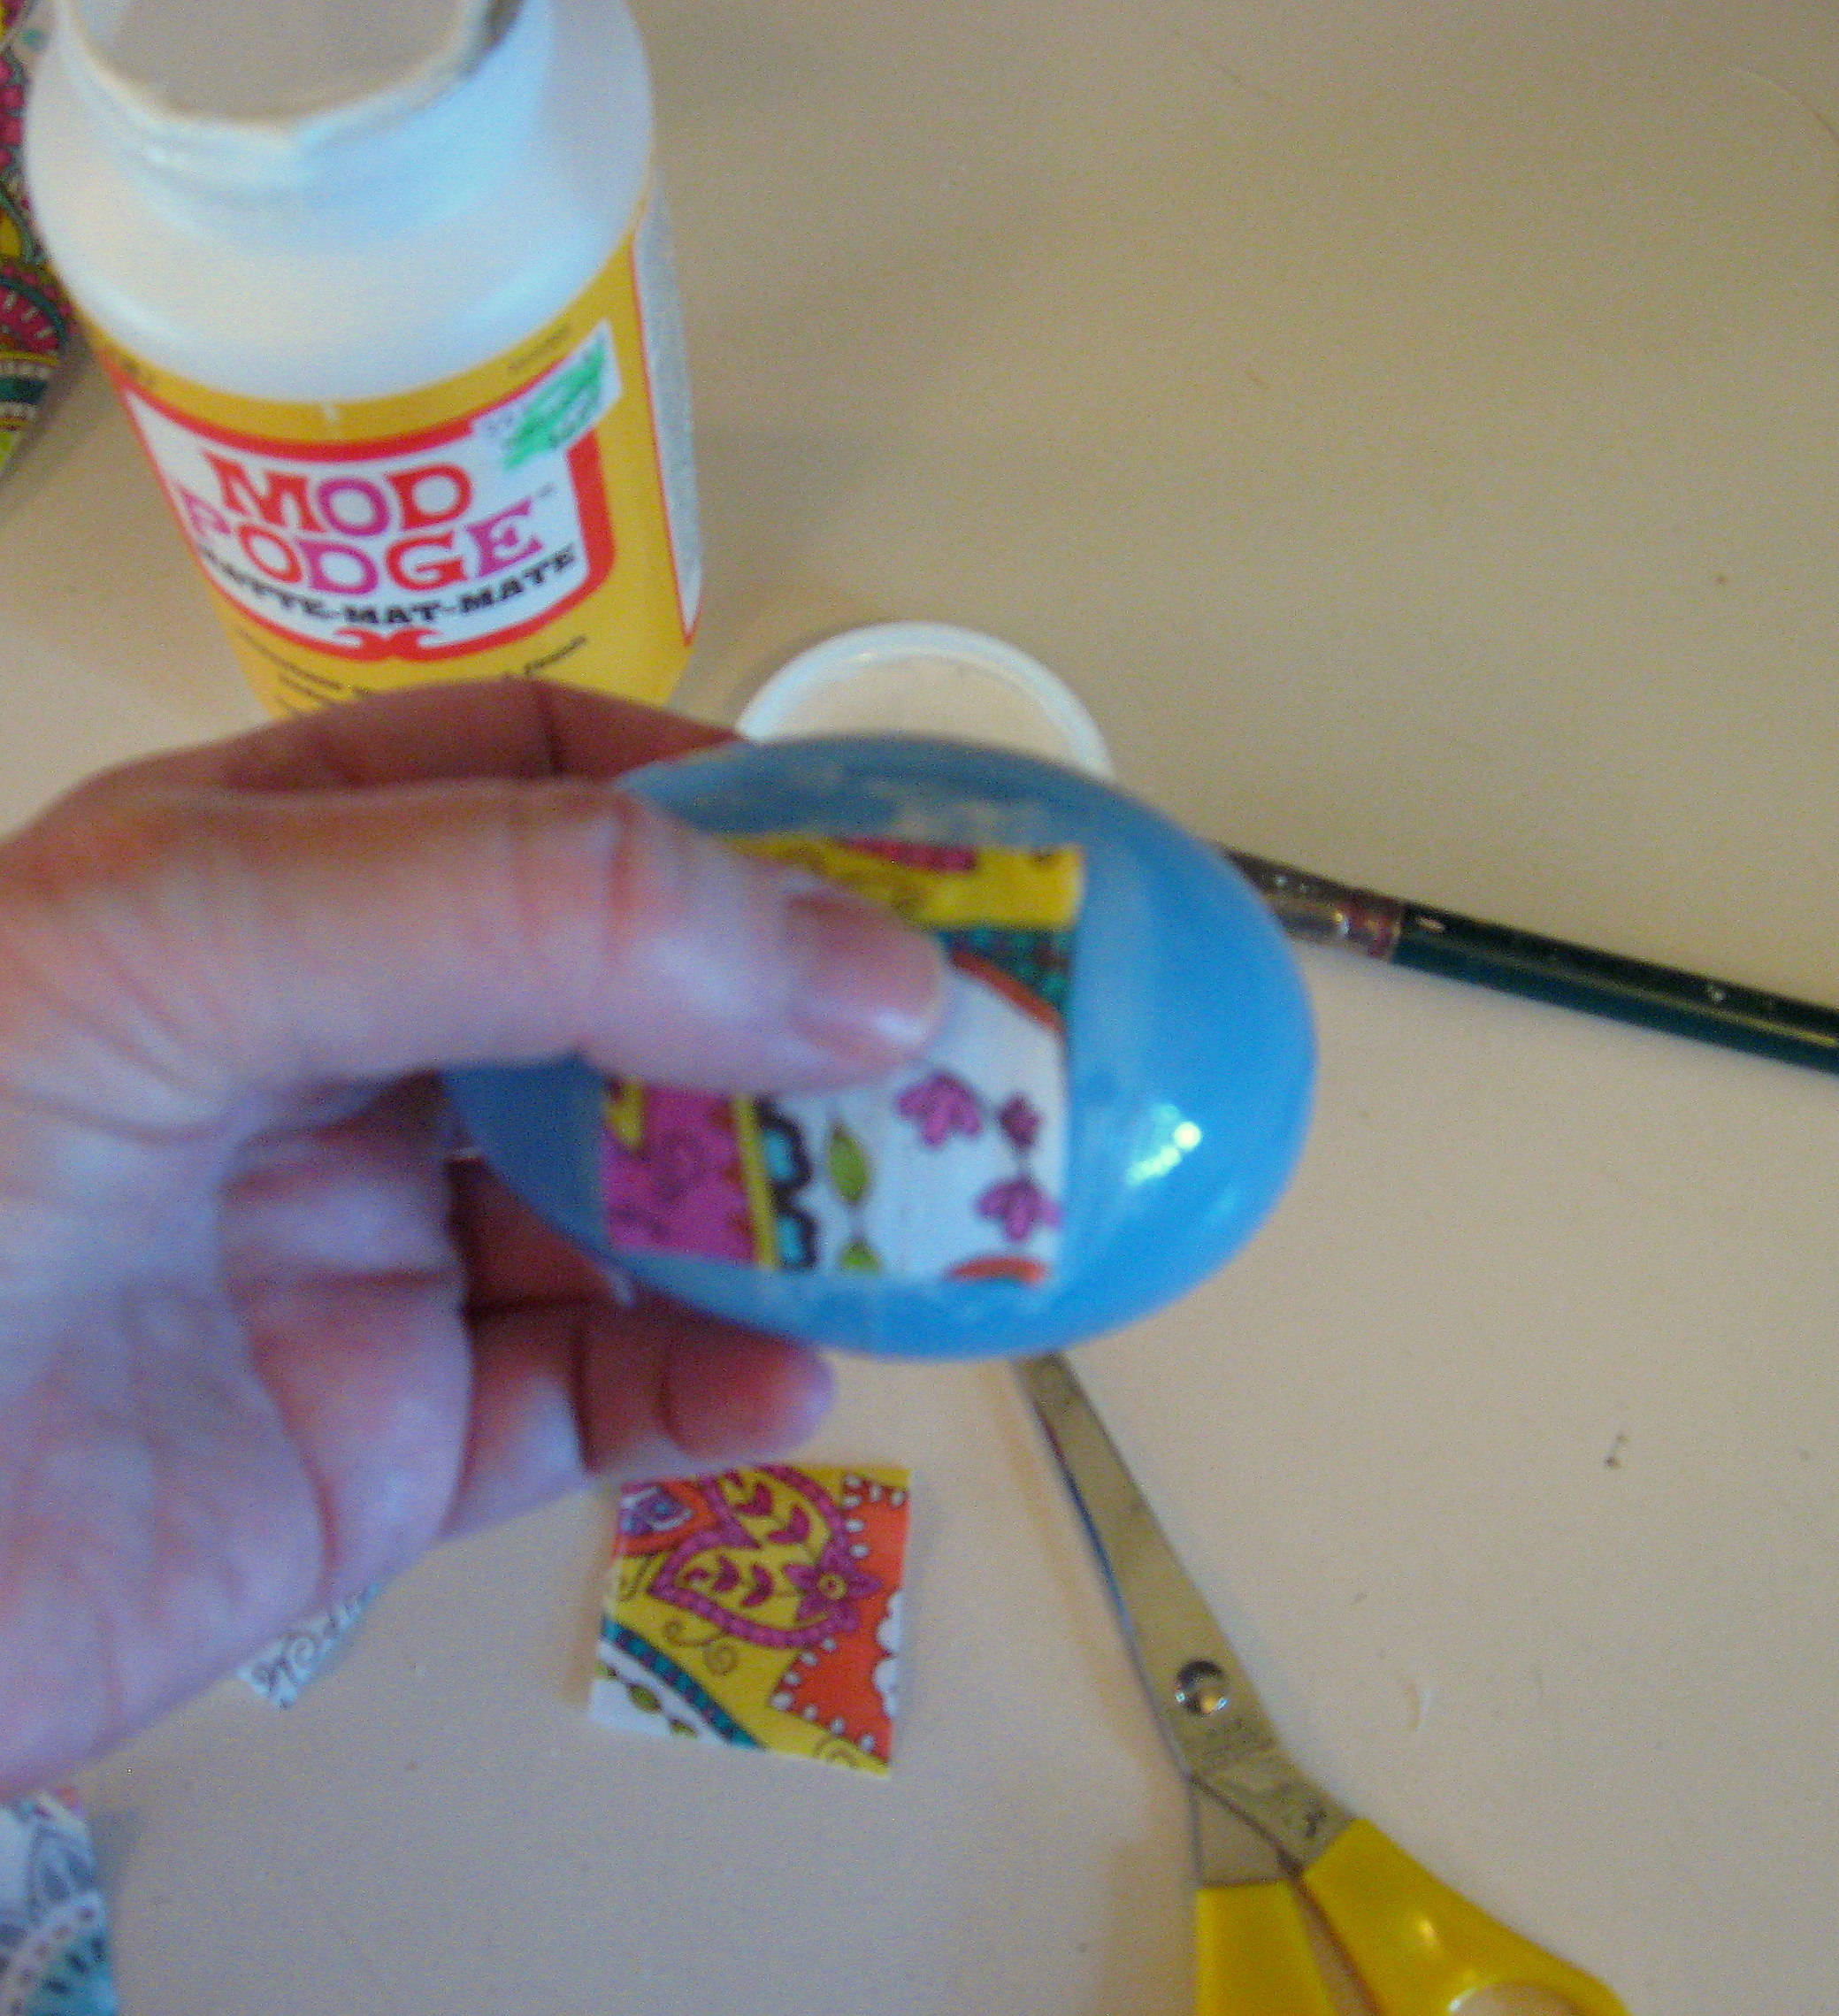
Continue on as above, painting on Mod Podge and covering with fabric squares, overlapping them as you go. Don’t try to stay in a line or anything – just make them random. When you get to the ends, paint on the Mod Podge, and lay a square on the very end, smoothing down two of the sides, which will cause the other two sides to stick out and create a little “tunnel”. You will clip into that “tunnel” with a pair of small sharp scissors.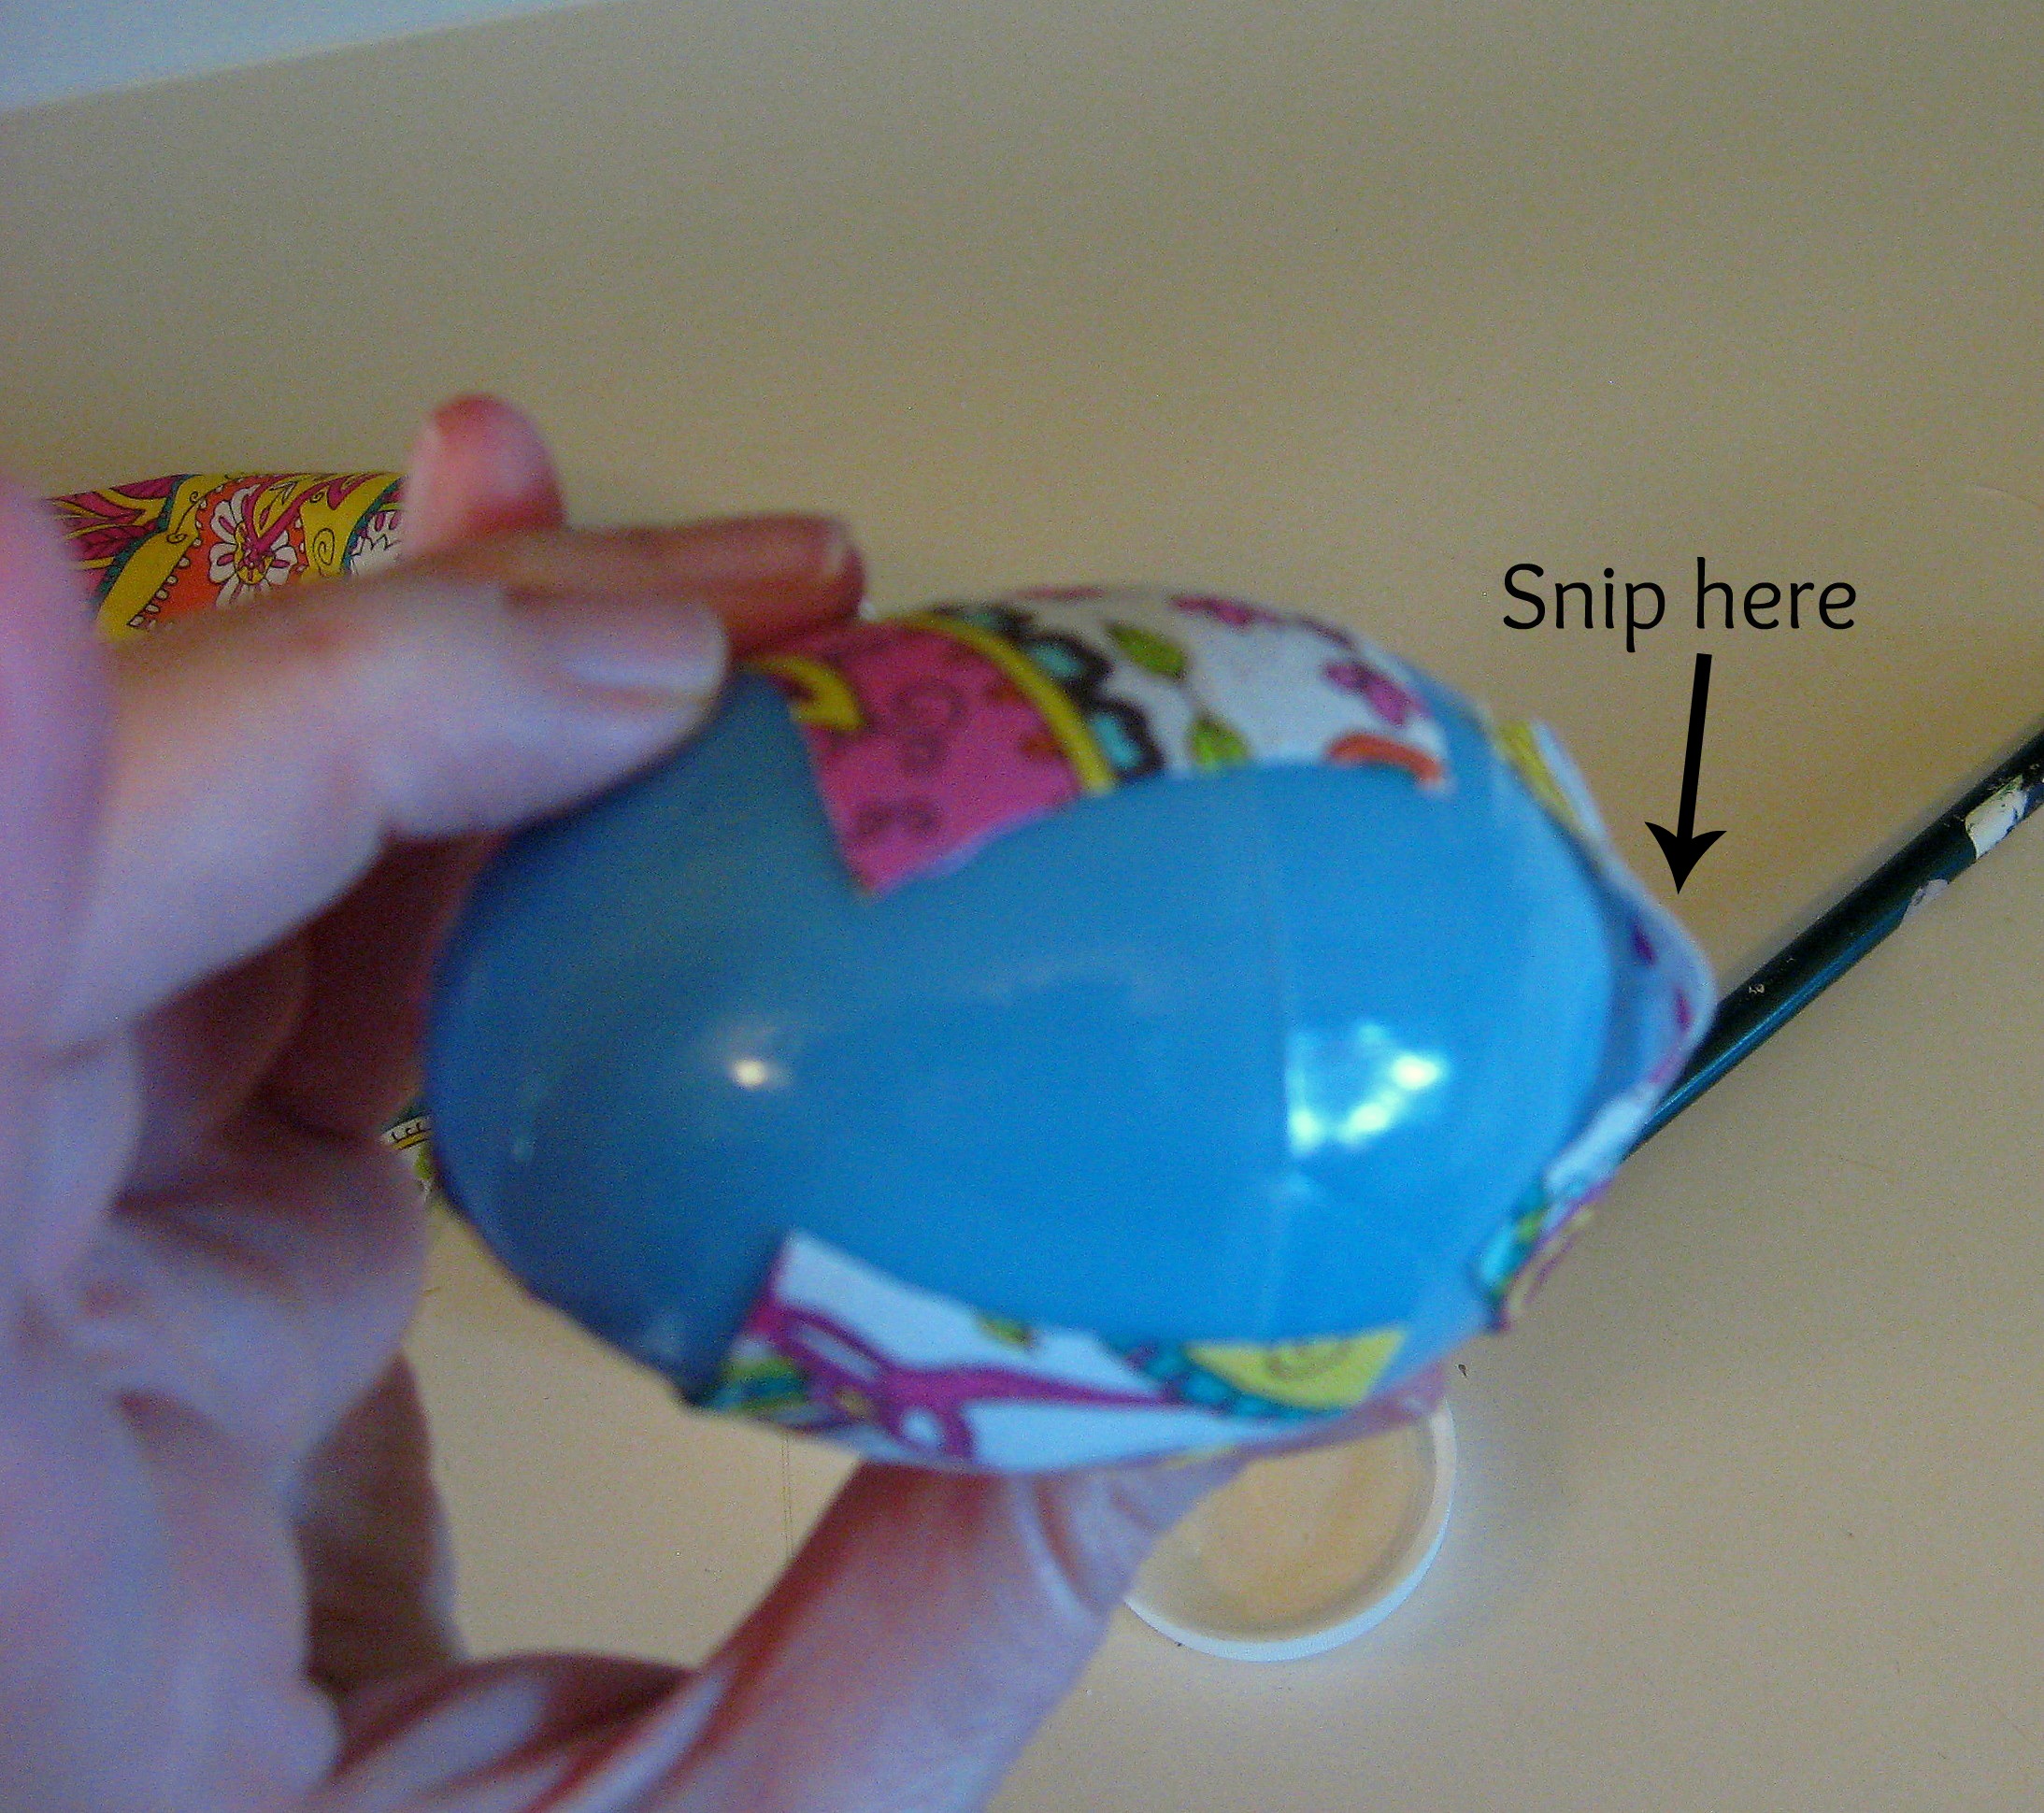
Now flatten one “flap” that you just created by cutting, apply a little Mod Podge under the remaining flap and smooth is down on top of the first one. Take a second to really work it down flat with your fingers so you’re not left with a ridge where the two flaps meet. Do the same thing on the other end of the “tunnel” and you’ll have a perfectly smooth end.
When you are almost done covering the egg, you’ll be left with smaller holes to cover. Feel free to cut the squares into smaller squares or rectangles to cover the last bits if you like. Once the entire egg is covered with fabric, give the whole thing a coat of Mod Podge.
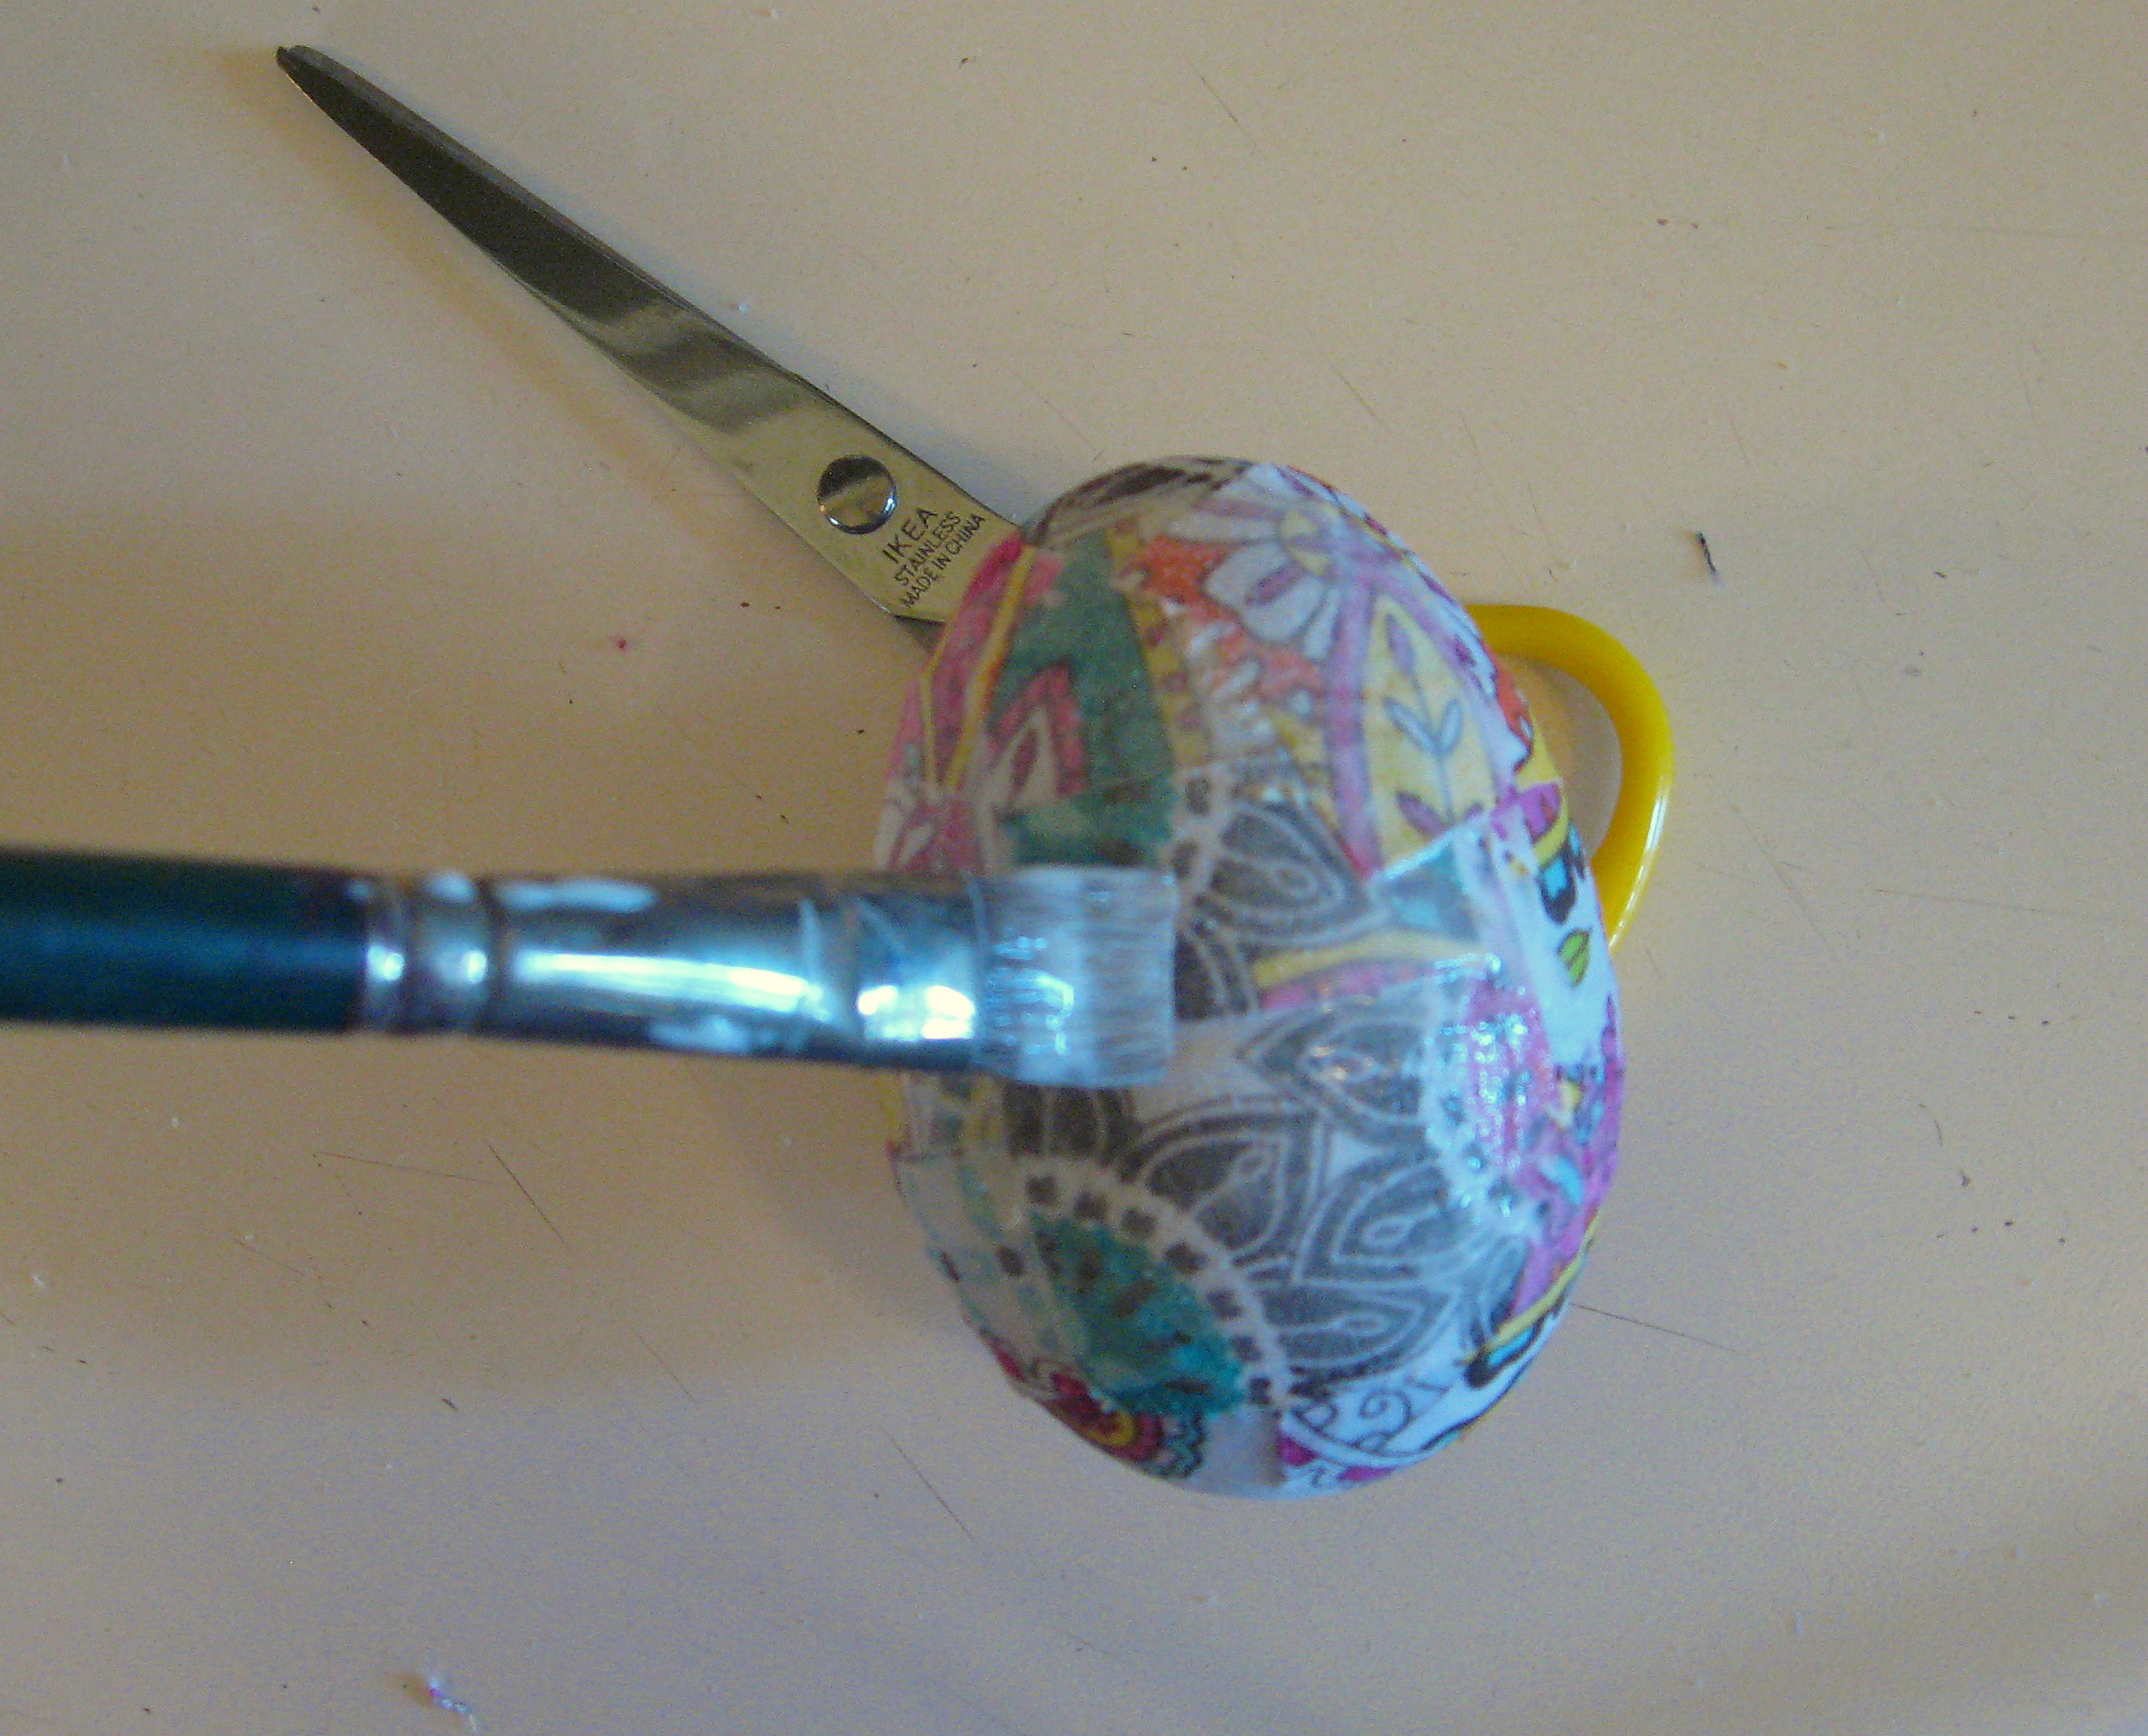
I did this by holding the ends and painting around the middle. I stood that up in an empty egg carton to dry while I started the next egg. Then come back and hold it in the middle to paint the ends, and lay it on its side to dry. When it’s completely dry, it will have a hard, durable finish.
Yarn Easter Eggs
Fast, inexpensive and endlessly customizable to match your home’s decor, this craft is easy and fun enough that your kids can join in!
Needed for this project:
*Balloons (I like water balloons for achieving a small Easter egg shape)
*White glue (like Elmers)
*Yarn – any type, any color. Once you see how easy it is to make these, you’ll want to experiment with all kinds of yarns and string for different finished effects.
You may want to line your work surface with newspaper; it can get messy!
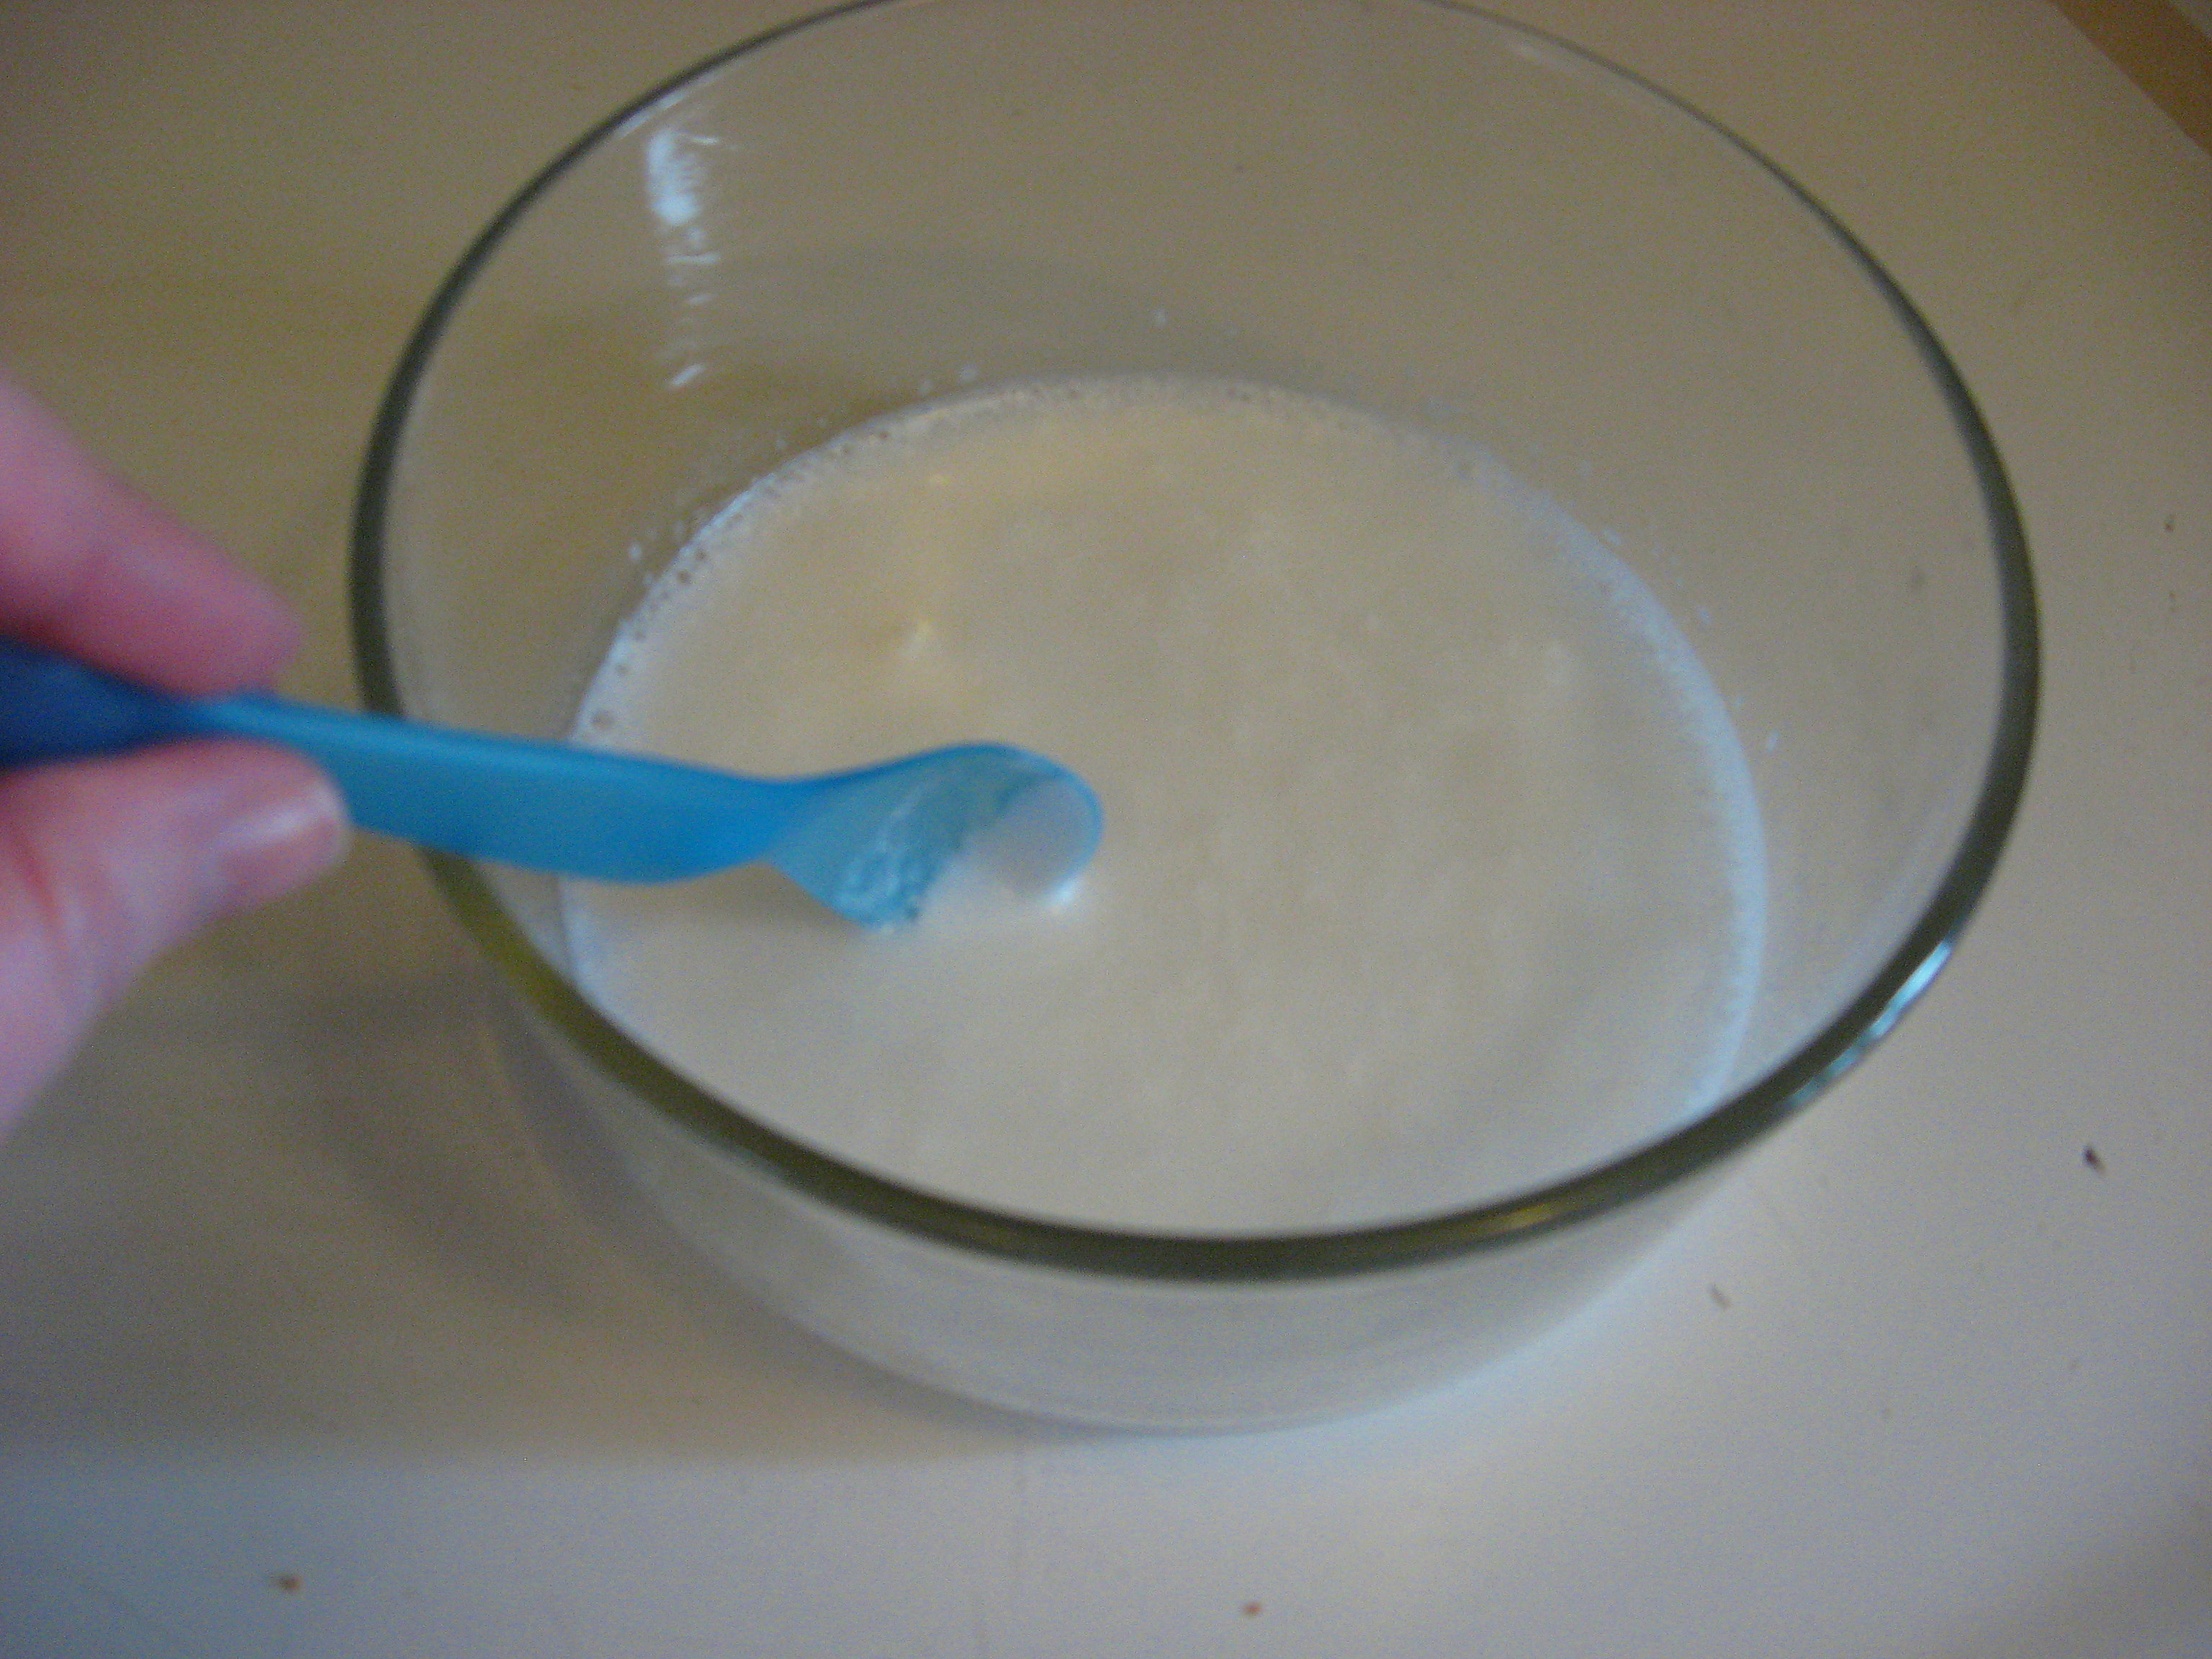
Start by pouring glue into a wide bowl. I tried a batch of eggs with glue only – NO water – and they turned out fine. I also tried a batch with about a 2/3 glue and 1/3 water mix and those turned out great too. I do not recommend going with more water than 1/3; many tutorials say to use equal parts glue and water, but in my experience the yarn didn’t stick well enough for the finished project to stay together. As far as I can tell, the only advantage to using water is that it will stretch the glue further.

Mix it together well (if you are using water.)
Cut off several yards of yarn and carefully coil it into the bowl, keeping track of the end when you get to it so you can pull it back out. After your first one or two eggs, you’ll get a feel for whether you like them with a lot of yarn or a little and about how much you need per egg. Don’t worry if you don’t cut enough initially; you can easily add more.
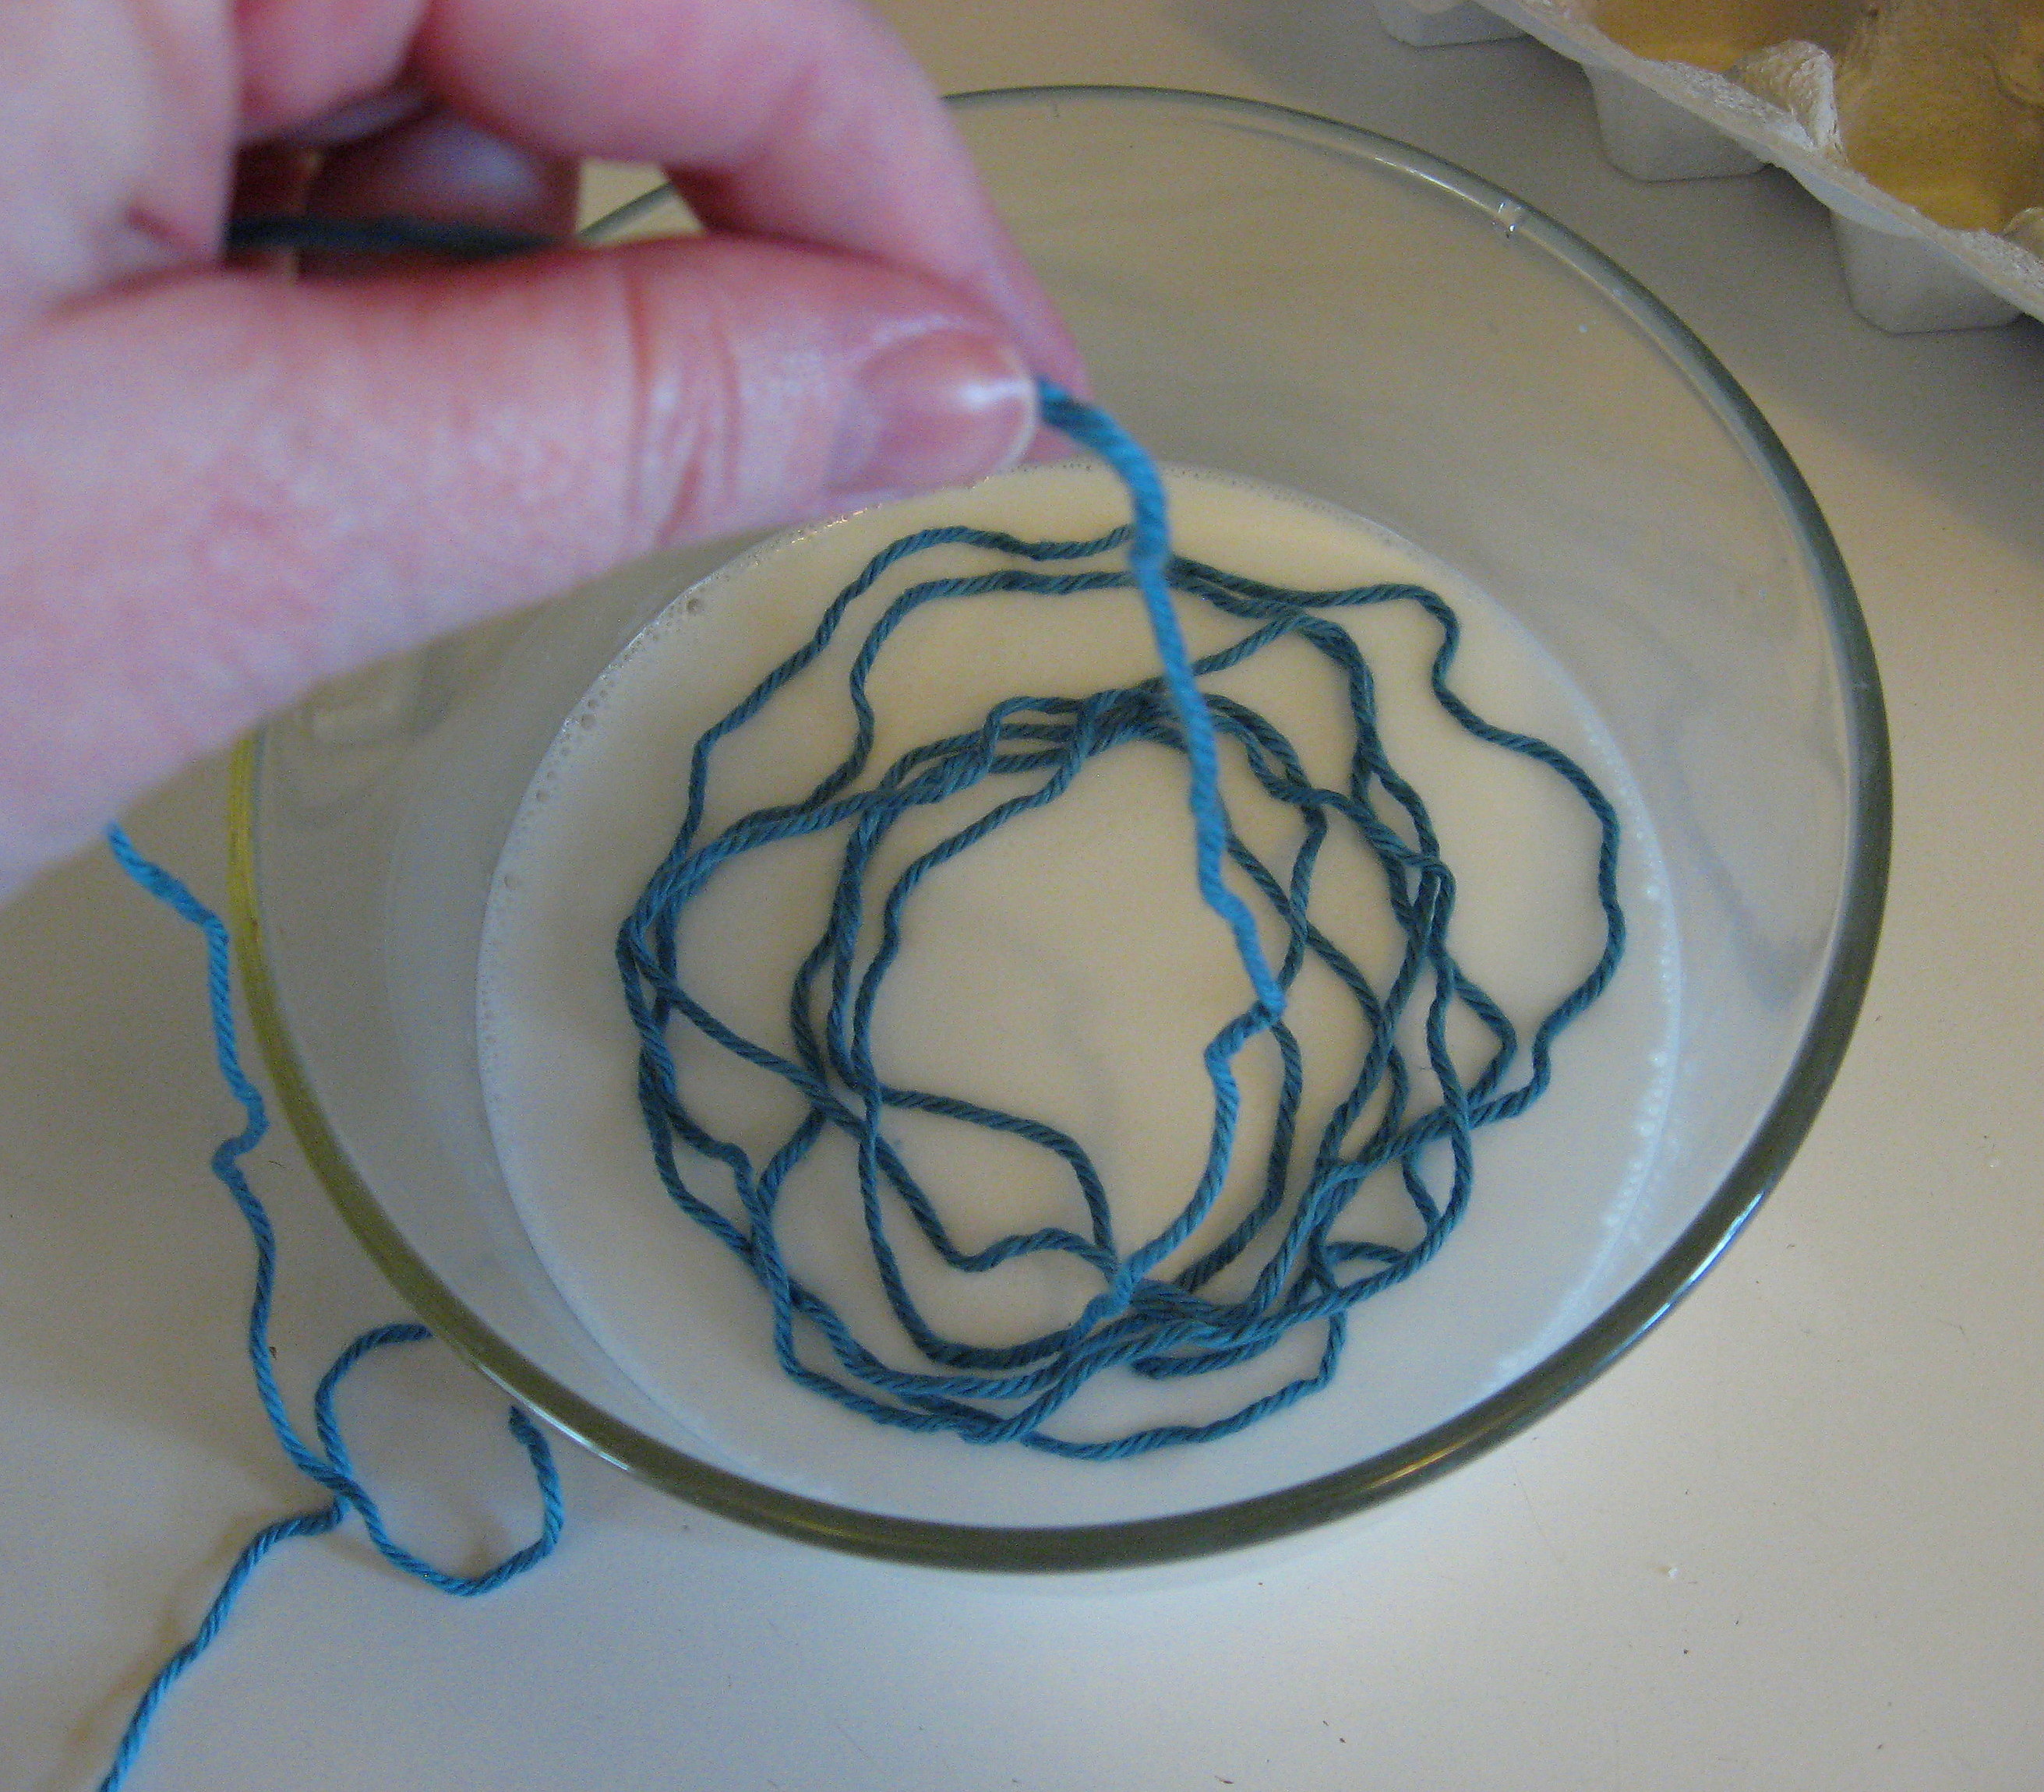
Use a spoon to push the yarn down into the glue until it is all covered. 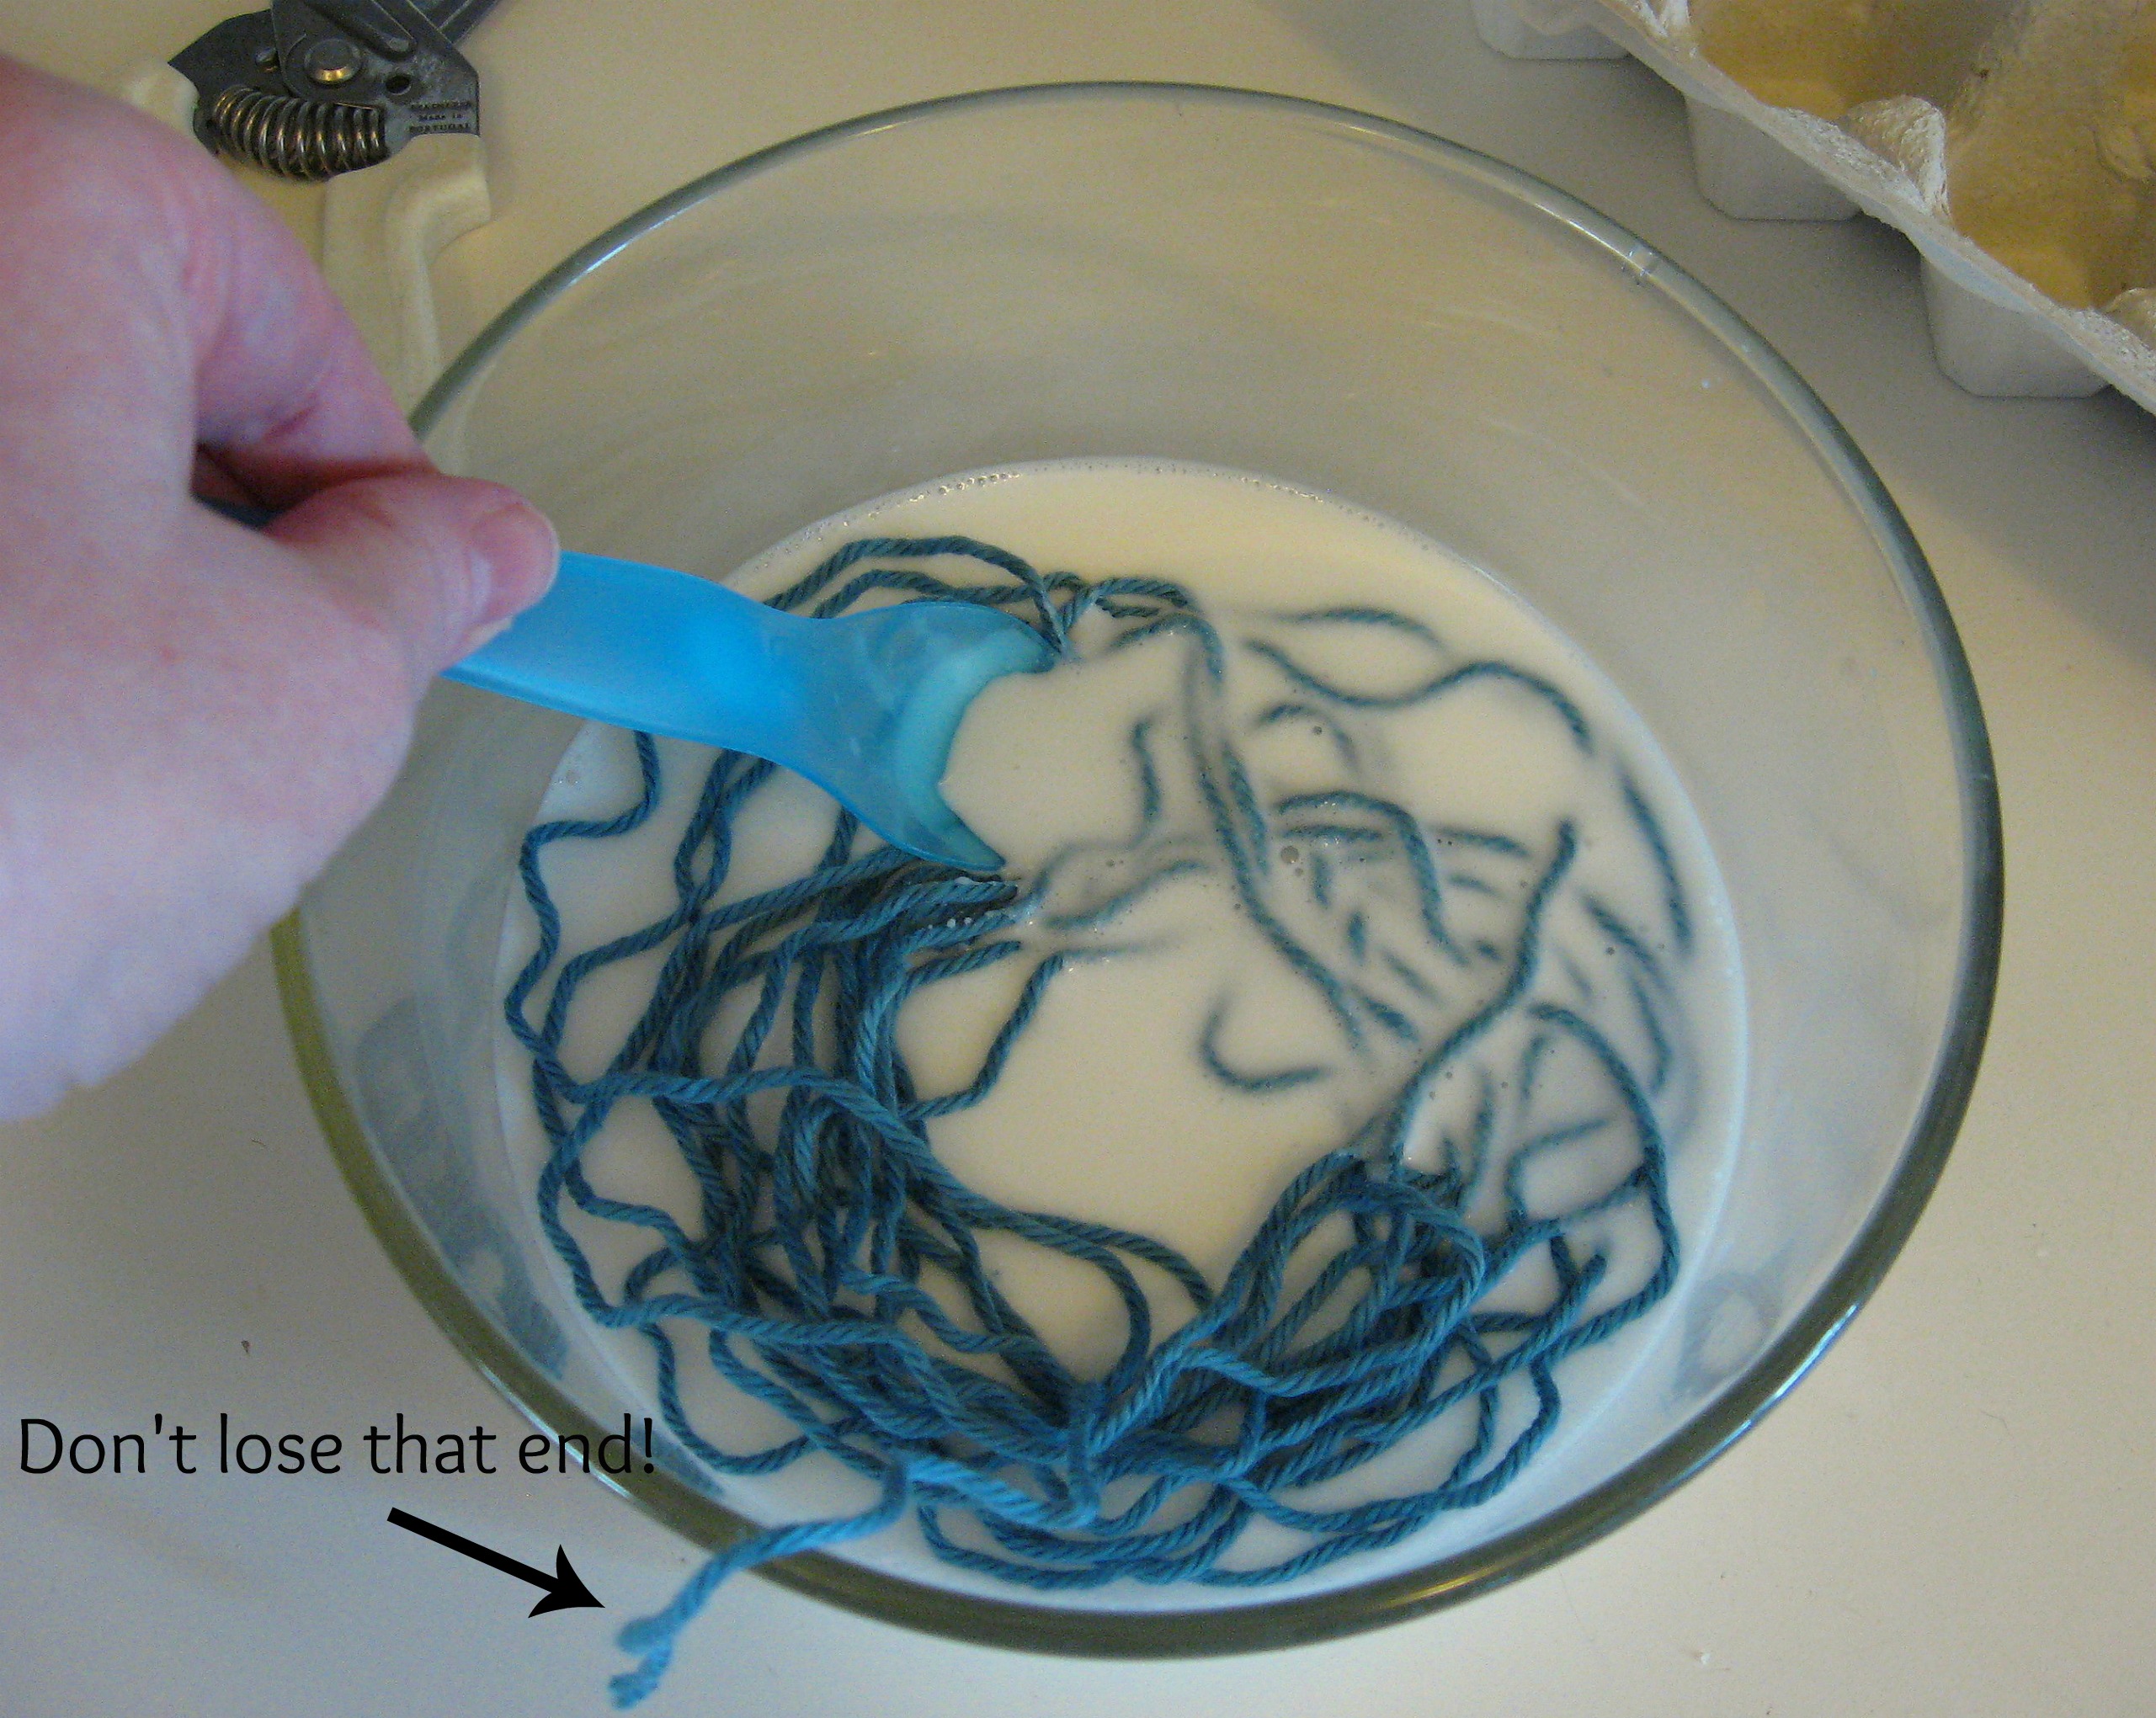
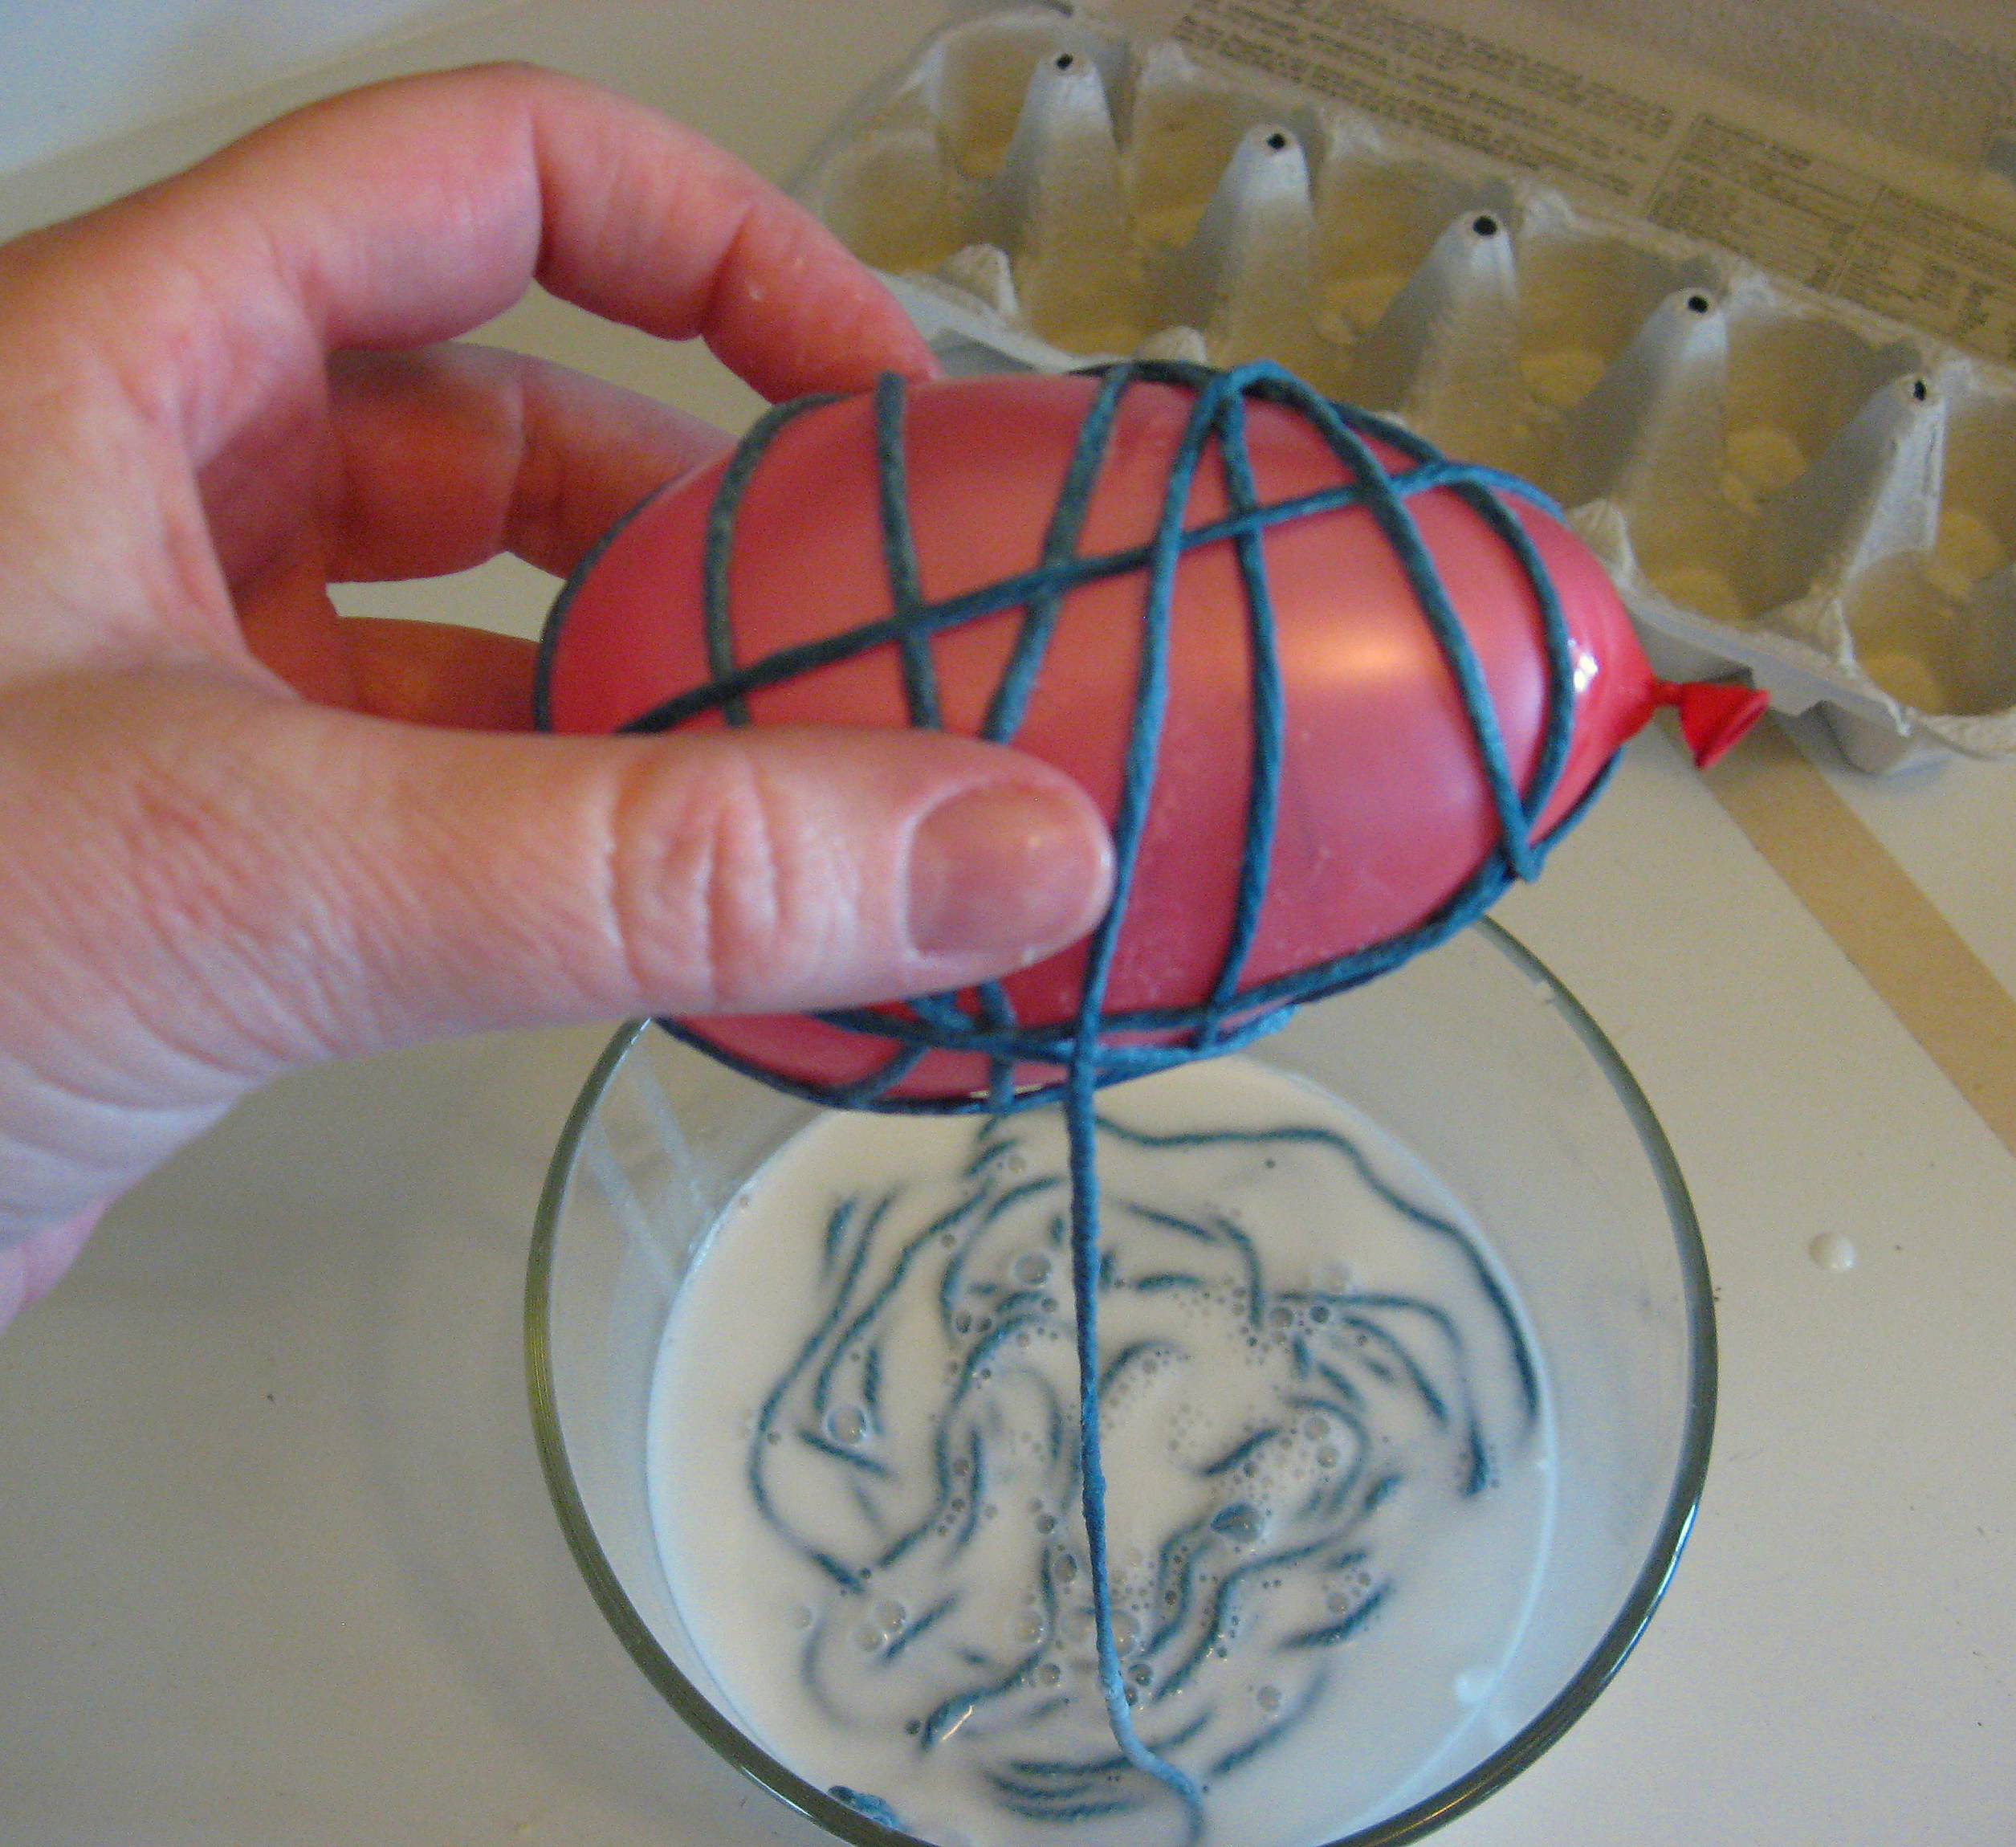
Now just start wrapping the yarn around the balloon.
A couple of tips for this part:
*As you pull the yarn out of the glue, lightly pull it between your thumb and finger to gently “squeeze” the excess glue off and back into the bowl.
*In the picture above, I’m pulling the yarn out in small bits and wrapping as I go, but I found that it was even easier to pull it all out and lay it on a piece of waxed paper, then wrap the balloon all in one go. The yarn doesn’t dry out fast enough to be a problem, and it gives you more control over the wrapping and therefore the finished shape.
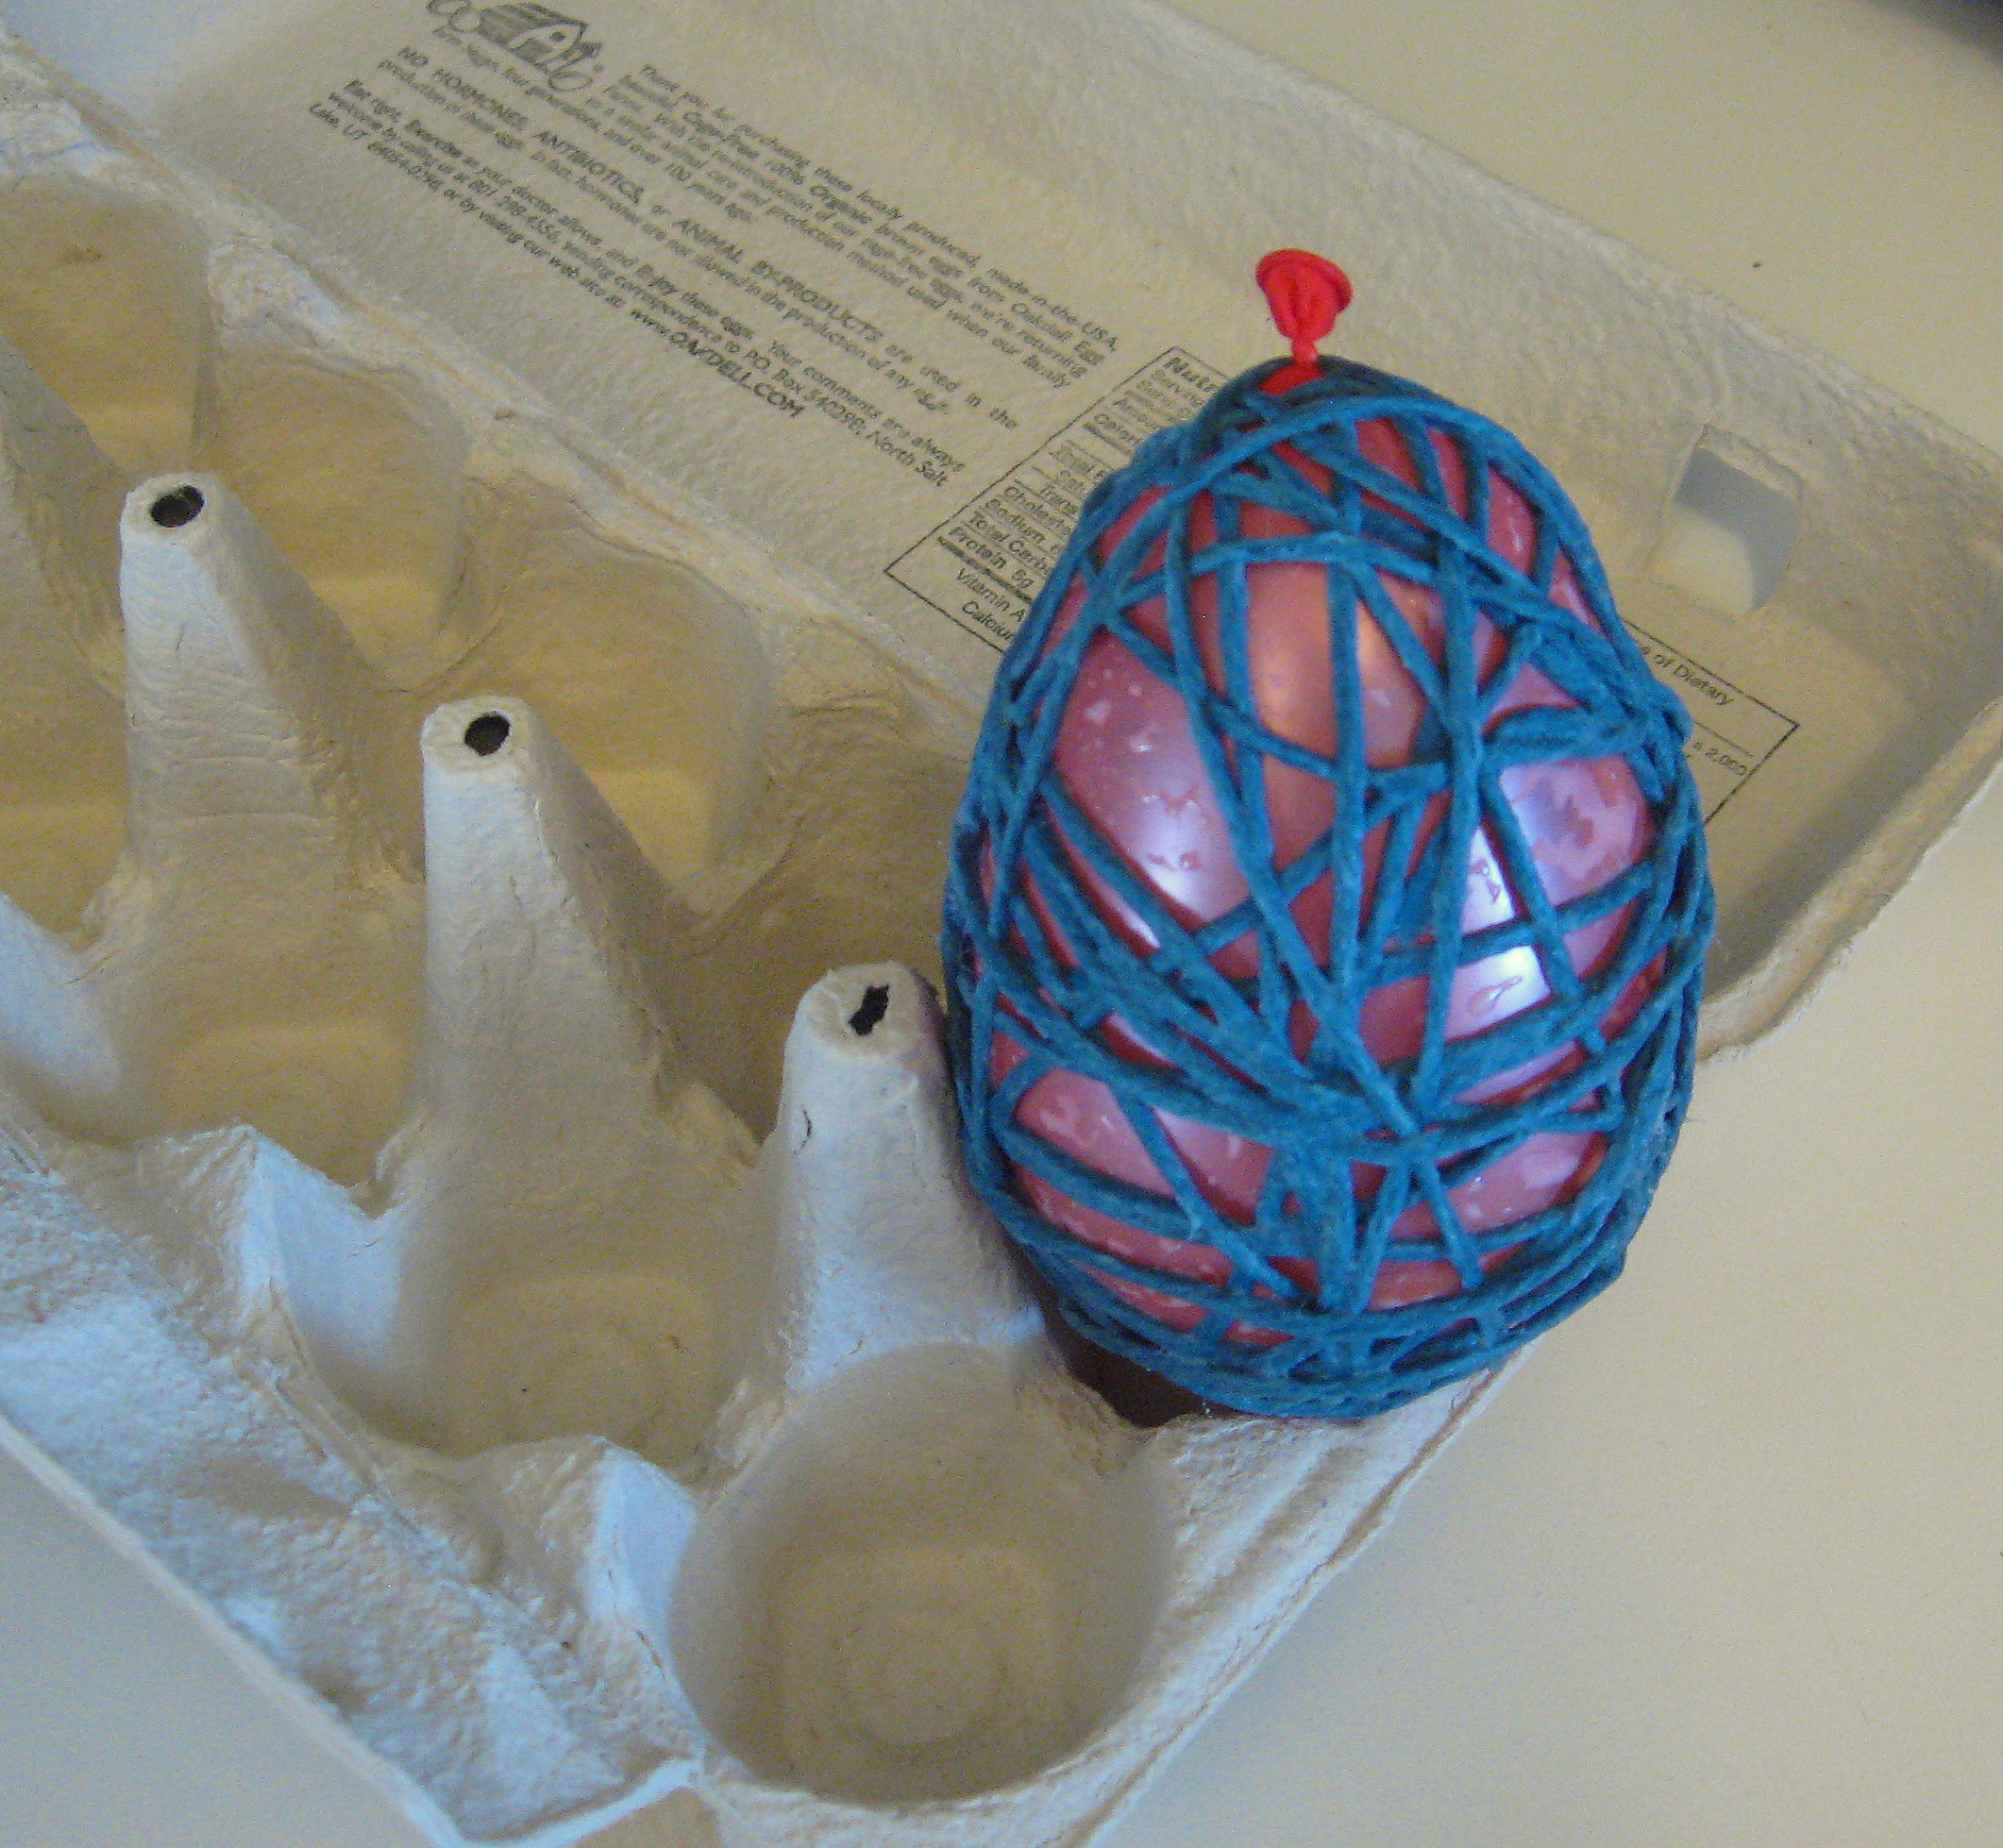
*Make sure you cover the starting end with a subsequent wrap or two, so that it doesn’t show when you’re done. Gently squeeze the raw end together with another piece of yarn and you won’t be able to see it at all when it dries. Do the same thing when you finish, tucking the end under another piece of yarn and squeezing them together.
*If you find that you want more coverage when you’re done, just cut another piece of yarn and wrap again, beginning and ending like above, being careful to conceal the raw ends.
*Try to vary how you are holding the balloon as you go so that you don’t end up with all your criss-crossed intersections in the same place.
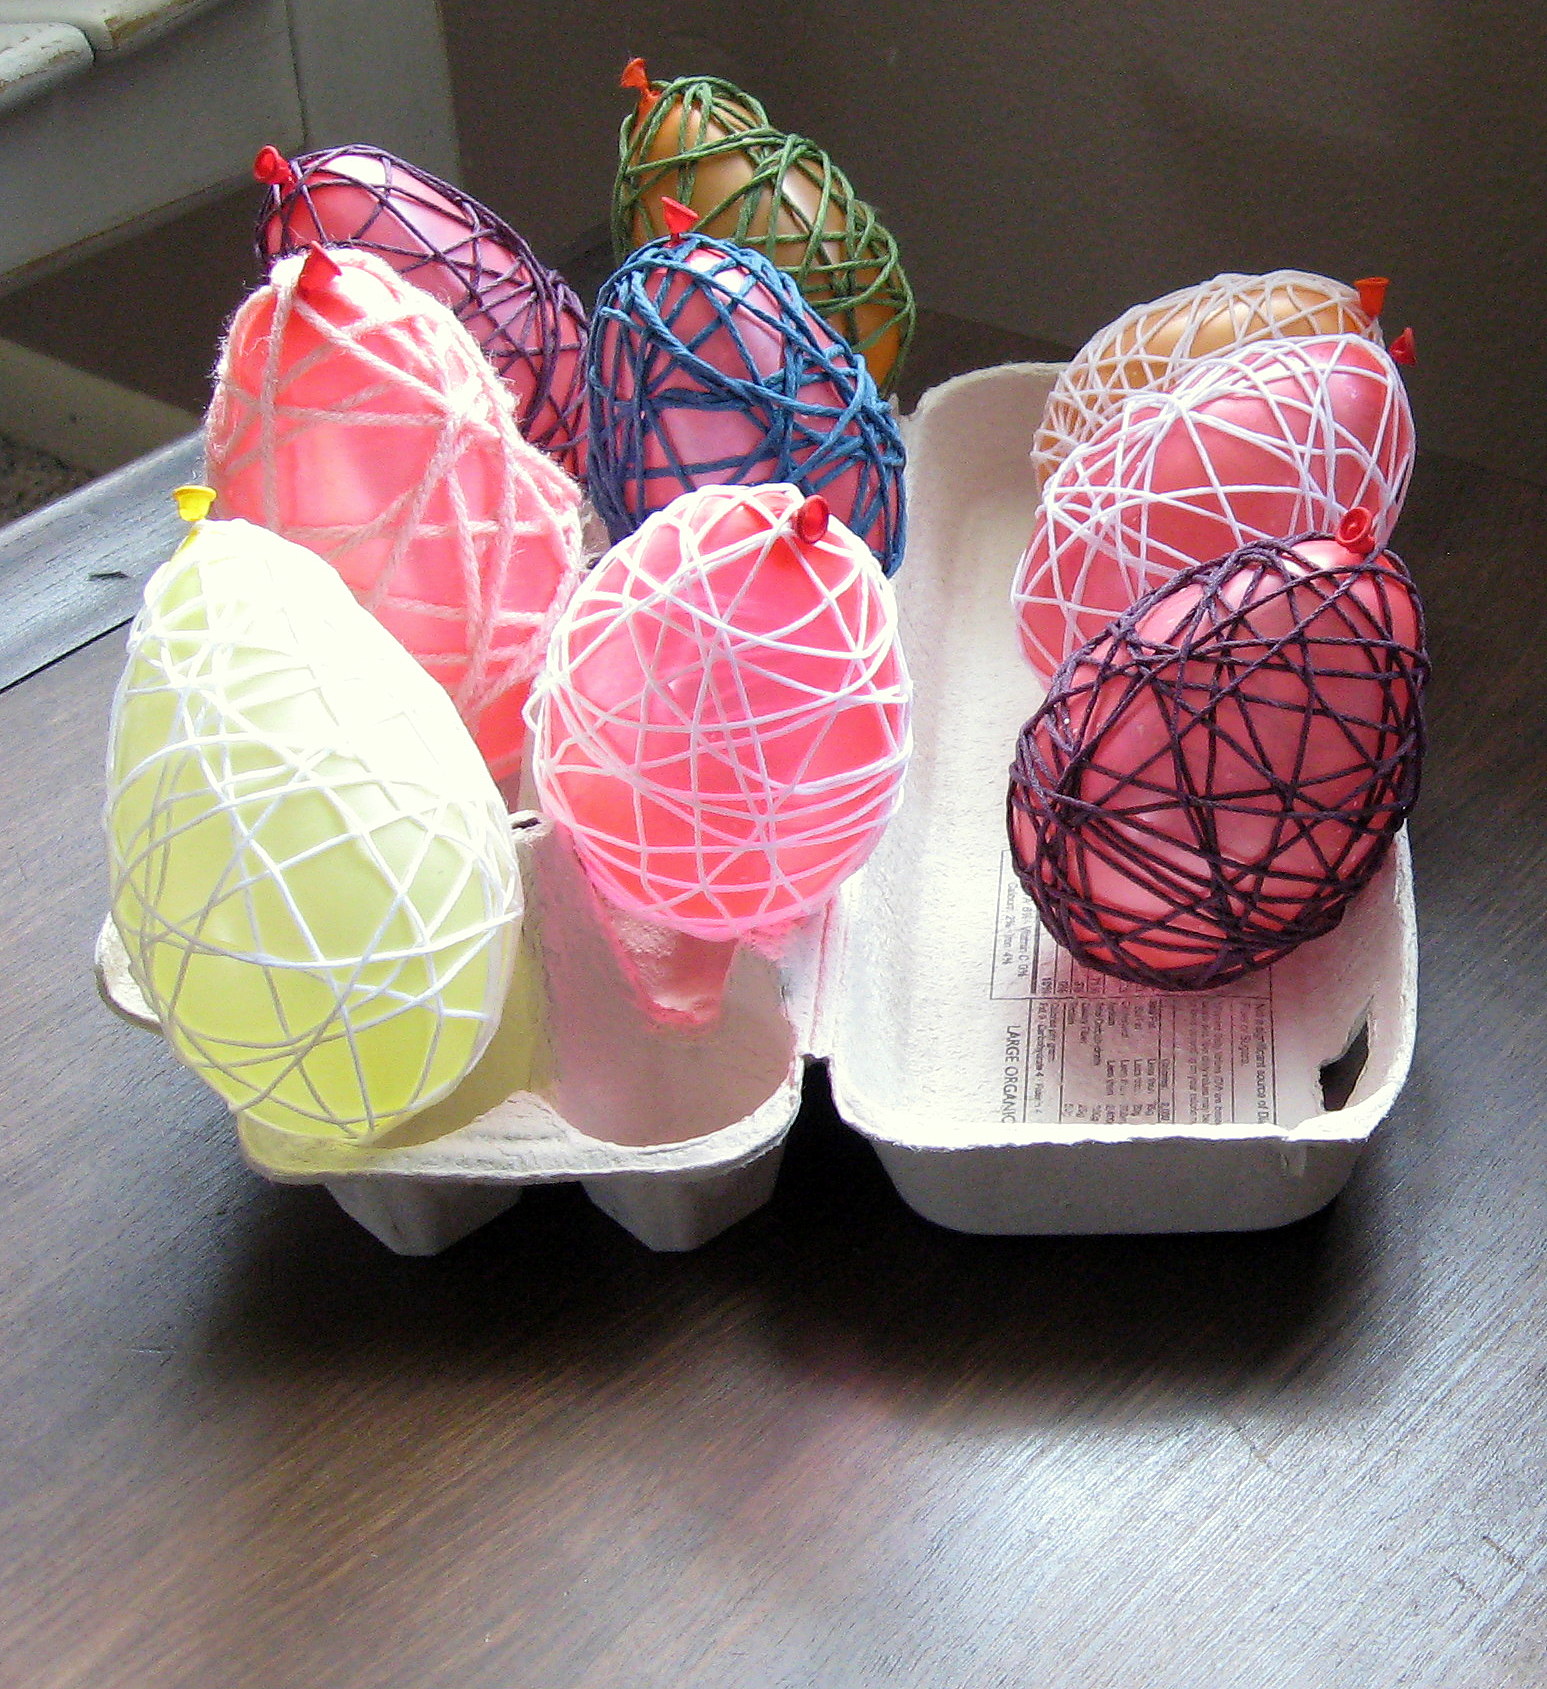
Now set the finished egg aside to dry. I like using an empty egg carton.
Let the glue dry THOROUGHLY. Really, it has to be totally dry before you mess with it. You may want to gently rotate the eggs once or twice as they’re drying, but other than that, leave them alone. If you try to move on while any of the yarn is still wet, the egg will collapse and you will be sad.
This is the part where this project always worries me; they look kind of ugly and funky while they are still on the balloons and I always wonder if I did it right, but then comes the magic!
Once all the yarn is dry, pop the balloon and remove the pieces with a pair of tweezers.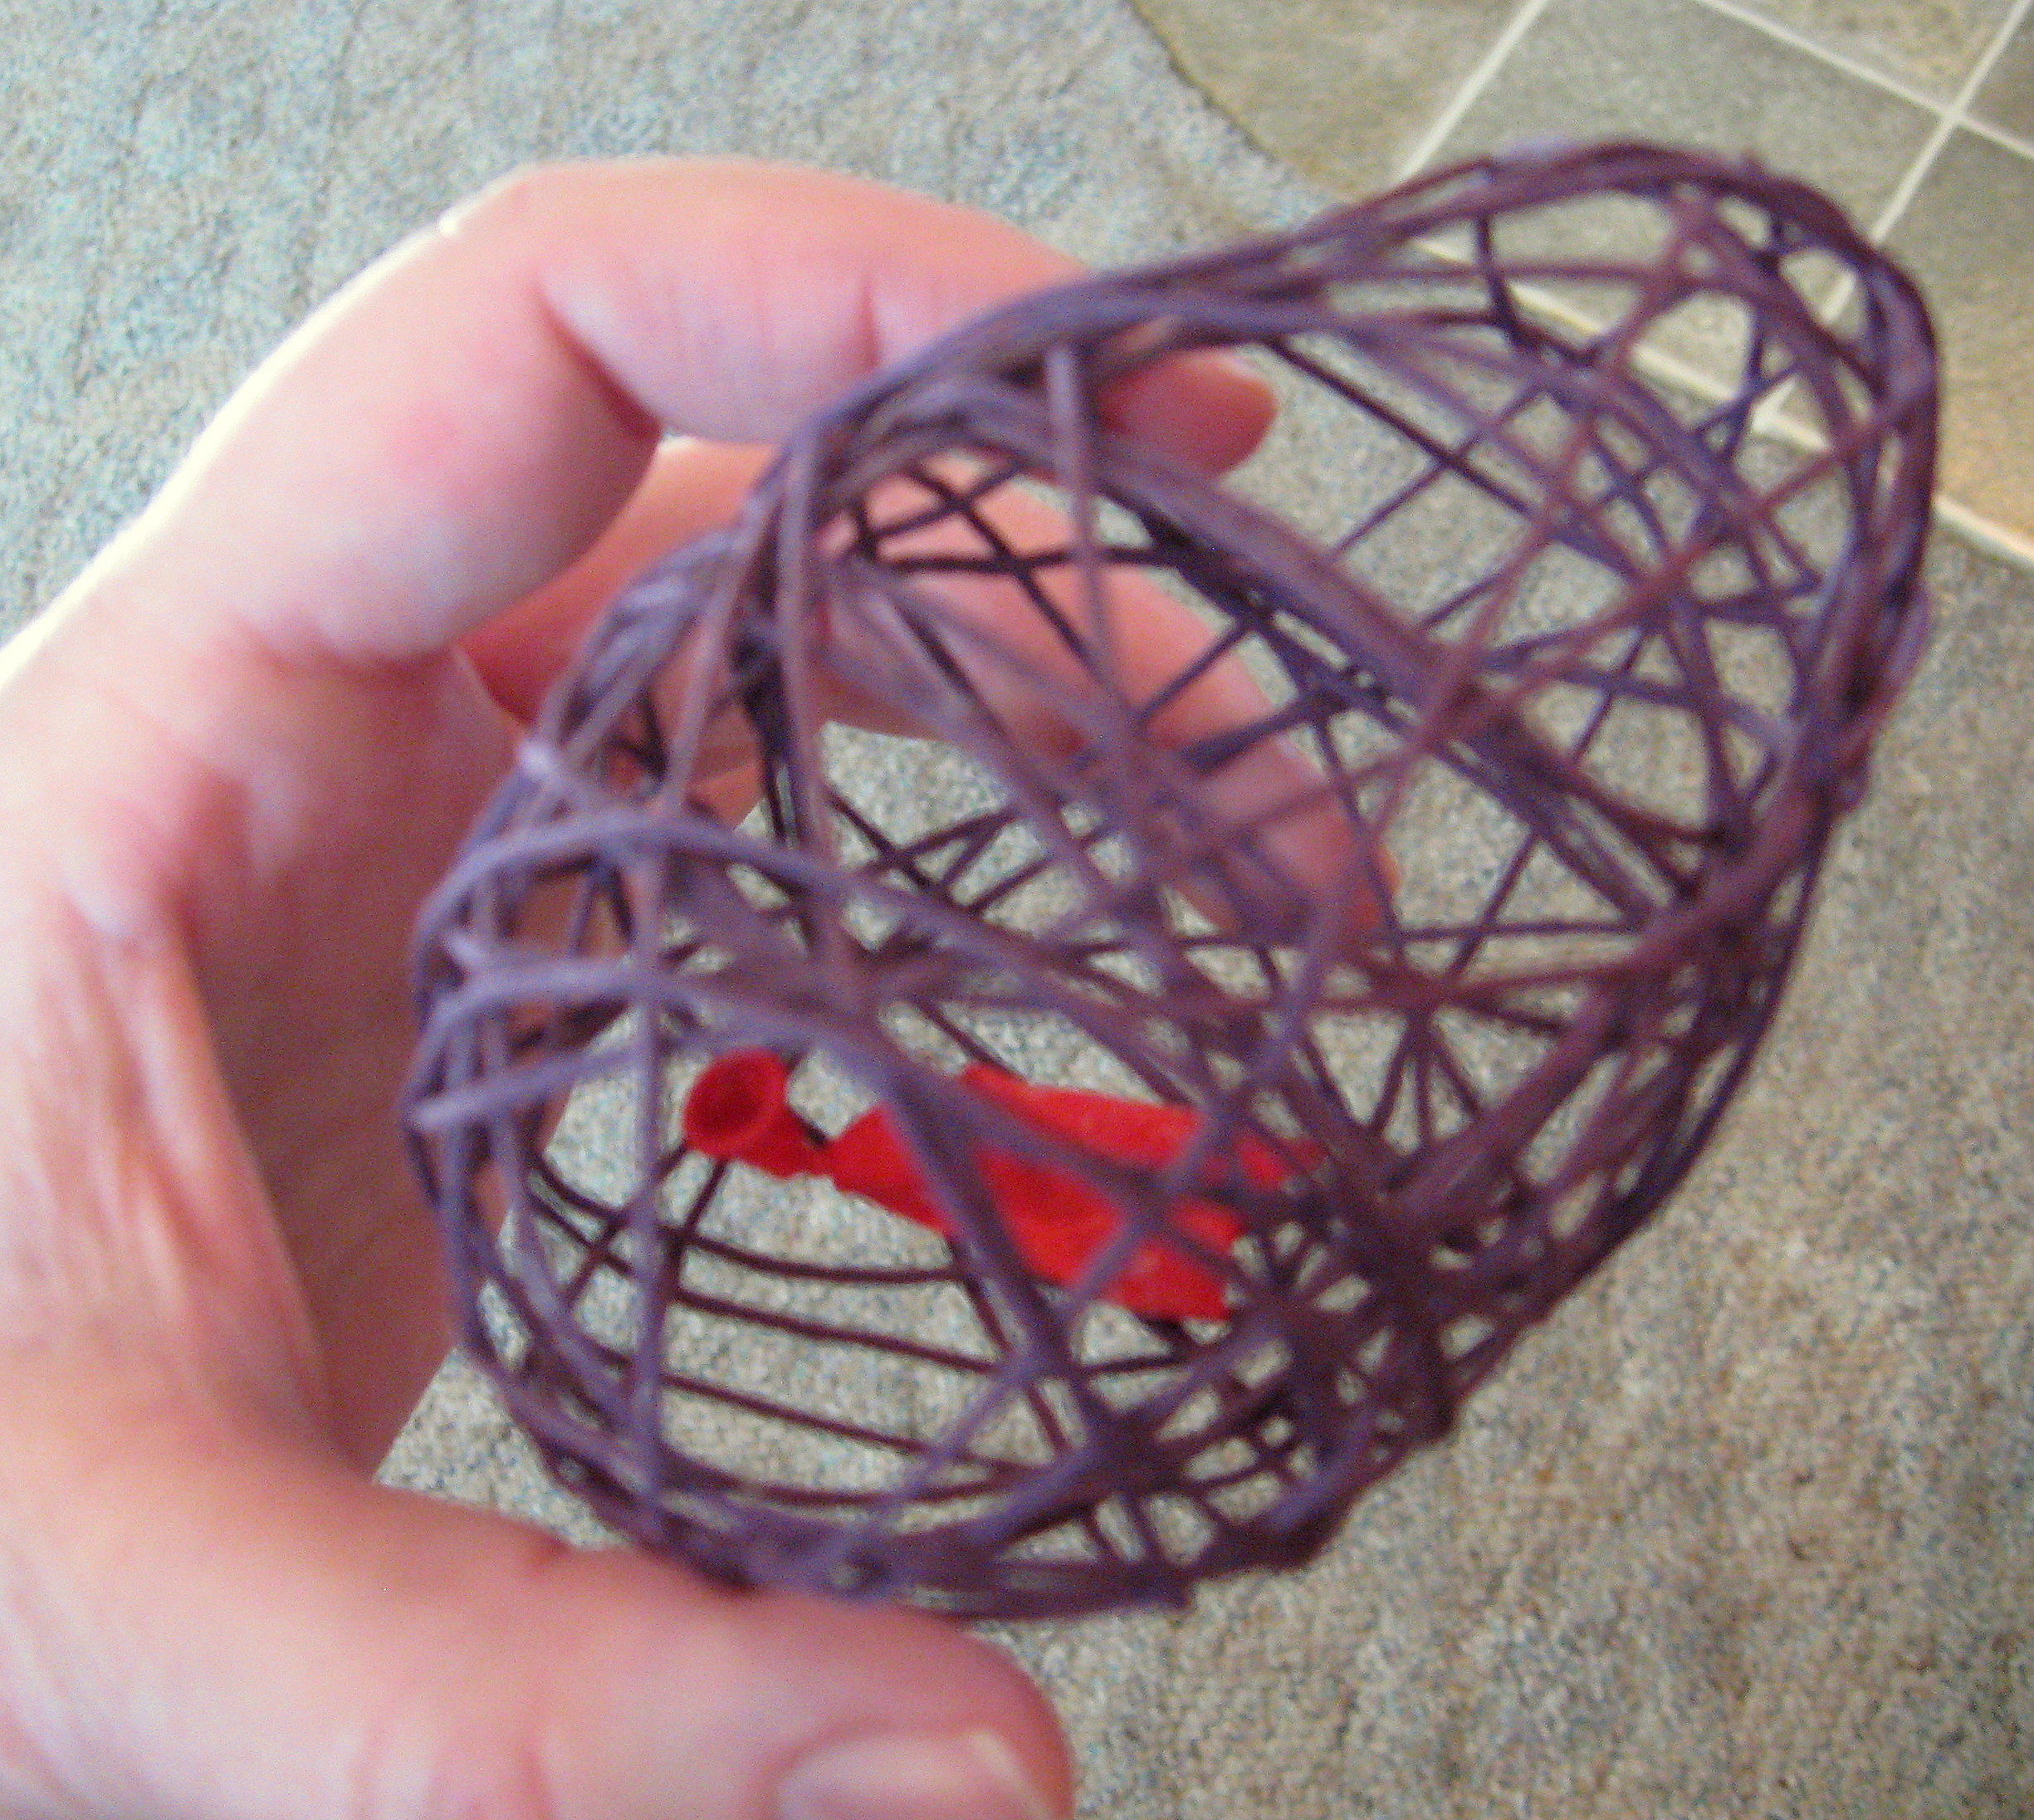
Now they’re all done and ready to display. You’ll be thrilled with how cute they are as soon as the balloon is gone.
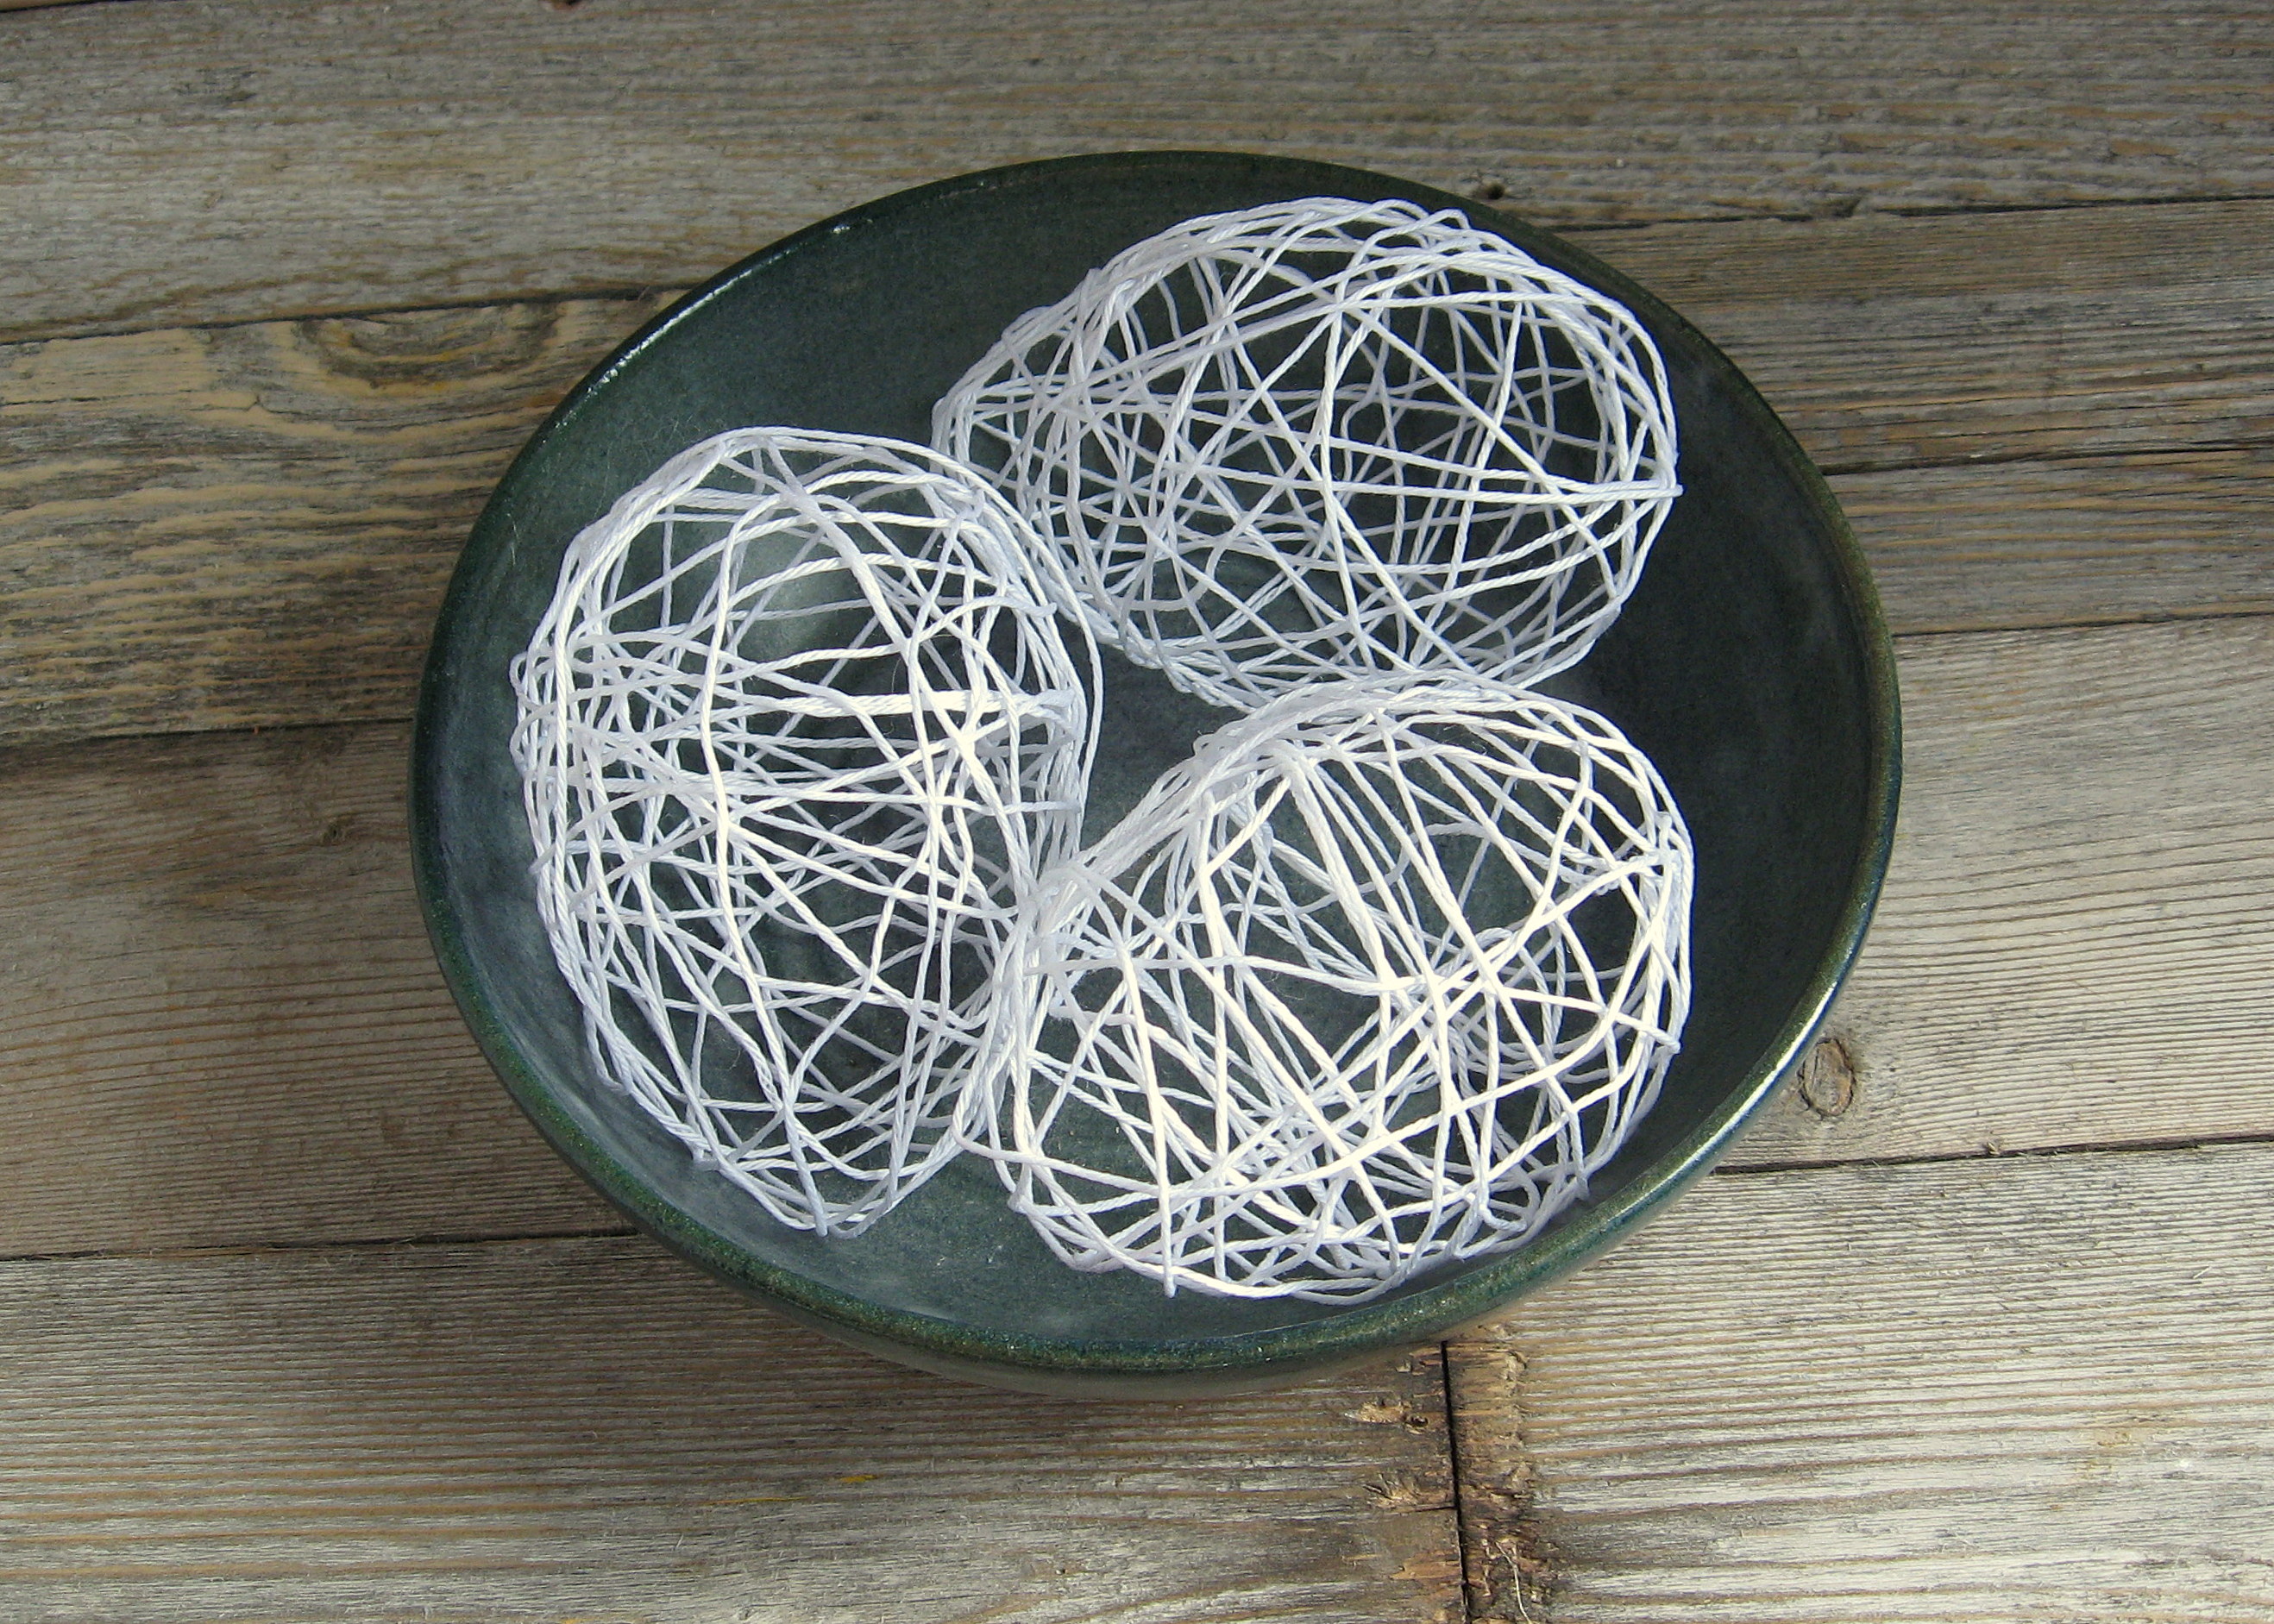
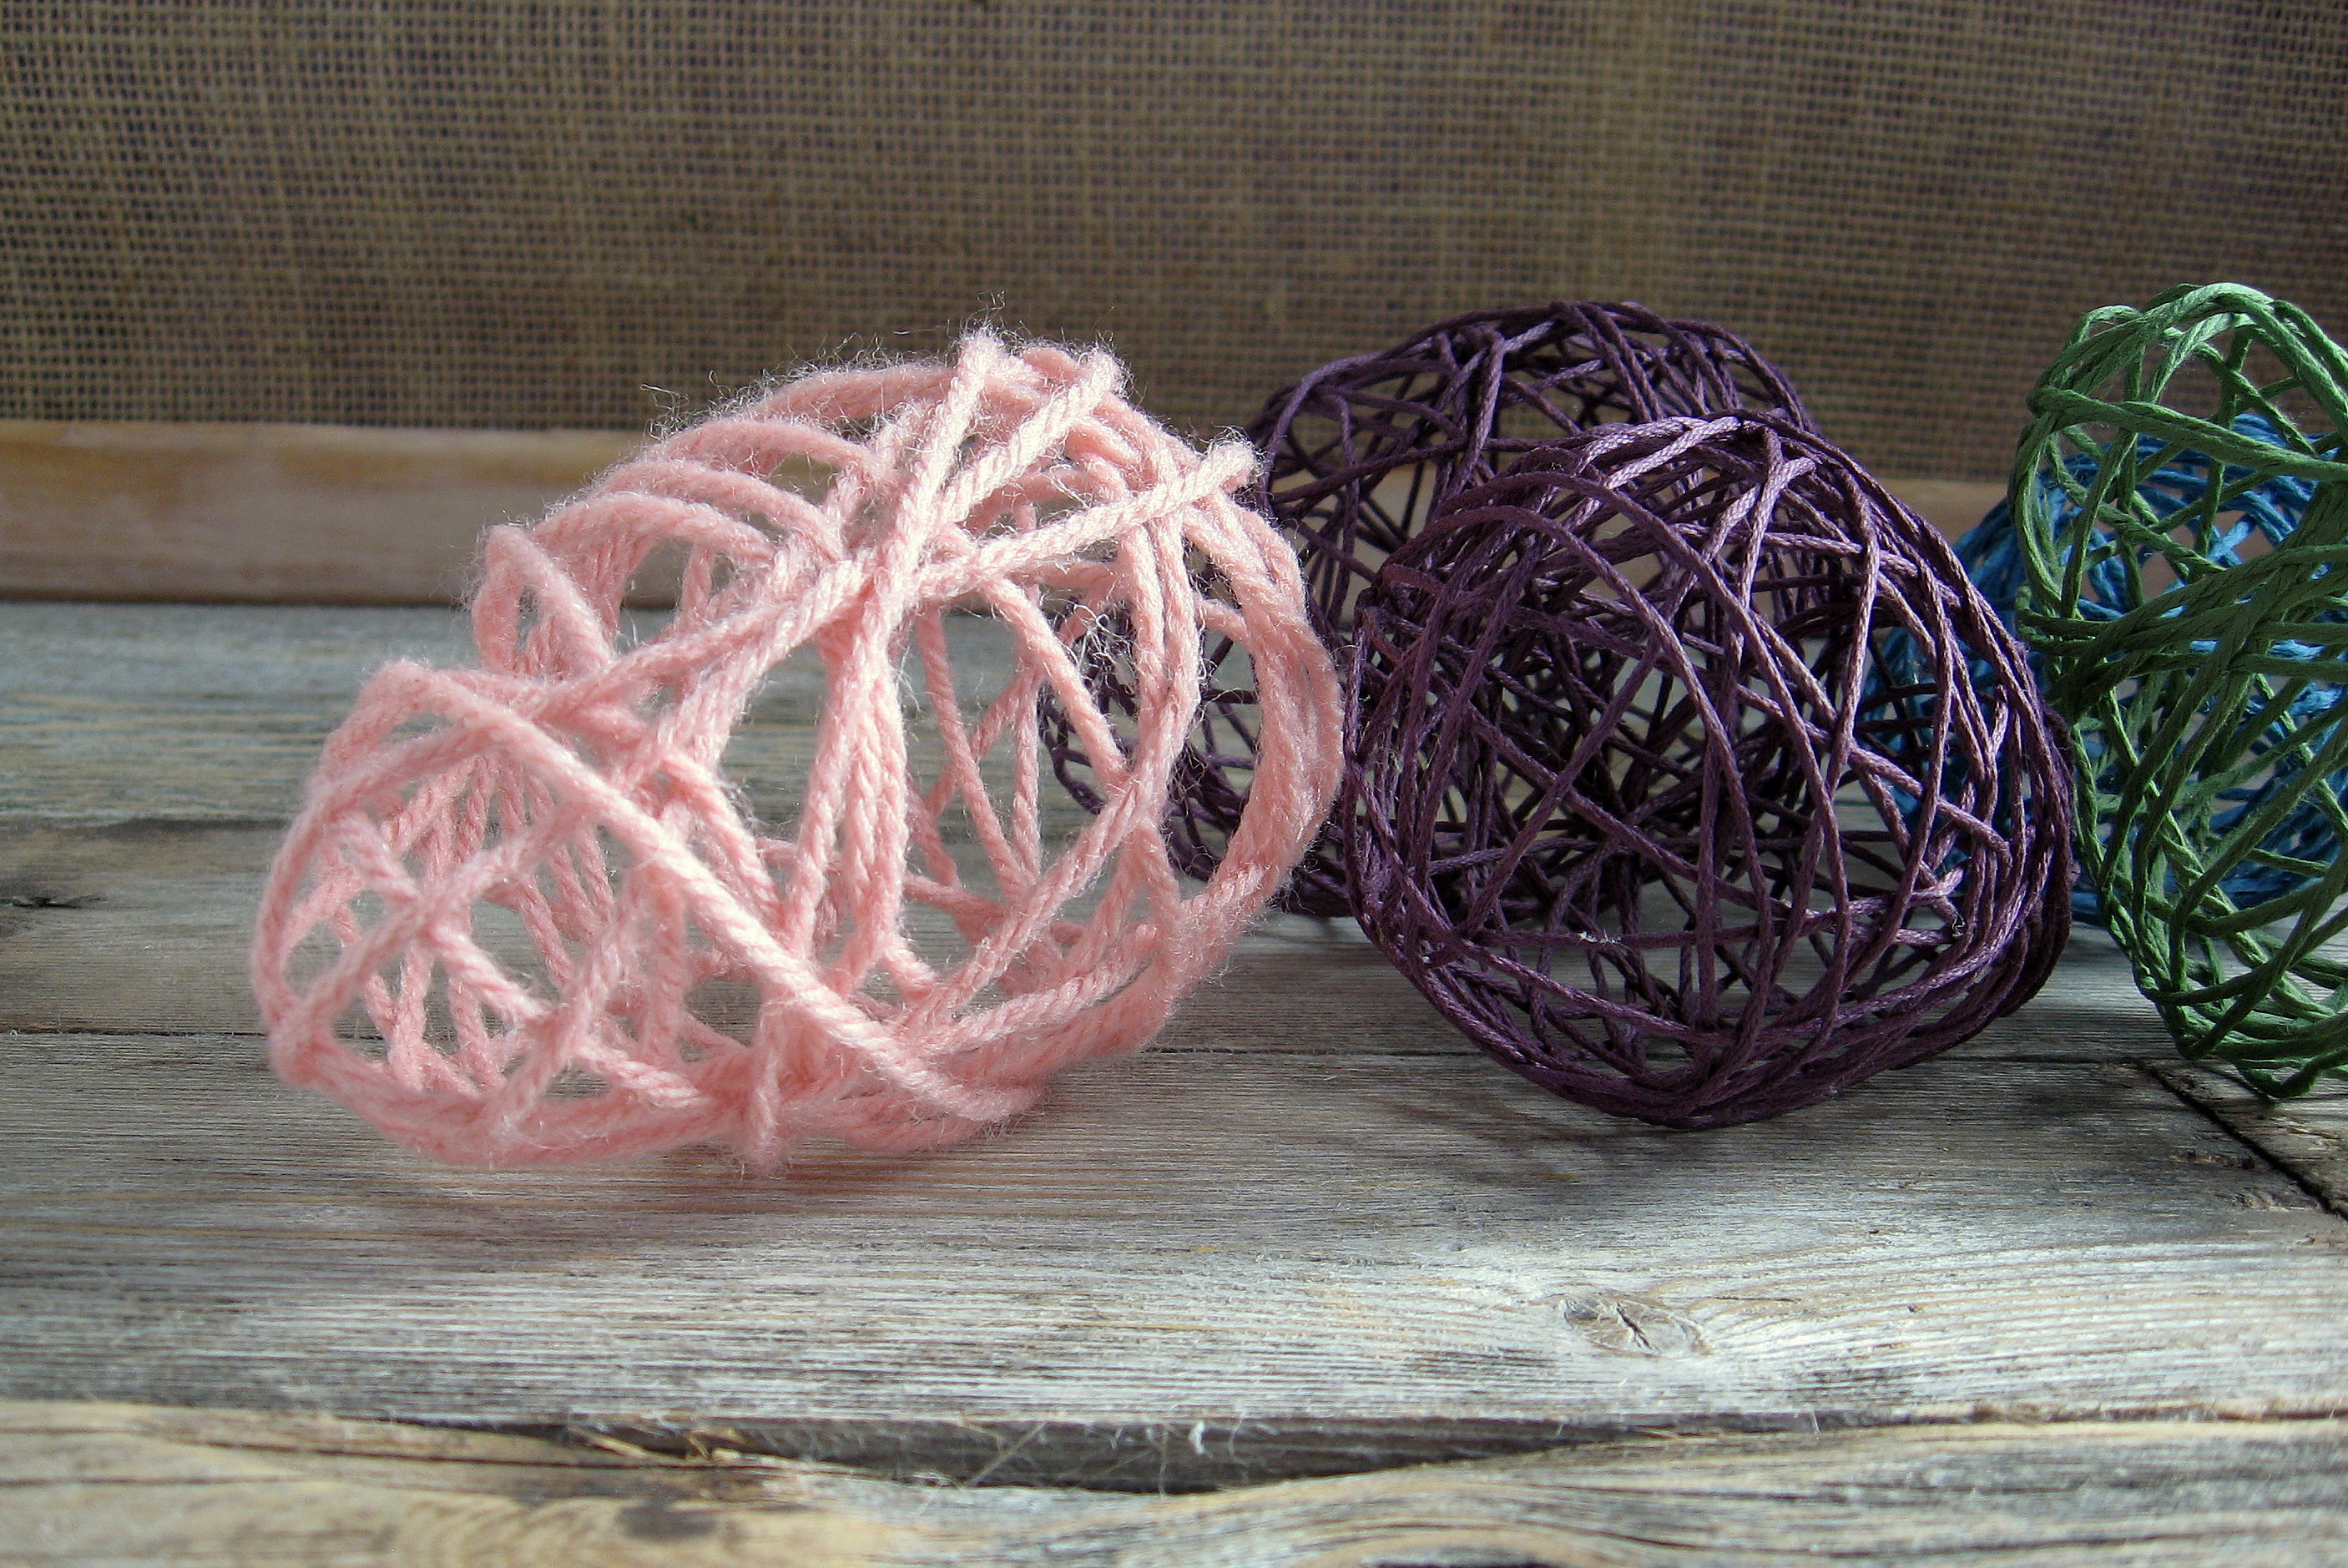
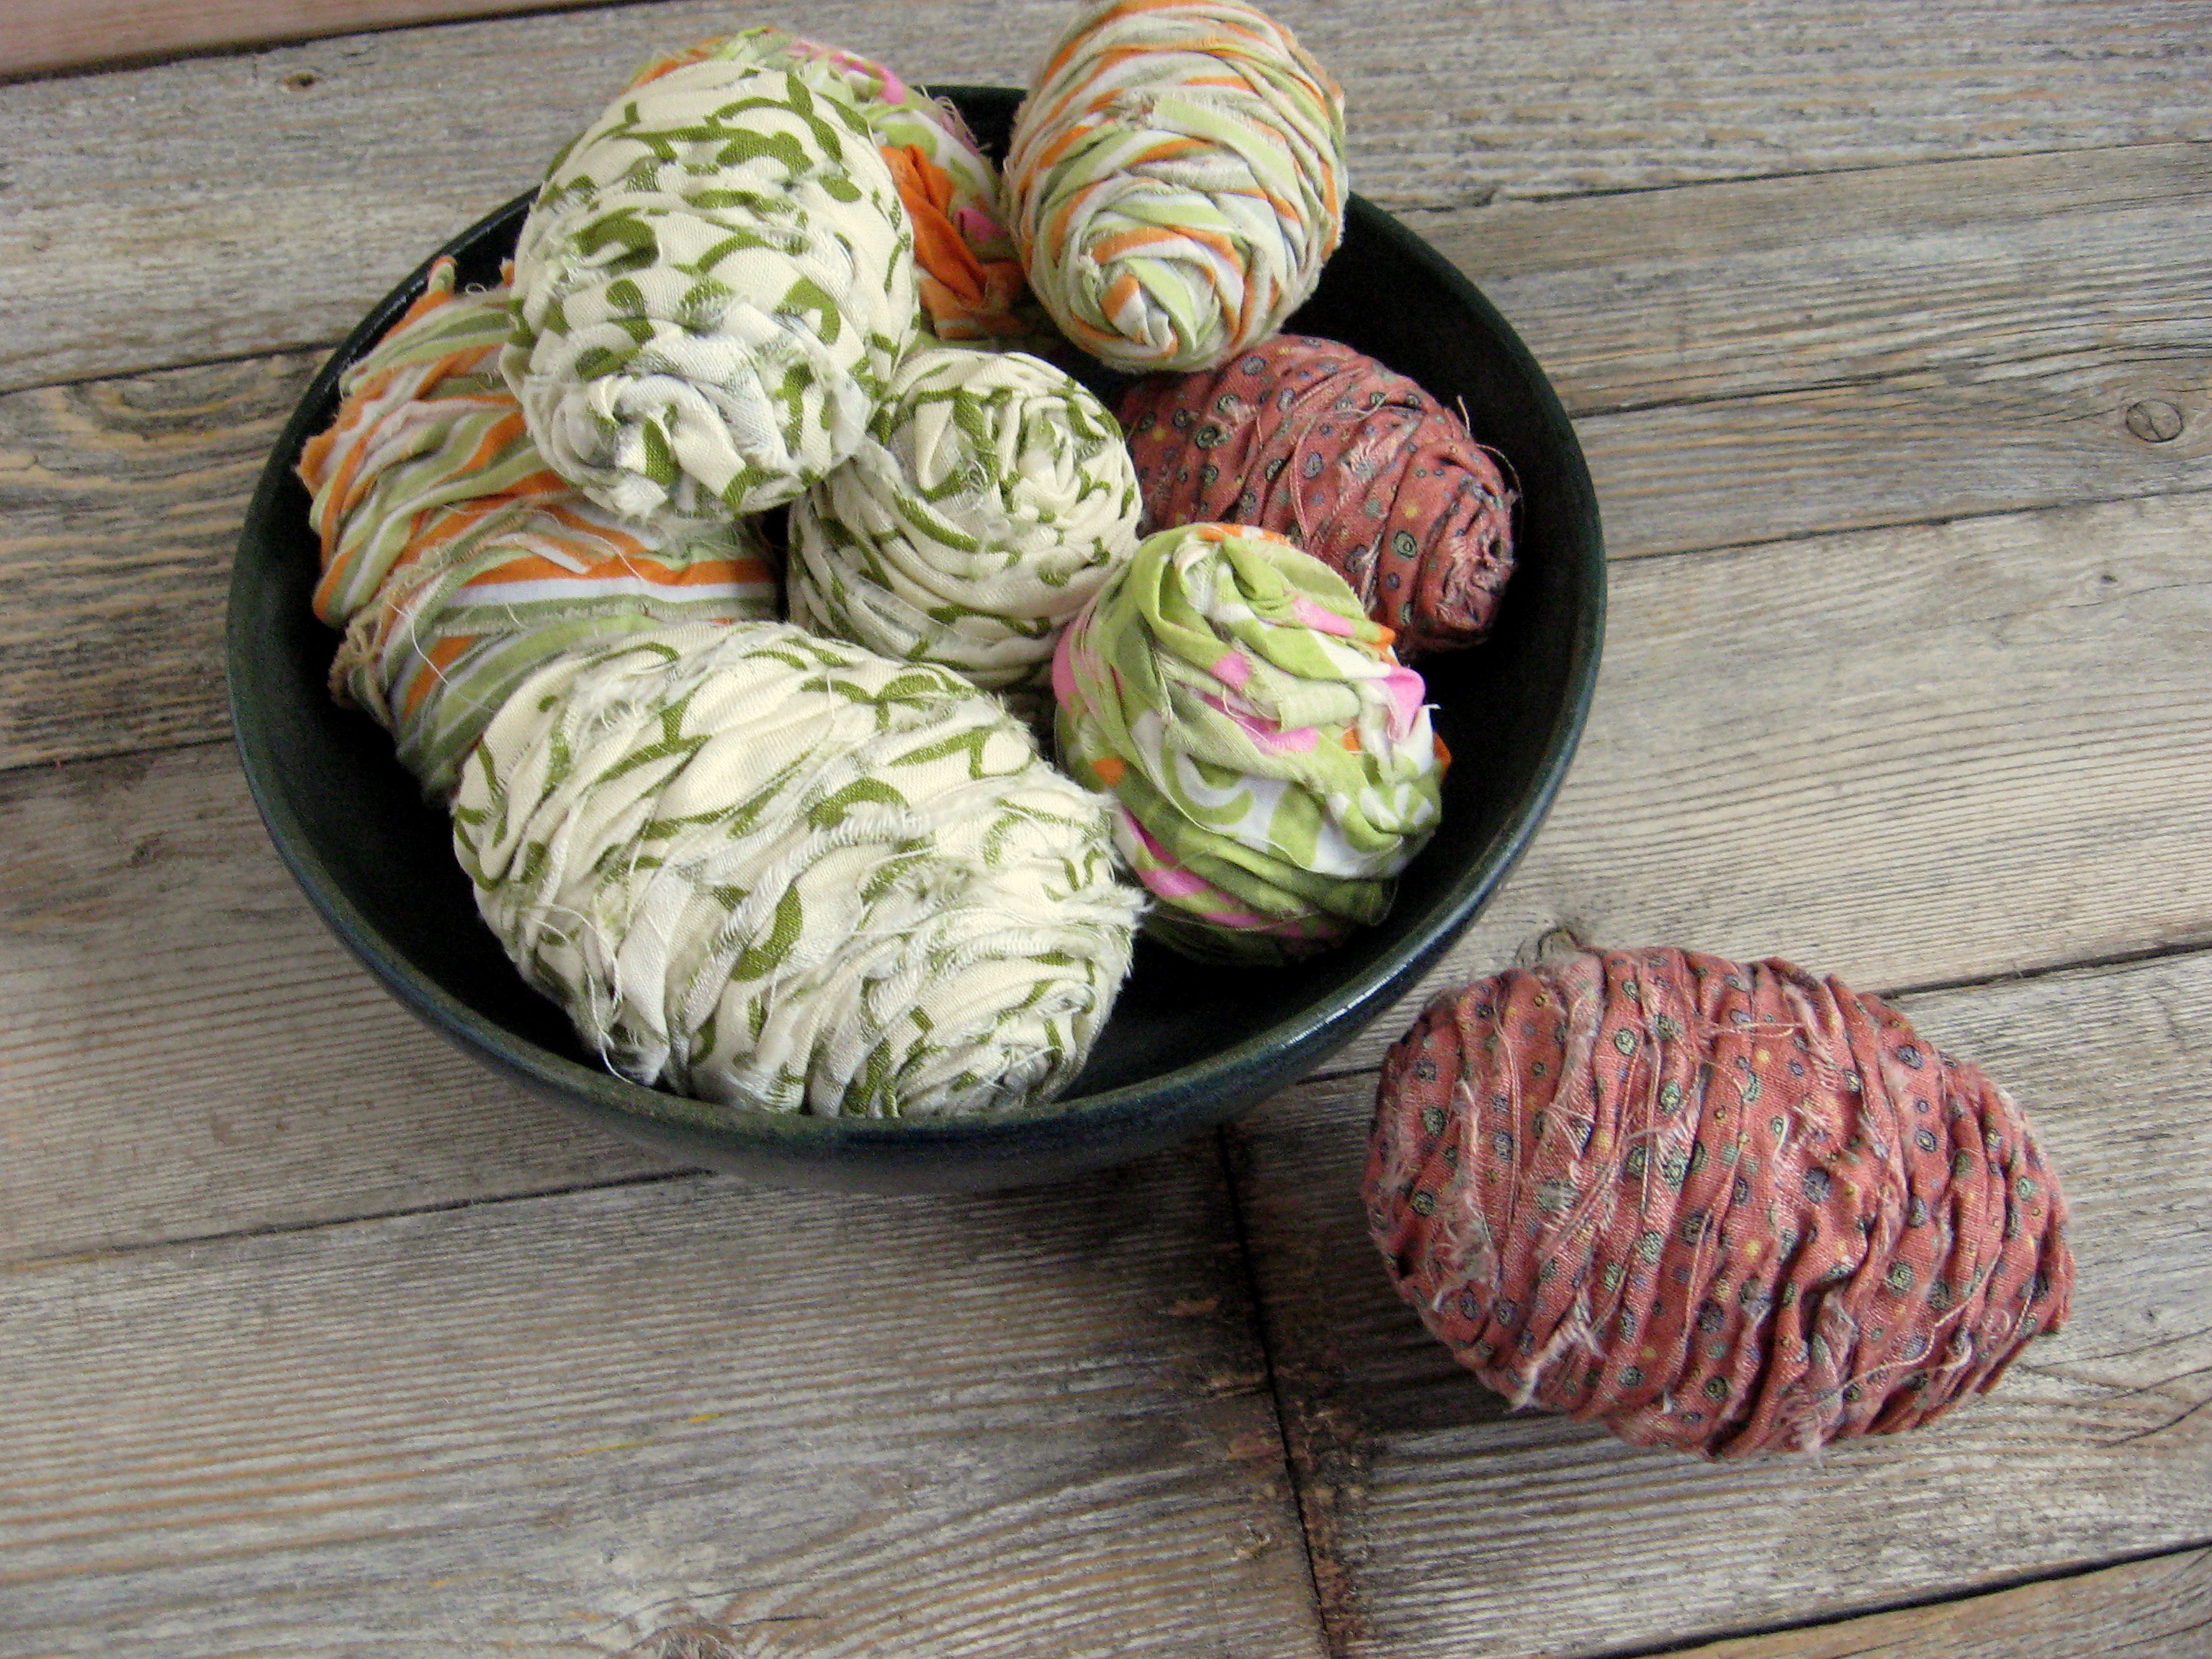
Here are some all white ones, that I made with some very thin white cotton yarn.
And here are some colored eggs, again using a thinner cotton yarn.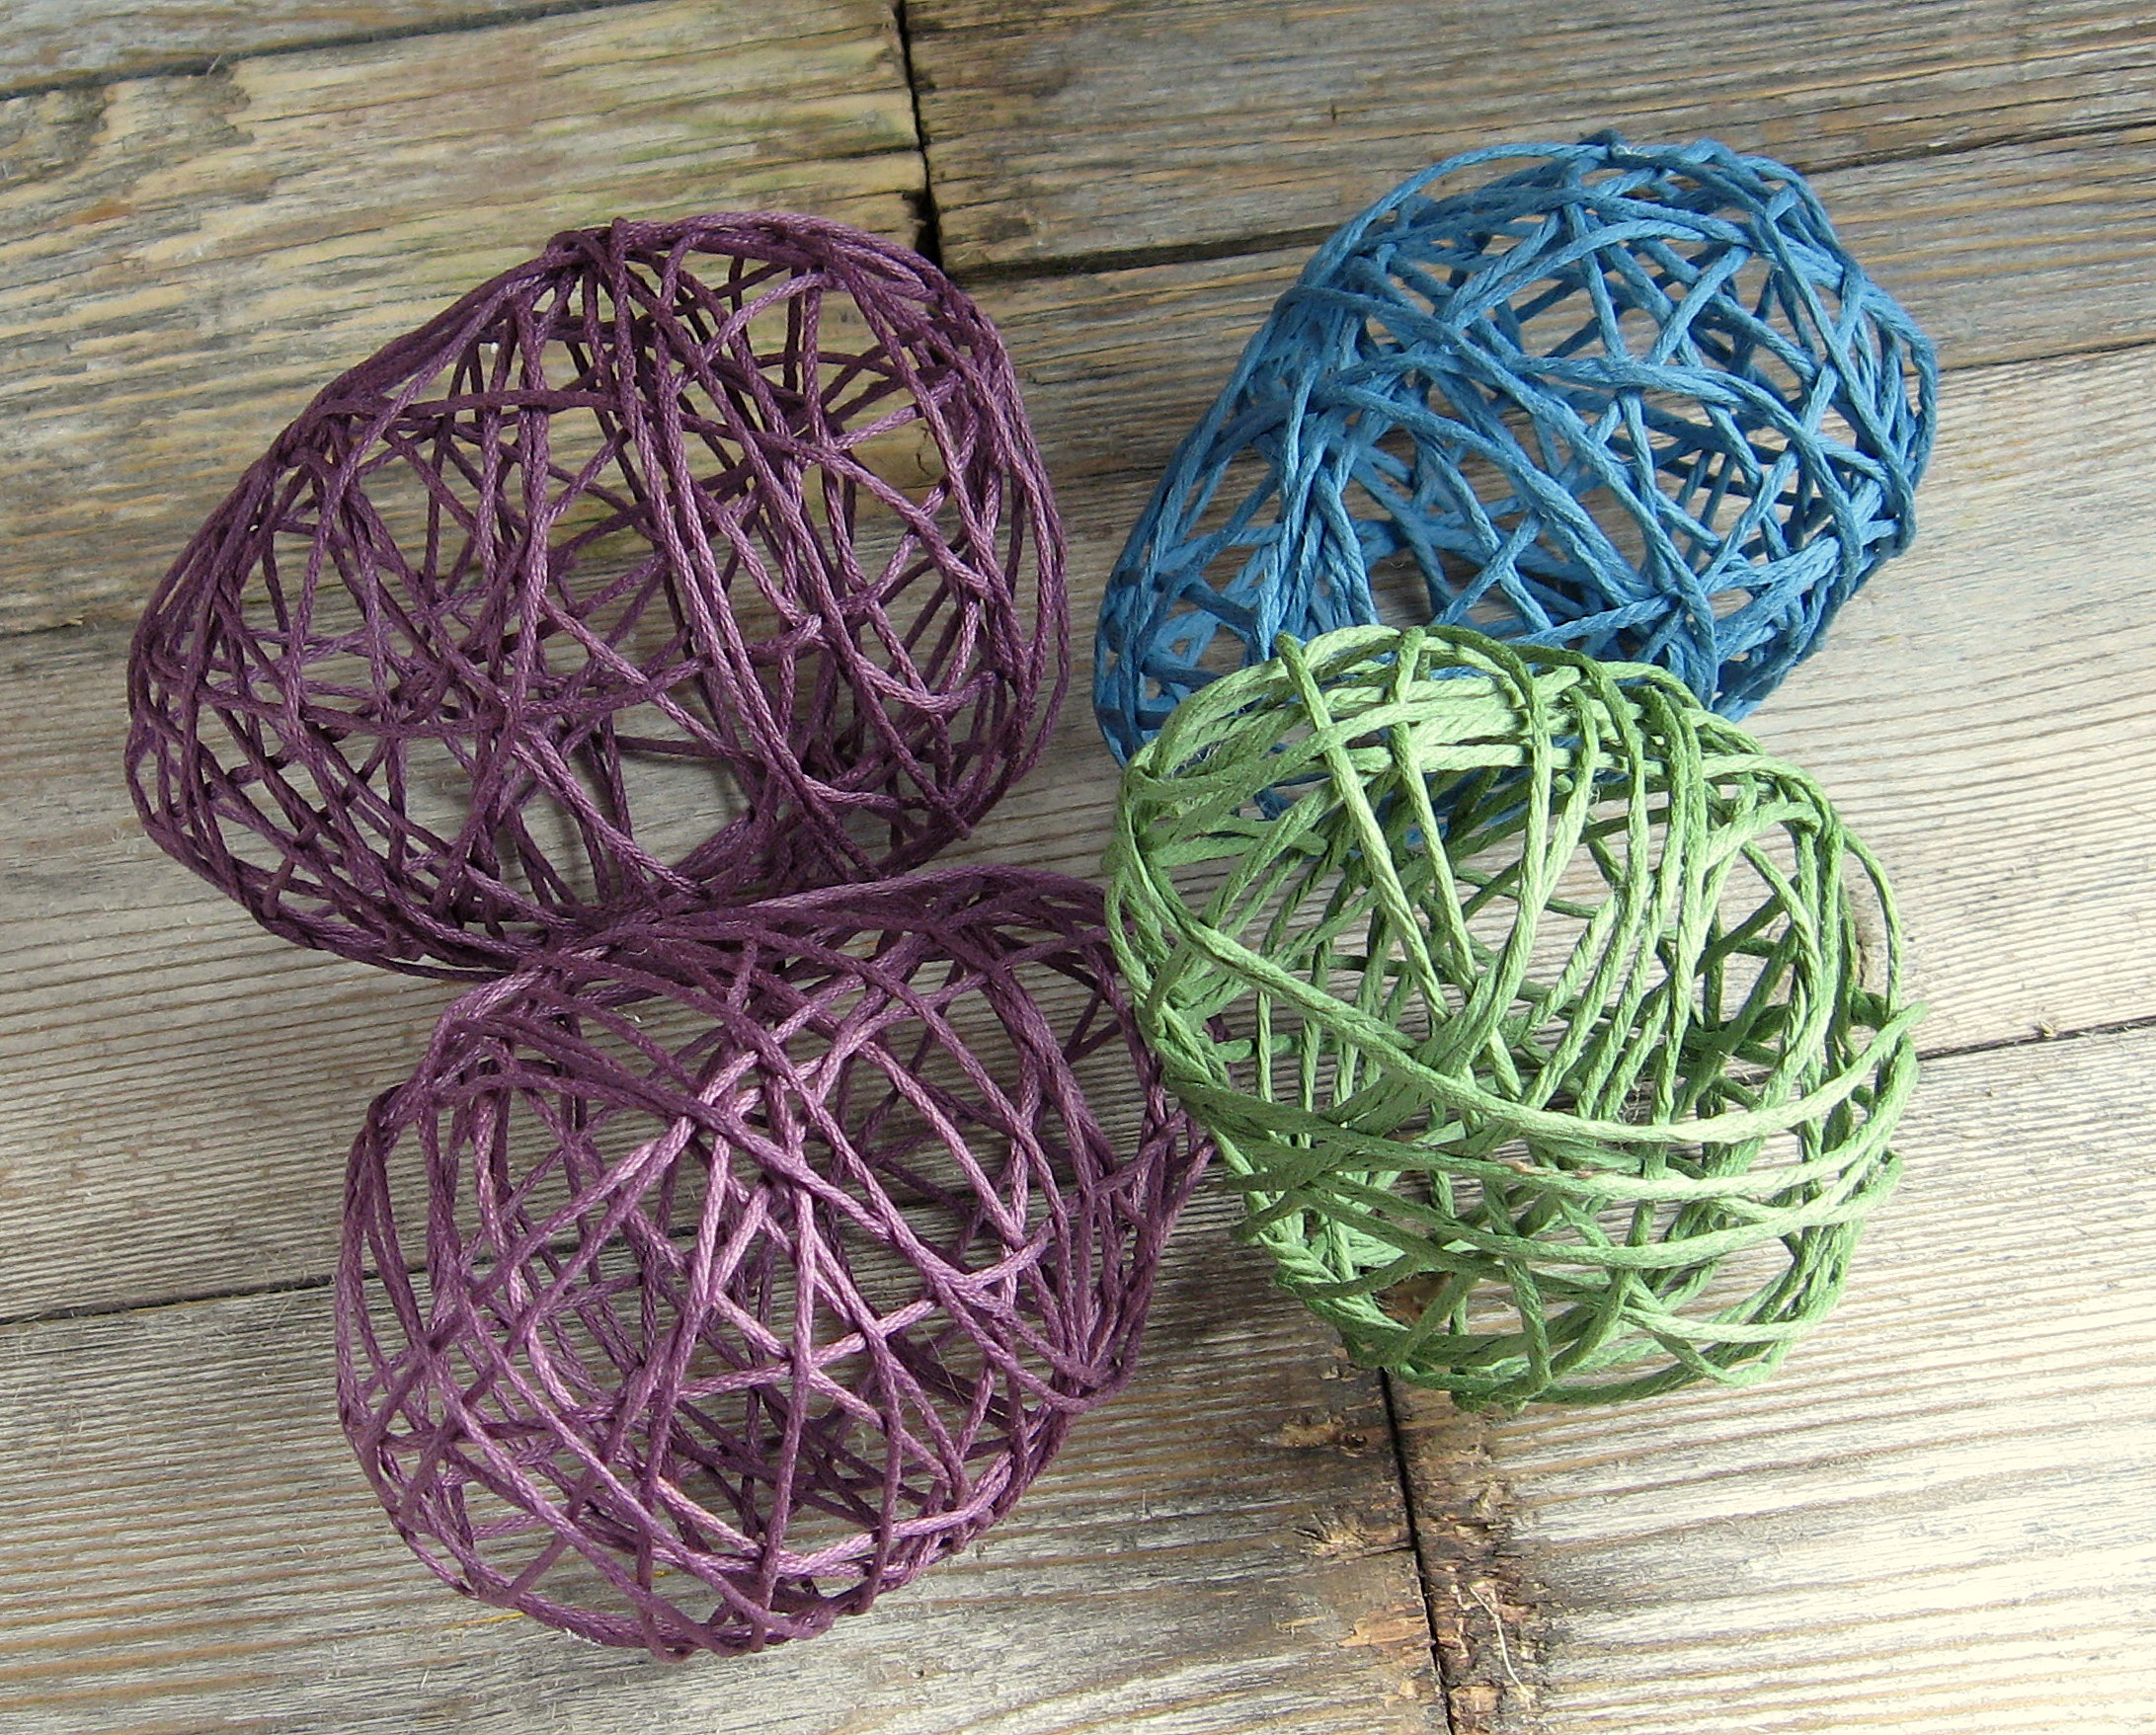
Notice the pink egg here. I used a thicker, fuzzier yarn, just so you could see the difference in how they look.
Once you get the hang of that, try some other projects with the same technique. How about using a larger round balloon to make pretty balls to hang from the ceiling? Pink yarn balls hanging by ribbon from the ceiling is adorable in a baby girl’s nursery. Or, use them in appropriate colors to decorate for any holiday party (I’m picturing black and orange ones at Halloween!)
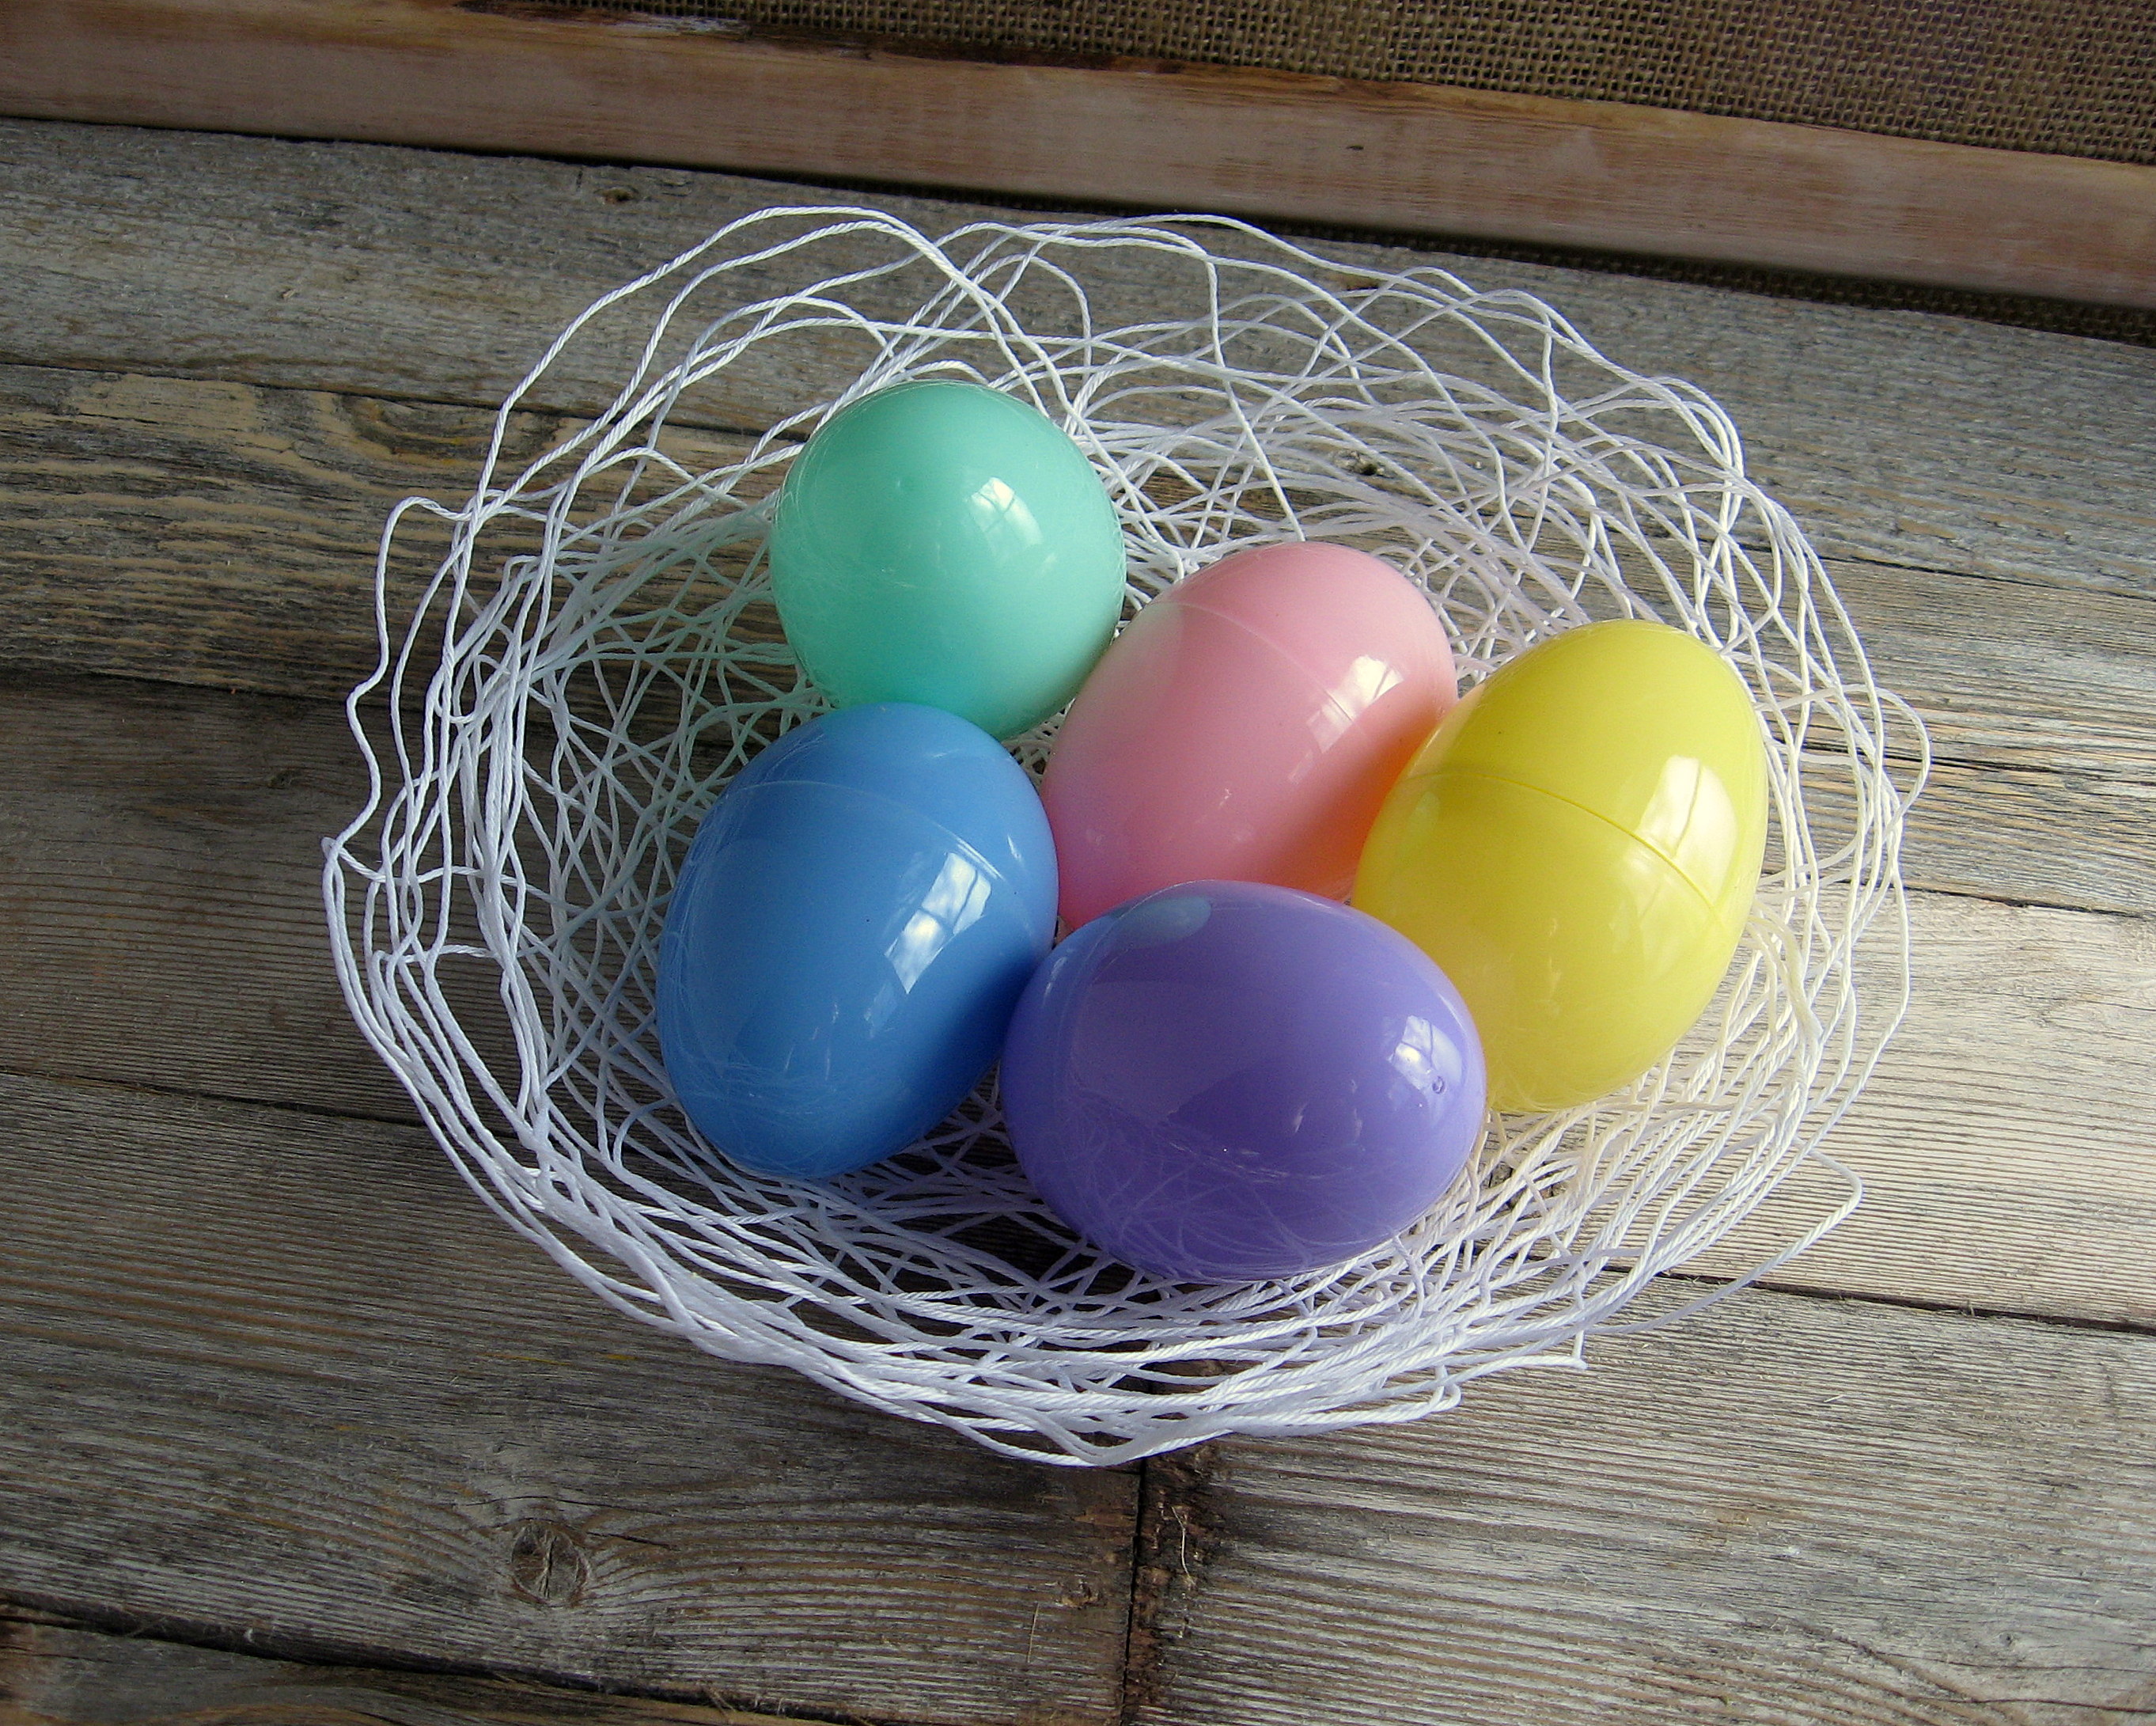
Or how about a bowl?
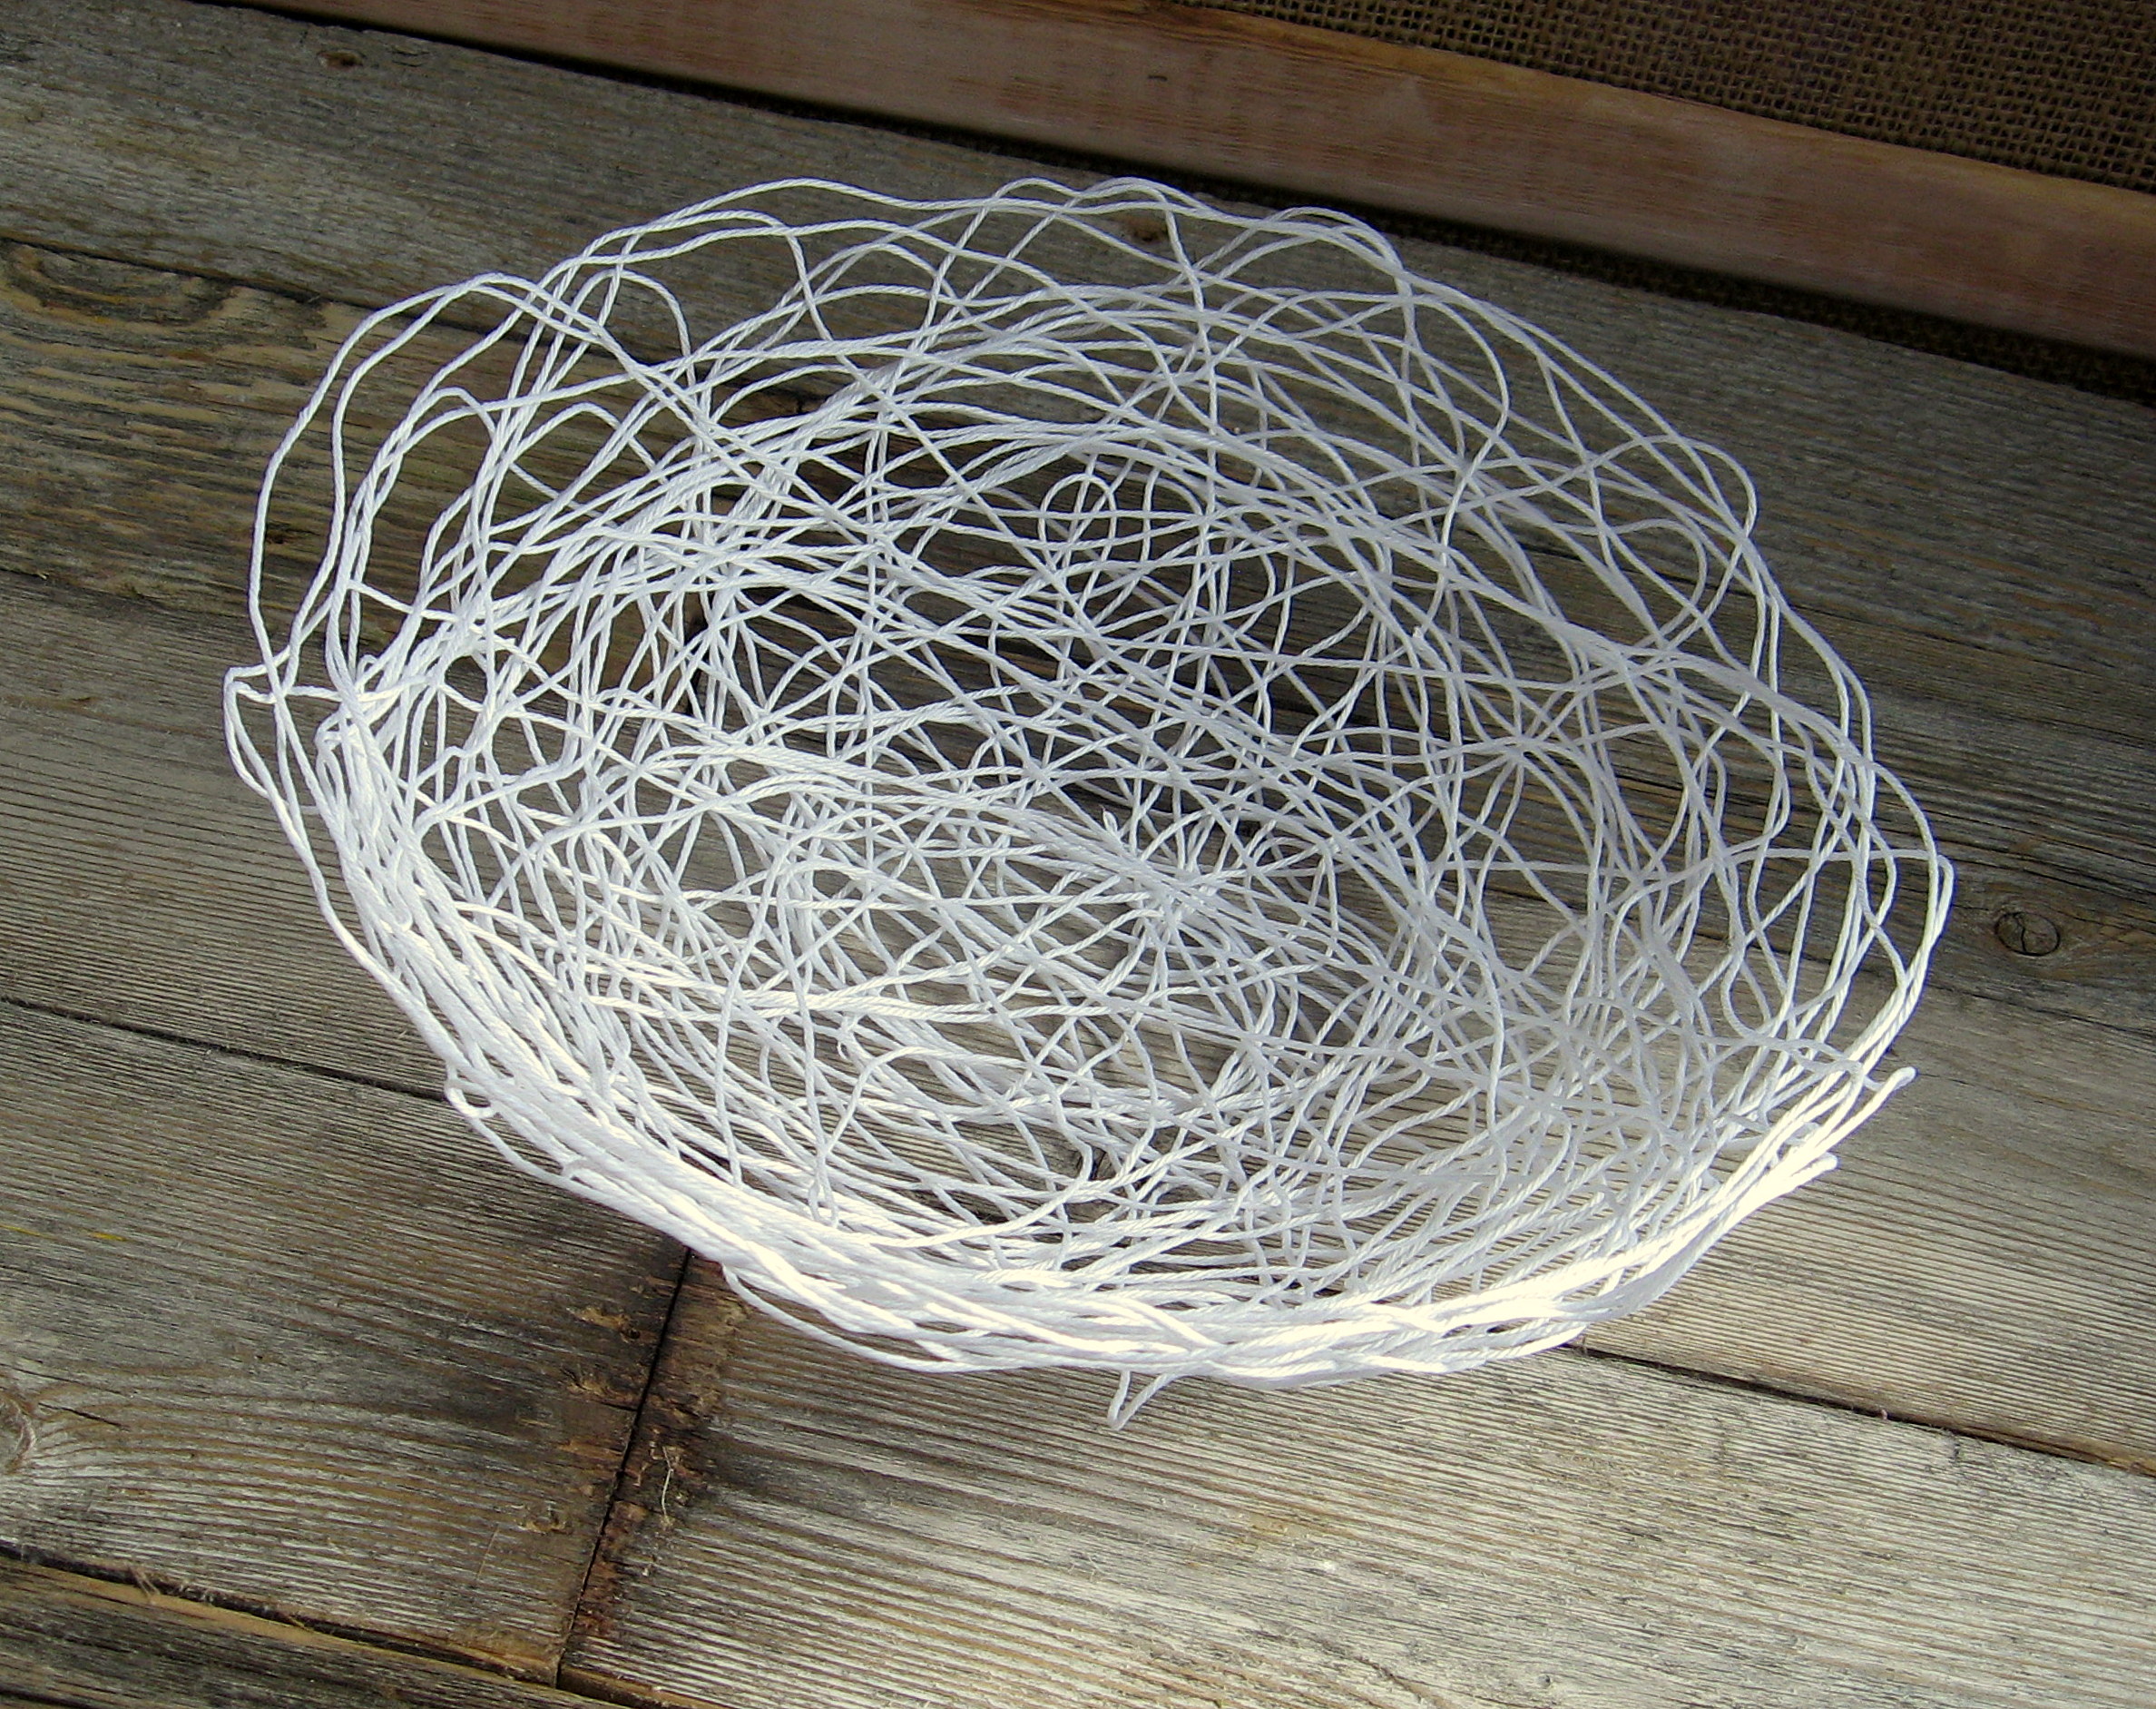
I made this one with a 14 inch balloon and just put the yarn on the bottom of it. With the eggs in it, it looks kind of like a nest, don’t you think? It would be so cute done in brown yarn, with little plastic eggs spray painted robin’s egg blue…
Twine Wrapped Easter Eggs
I stocked up on after-Easter clearance plastic eggs last year and thought now was the perfect time to turn them into classy spring decor for my home.
I started with twine that I bought from a home improvement store. A note about this: I bought this spool of twine about 5 years ago for $12 and used it to string balloons to completely cover the ceiling in a very large gym. 5 years worth of craft projects and gift wrapping later, and there is still this much remaining.
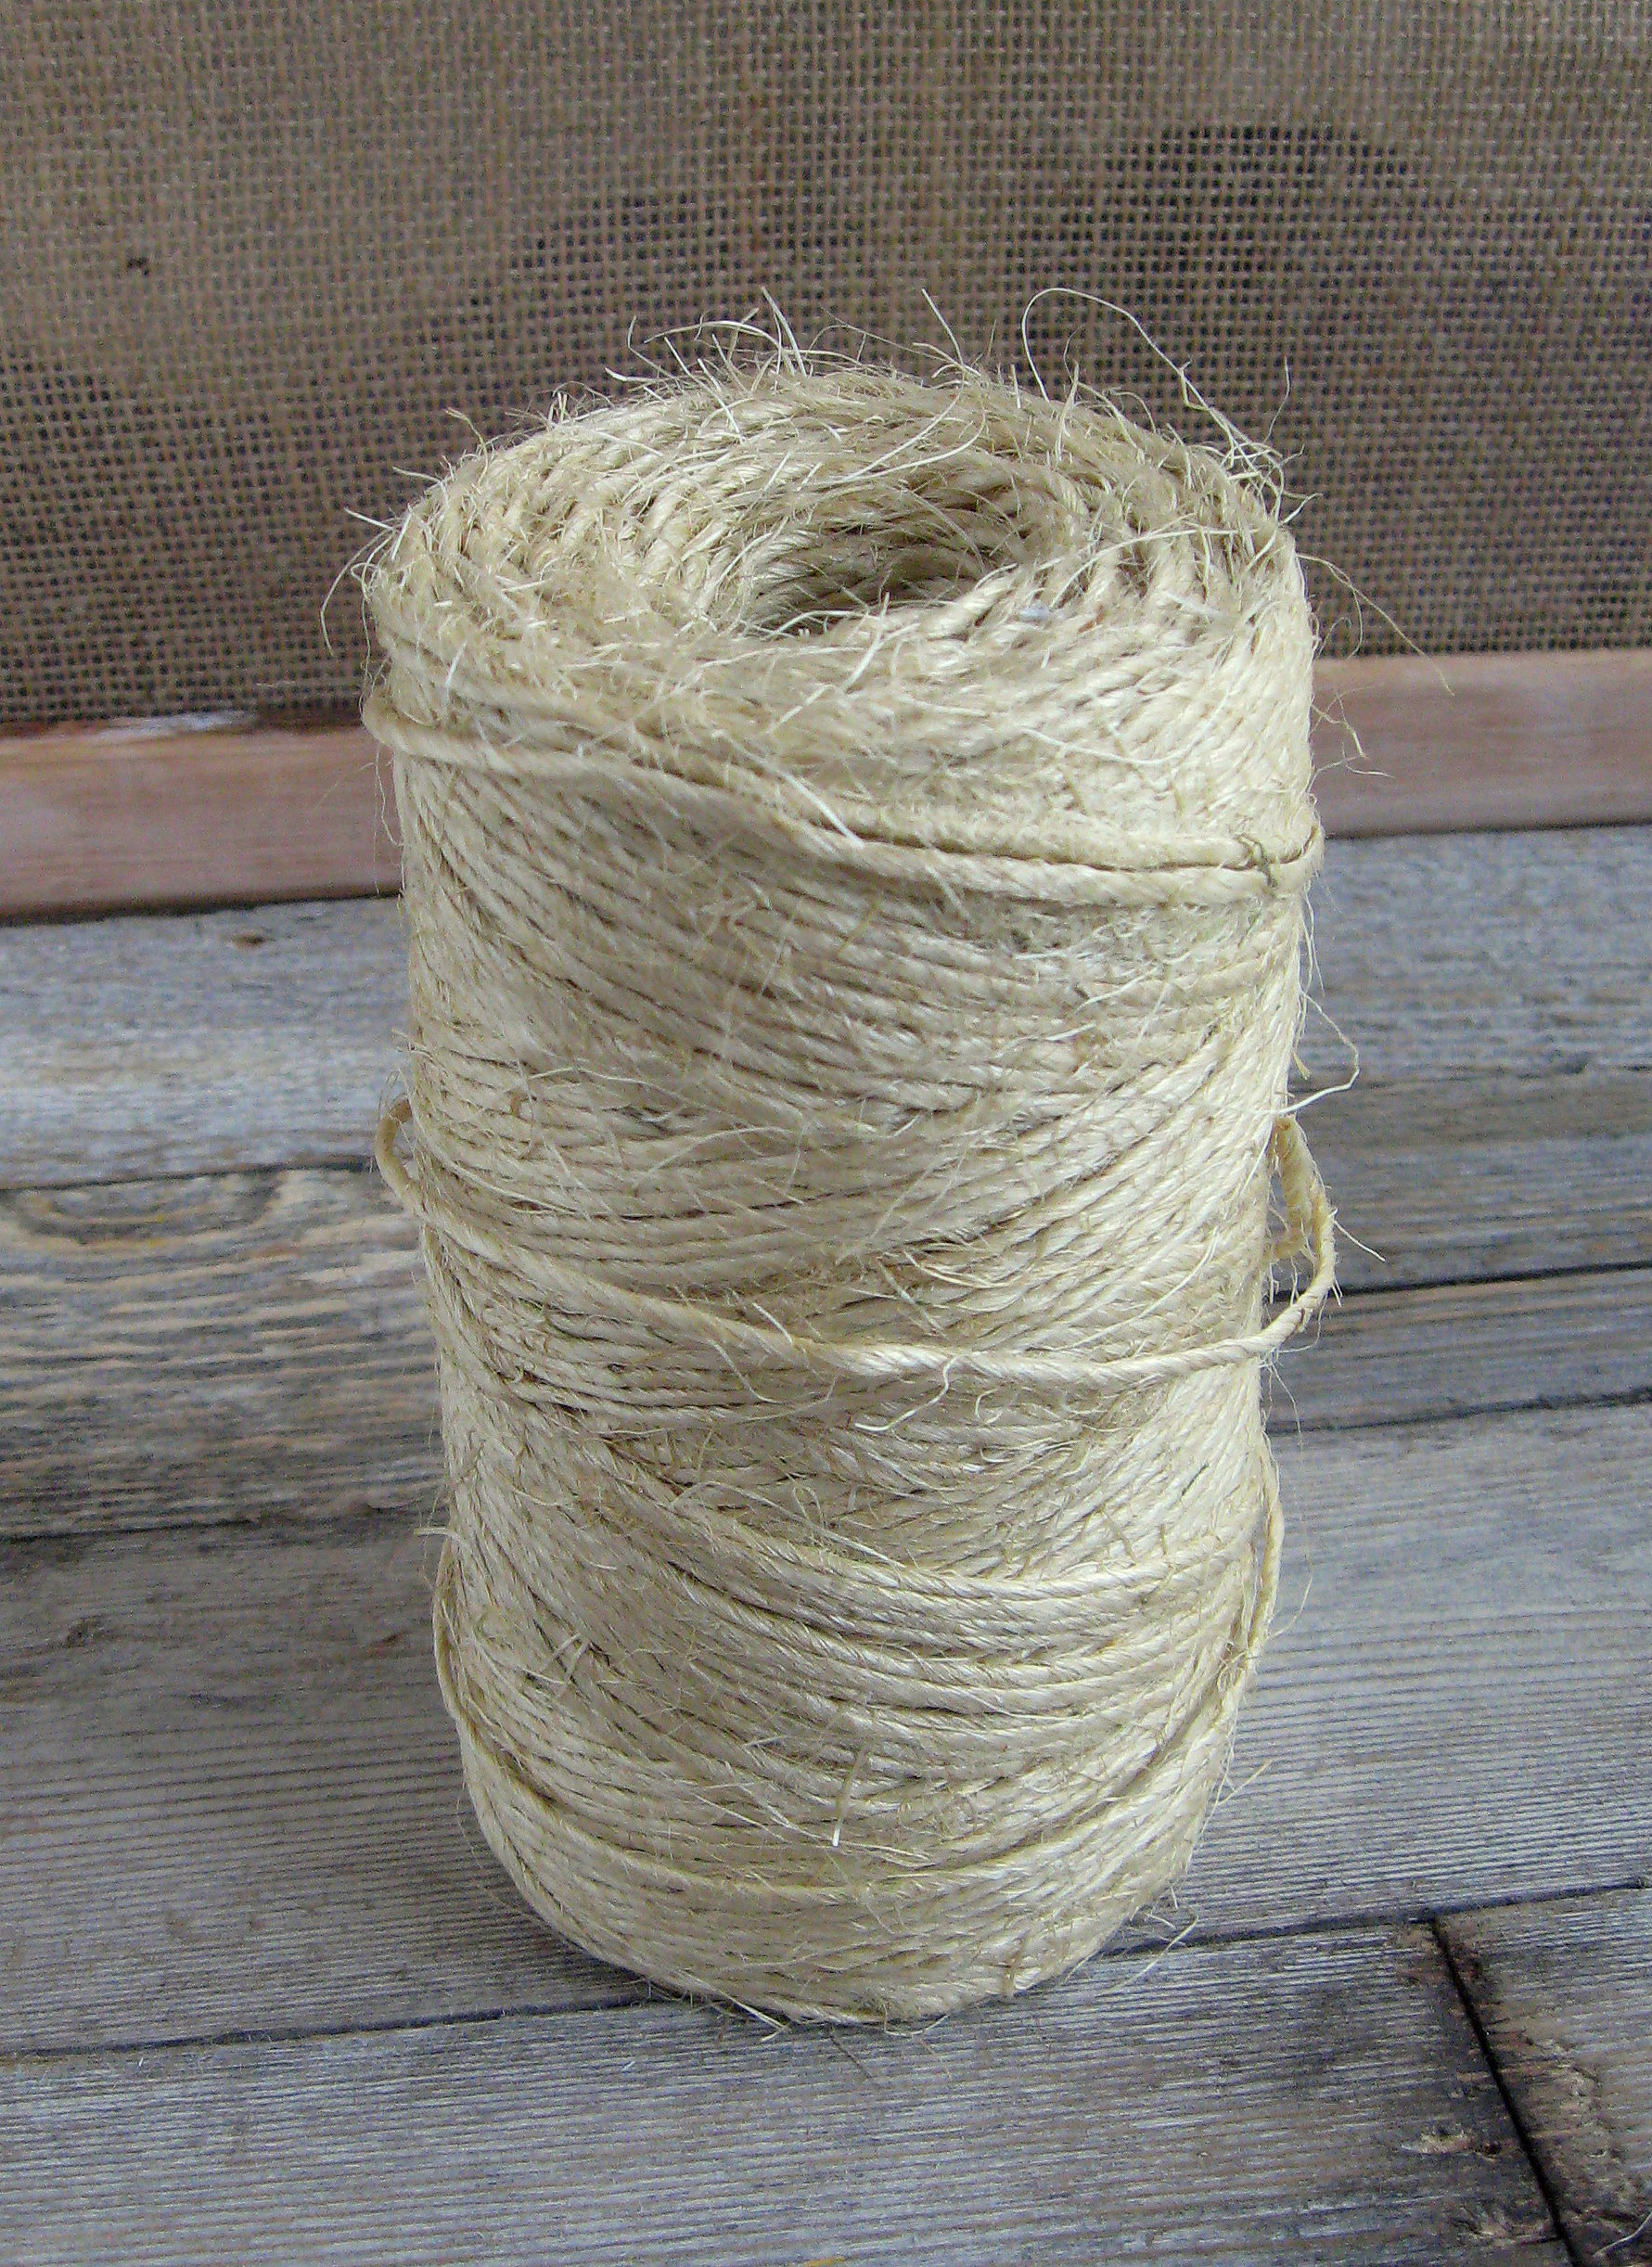
Best crafting money ever spent, and a great lesson about looking for your craft supplies outside of the craft store.
Now, on to the egg! Grab a plastic Easter egg – any size you like – and put a small dot of hot glue on the top. Stick the end of the twine on the dot of glue and hold it in place until it’s dry.
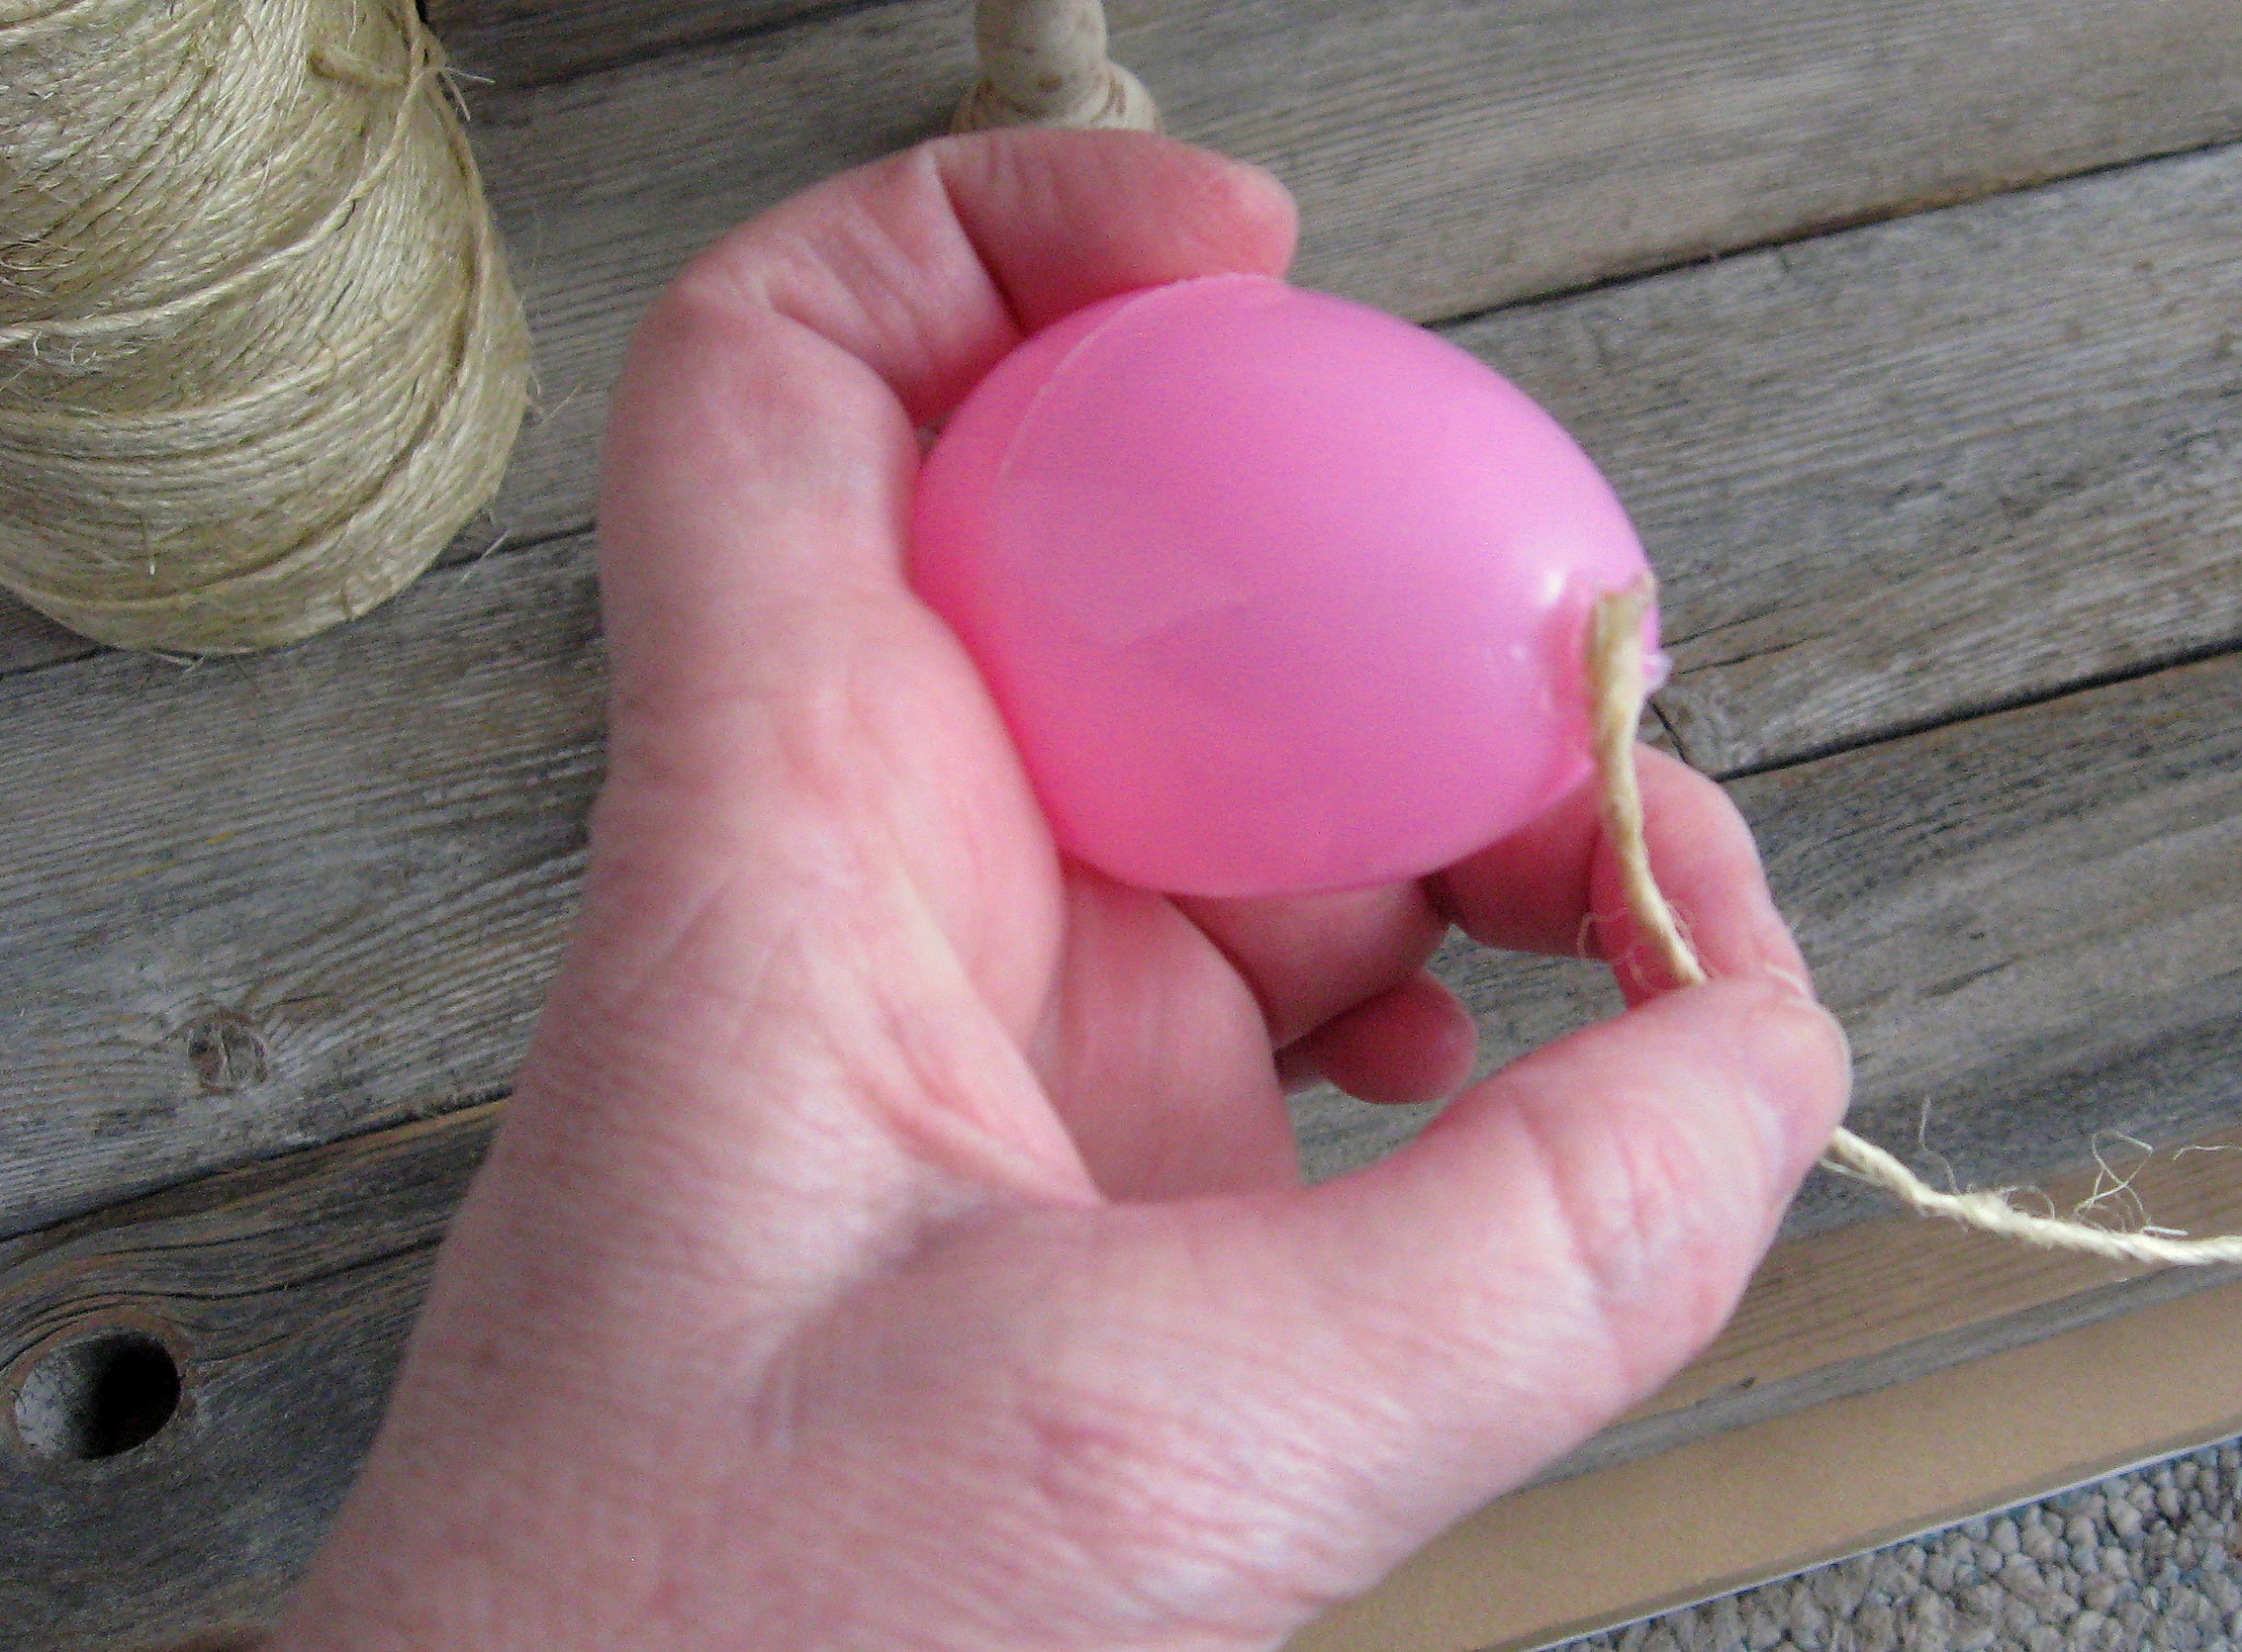
Now just start wrapping the twine around the egg, keeping each row close to the last so you don’t have gaps of the colored egg showing through. Use a small dot of glue on each side of the egg to hold the twine in place and keep it from slipping as you wrap.
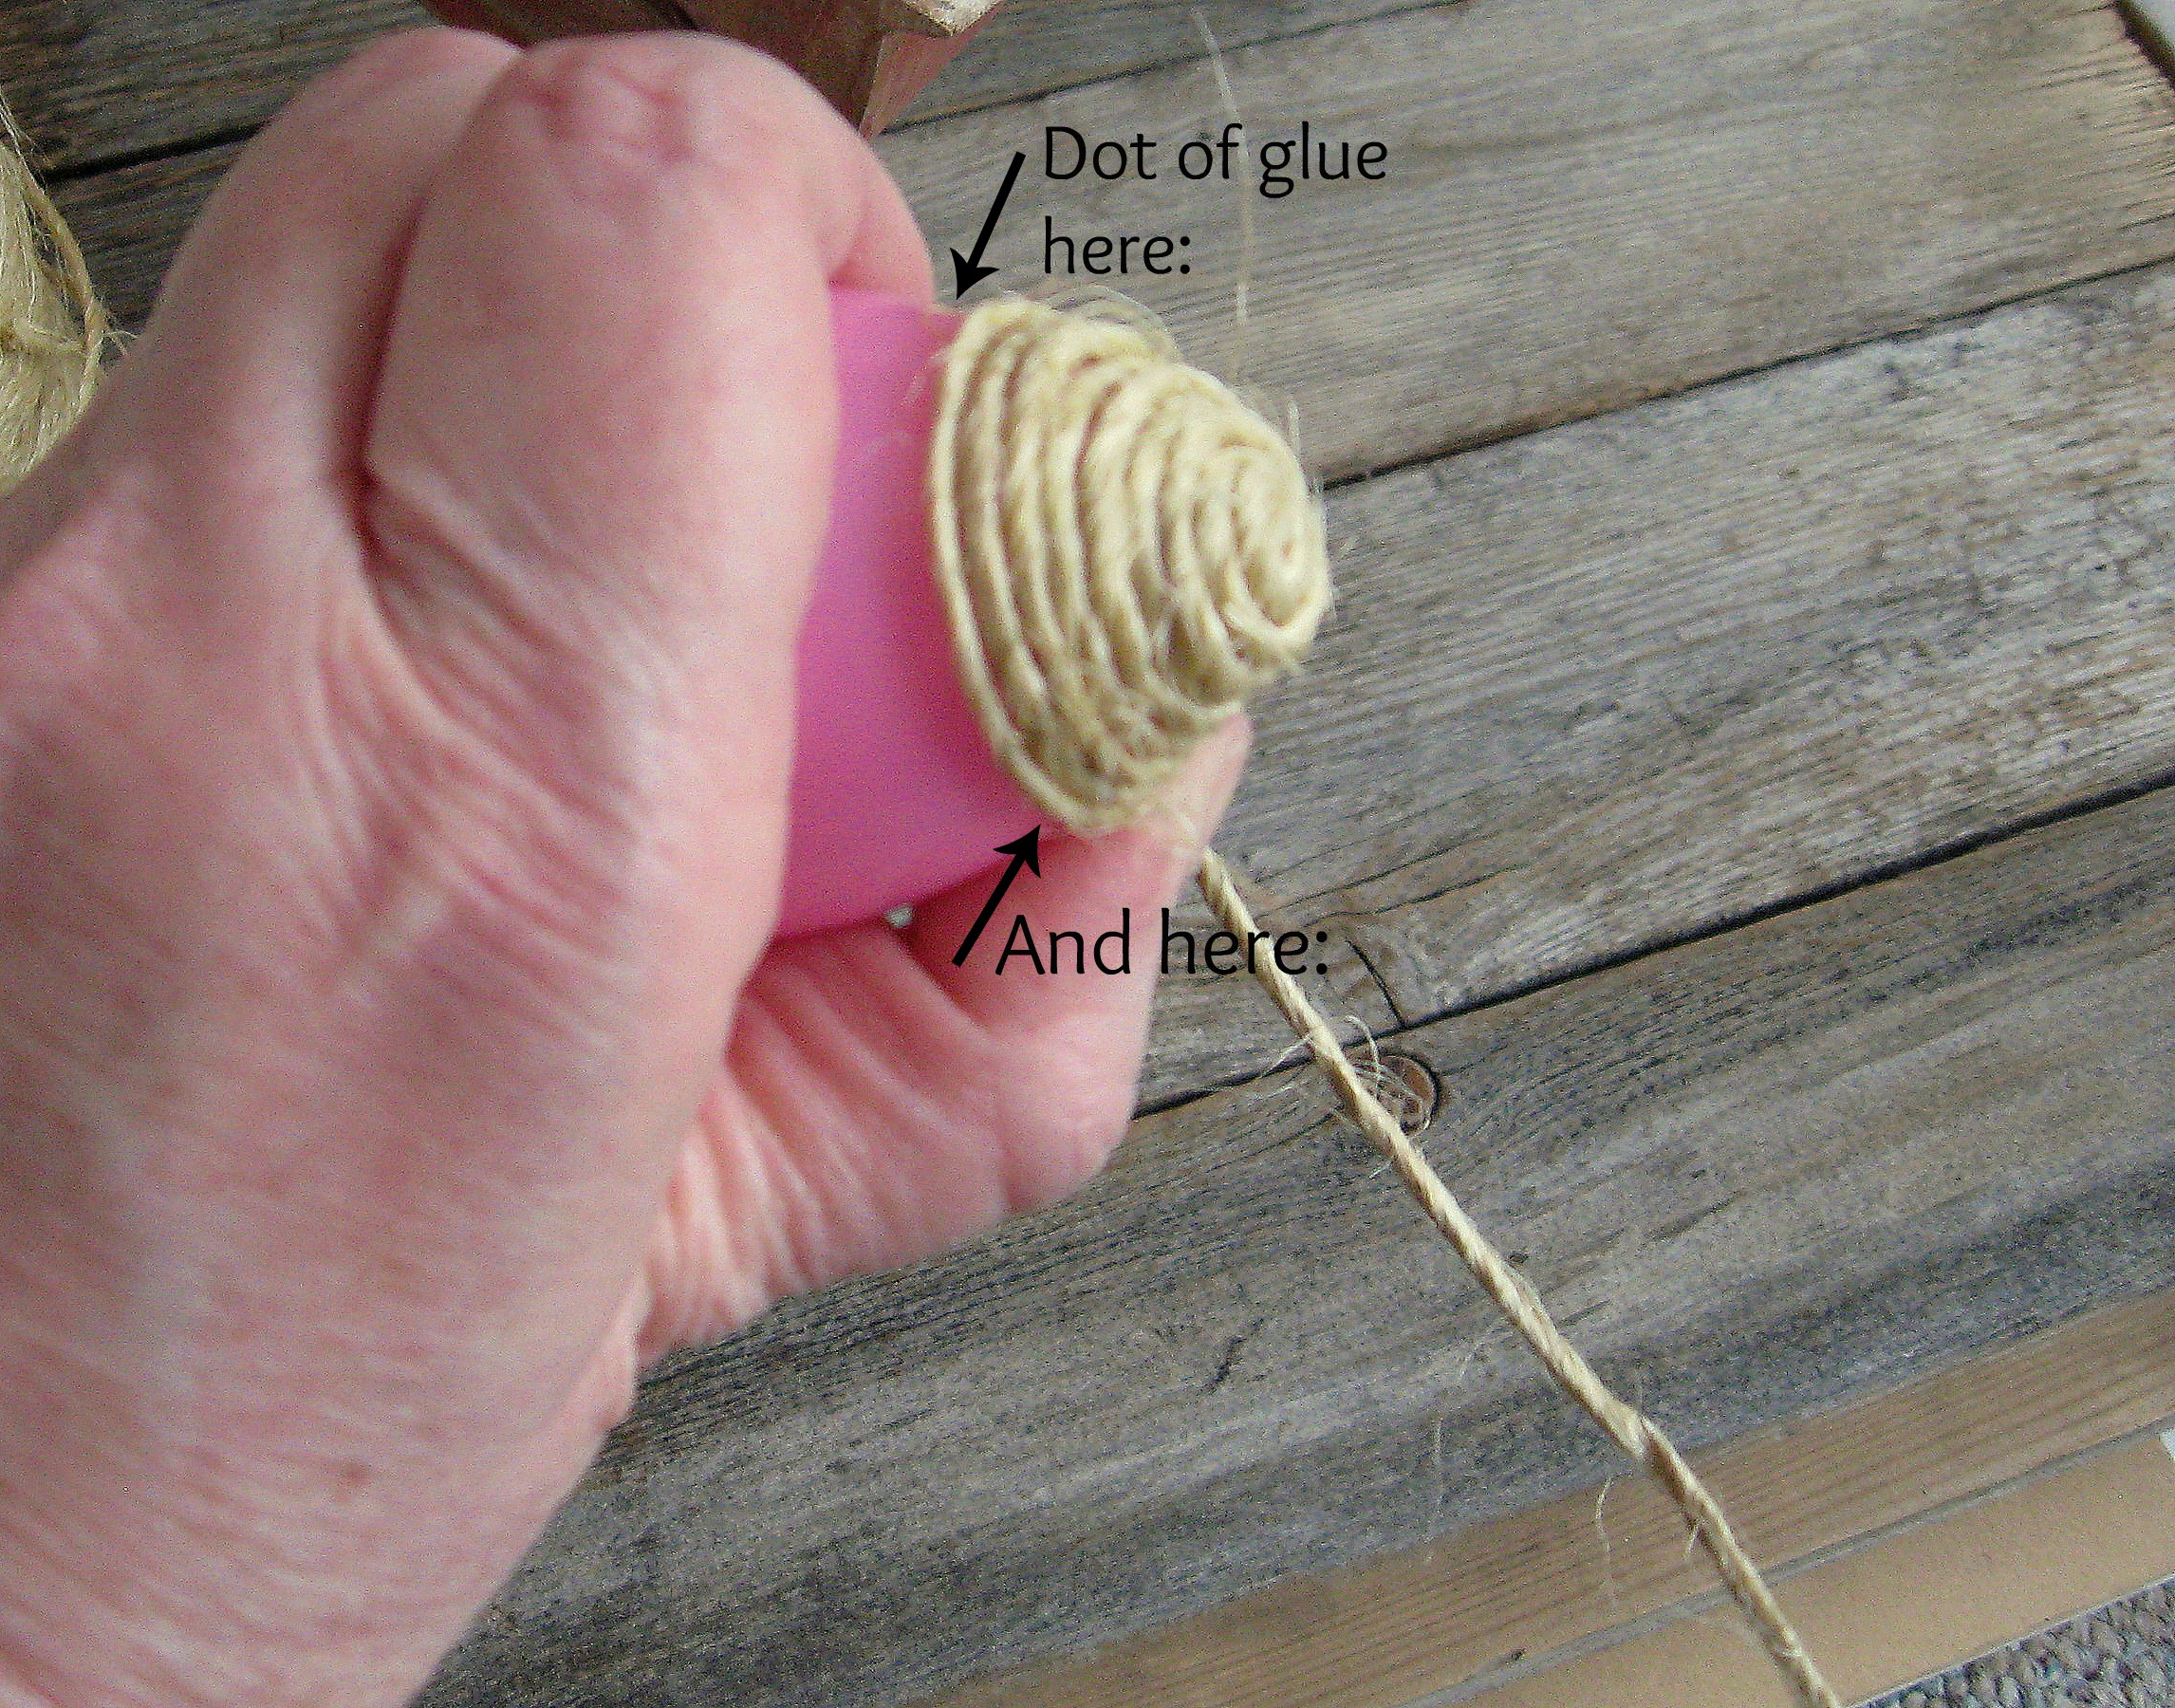
Just keep wrapping until you get to the bottom. When you only have a small circle of egg left on the other end, wrap the twine without glue to determine how much you’ll need to finish and cut it off at the correct length. Then, fill in the remaining exposed circle of egg with glue, and rewrap the twine around to fill it, and hold until the glue is set. That’s it! So easy, and mindless enough to do while you’re watching a little evening TV.
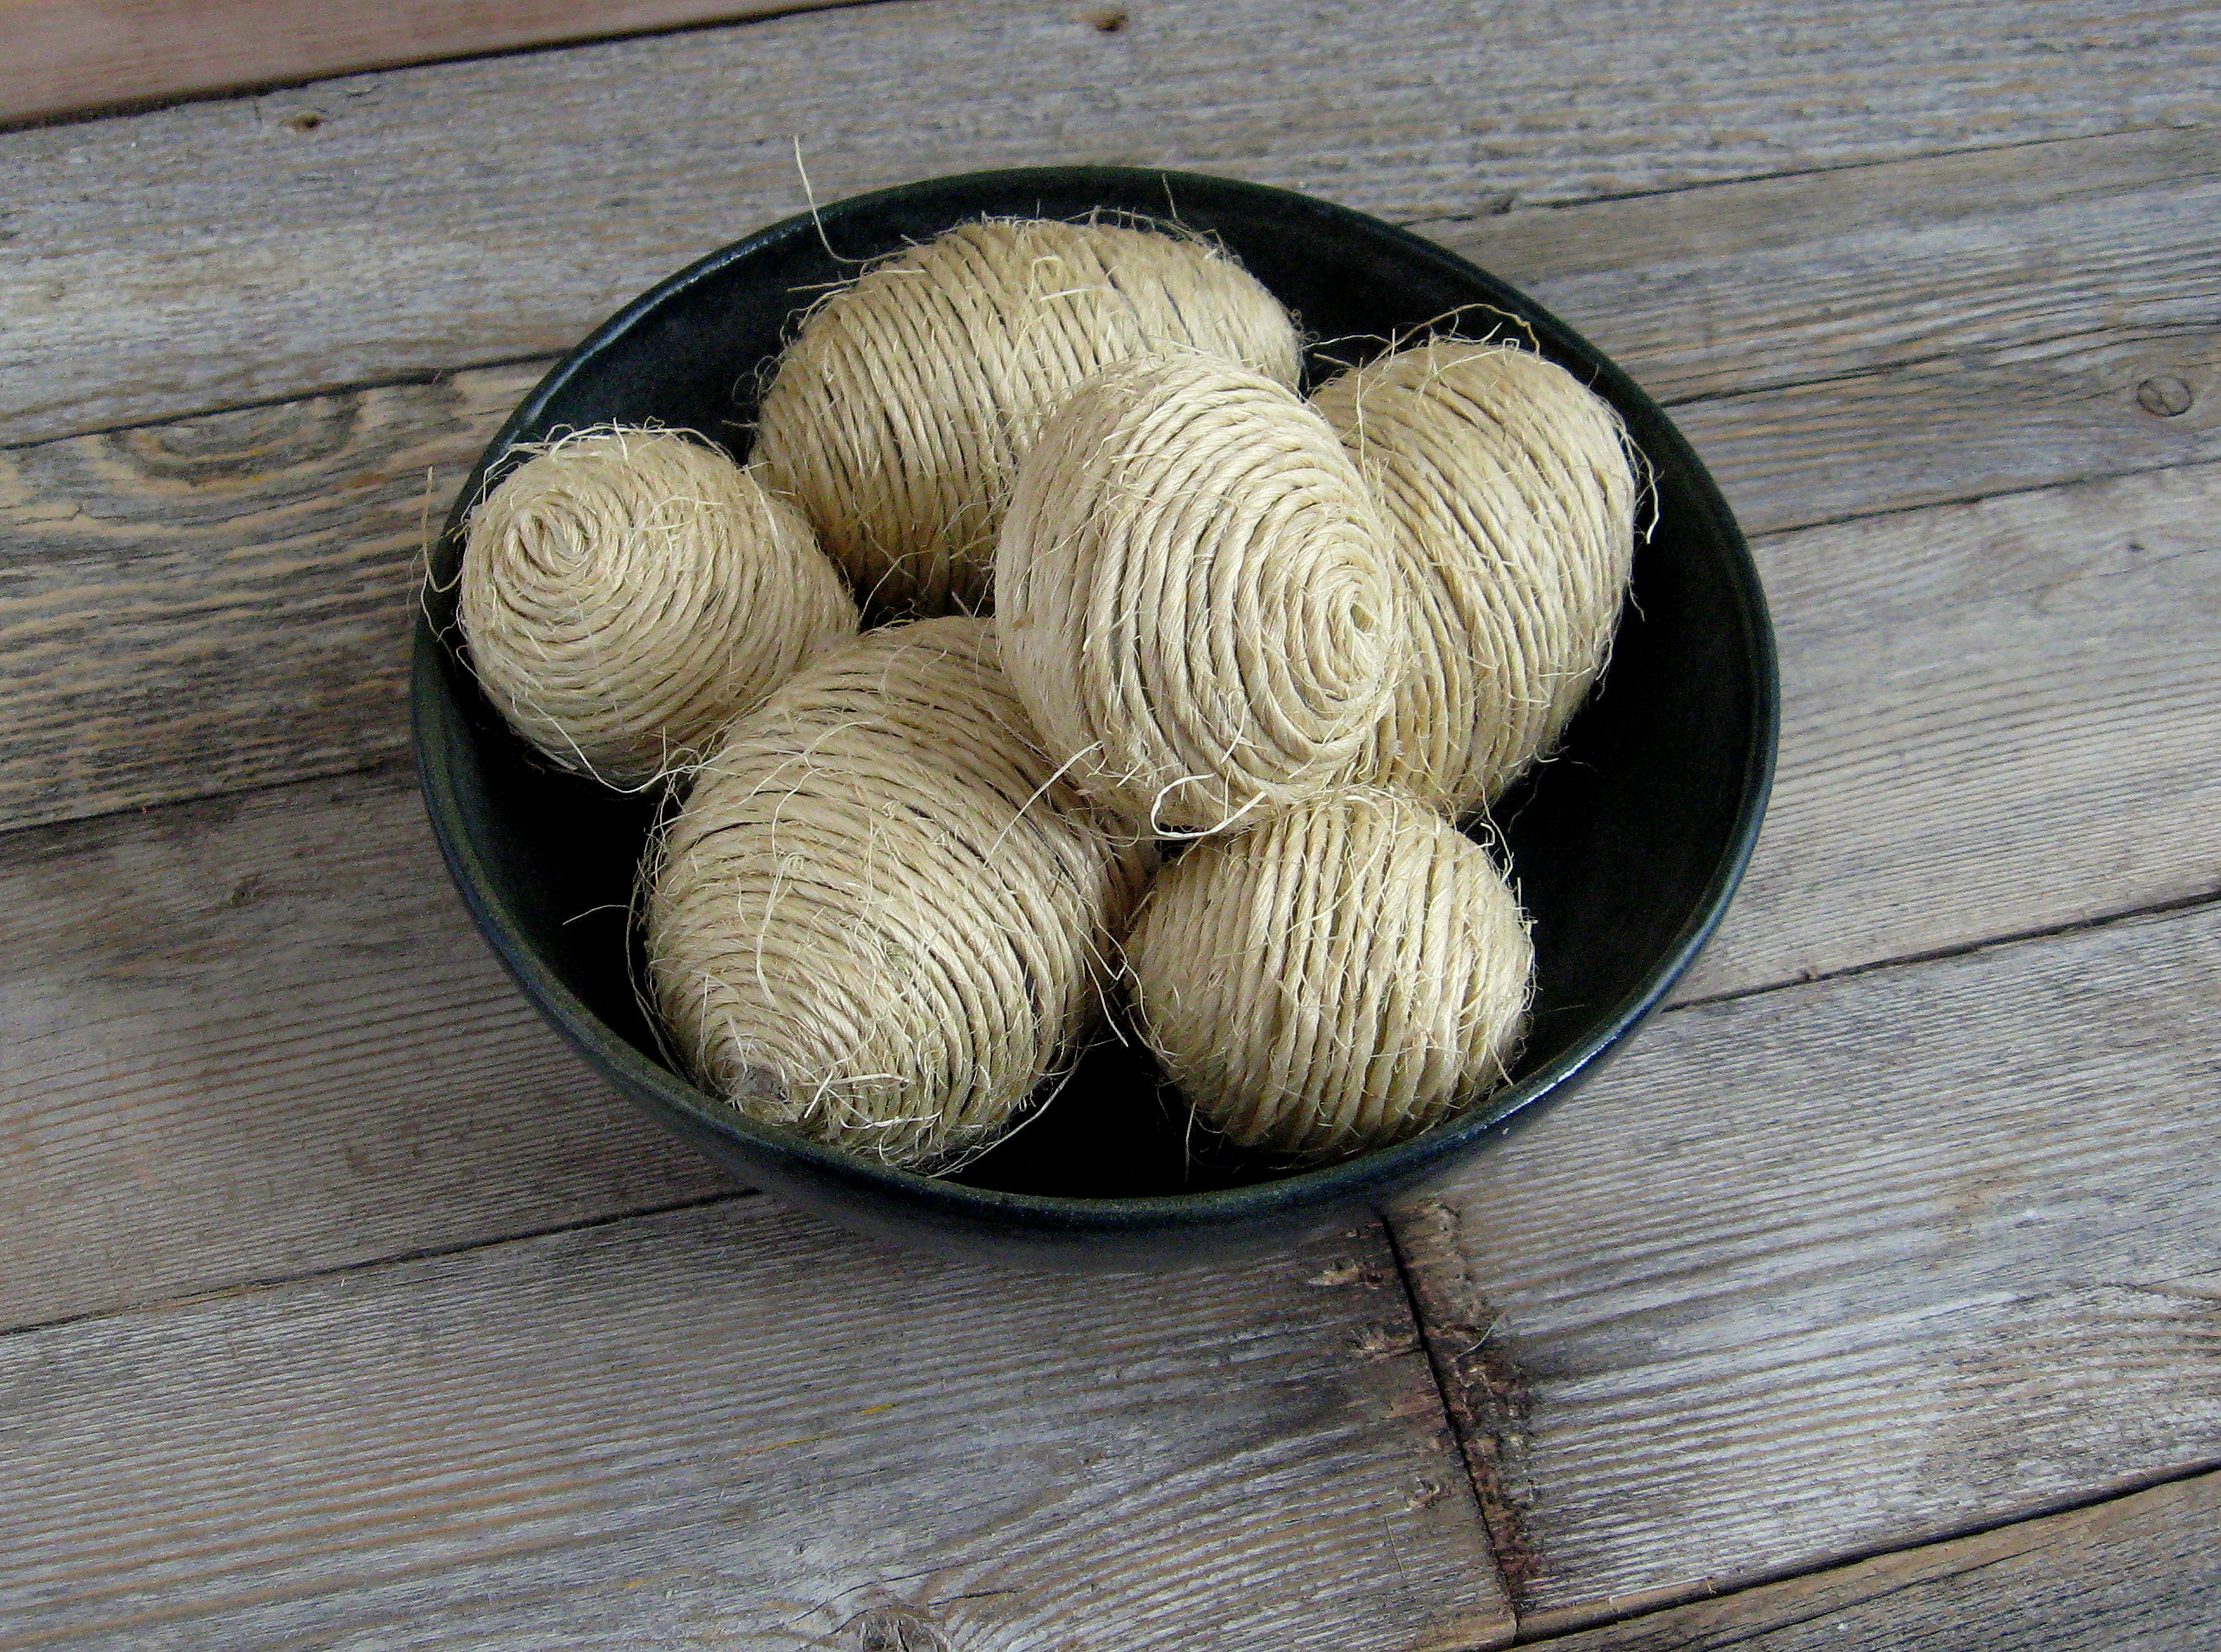
For a different look, try painting the finished egg. Just use watered down craft paint and cover all of the twine. The paint will soak in and leave a really cool, natural almost translucent look (I don’t know if it is showing in the picture very well; it is a really cool look!) If you’re not a fan of the hairy twine, just grab a pair of sharp scissors and give your egg a trim.
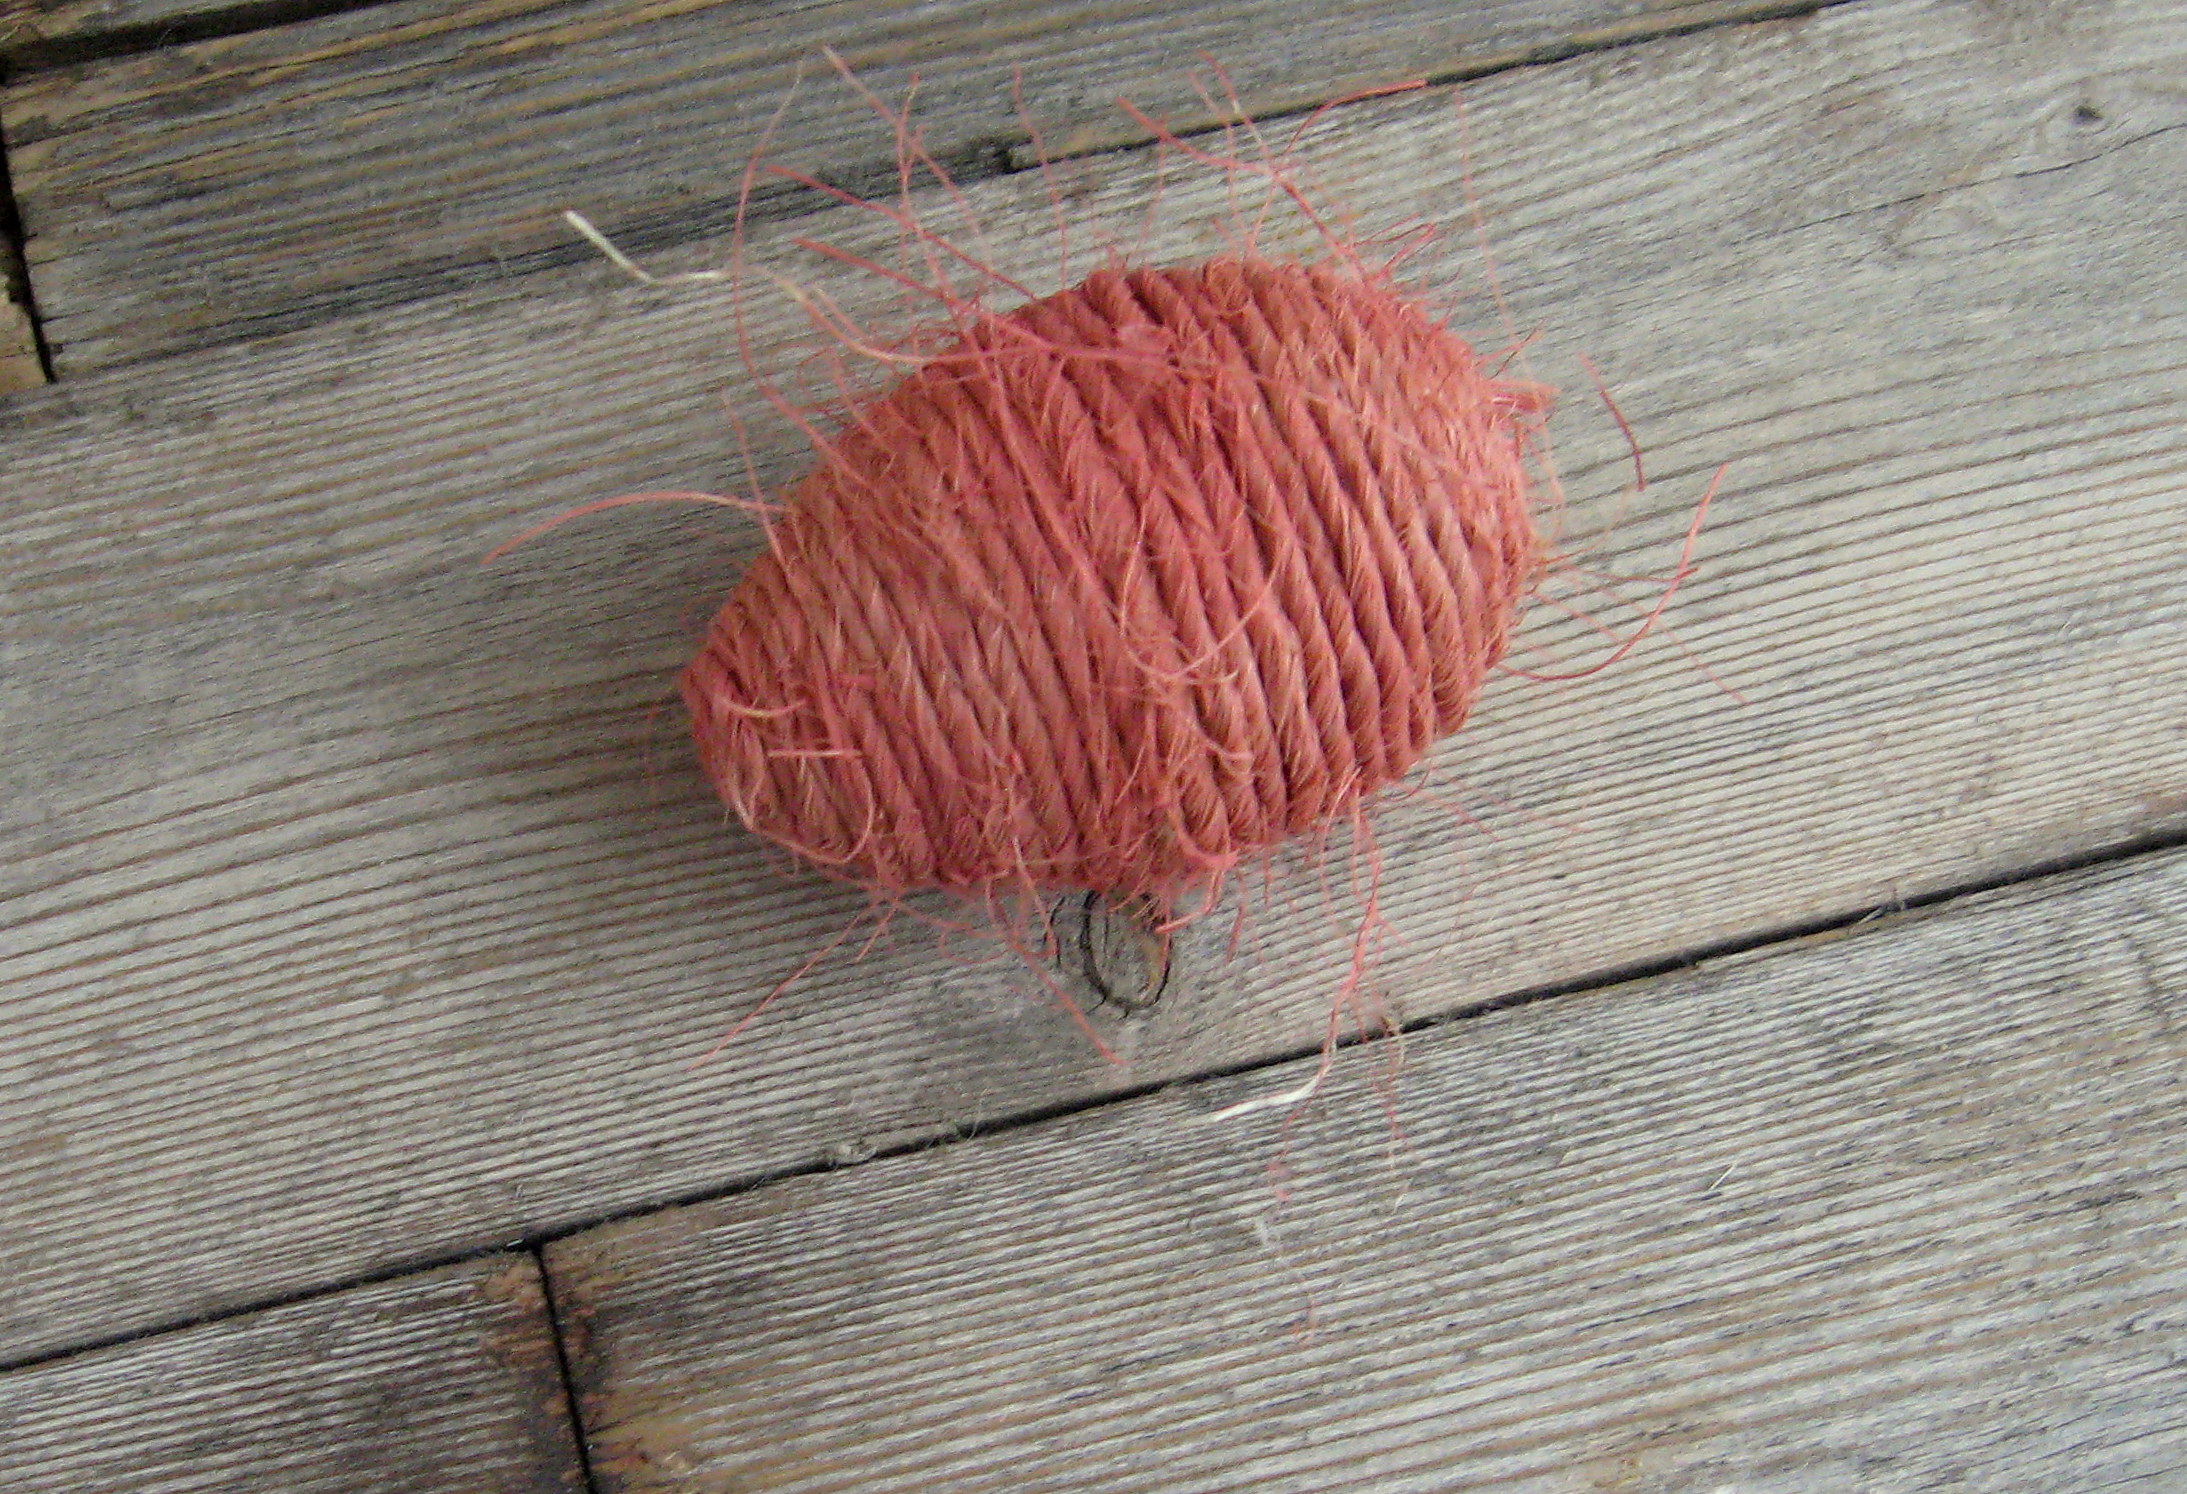
Here is another fun version of the same technique using fabric instead of twine.
For these, I just cut long, thin strips of fabric, then I twisted the strips as I attached to the egg just like with the twine. You will probably want to use more glue on these to keep the fabric from slipping. Experiment with the width of fabric and with how much you twist it to get different looks. If you just twist a half twist and attach, then twist again and attach, you get a really cool ruffled effect. I left my eggs really shabby looking, with frayed edges and loose threads; I love the look and it makes it a super fast project.
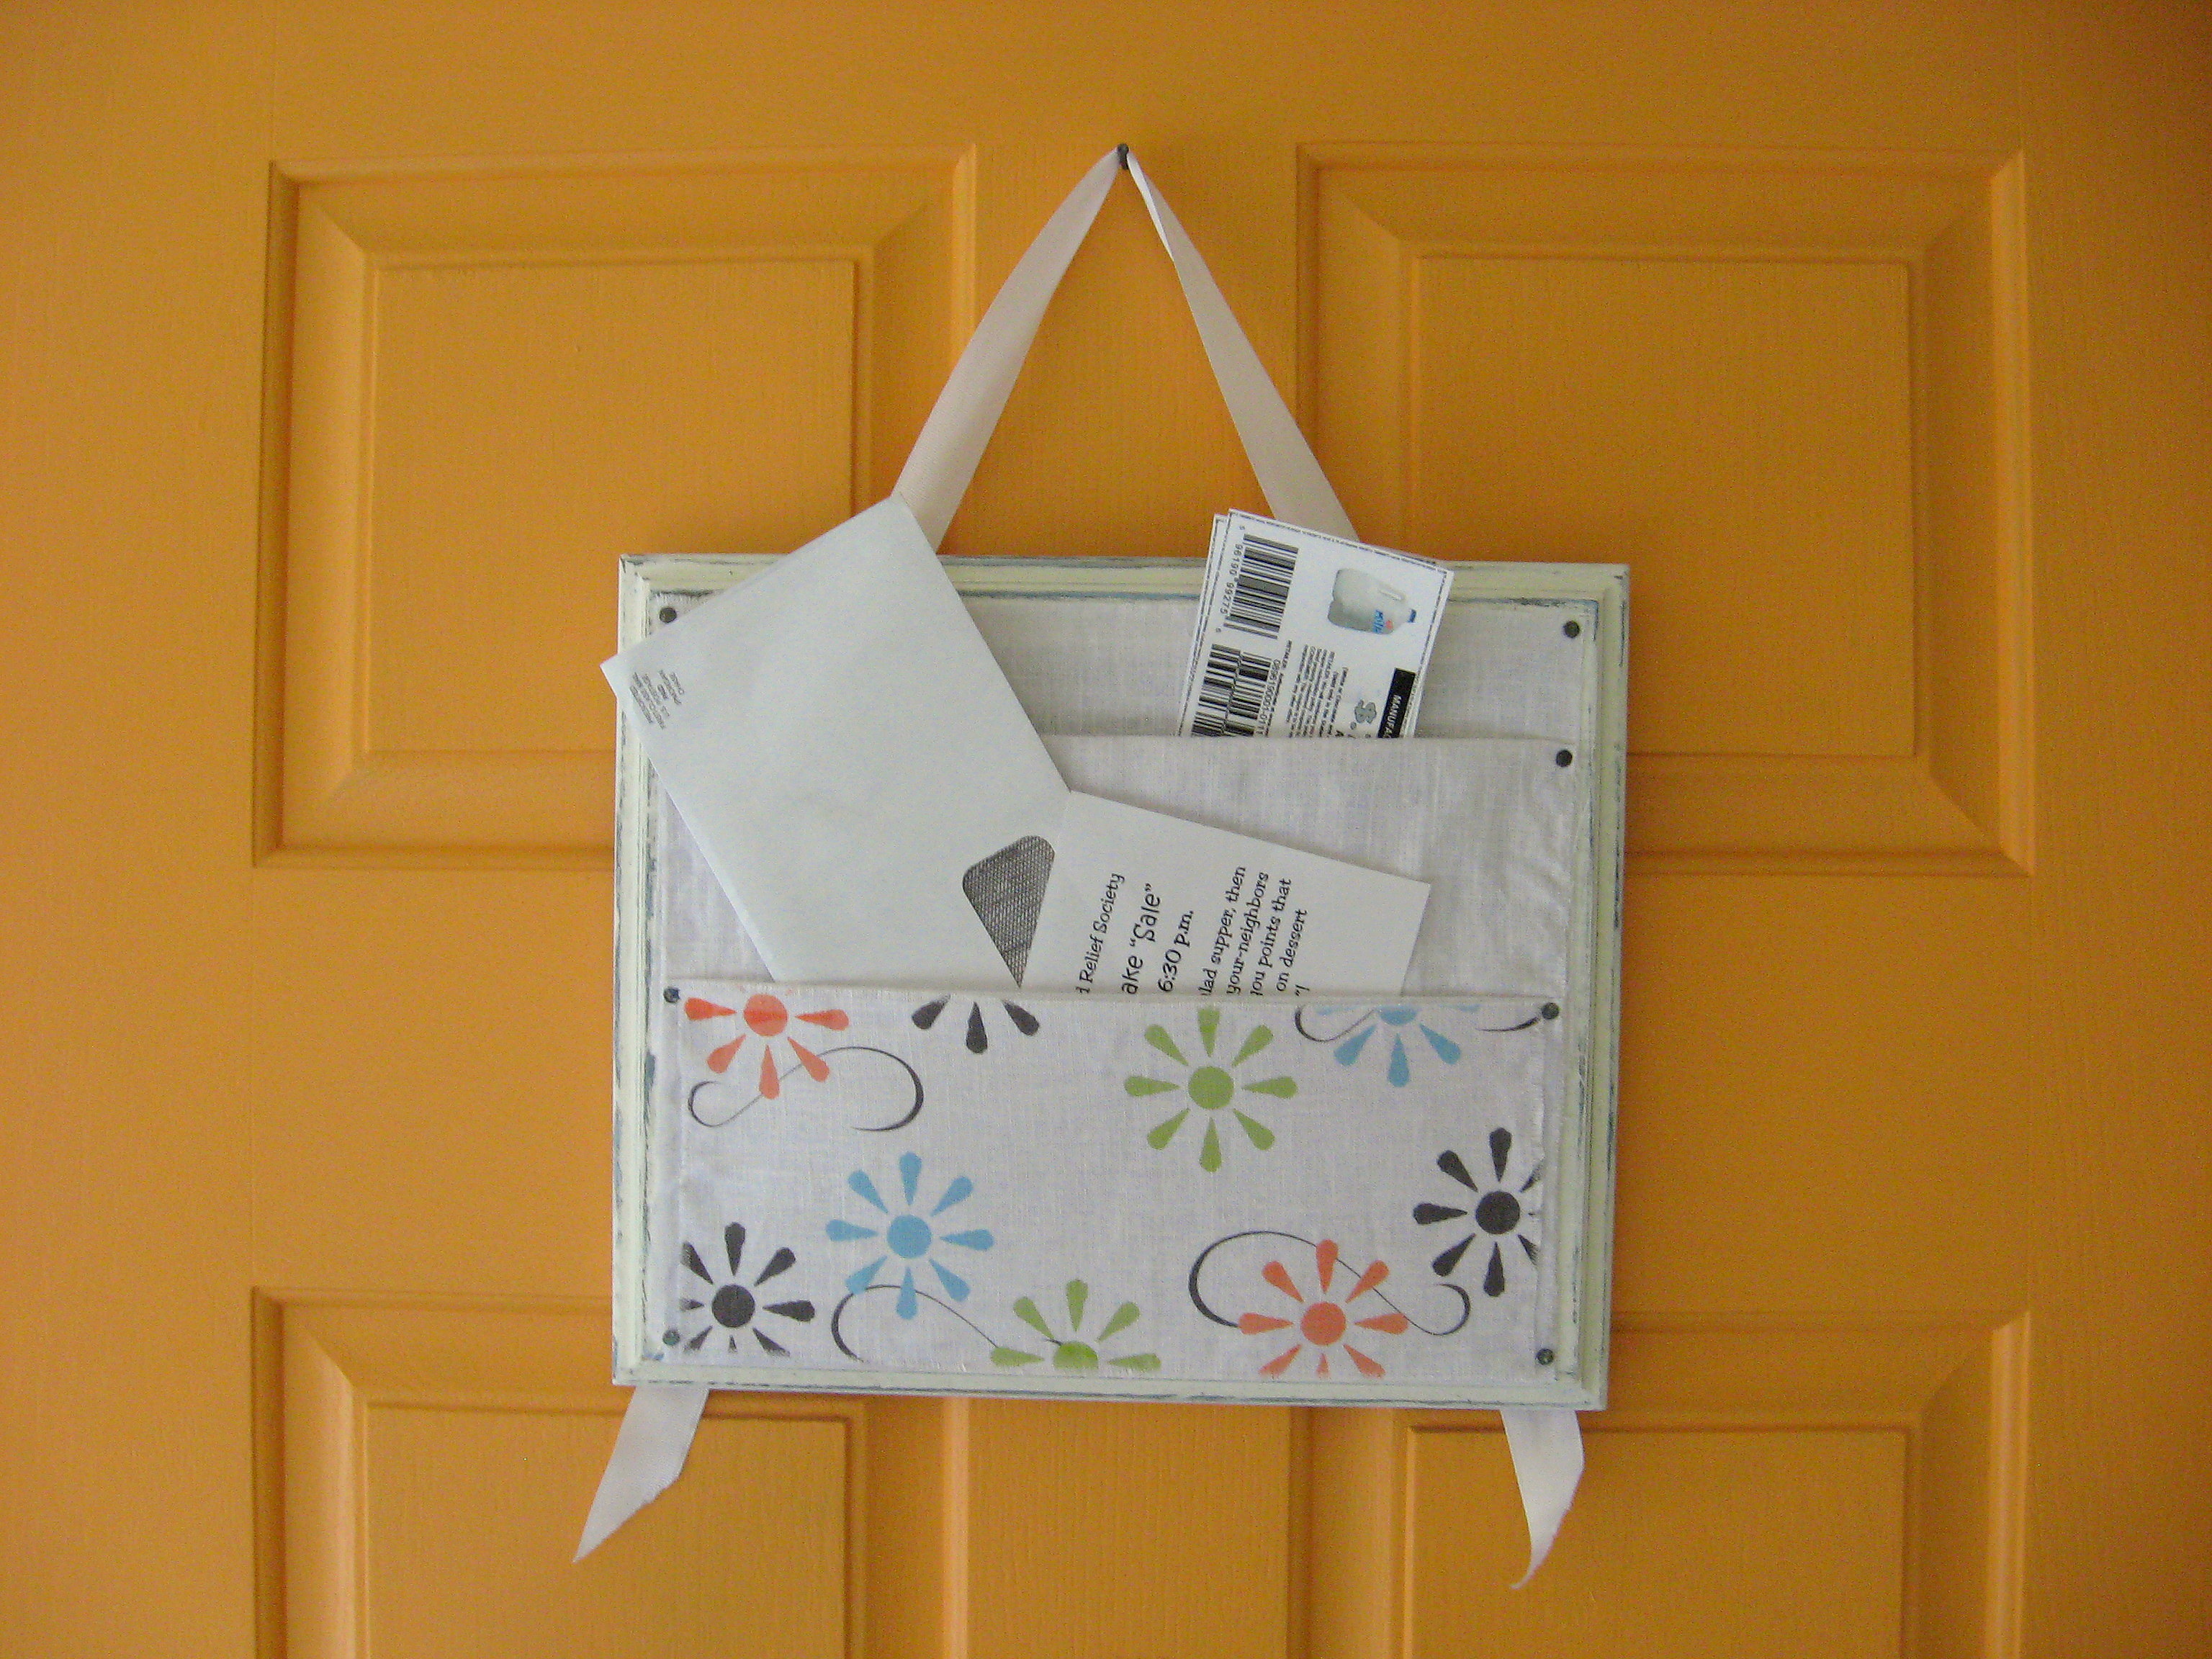
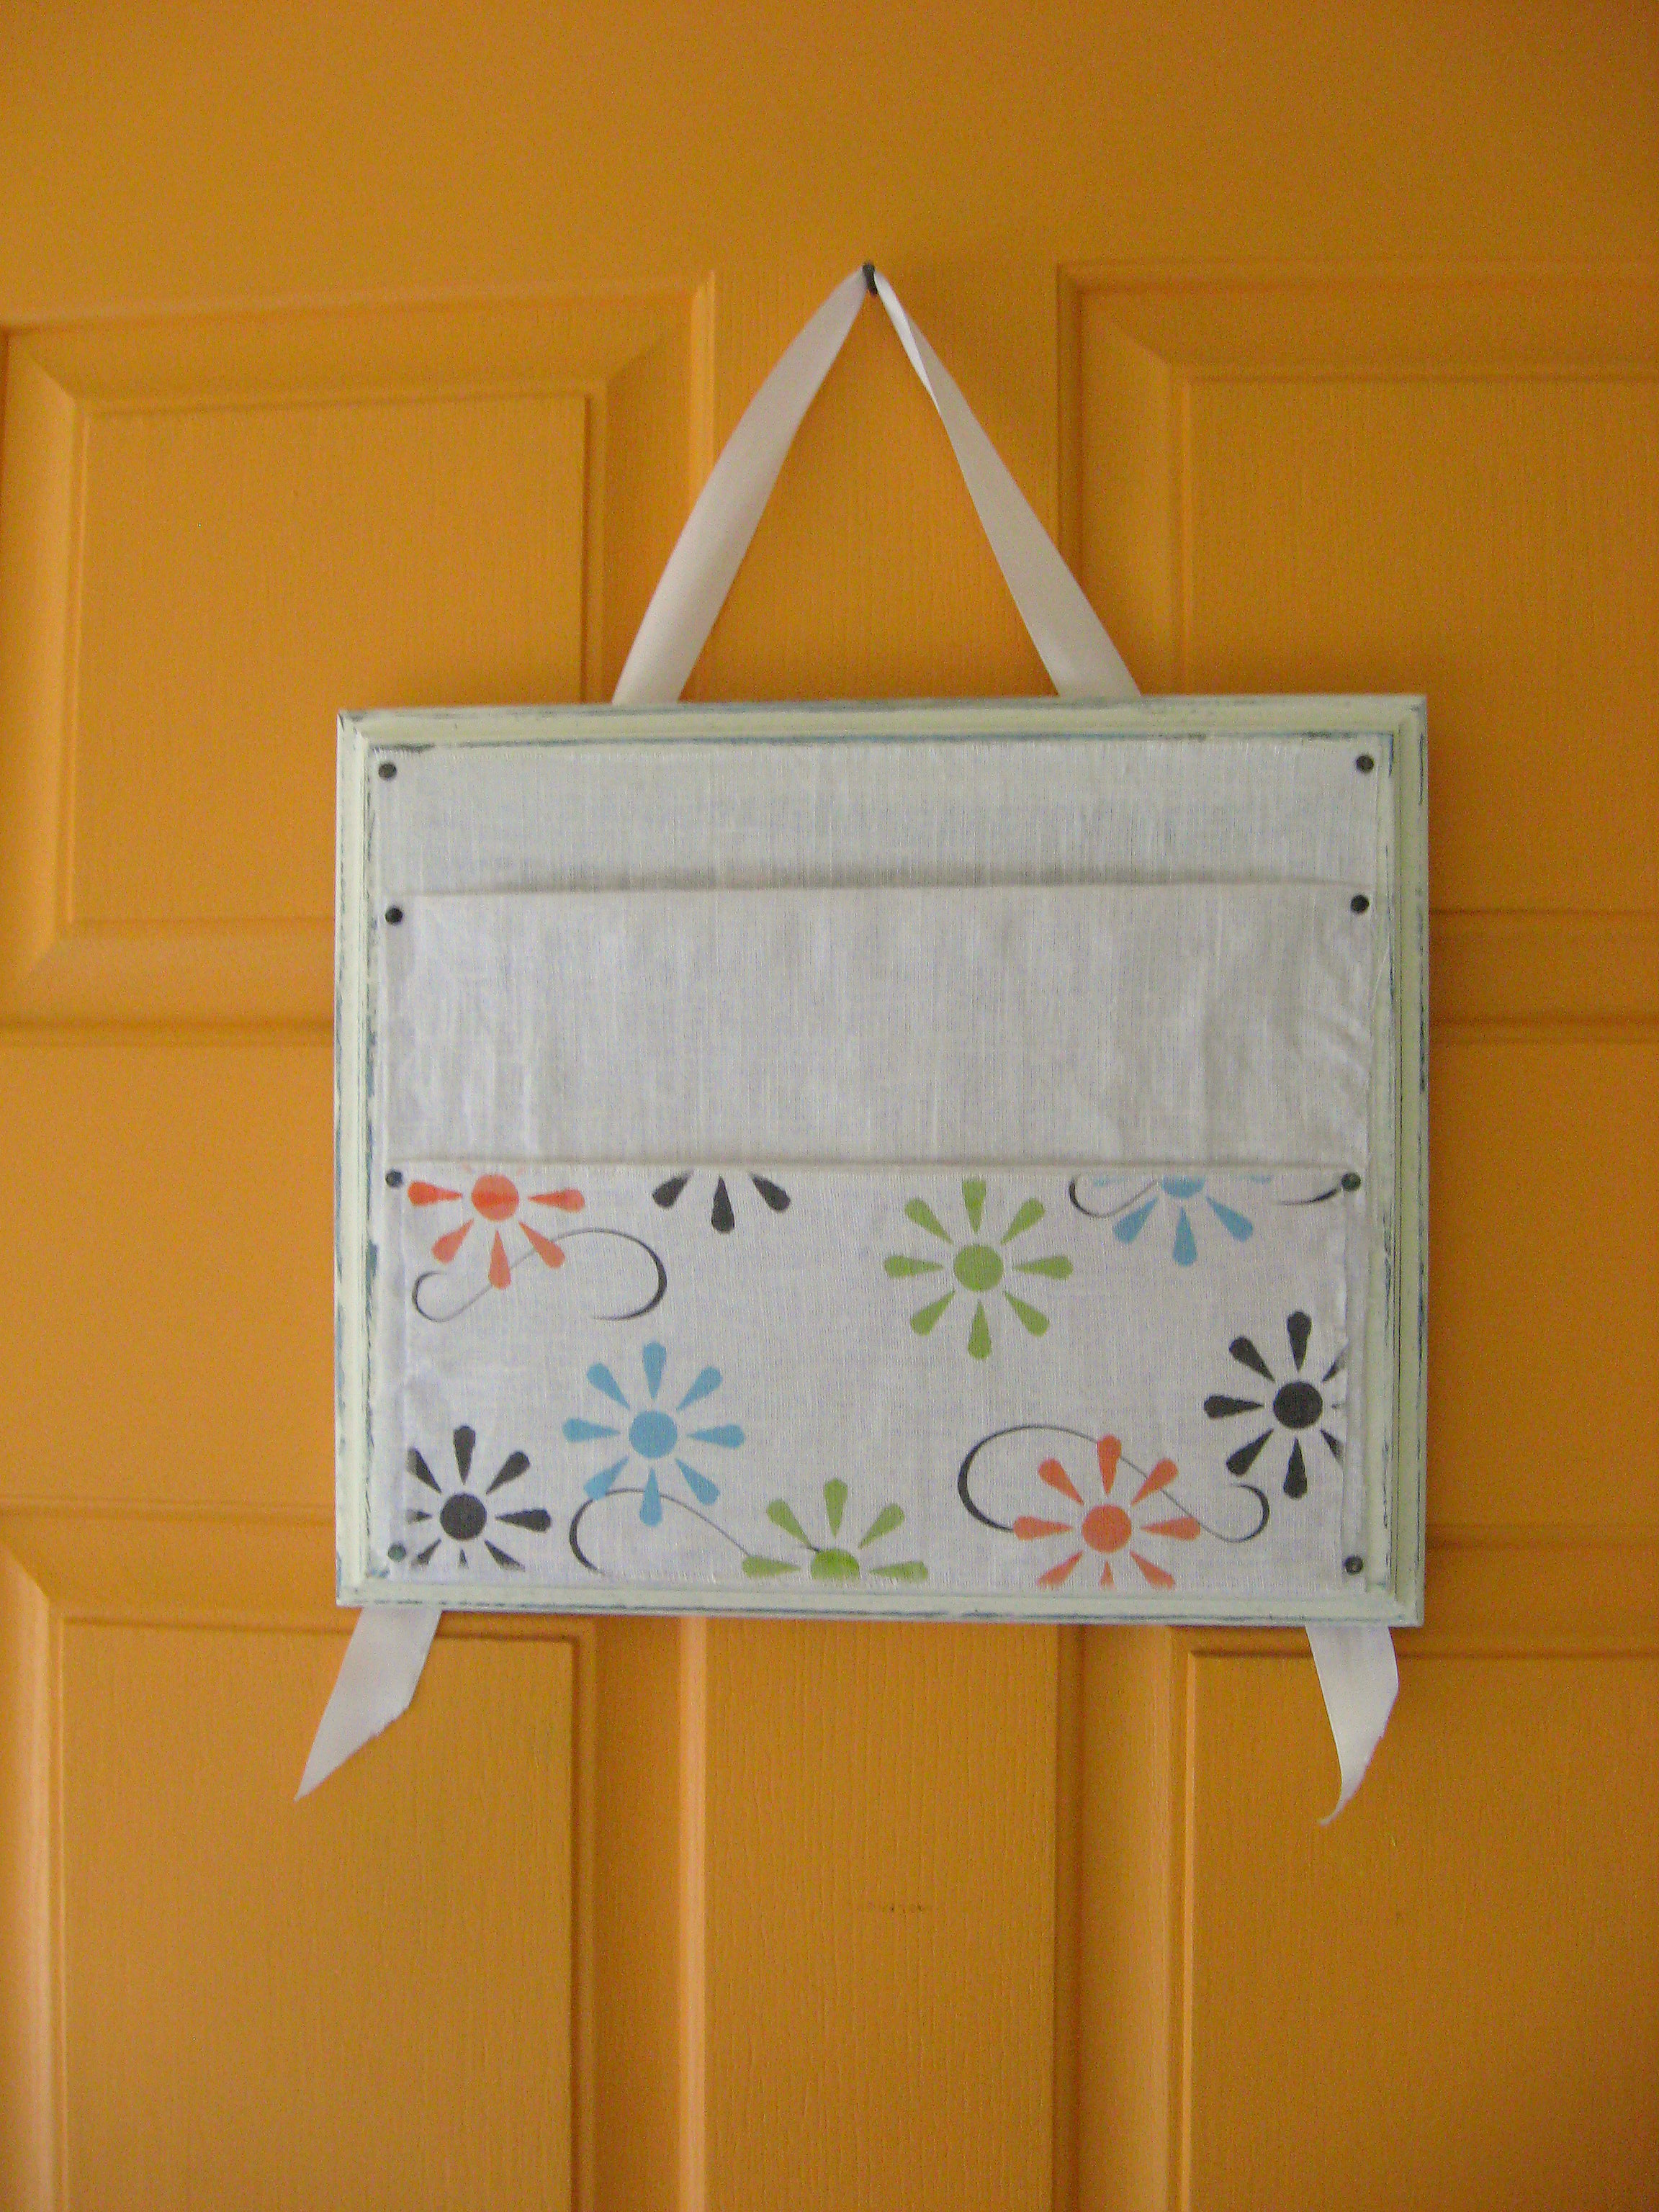
Front Door Organizer
Every apartment we’ve lived in had a metal front door. Now, I don’t care much what my doors are made of, except that it meant that I could magnet things to the back of the door that needed to go out–permission slips, coupons, bills to be mailed, etc. The door in our current home is not metal and so for years I’ve not had a good place to put these things and therefore, years of very important mail (read Netflix dvd’s) have not been mailed out in a timely manner. I finally could live like this no more! and made an organizer to hang on the back of my front door.
I think this project was very easy and pretty fast, not counting the dry time of the paint and the glue. I also apologize for some of the fuzzy pictures; my camera was having a hard time with the white.
Here is the before, as picked up for $1.50 at a local thrift store. 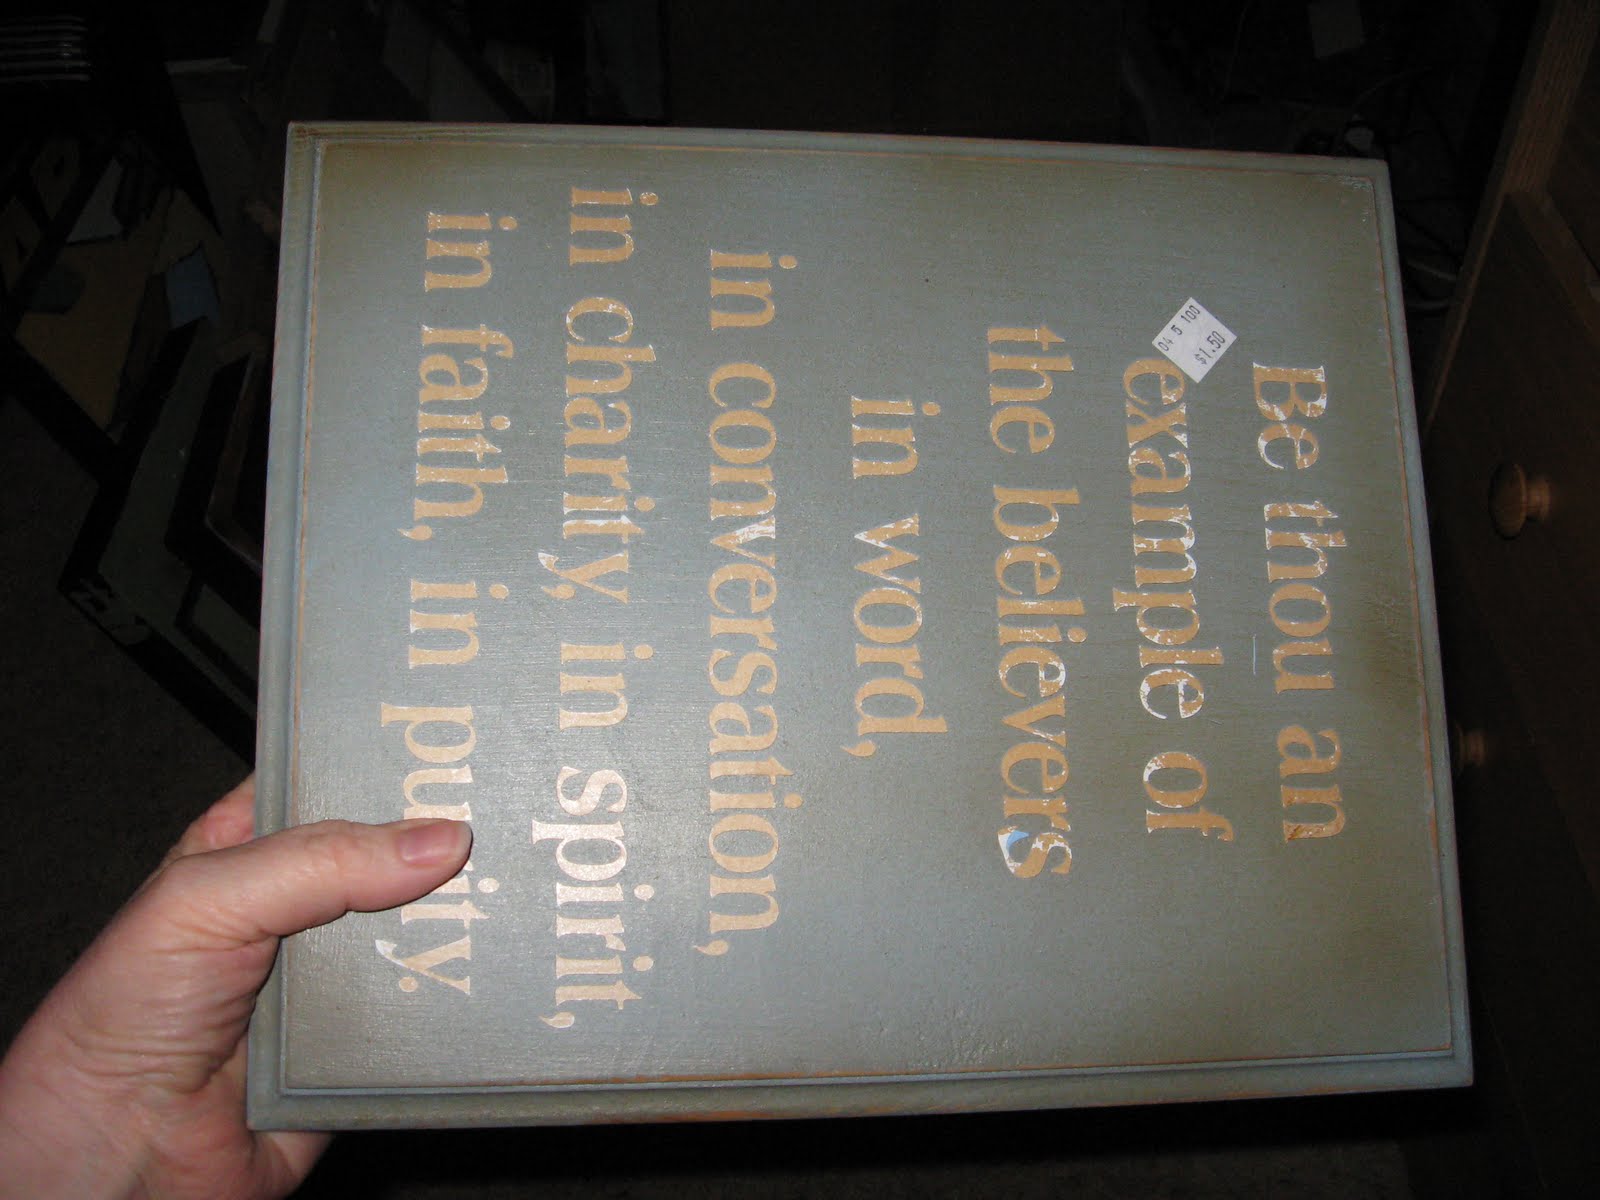
The words are vinyl, so you could pull them off (they peel up easily), but I left them on since I knew they wouldn’t show.
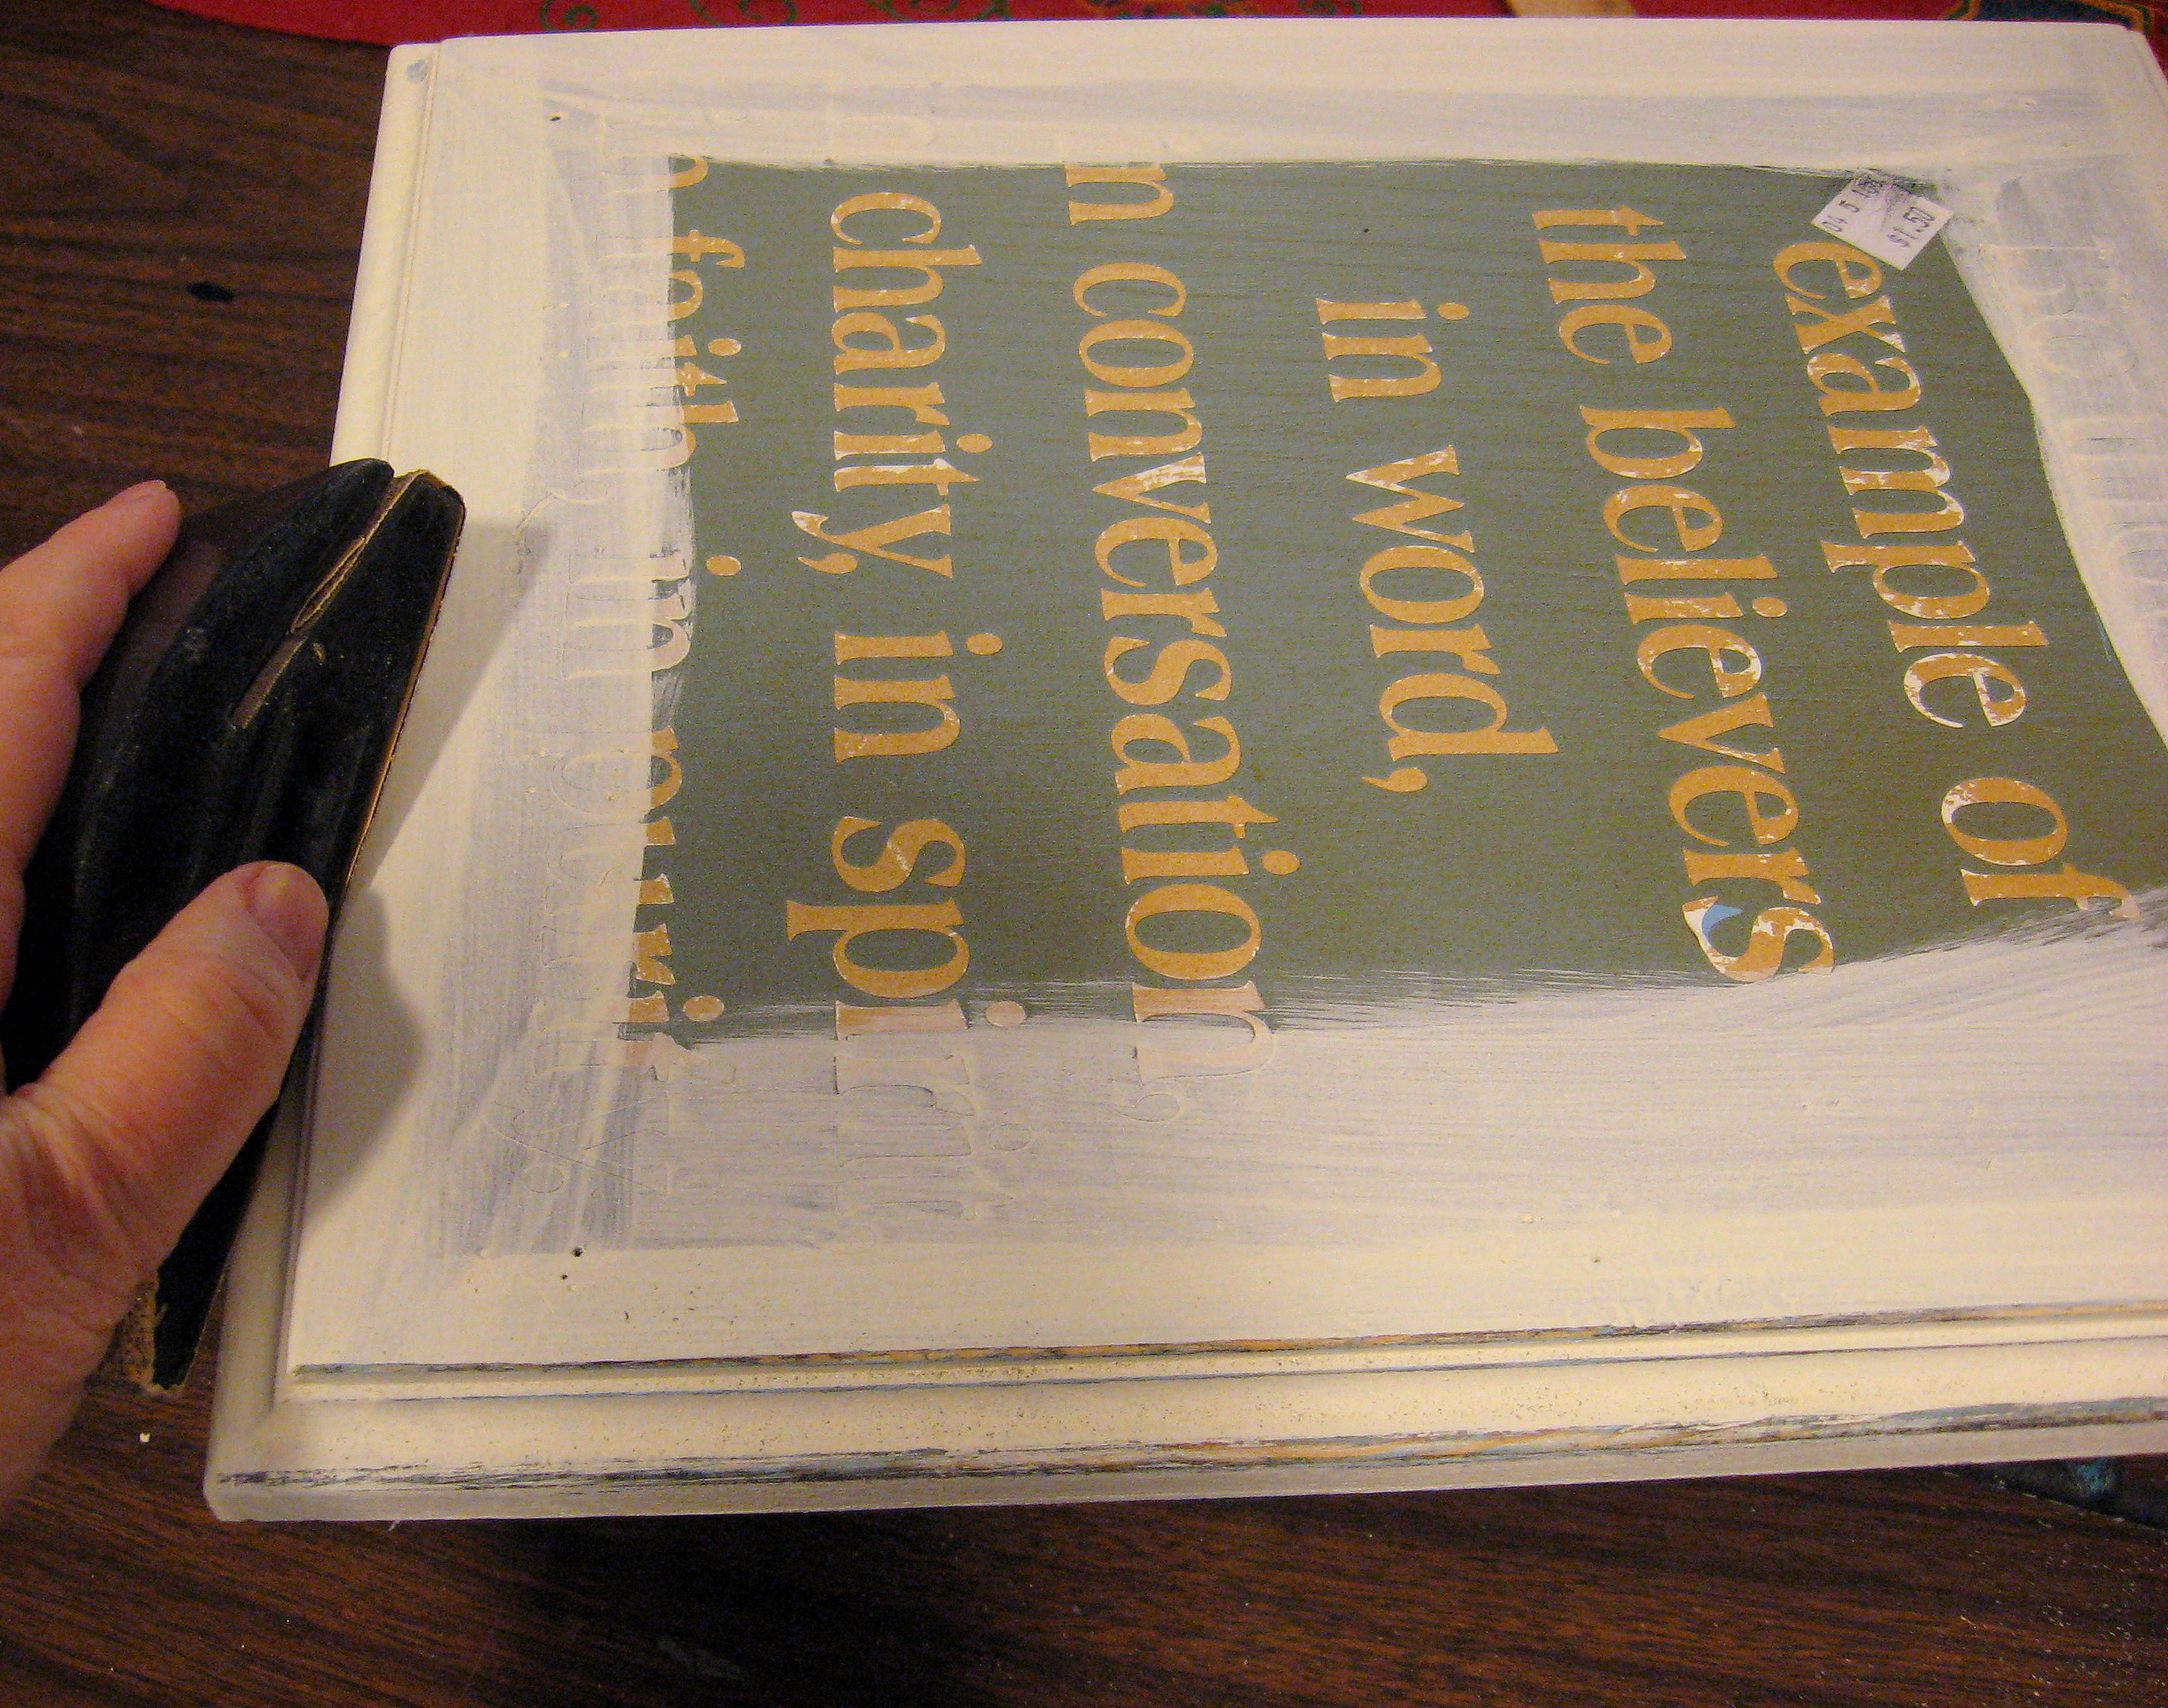
Paint the edges of the wood in your color of choice using craft paint. Once dry, use a sanding block on the edges for a distressed look; I love the blue peeking out here and there under the white.
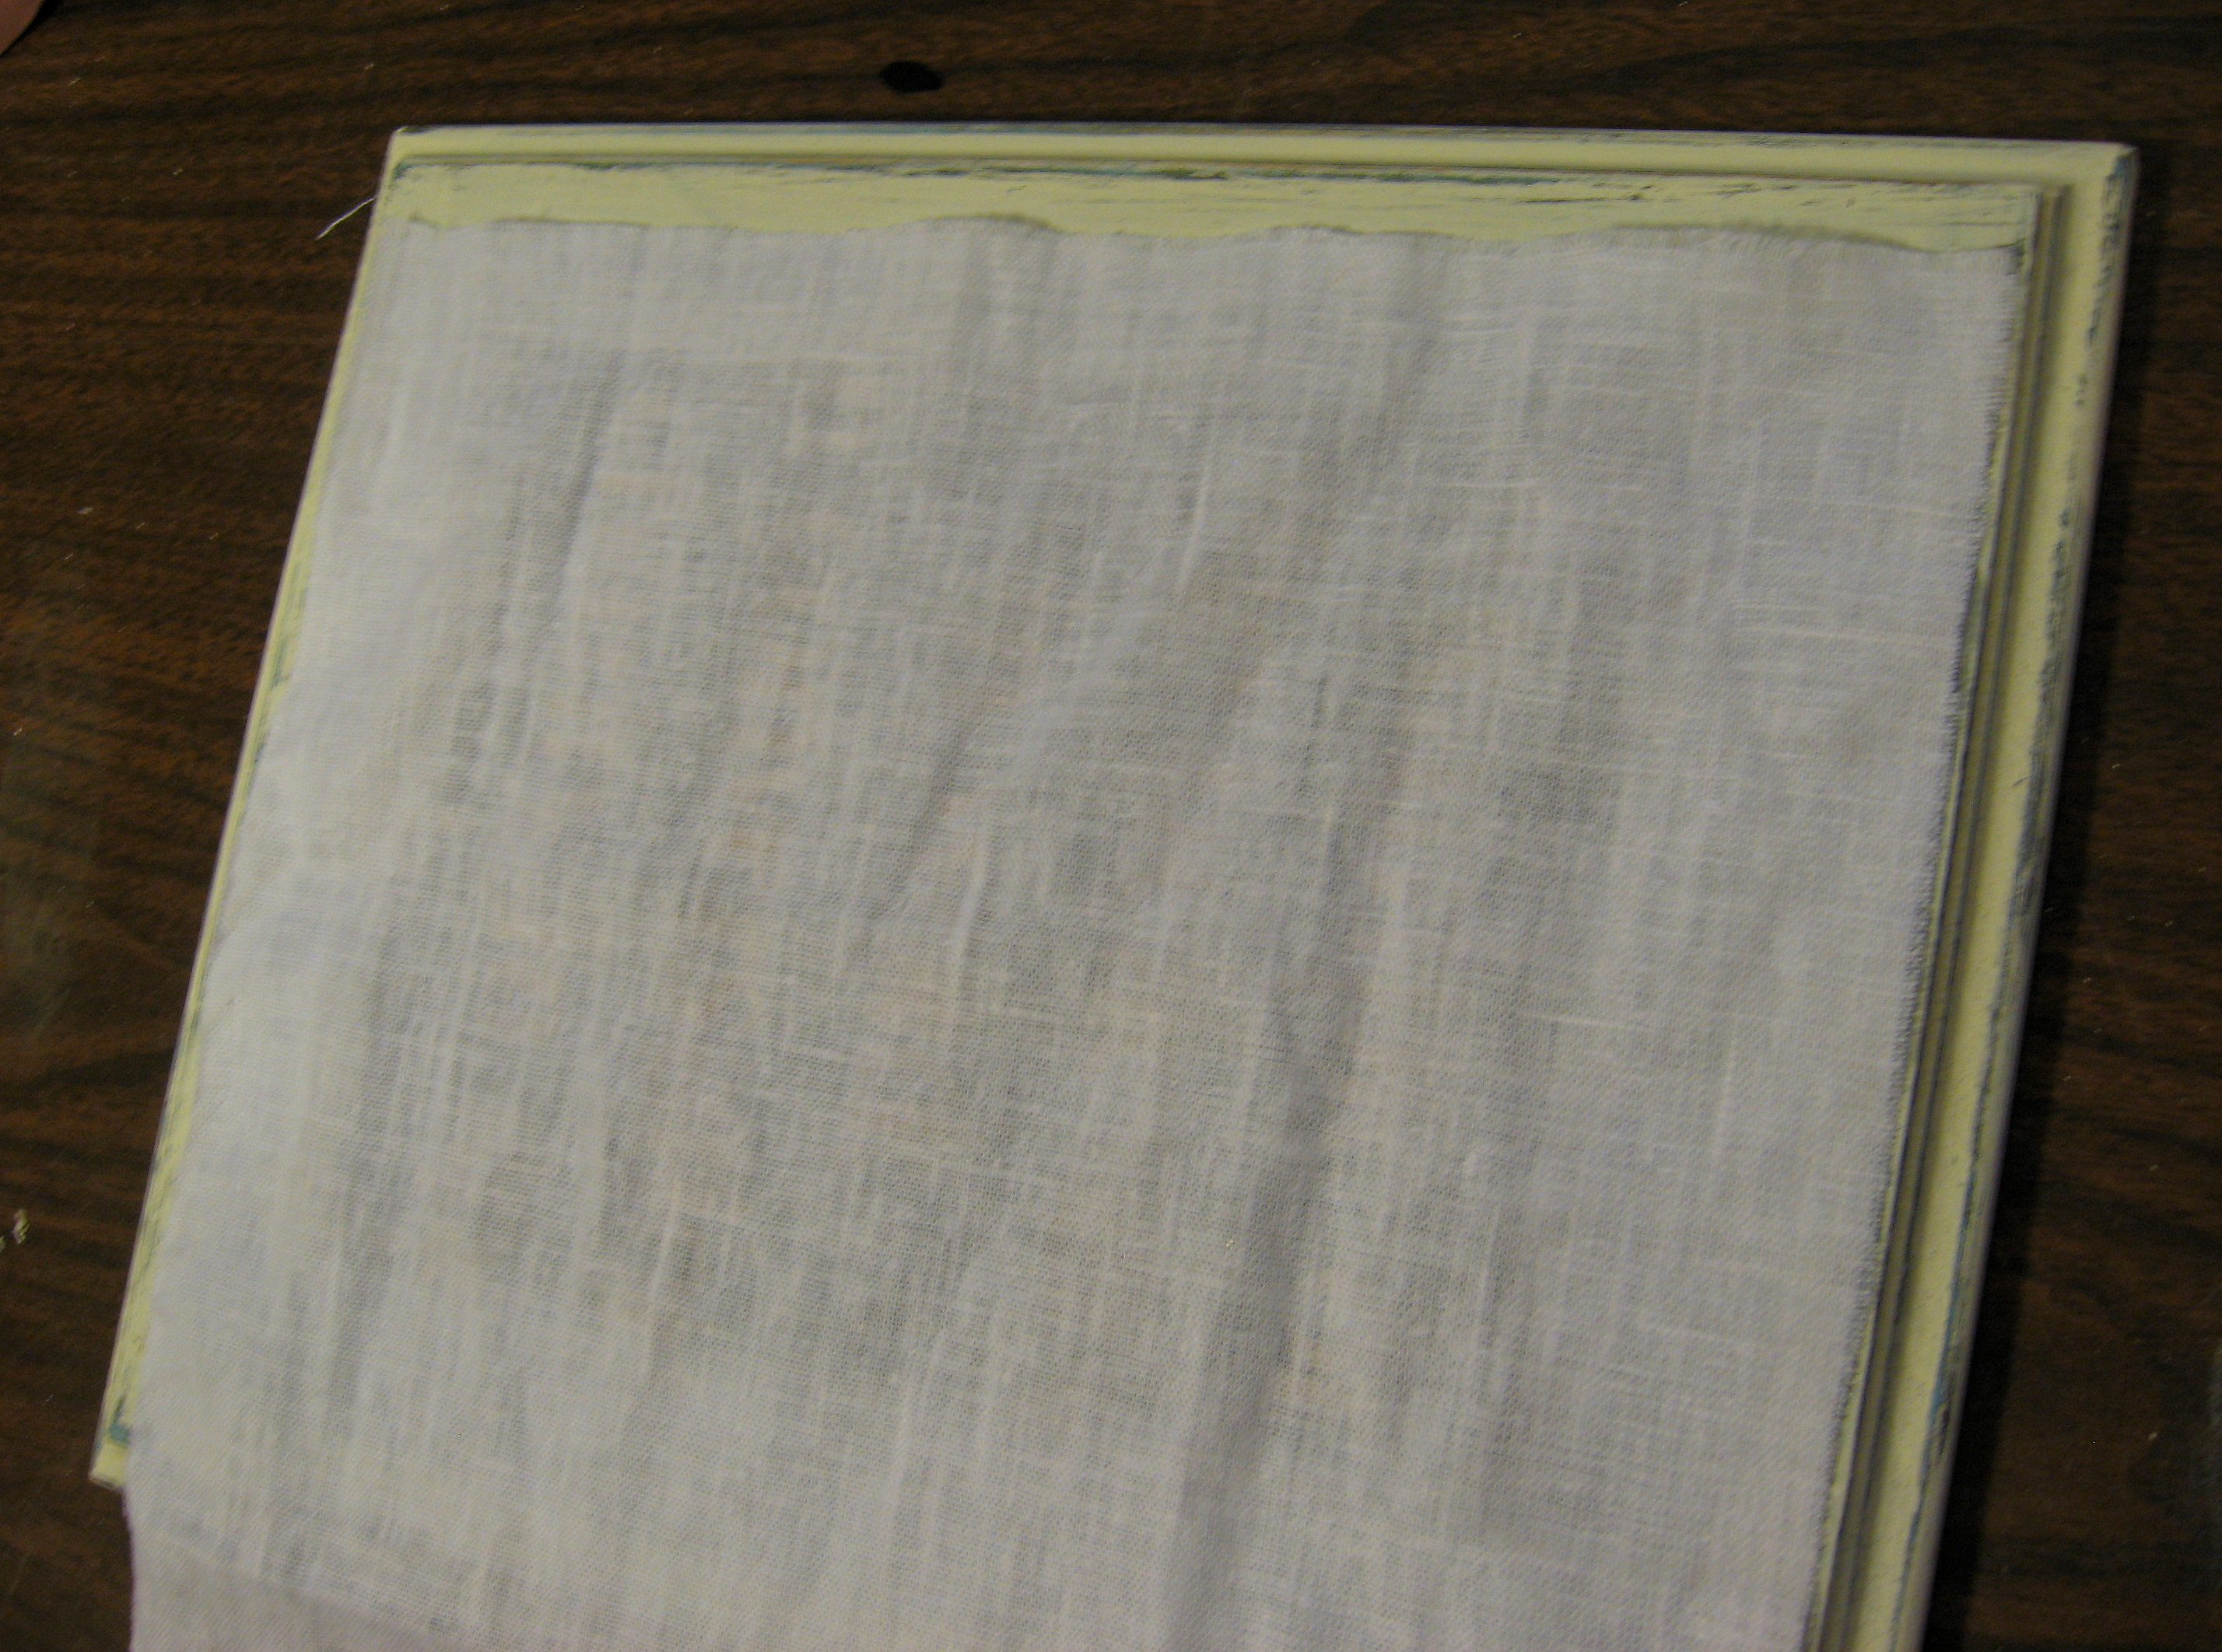
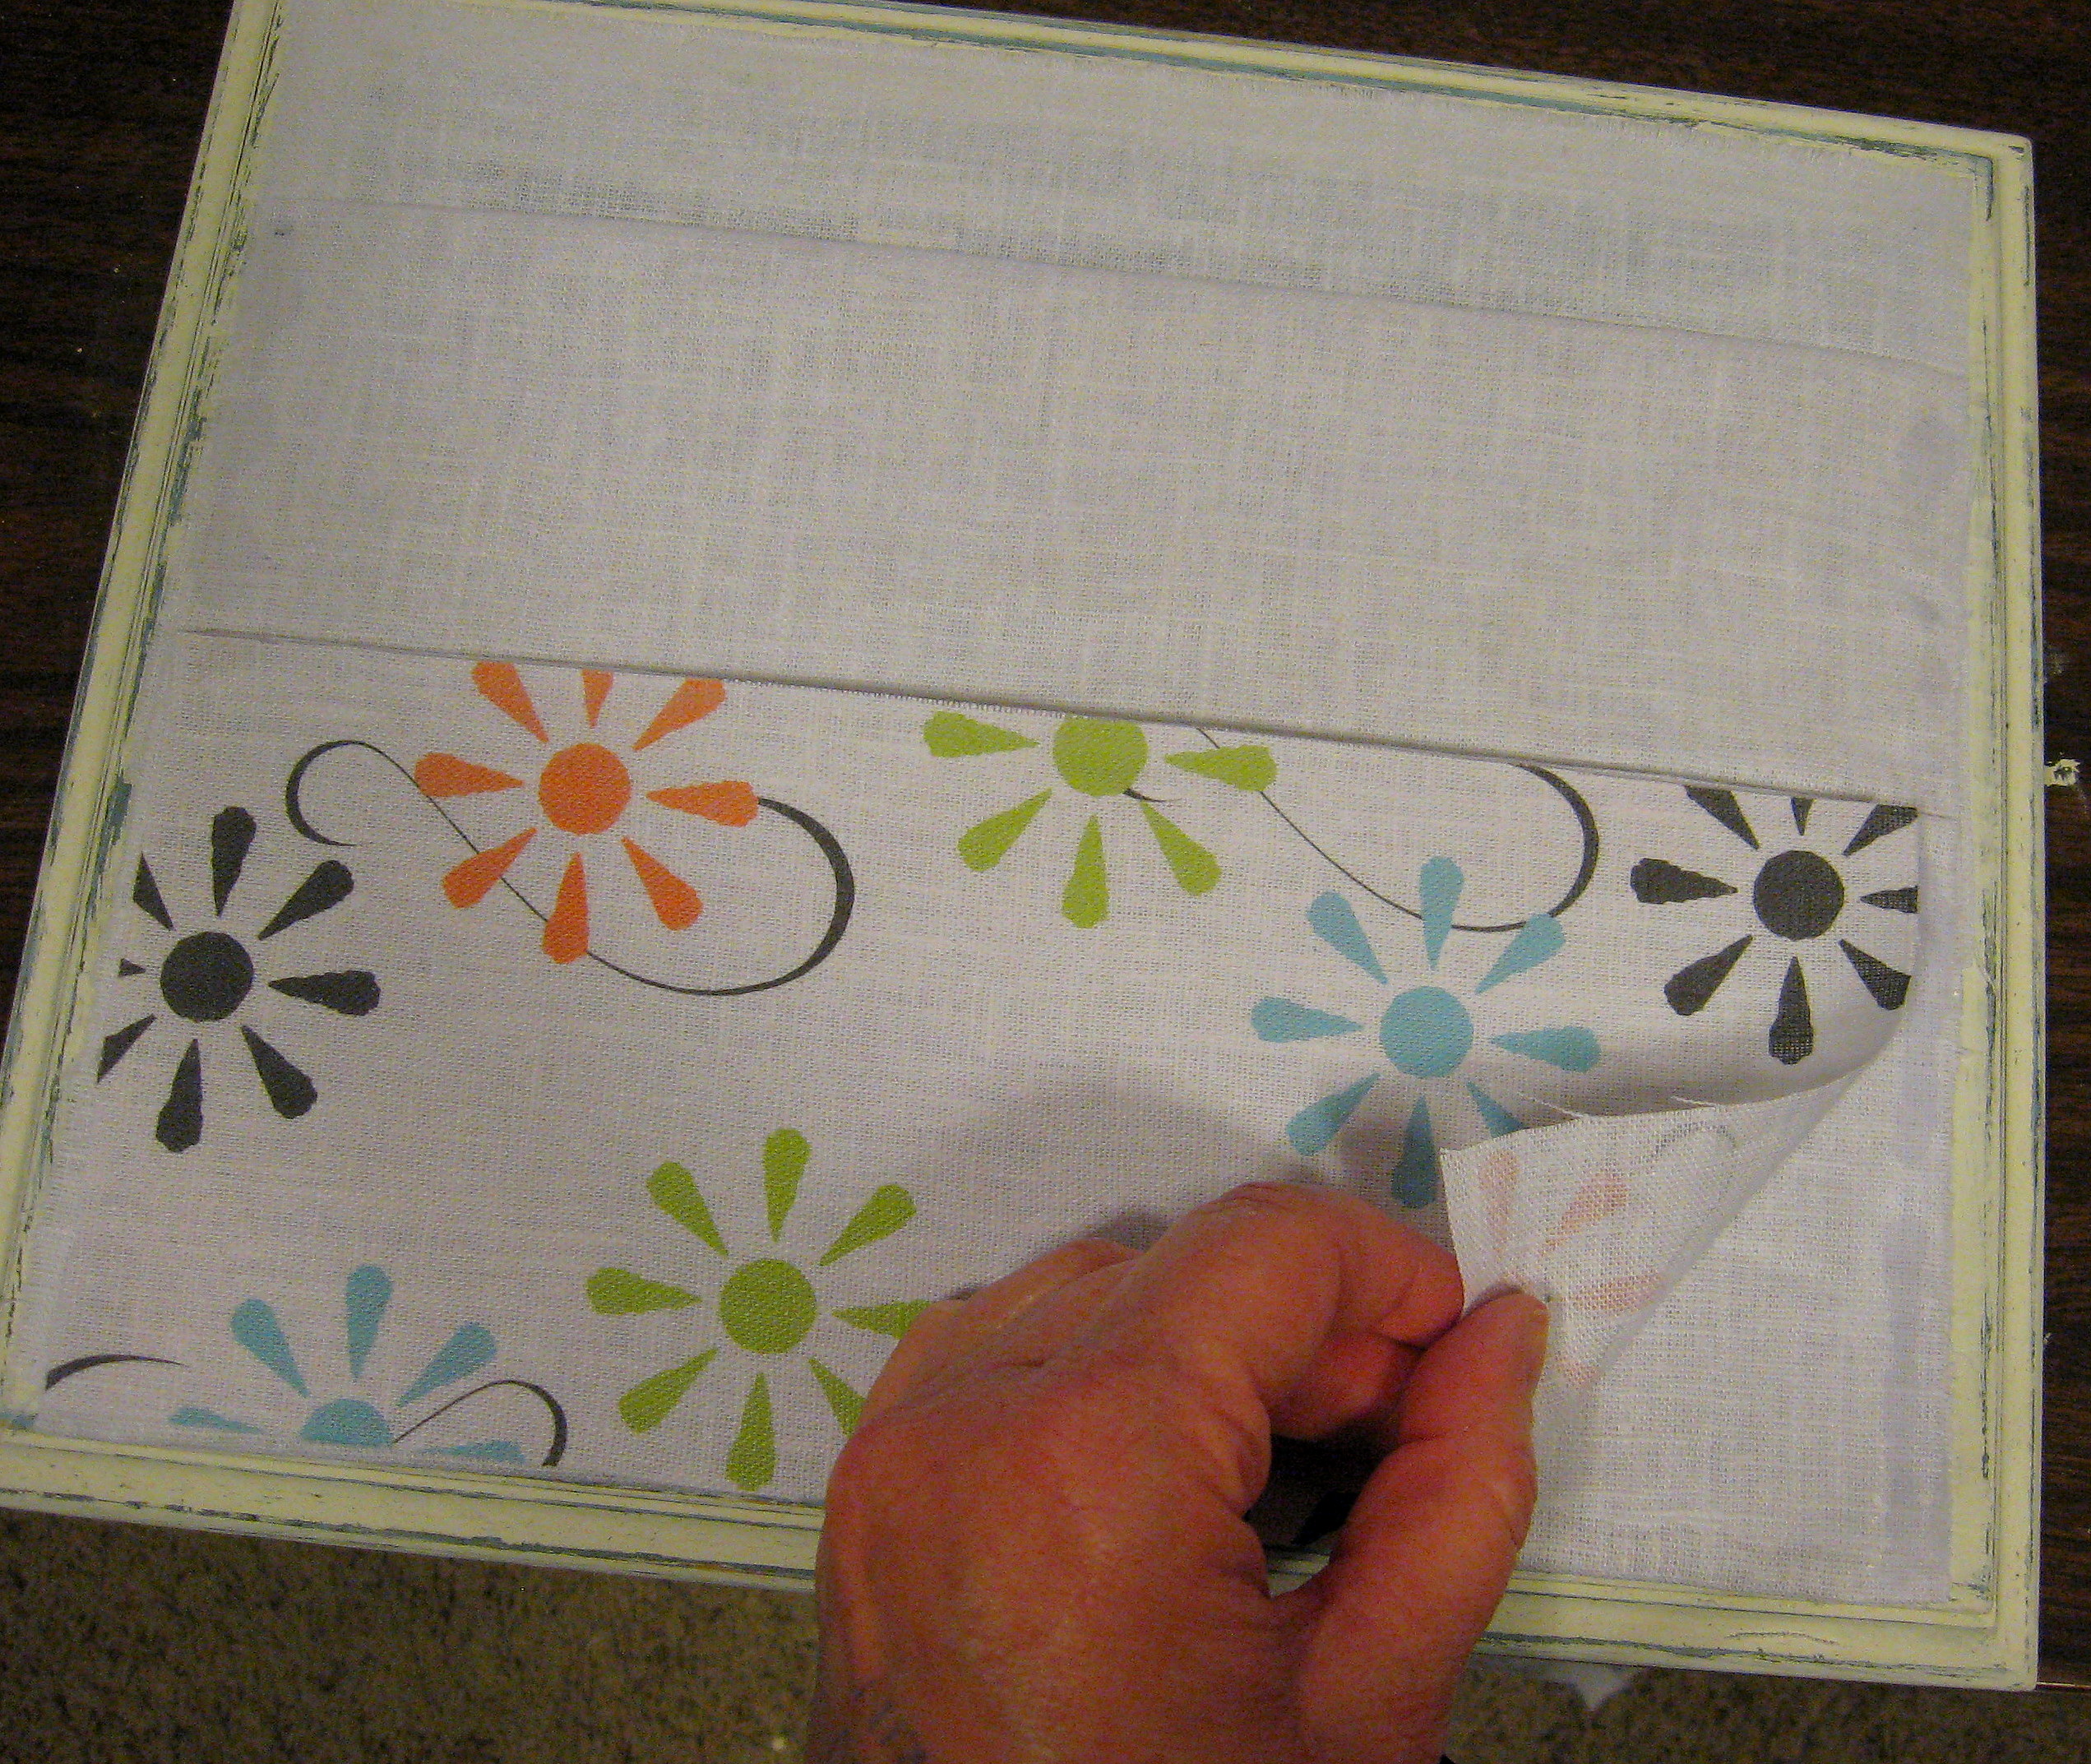
The fabric I used is a scrap of white linen that I had in my fabric stash, but you could use any fabric you like.
Basically, you will fold the fabric and glue it to the board to make two pockets. Follow the numbered arrows on this pic to see what I mean:
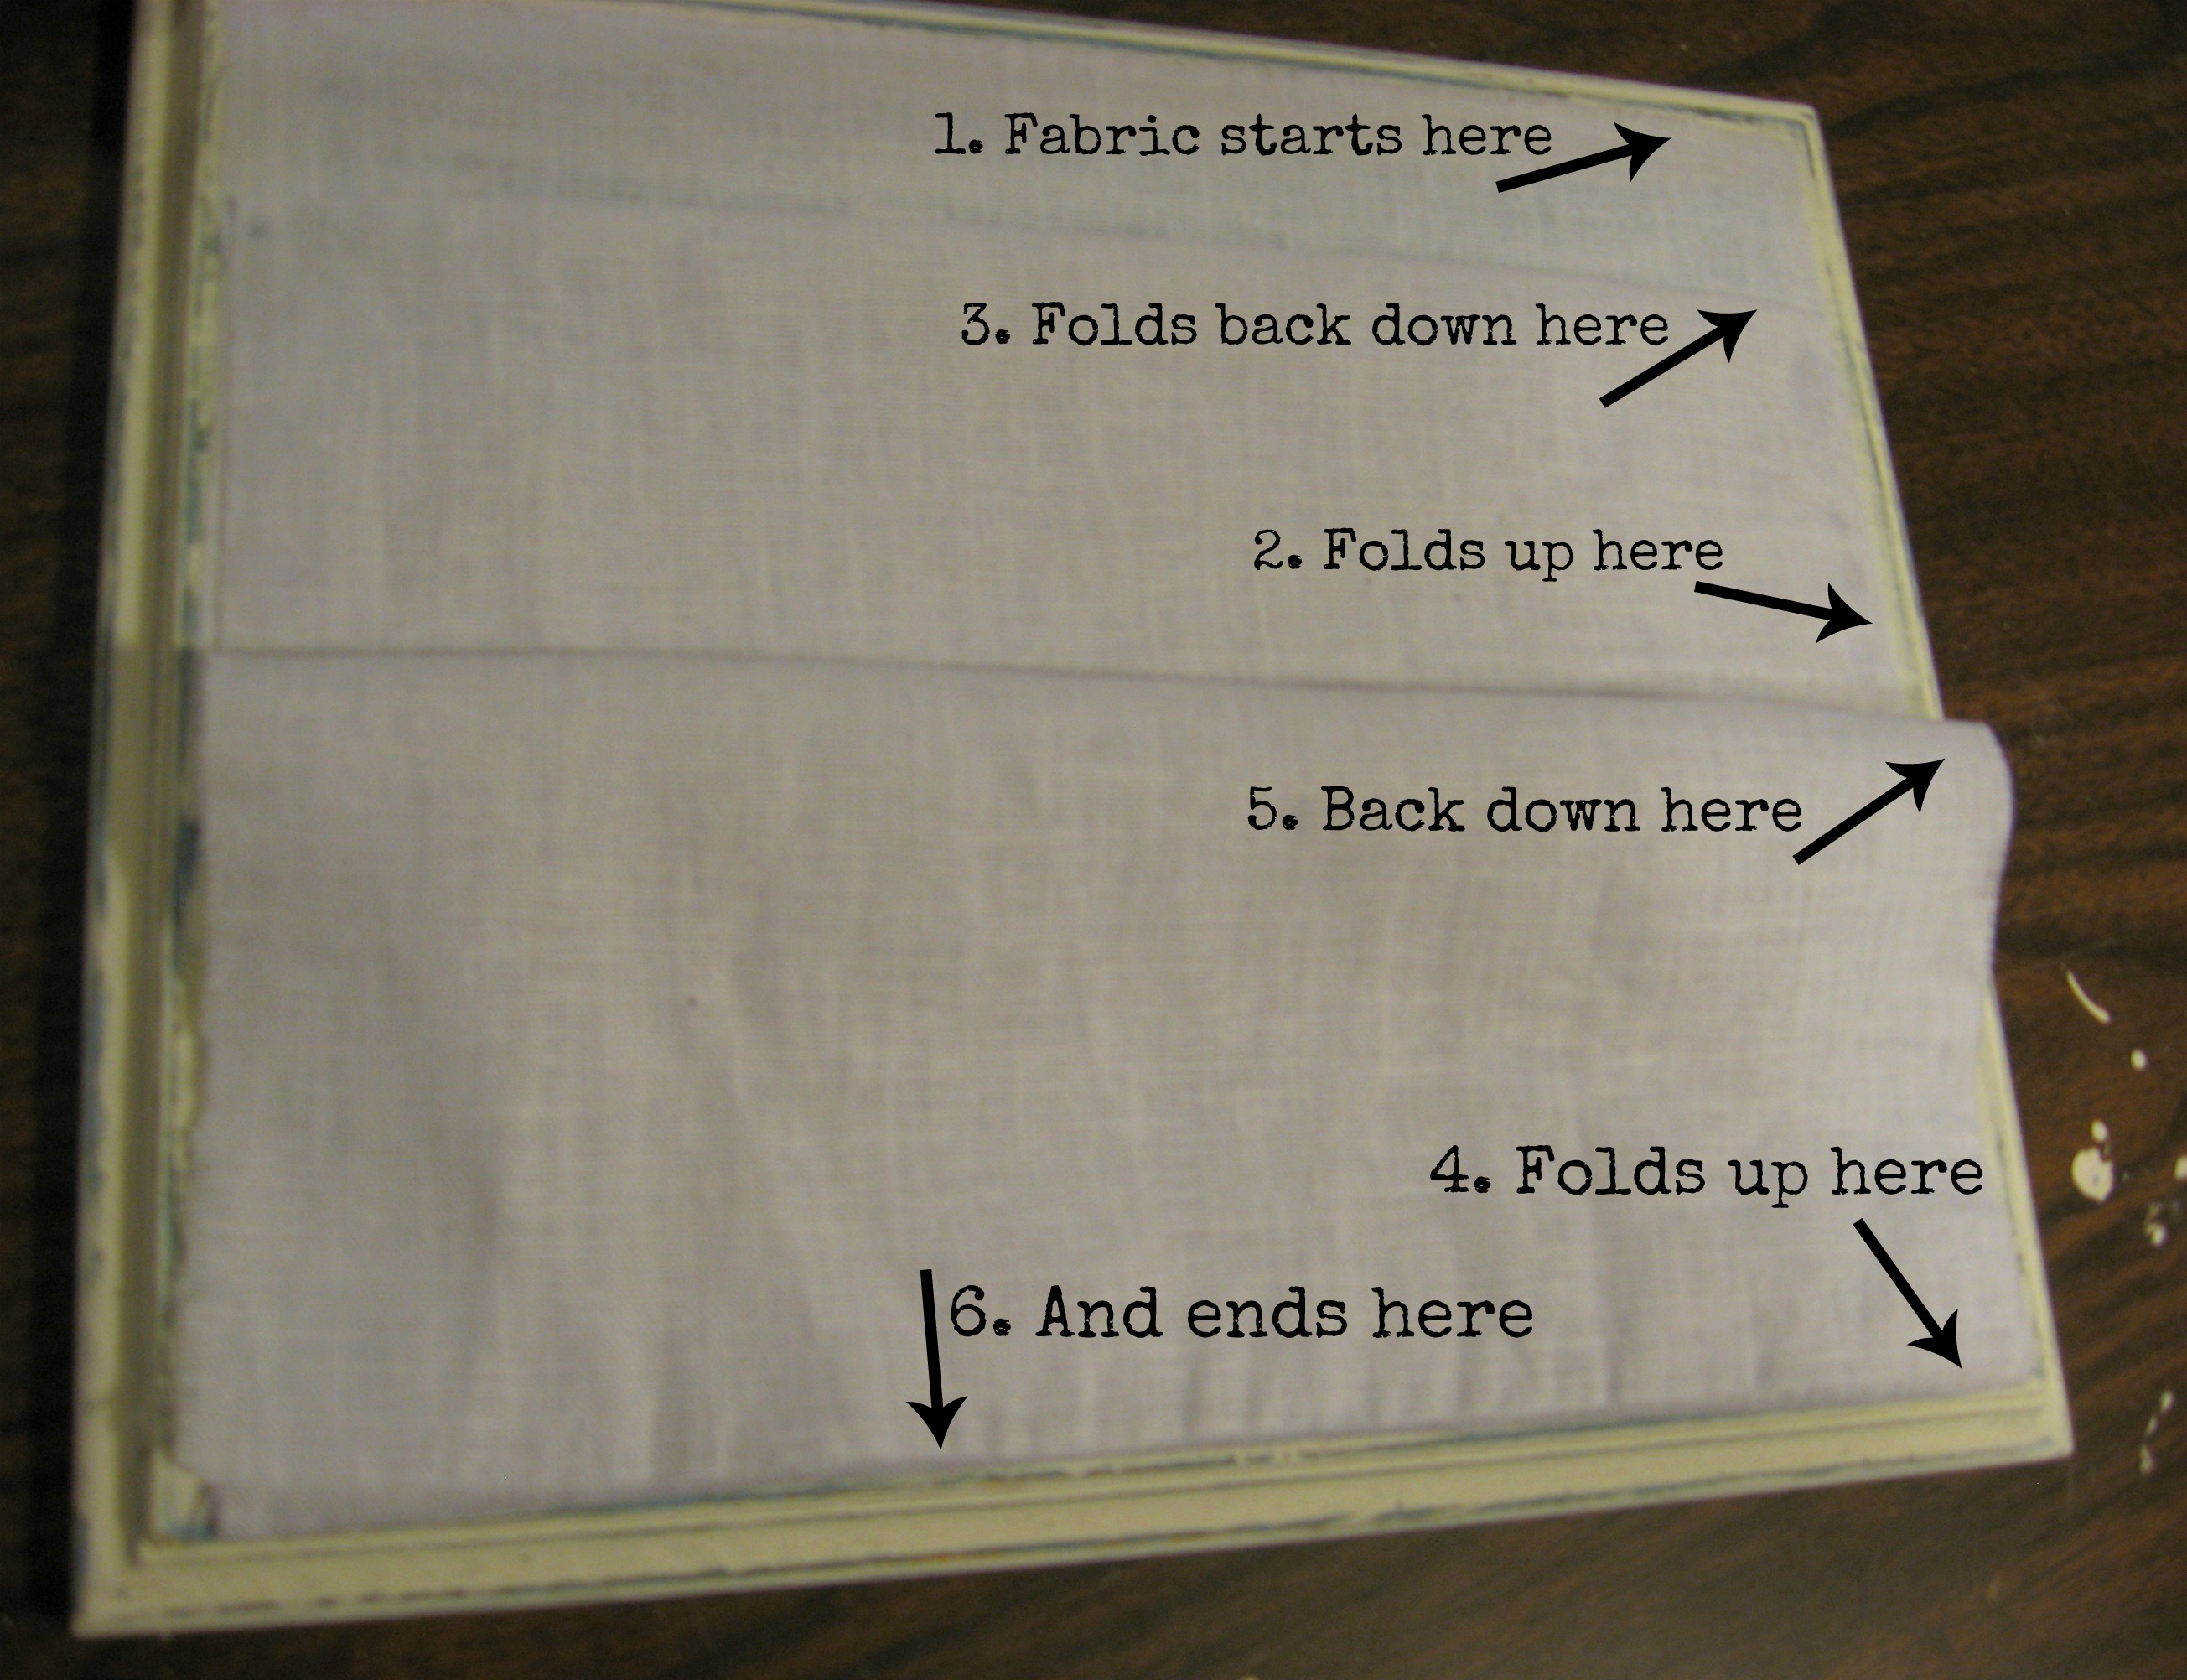
Start by laying the fabric out as shown above on the board and folding it as you would like the finished pockets to be to determine how long your fabric needs to be (I did two pockets, and they are both shallow. You can make as many or as few pockets as you like, and if I were doing it over again, I would make the back pocket deeper).
Cut the length (add an inch or two just to be safe; you can easily trim it later). Now cut the width of that entire piece of fabric to fit the width of your board – mine is just narrower than the board -being careful to cut very straight (if you are using a loose weave fabric like this here, pull a thread out along the length, then use it as a cutting line). Iron your fabric if needed.
Apply a bead of glue – I used Elmers –
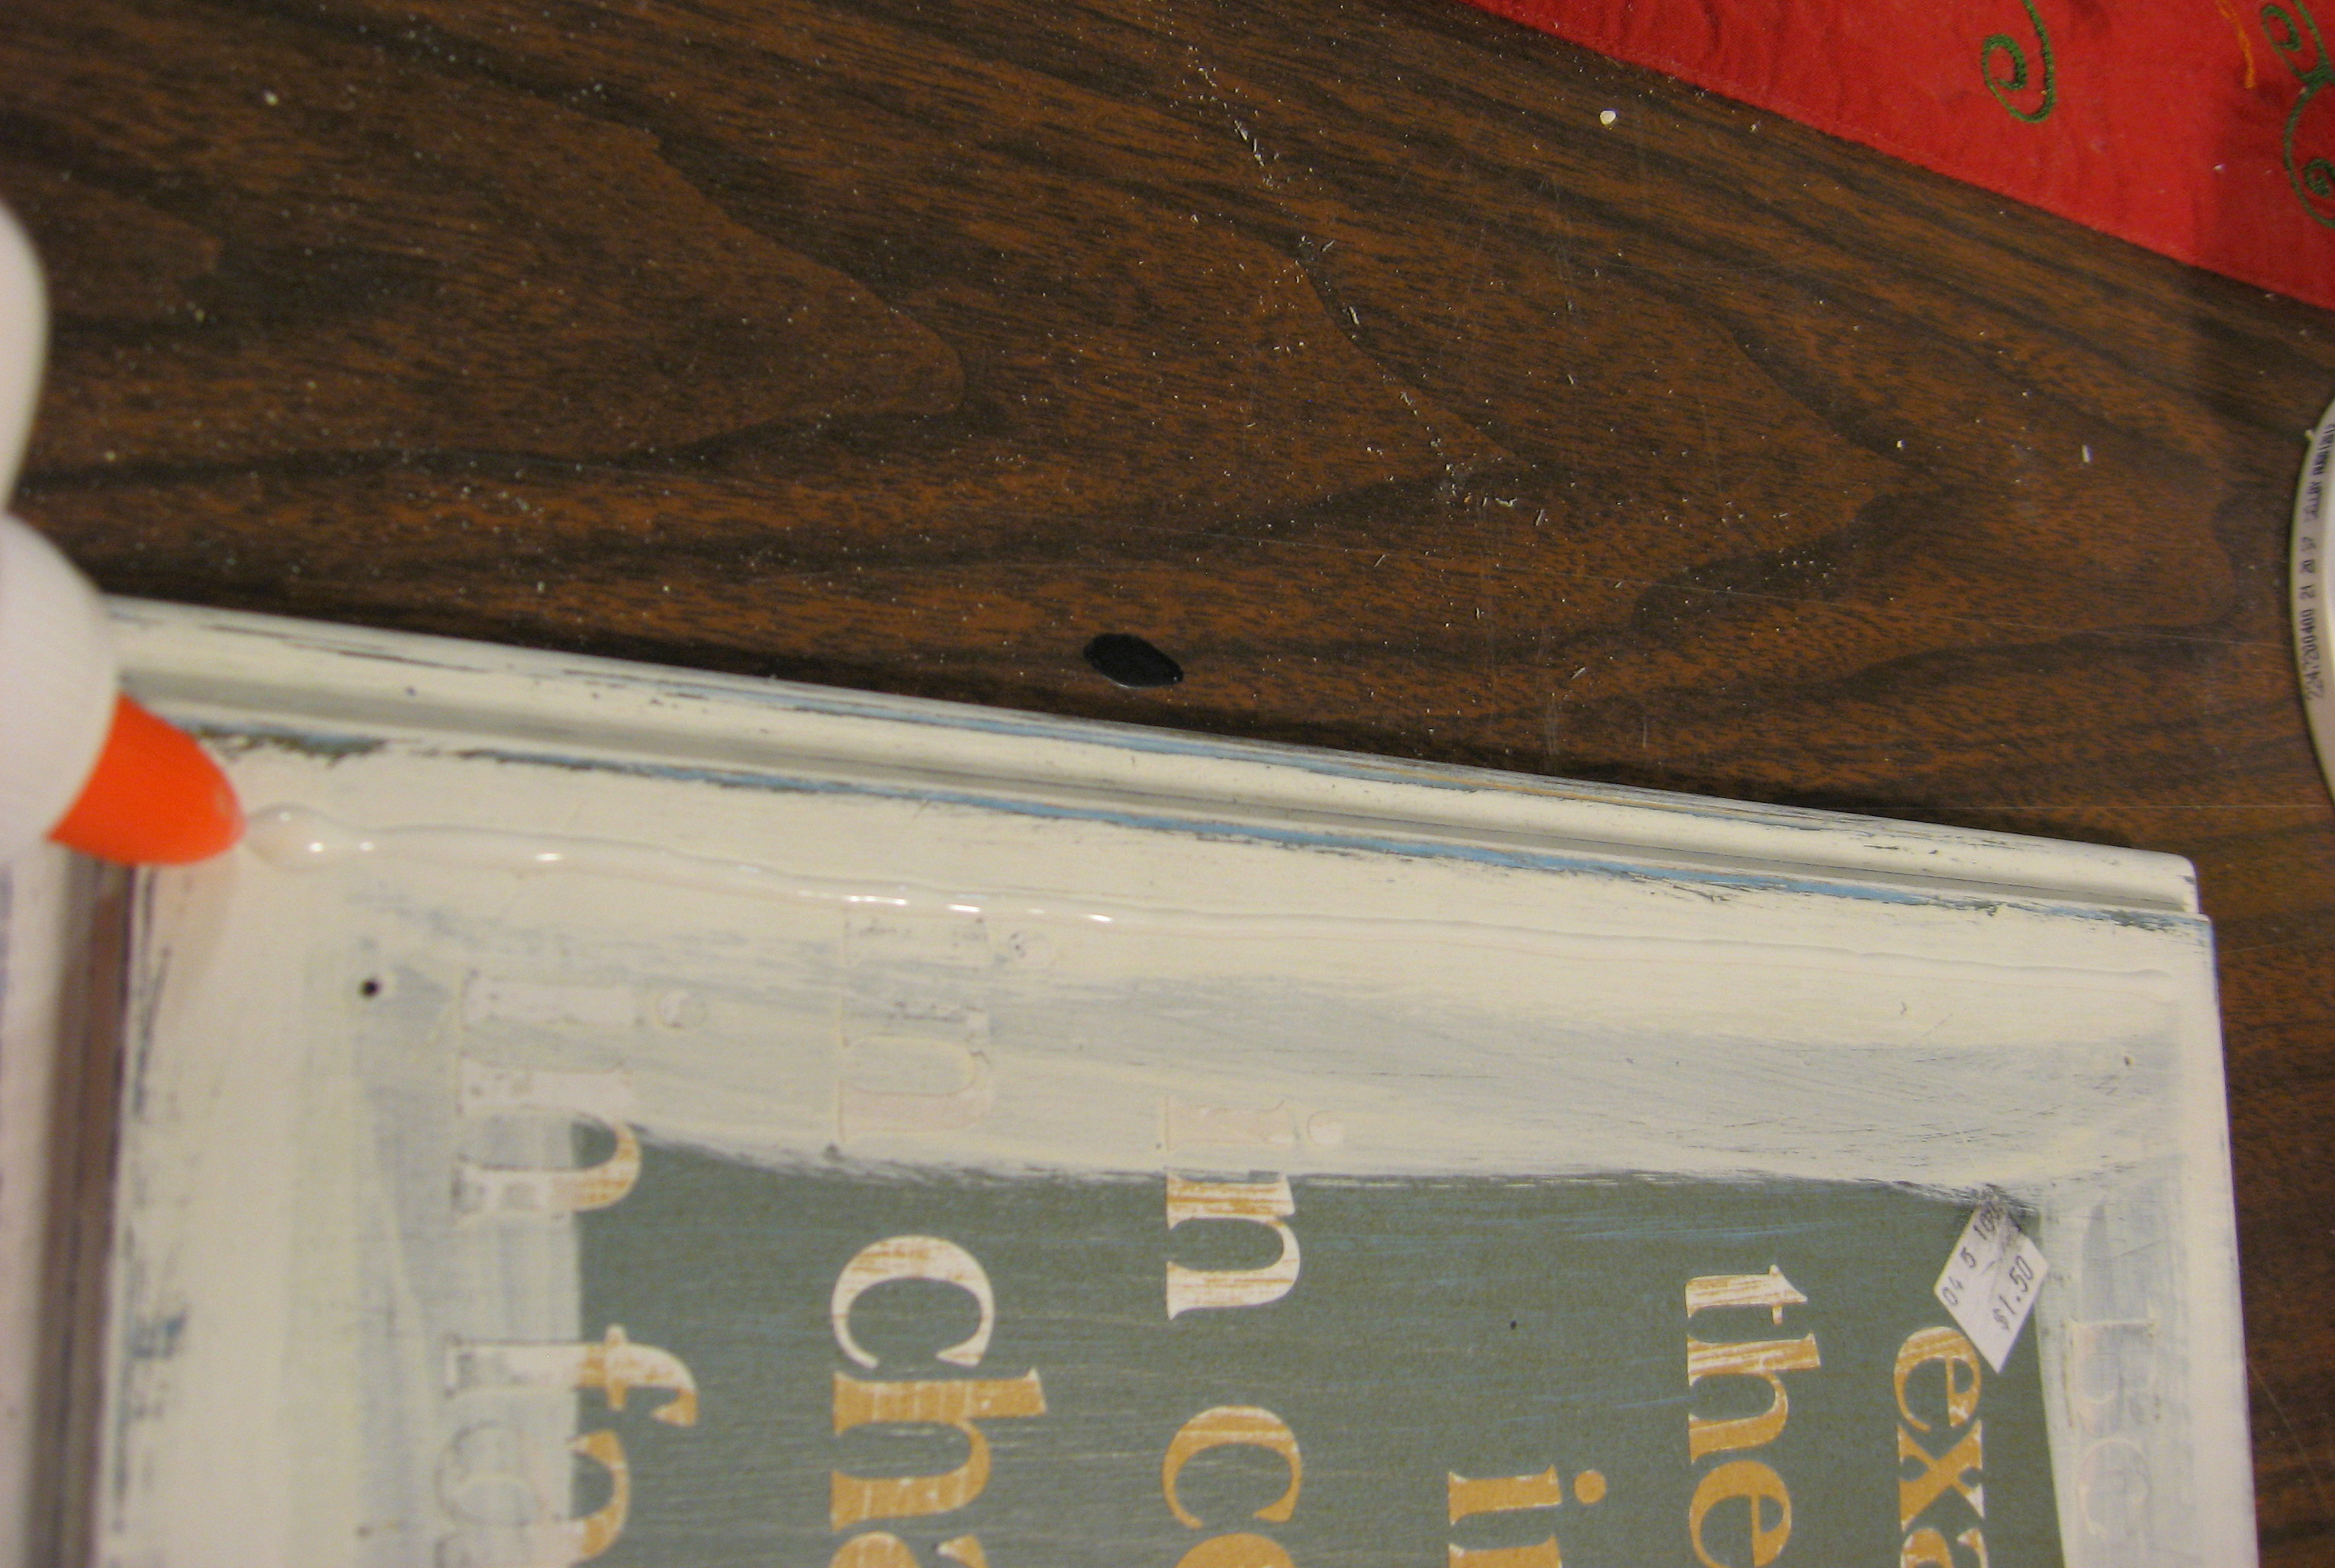
around the edge of the board at the top and sides down to where your top pocket will stop, and where the bottom of the pocket will be. Carefully lay the fabric out on the board, being careful to make it straight and even. Once the fabric is where you want it to be, you’ll let it dry. I carefully placed a piece of craft paper-waxy side down- on top of the fabric and weighted it down with a large bowl while it was drying.

Once that is dry, then fold the fabric up to create the bottom of this pocket. Apply glue to attach the sides of this pocket, then glue all the way down to the bottom.
Apply glue also along the bottom edge of the board. Carefully fold the fabric, being careful to line everything up and keep it straight. Weight down as before and let dry.
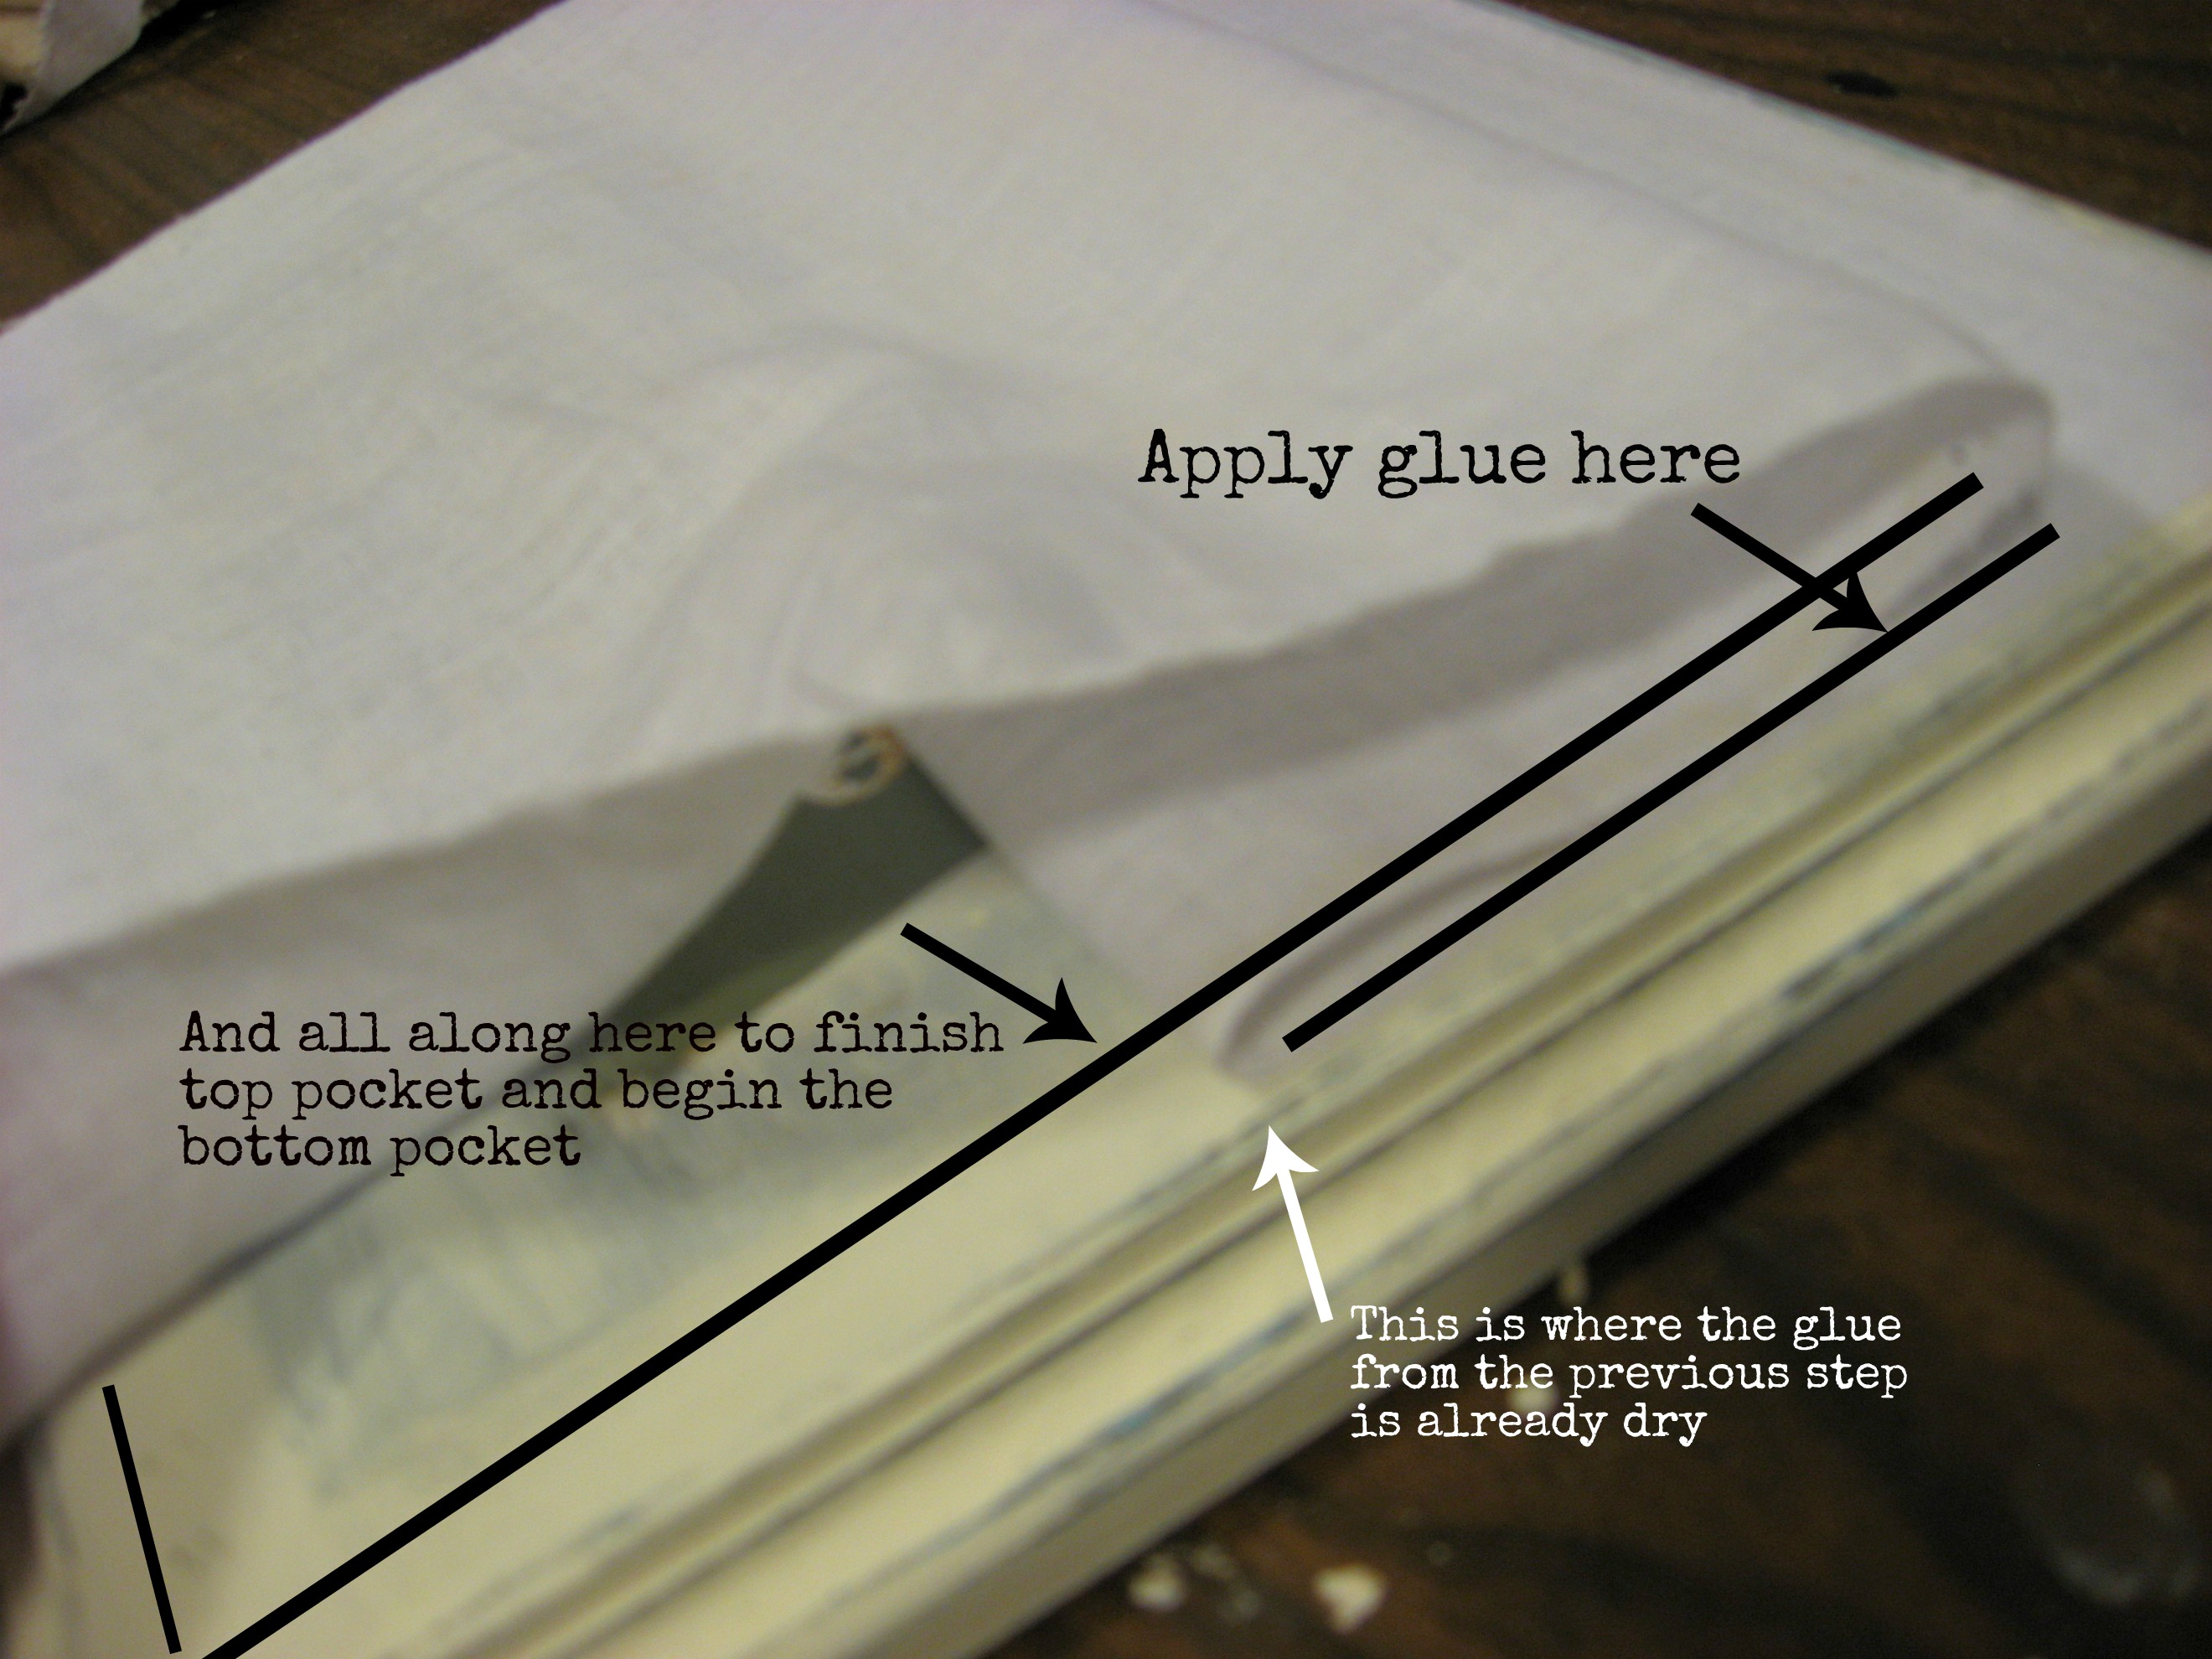
Now do the same thing to create the bottom pocket; gluing around the sides and bottom, folding carefully and weighting it down to dry.
You could be done at this point, but I wanted mine a little more embellished. I used the fabric piece that I printed on (see that tutorial here) and glued it onto the front of the bottom pocket.
Then I added small nails at the corners and at the folds of the pockets, both to strengthen those stress points, and to add visual interest.
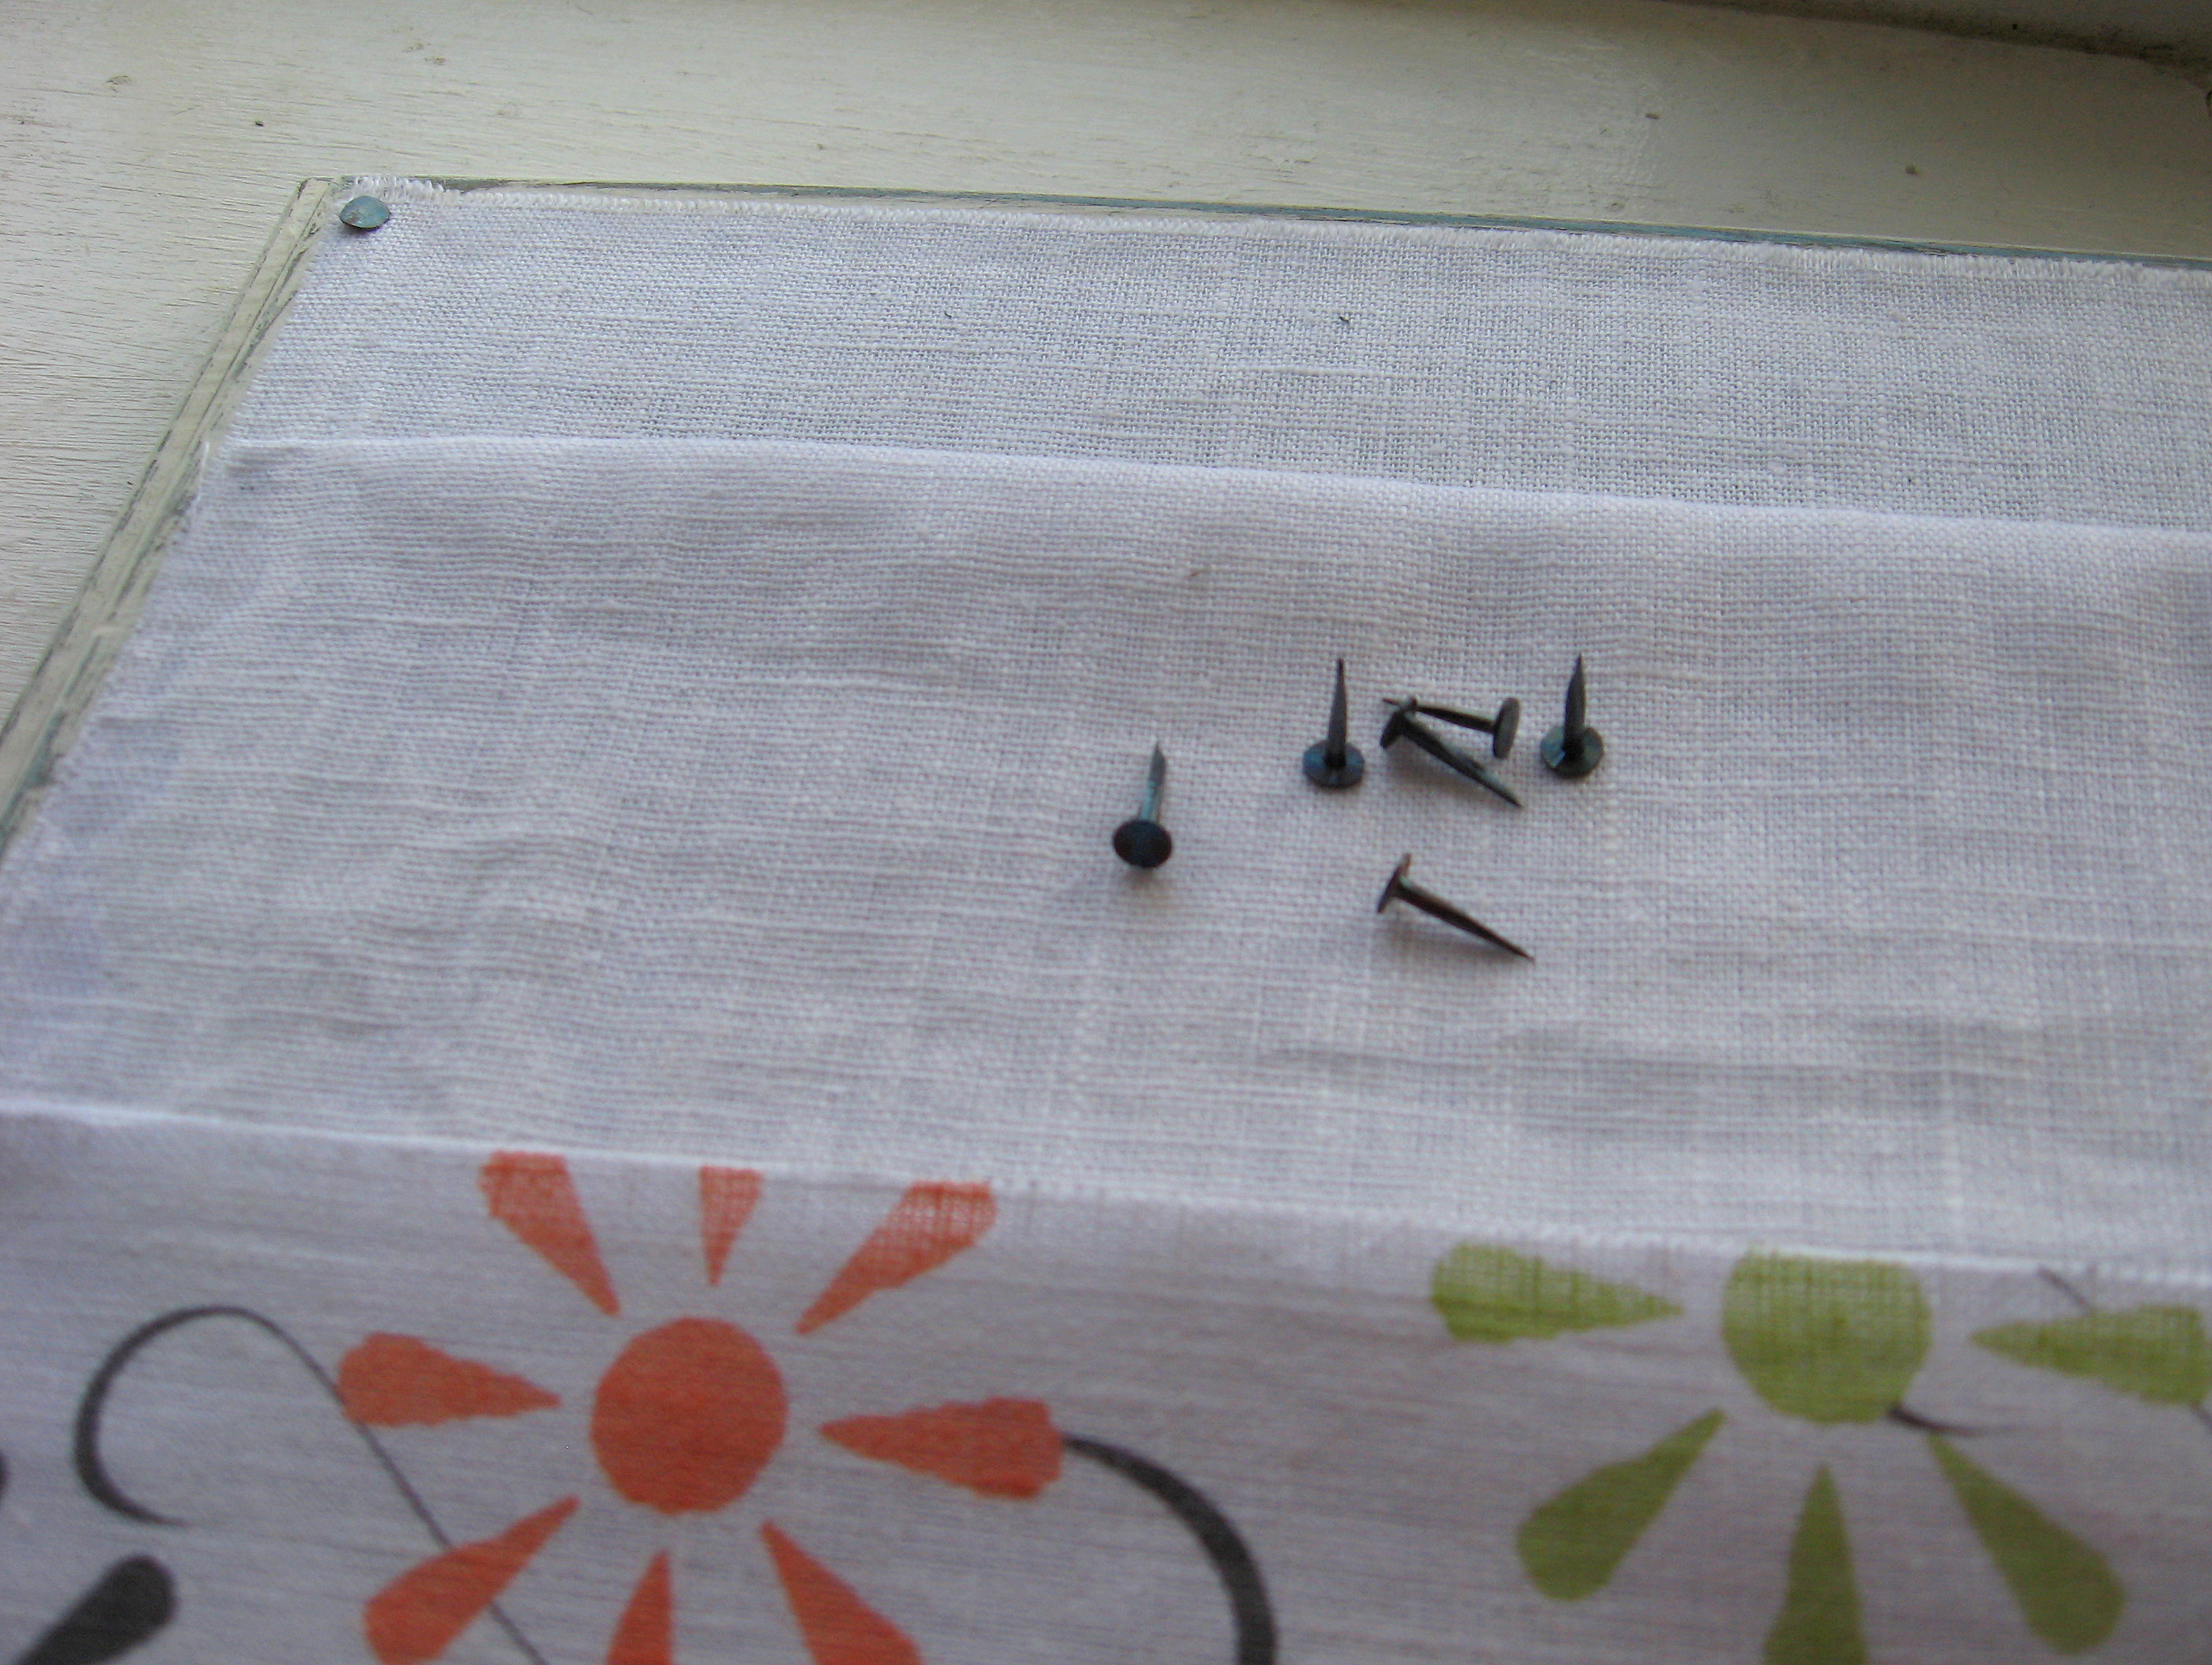
These are called carpet tacks and I just think they’re cute! You can get them in a small plastic package in the aisle with nails and screws at any home improvement store.
To hang, I stapled a piece of ribbon to the back.
All done!
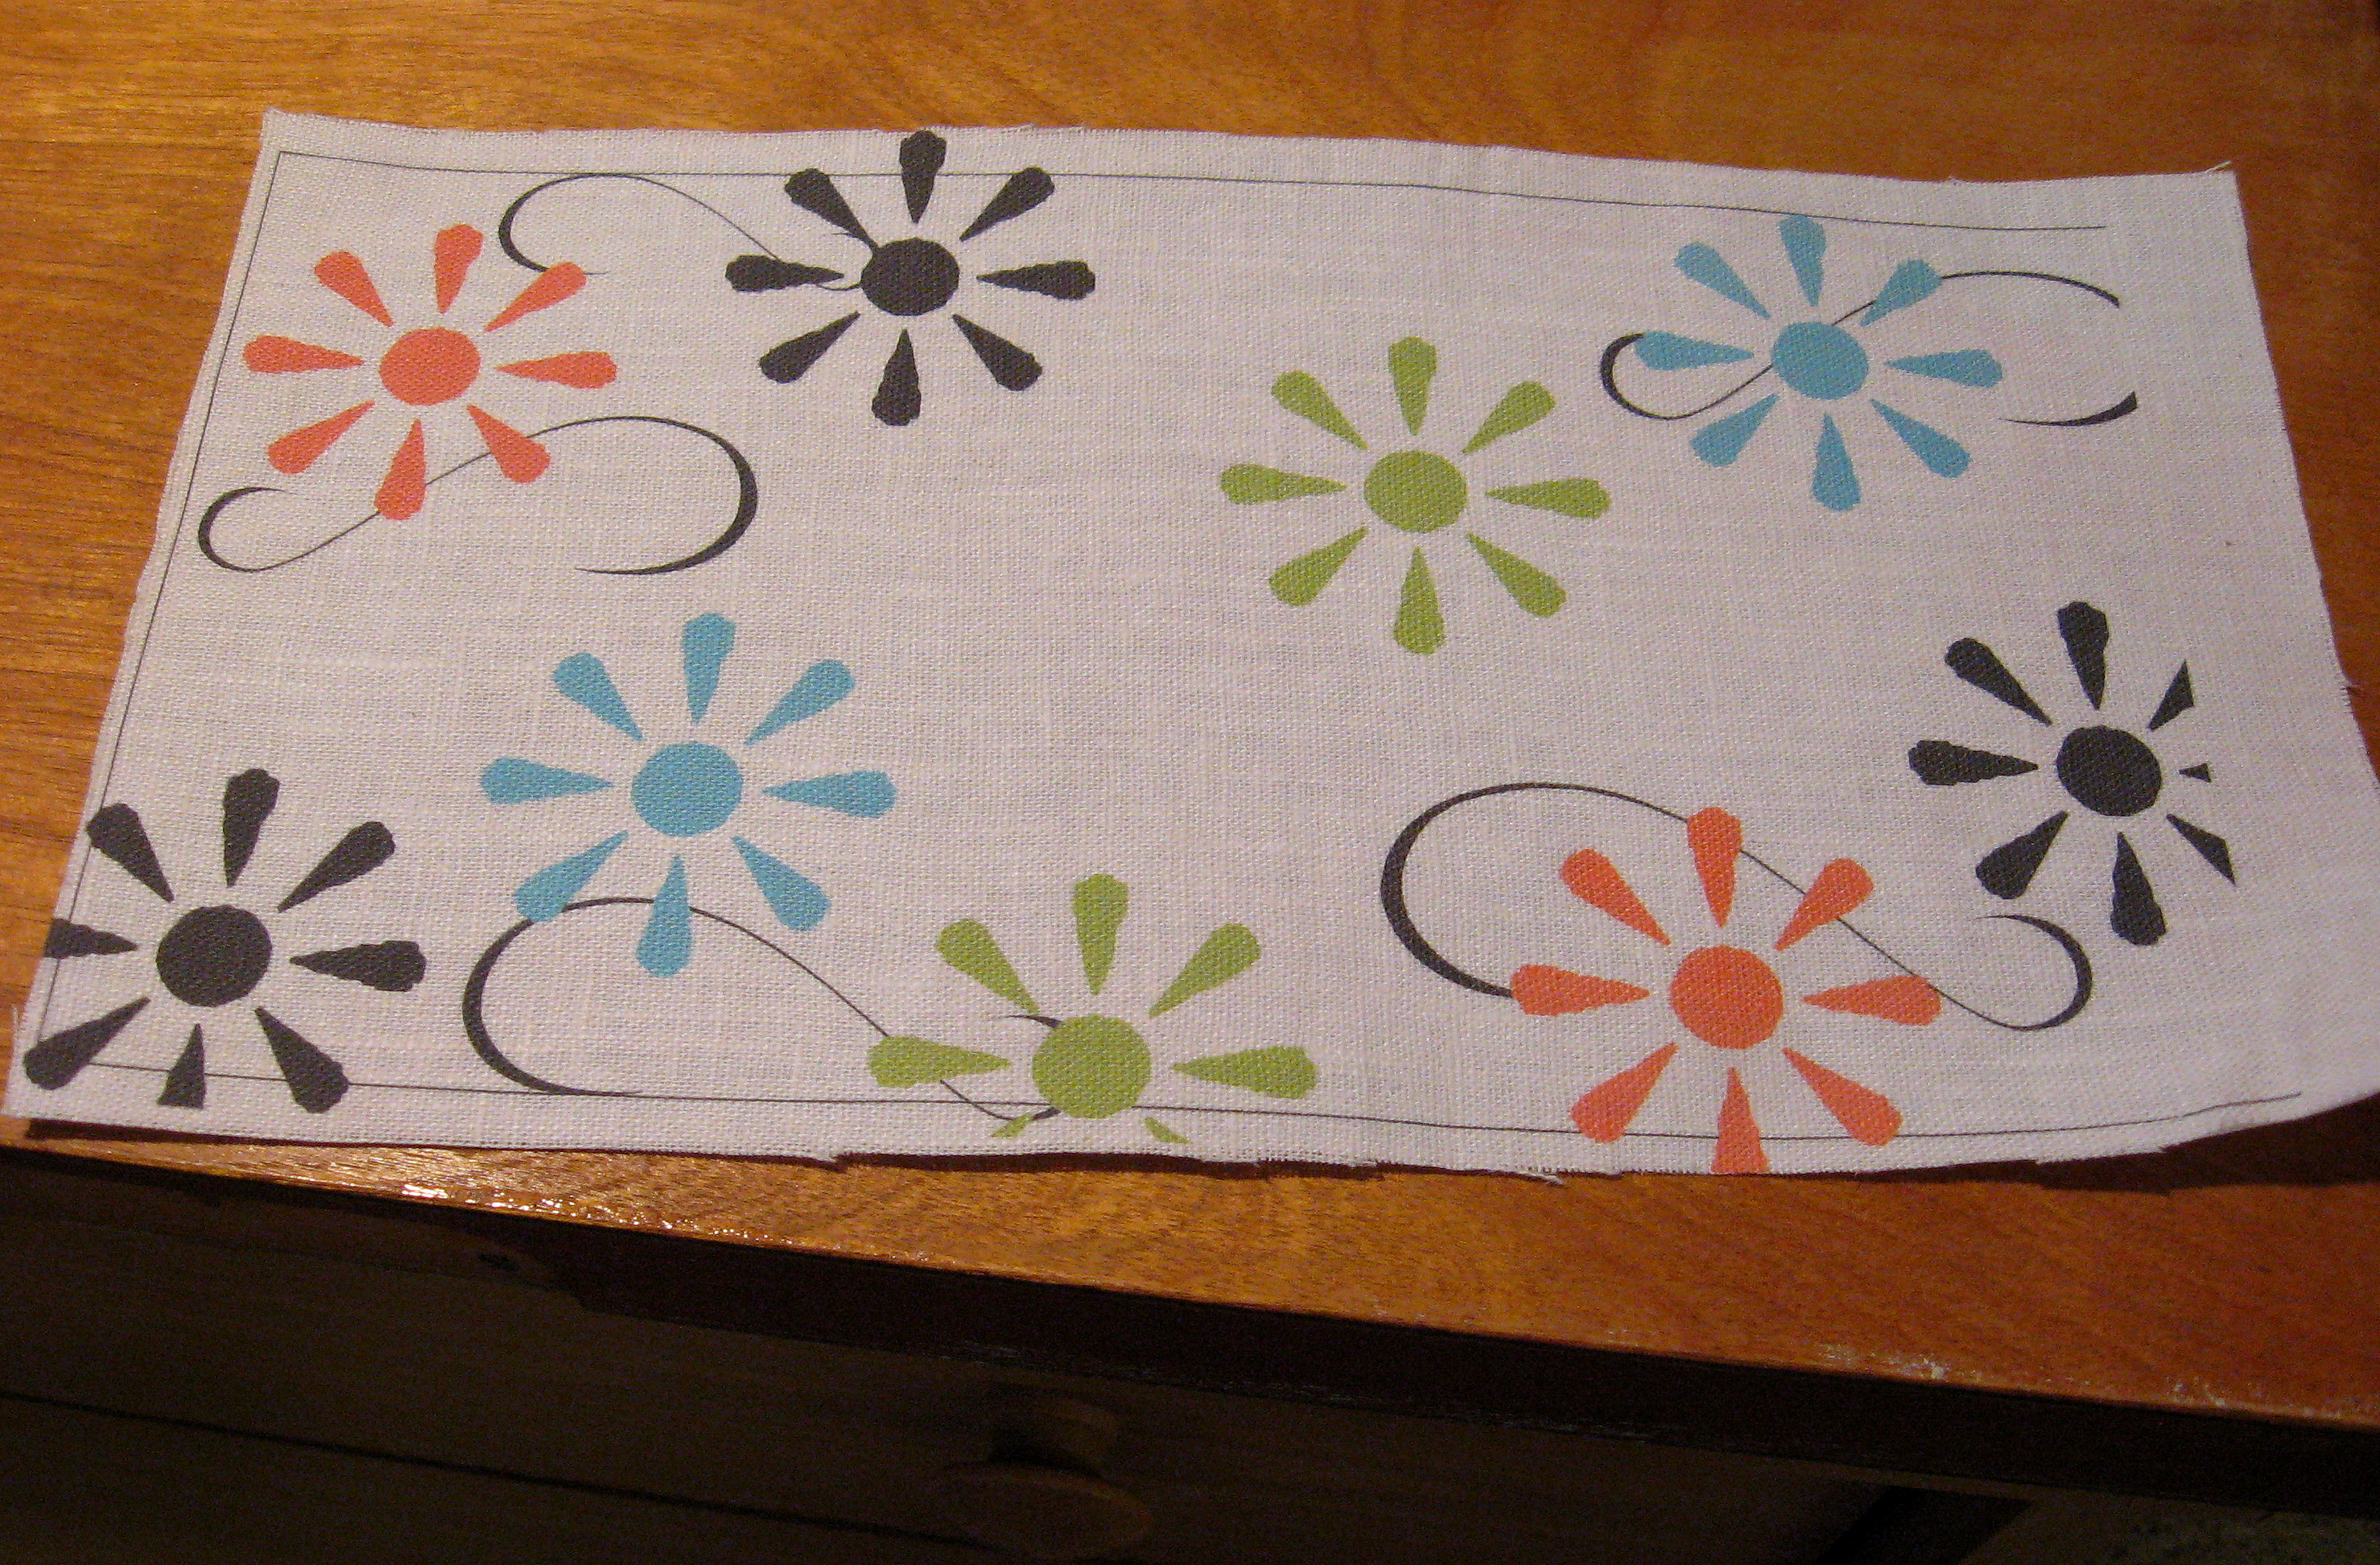
Printing on Fabric
Running a piece of fabric through your printer adds a wonderful new medium to your crafting arsenal and it couldn’t be easier! The trick is freezer paper which you should be able to find in any grocery store in the aisle by the aluminum foil and wax paper. Freezer paper is a thick paper that is waxy on one side. Don’t just get wax paper; freezer paper is much thicker. It isn’t too expensive and there is a lot of it in a box; it will last you forever and can be used for many different craft projects. 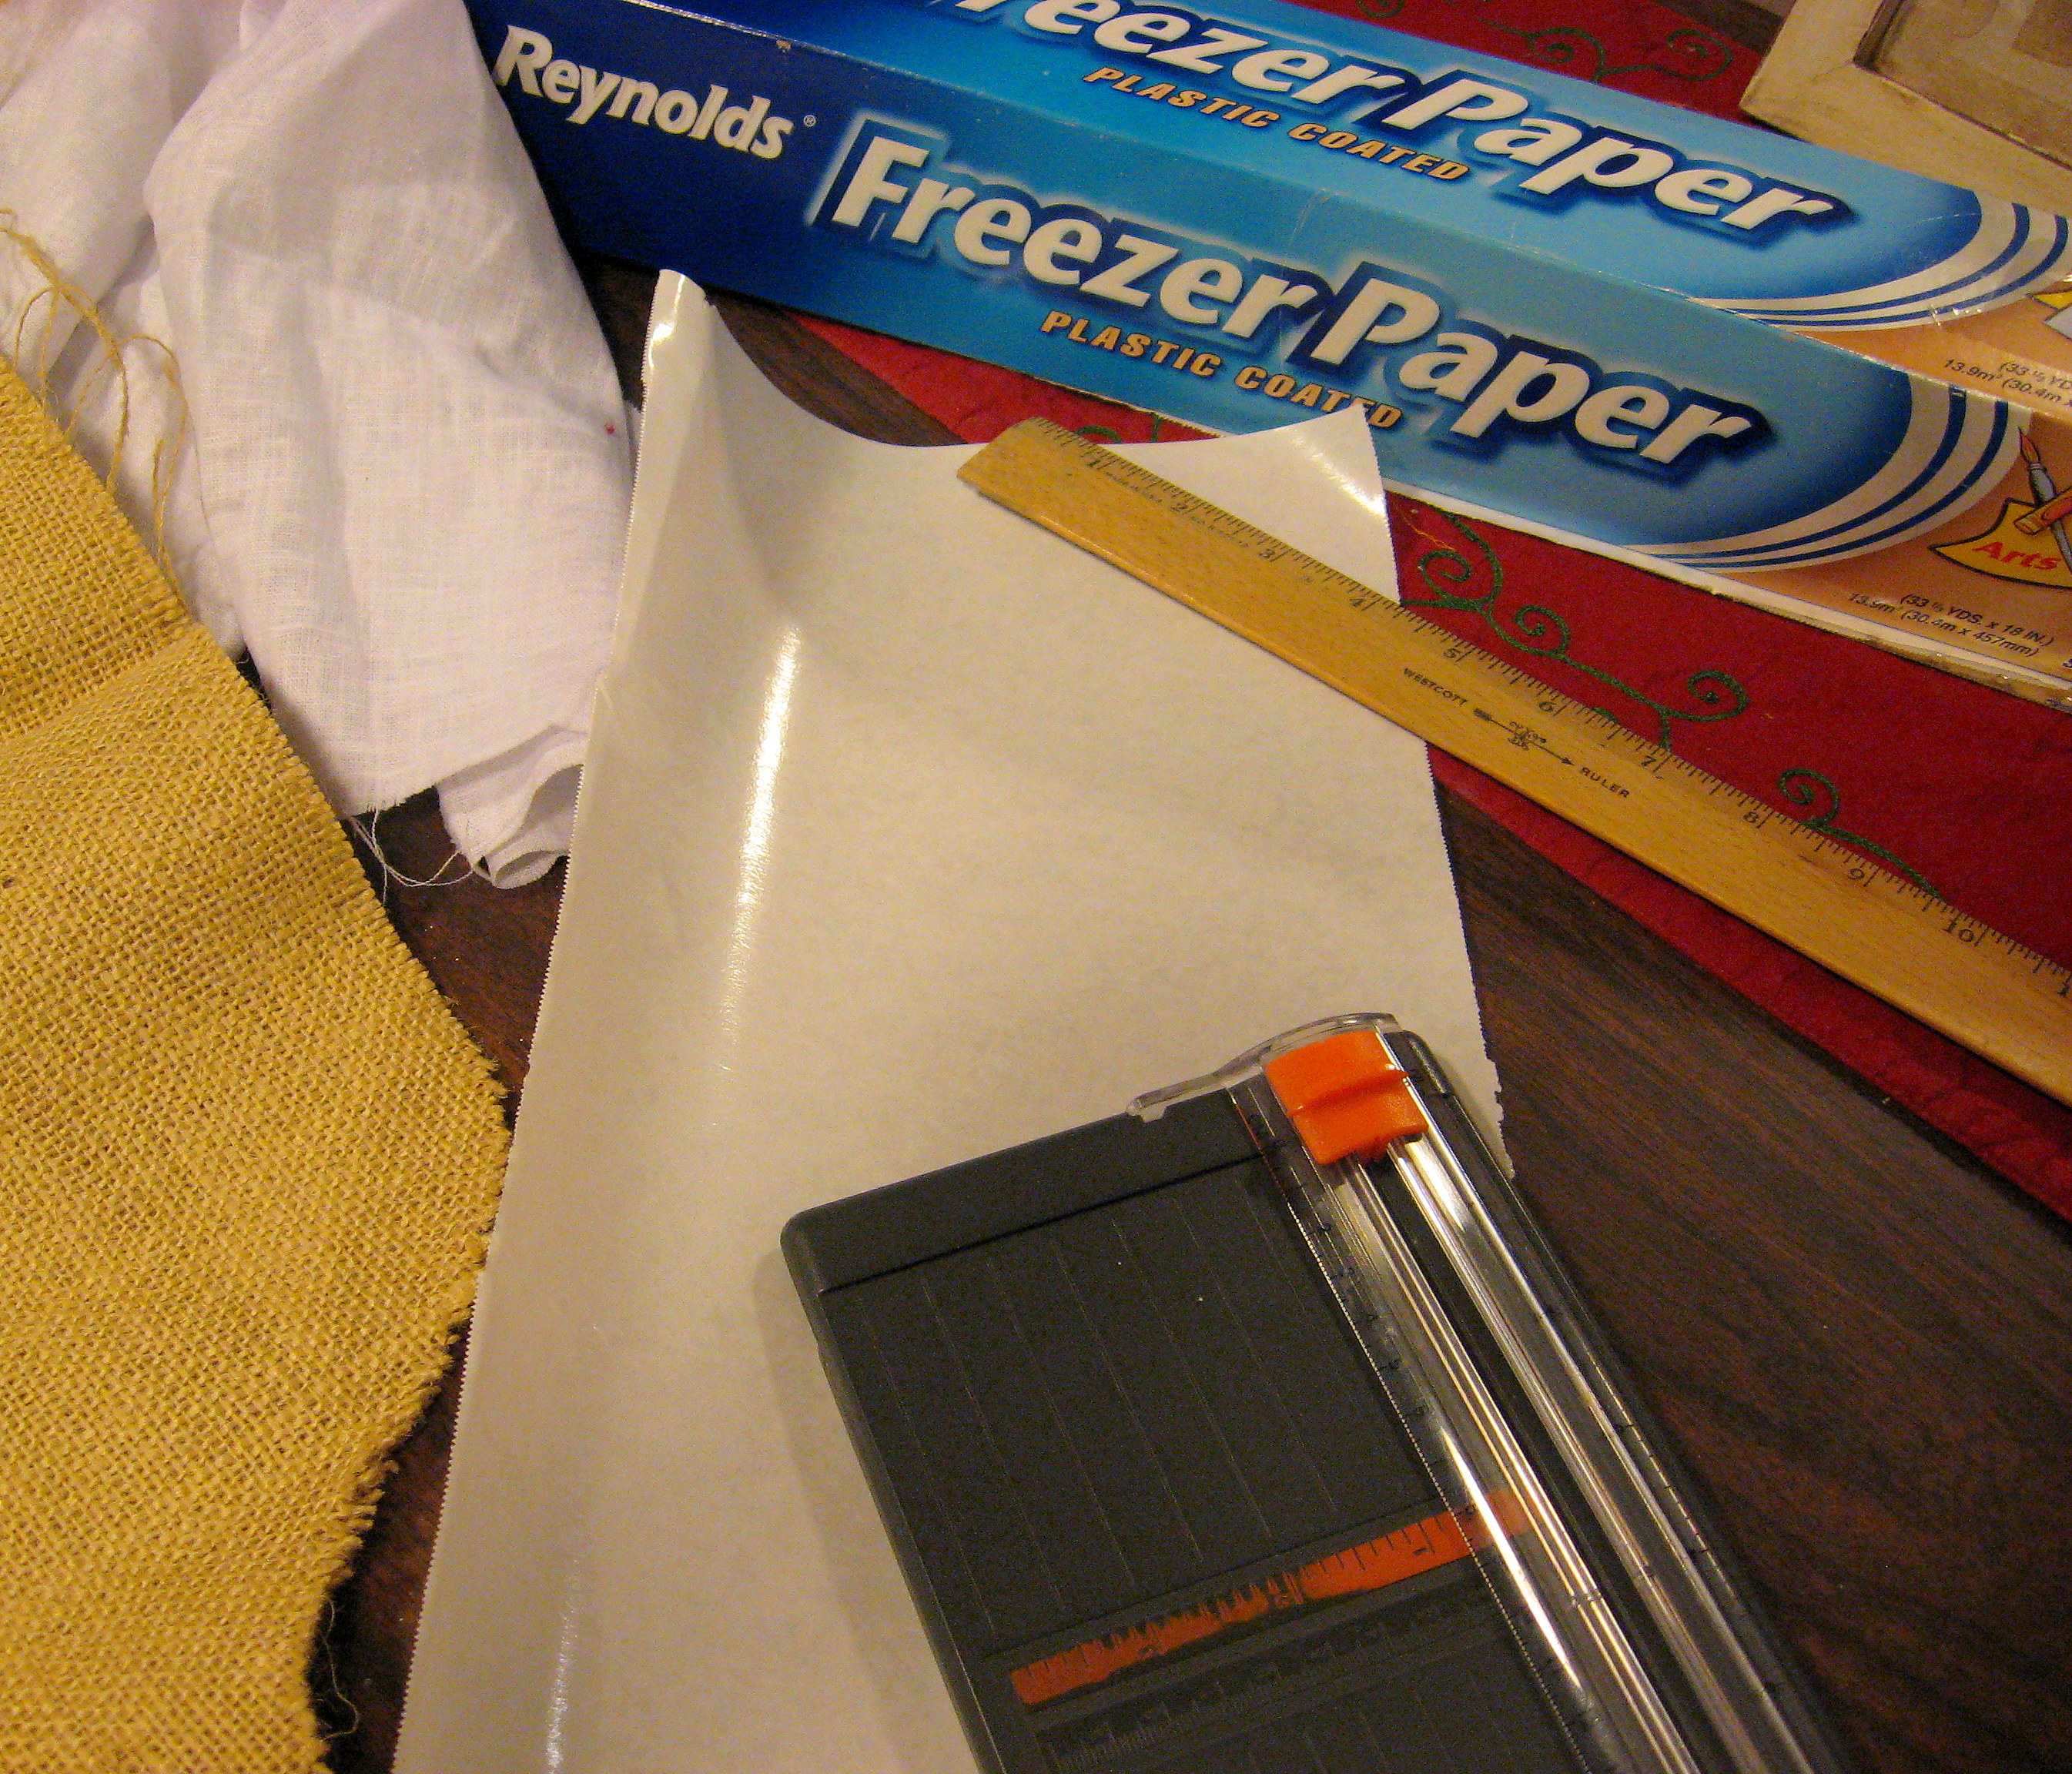
Decide on the finished size of your piece. Open up a Word document and change the size of the paper to be just slightly larger than what you want your finished design to be. For example, for this project, I needed the finished design to be 5 1/2″ X 10 1/2″, so I changed my paper size to be 6″ X 11″. If it helps, you can even draw a shape in your document that is the finished size for your project. (You can see that I did this in the picture of the finished fabric below; the printed rectangle you see is the finished size that I need and served as a template to guide the finished design.) Now add your words, clip art, images, etc and arrange them inside that shape; once your design is how you like it then just delete the shape, or leave it and let it print like I did. The rectangle then becomes the cut line for my finished project.
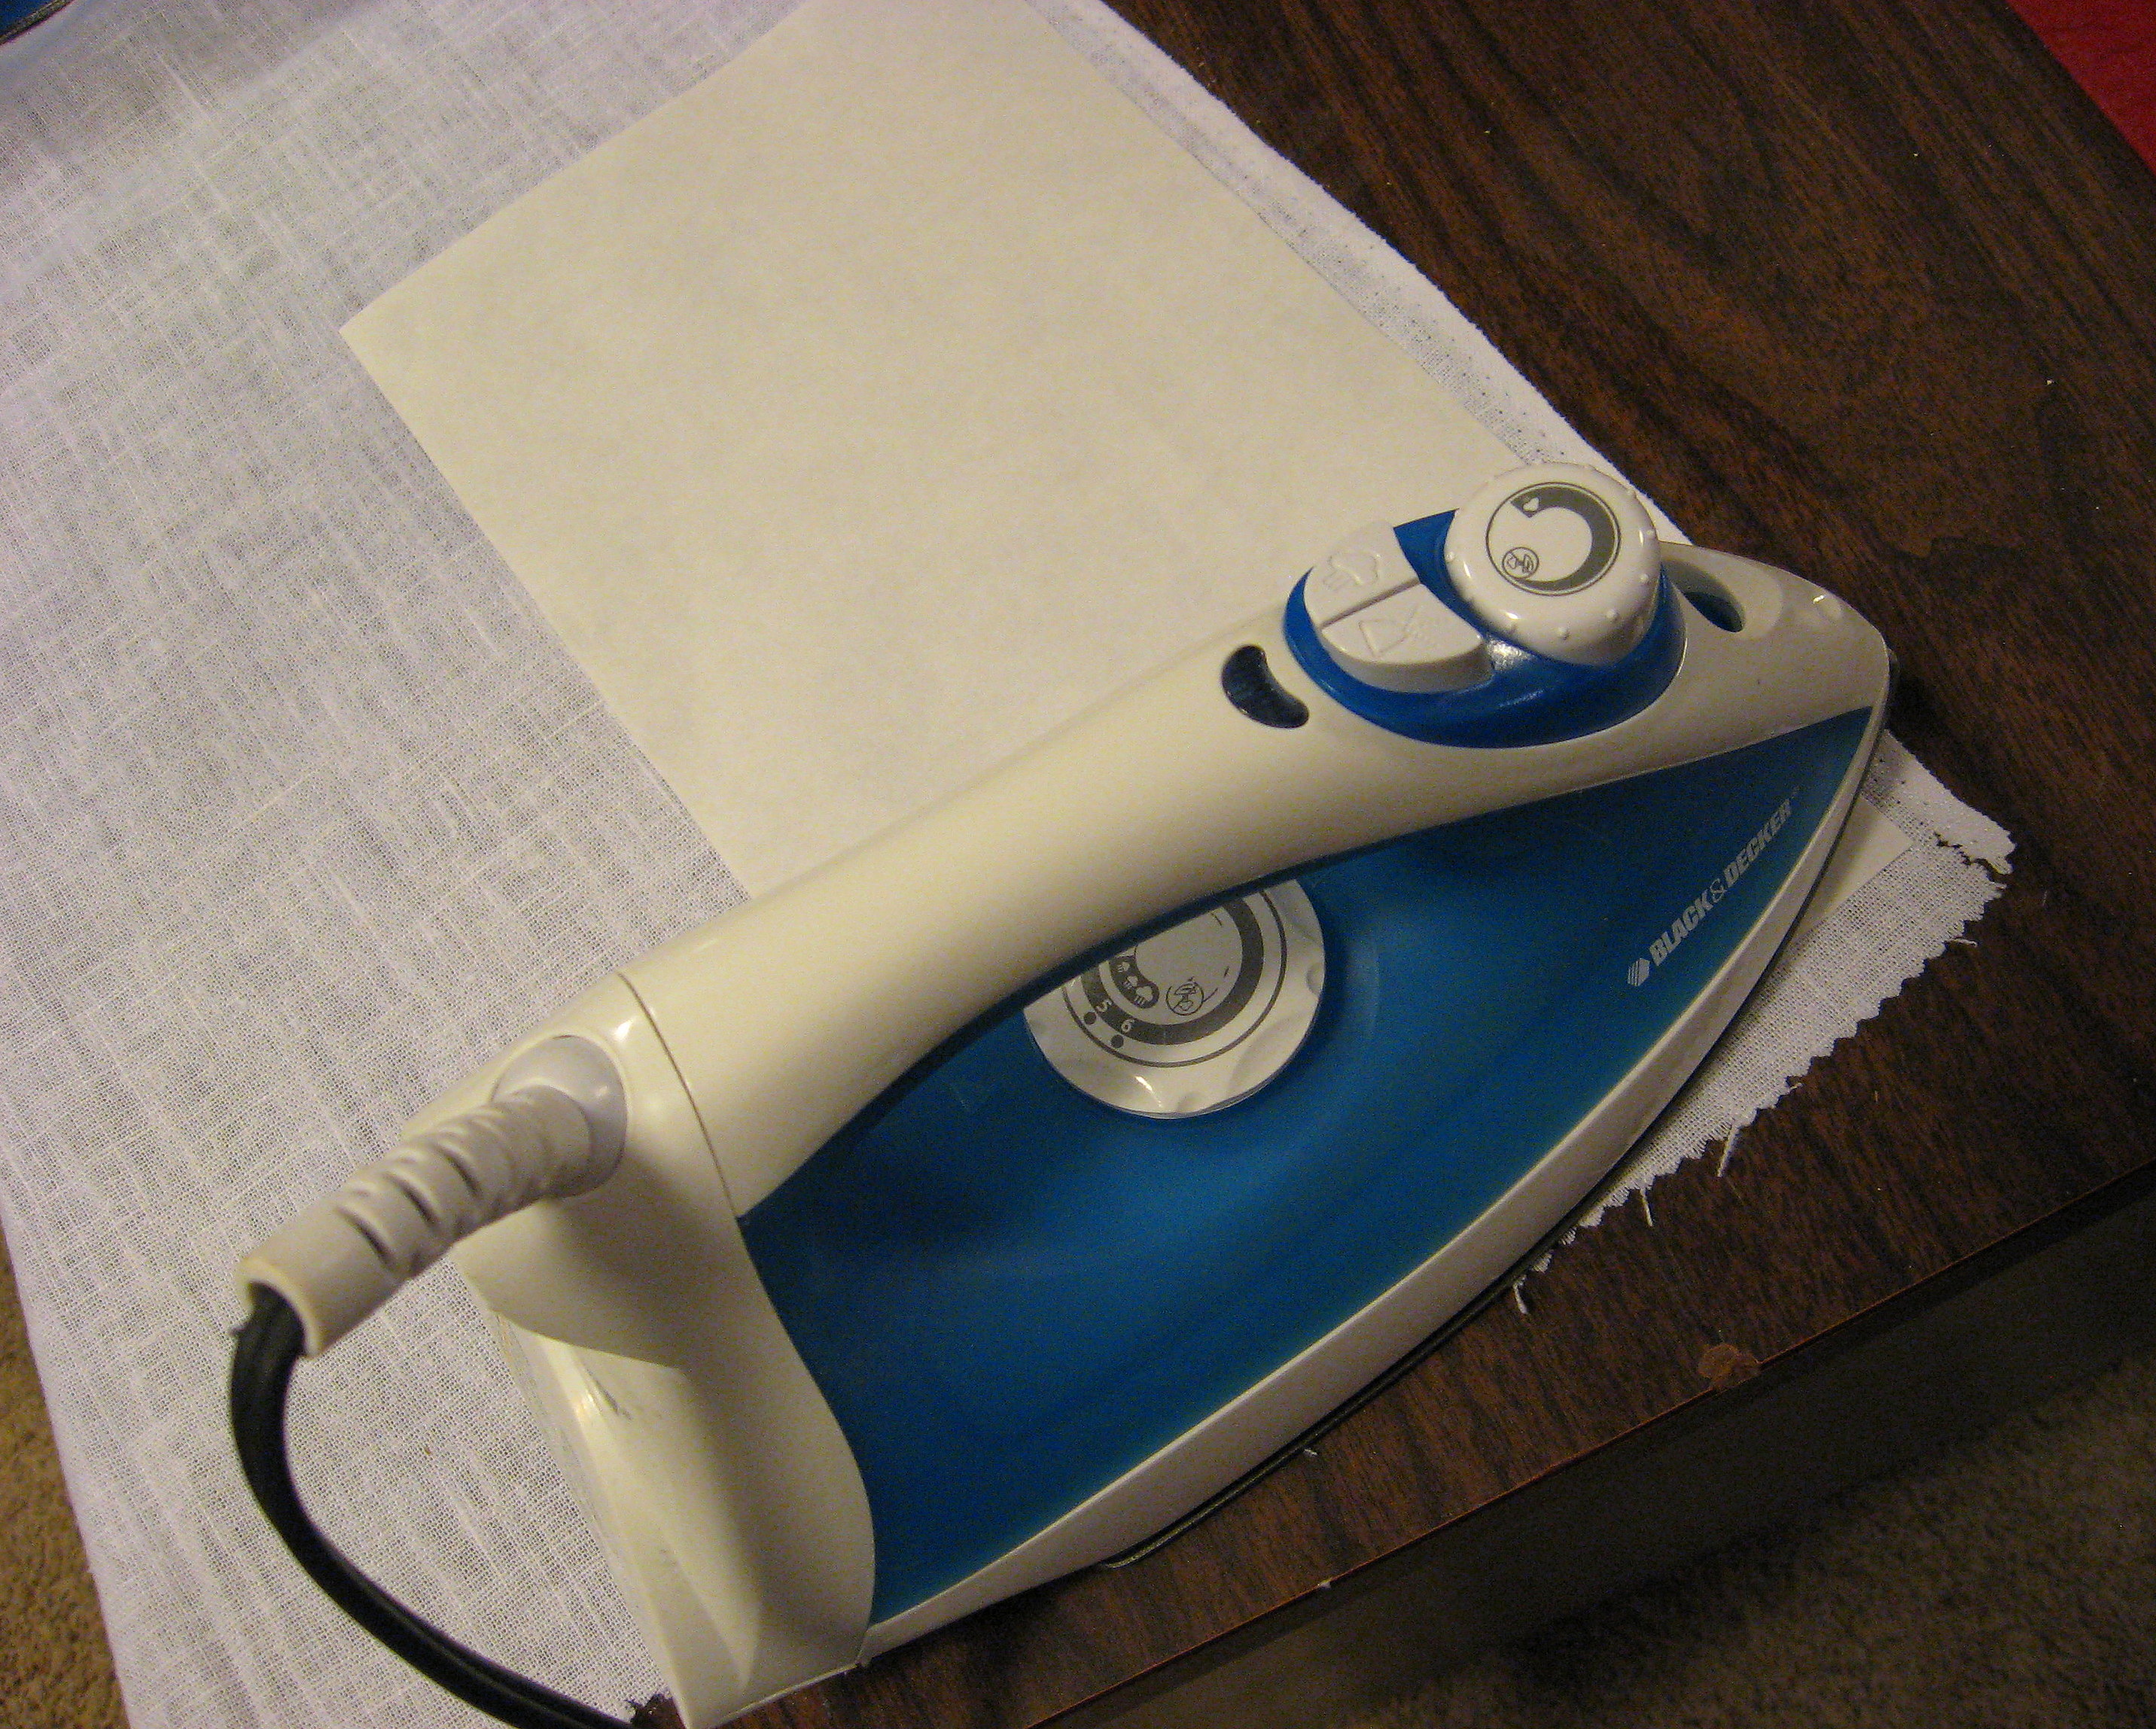
Now, using a paper cutter, or a ruler and scissors, cut a piece of the freezer paper to the size that you set your page to be in your document (so for me, 6 X 11). Place the paper, waxy side down, on the BACK of your fabric. Set your iron at a temperature appropriate for you fabric and NO STEAM. Run the iron evenly and slowly over the freezer paper until it is well adhered to the fabric.
Let it cool a minute, then cut the fabric out following the edge of the freezer paper. 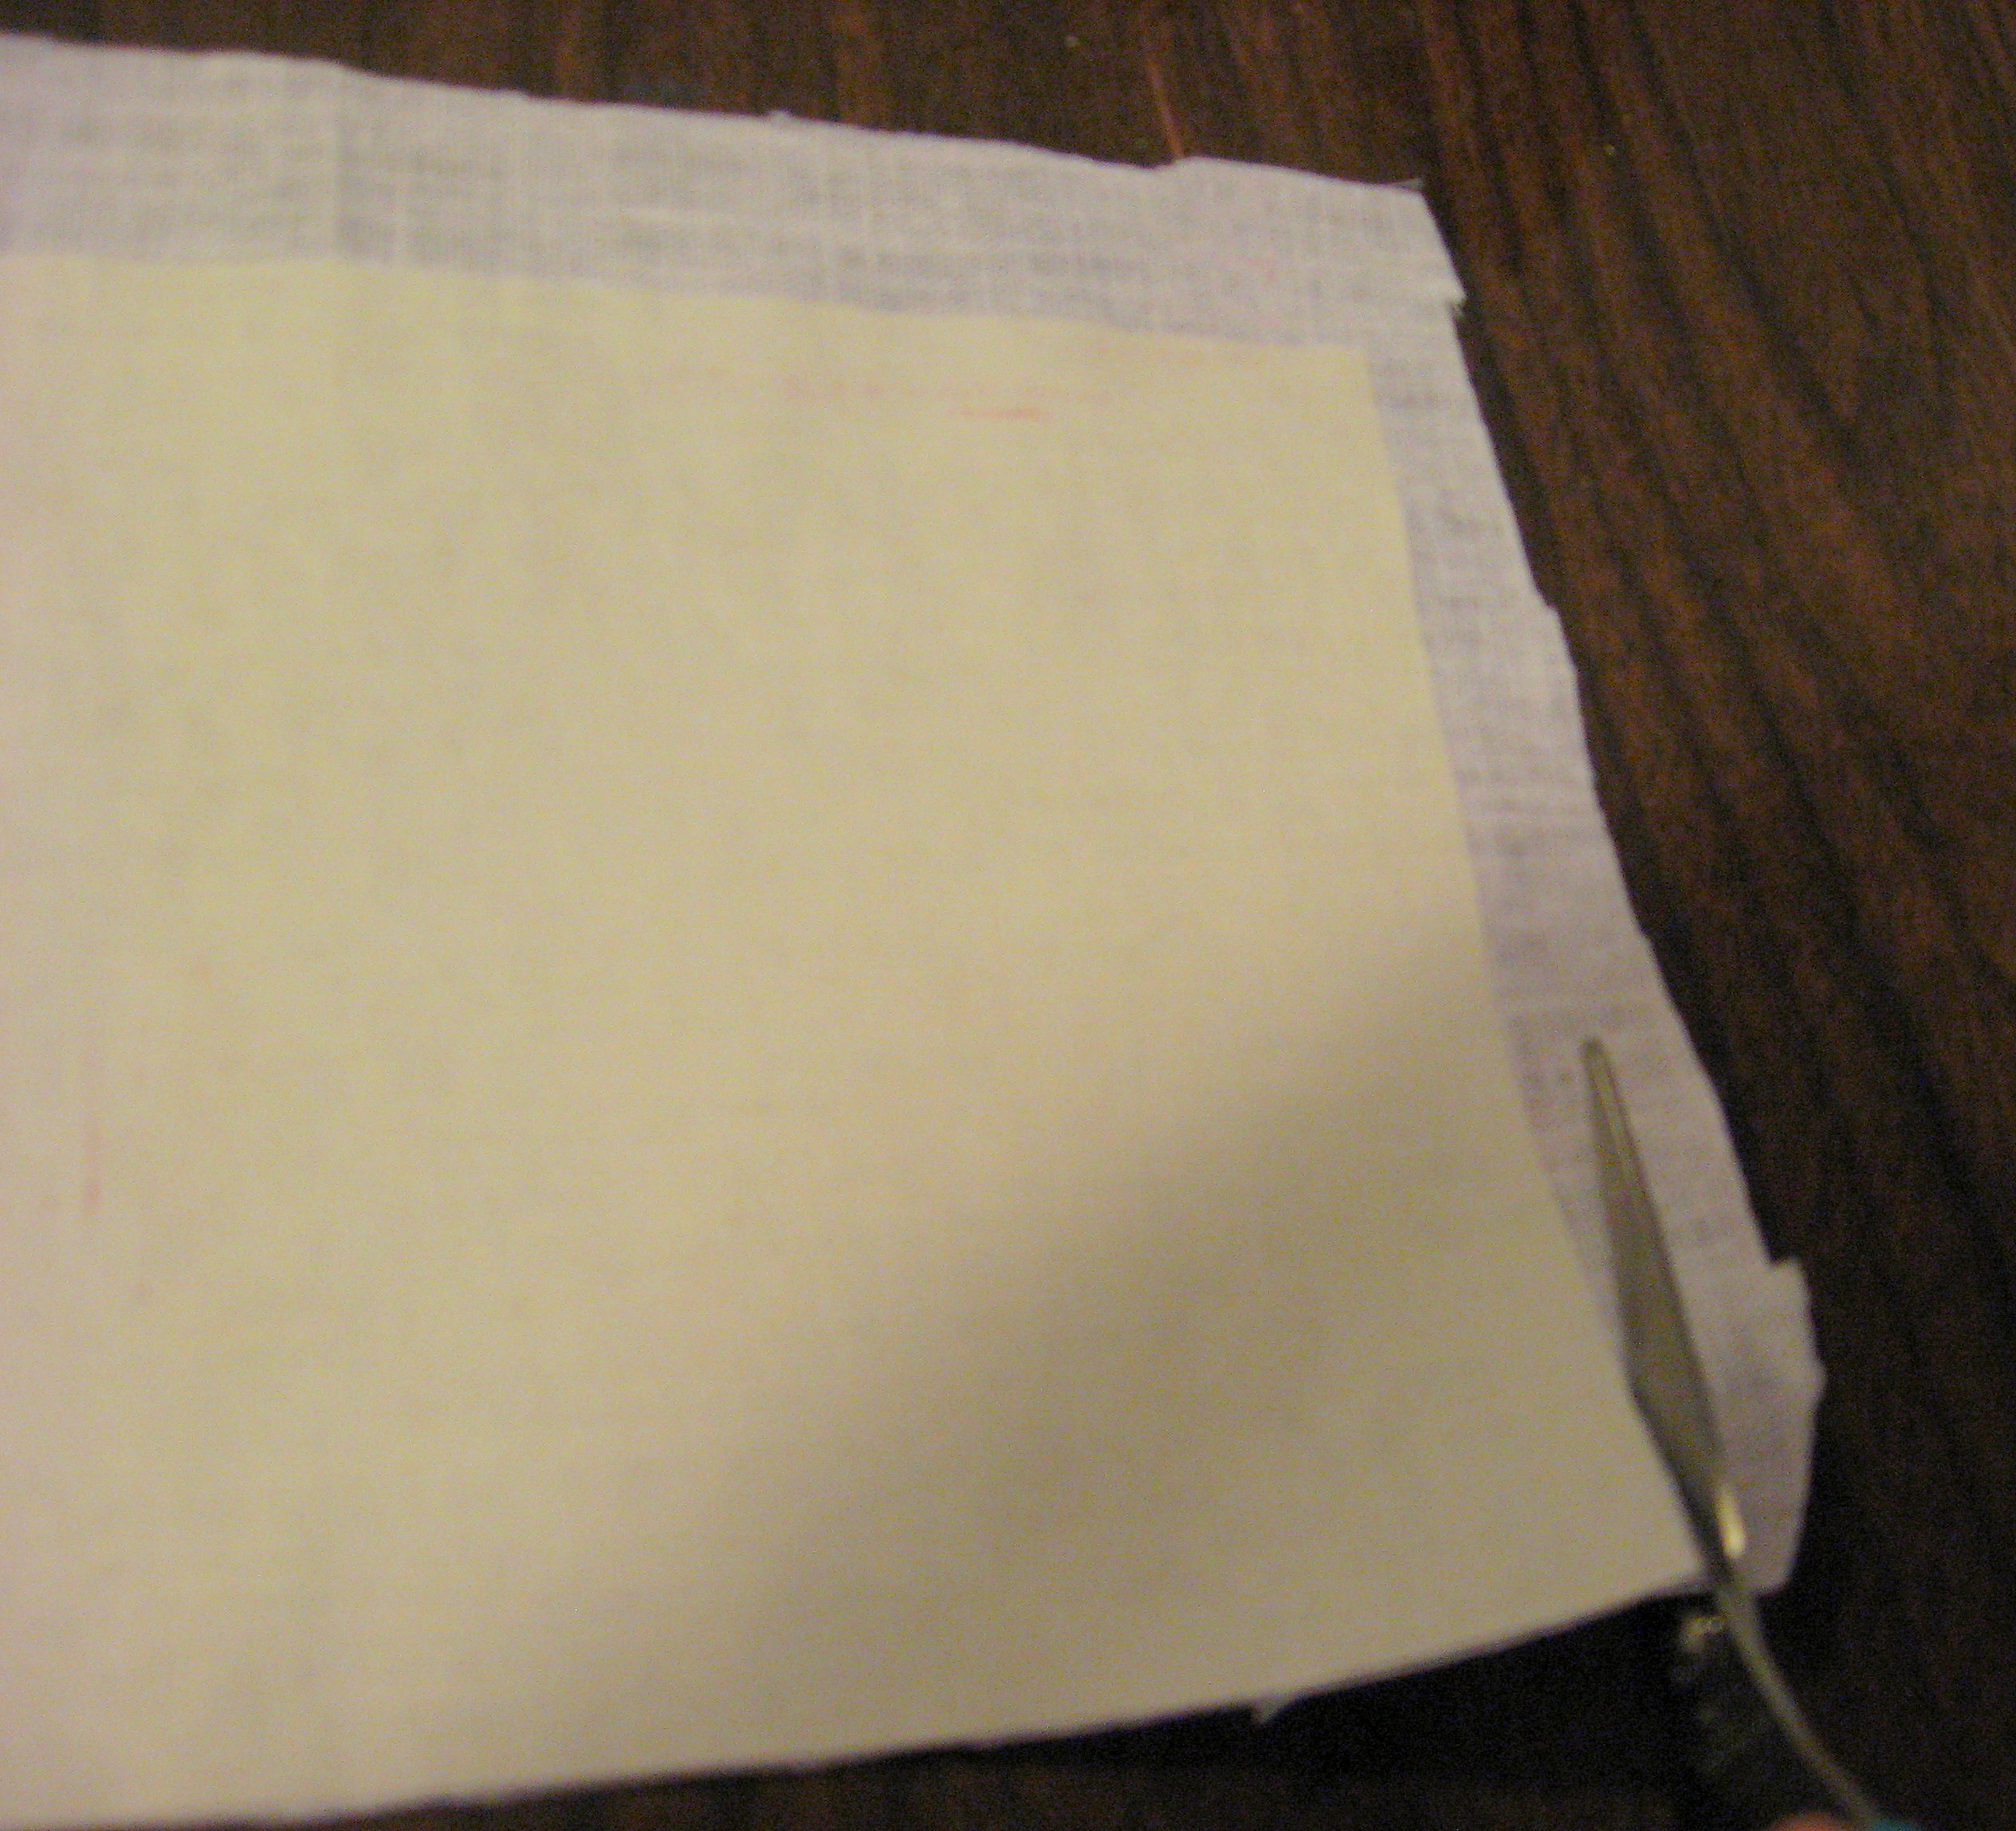
When it’s all cut out, iron it one more time to make sure it is good and stuck. Let it cool completely before you handle it.
Now you have a piece of paper/fabric that will be sturdy enough to go through your printer. Feed it into your printer just like you would a piece of paper, loading it so that the image will print on the fabric. Most printers have a diagram that shows you which way to put it in, but if you’ve never done this on your printer, I recommend doing a test print on a piece of paper first to make sure you’ve got it right (not that I speak from experience or anything…)
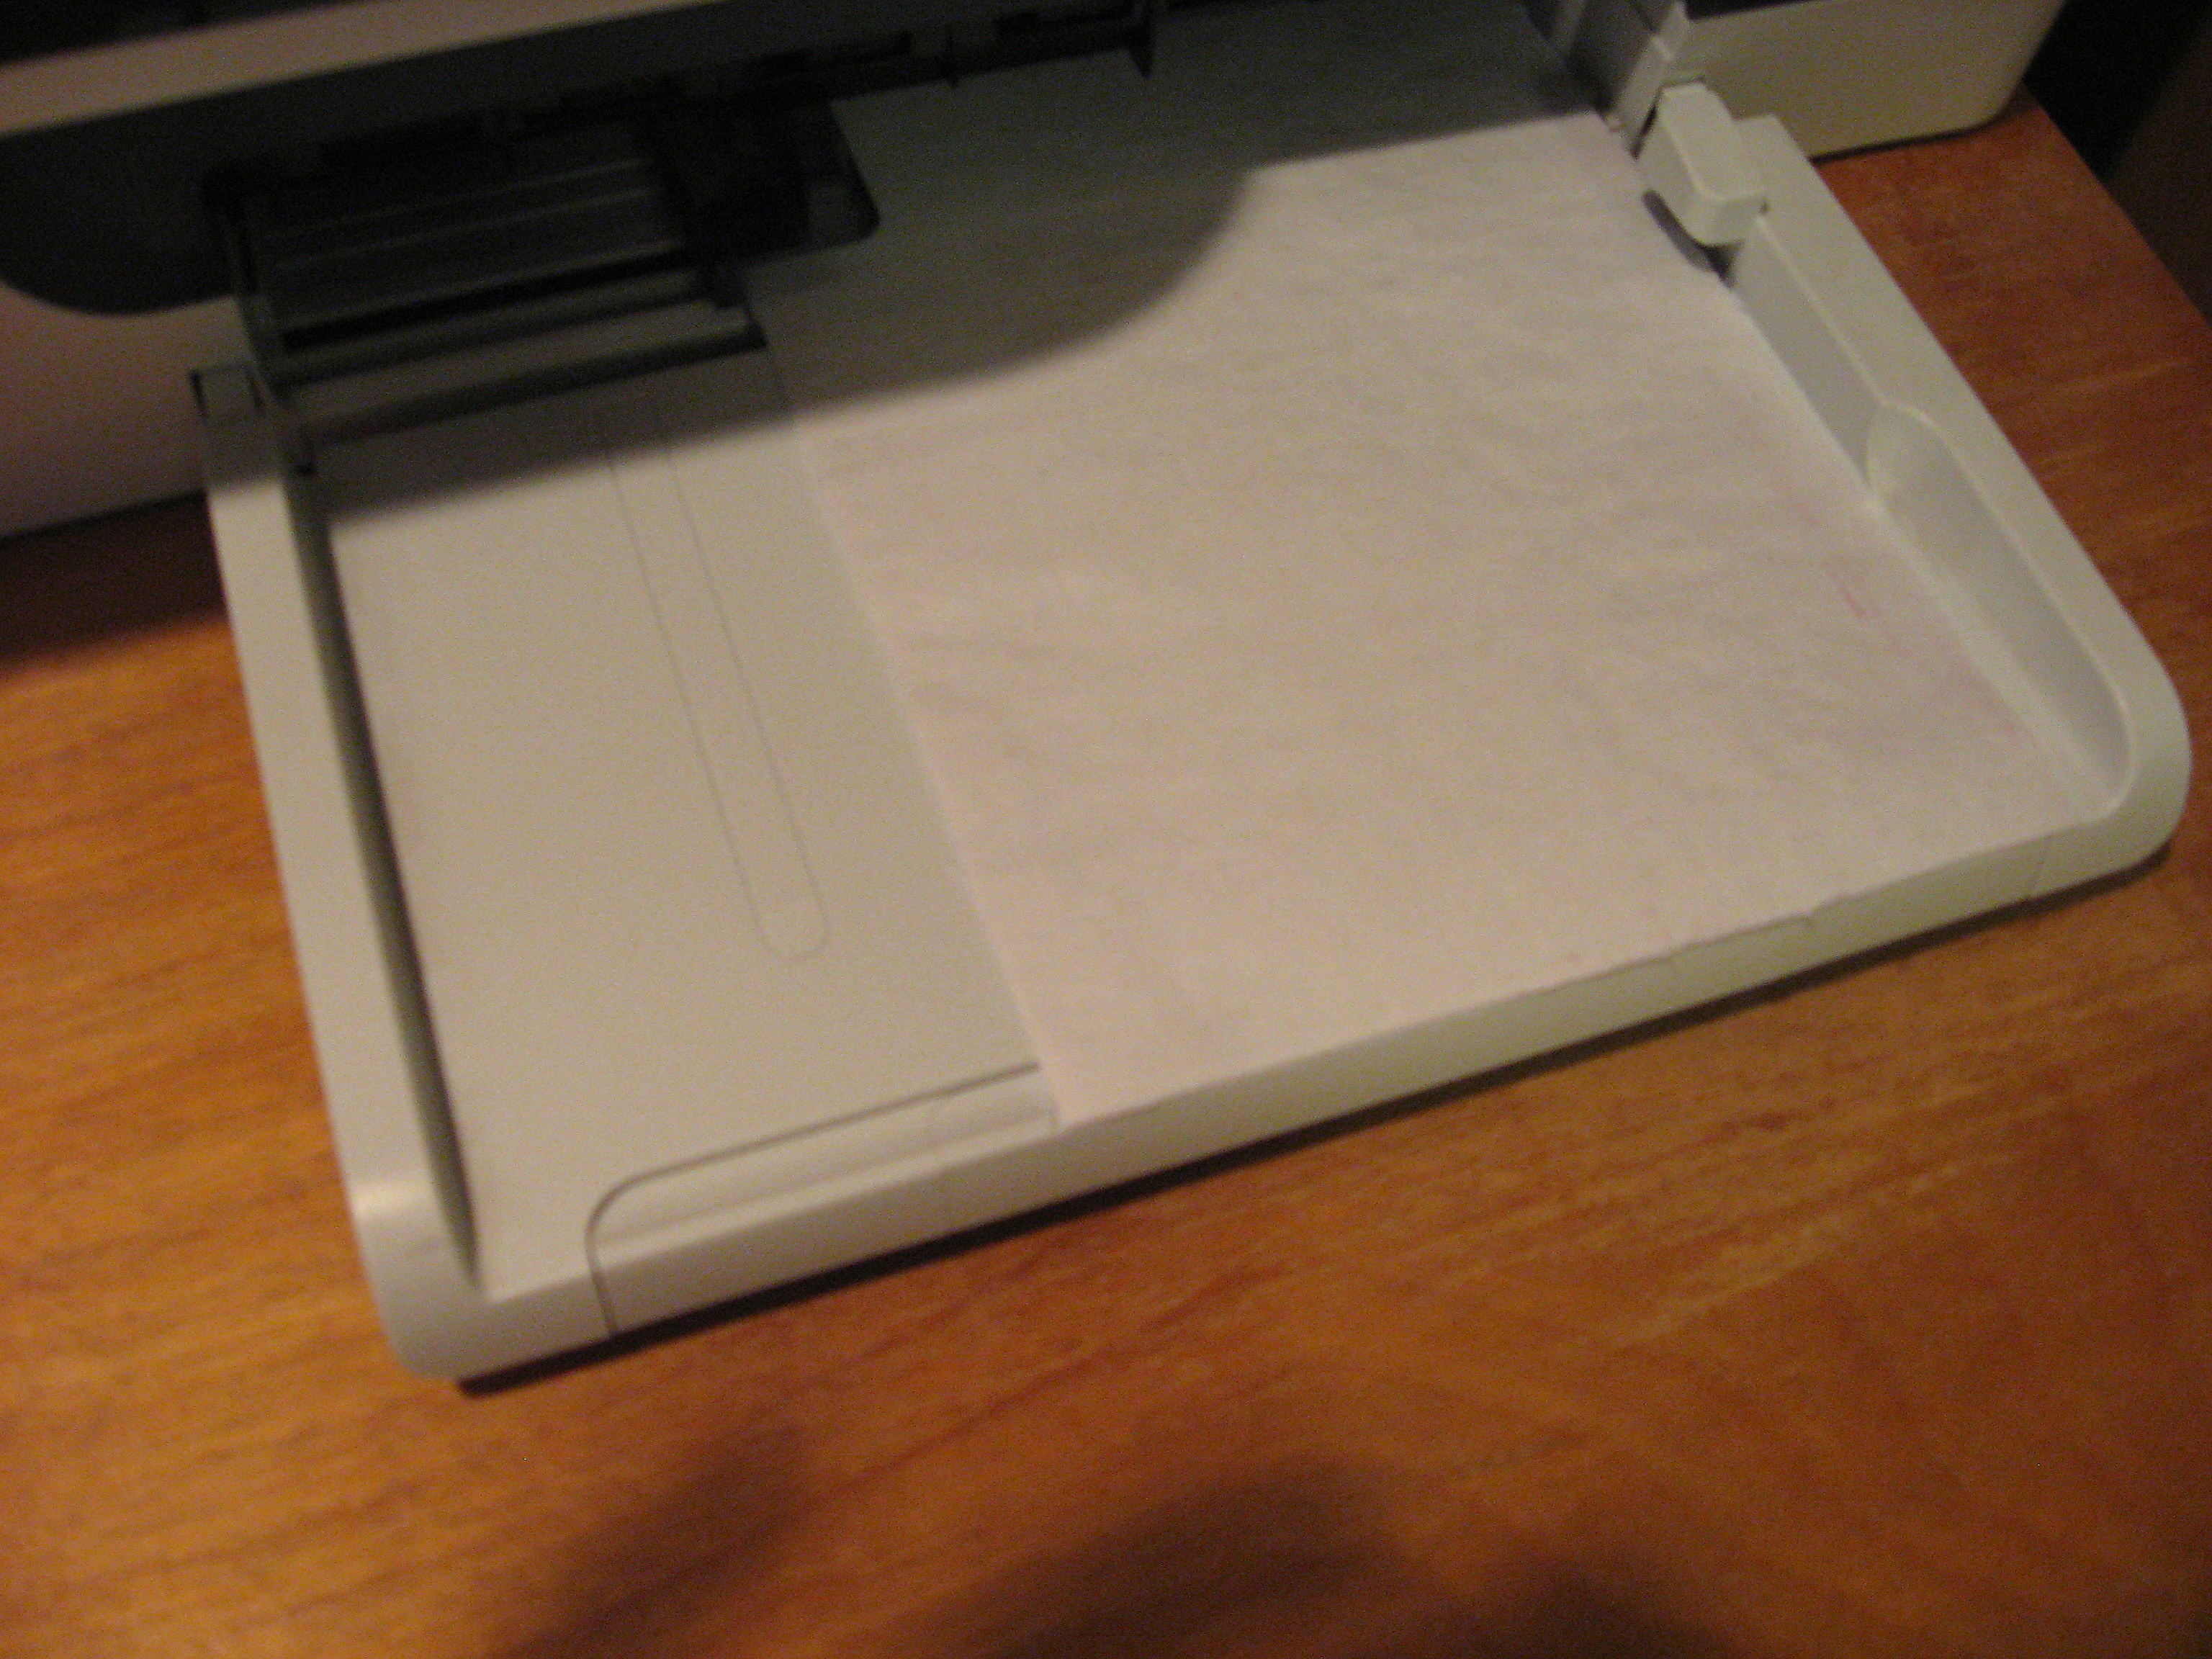
Now print and be amazed!
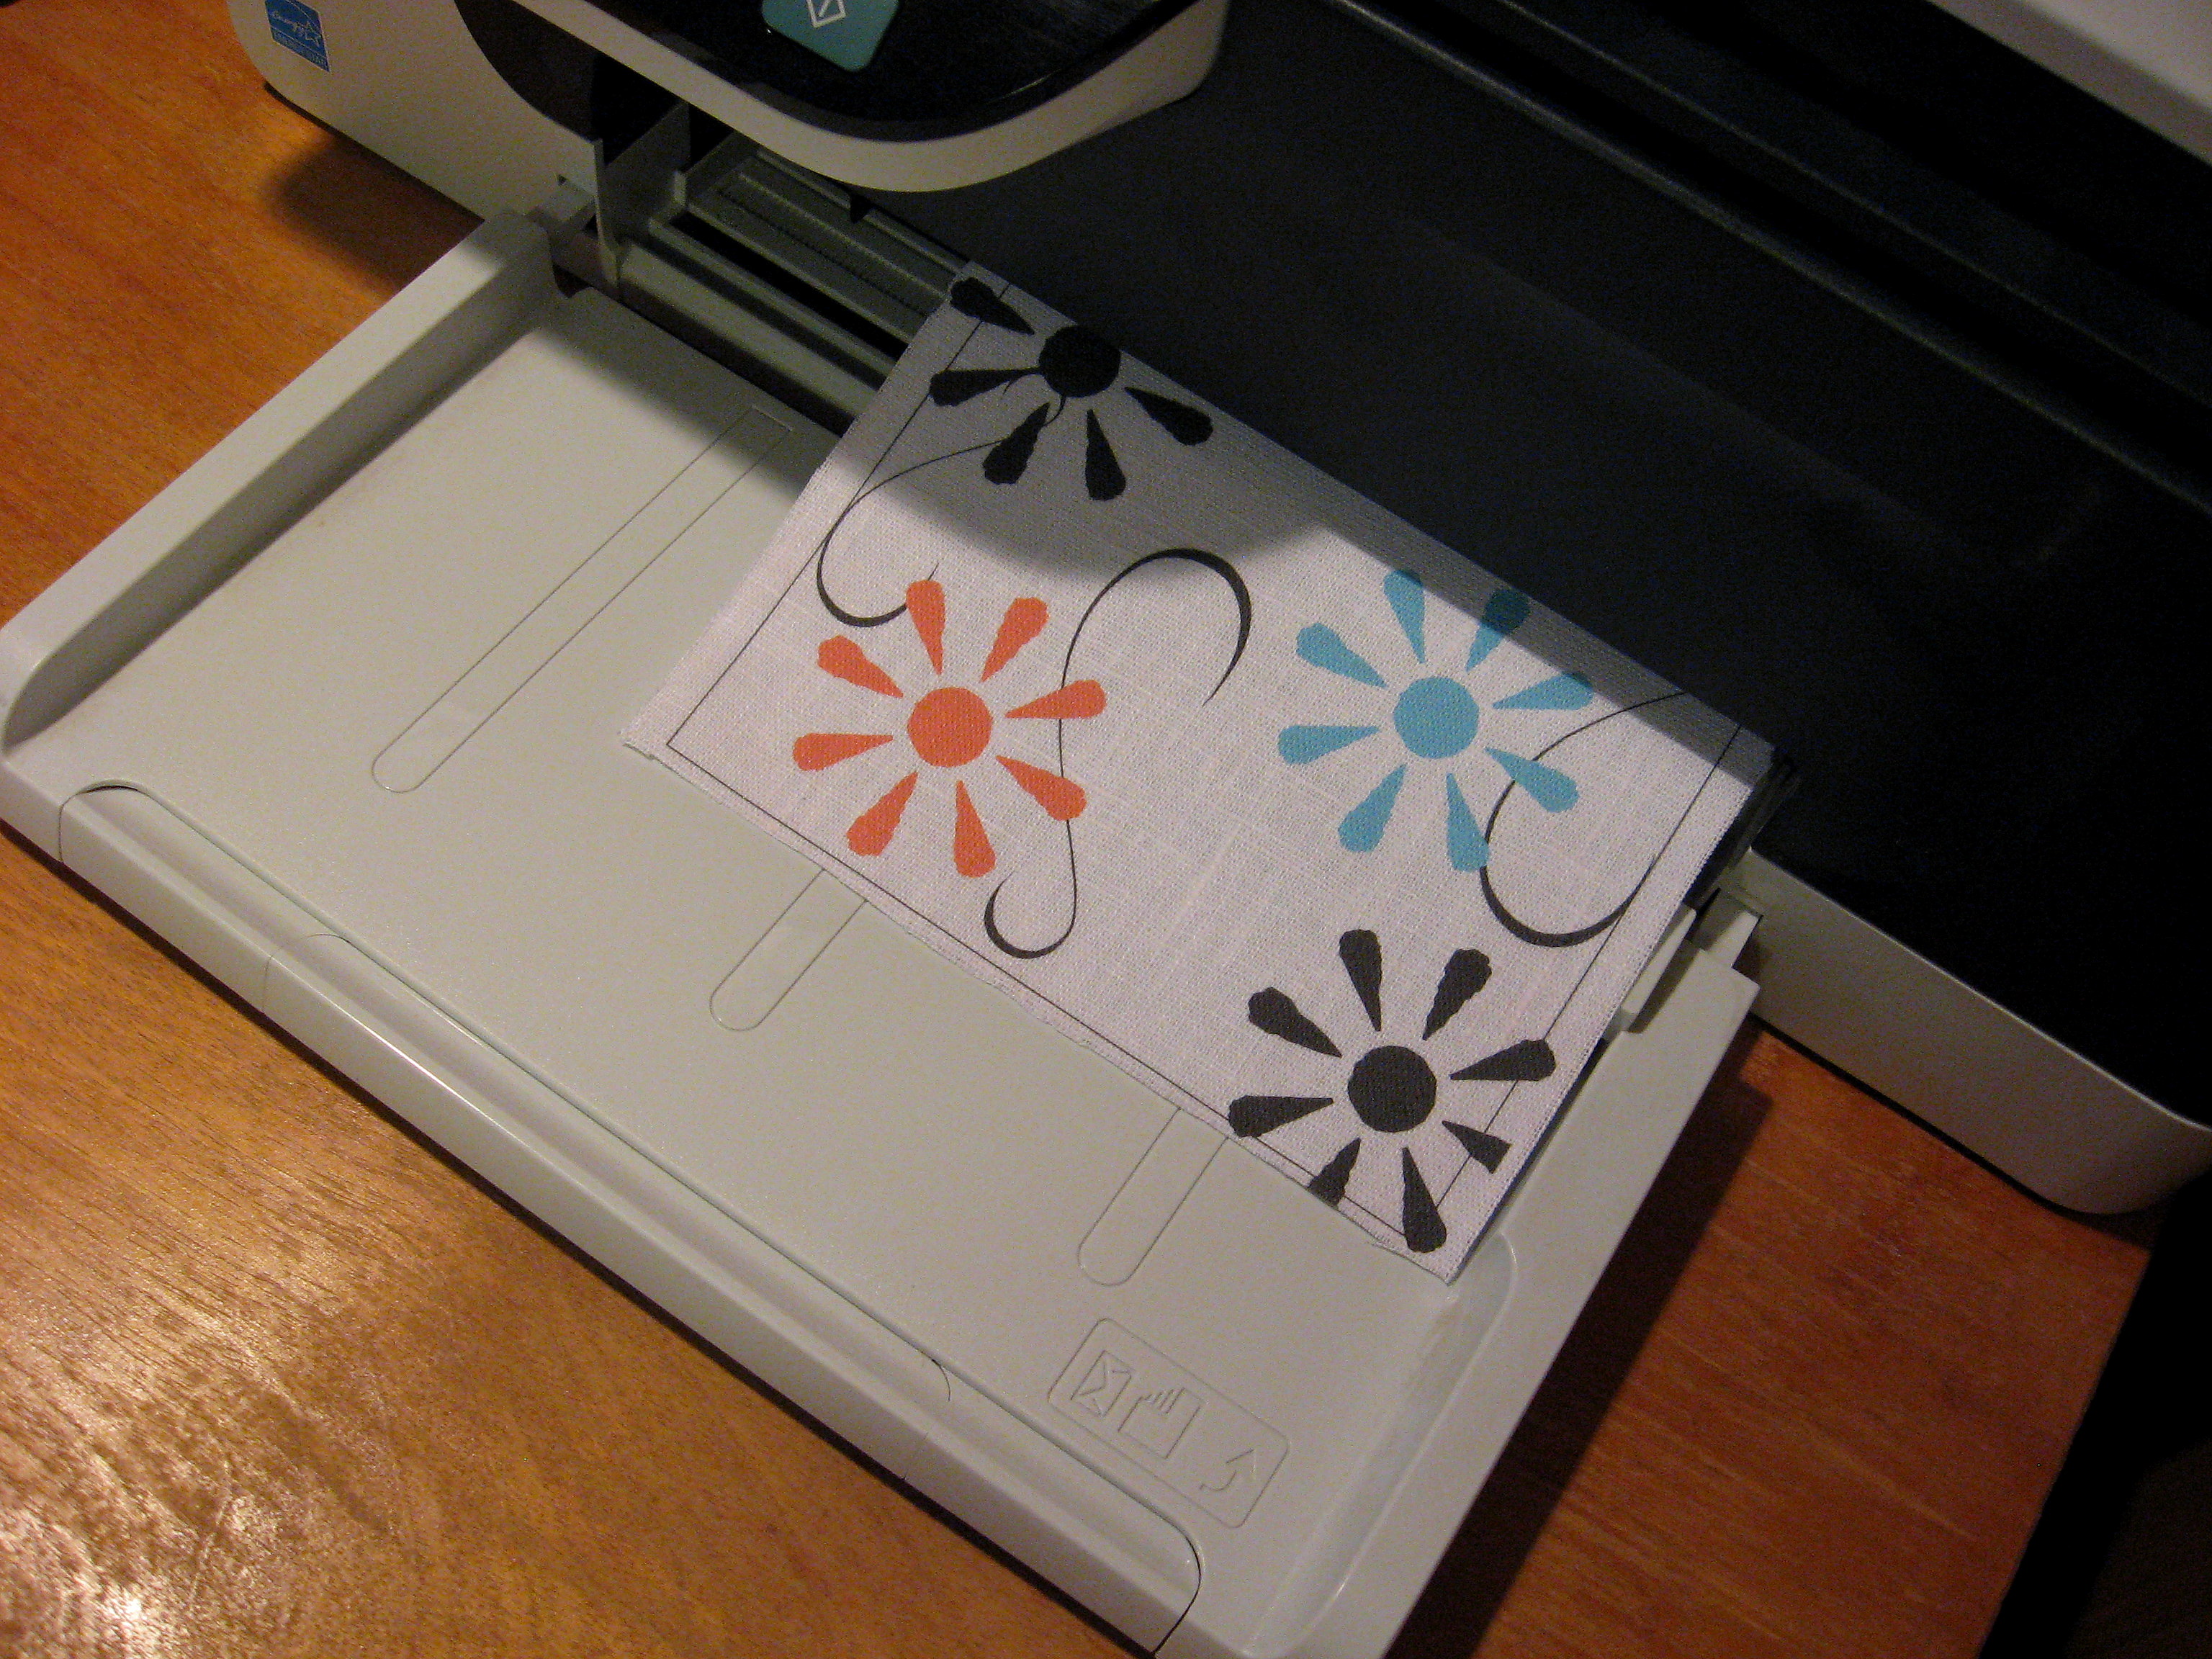
Pull the freezer paper off the back of the fabric, and your custom-designed fabric is ready to use in your project.
Stay tuned to see what I’m going to do with this one!
Here’s another finished project where I printed on burlap and then just spray glued it onto a wood shape.
What will you do with your printed fabric?
Chocolate Chip Pumpkin Pancakes
I mentioned on facebook that I make really good pancakes, and so many people asked for the recipe that I thought I’d share it here, too. I had used the same recipe for years…just the one out of the Better Homes and Gardens cook book but when I saw a recipe in a magazine called Perfect Pancakes, I ripped it out and tried it. They were pretty good, but I made a few adjustments and now they really truly are perfect. Enjoy!
Pumpkin Chocolate Chip Pancakes
1 1/2 C. Flour
3 T. Sugar
4 tsp. Baking Powder
1/8 tsp. Salt
Pumpkin Pie Spice (1-2 tsp. to taste)
2 Eggs
1 C. Milk
1/4 C. canned Pumpkin
Mini Milk Chocolate Chips
Stir together flour, sugar, baking powder, salt and Pumpkin pie spice. Separate eggs and whisk yolks in a small bowl with milk and pumpkin.
With an electric mixer, beat egg whites to stiff peaks. Stir pumpkin mixture into flour mixture just until combined; batter will be lumpy. 
Fold in the egg whites, gently, just until no white streaks remain.
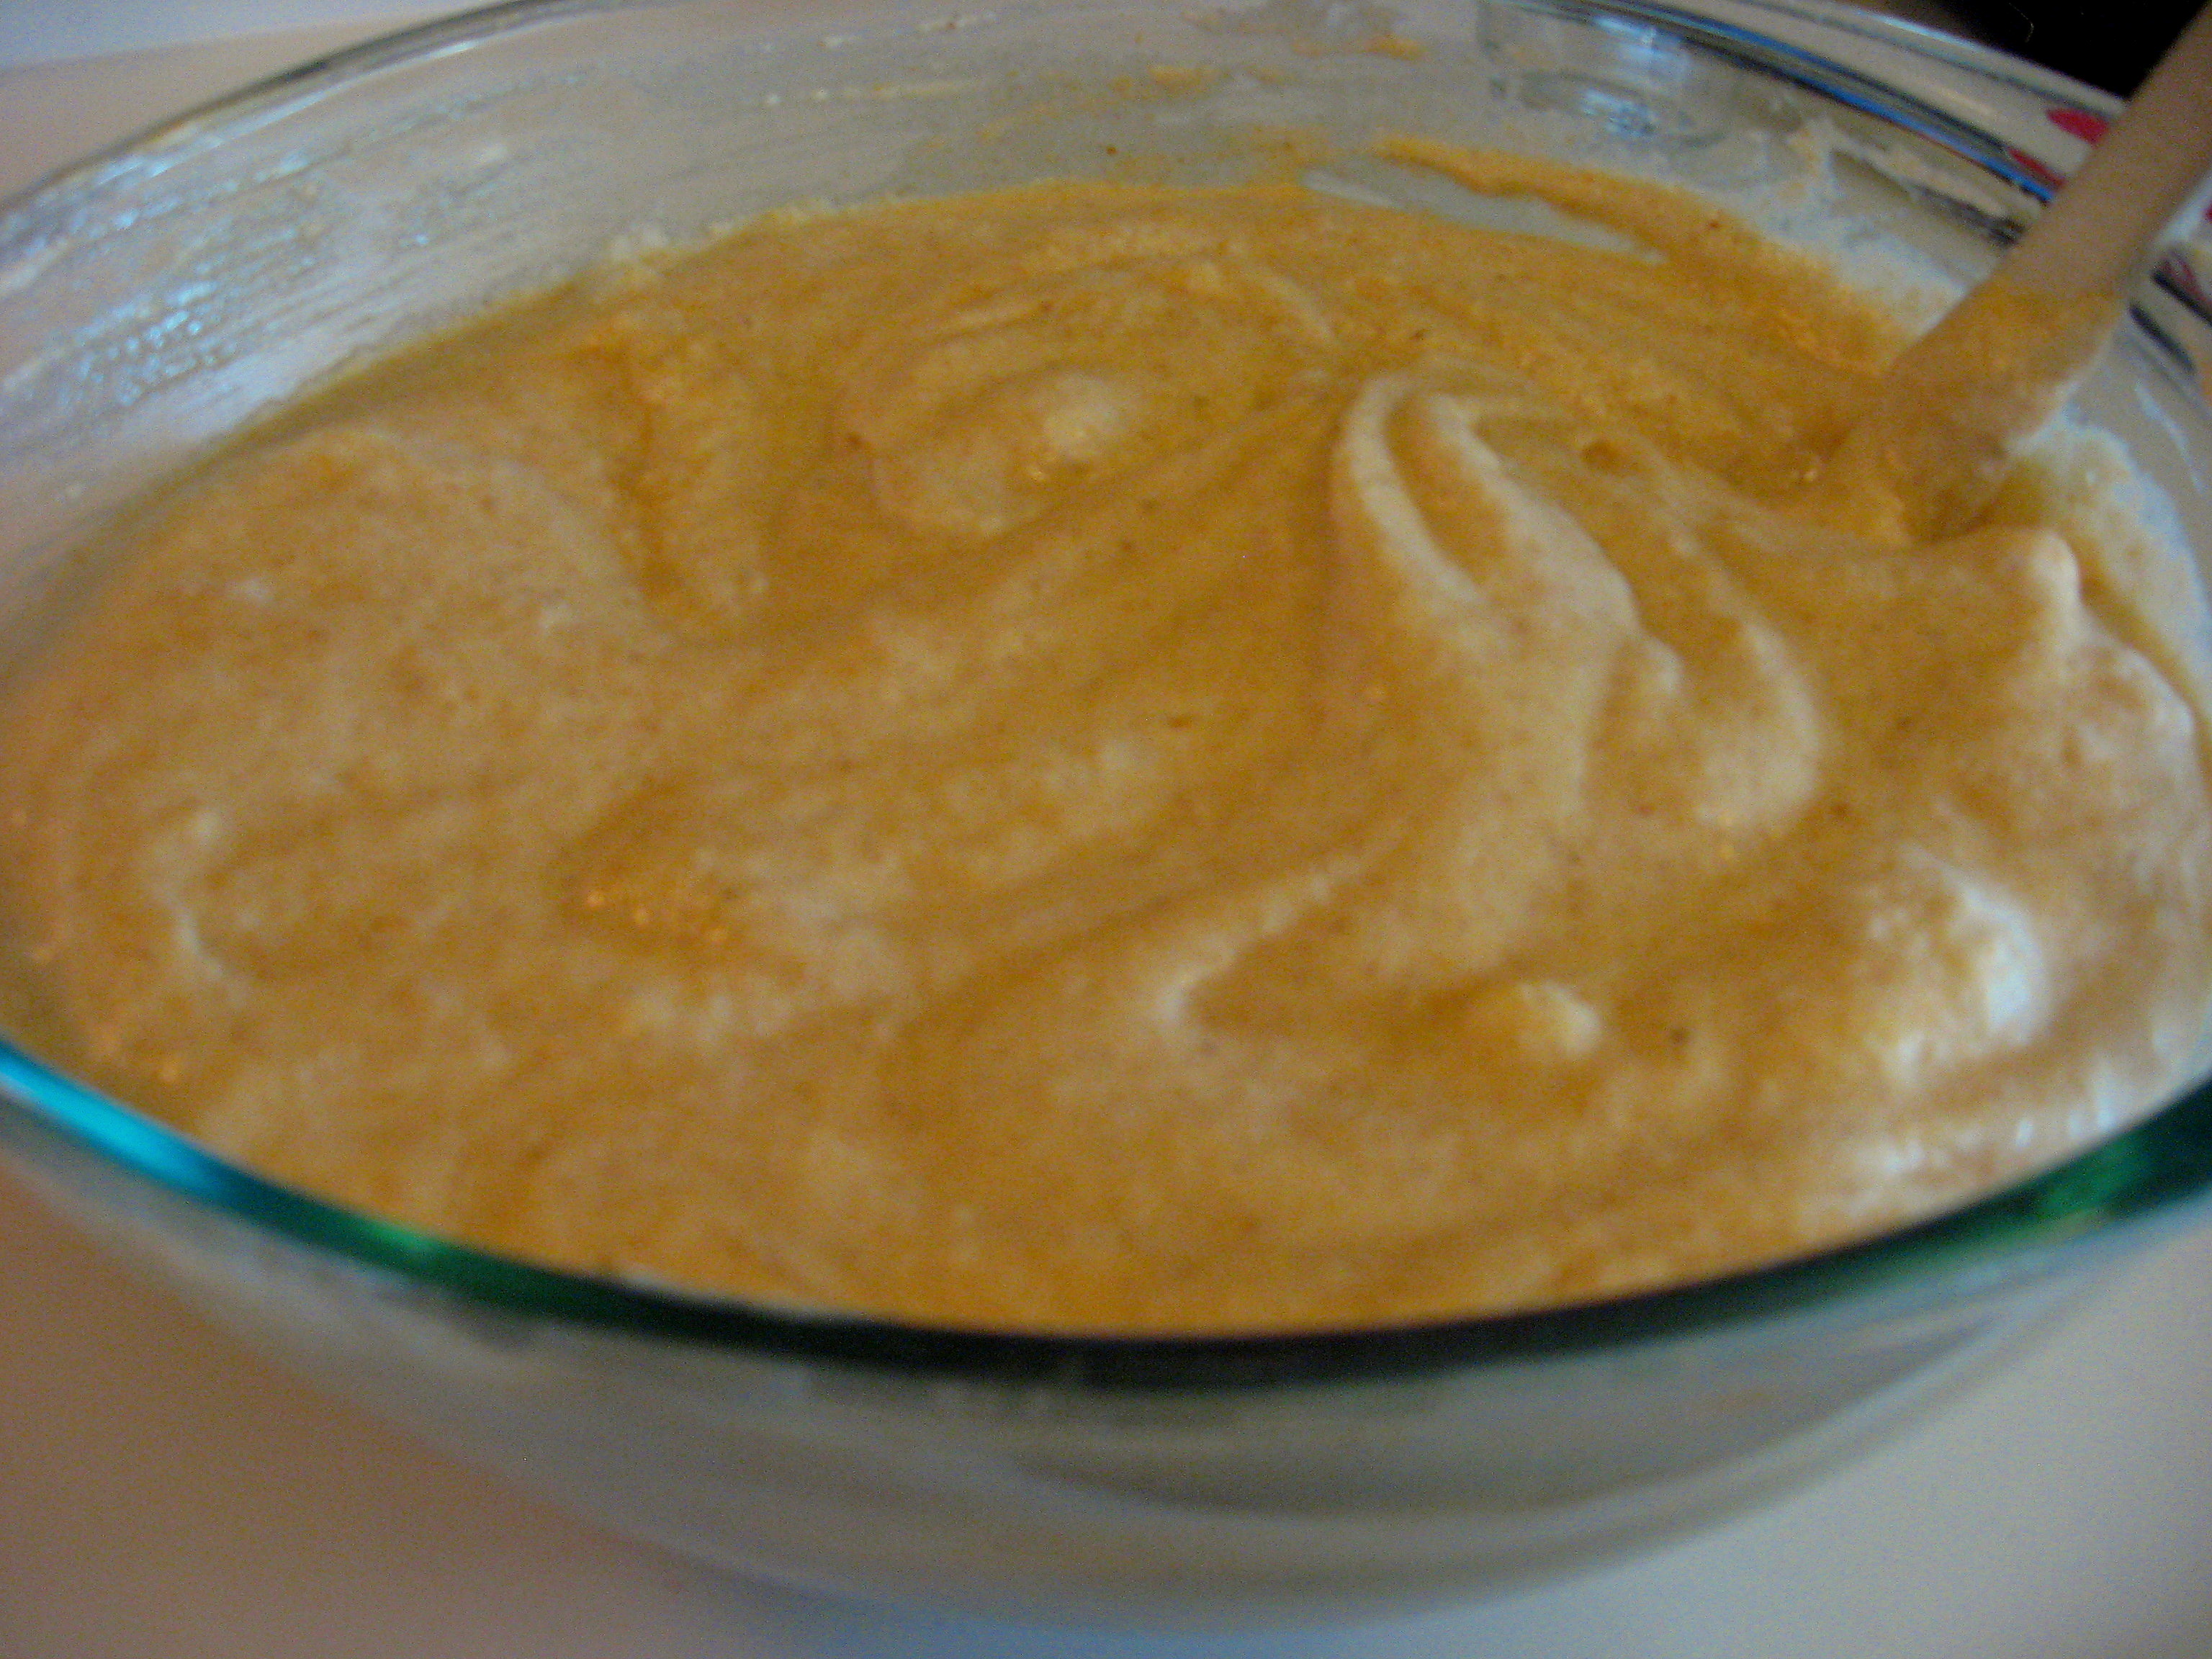
When whites are almost all mixed in, add half a bag of chocolate chips.
Cook…well…you know how to cook a pancake. I use butter flavored Pam so that I don’t need to put butter on the finished pancake. Serve with syrup.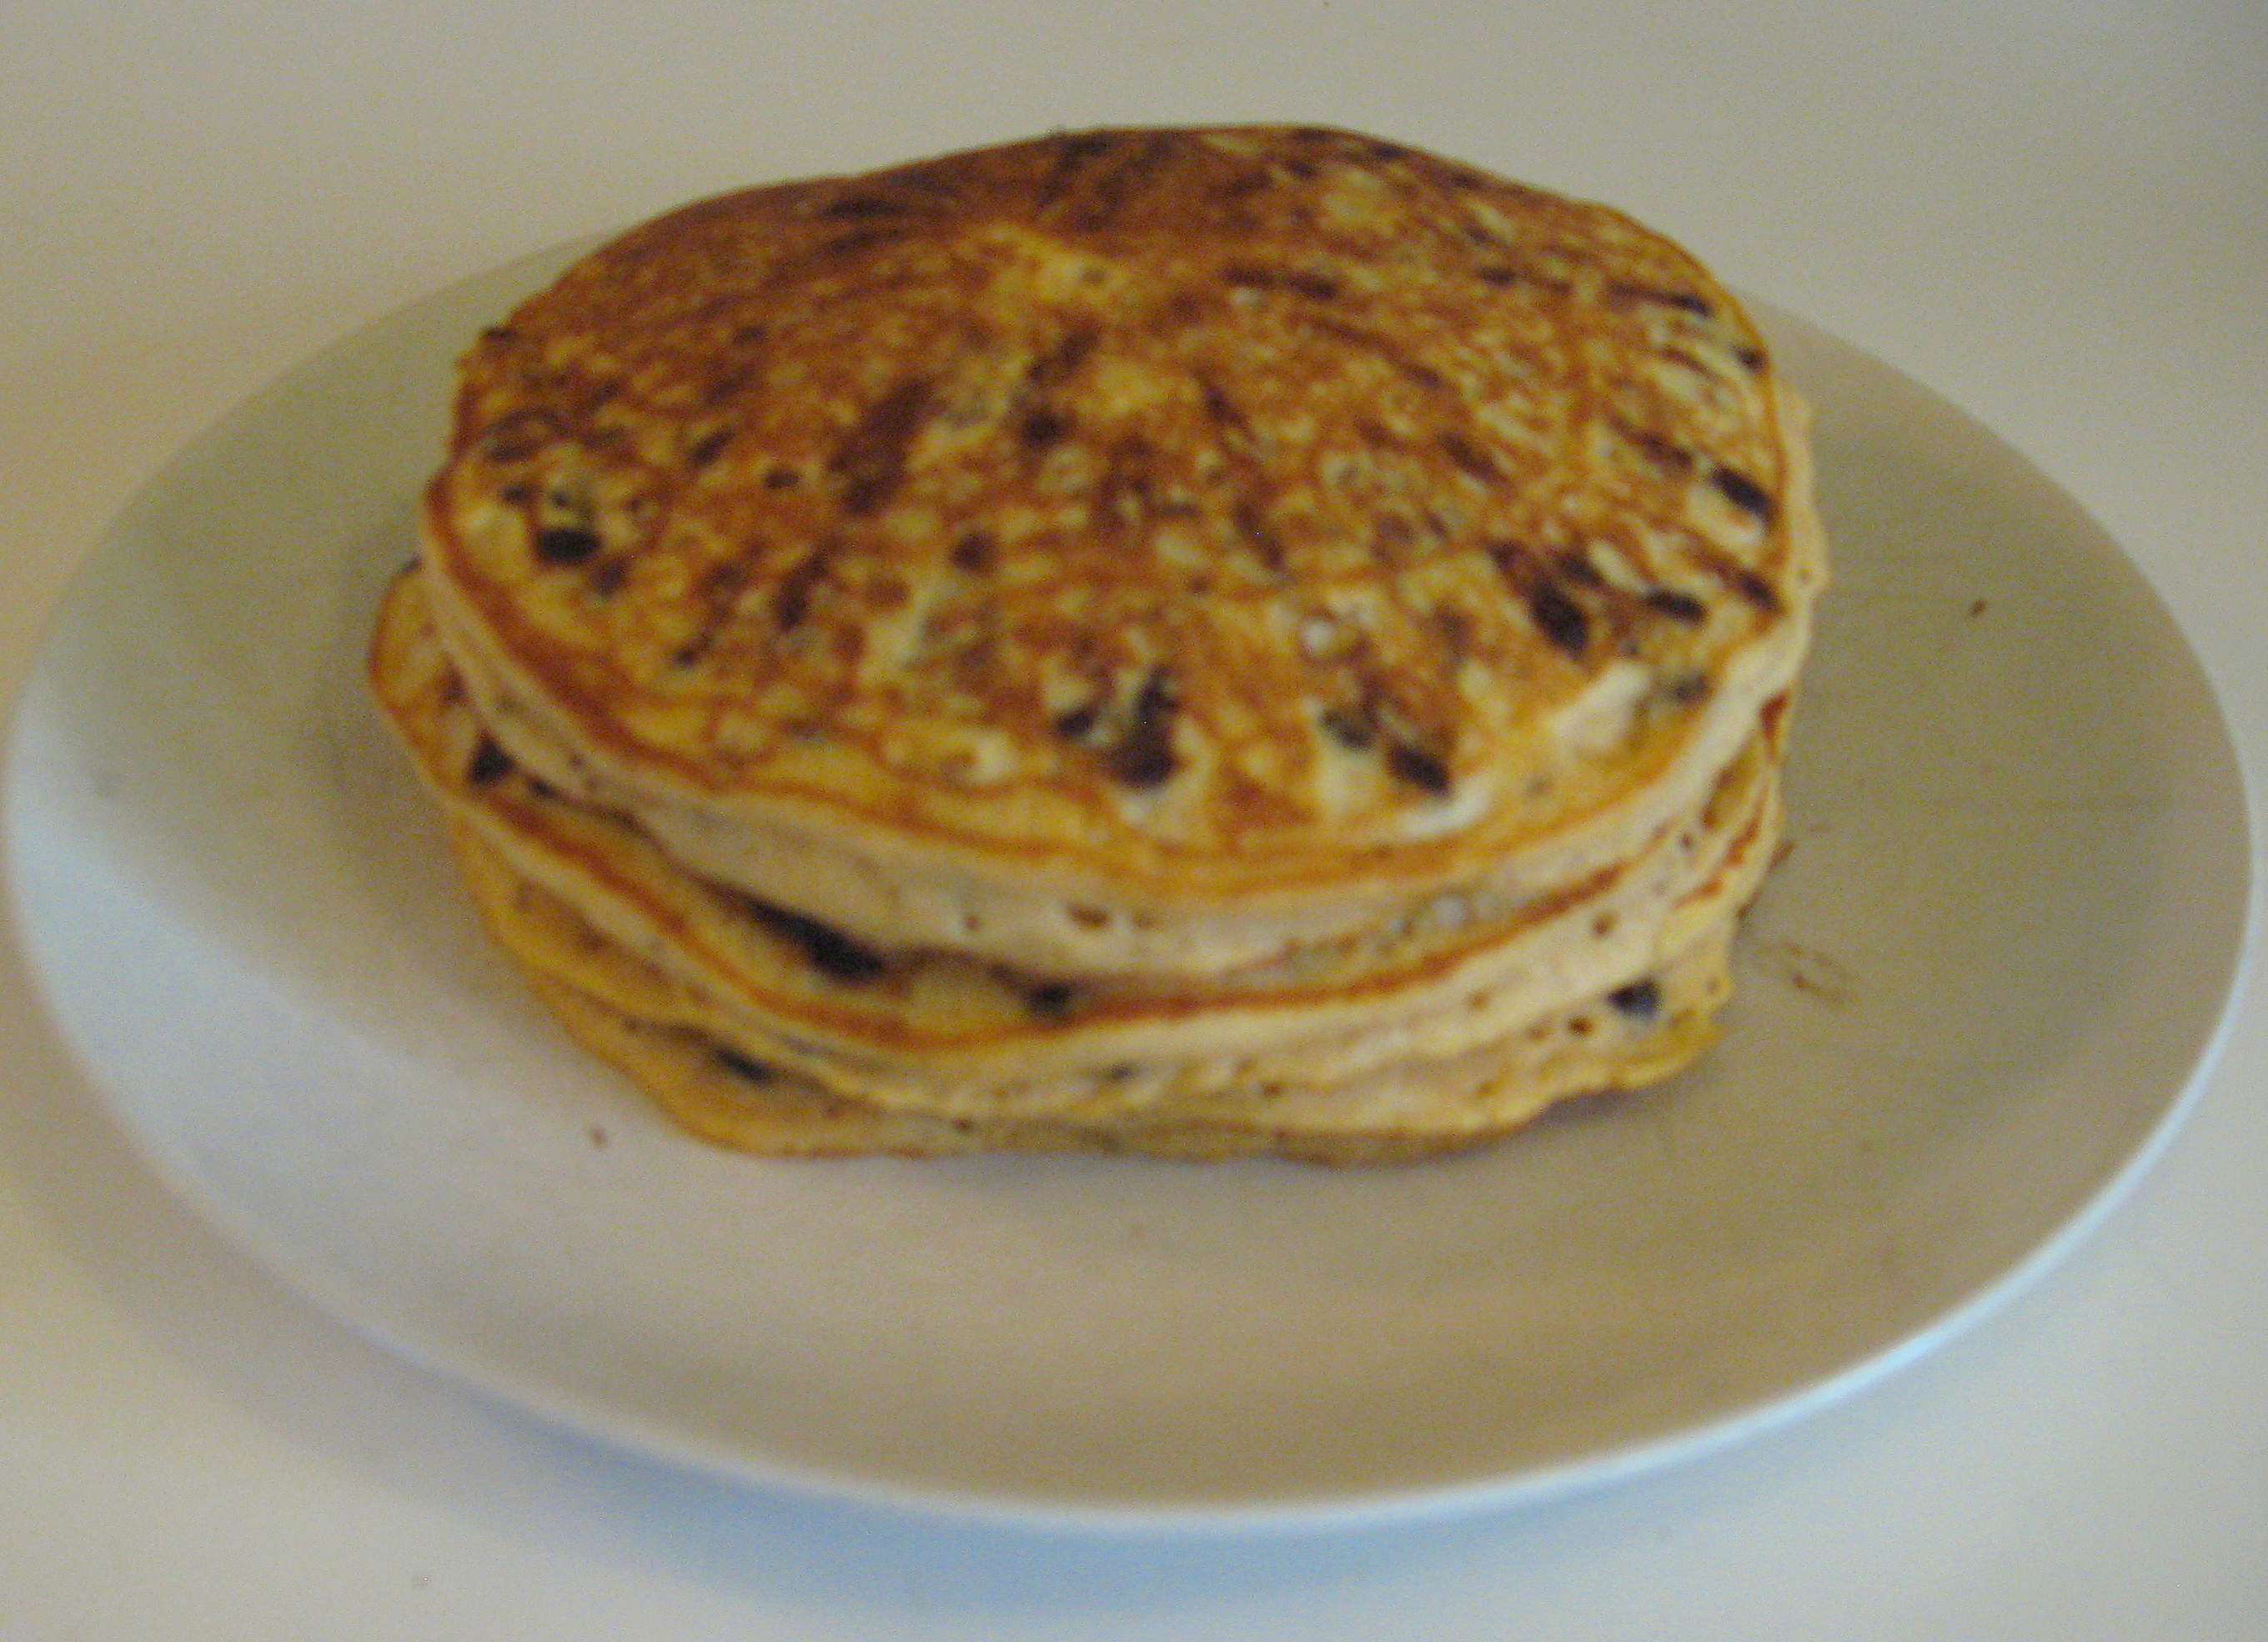
Notes: Using pumpkin in place of oil makes this a better-for-you pancake. I sometimes make it with whole wheat pastry flour to make it even better. It is super yummy with apple slices that have been boiled with a little brown sugar instead of syrup.
I like the mini chocolate chips instead of regular ones, because the regular sized ones tend to sink to the bottom of the batter when you cook them and then they melt and burn when they come in contact with the hot pan. I prefer milk chocolate, but my husband likes semi-sweet. They are also pretty good with butterscotch.
These pancakes are light and fluffy; if you like a denser pancake, add the whole egg in with the milk and skip the egg white part; they’re still yummy that way.
Miracle “Homemade” Hand Cream
Winters are just BRUTAL on the skin, and by this time of year my fingertips are usually cracking and bleeding like crazy. Walmart used to carry a store brand version of Eucerin that was $3.xx for a huge jar and it worked like a dream, but when I went in this year to get some the price has gone up to almost $10! That’s quite a price change, WM!
So, I ran across this tutorial on Pinterest a few months ago and decided for the cost involved, I might as well give it a try. I’ve been using it now since January, and I’m not only hooked, but I have a band of hand cream groupies that swear by it as well! No cracking or bleeding on my fingertips, and my hands are so smooth and hydrated looking that I’ve actually had strangers comment on them. The best part? Couldn’t be easier to “make”.
Ingredients:
16 oz. baby lotion
8 oz. Vaseline
8 oz. Vitamin E Cream
I bought the WM brand baby lotion, WM brand petroleum jelly and a Vitamin E cream that comes in a 2 pack in the lotion aisle at WM. Don’t worry too much about the exact ounces listed in the recipe; just buy the ingredients closest to the size you need and go with it.
Put it all in a large bowl, whip it well with your electric mixer and that’s it! It makes a ton…I put the finished lotion back in the empty petroleum jelly jar, the empty vitamin E jars, plus the extra plastic tub you see below.
 When you apply it, a little goes a long way, so it lasts a long time. It is a tiny bit greasy, so I use it a lot at night before bed, or in the morning as I’m headed out the door before I put my gloves on and by the time I get to where I’m going, it’s perfect. I even use it on my face around my eyes and mouth and my husband swears I have less wrinkles…bonus!
The baby lotion smell has been very popular with my family and friends, but I’ve also used the name brand cocoa butter scent and it is just heavenly.
Canning Jar Soap Dispenser
Here is the “before” of my kitchen sink. Clearly, room for improvement!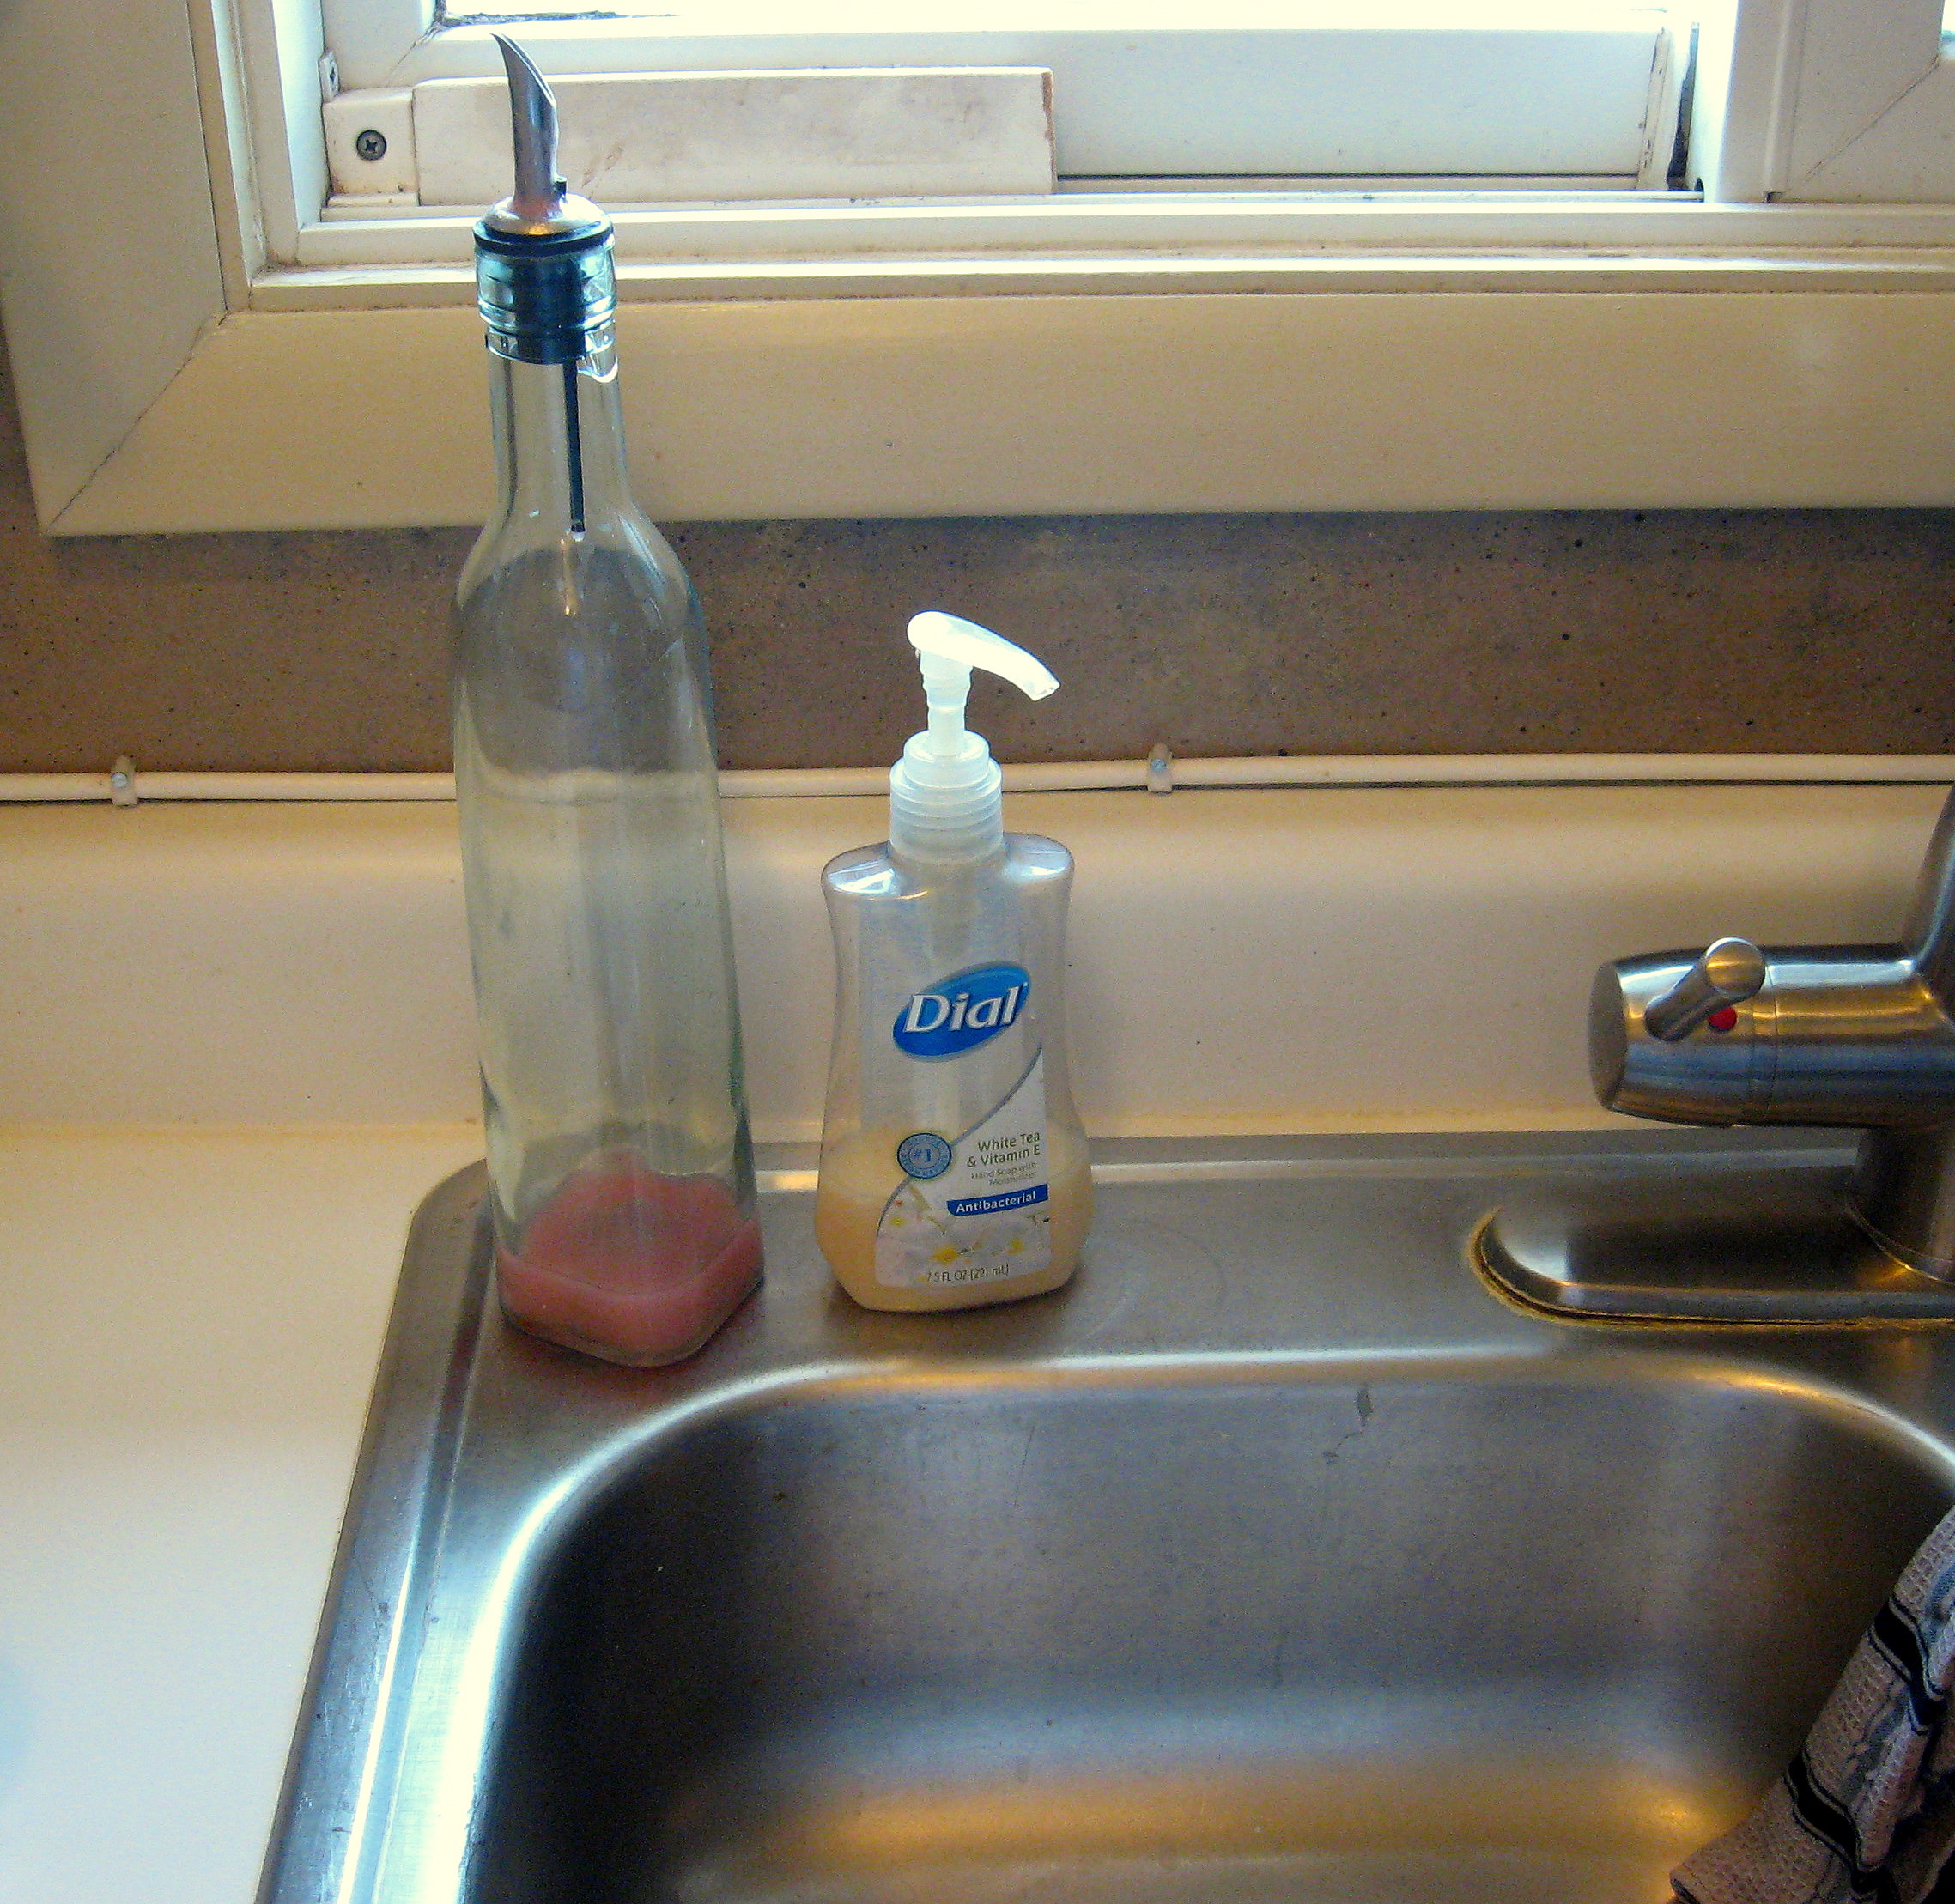
If you spend much time on the internet, you’ve likely the soap dispensers made out of canning jars, and if you’re like me, you’ve imagined them sitting beside your sink, looking just as cute in your home as they do on Pinterest. Soap pump and lid kits are available and ready to screw onto any jar. They’re adorable and not too expensive; if you want to go with that option, I recommend Etsy.com.
But, being both impatient (shipping takes too long!) and cheap (free is always better!) I decided to see if I could make my own, using materials I already had around my house.
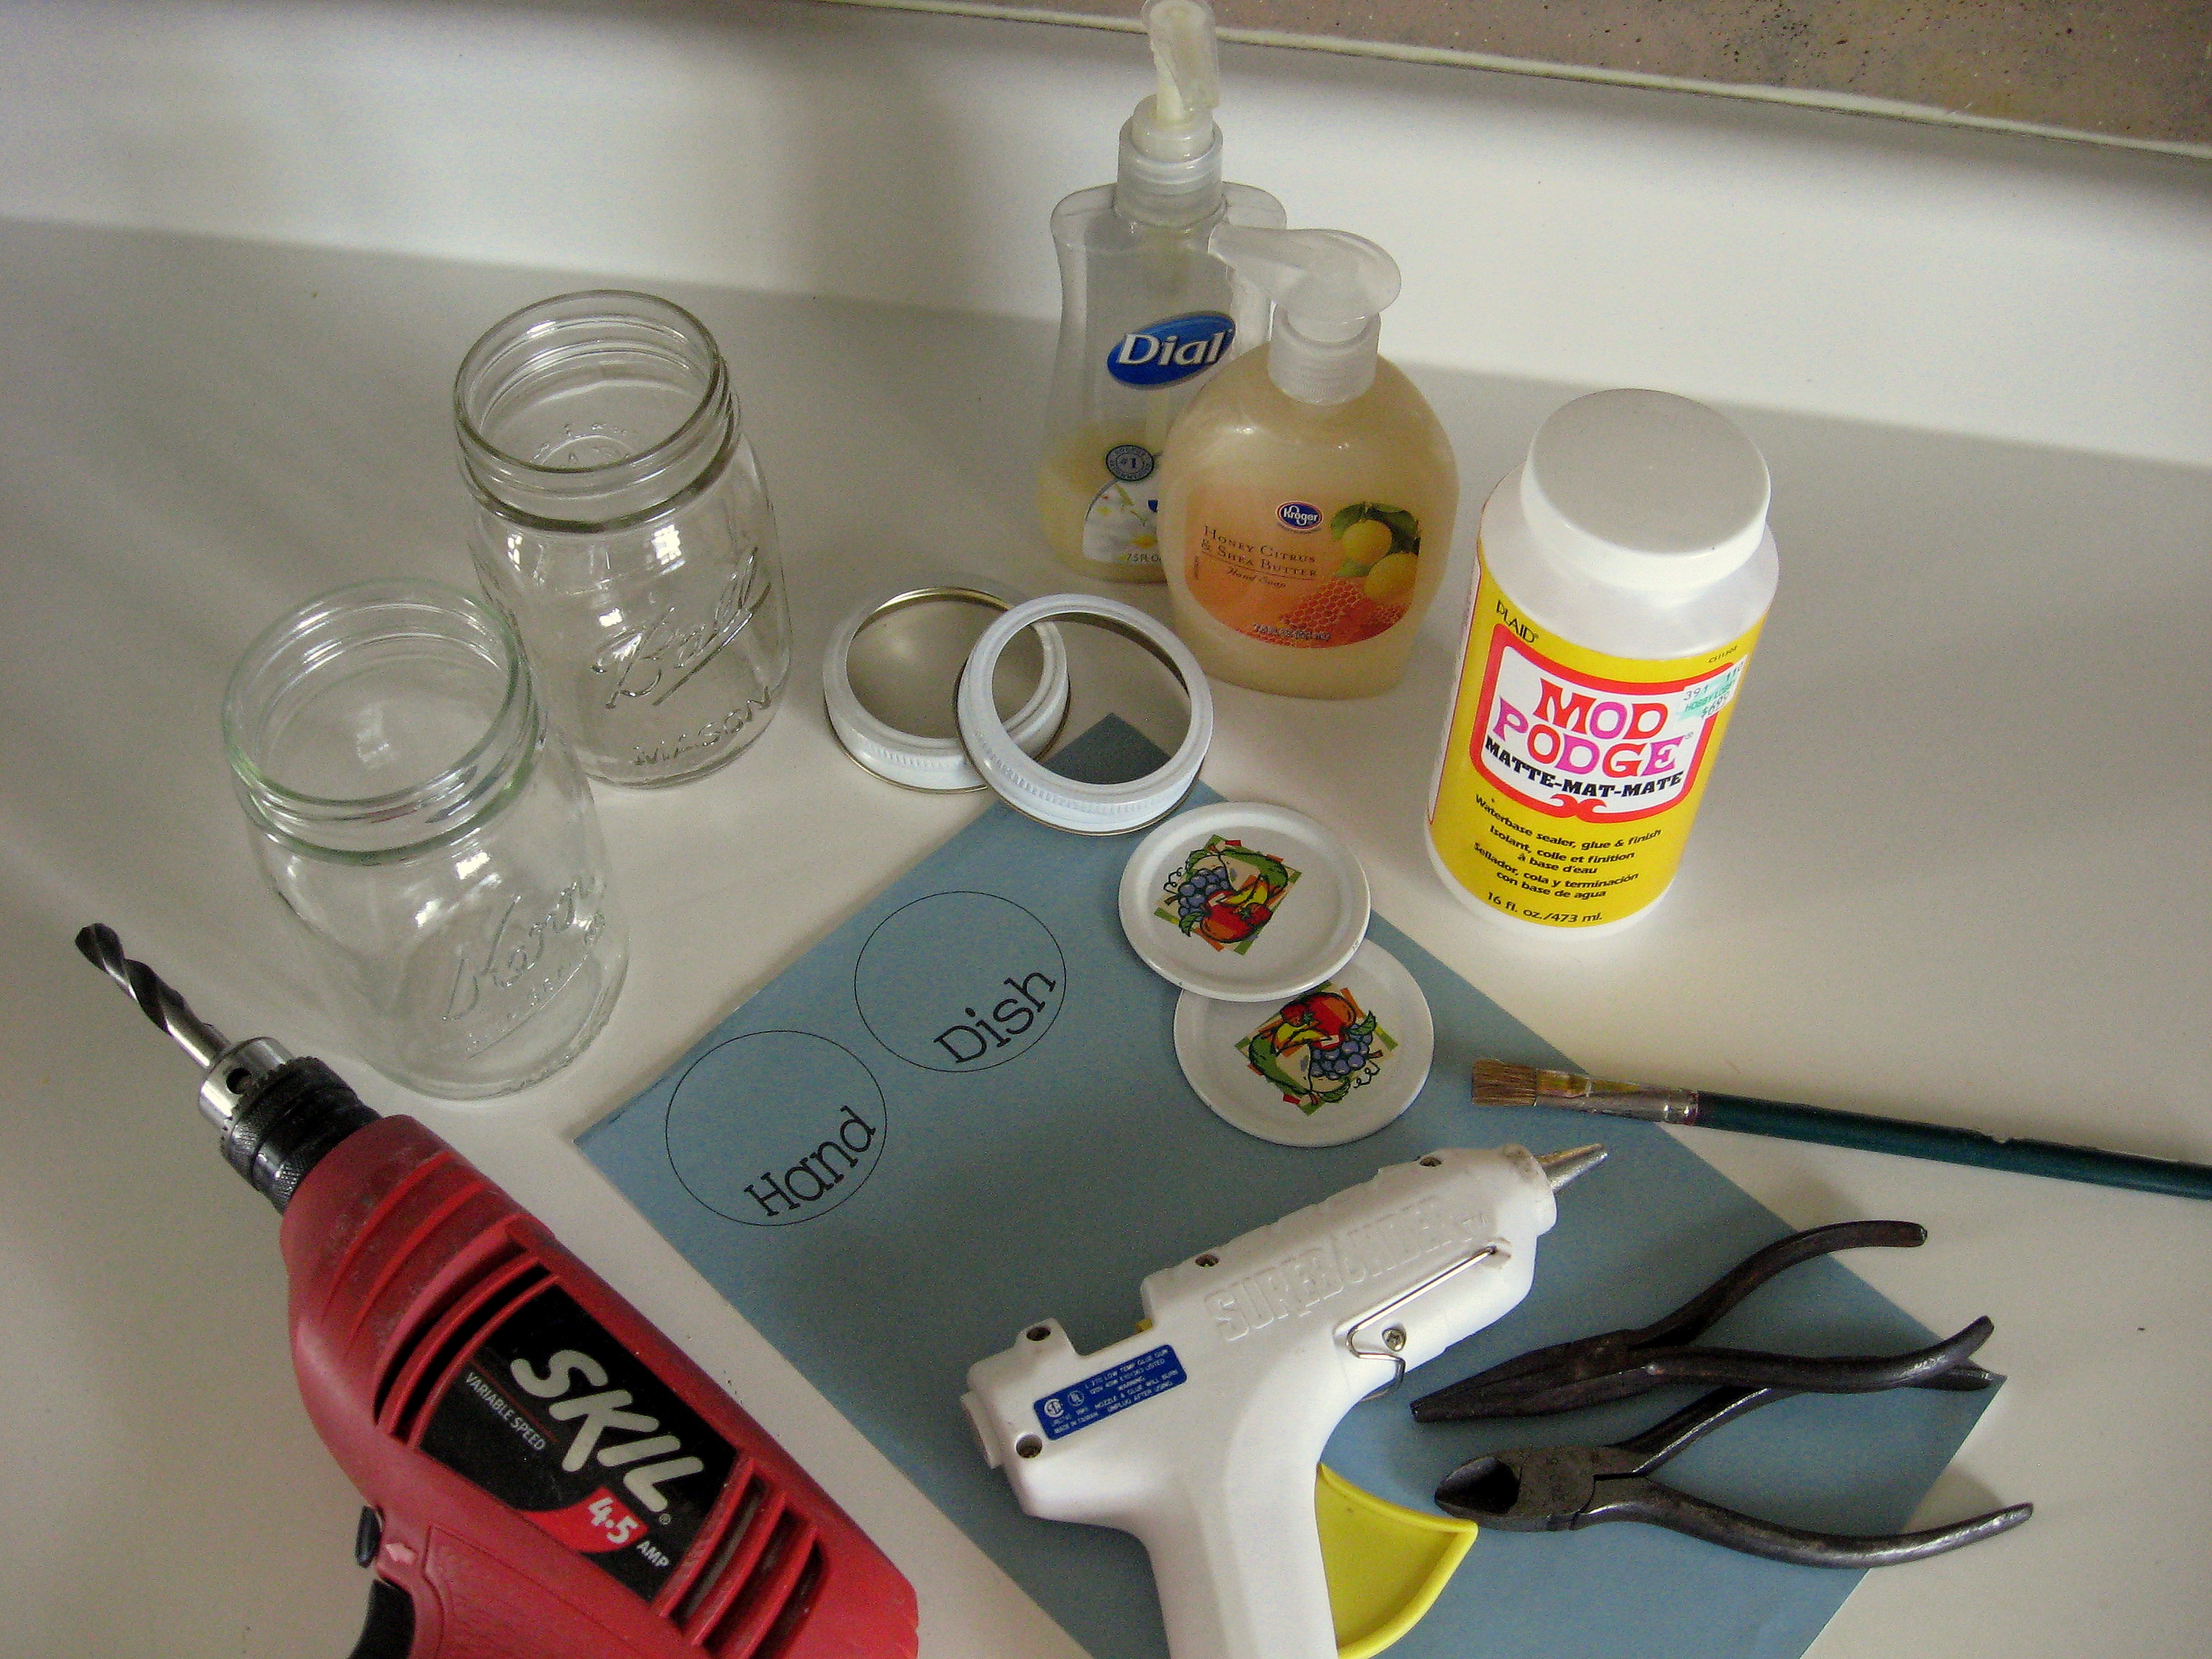
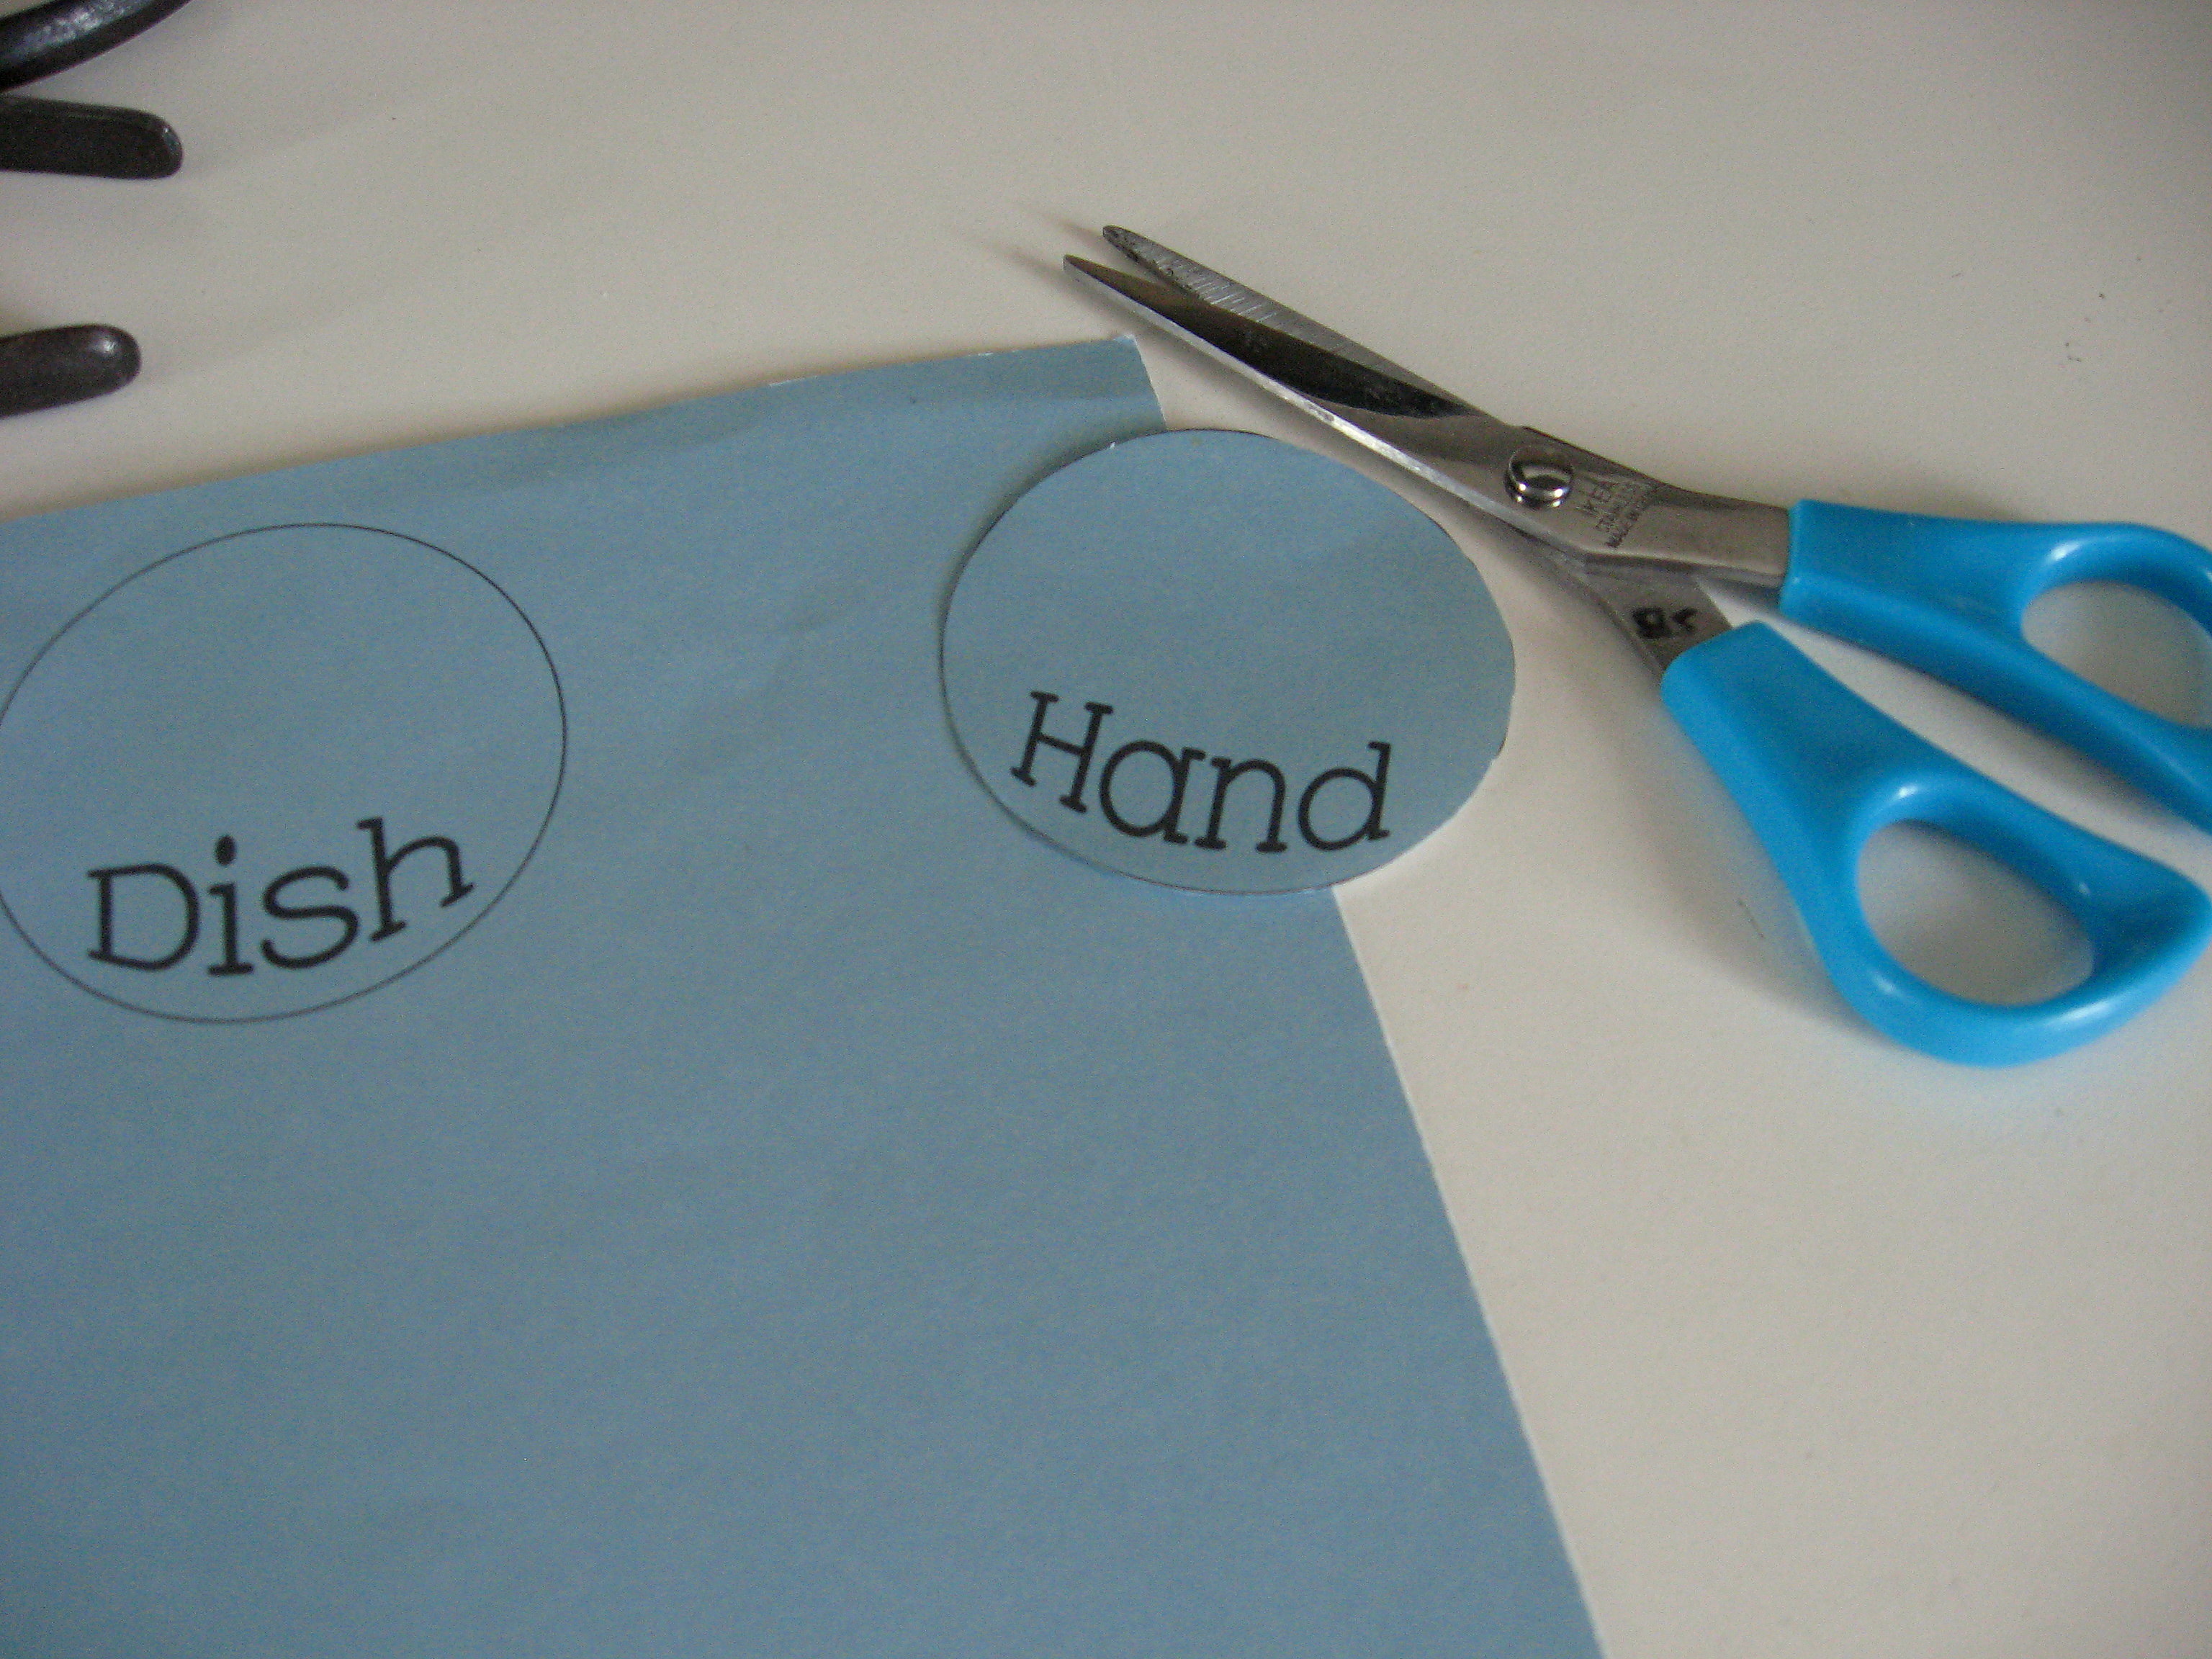
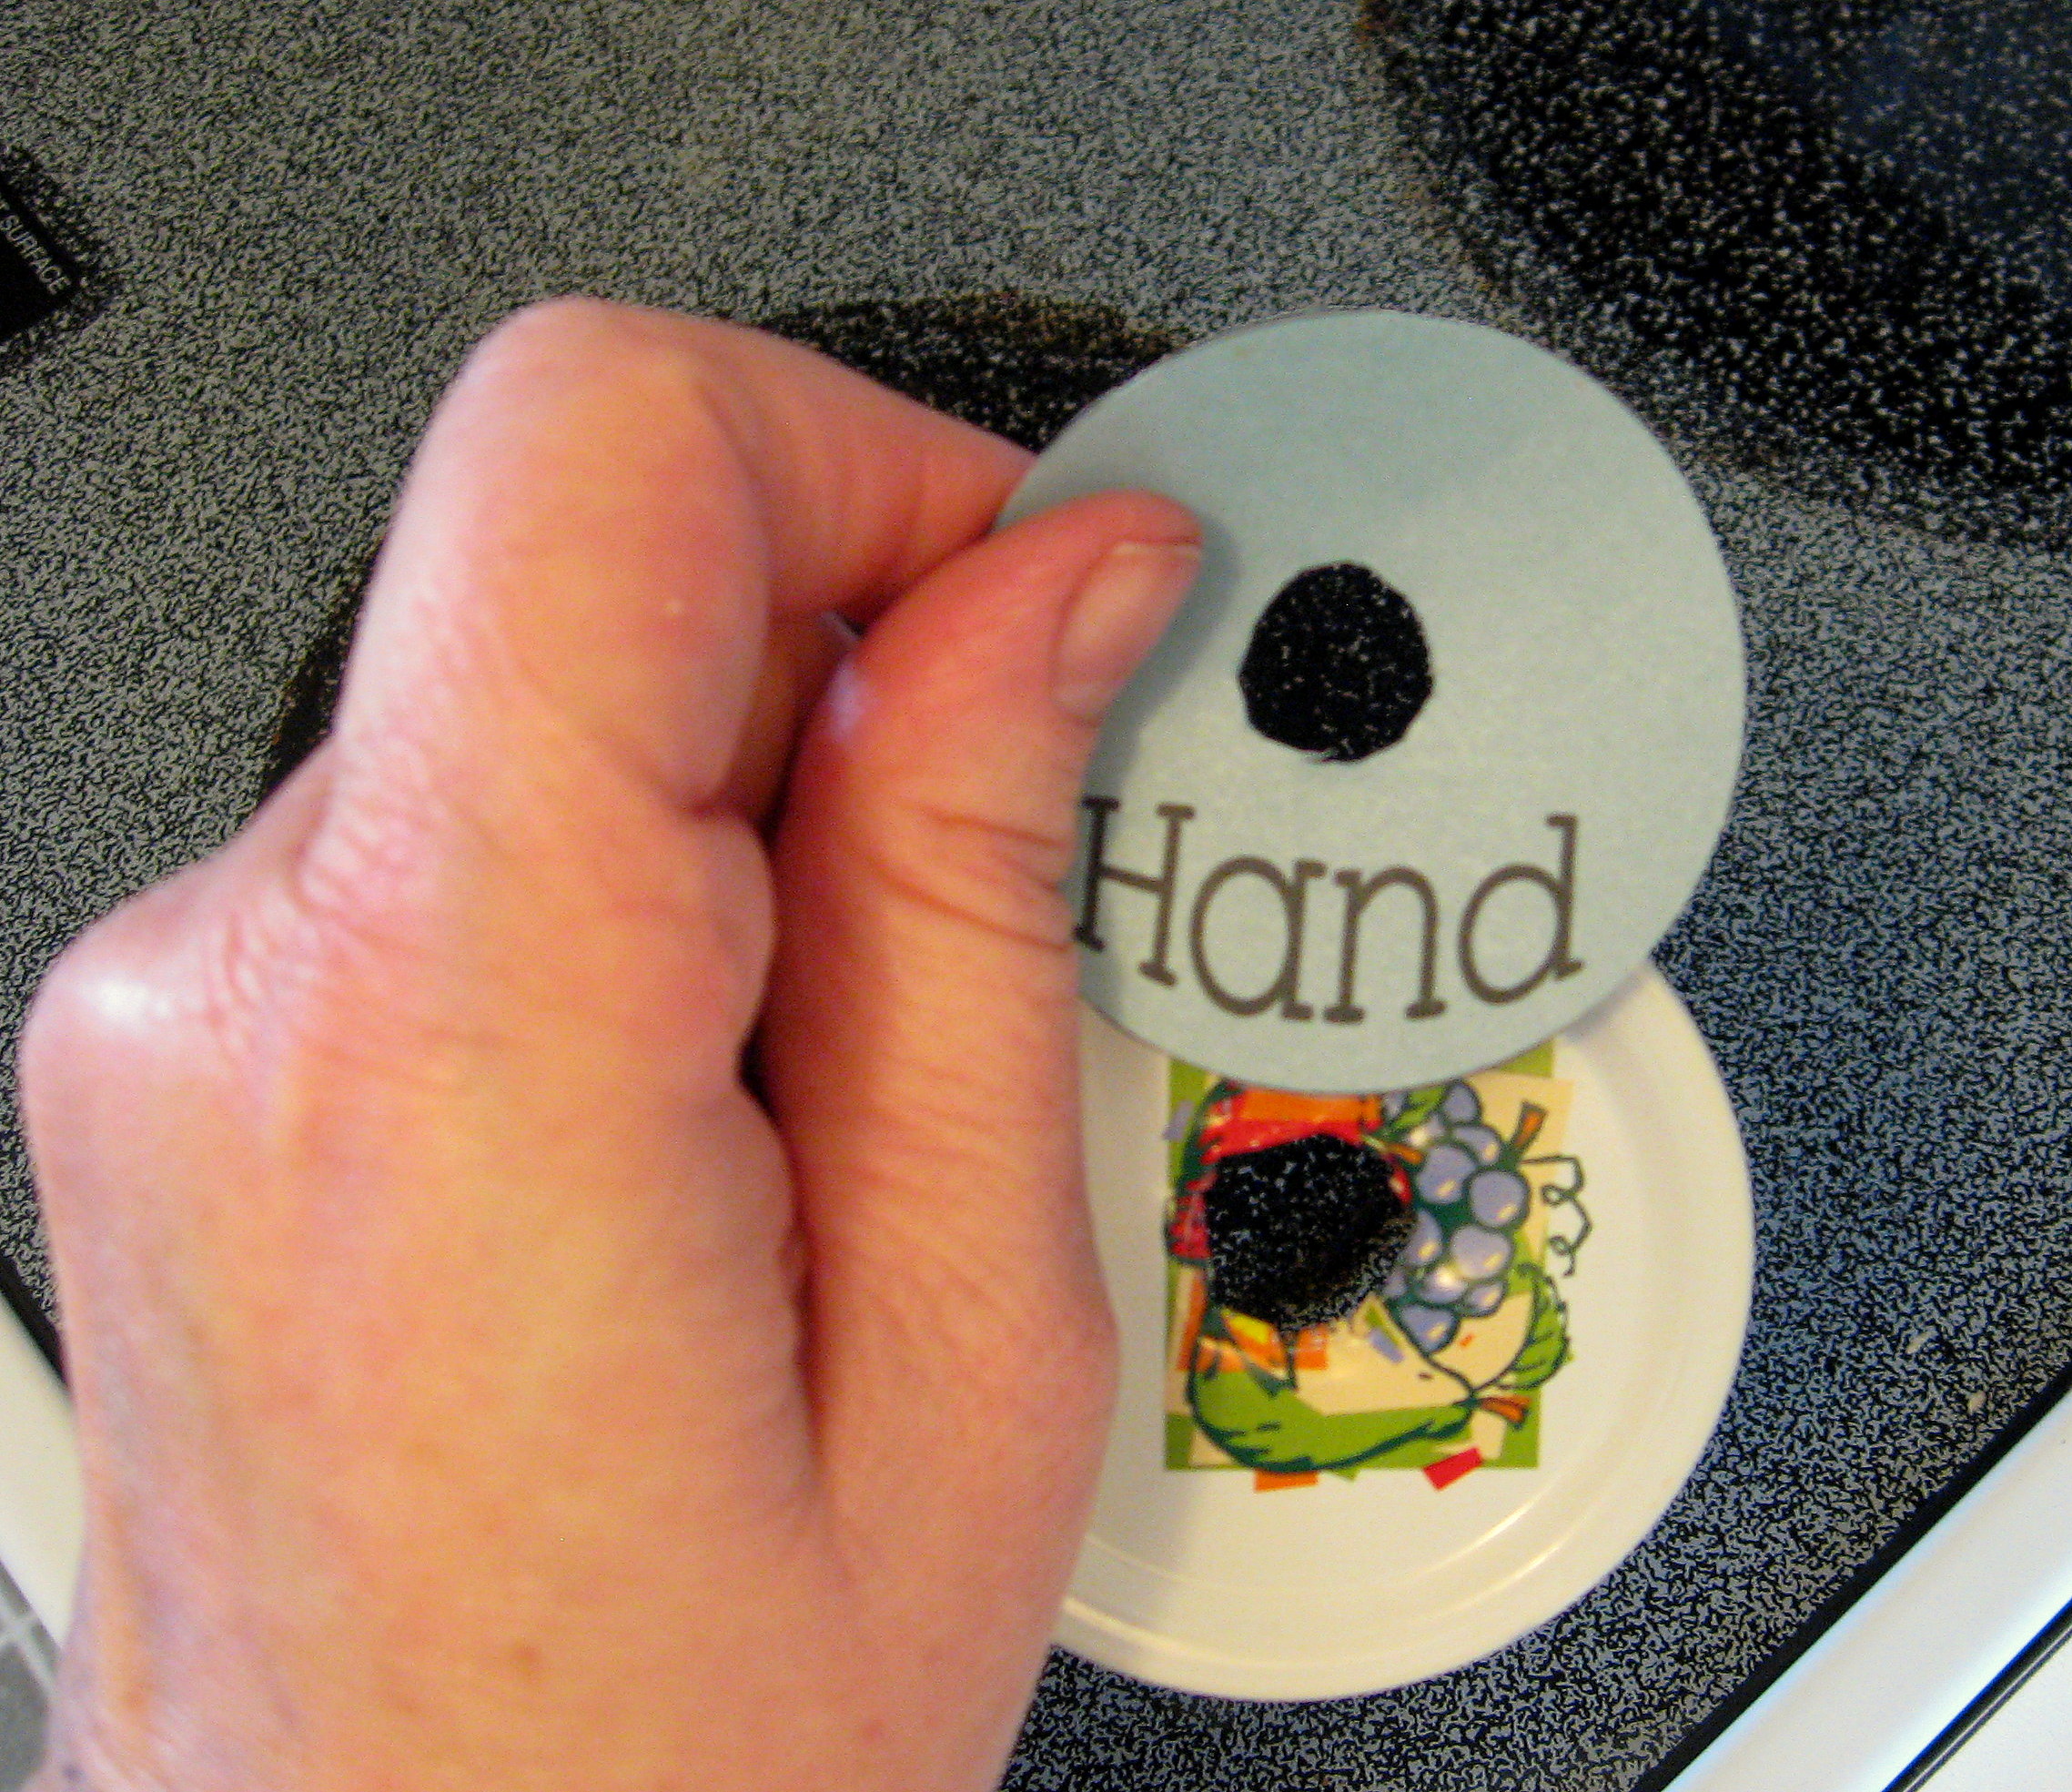
I wanted two finished jars; one for hand soap and one for dish soap. I started by using a word document to make 2 circles and then added the words “hand” to one and “dish” to the other (the circles should match up with the size of the jar lid; mine were just over 2″). Make sure the words don’t go through the middle or they will be covered by the pump.
Cut the circles out. It’s ok if they’re not perfect; the edges will be covered by the ring that screws onto the jar. Set them aside; we’ll come back to them in a minute.
Take the pumps out of soap bottles and give them a good rinse and dry. I found that the pump in the smaller bottle (like regular softsoap) is too short for the canning jar, so you’ll need to use the taller bottle (like the Dial in the picture above).
You are going to drill a hole in the jar lid to allow this pump to go through and sit on top of it.
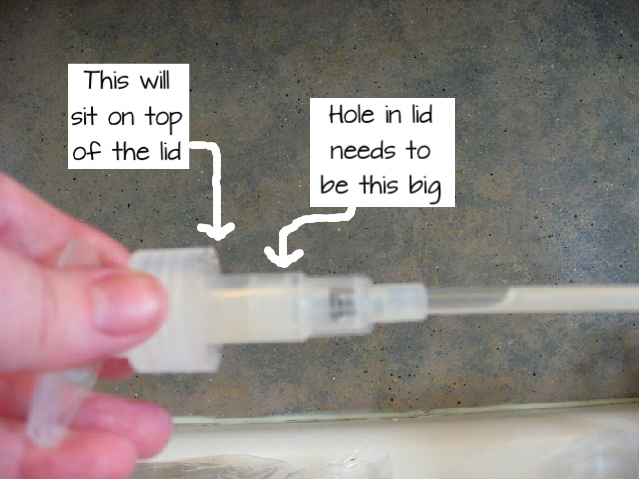
If you have a drill bit that matches the finished size you’re going for, great! I didn’t, so I just used the biggest one I had. 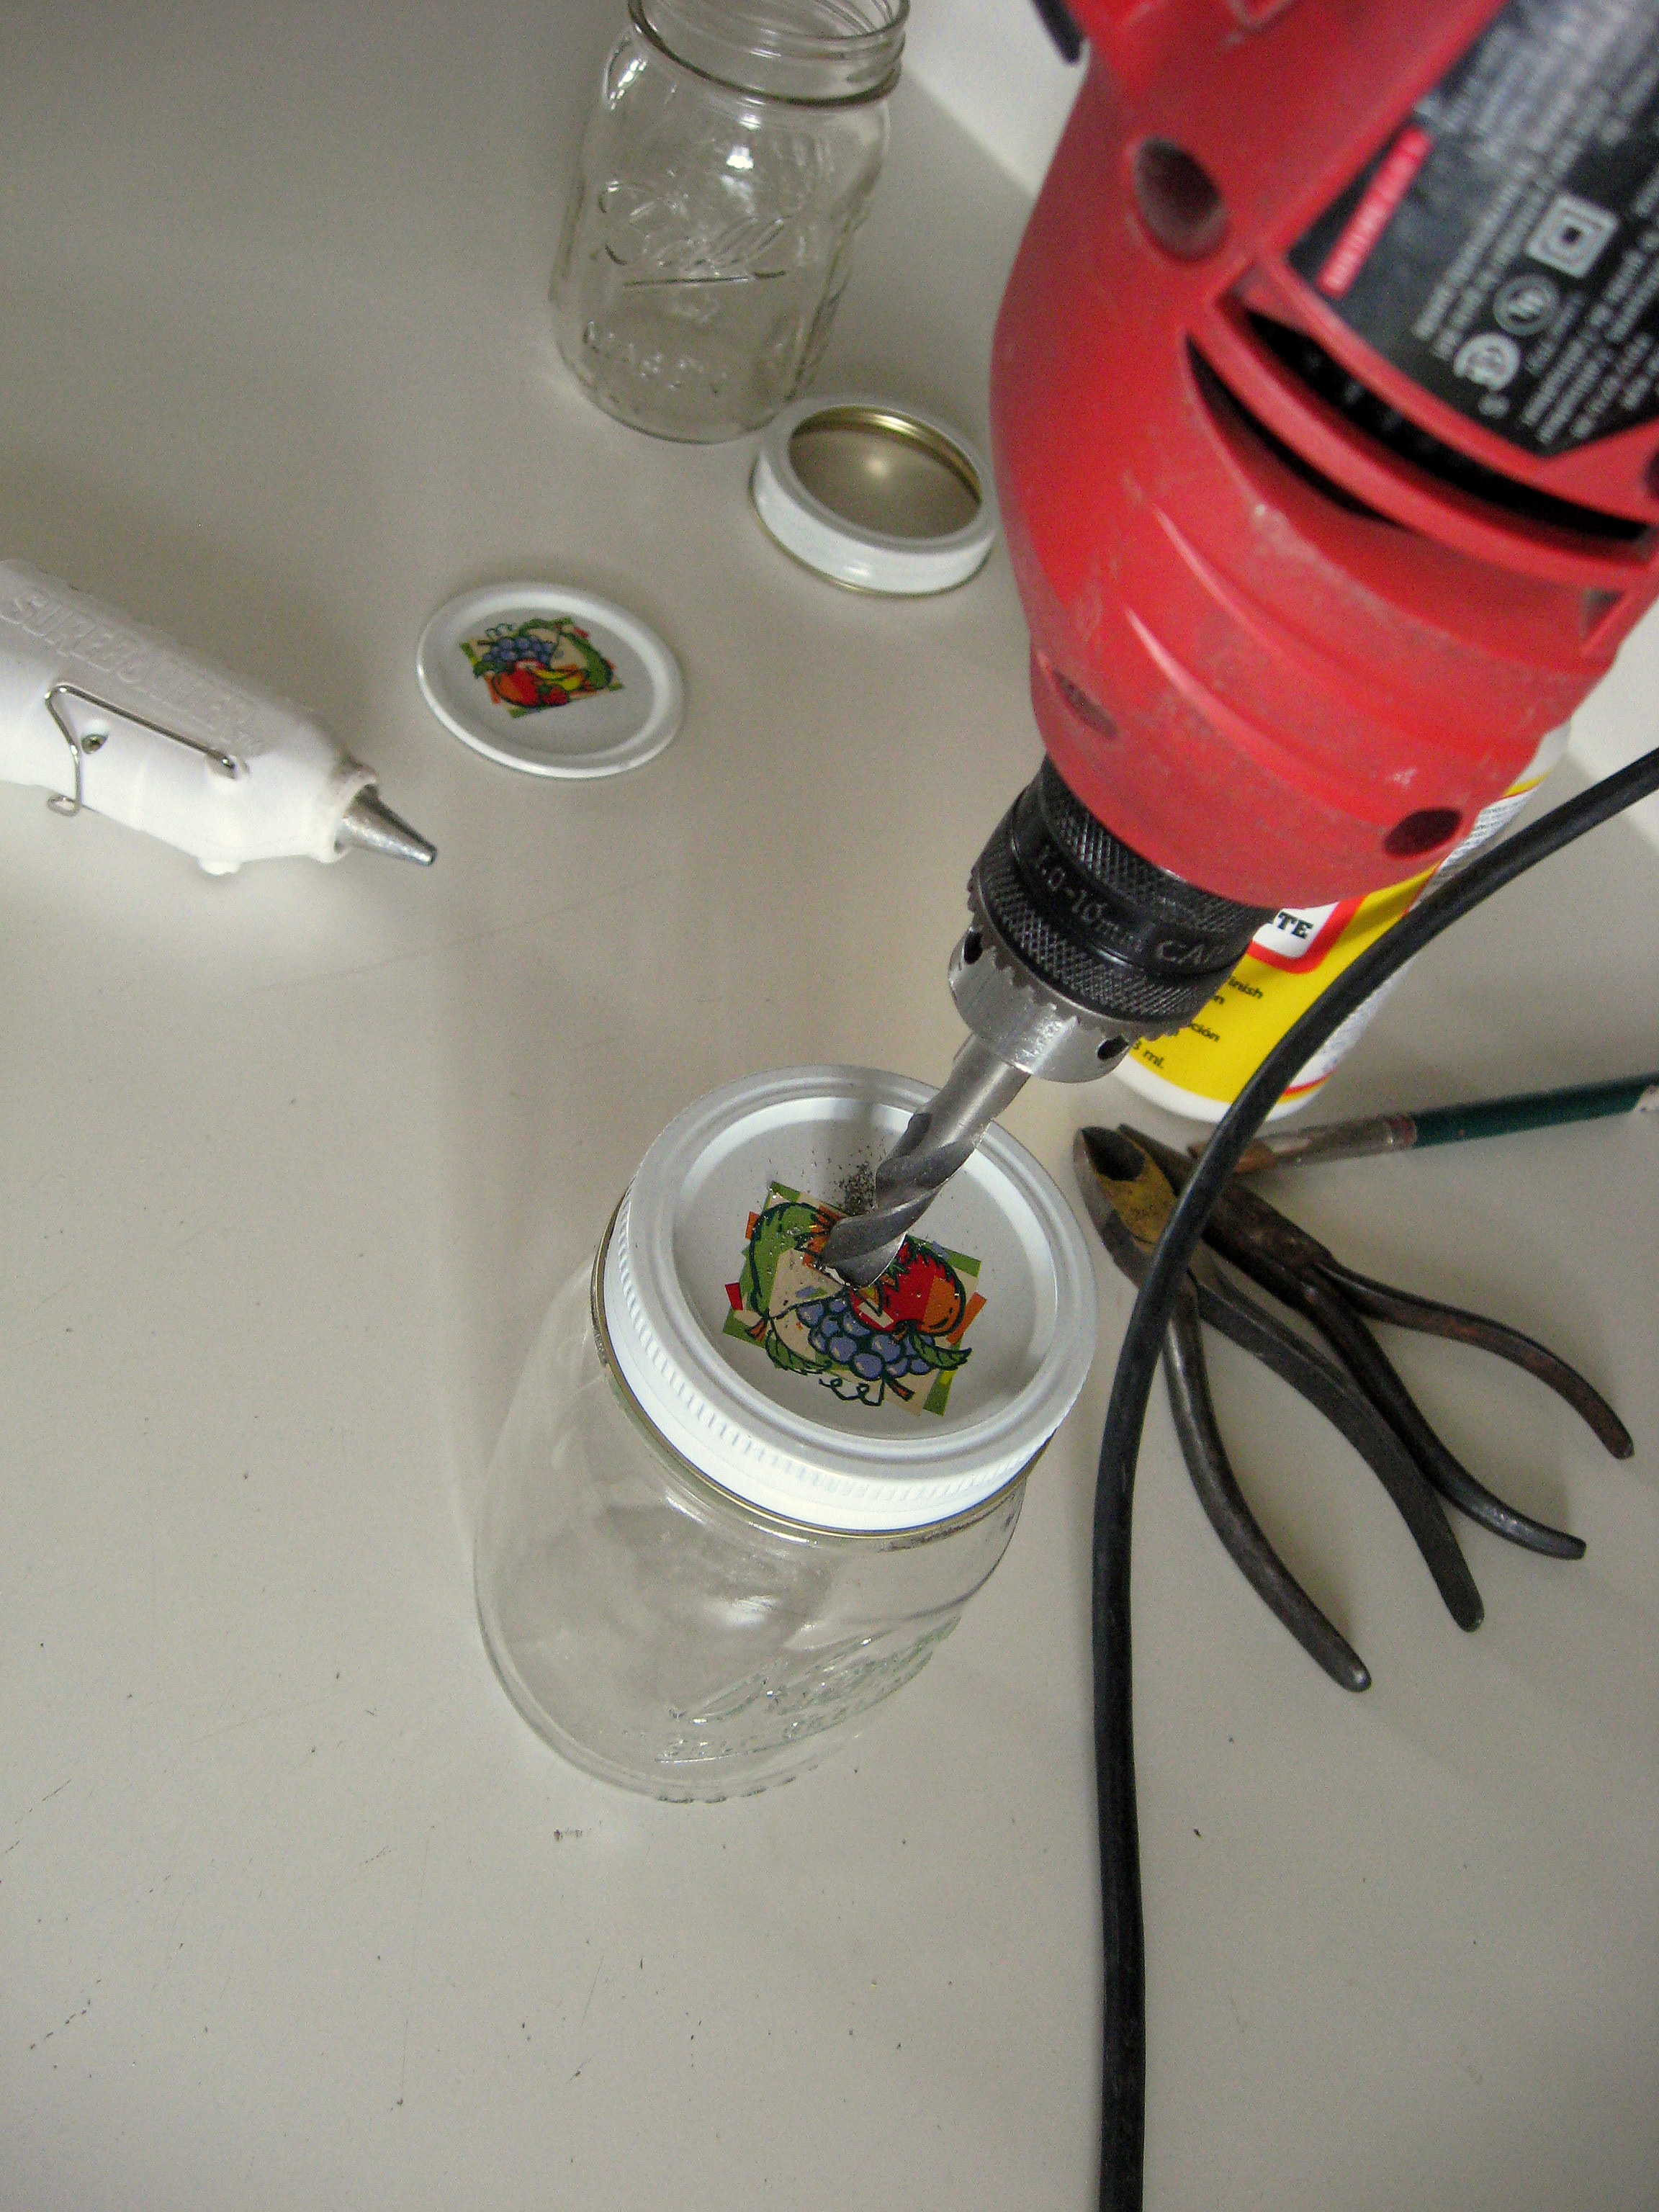
A couple of notes on drilling through the metal: I used the jar to hold the lid while I drilled. Once you get through the metal, the drill just drops so go slow and be careful not to break your jar. Also, I will admit that I’m not huge on wearing safety gear when I work with power tools, but in this case I would recommend glasses. Tiny bits of the metal can fly off and a few of them stung as they hit my hand, so I would imagine you wouldn’t want them hitting your eye!
Once you’re done drilling the hole, you will now want to make it big enough for the pump to go through. I tried using wire cutters, but found I had better luck with a sturdy pair of kitchen shears. Snip small snips (4 or so) around the perimeter of the hole, then use a pair of needle nose pliers to bend the metal back to the underside of the lid.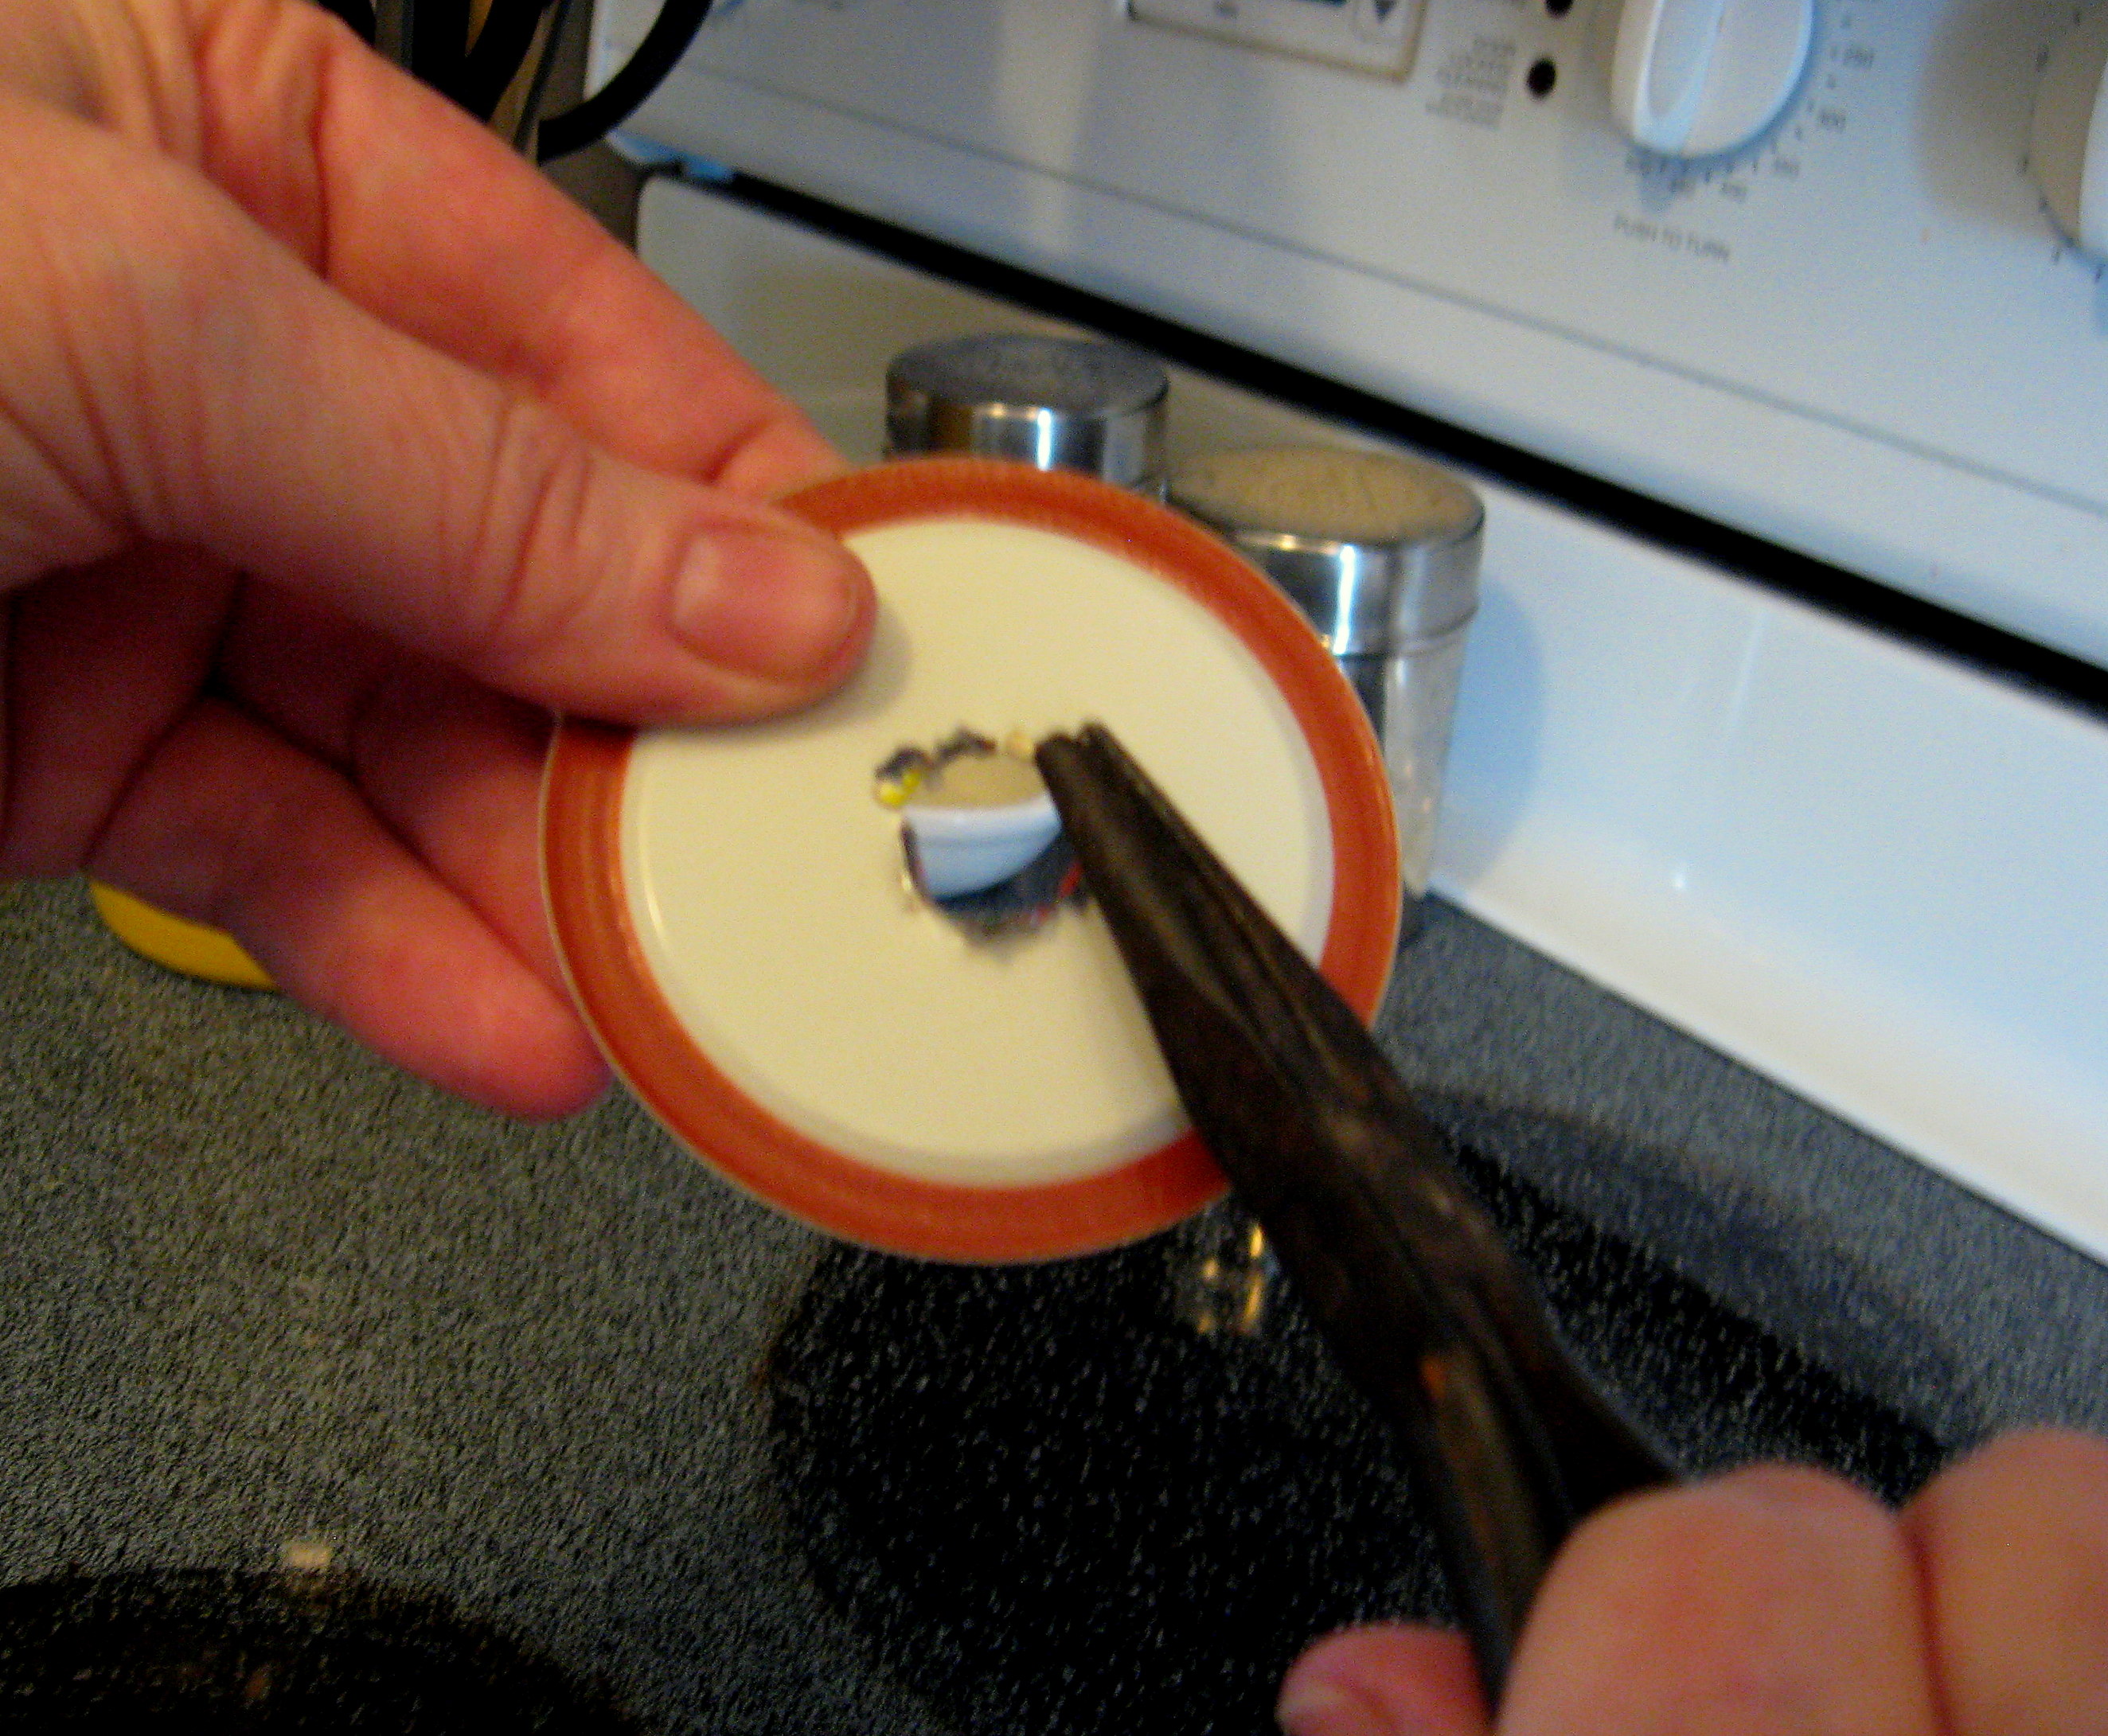
Keep bending and checking until the hole is JUST big enough for the pump to go through and sit on top. Don’t bend too much; you want it to be a snug fit. 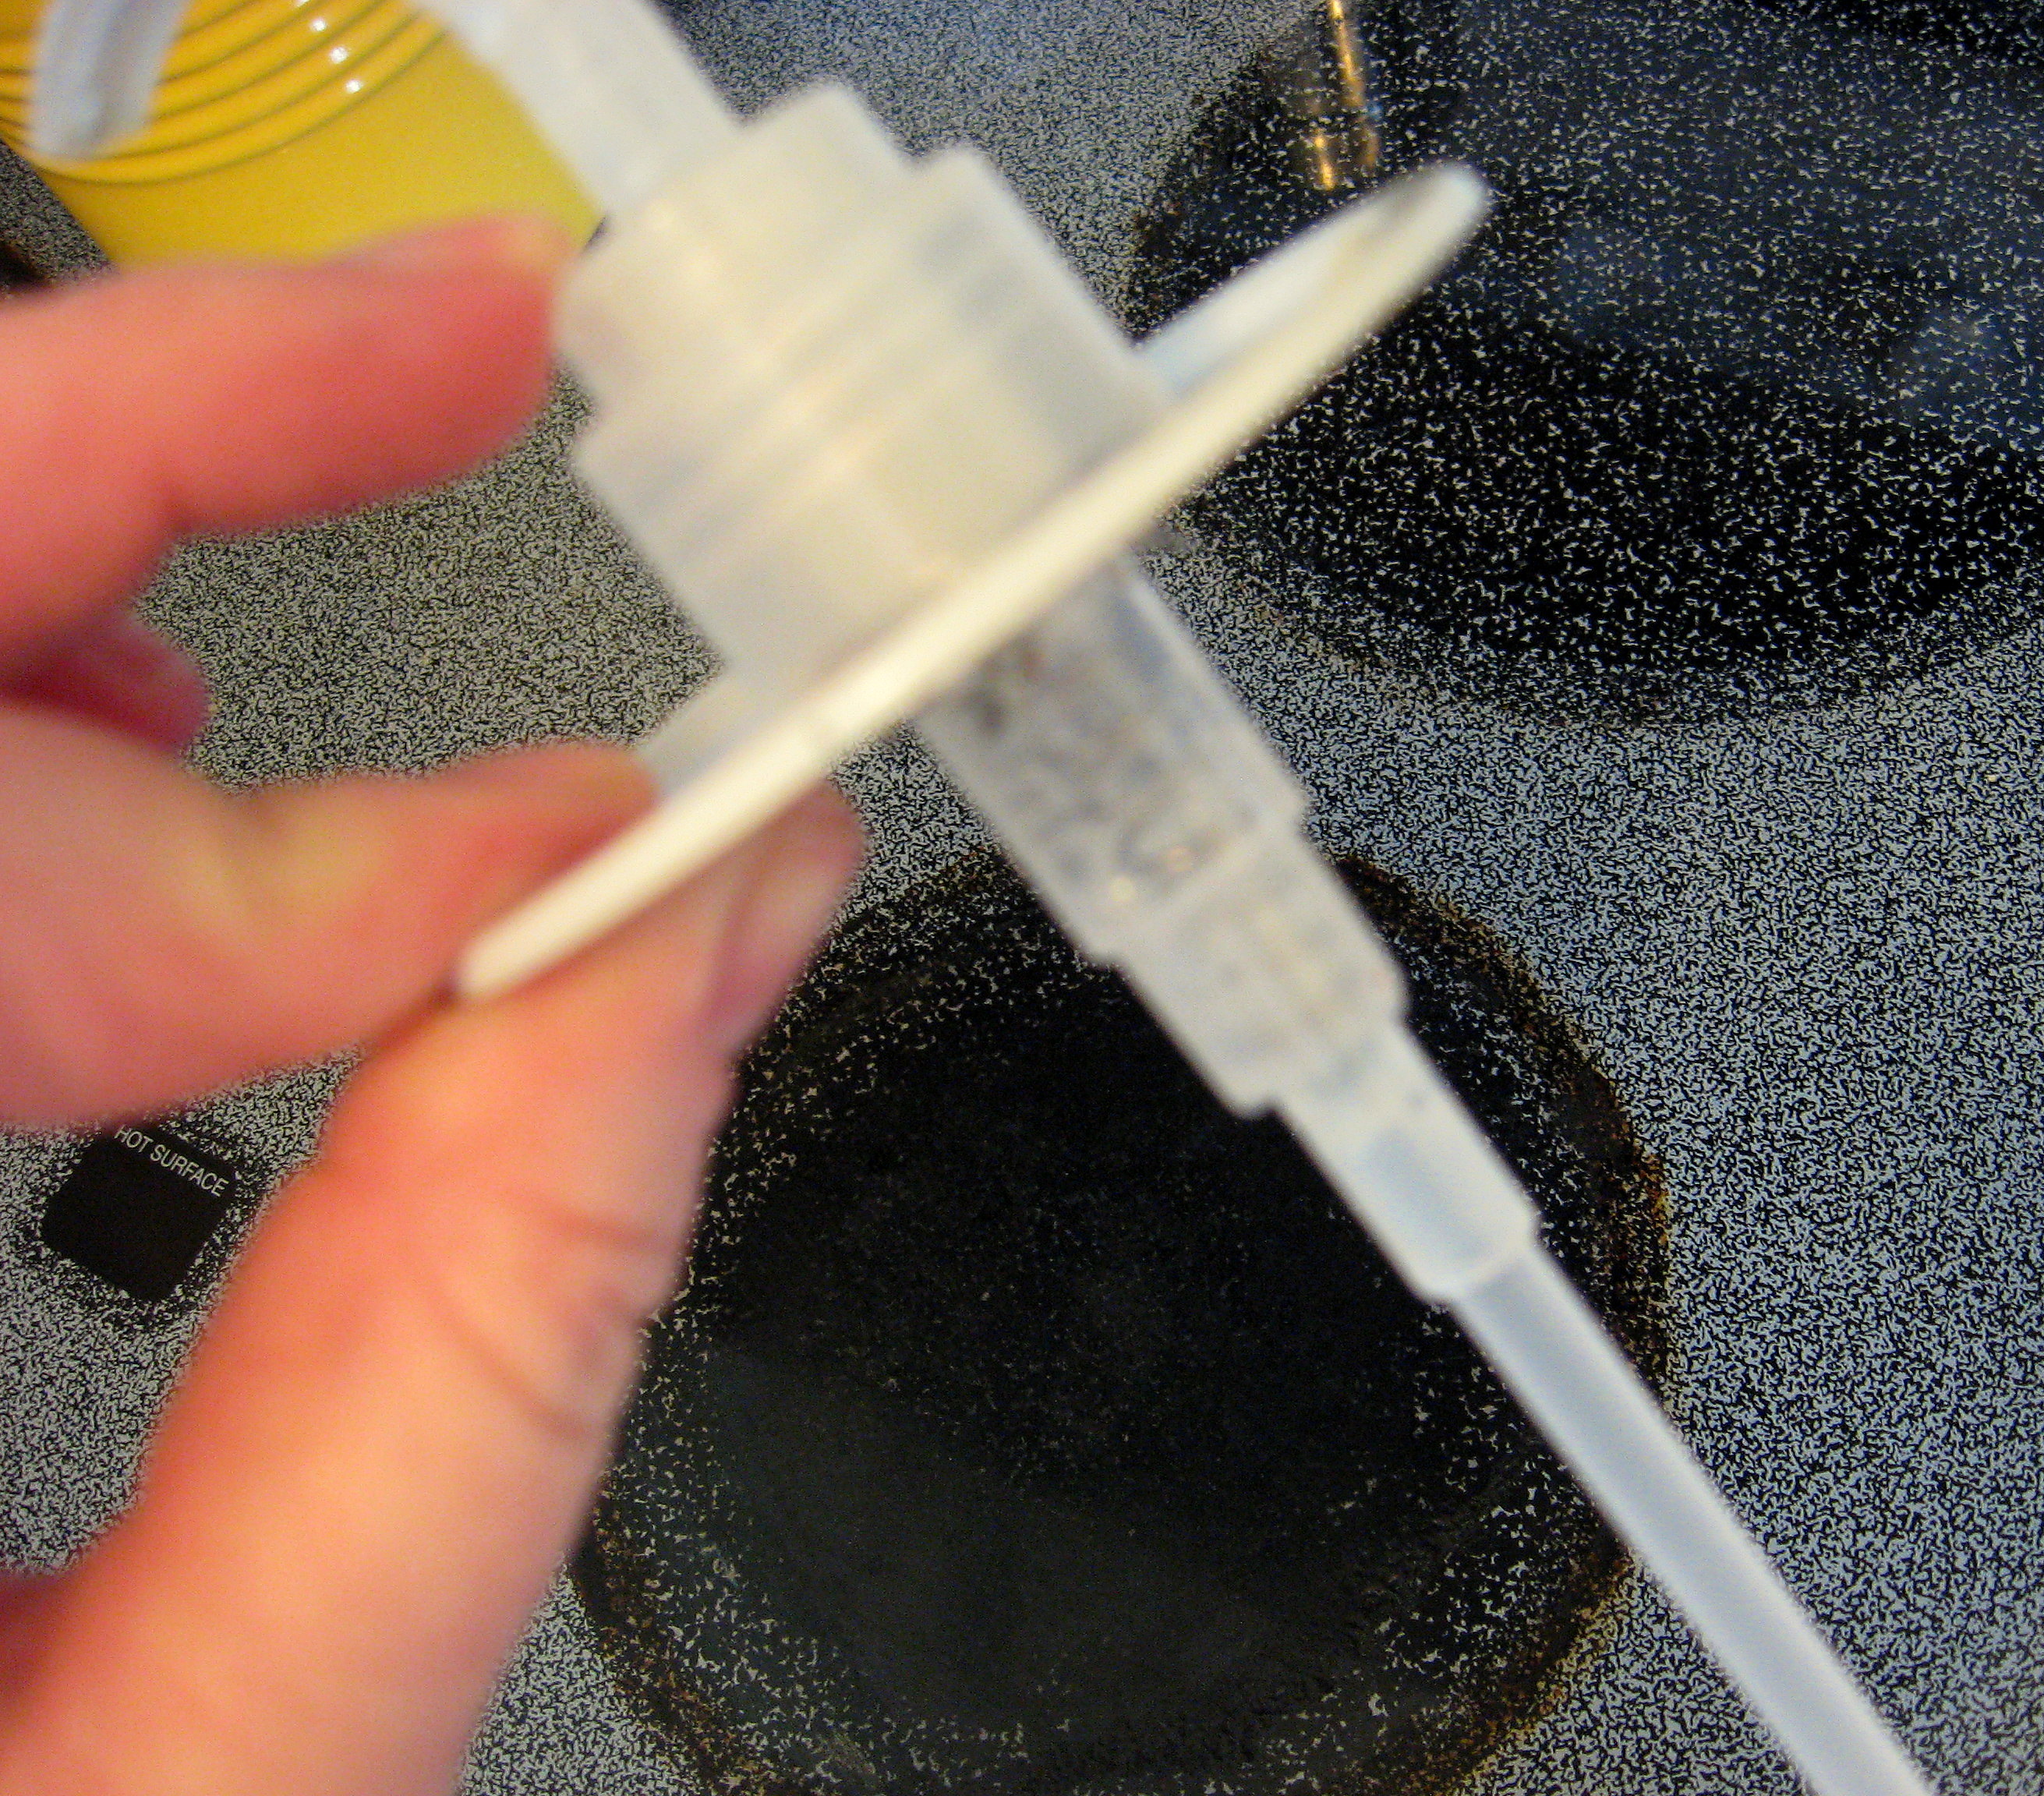
Take the pump back out and cut off any long pieces of metal, then use the pliers to pinch down the ragged edges so they are flush with the lid. They will be covered in a minute so you won’t get cut on them, and it’s ok if it’s messy because no one is ever going to see it.
Now use the metal lid to trace a circle on the paper circle from before. Cut it out so that the holes match up; again, if it’s messy, it won’t show when you’re finished.
Use Mod Podge to attach the paper circle to the top of the lid, making sure to smooth it firmly with your fingers as it starts to dry. Let it dry for 20 minutes, then apply a coat on top of the paper to seal it, being sure to cover the whole top of the lid very well. Let dry 20 minutes, and apply another coat. I ended up doing 3 coats on top since this is going to be around water. While those are drying, start heating up your glue gun.
Note: When you attach the paper to the lid, be sure to 1) make sure the entire lid is covered with Mod Podge and 2) let it dry thoroughly before you top coat. Otherwise, you will get bumps and bubbles like on the “dish” lid below. If you are impatient like me and end up with this, let it dry and work it smooth with your fingers before doing a second coat. Sometimes that will work without having to start over. 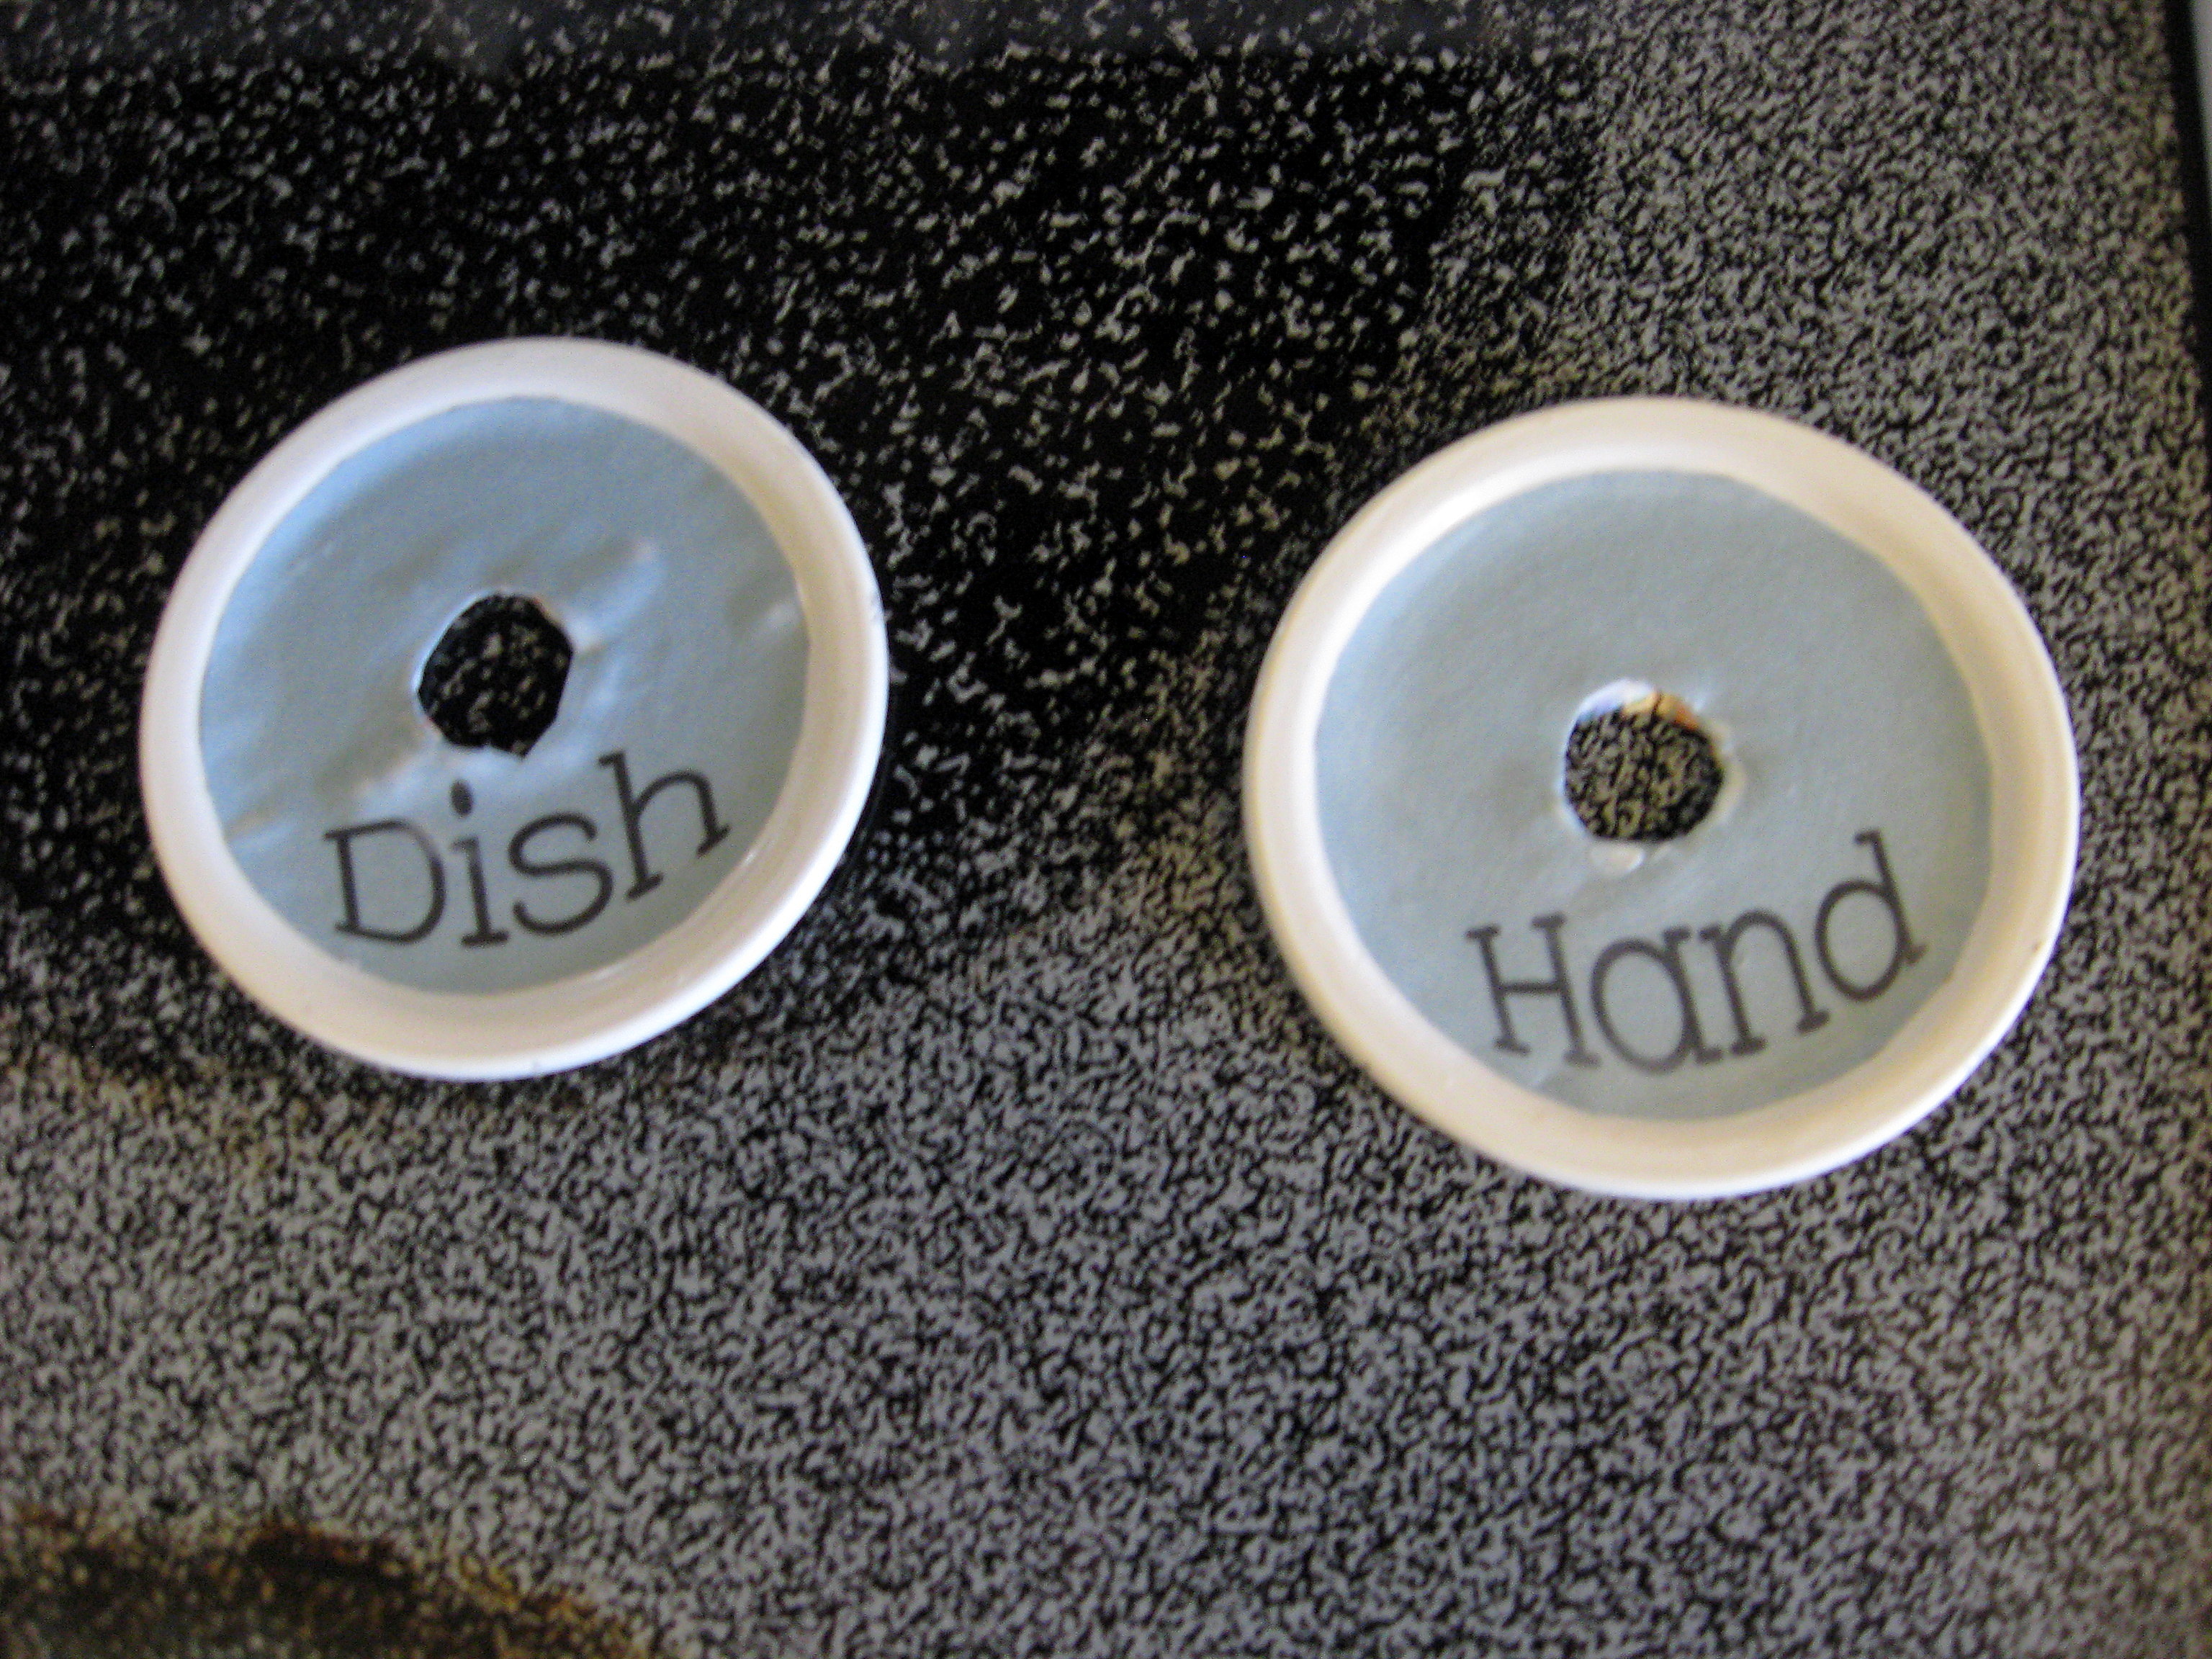
Once those are dry, put the pump through and hold it carefully together-upside down-with one hand. You are going to apply a ring of hot glue around the hole, right up against the pump where it comes through. Work quickly because you want to do the next step before it hardens.

Wet your finger and quickly run it around the circle, kind of smooshing the glue flat and smooth. 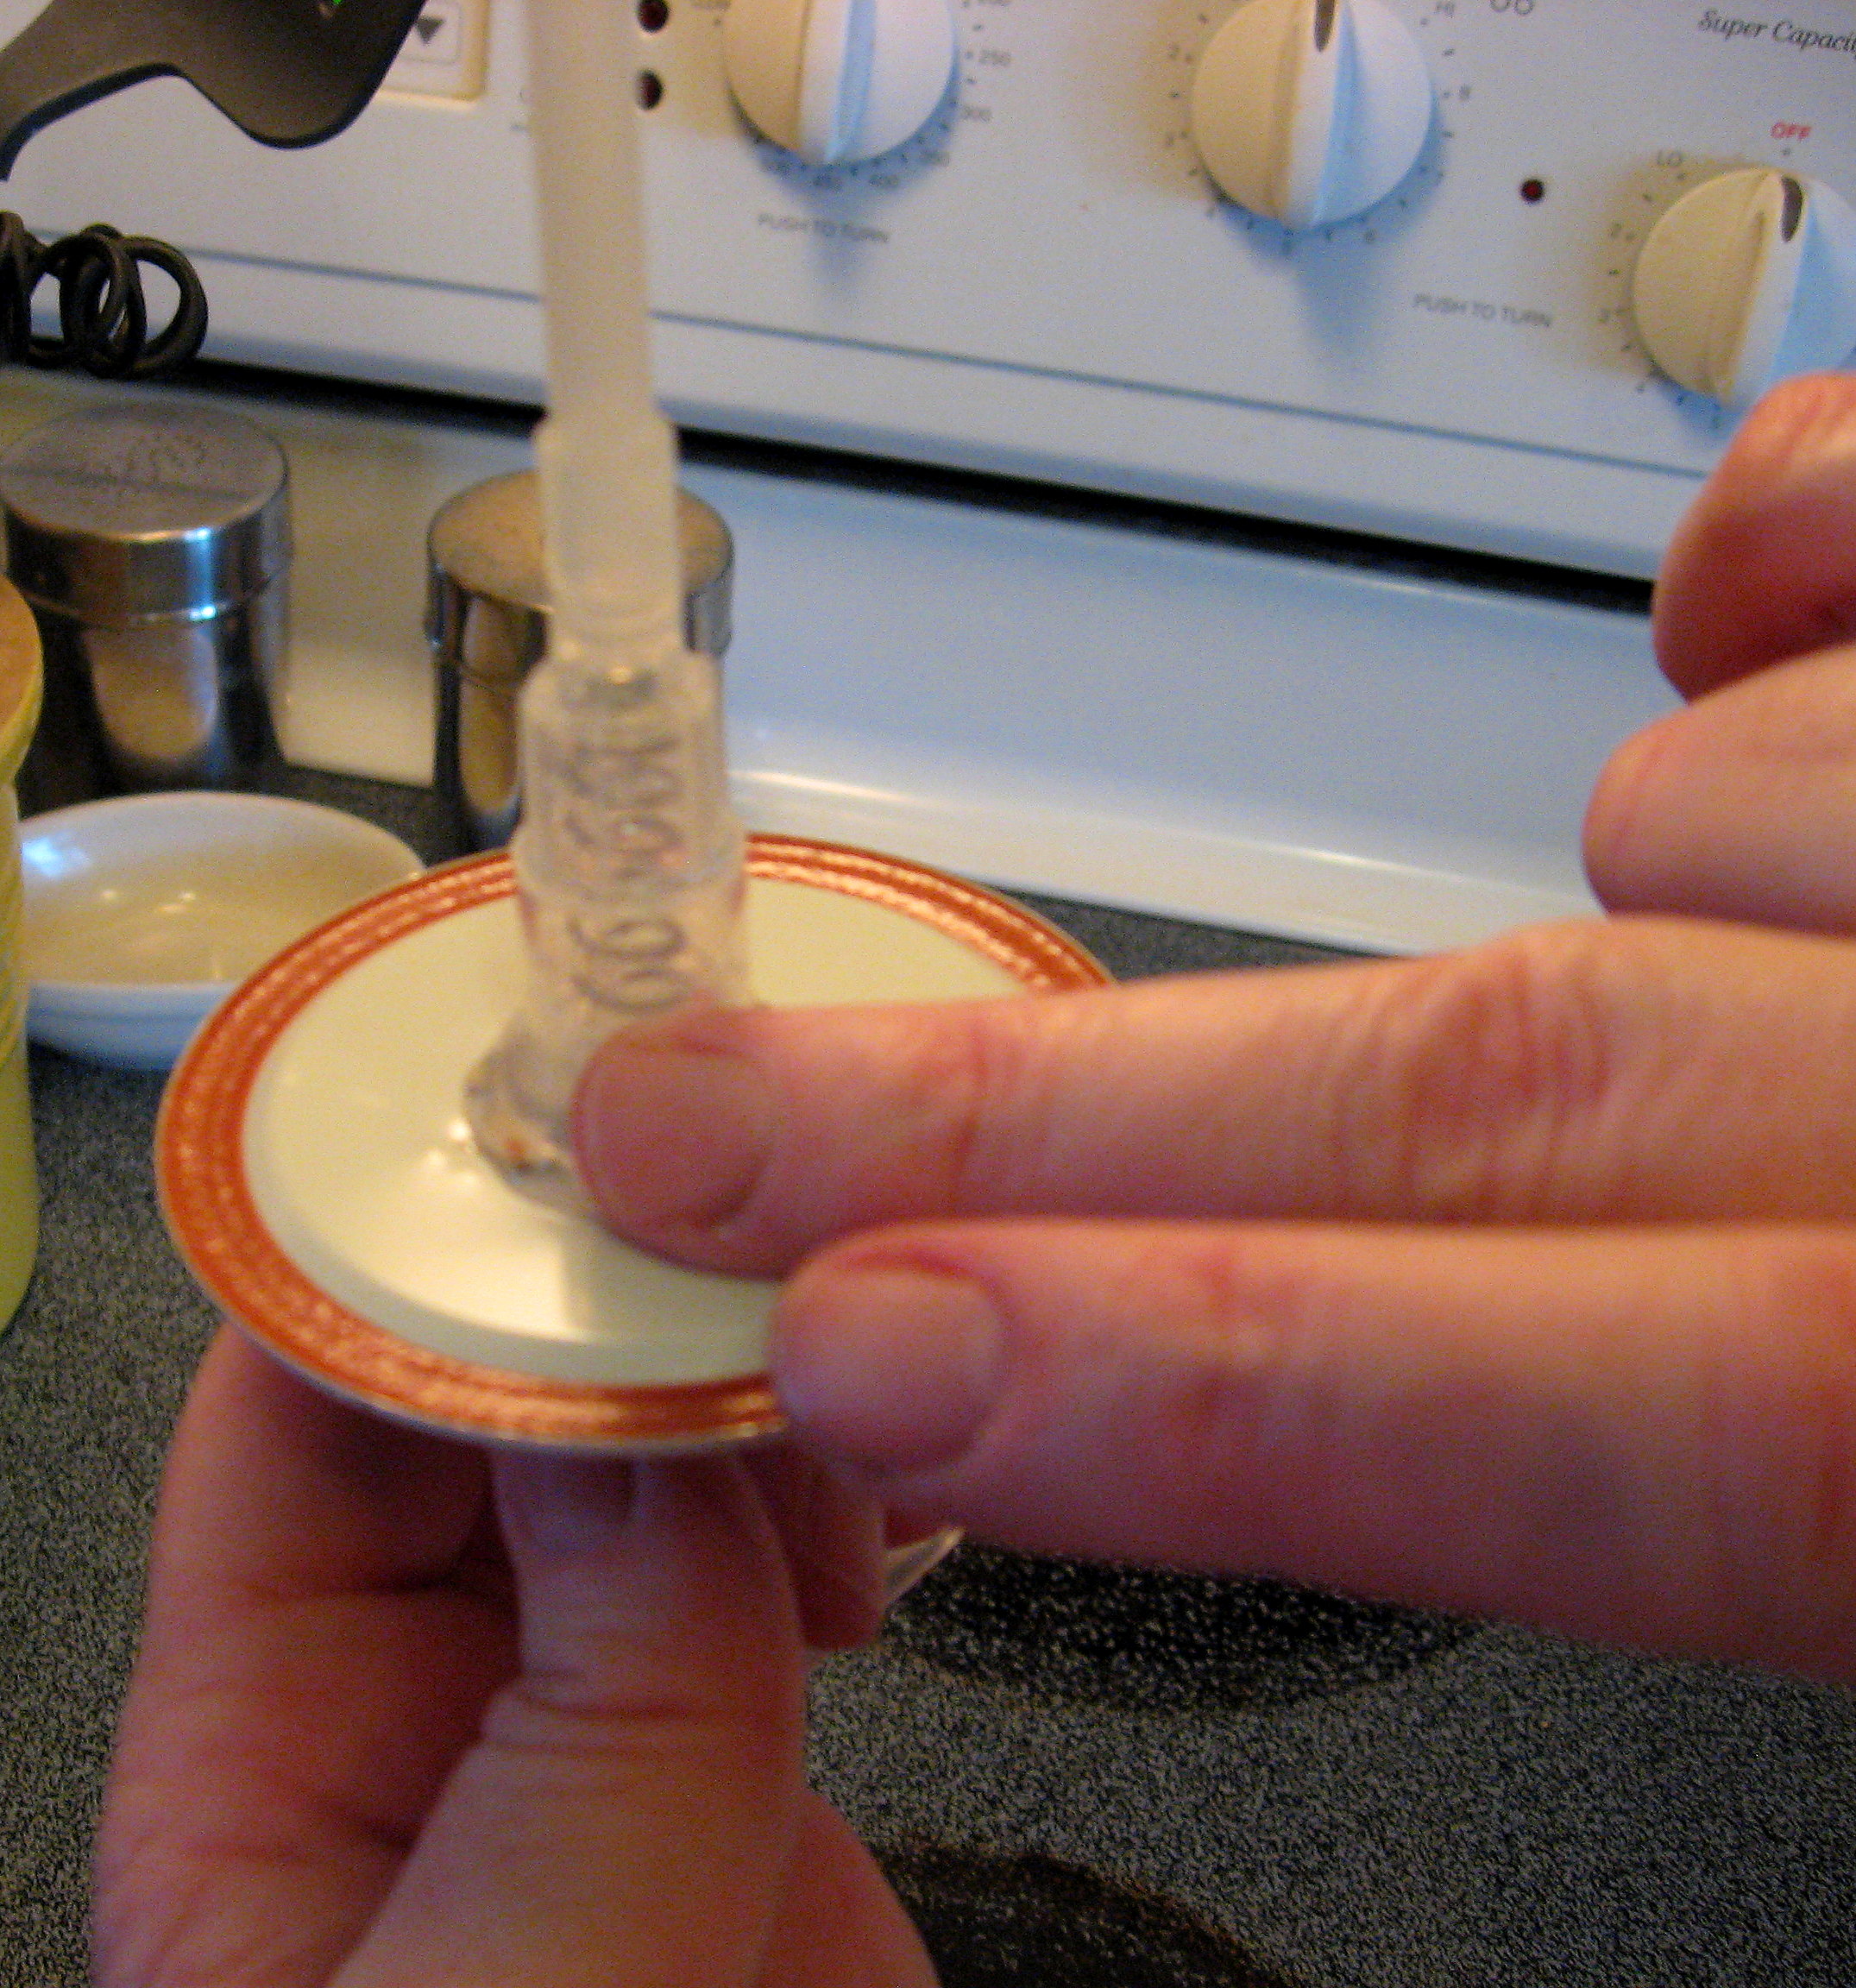
Doing this attaches the lid to the pump, forms a waterproof seal and covers all those jagged edges of metal. Awesome.
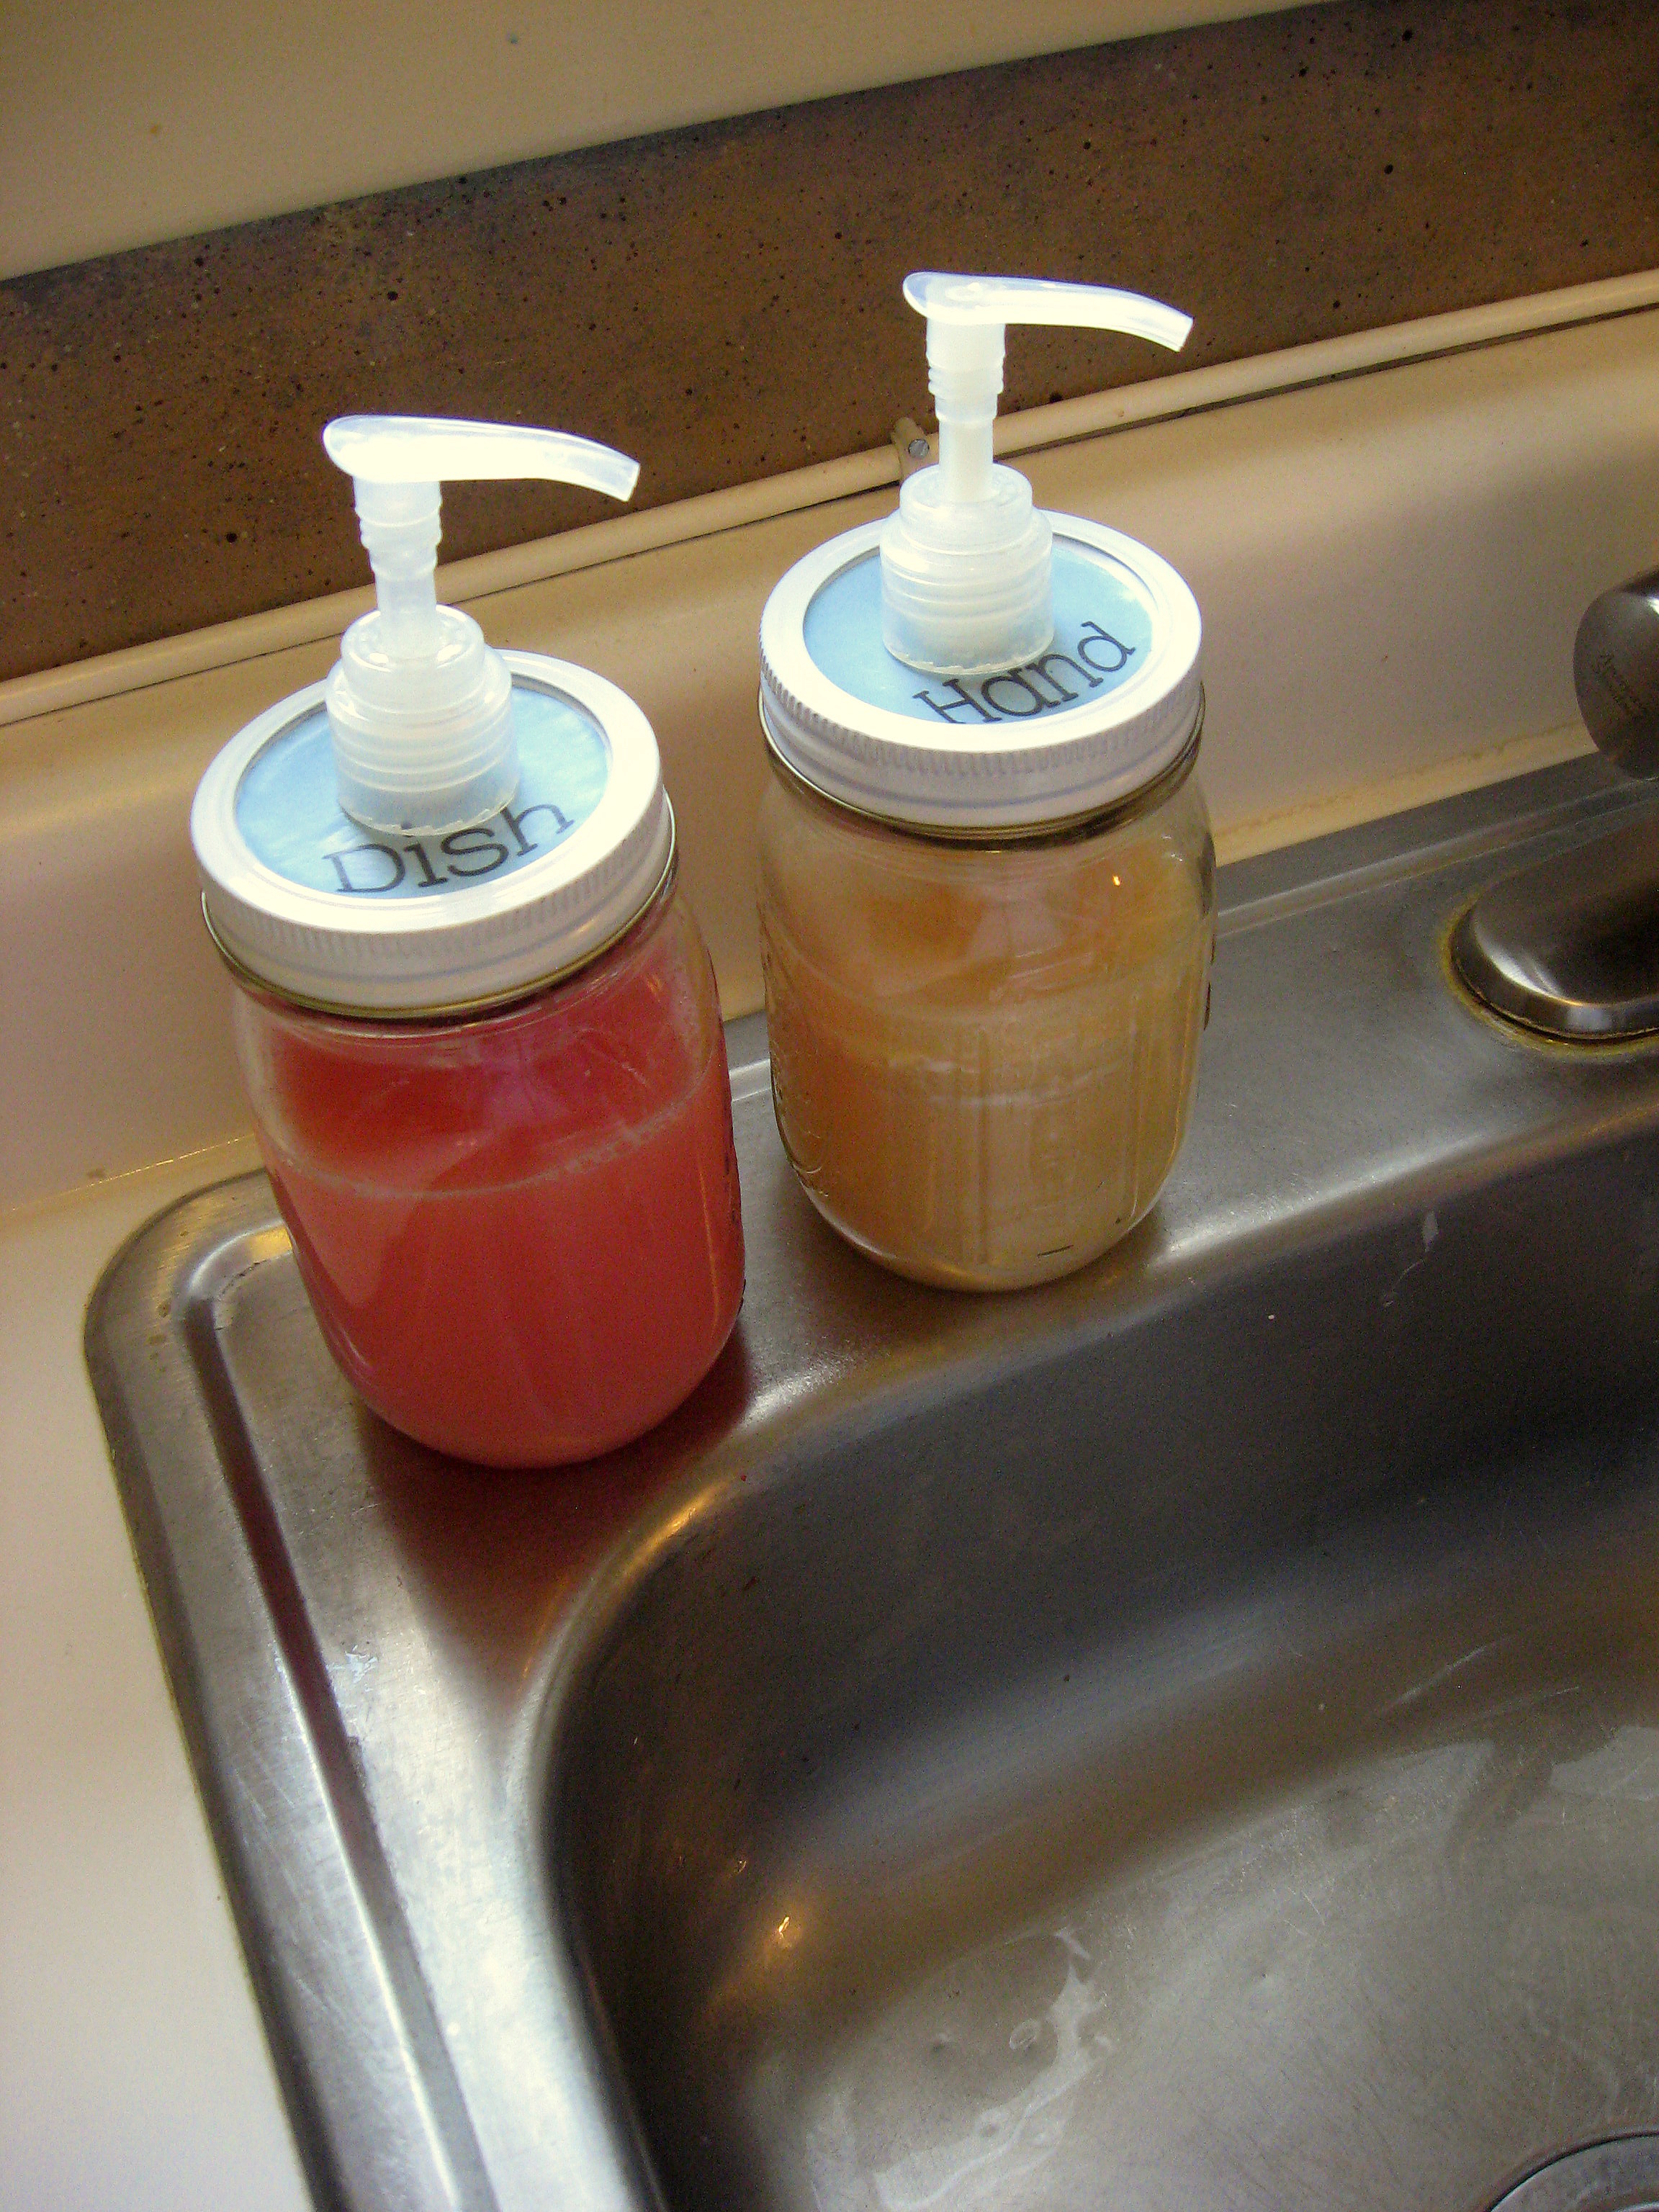
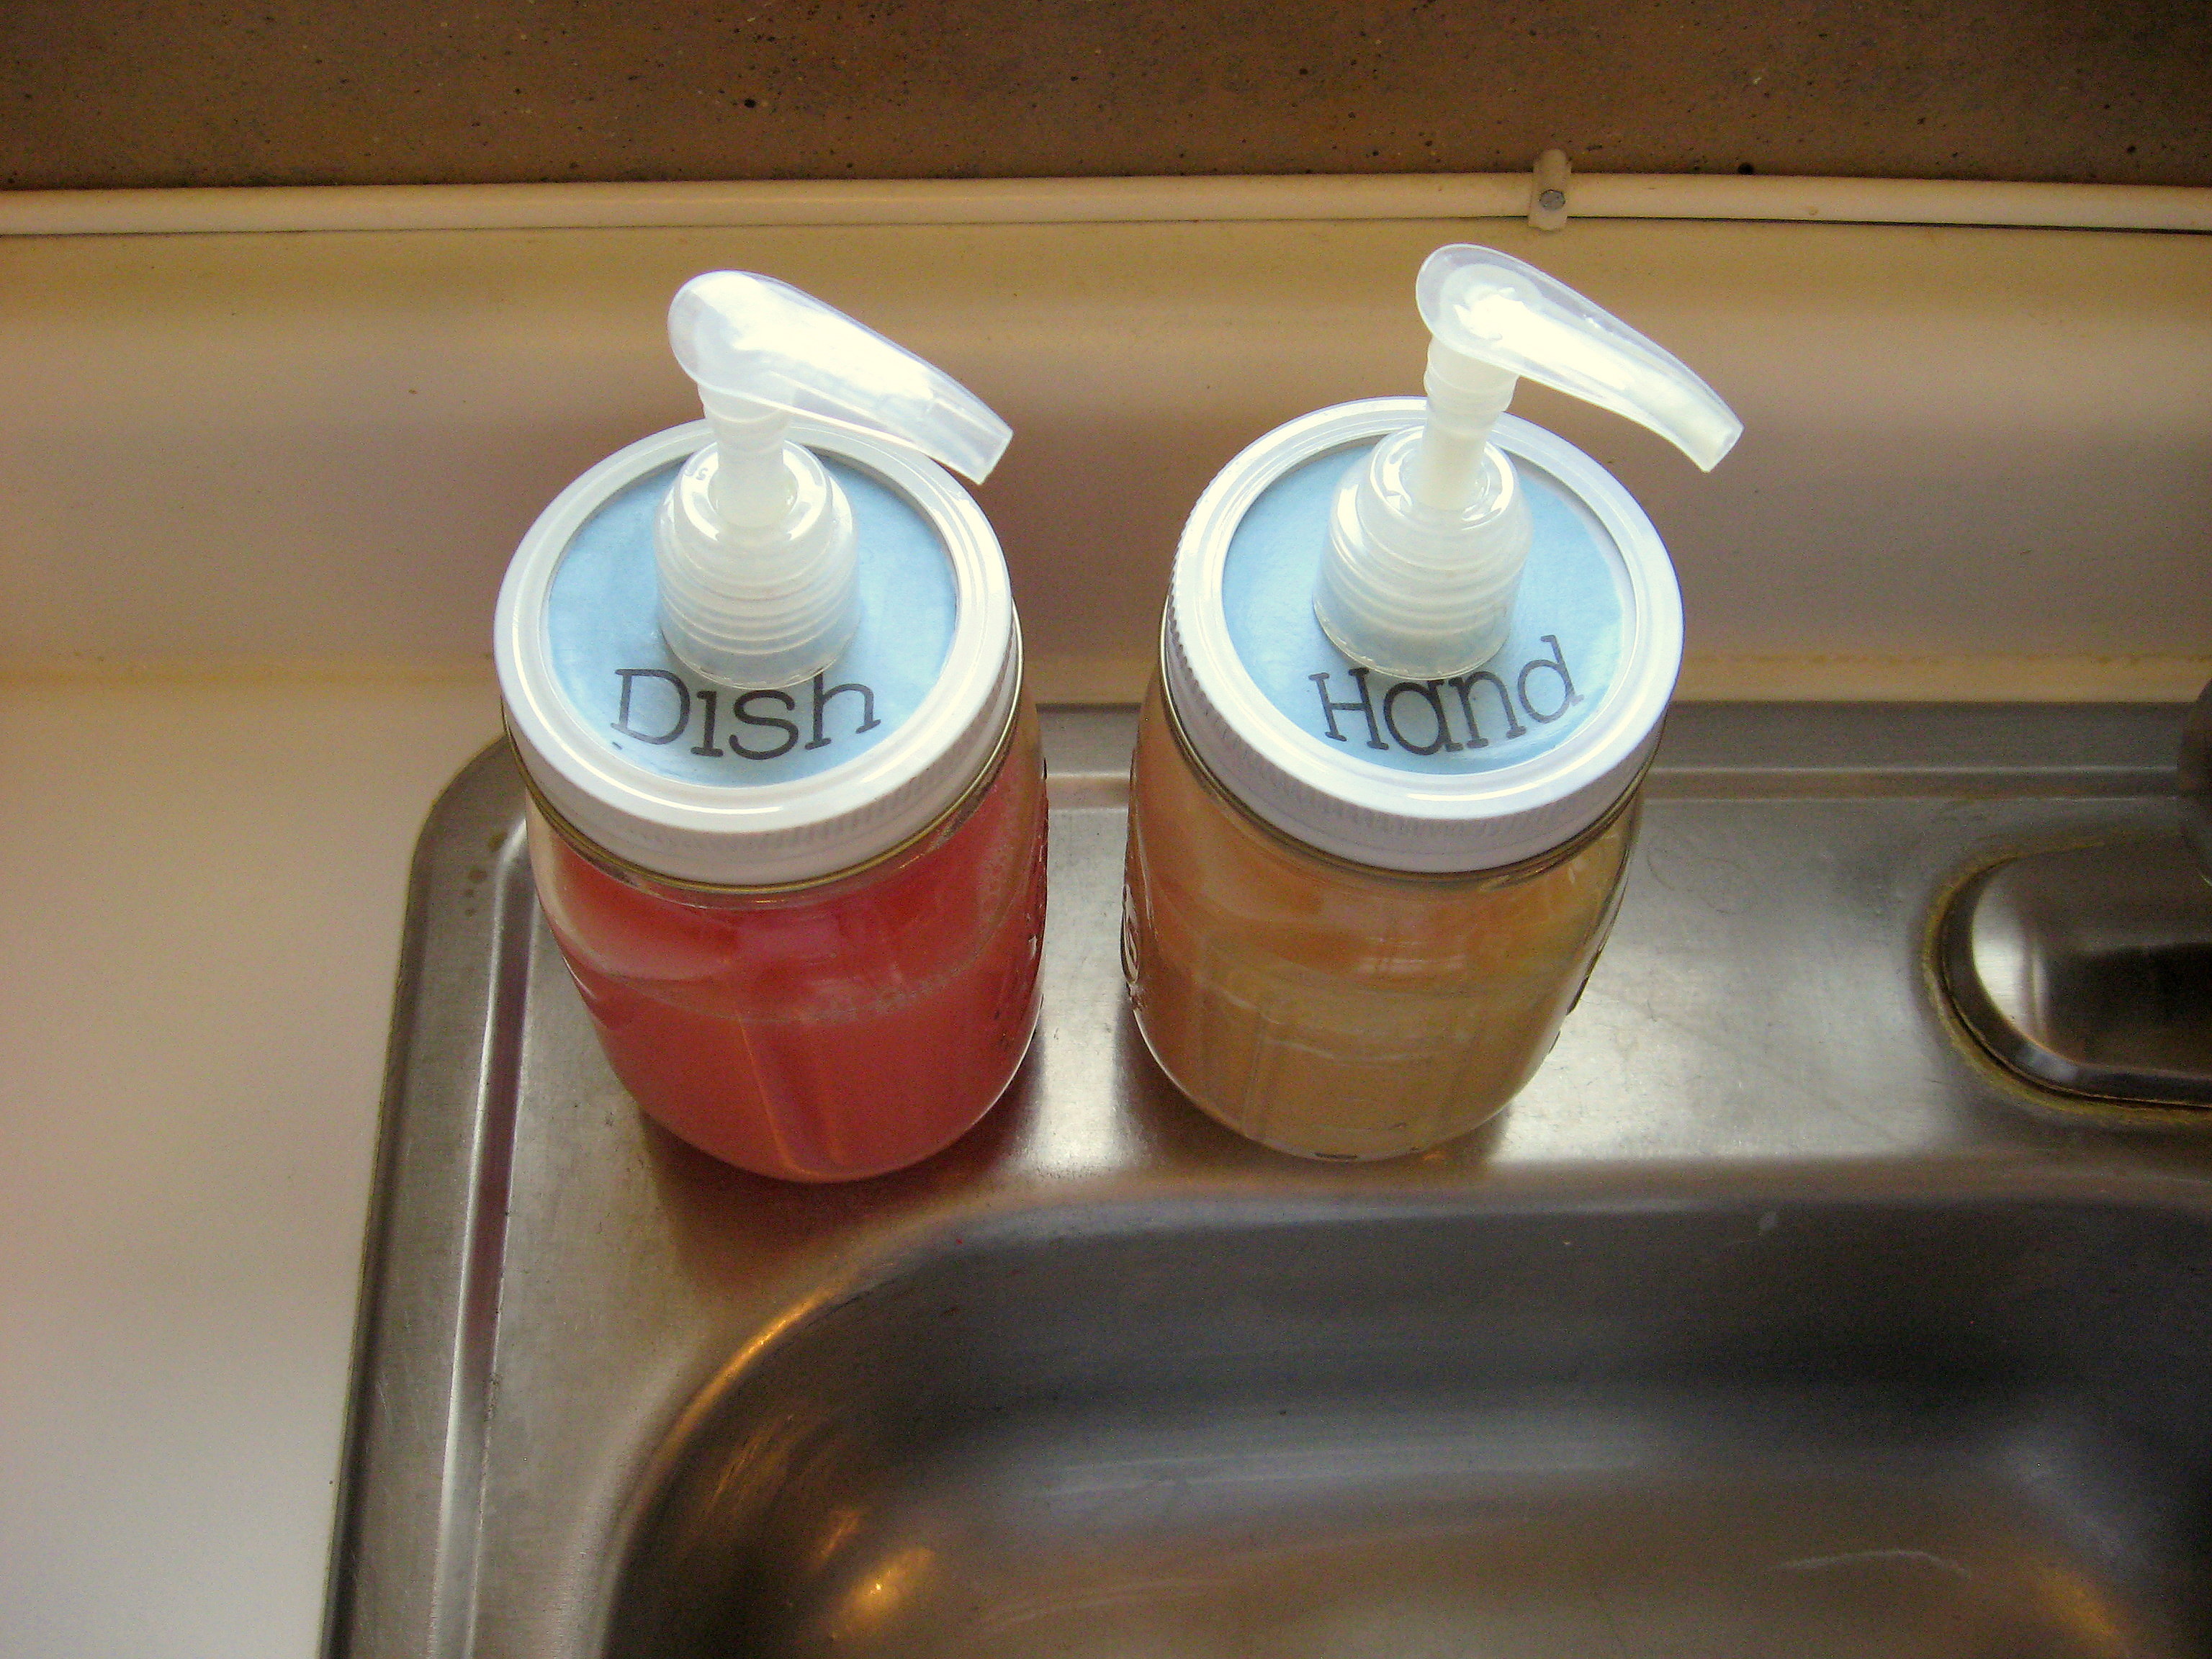
Now, put the ring on the lid and screw it onto your jar. I found that my pumps were about a 1/4 of an inch too long, so I snipped the bottom off (make sure to snip at an angle). Once it is the right length, fill your jar and screw the top on.
Better, no?
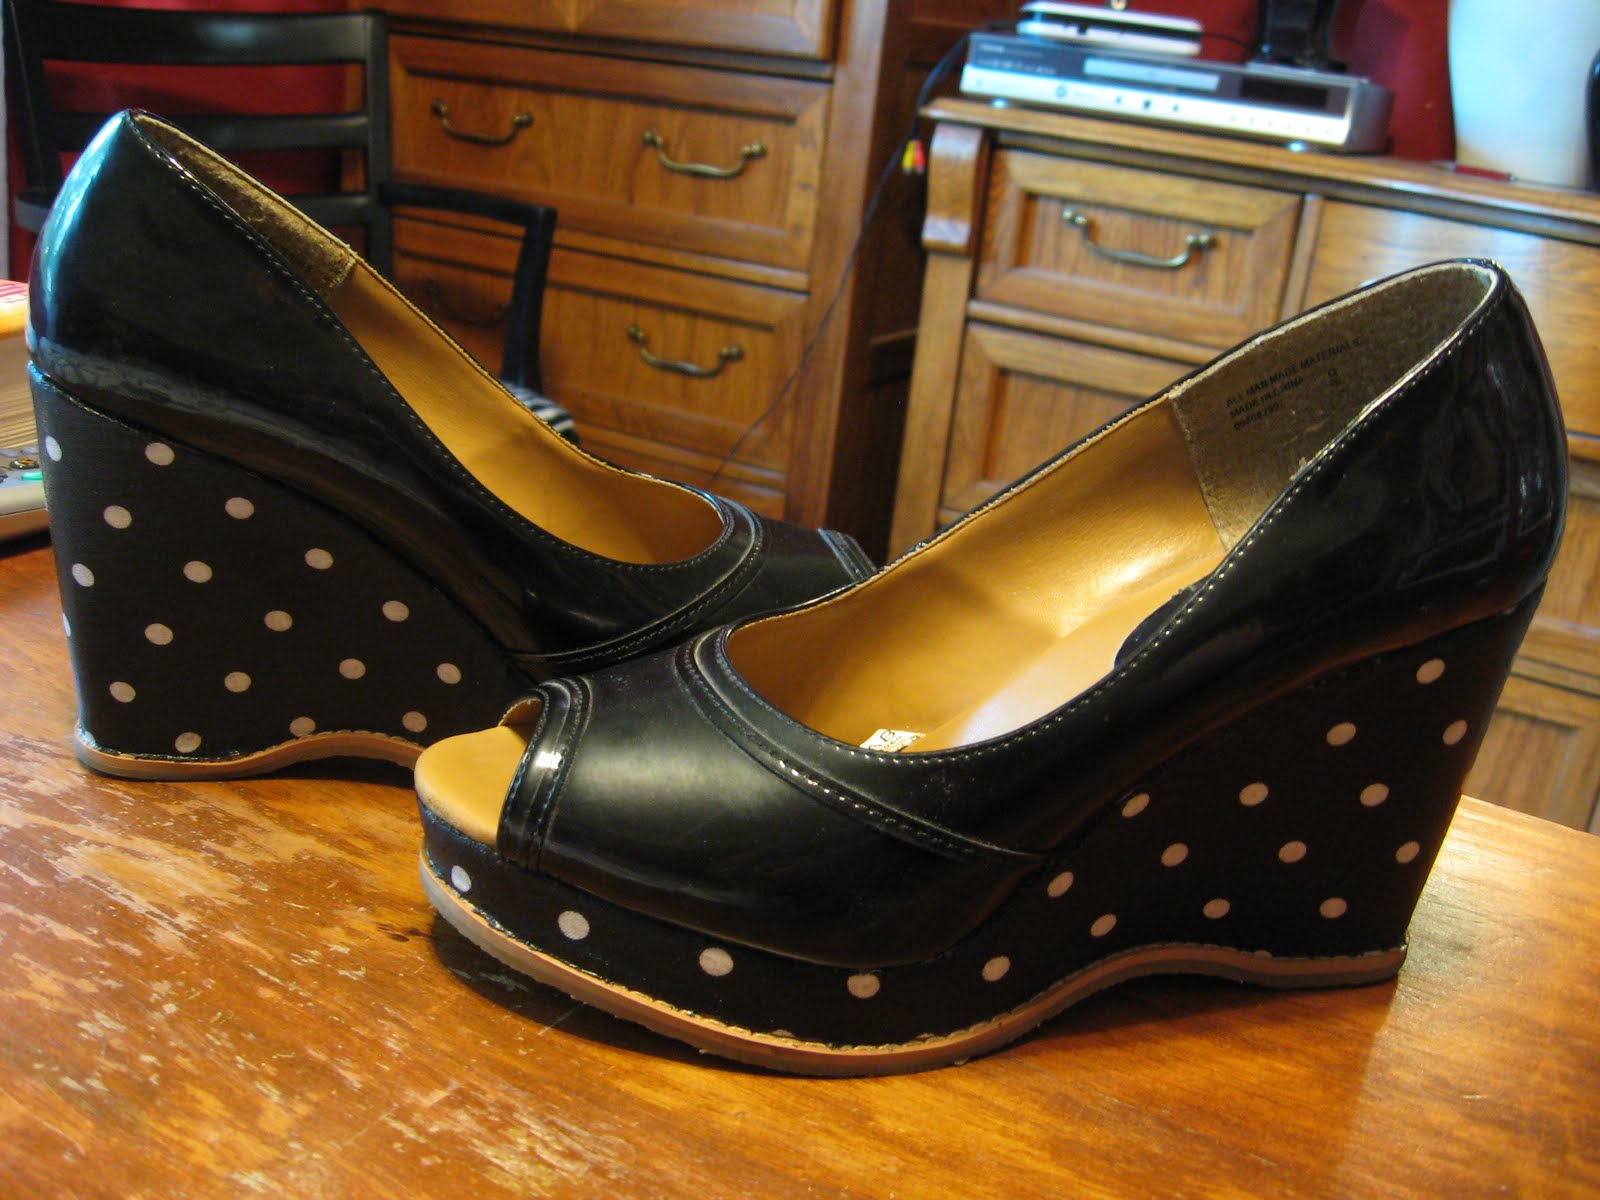
Fix your shoes with Mod Podge
I bought these shoes years ago from Target. I was never totally in love with the black shoe/brown heel but they were cheap enough that I bought them anyway. Turns out they are super comfy-as in, I can wear them to work all day without them hurting-comfy. BUT, the brown part started scuffing and wearing off the first time I wore them, leaving those awful white marks, so they’ve sat in my closet for over a year, untouched. I wasn’t ready to throw them out, so I decided to see if they could be saved. Here is the finished product; I love them and now I wear them all the time!
What you’ll need:
Shoes
Fabric
Mod Podge
Paintbrush
Small, sharp scissors or x-acto craft knife
NOTE: I didn’t take pictures as I went along, because to be honest I didn’t think it would work. I’ve gone back now and taken some pictures to show you how I did it. Don’t let it confuse you that the “during” pix are being taken on the “finished” shoe.
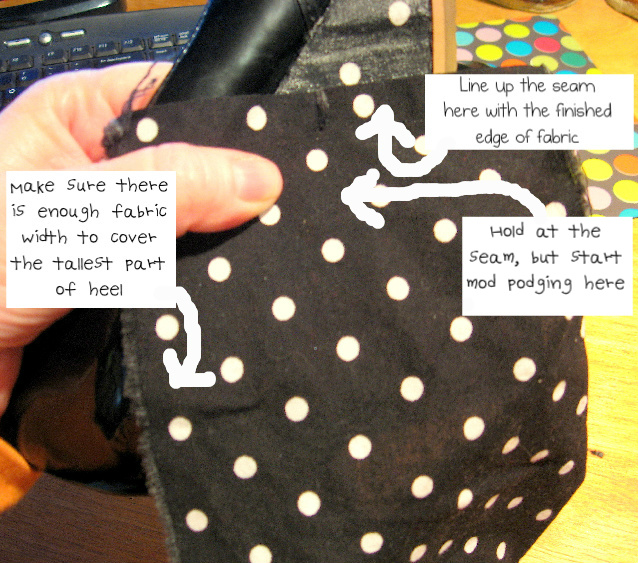
Start by cutting a piece of fabric into a strip that is wide enough to cover the tallest part of the heel and long enough to go all the way around your shoe.
Find the finished edge of your strip of fabric, and find the seam of your heel if there is one. You will start here, by lining them up (if you don’t have a seam, I recommend starting on the inside middle of your heel.) You want this nice straight line of fabric to be what shows when you are all done, so DO NOT mod podge it on yet. Hold it in place firmly with one hand, and move along the shoe a few inches and apply a little mod podge with the paint brush. Smooth the fabric down at that point, being careful to keep it in place (so that the seam is still lined up) and don’t let it slip. This is the hardest part; everything else goes pretty quickly.
 Continue on around the shoe, applying mod podge on an inch or two of the heel at a time, and then smoothing down the fabric. Just go slow and work it carefully with your fingers to make it lie smooth on the curves. Make sure you cover every bit of the area you are working on-top to bottom with the mod podge. Any loose pockets of fabric will not look nice and make it so the fabric doesn’t stay on the shoe as long.
When you get back to where you started, cut the fabric in as straight of a line as you can so that it will end just beyond the finished edge of fabric that you started with (remember how we didn’t stick it down yet?) Now mod podge down the cut end.
Then, mod podge down that finished edge of fabric. 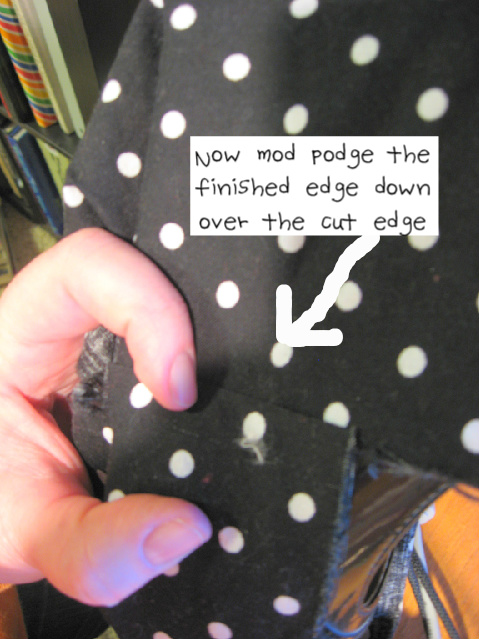
This will give you a perfect straight seam when you’re all done, like you see here.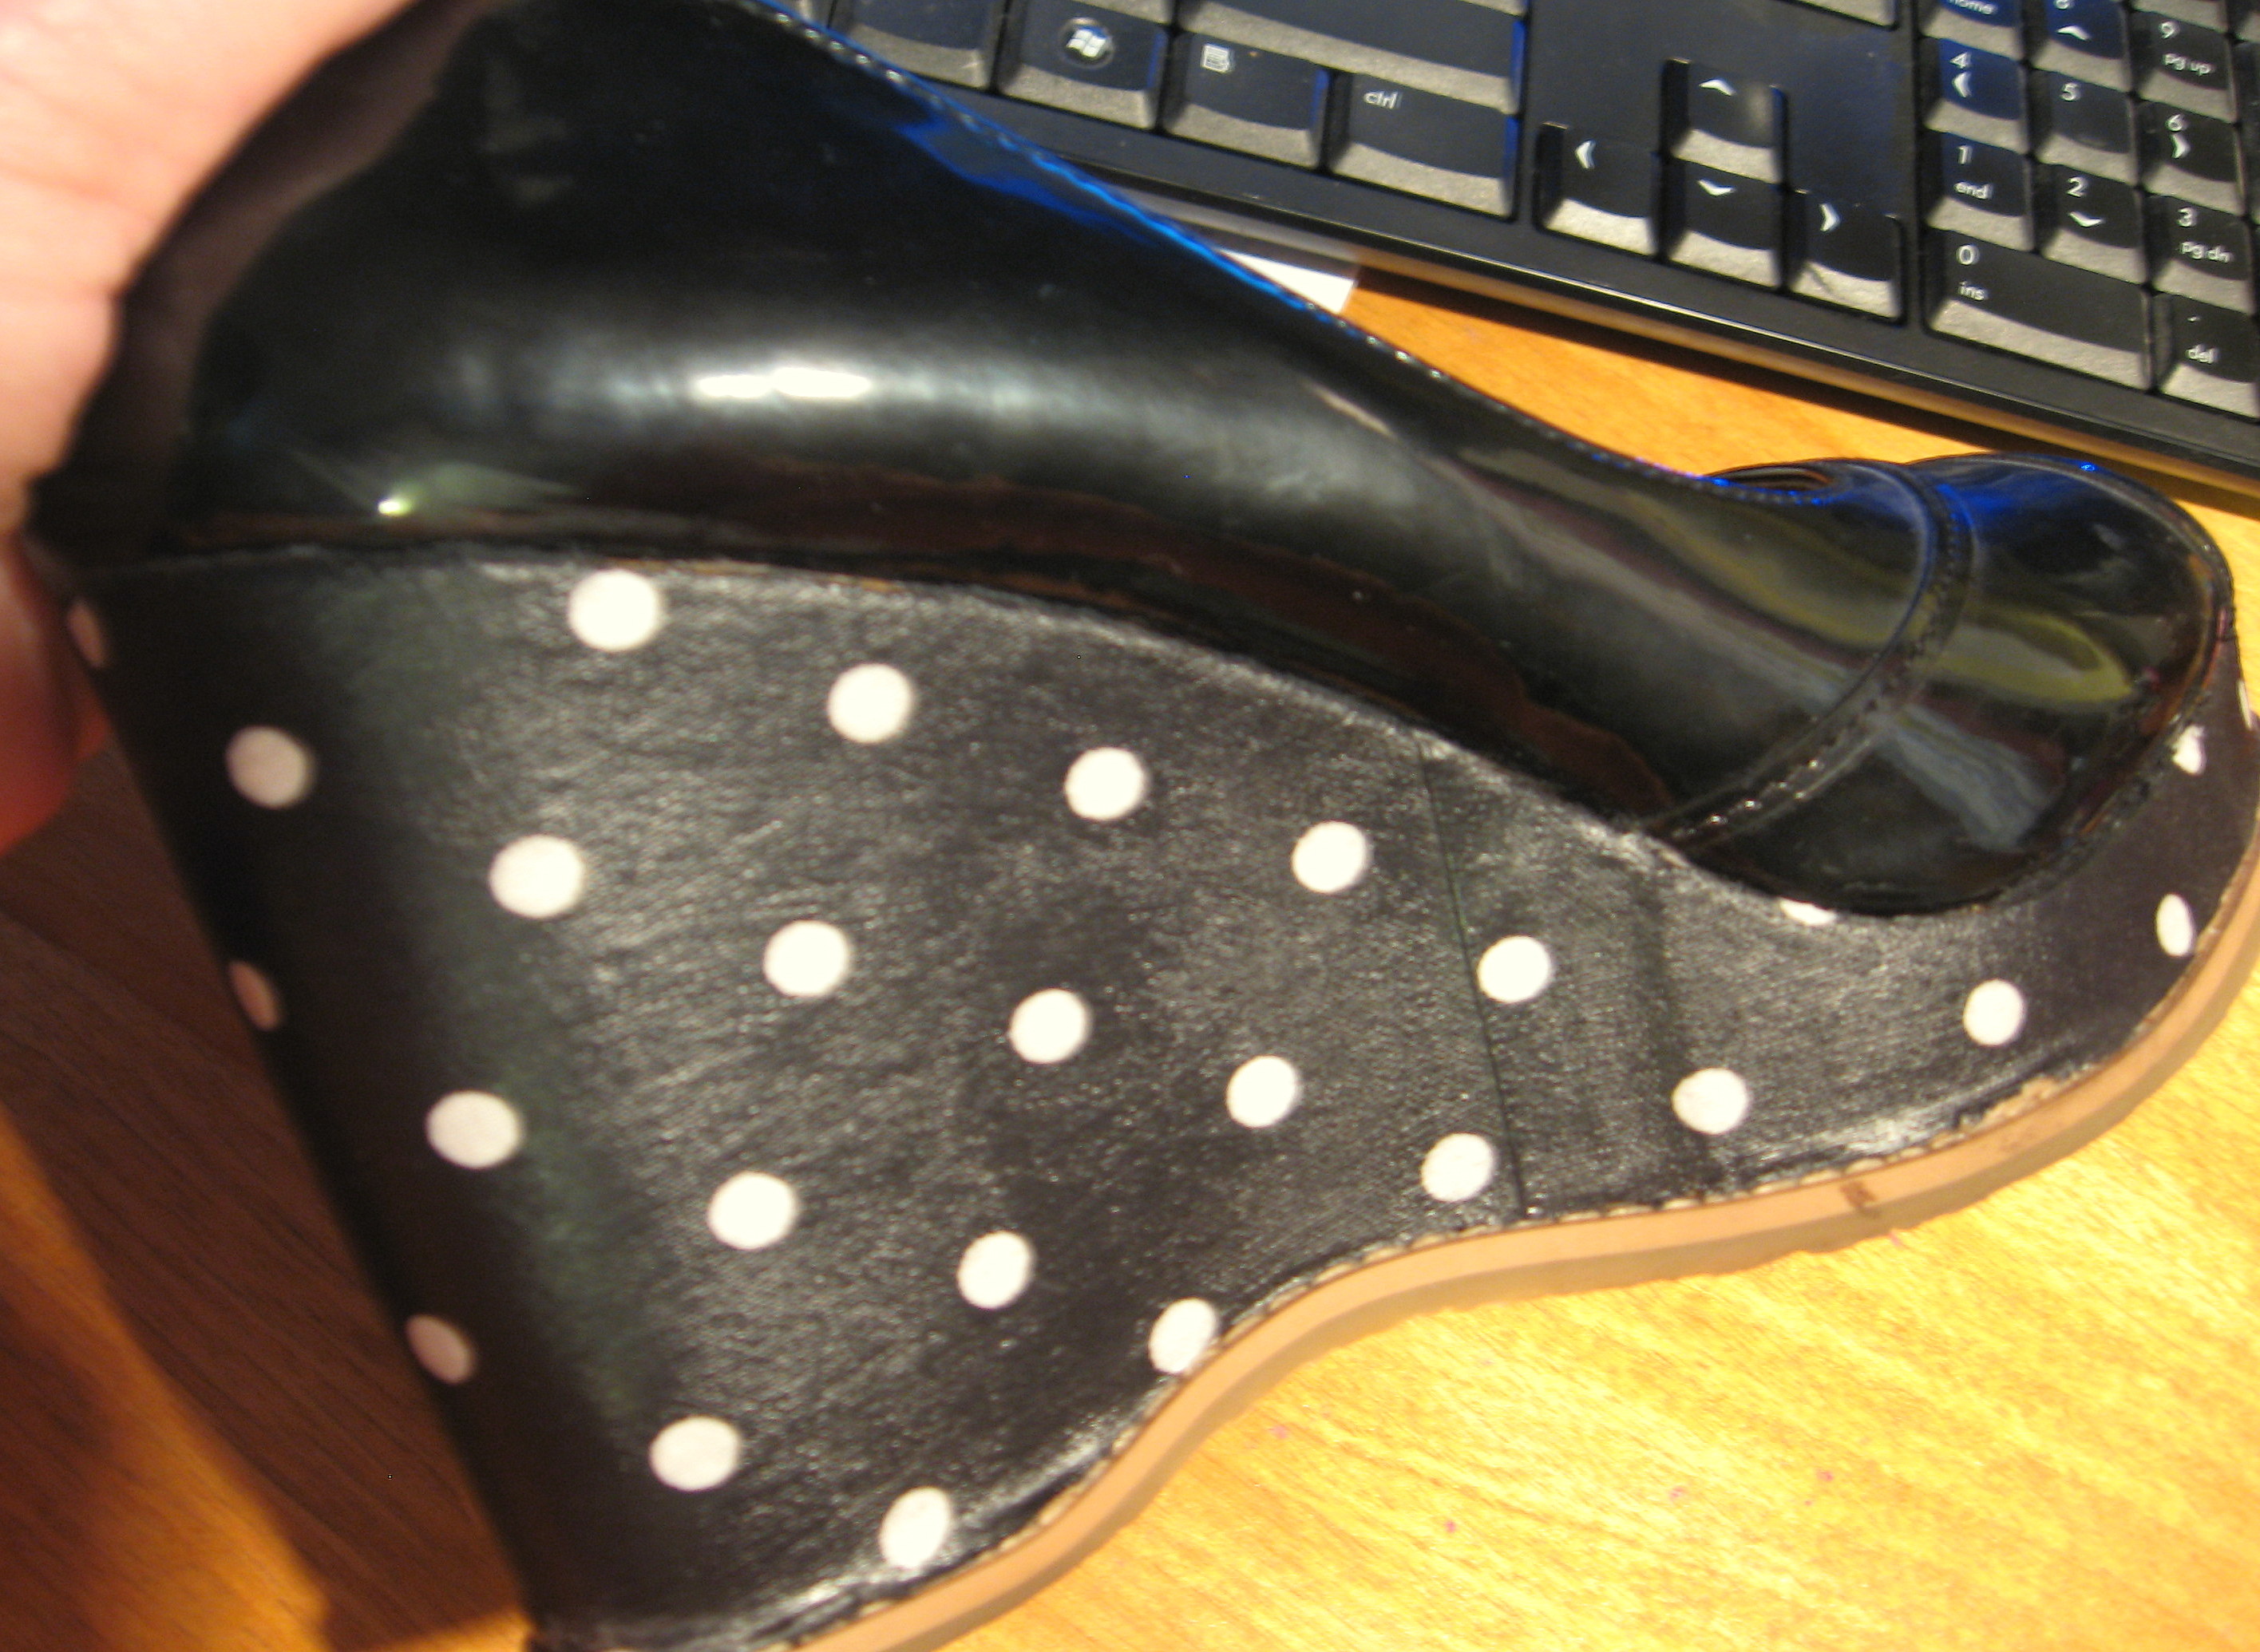
Let this dry well-probably about 20 minutes (good time to do the other shoe!) Once it is well dry, you will start cutting off the excess fabric. I used a pair of very sharp, small blade scissors, but you could also use a small x-acto blade.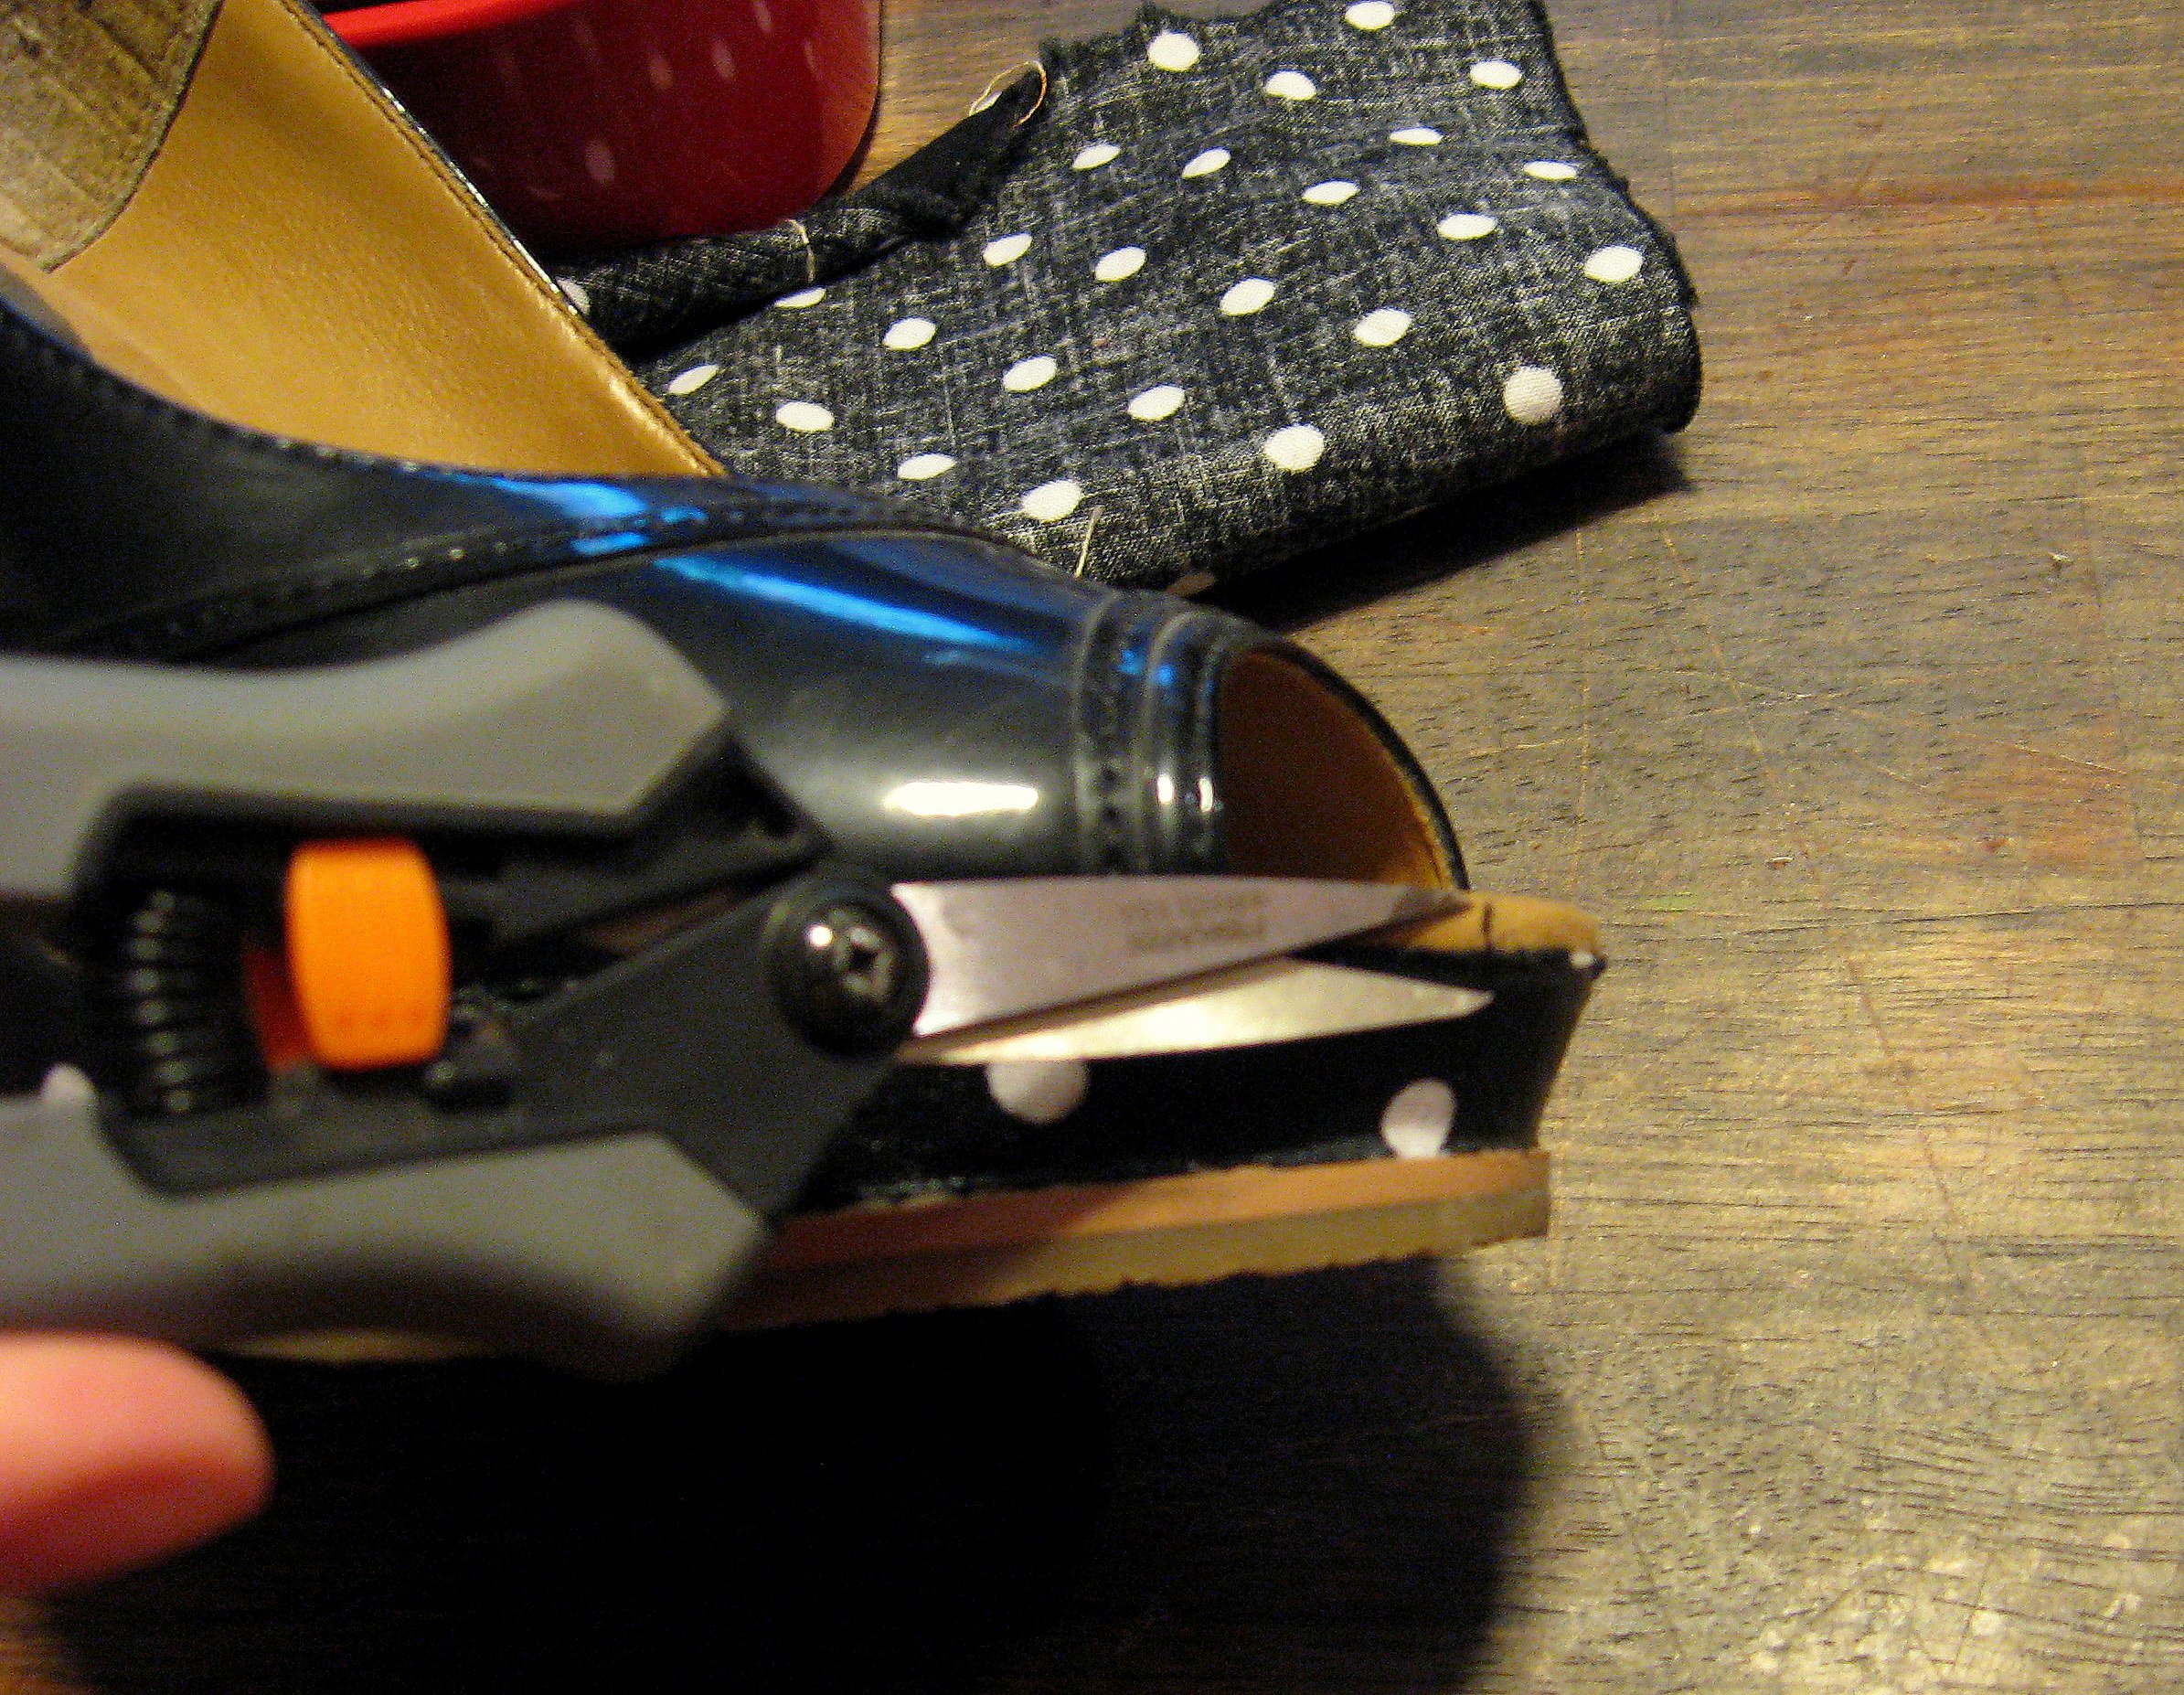
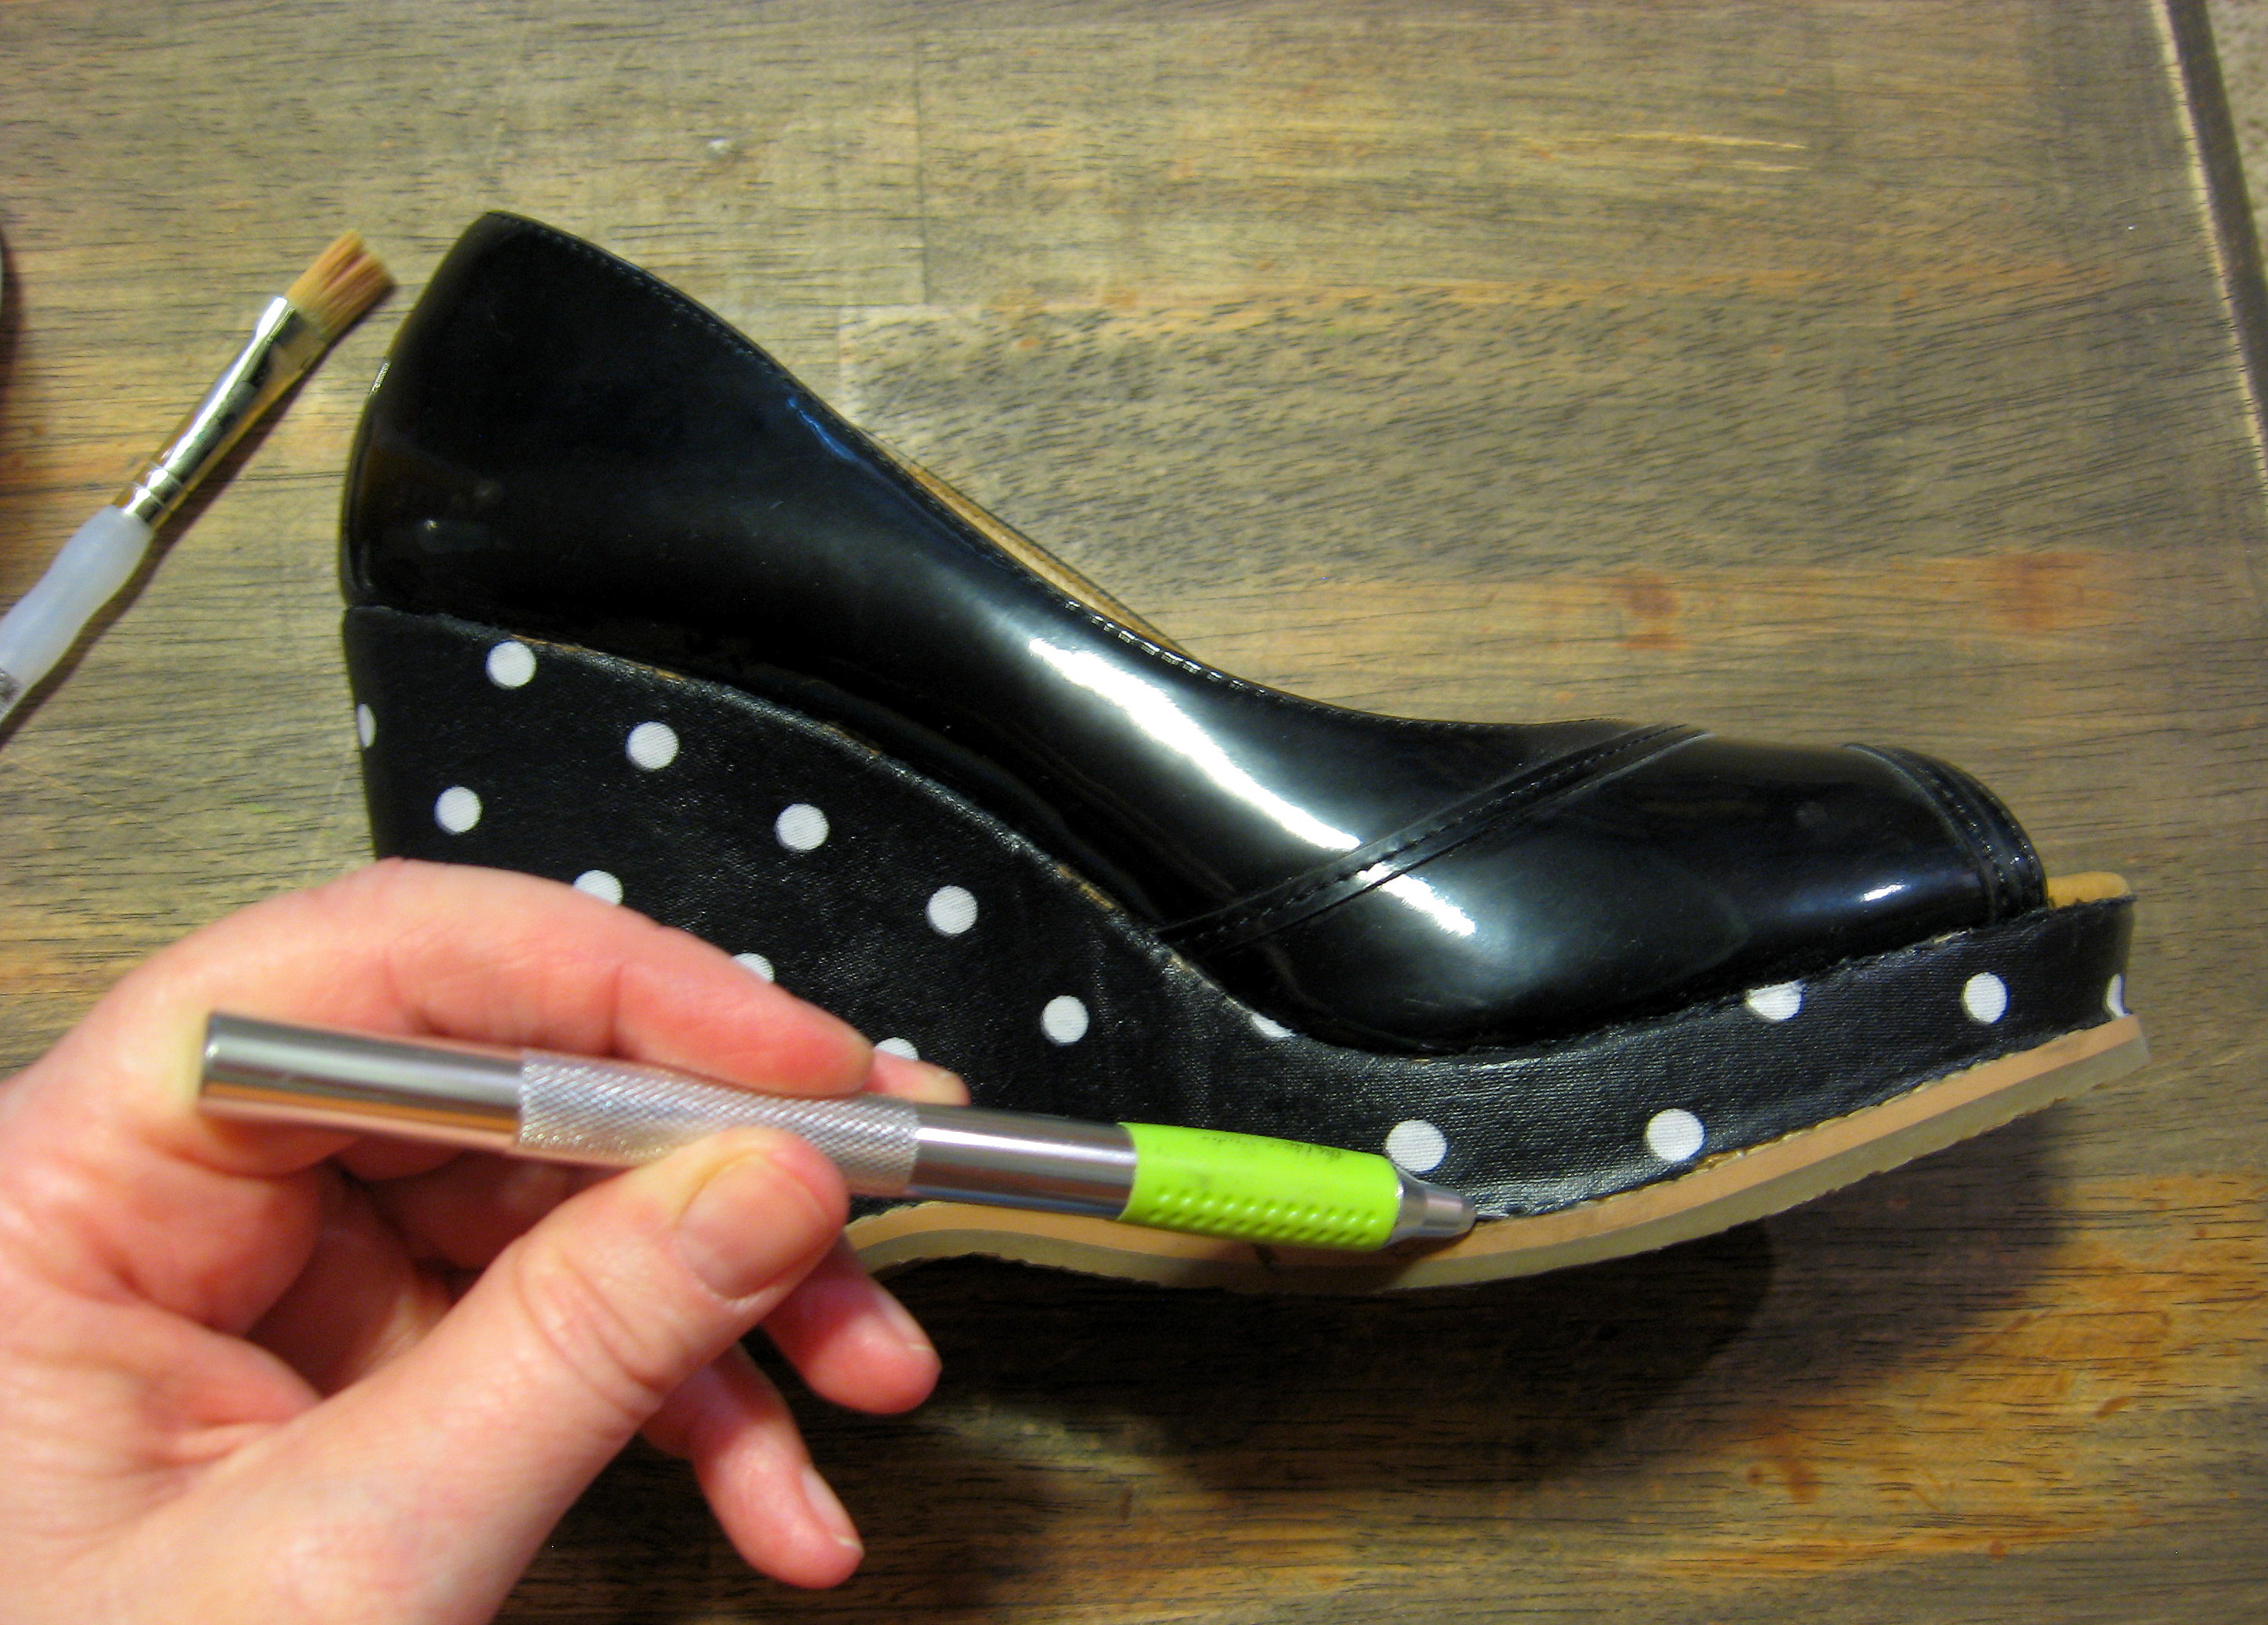
When all the excess fabric is cut off, you will go back and put two coats of mod podge on top of the fabric (let the first coat dry 20 minutes before you apply the second). This will dry hard and give you a nice, water resistant, wipeable surface.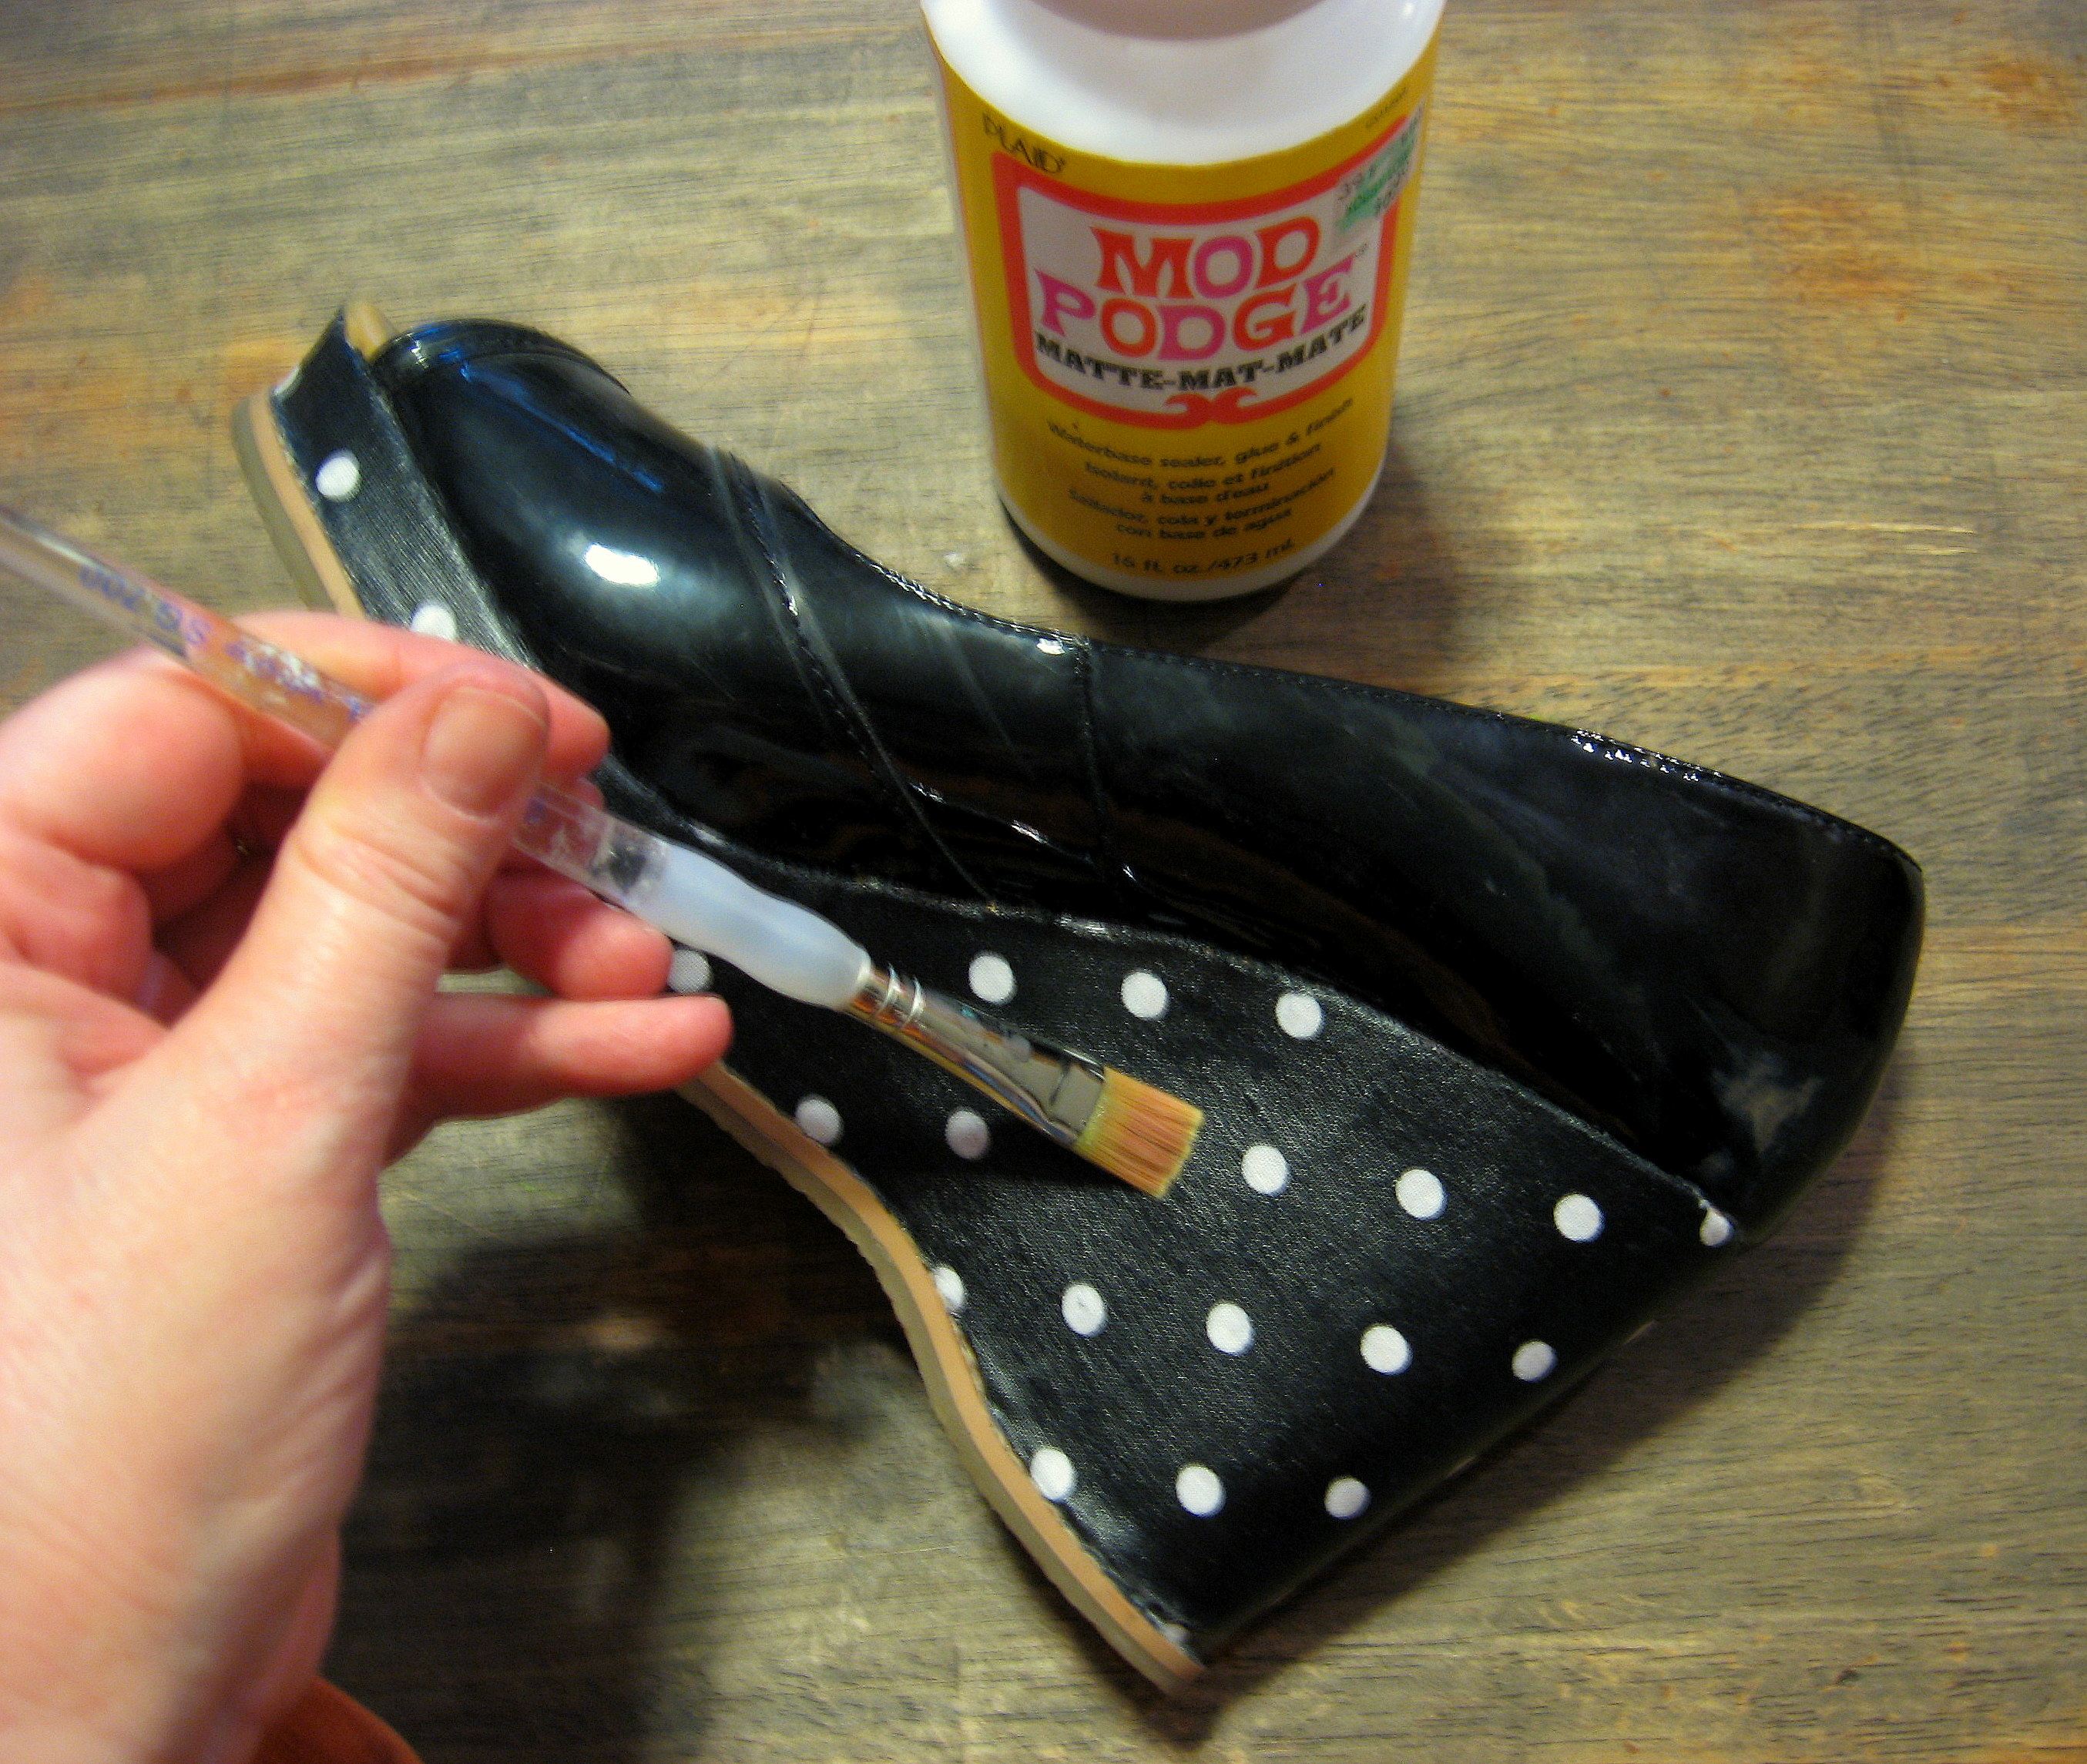
Wear and enjoy! 