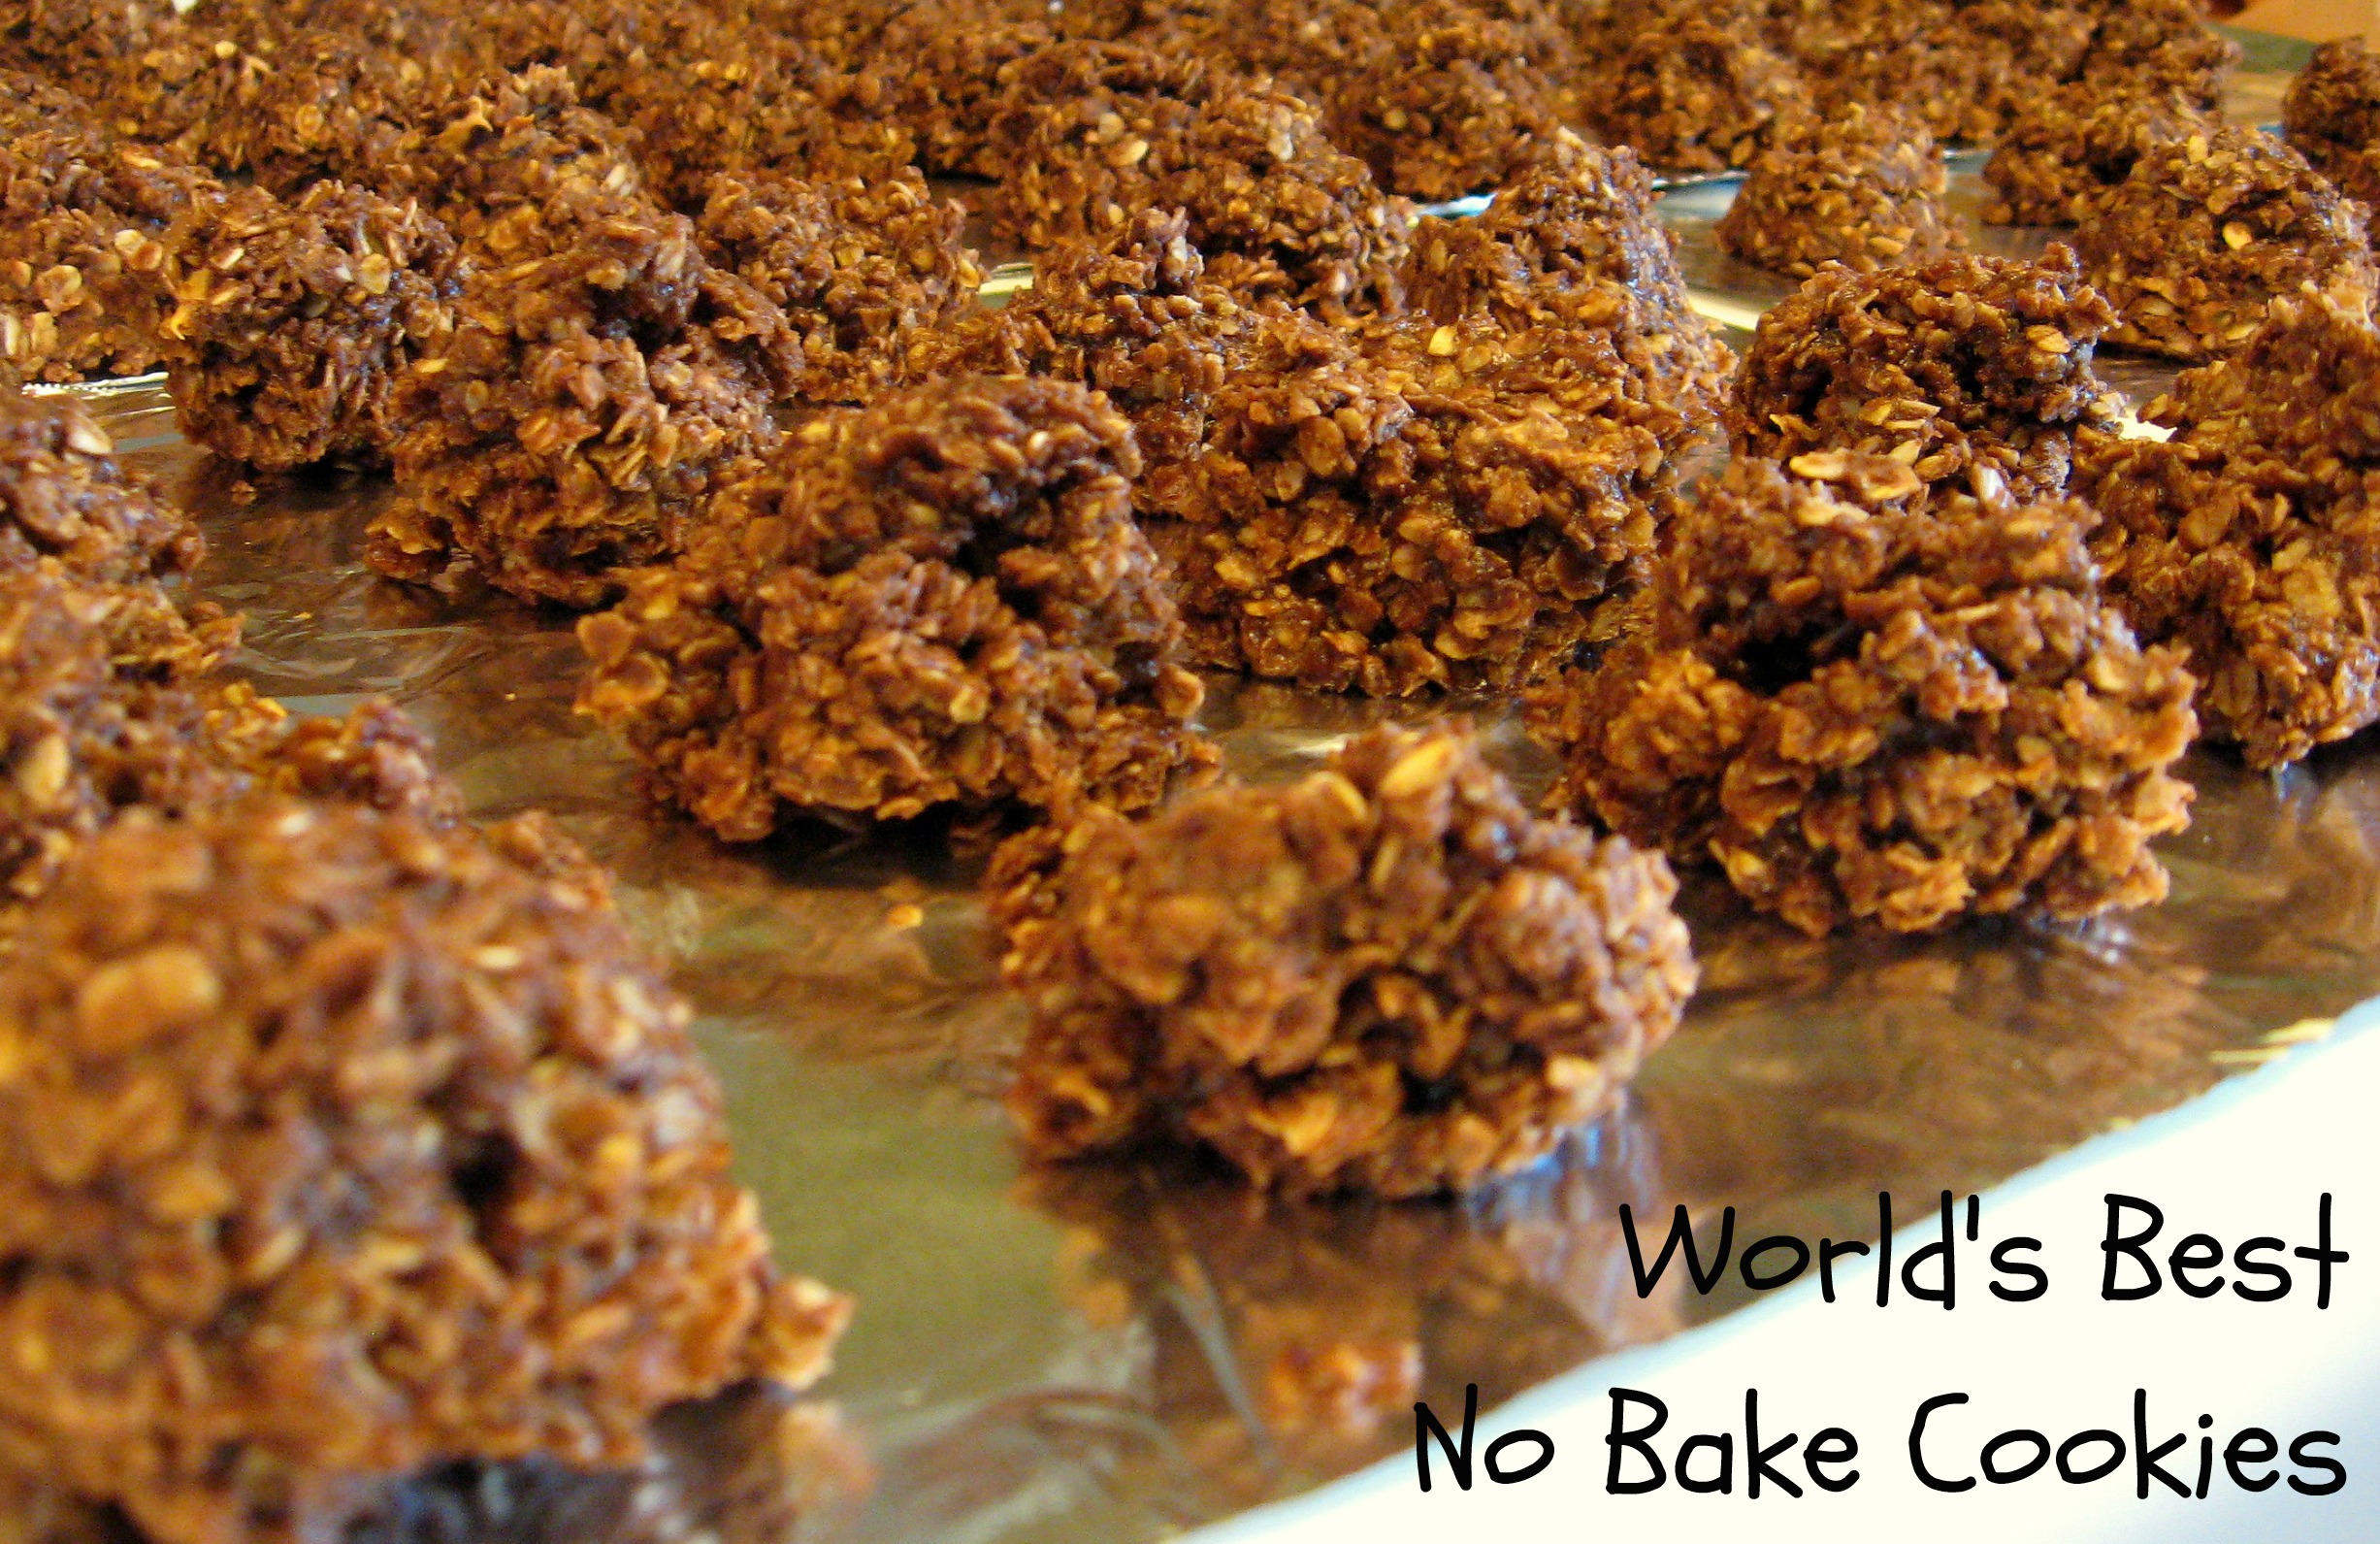
No Bake Cookies
There aren’t many things I would ever brag about being the best at, but making No Bake Cookies is one of them. I am often asked to make them, asked for my recipe and have even had people who swear they don’t like No Bakes tell me they like mine. I made a big double batch today for a family party and thought I would share. You’re welcome 😉
No Bake Cookies
1/2 C. Milk
1/2 C. Butter
2 C. Sugar
5 T. Cocoa
1/4 C. Peanut Butter
1 tsp. Vanilla
3 C. Quick Oats
1 C. Coconut
1/2 bag Butterscotch Chips
Mix together milk, butter, sugar and cocoa in saucepan. Bring to boil – stirring constantly – and boil for 60 seconds. Remove from heat and once it stops boiling, add vanilla, then oats and coconut, then butterscotch chips. Mix these in quickly, being careful not to over stir. Drop by spoonful onto waxed paper or foil.
Couple of notes:
- You can make these using margarine instead of butter; I sometimes do. They will turn out ok, but they are amazing with butter.
- I don’t really measure the peanut butter, I just scoop out a big spoonful and plop it in, but it is probably about a 1/4 cup.
- If you don’t want to use coconut, then just use more oats.
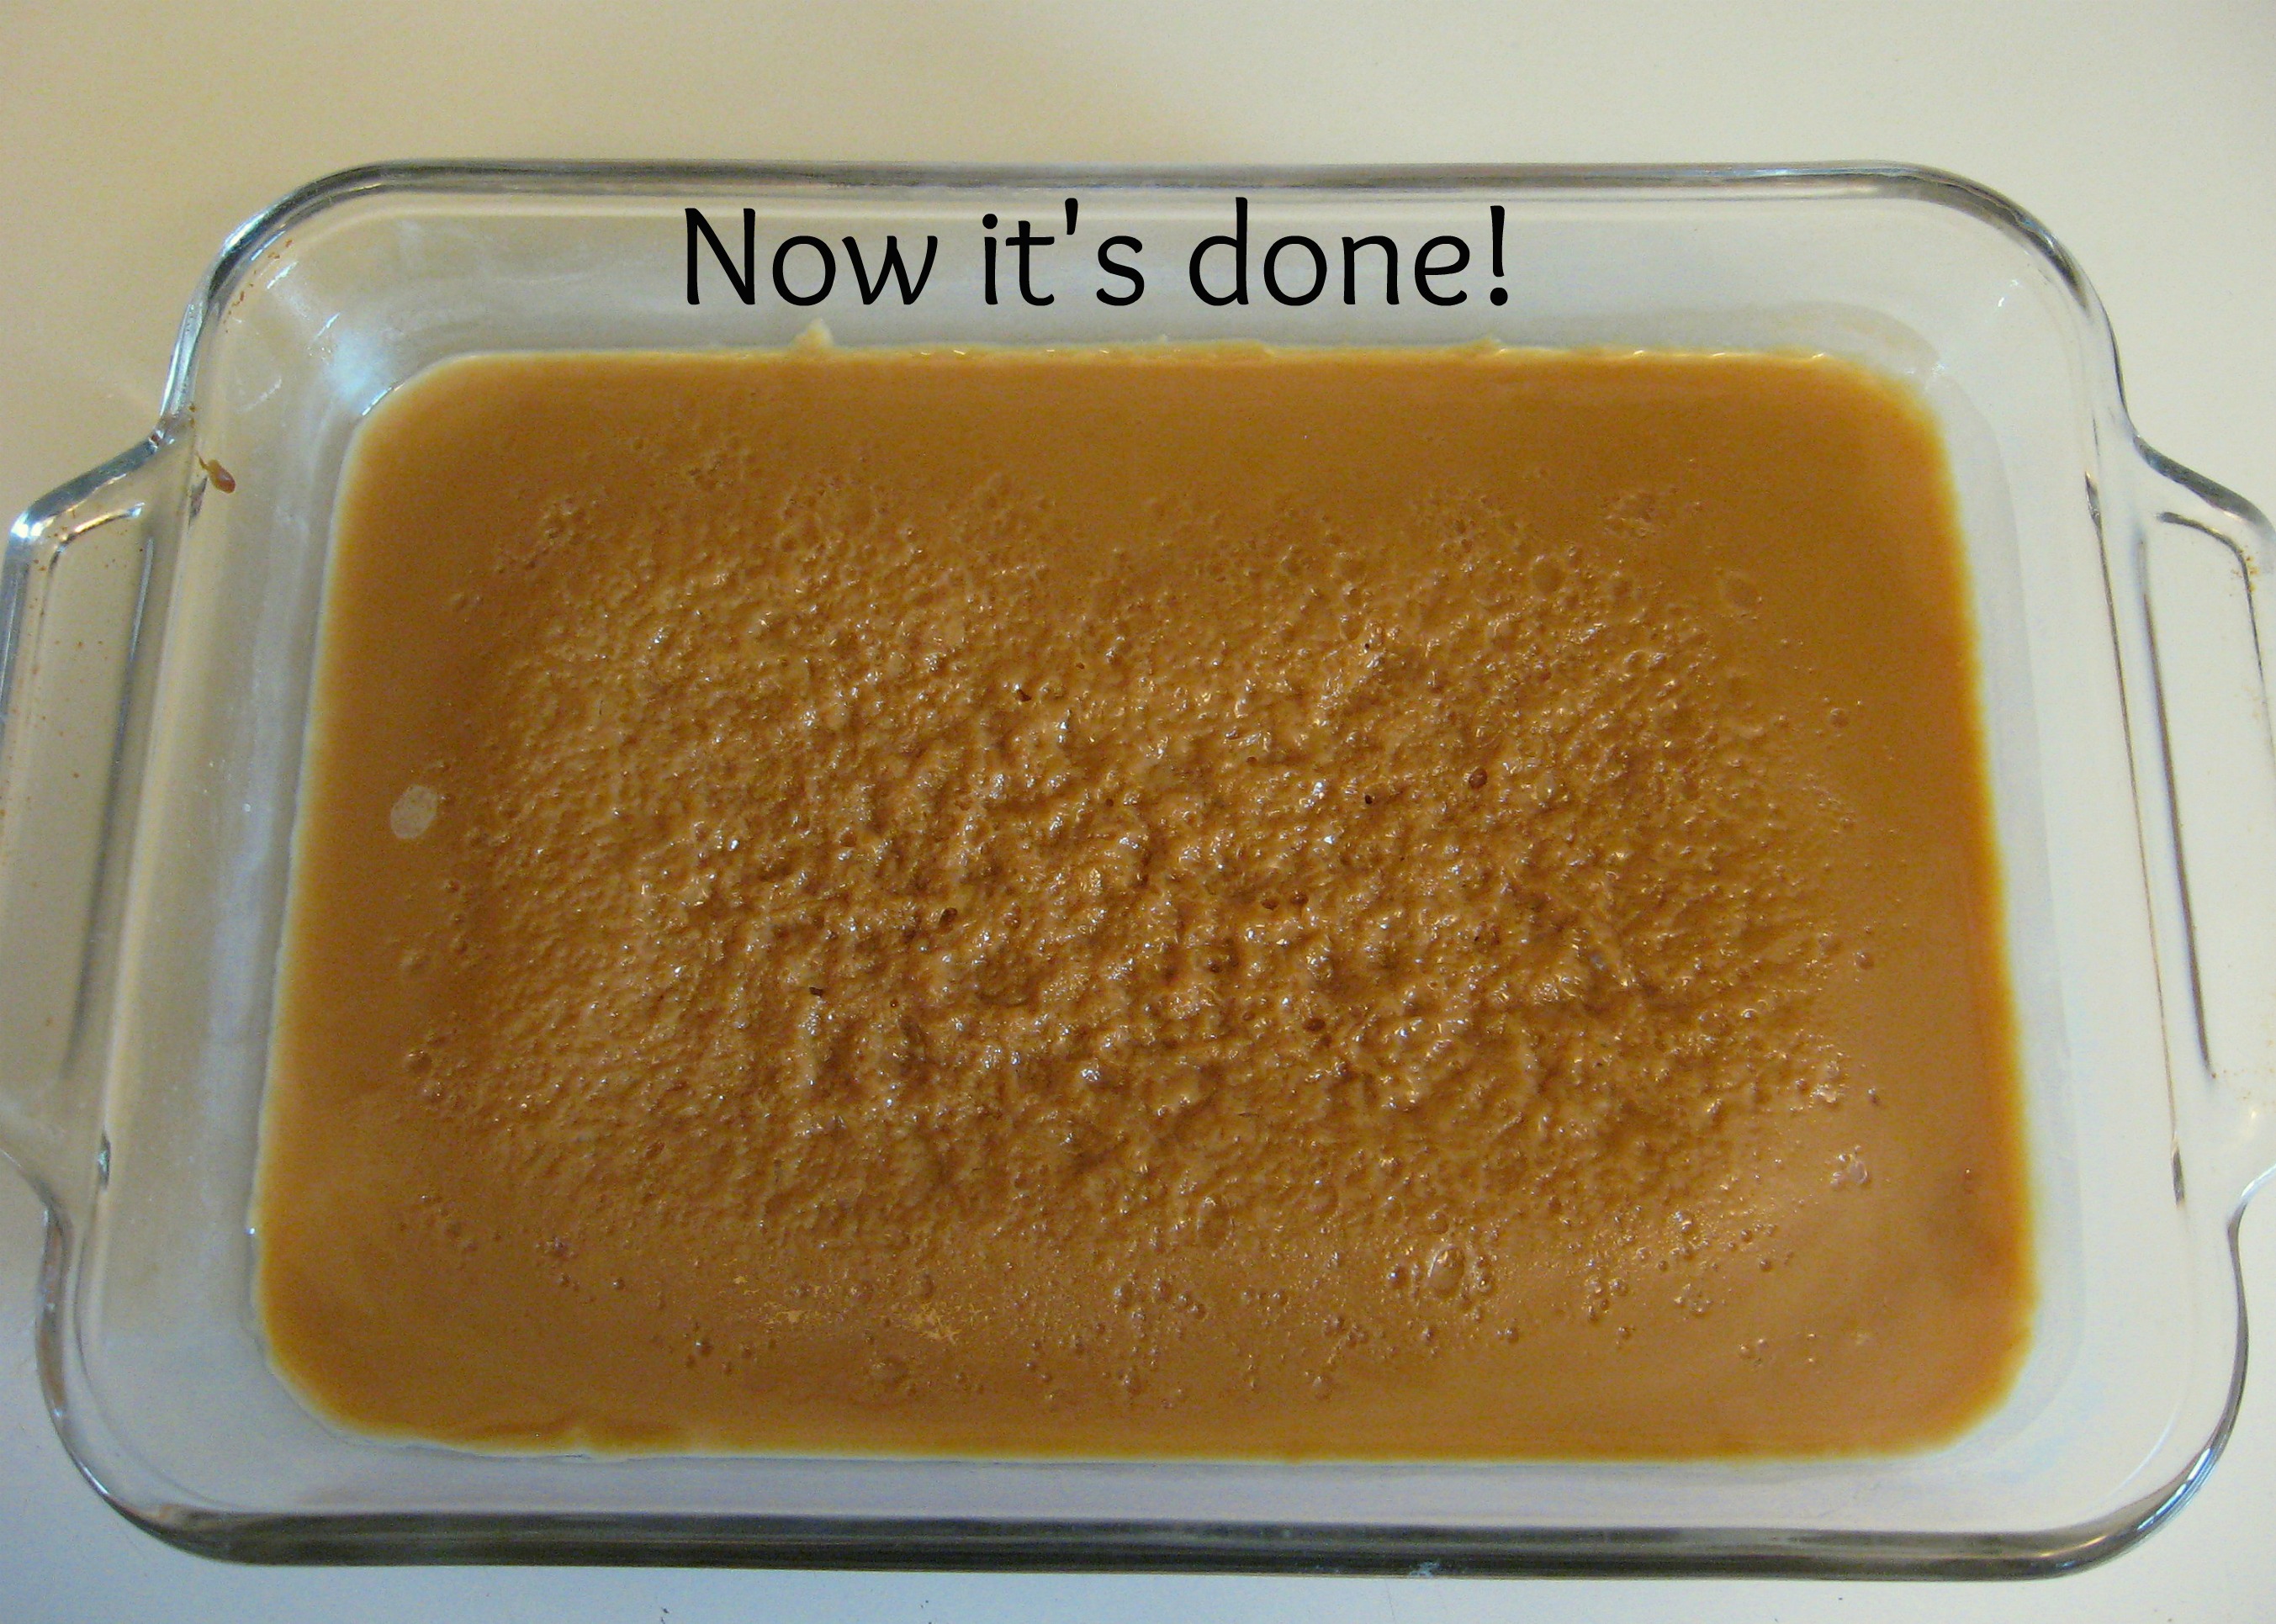
- Start with the stated amounts of oats and coconut, but you really want to mix it in by sight. Add until the mixture looks like this:
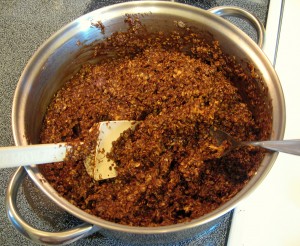
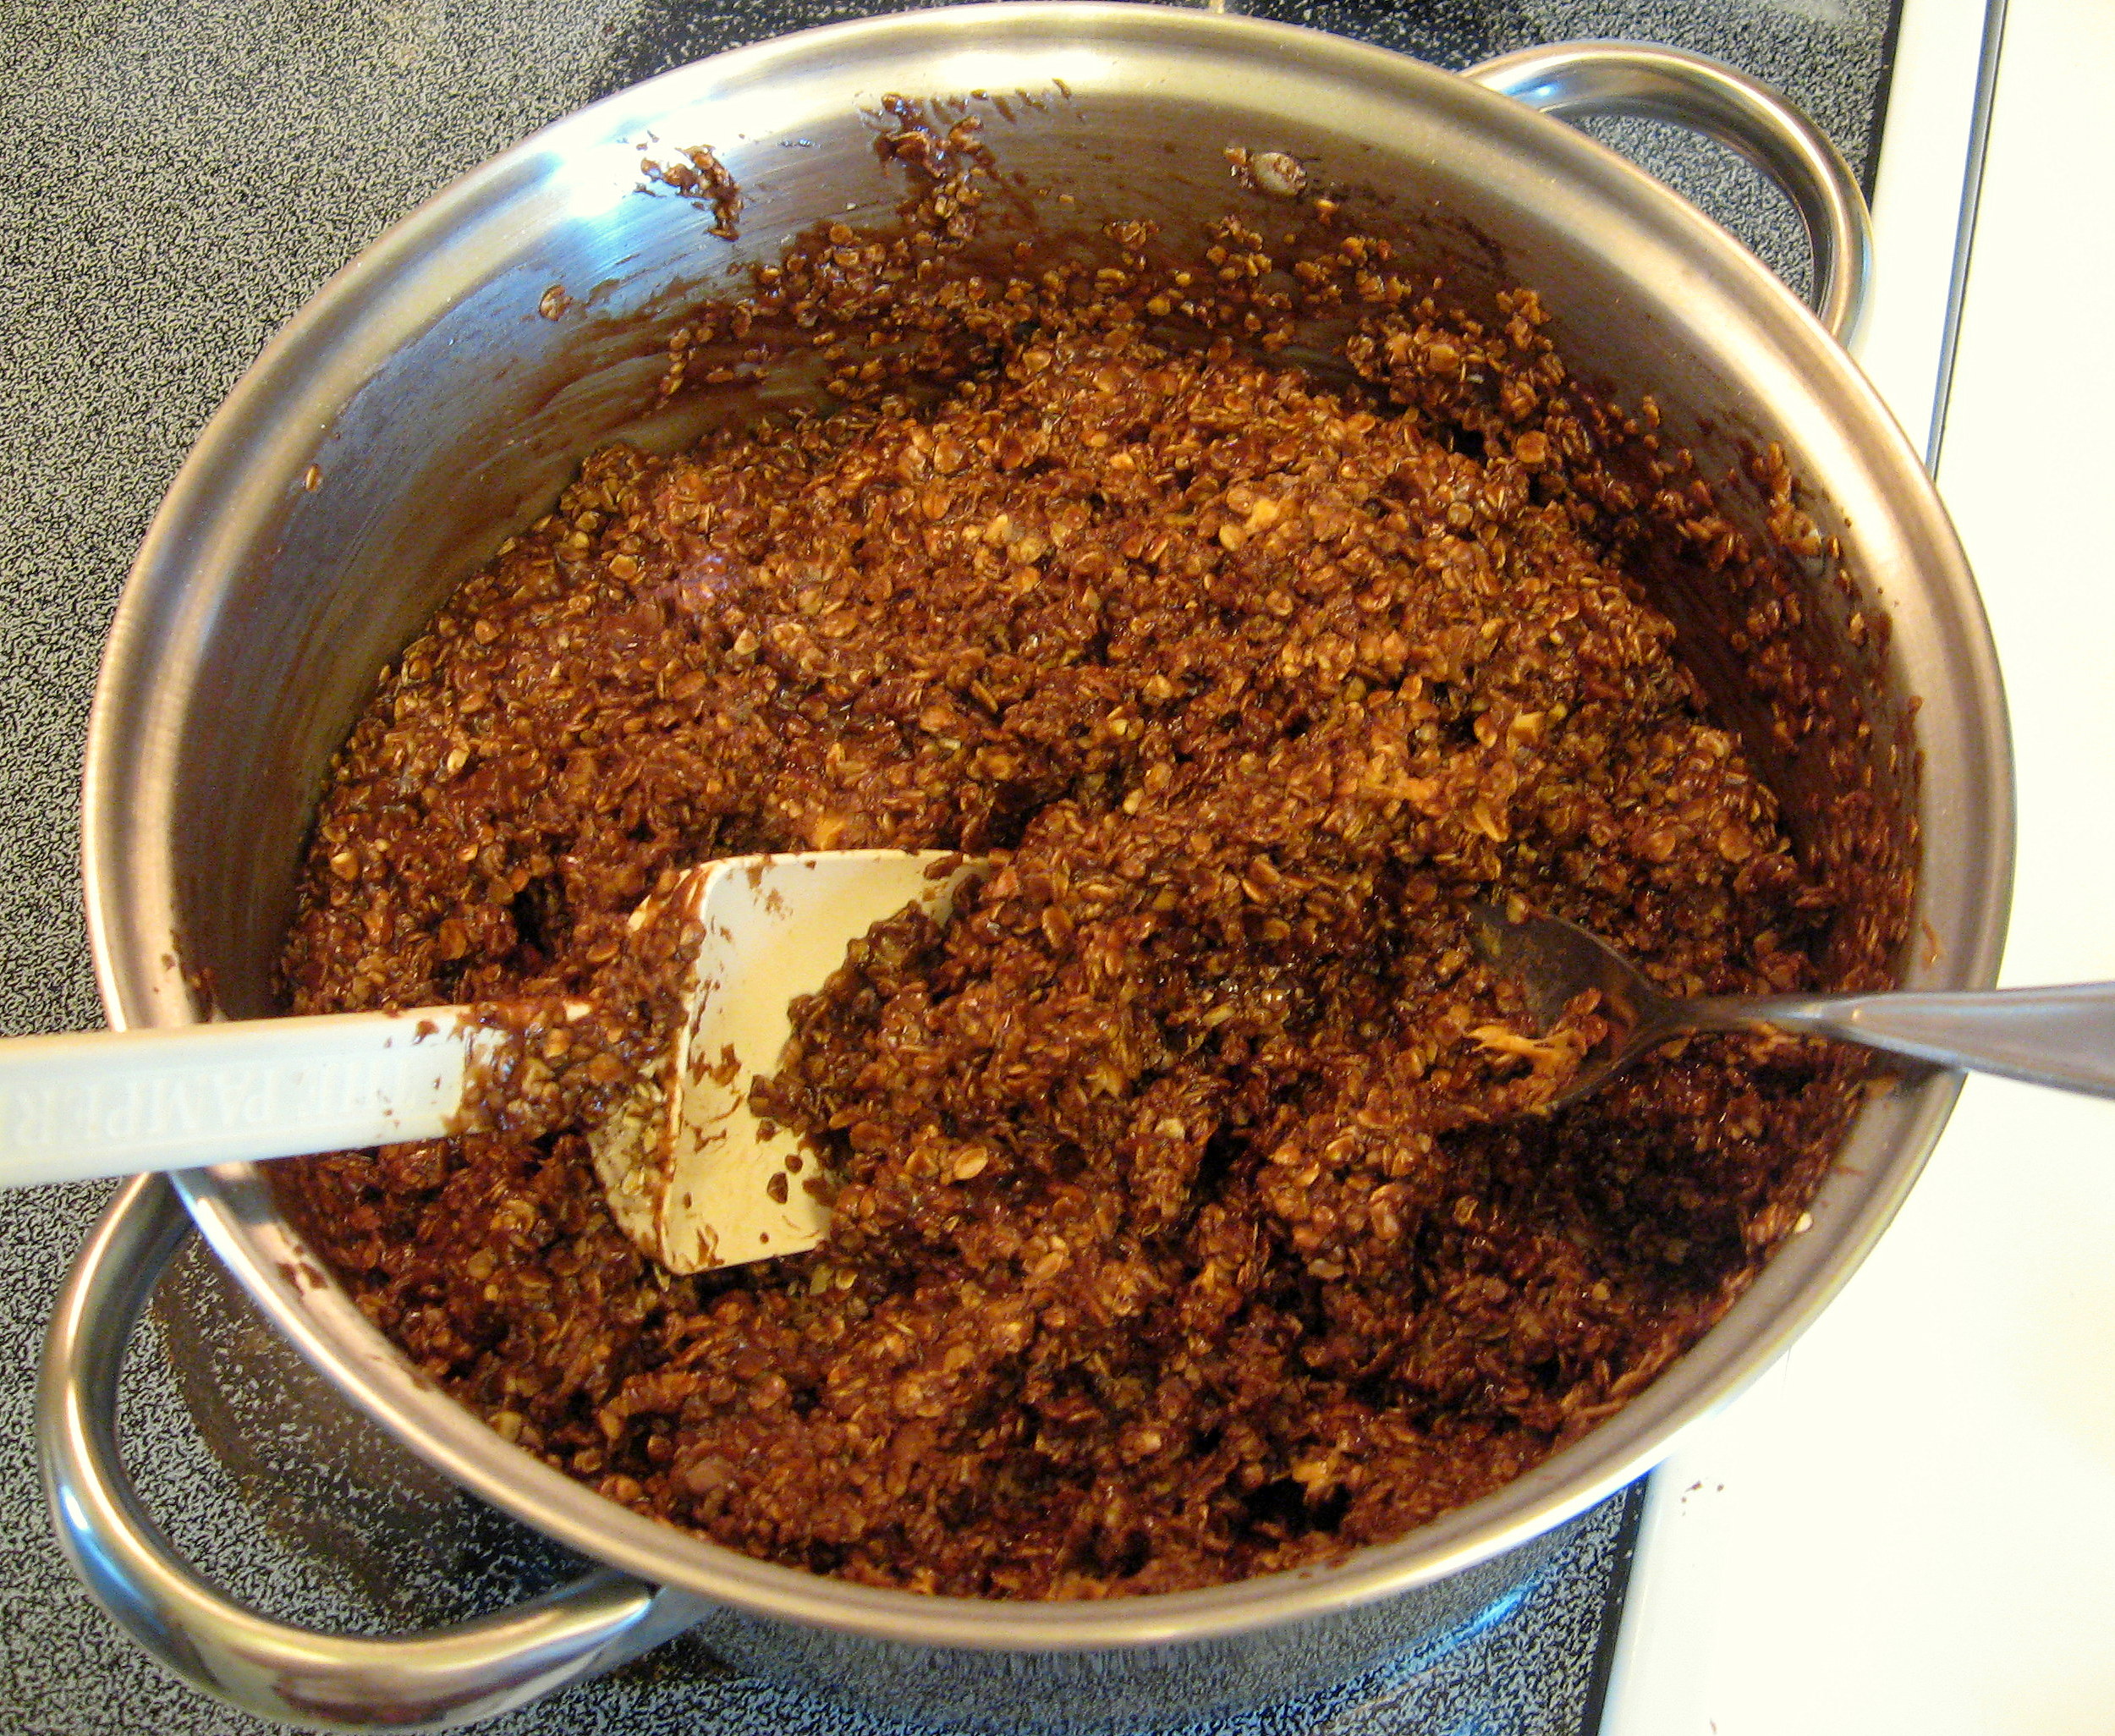
DON’T add too much; stop when they still look a little too wet; this is key!
- If you don’t like butterscotch, try chocolate chips, or the swirled chocolate and vanilla chips; ALTHOUGH, I am not a big fan of butterscotch myself and I think that they are best with the butterscotch chips.
Shopping List Dry Erase Board
“Next time you’re going to Wal Mart, could you pick me up a notebook?”
“Next time I’m at the store, I have to remember we need baking soda.”
“When are you going to Lowe’s? I need some sandpaper.”
“I need new socks!”
There’s no way I can remember all the shopping requests that get hurled my way every week, and having them written down usually results in the bottom of my purse being littered with enough Post It notes and scraps of paper to ensure that something was always being missed. What I needed was a master shopping list all in one place. For my family, the refrigerator door is the best place, and it is so effective that it only took a week or two to have everyone trained to write their needs on the list.
“Did you get my socks?”
“Did you write it on the list?”
Problem solved.
I started with a frame from the thrift store that was the right size to fit my freezer door. It needs to have glass or plastic in it to act as a dry erase board. I waited to find one that had plastic in it so it wouldn’t be so heavy. Just make sure it isn’t scratched up.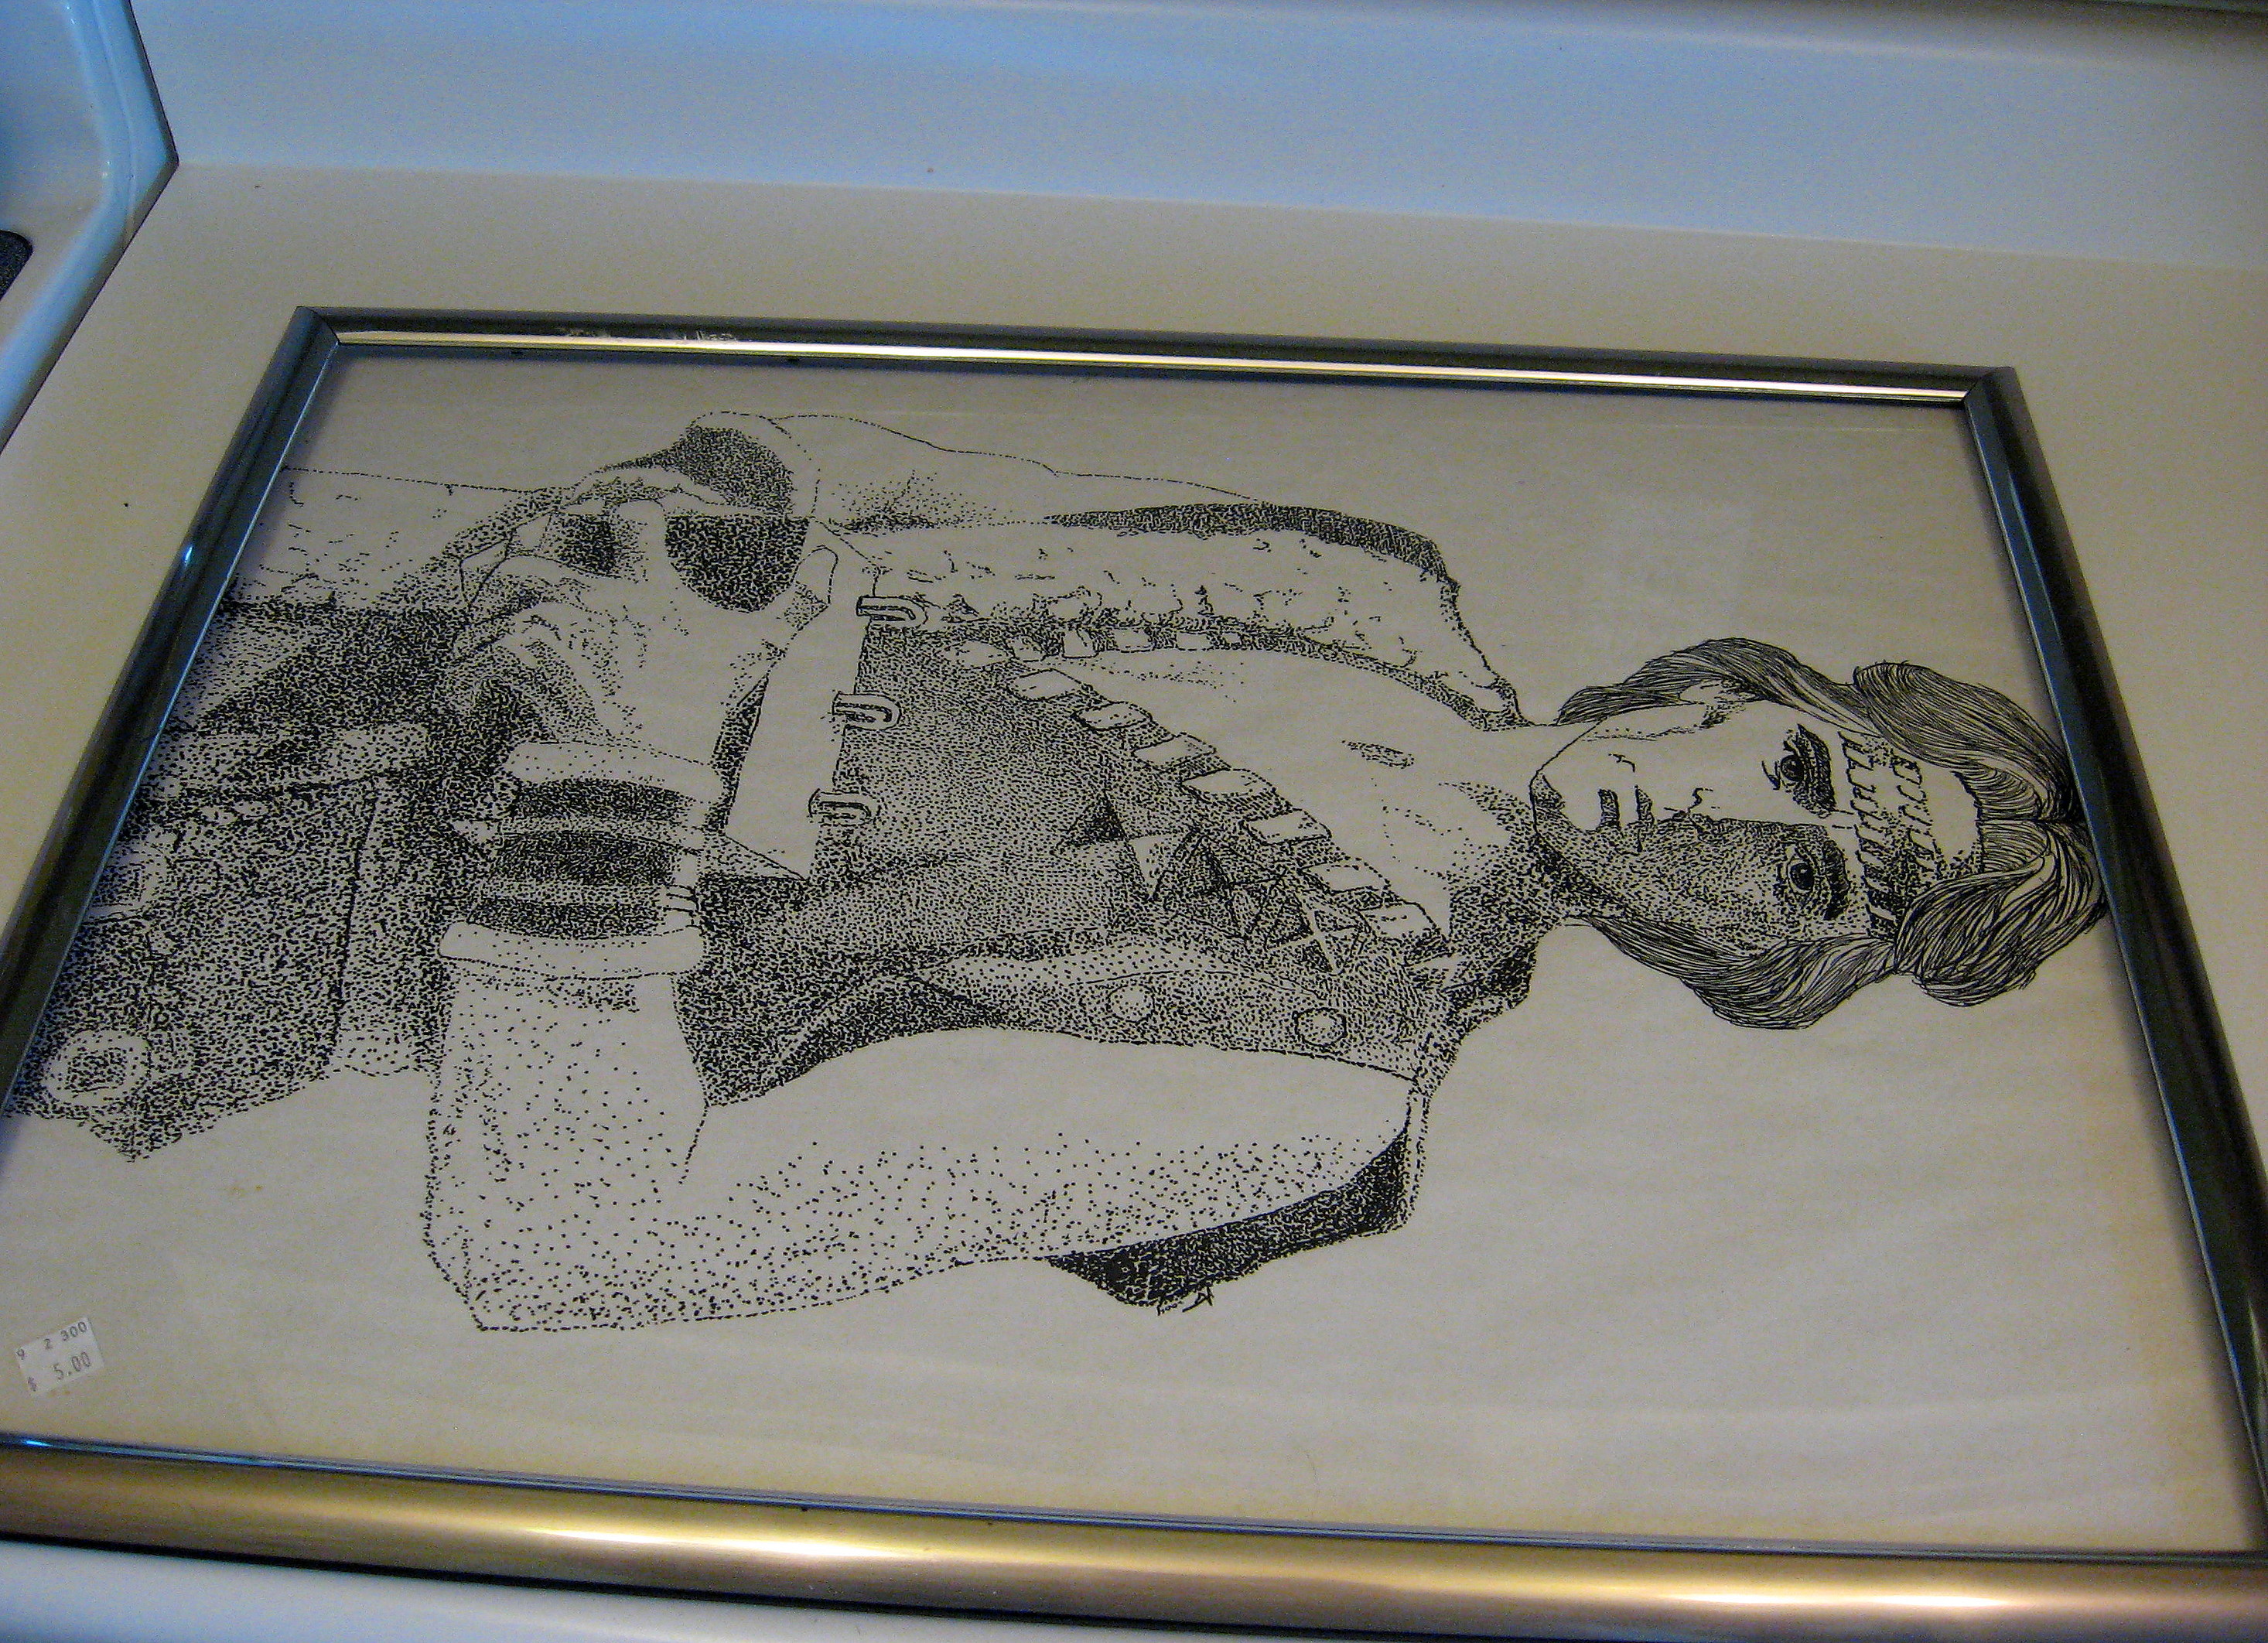
Take the back and the glass out (I will continue to say “glass” here even though mine is plastic. You know what I mean!) If the artwork in it is in good shape, be sure to donate it back to the store; someone obviously worked hard on this one! Paint the frame if you like; I spray painted mine orange. If yours is a plastic frame like mine was, I recommend a high quality spray paint made for plastic, like Krylon Fusion.
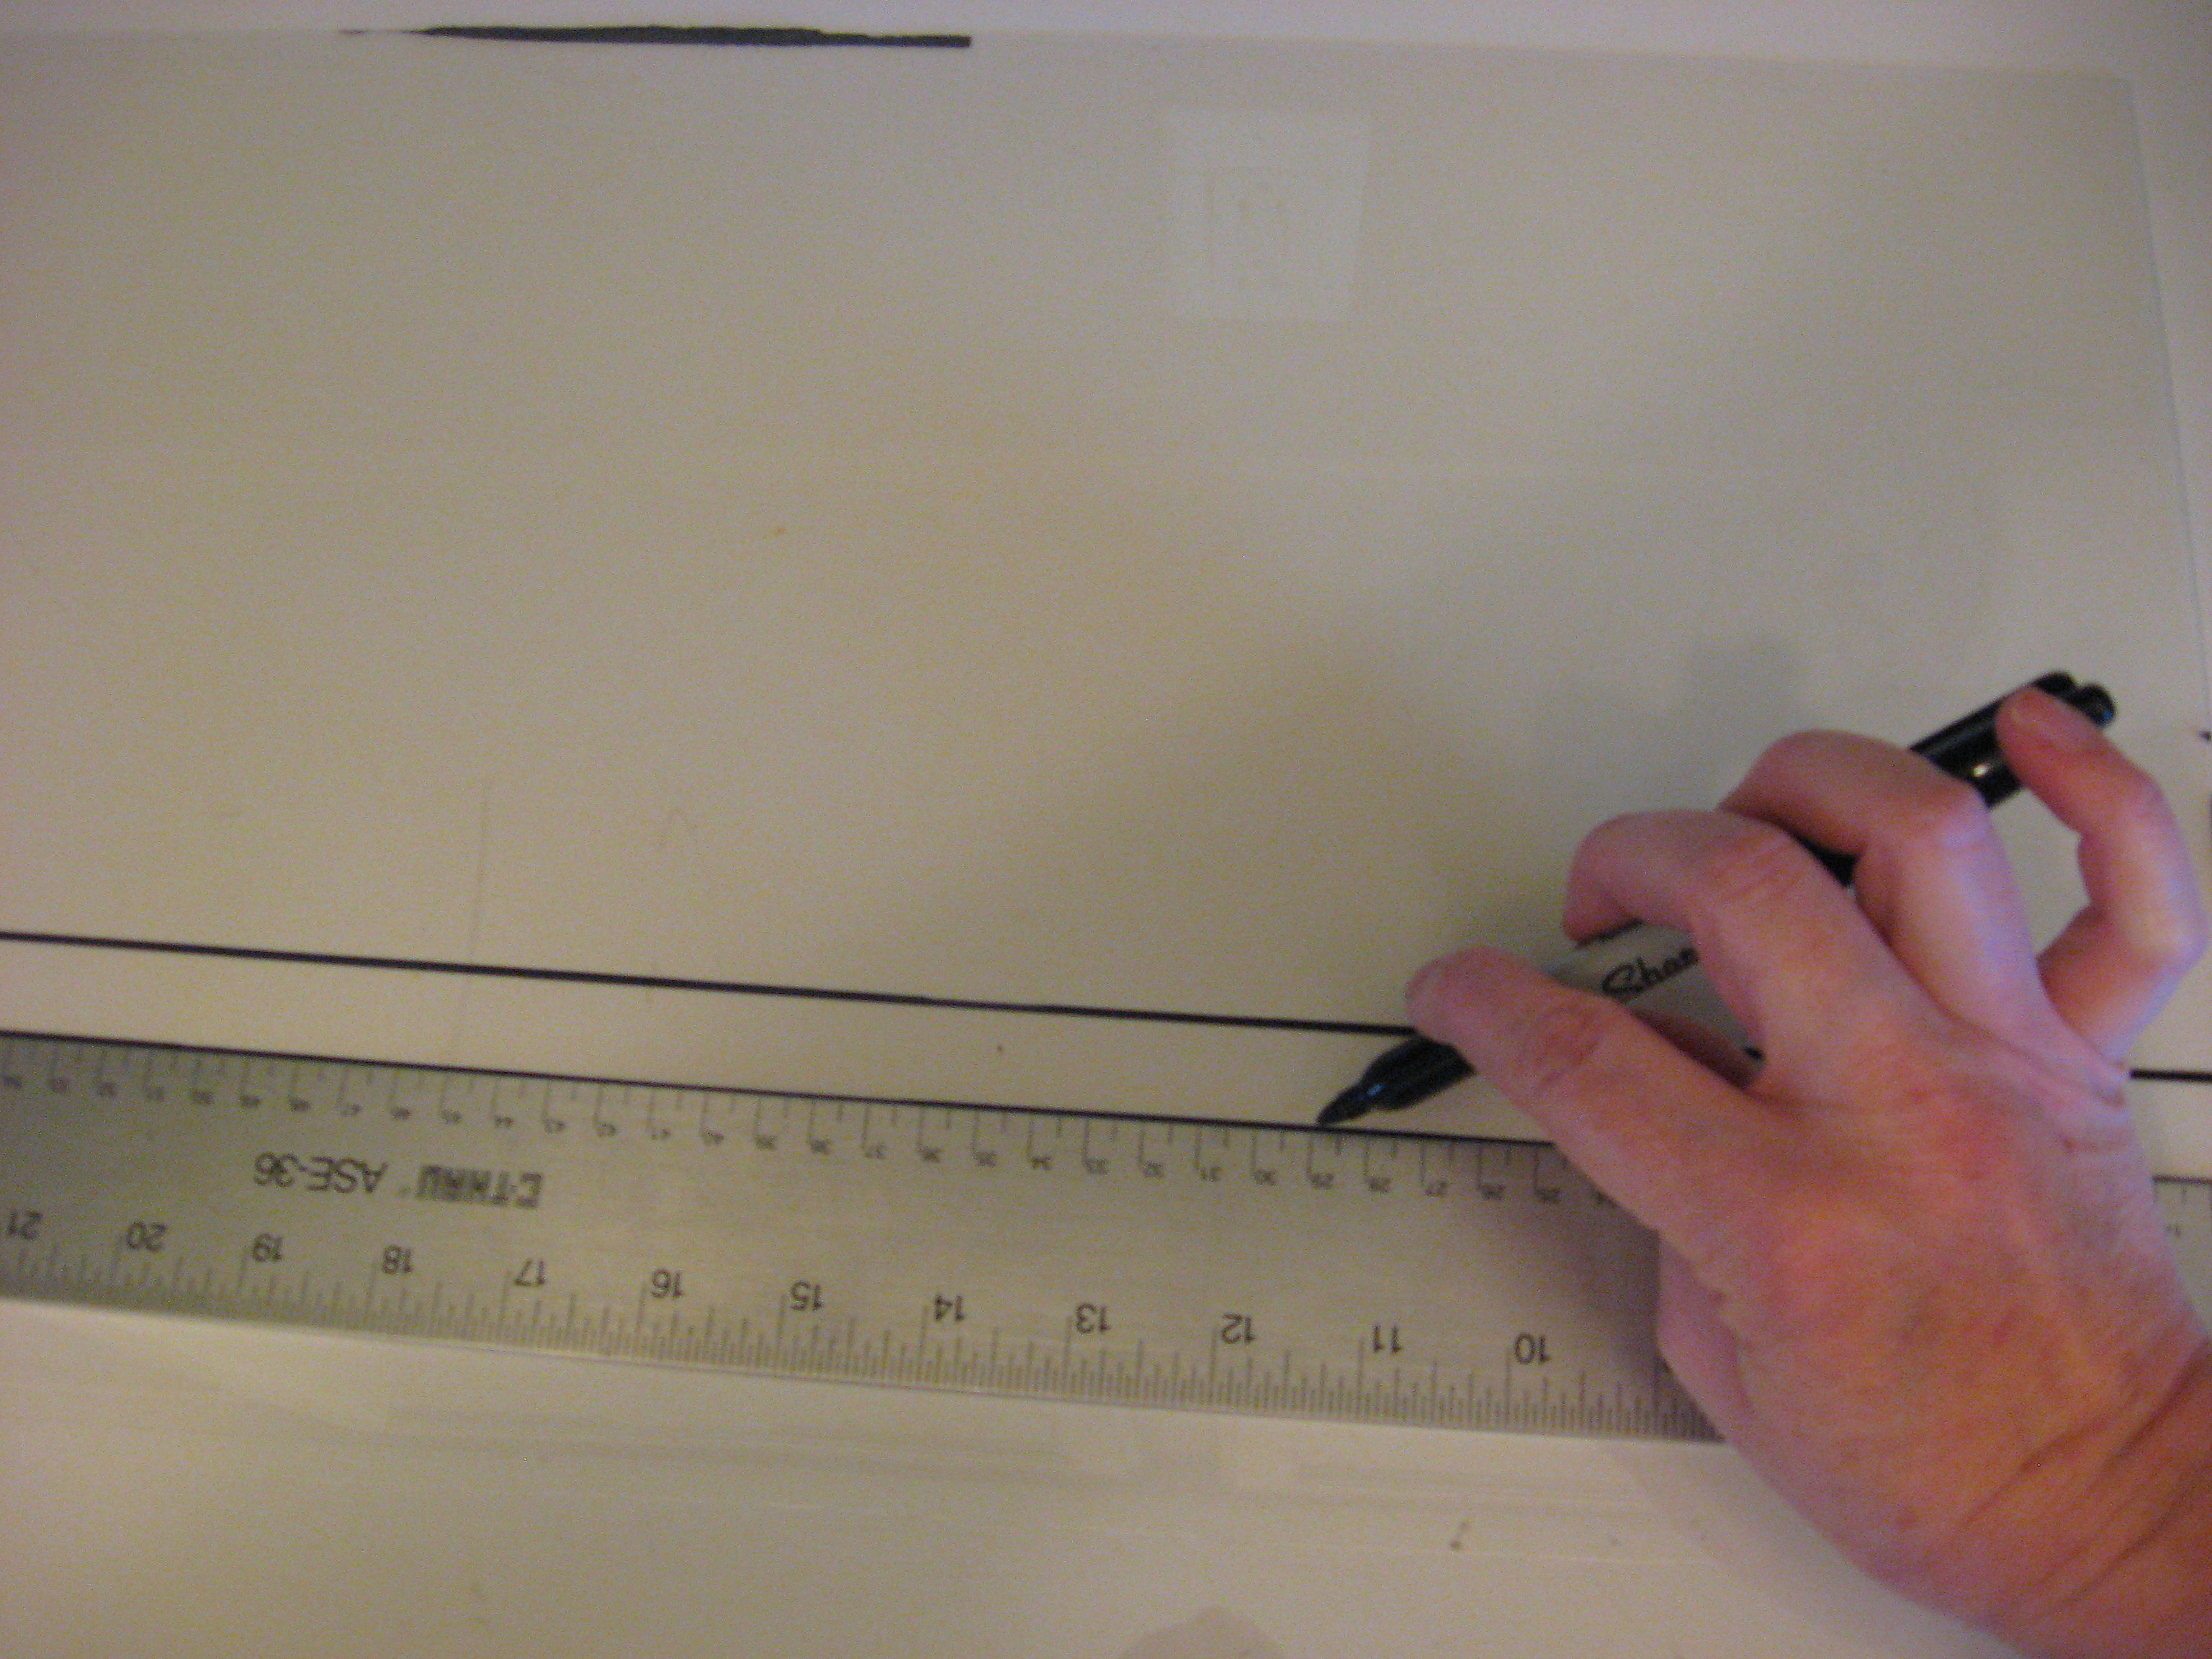
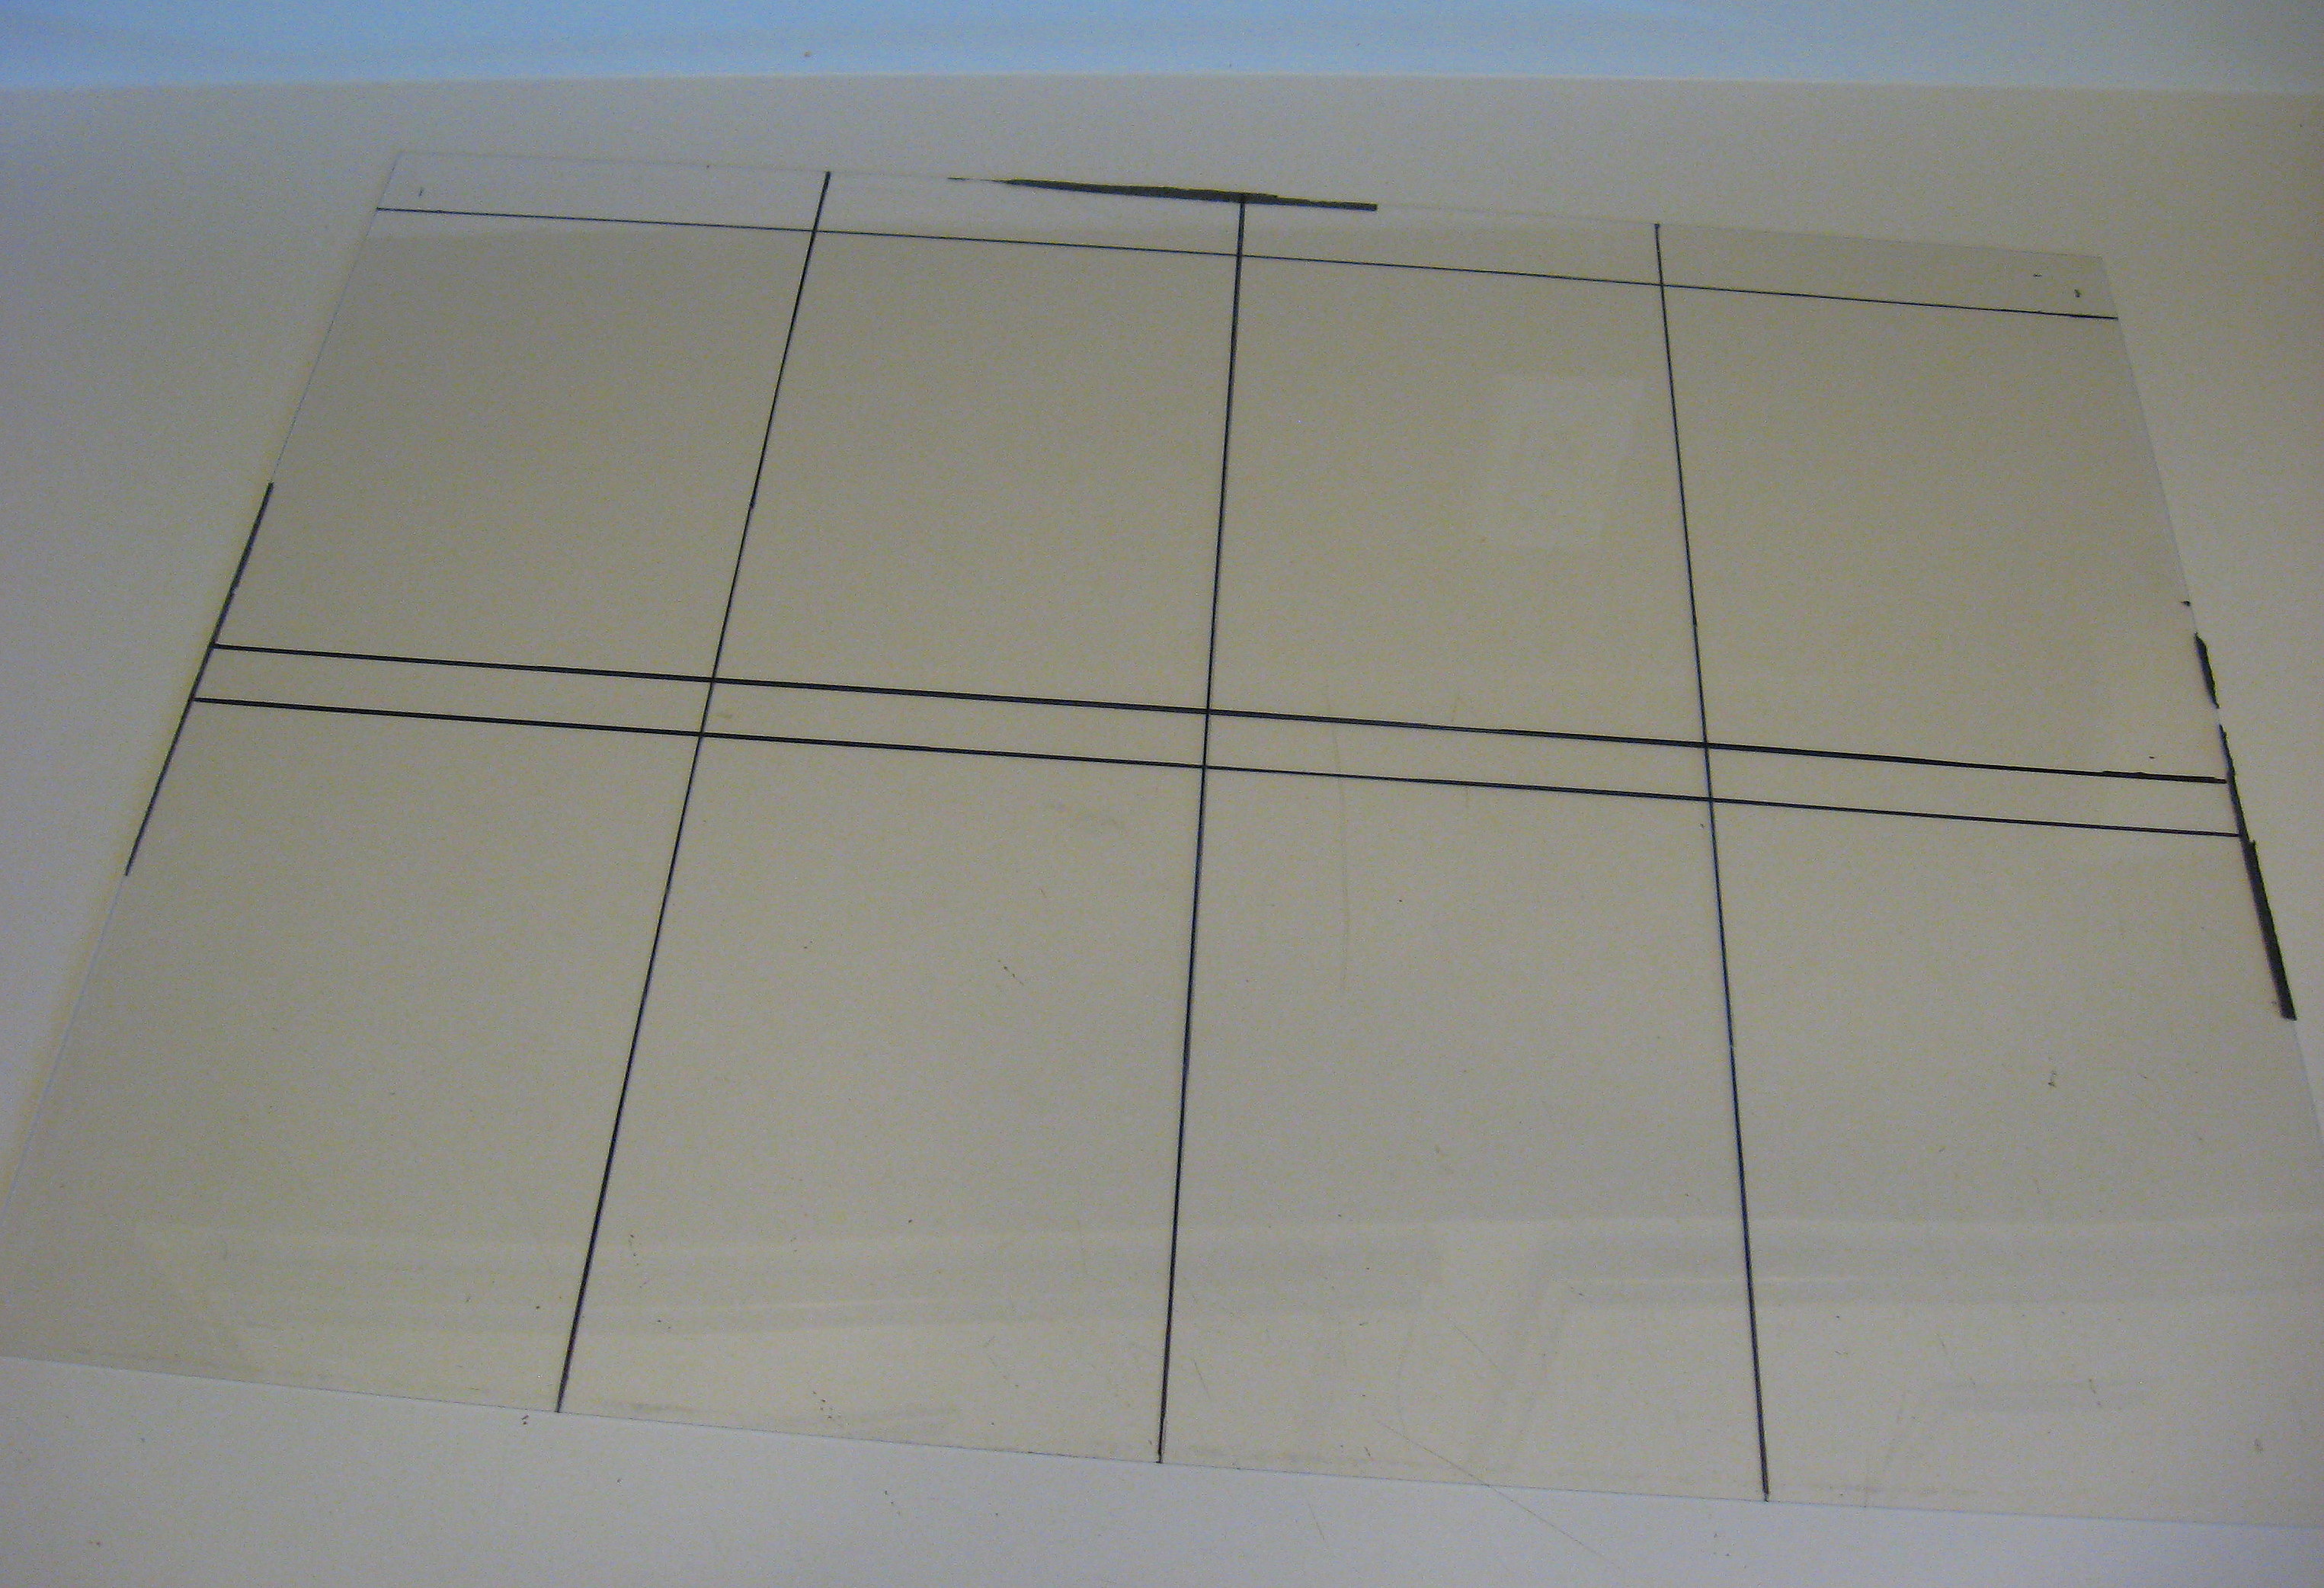
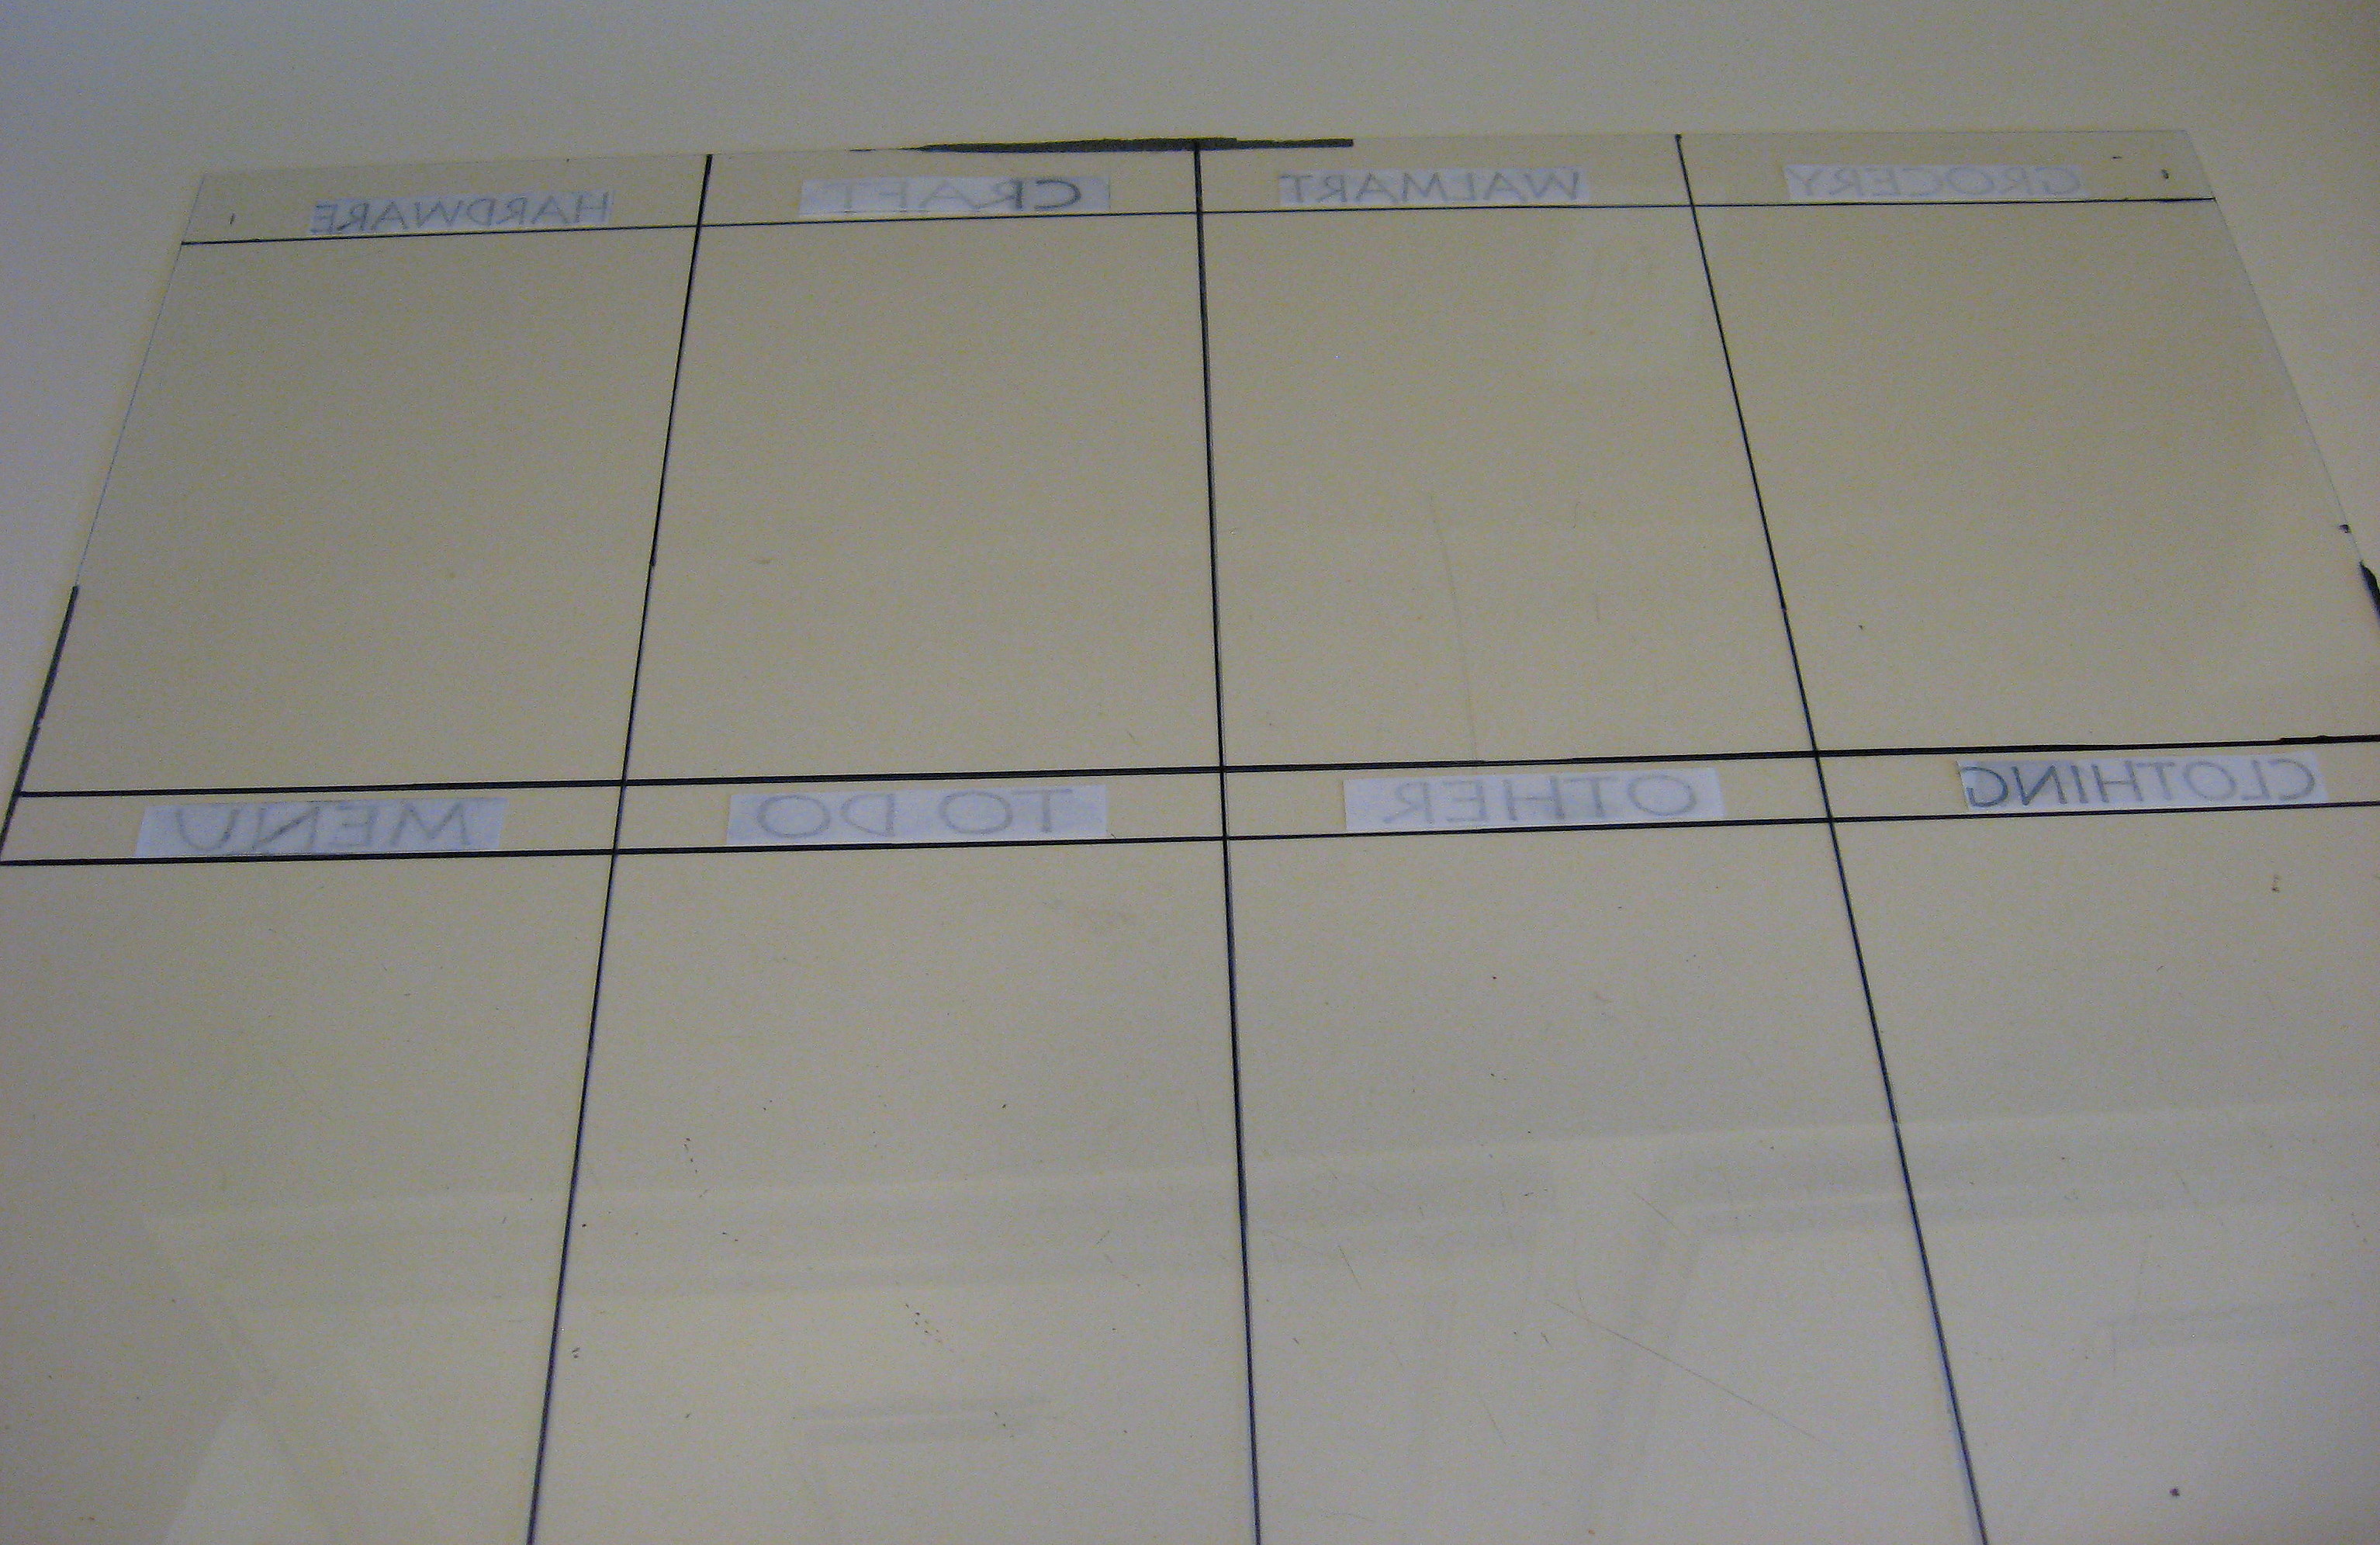
Decide how many different sections you want, measure them out and use a straight edge and a Sharpie to draw the lines on the back side of the glass. I made 8 sections, with an inch wide section at the top of each for the category title.
Like this:
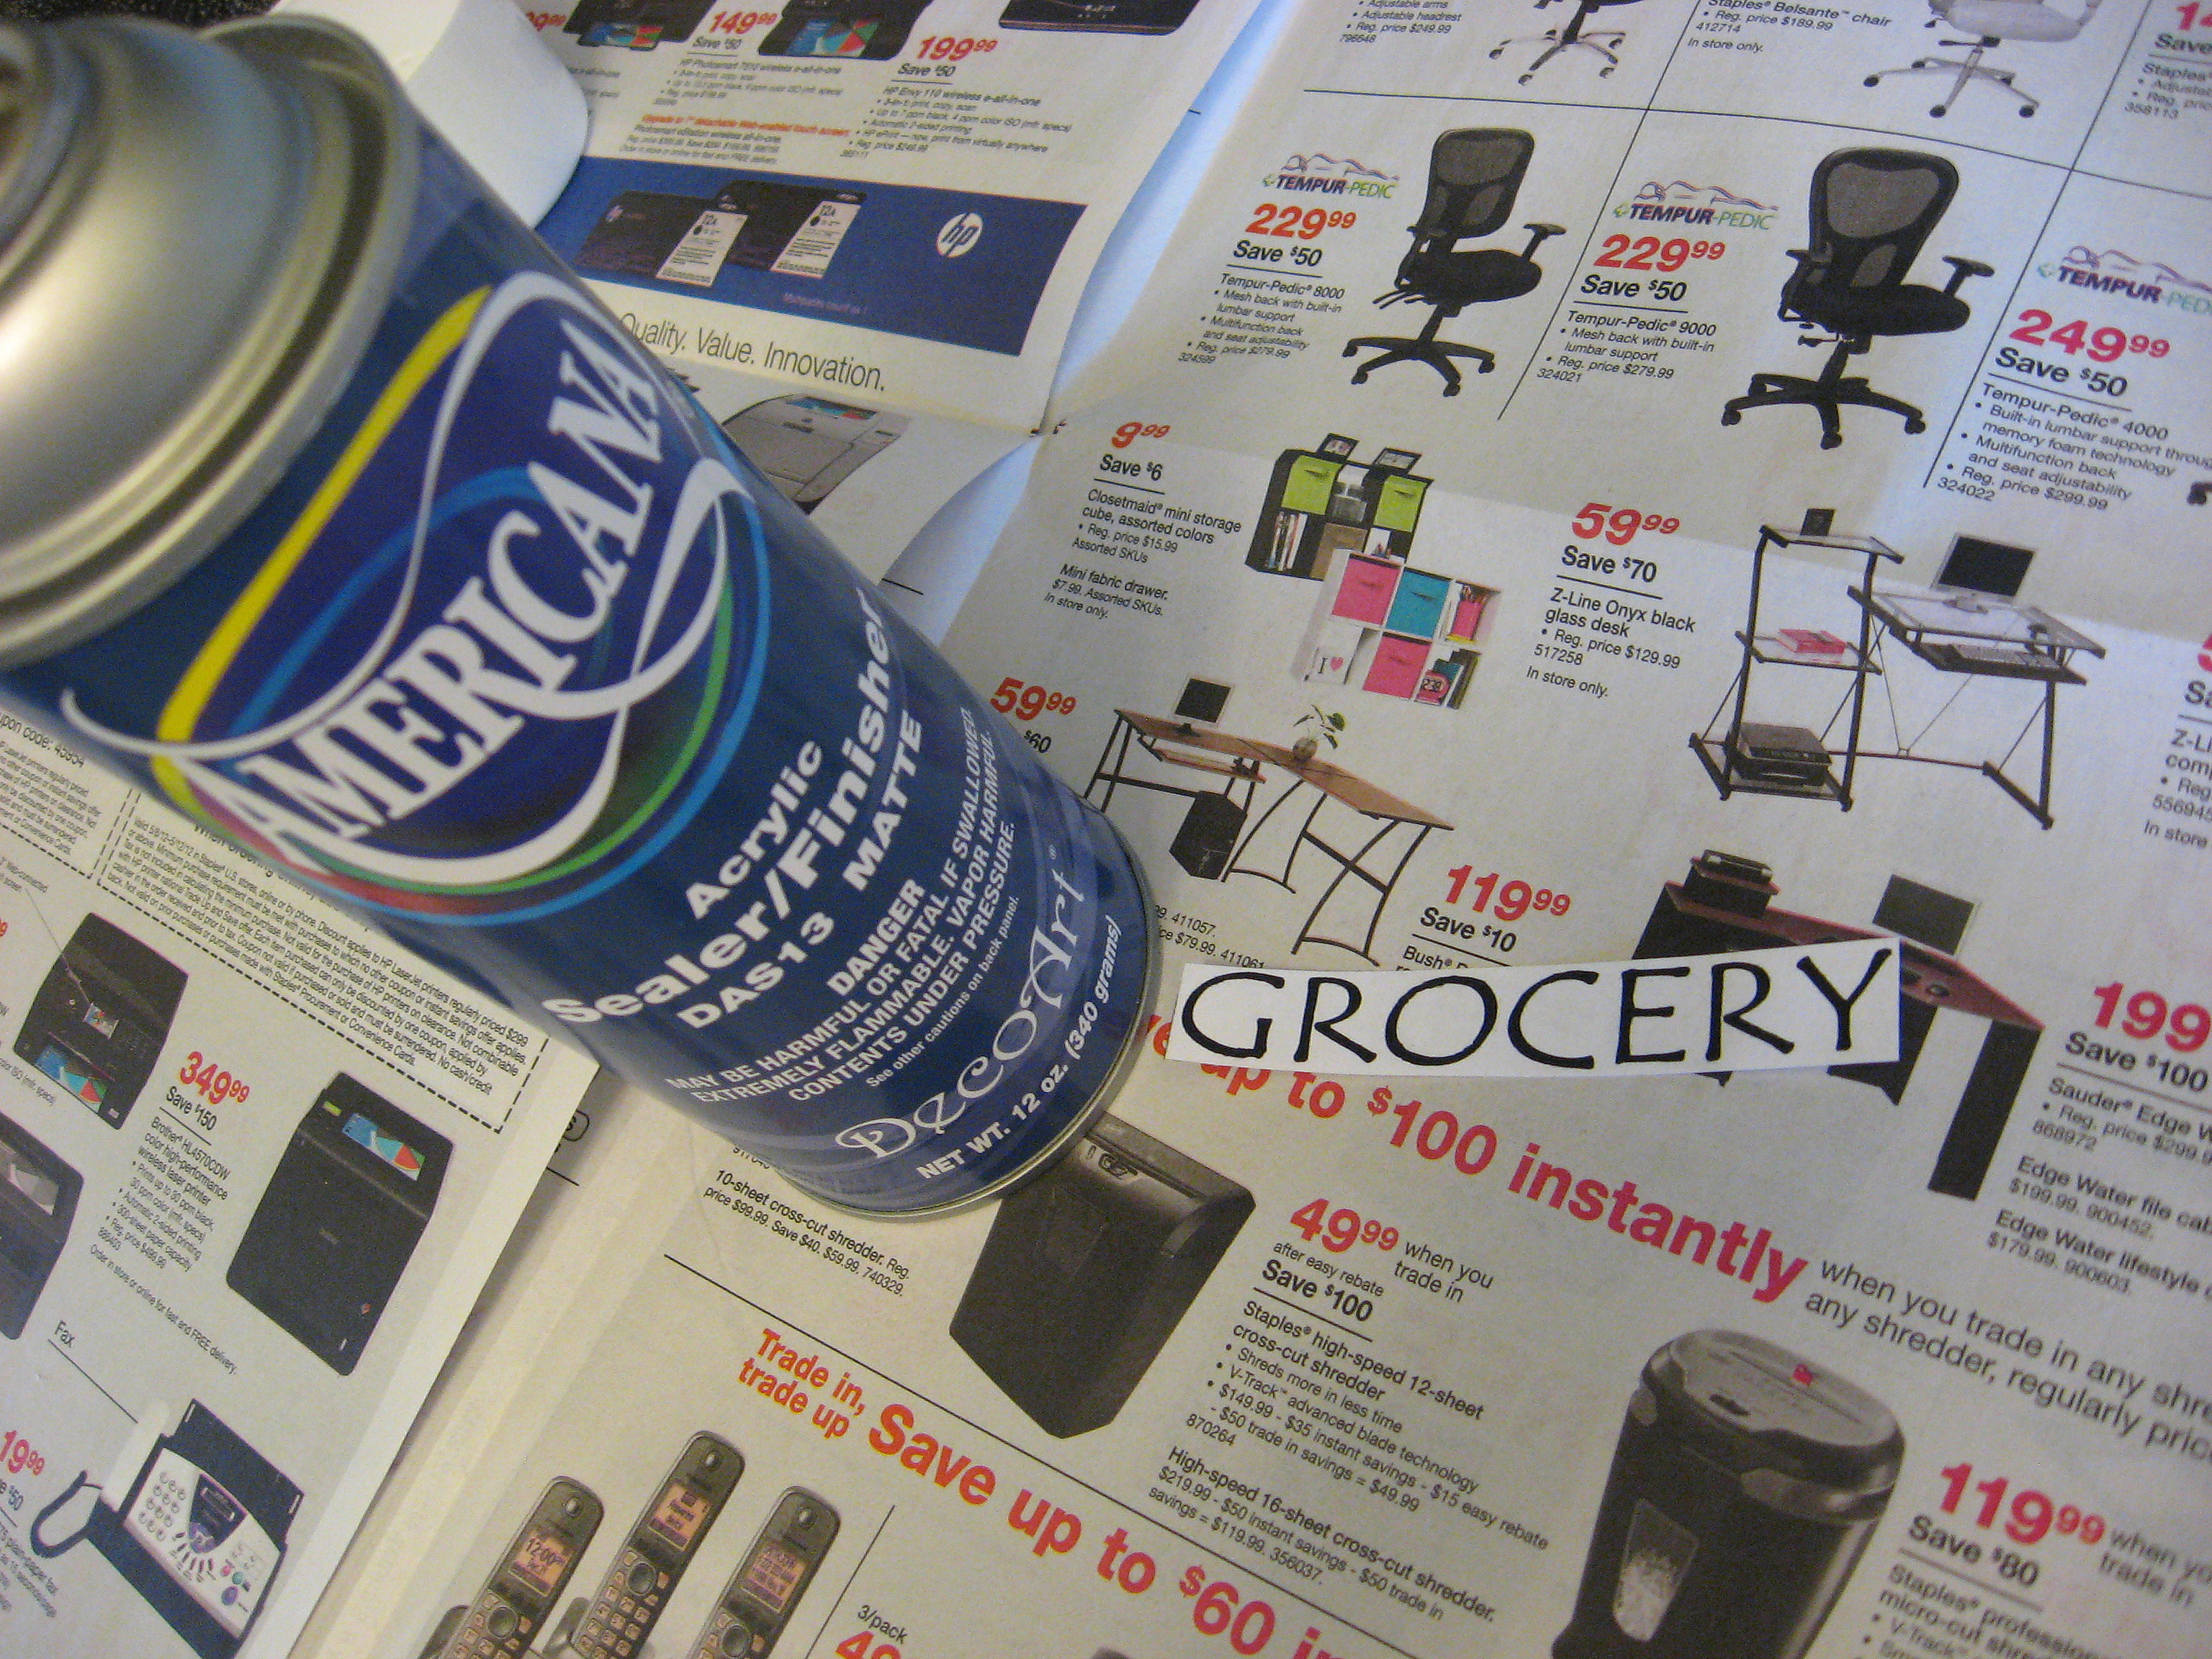
I printed out the categories I wanted onto pieces of paper, but you could also use vinyl, or even write them on the back of the glass with the marker (you’d have to write backwards, but you could print out the words, lay them under the glass and use them to trace.)
I cut out each title, and sprayed them with some craft fixative. I didn’t use an actual adhesive; I think it’s too messy. I just needed something that would dry clear and that would hold the paper in place well enough for the next step without interfering with the spray paint.
Here they are, attached face down to the back of the glass.
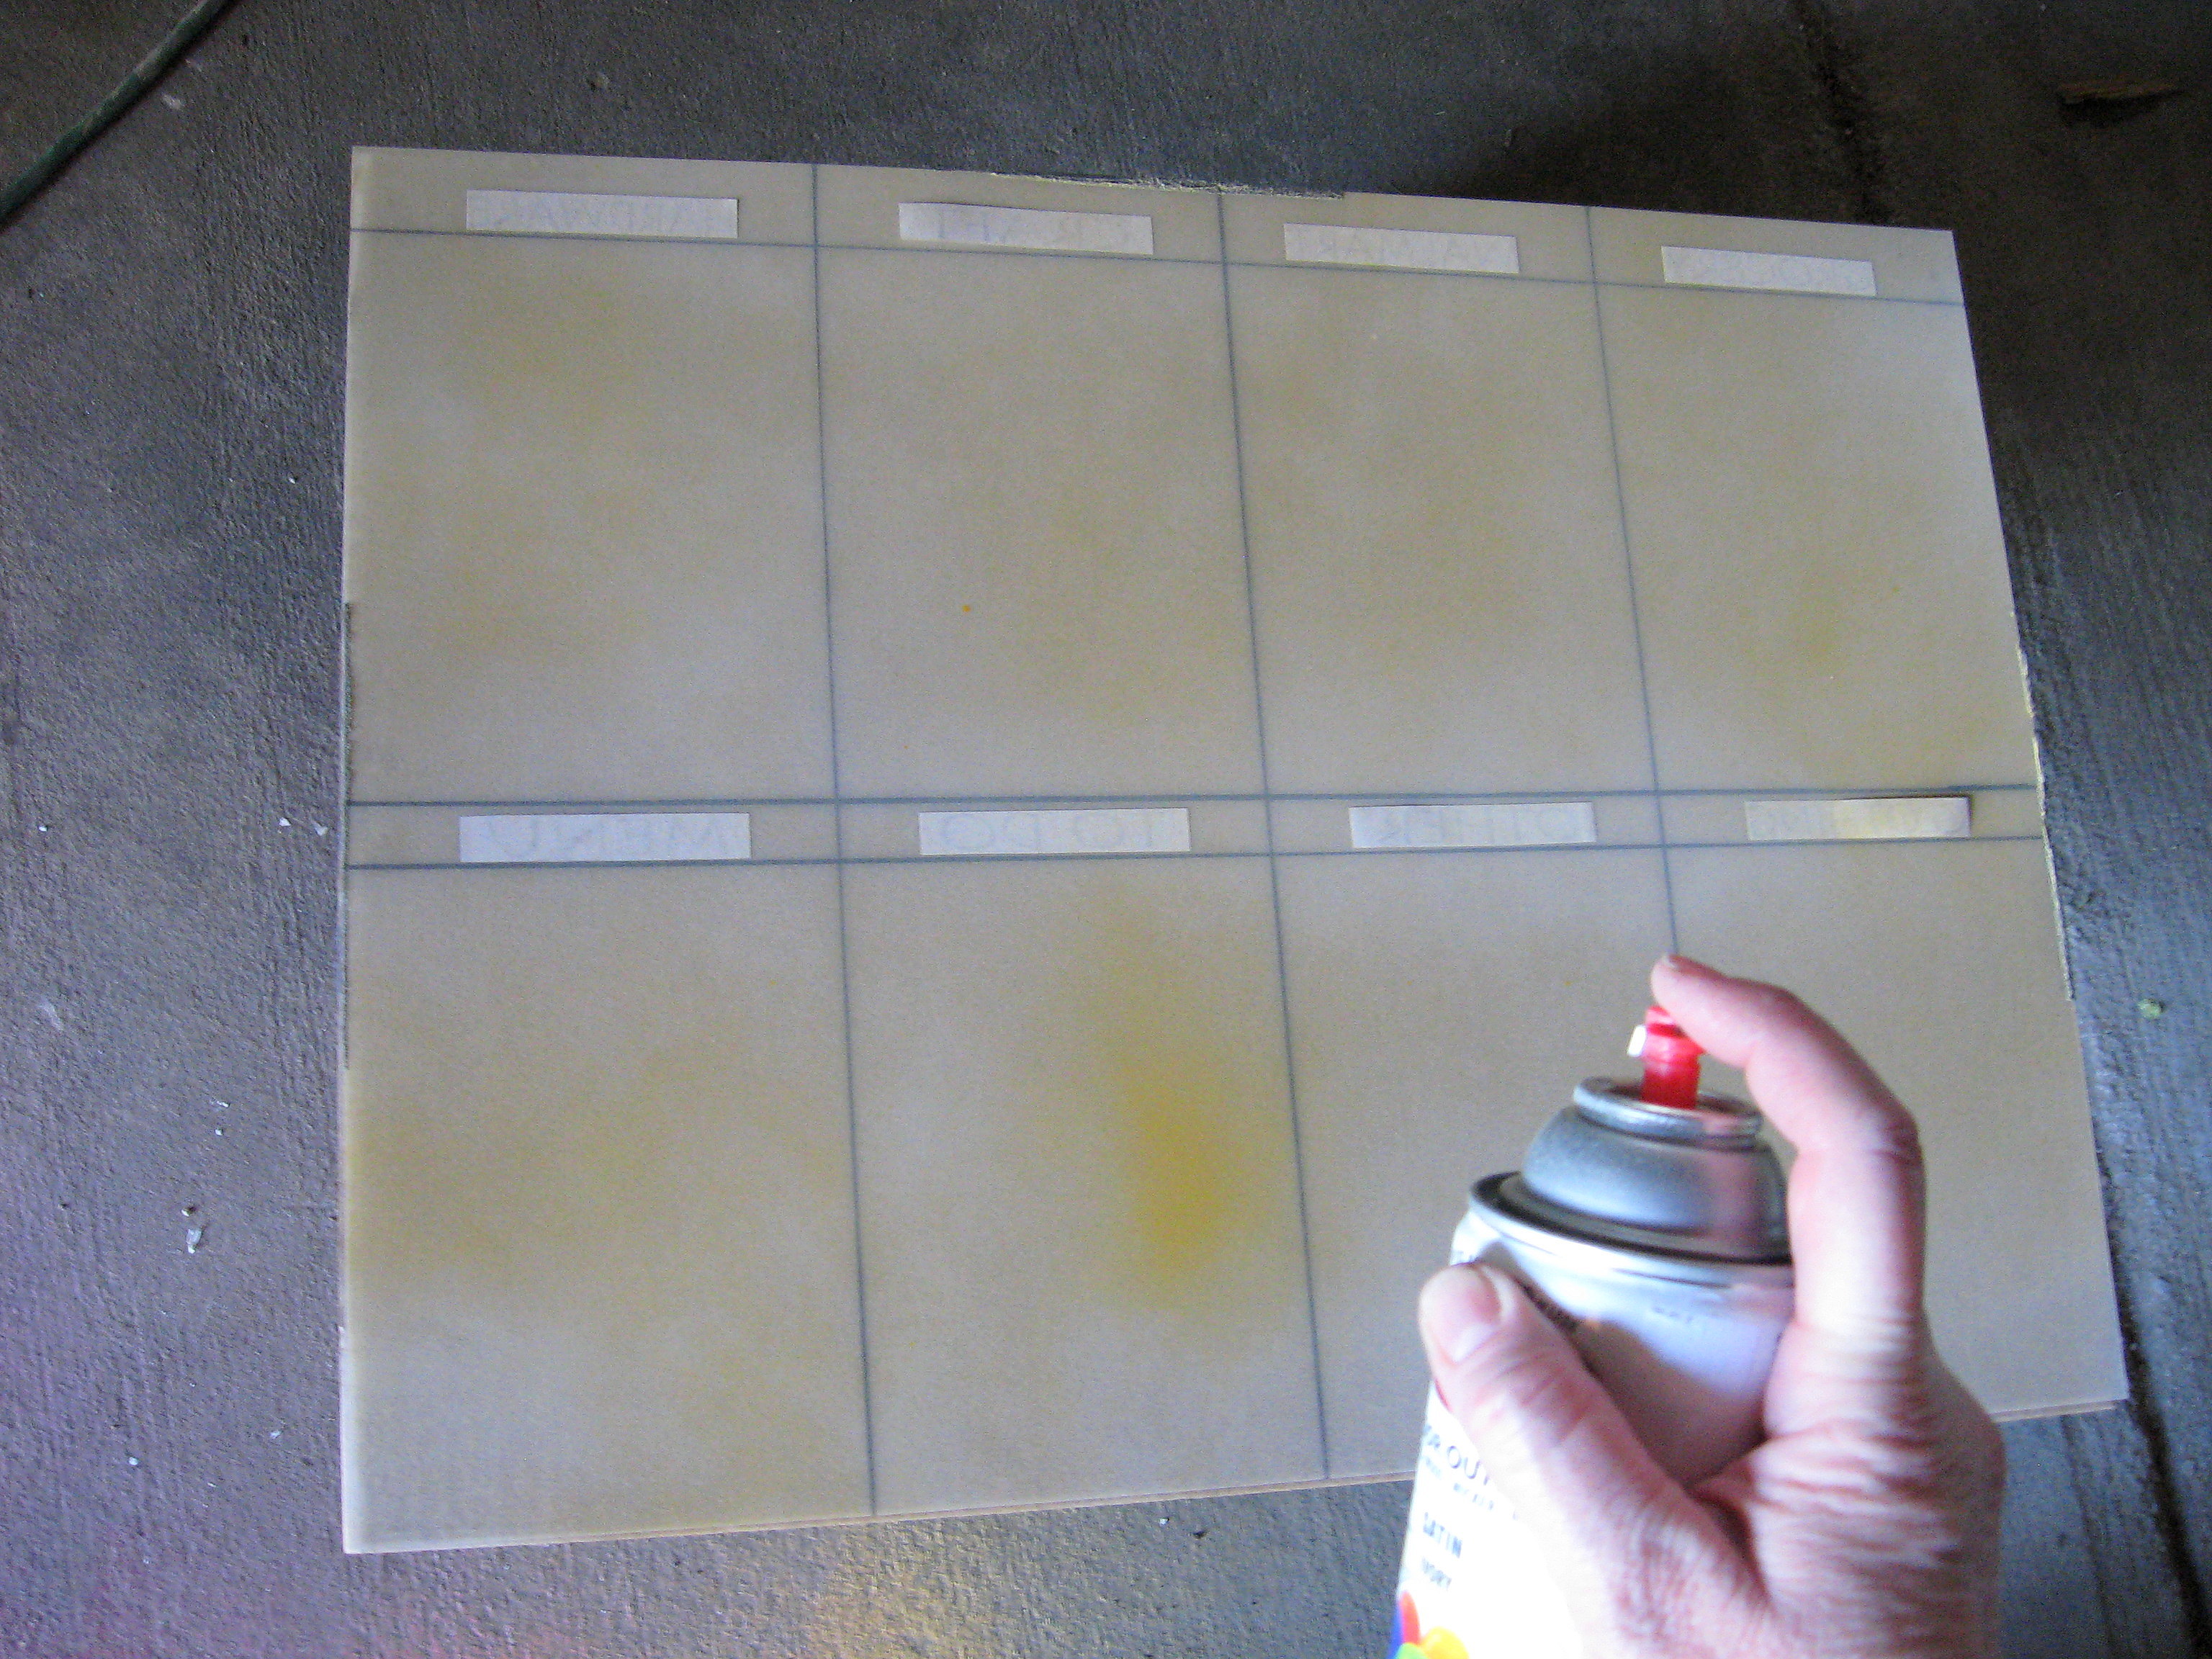
Now I spray painted over the whole back of the glass. I still wanted mine orange, but not as dark as the frame, so I sprayed on thin layers of white and orange until it was well covered. You could also just cover the cardboard that came with the frame with paper (think wrapping paper to get a big enough piece) or fabric.
Once that’s dry, put it all back in the frame, and use a good adhesive (I used E 6000) to glue very strong magnets onto the back of the frame.
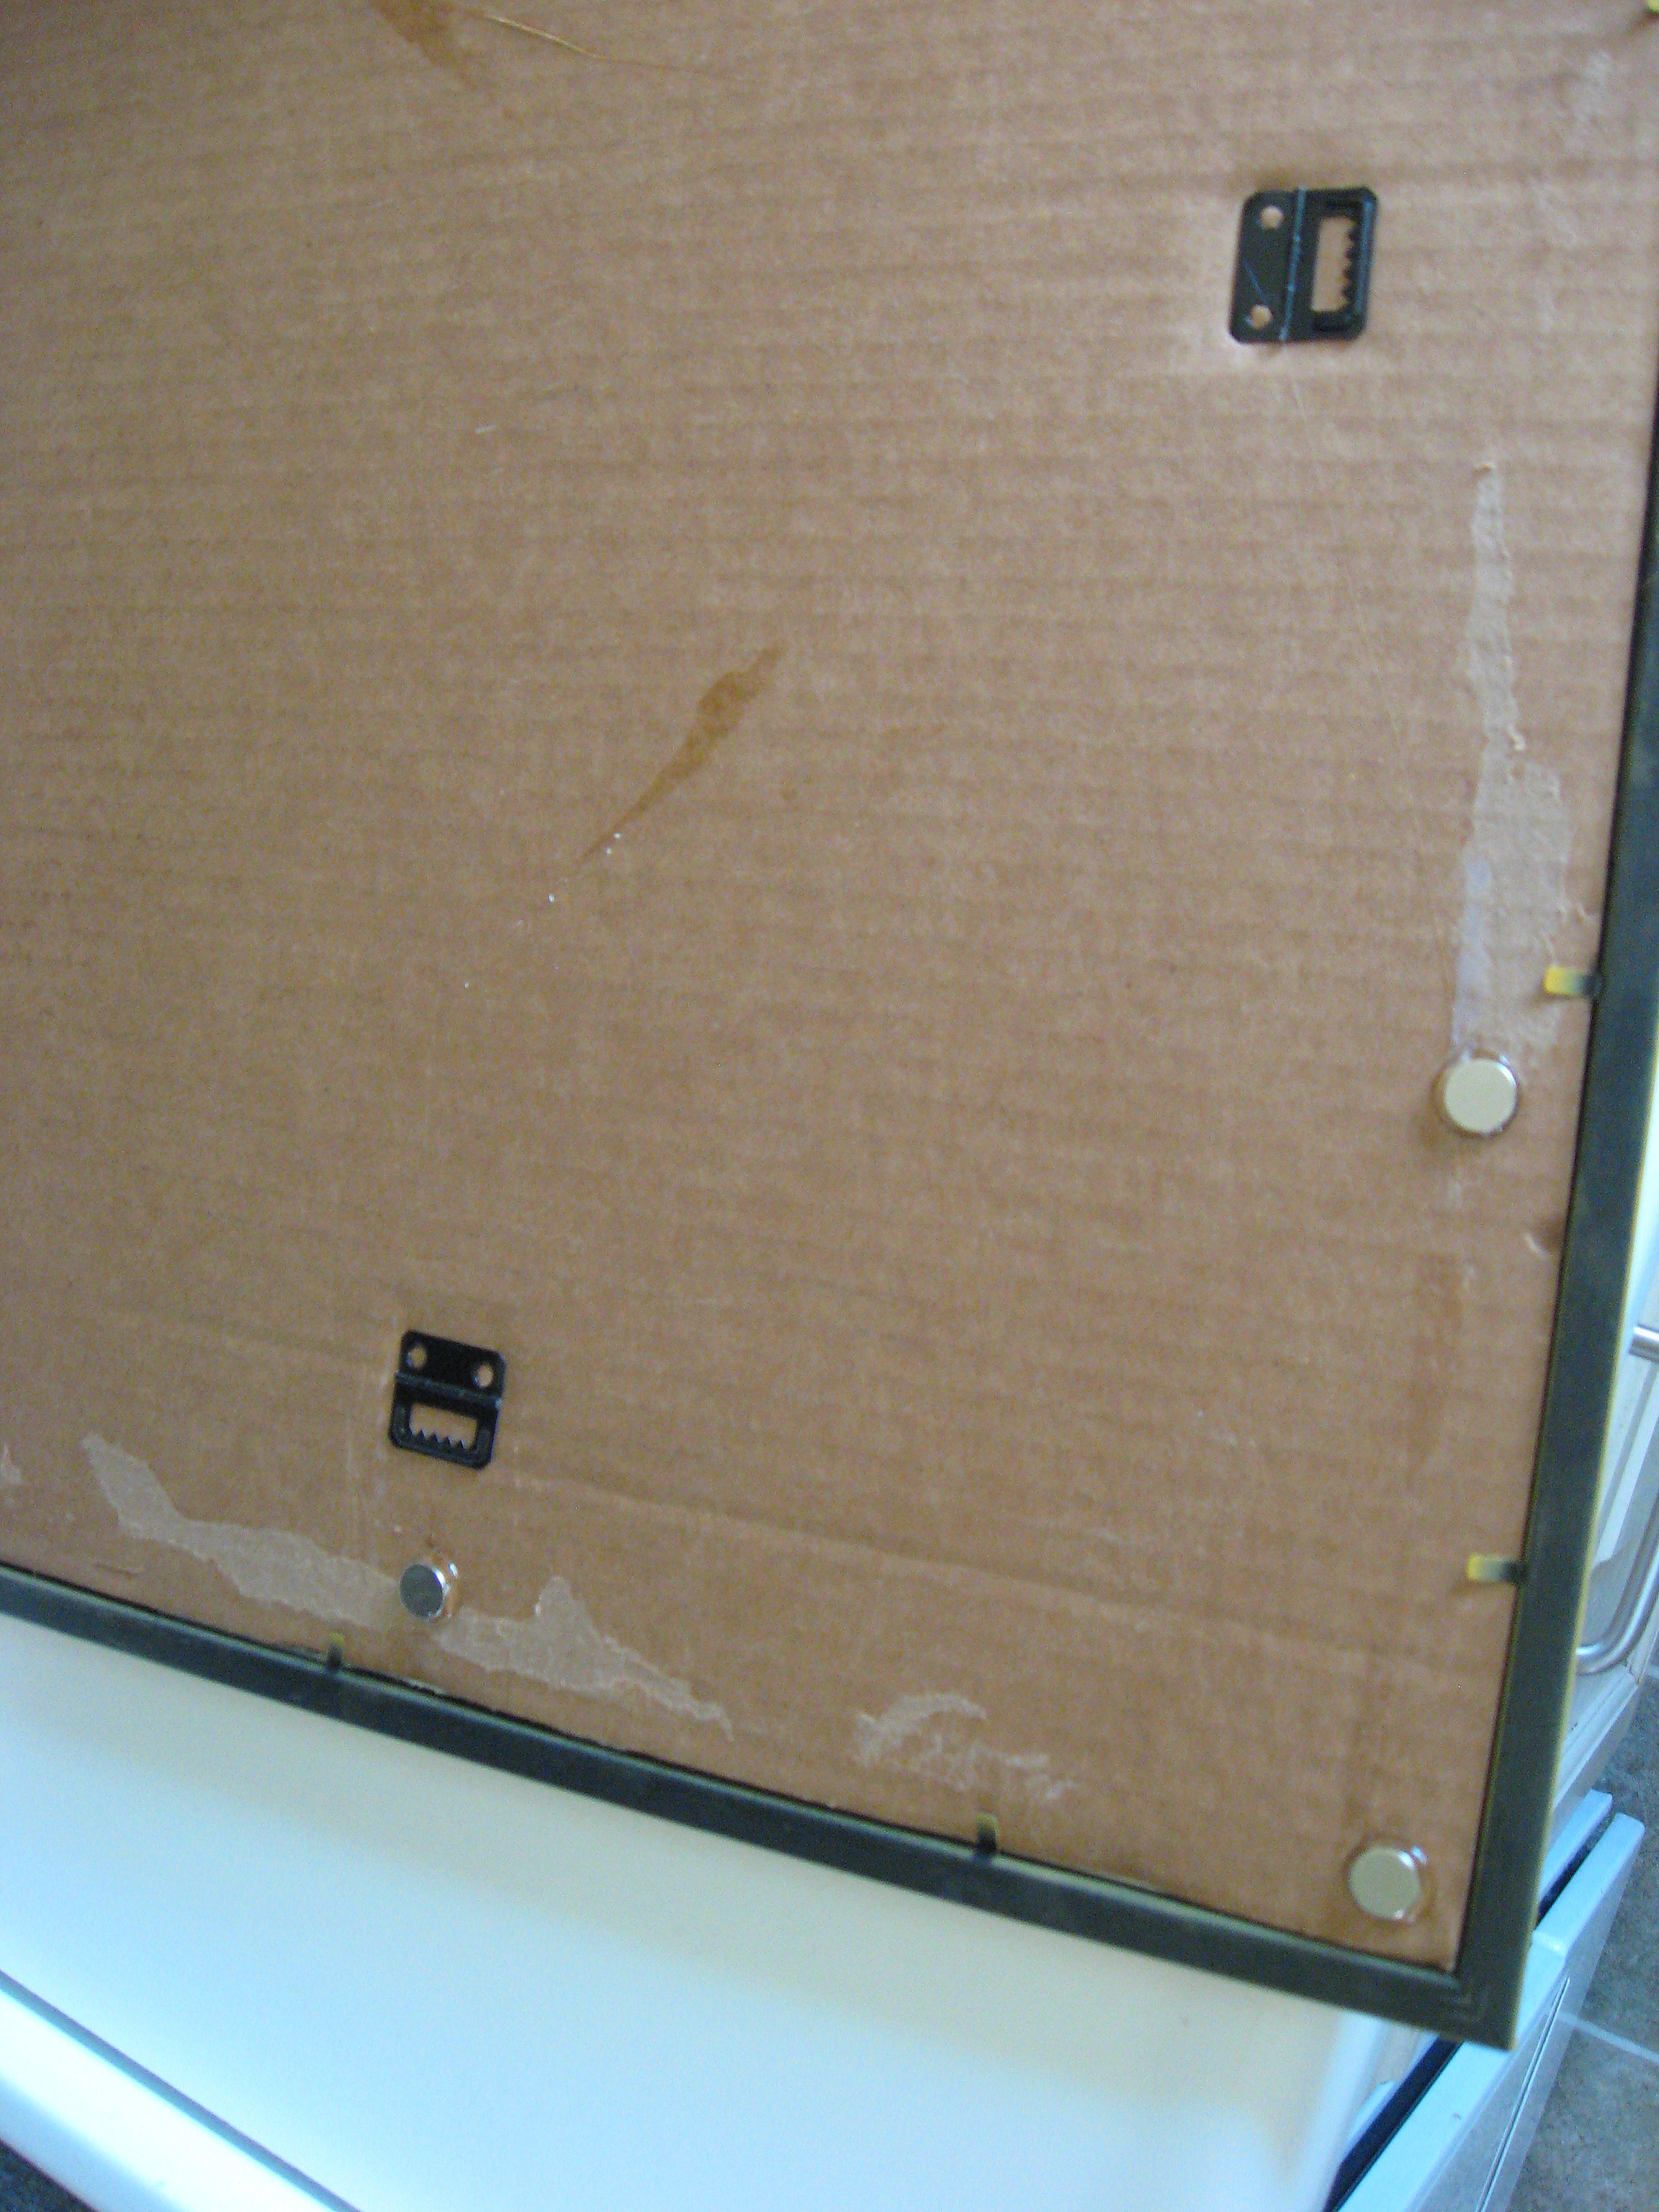
Once the glue is completely dry, it’s ready to hang.
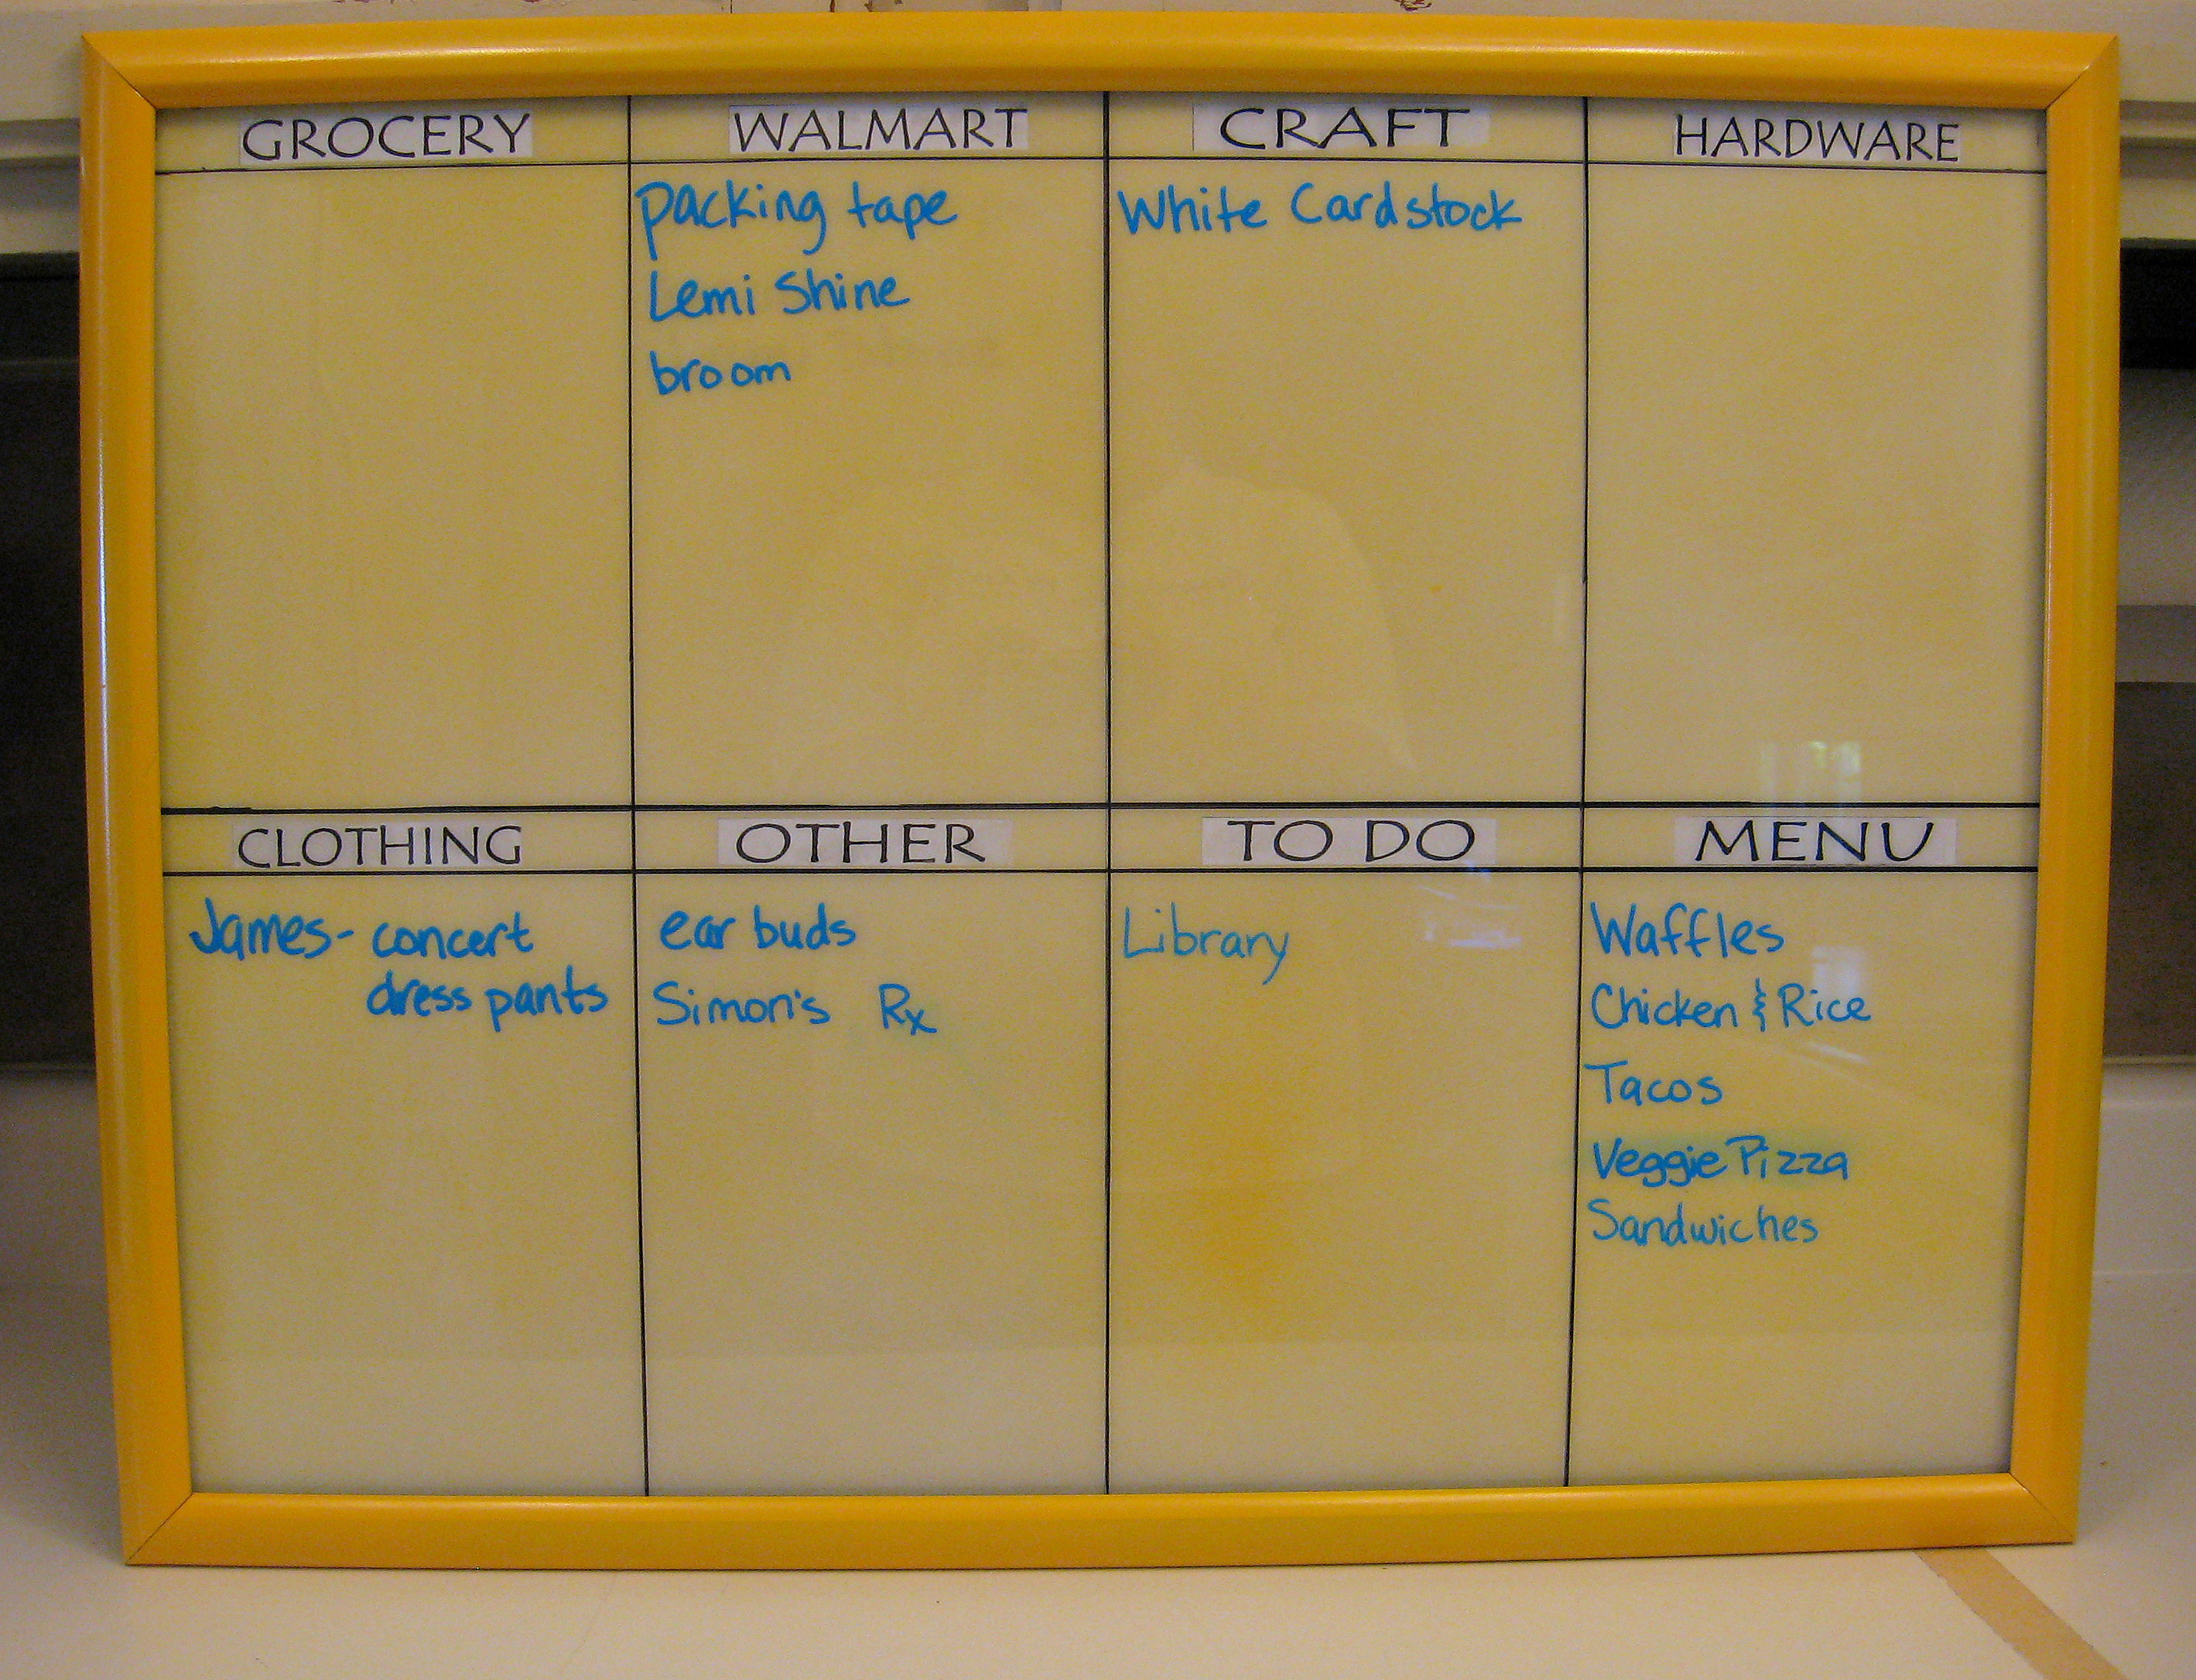
Since everything is on the back of the glass, you don’t have to worry about the lines and category titles getting erased or messy. Remember the Bistro markers from the last project? They work great for this too, and erase easily with a standard chalkboard eraser.
Family Organization Calendar
With a family of 5 constantly going in 5 different directions, I need an easy way to keep everyone’s schedules organized. We used a large paper calendar for a long time, but I decided I needed something bigger that provided a large visual for me to see the week at a glance.
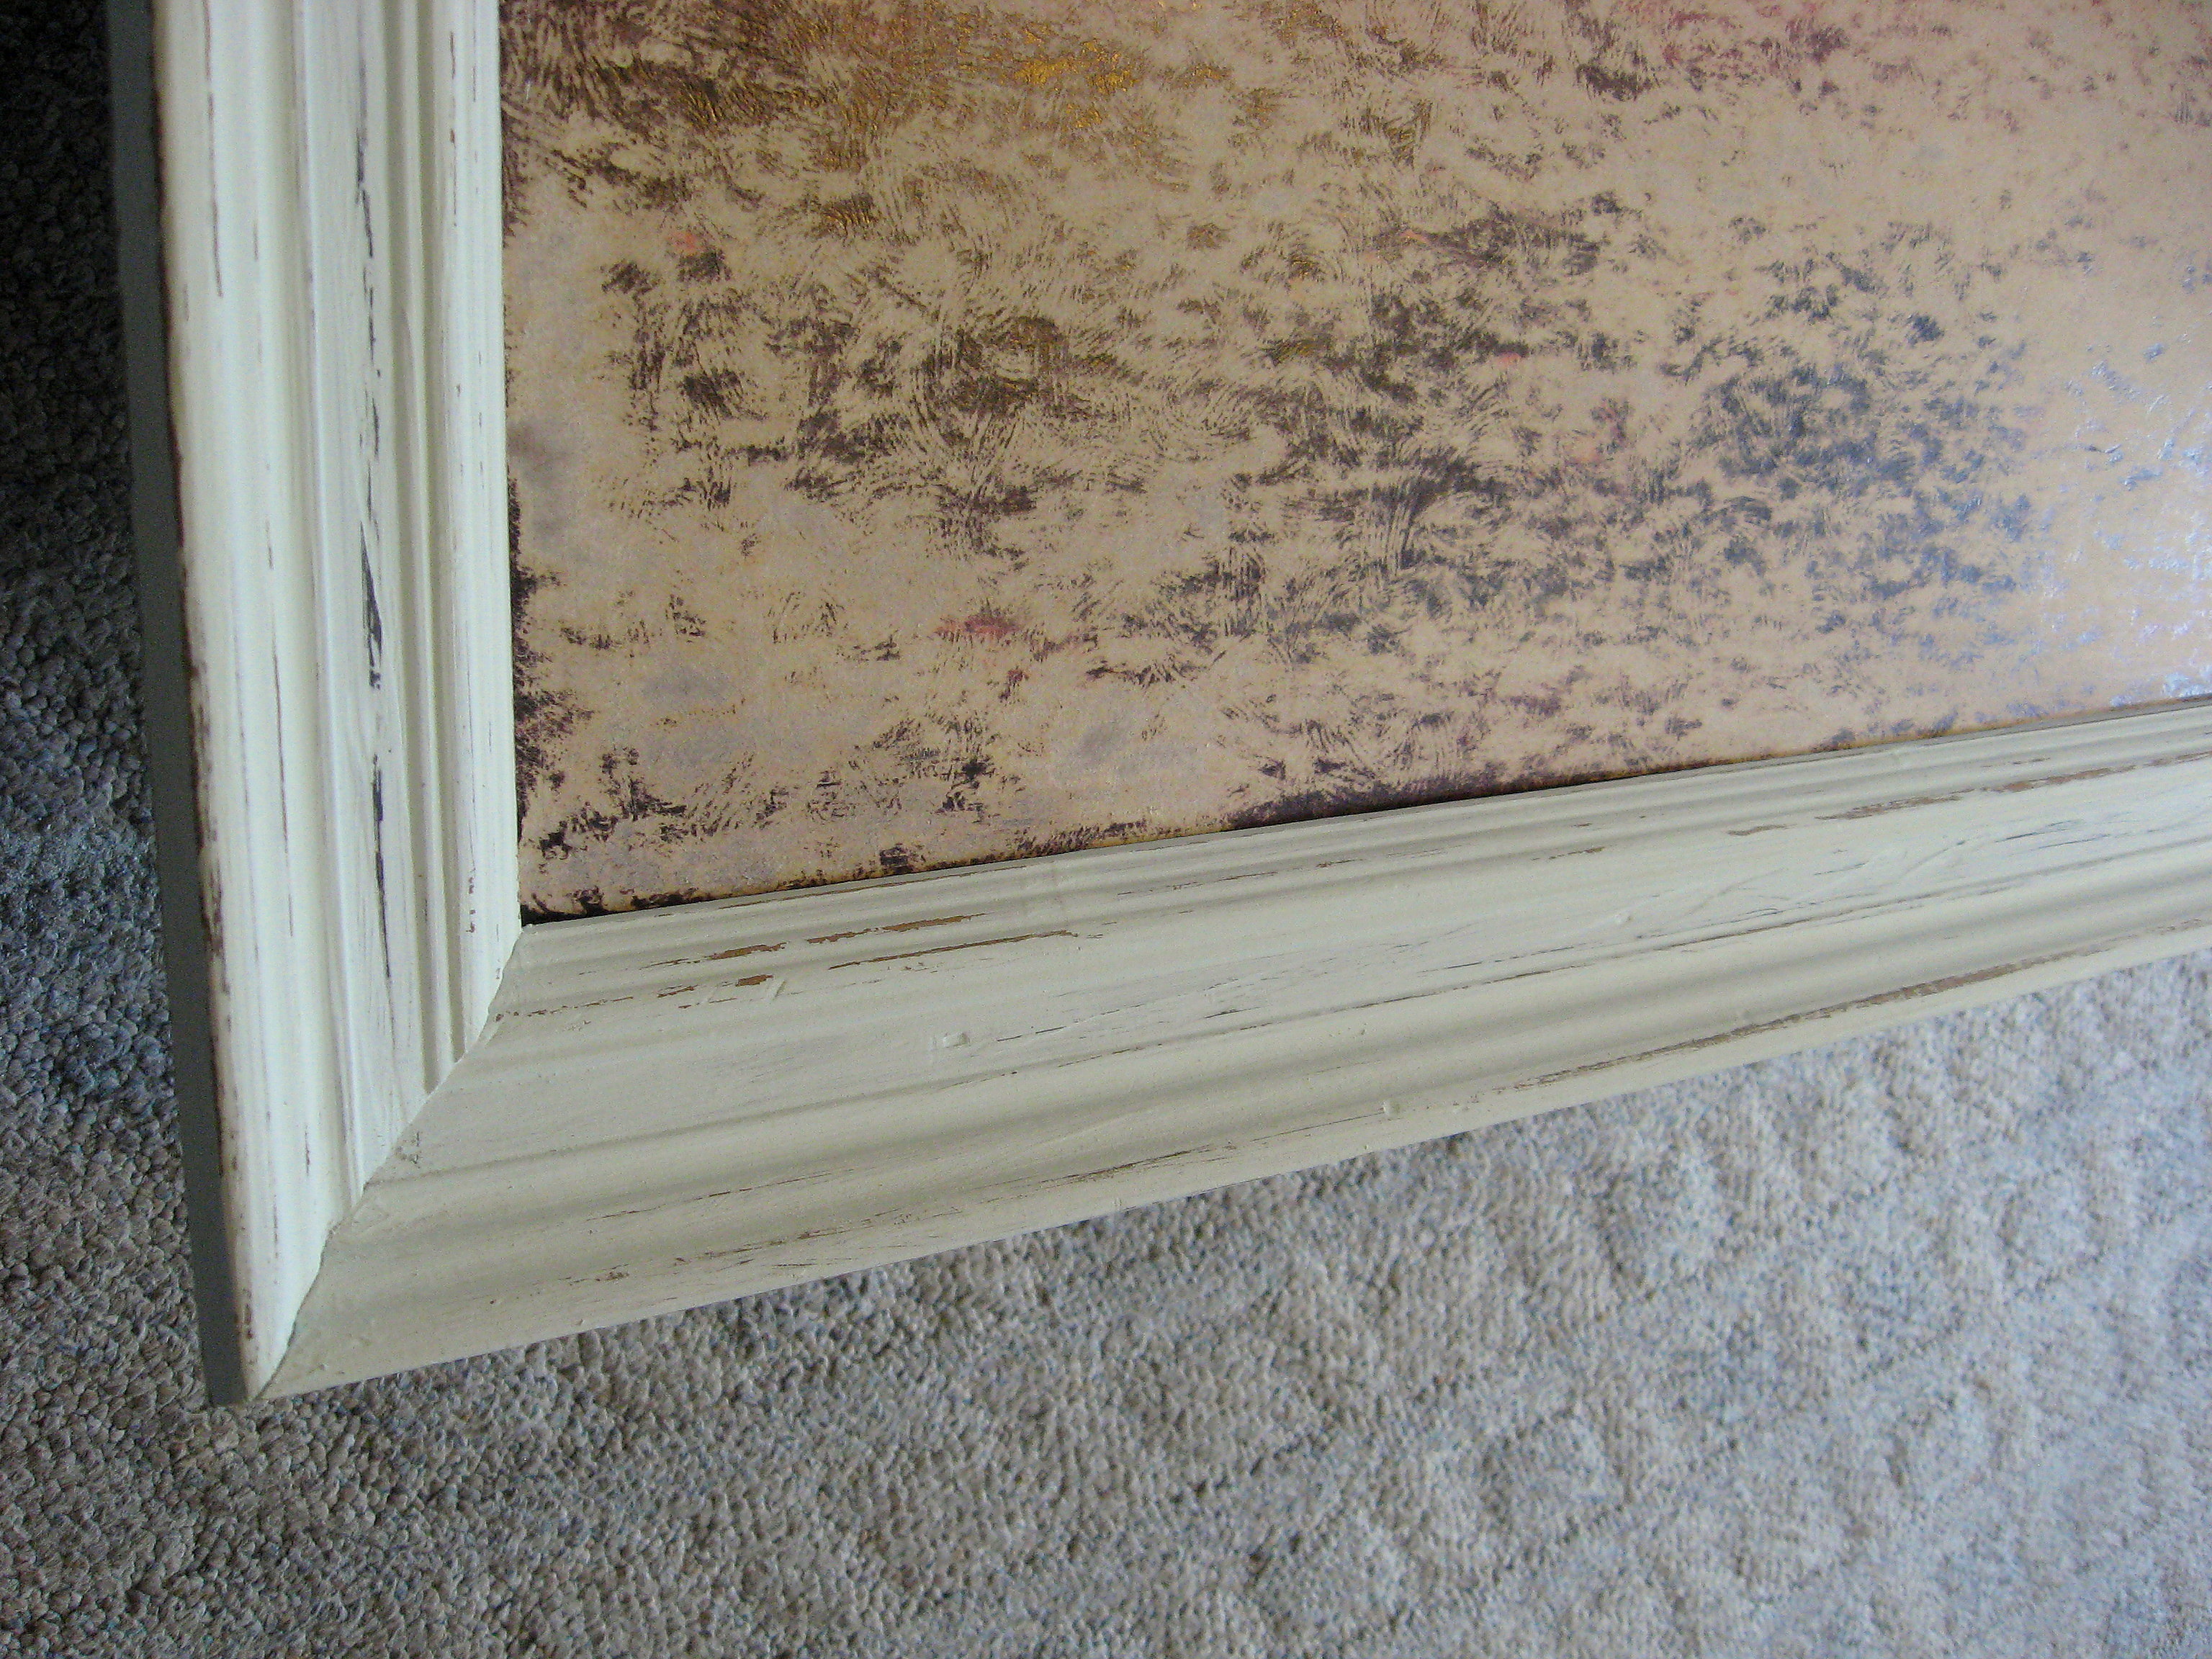
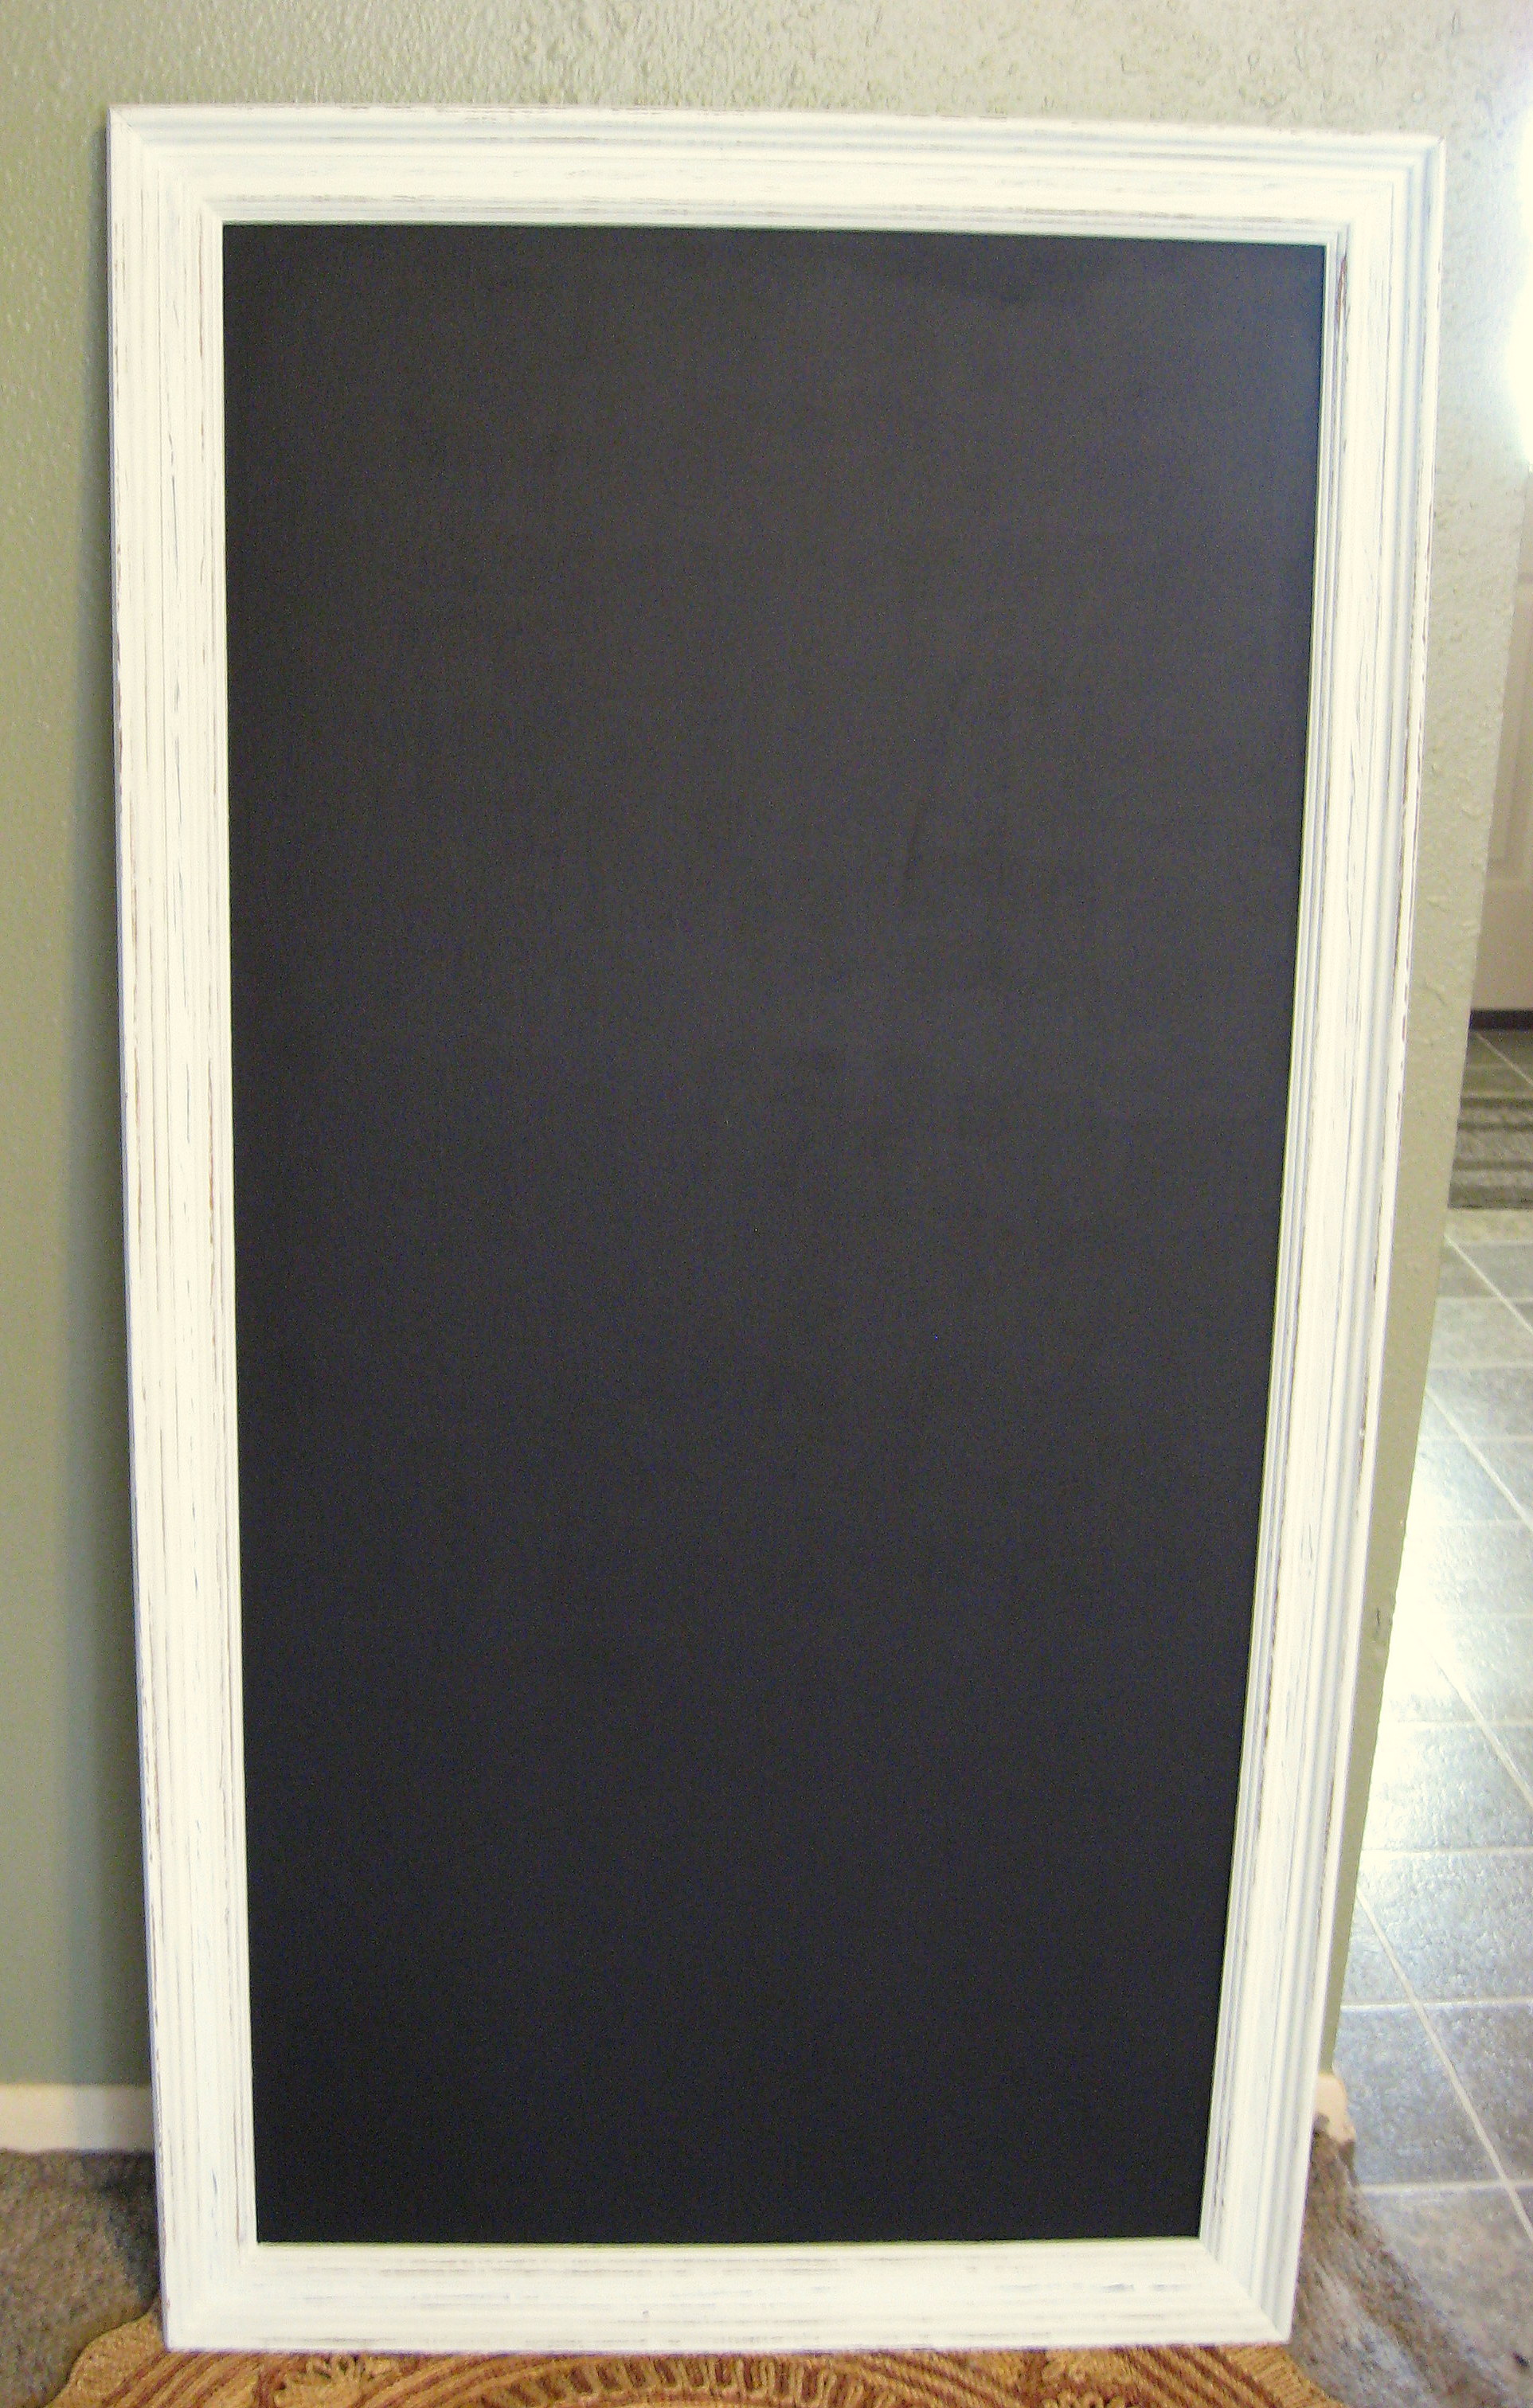
I found this frame for $5 at my local thrift store. $5 is a great price in my area for a frame this size, so I snapped it up.
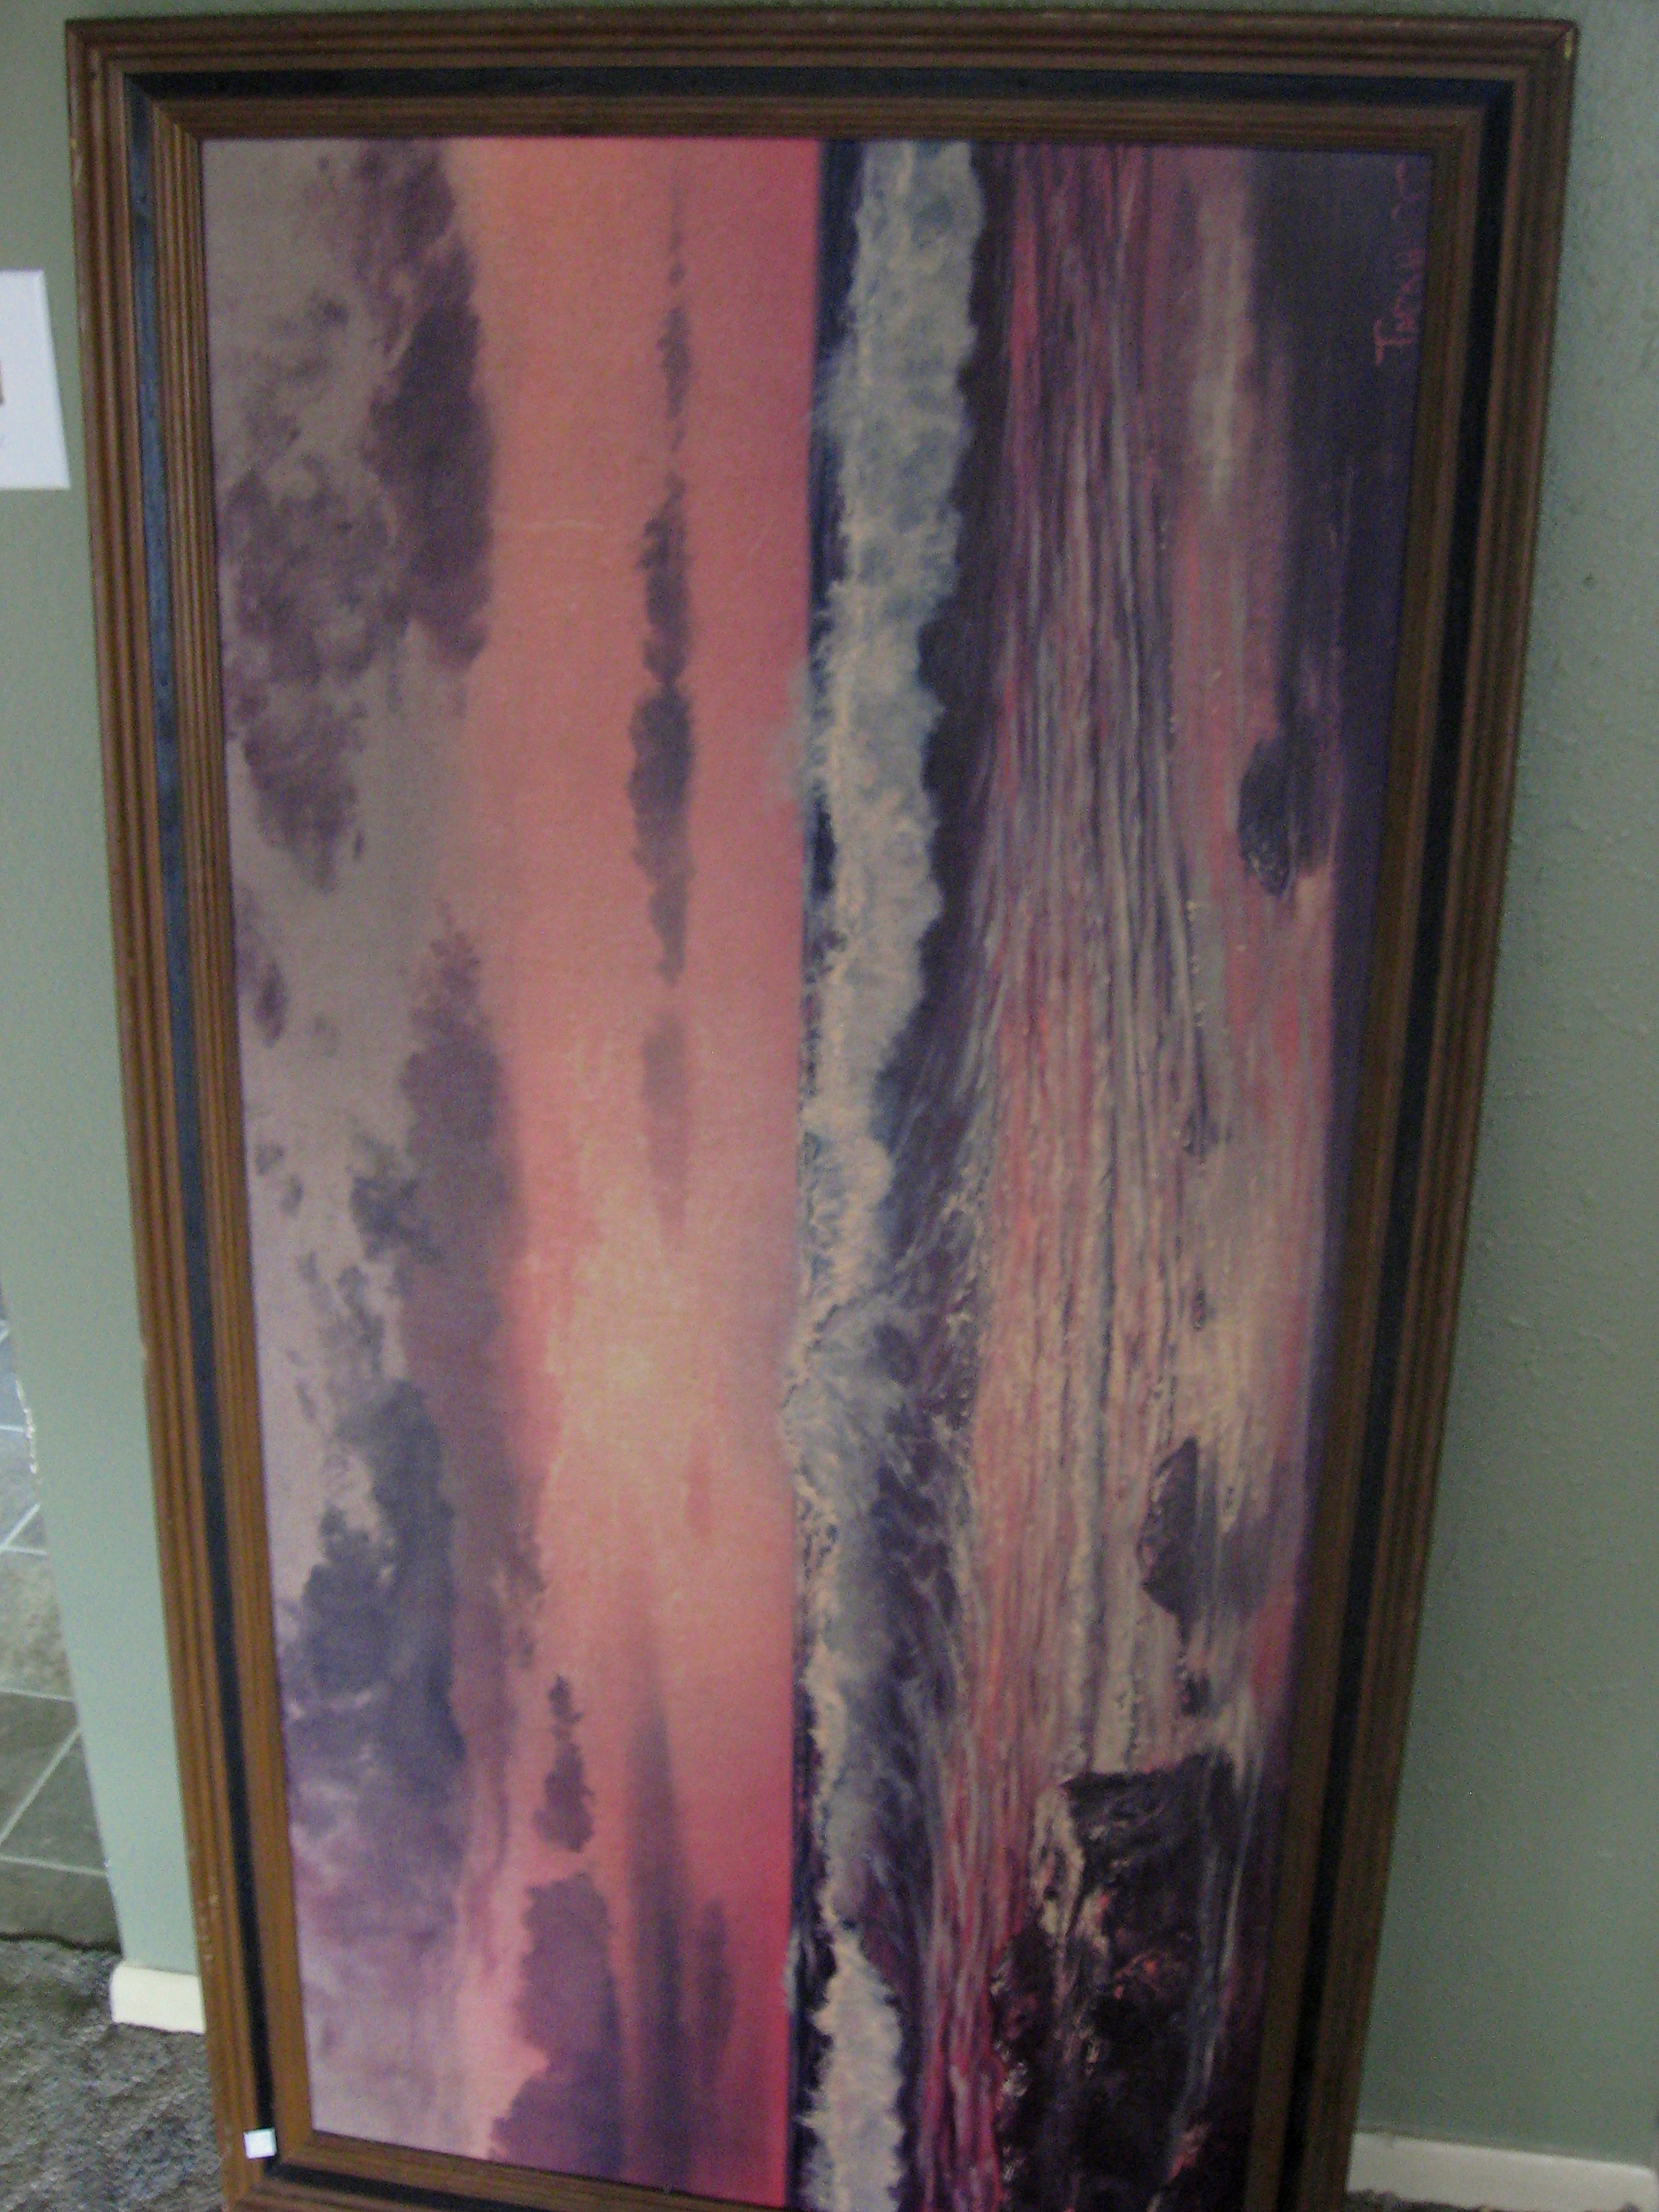
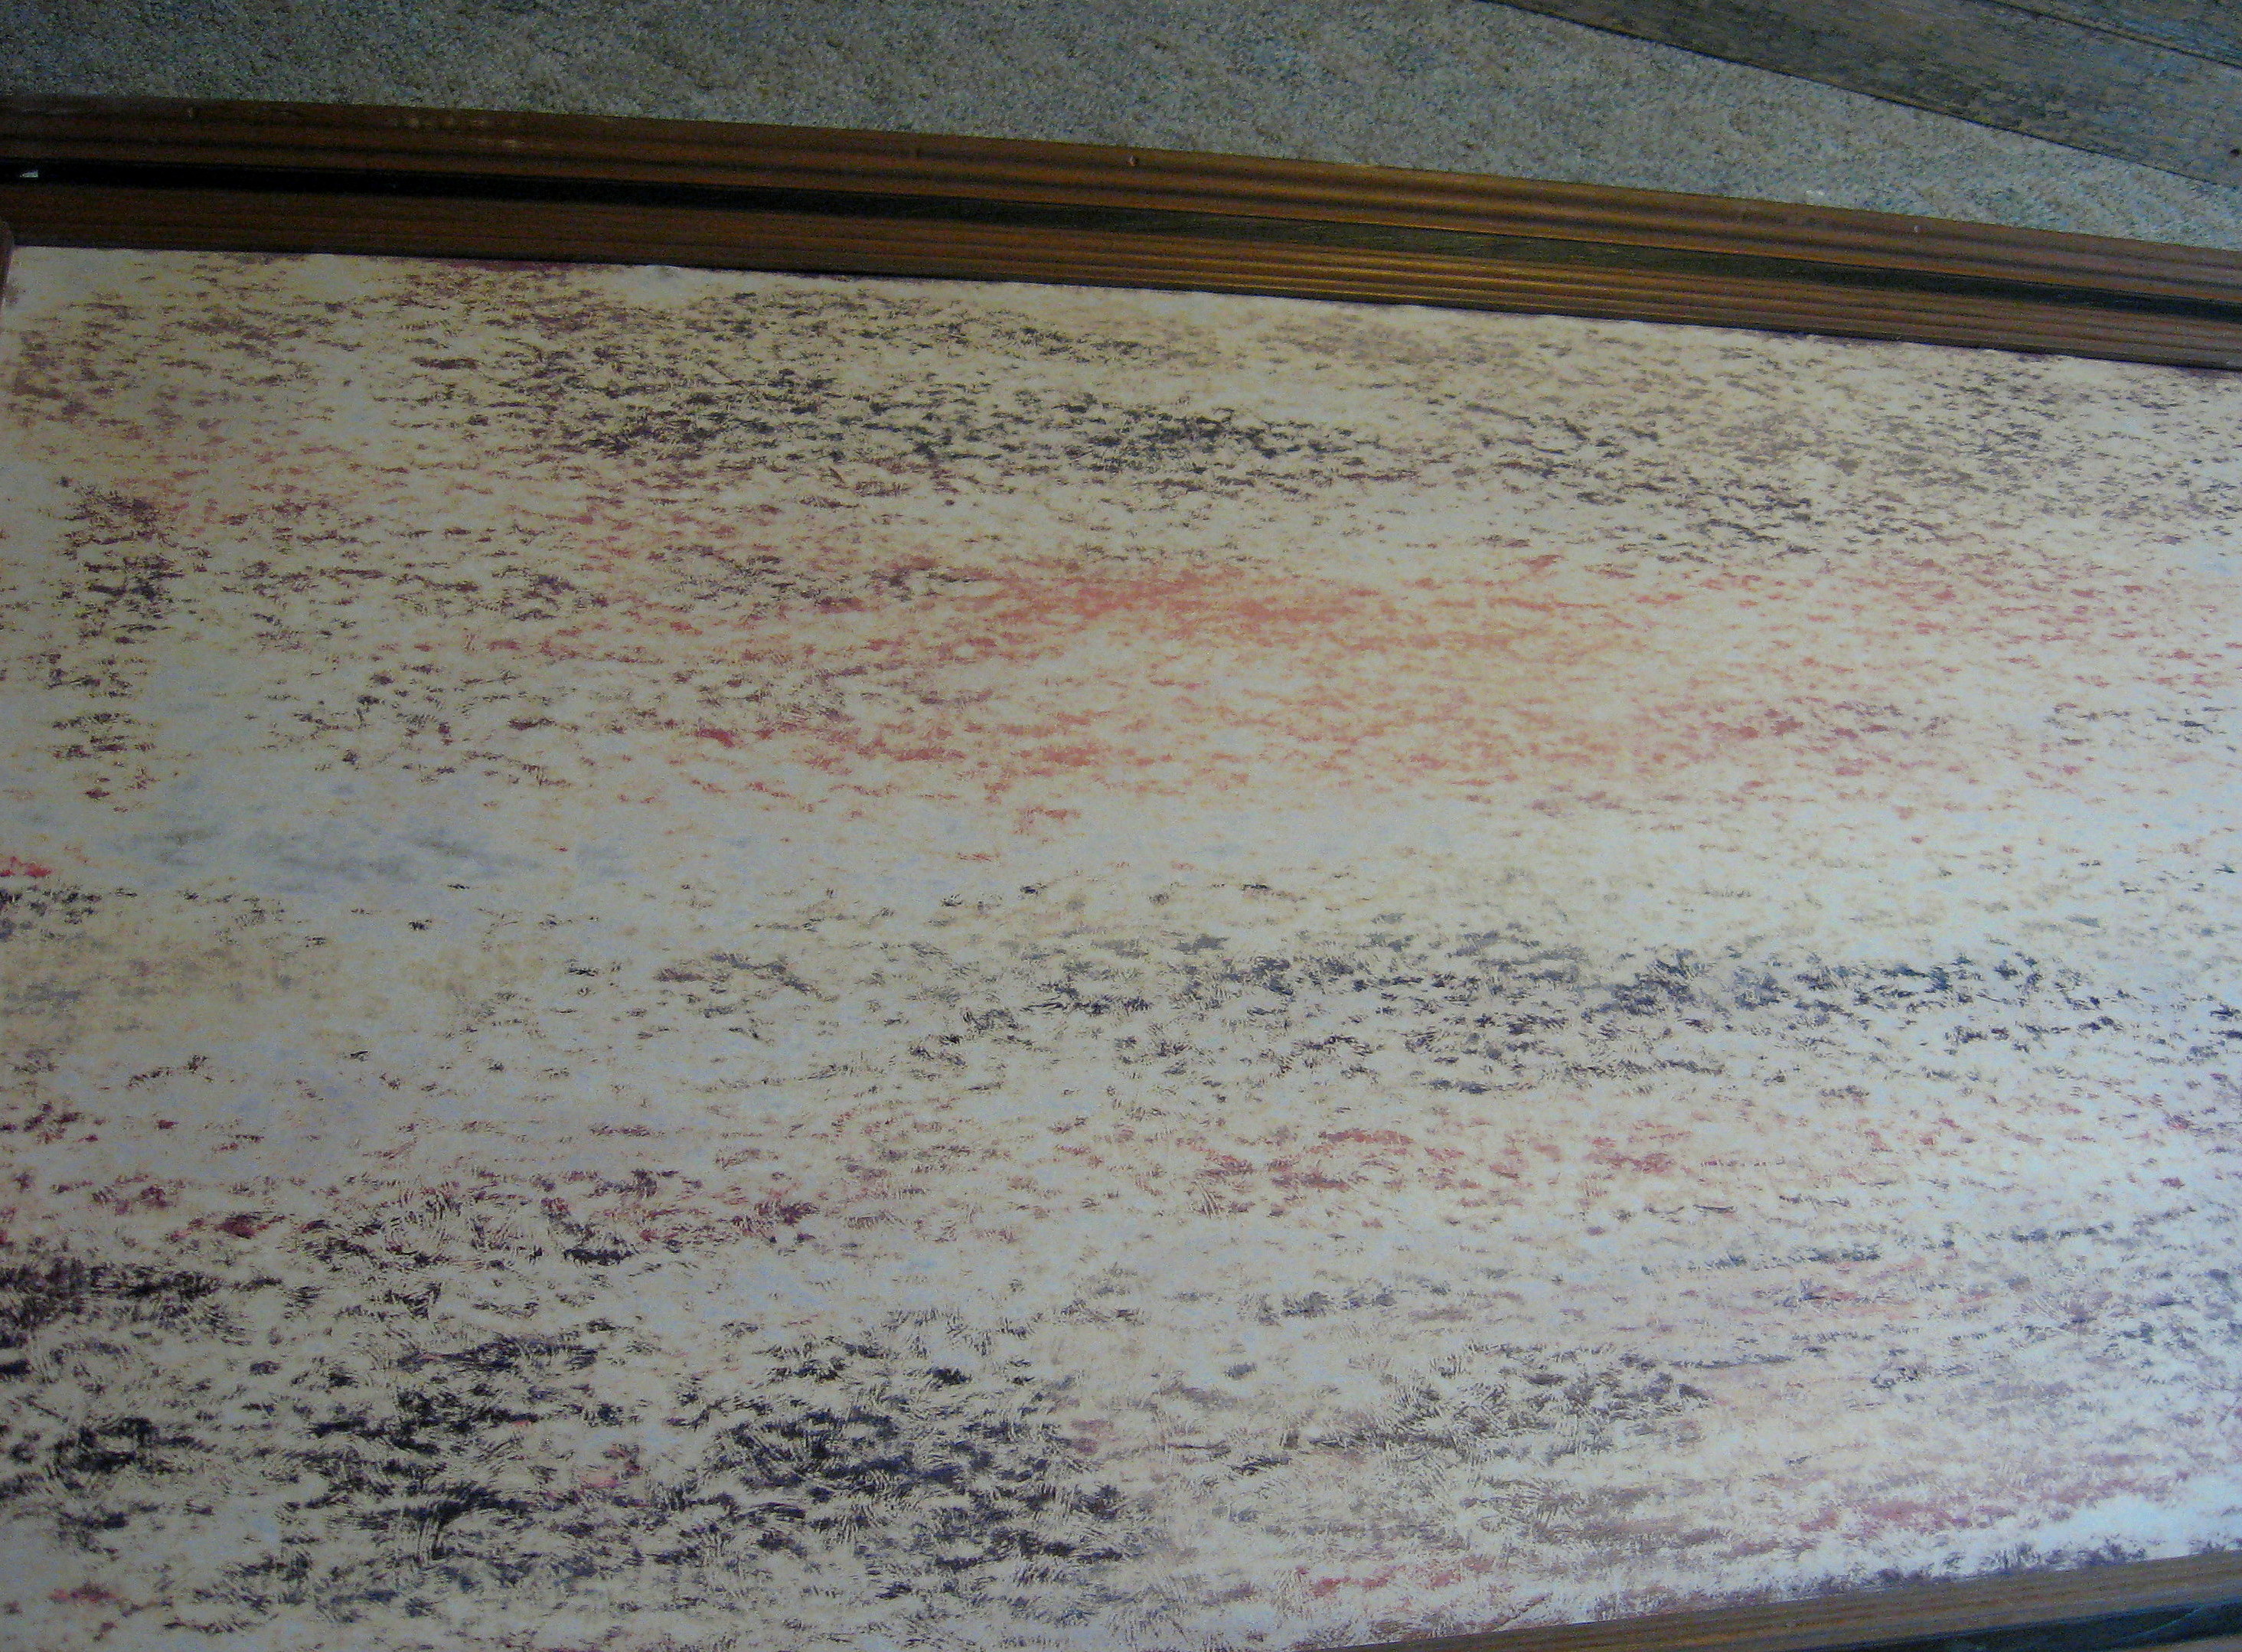
My original plan was to buy a sheet of dry erase board at a home improvement store and have it cut to fit in the frame. When I went to take this print out of the frame, I saw that it was stapled in VERY well and I started to think that maybe I could just use what was there. I knew I had some chalkboard paint in my garage – I wasn’t sure if painting this surface would cause it to warp, but I decided for free, I might as well try it.
This surface had a very slight texture to it, so I started by sanding it down. It is basically just a dense cardboard kind of material, so I sanded carefully with a fine grit sandpaper, then vacuumed the dust and wiped it down with a barely damp cloth.
Now paint the frame. I like to add just a little Plaster of Paris to my craft paint; not necessary, just my preference. It makes the paint act like expensive chalk paint; it covers well (sometimes in just one coat)
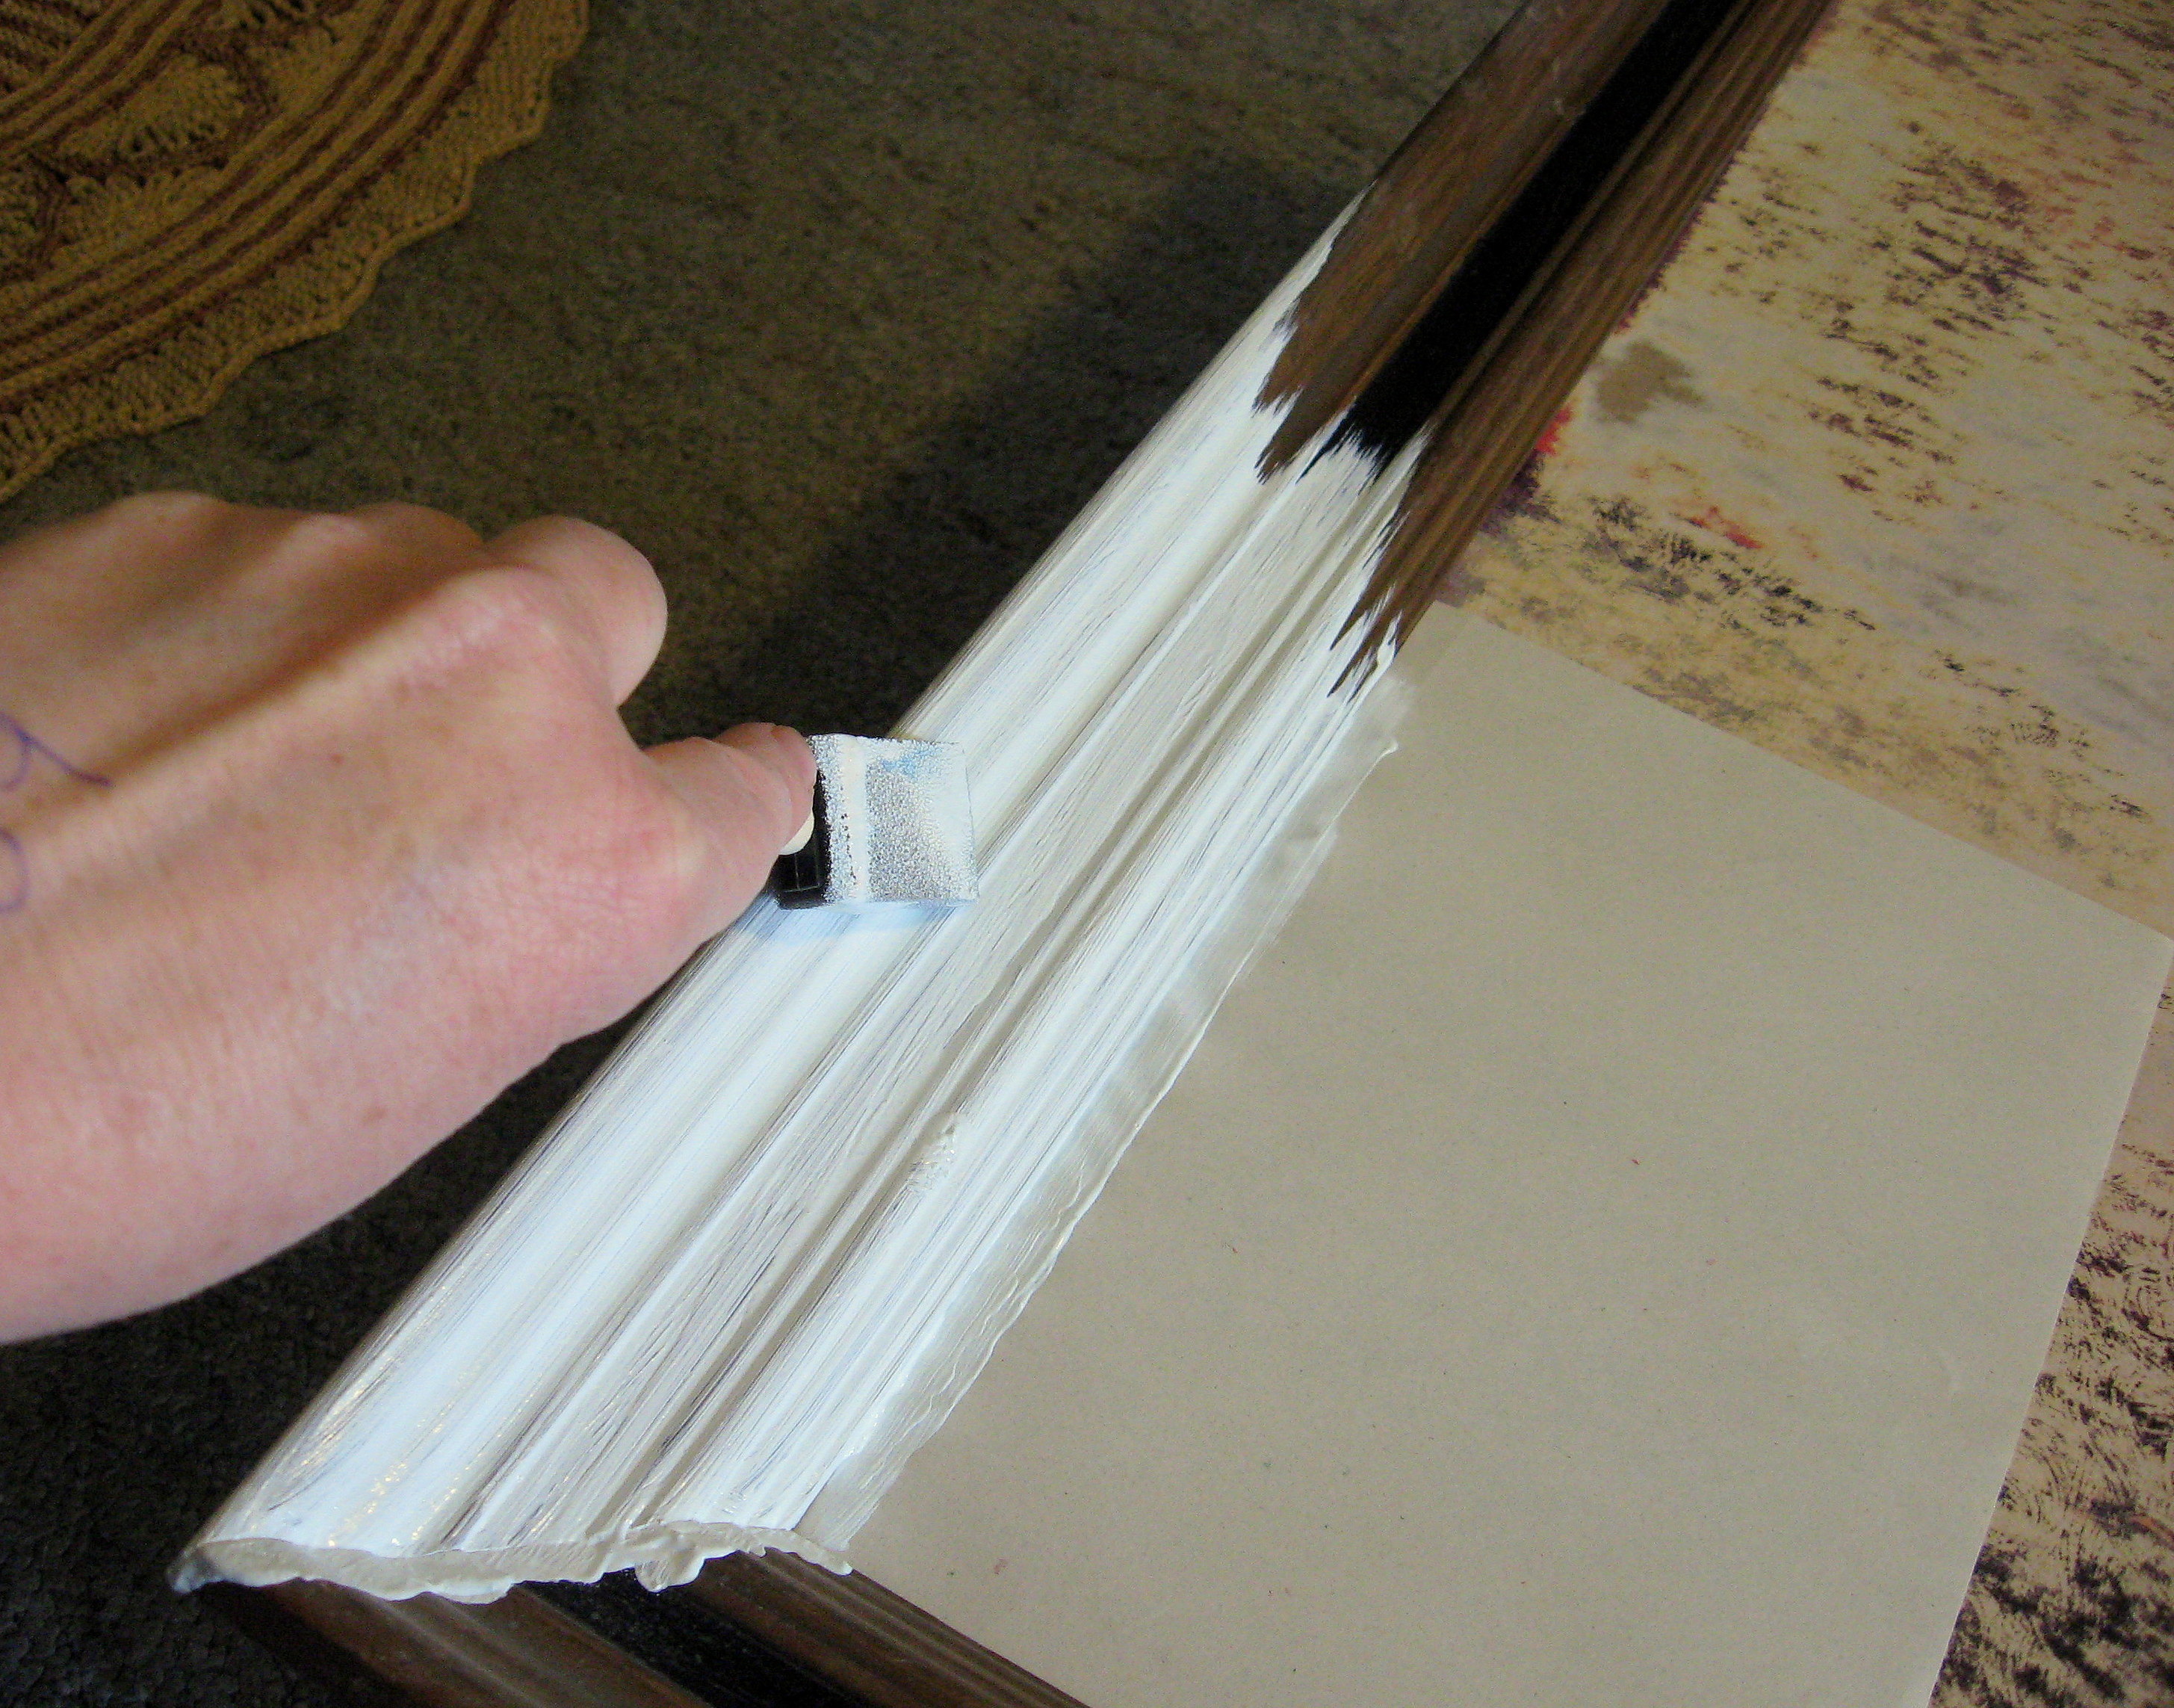
and it distresses very easily with sandpaper. Here is the frame all painted:
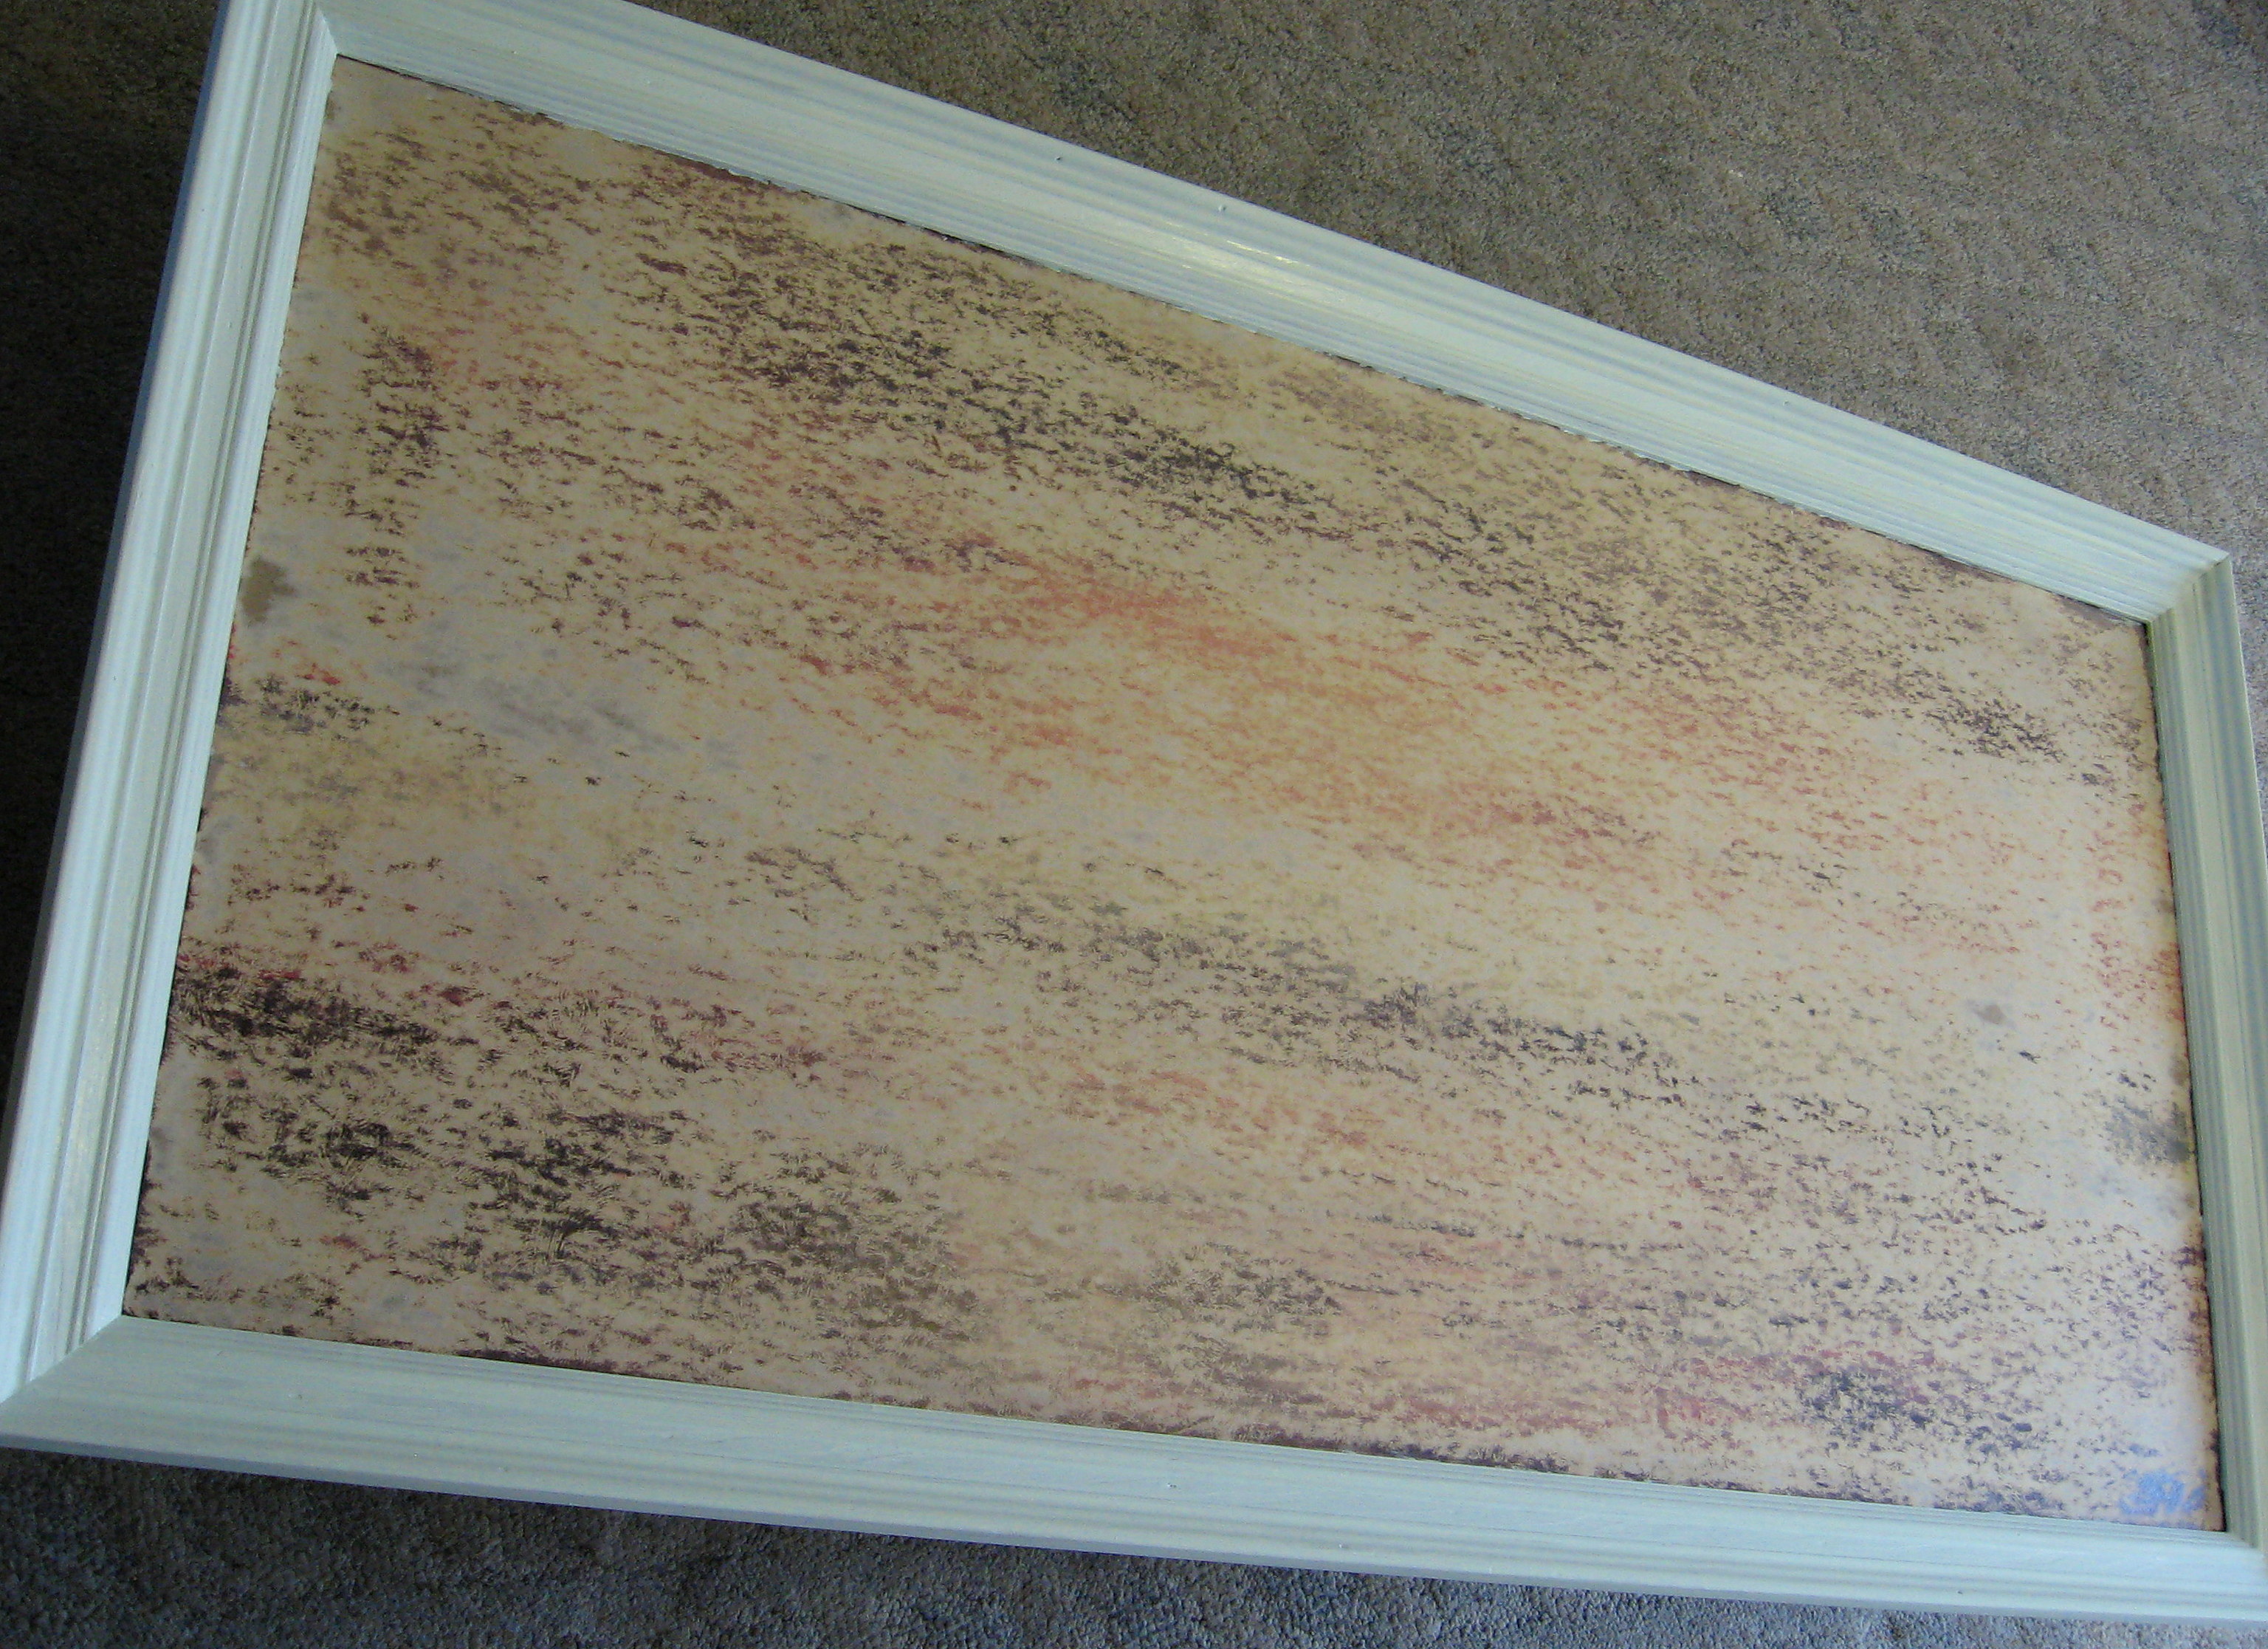
and then lightly sanded:
Now let’s paint the inside surface.
*Note – I lucked out and found a frame with a print in it that I could just paint over. If your frame doesn’t have this, I would recommend buying a piece of masonite from a home improvement store. They will even cut it to size for you. Masonite is inexpensive and easy to work with and provides a perfectly flat and smooth surface. Just paint it first, then staple or nail it into the frame when it’s dry.
I decided to start with magnetic paint so I could stick things to the calendar – bills to be paid, coupons needed, permission slips to turn in, etc.
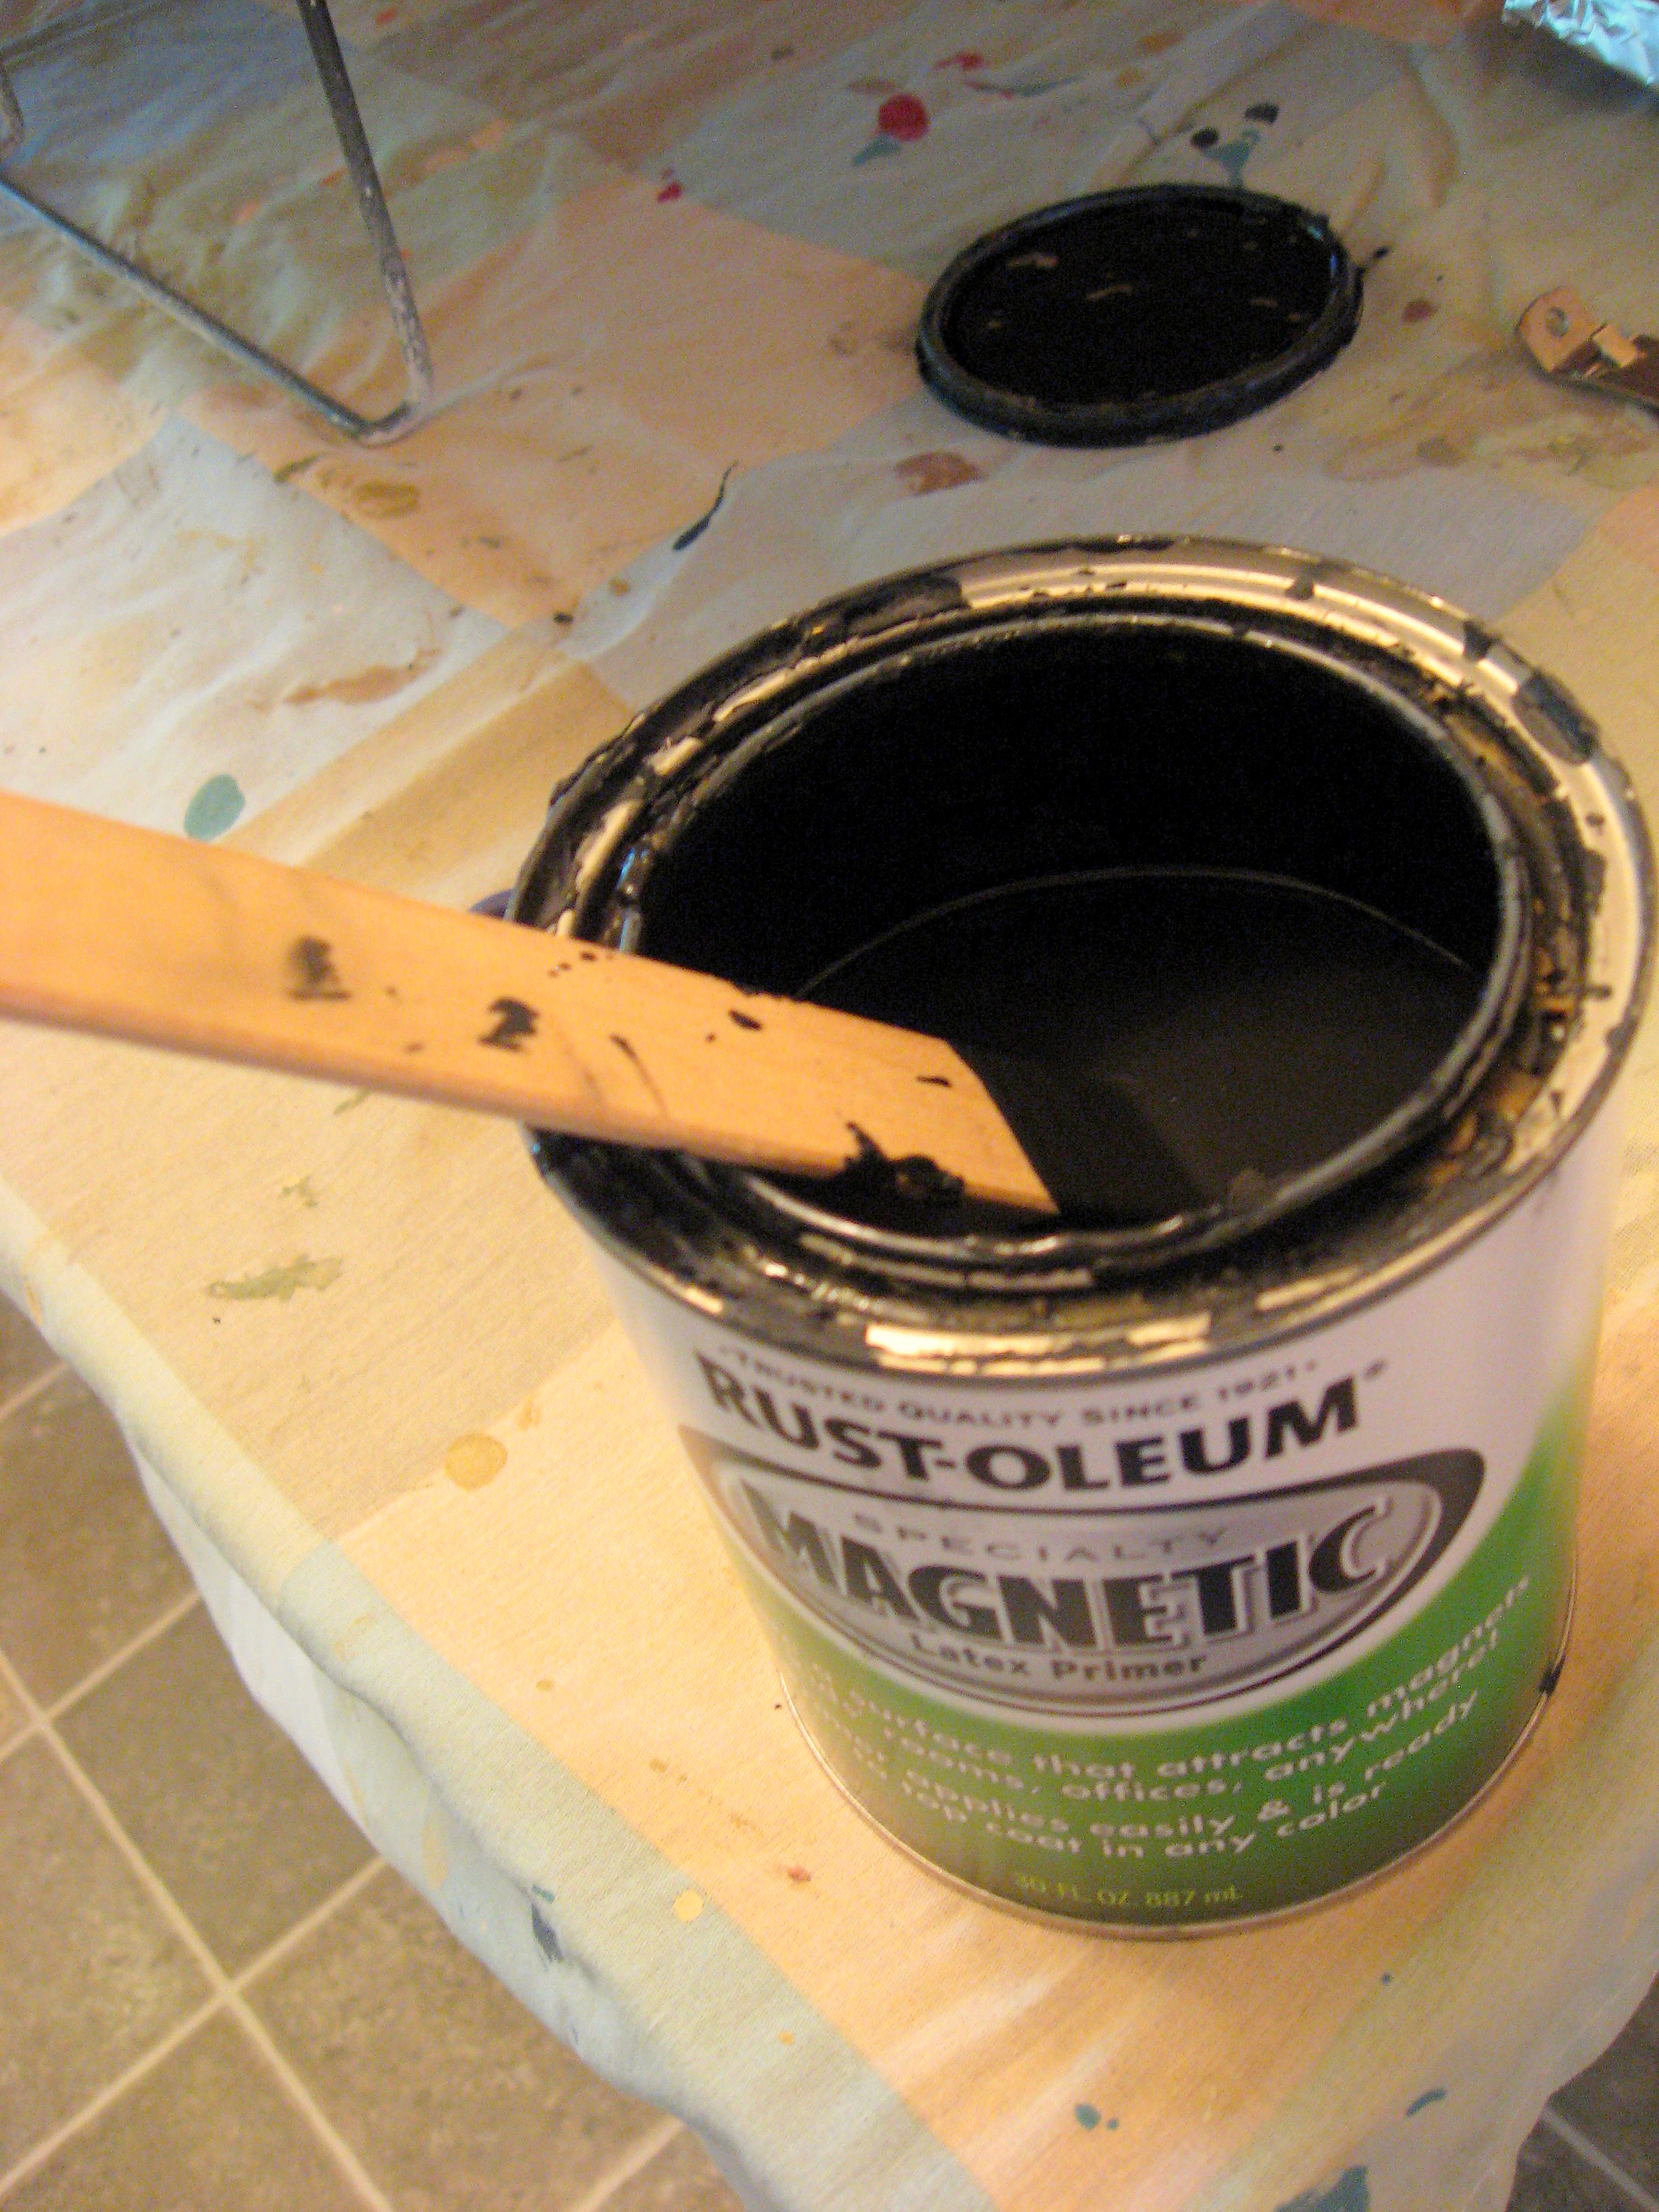
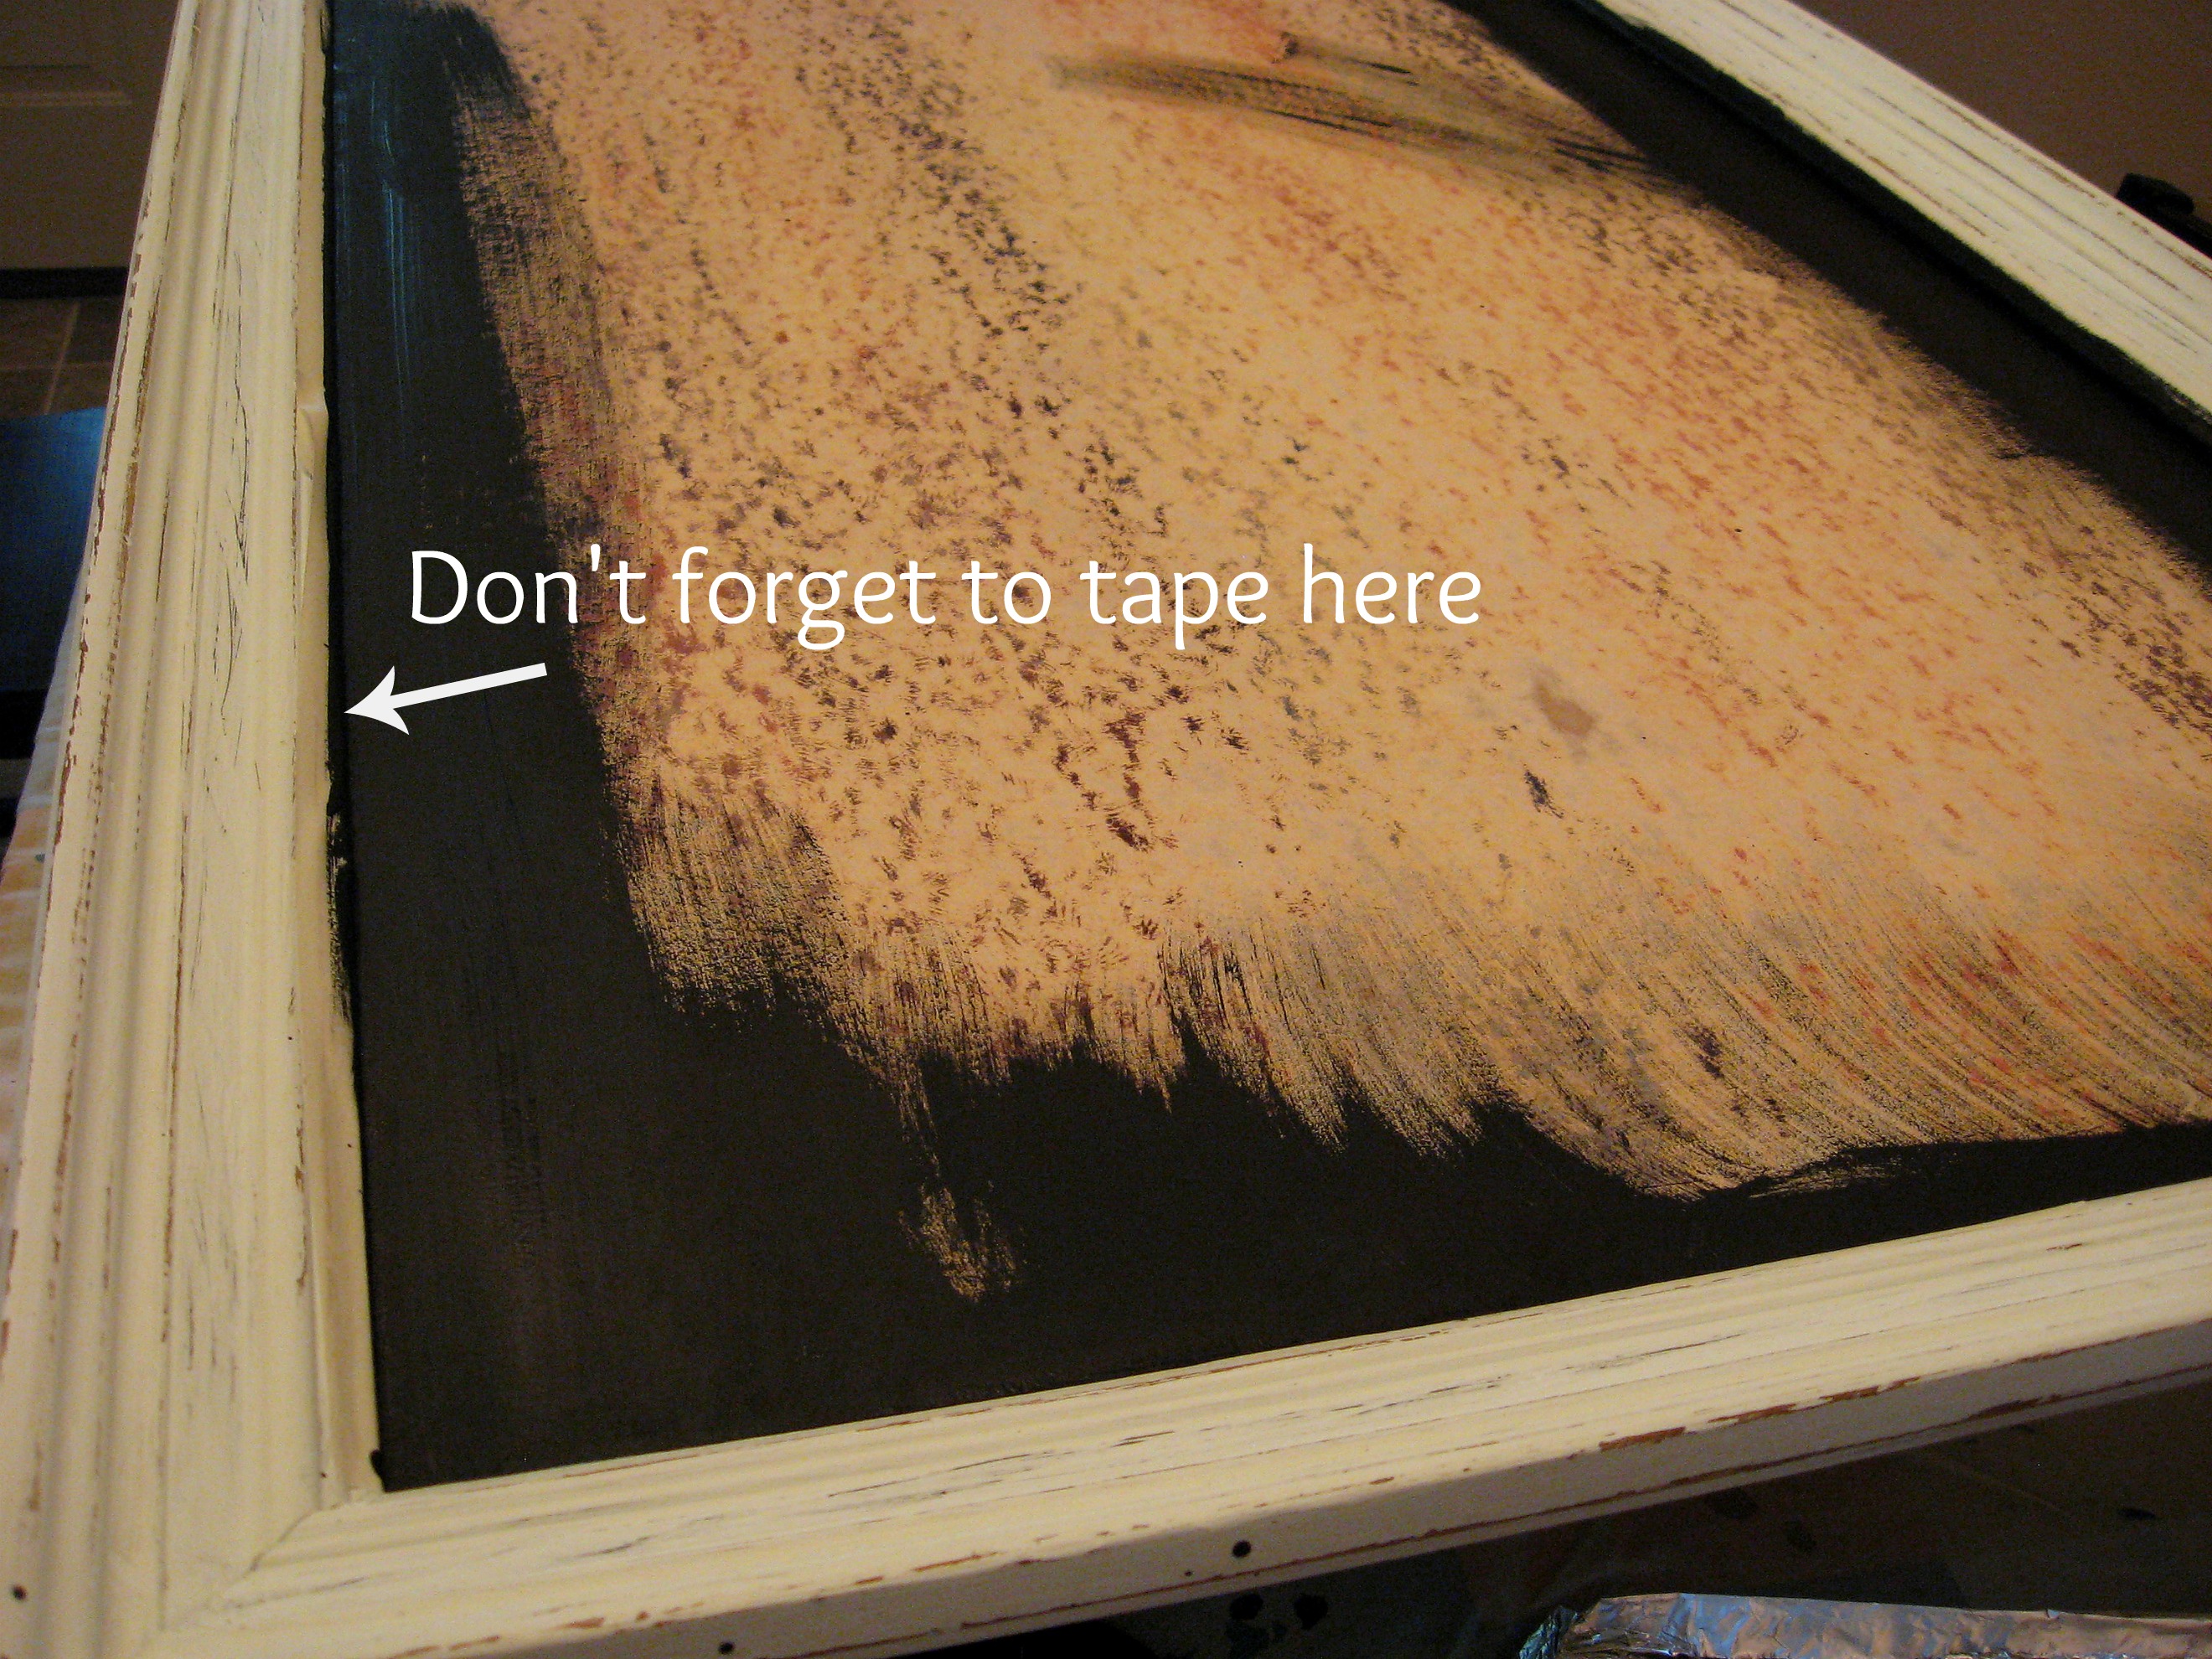
Tape around the inside edge of the frame and start stirring your magnetic paint. Magnetic paint is really just black primer with tiny flecks of metal in it. It is very thick and hard to stir, so if you are buying it from the store be sure to ask them to shake it in their paint mixer. If, like me, you have some sitting around the house, you’ll need to stir it for at least 10 minutes.
Start painting by cutting in around the edges,
then rolling it on in the center.
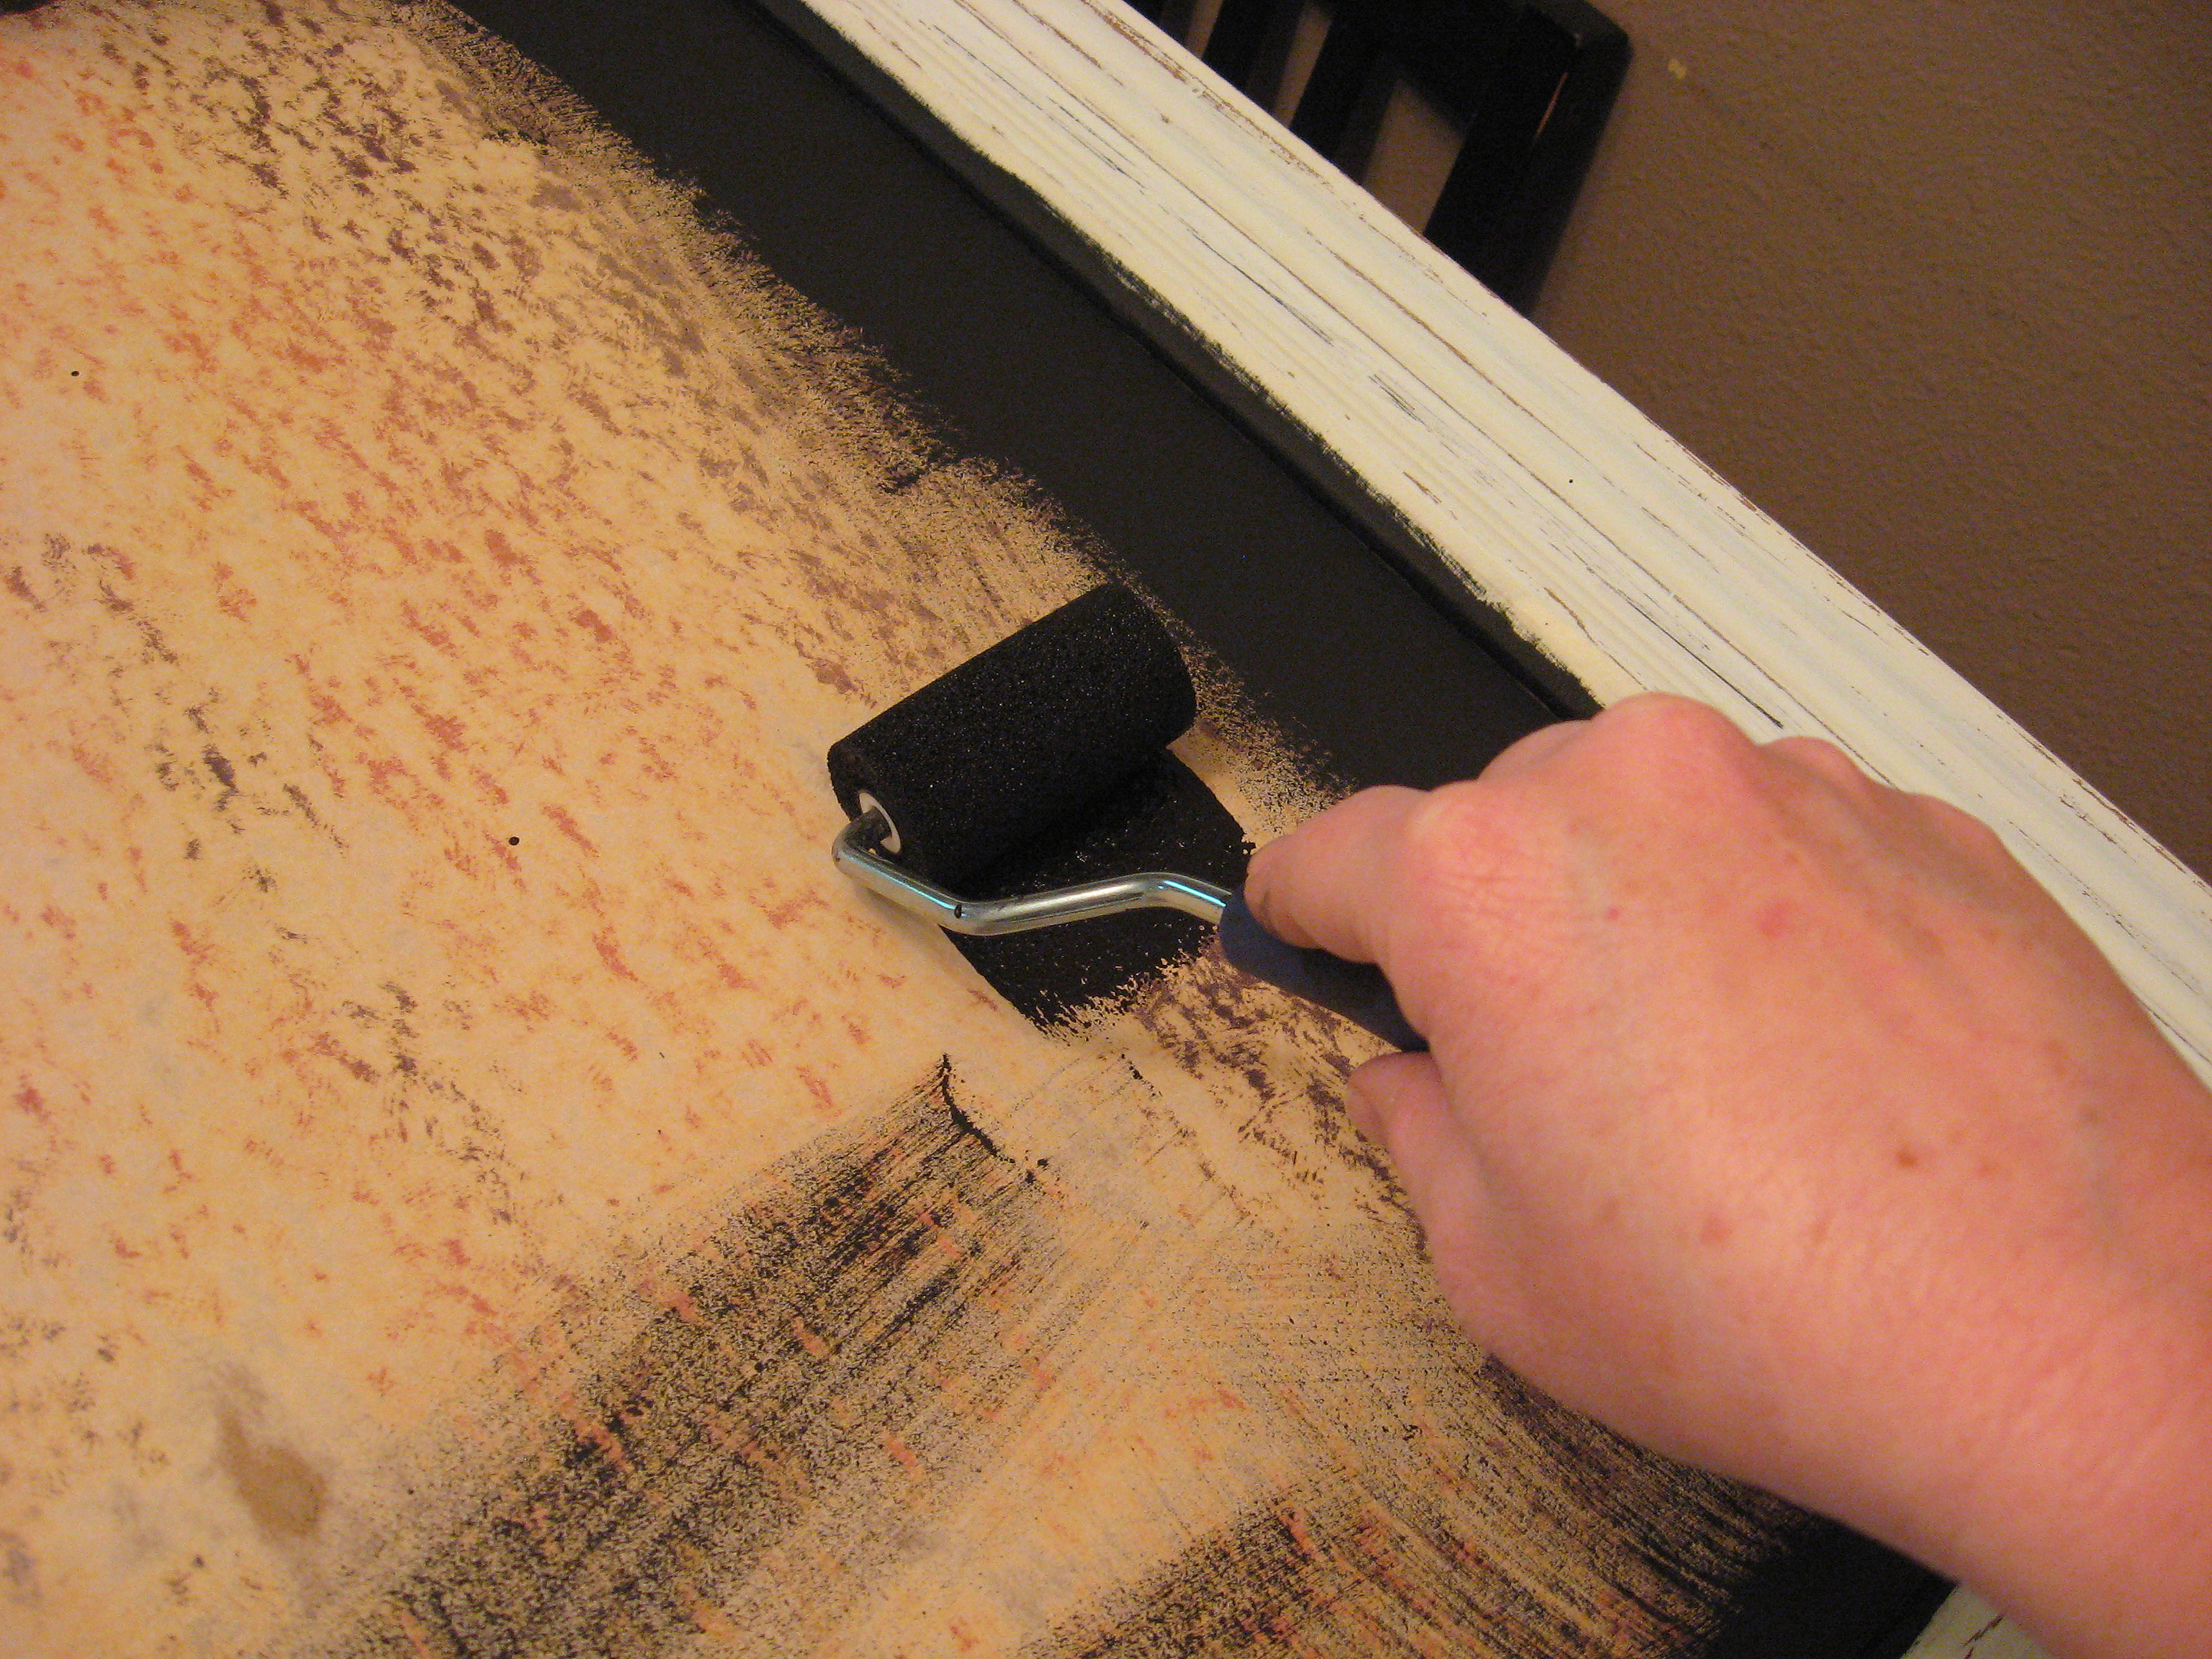
It is pretty important to use a foam roller. You want as smooth of a surface as possible. The can says that three thin coats are better than a heavy coat, so that is what I did, allowing each coat to dry for 30 minutes in between and then for 4 hours after the last coat. Wrap the roller in foil in between coats so it doesn’t dry out, then wash it out well after the last one so you can use it for the chalkboard paint too. You’ll probably want to just throw it away after the chalkboard paint, so I would use a disposable foam brush, too, instead of a nice paintbrush.
After the magnetic paint is dry, you will want to do the same thing with the chalkboard paint. Do at least 2 thin coats, rolling vertically on one coat and horizontally on the other. I didn’t take pictures of this step because I used black chalkboard paint and you wouldn’t be able to see a difference, but chalkboard paint is available in all kinds of fun colors!
Remove the tape CAREFULLY. Here it is all painted:
Now let’s turn it in to a calendar. Decide how you want yours to look, and then measure and figure out how big each section will be. For me, I wanted just a week long calendar and instead of 7 sections, I only did 6, with Saturday and Sunday sharing the last section since those days tend to be less scheduled for my family. I decided to make the lines between each section 1/4 inch wide, so I grabbed a measuring tape, a ruler, a piece of scrap paper, a calculator – and then finally my high school son 😉 – and figured out how big each section should be.
I wanted something to separate the sections that would be permanent – no chalk lines that would just be erased. I considered using tape or vinyl. That would work, but I thought the edges would get dirty as the board got erased, so I came up with using slick fabric paint.
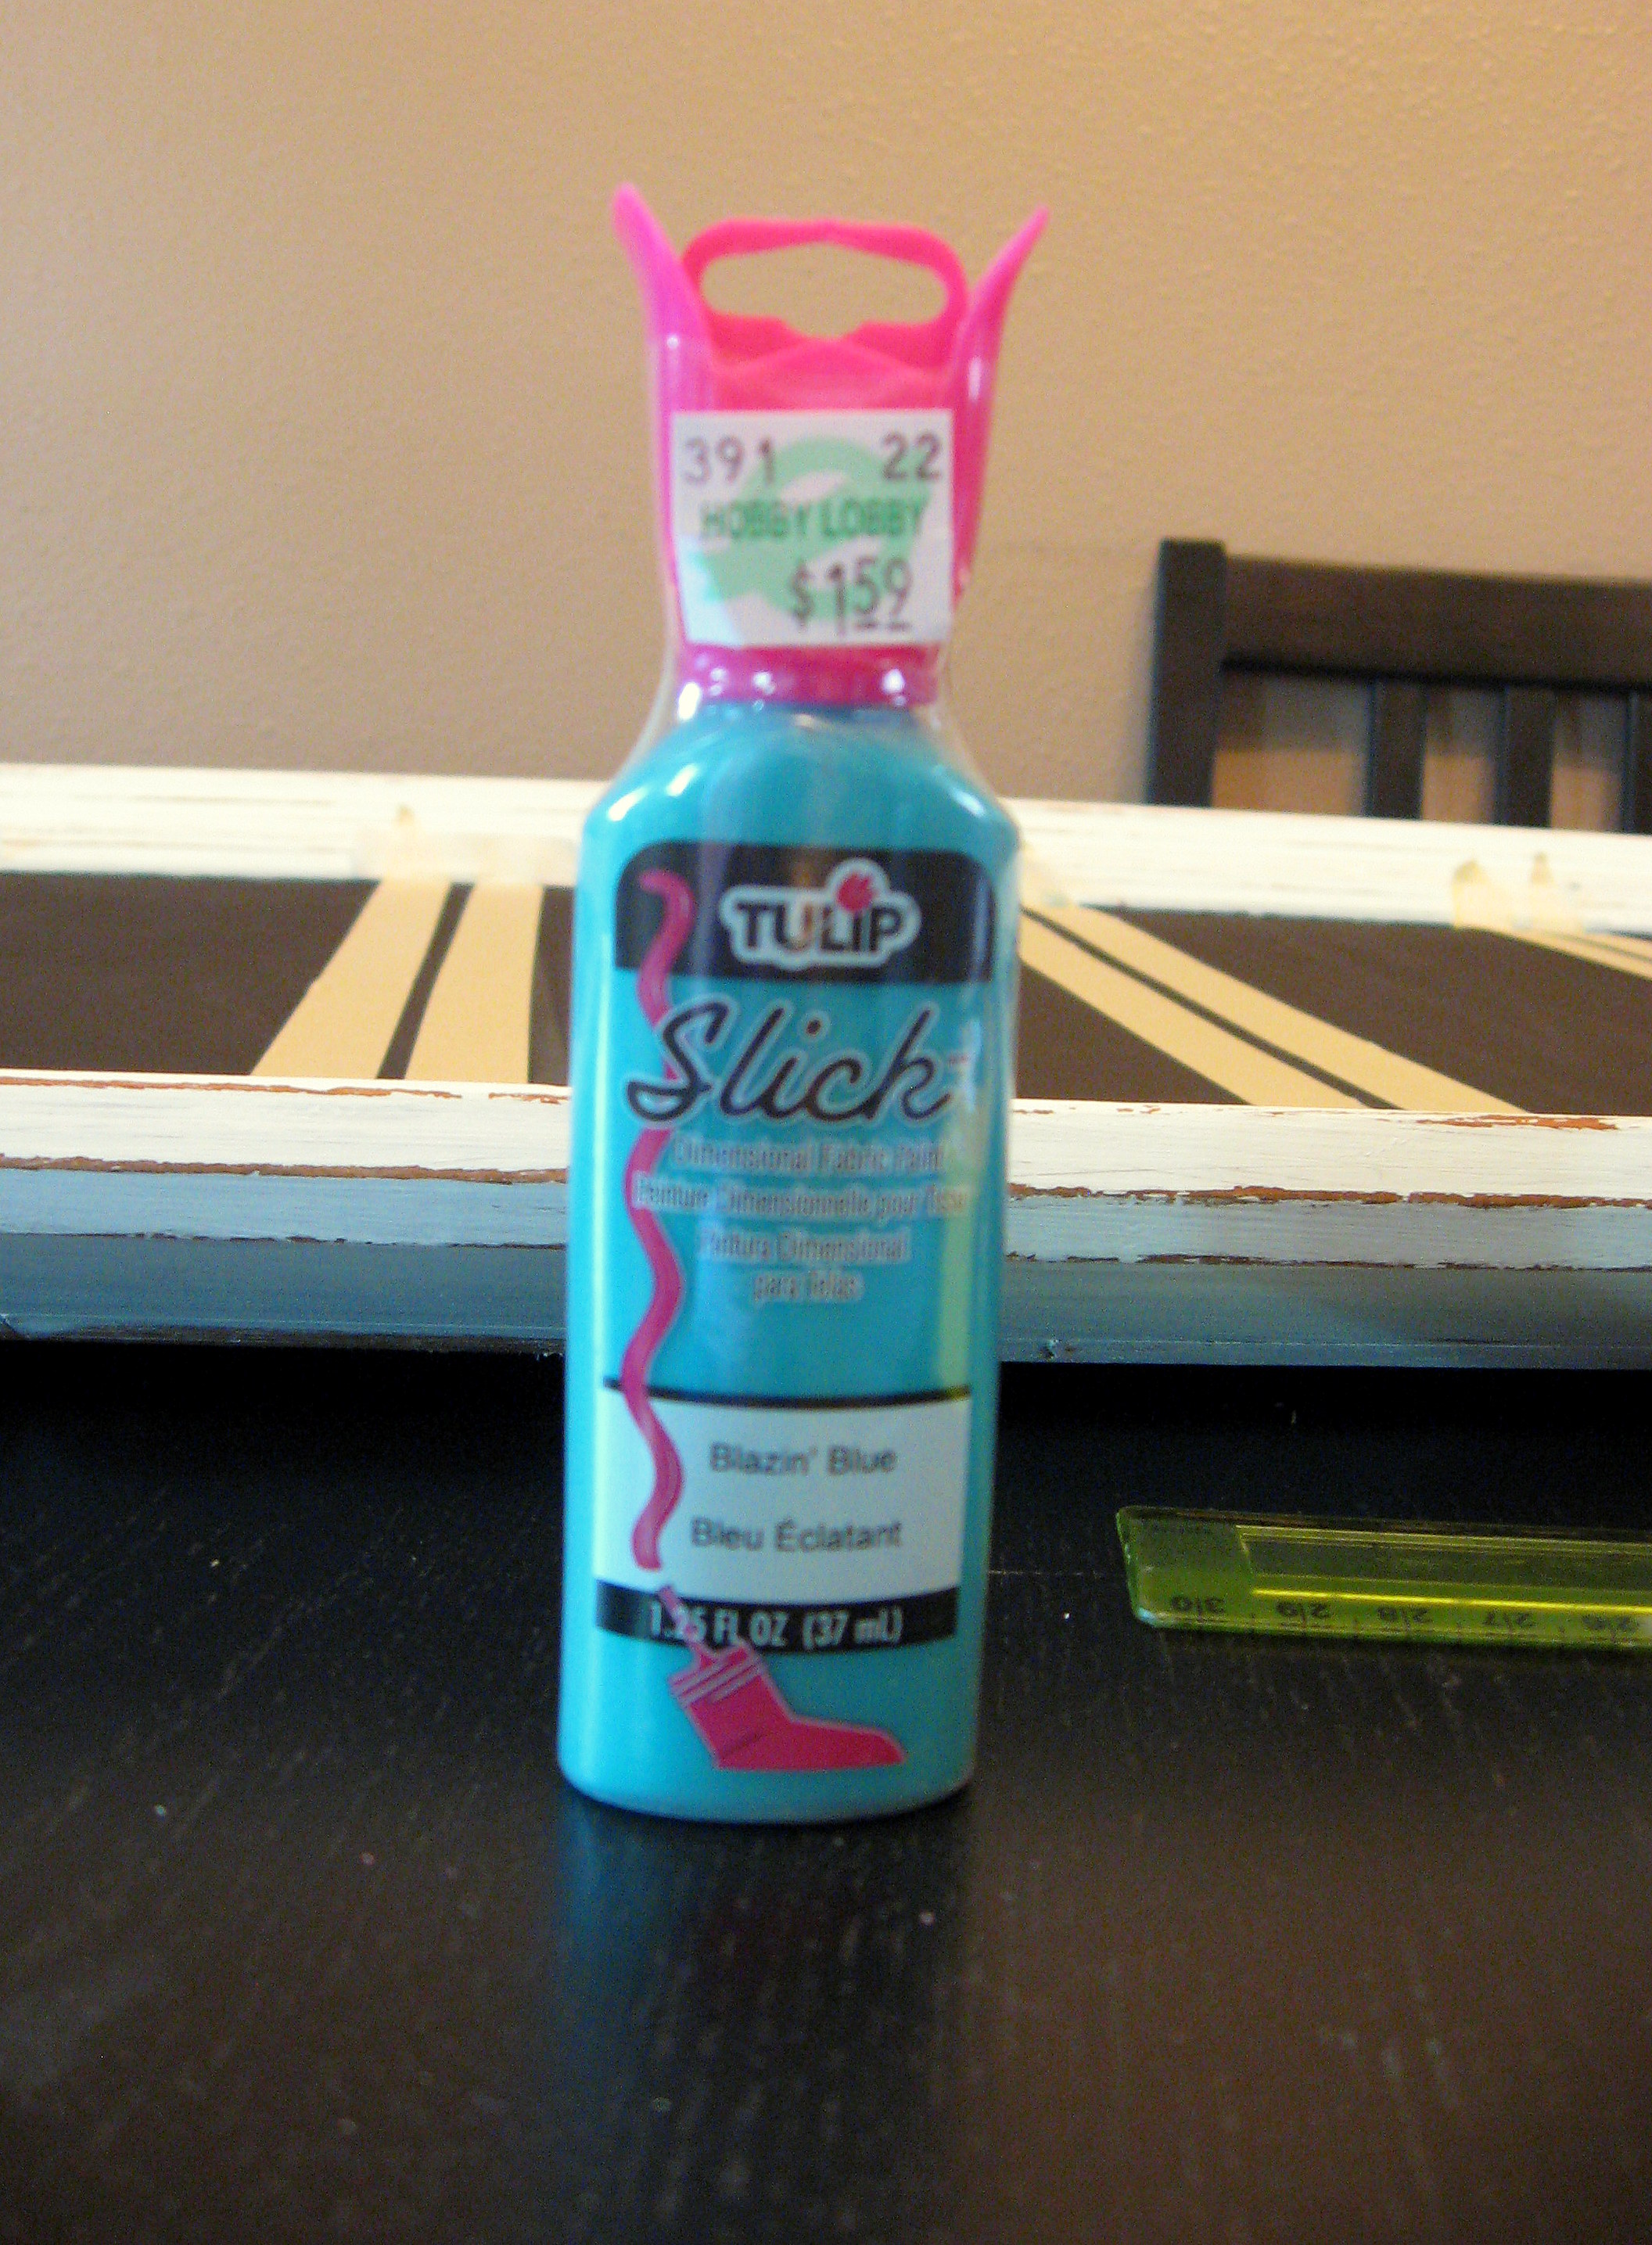
If you get the slick kind, it dries to a glossy, almost hard finish and it is available in dozens of colors, it is inexpensive, readily available and easy to work with.
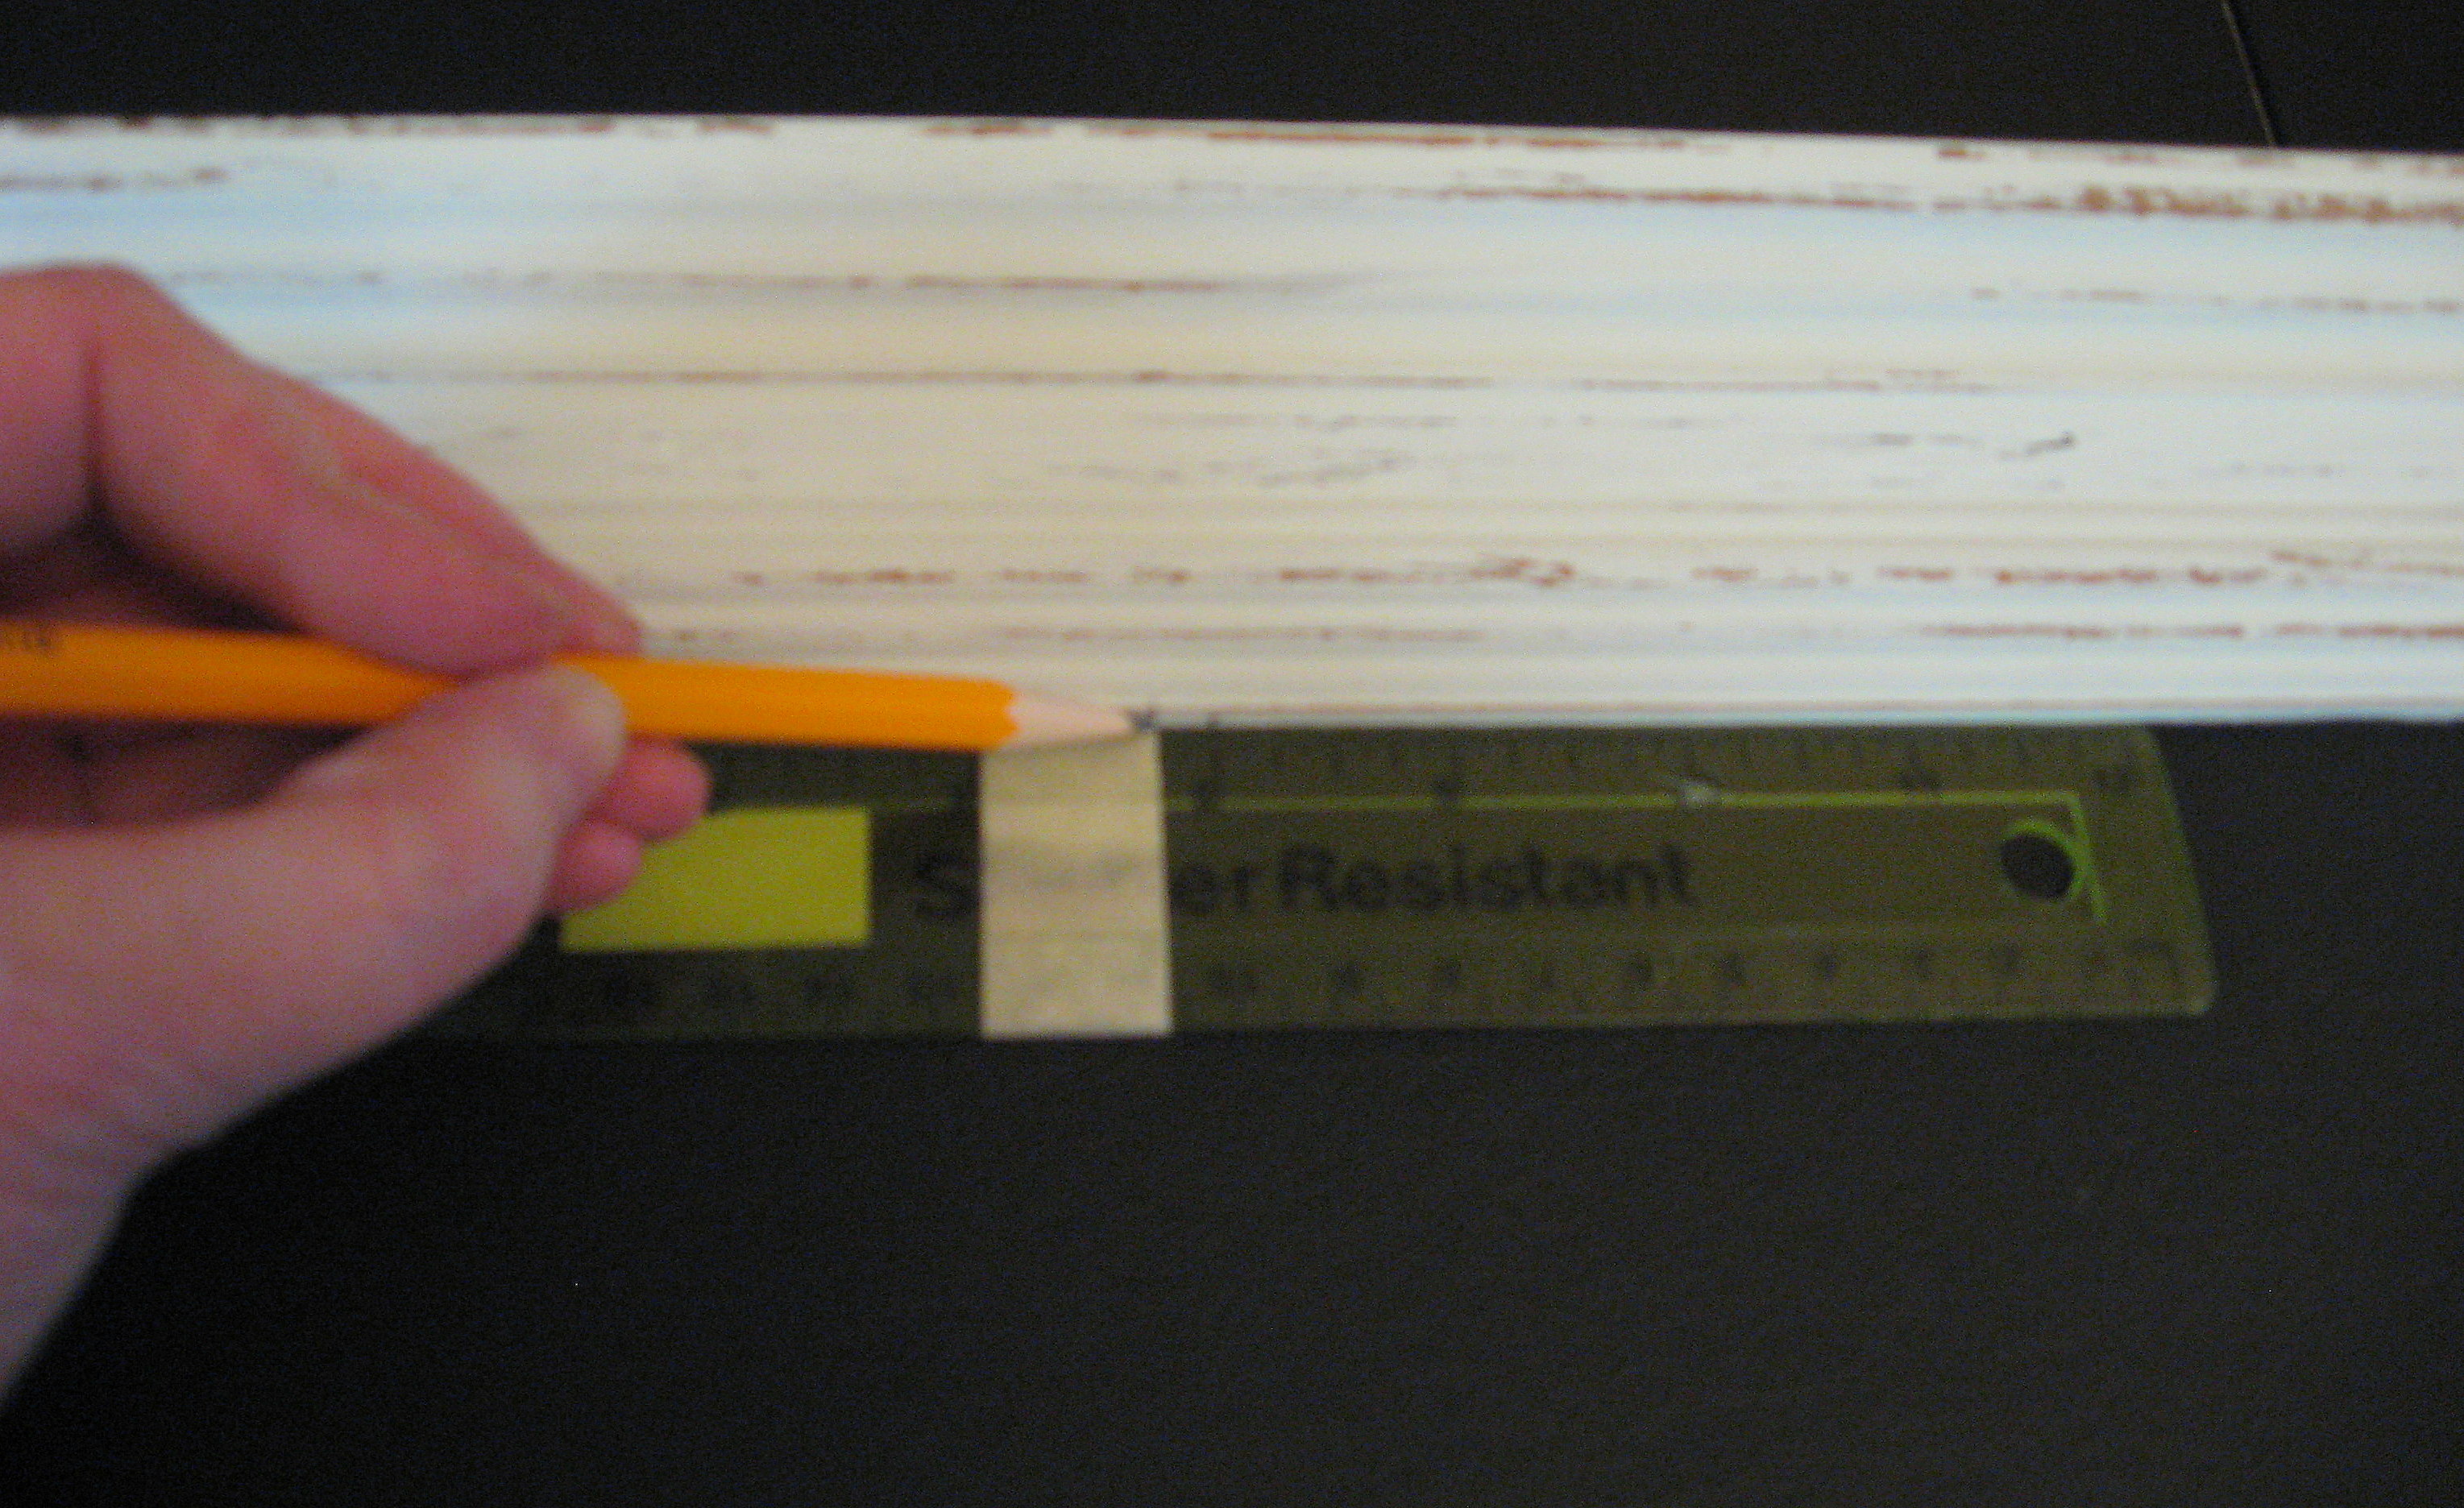
In order to make the lines of paint straight, you will tape off a line to paint in. Make small marks on the inside edge of the frame with a pencil. I made two marks to indicate where the 1/4-inch thick line will be. Measure and mark on both sides of the frame, all the way across.
Then connect the dots with tape; press the edges of the tape down well so you don’t get bleeding under the tape.
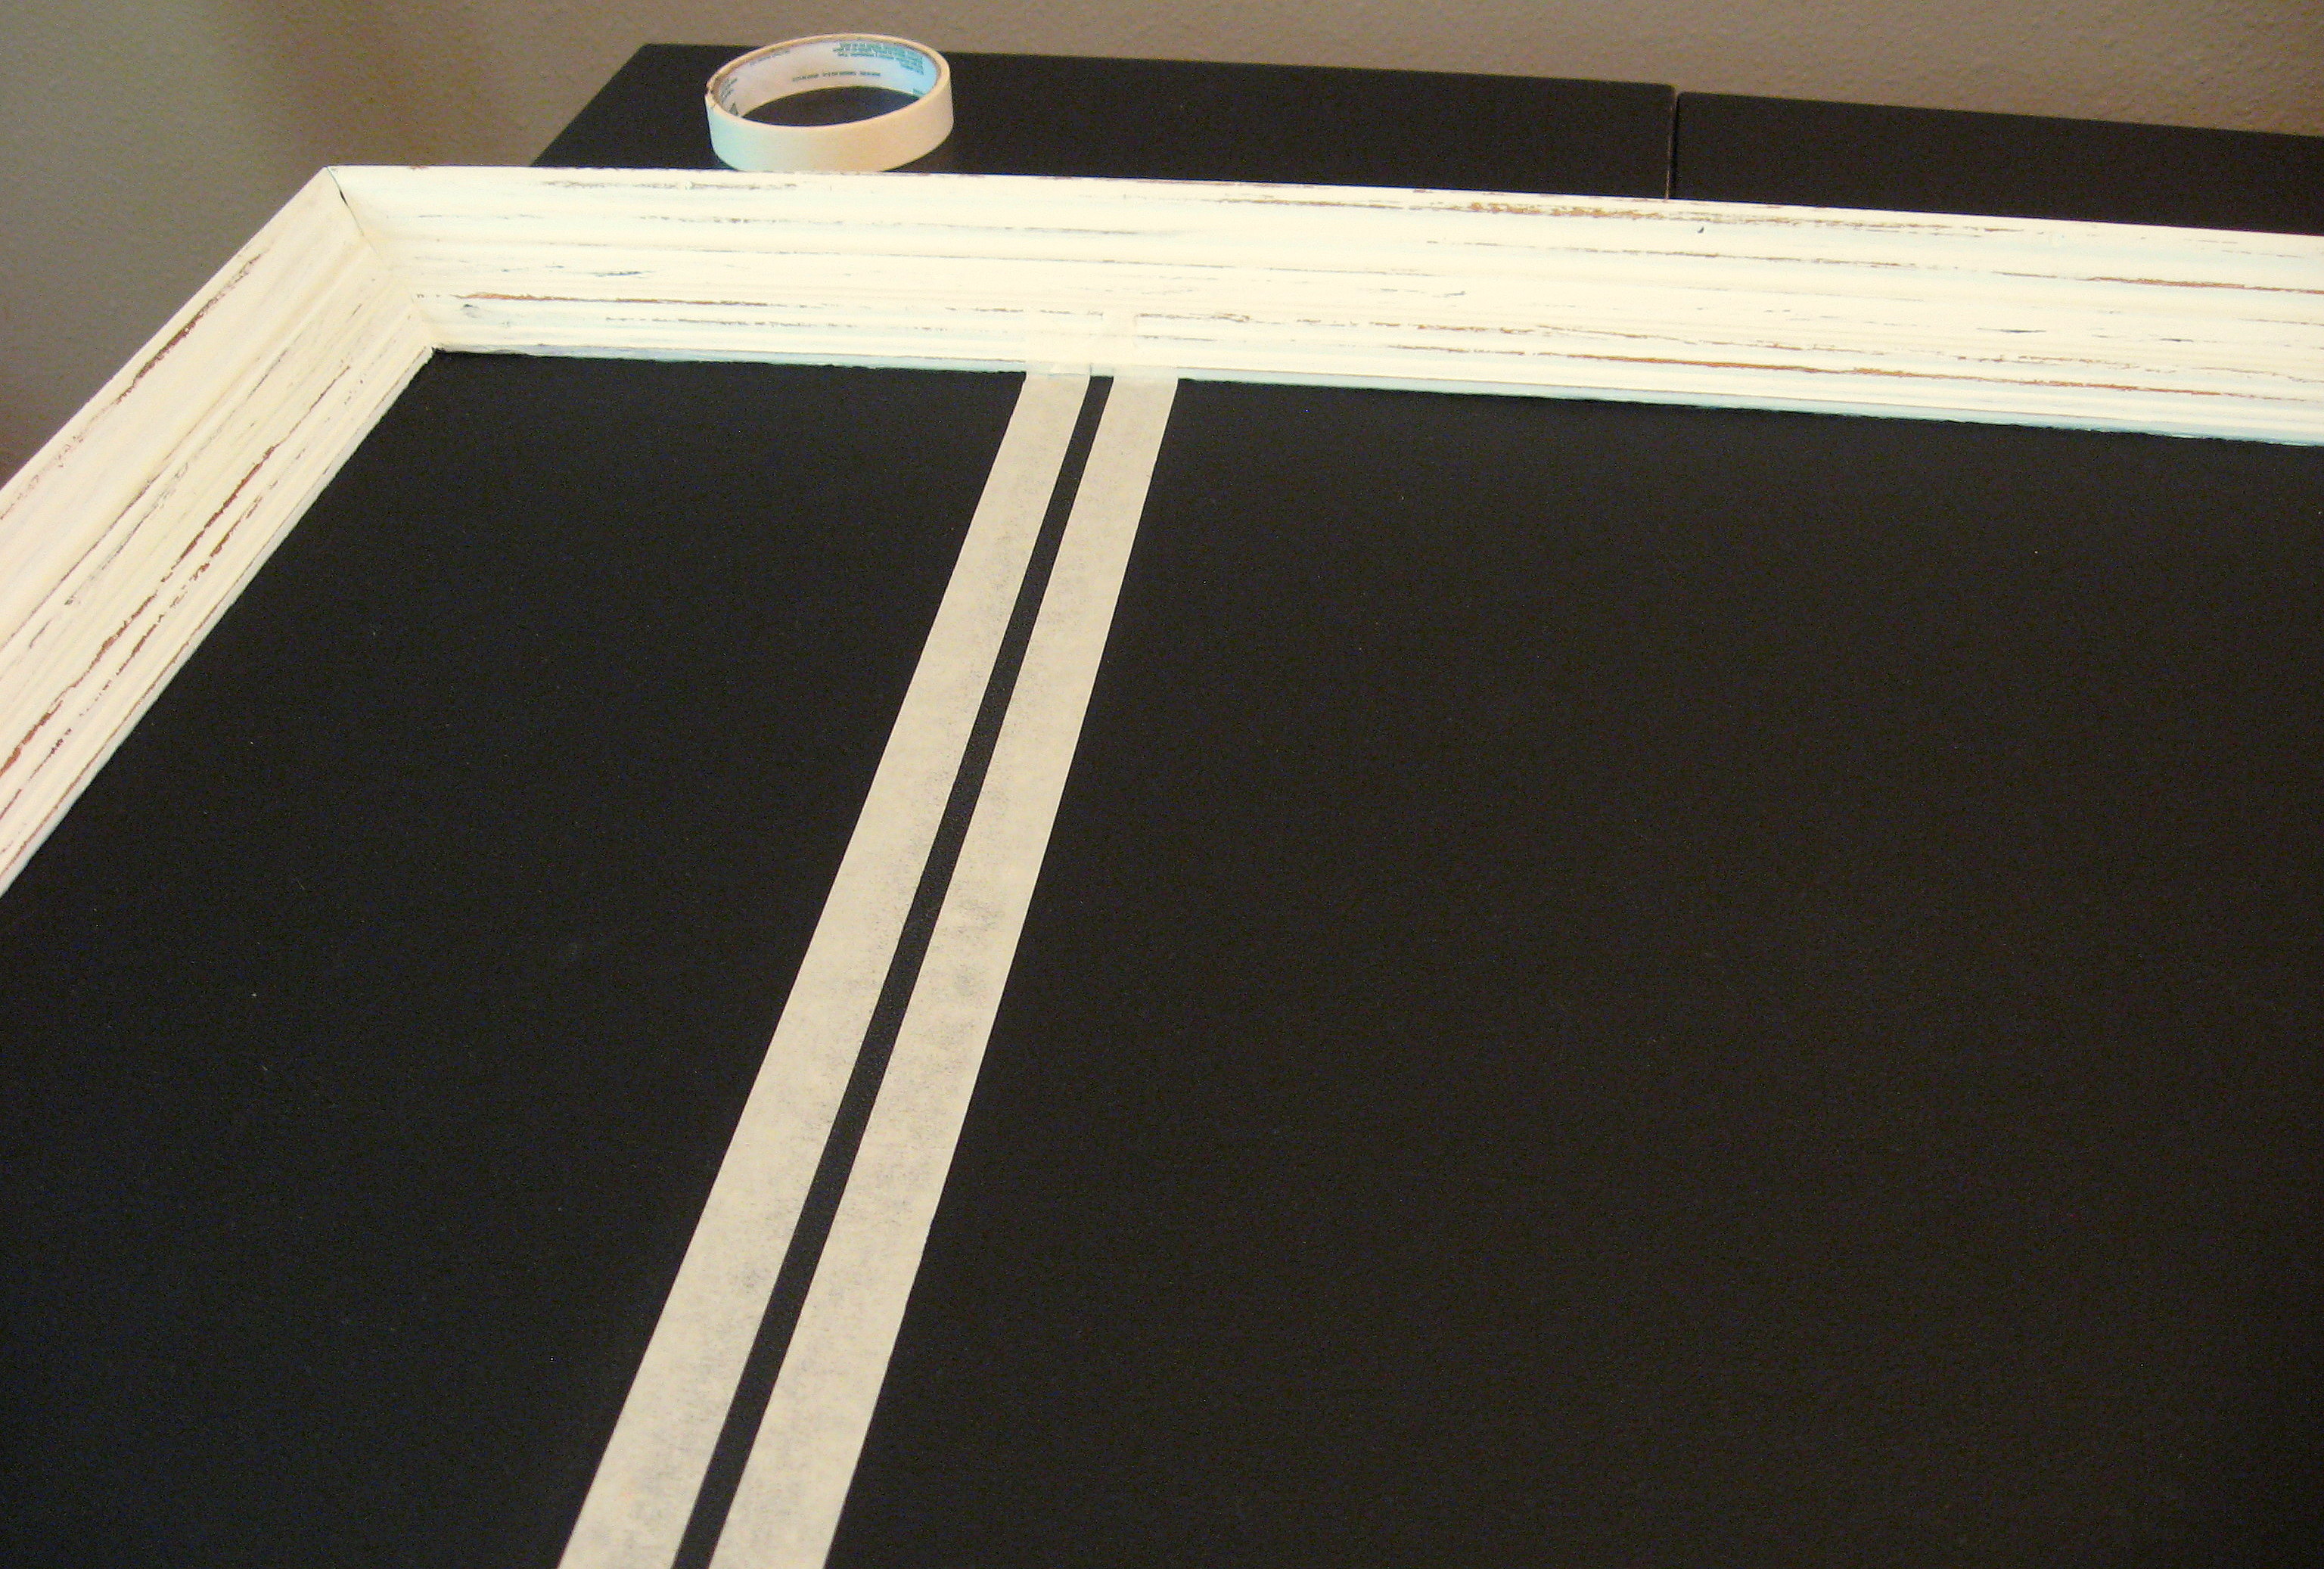
Here it is with all the sections taped off:

Squeeze the paint out in a line inside the tape
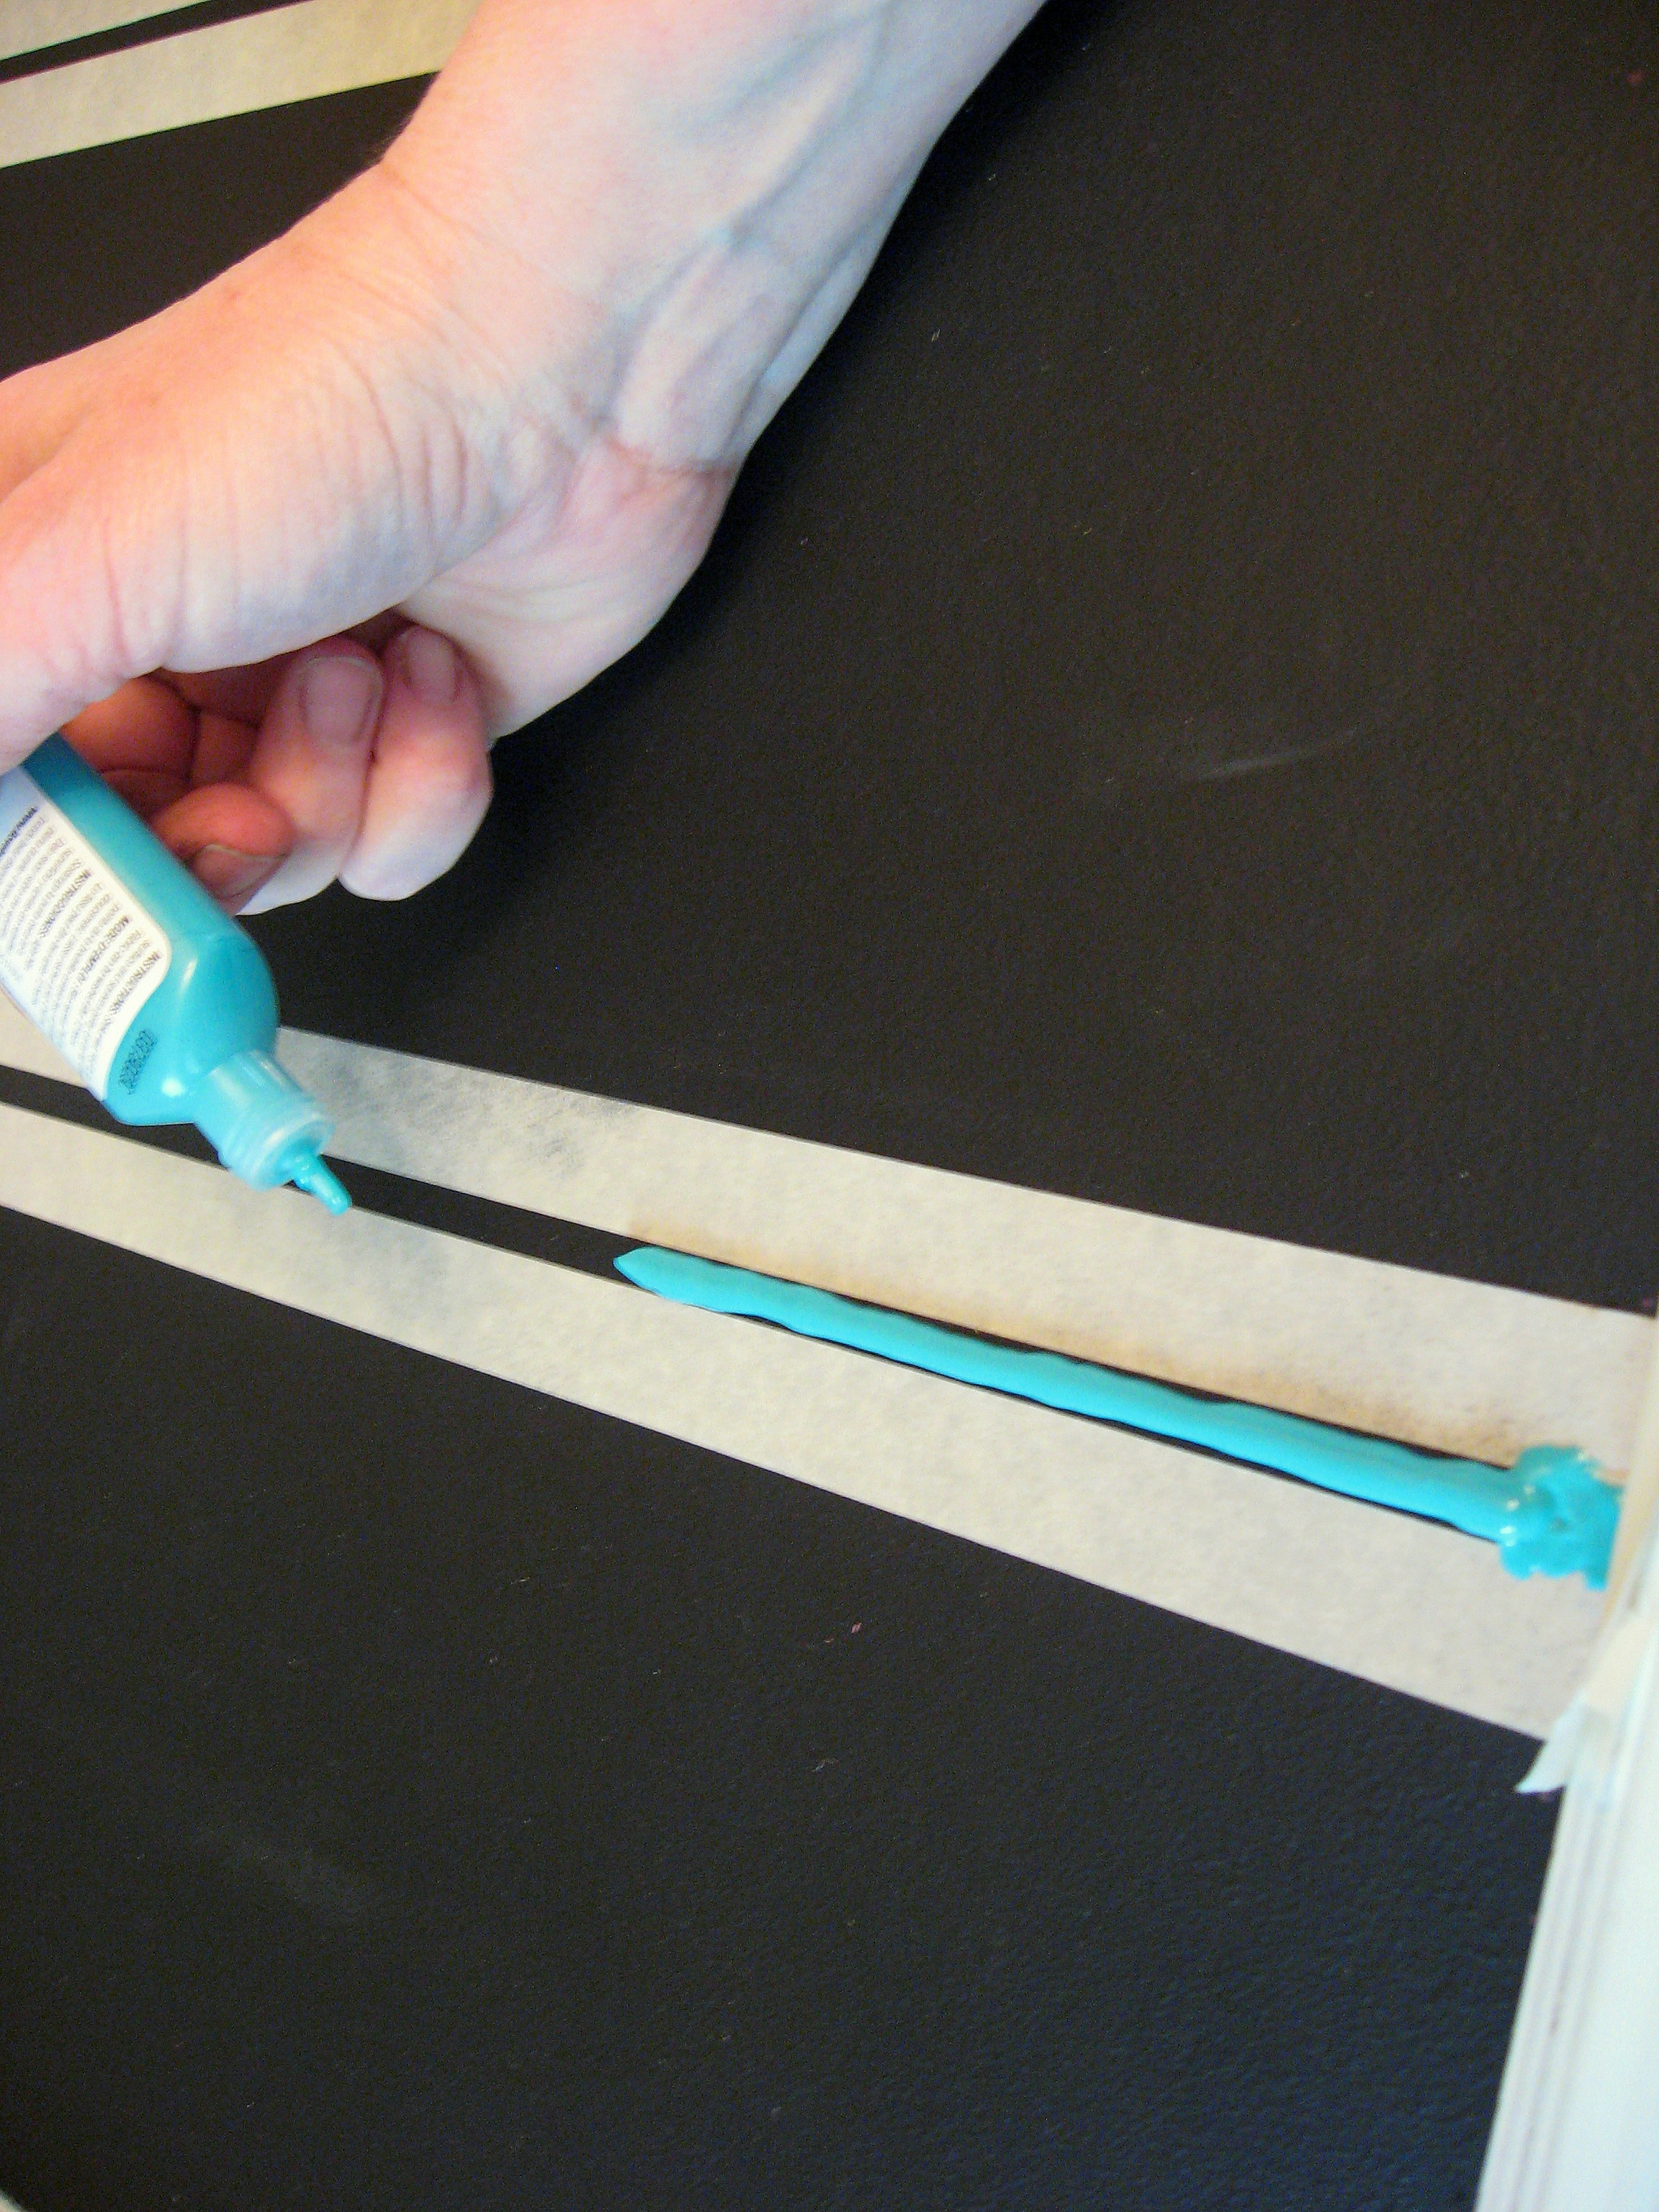
Then just kind of smoosh it flat with a paintbrush.
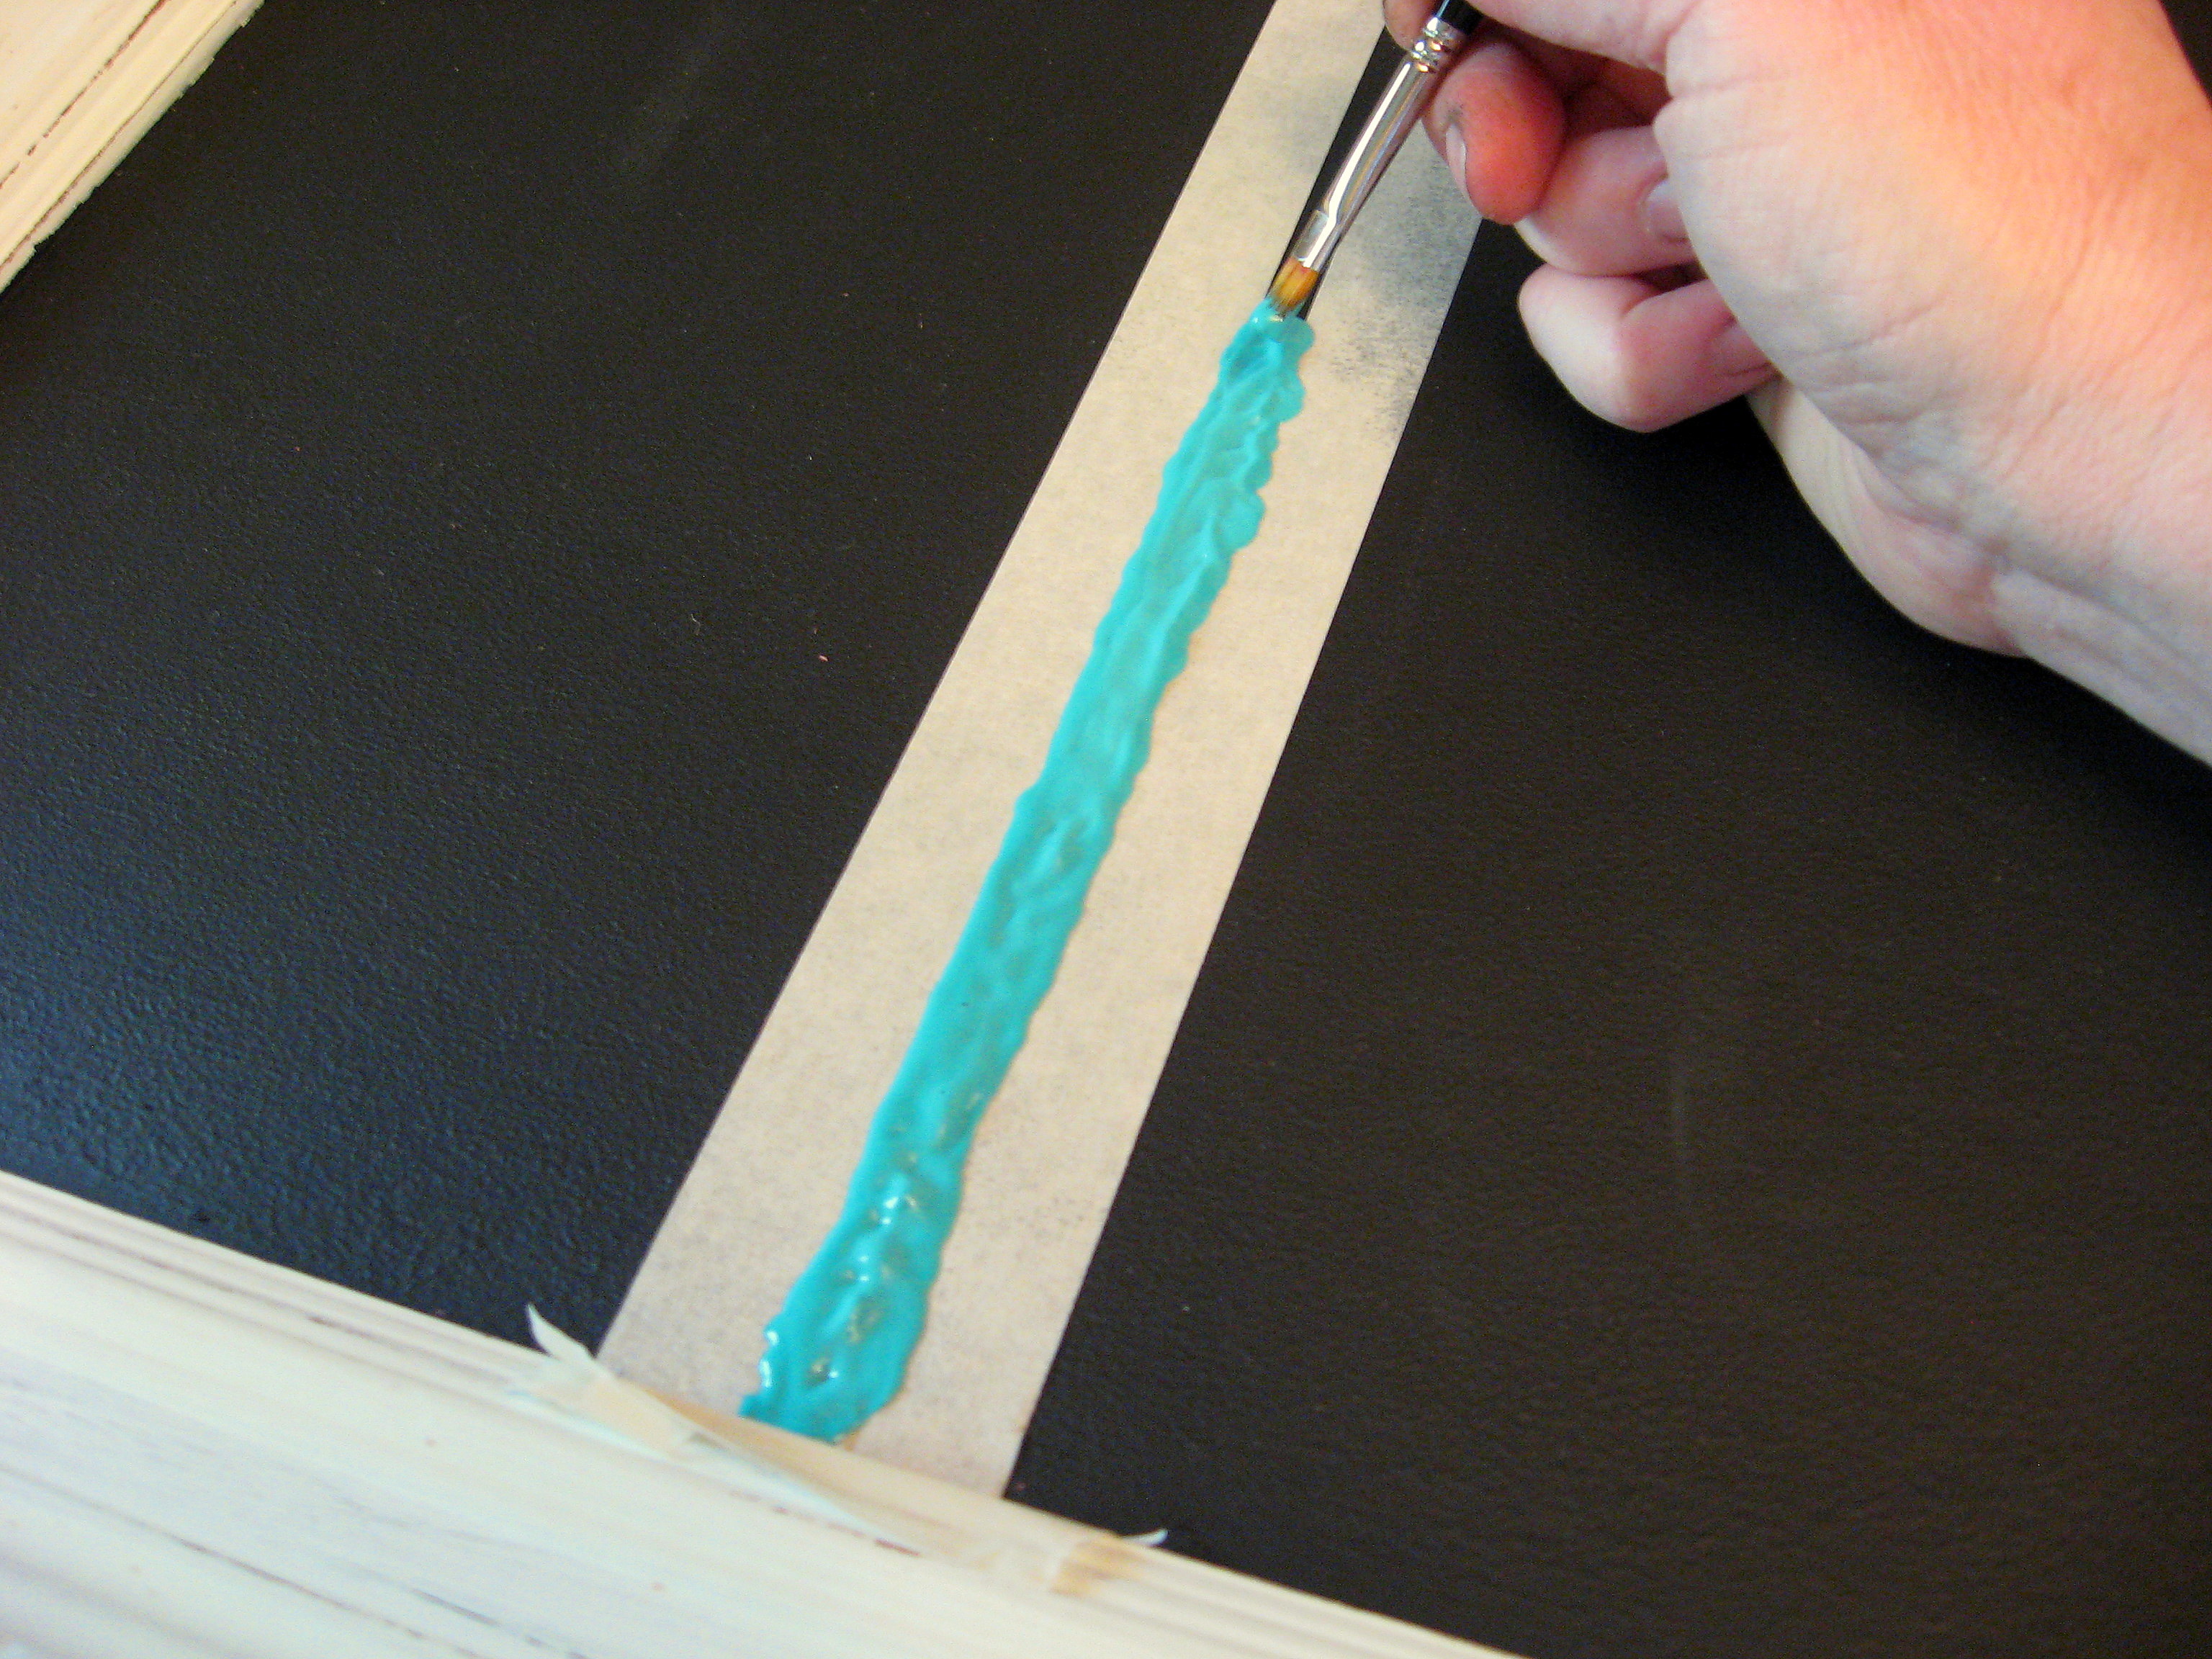
I liked the way it looked textury and bumpy, but if you wanted it to be smooth, you could do it that way too; it will probably take a second coat, though.
Here is is all finished:
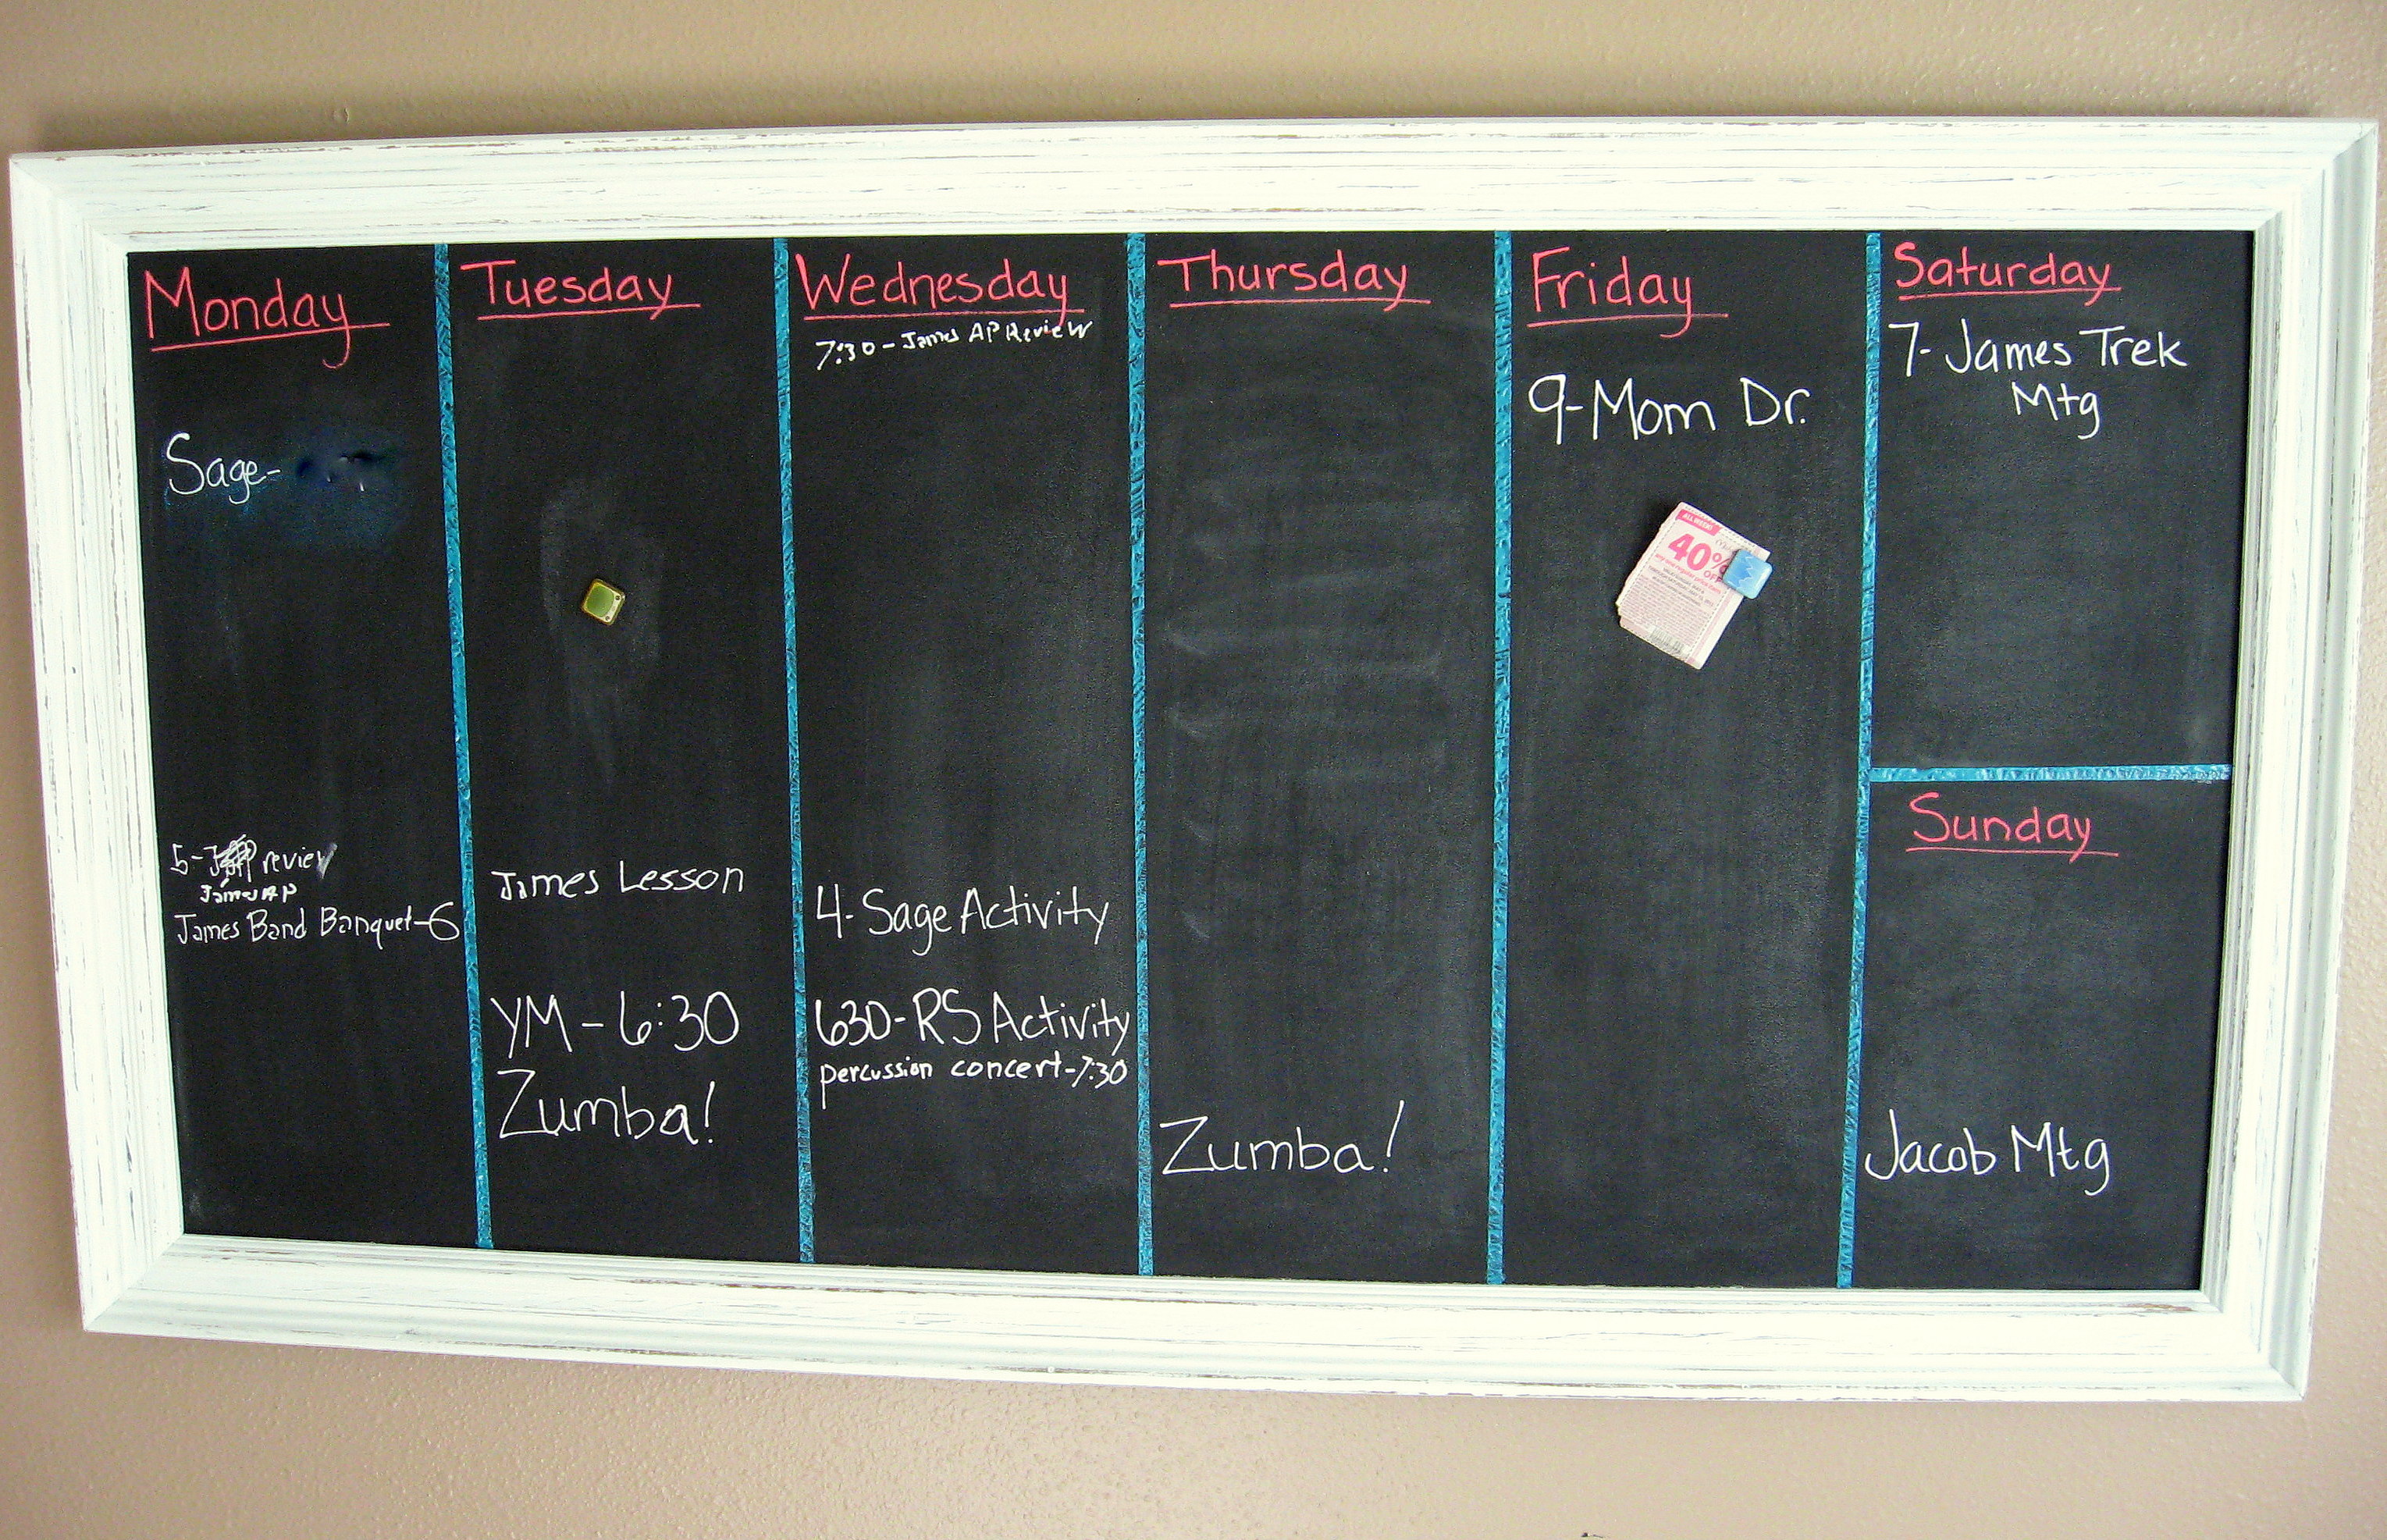
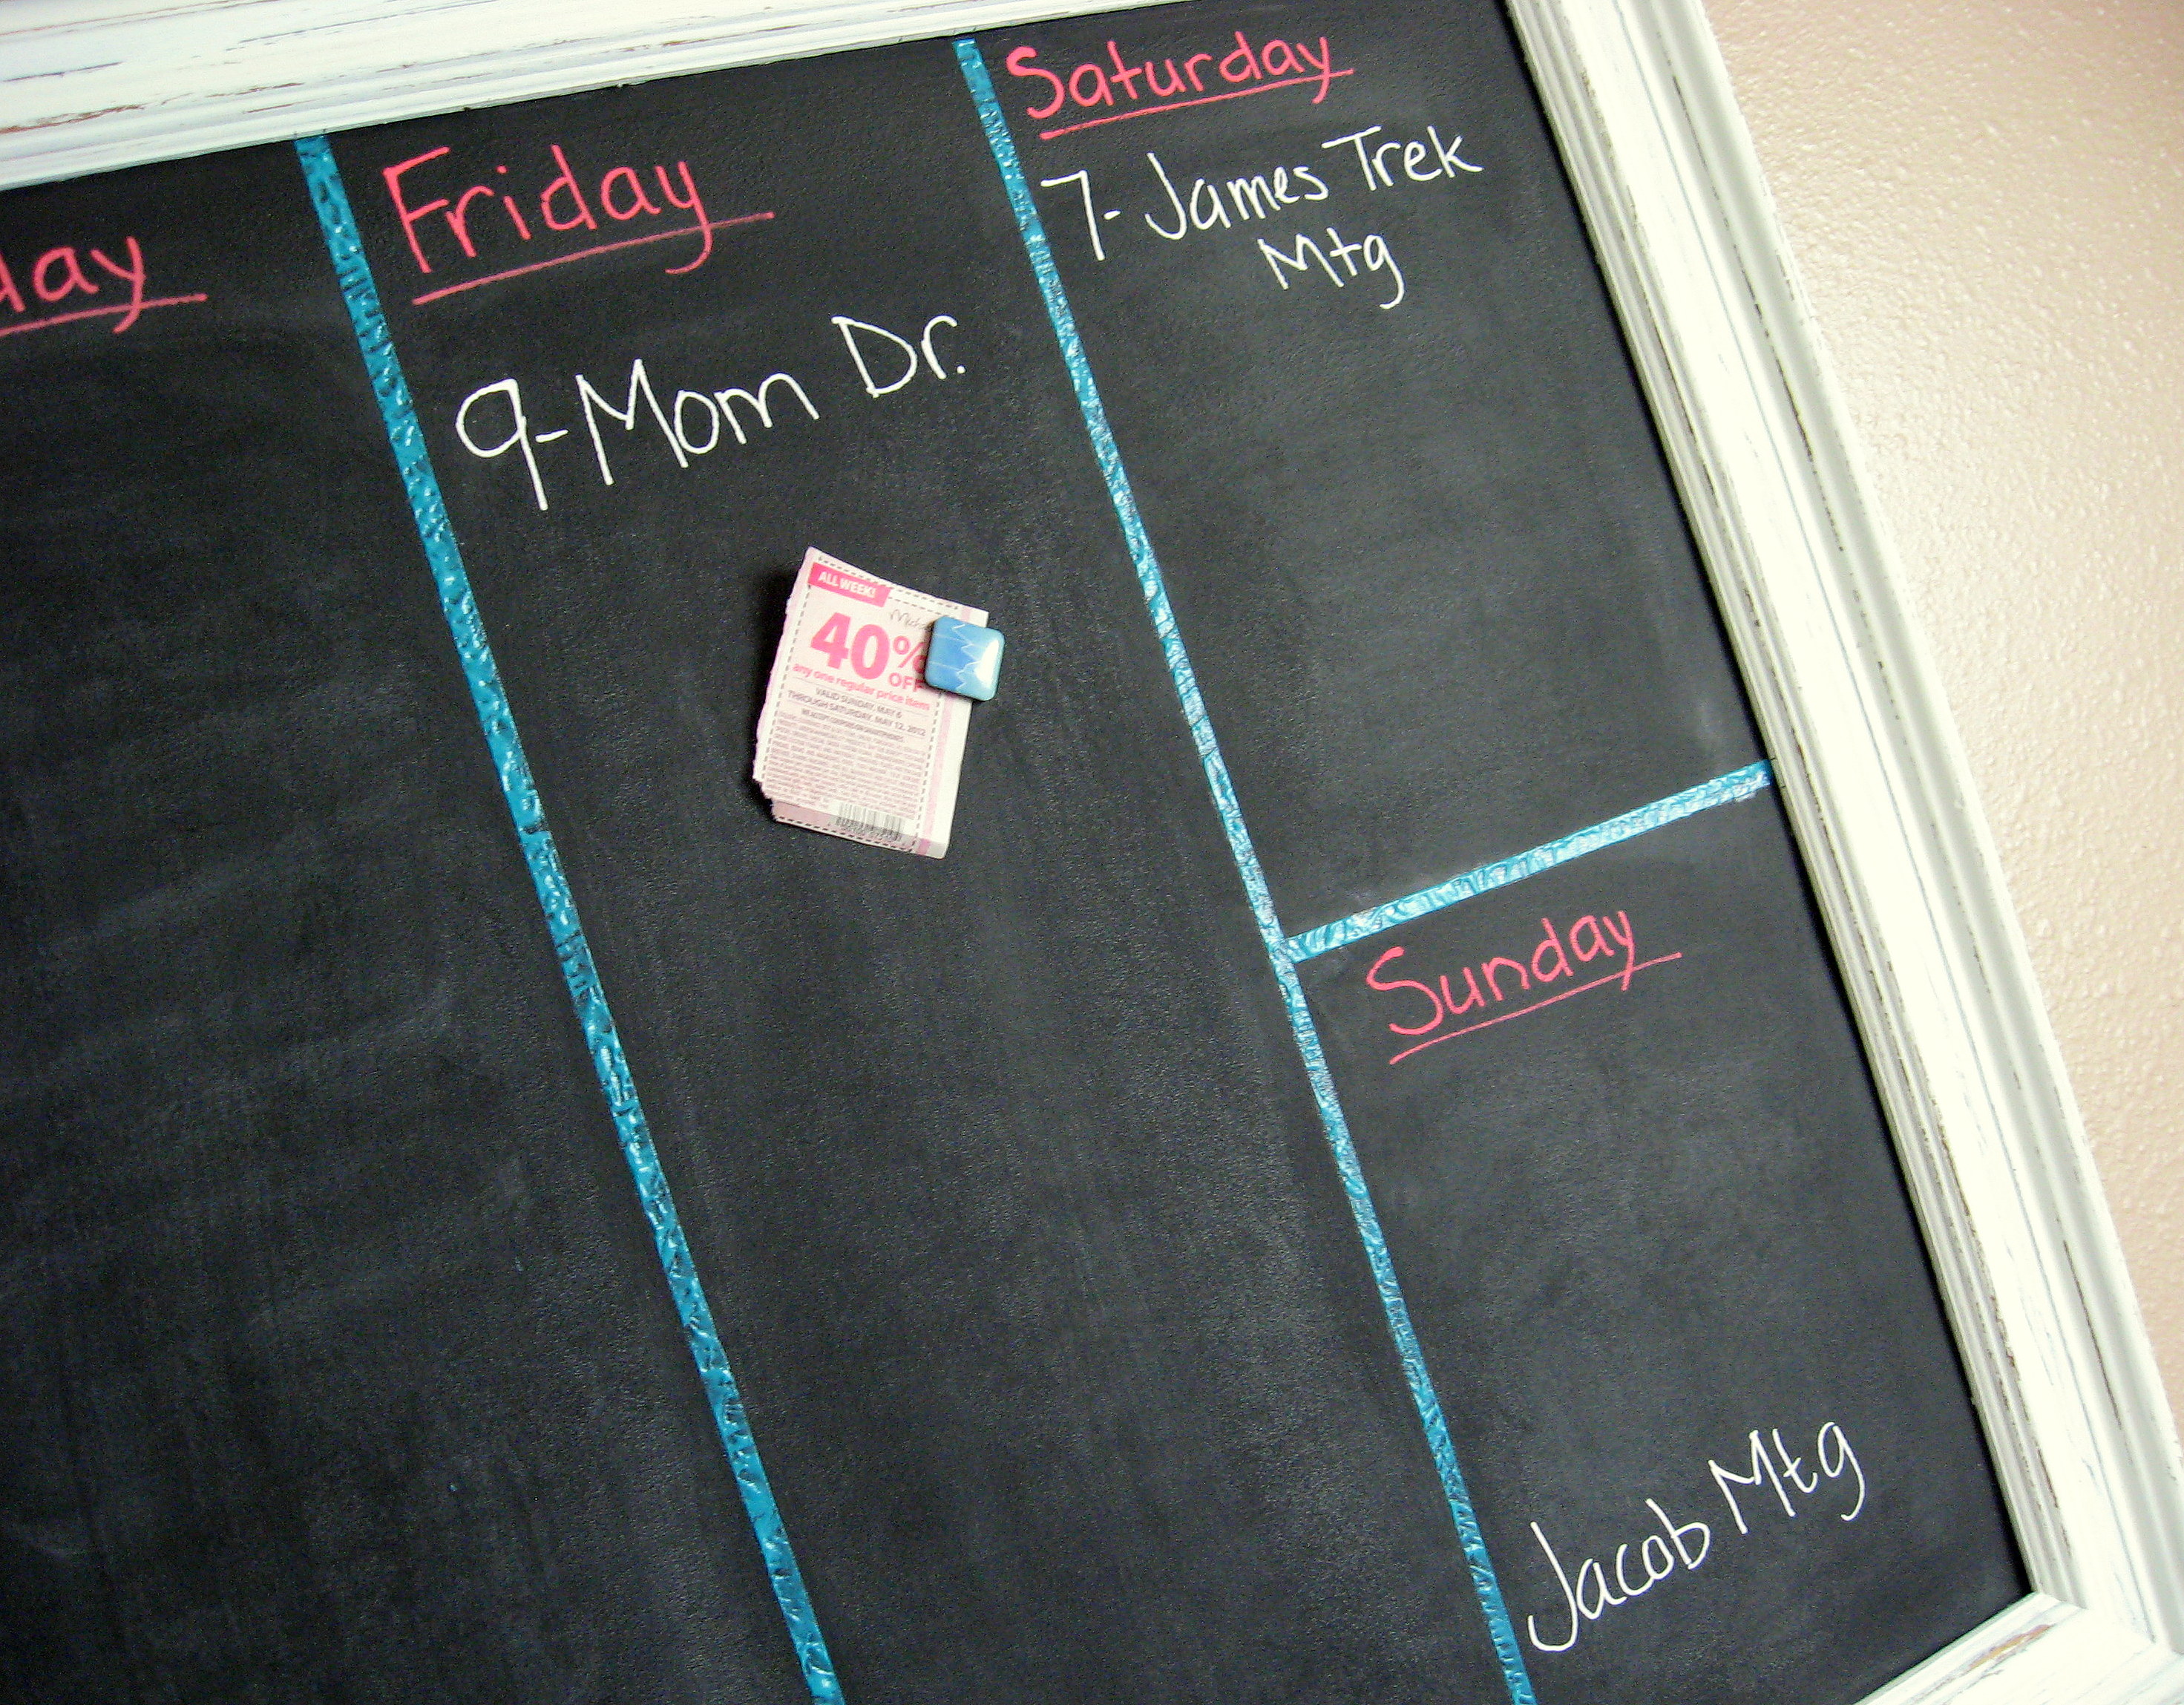
And a close up:

It works just fine with regular chalk, but I like the chalk markers (also called Bistro markers). They write brighter and tighter more like a marker, and they aren’t dusty, like regular chalk. They don’t erase with a regular eraser – you have to clean it off with a damp cloth – and they are a little more expensive, but for me it was worth it. I found them at Hobby Lobby, so be sure to use a 40% coupon!
Here is a final close up showing a magnet:
Homemade Liquid Hand Soap
When I decide to try making my own cleaners of any kind, I spend days searching the internet for recipes. I read them all, with the accompanying blog posts, articles and all the comments before I decide which one I want to try. Sometimes I decide to use a recipe I find just as it is; sometimes I use other peoples comments and experiences and put them together to make my own. This case is no different. I found dozens of recipes for making hand soap; I put this one together because it was the simplest and least expensive and my family is happy with the resulting soap.
You can really play around with the amounts; some of the sites I found made their soaps similar to this, but some used more water, some less. Some used glycerin, some didn’t. You’re not out much money to make it and the savings are huge, so it’s worth it to experiment until it’s exactly right for your taste.
Supplies and Ingredients:
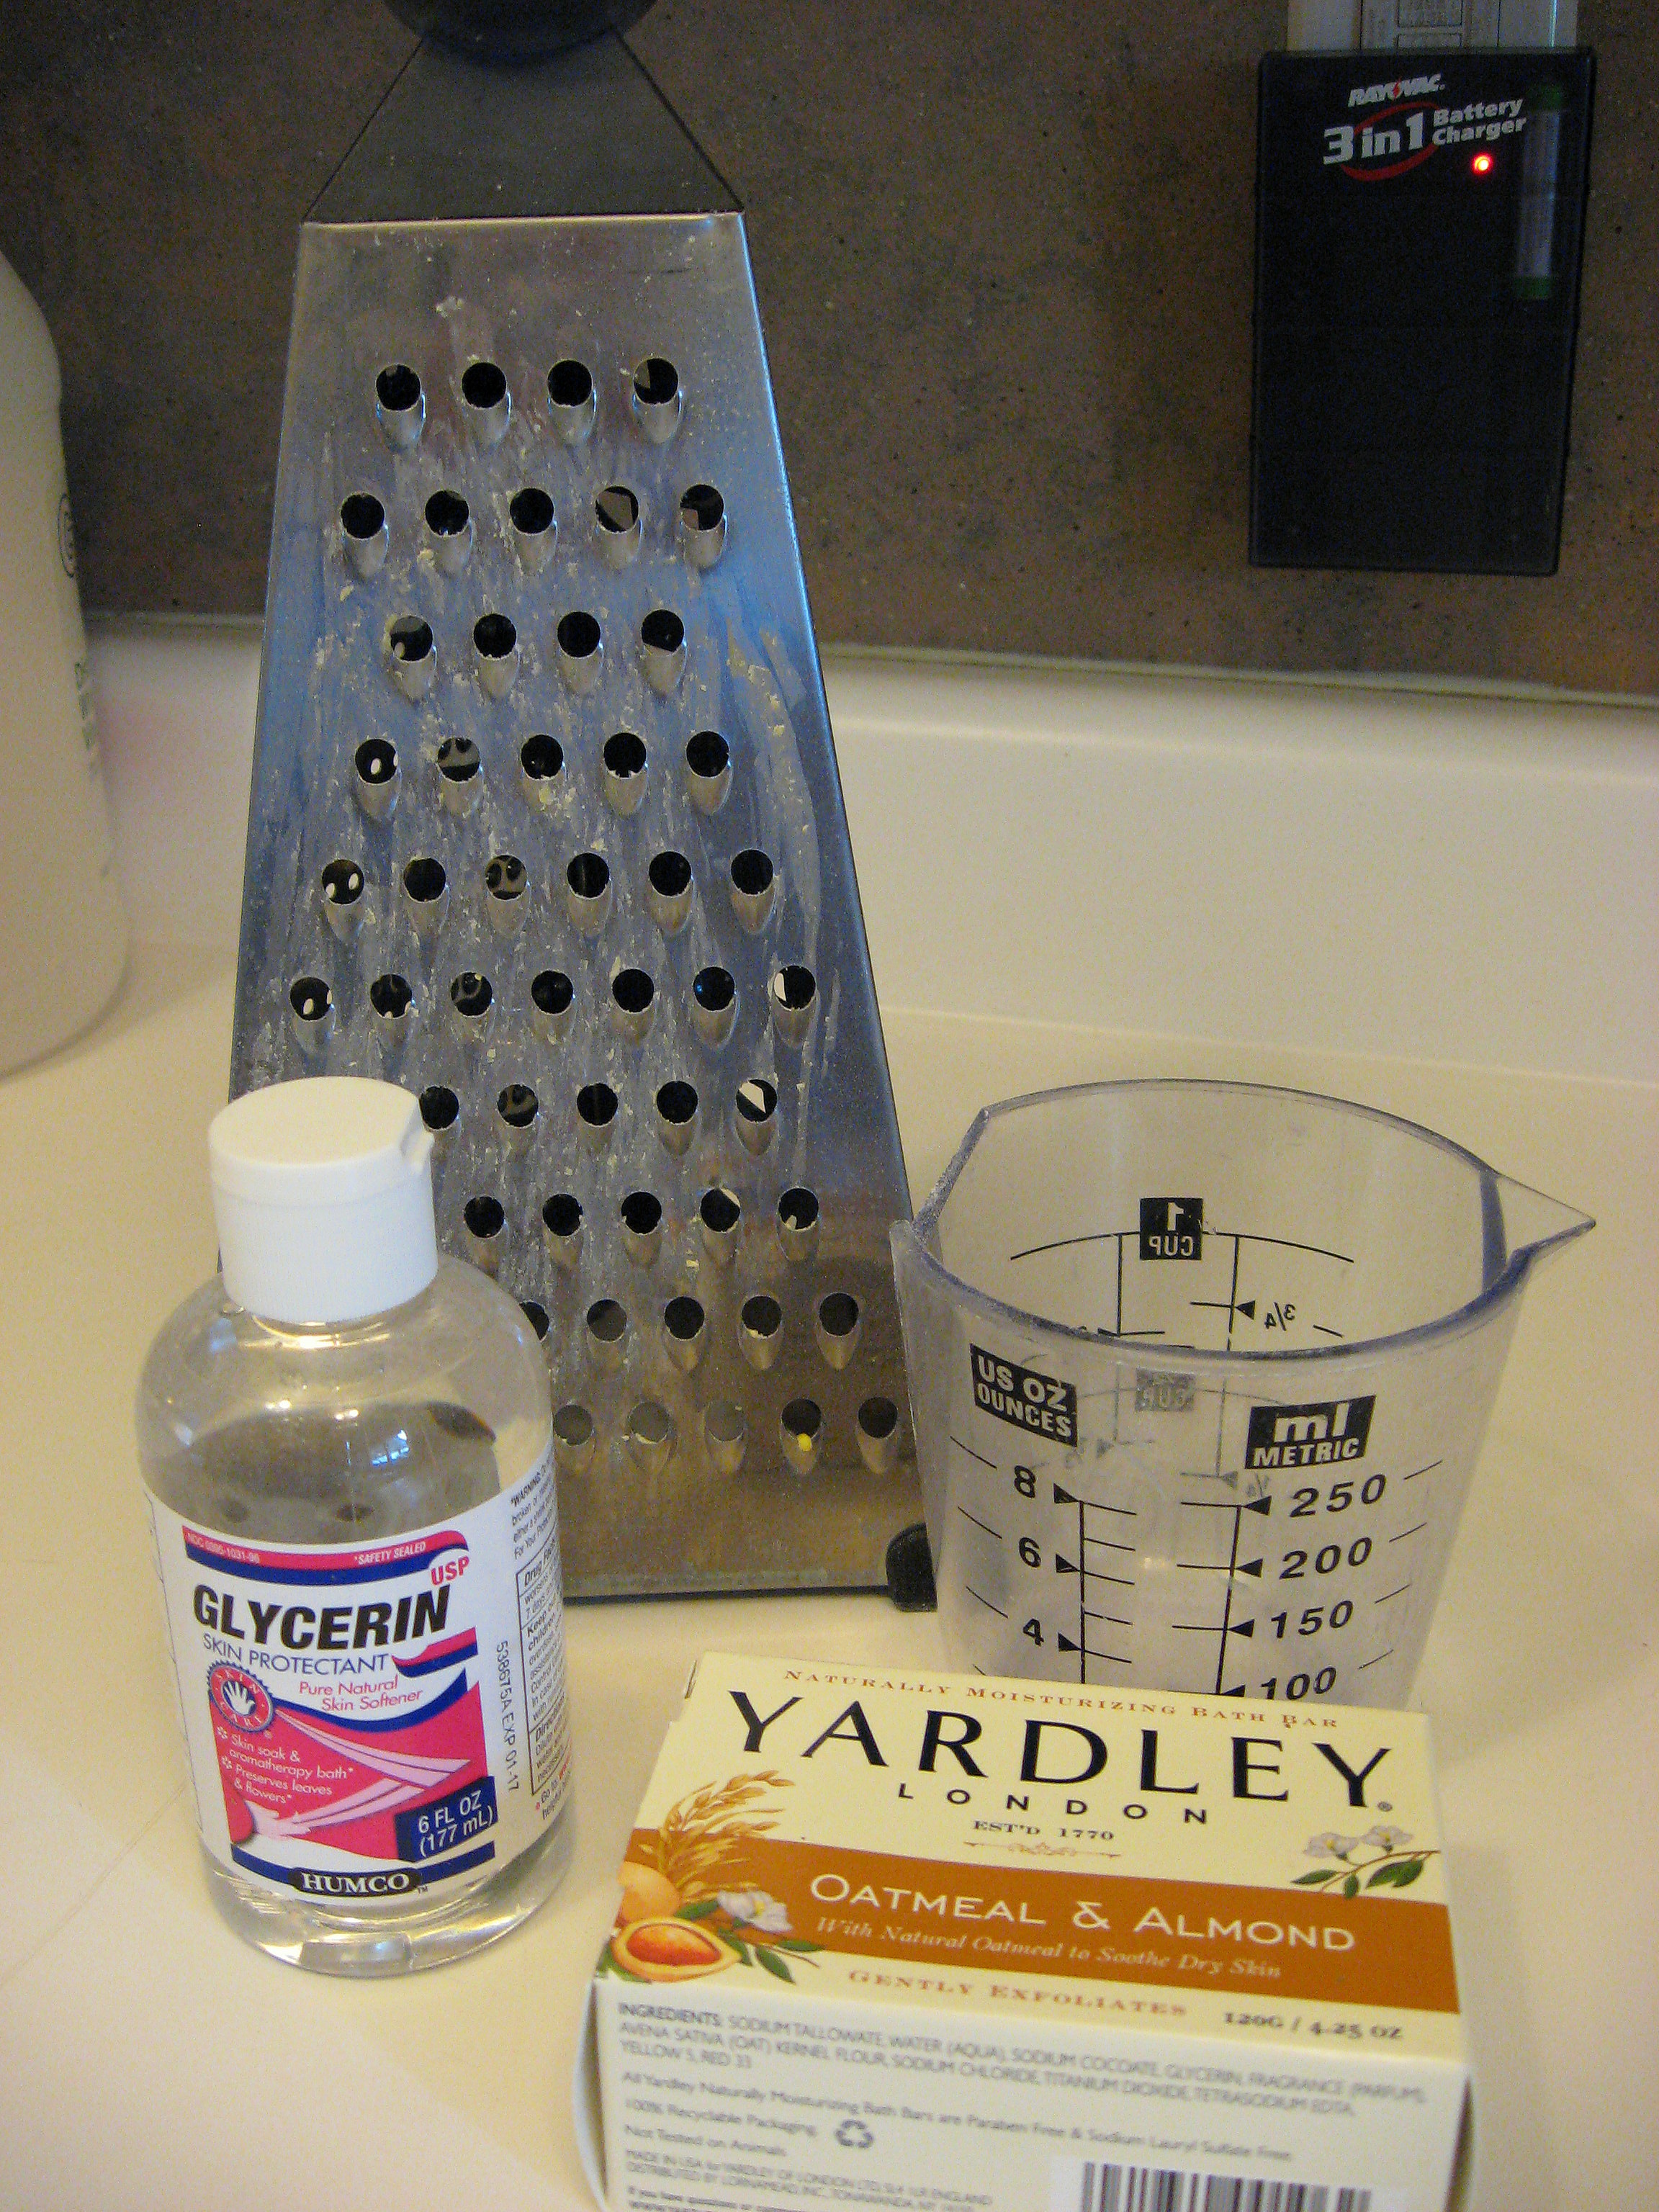
Bar Soap – One of the bloggers I read recommended Yardley. Since their Oatmeal and Almond soap is one of my family’s favorites –and since Walgreen’s regularly puts it on sale for $ .69, I decided to go with this. Many commenters had very different results when they used different soaps, especially kinds that had a high content of moisturizer, so if you want to use that kind, it may be worth a google search for a different recipe.
Water
Glycerin – Many people left this out. Those that used it said it made the liquid soap keep a smoother texture. I decided to make it with. I found this bottle at Walmart in the section with the vitamins. I don’t remember the exact price, but it was right around $3.
Cheese Grater
Large Pot
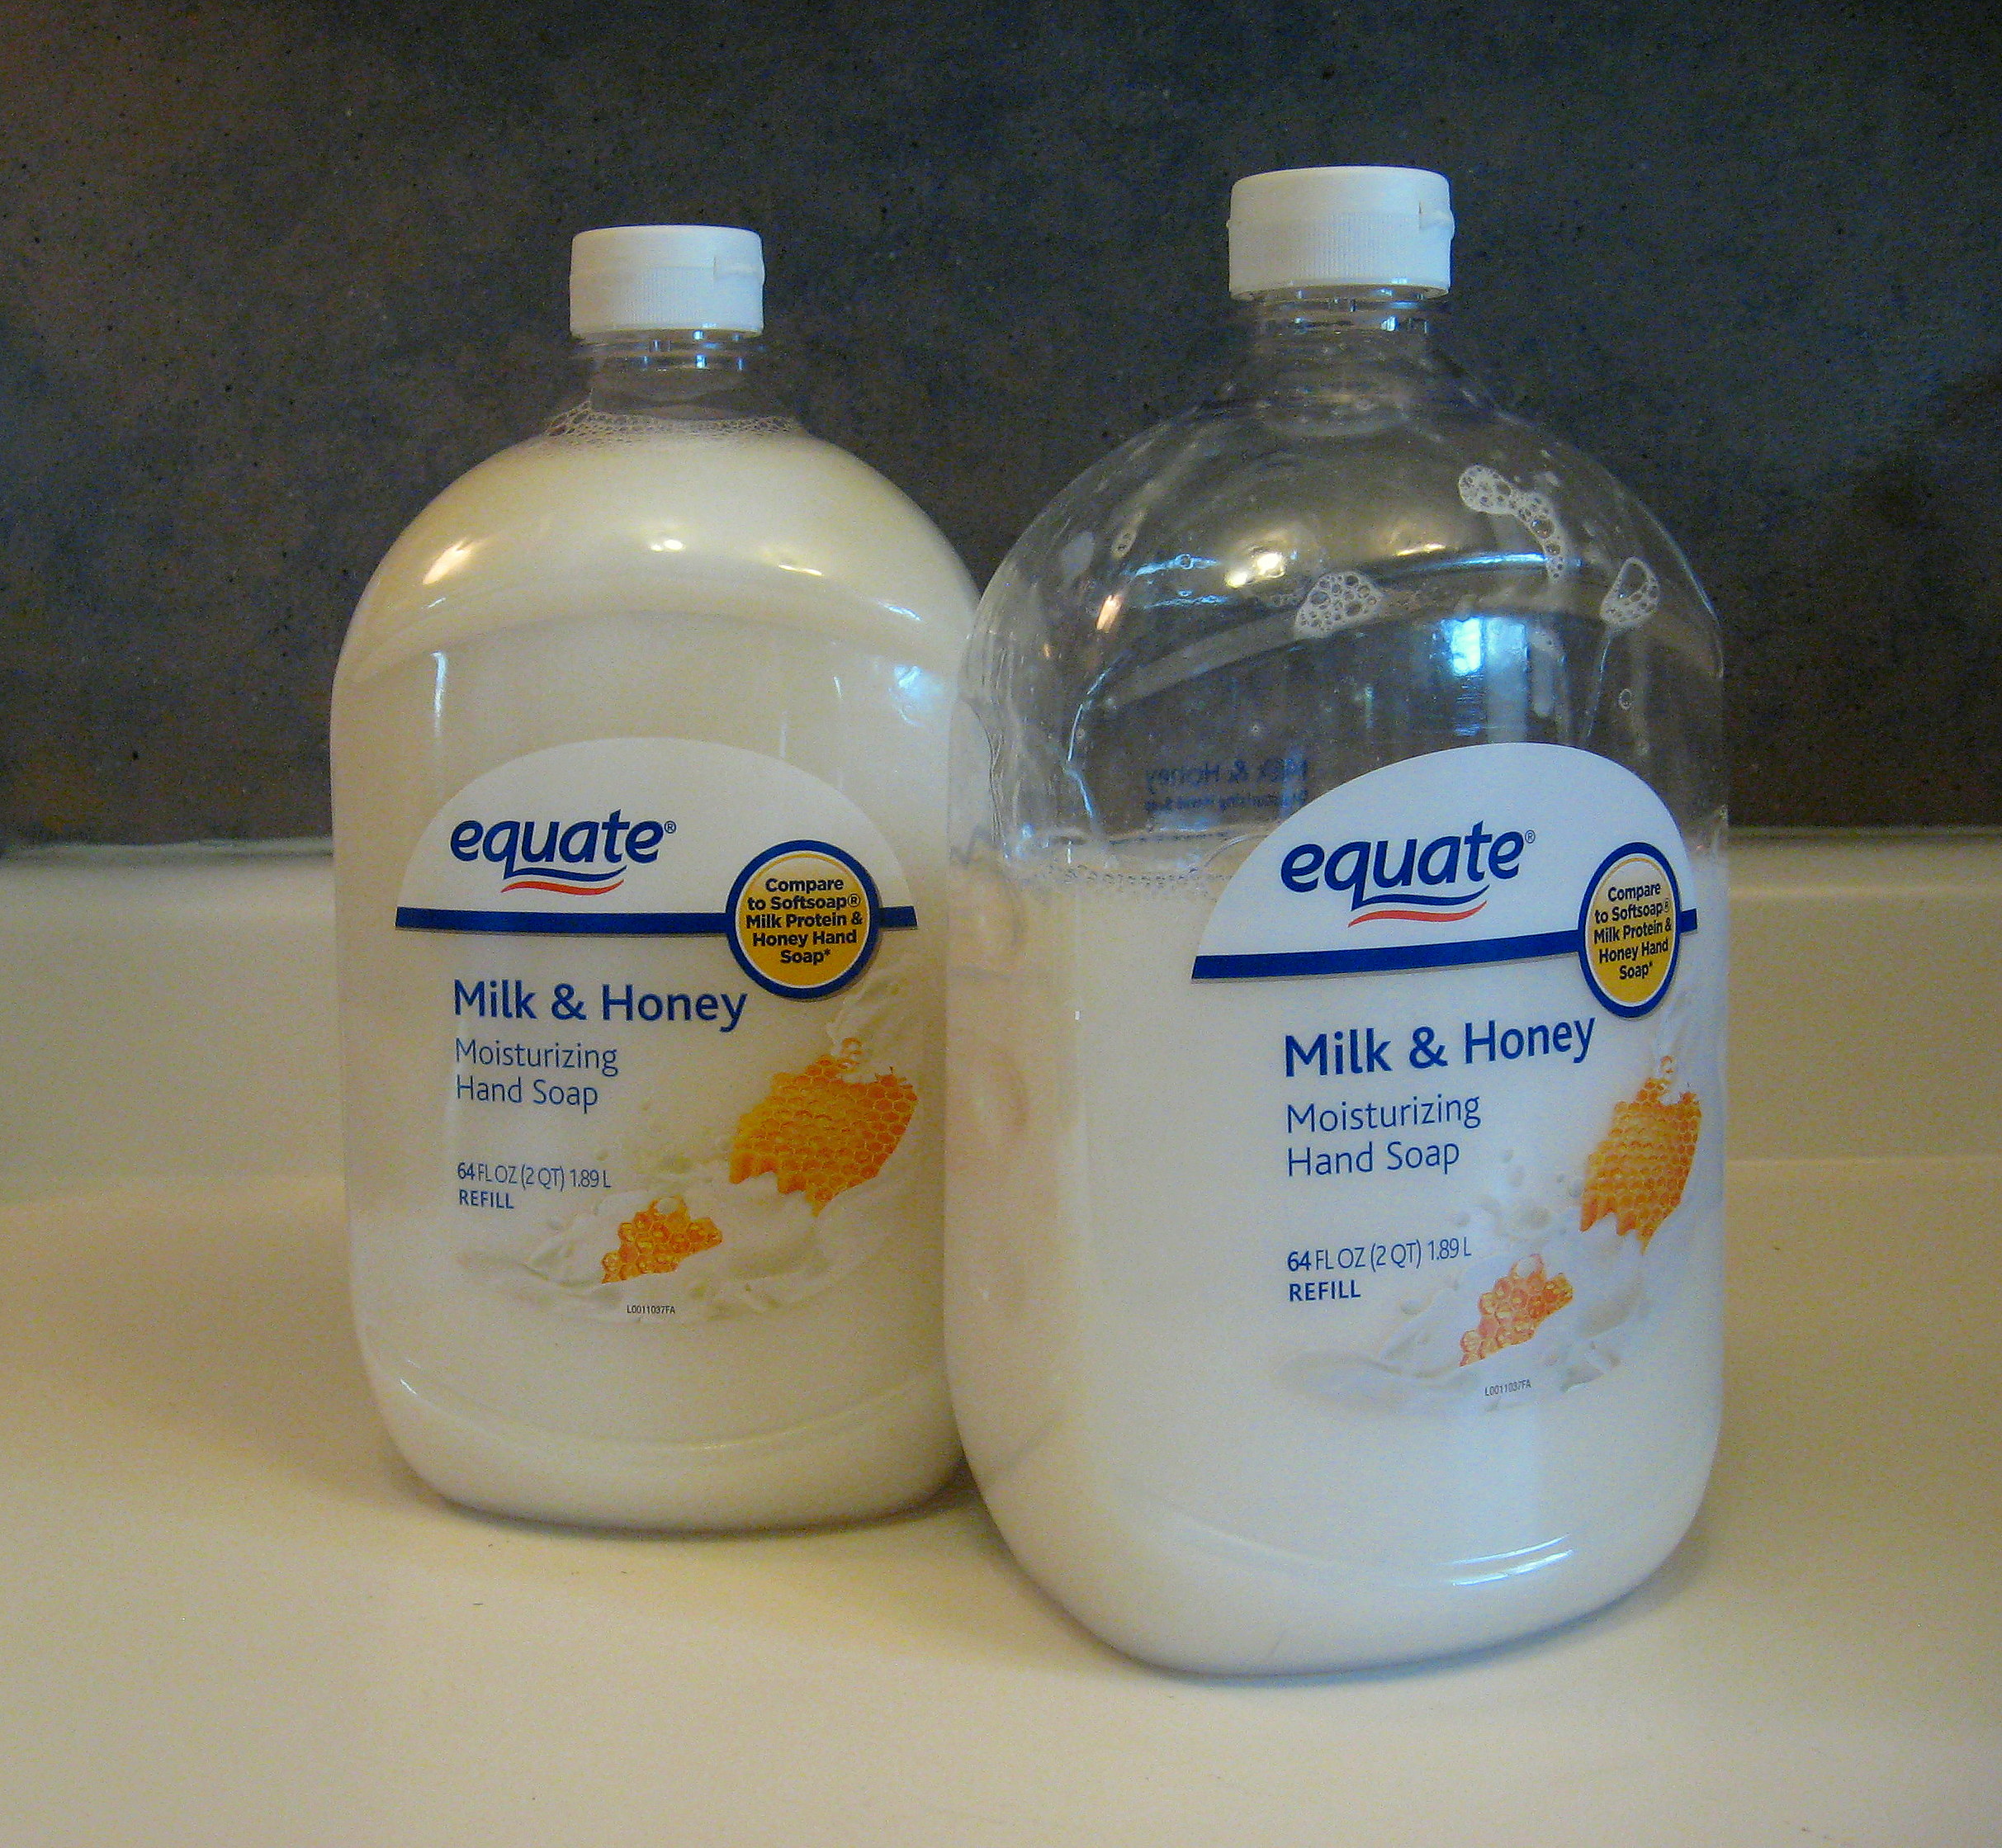
Something to put the finished soap in – I reused the old containers from previous store-bought soap refills.
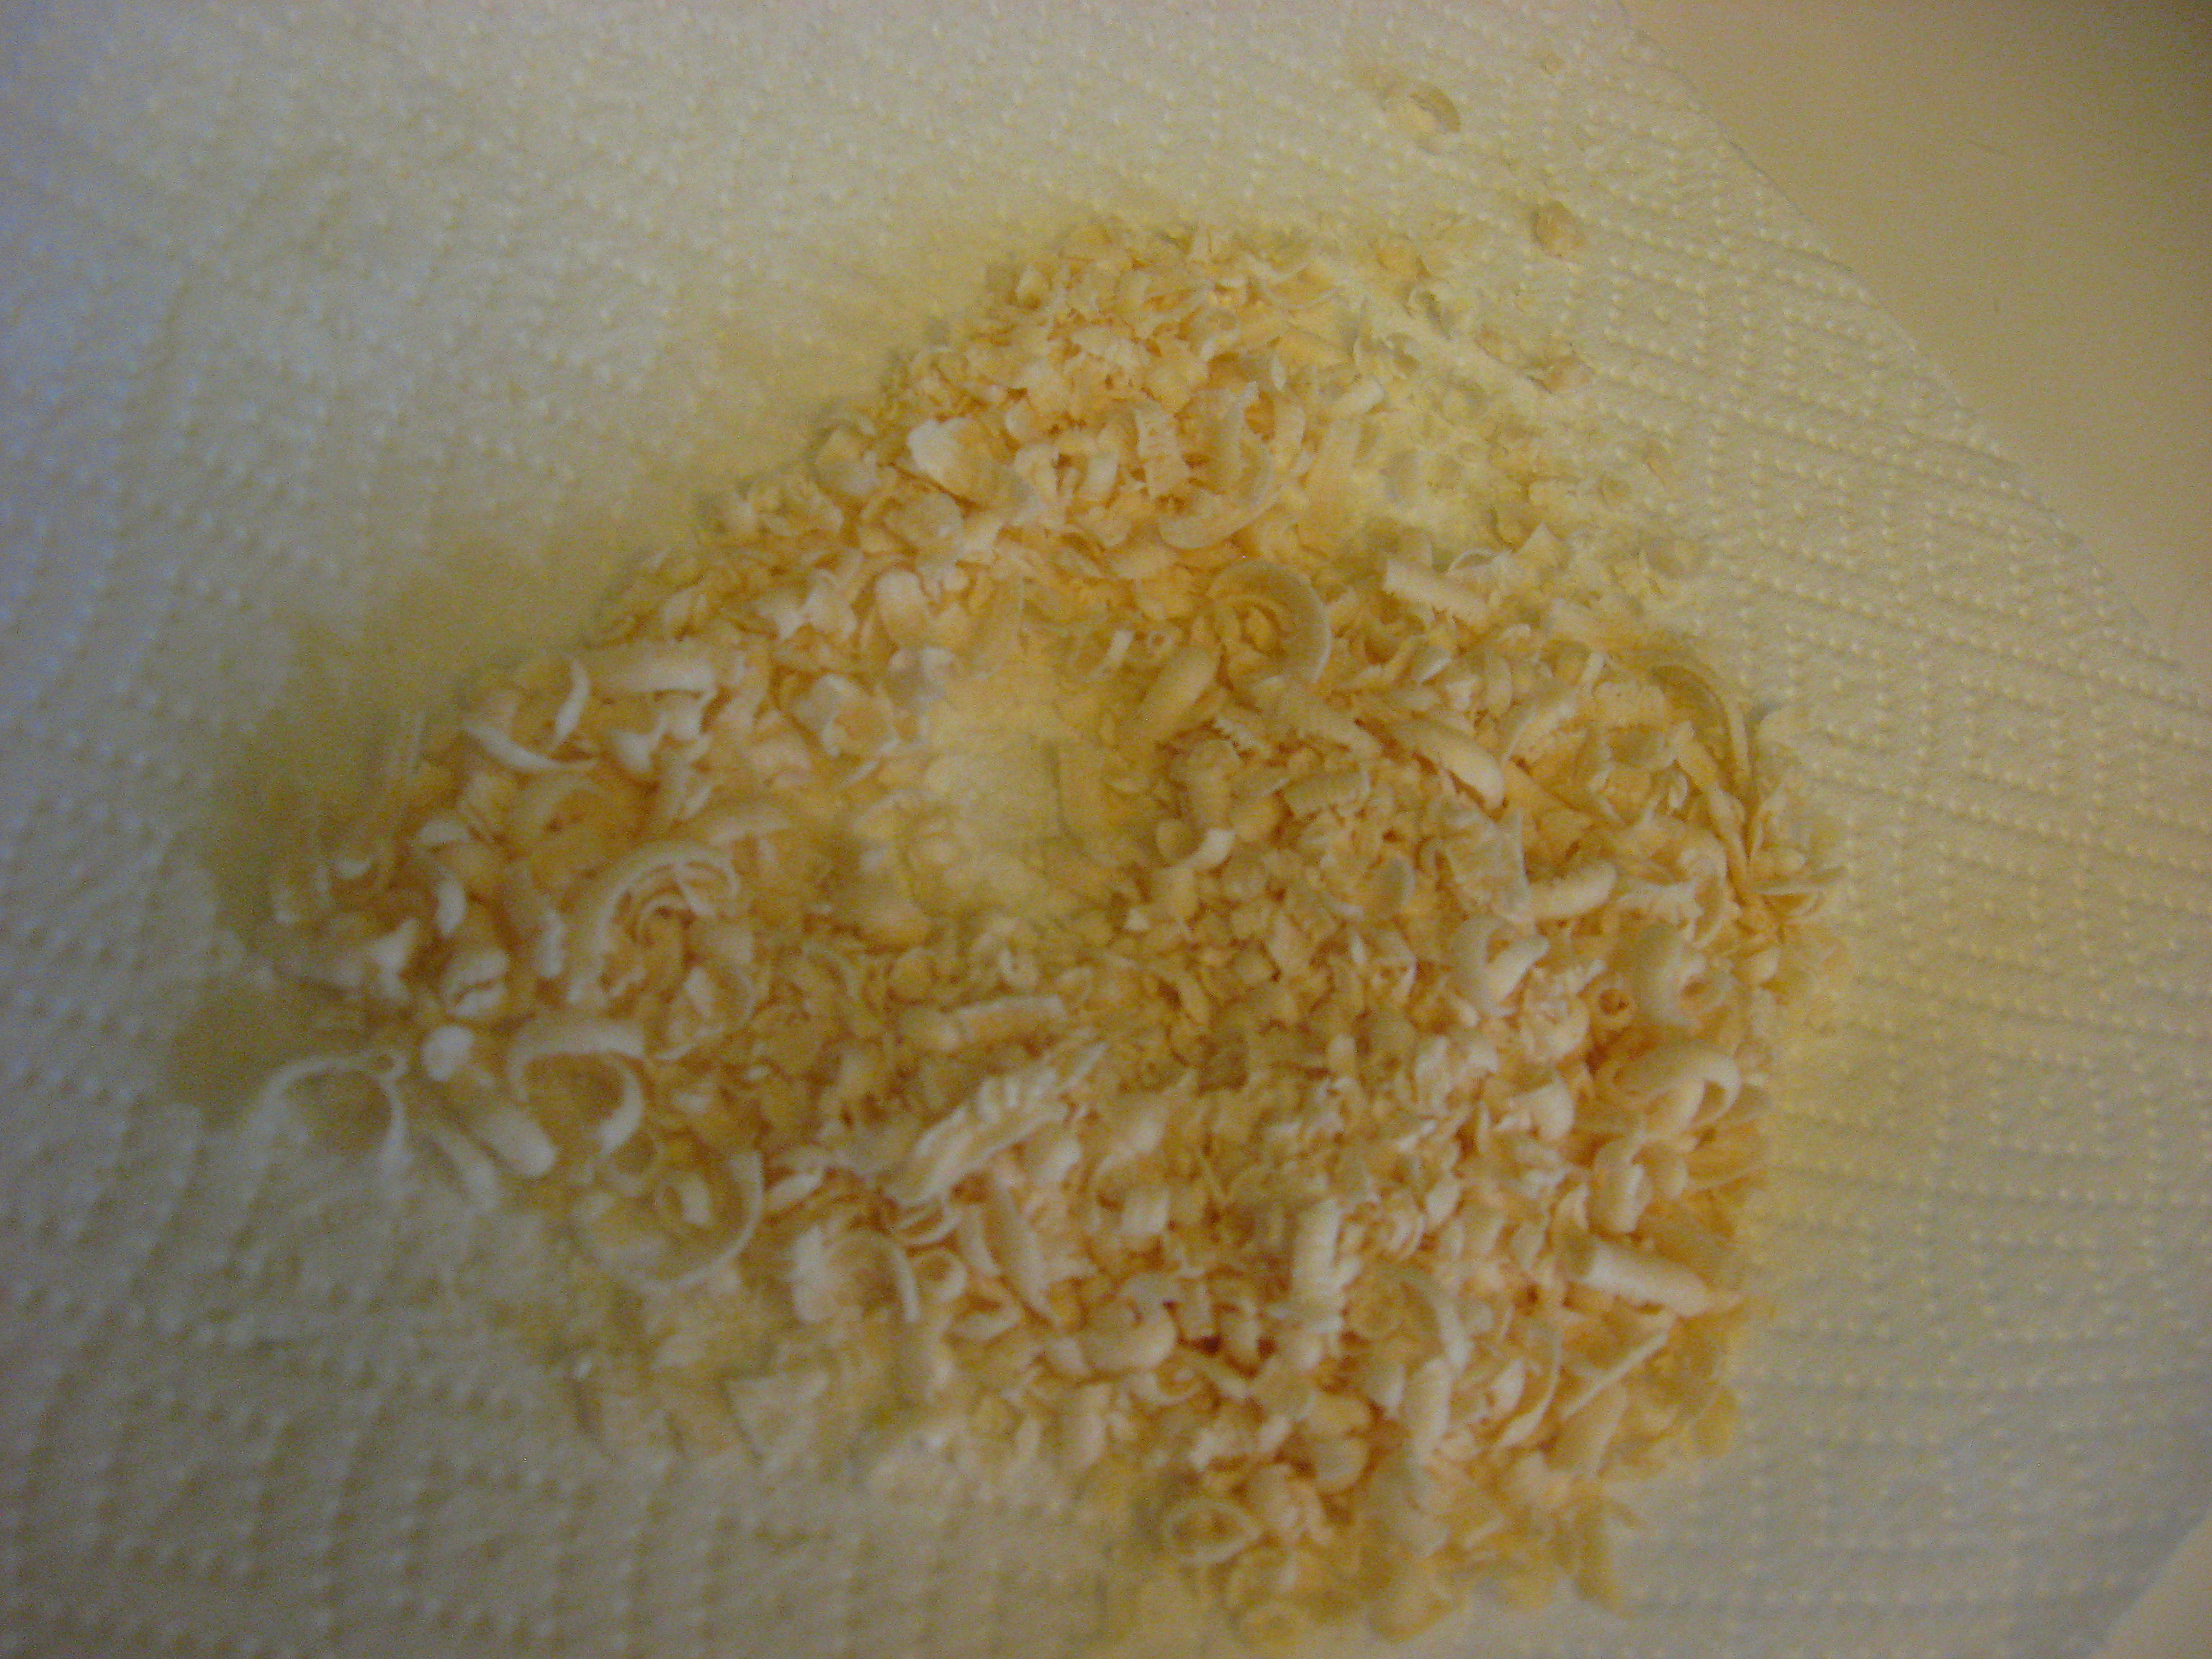
Directions:
Grab the bar of soap and grate the entire thing. I found that my one bar of soap made 1 1/2 cups of soap flakes.
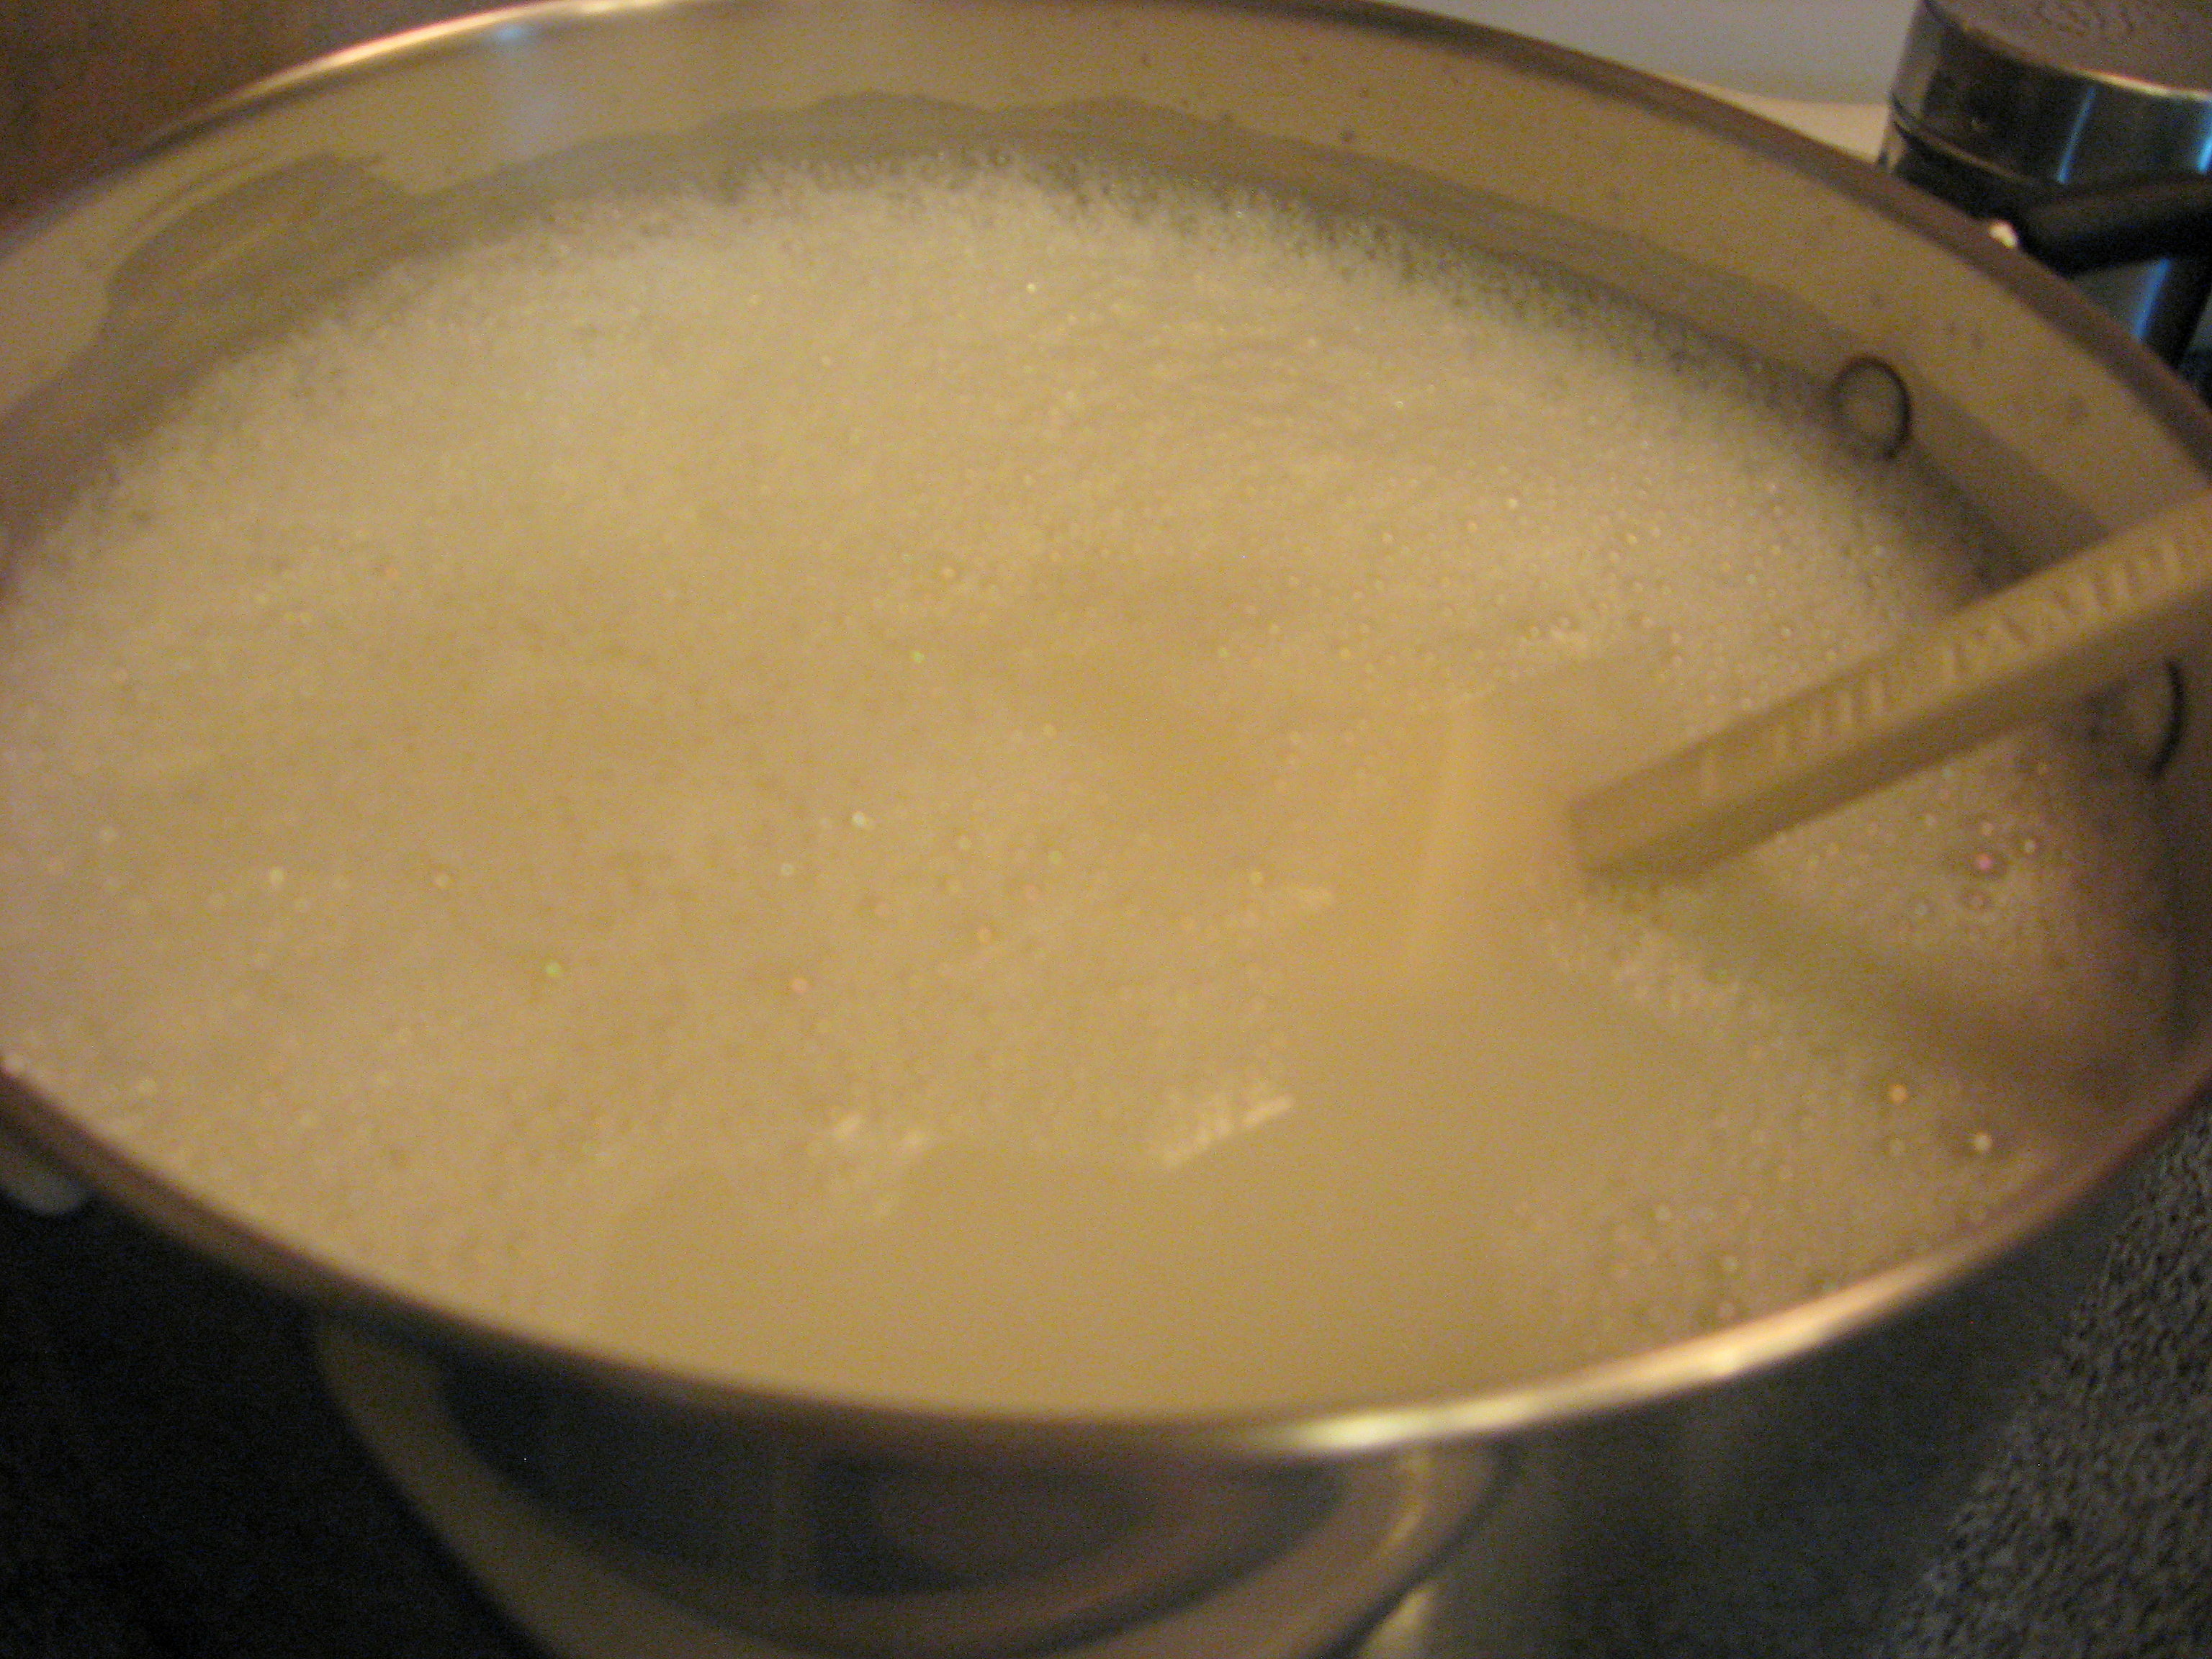
Put the soap flakes into a large pot, along with 15 cups of warm water and 1 1/2 Tablespoons of the Glycerin.
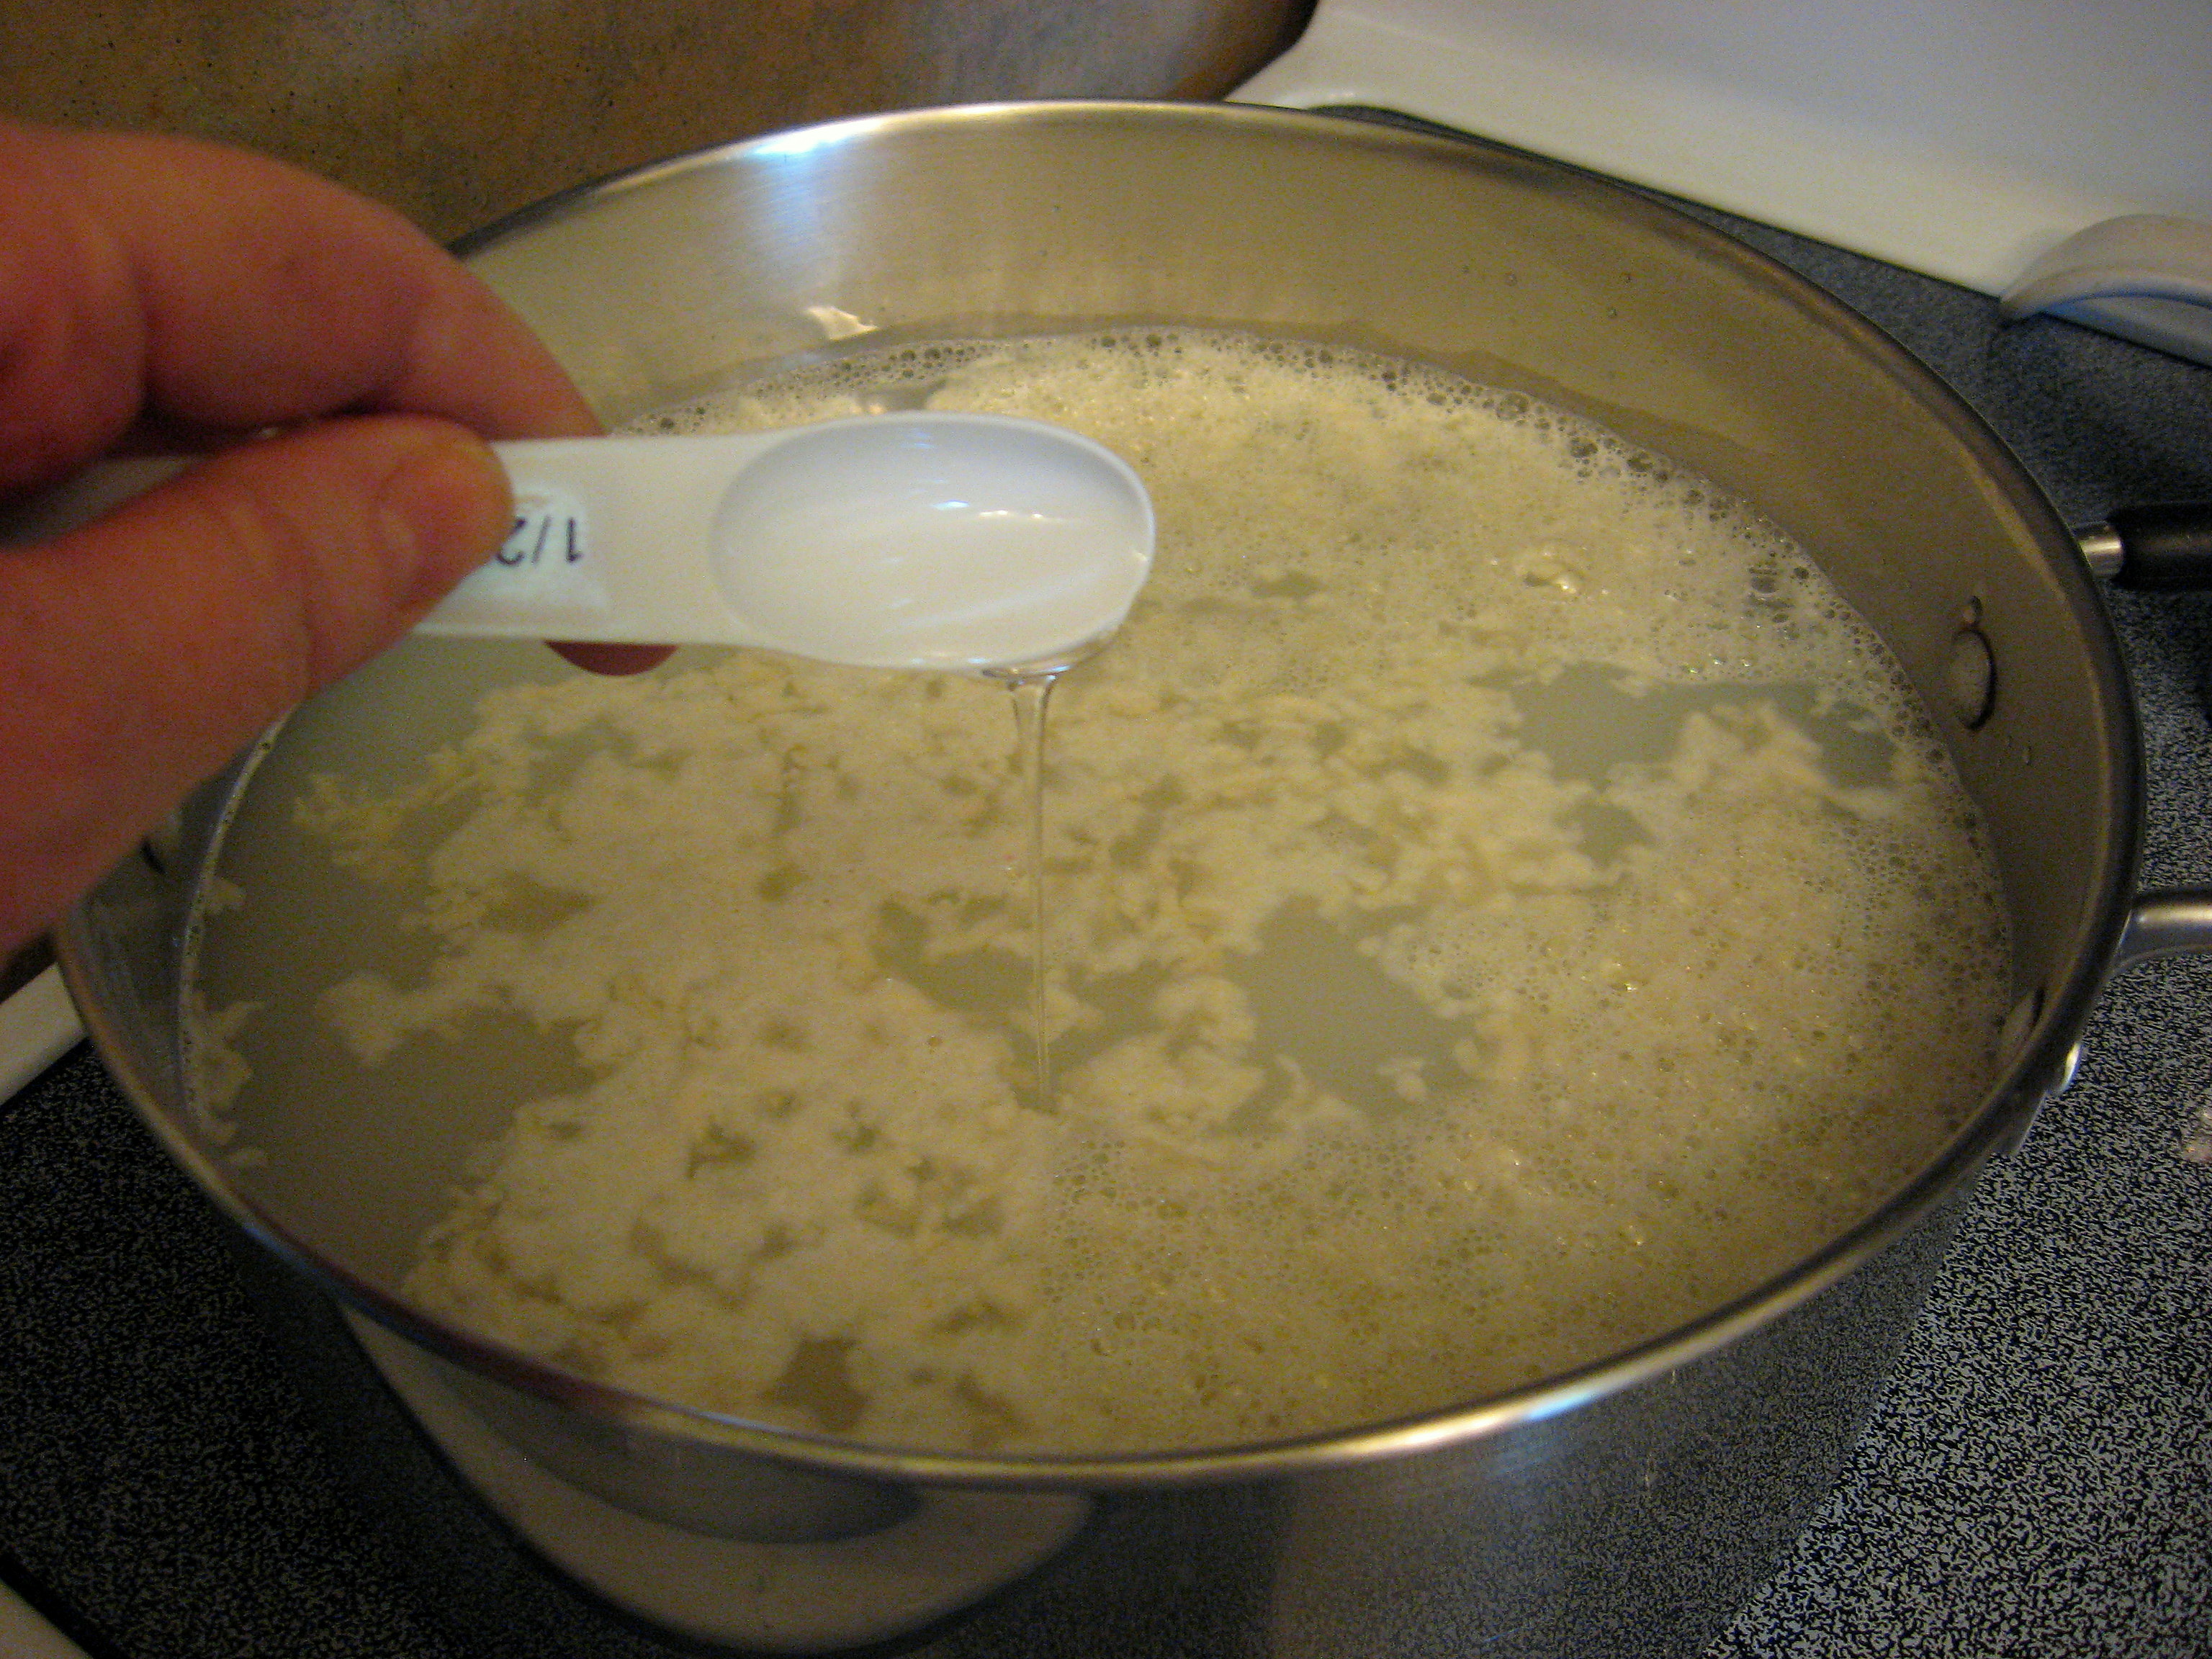
Cook and stir this over low to medium heat until all of the soap flakes dissolve. This will not take long; maybe 5 minutes.
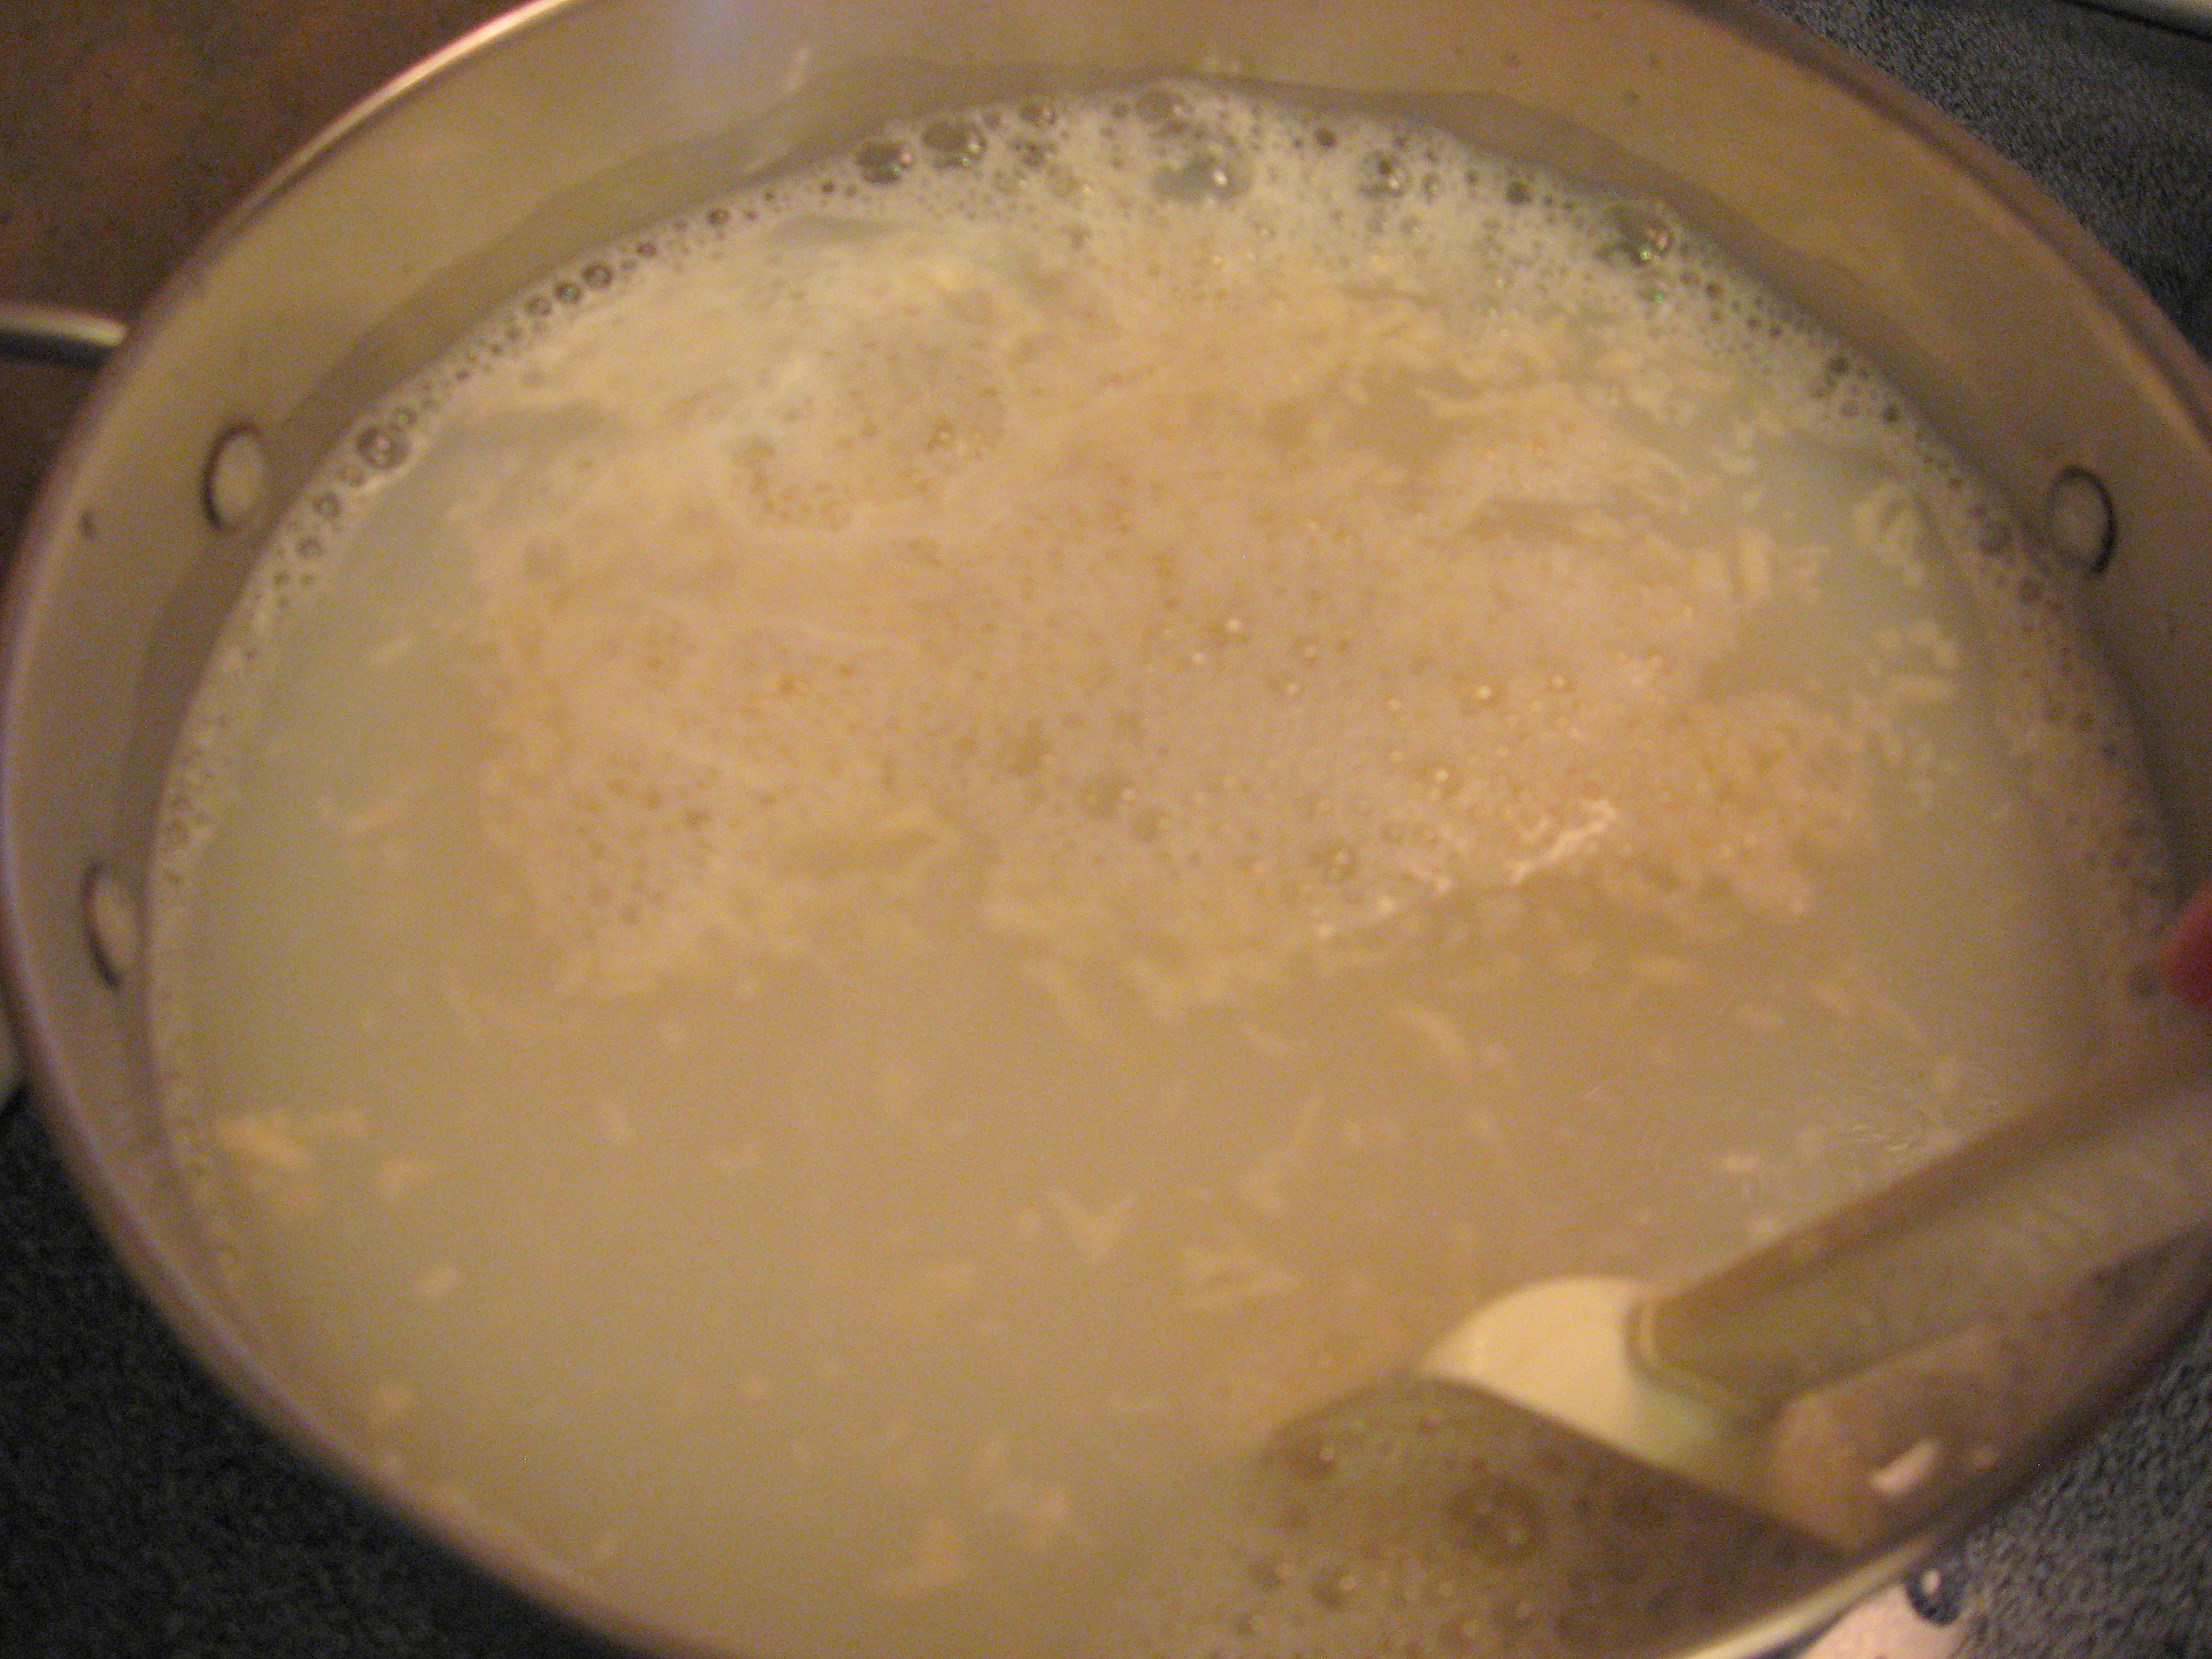
Once you see that all of the soap flakes are dissolved, keep stirring and cooking about 1 minute more. It should look very smooth and creamy.
Now just remove it from the heat, and set it somewhere it can cool. Let it cool for several hours. I left if sitting on my counter all afternoon and just gave it a little stir every time I walked by.
Once it is completely cool, it will turn really thick and congealed.
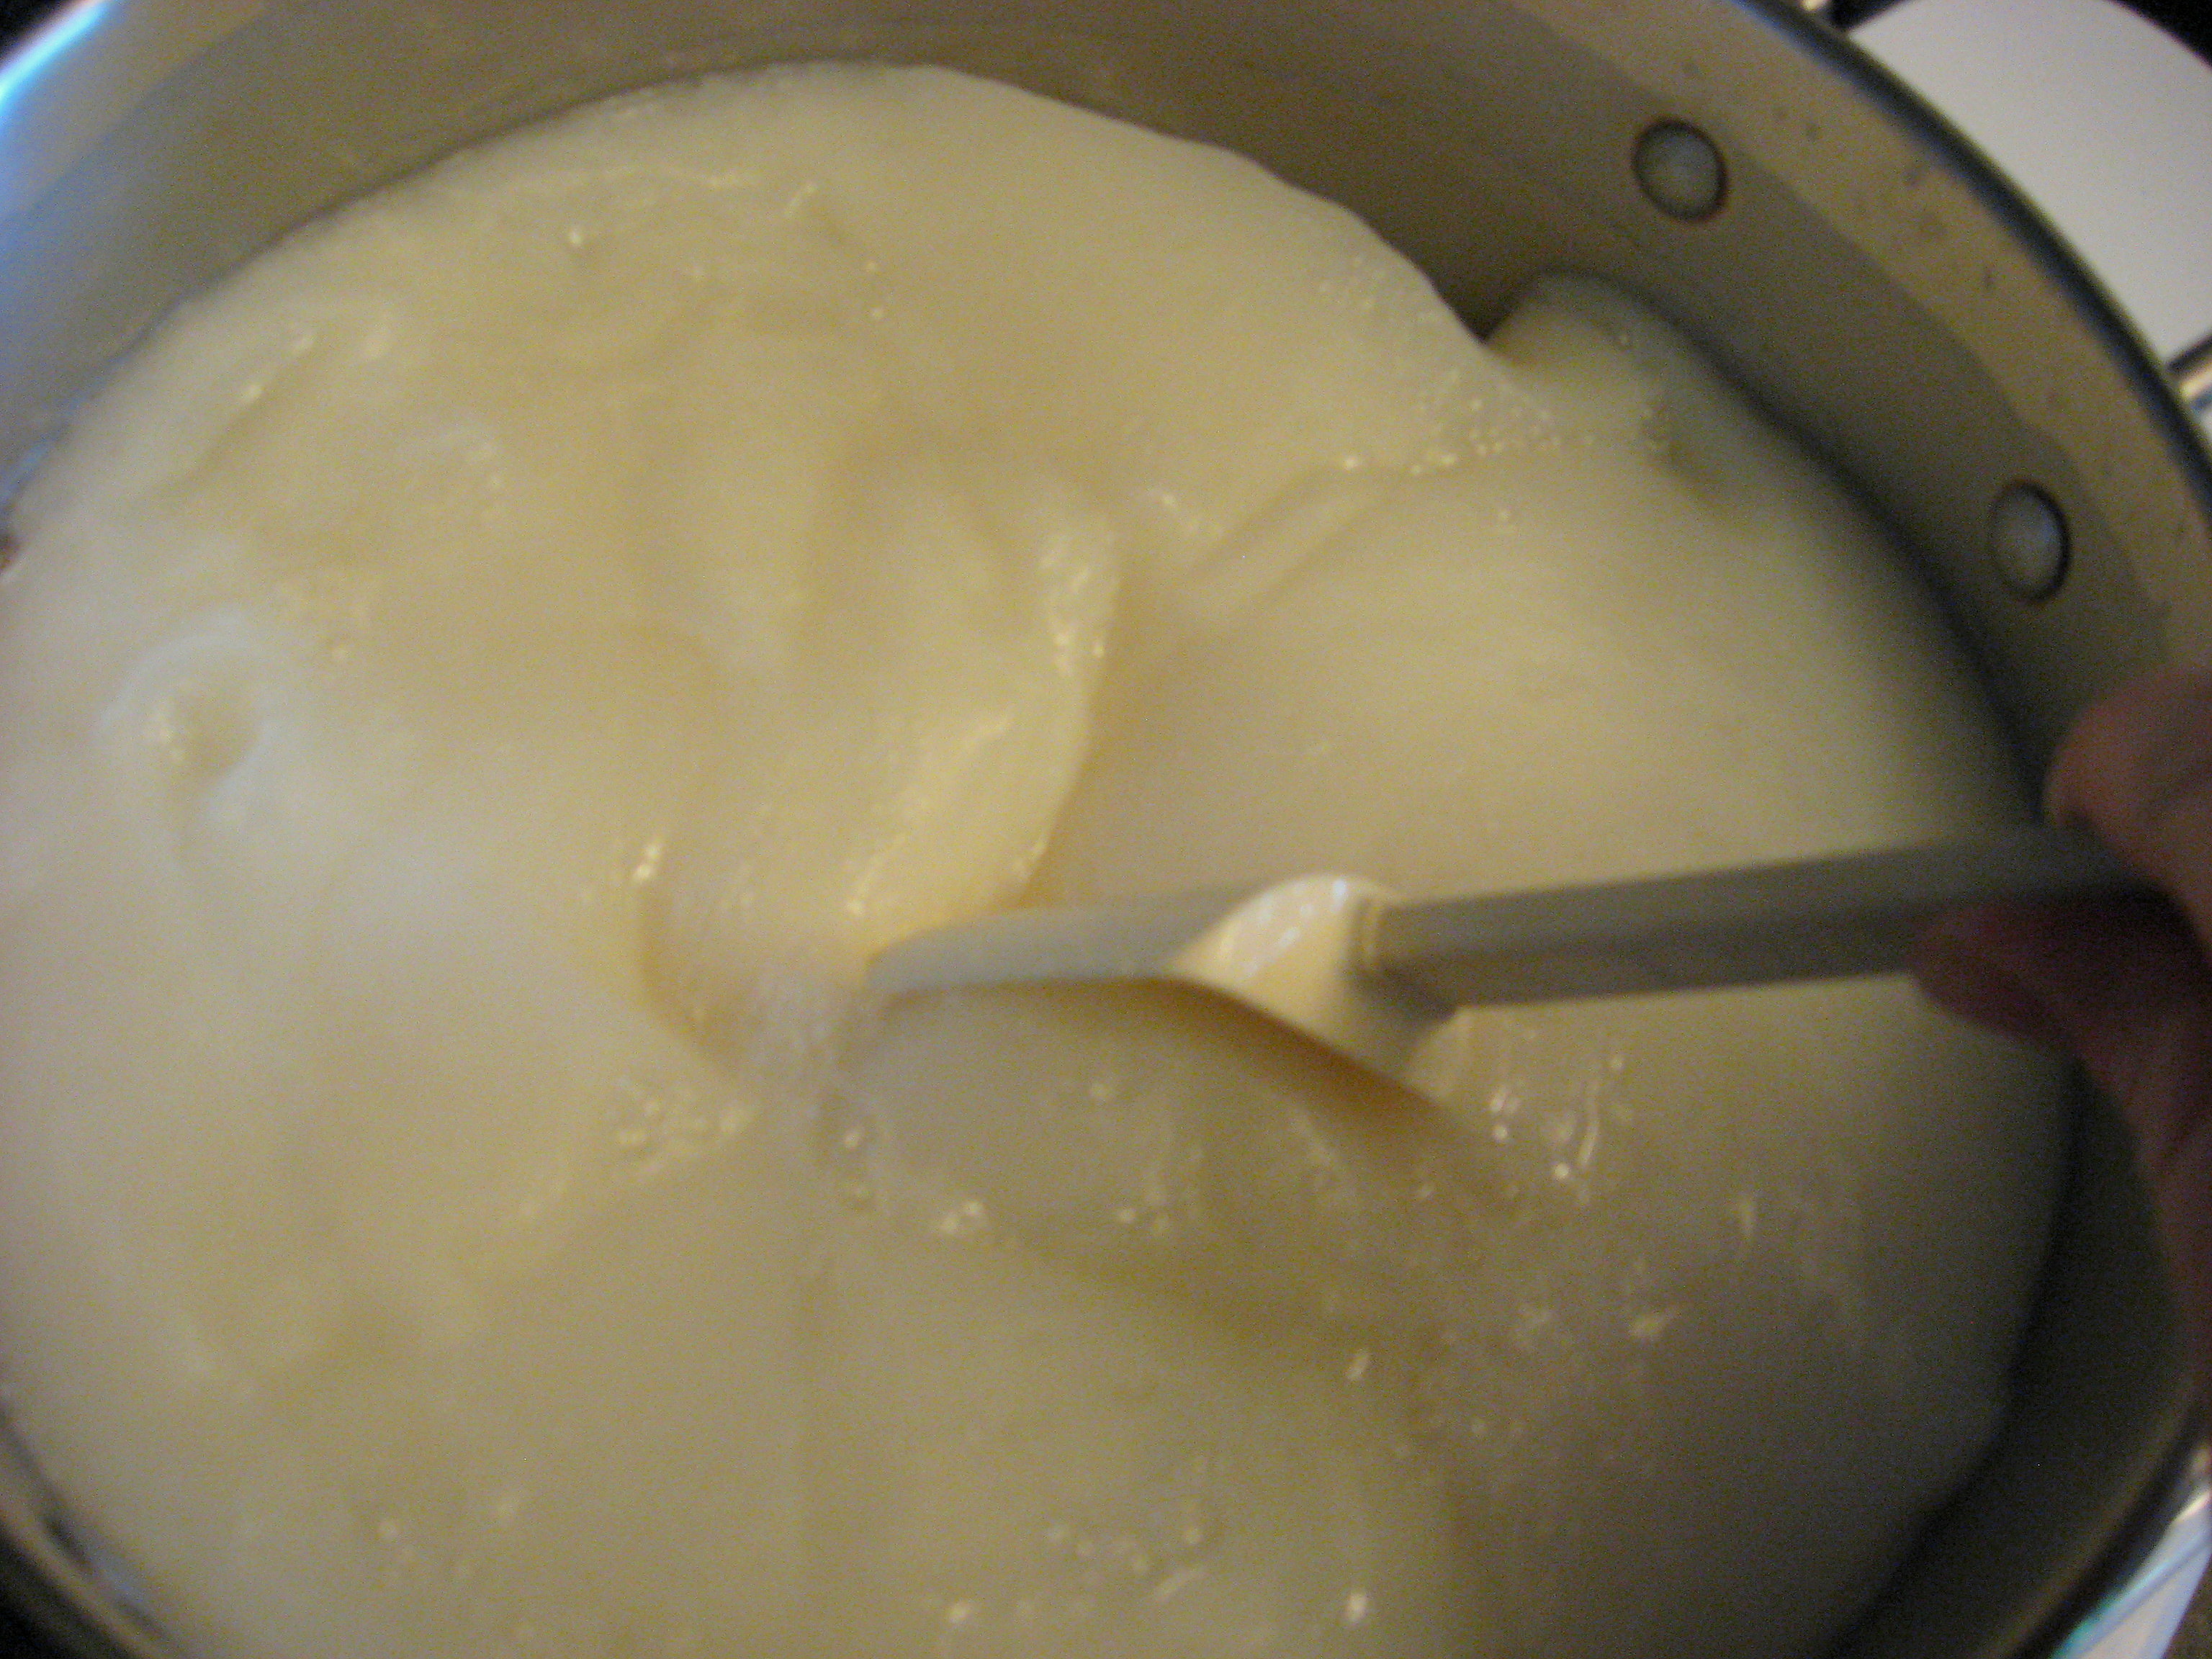
Now you want to whip it back to a smooth, liquid consistency. I used an immersion blender, but I’m sure that you could also use a regular mixer.
Use a funnel to pour the finished soap into containers for storage. 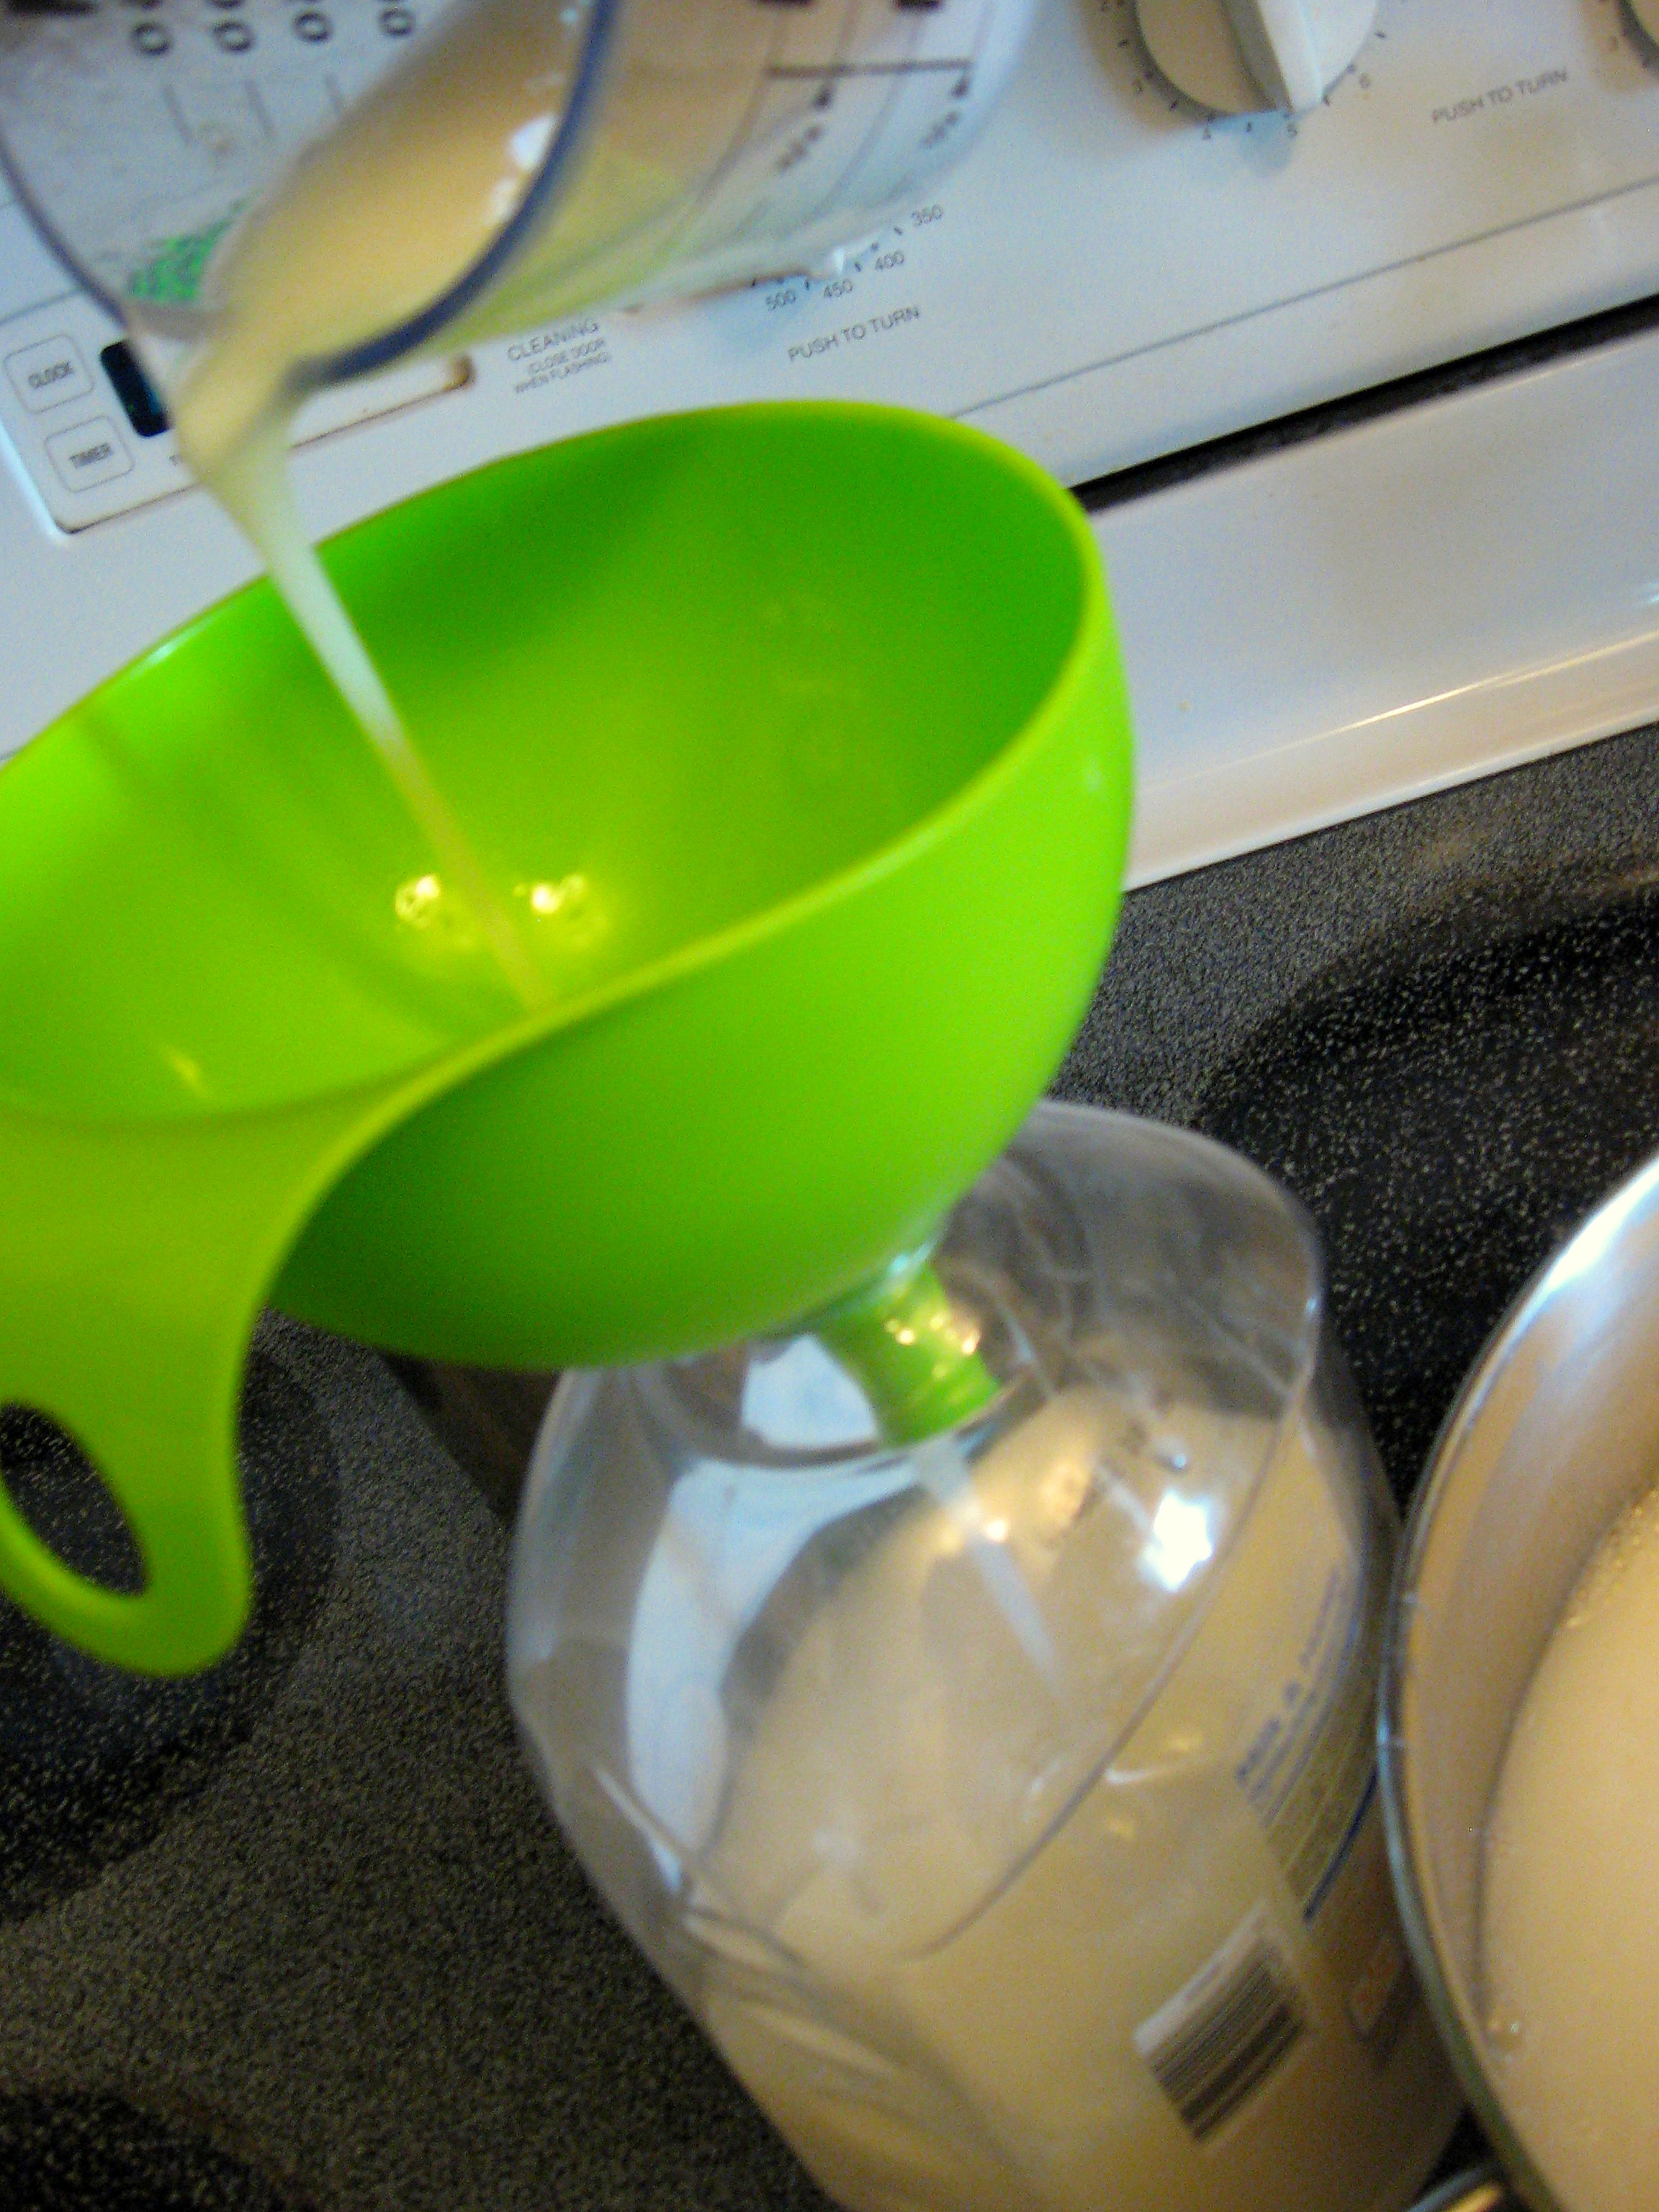
When you are ready to use it just pour into the soap pump of your choice.
*Note that this soap is not foamy. If you are someone who really needs the foam, then I would recommend buying a bottle of foaming hand soap from the store and reusing the bottle when it’s empty. Put this soap in, and it should foam up for you just fine.
As you store the soap, it can sometimes get a little thick. No biggie at all; just thin it out with a little bit of water and shake well.
So, I spent $.69 for the soap, $3.xx for the Glycerin – but only used about 1/6 of the bottle and this is how much finished soap it made (these are 64 ounce bottles).
DIY Flip Flops
Finally flip-flop weather; my favorite footwear! (read that sentence 10 times fast!)
I think I can never have too many pairs of flip flops and I was thrilled last summer to discover how easy and inexpensive they are to make myself. I’ll start here by showing you how to make the easiest, fastest flip flops, and then you’ll be ready to experiment with other styles. A quick internet search will bring you no end of ideas and inspiration to make flip flops from plain to fancy, simple to fabulous and everything in between!
Supplies:
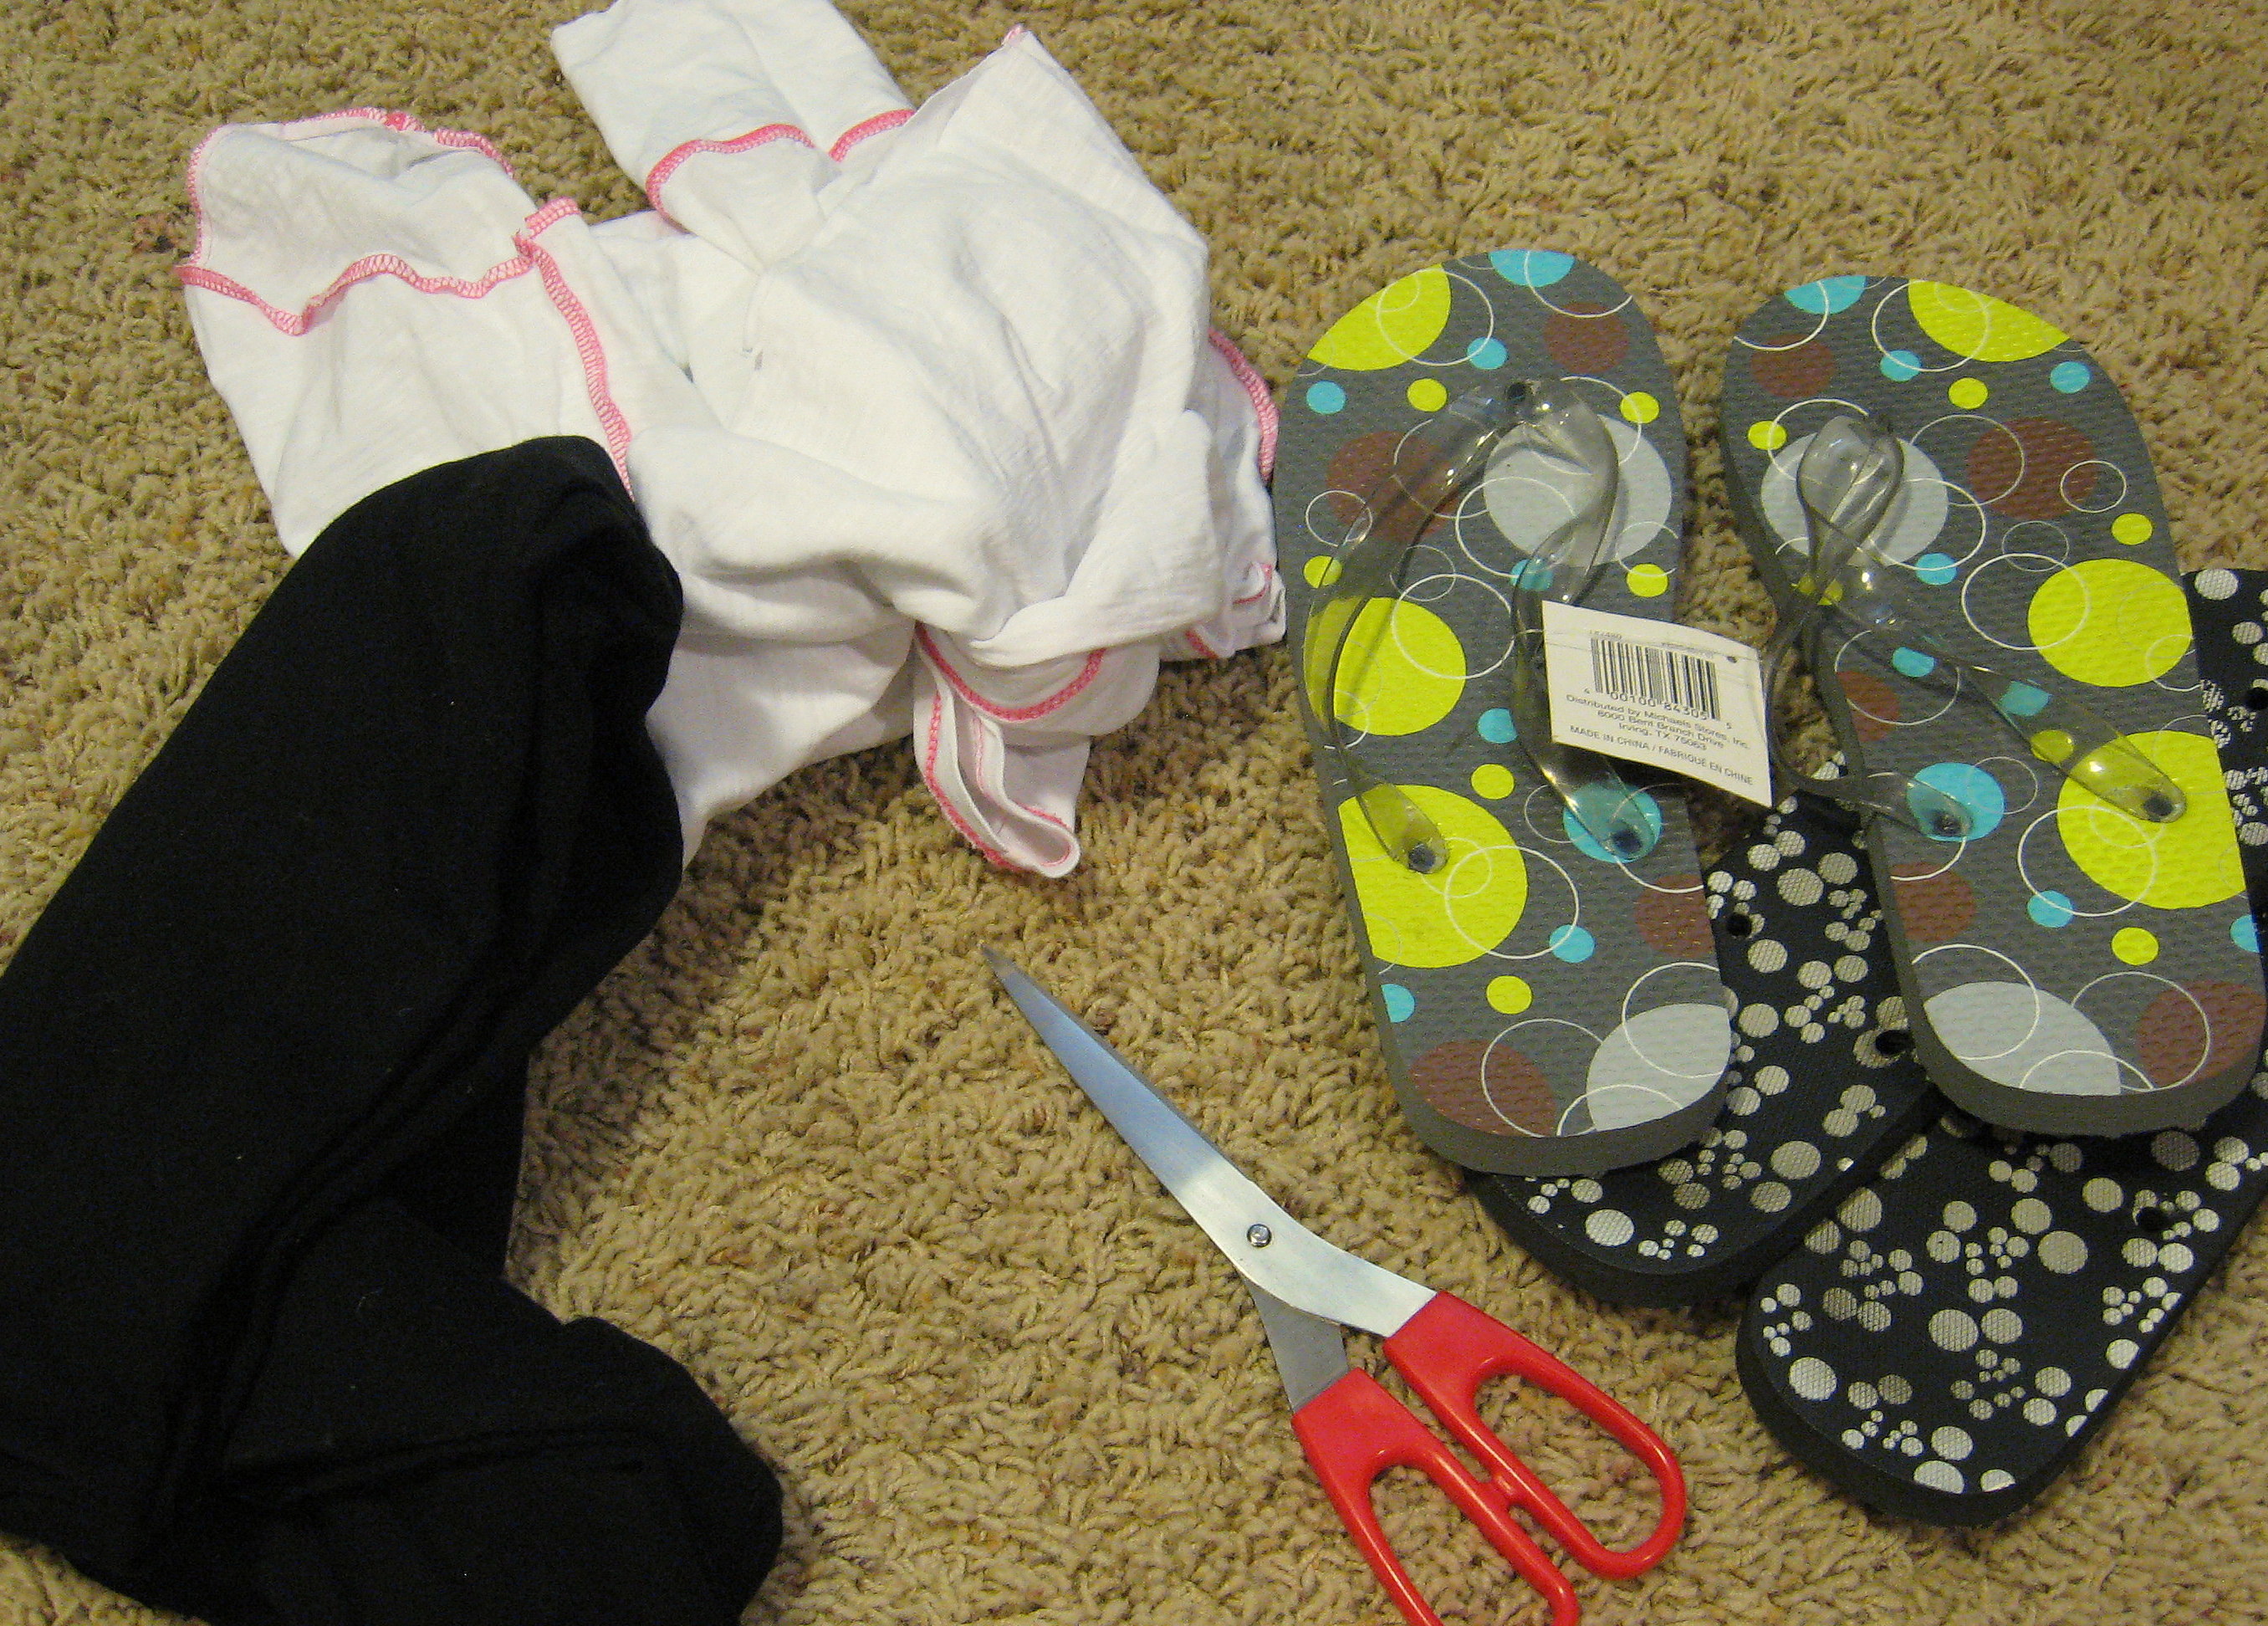
Flip Flops – Use a cheap pair of flip flops – the kind that you can remove the plastic “Y” that sits on top of your foot. With cheap flip flops, I find that the thing that makes them uncomfortable is the plastic pieces under your foot in the back, or the piece that goes between your toe and you’ll be cutting those off, so the cheaper the better! The top pair in the photo were picked up at Michaels last year on clearance for $1. I’ve also gotten a pair from the grocery store that were $ .69; they were much too large for me, but for that price I bought them anyway and trimmed them down to size with sturdy kitchen shears.
Fabric – You can use any kind of fabric you like. I’ve made them with simple cotton, and I’ve seen them made with wide ribbon. My favorite fabric for comfort, though, is a soft, stretchy jersey knit. Remember a few weeks ago when we made bags from old T shirts and I told you to keep the leftover fabric? That’s what I’m using here.
Scissors and Glue – You don’t even need the glue if you don’t want to use it. I just used Elmer’s.
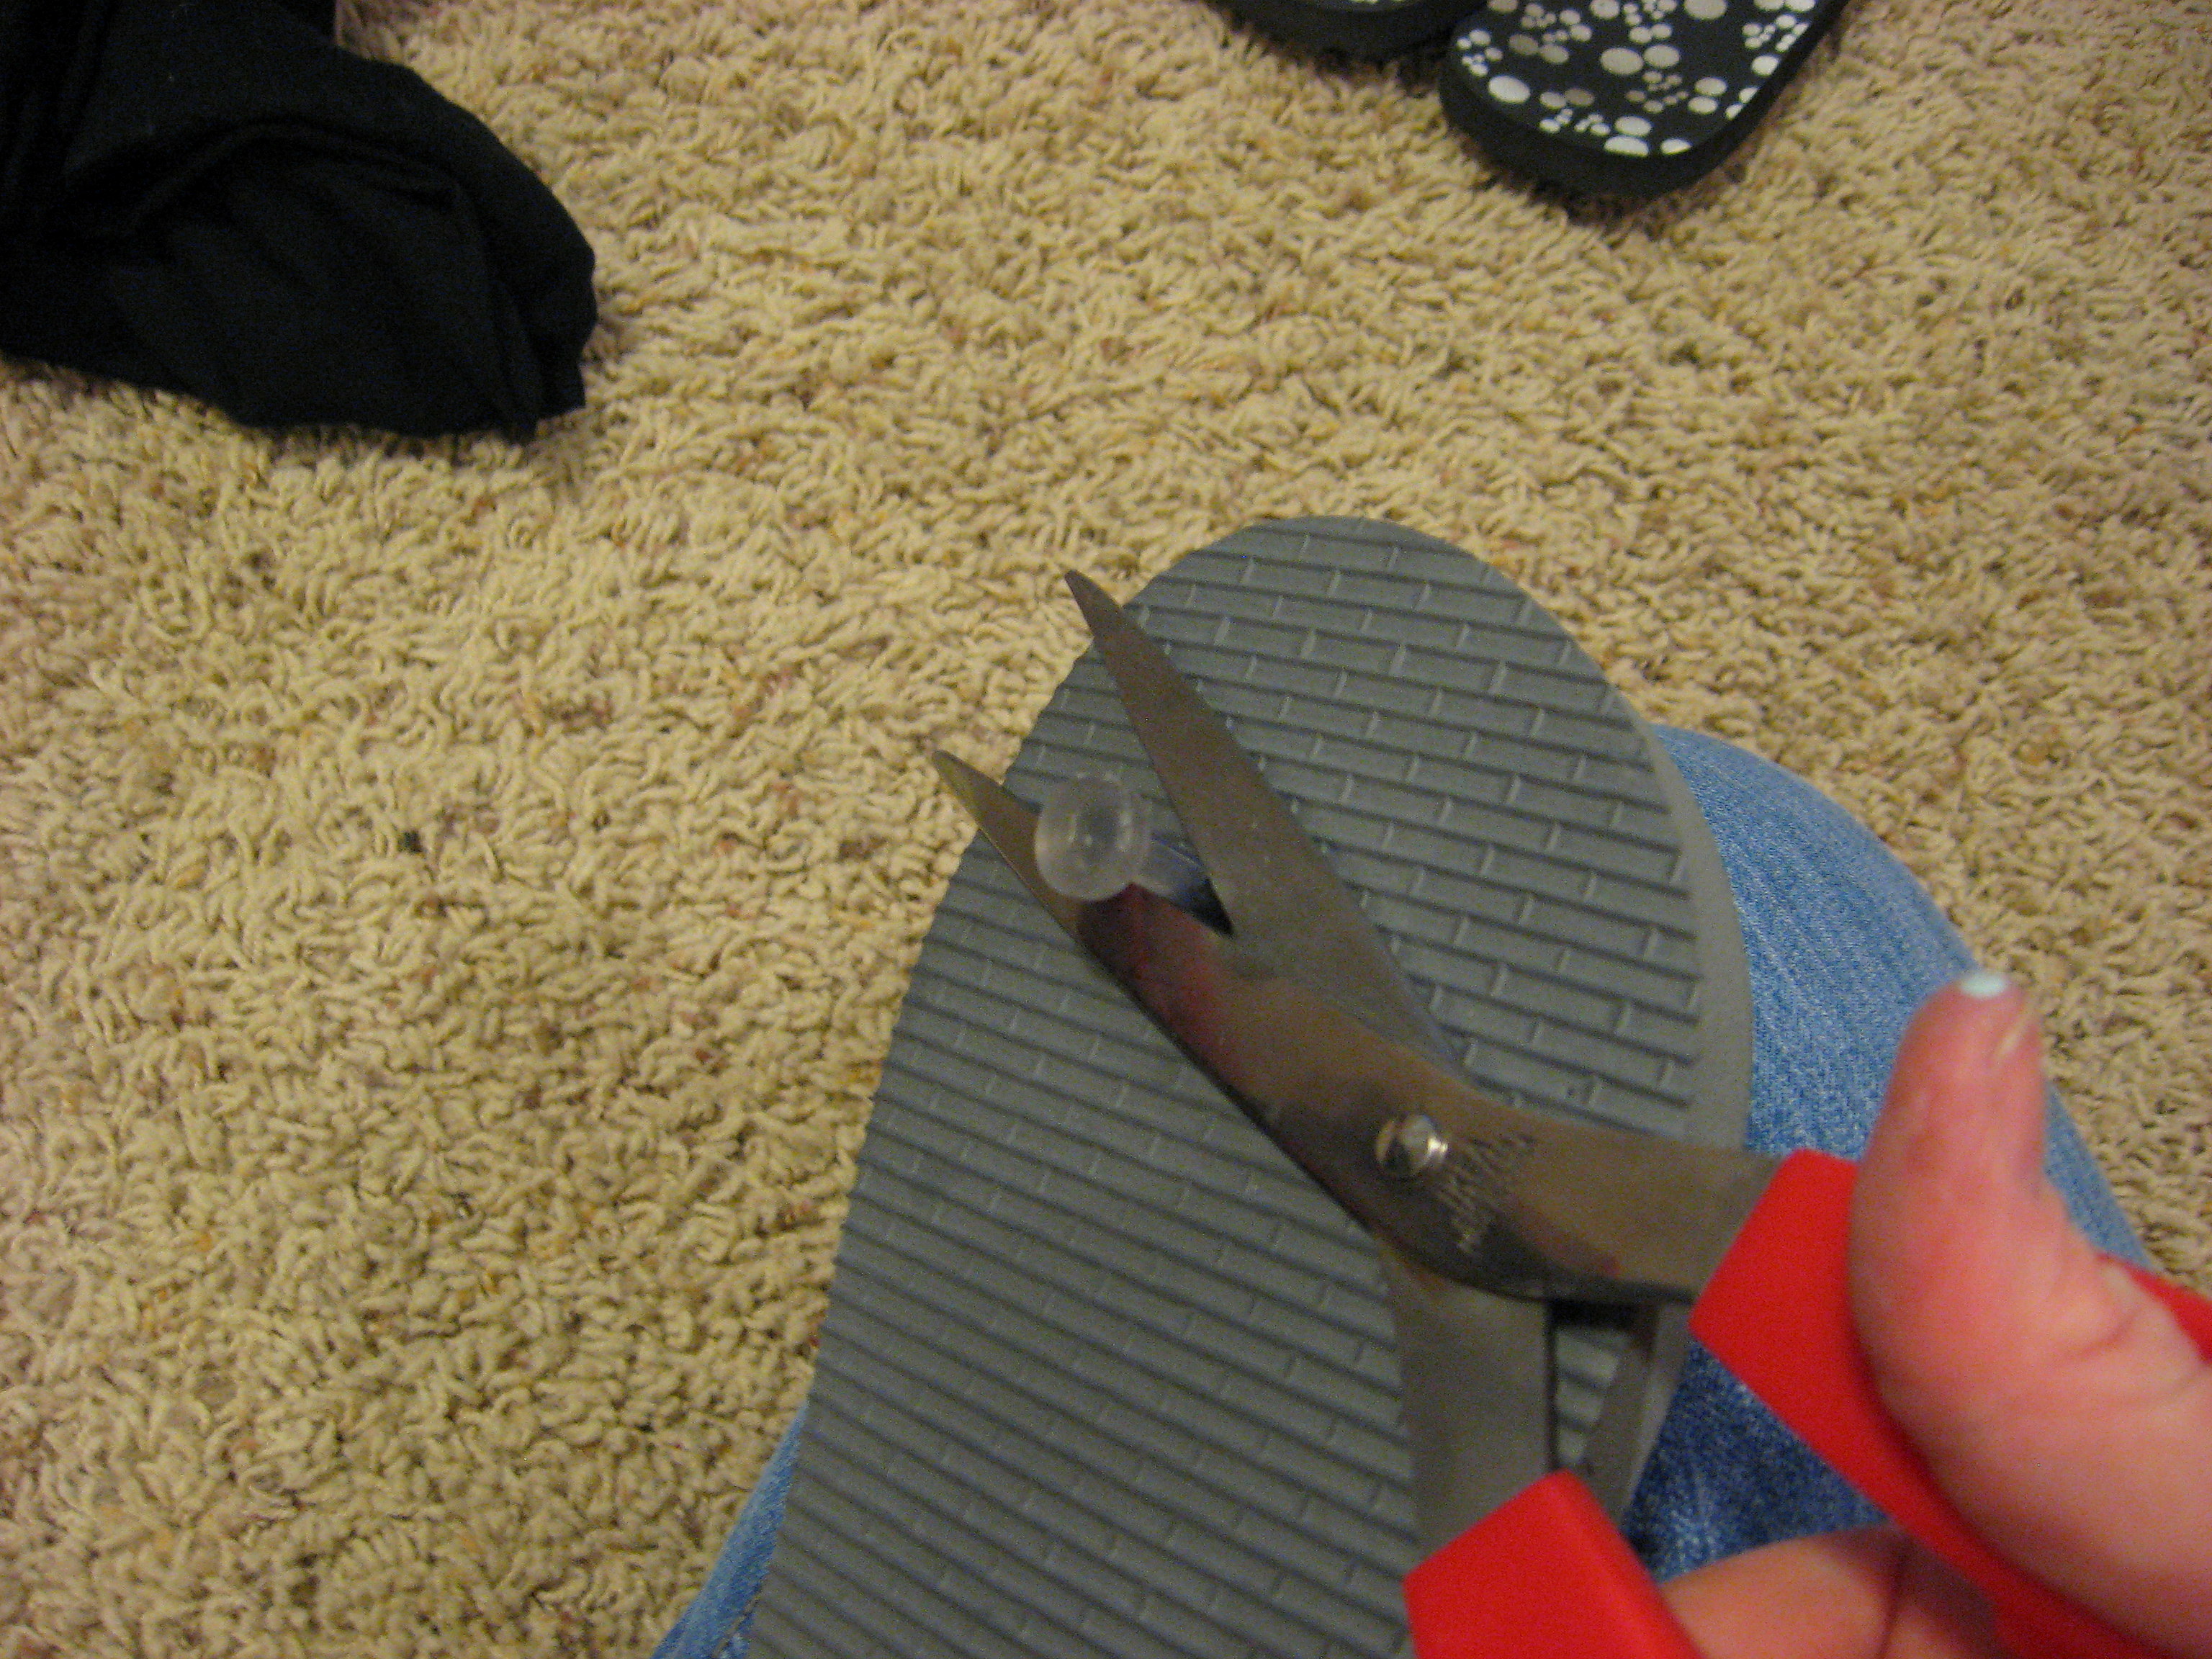
Start by cutting the straps of your flip flops and discarding them
Now you’ll cut the fabric into strips. This is totally up to you based on how you want the finished shoe to look. For these, I cut the strips about 3 1/2 inches wide. I usually start with strips about a yard long; you will probably not need that much in the end, but it allows for some oops along the way. I double it over to cut the strips so both sides will match perfectly.
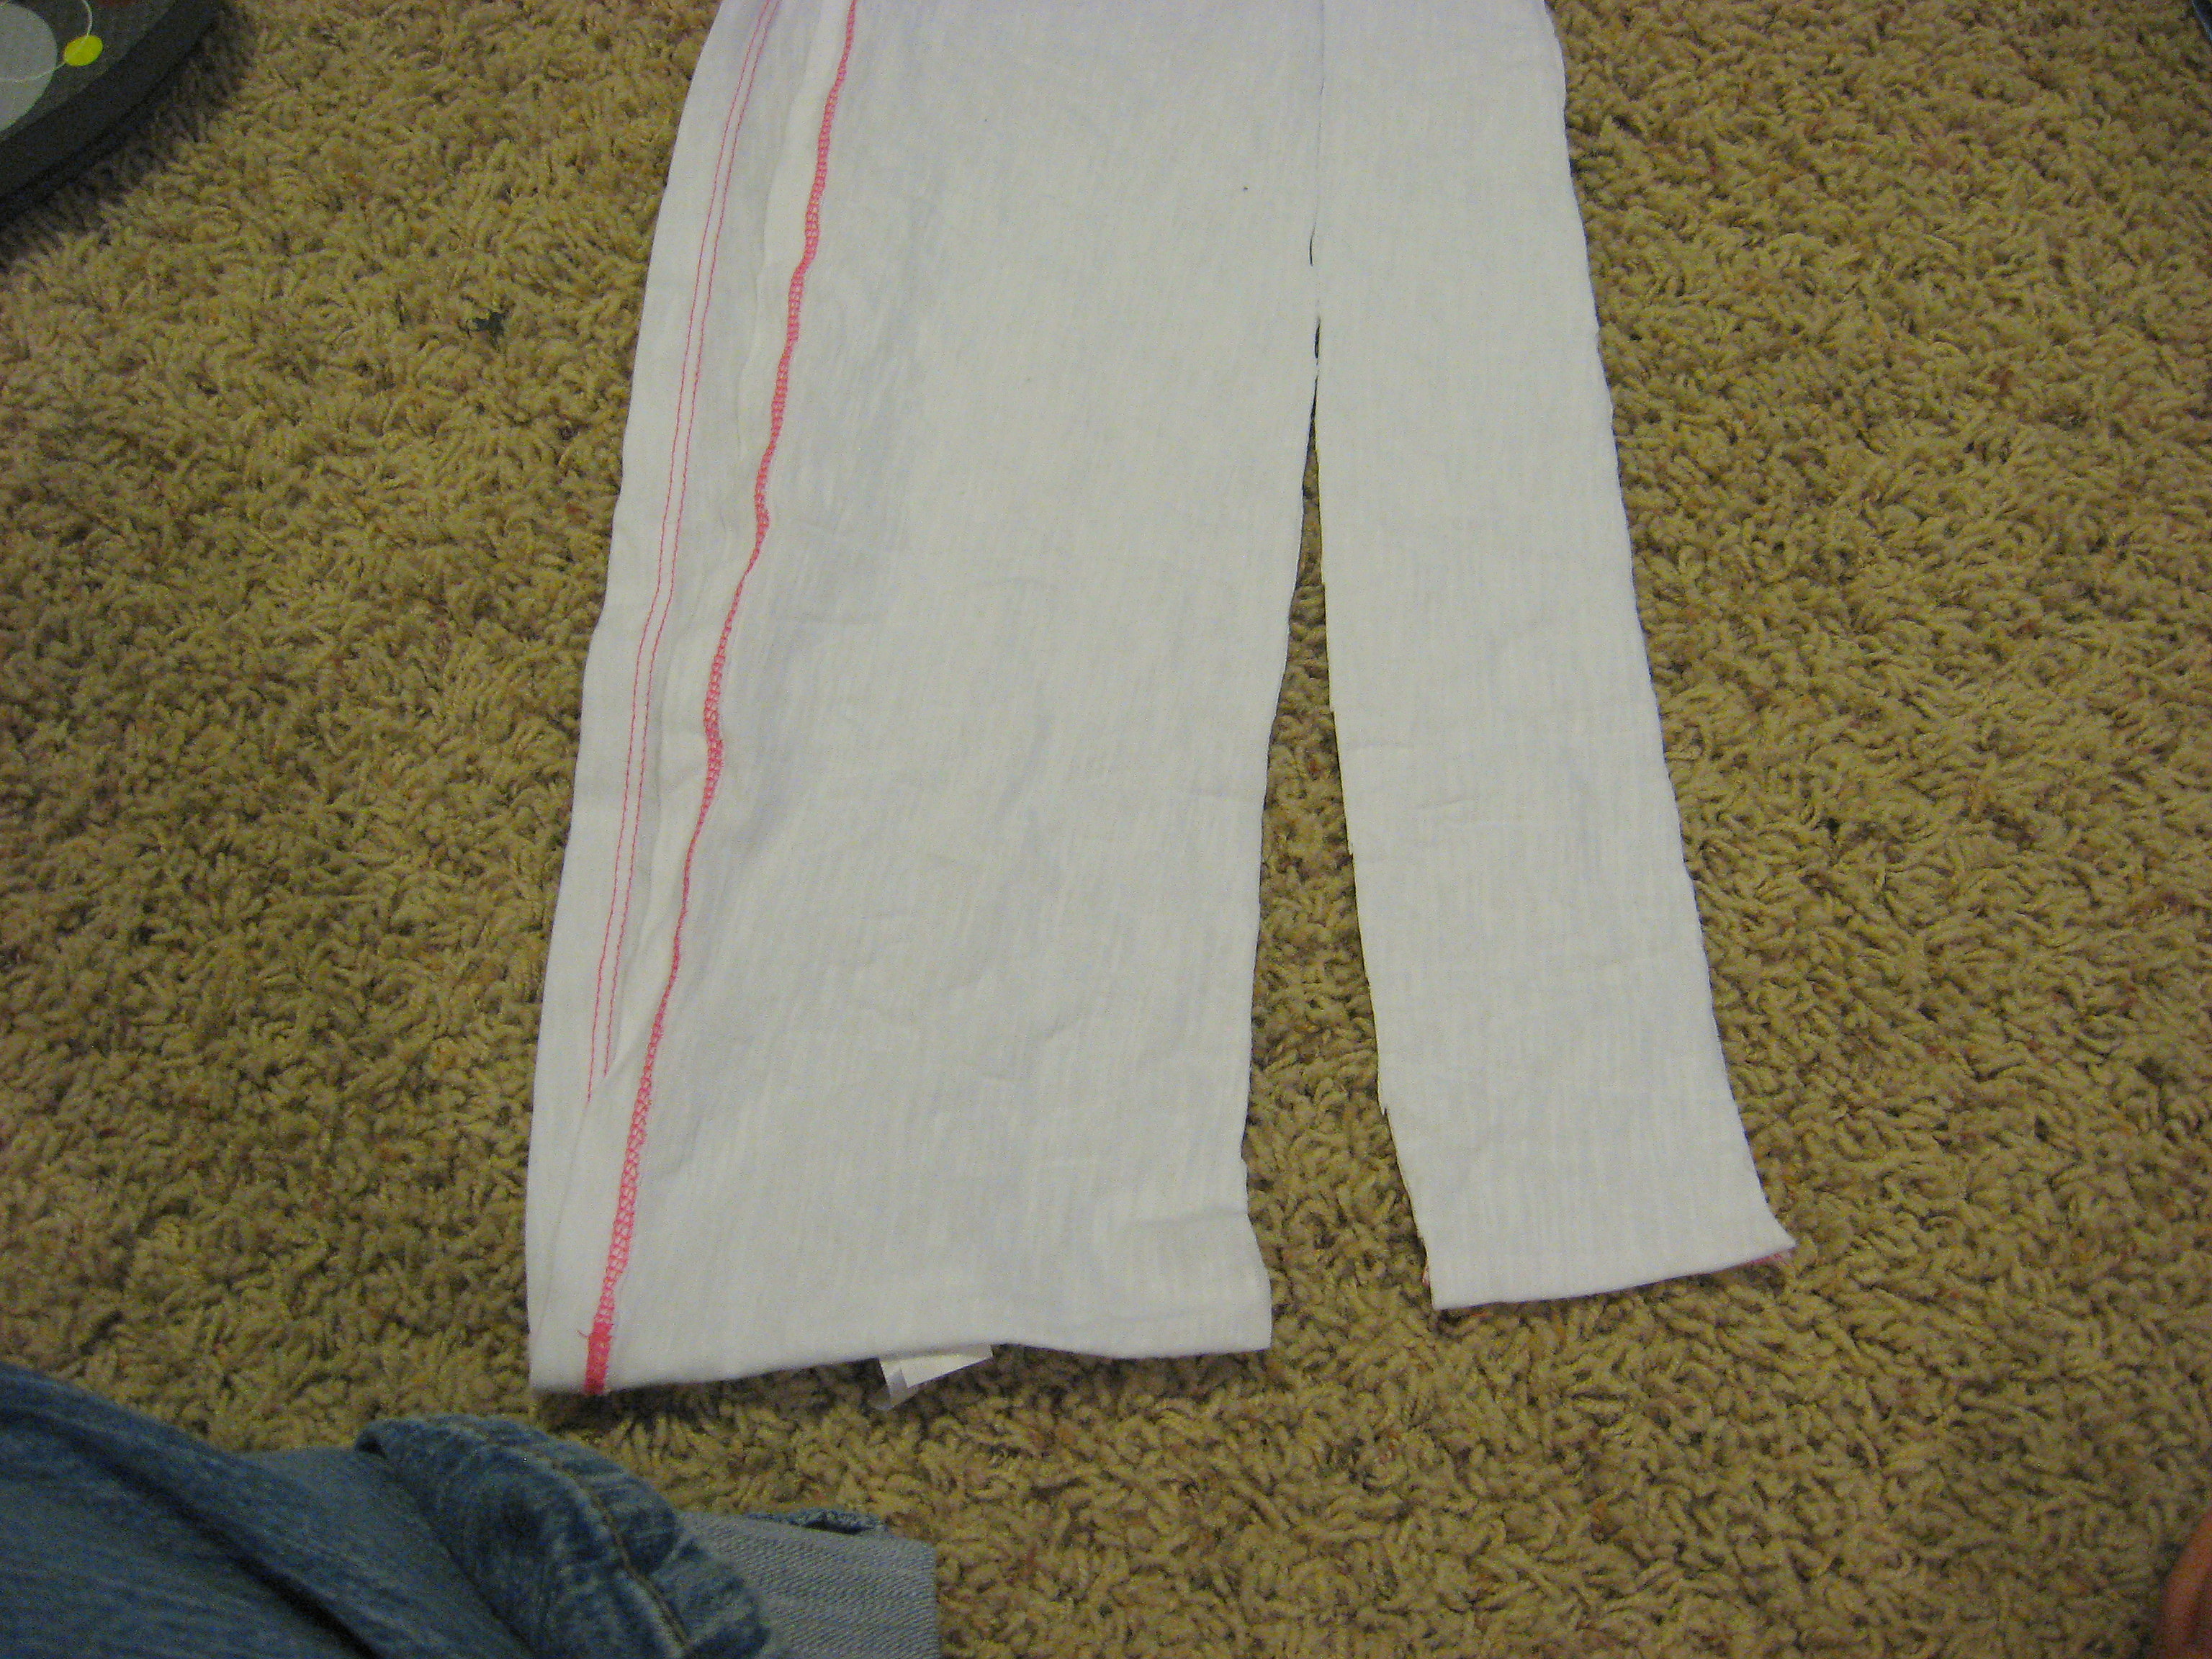
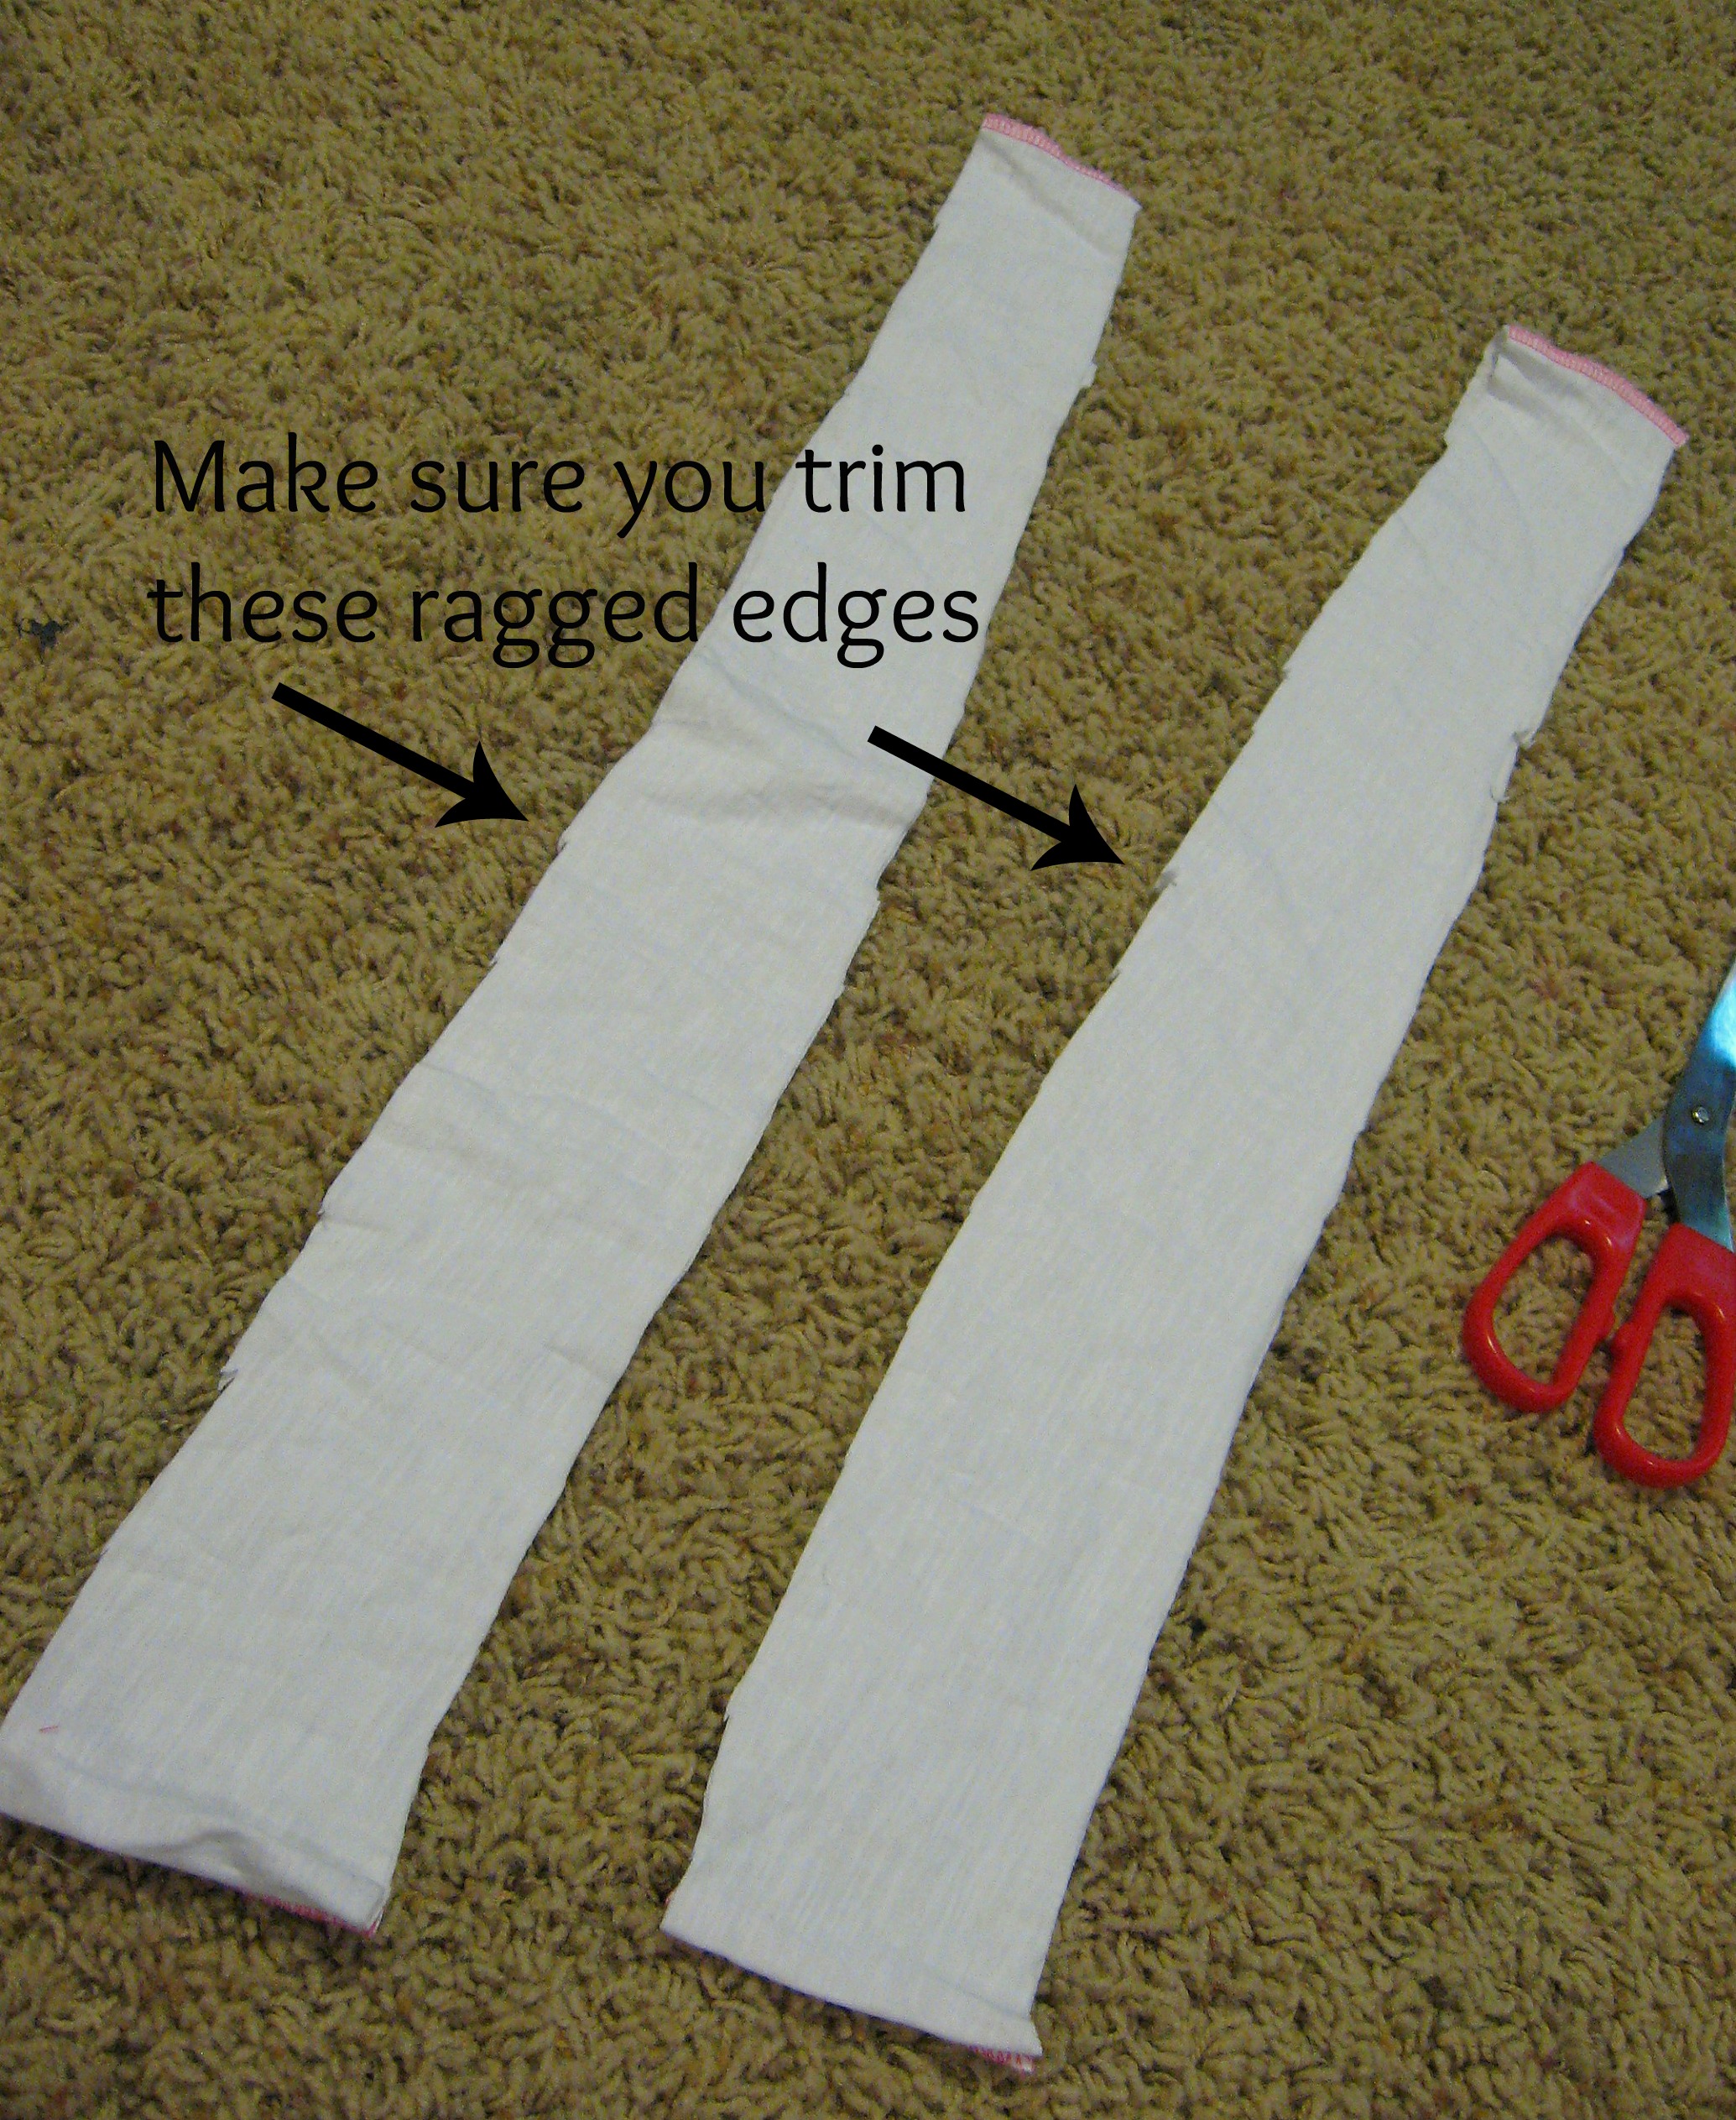
The fabric in the picture above is still doubled-over so you can see that the end that will be between my toes is a little narrower. If you don’t want to think it through that much, no worries. Just cut it straight and you’ll be fine.
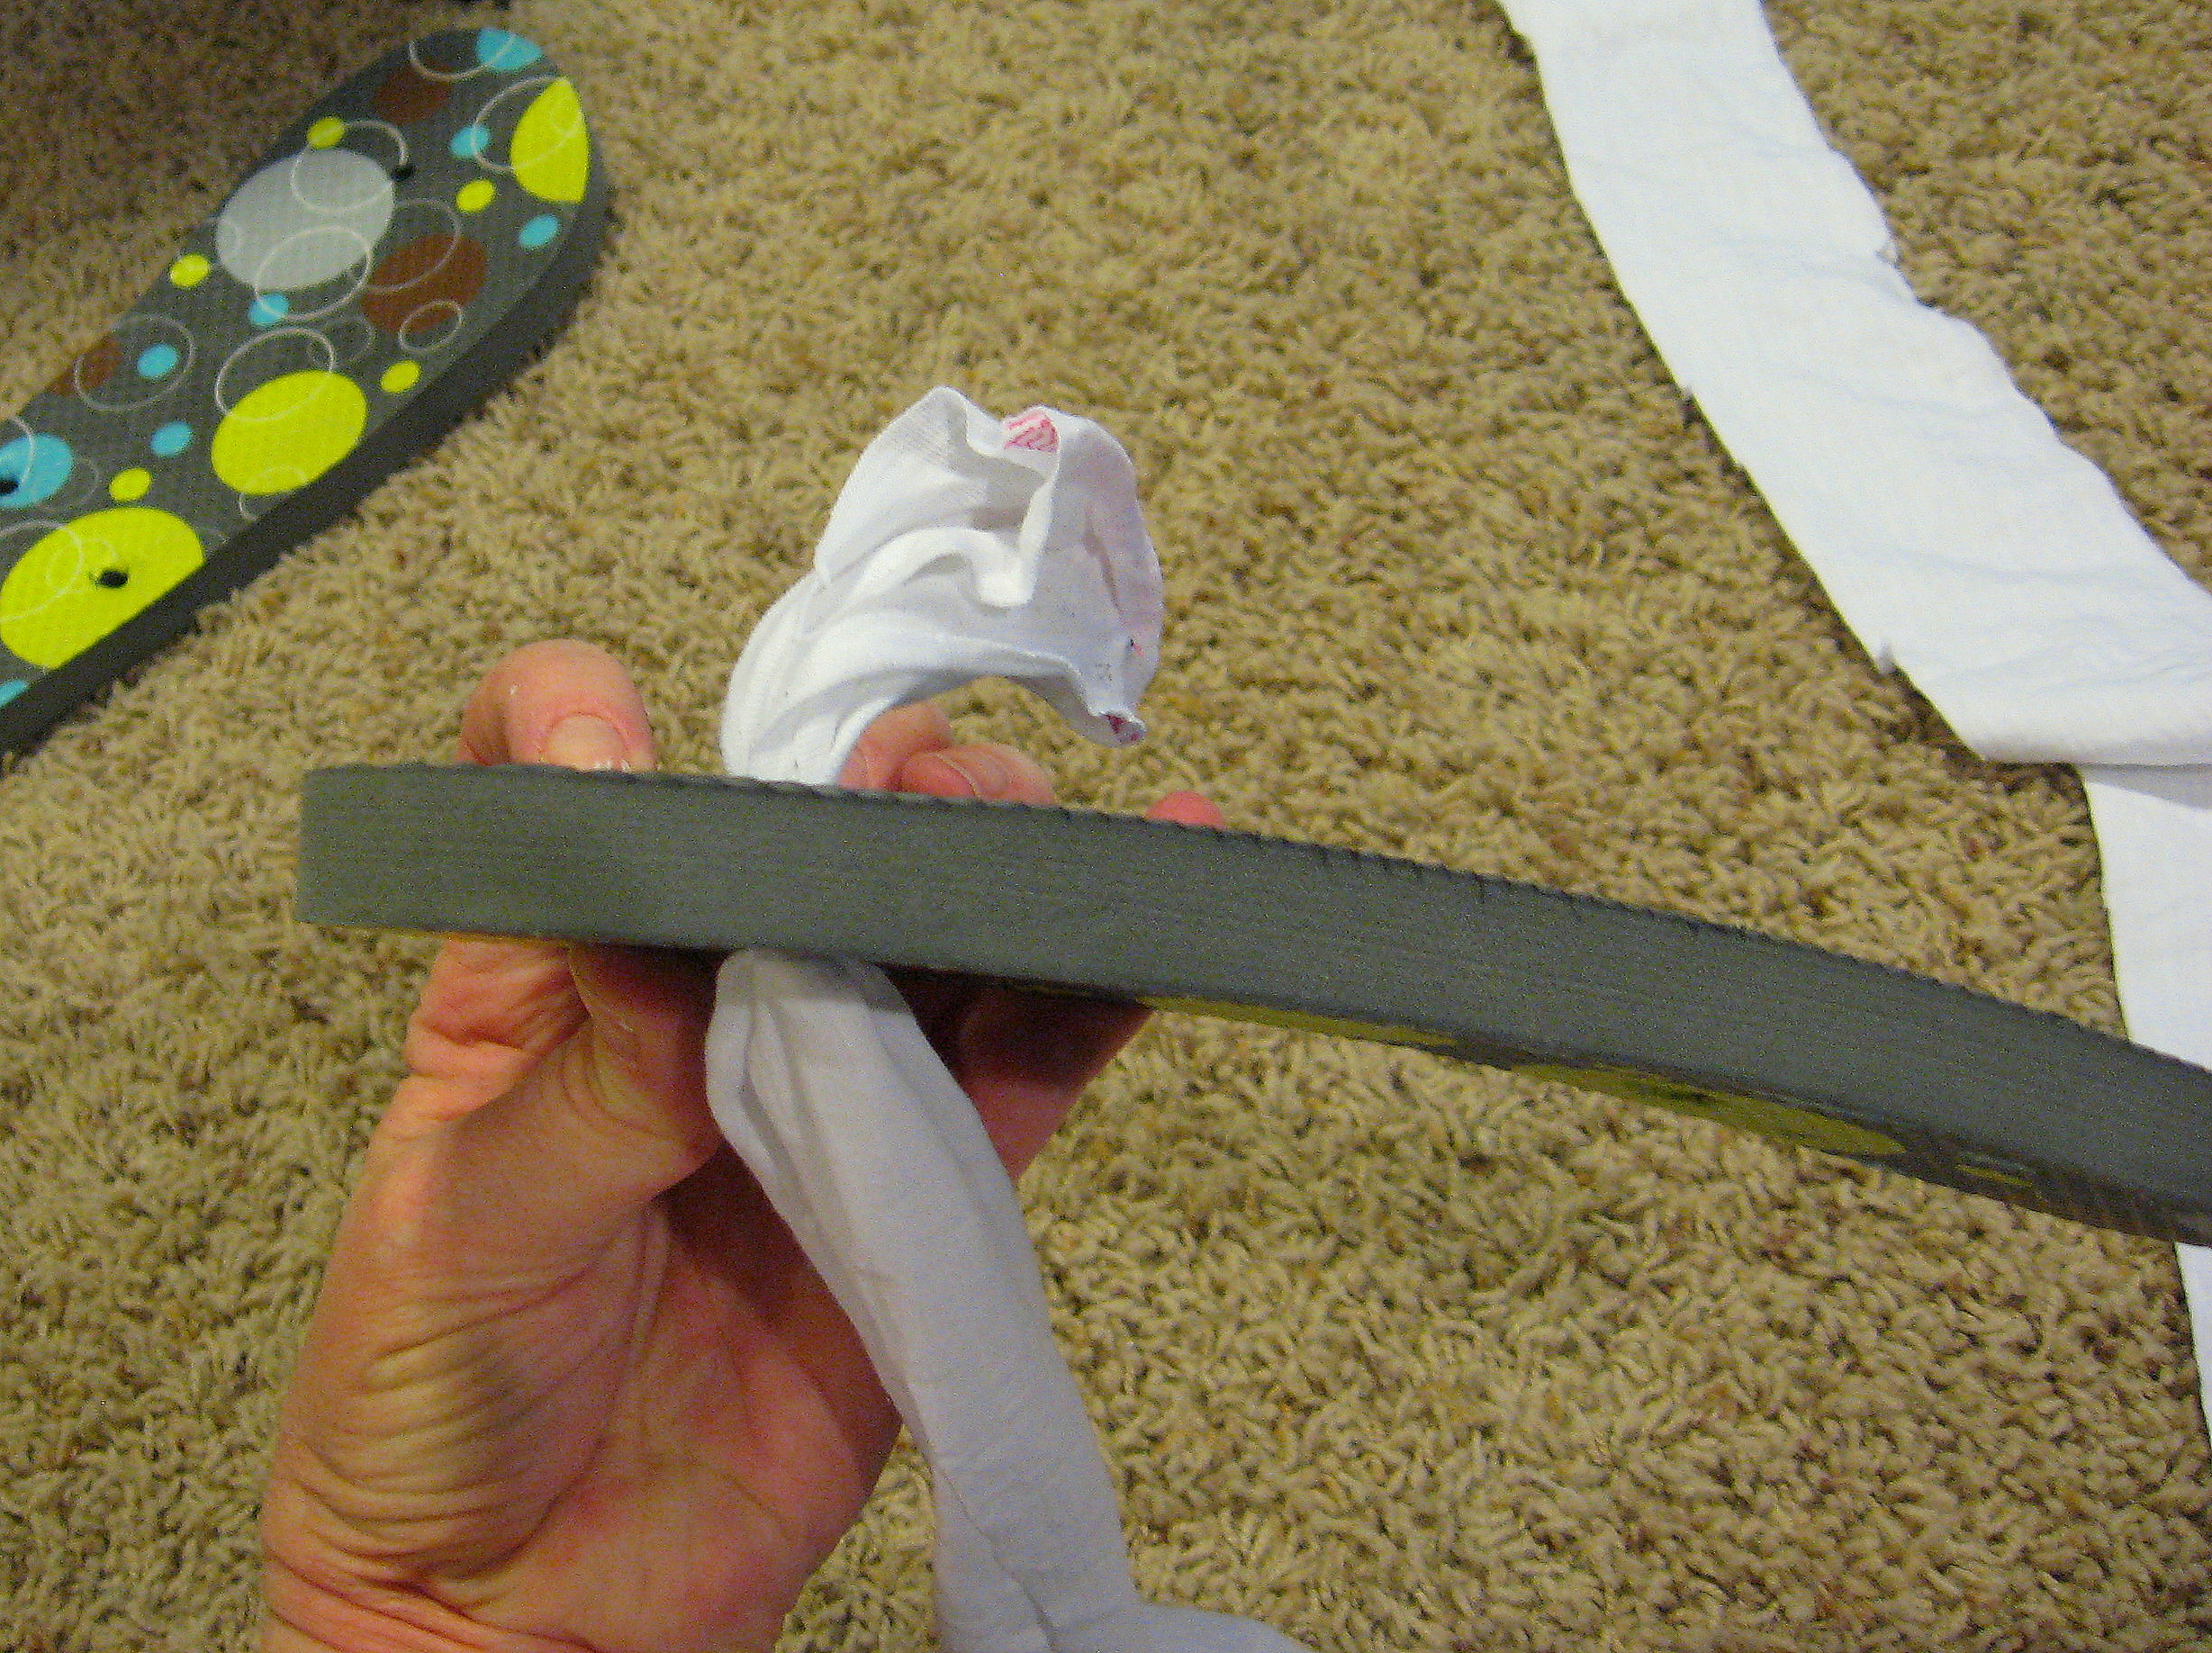
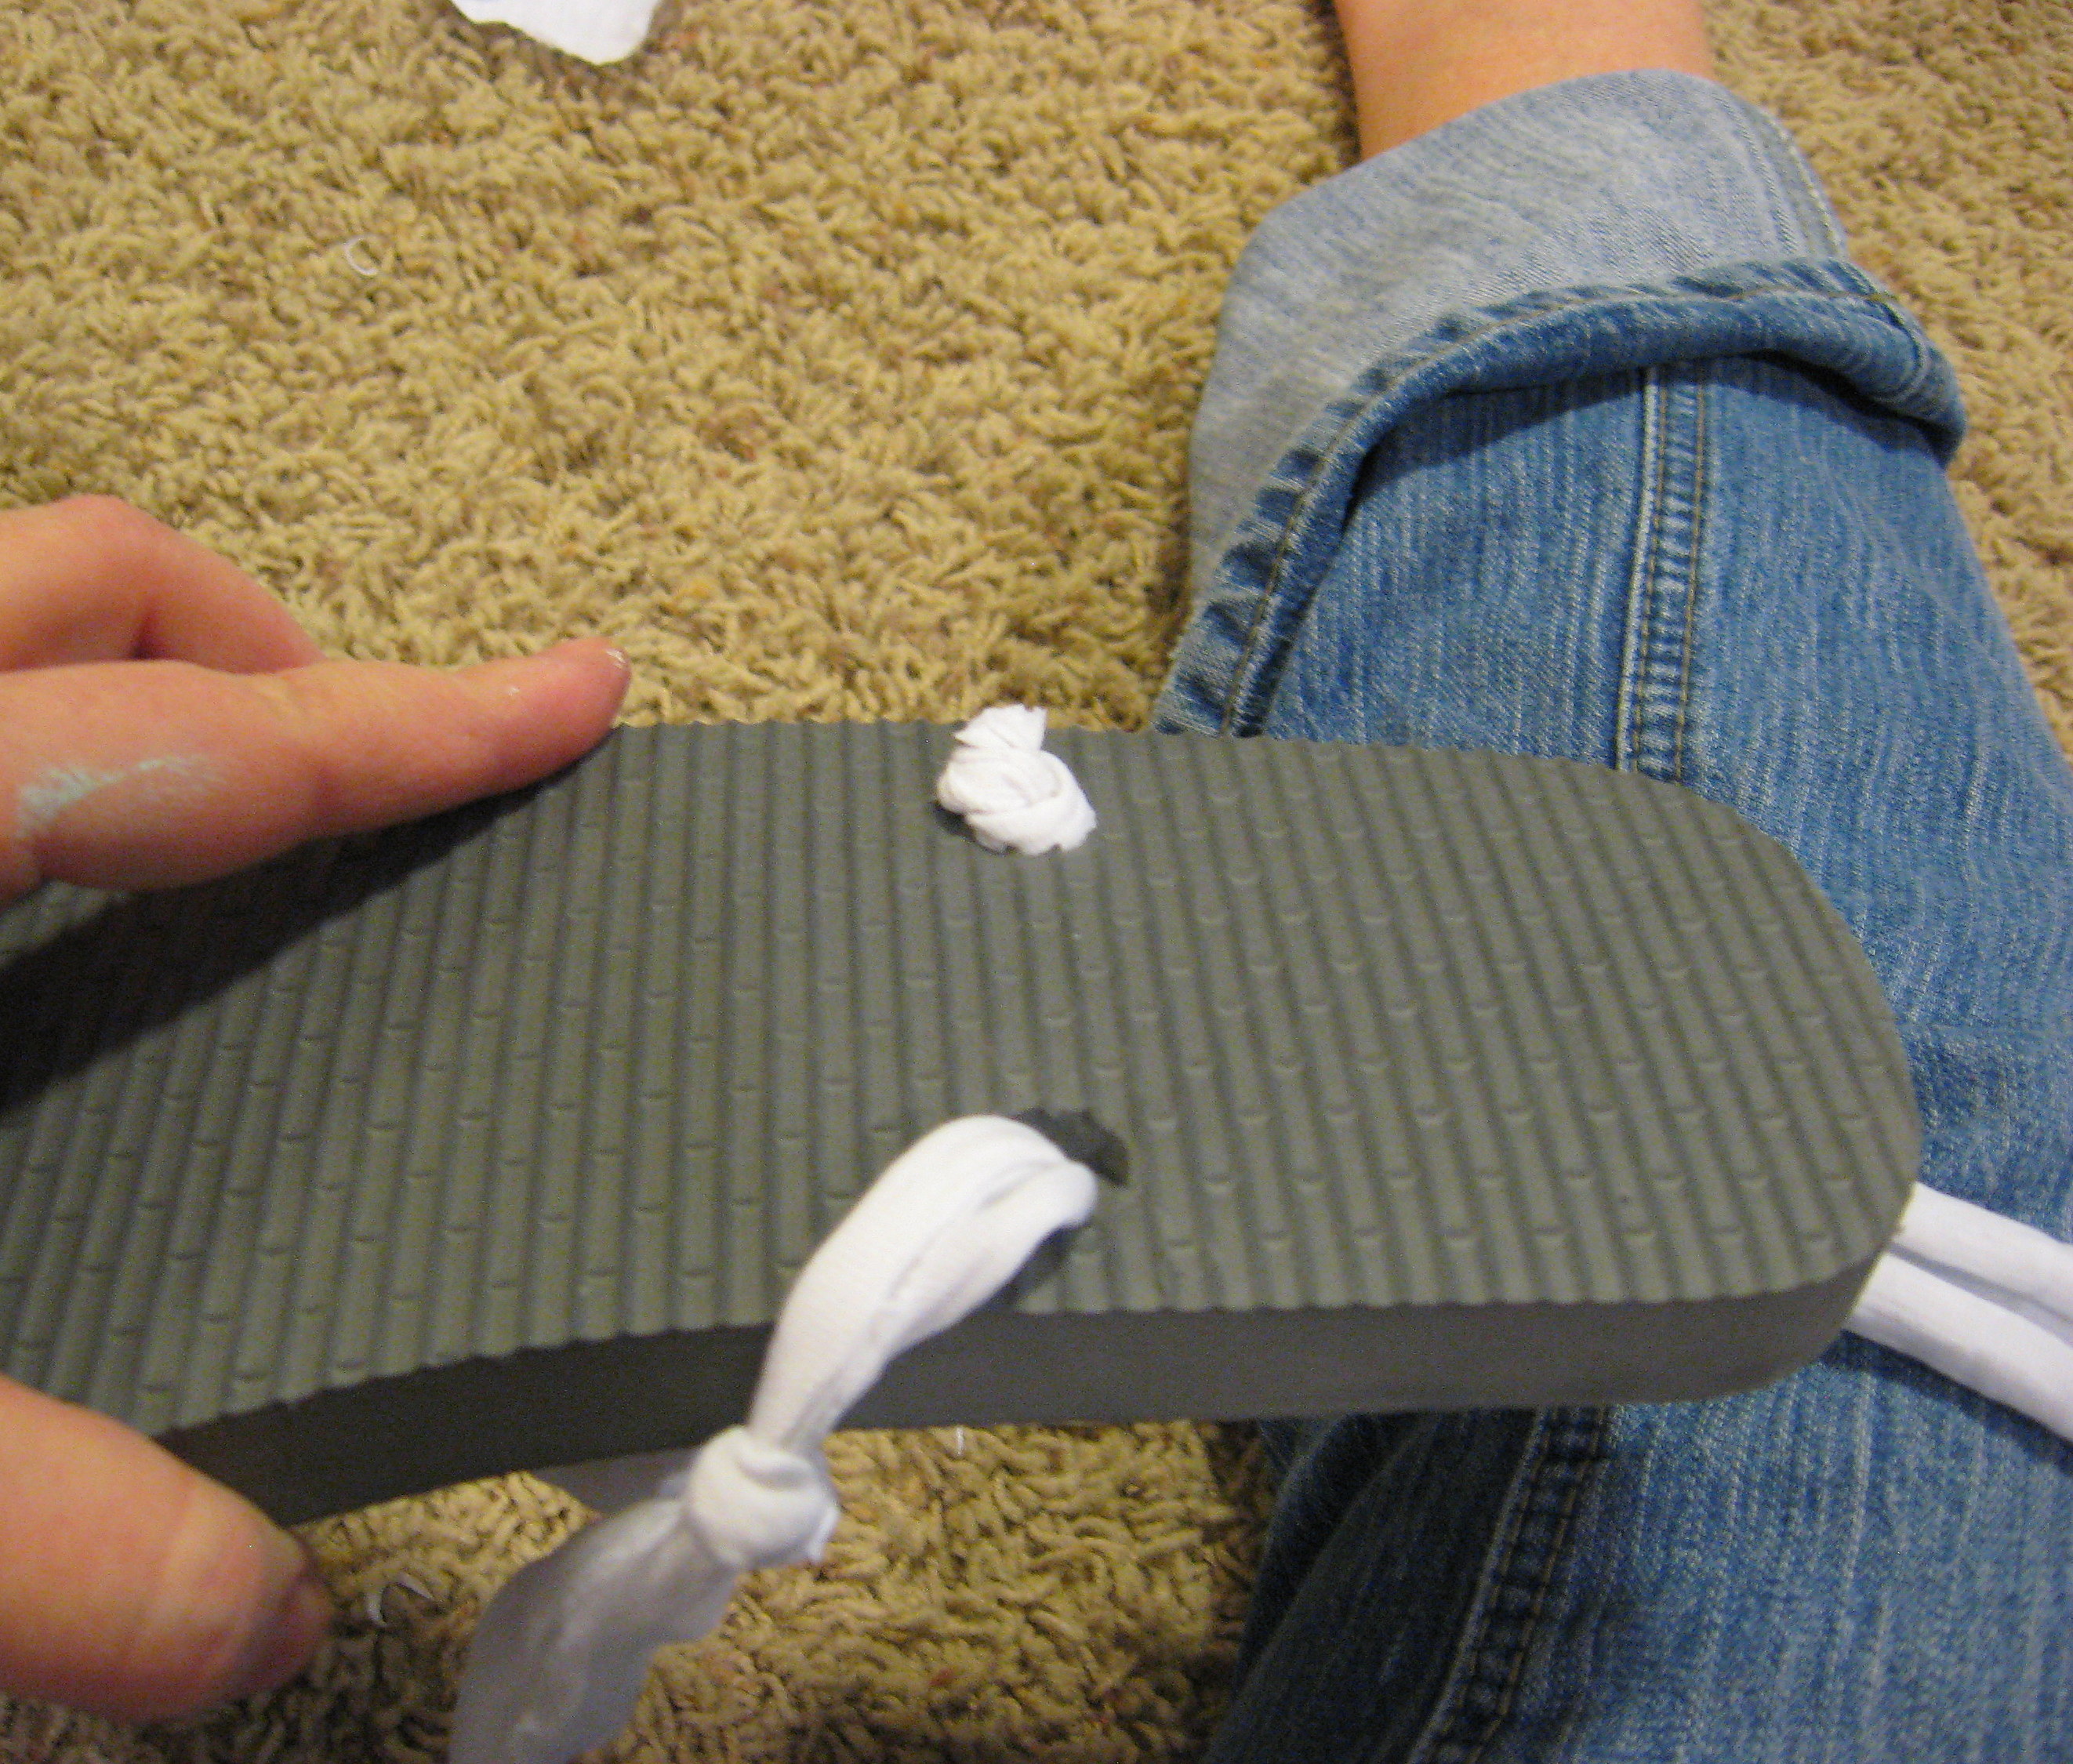
Keeping the fabric doubled up, grab the end that will go at the front of the shoe and shove through the hole at the toe end of the flip flop. Tie a knot. 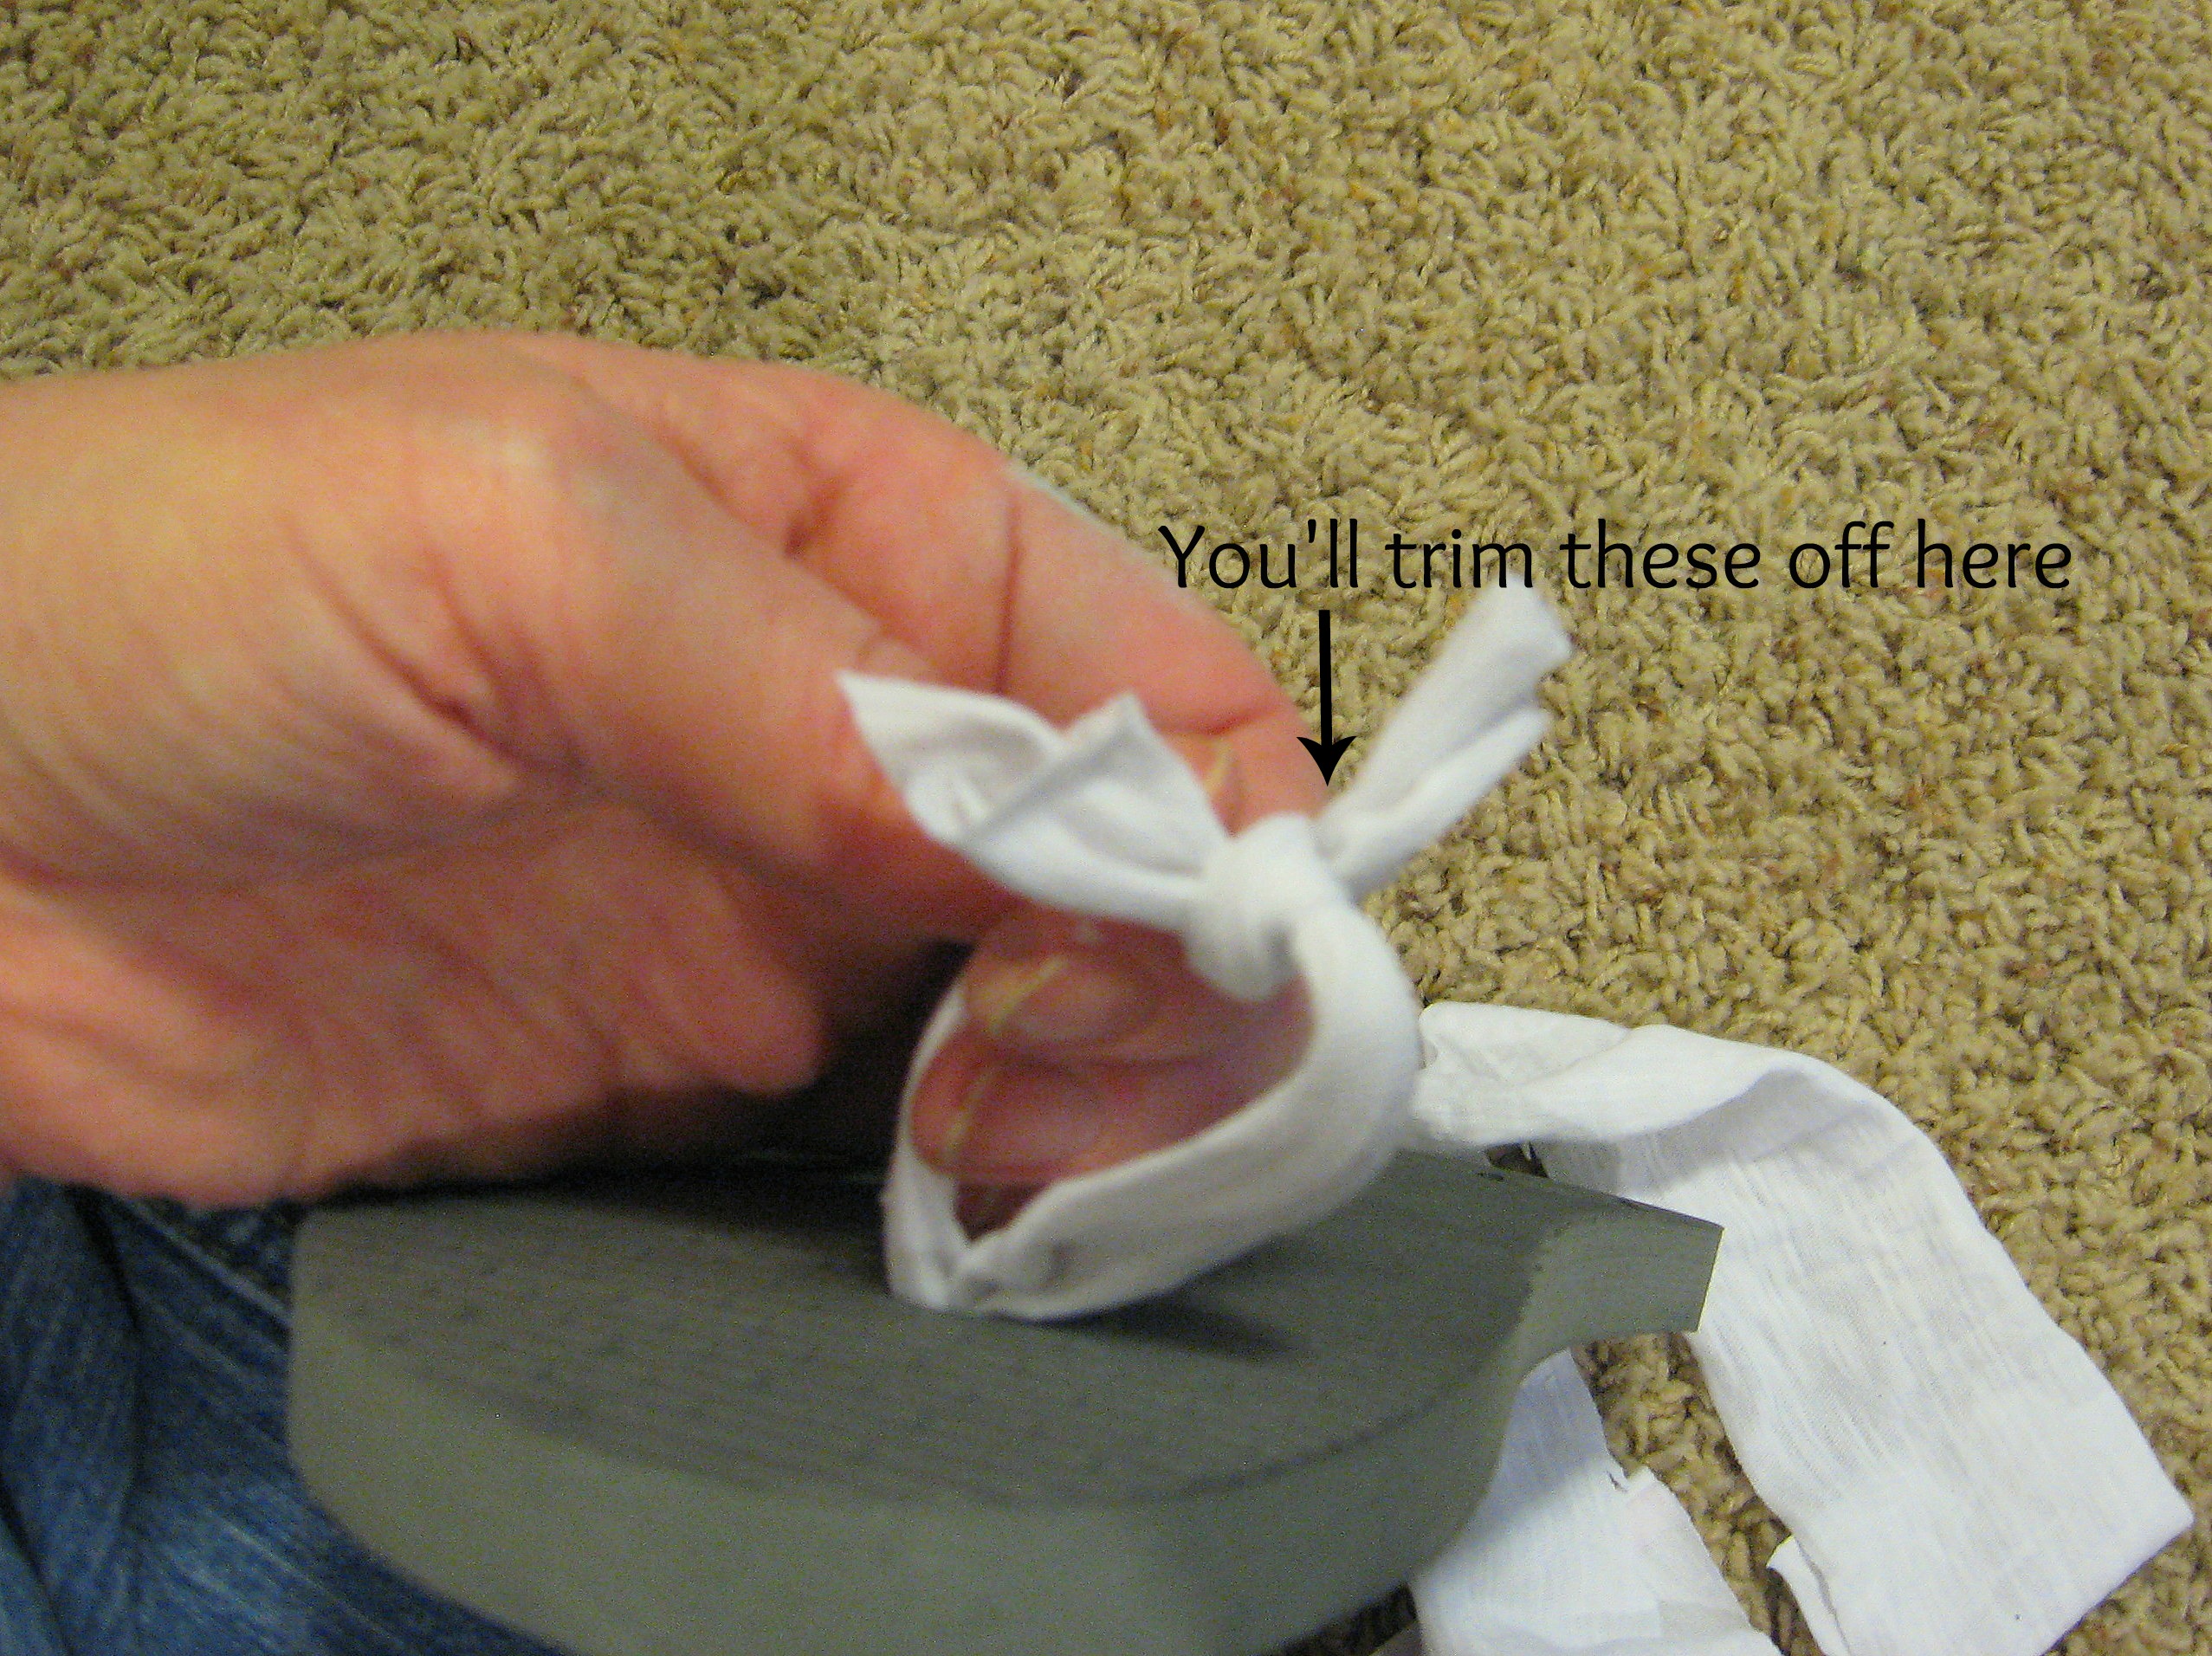
Get it as tight as you can, then trim off the extra fabric ends.
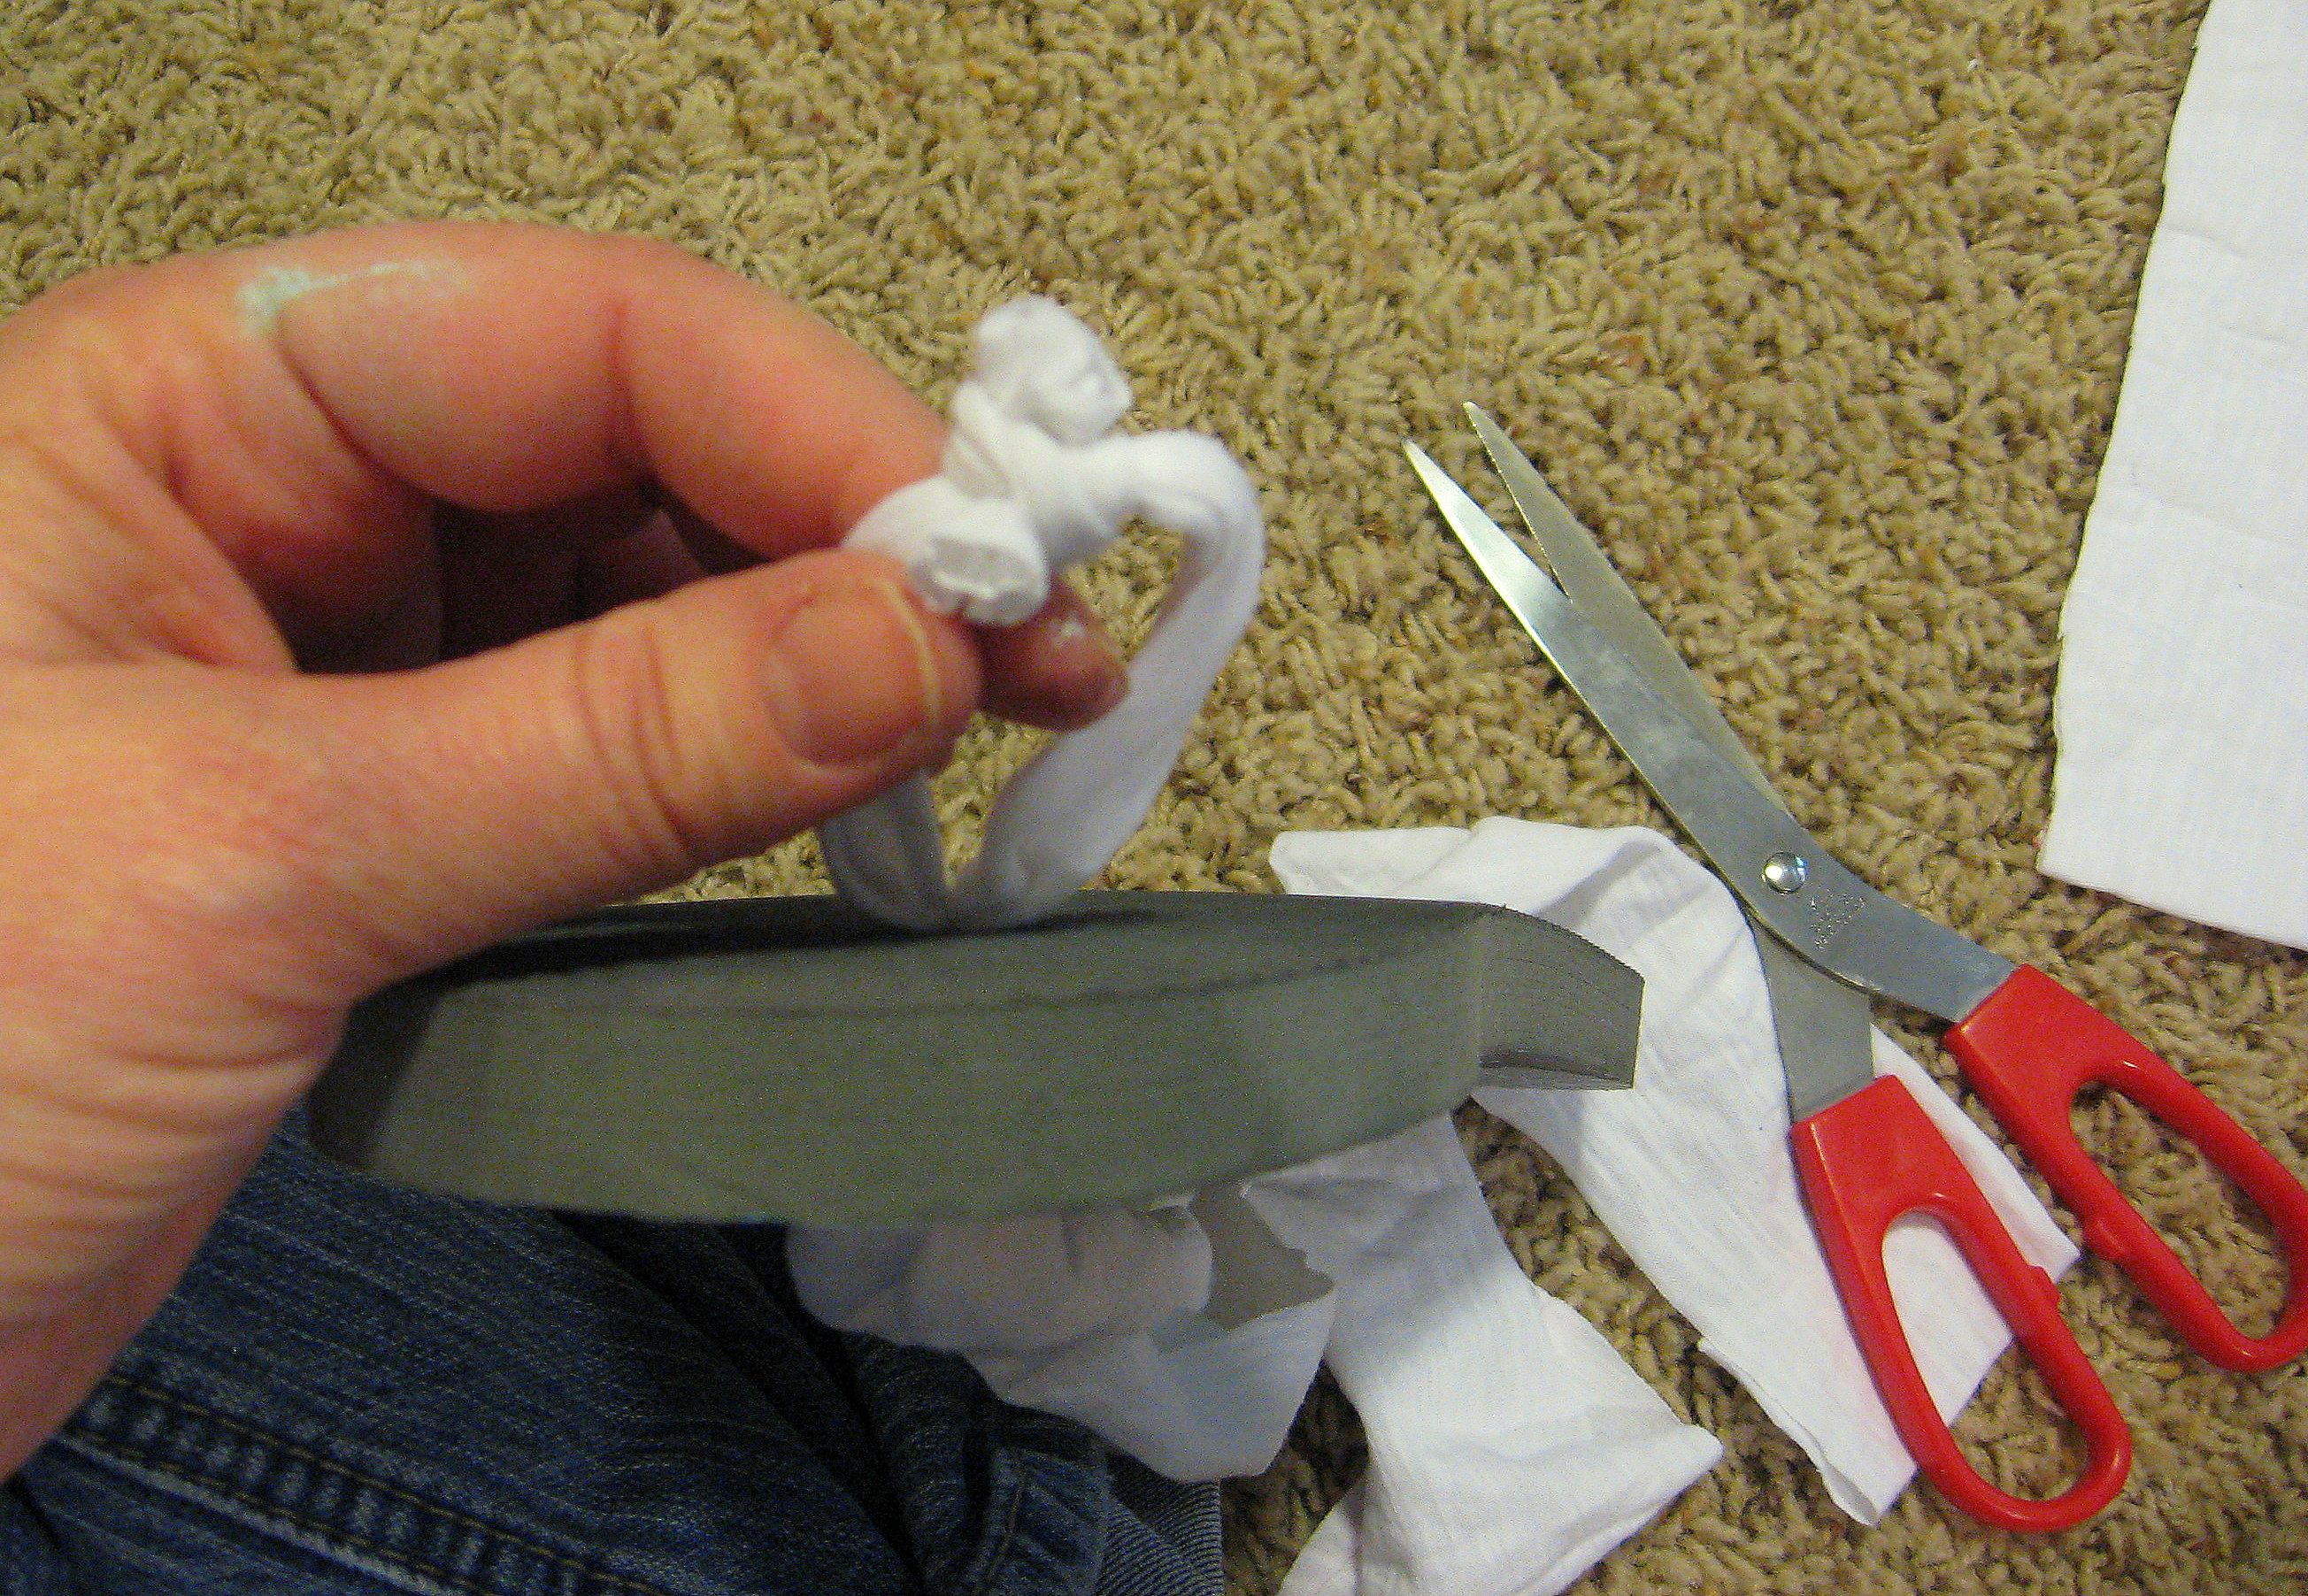
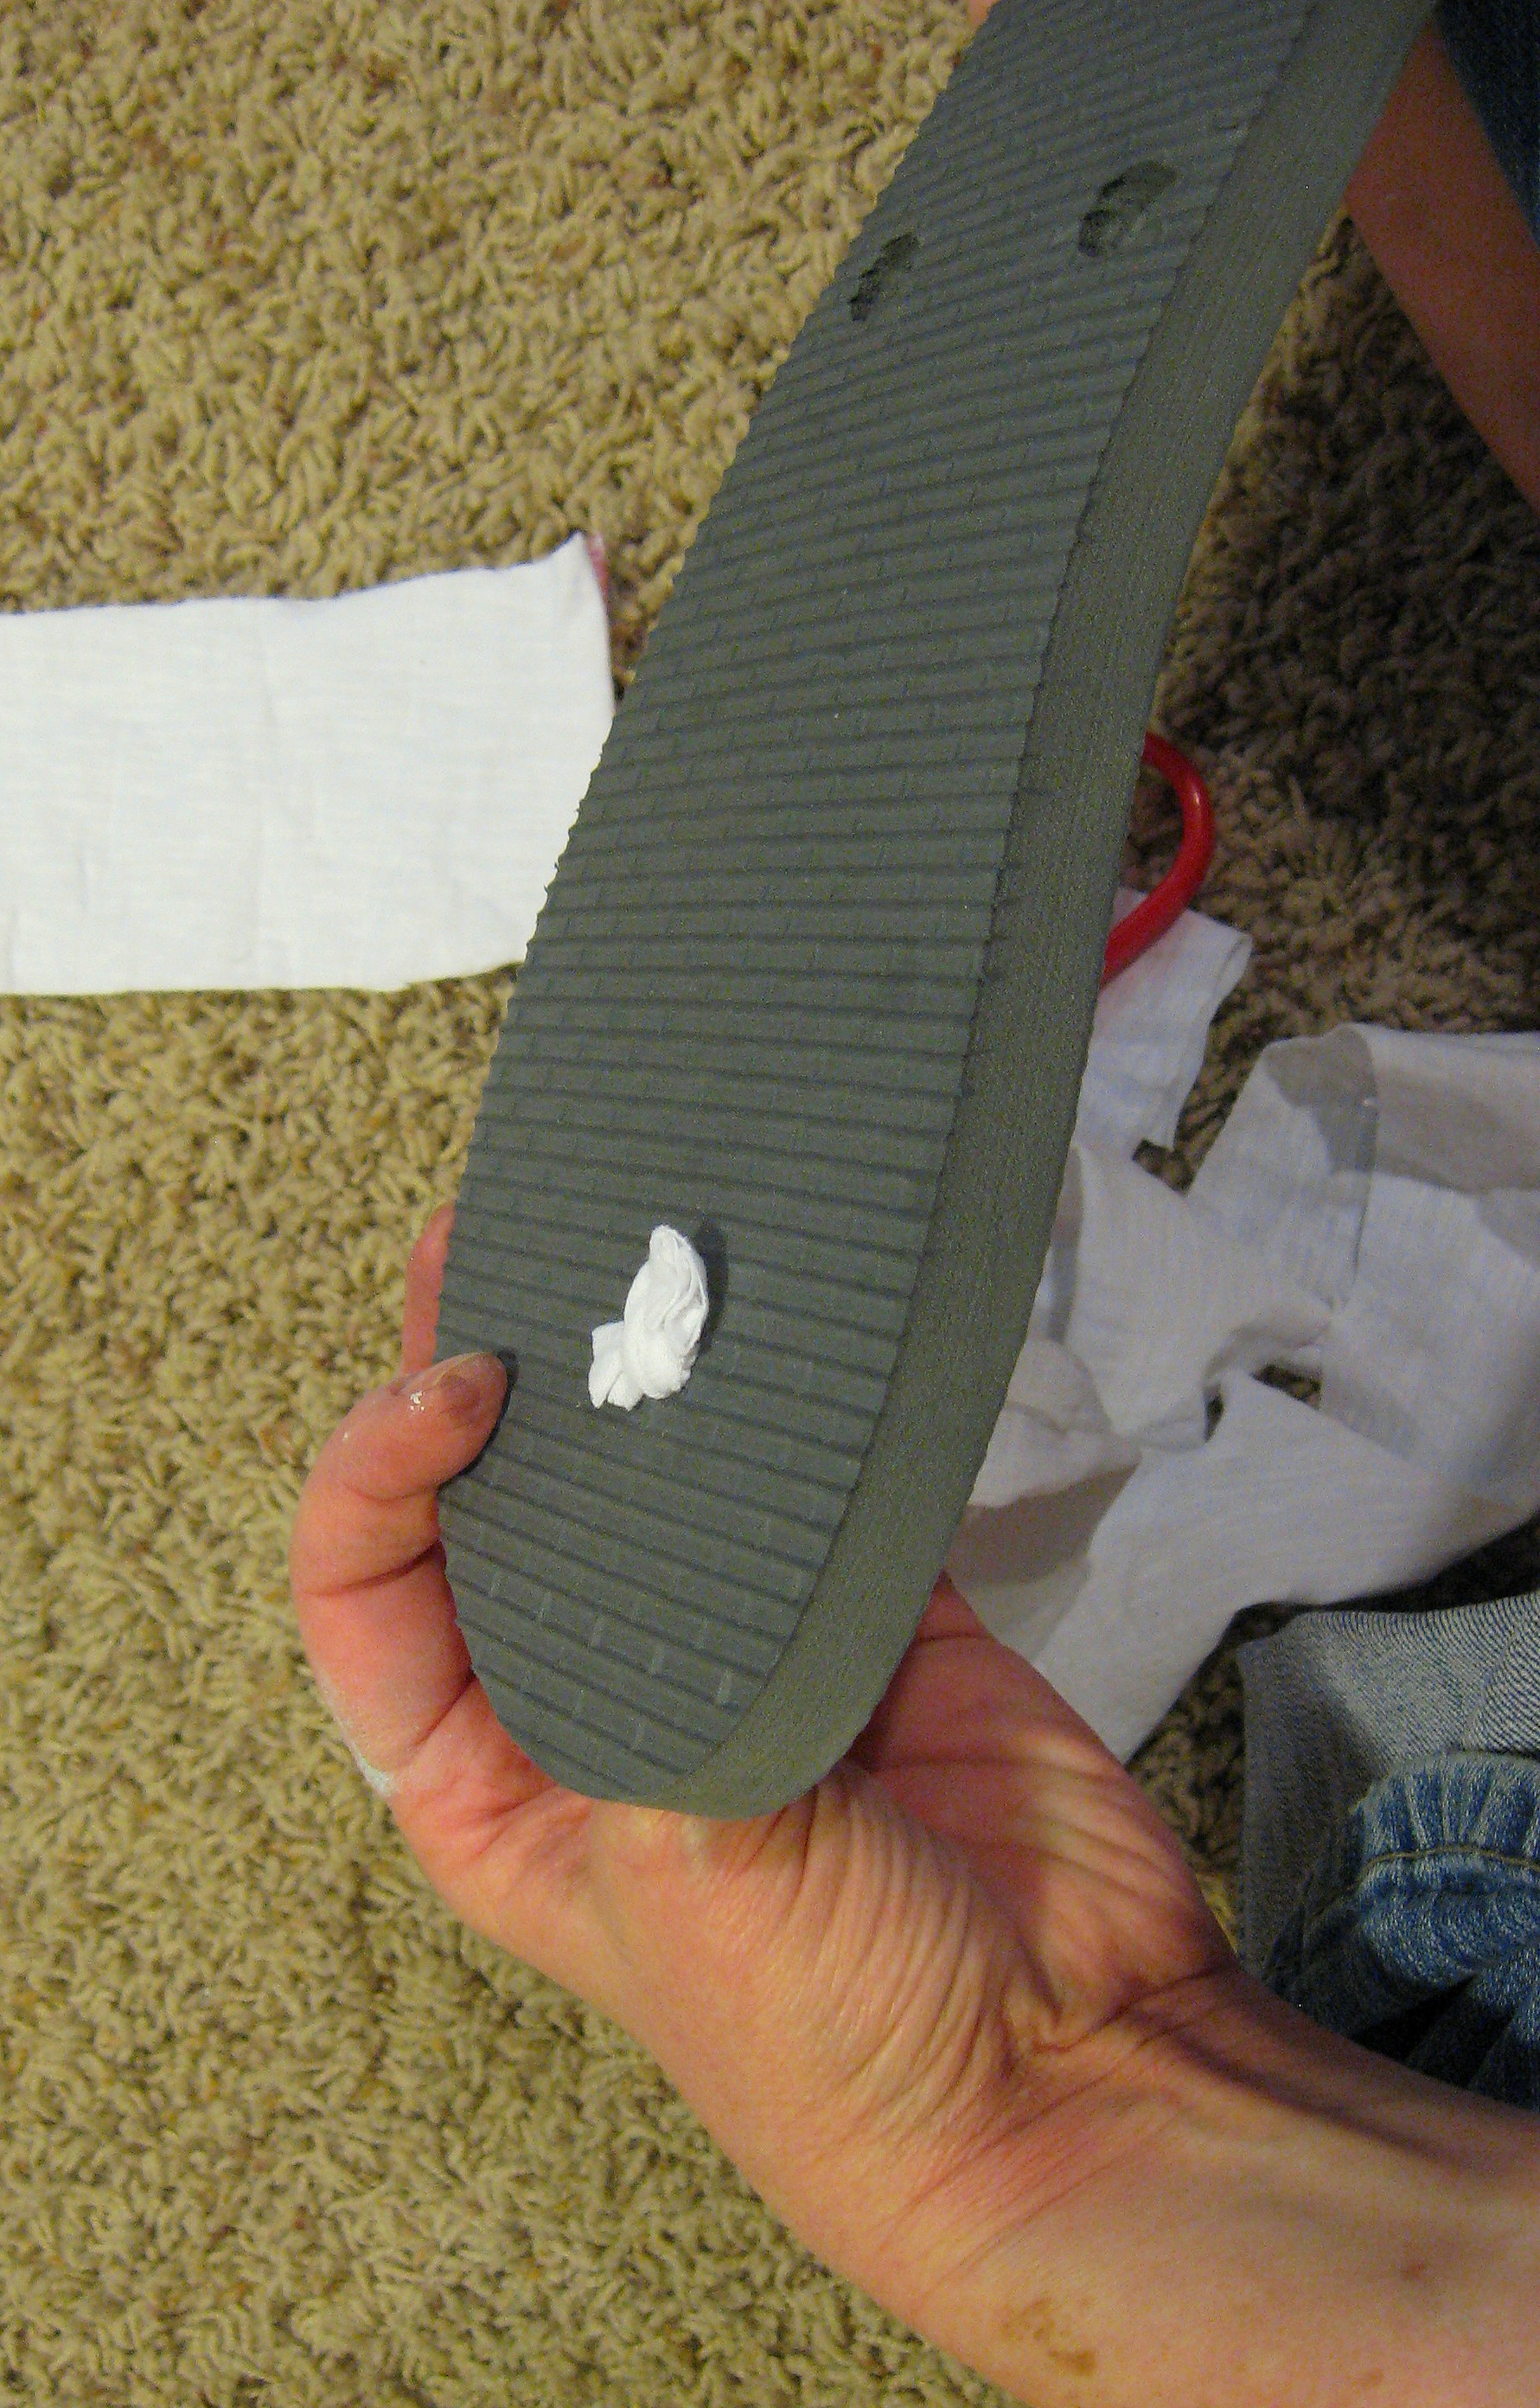
Now pull the fabric back towards the top of the shoe until the knot nestles down in the hole. The knot needs to be big enough that it won’t pull through the hole, so if you are using really thin fabric, or you cut your strips very thin, then you may need to tie another knot until it is bulky enough to stay in place.
Now you will tie a knot on the top of the shoe to form the “Y” on top of your foot. Put the shoe on with the new straps coming up between your toe. Grab the fabric together and determine where you want to tie the knot.
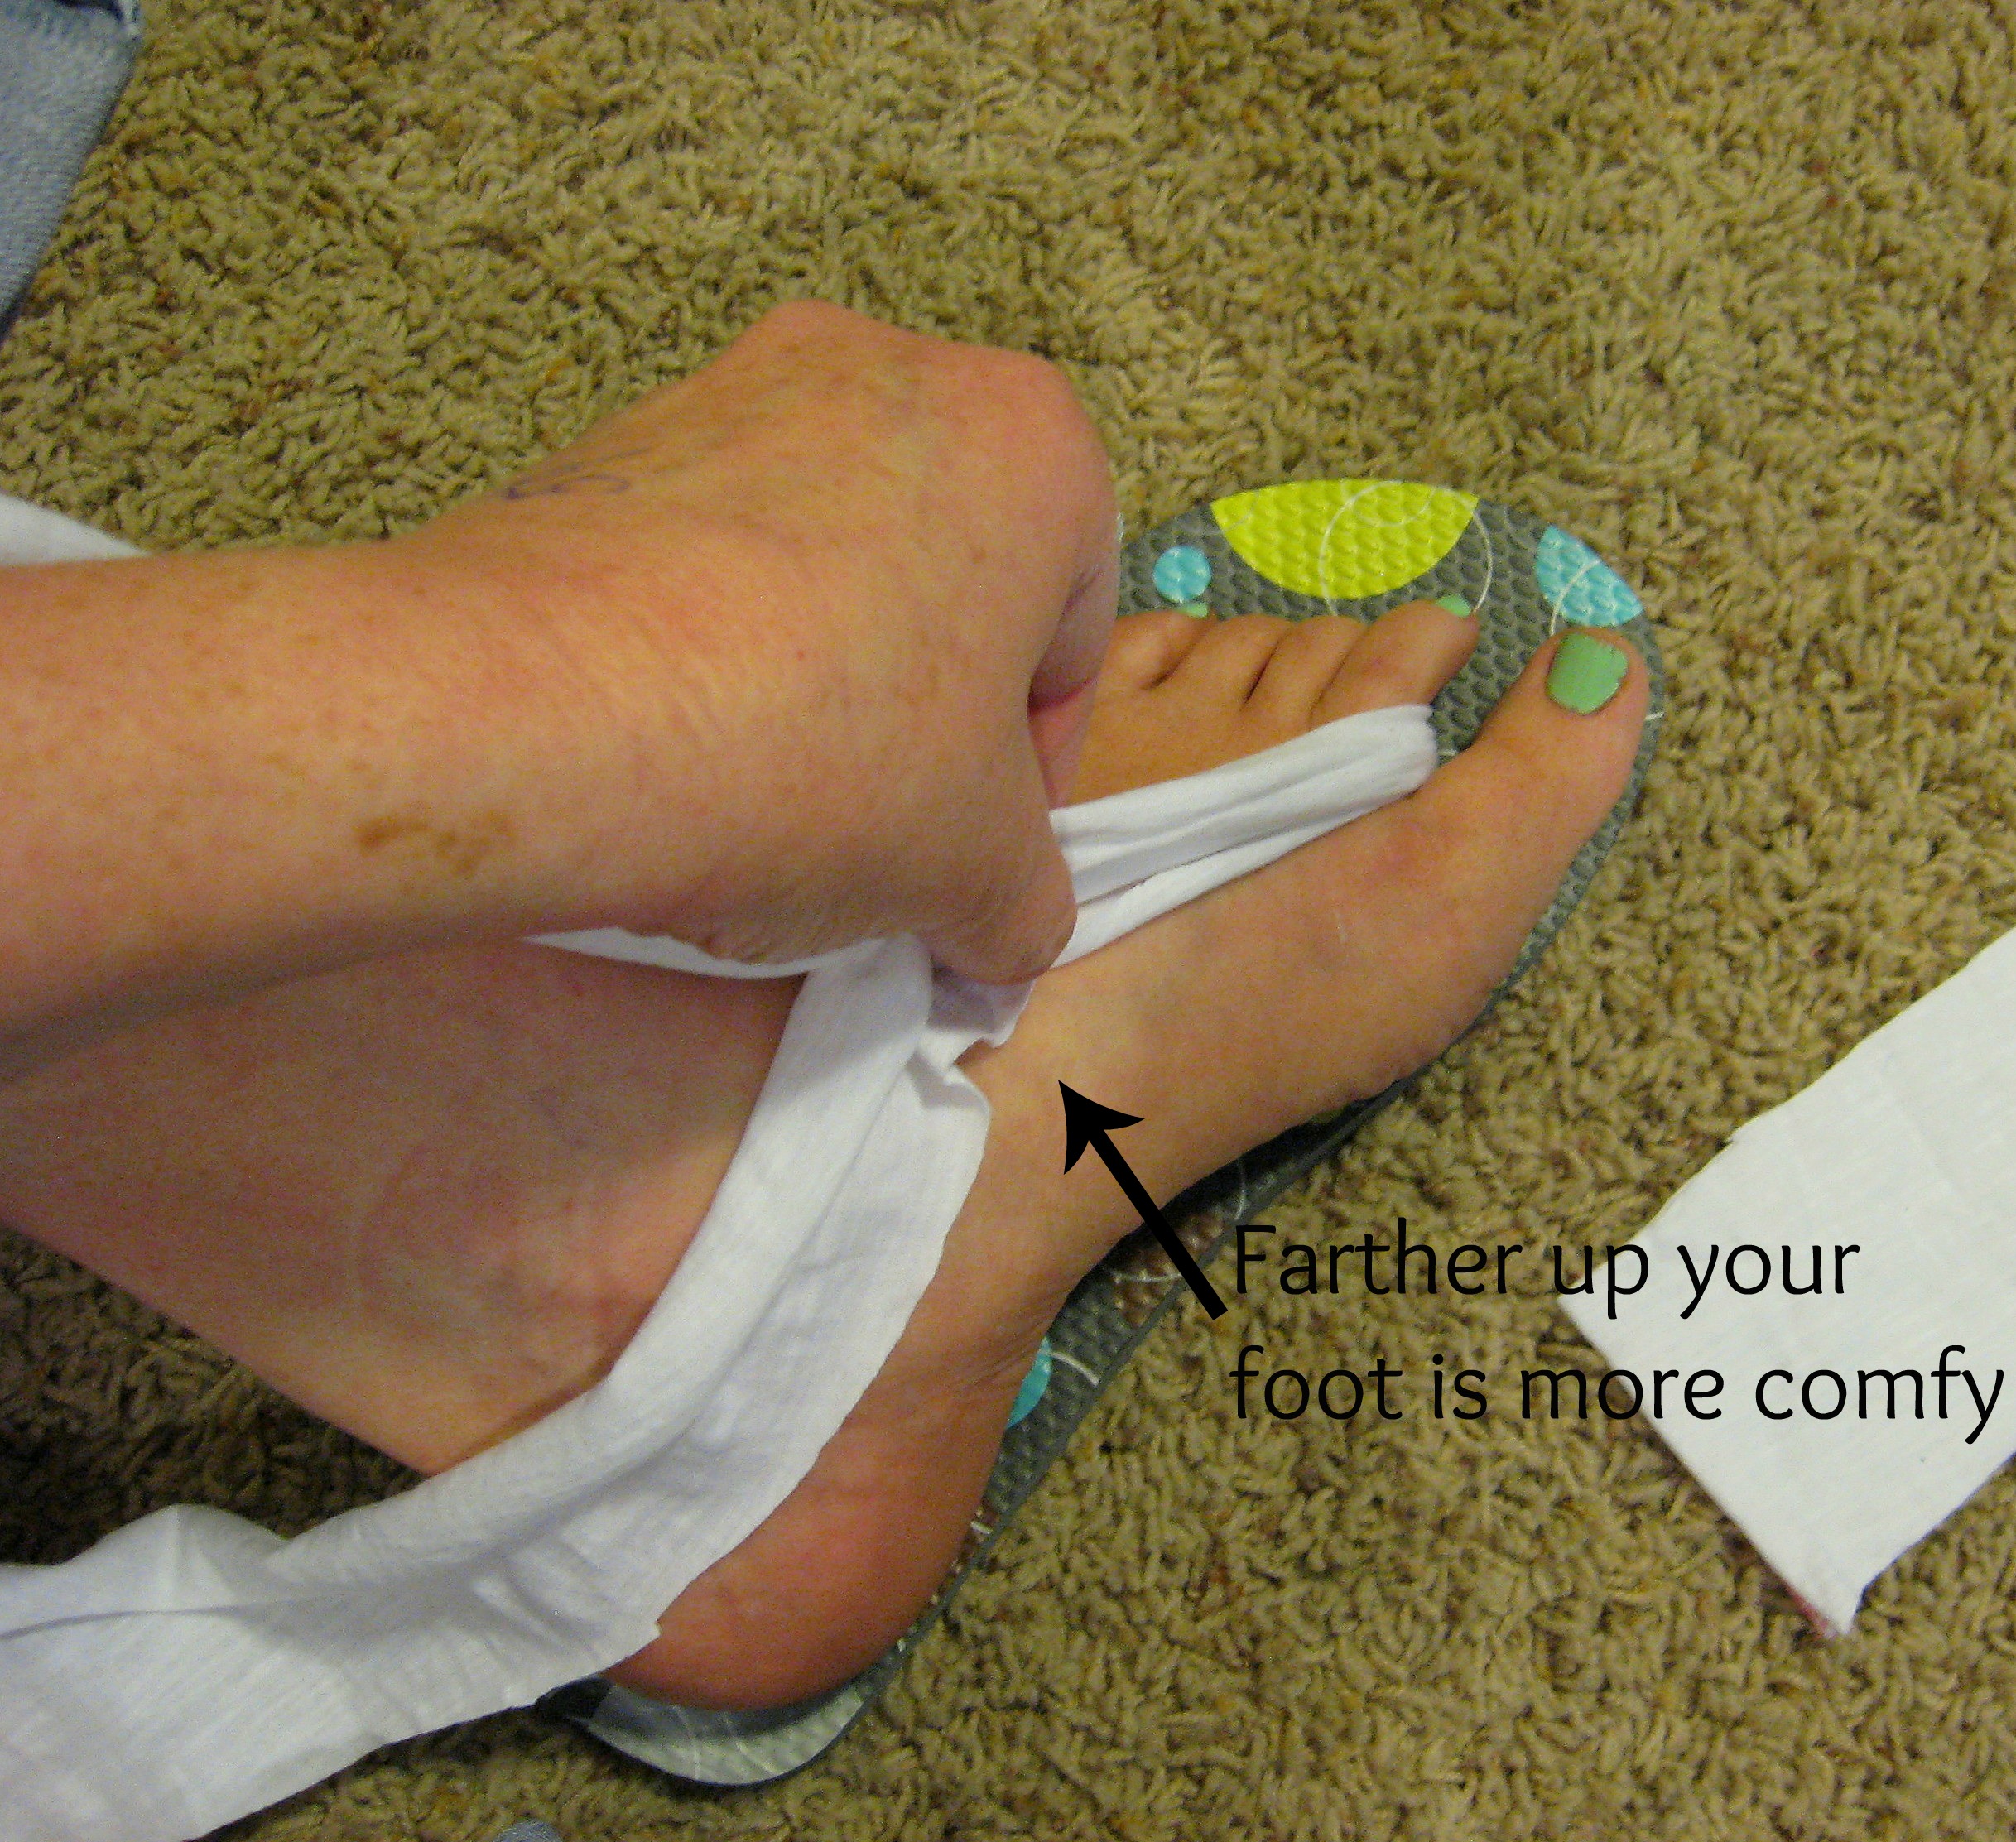
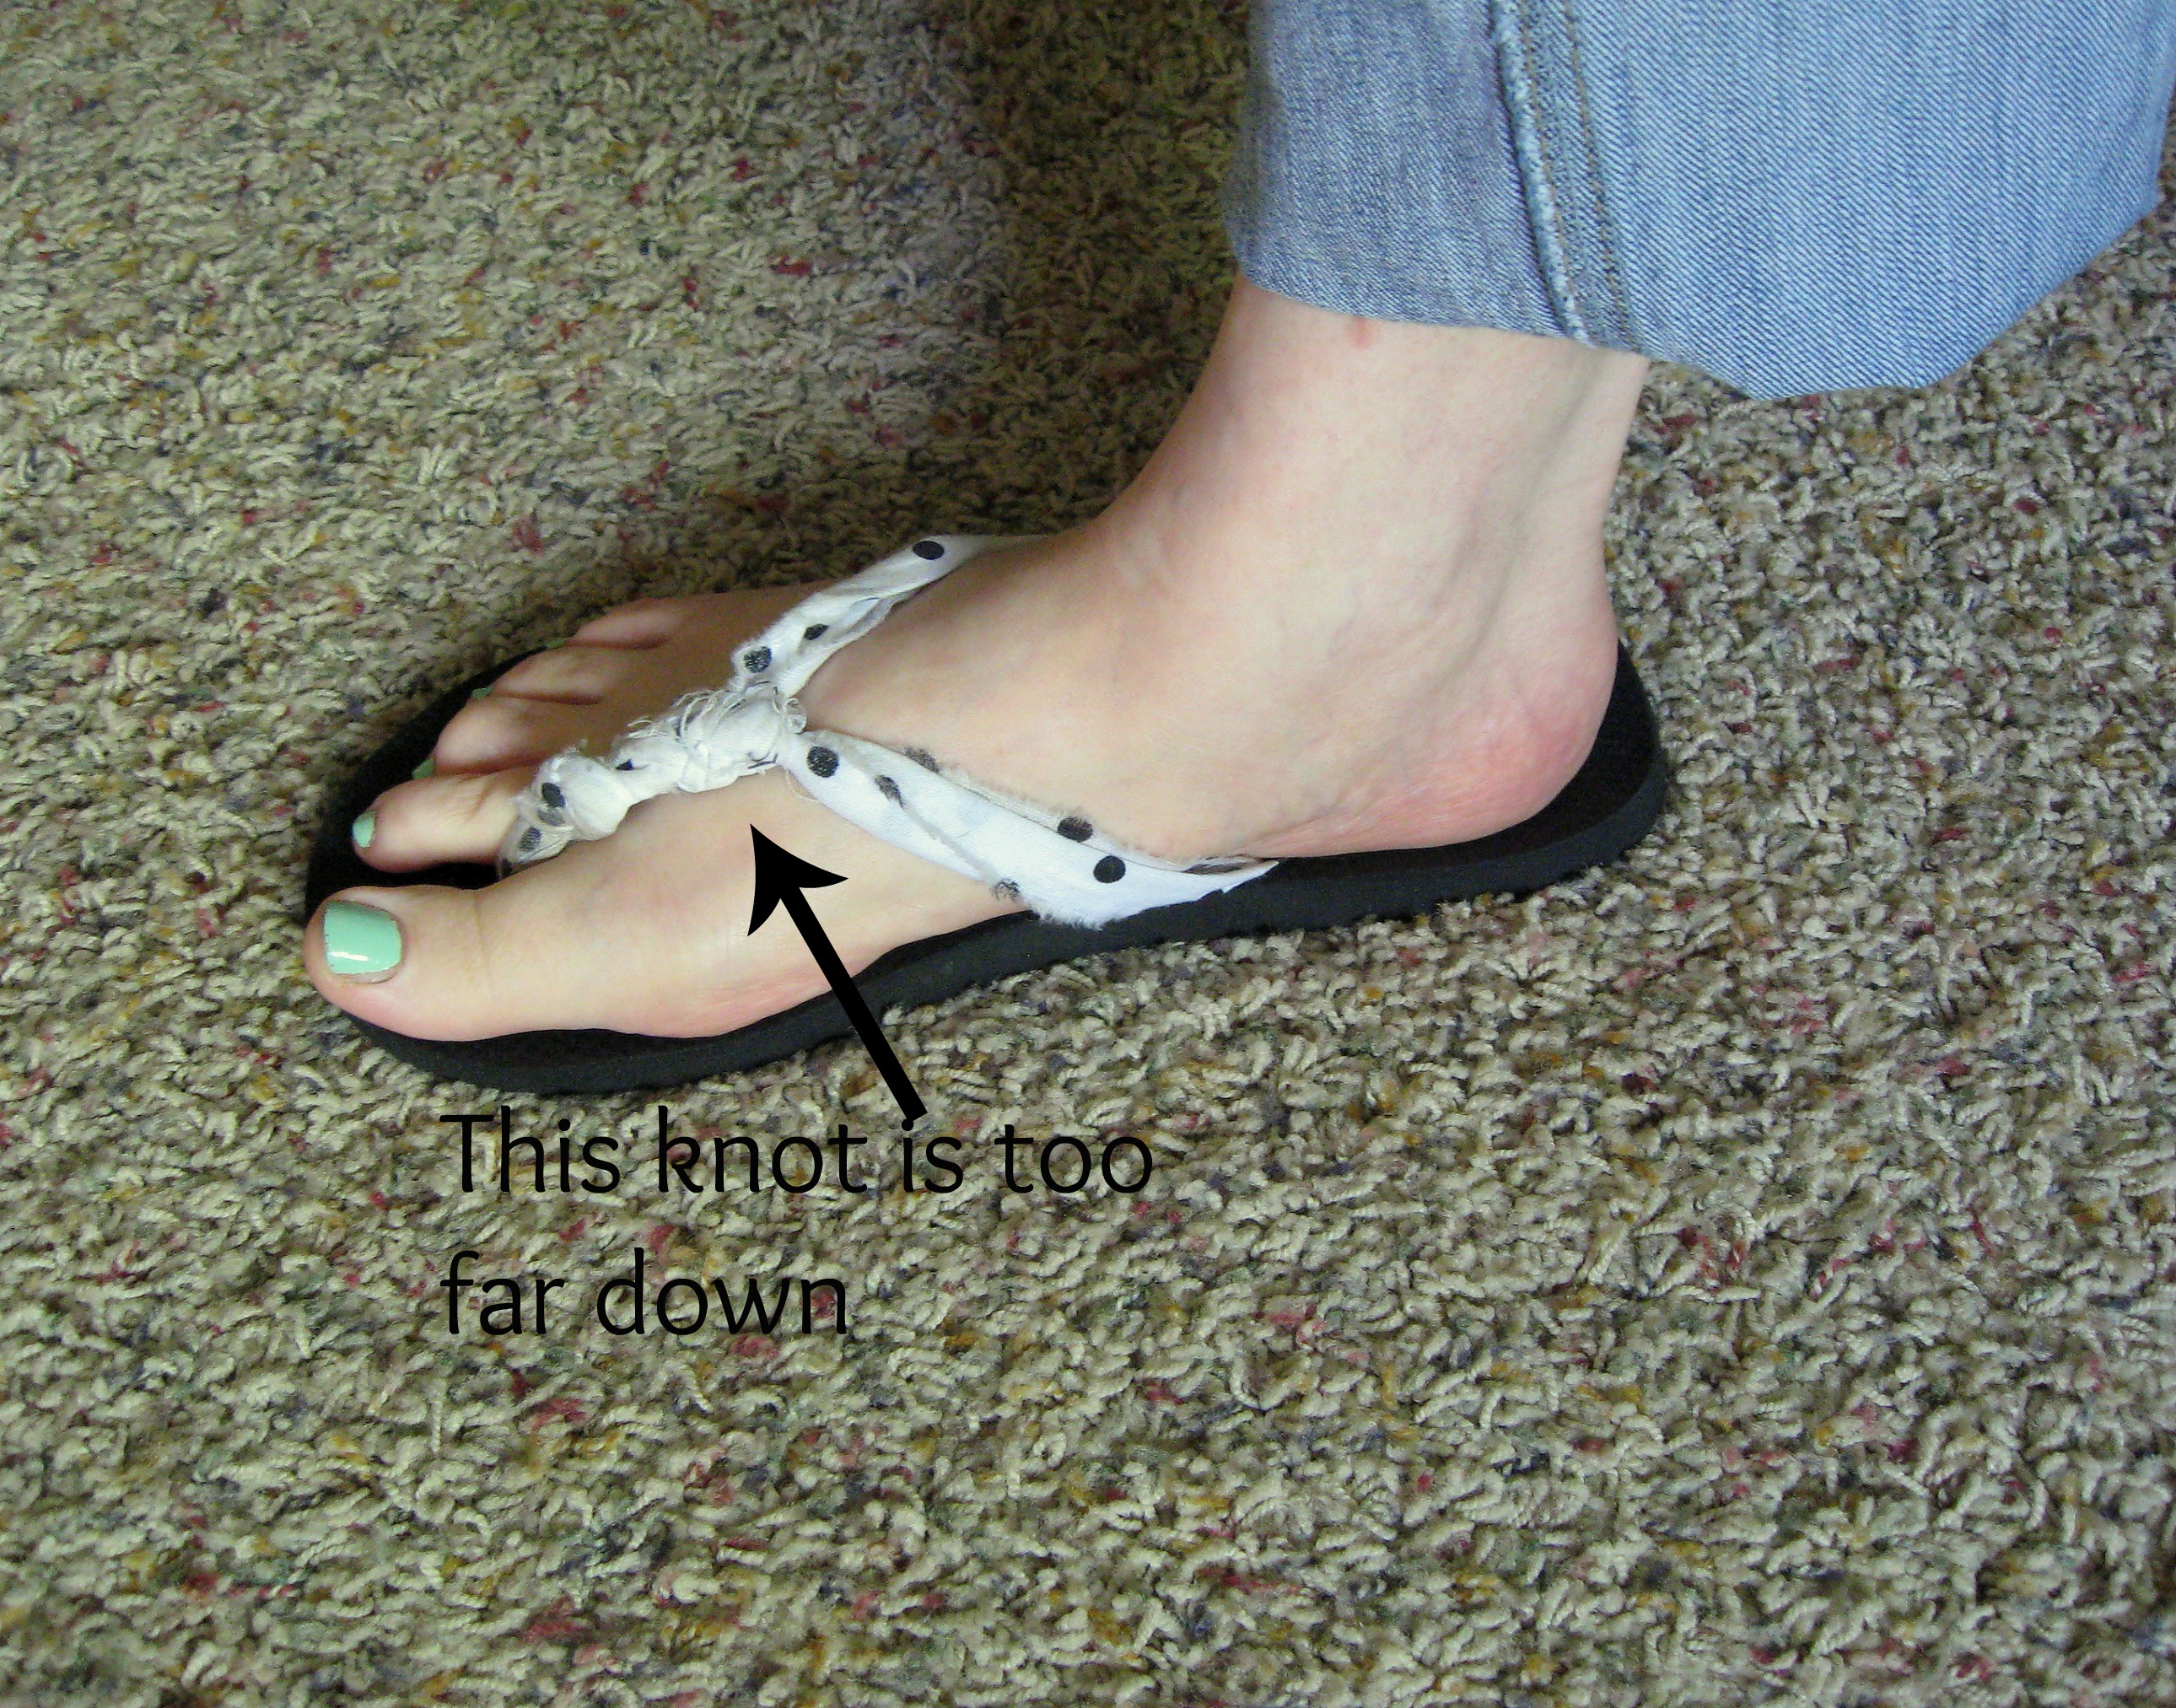
I found that the farther up my foot the knot is, the more comfortable they are to walk in. Below is a picture of a different pair I made. The knot is too close to my toes, and they aren’t as easy to walk in; I have to clench my toes to keep them on and it makes my feet tired! (Also, though, a good picture to show how easy it is to vary this basic idea. Here I used a simple polka-dotted cotton and tied a series of small knots instead of just one big one.)
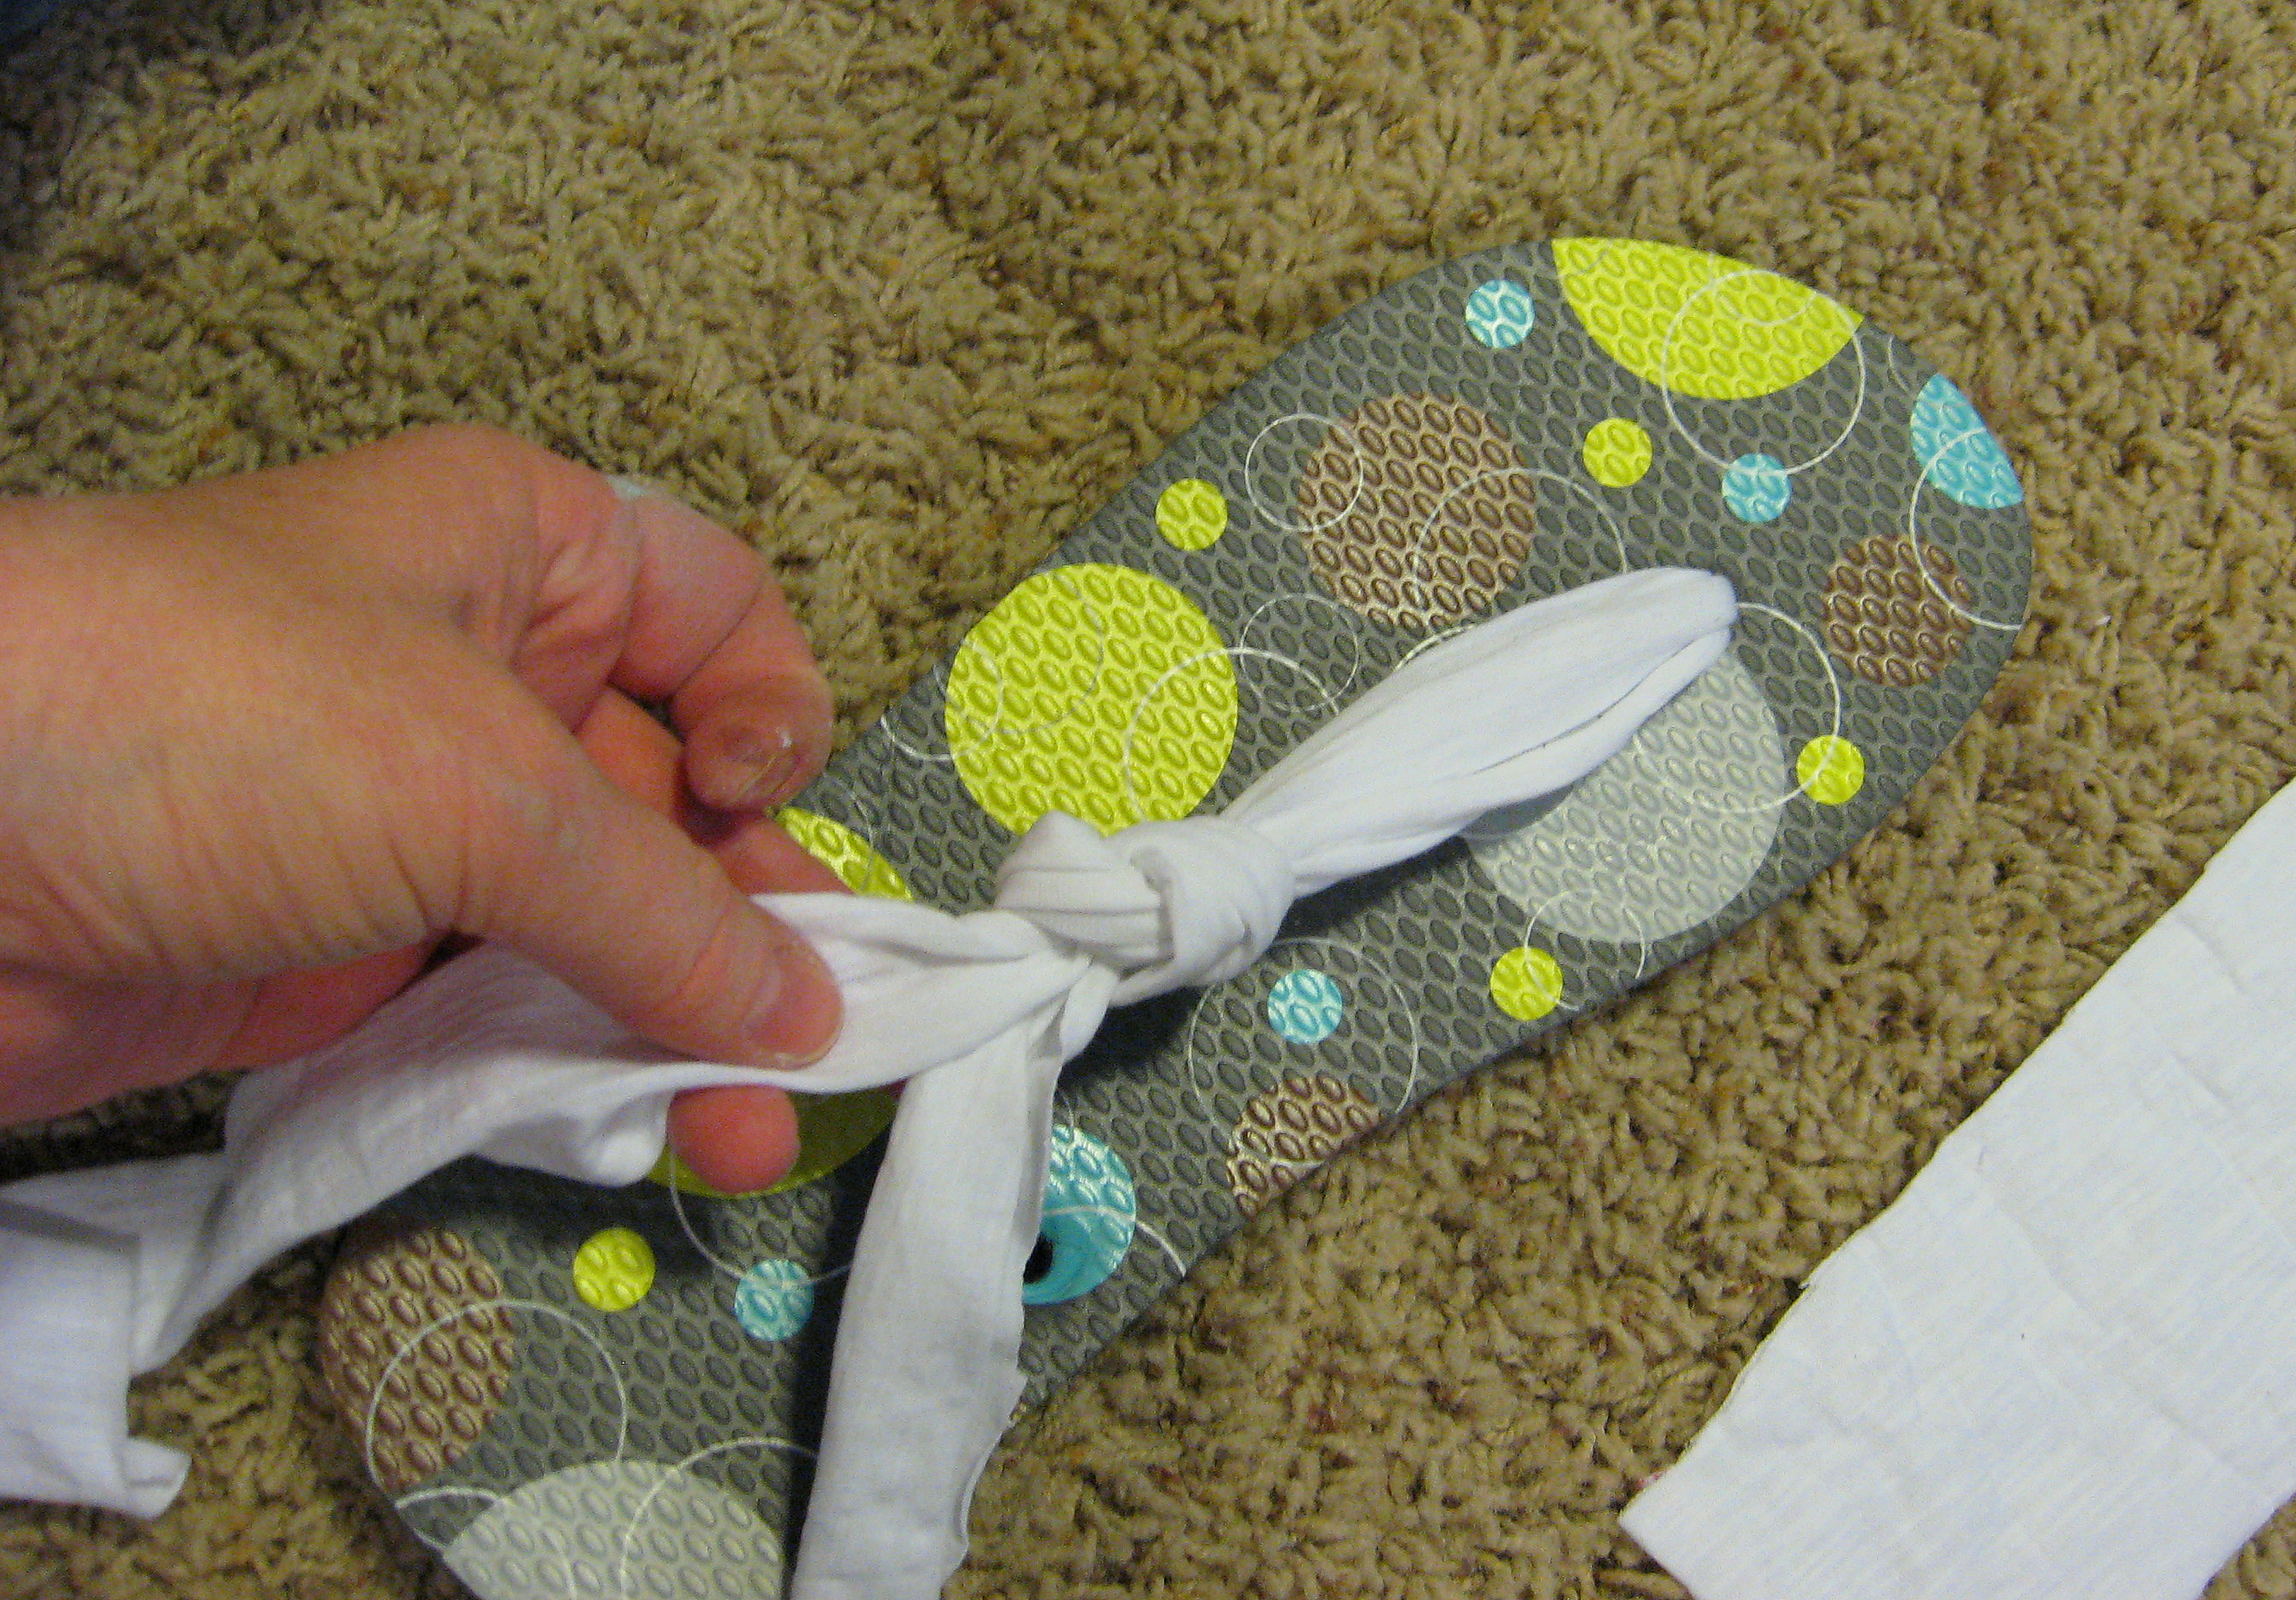
Once you know where you want the knot to be, grab both fabric strips and tie a simple knot. Try the shoe on again and make sure it is in the right place. Tighten it up and arrange it so it looks just right.
I would pause now and make the other shoe up to this point so that you can make sure they look the same. Whichever direction you tied the knot on the first shoe, do it the opposite way on the second shoe (harder than it sounds!!)
Now separate the back straps and, keeping them straight and untwisted, shove them through the back two holes.
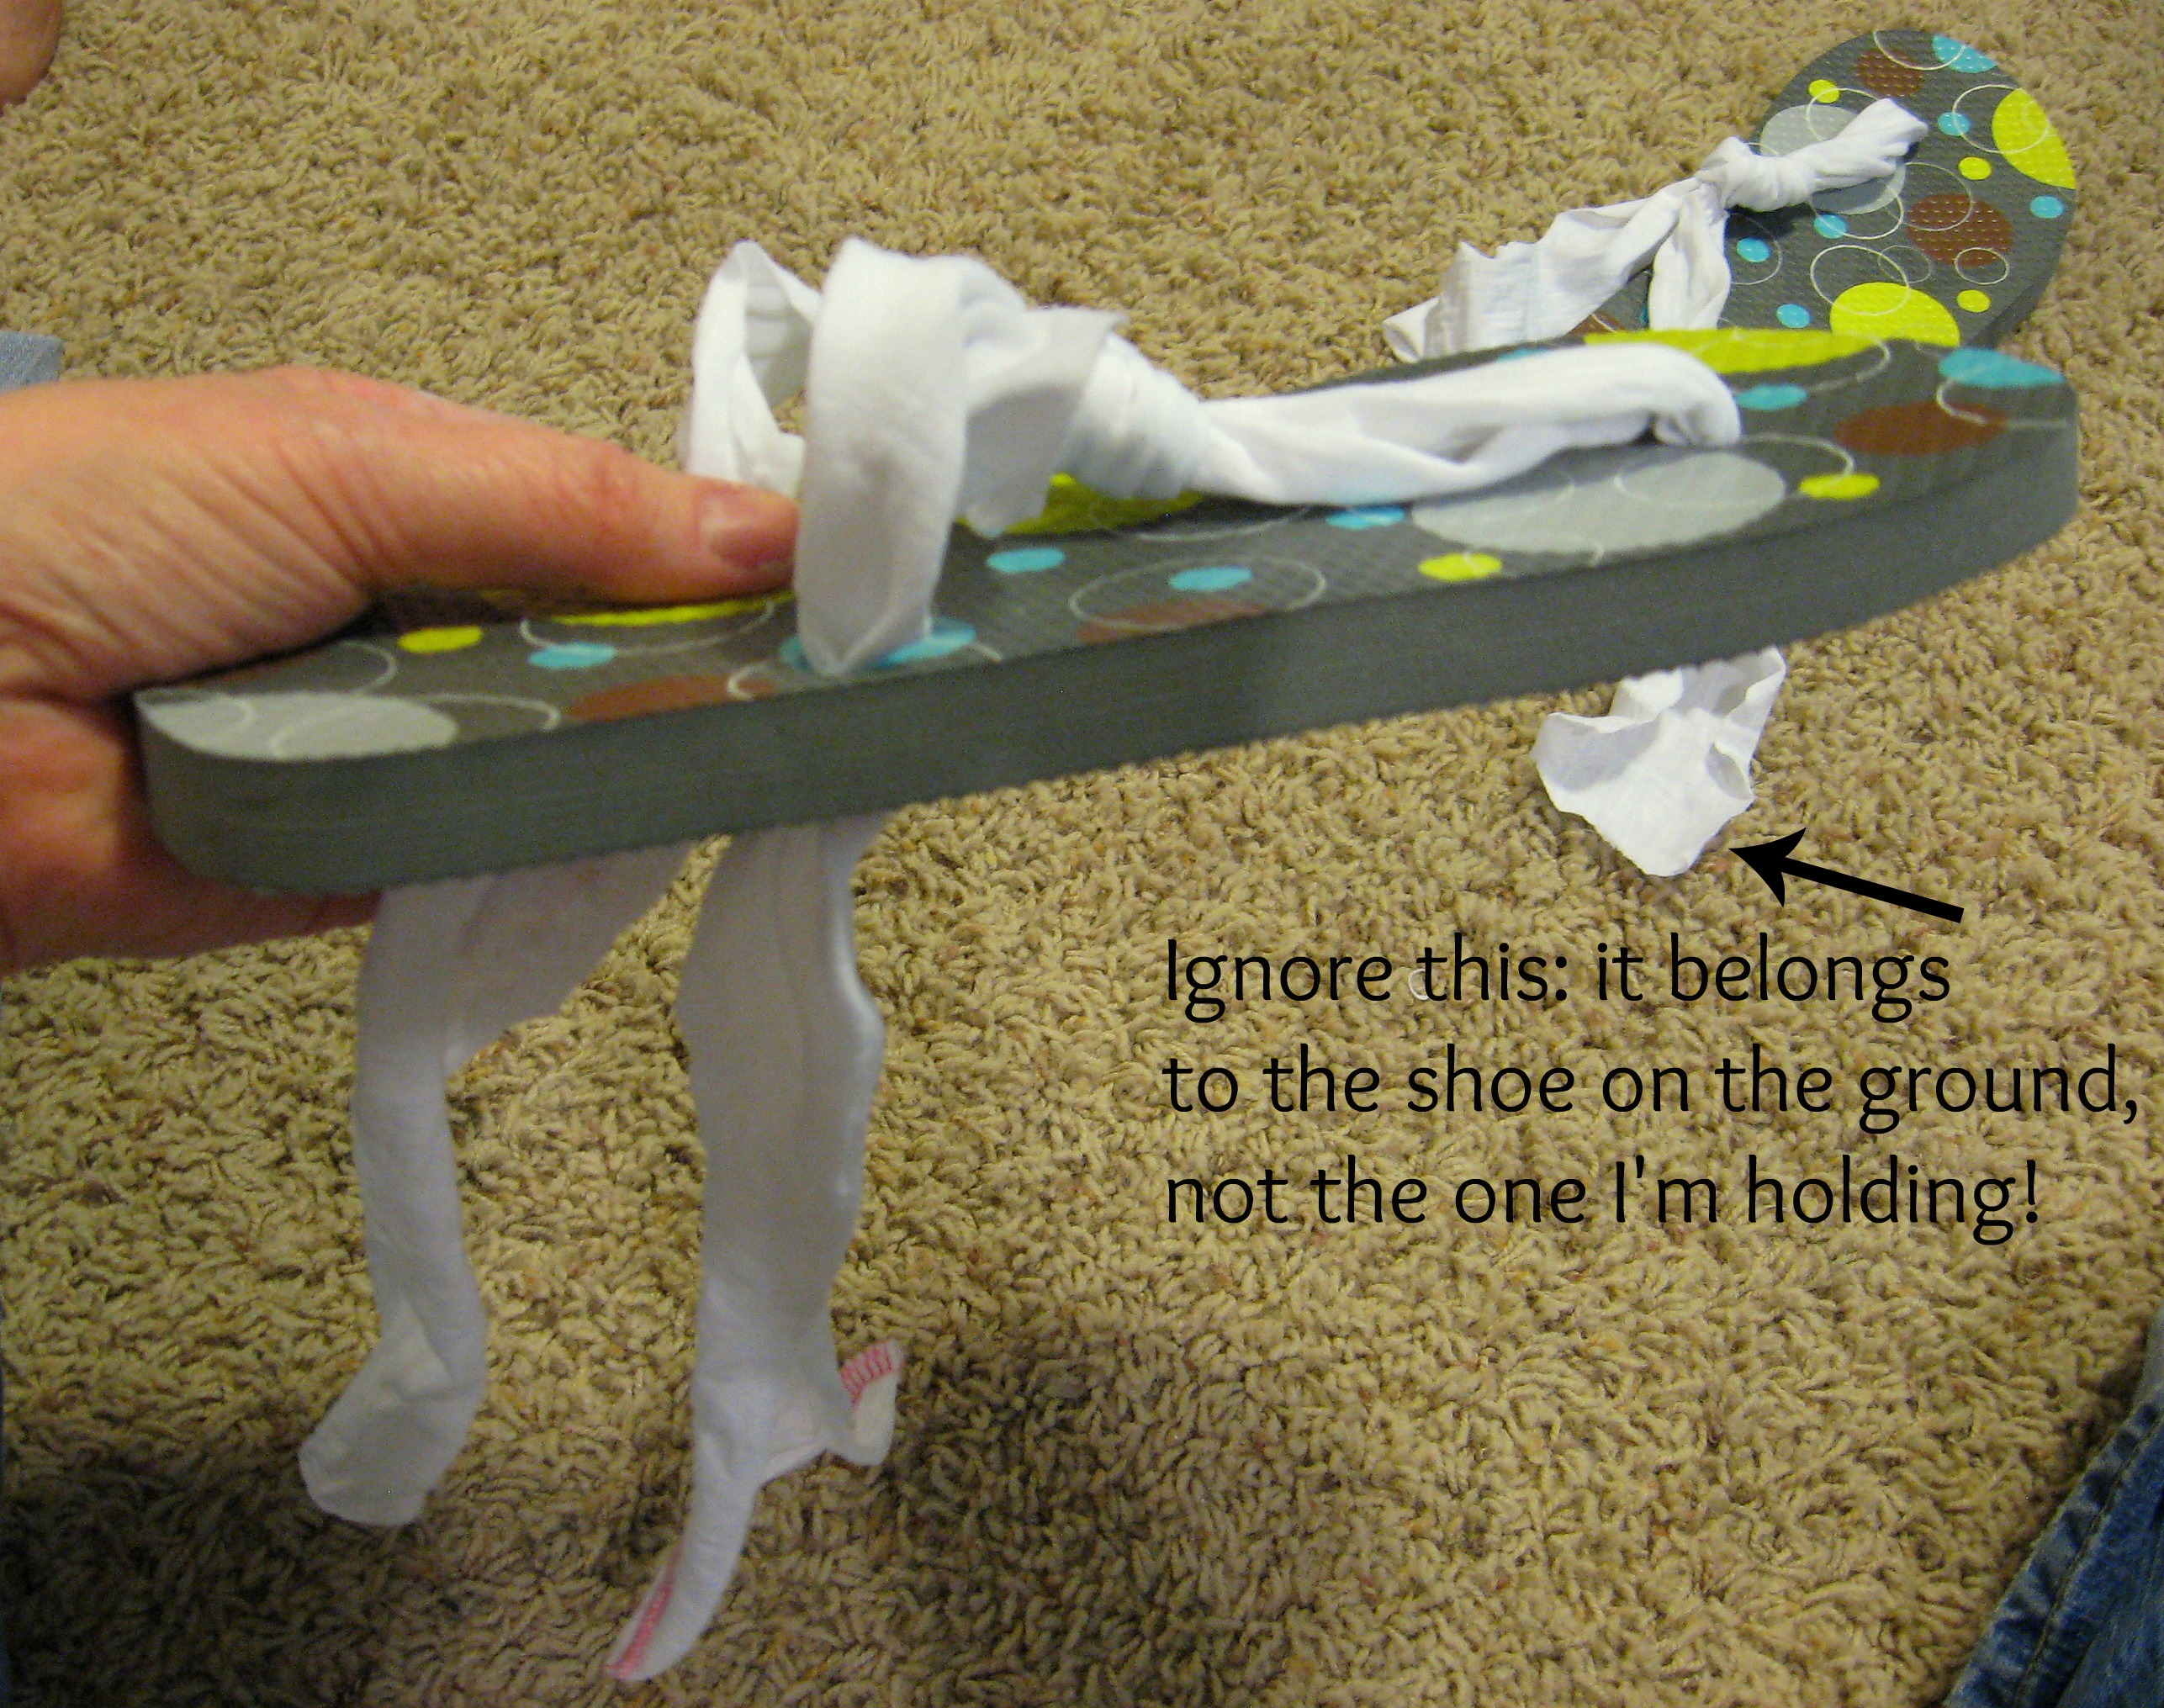
Put the shoe on again, and pull the straps through until they are as tight as you want them to be. Remember to take into account what type of fabric you are using. If I’m using something that doesn’t stretch – like cotton, I like them to be just barely snug. If I’m using something that does – like knit, I like them to be pretty tight.
Hold one of the straps underneath the shoe right where you want the knot to be and take the shoe off, keeping your fingers in that spot.

Tie that knot, then put the shoe back on and repeat on the other side.
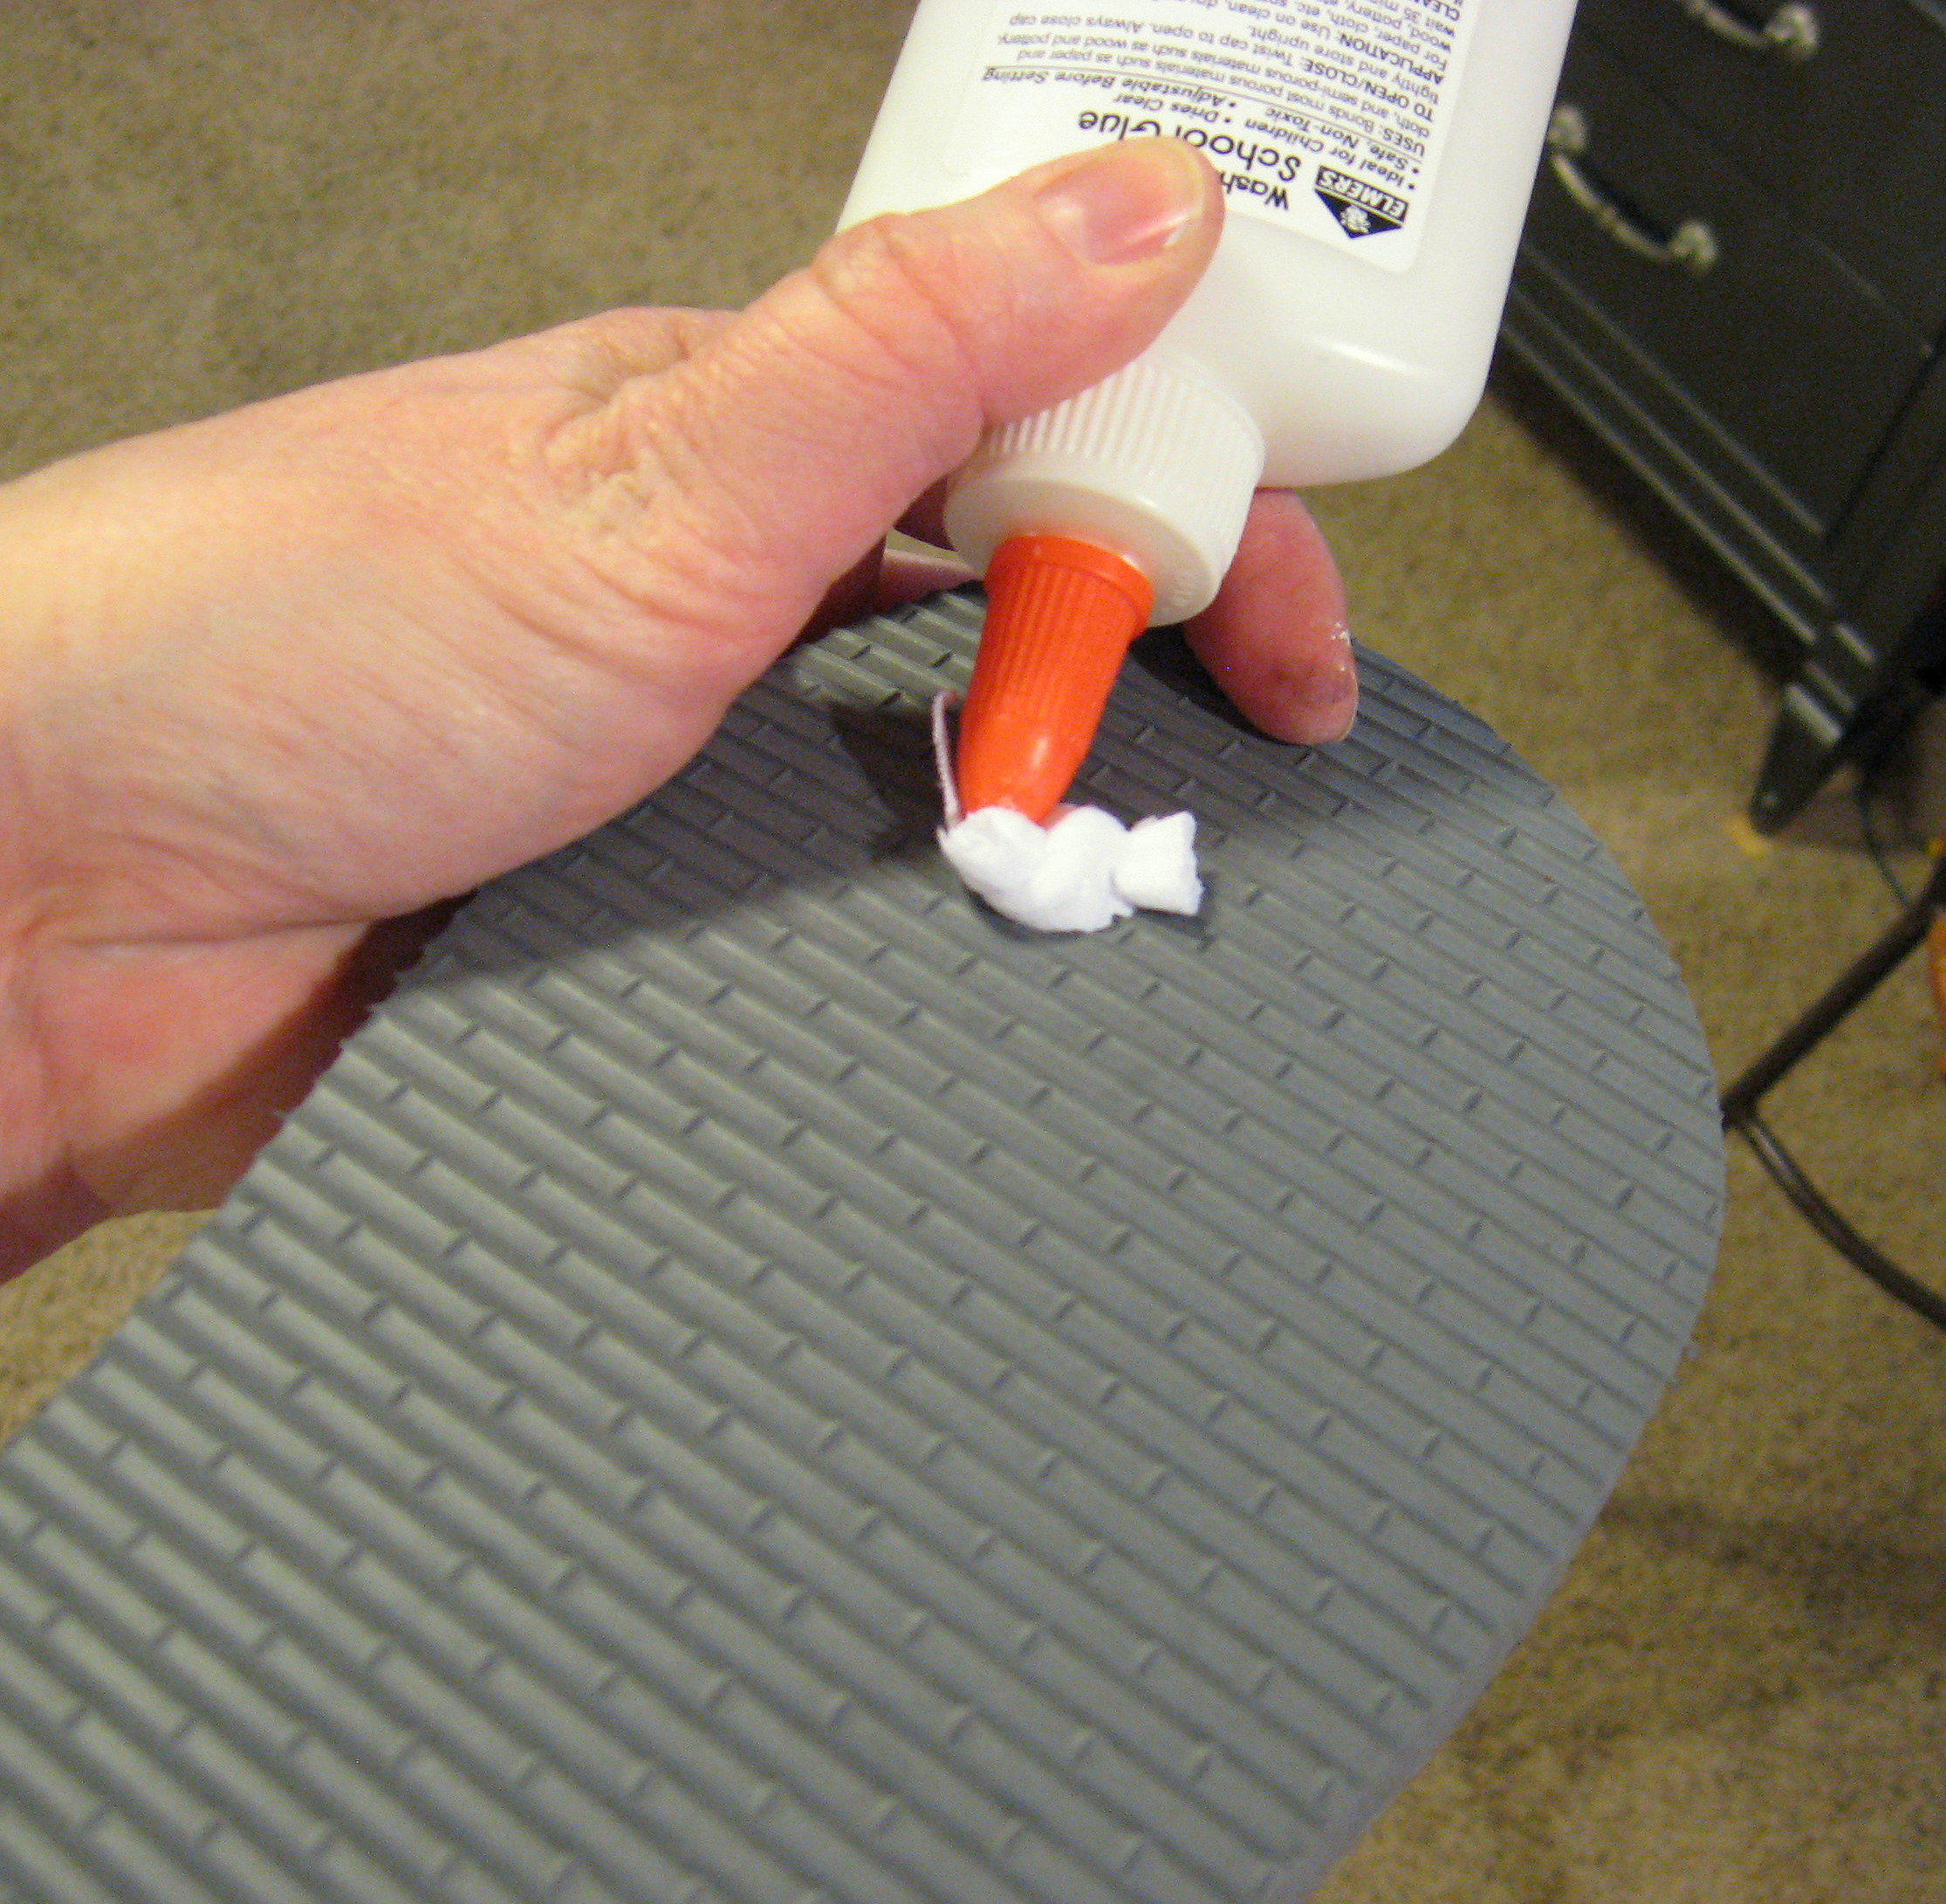
Try the shoe on again and adjust the knots if needed. Once you are sure they are where you want them to be, trim the excess fabric off the ends. Put a little dab of glue on each knot and let it dry.
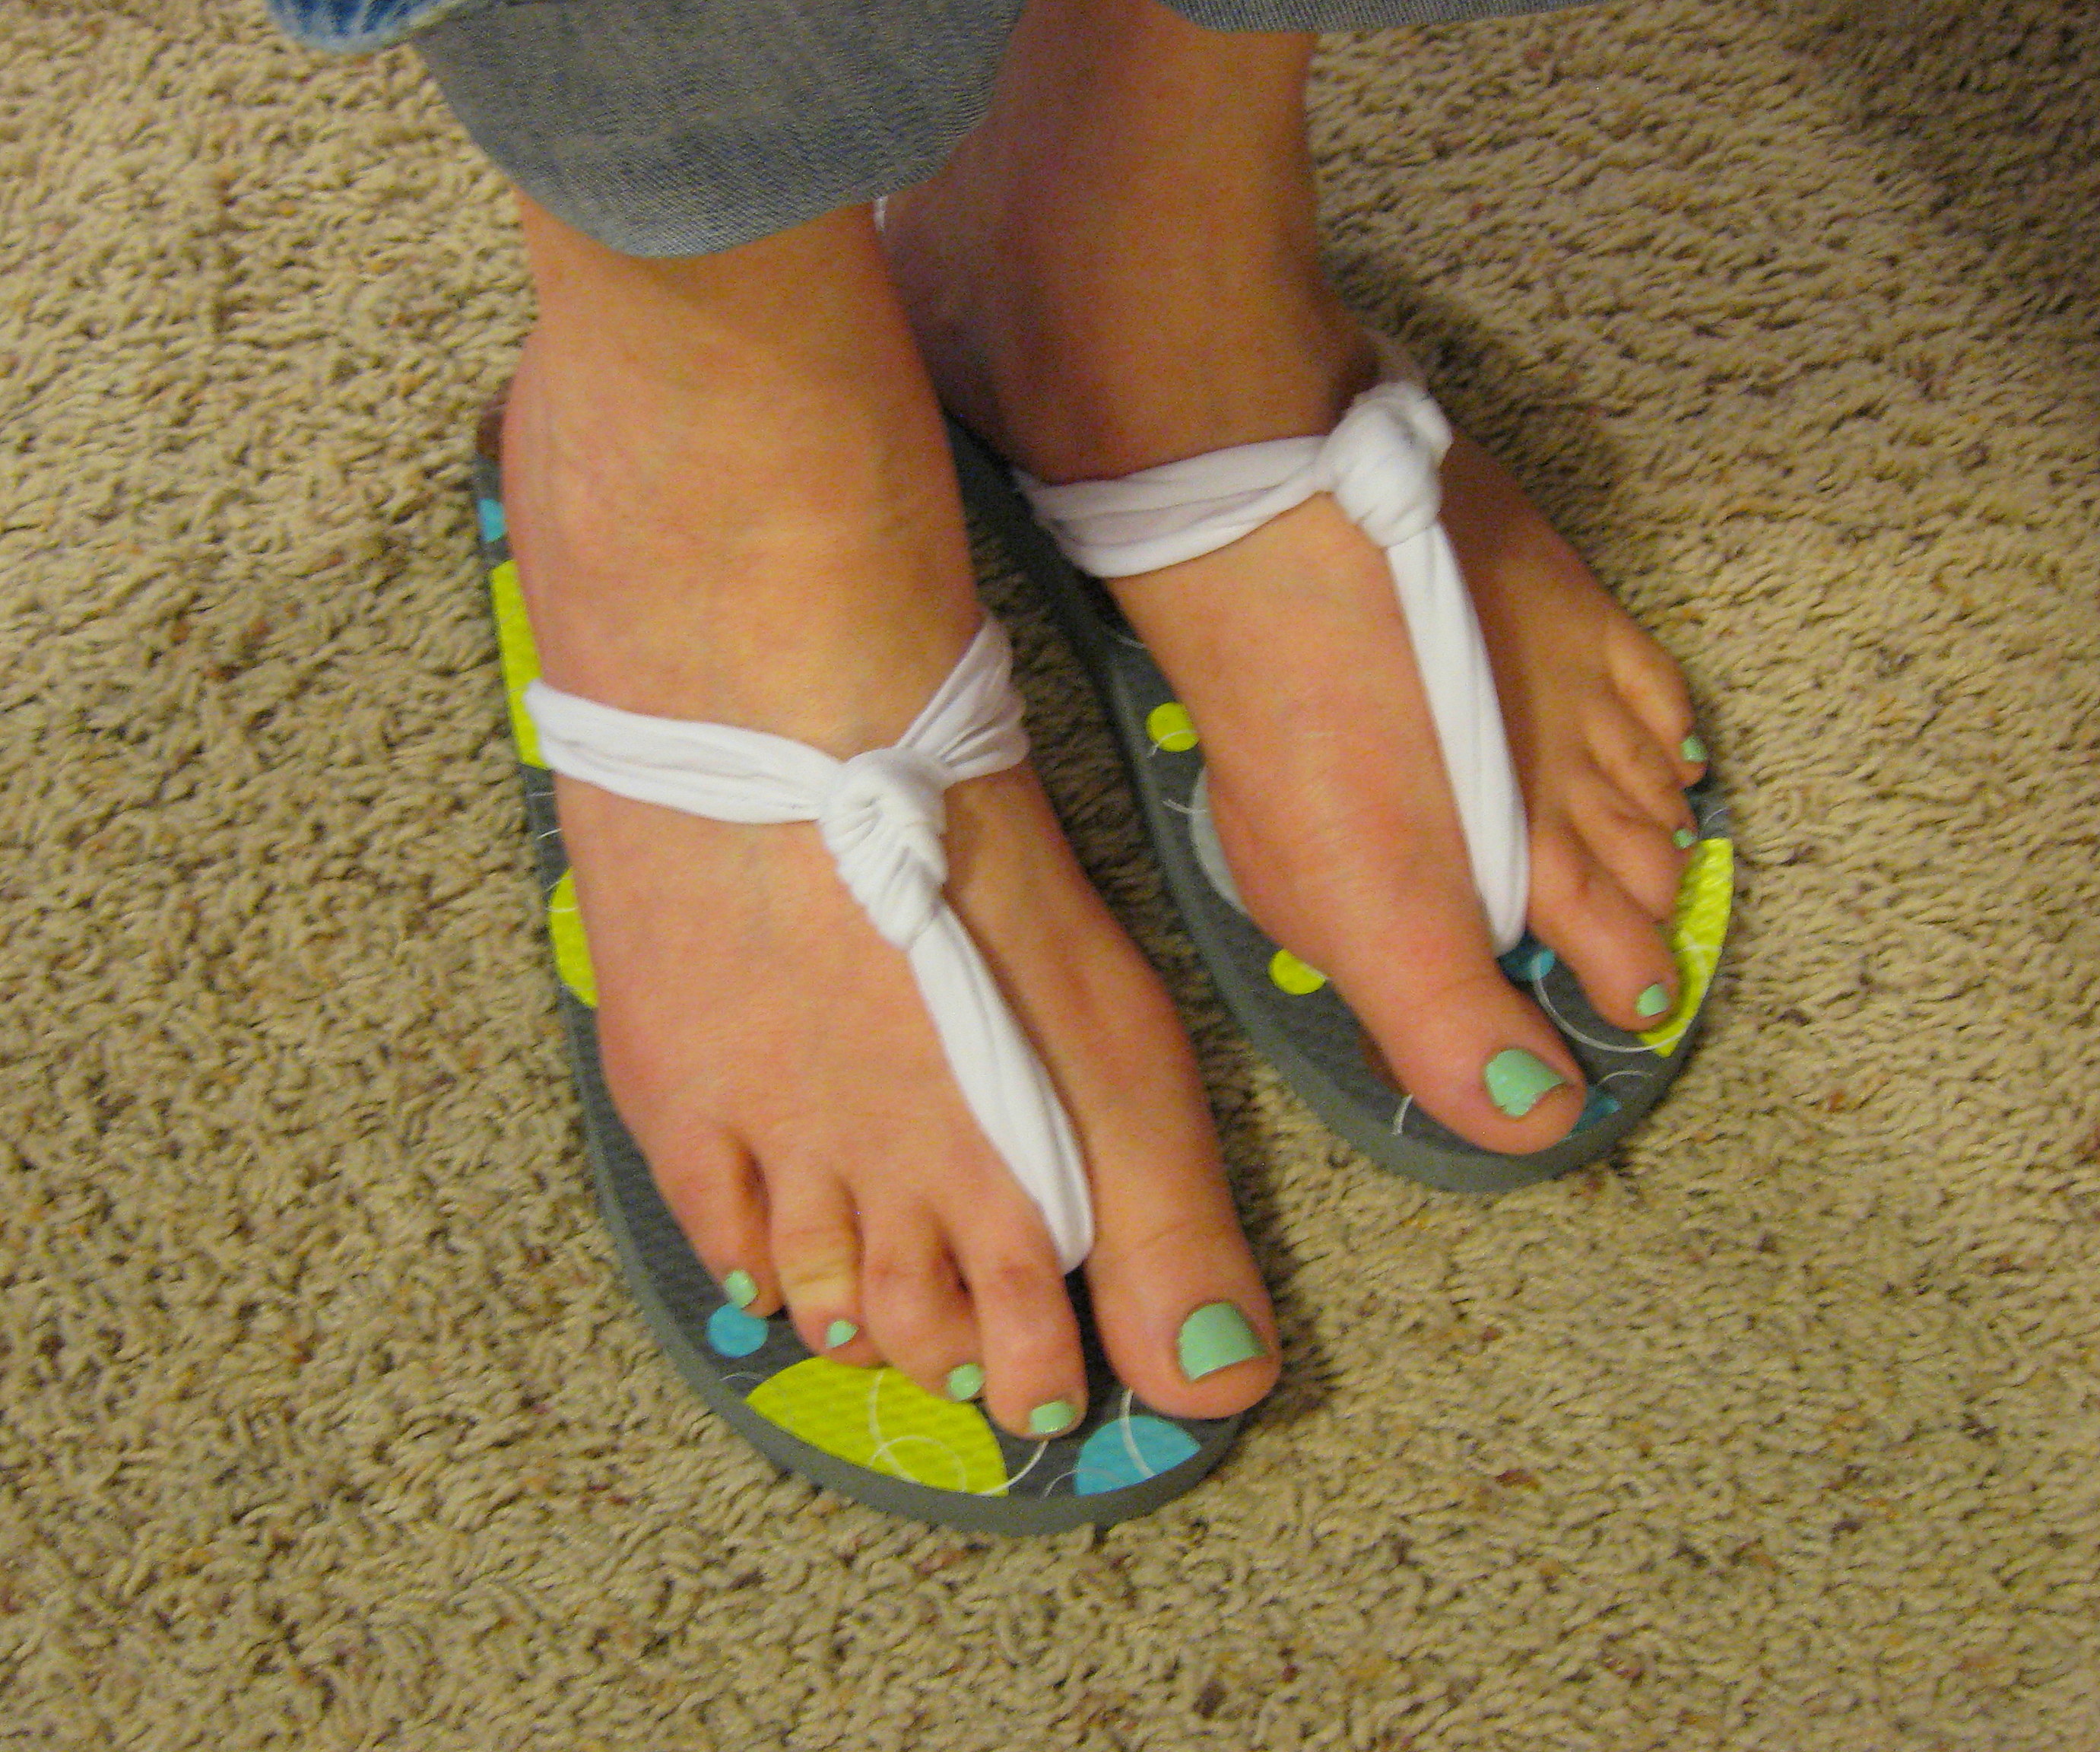
Now go out and enjoy the sunshine and your fabulous cheap new shoes!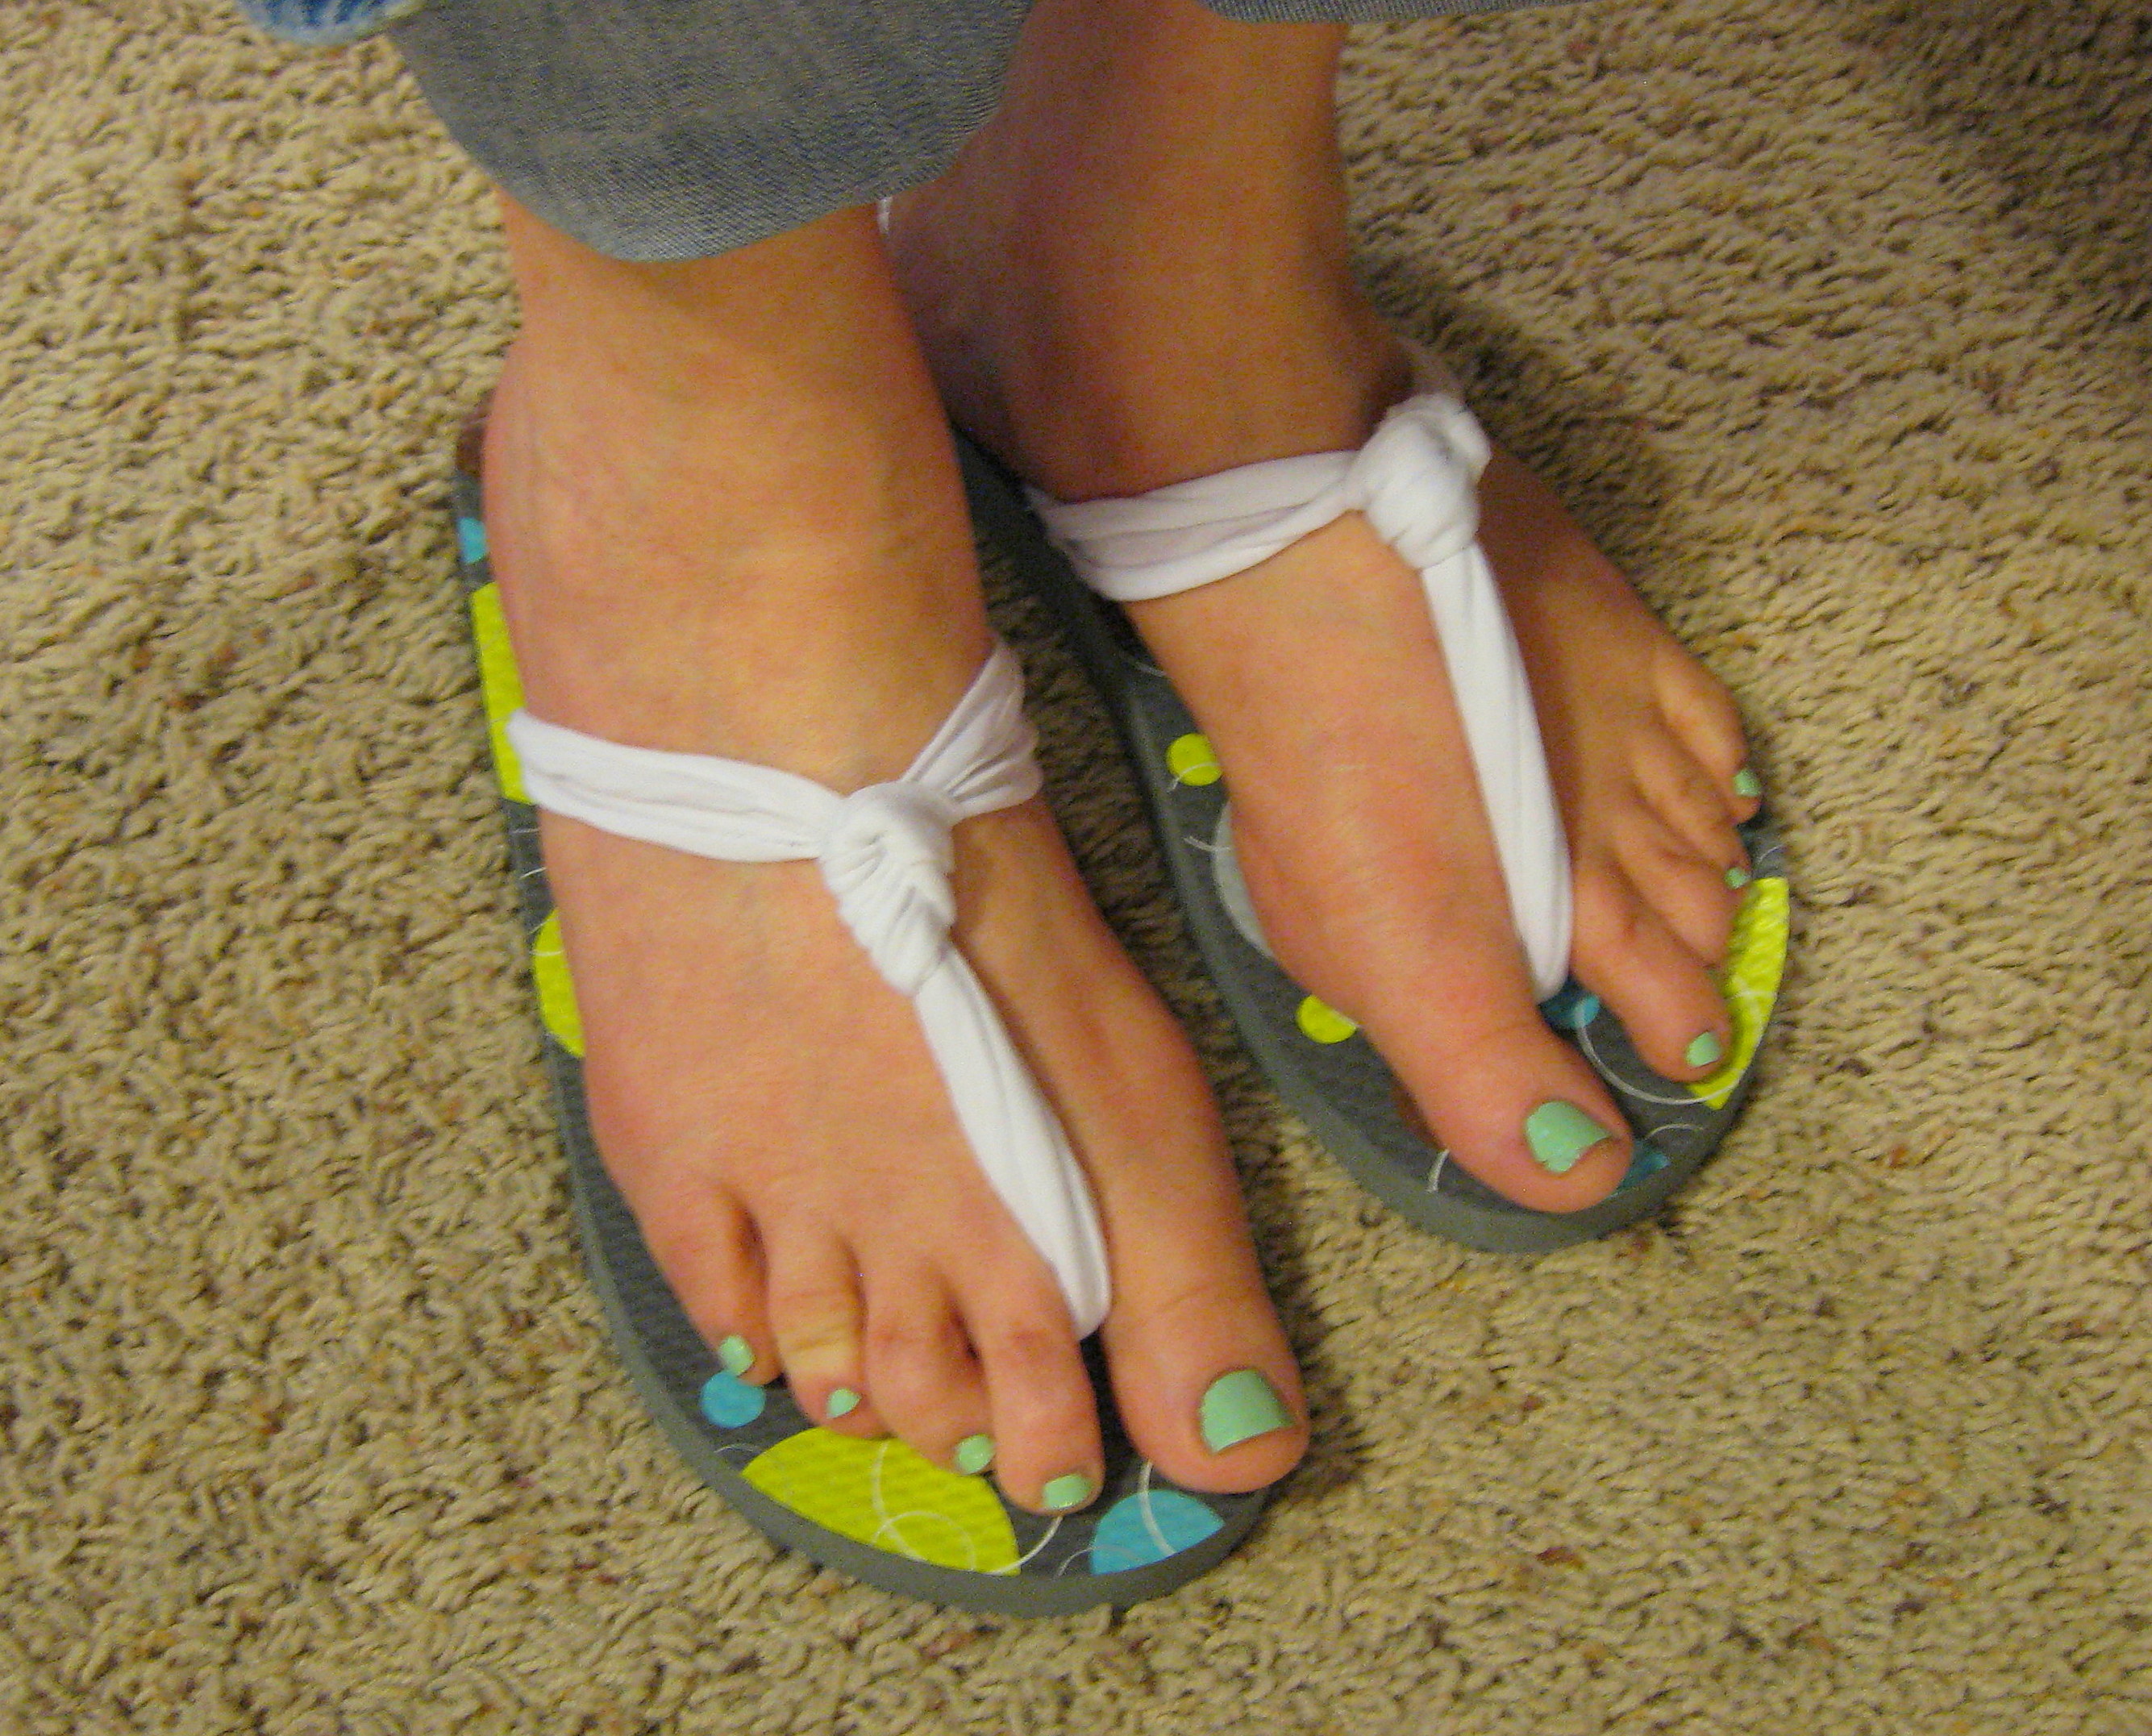

Quick and Easy Banana Bread
My family LOVES banana bread.
I hate making banana bread.
I can’t tell you how many black bananas I’ve thrown away because I just swore I was going to get around to it – eventually. I’ve even put them in the freezer to save for later, then I eventually throw away the freezer burned bananas, too.
So when I started seeing this recipe for banana bread pop up all over Pinterest, I knew I had to give it a try.
Ingredients
1 Yellow Cake Mix
3-4 very ripe Bananas (I used 4)
2 Eggs
Chocolate Chips (optional)
Preheat oven to 350*. Prepare 2 regular or one large loaf pan(s) by spraying WELL with cooking spray (or by greasing and flouring. Do people still do that?)
Peel the bananas and throw them all in a big bowl; use your mixer to mash them all up.
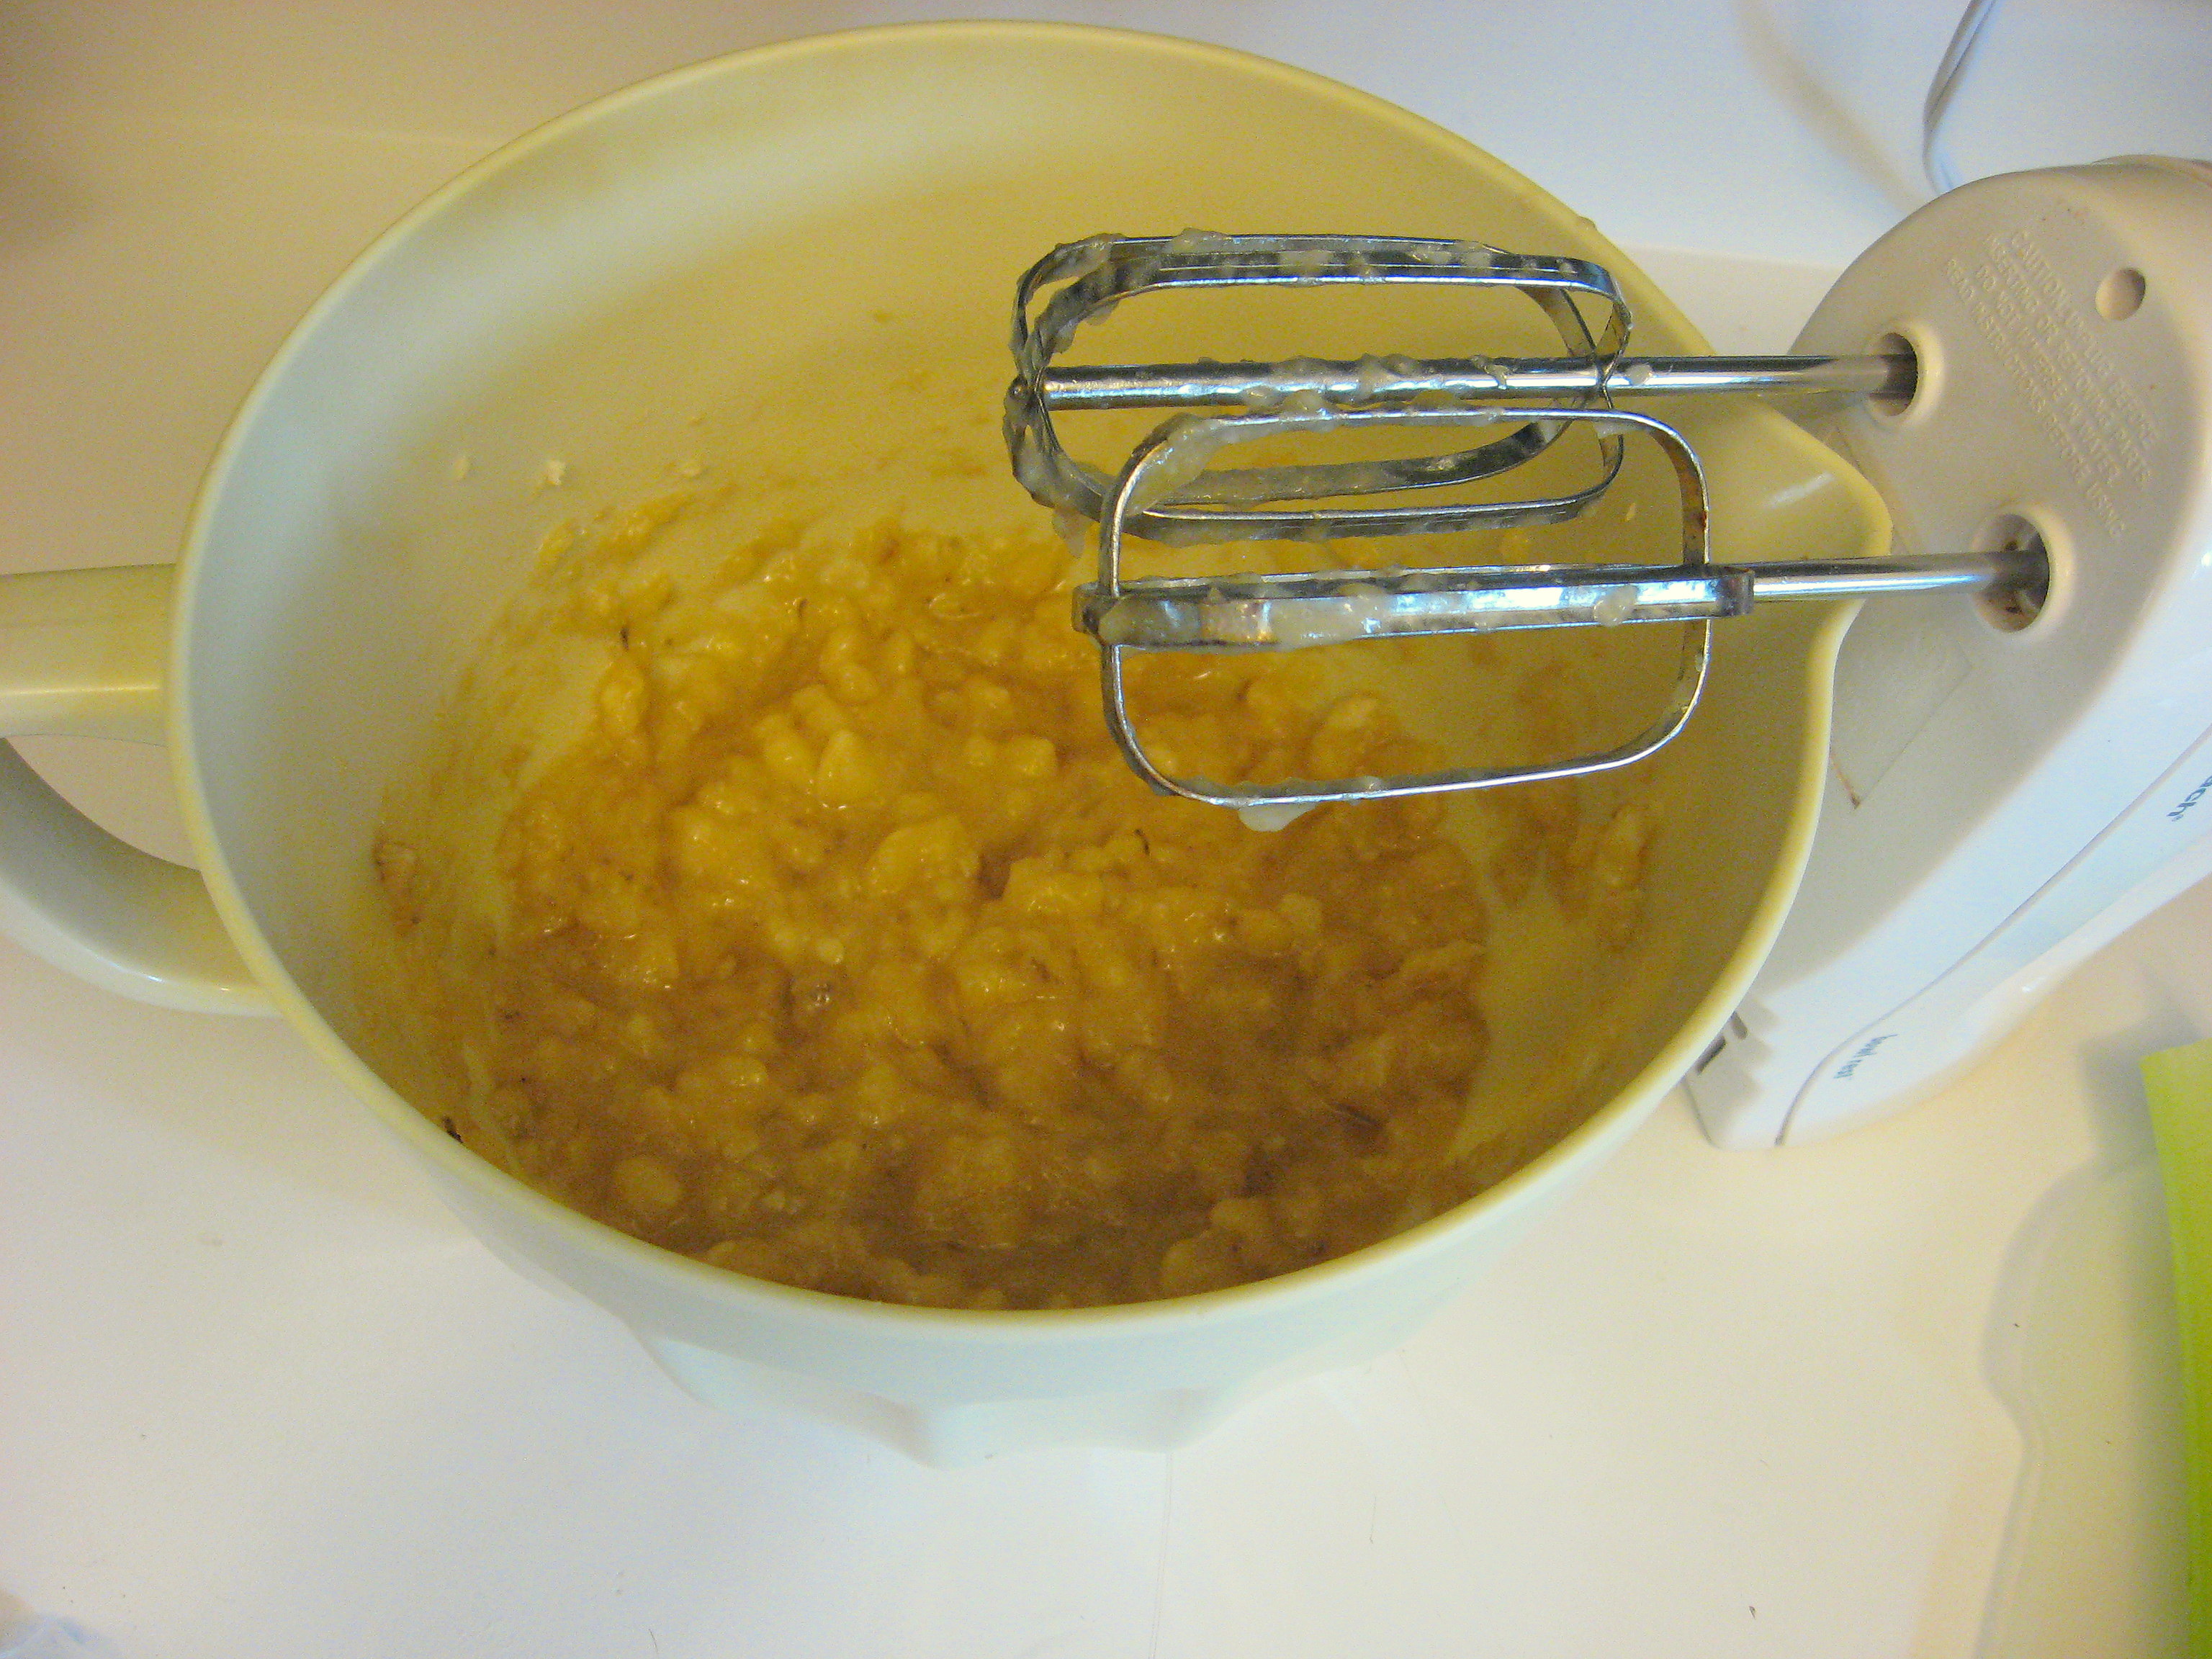
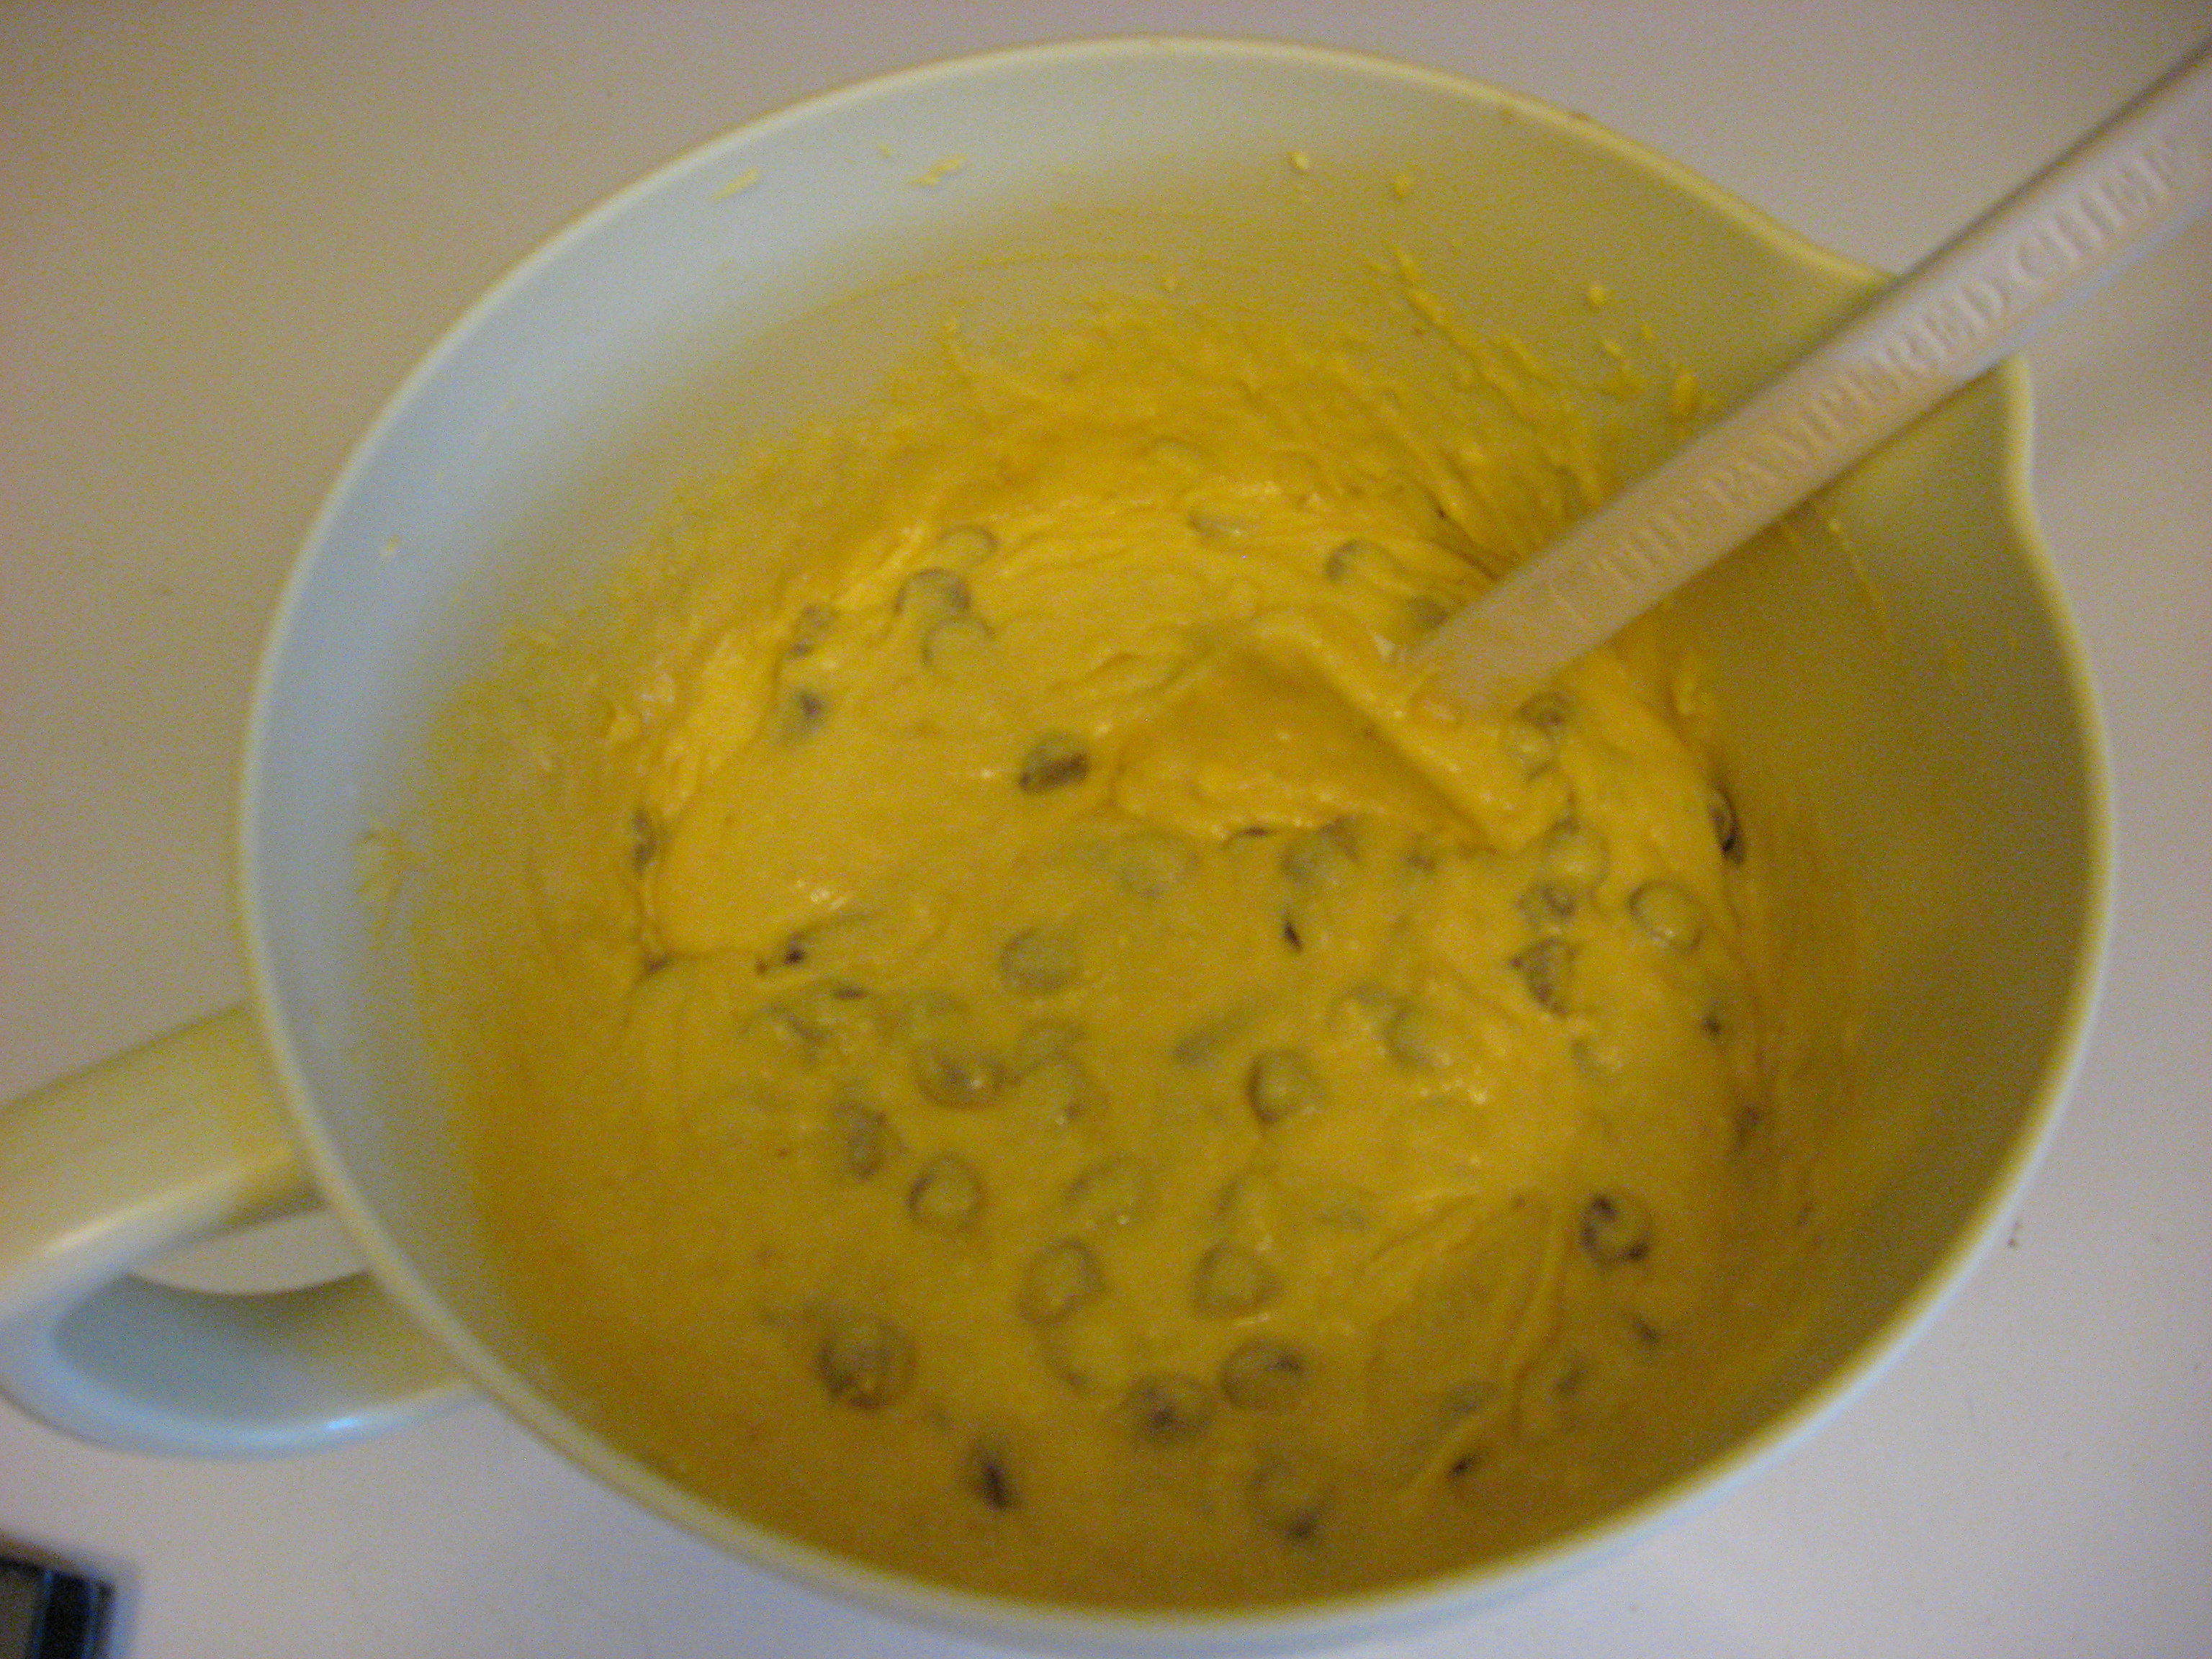
Now just dump in the cake mix and the eggs, and mix well. Then stir in the chocolate chips. The recipe calls for 1/2 cup to 1 cup. (I am lazy, so I just threw in the whole bag. I thought that was a little too chocolately and would only use 1/2 bag next time.)
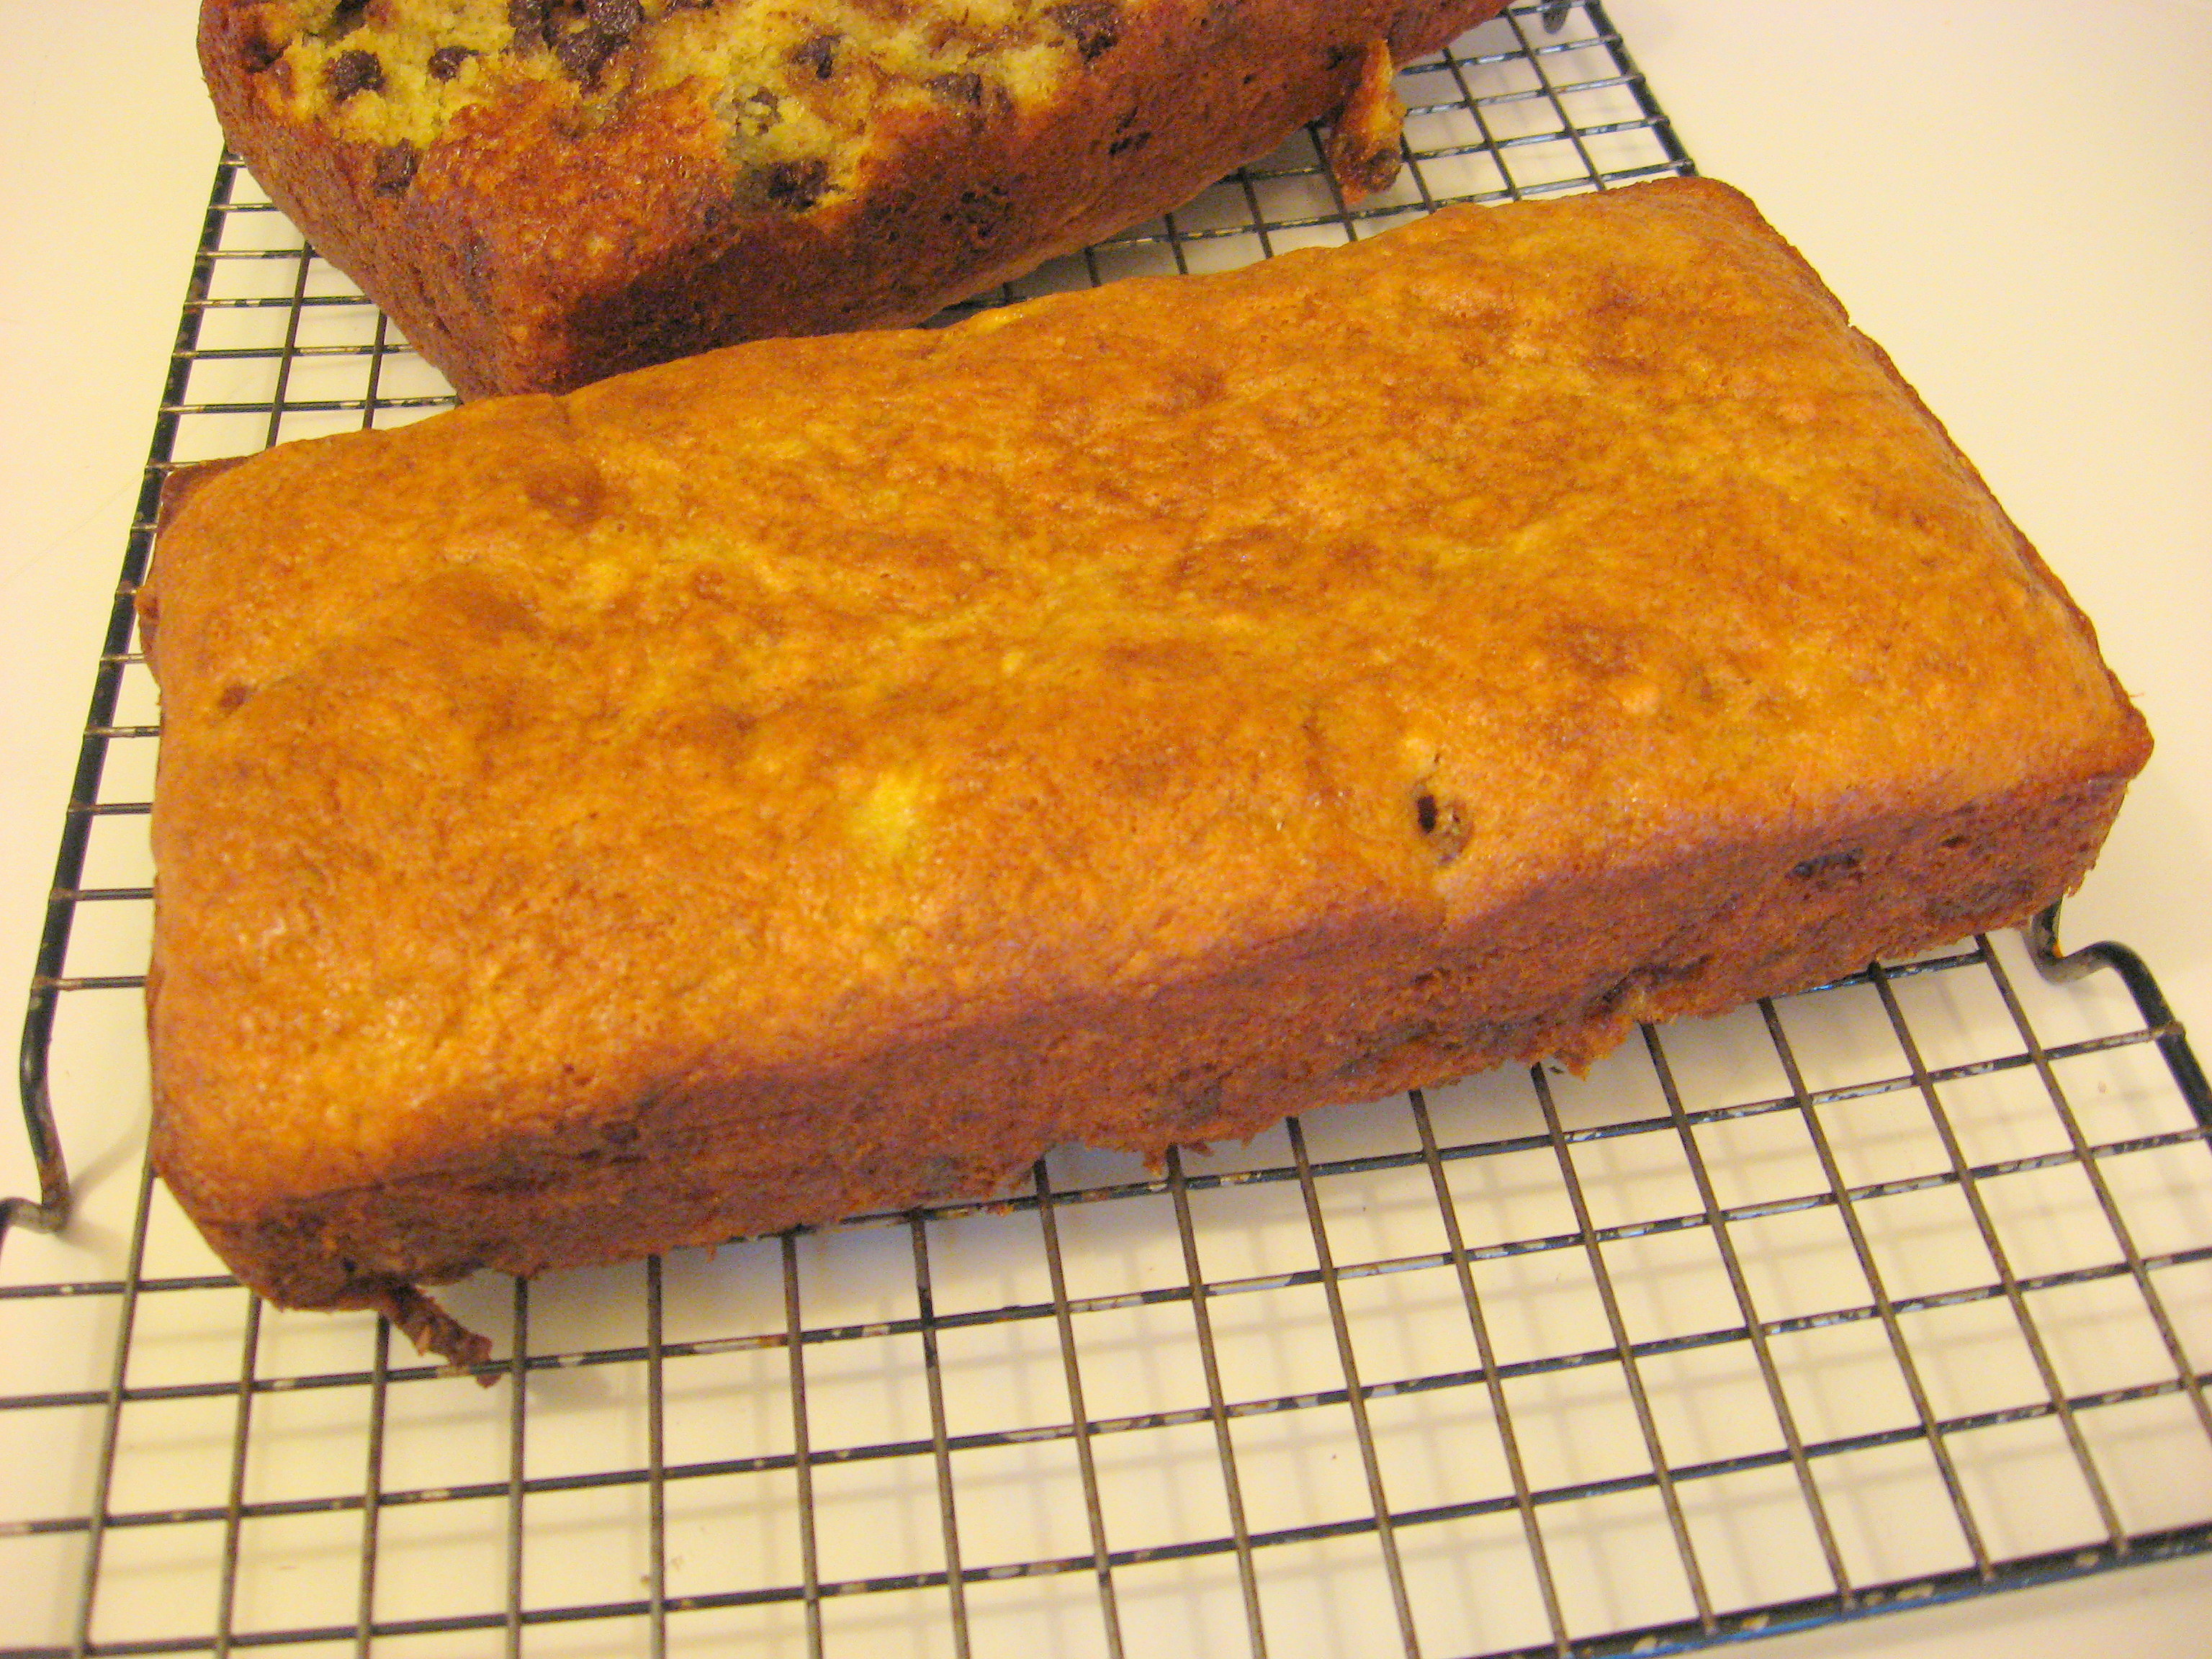
Pour into the prepared loaf pans
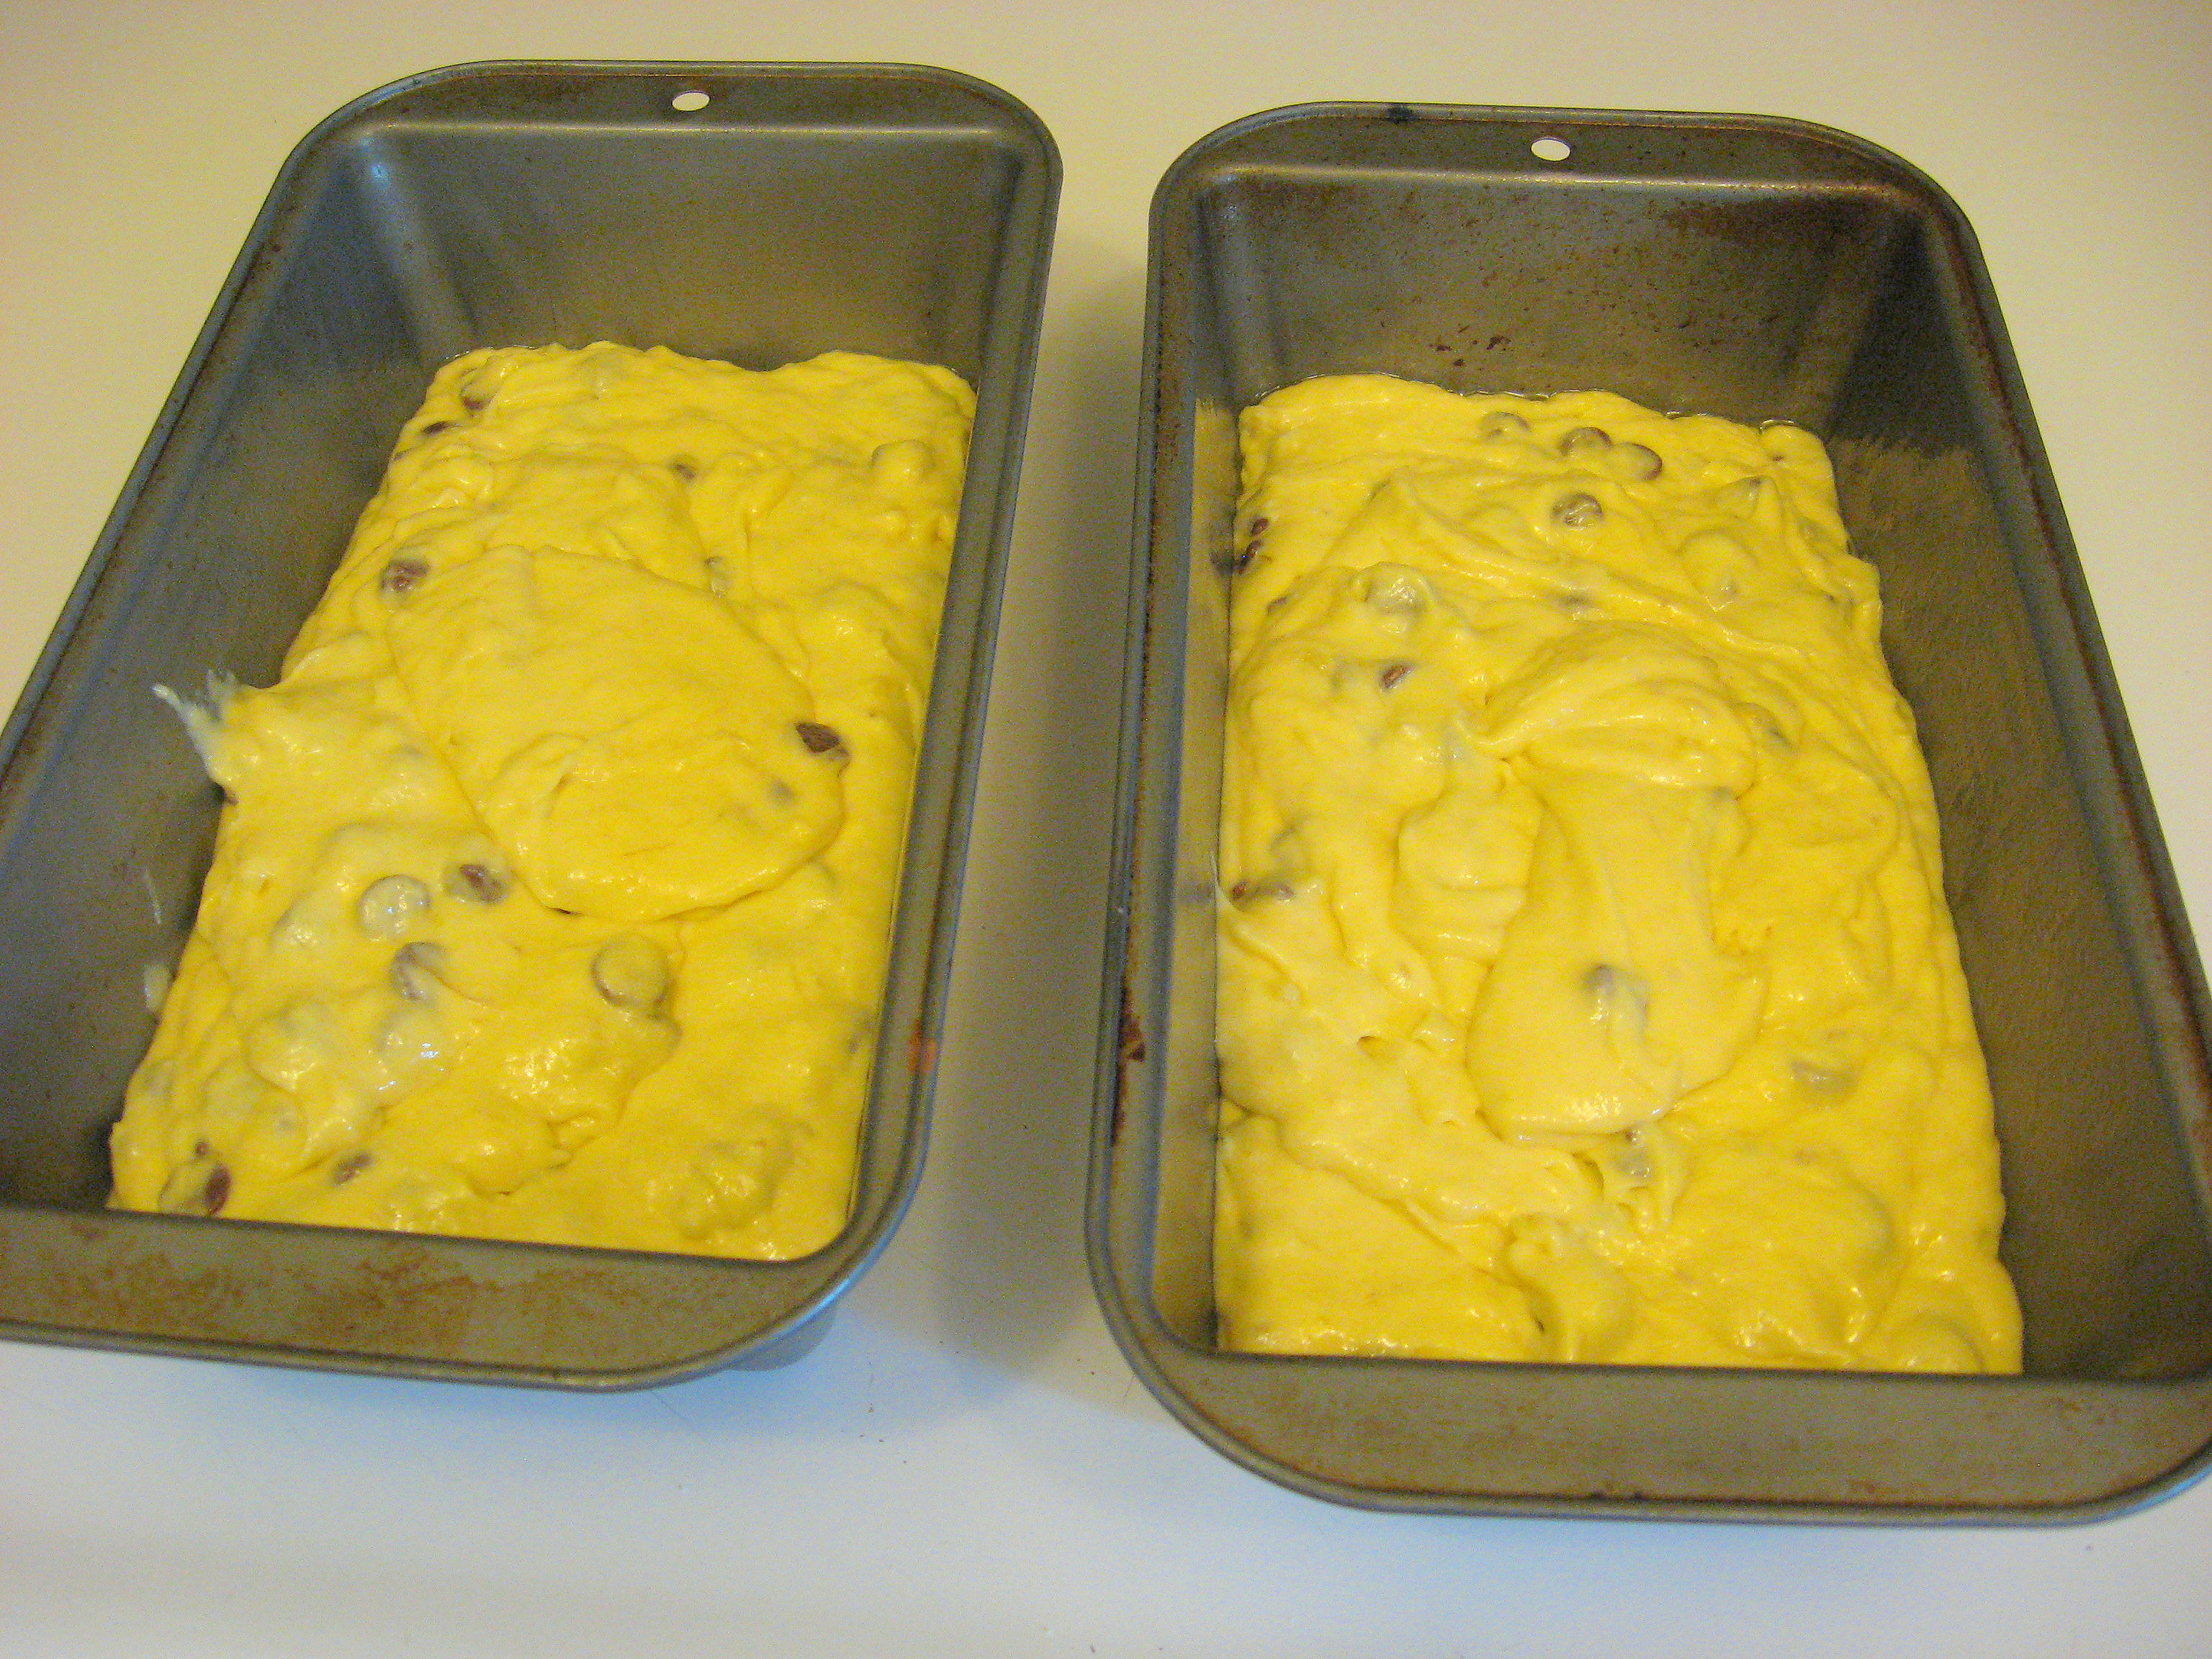
and bake for 35-40 minutes (mine took 45. It will also take longer if you are doing one big pan). Remove from the oven and let cool slightly, then turn out onto a cooling rack to finish cooling.
Uh…I told you to spray the pan well…
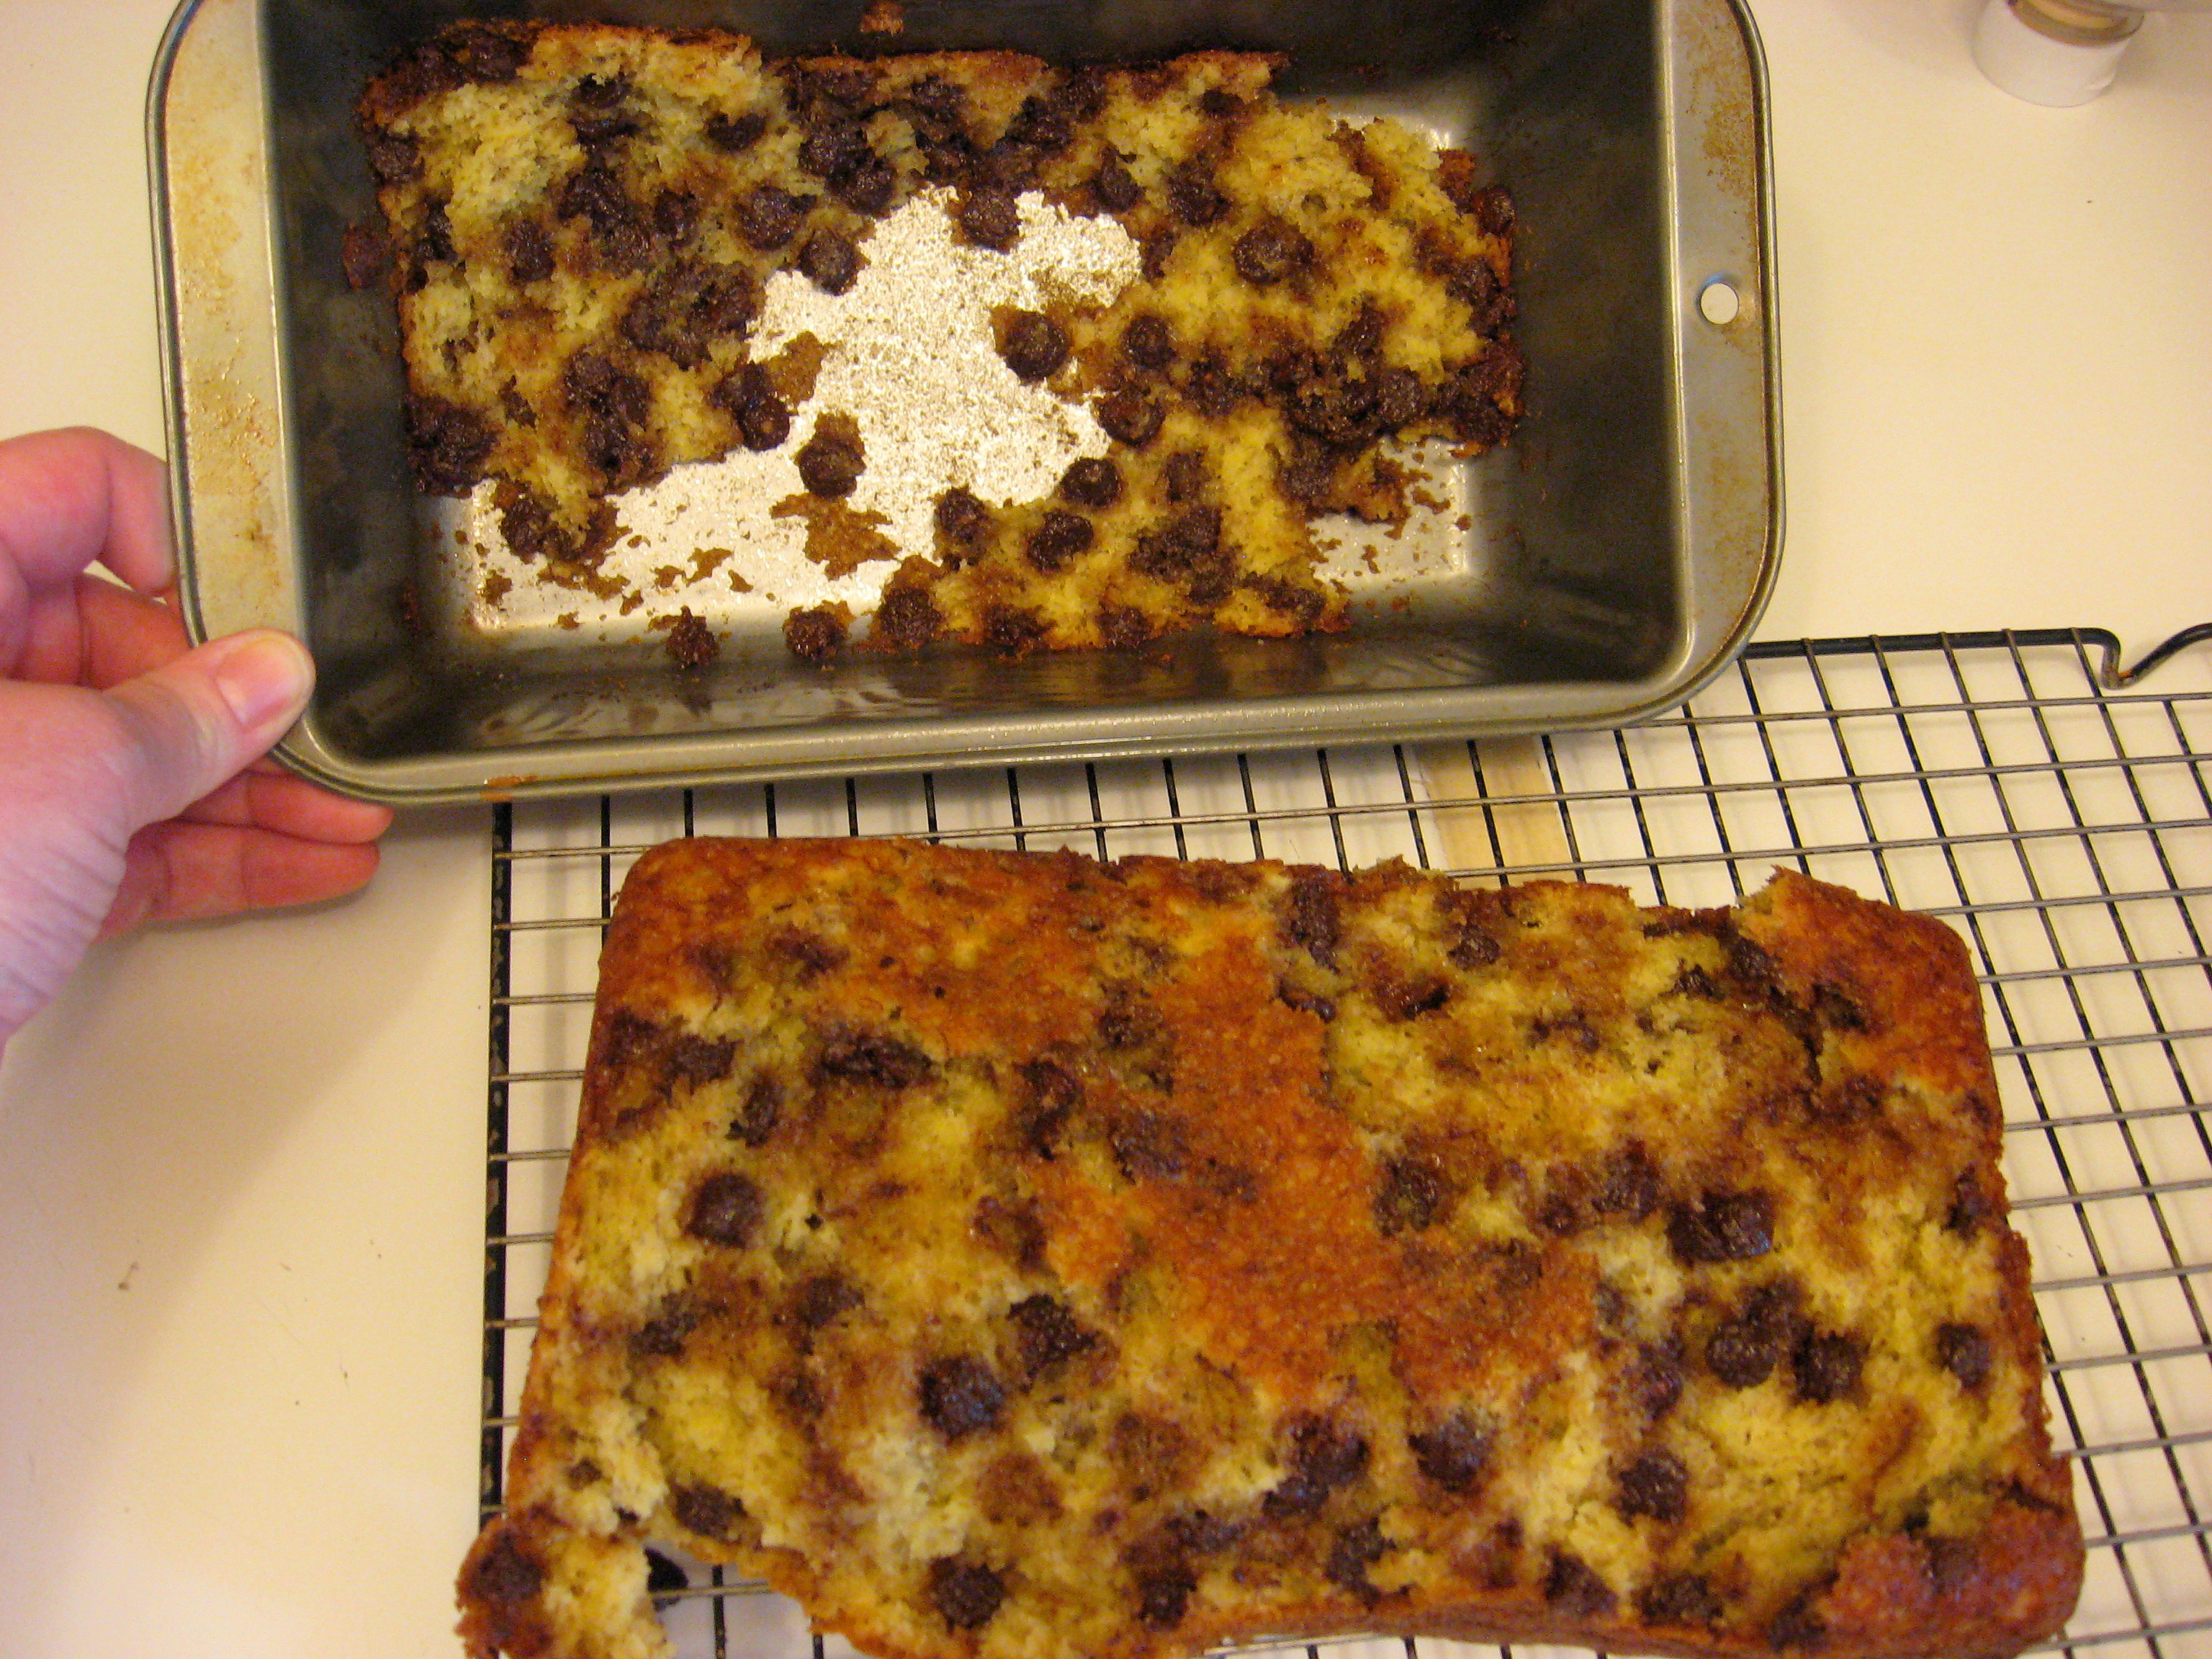
It was DELICIOUS. I will never make regular banana bread (or waste all those bananas!) again!
DIY Dulce de Leche
I made a discovery of epic proportions this weekend! Dramatic? Maybe a bit, but if you – like I – didn’t know this before, I think you’ll be happy I shared!
My boys found a recipe they were dying to try, but it called for Dulce de Leche. Whether that is available in my store or not, I don’t know, I never looked. Since I had cans and cans of sweetened condensed milk in my pantry and knew you could use it to make dulce de leche, I wasn’t going to spend the extra money. The internet is full of “recipes” about how you can boil a closed can of sweetened condensed milk either in a pan or in your crock pot for hours until it turns into thick, gooey, carmely goodness.
The internet is also full of stories about said cans exploding as they heat and making a thick, gooey carmely mess in your kitchen and potentially harming anyone nearby.
I will admit that I tried it once; it works, but I was nervous the whole time, so even though I knew I could do it again, I kept putting it off. Finally, I searched the internet to see if there was another option. I found one blogger who said that you can pour the milk into the top of a double boiler and stir it over heat for 2 1/2 hours as it cooks. No thanks; keep searching…
BINGO!
You can cook it in the oven!!!
Turn your oven on to 425*. Open the sweetened condensed milk and pour it into an oven safe glass pan…a pie plate is perfect for one can. I used a bigger pyrex pan here because the recipe I’m making required 2 cans worth of the finished product. 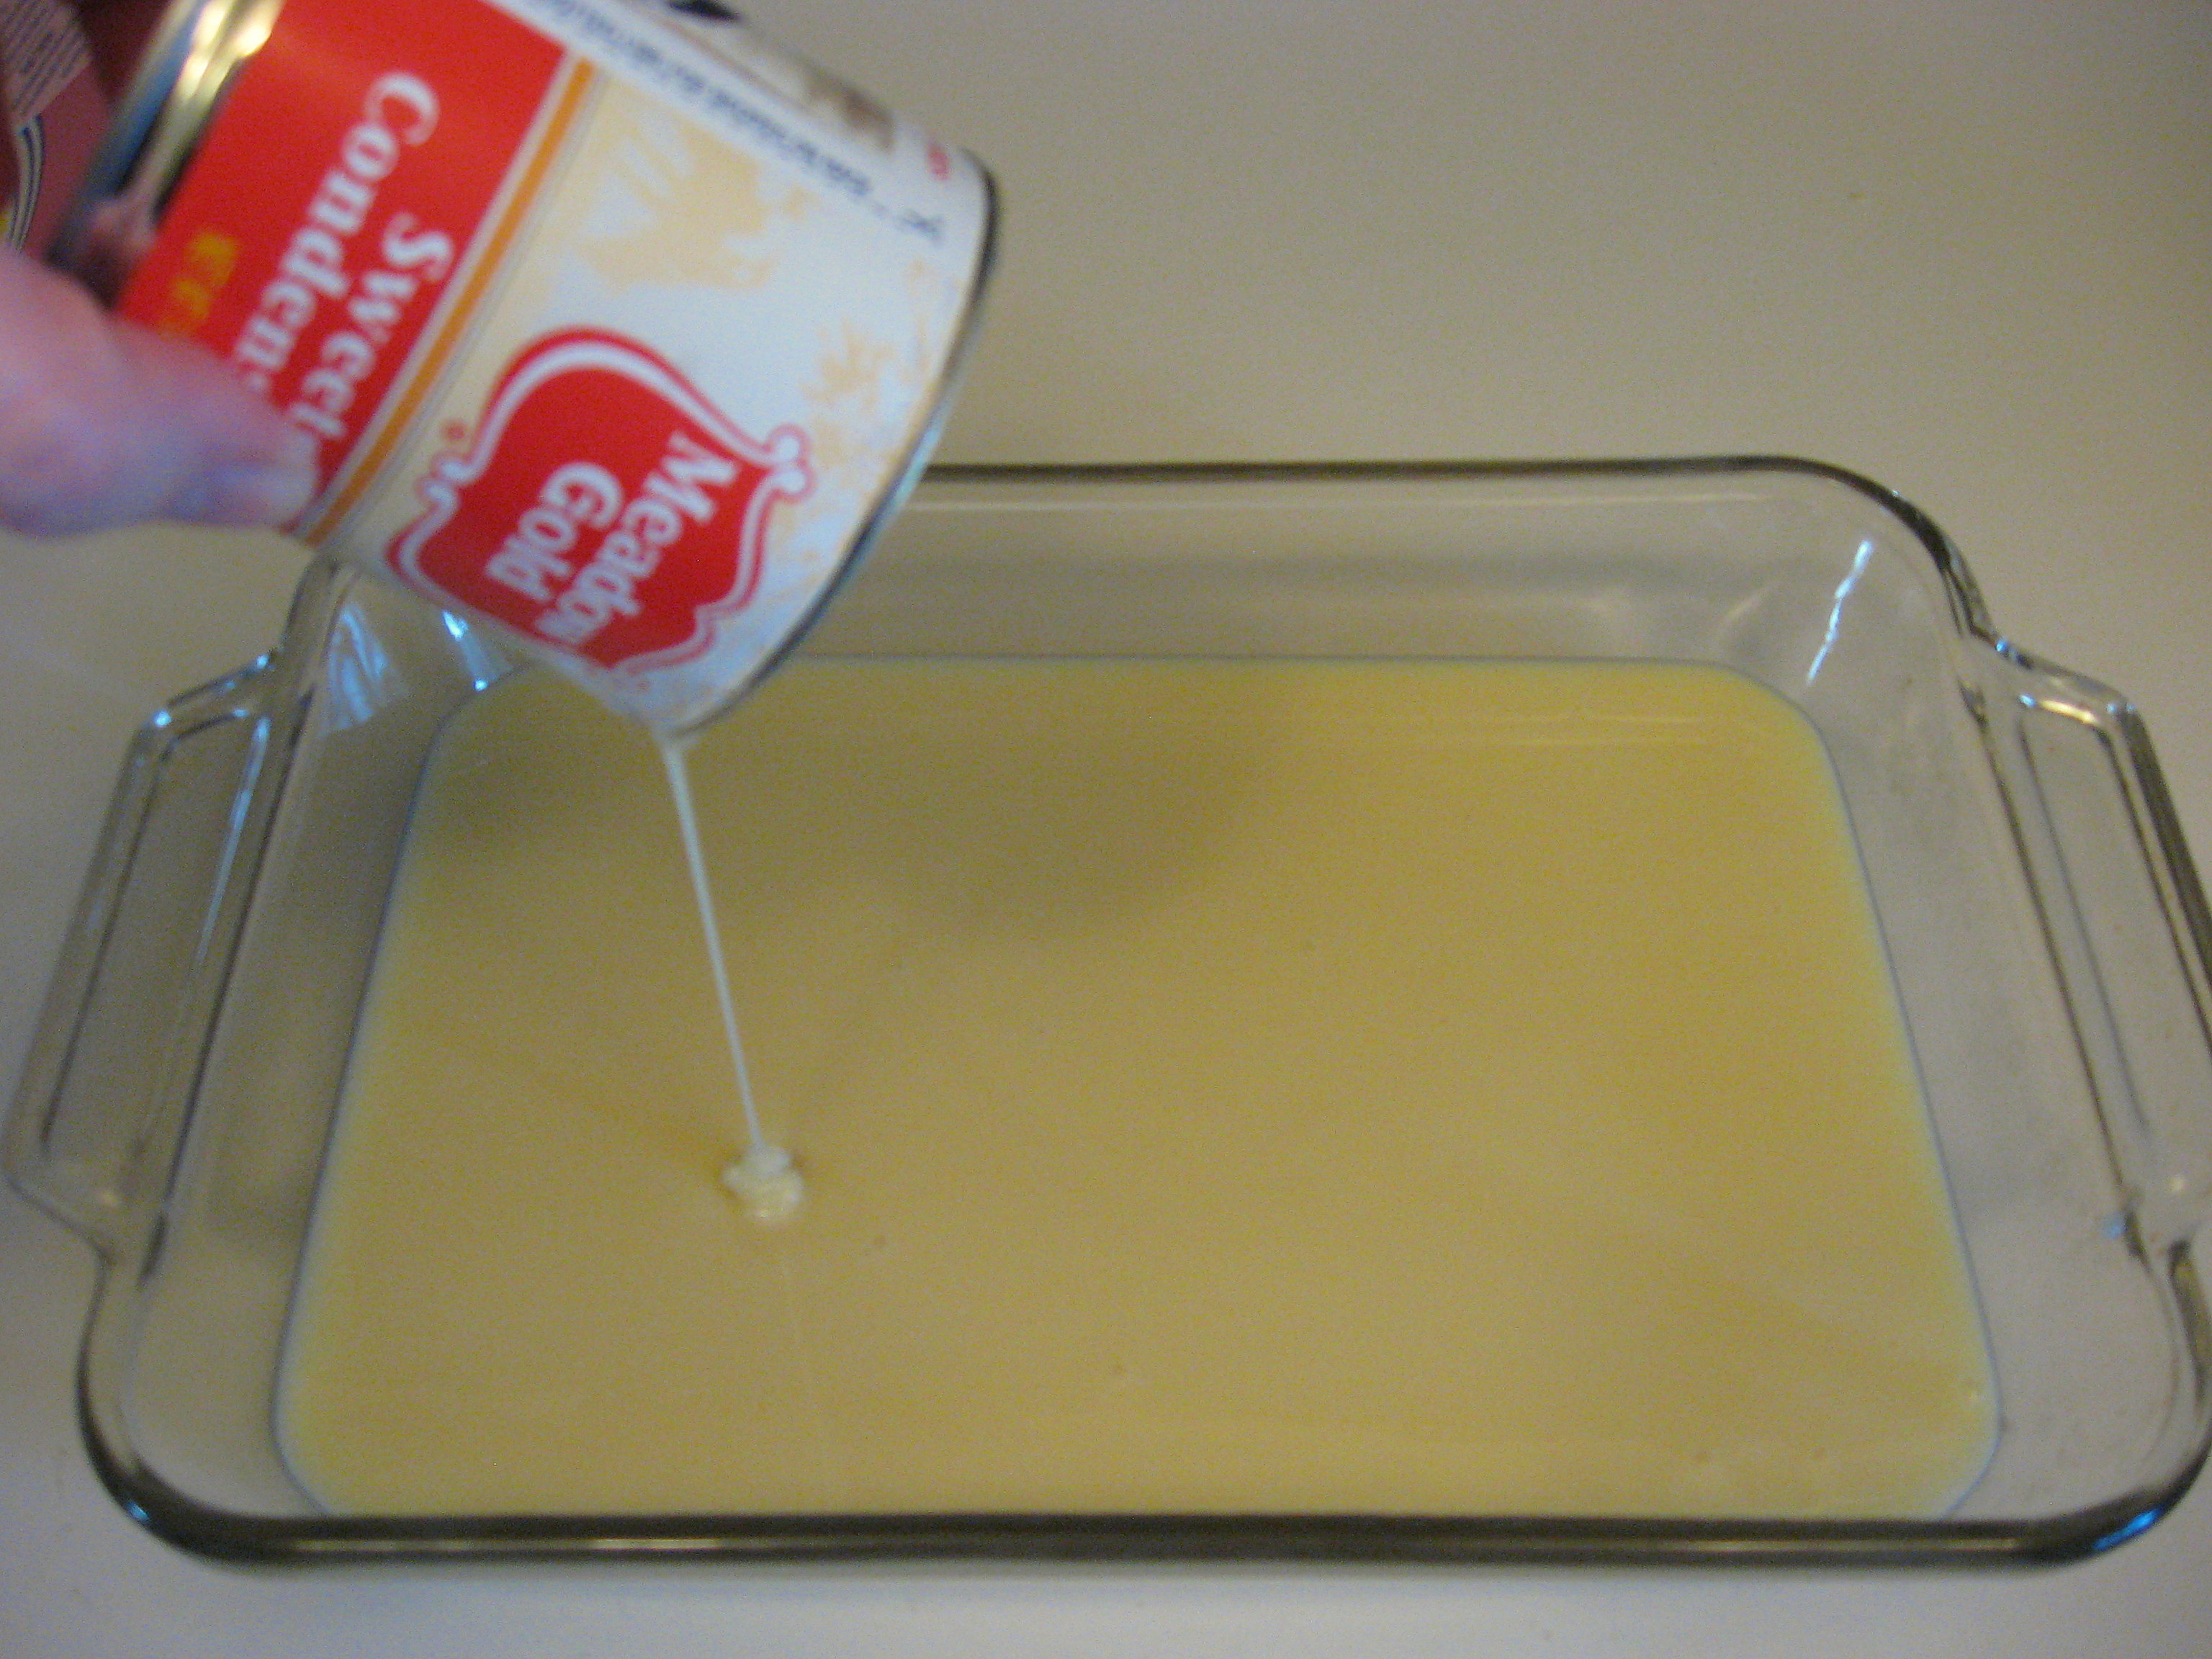
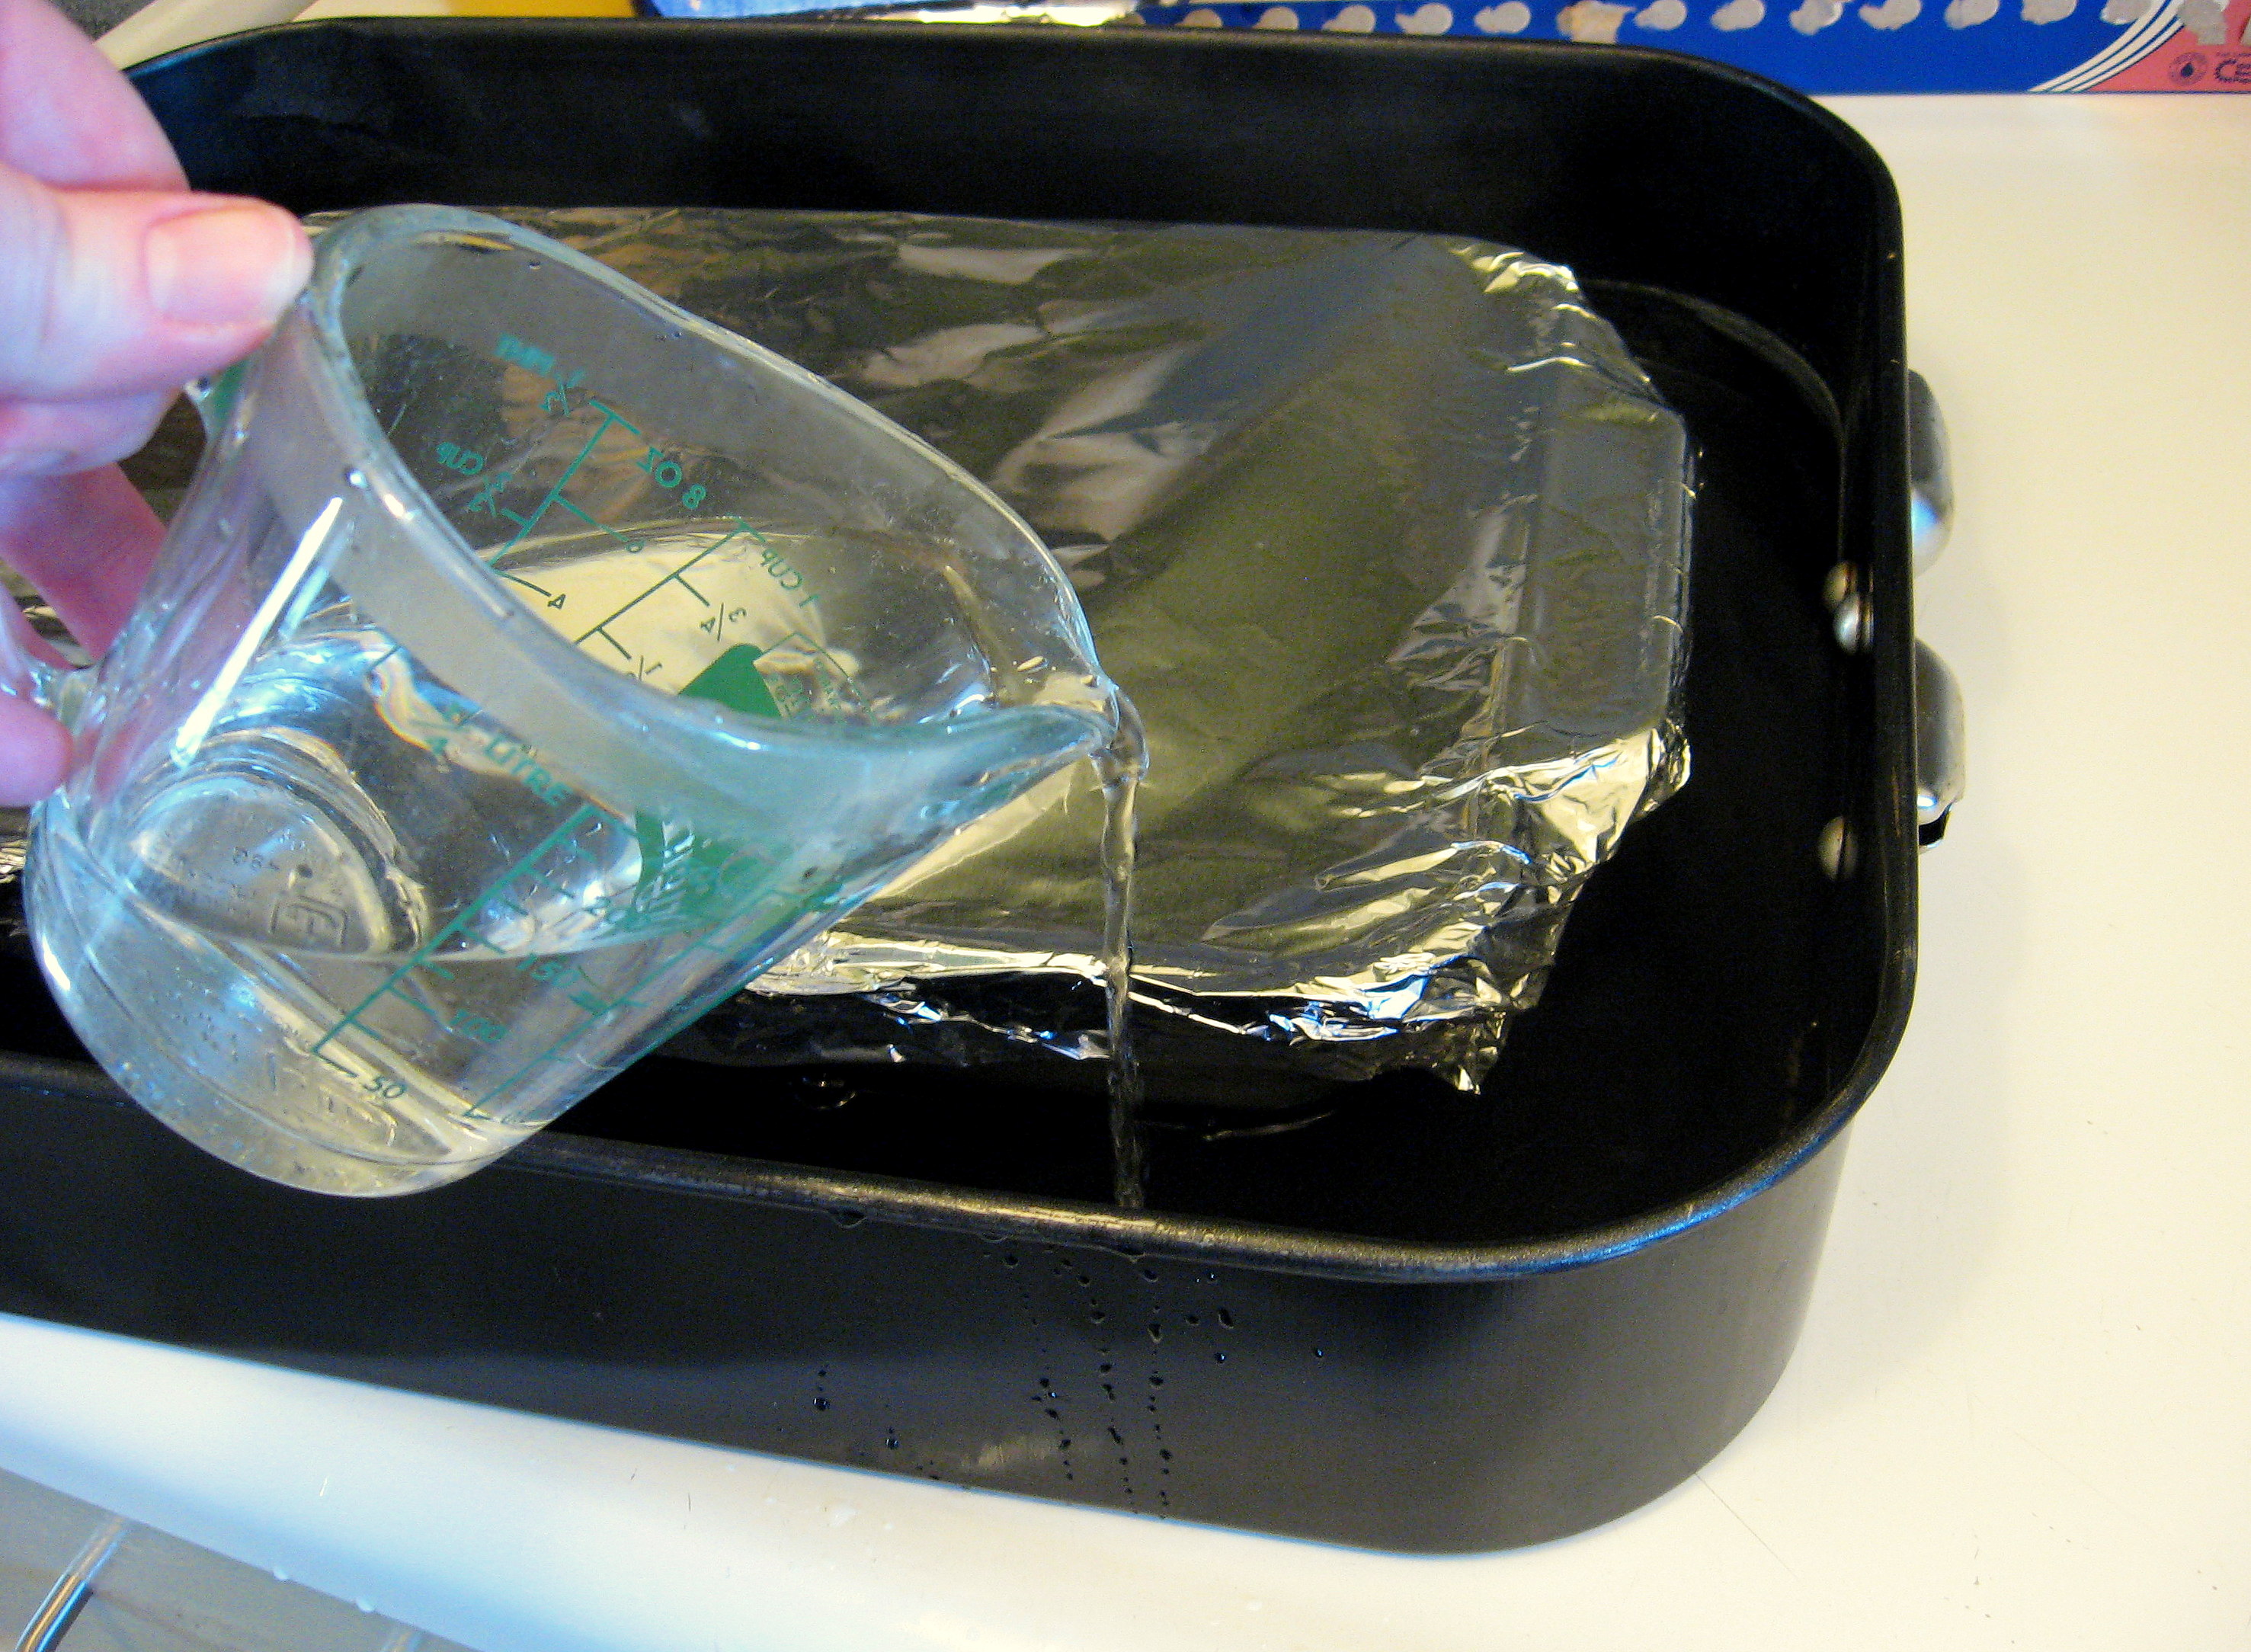
Cover this tightly with aluminum foil.
Put the glass pan into a bigger pan – like a roaster pan – and fill with hot water up to about halfway up the sides of the glass pan.
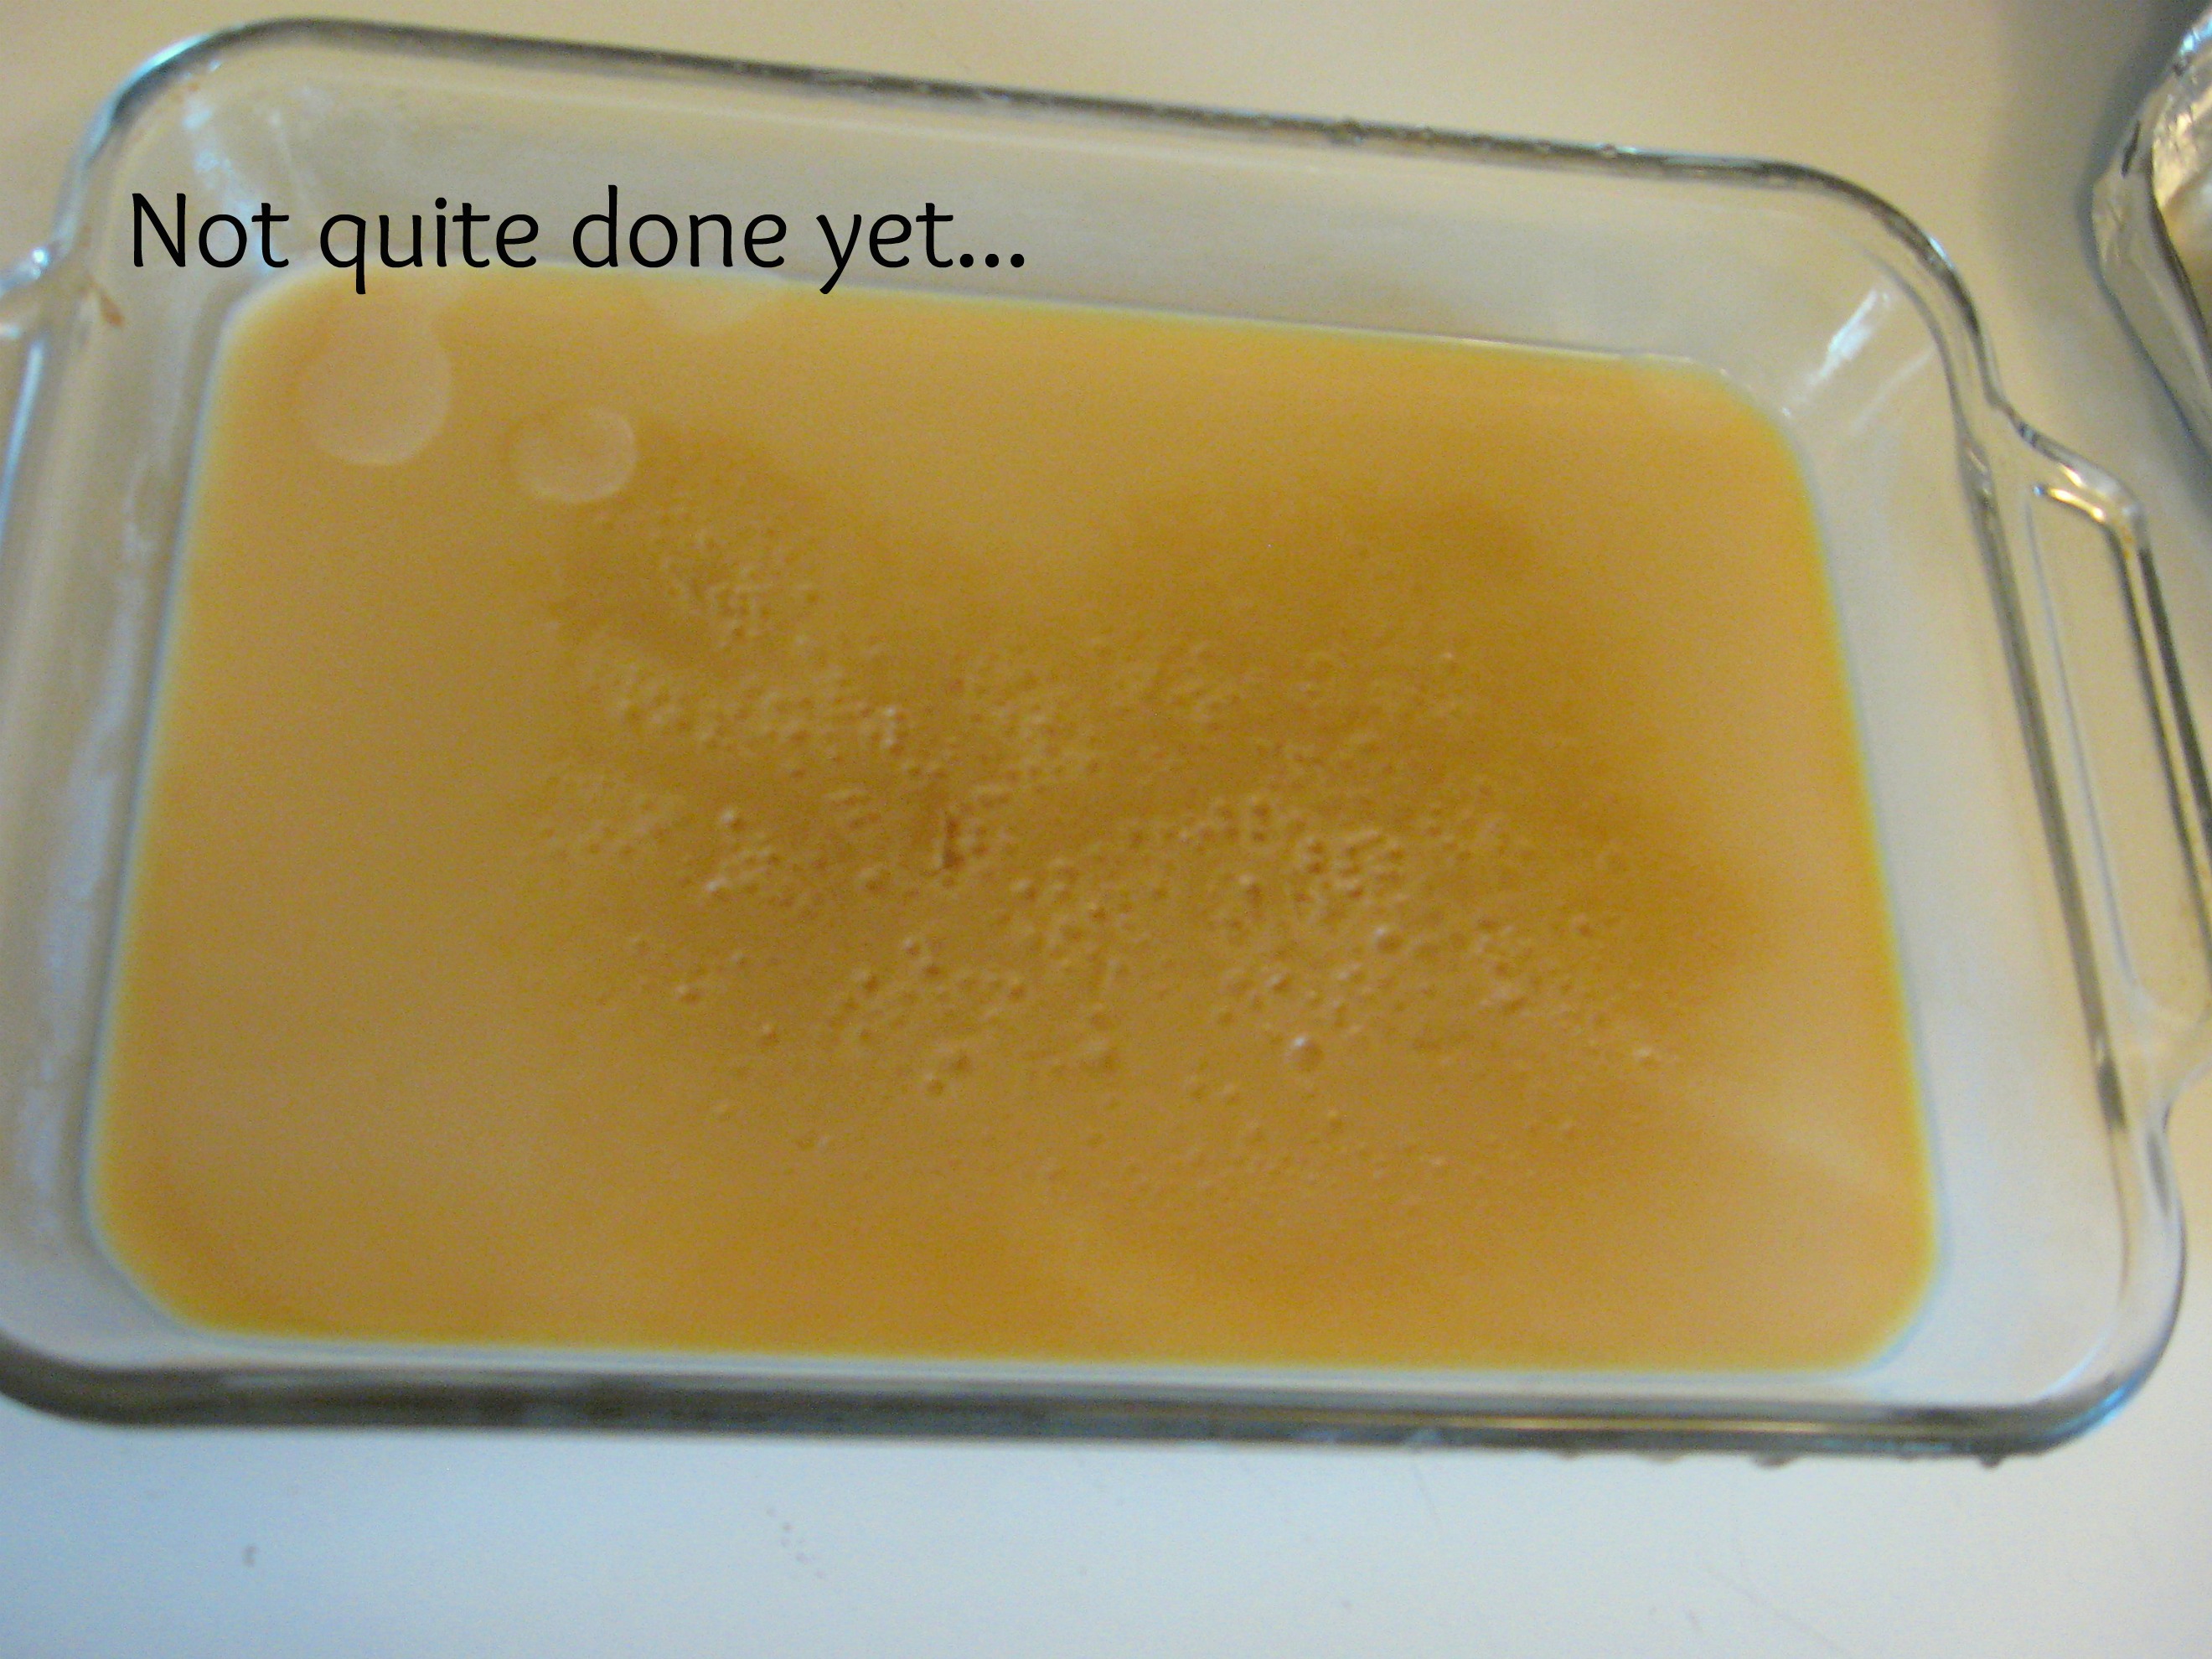
Pop the whole thing in the oven and leave it to cook for 1 to 1 1/2 hours. Check it once in awhile to make sure that there is plenty of water and replenish when necessary.
After about an hour, pull back the corner of the foil and have a look. When it’s done it should be thick and brown. (With the 2 cans that I did, it took more like 2-and-a-bit hours, but the one can was perfect after about an hour and 15 minutes).
**BE VERY CAREFUL when you open the oven door. Open it and stand back or you will get hit in the face with very hot steam!!
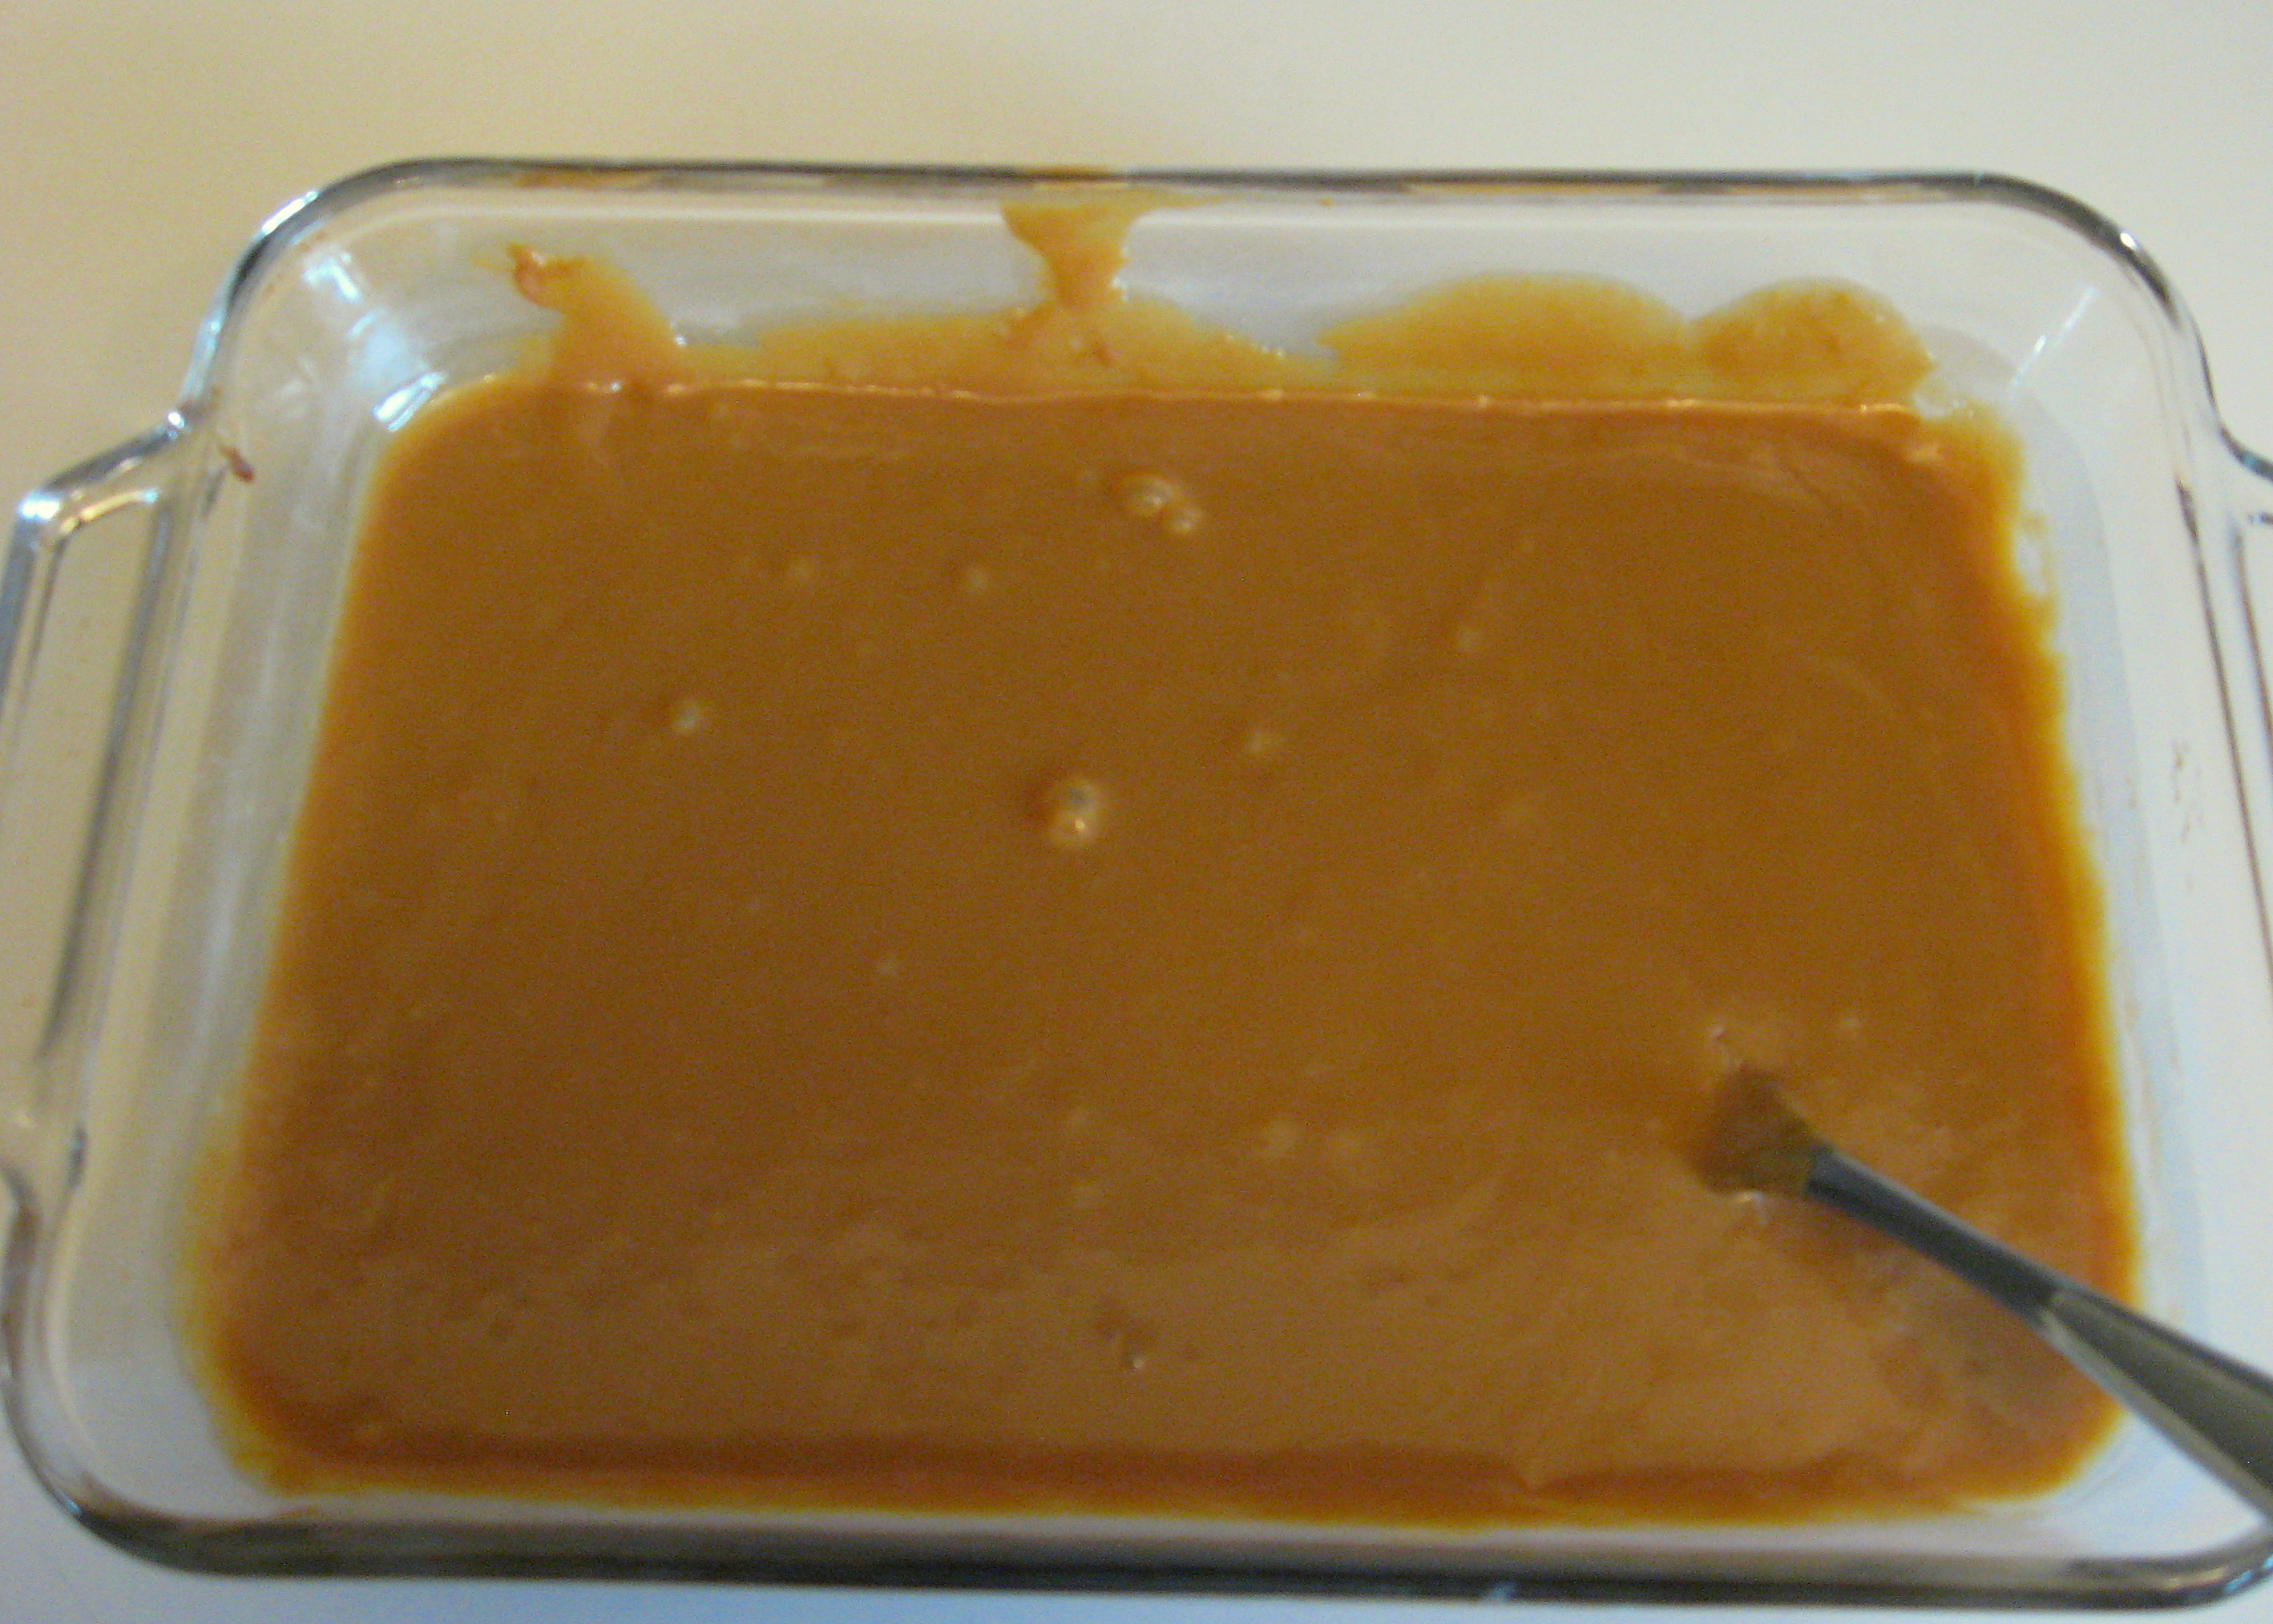
Once it is dark and carmely looking, remove the pan from the water and whip it with a whisk or a fork until it is smooth.
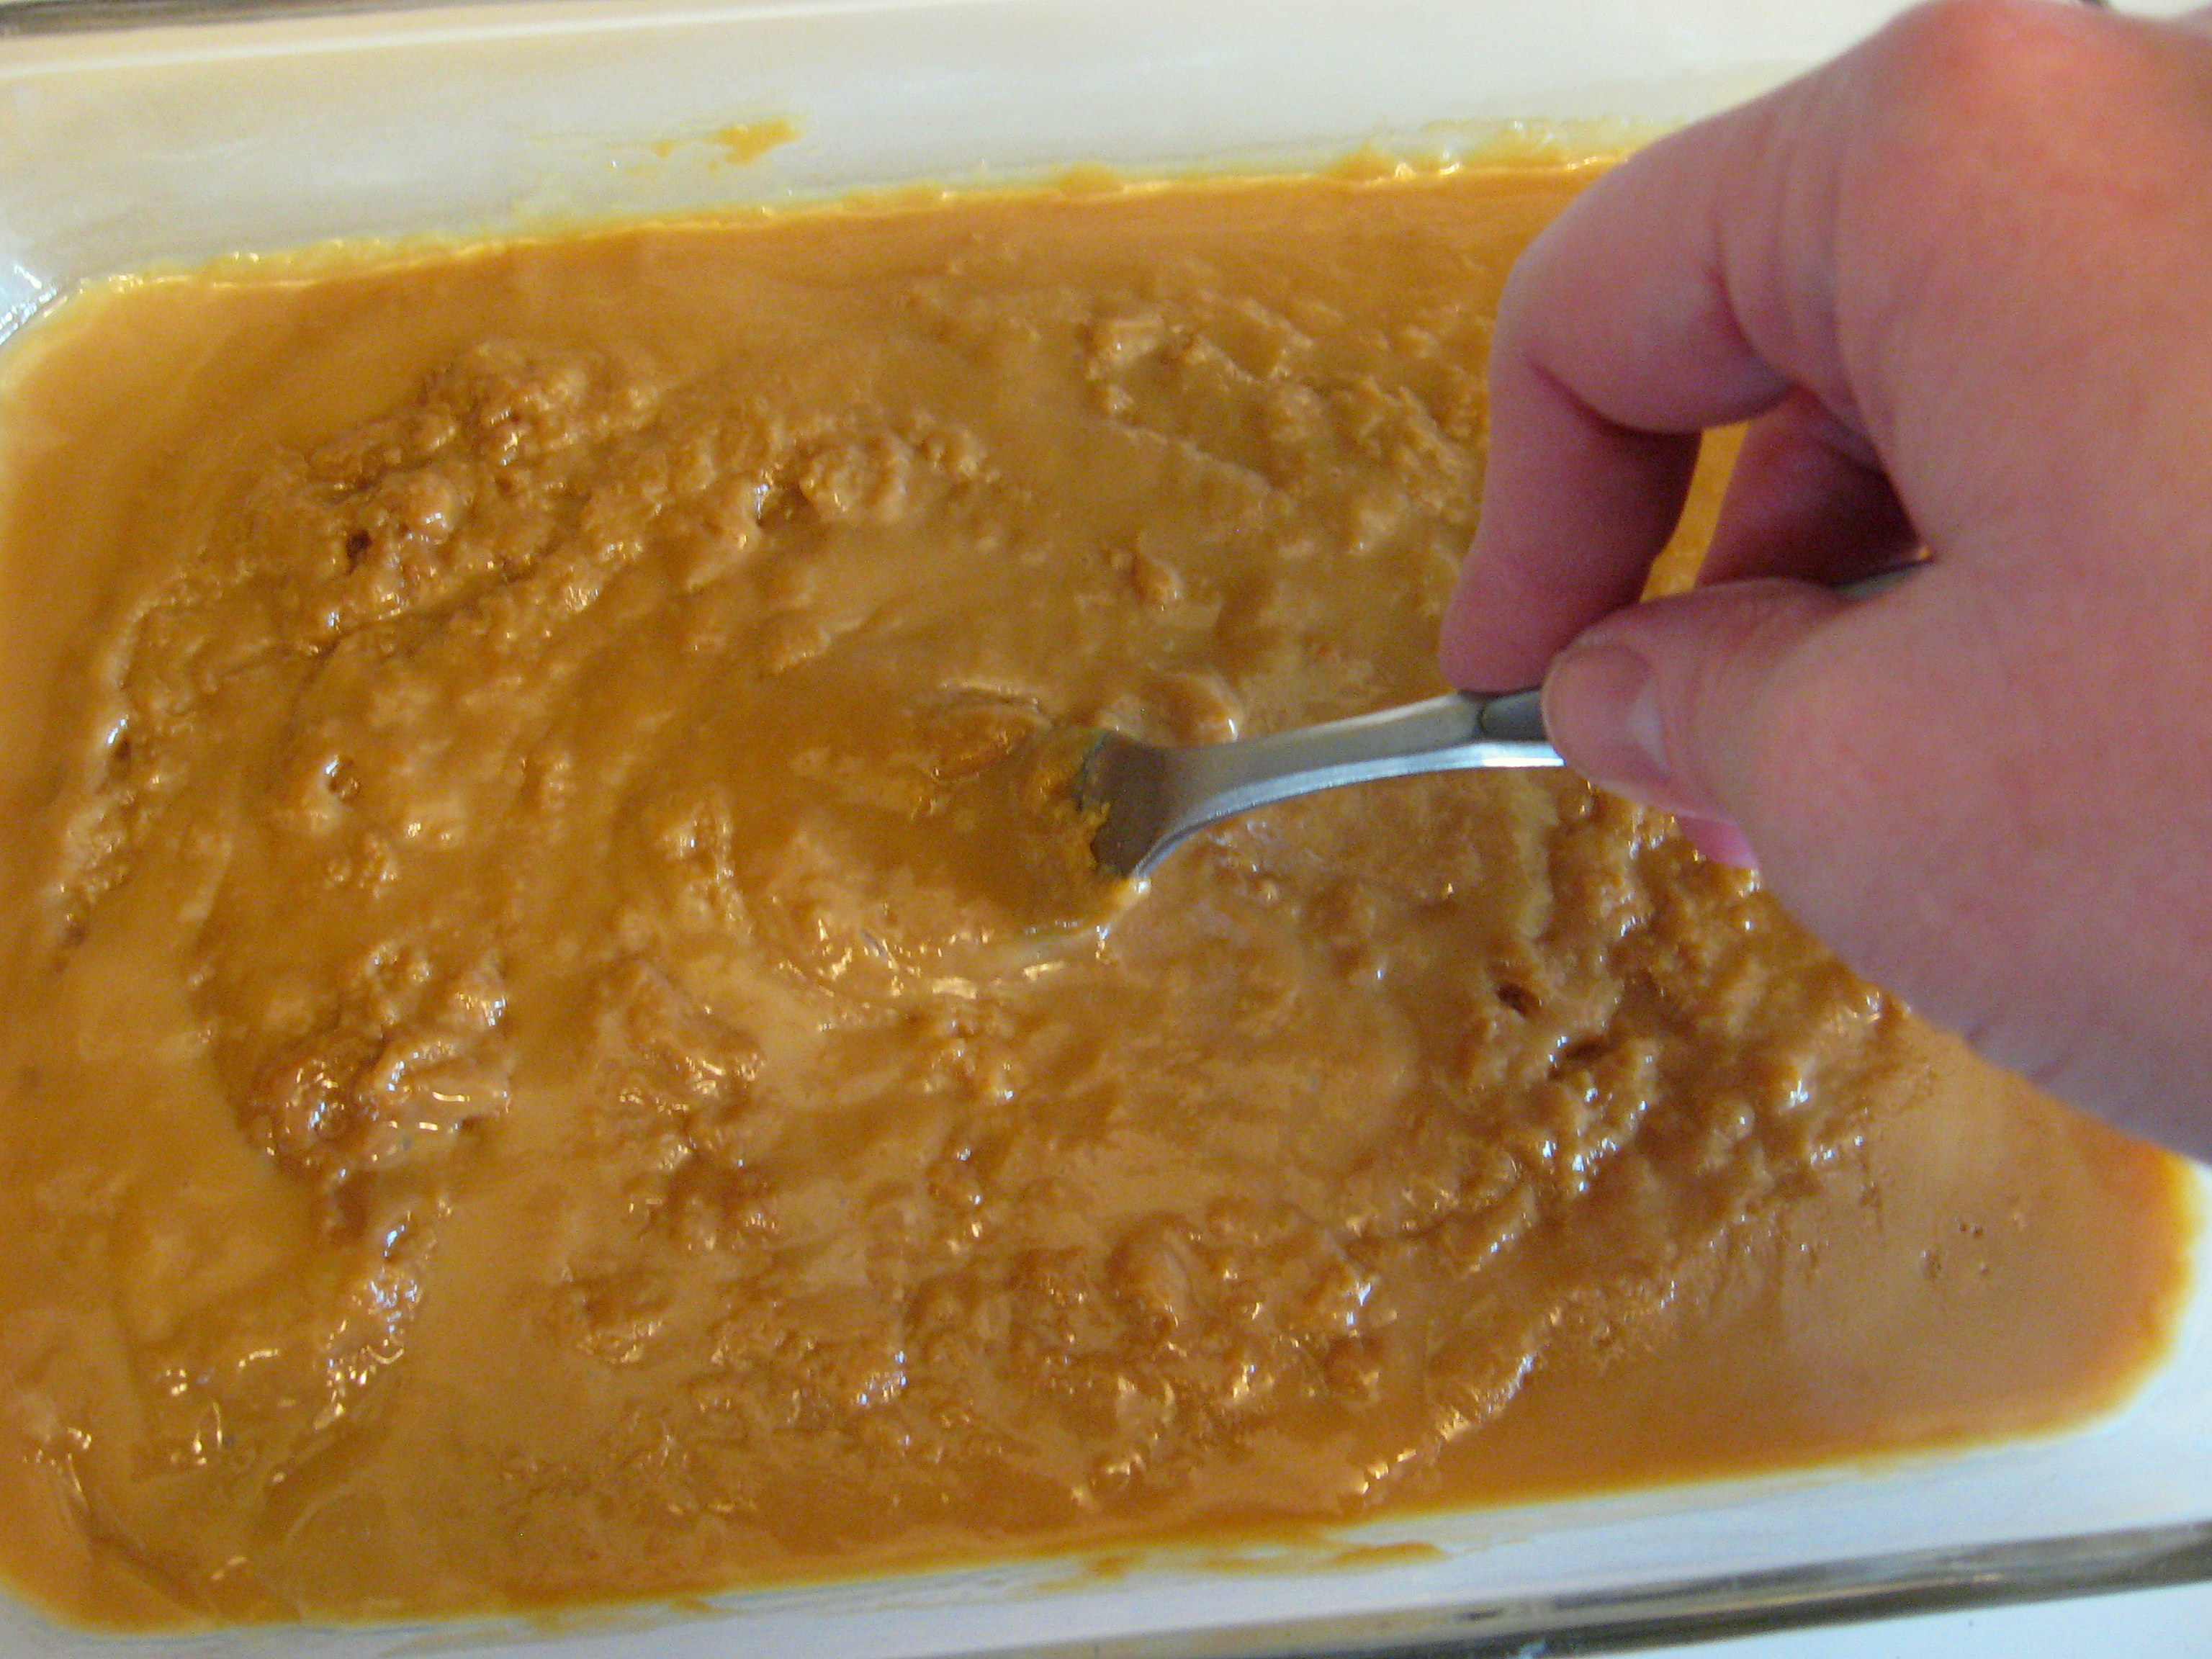
Now just try not to eat it all with a spoon…
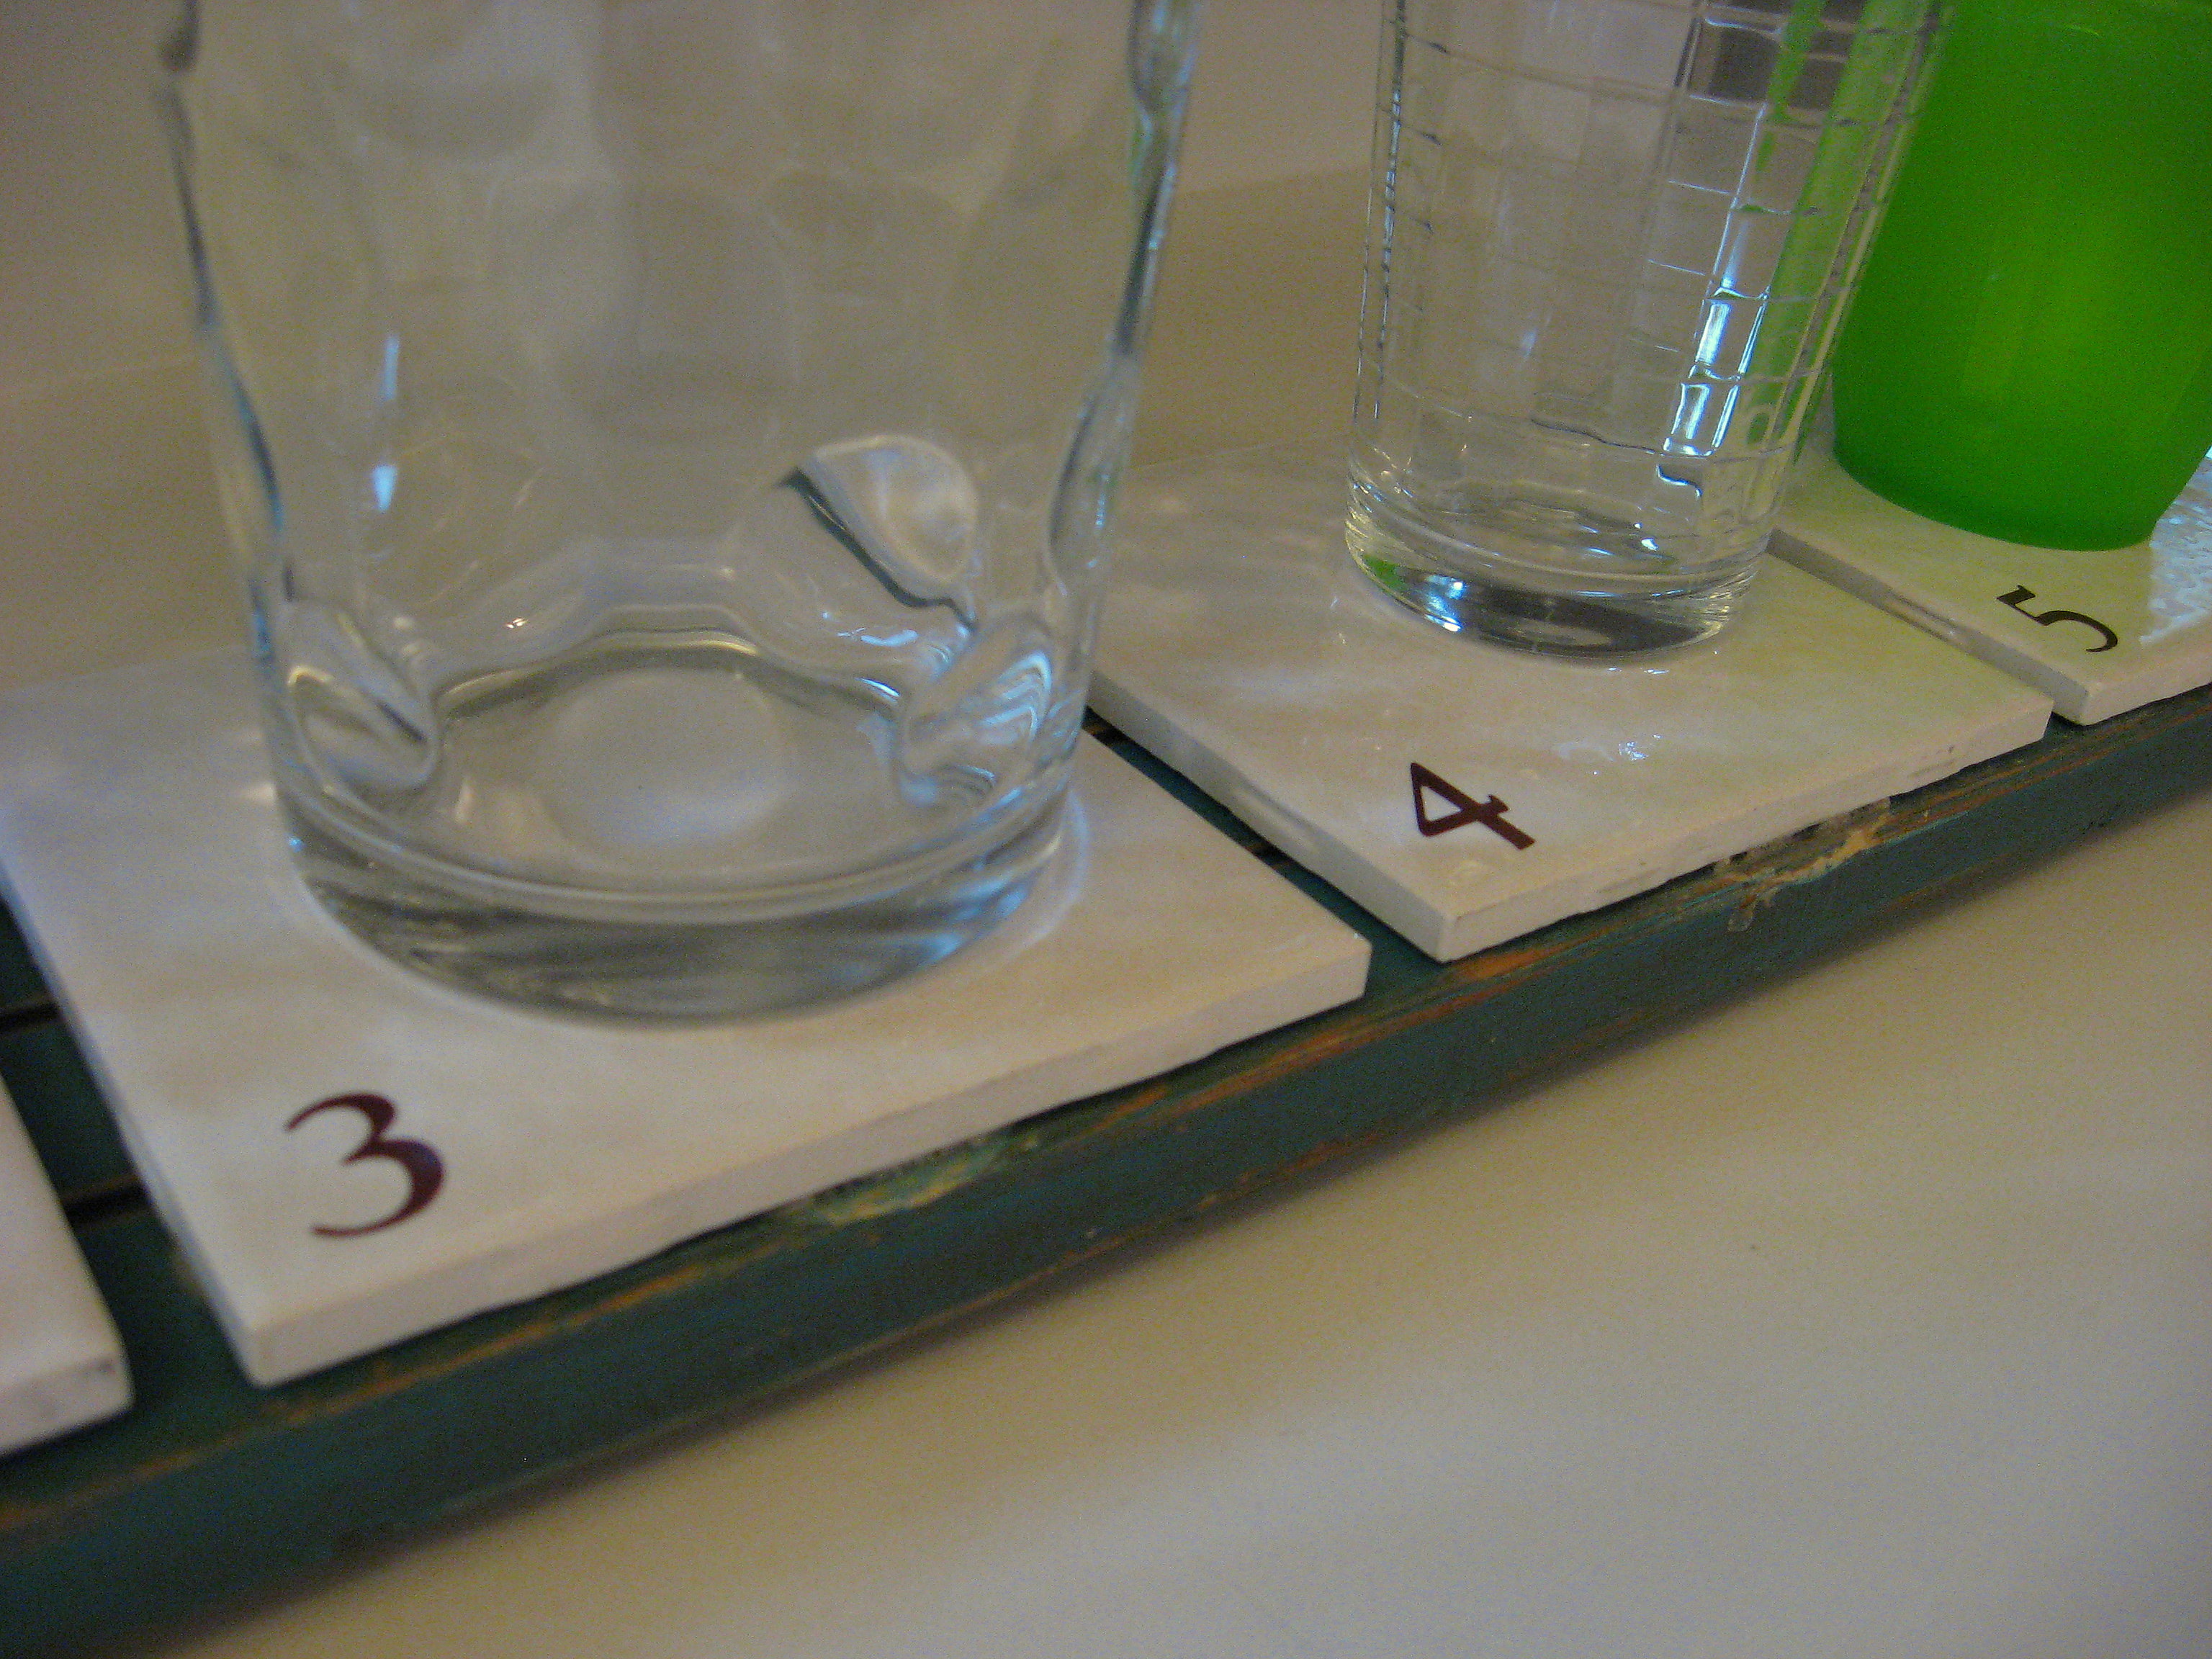
Family Coaster
At any given time, there will be a sea of cups sitting on the counter next to my sink. I swear I just get them in the dishwasher, turn around and there are more already! With summer coming, I know that is just going to get worse. In the past, I’ve resorted to buying stacks and stacks of paper cups, but that is so unfriendly to the environment! Here is my new – greener – solution; a family coaster!
Supplies needed:
Tiles or coasters (one for each family member)
A board
Paint
Rubber feet
Heavy duty adhesive like Gorilla Glue or E6000
Stickers (optional)
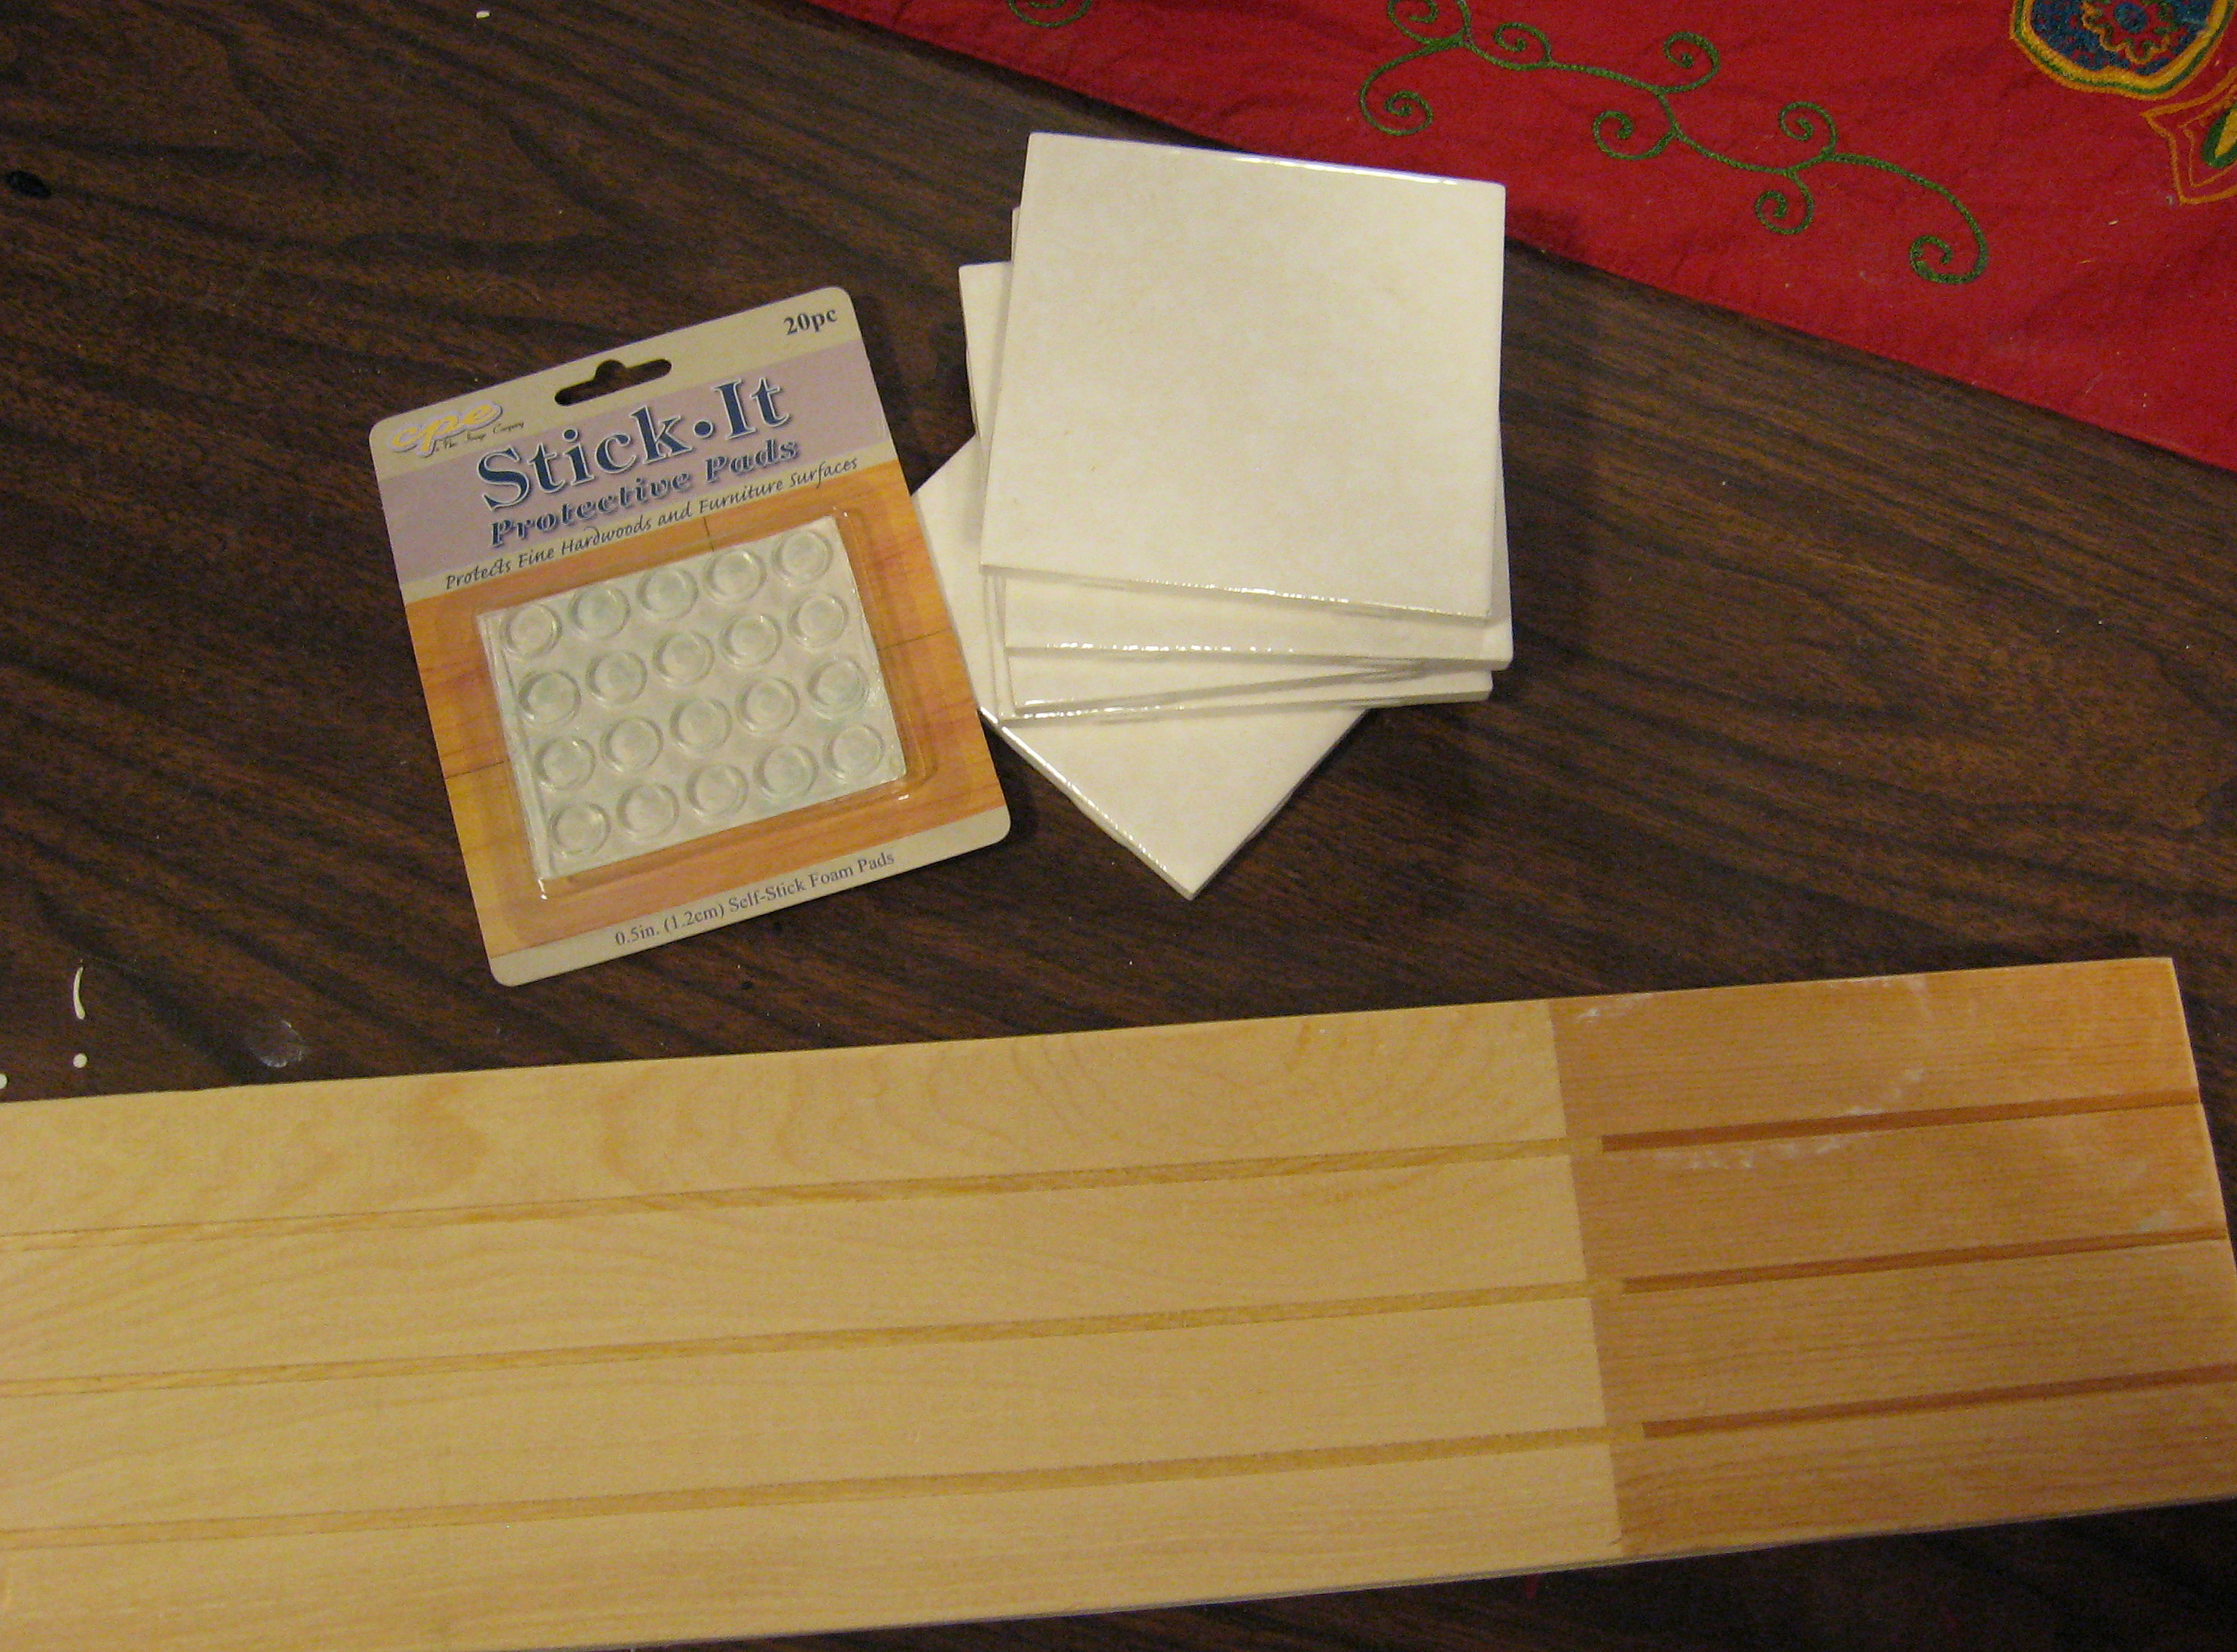
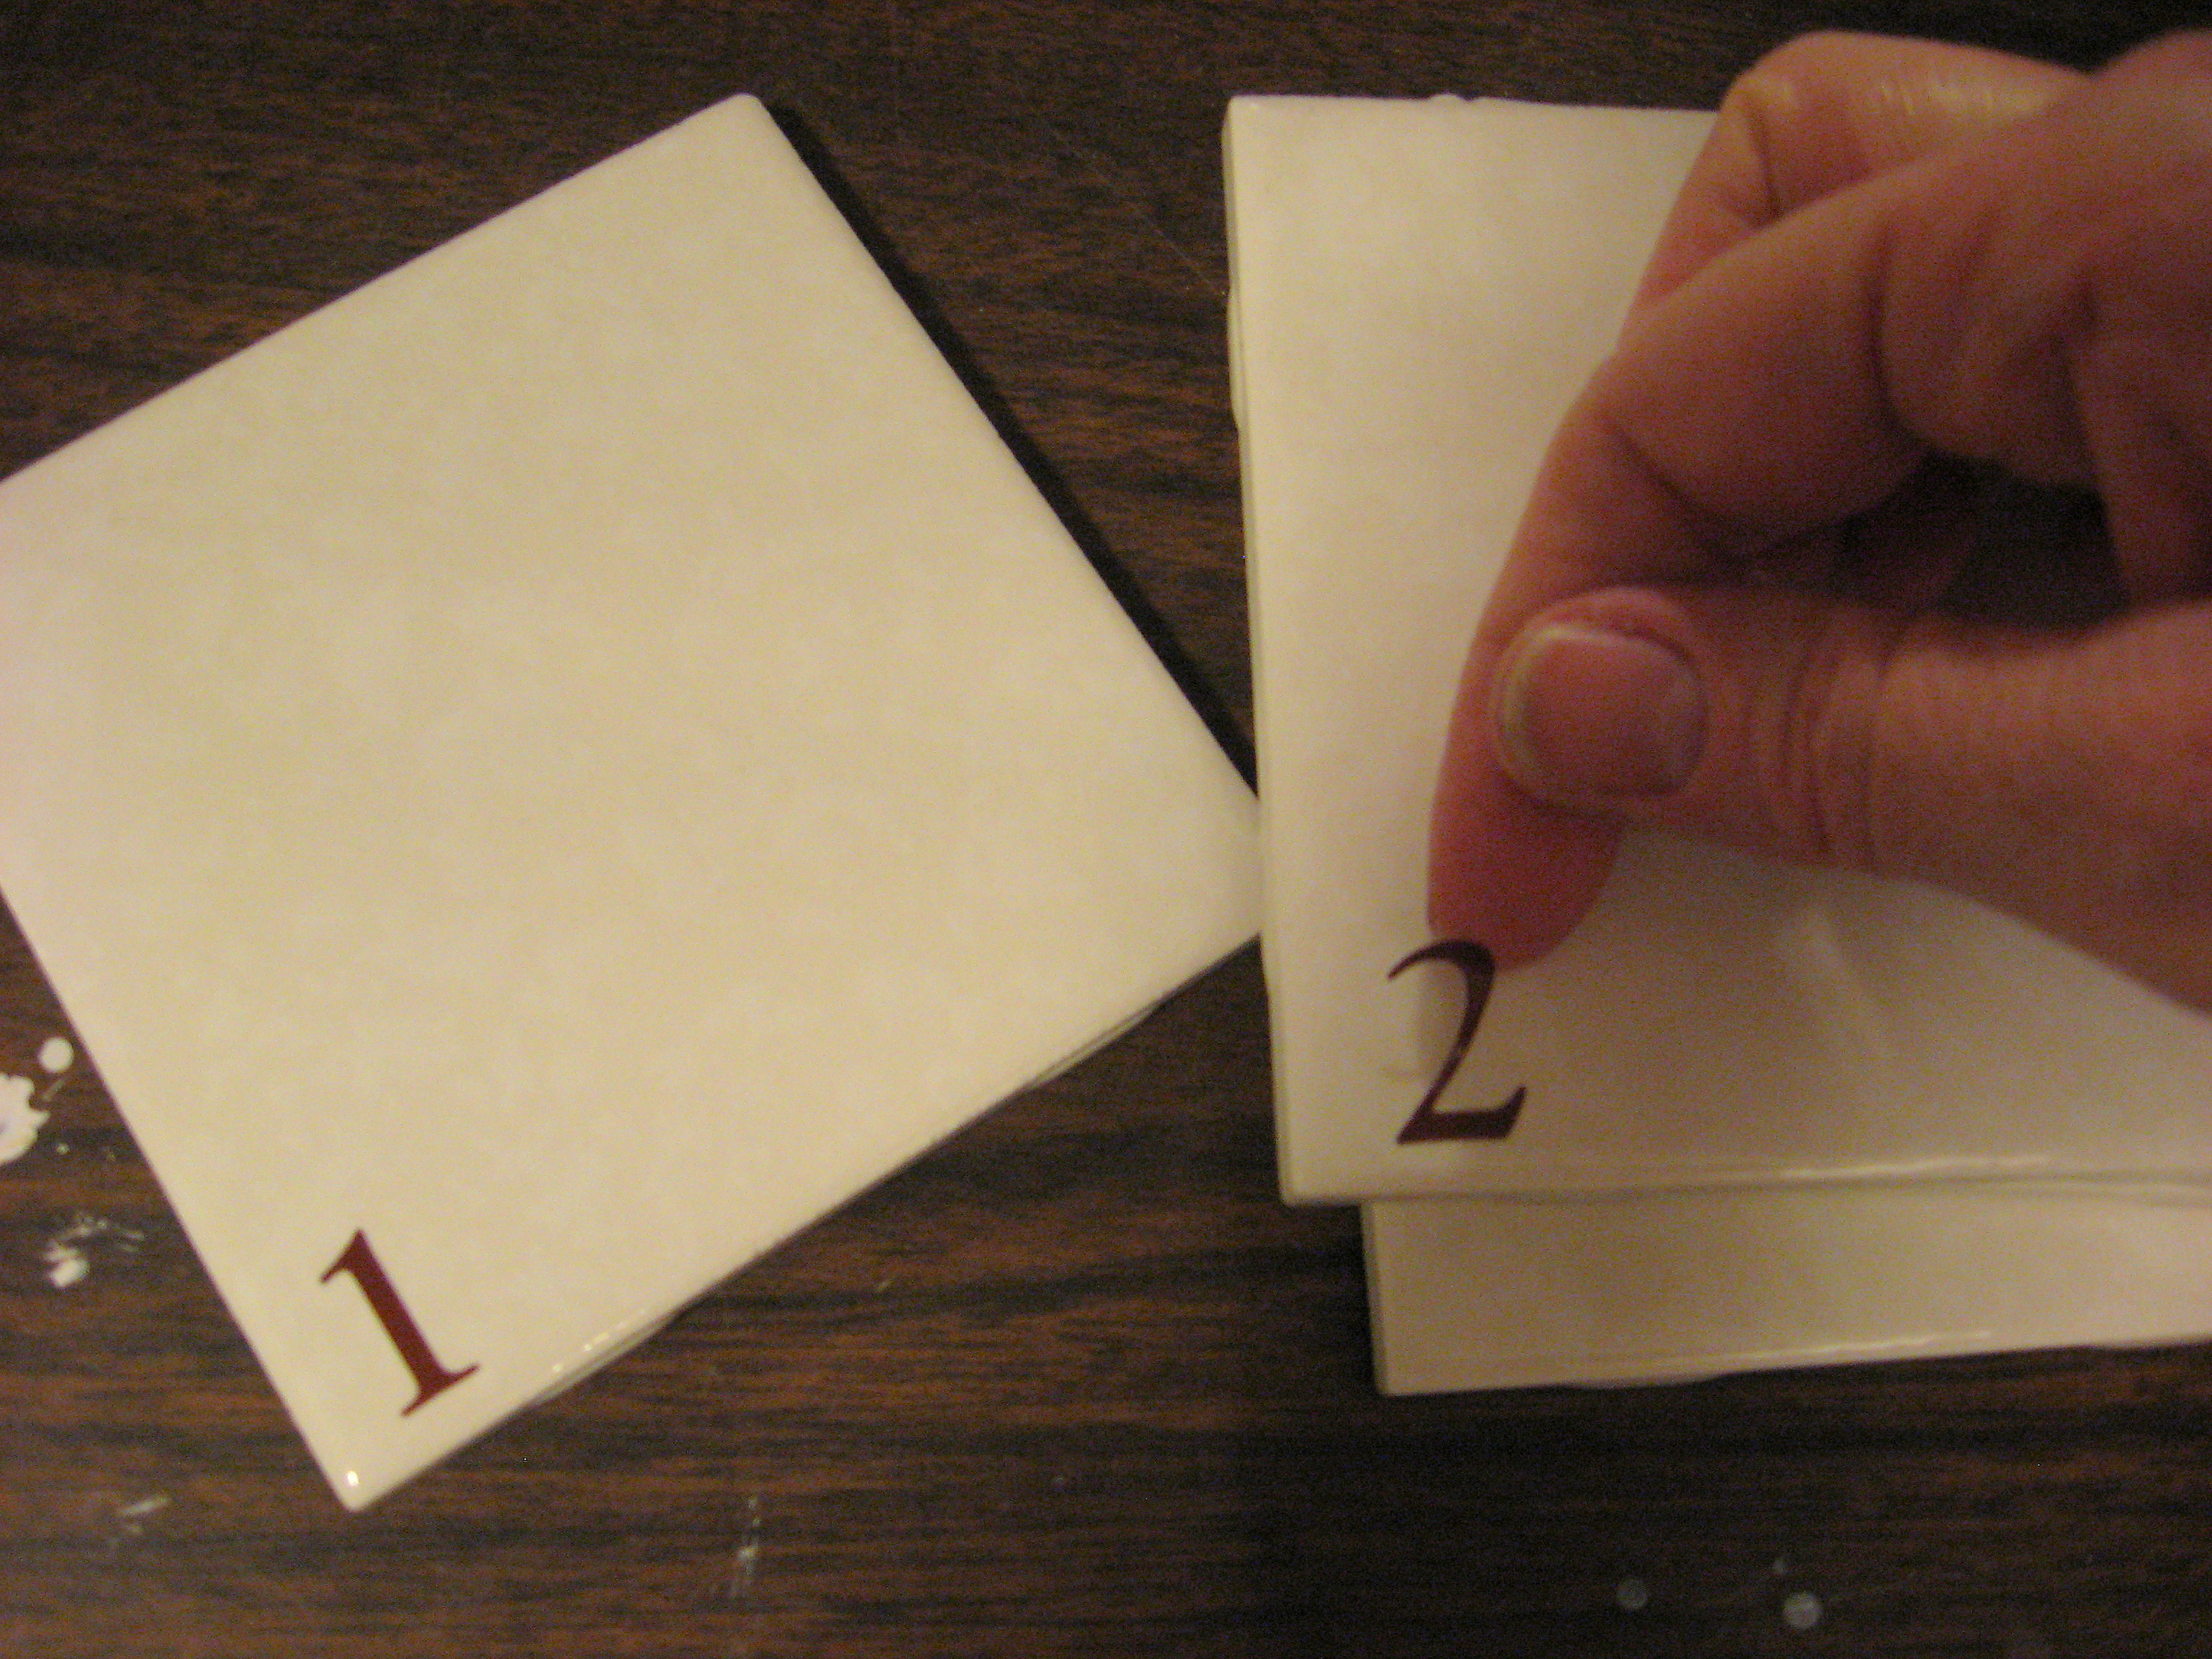
I bought these tiles at Home Depot for $ .19 each. There were more expensive ones, but there were also even cheaper ones. You could also use coasters. Once you have your tiles picked out, lay them out with a space between them and measure to determine how long your board needs to be.
You can buy a board from any home improvement store; just go with whatever is cheapest. They should cut it for you if you need them to. Or, look in the aisle of the lumber section – or sometimes up front near the entry – they will often have a metal cart full of board ends that they sell for cheap.
For me, I looked through my stash of boards in my garage and found this piece of trim that we ripped out in a remodel and decided to use the back of it; I liked how it had the ridges.
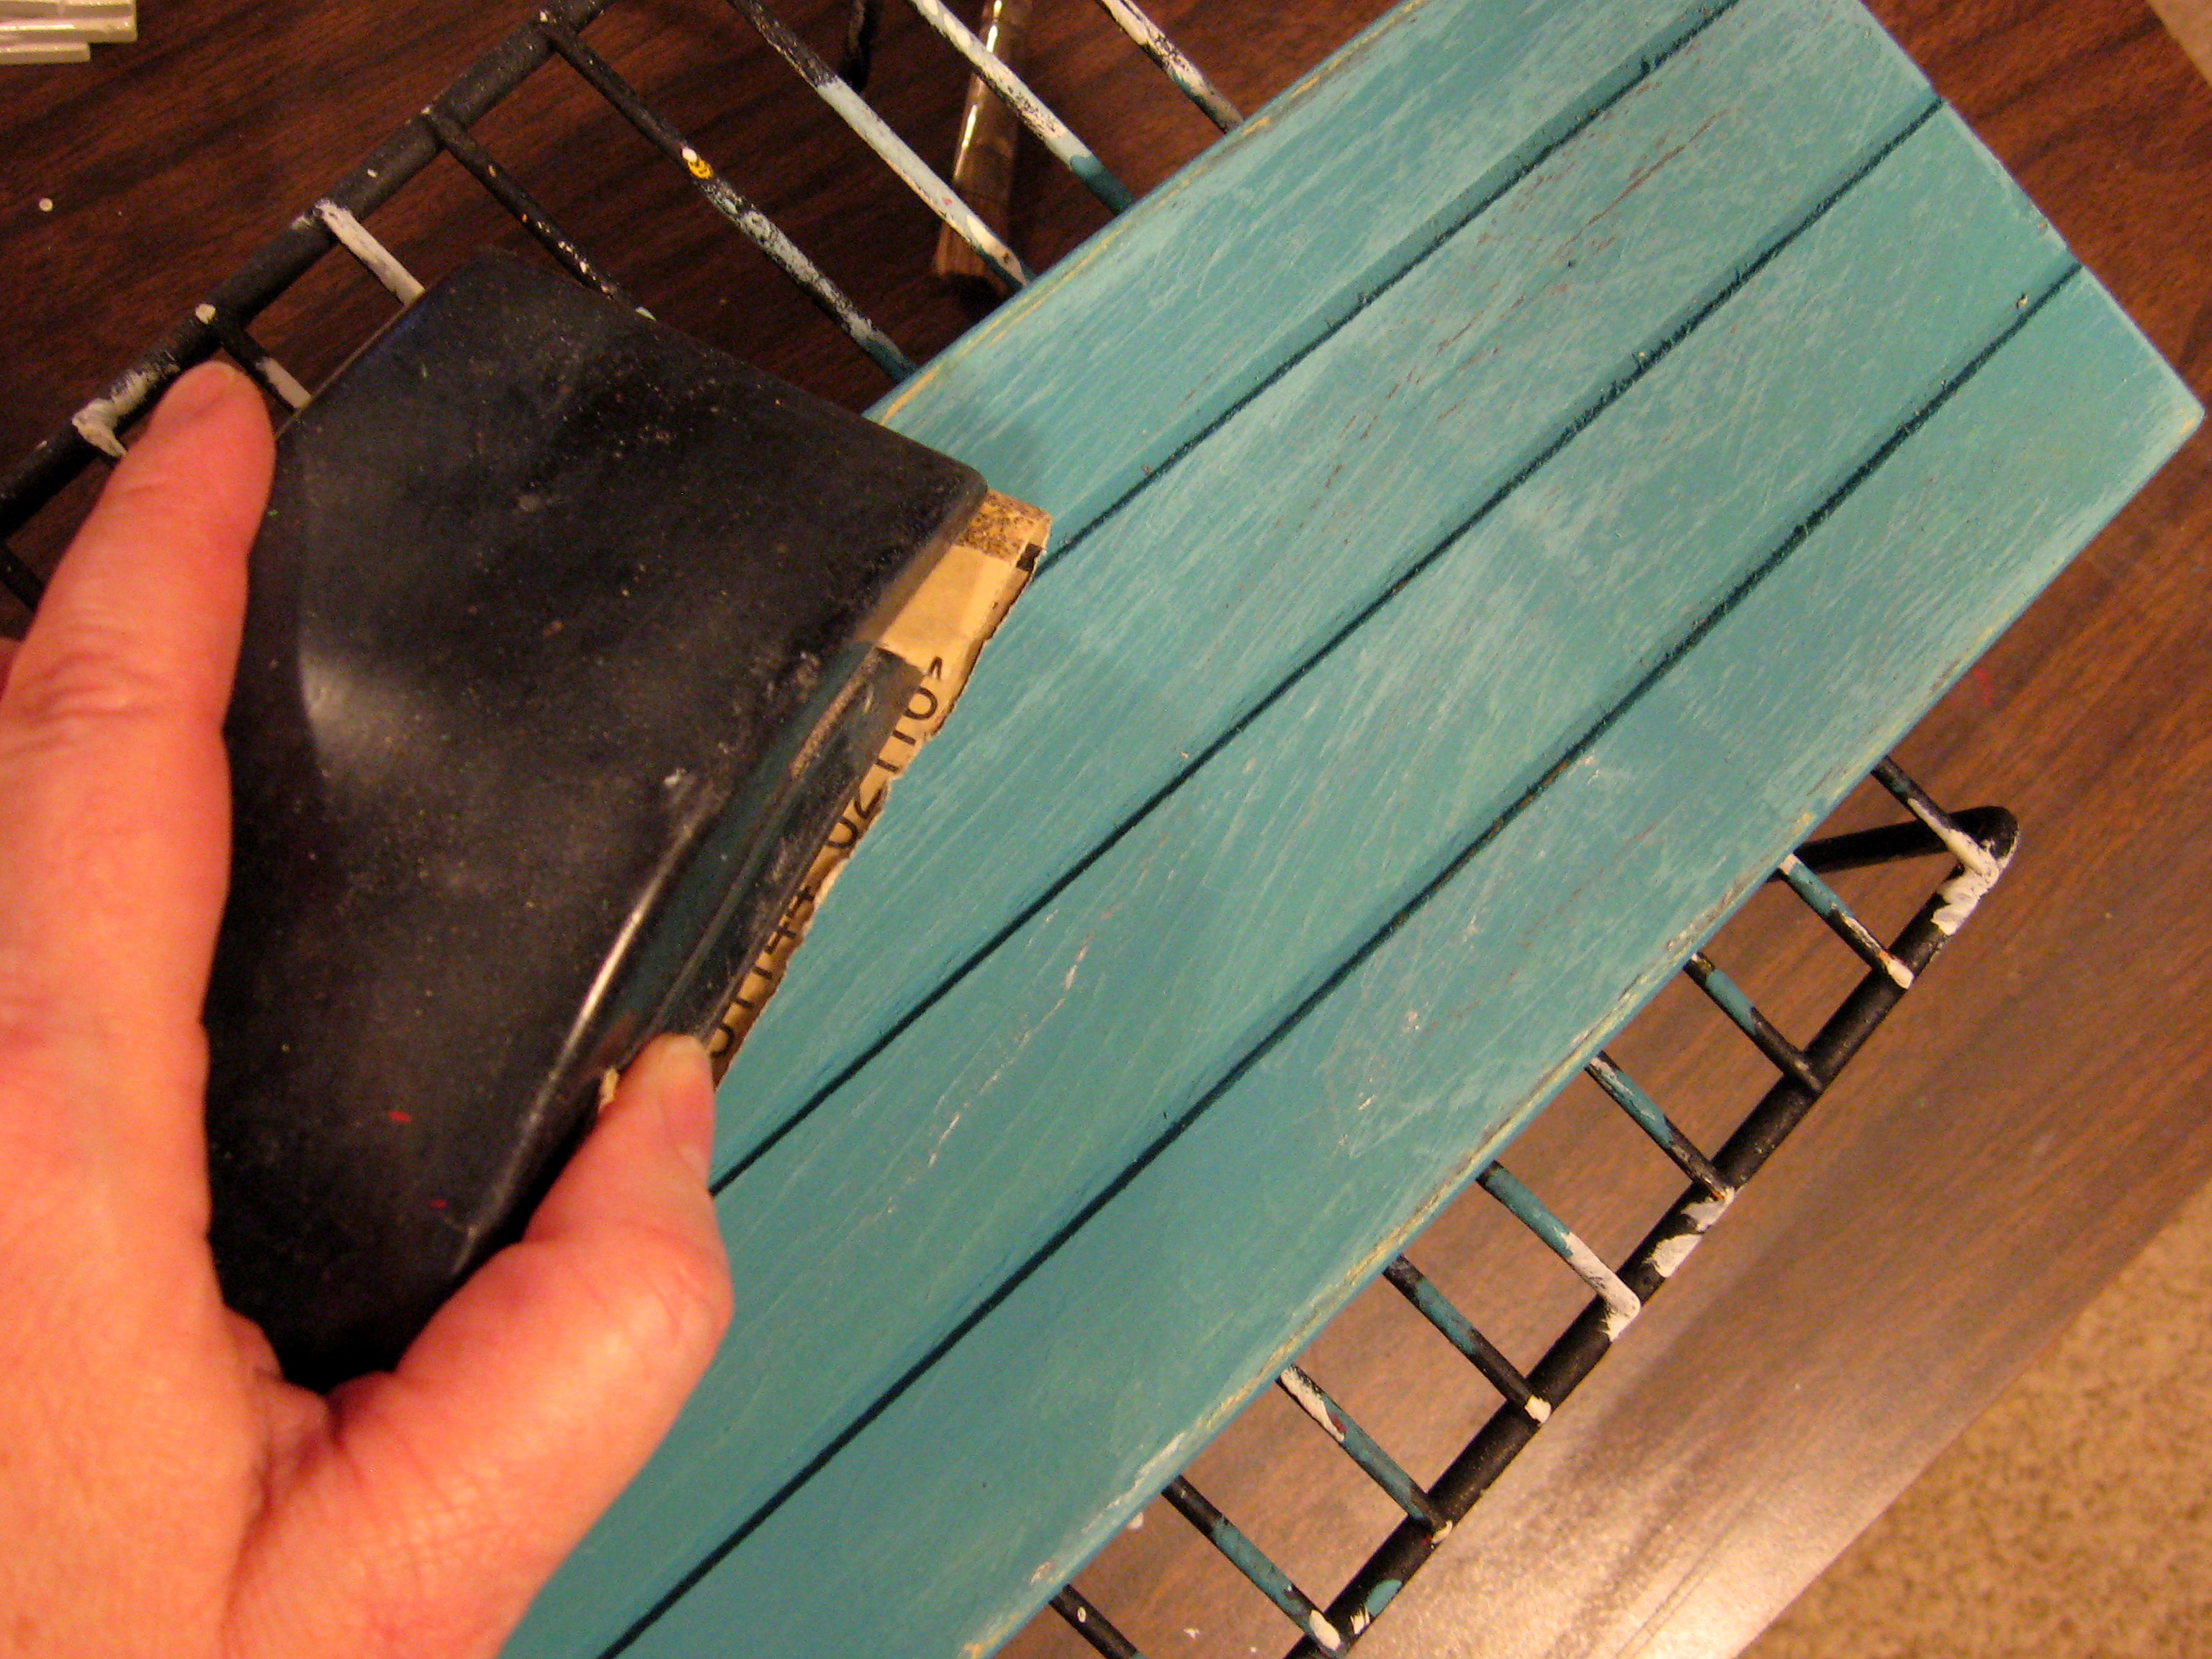
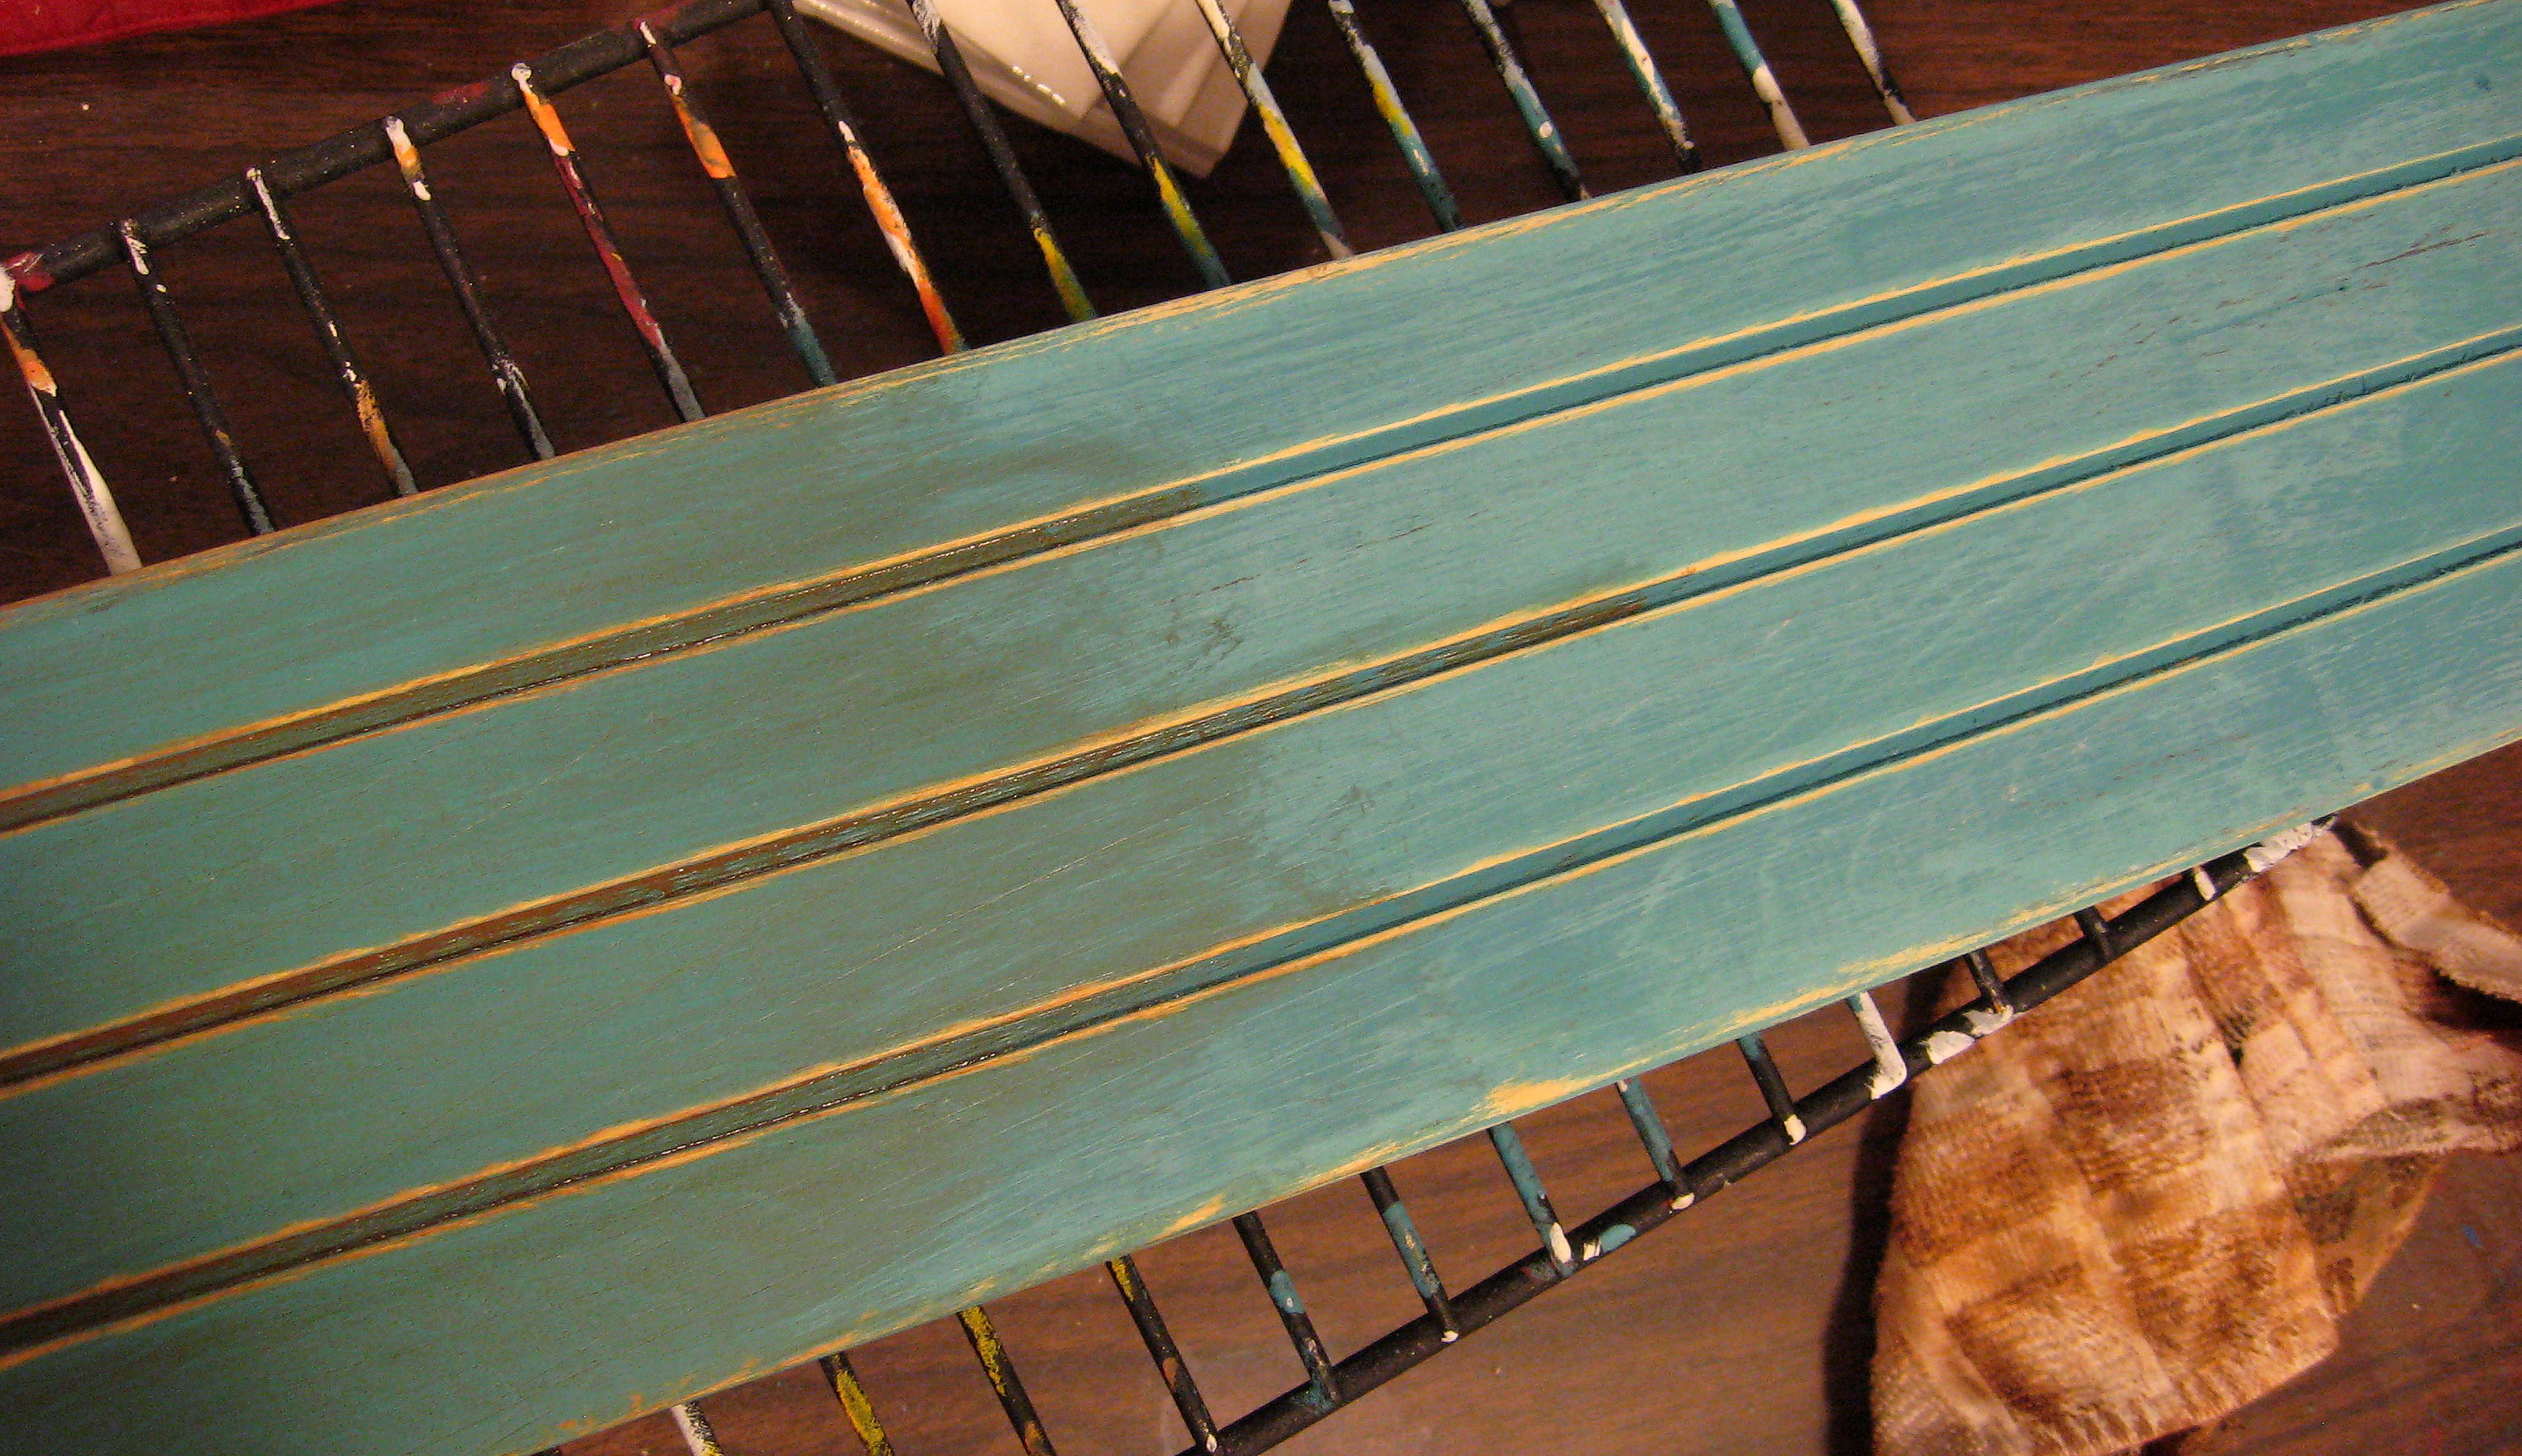
Sand your board down if you need to, then paint the whole thing front and back and let it dry.
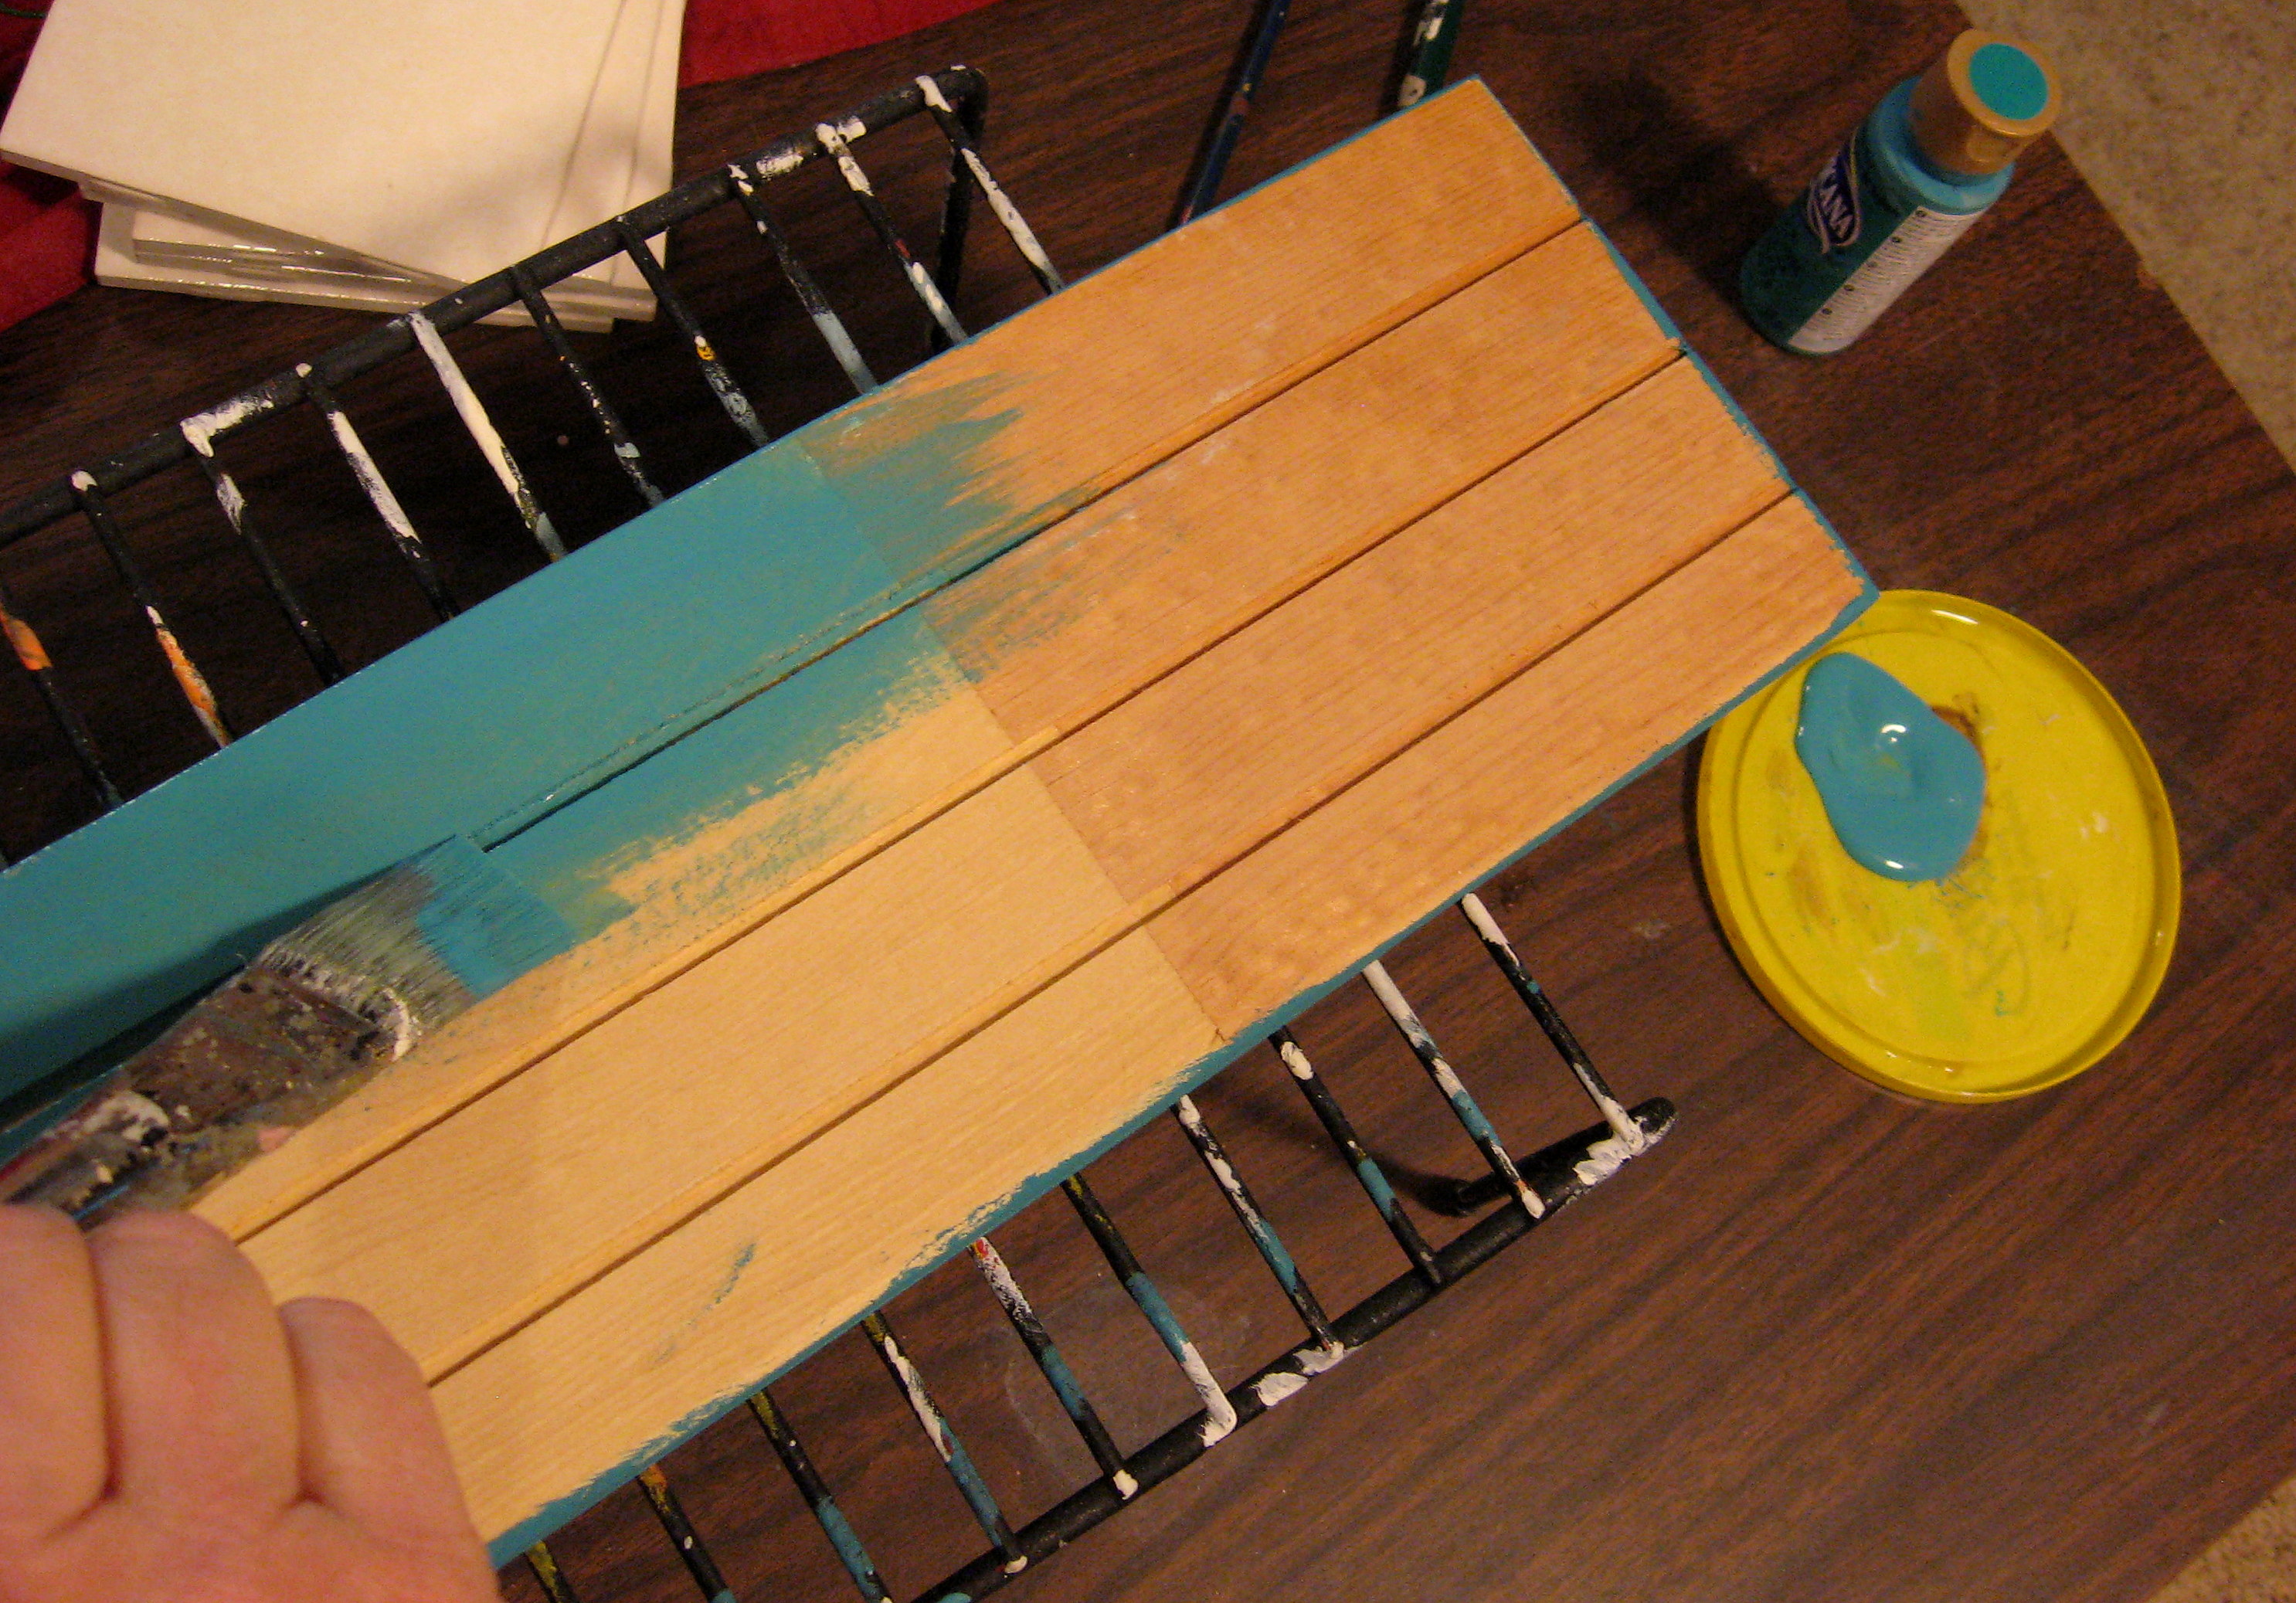
If you don’t want it distressed, I would put two coats. I like mine roughed up, so I did one heavy coat, then distressed it with a sanding block.
Now, I brushed the top and sides with stain, making sure to get it down in the ridges.
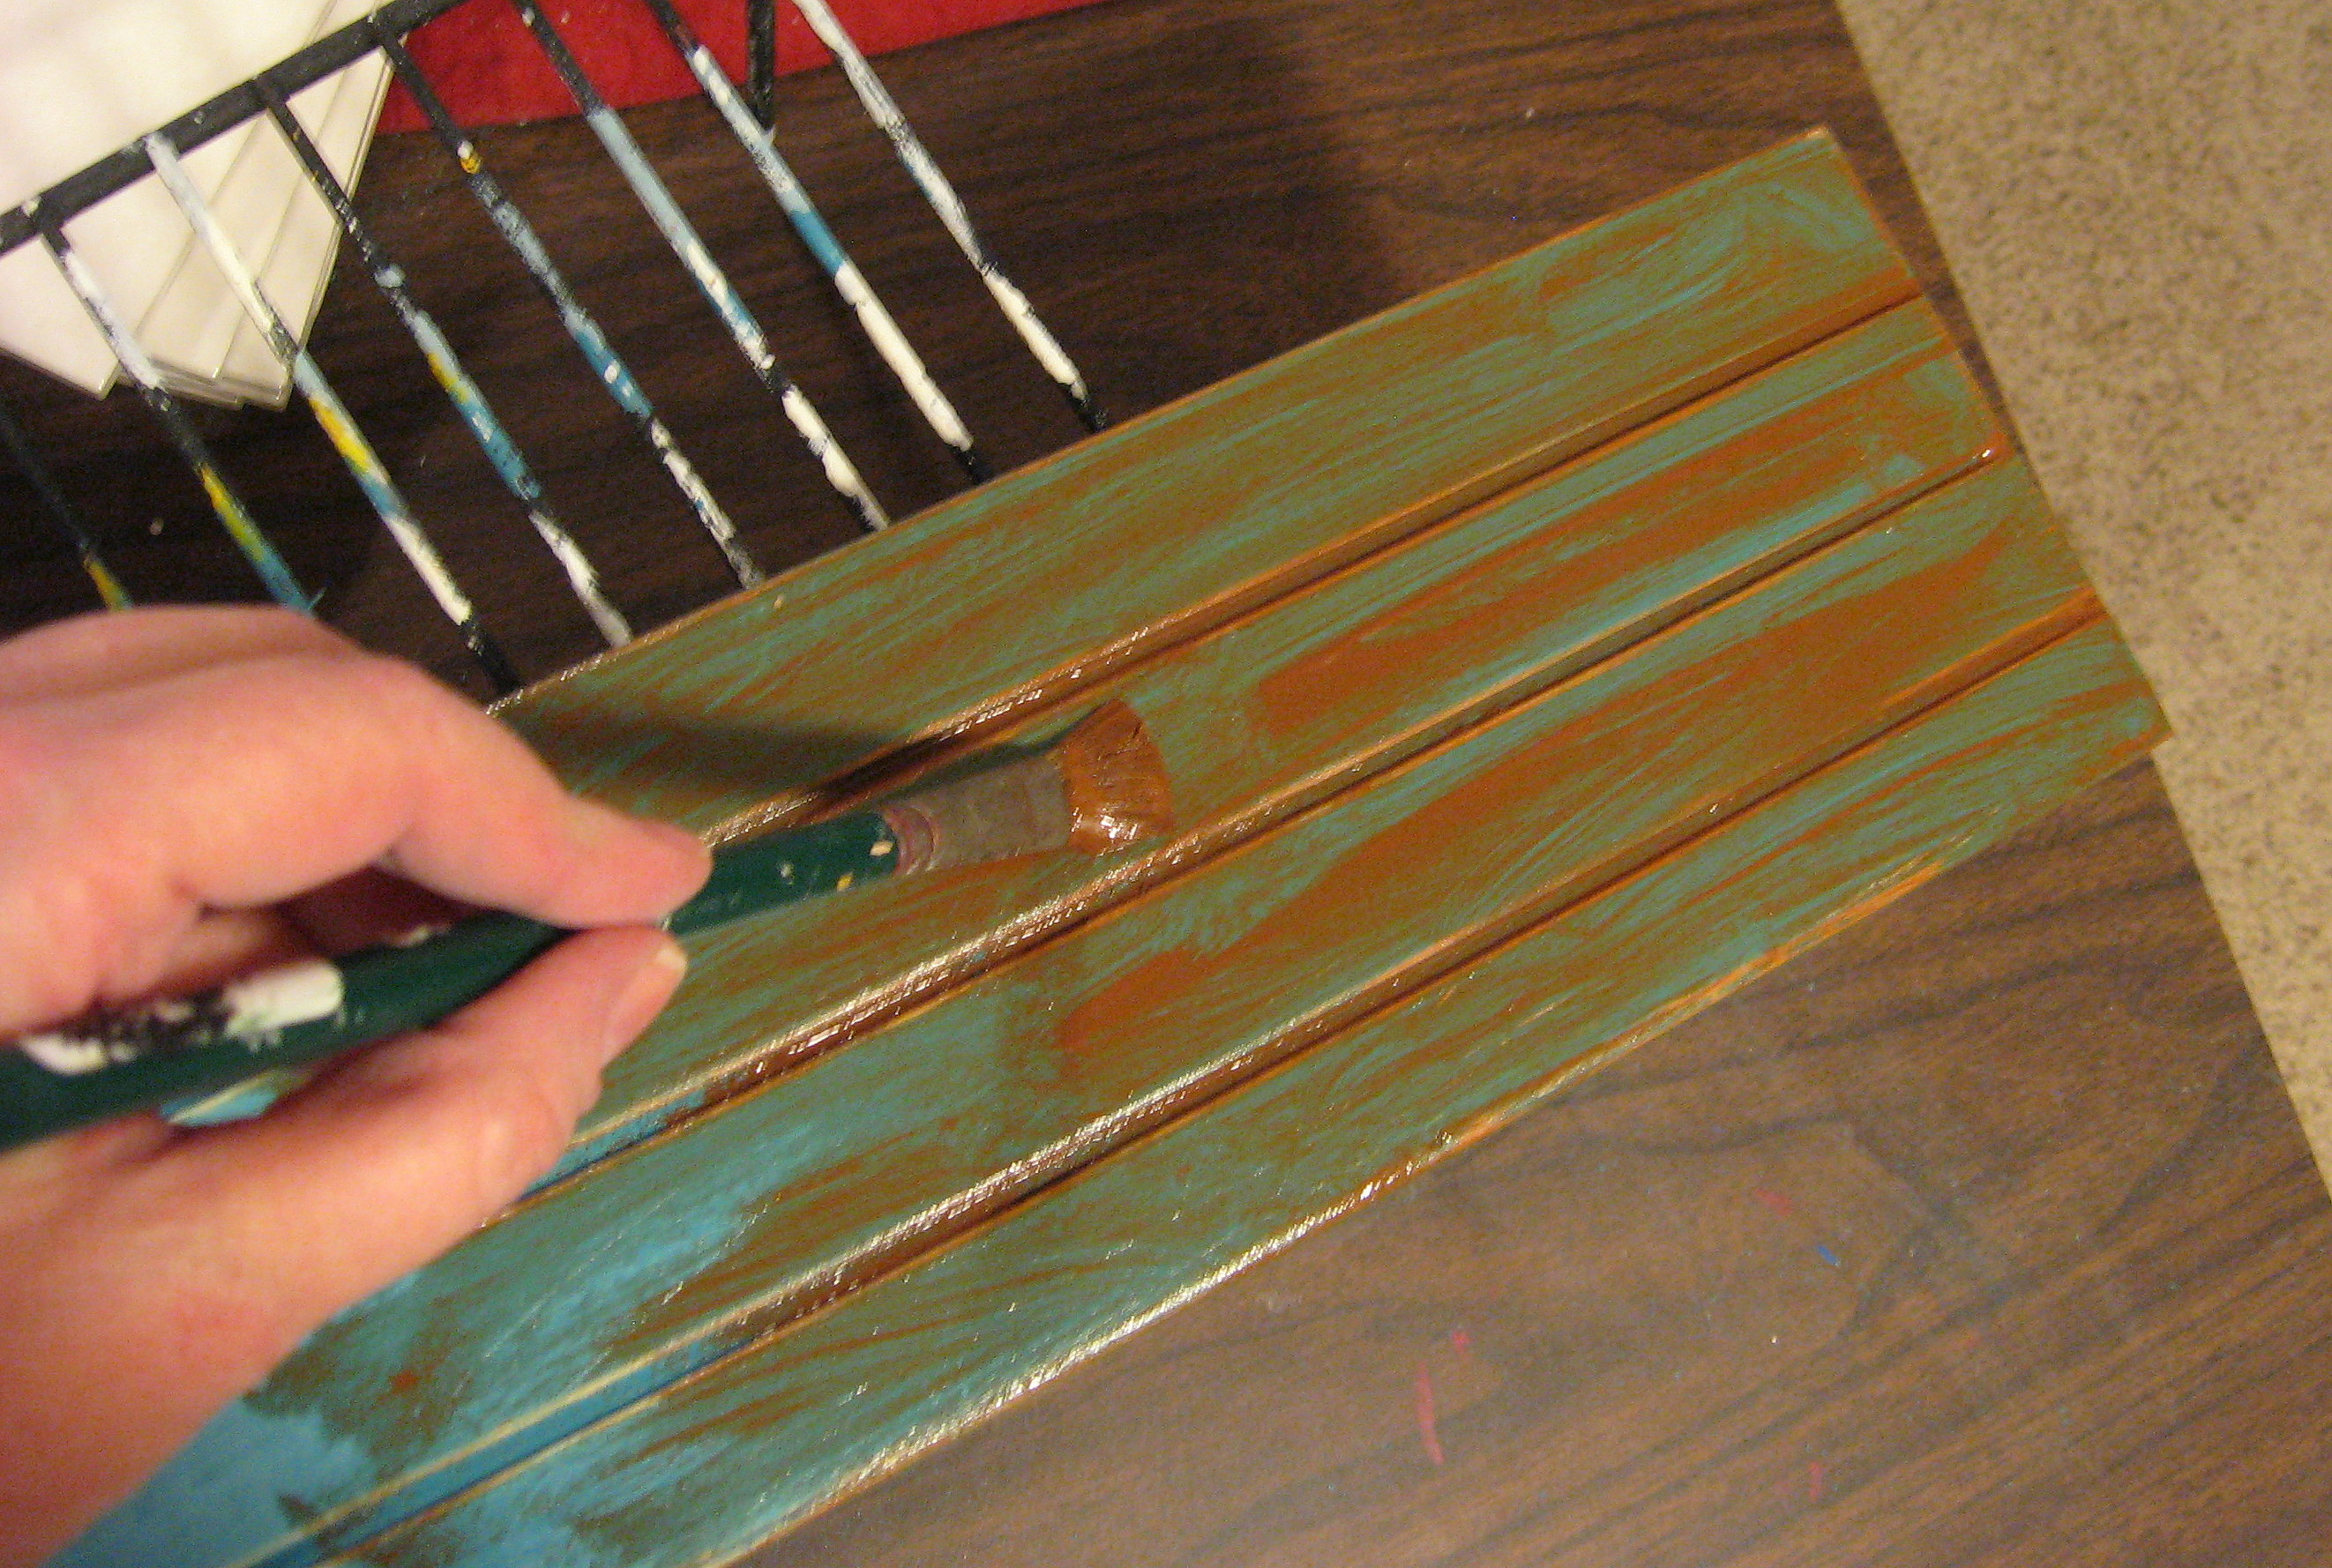
Using a rag, wipe it back off until you like the look of it. I like to leave a little more stain down in any nicks or ridges.
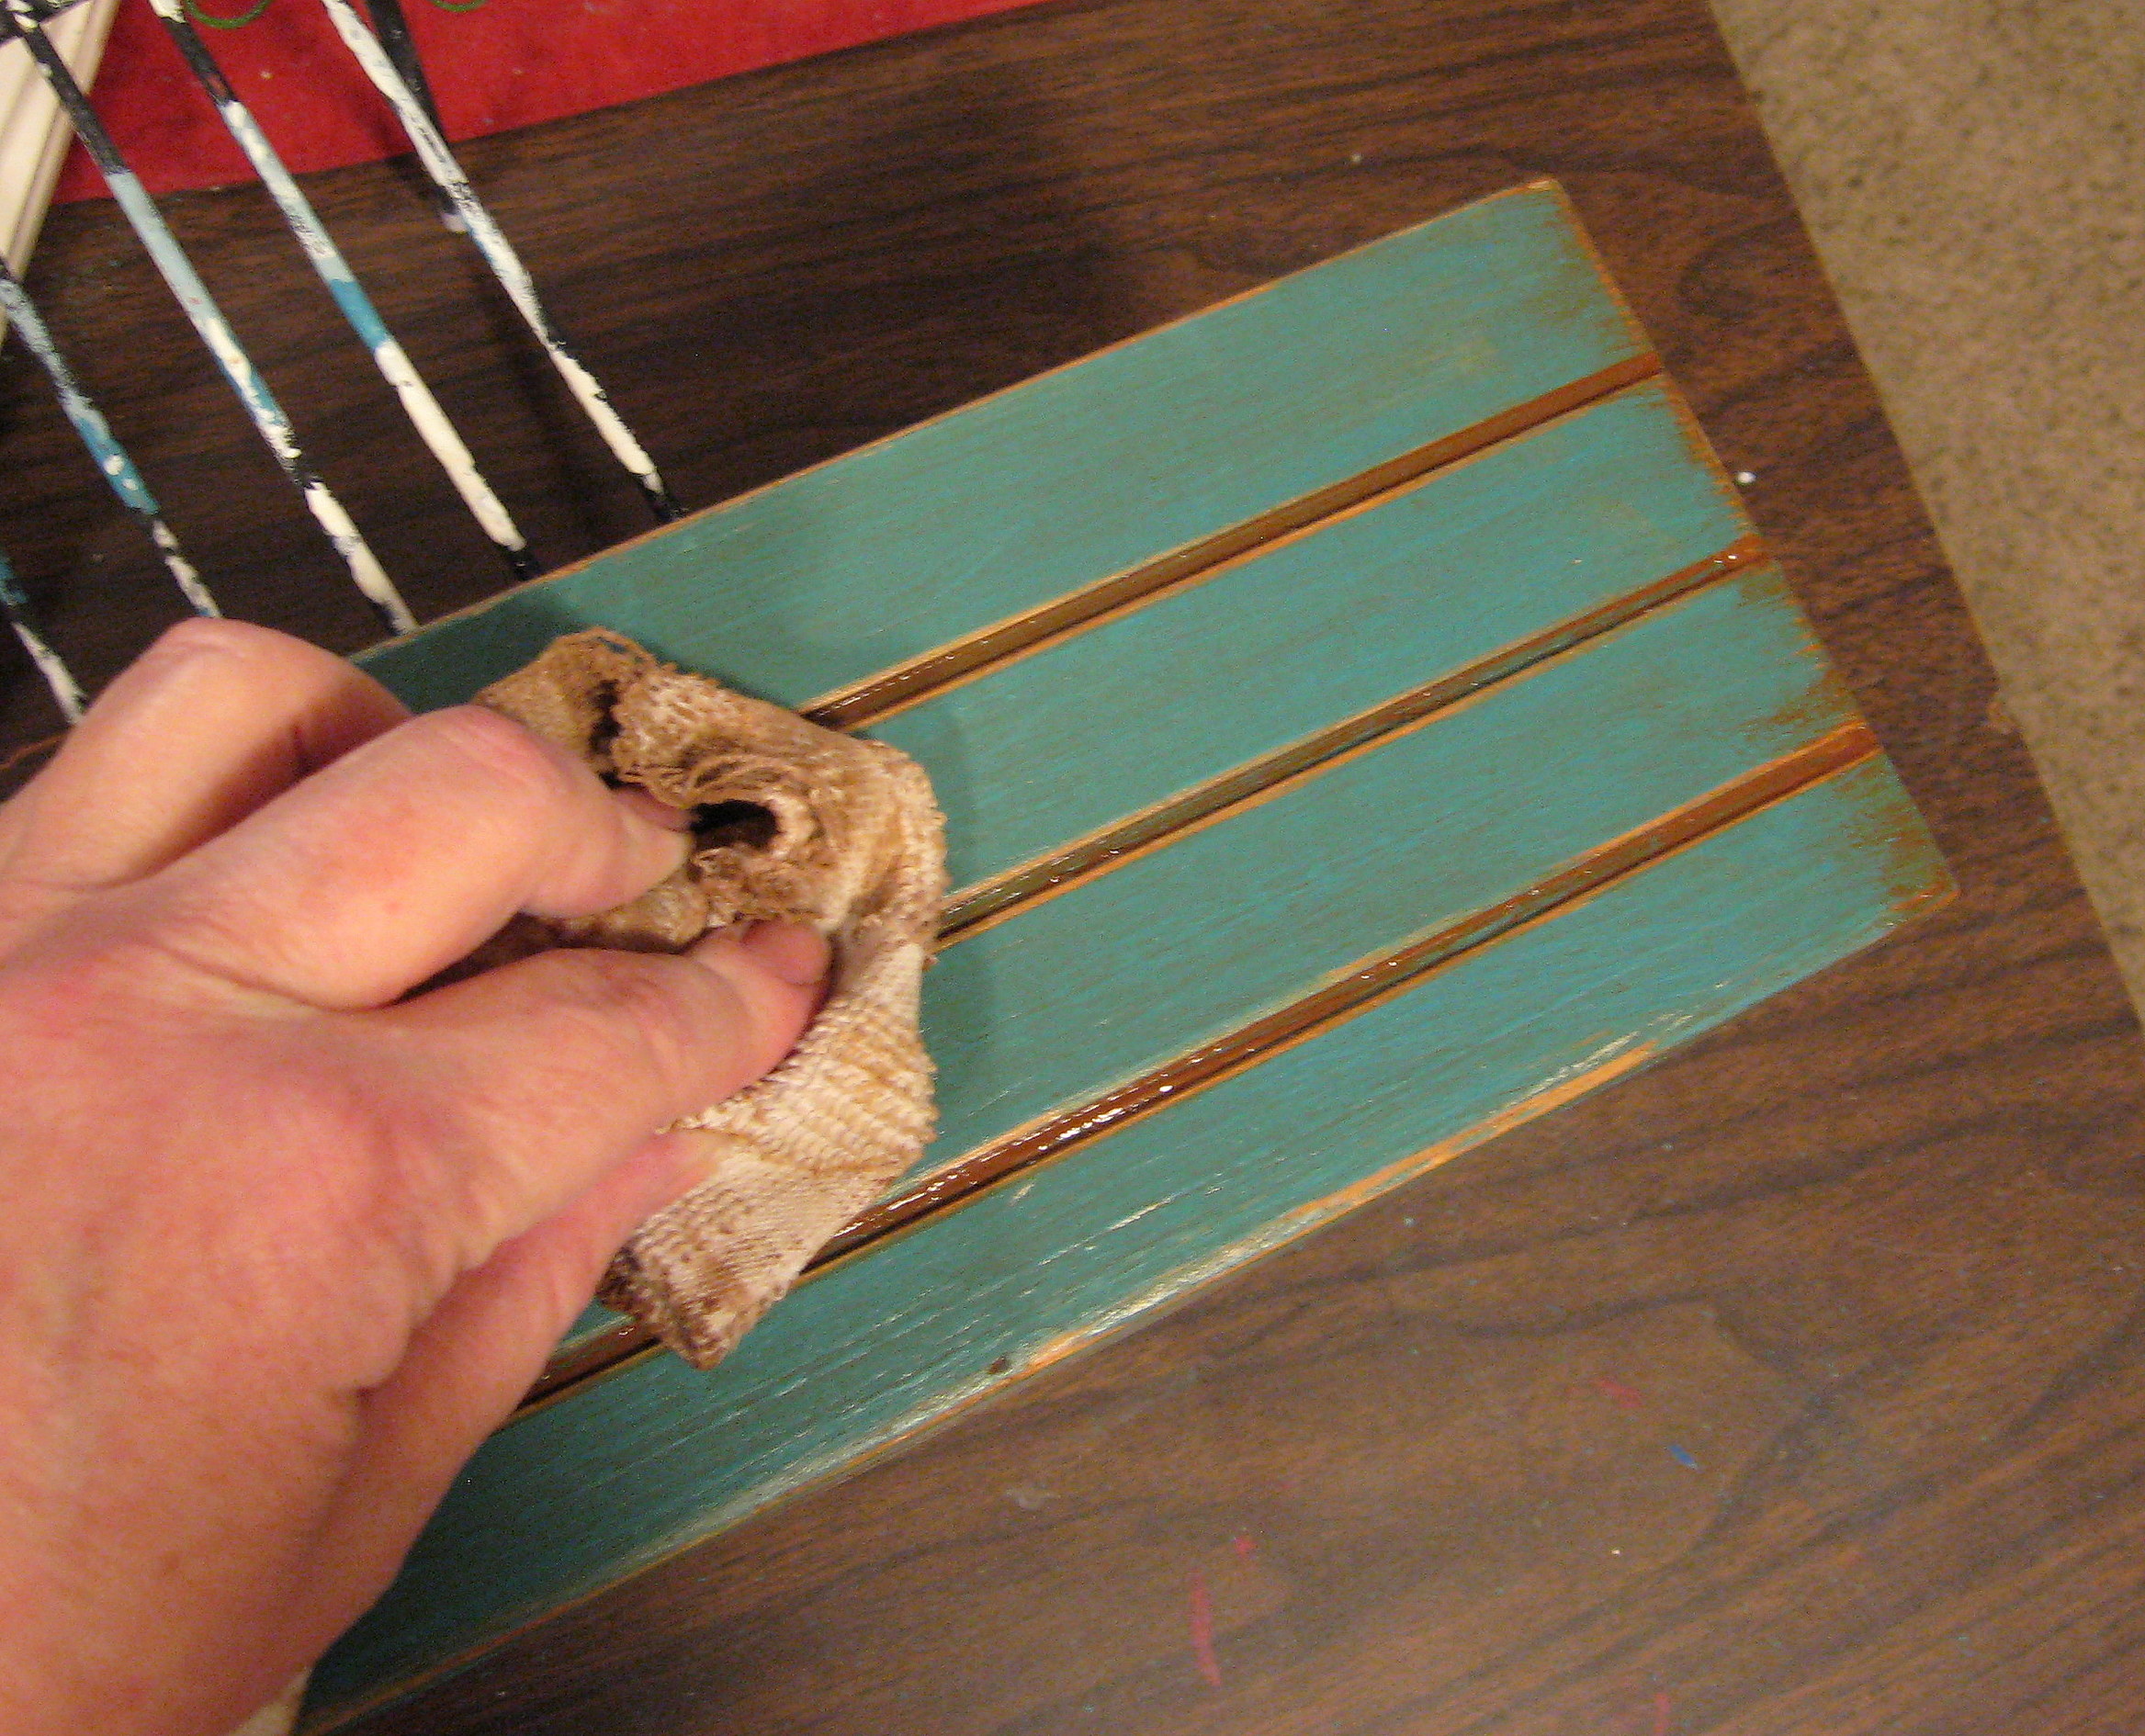
This is just so you can see the difference; stained on the left, not yet stained on the right.
Let that stain dry well. In the meantime, wash the tiles with some window cleaner and get them ready to adhere to the board.
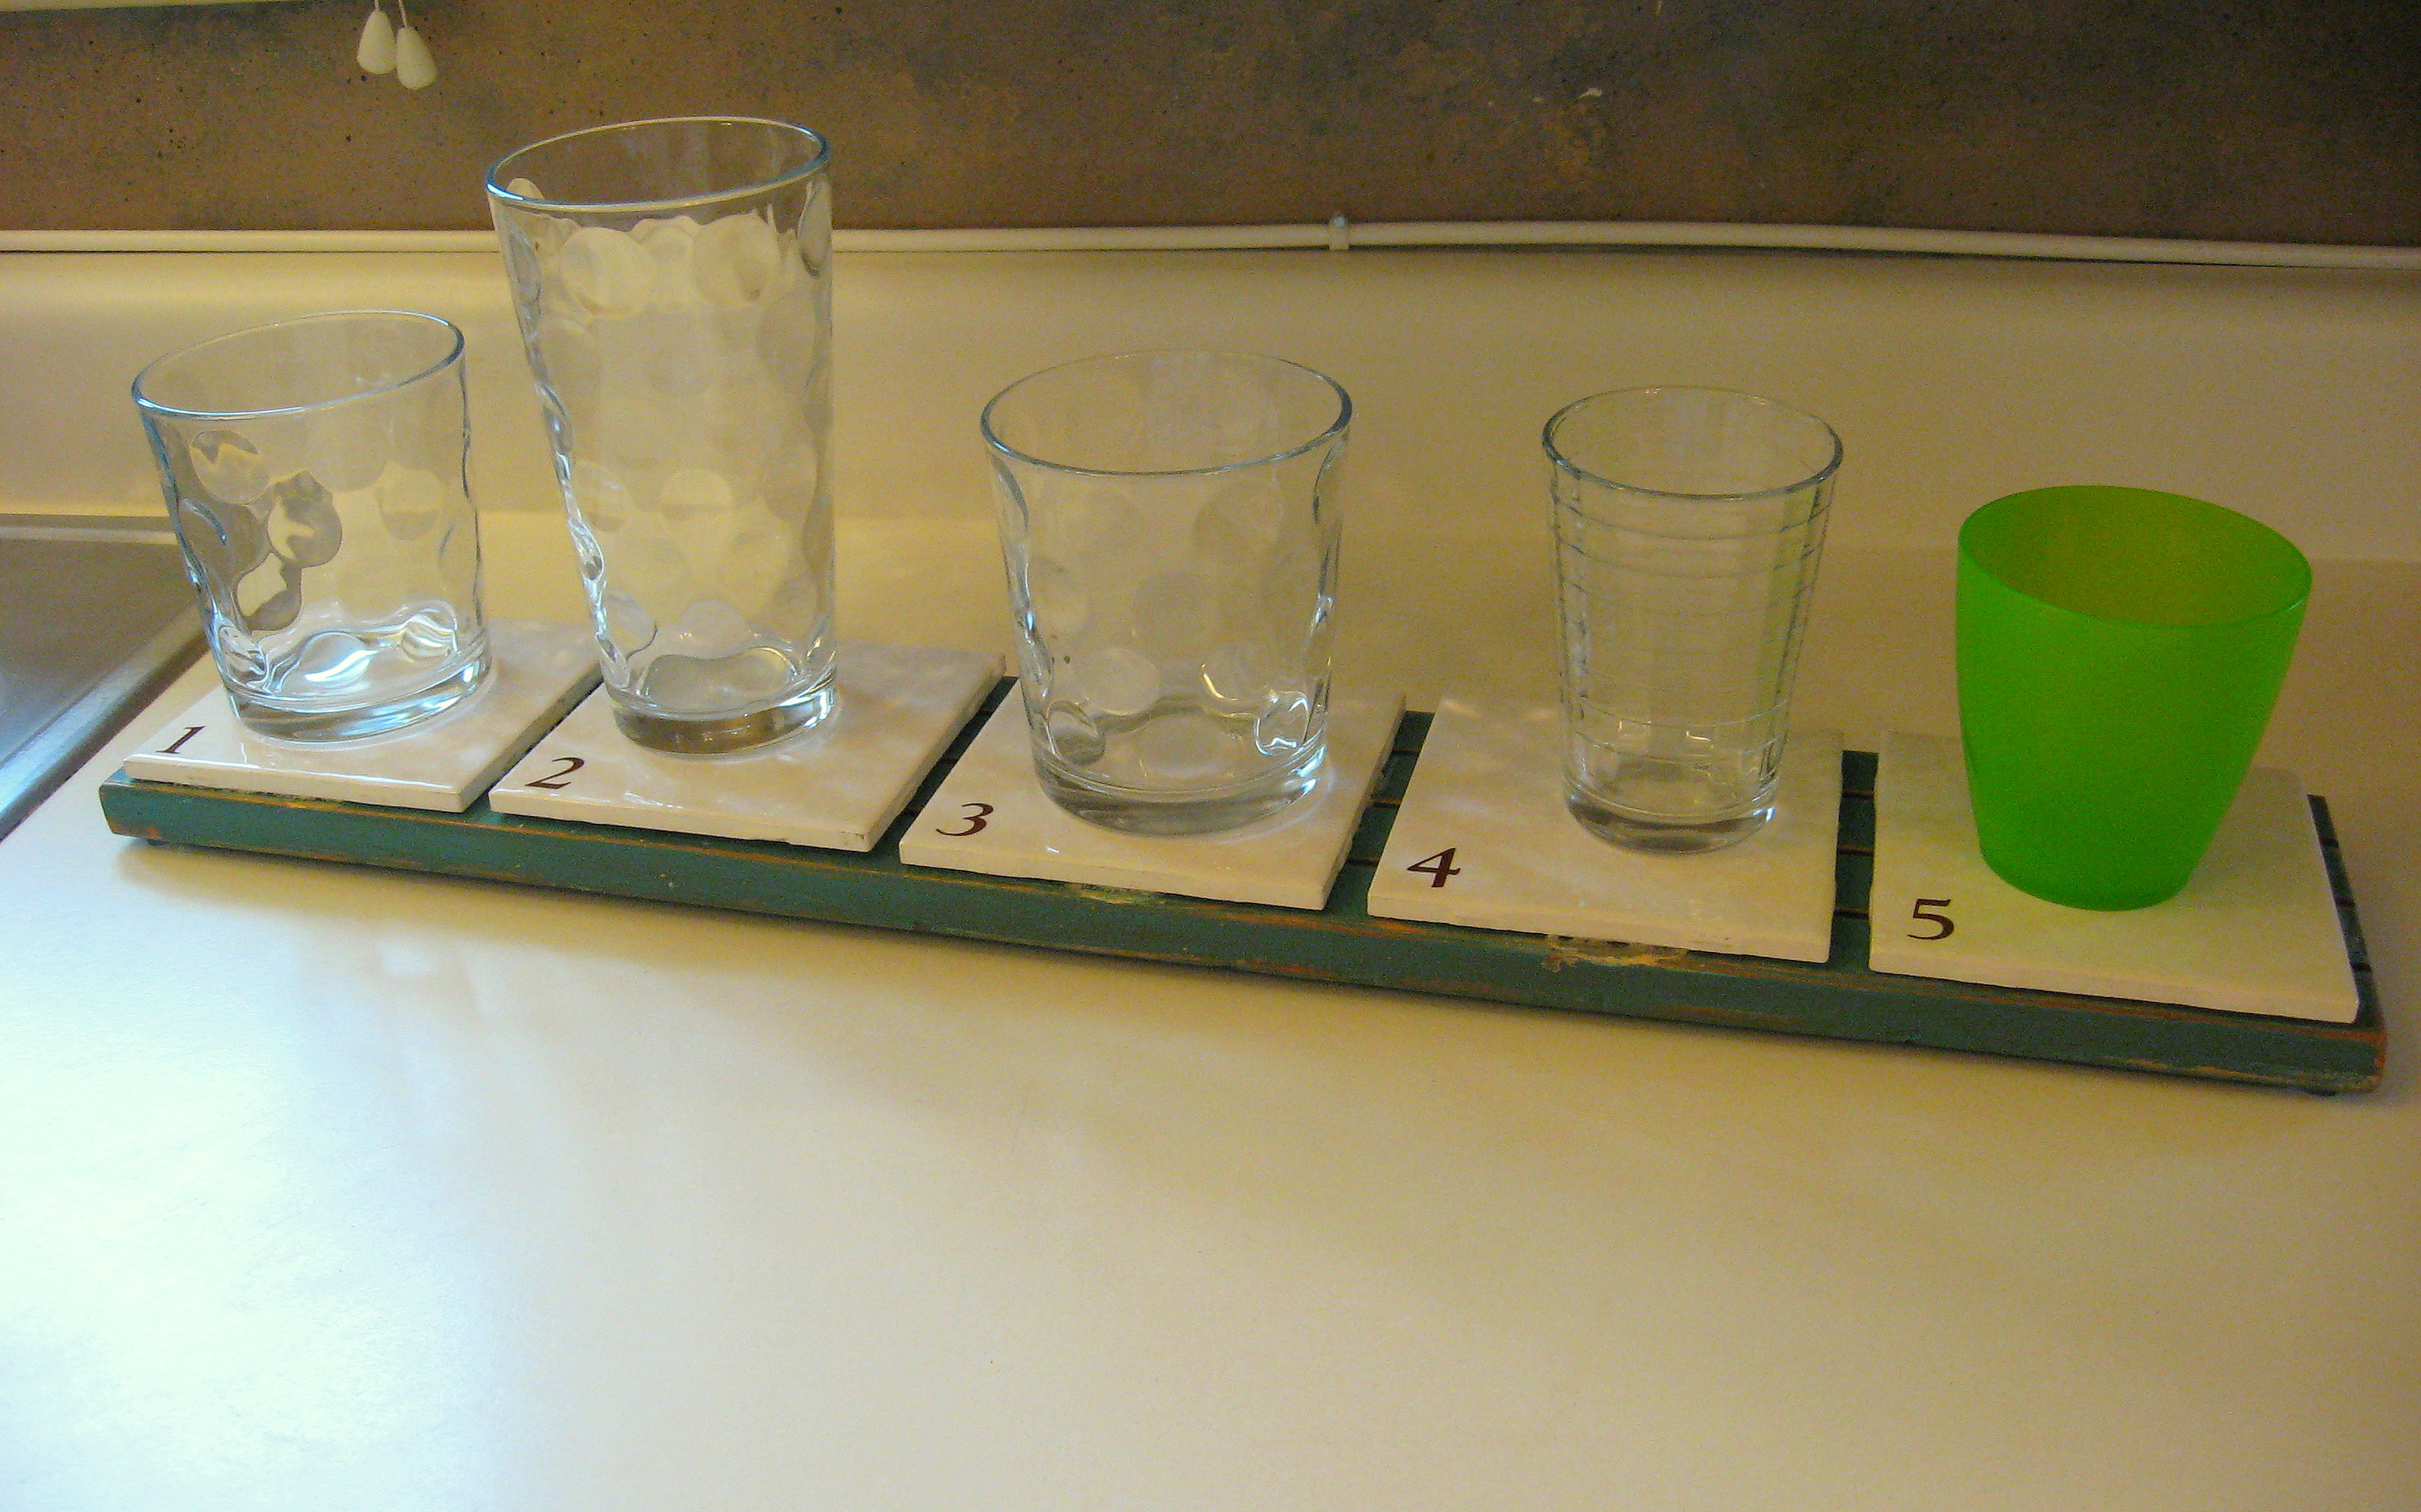
I chose to embellish my tiles with numbers (1-5) so I just used a vinyl sticker on the corner. You could do initials, too. I think cork coasters with stamped numbers or letters would be super cute.
Once the stain is dry, you can spray the whole board with a craft fixative if you want, just to make it a little water resistant.
Now you will adhere the tiles to the board. I didn’t get a photo of this step, but I know you can figure it out 😉 Since I have an odd number of tiles, I put a little mark at the center of my board and started by gluing down the middle tile centered right on the mark, then eyeballed the others out from that.
I used Gorilla Glue, but it takes some getting used to since it foams up as it dries. If you use too much, it will foam out from under the tiles (ummm…not that I know that from experience…). If you are nervous about that, I would recommend E6000. Either of them should be heavy duty enough for this project.
Let those dry overnight.
Now, put rubber feet on the bottom. There are dozens of options available at home improvement stores, craft stores or even Walmart, so look for what works for you. These are little clear rubber sticky dots that they sell to put inside your cabinet door to cushion the slam.
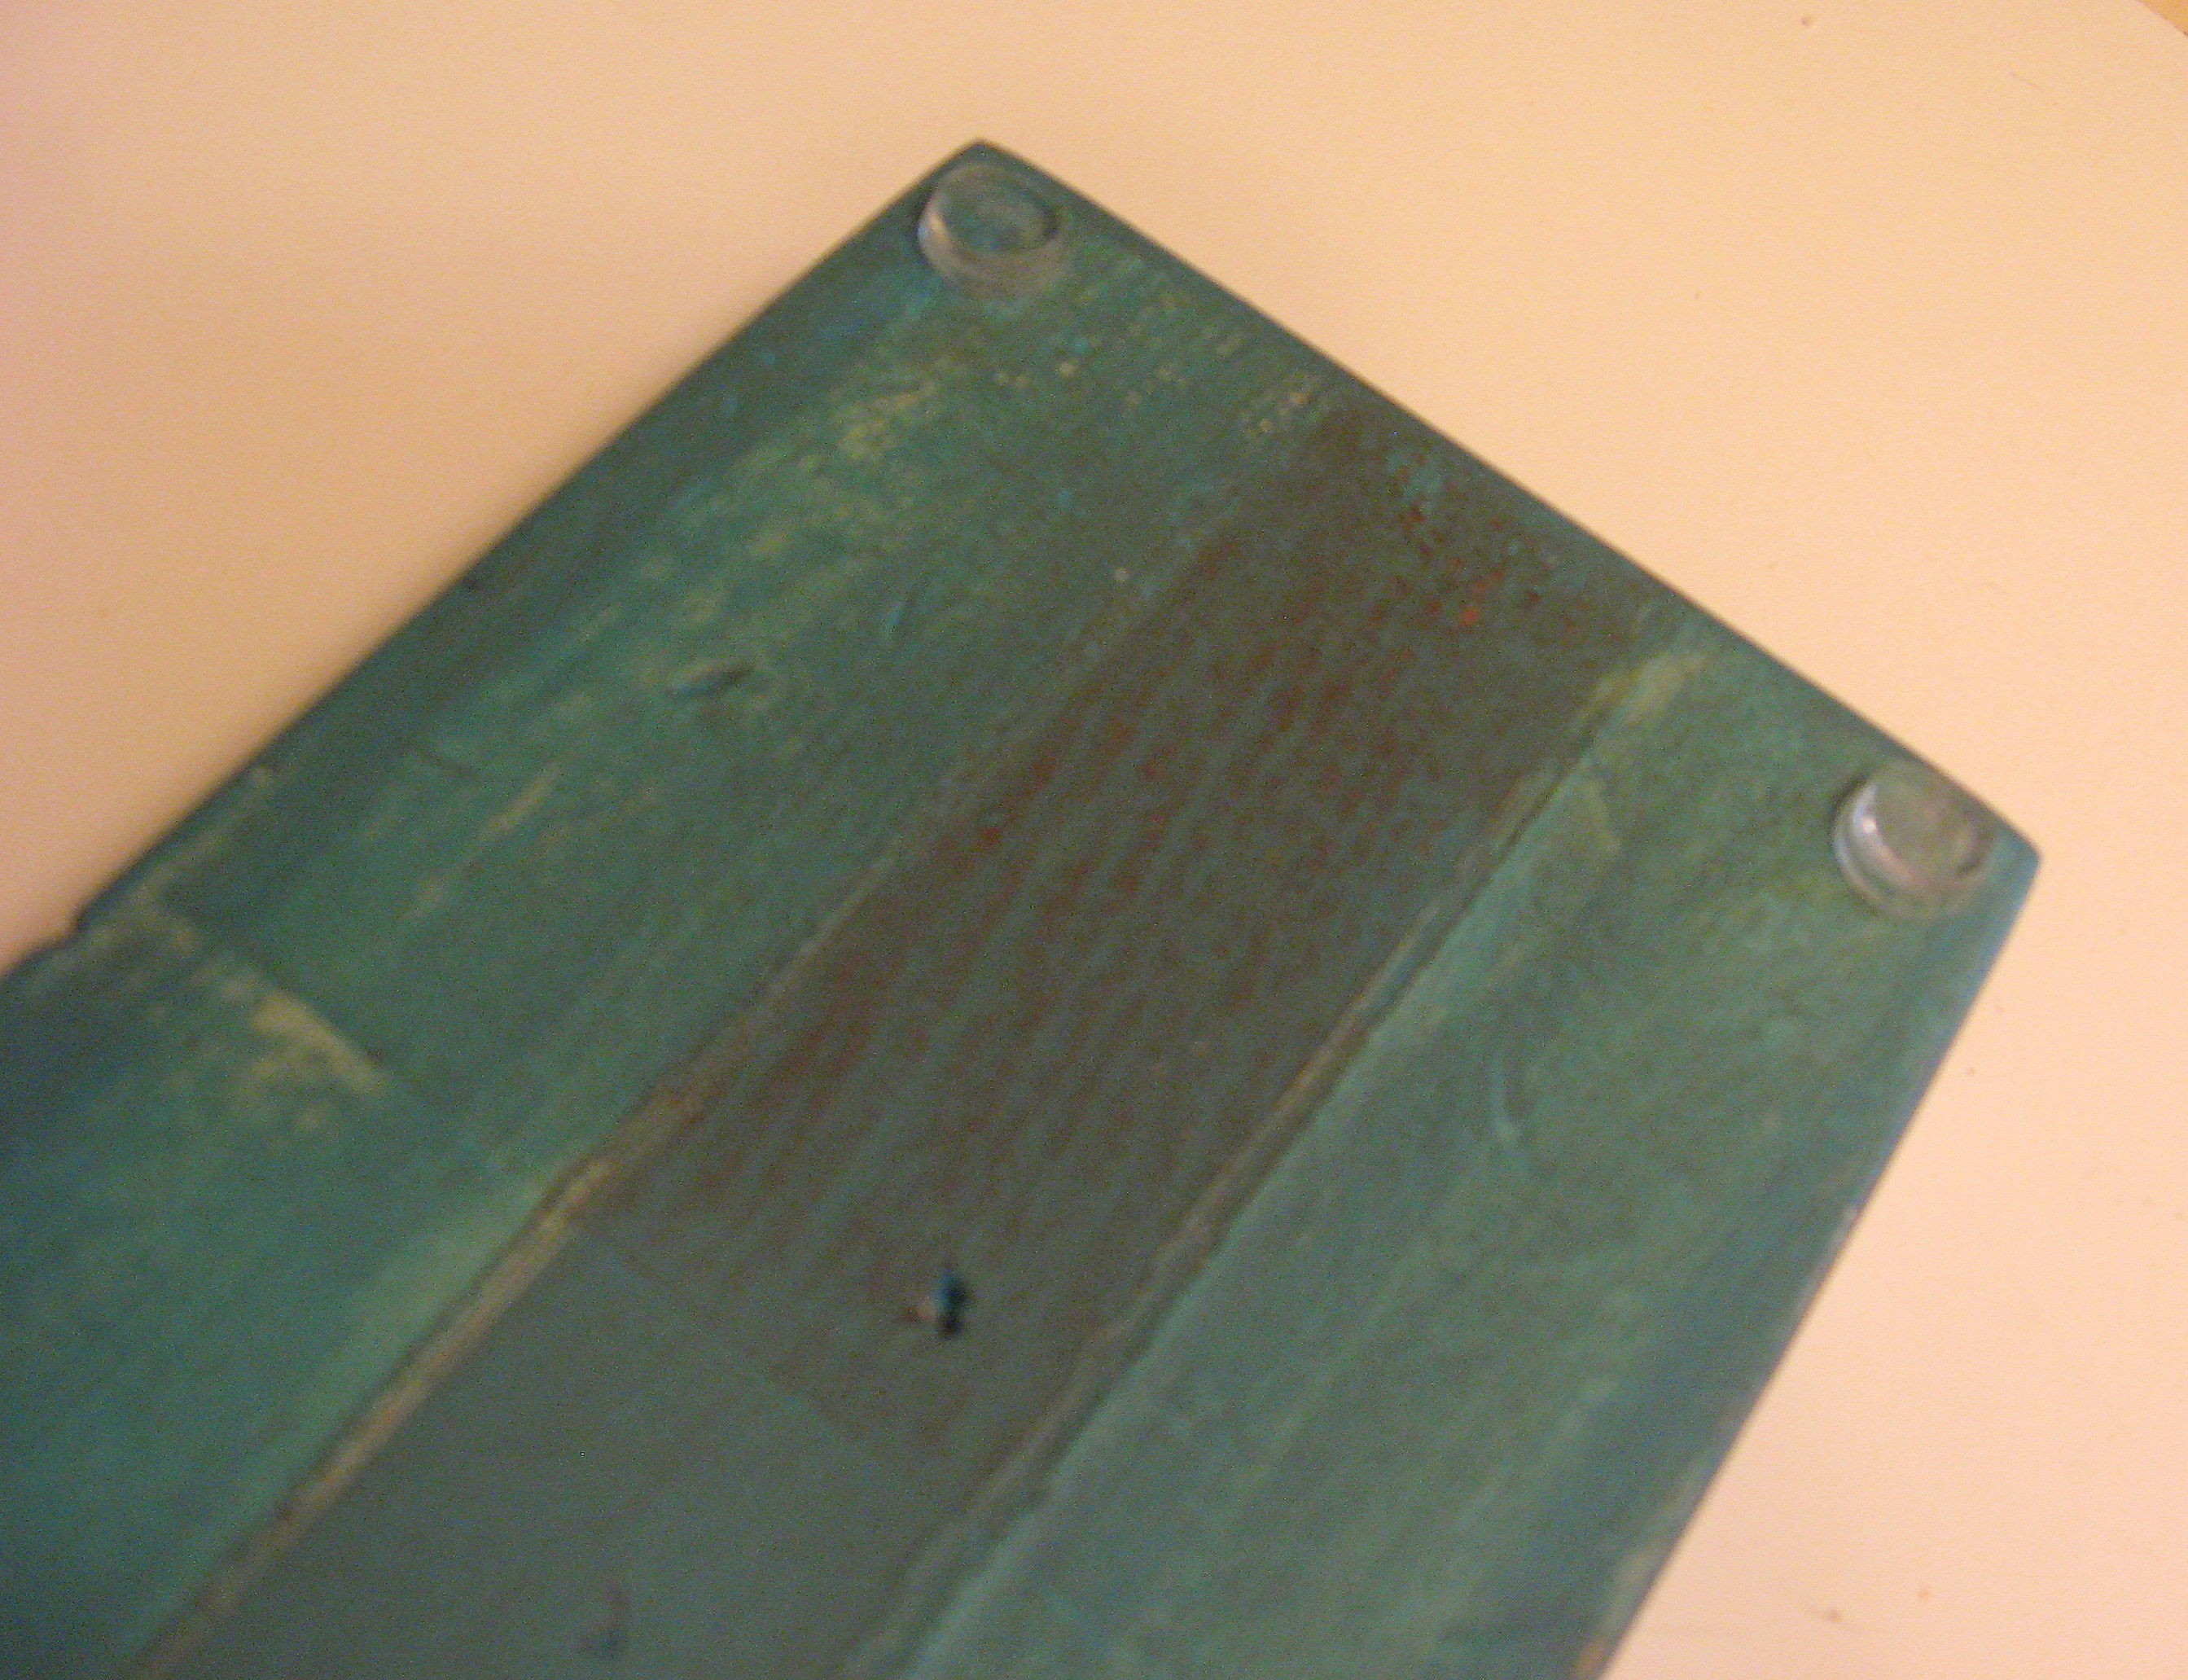
Now you have a family coaster to keep right by your sink. The rule in our house is that everyone gets one glass per day and it must be on your assigned tile. Works great!
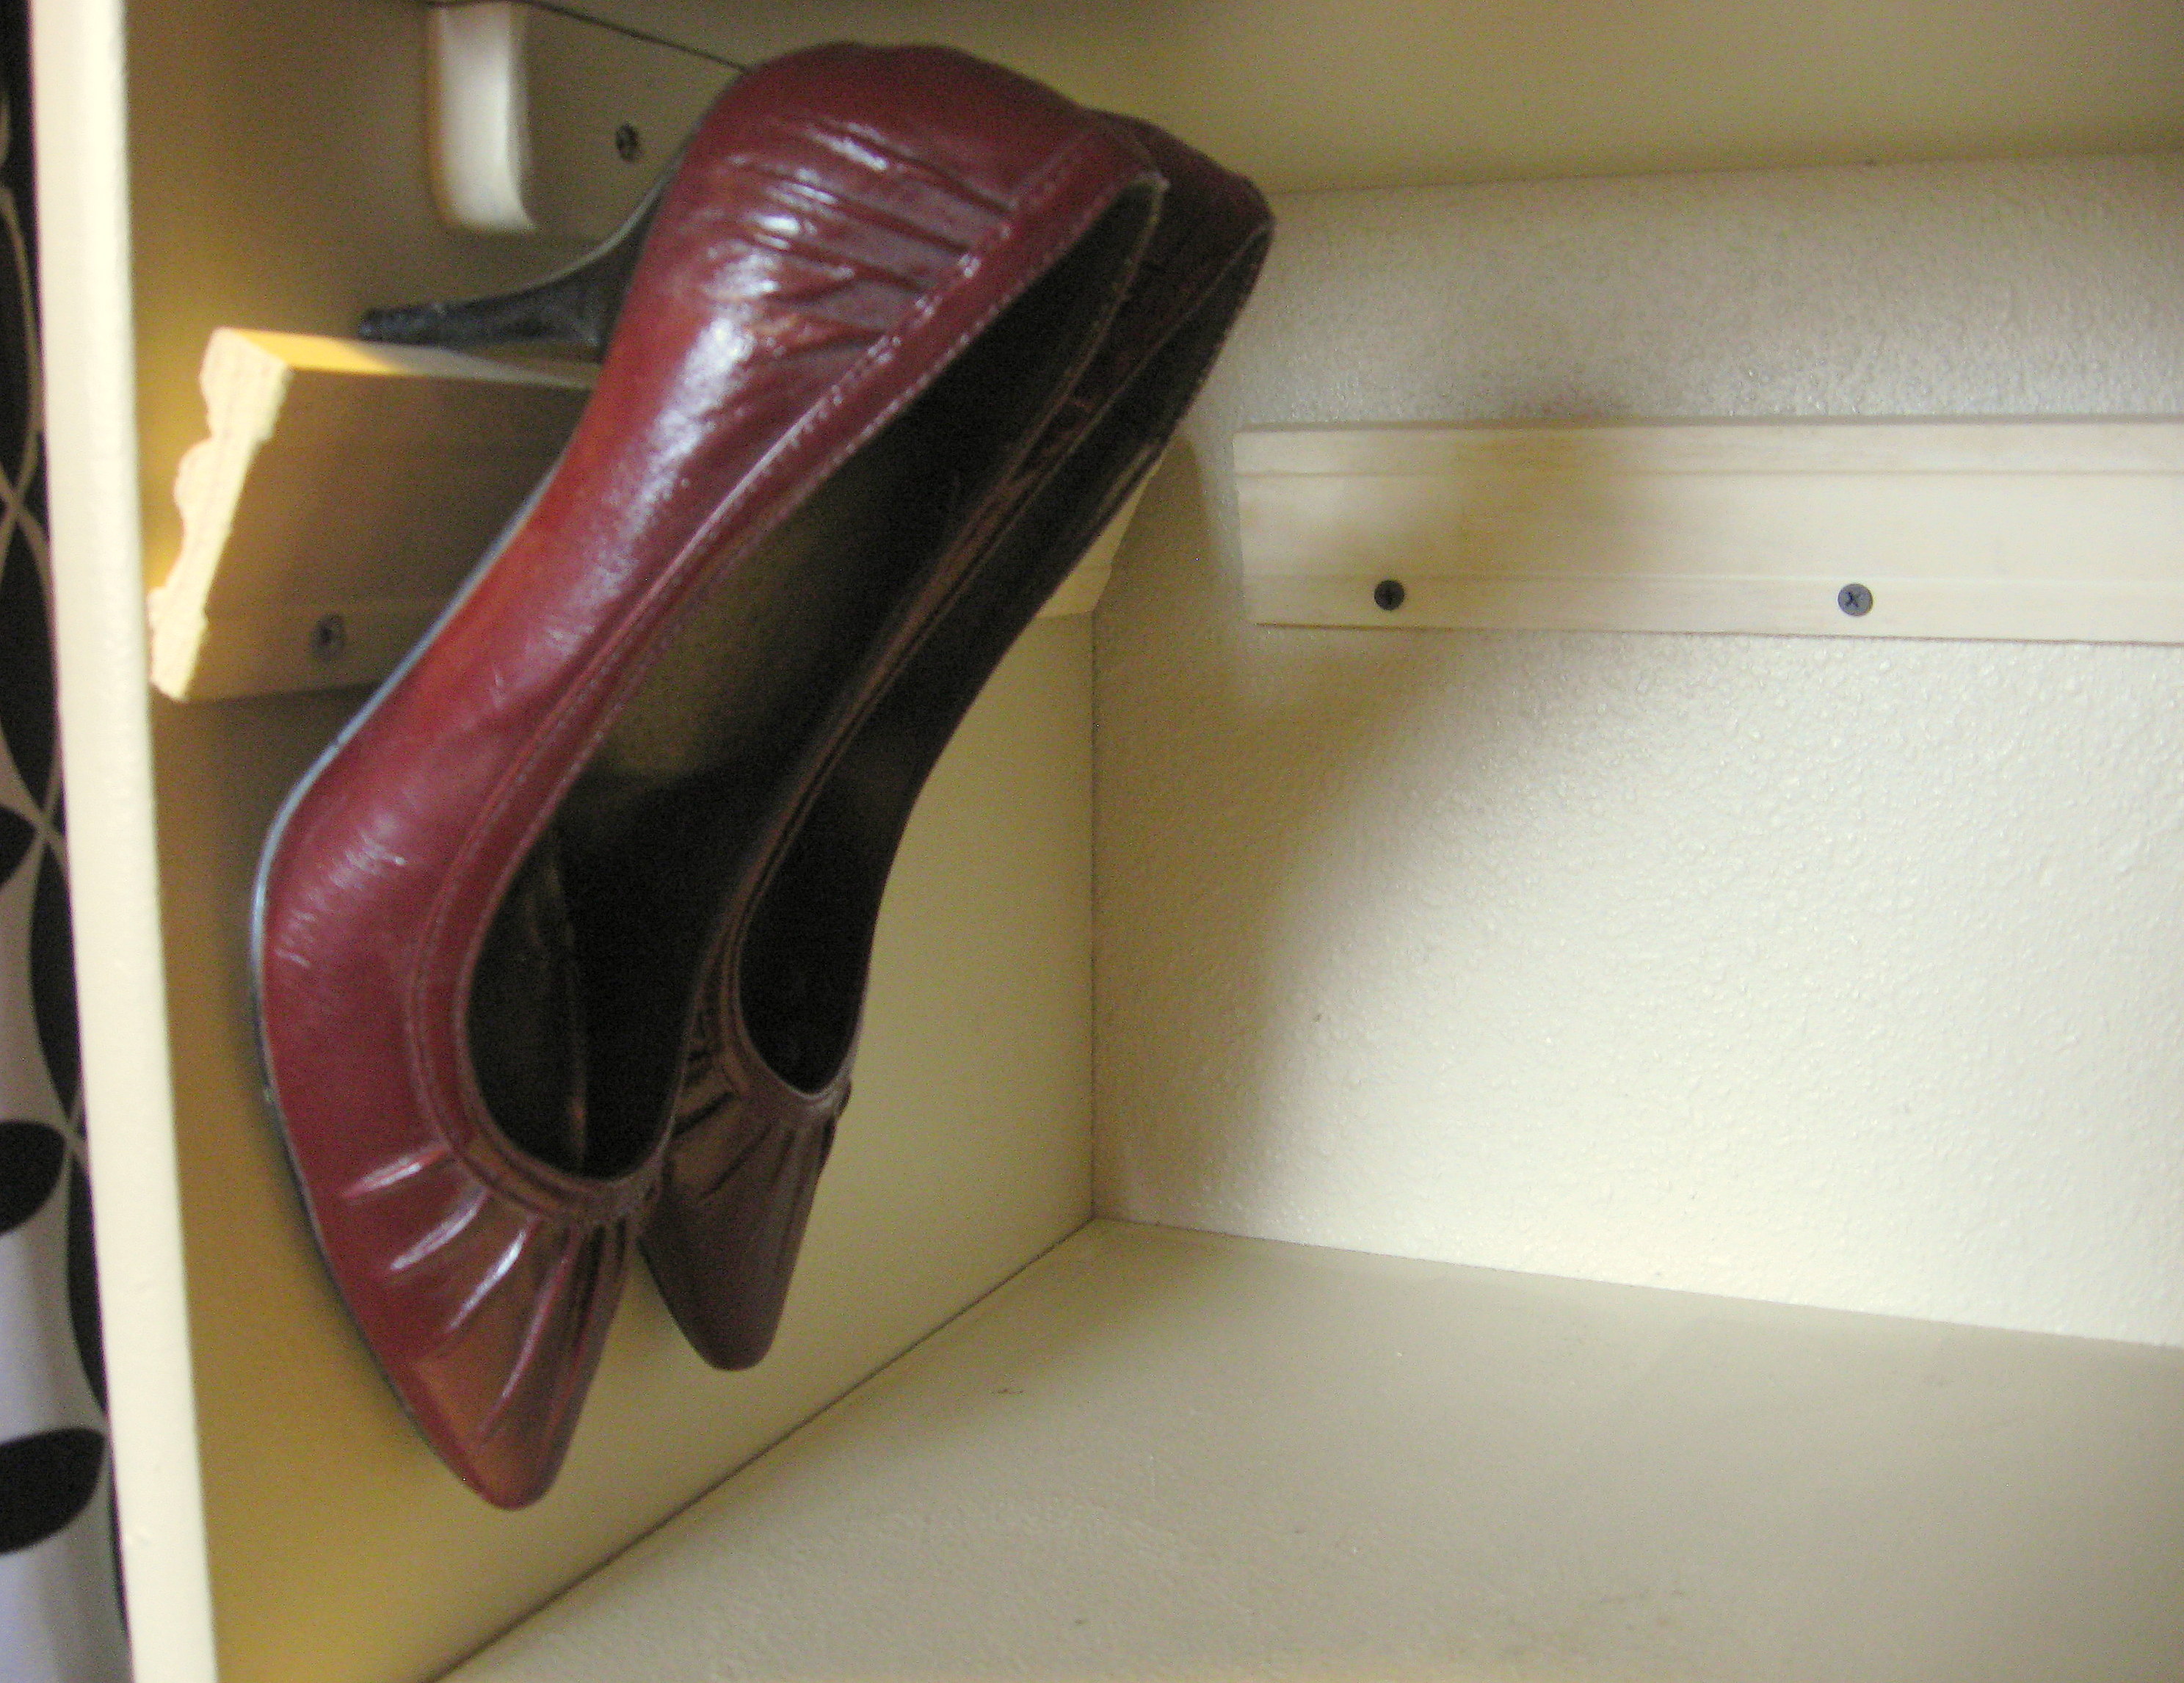
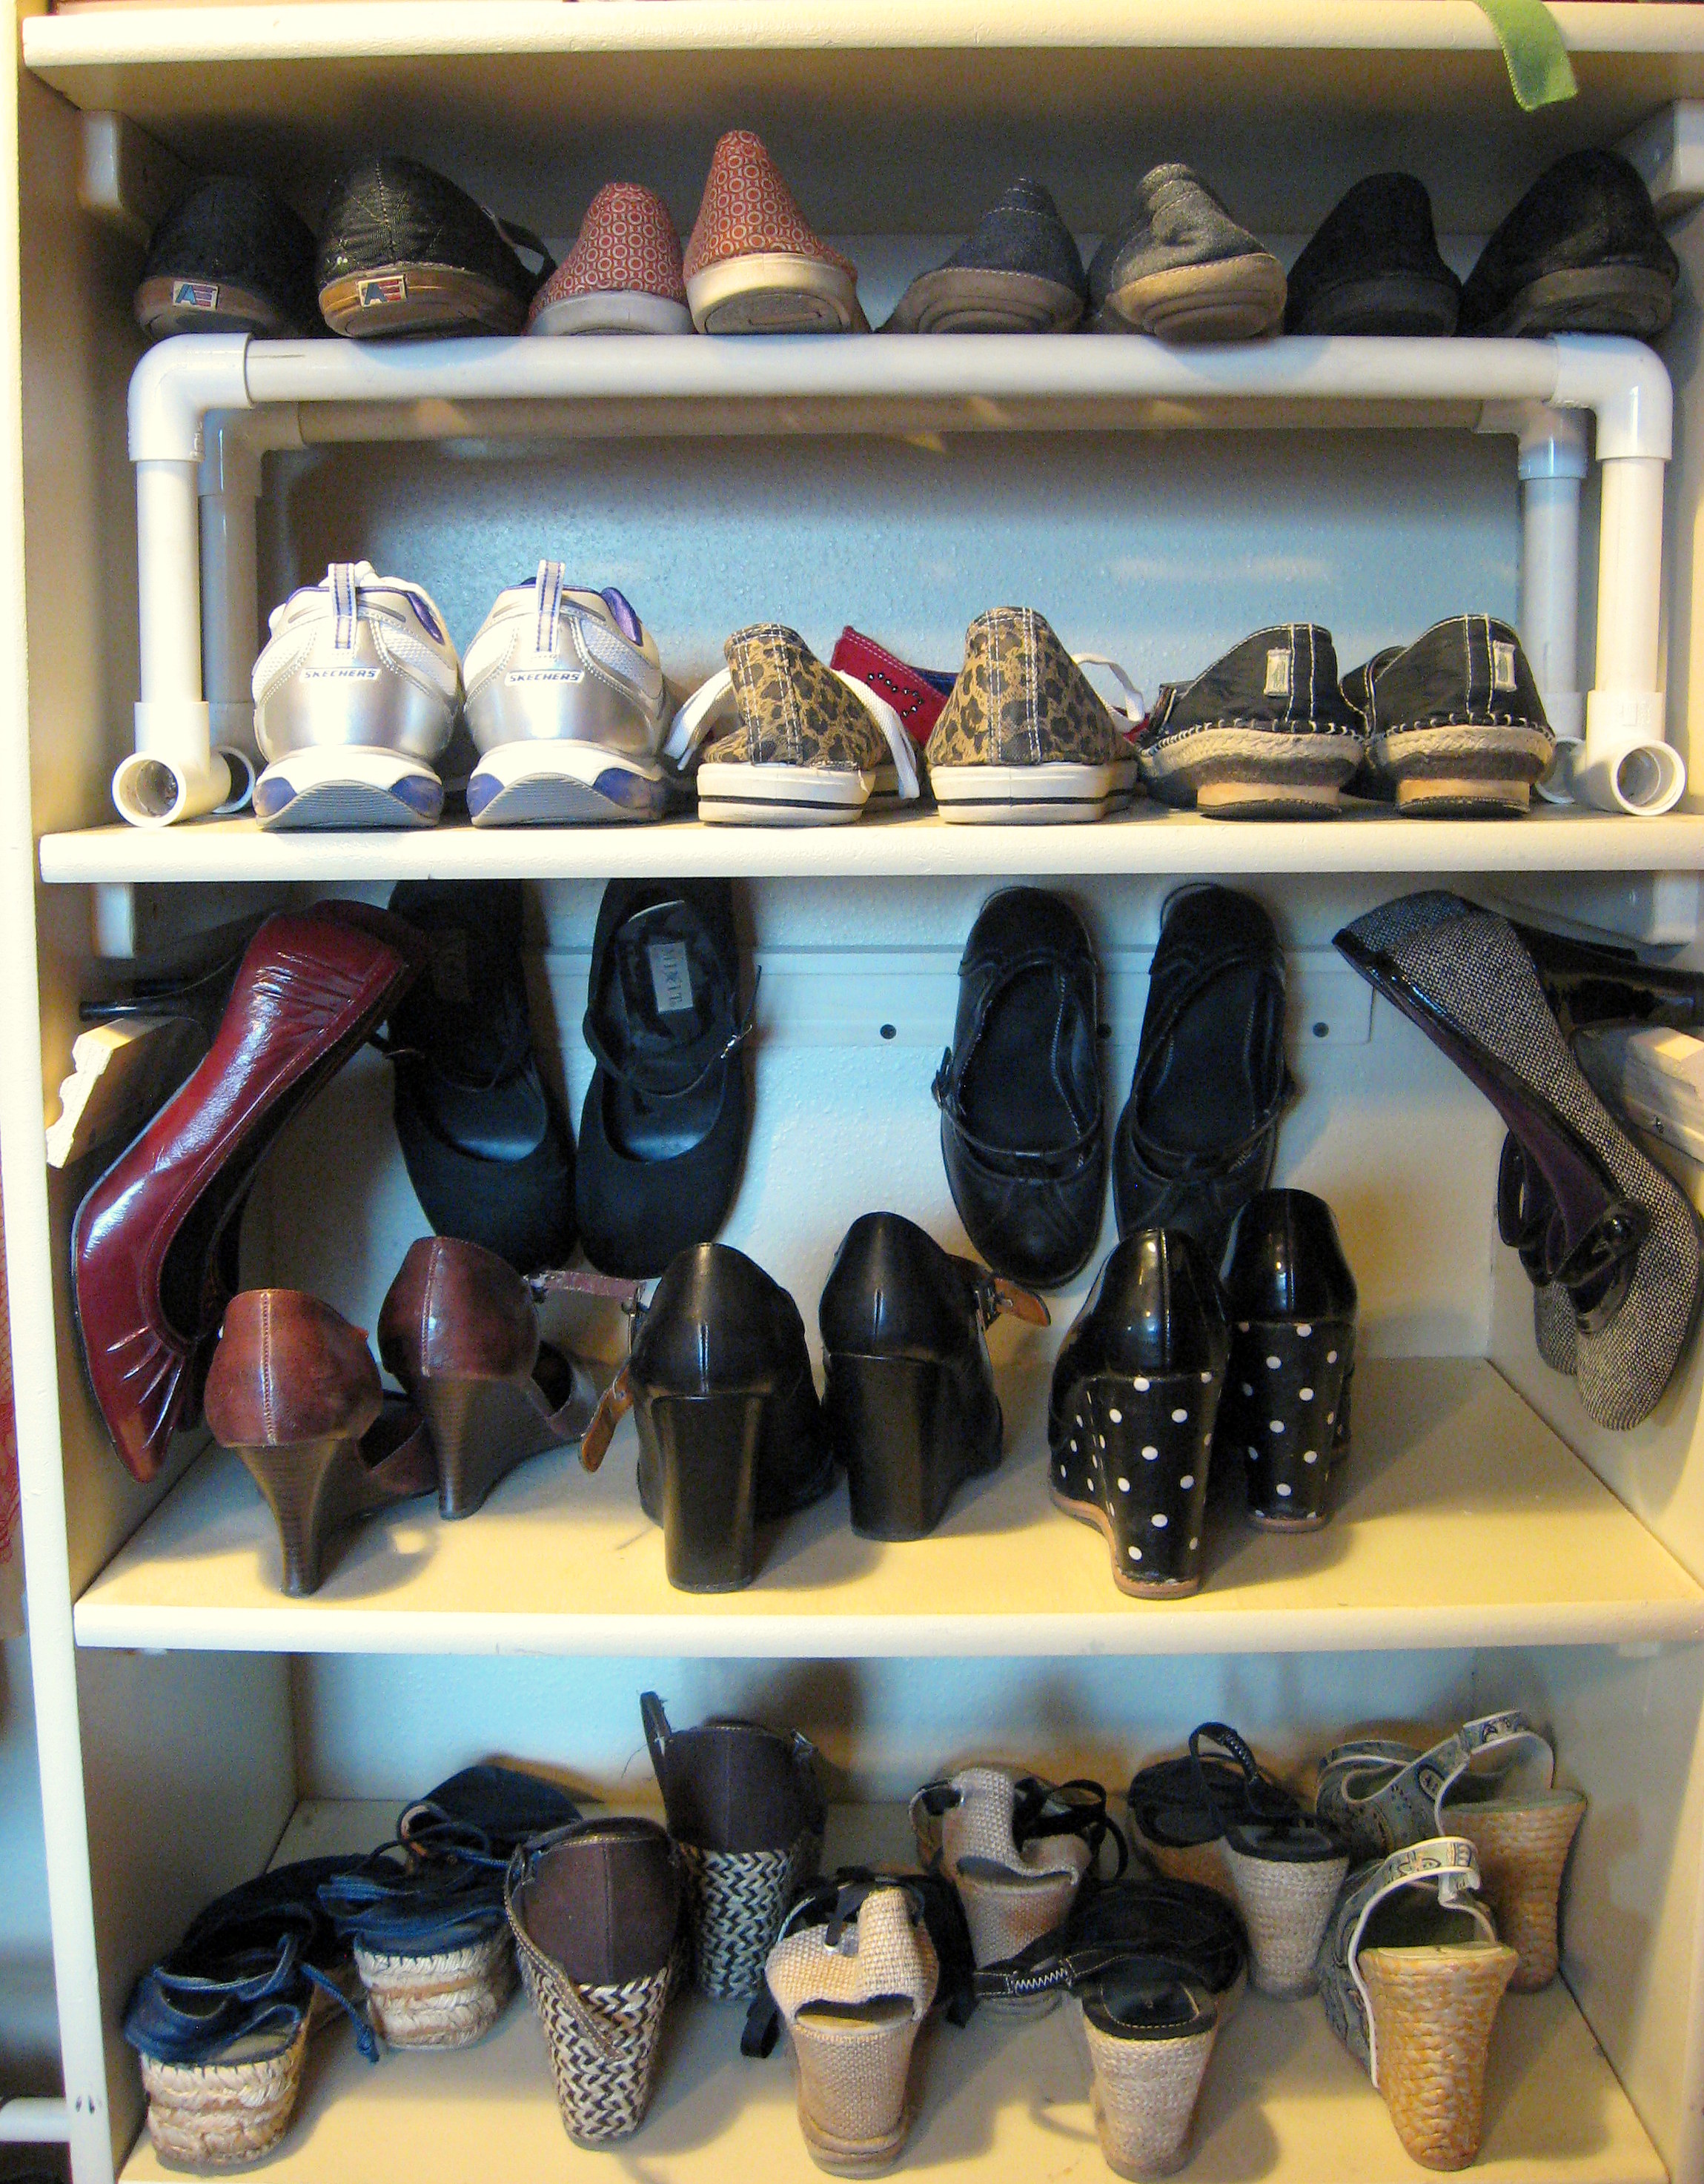
Shoe Storage
No matter how many times I straighten them up, my shoes always look like this again within a week:
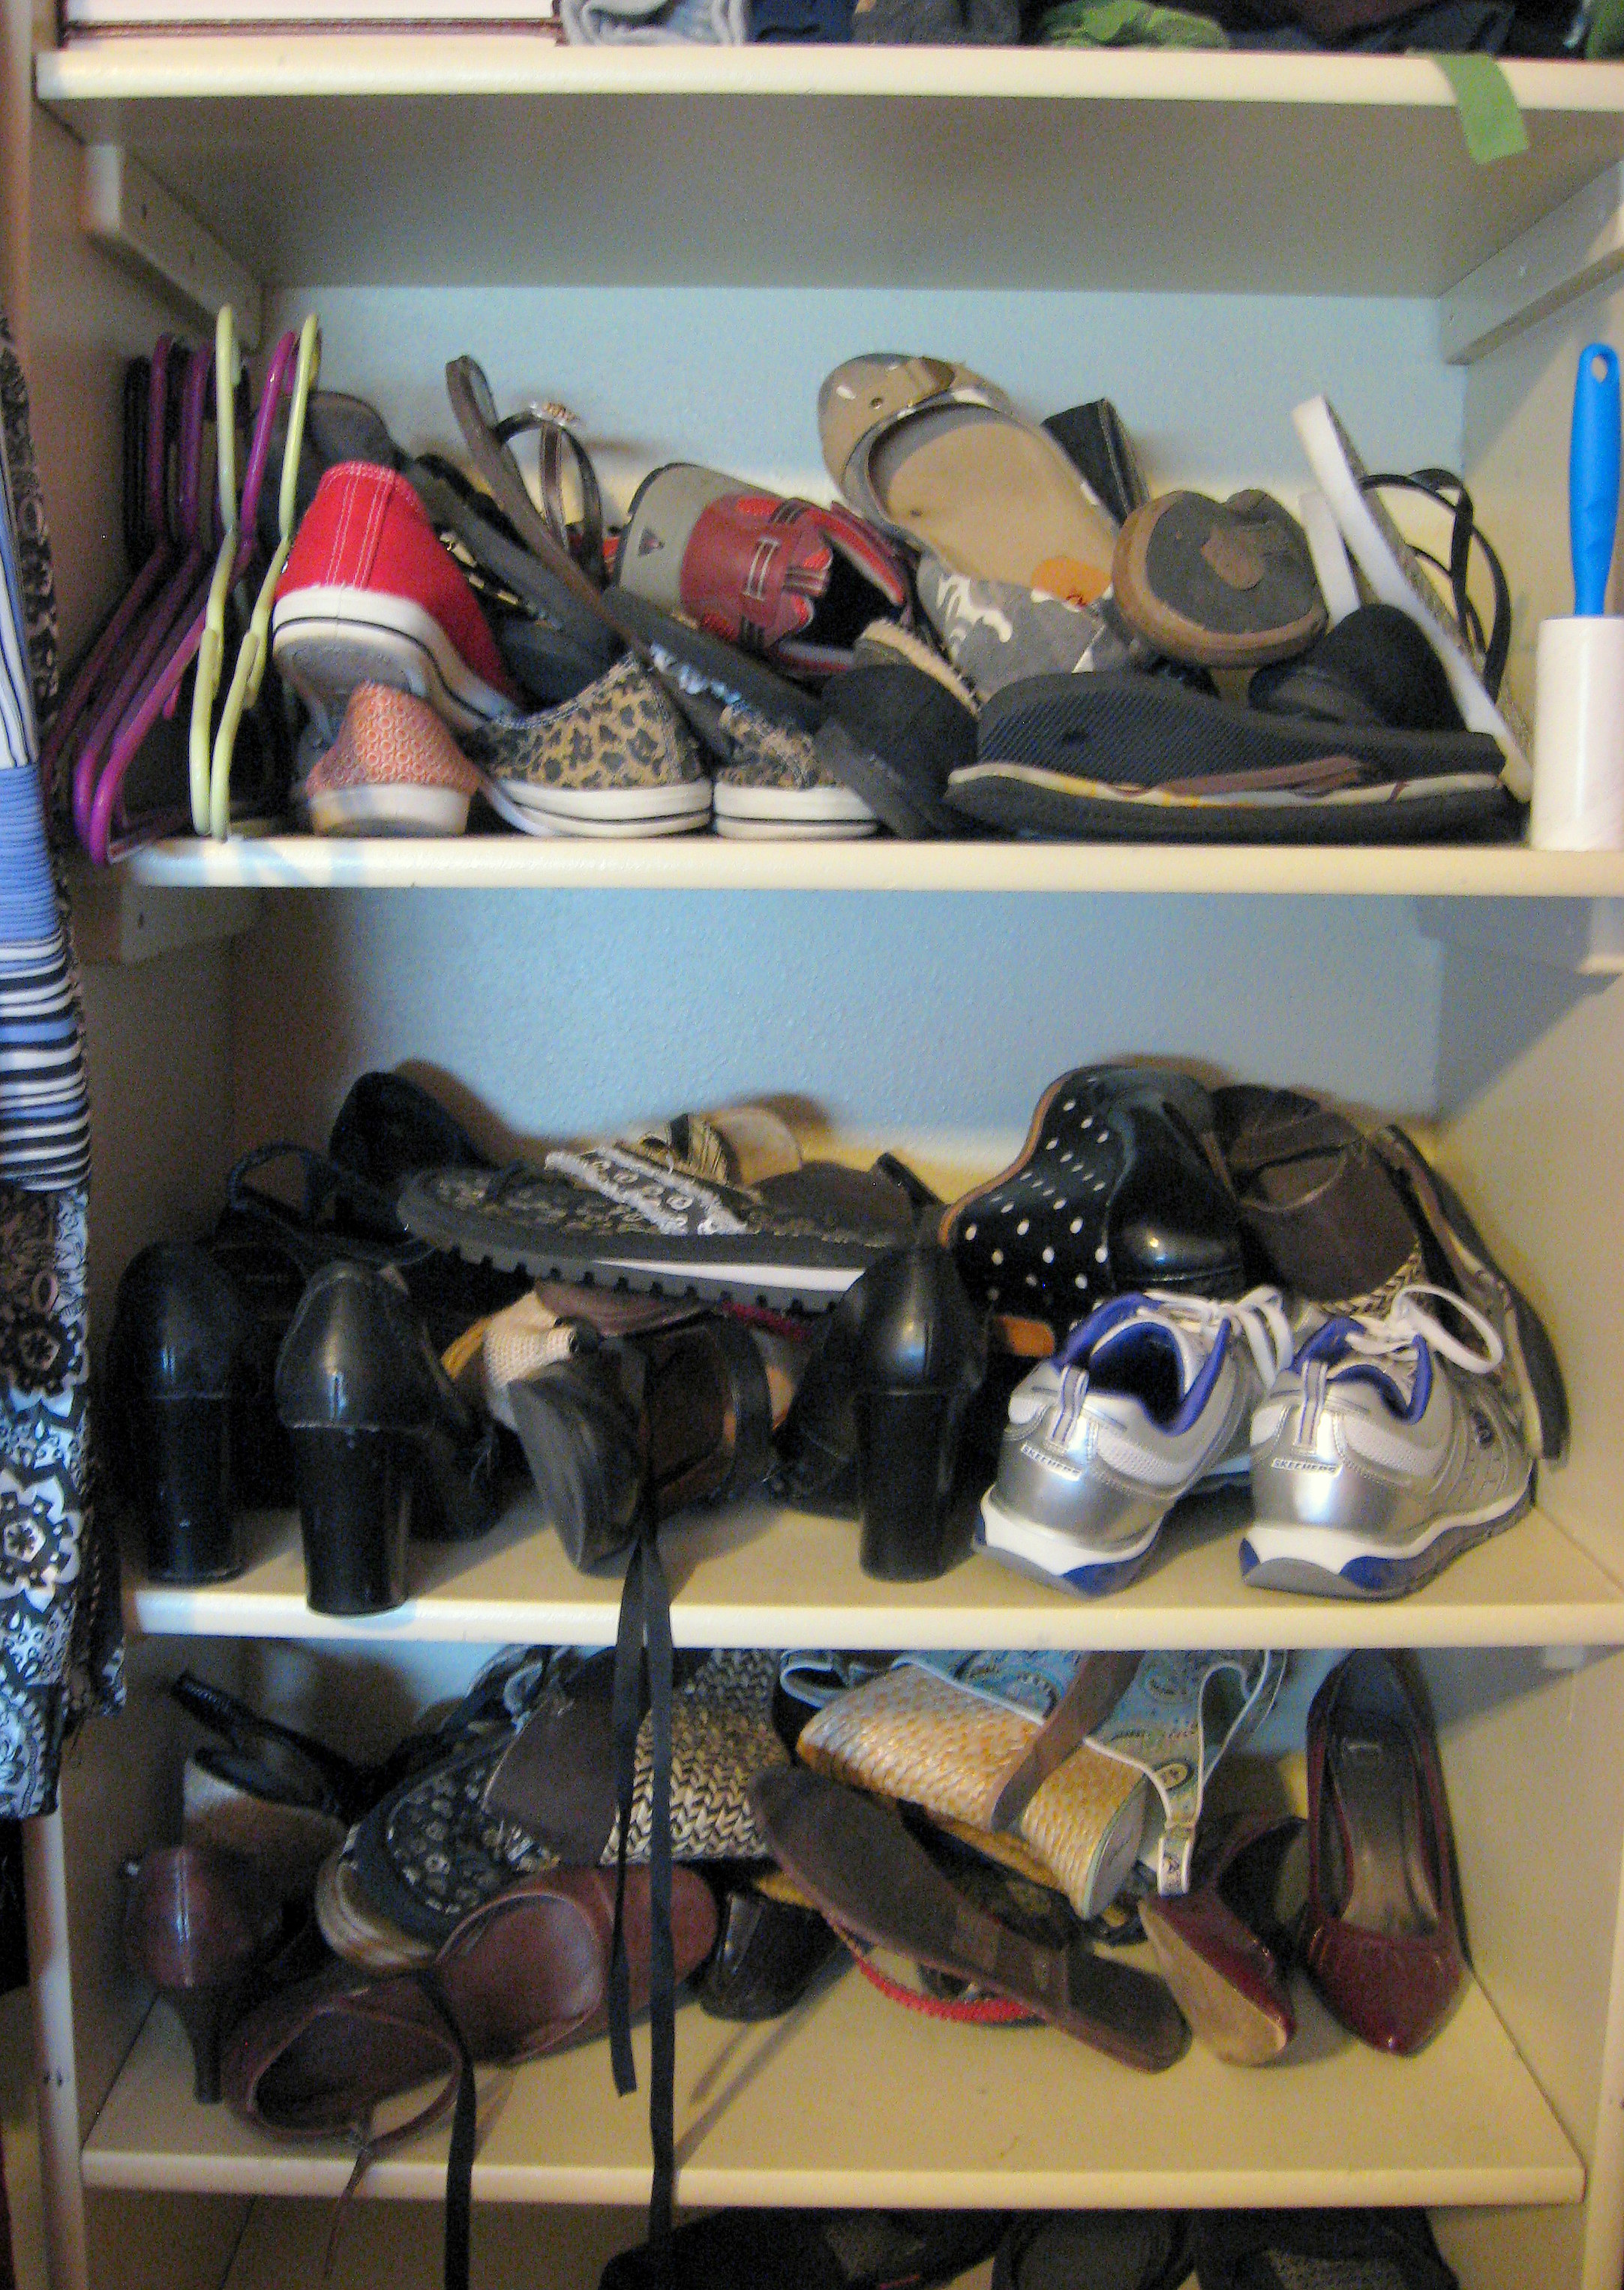
Not so good. As I was pulling out all my summer shoes and stowing away the boots this week, I thought, “I have got to do something about this!” There are many different DIY shoe storage solutions around the internet, and I decided to put together several different ones to make a custom system that fits my needs in my closet. I’m going to walk you through what I did and you can take the parts of it that fit your situation.
There are many ways to dress up the ideas here and make them look pretty if you are blessed to have that kind of closet. I don’t. My closet is tiny and is only cute when the curtain that covers it is closed, so I was going for 2 things with this project: high function, no cost. I didn’t spend a penny; I just used things I already had around the house, but if you do end up having to purchase the materials, none of them were expensive.
I ended up dividing my shoes into 3 different parts: dressier heels, flip flops and flats, and other.
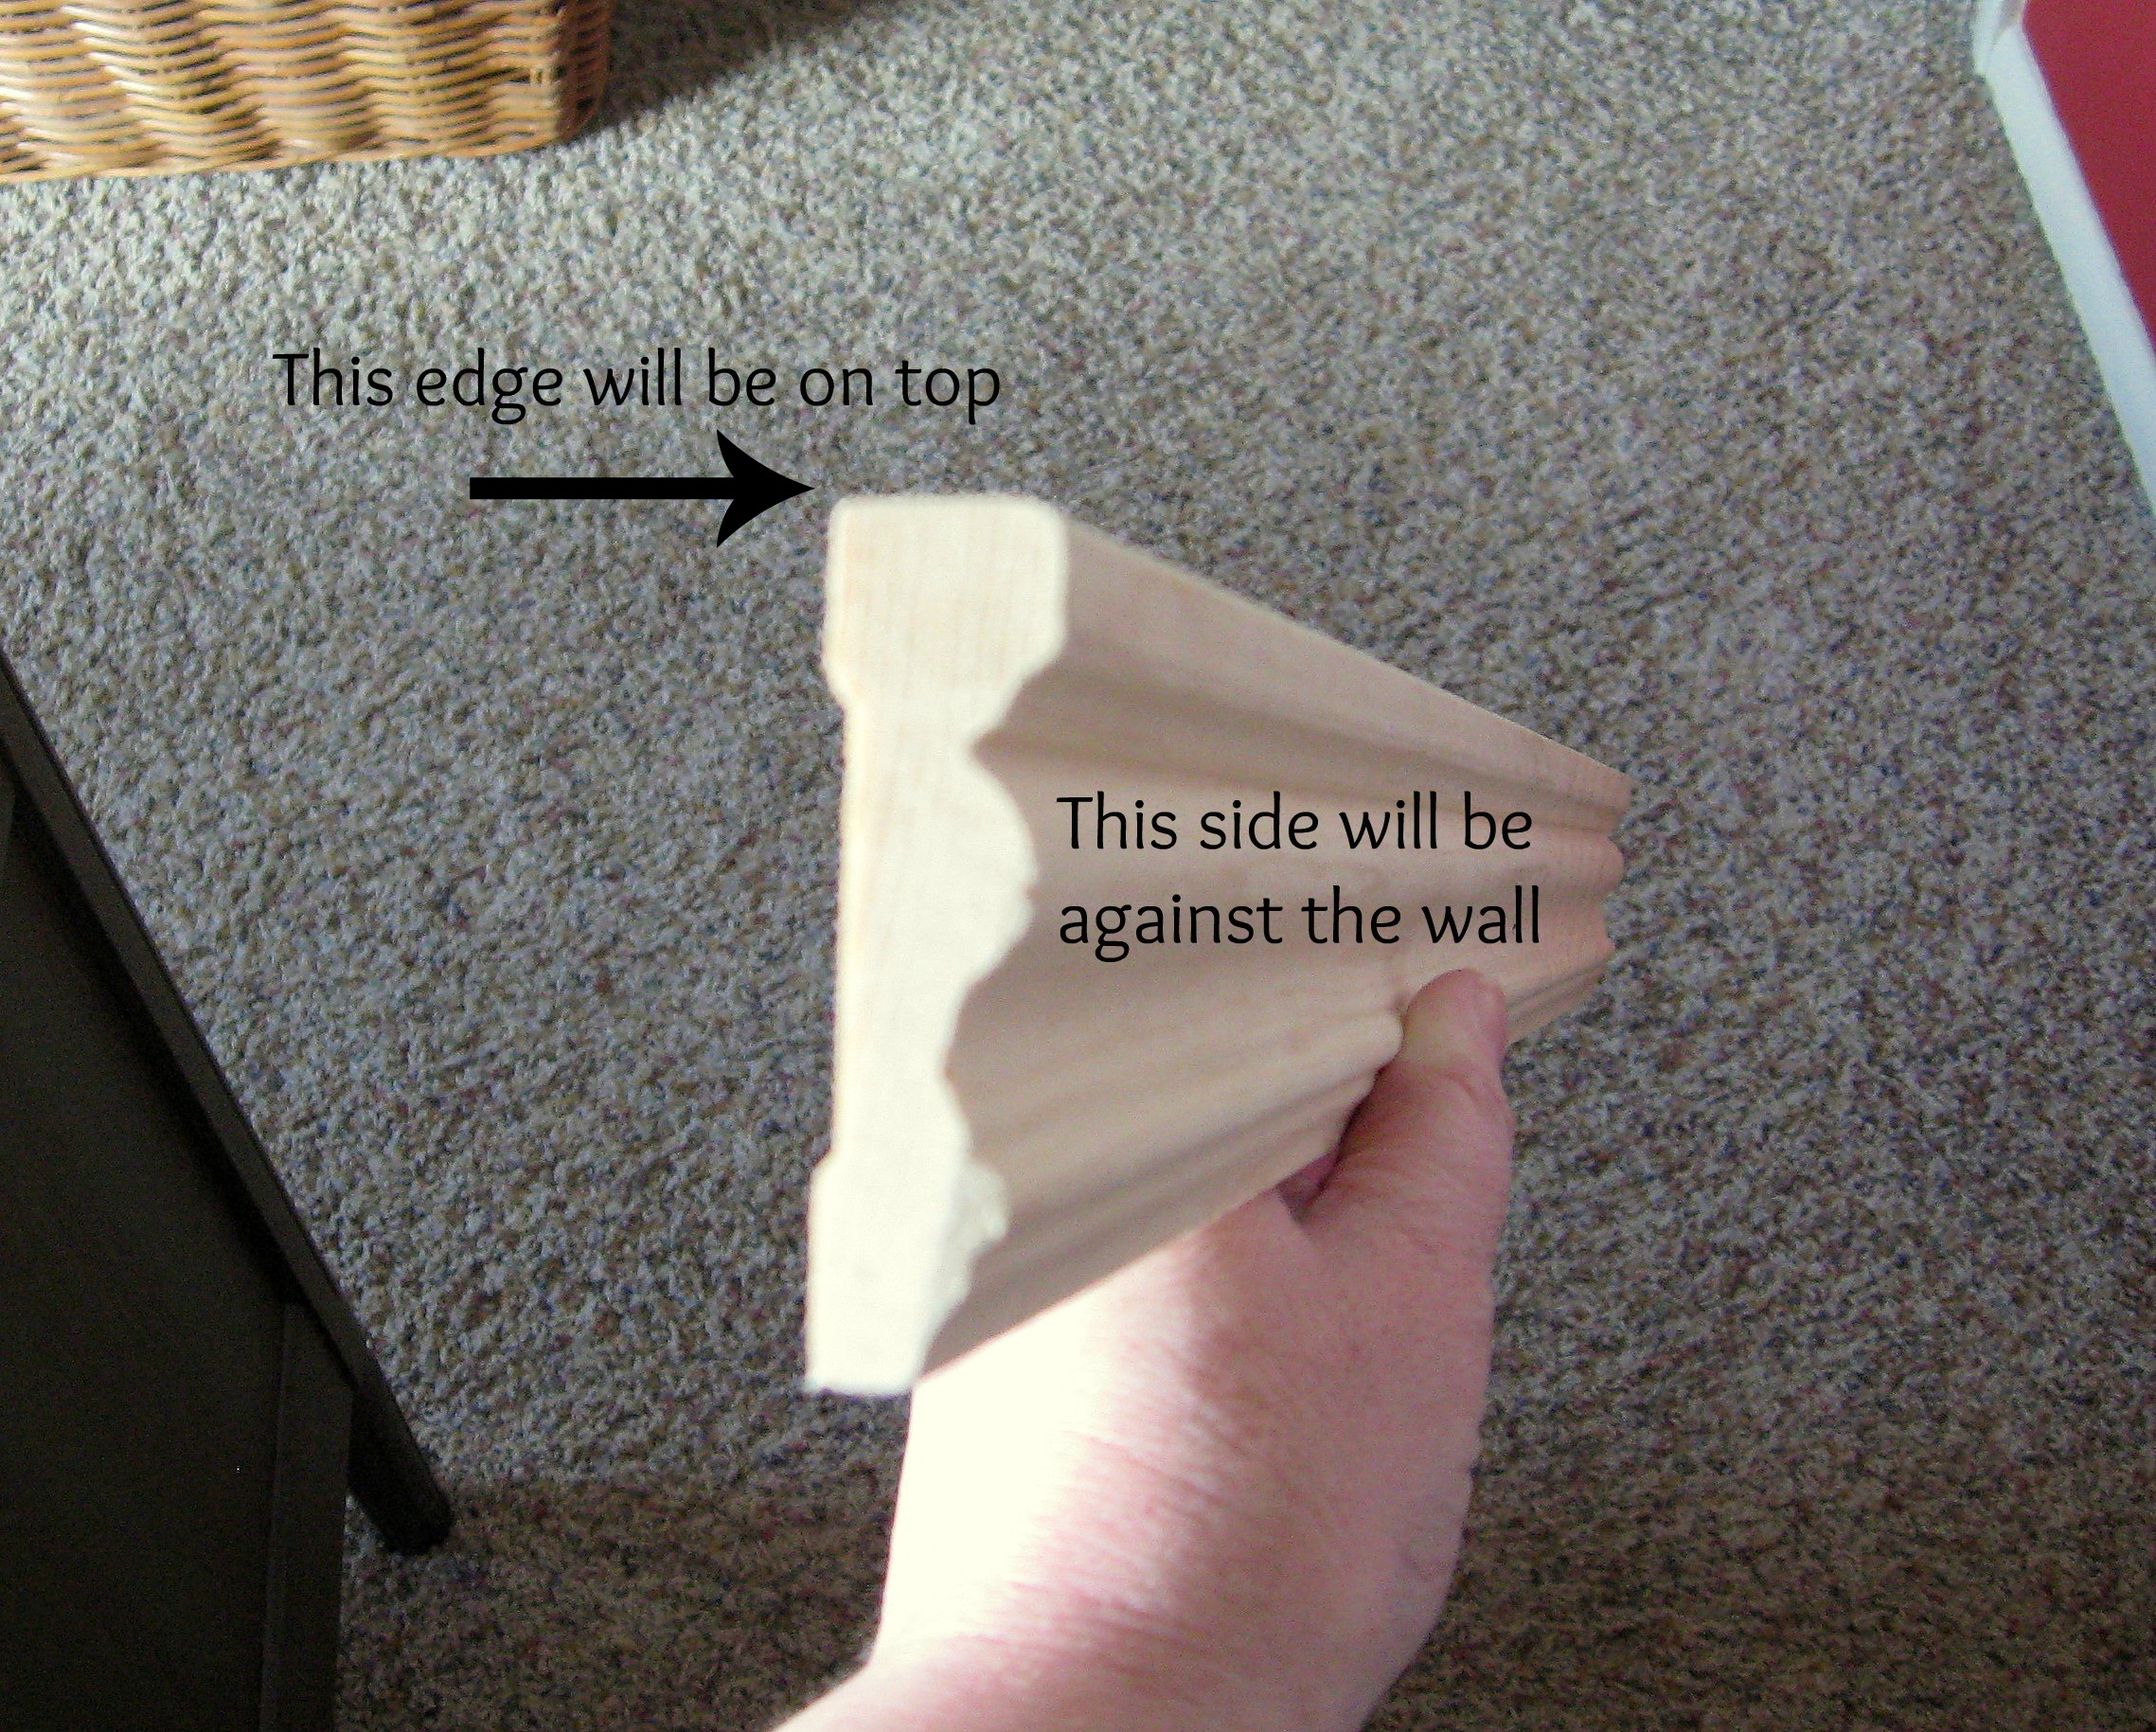
Let’s start with the heels.
Actual crown moulding would work great for this, but since I didn’t want to spend any money, I headed out to the scrap wood pile to see what I could find. I found this moulding and I had my son hold it up against the wall for me – upside down with the wide flat part up- while I tried hanging my shoes on it to see if they would stay. They did, but I thought that they stayed on better when I also turned it backwards, with the right side facing the wall, so that it was sitting at an angle.
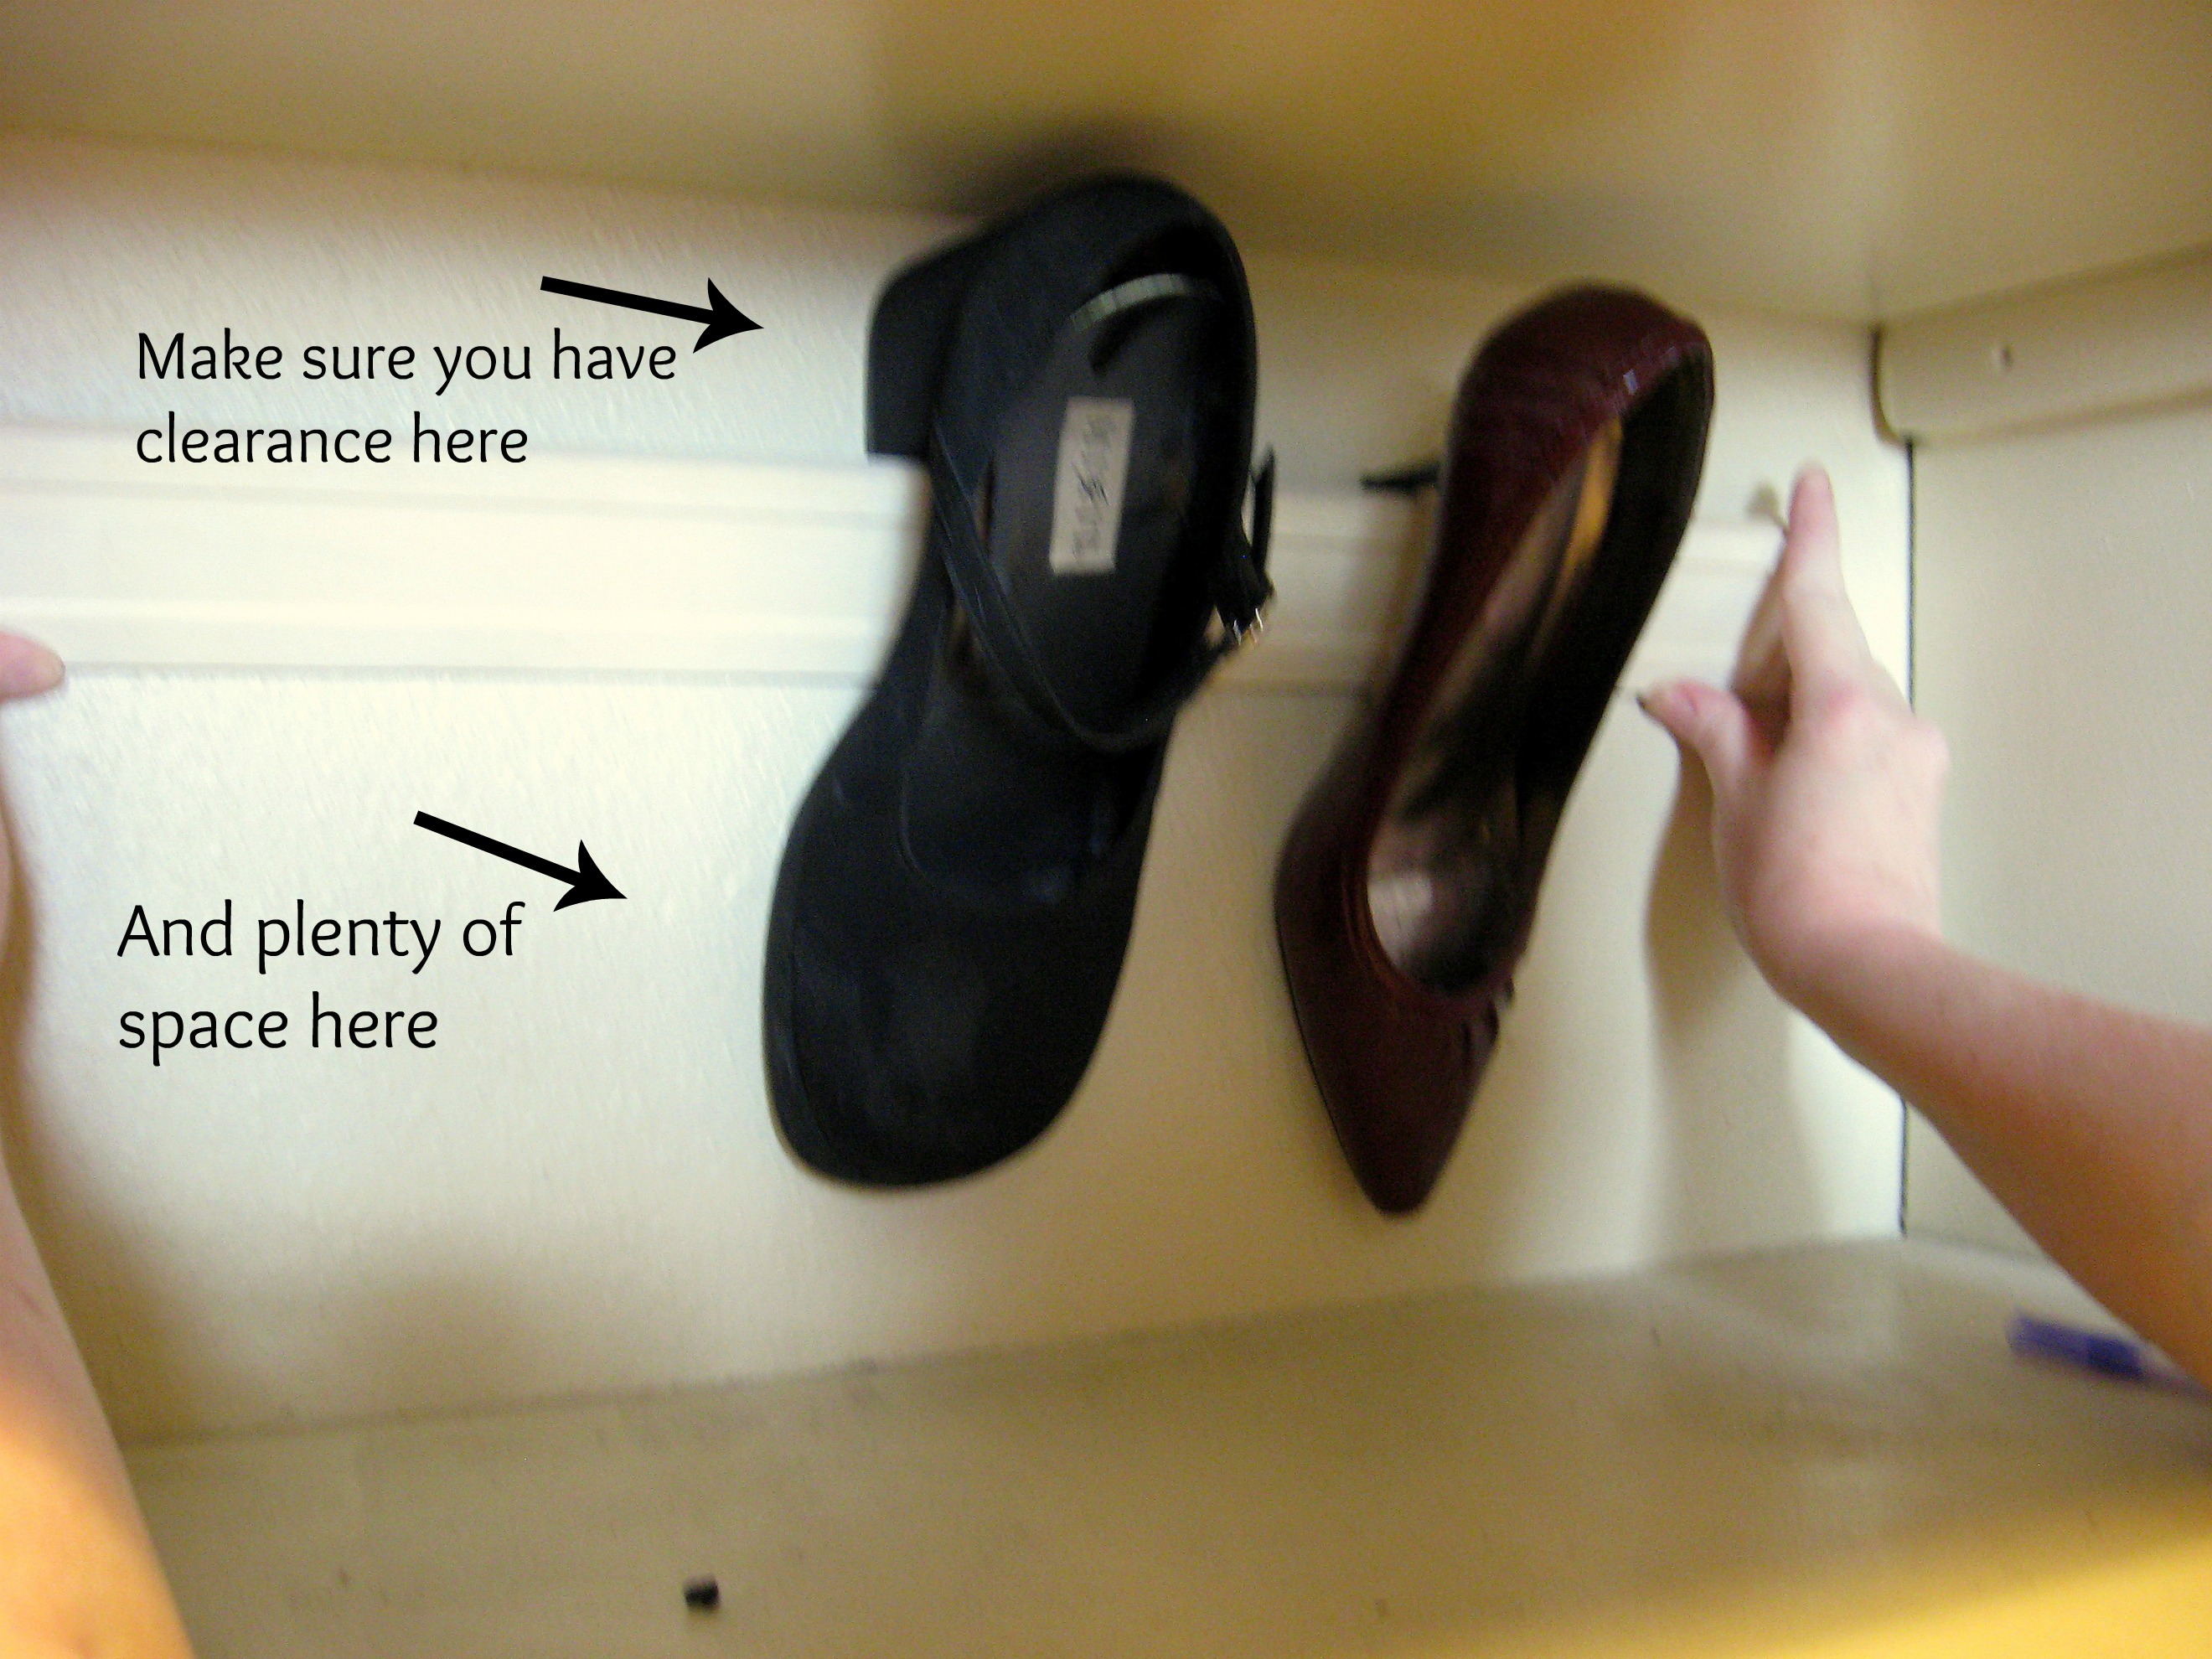
Cut the moulding to the length you need, then have someone hold it in place for you while you determine where on the wall you want to put it. Hang a couple of shoes off of it, and make sure you like the placement, leaving plenty of clearance for the shoes both above and below.
Once you like where it is, use a level to make sure it is straight,
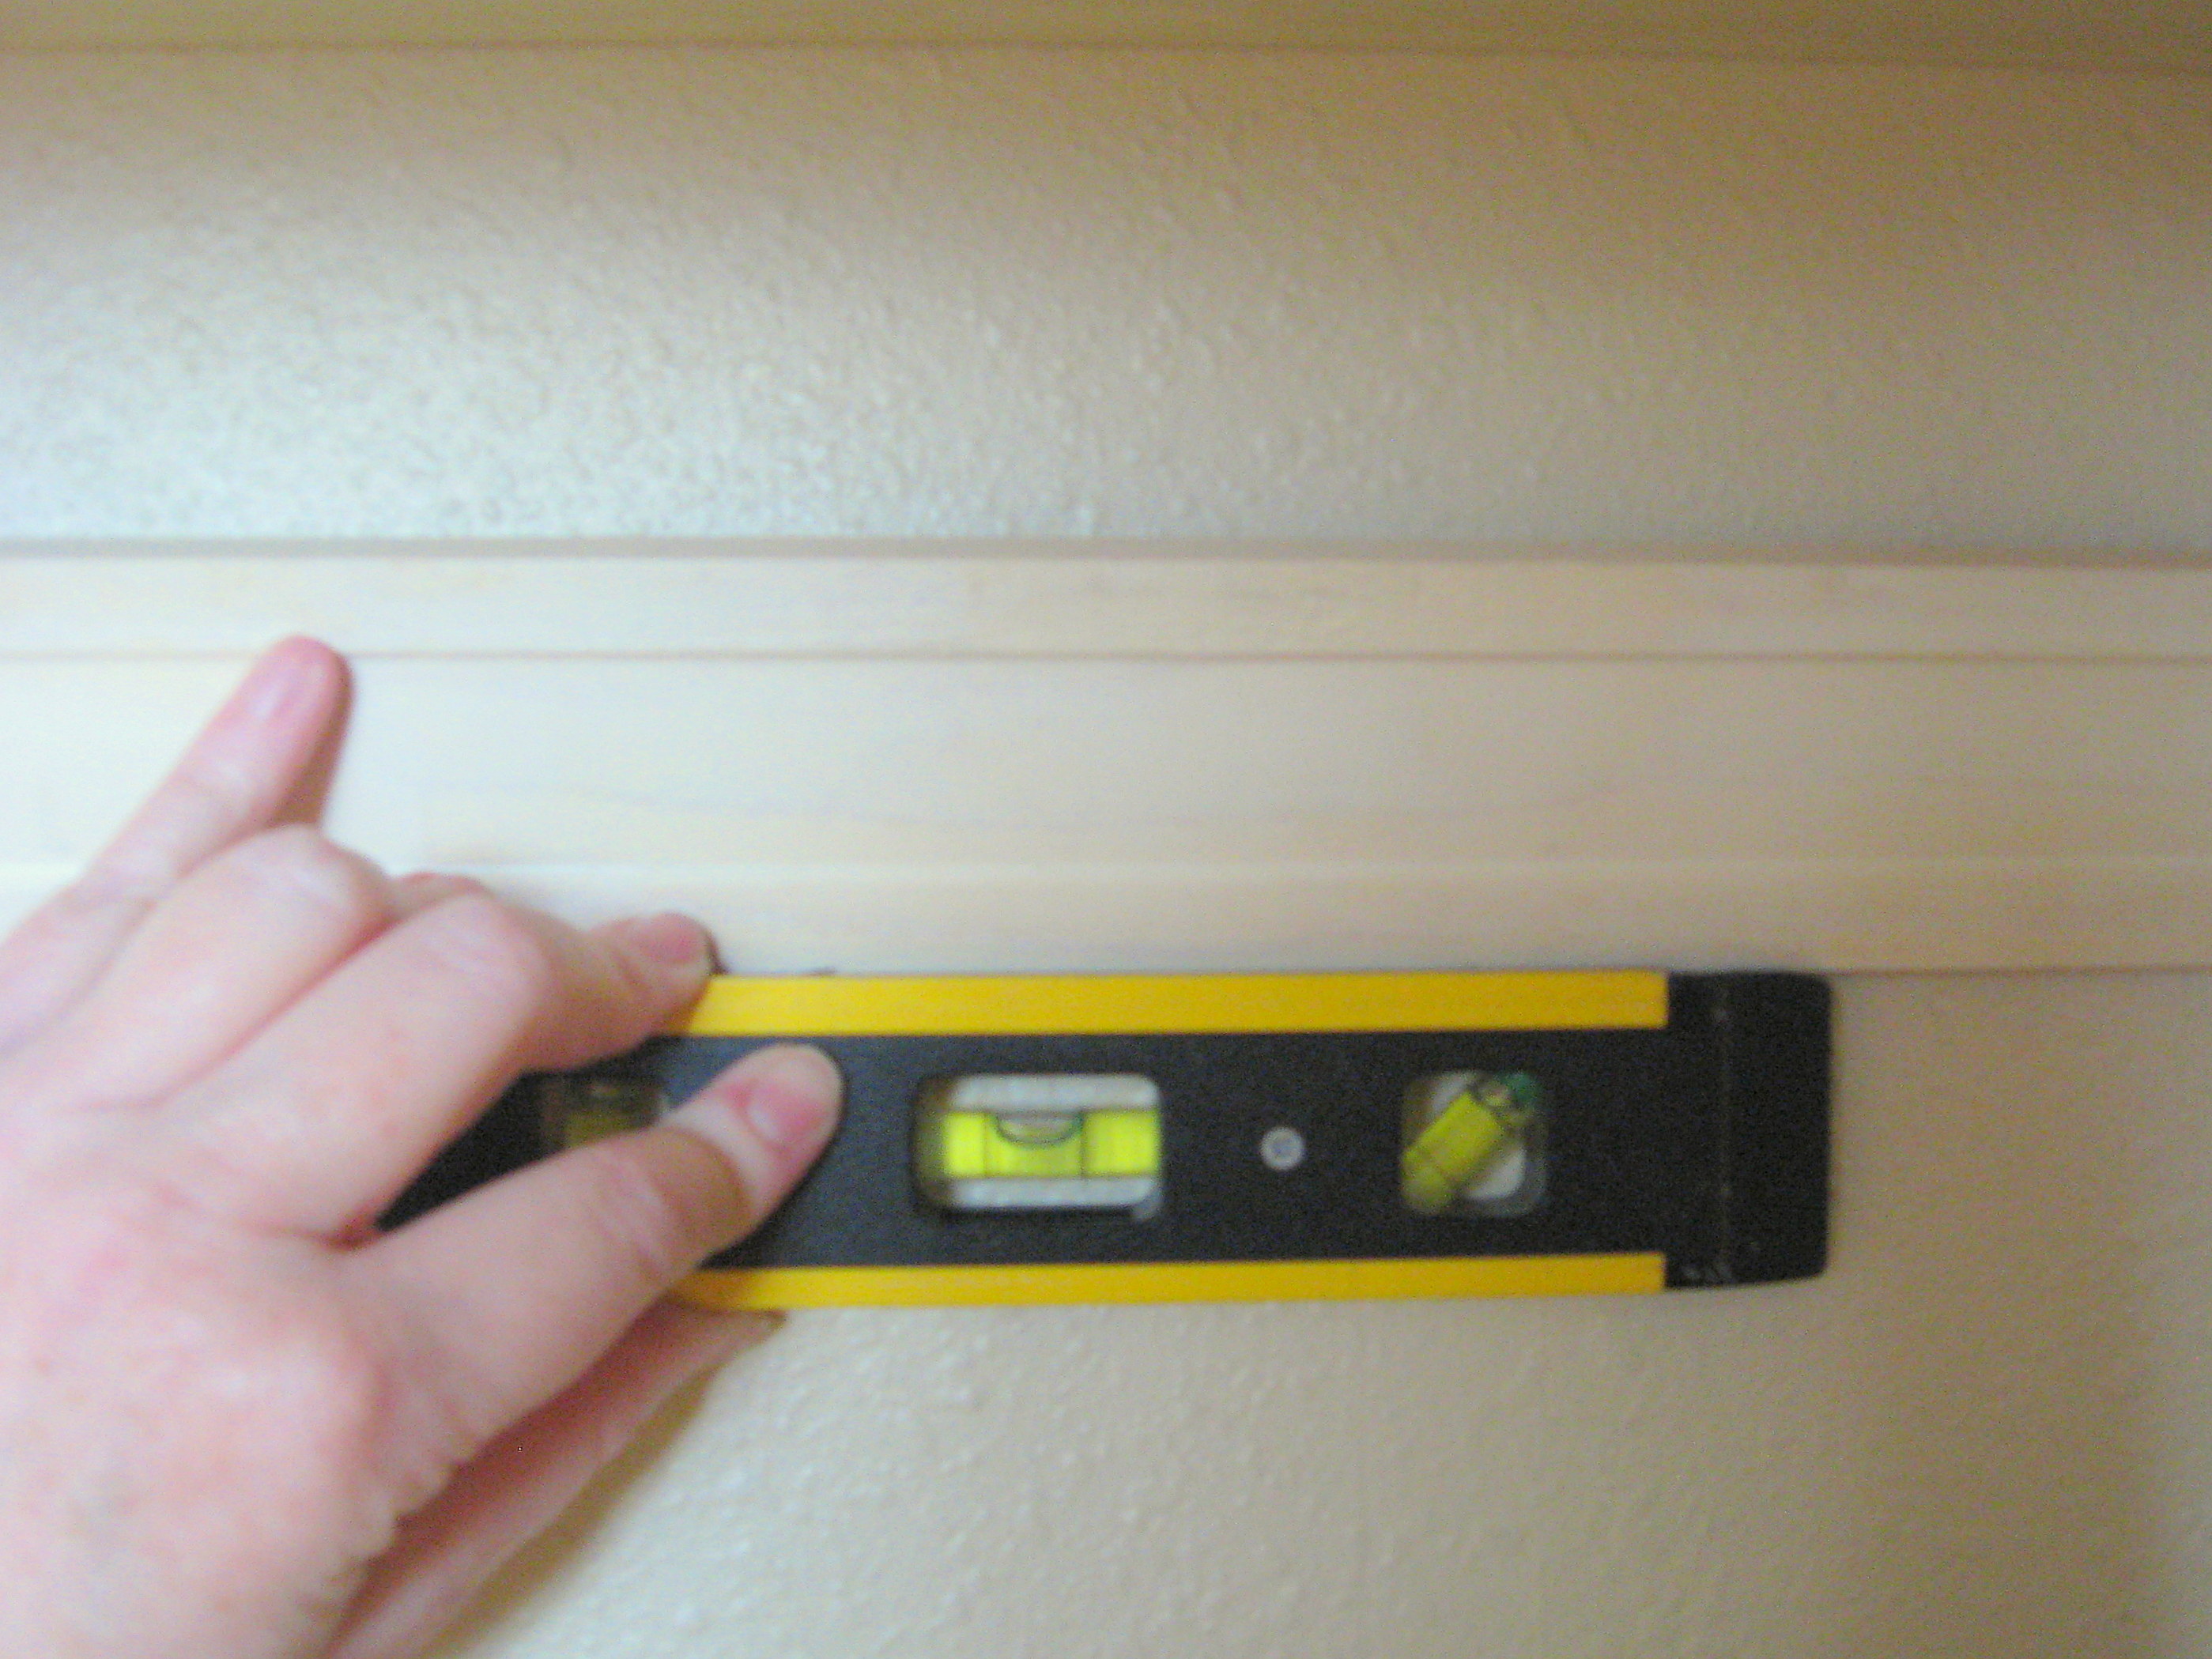
then draw a line along the bottom edge (see how I’m holding the moulding with the unfinished side towards me, and the thin top on the bottom).
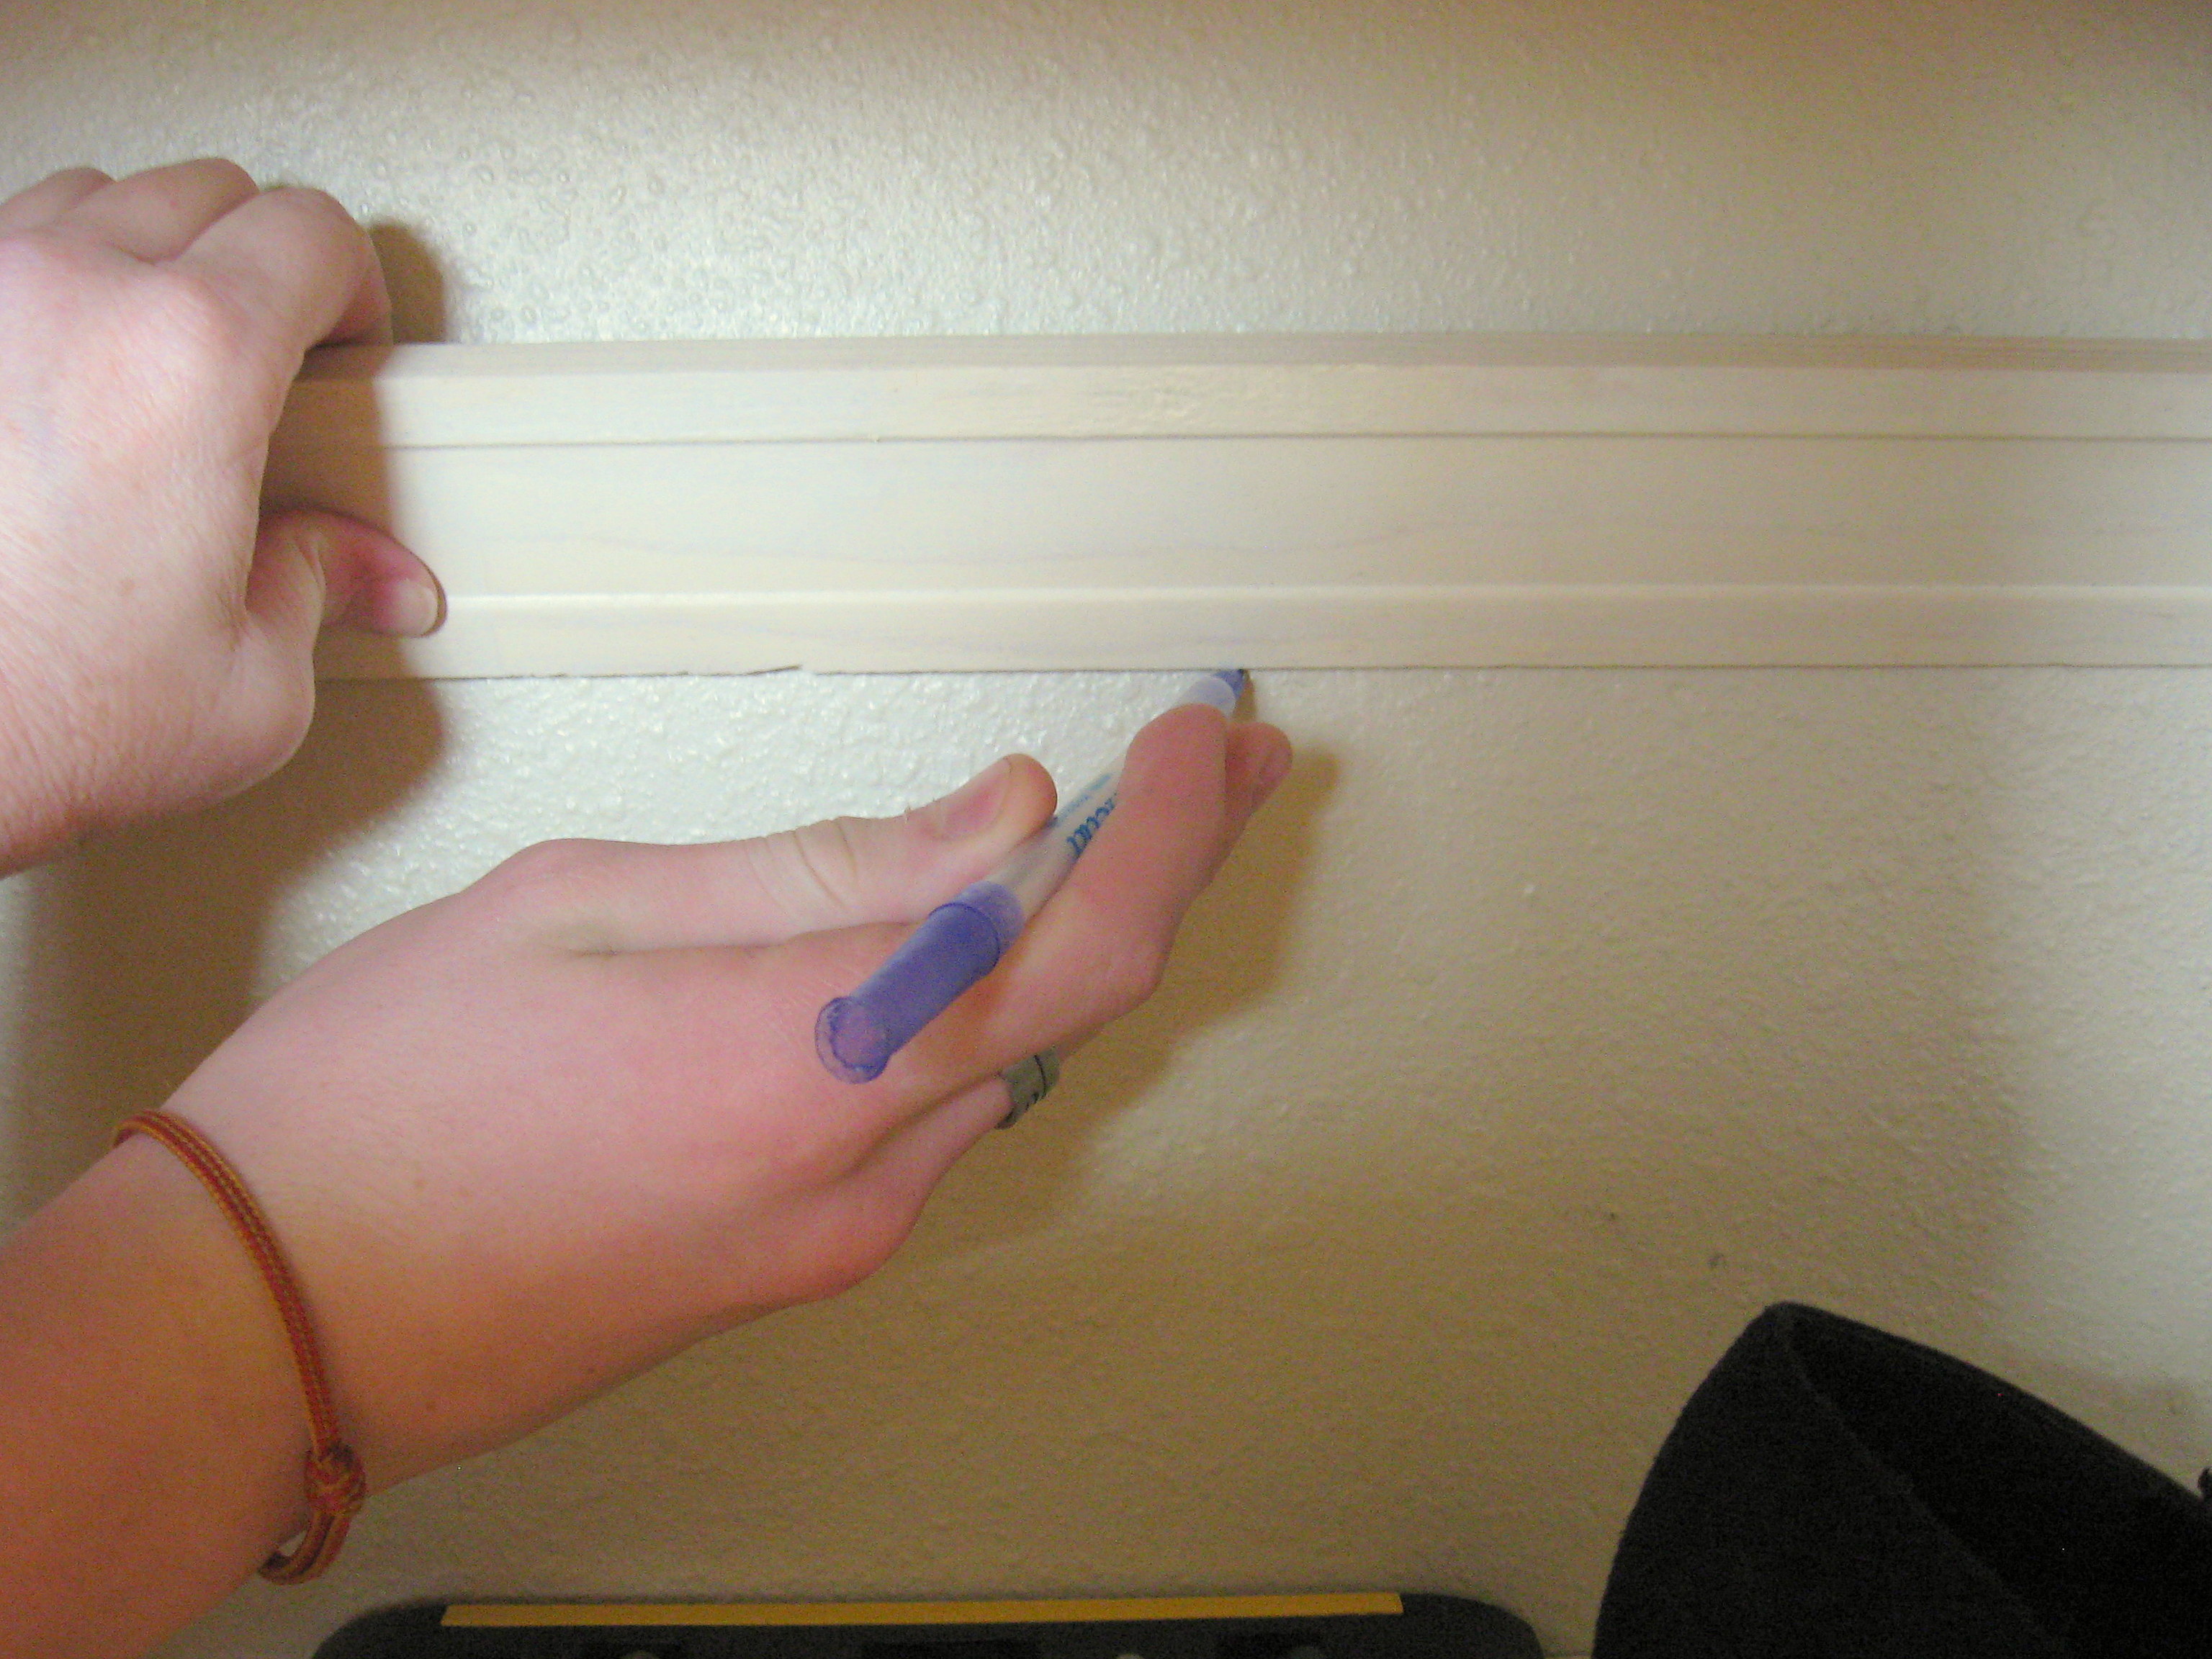
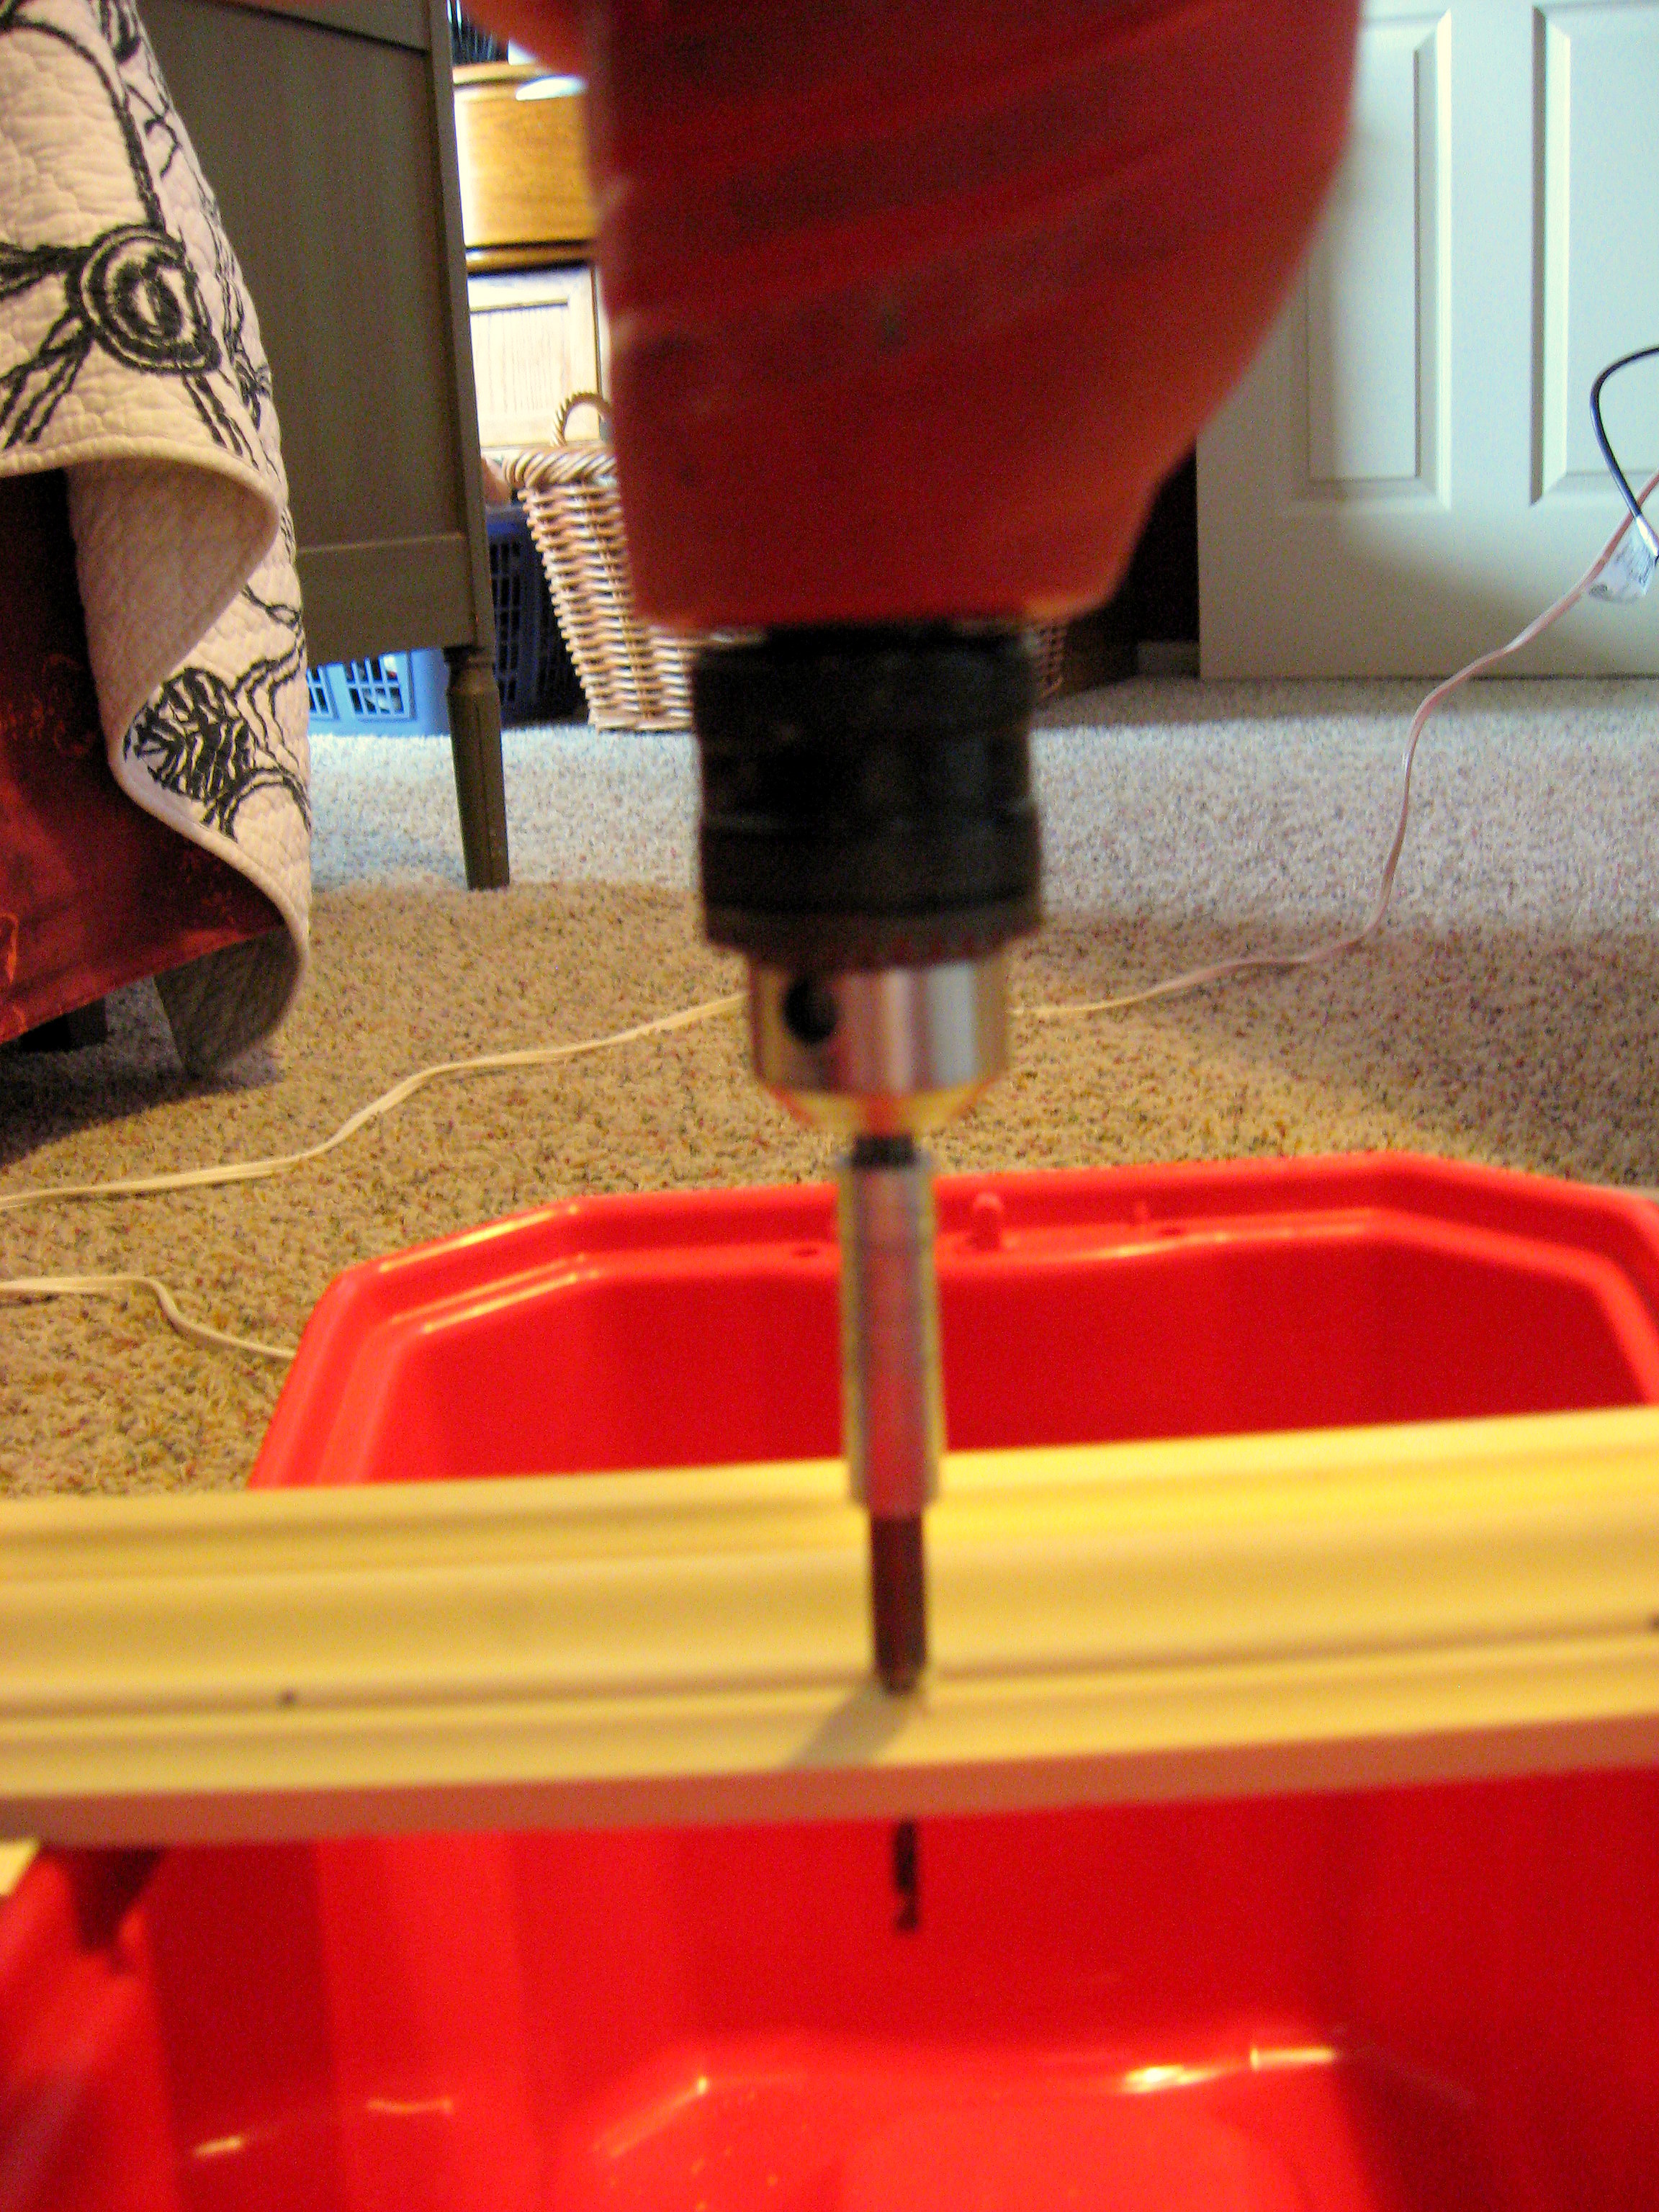
You are going to be putting screws through the thinner edge of the moulding to attach it to the wall. Carefully drill pilot holes so that you don’t split the wood.
Hold the moulding back into place (checking to make sure it’s level) and mark the placement of the holes with a pencil – or have someone drill through the holes into the wall behind while you hold the moulding firmly in place.
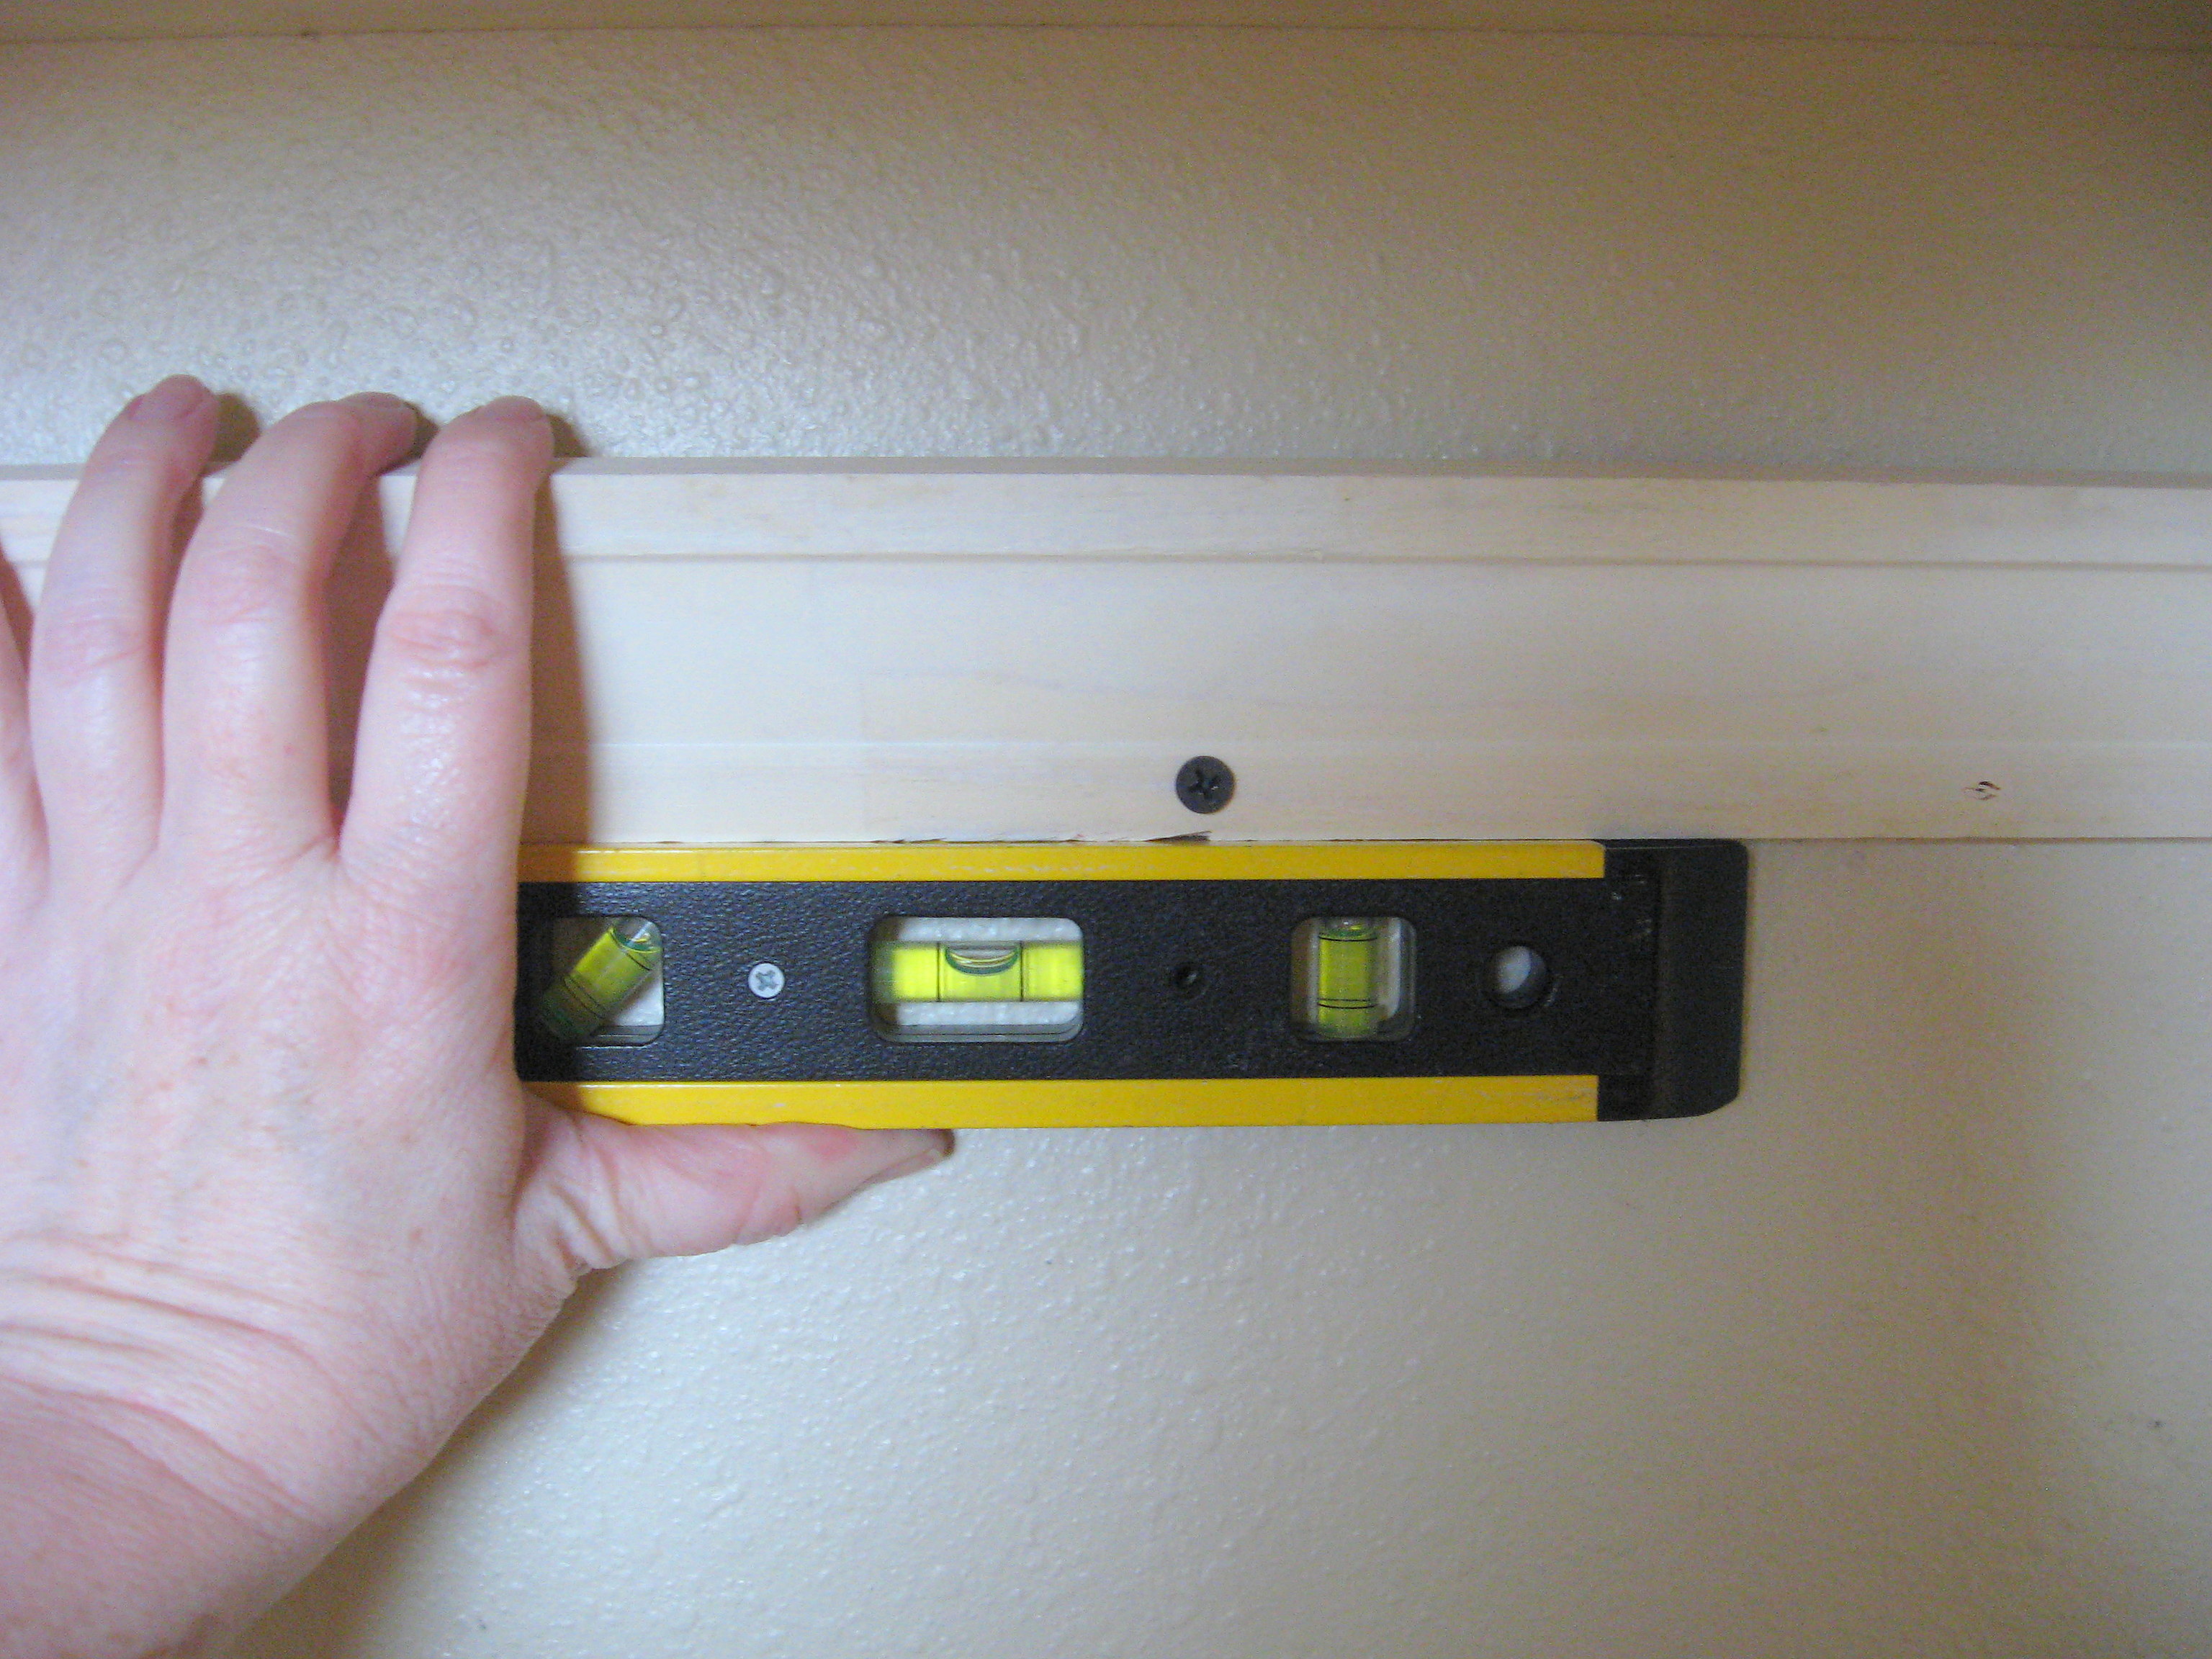
If you are drilling into hard wood or into a stud, you can now just screw the moulding right into place. If you are drilling into drywall, you should use wall anchors, then screw into those.
This is what it looks like when it’s all done with the shoes hanging on it. Notice how the moulding sits at an angle, since the angled face of it is against the wall.
If you’re concerned with the look of it, paint the moulding a fun color. Make sure to countersink the screws, cover them in wood putty or spackle, and touch up paint them when it dries.
And all of them done:
Now let’s do the flip flops and flats:
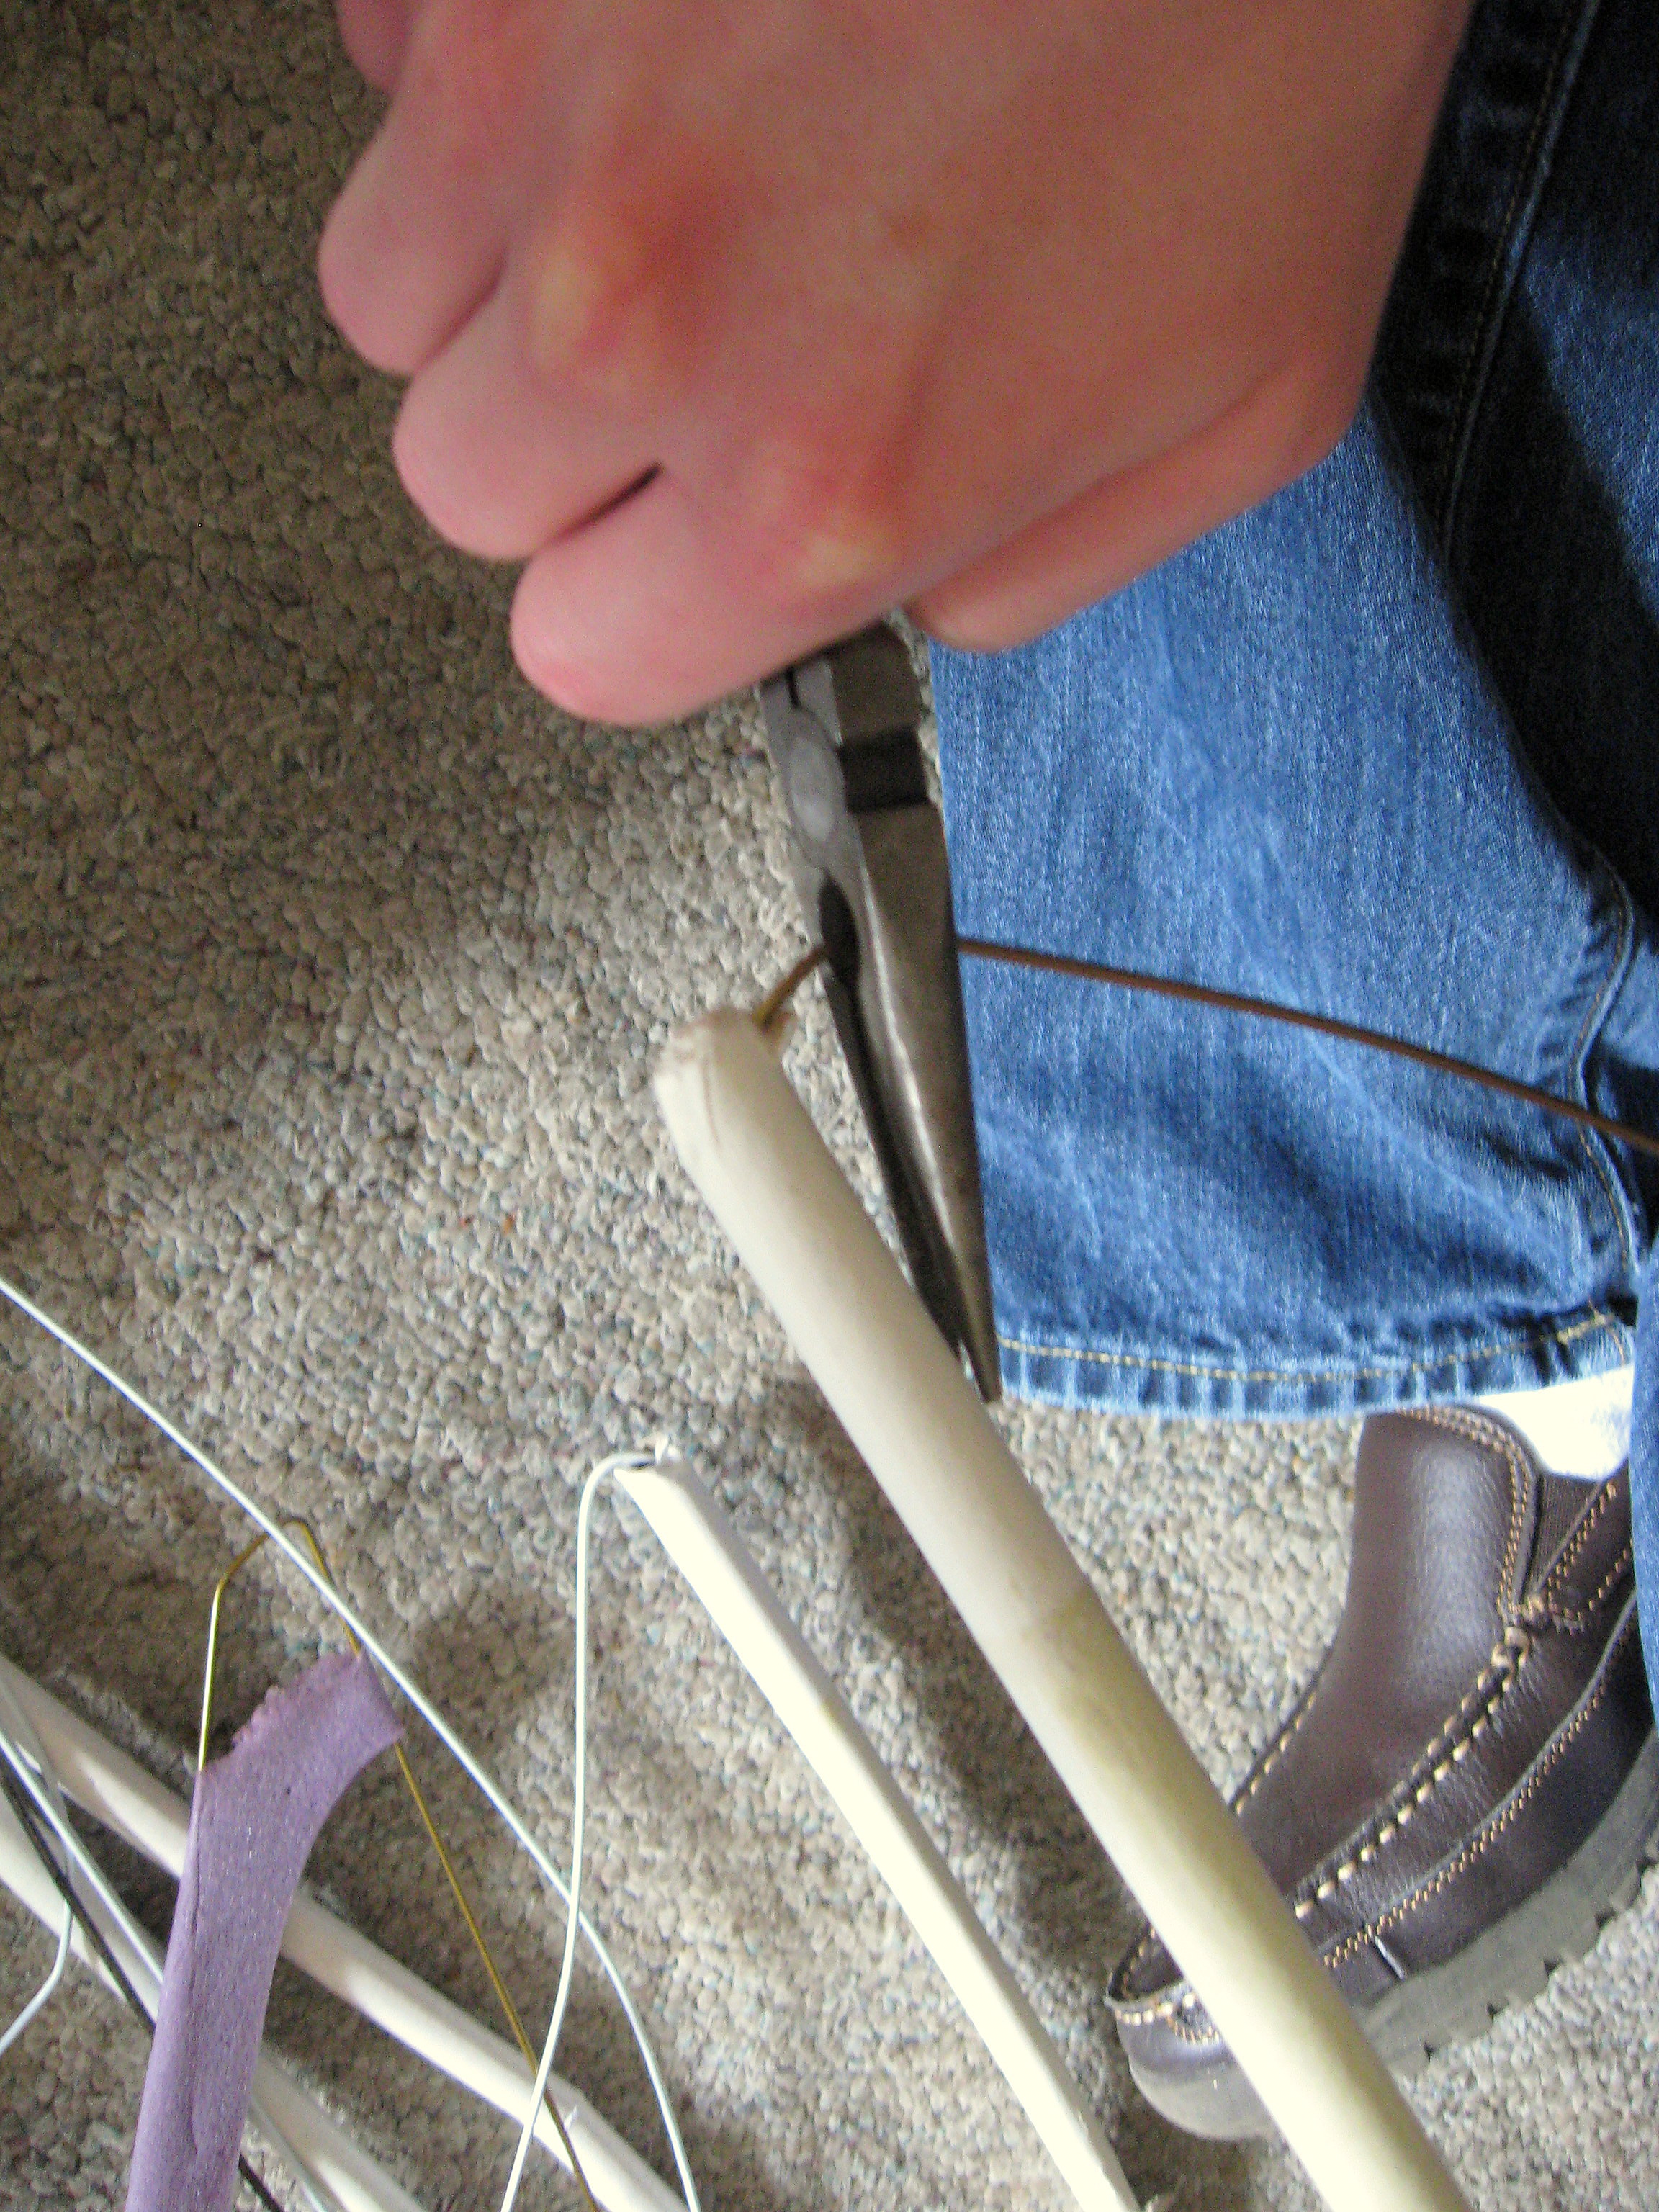
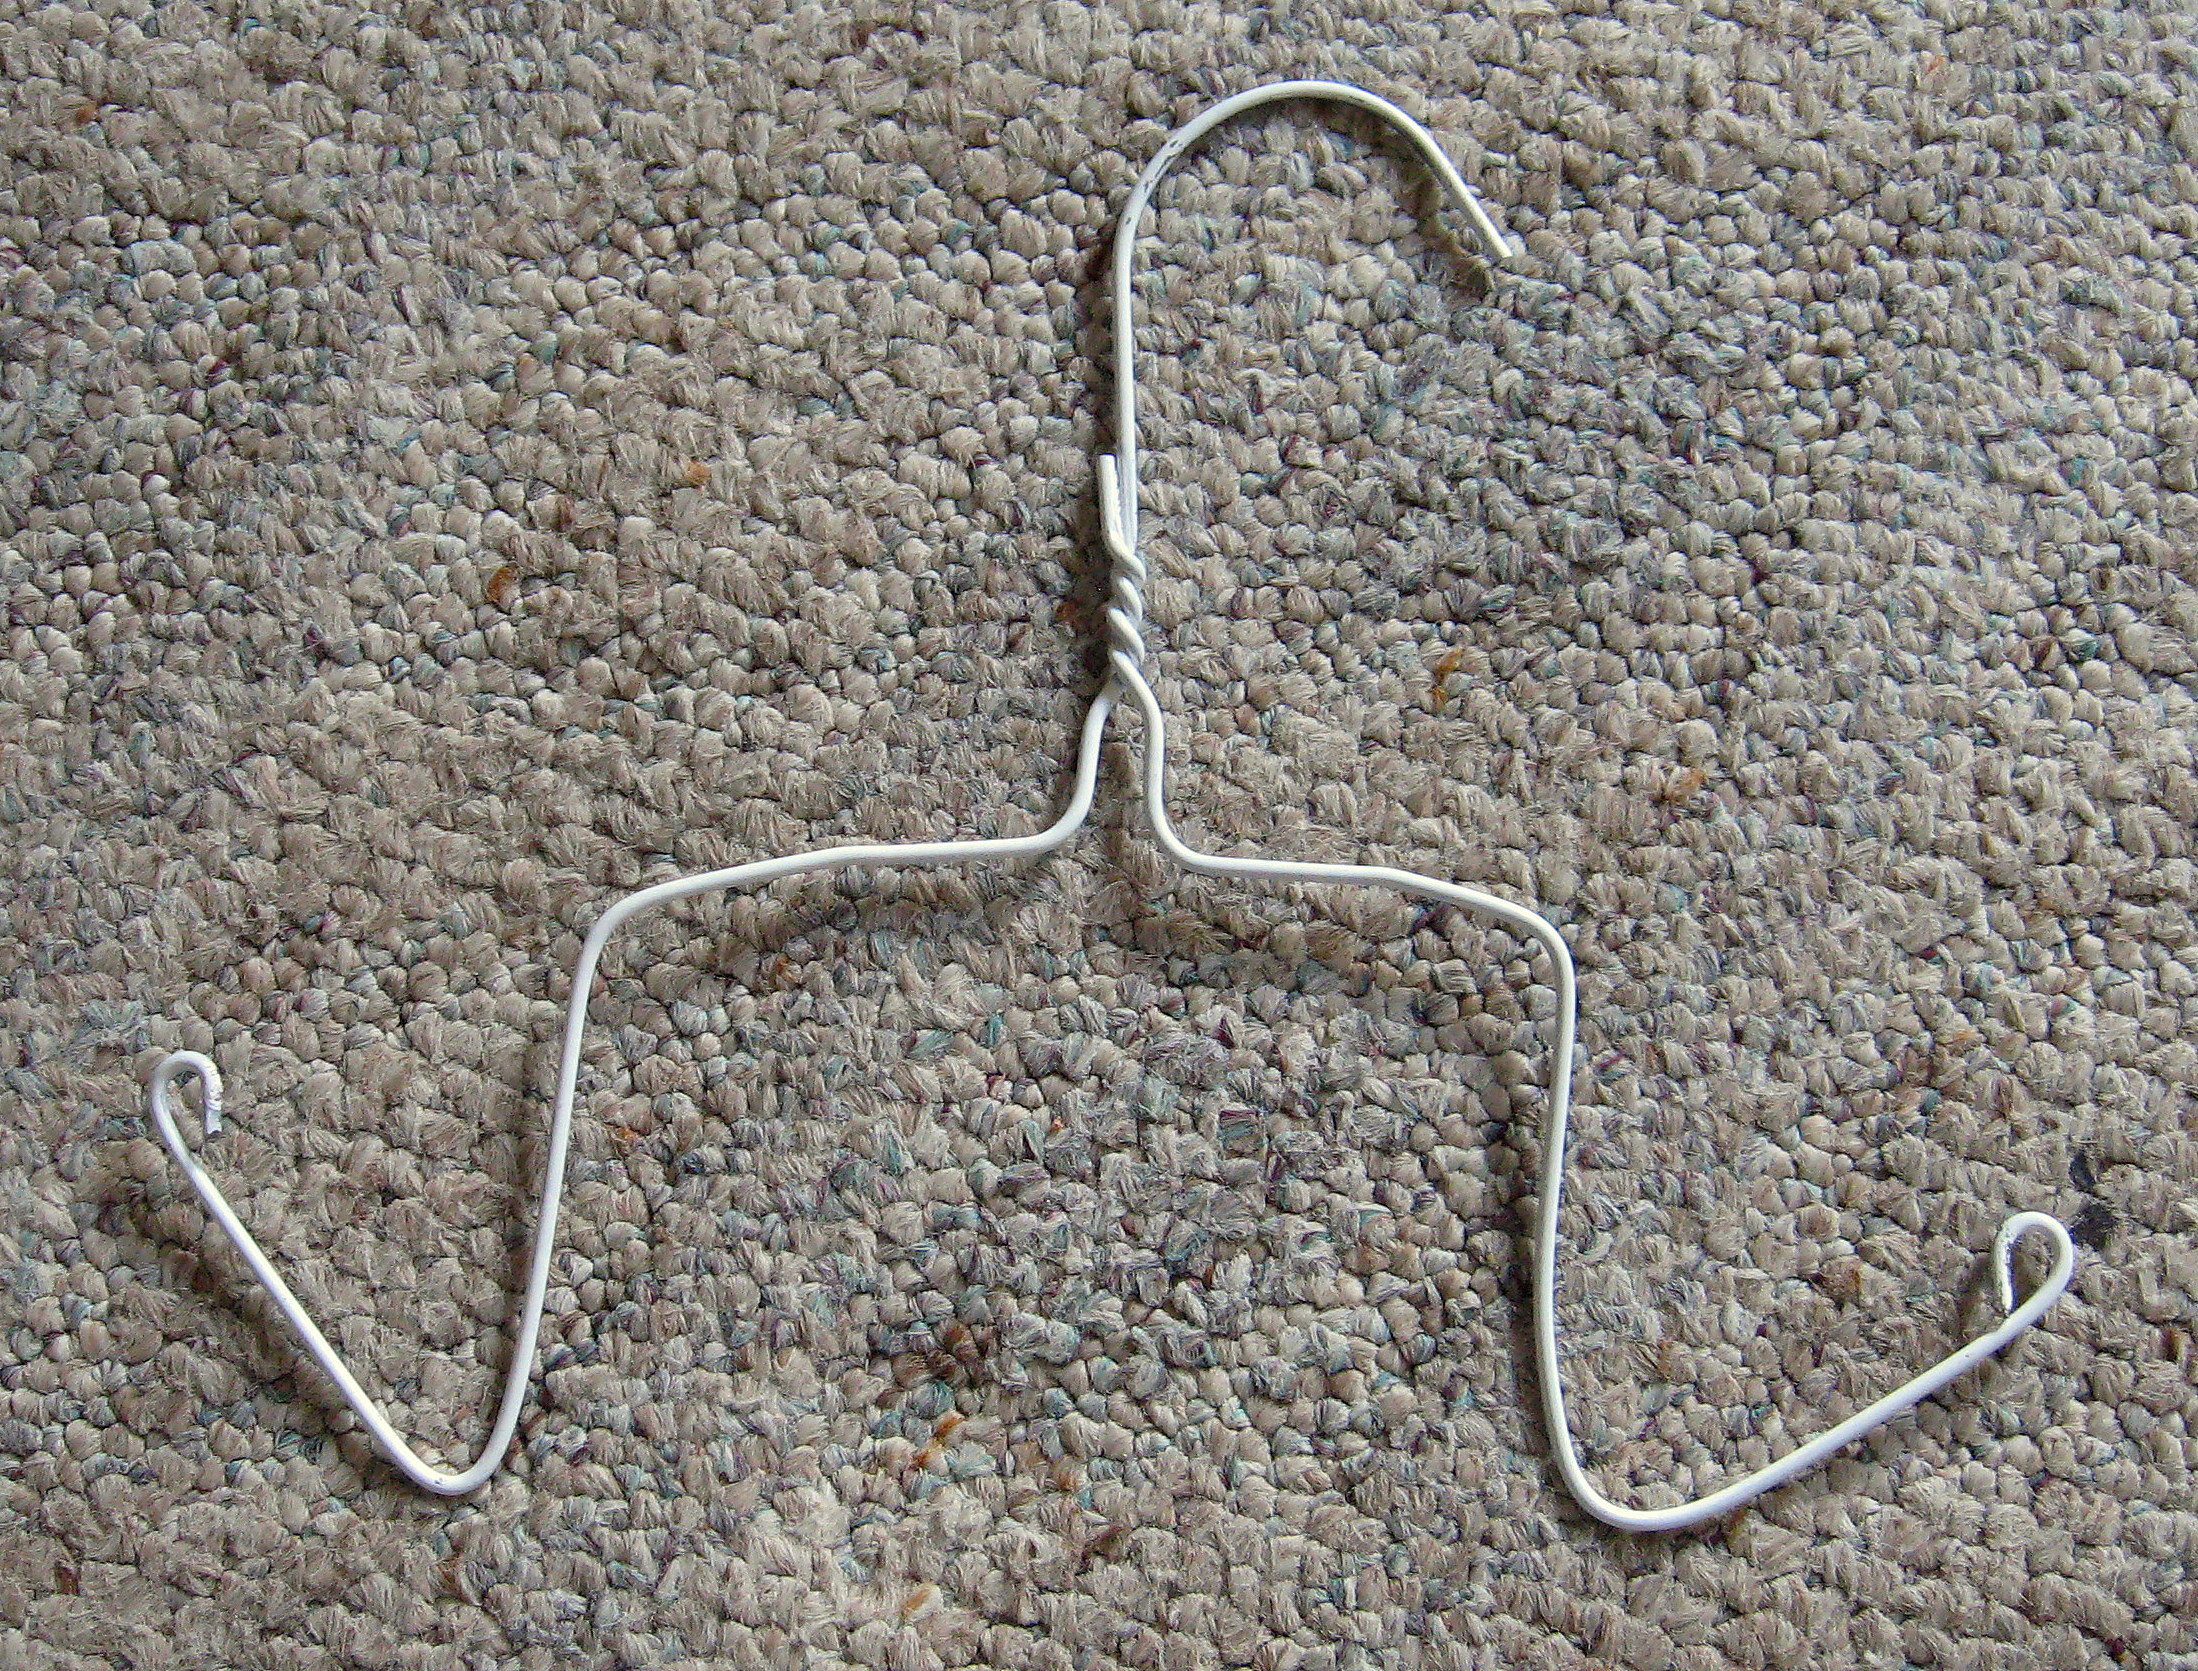
You will want to buy, beg or find enough wire hangers for how many shoes you want to hang from them.
If you have a choice between really heavy hangers and thinner ones, I would take the thinner ones because they are easier to bend, but it’s not a huge deal either way.
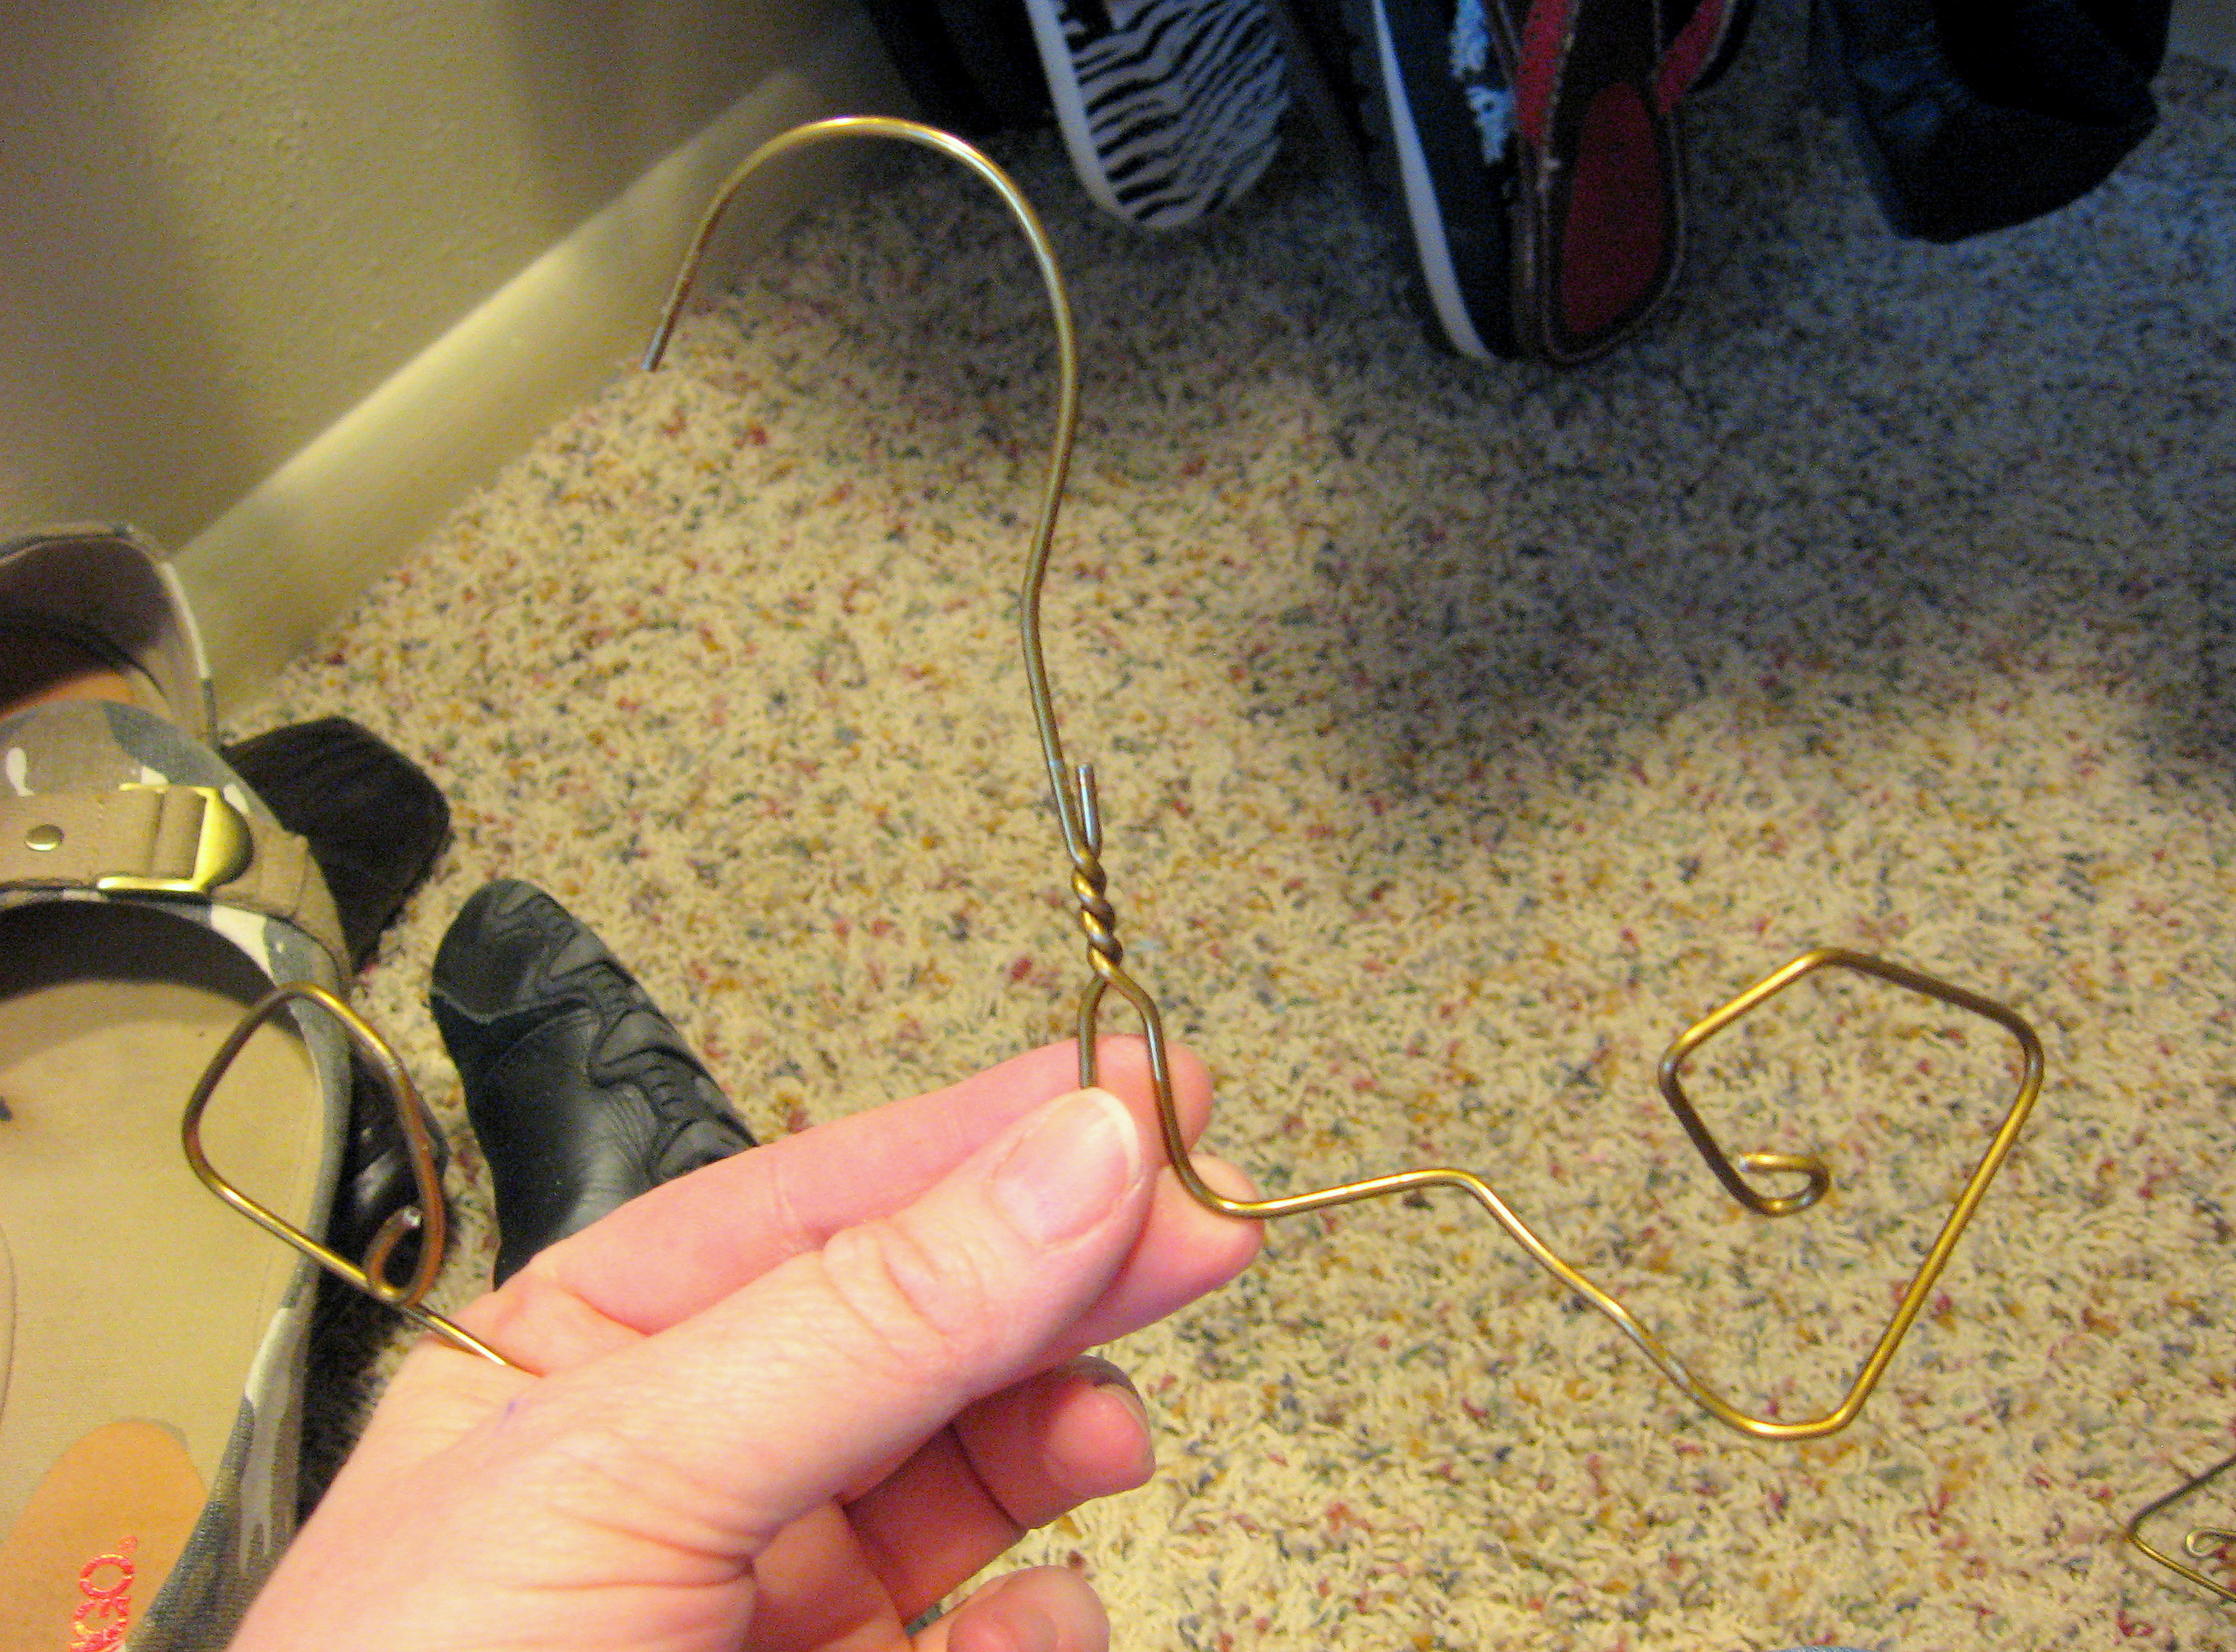
Start by cutting each hanger off at the corners with a pair of wire cutters.
Then, using your hands -or needle nosed pliers if you need to- bend the remaining part of the hanger into a shape like this:
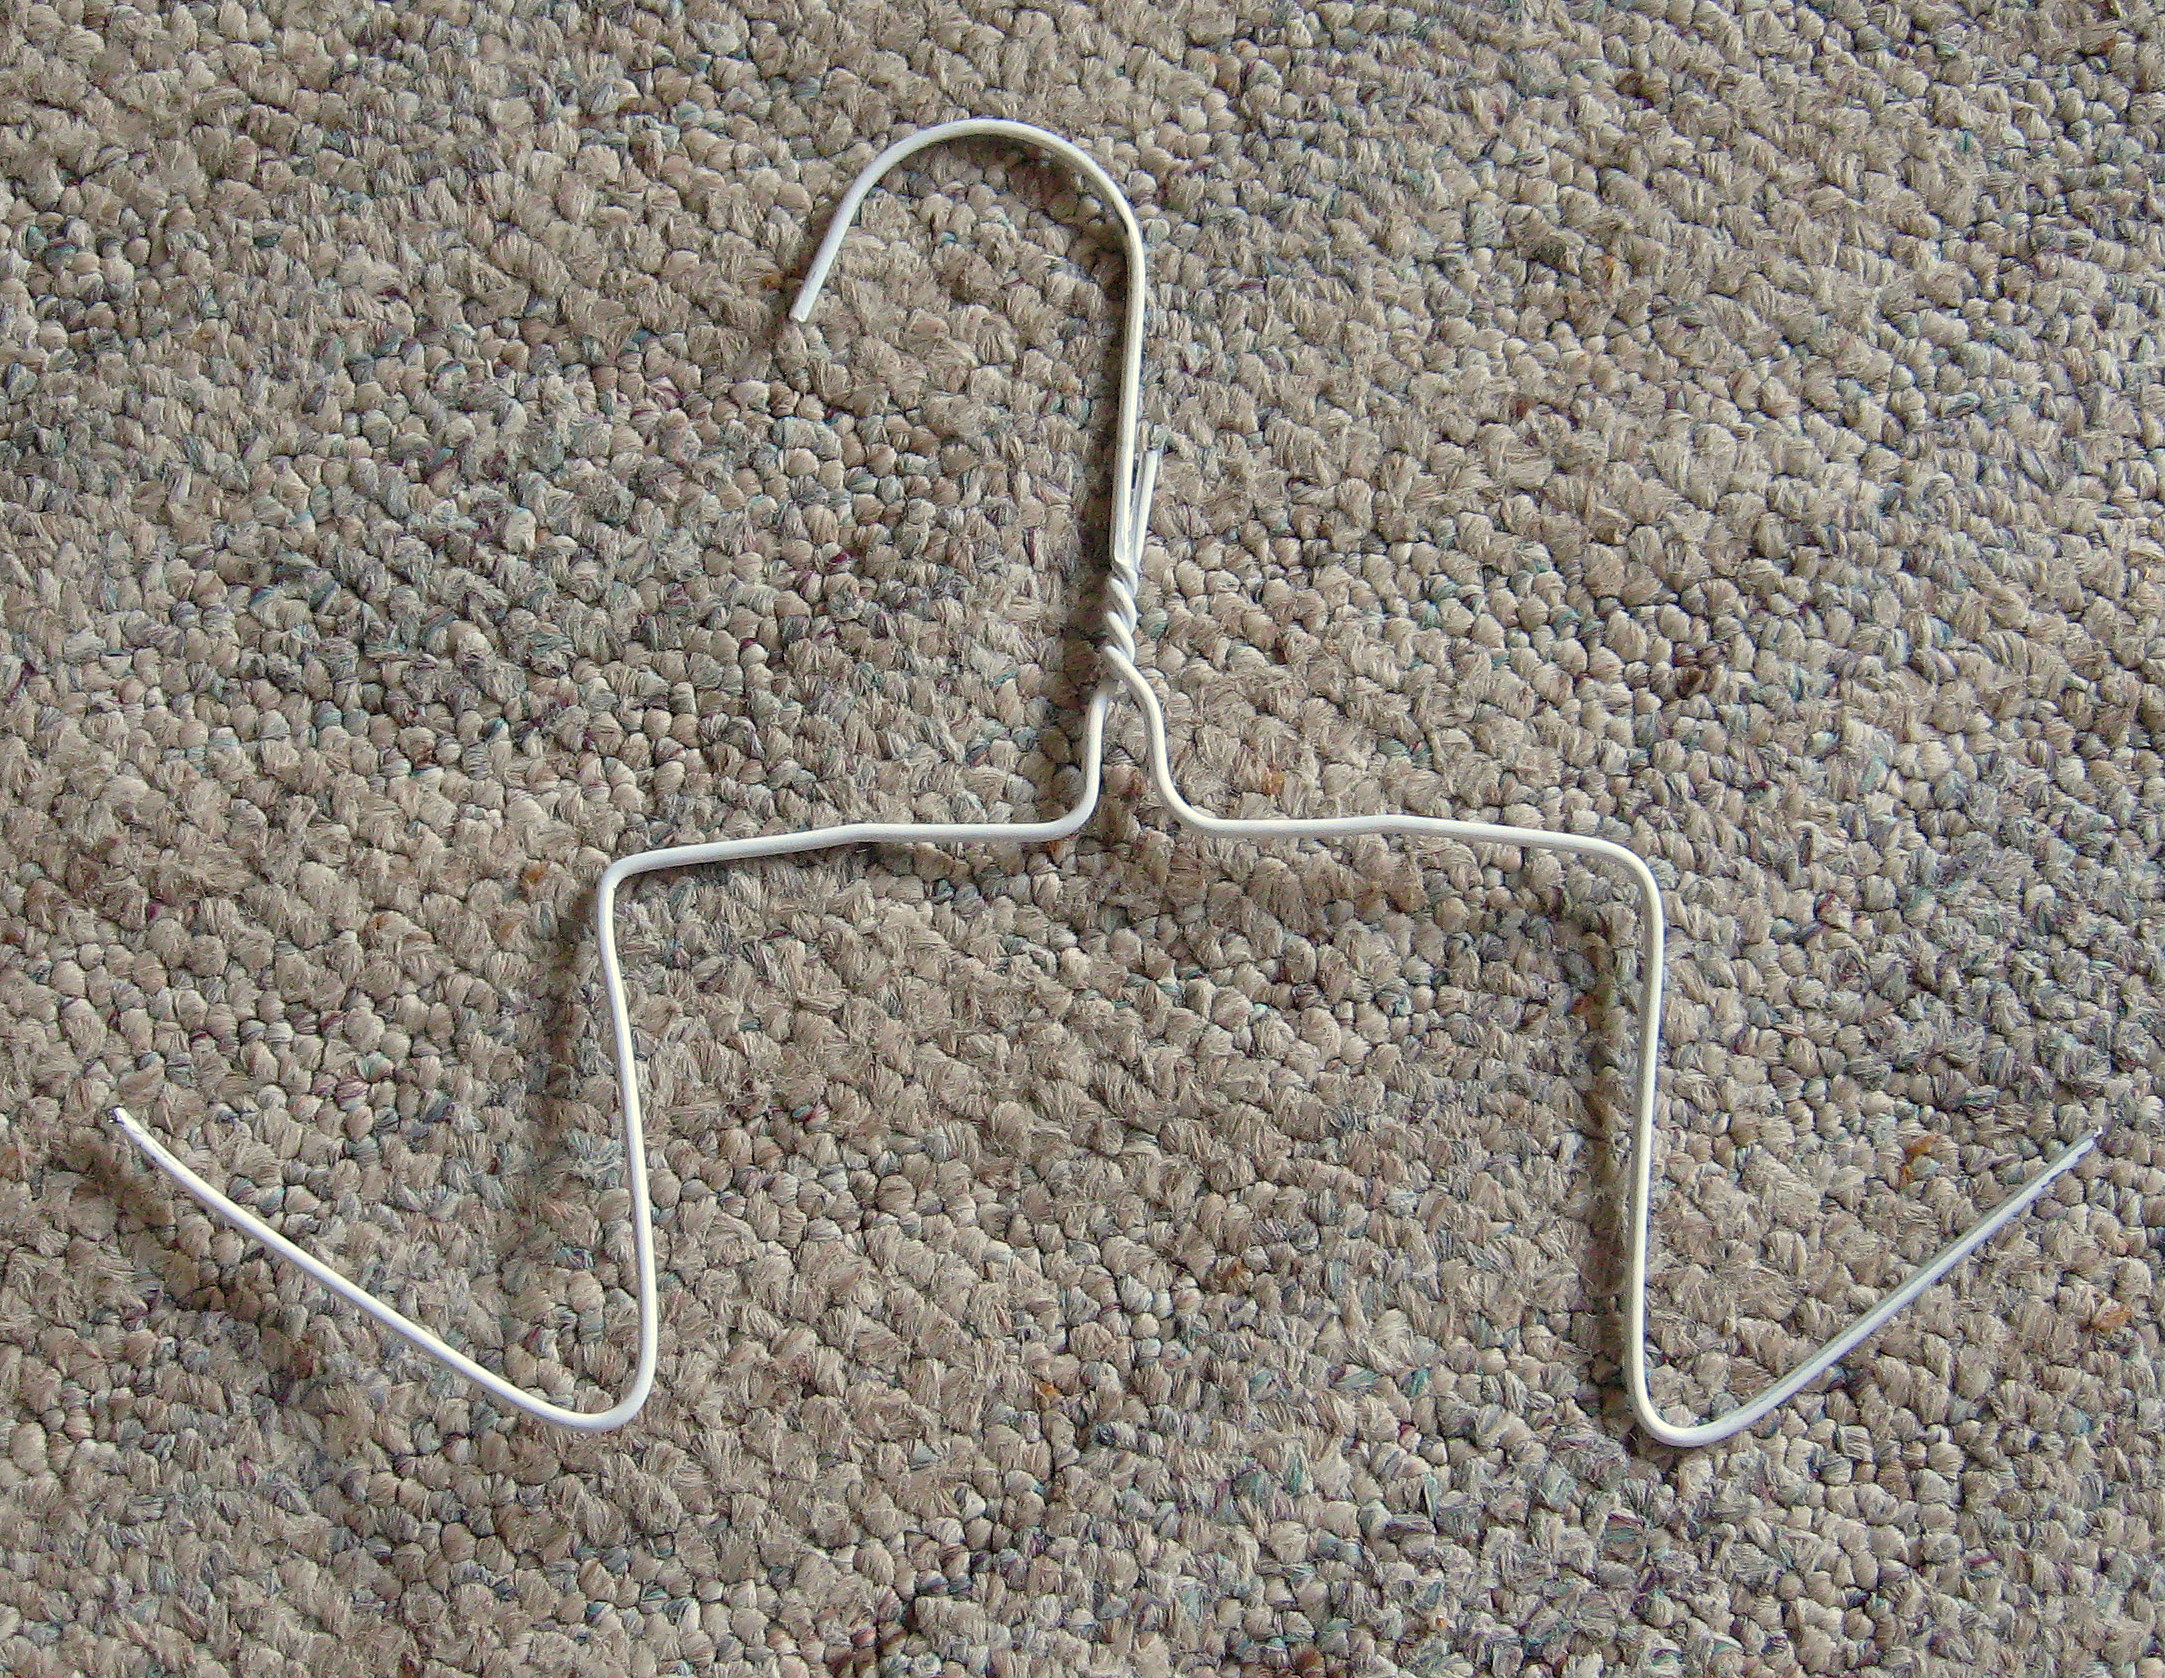
Using the pliers, curl each end in on itself so that you don’t get poked or cut on the cut end of the hanger.
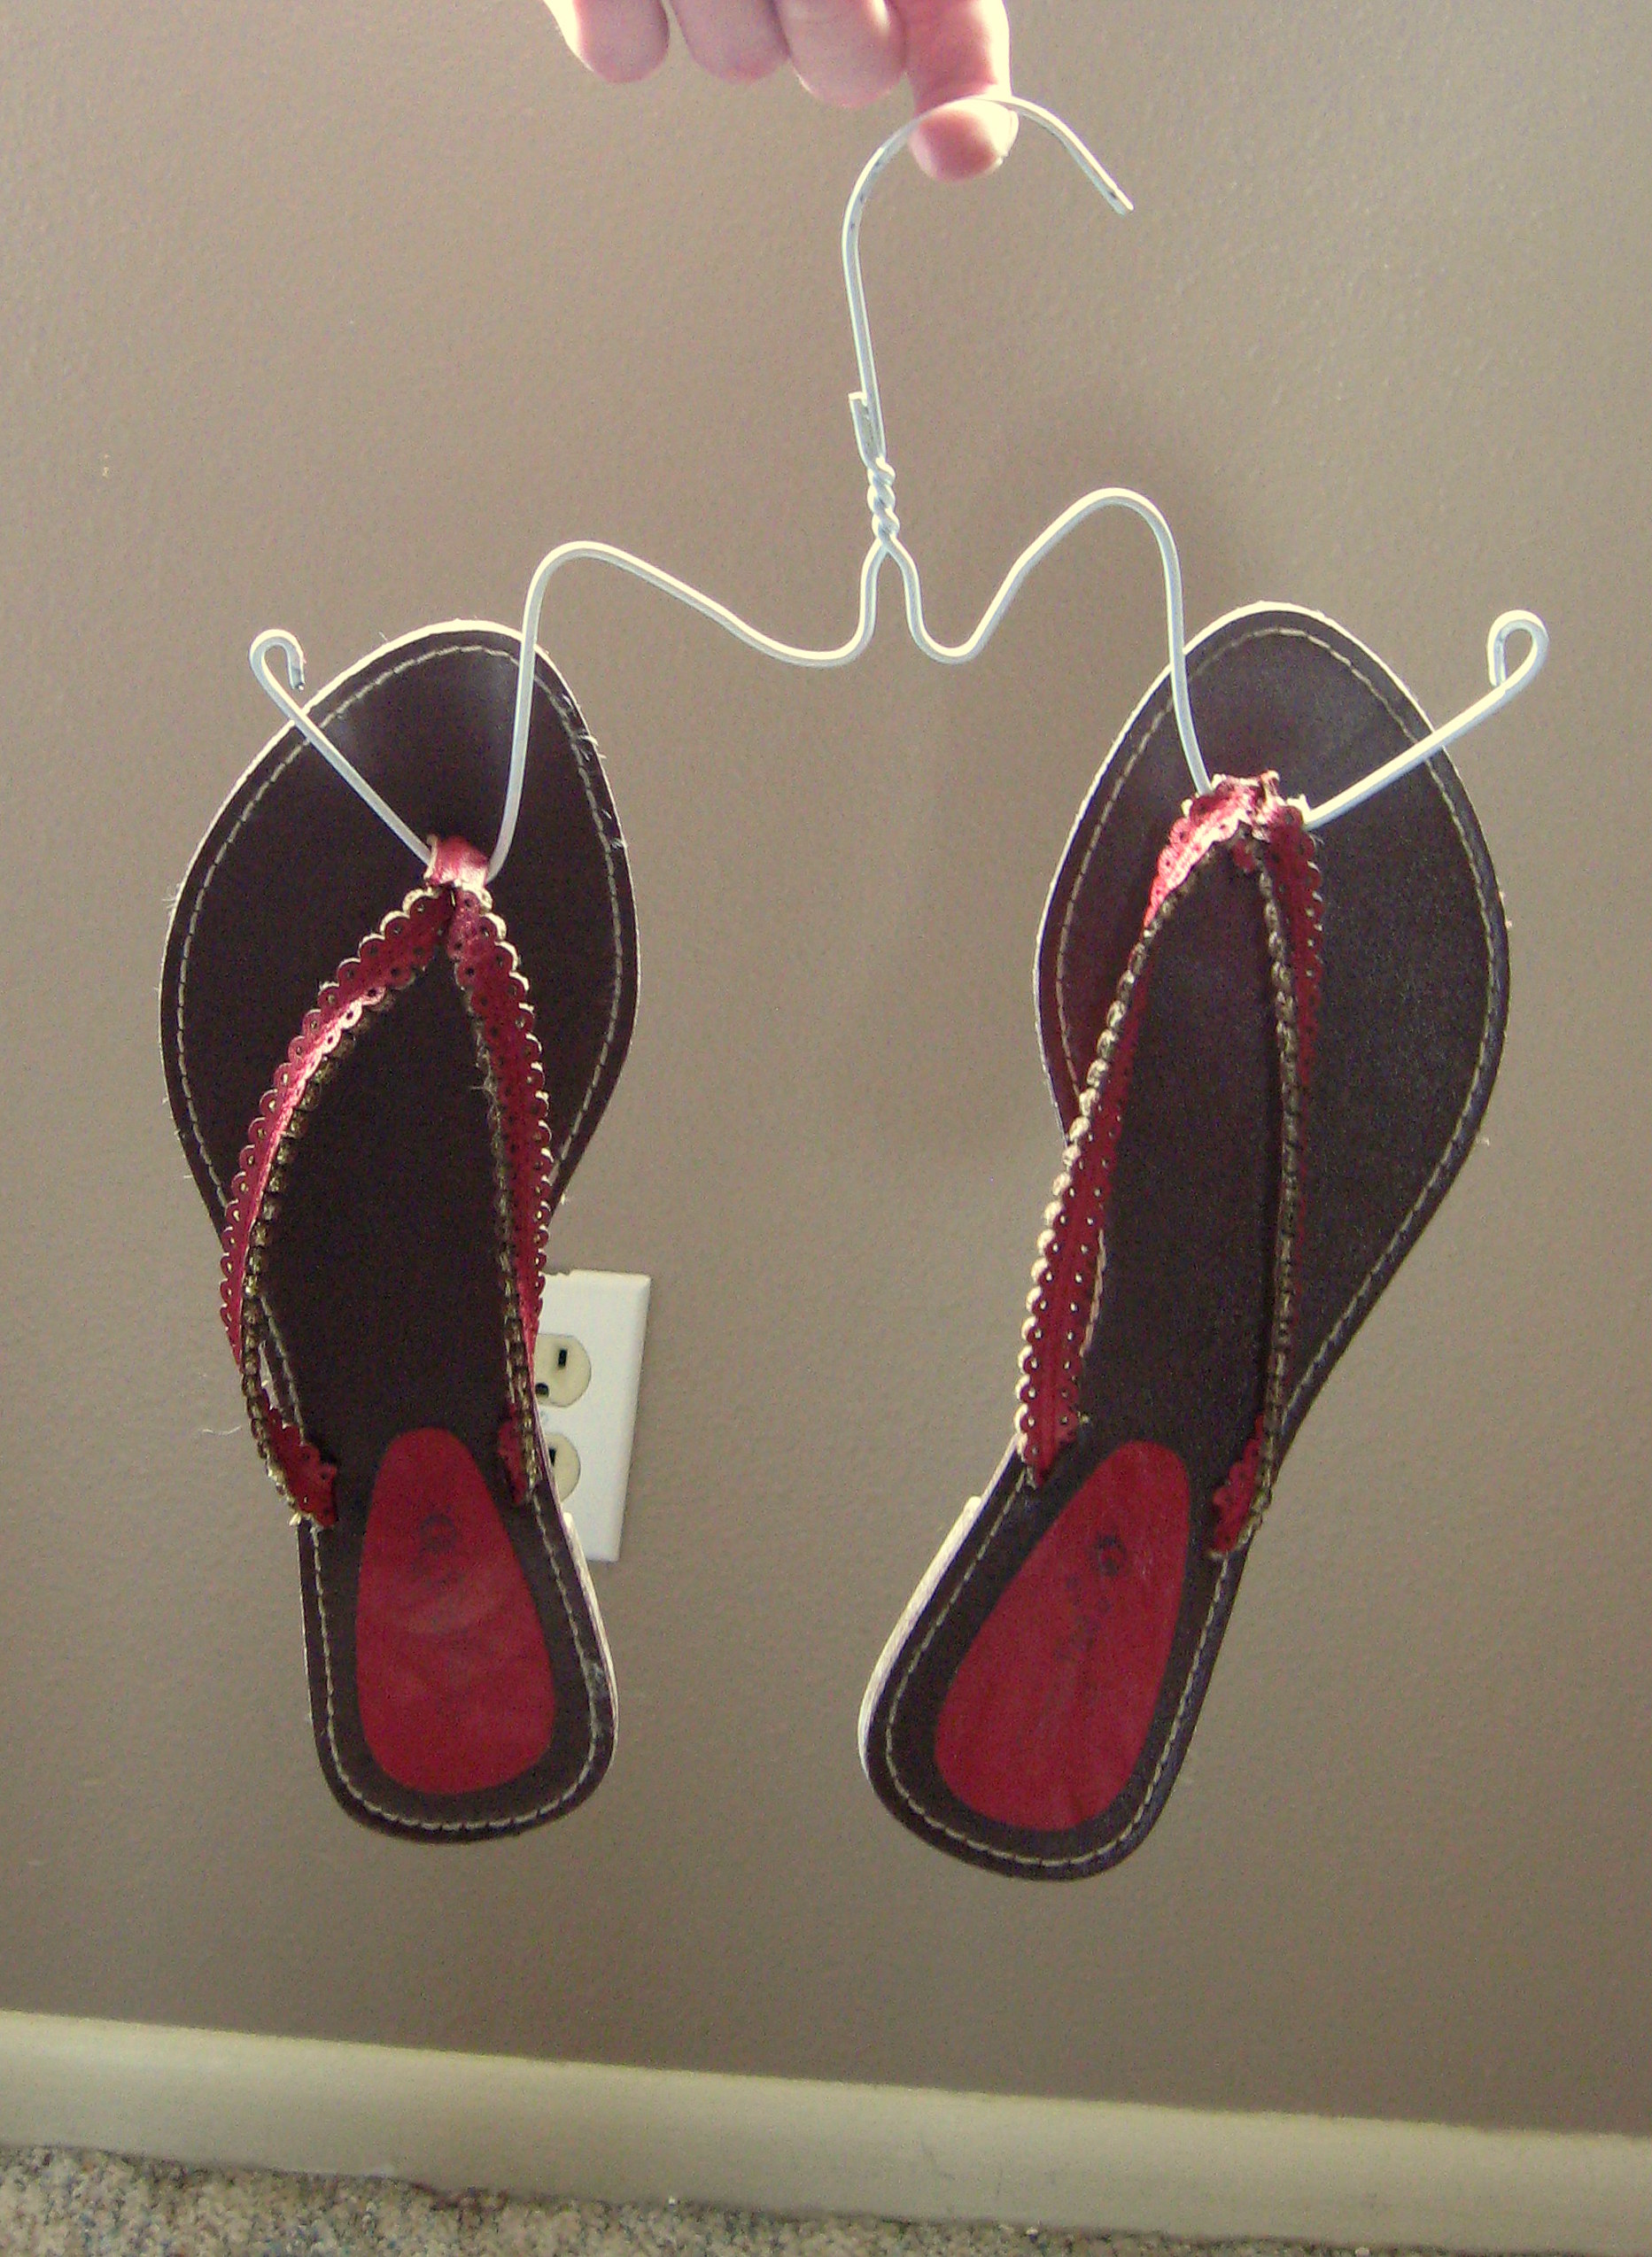
I hung my shoes on as is, but if you want to pretty them up you could make a little decorative sleeve to slip down over the top out of paper or fabric.
You could hang them on a tension rod (less than $5 at Walmart) but in keeping with my “no money” theme, I decided to use a piece of PVC pipe from the garage, mounted on L brackets.
Cut the PVC with a hacksaw to the length of wherever you are putting it, minus however much width the brackets will add (for me it was like 1/4 inch.) Insert the L brackets into the ends of the PVC pipe and make sure it fits in the space (a little looser is better than too tight) and decide how high you want to hang it. I put mine in my closet near the floor, under my skirts and dresses.
Hold the first bracket as straight as you can and mark the holes with a pencil.
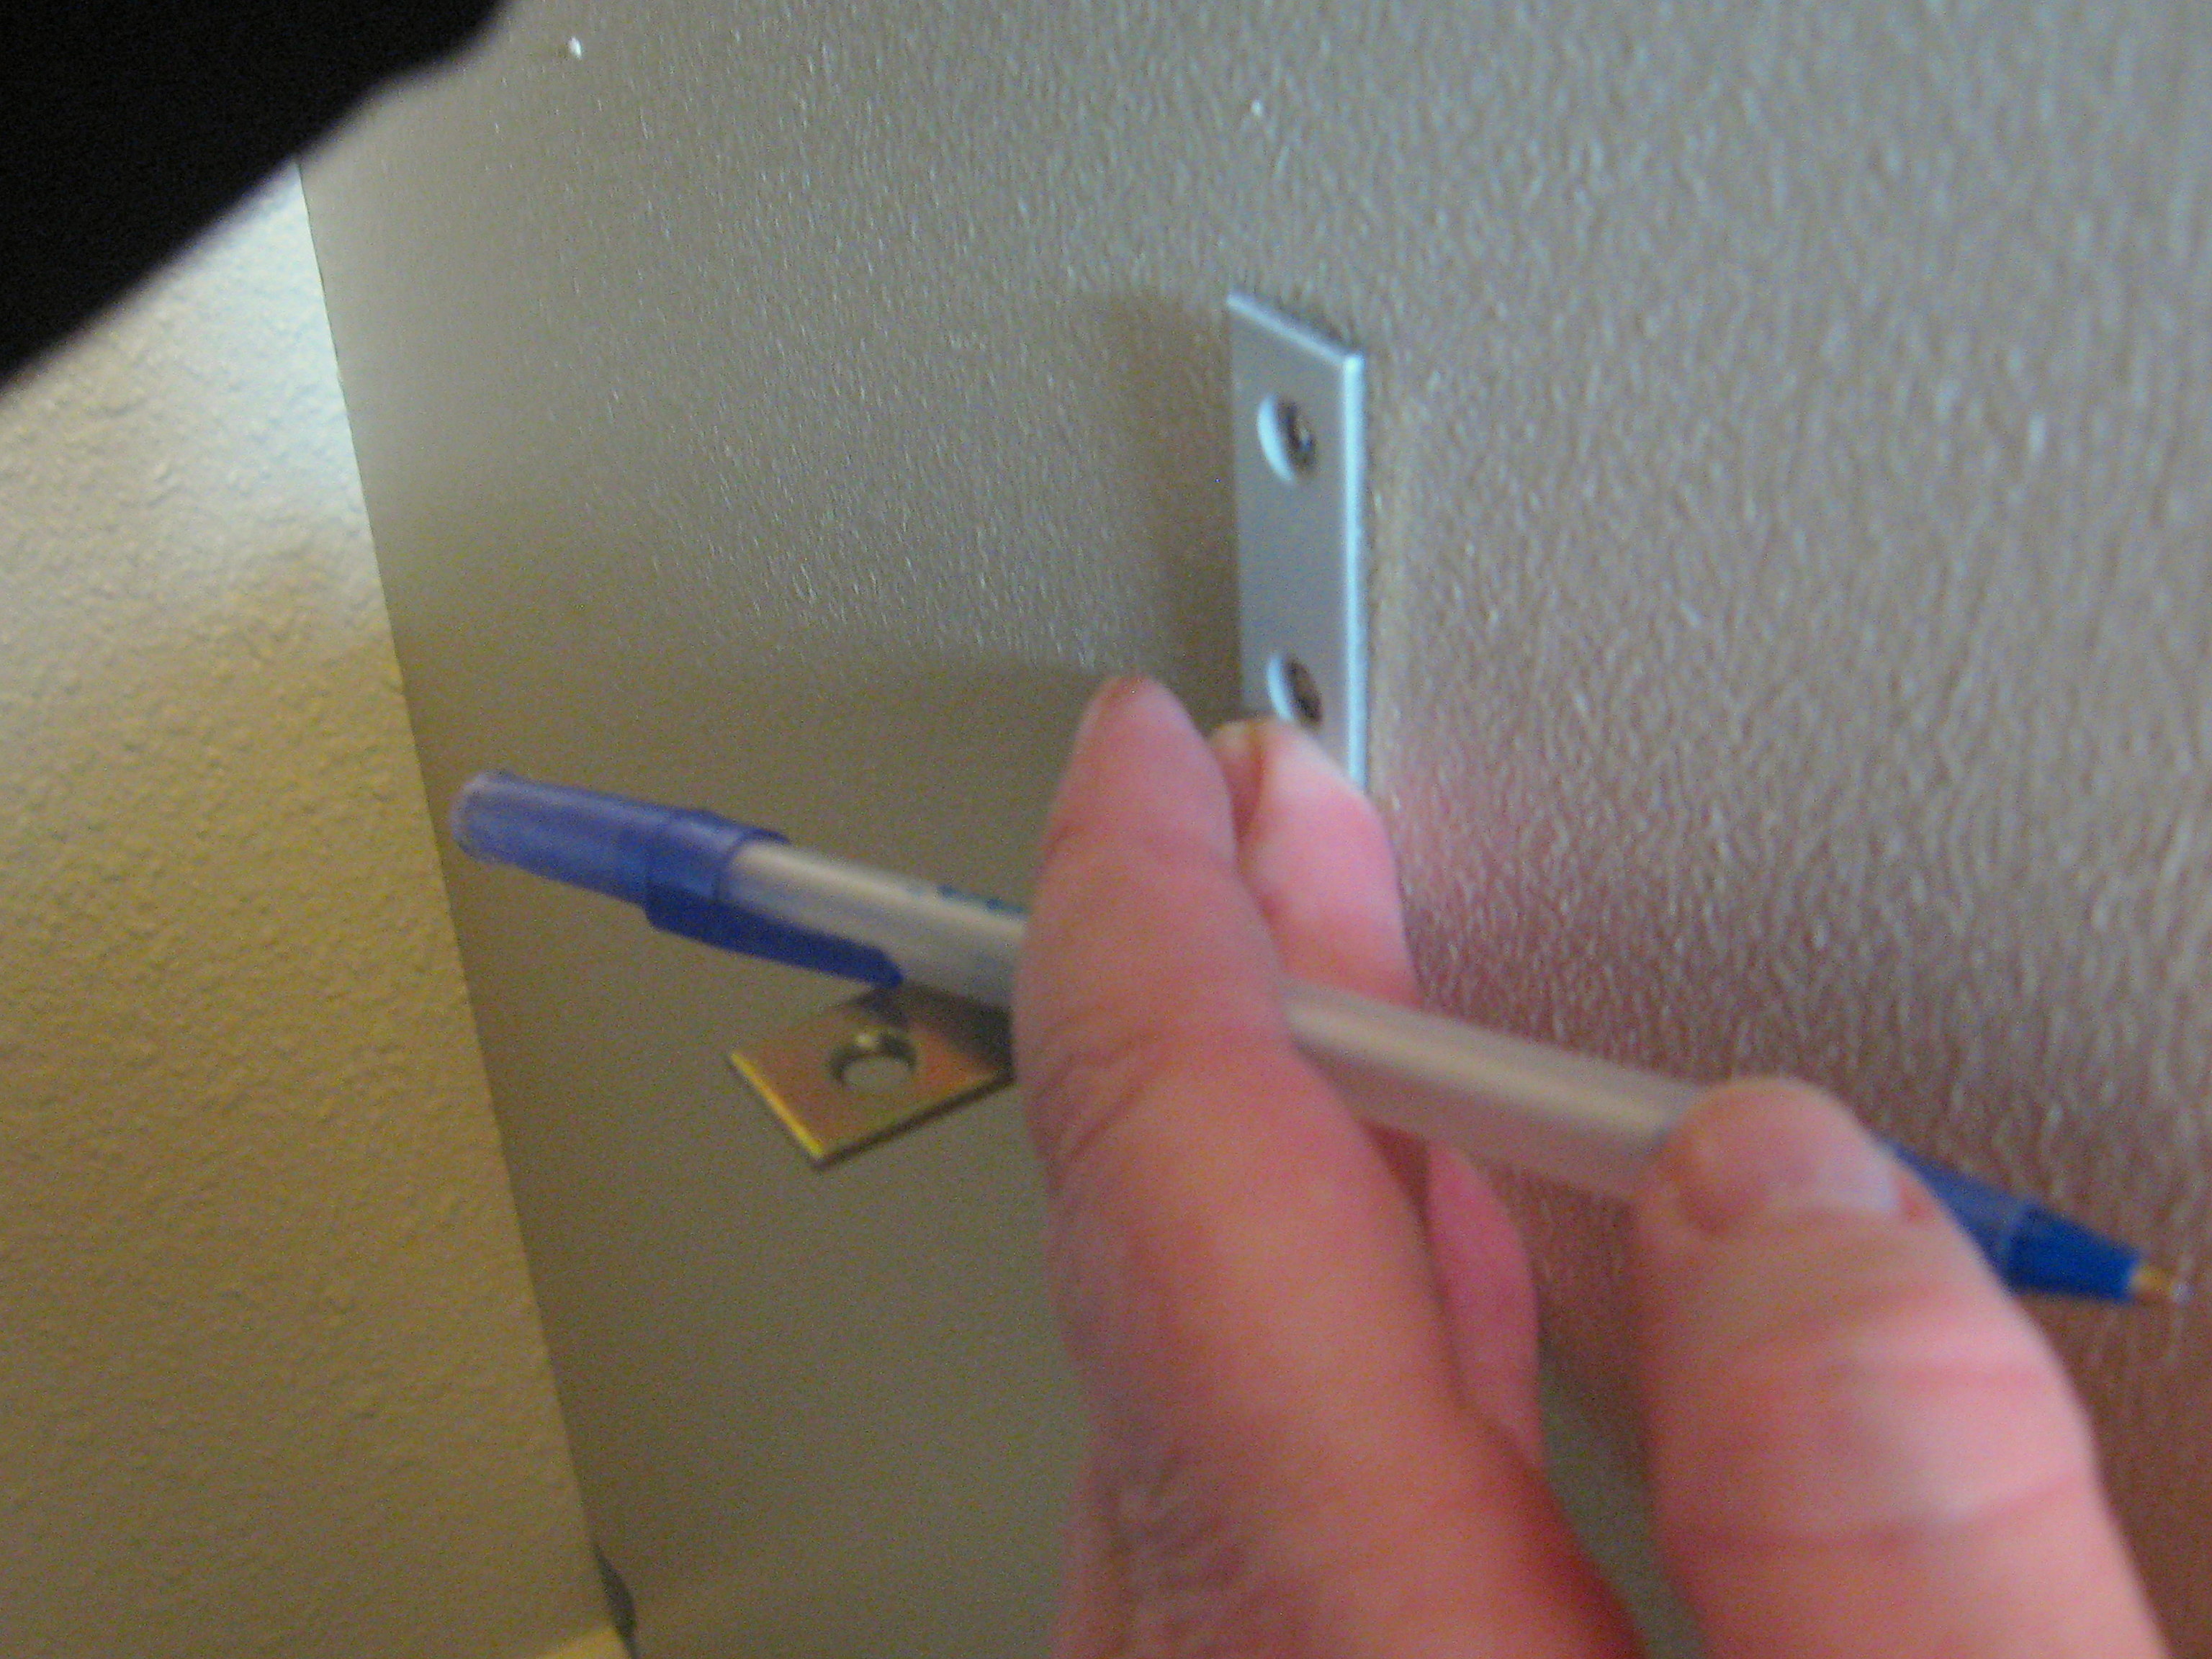
Pre drill holes (or insert wall anchors) then screw the bracket firmly to the wall. Now insert the other bracket into one end of the PVC, and slip the other end onto the bracket that is attached to the wall. Hold the other bracket up straight, mark, drill and attach just like with the first side.
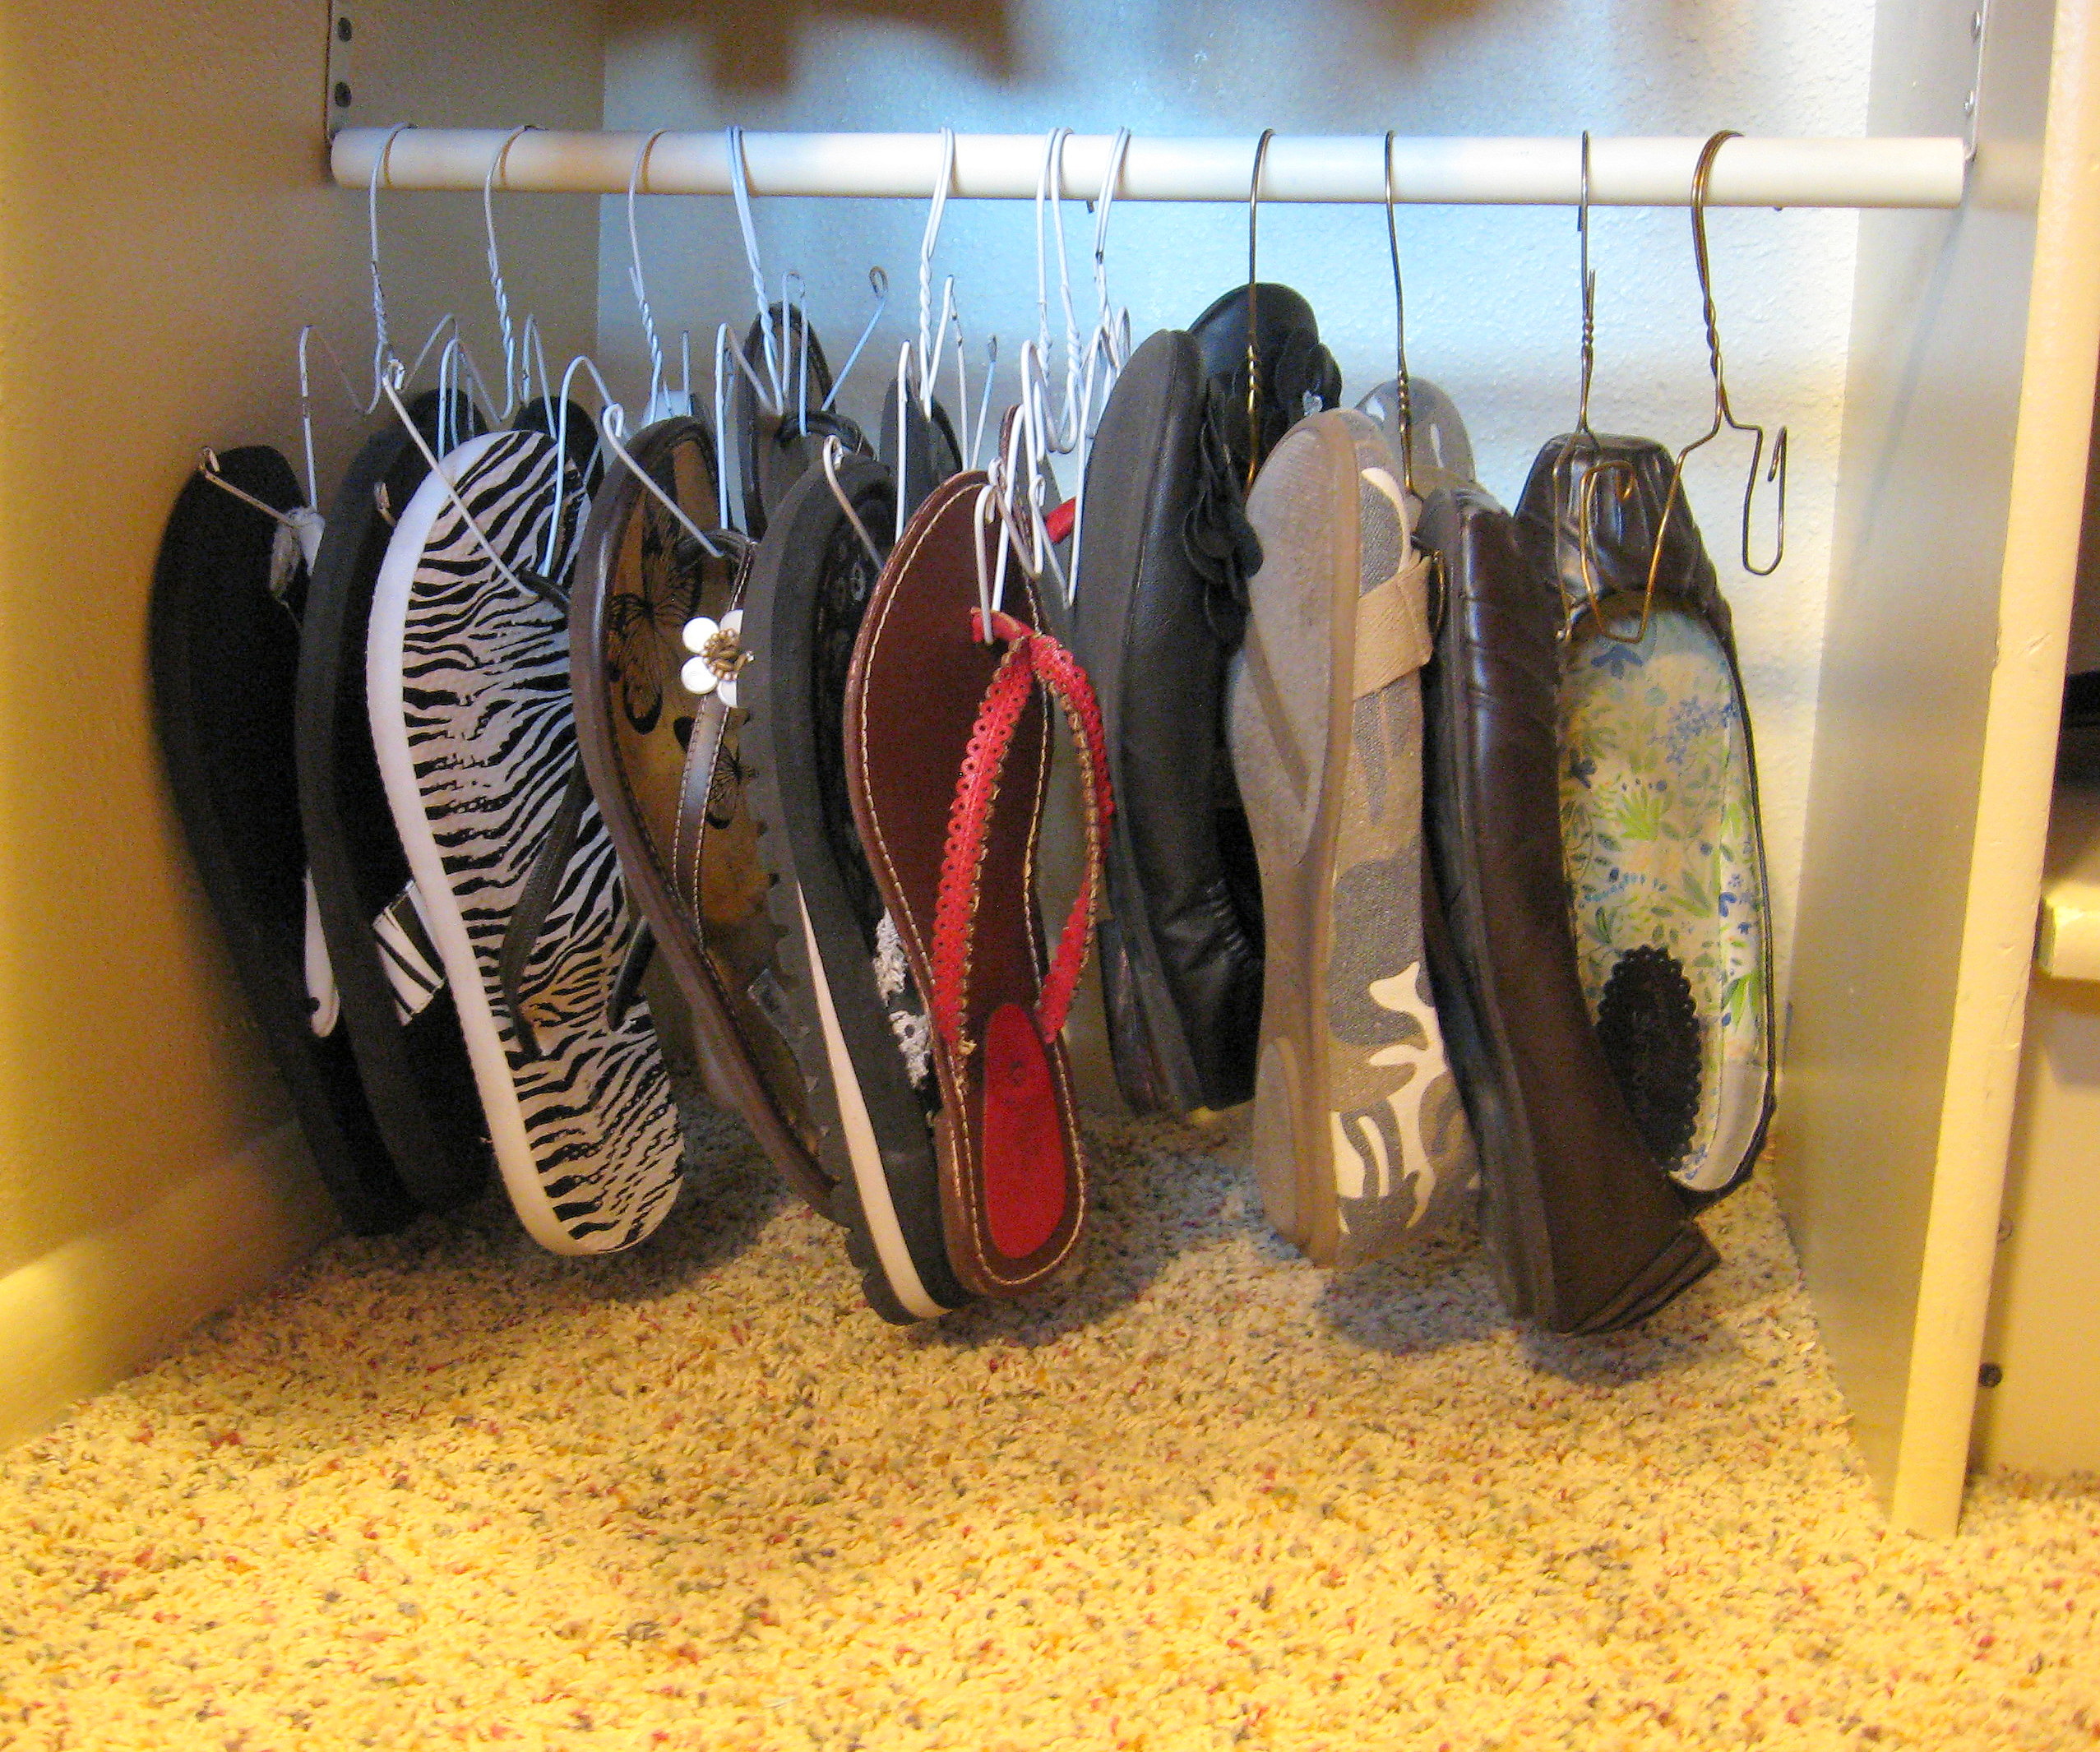
Here is is all finished.
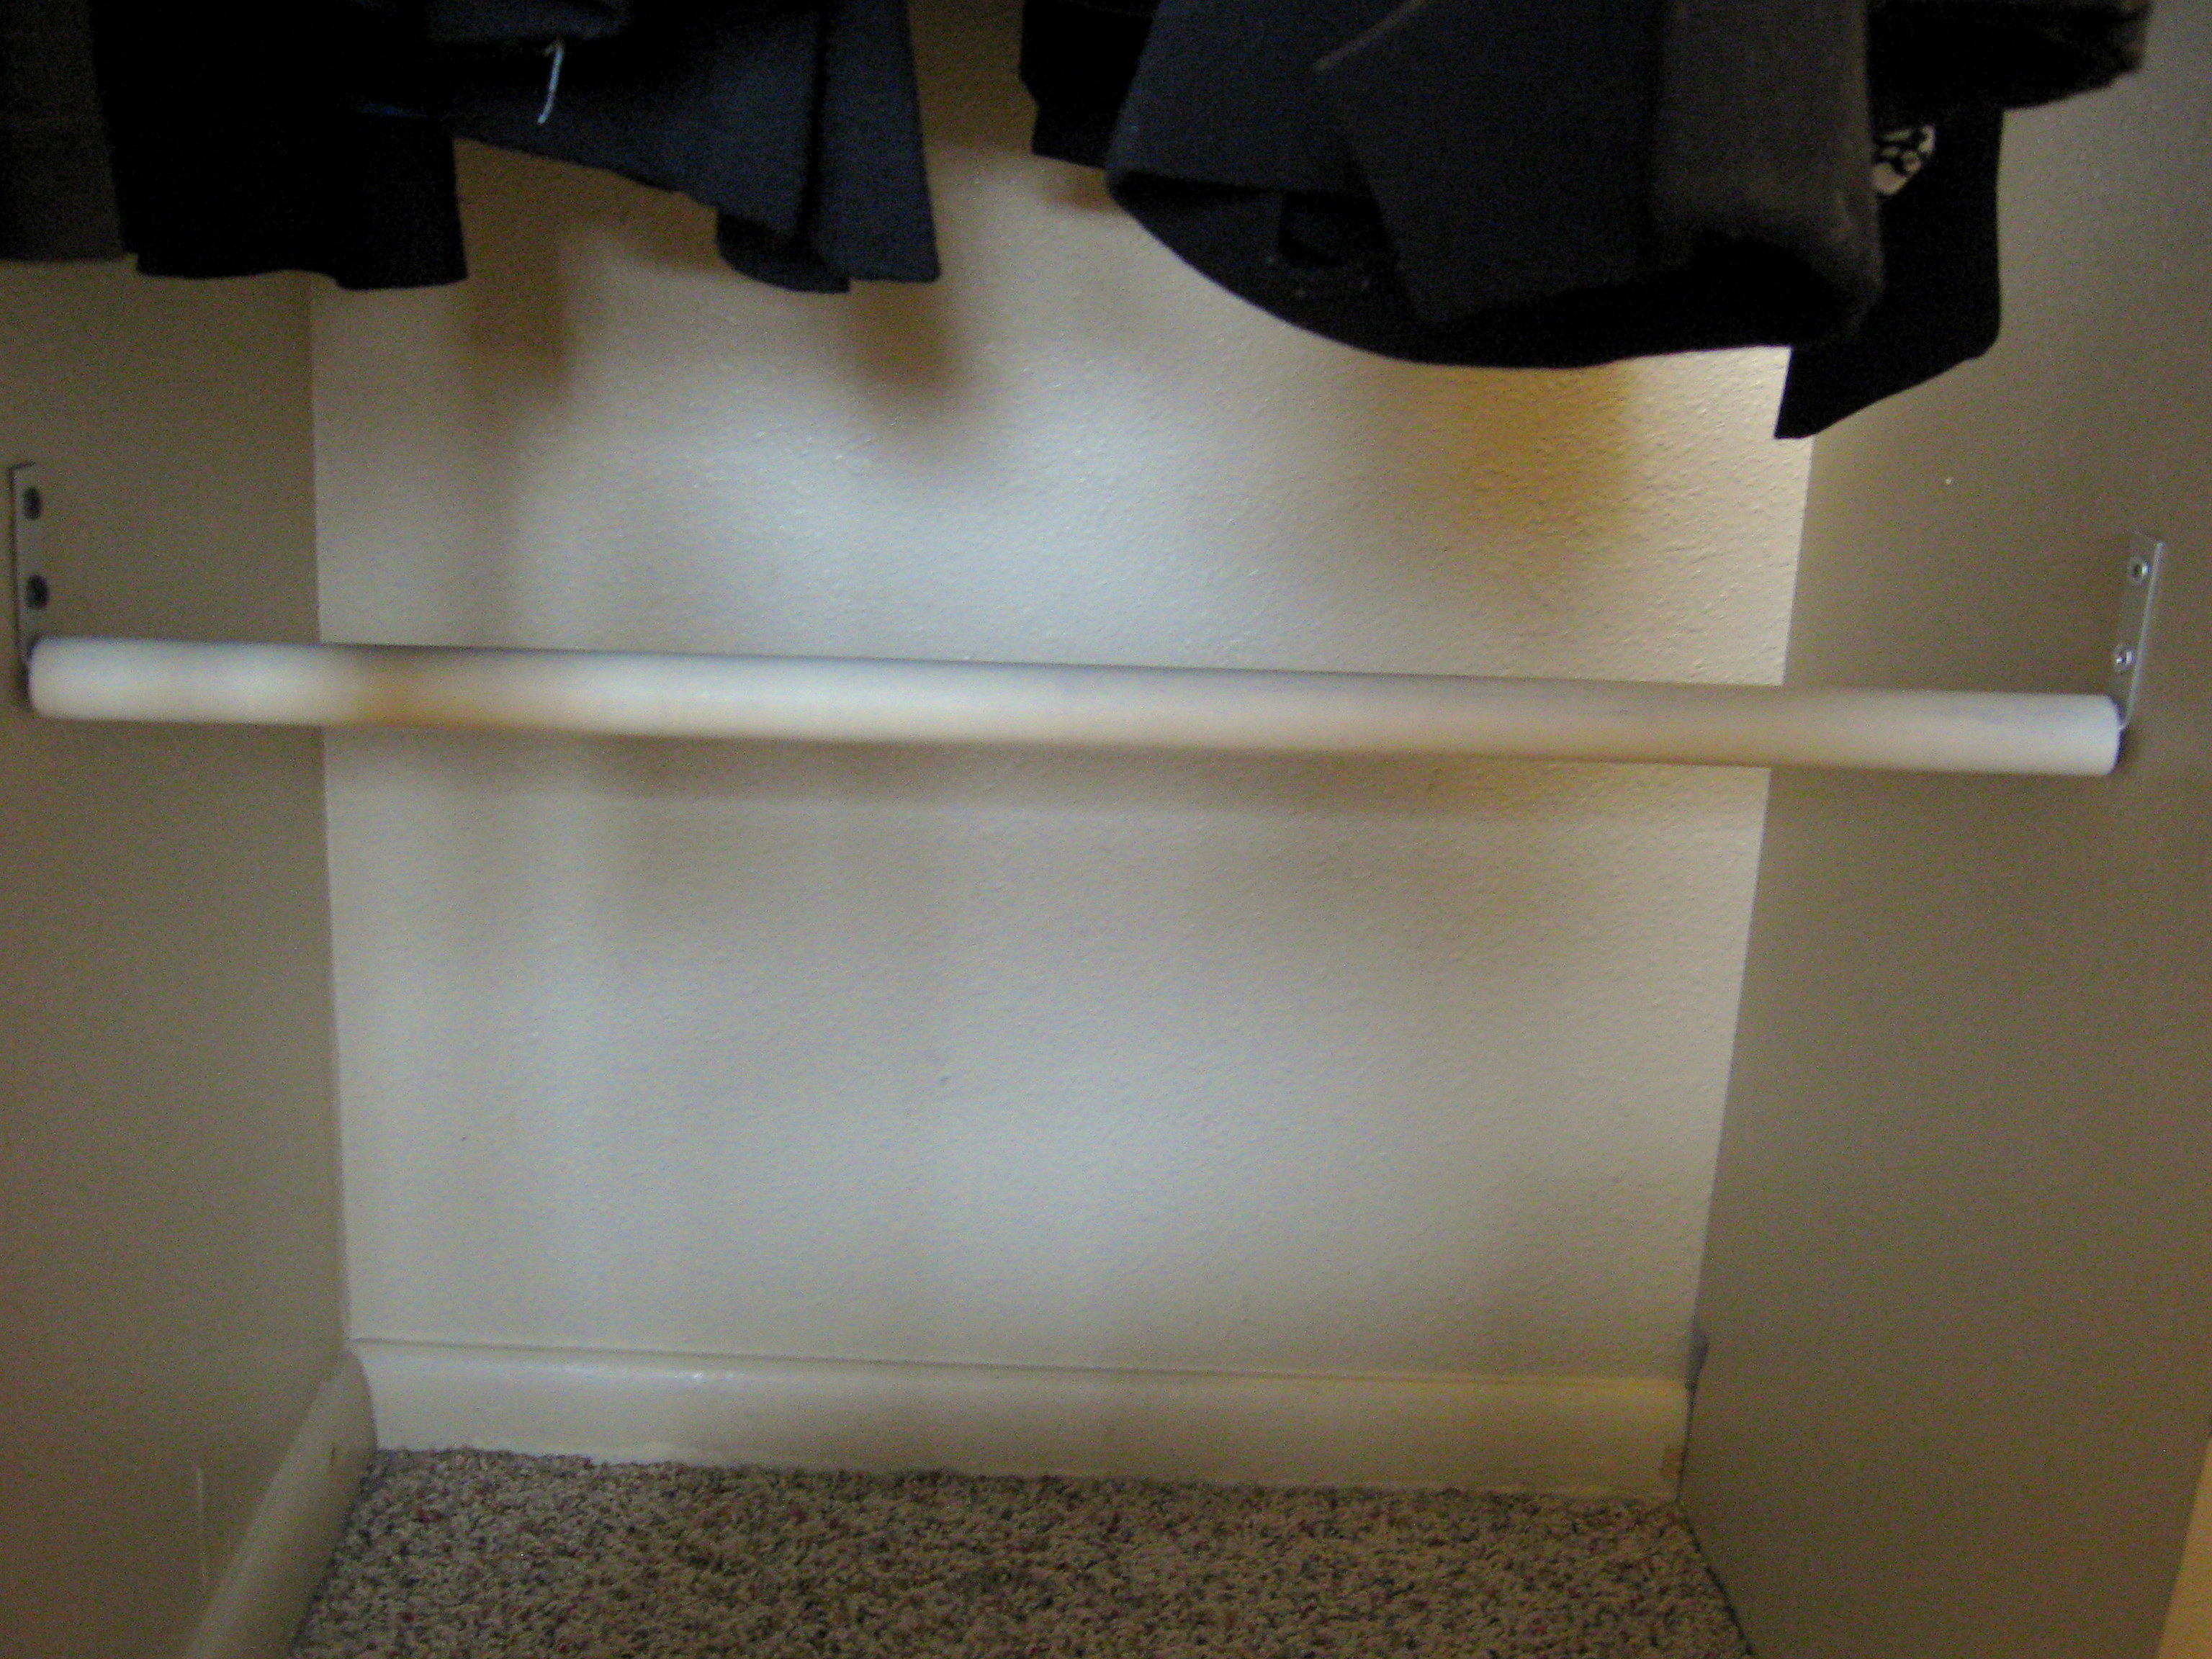
I spray painted the brackets and the PVC to make is look a little nicer.
When I started to hang my shoes, some of them touched the floor, so I just bent the “shoulders” of my hanger up a little and it was perfect.

Also, I found that I liked this shape a little better for hanging flats on.
Here is what it looks like:

Now, everything else:
Now I was left with a pile of miscellaneous shoes, but there were too many to just pile on the shelf. I was thinking that maybe I should break my “spend no money” motto and just go buy a wire shelf to double my remaining space, when I decided to have one more look around the garage, and saw the PVC pipe and decided to make a shelf instead.
Cut and assemble PVC pipe and joiners into the shape below (you’ll need 2 of these, so 2 long pieces, 4 short pieces for legs and 4 corner joints.)
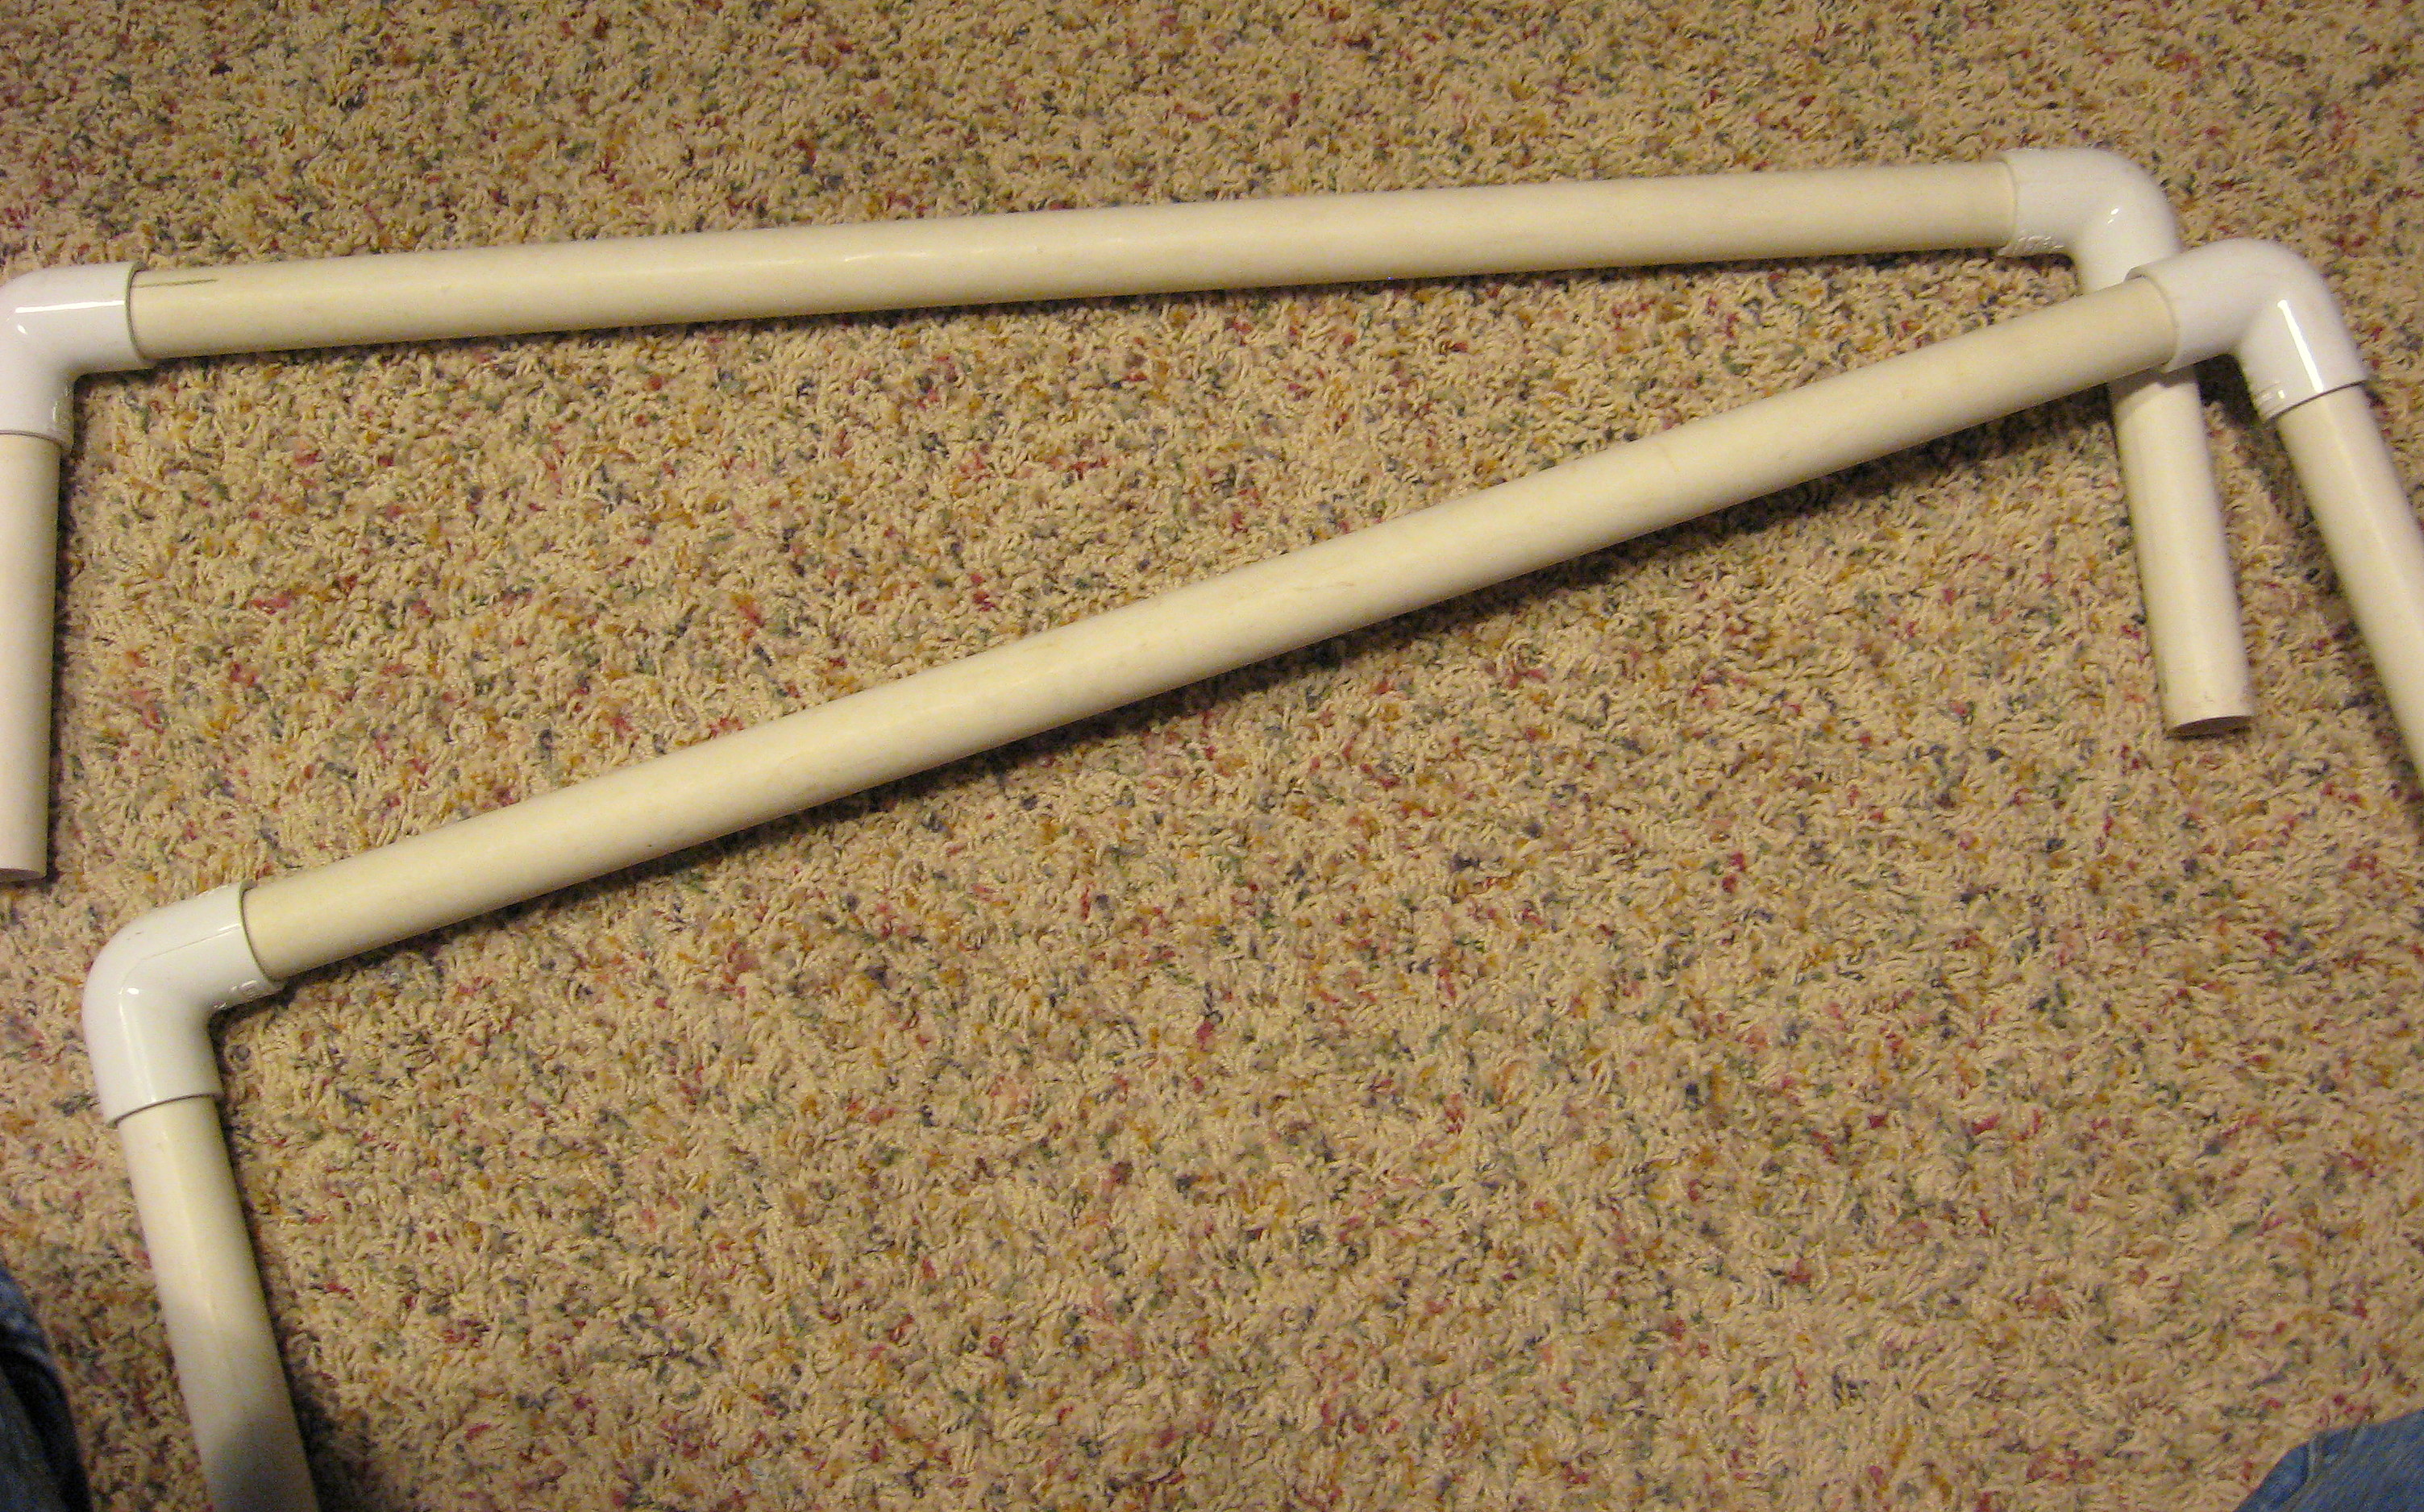
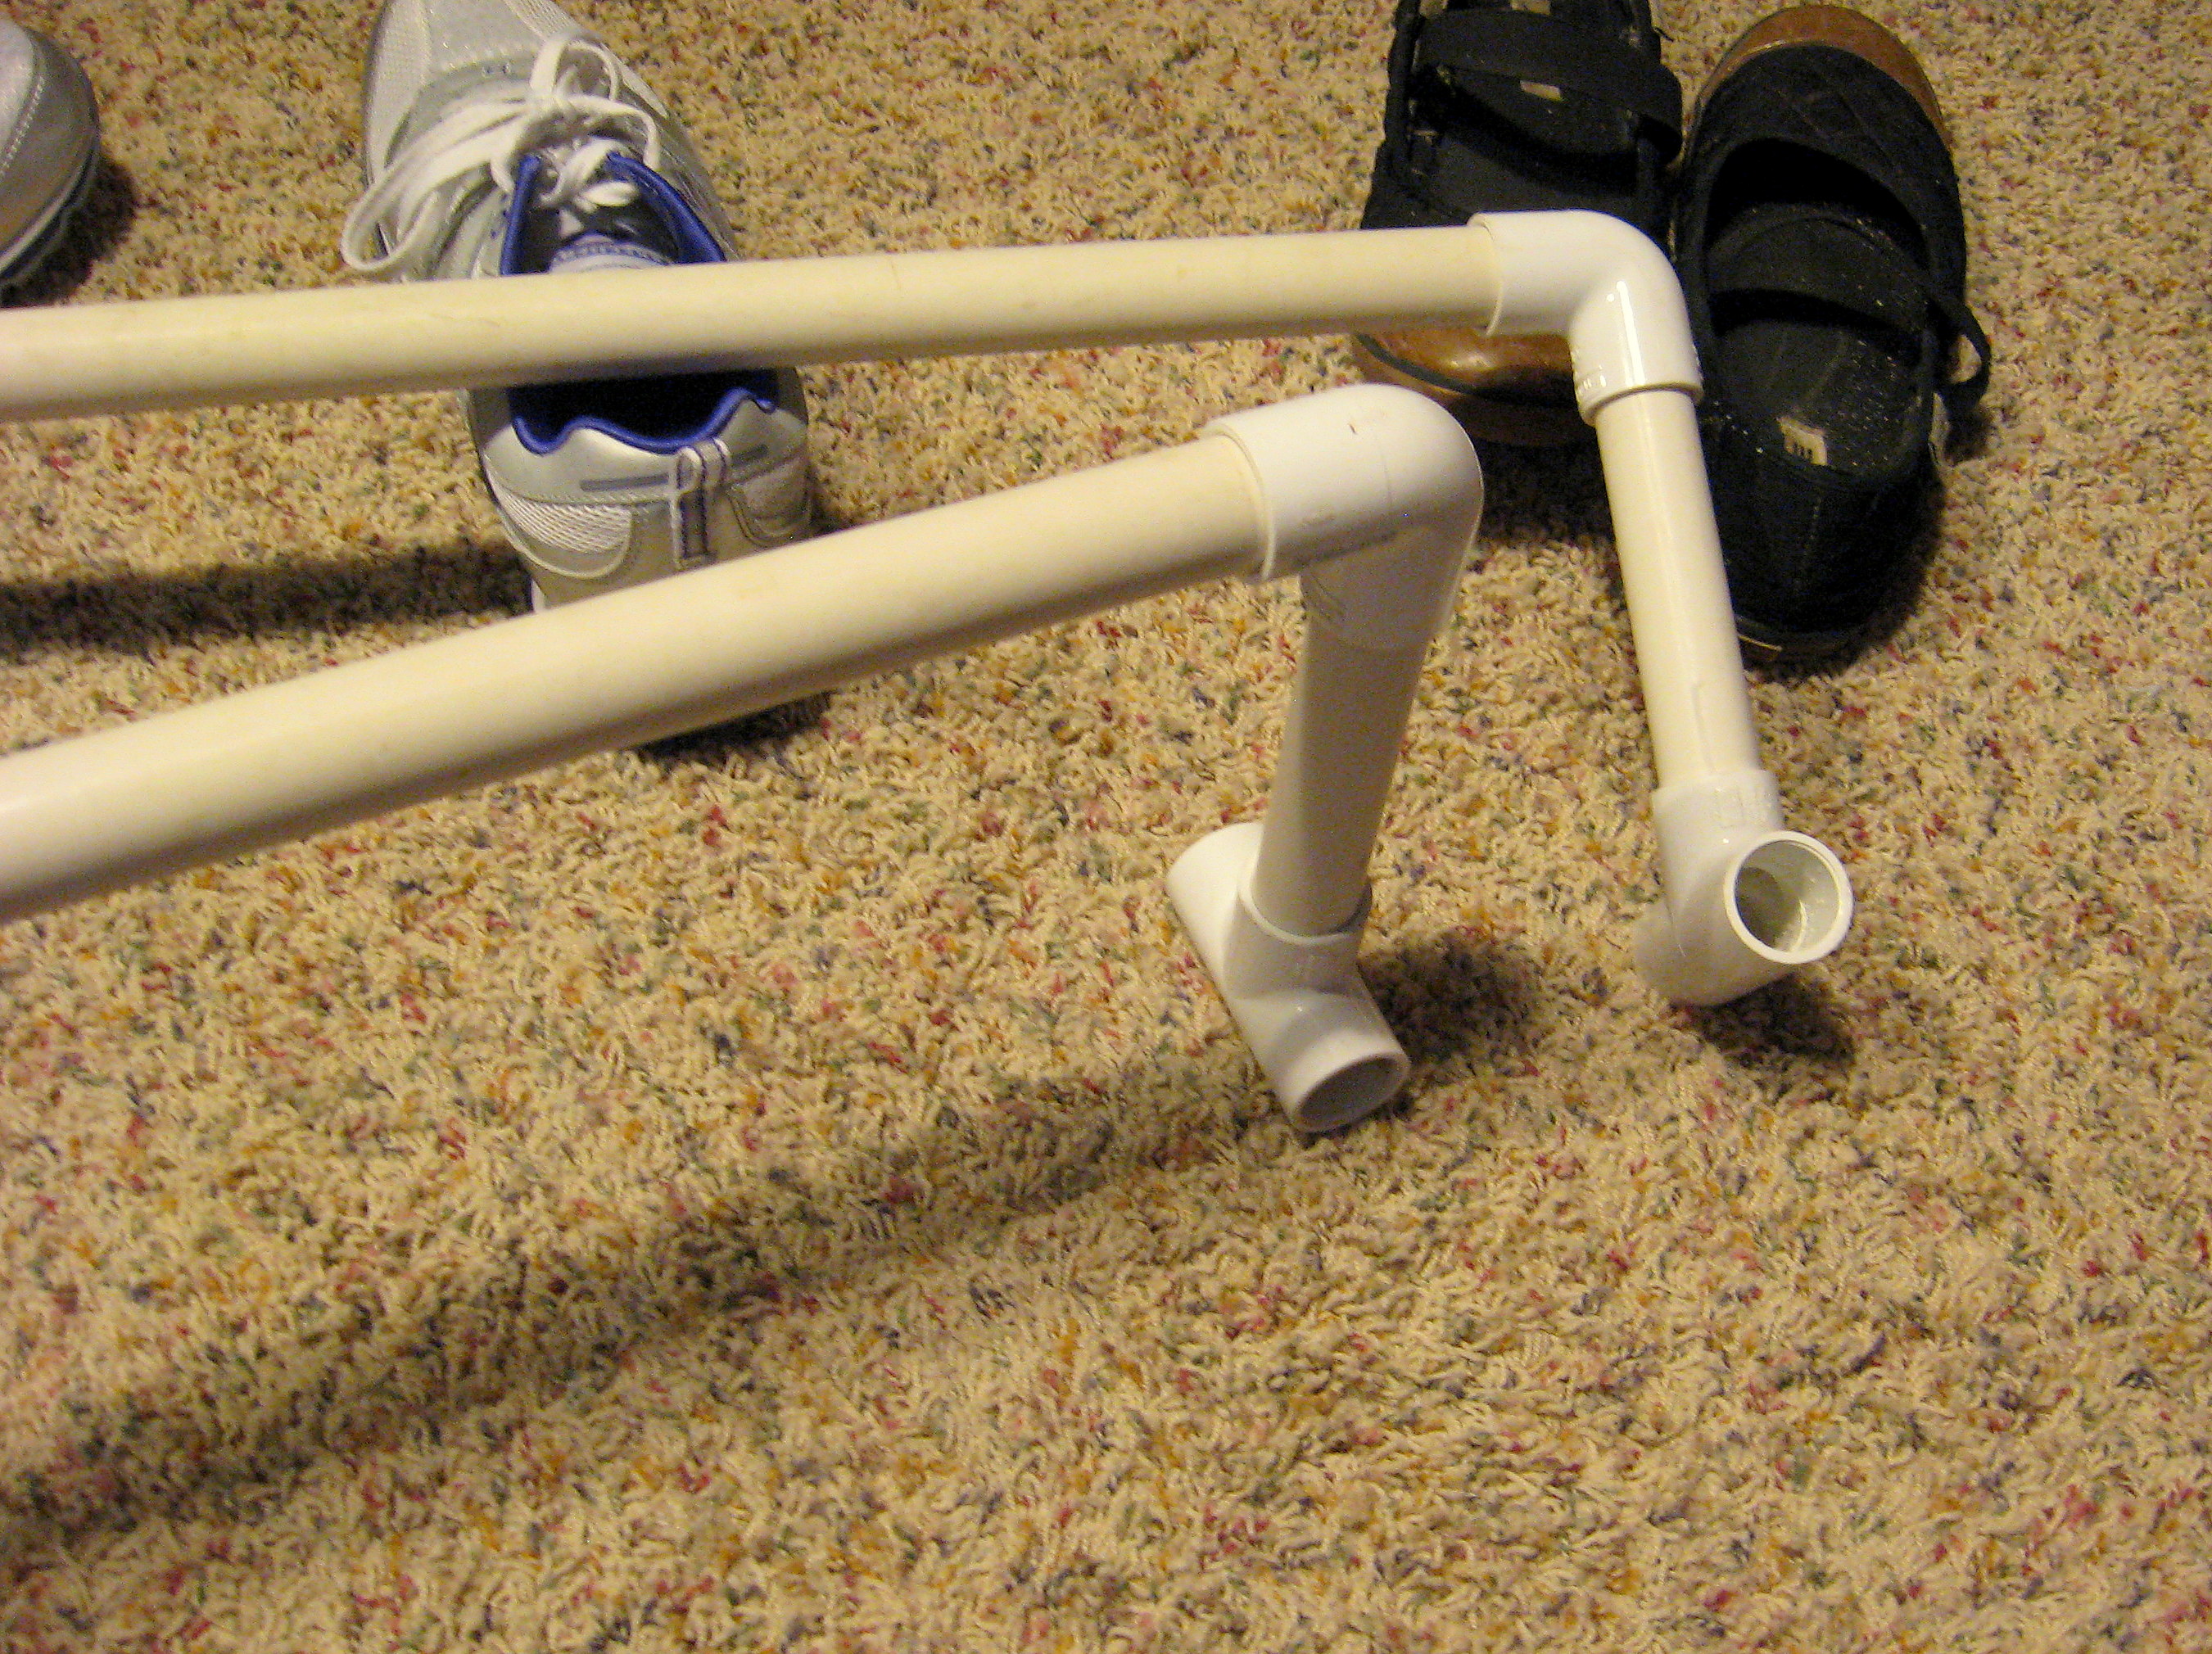
Now add a T shaped joint at the bottom of each leg to act as a foot and allow the shelf to stand.
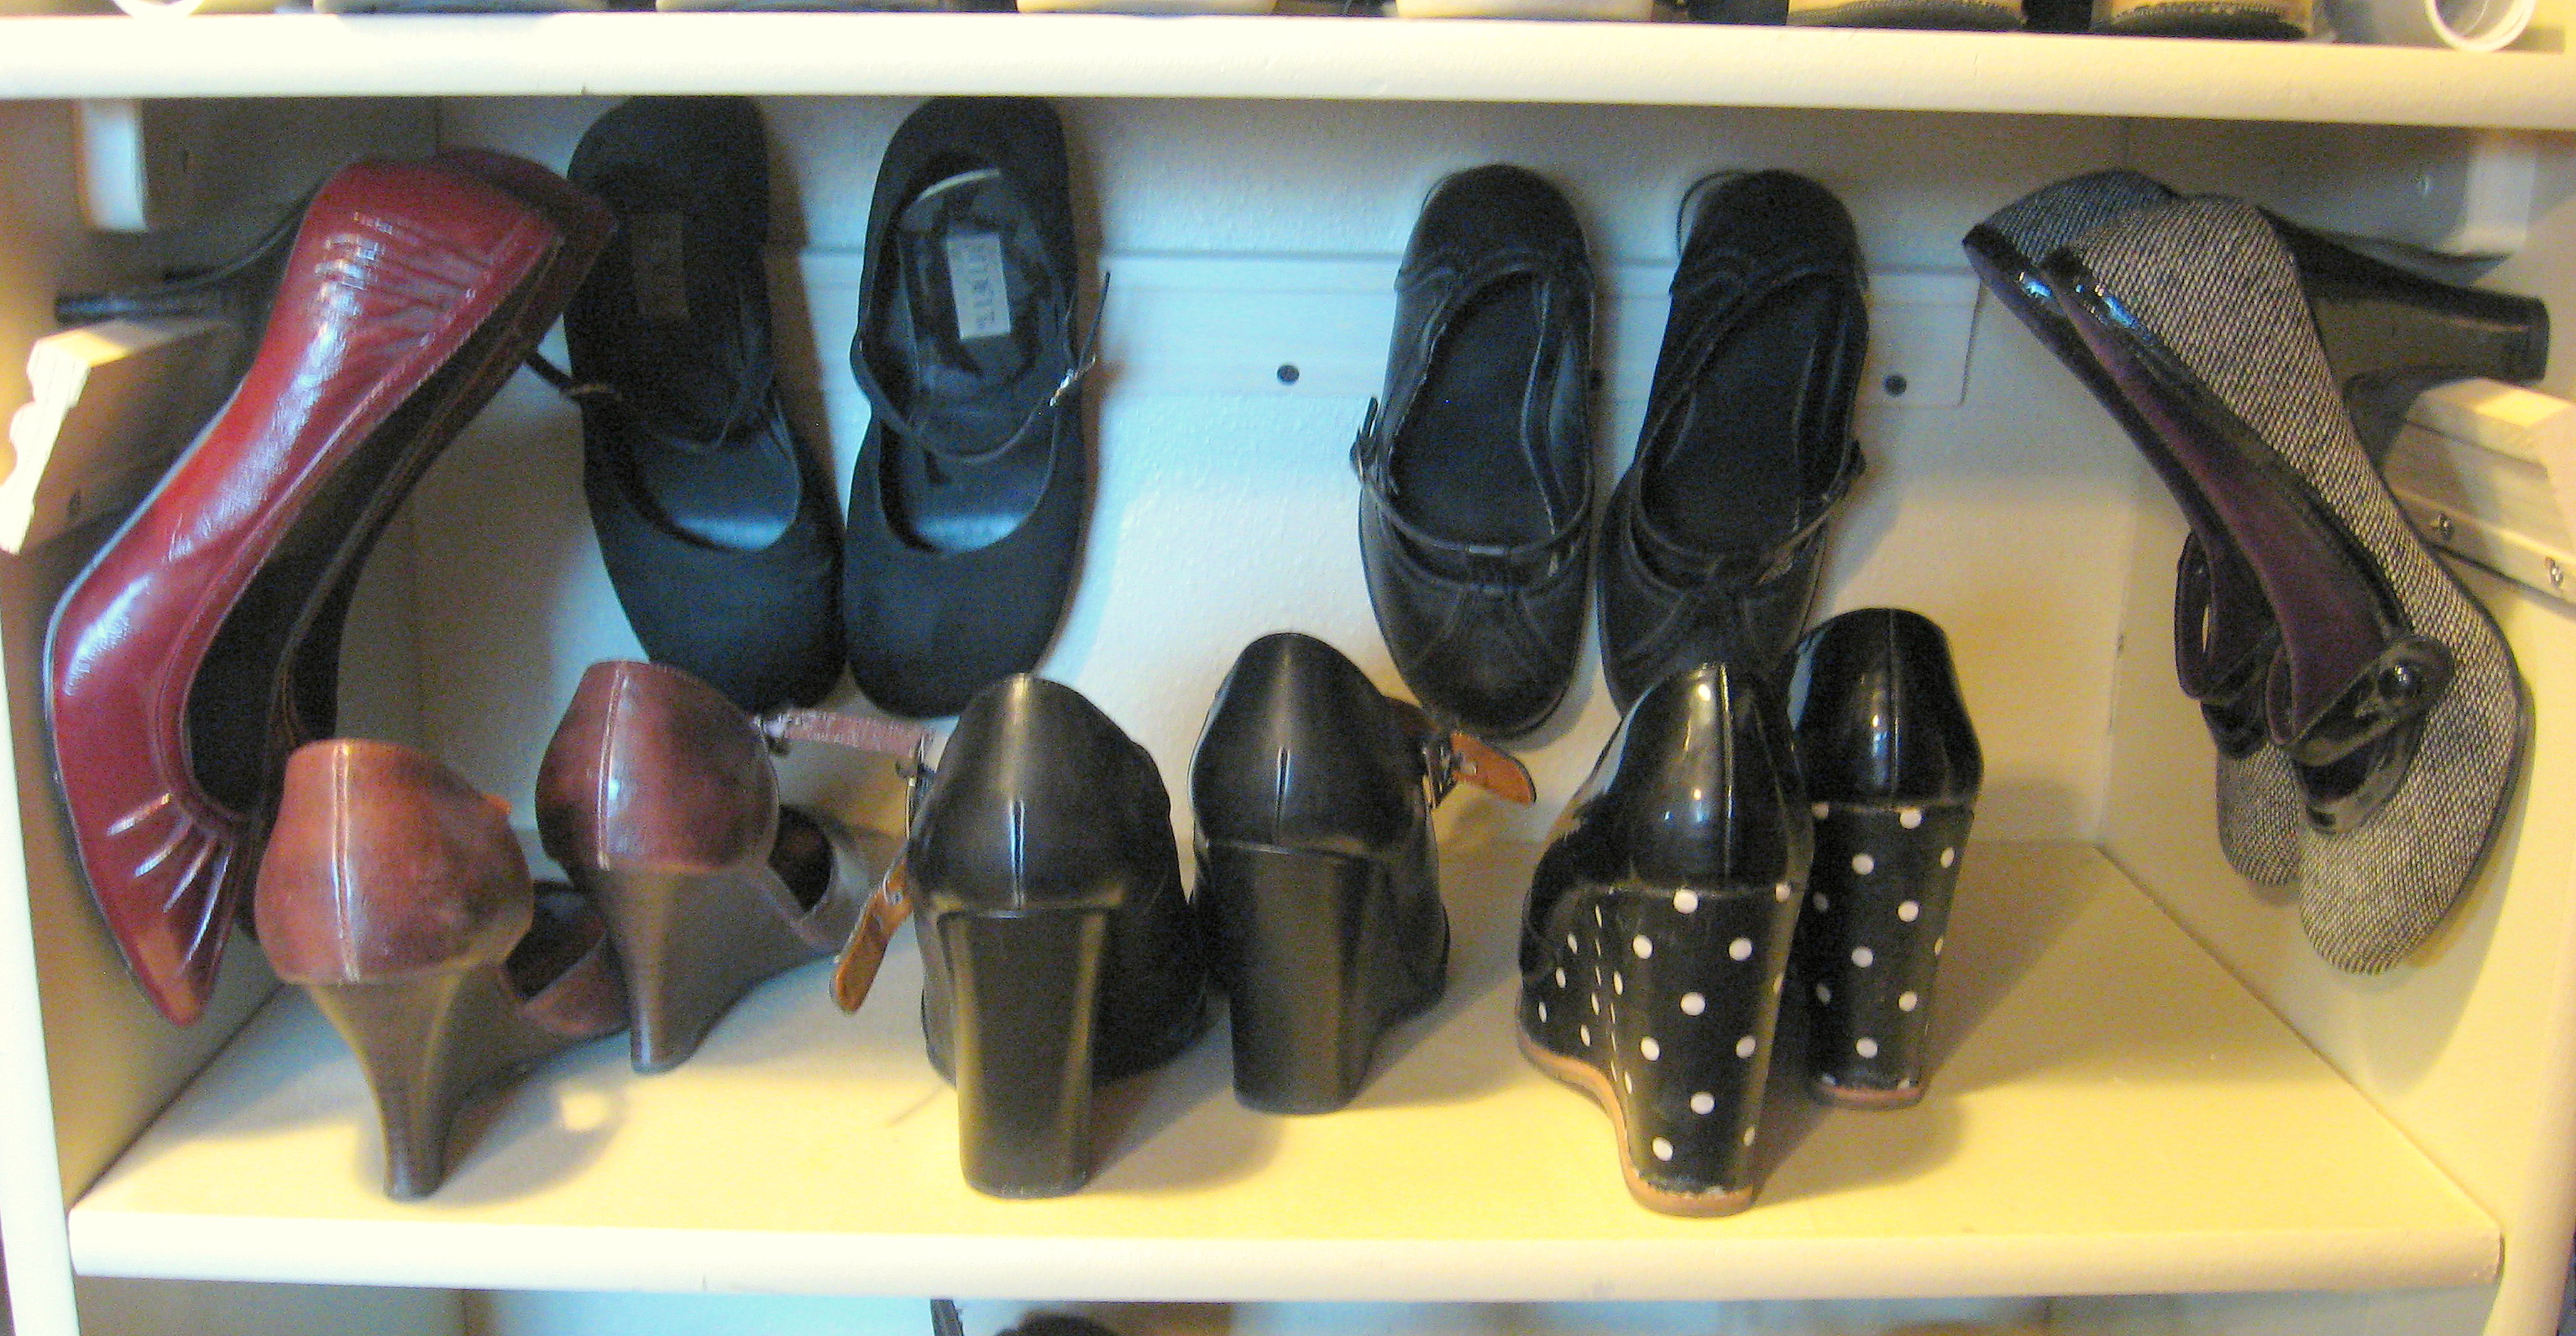
Put them in your shelf one behind the other and stack half your shoes on top.

And here’s the same view from the “before” picture. I’m happy to report it’s been more than a week and it still looks like that!


Dollar Store Spring Wreath
Time to spruce up your front door for spring! I priced wreath forms in the craft store this week and the styrofoam rings start at about $9 for a small one and go up from there. The large sizes were so expensive! Even with a coupon; no, thank you! Let’s make our own.
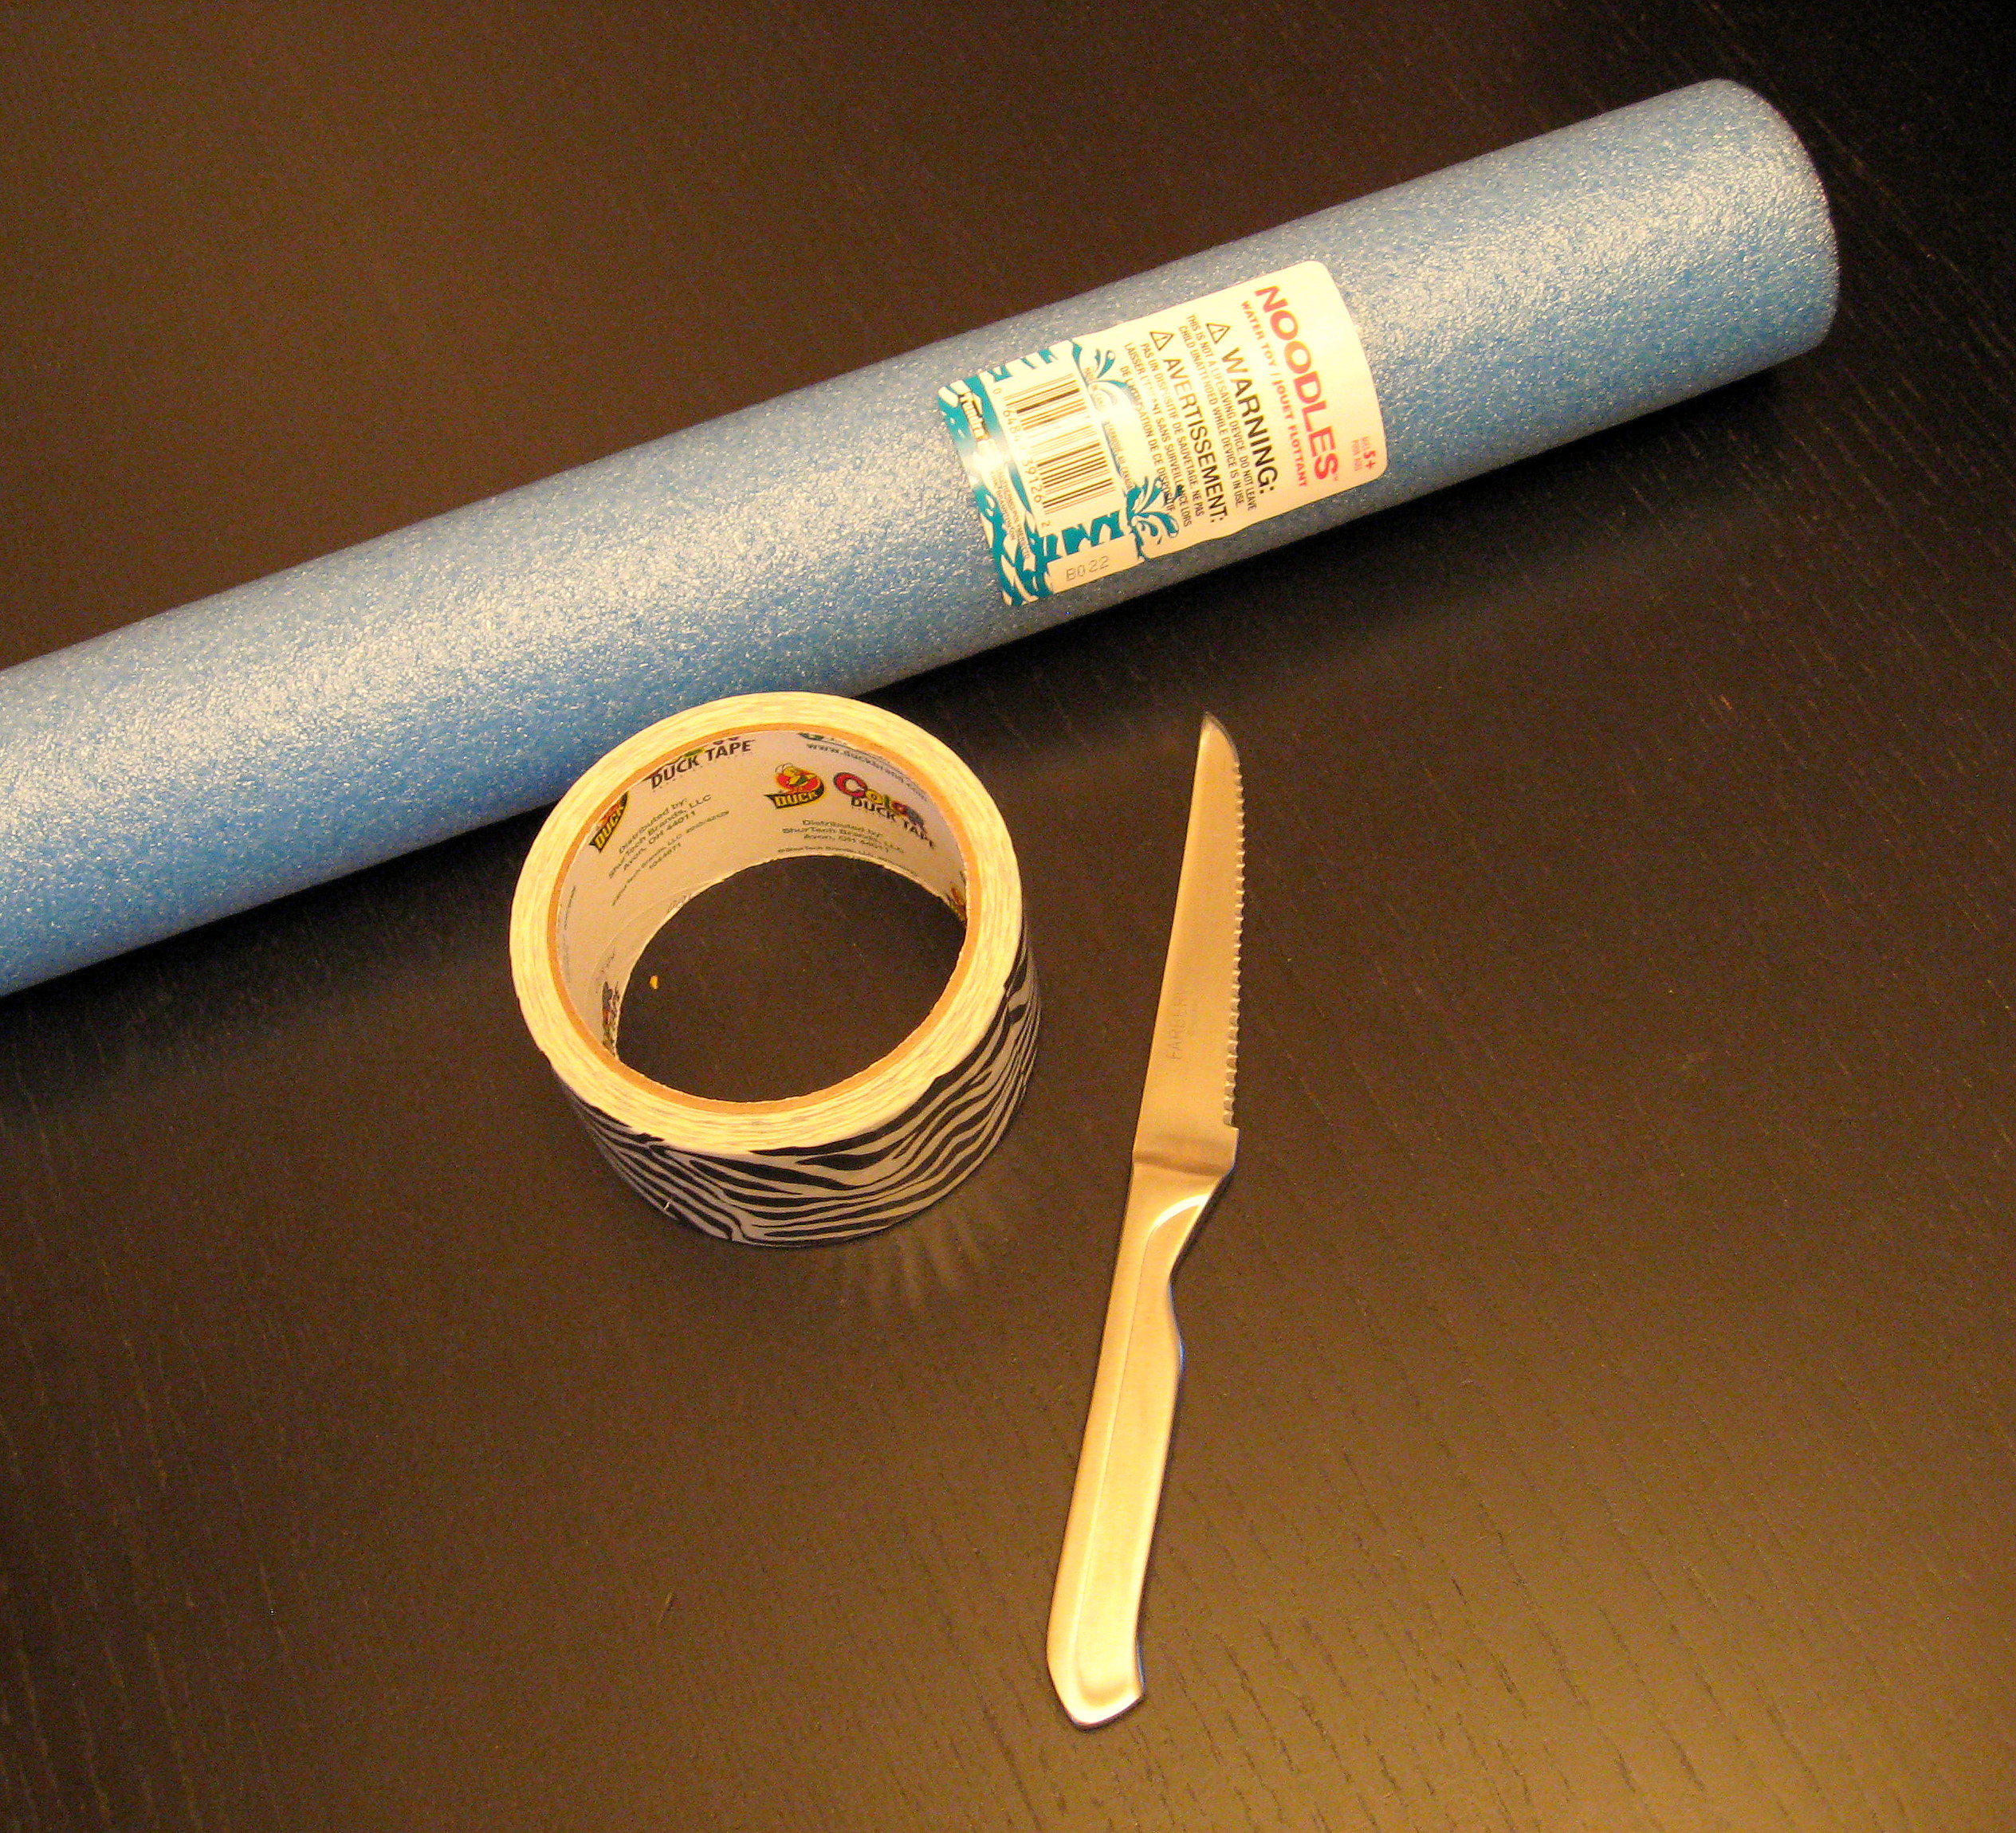
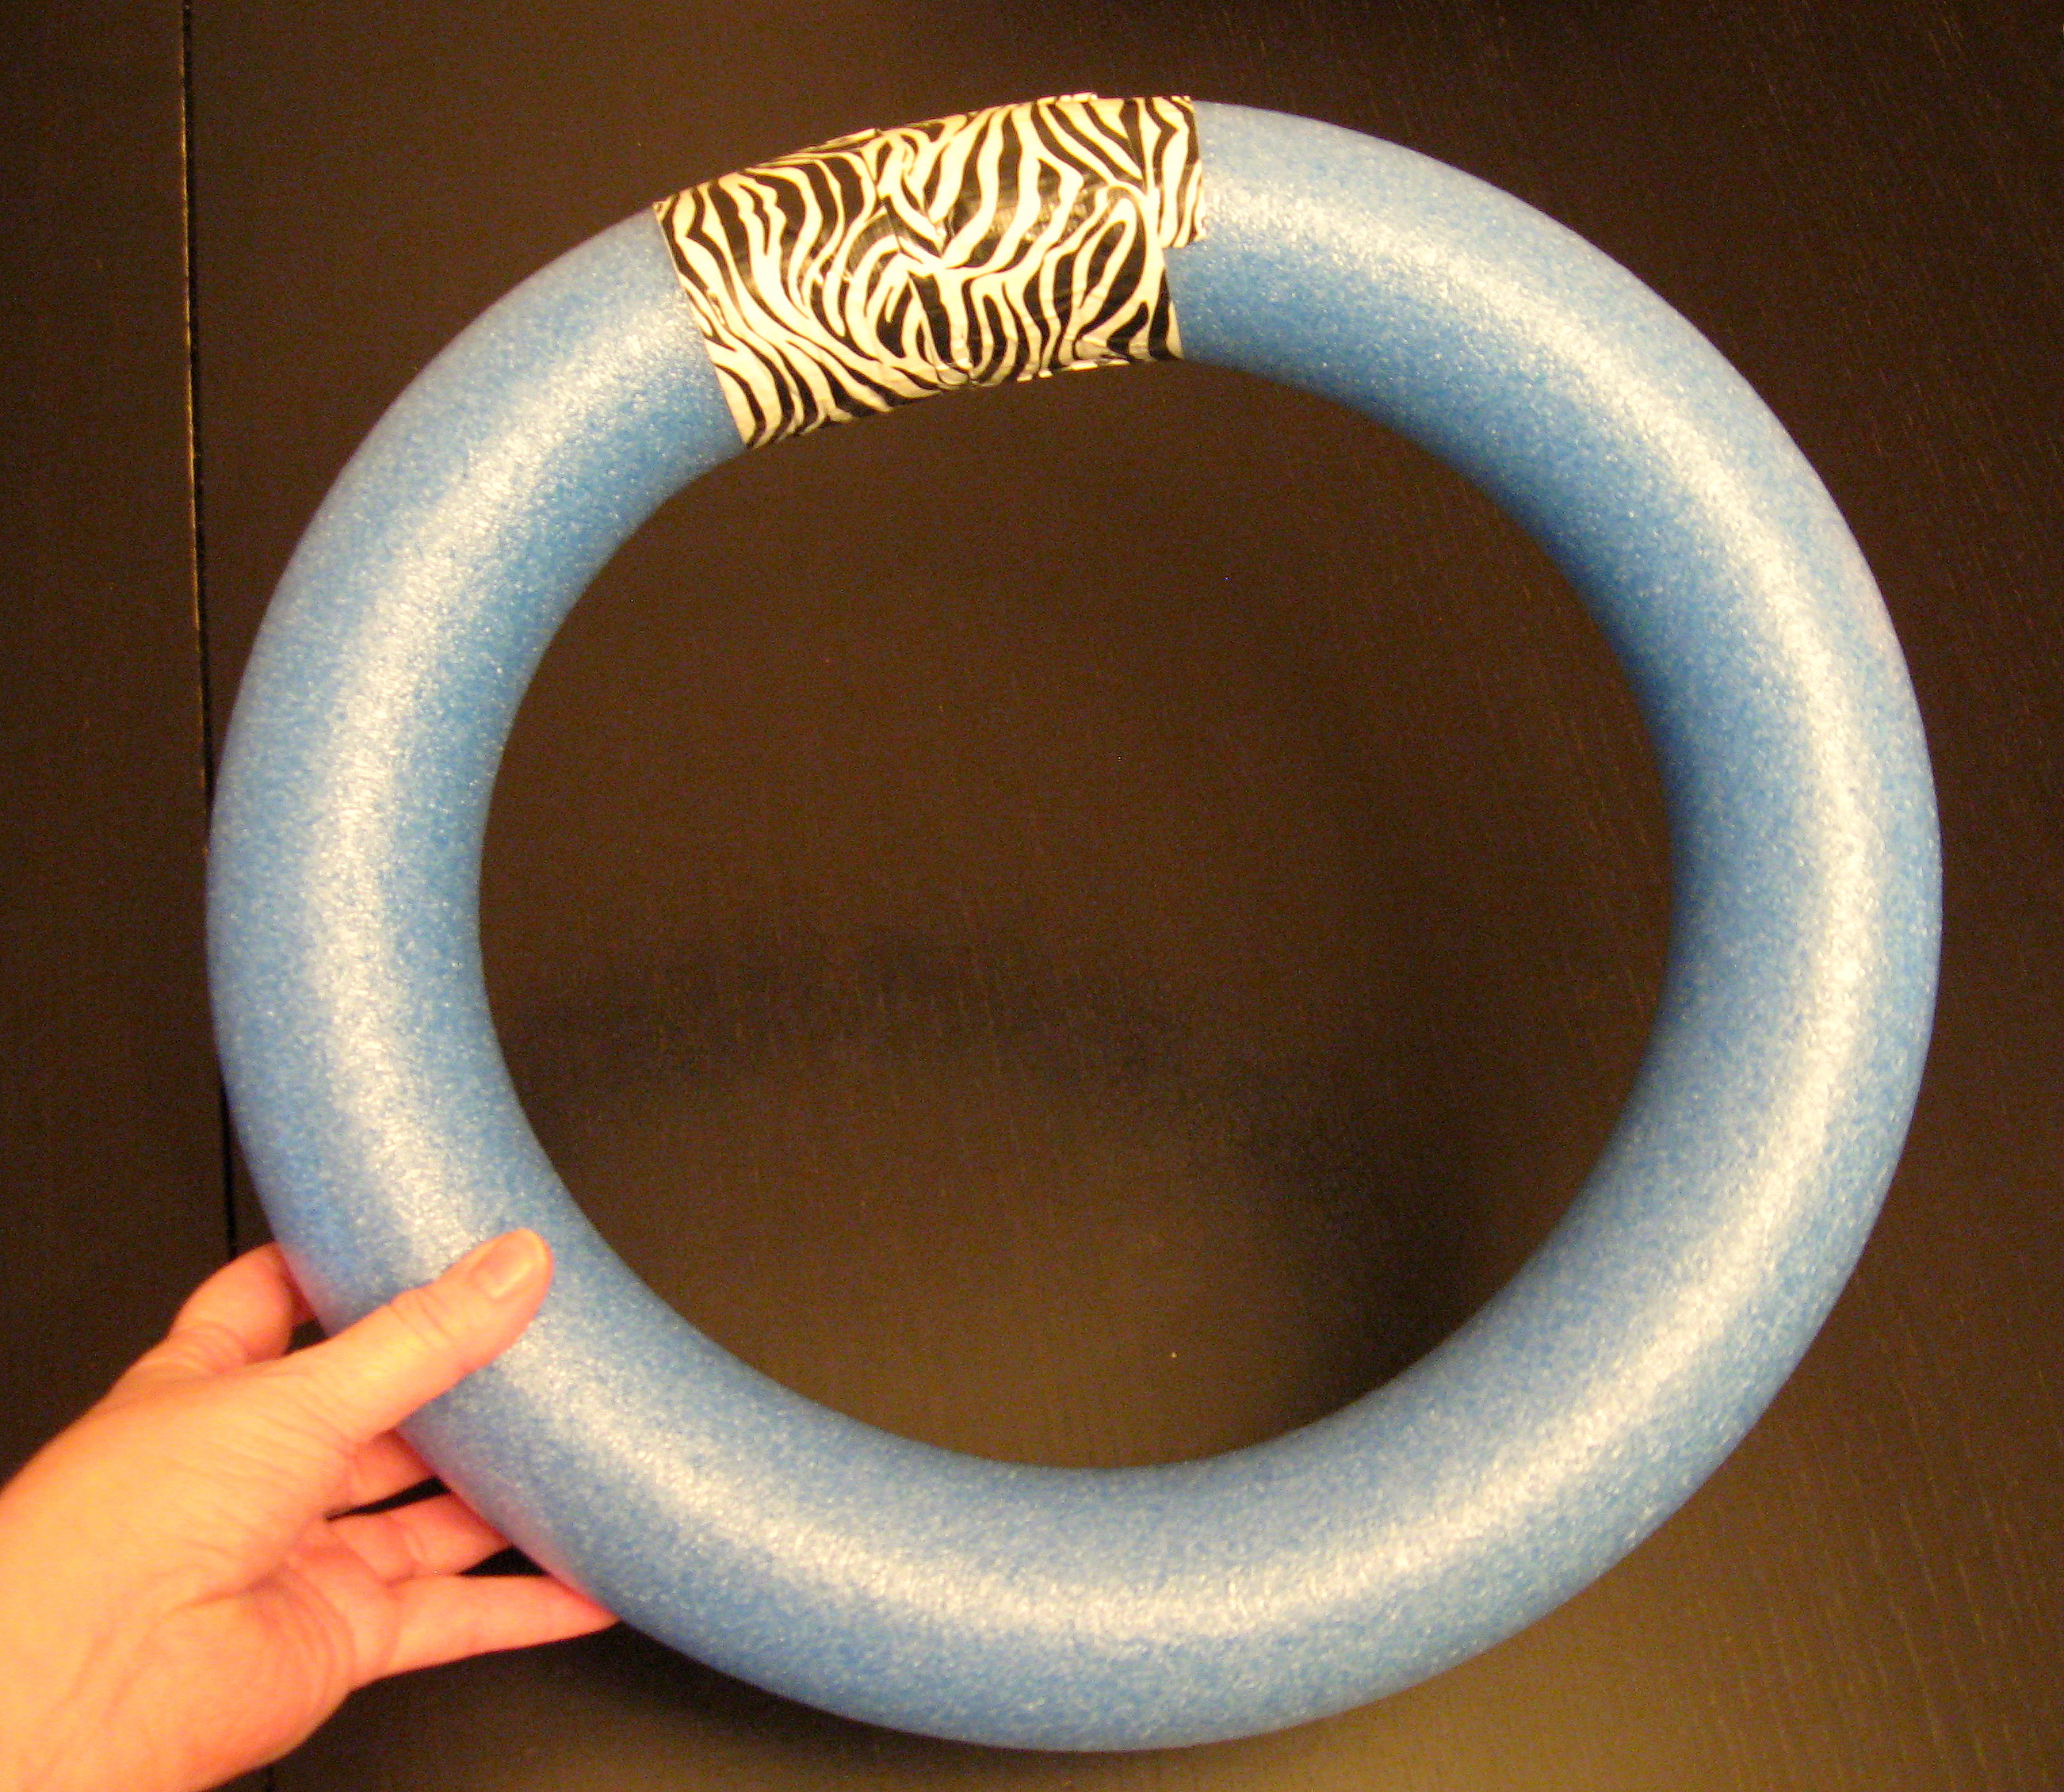
Start with a pool noodle and some duct tape. The noodle was $1 at my dollar store. You should be able to get duct tape there, too. I’m using the zebra striped stuff because it’s what I had; whatever it looks like, it won’t show in the end.
*You could also use foam insulation tubes from the home improvement store.
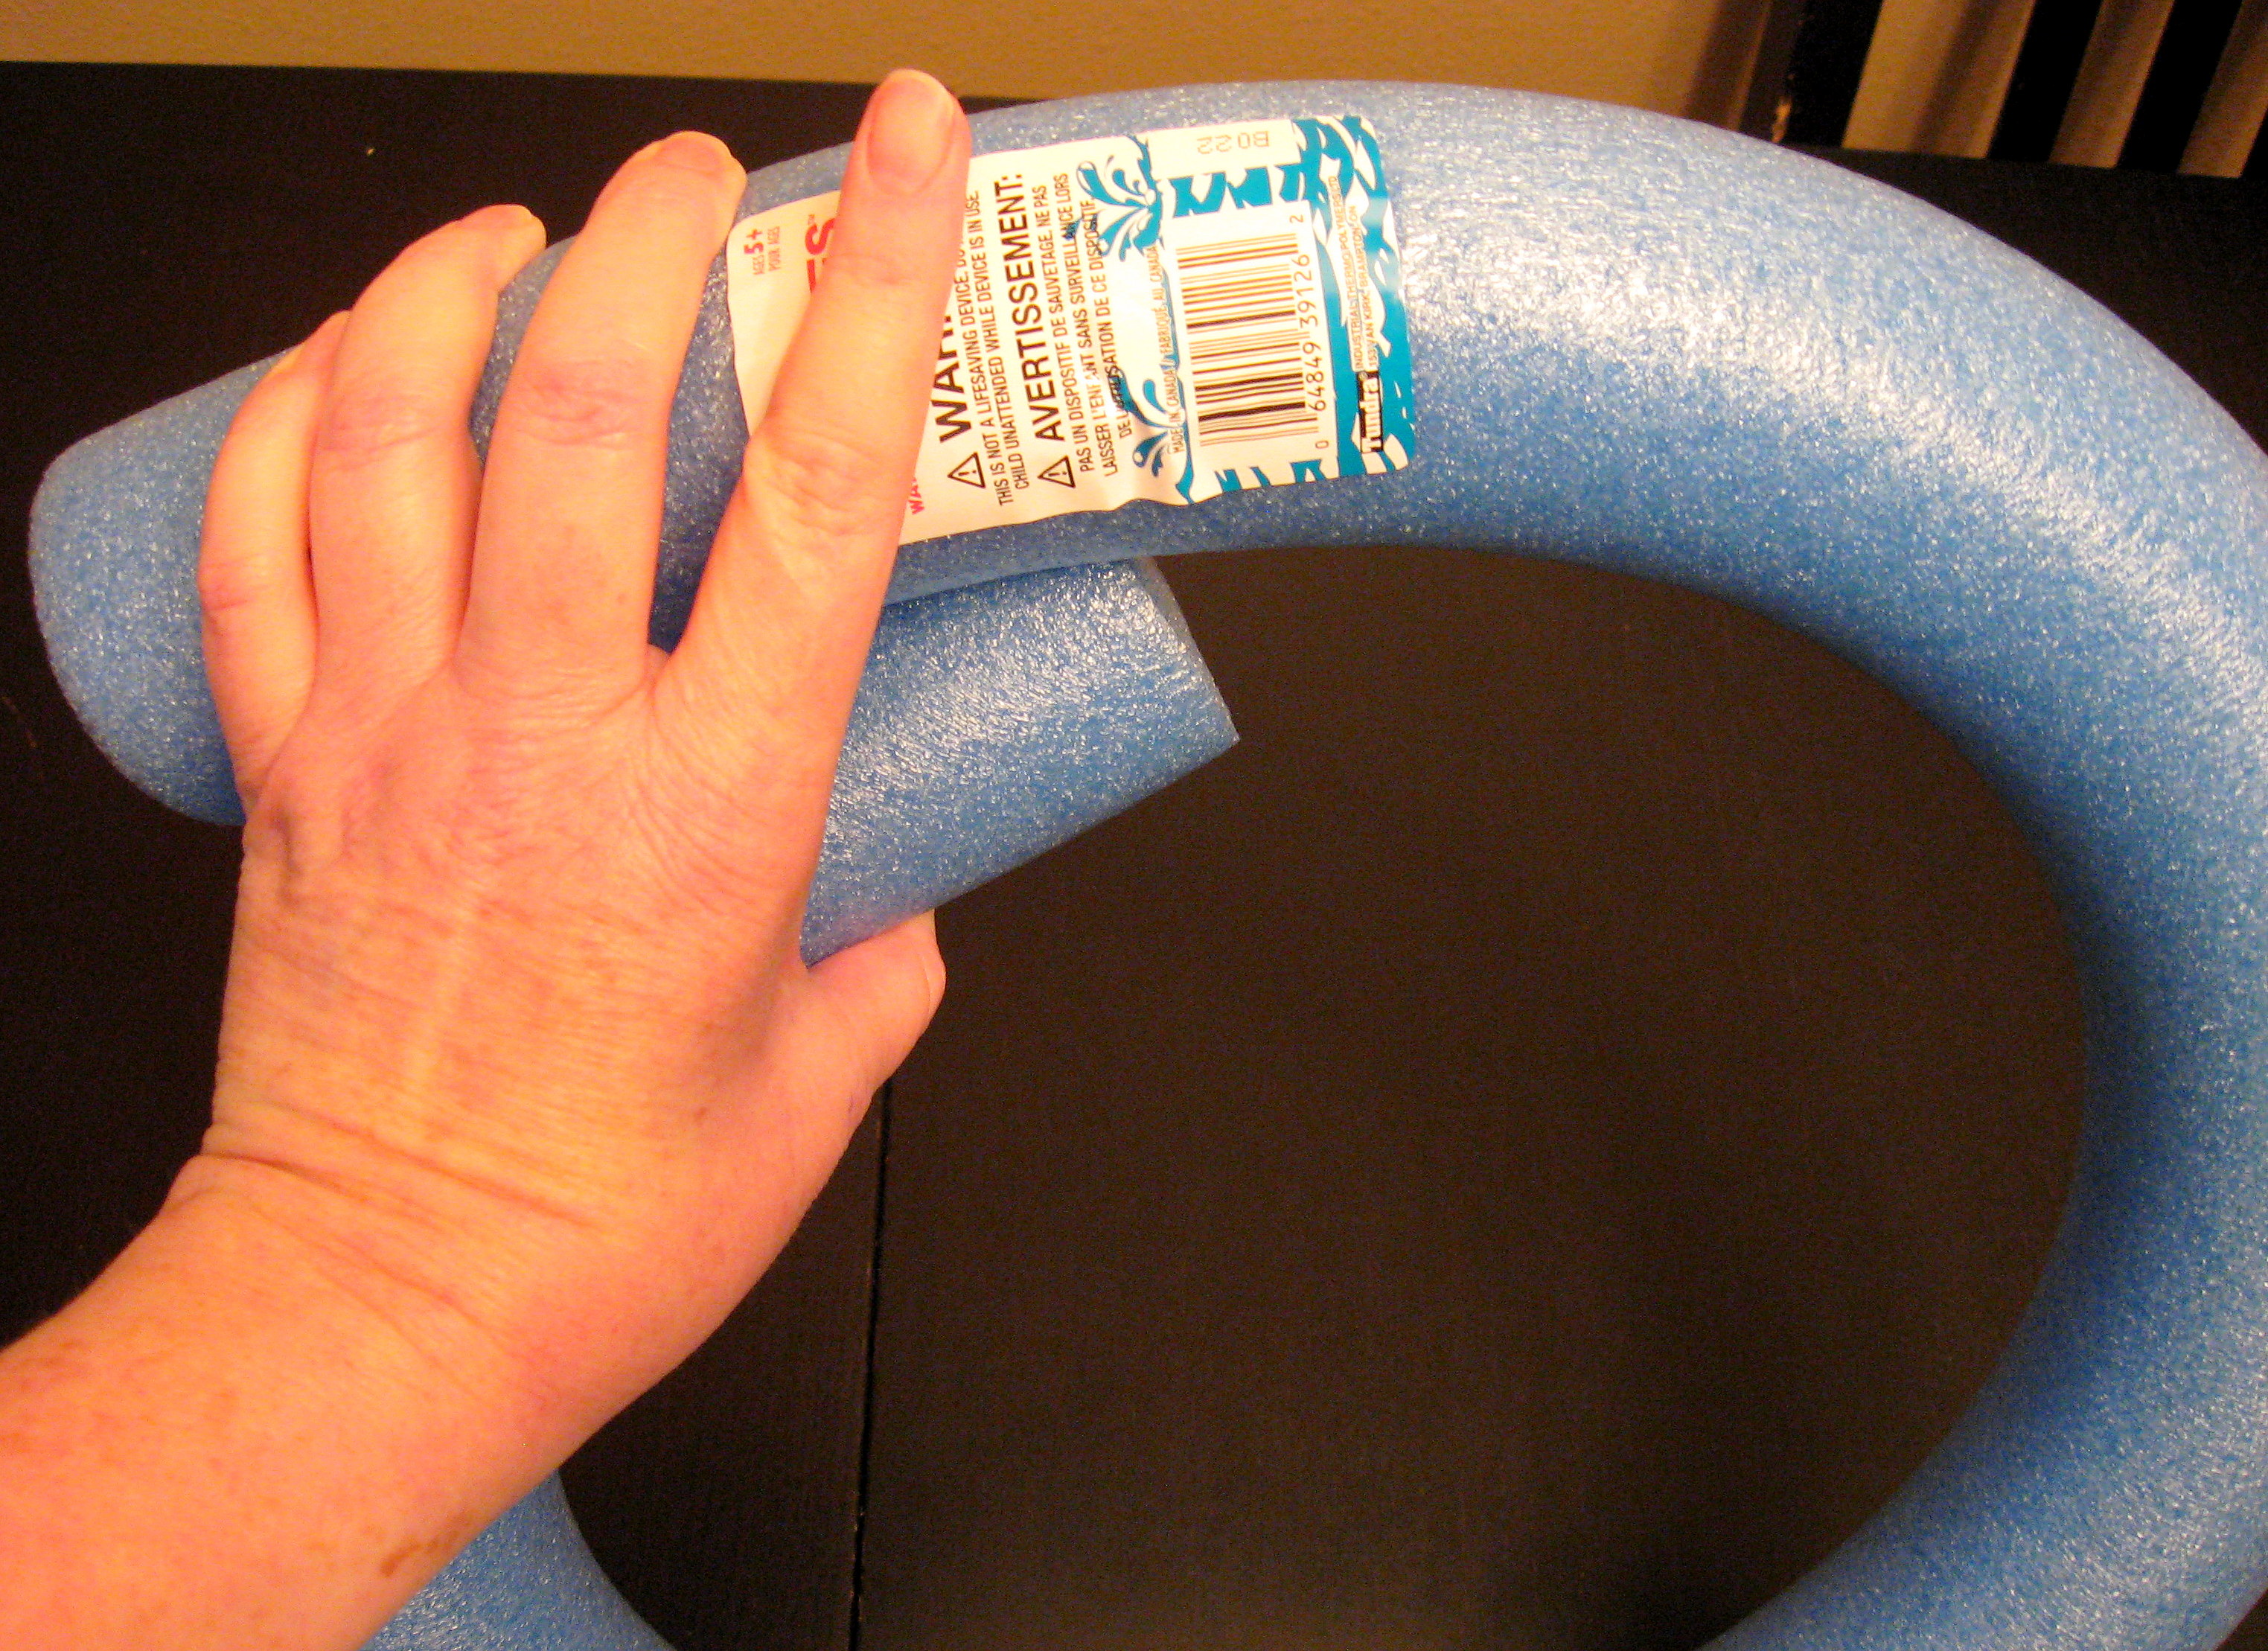
Bend the noodle into a circle and determine how big you want it. You could use the entire length of it if you like that size circle.
I chose to cut off about 6 inches using a serrated steak knife.
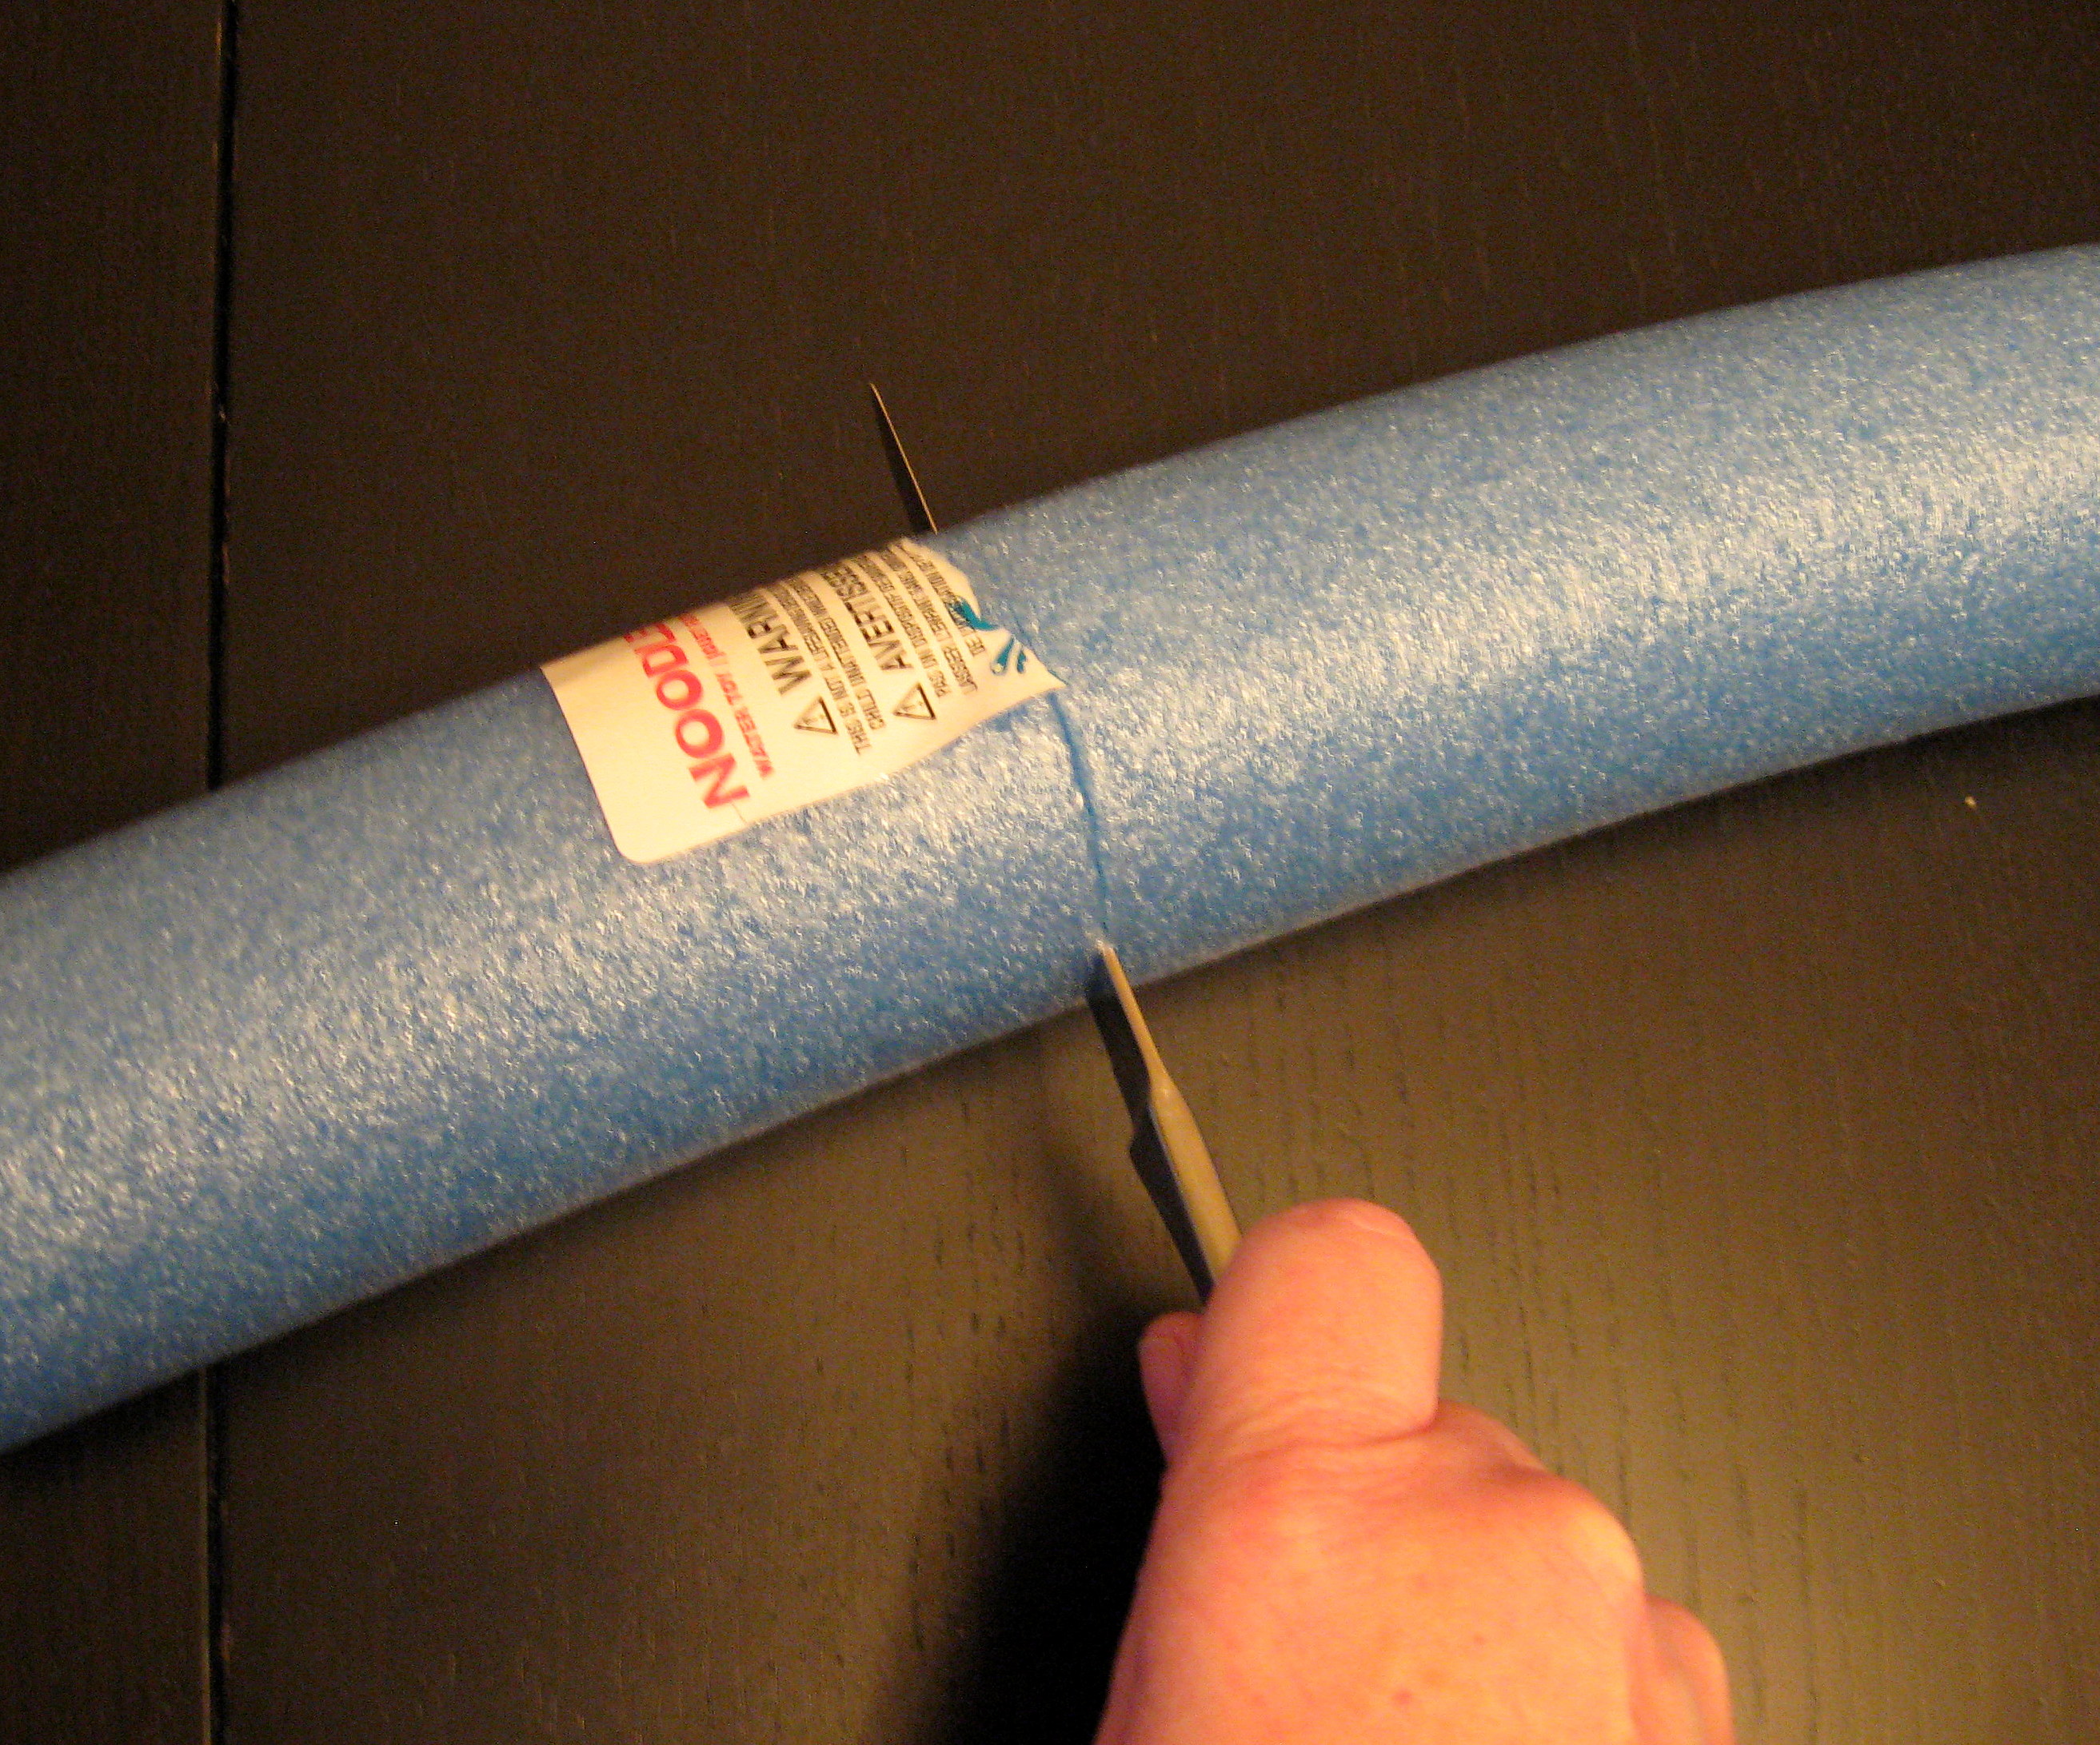
When it is cut to the size you want, tape the ends together securely with the tape. You’ll probably want a second set of hands for this.
See how it’s kind of flat where you put the tape? GENTLY squoosh it into a more round shape until you’re happy with it.
Now we will wrap the entire wreath. You could use yarn, twine, rope, whatever looks good to you, but I found this at the dollar store:
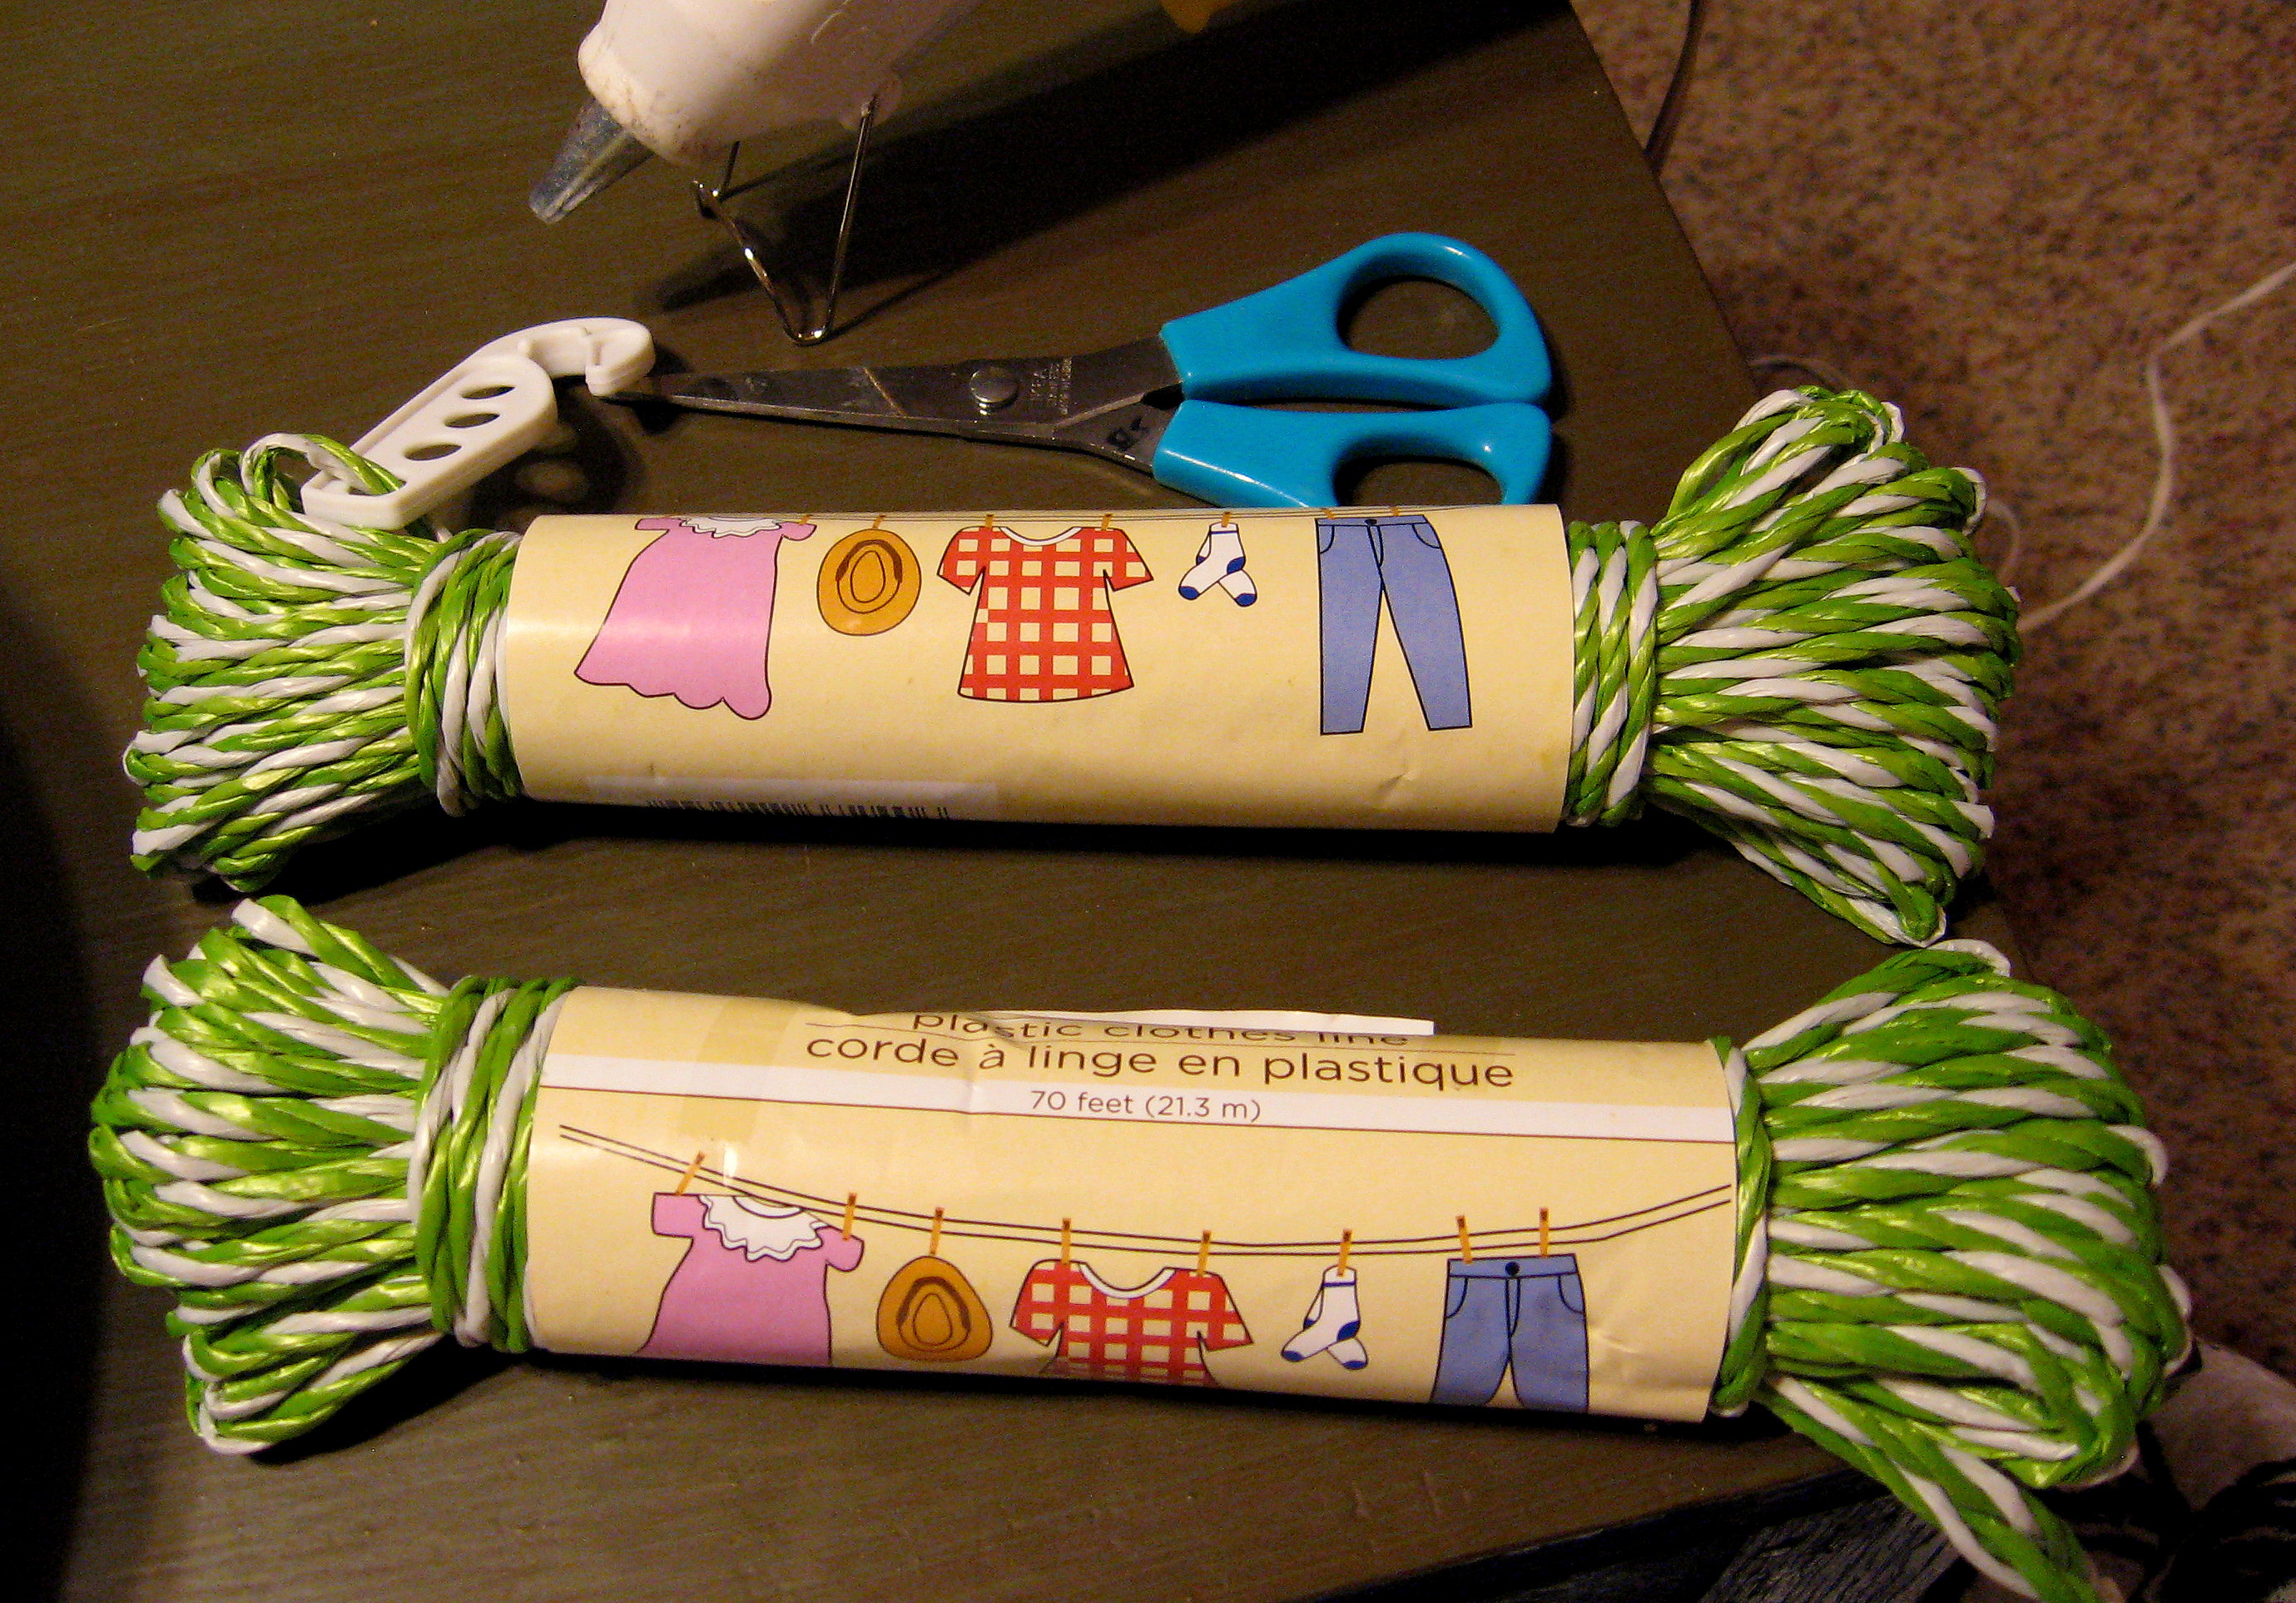
It’s clothesline; isn’t it gorgeous? It is plastic, but it looks just like baker’s twine, and it came in about 5 different colors. For my wreath, I used 3 bundles.
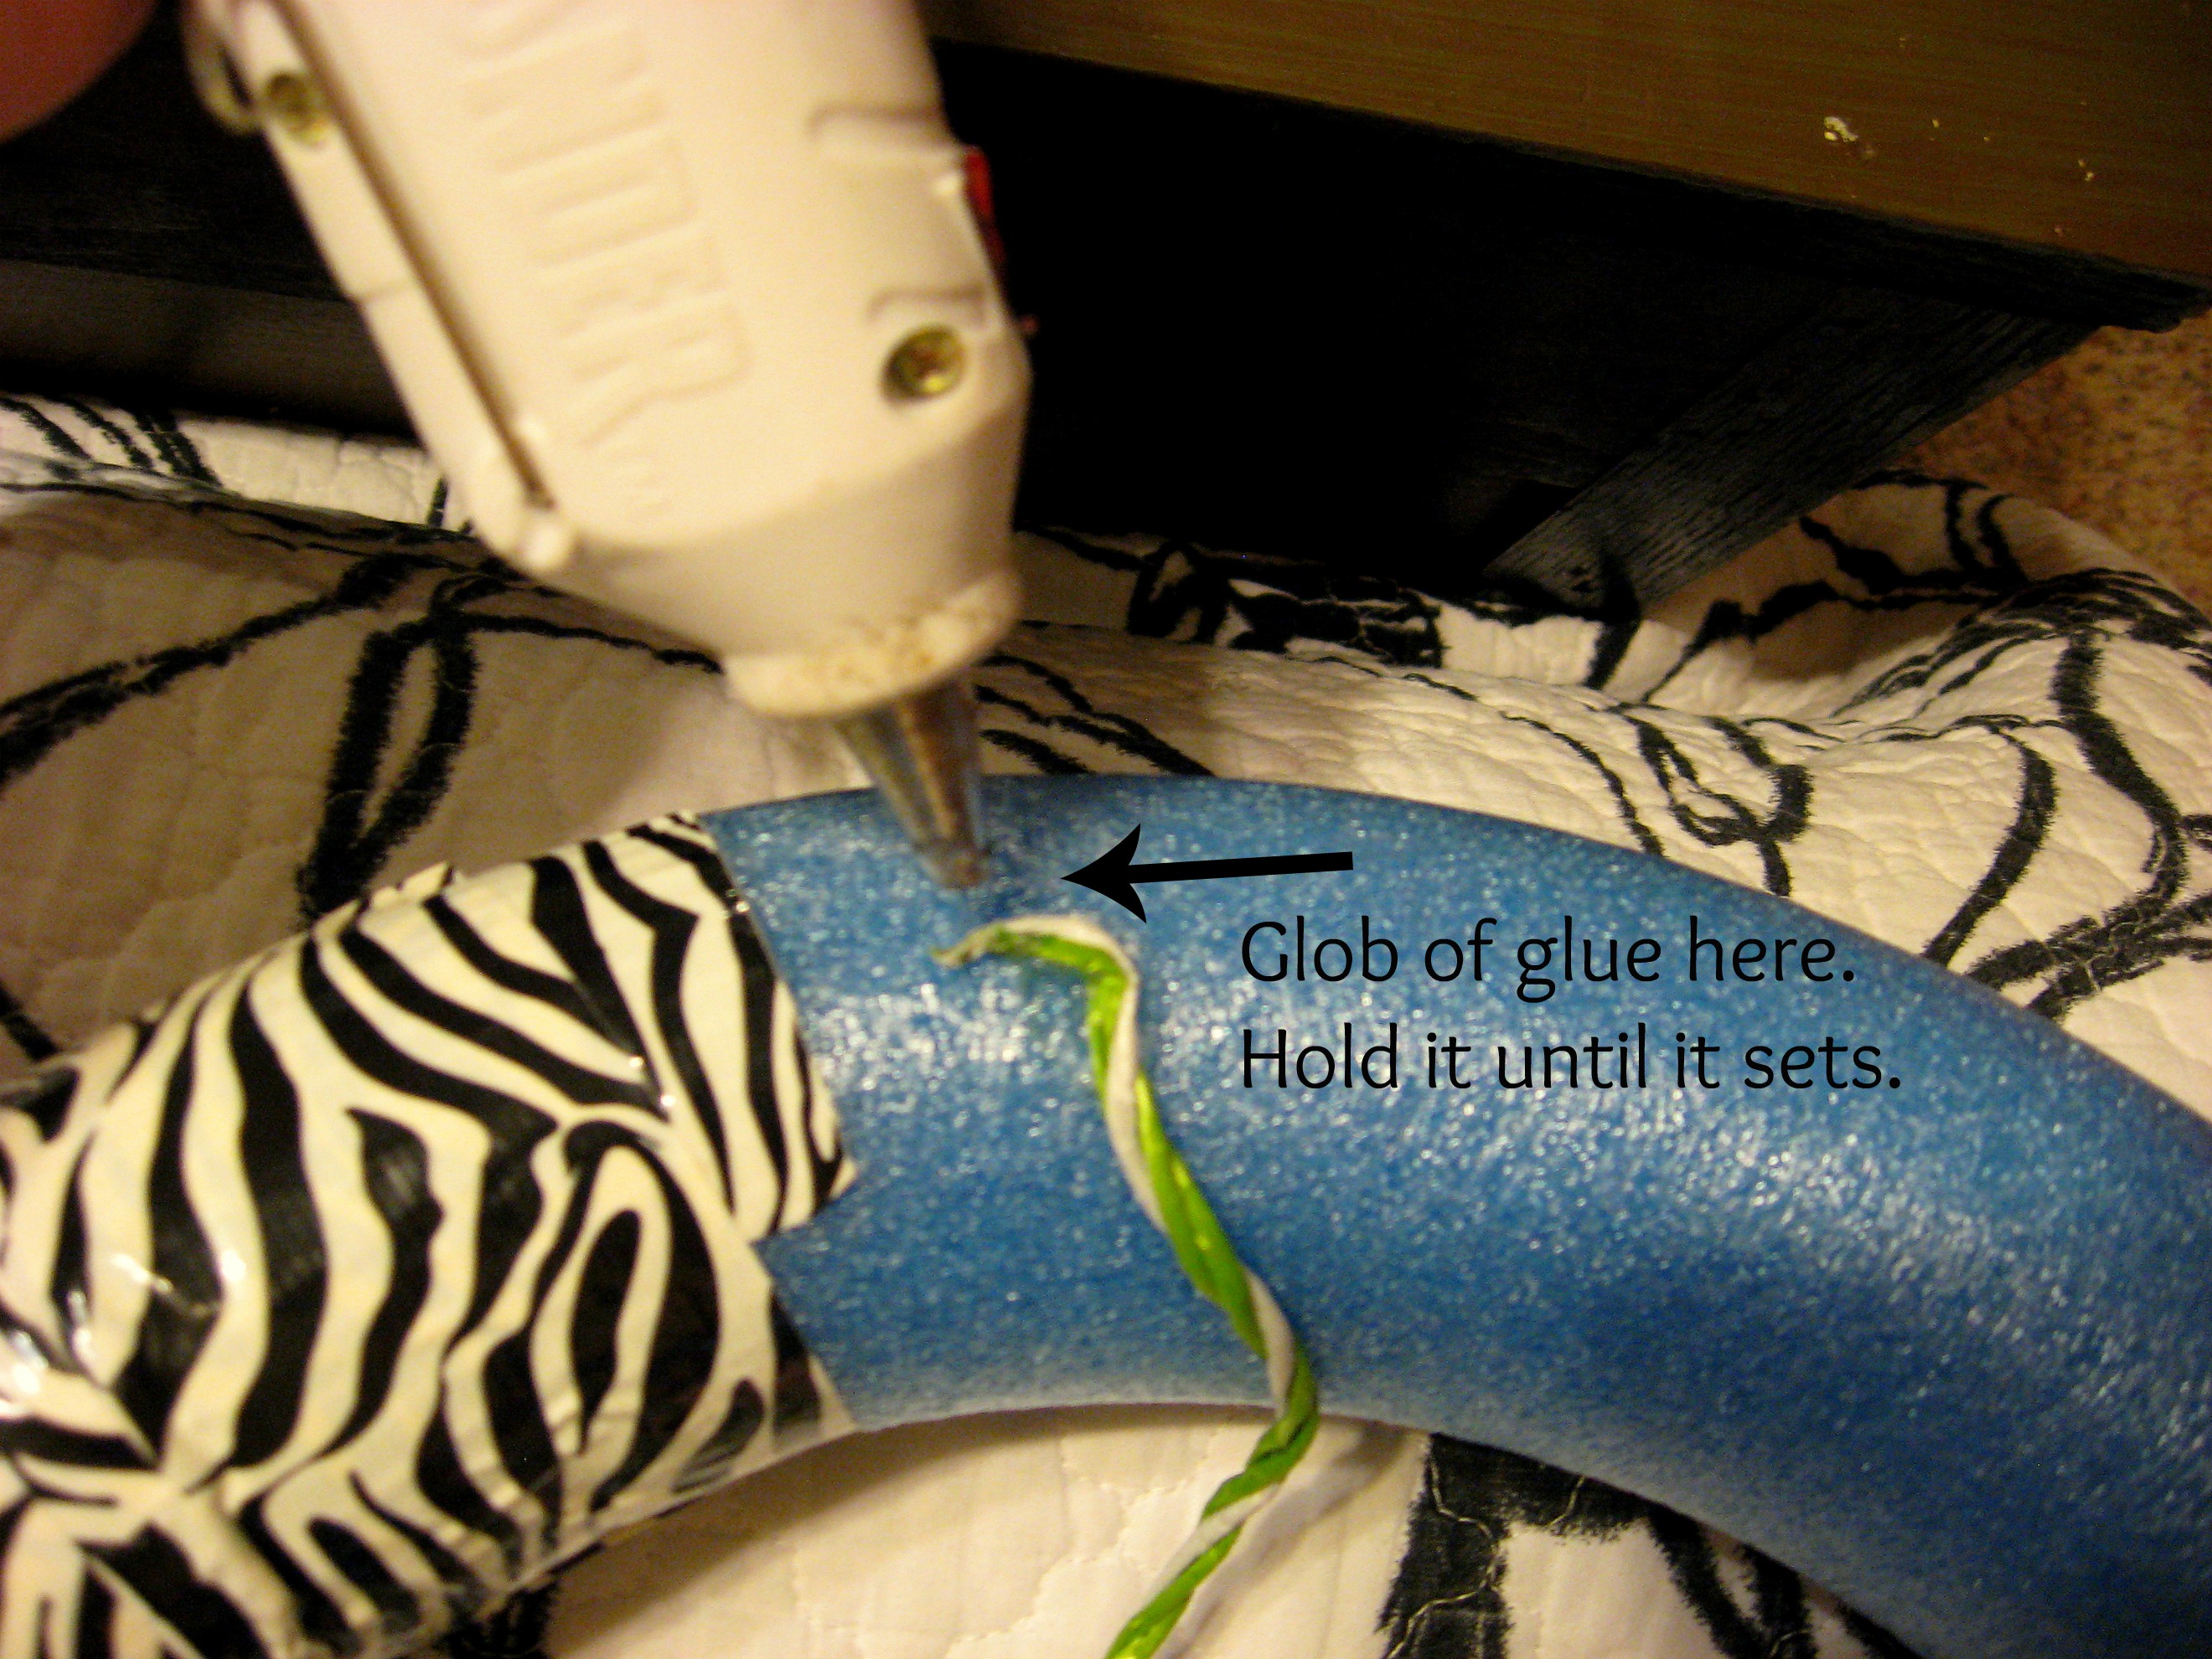
Put a small glob of hot glue on your wreath and press the end of the clothesline into it. Hold it there until it sets. Now this will be the back of the wreath; you’ll want to keep track of that as you wrap because you’ll want to keep the front as smooth as you can.
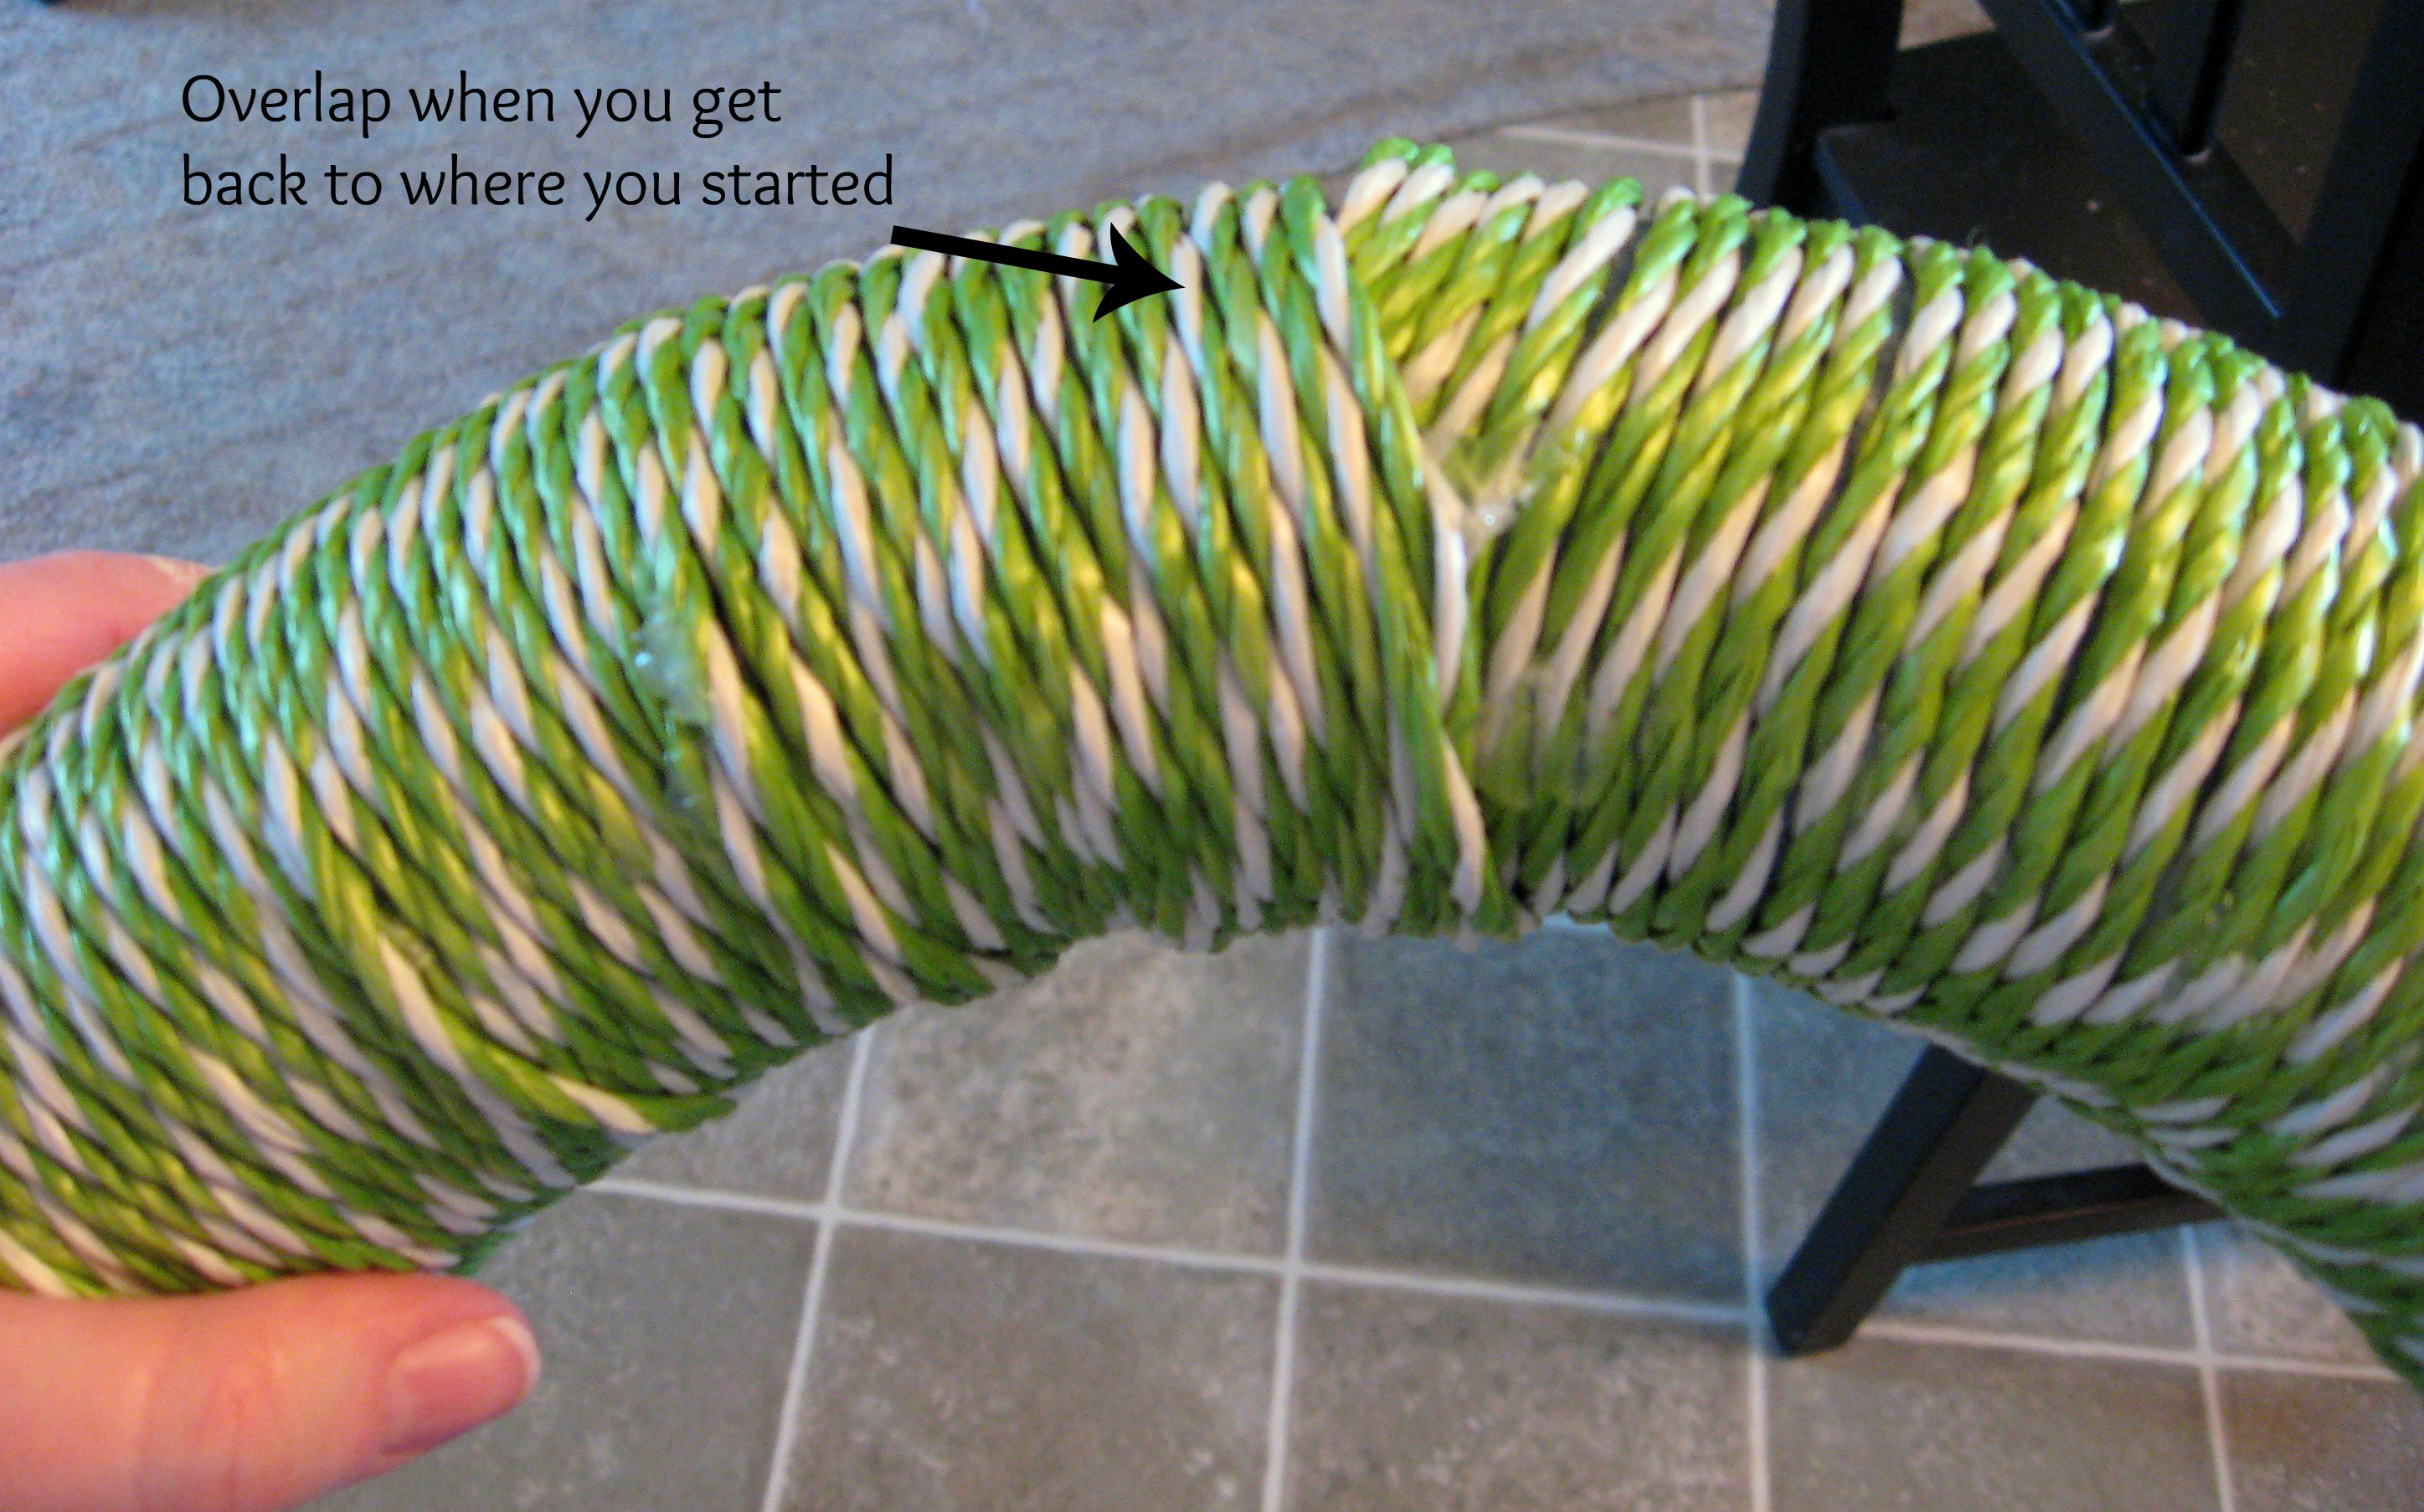
Now put on your favorite movie, get comfy and start wrapping.
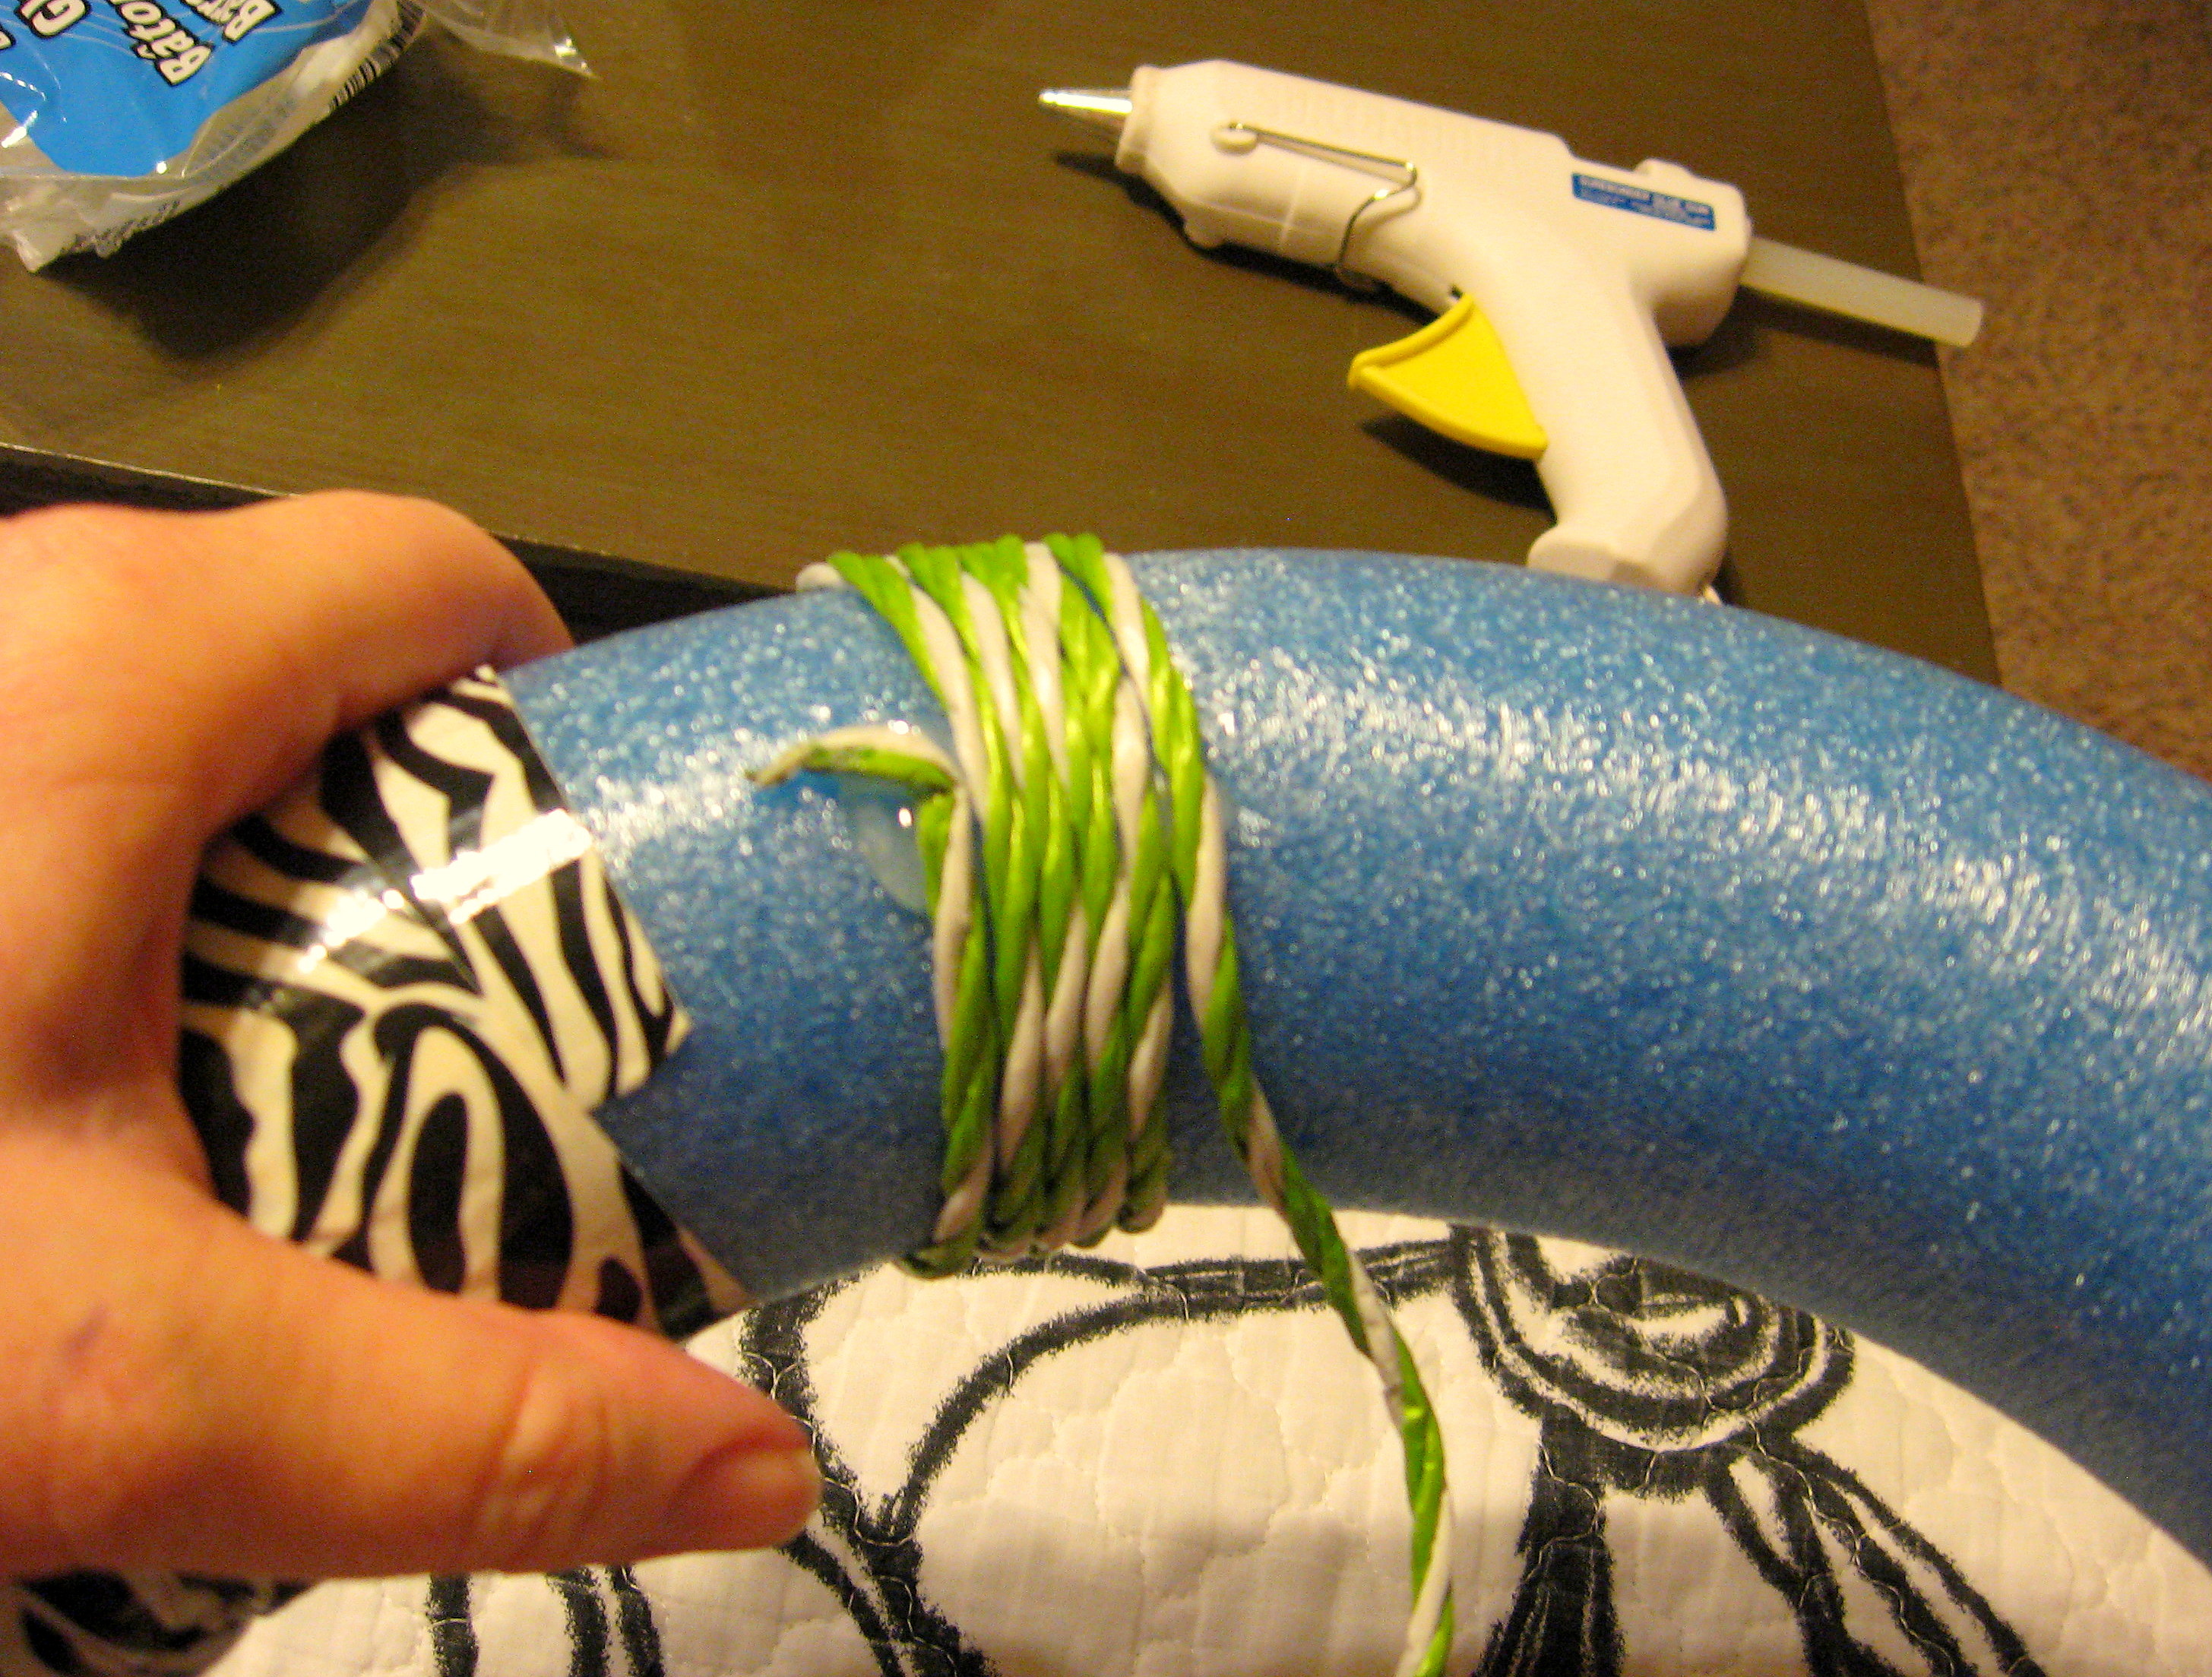
It does take some time and patience to do this, but it’s not difficult. Keep each wrap as close to the last one as you can. I put about an inch of hot glue on the back, wrap until I was at the end of the glue, hold it a few seconds until it was well set, then check the front to make sure everything looked good. As you go around the circle, you may get some bunching or overlapping on the back to make it fit; just be sure it stays pretty smooth on the front.
Also, the styrofoam will melt if you touch it with the tip of the glue gun, so be careful of that.
Keep going until you get back to where you started. Overlap until you’ve covered all of the noodle, then glue the end down.
Take a minute to adjust the front to make any lumpy pieces lie flat and to cover any “bald spots.”
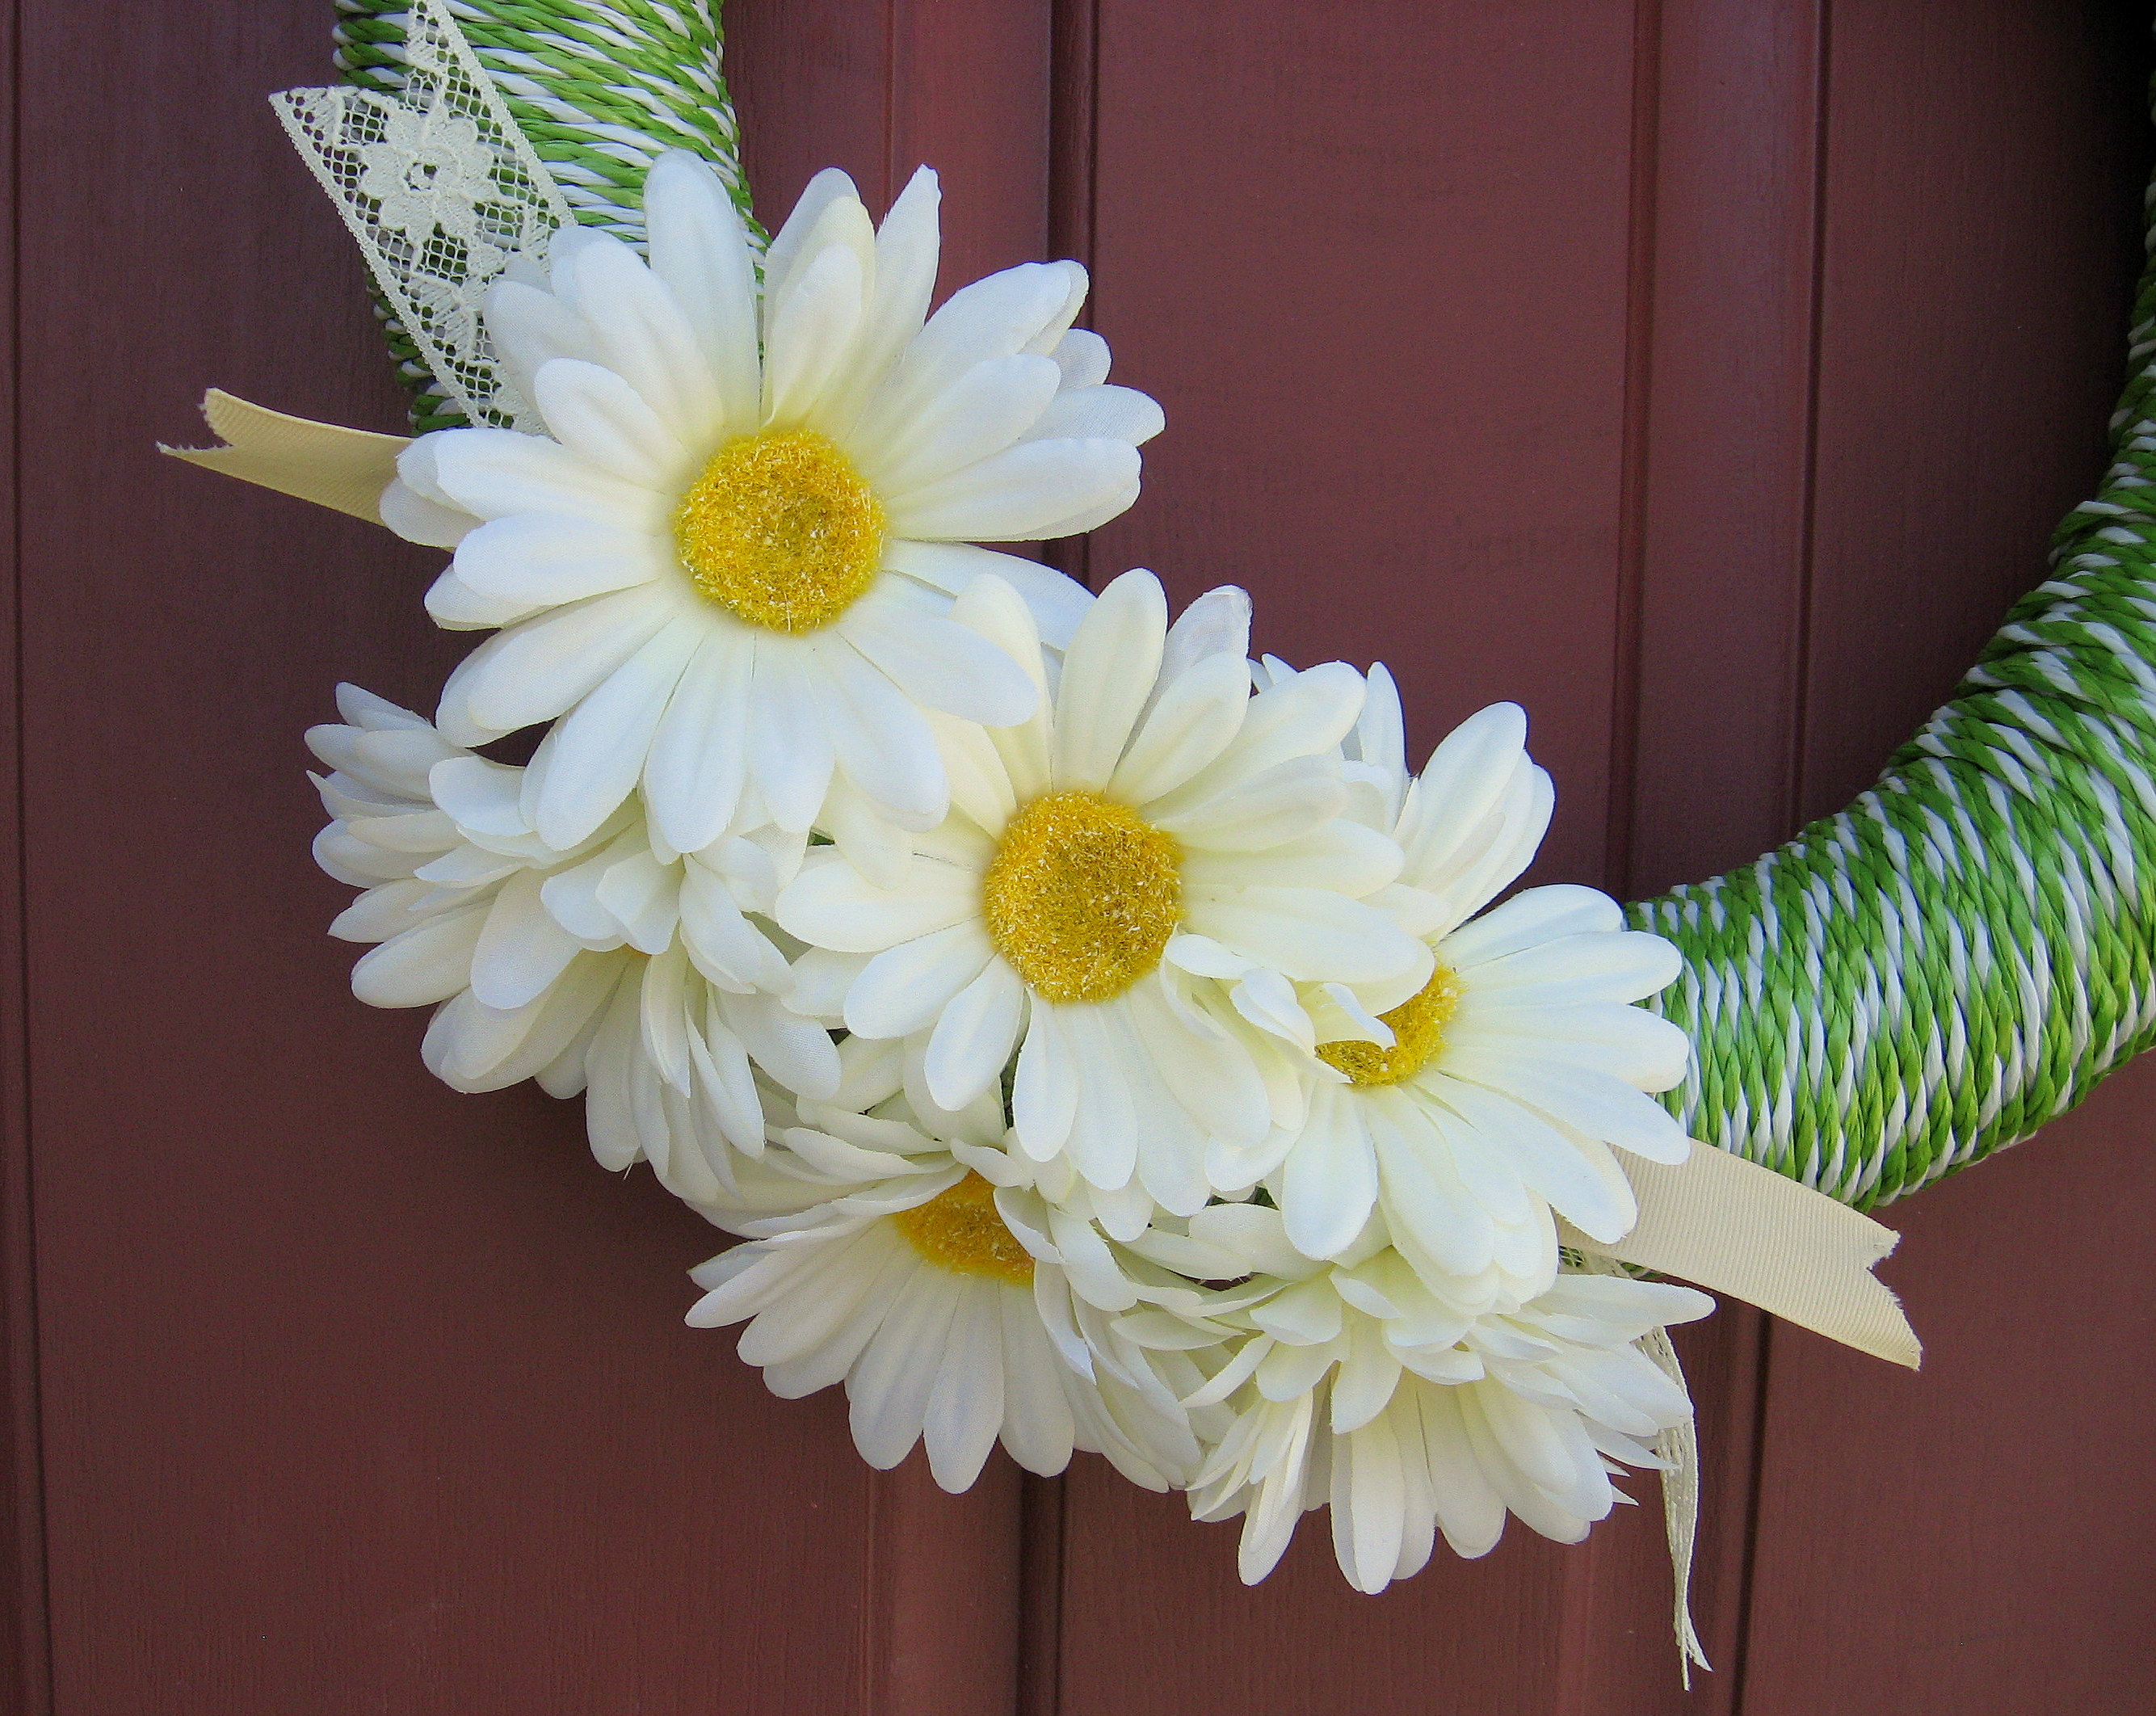
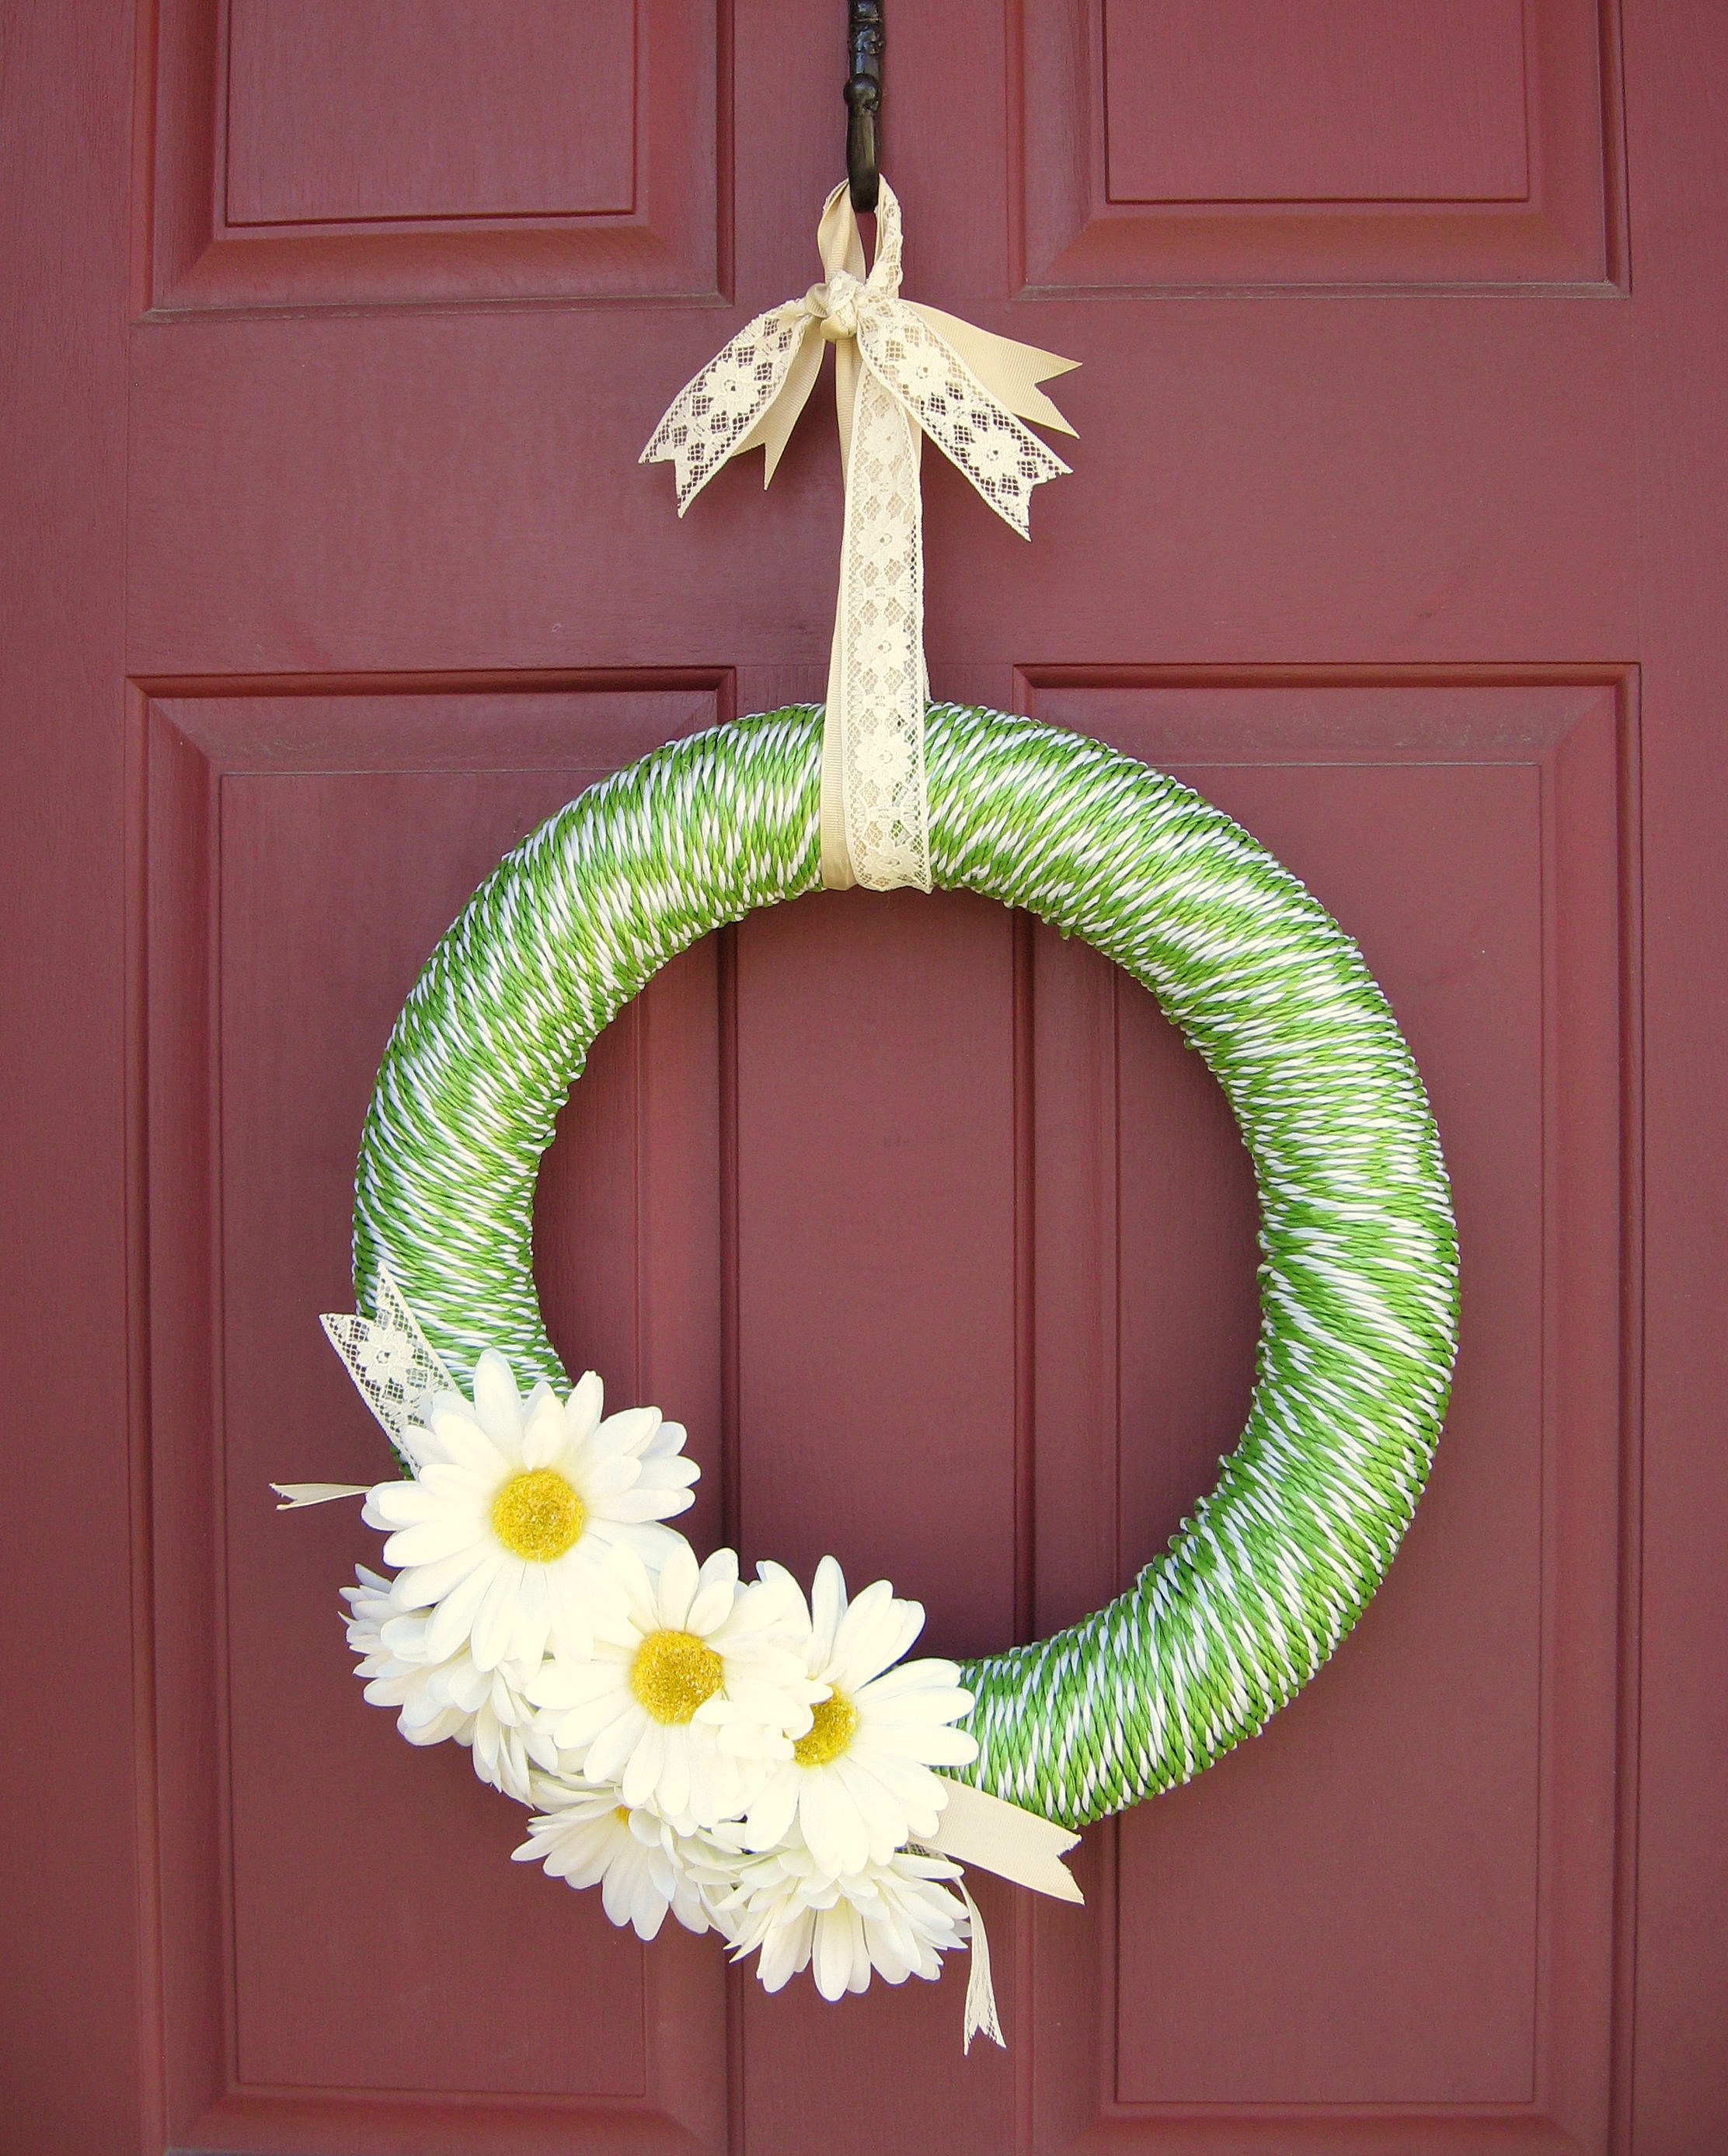
I embellished mine by hot gluing on some ribbon, lace and flowers that I had in my stash, but these are all things that are readily available at any craft store or usually even the dollar store.
Loop a ribbon through the top, tie, and hang.
Water Tracker Bracelet
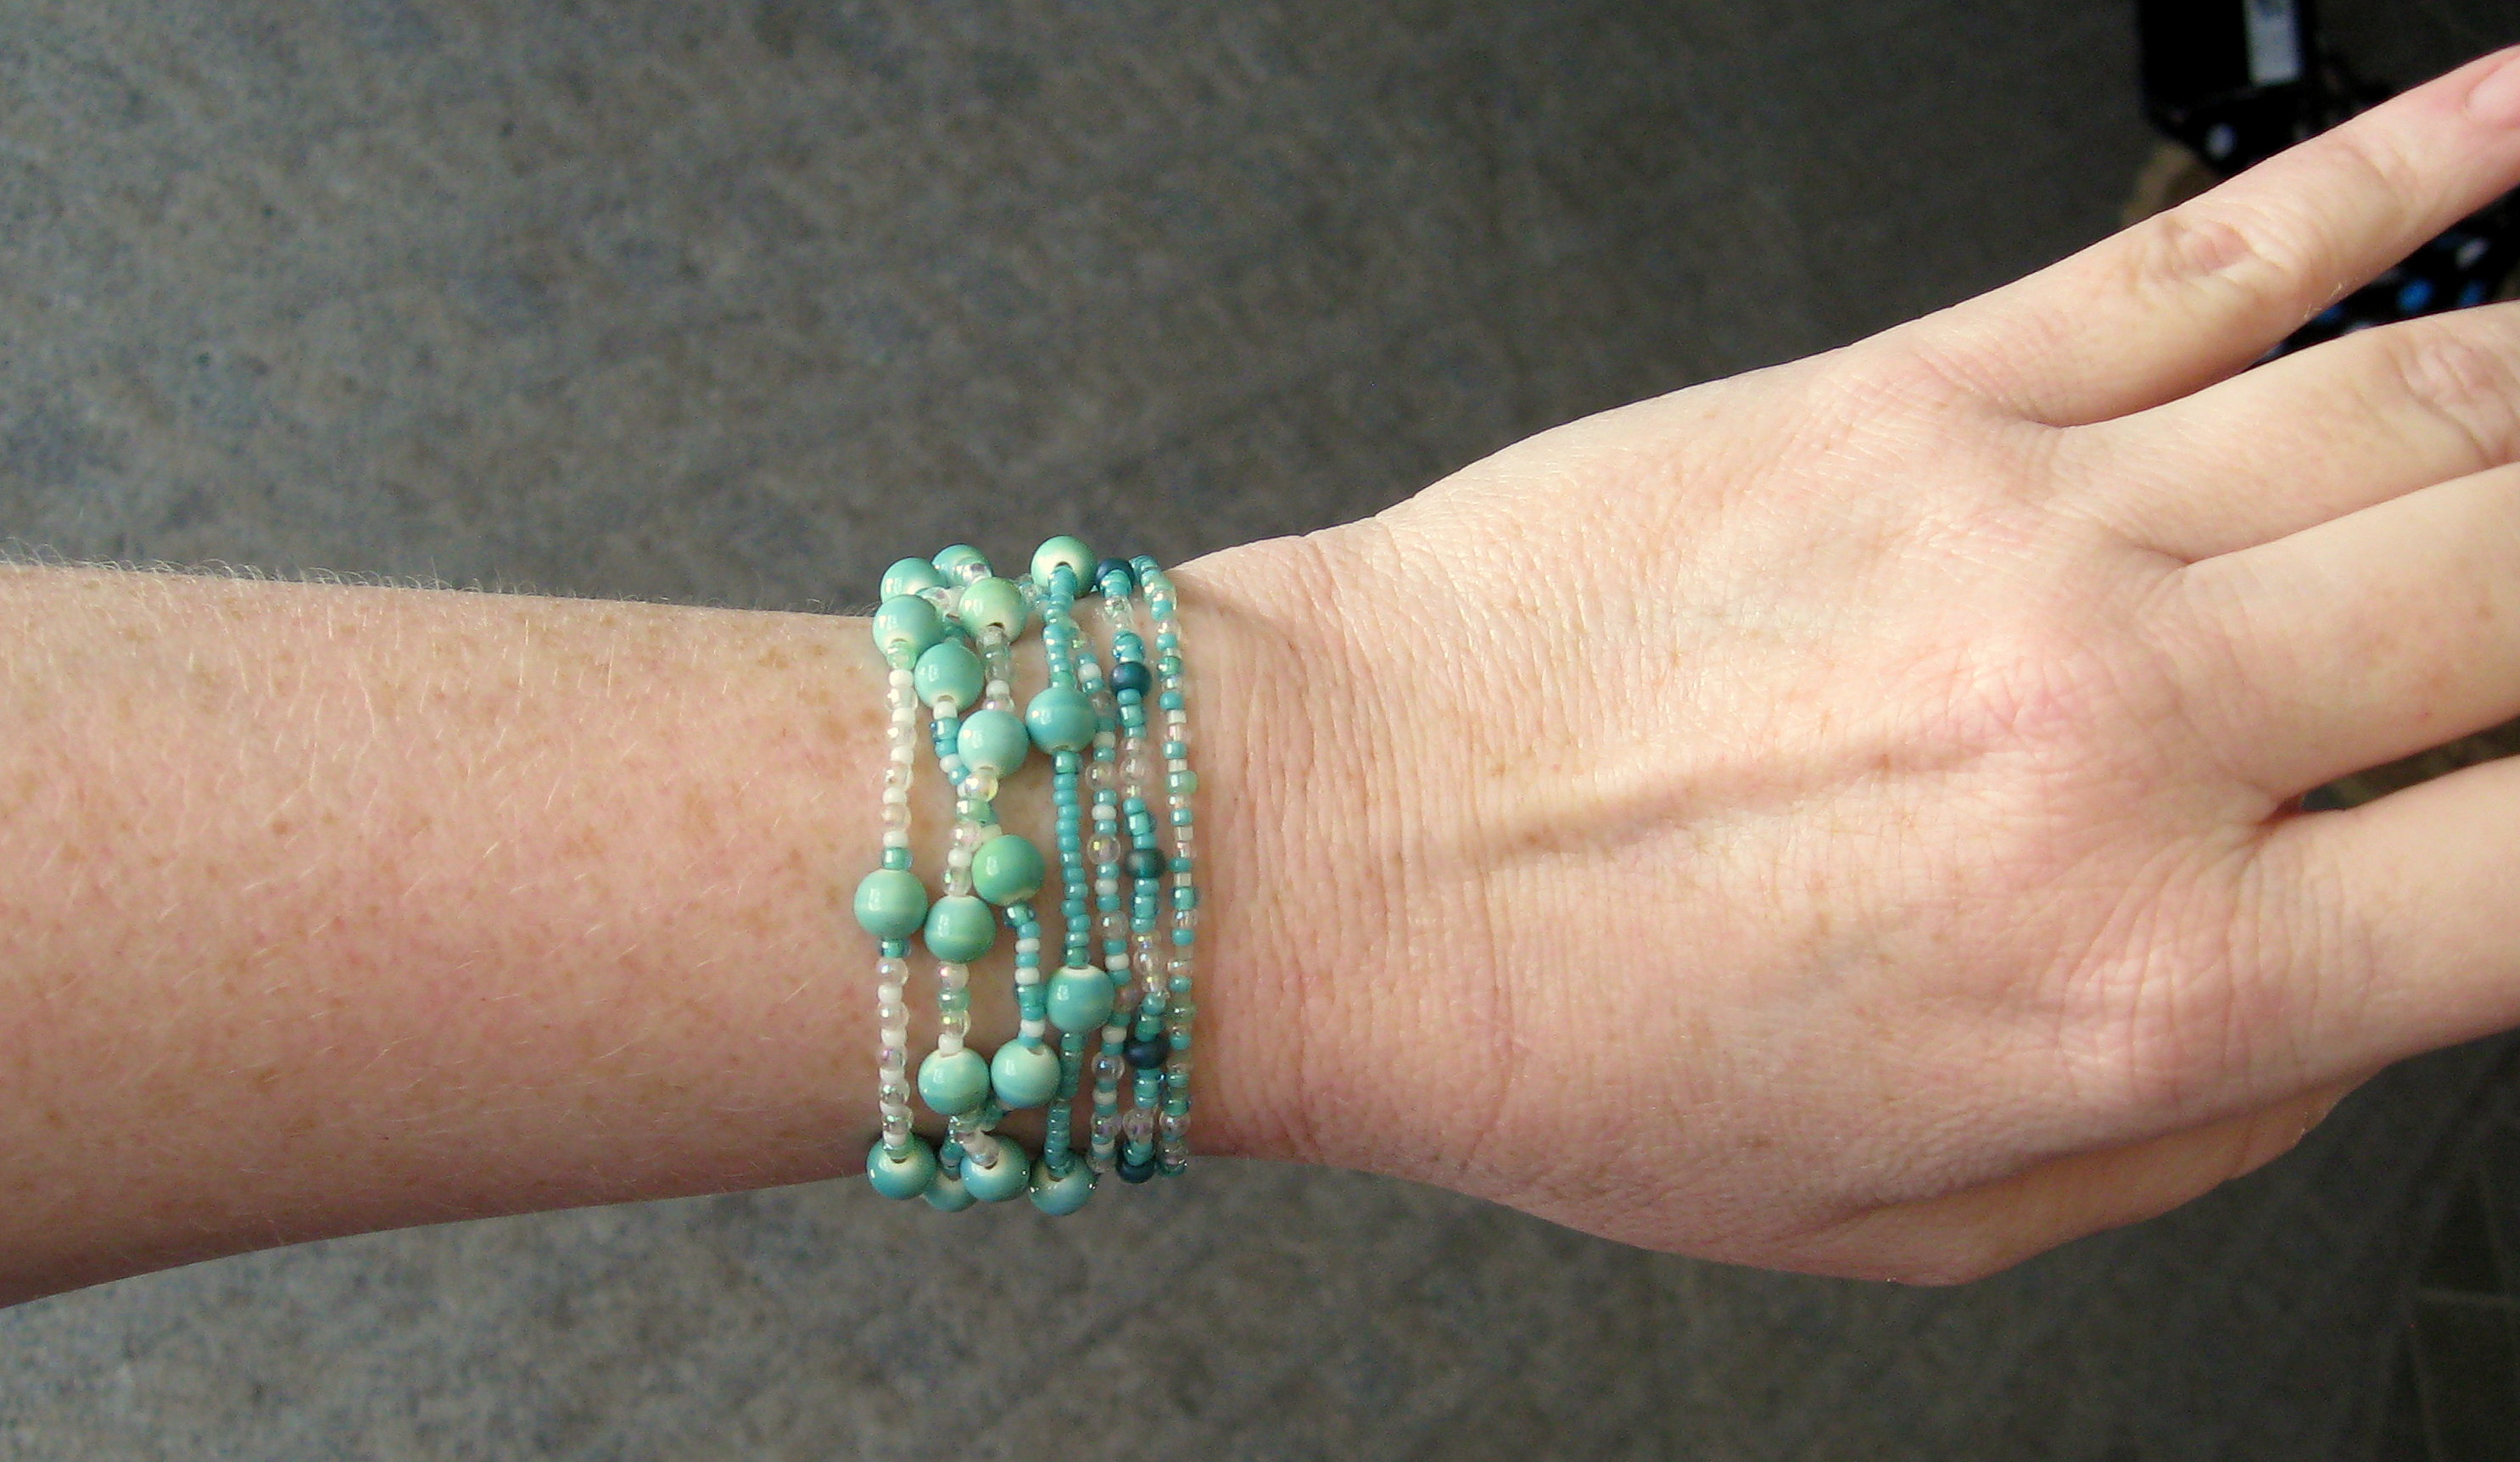
I have an ongoing goal to try to drink more water. I do great for a day or two, but then I fall off and get back into bad habits. Here is an easy way to keep track of how much water I’m drinking each day: I use bracelets! I start with 8 bracelets on my left arm every morning. After I drink a serving of water, I move it to the right arm. The goal is to have all of my bracelets moved by dinnertime. It works great for me to have the actual physical reminder.
There isn’t a real tutorial for this; they are pretty simple to make. Get stretchy jewelry cord from any craft store, beads in your color choice (it will take a lot!) and a small bottle of bead glue.
String the beads onto the cord until they are the right size to slide on over your hand, tie a knot and put a little glue on the knot, holding the beads out of the way until it dries. Simple as that.
I used aqua and white beads, and varied the size and pattern on each one so that they would be more interesting, but they would be just fine if you used only the small seed beads on each bracelet. Think of all the other things you could use these for…need to up your calcium intake? Make a set of white ones for dairy servings. What about green ones for veggies, red ones for fruits? Use your imagination!
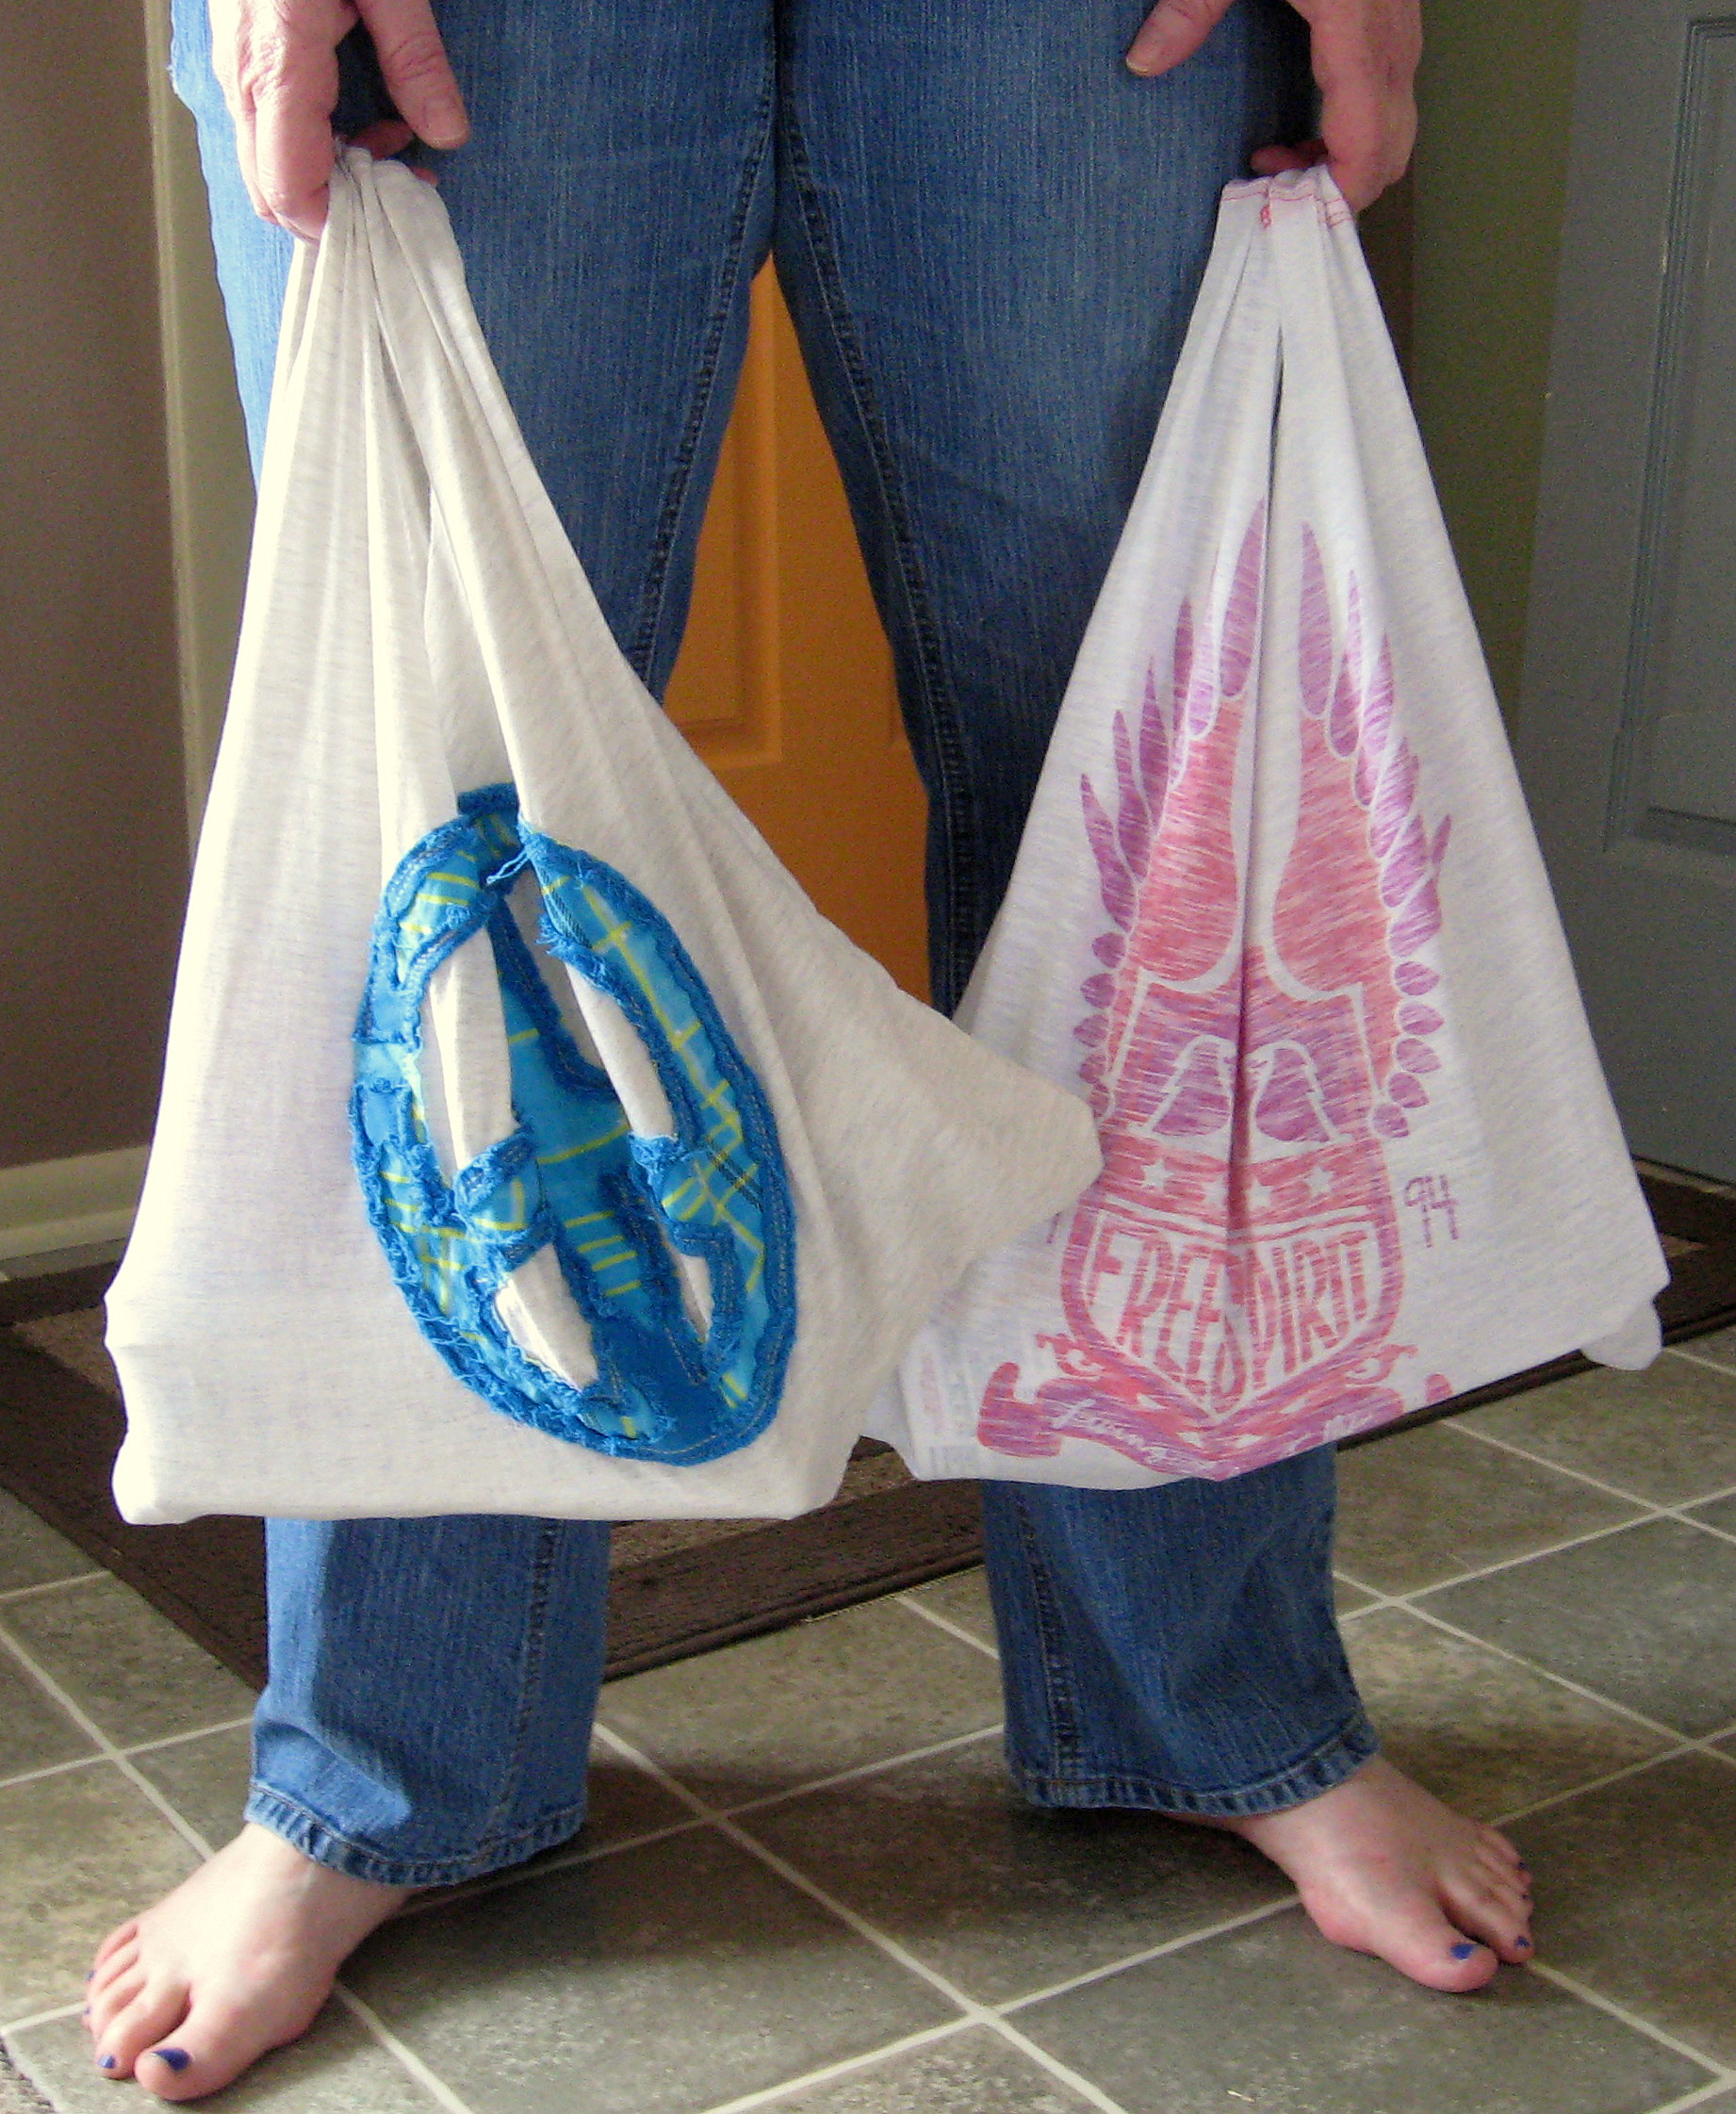
Reusable T-Shirt Bags
I have some big, sturdy reusable bags that I use for grocery shopping, and I am pretty good at remembering to take them into the store with me. Where I have a problem is with stores like Walmart or the craft store where I am just running in for one thing, so I don’t take in a big bag, but end up really buying 3 or 4 things- just a little too awkward to carry out in my hands. I needed a smaller bag for these trips, and I needed it to fold up small enough to fit in my purse so I always have it with me.
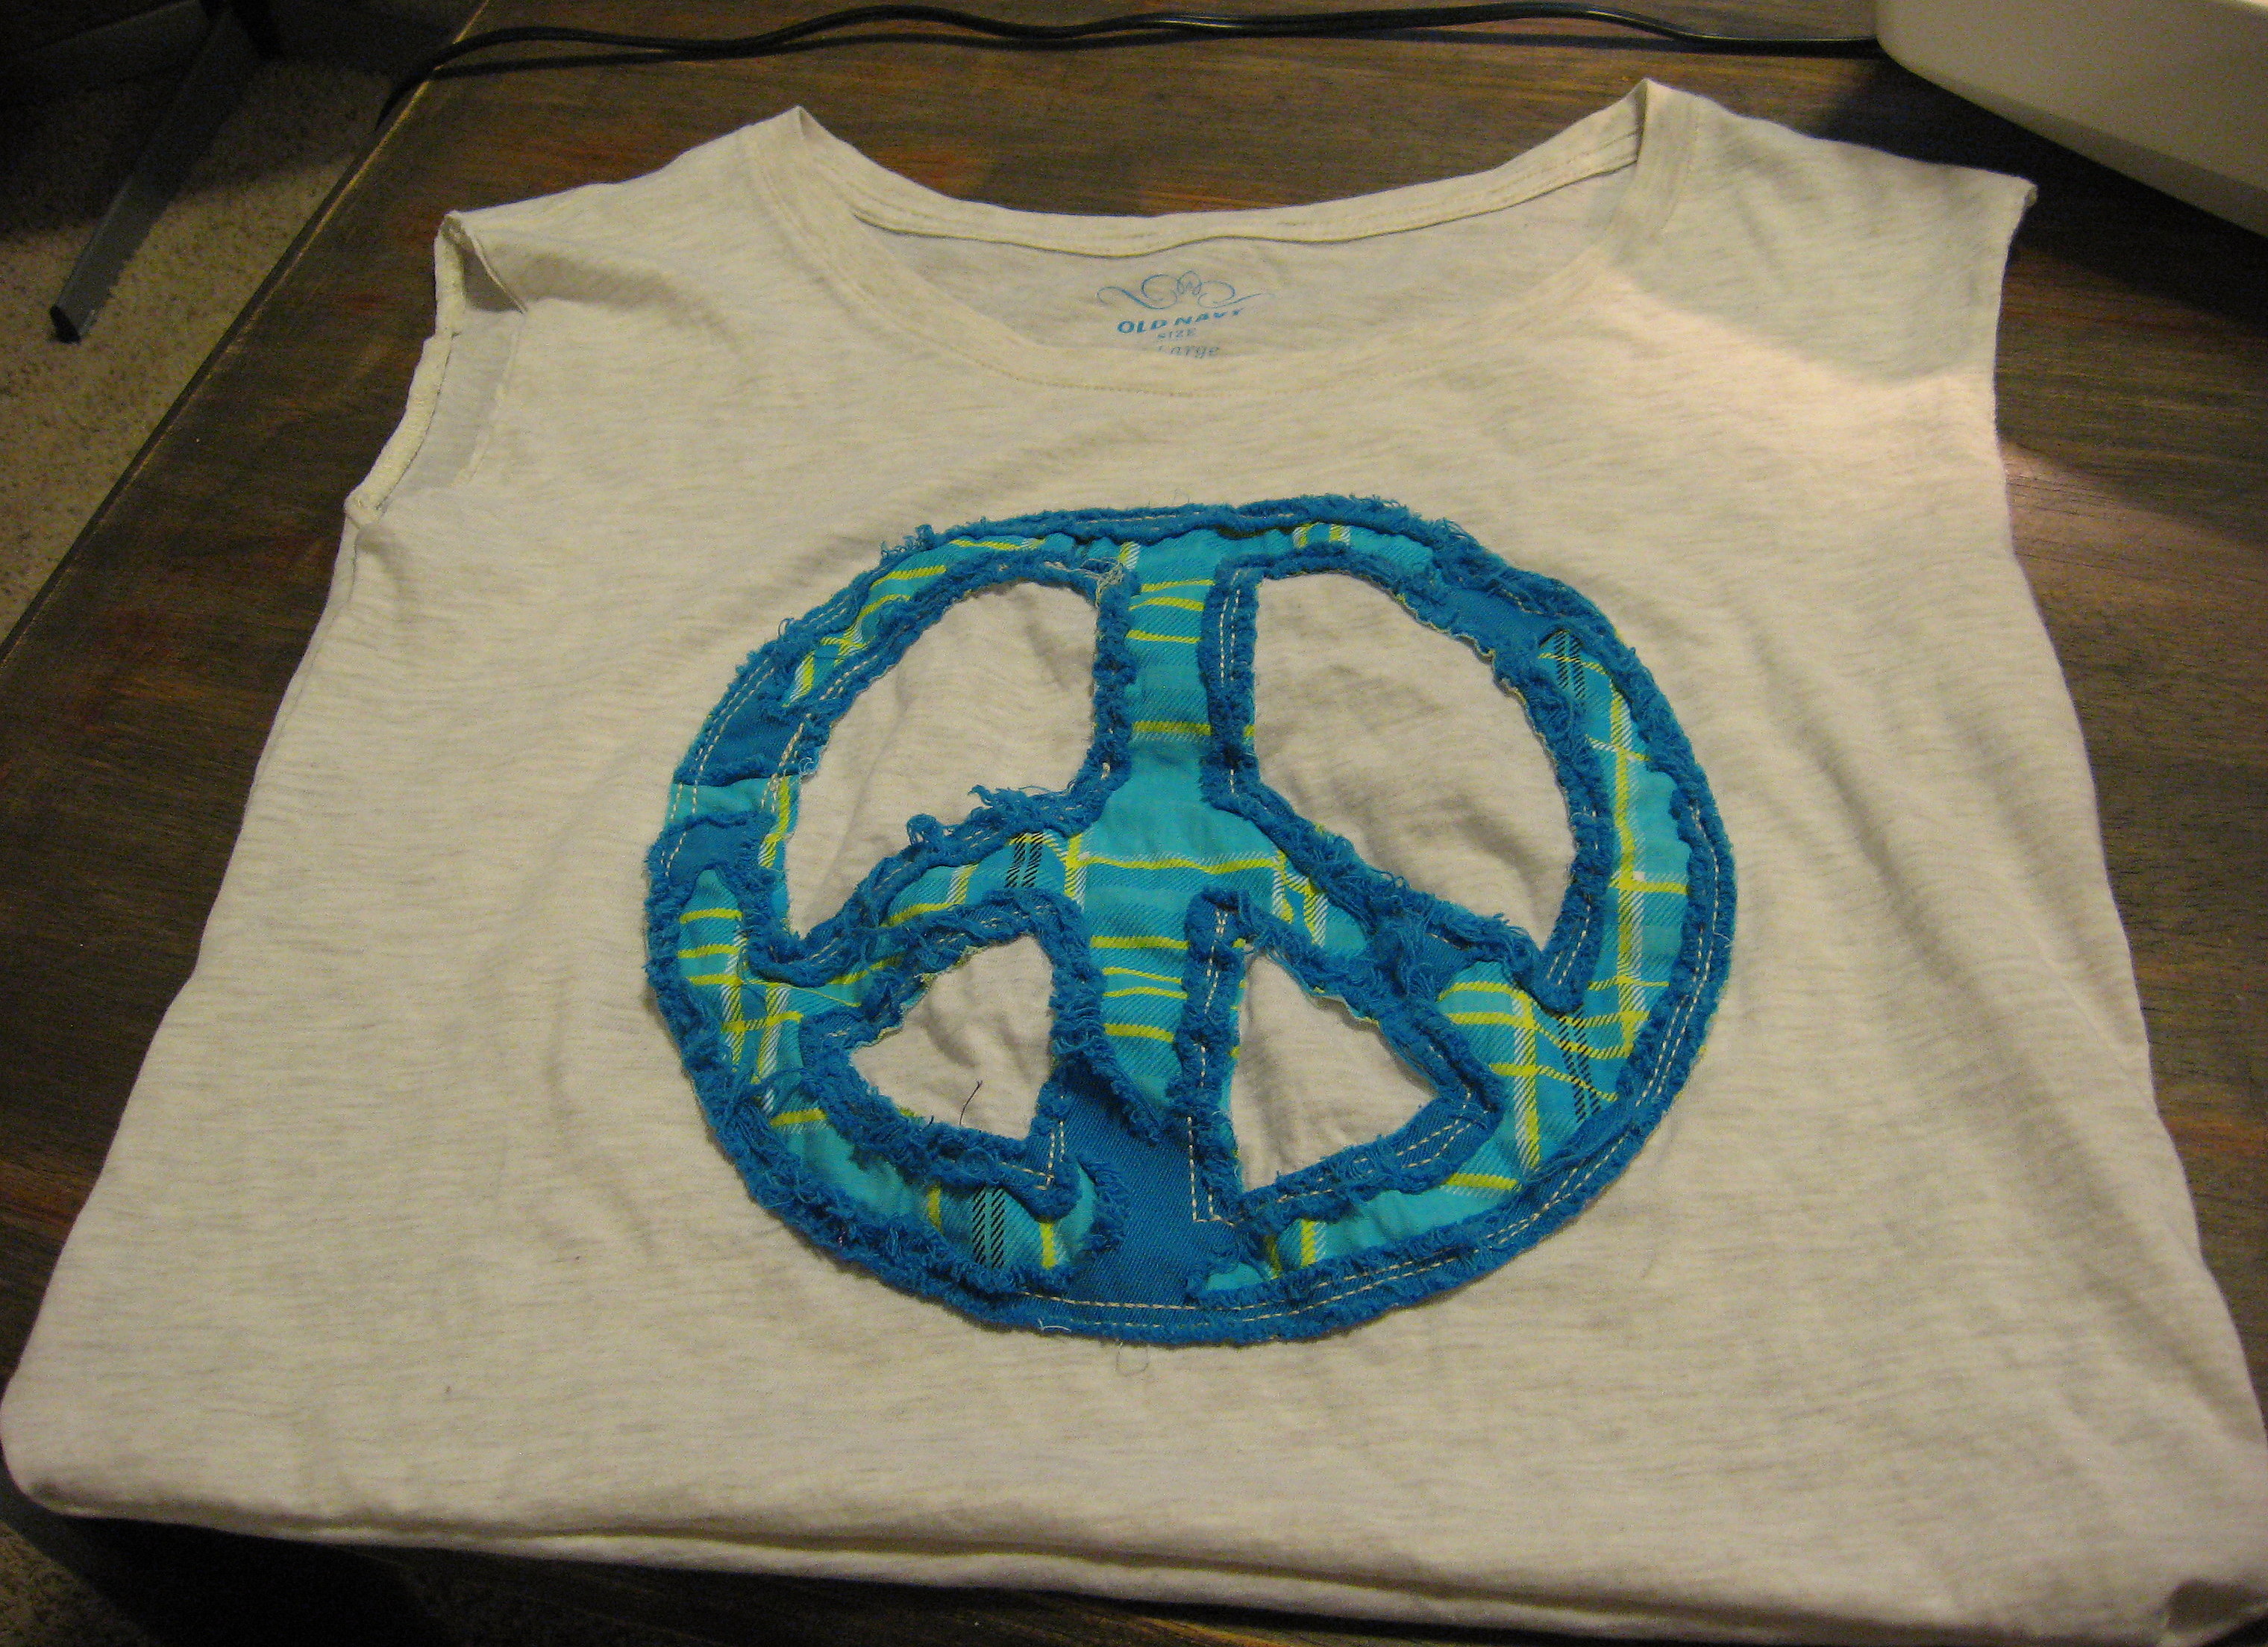
Enter cast off Old Navy T-shirts! My sister had put these shirts in her “donate” pile even though they were brand new, so I brought them home and tried to wear them. 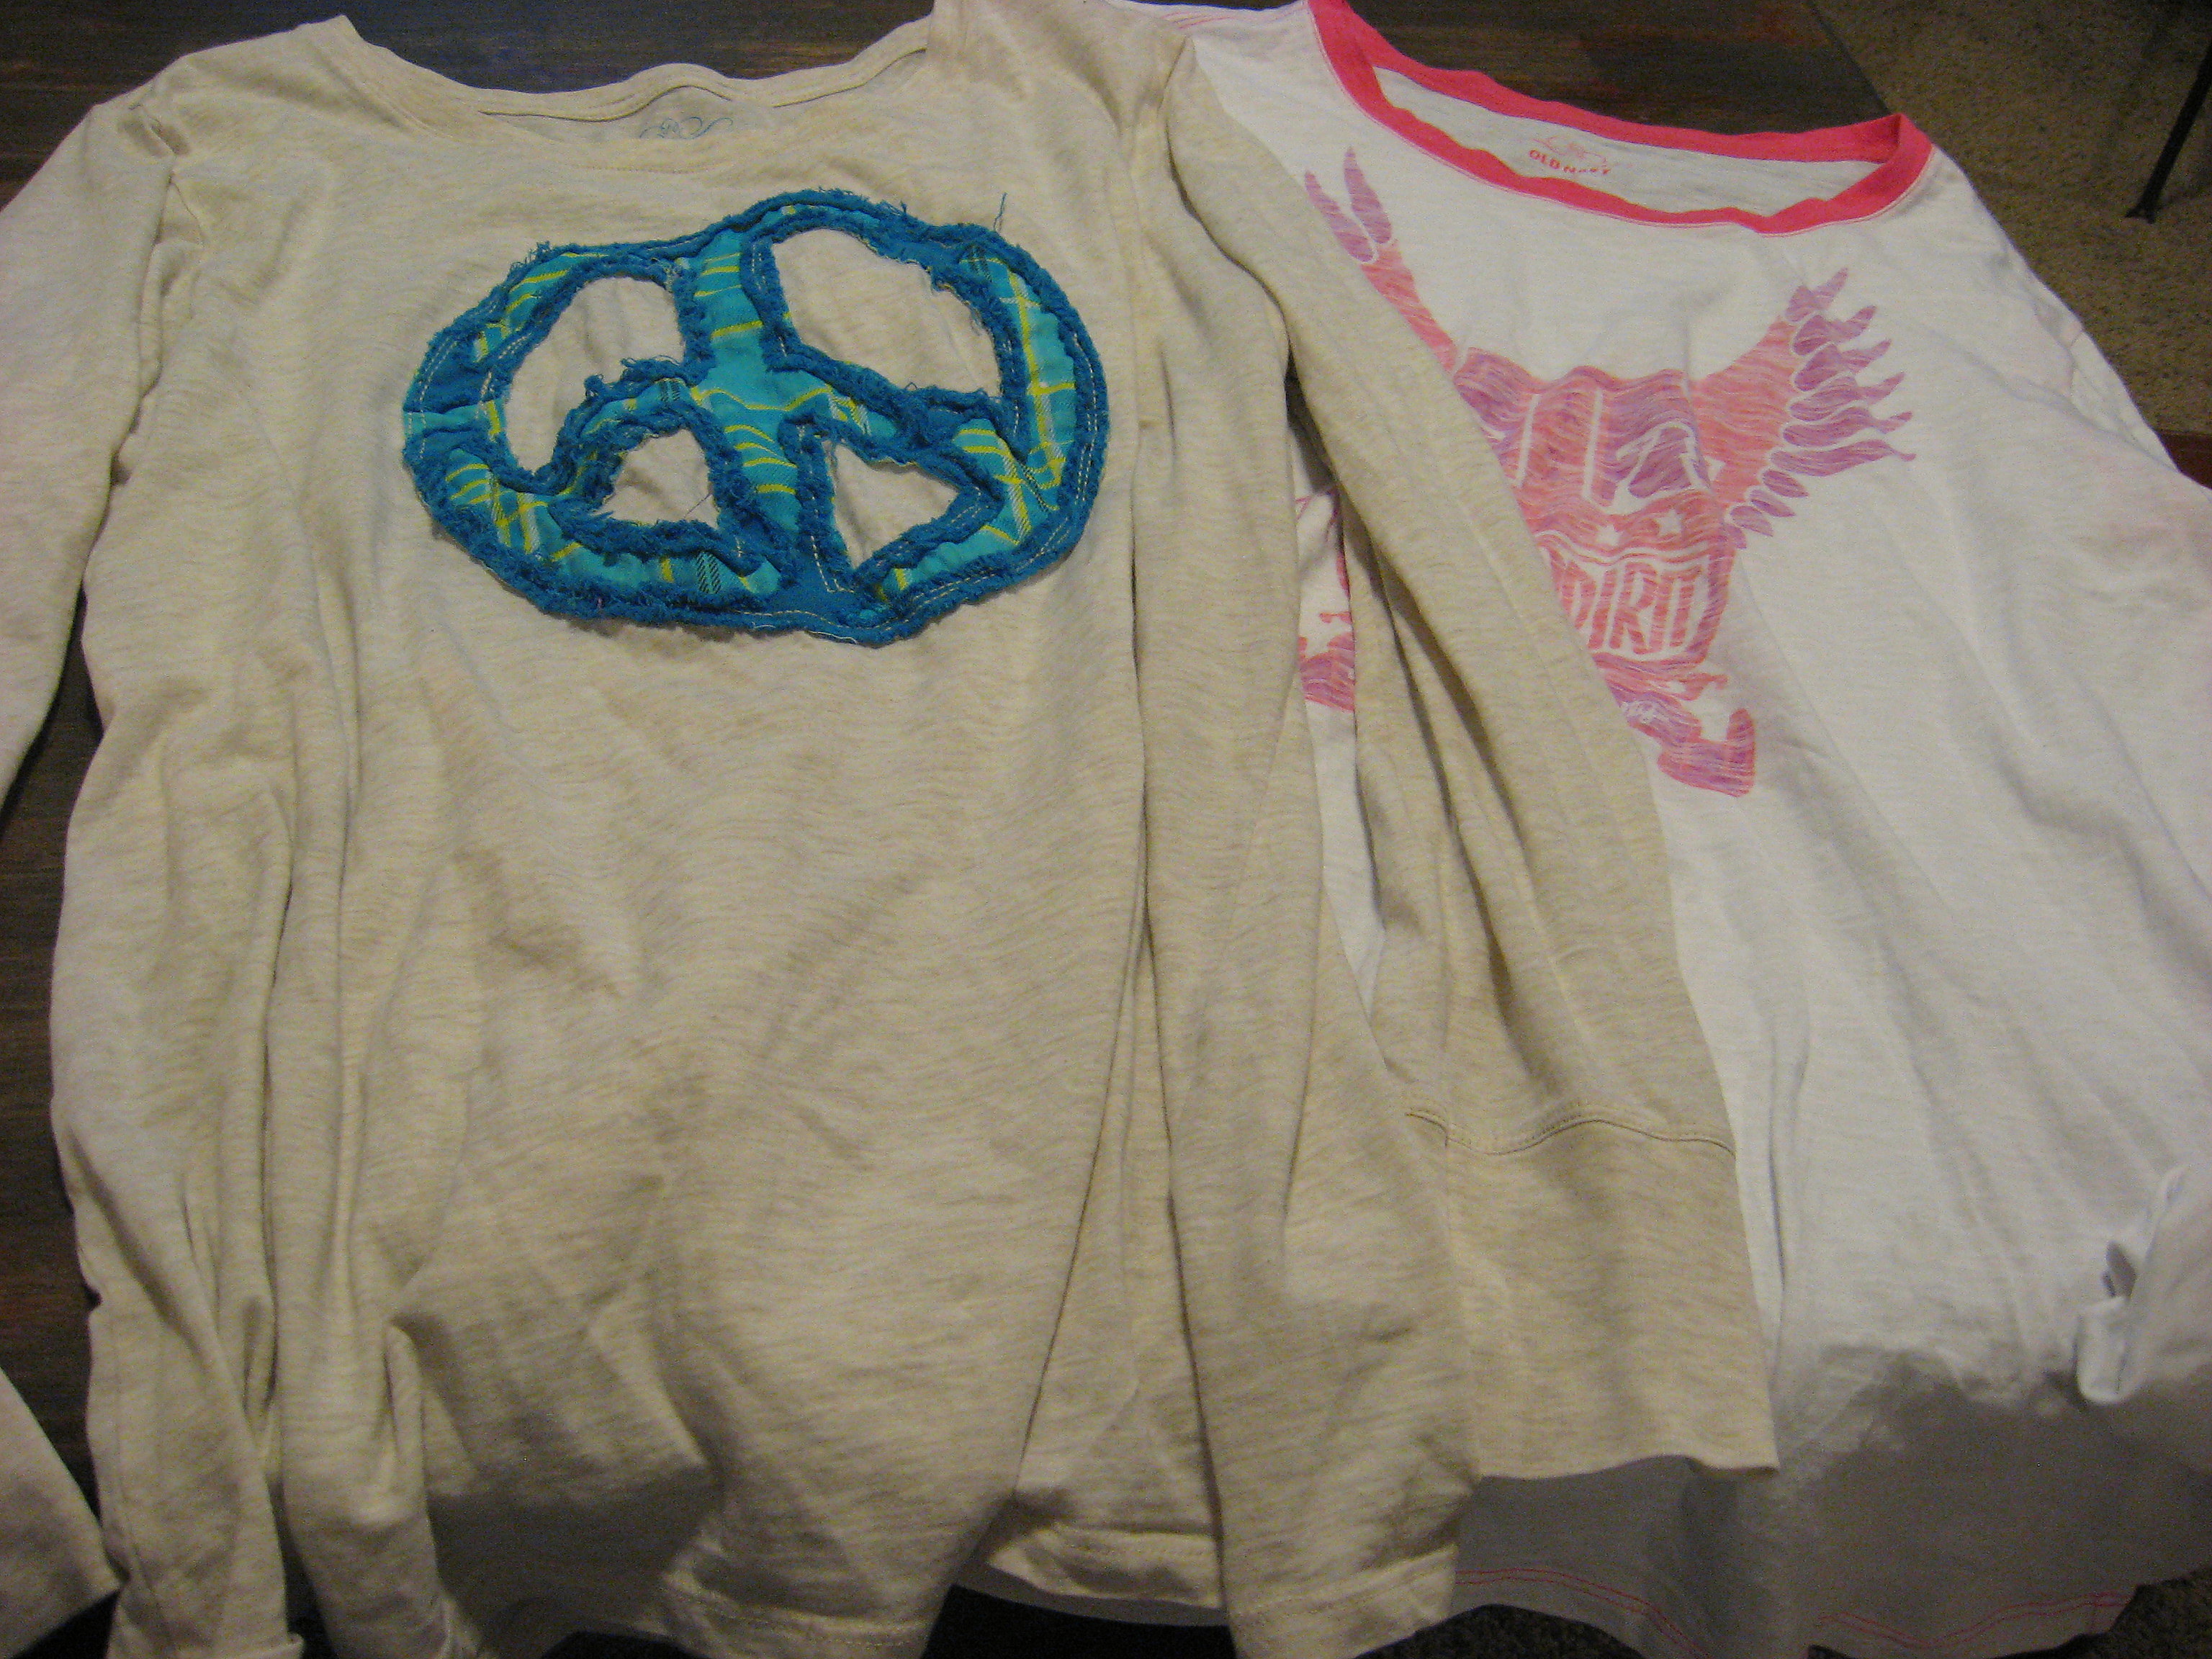
Aaaand, quickly discovered why she had discarded them. They just fit weird and were very uncomfortable. I put them in my own “donate” pile, then realized that they were the perfect solution to my reusable bag dilemma.
Inexperienced seamstresses are often afraid to sew with knit; don’t be! It is easy and fast and the cut edges don’t even need hemming. DON’T get too hung up on making it perfect. Knit is stretchy and the shirts I started with were a little wonky anyway. Close enough will be good enough for a project like this. I made both bags in a little less than an hour.
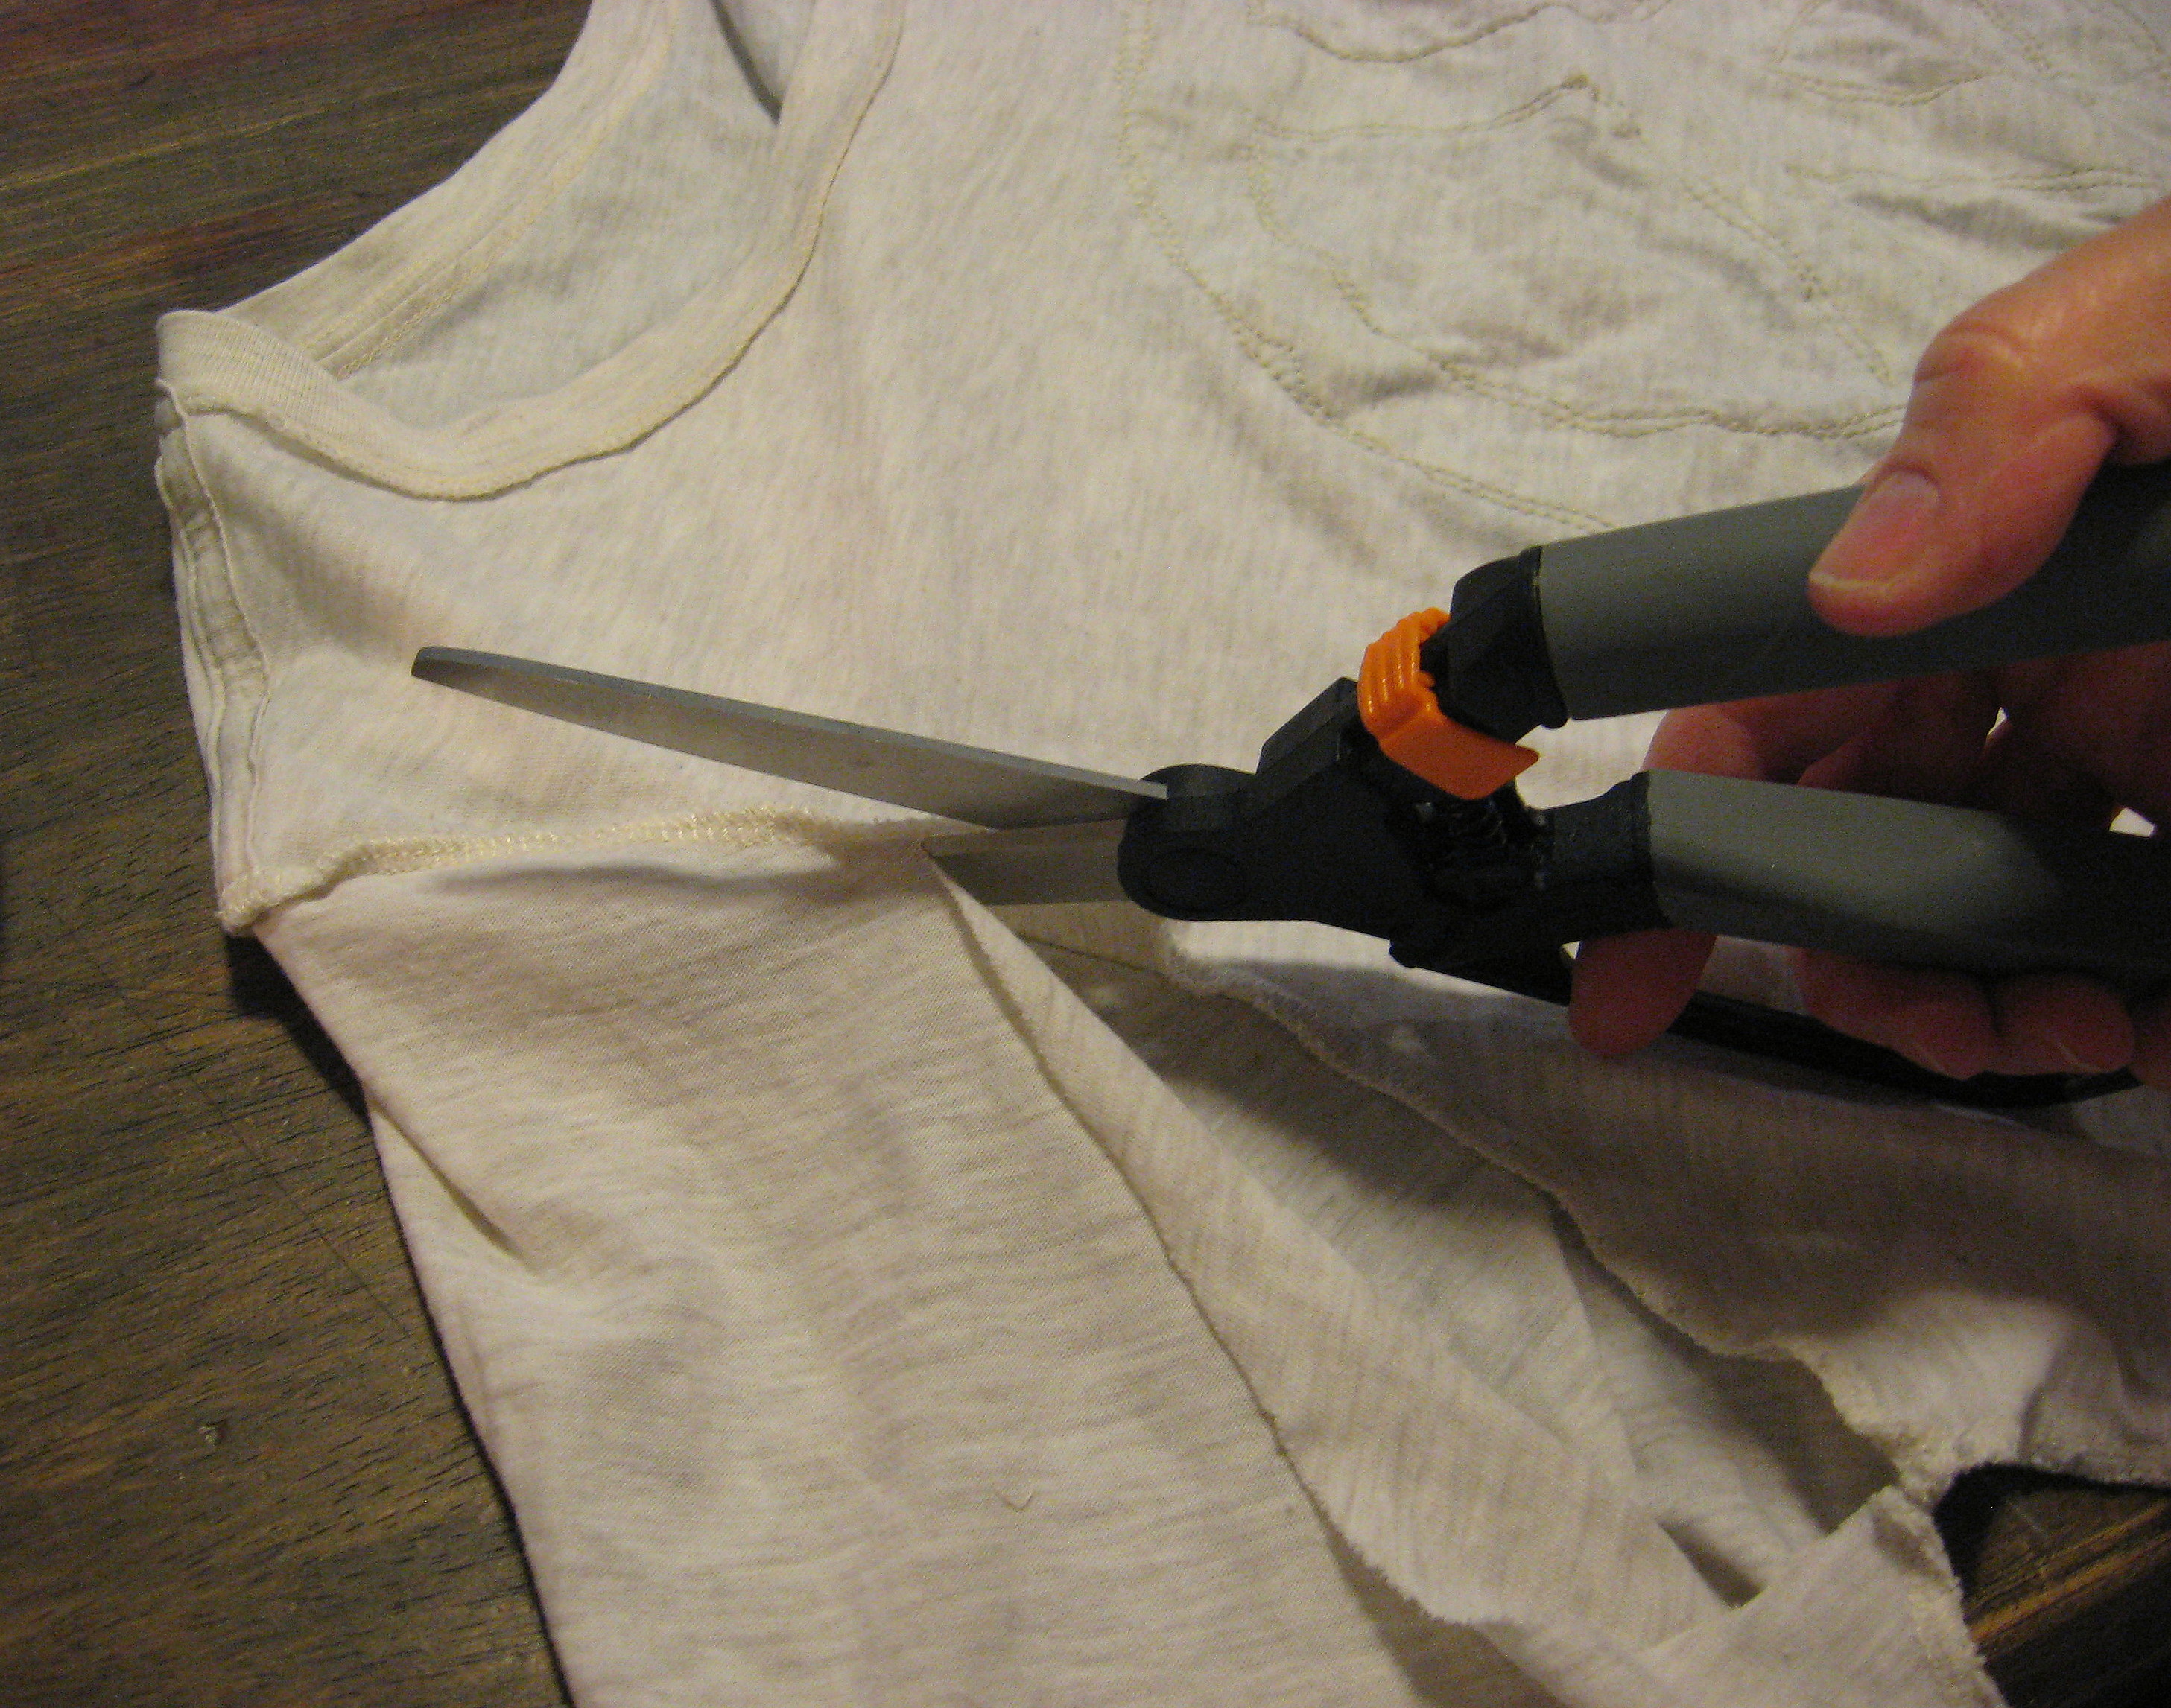
To start, turn the shirt inside out and cut off the sleeves. Cut close to the seam, on the shirt side (not the sleeve side). SAVE the scraps from this project; I’ll be showing you another project later that you can make with the scraps.
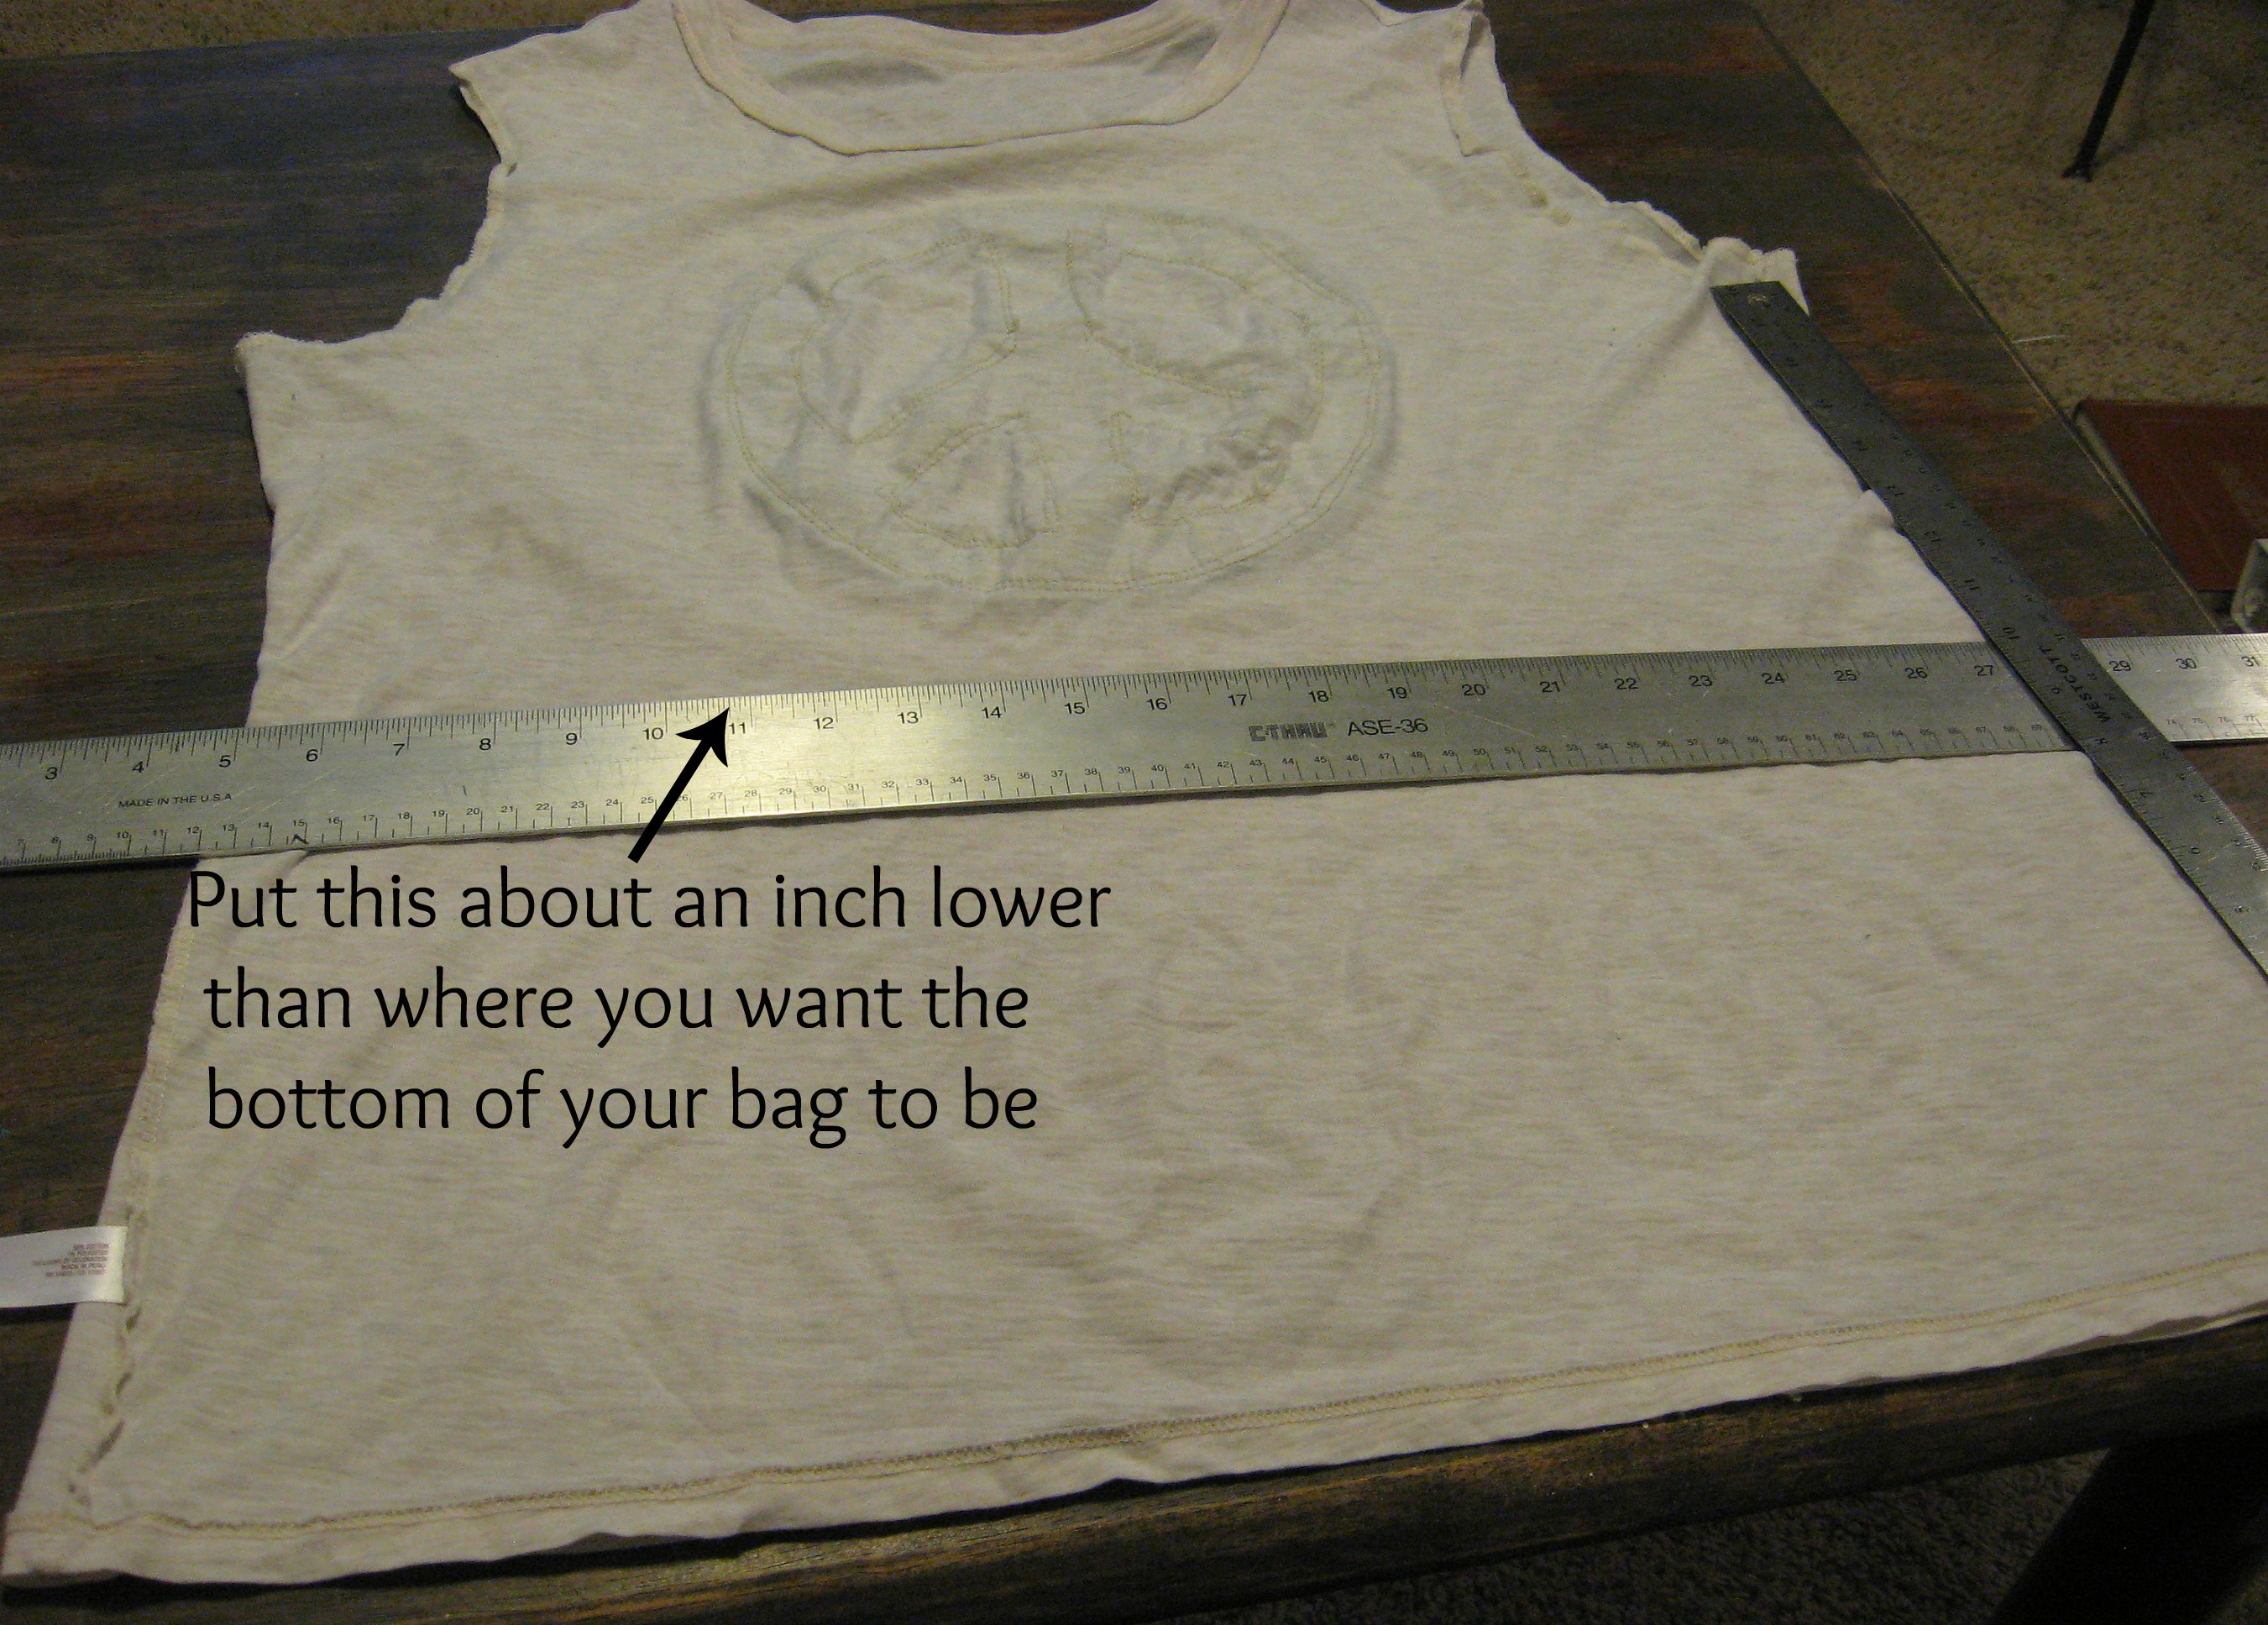
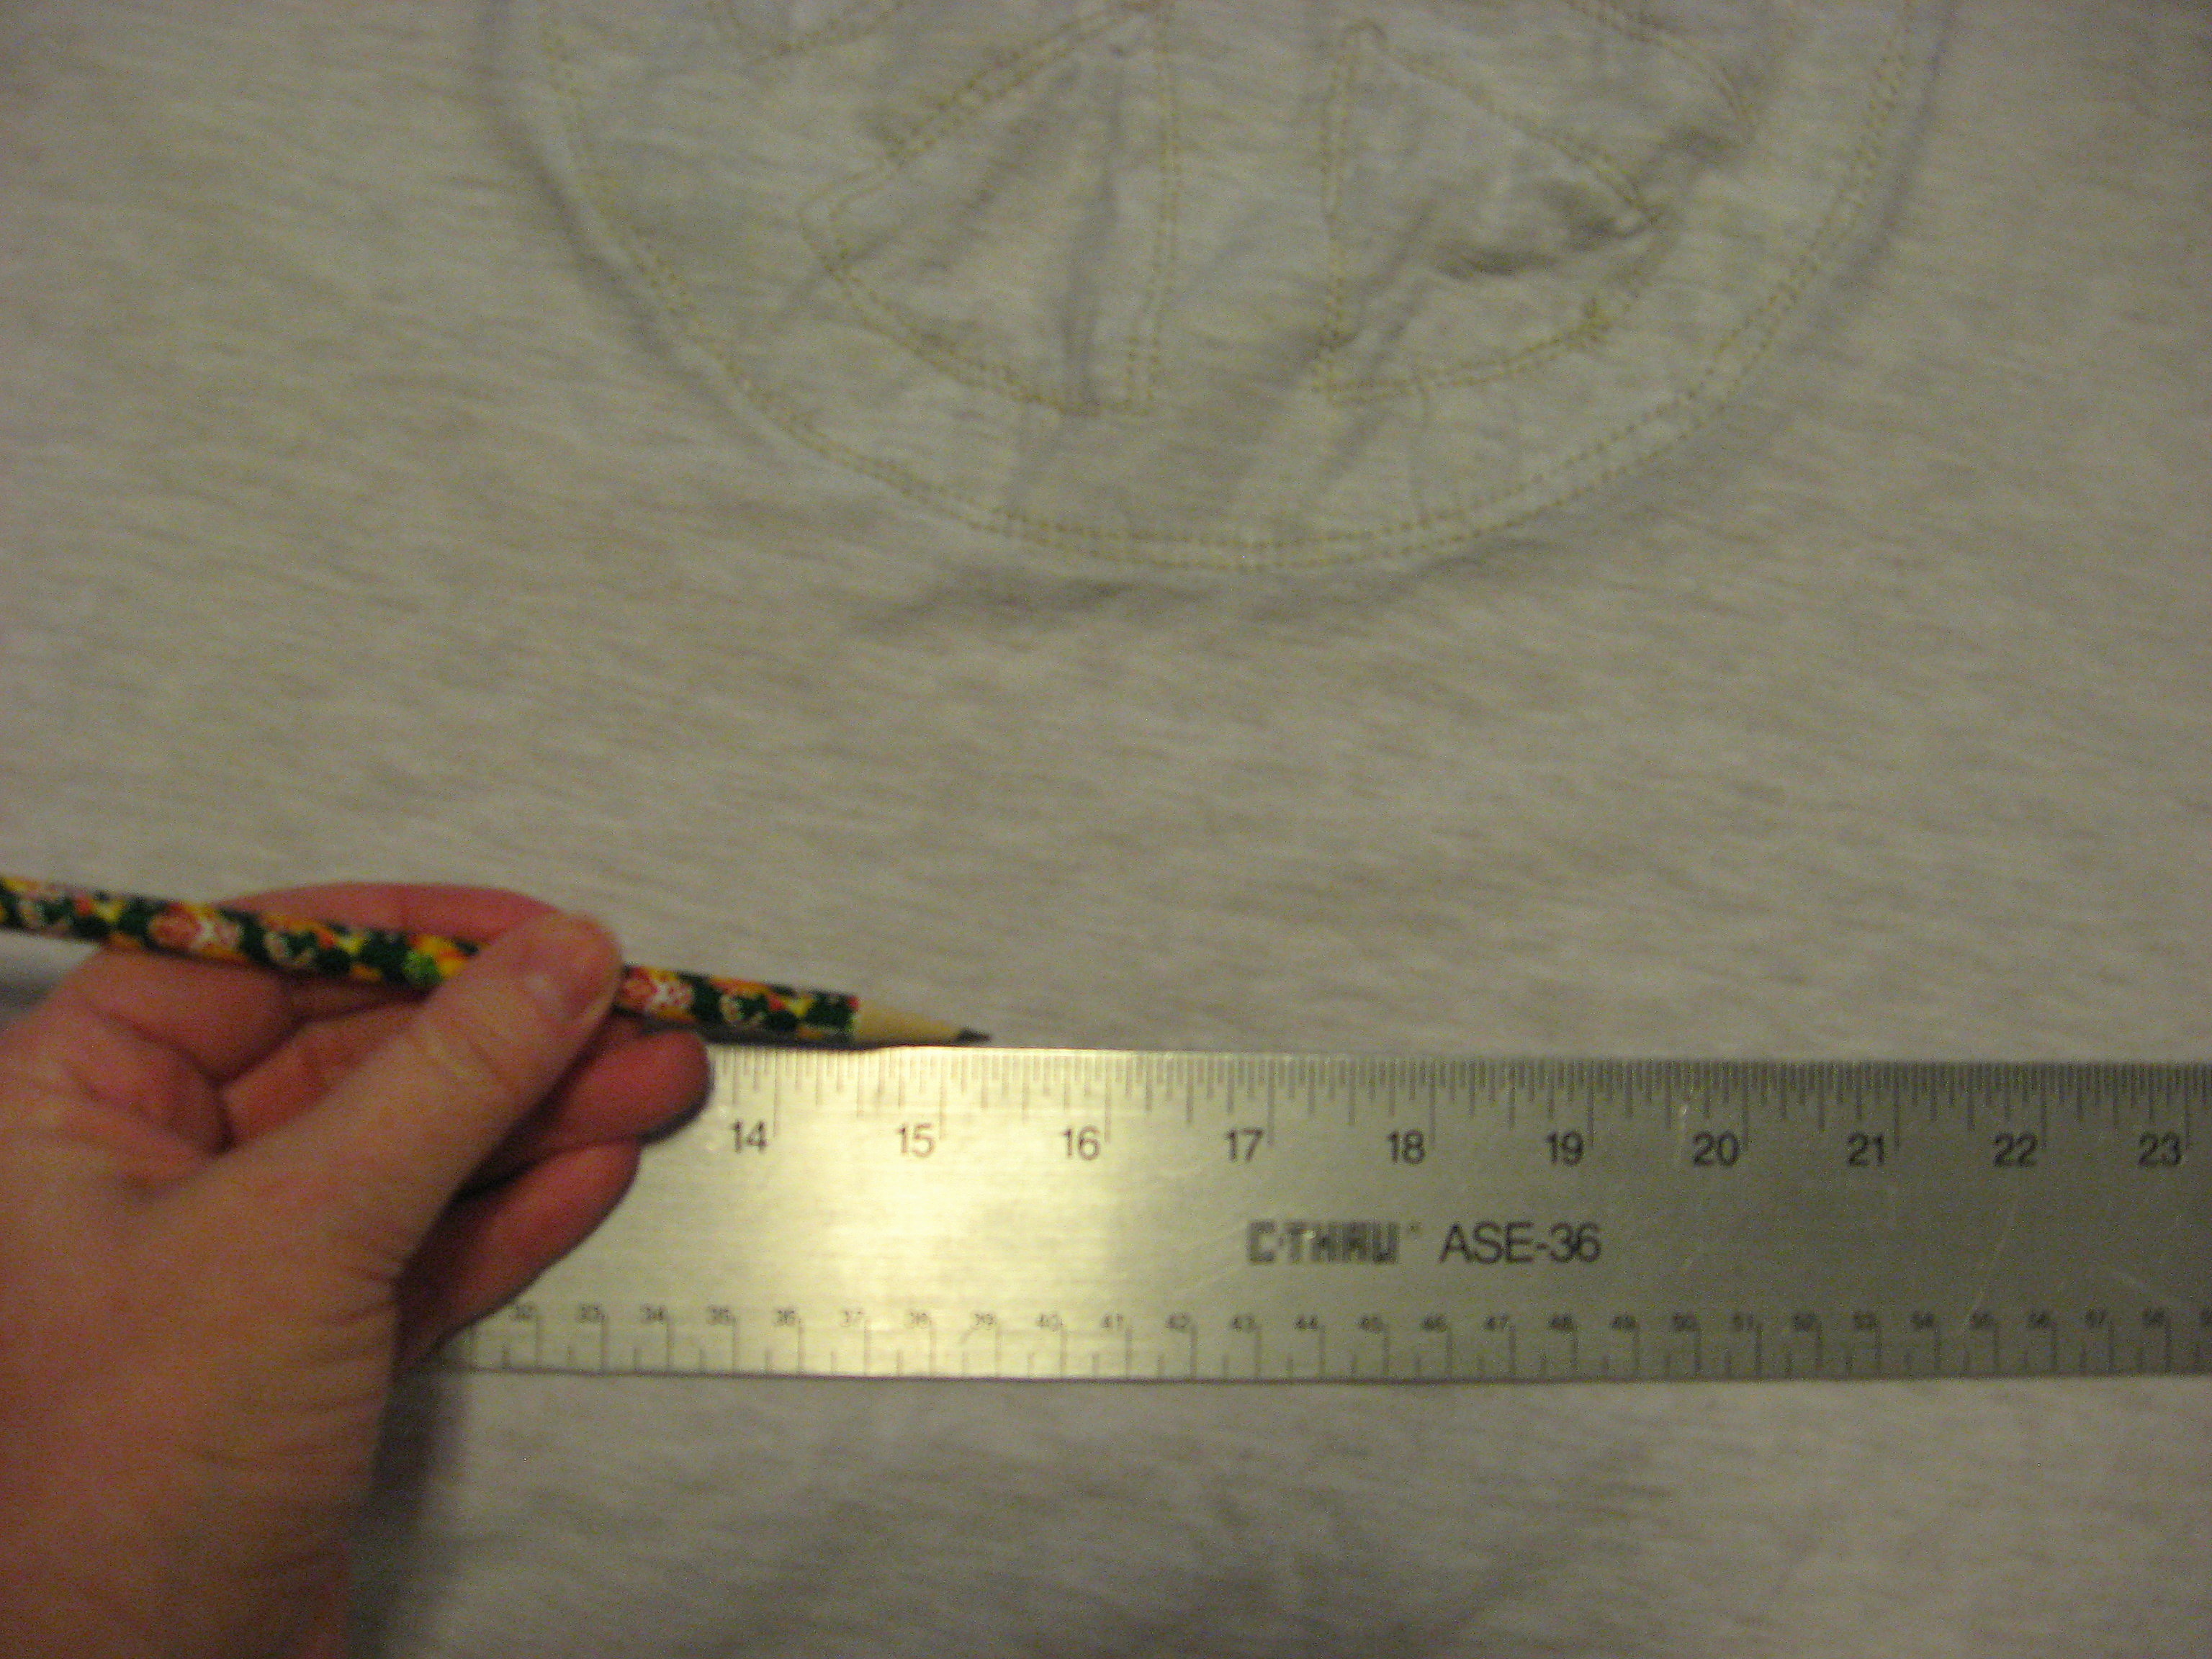
Now hold the shirt by the seams just under the arms, matching them up nice and straight, and lay the shirt out on the table, smoothing and straightening it as well as you can. Use a straight edge to mark where you want the bottom of the bag to be. Determine how big you want the finished bag, then drop down about an inch to account for the seam allowance.
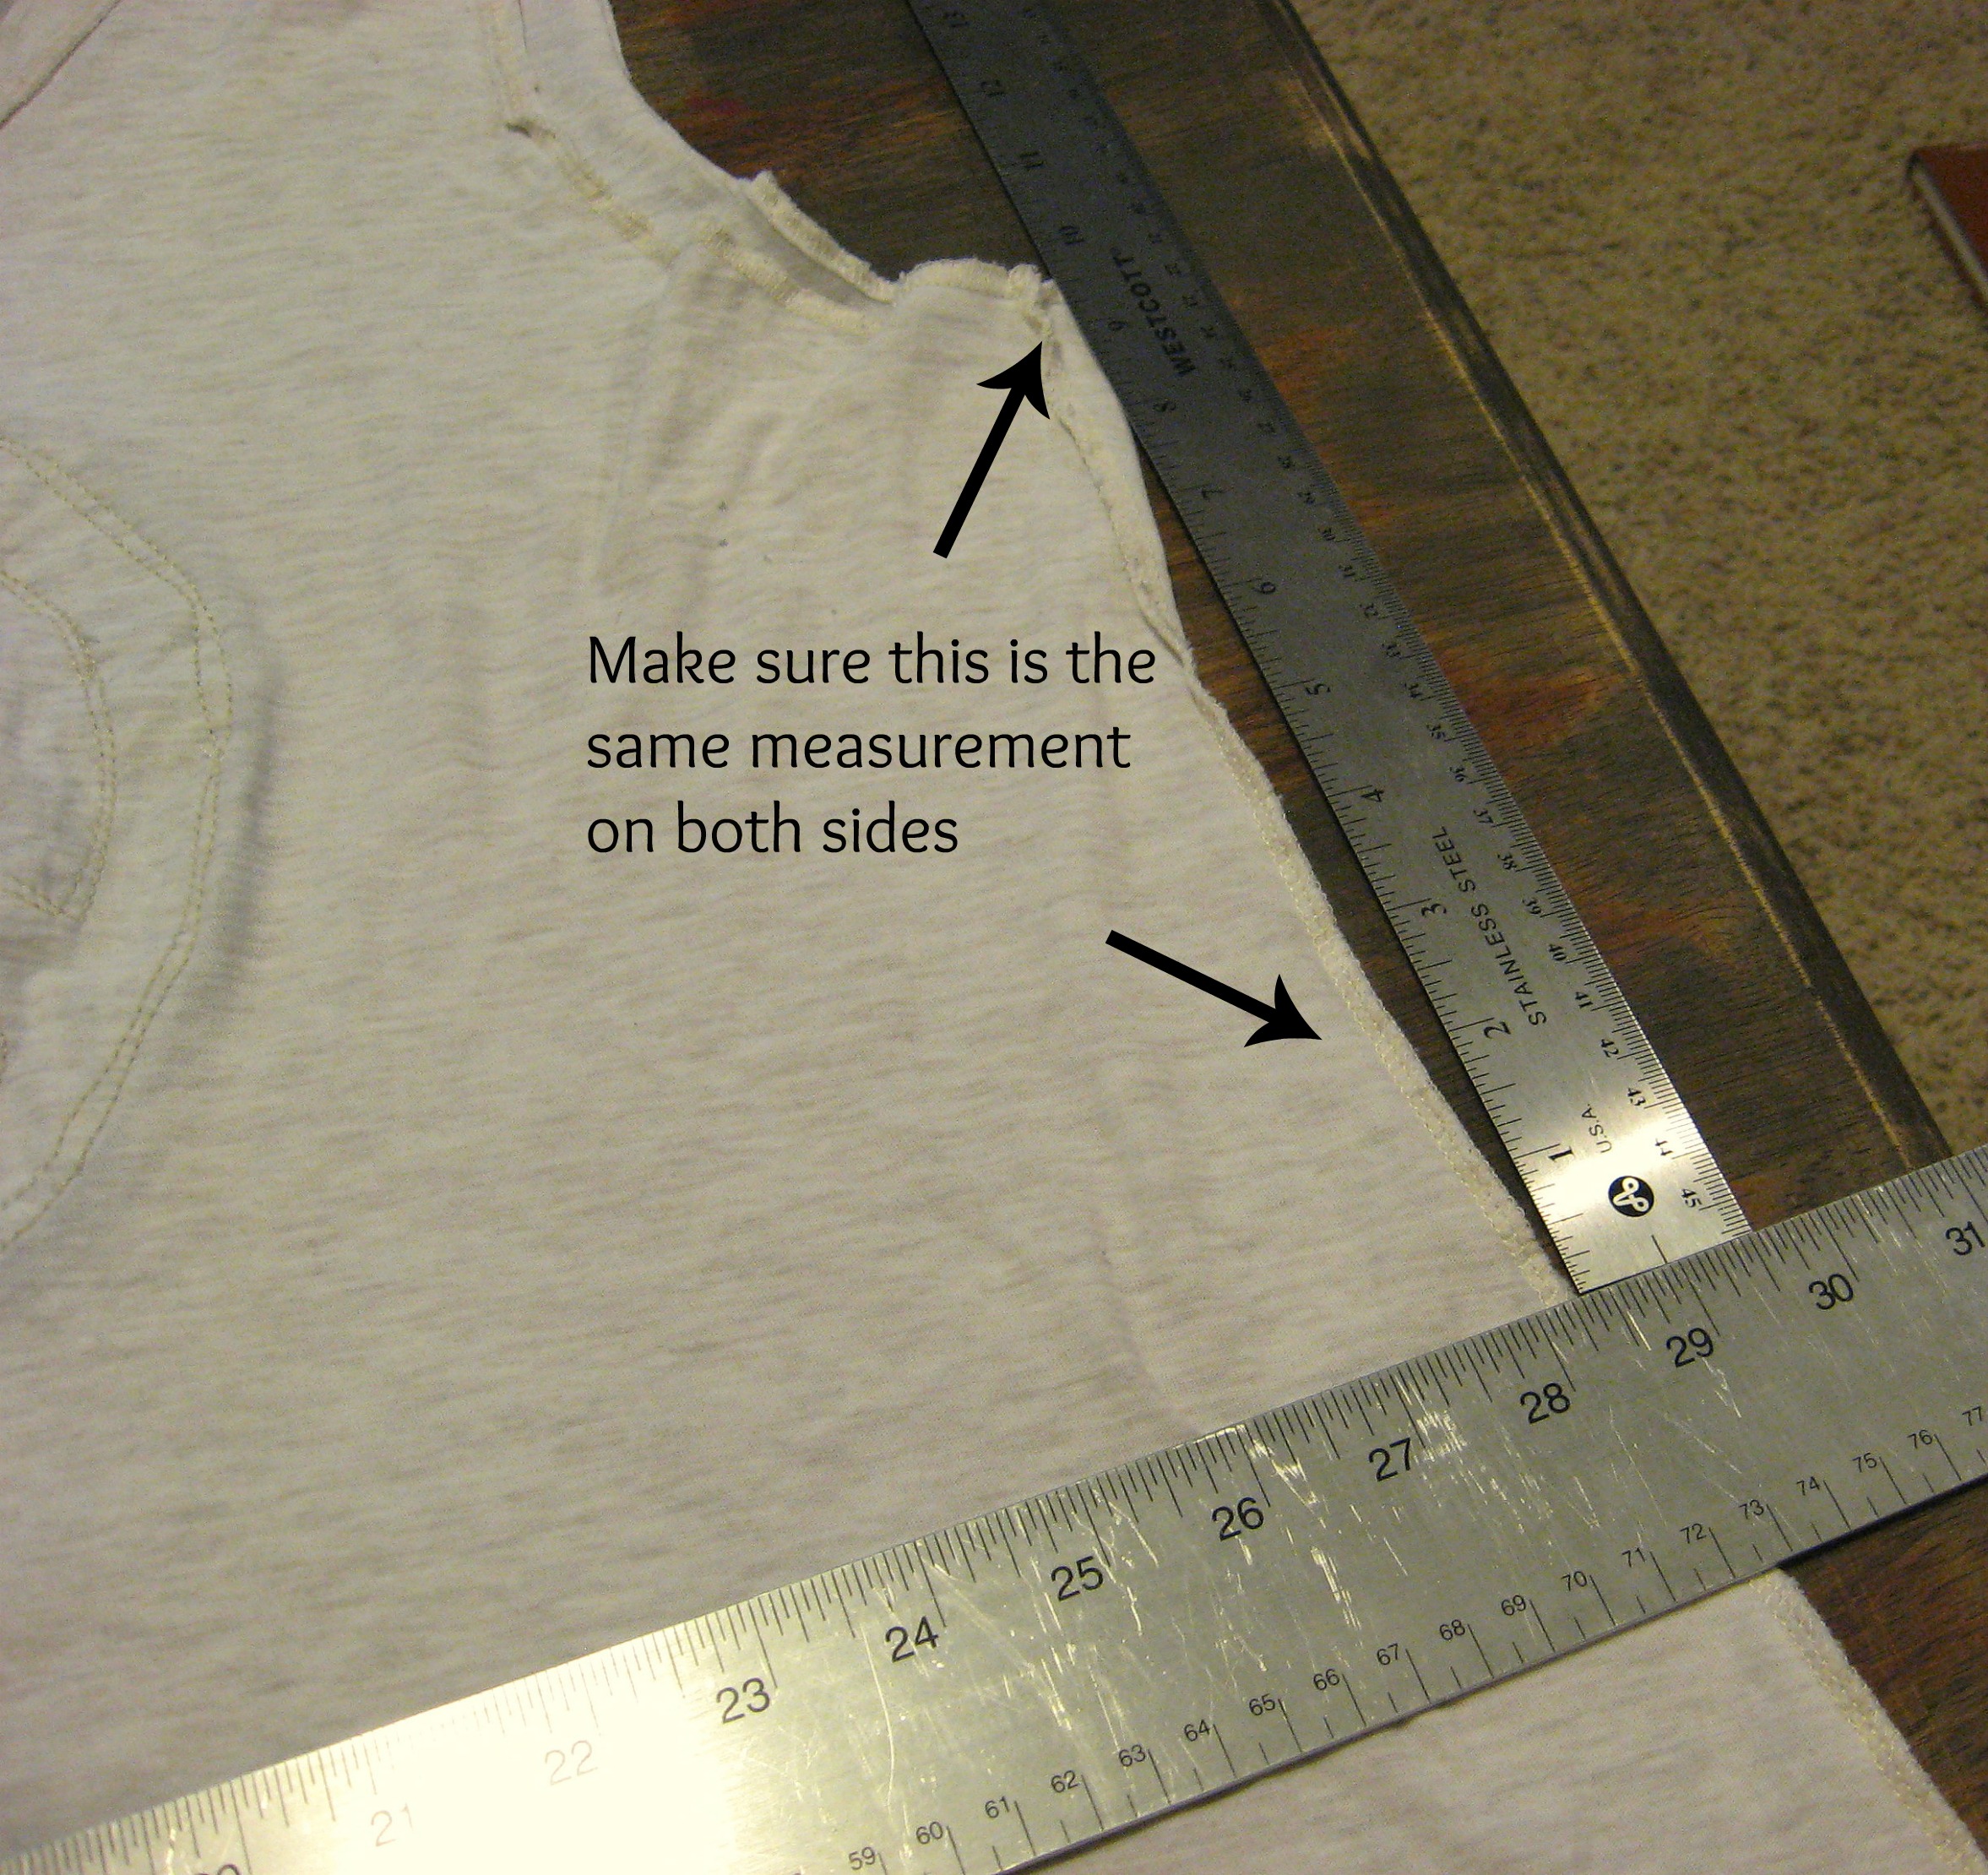
Use a ruler to measure from the arm pit down to the straight edge, making sure it is the same on each side. When I first tried to just eyeball it, I was way off, so take the time to do this step. Don’t worry about it being absolutely perfect (this isn’t that kind of project, remember?) but you will want it to be close.
Now draw a line with a pencil along the straight edge.
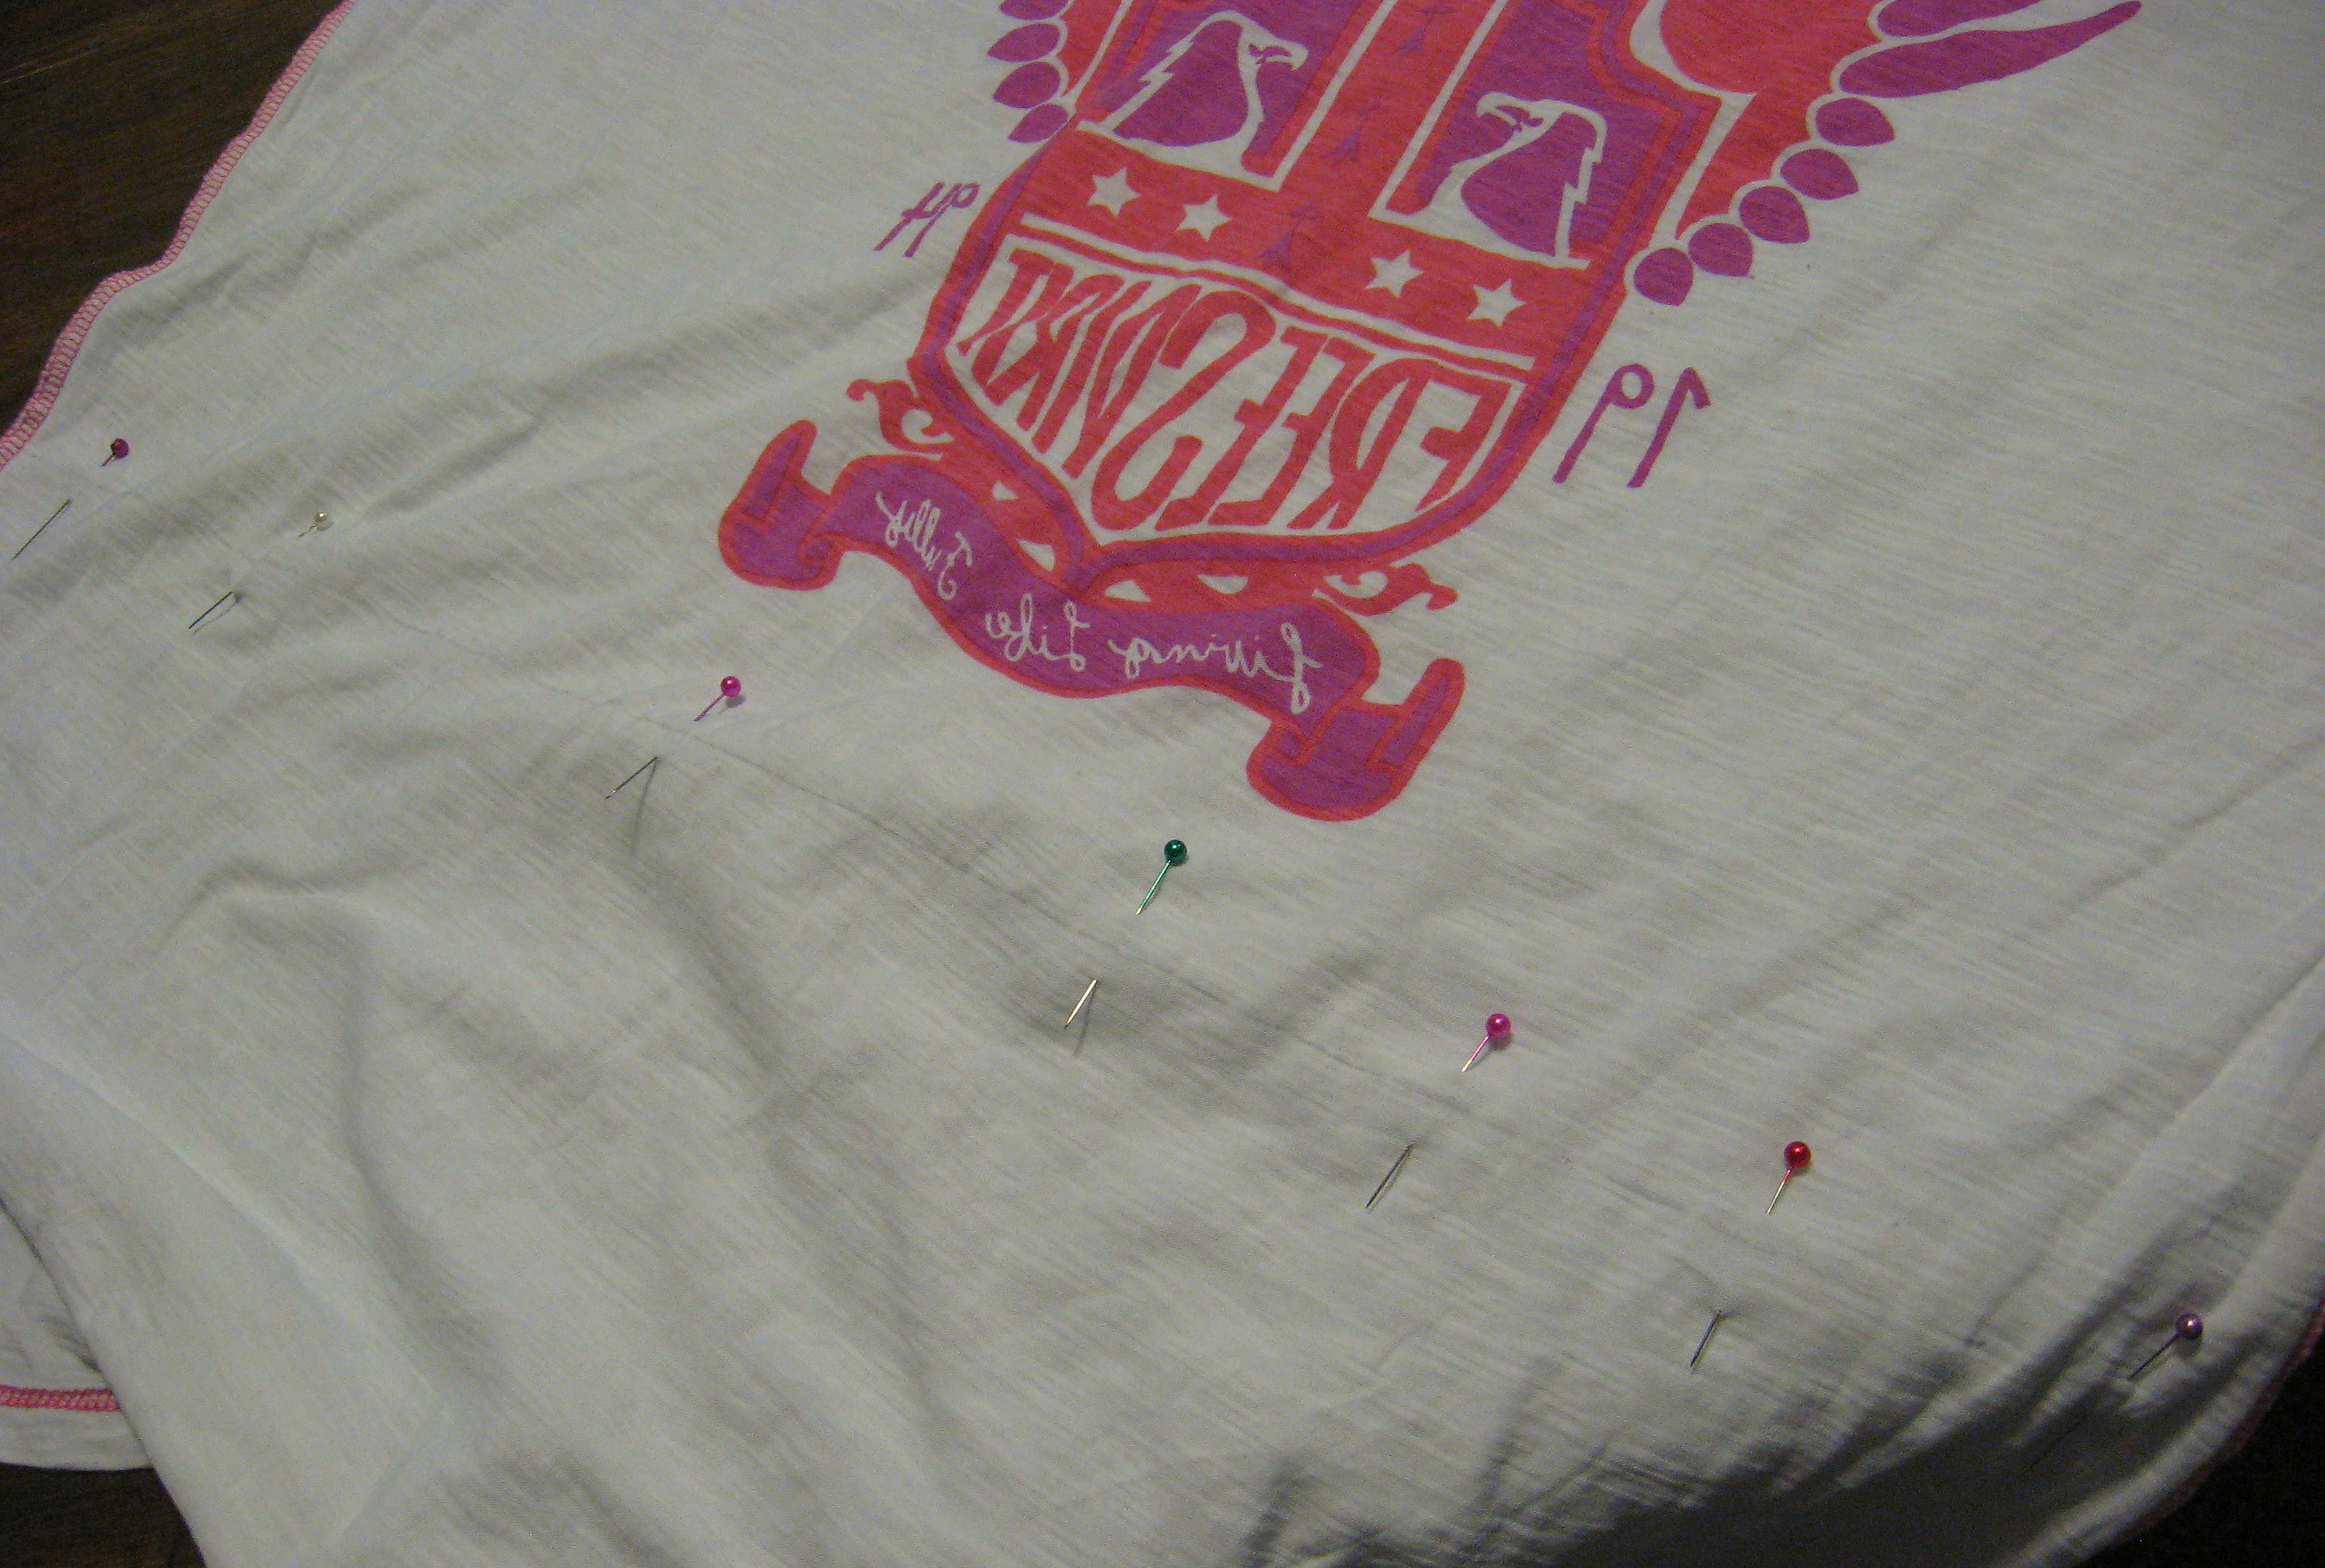
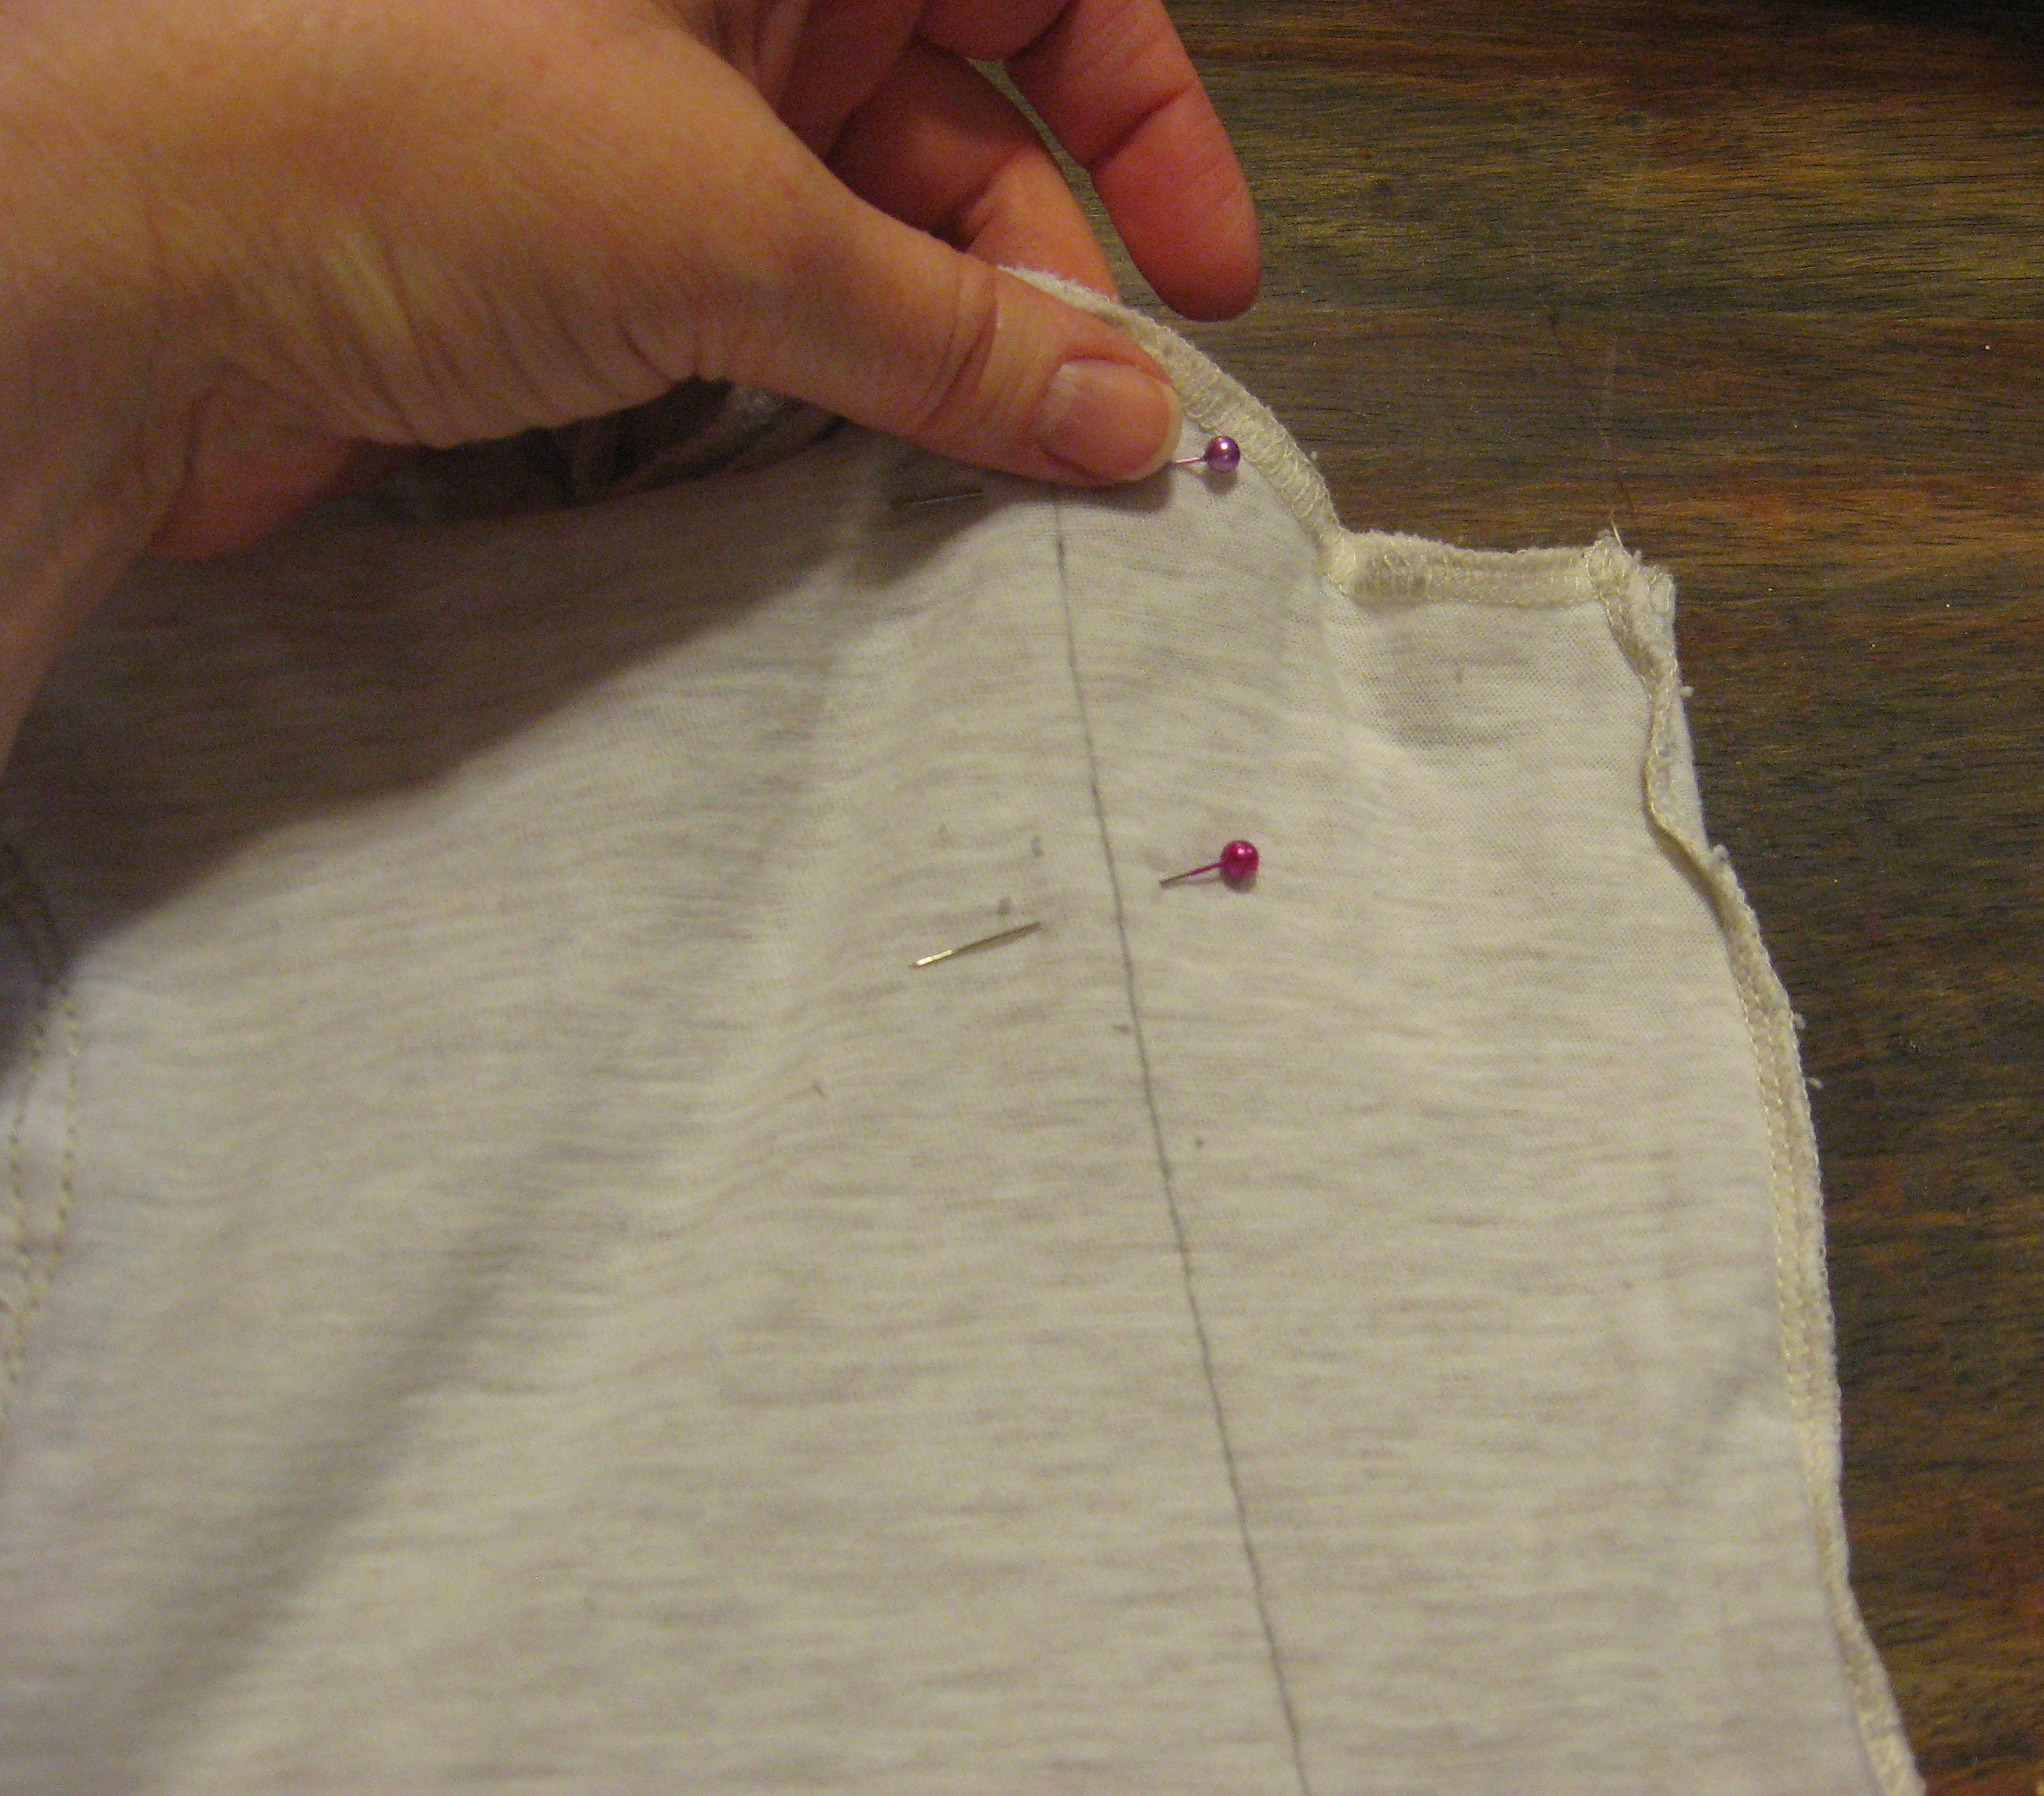
Next step, pin along this line. If you want to cut first, then pin and sew, go ahead and do it that way. I just think it is easier to sew first, then cut.
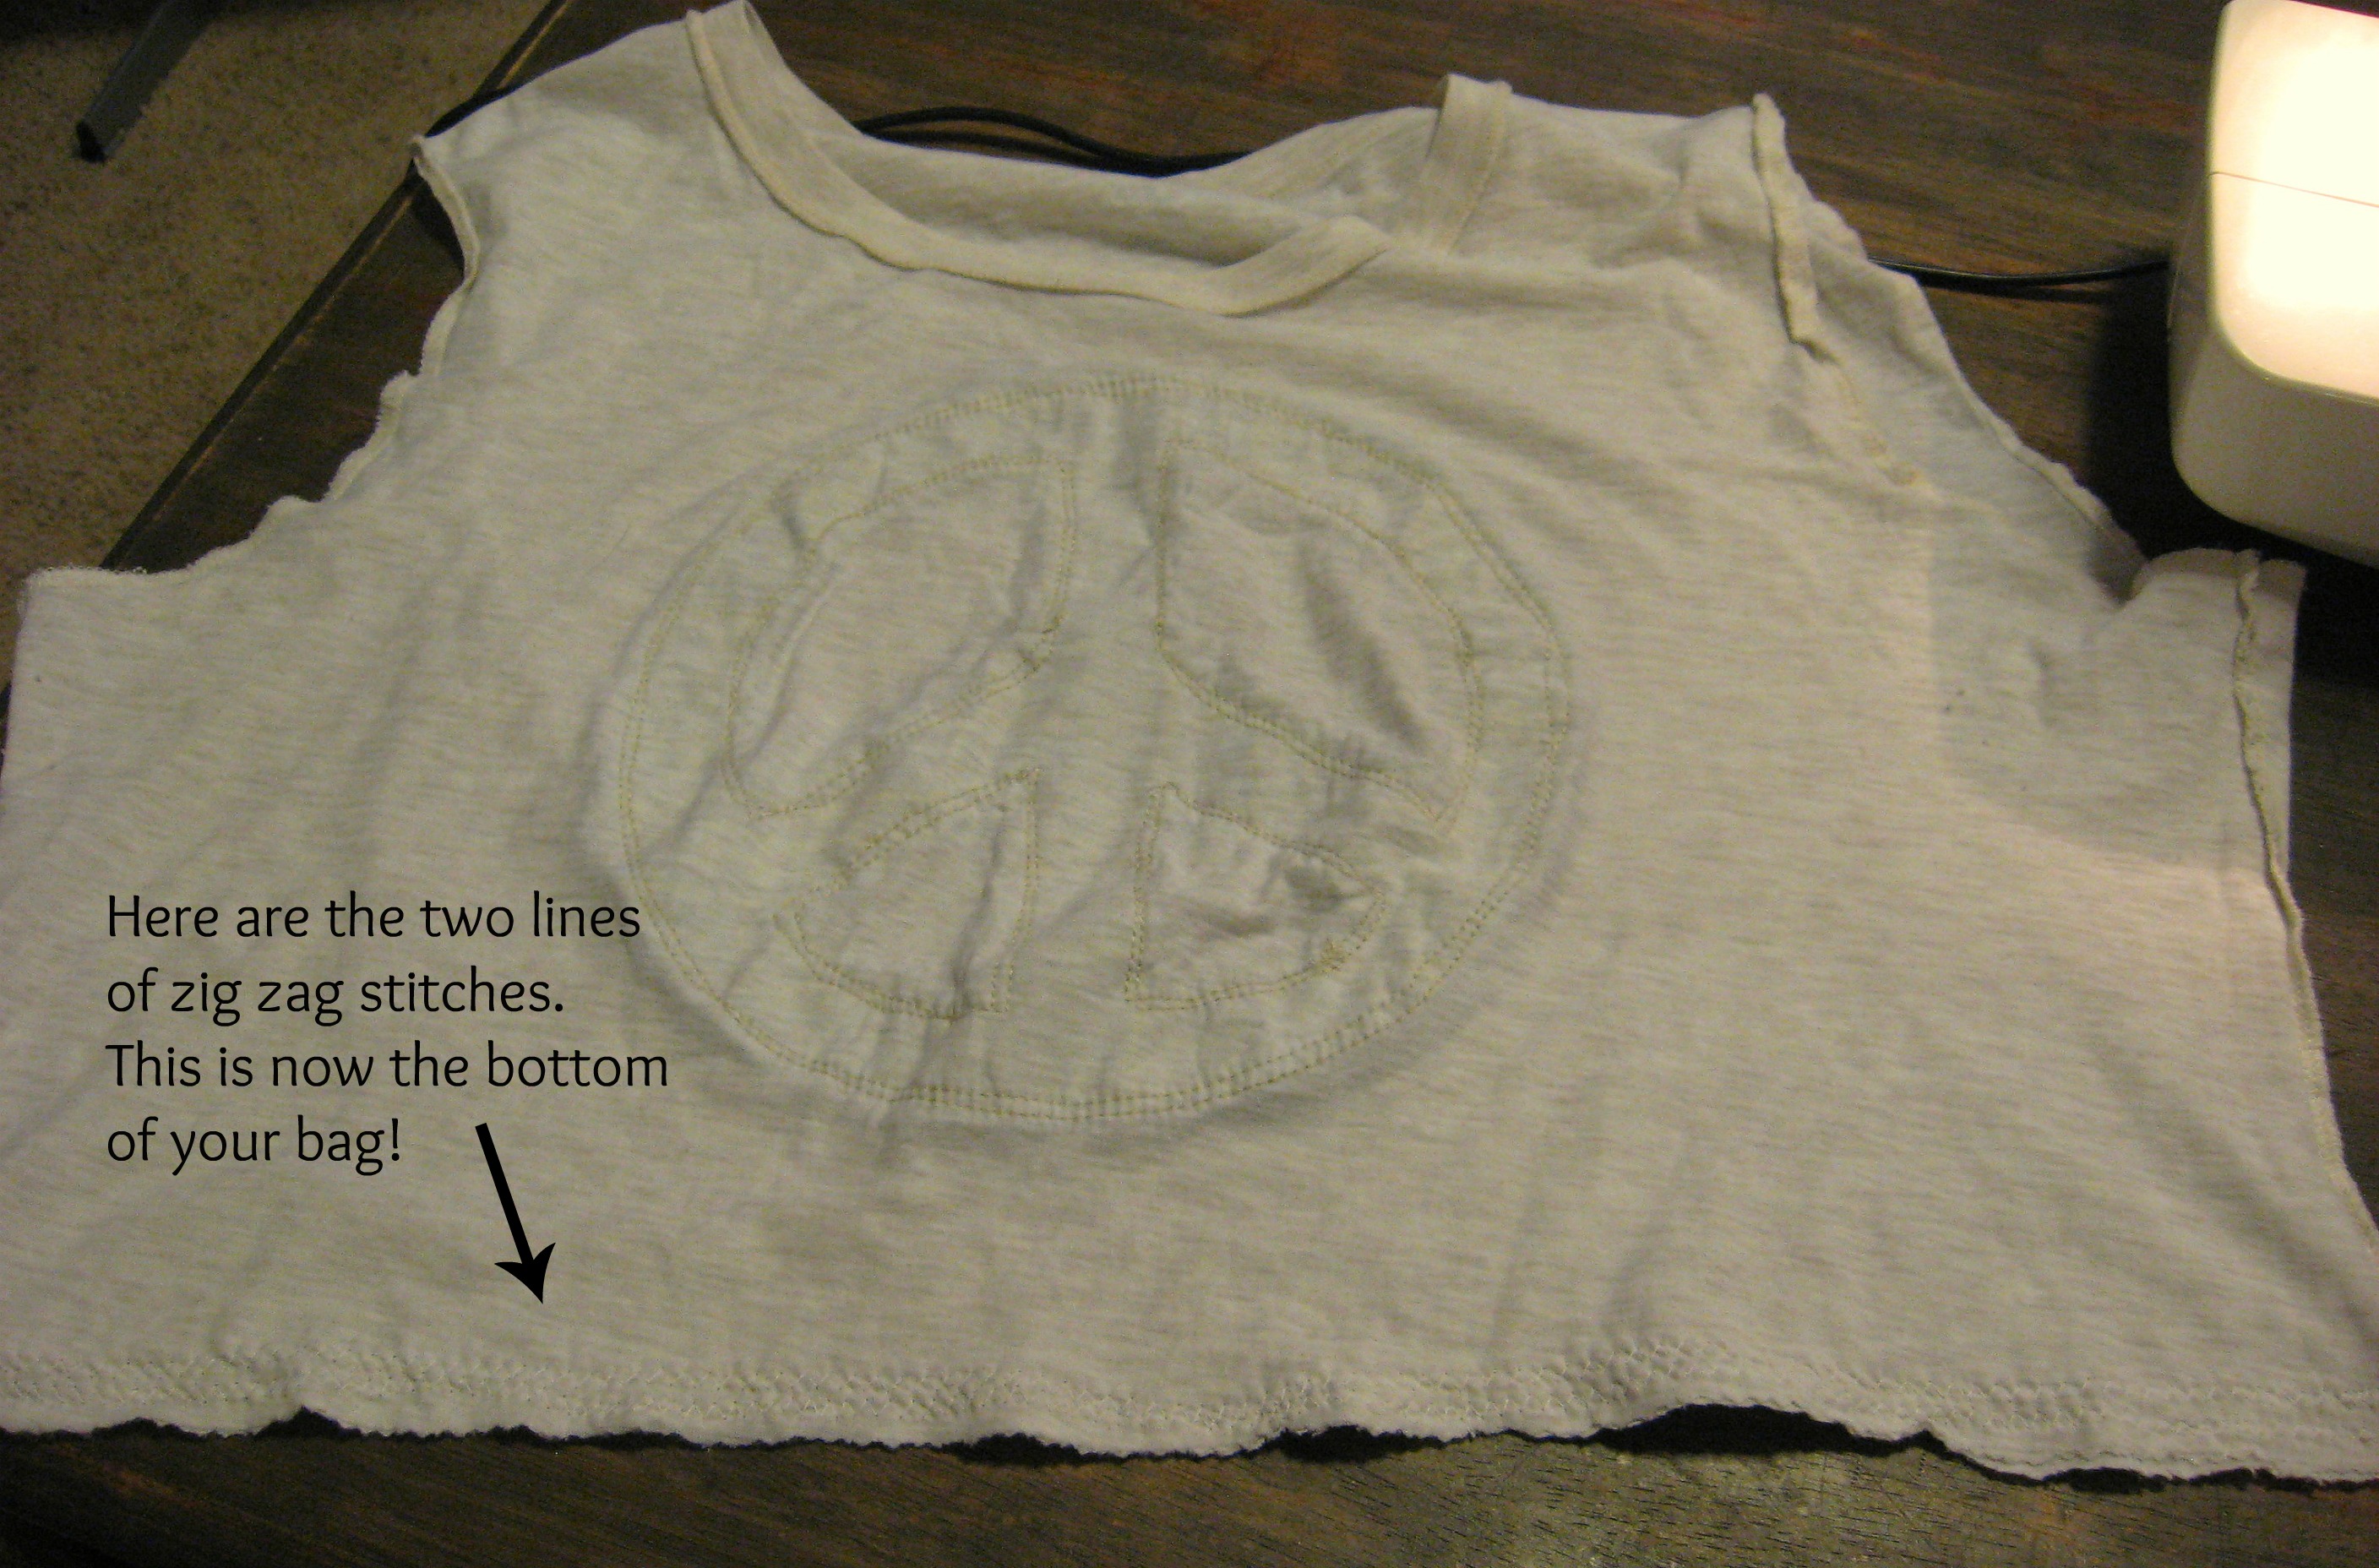
Now sew along this line. A couple of notes about working with knit fabric on a regular sewing machine: 1) USE A ZIG ZAG STITCH! This is really important; the fabric has some stretch, so your finished seam needs to have a little stretch. 2) Let the fabric feed through evenly, being careful not to pull or push it through. Just go slow and steady and let the machine take it through and you’ll get a nice flat seam.
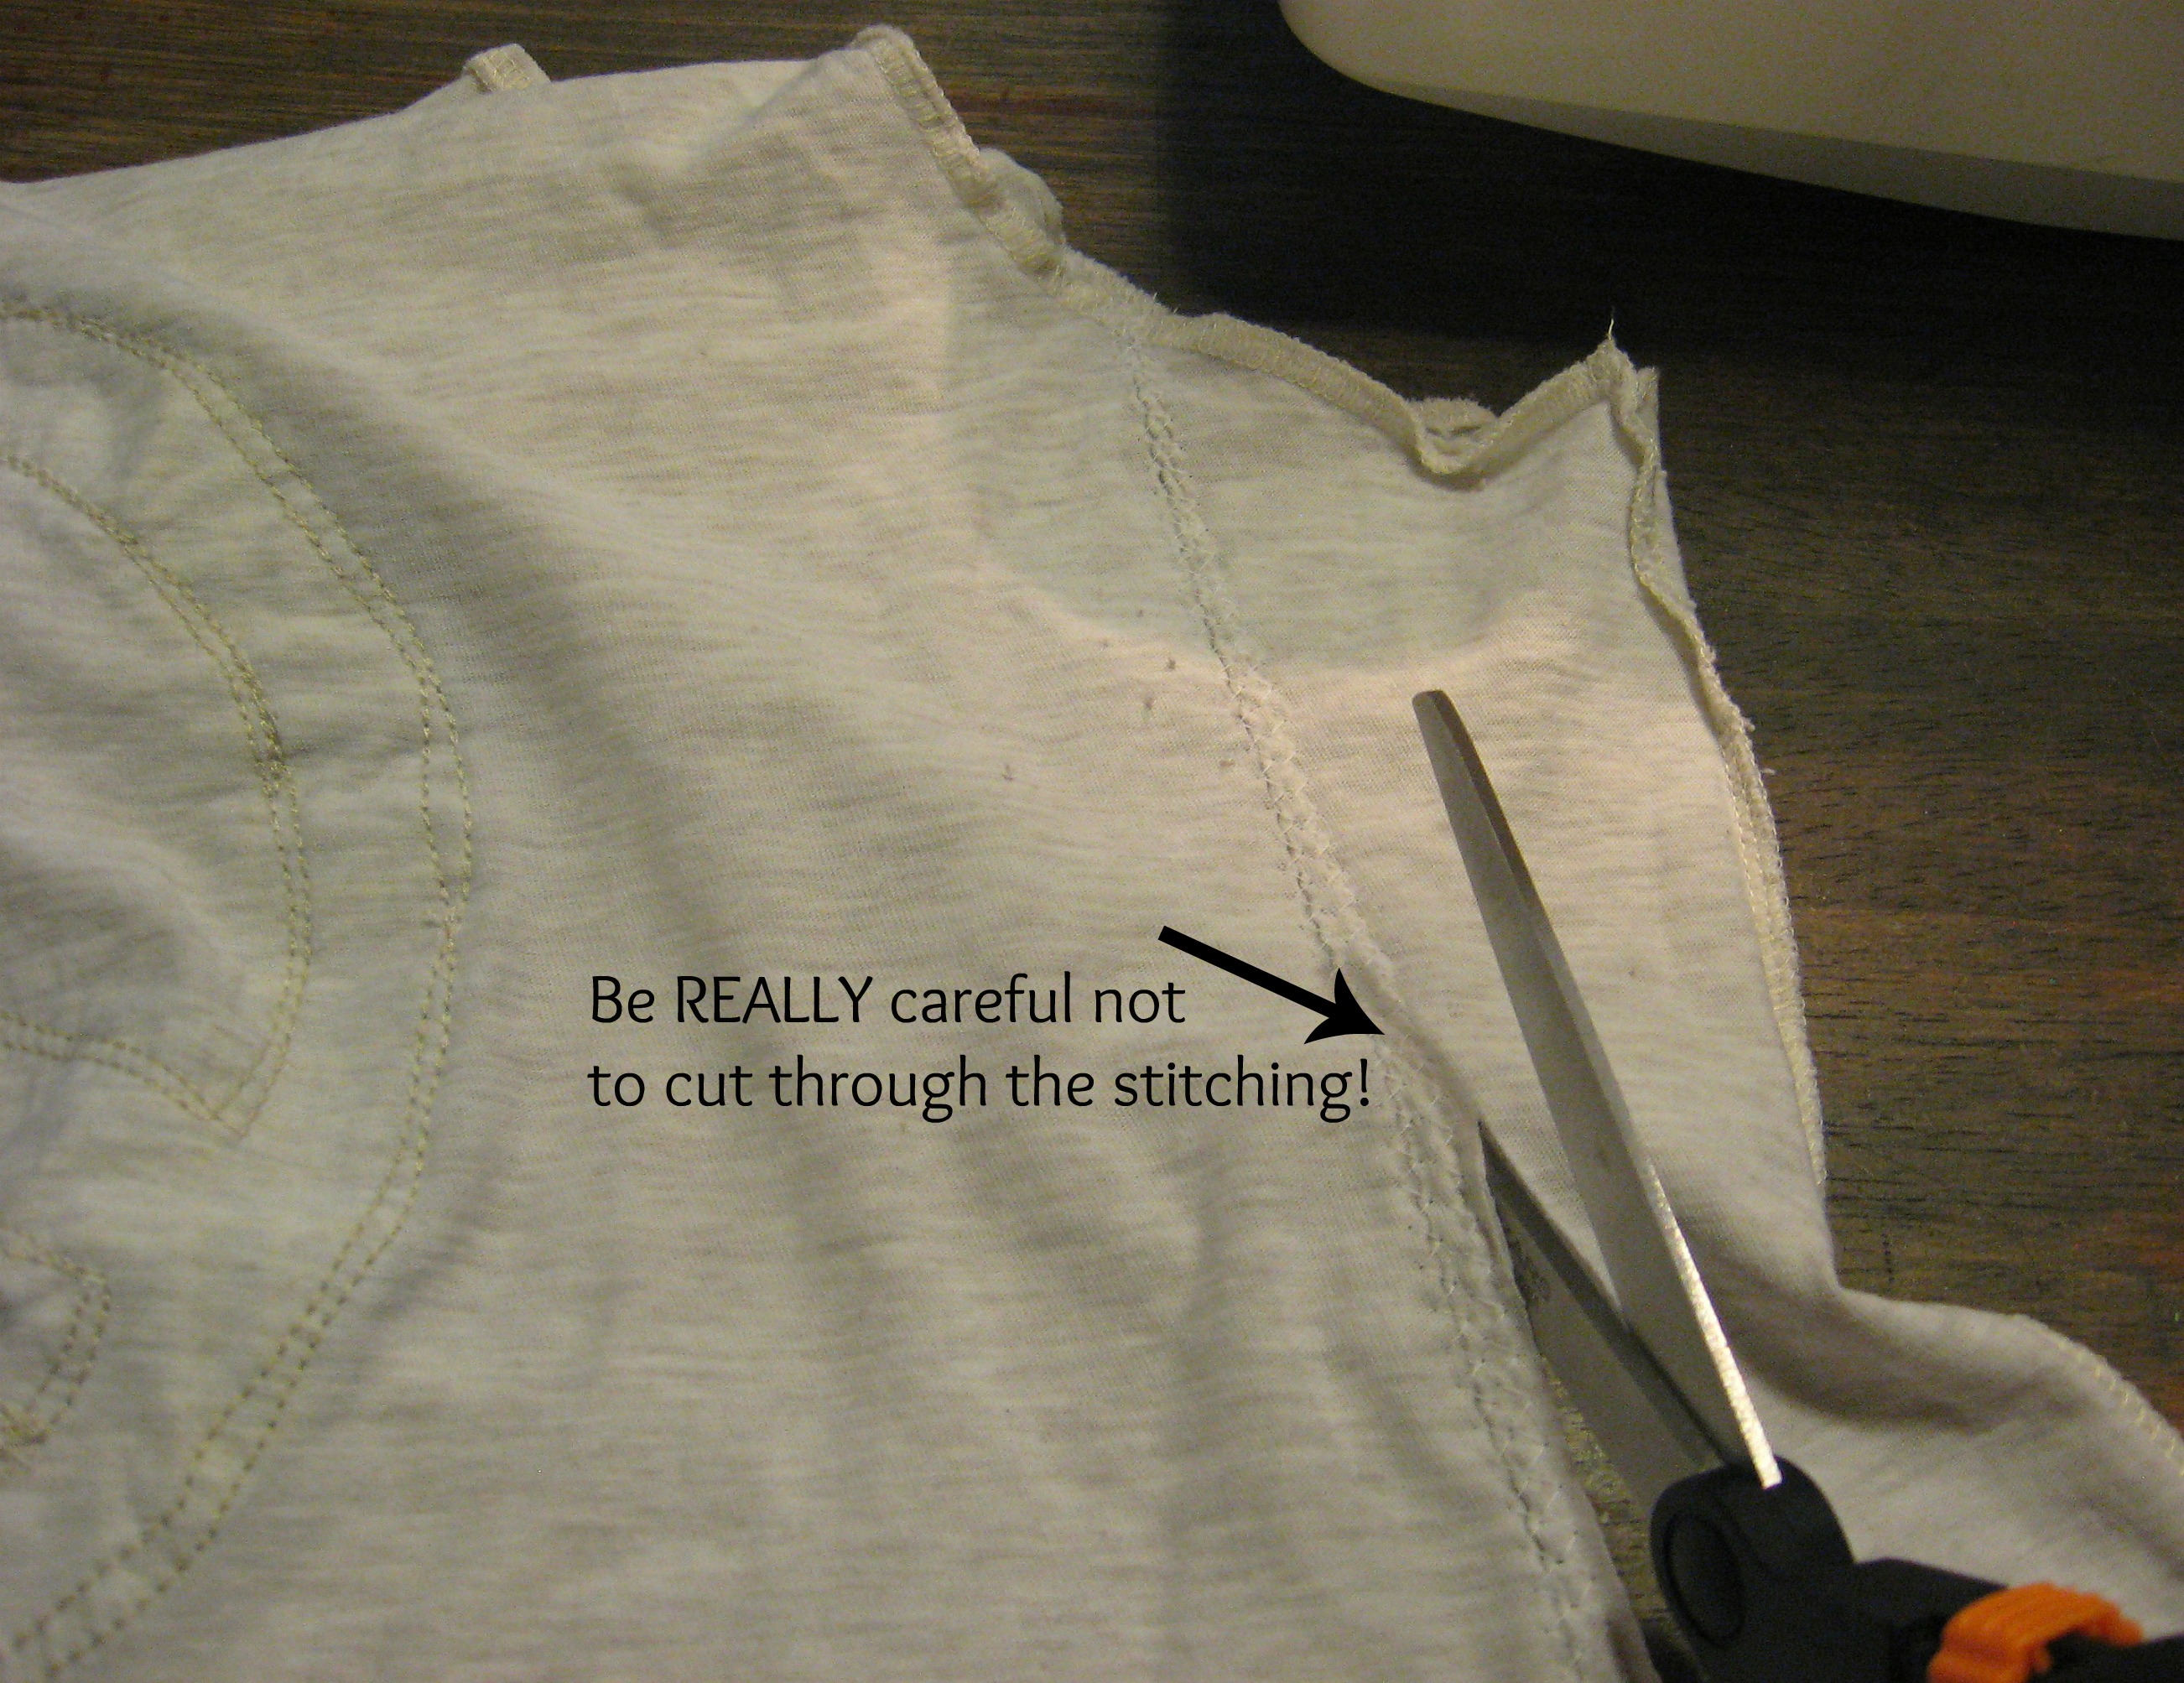
I sewed this twice, one line of stitching right above the other. I wanted the seam to be really strong since it will have stress on it from carrying things in the bag. Then, cut carefully just under the stitching, being VERY CAREFUL not to cut the stitching at any point.
Now, since these are size XL shirts, I think they are a little too wide for the finished bag. If your shirt is smaller, and you are happy with the finished width, you can skip this next step, but I wanted to trim down the sides.
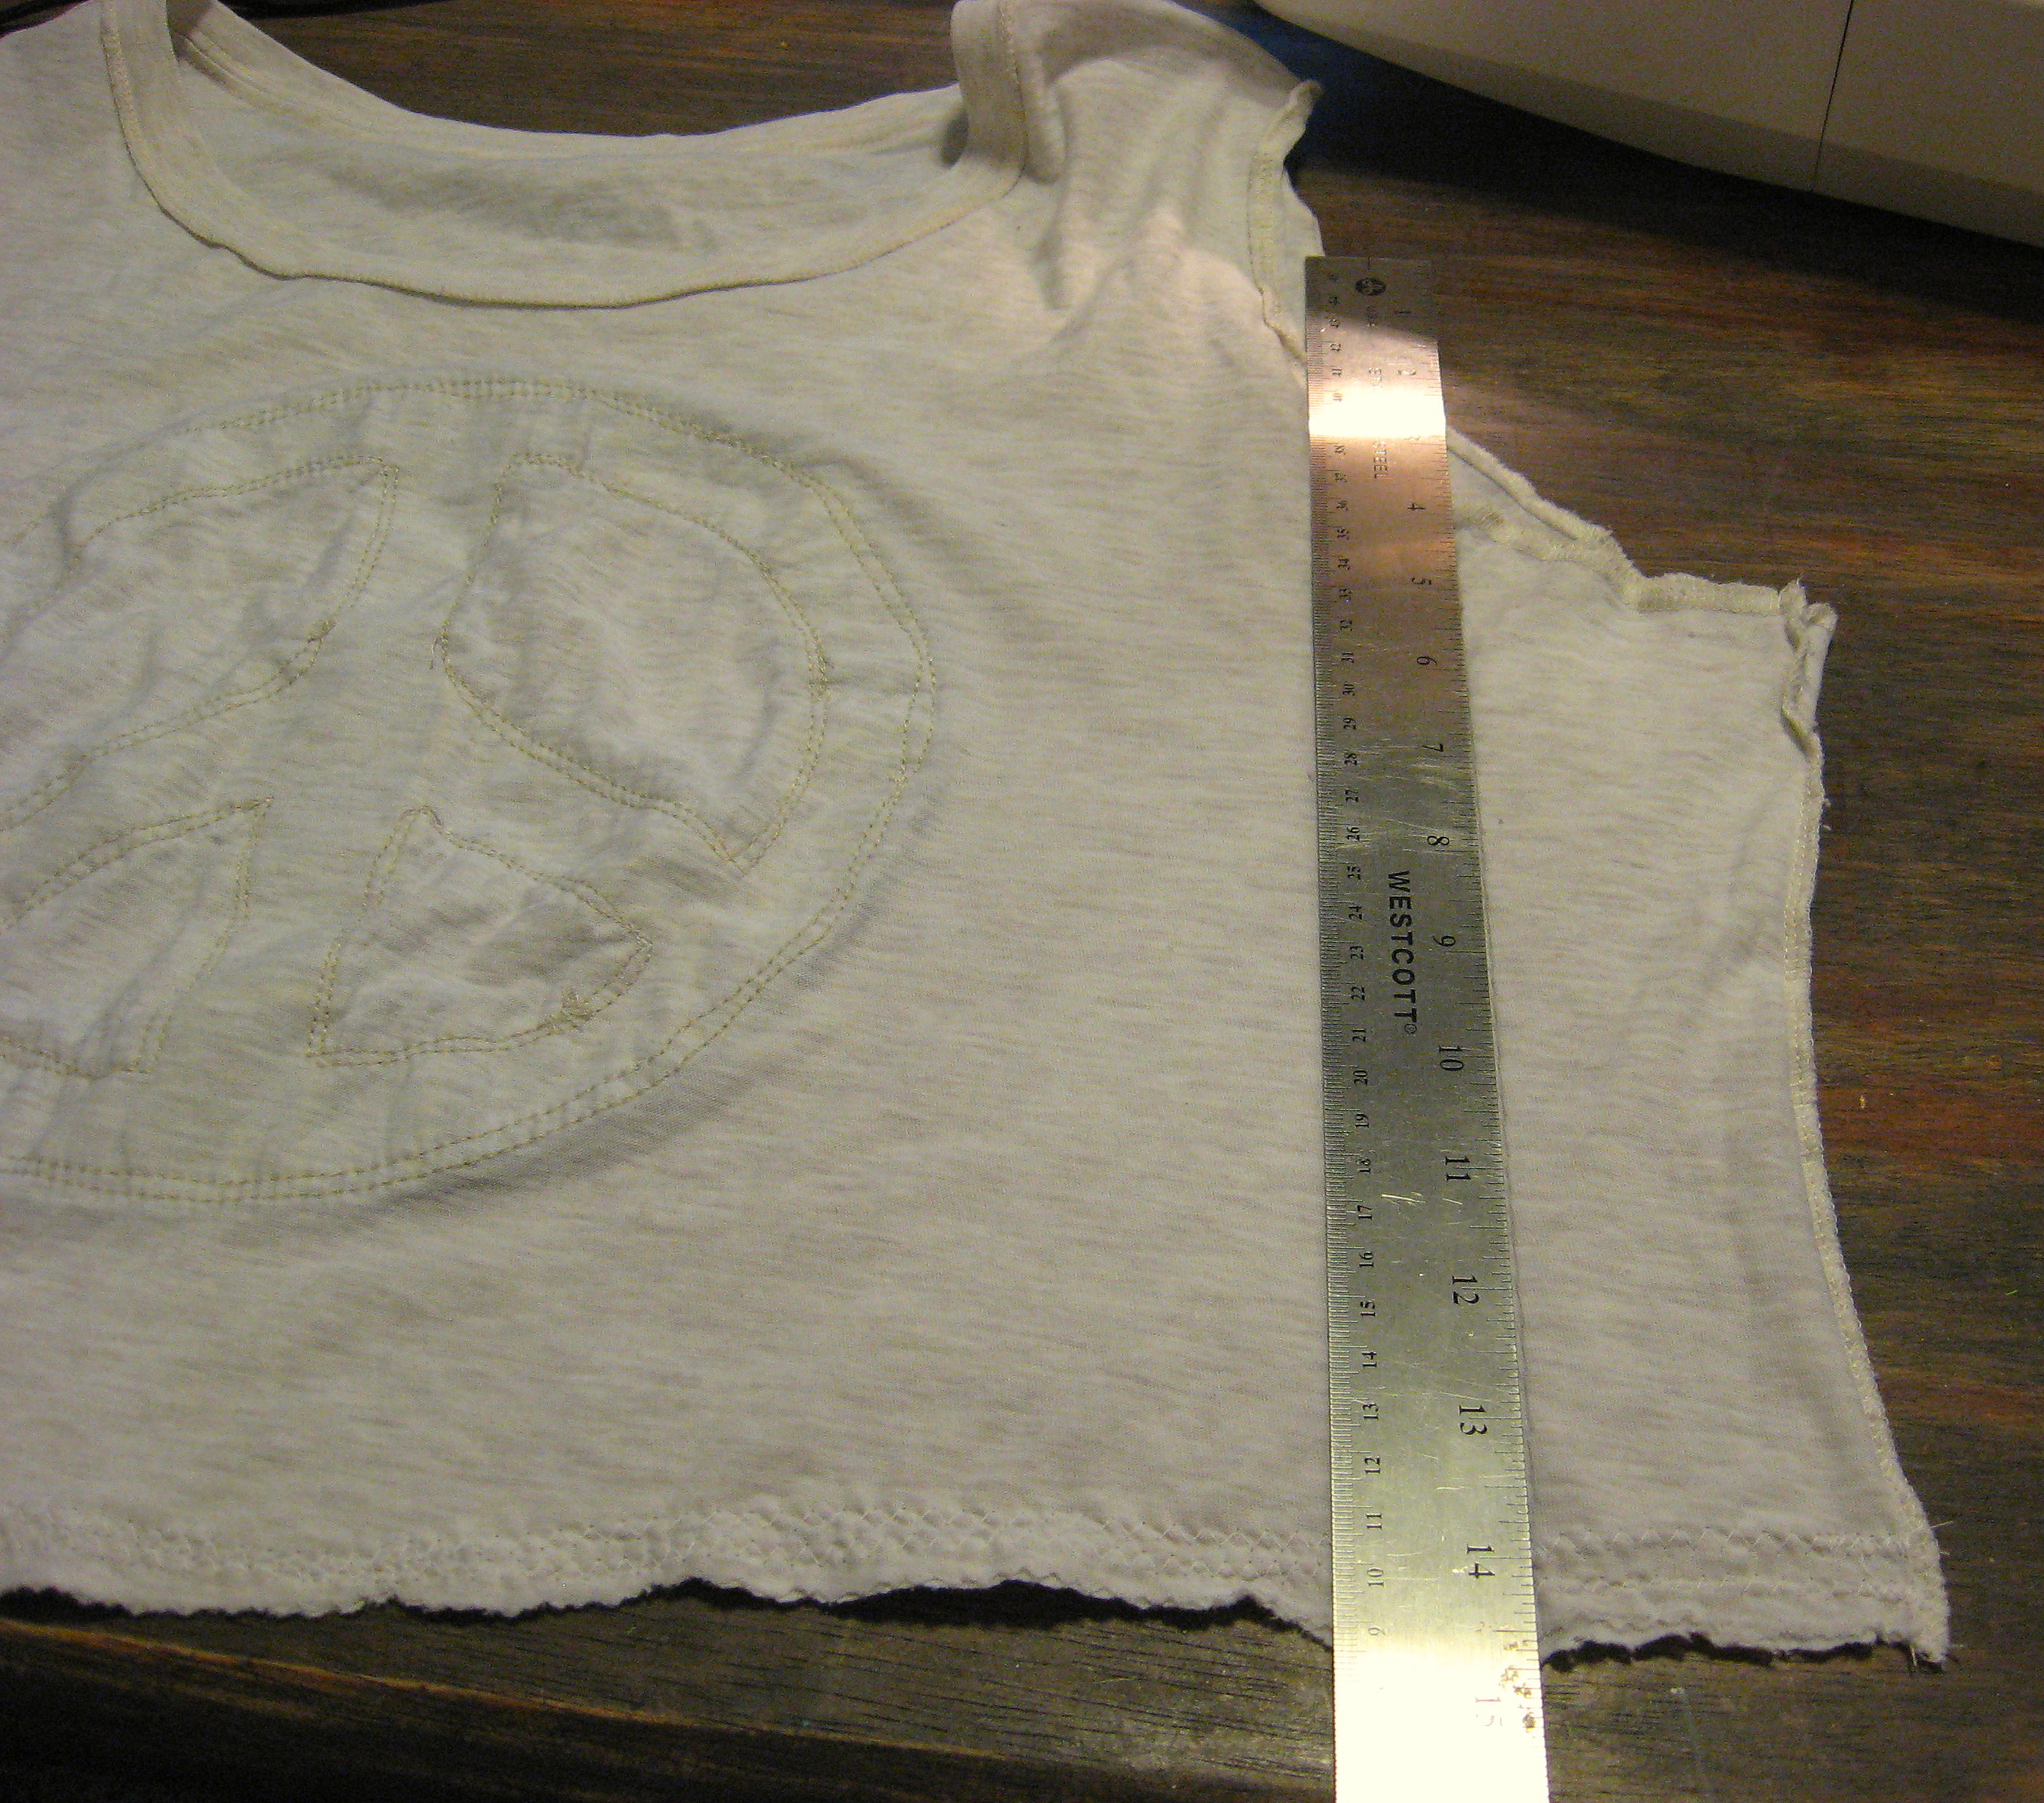
Use the ruler to determine how far in you want to trim the sides. I just did this by sight. Draw a line and pin it, just like you did when you sewed the bottom. At the top, the cut edges might not quite match up, but just stretch it a little so that they match up at the top.
Measure how far you went in at the top and bottom on the first side, and mark those measurements on the other side of the bag, then draw a line and pin it, so that both sides of the bag match.
Now sew a double line of zig zag stitching, and cut outside of that stitching. Repeat on the other side of the bag. Make sure at the bottom of the bag – where you are sewing over the bottom stitching that you did earlier – that you backstitch a couple of times to make sure your original stitching won’t unravel.
Turn the bag right side out and make sure you like the size and shape of it.
Now cut out around the neck. Cut the front and back at the same time, following the curve of the front neckline.
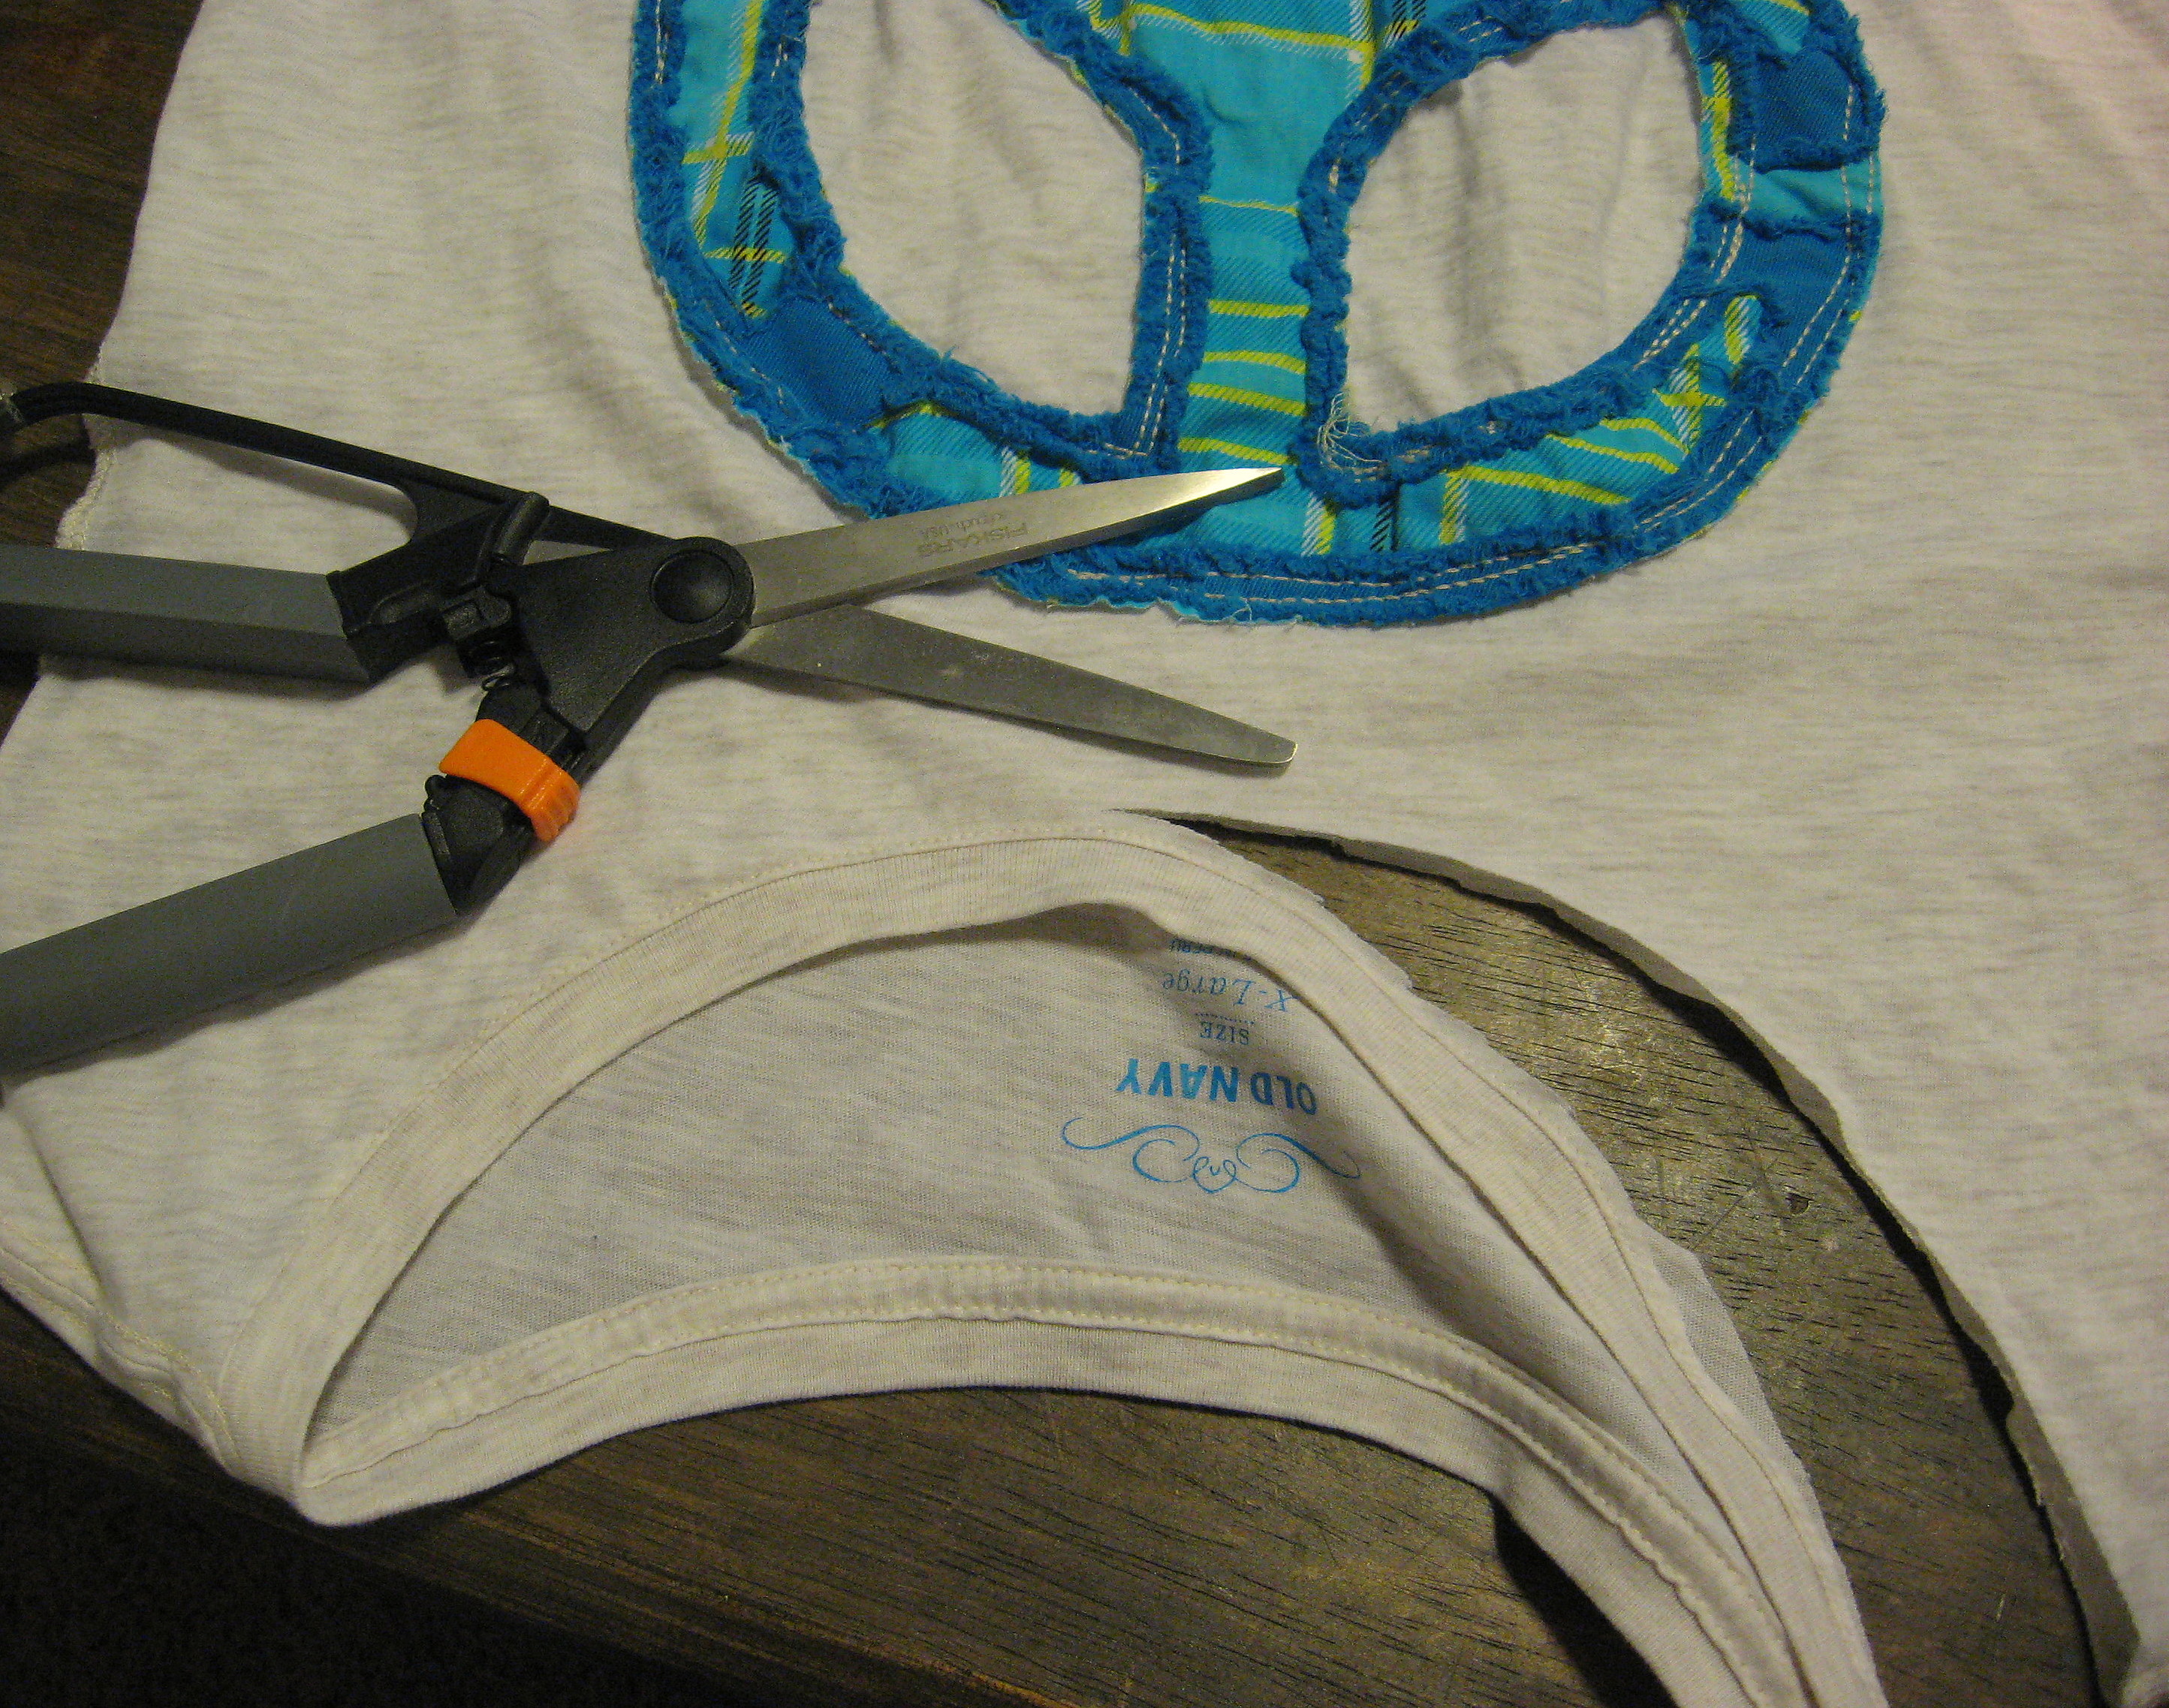
And you’re done! They roll up this small:
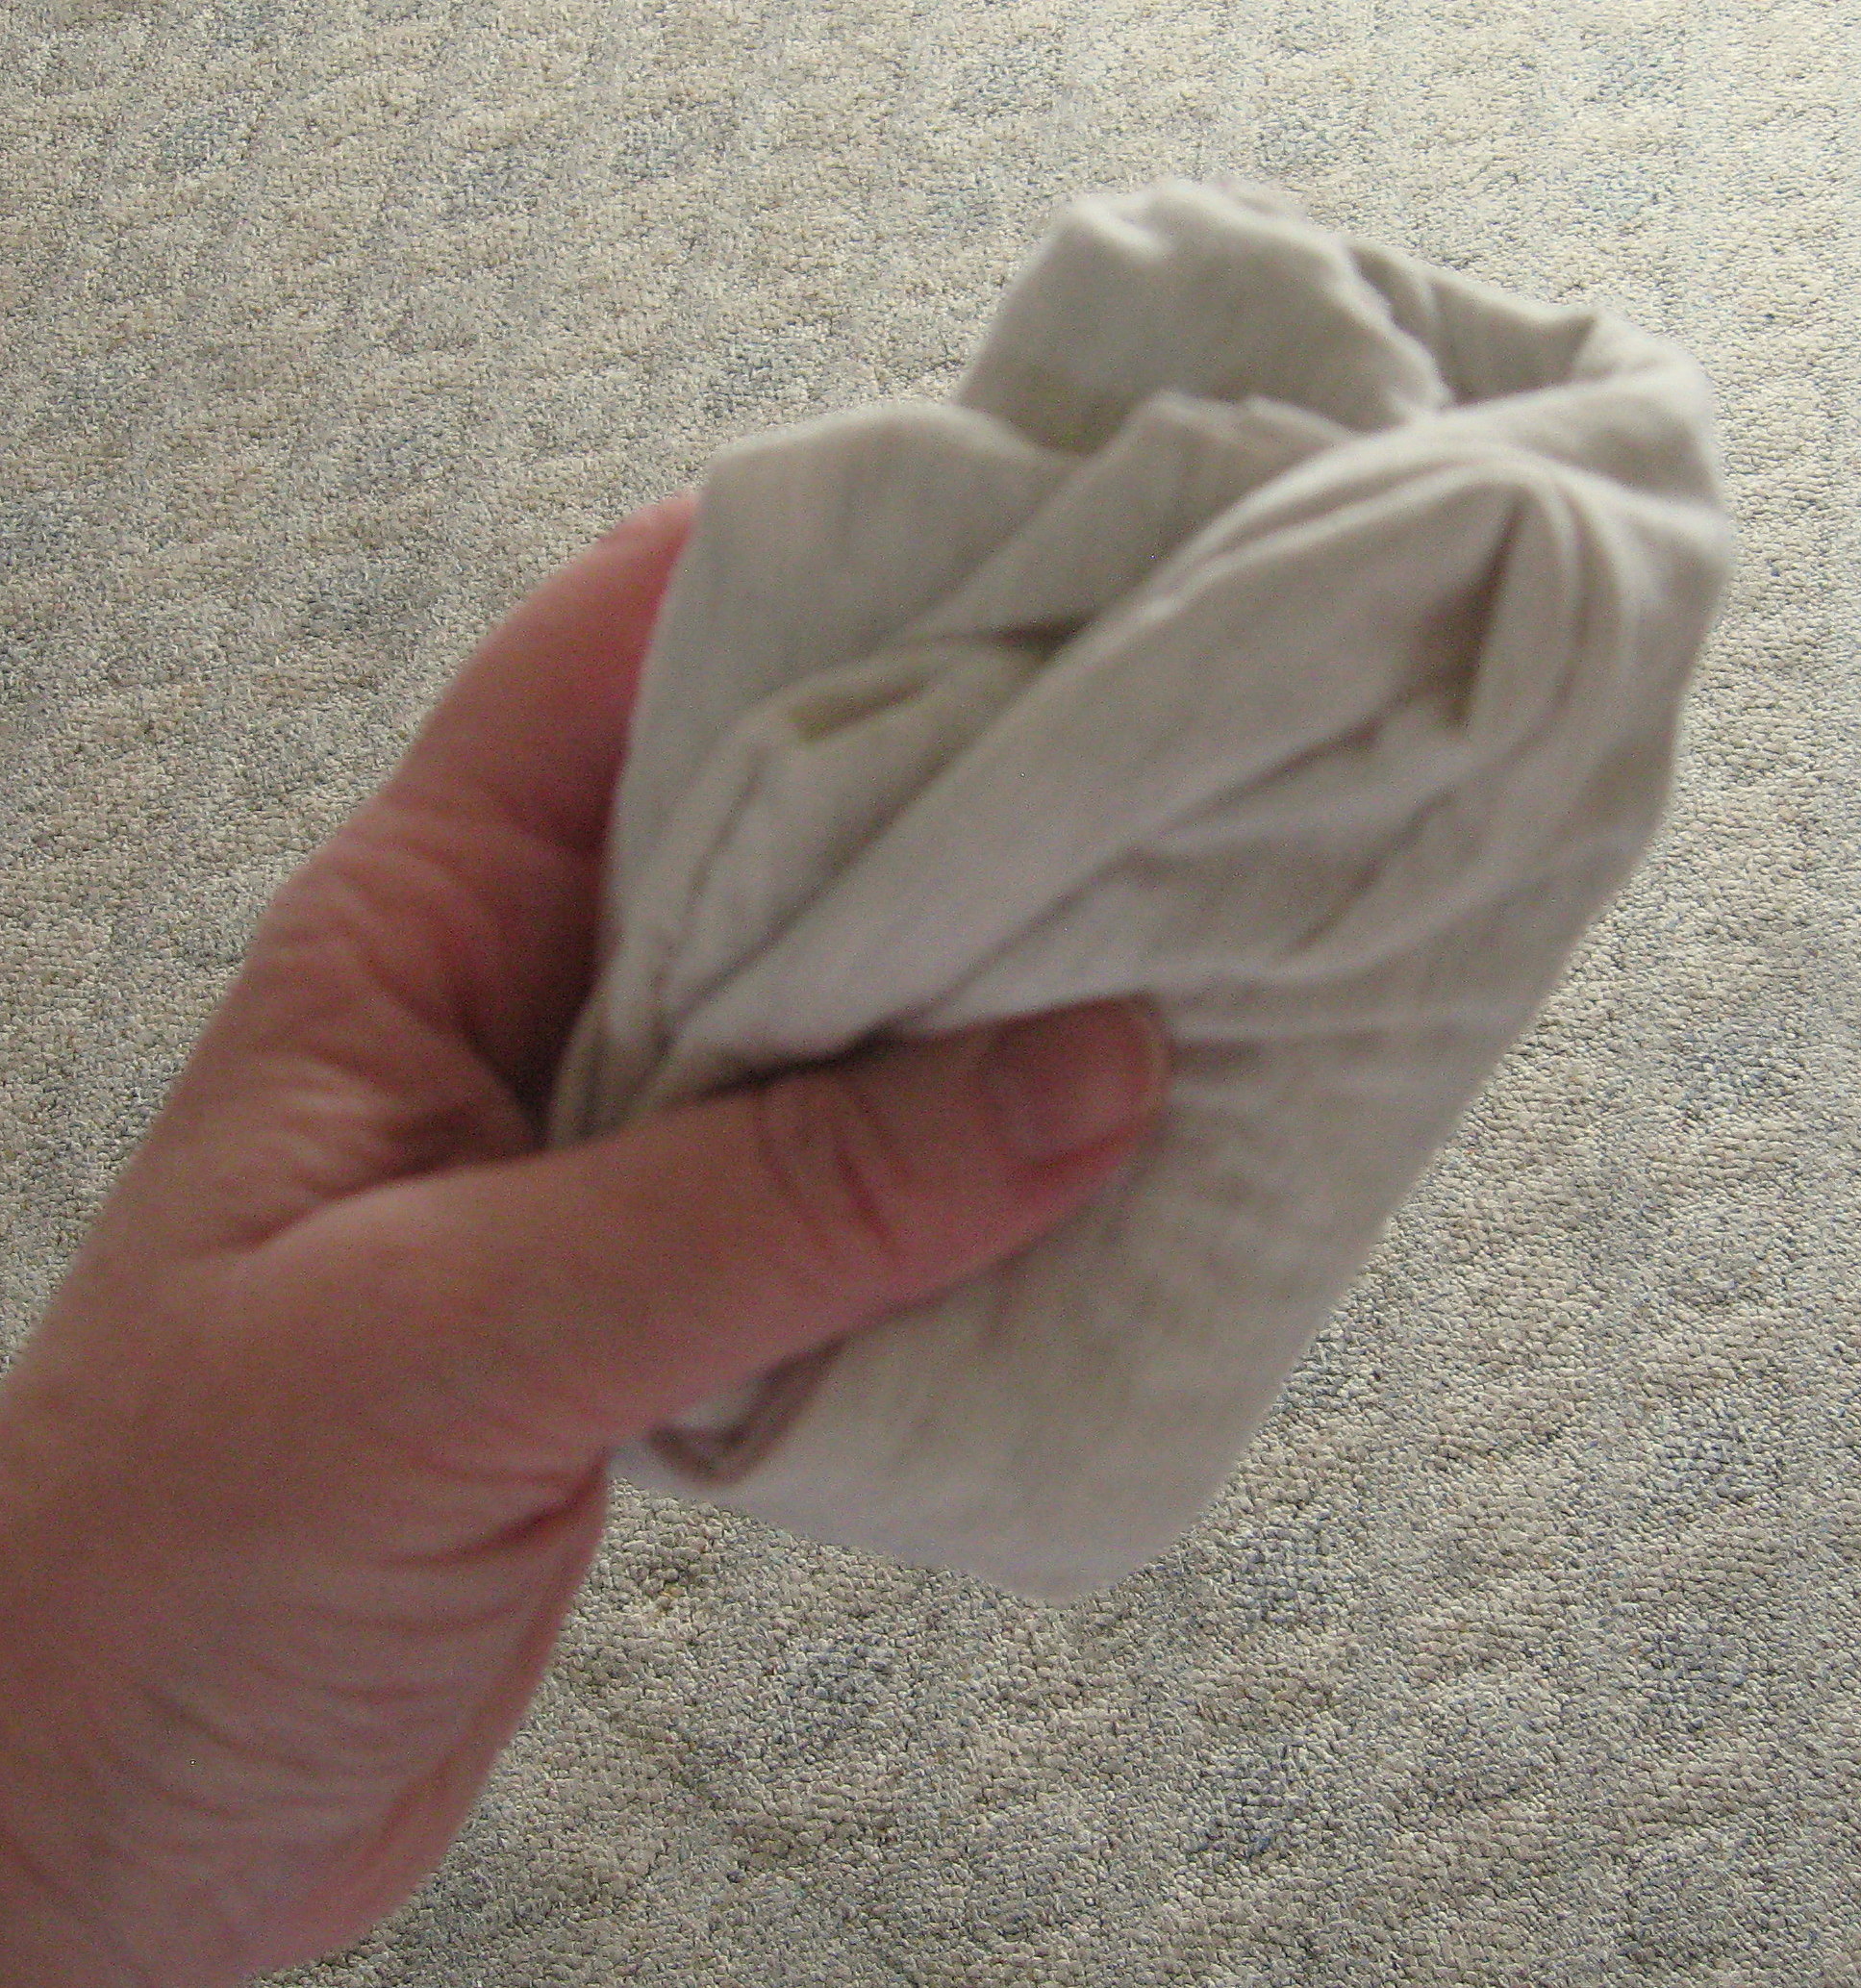
But they’re big enough to hold quite a bit of stuff.