
A PYP Best Blog! DIY Recipes: Homemade Meatballs!
Just in case you missed this DIY article on making homemade meatballs the first time we shared it a couple of years ago, we are republishing it. After Marne wrote this blog originally, we got an awesome response. This is one of the PYP Best Blogs!
Tuesday I picked up my 40 lb box of ground beef from Zaycon and needed to prep it. One of my favorite things to have ready in the freezer are homemade meatballs. I don’t particularly like making them, but I love having them all ready for meals. So I just remind myself of that. I made and froze 208 meatballs!! Holy cow.
Here is how I like to do homemade meatballs!
HOMEMADE MEATBALLS
1 1/2 lbs lean hamburger
3/4 cup quick oats
1 egg
1/4 cup finely diced onion
1/4 cup milk
1 tsp salt
1 tsp ground pepper (use another teaspoon of pepper if you love pepper flavor)
1 tsp Worcestershire sauce
2 Tbsp ketchup
1 Tbsp dry parsley
Put all ingredients into a large bowl (I love using glass bowls as they clean easily from all the germs from raw meat).
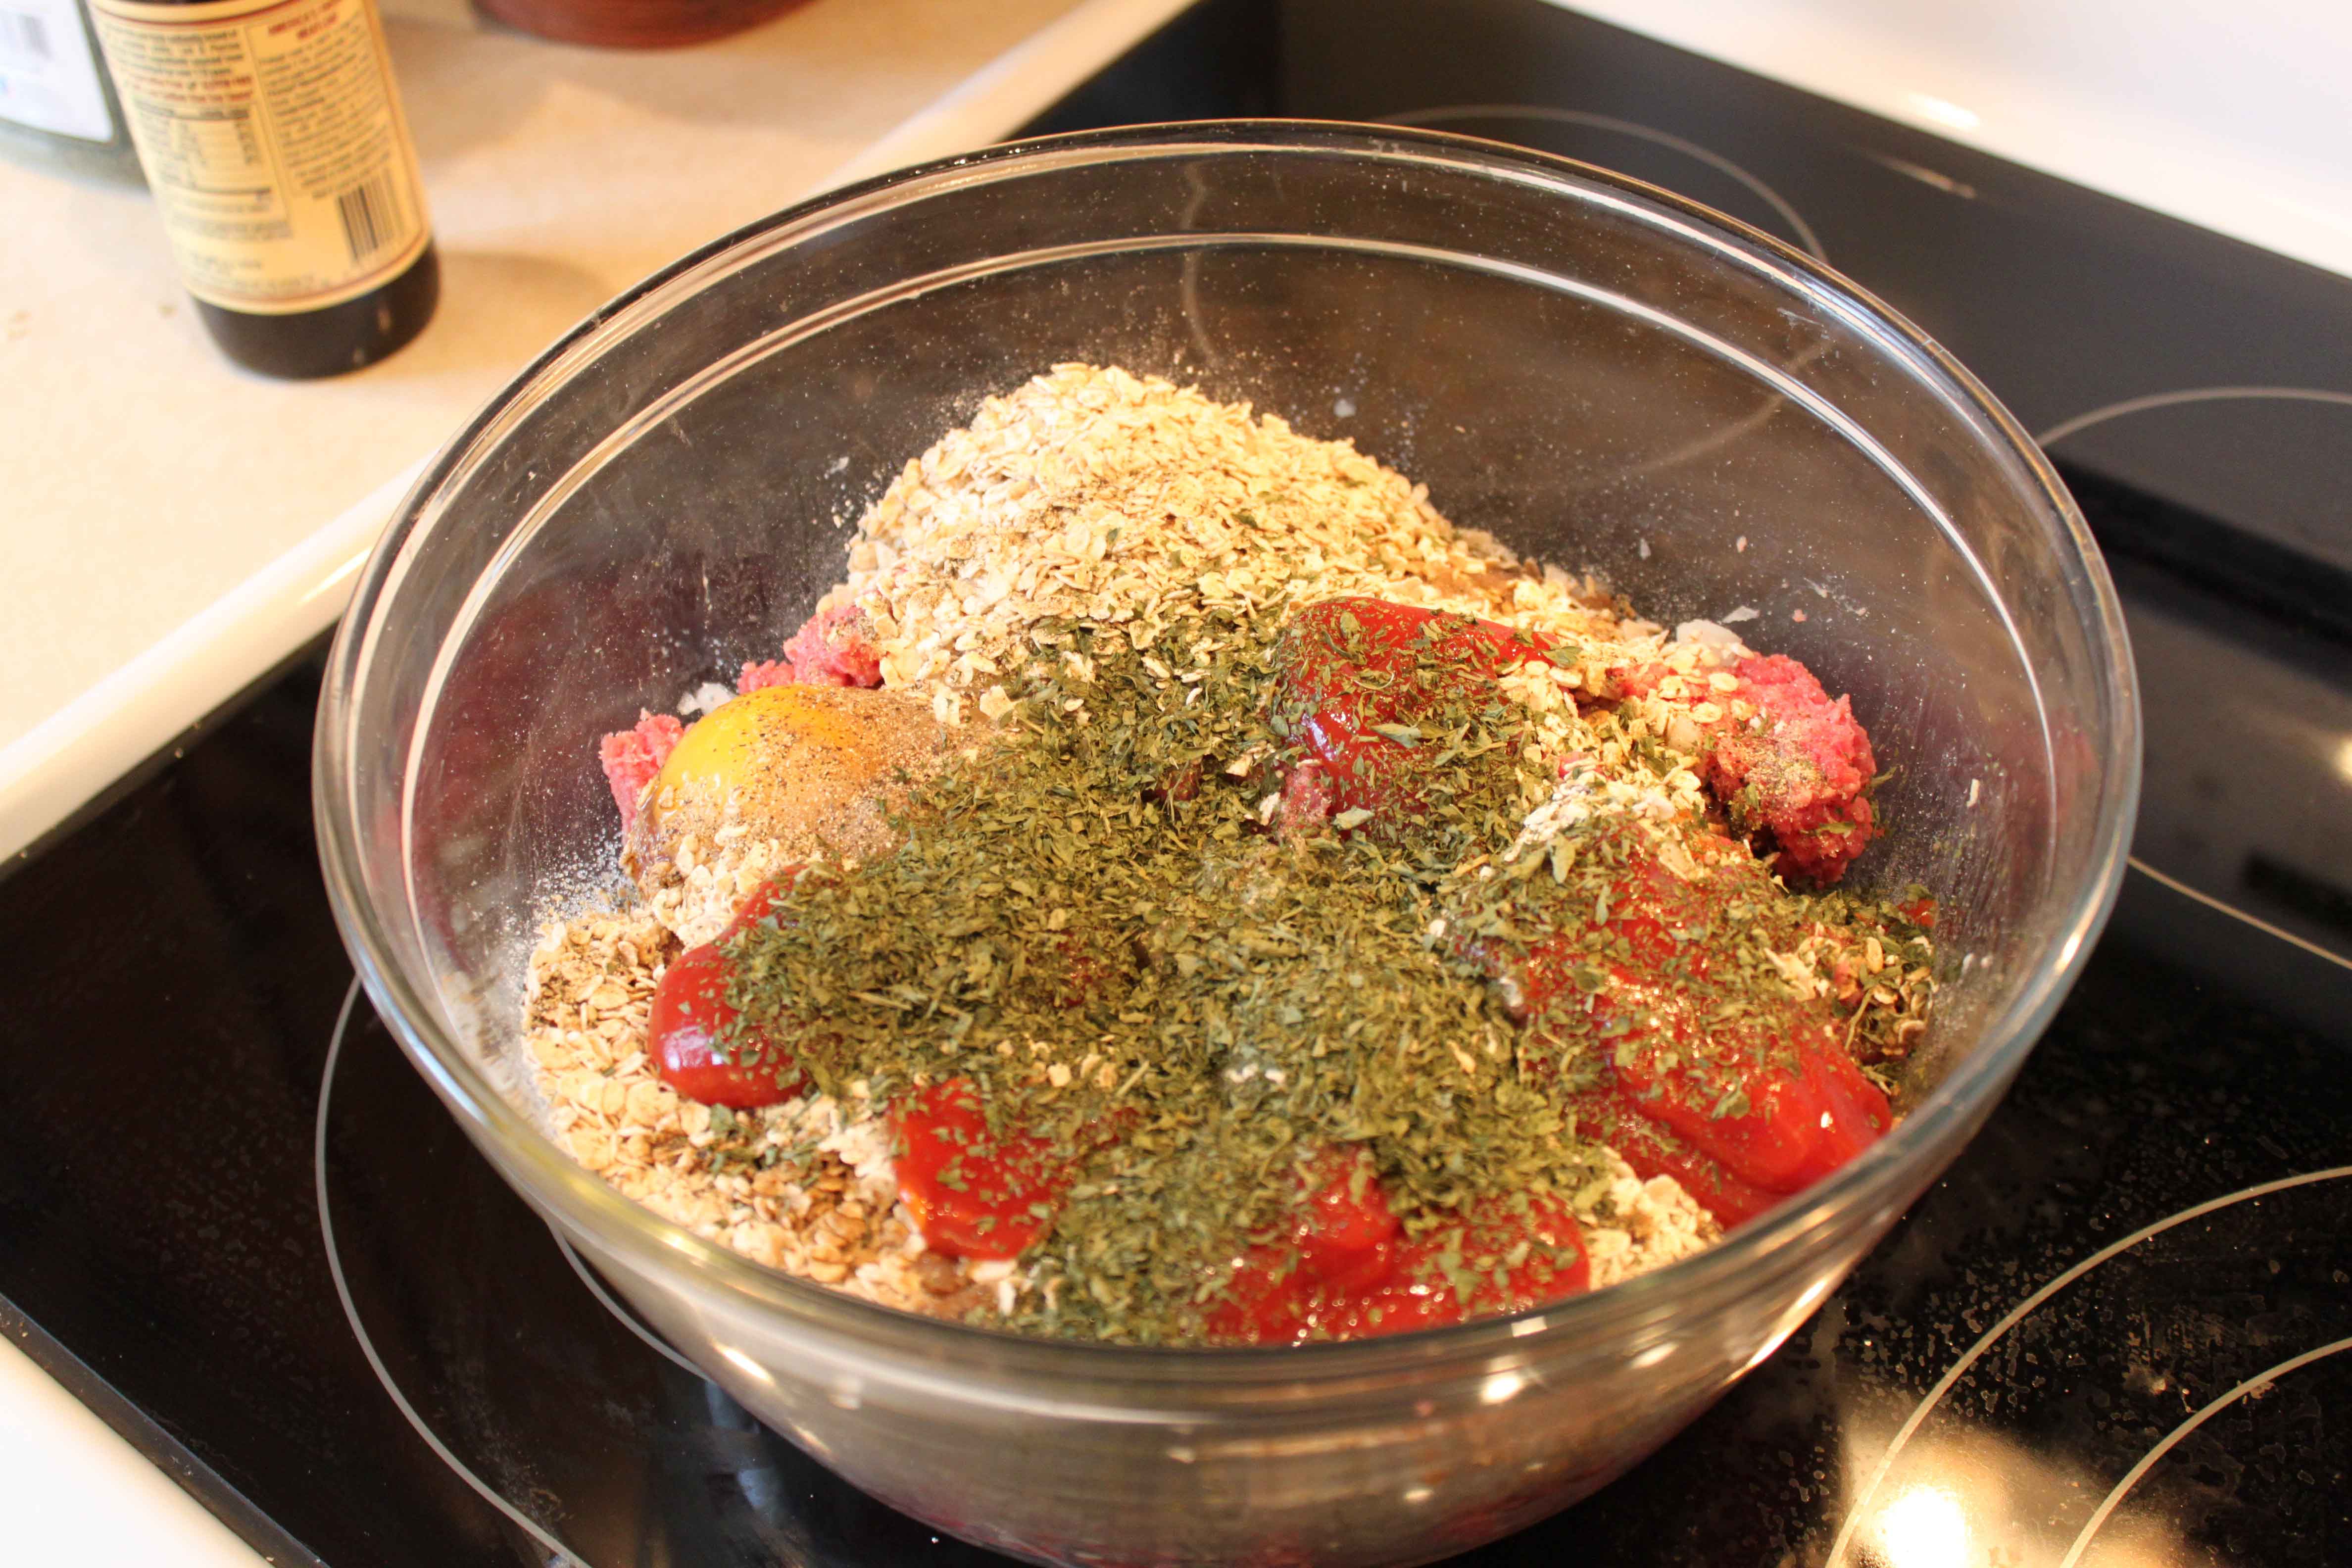
Mix all together WELL. Use your hands to make sure it is well-incorporated. Make sure you take any rings off. 🙂 It will look like this:
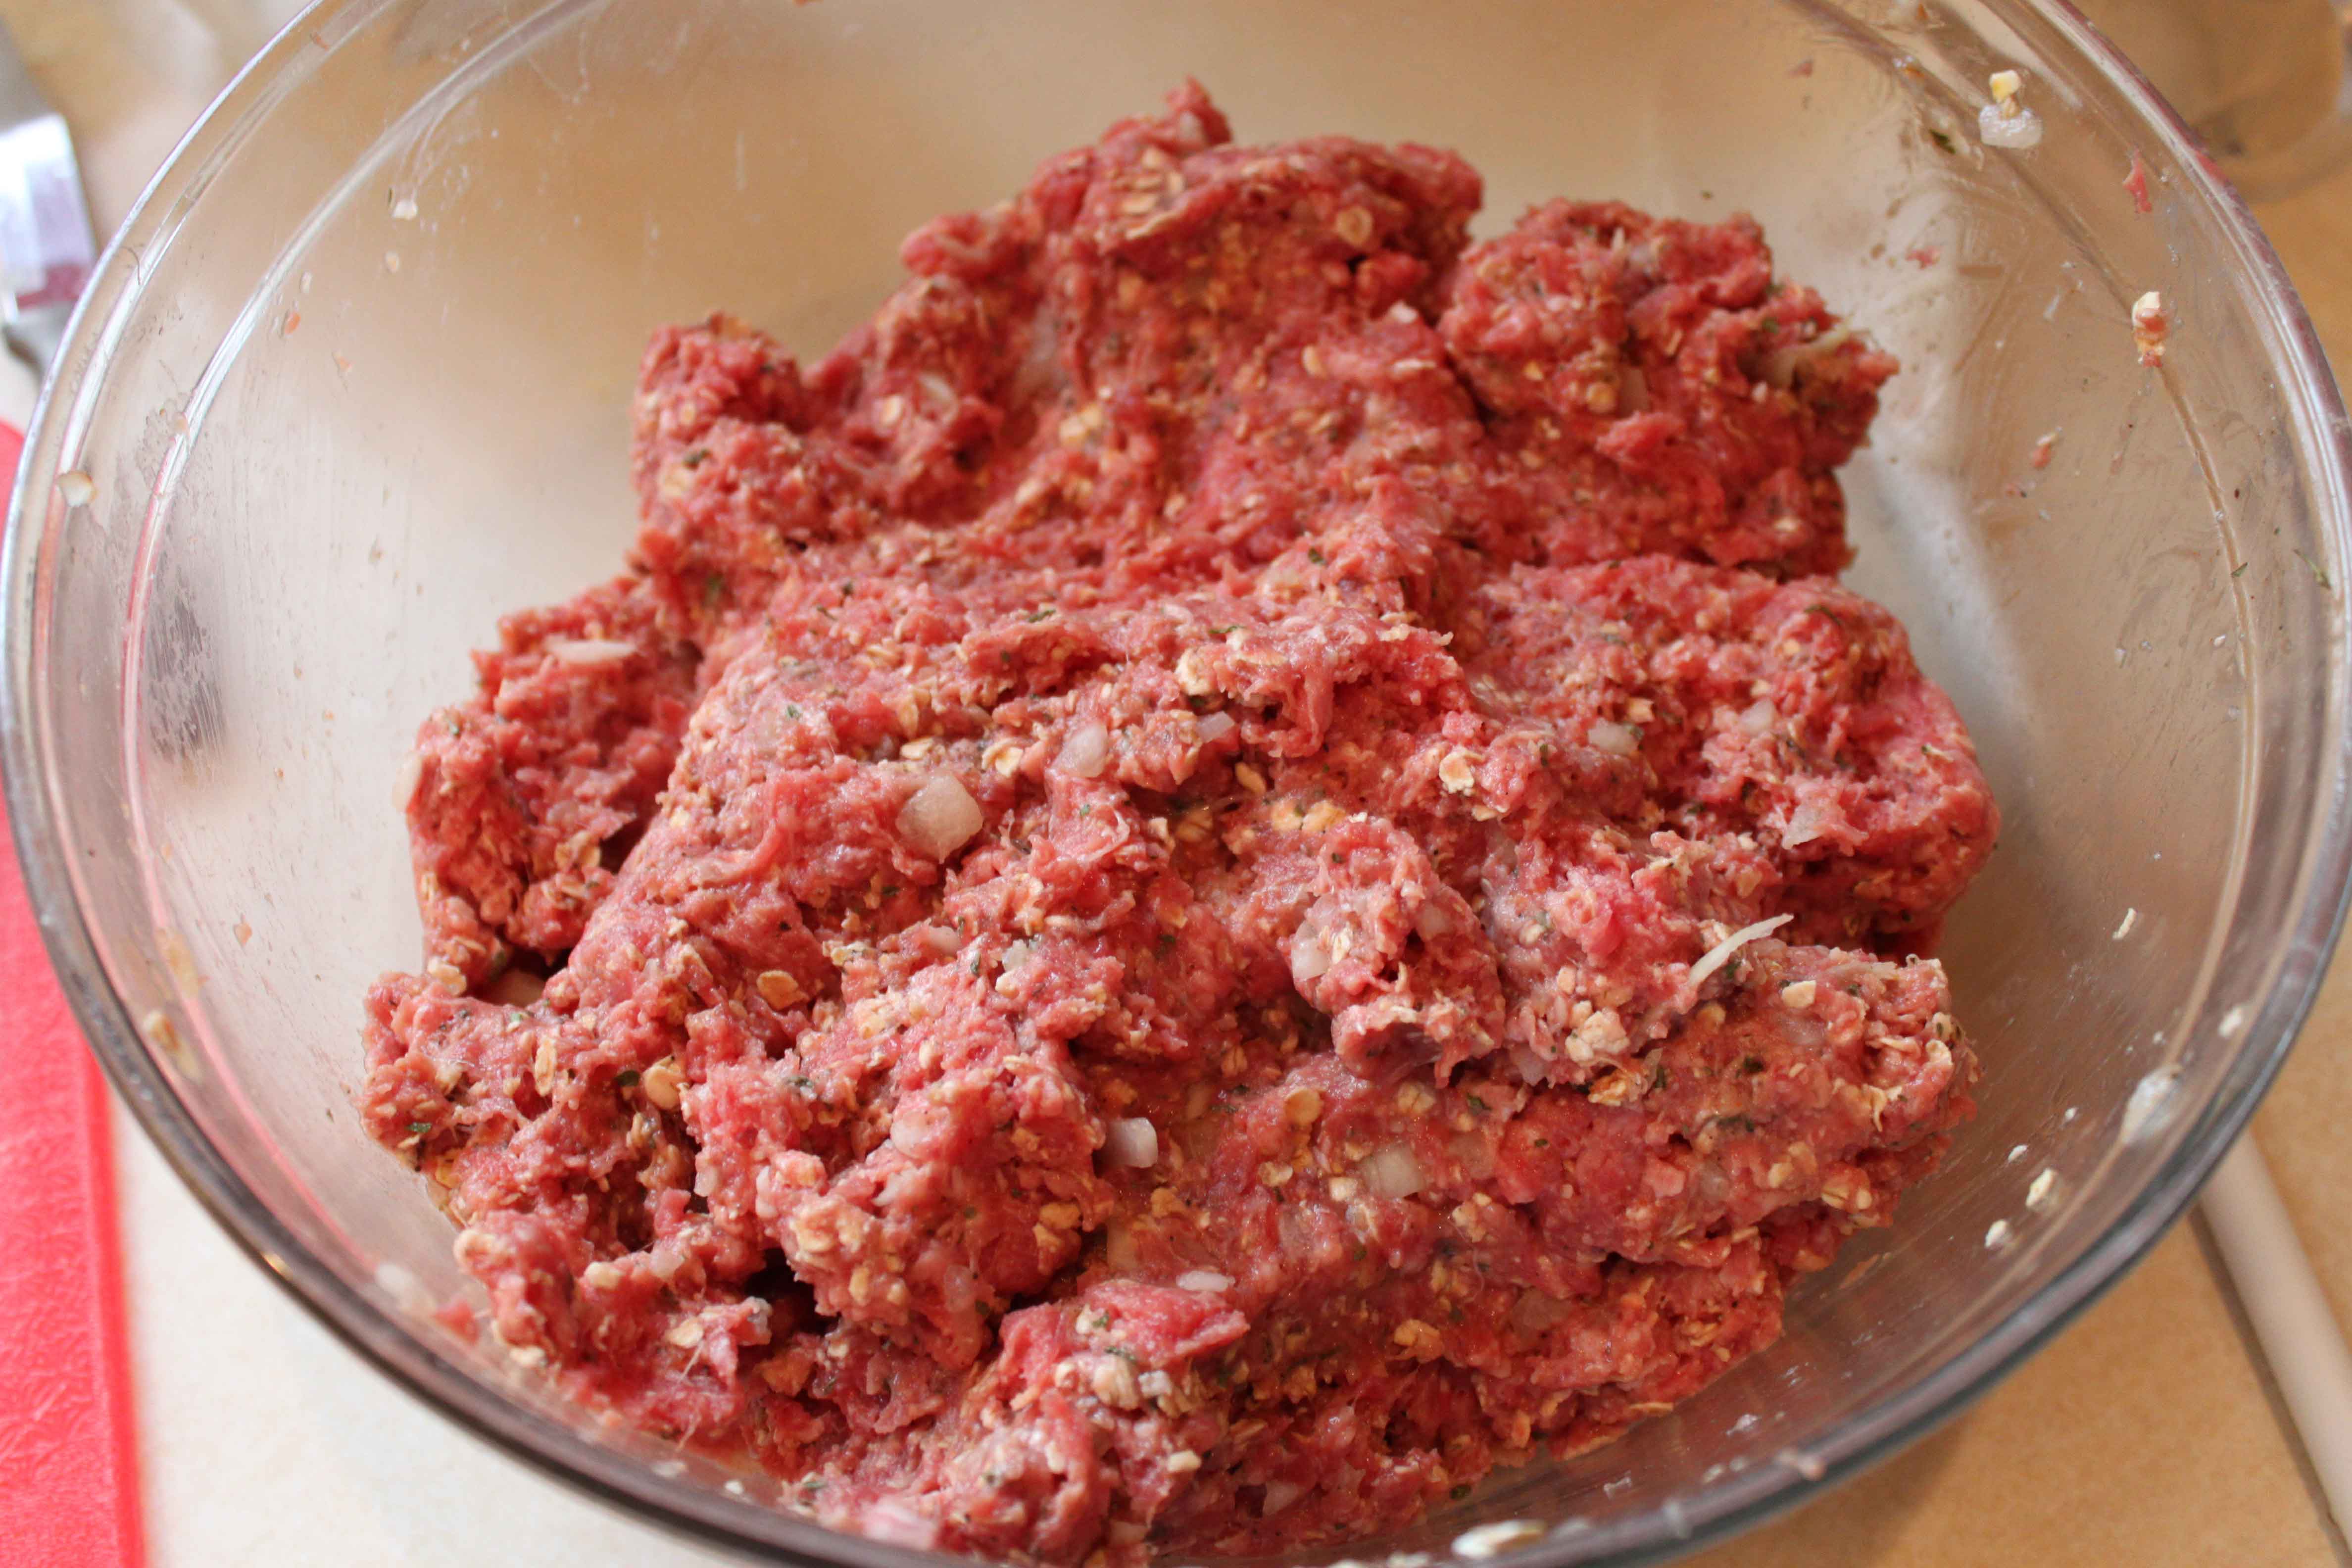
Now, form the meat mixture into balls and place on a cookie sheet lined with foil (it makes clean up a breeze! Bake at 400 for about 18 minutes, shaking or stirring occasionally.
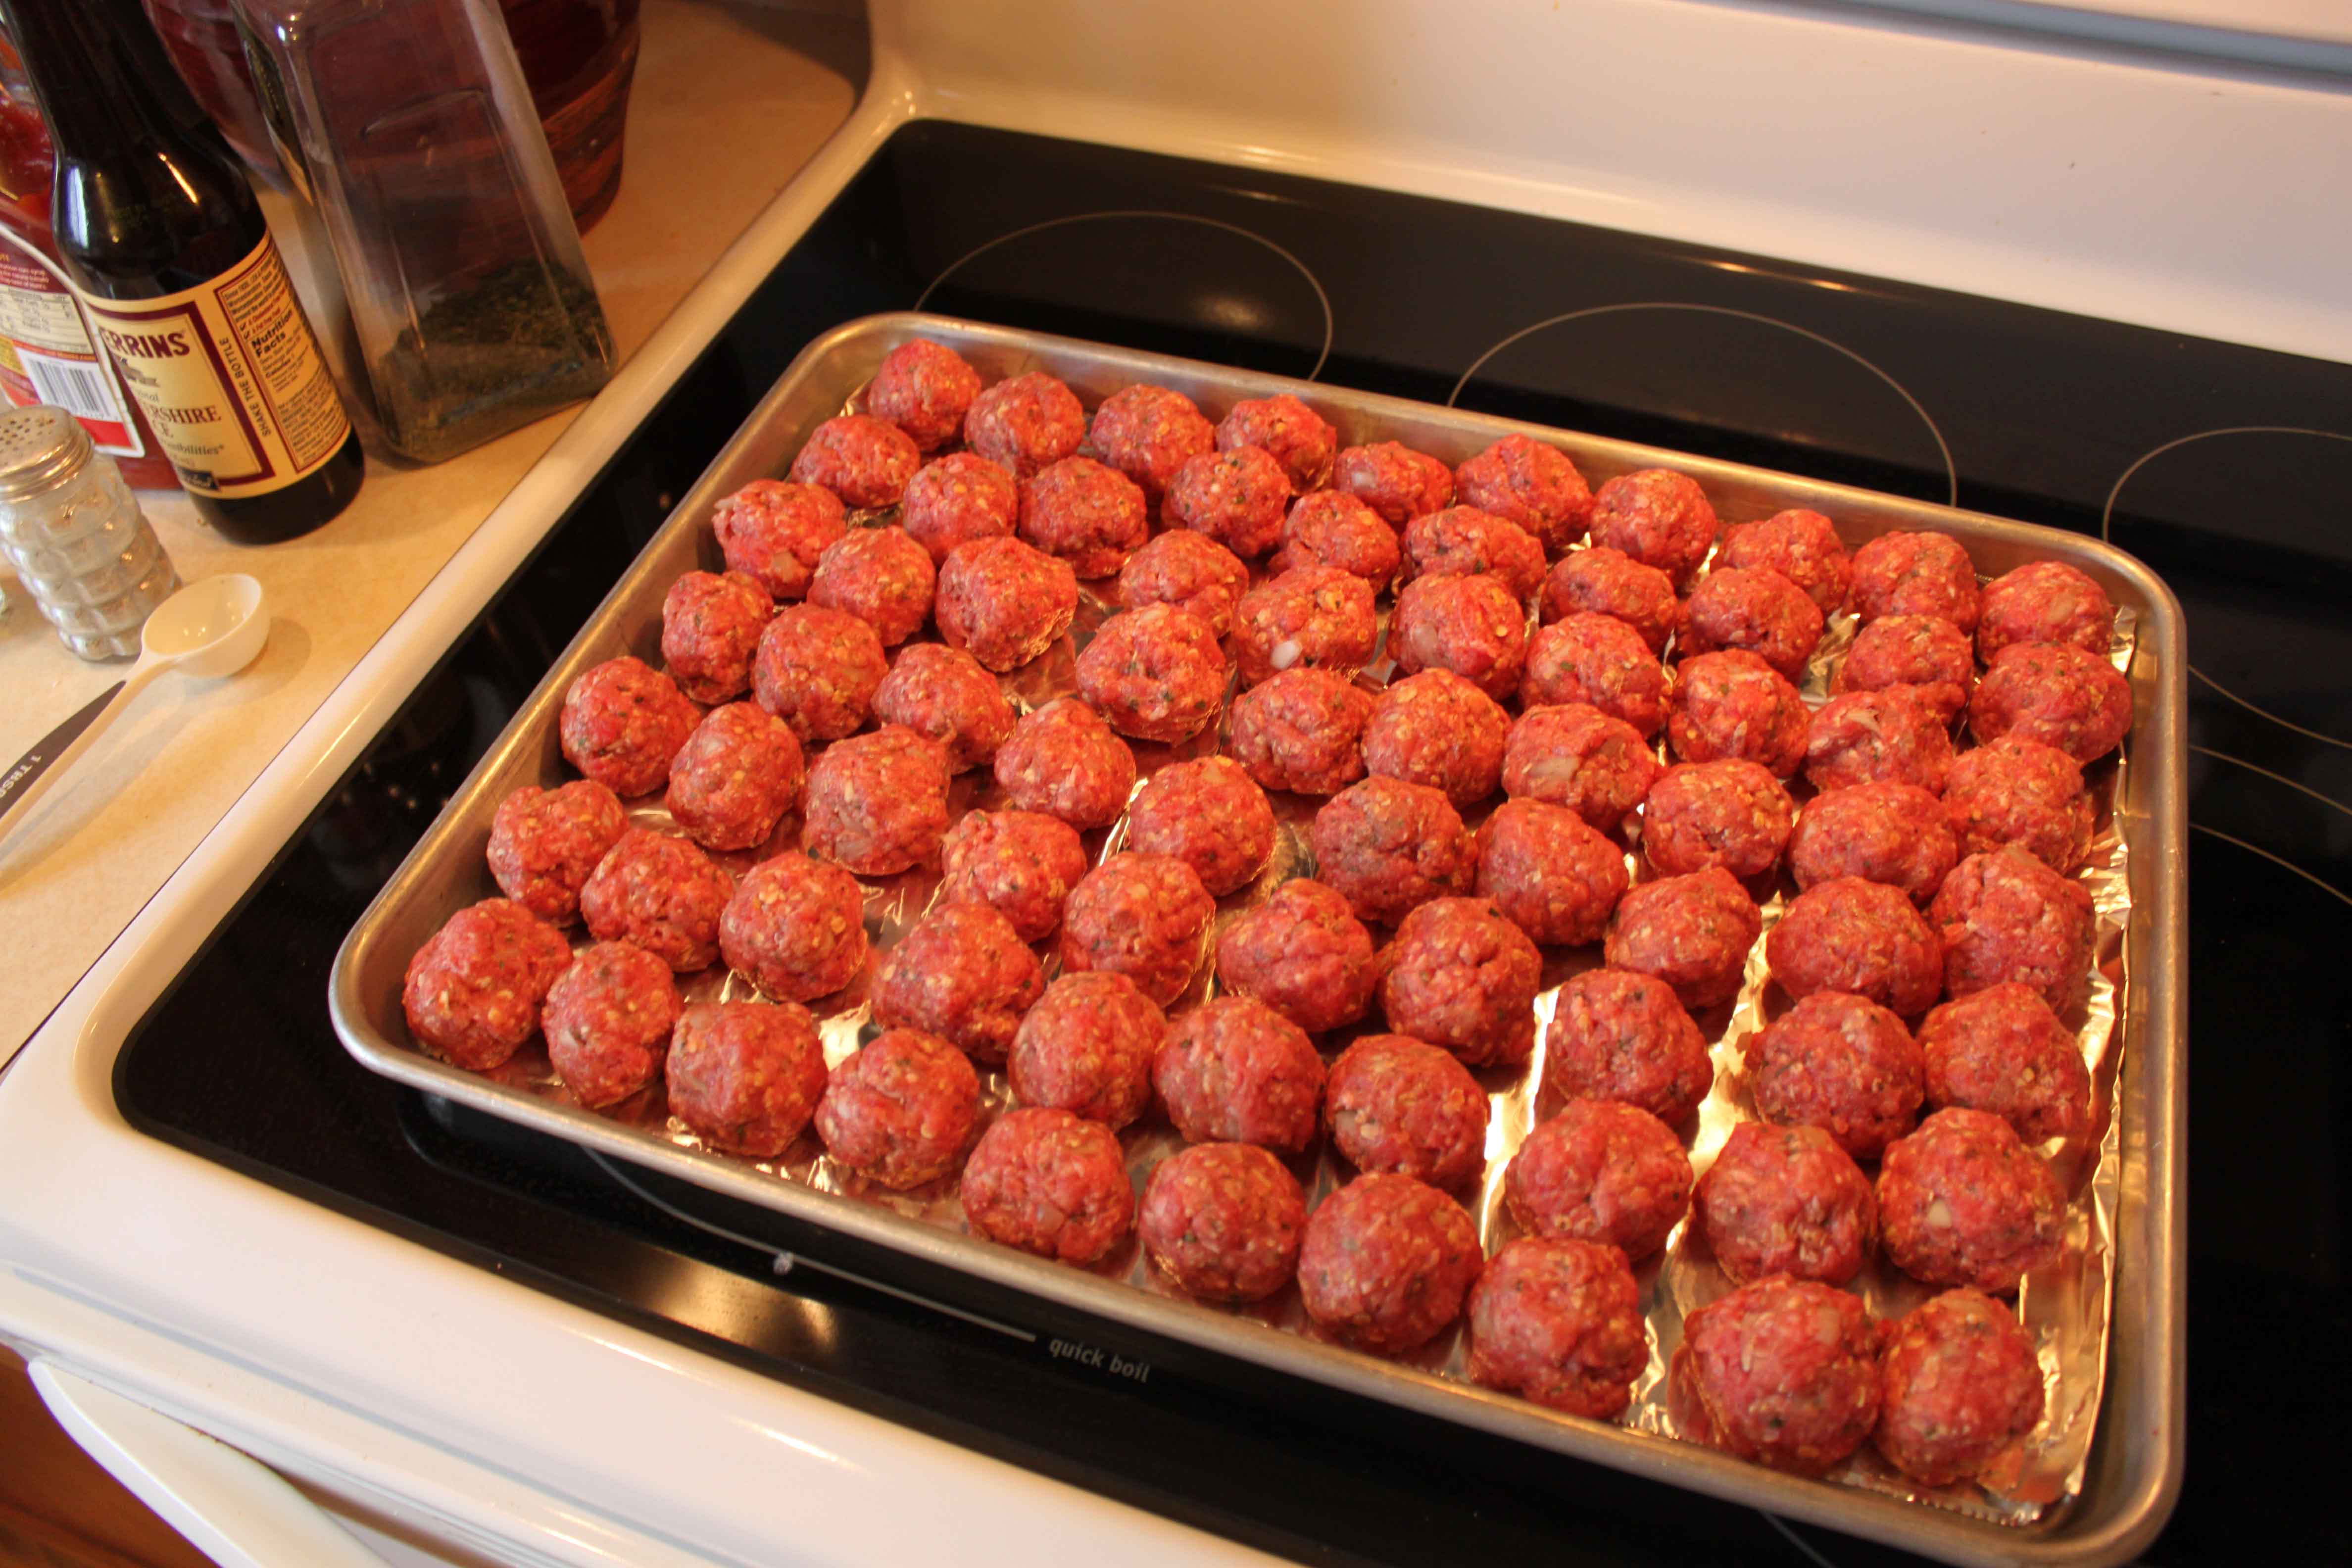
When they are done cooking, they look like this, and smell soooo good!

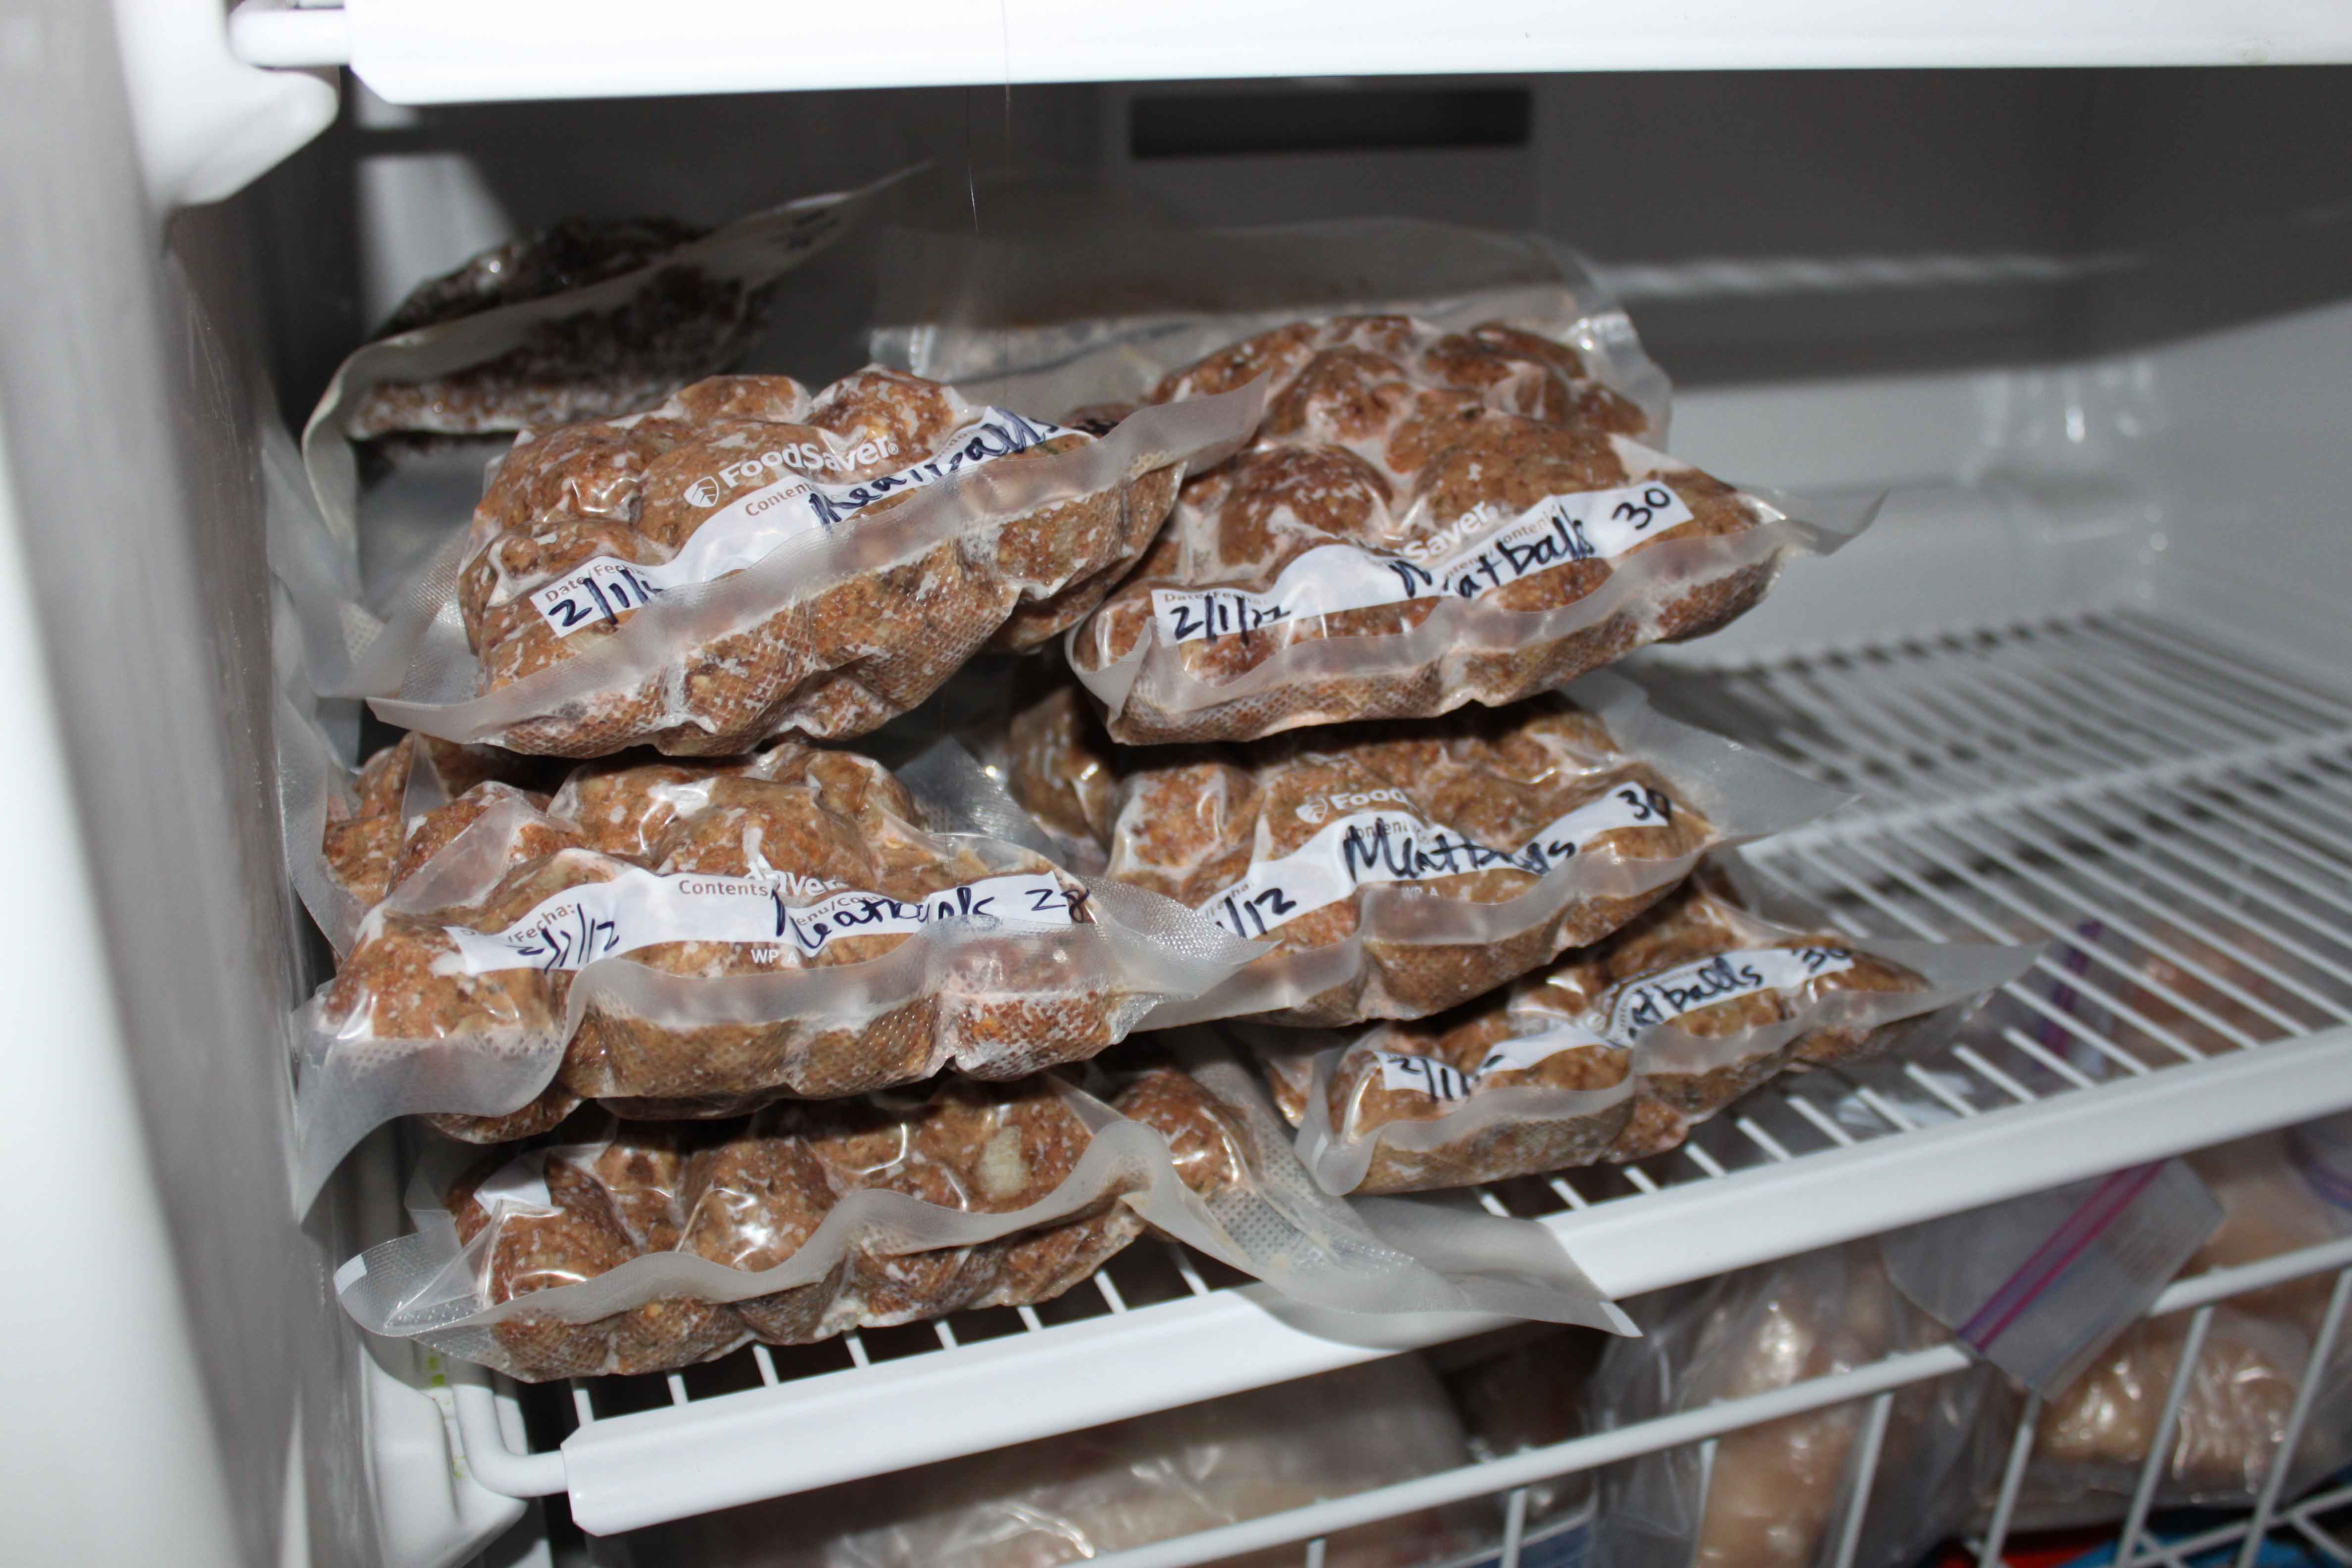
Then what I like to do is freeze them. I have a Foodsaver which is fantastic. It is totally worth the investment if you like to freeze foods. It really does help keep foods fresher longer! All the air is sucked out so there will be no freezer burn. Here are all the meatballs I froze yesterday.
I also cooked about 10 lbs into regular ground beef to use later in recipes. I froze that in Foodsaver bags too. After cooking 20 pounds of meat today, I still have 20 more pounds to cook up. Wish me luck!
WAHL Chrome Pro Home Haircutting Kit – $19.00!

WAHL Chrome Pro Home Haircutting Kit, Model 79520-3501
List Price: $26.98
You Save: $7.98 (30%)
$19.00
Shop the Value of the Day and Grab It Before It’s Gone at Walmart.com!
Free in store pick up!
A PYP Best Blog! Making a jewelry organizer!
Just in case you missed this DIY article on making a jewelry organizer the first time we shared it a couple of years ago, we are republishing it. After Marne wrote this blog originally, we got an awesome response. This is one of the PYP Best Blogs!
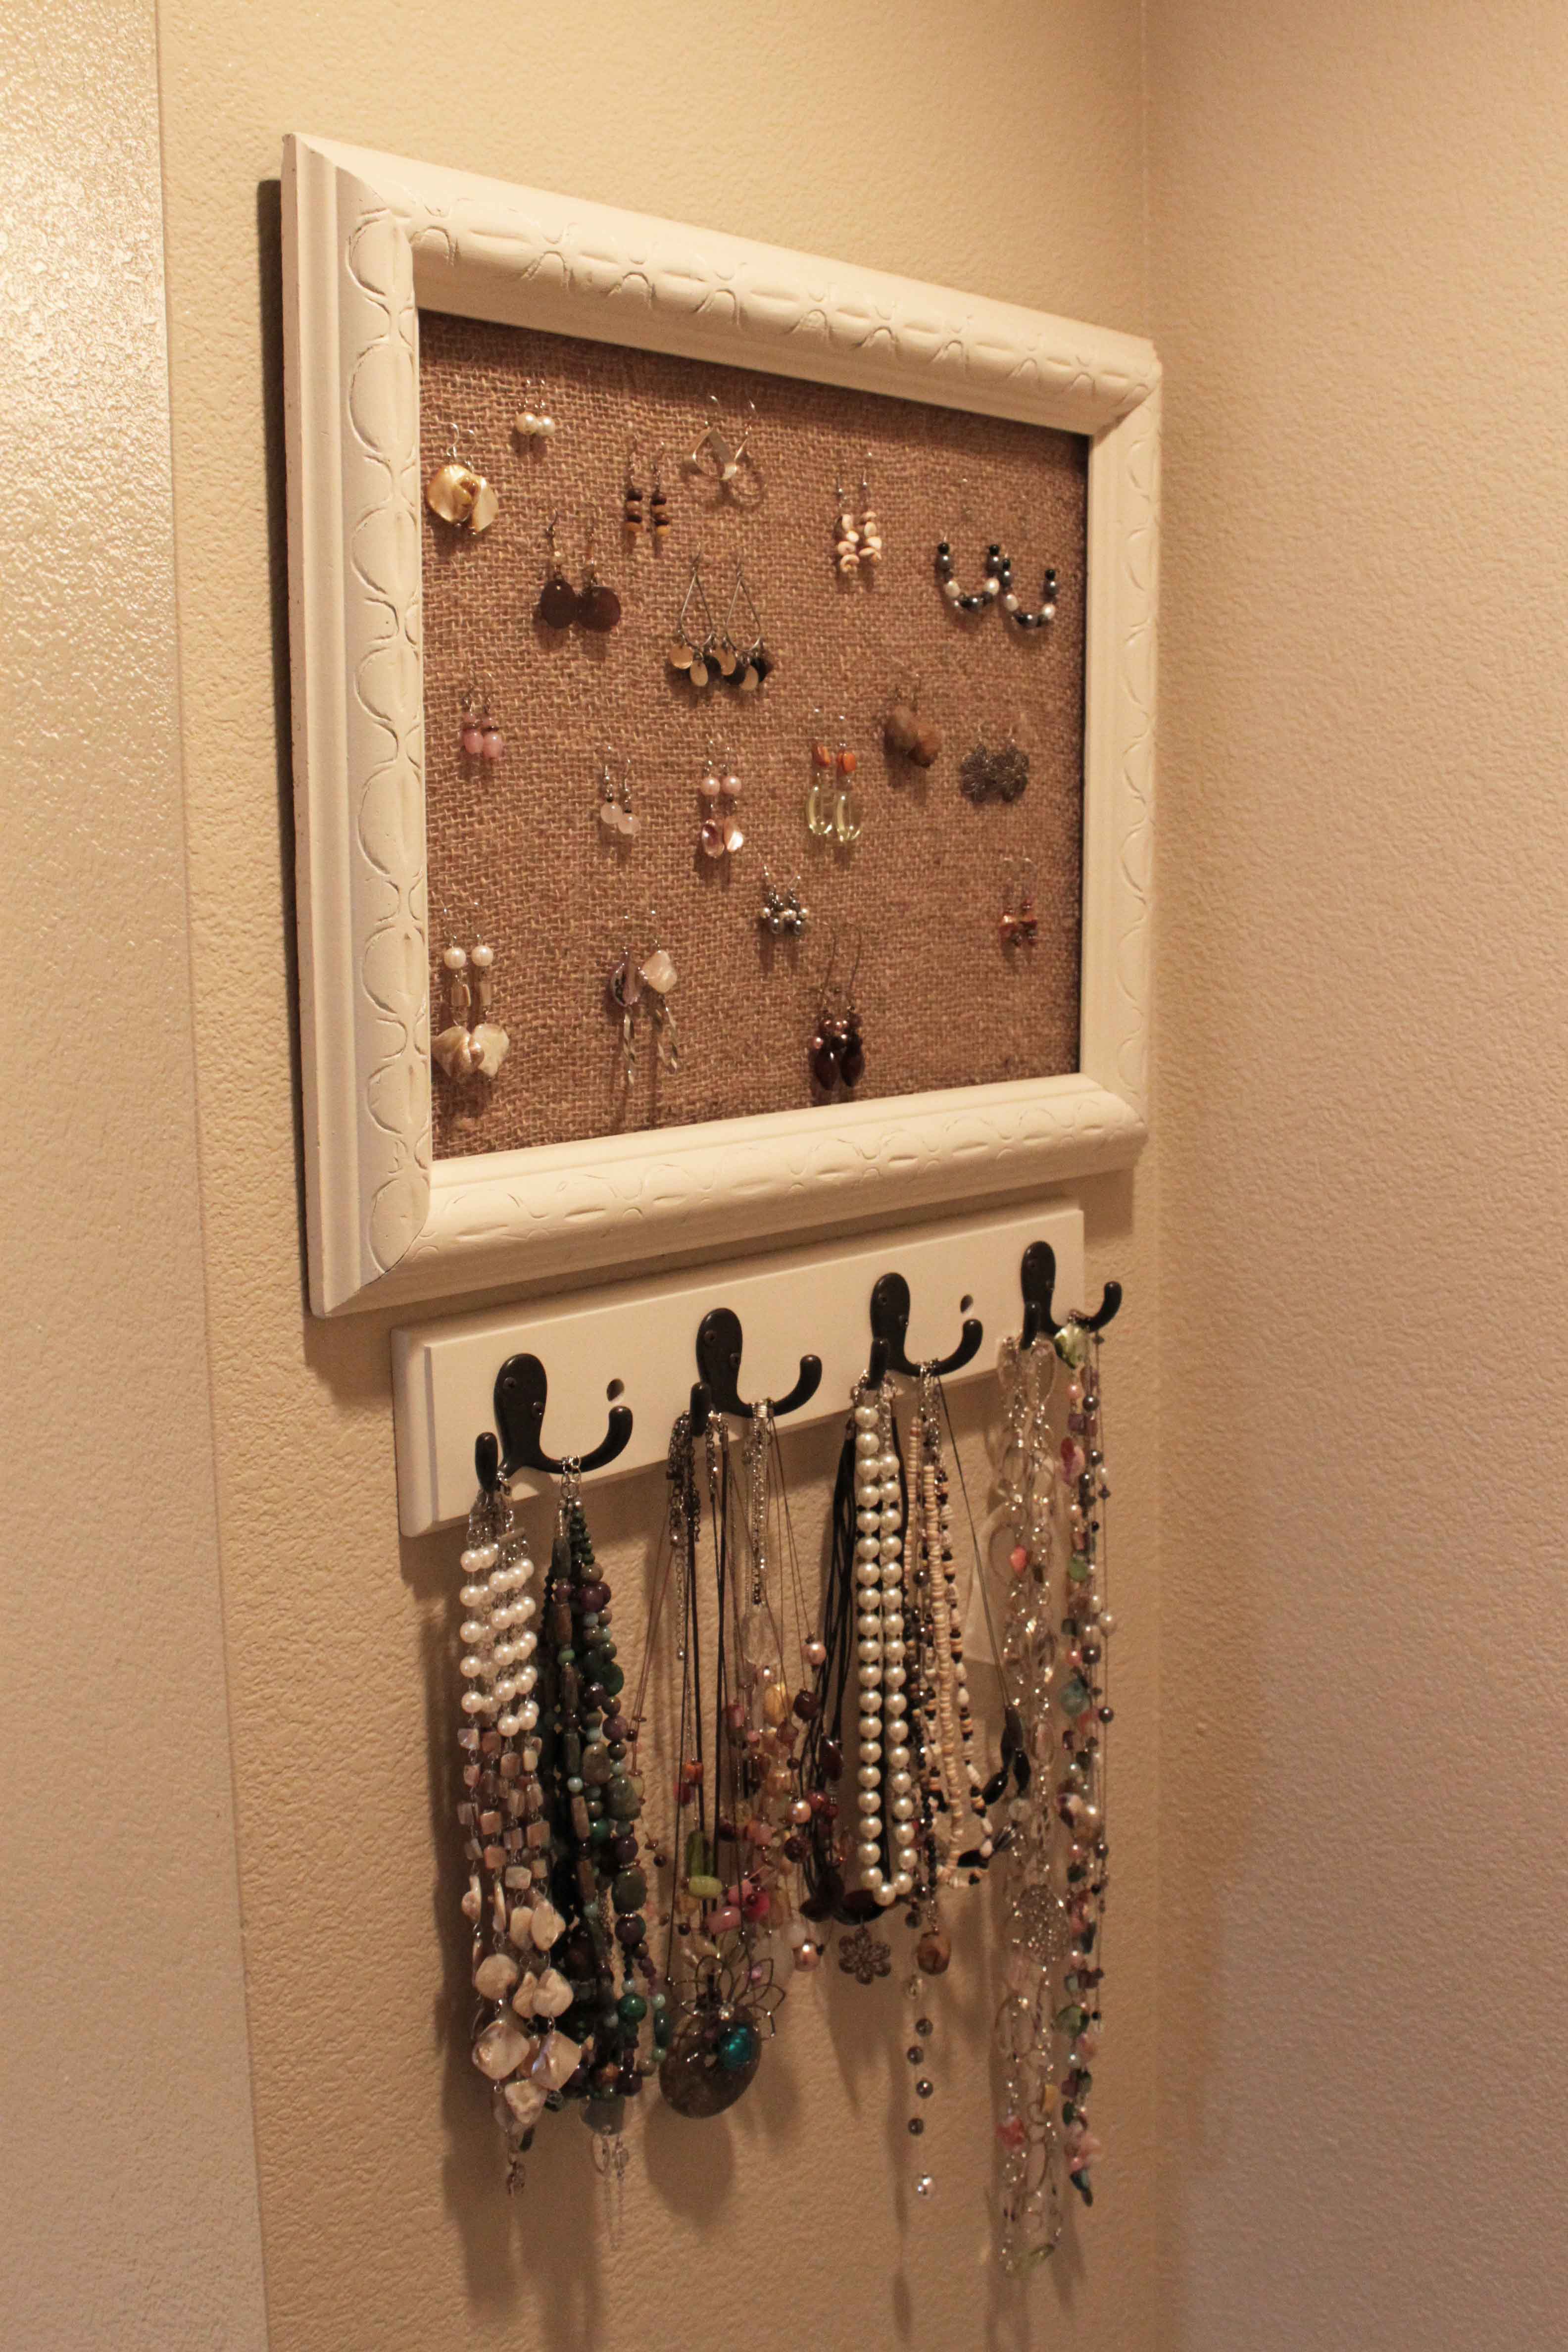
I have been wanting to organize my jewelry for awhile. It has been a heaping mess for quite some time! Here is what I came up with – a fun and easy jewelry organizer! Sorry, I didn’t take any before photos, but I can tell you what I did, it was really easy!
Supplies
Old empty frame ($1.49 at Goodwill)
Burlap sack (already had)
spray paint (already had)
hook thing for my necklaces (already had)
staple gun
screwdriver
First I spray painted primer on my frame. It was a really ugly blue. Then I did a couple coats of my favorite spray paint, Rustoleum Antique White, that you can buy at Lowe’s. Then I cut up an old burlap sack I’ve had in my garage for years (yes, I did wash it first!). I stretched it tight behind the frame then used the staple gun to secure it. Easy and fast!
Then the holder my necklaces are on I have had in my garage for a few years, it was an ugly cherry wood color. It used to be used to hang coats on before we redecorated our family room. So all I did is use a screwdriver to take off the hardware, spray paint with Antique White, then put the hardware back on. Super easy!
I LOVE how my jewelry organizer looks! Fits my style and my budget! Talk about pinching your pennies. Look around your house to see what you already have before starting a project. You might be surprised to find things that will work, with a little spray paint and imagination.
A PYP Best Blog! The Little Ways to Save: Homemade ‘Drano’!
Just in case you missed this DIY article making your own homemade drano the first time we shared it a couple of years ago, we are republishing it. After Marne wrote this blog originally, we got an awesome response. This is one of the PYP Best Blogs!
As I posted last month, this year I am trying to do better on my grocery budget. I want to not only bring my cost down, I want to be more thrifty in how I feed my family. Make more things from scratch, eat out less, etc. In January I was very close to my goal and so far in February I have spent $343.14. A little more than where I was in January but this is all a process, right? A learning curve. For me, its not always about the exact penny spent but if I am improving in the way I feed my family. More on that later.
Not only am I wanting to save in the grocery budget department, I also want to save money in every way I can. Today I wanted to share with you an old trick. At least that is what I learned when I did some searching online.
If you have a slow or clogged drain, don’t go out and buy Drano (which is super expensive and contains hazardous chemicals), you can clear that drain with 3 simple things you already have in your house!

Here is what you will need:
1/2 box baking soda
1/2 c. white vinegar
1 qt. boiling water
1 washcloth
Take the baking soda and dump it down the drain as good as you can. Pour in the vinegar. IMMEDIATELY plug the drain with the washcloth so the foaming action stays in the pipe, and not in the sink.
Let sit for 30 minutes.
After the time is up, dump the boiling water down the drain. VOILA! A clear drain with haveing to buy drano. This works almost every time.
And I can vouch for this method. I did it this morning, and it worked fabulously! Try out your homemade drano and let me know what you think.
A PYP Best Blog! Max & Ruby Birthday Cakes plus Buttercream Frosting!
Just in case you missed this DIY article on making cute Max & Ruby birthday cakes with a great recipe for buttercream frosting the first time we shared it a couple of years ago, we are republishing it. After Marne wrote this blog originally, we got an awesome response. This is one of the PYP Best Blogs!
My youngest child turned 3 years old last Friday. I am so sad to see her growing up…..the more kids I have the longer I want them to stay little! She loves the show Max & Ruby, so she requested a Max & Ruby birthday cake.
I ordered this bunny cake pan off Amazon and got to work! Didn’t they turn out so cute? My daughter loved them!

Here is what I did:
You will need:
3 cake mixes (and ingredients to bake them)
bunny cake pan
9×13 cake pan
a large platter to put cakes on (I just used the bottom of my sheet pans)
a double recipe of buttercream frosting (below)
Wilton icing colors
Bake two bunny cakes. Then bake another cake in a 9×13 pan. After the cakes have cooled, cut the 9×13 cake in half and assemble beneath each bunny cake for the shirt. I cut a small oval out so it would fit nicely under the bunny. Then you can decorate as desired!
I found this idea on Pinterest and just printed off the photo and copied it as best as I could with the buttercream frosting and details. I always make homemade buttercream frosting on my cakes. Tastes so much better! Here is my favorite buttercream frosting recipe:
Homemade Buttercream Frosting
2/3 cup butter, softened
4 cups confectioners’ sugar
2 tablespoons milk
1 teaspoon vanilla extract (optional)
In a medium bowl, cream together the butter, confectioners’ sugar, and milk until light and fluffy, about 3 to 4 minutes. Beat in the vanilla.
A PYP Best Blog! Make Your Own Quote Wall!
Just in case you missed this DIY article on making your own quote wall the first time we shared it a couple of years ago, we are republishing it. After Marne wrote this blog originally, we got an awesome response. This is one of the PYP Best Blogs!
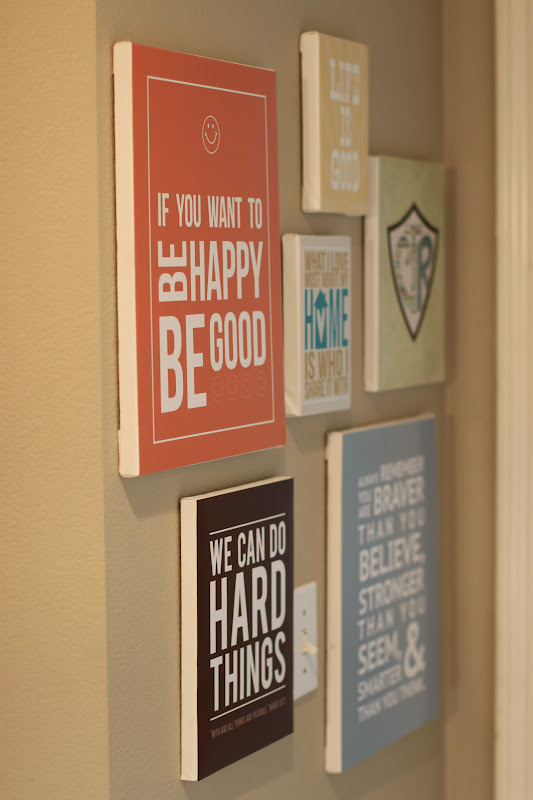
I love quotes and inspirational thoughts. They lift me up and help inspire me to be a better person. I have seen ideas online on creating a quote wall, so I decided to improvise and make my own. There was a small blank wall by my kids’ bathroom and it was the perfect spot.
Instead of buying frames, I used canvases that I already had, except the 5×7 sizes. They had been under my bed for several years, so I knew they would be perfect! And I was able to use what I had a home. Love that. I got the 5×7 canvases for $1.99 each last week at Micheal’s at 60% off.
I printed my prints at Costco, high quality and the best price around. Then I just modge poged the prints onto the canvas…easy peasy. I didn’t put anything on top of the print. Then I stuck them to the wall with a 3M product…you know those one that come off clean and don’t damage the wall? It was a really fast project to do.
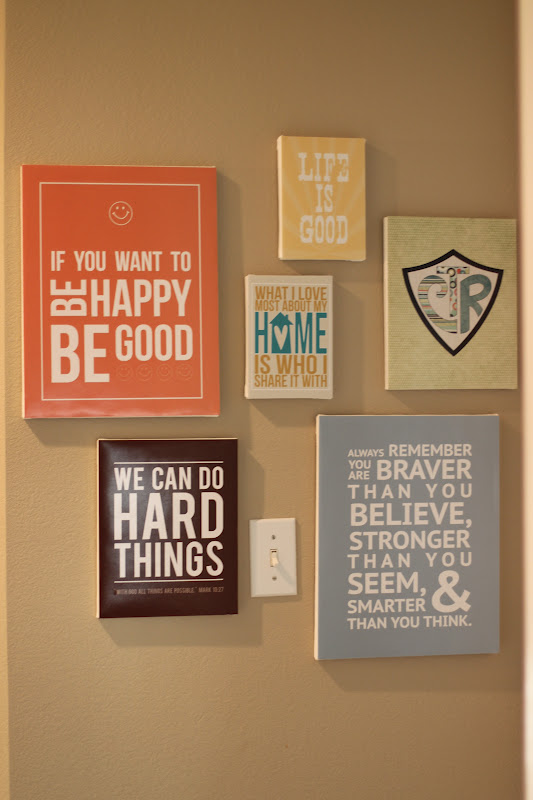
I am really pleased with it and my kids really like it. I heard them telling their friends the other day, “If you want to be happy, be good!” I love having positive quotes on the wall and reminders. The kids see them everyday and we talk about what they mean.
Here are where I got the free prints on my wall in case you are interested. There are so many places online where there are free prints to download!
CTR print..Choose The Right (free)
We can do Hard Things (free)
Home print…Eighteen25 (free)
The other 3 prints were not free, but very reasonably priced at Simply Fresh Designs.
A PYP Best Blog! Make Your Own Brownie Mix!
Just in case you missed this DIY article on making your own brownie mix the first time we shared it a couple of years ago, we are republishing it. After Marne wrote this blog originally, we got an awesome response. This is one of the PYP Best Blogs!
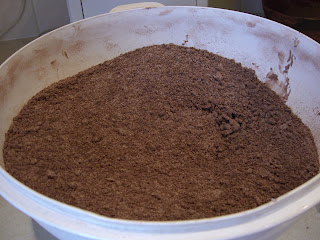
With one recipe of this homemade mix, I figure it is like having about 4-5 box mixes from the store. You can make several batches of things with one mix recipe. Besides brownies, you can also make fudge sauce and crinkle cookies. I made the brownie crinkle cookies yesterday and got 3 dozen cookies. With the cost of the ingredients figured in, I estimate the cost for a batch of brownies with this mix to be approximately about .30 cents . Not too bad, eh?
Plus, you are getting the satisfaction of knowing you are making something that you feel good about. You know what goes in there. There is so much crap in those box mixes, so much stuff that is really bad for us.
8 cups sugar (I do less, but that is just me)
4 cups all-purpose flour
4 tsp. baking powder
4 tsp. salt
2 1/2 c. baking cocoa
2 cups shortening
In a large bowl, combine the sugar, flour, cocoa, baking powder, and salt. Cut in shortening until the mixture resembles coarse crumbs, like this:
Store in an airtight container in a cool dry place for up to 6 months. I put mine in Tupperware, label it like so and stick it in my fridge in the garage. Yield: 18 cups.
Here are the recipes for the other treats from this mix:
Fudge Sauce
1 c. Brownie mix
2/3 c. water
In a saucepan, bring the brownie mix and water to a boil. Reduce heat, simmer for 1-2 miinutes or until thickened. Serve over ice cream.
Brownie Crinkle Cookies
4 c. Brownie Mix
2 eggs
2 tsp vanilla extract
In a mixing bowl, combine the brownie mix, eggs, and vanilla and mix well. Drop by tablespoonfuls 2 inches apart onto greased baking sheets. Bake at 375 degrees for 8-10 minutes or until the tops are cracked. Cool 2 minutes before removing from pans to wire racks to cool. Makes 3 dozen.
Walnut Brownies
4 c. Brownie Mix
4 eggs
2 tsp vanilla extract
1 1/3 cups chopped walnuts
1 c. semi-sweet chocolat chips
In a mixing bowl, combine the brownie mix, eggs, and vanilla; mix well. Fold in the walnuts and chocolate chips. Pour into a greased 9×13 pan. Bake at 350 degrees for 35 minutes or until a toothpick inserted near the center comes out clean. Cool on a wire rack. Makes 2 dozen.
A PYP Best Blog! Making popsicle stick bracelets! Plus bonus organizing tips!
 Just in case you missed this DIY article on making popsicle stick bracelets, the first time we shared it a couple of years ago, we are republishing it. After we first published this blog originally, we got an awesome response. This is one of the PYP Best Blogs! (I also included a couple oldie but goodie organizing tips! Perfect for all the back to school clutter and chaos!)
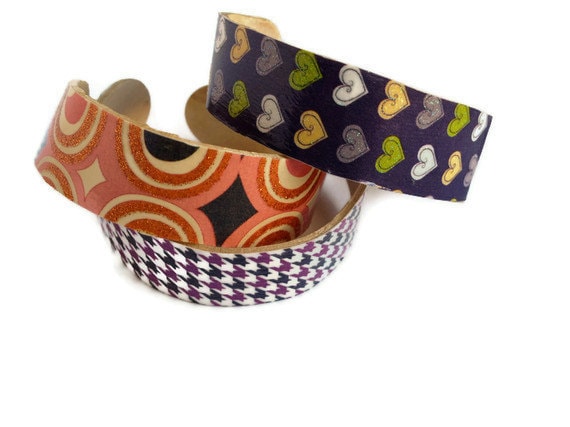
These are so much fun to make! You can recycle your popsicle sticks from the Summer – or purchase jumbo craft sticks to make these. They are so cute and simple to make and decorate.
What you need: Craft sticks (or popsicle sticks); modge podge; craft paper; paints; whatever you want to use to decorate your bracelets! You are only limited by your imagination. You will also need drinking cups/glasses, rubber bands (optional) and an emery board or some sandpaper.
Boil a pot of water and add your craft sticks to the water. Some sticks will break so make sure you boil more bracelets than you actually want/need. Let sticks boil for 30 minutes. Take off the heat and let sit in the pot of hot water for another 30 minutes.
Form your craft stick bracelets around cups or glasses or vases (measure wrists to get the right sizes!) and rubber band around. You can also form the bracelets inside the containers and you will not need rubber bands. Let dry overnight. Sand the bracelets with an emery board or sandpaper as necessary and…
Decorate!
~~~~~~~~~~~~

Back to school means back to school hair! Here’s an organizing tip you NEED if you’re not doing it already. Just purchase an inexpensive carabiner and voila – instant organization for one of the messiest things in the bathroom, your ponytail holders!
~~~~~~~~~~~~

With all of the white sales going on this week I was reminded of a project that I’ve been wanting to do. I’ve seen this idea in several places online and I’m sure I’ve pinned it at least once! This is such a simple way to organize scarves. You just put shower curtain rings on a hanger and voila, instant scarf organizer! This could be used for ties as well. This is one I need to do today! You could spend $14 and buy one, but you can make it yourself for so much cheaper.
A PYP Best Blog! Making file boxes from cereal boxes!
Just in case you missed this DIY article on making file boxes from cereal boxes the first time we shared it a couple of years ago, we are republishing it. After we published this blog originally, we got an awesome response. This is one of the PYP Best Blogs!
My kids love, love, love anything that has to do with art, coloring, drawing, etc. We have tons of coloring books, how-to-draw books, workbooks…you name it! But I get frustrated with the mess it can create…books all over the place! This isn’t even all of them!
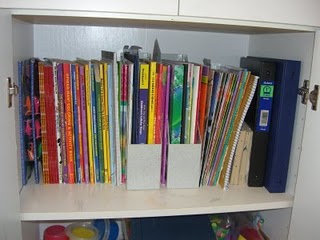
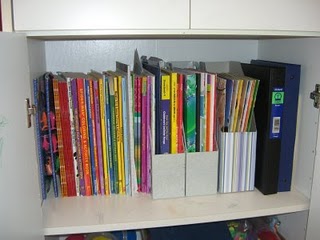
As you can see in the photo, I have a couple of plastic file boxes. I love organizers of any kind! I am working on organizing all these books, and I want more file boxes. But I am too thrifty to just go spend $7+ dollars on several more organizers….so I am making my own! We all have empty cereal boxes around the house. Here is one way to use them.
Supplies you will need:
a large cereal box (large enough to fit the books inside)
modge podge
brush
scissors
scrapbook paper to cover the cereal box
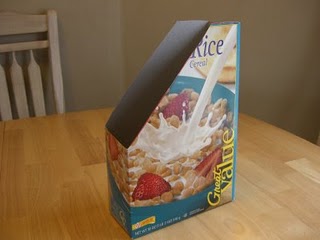
 You can see on the cereal box I took a permanent marker and drew the lines where I wanted to cut the box. I just used my current file boxes as a template. You can eyeball it with a ruler too.
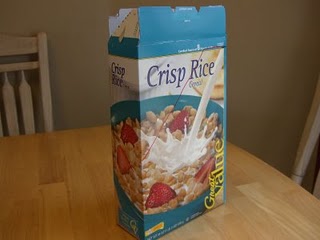
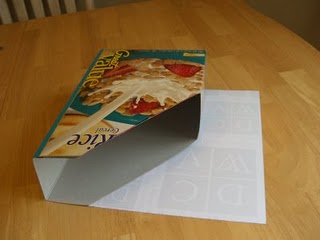
Then cut your box on the lines you drew. Here is what mine looked like after I cut it:
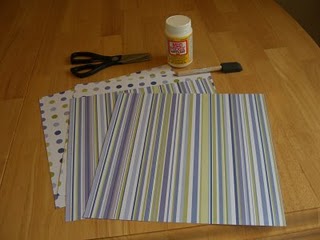
Then you will want to take your scrapbook paper and trace to cut.
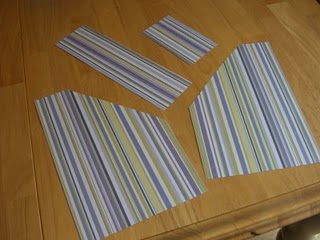
At first I was going to use a couple of different kinds of paper on the box, but then I changed my mind. Here are all the paper pieces, ready to be put on the box.
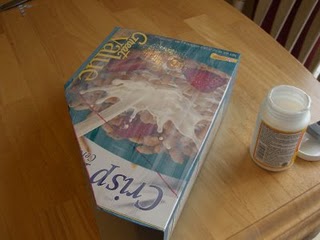
Take your modge podge and paintbrush and cover one side at a time. Line up the paper pieces that fit on that side and press firmly. Get out all the air bubbles and smooth out.
When you are all done with each side here is what it looks like. Pretty cute, huh!
After it dries for a bit, take your paintbrush and paint modge podge over the edges and corners to reinforce durability.
Now you have a cute file box! I put it in the cupboard…and it looks great! Now I need to make a few more. I will also label them with the book contents to make it easier for the kids to put things back where they belong.
 I already had all my supplies on hand for this project, so I didn’t have to spend any extra money to start organizing my kids workbooks. Next time you need to do some organizing, think thrifty and pinch your pennies!
A PYP Best Blog! Thrifty and Fun Birthday Cake Gift!
Just in case you missed this DIY article on making a thrifty and fun birthday cake gift the first time we shared it a couple of years ago, we are republishing it. After Marne wrote this blog originally, we got an awesome response. This is one of the PYP Best Blogs!
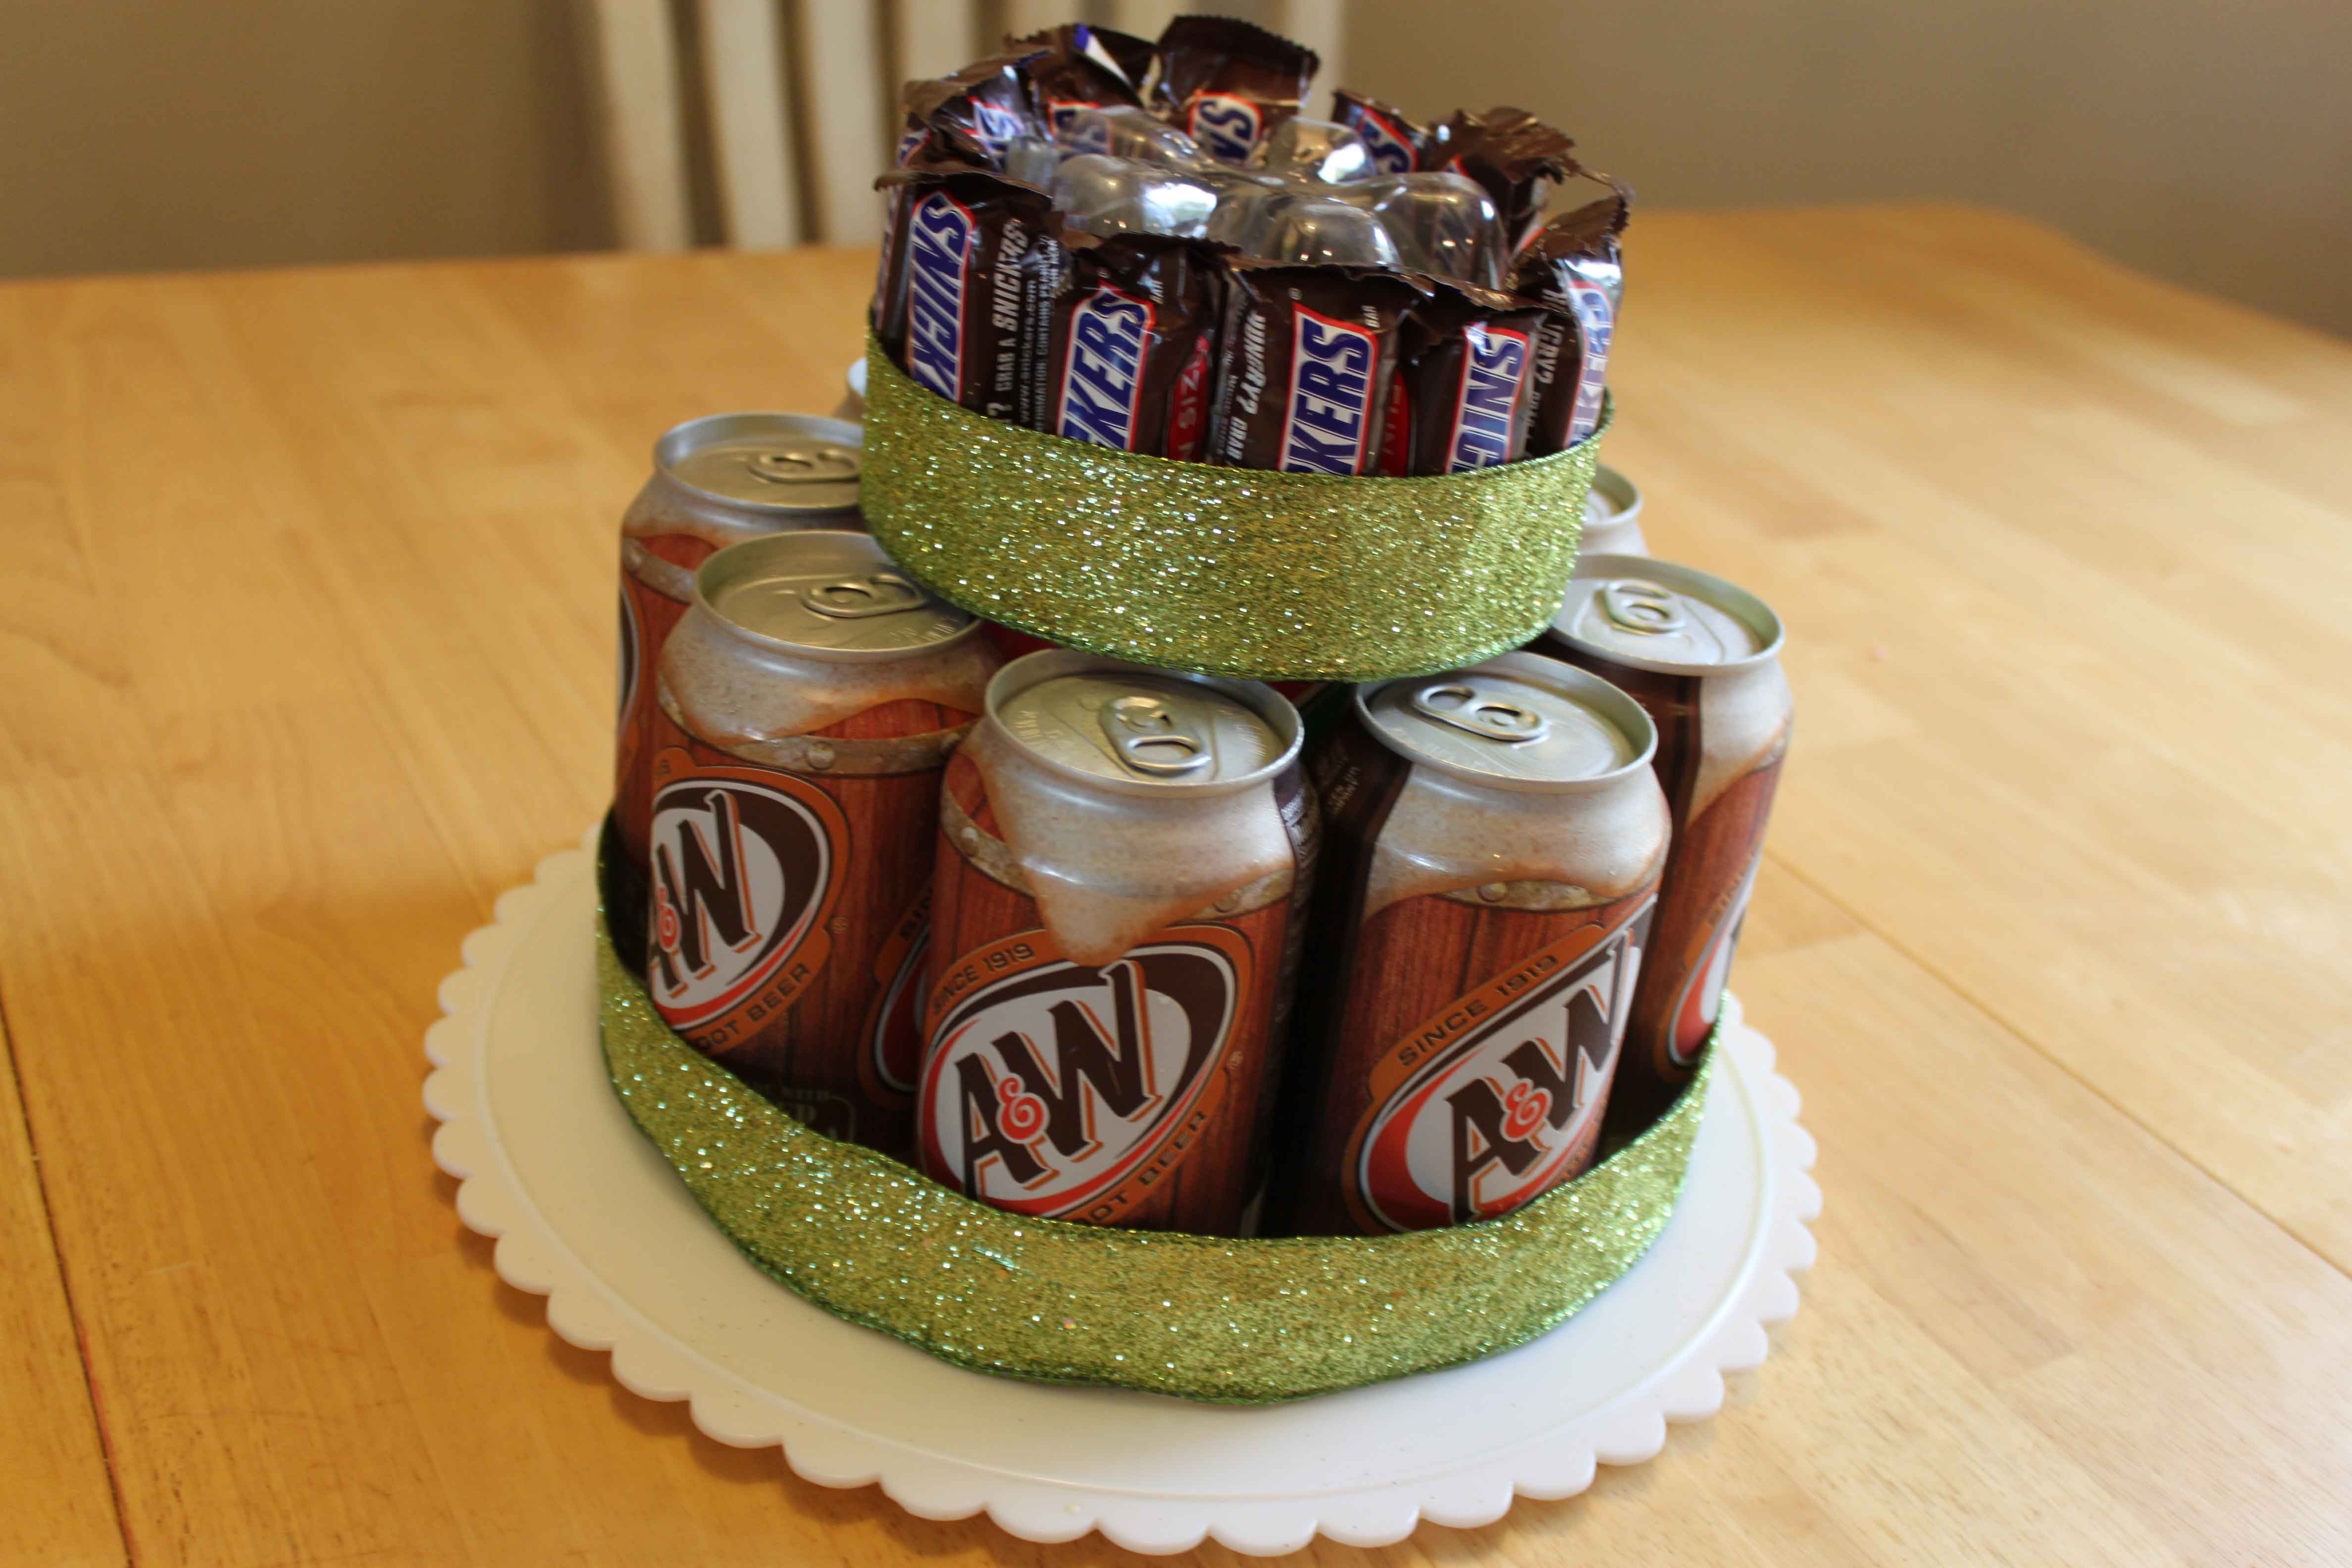
Are you looking for a gift to give a teenager or friend for their birthday? Look no further! This is a fun, quick, easy and satisfying gift idea for all ages! In fact, I made this today for my son’s 12th birthday…as his birthday cake! He LOVED it!

Here is what you need to make this fun birthday cake!

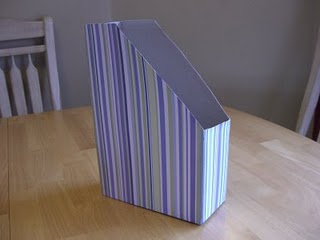
Empty 2 liter bottle (with the top cut off so it sits flat)
8 soda cans of your choice
12-14 mini candy bars of your choice
wide ribbon for the cake
thin ribbon for the top
candle
cake plate
tape
Begin by placing the two liter on the cake plate upside down (so the rutted edge bottom is now the top) and place the soda cans around it. You can place tape on the soda cans so they stick to the plastic bottle and don’t shift.
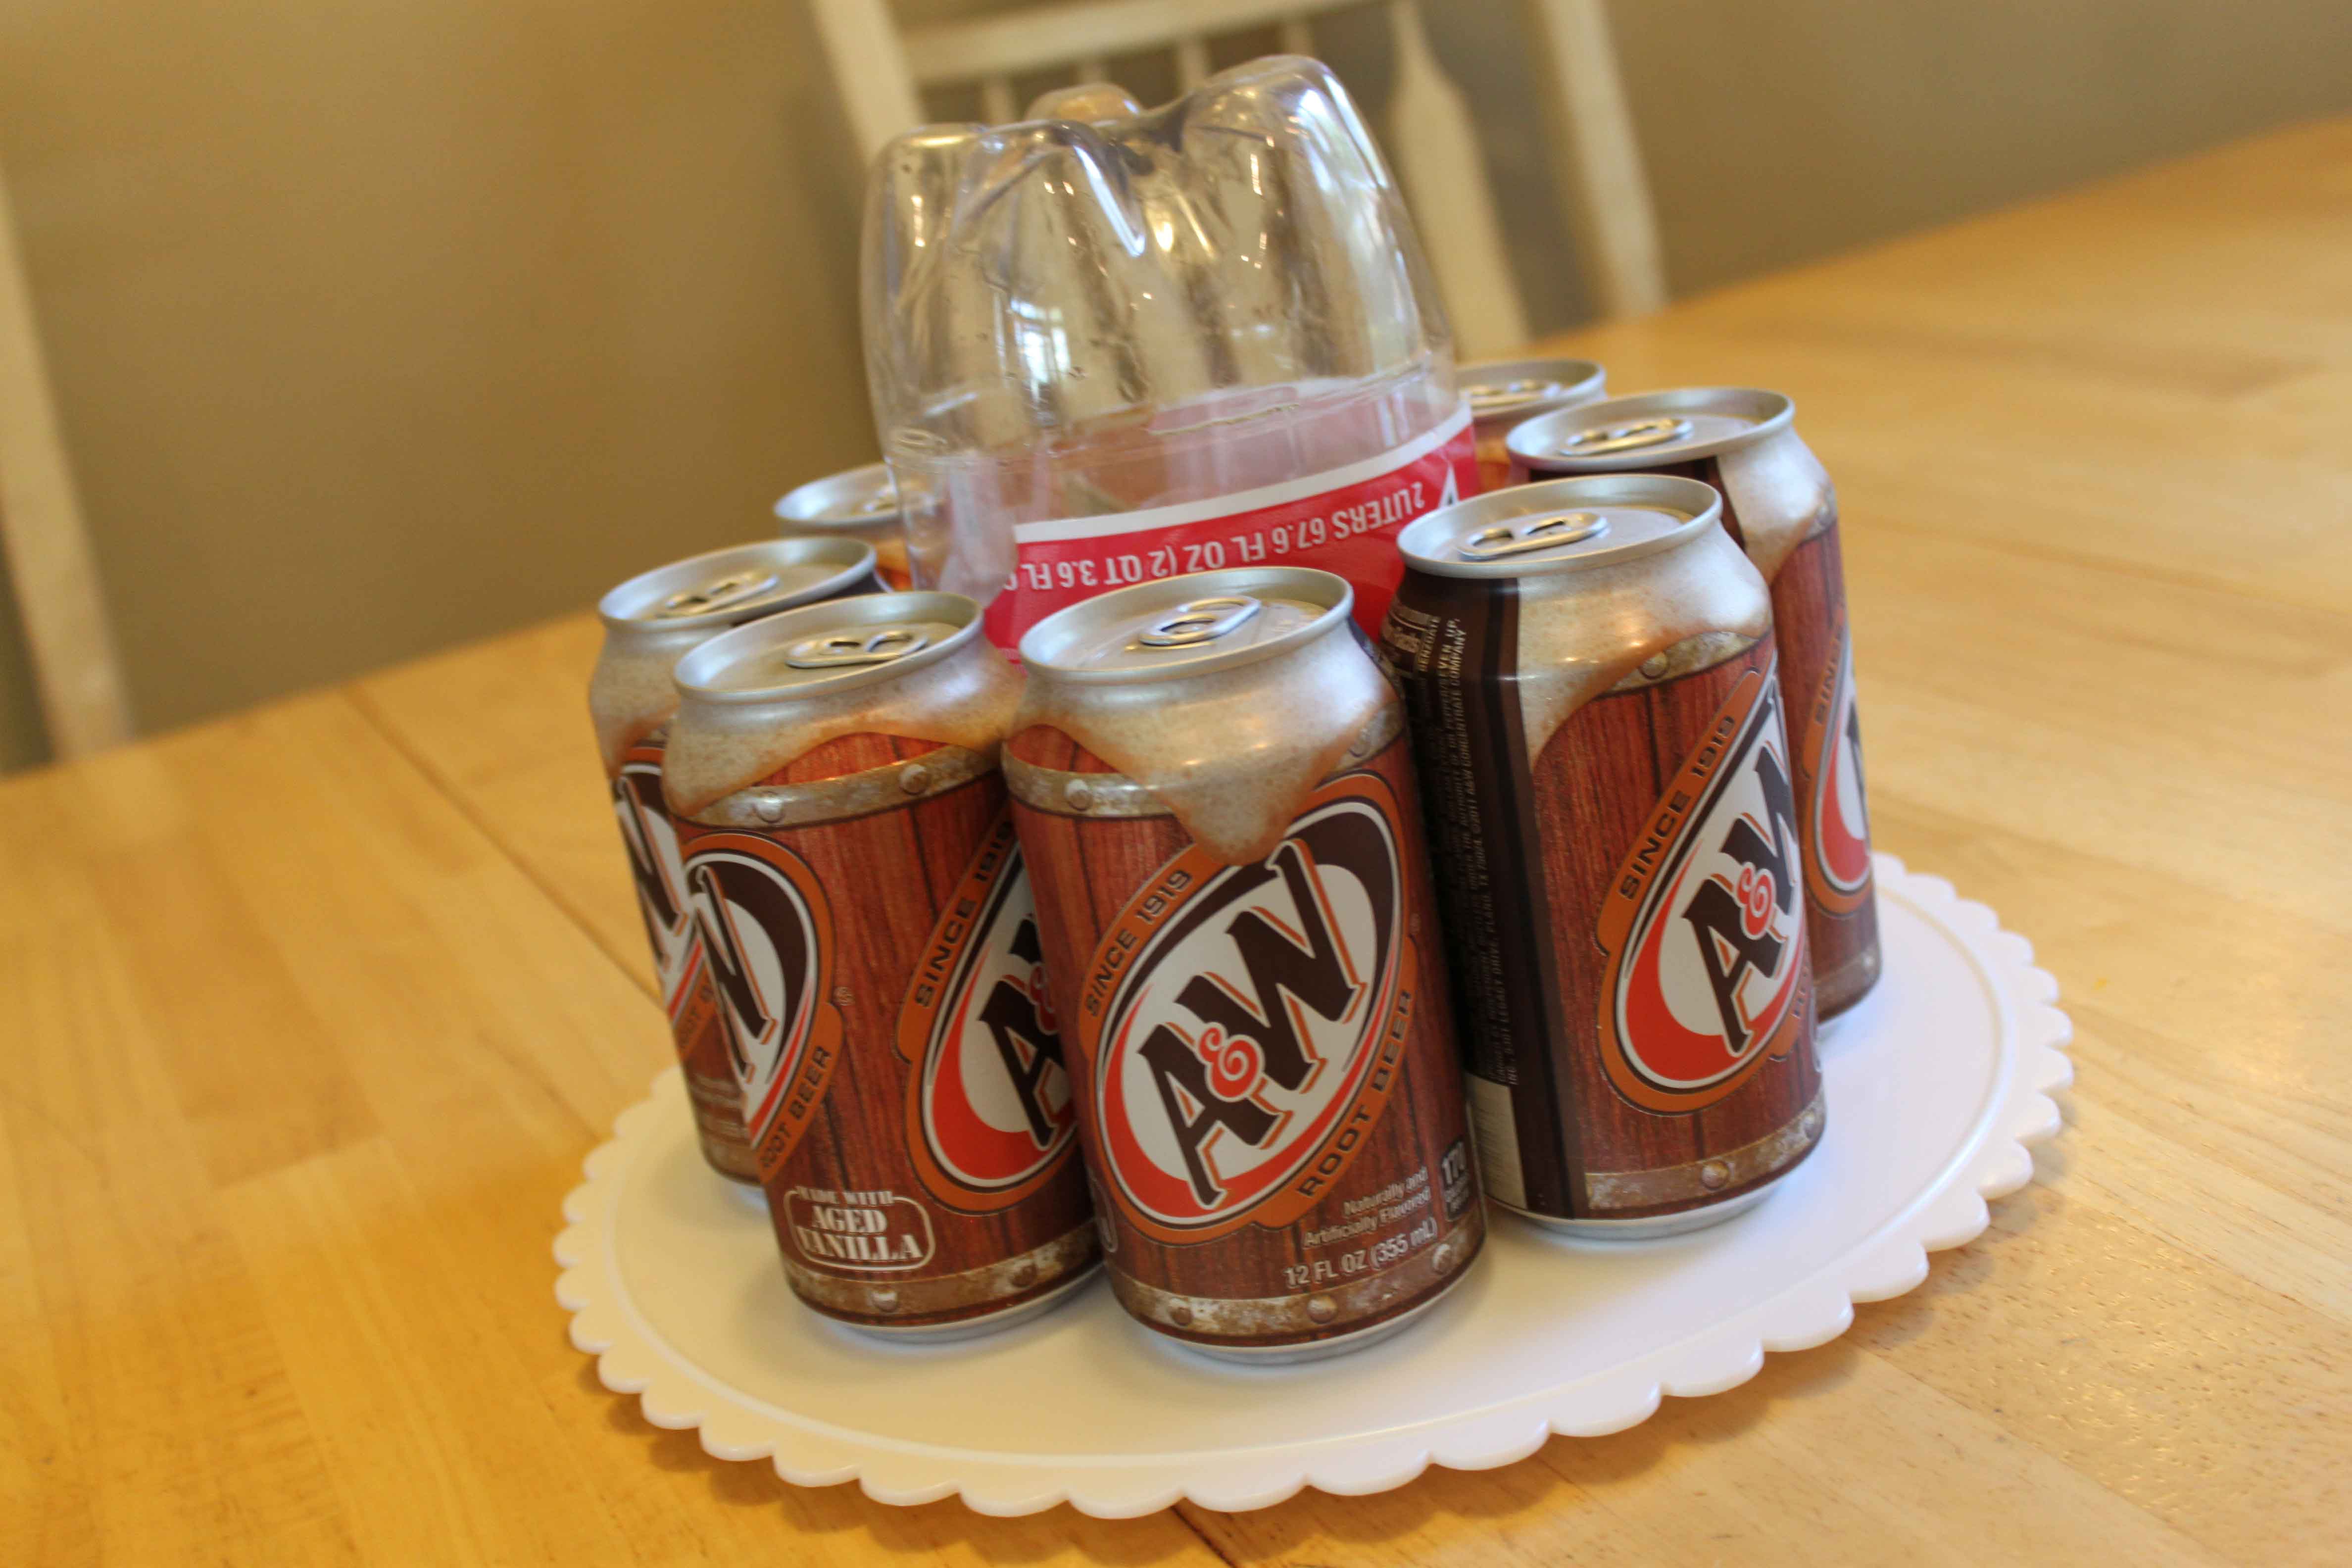
Then place the candy bars around the same way. I also used tape so they didn’t fall. I placed them up a little higher as the wide ribbon would cover it.
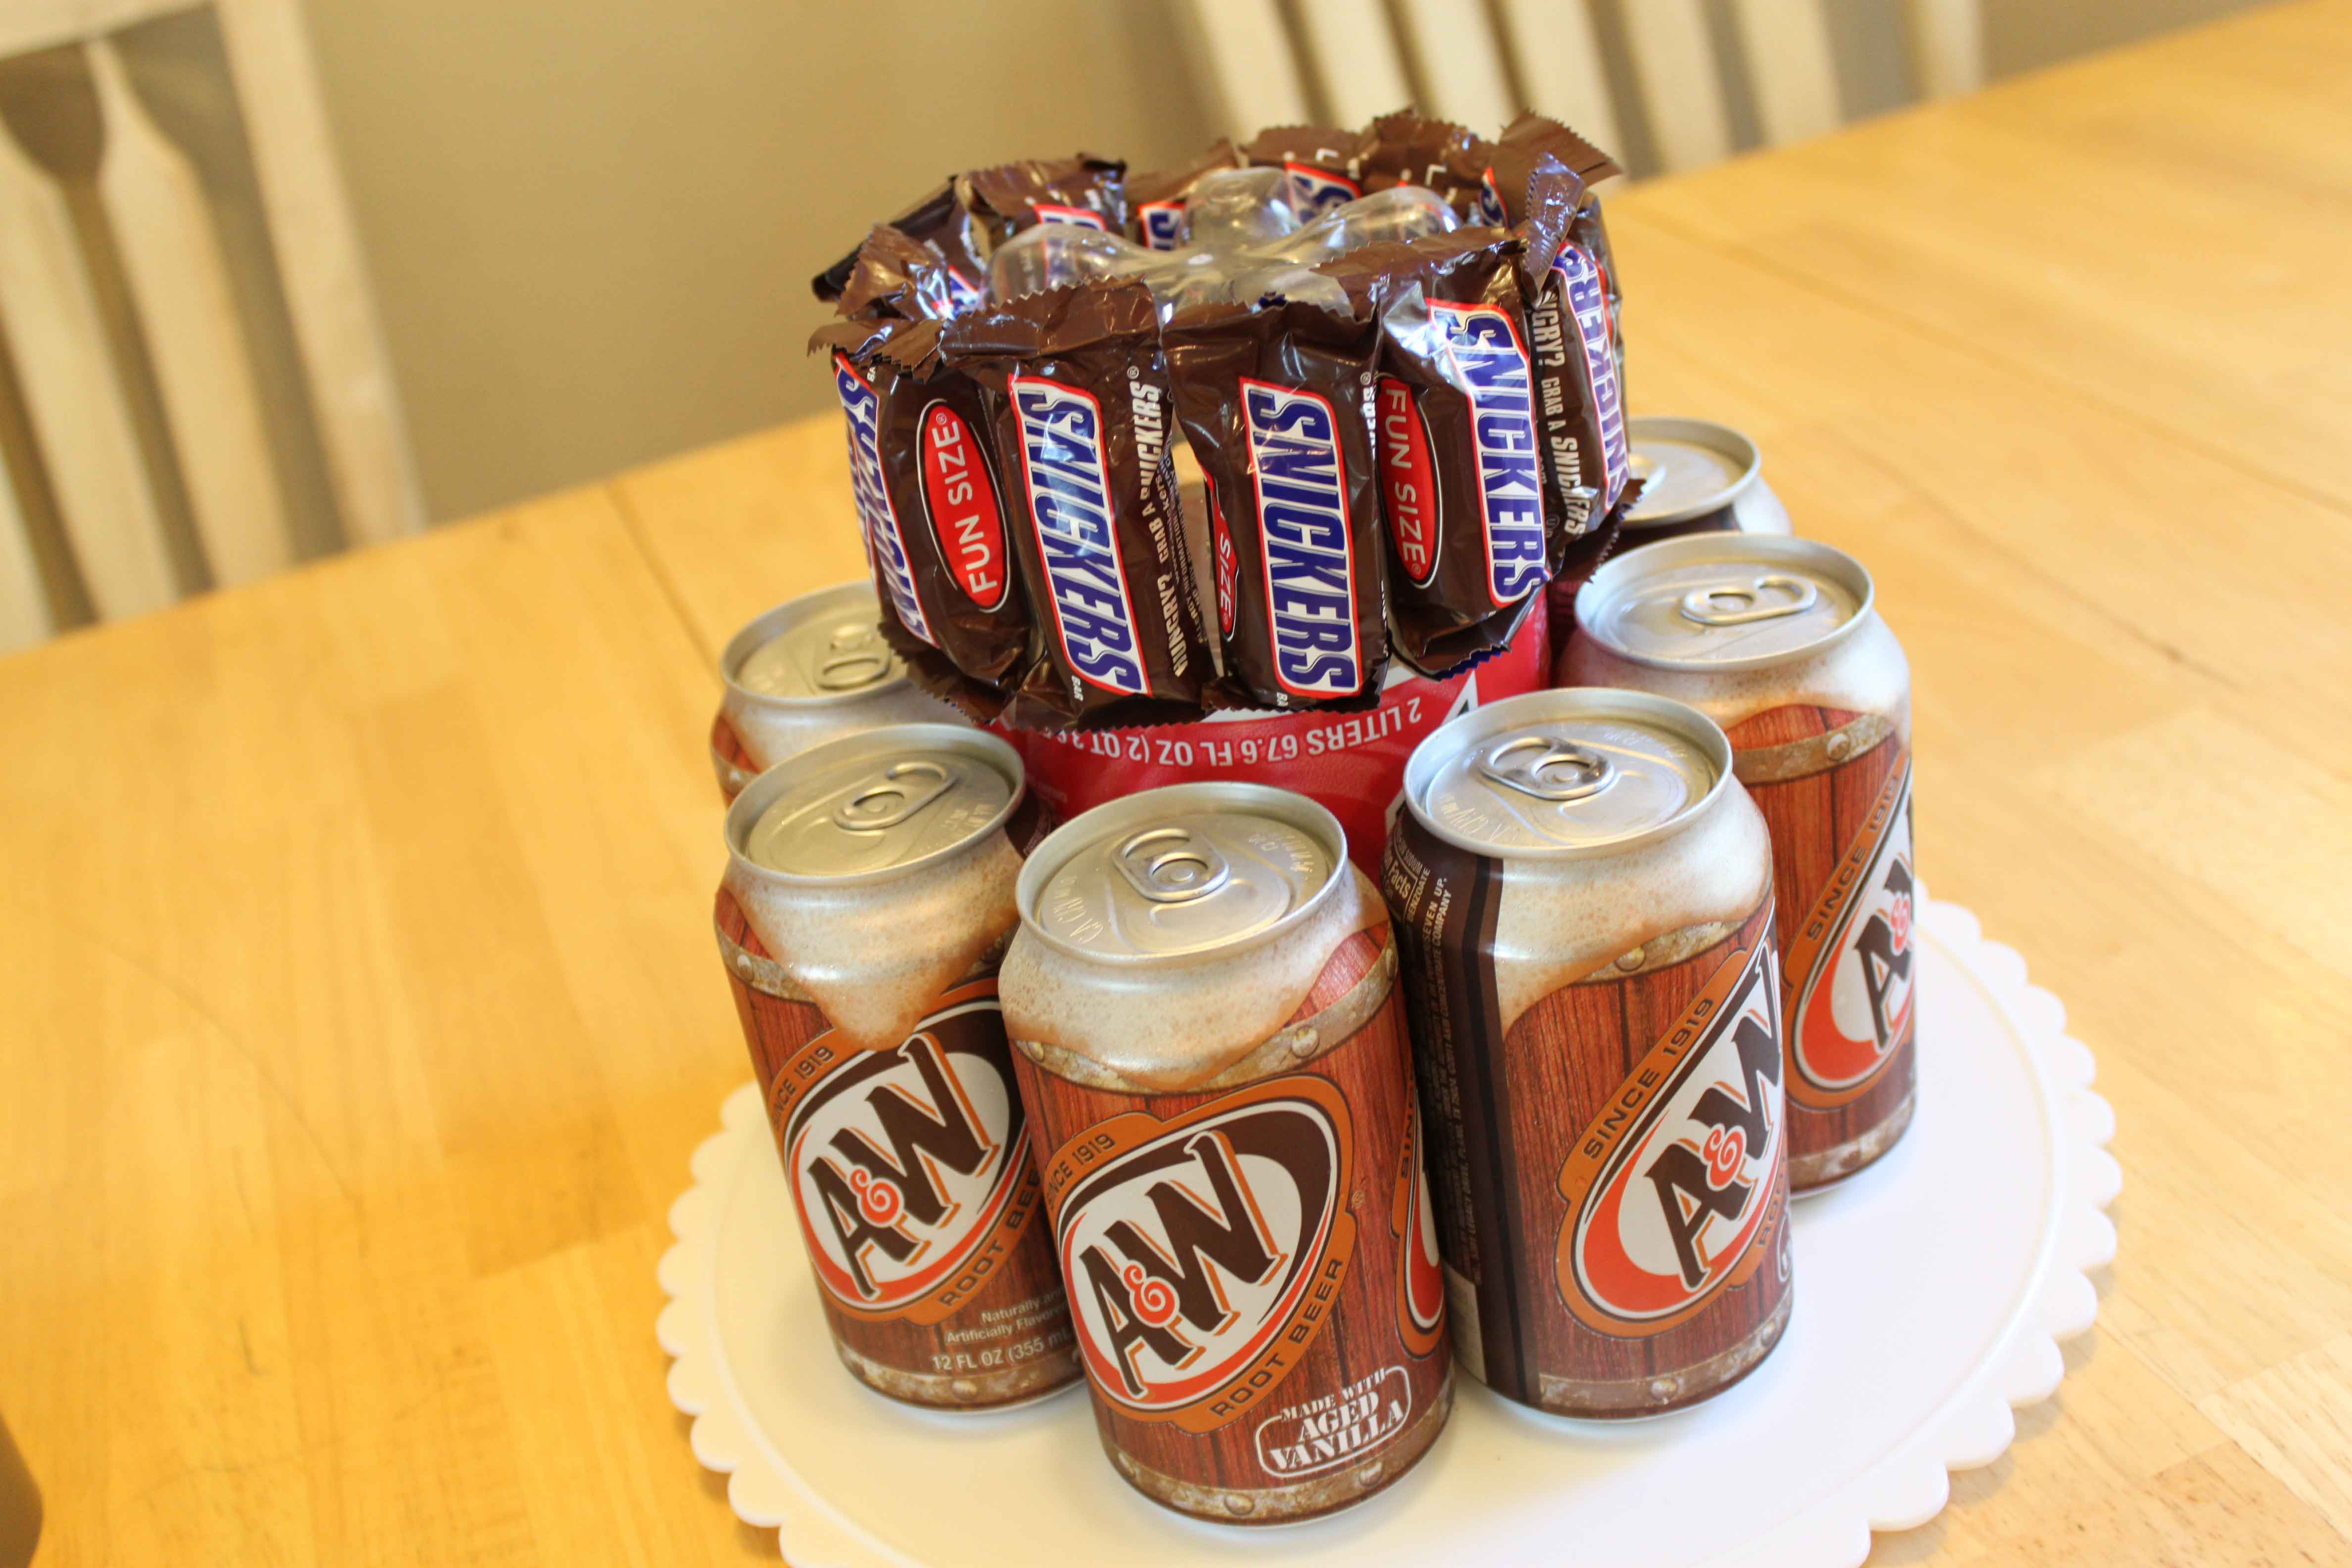
Then cut the wide ribbon to size and put it around both spots as shown. I stapled my ribbon together after measuring it and cutting it, then slipped it over where it needed to go.
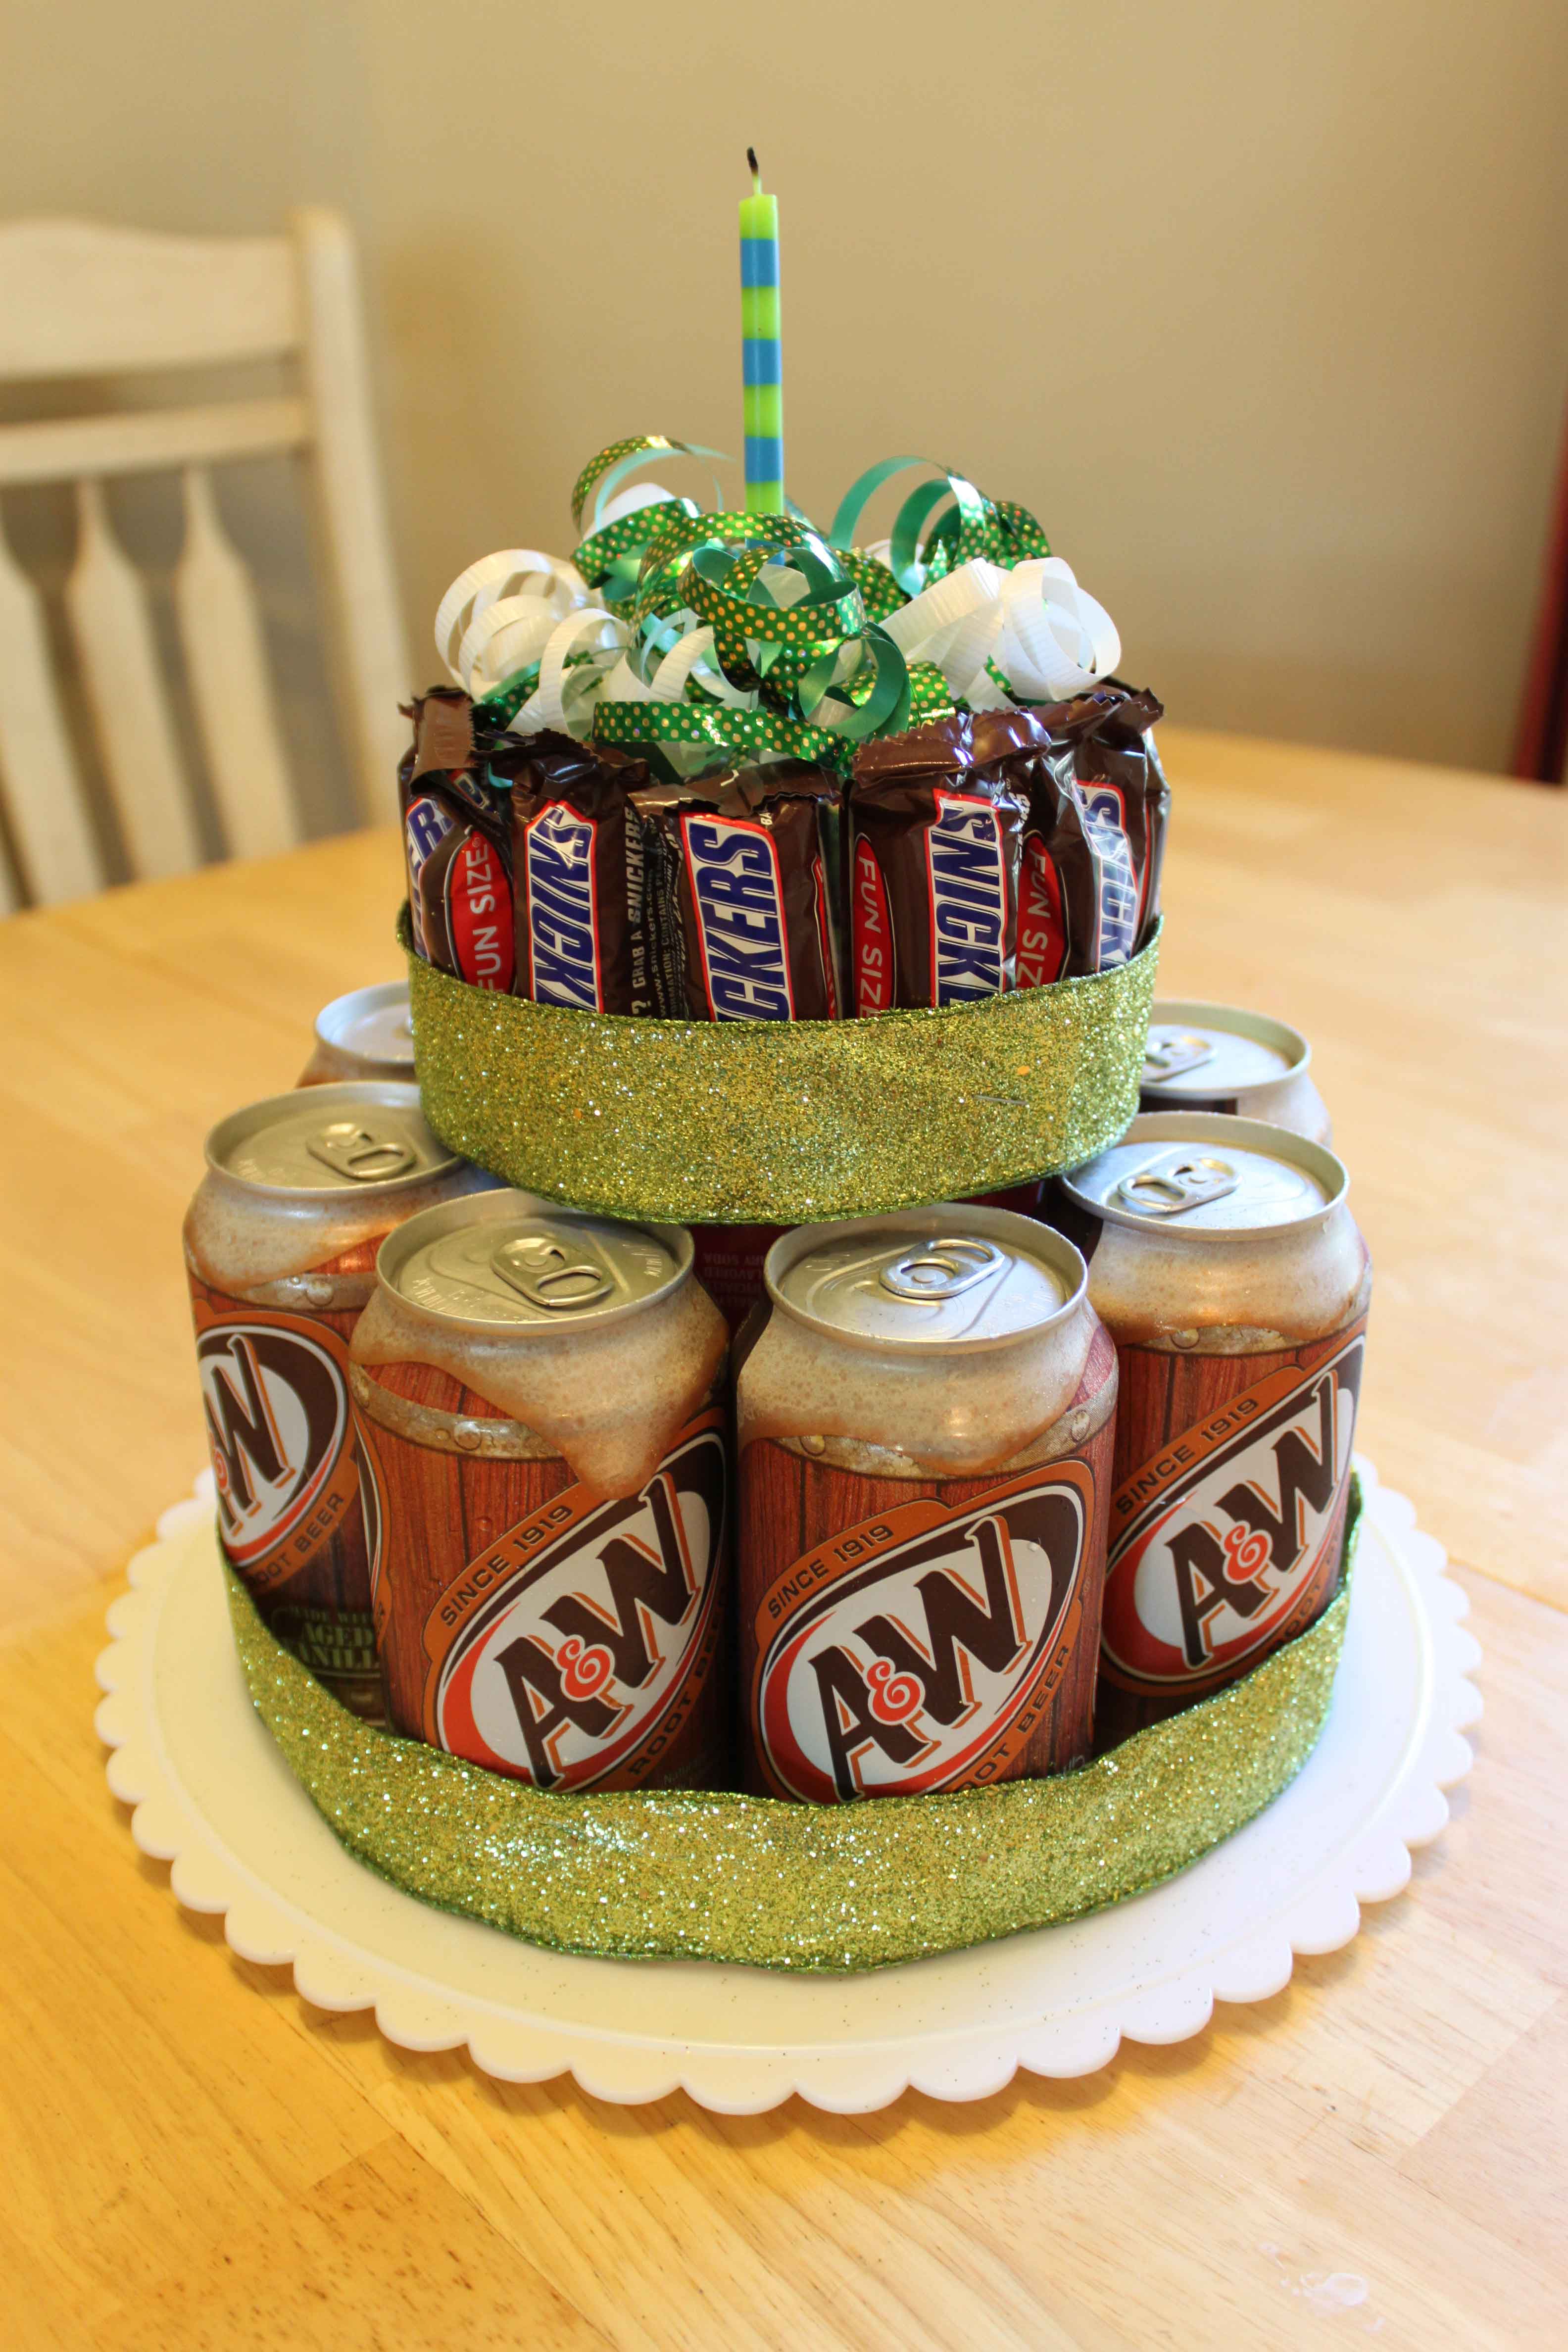
The last step is to poke a hole in the top of the bottle (in the middle of the notches) and put your candle in. I actually hot glued my candle on tonight, and it worked just fine! Then cut a bunch of thin ribbon, curl it, and tape it in place to cover the rest of the bottle. Now you have a totally fun, cute, thrifty and awesome gift for a birthday! This is a perfect idea for those who don’t bake.
A PYP Best Blog! DIY Garage Mudroom on a Budget!
Just in case you missed this article on DIY garage mudroom on a budget the first time we shared it a couple of years ago, we are republishing it. After Marne wrote this blog originally, we got an awesome response. This is one of the PYP Best Blogs!
I have been looking at mudroom ideas online for months. The idea of making a garage mudroom is not a new one, but I needed to really tweak all these ideas I was finding. Simply because we have hardly any space. We have a 2-car garage and are pretty cramped. But I KNEW I could do it, and we did! My only regret was that I forgot to take before pictures! We were too anxious to get it done before we left for Thanksgiving. This post is proof that you don’t have to spend much money to have a functional and organized mudroom! Here is what we did.
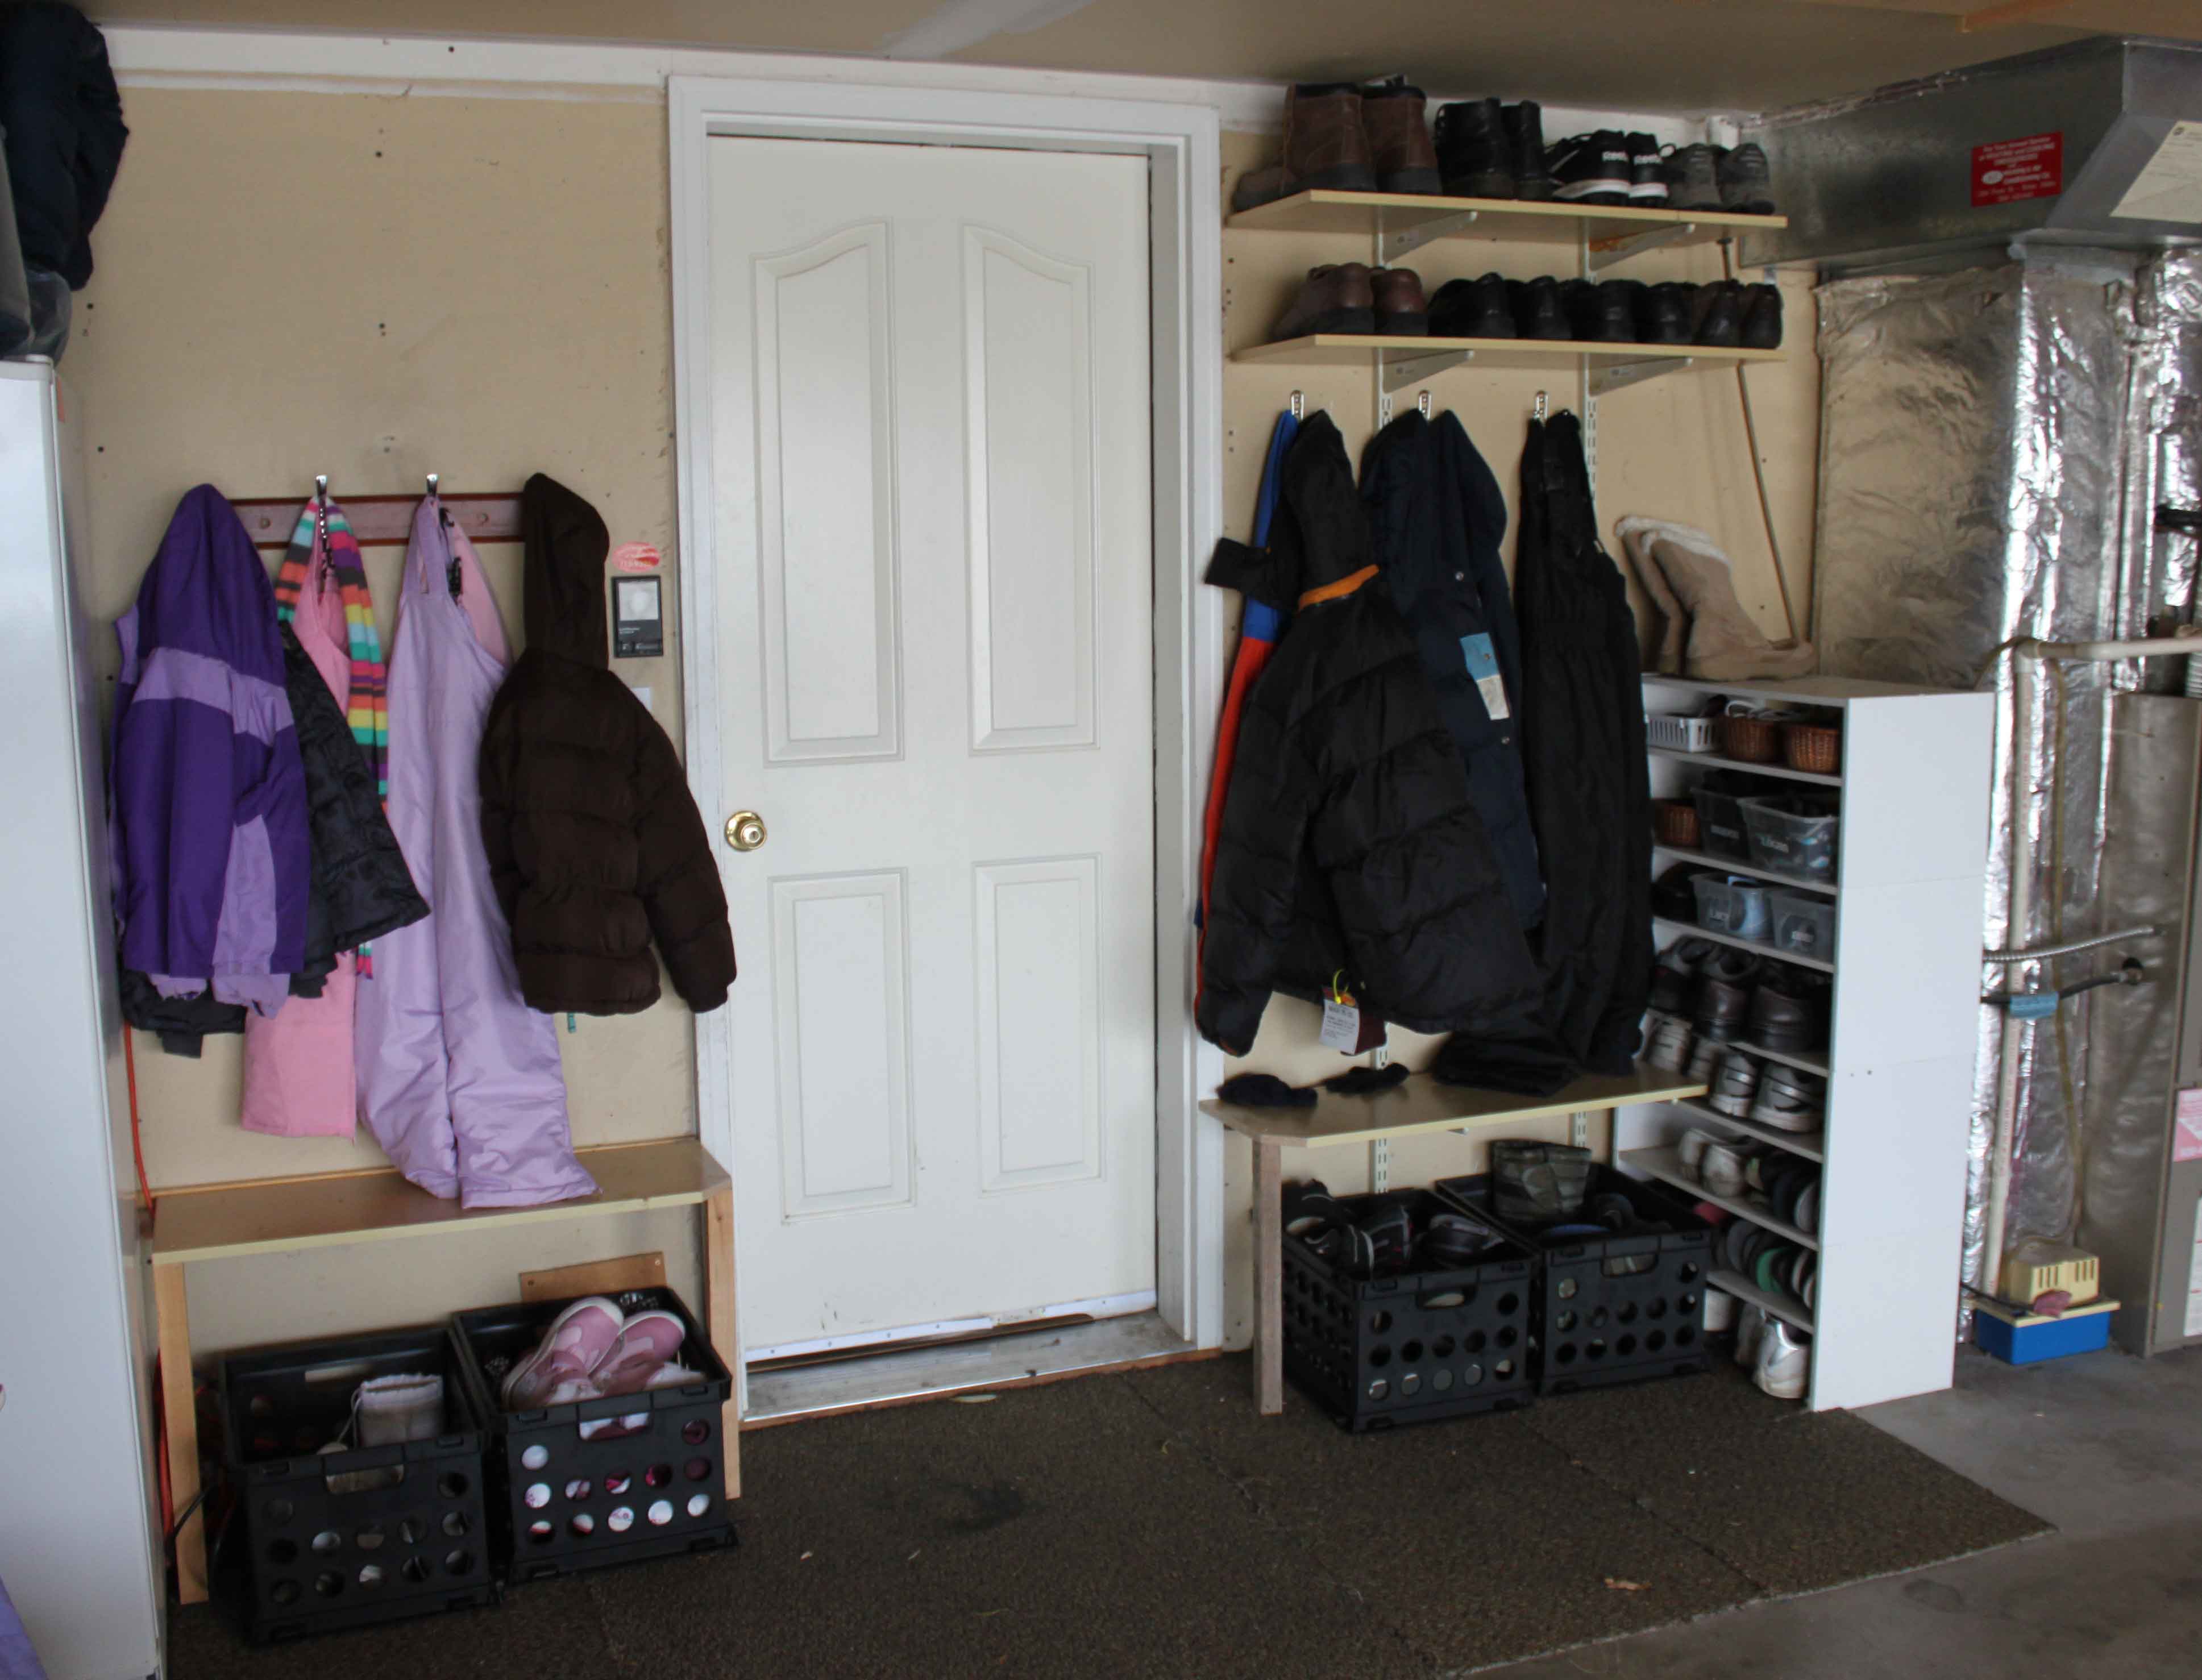
1. I originally wanted cubbies, but when I looked at the space we had, I realized that wasn’t possible. So we just did hooks. We already had the 4-hook one on the left, then I bought 3 hooks for the right side.
2. I bought a black bin for each child ($7 at Walmart in the office supply section) to put their shoes in.
3. My hubby build two benches for each side with wood scraps already in the garage.
4. We put two shelves up high (that we already had, just stored away) for hubby’s shoes. He can reach them!
5. We moved around & cut some carpet scraps we had to make them fit perfectly around the area.
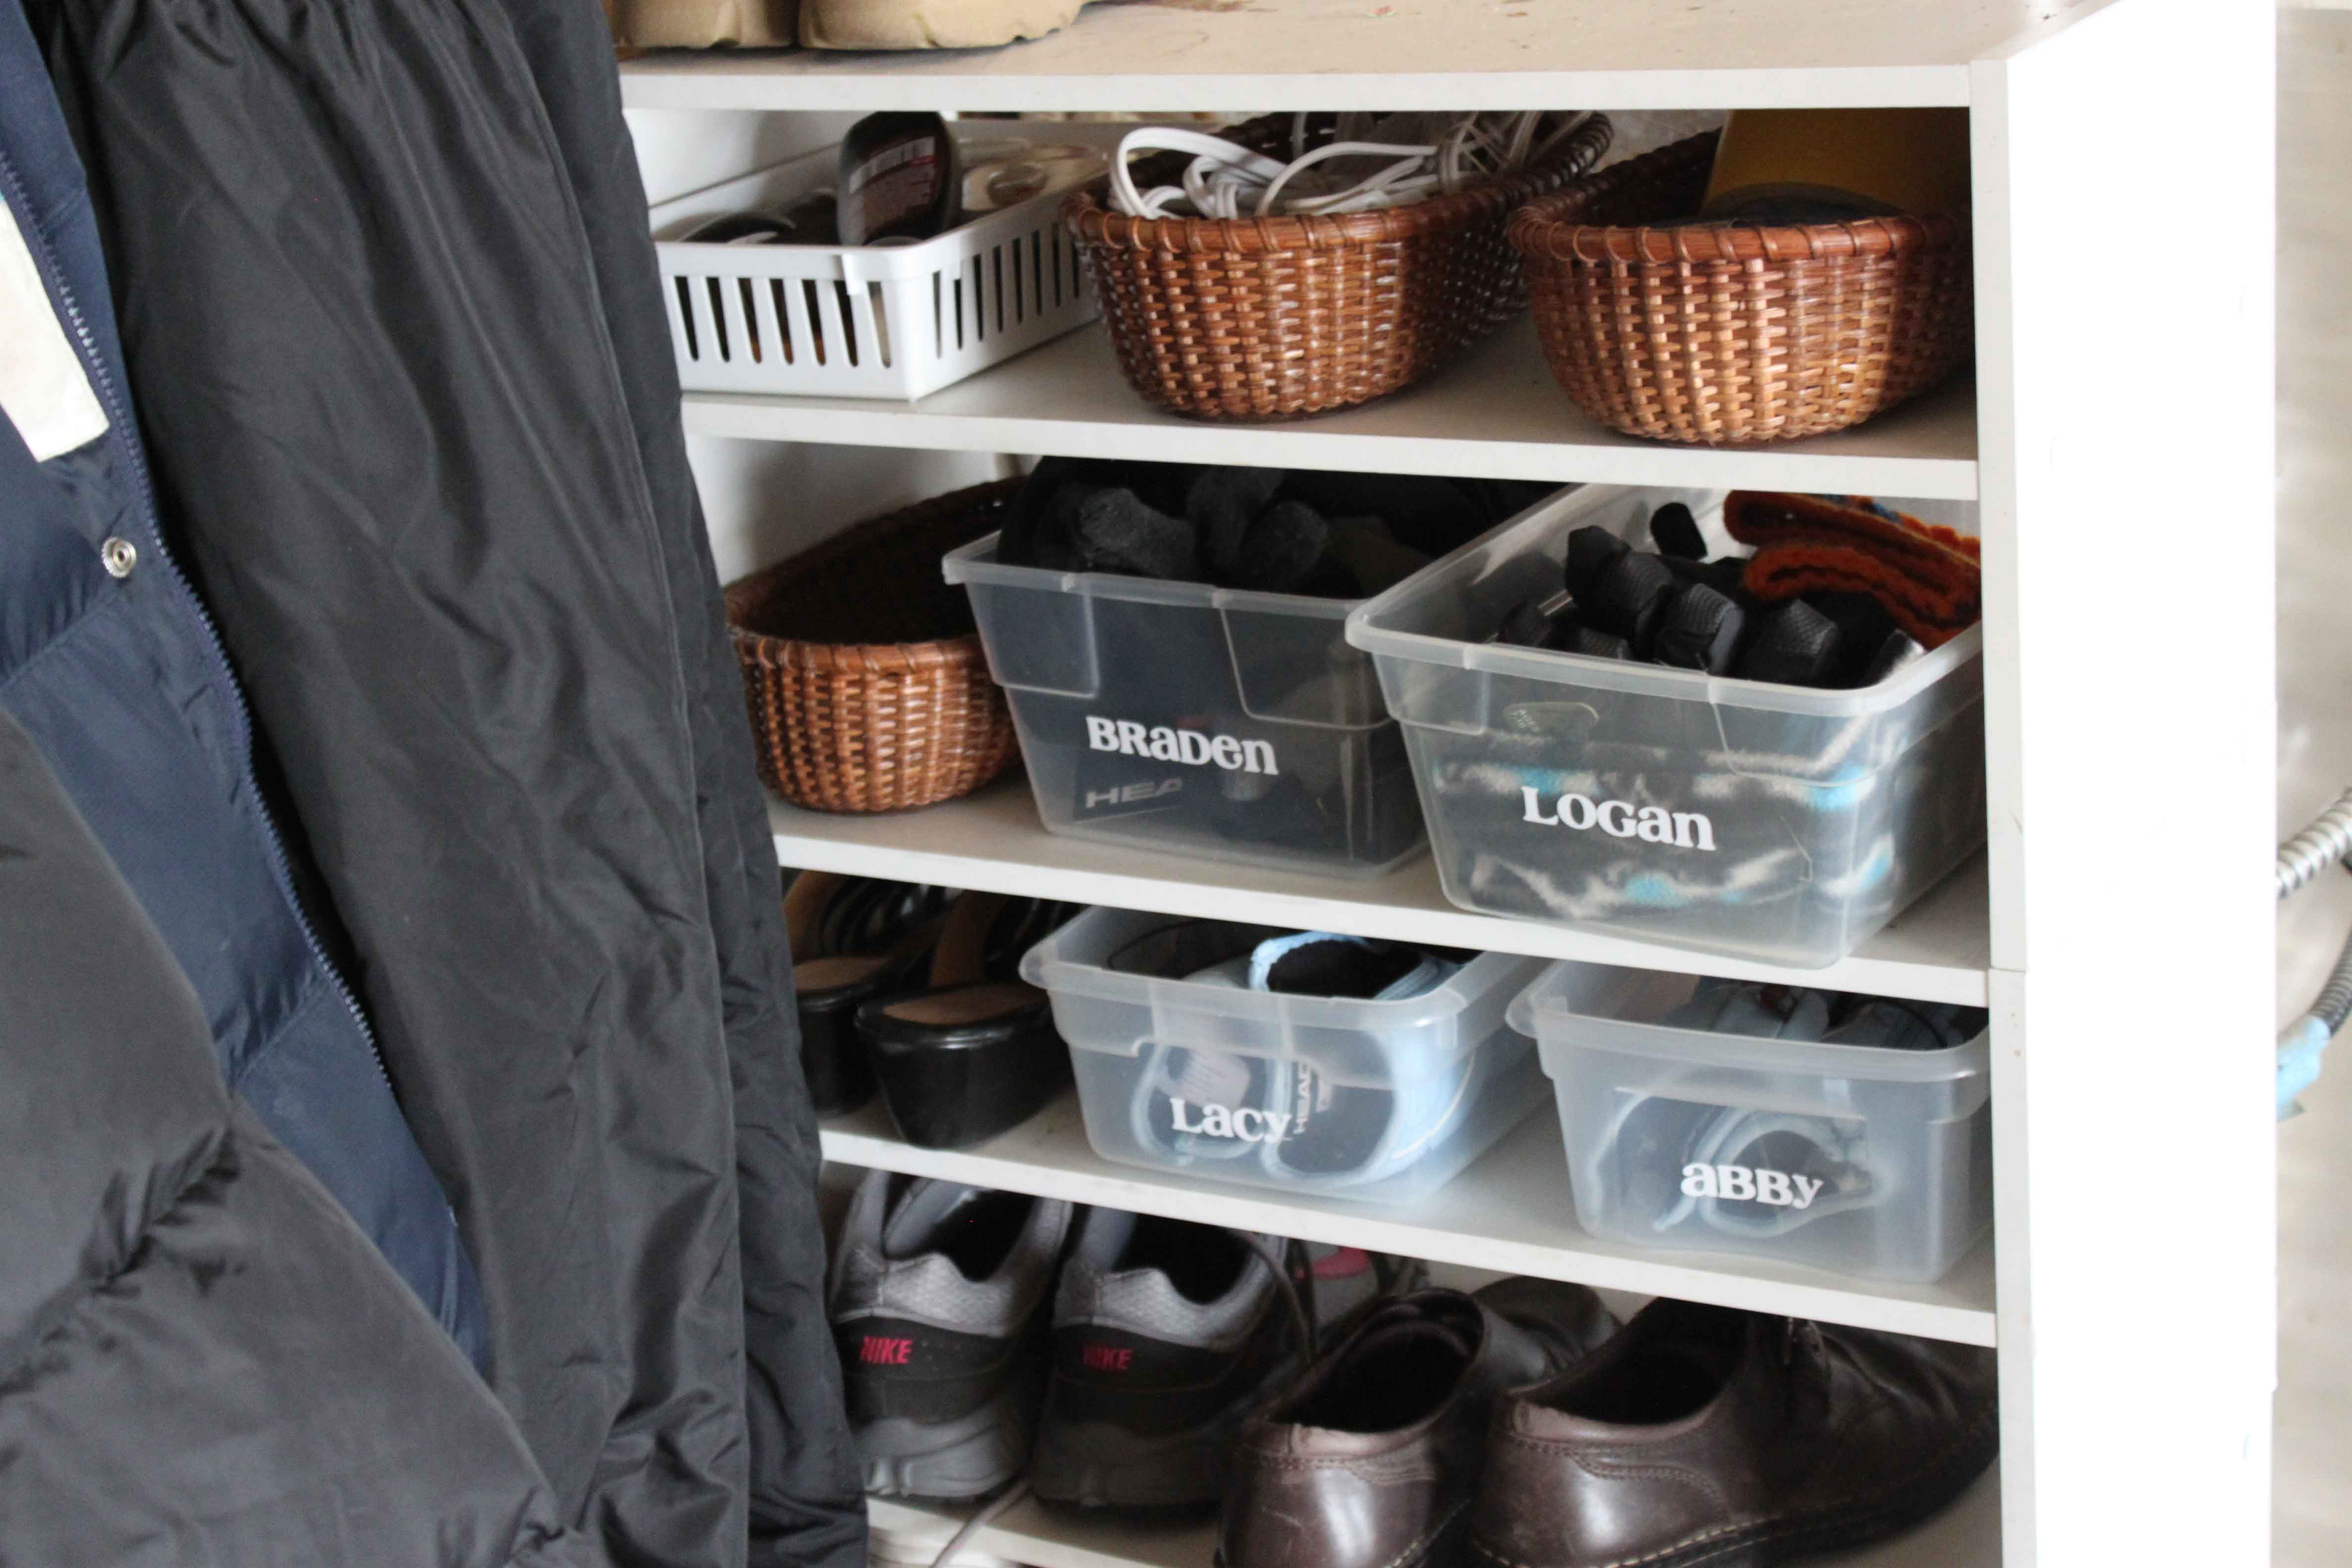
6. The original shoe shelf on the left still hold my shoes and hubby’s. As you can see, I gathered up 4 clear bins in my house I wasn’t using and made them homes for the kids’ winter gloves, hats, and scarfs. Then I used 3 small baskets I already had to store duct tape, shoe shine/shoe brush, and electrical cords that we always use.
We spent a grand total of $35.45 on this garage mudroom! I know it isn’t the fanciest, but if you saw the mess before (shoes EVERYWHERE, and coats all over the house & not enough room for them) you would be so impressed! I love that is is so functional for our family. I was proud of myself for trying hard to use what we already had instead of spending more money.
We are still planning on doing the following things:
1. Putting 4-5 more hooks on the left side above the girls’ hooks for all hats we have. That will also be a big help for us.
2. Putting a wire shelf (that we already have) on top of the white shoes racks to make one more level for the winter boots.
So what do you think? Have you done a garage mudroom for your family?
A PYP Best Blog! Making Your Own Laundry Detergent – An Update!
Just in case you missed this article on DIY an update on making your own laundry detergent the first time we shared it a couple of years ago, we are republishing it. After Marne wrote this blog originally, we got an awesome response. This is one of the PYP Best Blogs!
Remember my previous post on how to save money and make your own laundry detergent?
Well, I wanted to post an update for you. I just ran out of it about a week ago. So this mix lasted me 7 months. Not quite as long as I had thought, but I do A LOT of laundry. With four kids and three of them in sports (and the other a messy 3 year old0, my washer rarely gets a rest. Here is the breakdown for you for me and my lifestyle:
Cost of original detergent: approx. $20
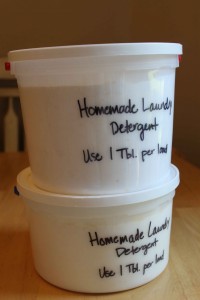
Amount made: approx. 2 gallons (see photo above)
Length of use: 7 months (29 weeks)
Loads done: 10-15 loads per week (average)
Amount of detergent used:1-2 Tbl. per load
So, if I am doing my math correctly, for each week I did laundry for 29 weeks my detergent cost me $.69 cents (I divided $20 into 29 weeks). And…as I am doing between 10-15 loads per week, that means each load of laundry was between $.04-$.06 cents per load!
That is pretty awesome.
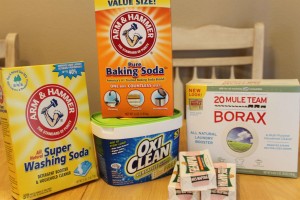
For now I am going to keep on making my own detergent. I like how easy it is to make, how well it cleans my clothes, and how cost effective it is to make. Remember, the recipe I gave you has Oxi Clean in it, which does raise the price of the original cost. You can leave it out of the recipe in order to lower your overall cost. HOWEVER, I think it is worth it because it helps keep my whites from getting too dingy.
Did you make this recipe of detergent? How has it worked for you?
A PYP Best Blog! DIY making your own lotion!
Just in case you missed this article on DIY making your own lotion the first time we shared it a couple of years ago, we are republishing it. After Marne wrote this blog originally, we got an awesome response. This is one of the PYP Best Blogs!
My friend recently taught me how to make some incredible homemade lotion! I love this stuff. I have been using it for about a month now consistently and I have noticed my skin is much softer. I love how this lotion isn’t greasy yet it contains healthy minerals and vitamins for my skin. It is so easy to make!
First, gather up your ingredients. You will need:
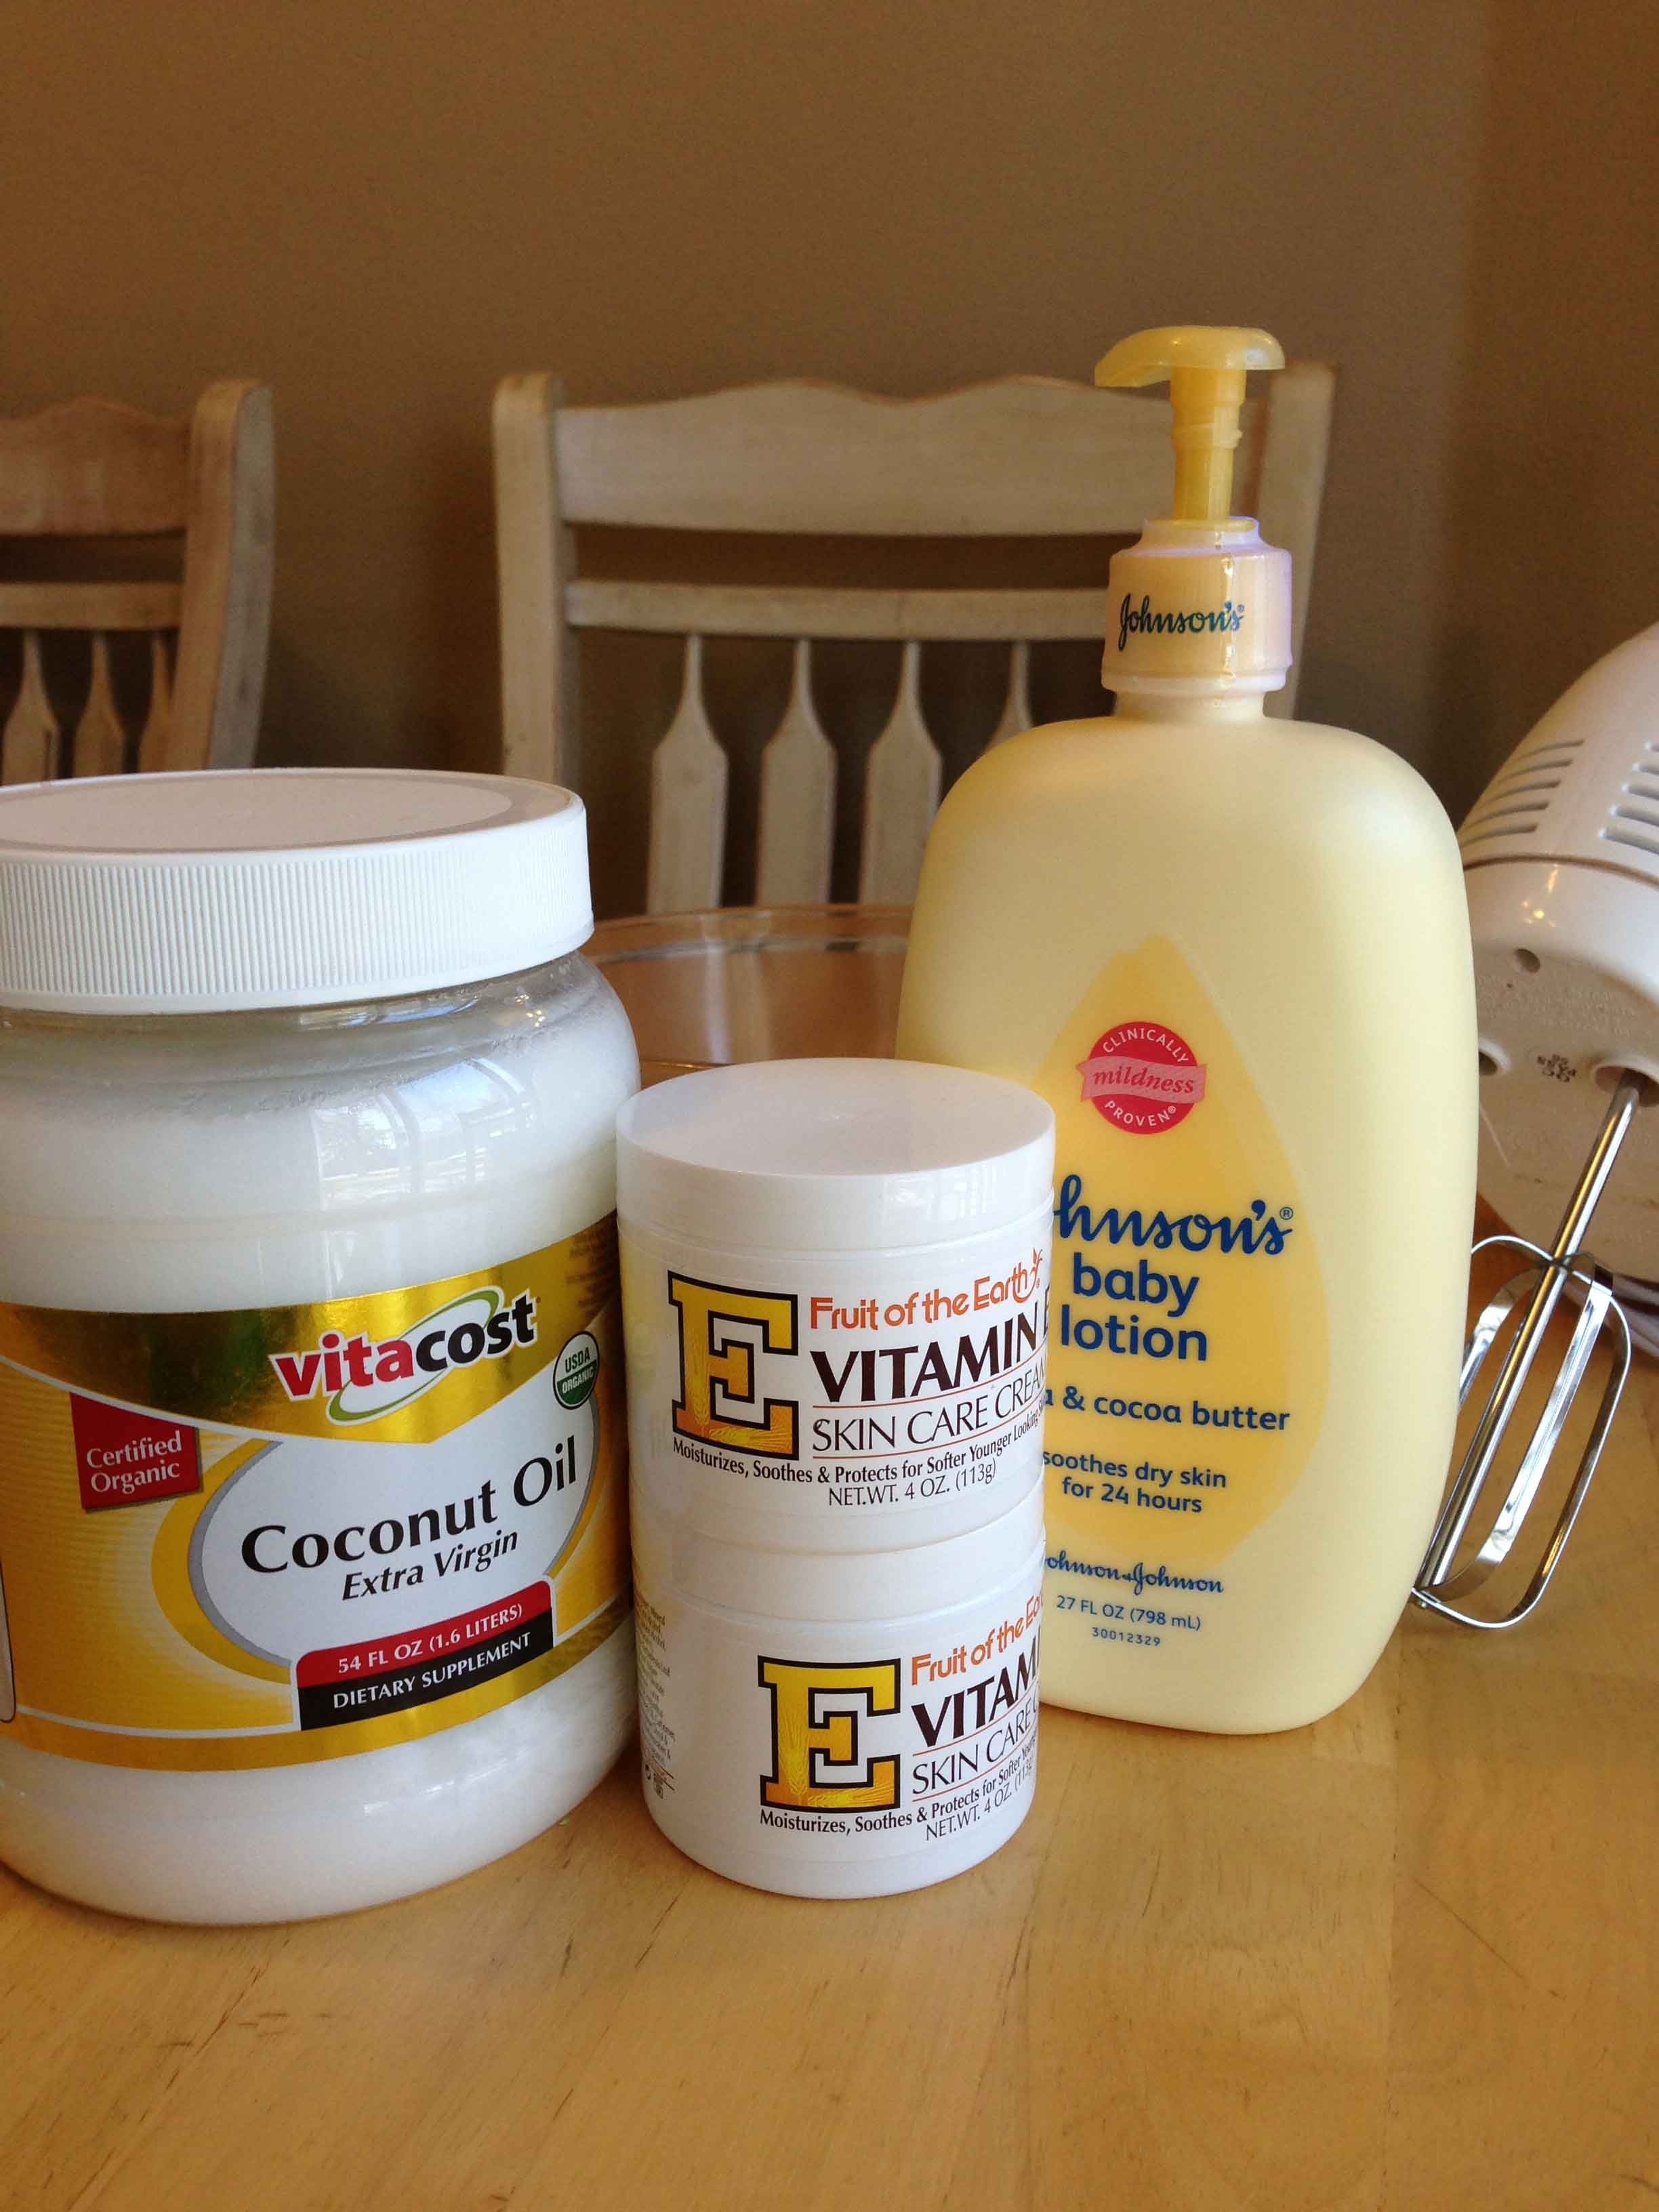
16 oz baby lotion (I like using Johnson & Johnson baby lotion, but you can use whatever you like)
16 oz coconut oil (you can also use Vaseline if you don’t have coconut oil)
8 oz Vitamin E cream (found at Walmart in the lotion section)
Large bowl
Hand mixer
Next, you will want to put your ingredients into a bowl to mix up together. This is the fun part, it is kinda cool to whip up.
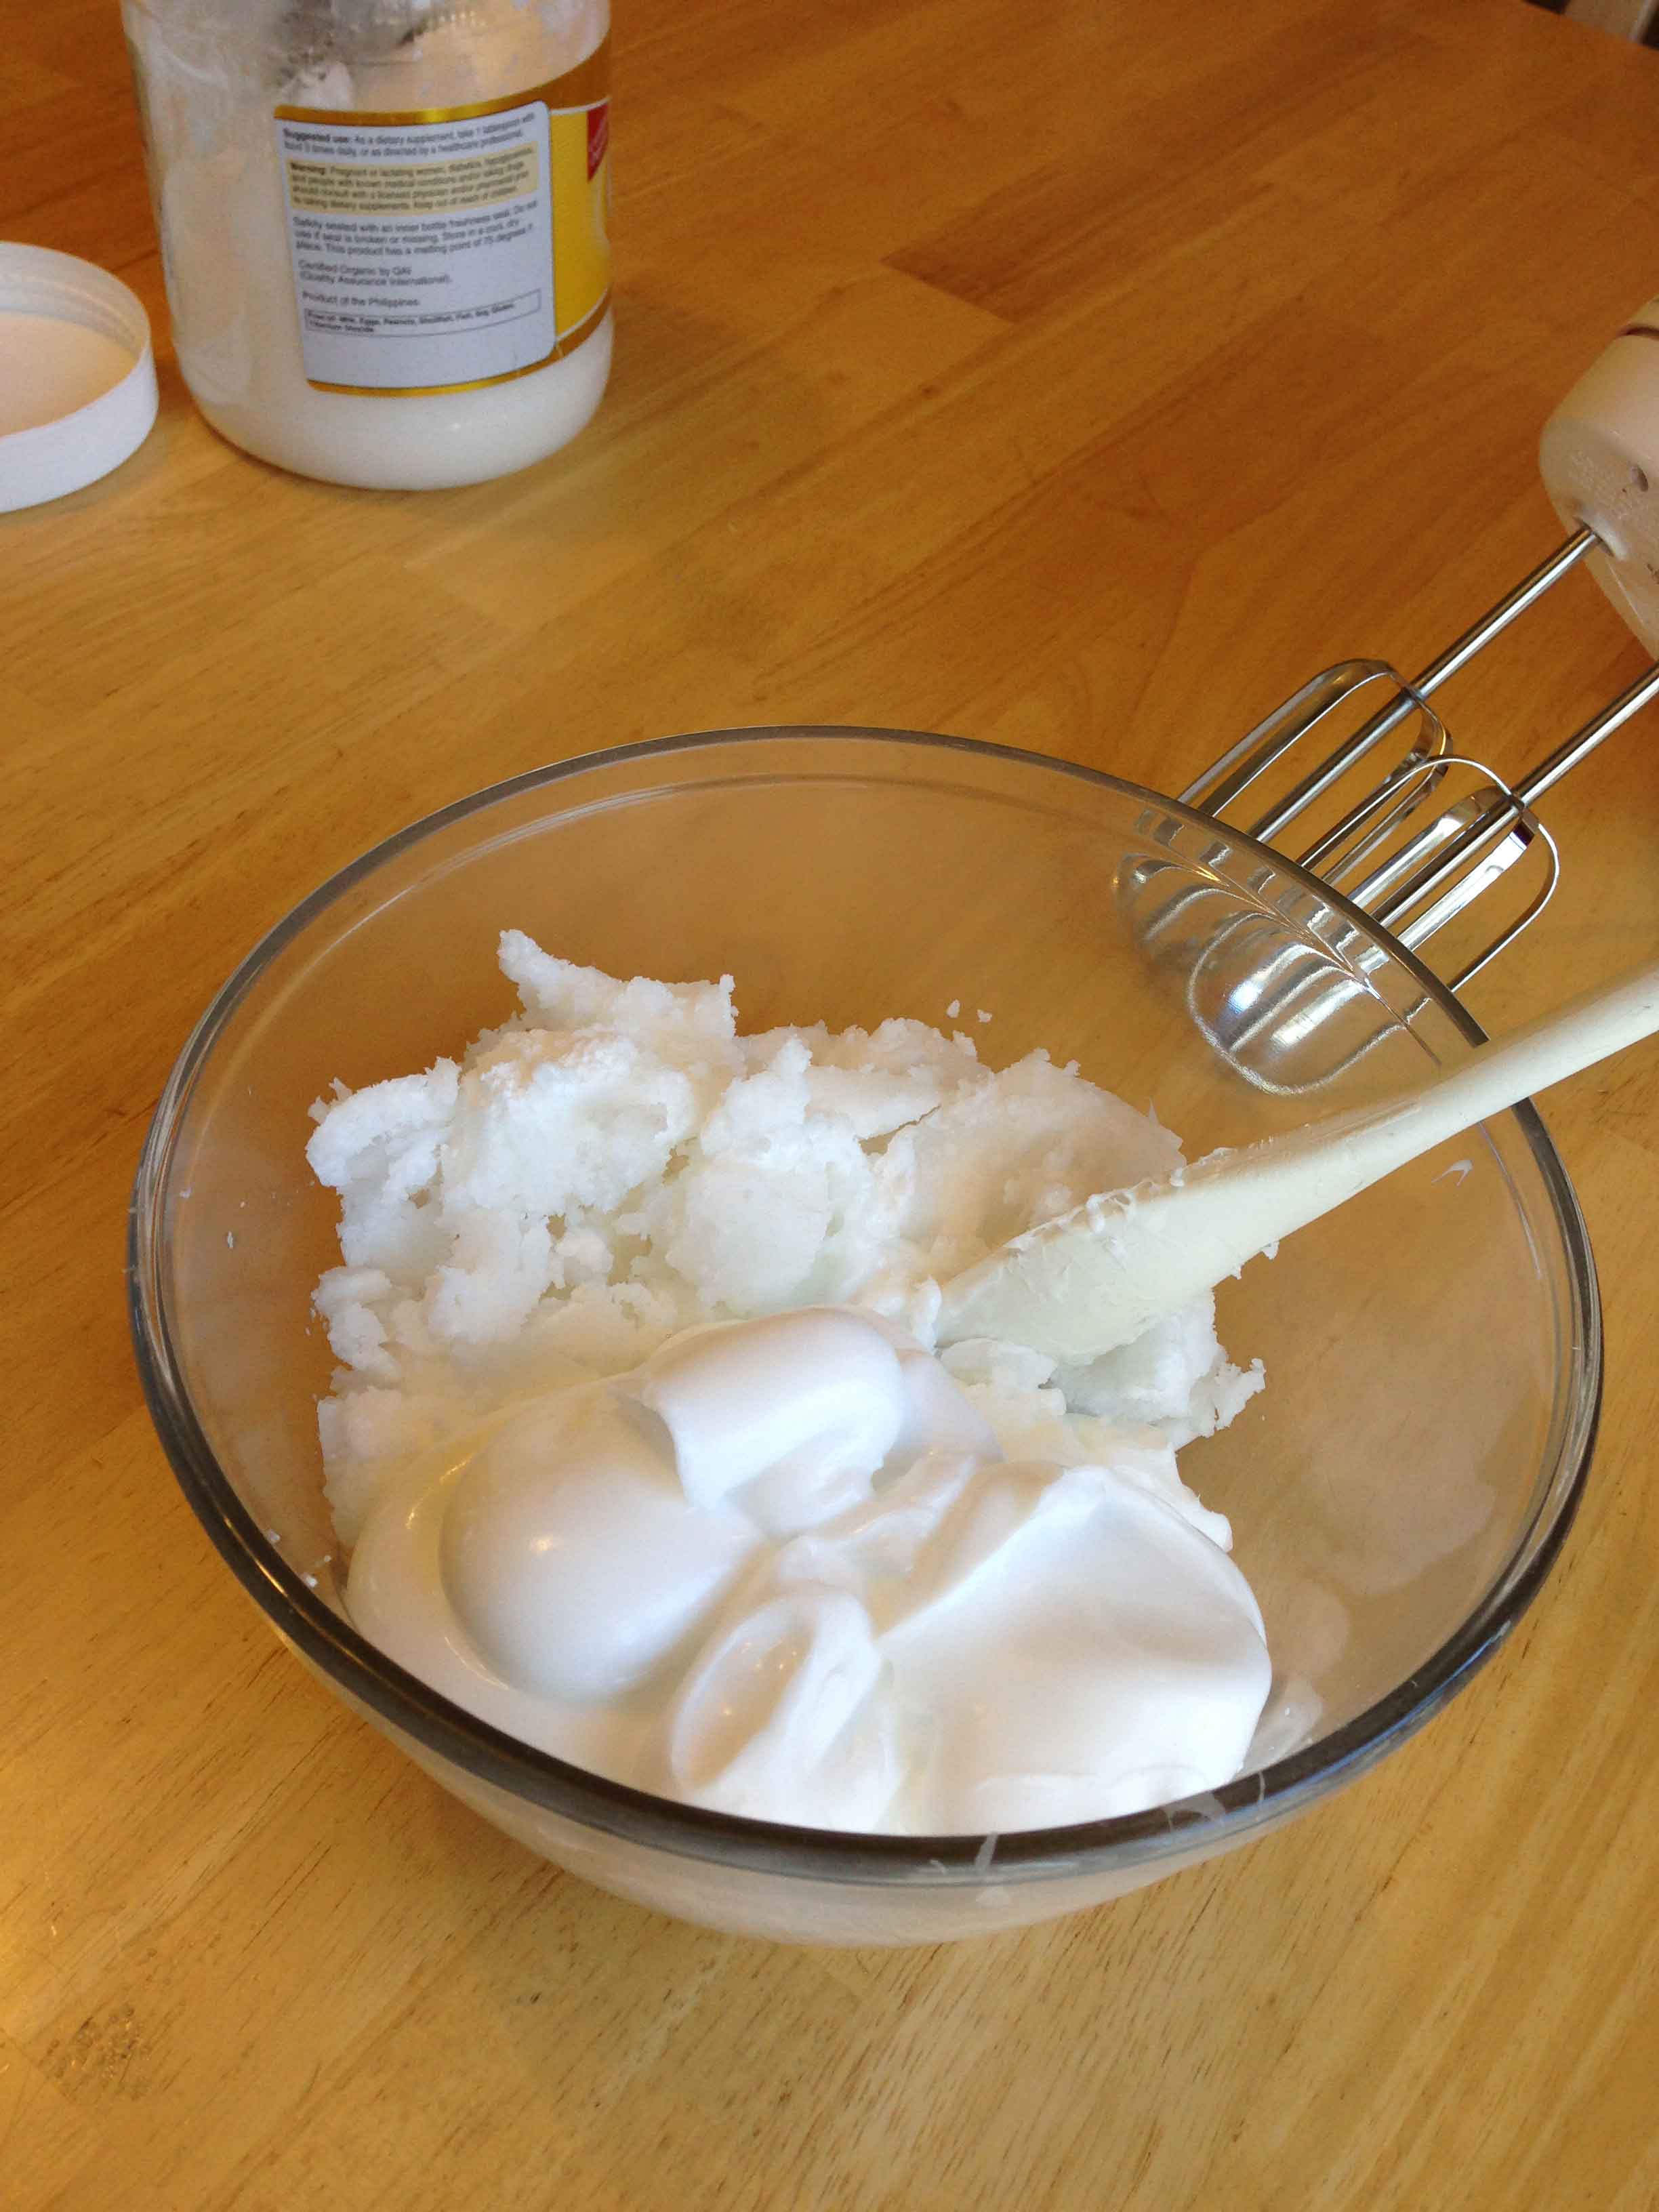
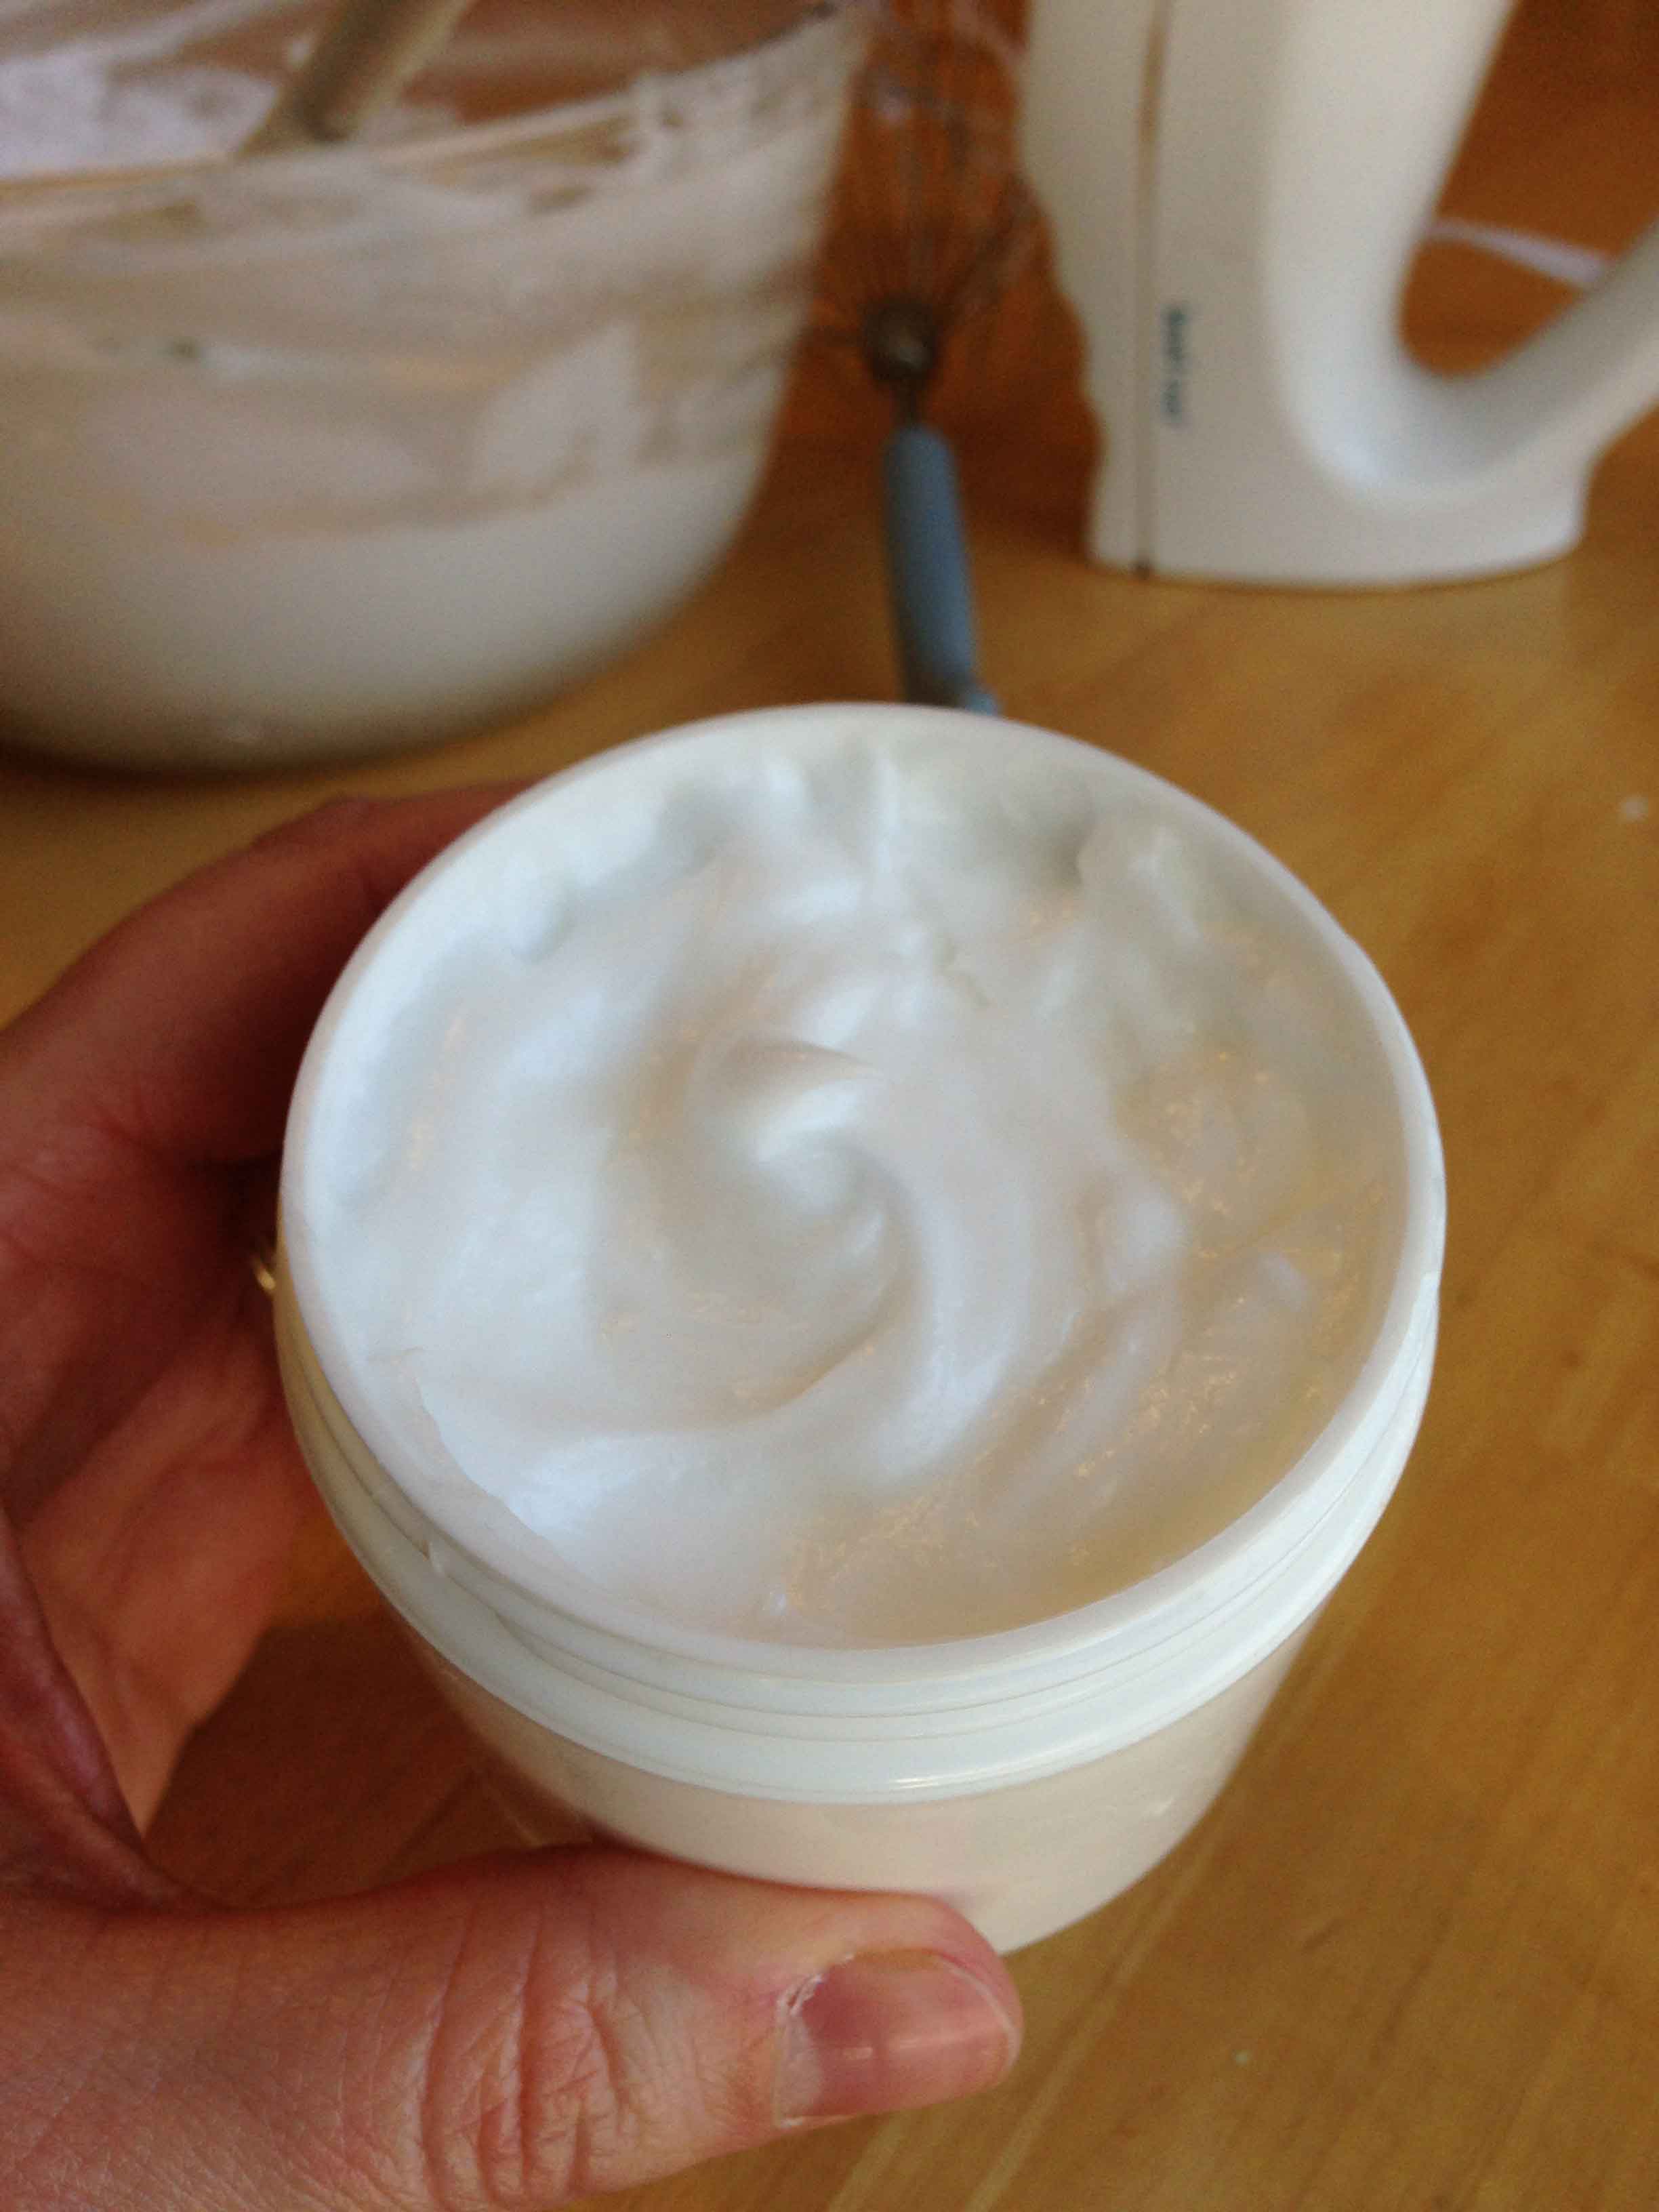
This is what it looks like all whipped up! Nice and creamy. Don’t worry if there are small chunks of coconut oil. They melt easily when you rub it onto your skin. If your coconut oil is in larger chunks, you might want to soften it a little before mixing together. Just don’t melt it!

Now its time to put the lotion in containers so it is ready to use. Those cute containers that the vitamin E came in? The labels peel off really easily! They are perfect for putting the lotion in.
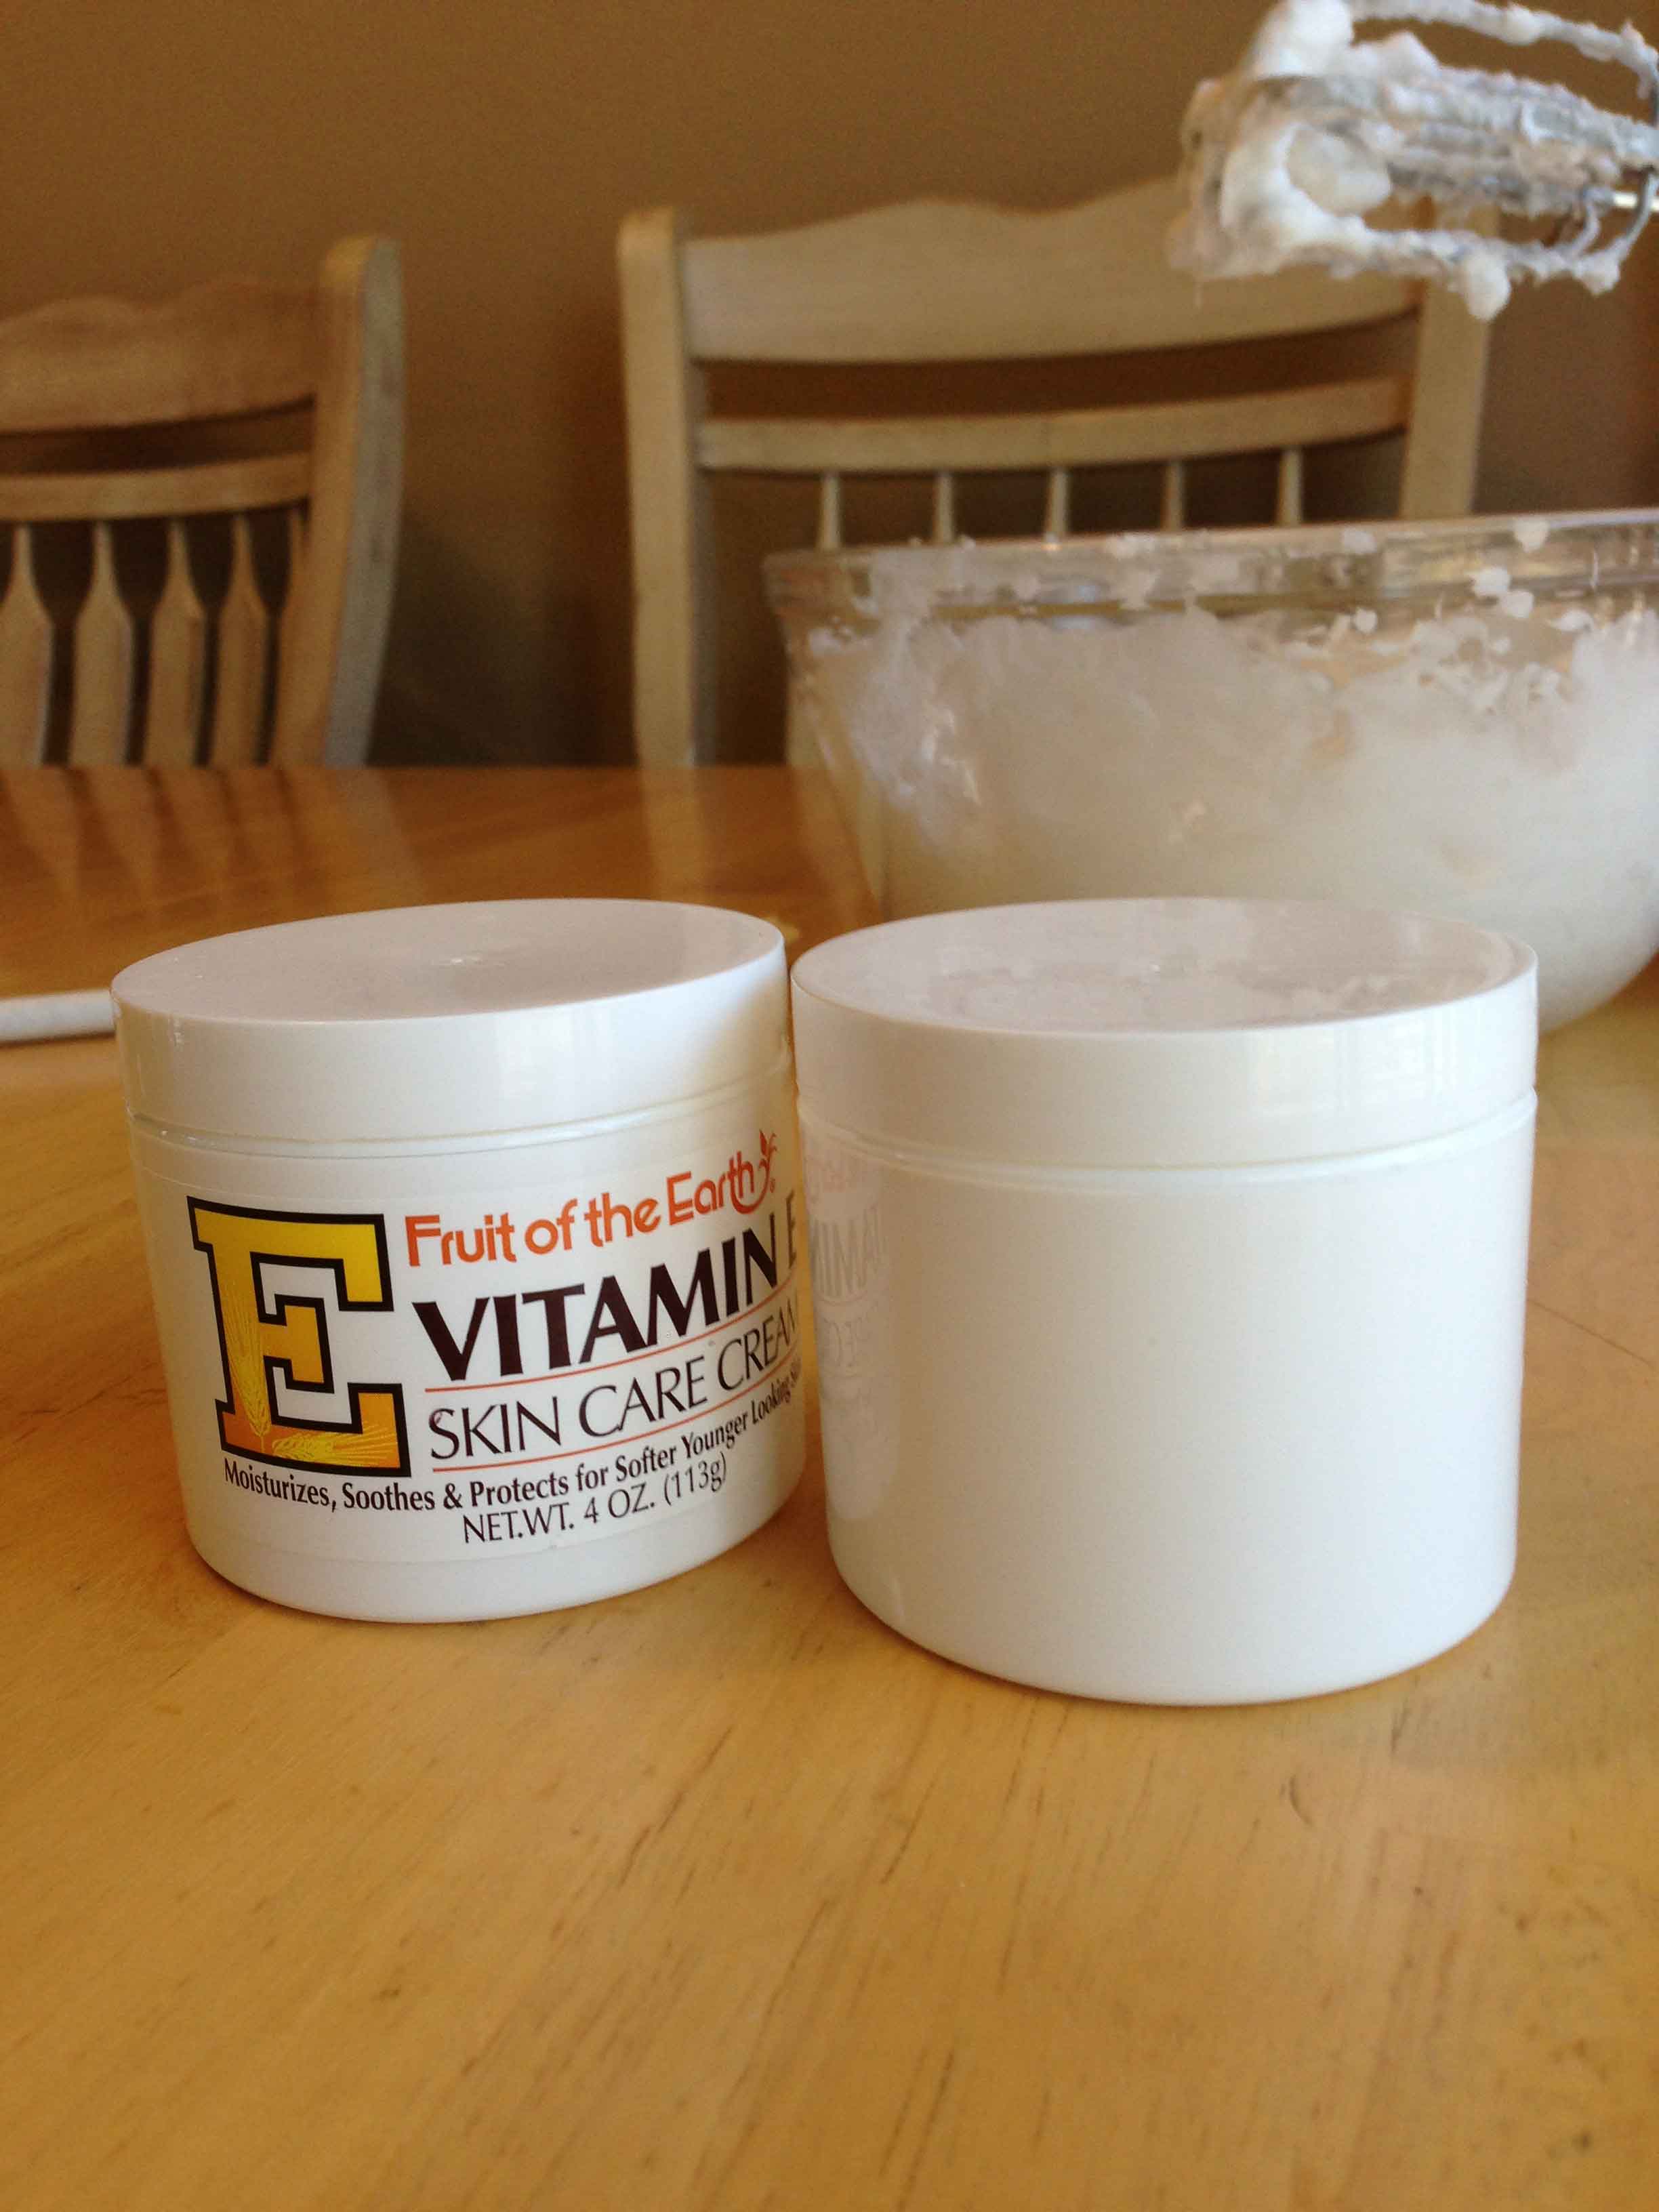
Granted, this makes A LOT of lotion, as you see. These two small containers will not fit the lotion. So use whatever container you like. 🙂 As you keep making the lotion you will aquire more of the vitamin E containers to use.
If you make this and try it, let me know what you think! I love this lotion and am hooked on it forever!
A PYP Best Blog! Give your Washer a Good Cleaning!
Just in case you missed this article on giving your washer a good cleaning the first time we shared it a couple of years ago, we are republishing it. After Marne wrote this blog originally, we got an awesome response. This is one of the PYP Best Blogs!
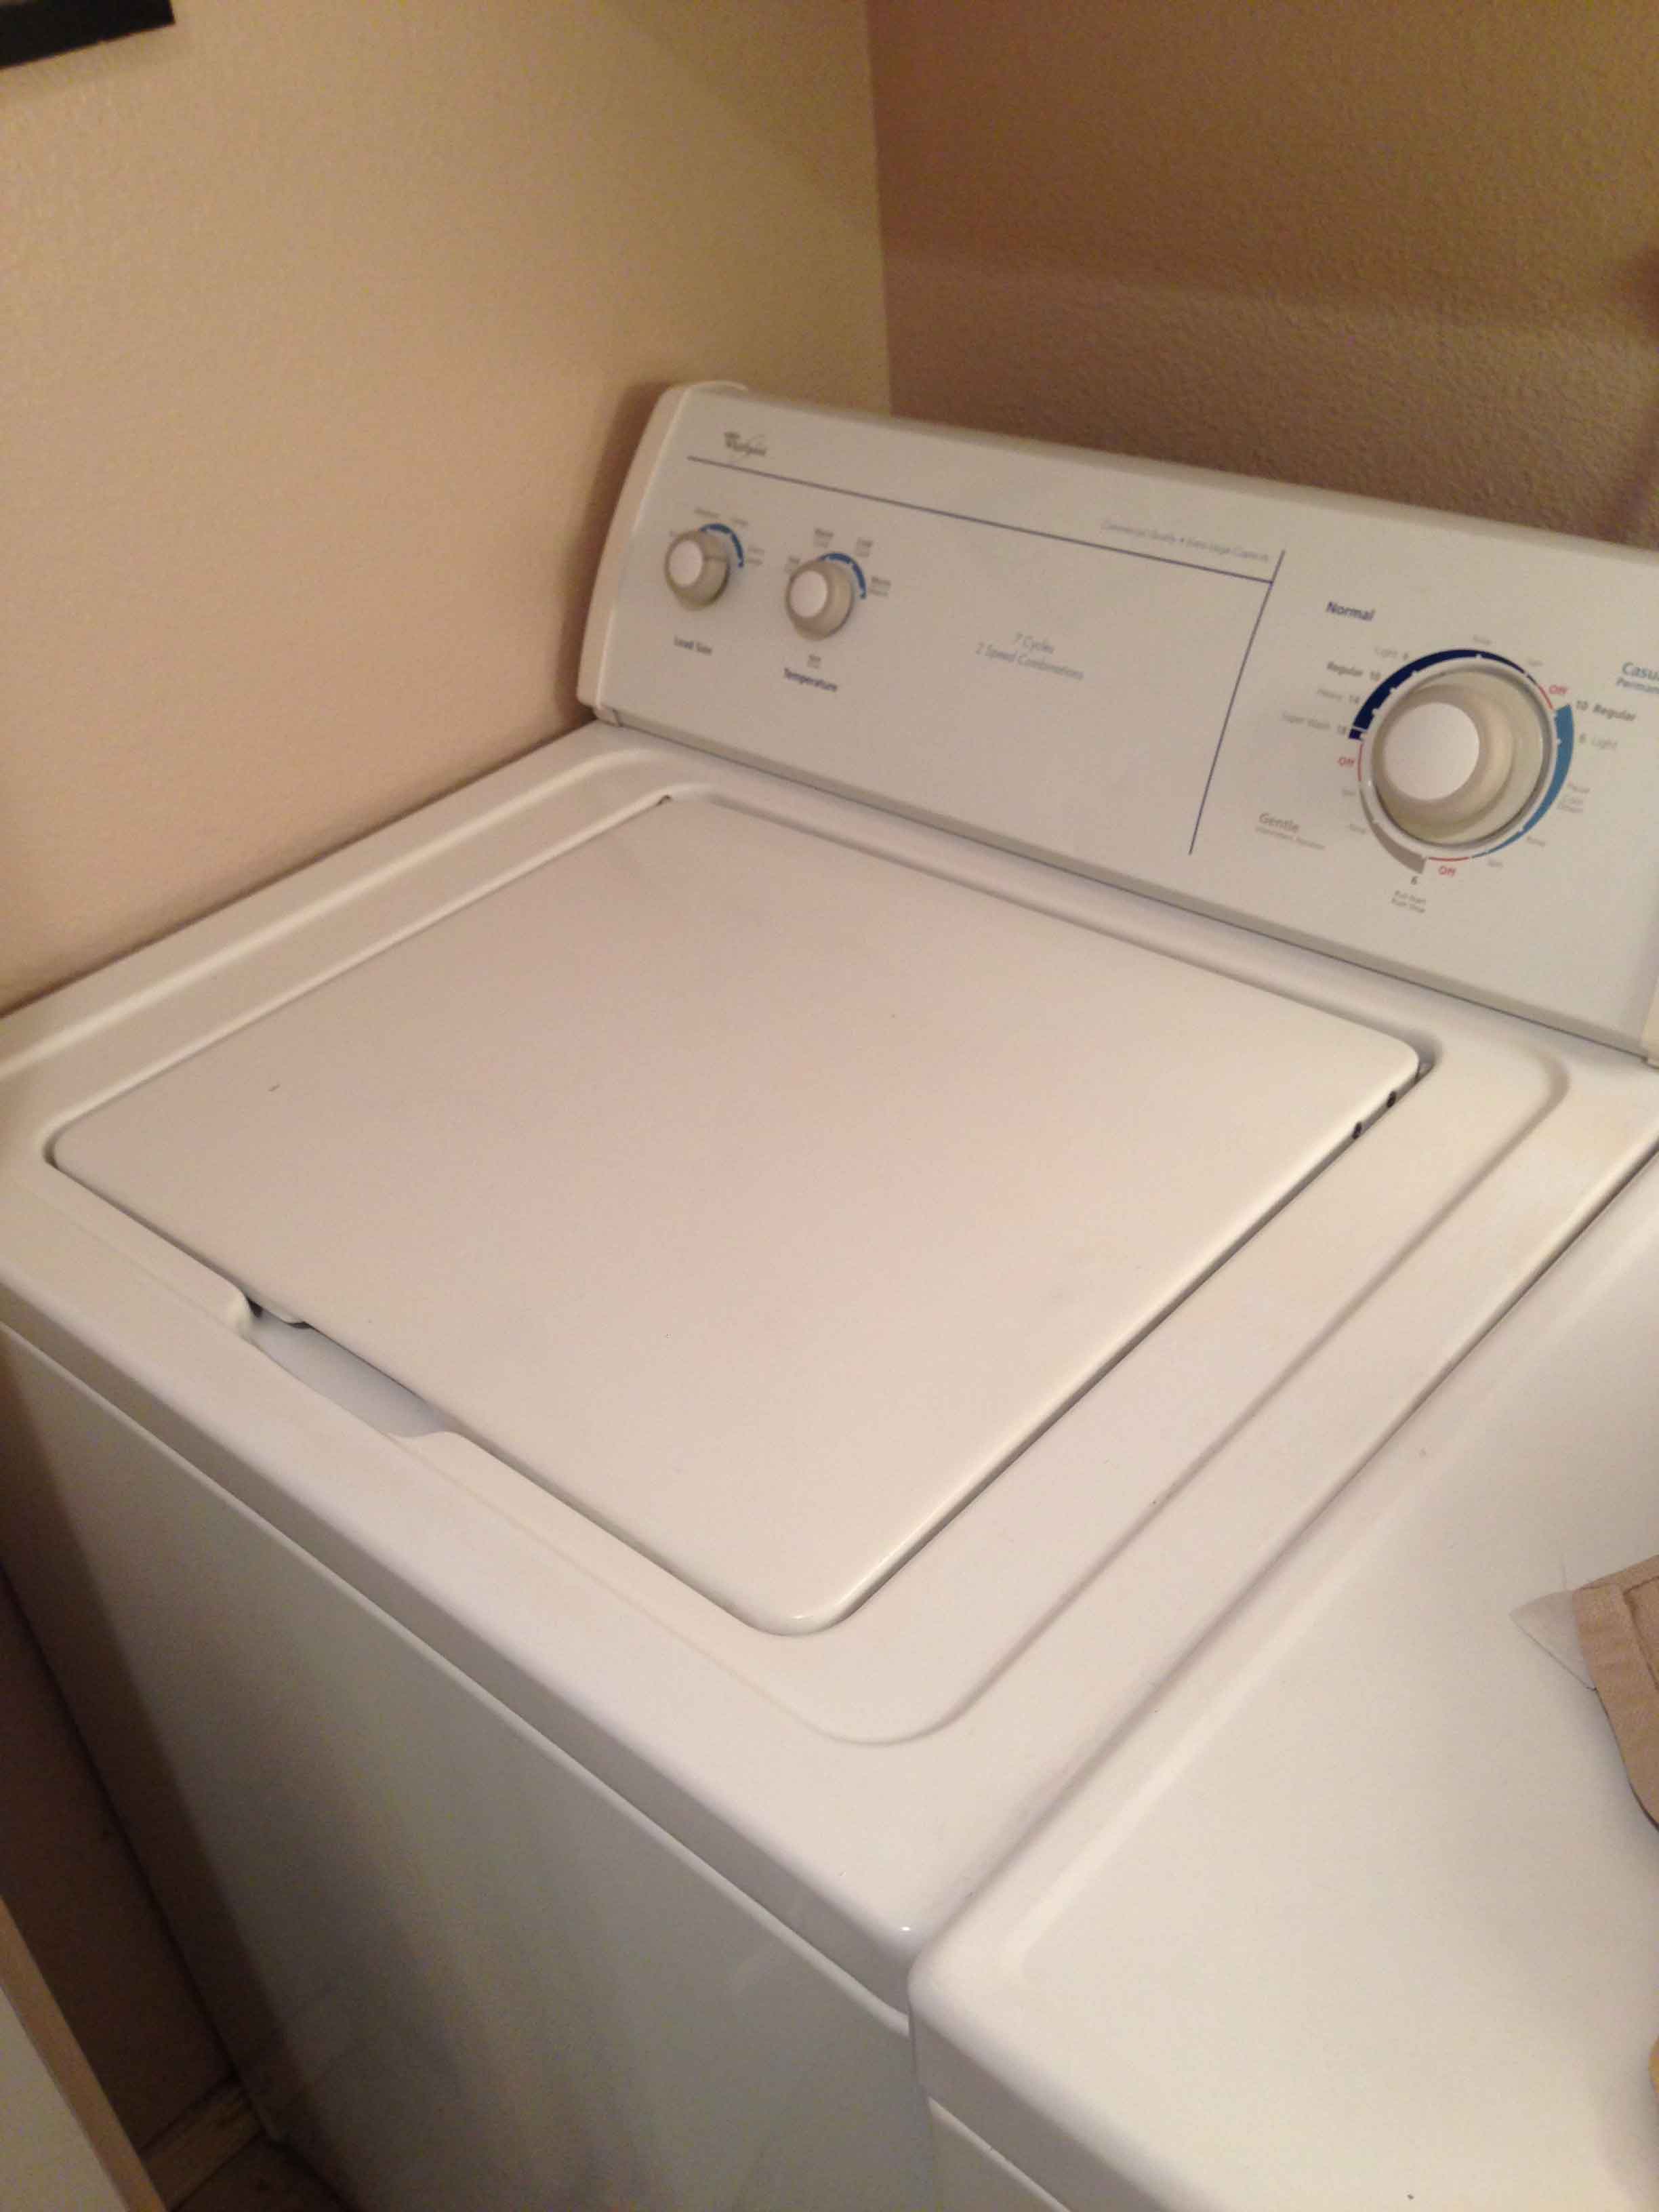
I am not one of those people that has the new, nice, front loading HE washing machines and dryers. I would love a set, but I still have a normal, ordinary, top loading washer and front loading dryer. I’ve had this set for over 10 years, and I bought it used then. Works great still. But it helps if I keep it in top-notch running order.
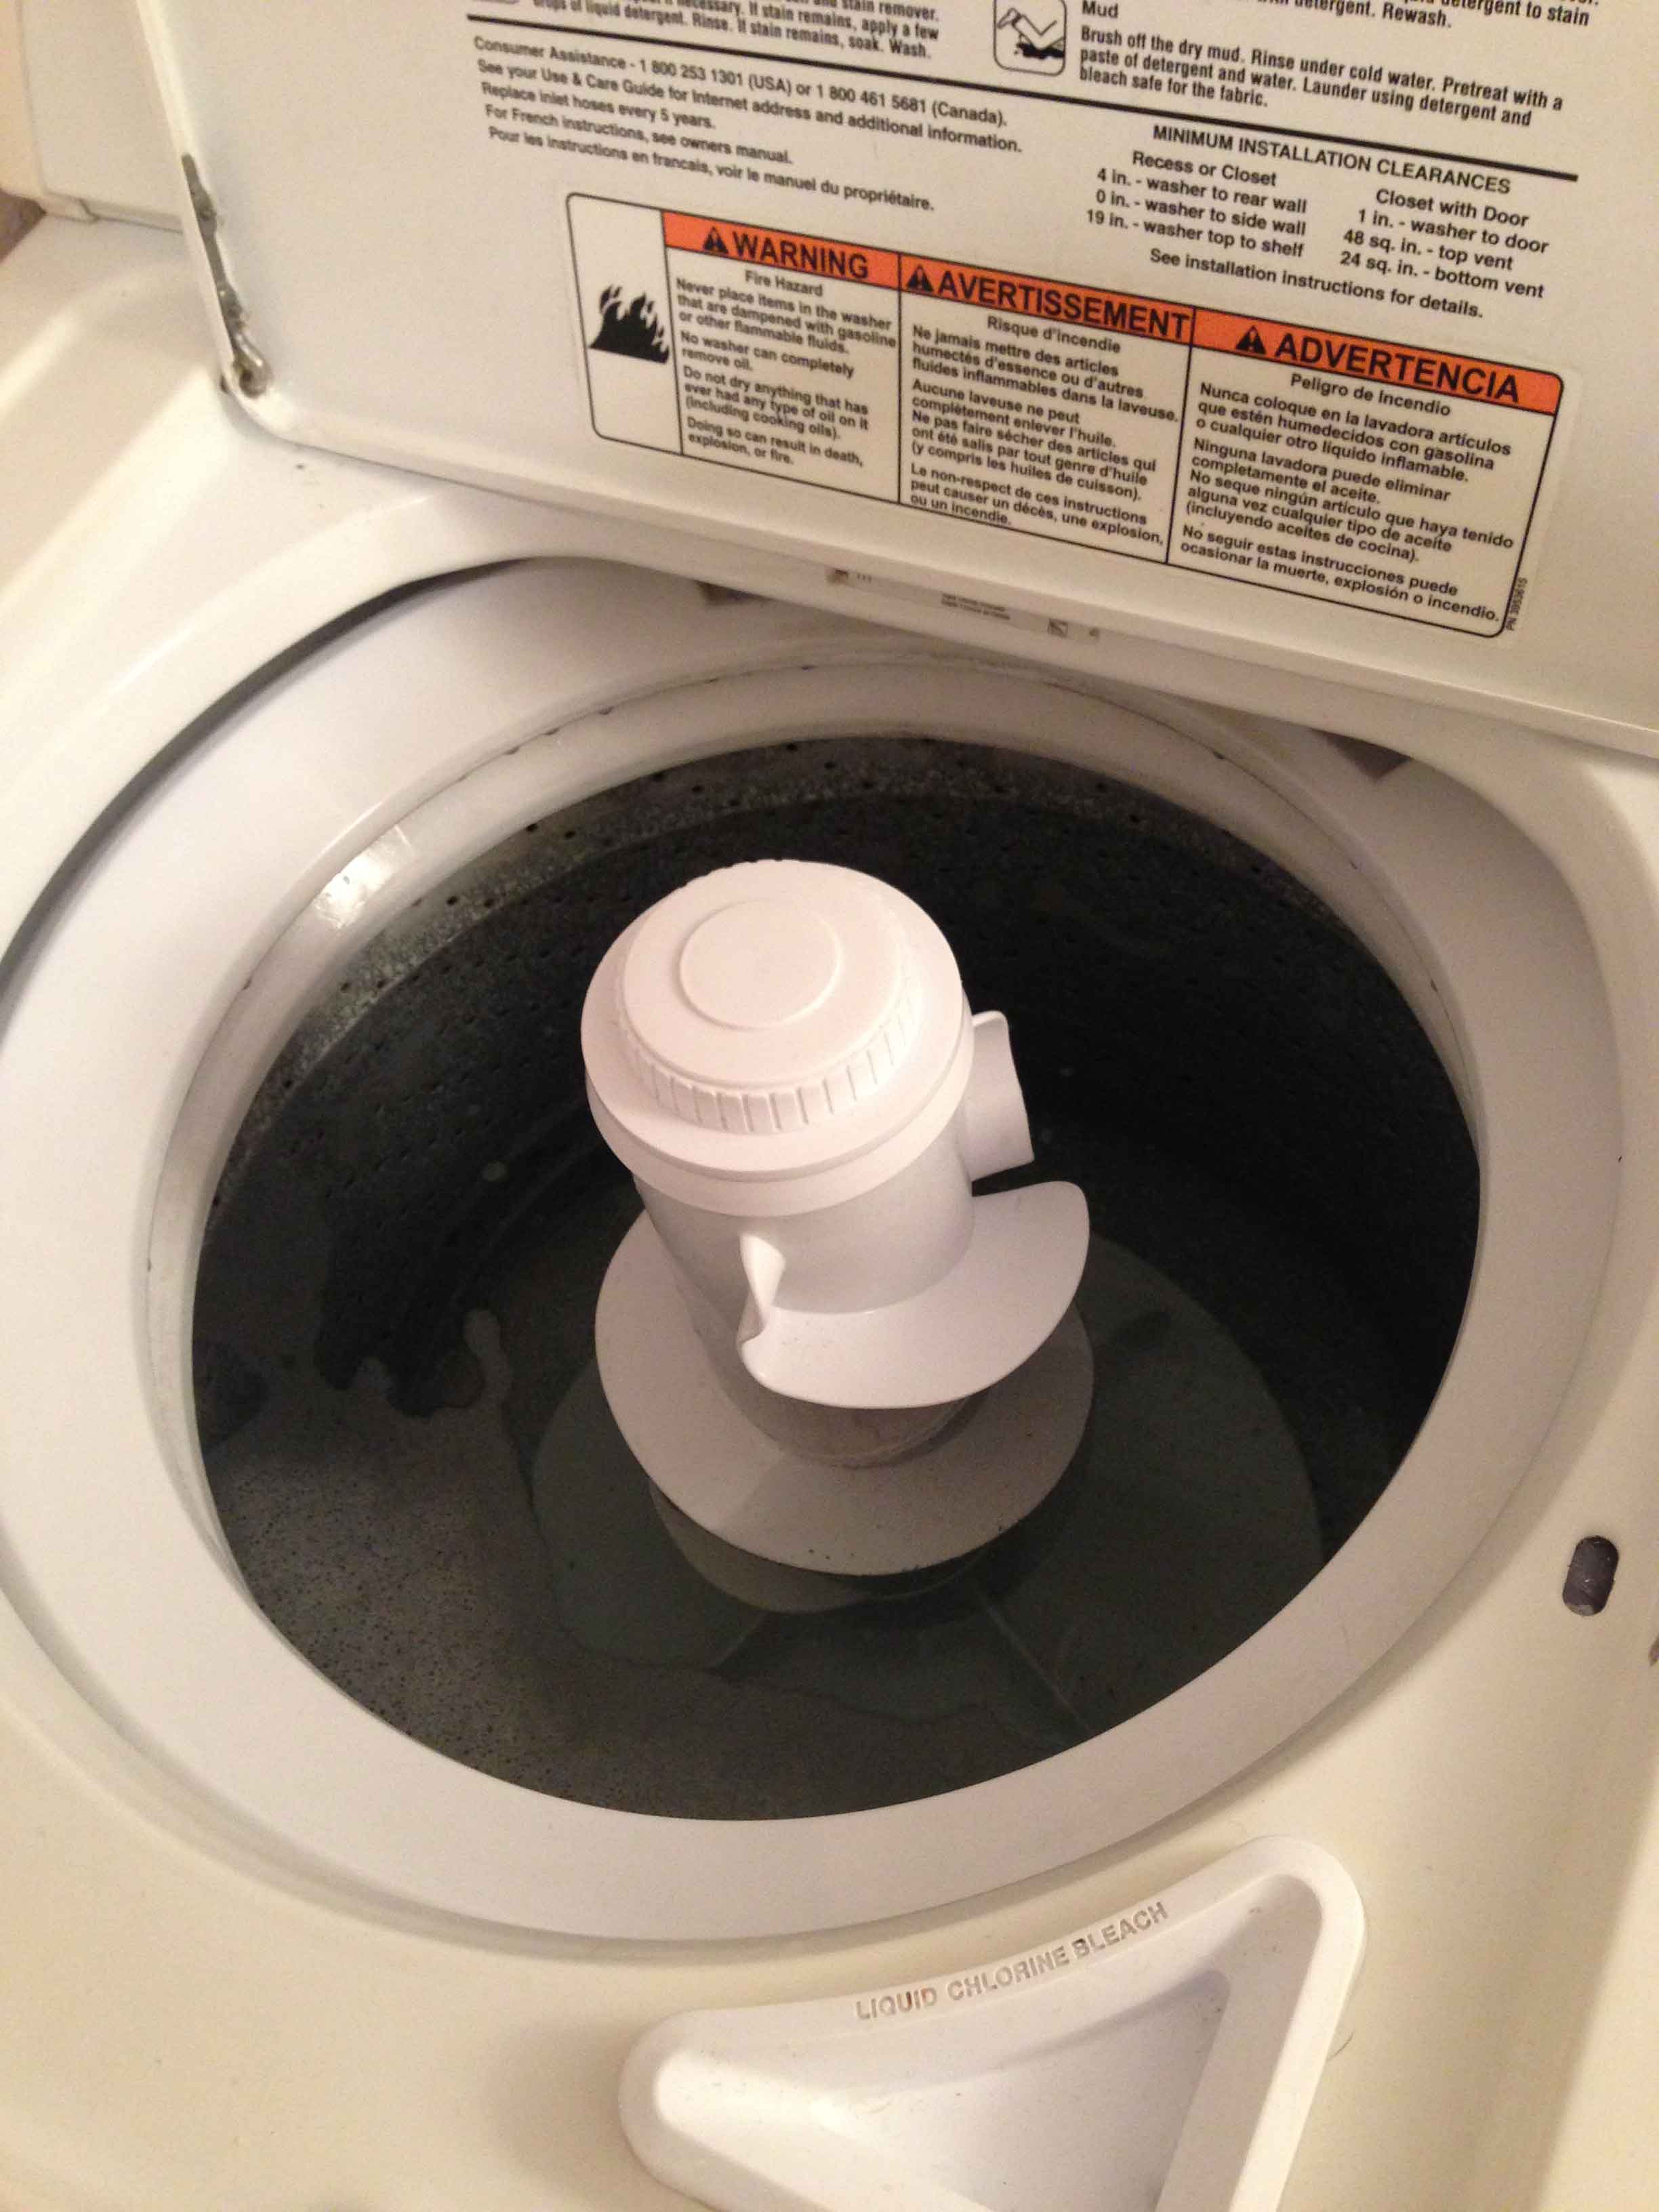
If you have ever noticed your washer smelling a bit musty or with a slight odor, or a film building up in it, then you need to clean it. This is a great way to clean your top loading washer. Really easy and costs pennies. There are several ways to do this, but this method is my favorite. Mt friend taught me how to do this and I am so grateful.
1. Fill your washer with HOT water and one quart of cholrine bleach.
2. Let it agitate for a couple of minutes, then let it sit for ONE HOUR.
3. After the hour is up, let the washer go through it’s longest wash, rinse and spin cycle.
4. Fill the washer with HOT water again, and this time put in 1 quart white vinegar.
5. Let it agitate again for a few minutes, then let it sit for ONE HOUR.
6. Let it go through the regular cycle again, like in the step above.
You now have a clean washer! The bleach and the vinegar clean away bacteria and sanitize your machine. It can also help with mineral deposits and soap scum. You will also want to take a wet rag (it works great to dip it into the vinegar water while the machine is soaking) and wipe down the outside of your machine and under the rims too.
How do you clean your washer?
$9 Leggings, Finger Puppets, Color-on Pillowcases, Elastic, Twine & More!
Lots of great deals today!


More cute stuff available today! Low shipping prices!