
Powdered Sugar Frosting – Perfect For Sugar Cookies

Heart shaped cookies say, “It’s Valentines Day,” to me. Every year my mom would heat up the oven, break out her baking ingredients, apron, and rolling pin and begin to whip up a batch of sugar cookies. She would then cut them with a heart shaped cookie cutter and produce a perfect cookie dough heart to be baked in the oven. I remember walking into the kitchen to see the finished product. The counter would be covered with beautifully light pink frosted cookies each topped with colorful sprinkles for us to enjoy. These are fond memories of my childhood and a tradition that I have continued with my own children.
Sugar cookies are one of my favorite kind of cookies but I have to say the frosting makes them even better. Growing up with my mom’s homemade frosting I was spoiled. Now I am picky about my frosting and a sugar cookie just isn’t the same if it doesn’t have the taste of her sugary concoction spread all over it. There is just no comparison to the frosting I remember from my childhood. I love how simple it is to make my mom’s frosting recipe and since it is almost Valentines Day and I’m sure many of you out there will be making cookies of your own I thought I’d share it with you.
Powdered Sugar Frosting
4 cups powdered sugar
1 cup unsalted butter, room temperature
1 teaspoon pure vanilla extract
4 tablespoons evaporated milk (milk or cream will work as well)
Assorted food colors (if desired)
Place powdered sugar into a bowl. Add butter, vanilla, and evaporated milk and beat with a hand mixer. When combined add a few drops of food coloring and beat until color is mixed in well.
Tip: For a softer and fluffier frosting use a combination of 1/2 cup unsalted butter and 1/2 cup shortening. In place of 1 cup of butter.
This frosting is a great option for cookies or cakes. If you find it too dry add a little more milk. If it is too runny, add more powdered sugar until you get the right consistency. Then frost away and decorate.
DIY: Frozen Smoothie Packets

We have a love for smoothies at our house. If you say, “Jamba Juice,” it doesn’t take long for us to load into the car on a Saturday morning. However it can be expensive and like I’ve said before, I am a self proclaimed penny pincher.
Recently my son asked me to purchase a frozen Dole Smoothie packet while we were shopping at the grocery store. When we opened it up at home the next morning and I read the directions, I thought, “ I could make this myself.” Although I will admit it was yummy, it just didn’t go that far with four smoothie loving boys sitting around the kitchen table. So I set out to make my homemade version and found out that a lot of other people have had the same idea.
Making smoothies at home is a great way to use up fruit sitting in the fridge. Bananas that a slightly past the stage a eating fresh are great frozen and tossed into the blender to add an icy sweetness to breakfast. Something about blending your own tasty concoctions out of fruit, yogurt, milk, juices and ice is interestingly satisfying and fun.
Here is what we came up with as a rule of thumb for smoothie making.
1/3 Yogurt
2/3 Fruit
1 Cup Liquid ( like Milk or Juice)
Ice (optional if your fruit isn’t frozen)
Drizzle of honey or tsp of sugar if you prefer it to be sweeter.
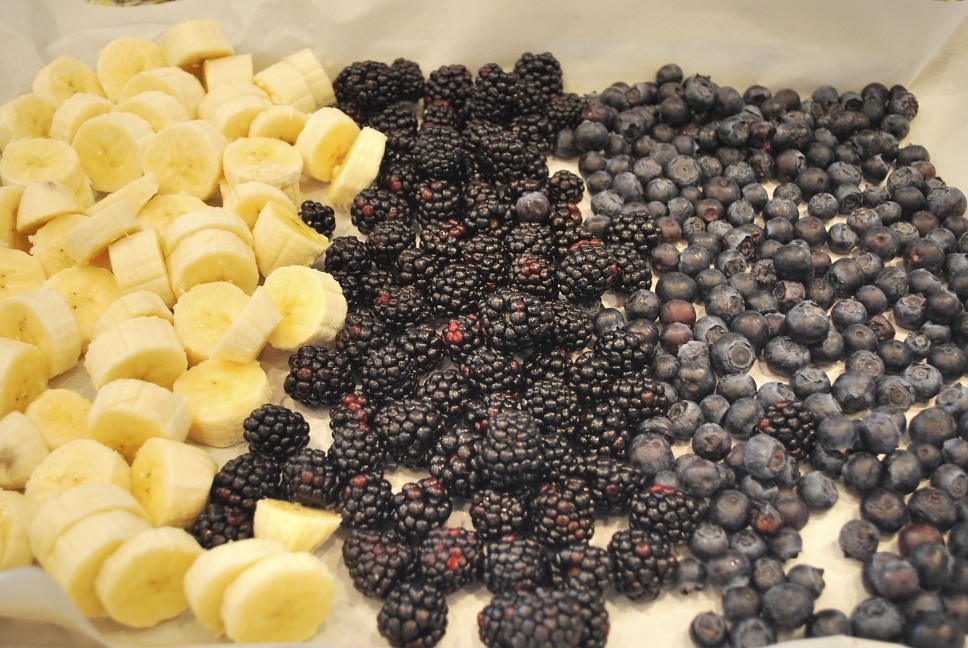
To make it easy for my kiddos to make their own breakfast, I made some my own frozen smoothie packets. I purchased blueberries and blackberries on sale and froze them on my own, along with some slightly ripened bananas that were sitting on my counter. I also purchased a bag of frozen strawberries so we could make it a mixed berry smoothie and to add some color.
Just a couple of notes about pre freezing your fruit and yogurt. Slice fruit and place it on a wax paper lined baking sheet and cover with plastic wrap before placing it in the freezer. Place in the freezer for a couple of hours prior to assembling smoothie packets. It is easy to add frozen yogurt to your packets if you freeze small amounts ahead of time in ice cube trays or mini muffin tins. Let the yogurt sit on the counter for a couple mins after it has been frozen and it will easily come out of it’s container.
Assembly Instructions:
In each small freezer bag place
1/4 cup sliced bananas
1/2 cup mixed frozen berries
1/4 cup frozen yogurt
Date and place in freezer. To prepare smoothie empty contents into blender with 1 cup milk or juice and blend until mixed well and enjoy.
February – The Month of Love

2012 has already begun ticking away and we find ourselves in the month of February. When I think of February images immediately come to mind of pink and red hearts, Valentines, flowers and candy. This is the month of the year that has been dedicated to celebrating love.
If you’ve been in any store lately your sure to have noticed this since before New Year’s. The large pink, red and white paper hearts swinging from the ceiling have been advertising that it is so. Boxes of Valentines, candies and everything that could possibly be made into a Valentine are on display begging to be traded for your hard earn dollar.
Many people celebrate their romantic love on February 14th, St. Valentines Day. This day is the popular day to set aside a time to express ones love for that special someone. Valentines Day has been celebrated since 496 A.D. Traditionally it is celebrated by the giving of candies, roses or greeting cards to express ones feelings for another.
I have never been a big fan of Valentines Day. What is it with Valentines Day anyways? It always feels like your “in” or your “out” on Valentines Day depending on your relationship status. All the hype and pressure to make the day so special just is exhausting to me. I’ll admit the big fan fare is romantic and exciting but to me it doesn’t mean as much as a simple and sincere “ I love you.”
So I propose that this month of love be dedicated to all things worth loving. Think about it for a minute. What do you love? What makes you smile? What are the simple things that bring you an everyday happiness? Little things everyday cause us to feel this emotion we call love and enjoying them causes it to increase.
For me it’s the simple everyday things in life that make me feel loved.The sunrise, a good book, a joke, my children’s laughter and my husband’s smile all make me feel this emotion we call love. So join with me this month as I try to focus on the everyday things that make this emotion of love feel so real.
When you arise in the morning, think of what a precious privilege it is to be alive – to breathe, to think, to enjoy, to love.” Marcus Aurelius
Stretch Canned Frosting With This Simple Tip
 Have you ever been in the middle of baking up a batch of cupcakes and then realized you might not have enough frosting to cover them all? I hate this feeling and the idea that I would have to load all my kiddos into the car for a quick run to the store. I’d much rather just be able to finish what I started.
I picked up this little tip I thought I would share it with you. Now there is no need to stress about a quick trip to the store as long as you have 1 can of ready made frosting. Plus I love any tip that helps stretch a dollar. You can easily double the frosting you have on hand by following these simple steps.
Ingredients:
1 can of frosting
Tools needed:
bowl
hand mixer
plastic wrap
Directions:
Empty frosting can into a bowl.
Beat with the hand mixer on medium low speed for about a minute or until you can see that the frosting has almost doubled in volume.
Use immediately or cover and refrigerate until ready to use.
It’s really just that simple. I find this tip not only stretches your dollar but it also cuts the sugar your consuming in half and no one even knows what their missing. 🙂
Keep Brown Sugar Soft
 It is so frustrating when you go to make cookies only to find that the brown sugar is now as solid as a rock. Sitting on the shelf it has dried out and taken on a consistency that is similar to that of concrete. You know there is no way you are going to get it into a measuring cup with out a chisel and at this point it just seems to make more sense to toss the bag rather than trying to soften it.
So how do we keep our brown sugar soft? You may have seen those terra-cotta brown sugar softeners that you soak in water. Those seem to work and are sold at all the kitchen supply stores. But if you are a penny pincher like me and are looking for simple and affordable ways to make your brown sugar last you may be looking for other options. Maybe you have tried a piece of bread placed into the bag or and apple core to keep the sugar soft. Both of these seem to work well and are cost effective, but I have to share with you the newest tip I have learned.
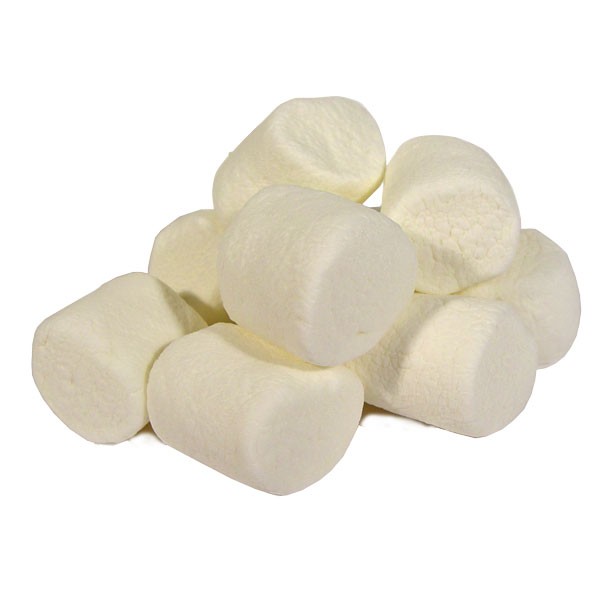
To keep brown sugar soft try tossing a couple of marshmallows into the top of the brown sugar bag. Close the bag with a clip or twist tie. That’s all there is to it. The marshmallows absorb the air and keep the brown sugar soft. I like the idea of using the pretty white soft cylinder shaped sugar to keep another sugar soft and ready for use. No more bread crumbs in the sugar or ugly apple cores decaying in the bag.
It looks pretty, is inexpensive and will keep your sugar ready the next time a cookie craving hits.
Celebrate National Popcorn Day

If your looking for another reason to celebrate right after the holidays, here is one for you, It’s National Popcorn Day! A whole day devoted to the most popular snack at the movie theatre. No one is really sure who declared January 19th as “National Popcorn Day,” but do we really need to know? I say let’s celebrate.
Popcorn has been around for centuries. Evidence of popcorn has been found by archeologist at archaeological sites in South America. Some scientist say that they believe the corncobs found to be dated back to 4700BC.
Popcorn is one of my favorite snacks. I love it air popped with a little salt and a drizzle of butter. It’s fairly healthy to eat as long as you watch what you put on it. It is also a great option to snack on for those of us counting carbs.
Popcorn is such a versatile and affordable ingredient with so many ways to prepare it. You can dress up plain old popcorn to be sweet or savory. Here are a couple of recipes to try out in honor of National Popcorn Day.
Sweet – Homemade Kettle Corn
Ingredients
1 1/2 Tablespoons Vegetable Oil
1/2 Cup Popcorn Kernels
1/4 Cup Sugar
1/2 teaspoon Kosher Salt
Heat the vegetable oil in a hand cranked popcorn popper or large kettle / pot. Once oil is heated add a few kernels to the oil, cover with a lid and wait for them to pop. Once popped quickly stir in the remaining kernels and sugar. Cover with the lid and listen for kernels to pop. When they have begun to pop turn off the heat and shake the pot gently to keep popcorn from burning. If popping slows down and not all the kernels are popped turn heat on again heat for a little bit and repeat the process. Finally when all the kernels have popped add salt, toss and enjoy!
Savory Popcorn Seasoning
Ingredients
1 Tablespoon Garlic Powder
1Tablespoon Dried Parsley Flakes
1 1/2 teaspoon Dried Basil
1 1/2 teaspoon Dried Marjoram
1 1/2 teaspoon Dried Thyme
1 1/2 teaspoon Pepper
3/4 teaspoon Cayenne Pepper
In a small bowl combine all of the above and mix. Store in an air tight container for up to 6 months.
Add the desired amount of the mixture above to :
2 Cups Air Popped Popcorn
1 1/2 teaspoons melted butter
So make a batch of popcorn today and take a minute to six back relax and celebrate National Popcorn Day!
Holiday Treats Day 5: Egg White Chocolate Chip Cookies
The holidays just aren’t complete with out cookies. Although I think cookies are a necessity all year round they add an extra special touch to the holidays. Christmas just wouldn’t be the same if Santa couldn’t collect the reward of cookies and a tall glass of milk as he visited each child’s home. He deserves to be rewarded for a long nights work, and we need to look out for his plump familiar figure. What better way could there be for him to relax for a just a minute than by enjoying a cold glass of milk along with homemade cookies for dunking.
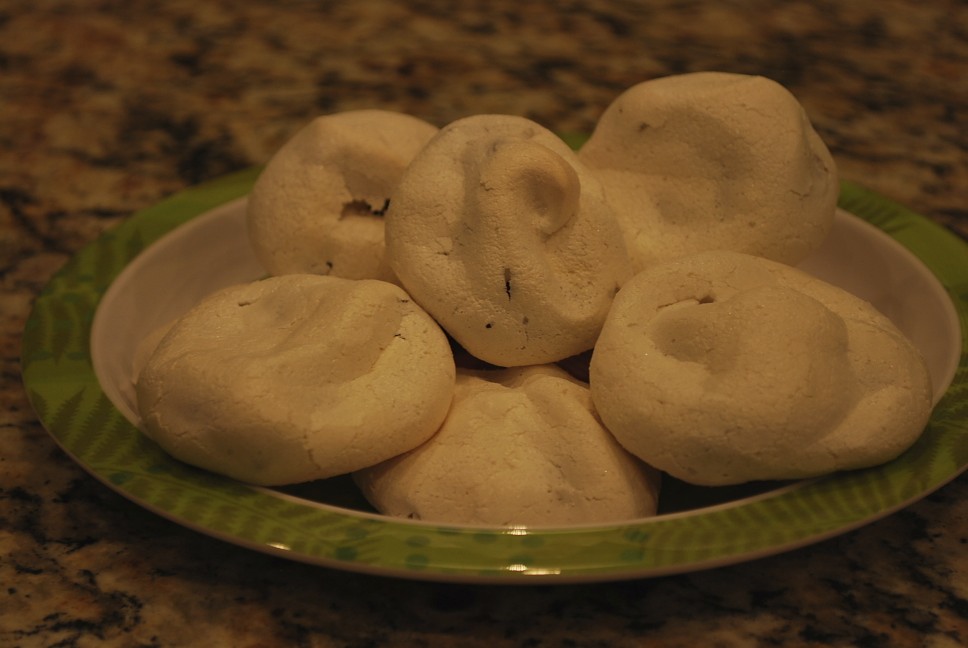
This cookie recipe has been passed down through generations of my father’s family. The Chocolate Chip Egg White Cookie is one of my father’s treasured childhood favorites and has been ever since his childhood. I’ve made these for my kids every year at christmas time and they love them. This is a great cookie option for those of you with wheat allergies. They are light and airy with surprise pieces of chocolate hidden inside.
Ingredients:
2 egg whites
1/8 tsp cream of tartar
1/8 tsp salt
3/4 cup sugar
1/2 tsp vanilla
1package chocolate chips
paper bag
Directions
Beat egg whites until frothy.
Add salt and cream of tartar and continue to beat egg whites until stiff but be care not to let them get too dry.
Add sugar 2 TBSP at a time beating after each addition.
When egg whites form a stiff peak, stop beating and fold in chocolate chips and vanilla.
Cut paper bag to fit onto the cookie sheet.
Place spoonfuls onto the paper bag lined cookie sheet and bake at 300 degrees for 20 to 25 minutes. Remove from the oven when lightly browned and dry in appearance.
Holiday Treats Day 4: Celebrate The Holidays With Gourmet Popcorn
Popcorn just seems to go with the holidays. Images of garland popcorn strung on trees, colored popcorn balls and decorated popcorn tins come to mind. Walking through the stores as the holidays draw near you can easily find tins full of flavored popcorn. Specialty kiosk pop up all over malls and shopping centers offering a variety of tempting treats to purchase.
During the holidays as a child I remember going to the mall with my parents. One of our favorite shops to stop by was a Gourmet Popcorn store. I remember walking into the store as my eyes consumed the beautiful glass displays of the colorful, popped, flavored kernels. Pressing my finger tips against the glass I counted the individually, beautifully coated popped corn kernels. The sales associates were always quick to offer samples to taste test. As children my brothers and I always looked forward to this treat.
I came across this popcorn recipe and I thought I’d give it a try. This is a super simple recipe and was a fun activity to do with my boys. It looks pretty, taste great and could easily be dressed up and given away as a neighbor gifts.
Holiday Popcorn Recipe
Ingredients
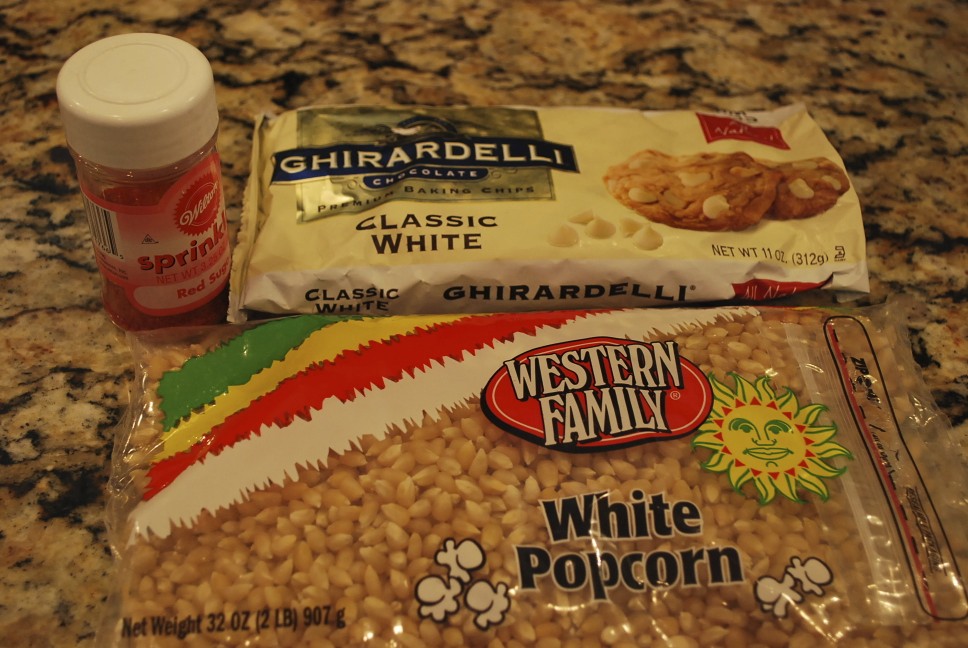
Directions:
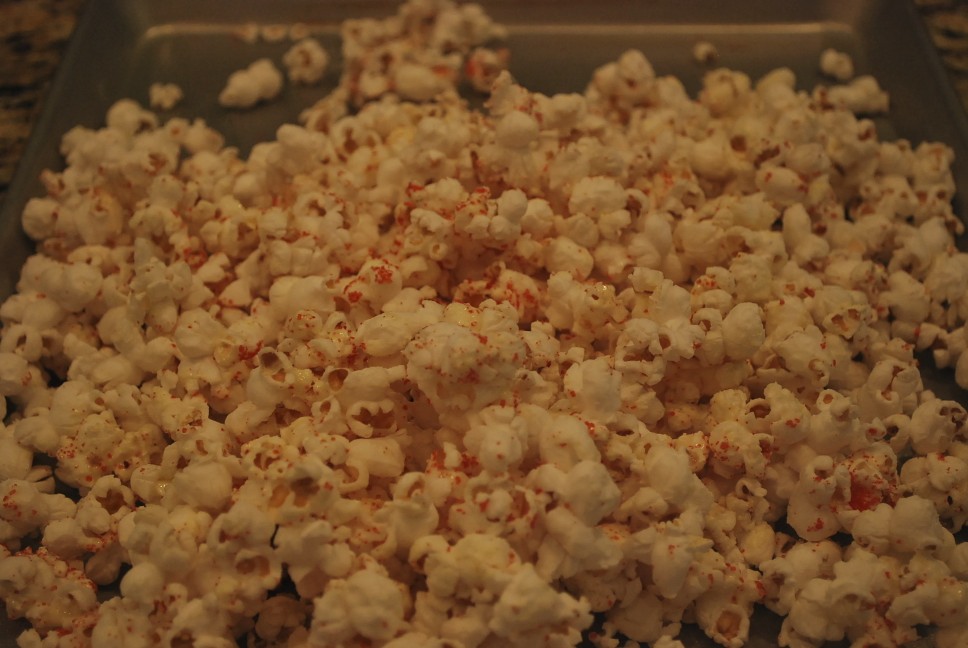
Pop the 1/2 a cup of popcorn into a large bowl.
Melt the white chocolate chips in a microwave safe bowl. Melt for 30 seconds at a time and stir occasionally until smooth.
Pour chocolate over popcorn and toss to coat.
Dump popcorn mixture on to a large cookie sheet and salt and add sprinkles to desired taste.
Store in a ziploc bag.
There you have your own homemade gourmet popcorn. 🙂
Holiday Treats Day 3 – No Bake White Chocolate Lemon Truffles
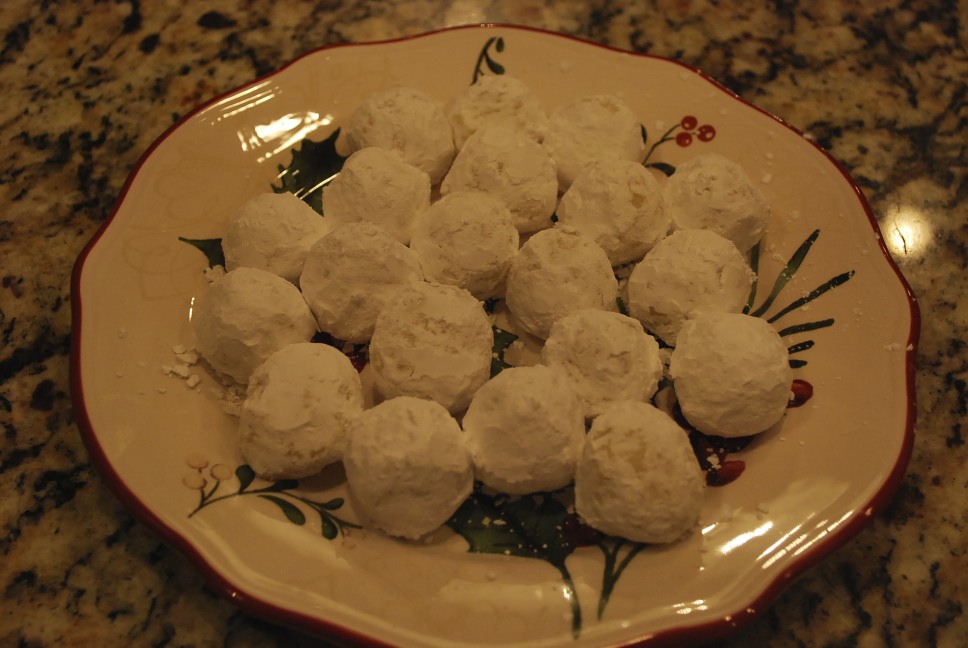
This is a new recipe we tried this year. Like I said in my earlier post we are always looking for new recipes to add to our holiday recipe collection. I love how truffles look and always like to add a little candy to our christmas goodies so I thought I’d give these a try. They have a light lemony flavor and look like little snowballs. I definitely think this is a recipe more the taste buds of grown ups. My husband loved them, my kids were not in love with them. I think they would rather eat a cookie. So if you like truffles give these a try.
White Chocolate Lemon Truffles
1 cup white chocolate
5 Tbsp. unsalted butter
3 Tbsp. heavy cream
pinch salt
1 tsp. lemon extract
powdered sugar, for dusting
Melt chocolate, butter and cream over a double boiler or in a microwave. Stir until smooth.
Stir in salt and extract. Allow to cool slightly before covering with plastic wrap.
Refrigerate for 4 hours or until firm enough to handle.
With a melon baller or small spoon scoop out mixture and form into 1 inch balls. Toss with icing sugar to coat.
Store covered in the fridge for up to one week. Freeze for longer storage.
Makes about 24.
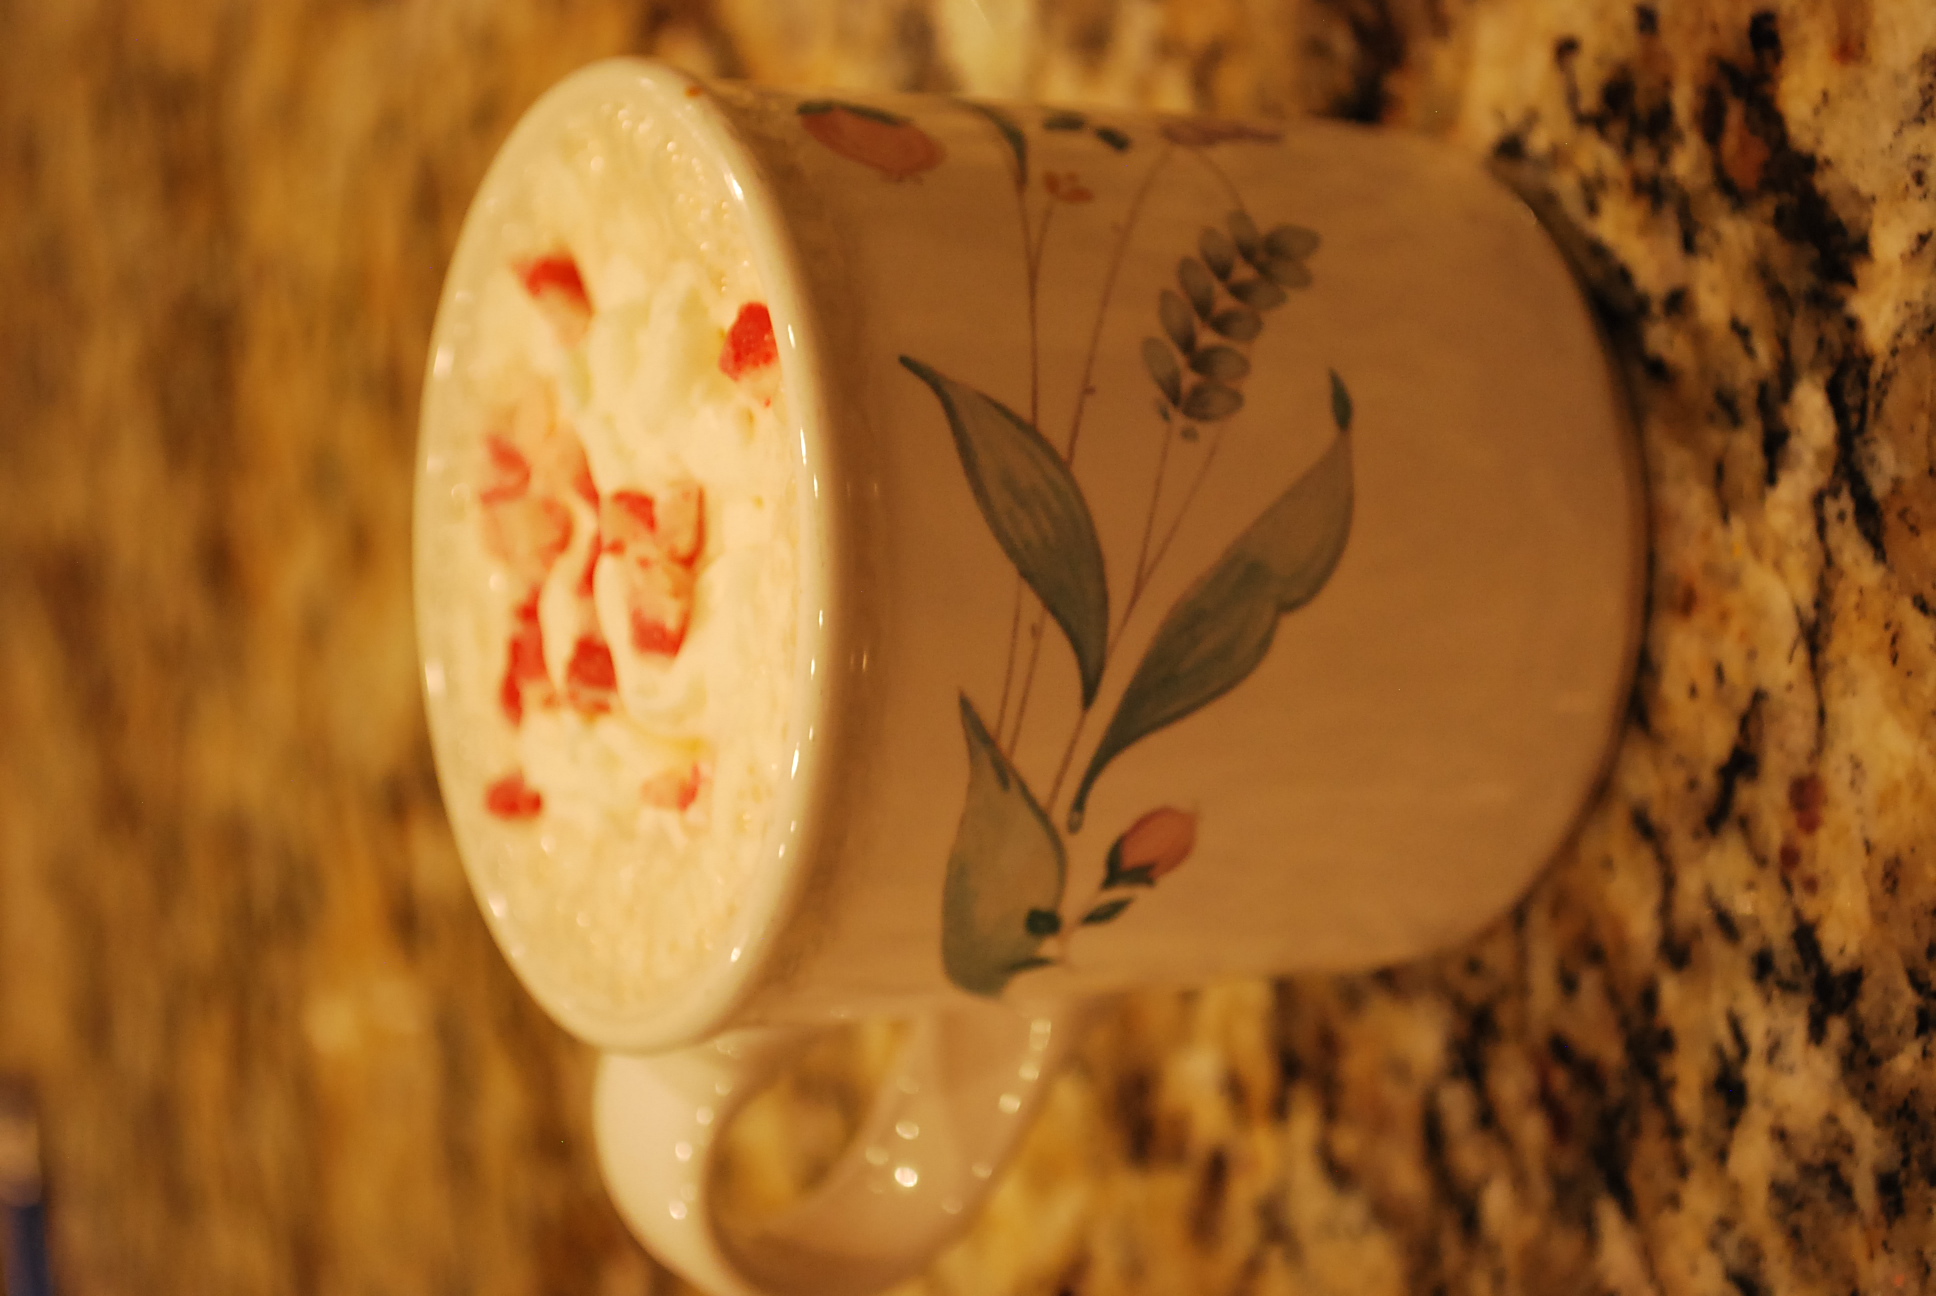
Holiday Treats Day 2 – Crock Pot Hot Chocolate
Winter’s cold weather makes hot chocolate a staple in our house. It’s almost become it’s own food group in our house. My kids make it before school to have with breakfast and afterwards warm themselves up after their walk home from the bus on a brisk winter day leaves them chilled to the bone. It’s an understatement to say that we love hot chocolate.
There are many winter activities that we love like sledding, making snowmen, snowballs , building ice forts and going to see the christmas lights around town. I thought the the idea of crock pot hot chocolate would be welcoming as you came in from some of these cold weather activities. This is a fun alternative to the powdered mixes you can buy at the store. It’s from scratch, homemade and will warm your loved ones on one the colder days this holiday season.
Crock Pot Hot Chocolate
Ingredients
1/3 cup sugar
1/4 cup unsweetened cocoa powder
1/4 tsp salt
3 cups milk, divided
1 tsp vanilla
1 cup heavy cream
1 bittersweet chocolate square
1 white chocolate square
3/4 cup whipping cream
1/2 cup milk chocolate chips
Directions
Combine sugar, cocoa, salt and 1/2 cup of milk in a bowl. Stir until sugar is dissolved and pour into the crock pot. Add the rest of the milk and vanilla extract to the crock pot as well. Cover and let sit on low for 2 hours, stirring occasionally. Add cream and chocolate squares and chocolate chips. Let cook on low for 10 mins stirring occasionally.
That’s it and it’s ready when you are. Make it just a little better by topping with candy canes , mini chocolate chips, whipping cream or homemade marshmallows. Check back tomorrow for Day 3 of Holiday Treats.
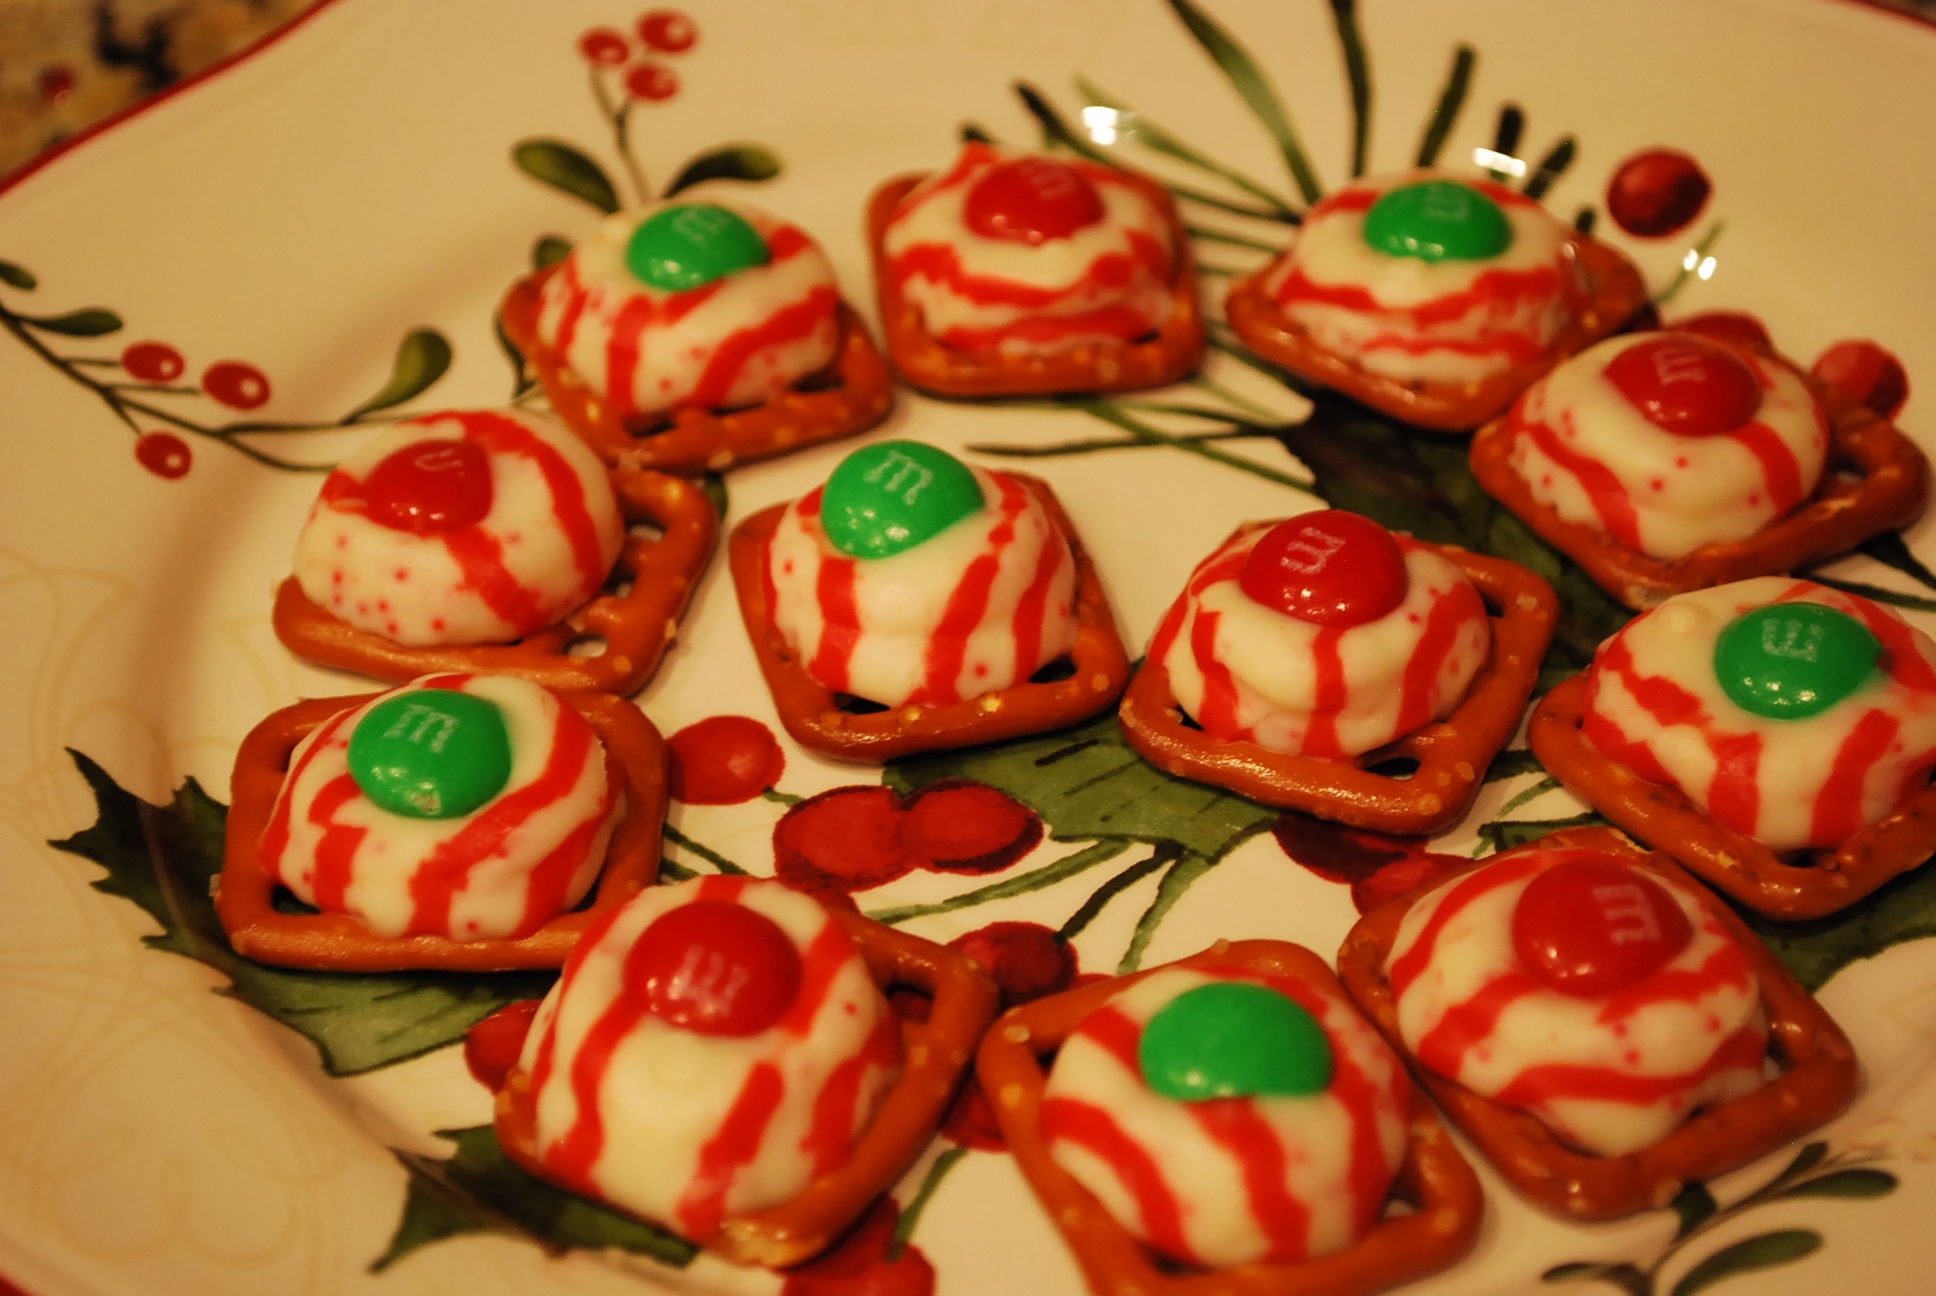
12 Days of Holiday Treats – Day 1: Peppermint Pretzels
The holidays are my excuse to bake and make treats for my family and friends. Each year I have a goal to try something new. If it passes the family taste test it will be added to our collection of holiday recipes.
As a child I remember my mother putting together elaborate plates of treats to deliver to neighbors, friends and members of the church we attended. Each plate was assembled and delivered to those we cared about. They brimmed with homemade goodies like carmel popcorn, a variety of cookies and candies that she made with love. My childhood memories are relived each year as now I try to create these goodies for my family and friends.
Life now just seems busier and continues to get busier and busier as my children grow and I take on new roles. I am sure that many of you are experiencing this same feeling of fleeting time that I do. Really, are there ever enough hours in a day? In the past few years it seems like I have been lucky if I get a batch of our families favorite sugar cookies made to leave out for Santa with his glass of milk.
So this year in an effort to continue with tradition and in order to make memories for my children I have made a goal to make and share 12 holiday treats. To keep up with the fast paced world we live in I have also tried to find quick holiday treats that even the busiest of the busy can find time to make. This recipe is one of those perfect for the holiday party you were supposed to bring a treat to and just didn’t have time to get it made.
Peppermint Pretzels
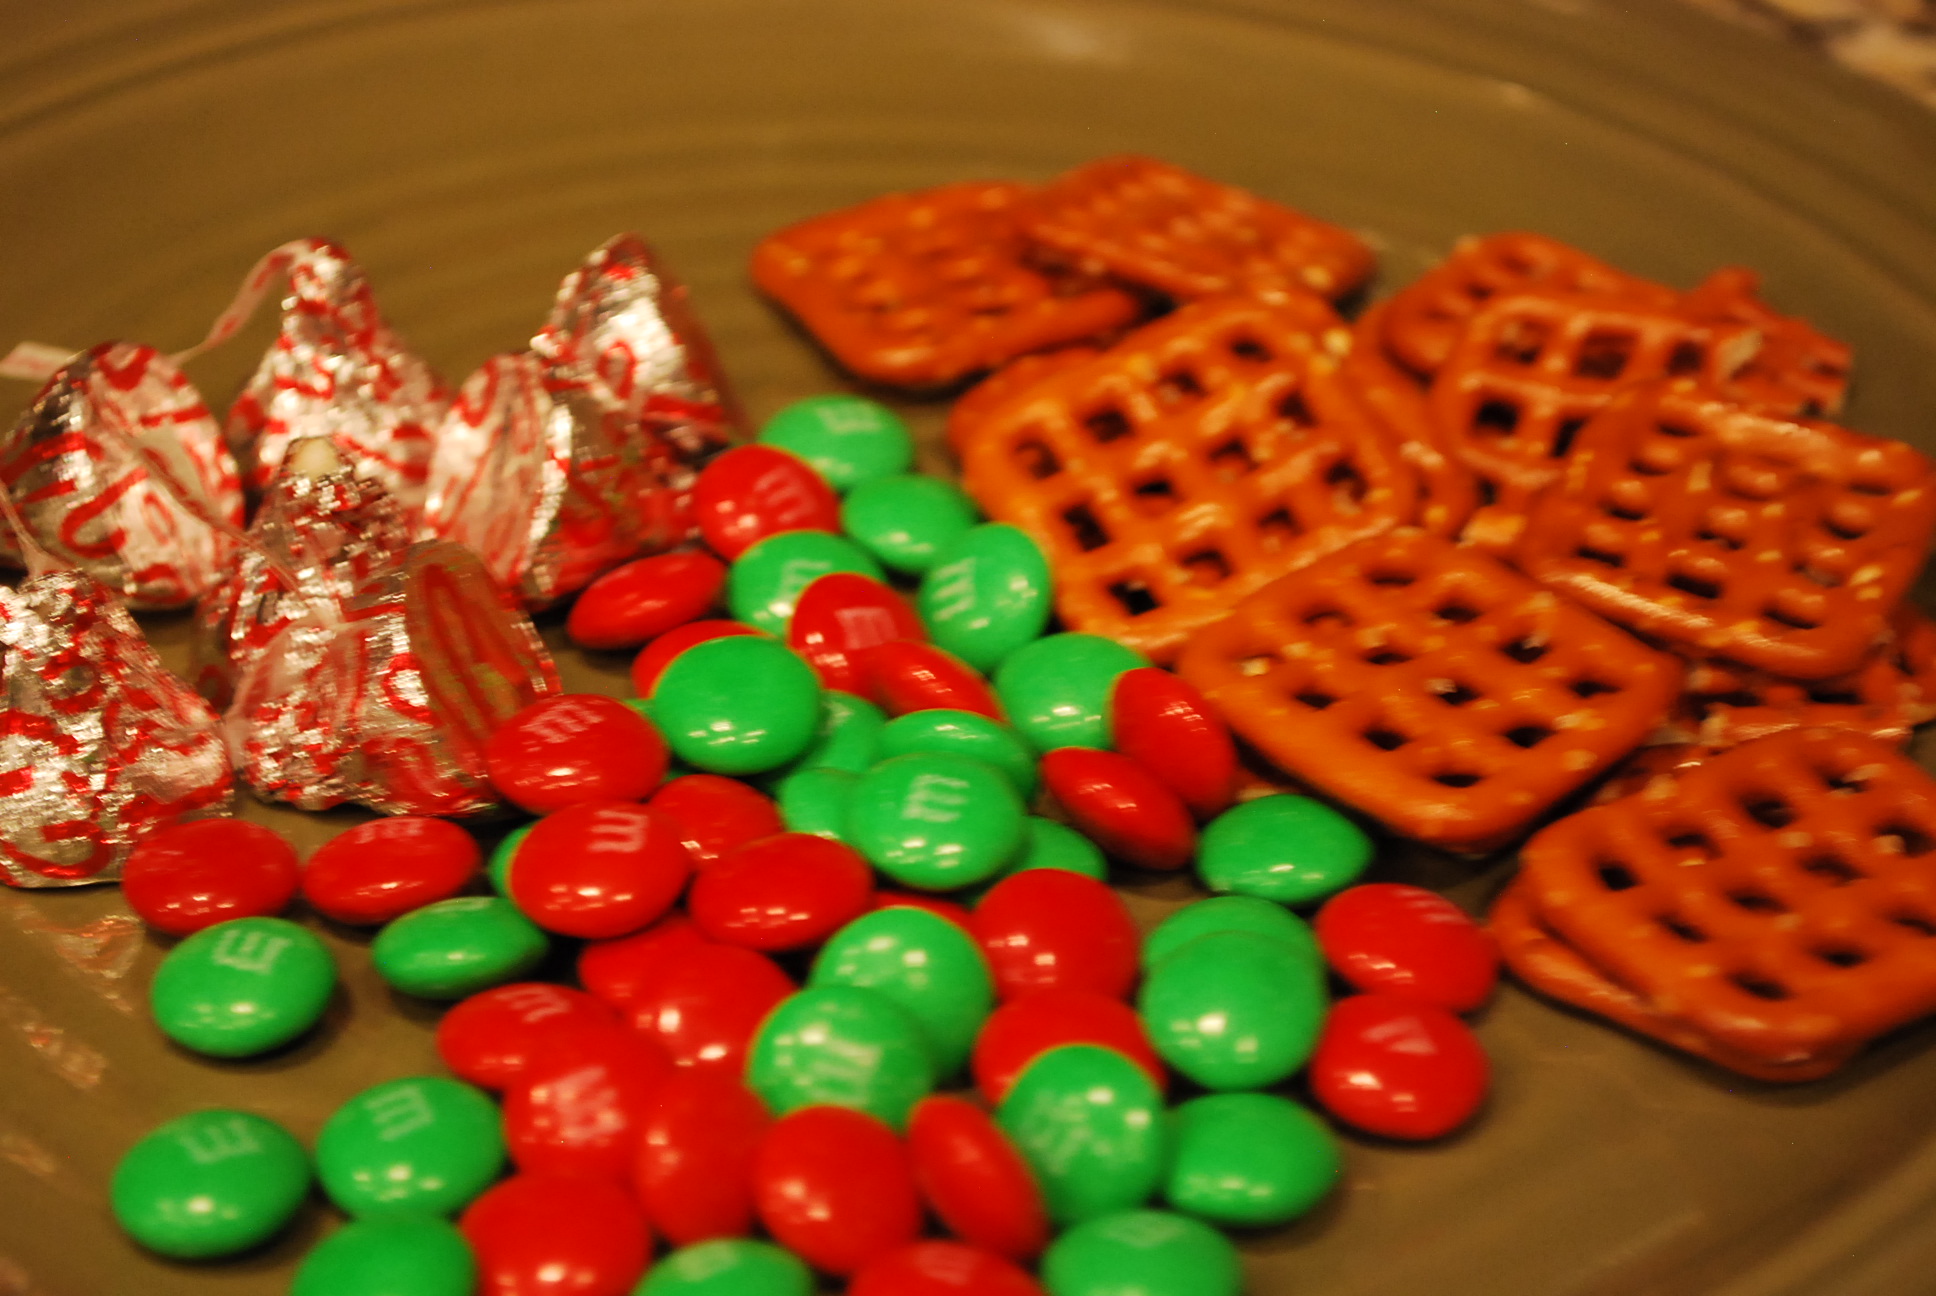
Ingredients:
Hershey Candy Cane Hugs
Pretzels (I chose square ones because I like the look.)
M&M’s (Holiday colors to make them look festive.)
Directions:
Step 1: Preheat oven to 200 degrees.
Step 2: Line pretzels on a cookie sheet.
Step 3: Unwrap hugs and place one on each pretzel.
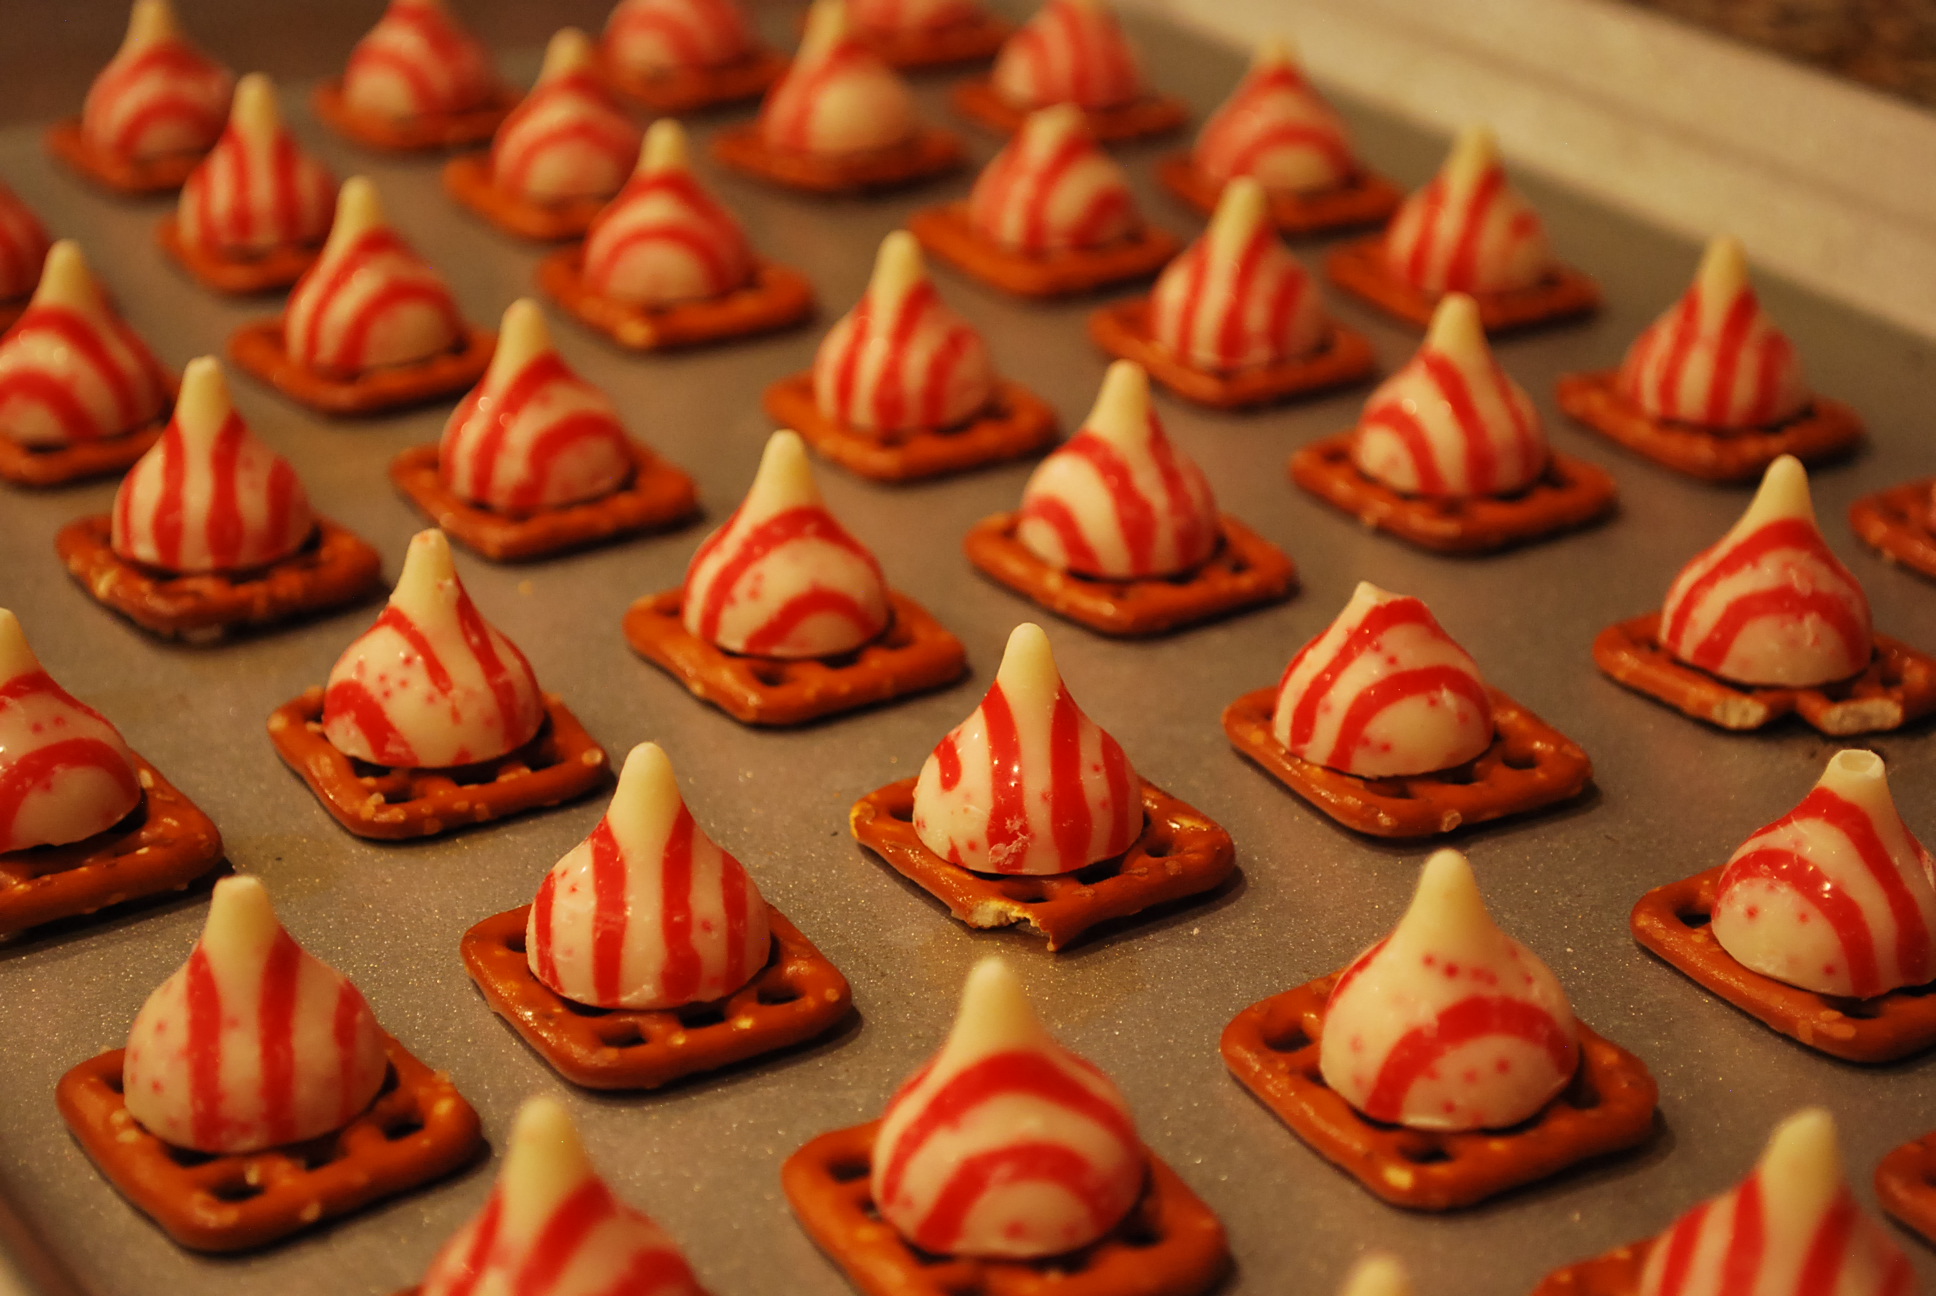
Step 4: Place cookie sheet in oven for 5 to 8 minutes.
Step 5: Take out of oven and top each treat with a M&M. Be careful the chocolate will be hot. Let cool. For best results place in the refrigerator or on top of another cookie sheet filled with ice until they have set up.
So simple and still they taste so good! These easy treats taste just as good with traditional Hugs just in case your not a fan of peppermint. This is a truly easy and quick holiday treat for the busy family on the go. Check back tomorrow to follow Day 2 of Holiday Treats.
Tips To Entertain The Kids At The Thanksgiving Table

Thanksgiving is one of my favorite holidays. I love the traditions that come with this annual feast, they warm my heart and their memories last throughout the year. I always enjoy Thanksgiving because it brings together two of my very favorite things, food and family. I am a self proclaimed “foodie.” I love being in the kitchen with my mother and sisters preparing the traditional meal along with a few family favorites and then enjoying it around the table with everyone we love.
This year as our company gathers together around the dinner table we will have just about as many kids as adults to seat. There really aren’t enough of us to break into an adult table and a kids table so I have decided that we will all sit around the same table this year. I know this decision may cause me a little more work as a mother but I am excited to give it a try.
While trying to decide how best to keep the kids engaged and pleasant during the meal I found some great tips online. I have also brainstormed a few of my own. The Family Fun website is also a great resource for family and holiday entertainment. Here are a few ideas you might try.
Printable Thanksgiving Activity Placemat
If your kids enjoy coloring, mazes and spot the difference activities, this might be a great option. Print the activity sheet and place it at each child’s seat with some crayons. It might buy a few minutes of quiet time.
Bag of Fun
Try keeping a bag of fun under a small child’s seat with quiet activities. Things like
stickers, crayons, small notebooks or a quiet book may be helpful to keep children under the age of 5 in their seats a little longer.
Get the Kids Involved
My children love to be included in anything that seems grown up. So I plan on having them help with the preparations for the day. This way they will take pride in the meal and sharing it with others. I have also planned some dinner table conversation topics that the kids will be able to join in on.
Entertainment
Have the children put on a show. The options for this are endless, maybe a skit or puppet show with a thanksgiving theme would be appropriate. Have them sing a song they know for your company. My children will be playing their upcoming piano recital pieces for our company. This way they are getting a little extra practice playing in front of others and have something to look forward to.
These are just a few ideas to help entertain and include your children during the Thanksgiving celebration. If any of you have ideas that work well at your table please share them in the comment section. Happy Thanksgiving!