
ALEX Toys – Craft My Embroidery Kit – $11.20!
Learn 12 easy stitches, Includes 75 embroidery essentials, Colorful tin storage box, Lots of extras like buttons, beads and bright thread!
 ALEX Toys – Craft My Embroidery Kit
List Price: $27.99
You Save: $16.79 (60%)
Price: $11.20
Eligible for free shipping on $35+ orders or on ANY order with Amazon Prime.
Don’t have a Prime membership? Get a one month free trial! Click here for details!
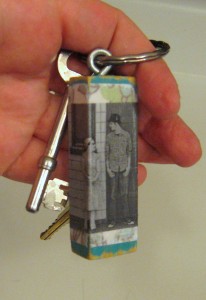
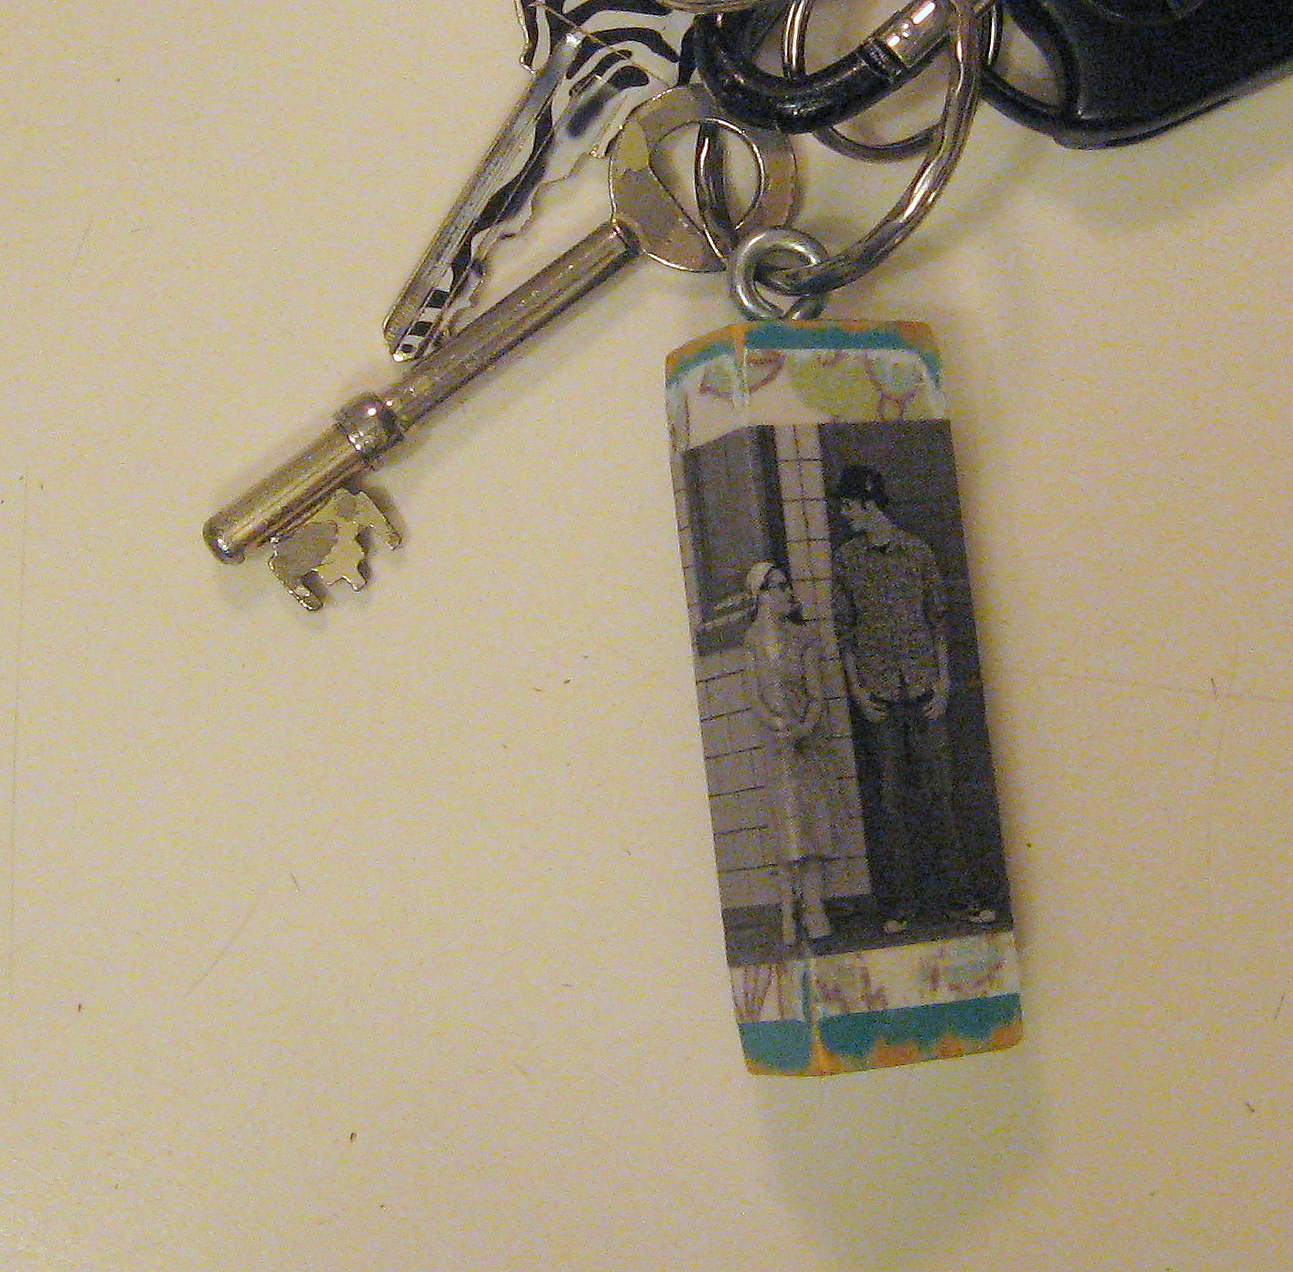
A PYP Best Blog! Make a Jenga Block Photo Keychain!
Just in case you missed this article on making a Jenga photo block keychain the first time we shared it a couple of years ago, we are republishing it. After Sharon wrote this blog originally, we got an awesome response. This is one of the PYP Best Blogs!
I was helping someone move recently and we found a handful of homeless Jenga blocks in the bottom of a closet. I rescued them back out from the garbage; I knew I could find something fun to do with them! This project was basically free, as I had all of the supplies on hand already, but if you need to purchase anything, it shouldn’t be much at all.
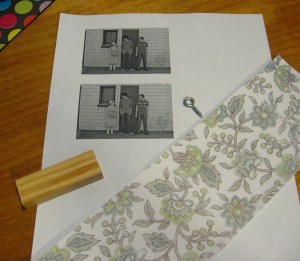
You’ll need a Jenga block or similar sized piece of wood, some scrapbook paper (paper will work better than cardstock), a little paint, a small eye screw, a drill and some Mod Podge.
You’ll also need a photo of your choice printed with a laser printer. If you print it on an inkjet printer, the Mod Podge will likely smear the ink in the photo, although if that is your only option, I have had luck with spraying the photo with a clear craft sealer and letting it dry well, then use the Mod Podge on top. Use the Jenga piece to decide about how big you want your photo to be and just print it on plain white paper.
*You only need one photo. I printed 2 in case I made a mistake!
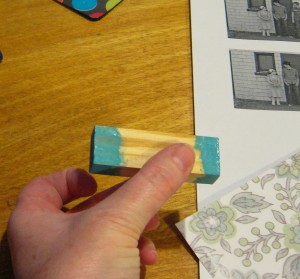
Draw an X on one end of the Jenga block and drill a small hole where the lines meet. This is where you will screw in the eye screw later.
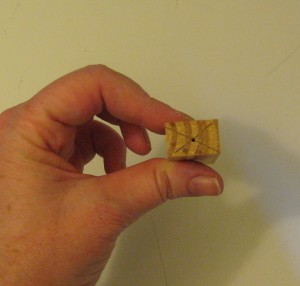
Now paint the ends of the Jenga block in the color of your choice. You only have to paint the ends because the middle will be covered with paper.
Once the paint is dry, it is time to Mod Podge on the scrapbook paper.
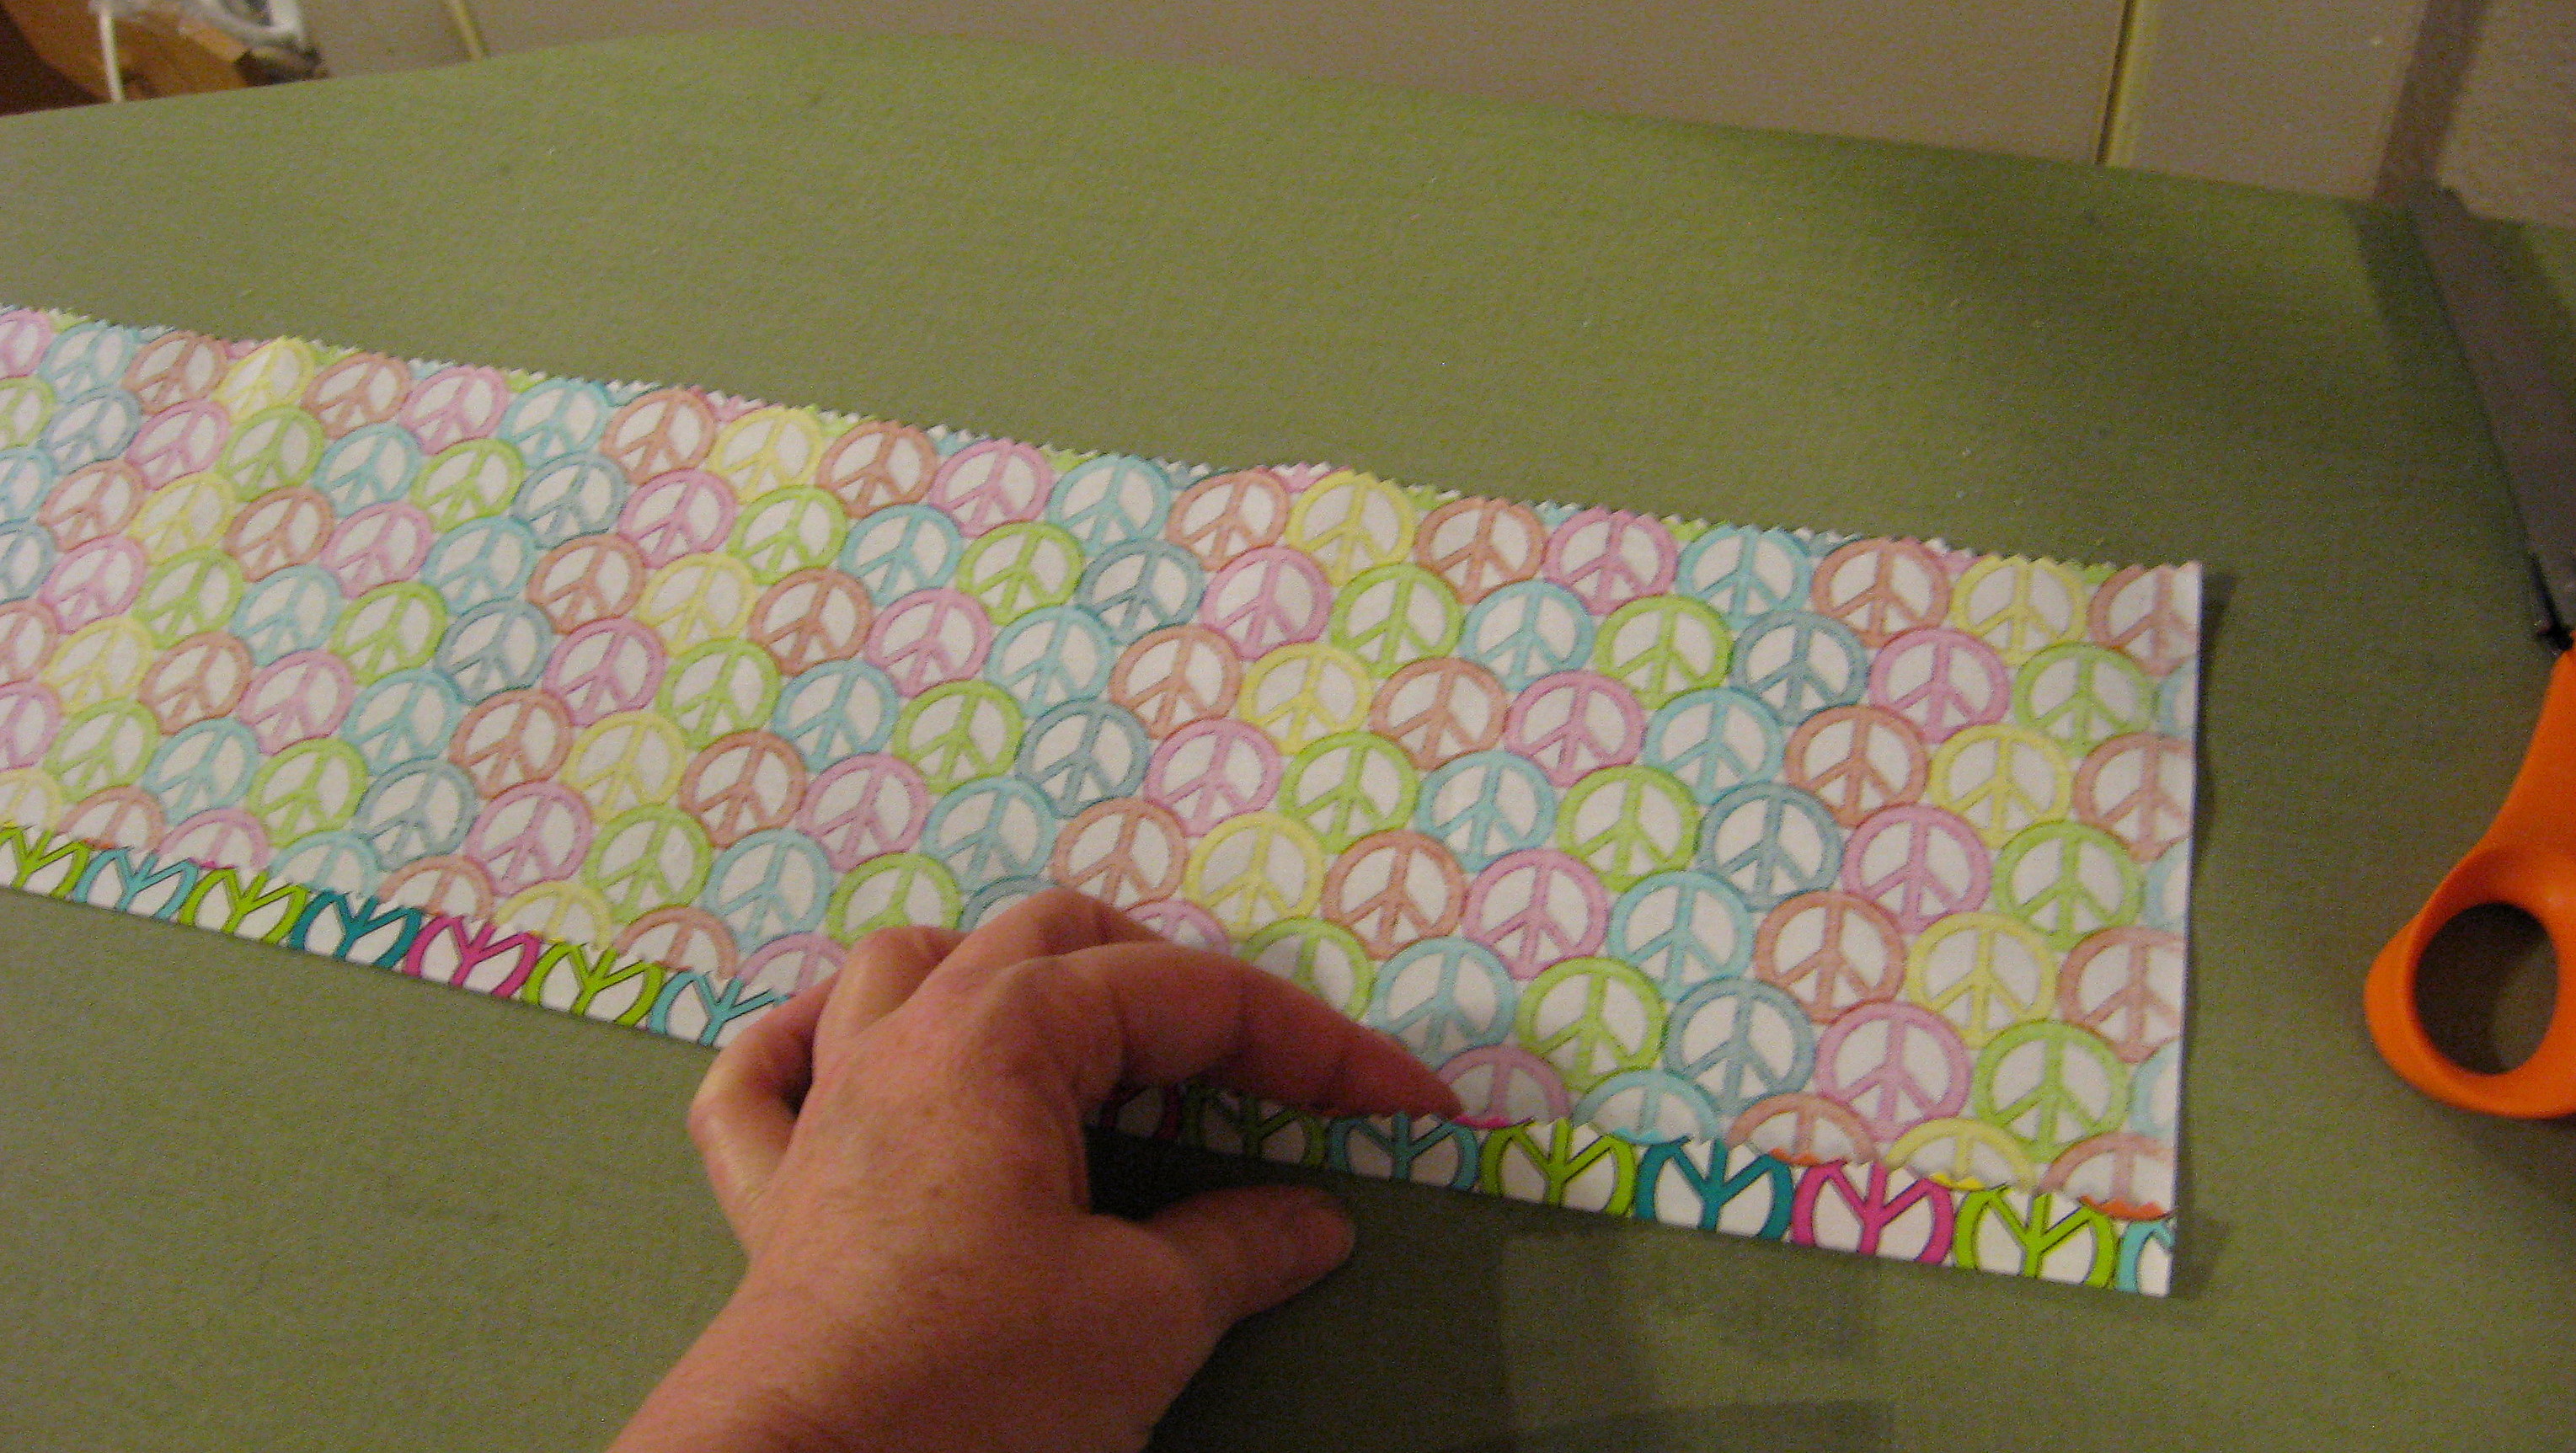
Cut a small piece of paper to the right height (just eyeball what looks good to you – it is up to you how much of the painted wood shows underneath!) and long enough to wrap around the Jenga block and just slightly overlap in the back.
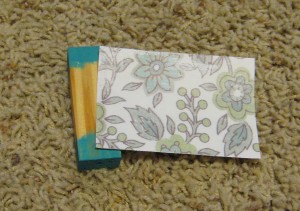
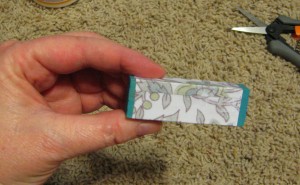
I found that it was easiest to Mod Podge the paper down one side at a time; it was pretty easy and gave me a nice crisp finish. Apply Mod Podge to one side of the Jenga block with a paintbrush and line the paper up so it is even with the edge of the Jenga block. Rub the paper with your fingers until it adheres and starts to dry, then move on to the next side, folding the paper tightly around the corners.

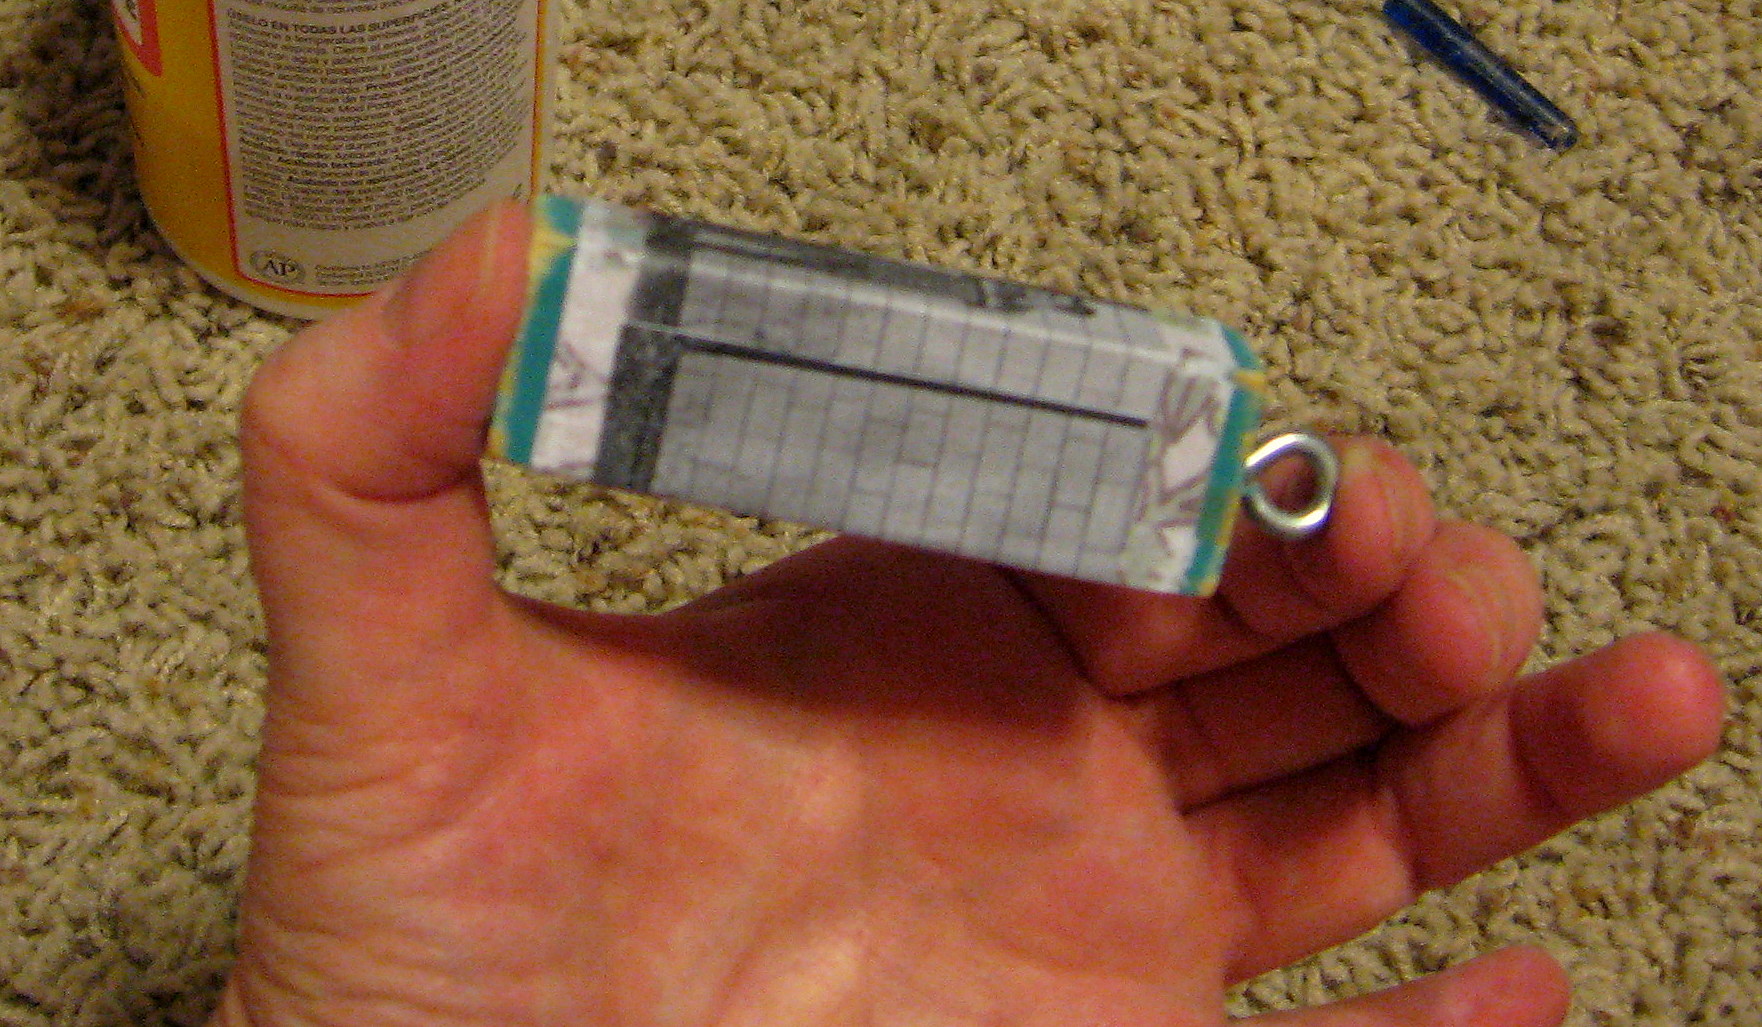
Once that’s dry, you can scuff up the paint and paper a little with some sandpaper if you like that look – or just leave it if you don’t! Now is a good time to put in the eye screw, as it gives you something to hold on to in the remaining steps.

PickYourPlum! Permanent Textile Stamps! Tribal Maxi Skirts! Magnetic Iron Mat!


Quick and Easy – Permanent Textile Stamps
Quick and easy is the way to go!
Starting at $14.99 (58% off) Retail: $35.99
Is it Hot in Here or is it Just You? Tribal Maxi Skirts
This one’s a knockout.
$12.99 (67% off) Retail: $39.99
Heat it Up – Magnetic Iron Mat
Just add a flat surface.
Starting at $8.99 (55% off) Retail: $19.99
Plus lots more CUTE deals!
LOTS of cute deals! Inexpensive shipping!
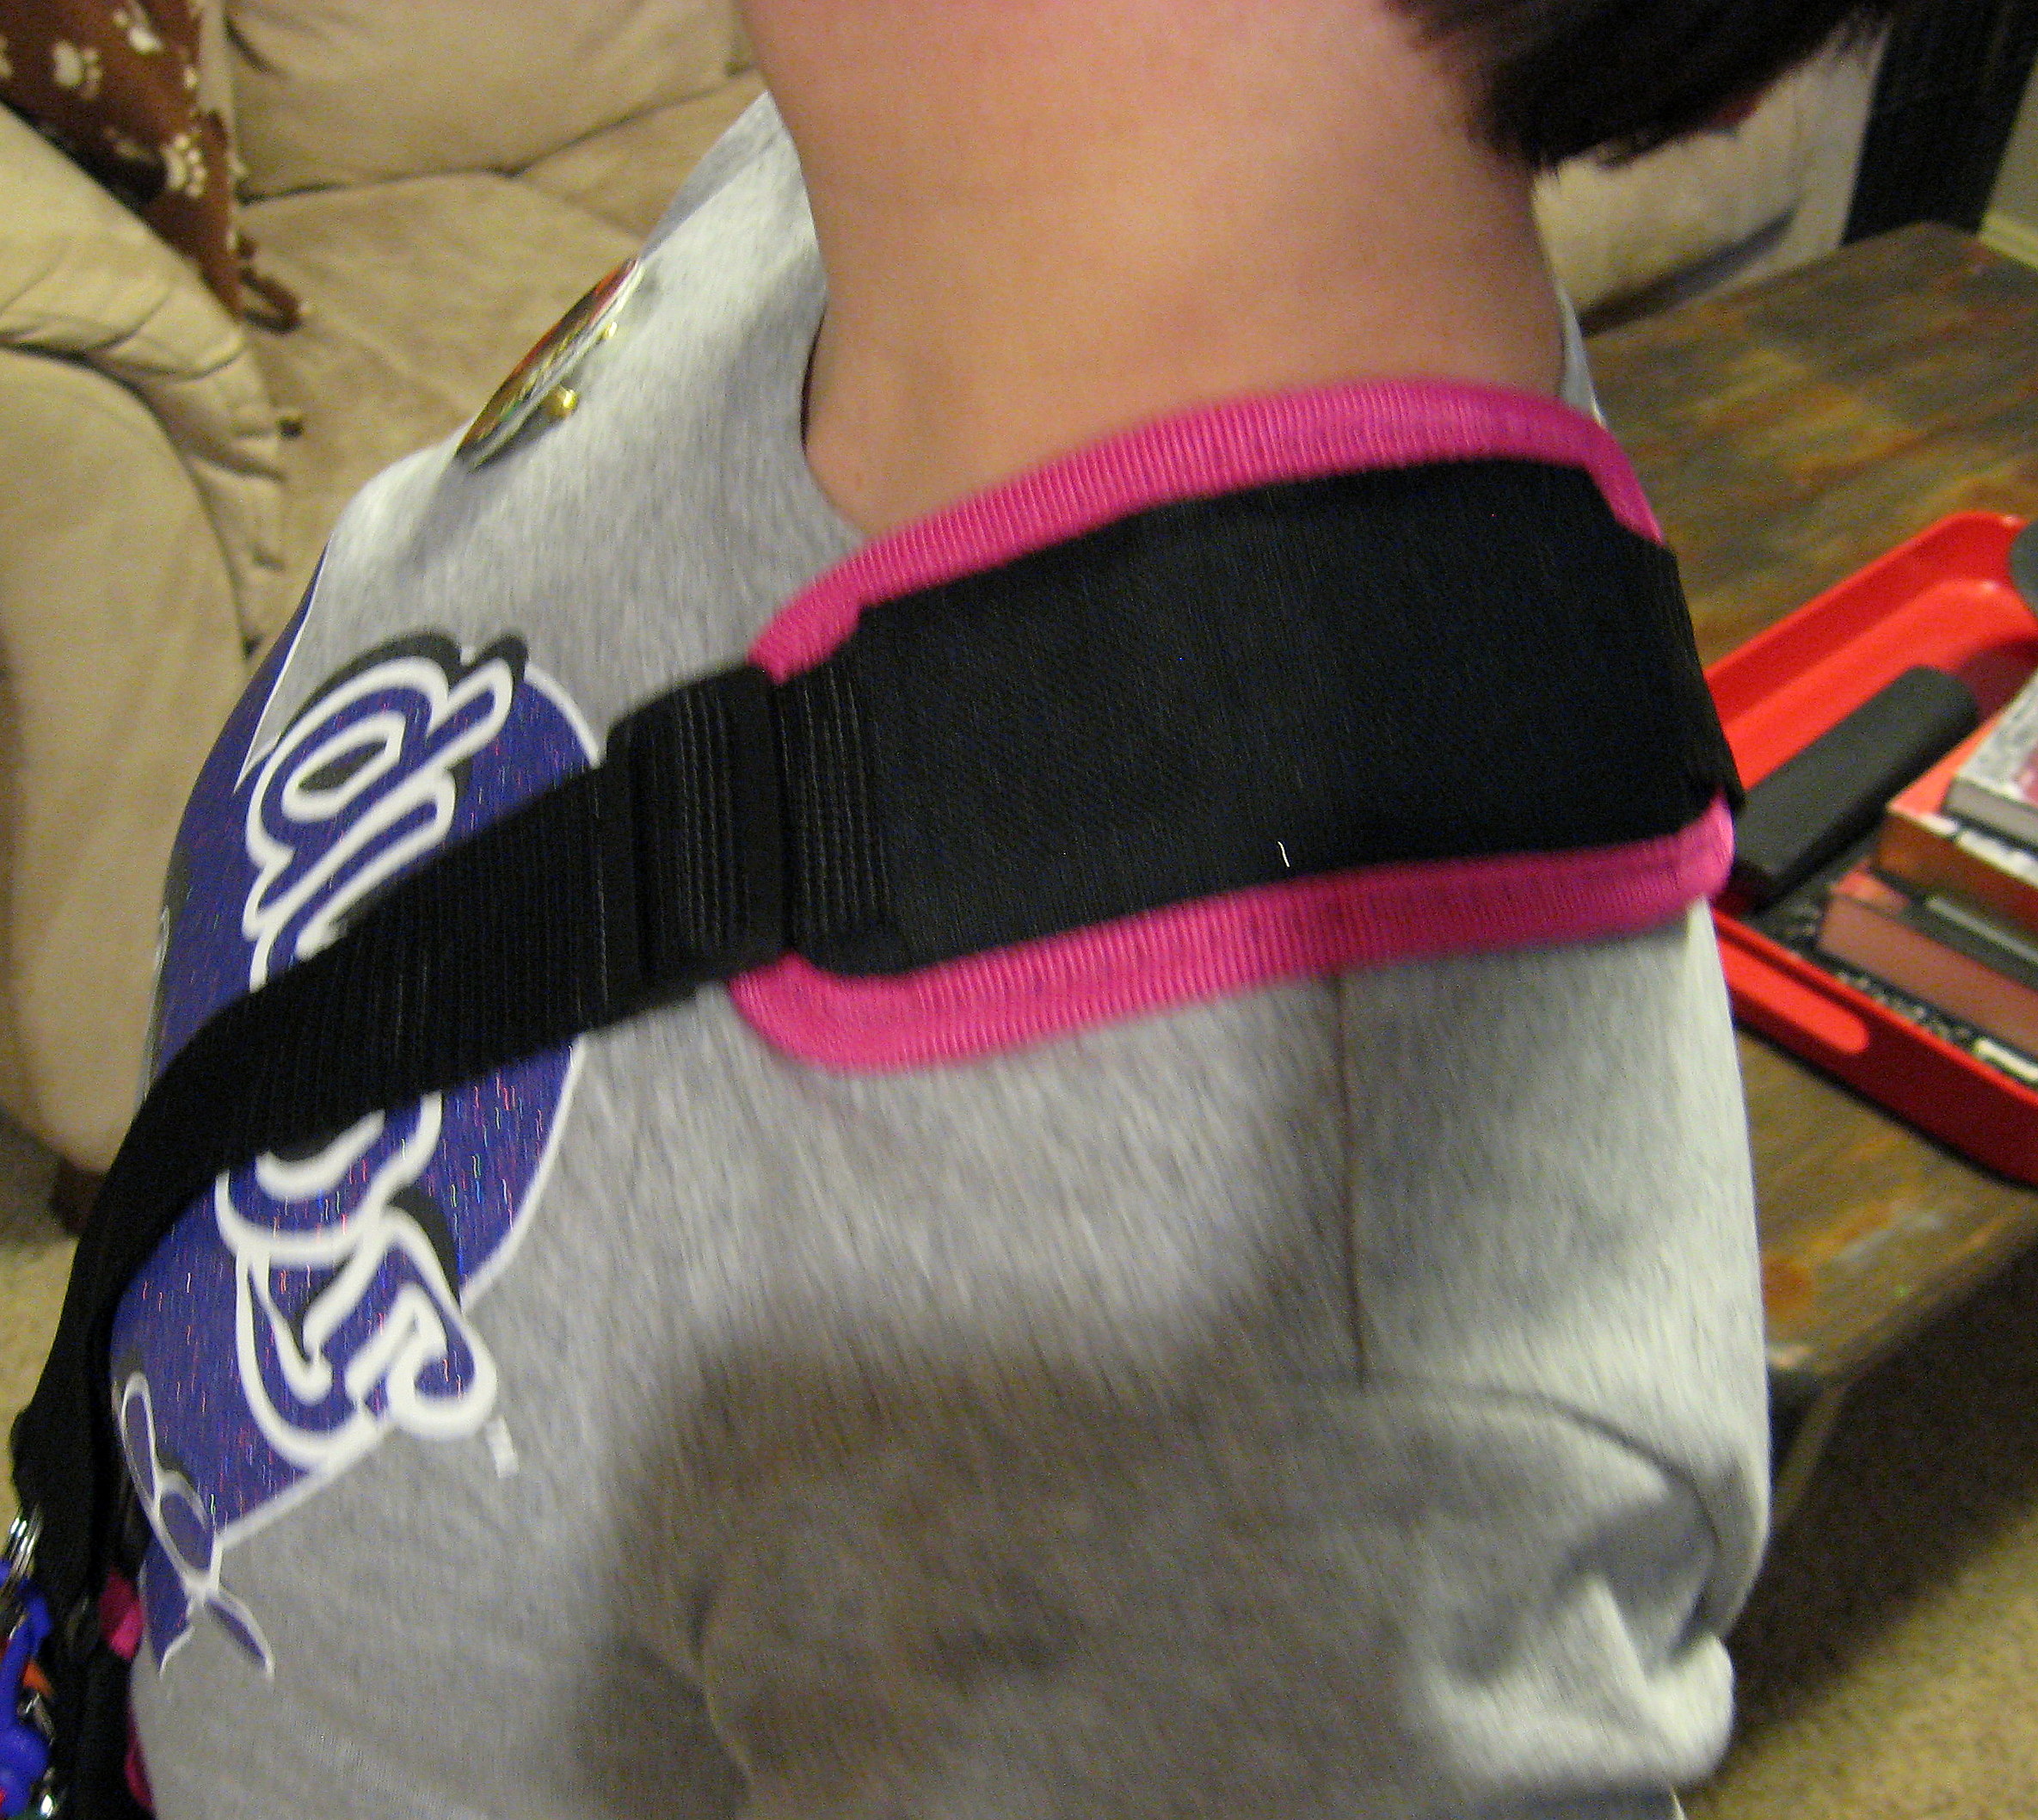
A PYP Best Blog! Make a Padded Messenger Bag Strap!
Just in case you missed this article on making a padded messenger bad strap the first time we shared it a couple of years ago, we are republishing it. After Sharon wrote this blog originally, we got an awesome response. This is one of the PYP Best Blogs!
My daughter prefers messenger bags to backpacks, but I find that if I leave them as they are, she comes home bright red and irritated where the strap has rubbed her neck. Luckily it couldn’t be easier to use a piece of scrap fabric to make an almost no-sew padded strap cover.
This year’s messenger bag does not have a detachable strap, so this tutorial will be for that. If your strap comes off, then it is even easier because you can sew the cover, then just slip it onto the strap.
First, cut off the padded part of the strap if it has one, and throw it away – so useless!
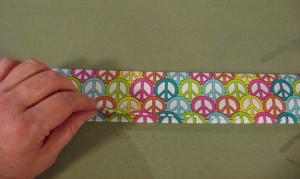
Decide how long you want the strap to be; mine is about 24 inches long because I like the way it looks, but you could do it shorter if you like. Then, figure out how wide to make it. Measure the width of the strap, double it and add 1 1/2 inches – my strap is 1 1/2 inches wide, so the width of my fabric will be 4 1/2 inches wide. Cut out your fabric into a rectangle in those measurements (so mine is 24″ X 4 1/2″).
Fold down each long side 1/2 inch and iron. Put a strip of Heat and Bond inside this fold and iron it down following the manufacture’s instructions.
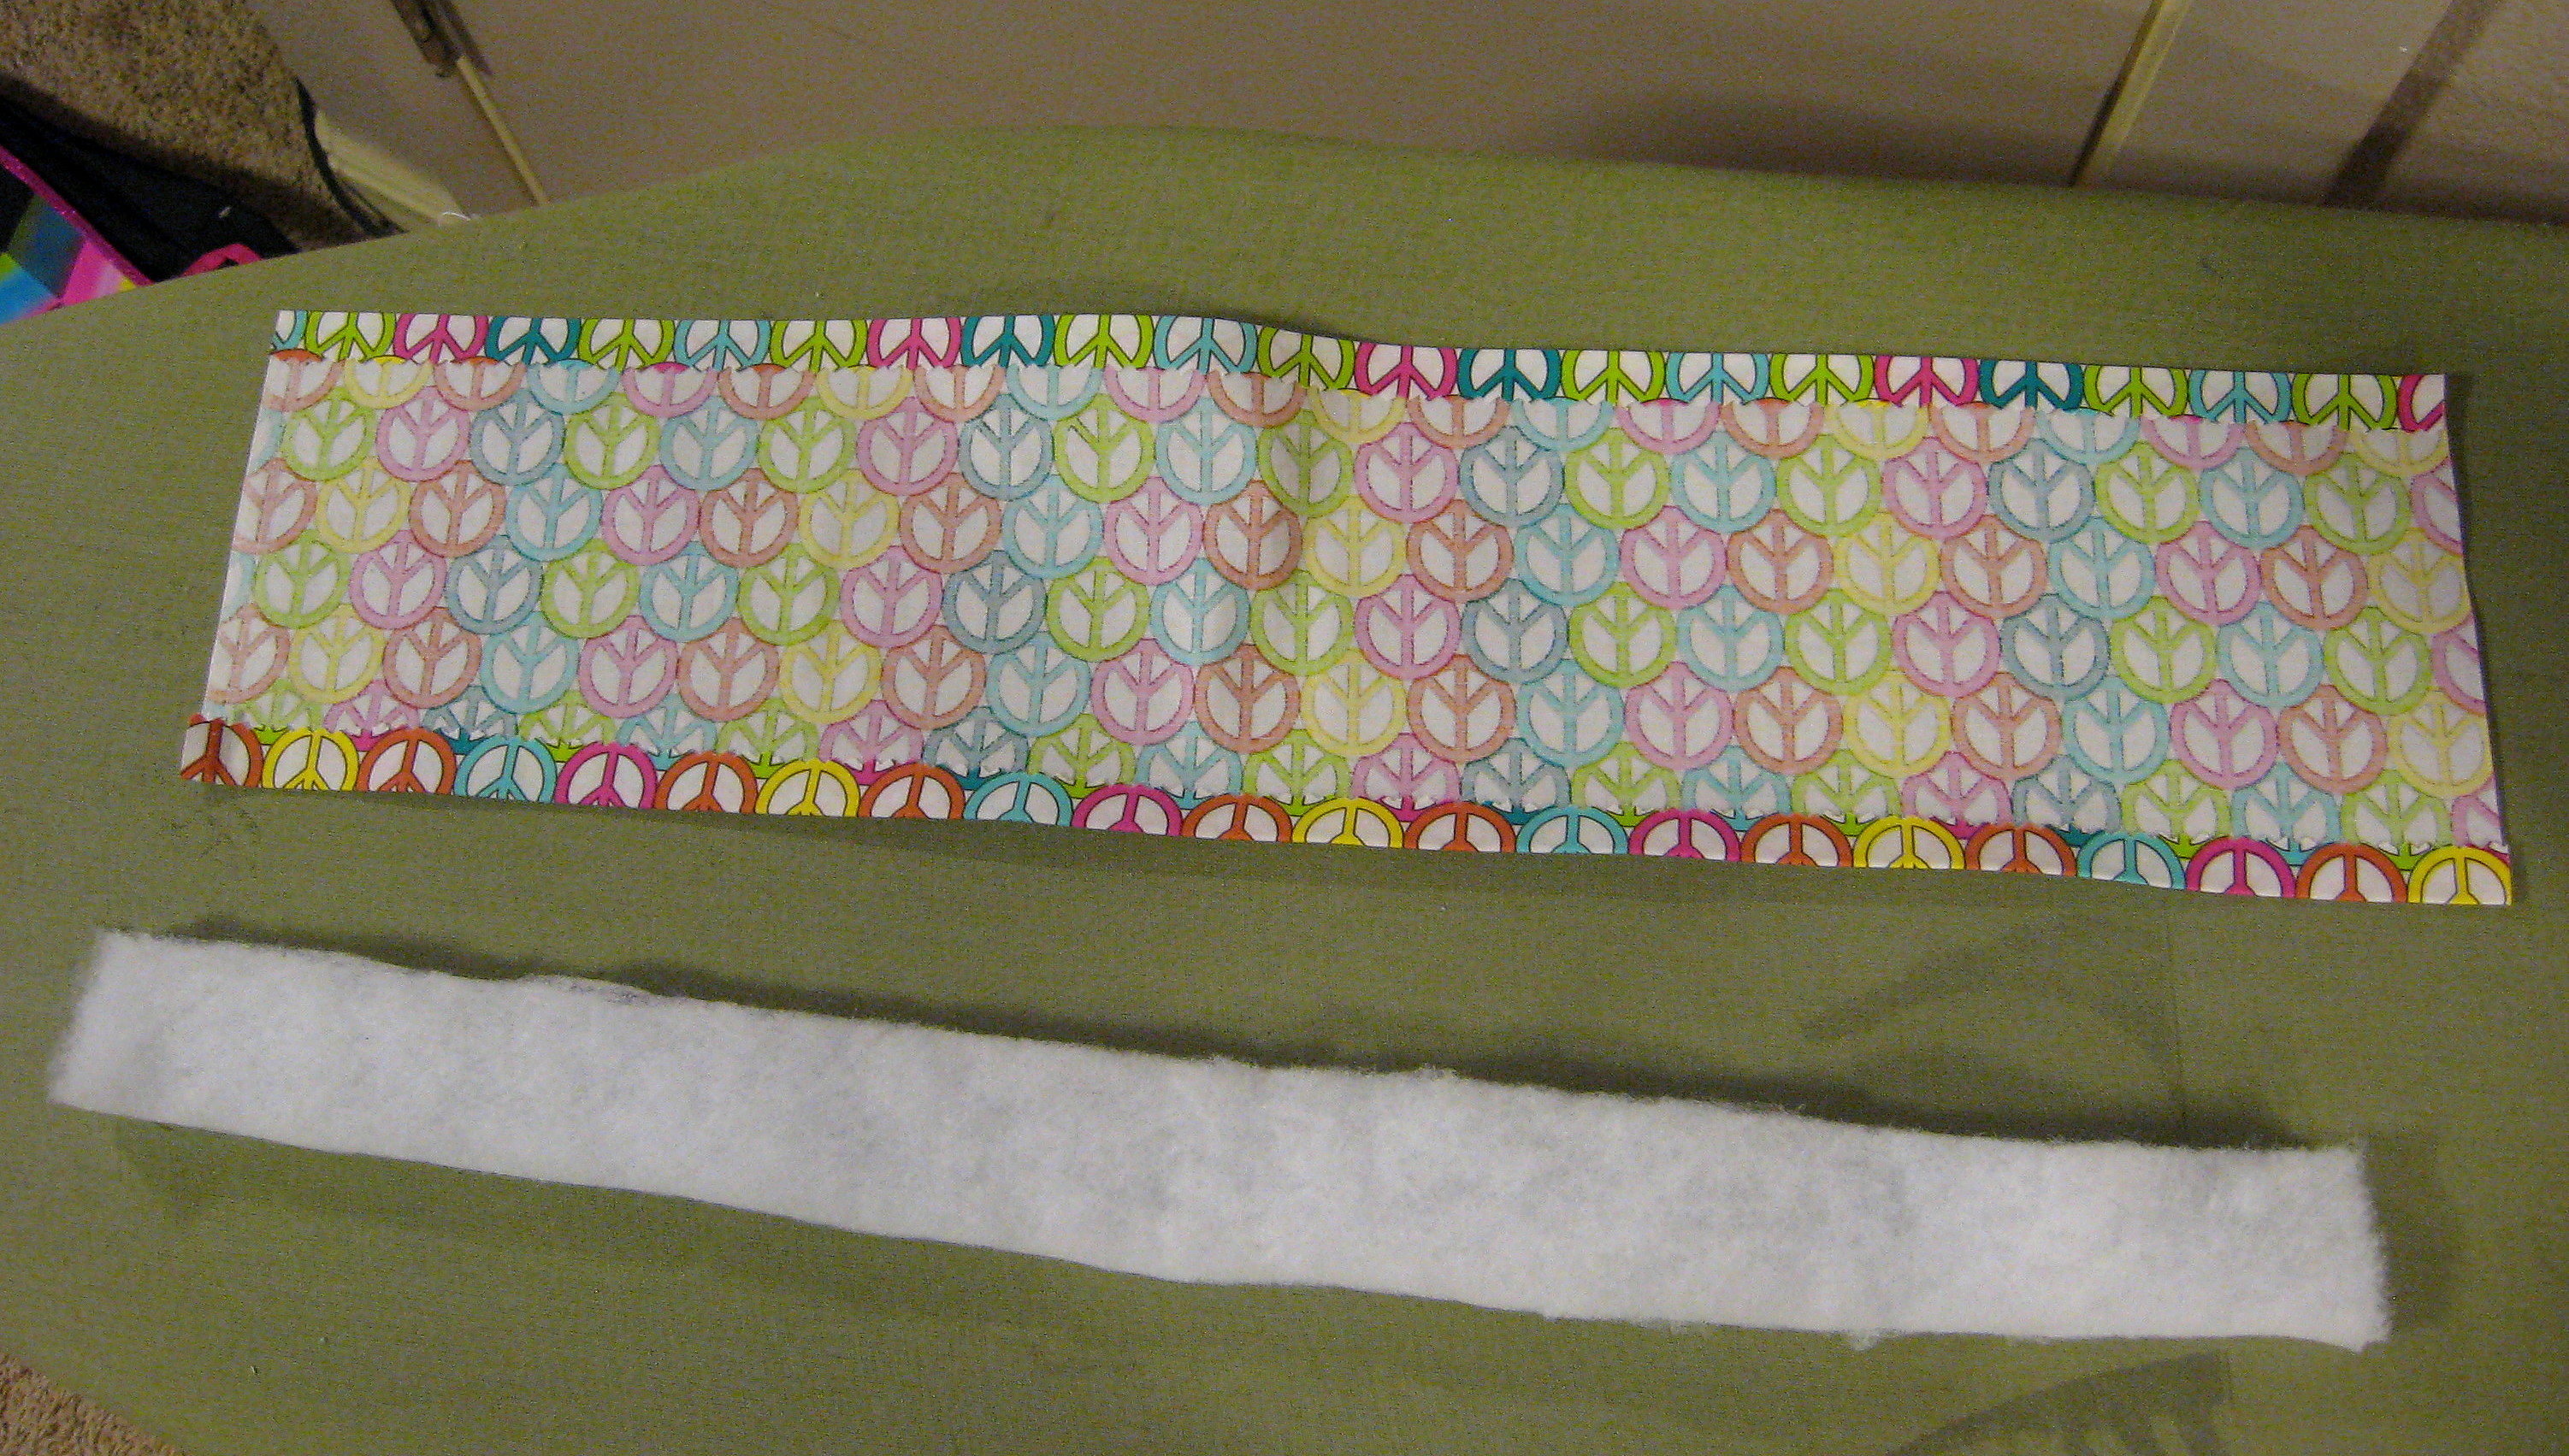
Now cut a piece of padding almost as long as the strip of fabric, and the same width of the original strap (mine is about 21″ long by 1 1/2″ wide). Here, I used quilt batting, but in the past I have used fleece fabric and that works great too.
Fold the fabric in half and iron it flat.
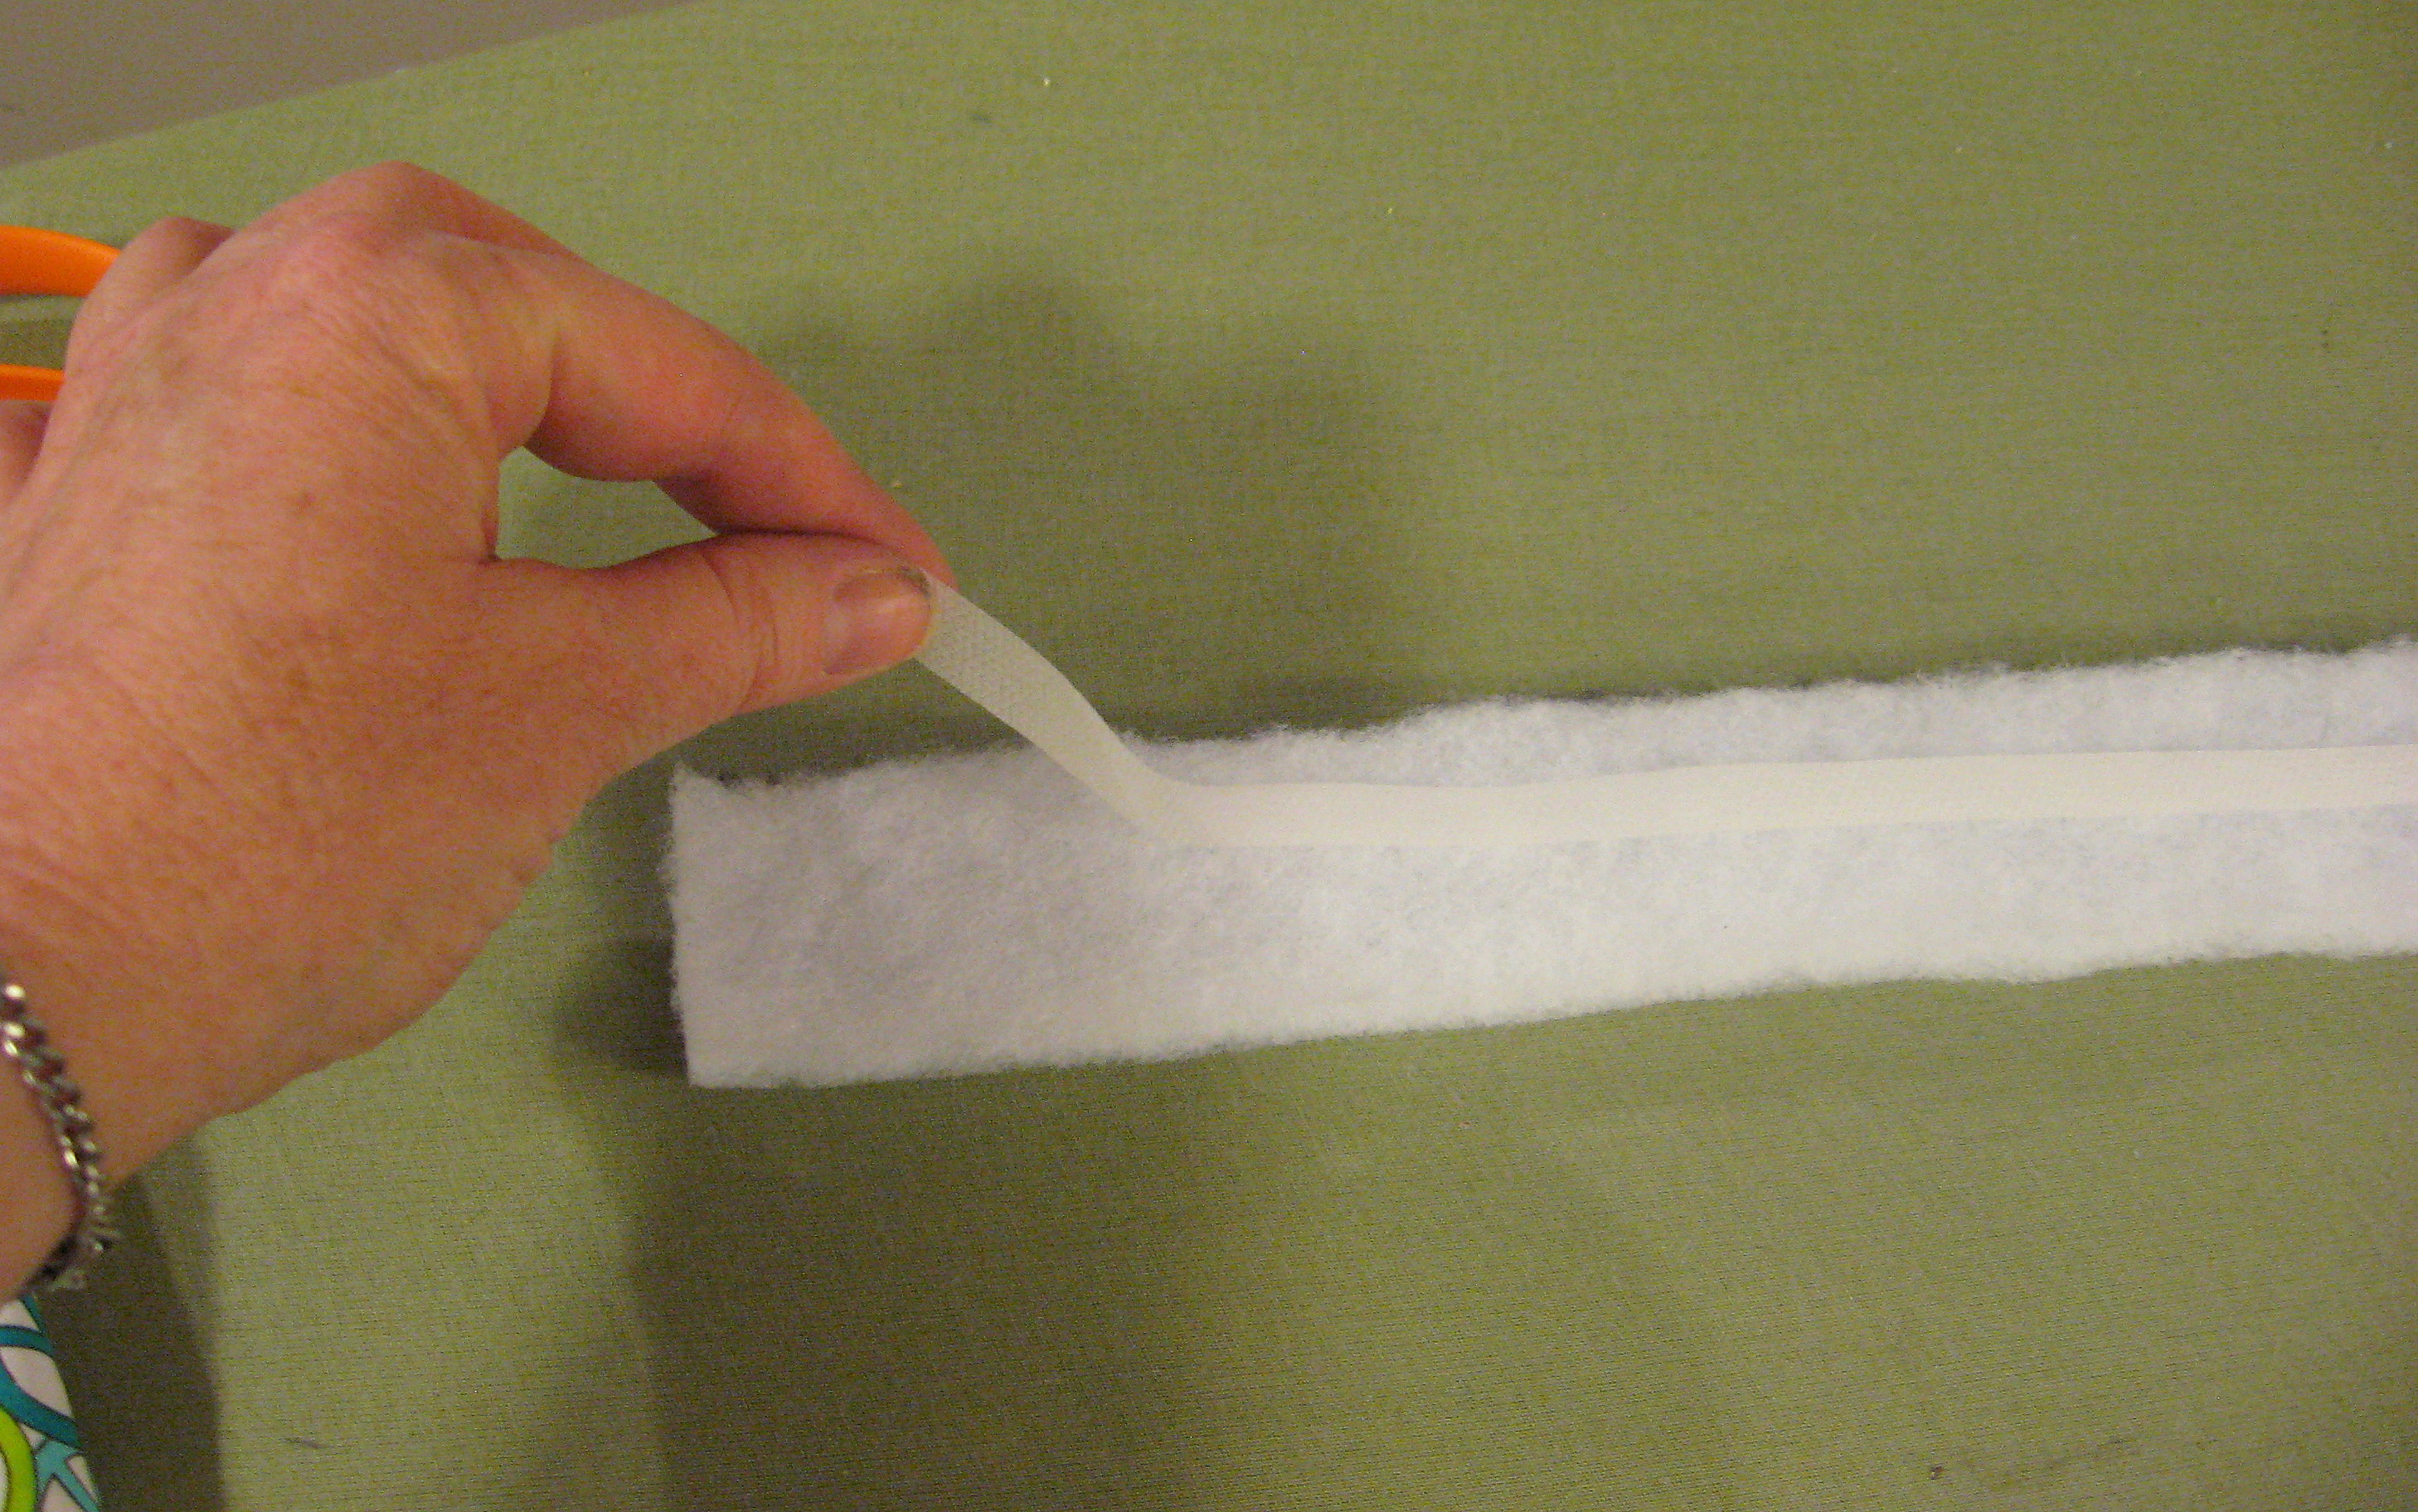
Put a piece of Heat and Bond down the center of the padding, then open the fabric back up and line it up on top of the Heat and Bond like this:
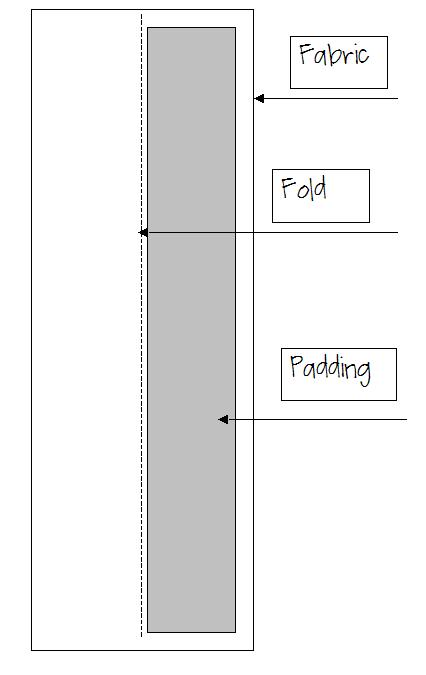
and iron it down. Be careful not to iron it so much that it melts the batting; you just want it to keep the padding in place on the fabric while you finish the strap.
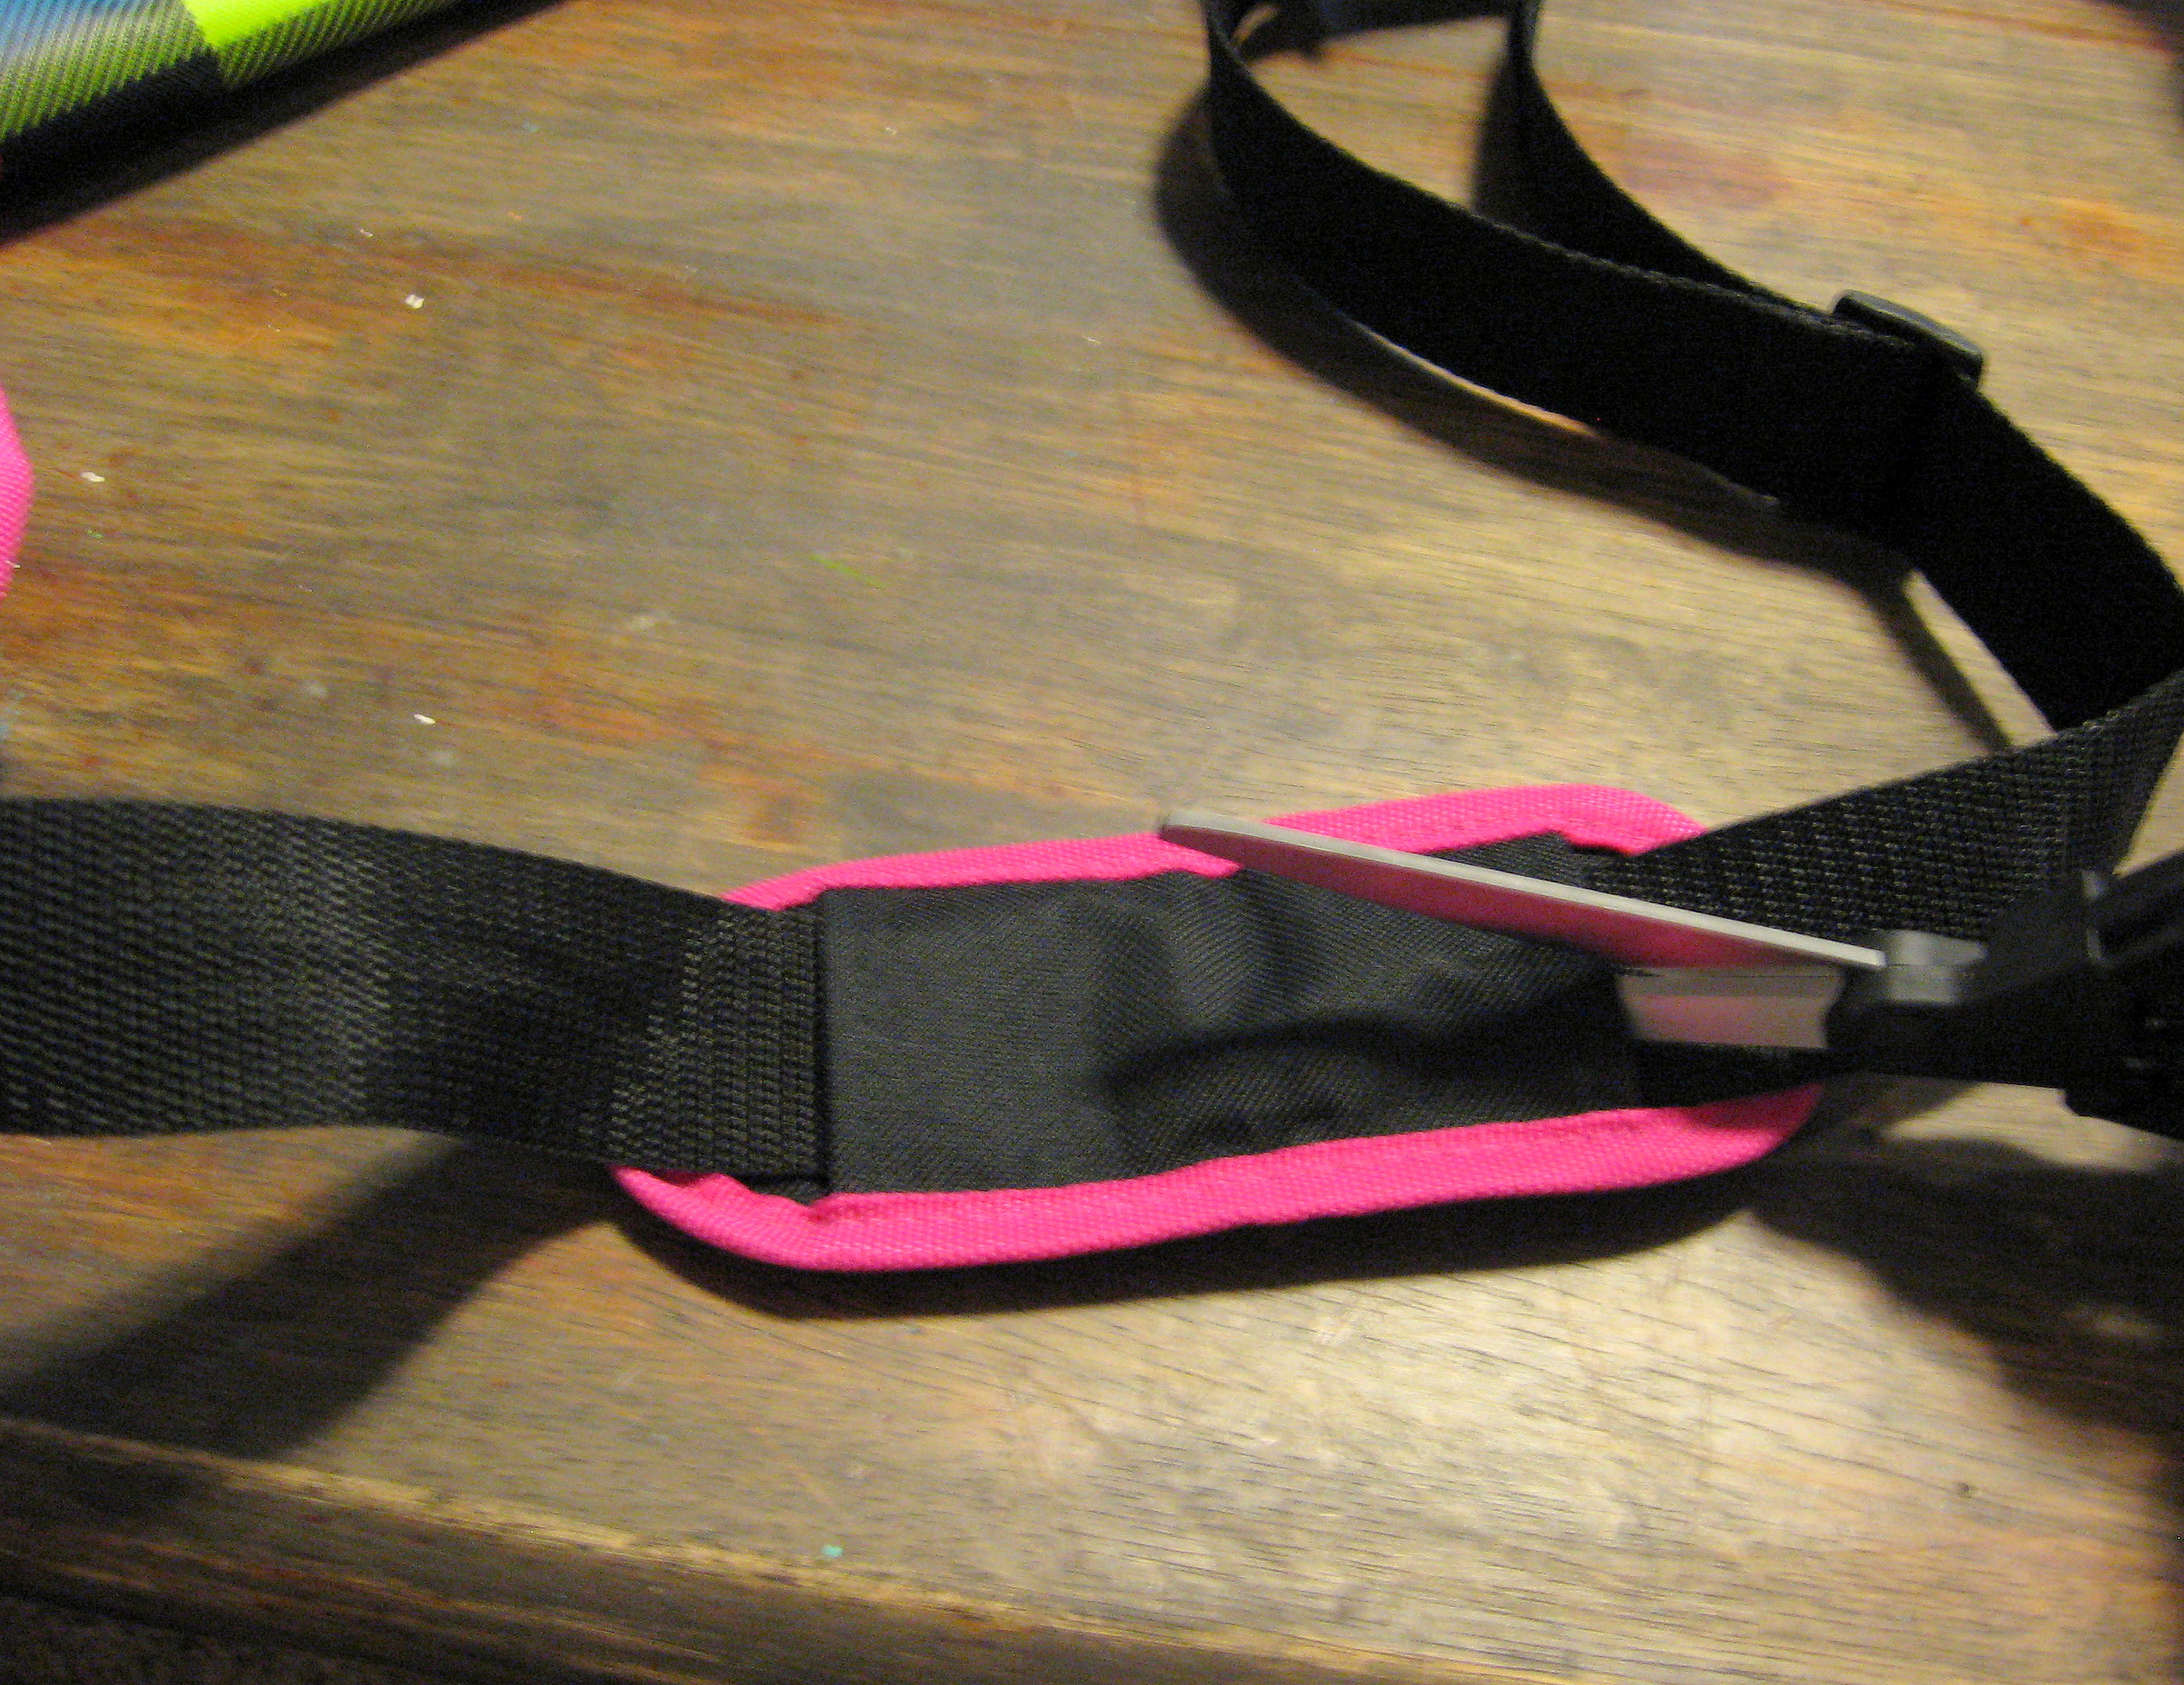
Now put the strap down on the padding, and put another piece of Heat and Bond along the outside fold.
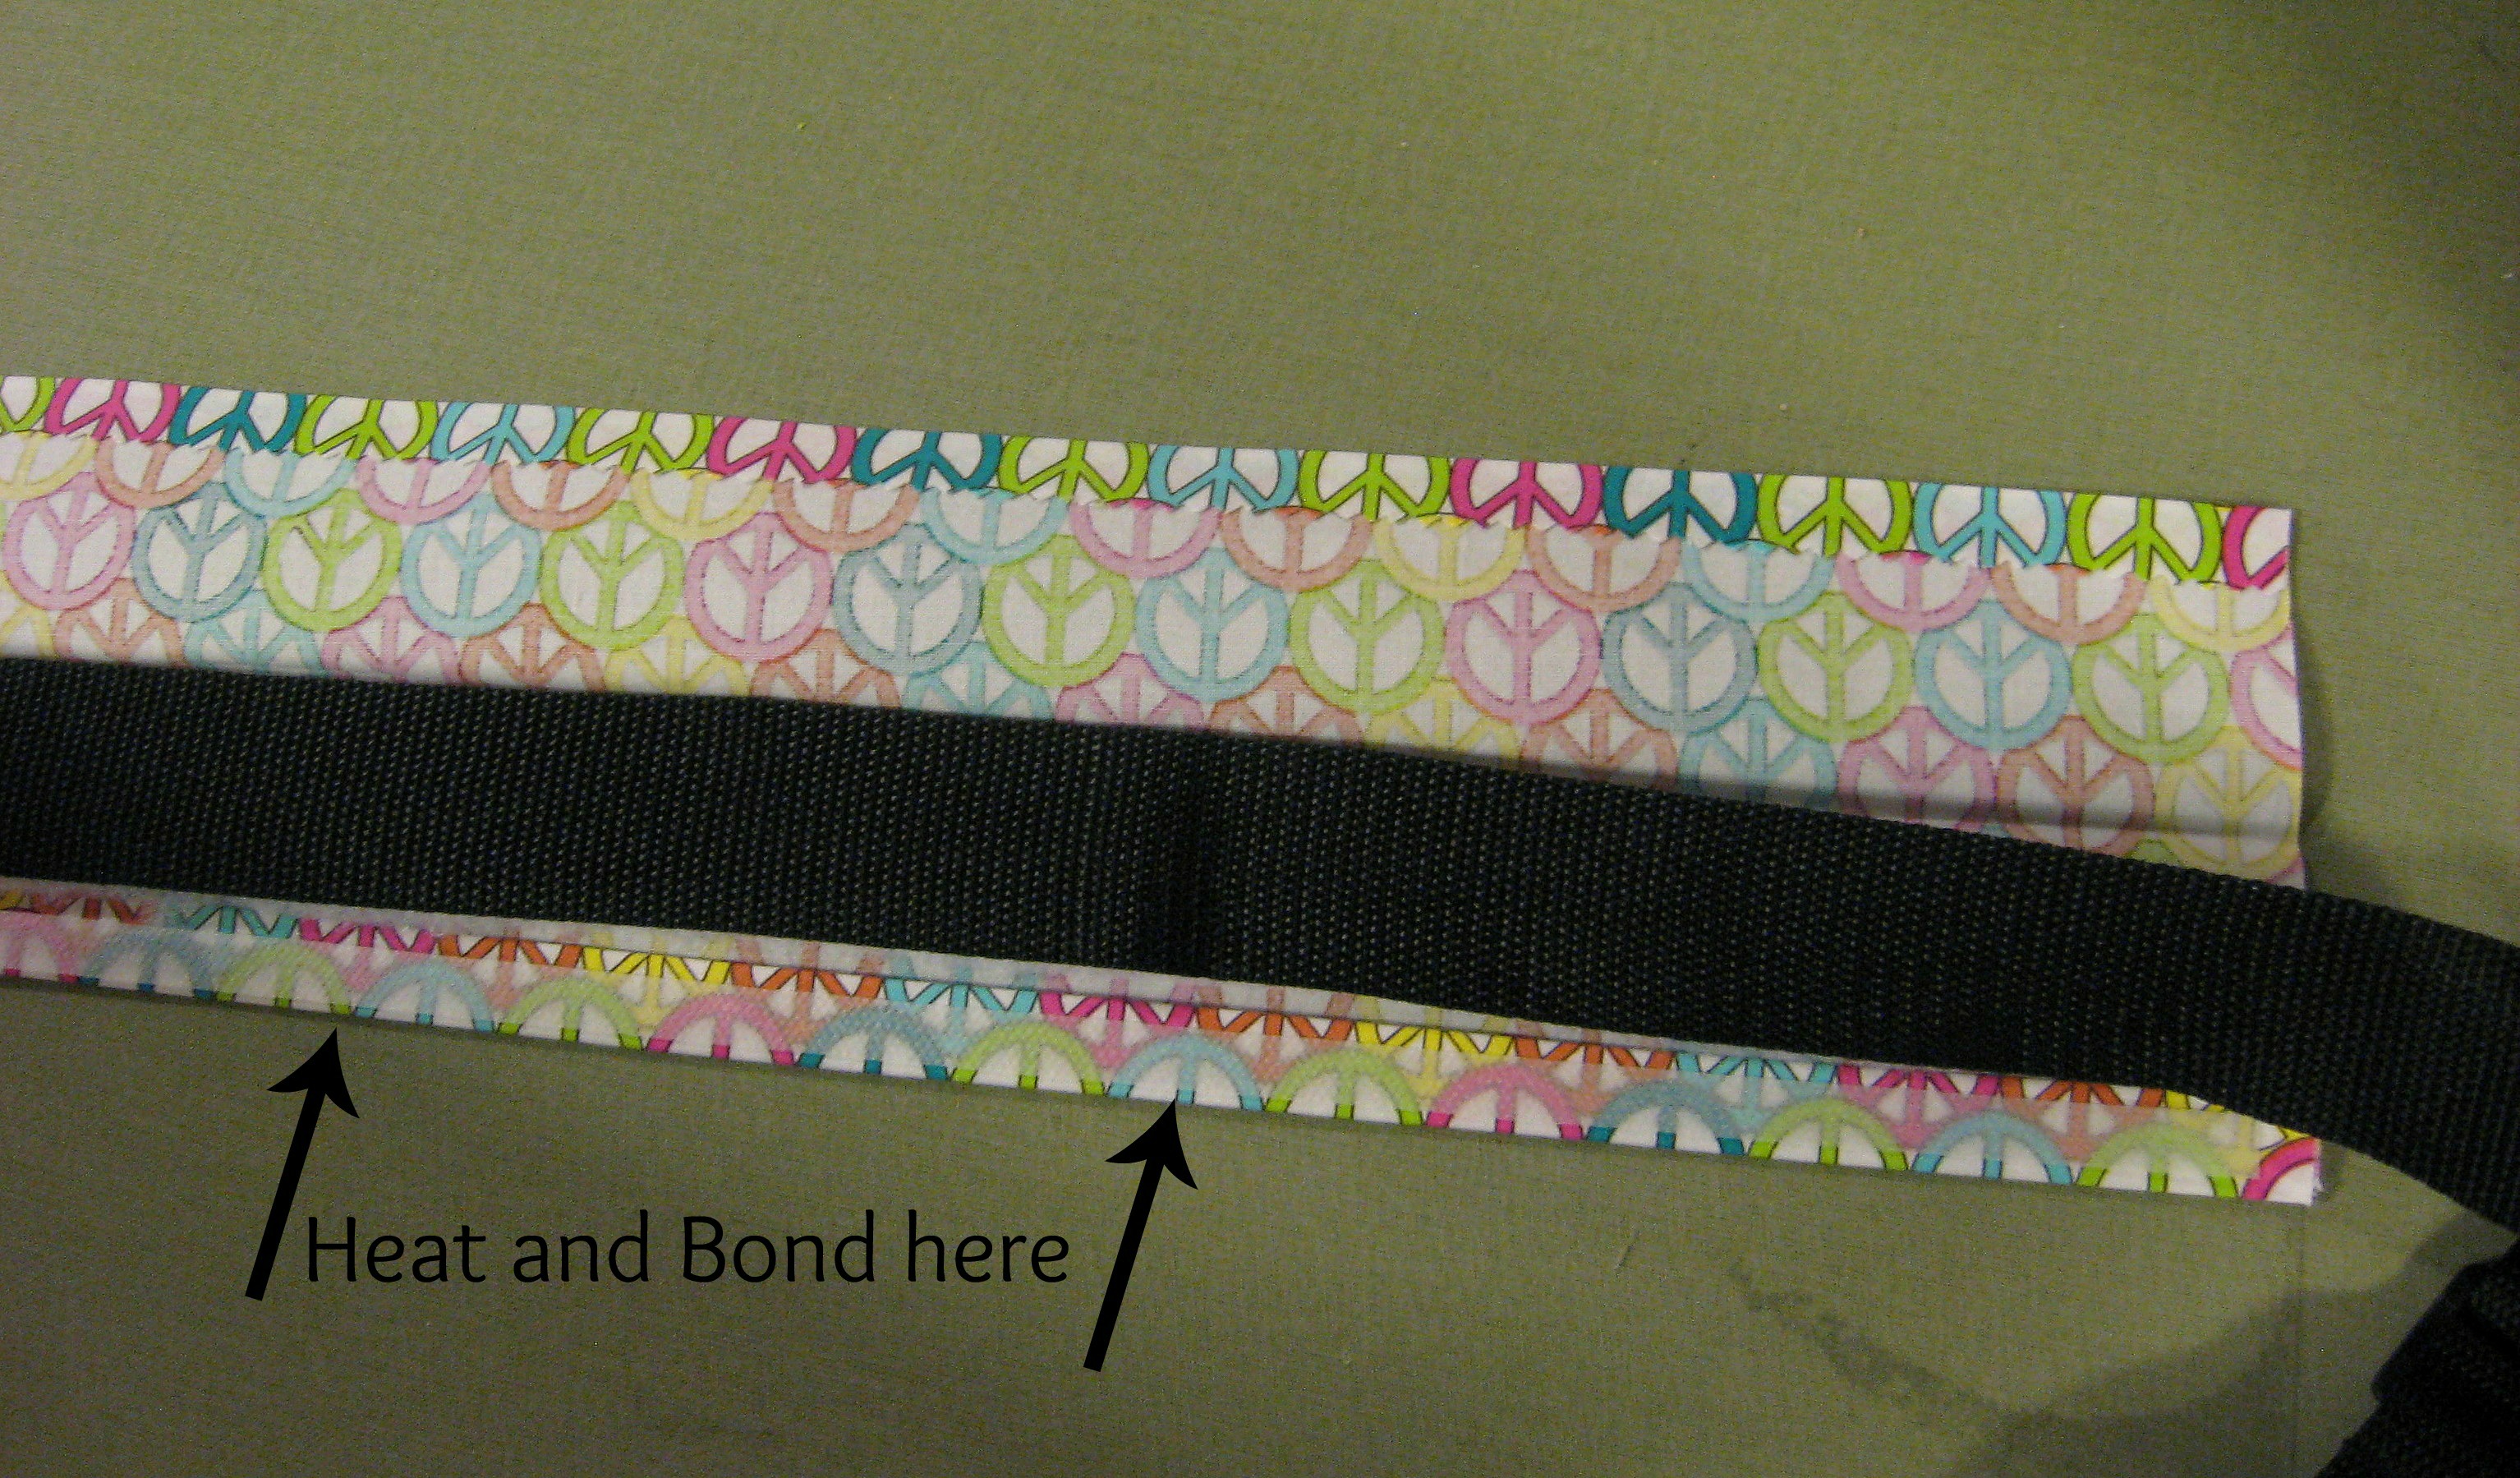
Fold it over and iron it to seal the edge.
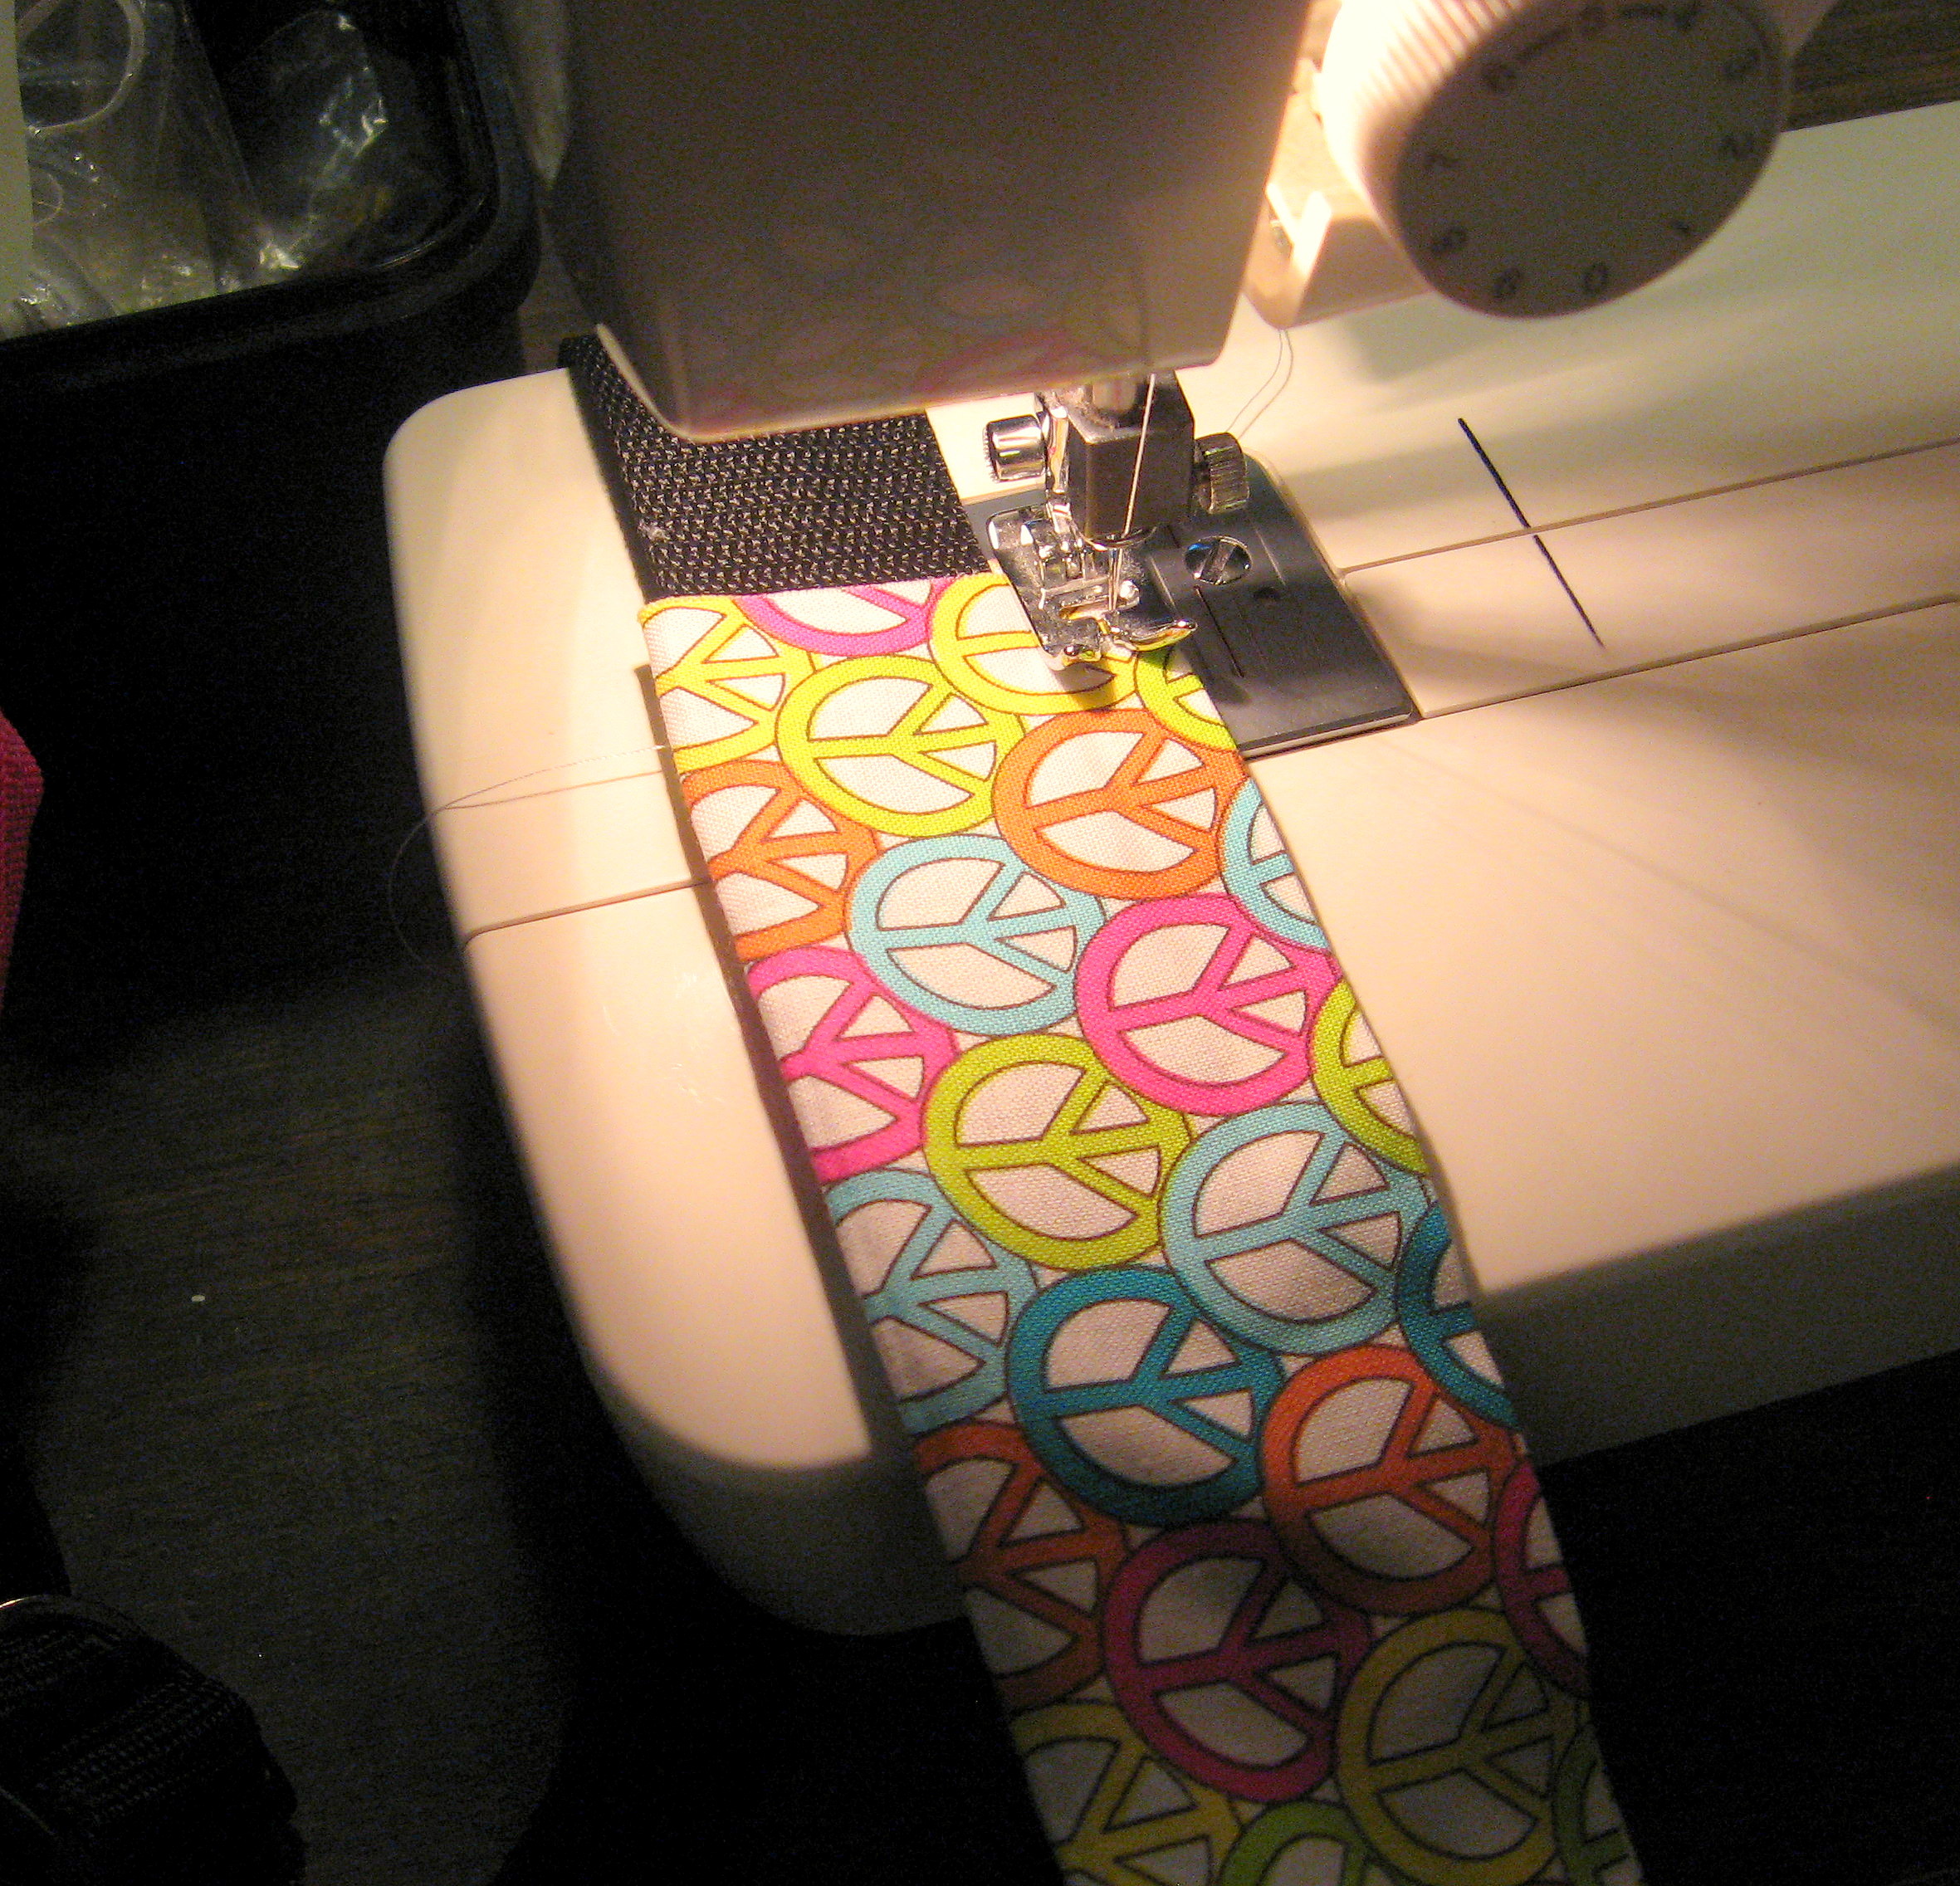
You could stop at this point, but I felt like it wasn’t holding together well enough to withstand the daily wear and tear, so I ran a straight stitch down that side to sew it closed (this is where it is a little difficult to keep everything straight with the bag attached. Just go slow and you can do it!)
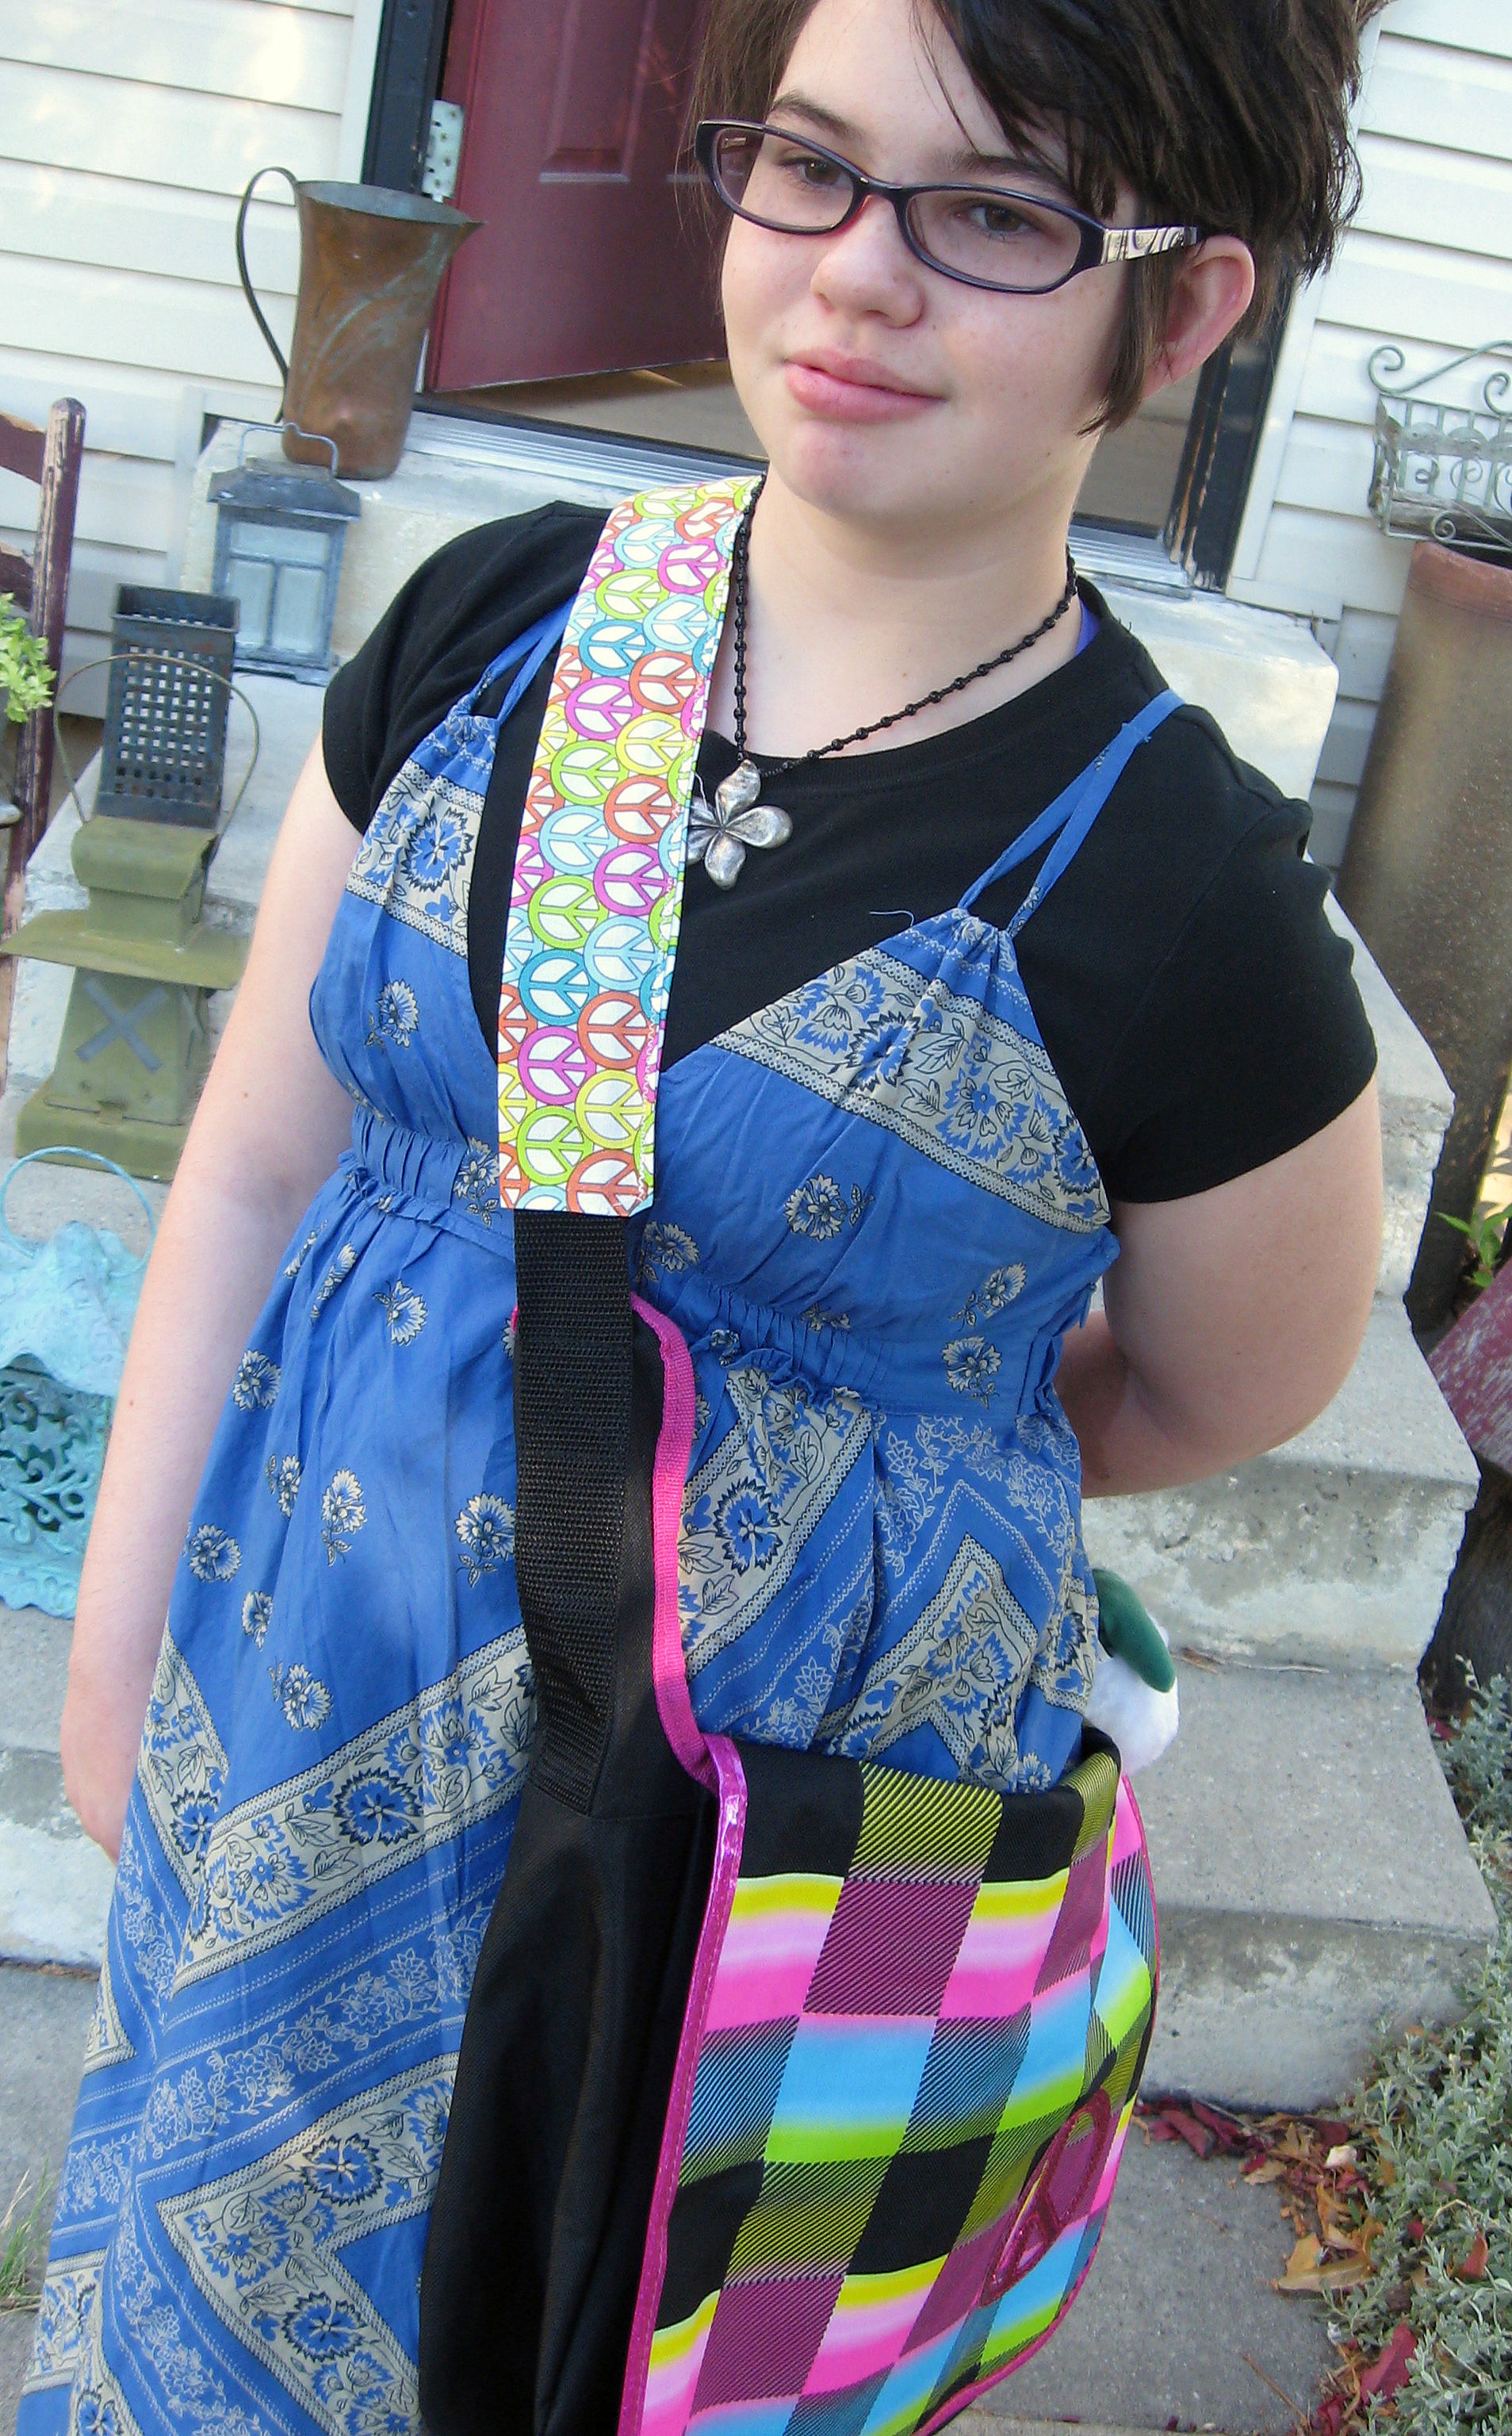
Feels much better; and it’s cute, too!
A PYP Best Blog! DIY Stuffed Animal Storage!
Just in case you missed this article on creating DIY stuffed animal storage the first time we shared it a couple of years ago, we are republishing it. After Sharon wrote this blog originally, we got an awesome response. This is one of the PYP Best Blogs!
My daughter has an addiction – a stuffed animal addiction! Although I don’t mind enabling her, I don’t like how they end up piled in an ugly heap on the shelf, and I don’t like how she can never find the specific critter she’s looking for – especially the little ones. Here is how we solved the problem.
If you are DIY’ers with a well stocked garage you can do this project very inexpensively. Even if you have to buy everything, it should only cost about $15.
What you’ll need
- Wire hanging planter baskets. I used 5 and I got them at Dollar Tree.
- Board(s); as tall as you would like, and wide enough to accommodate the baskets; I used 3 6-ft. tall cedar fence boards. These are about $1.90 at Home Depot but they regularly go on sale this time of year for less than $1. (I use these for crafts all the time, so I buy a stack whenever they are on sale.)
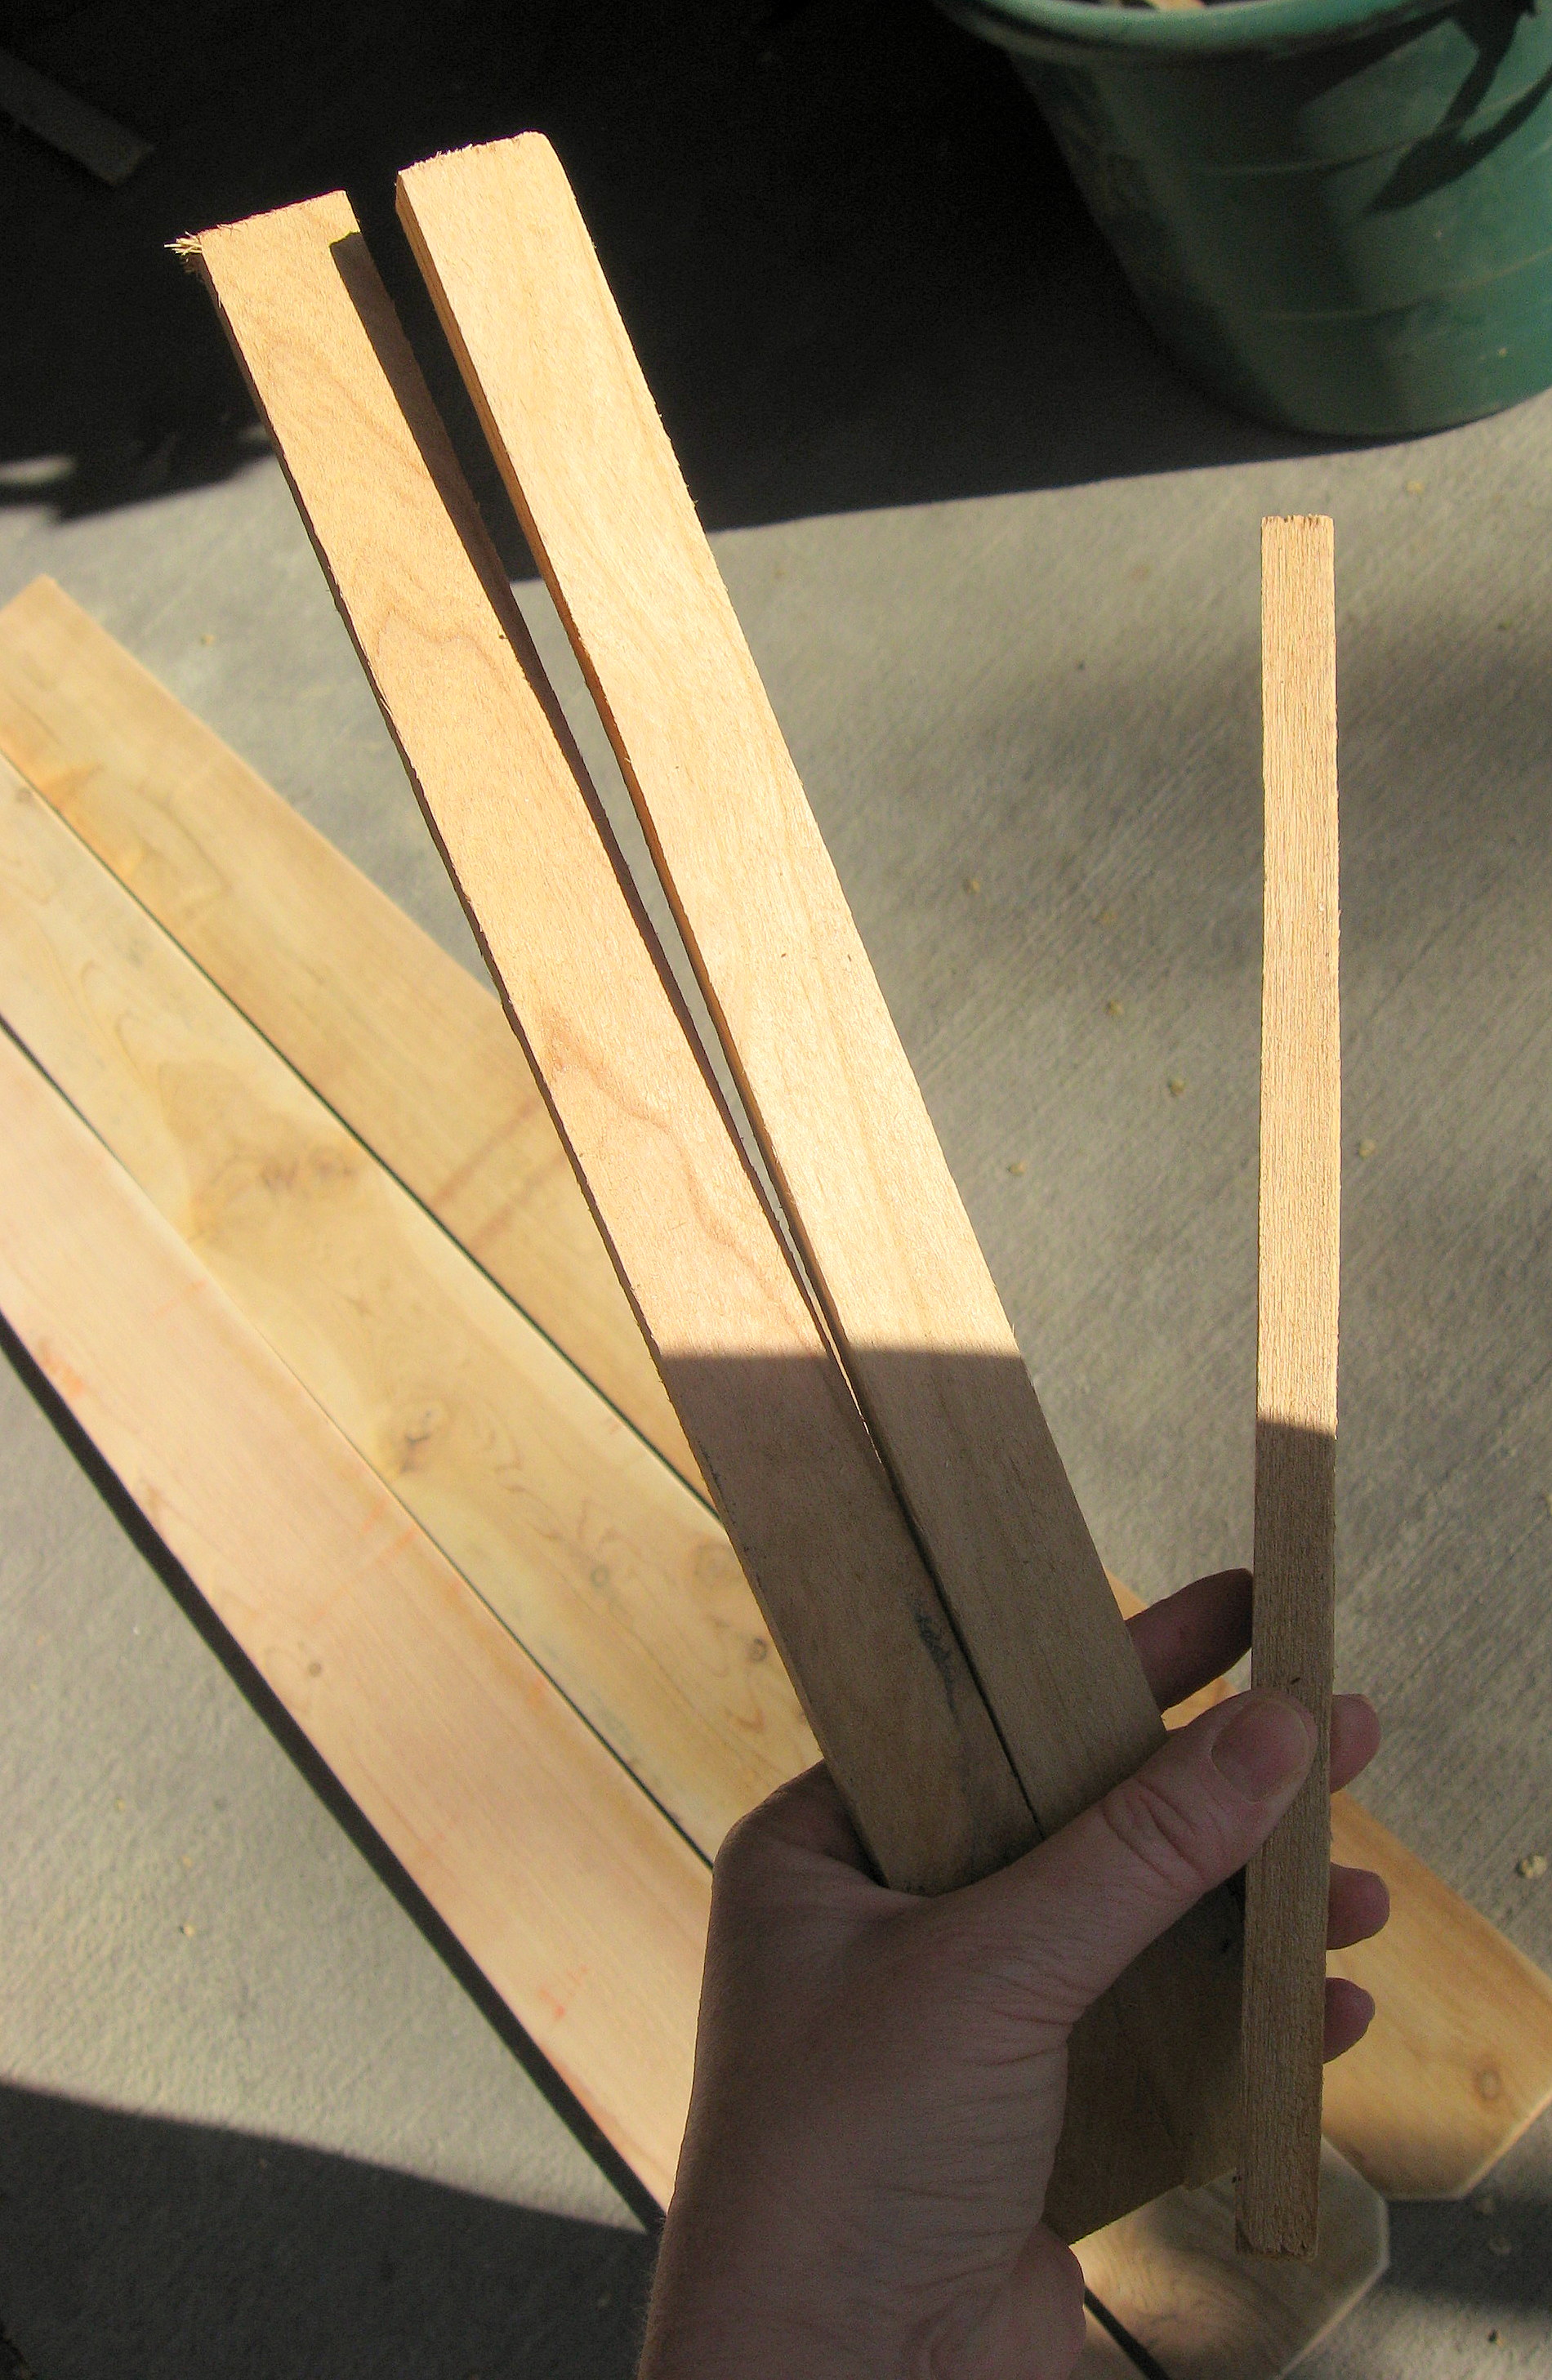
- Thin boards to connect the fence boards together; I used scraps from my garage, but if you have to buy something, ask for lathing strips. You should be able to get one long board for about $1.
- Nuts and bolts a bit longer than the board is wide – look for these hanging in little bags in the same aisle as screws and nails. Should be less than $1 per bag and if you follow my design you will need 10.
- Screws
- Drill
- Saw
- Sander or Sandpaper
- Strong Wire cutters
- Paint
Let’s get started!
Start with the wire baskets; take off the hanging chain and either throw them out or save them for another project; you won’t be using them for this project.
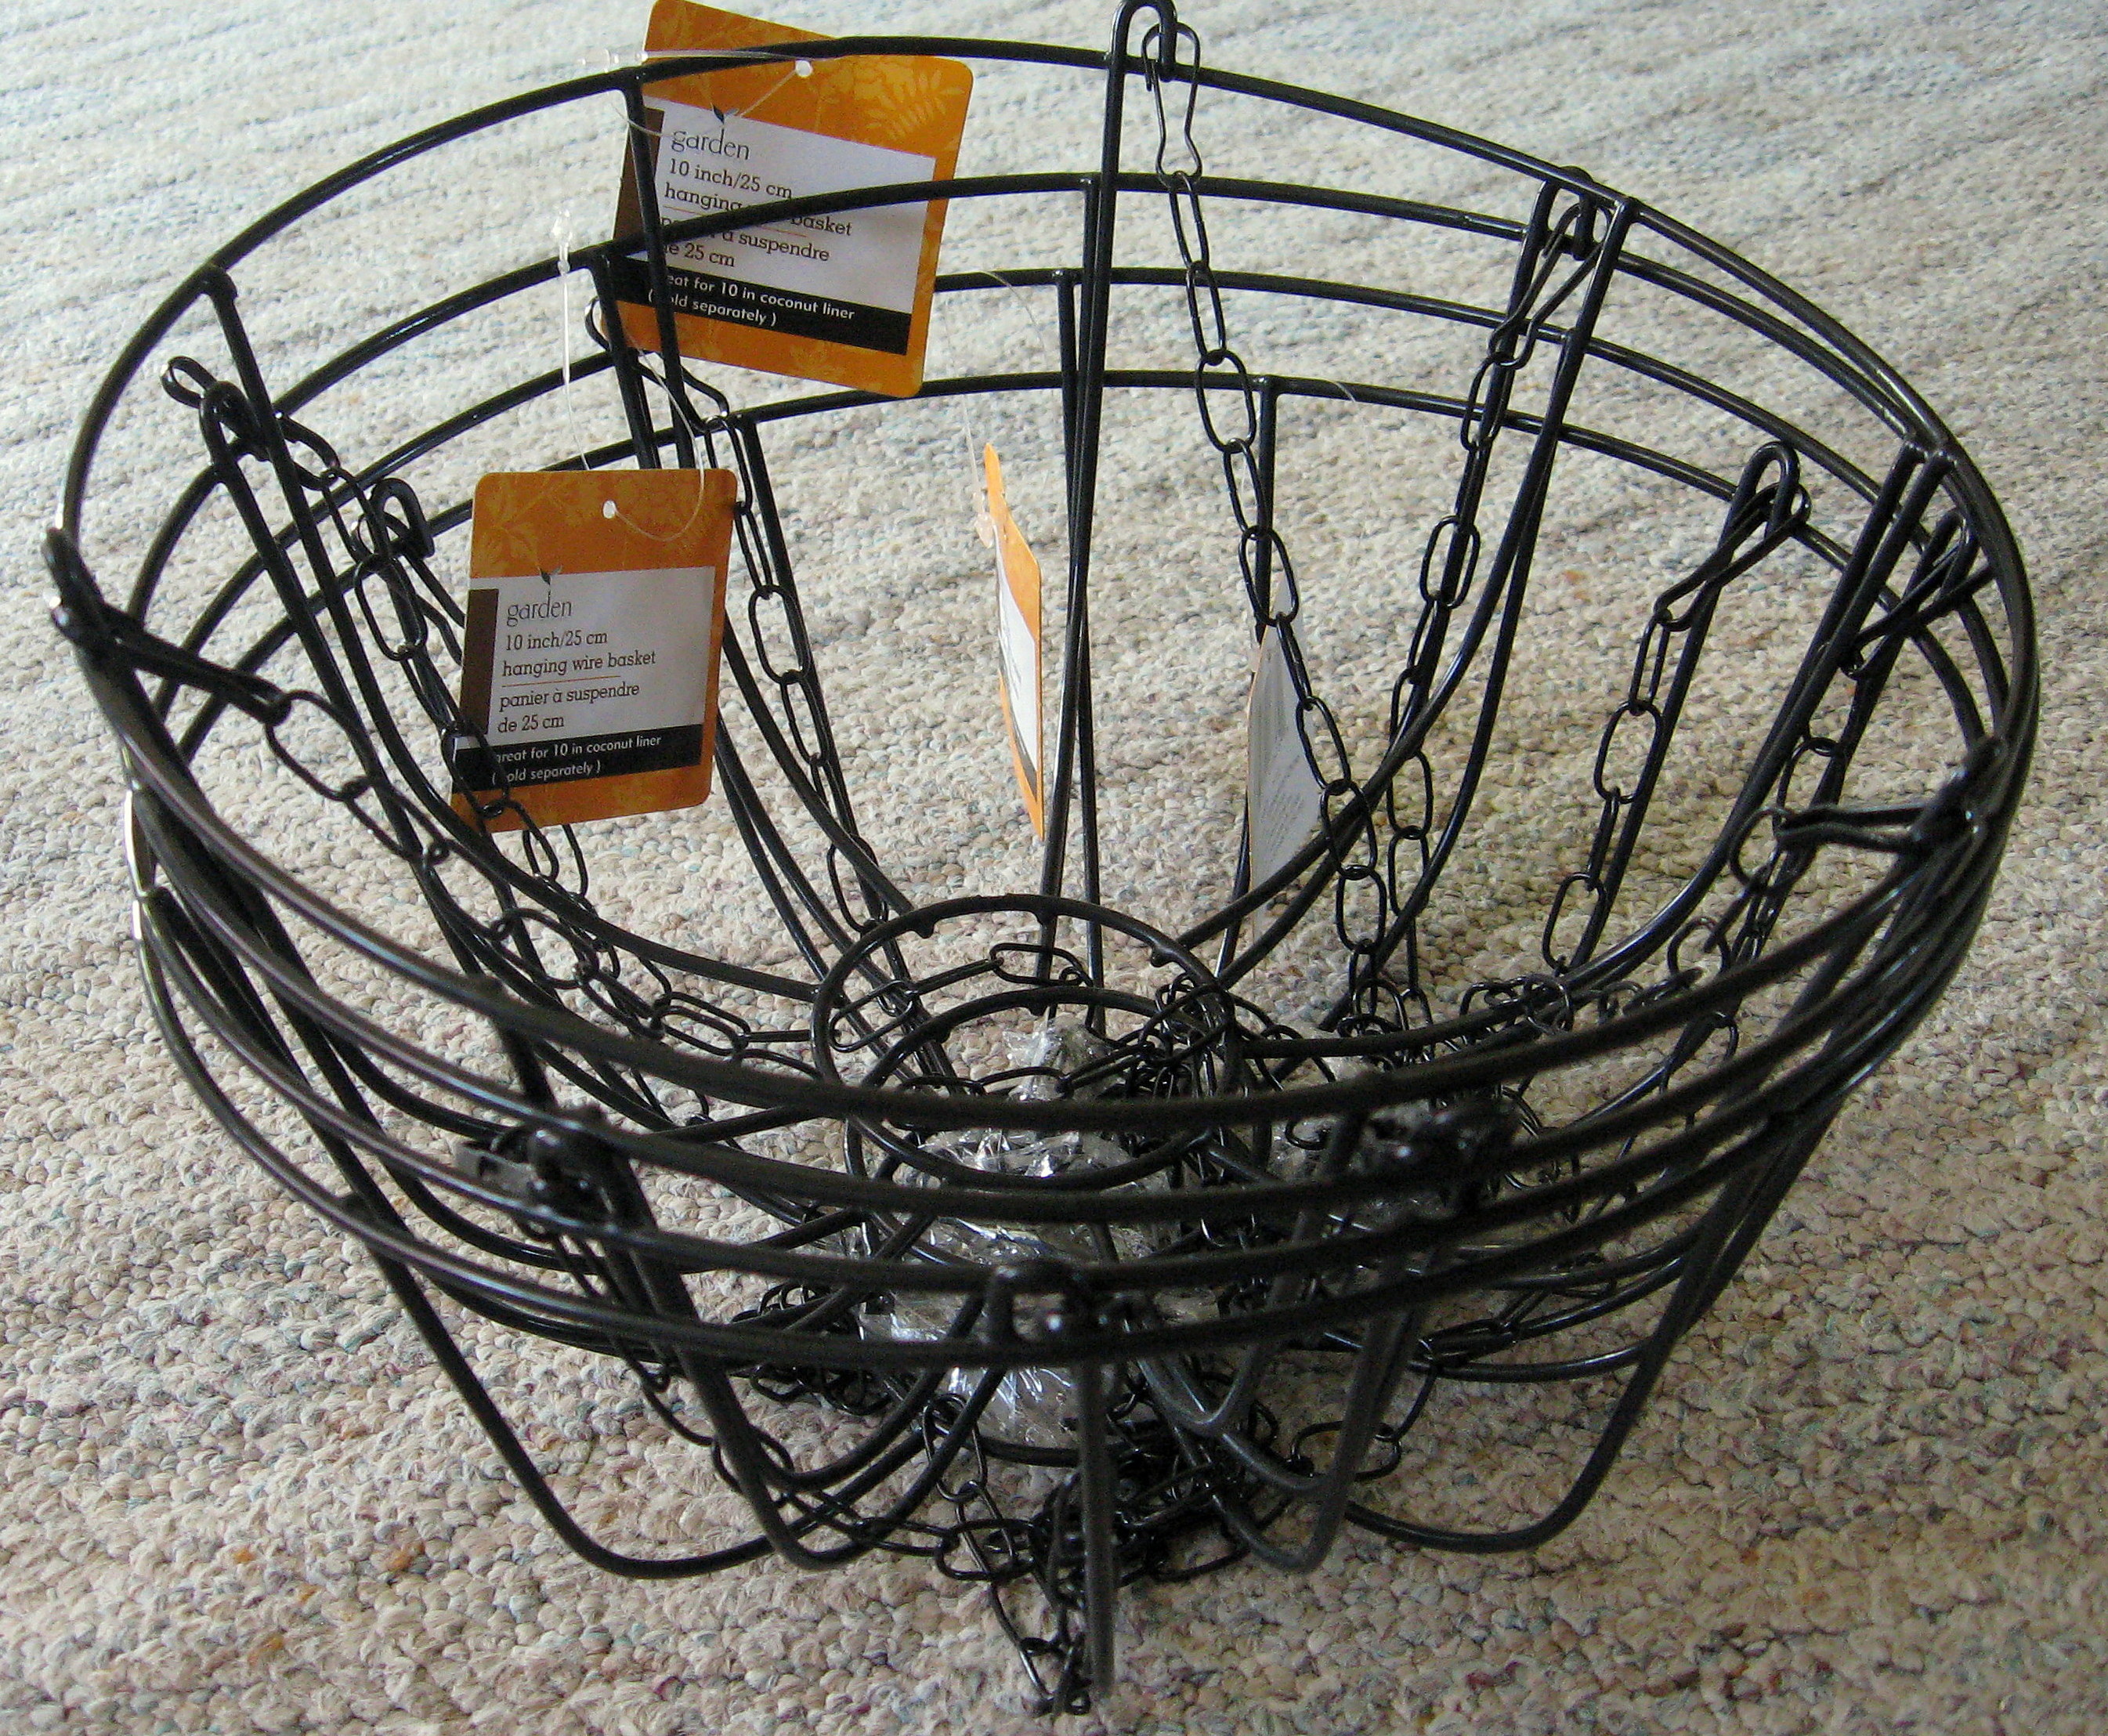
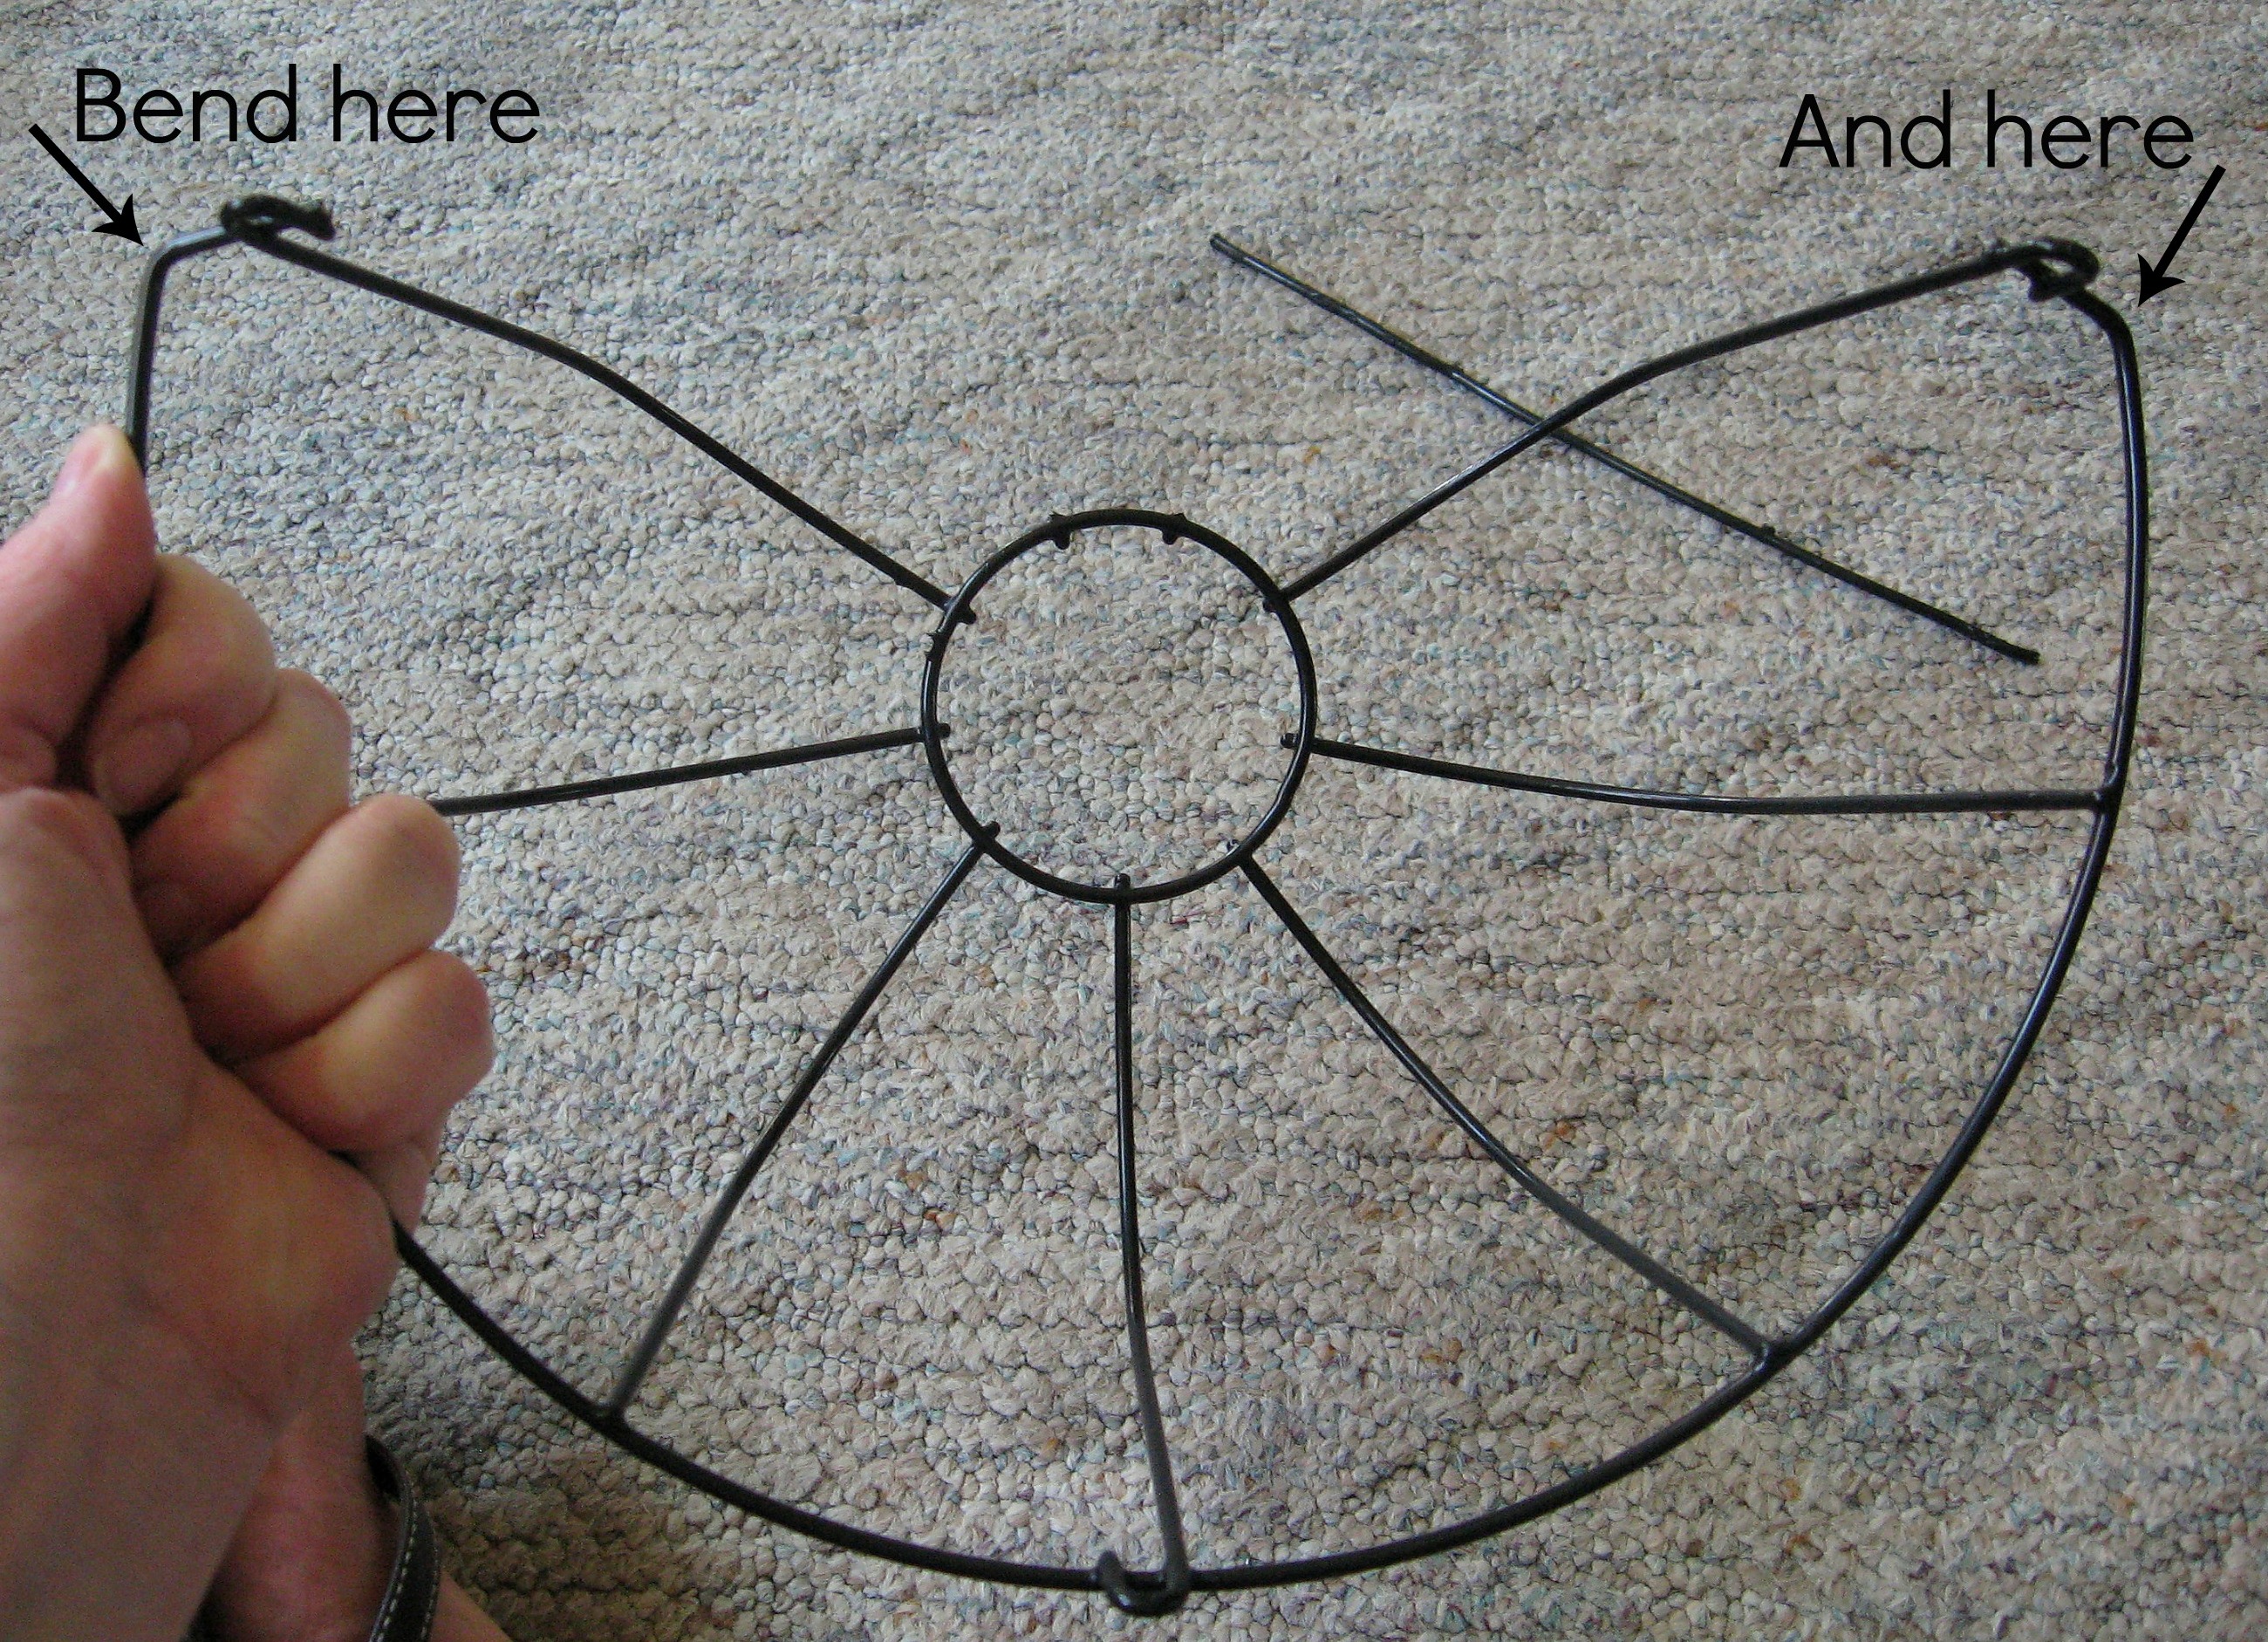
Here is a close up of what my basket looks like. You will cut out a section of the basket so that it sits flat against the board. Make sure you keep the little loops that held the chain; that is where you will screw the basket into the board.
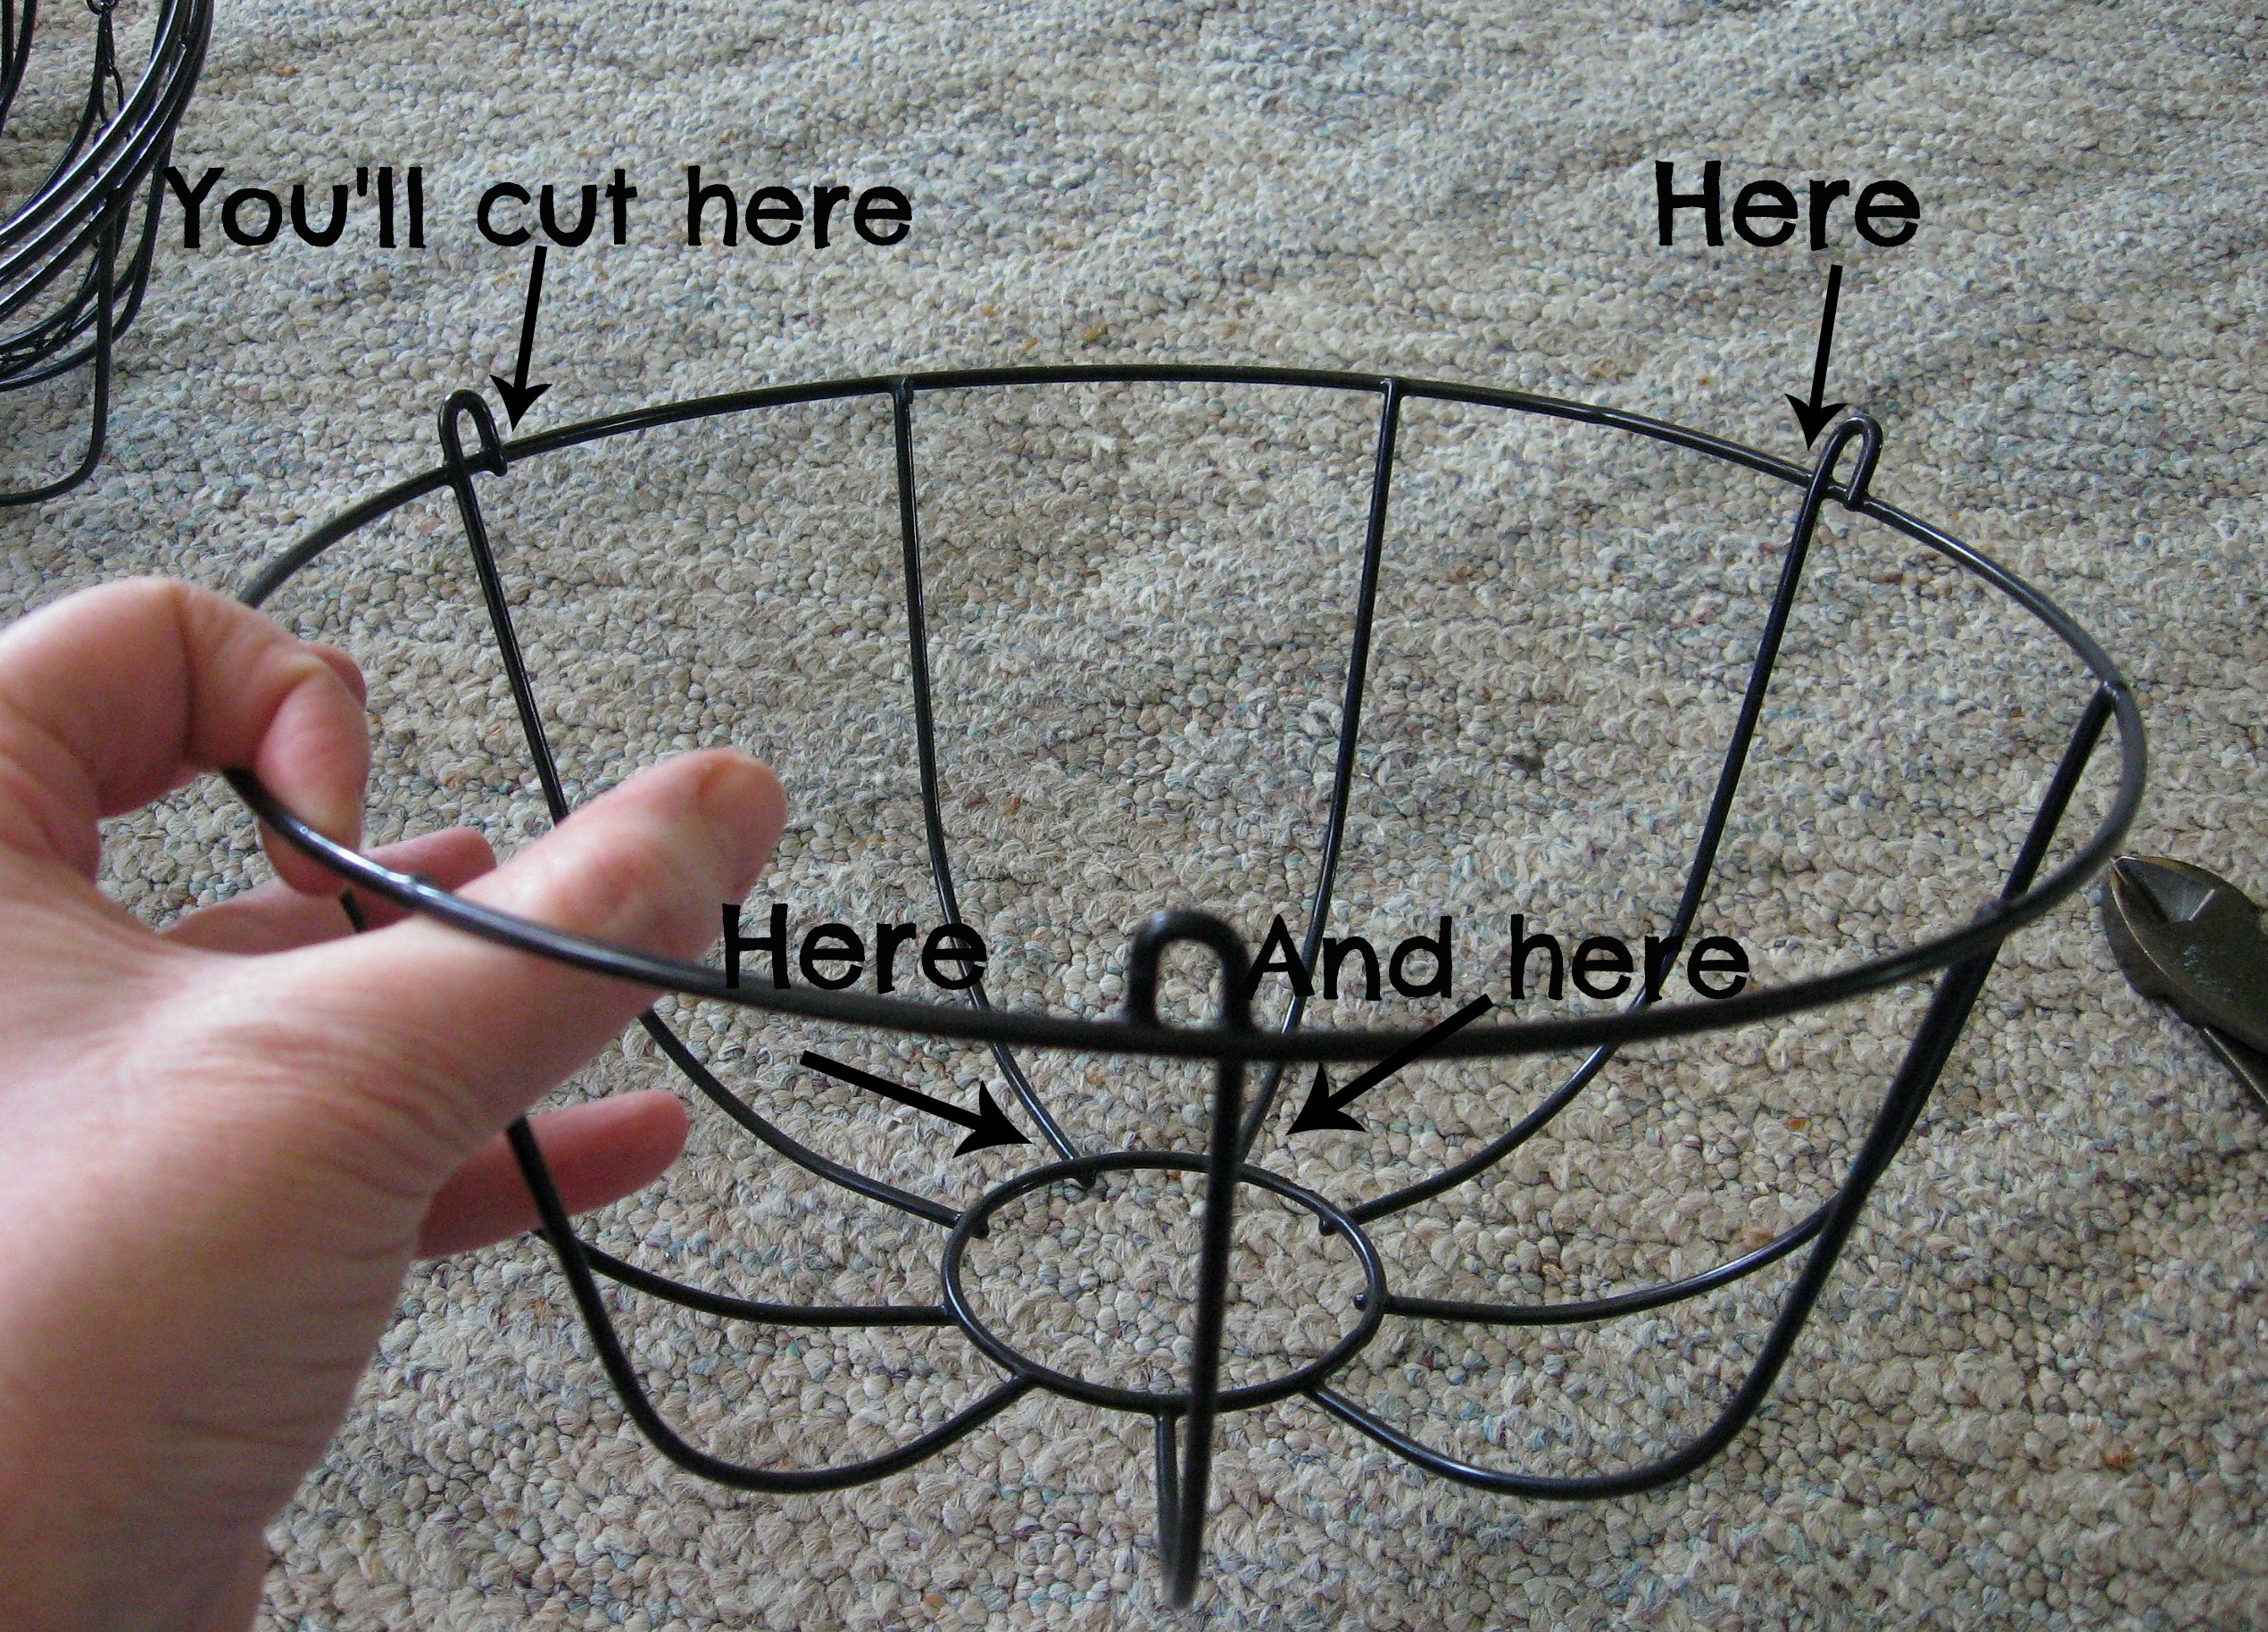
Use heavy duty wire cutters and cut as close to the intersections as you can, so you don’t leave a sharp end.
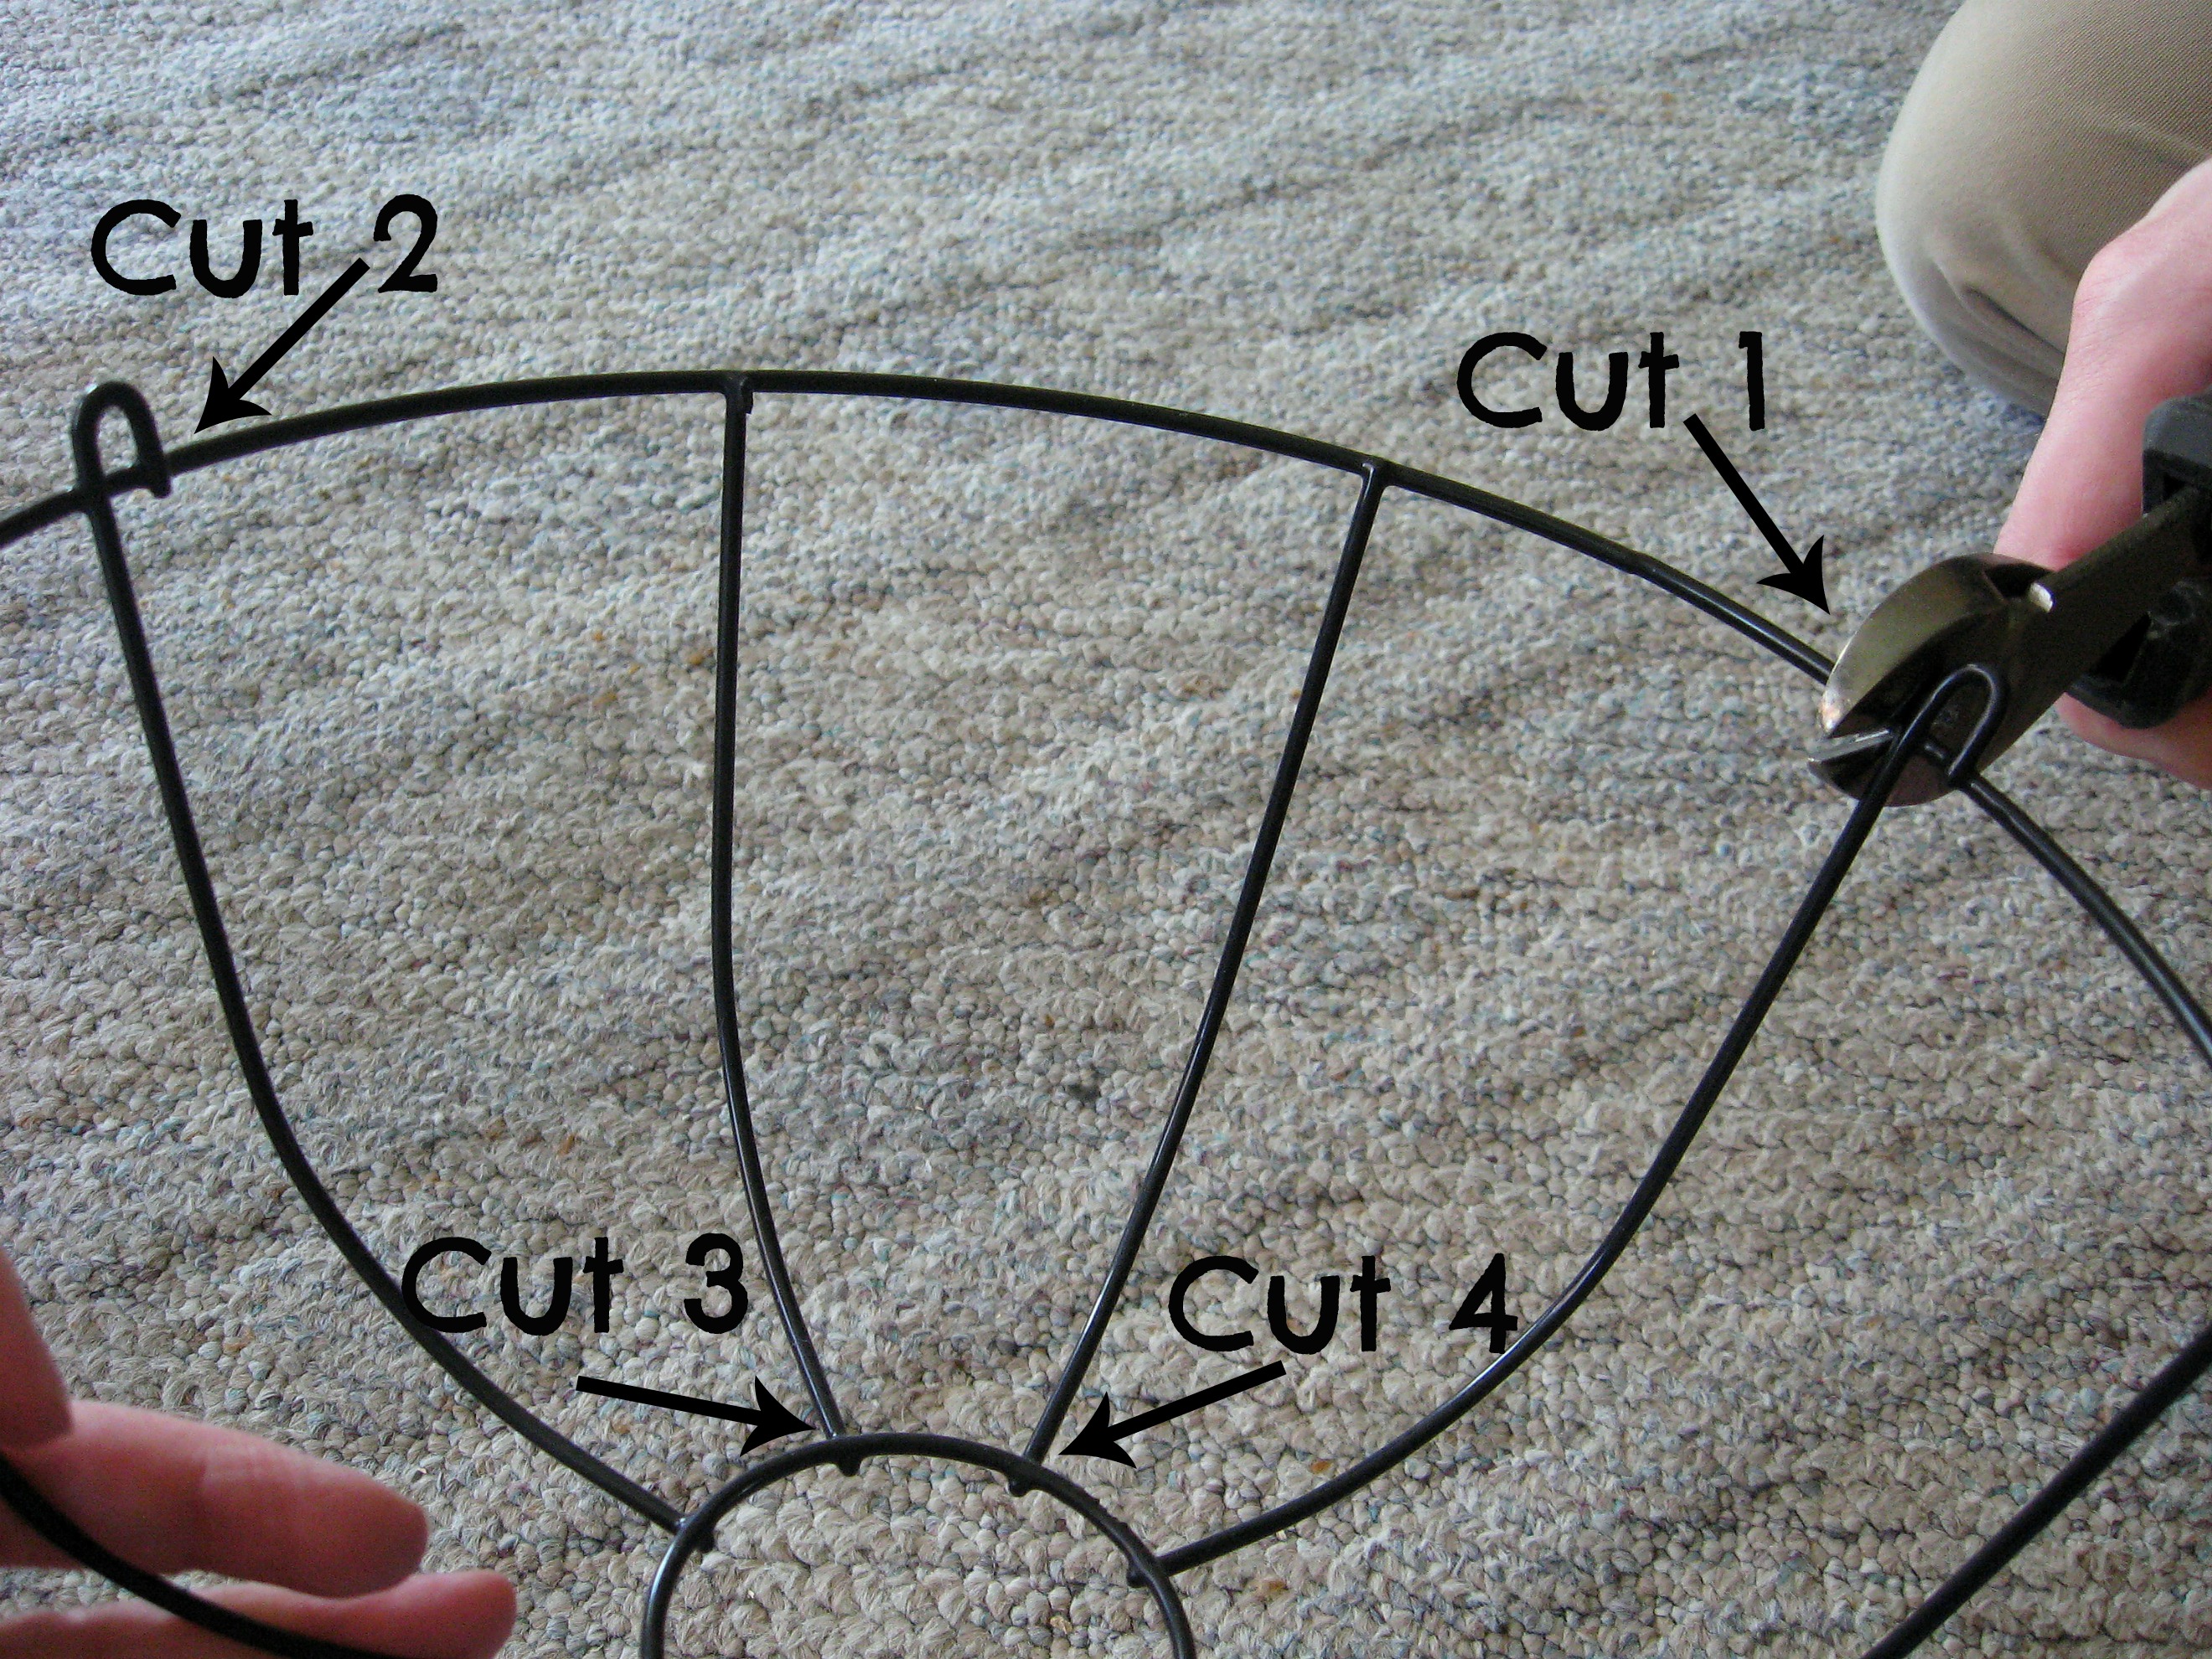
Now you’ll have a basket that has one whole “side” cut away. Next, with pliers, bend the little wire loops in at a 90* angle like this:
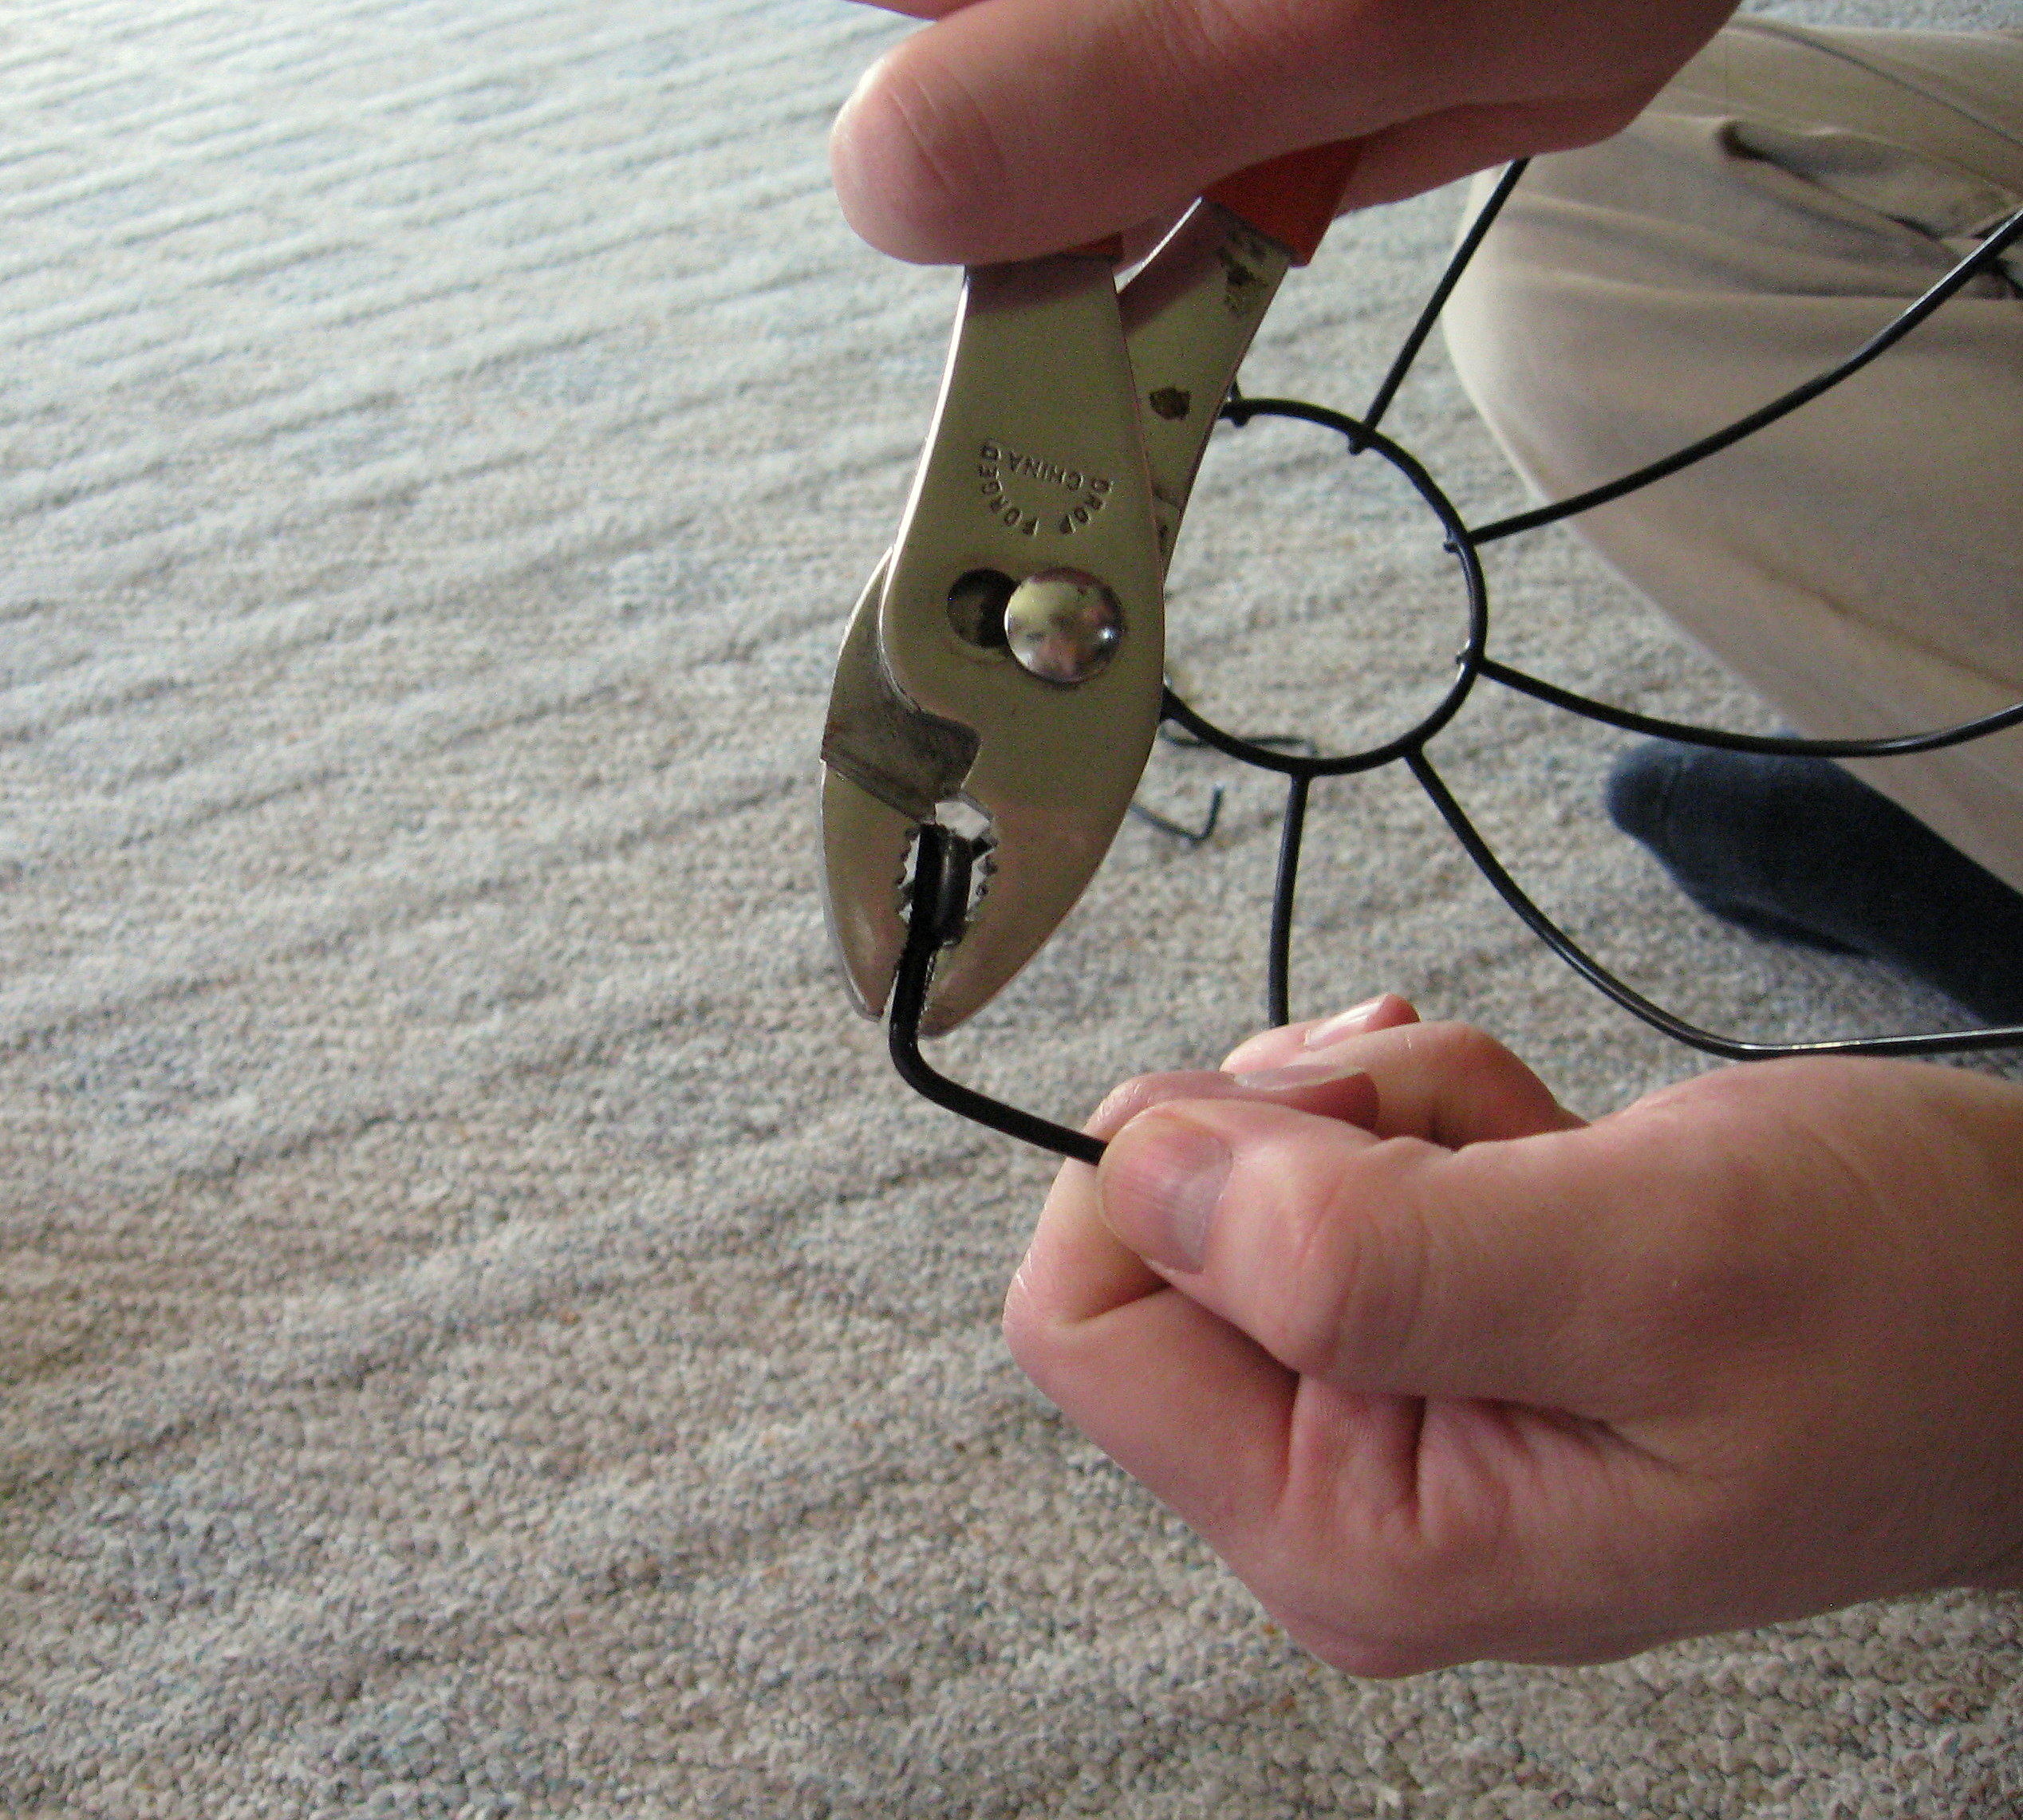
Bend the loops on each side, in towards each other.
Now it should look like this:
Cut and bend all of your baskets. Now take a minute to make sure you don’t have any sharp points, and if you find one, either cut it closer or file it down with a metal file.
Now we will put the boards together. A couple of notes about the boards that I used; I chose the dog eared cedar fence boards because that is what matches the style of my daughters room. You could easily change the style of this project by using one board that is wide enough for the baskets. You could even skip this part and attach the baskets straight to the wall. I considered attaching the baskets to the boards the other way. I decided that it fits better in her room vertically, but horizontally would be super cute too!
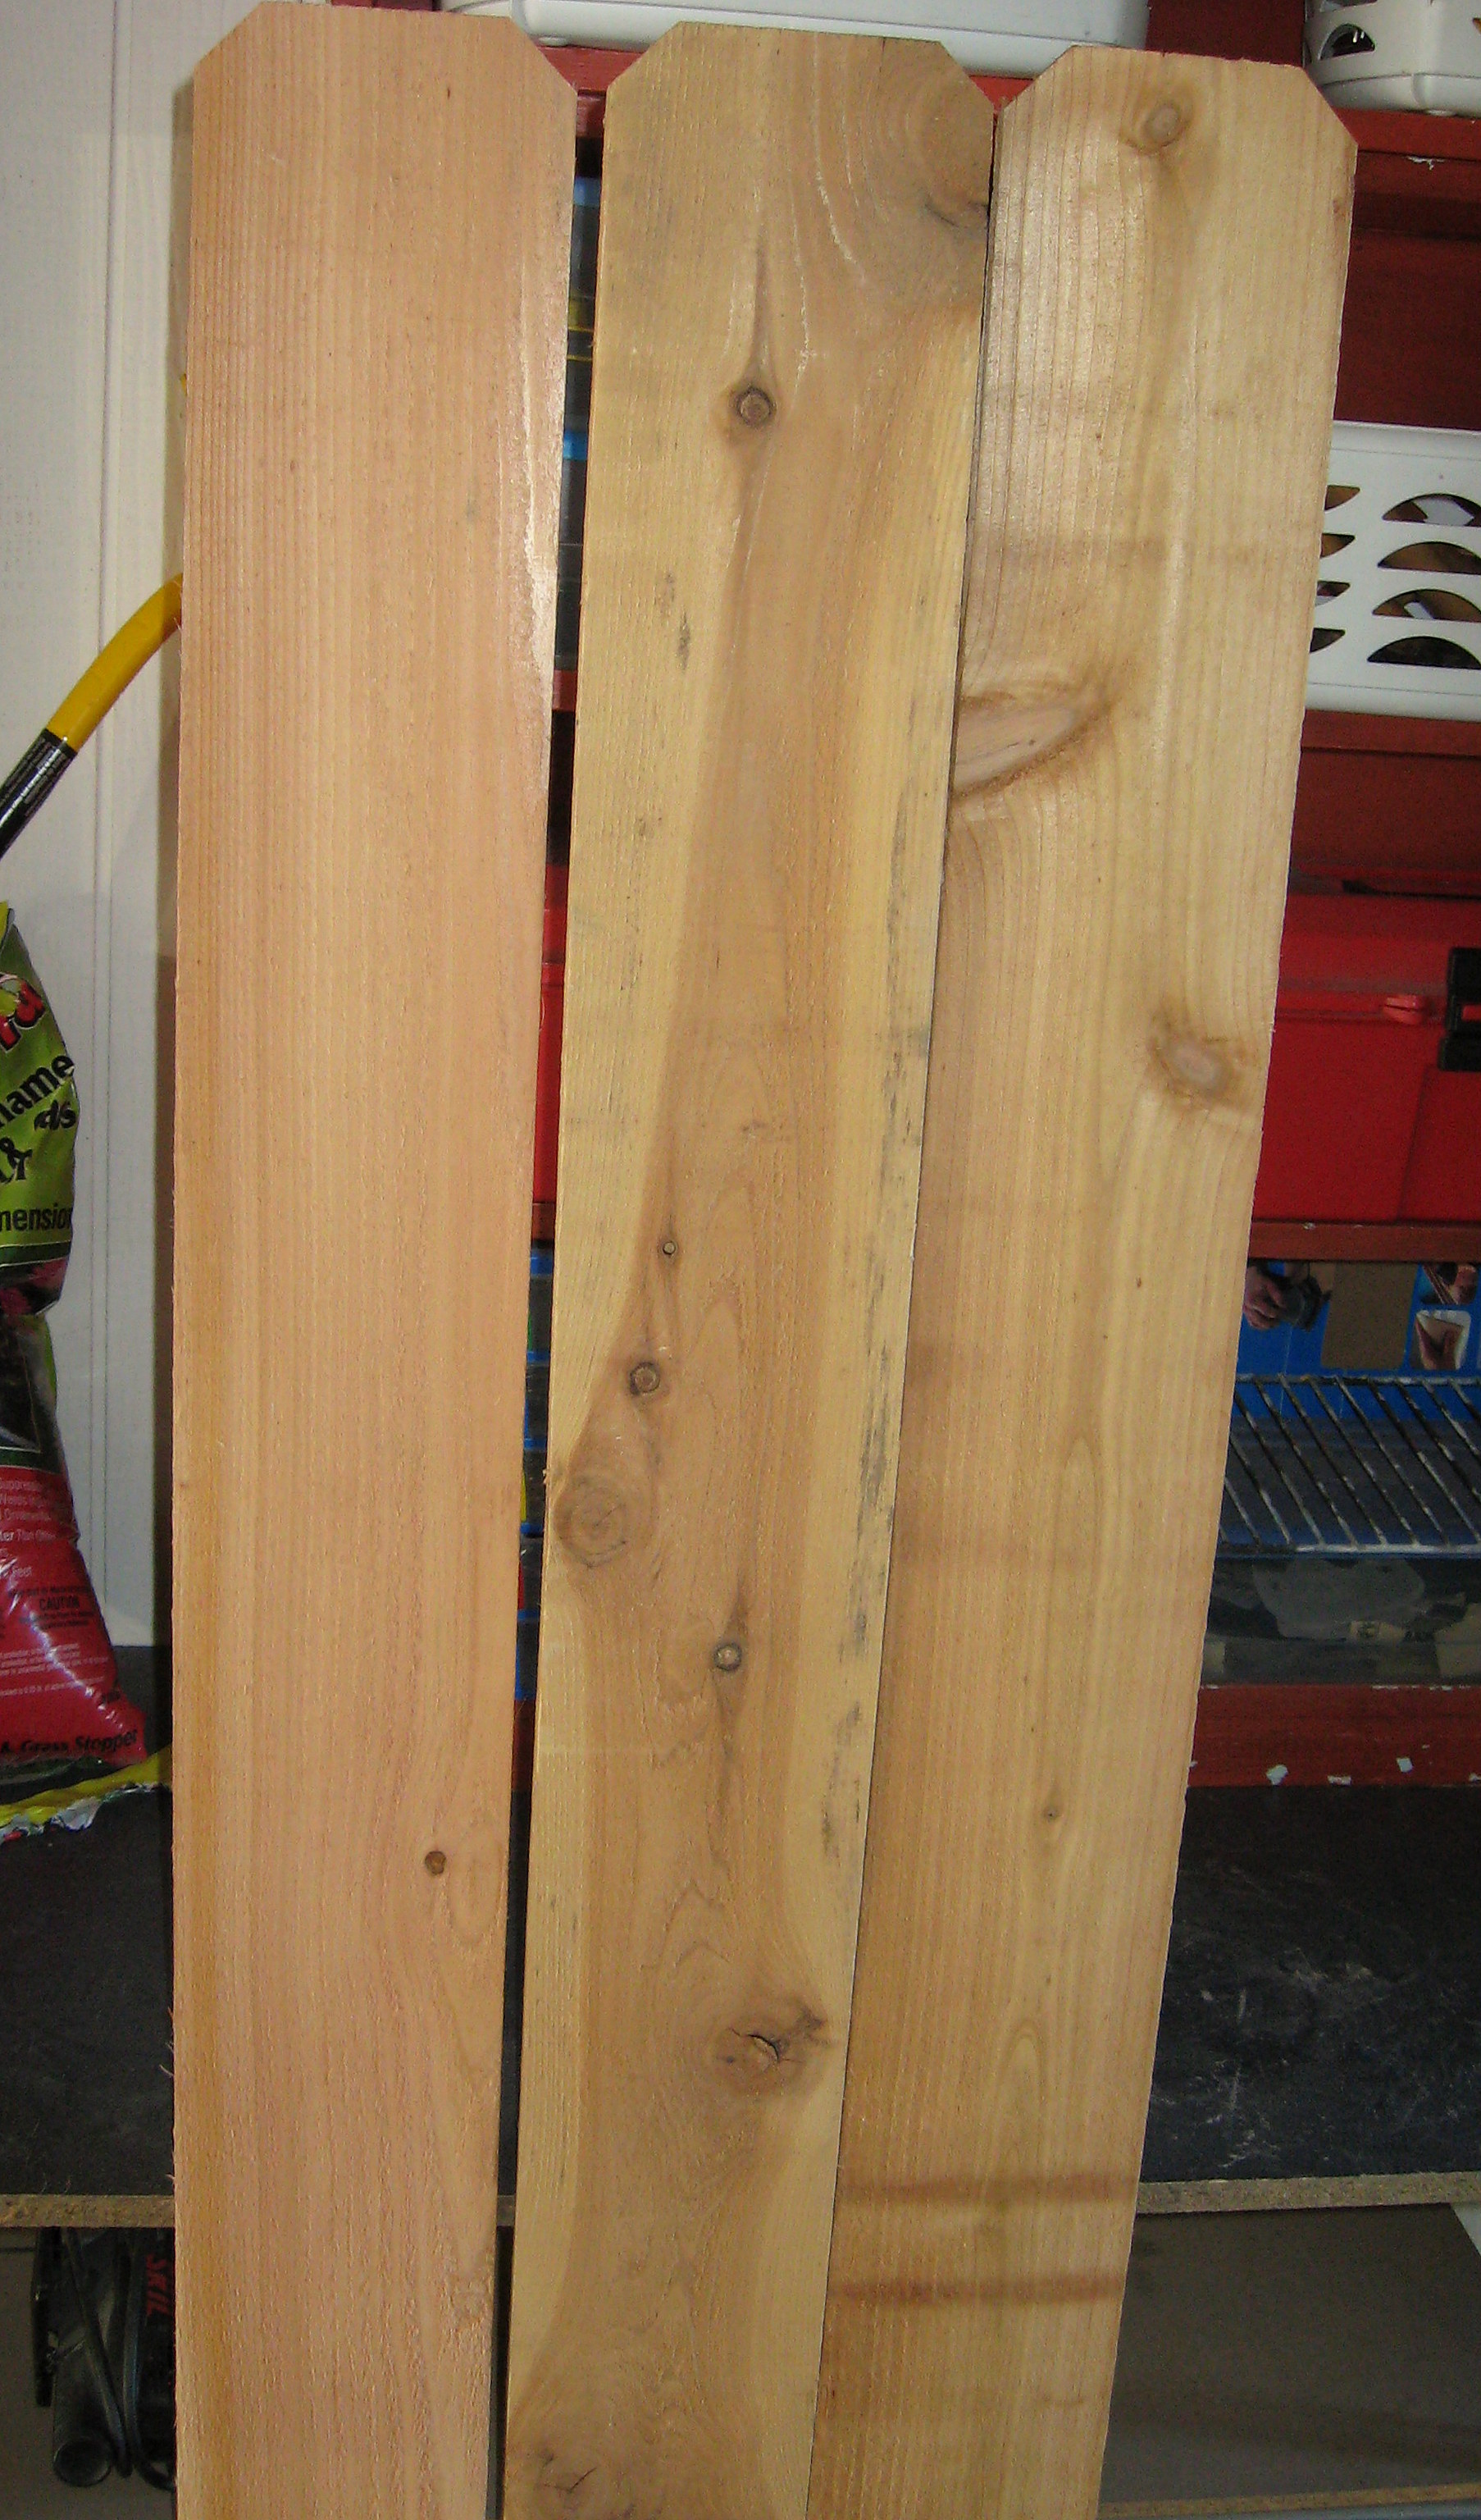
Here we go… cedar fence boards are notoriously warped and wonky. Again, for the style I was going for I didn’t mind if they didn’t fit together really tight, but if that matters to you make sure to take the time in the store to sort through the pile and find the straightest, flattest ones you can find.
The wood is very rough so start by giving them a quick sanding on all sides. Lay them out on the ground face down. Push them together and line up the bottoms so they are straight and perfectly lined up. See how mine are warped? That is fine; they’ll still go together. Just make sure the bottoms are even.
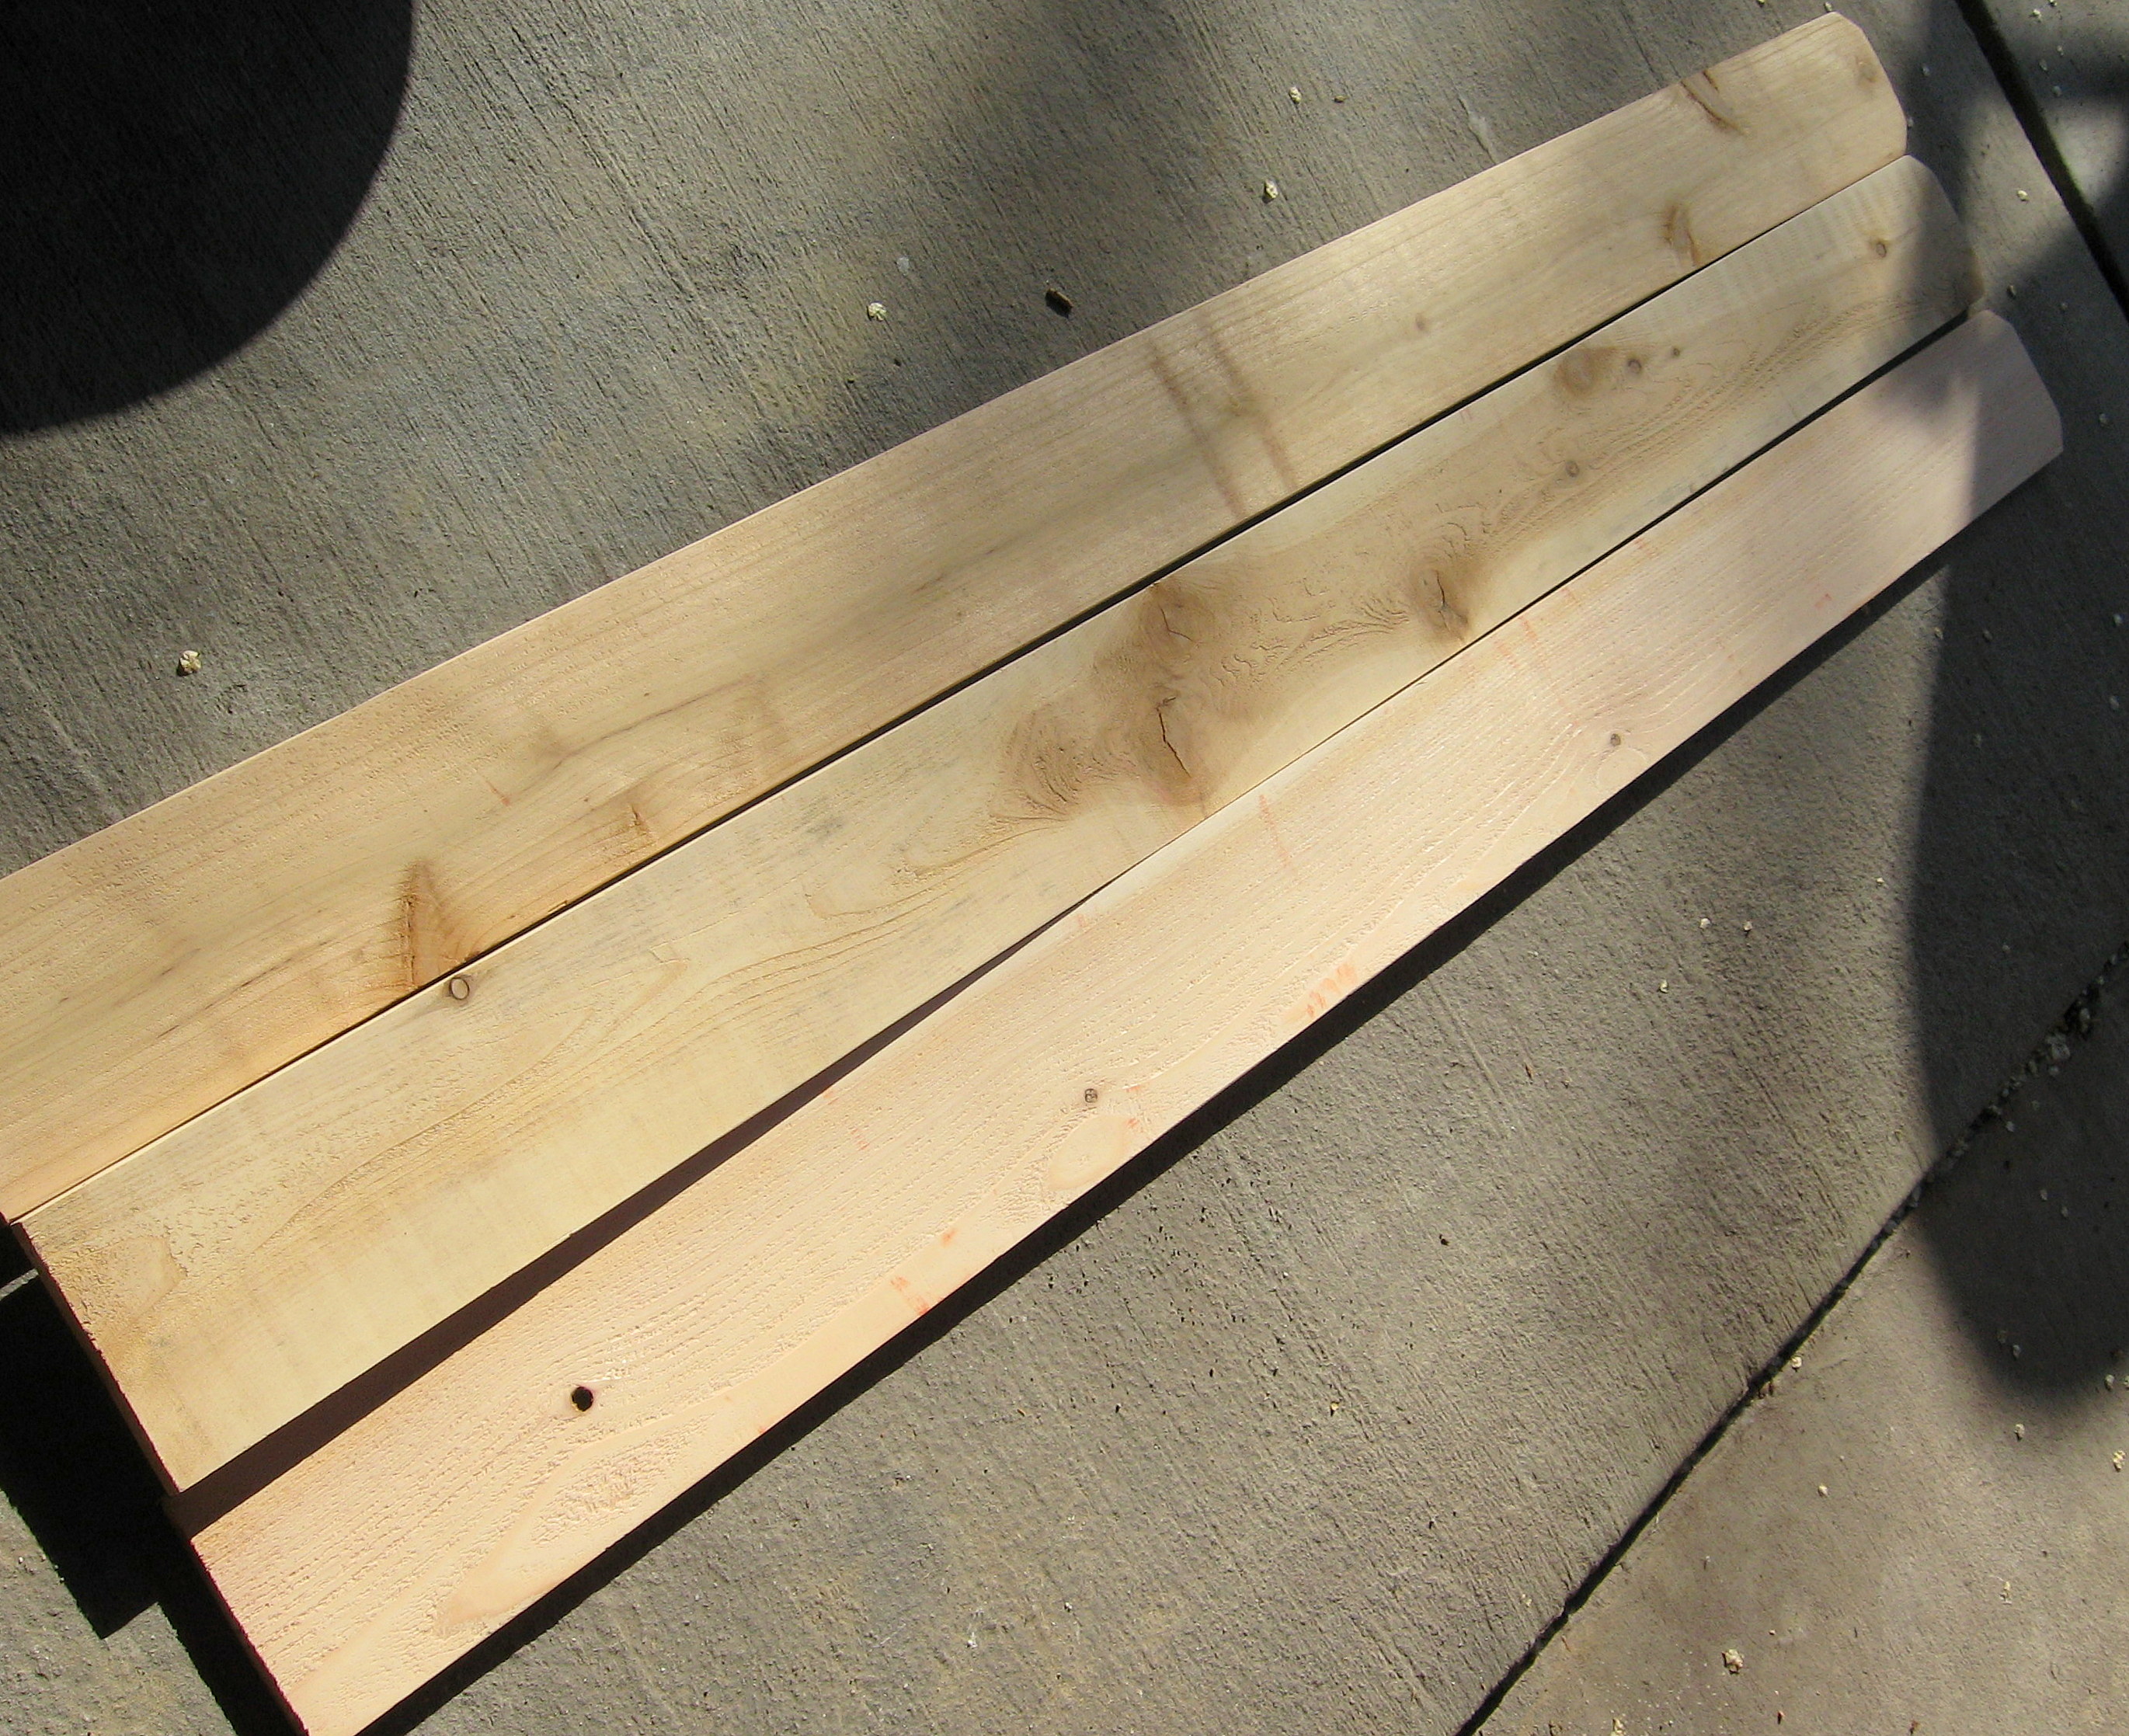
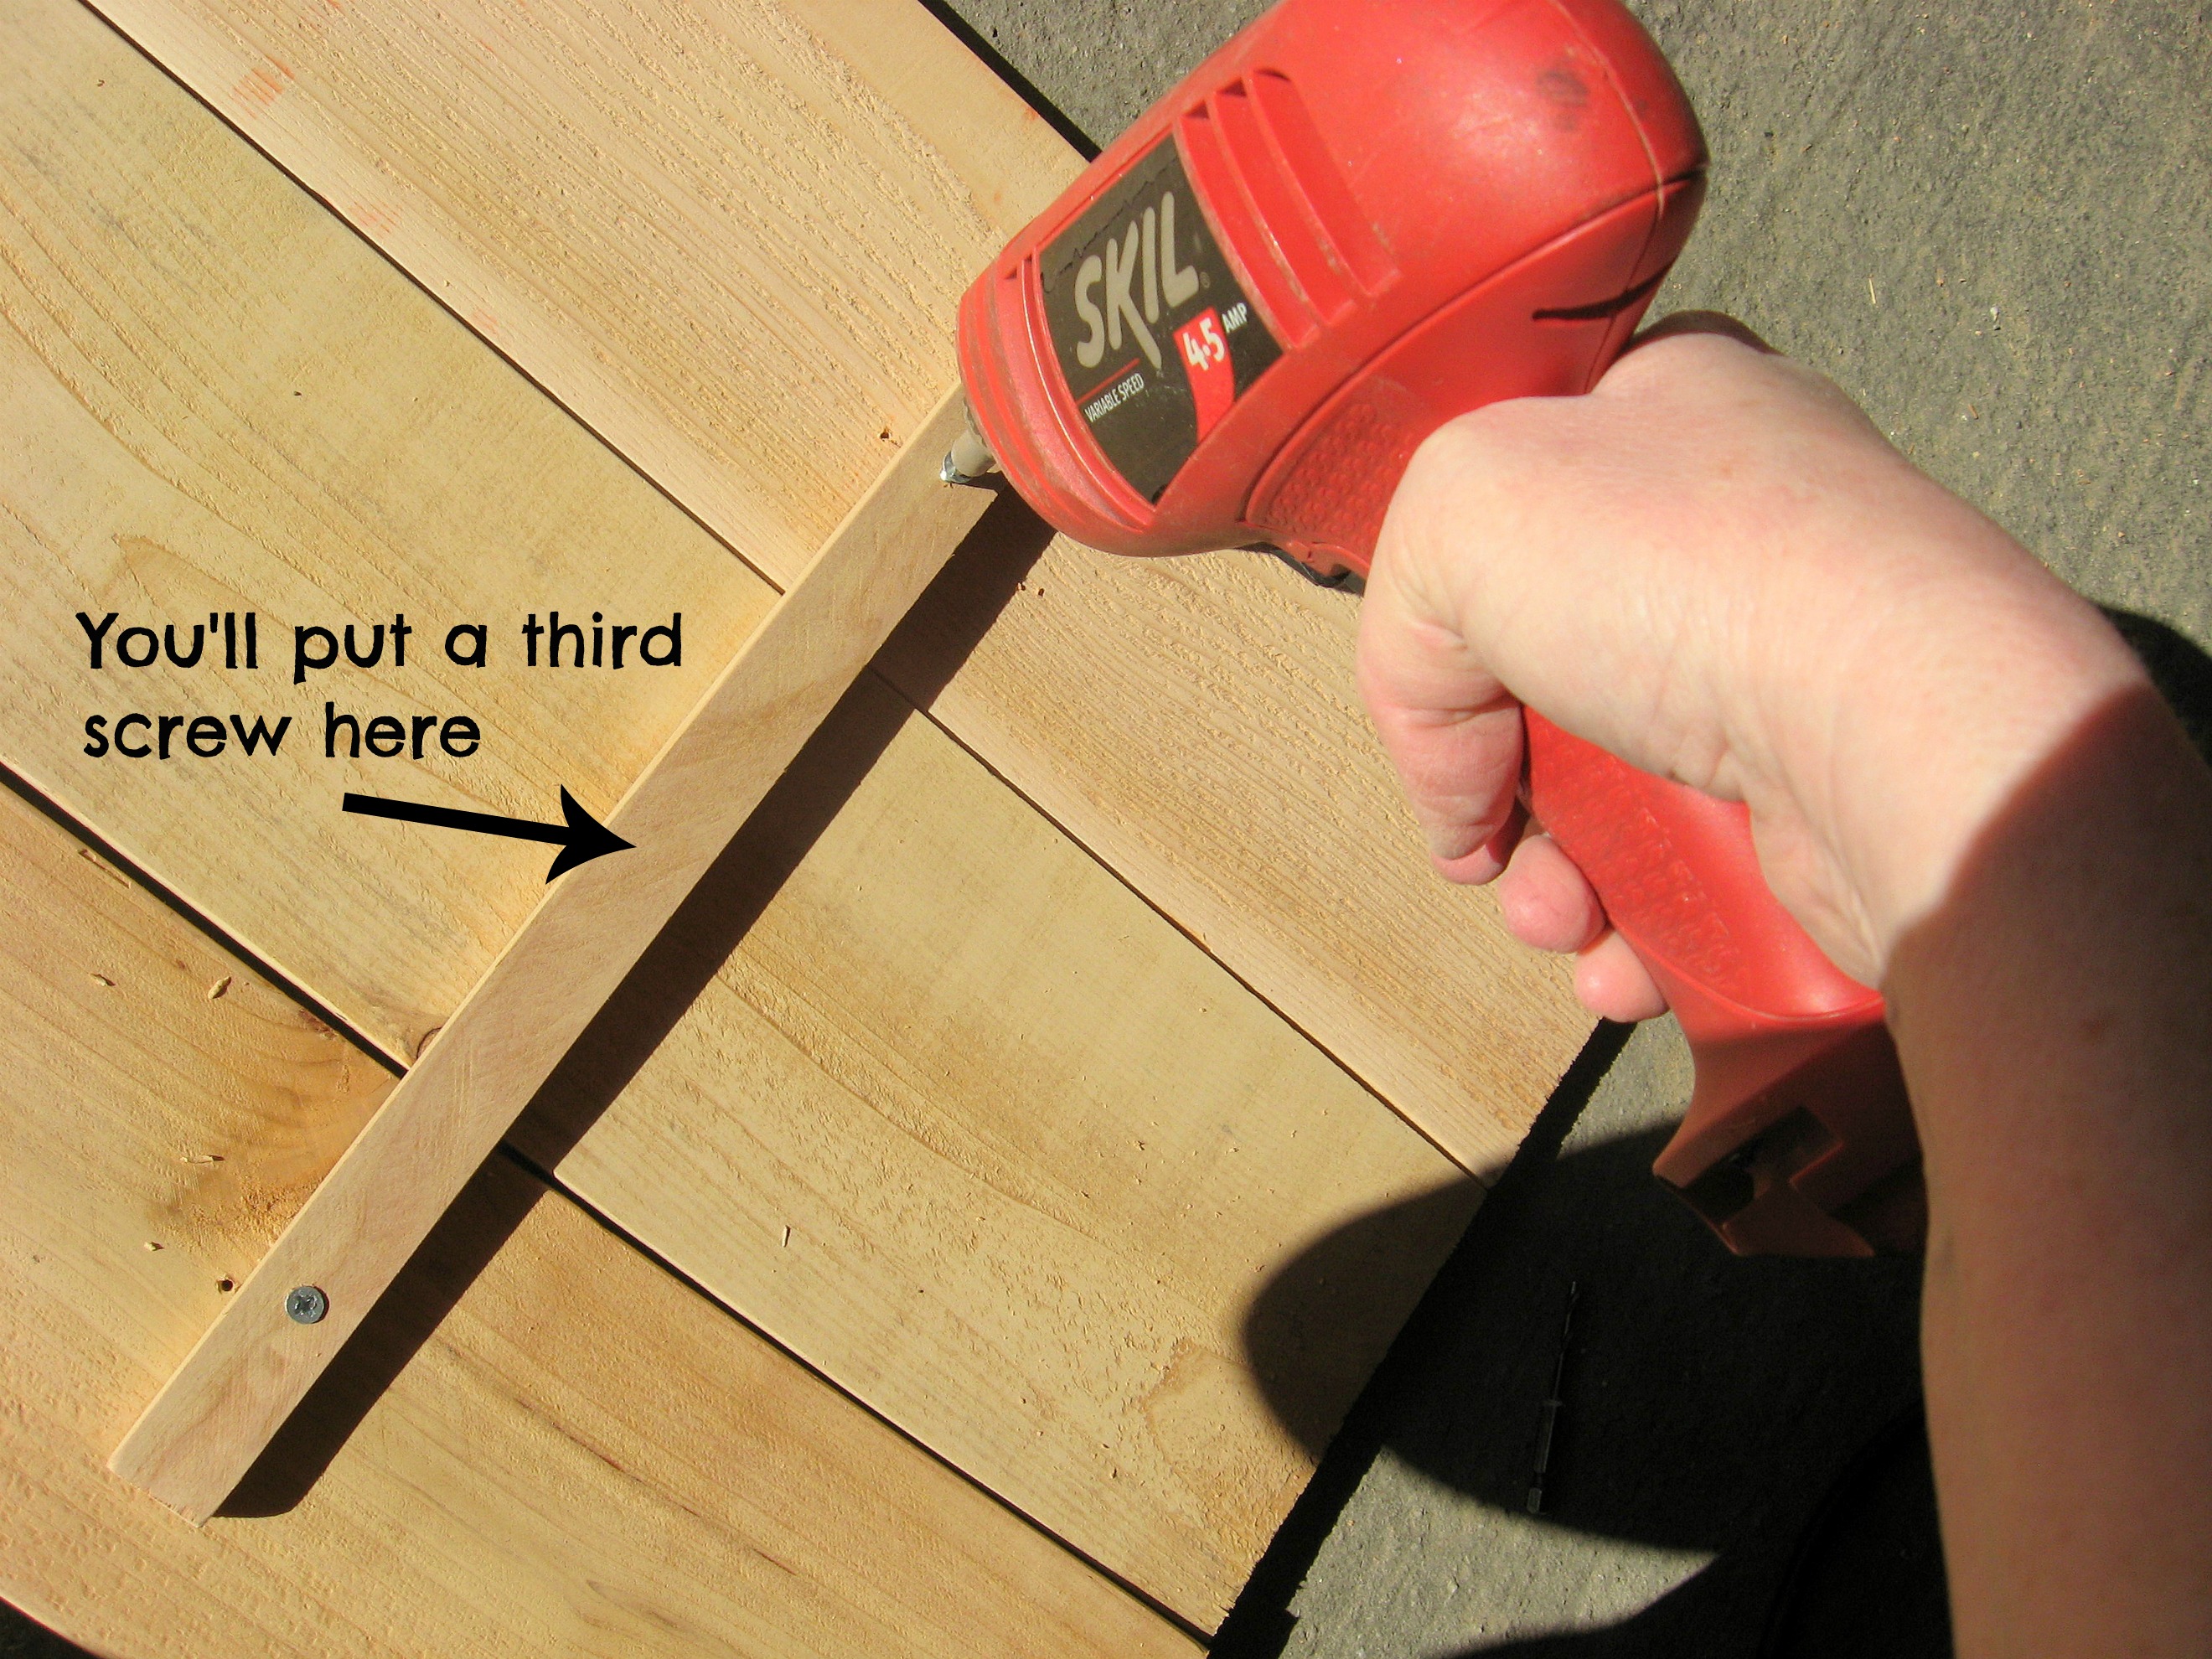
Now you will attach them together by screwing three strips of wood across them through the back. This is the wood I used – sorry for the shadows!
Hold the fence boards together tightly as you screw the cross boards in – use an extra set of hands, a large clamp or even some heavy cinder blocks on either side of the boards. Make sure you pre-drill all the holes so you don’t split the wood.
Here is what the back will look like when you’re all done:
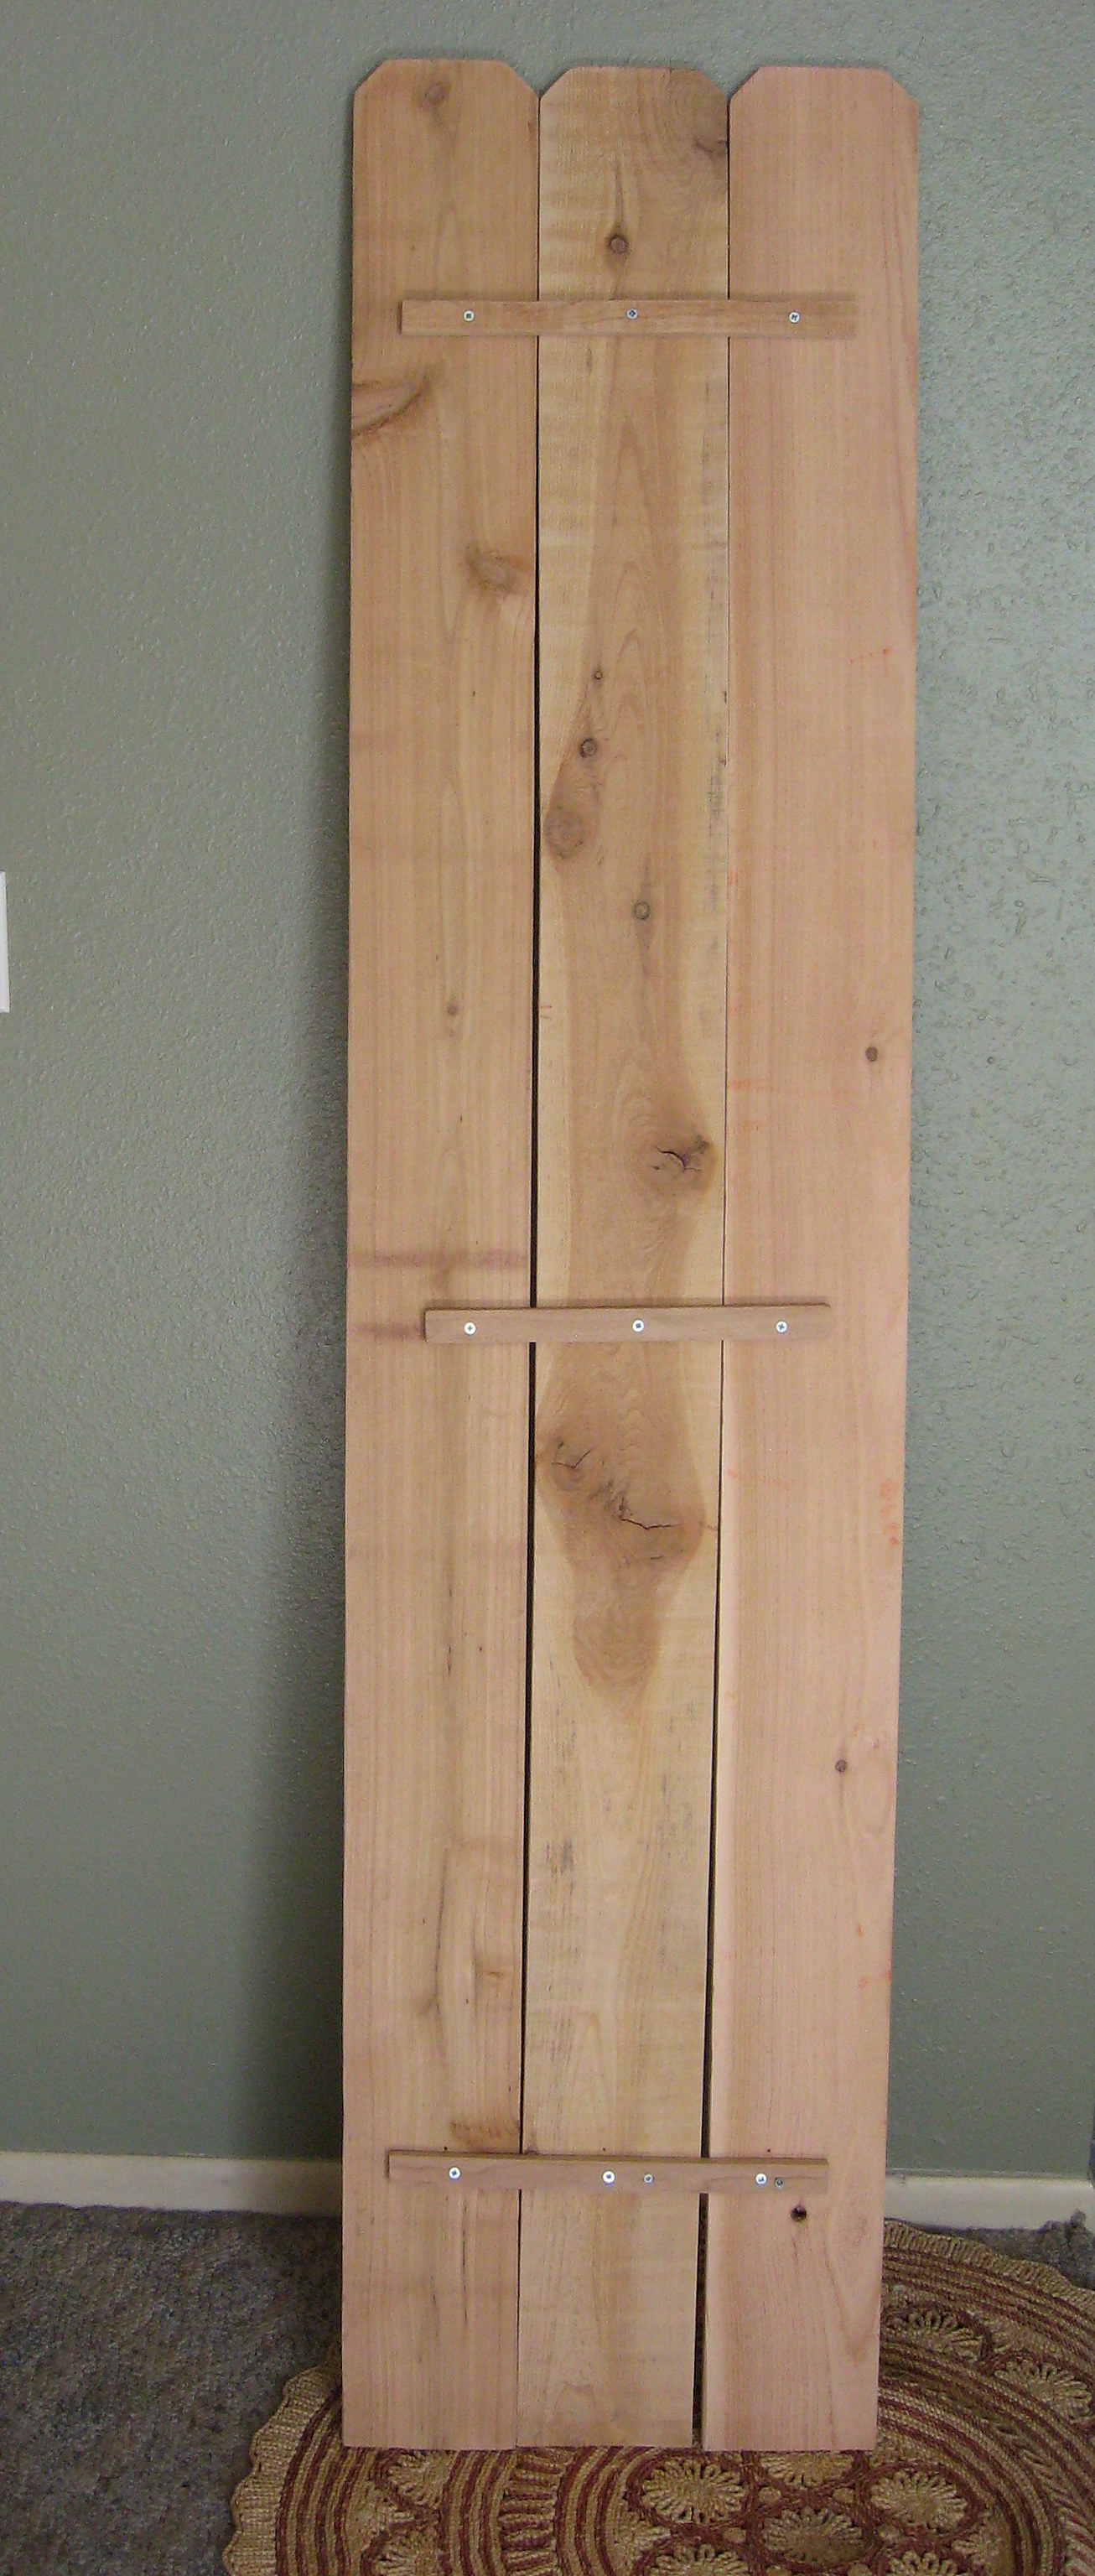
Paint the boards in the color of your choice; I went with white and gave them a good sanding to distress them once it was dry.
Now we will attach the baskets to the boards. Lay the boards out on the floor and decide where you want the baskets. I worked on this for a long time, getting them perfectly lined up and spaced evenly.
Then my son came home and moved them so that they were offset. After I freaked out, I looked at them again and realized I liked it better this way. Just make sure that once you know for sure where you want them, use a pen to mark the placement of each basket through the wire loop before they get moved again 😉 This marks where you will drill.
You could just use a screw into the wood, but since the baskets will get a lot of action, I decided I wanted them to be really secure, so I used a nut and bolt. Drill a hole just big enough for the bolt to go through on each of your markings. Then, hold each basket in place and screw the bolt through the wire loop on the basket and through the board.
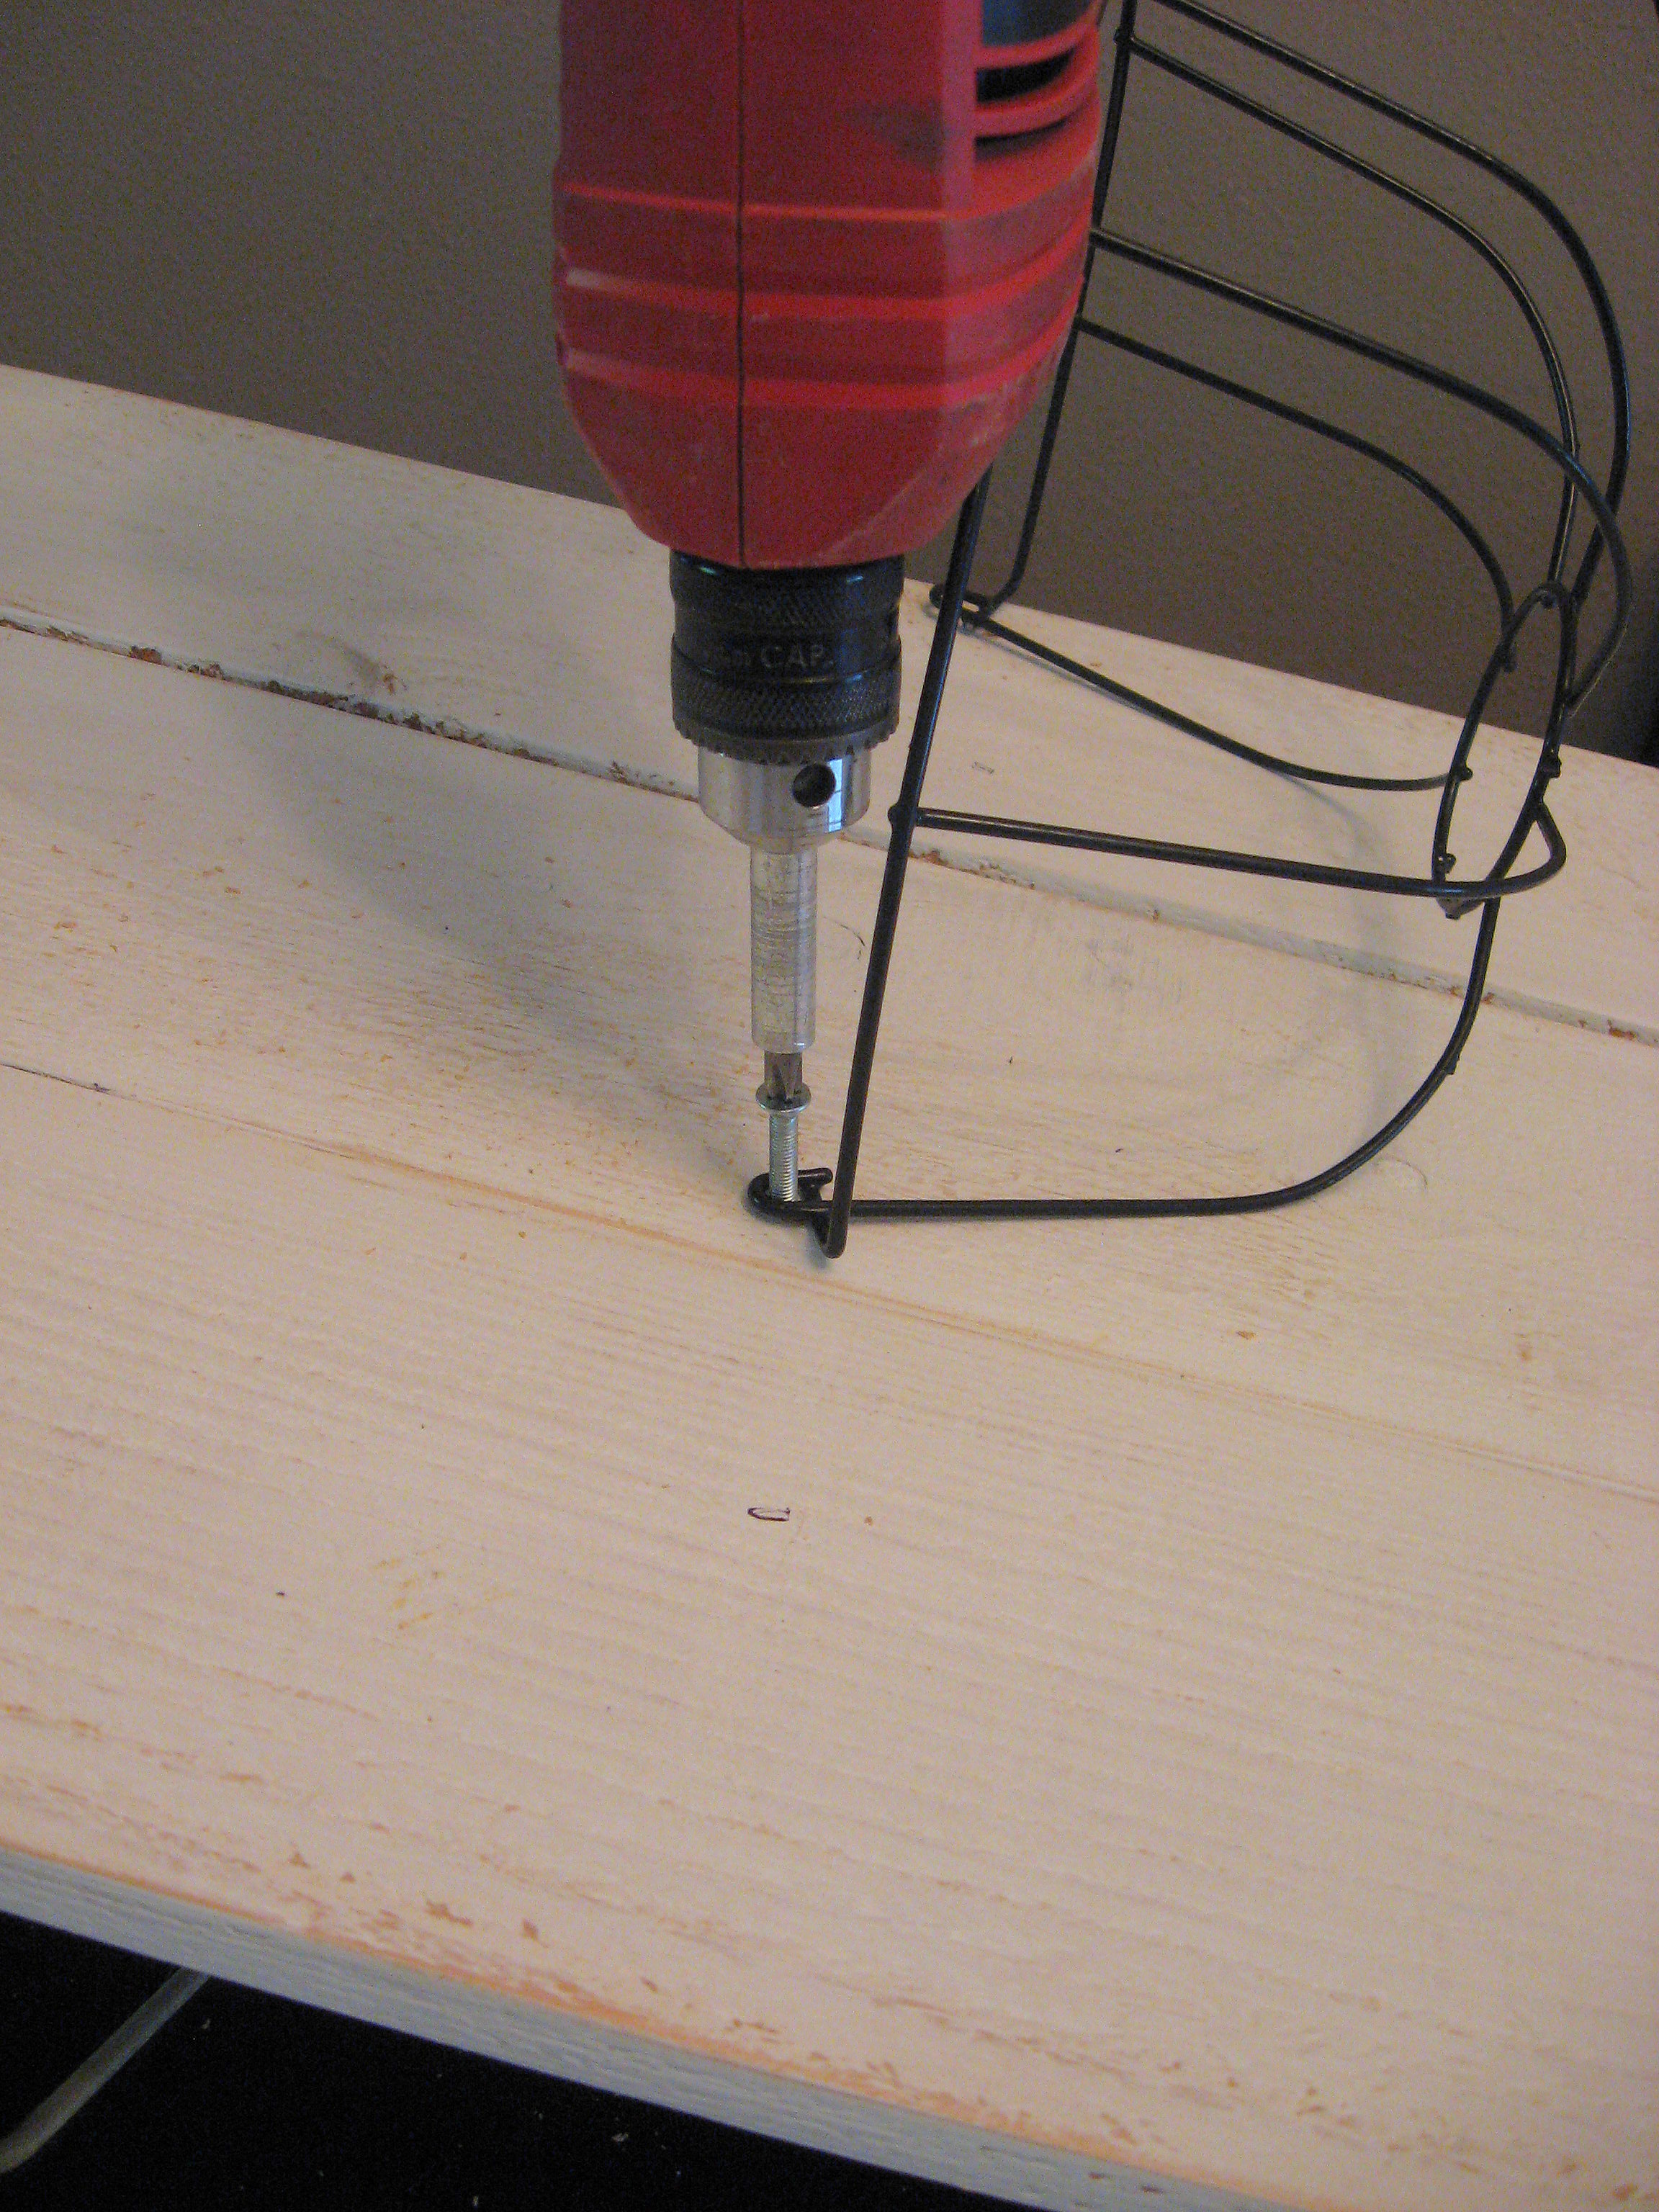
When all the baskets are screwed into place, flip the board onto its side and screw all the nuts into place using pliers or a…. ummm…. nut-tightening-tool (shoot!! What is that called?)
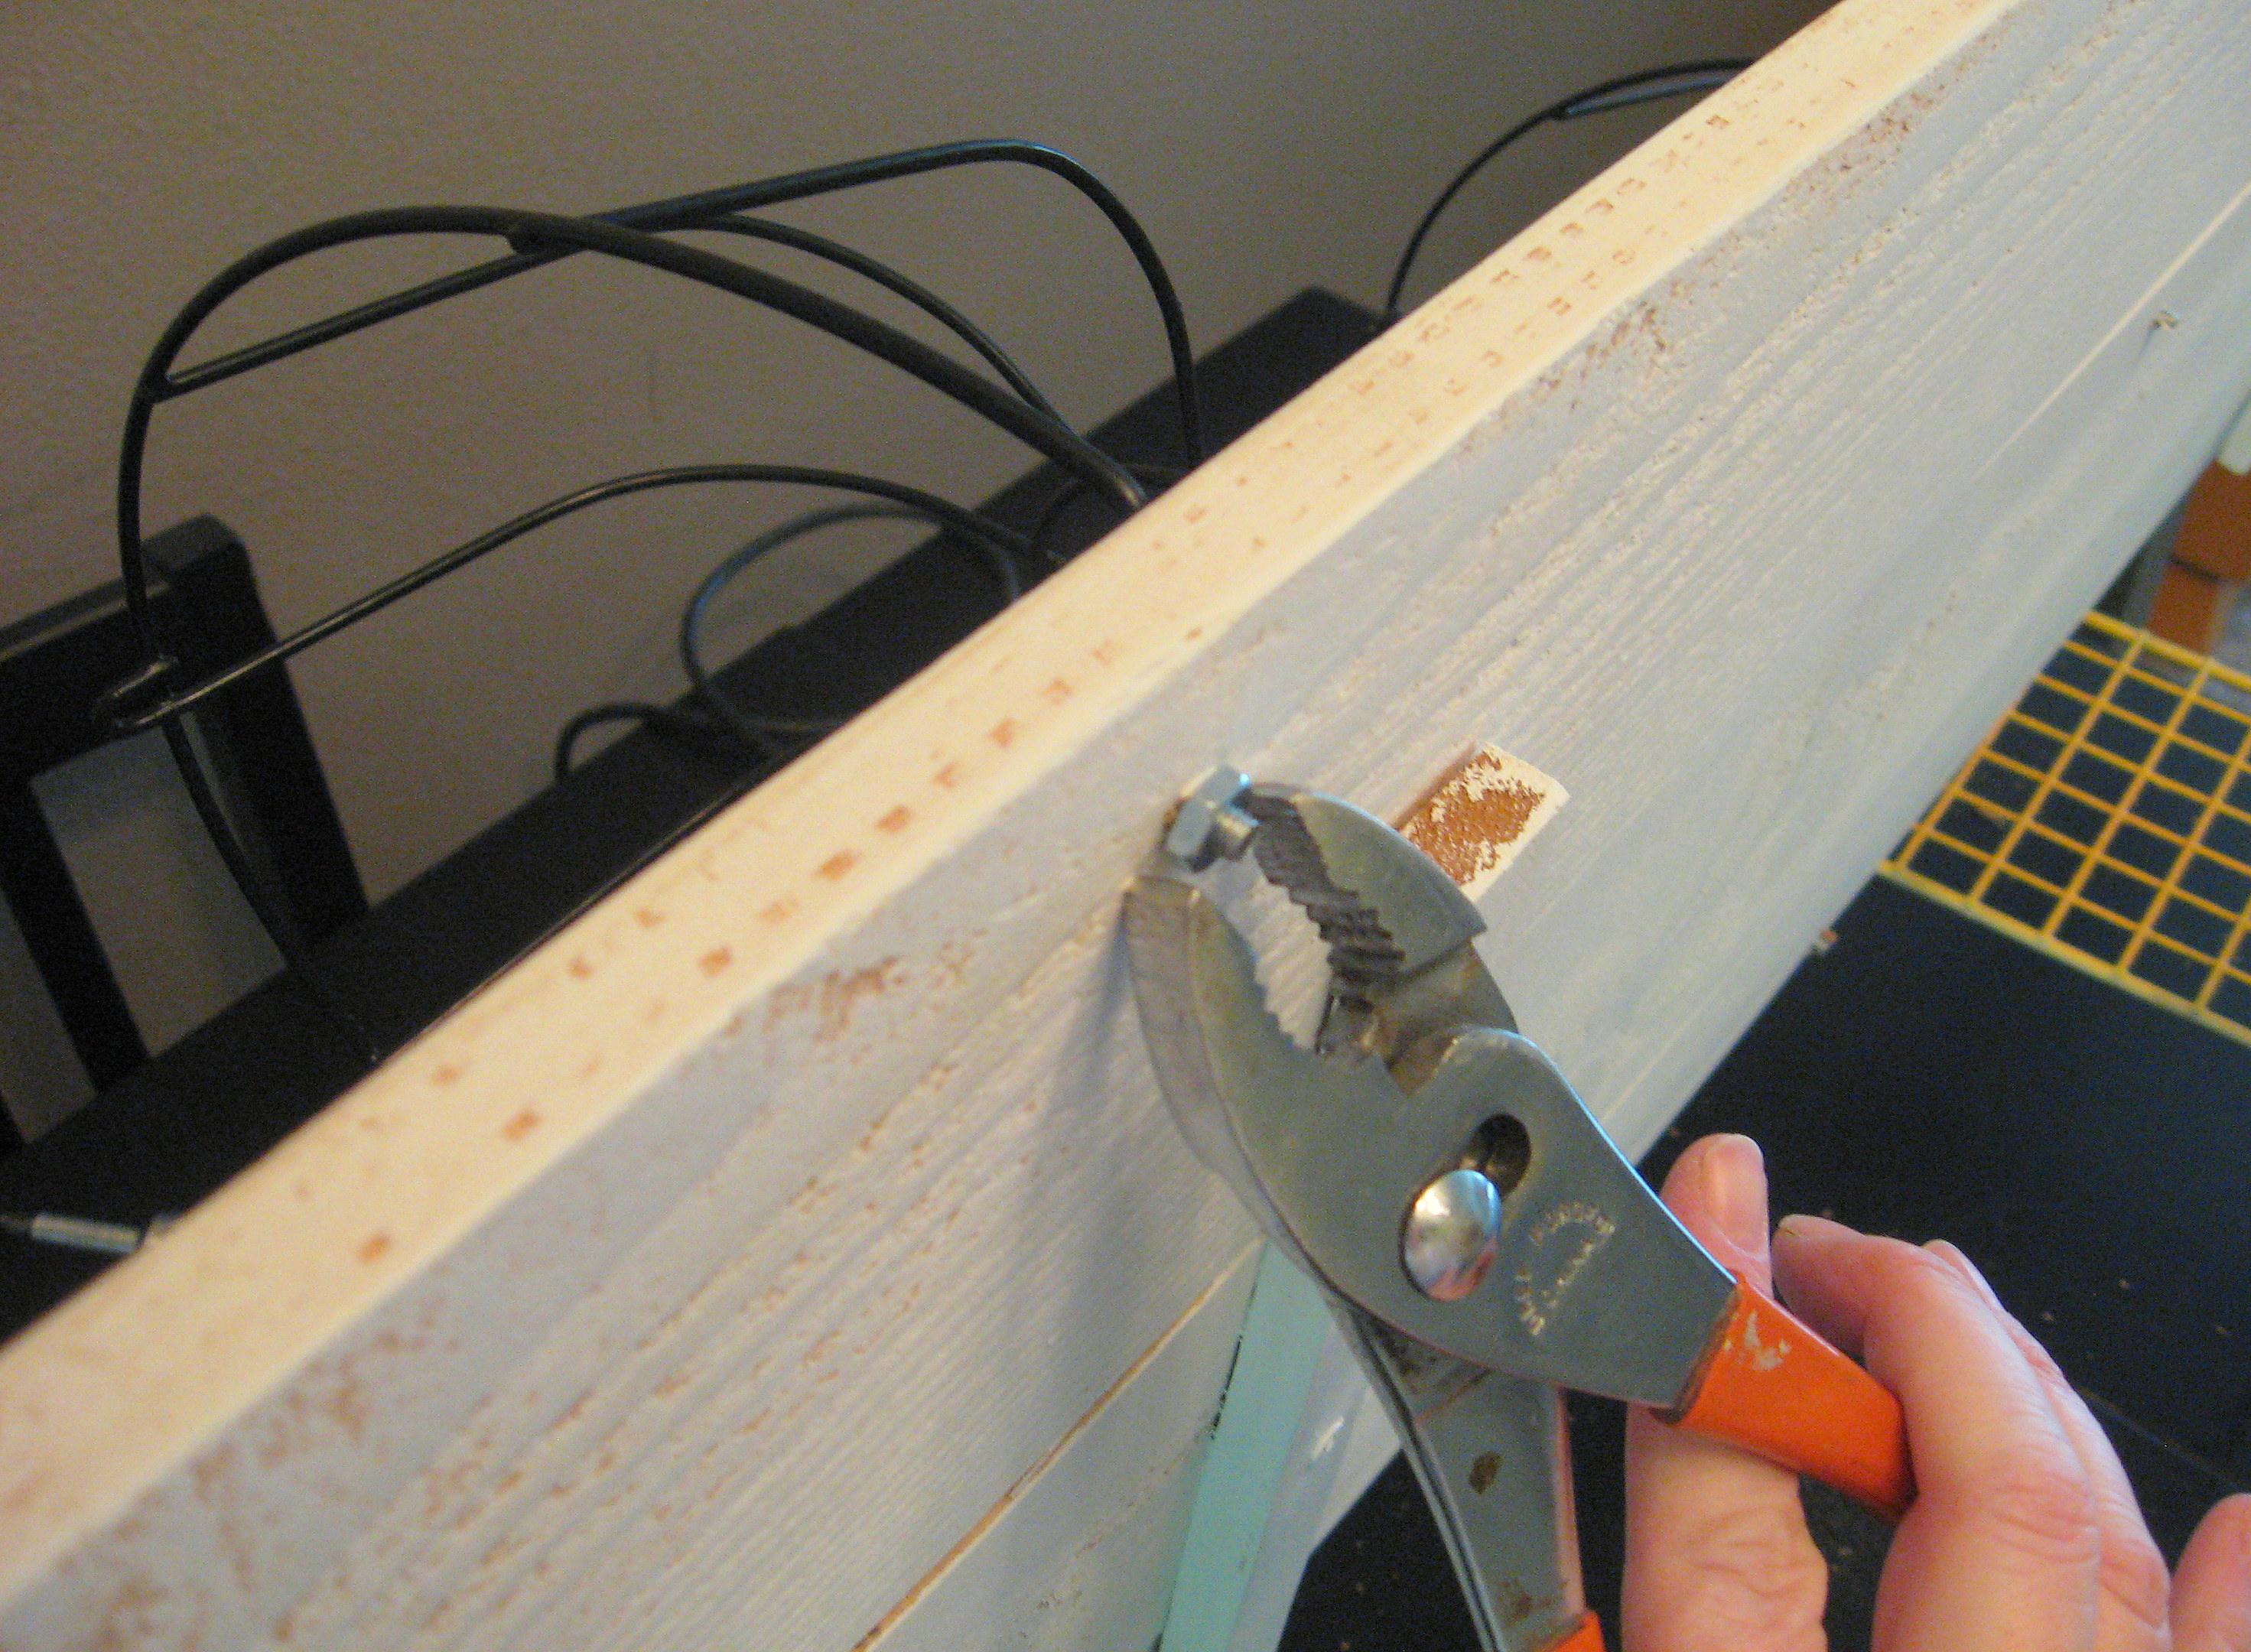
When you tighten all the nuts and bolts, it will make the baskets pop up away from the surface of the board.
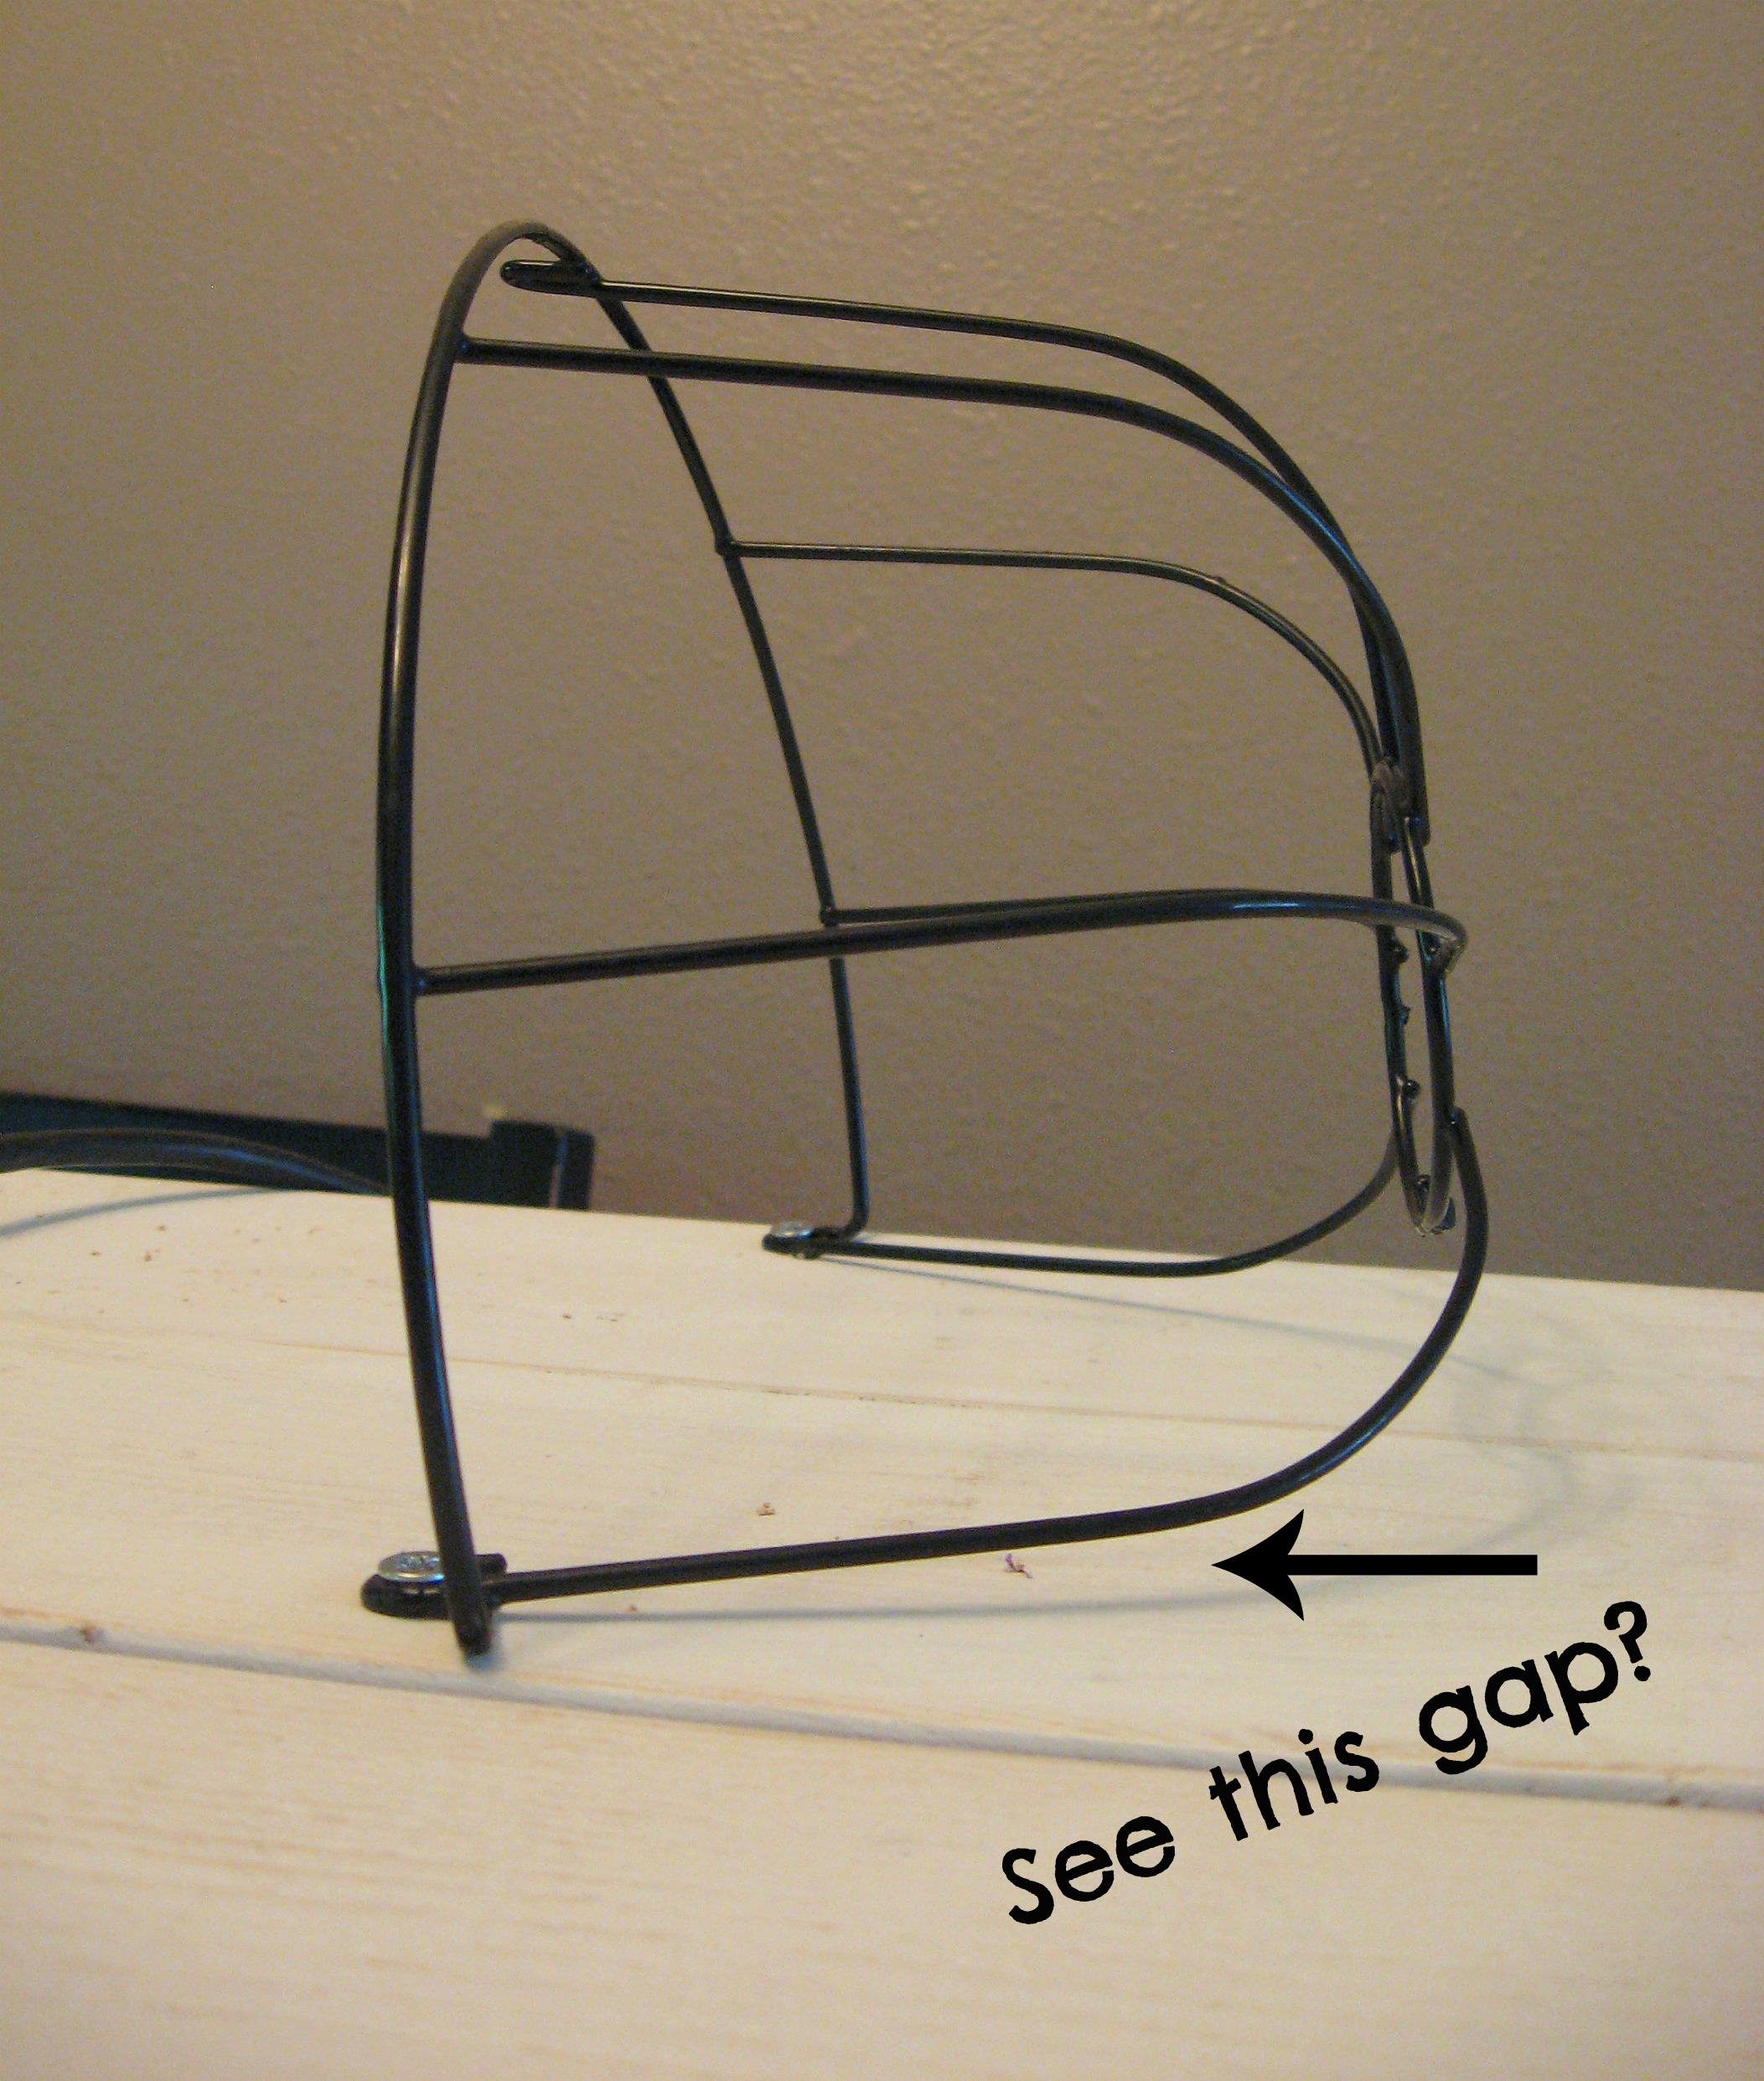
I’m sure it isn’t a big enough gap for the critters to fall through, but I didn’t like the way it looked. I found that if I just pushed it down against the board,
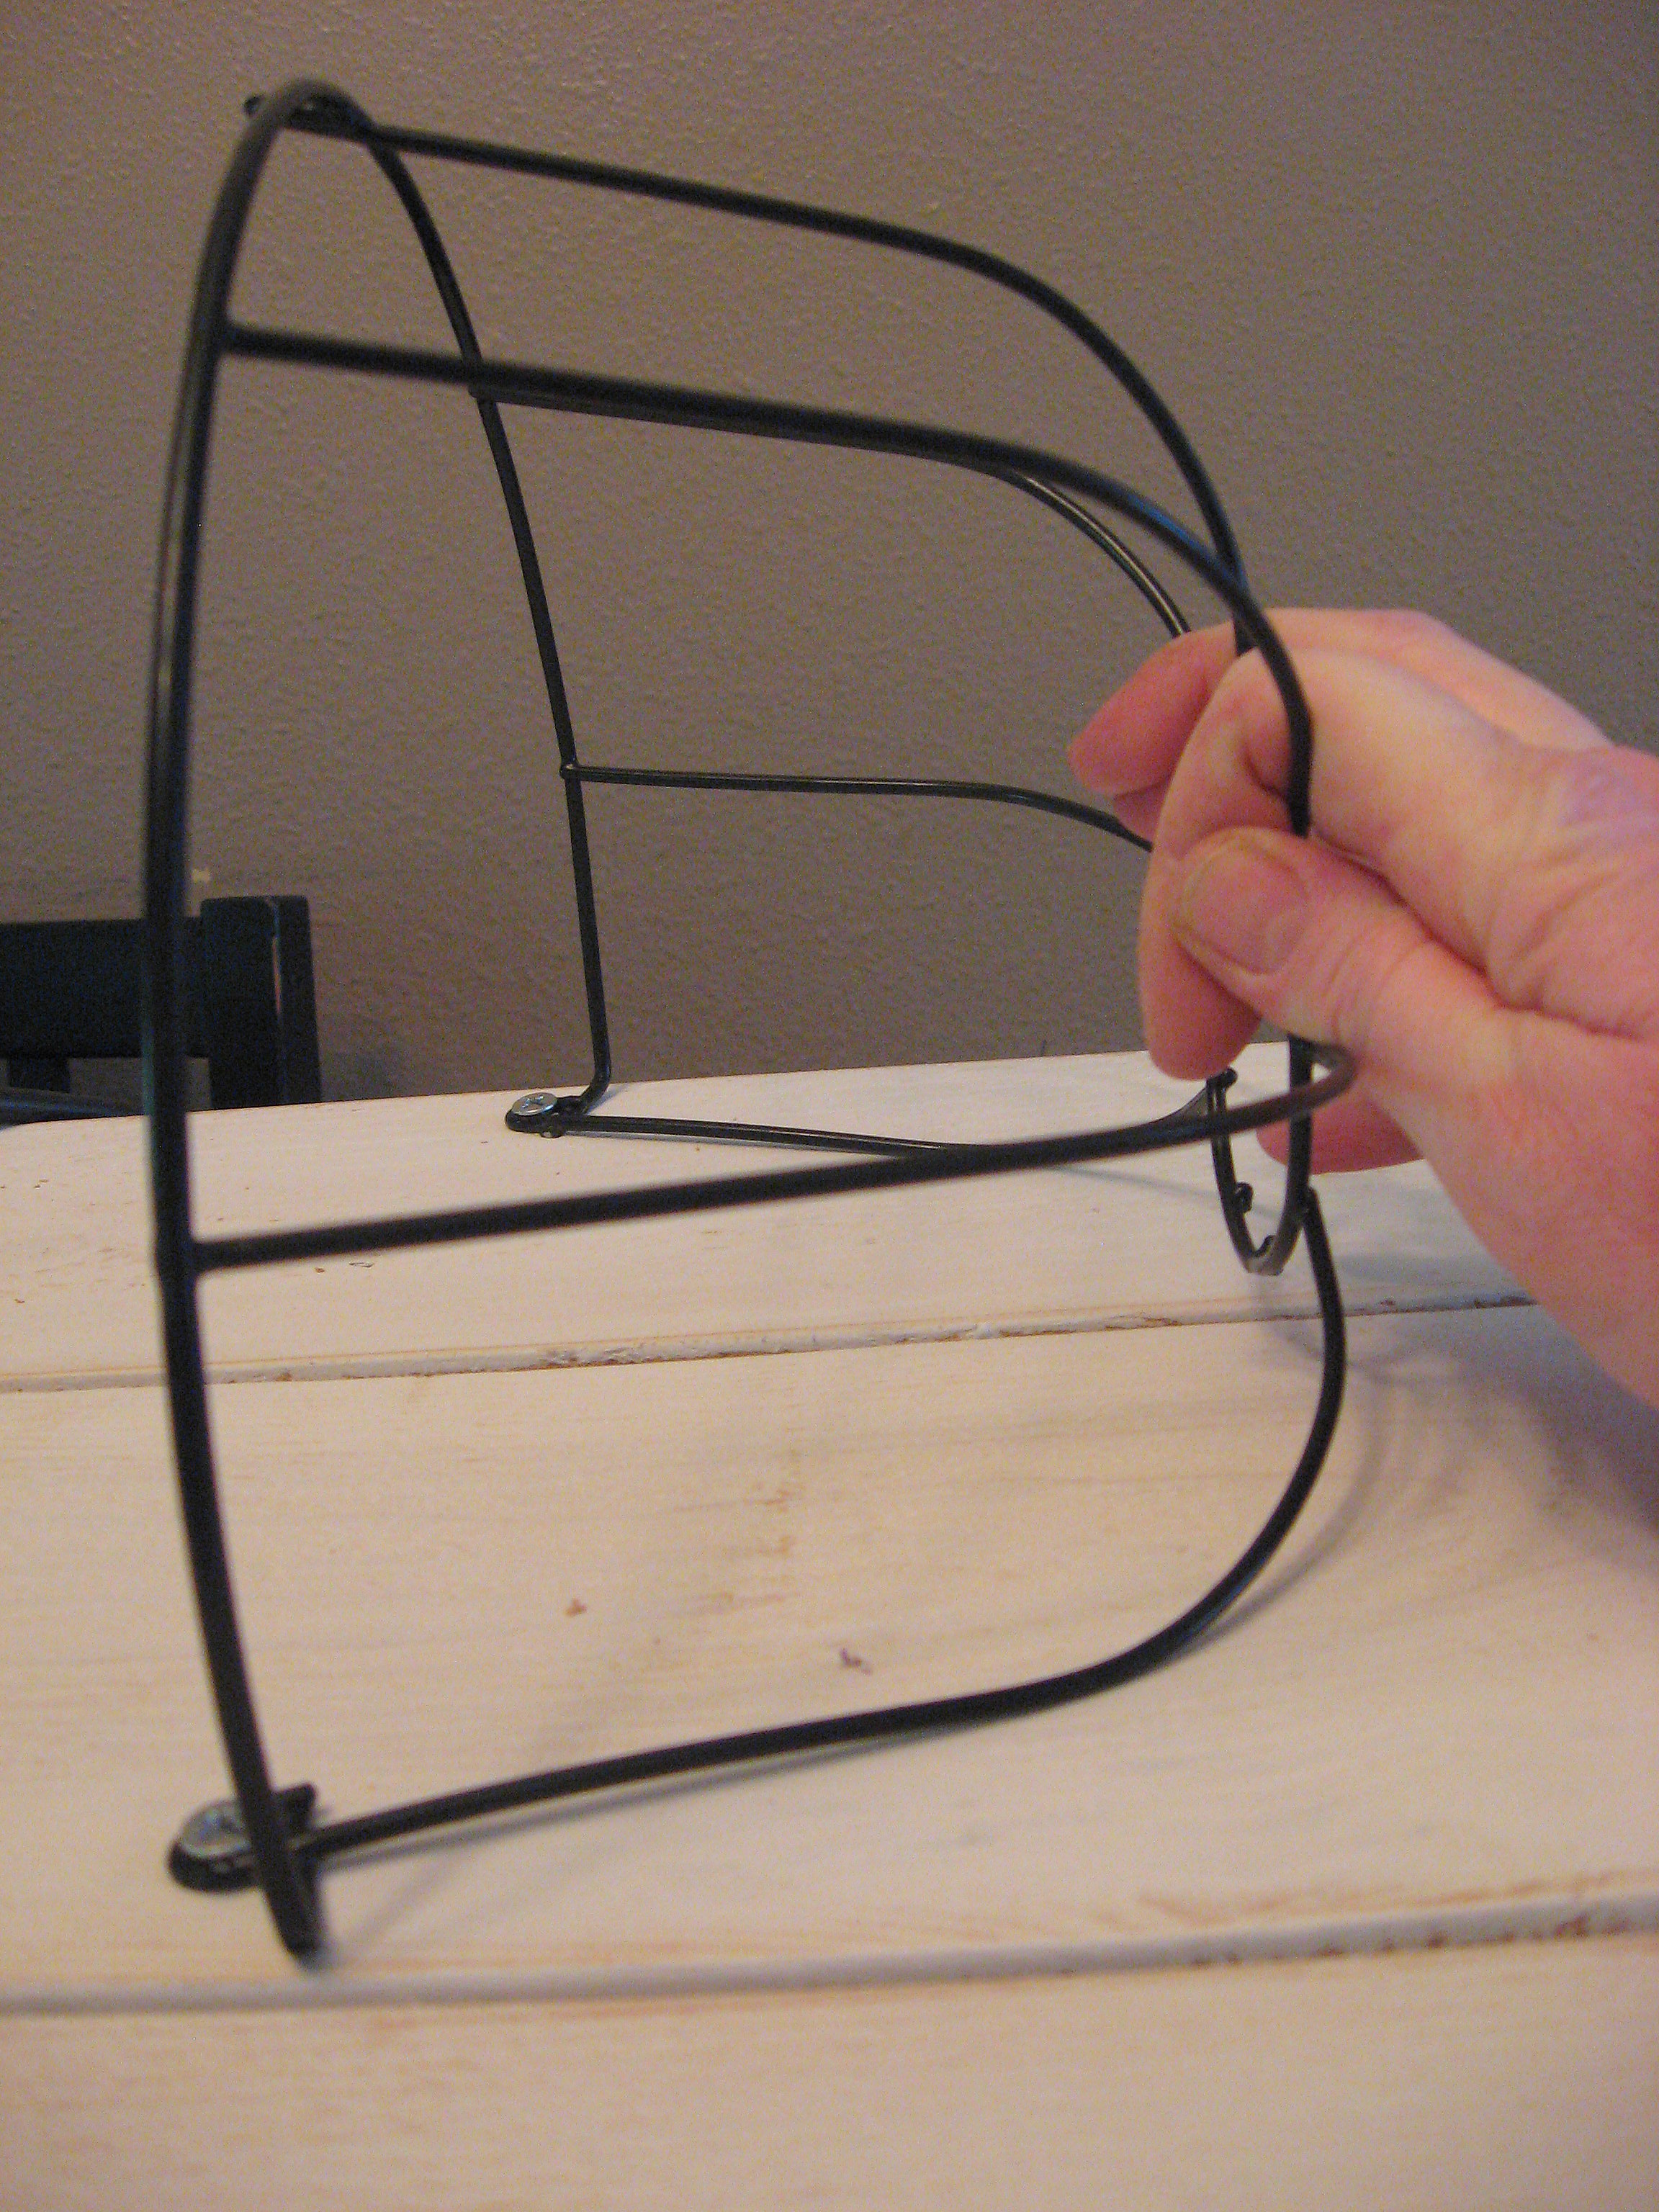
the wires of the basket would bend enough that the basket would sit flat against the board again.
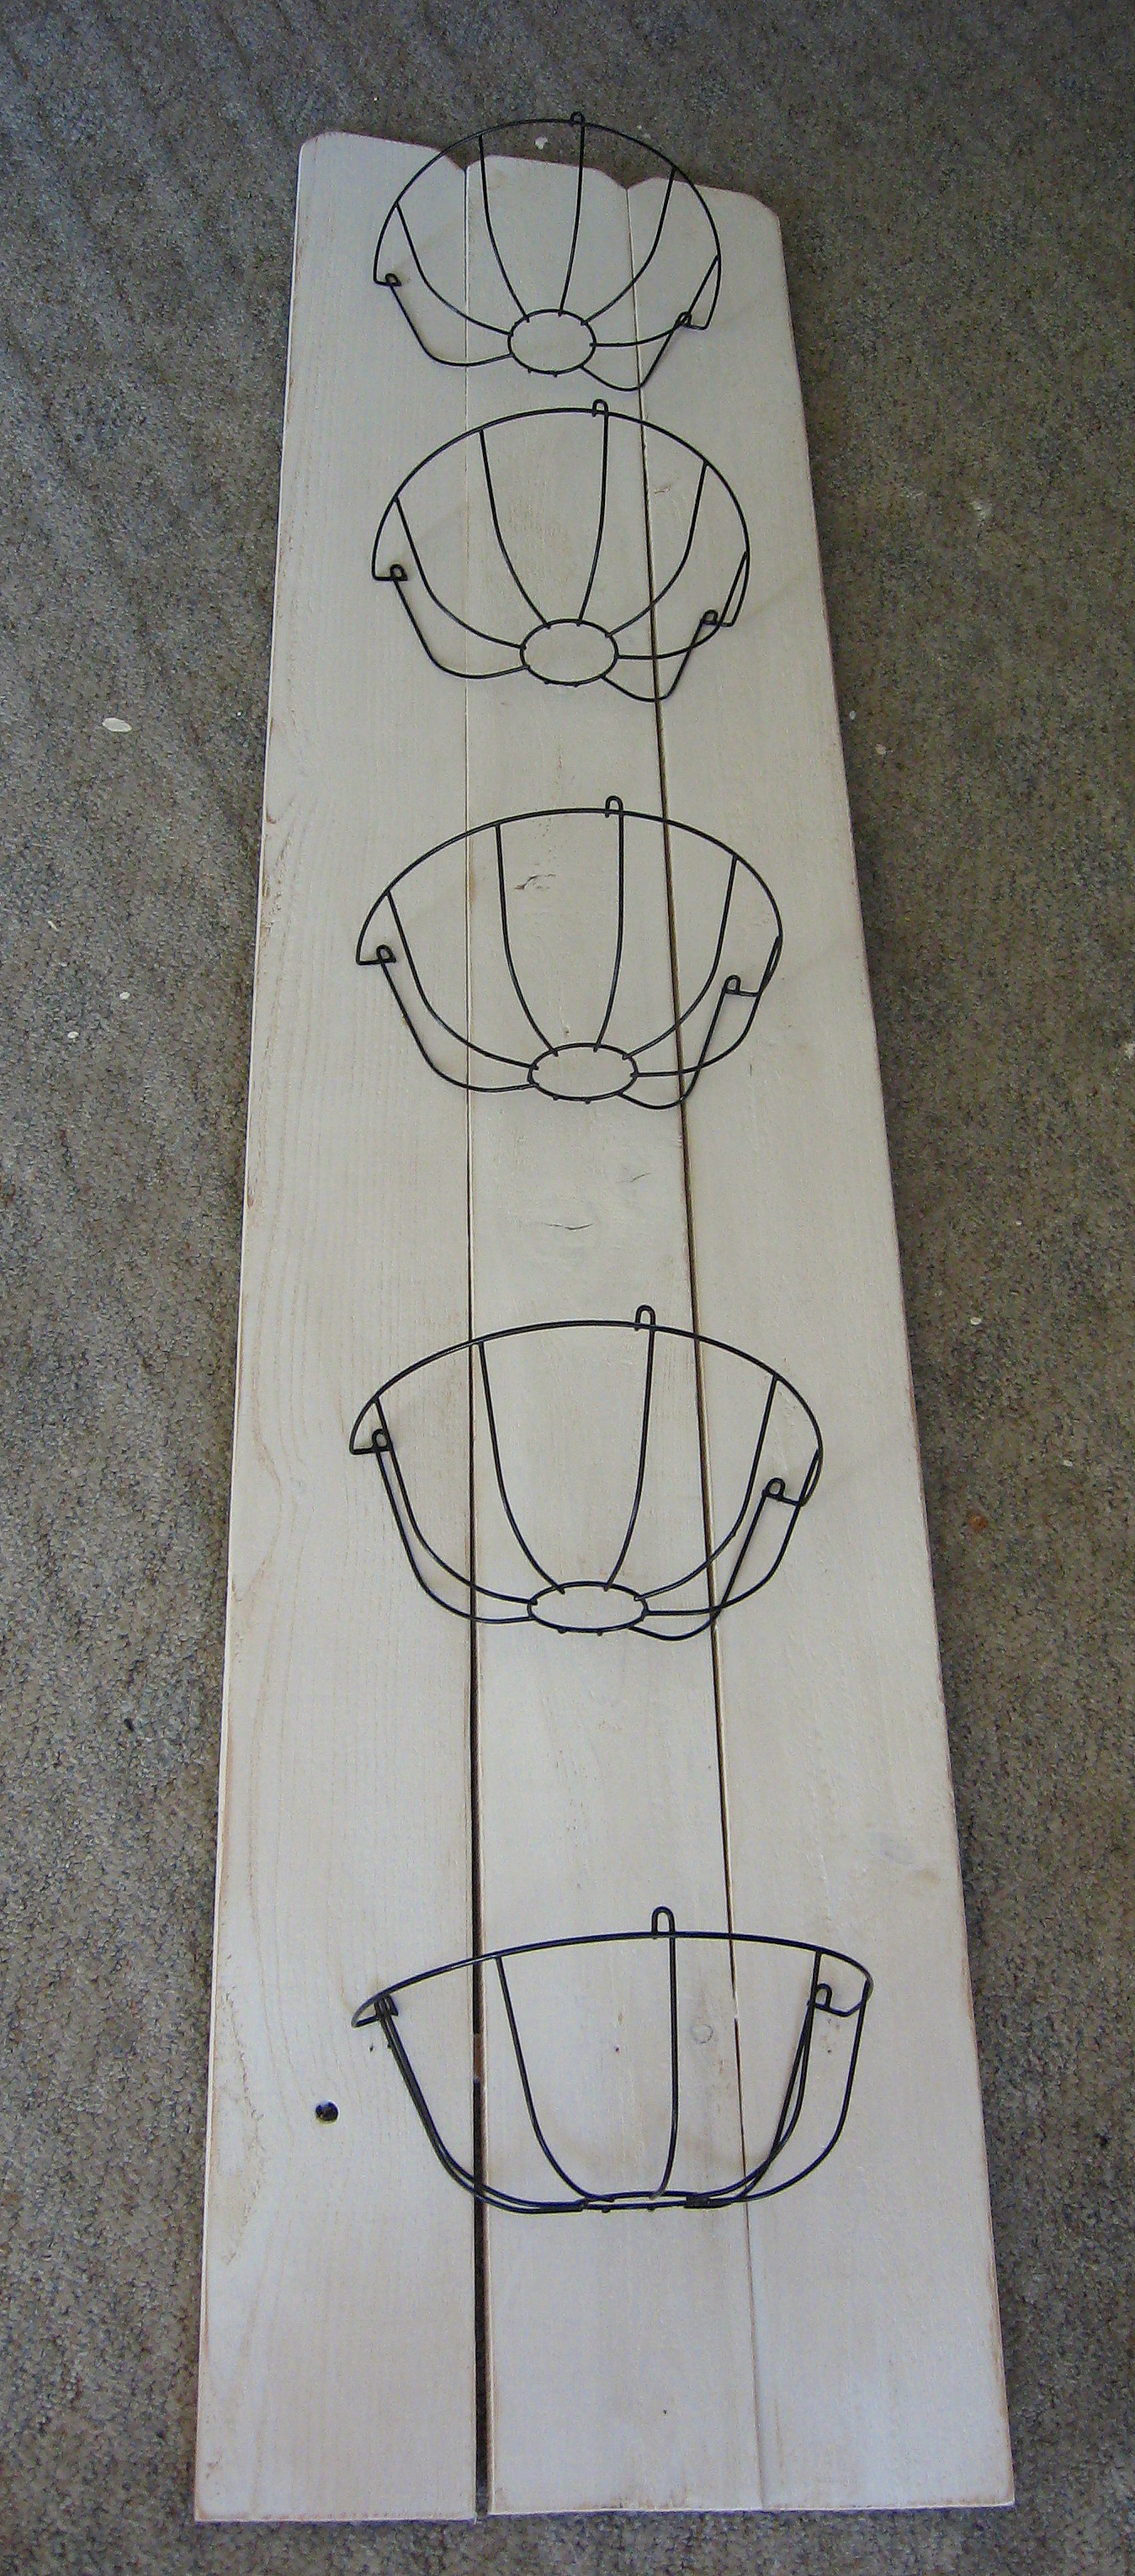
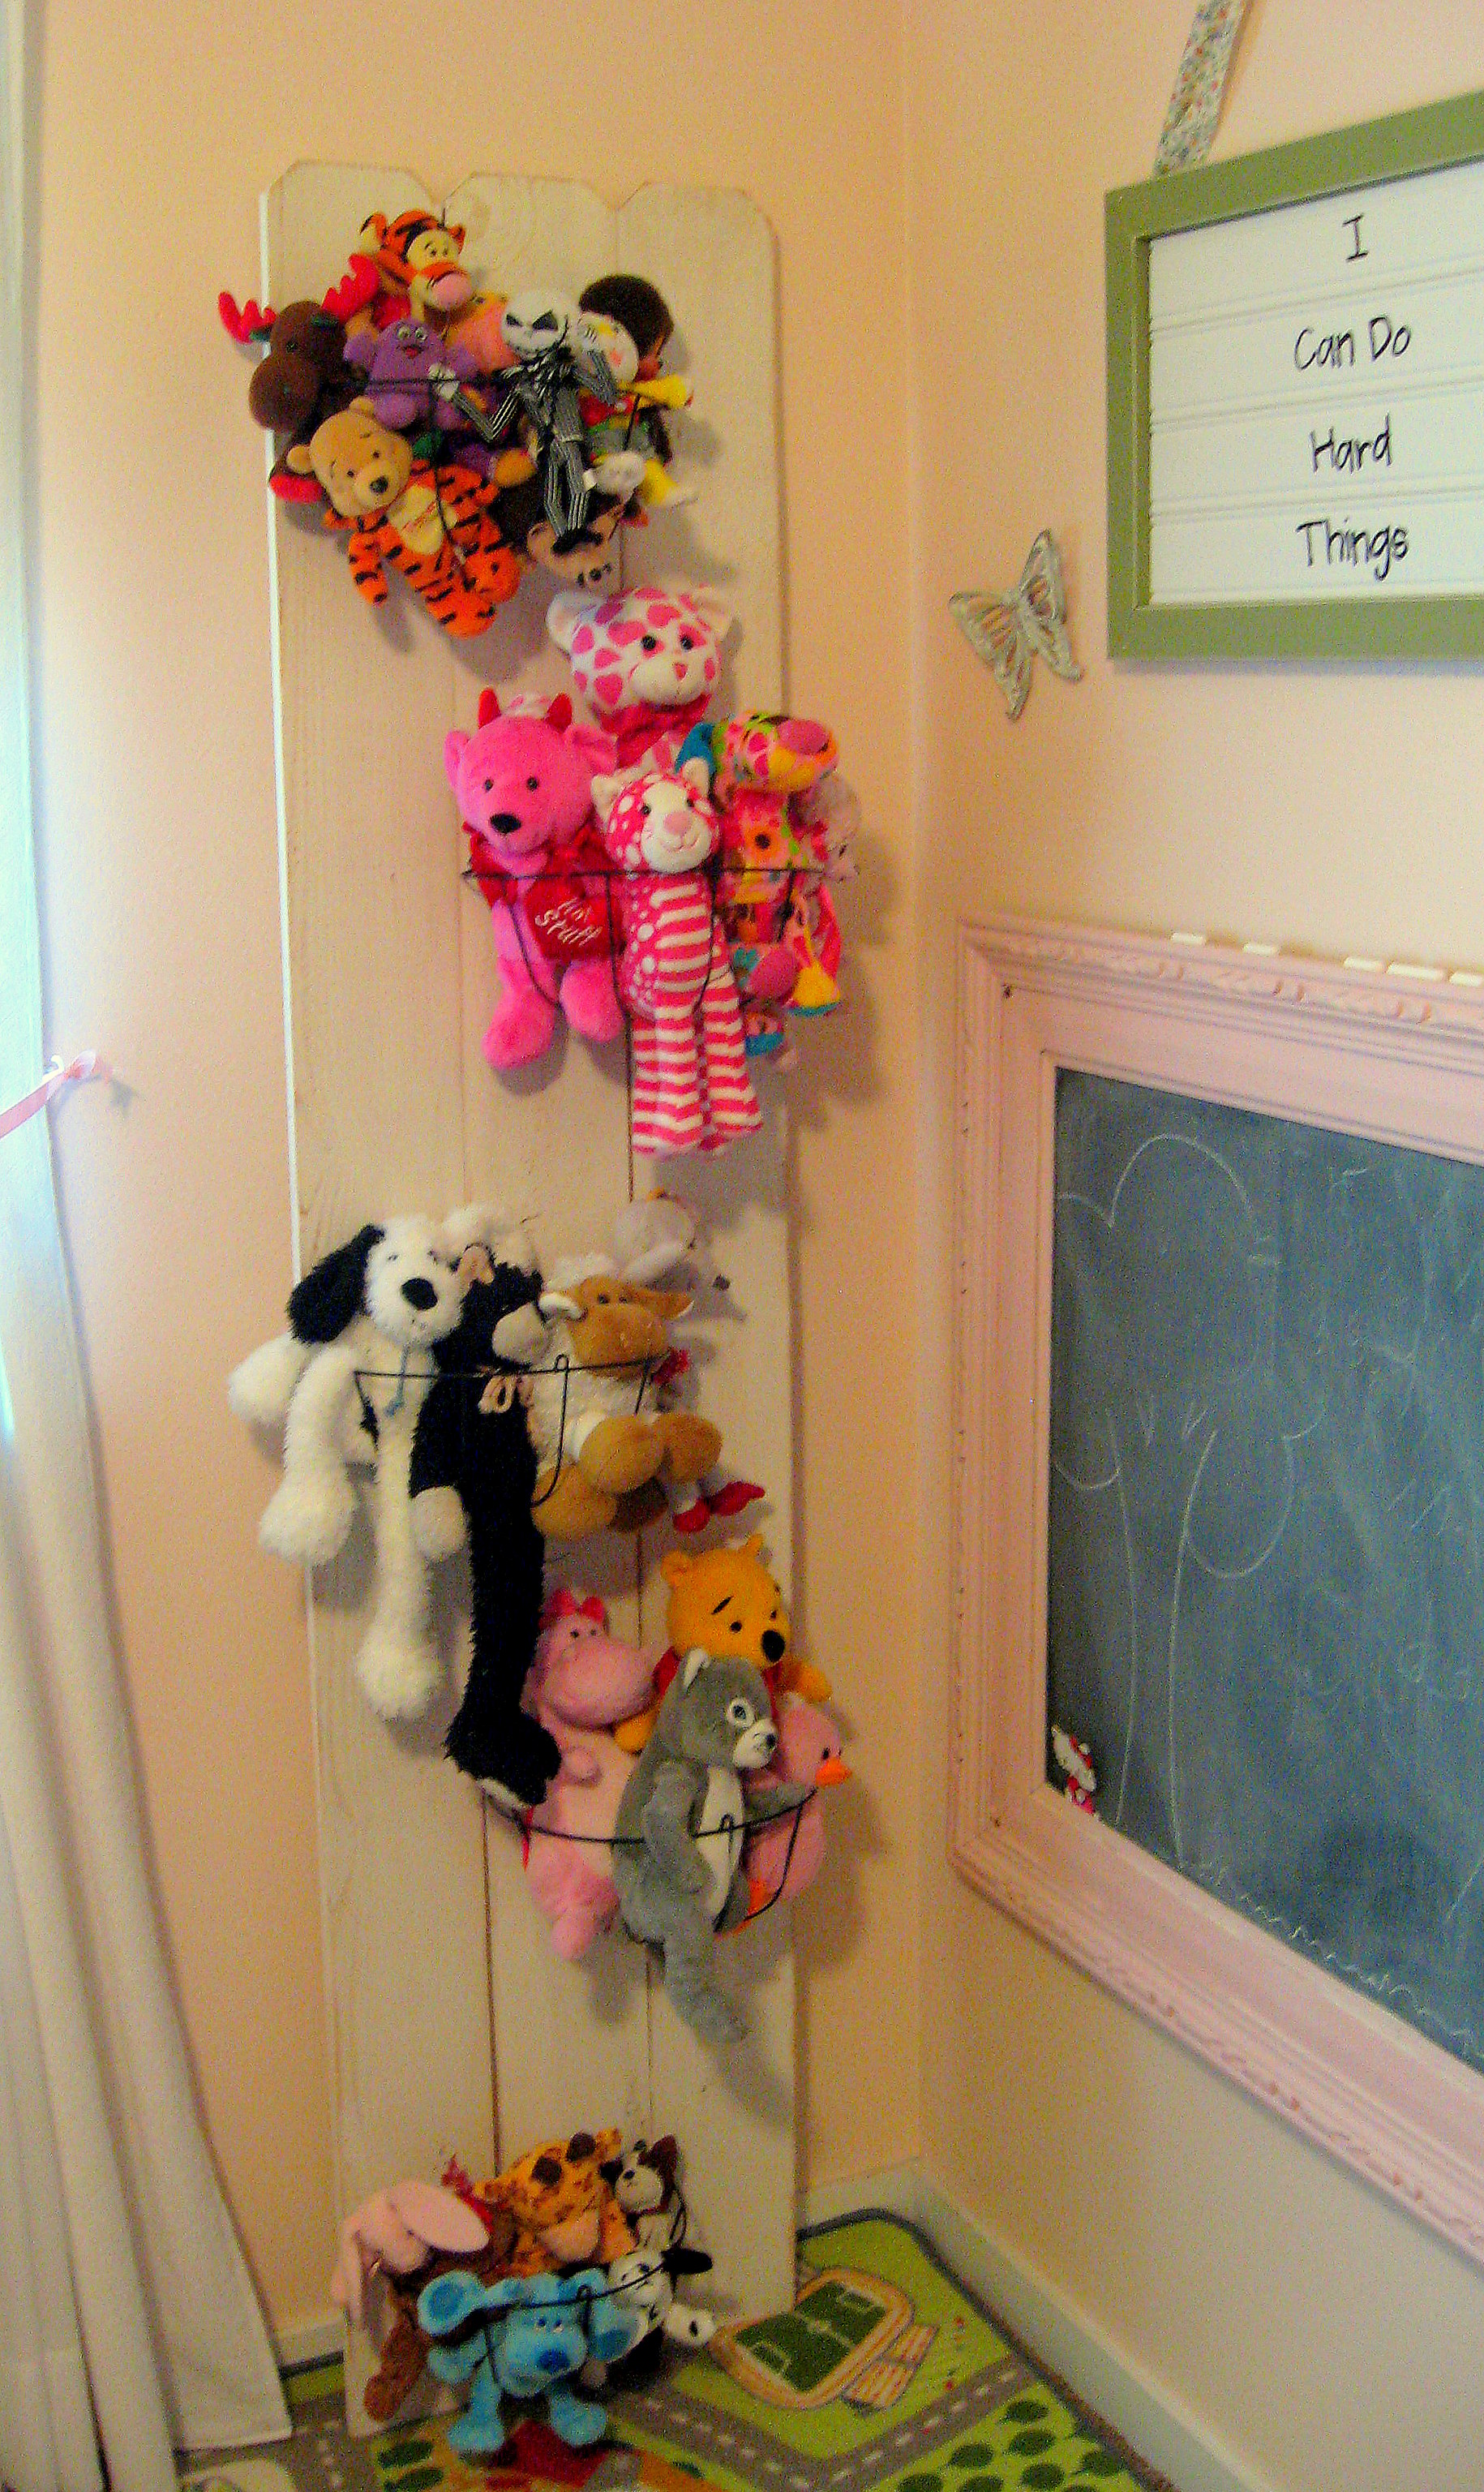
Here it is with all of the baskets attached:
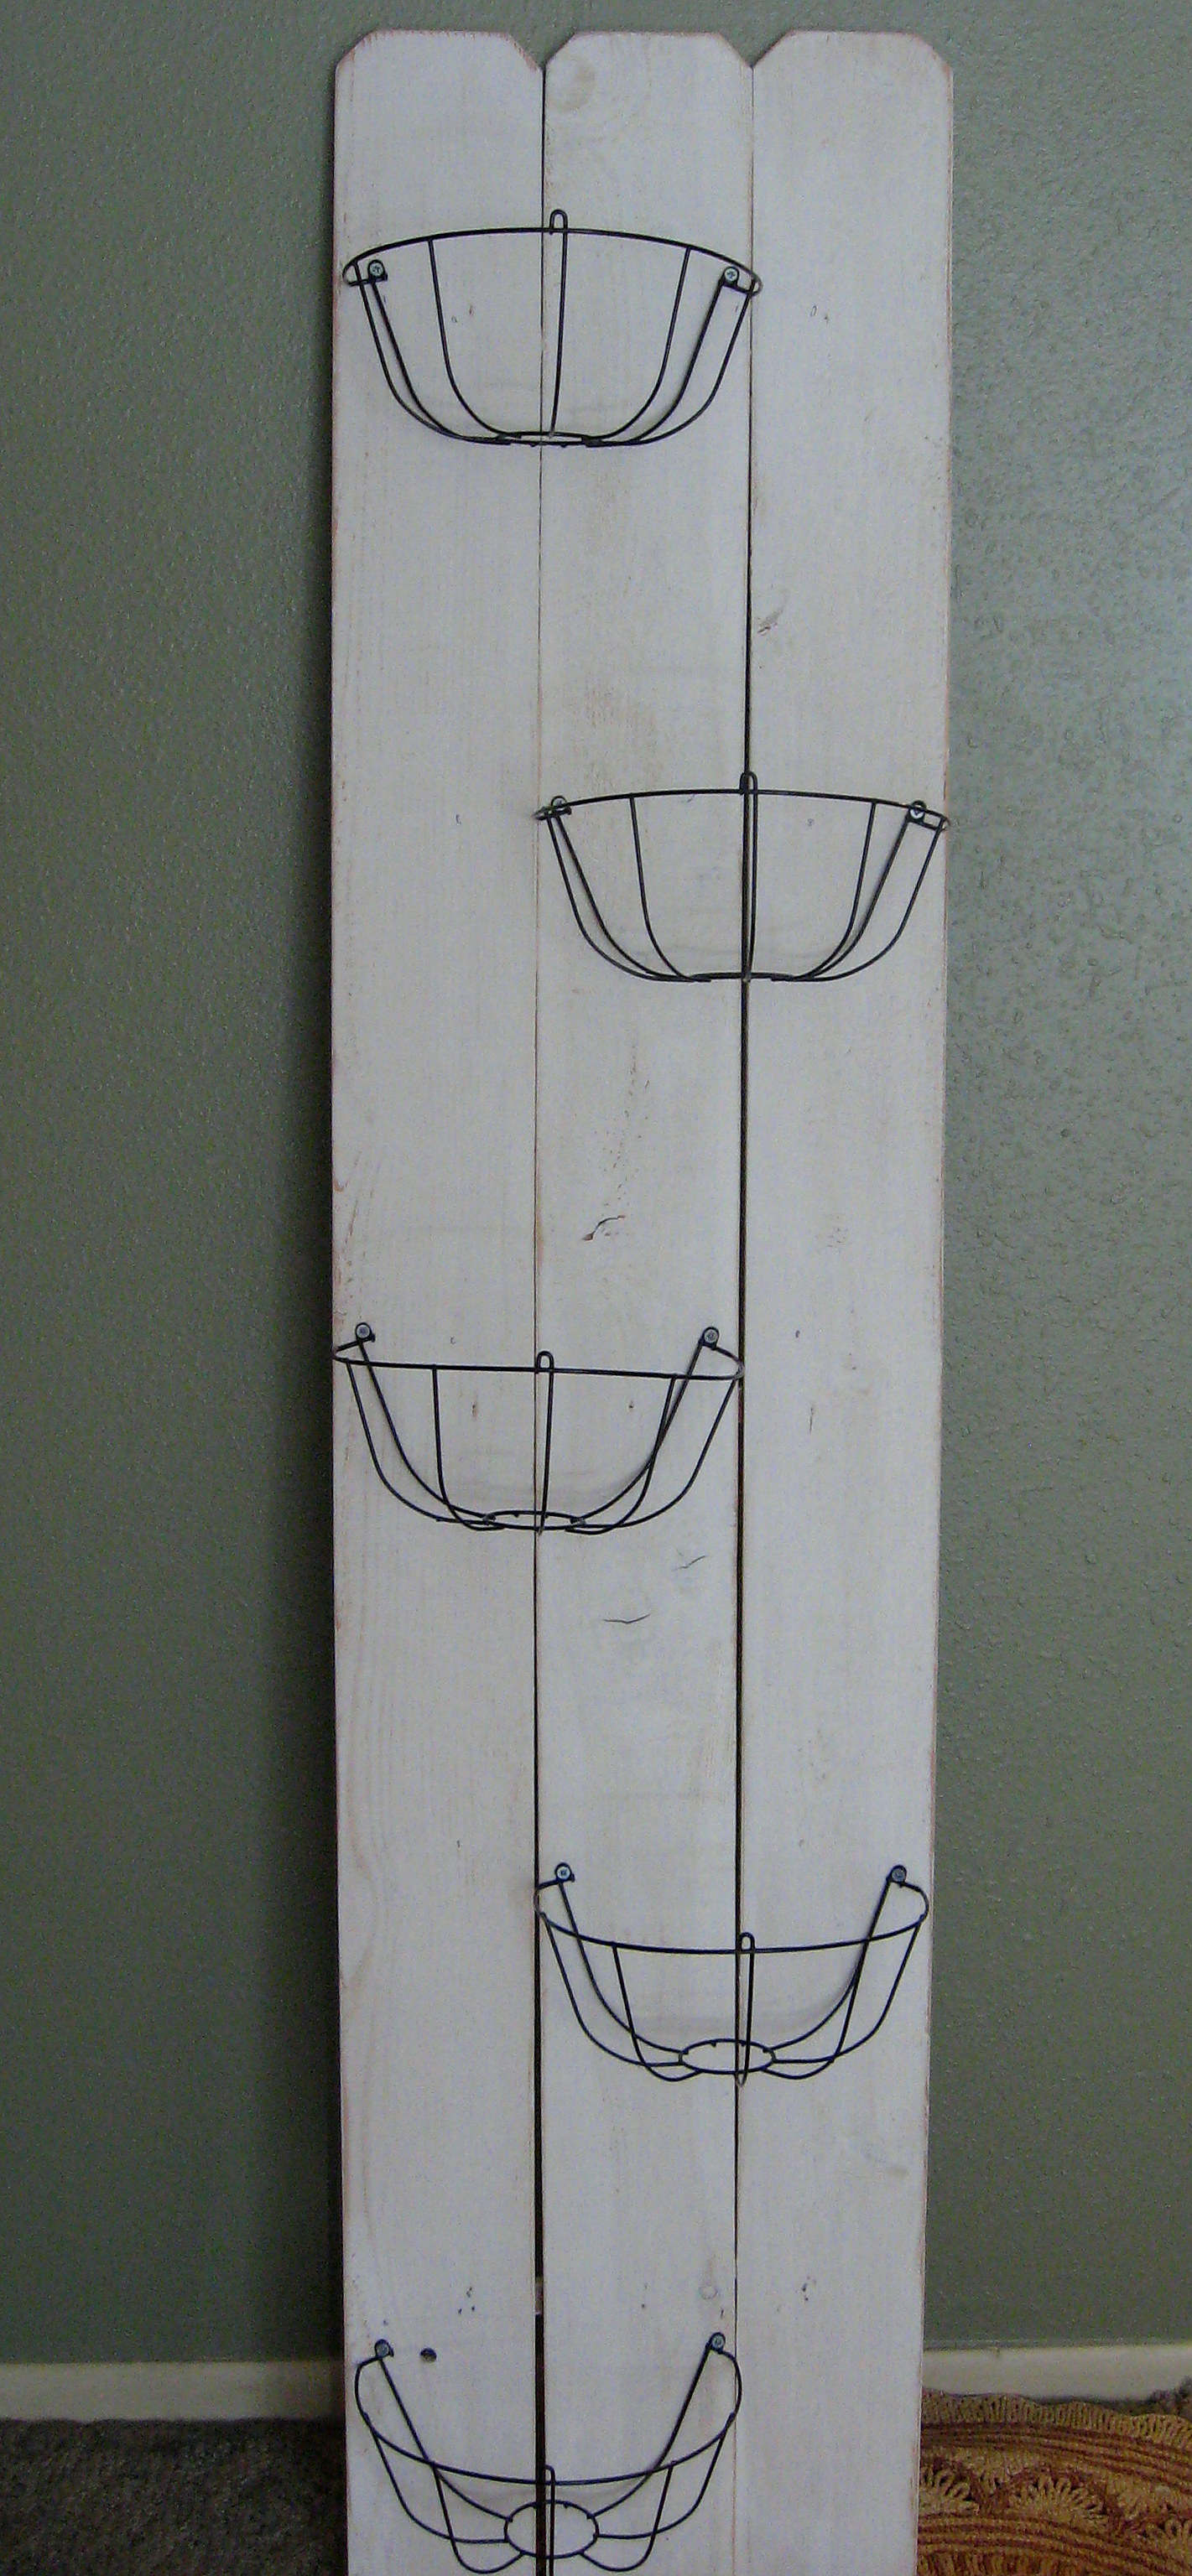
**NOTE – Once this is full of critters, it is very front heavy. My intention is to hang this on the wall as part of my daughters room redo this summer. In the pictures here it is just leaned against the wall. My daughter is old enough that I feel safe leaving it this way until her room is finished, but if your kids are small and you think they might pull this over on themselves, PLEASE attach it to the wall before you fill it!
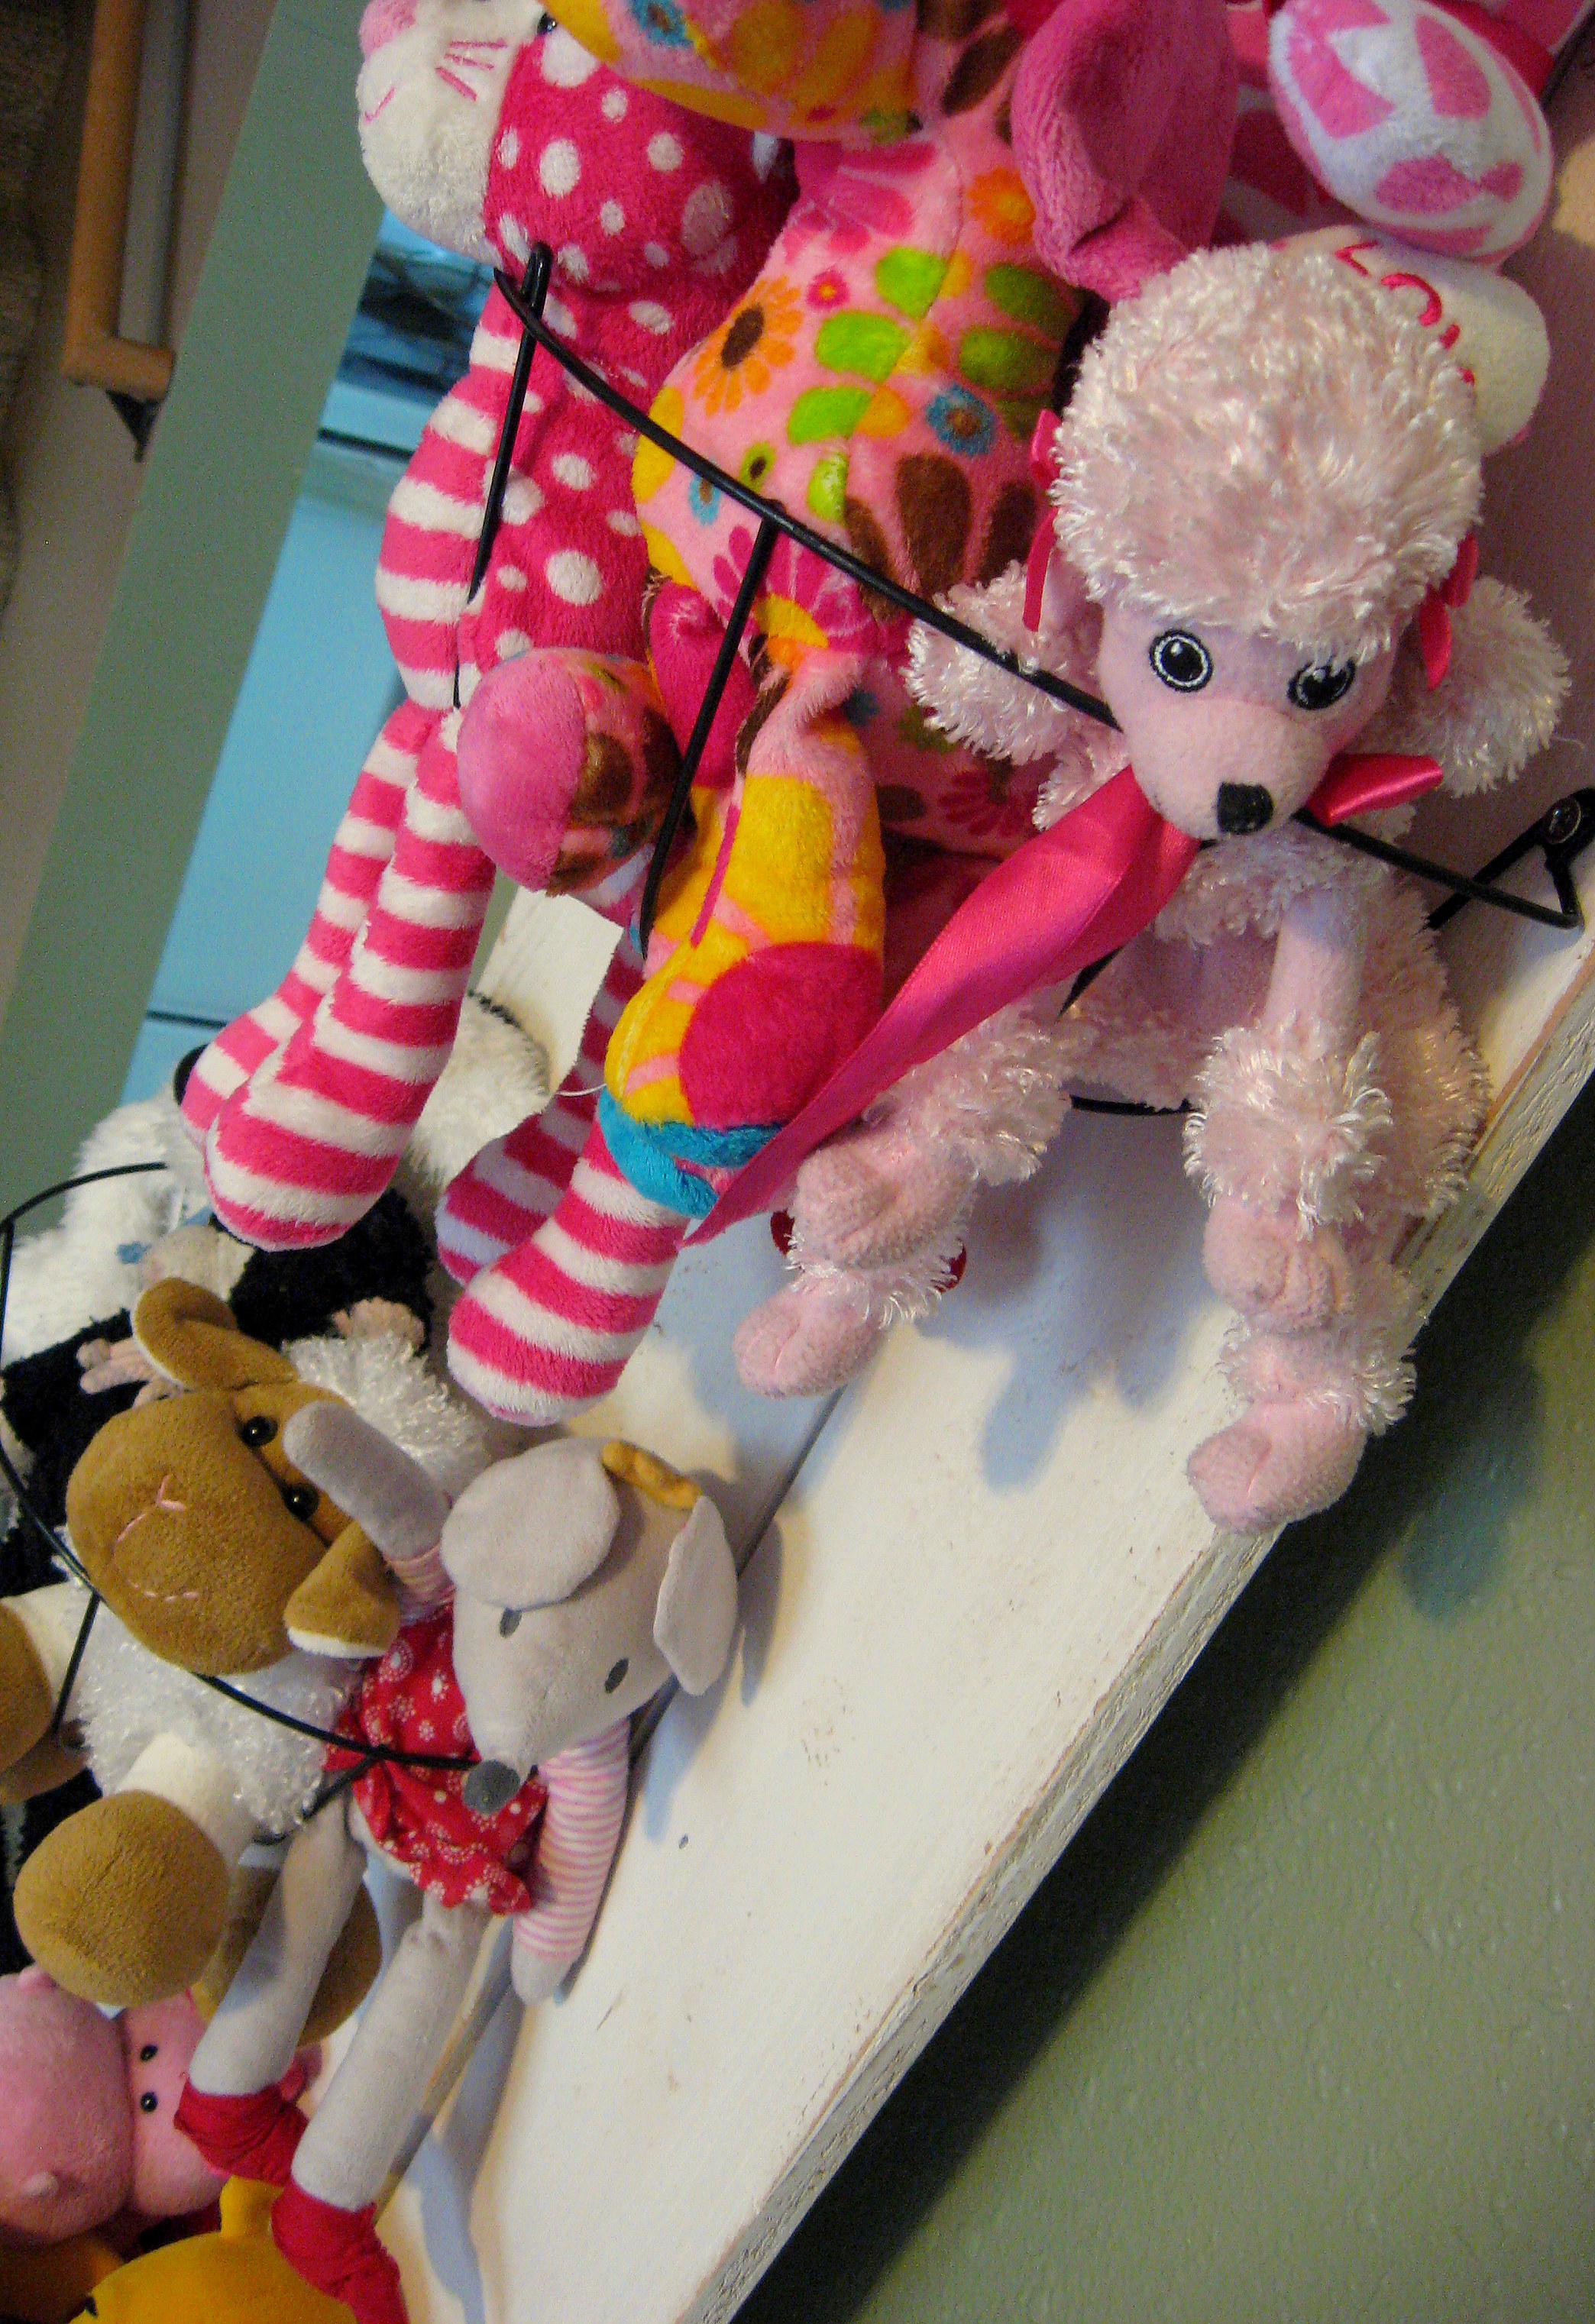
And here it is all filled with critters.
A PYP Best Blog! DIY Roman Shade!
Just in case you missed this article on making a DIY roman shade the first time we shared it a couple of years ago, we are republishing it. After Sharon wrote this blog originally, we got an awesome response. This is one of the PYP Best Blogs!
Summer wreaks havoc on my daughter’s sleep schedule; it is light when I put her to bed and the light in the morning gets her up much earlier than I want to join her! I purchased a black out shade a few summers ago from Ikea for my own bedroom and it works great – totally where I recommend buying them if you don’t want to go the DIY route – but since our Ikea is quite a drive, I just bought a $20 shade from Kmart for my daughter’s room. And it broke in a week. She does have blinds, but they just don’t block out enough light. I decided to use the broken black out shade and some decorative fabric to make my own Roman Shade.
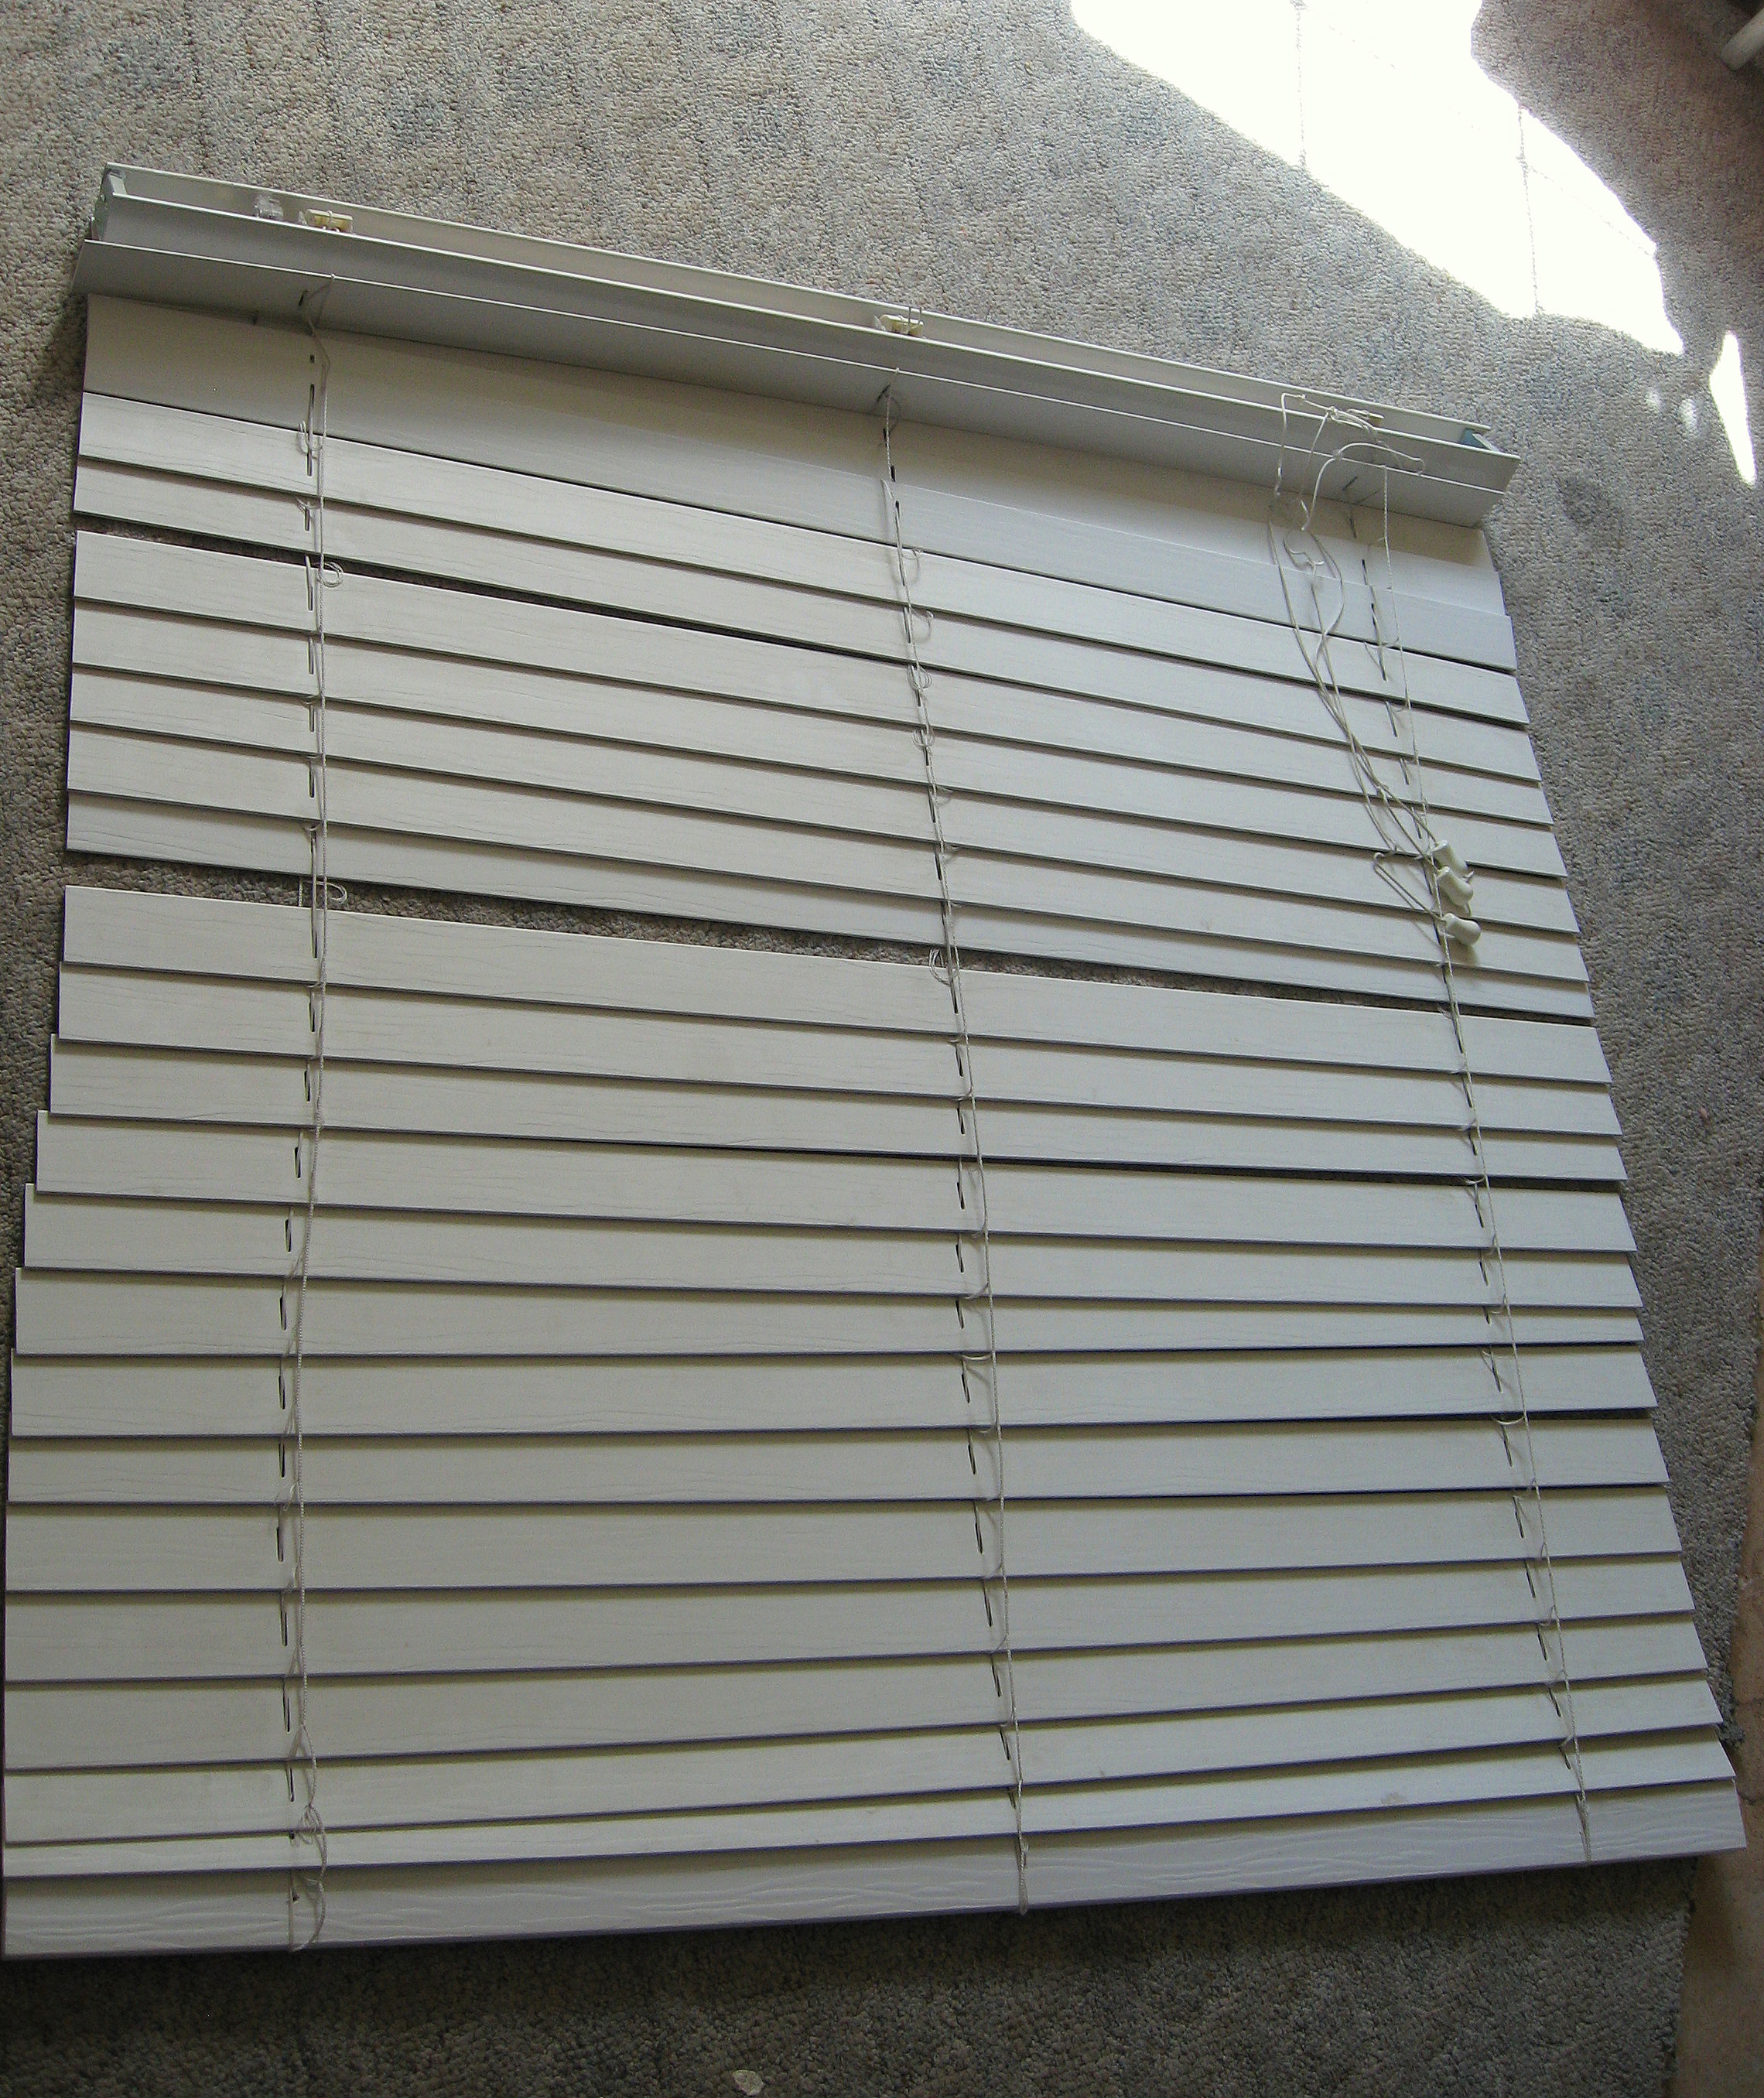
I used these blinds because that is what I had already, but you can follow these same instructions if you have the cheap mini-blinds. OR, if you are starting from scratch, mini blinds are super cheap at Walmart.
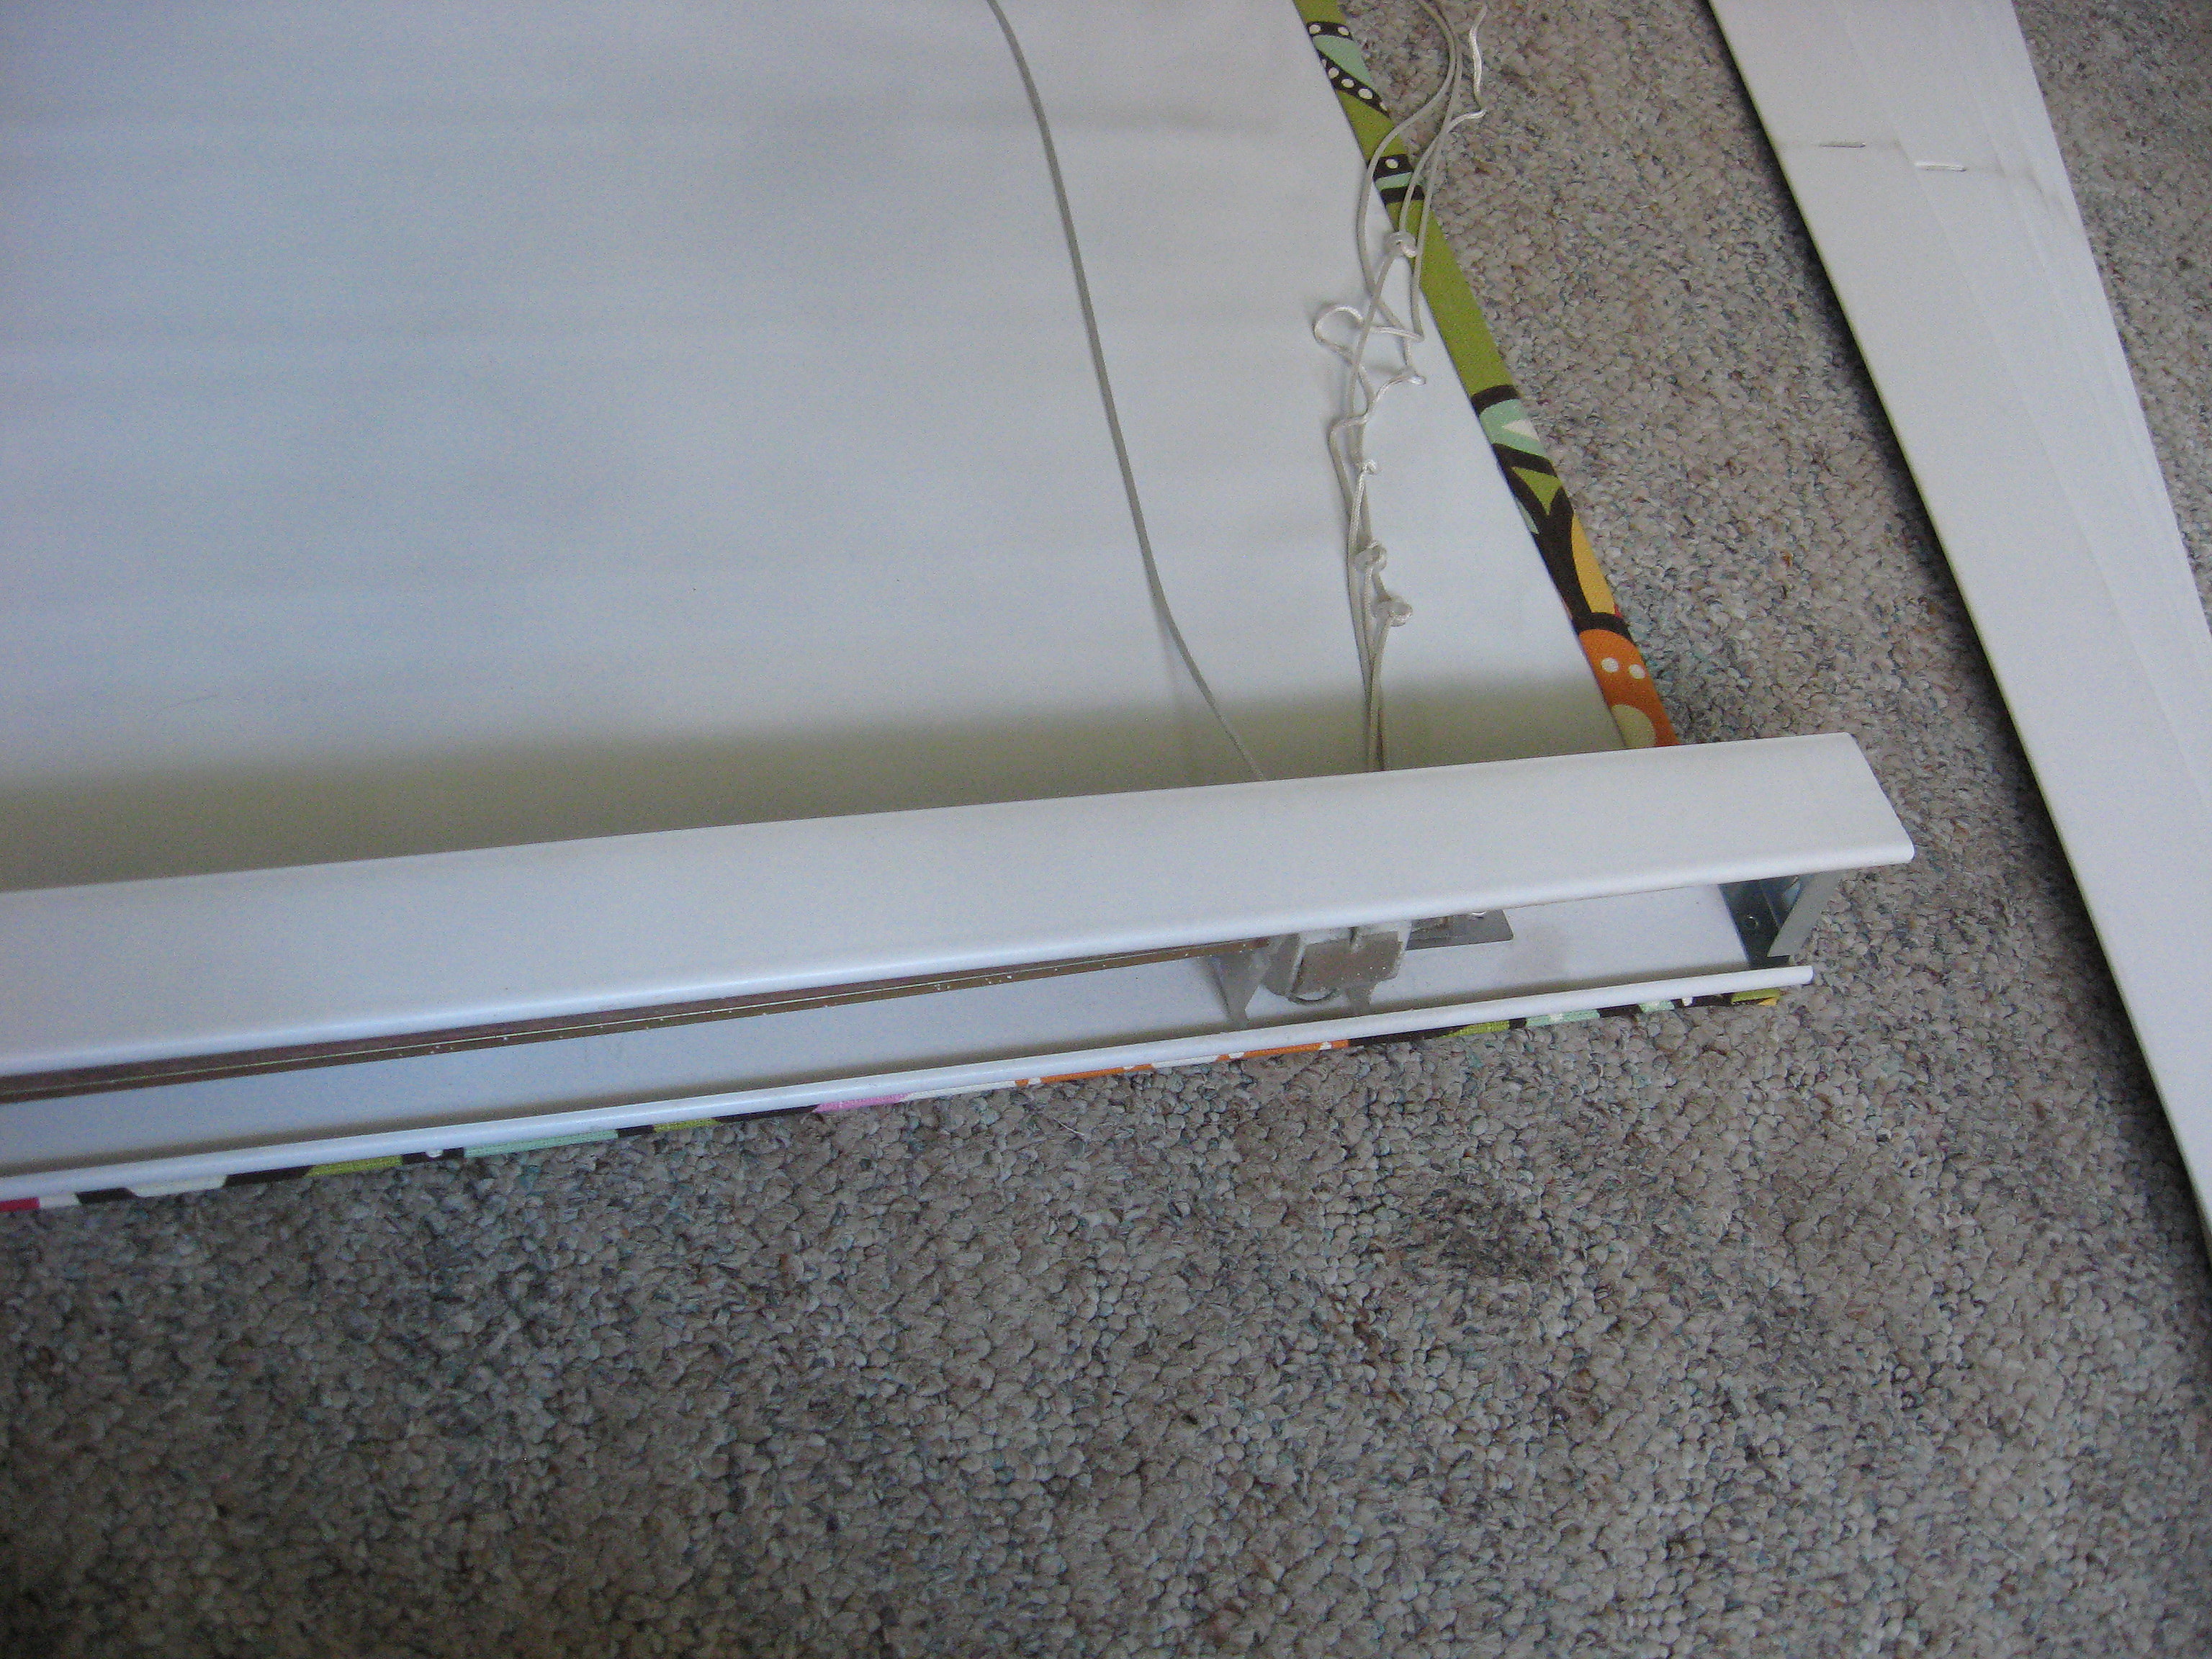
Take the blind, open them all the way and lay them out on the floor.
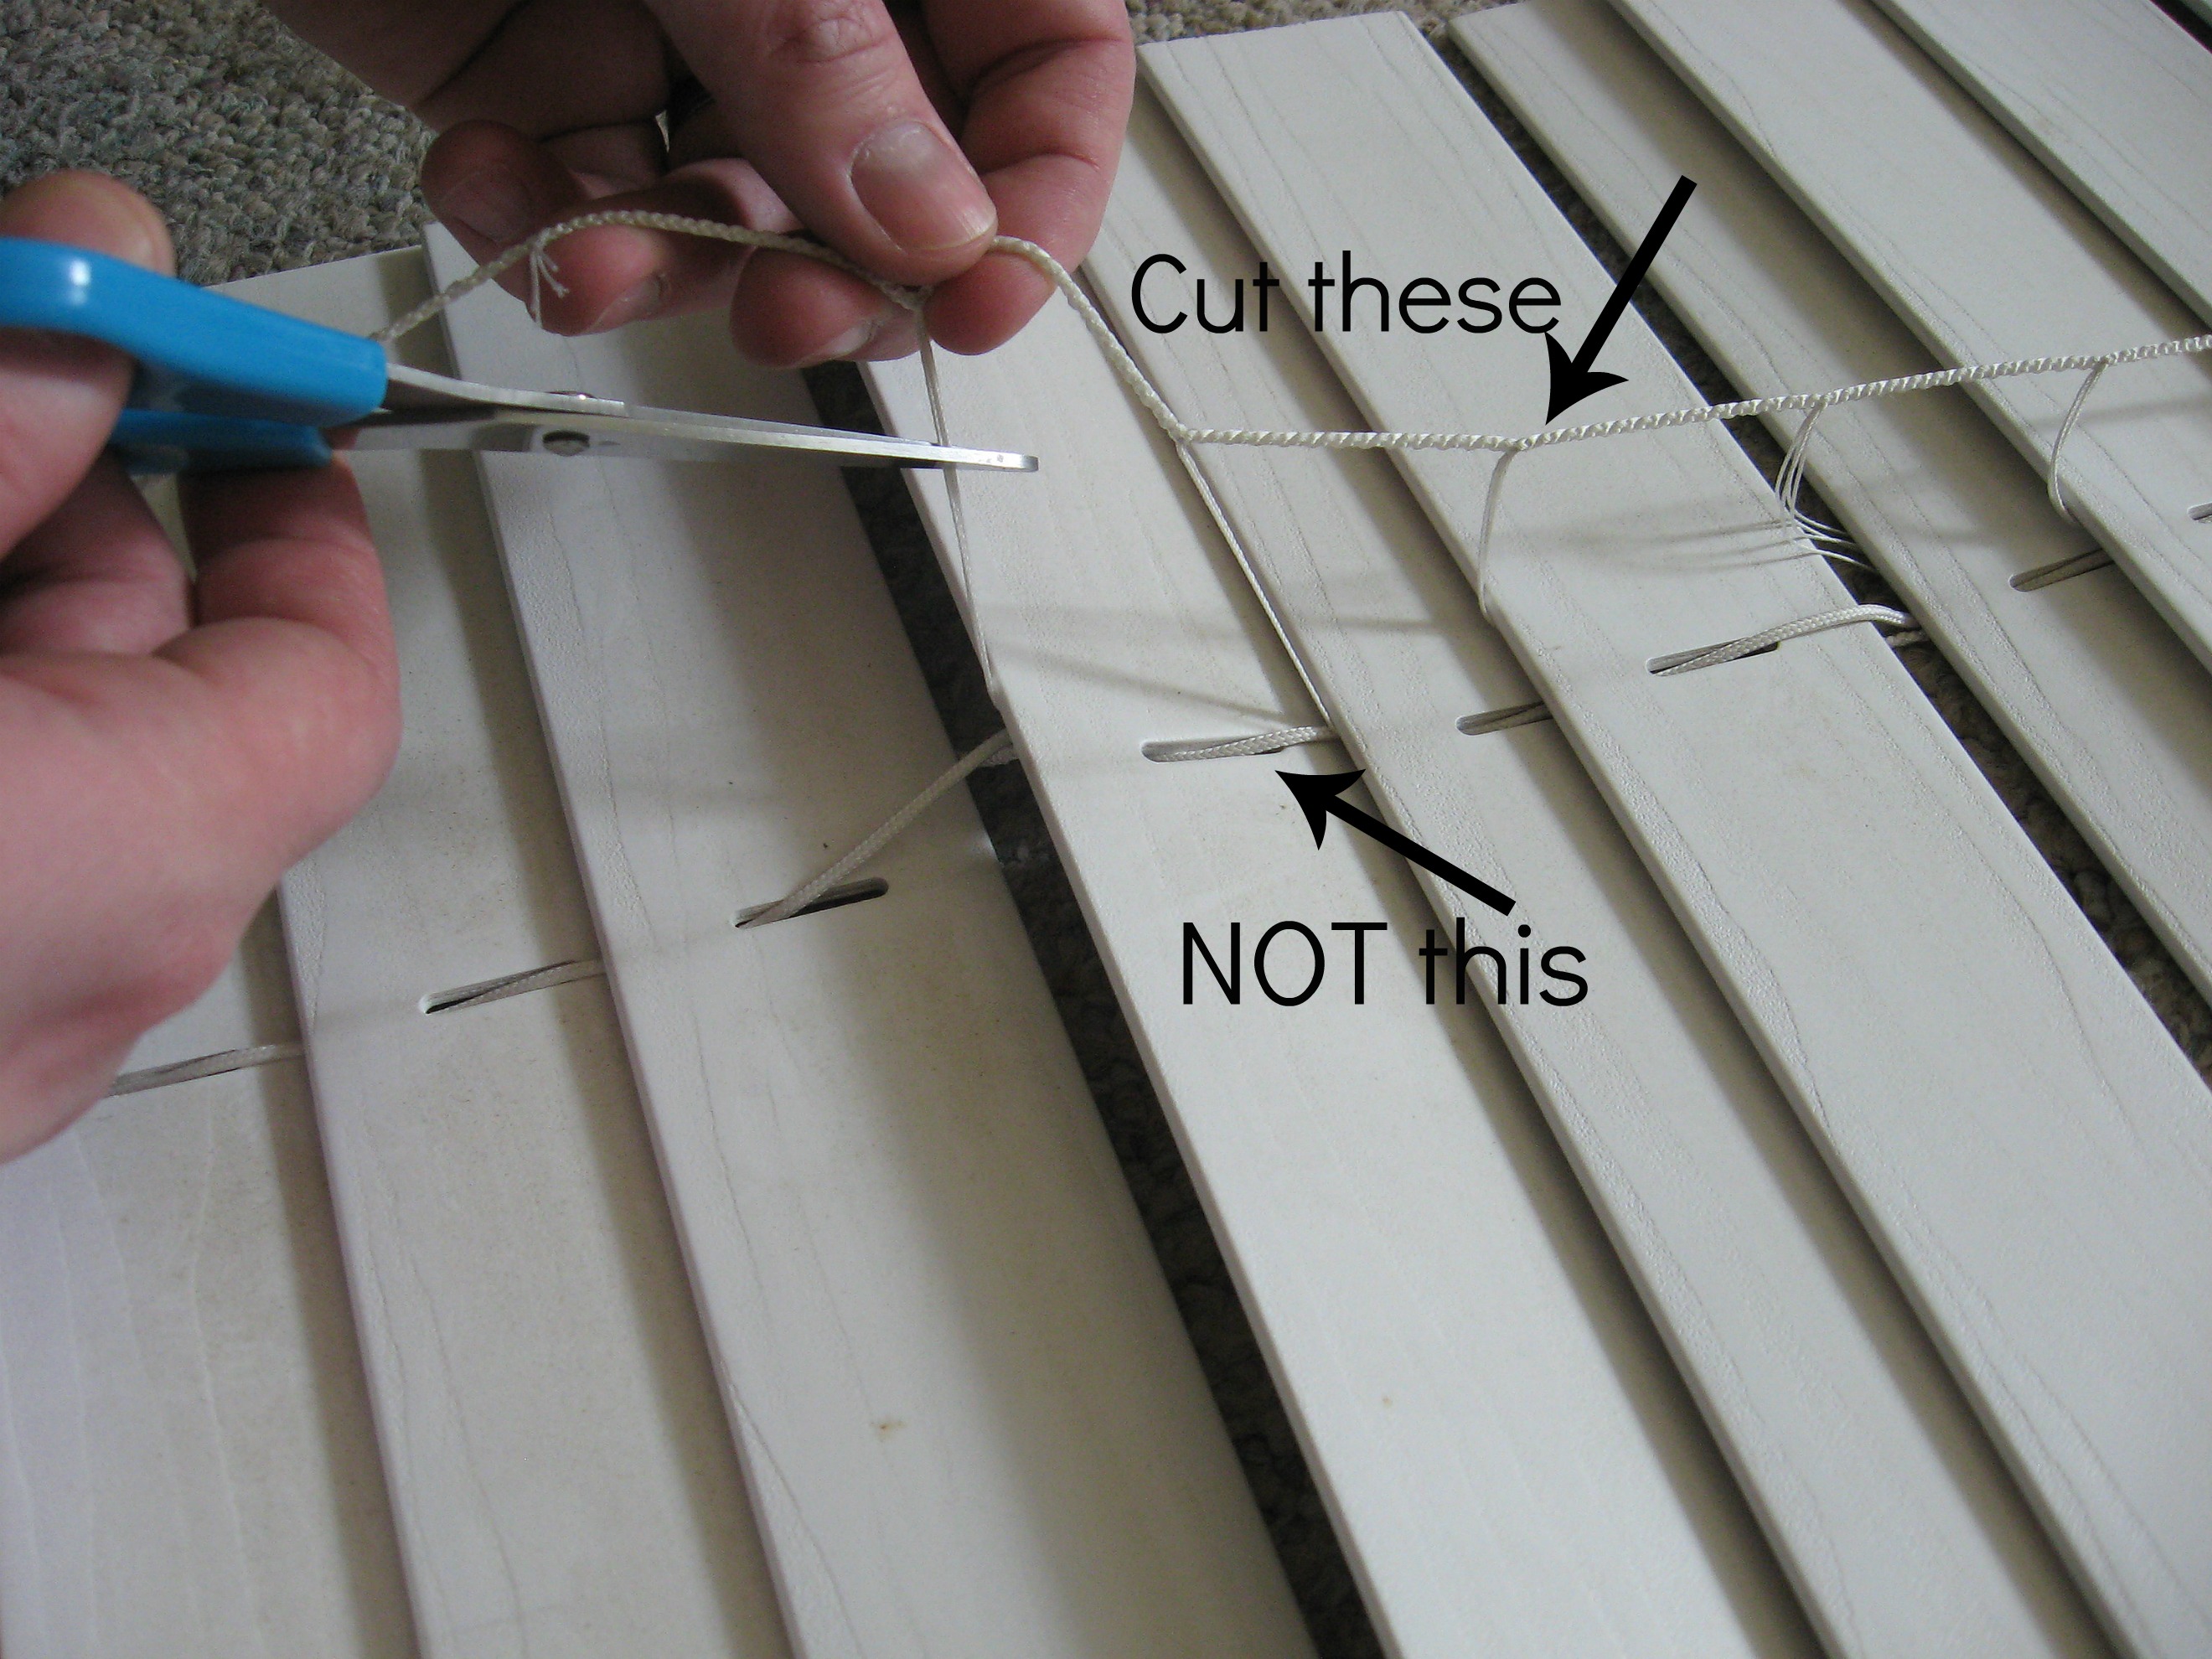
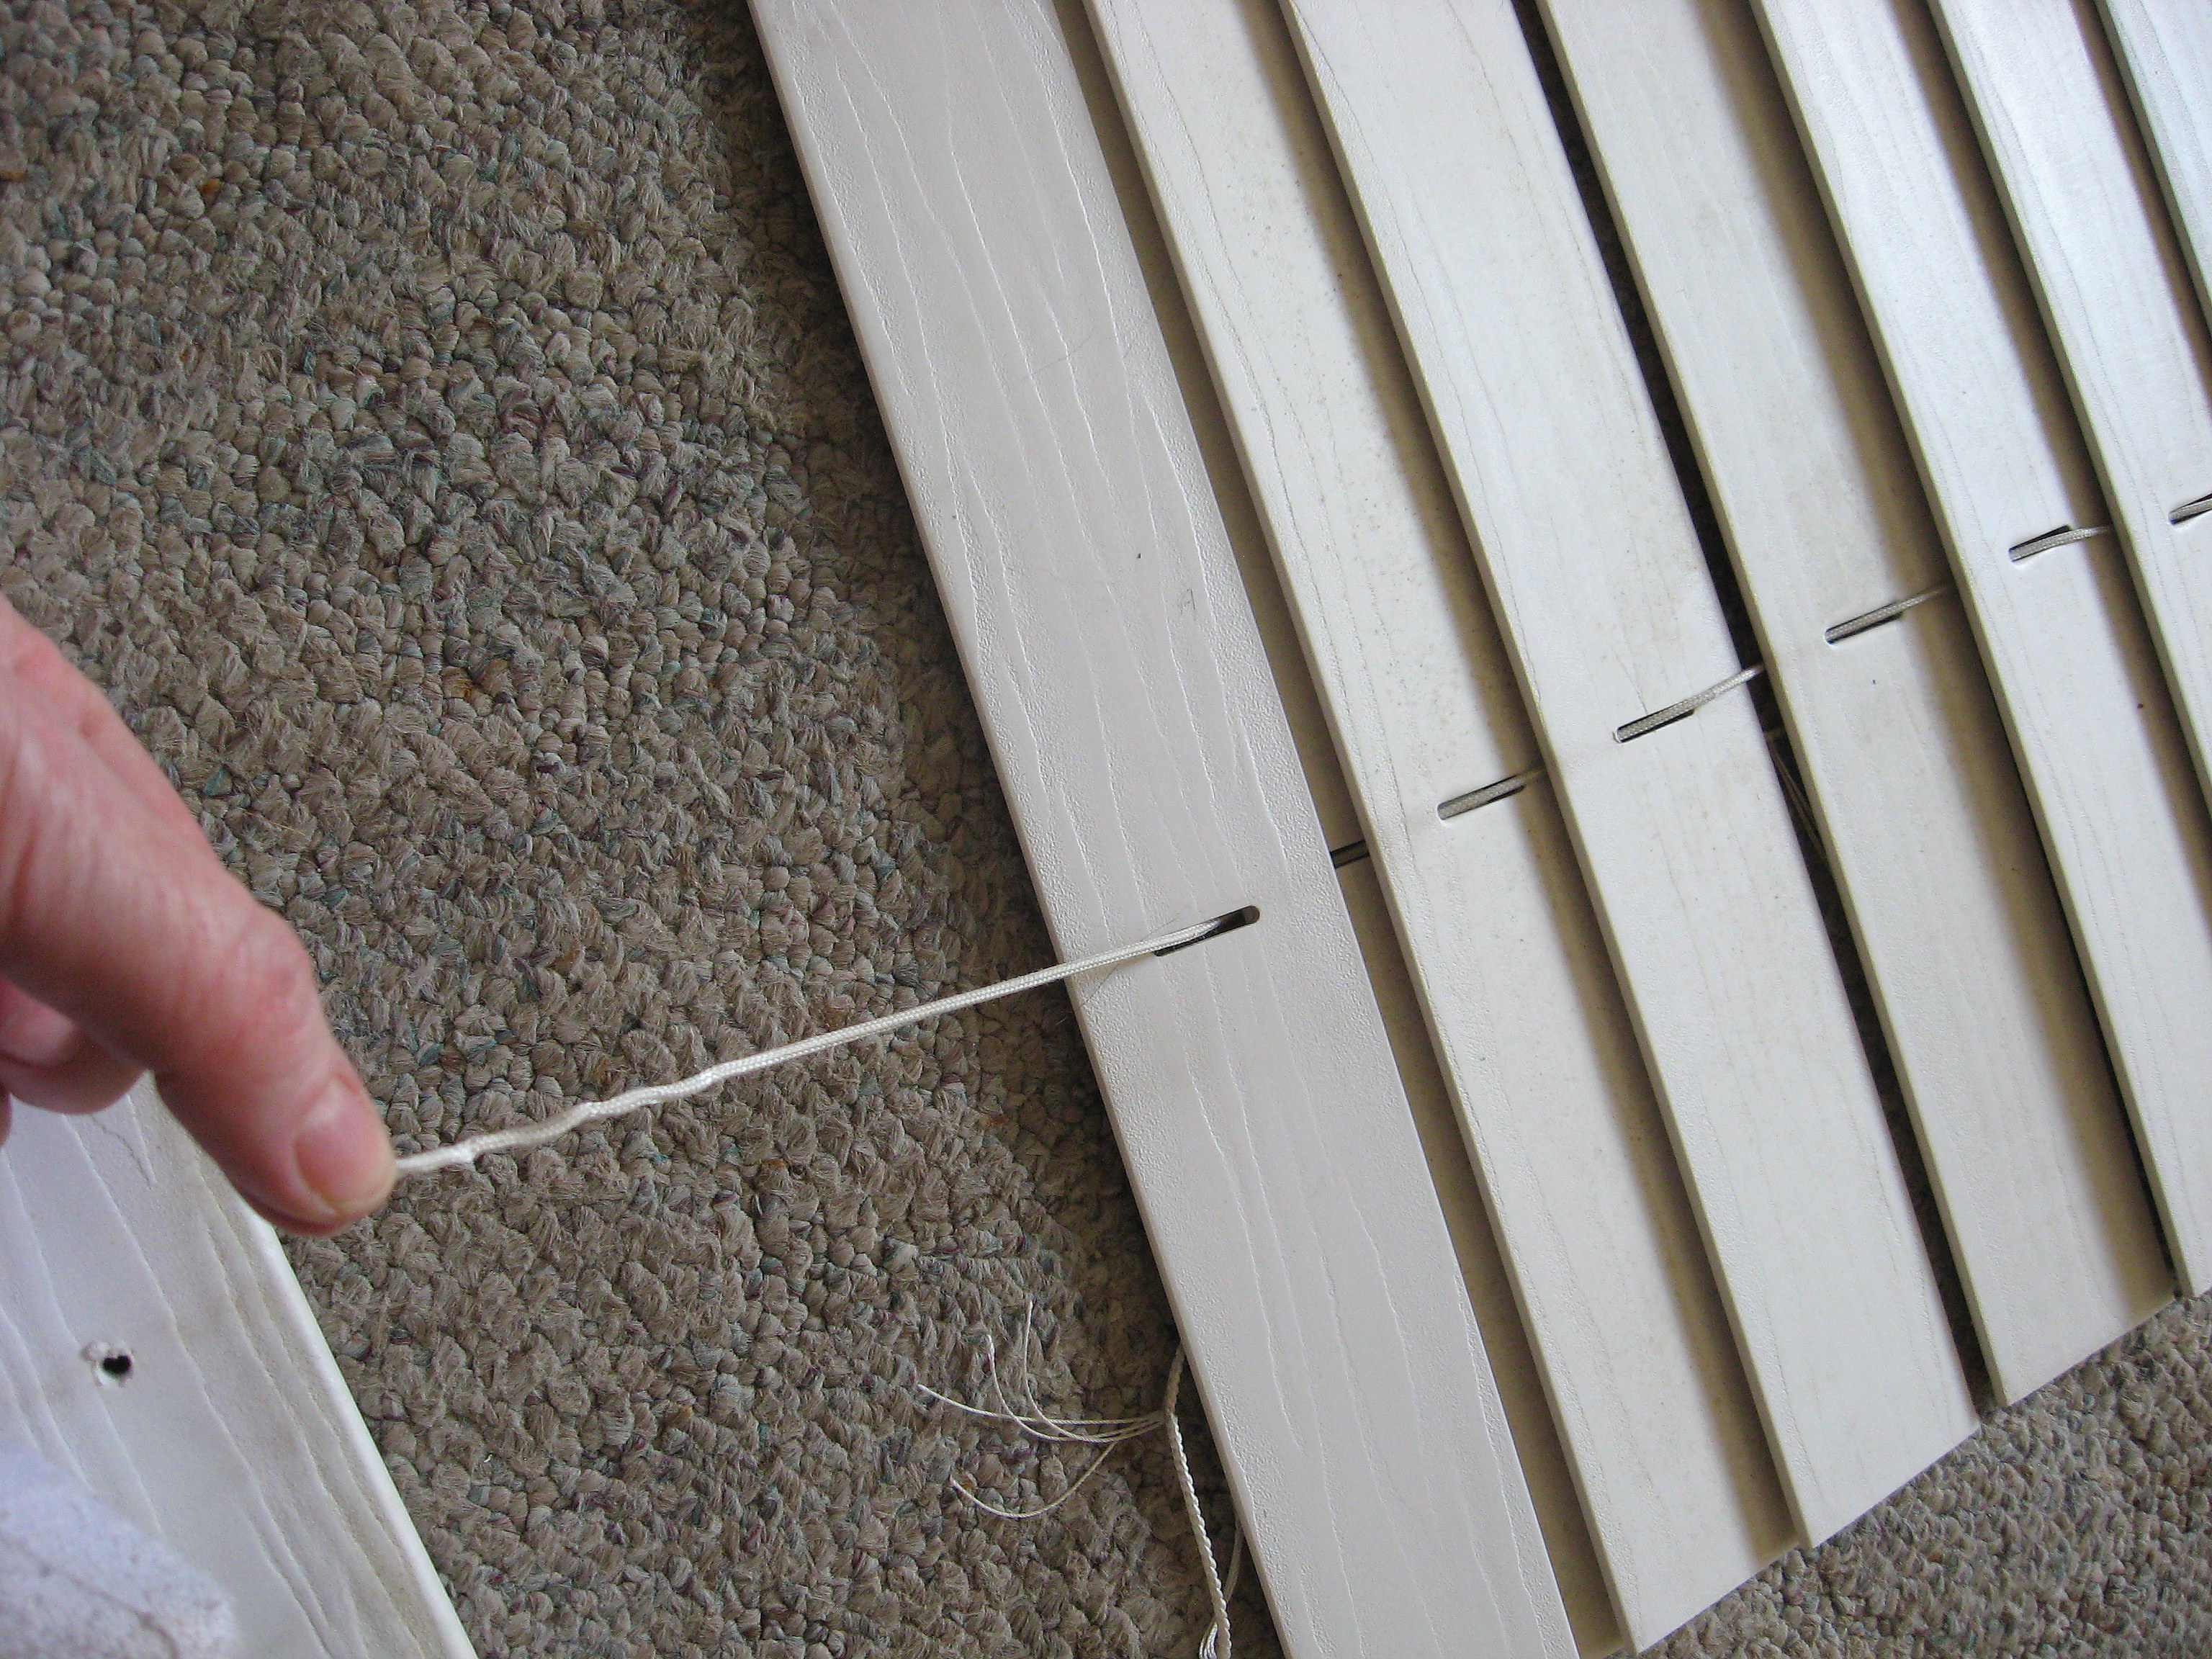
You will cut the thin strings that hold the slats in place – the ones that look like a ladder. DO NOT cut the heavier string that runs up through the holes in the slats – that’s the string that makes the shade go up and down.
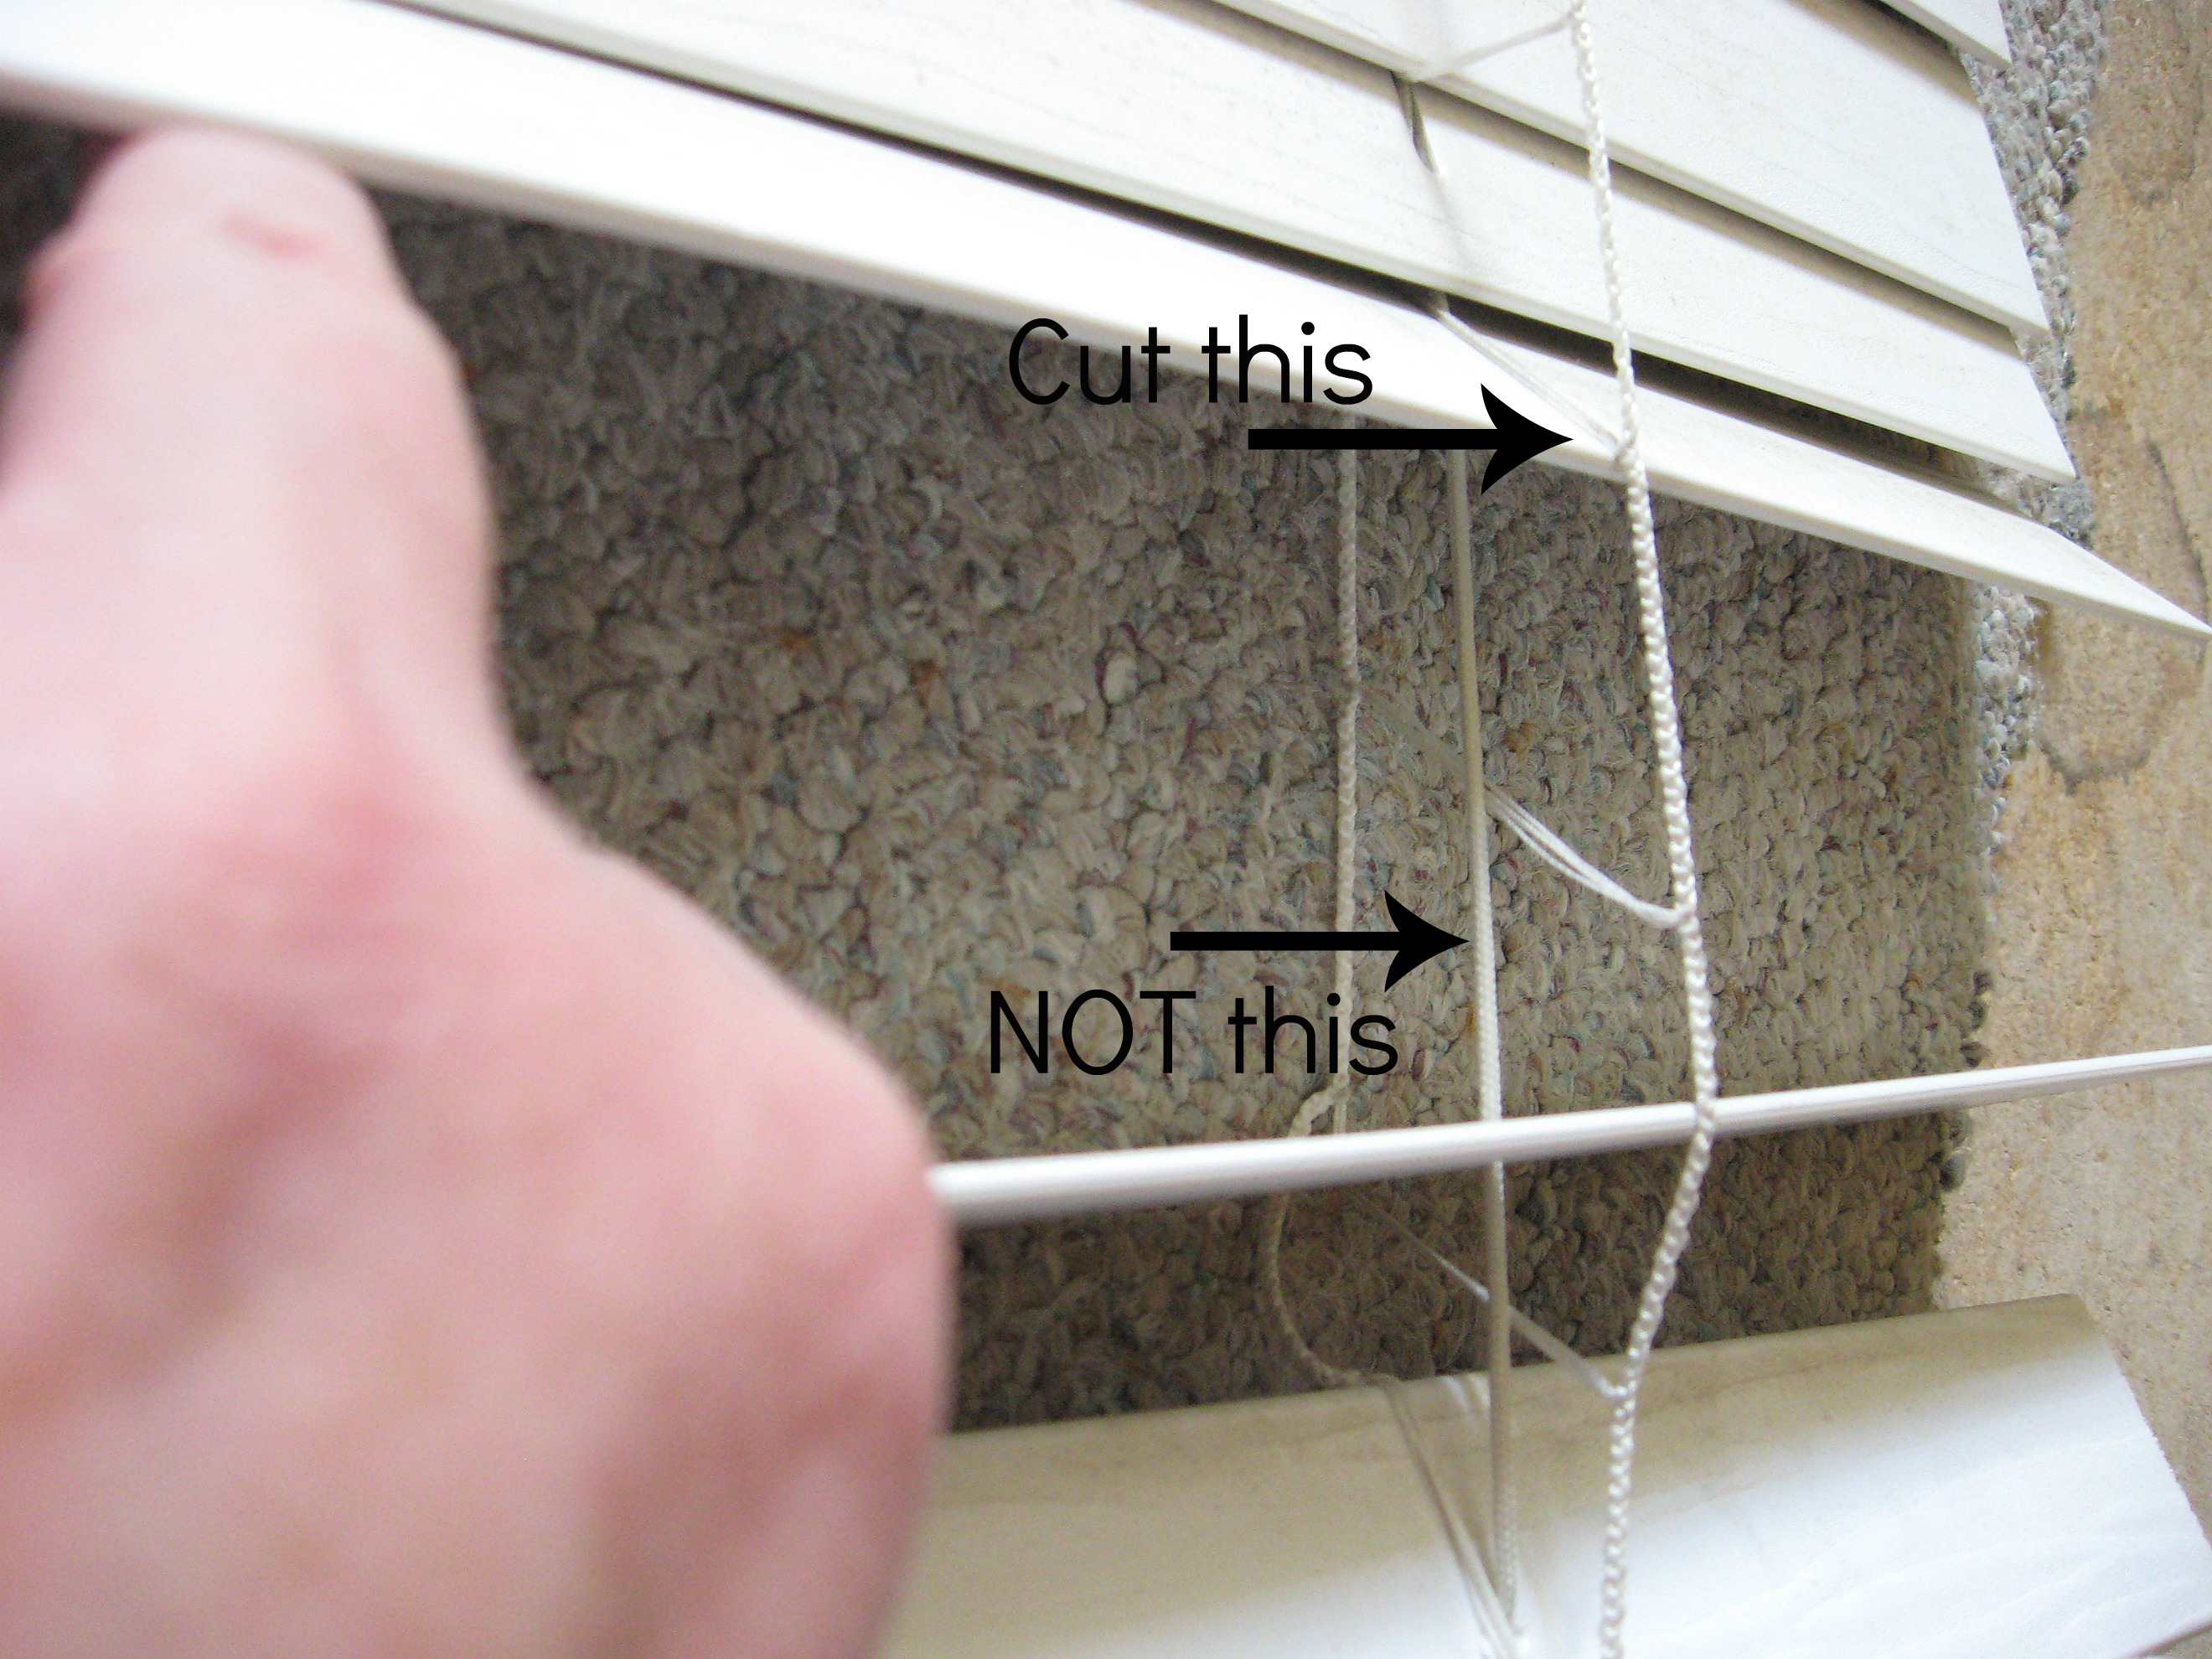
Cut them all the way, top to bottom.
Now remove the little plastic plug at the bottom to reveal the knotty mess of strings there. Pull all the strings out – the knots in the thin strings that you just cut can just be cut away. Carefully untie the other string – the thicker one.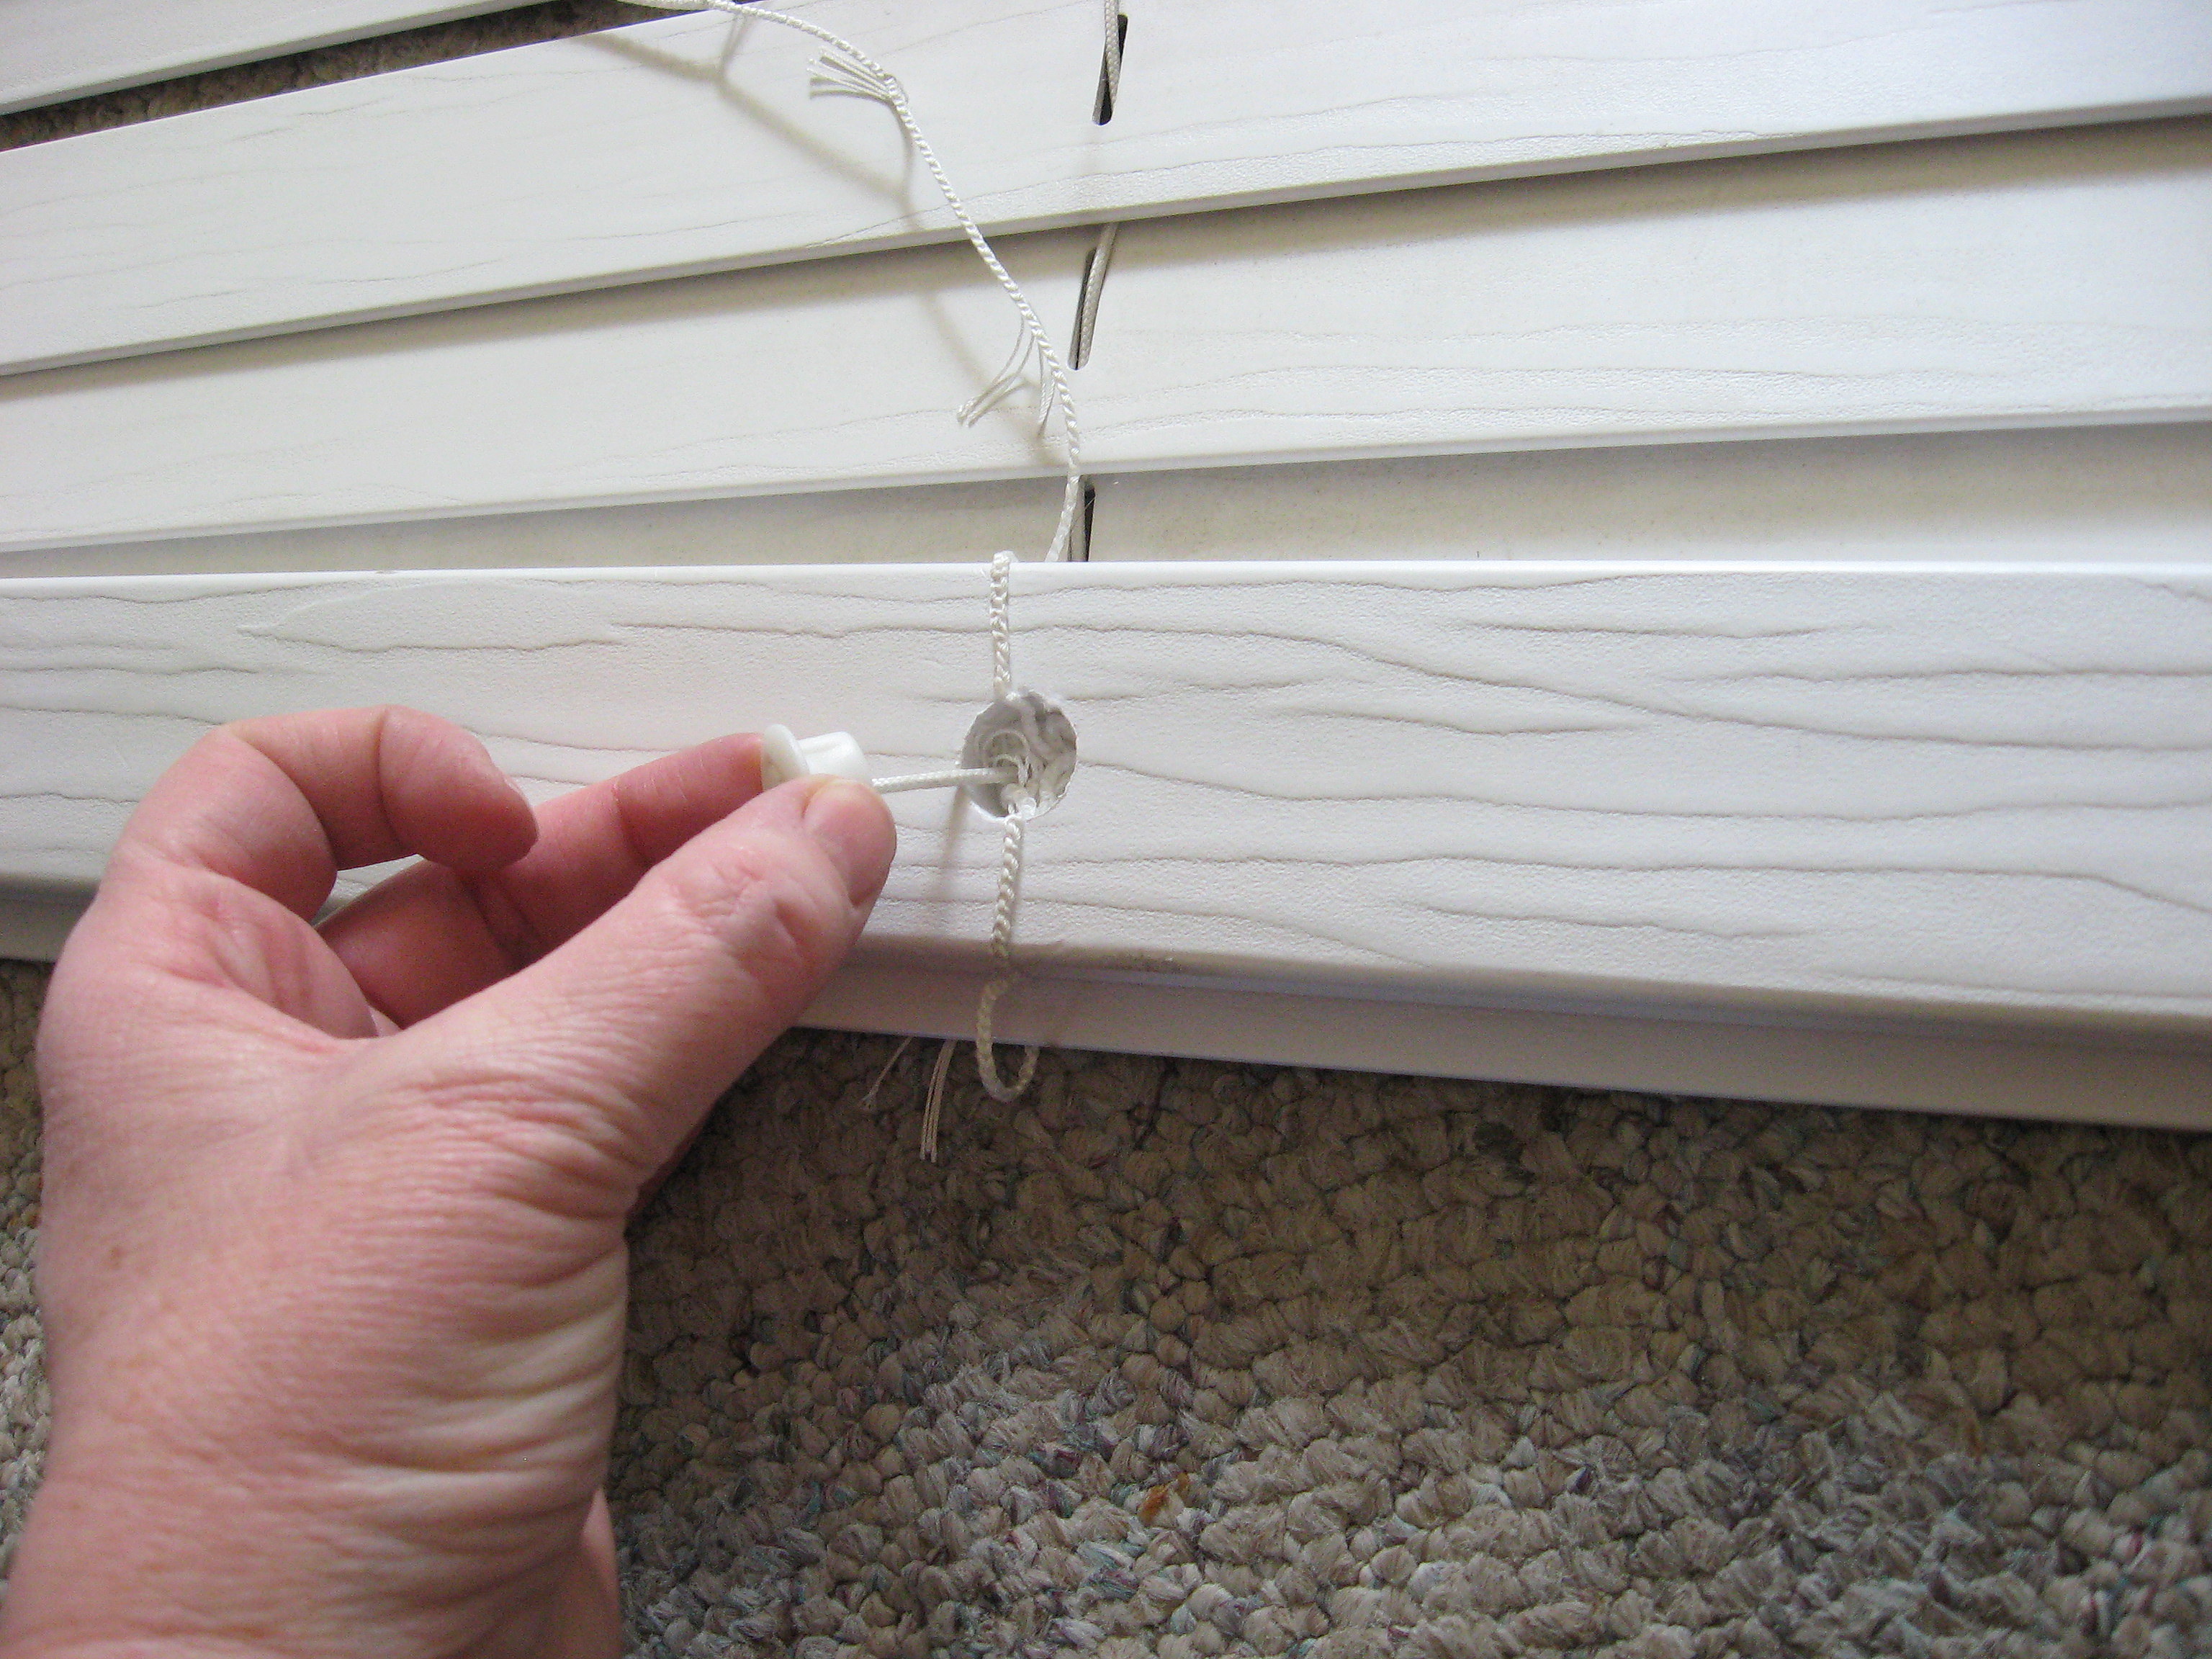
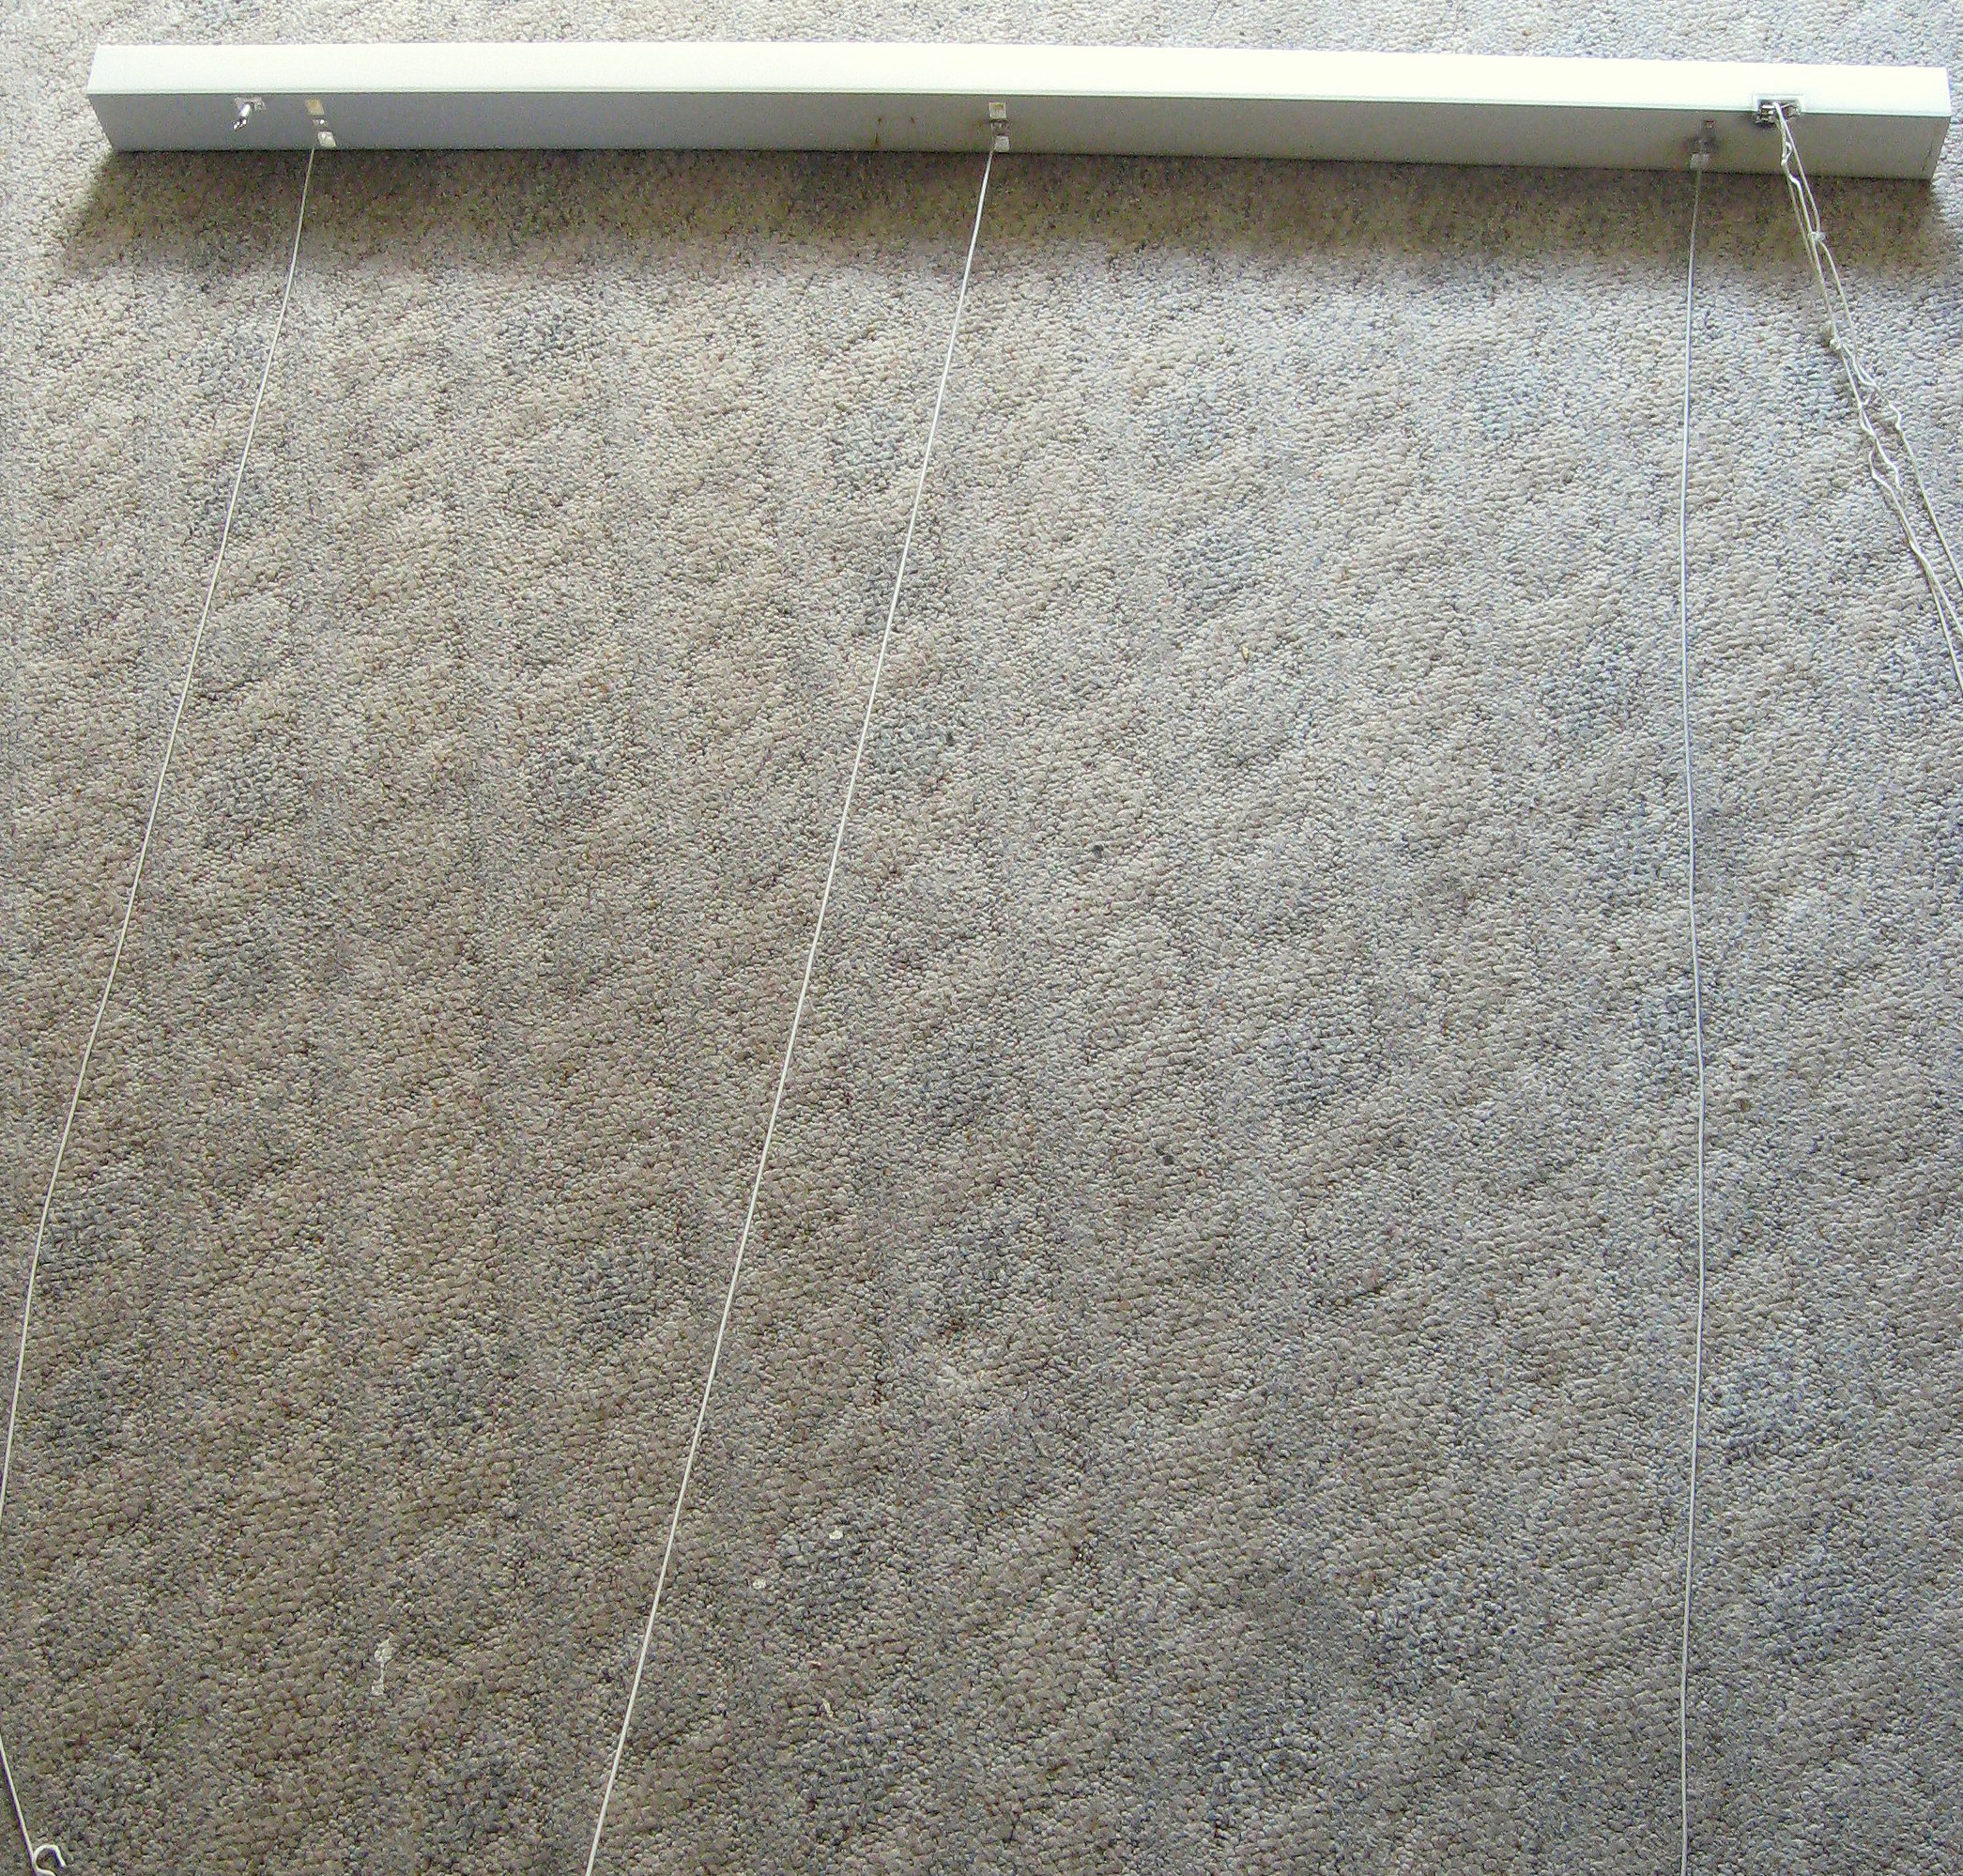
Now take that bottom board off and you will be left with the slats on the thicker string.
Remove all the slats and it will leave you with this:
Set this aside and prep the fabric.
I am using a piece of fabric and the plastic from the broken shade. You can buy black out fabric, or you can use just the decorative fabric if your shade is more decorative than for light control.
First, you will cut the black out fabric -if you’re using it- to size for your window. Then cut the decorative fabric to size plus one inch on all sides.
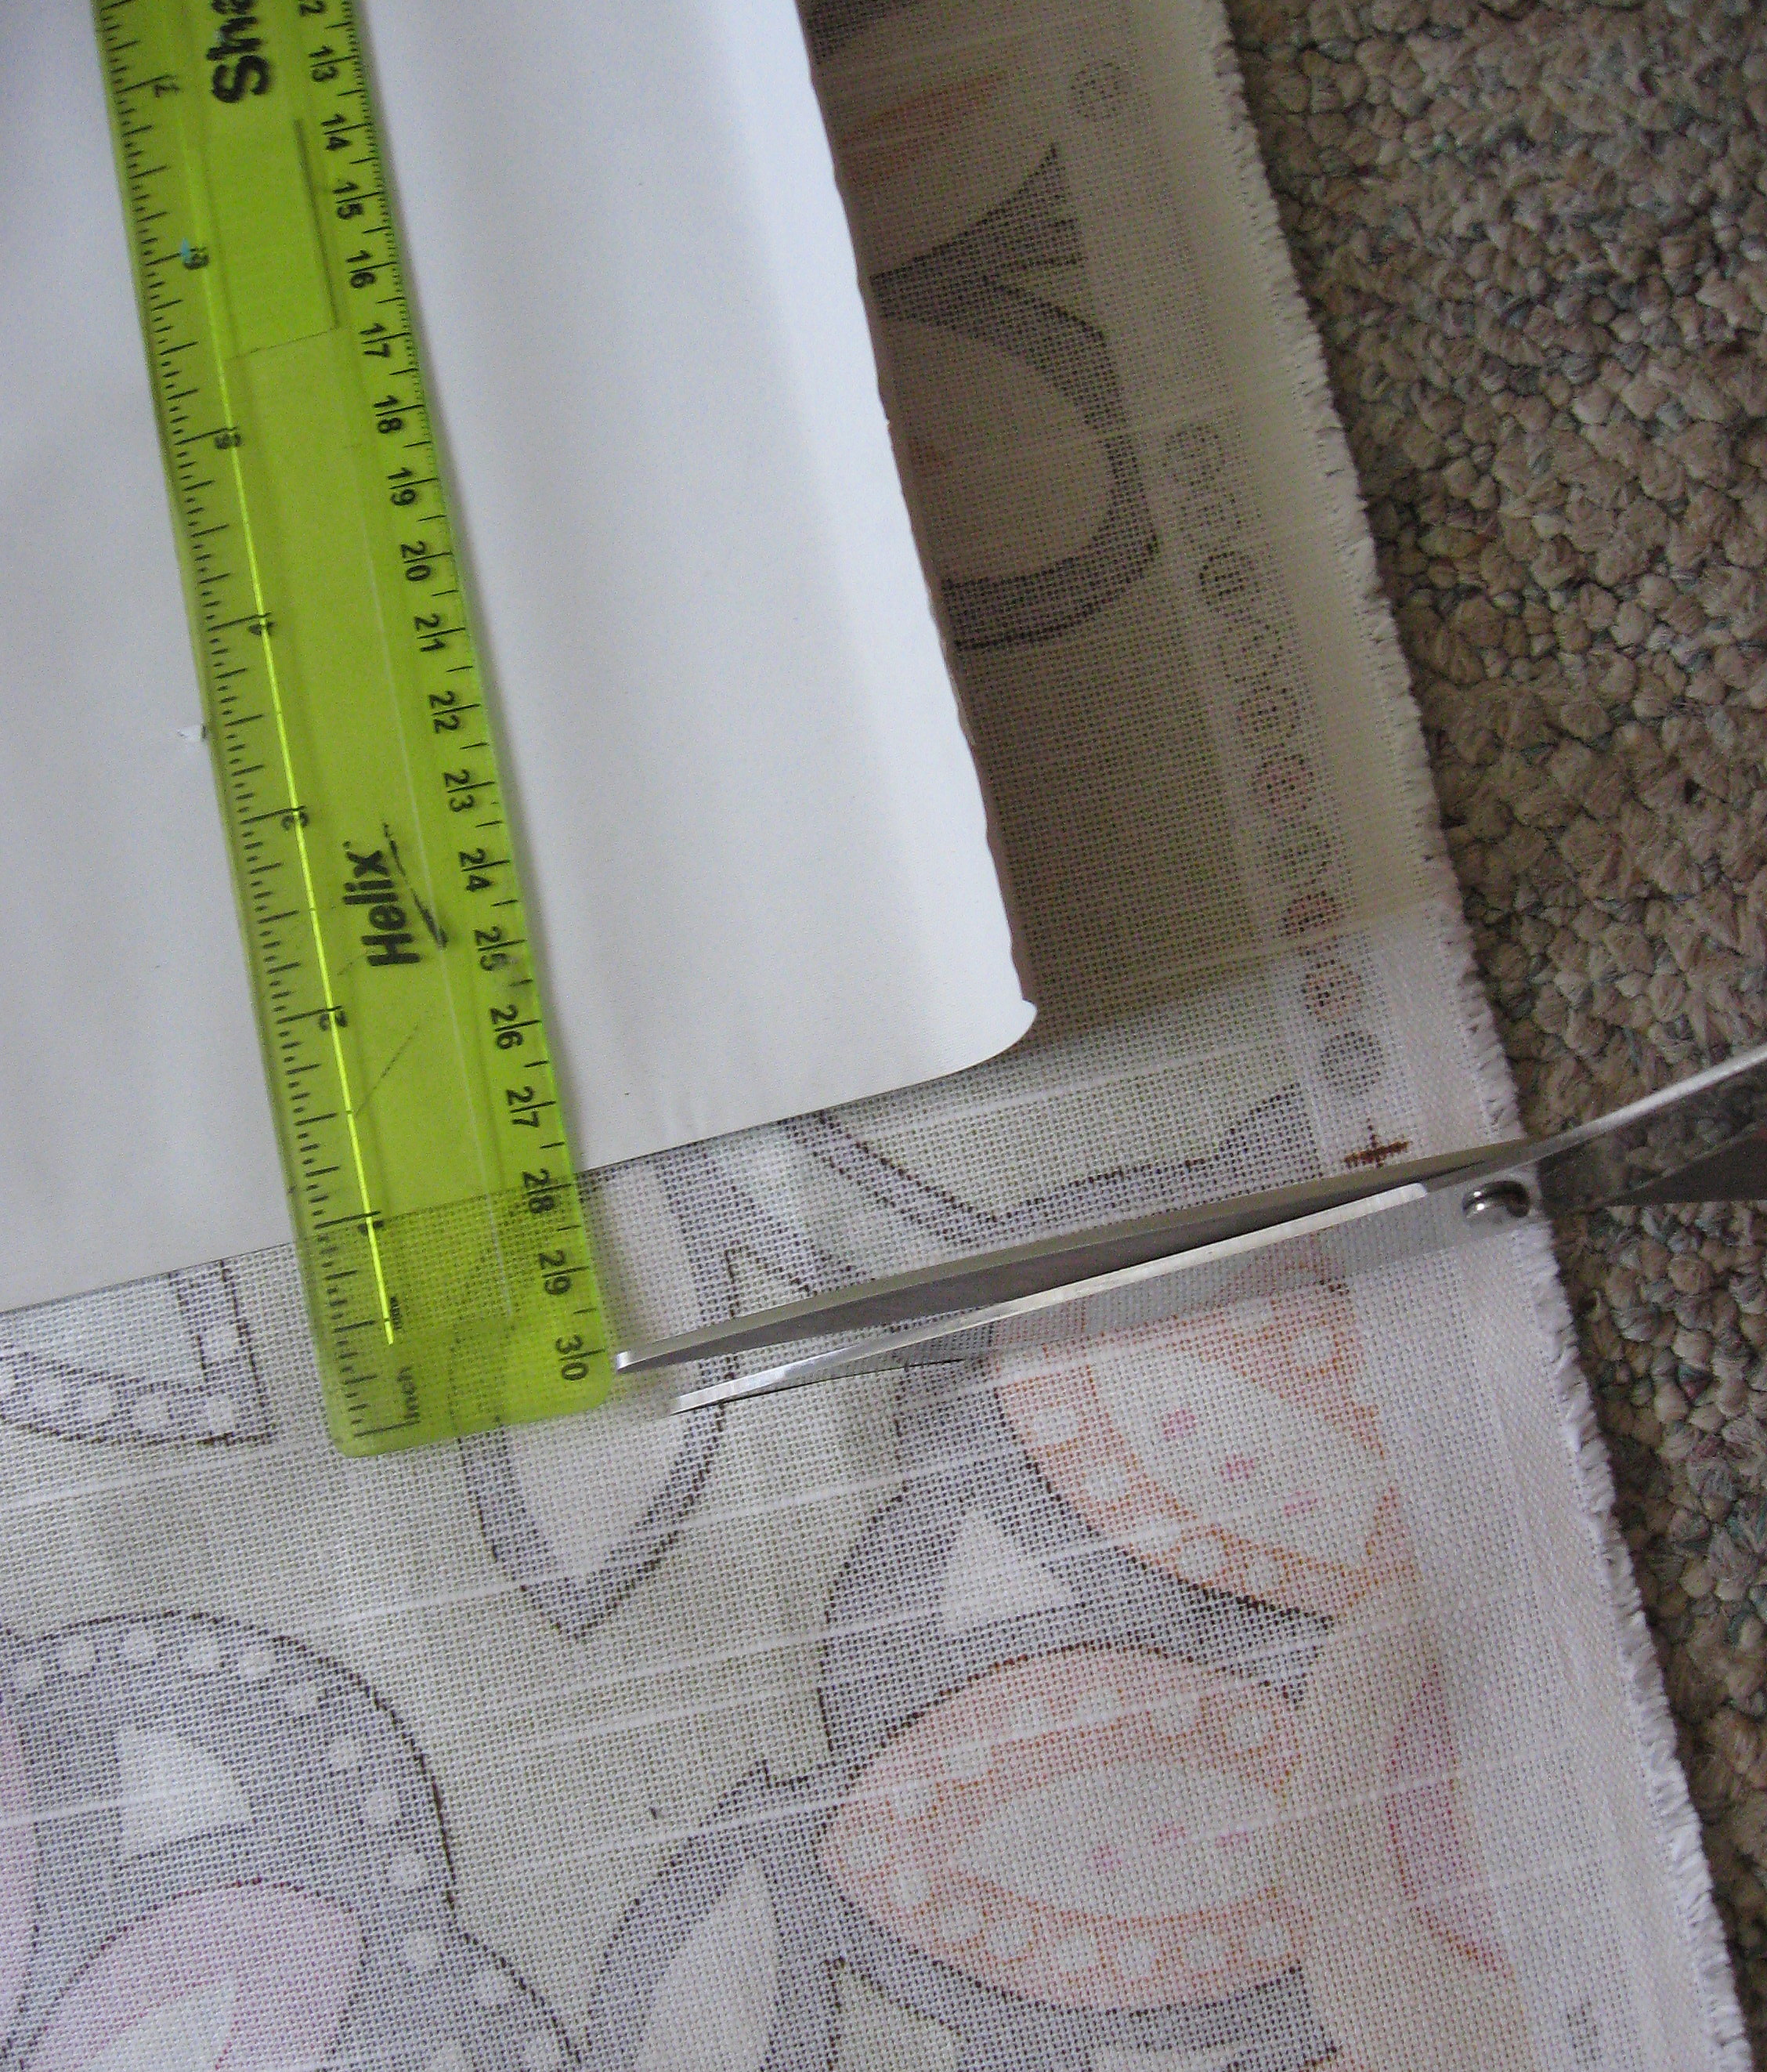
Fold the decorative fabric over 1/2 inch on all sides and iron.
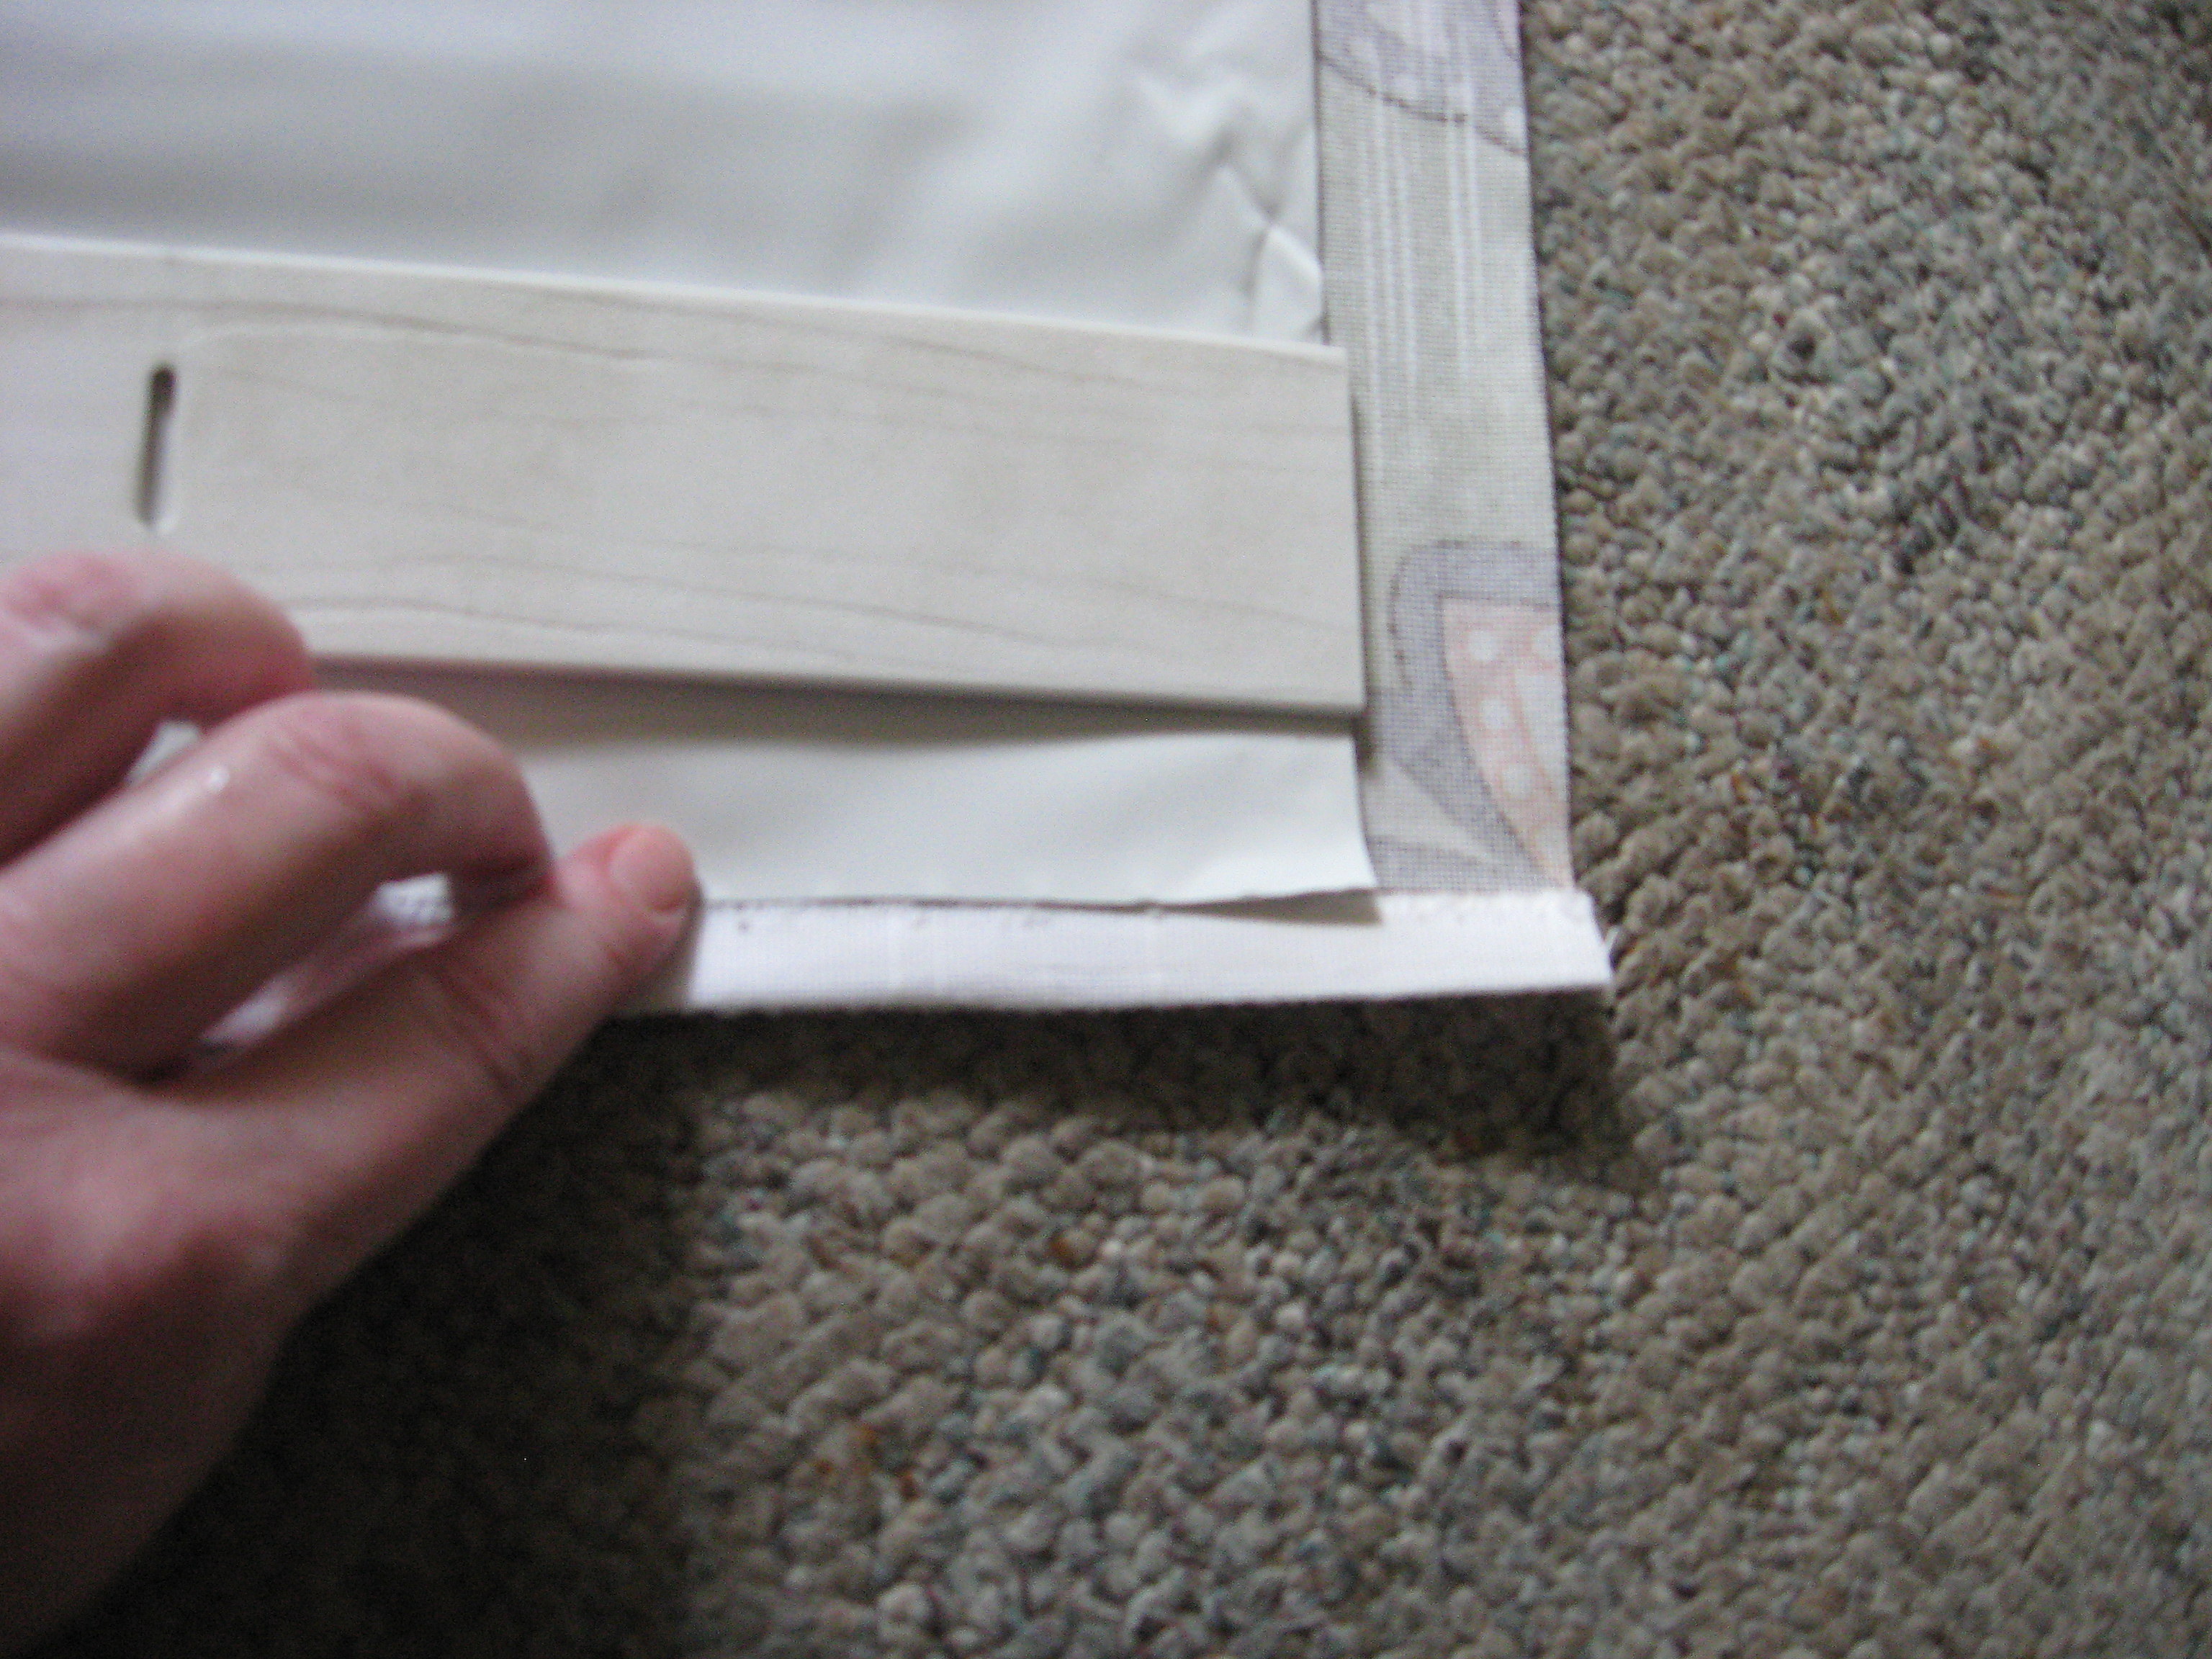
Then fold over 1/2 inch again and iron.
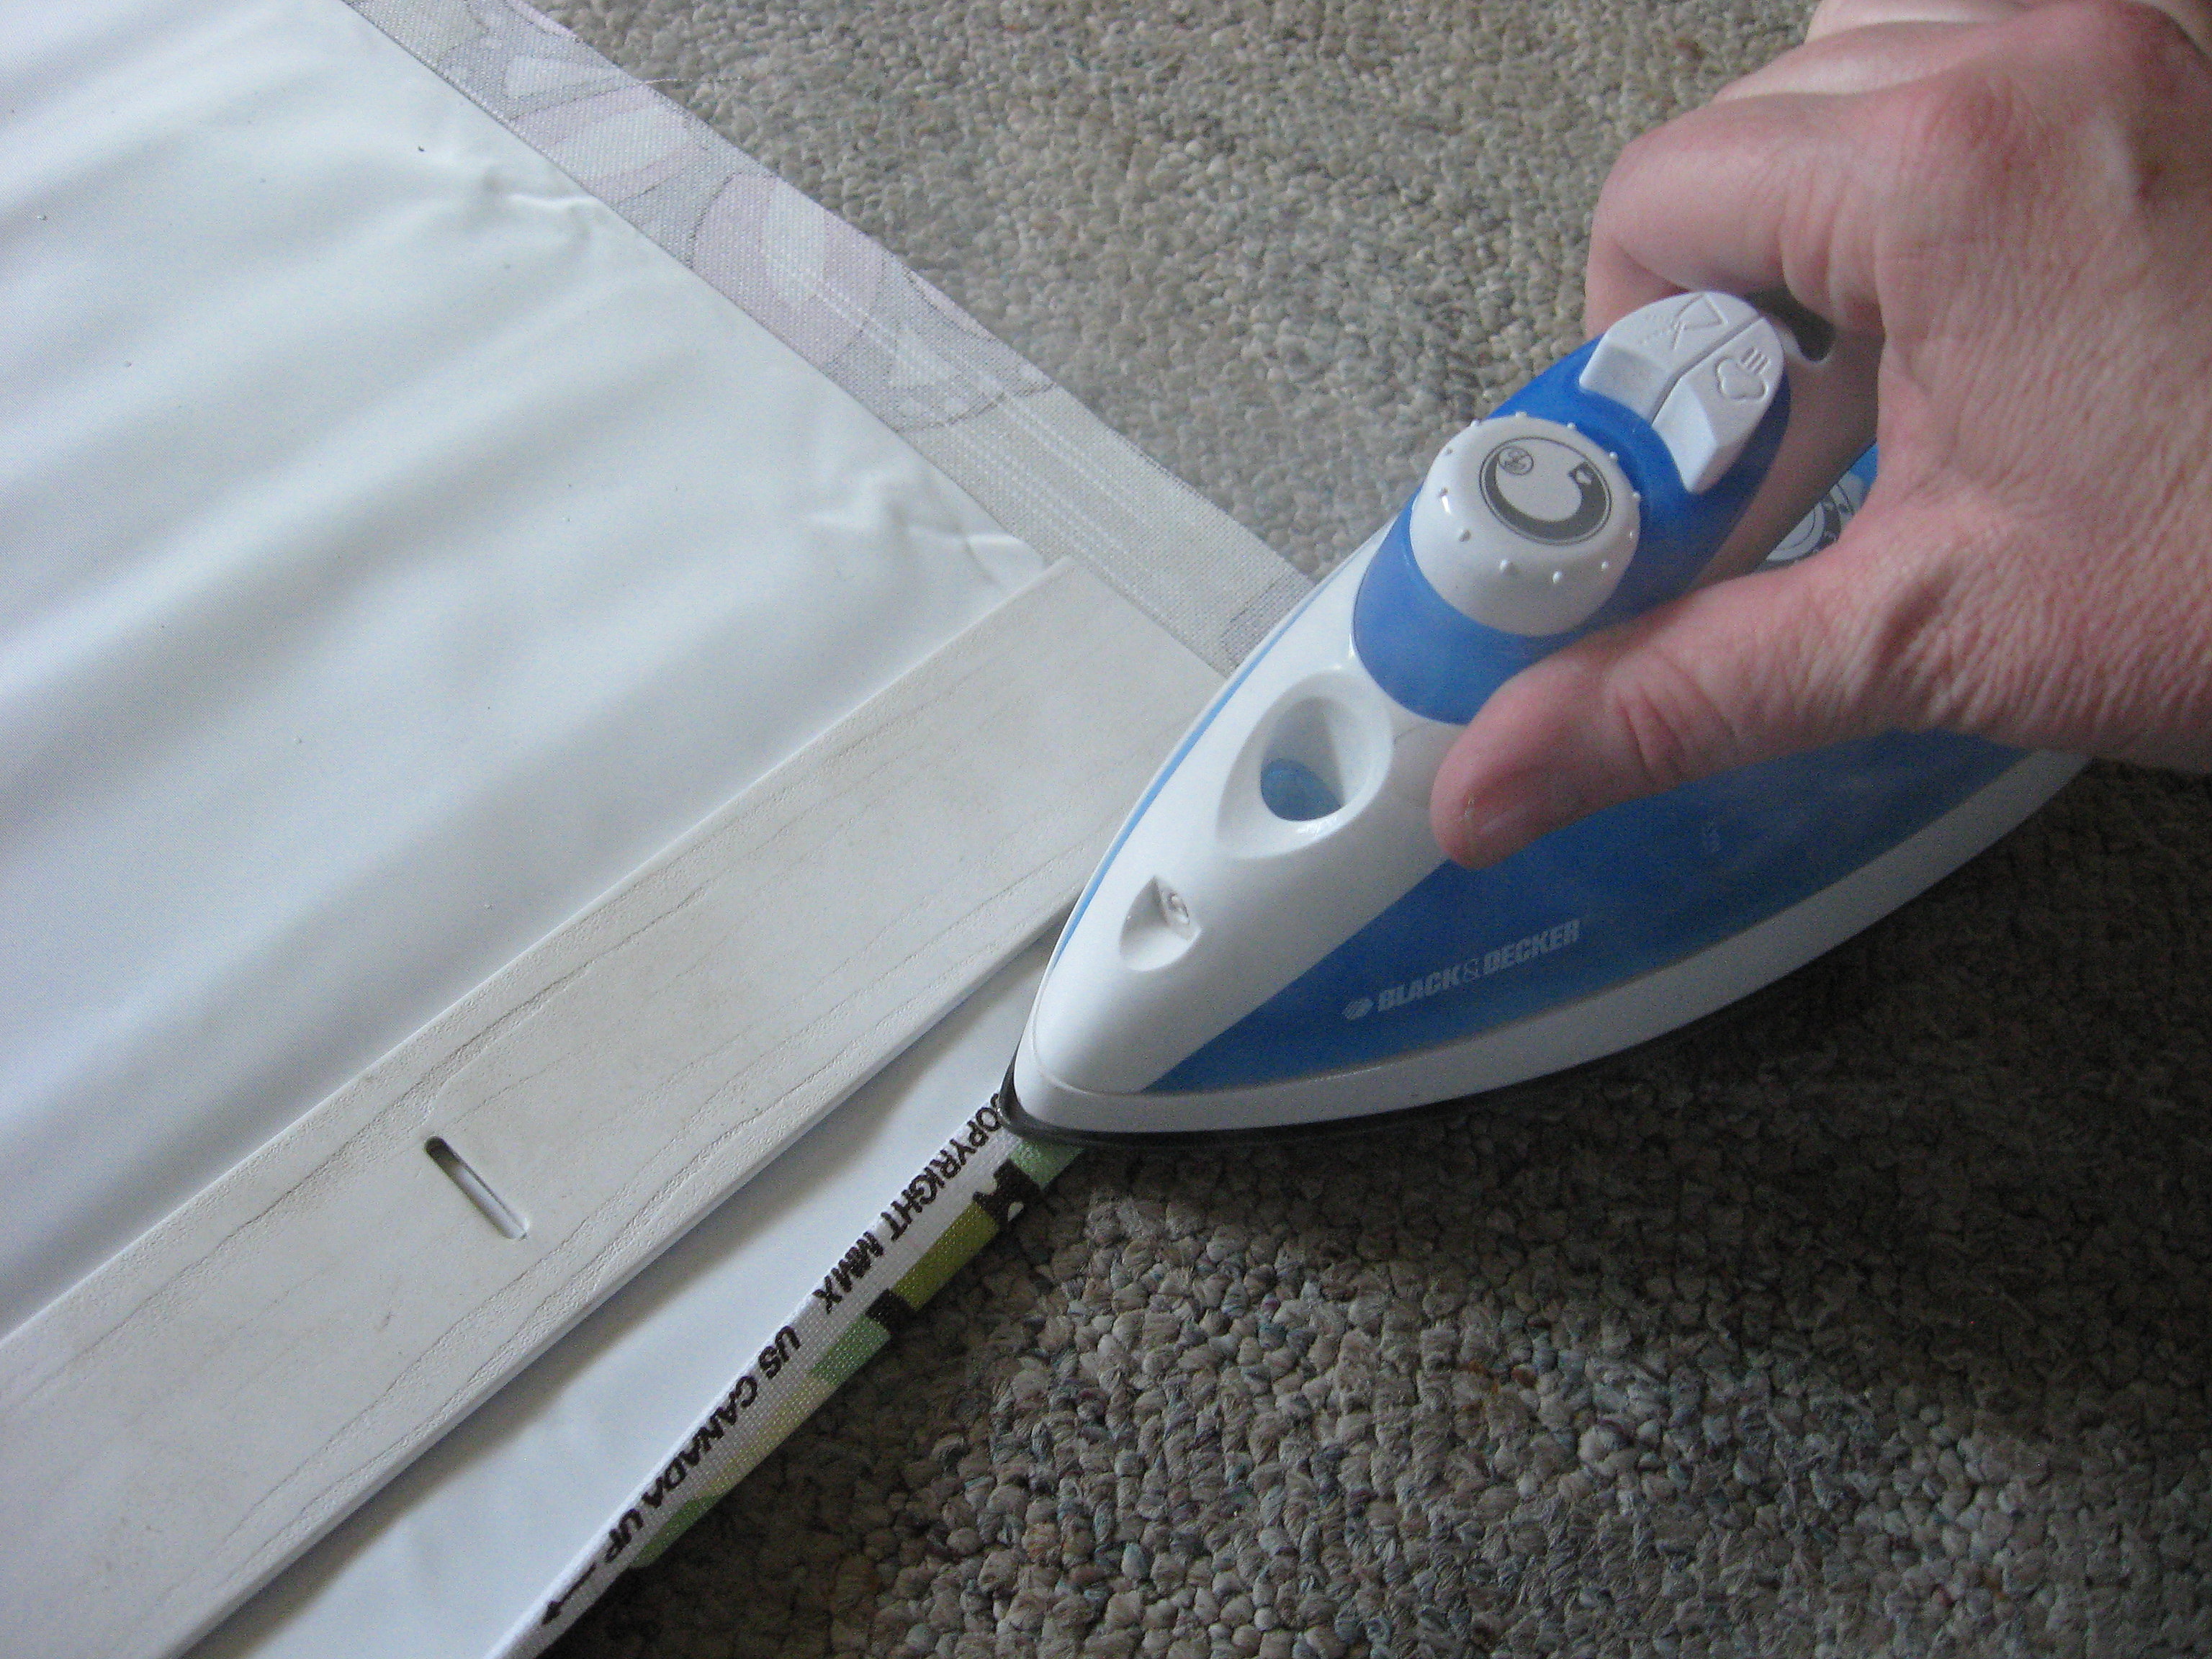
BE CAREFUL if you are using plastic that you don’t melt it!
Now use fabric glue to glue this hem down on all four sides – gluing it to the black out fabric if you are using it.
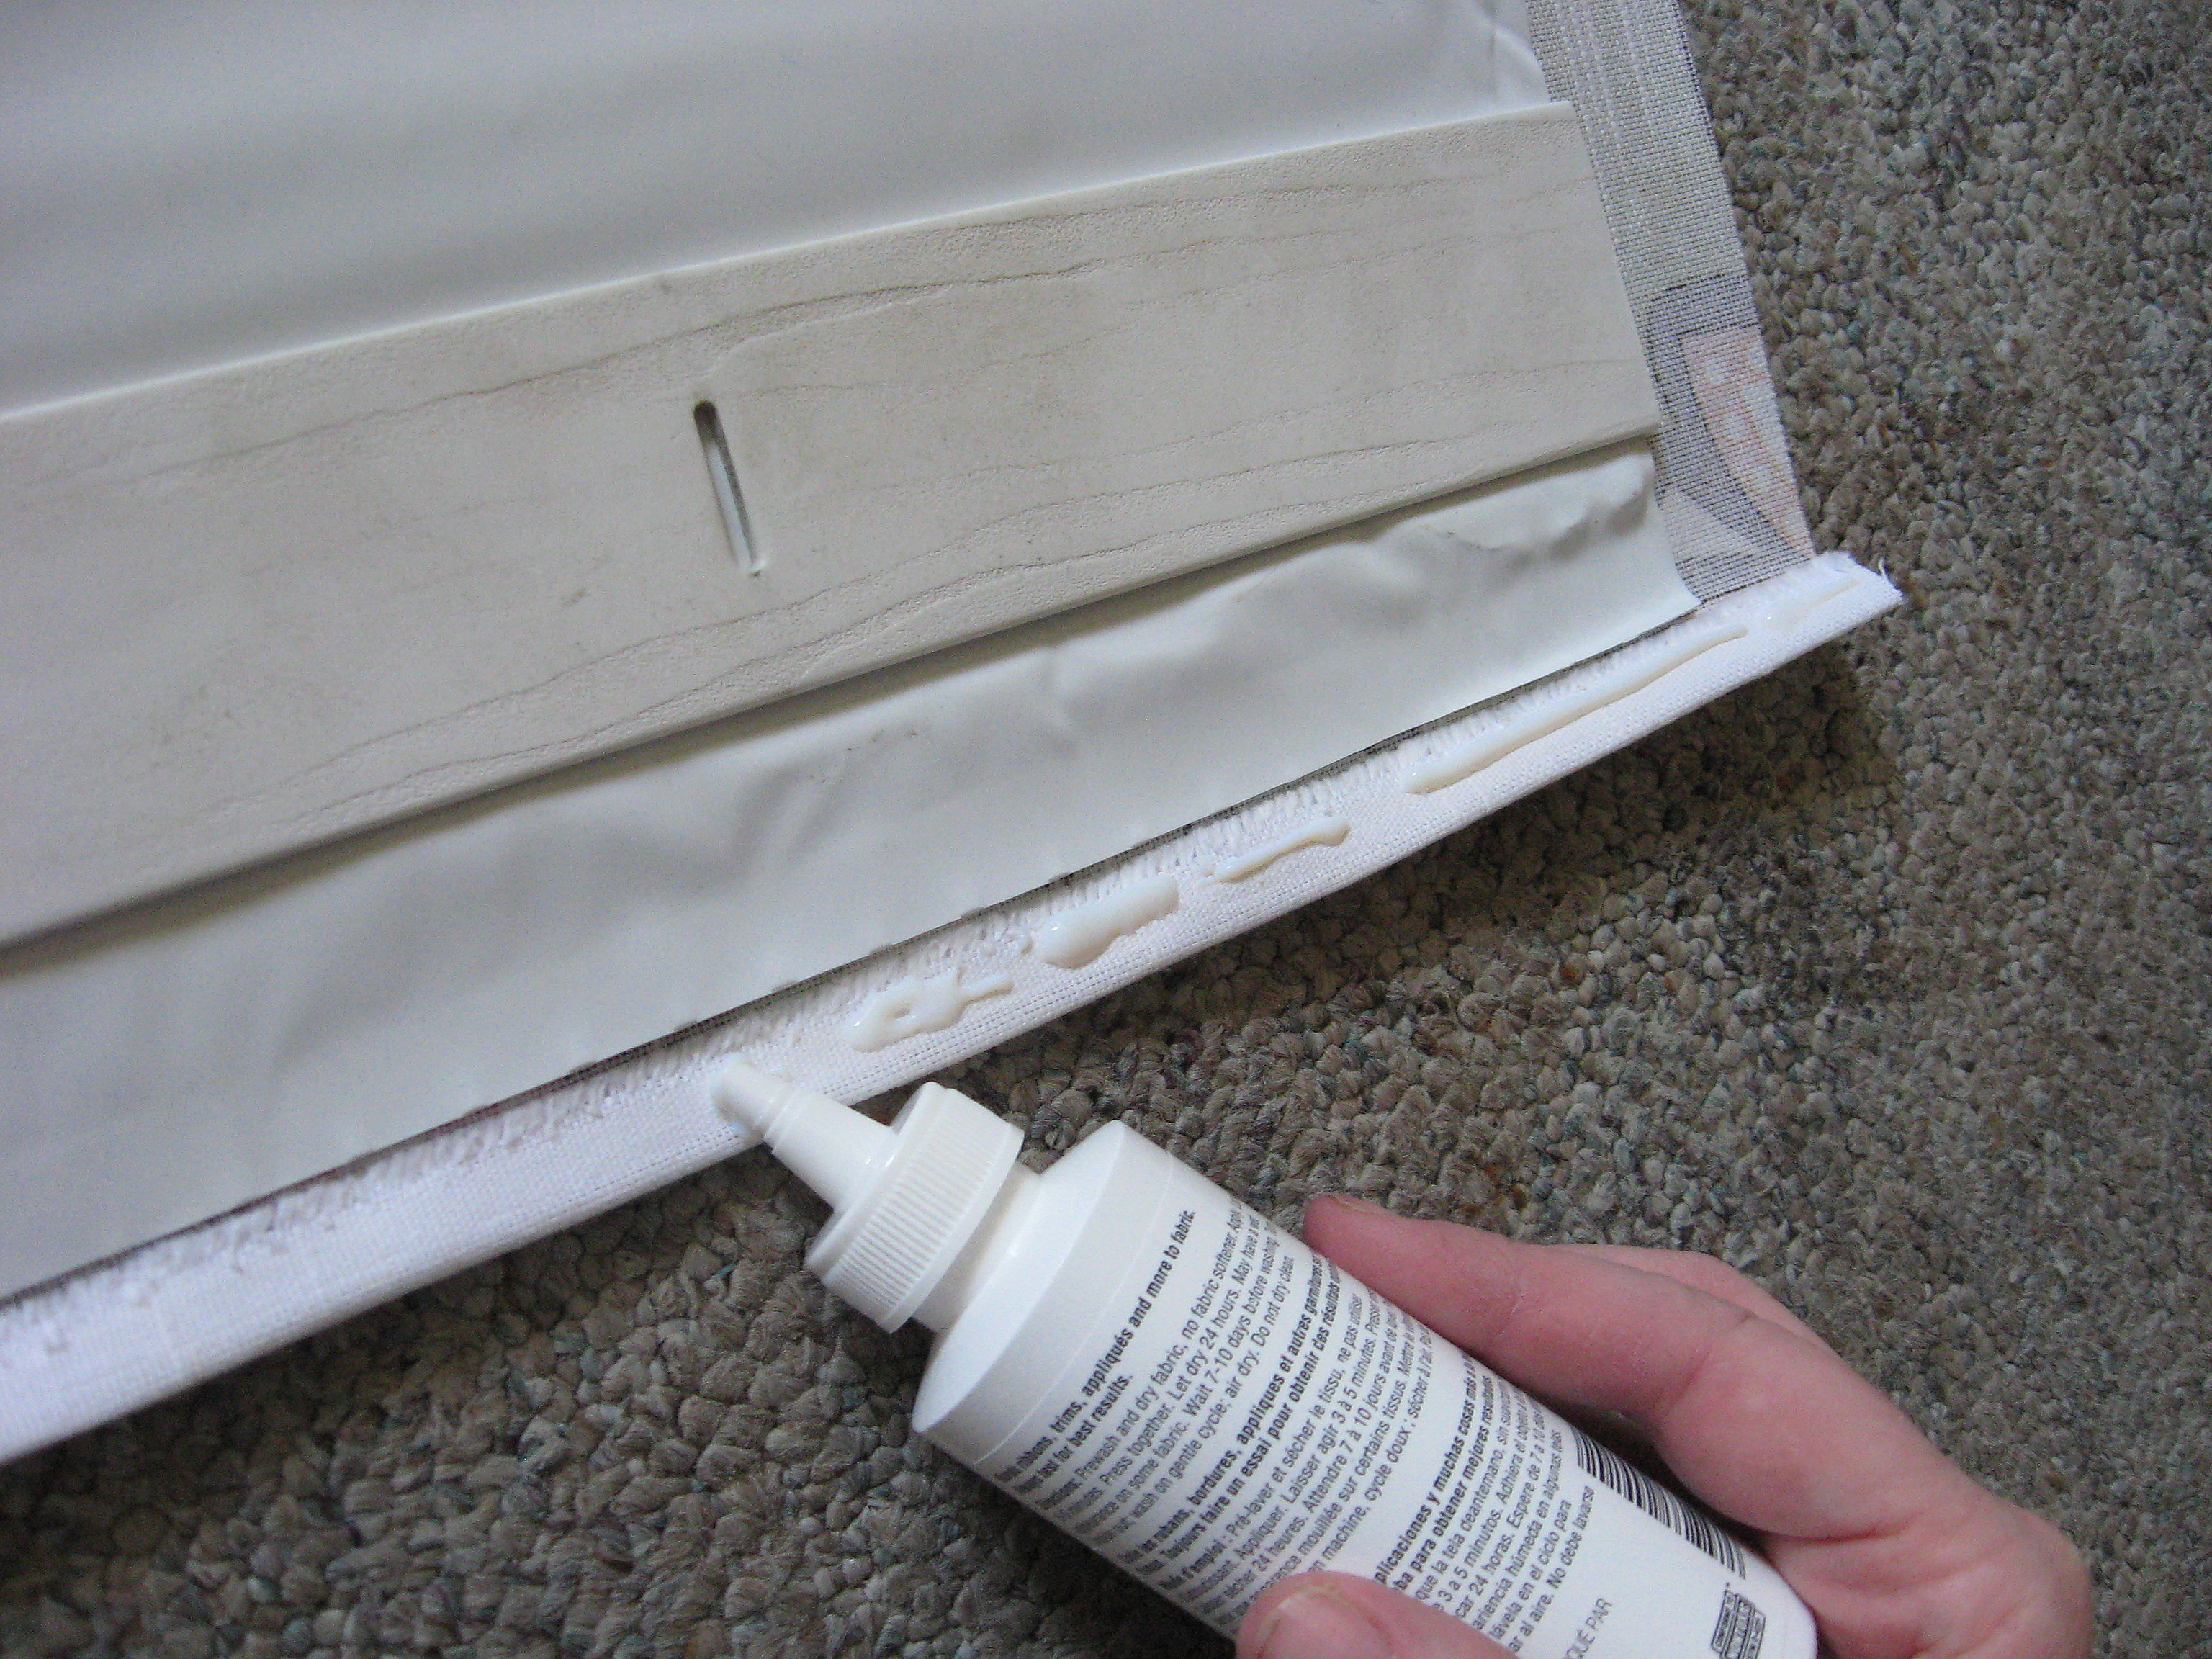
Glue it down on all four sides and weight it down while it dries (I used the slats from the blinds).

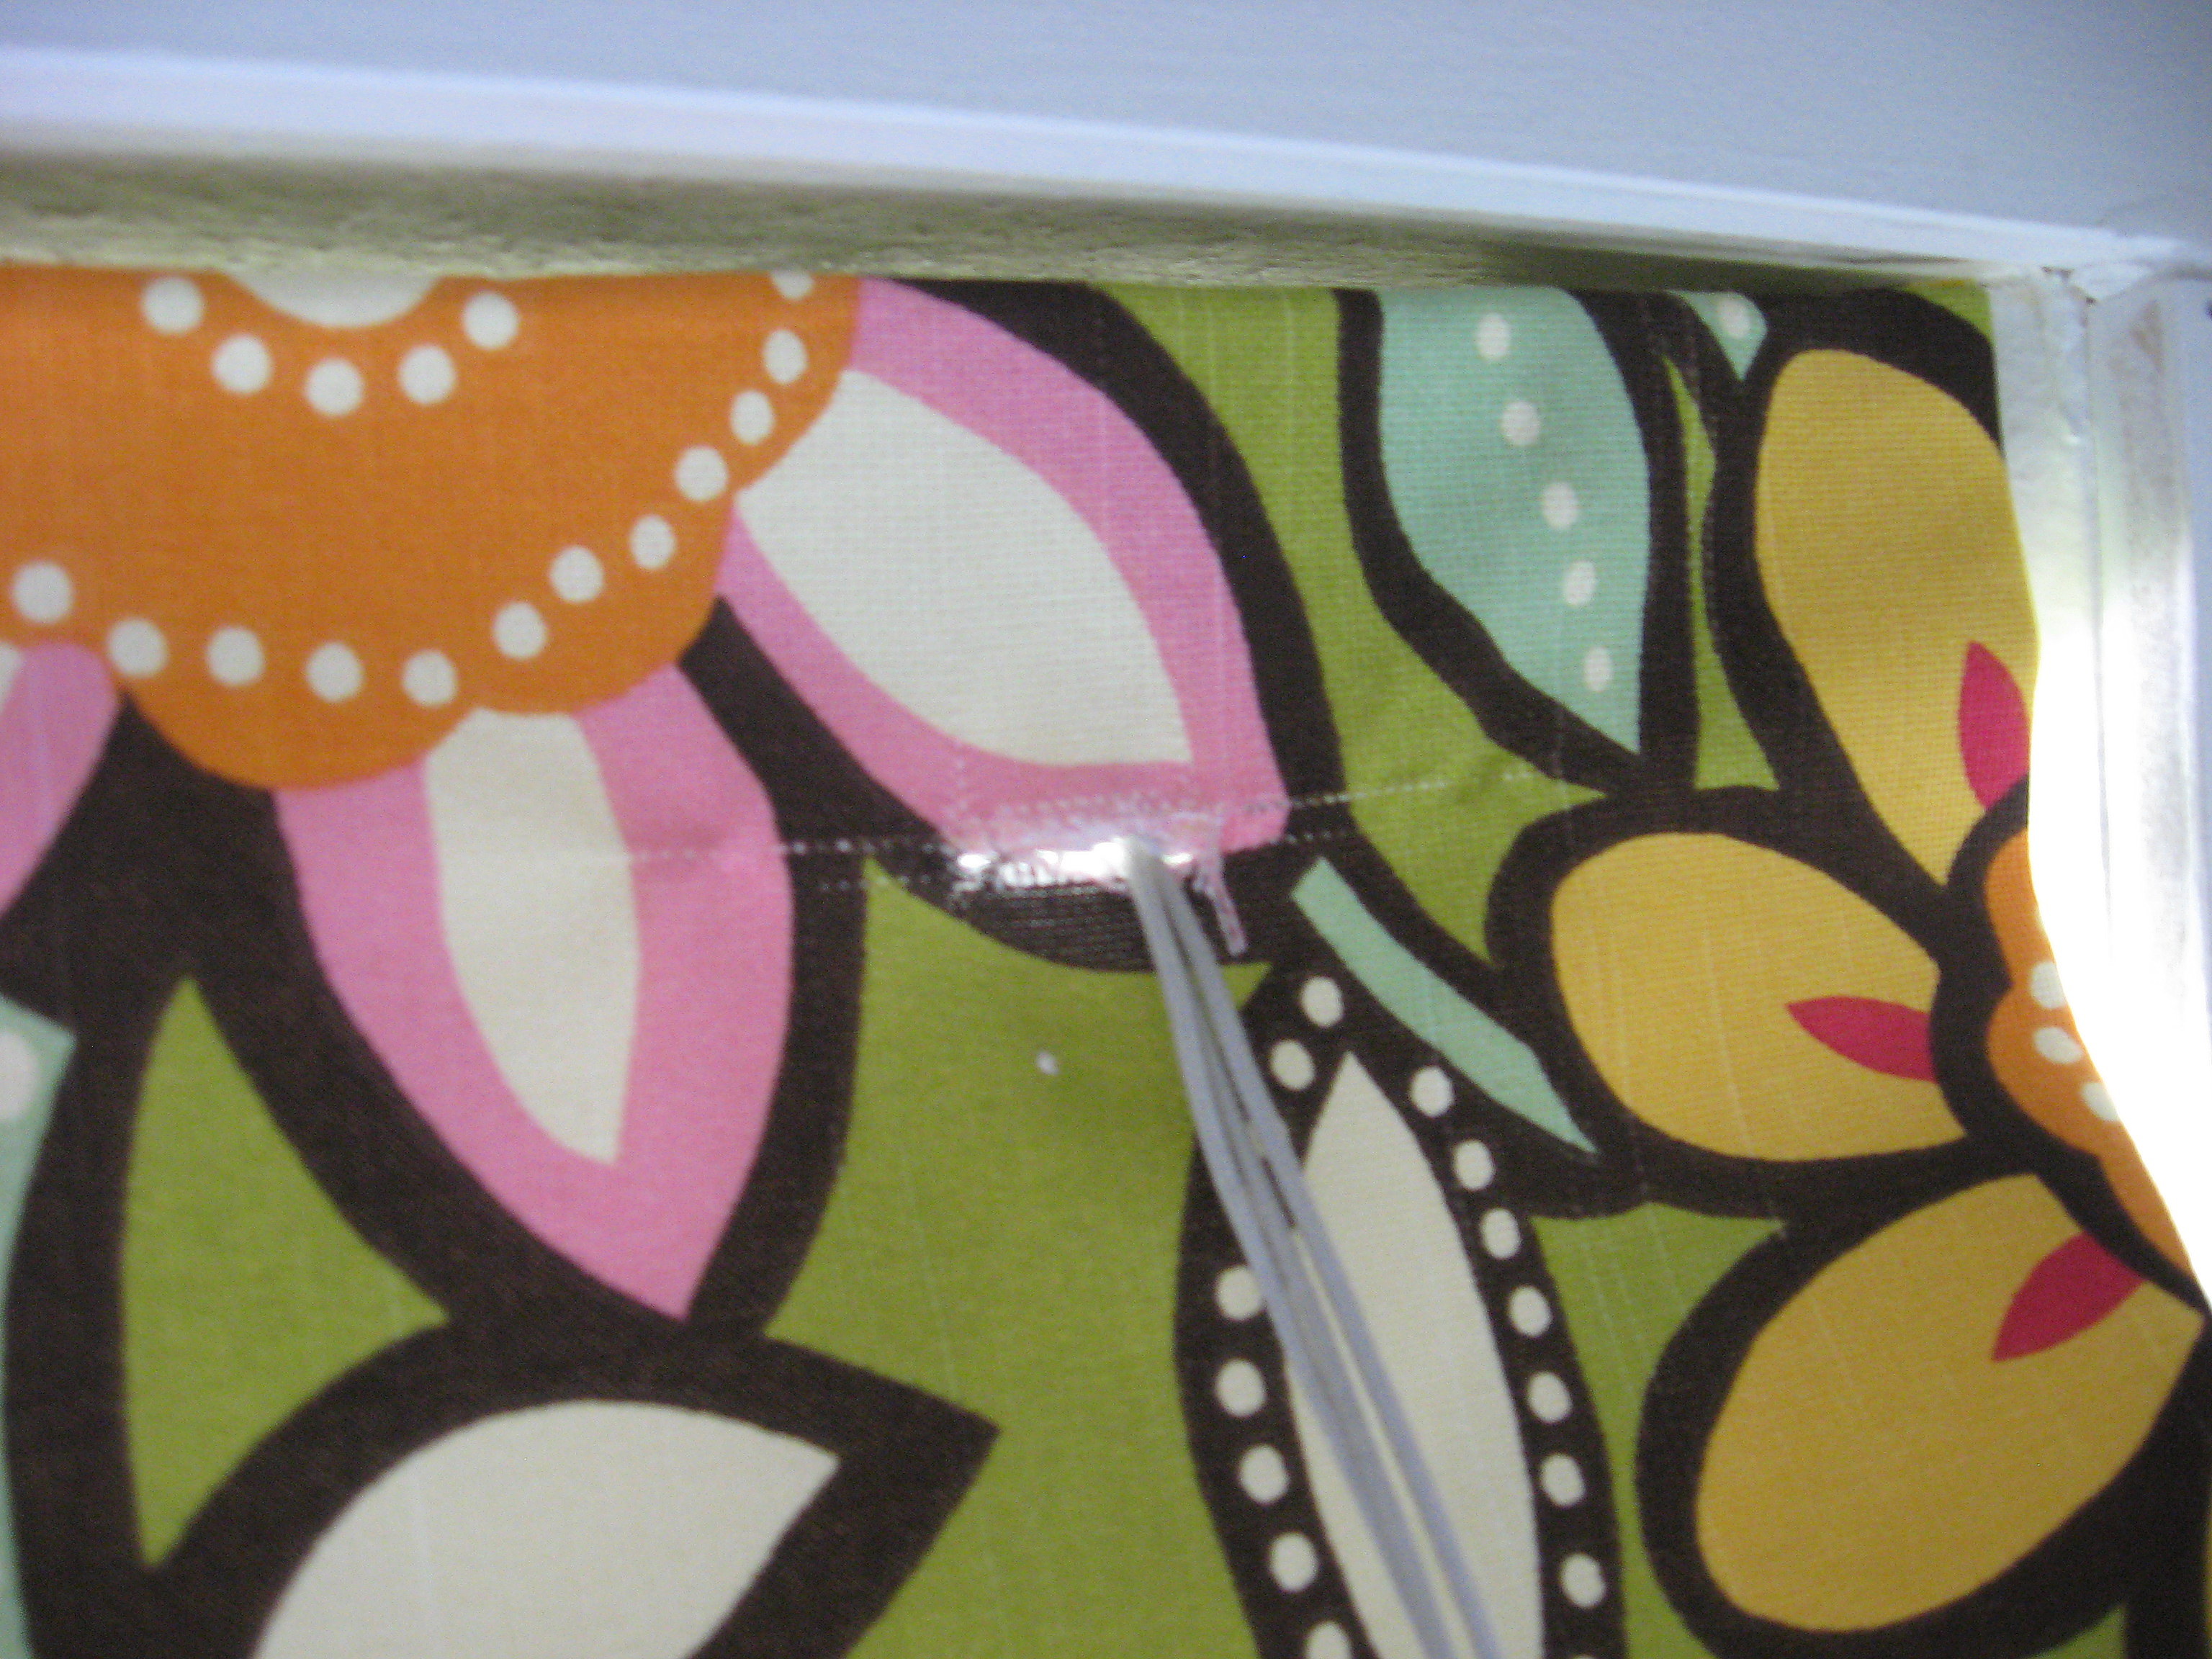
Once that’s dry, you will glue the top of the blinds to the top of the fabric. Stop the glue a couple of inches from the ends so that you can hang it back in the brackets when you’re done.
Line it up carefully, weight it down and let it dry. Make sure you don’t get glue on any of the strings.
Once that’s dry, you will start to reassemble the shade. First, you need to decide how many folds you want in the shade when it opens. It’s totally up to you; I just measured the length of my shade and came up with a number that made sense to me; mine are about 9 inches apart.
Start at the bottom of the shade and measure up, making a mark on each side of the shade.
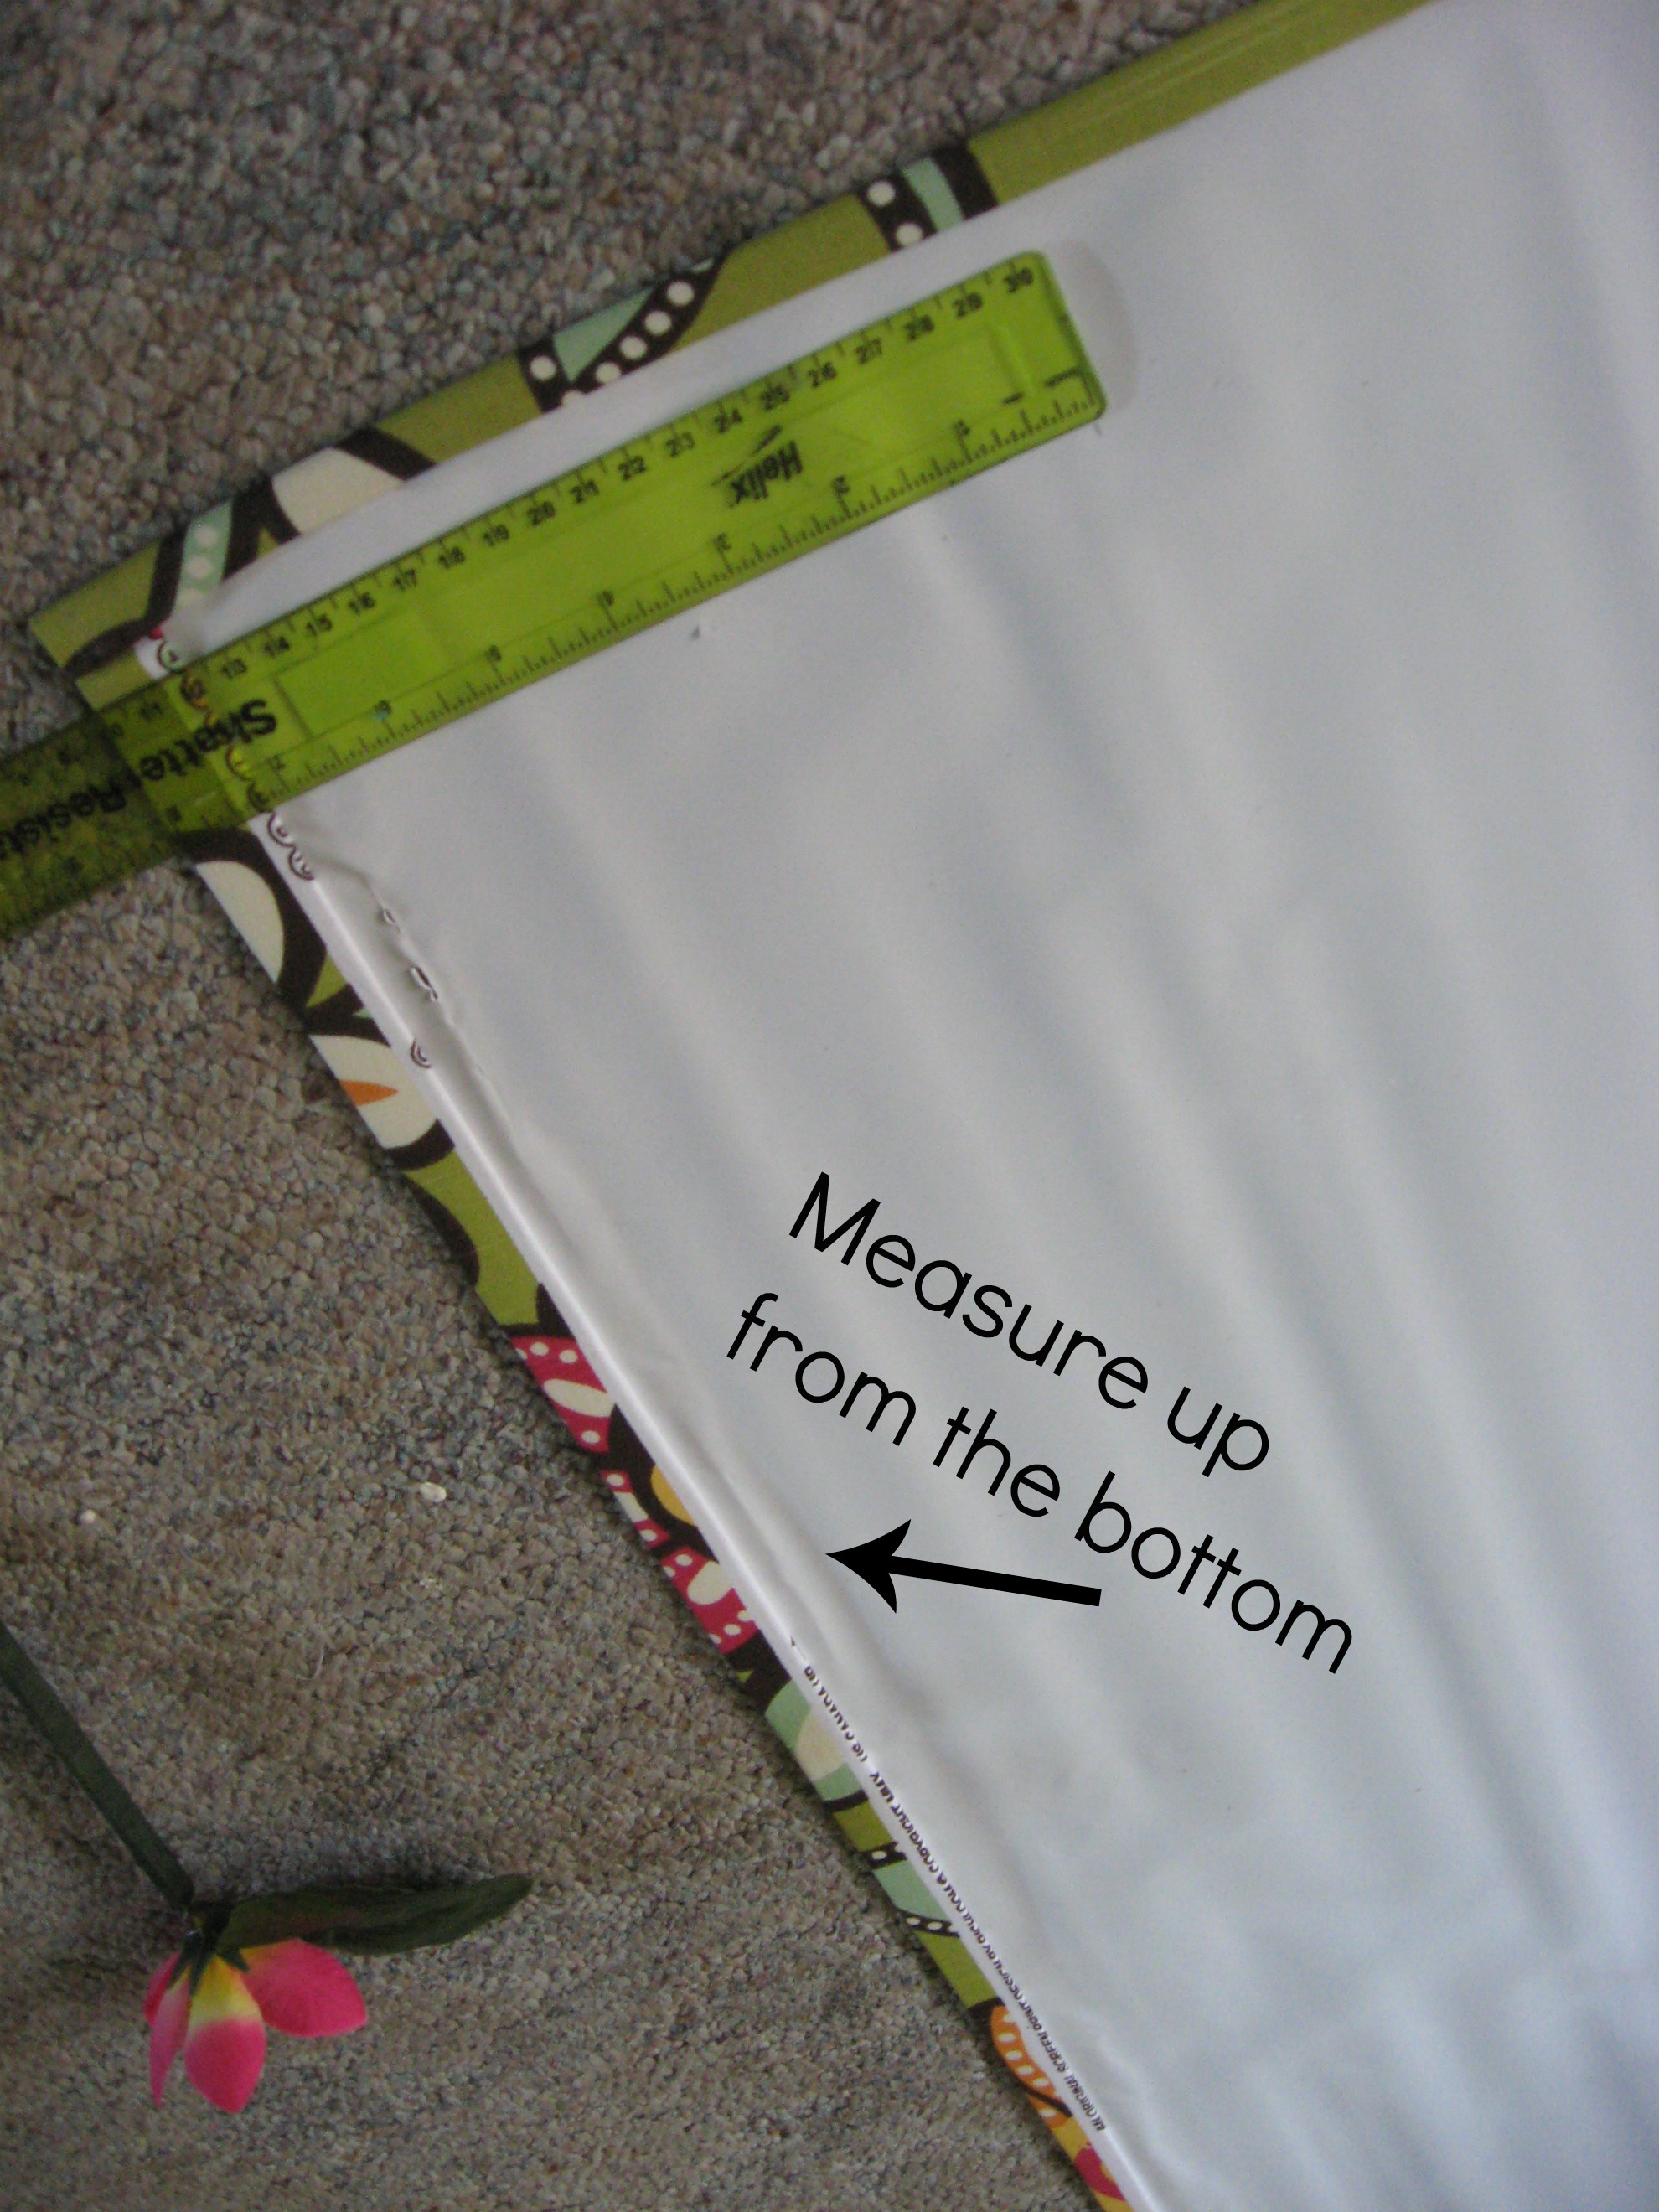
However many folds you want (however many marks you made) – that’s how many slats you will use. Slide them back onto the strings.

Put glue on the back of the slat – being careful to avoid the strings – and line it up with the marks you made.
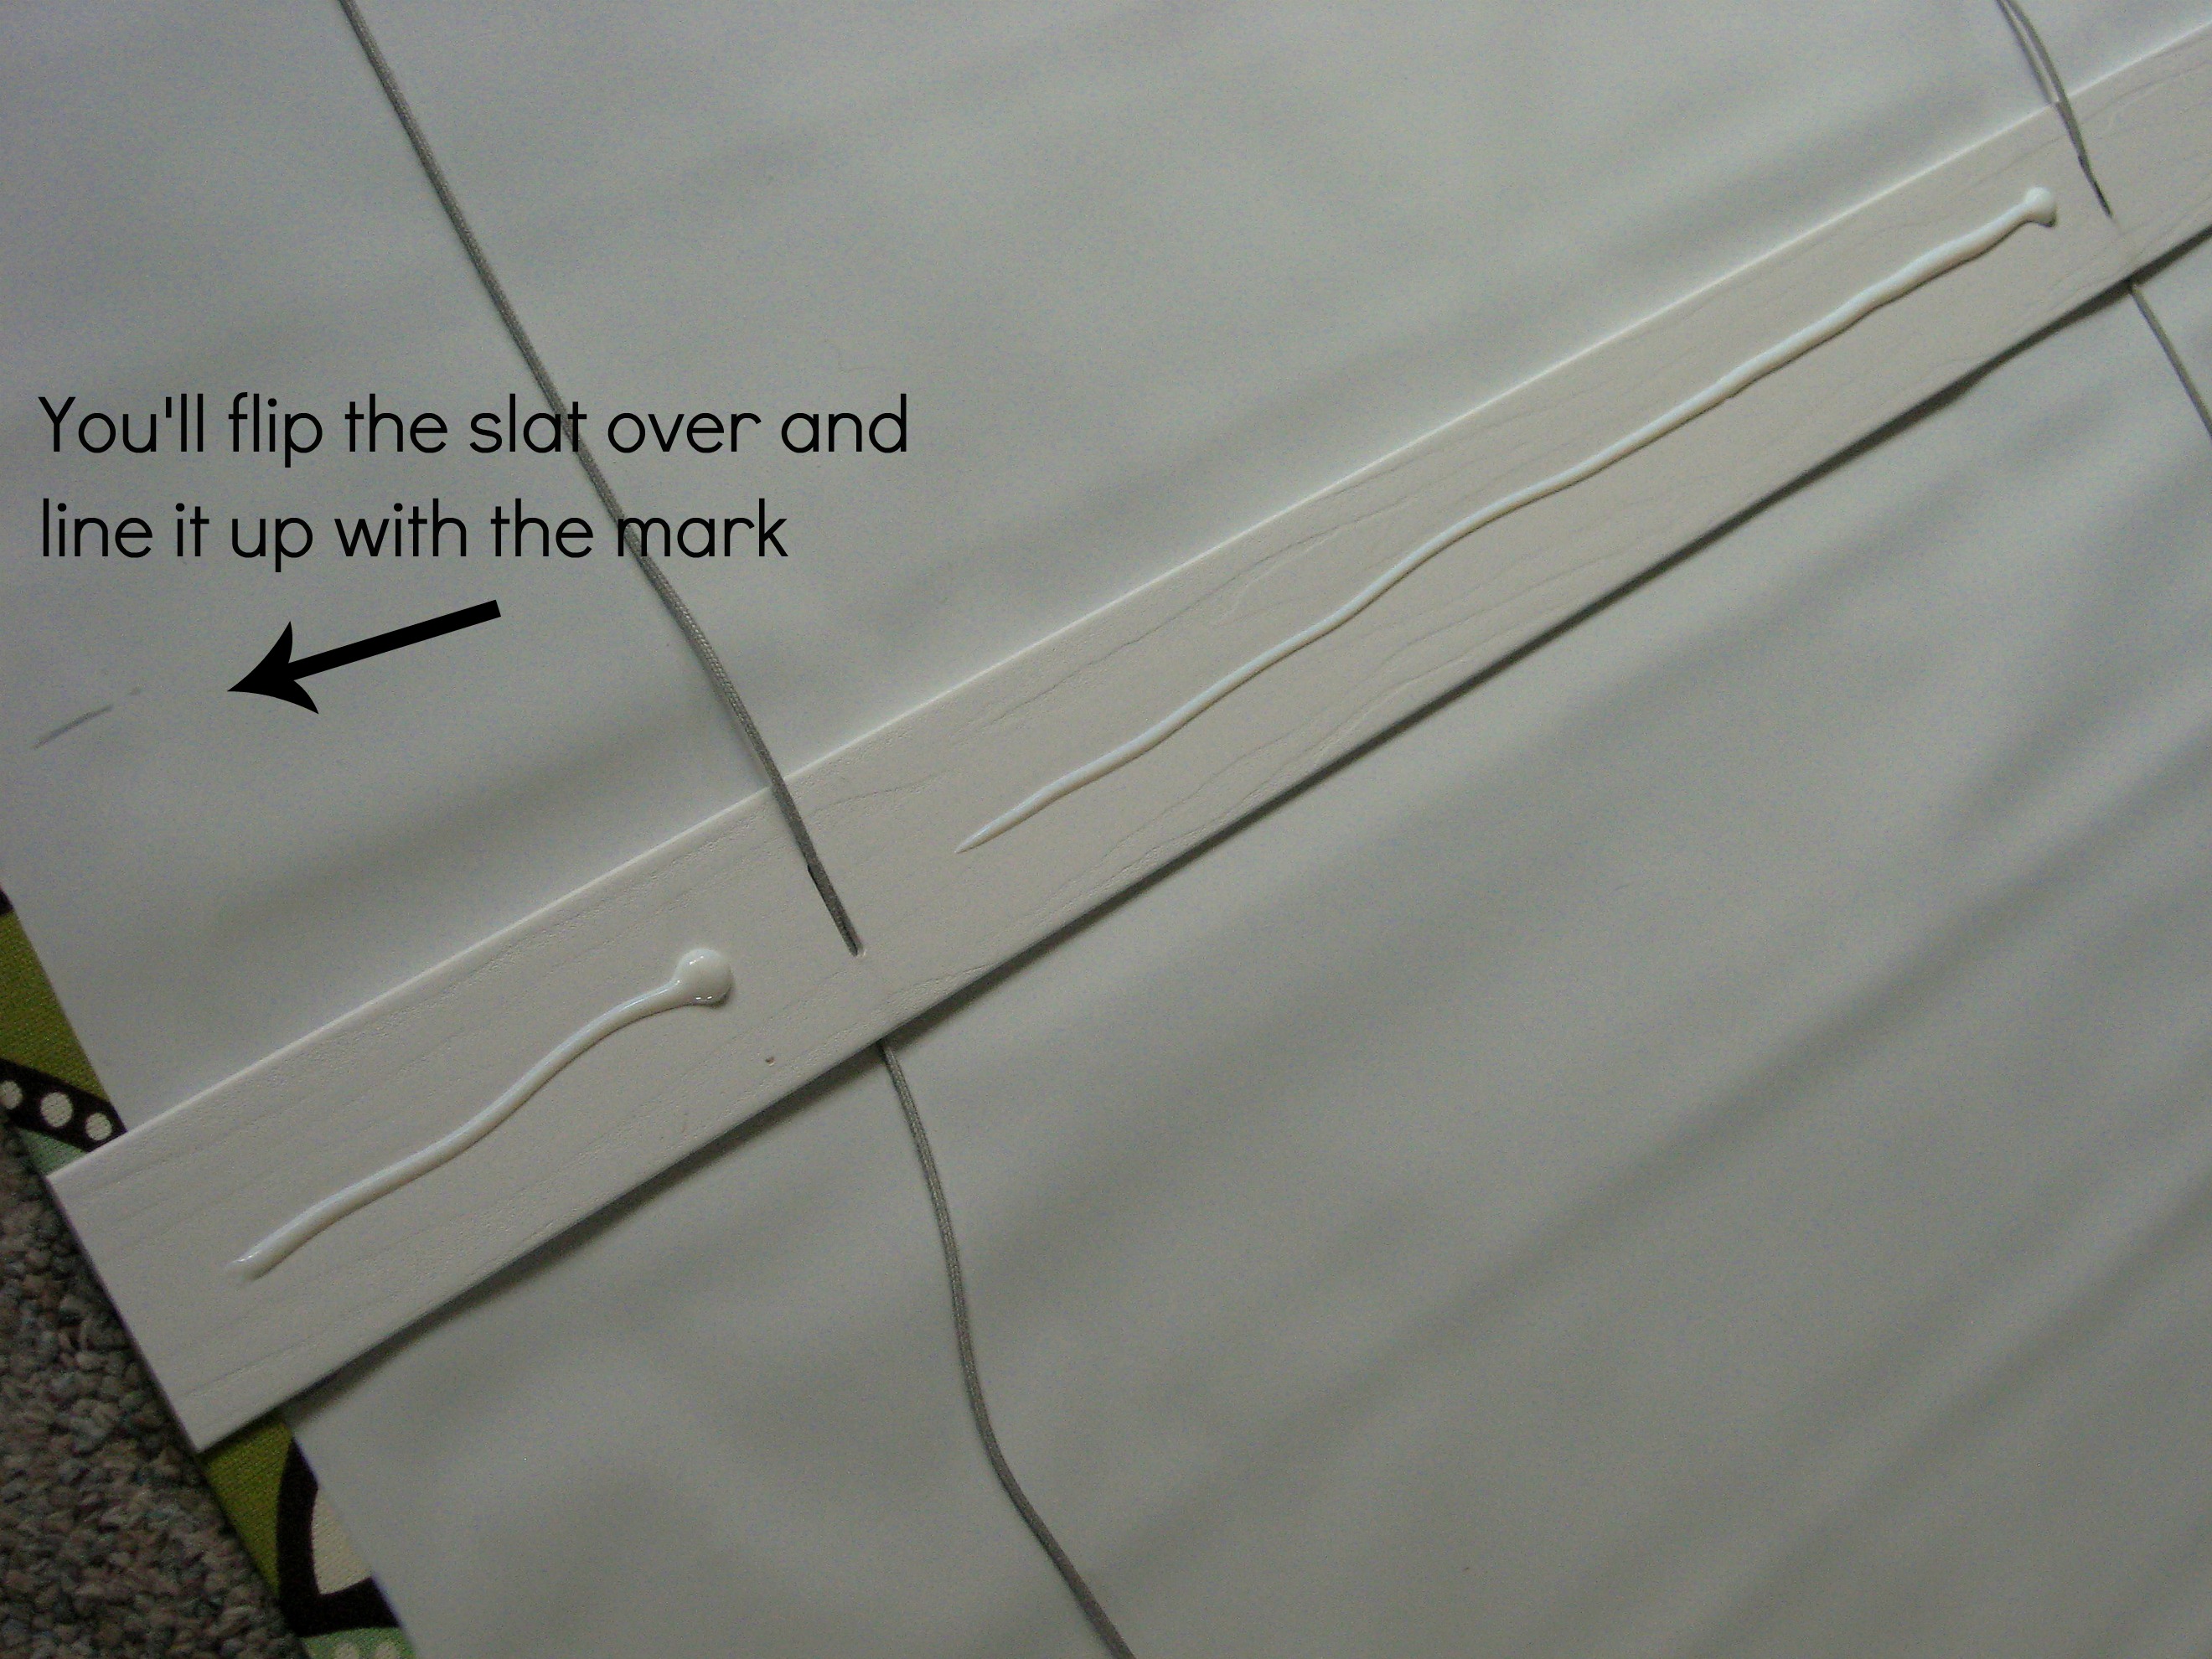
Repeat for all of the marks, weight them down and let them dry.
Now restring the bottom board back on, glue it to the bottom of the shade, and weight it down while it dries.

When everything is dry, retie the strings at the bottom and replace the little plastic plugs.
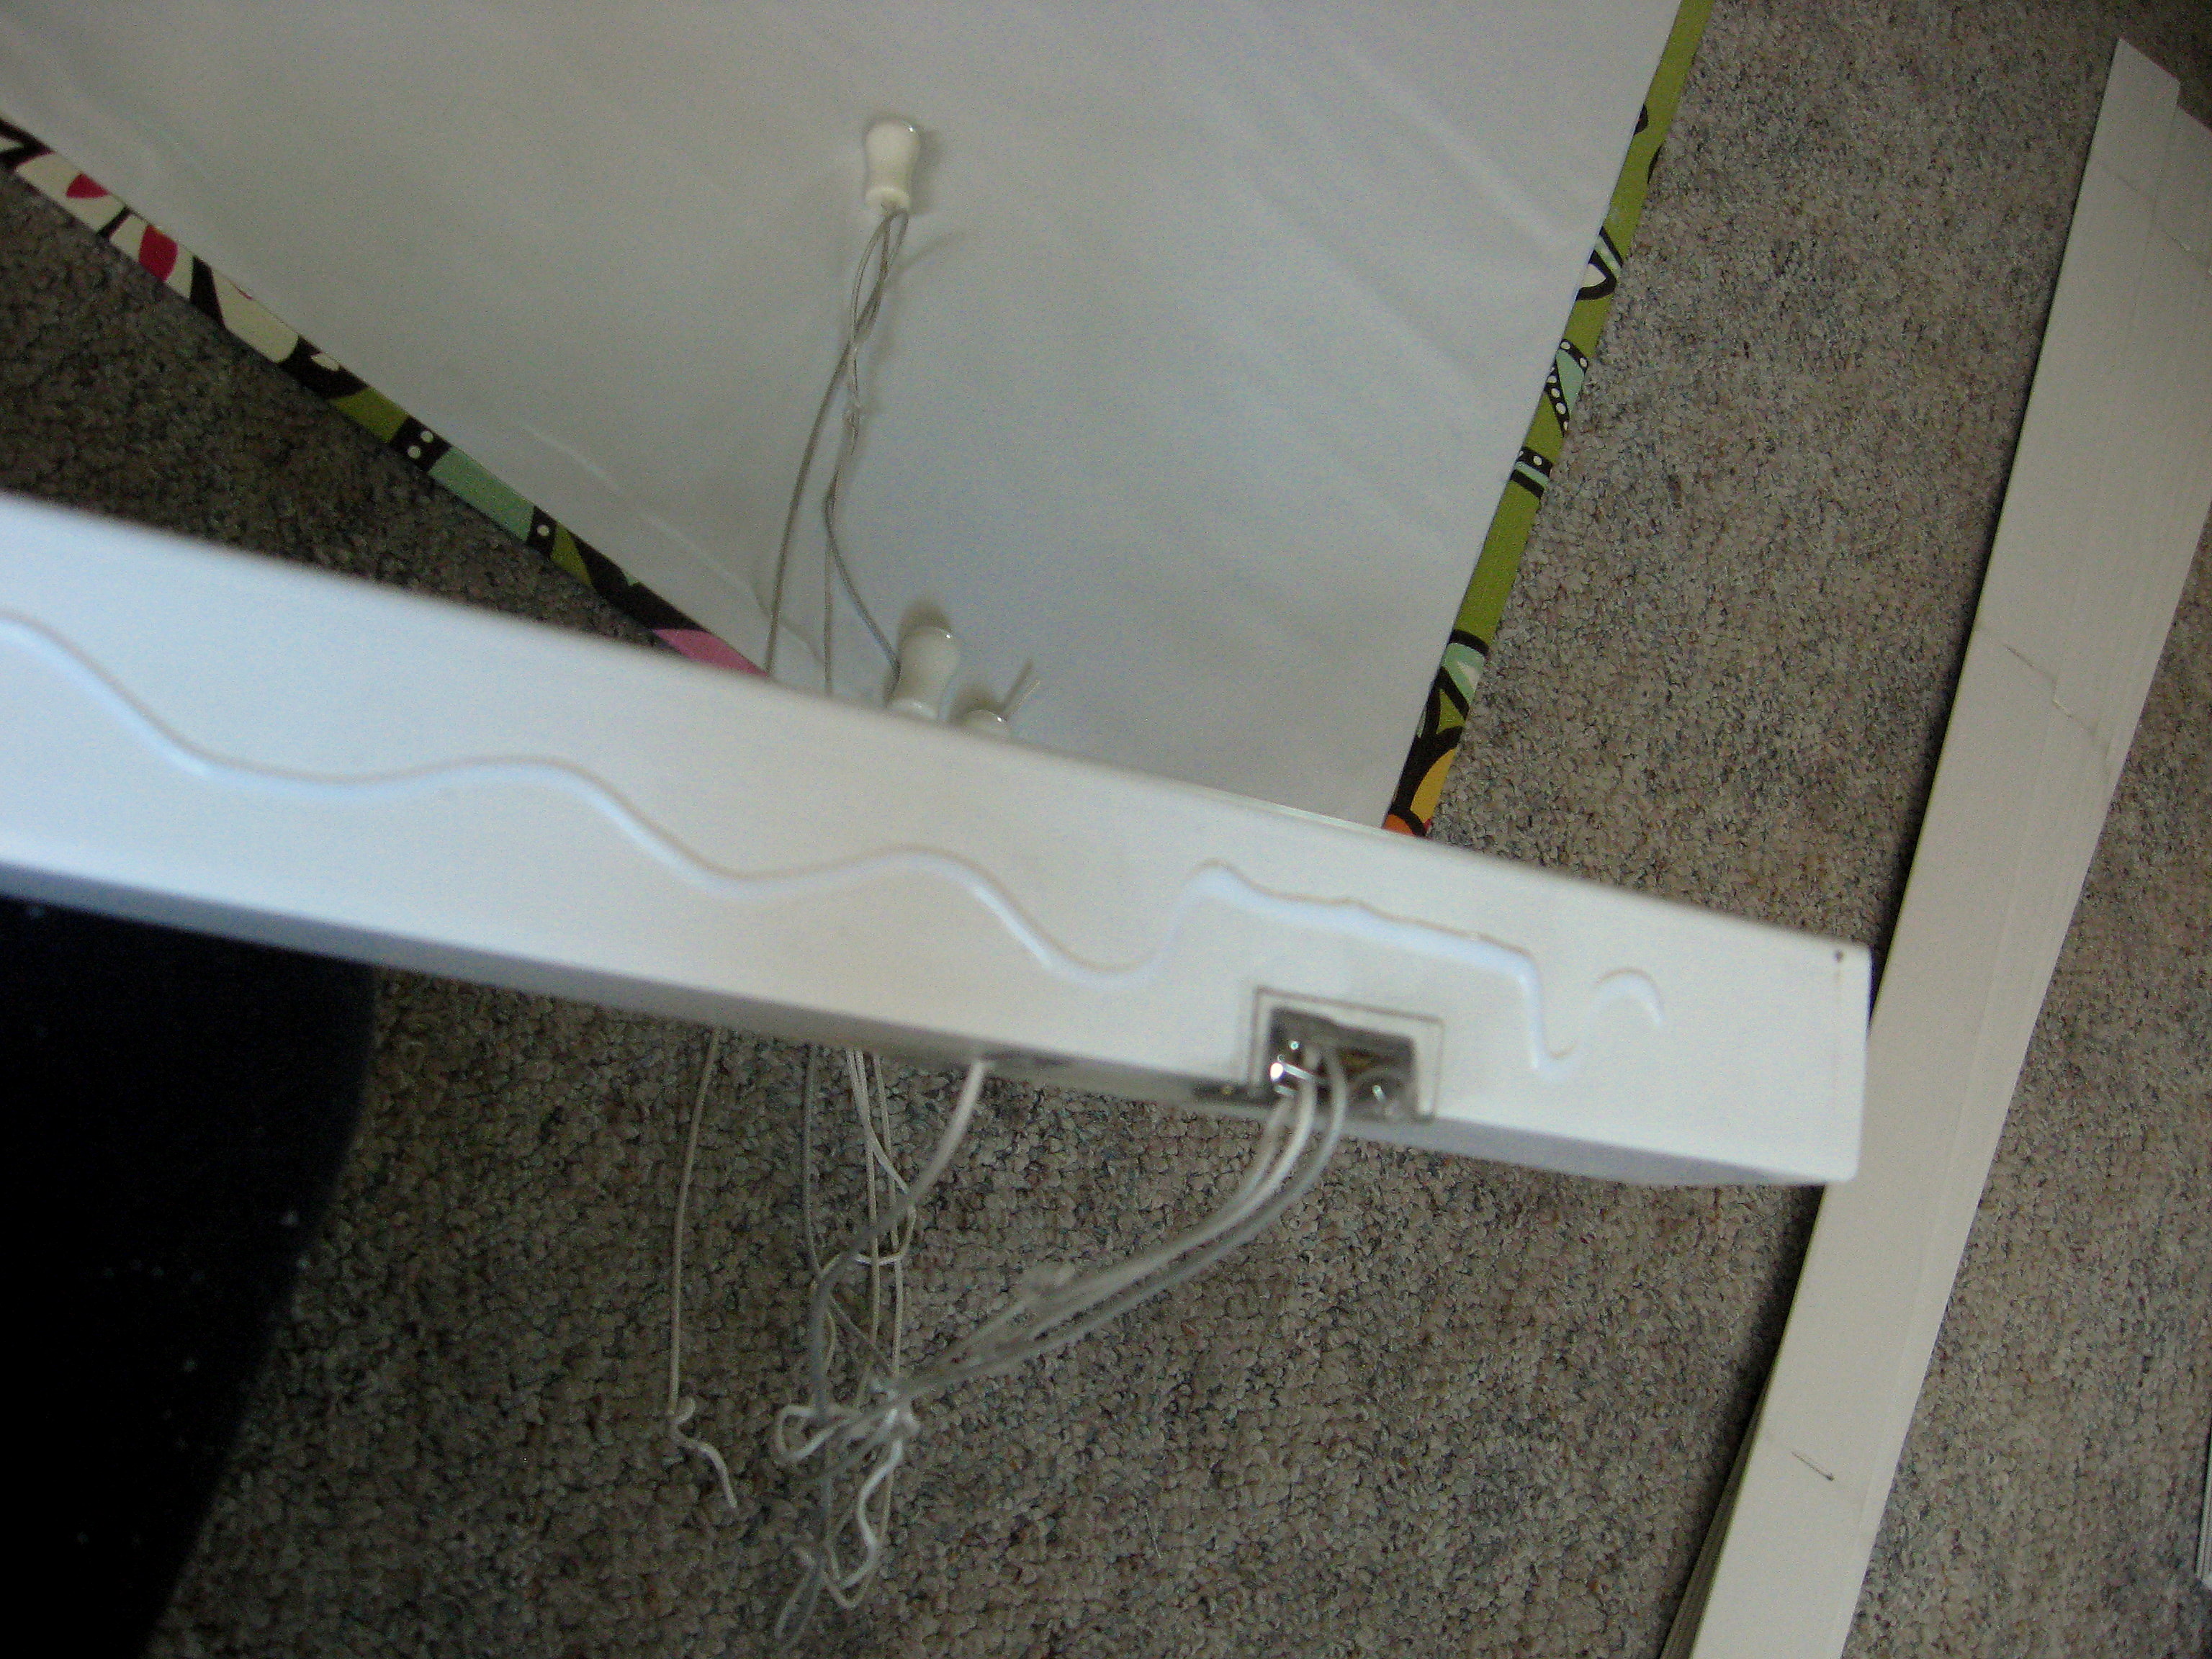
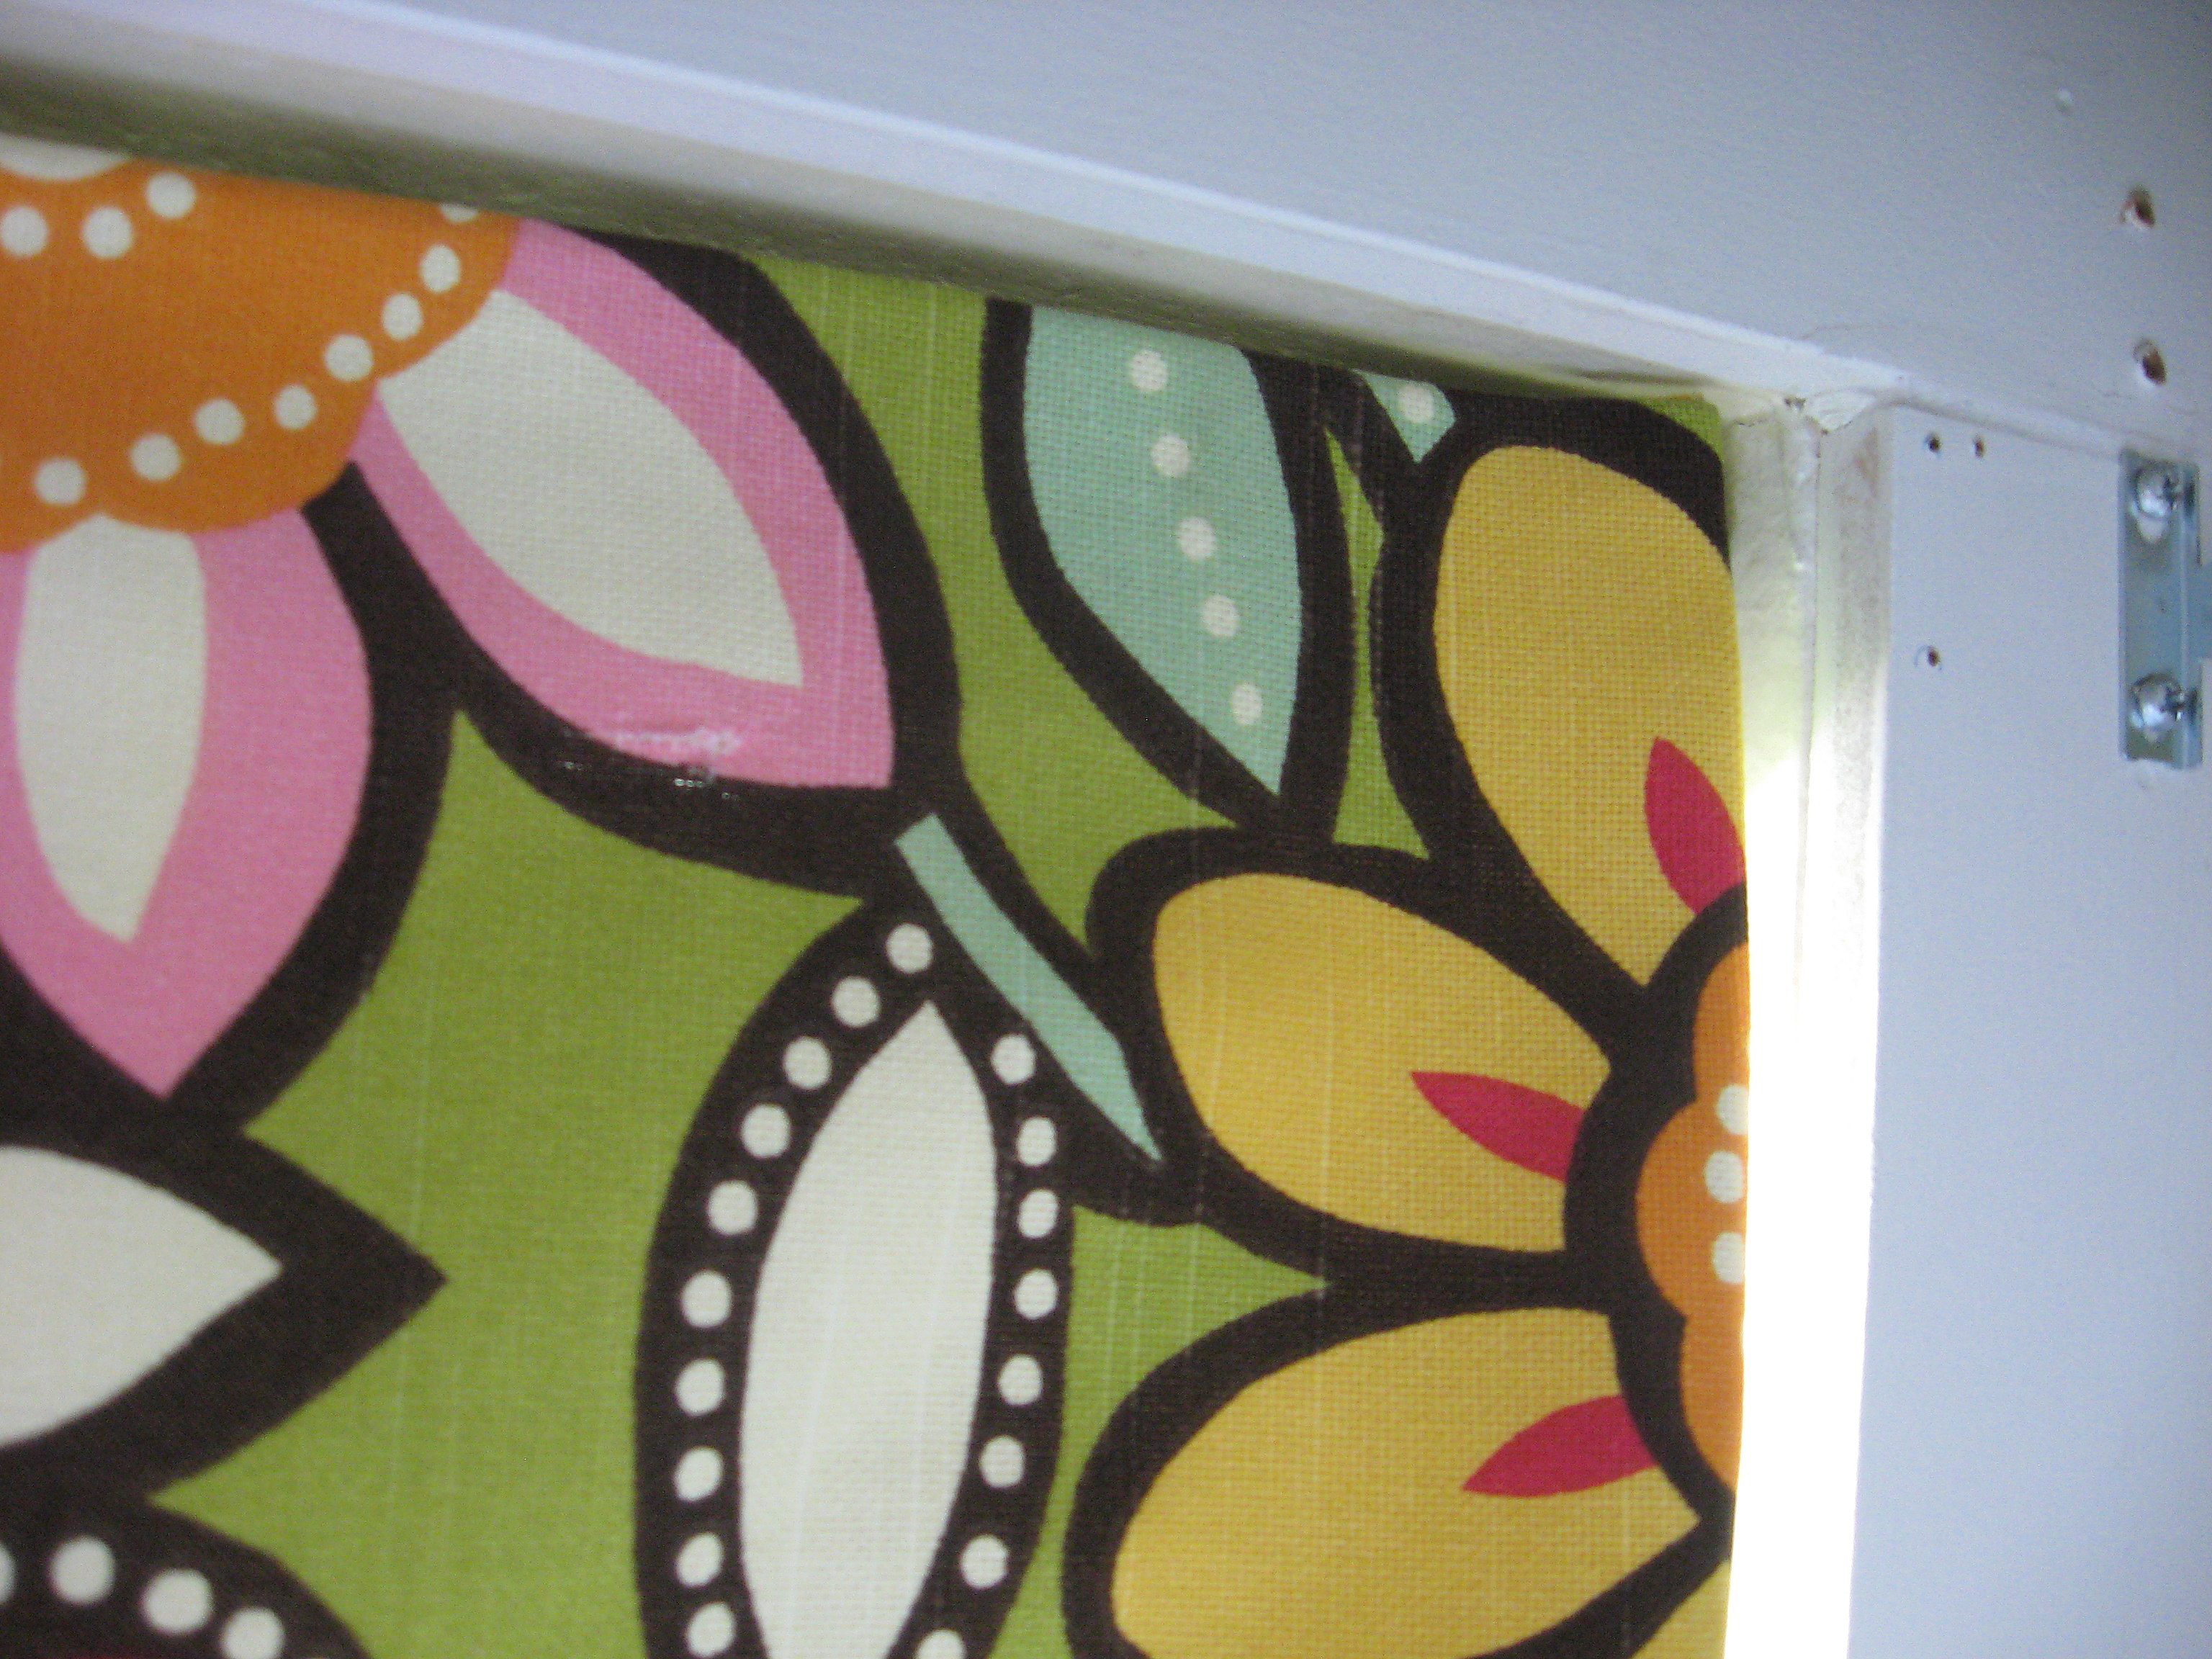
Now rehang the blinds in the brackets. You can see here how I left the fabric loose at the ends, so that I could lock the blinds back in the bracket properly.

But it lies nice and flat:
At this point the strings are behind the blind. I’ve seen people deal with this a couple of ways; I’ve seen a few people glue the fabric to the BACK of the top bar on the blinds, but I don’t like the way that looks. Most people seem to leave it behind – you can open and close the shade, but I think it’s inconvenient, and since this is in my little girl’s room I needed her to be able to do it on her own.
I opted to cut a slit in the shade right where the pull strings come out of the top bar. I threaded the pull strings through the slit to the front of the shade. Put a little fabric glue on the fabric around the slit so that it doesn’t fray or tear.
Here they are open:

And closed:
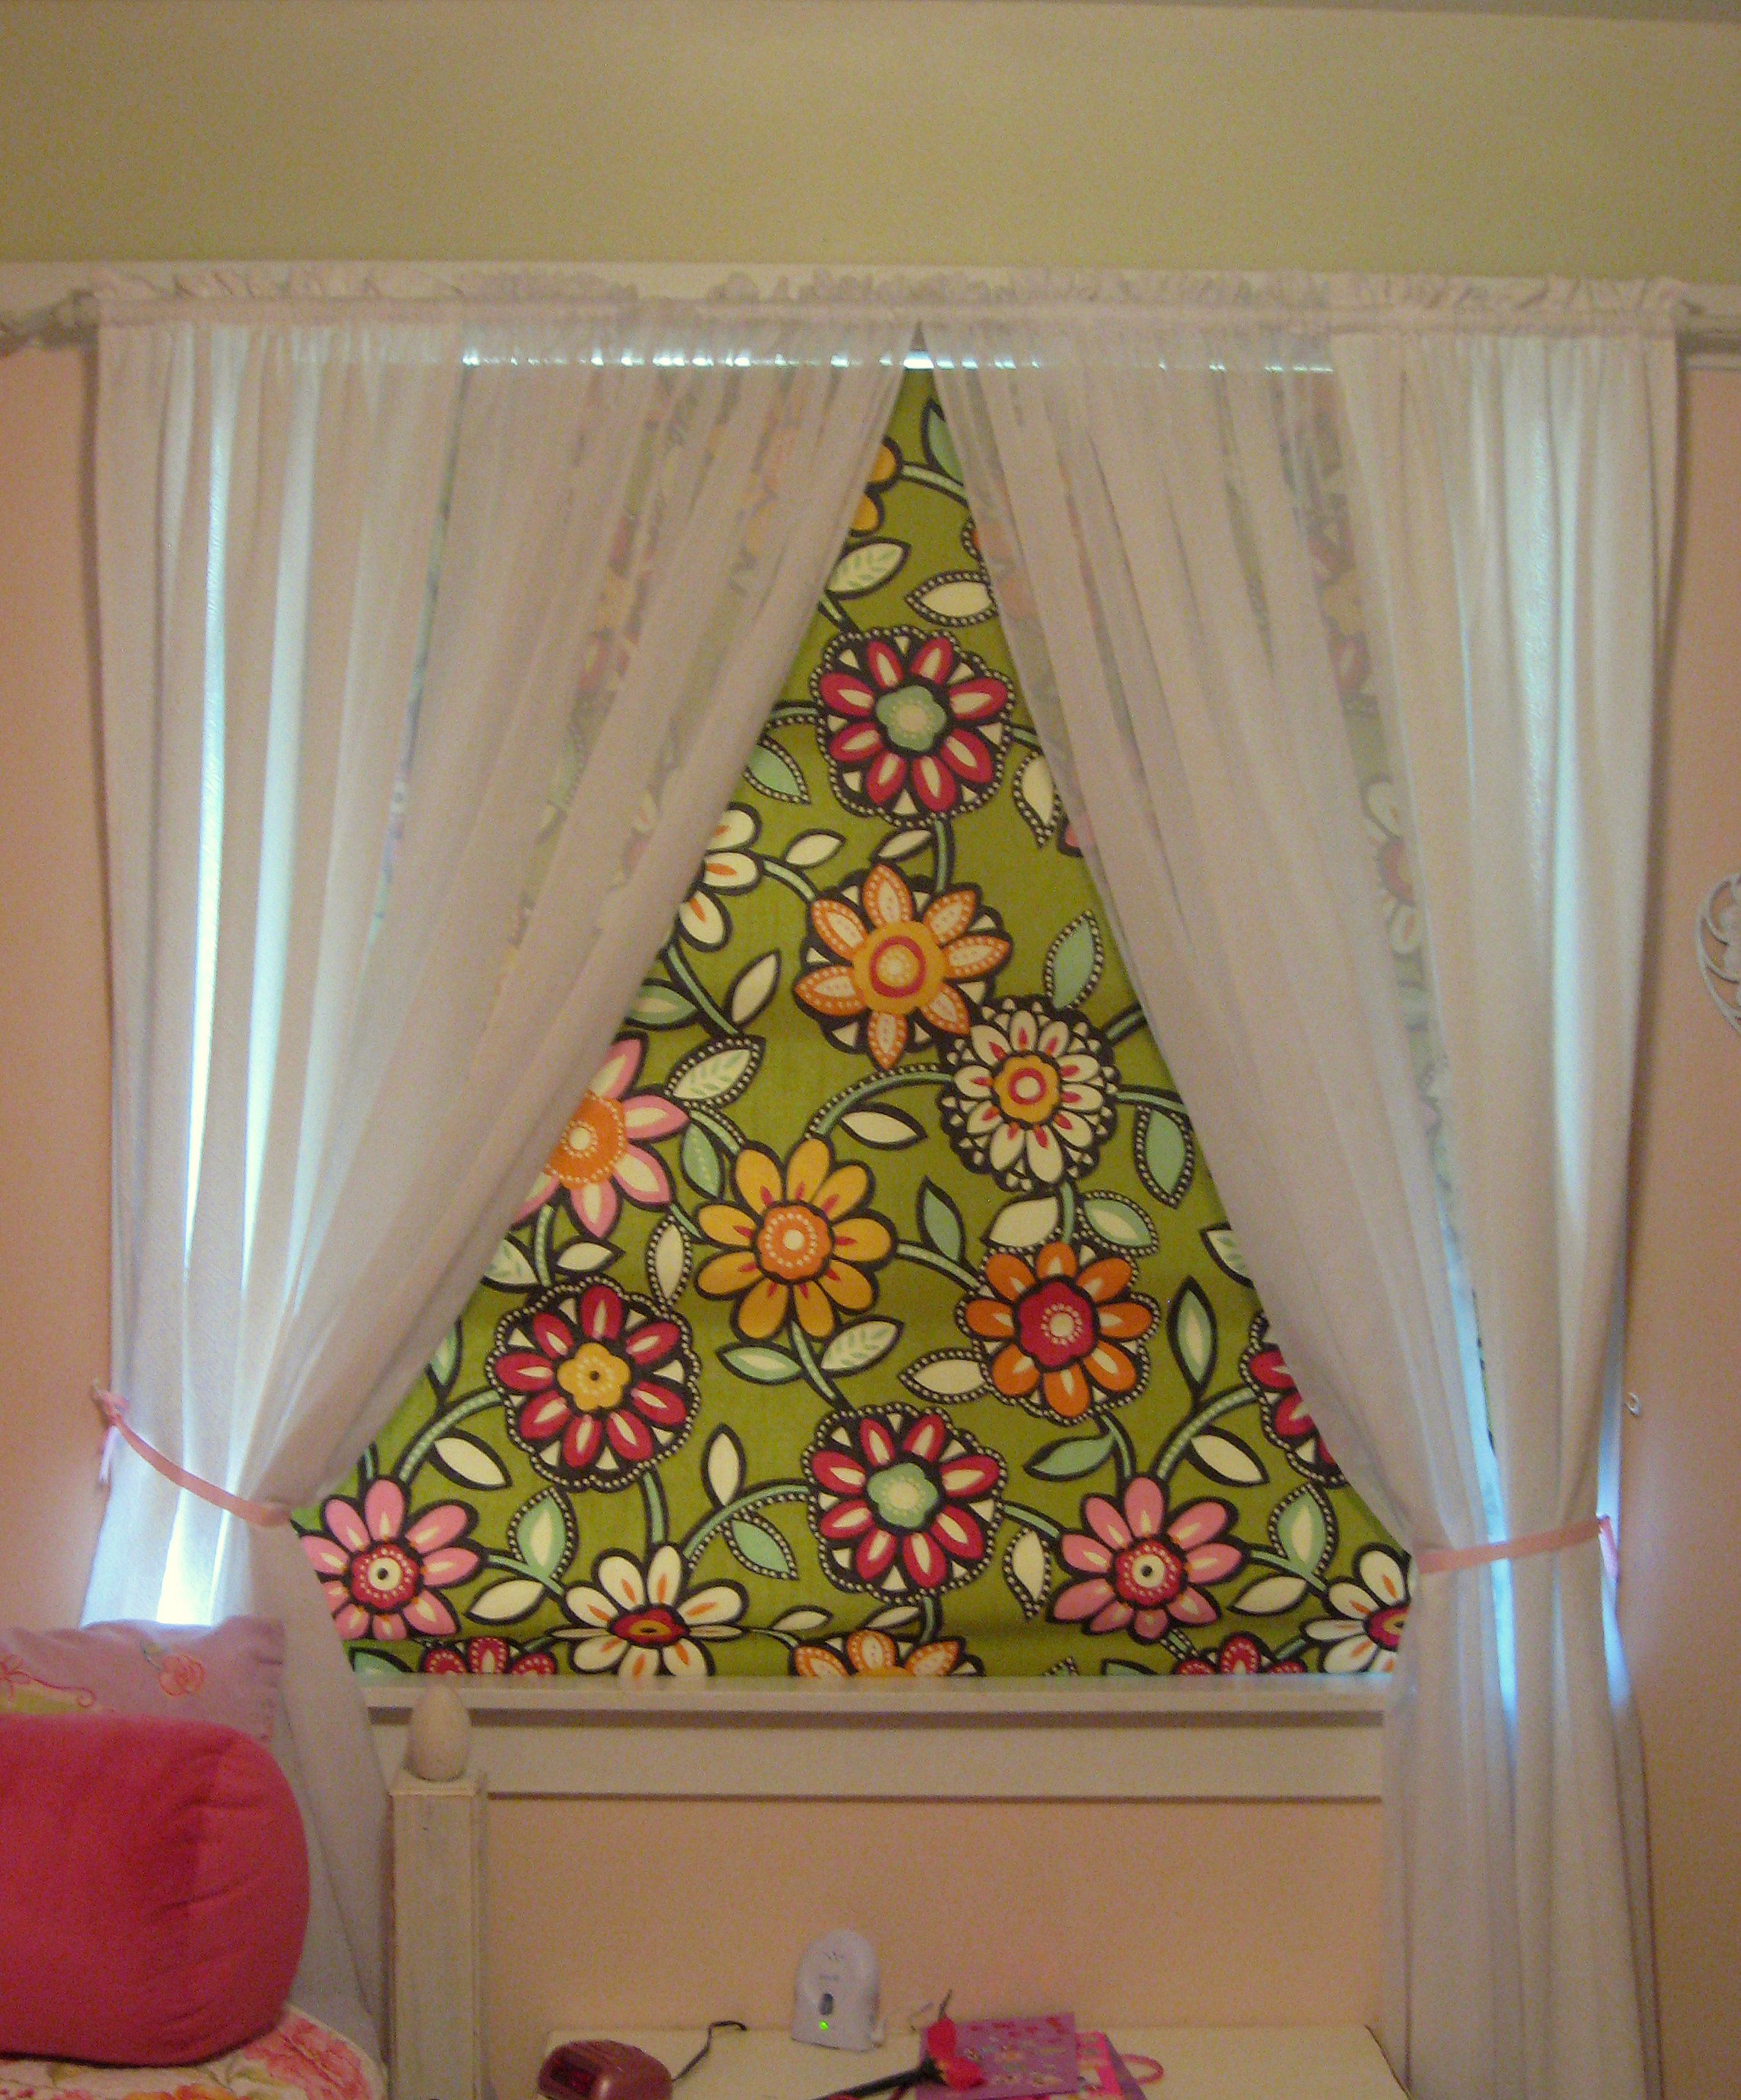
Much better!
A PYP Best Blog! Update a Boring Ceiling Fan!
Just in case you missed this article on updating a boring ceiling fan the first time we shared it a couple of years ago, we are republishing it. After Sharon wrote this blog originally, we got an awesome response. This is one of the PYP Best Blogs!
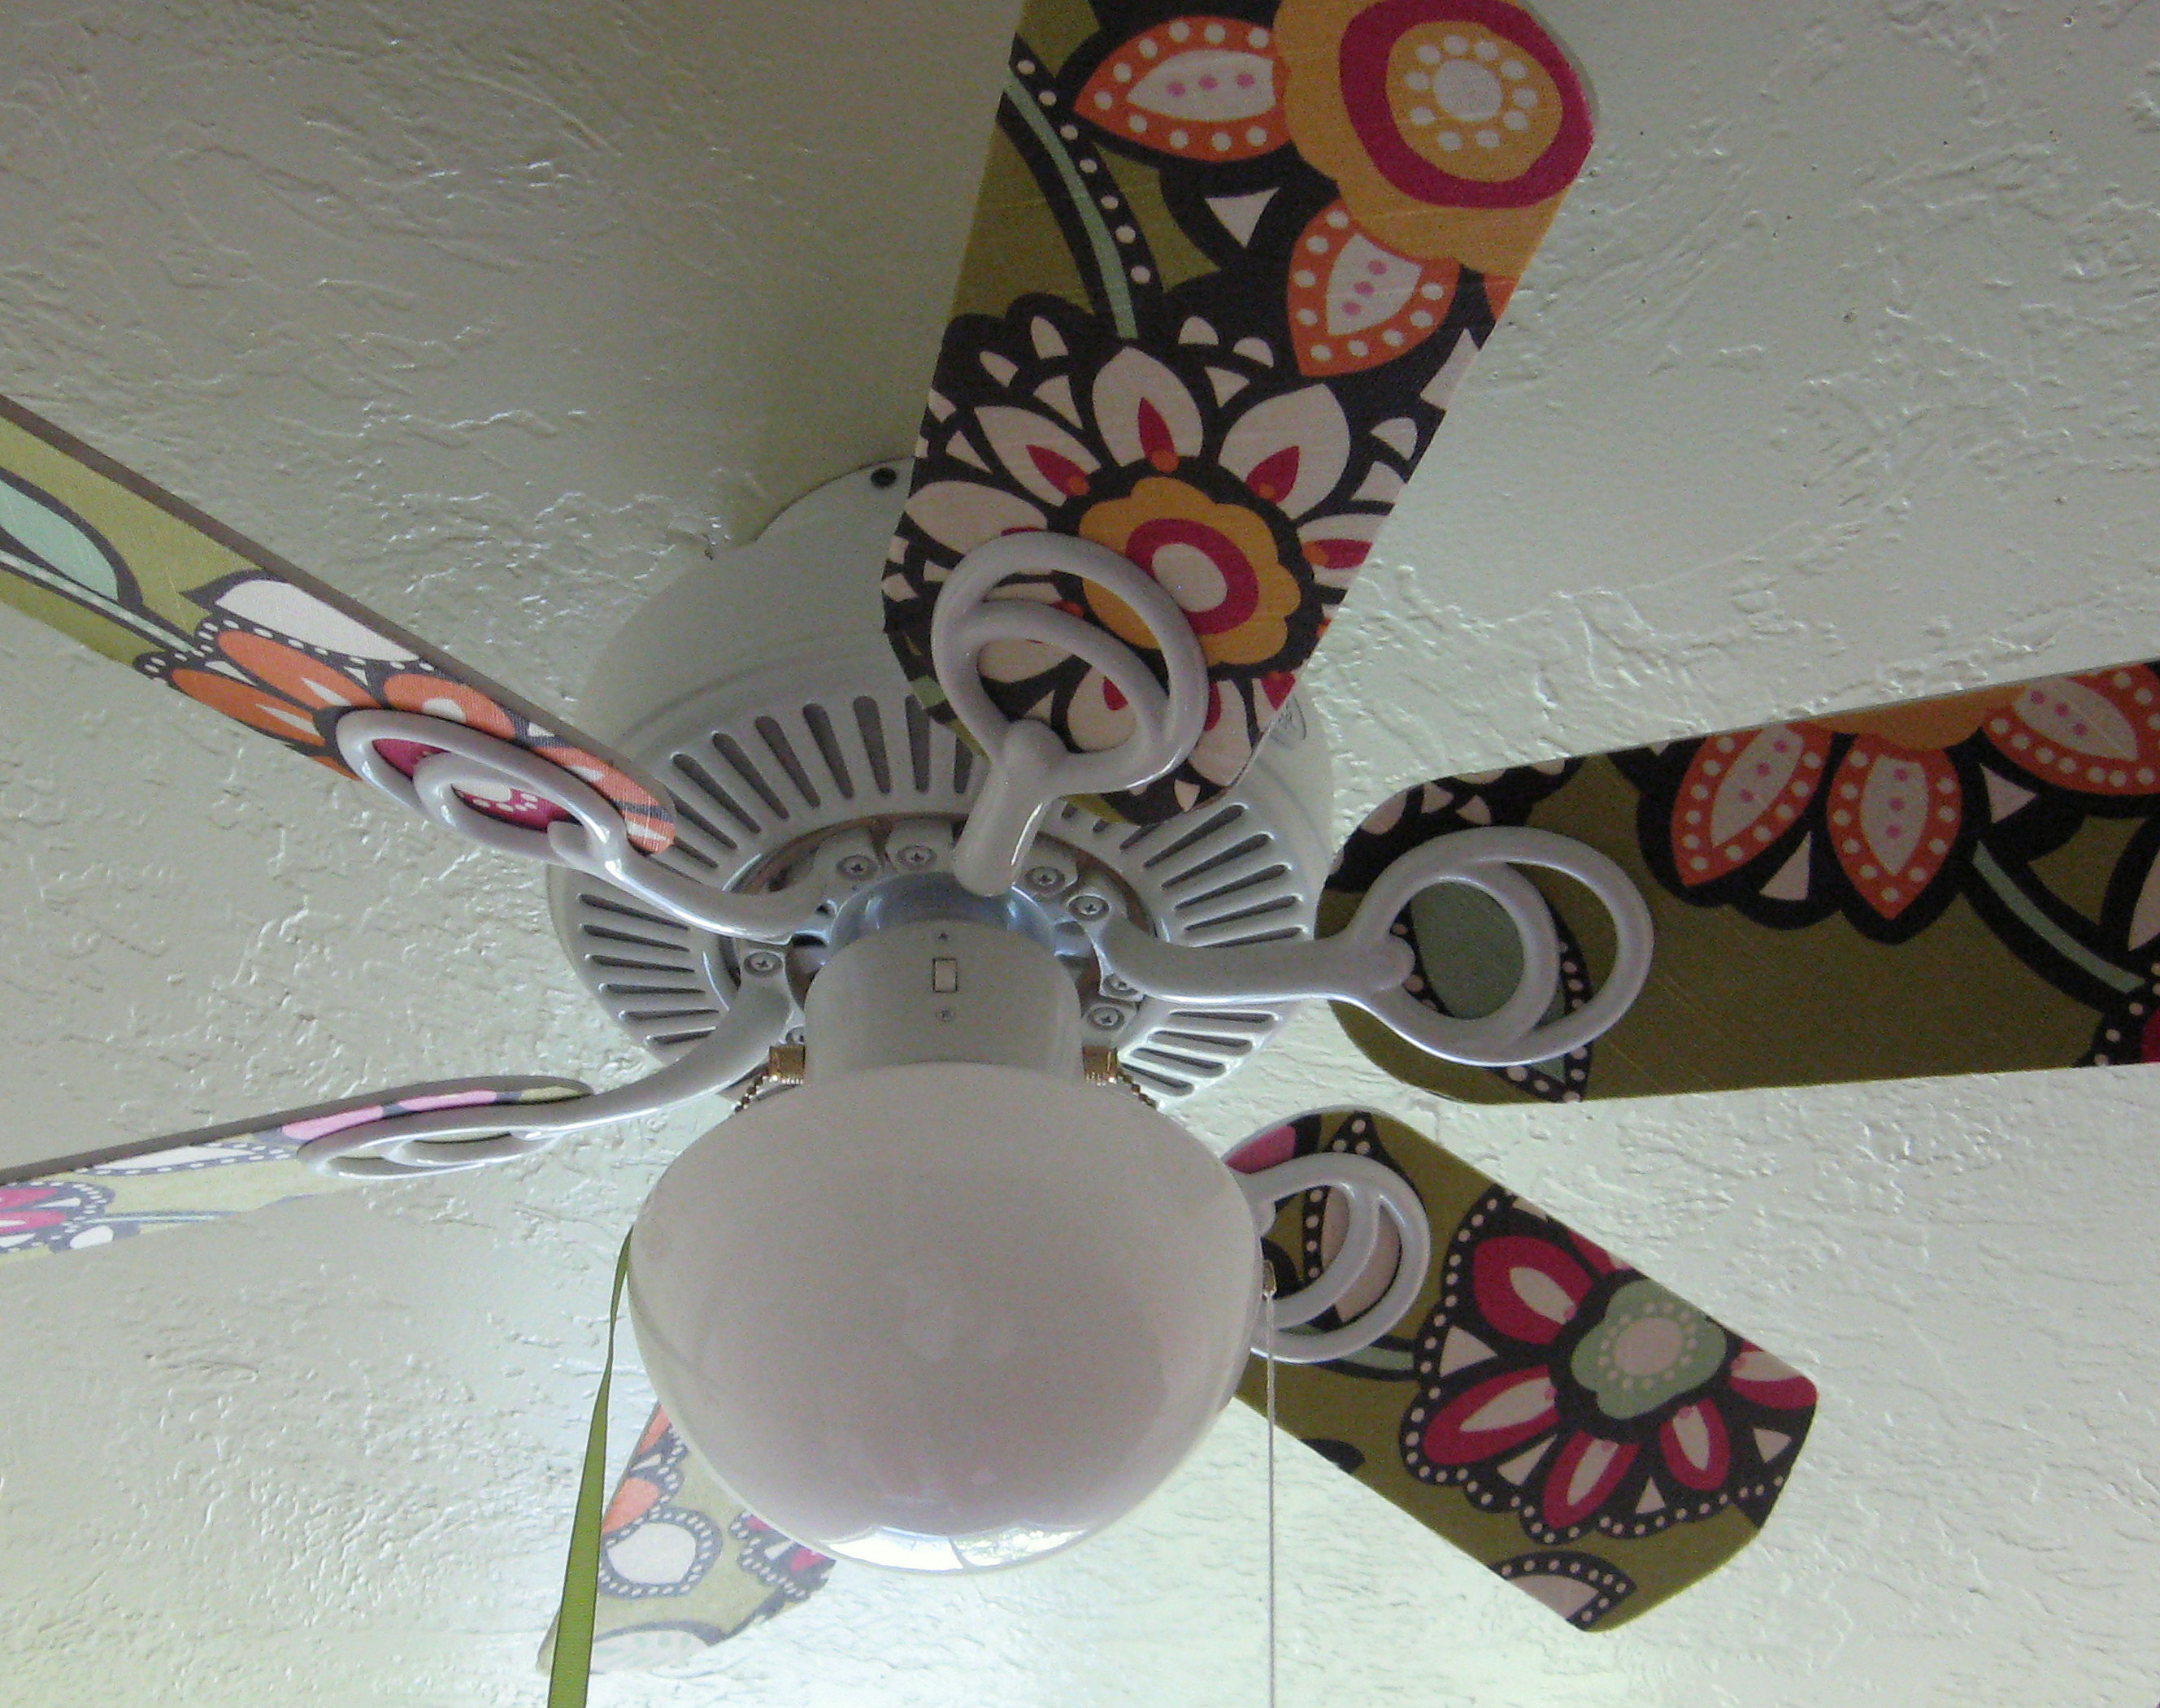
This is the ceiling fan that was in my daughter’s room when we bought our house:
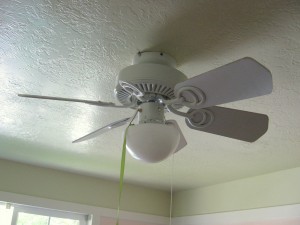
I used the leftover fabric from the roman shade that I made for her room and a bottle of Mod Podge and the whole project took about an hour.
Start by removing the fan blades. They come off easily with a screwdriver. Use this opportunity to give both fan and blades a good scrubbing!
Most fan blades will be reversible with a different color on each side so that you can change them out if you want to. This fan had brown wood grain on the other side, and since I can’t see myself EVER using it that way, that is the side I decided to cover.
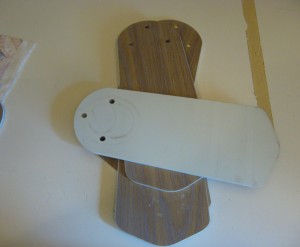
Lay a fan blade out on the backside of the fabric and trace around it once for each fan blade, then cut them out.
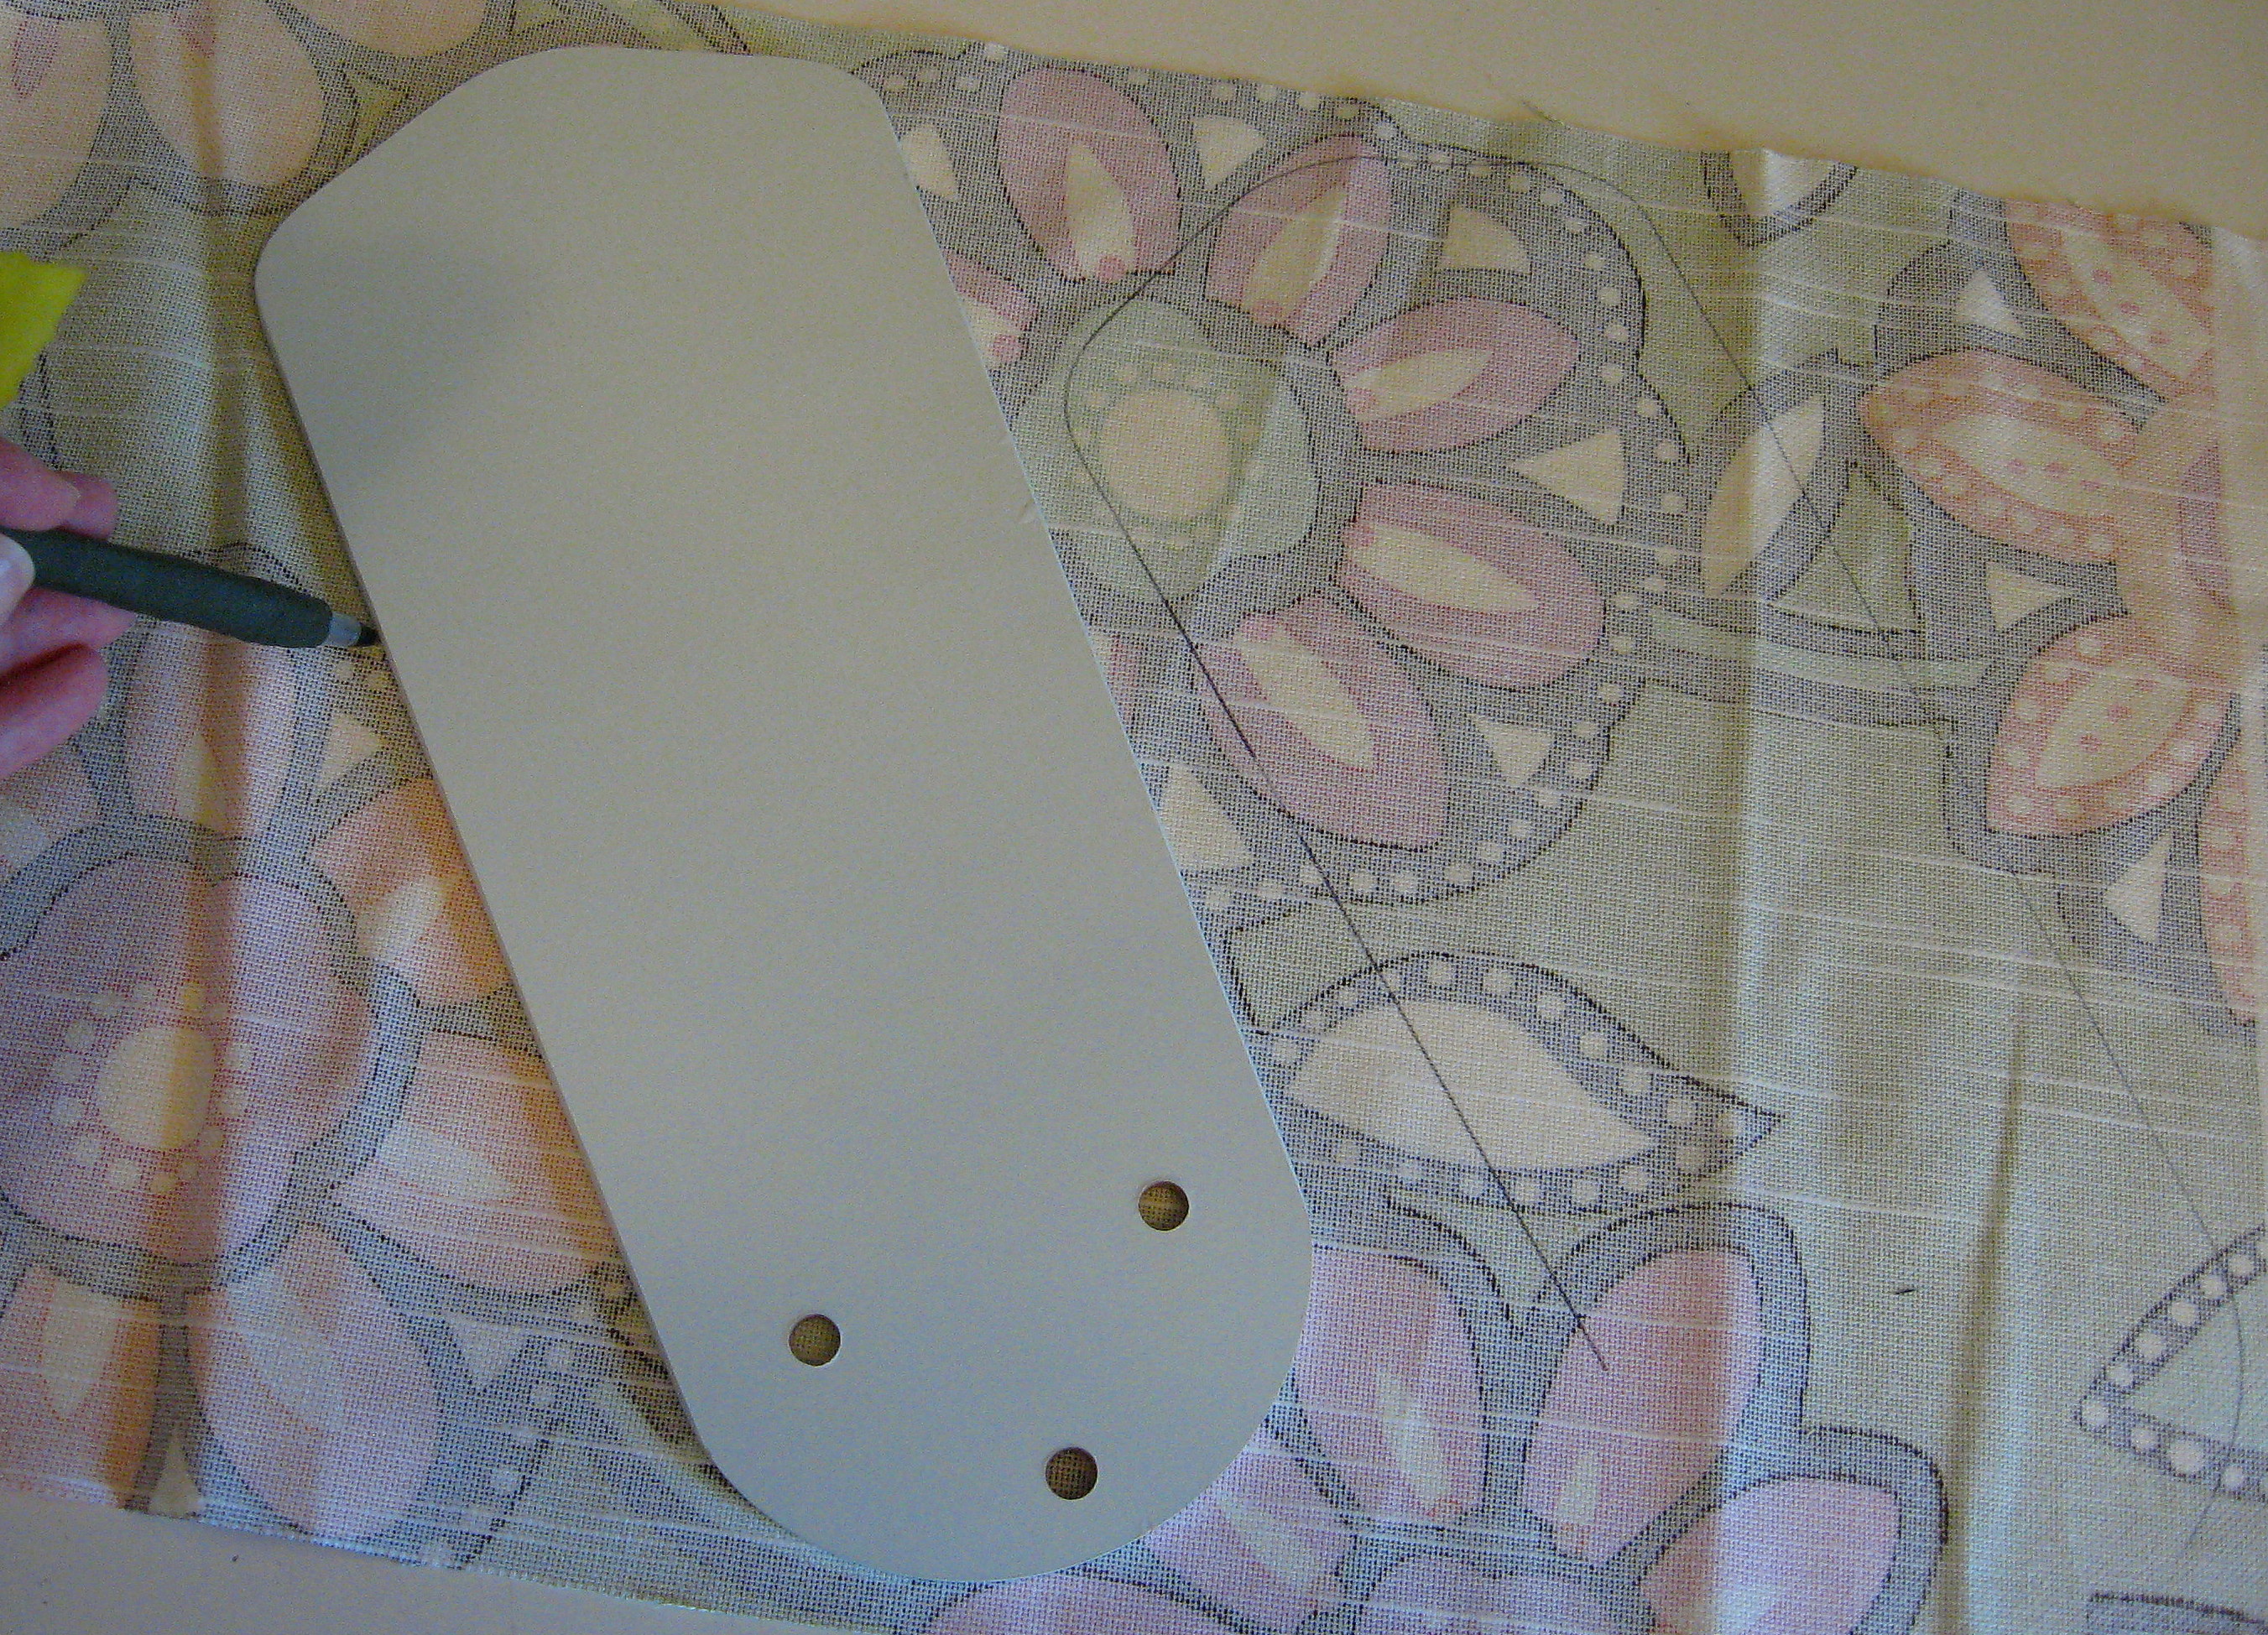
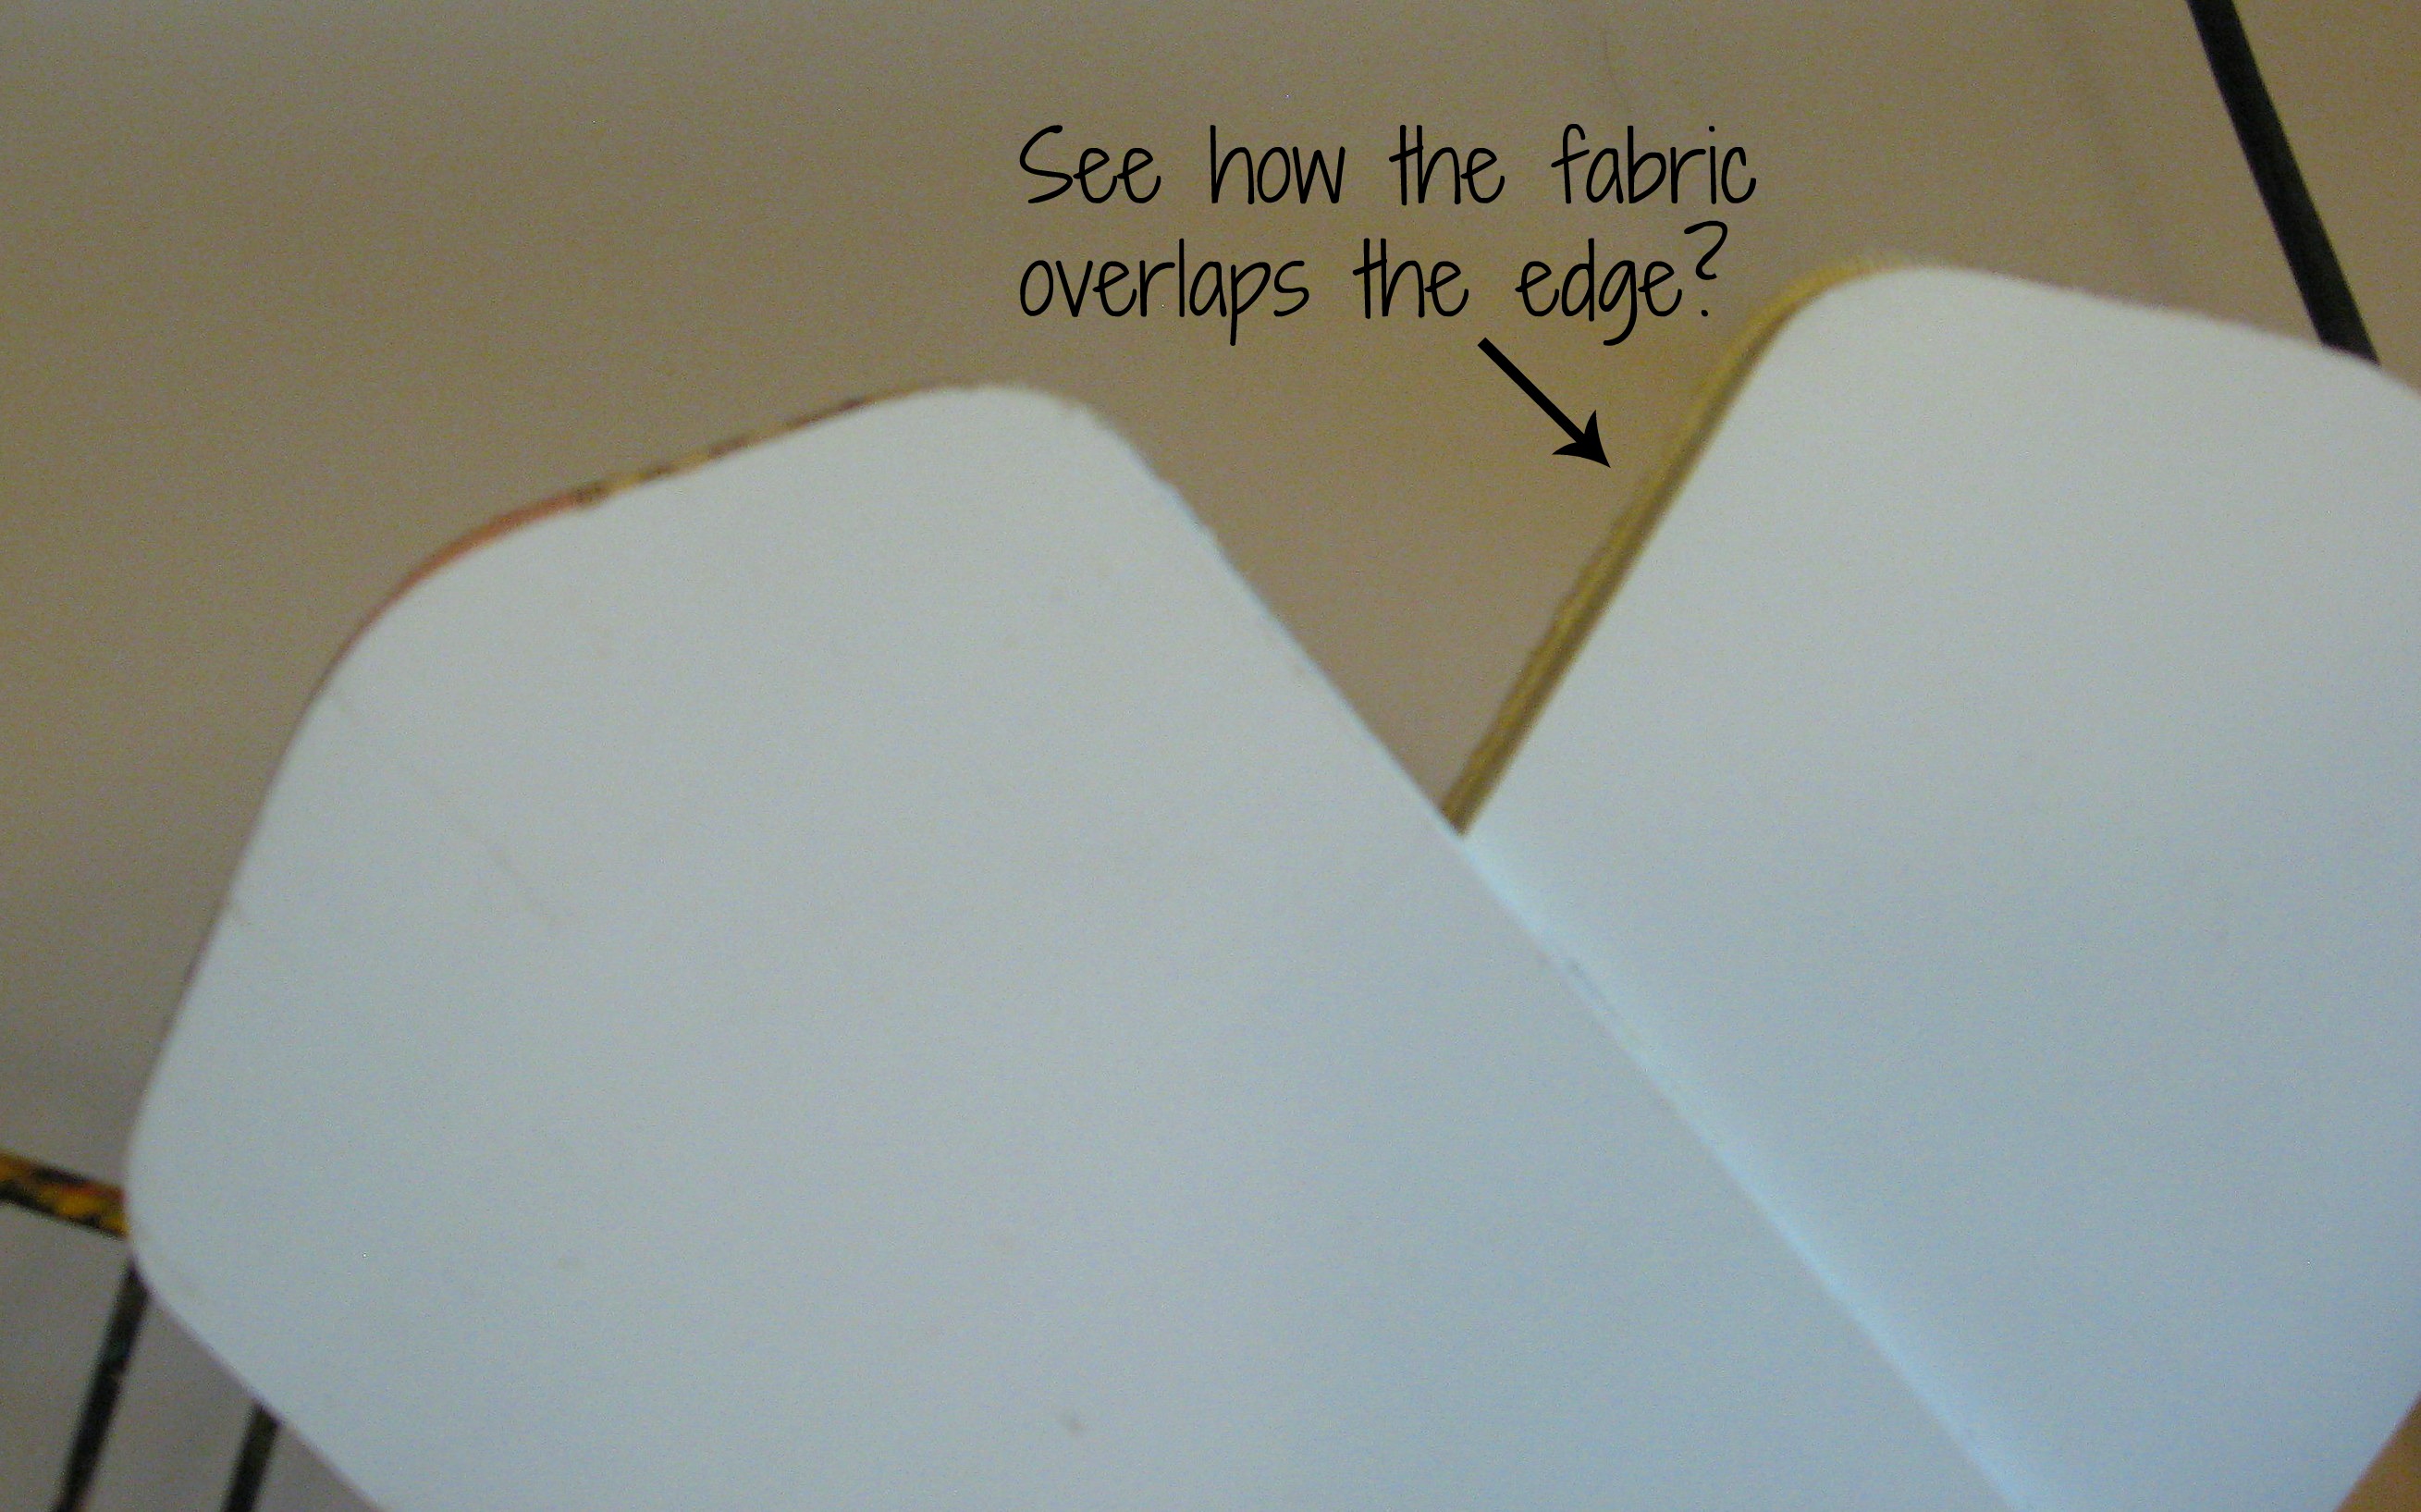
Err on the side of cutting too big and not too small. You don’t have to be too careful about the fabric fitting on exactly – if it hangs over just a touch it will be fine because no one will ever see the tops!
Now put a generous coat of Mod Podge on the fan blade
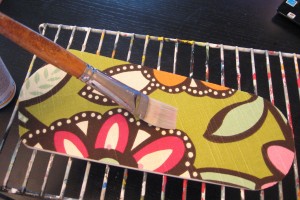
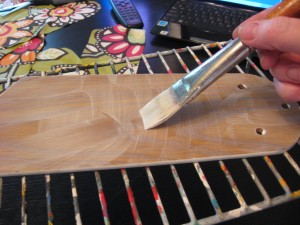 and then put the fabric on it. Smooth it down with your hand as it begins to dry; I didn’t even iron the fabric first. Between the Mod Podge and the smoothing, it will get the wrinkles out!
Let that dry about 15 minutes, then put a coat of Mod Podge on top of the fabric to seal it. Let that sit until it is completely dry,
 then use a drill bit to drill a hole through the fabric where the screw holes are in the fan blade. Make sure the Mod Podge is totally dry or the fabric will come twisting off when you start to drill through it (uh…you know. I’m IMAGINING that is what would happen anyway…..)
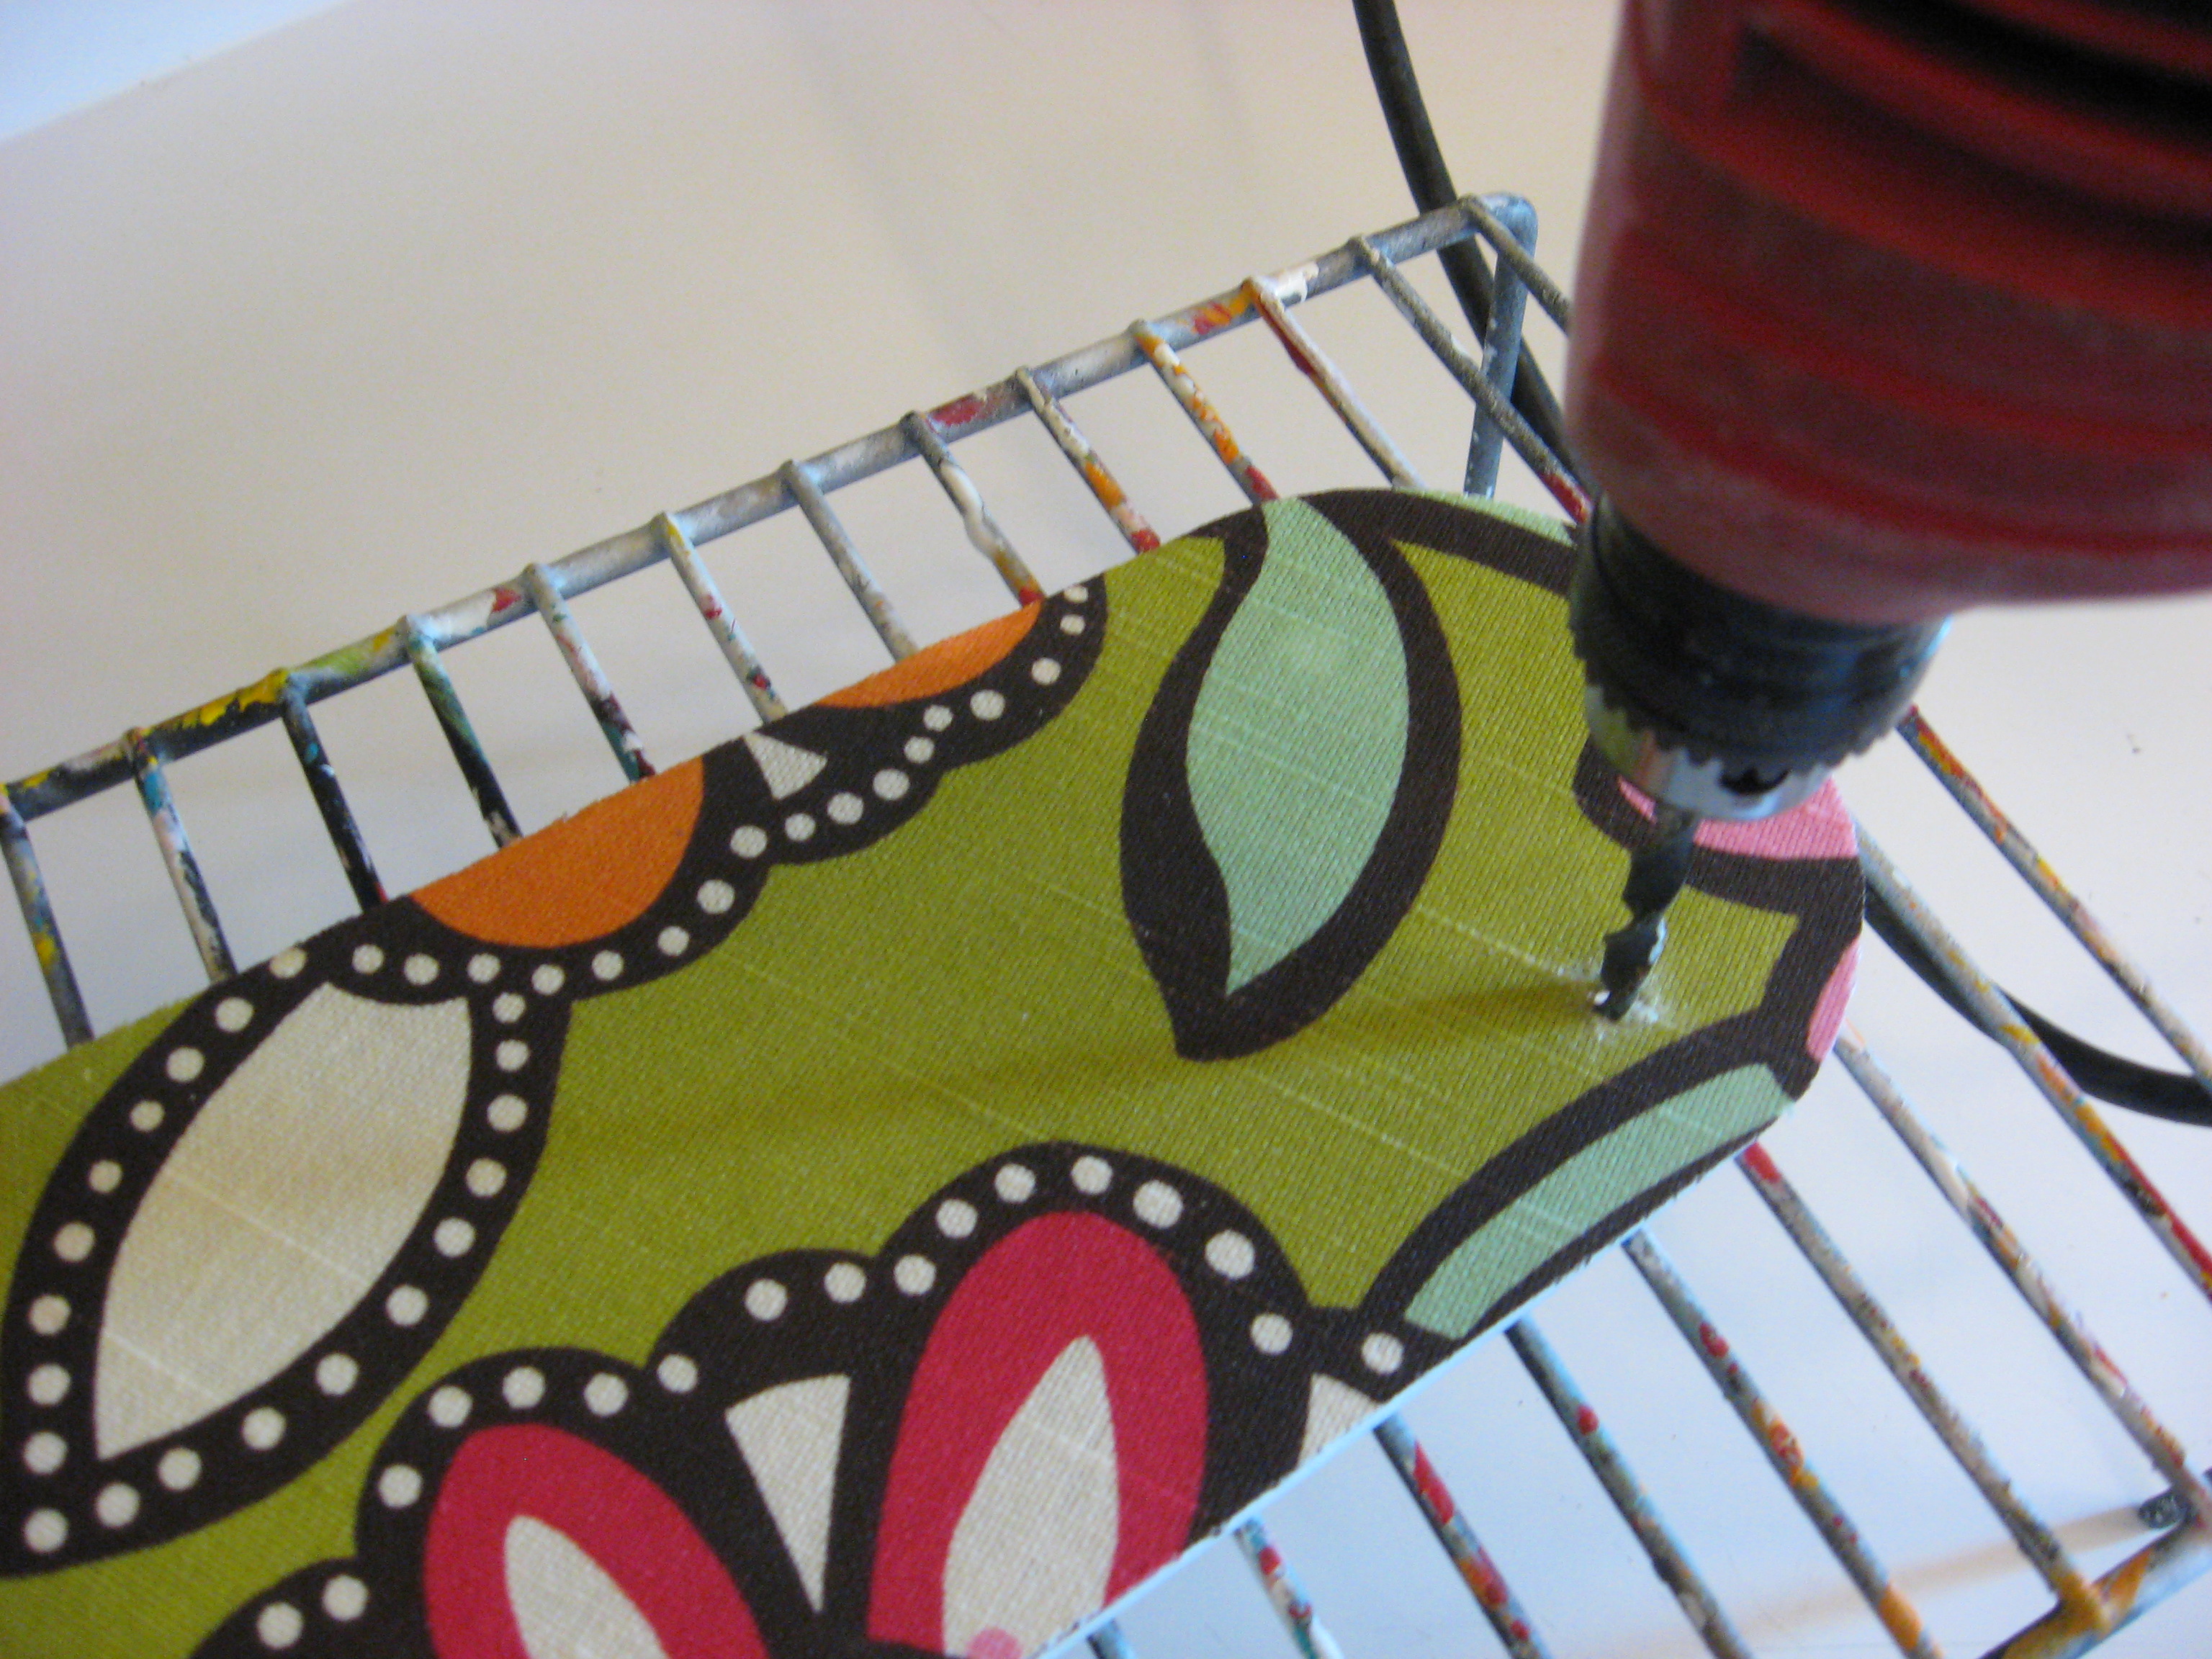
Screw the finished fan blades back into place and enjoy!
Joanns Online Christmas in July Sale! Free Shipping!

Online Christmas in July Sale!
Use code YSQA207 when you spend $12.75 or more!
Joanns.com LINK
A PYP Best Blog! Painting Laminate Furniture!
Just in case you missed this article on painting laminate furniture the first time we shared it a couple of years ago, we are republishing it. After Sharon wrote this blog originally, we got an awesome response. This is one of the PYP Best Blogs!
If you google “How to paint laminate furniture” you will get dozens of different results. Being able to paint cheap laminate furniture and give it new life is the hallmark of the DIY blogger. I will admit that until recently I usually ignored these posts. I’ve been painting laminate furniture since before most of these bloggers were out of diapers – back in the day when everyone said it was impossible to do! I got great results – I have a cheap WalMart shelf in my kitchen that I first painted 19 years ago and it still looks great – but it was labor intensive with days of sanding, priming, painting and more sanding to get the desired results.
Well, I am glad that this old dog finally paid attention to some of those DIY bloggers and learned a new trick; I’m converted! I have always used Kilz brand primer, and I’m sure I still will, but what I have learned is that some primers are gripping primers and some are not. If you want to paint a surface like laminate that the paint won’t adhere to, you’ve got to give it something to stick to. Enter this wonder:
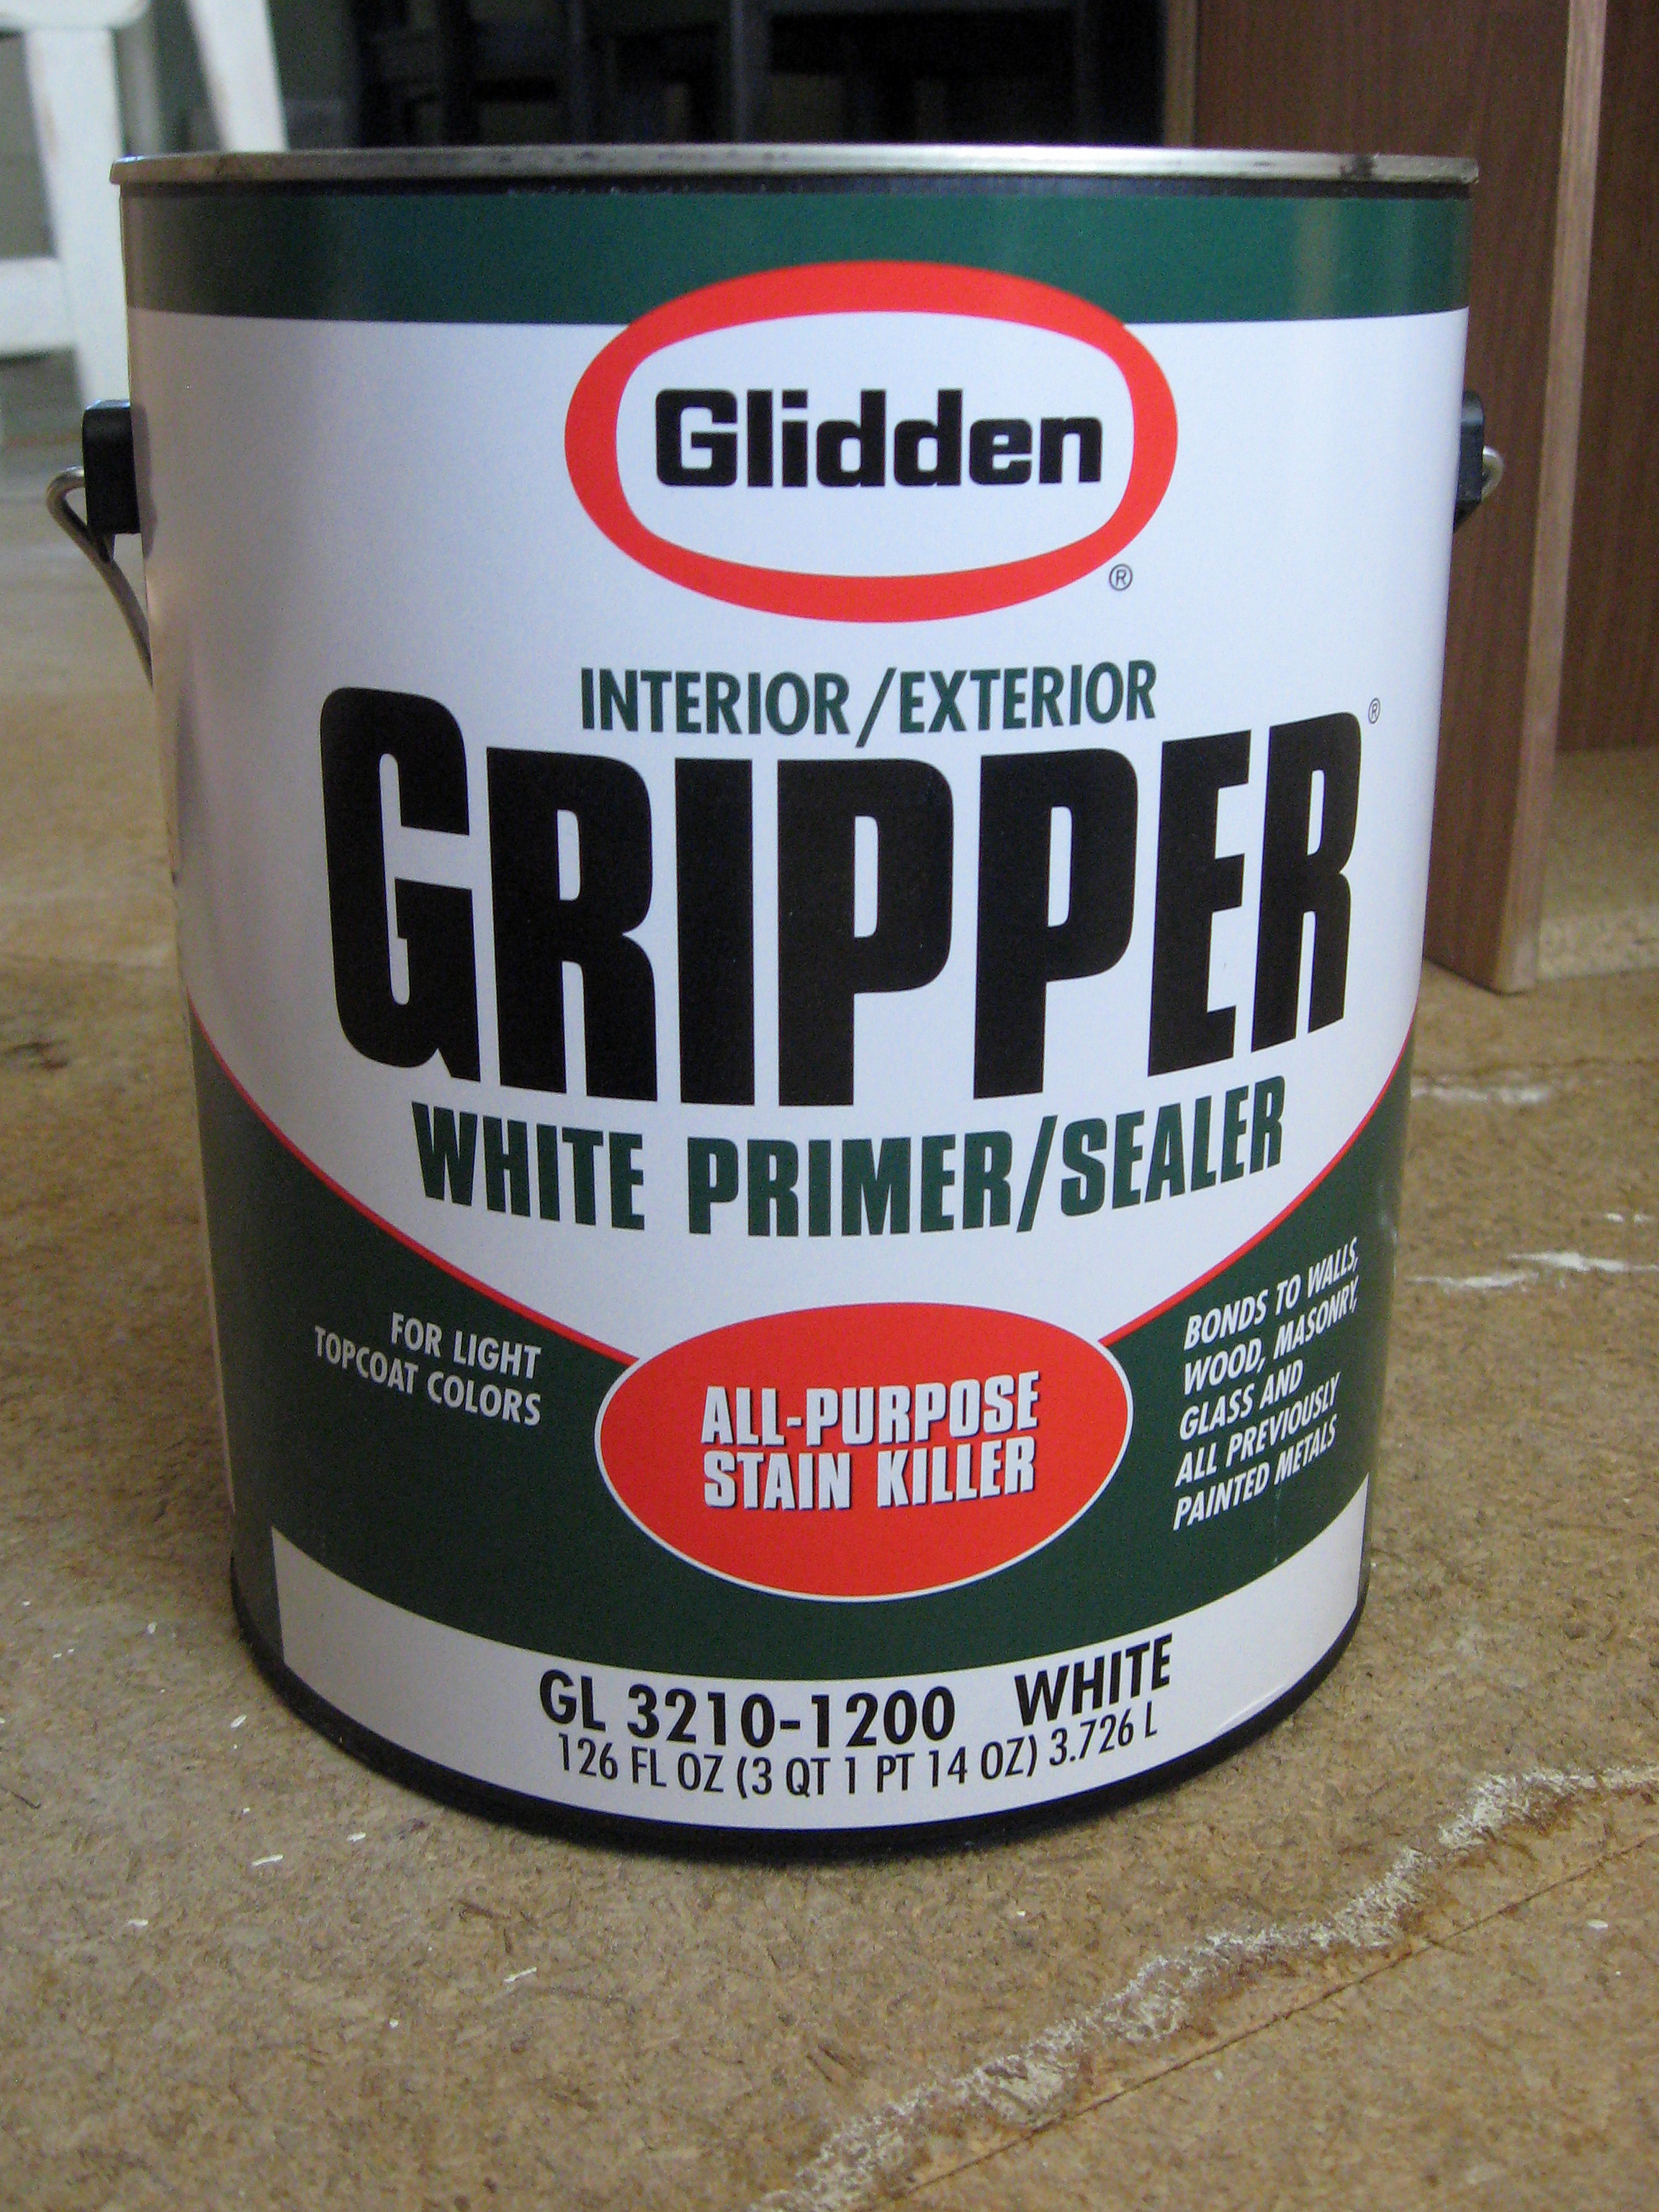
It grips to the surface to be painted with NO SANDING. I bought this straight off the shelf at Home Depot (have them shake it up for you while you’re there!). It is pretty pricey stuff, but it seems to go a long way. It comes in both white and grey; get white if your paint is light and use grey if it is dark.
I had a laminate Ikea wardrobe that I have been wanting to paint forever, but I knew all that sanding was going to be a pain so I kept putting it off. I thought this was the perfect project to try out the Gripper on.
I forgot to take a picture of it before I took the doors off, but you get the idea…
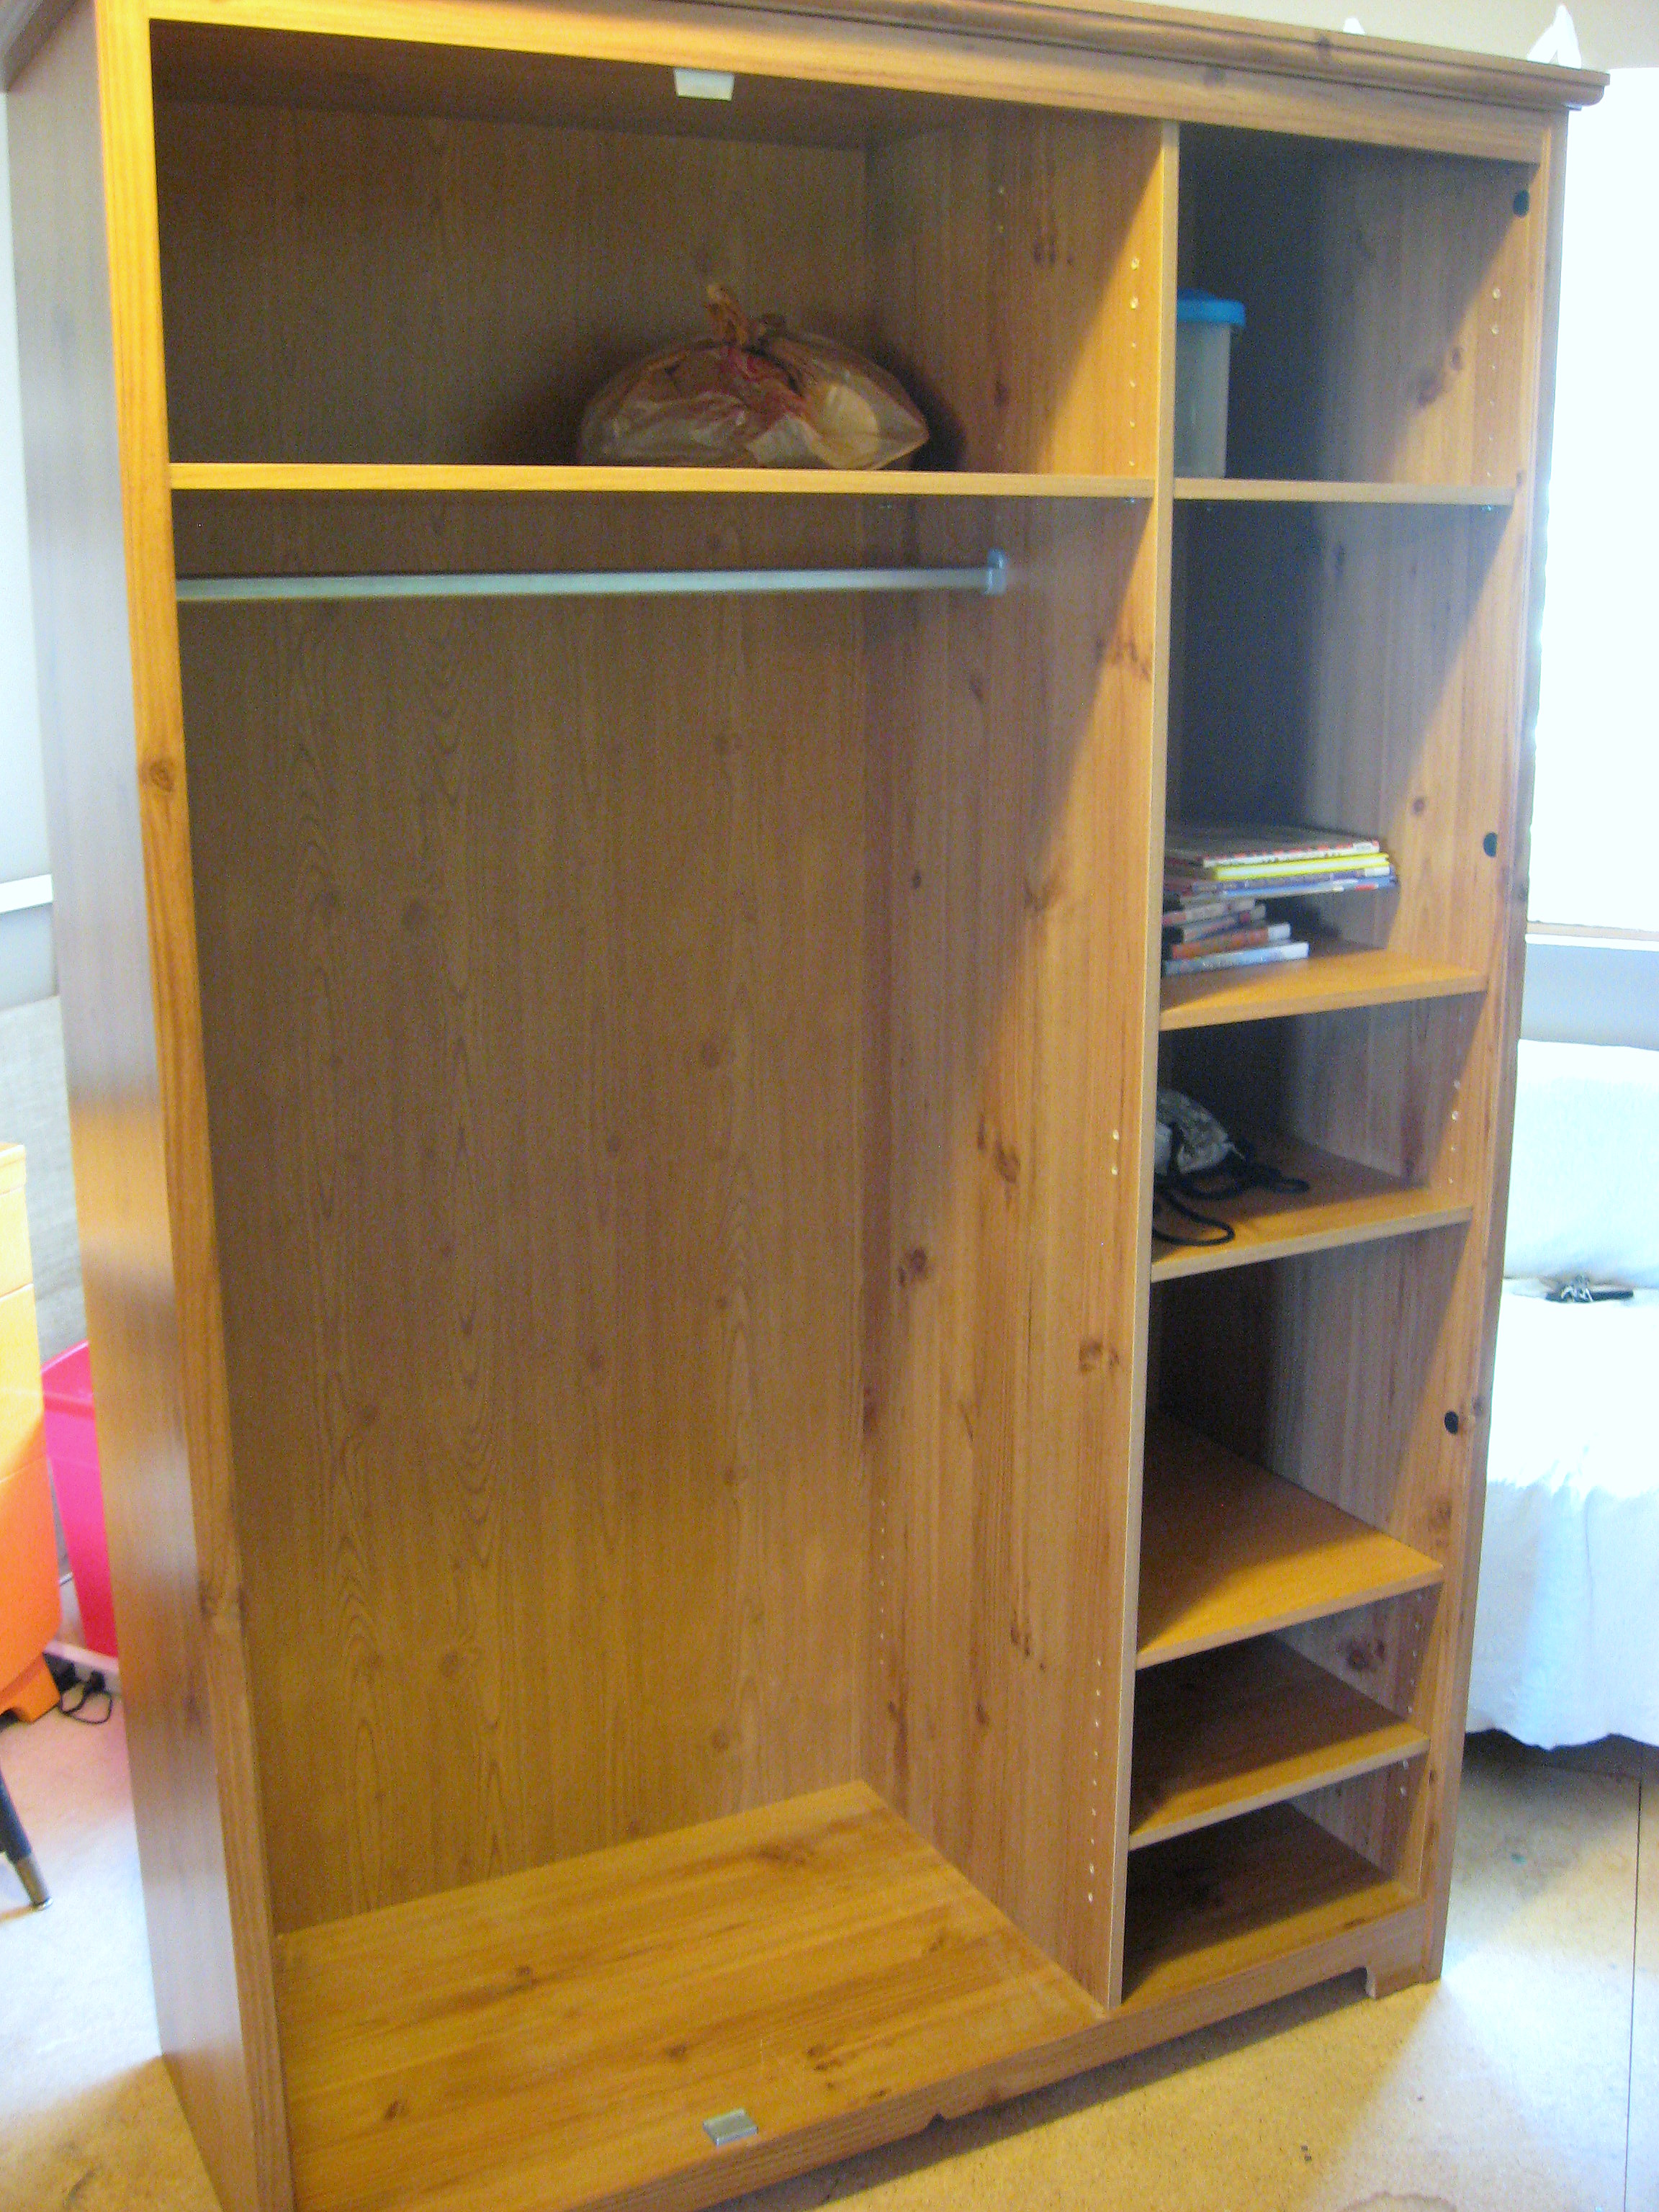
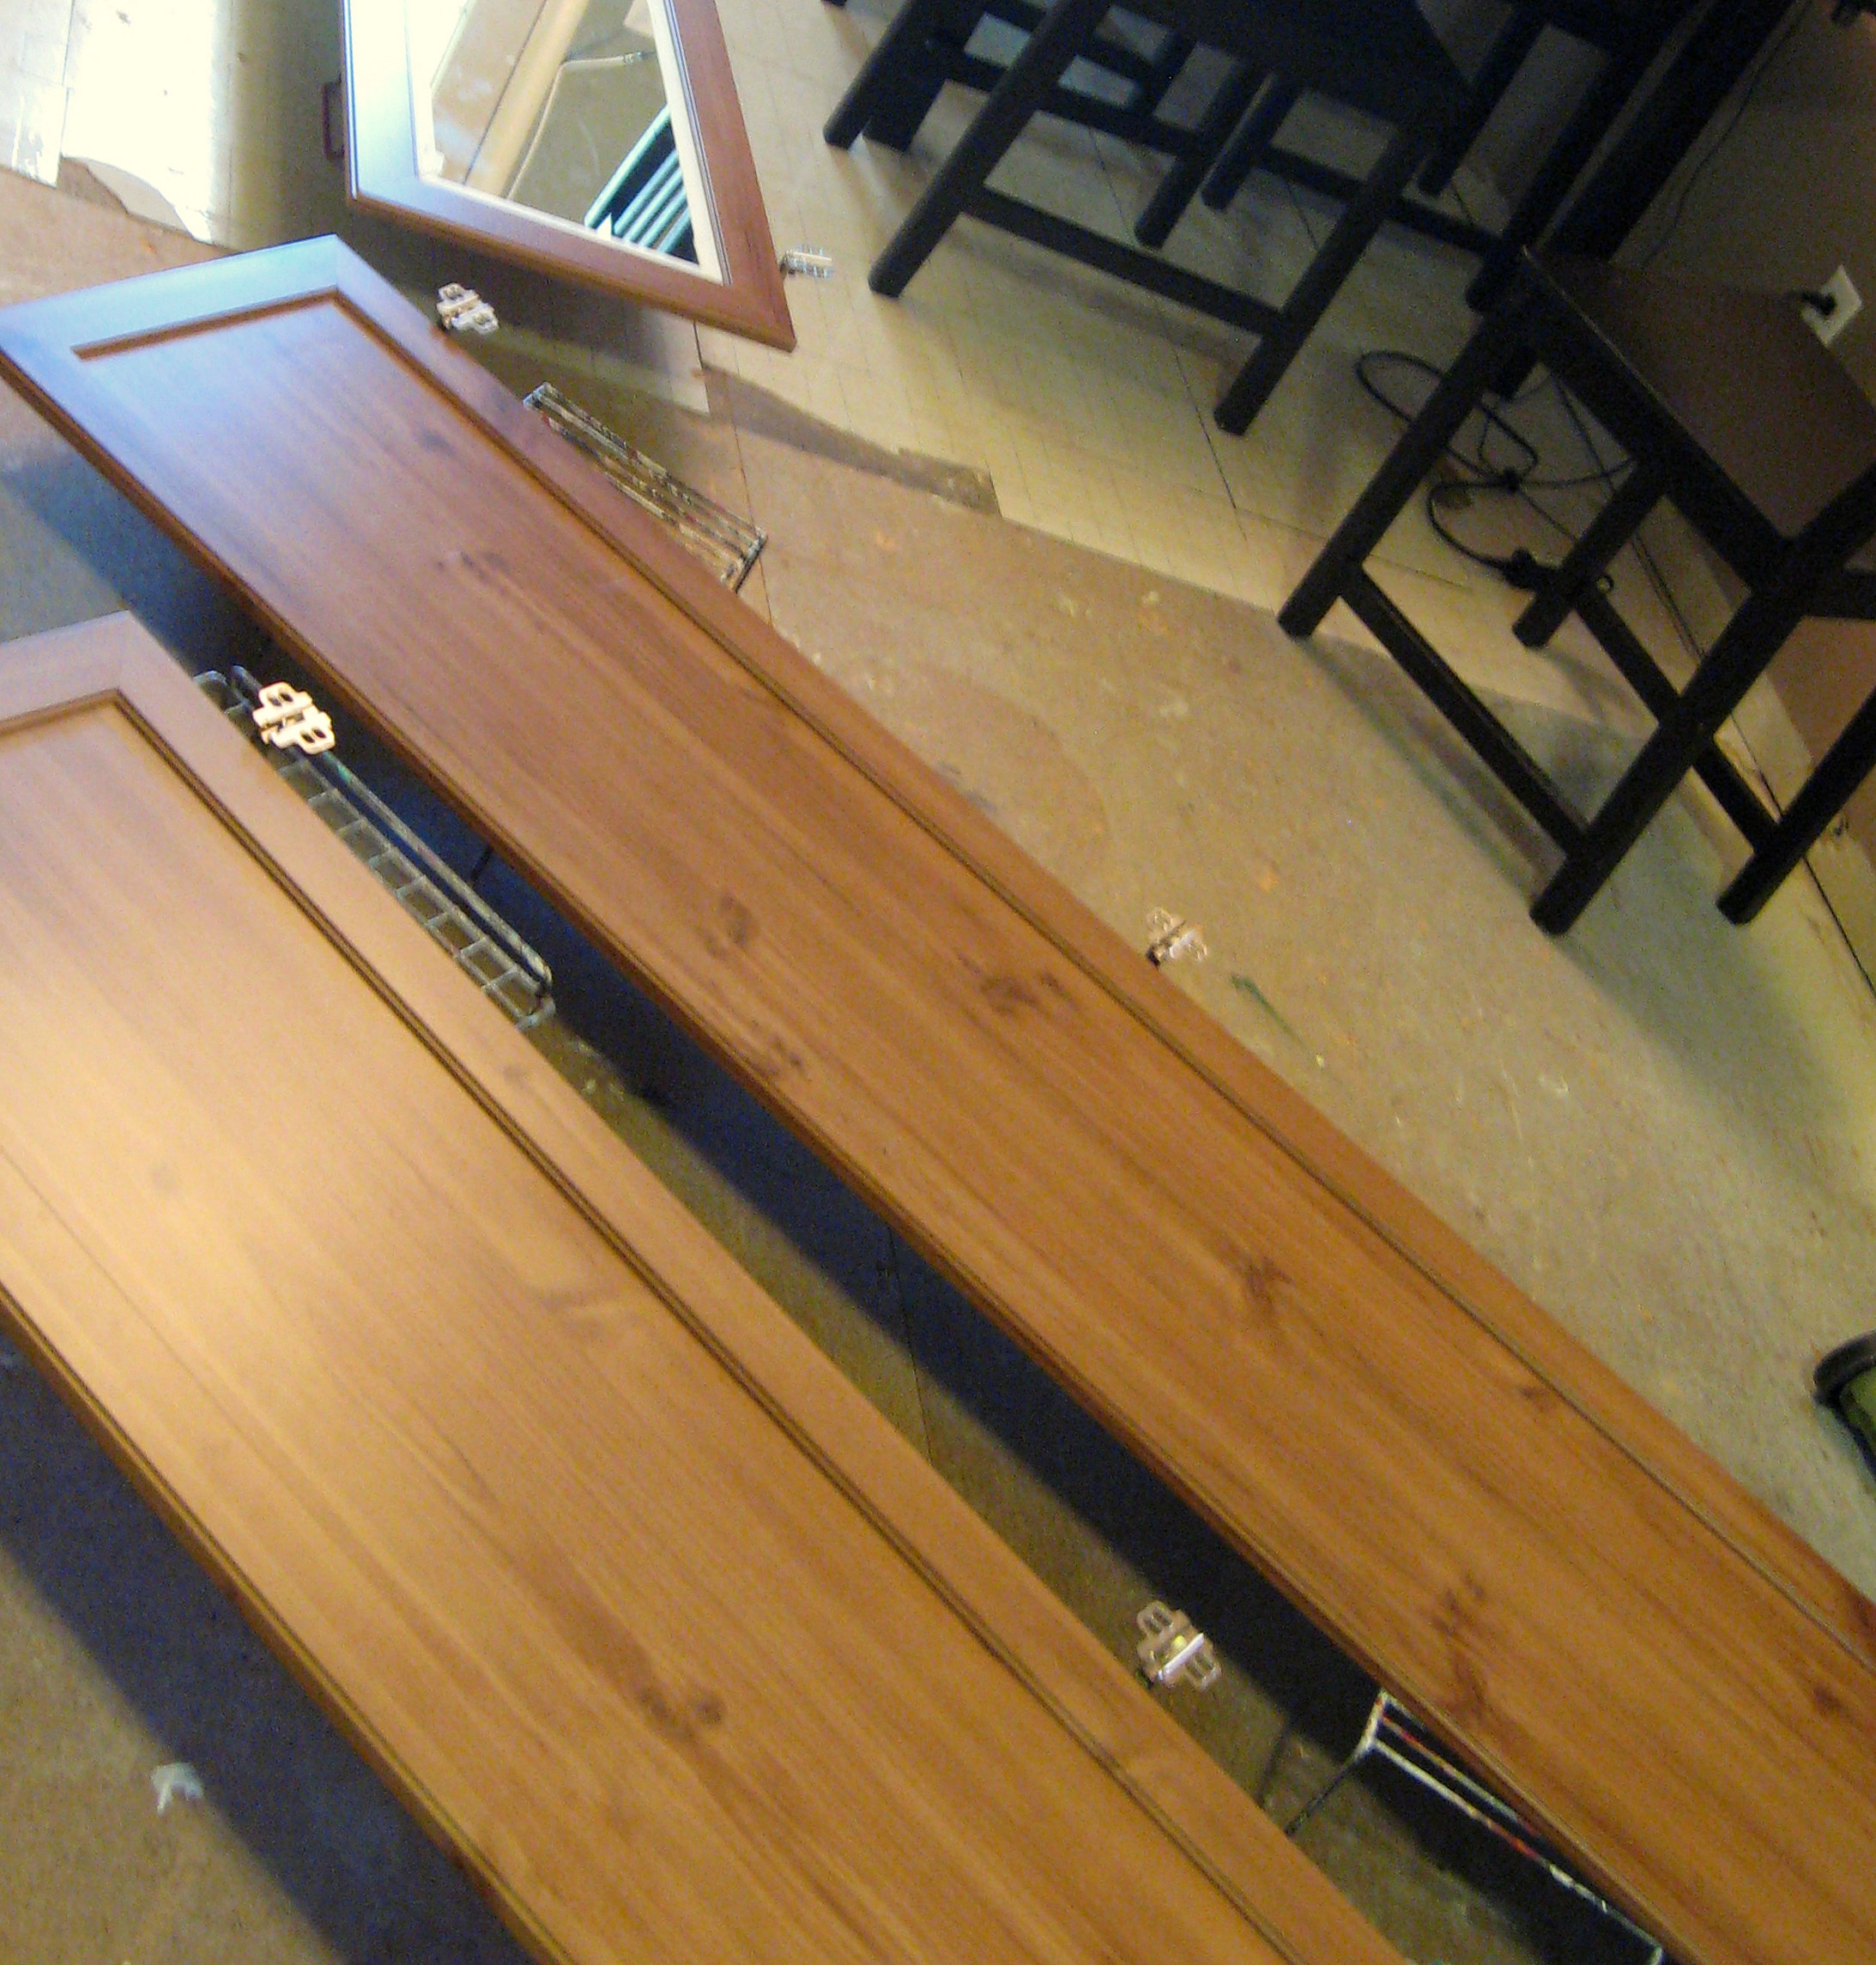
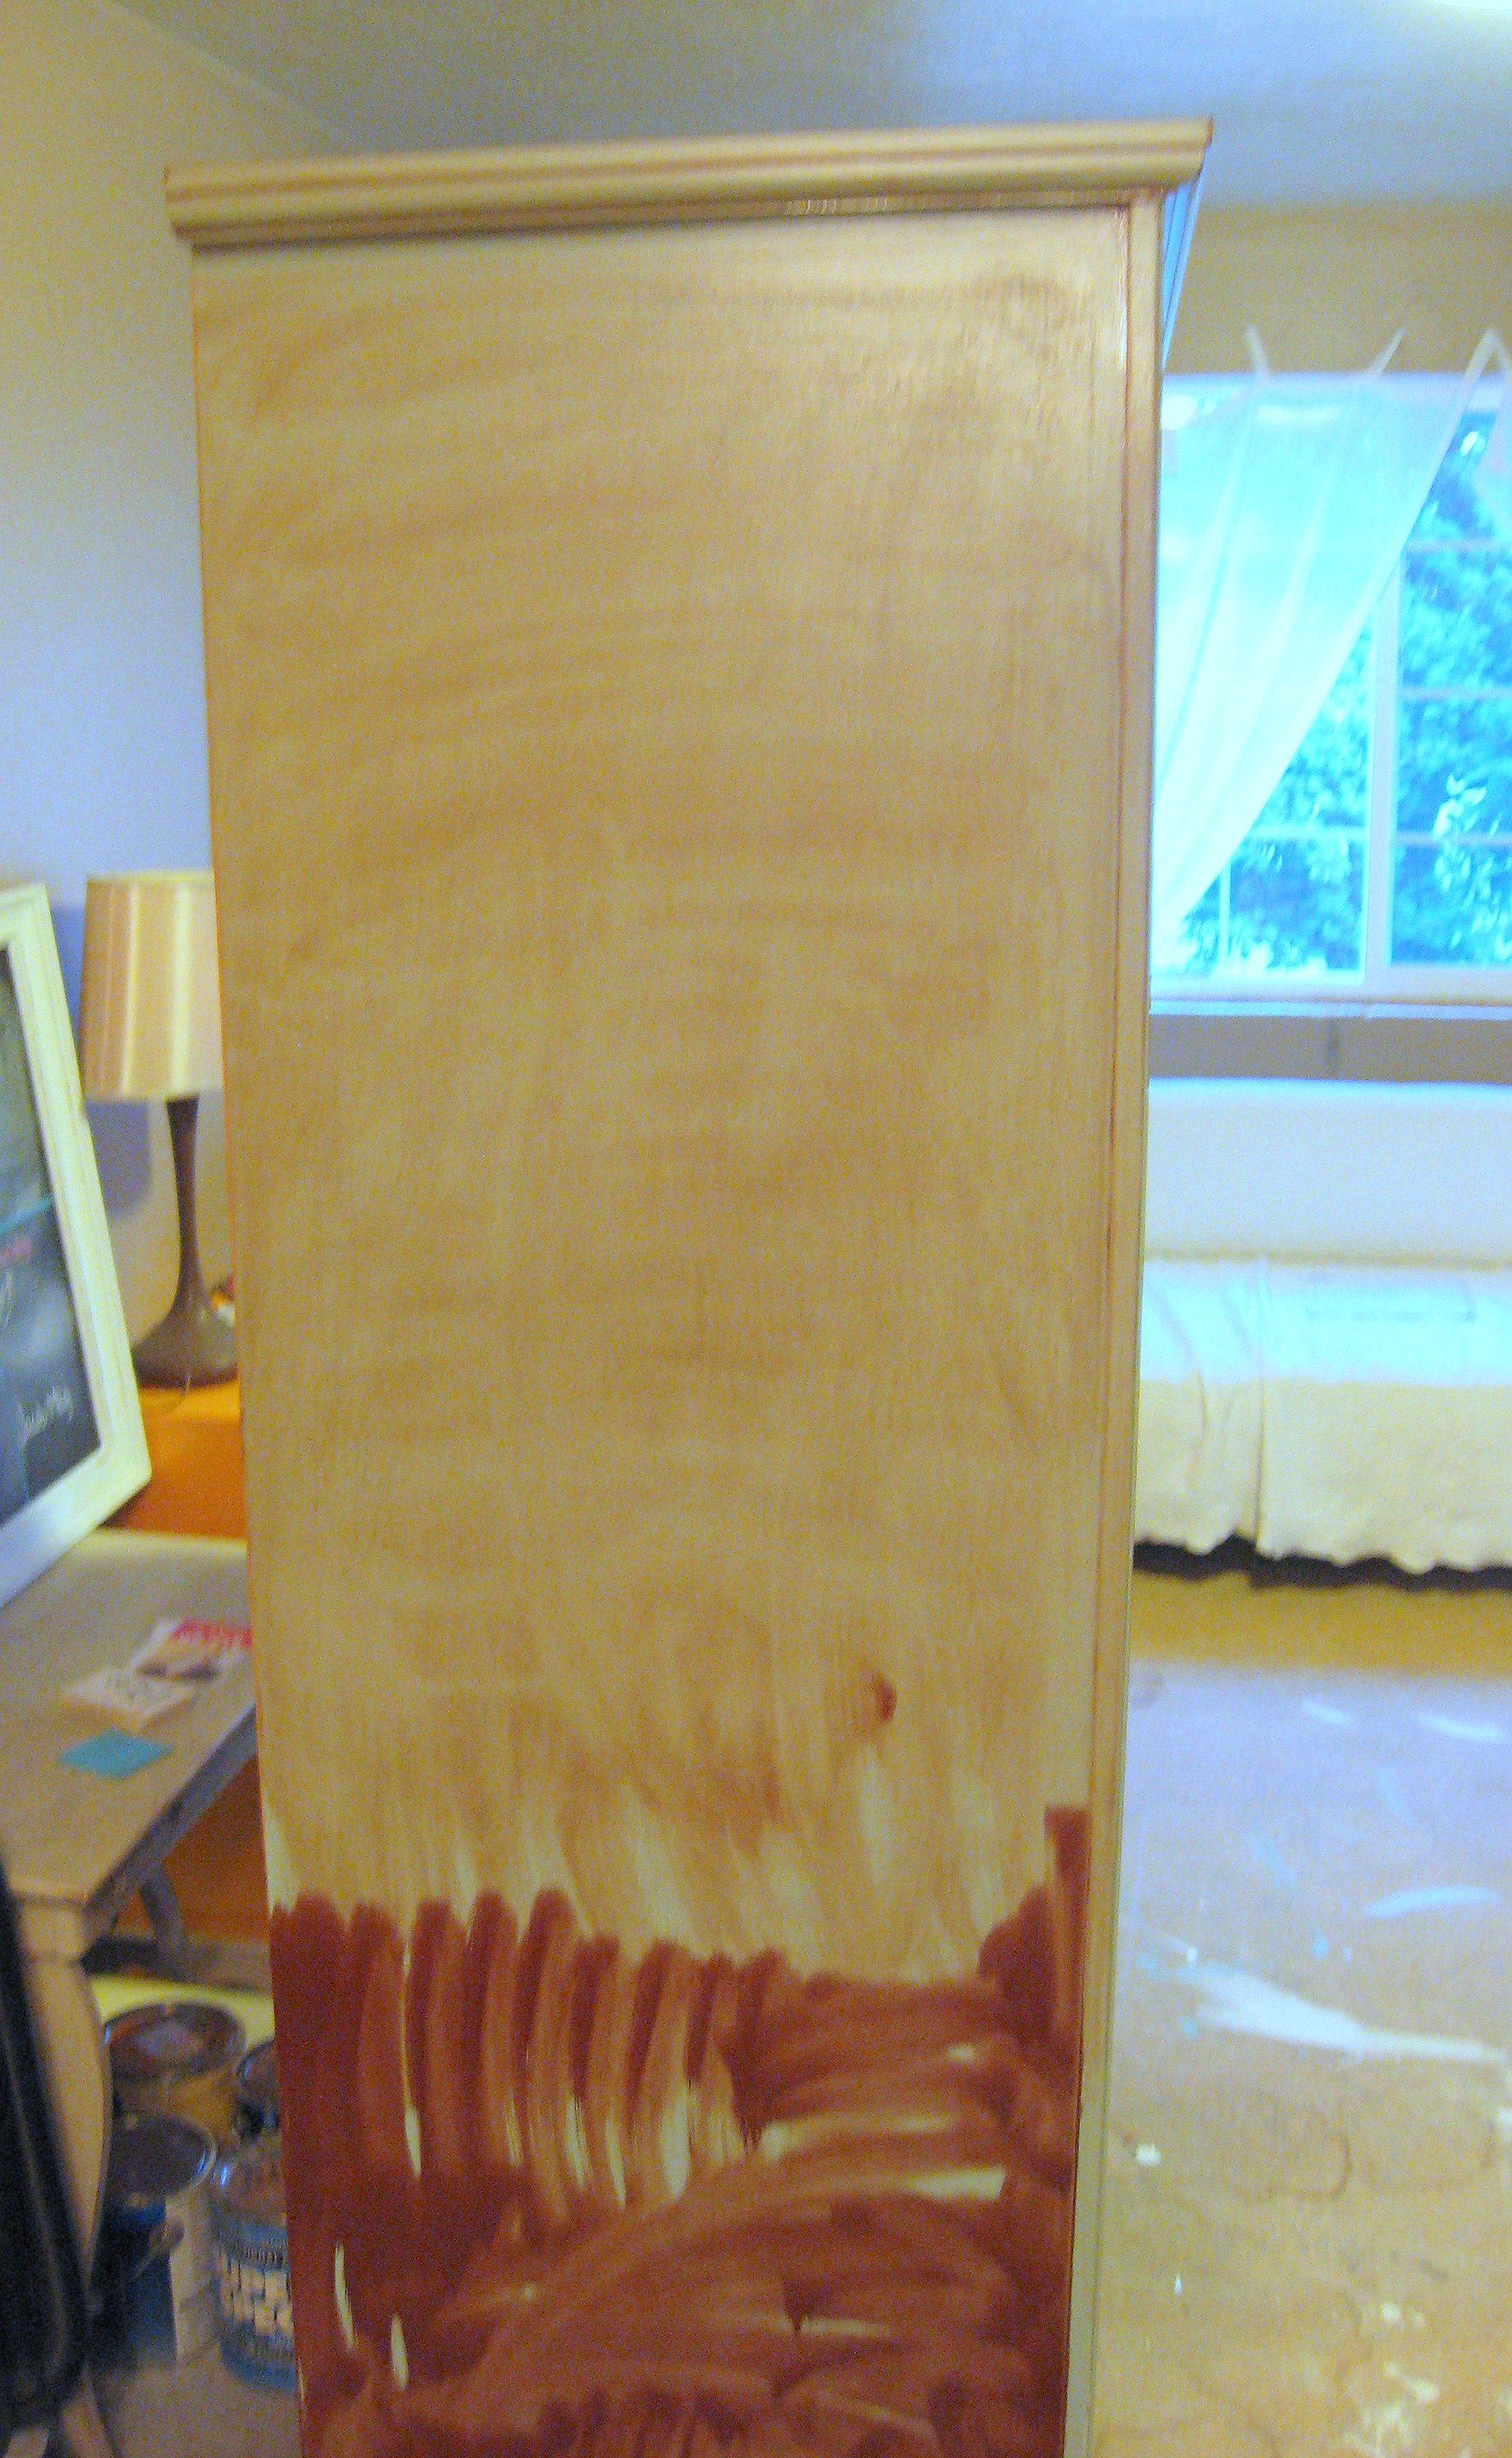
Take the doors off, tape around the mirror and remove or tape all the hardware. I chose not to paint the inside, so I taped around there too. Give everything a good coat of the Gripper with a regular brush or roller.
You can see here that I wasn’t even too careful about getting the coat even. Here are my thoughts on this – I wanted this finished project to be something I could sand back into and expose some of the “wood” underneath. Usually when you try that on laminate furniture, the paint will just lift right off. I was curious how it would work here, so I only did one coat of Gripper. I have a dresser that I used it on that I wanted to be solid and smooth so I used 2 coats of Gripper and I was more careful to brush it on smoothly.
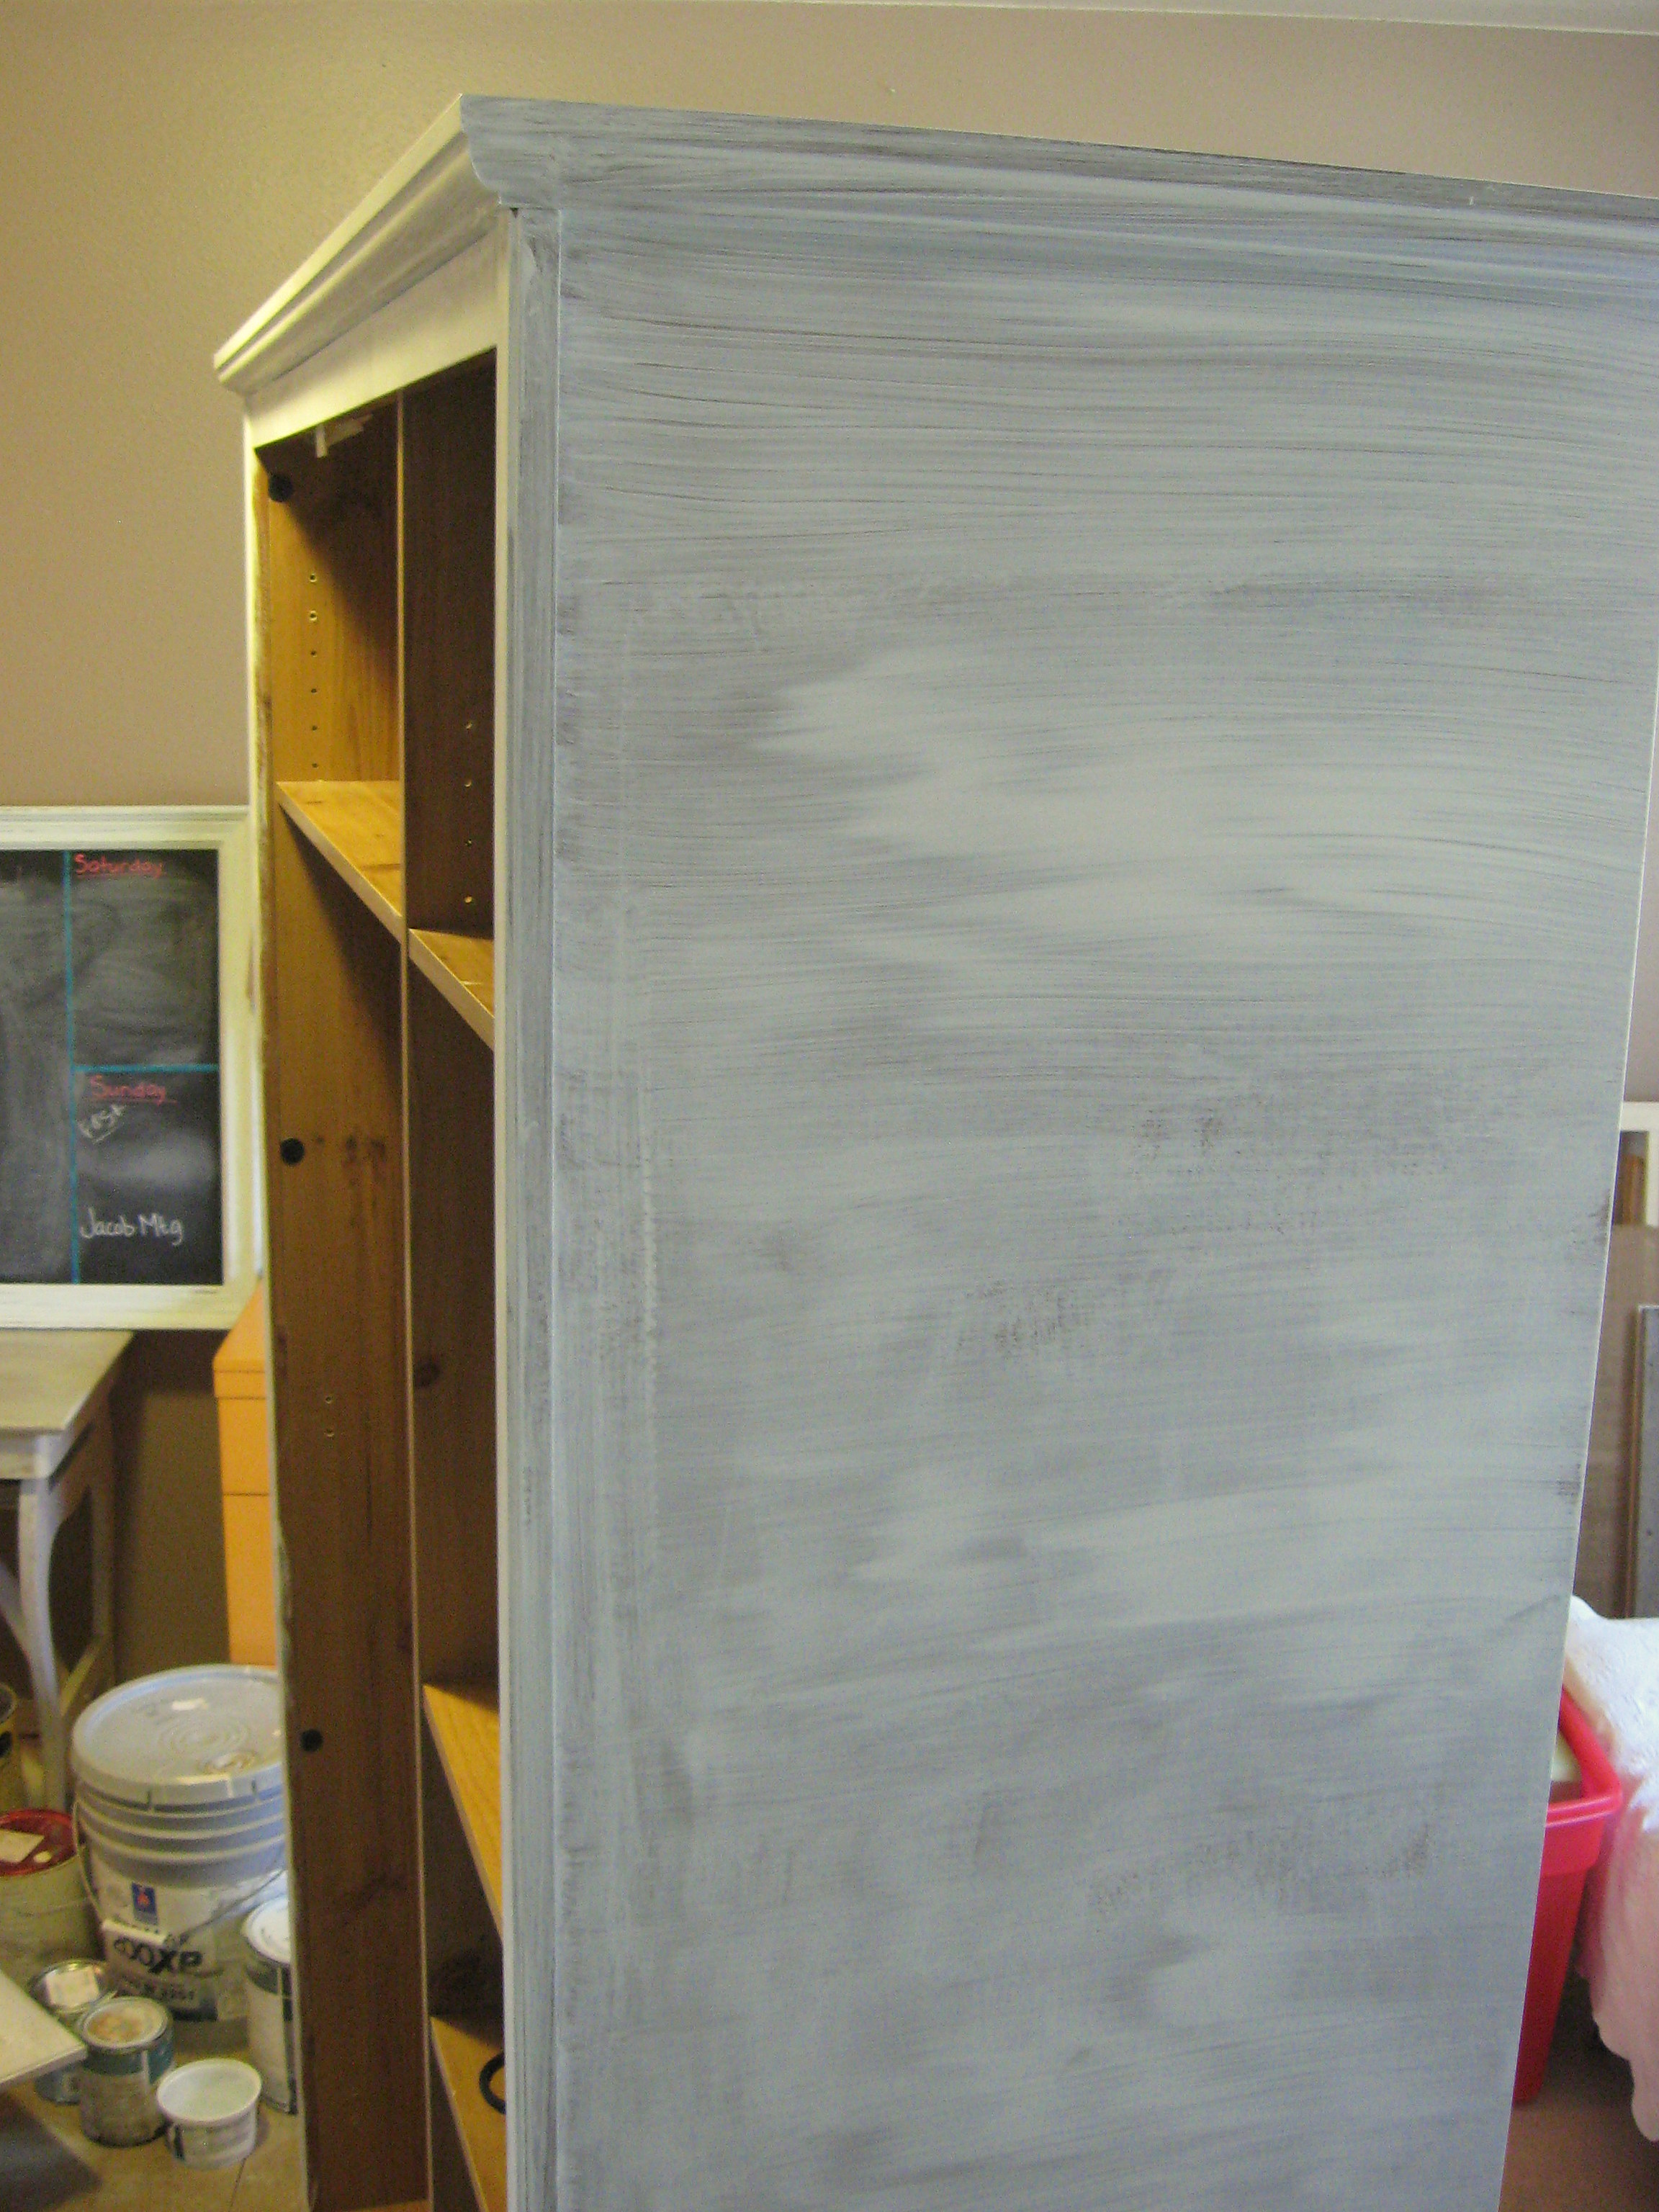
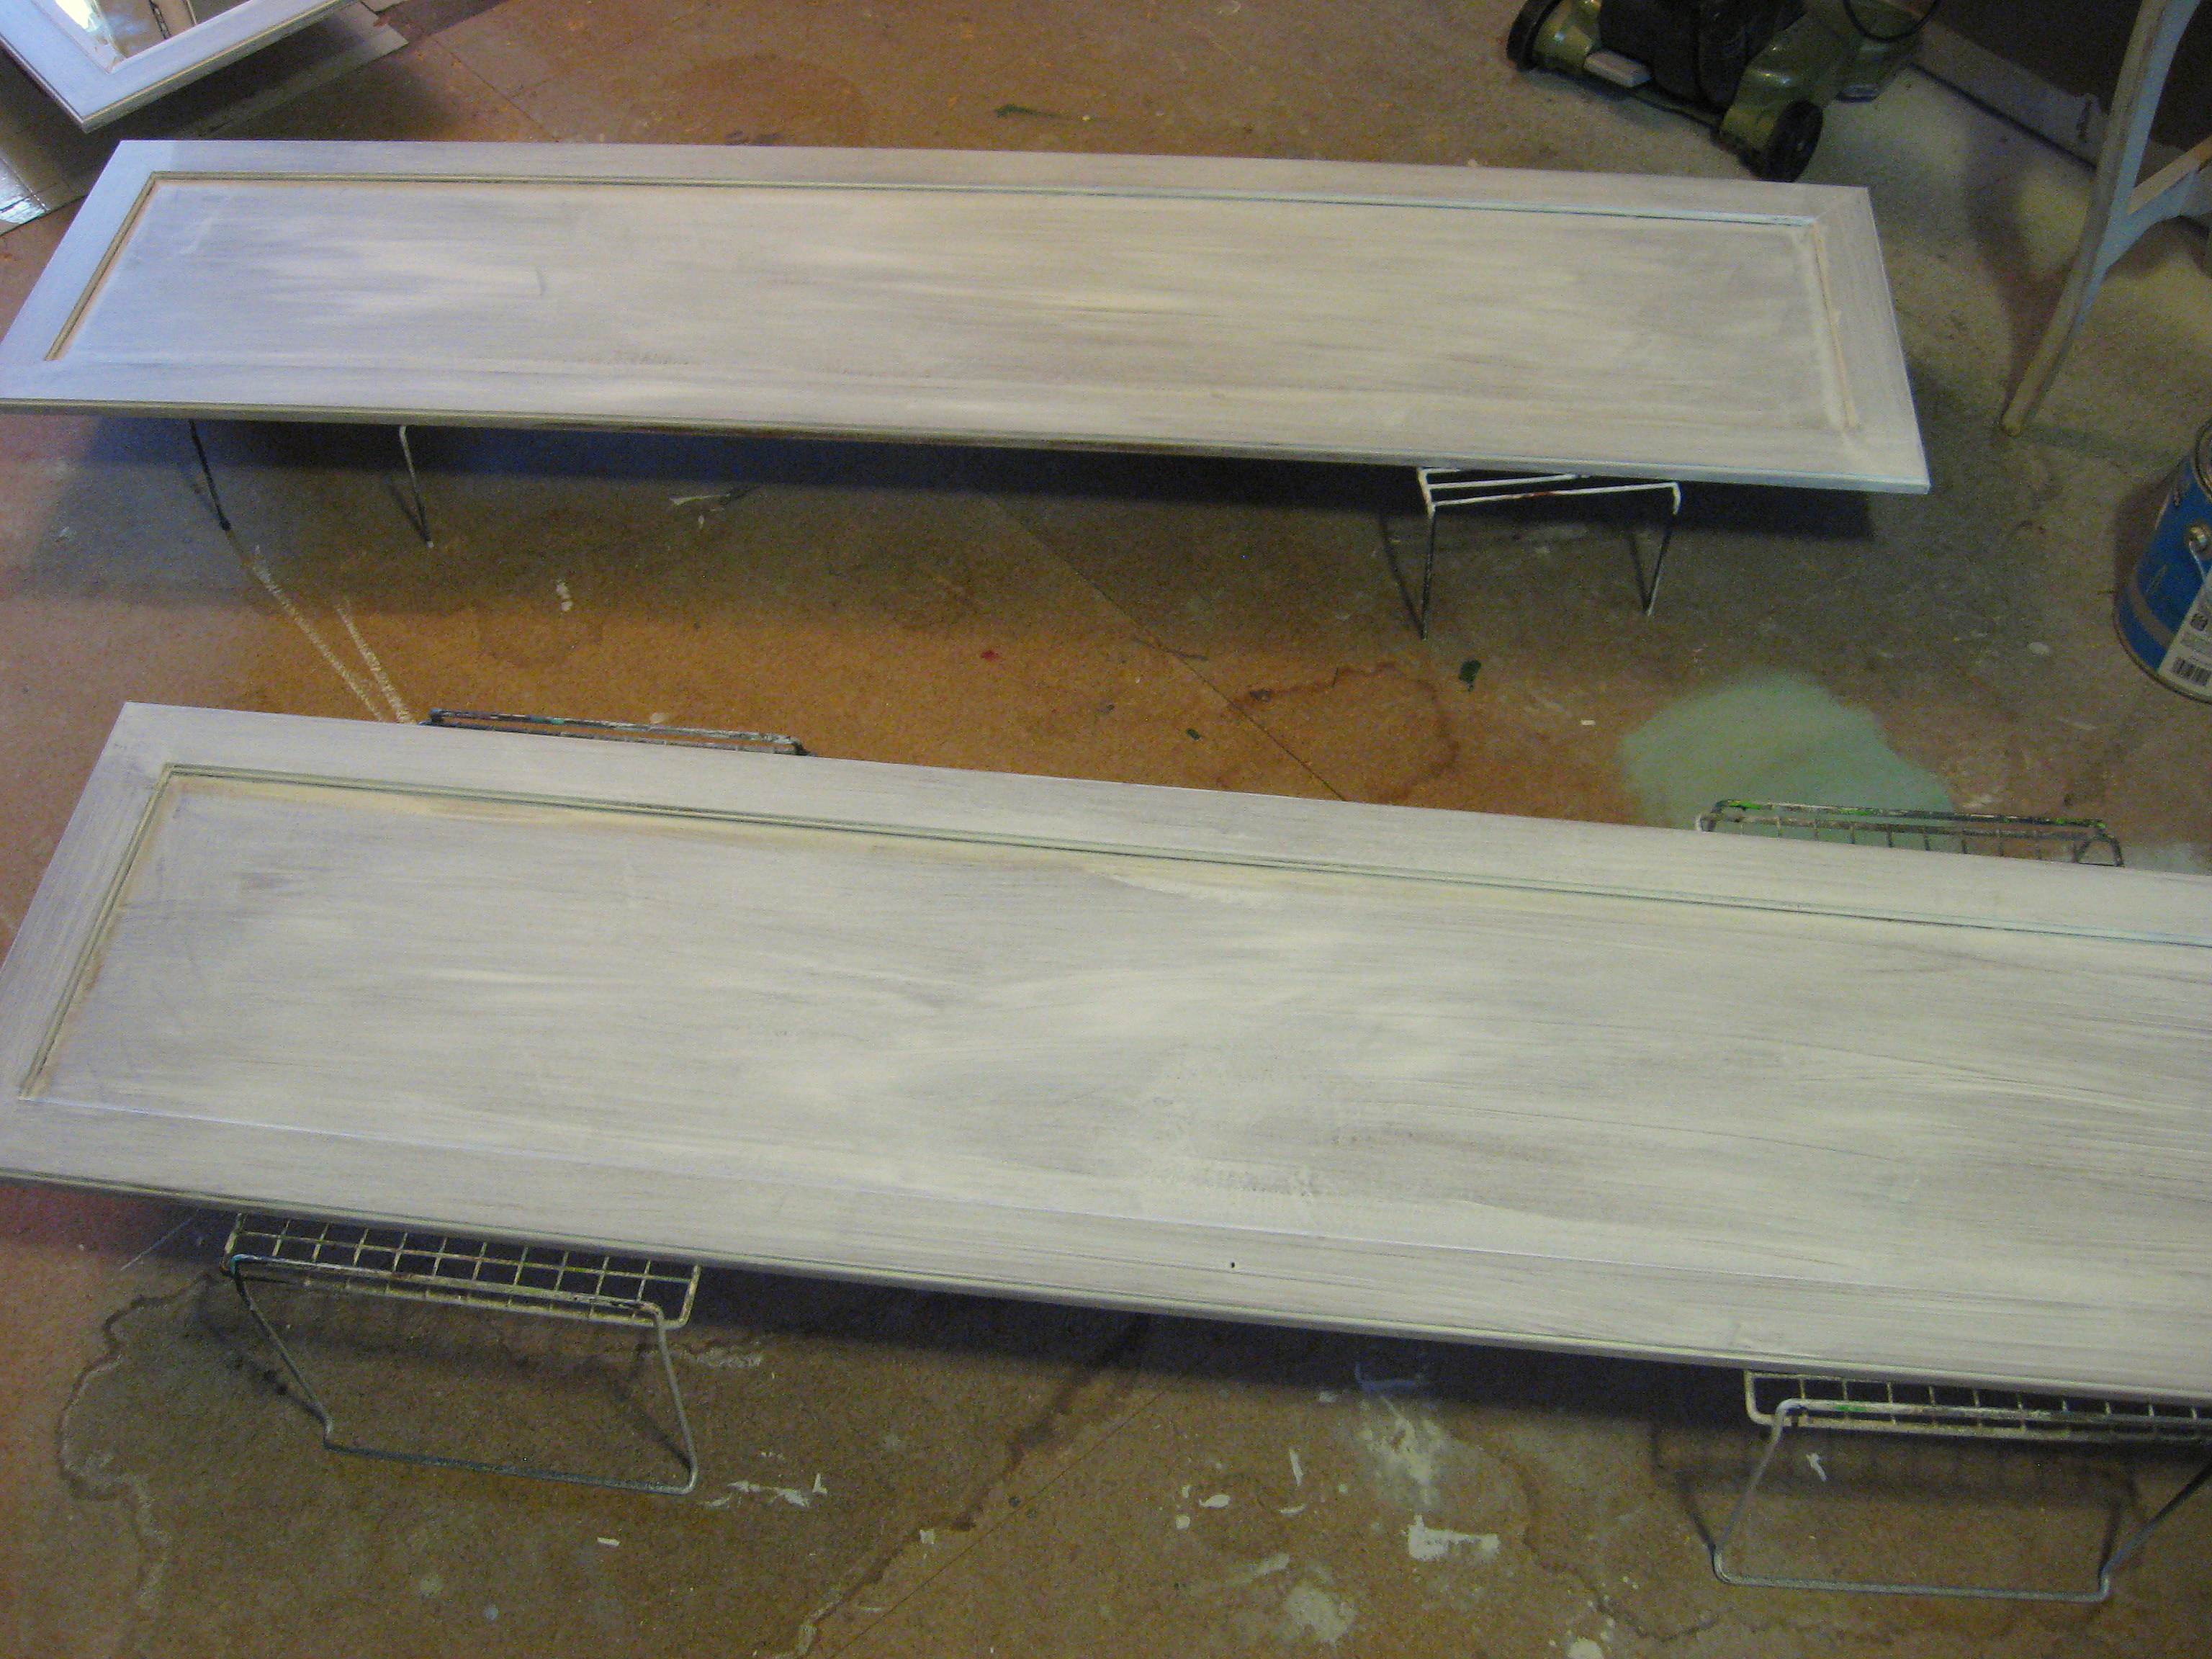
Let that dry according to the directions on the can, then cover with the paint of your choice. I didn’t get a picture of this step, but I used 2 coats of pale blue Satin interior house paint
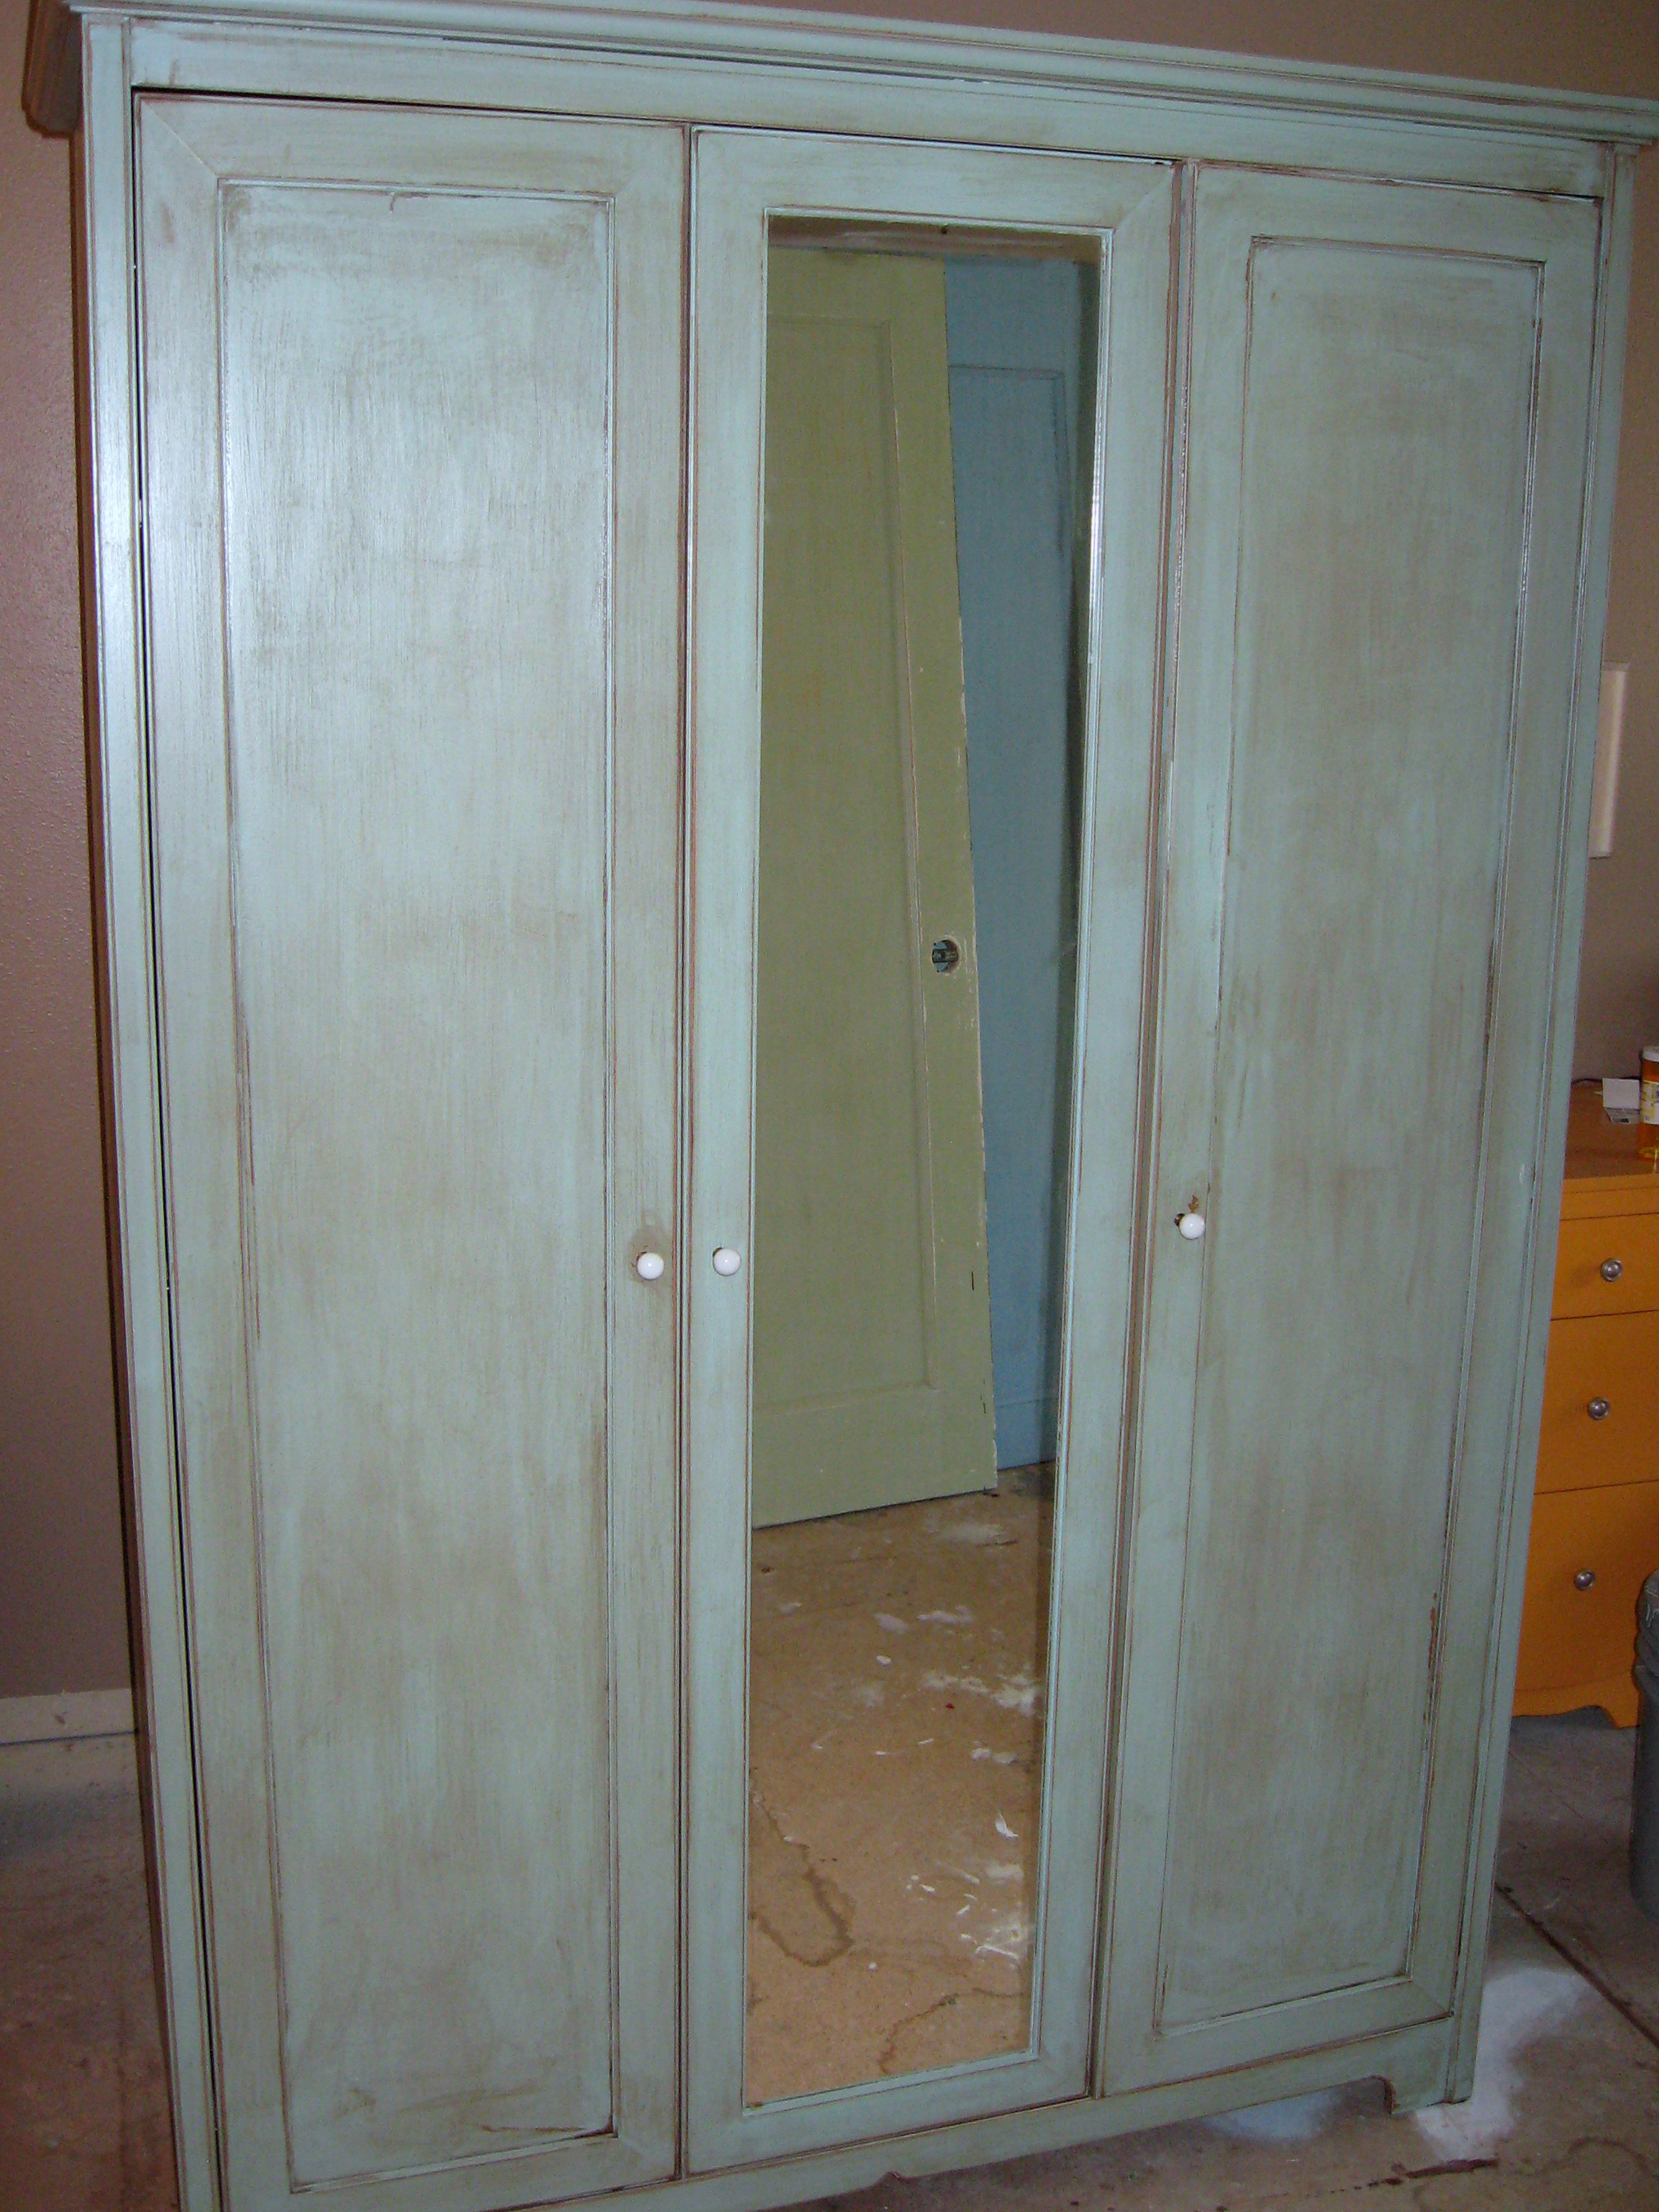
Once that is dry, I went over the whole piece with a fine grit sandpaper on a small detail electric sander, roughing up the whole surface and concentrating (holding my breath!) in a few spots along the edges to wear the paint down to the wood. The paint came off very worn and natural-looking just as if it had been on raw wood! Wonderful!
Next I put on a wood stain. Just brush it all over with a paintbrush – working in small sections –
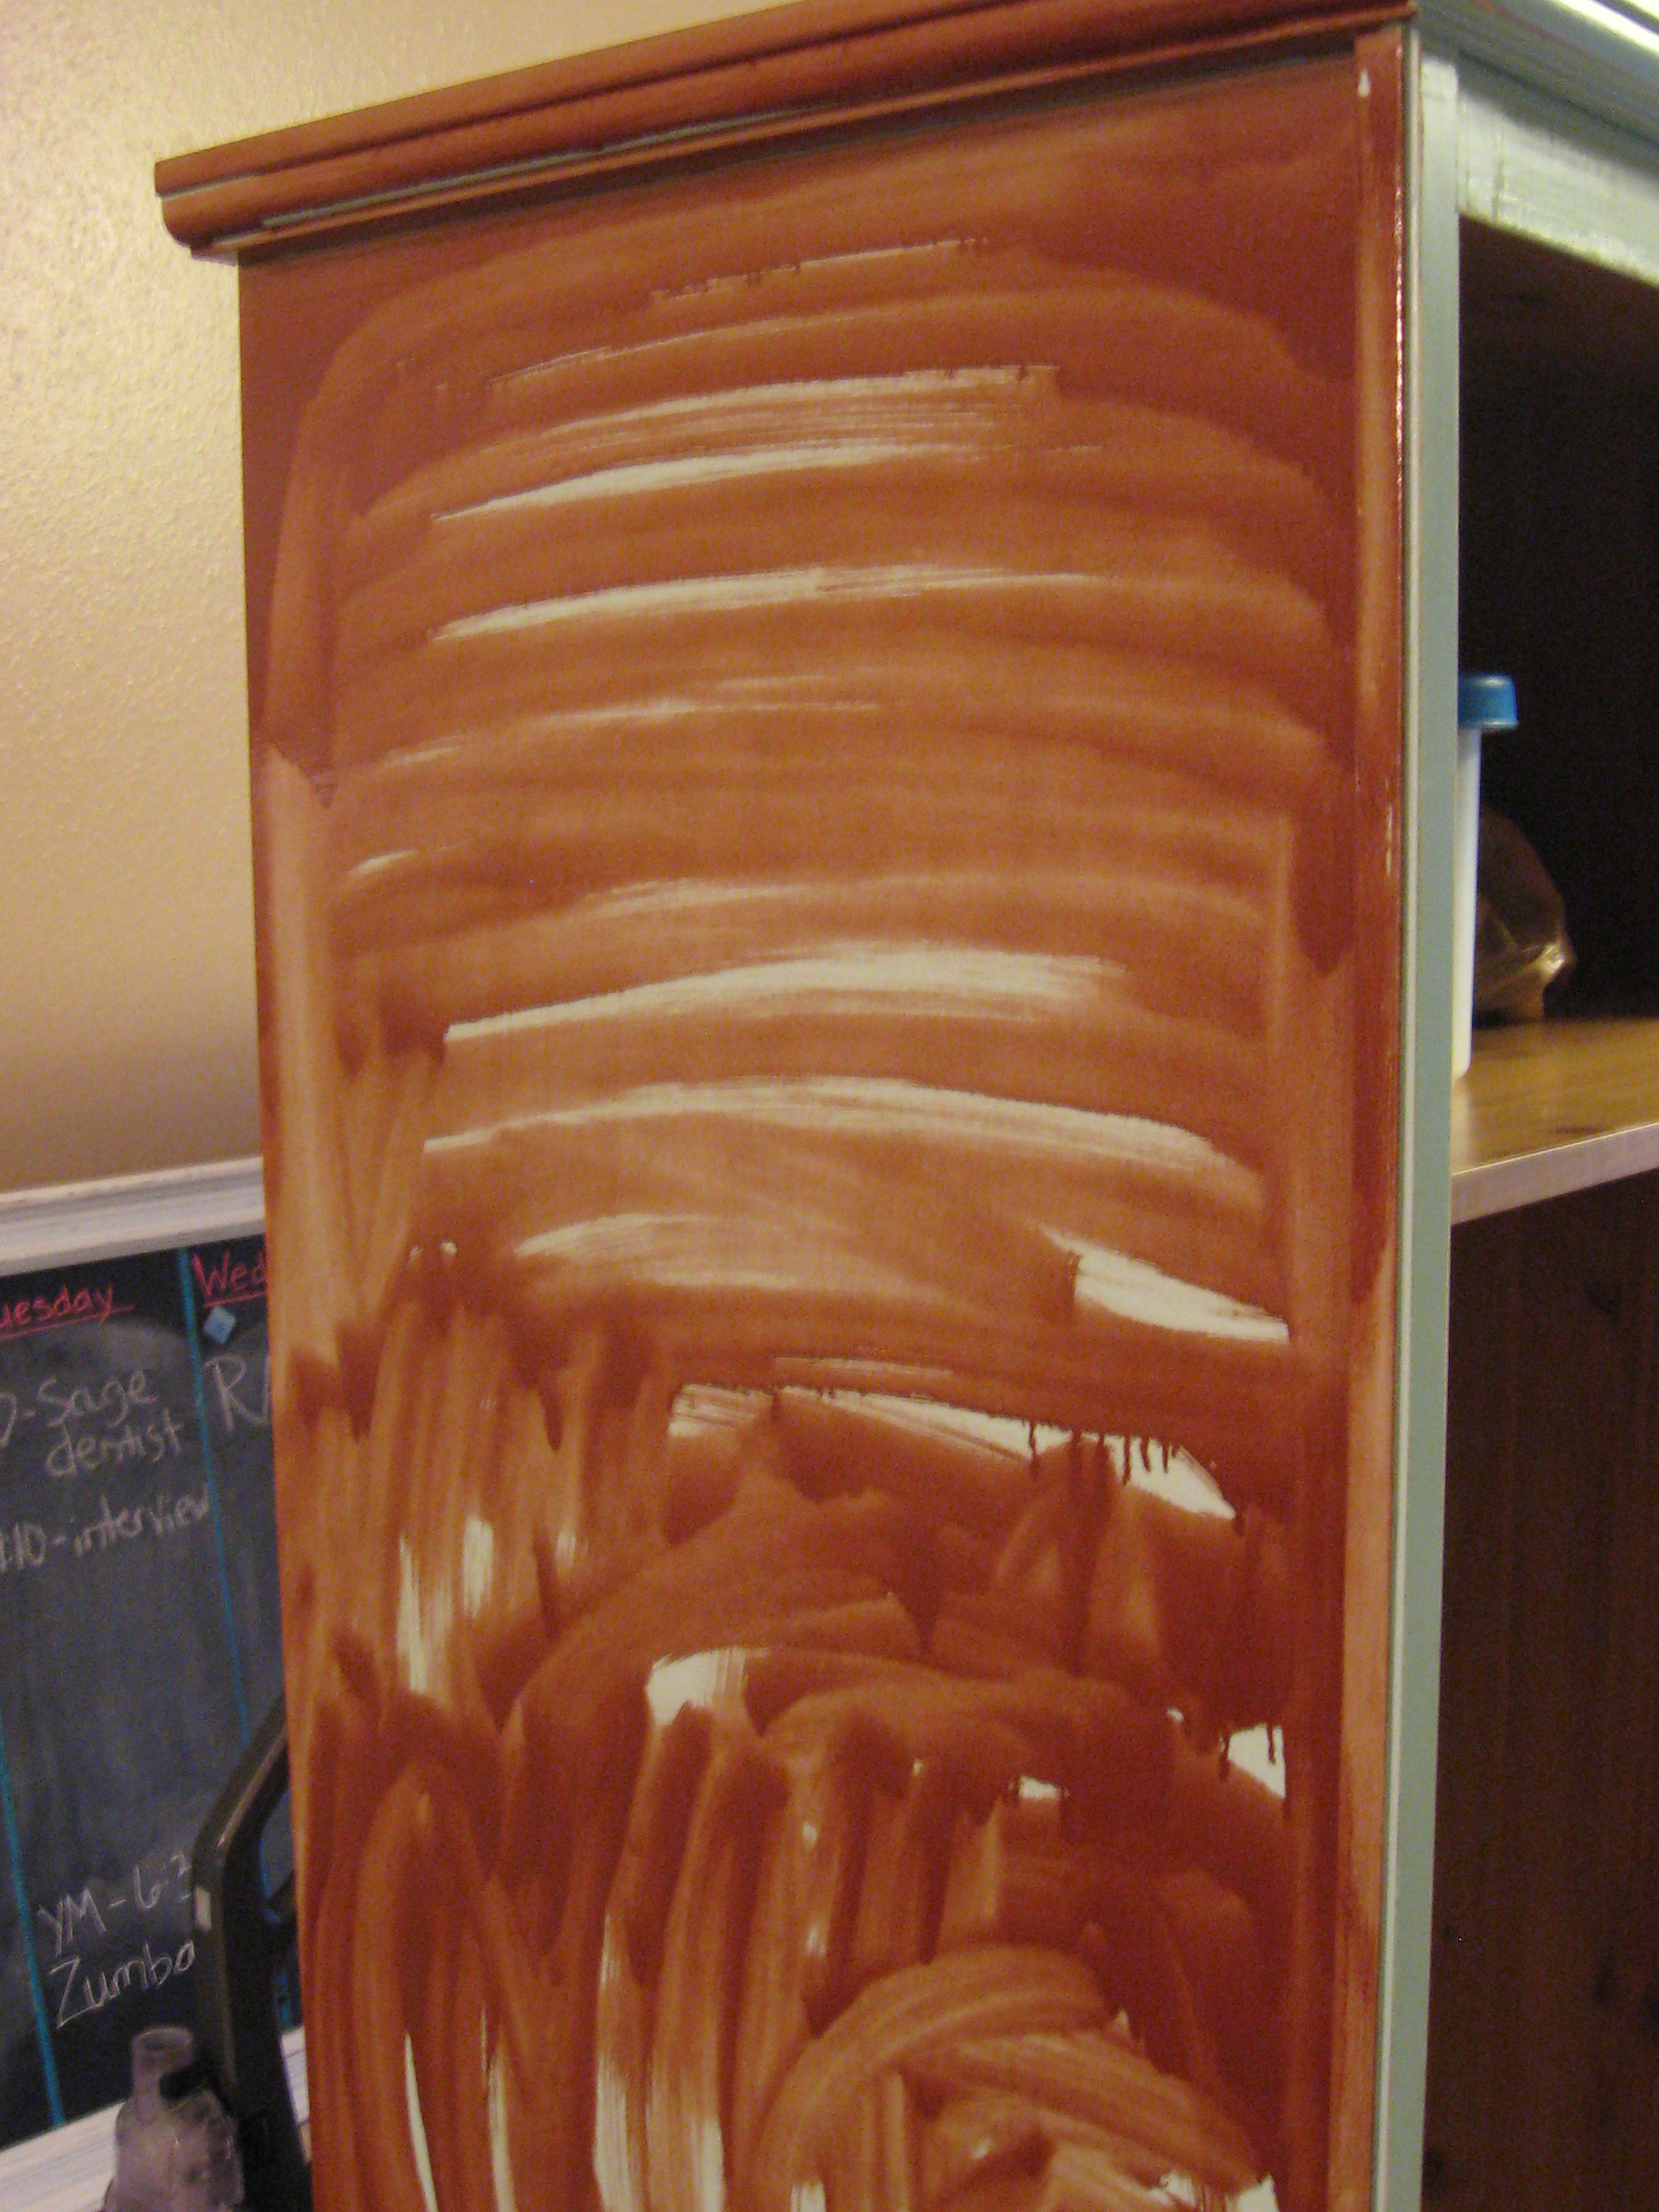
and then rub it back off with a rag. If you want it darker, then leave the stain on longer. If you want it lighter, continue to rub and buff it off with a rag until you get the desired results. Be sure to leave more stain in the crevices and cracks, where age build up would naturally occur.
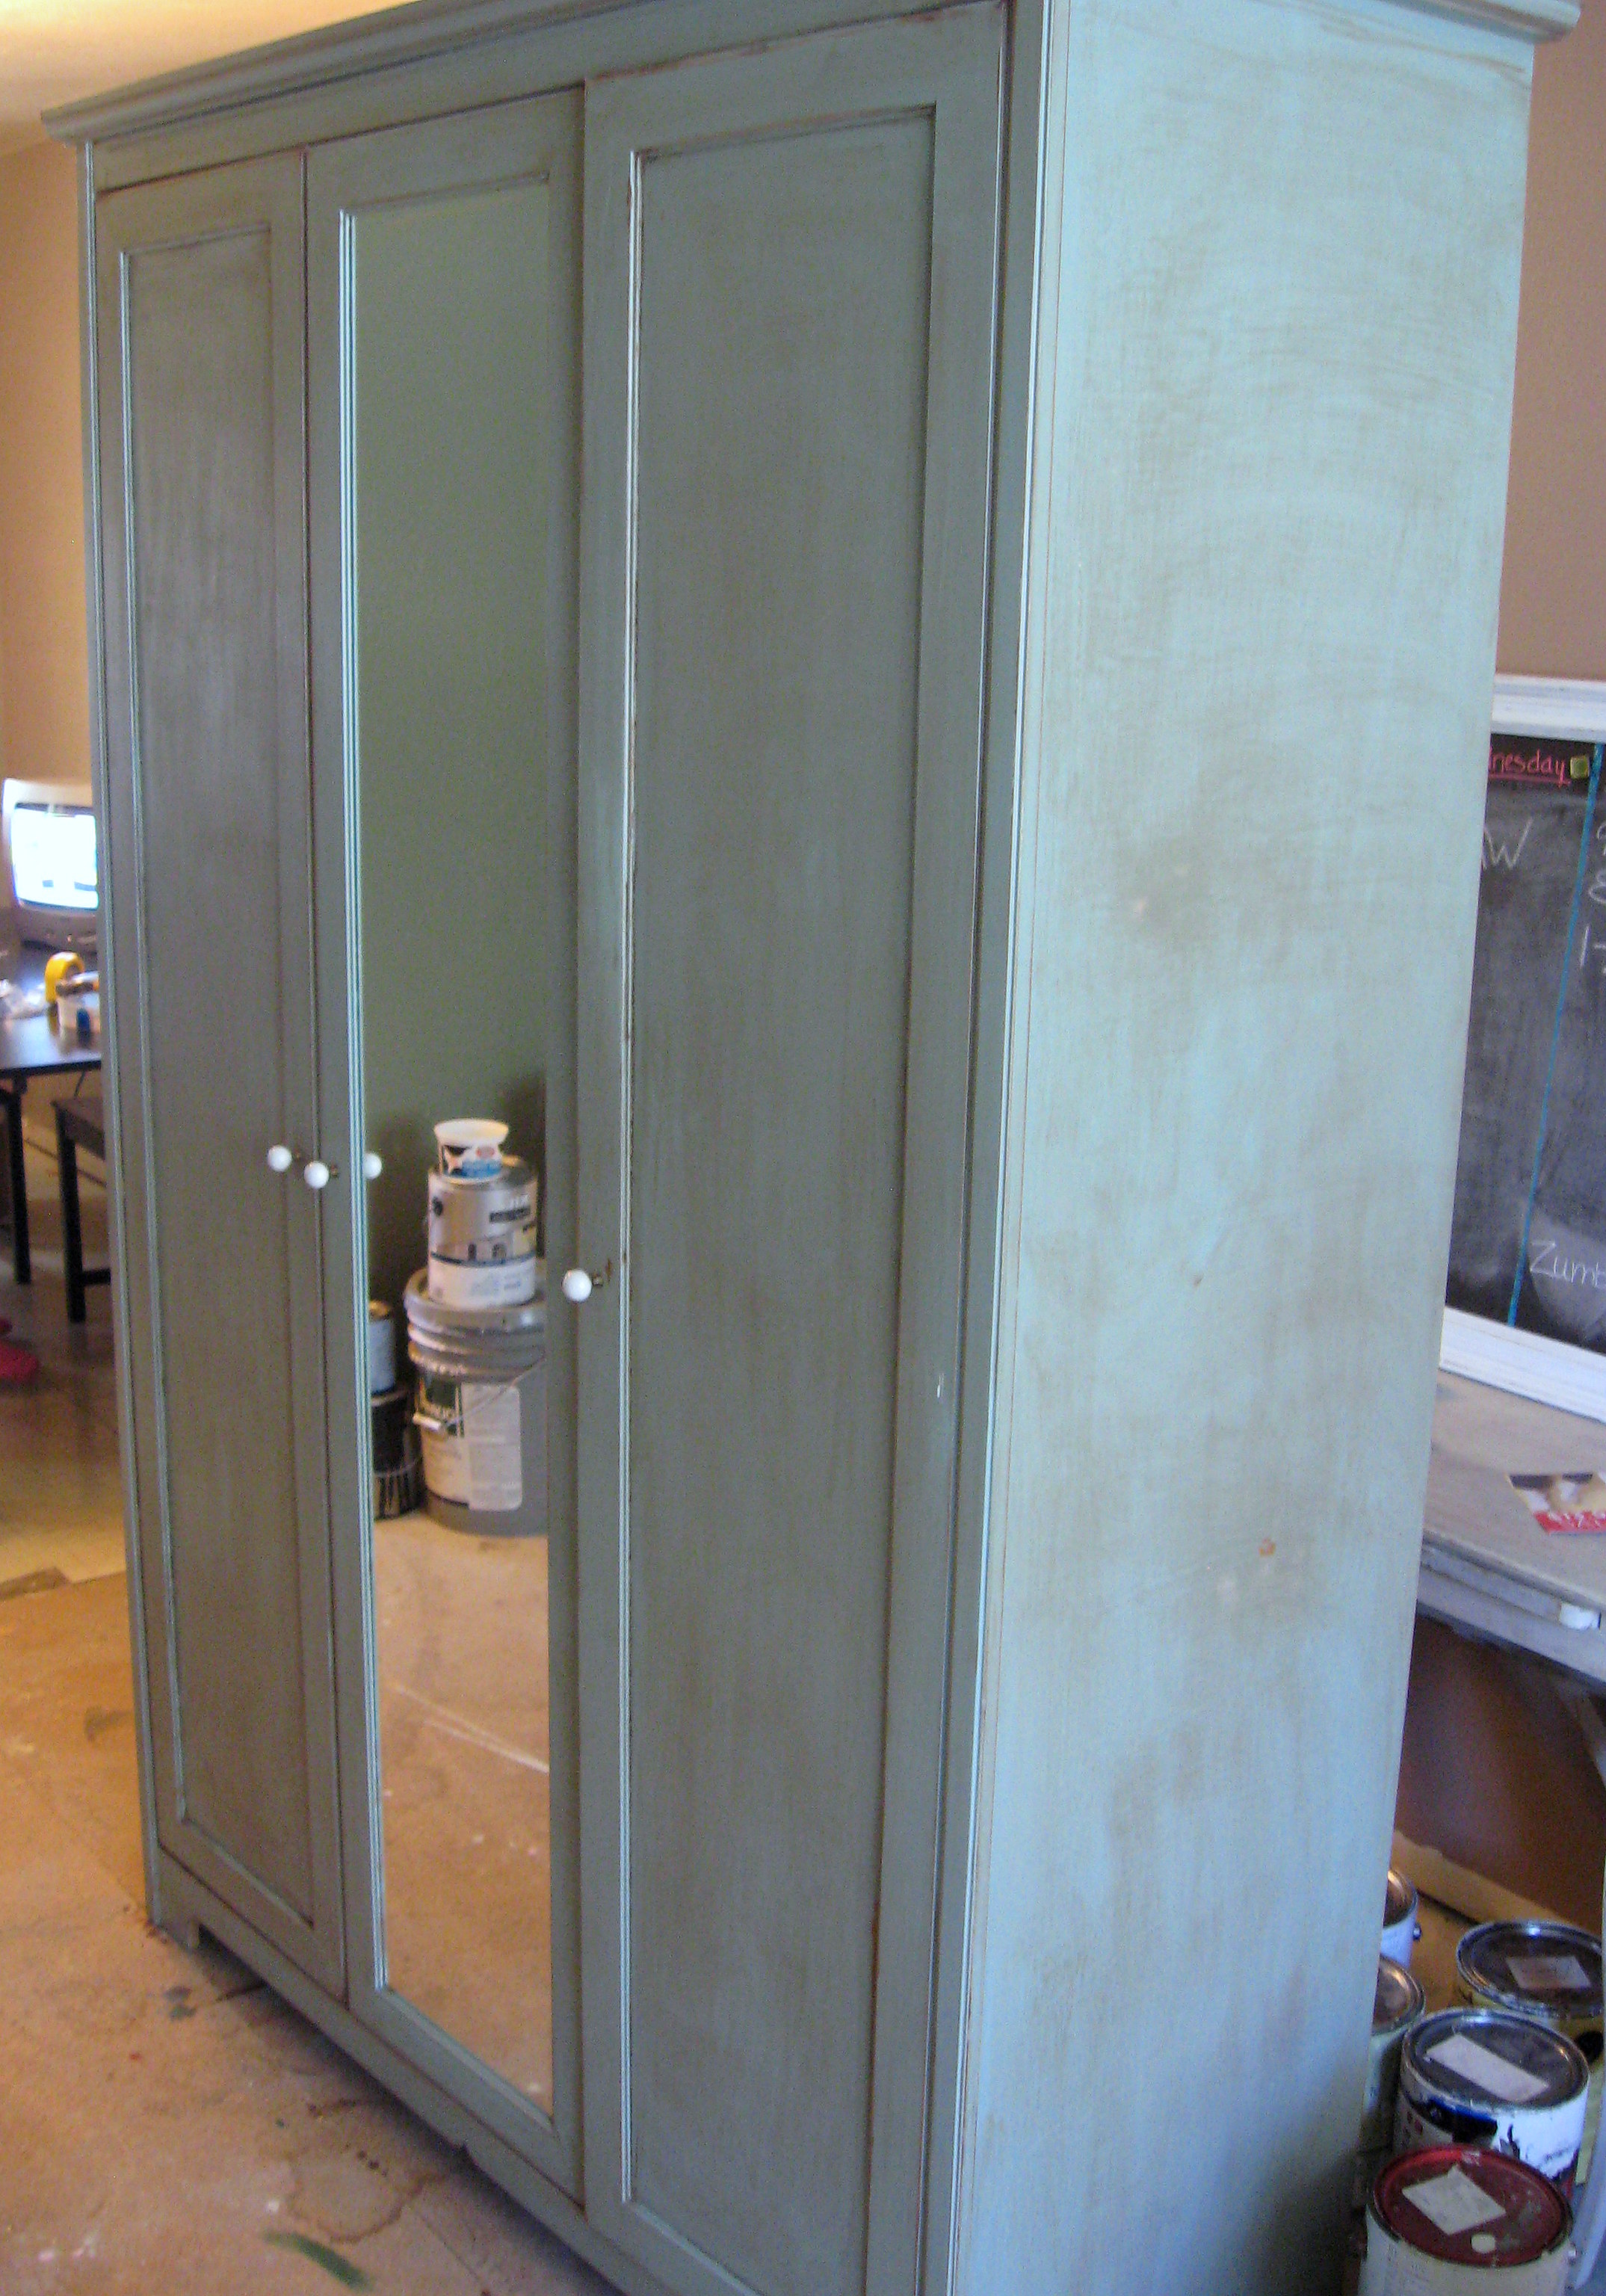
Replace the doors and hardware – I got these cute little white ceramic knobs on a 50% off sale at Hobby Lobby for $2/knob. I saw the exact same knobs at Anthropologie for $7!
This has been sitting in the middle of our massive-messy remodel now for 3 weeks waiting patiently for us to finish the floor in it’s eventual home. It has been bumped, scraped, brushed up against and generally abused and it still looks great and COULD NOT have been easier to do.
A PYP Best Blog! DIY Dulce de Leche!
Just in case you missed this article on making your own dulce de leche the first time we shared it a couple of years ago, we are republishing it. After Sharon wrote this blog originally, we got an awesome response. This is one of the PYP Best Blogs!
I made a discovery of epic proportions this weekend! Dramatic? Maybe a bit, but if you – like I – didn’t know this before, I think you’ll be happy I shared!
My boys found a recipe they were dying to try, but it called for Dulce de Leche. Whether that is available in my store or not, I don’t know, I never looked. Since I had cans and cans of sweetened condensed milk in my pantry and knew you could use it to make dulce de leche, I wasn’t going to spend the extra money. The internet is full of “recipes” about how you can boil a closed can of sweetened condensed milk either in a pan or in your crock pot for hours until it turns into thick, gooey, carmely goodness.
The internet is also full of stories about said cans exploding as they heat and making a thick, gooey carmely mess in your kitchen and potentially harming anyone nearby.
I will admit that I tried it once; it works, but I was nervous the whole time, so even though I knew I could do it again, I kept putting it off. Finally, I searched the internet to see if there was another option. I found one blogger who said that you can pour the milk into the top of a double boiler and stir it over heat for 2 1/2 hours as it cooks. No thanks; keep searching…
BINGO!
You can cook it in the oven!!!
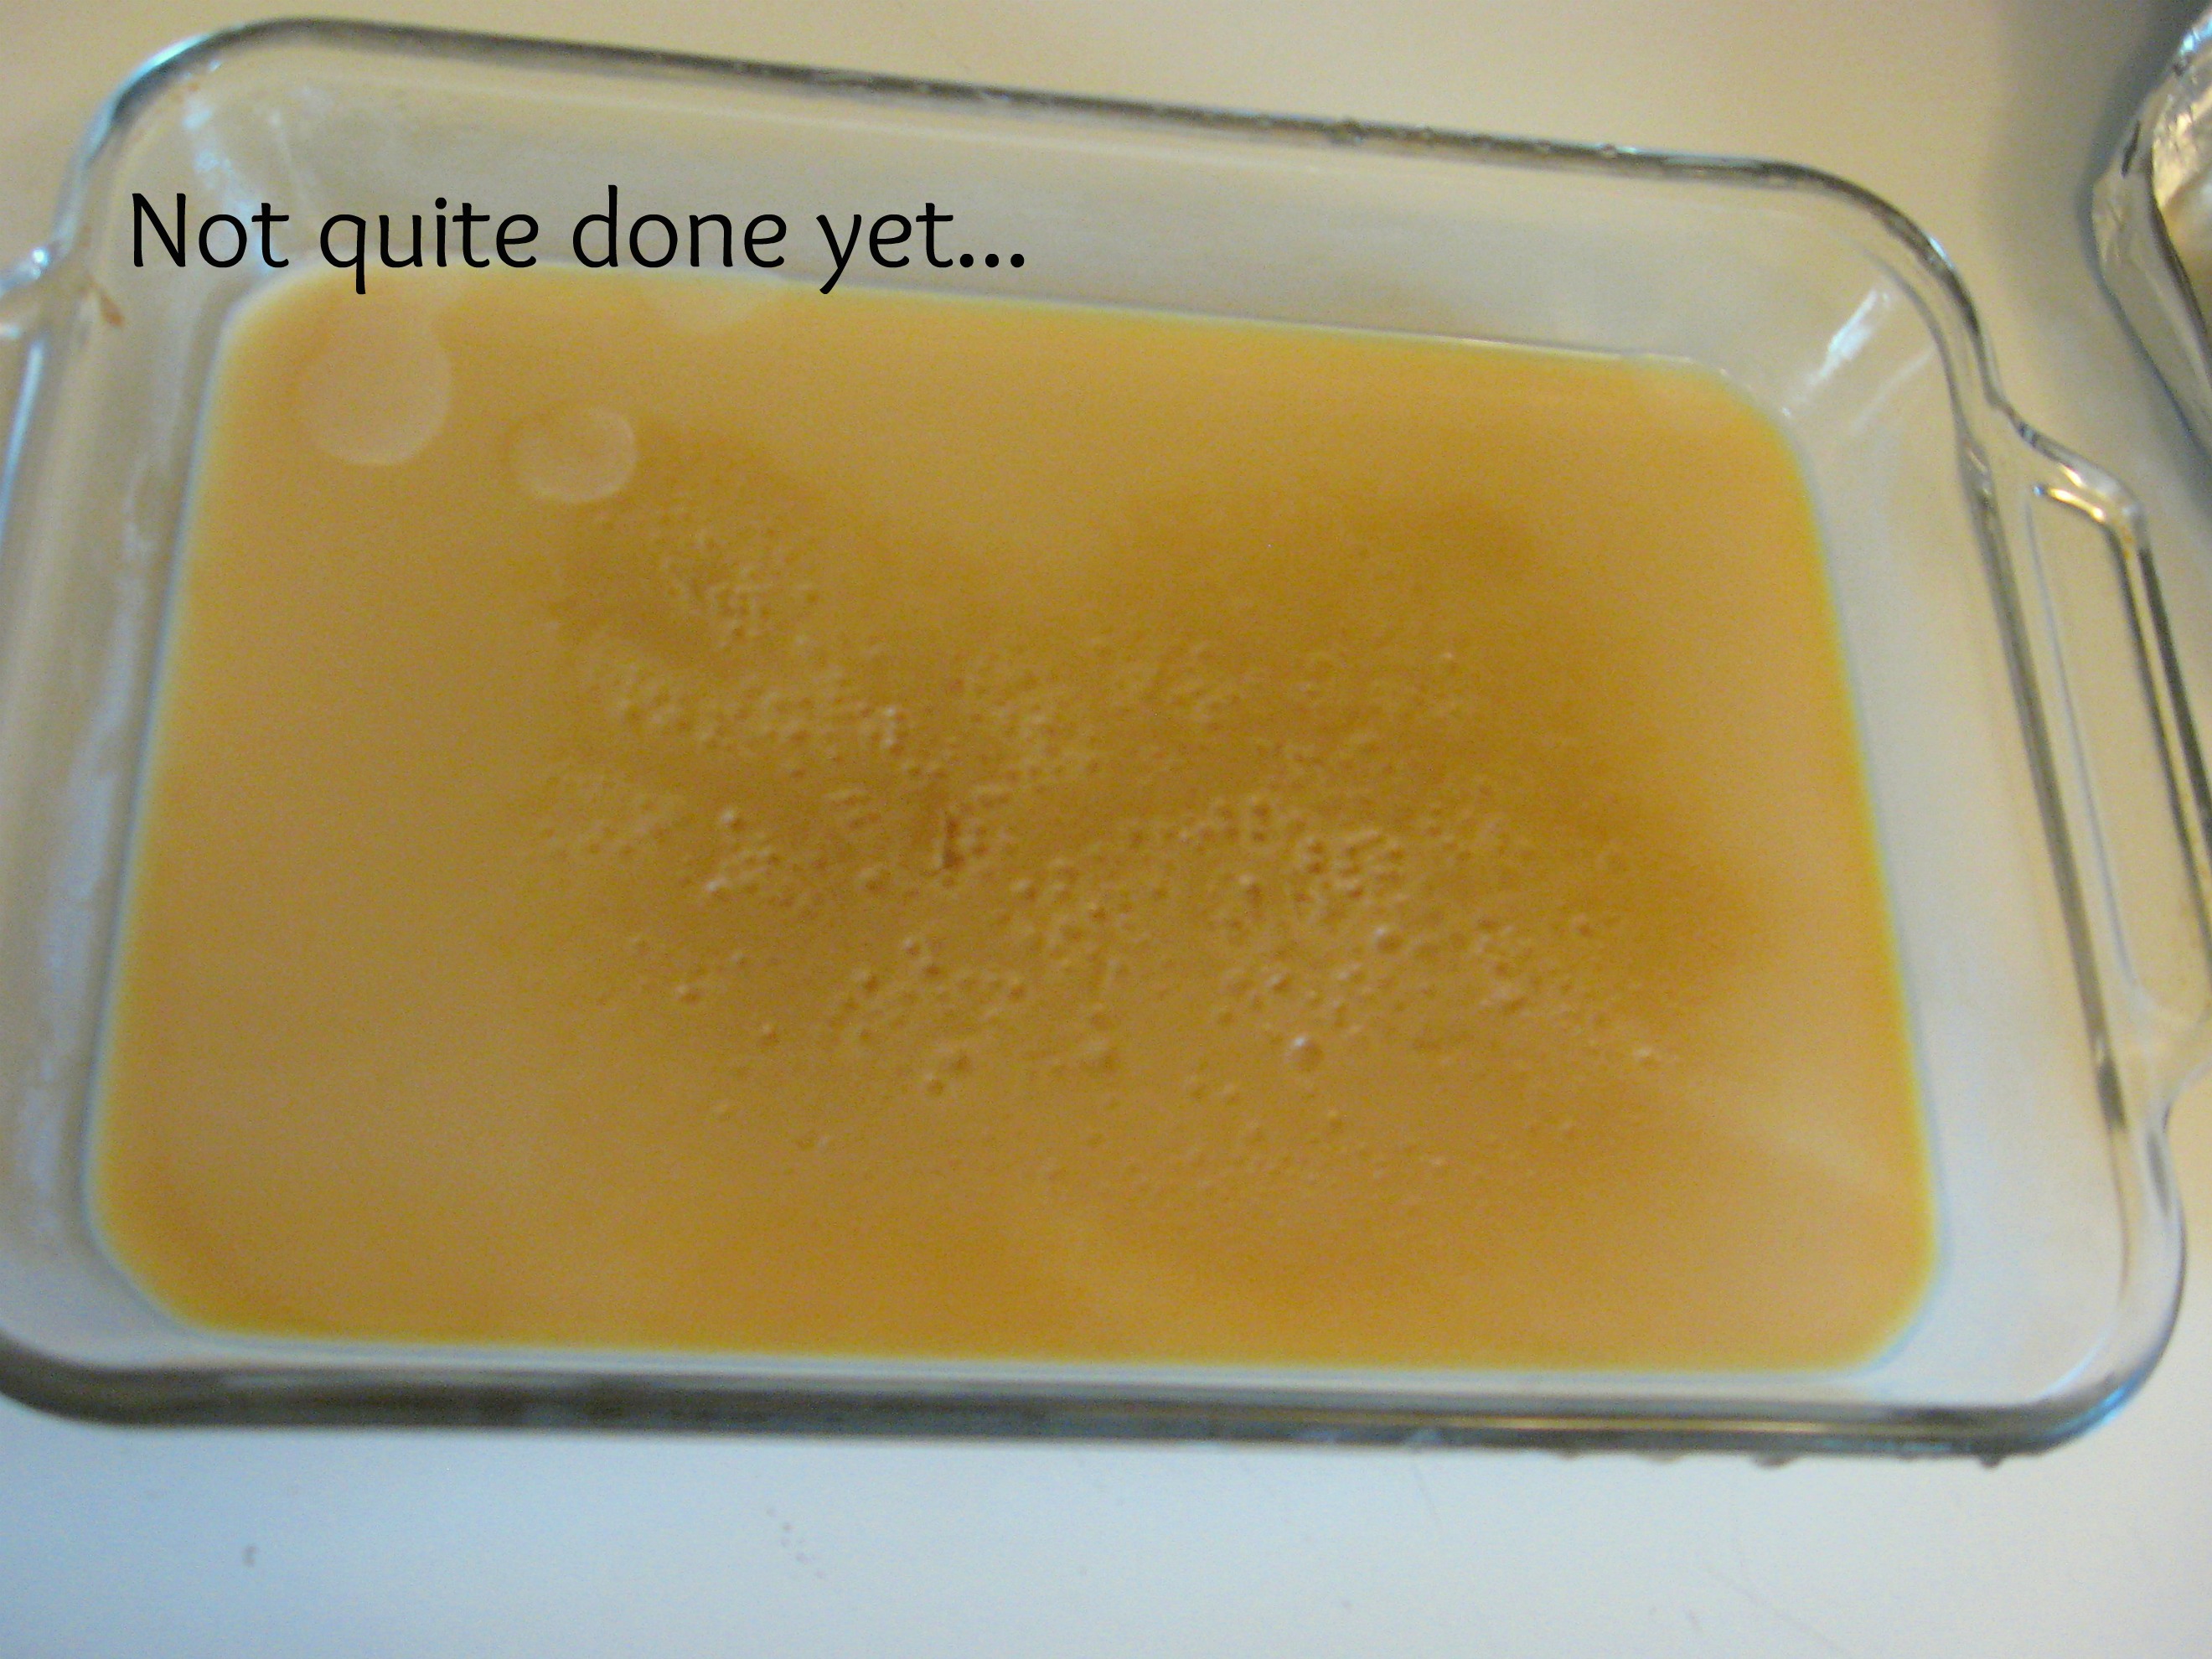
Turn your oven on to 425*. Open the sweetened condensed milk and pour it into an oven safe glass pan…a pie plate is perfect for one can. I used a bigger pyrex pan here because the recipe I’m making required 2 cans worth of the finished product. 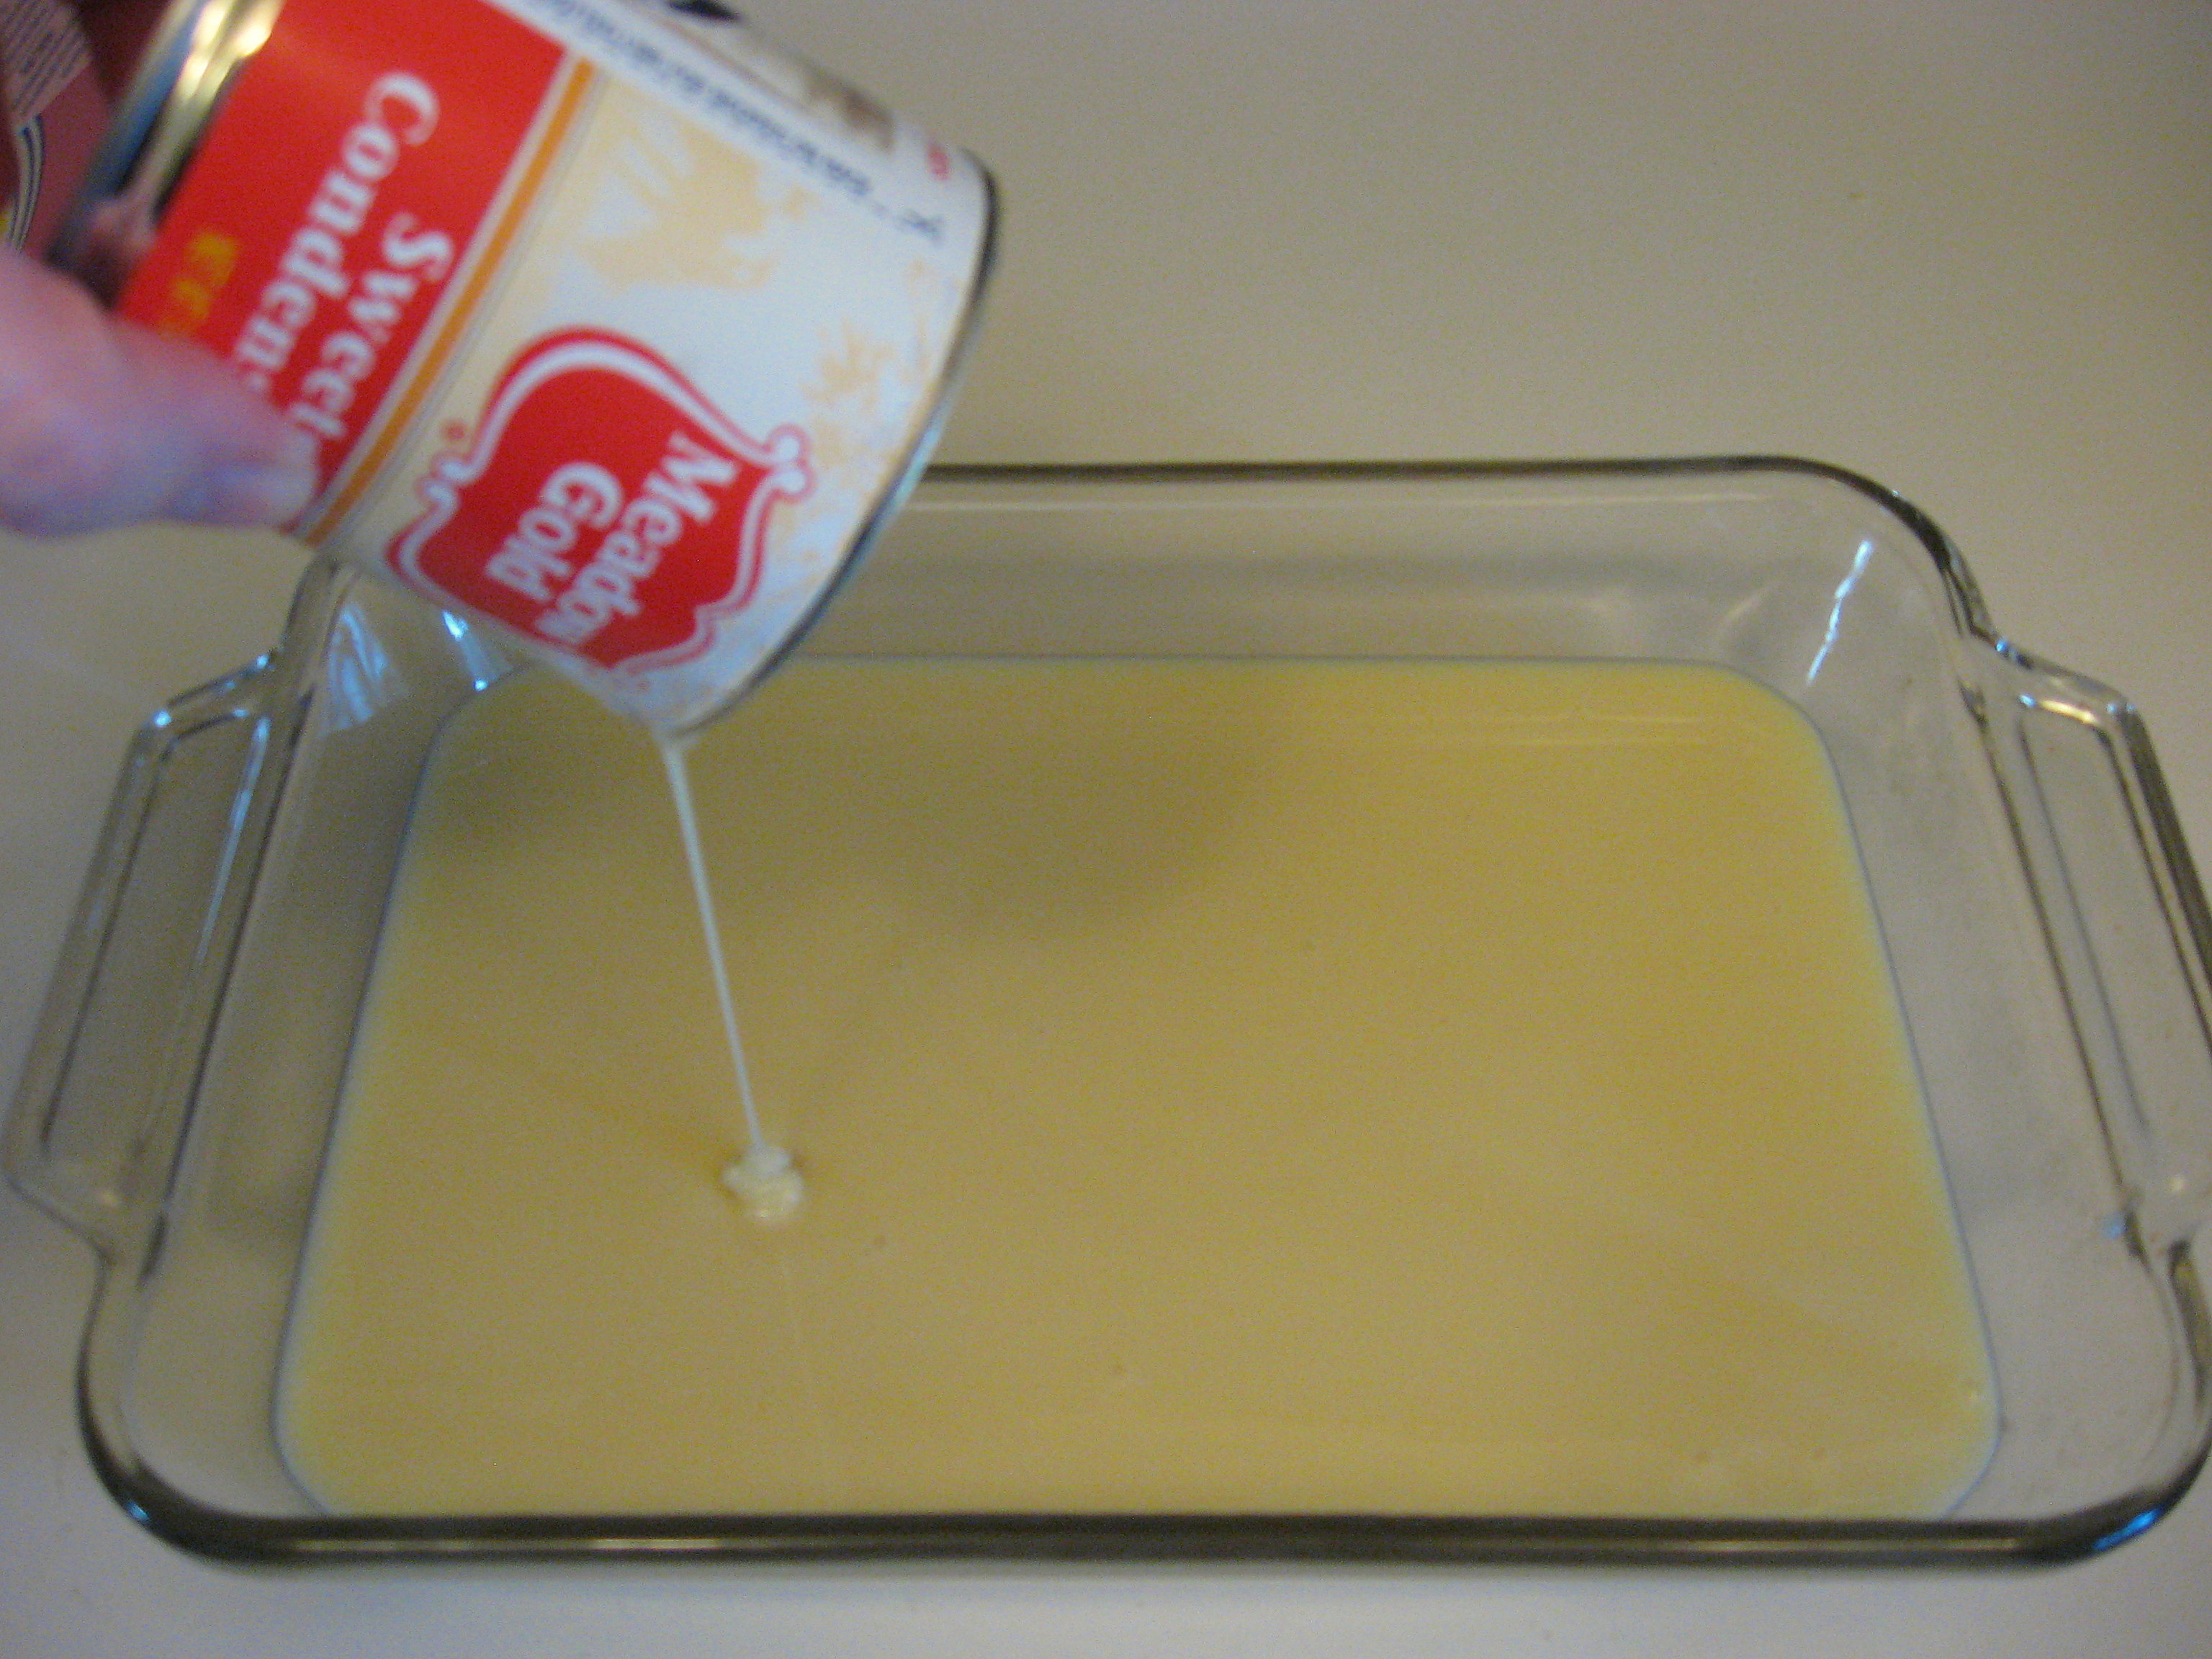
Cover this tightly with aluminum foil.
Put the glass pan into a bigger pan – like a roaster pan – and fill with hot water up to about halfway up the sides of the glass pan.
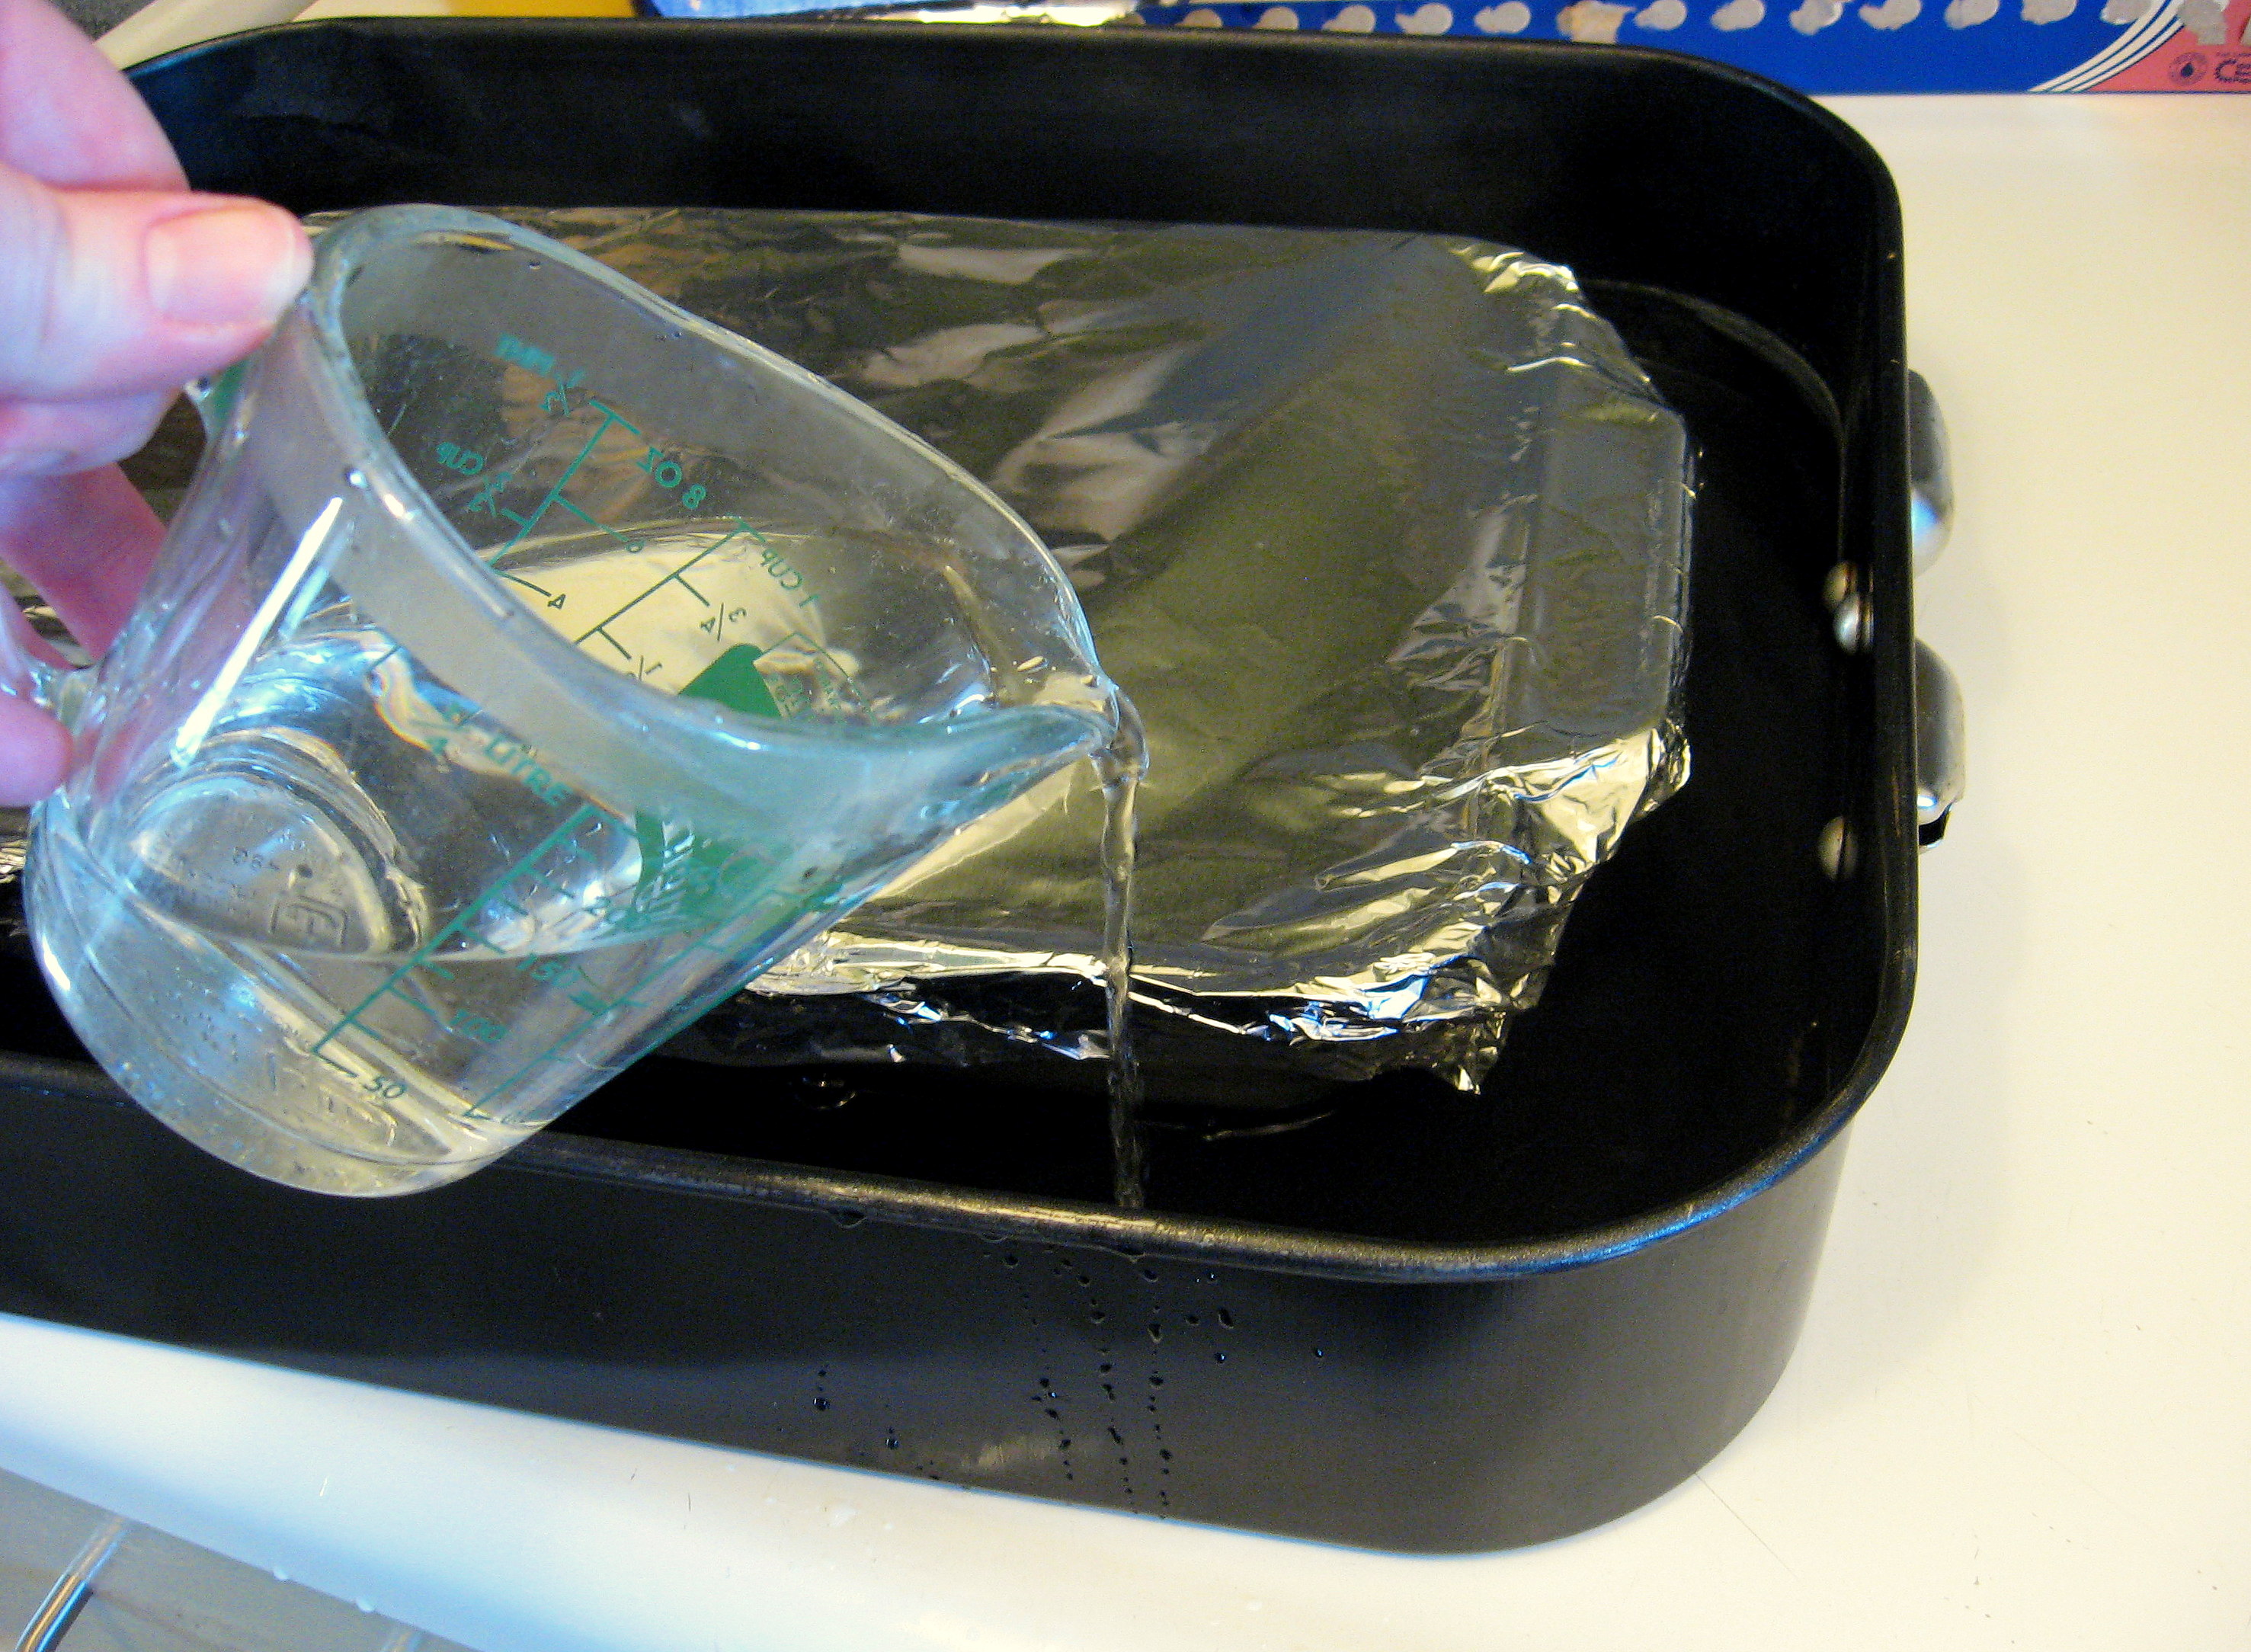
Pop the whole thing in the oven and leave it to cook for 1 to 1 1/2 hours. Check it once in awhile to make sure that there is plenty of water and replenish when necessary.
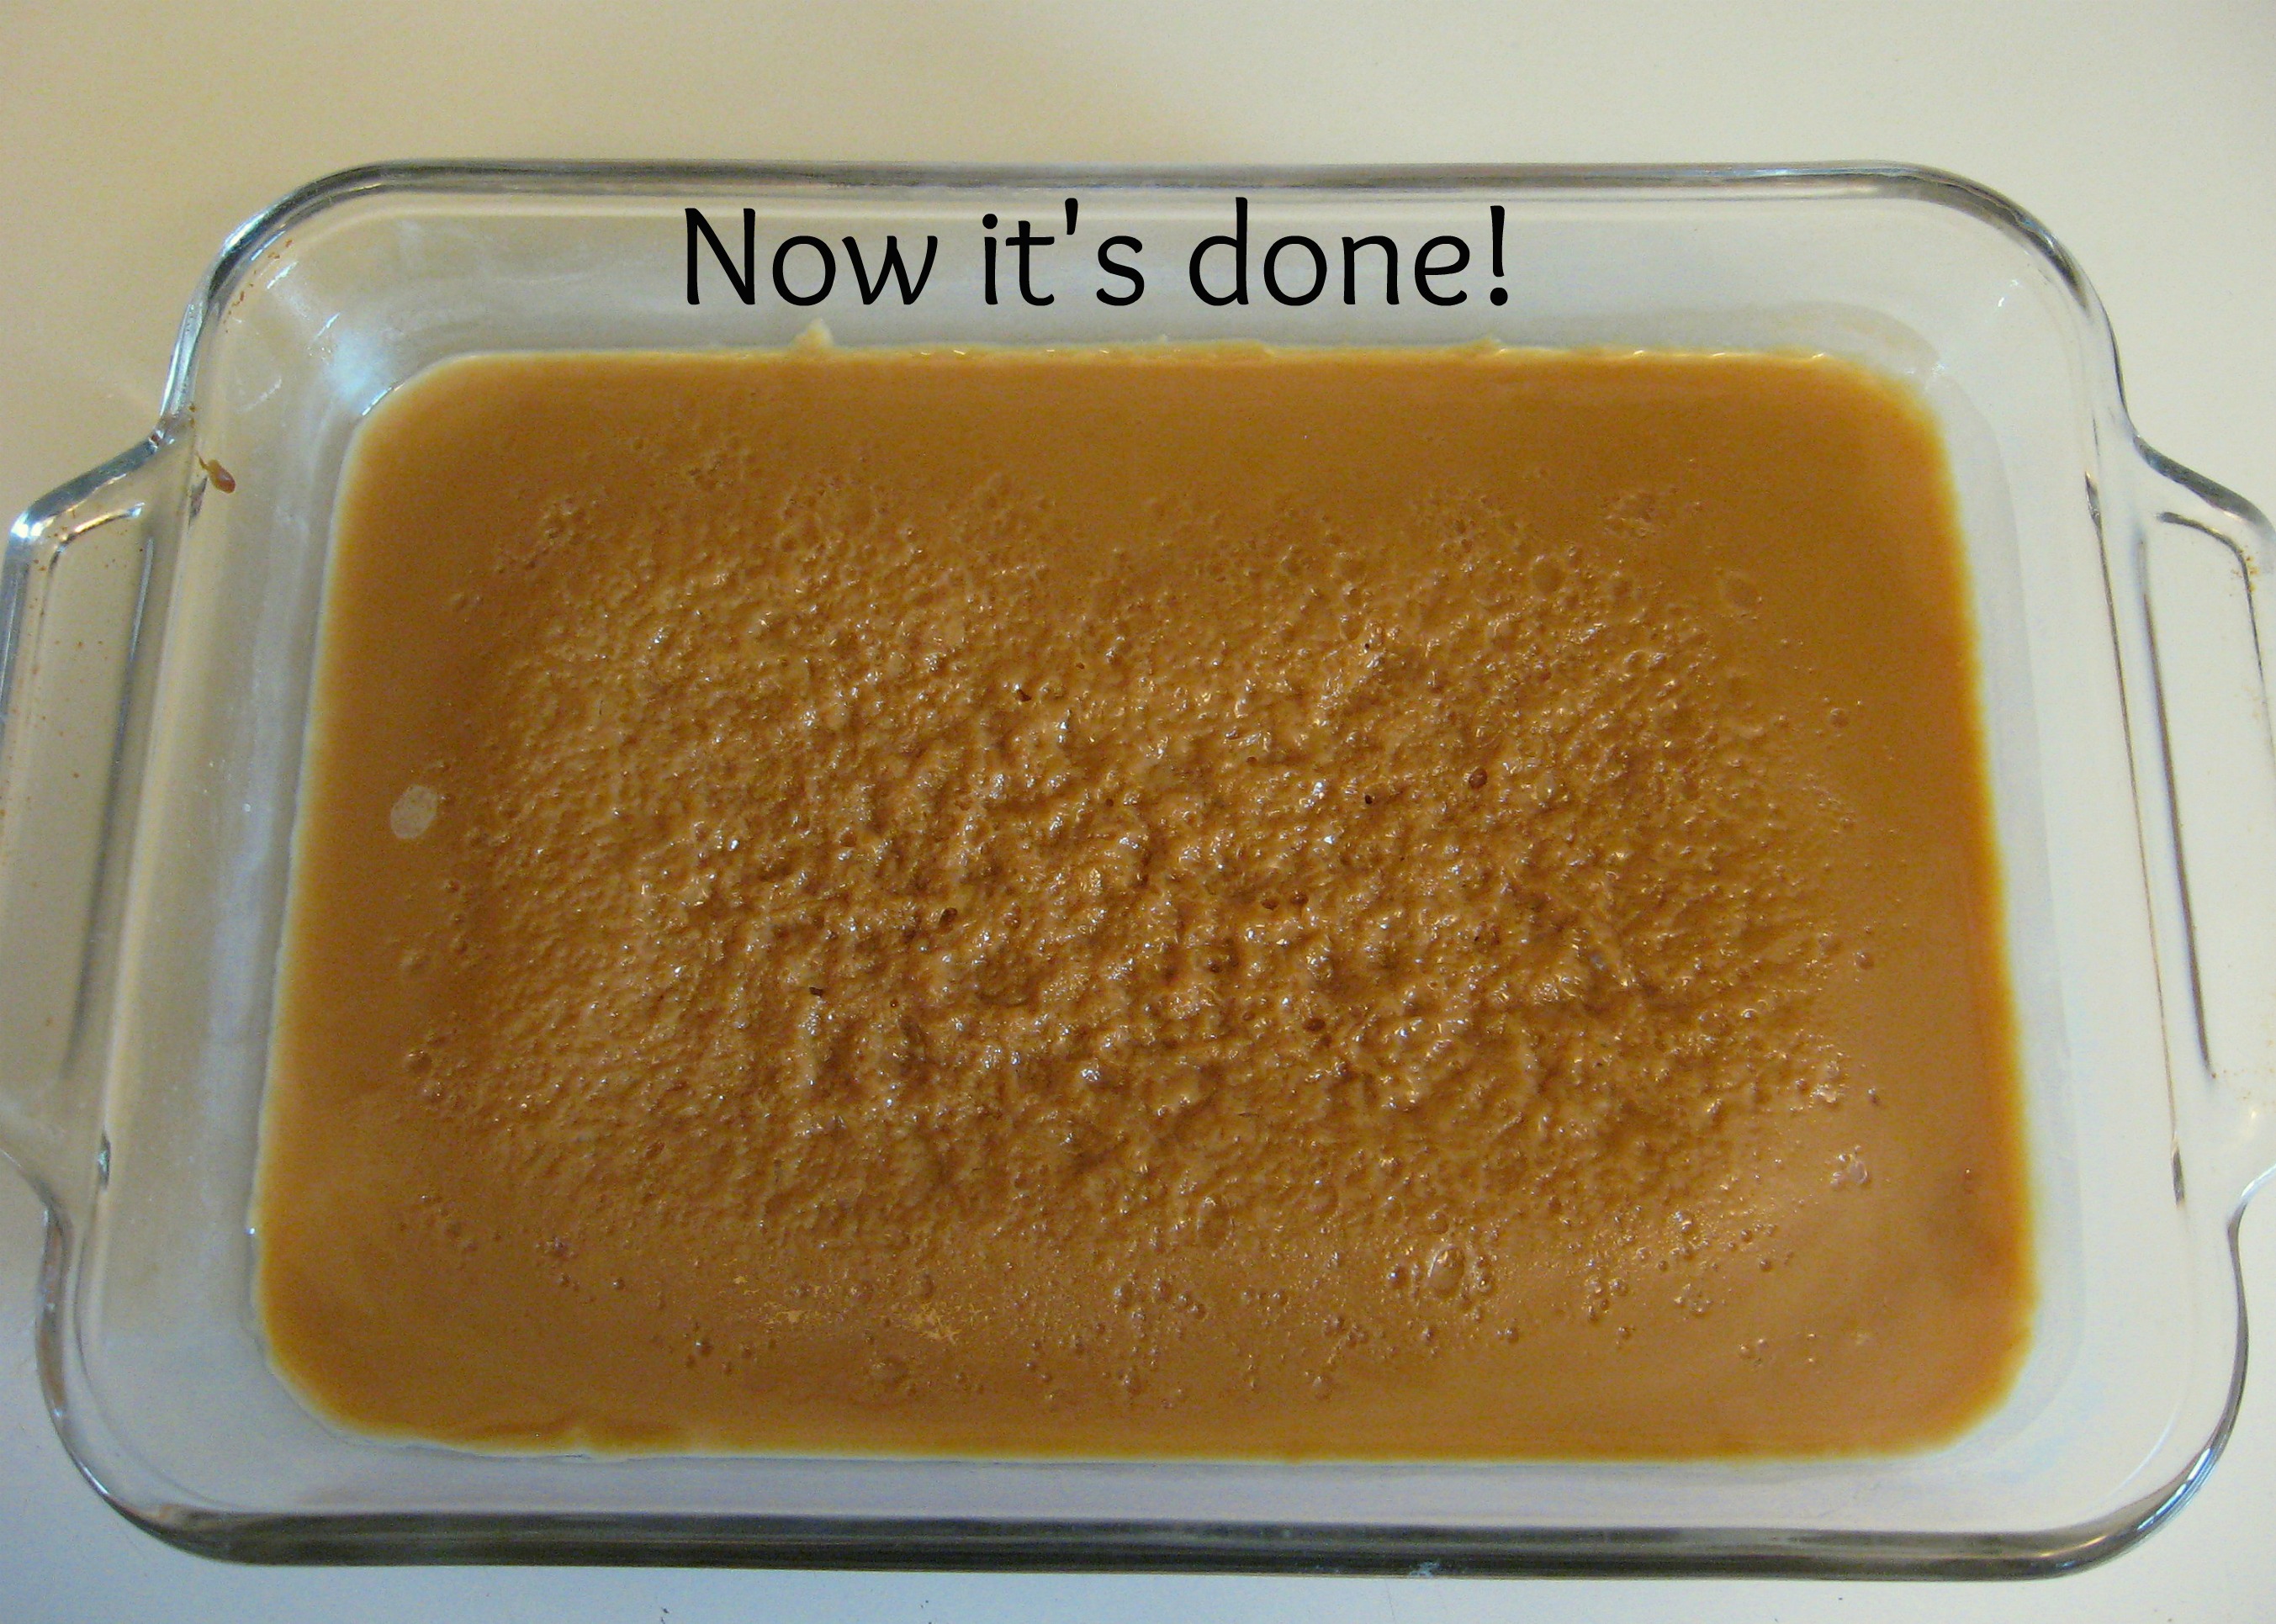
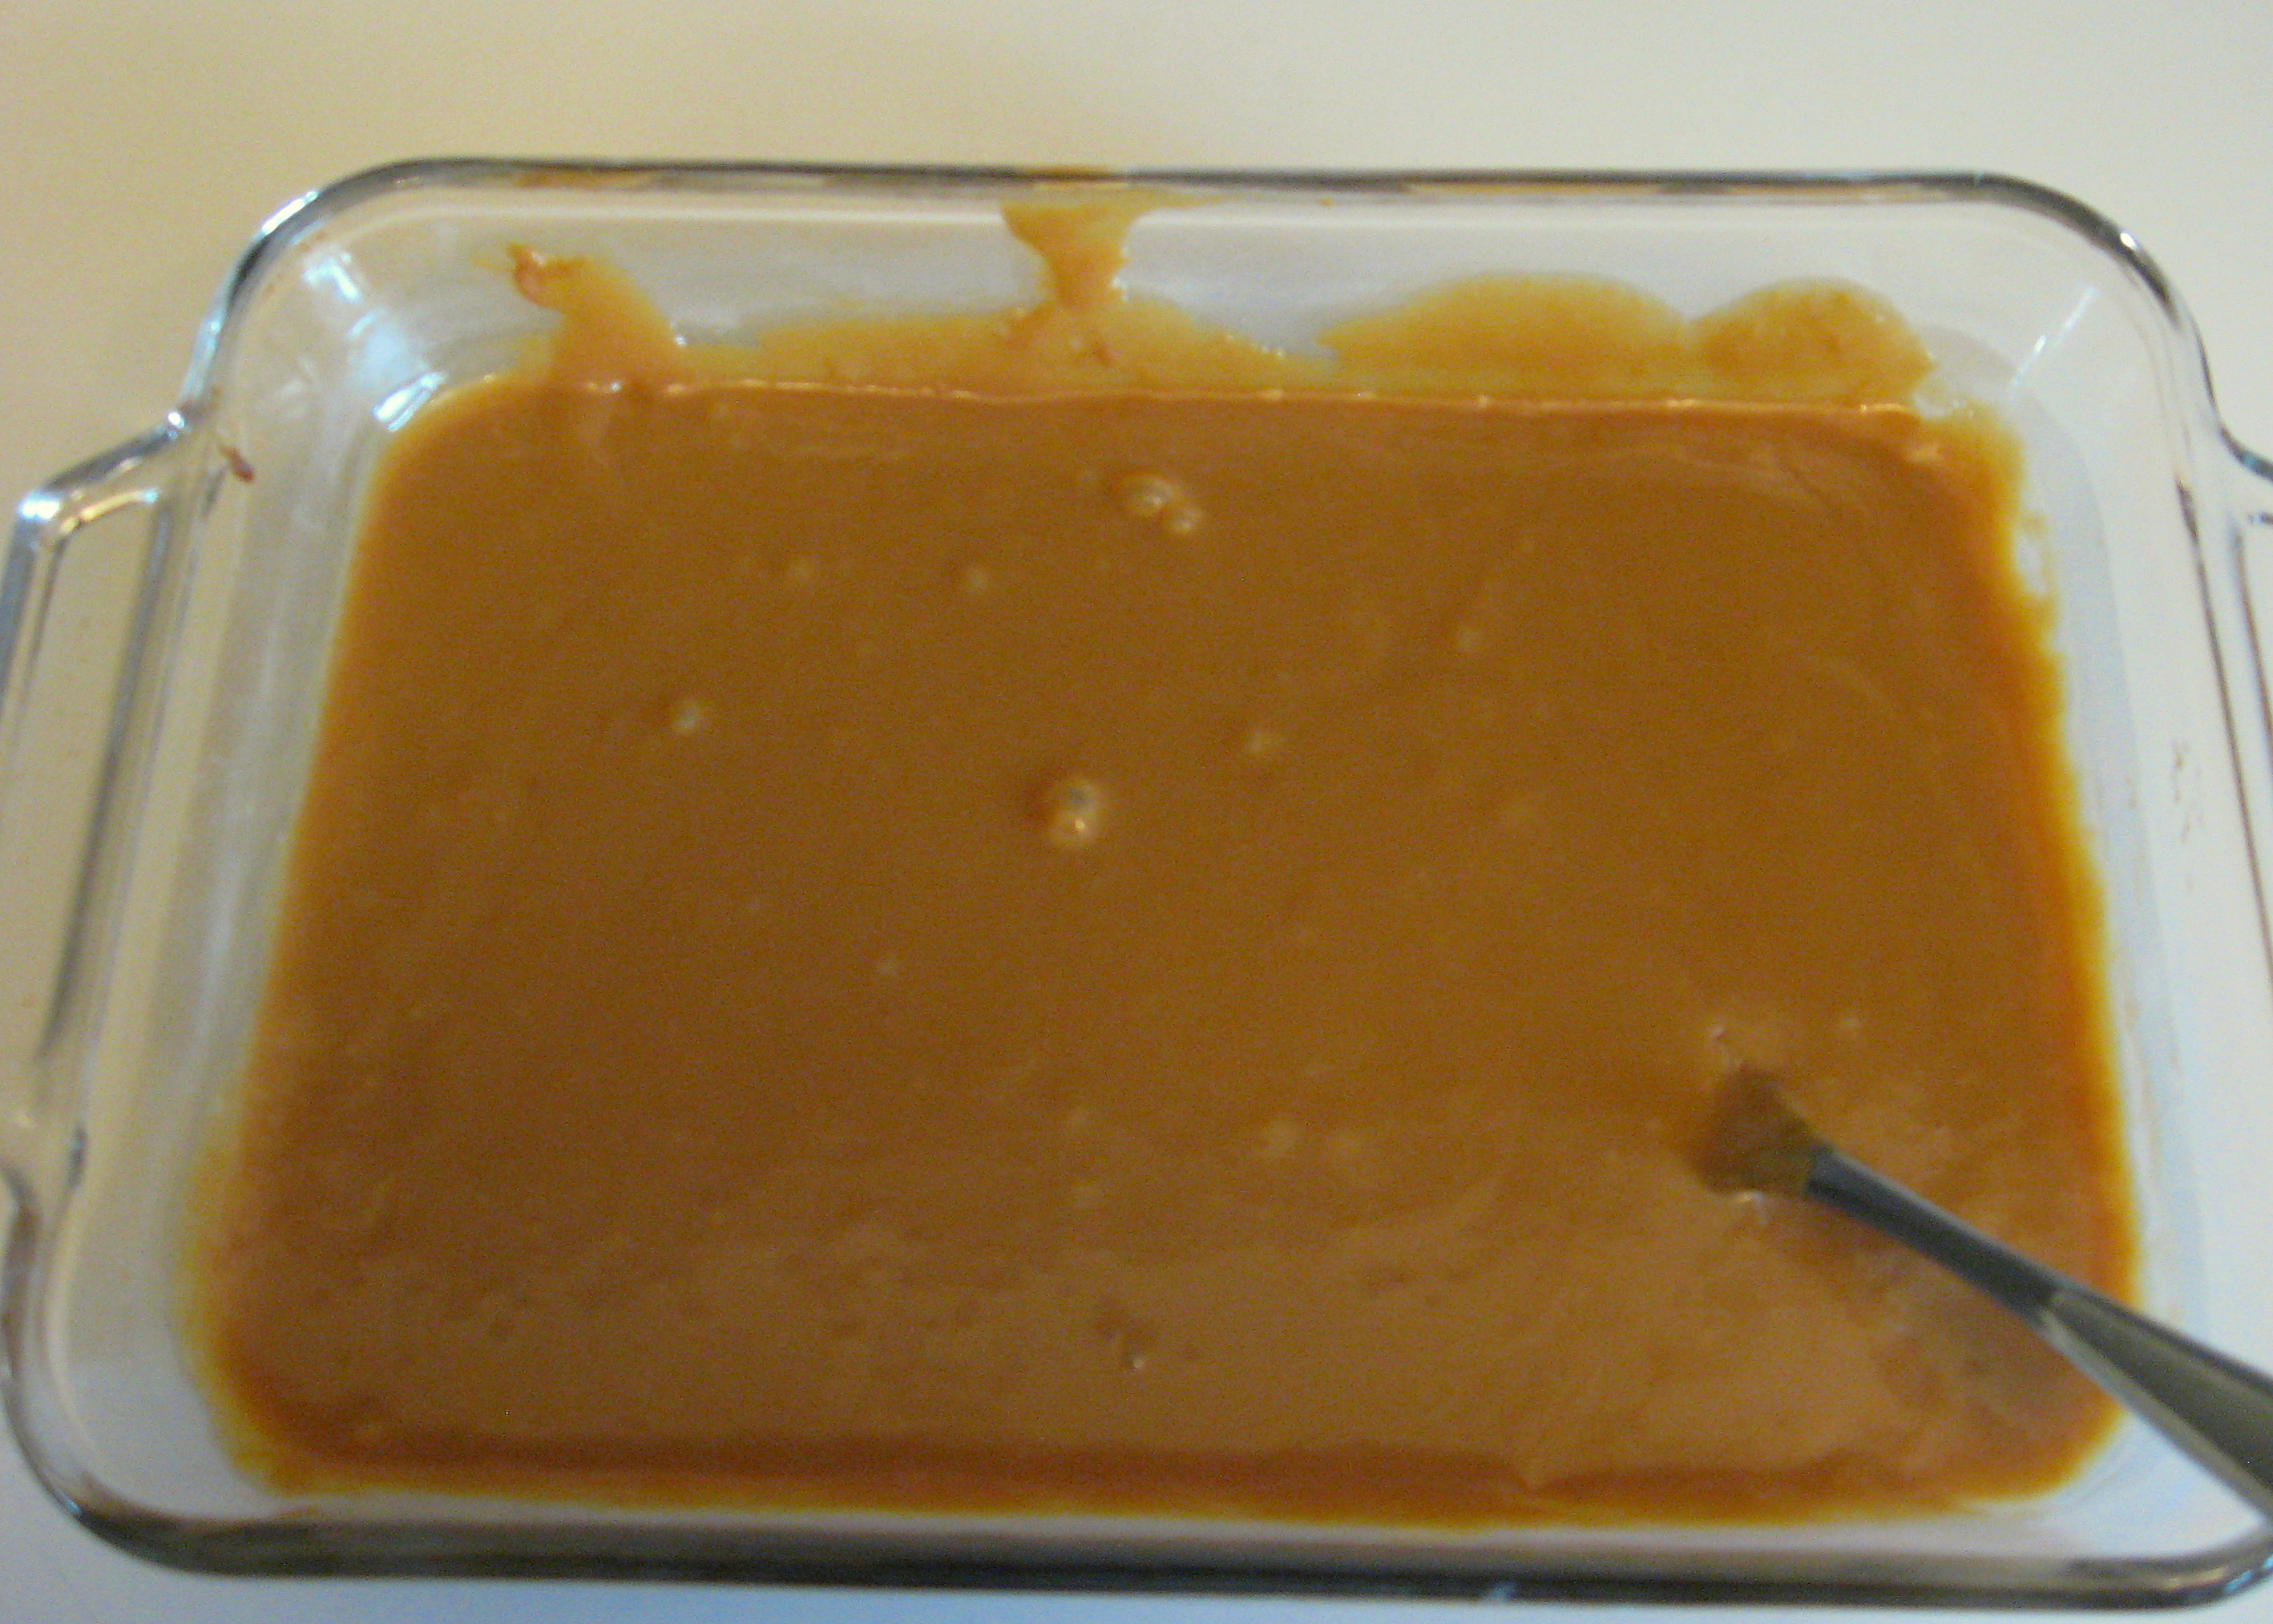
After about an hour, pull back the corner of the foil and have a look. When it’s done it should be thick and brown. (With the 2 cans that I did, it took more like 2-and-a-bit hours, but the one can was perfect after about an hour and 15 minutes).
**BE VERY CAREFUL when you open the oven door. Open it and stand back or you will get hit in the face with very hot steam!!
Once it is dark and carmely looking, remove the pan from the water and whip it with a whisk or a fork until it is smooth.
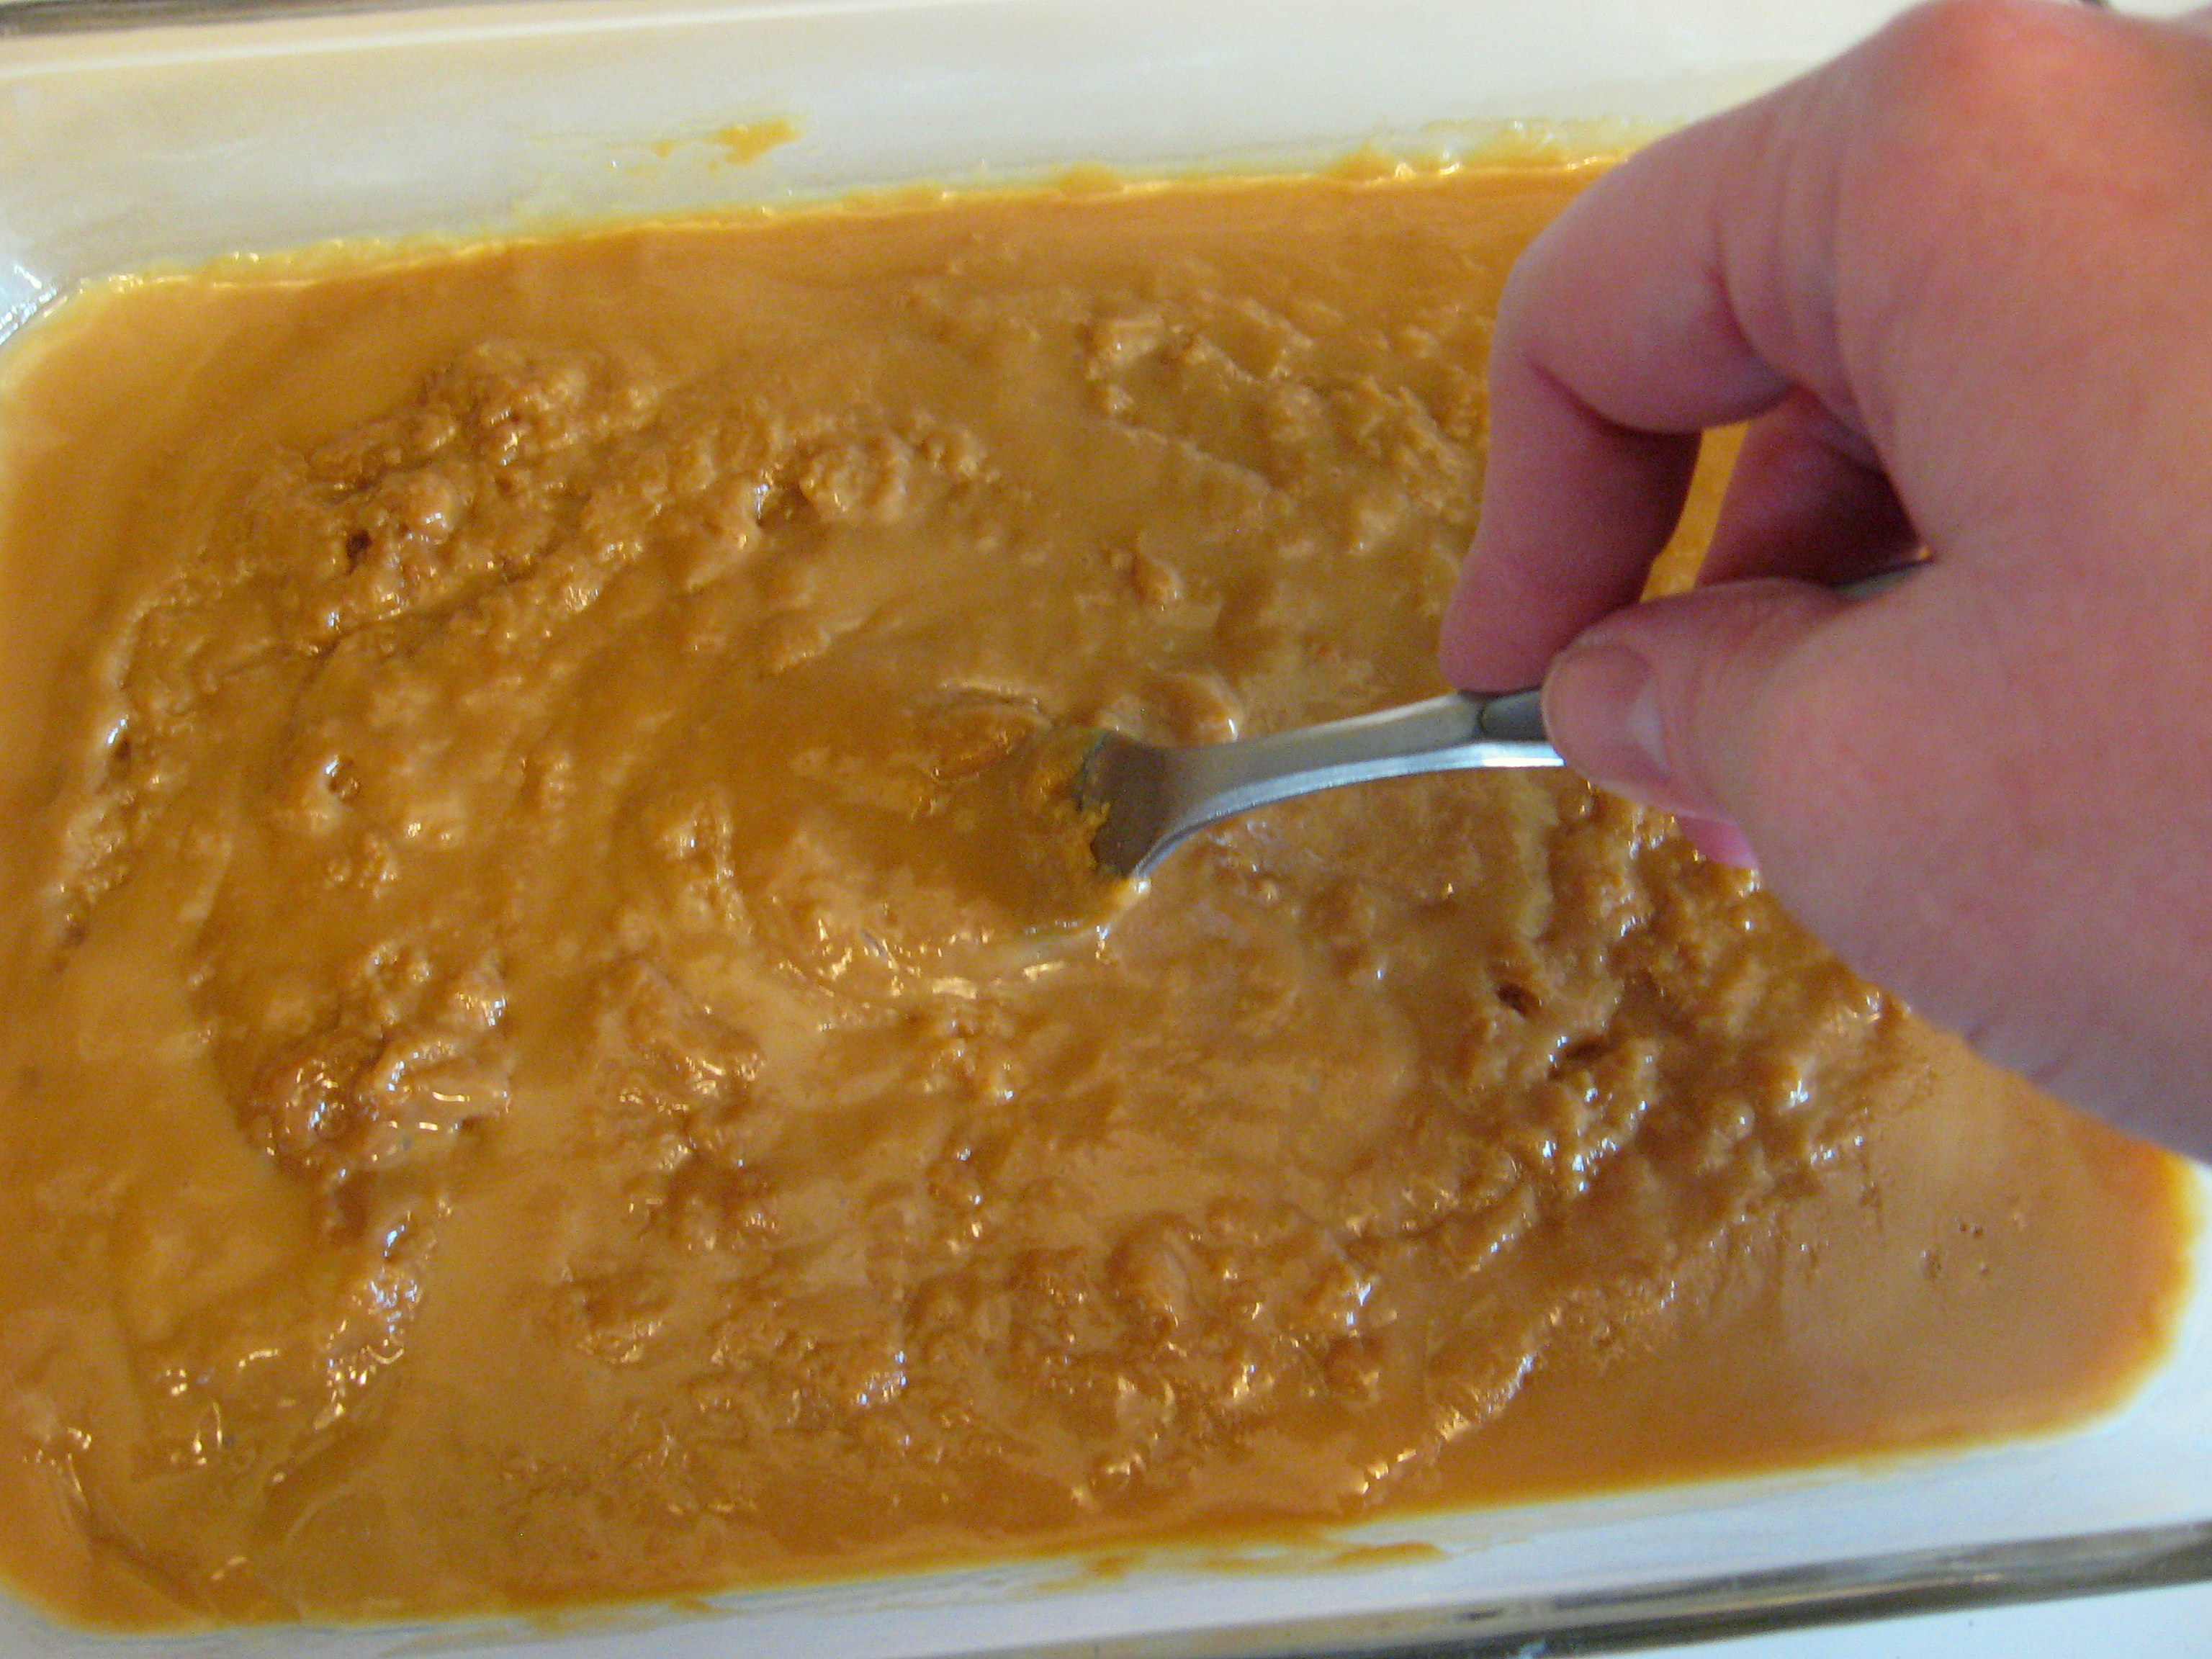
Now just try not to eat it all with a spoon…
Milwaukee Airless/Fine Finish Paint Sprayer Hub $265.30 Today Only (reg $379)
 Milwaukee Airless/Fine Finish Paint Sprayer Hub
Internet# 202019771
$379.00 WAS
-$113.70 SPECIAL BUY SAVINGS
$265.30 – YOUR NEW PRICE
May be available for FREE Store Pickup!
A PYP Best Blog! Making Paper Stars!
Just in case you missed this article on making paper stars the first time we shared it a couple of years ago, we are republishing it. After Sharon wrote this blog originally, we got an awesome response. This is one of the PYP Best Blogs!
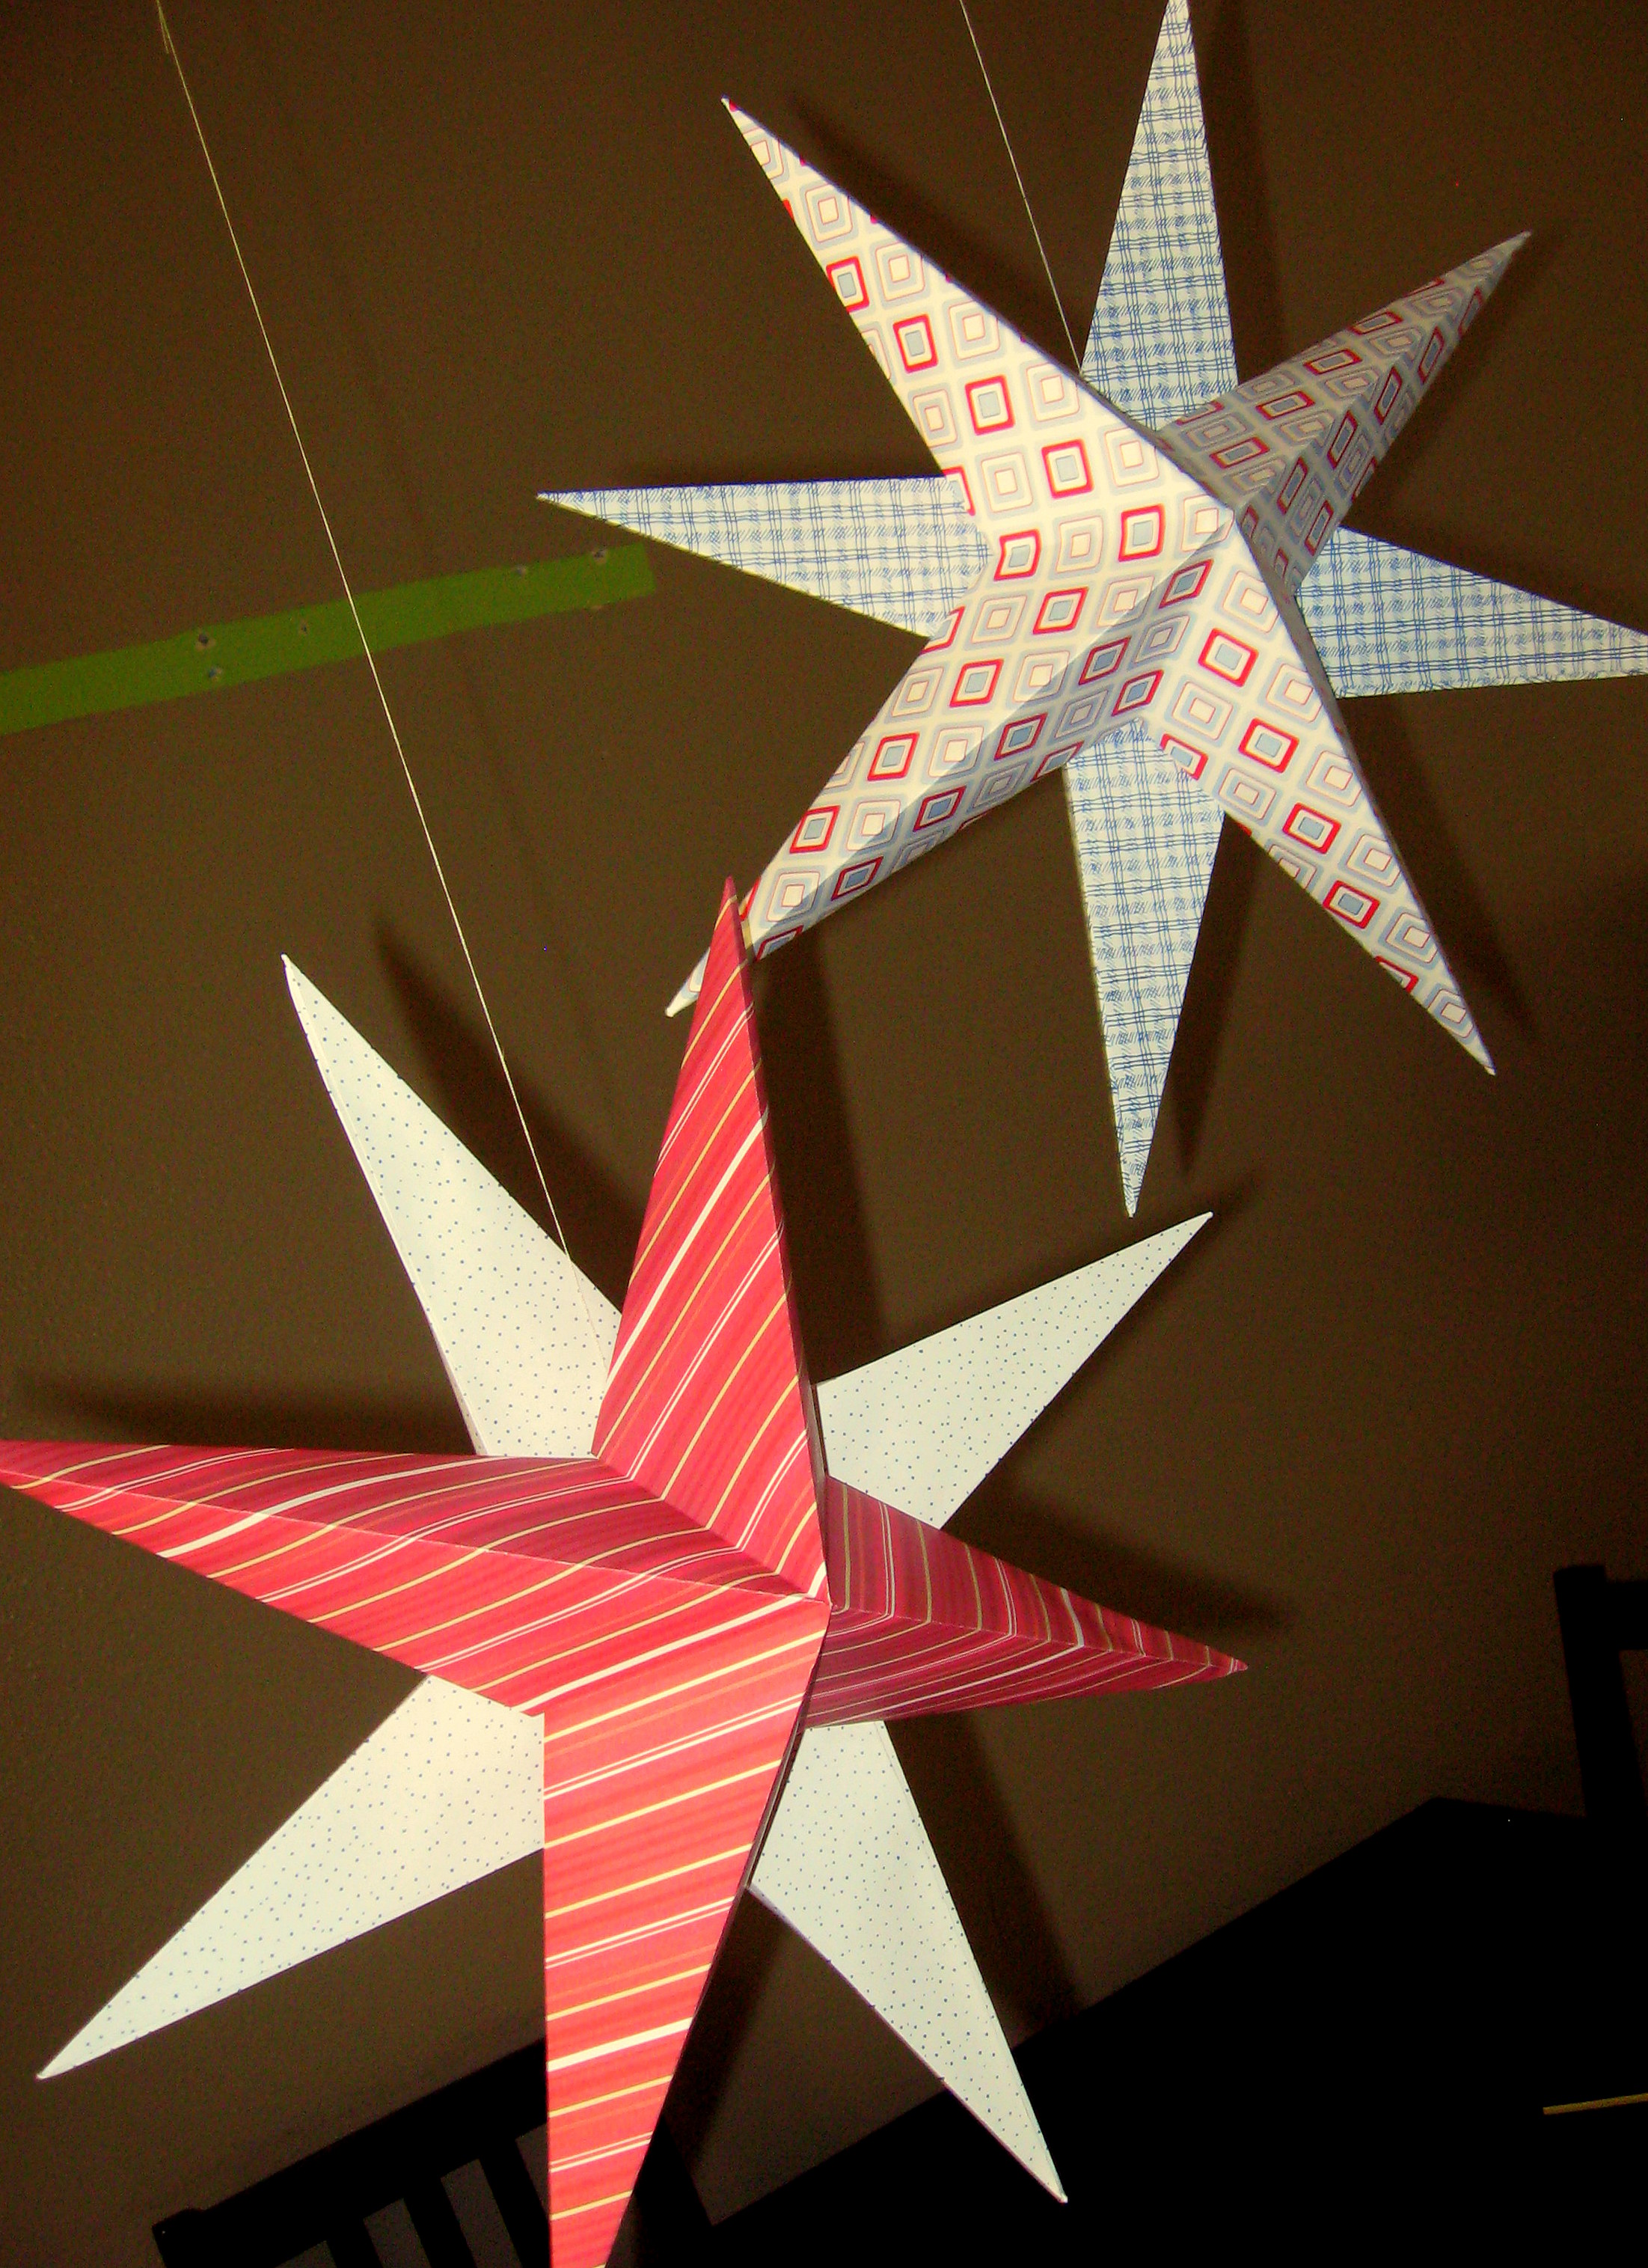
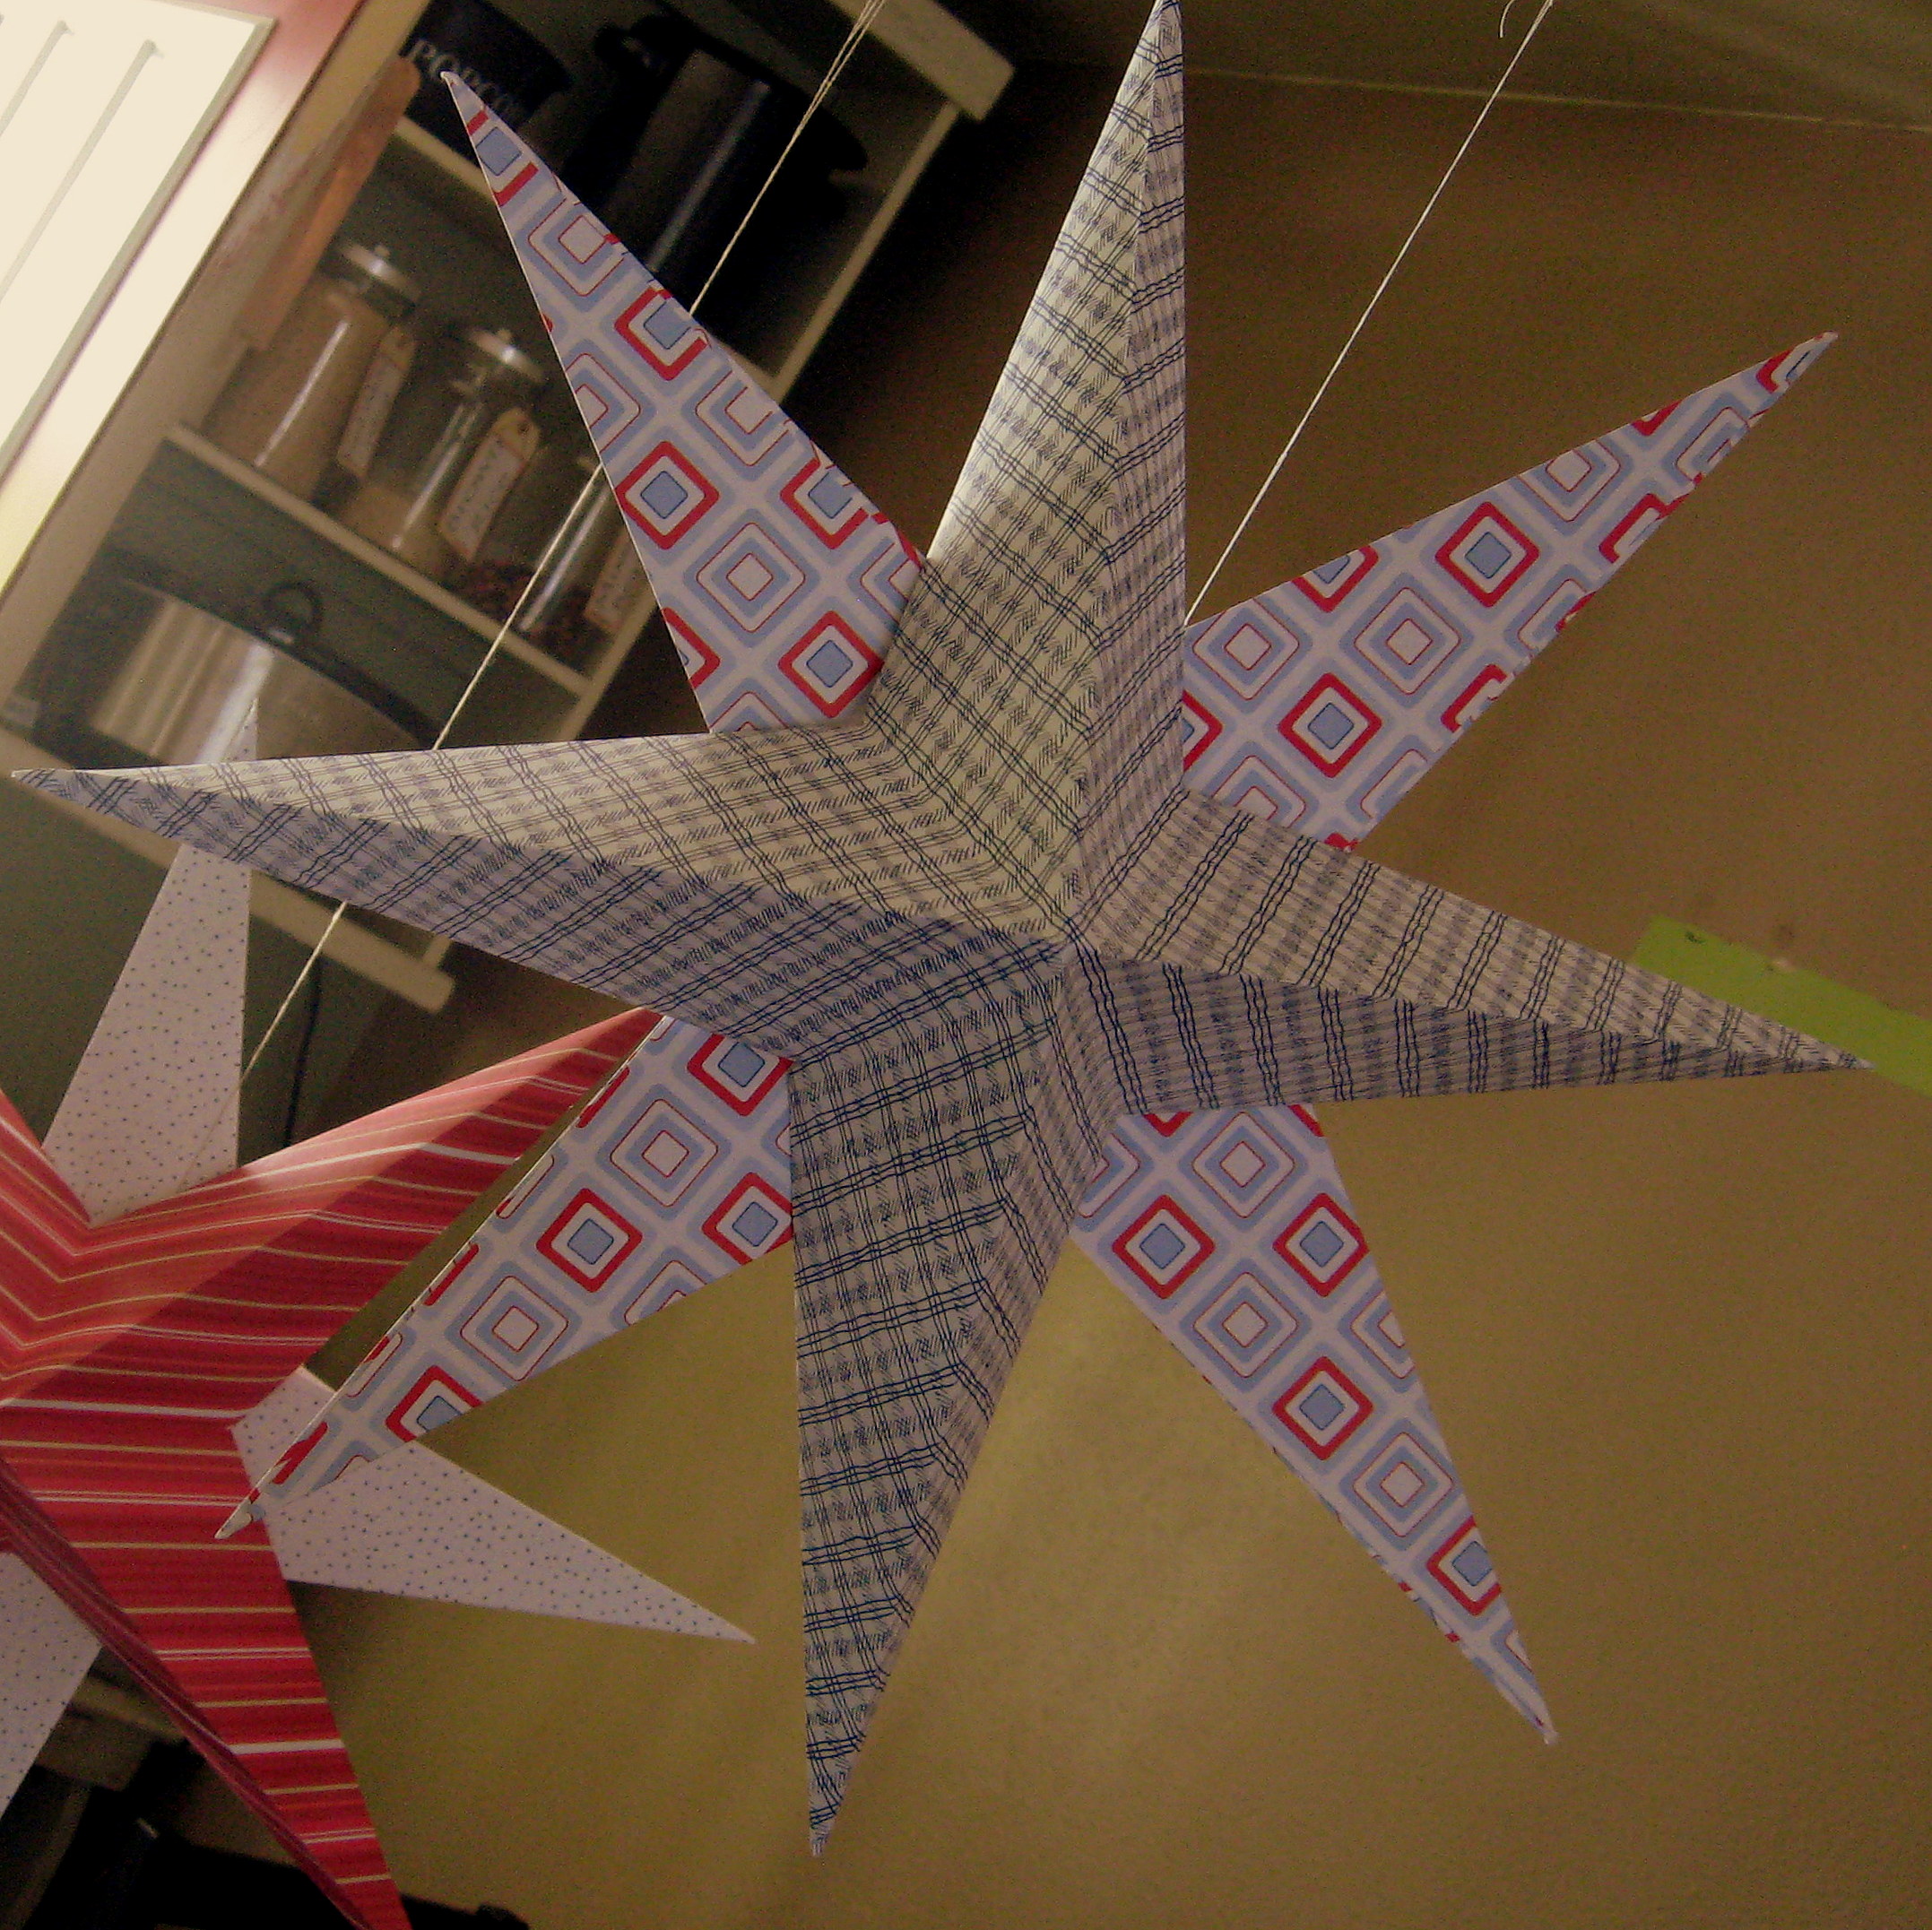
I’ll show you two different ways to fold a paper star. They are both fun projects to do with your kids and they make cute and easy 4th of July decor when you use red, white and blue paper.
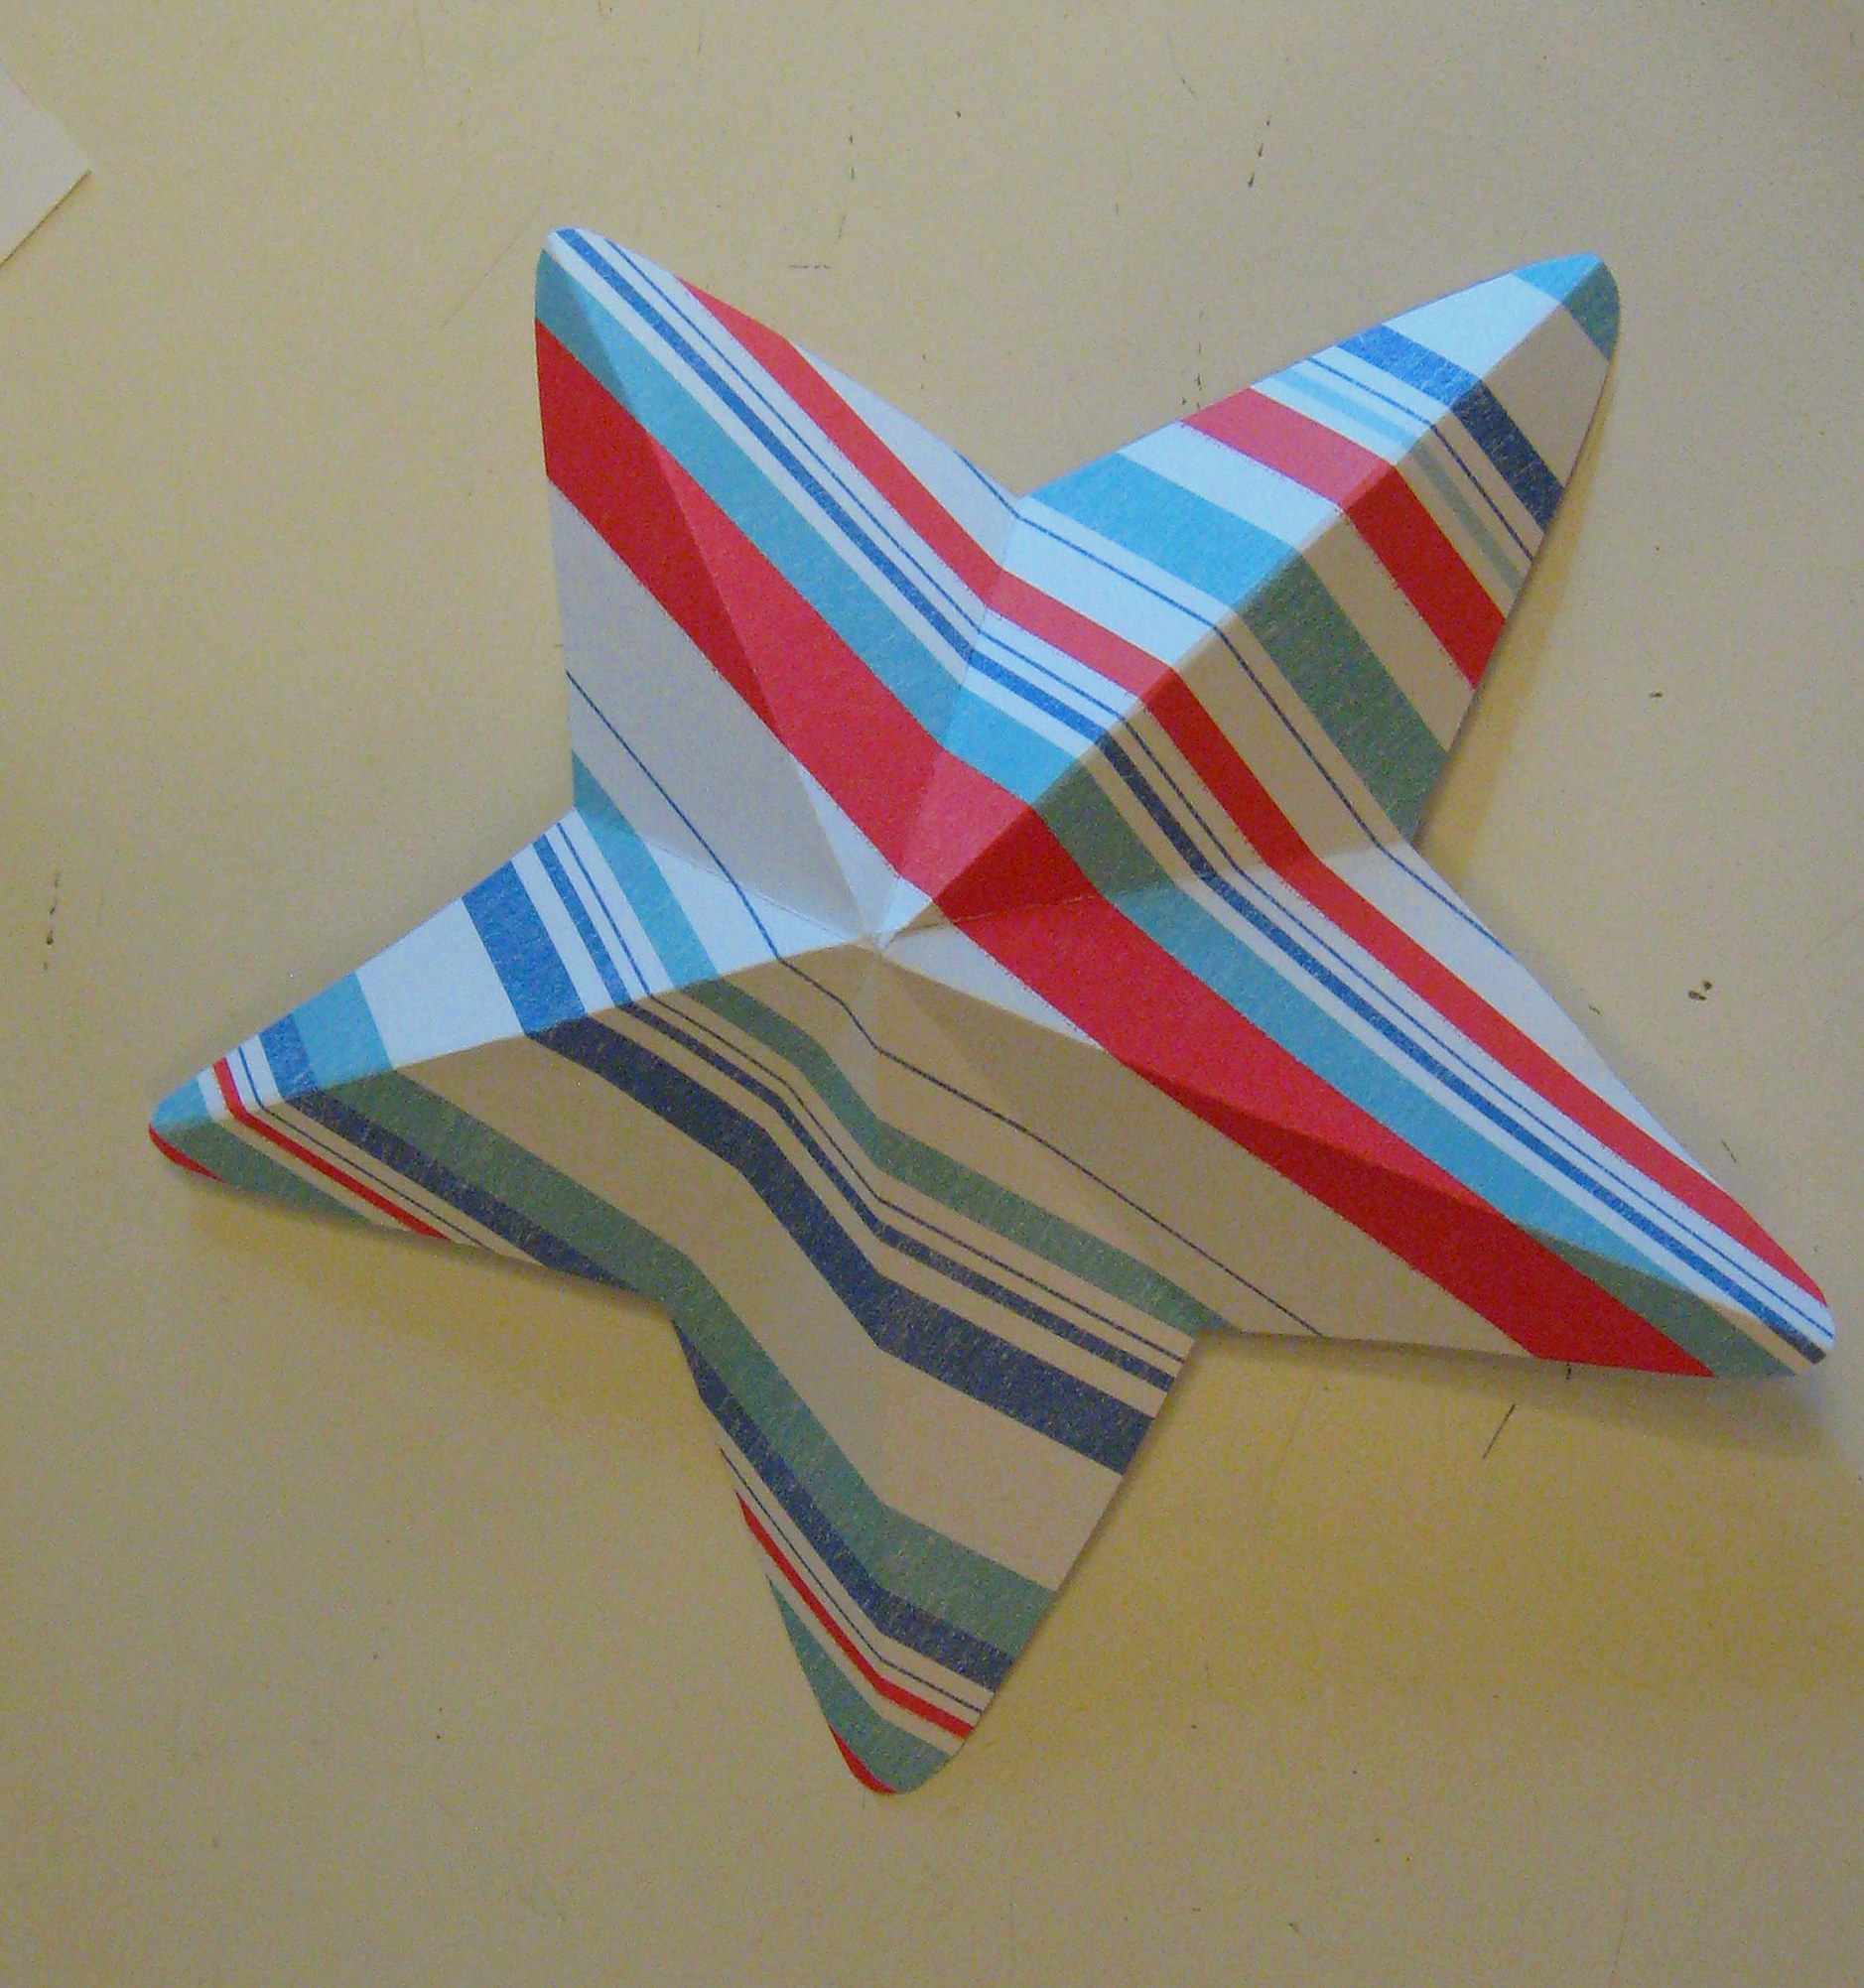
Star #1
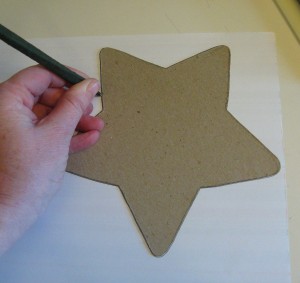
Start with any paper, and any size and shape of star. Trace the star shape onto the paper and cut it out.
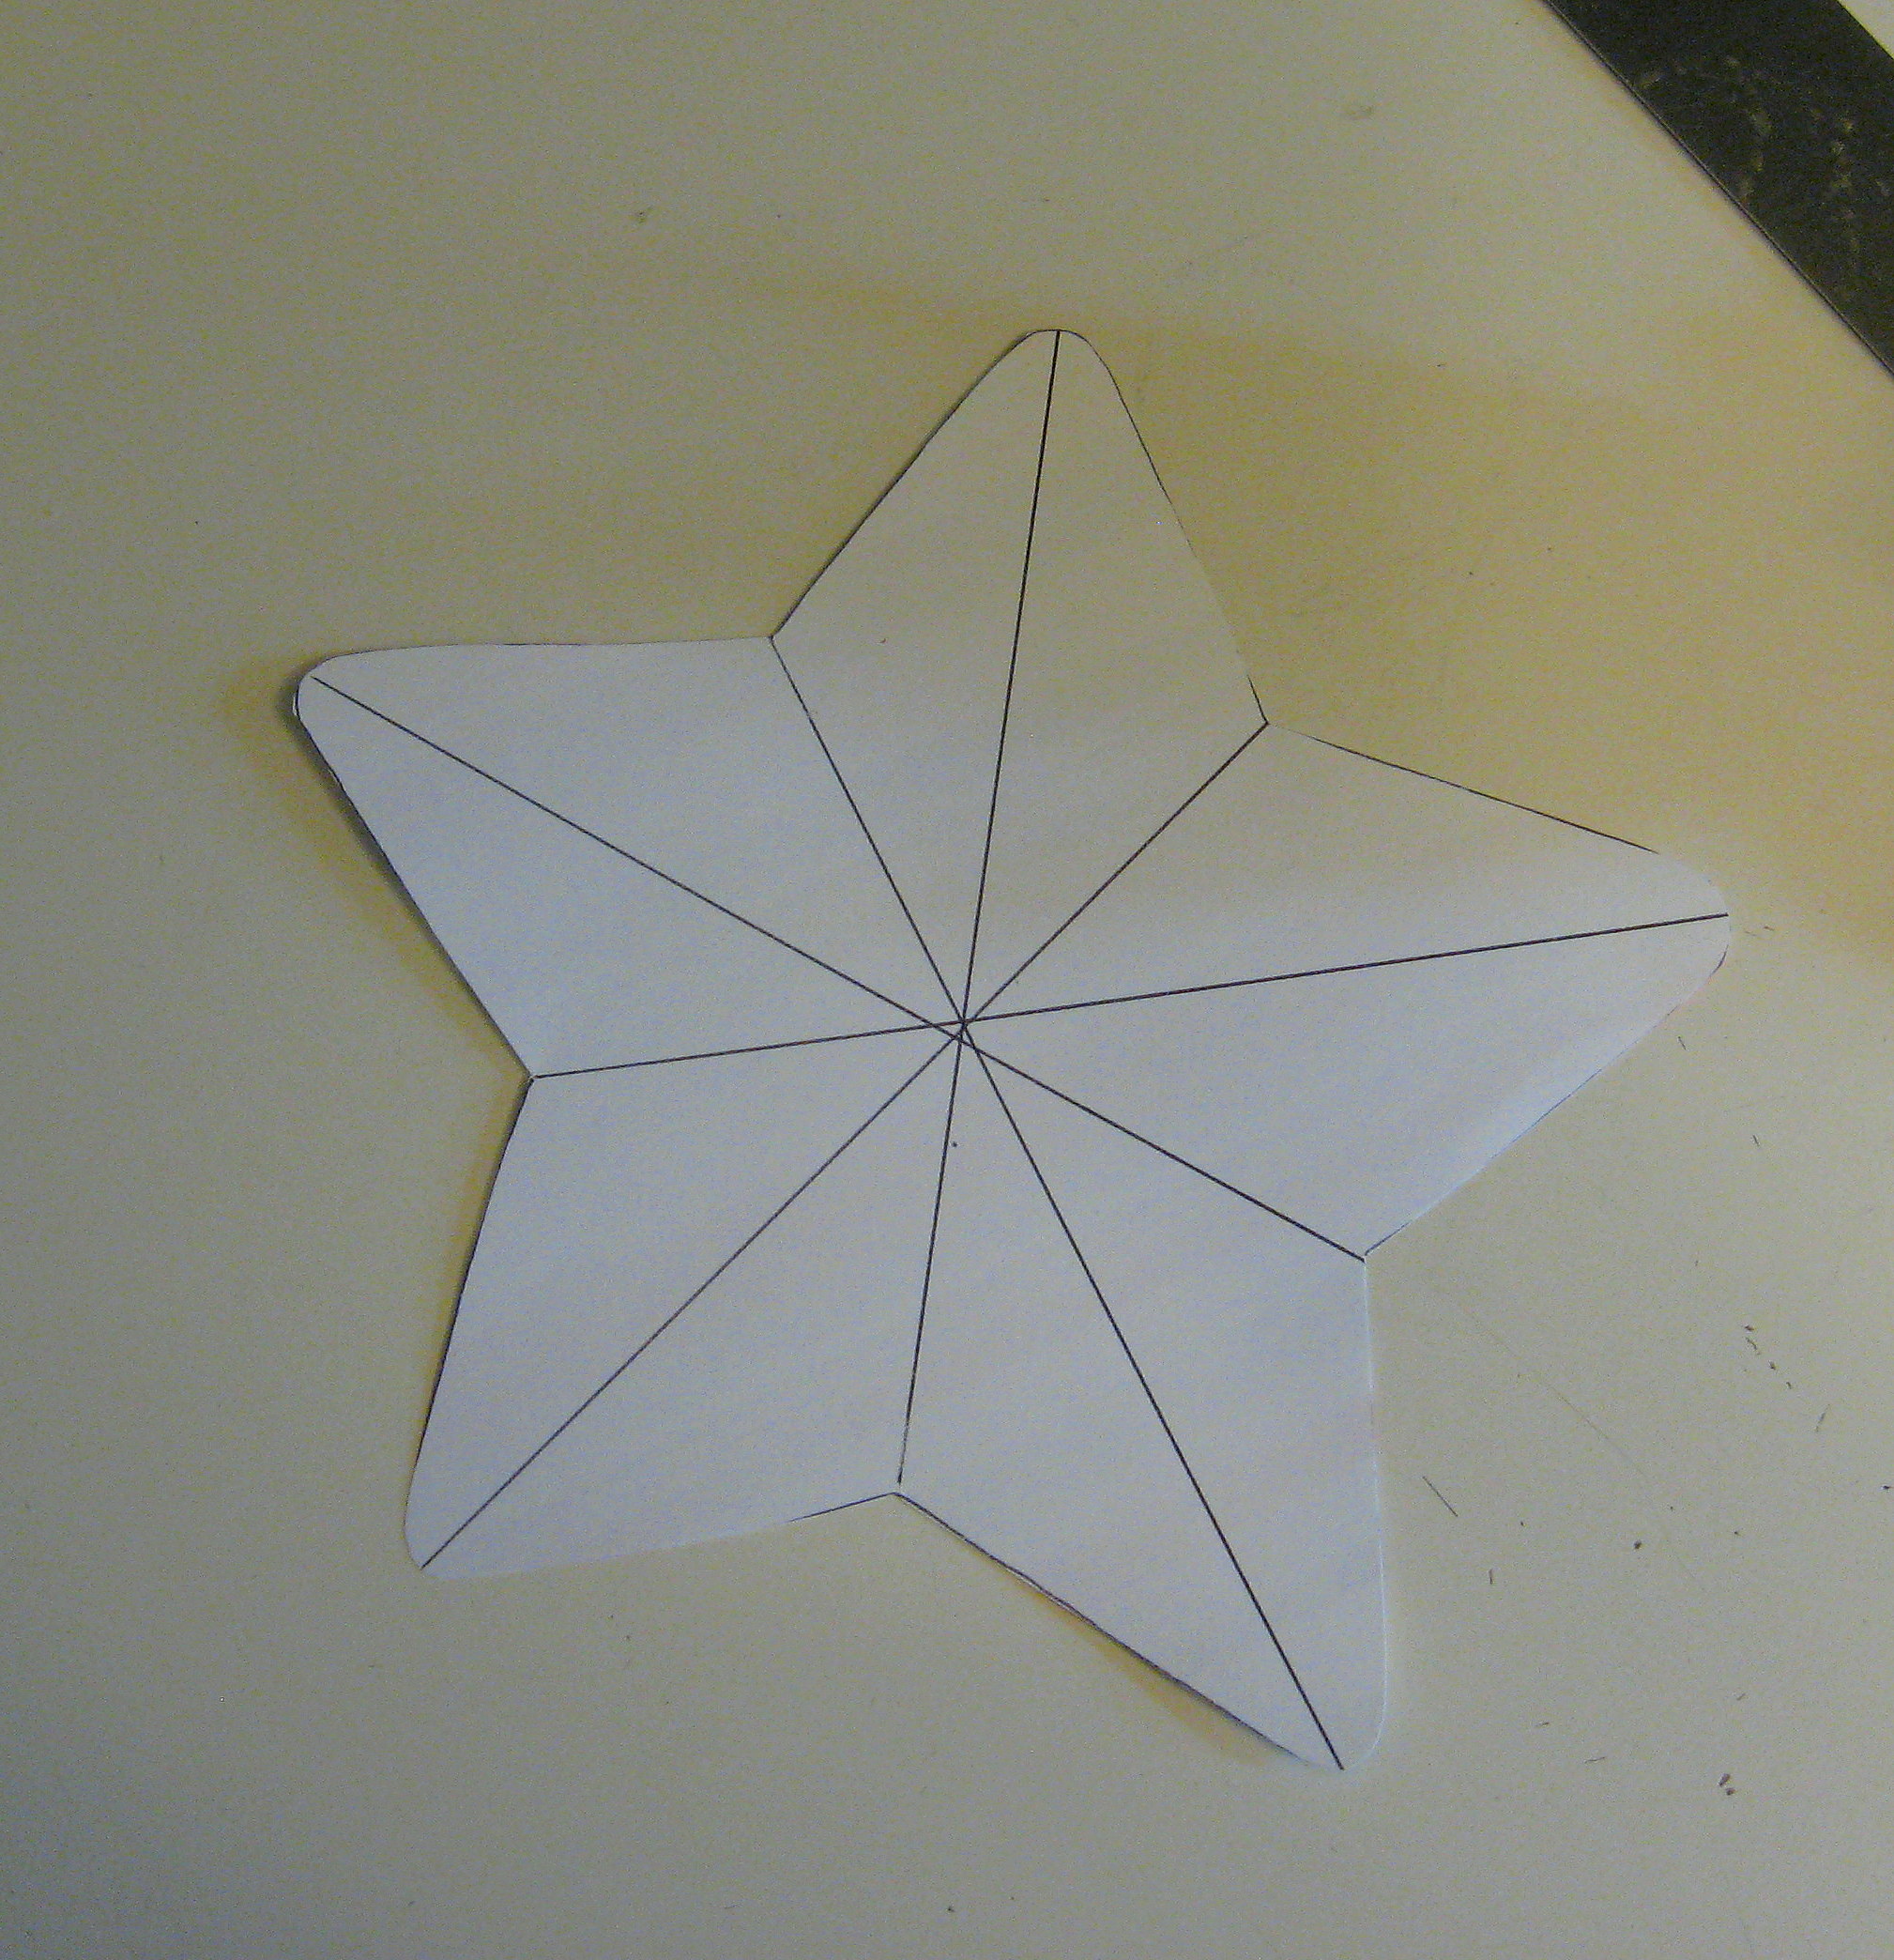
Using a ruler, connect each star point with the “valley” opposite it and fold.
I have drawn lines here to show you where you will fold – you don’t need to draw the lines (you should, though, probably be more careful to make sure all folds meet in the middle!)
Make a nice sharp crease by using a bone folder, or if you don’t have one, you can use a pen cap or another ruler.
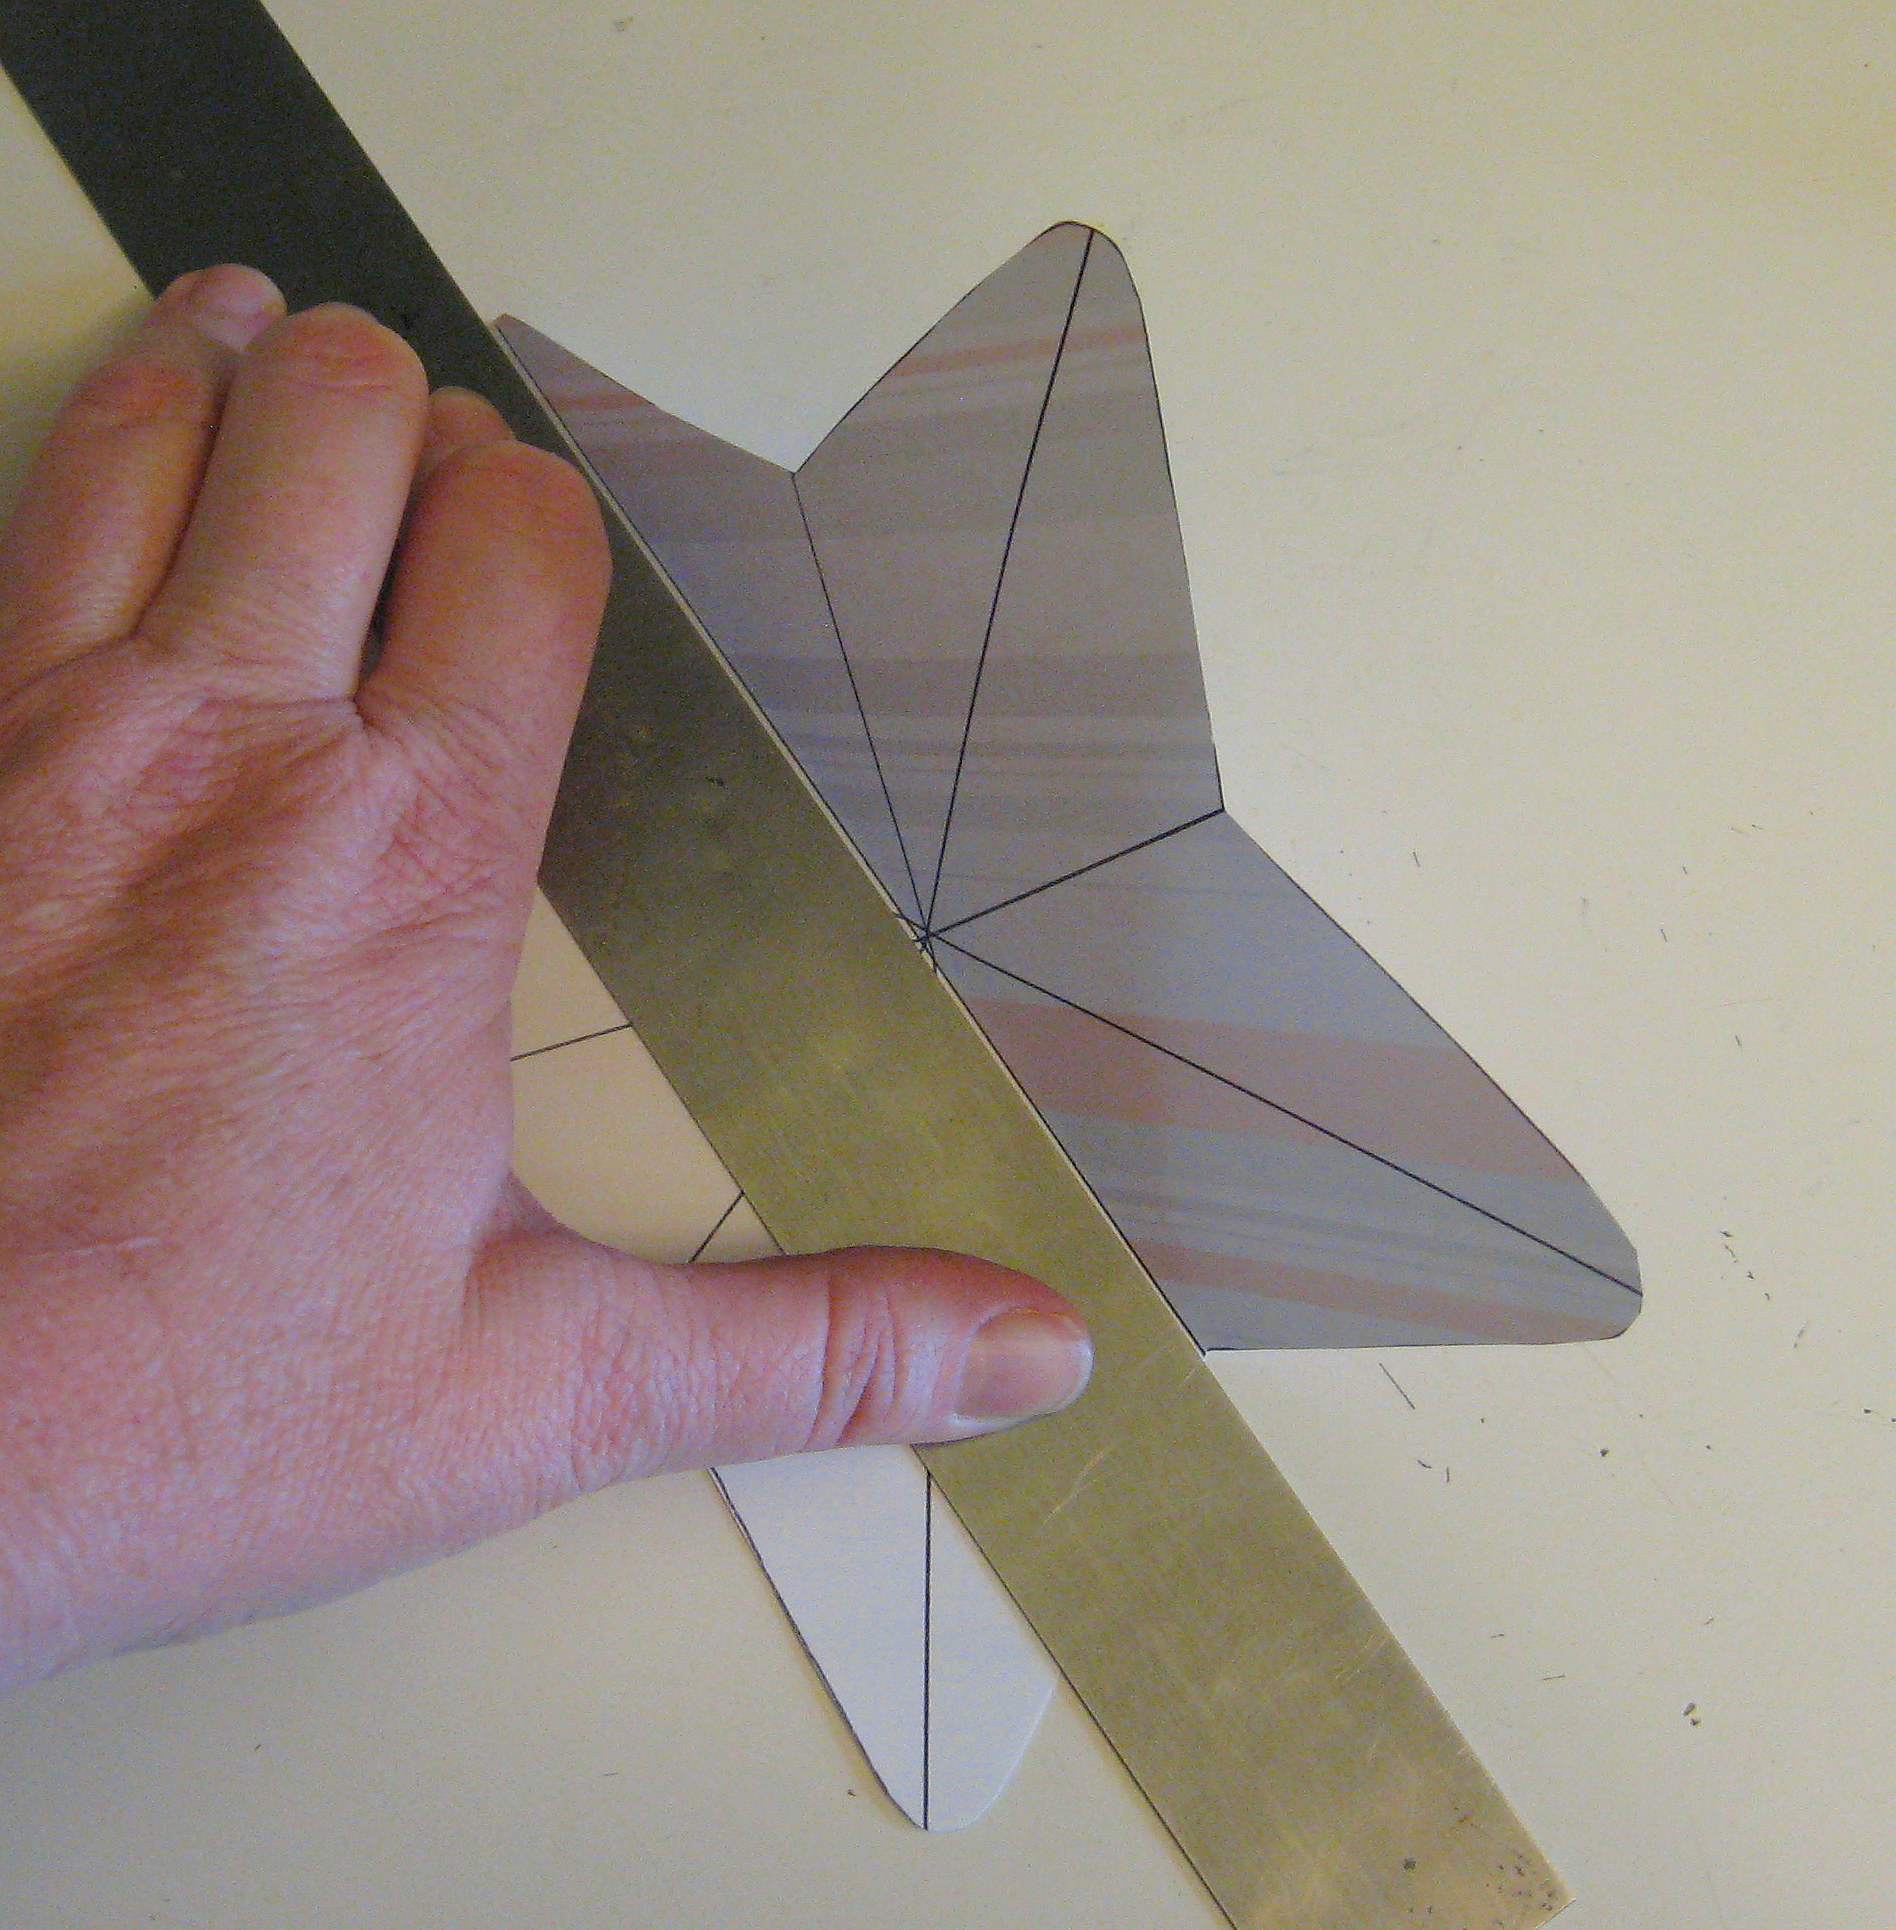
Now flip the star over to the right side and make the folds go the way you want them to go – folds from the center to a point will point up and the folds from the center to a “valley” will point down – like this:
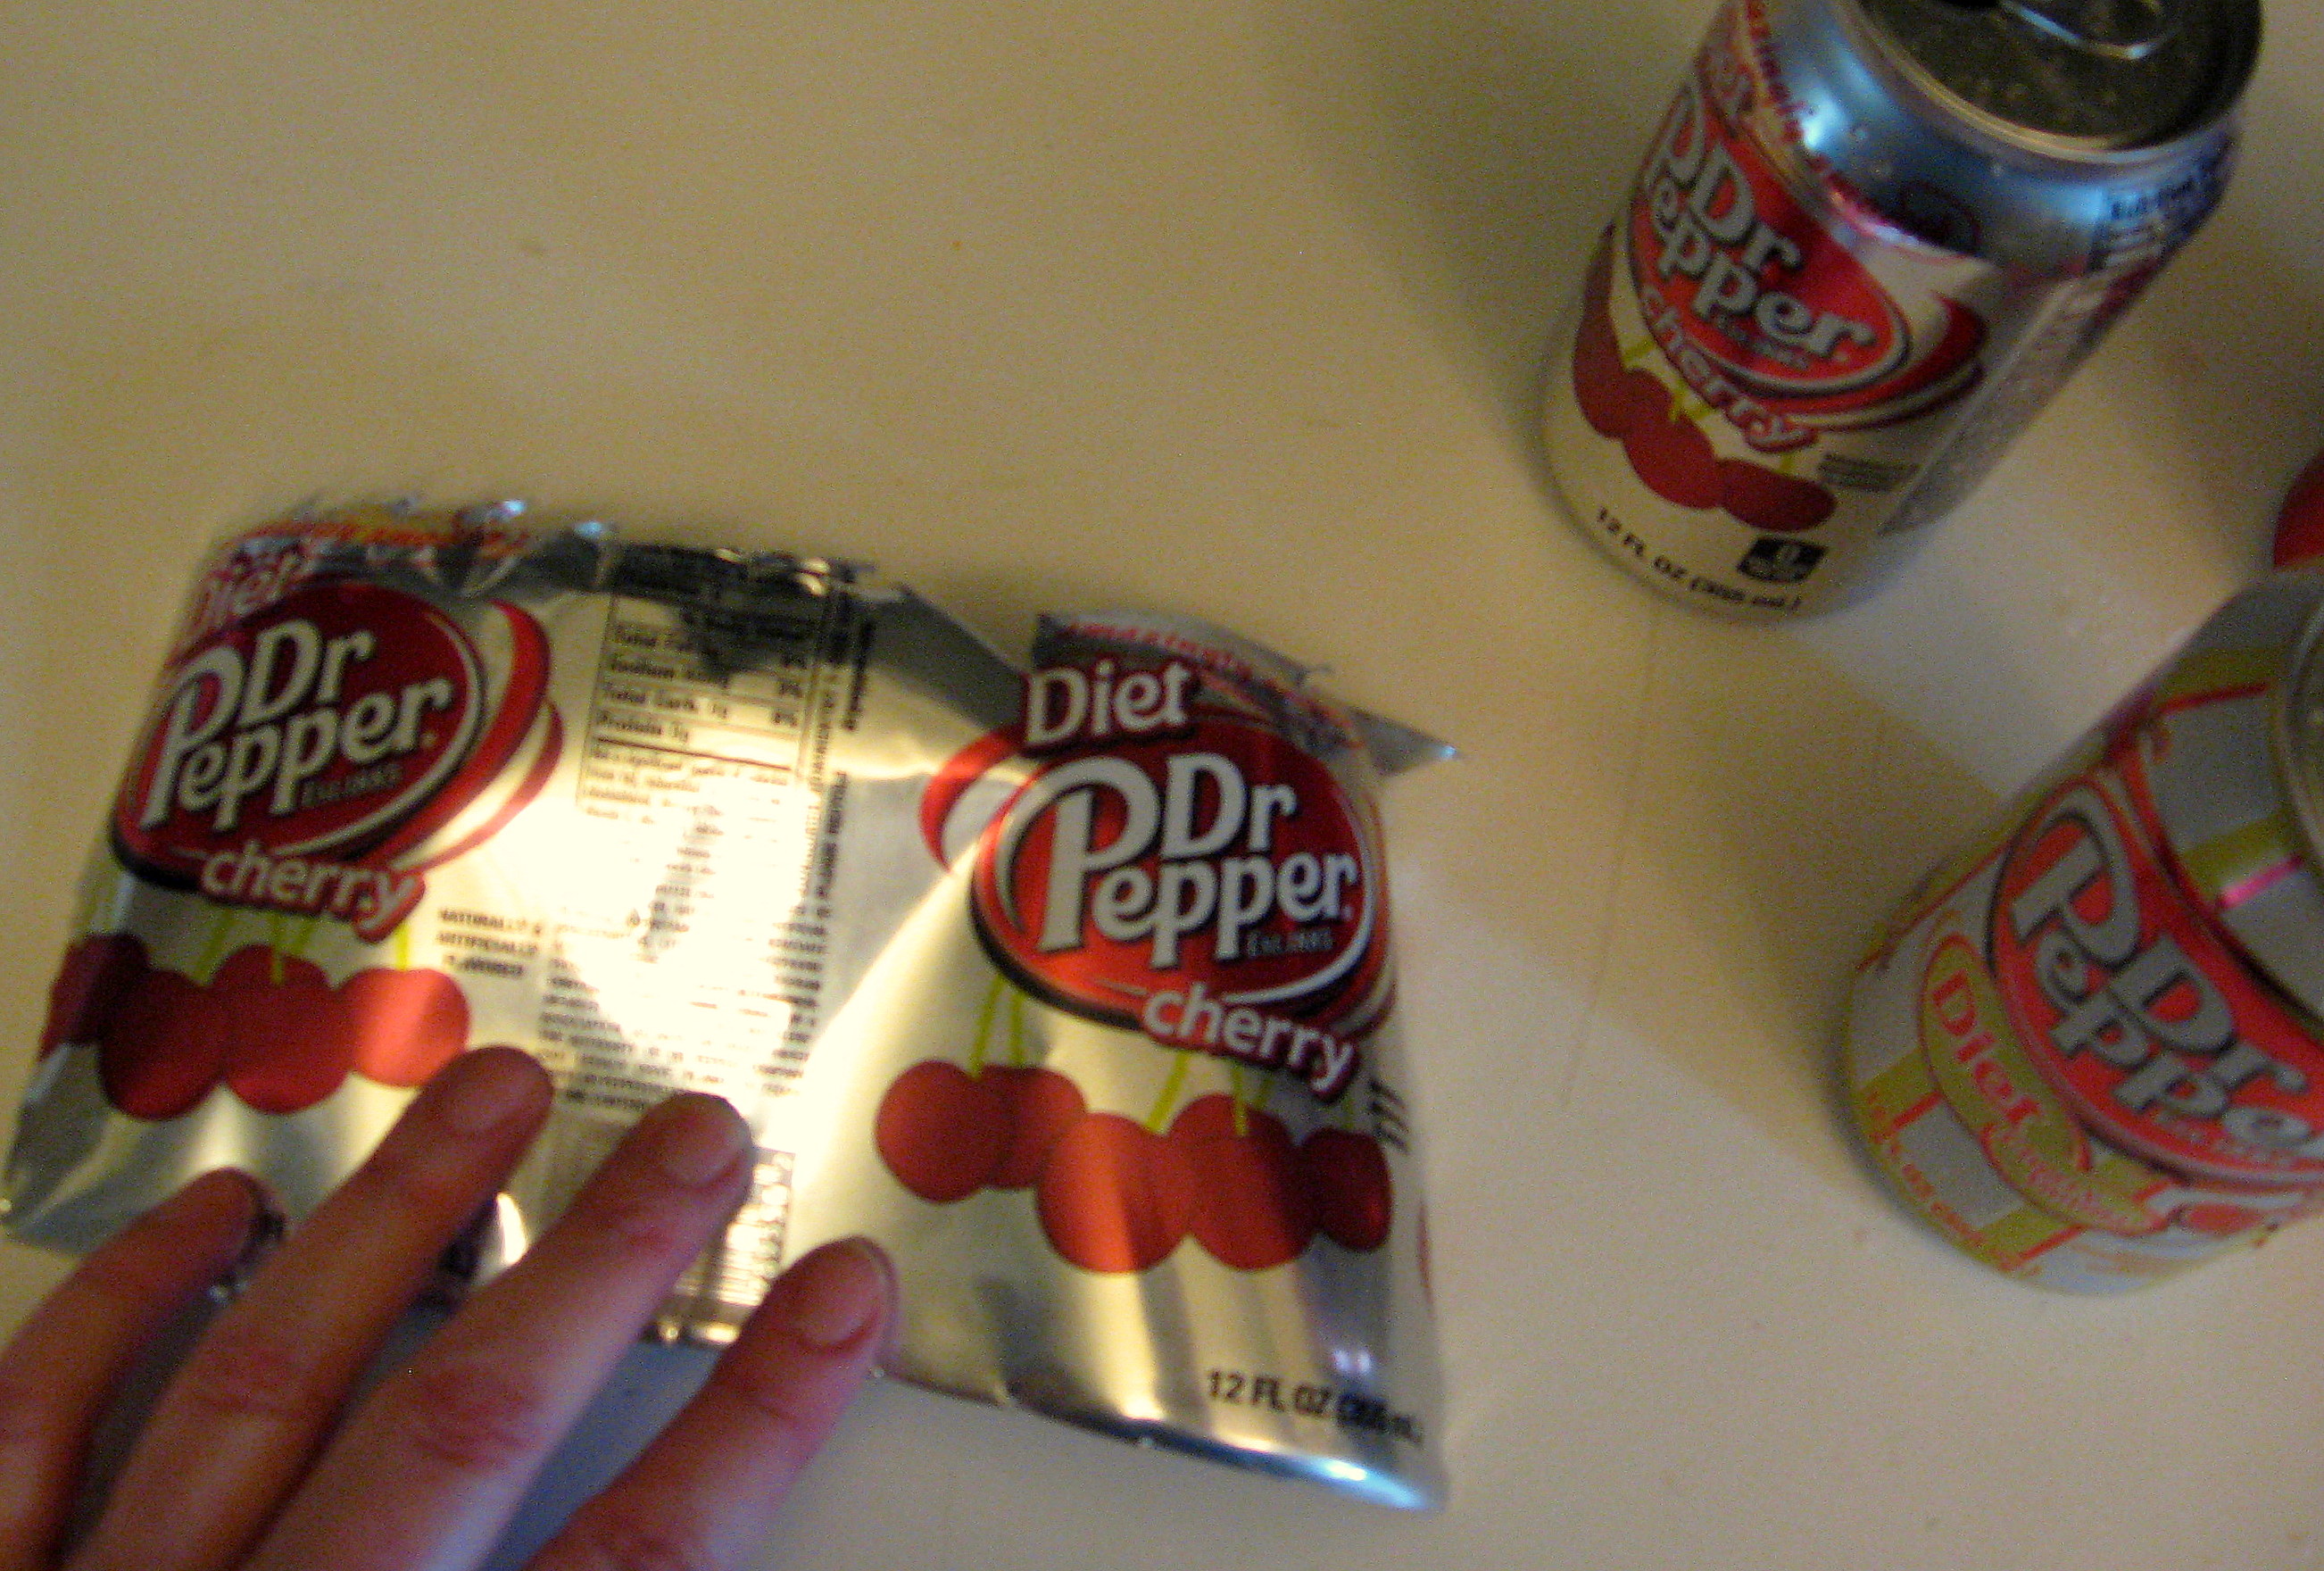
Once you’ve perfected it with paper, try it with metal! I cut apart some pop cans and folded them the same way.
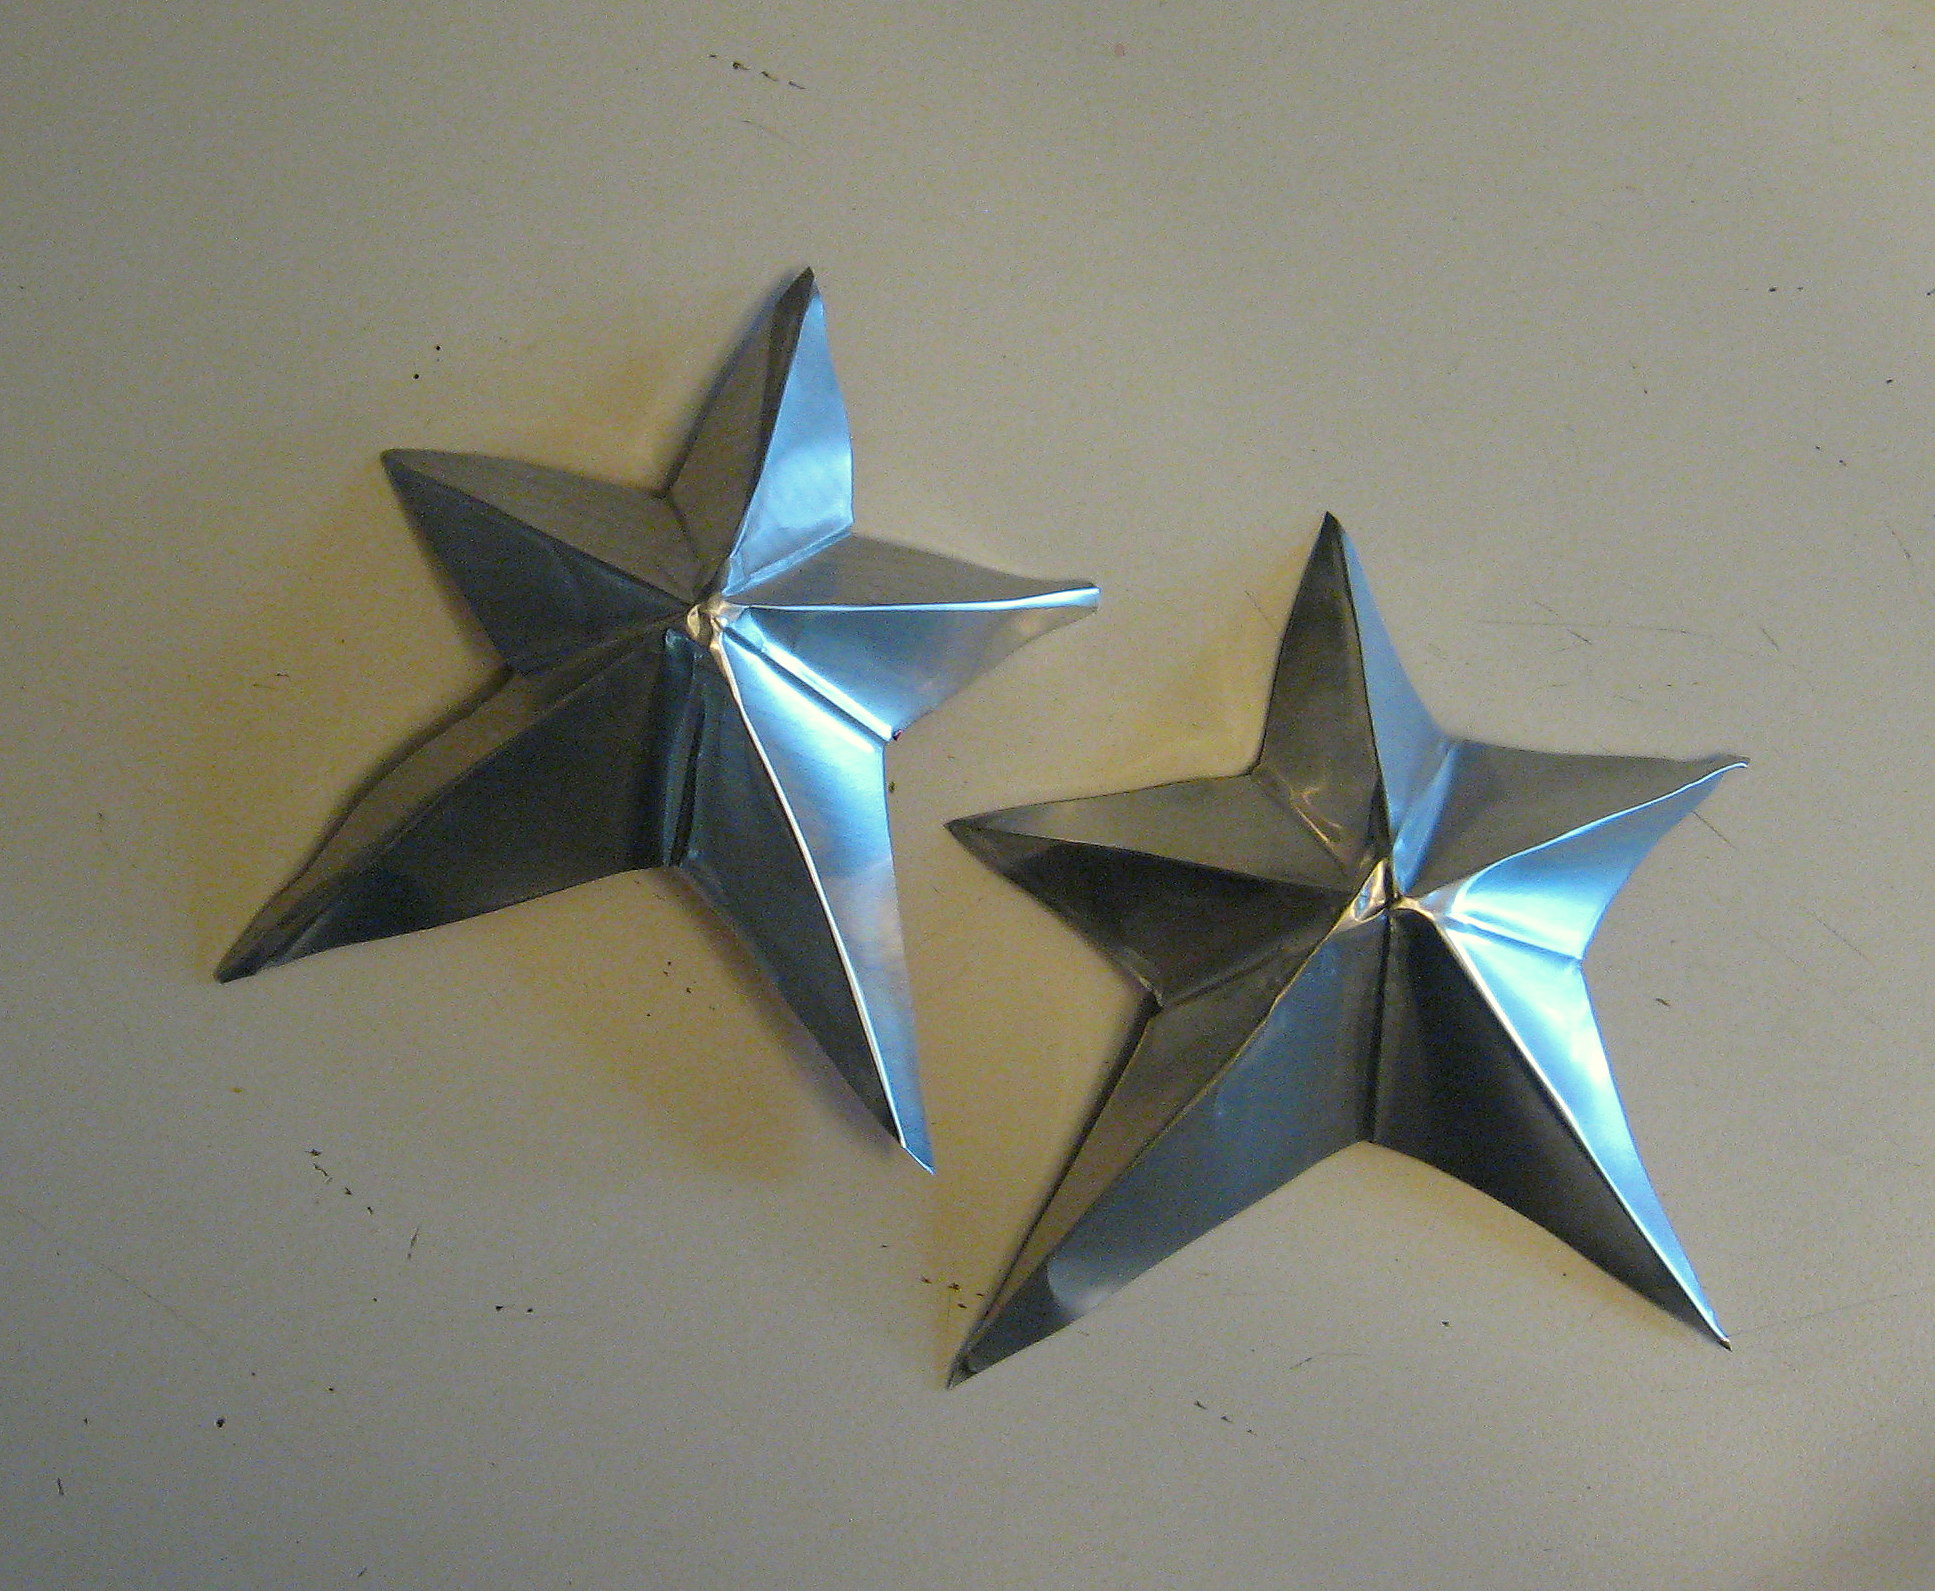
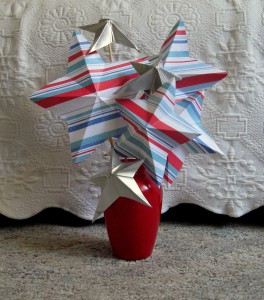
You can put a string through one point and hang them from the ceiling, or string them together to make a garland. We opted to hot glue them to small dowels and display them in a vase.
Star #2
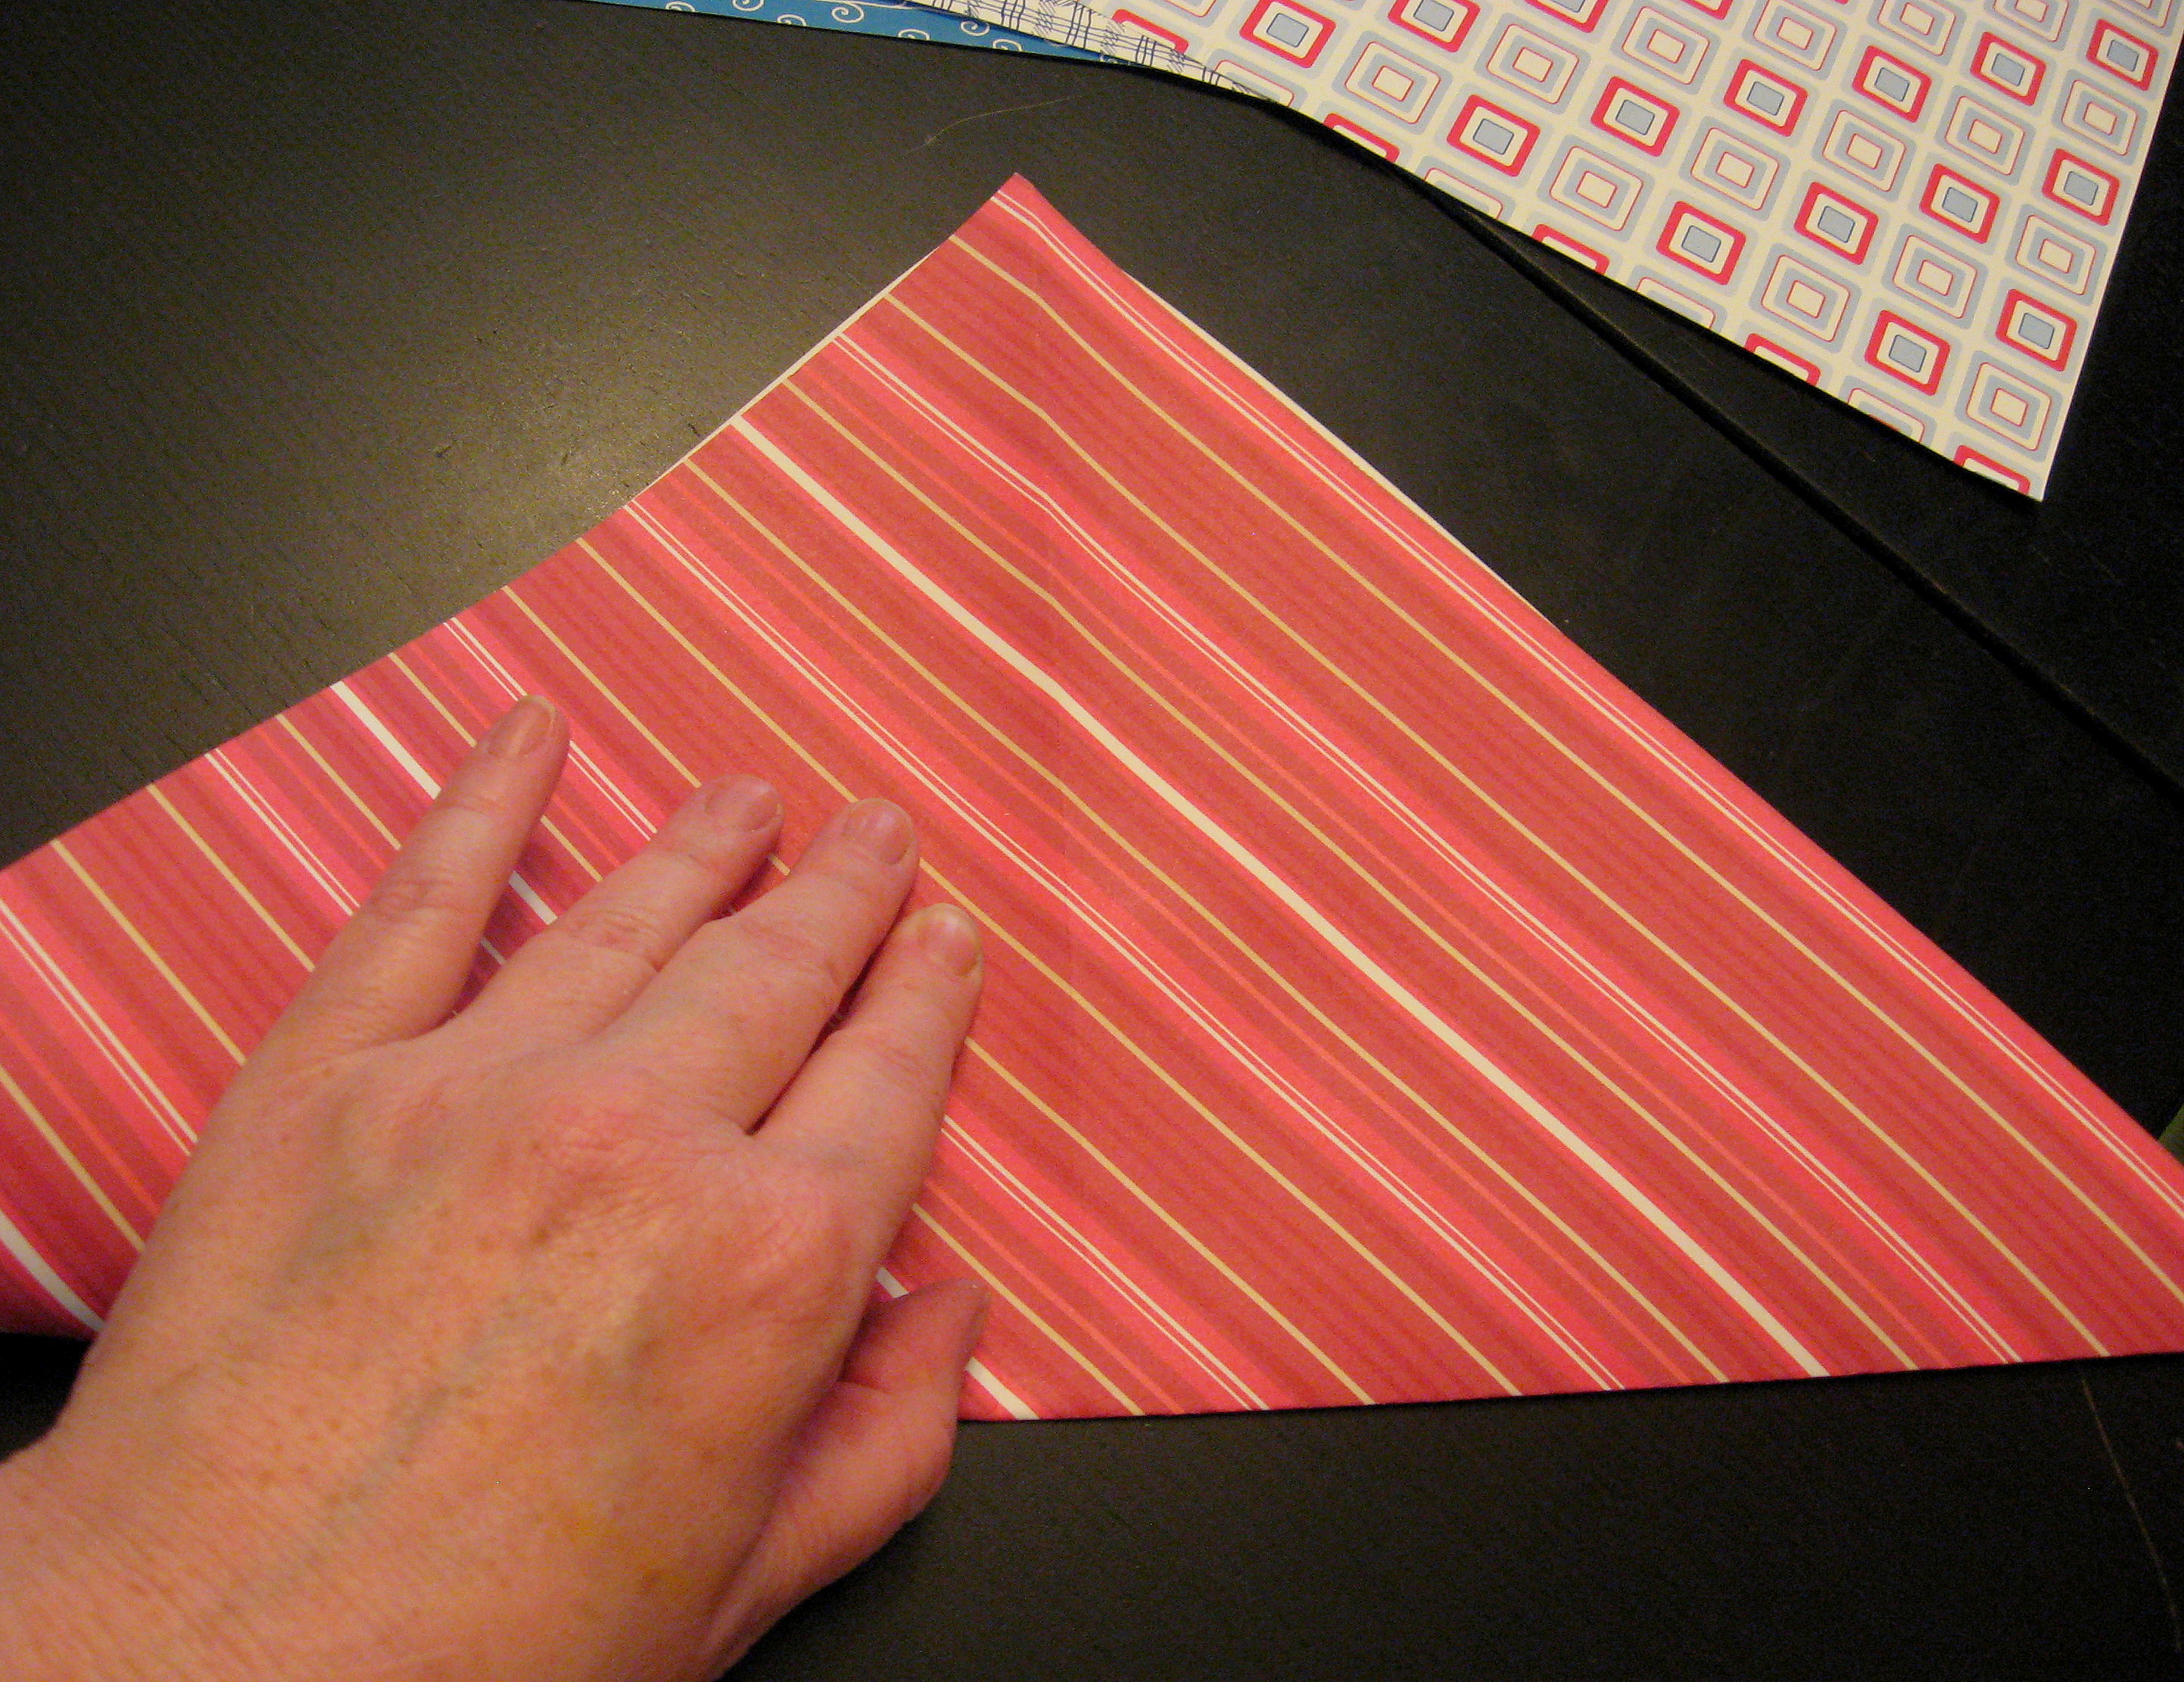
You can use any size of paper for this star, but it needs to start out as a square and you will need two squares for each star. I used 12 X 12 scrapbook paper. I made my stars 2 different colors, but they look great all the same color too.
Start by folding the paper corner to corner on the diagonal; then open back up and fold on the other diagonal.
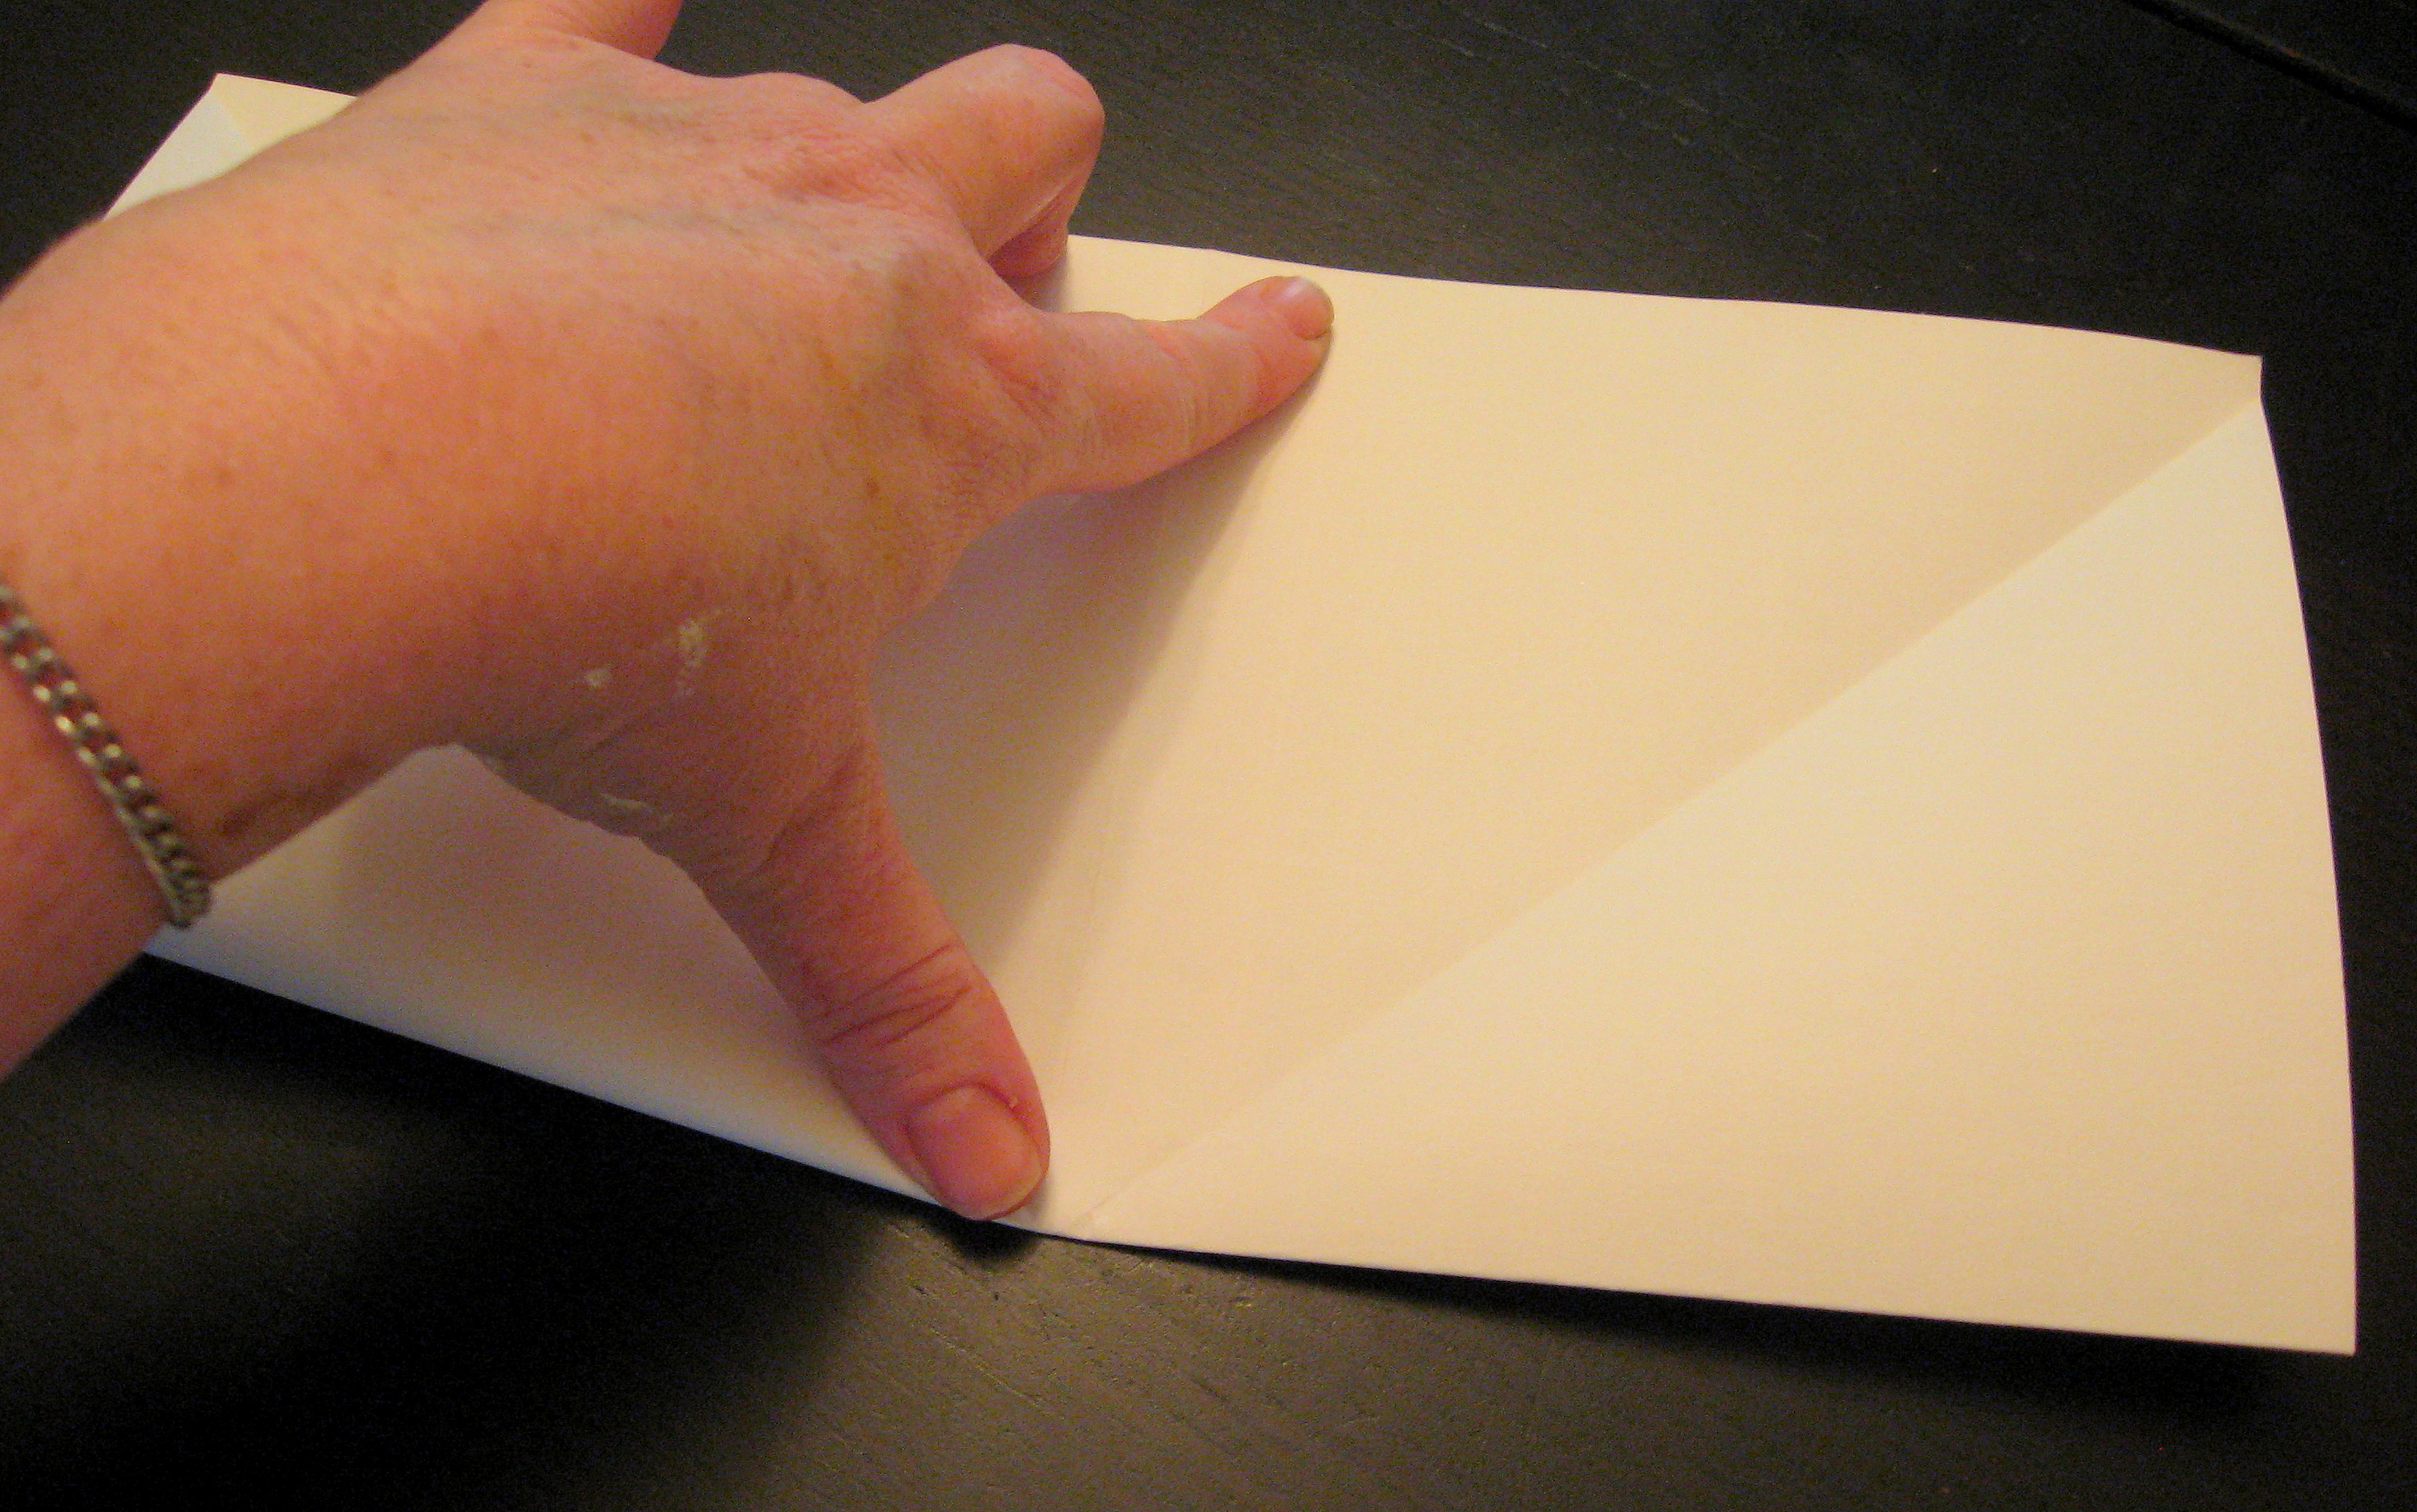
Now fold in half one way, then open back up and fold in half the other way.
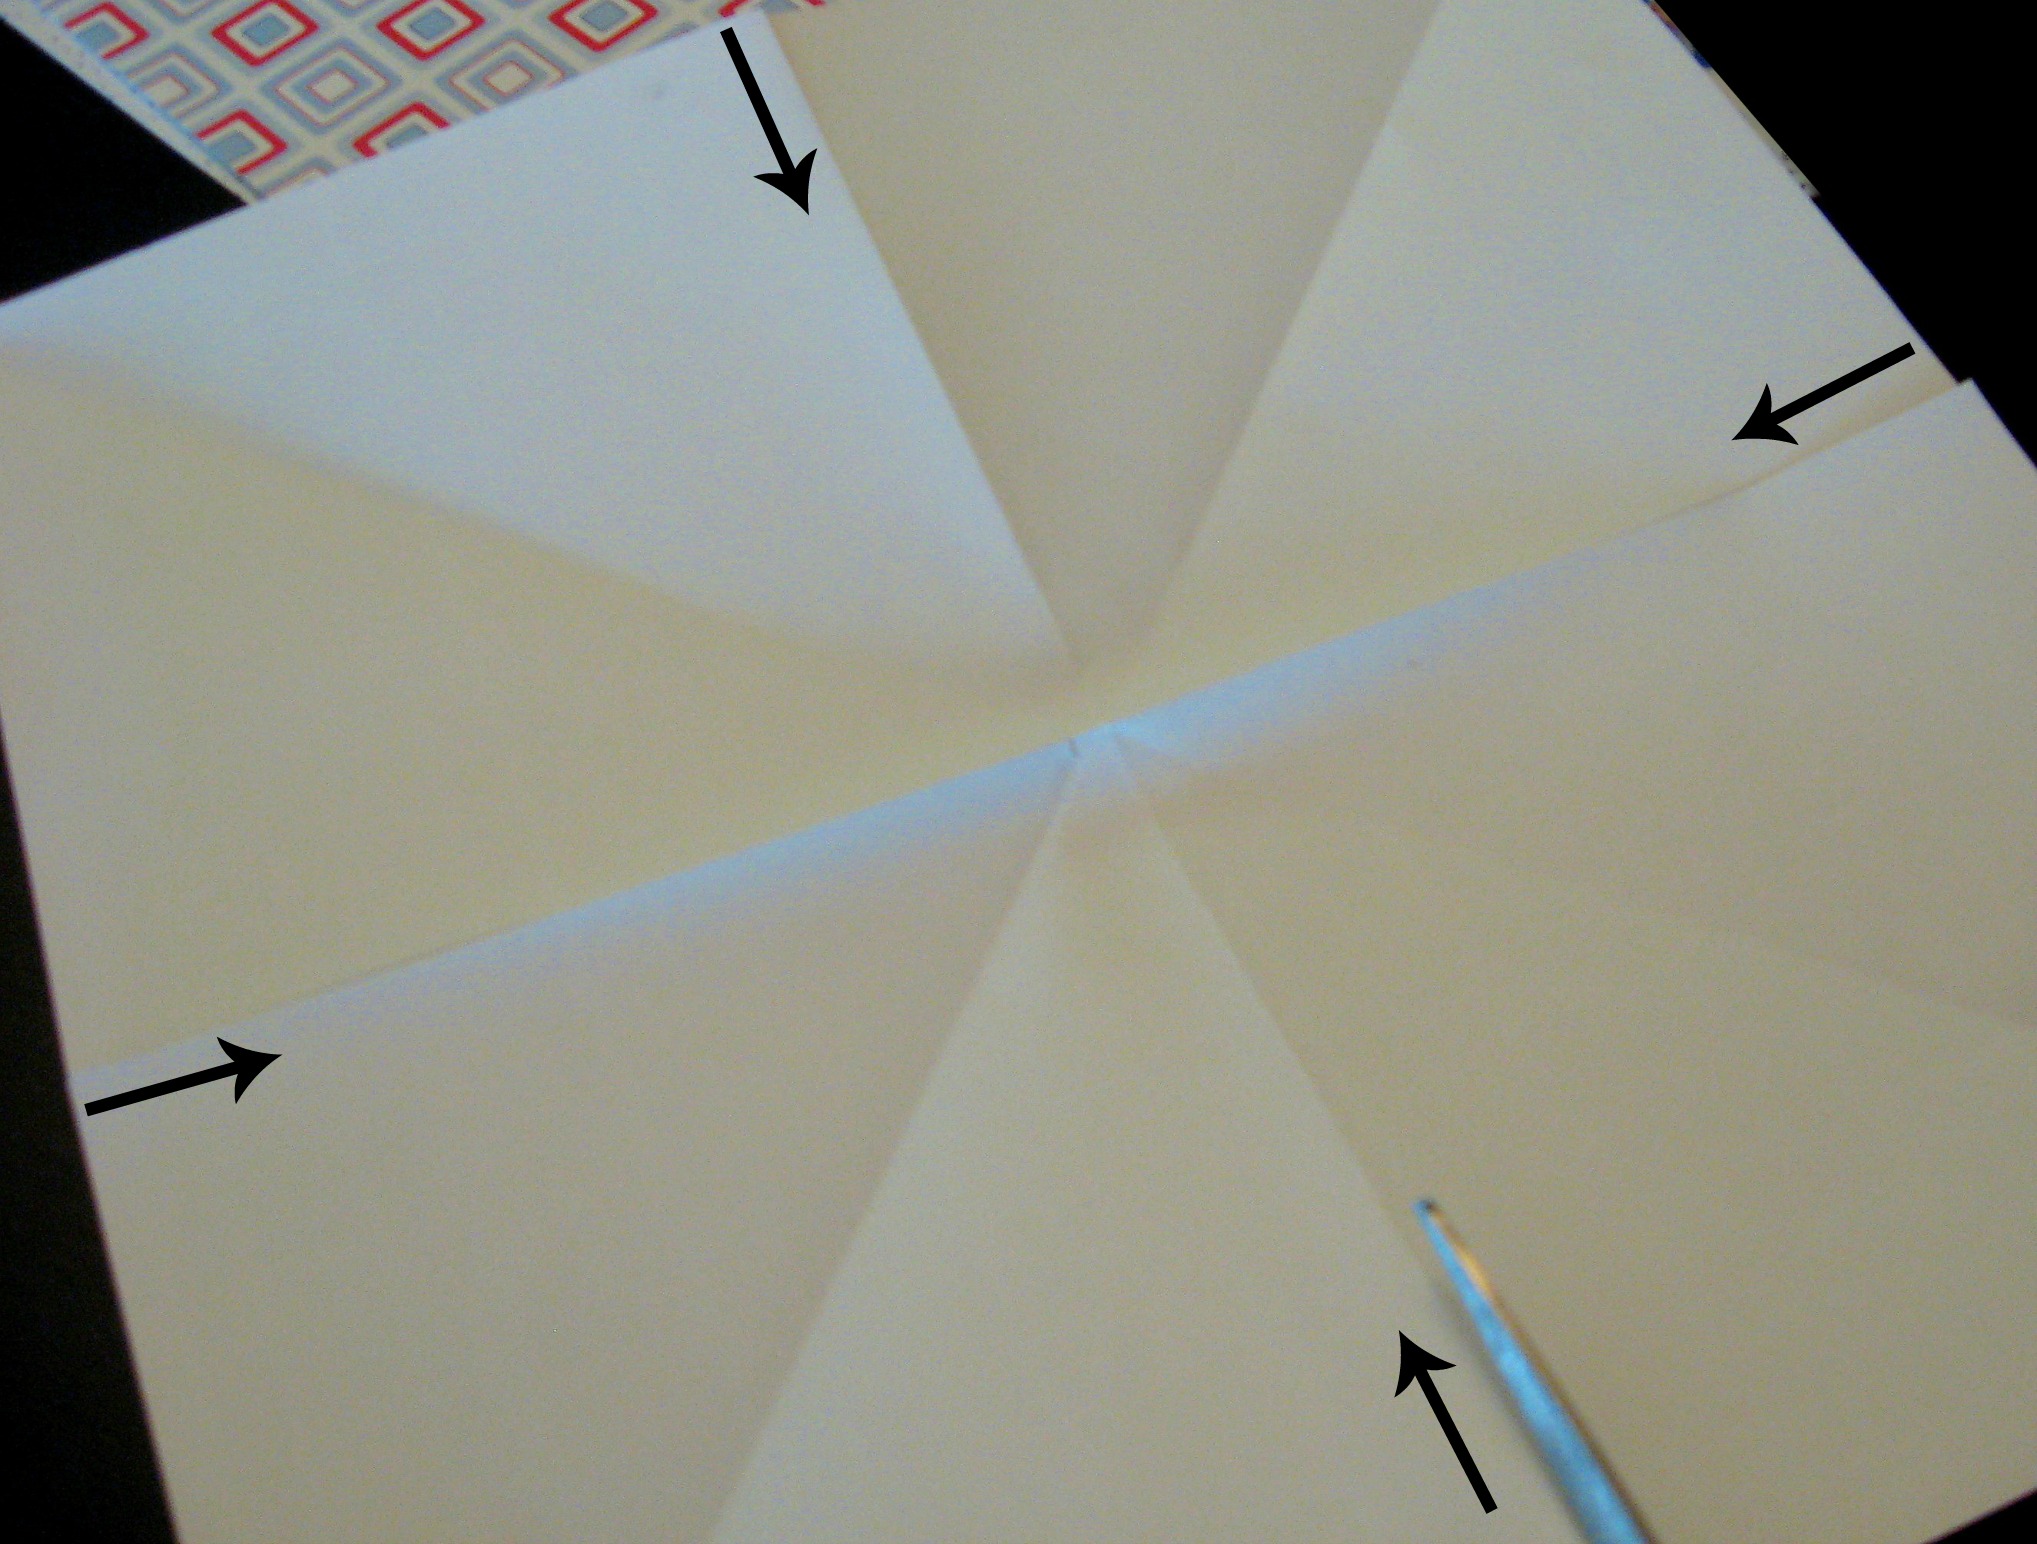
Open the paper back up and cut along the folds that you just made – the horizontal/vertical ones, not the diagonal ones (see arrows in the picture below). Cut about 2 1/2 inches in on each fold.
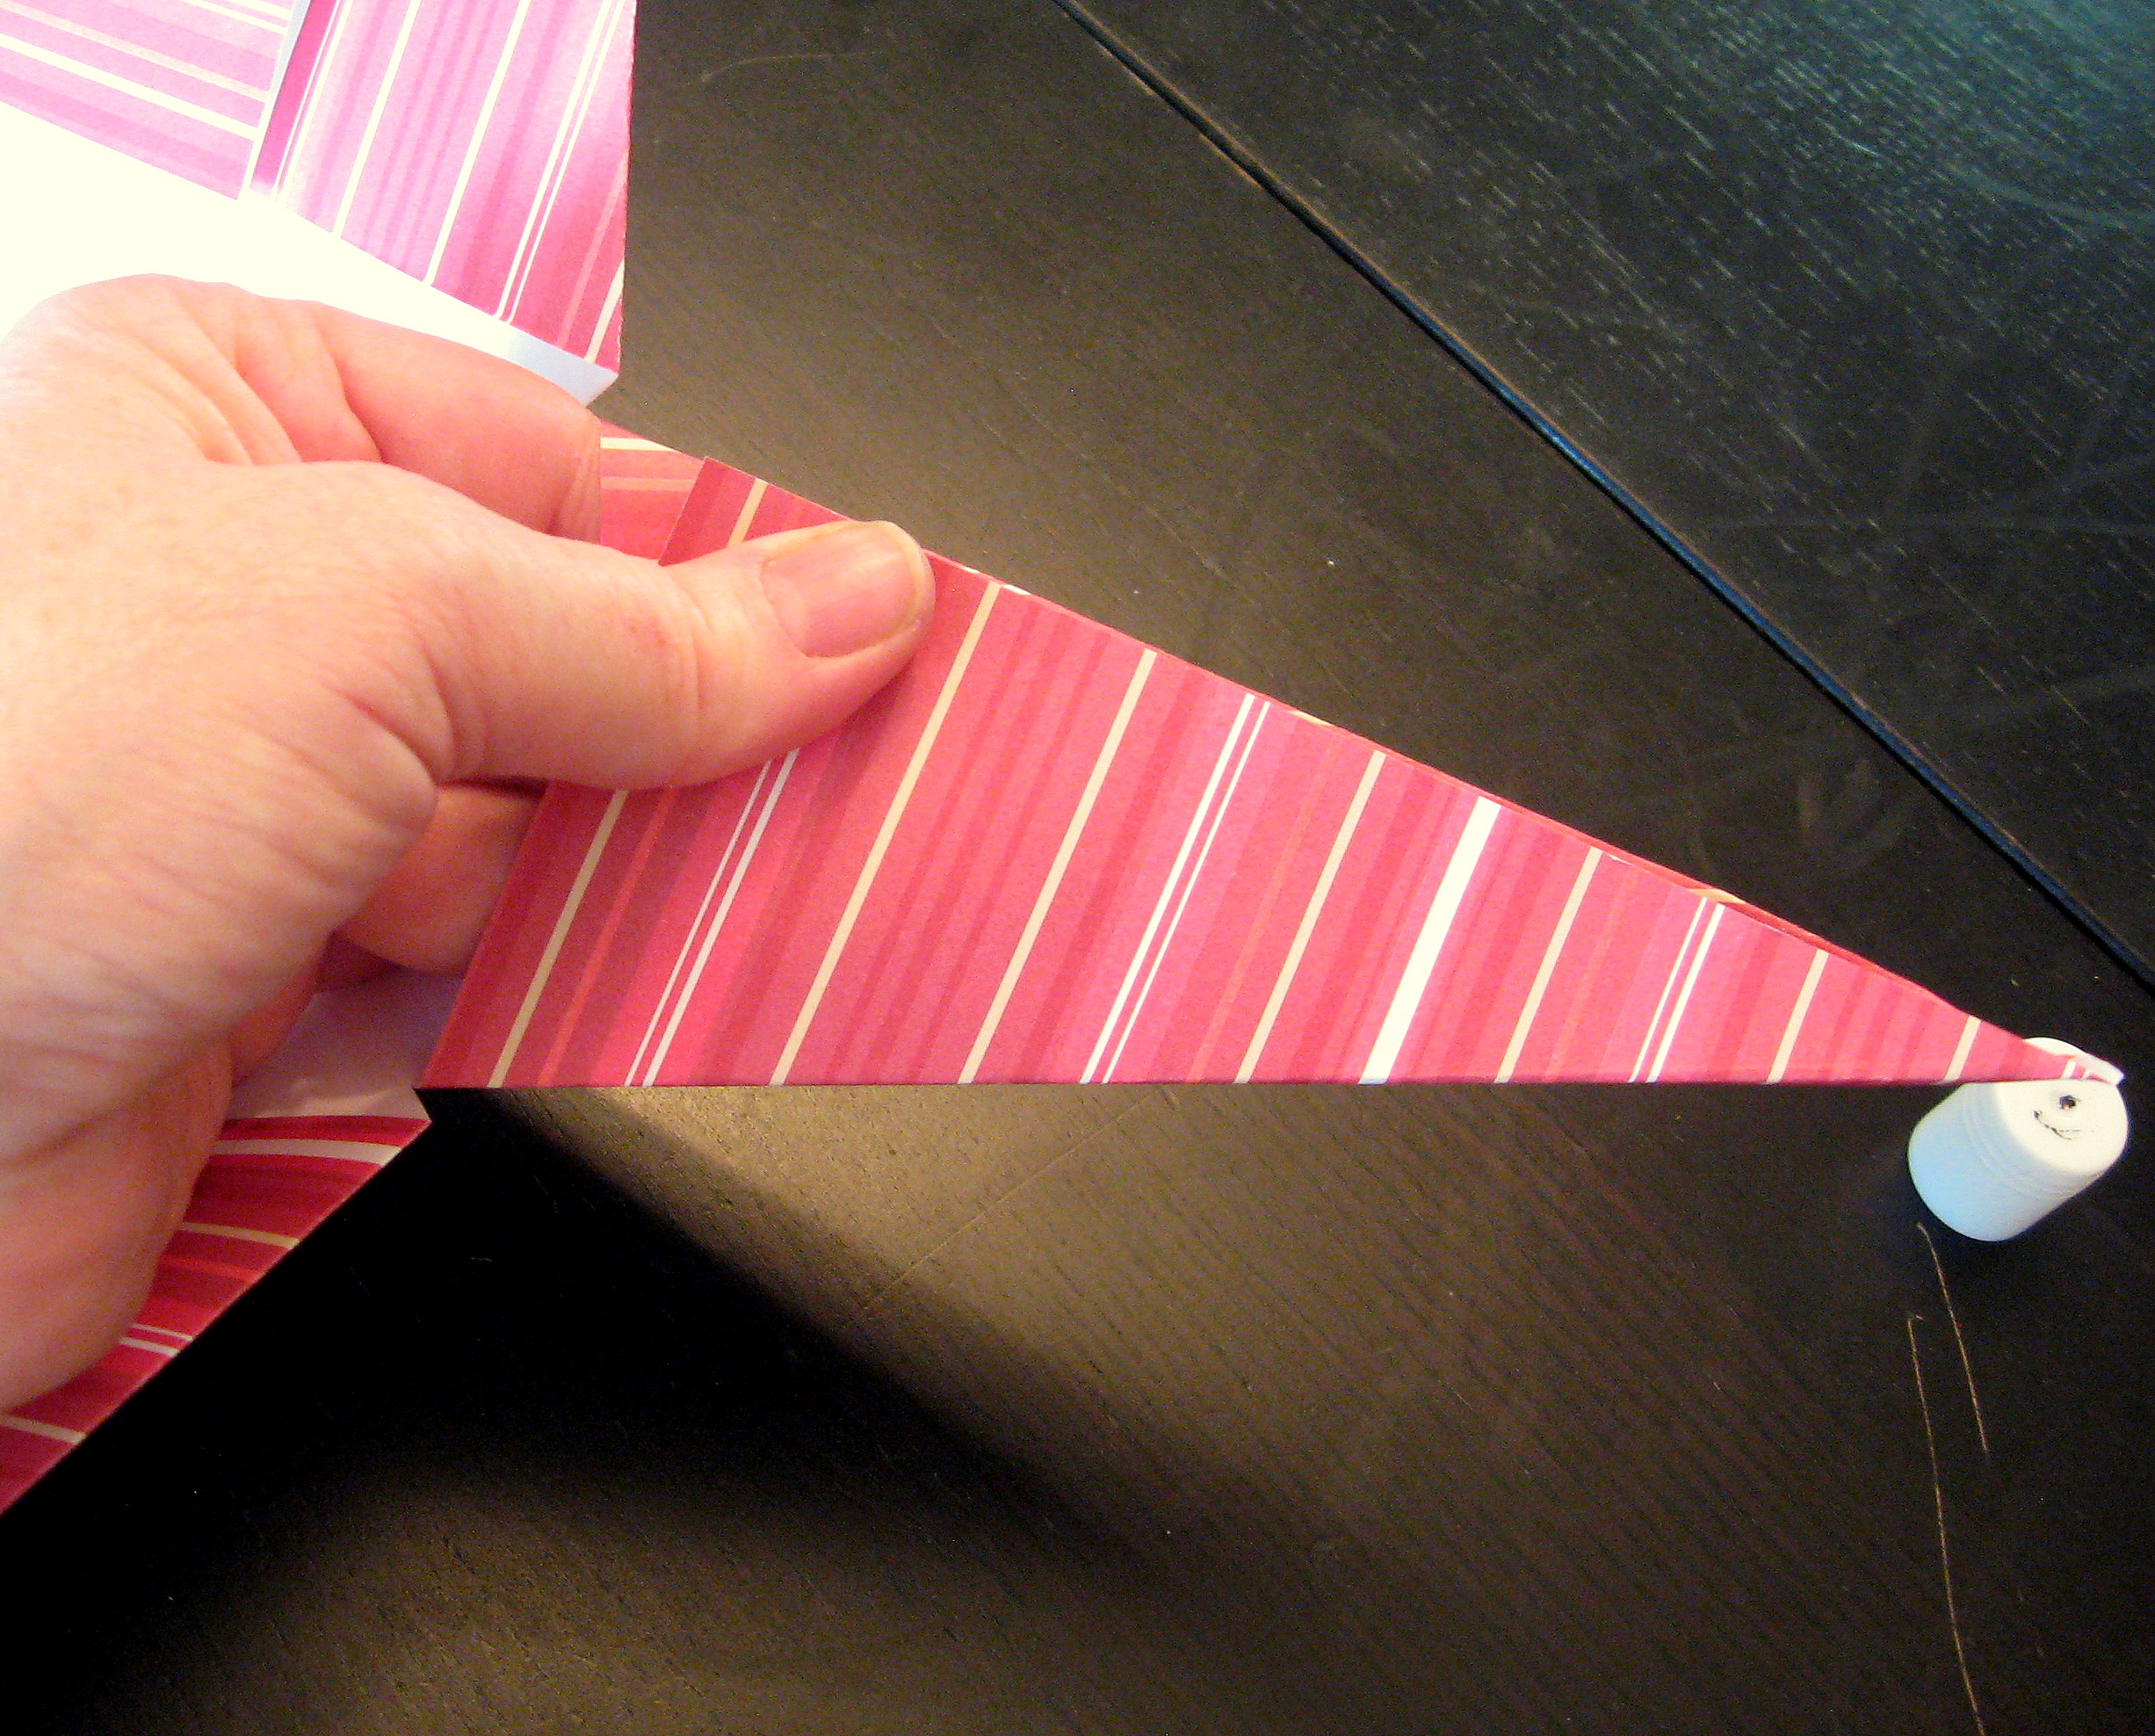
Now fold each cut edge in to meet at the diagonal fold and form a sharp point at the end.
For each point, put glue (I used a glue stick) on one of the flaps:
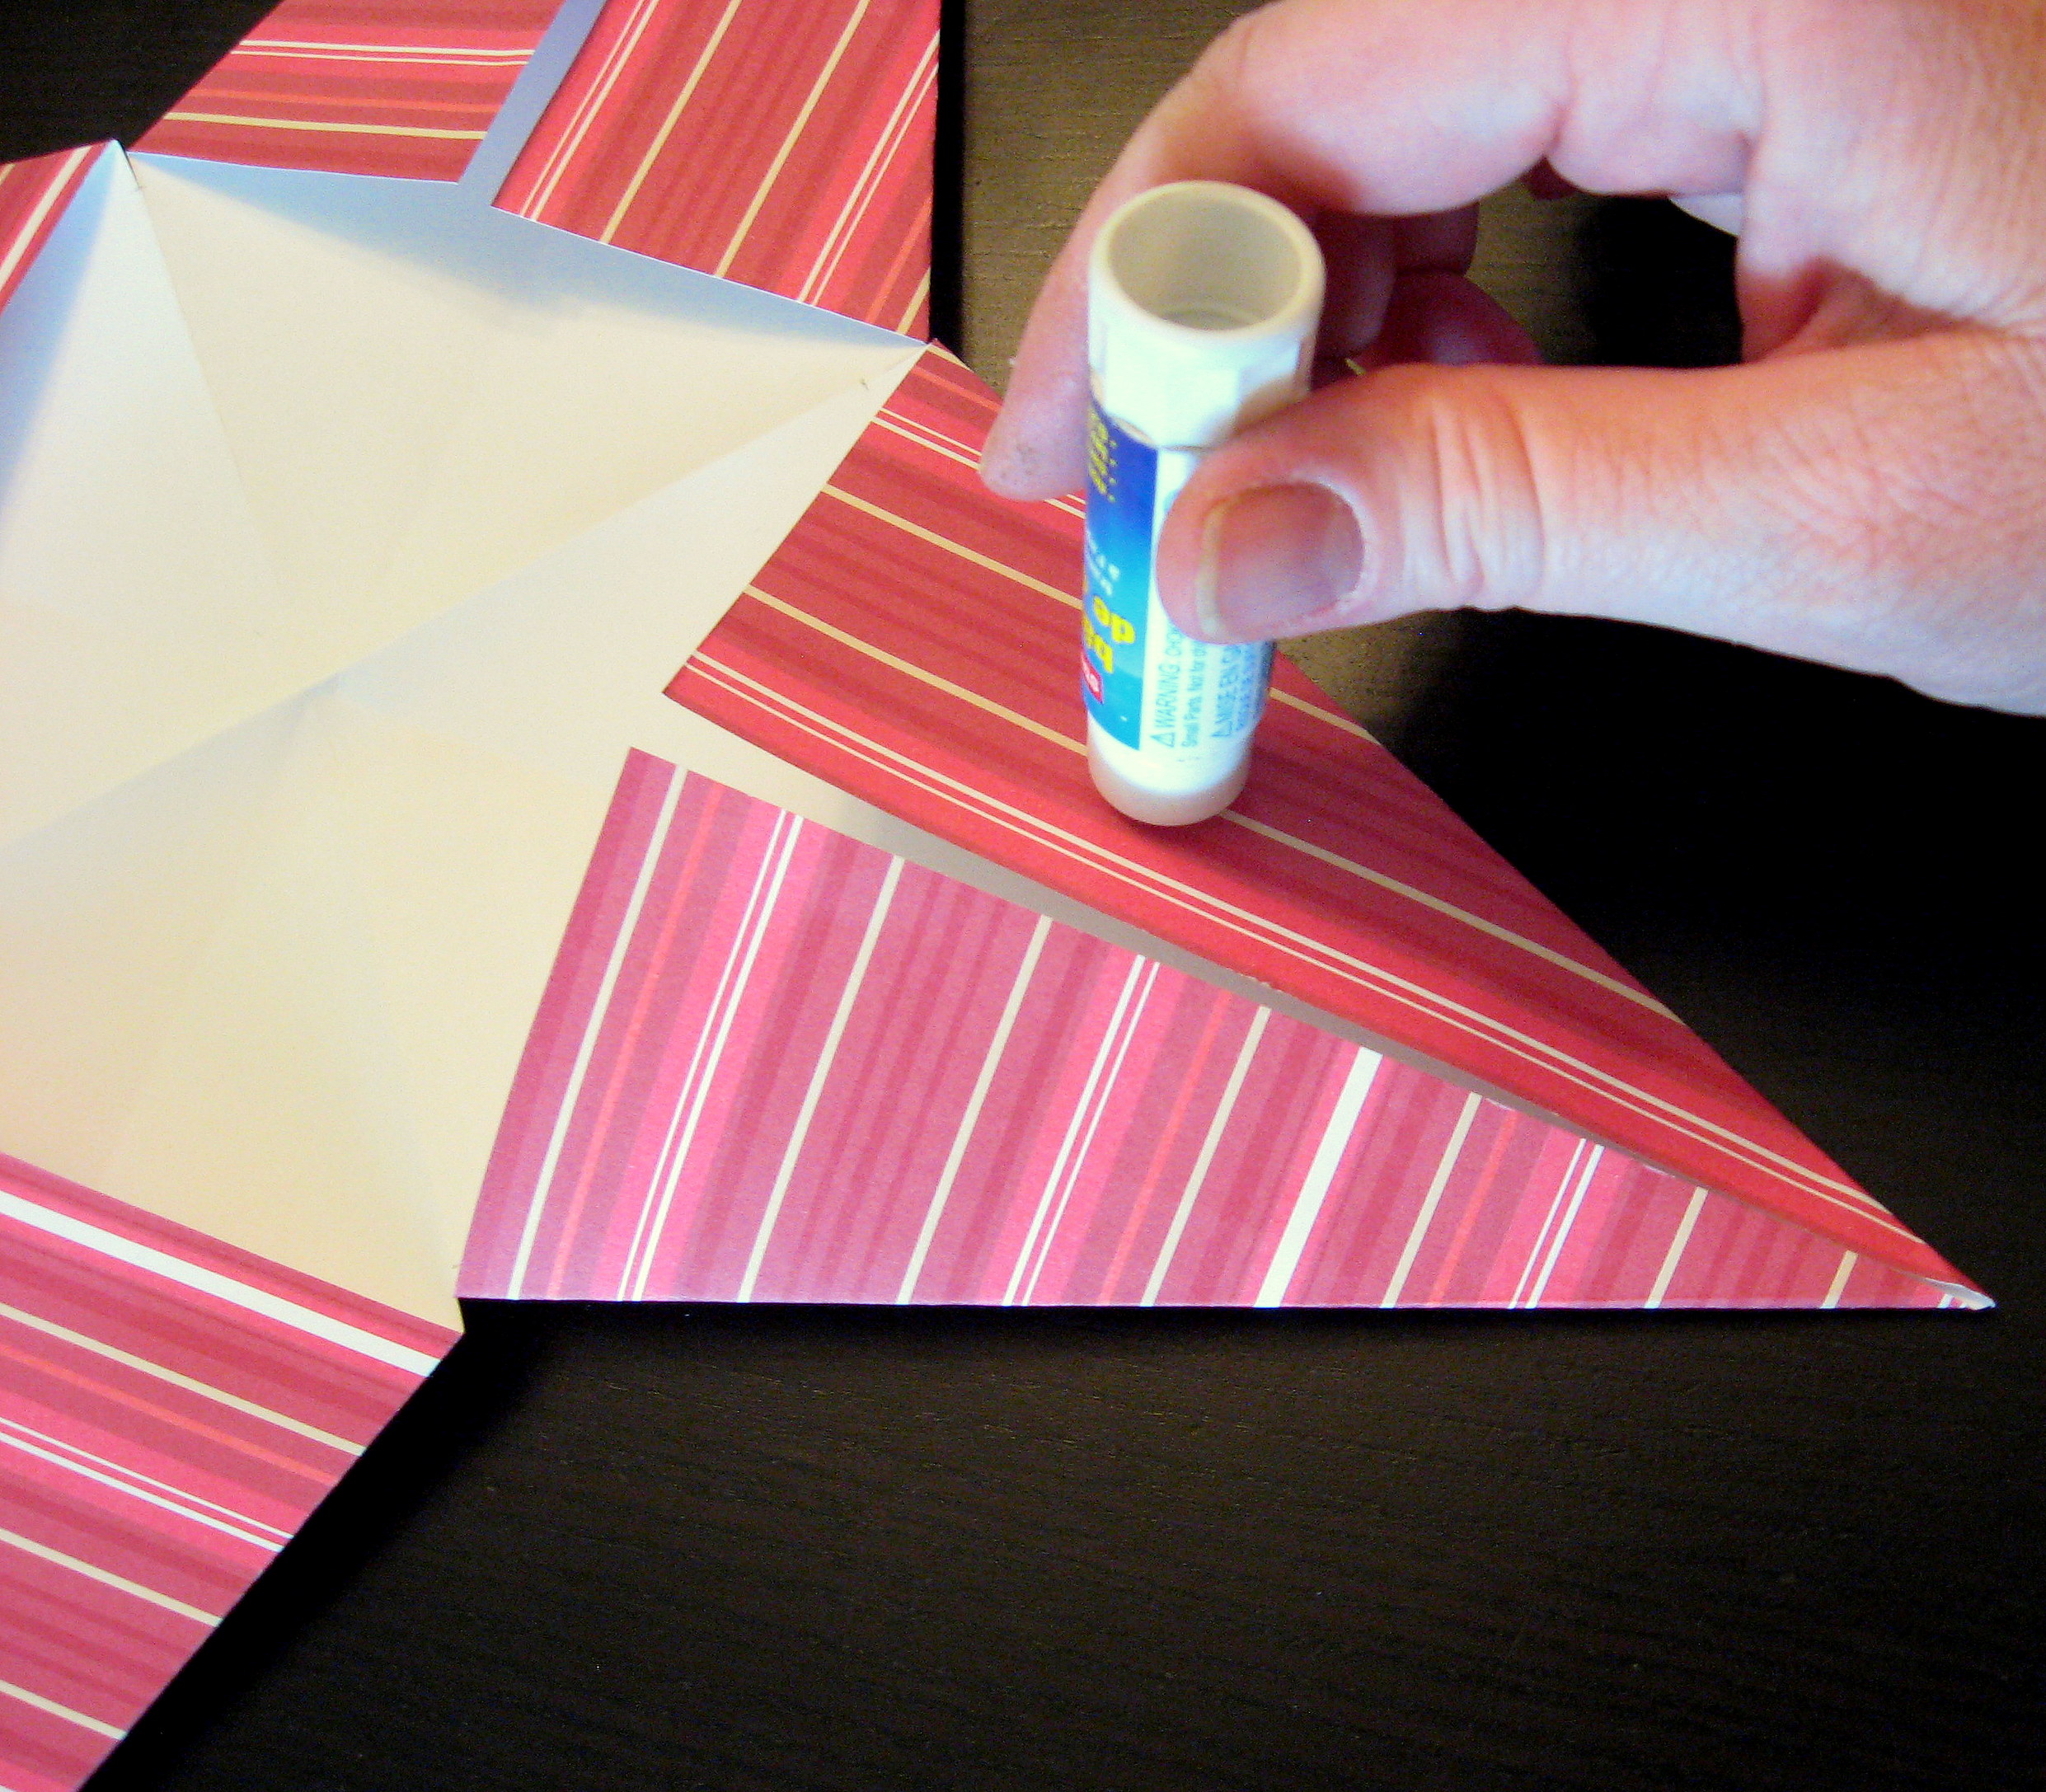
then position the other flap on top of it and hold for a minute until it dries.
Once all 4 points are glued, it will look like this:
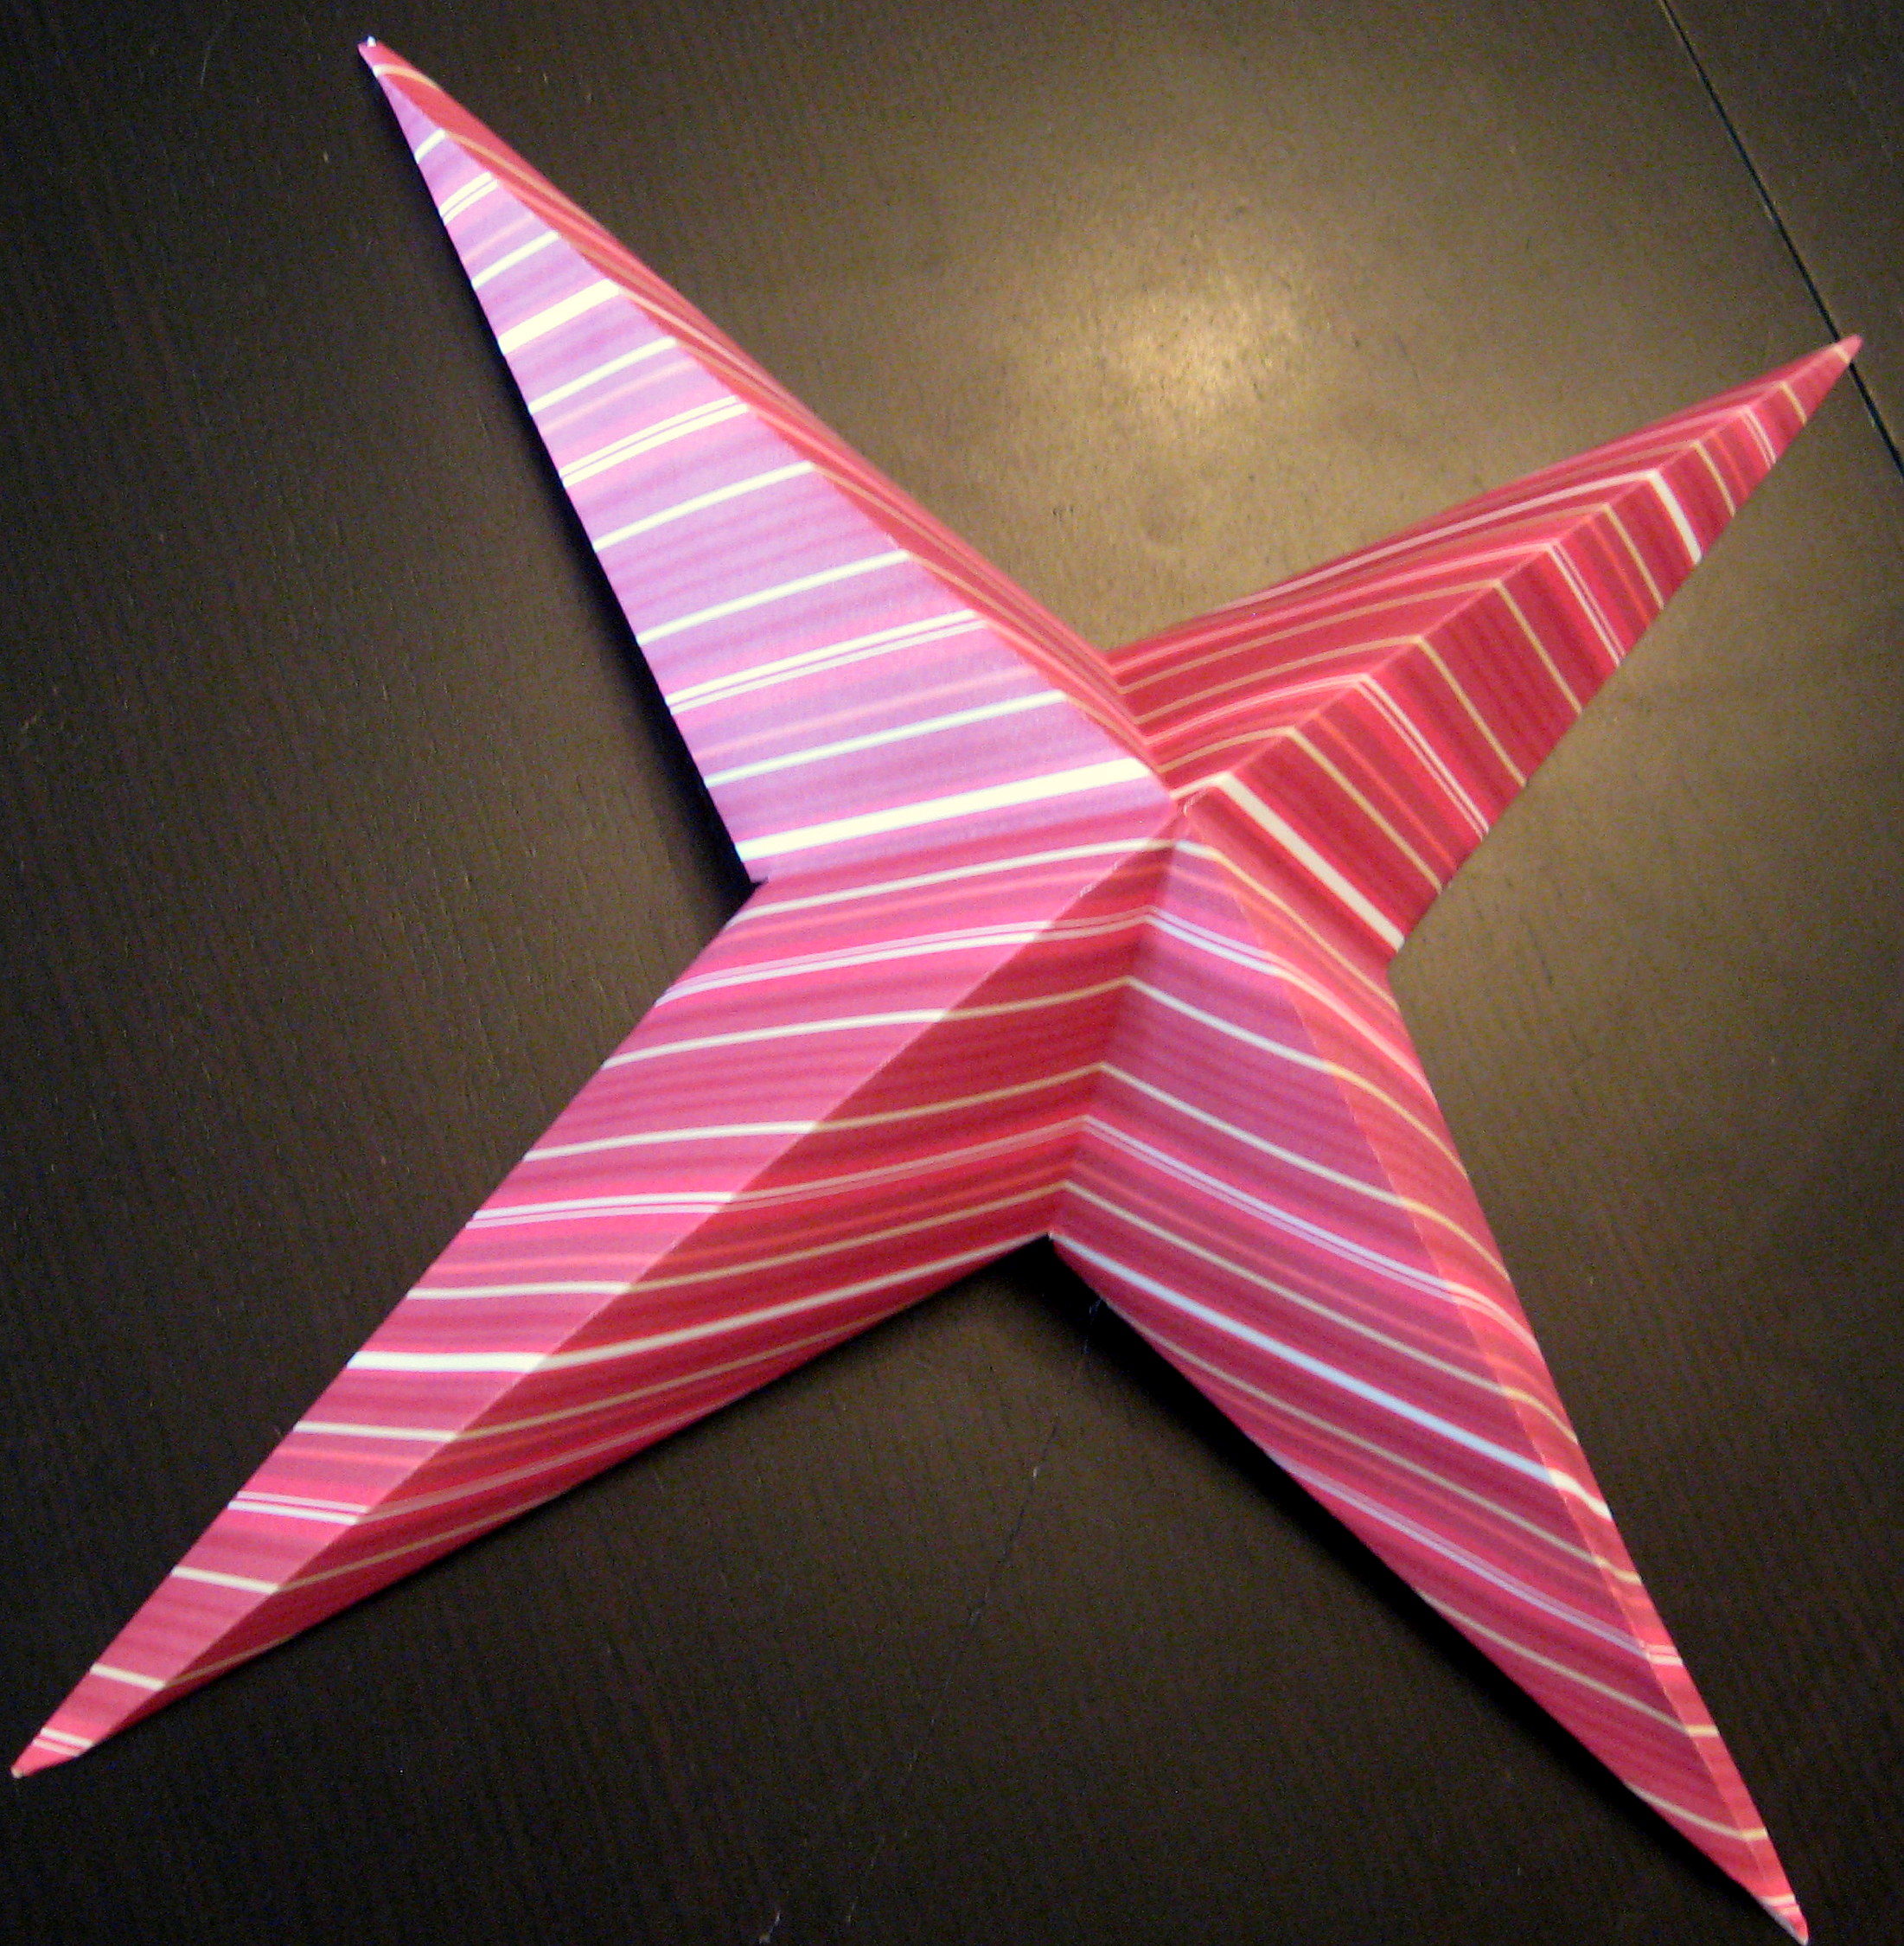
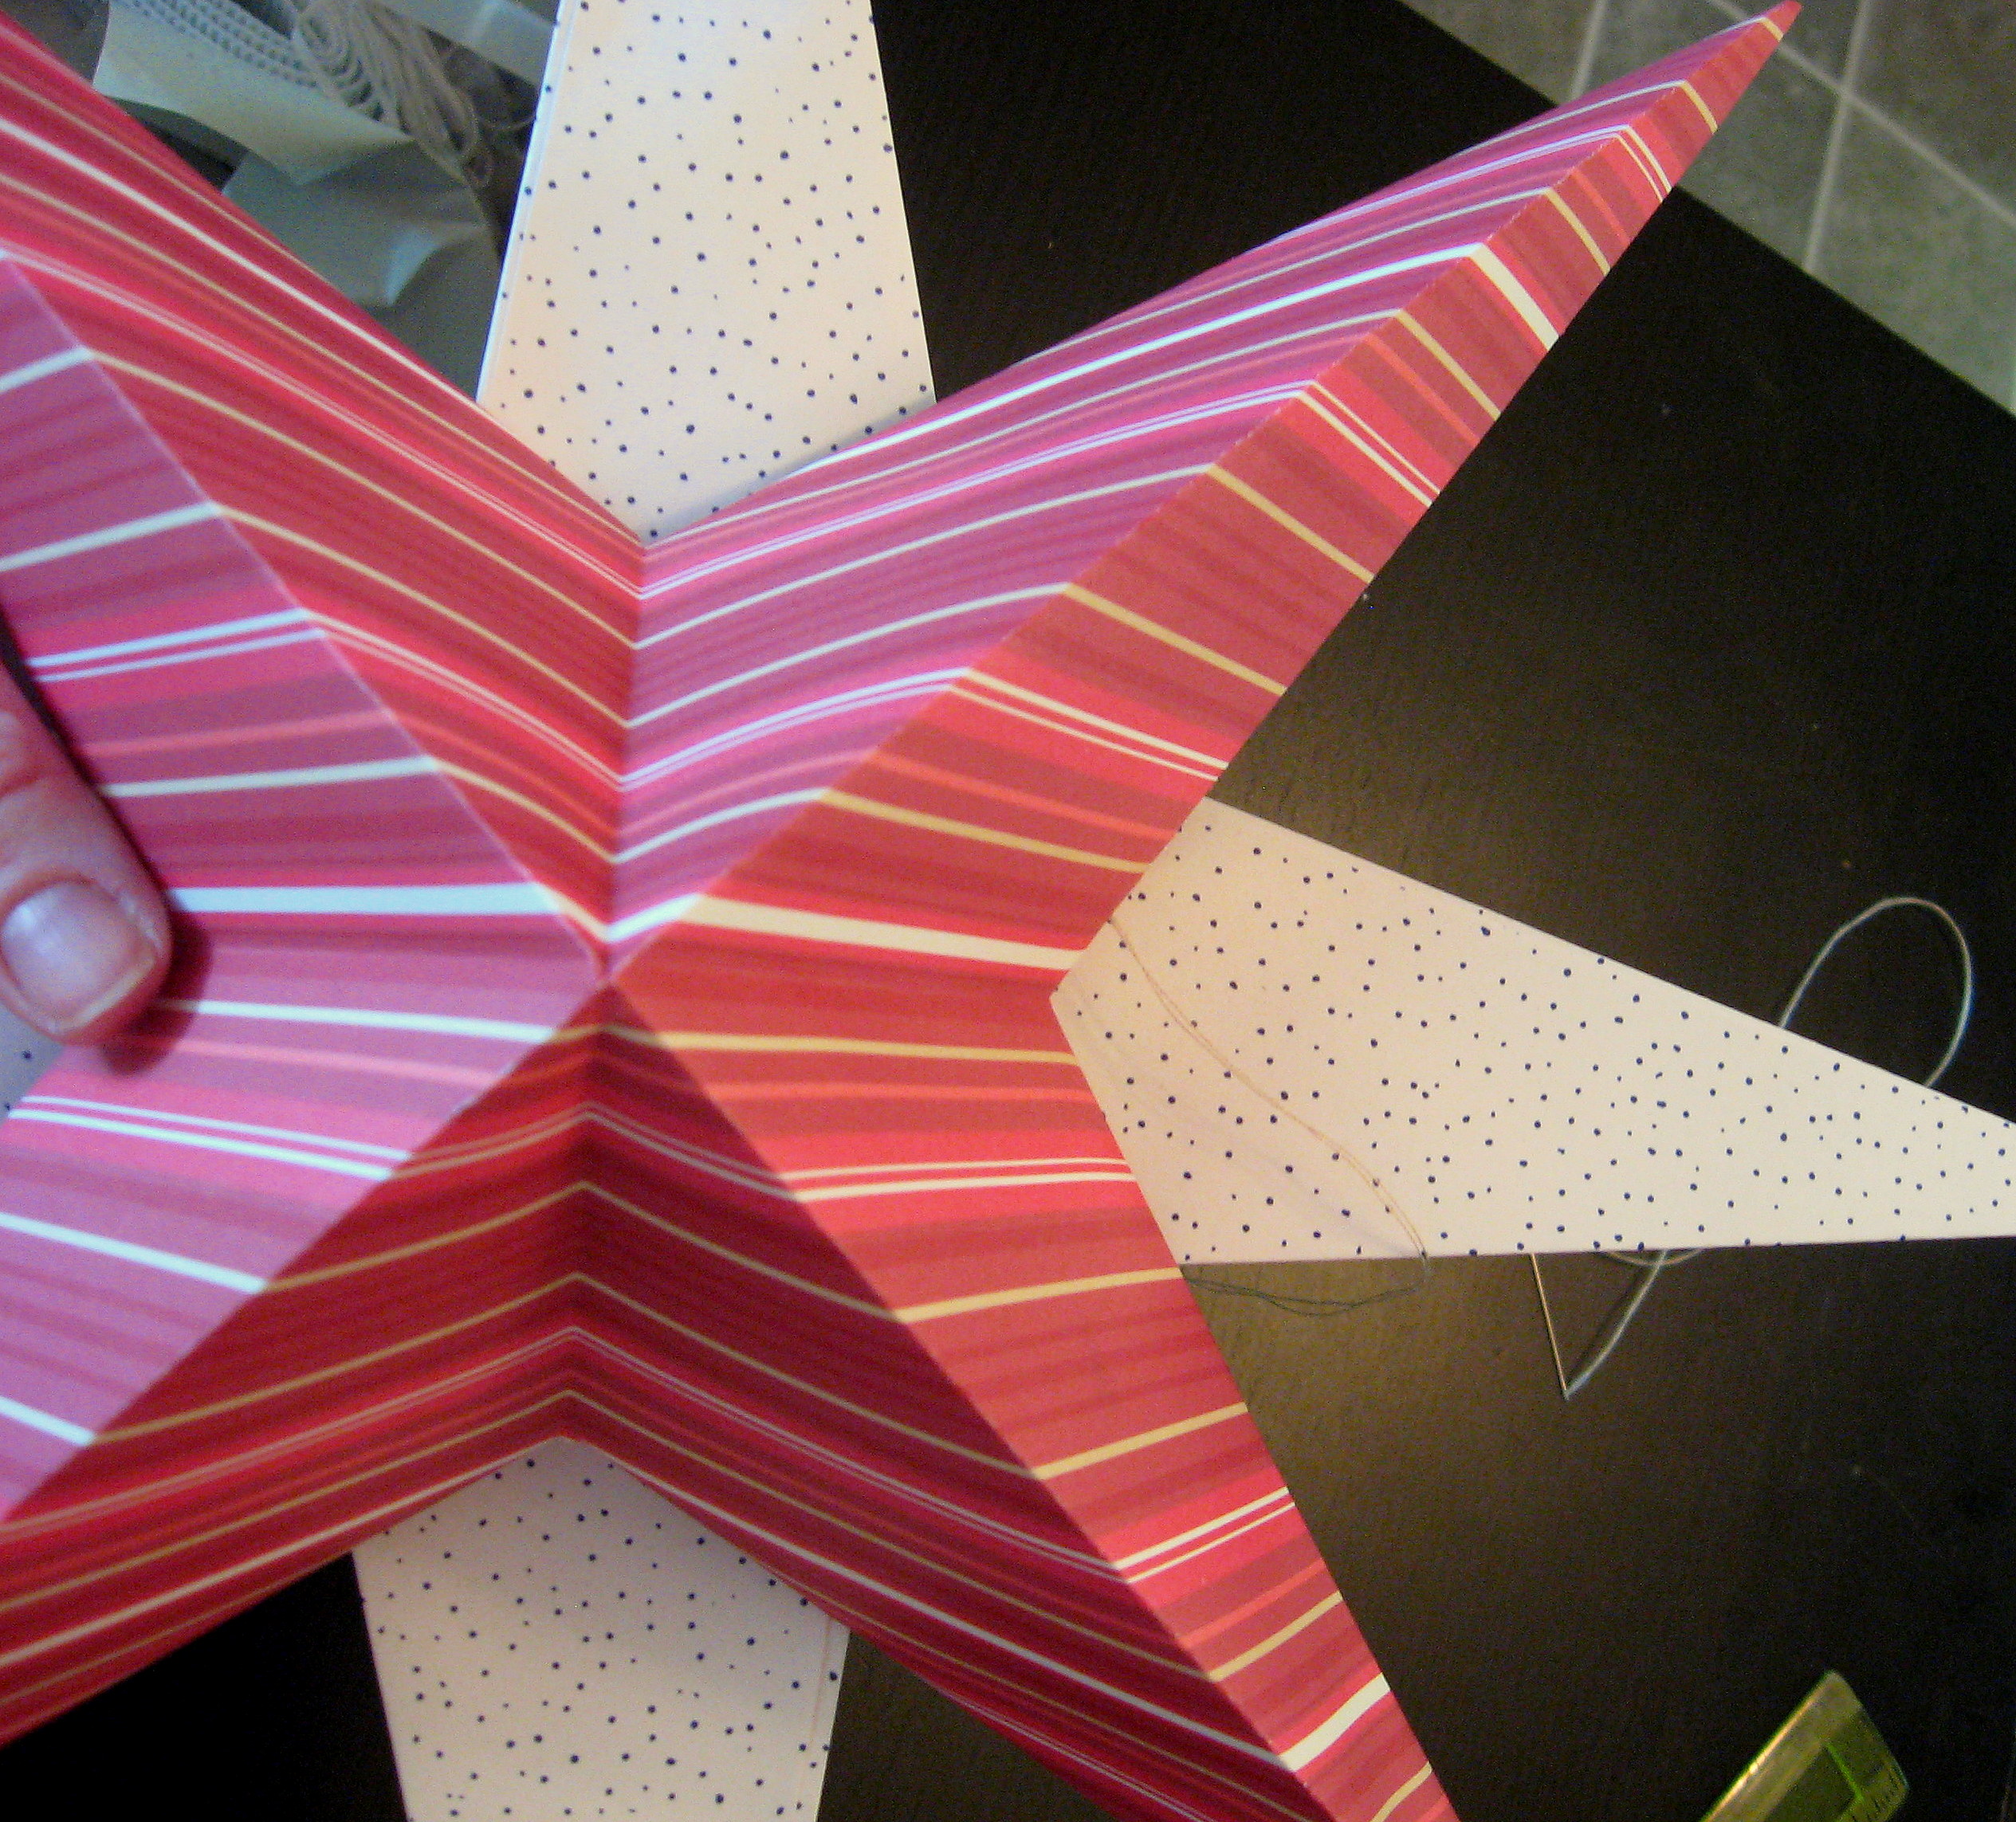
Now make a second one, exactly the same way, and attach them together back to back – double stick tape or sticky dots work great for this. Use a needle to thread a piece of string through for hanging.
We hung them from the light above our dining table; don’t judge them too harshly based on this bad picture quality – I either had to open the door to get natural light, which made them swing and spin from the wind, or try the pictures with the door closed and glaring overhead light! In person they are super cute!
Burlap Stockings, BACK TO SCHOOL TEES, Essential Oils, Midi Skirts & More!
Such cute stuff today!
 $12.99 | Christmas in July! LOWEST Price ever!!! Personalized Burlap Stockings!!!!
|
 $4.99 | BLOWOUT on BAKERS TWINE
|


More cute stuff available today! Low shipping prices!
A PYP Best Blog! Create an Ombre Painted Dresser!
Just in case you missed this article on creating an ombre painted dresser the first time we shared it a couple of years ago, we are republishing it. After Sharon wrote this blog originally, we got an awesome response. This is one of the PYP Best Blogs!
I’m not usually one for following what is trendy in my home decor, but I do love the ombre look. Even if you don’t know the word, I’m sure you’ve seen it around; it refers to a gradation of color and can be spotted everywhere – from ombre home decor:

to ombre clothing:

to ombre hair:

and I love it!
If you want to add this ombre trend to your home, it is a pretty easy technique to produce a big wow factor.
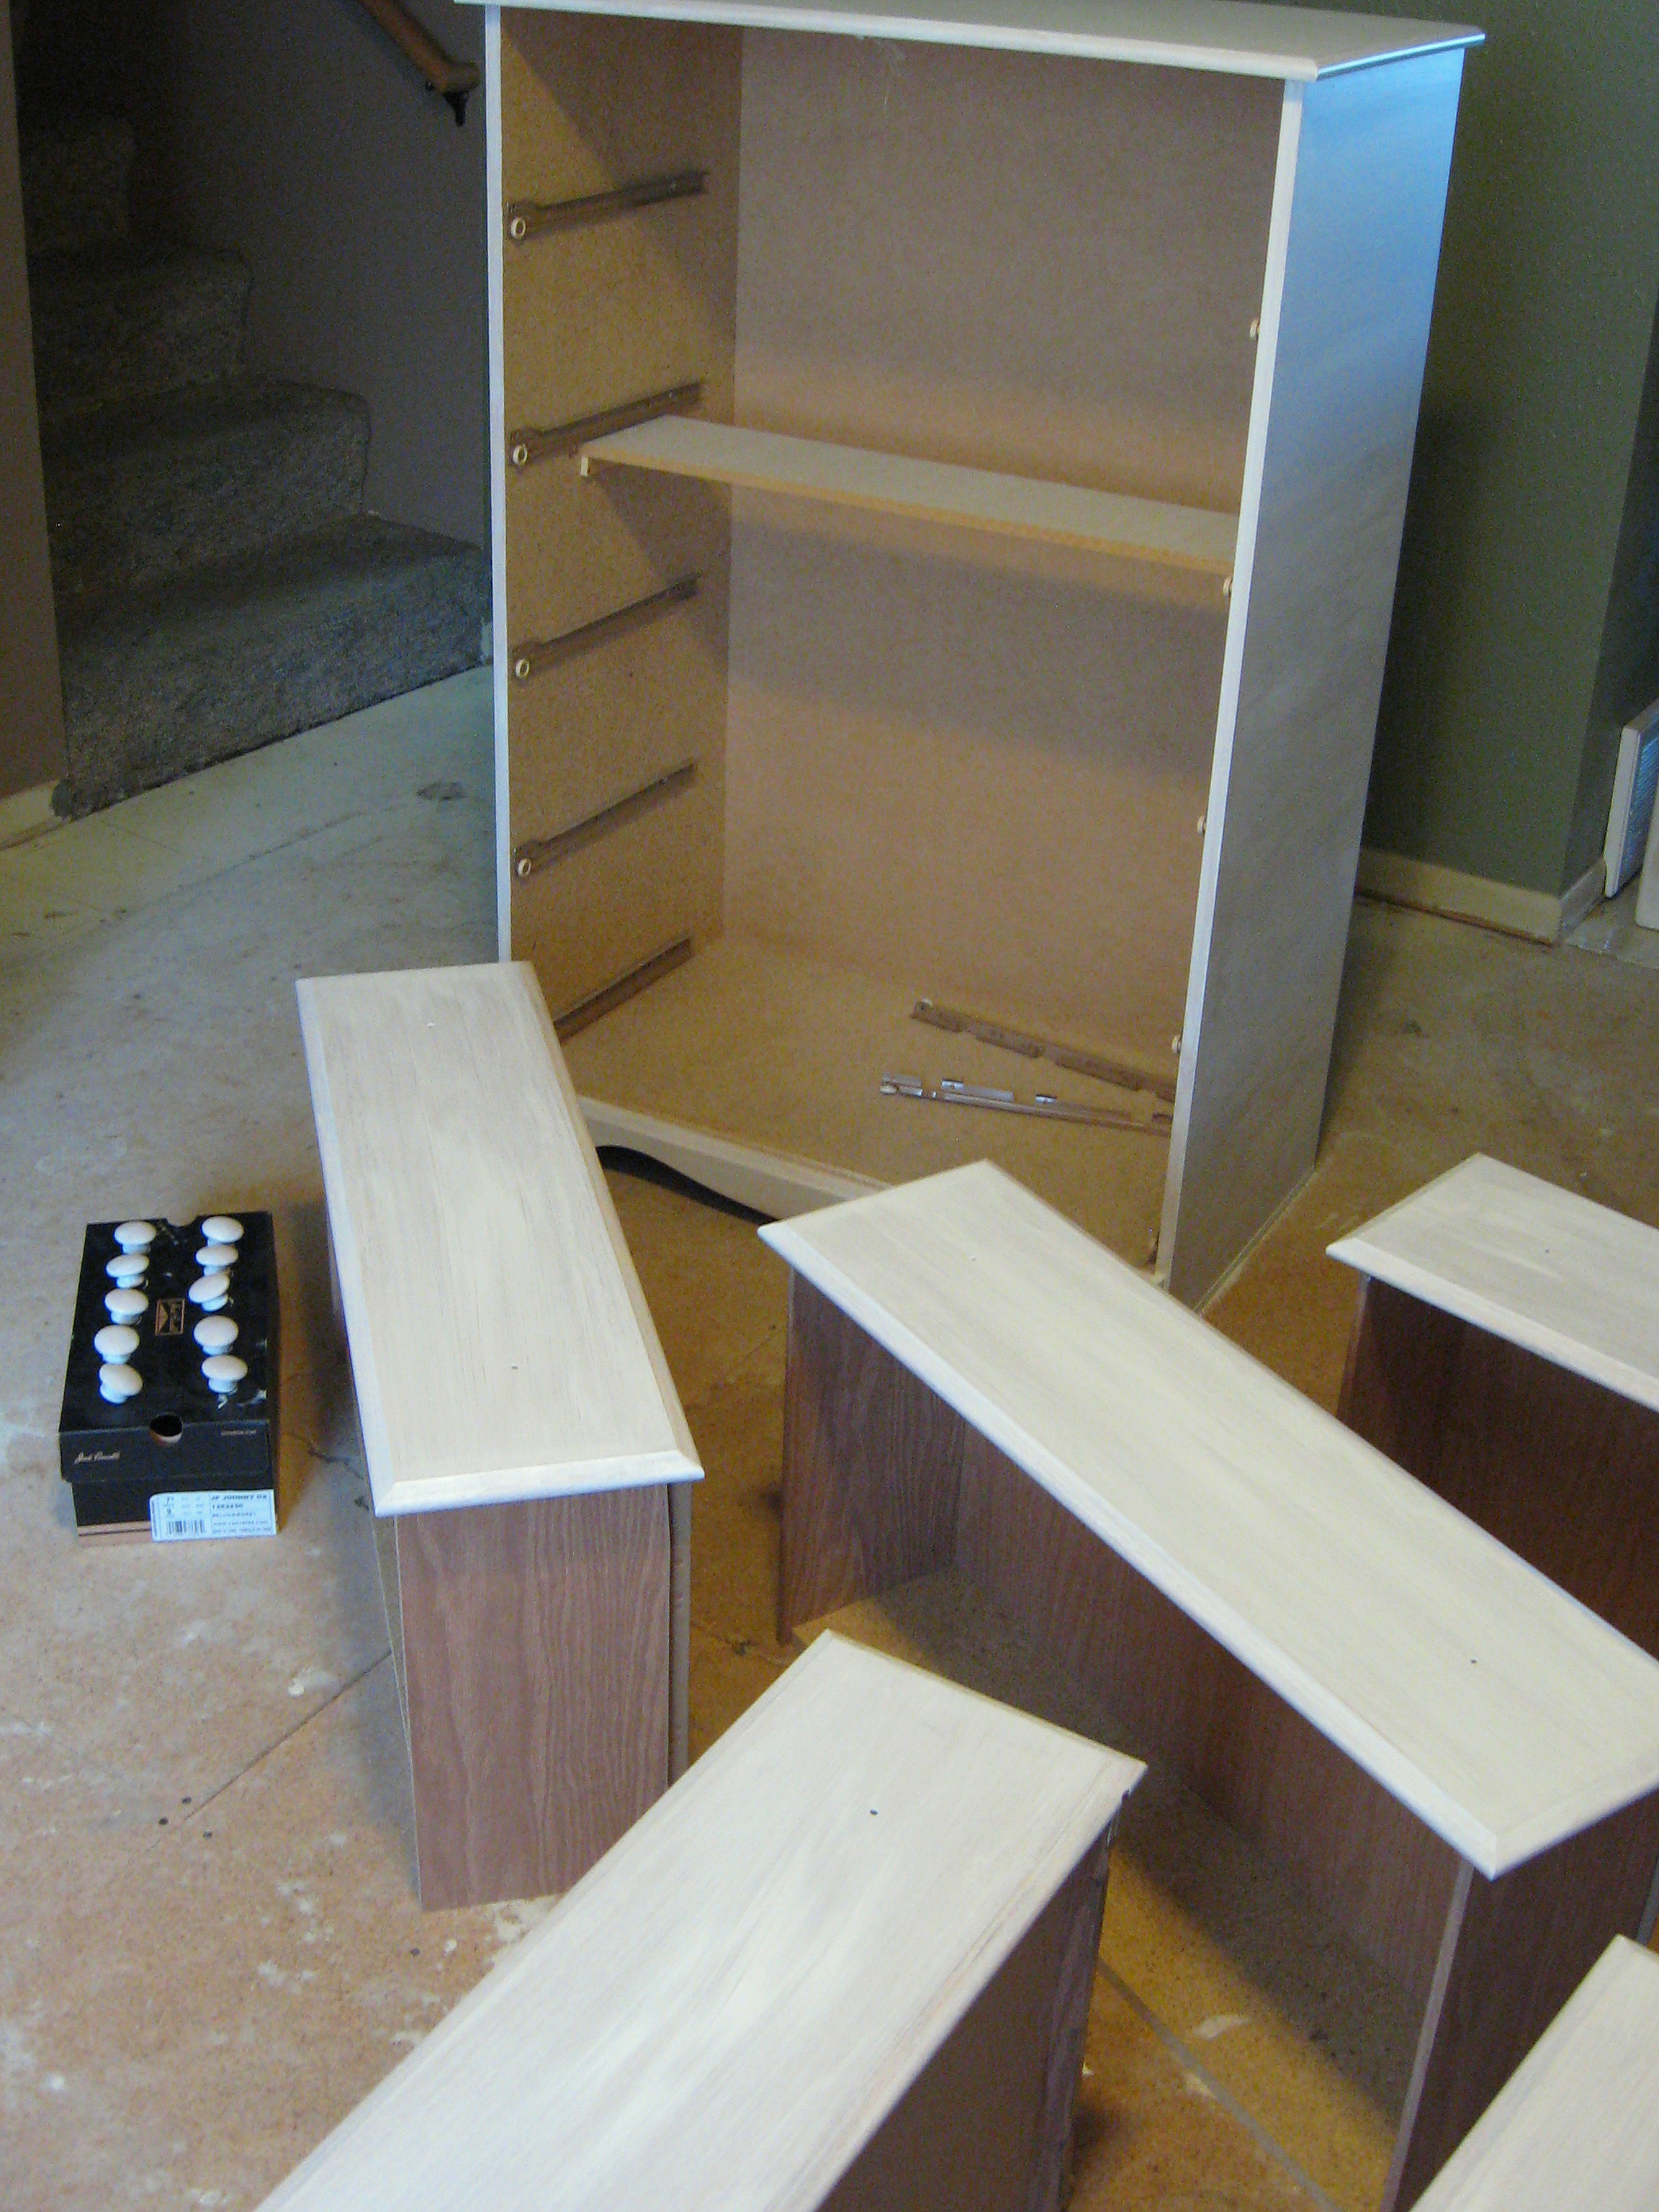
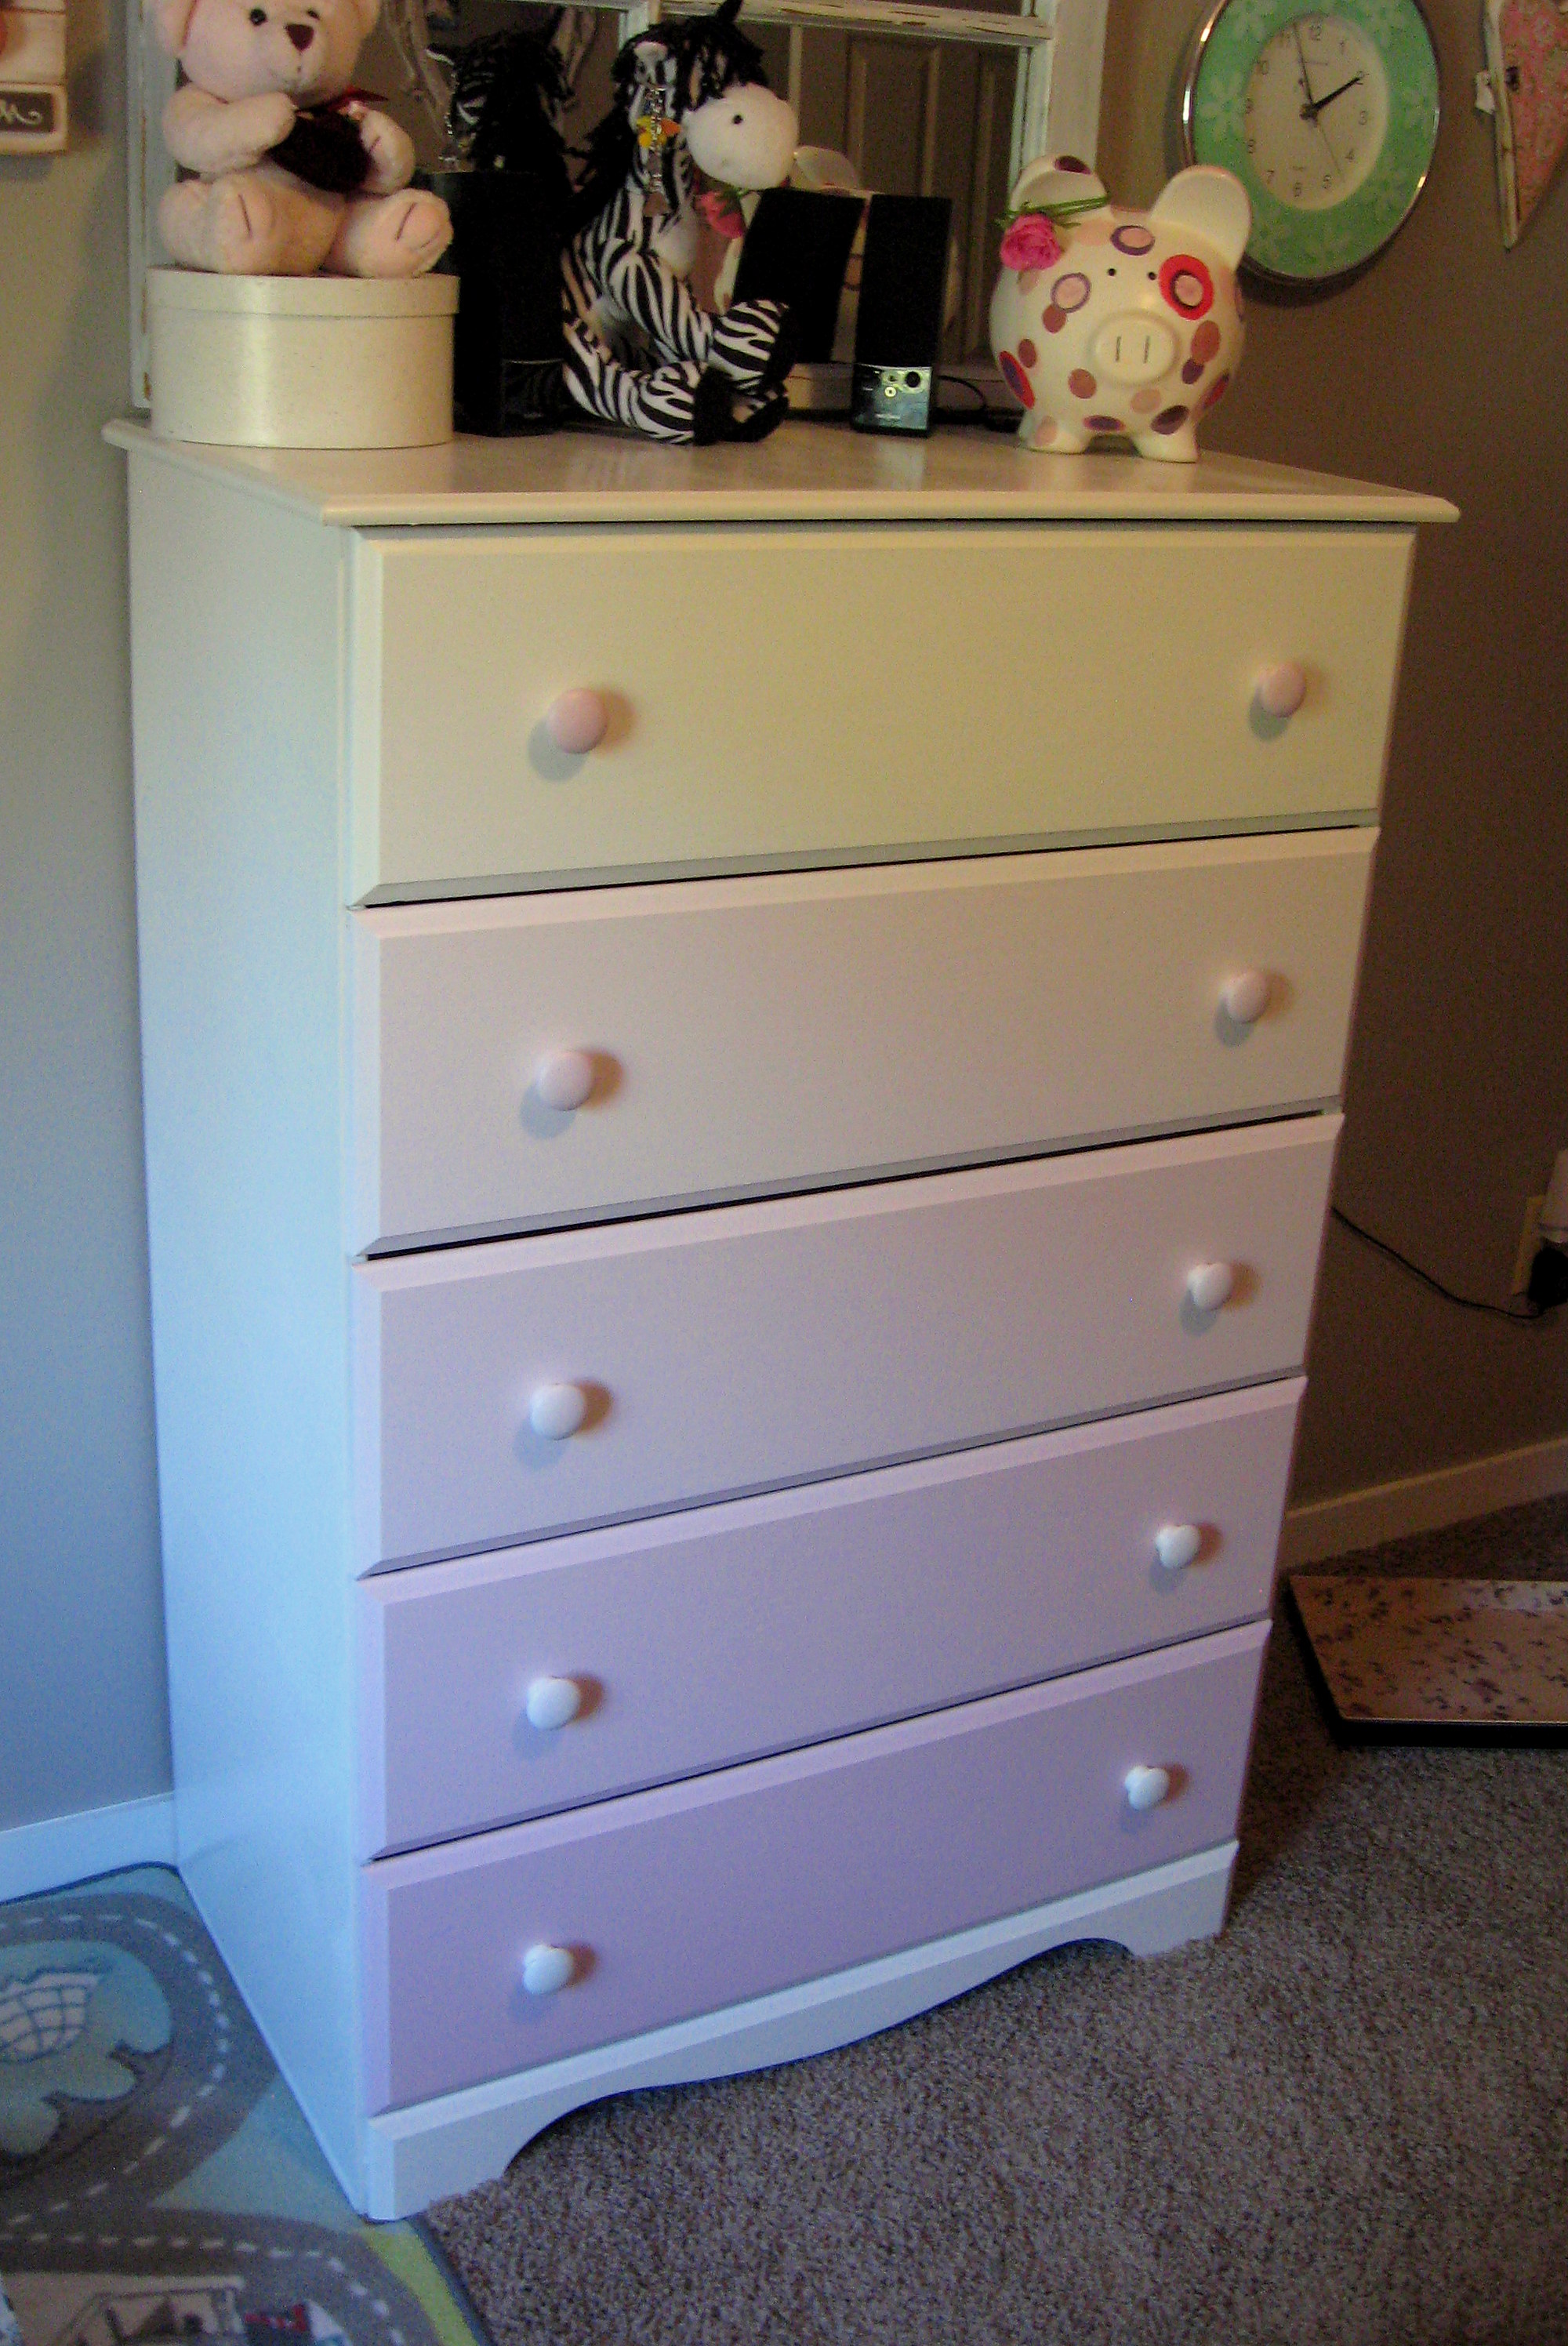
I started with the dresser that’s been in my daughter’s room. I didn’t get a picture of it before I took the drawers out (what is with me and before pictures!?!) but it is your basic inexpensive laminate furniture store dresser.

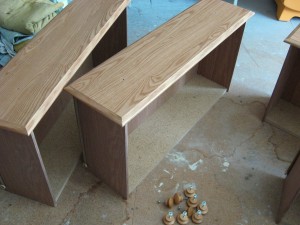
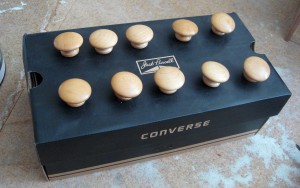
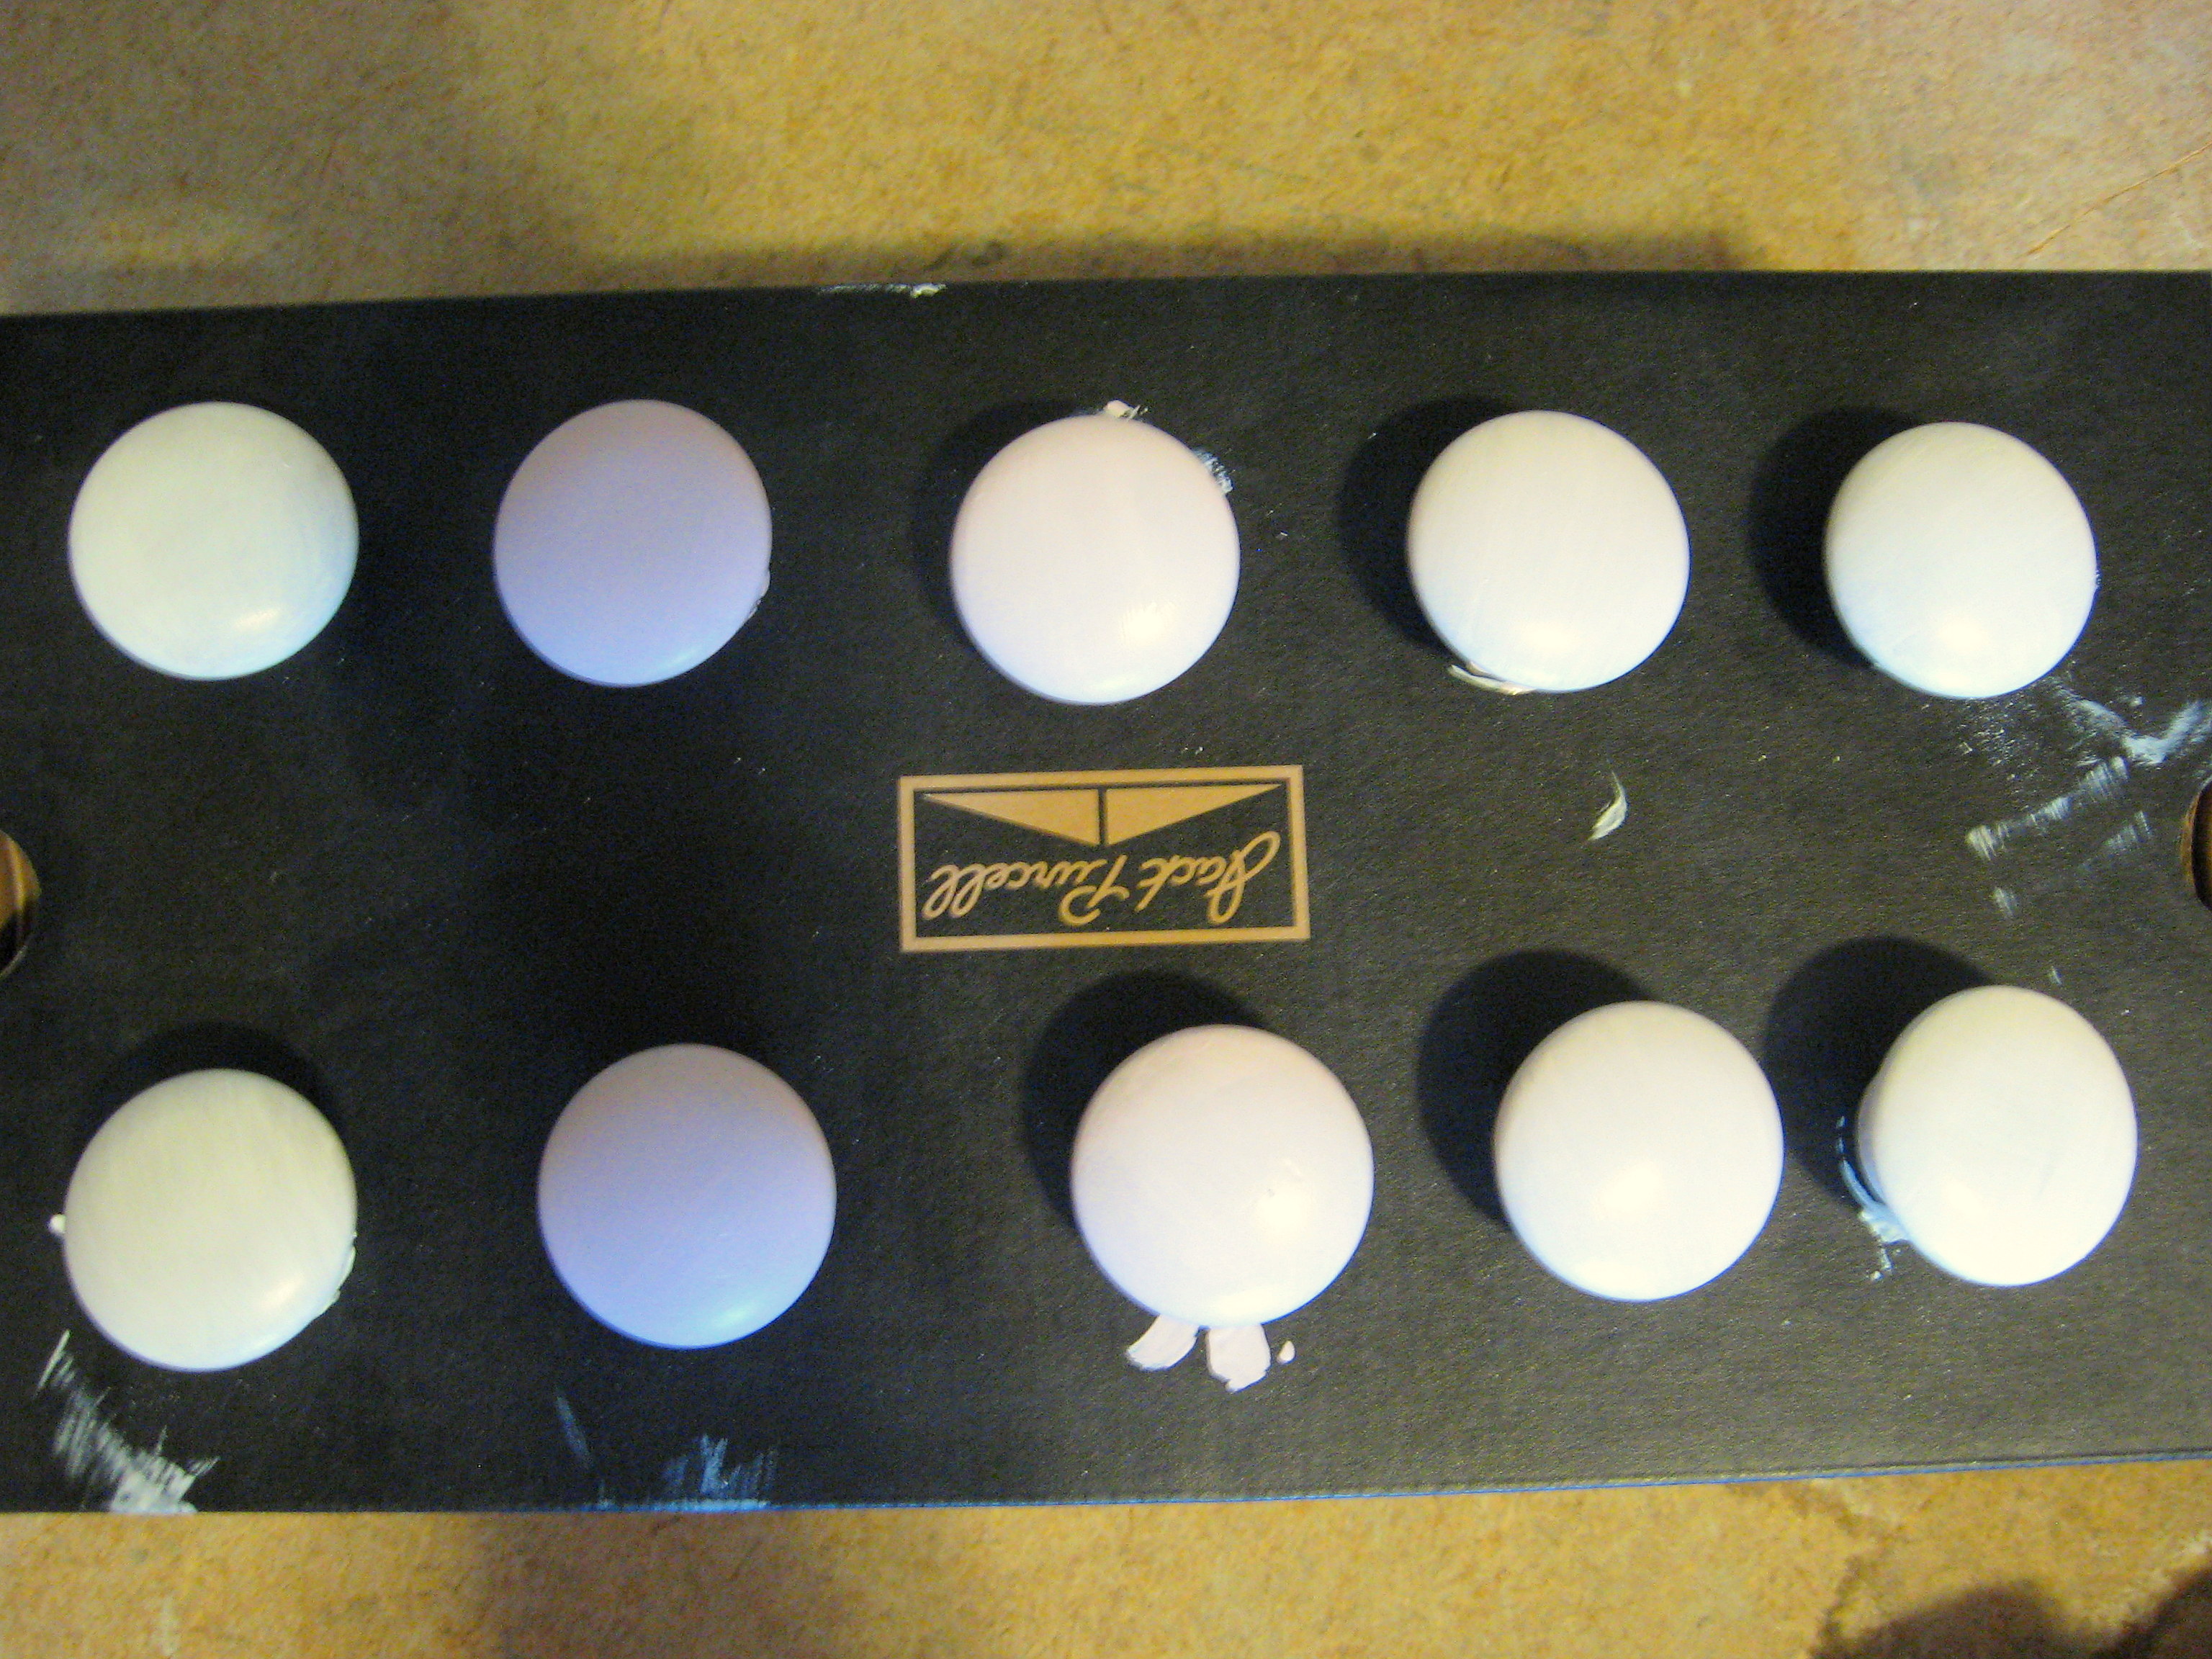
Start by taking the drawers out and removing all the knobs. I stick the screw part of the knob through a box like this to hold them while they dry.
 Give everything two smooth coats of a good gripping primer (if you’re unfamiliar with painting laminate furniture, read this post first.) and let it dry. I chose for this project to paint the body of the cabinet white, so I did that next and set it aside to dry while I worked on the drawers.
First up, mixing the paint for the ombre effect. This dresser has 5 drawers, so I needed 5 different colors. I started with the top drawer being white and the bottom drawer being the same color of pink that I painted her bedroom ceiling.
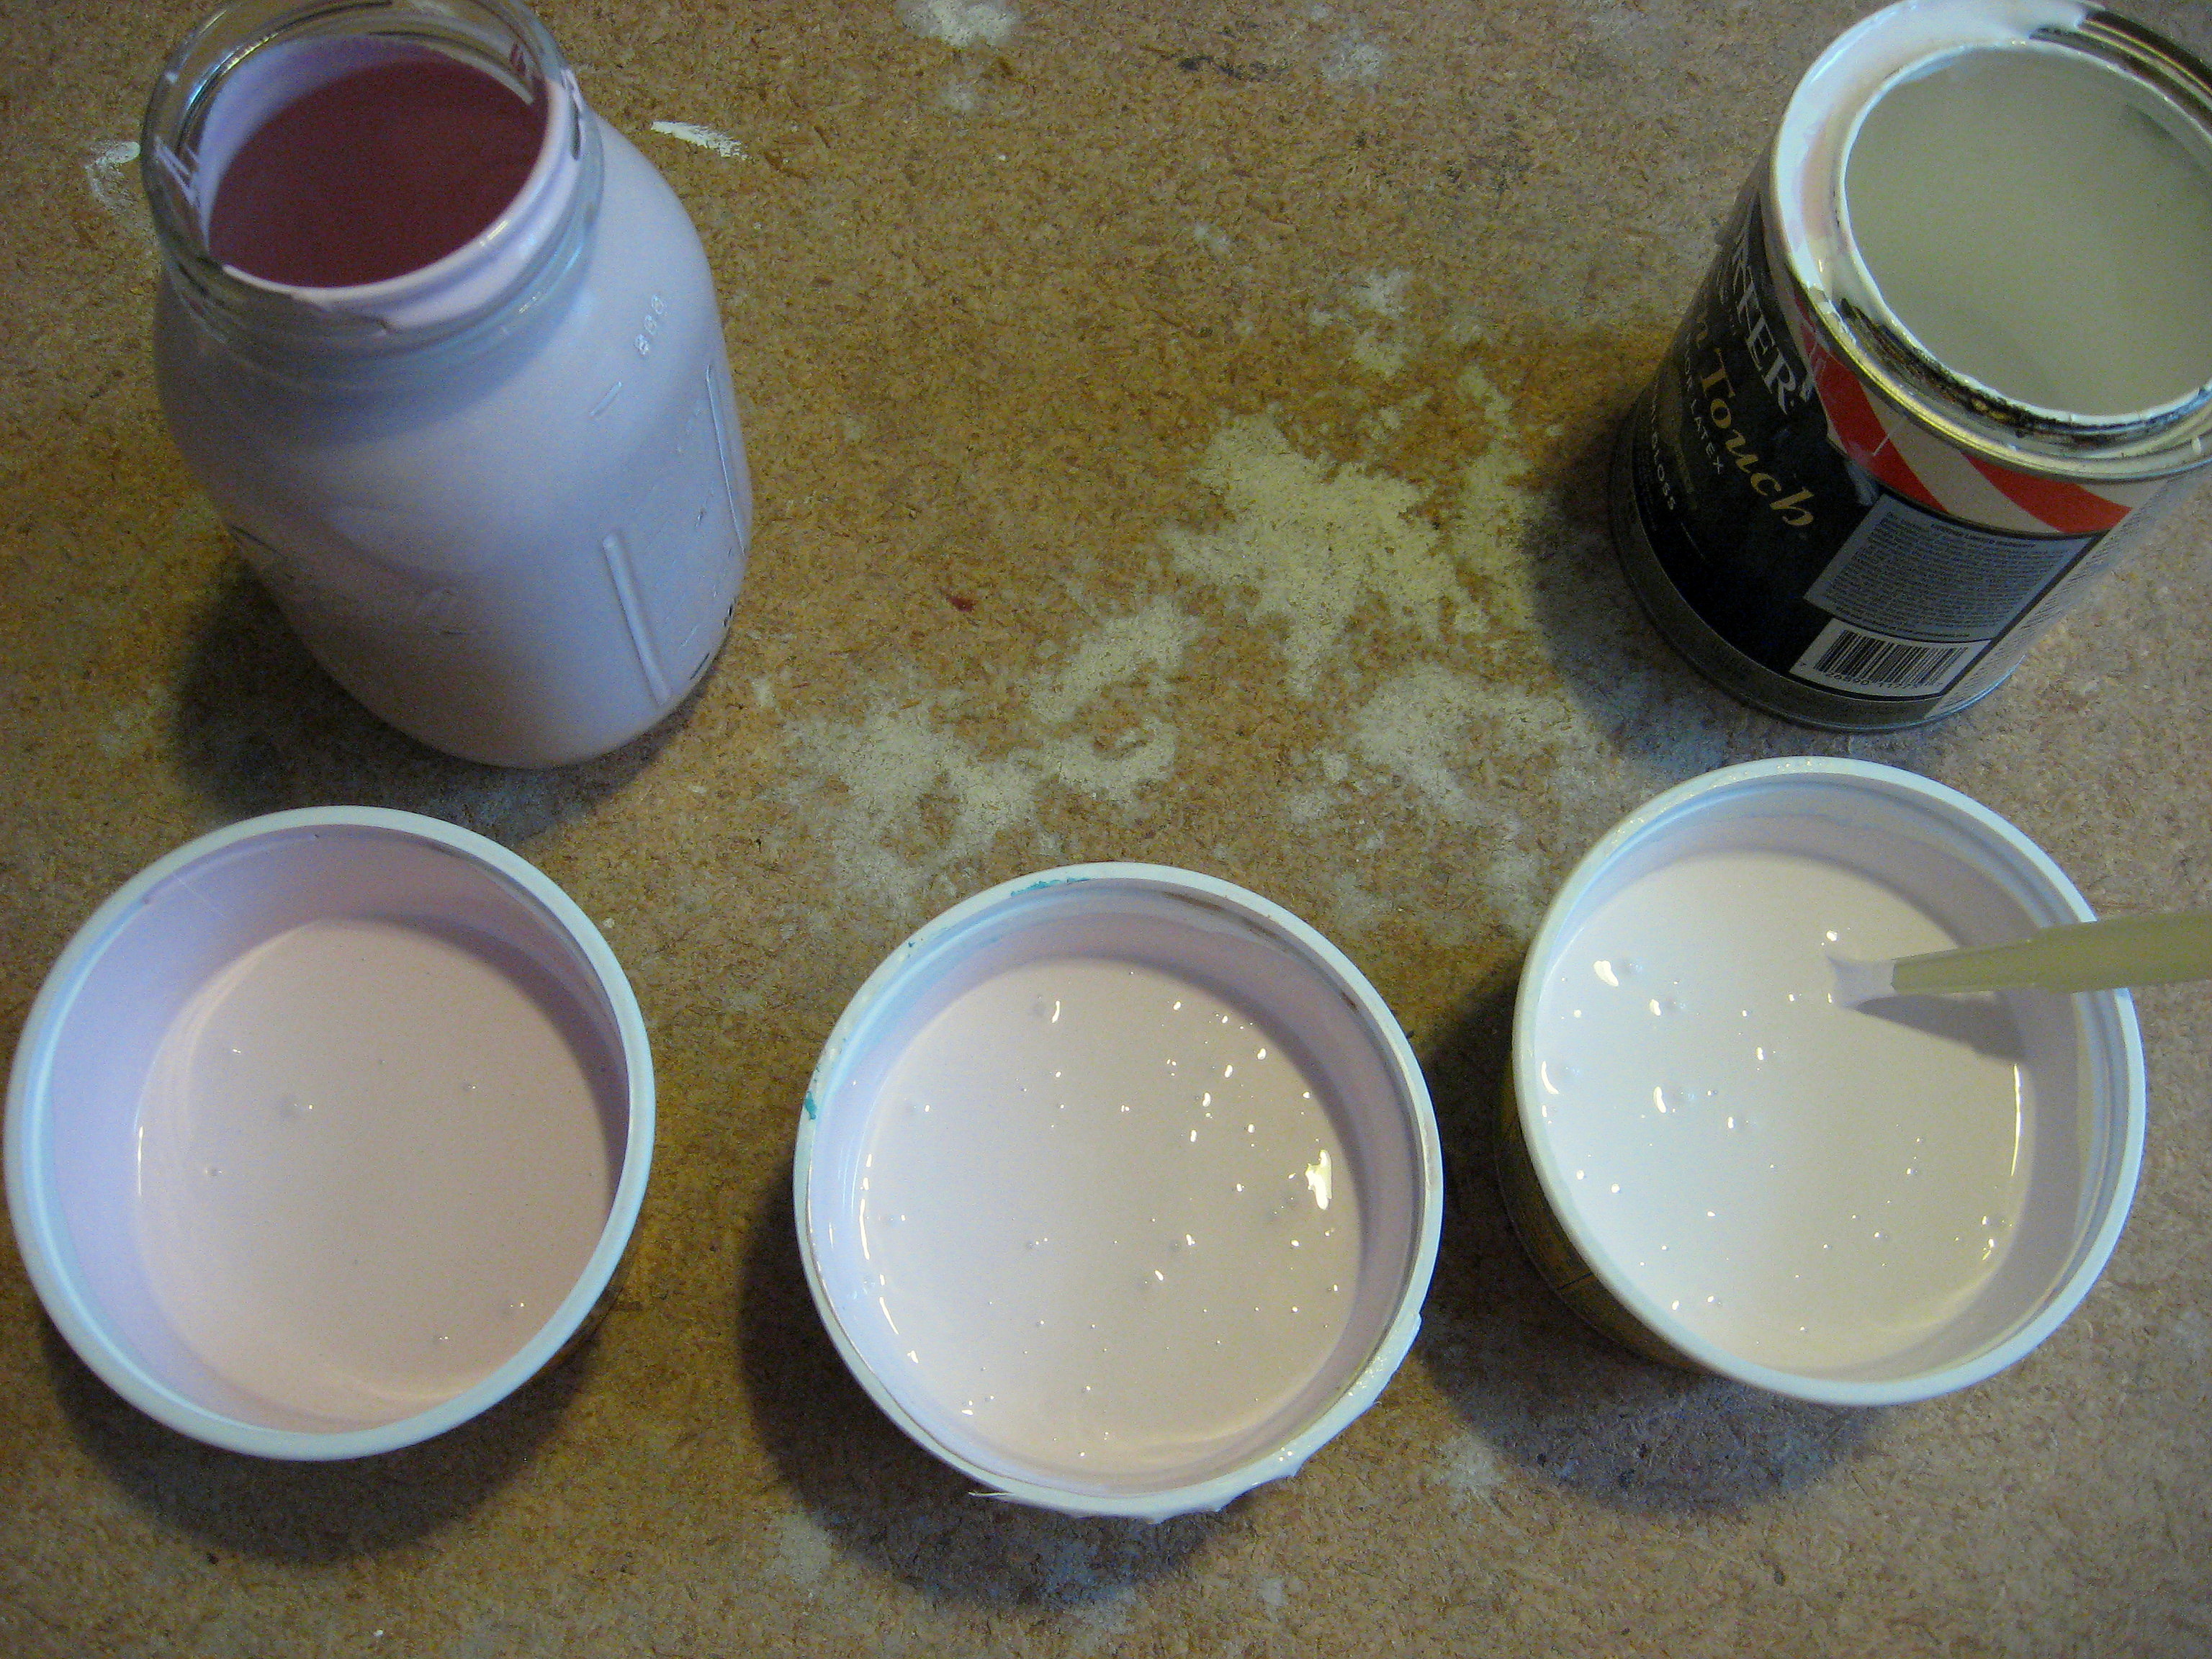
I poured an equal amount of pink and white into one container (the middle one), then about the same amount of paint into another container, but this time more pink than white (the lefthand one) and then the same thing in reverse in a third container – more white than pink (the righthand one).
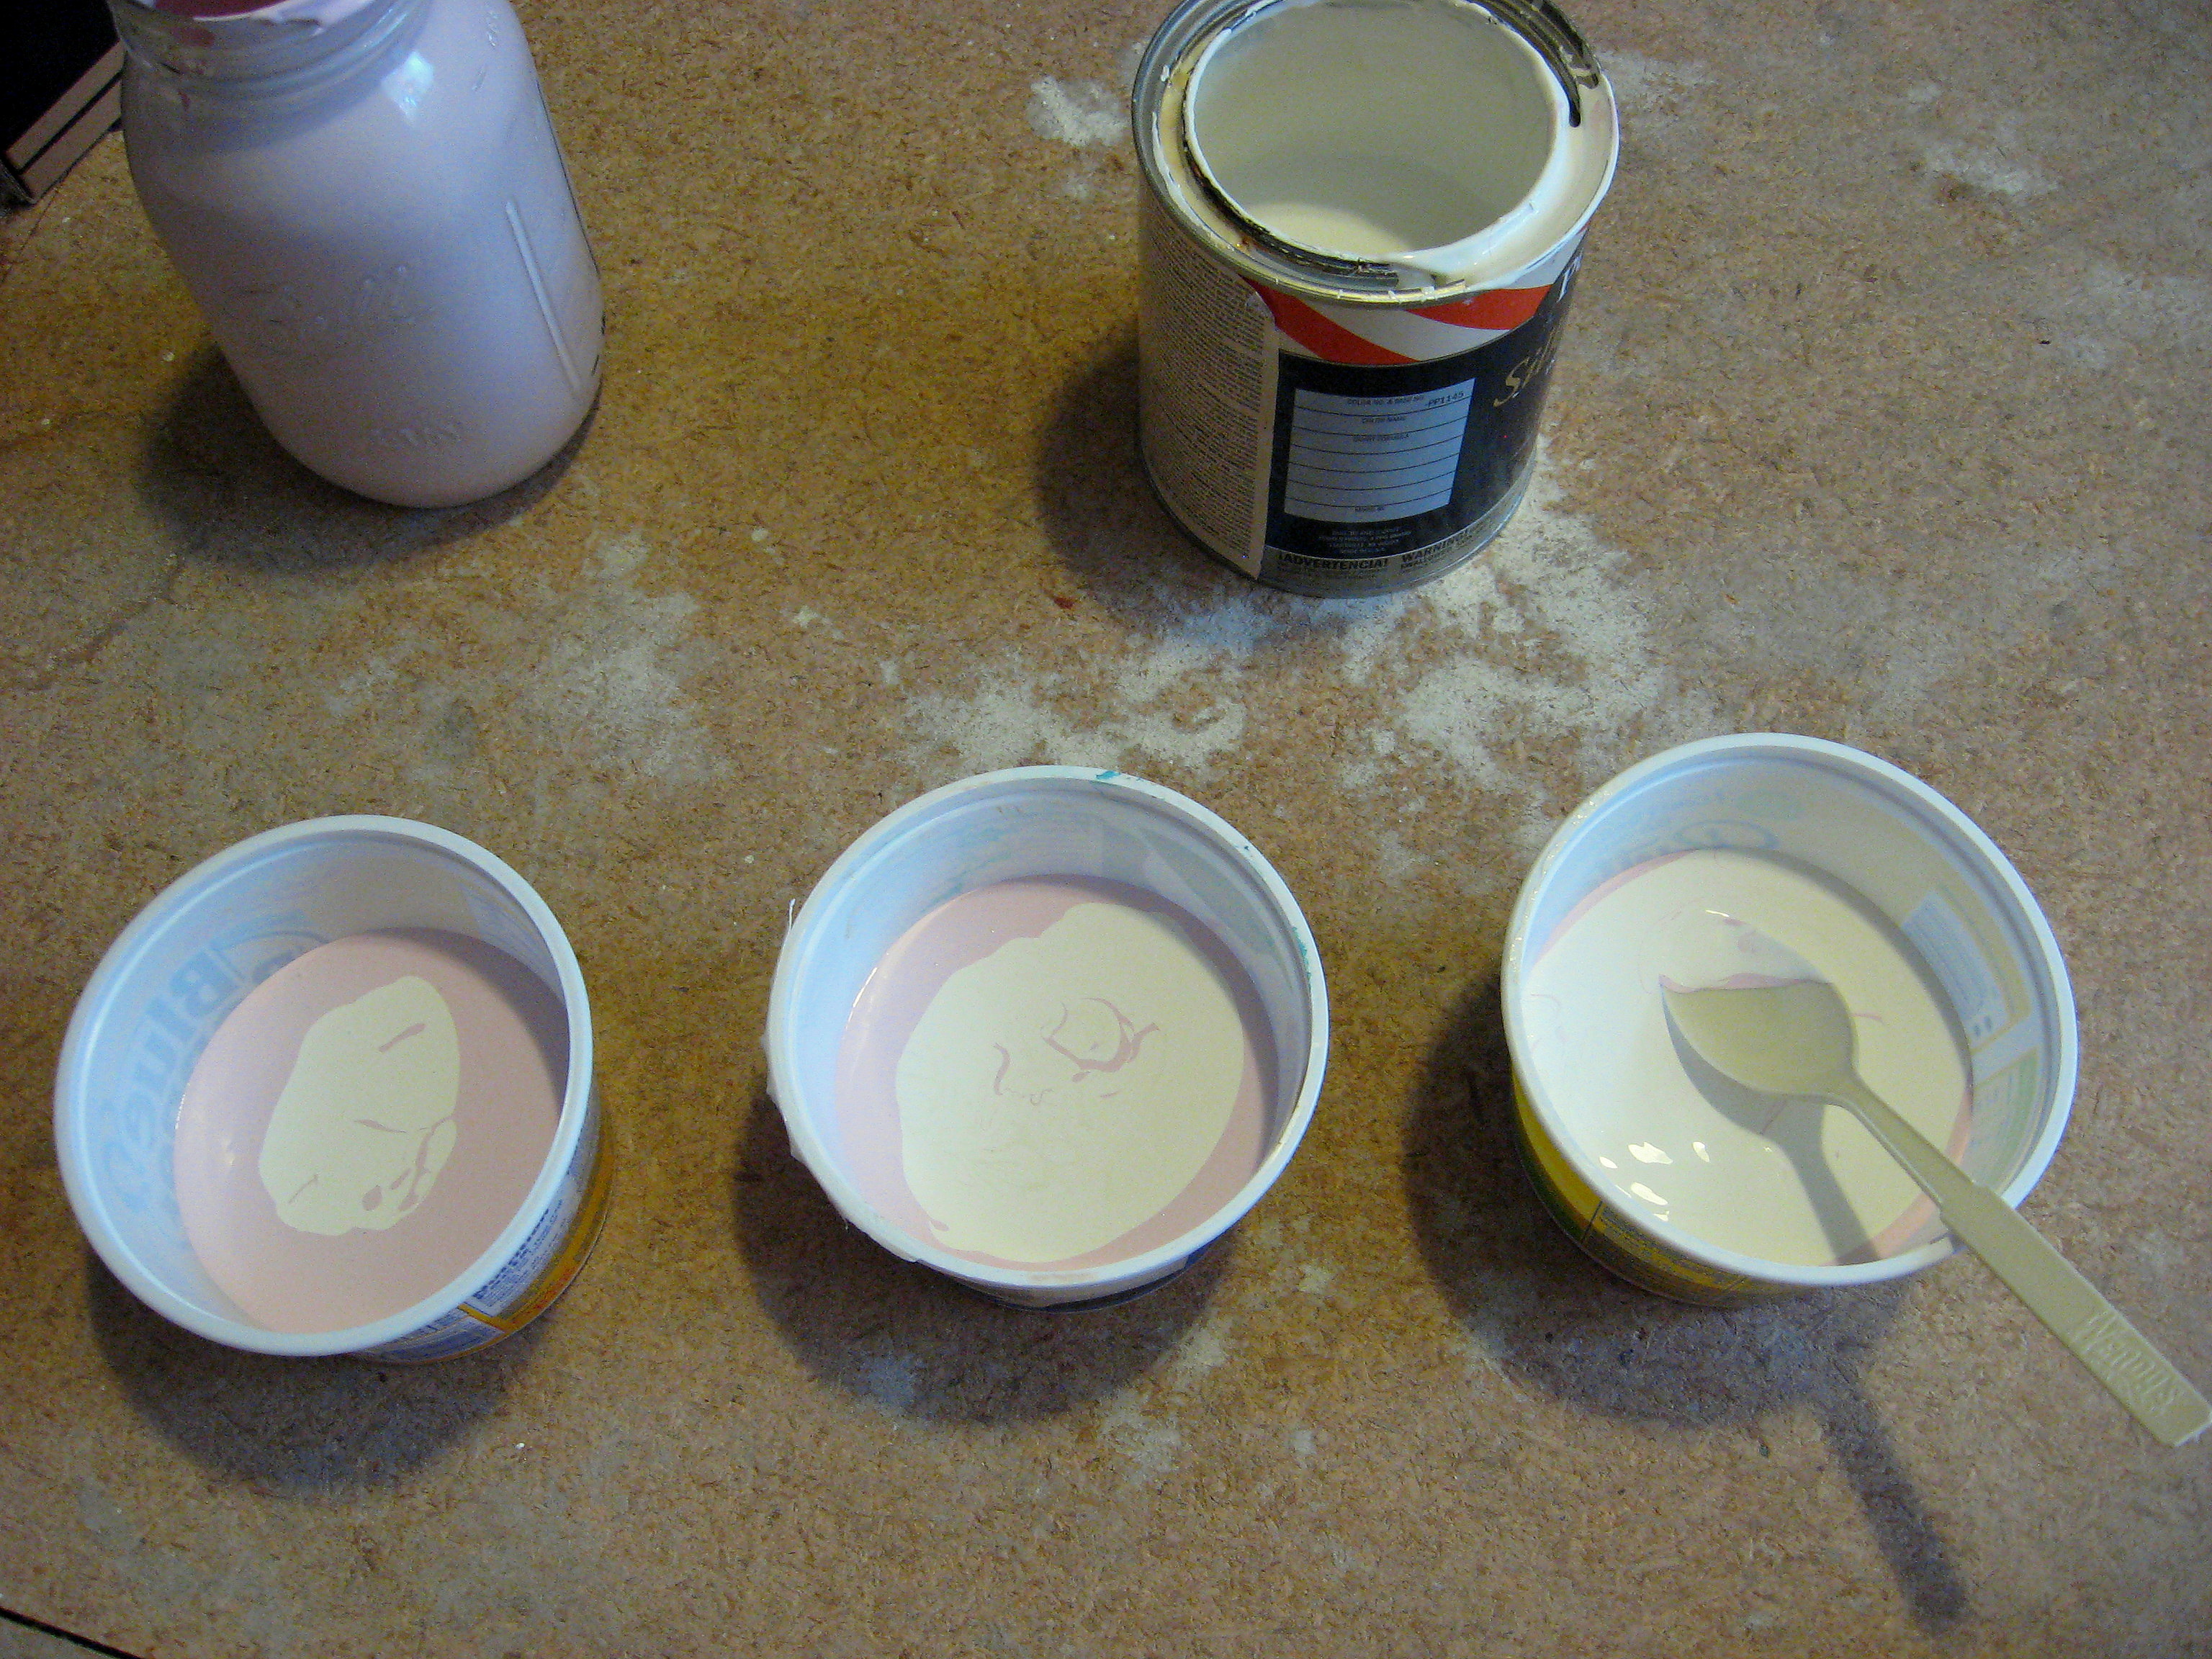
Mix them all well and line them up with the plain pink and plain white to see if you like the color values. Add more pink and/or white as needed to achieve the color gradation you are happy with.
Don’t forget about the knobs! This is the world’s worst picture to show what I actually did – sorry – but I painted each set of 2 knobs one of the five colors.
Once everything has received 2 coats and is very dry (wait at least overnight – the longer you let this cure the sturdier the paint will be!) reassemble the drawers. I reversed the knobs, so that the darkest pink ones are on the white drawer and vice versa.
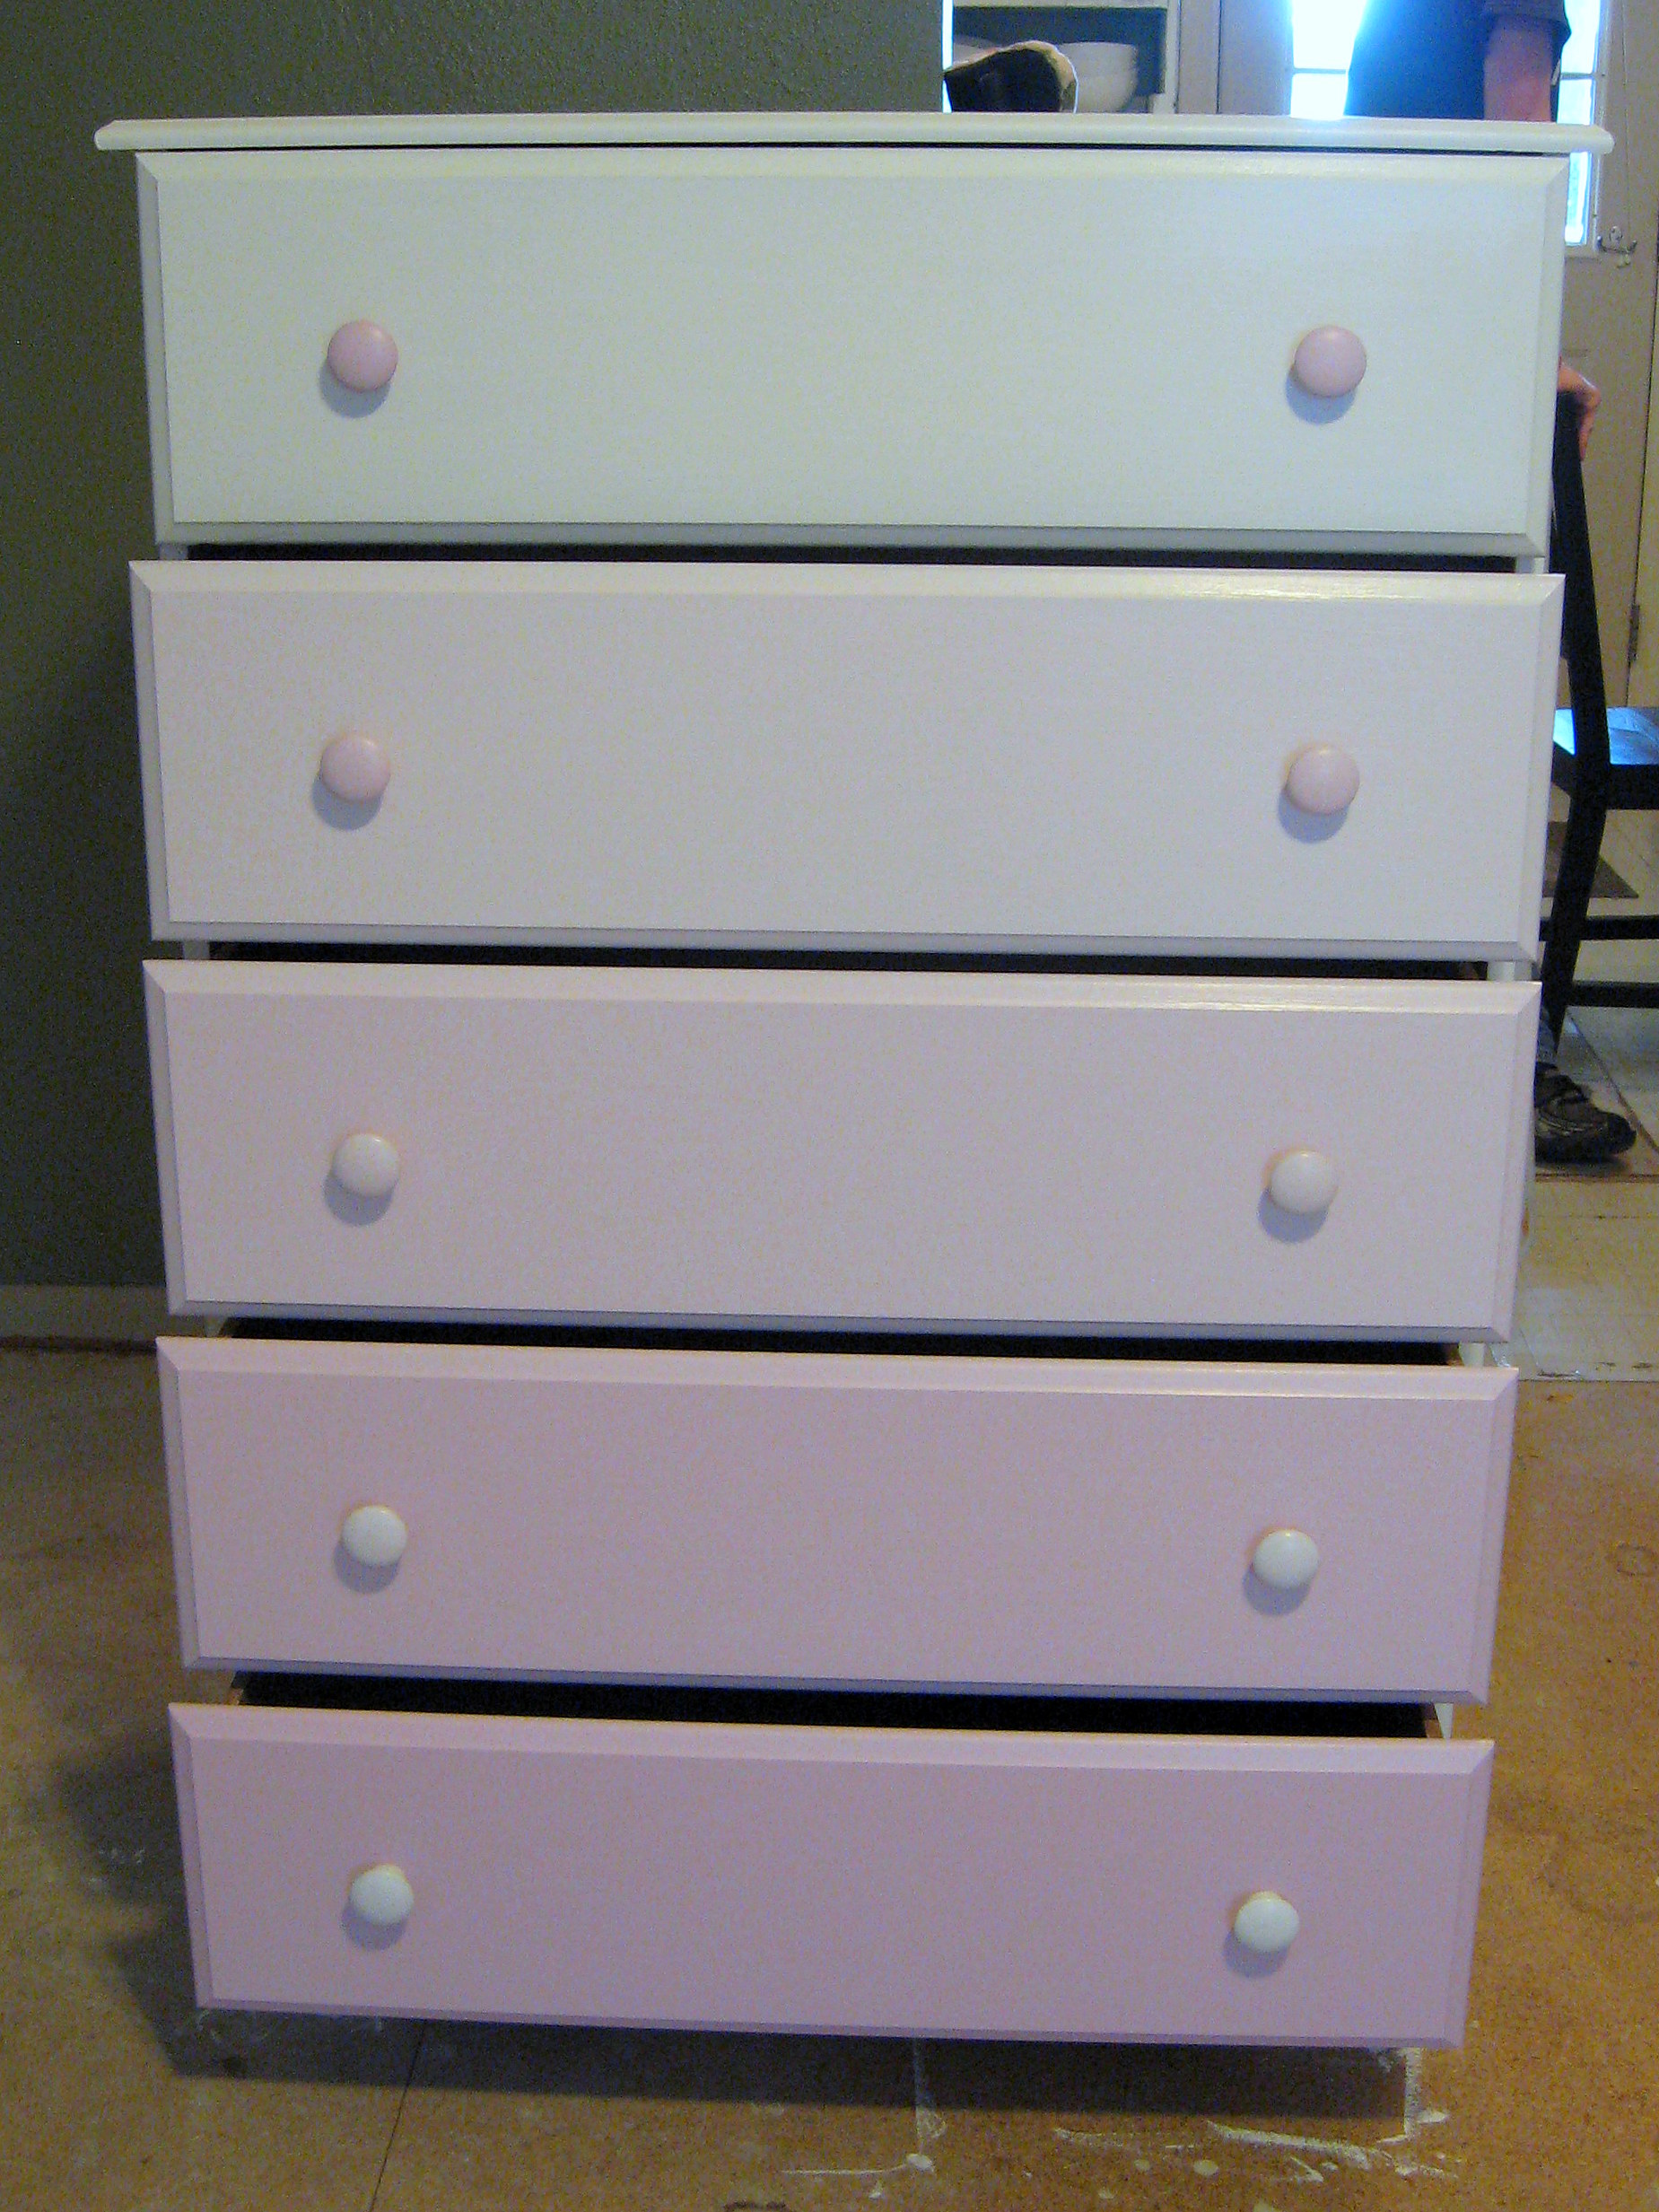
Love how this ombre turned out, and not any harder than just painting it plain!
A PYP Best Blog! Making a Polymer Bouncing Ball!
Just in case you missed this article on making a polymer bouncing ball the first time we shared it a couple of years ago, we are republishing it. After Sharon wrote this blog originally, we got an awesome response. This is one of the PYP Best Blogs!
 I saw “recipes” all over Pinterest last summer for making your own bouncing ball. Since I have a daughter who is OBSESSED with them, I thought it would be a fun activity, and even went so far as to buy the ingredients – which then sat on my counter until now. I never really got around to reading the instructions and assumed that it would be complicated. Finally, I got tired of the stuff being in my way and made a few of them this afternoon.
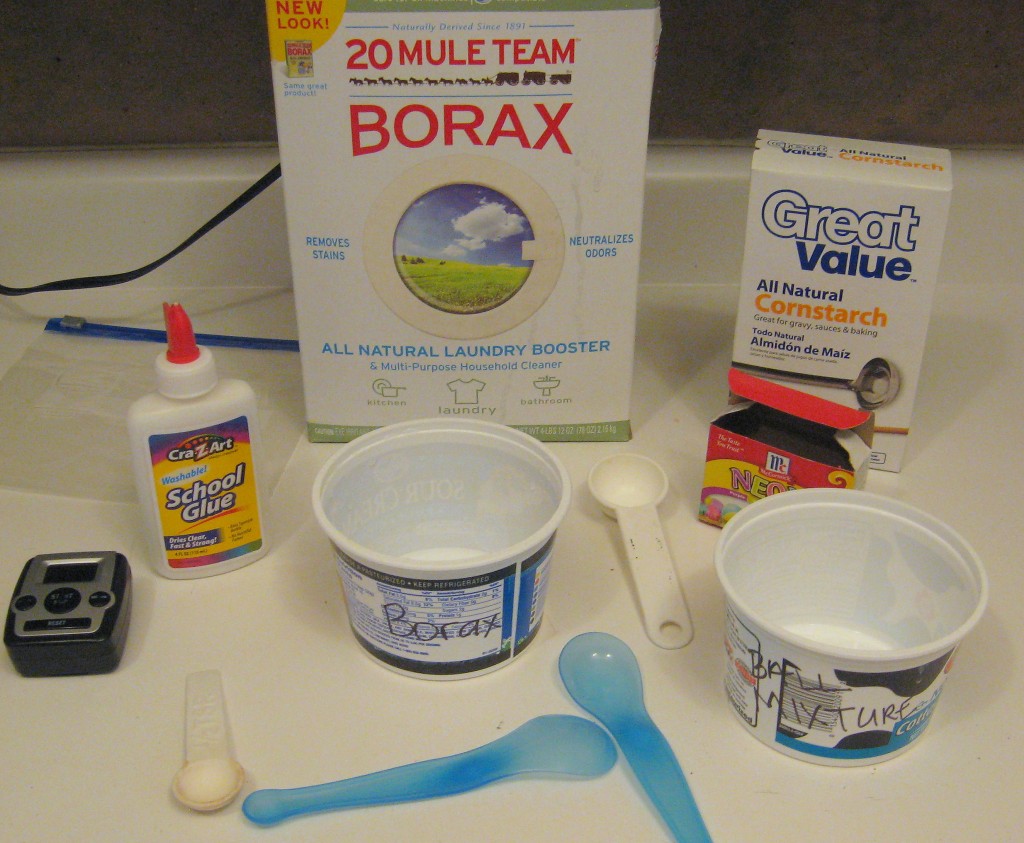
I used the recipe on this site:
https://chemistry.about.com/od/demonstrationsexperiments/ss/bounceball.htm
Here is what we thought:
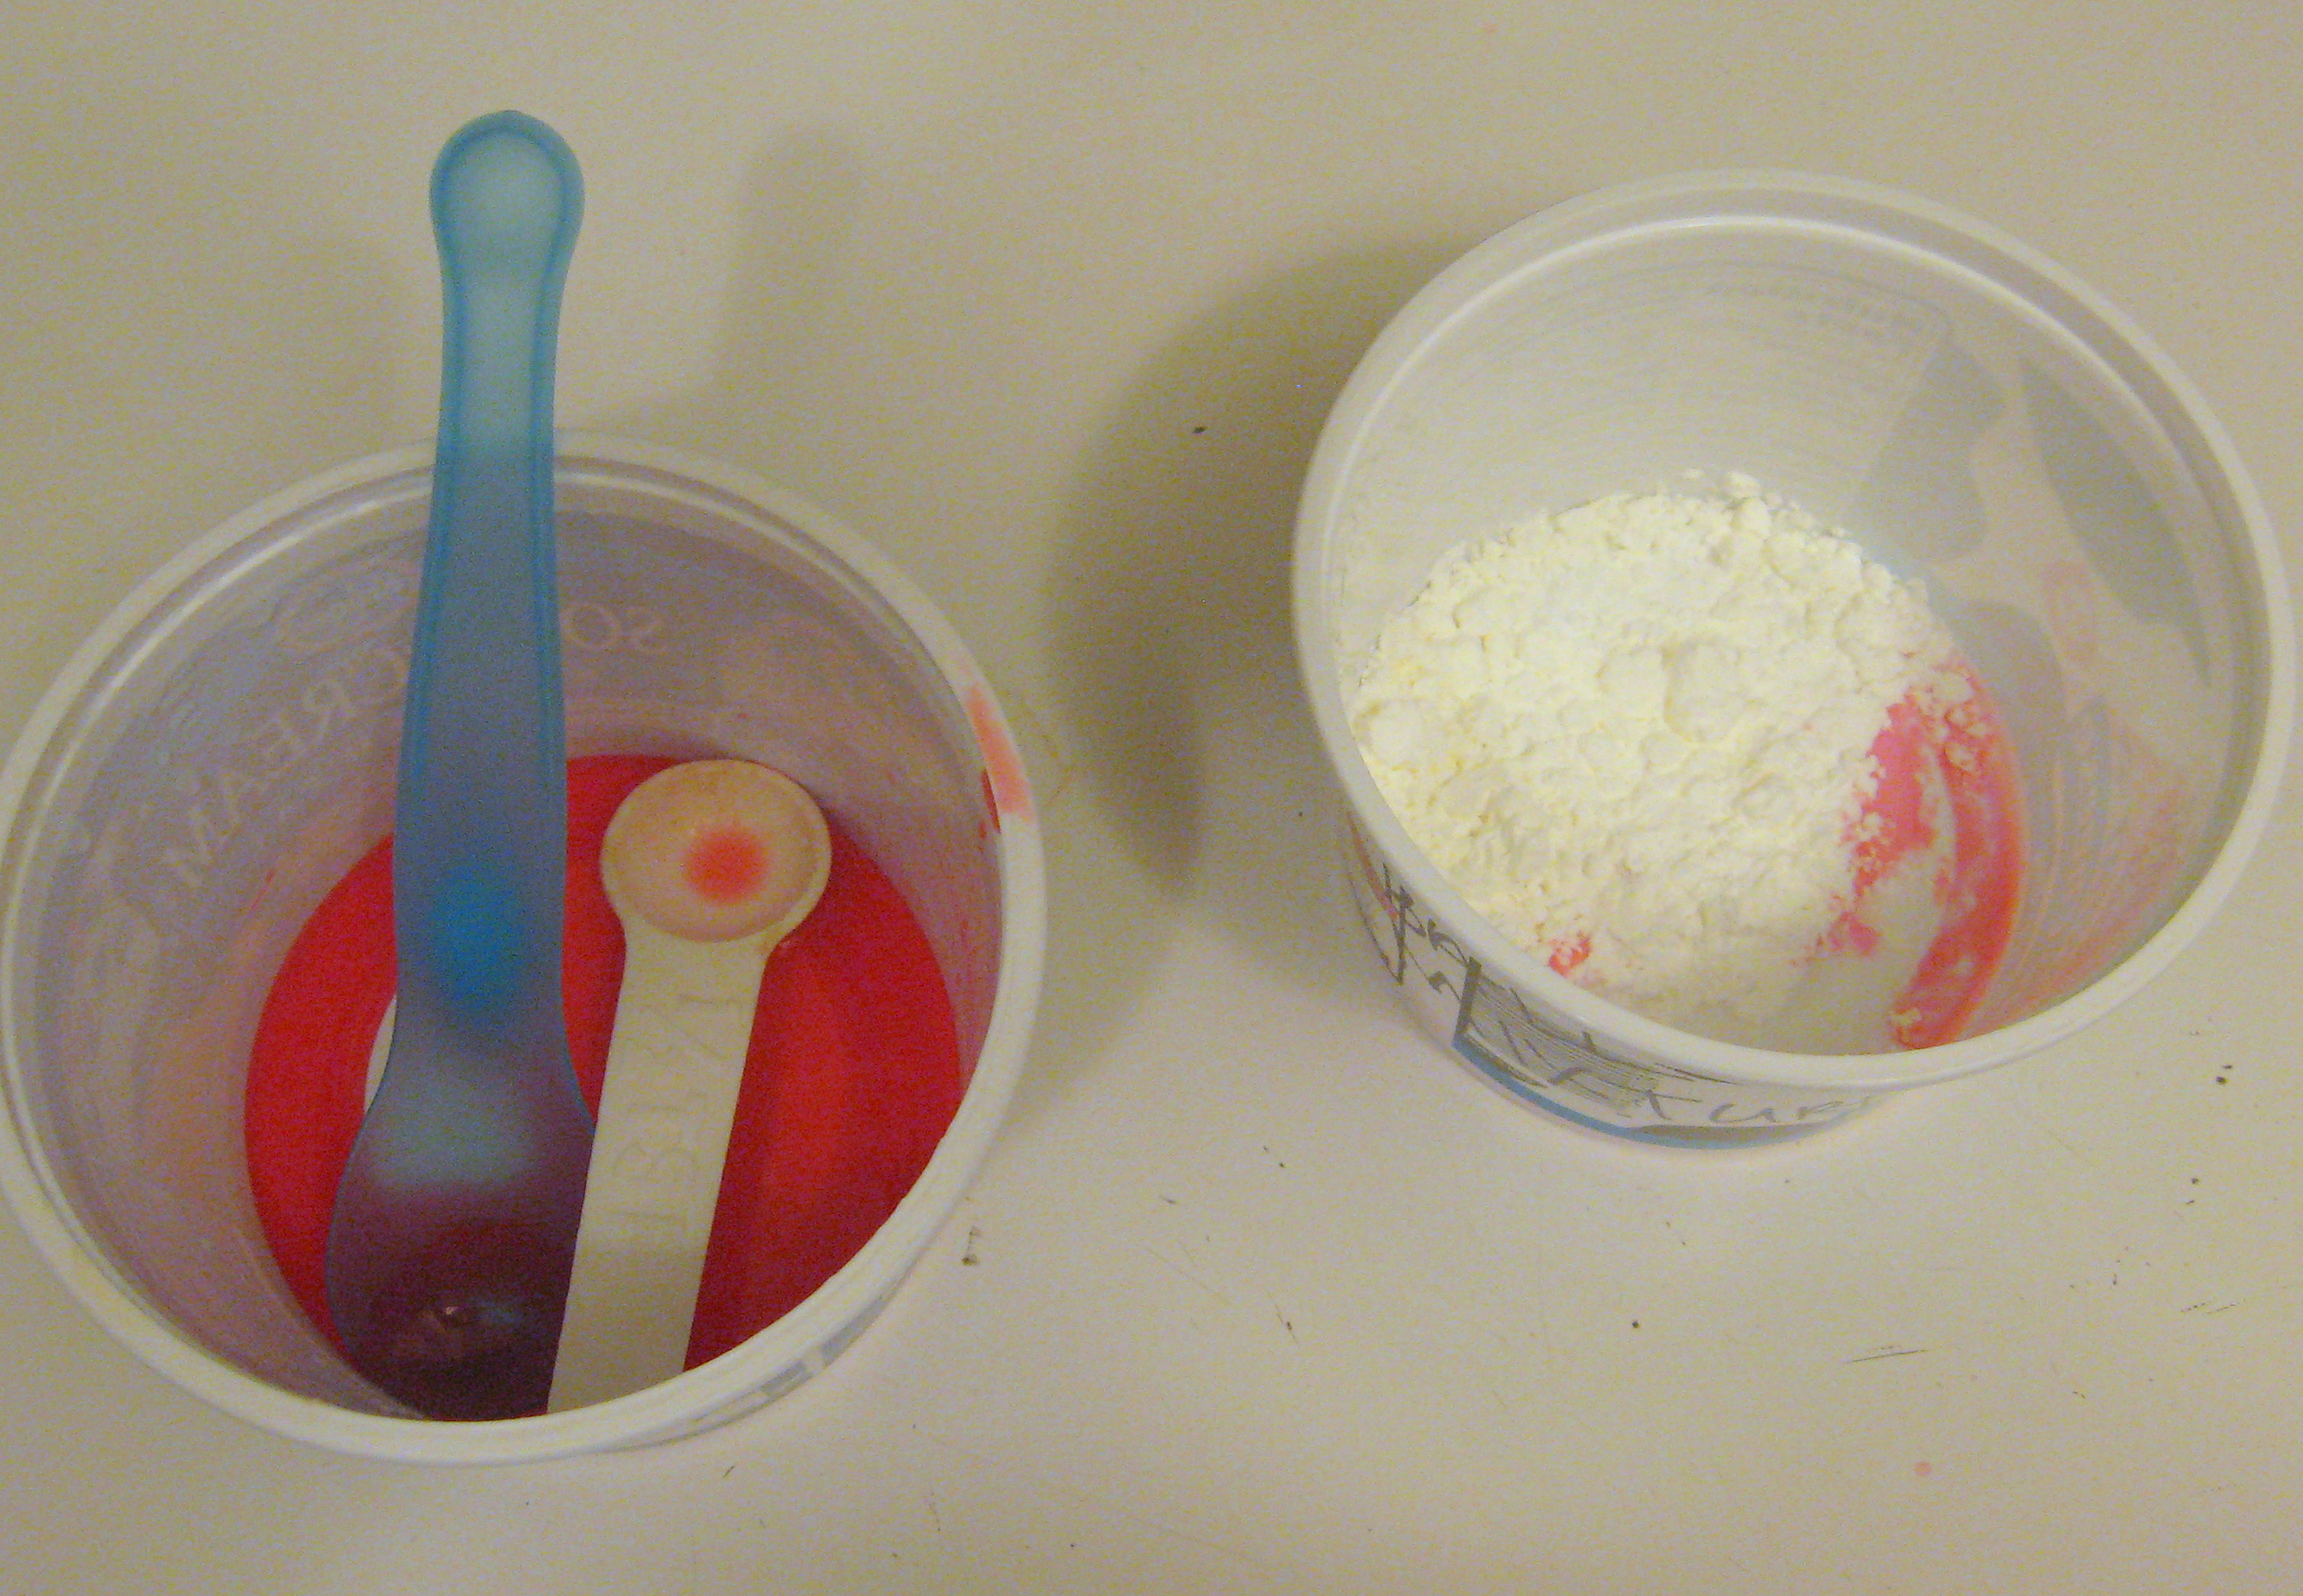
- It was certainly NOT complicated. It was super easy and only took a few minutes to make. It probably took longer to read through the recipe than it did to make it.
- It also isn’t super messy. If you are doing it with very small children, you may want to put down newspaper or an old towel, but really, I did it right on my counter top using old butter tubs and plastic spoons. Once I threw those away, there was no other mess.
- I used white glue, but if I were to make this again, I would definitely use glitter glue or clear glue; I think it would look much cooler
- Our balls didn’t really bounce. They are super soft – basically like slightly more solid Gak. We all thought it was fun to play with it – like you would play dough or silly putty – but they definitely didn’t come out like a bouncing ball.

- The website explains the science behind how it works, but it is more on a level for middle school students, not little ones. My high schoolers understood it, but I didn’t!! so if you’re looking for a science lesson and – like me – haven’t taken chemistry since the 80’s, you may need to google for a simpler explanation. We did change up the ingredients on the second ball as per their suggestion (we added more cornstarch) but thought it was only barely different from the first one.
Final analysis? I think you should give it a try! It is easy and fast, and takes ingredients that you likely already have sitting around the house. It is fun to play with (it would make a great stress ball). If I had had more time, I think I would have gone ahead and made gak as well, so we could have talked about the differences (here’s a good gak recipe if you don’t know what I’m talking about: https://lilluna.com/homemade-gak-recipe/).