
A PYP Best Blog! Make a Padded Messenger Bag Strap!
Just in case you missed this article on making a padded messenger bad strap the first time we shared it a couple of years ago, we are republishing it. After Sharon wrote this blog originally, we got an awesome response. This is one of the PYP Best Blogs!
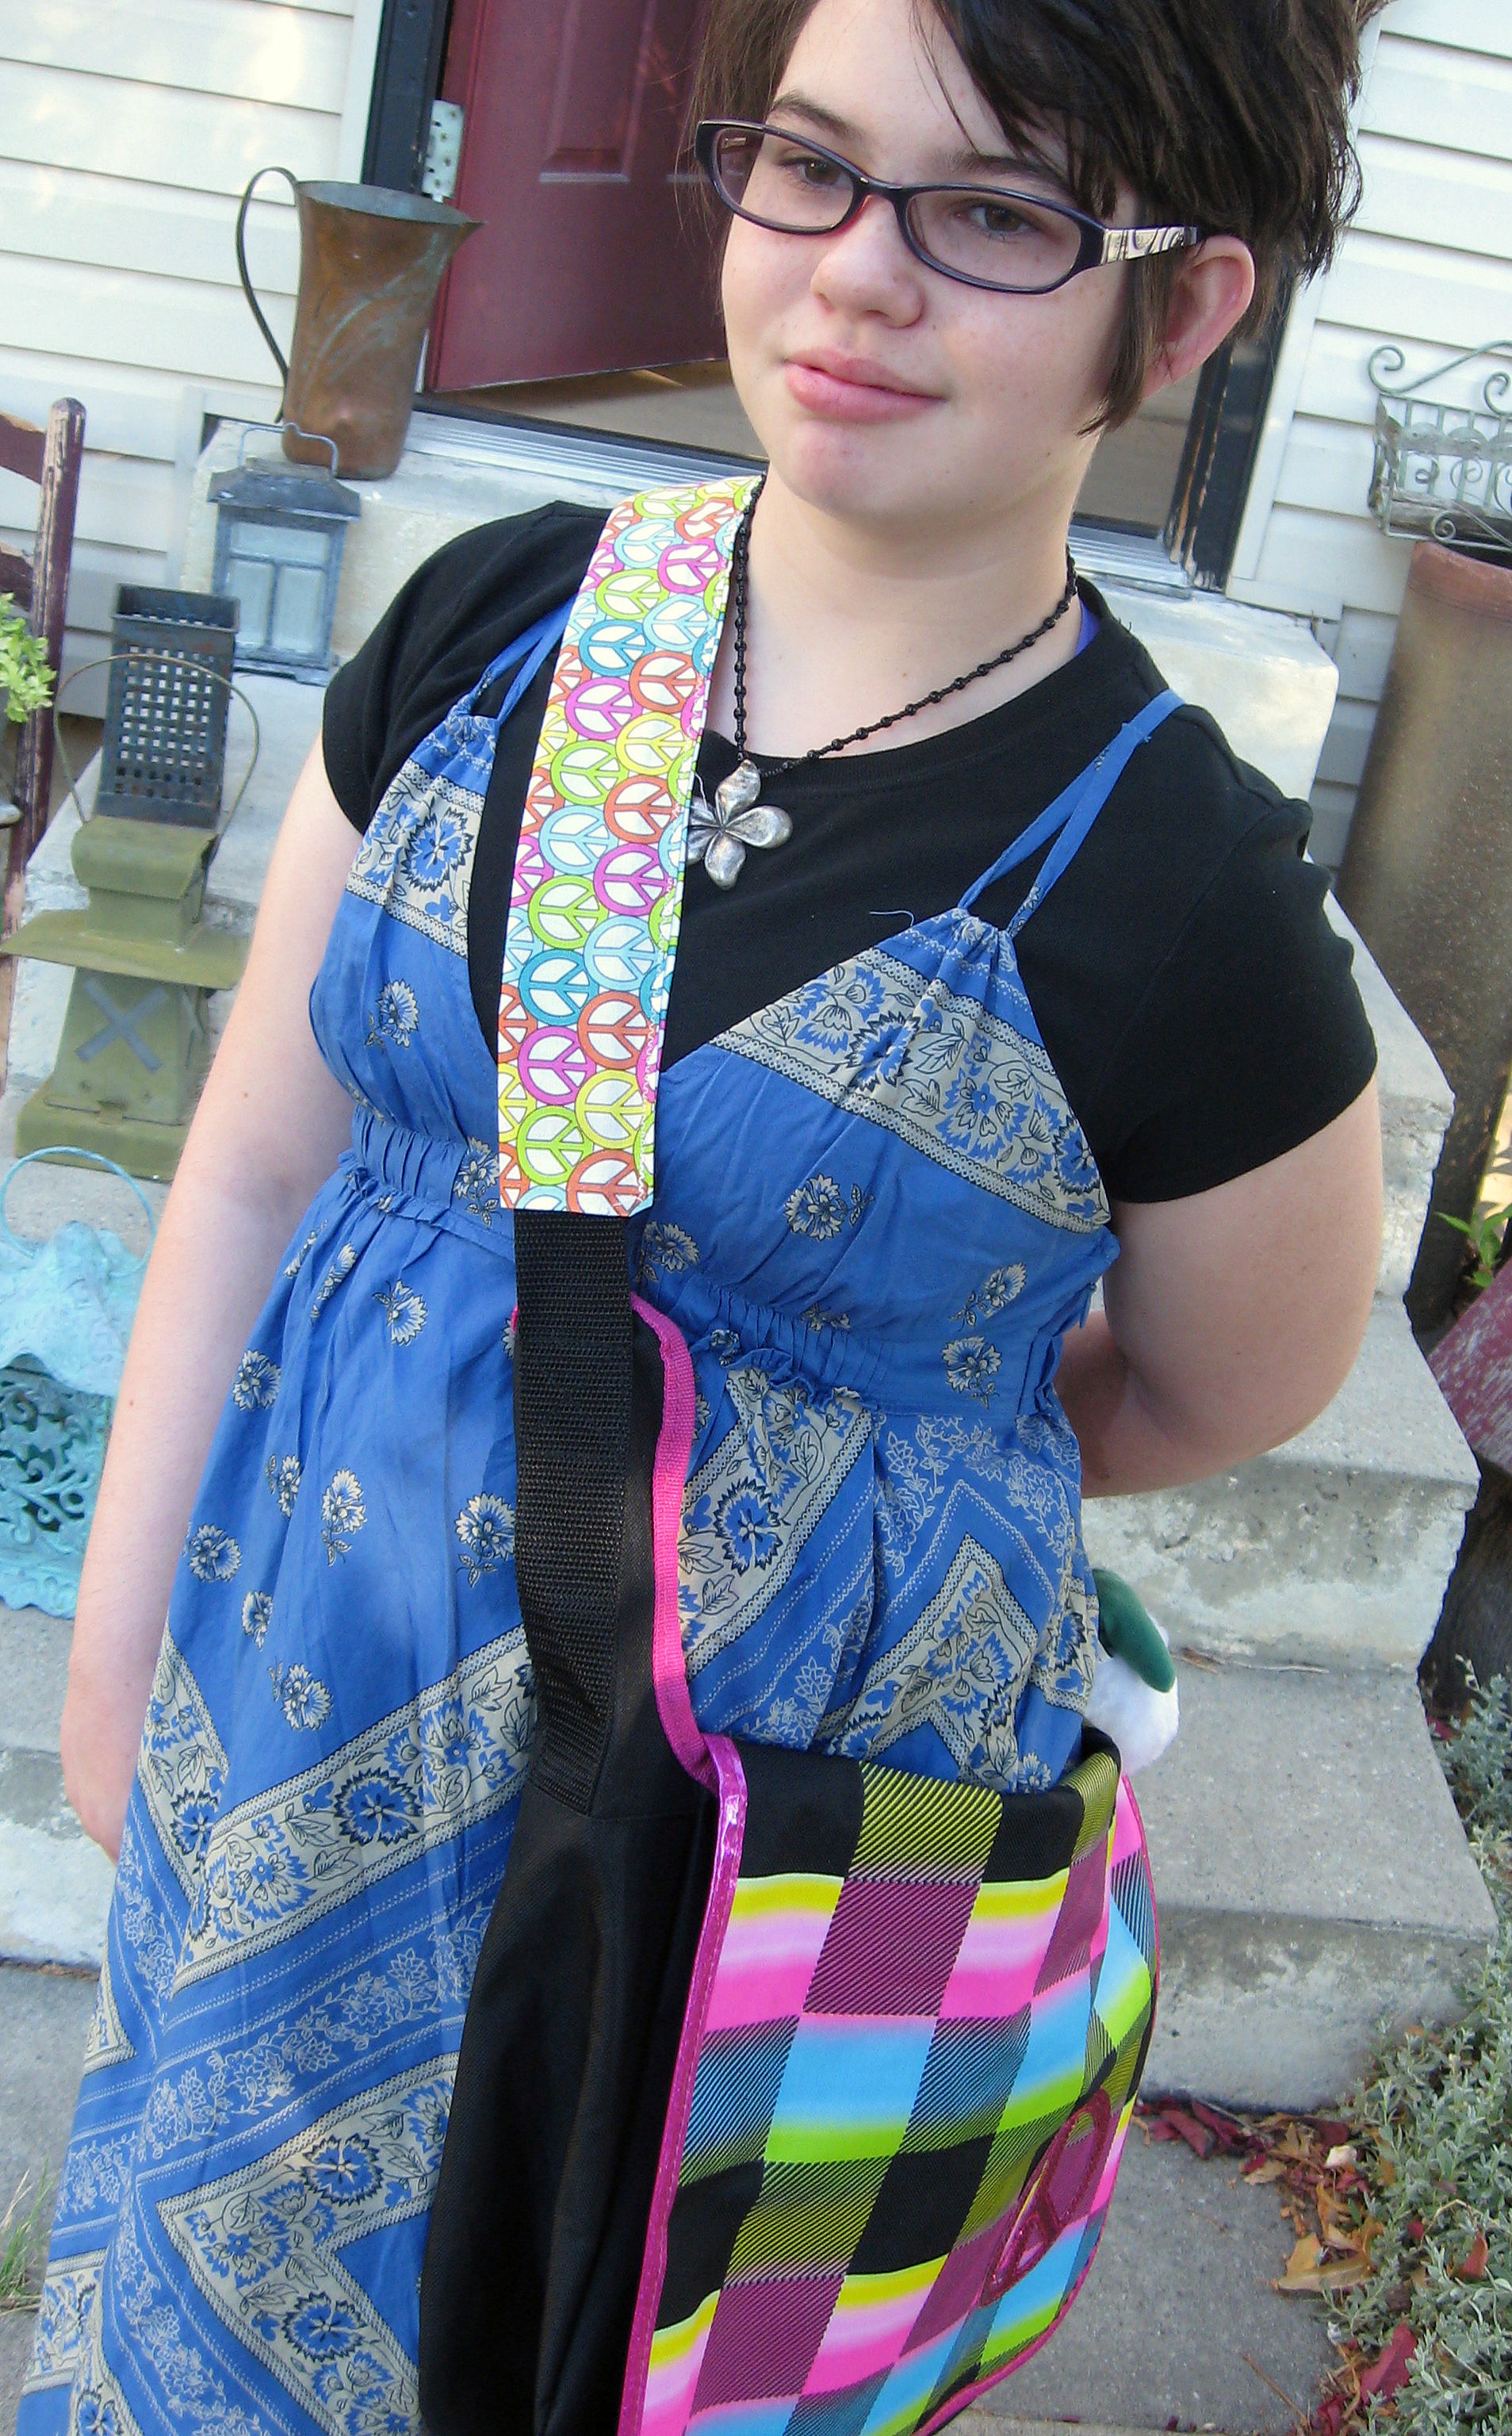
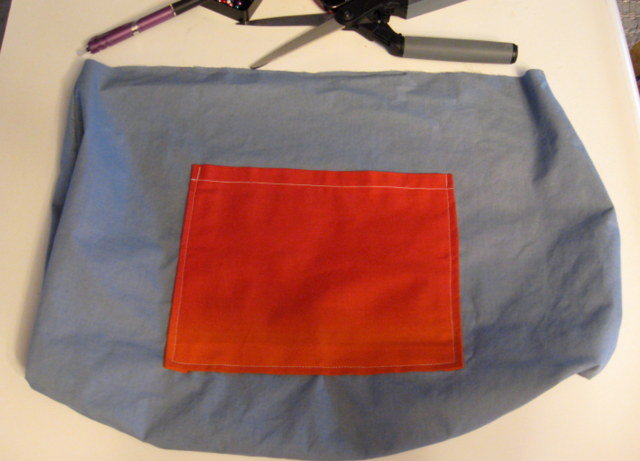
My daughter prefers messenger bags to backpacks, but I find that if I leave them as they are, she comes home bright red and irritated where the strap has rubbed her neck. Luckily it couldn’t be easier to use a piece of scrap fabric to make an almost no-sew padded strap cover.
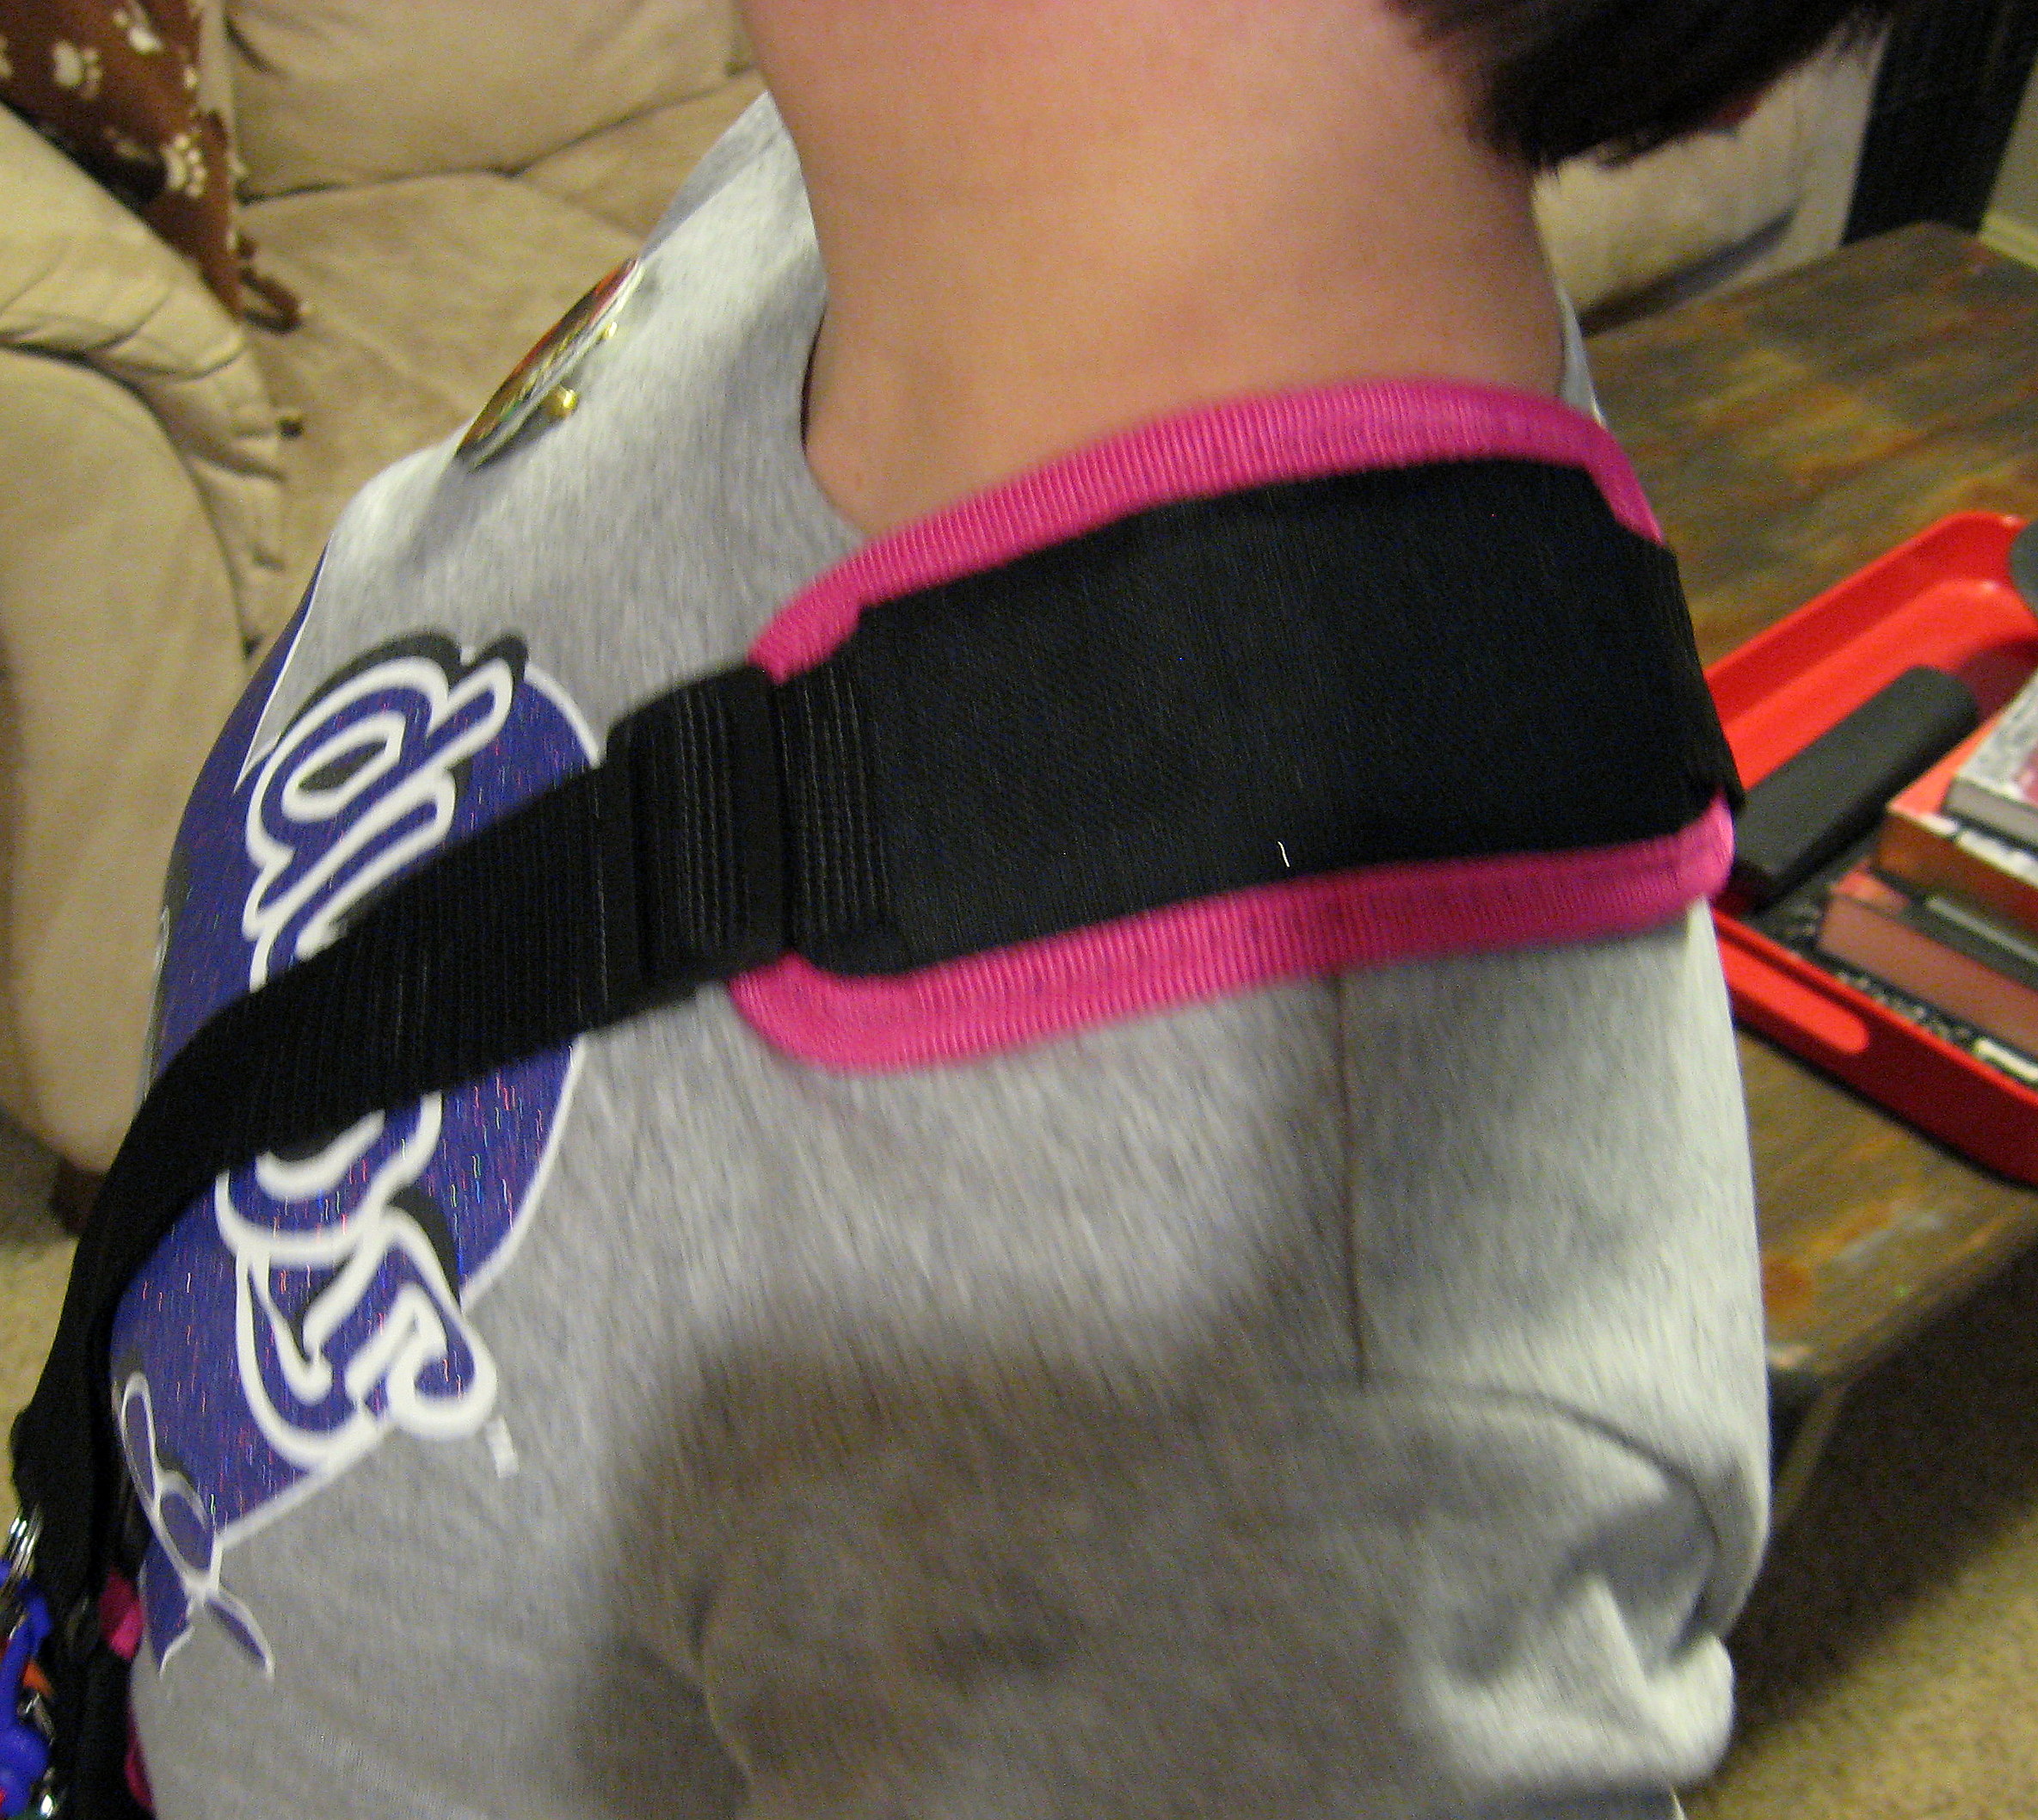
This year’s messenger bag does not have a detachable strap, so this tutorial will be for that. If your strap comes off, then it is even easier because you can sew the cover, then just slip it onto the strap.
First, cut off the padded part of the strap if it has one, and throw it away – so useless!
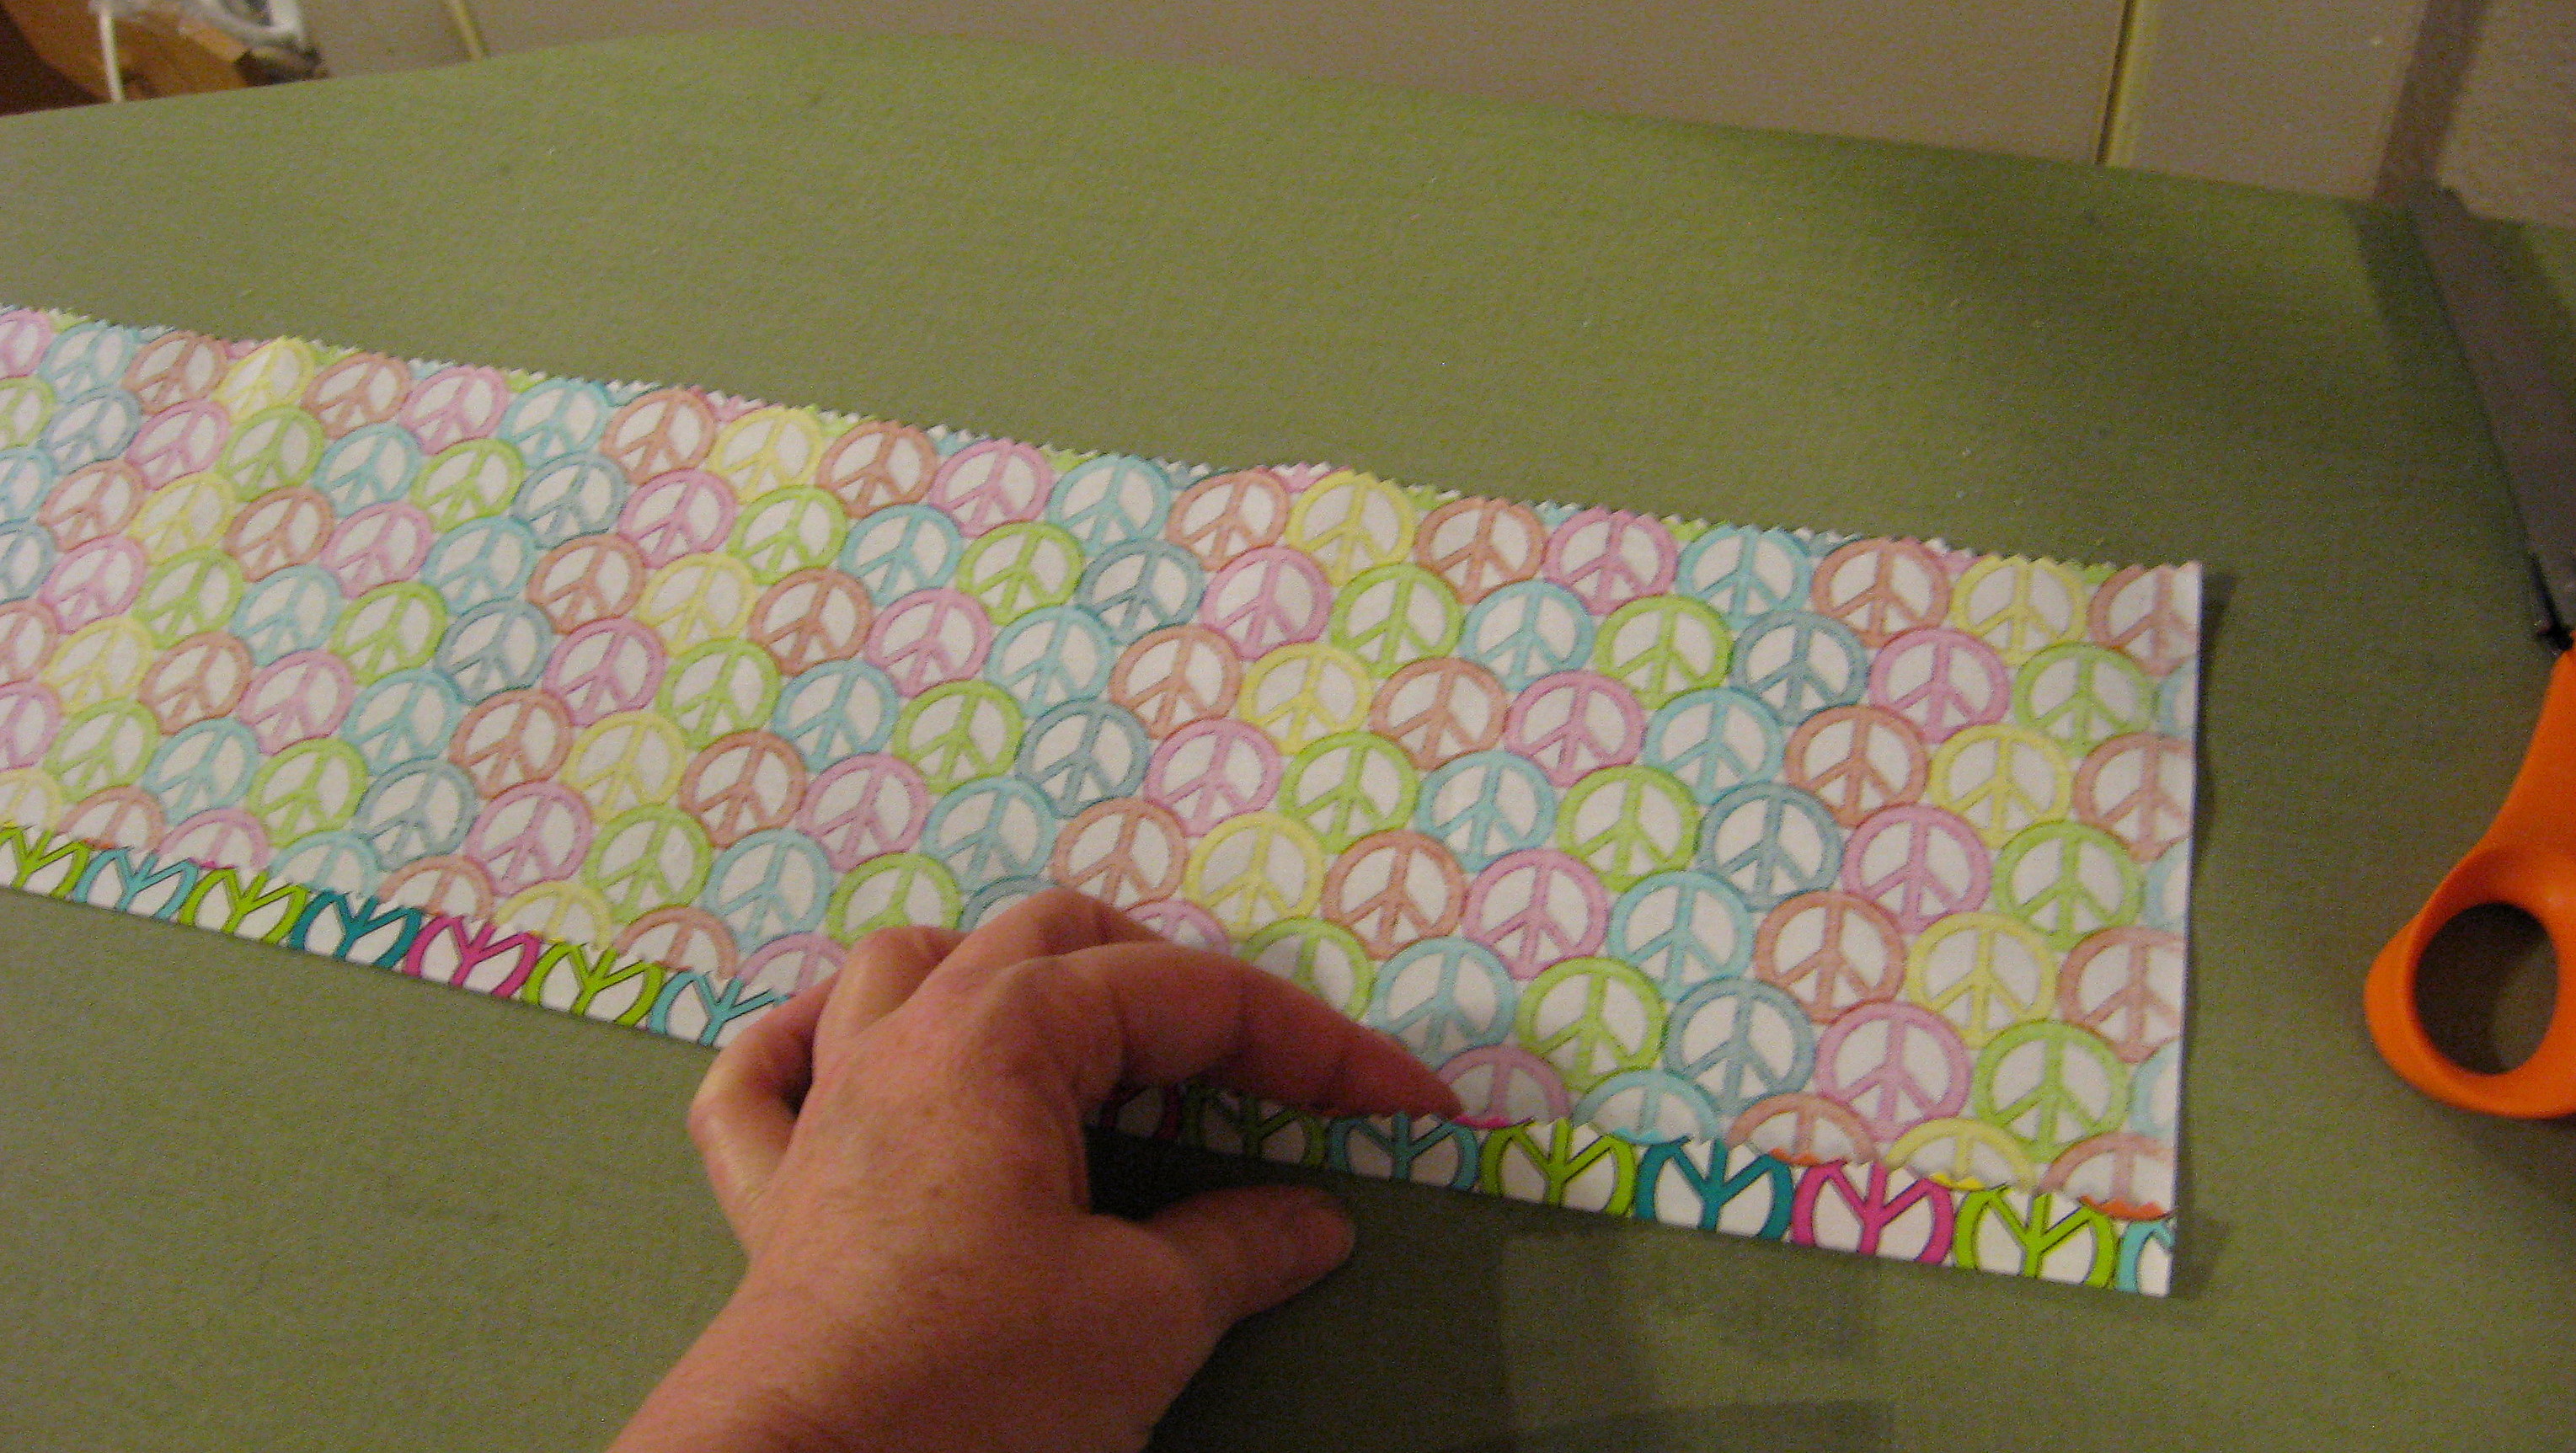
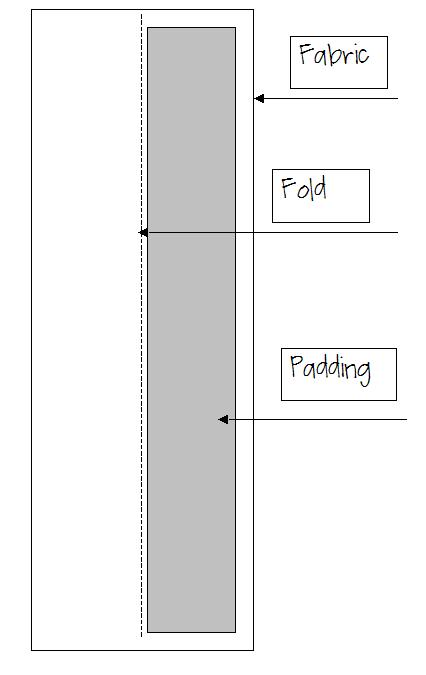
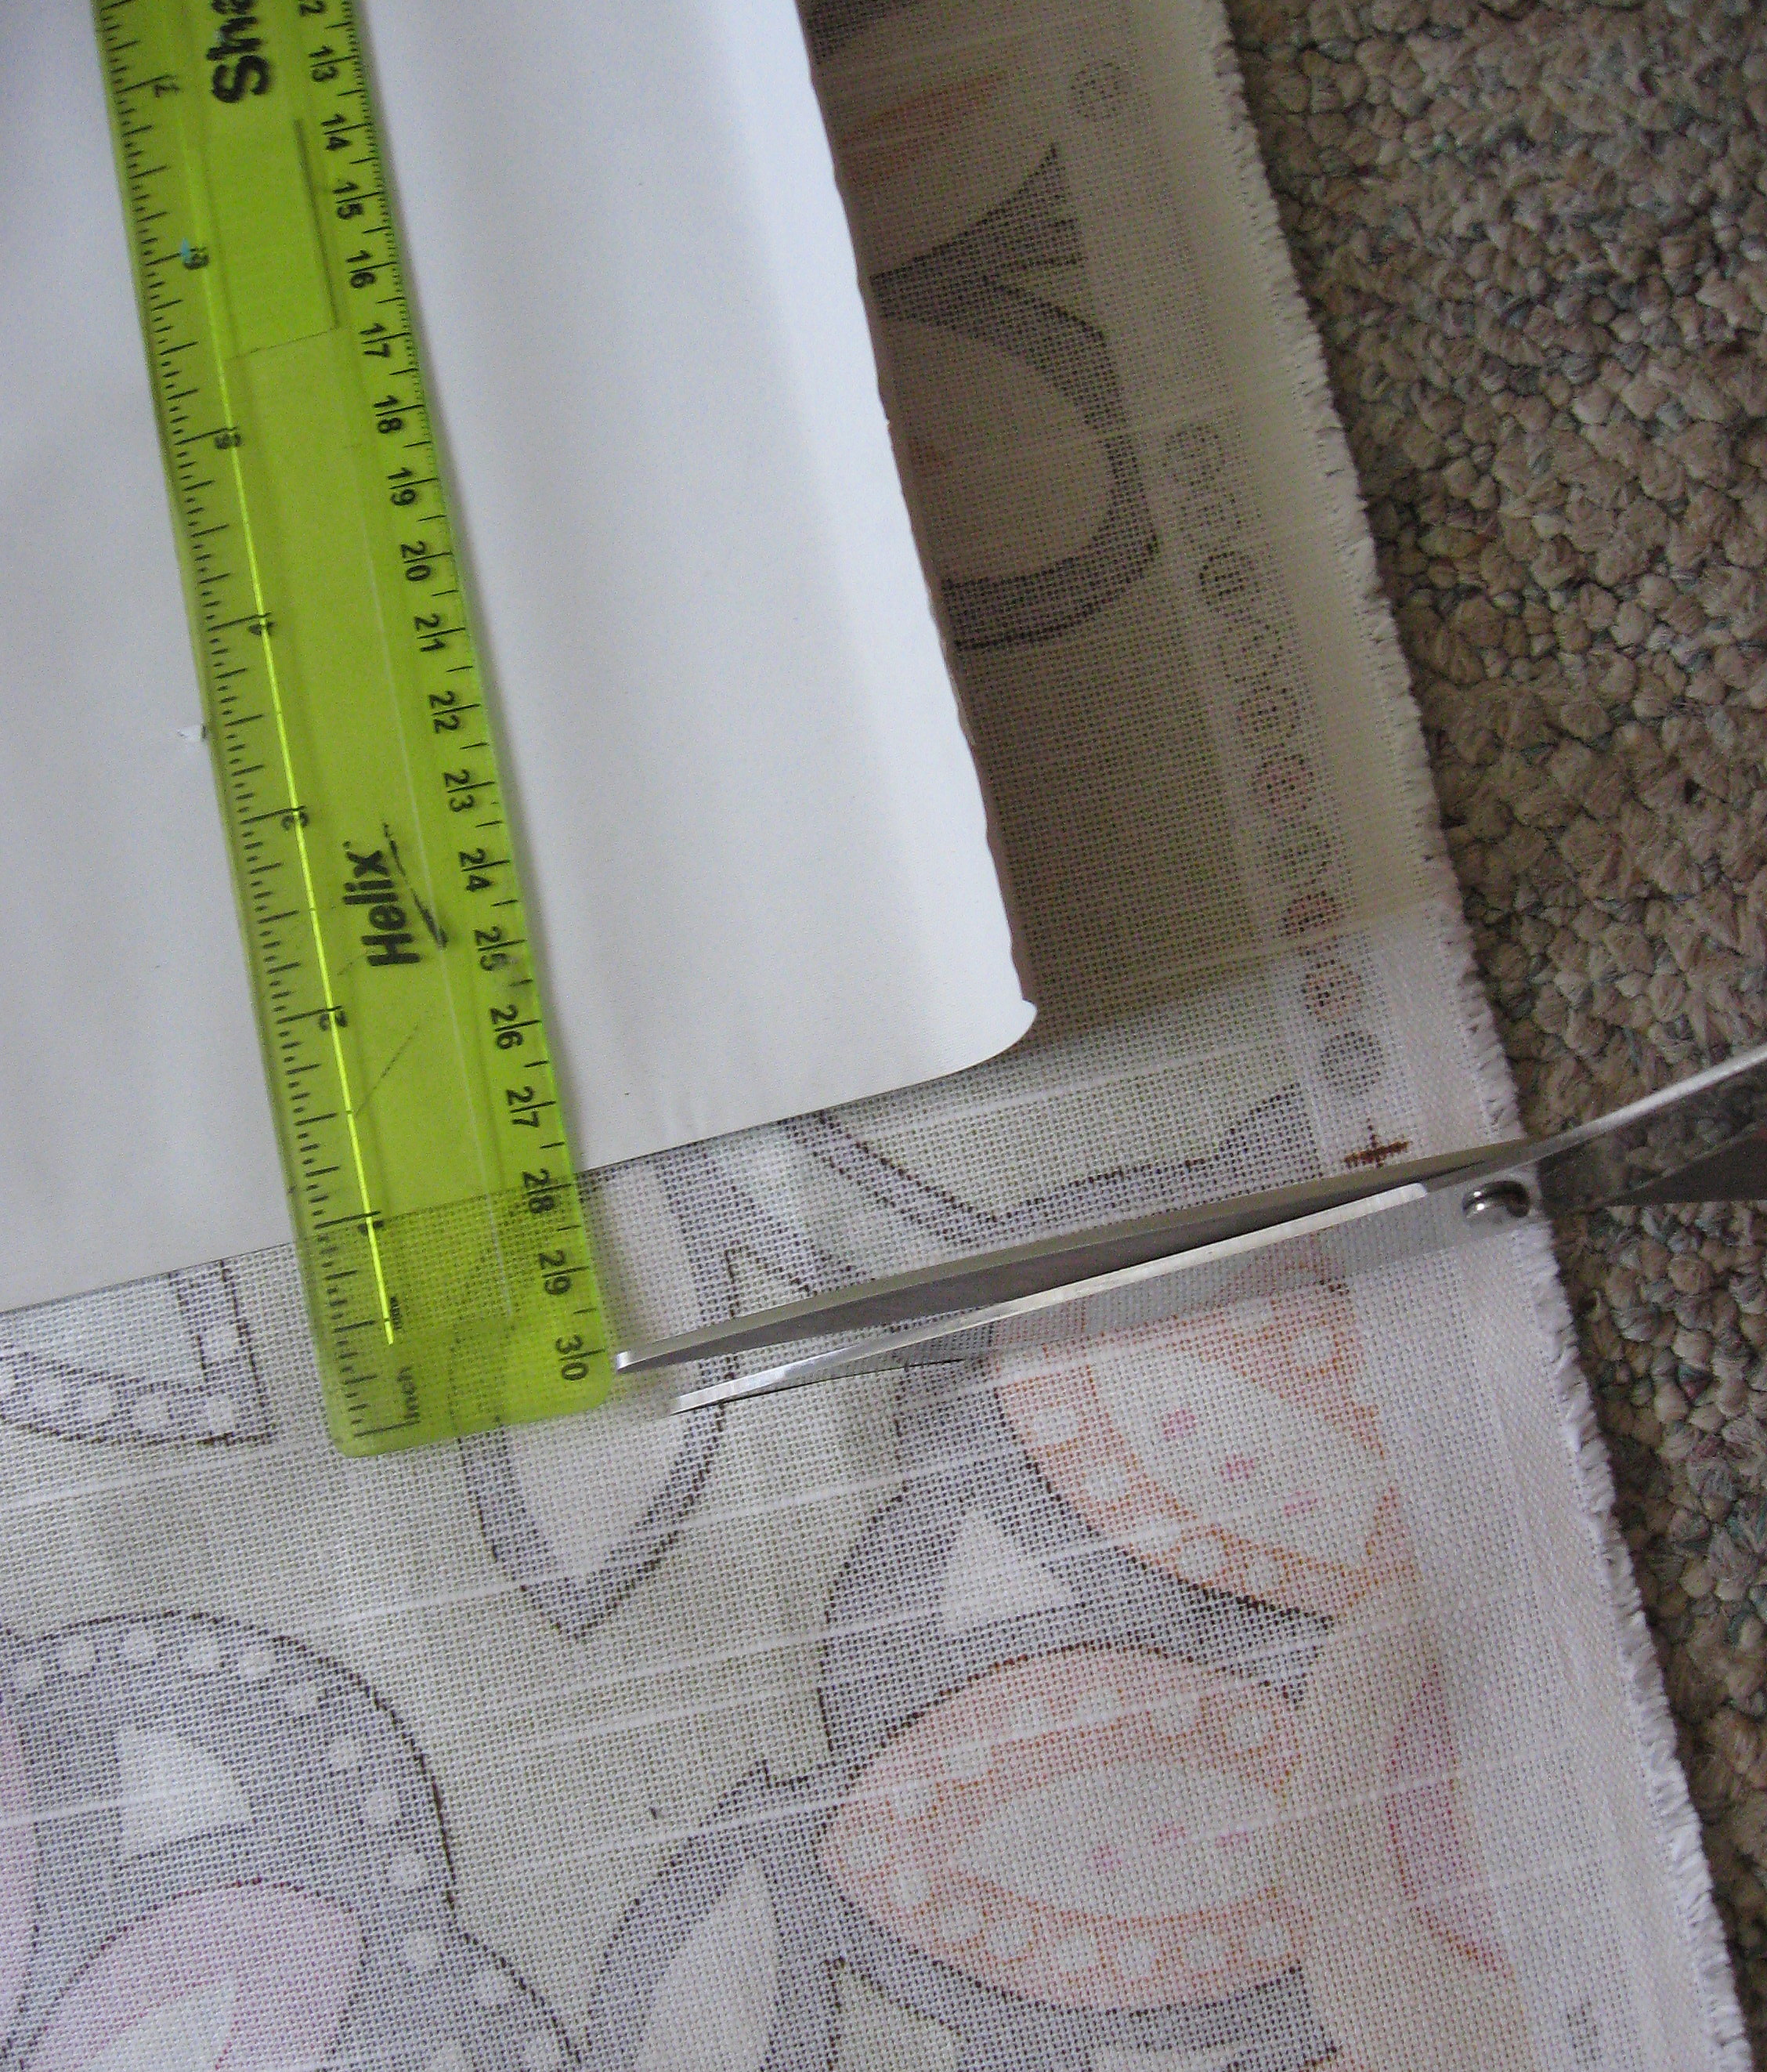
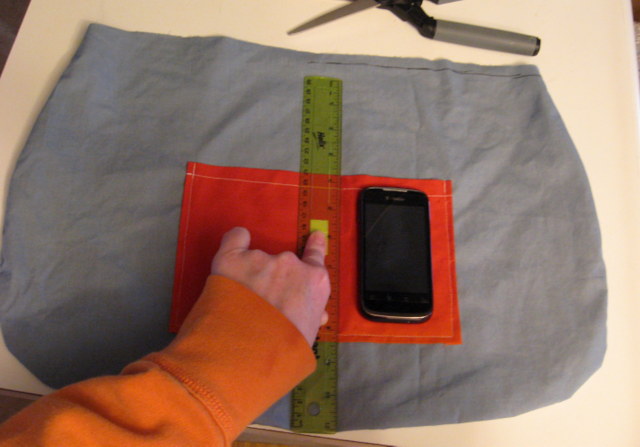
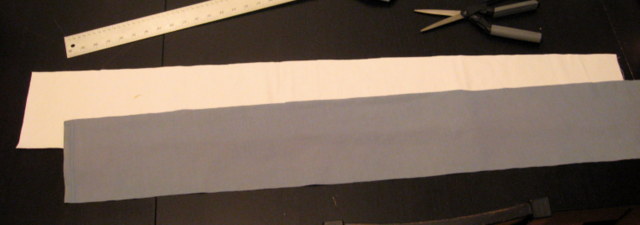
Decide how long you want the strap to be; mine is about 24 inches long because I like the way it looks, but you could do it shorter if you like. Then, figure out how wide to make it. Measure the width of the strap, double it and add 1 1/2 inches – my strap is 1 1/2 inches wide, so the width of my fabric will be 4 1/2 inches wide. Cut out your fabric into a rectangle in those measurements (so mine is 24″ X 4 1/2″).
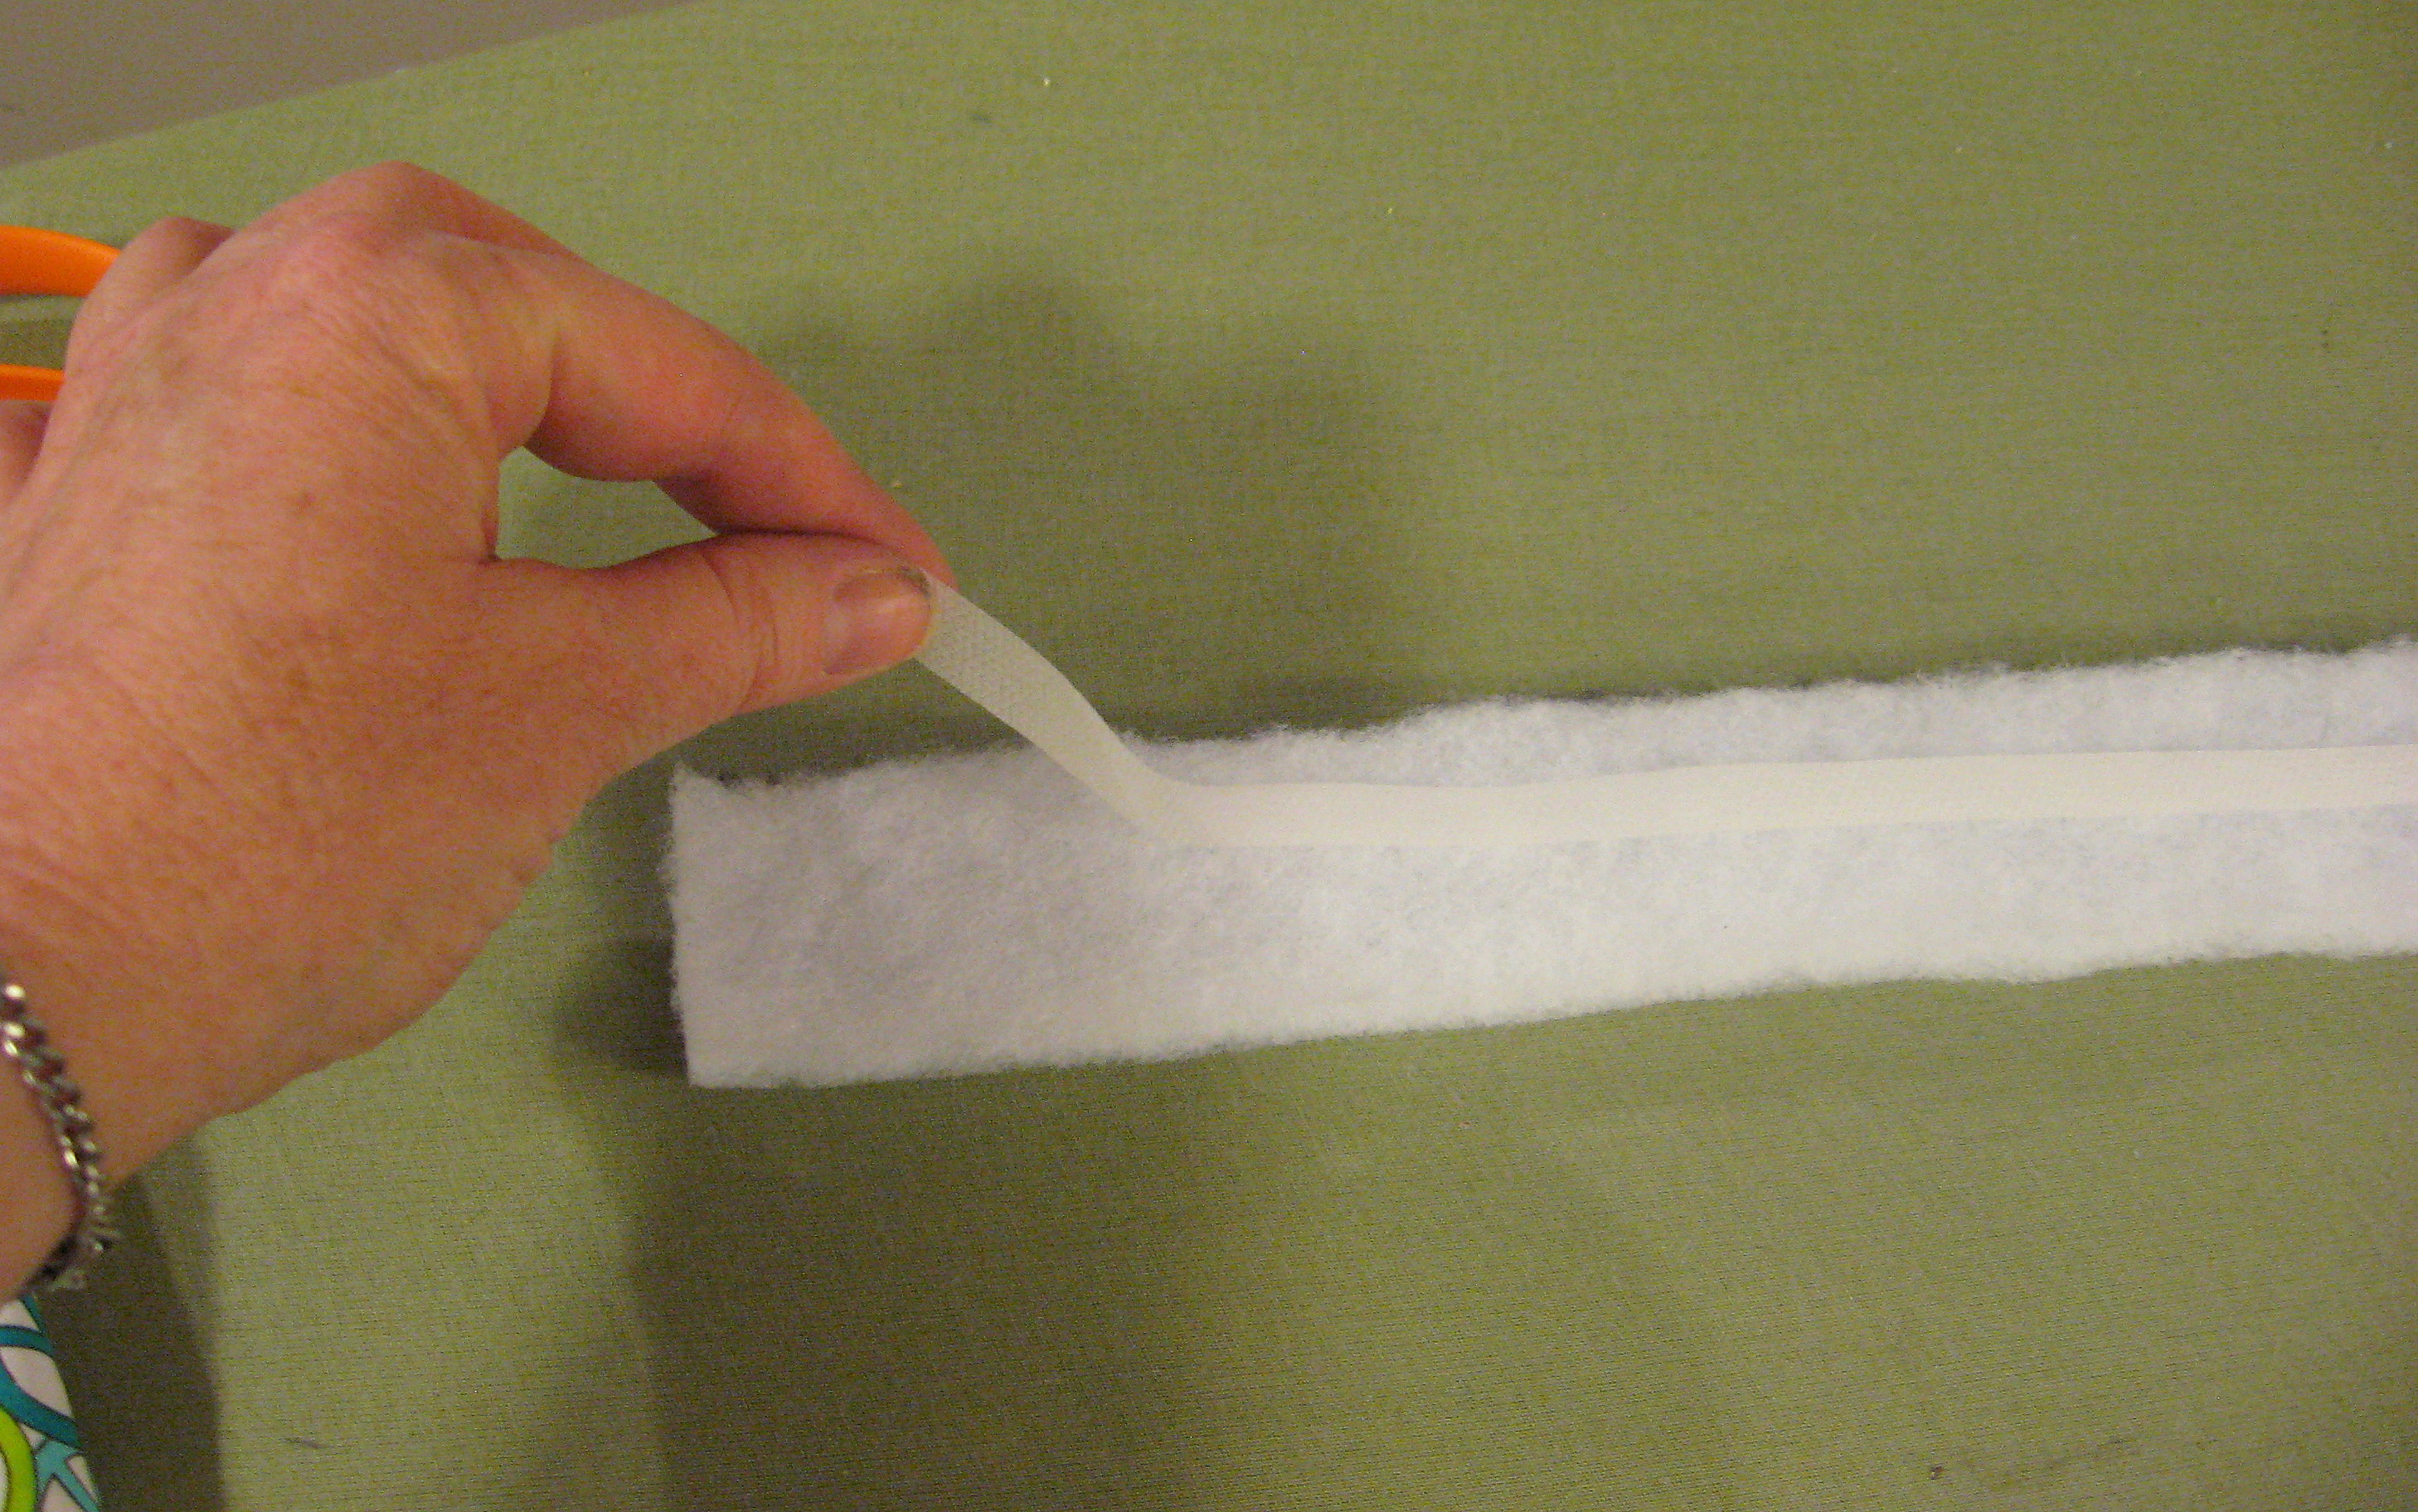
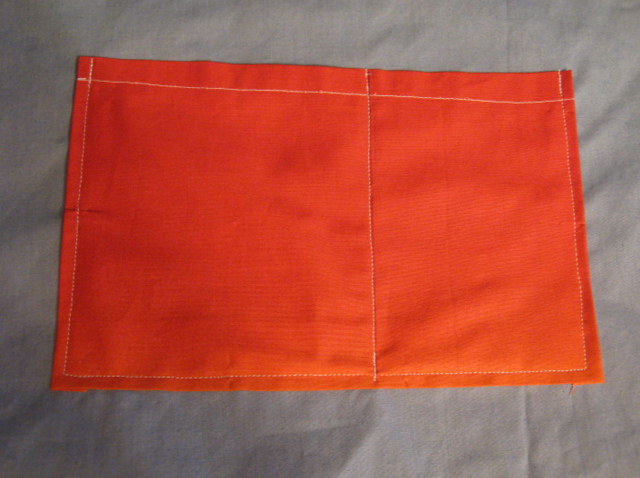
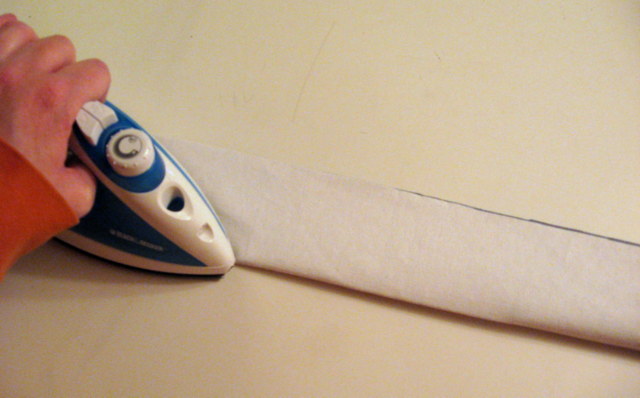
Fold down each long side 1/2 inch and iron. Put a strip of Heat and Bond inside this fold and iron it down following the manufacture’s instructions.
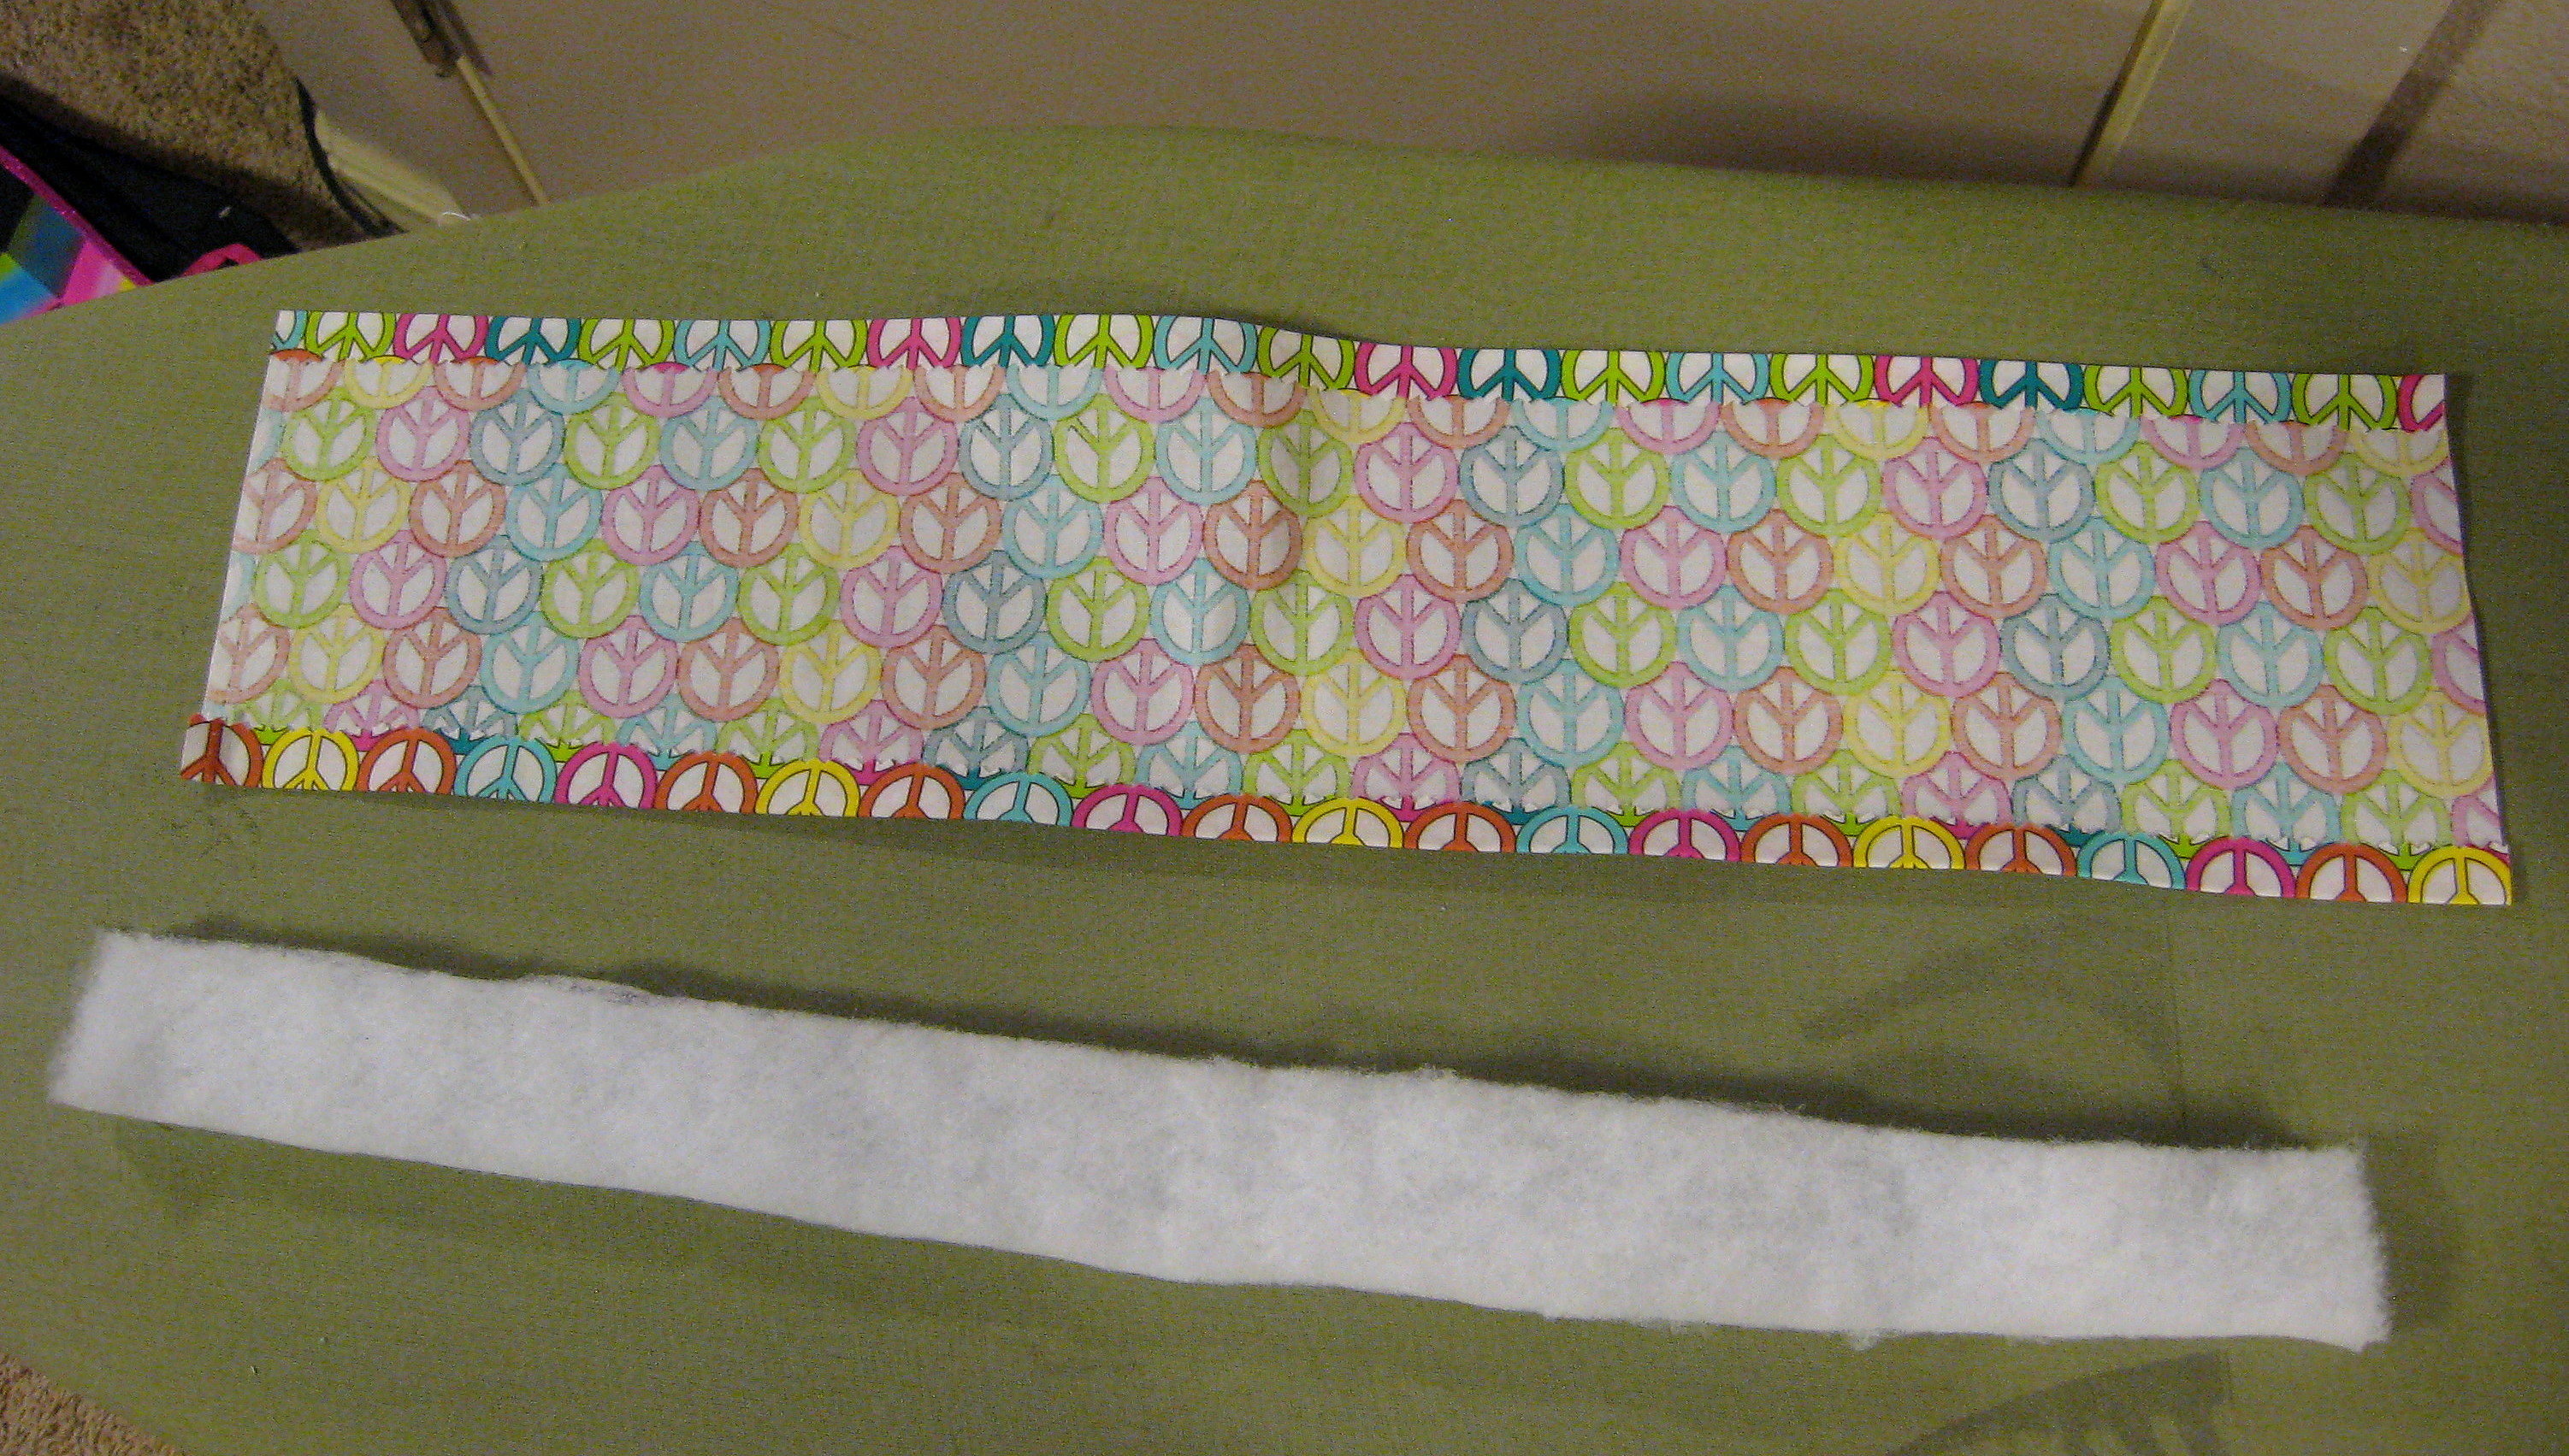
Now cut a piece of padding almost as long as the strip of fabric, and the same width of the original strap (mine is about 21″ long by 1 1/2″ wide). Here, I used quilt batting, but in the past I have used fleece fabric and that works great too.
Fold the fabric in half and iron it flat.
Put a piece of Heat and Bond down the center of the padding, then open the fabric back up and line it up on top of the Heat and Bond like this:
and iron it down. Be careful not to iron it so much that it melts the batting; you just want it to keep the padding in place on the fabric while you finish the strap.
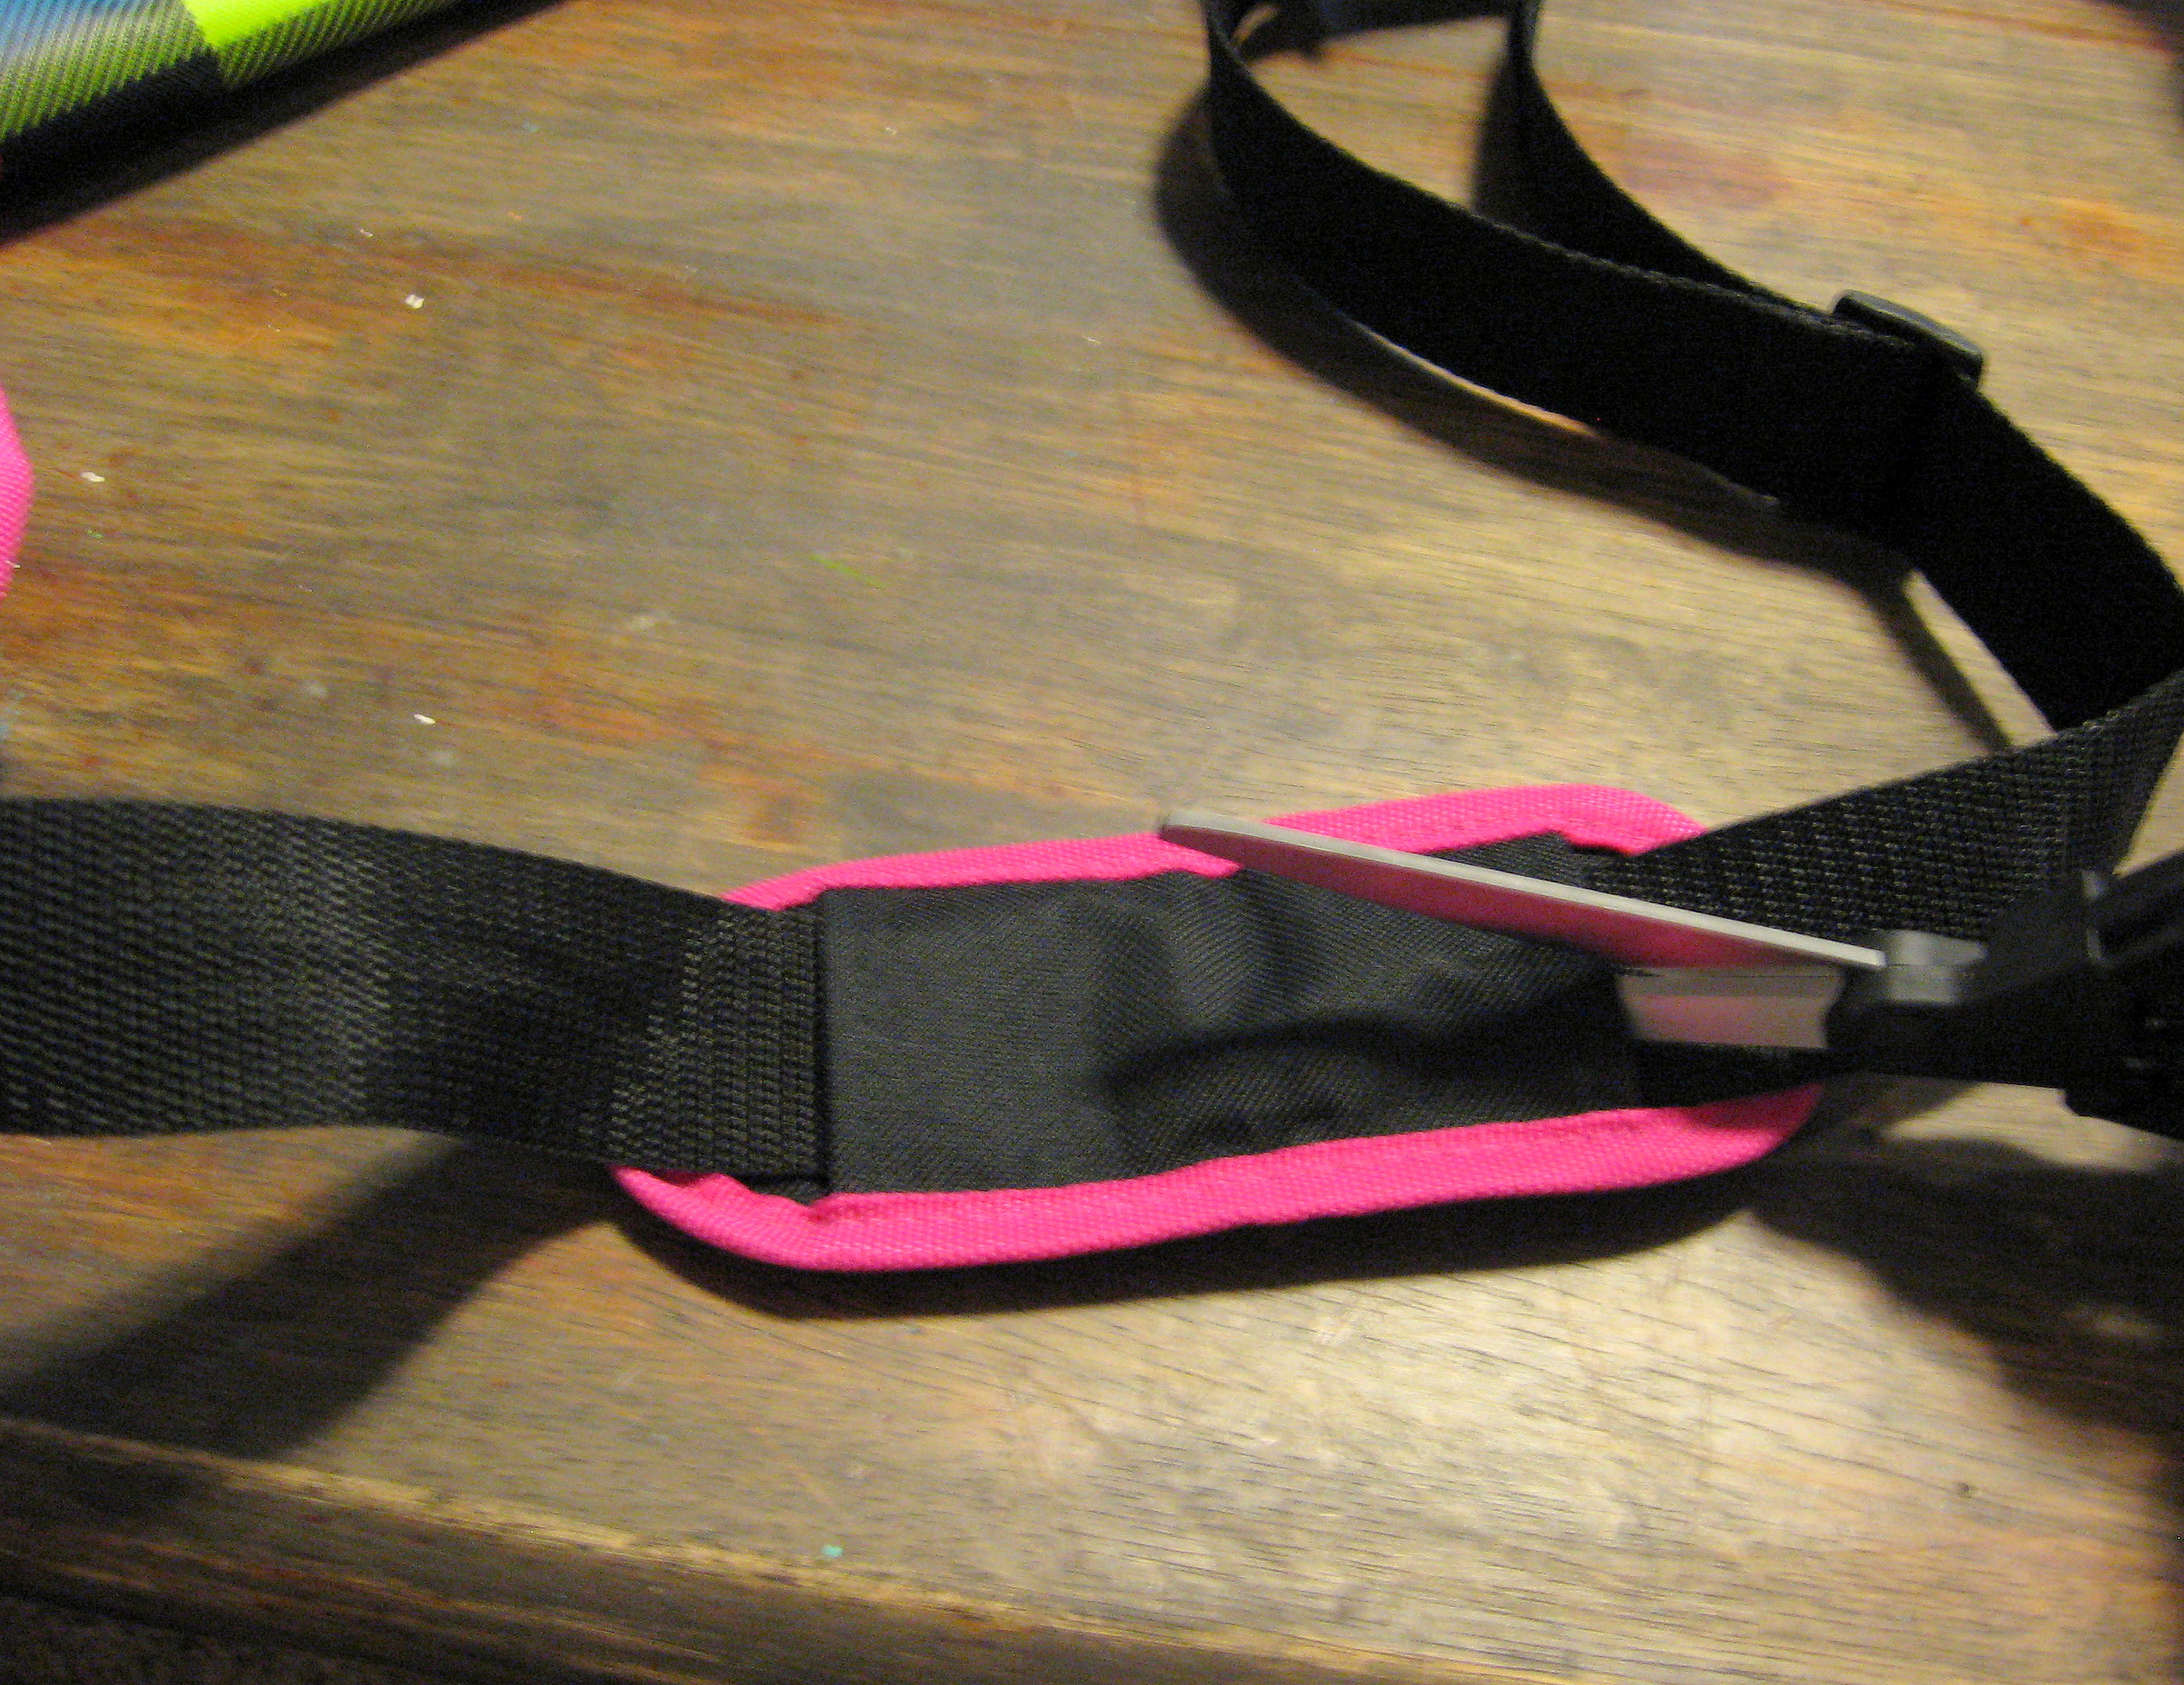
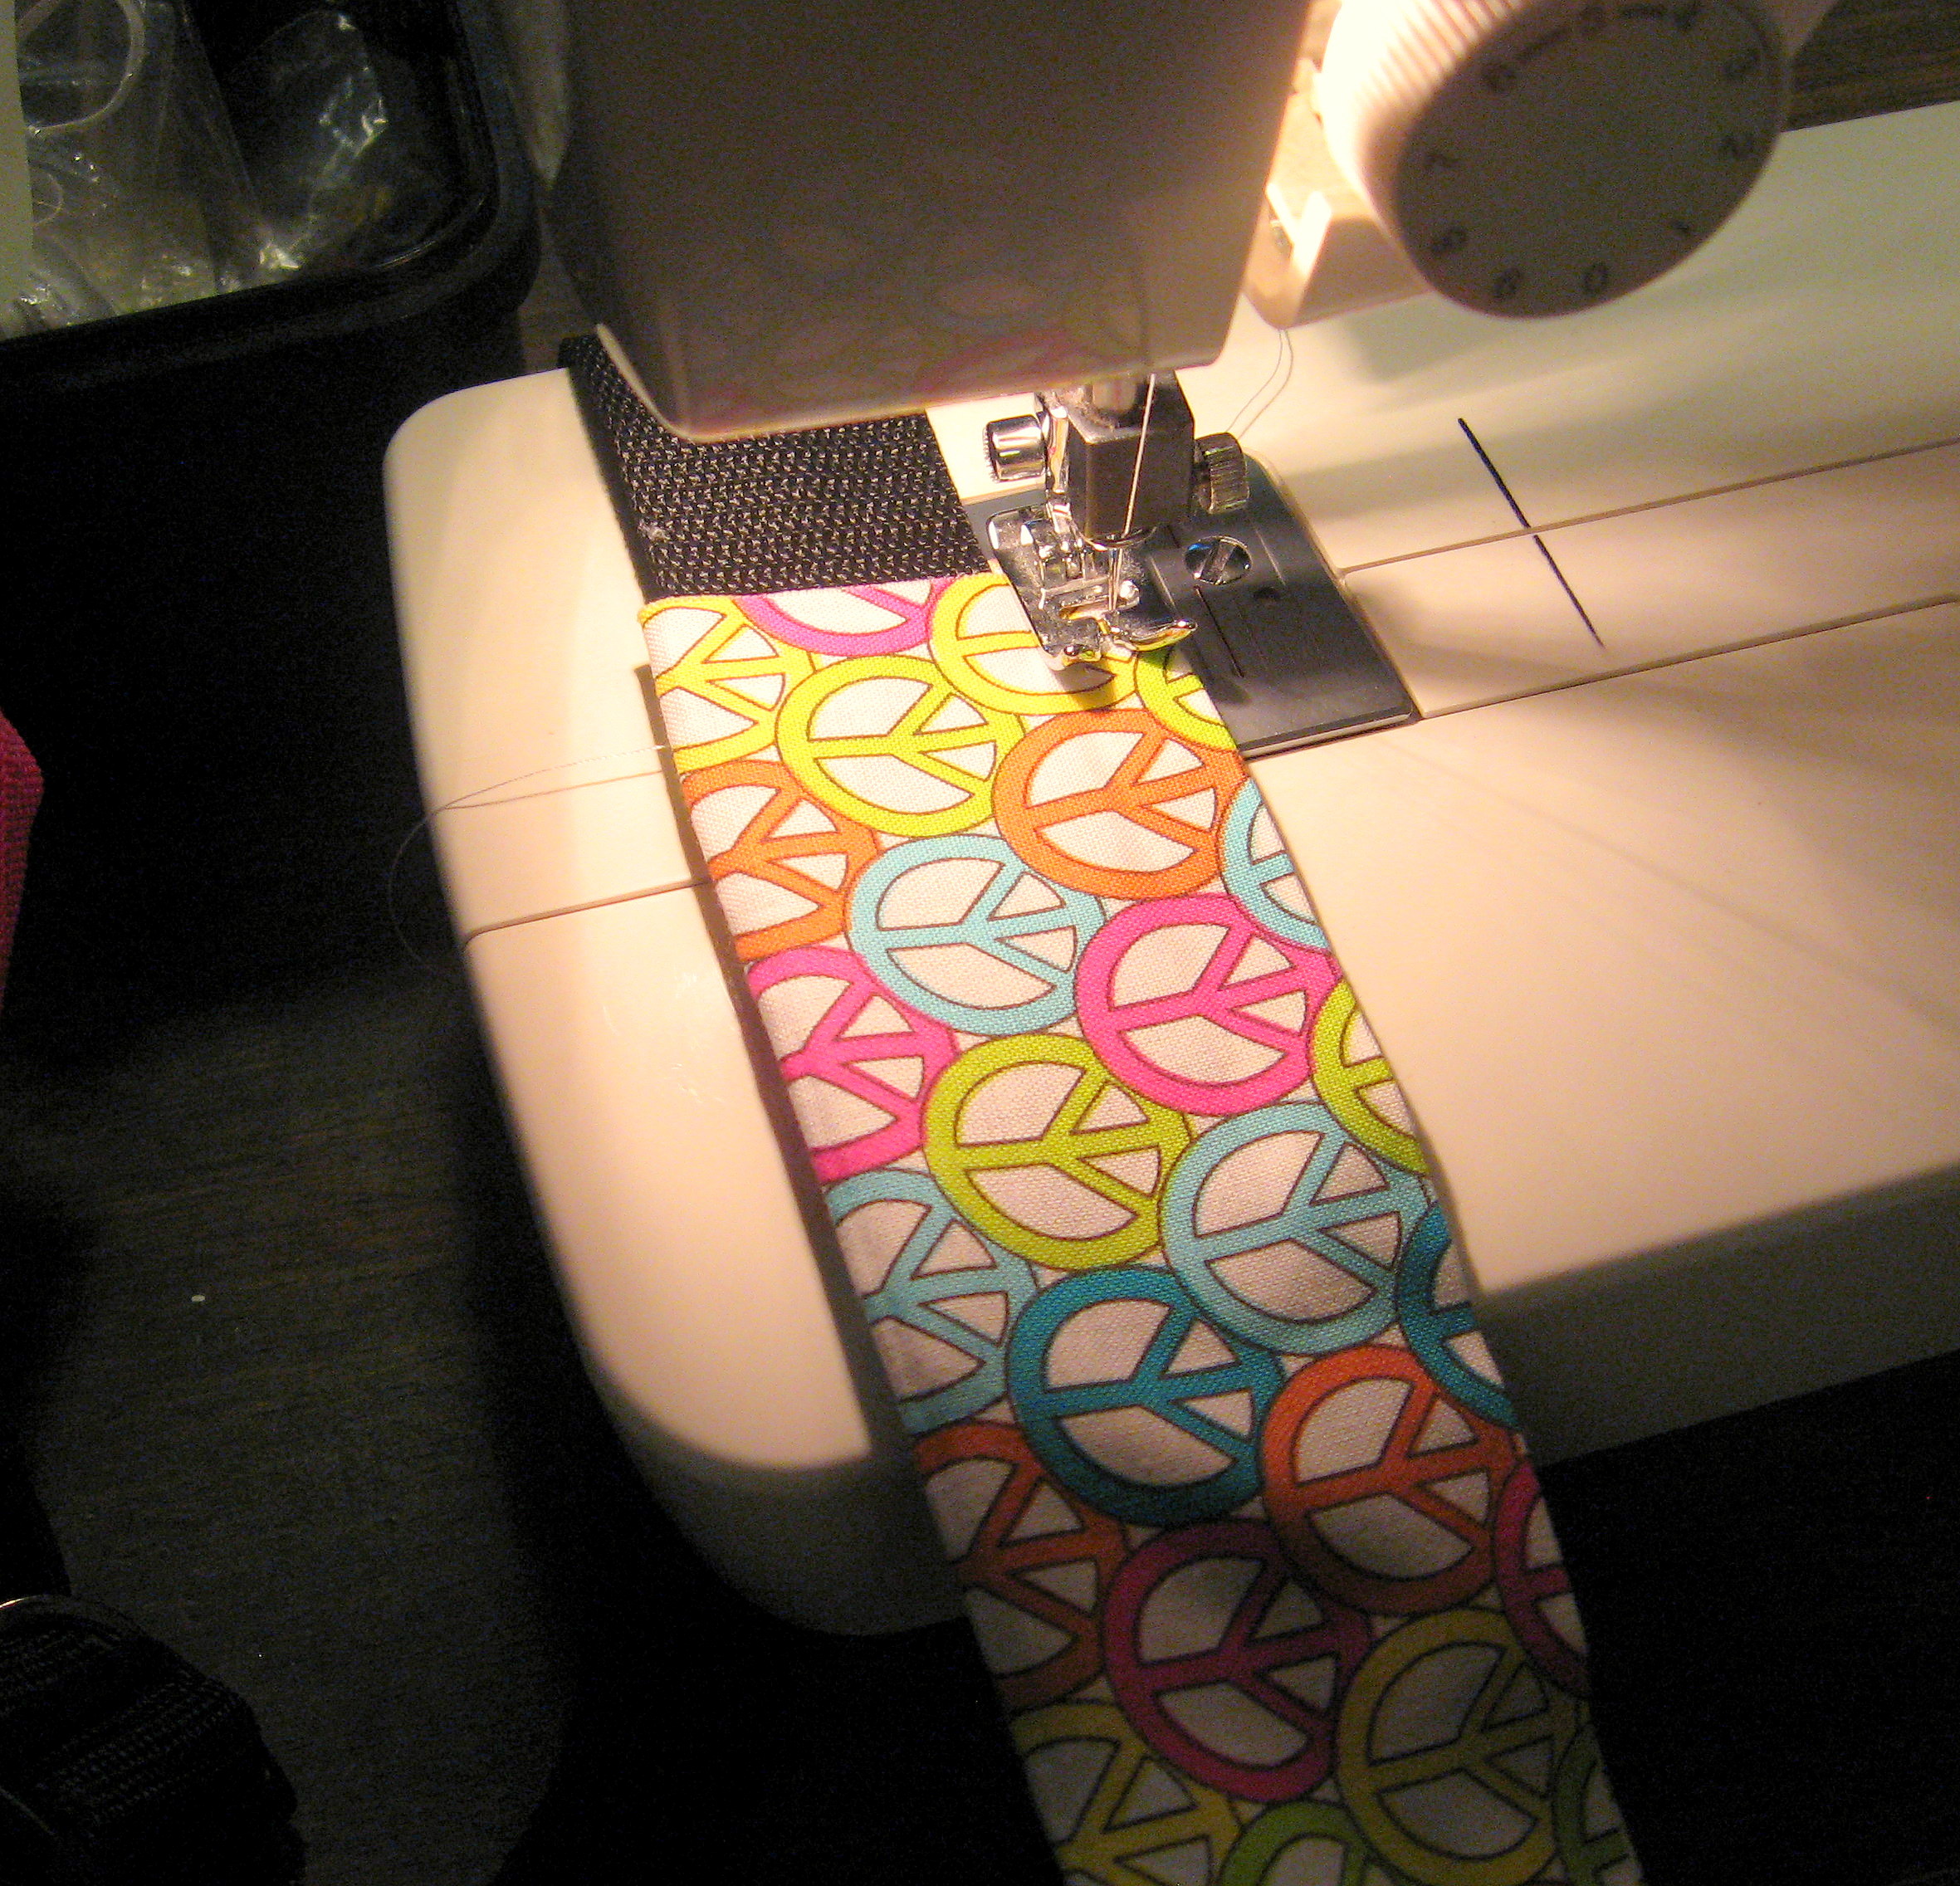
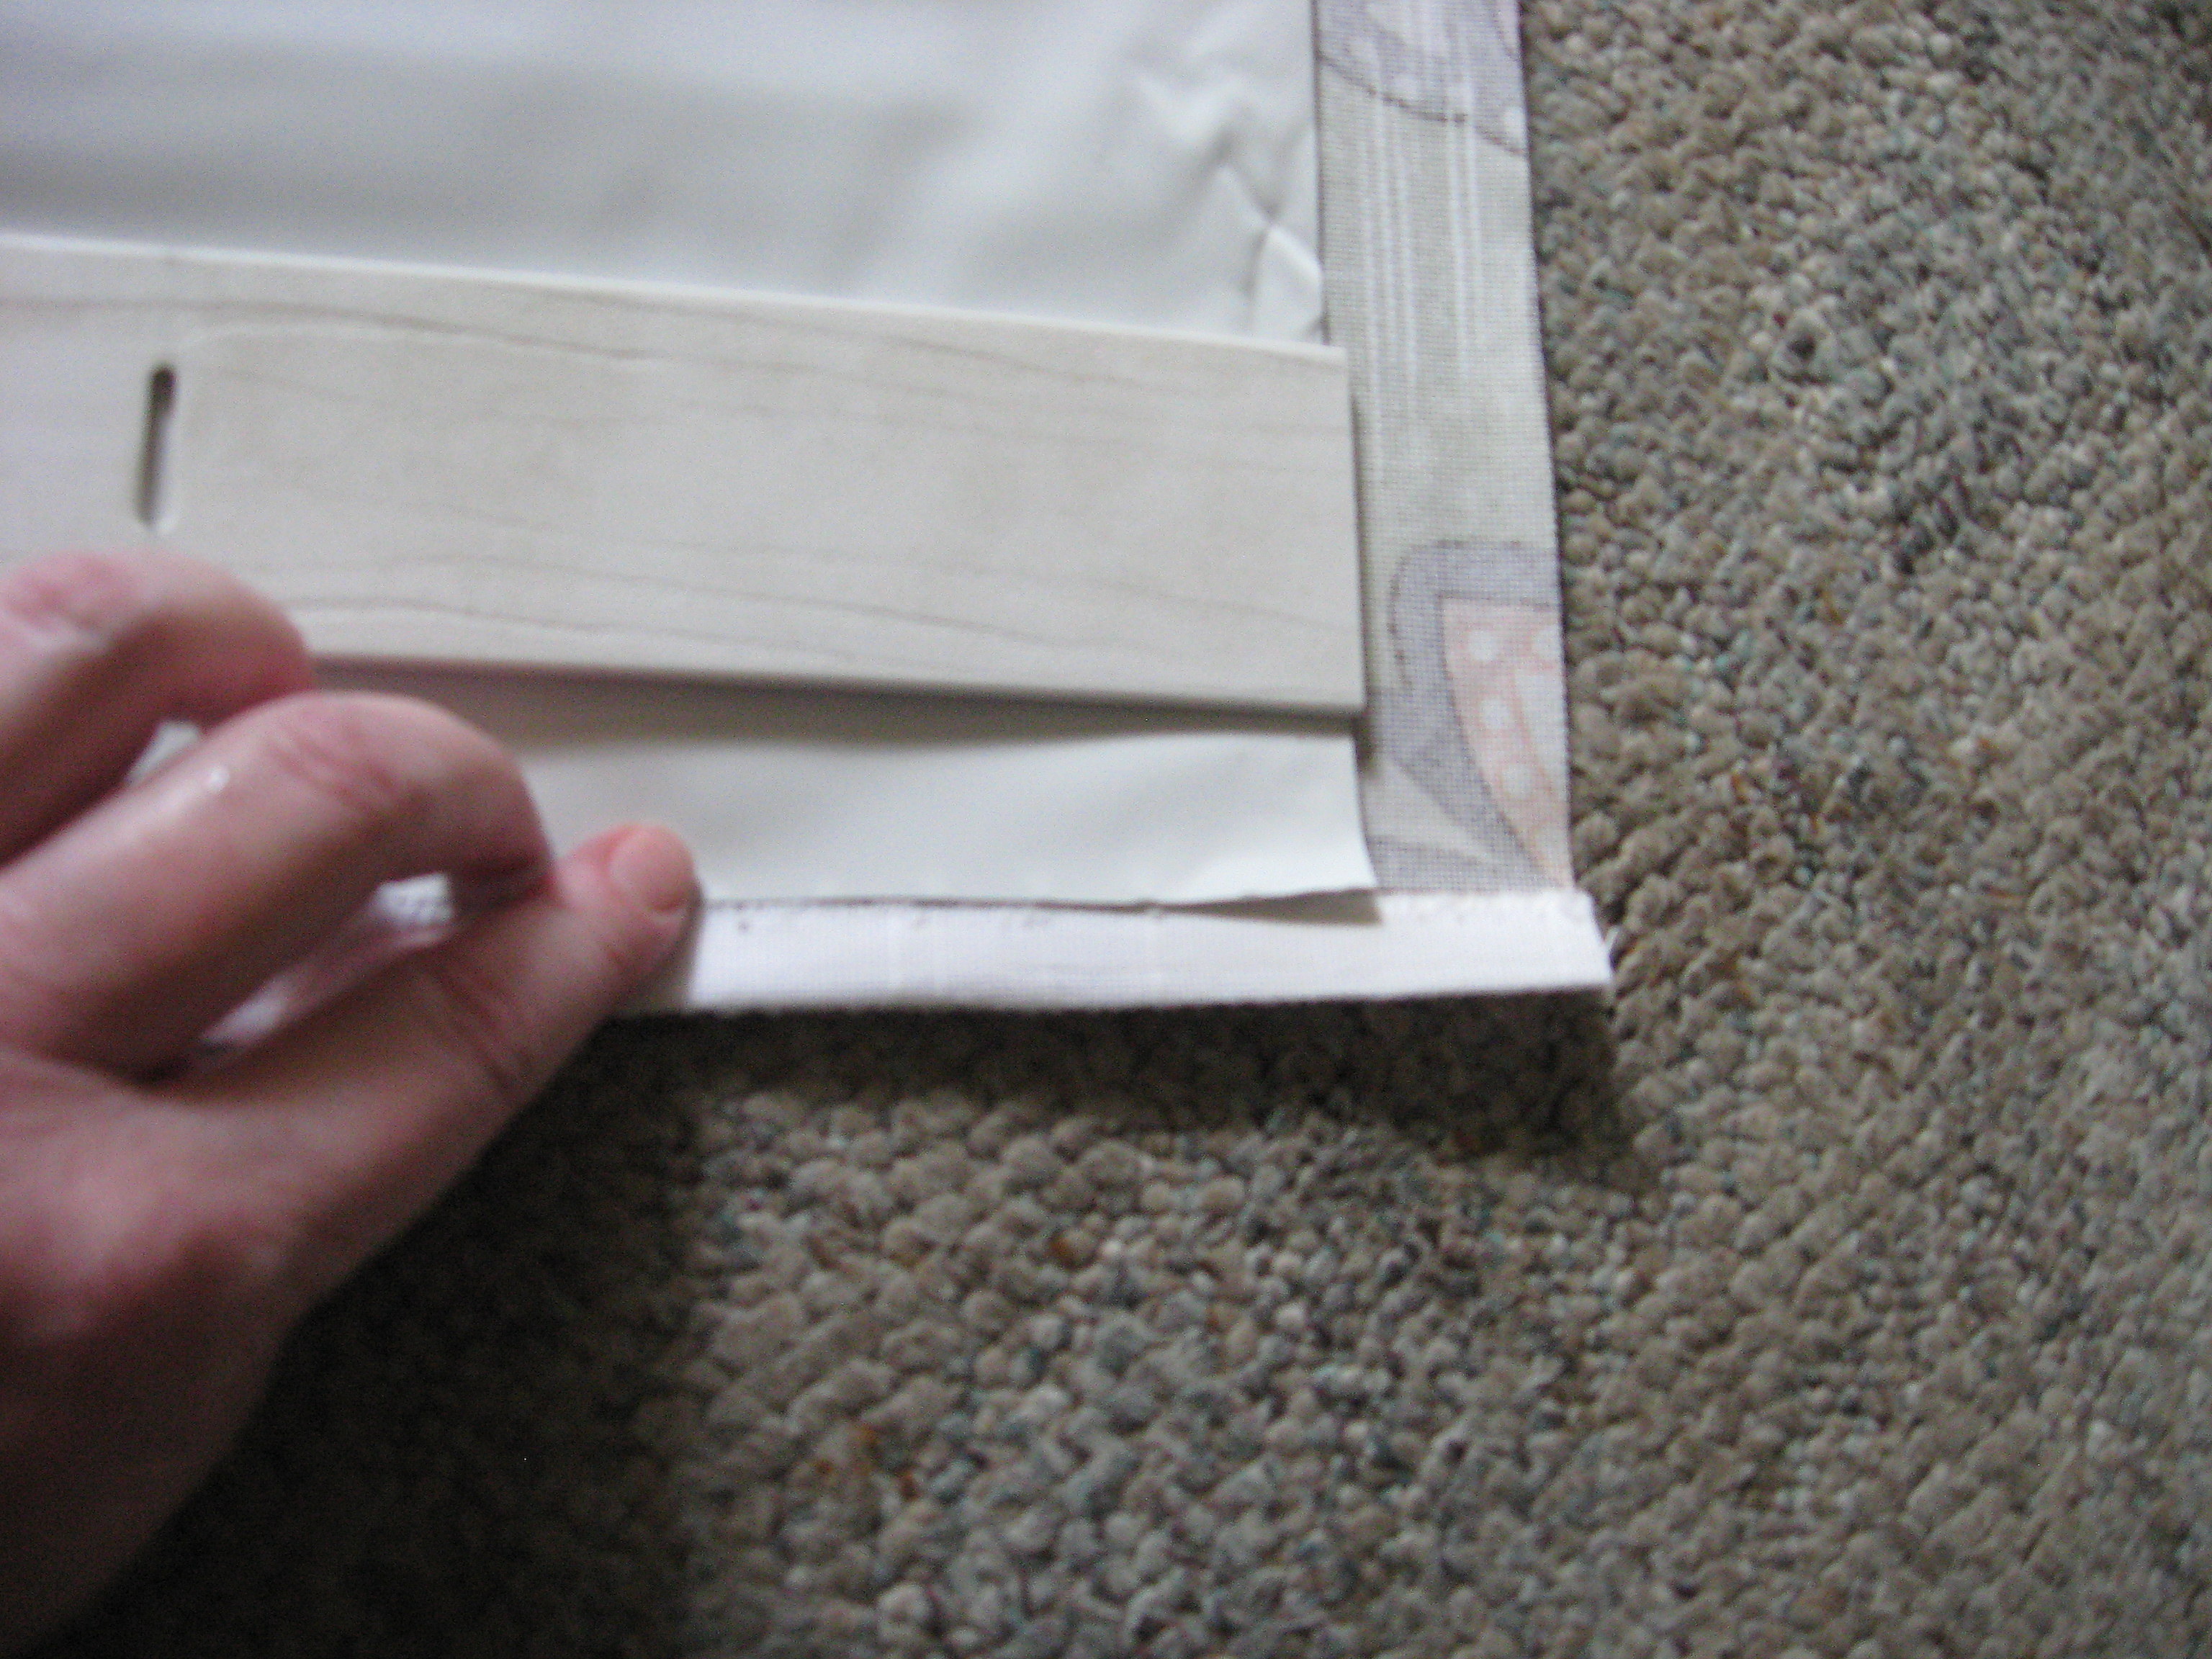
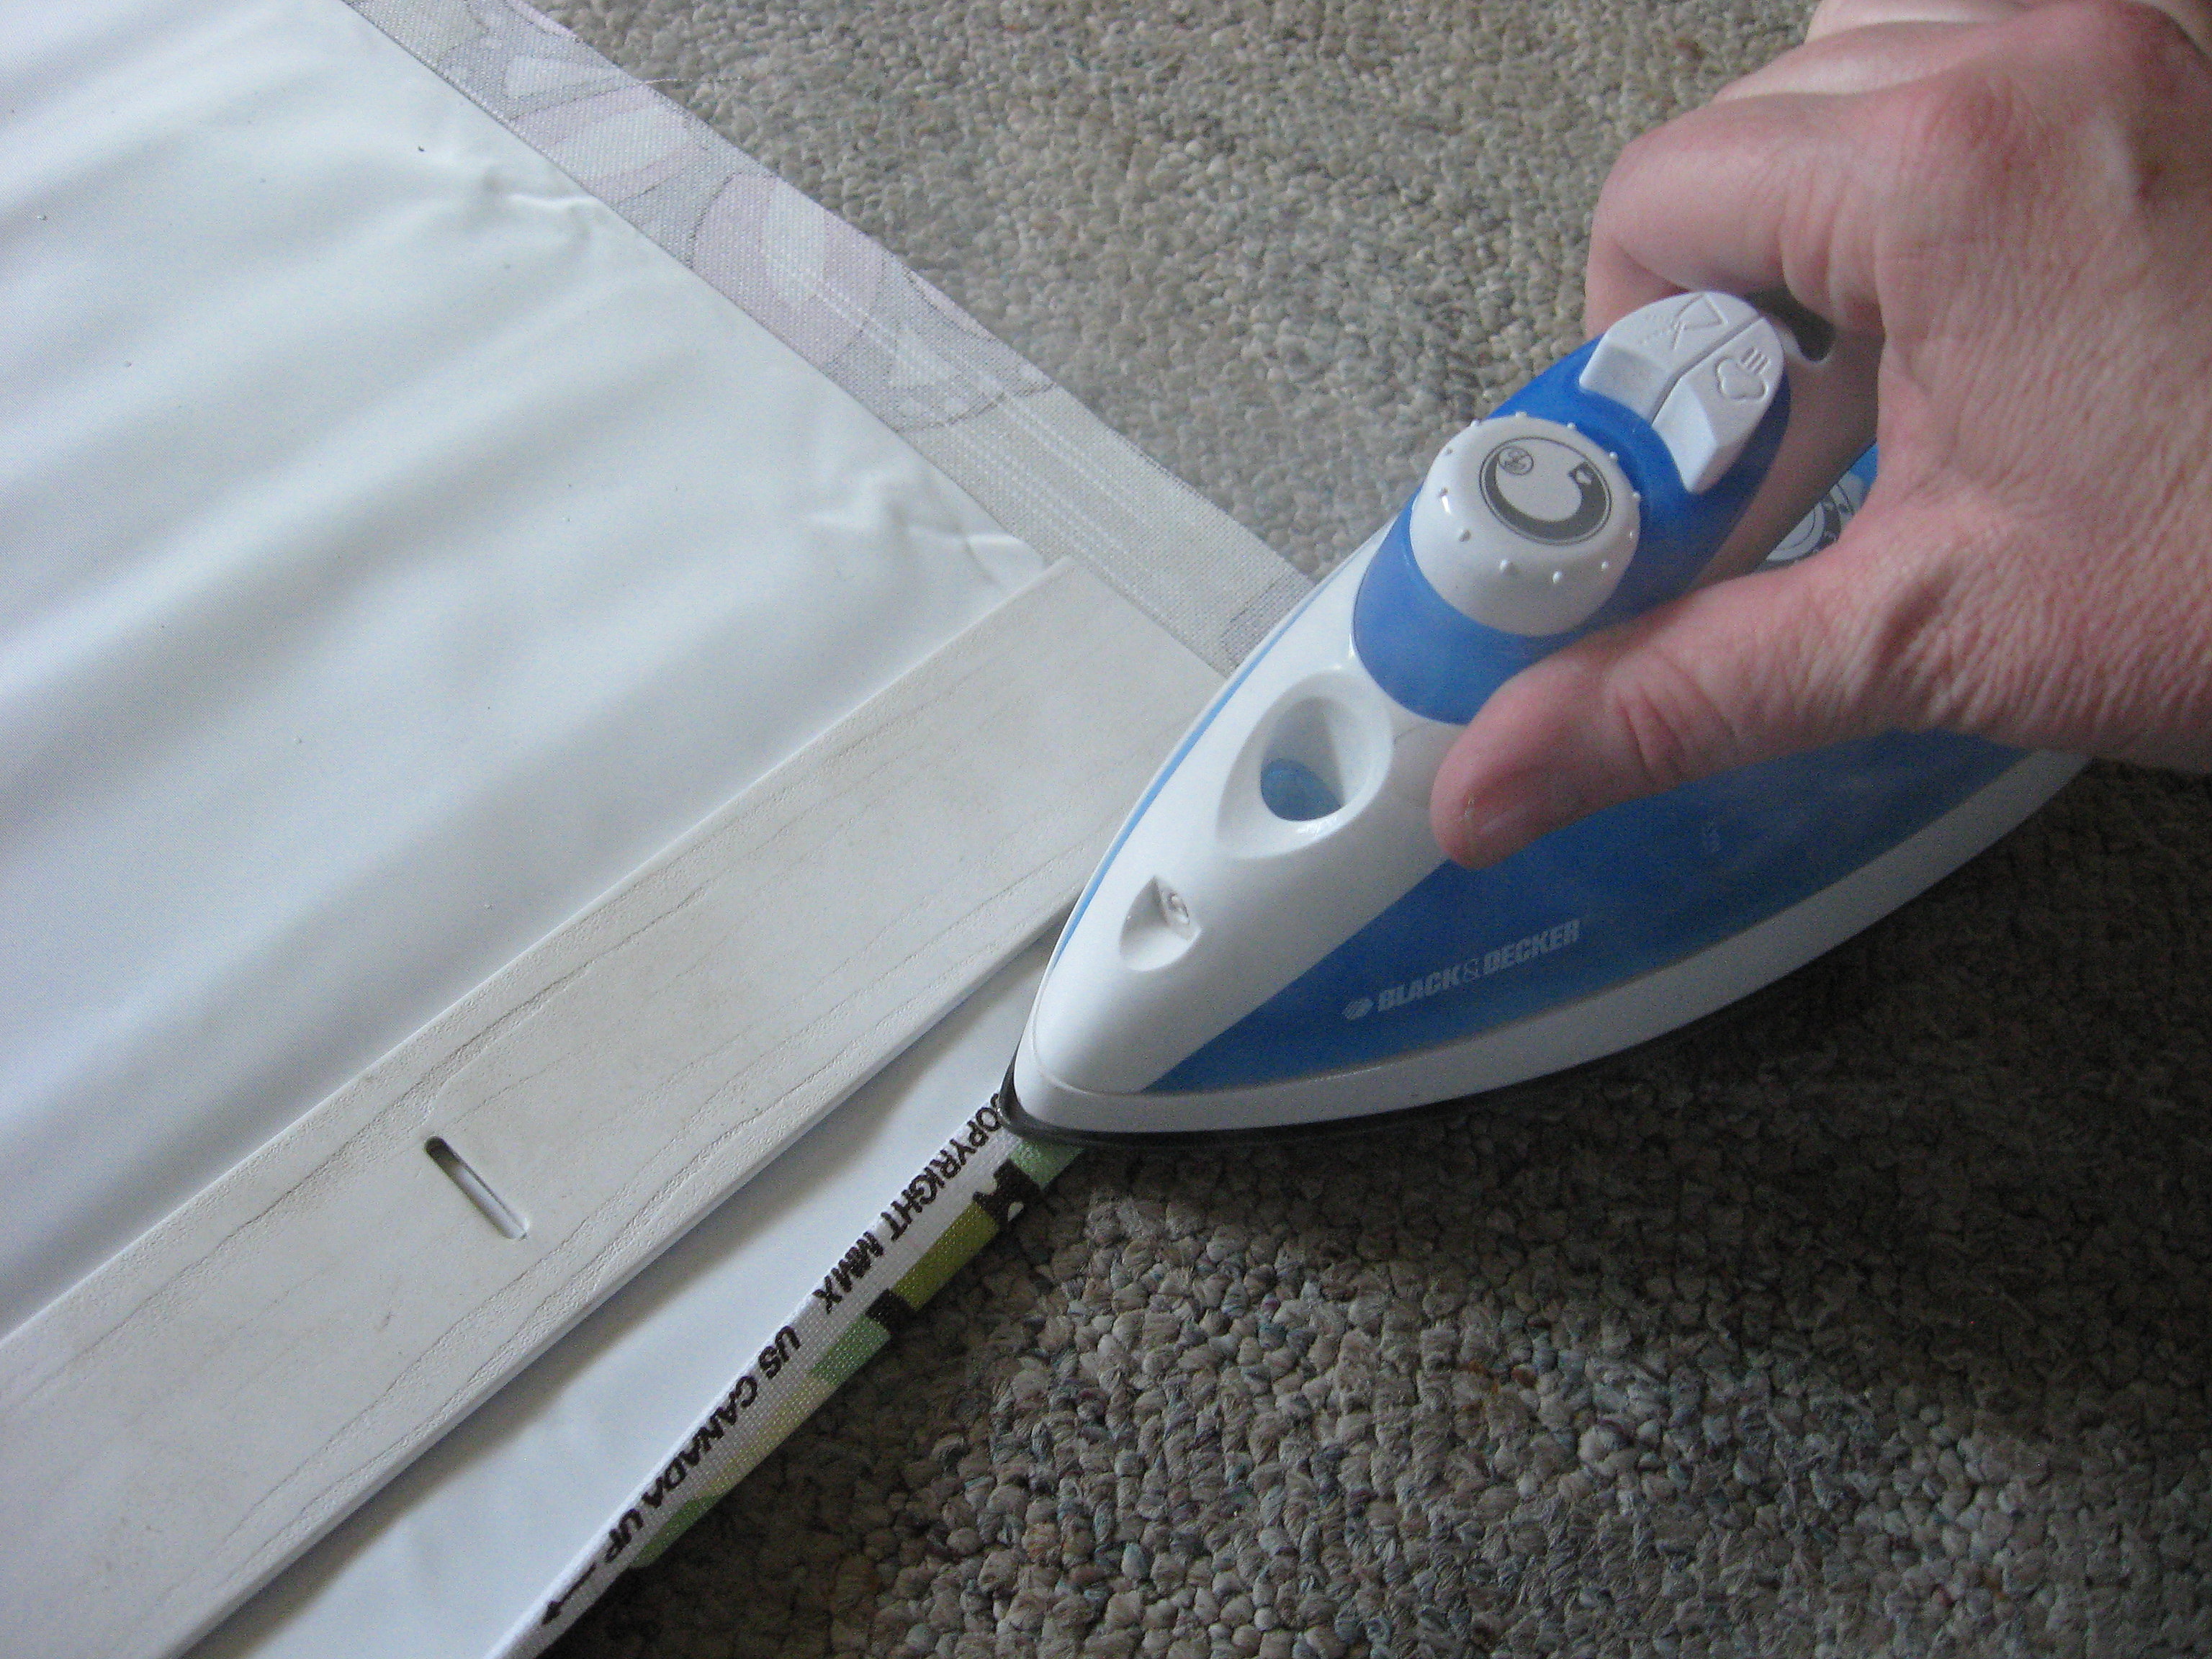
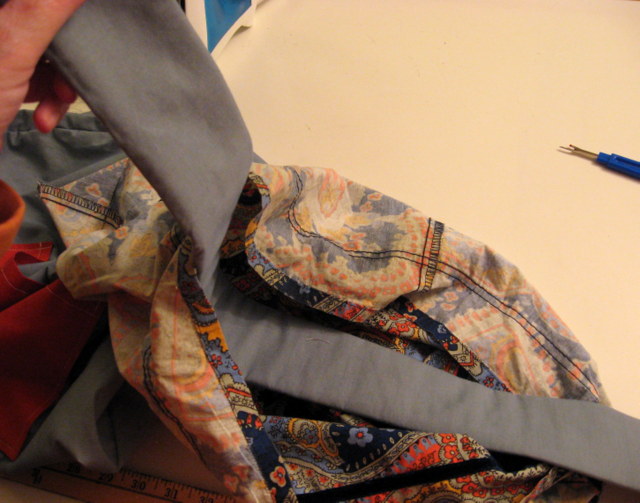
Now put the strap down on the padding, and put another piece of Heat and Bond along the outside fold.
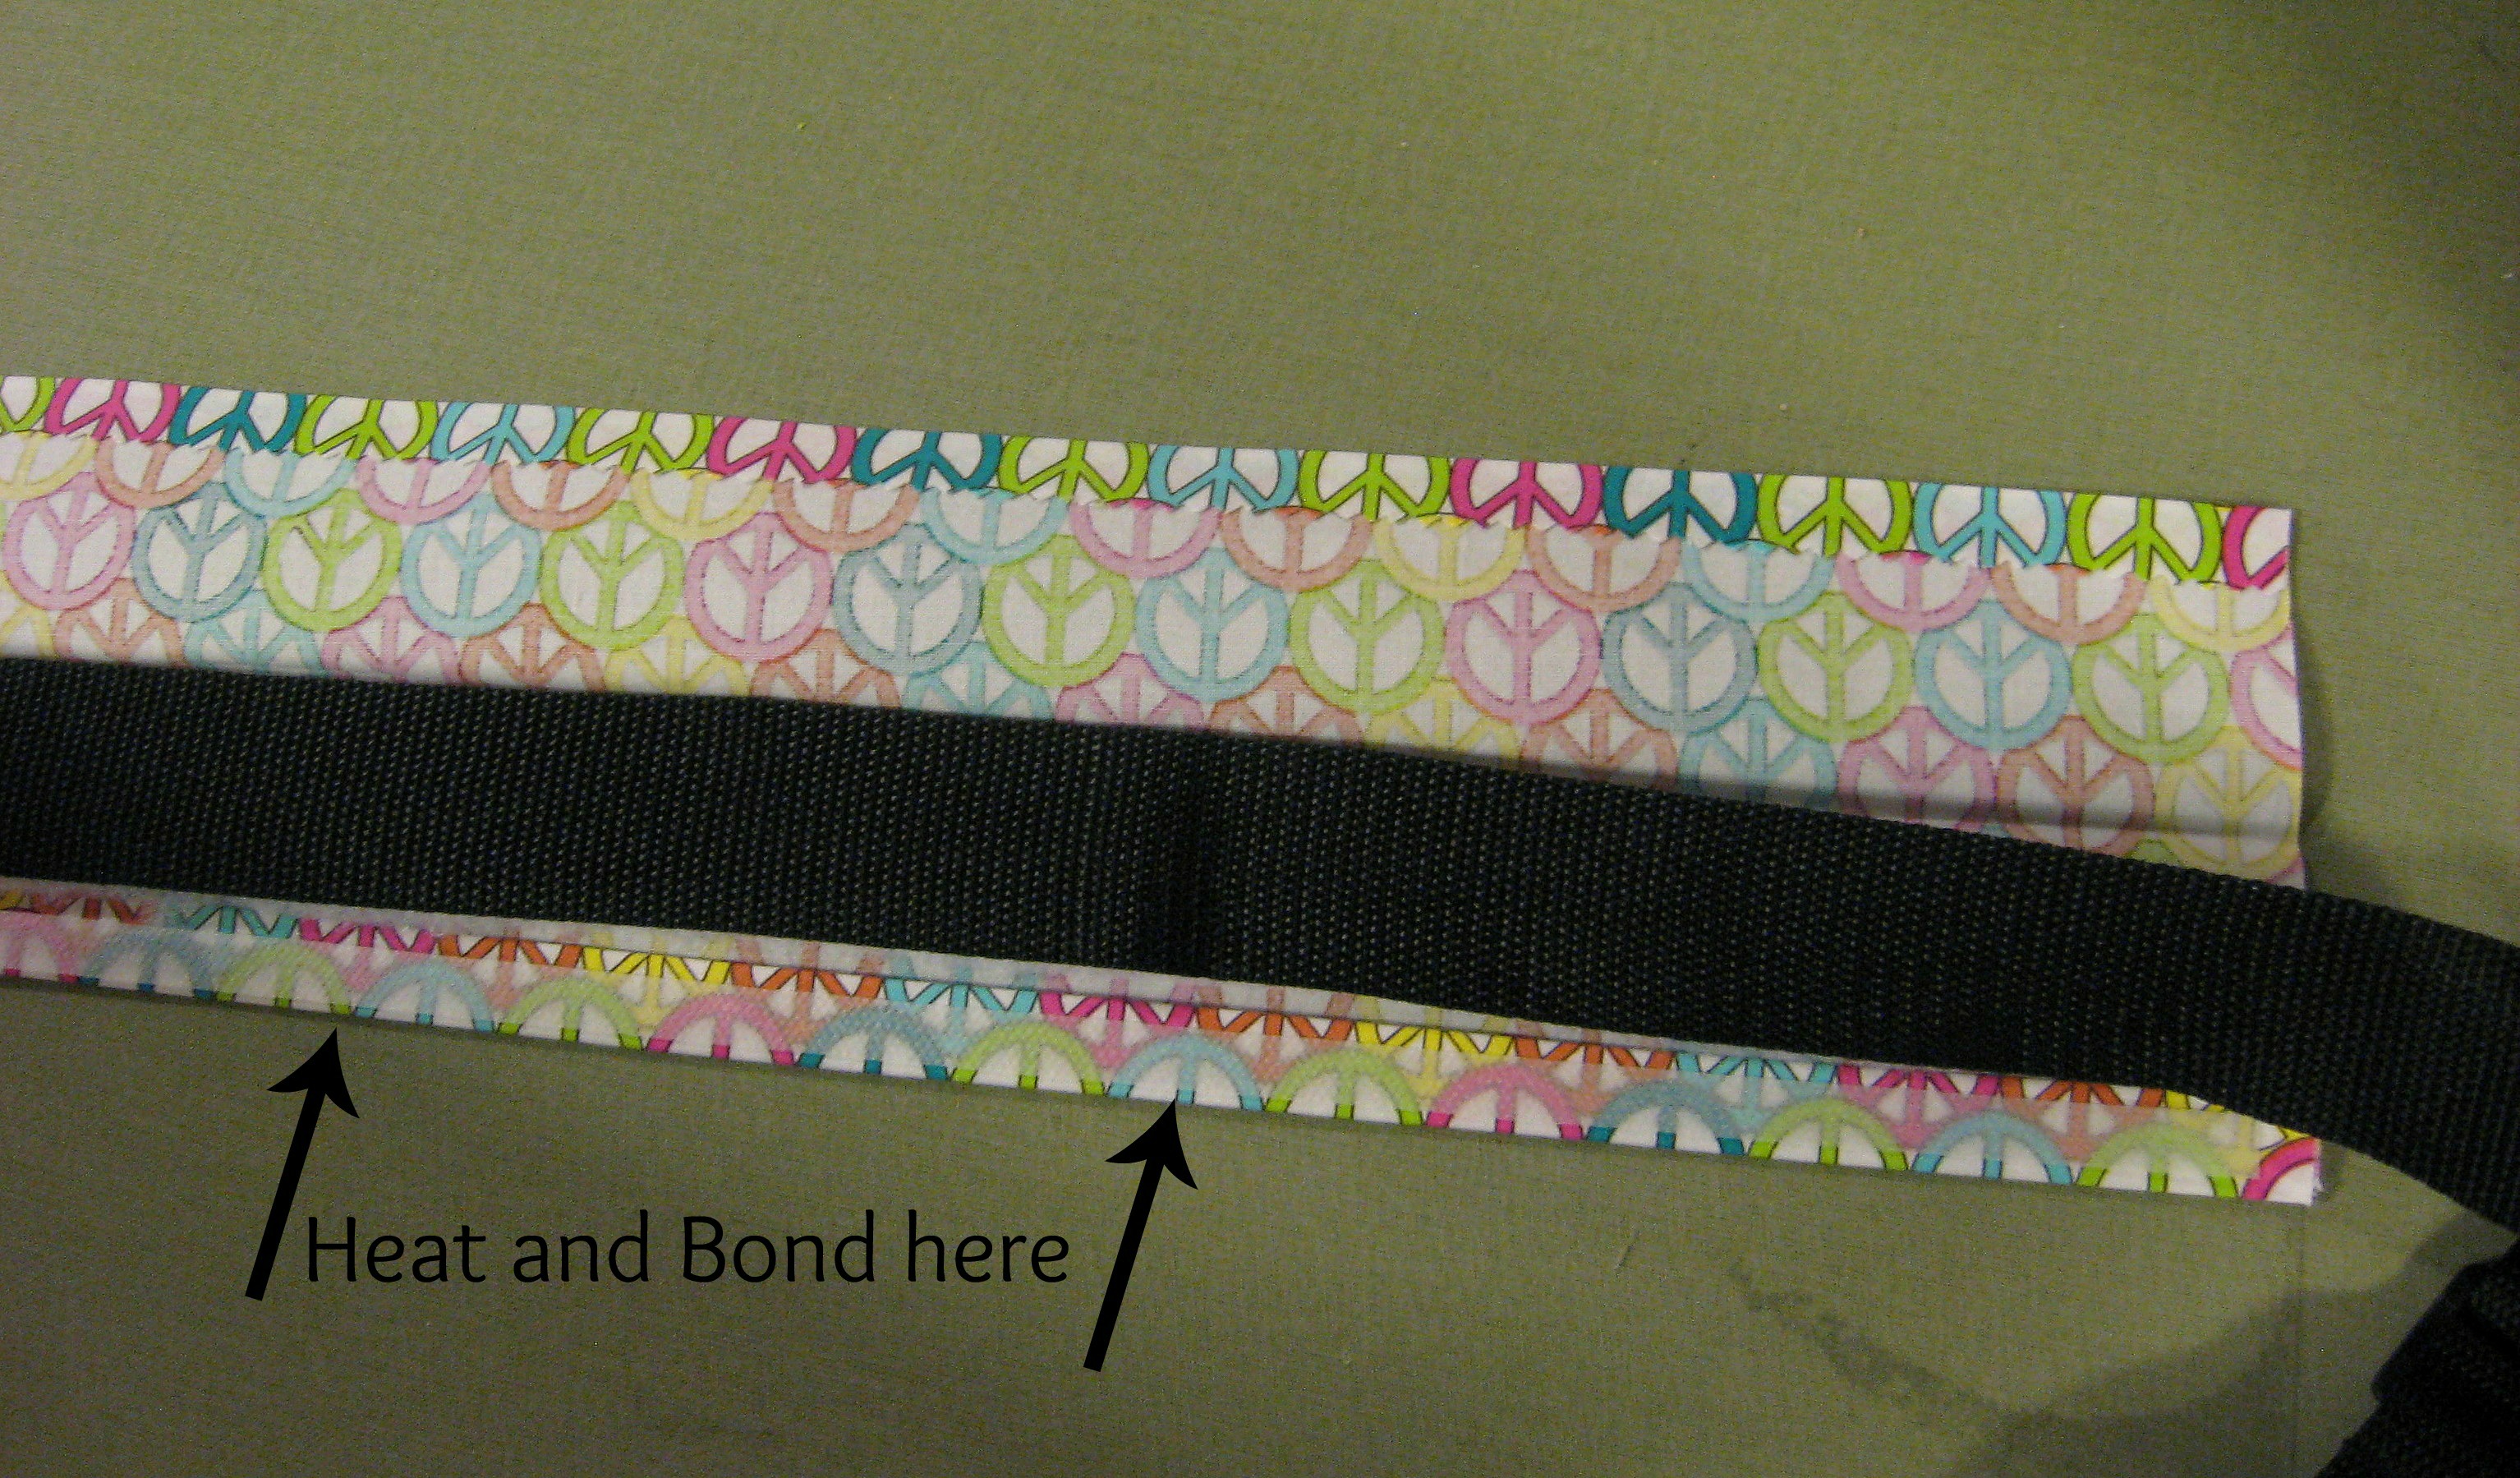
Fold it over and iron it to seal the edge.
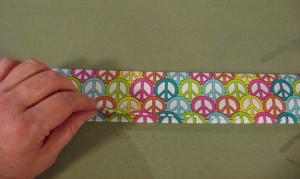
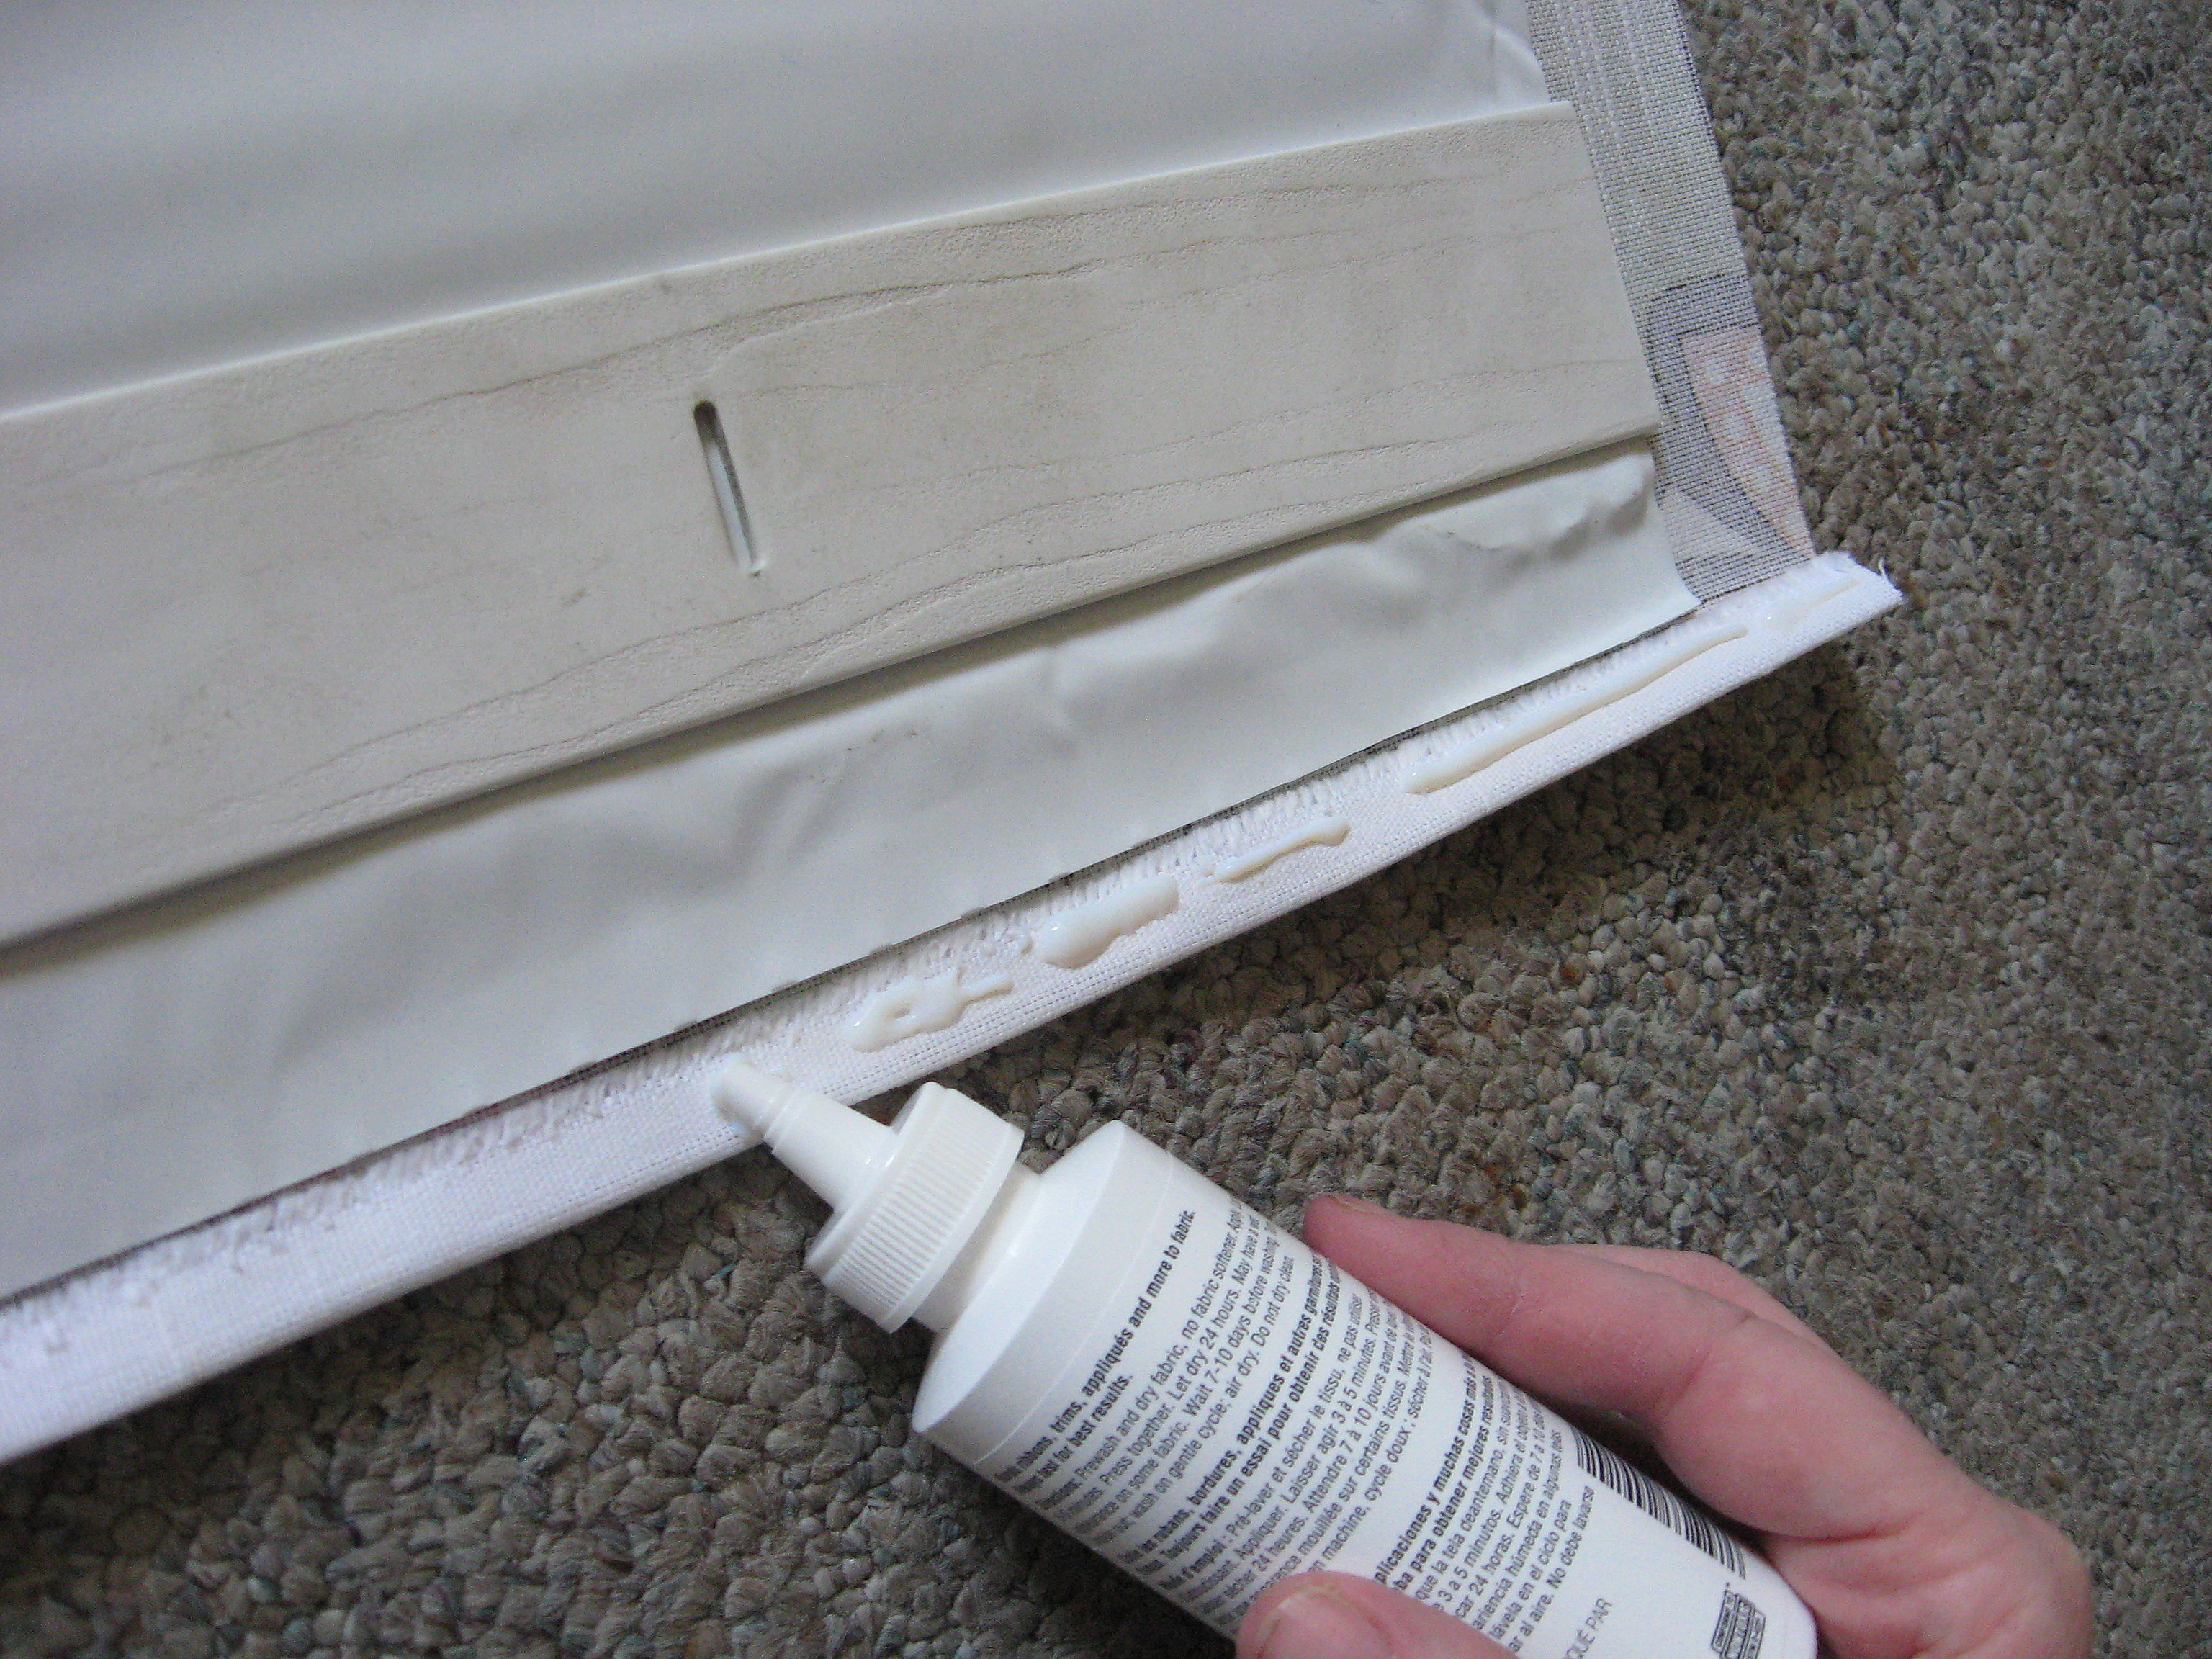
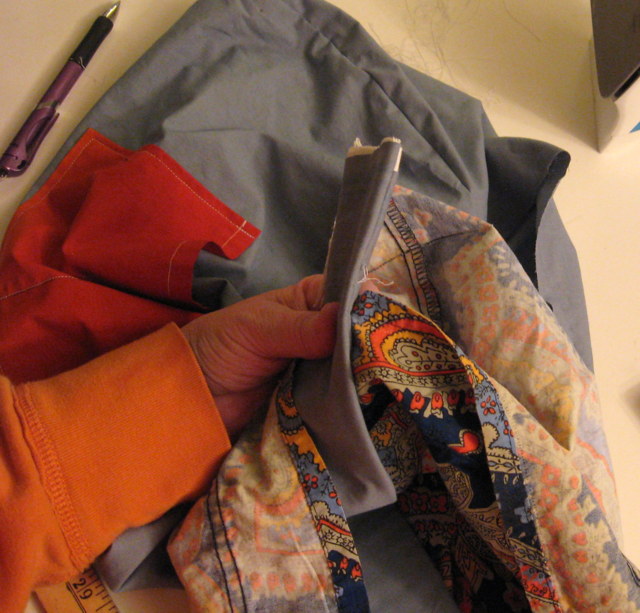
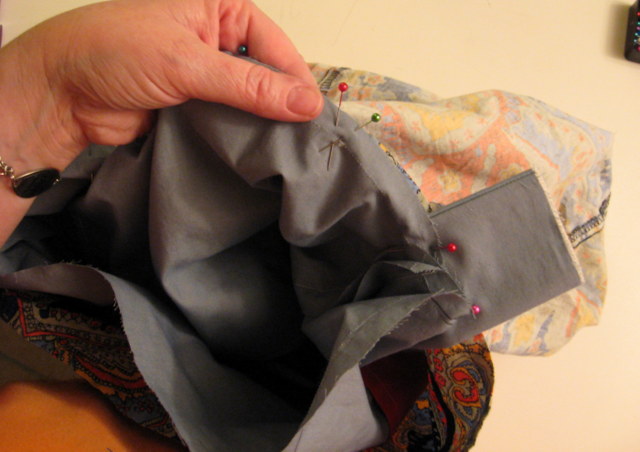
You could stop at this point, but I felt like it wasn’t holding together well enough to withstand the daily wear and tear, so I ran a straight stitch down that side to sew it closed (this is where it is a little difficult to keep everything straight with the bag attached. Just go slow and you can do it!)
Feels much better; and it’s cute, too!
A PYP Best Blog! DIY Roman Shade!
Just in case you missed this article on making a DIY roman shade the first time we shared it a couple of years ago, we are republishing it. After Sharon wrote this blog originally, we got an awesome response. This is one of the PYP Best Blogs!
Summer wreaks havoc on my daughter’s sleep schedule; it is light when I put her to bed and the light in the morning gets her up much earlier than I want to join her! I purchased a black out shade a few summers ago from Ikea for my own bedroom and it works great – totally where I recommend buying them if you don’t want to go the DIY route – but since our Ikea is quite a drive, I just bought a $20 shade from Kmart for my daughter’s room. And it broke in a week. She does have blinds, but they just don’t block out enough light. I decided to use the broken black out shade and some decorative fabric to make my own Roman Shade.
I used these blinds because that is what I had already, but you can follow these same instructions if you have the cheap mini-blinds. OR, if you are starting from scratch, mini blinds are super cheap at Walmart.
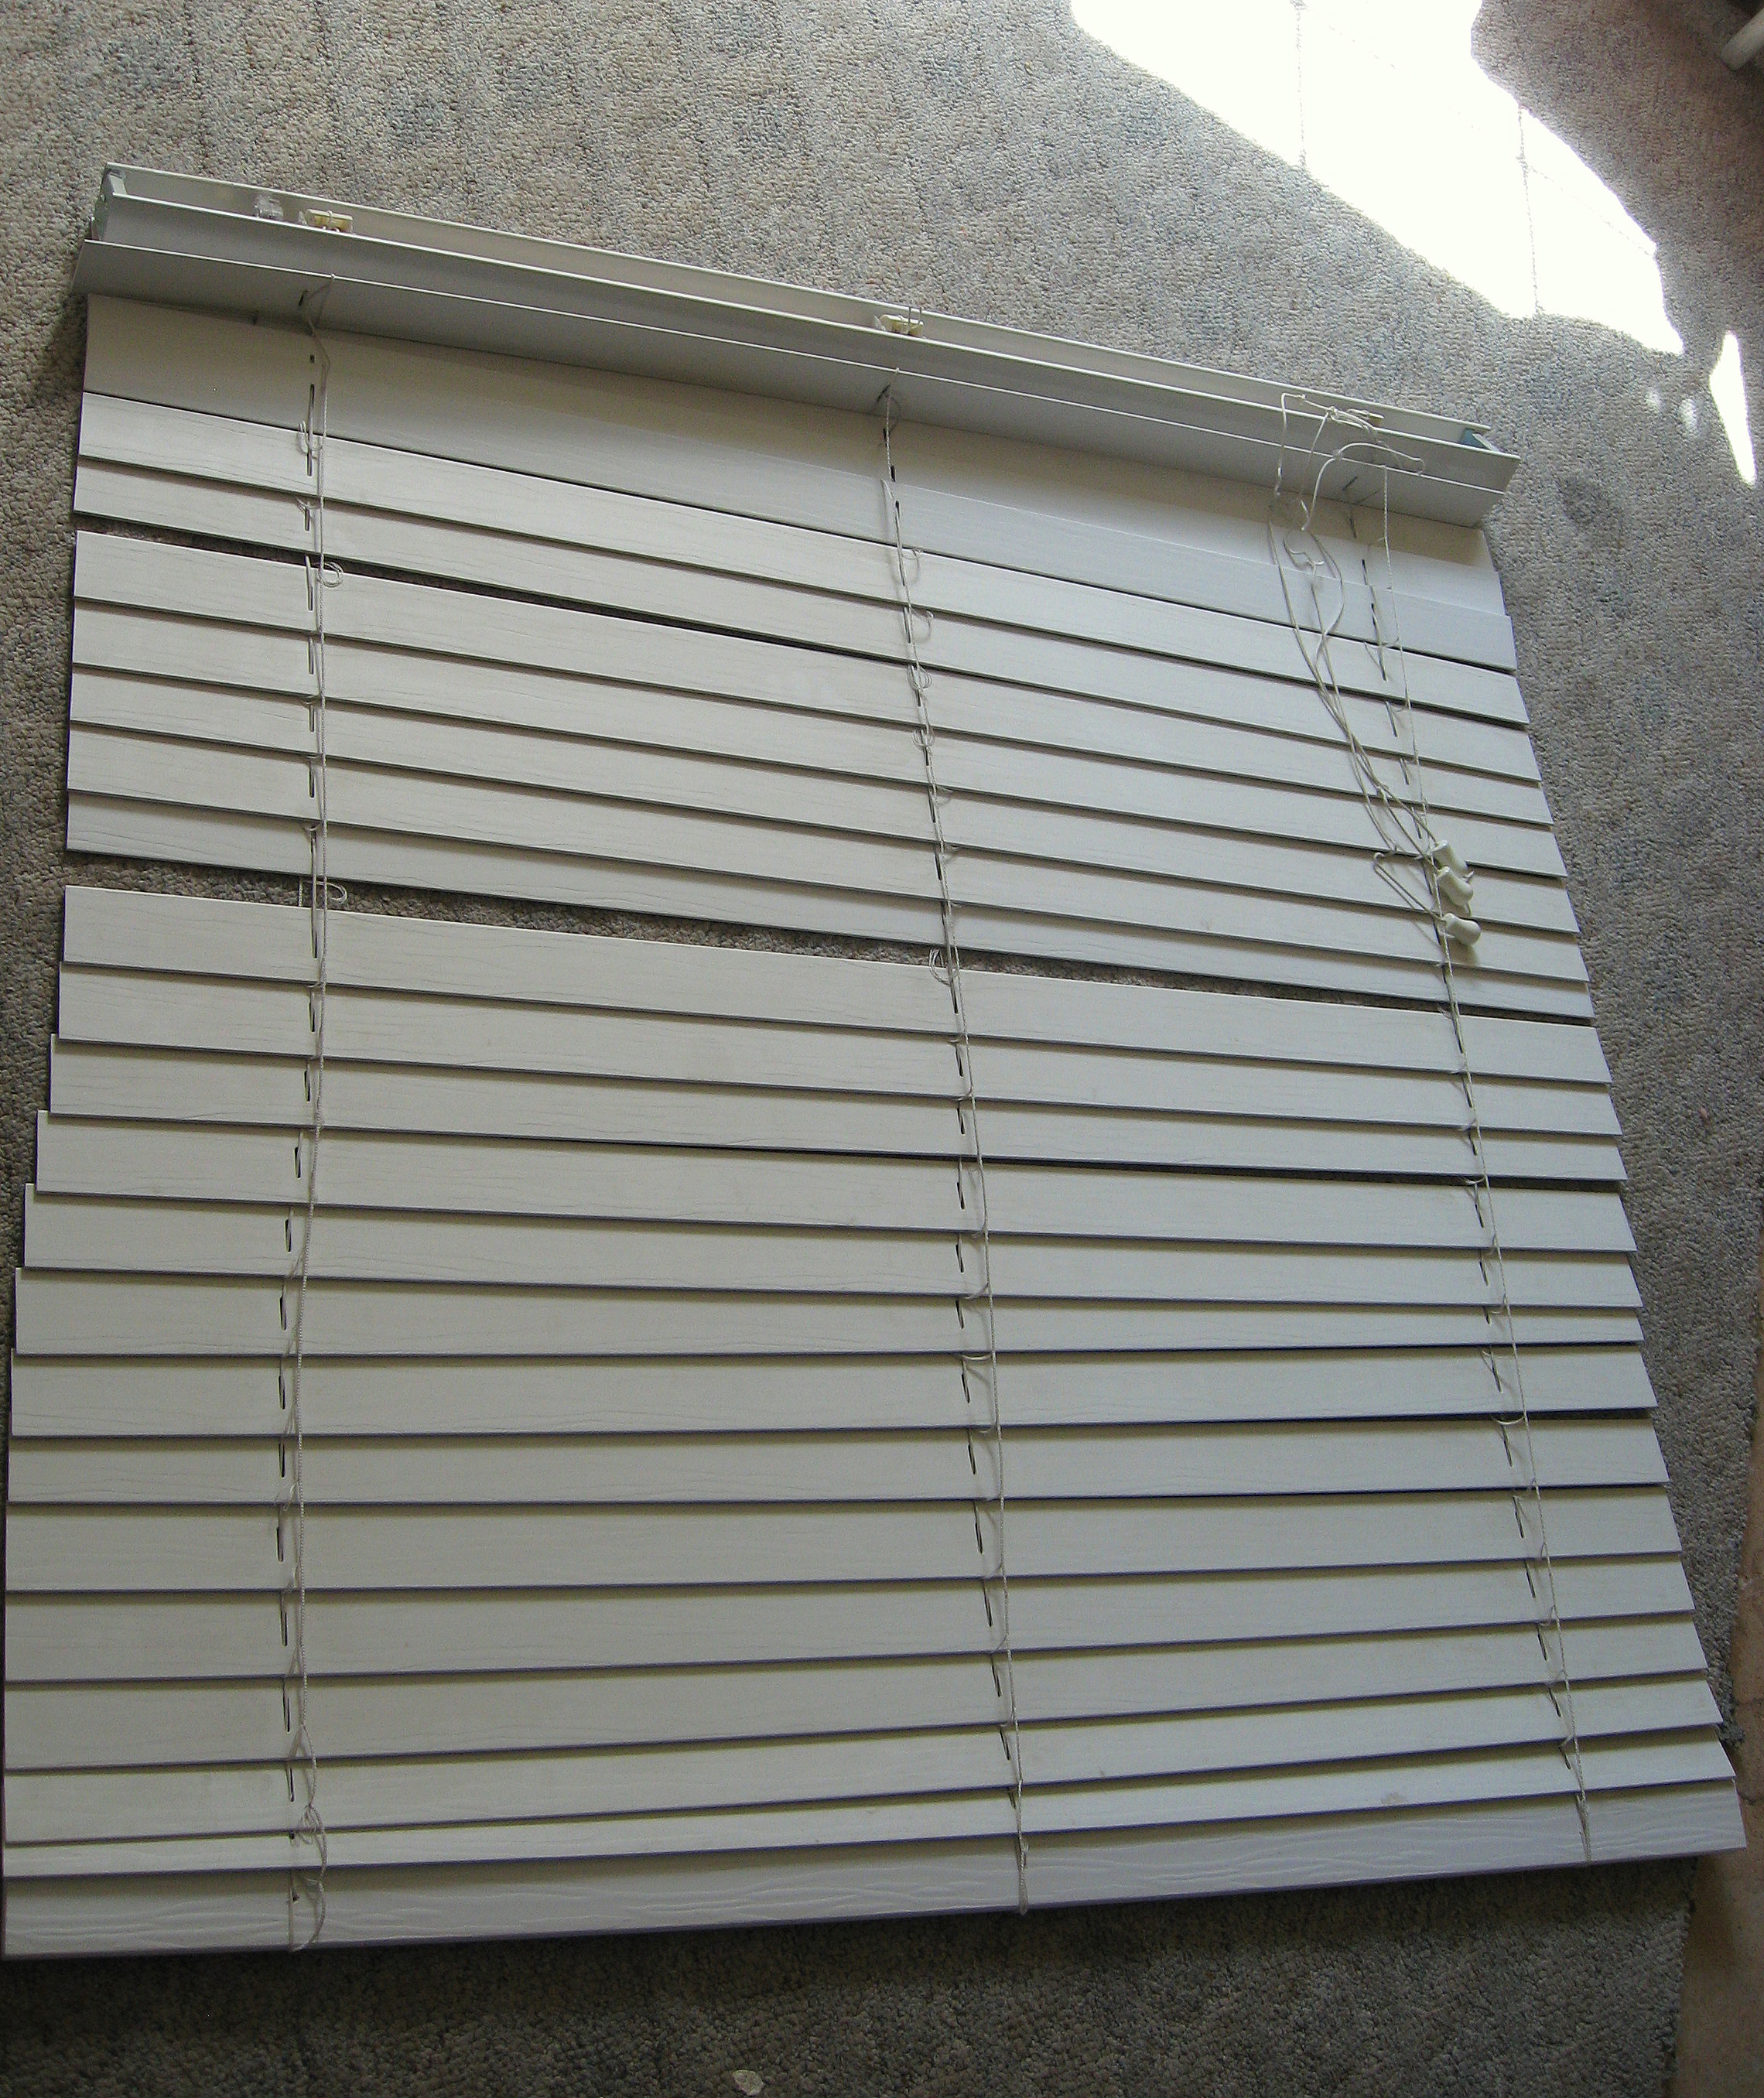
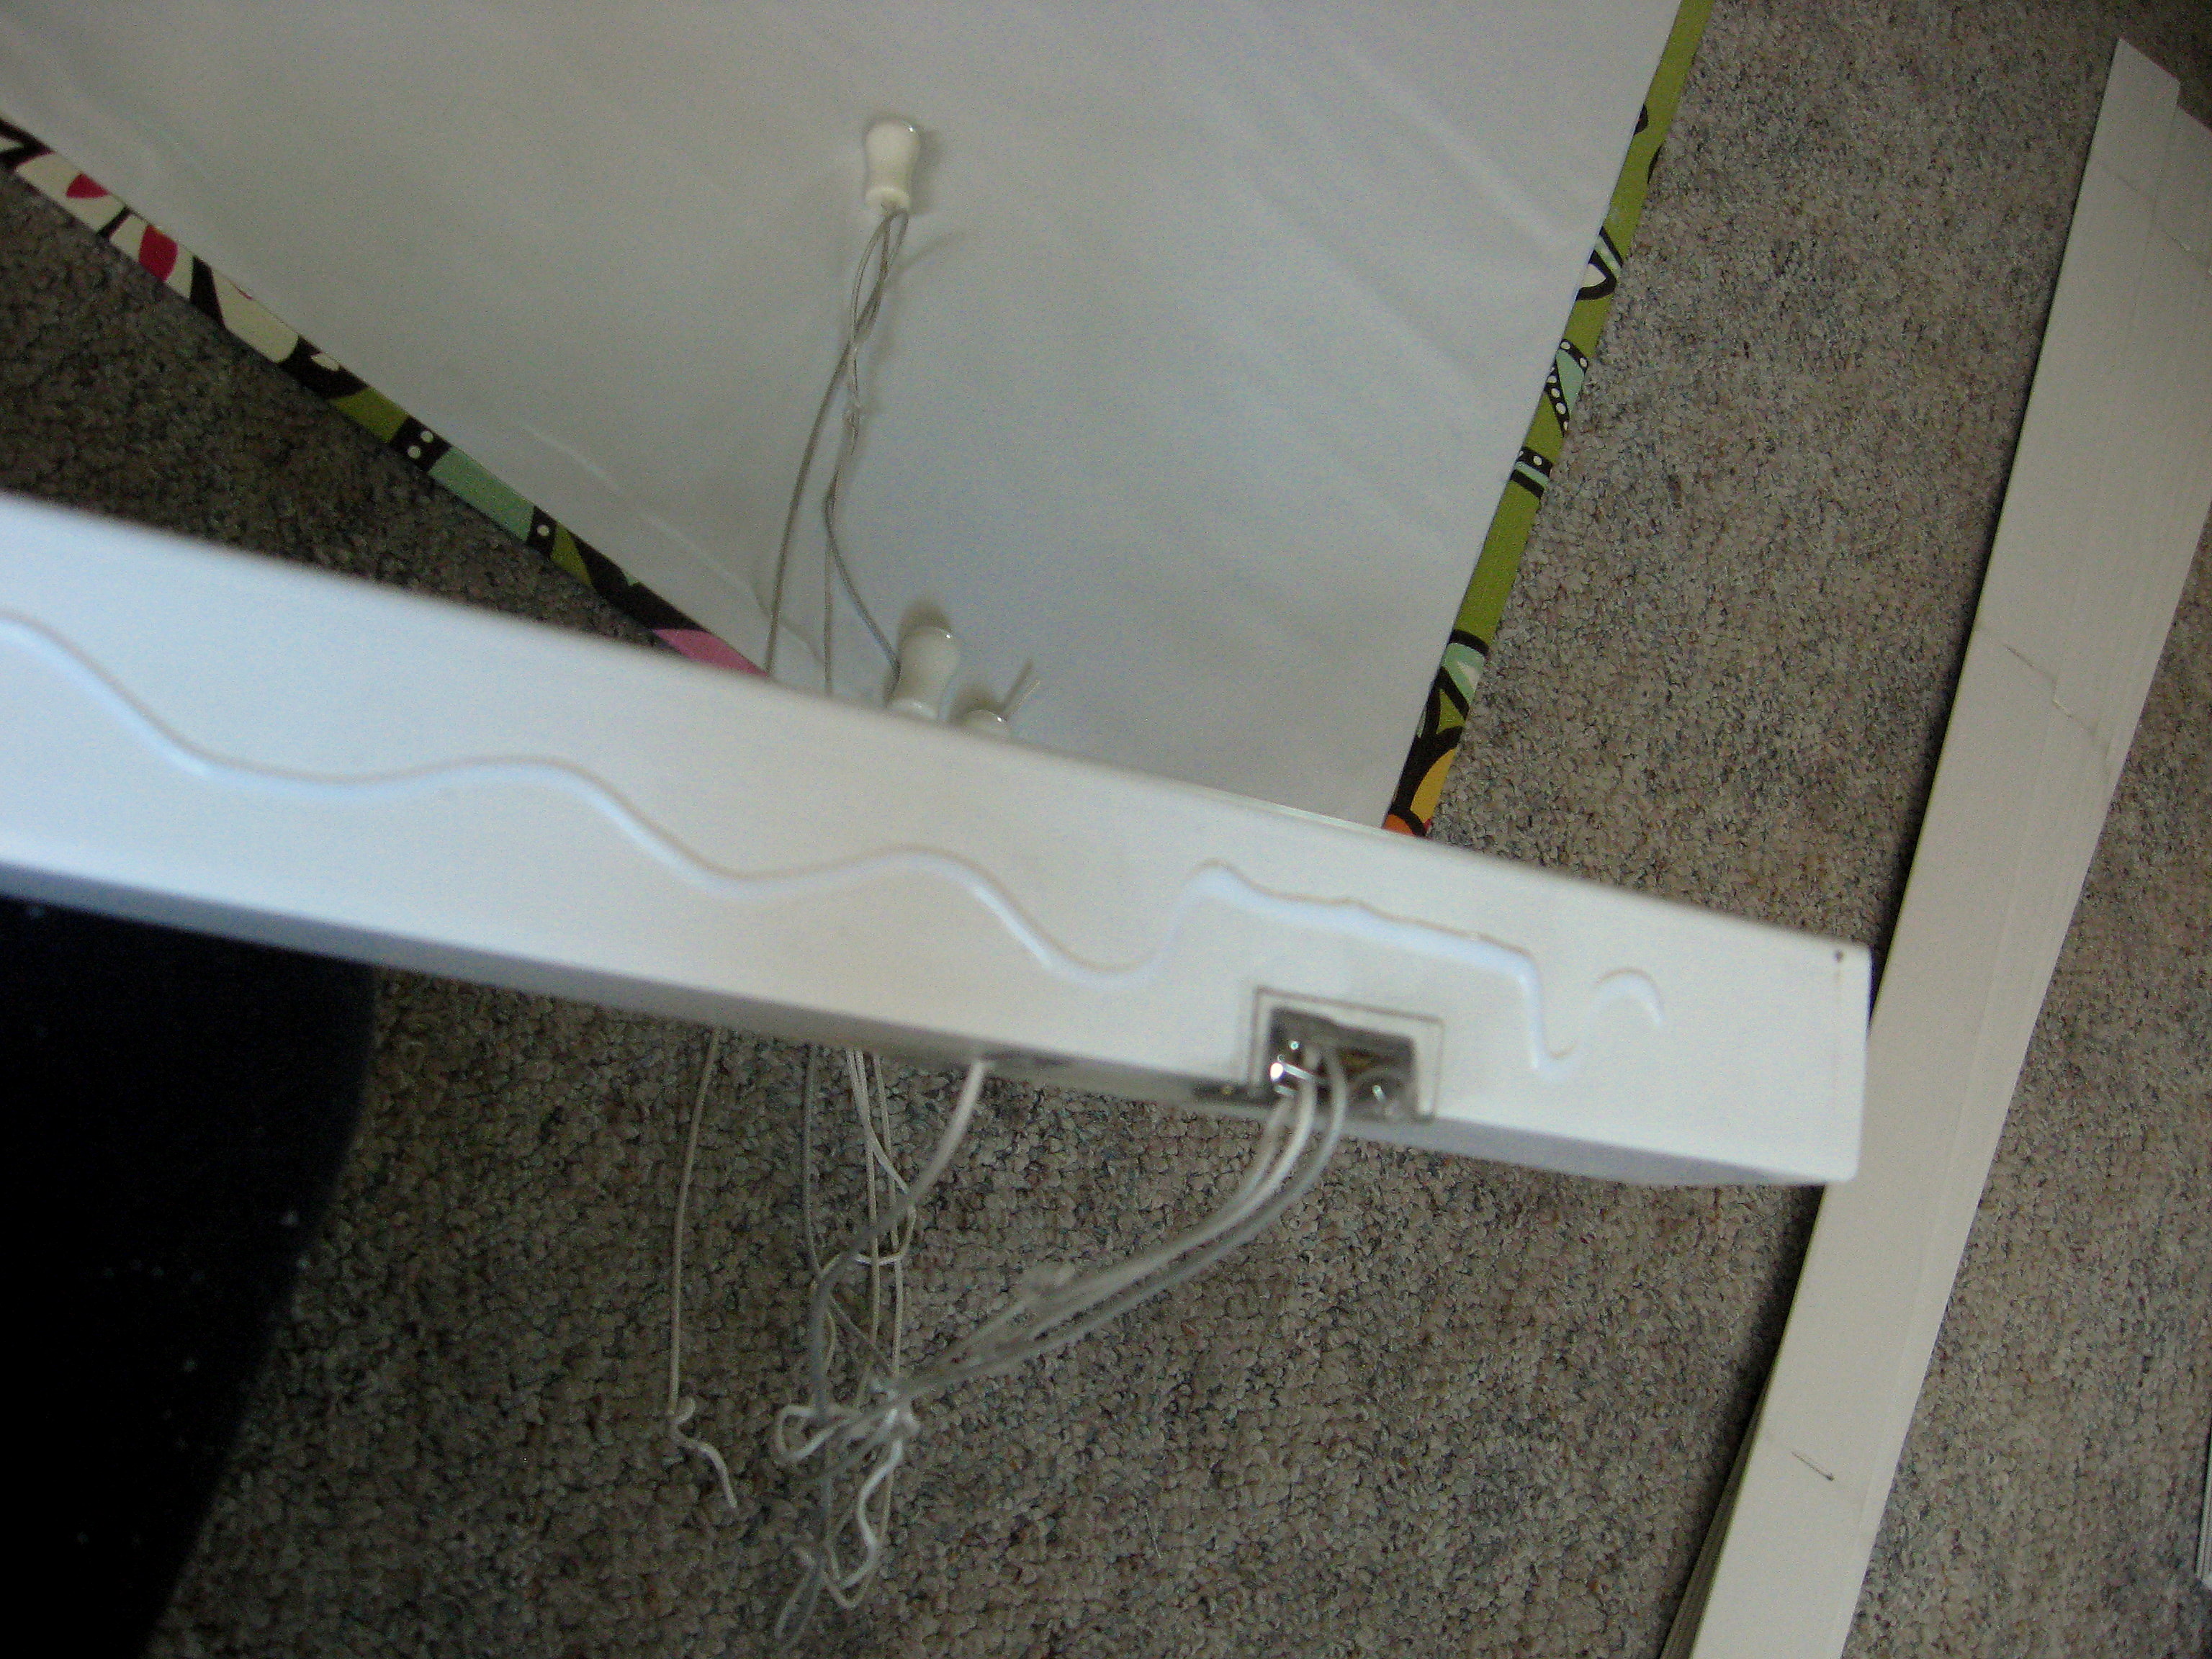
Take the blind, open them all the way and lay them out on the floor.
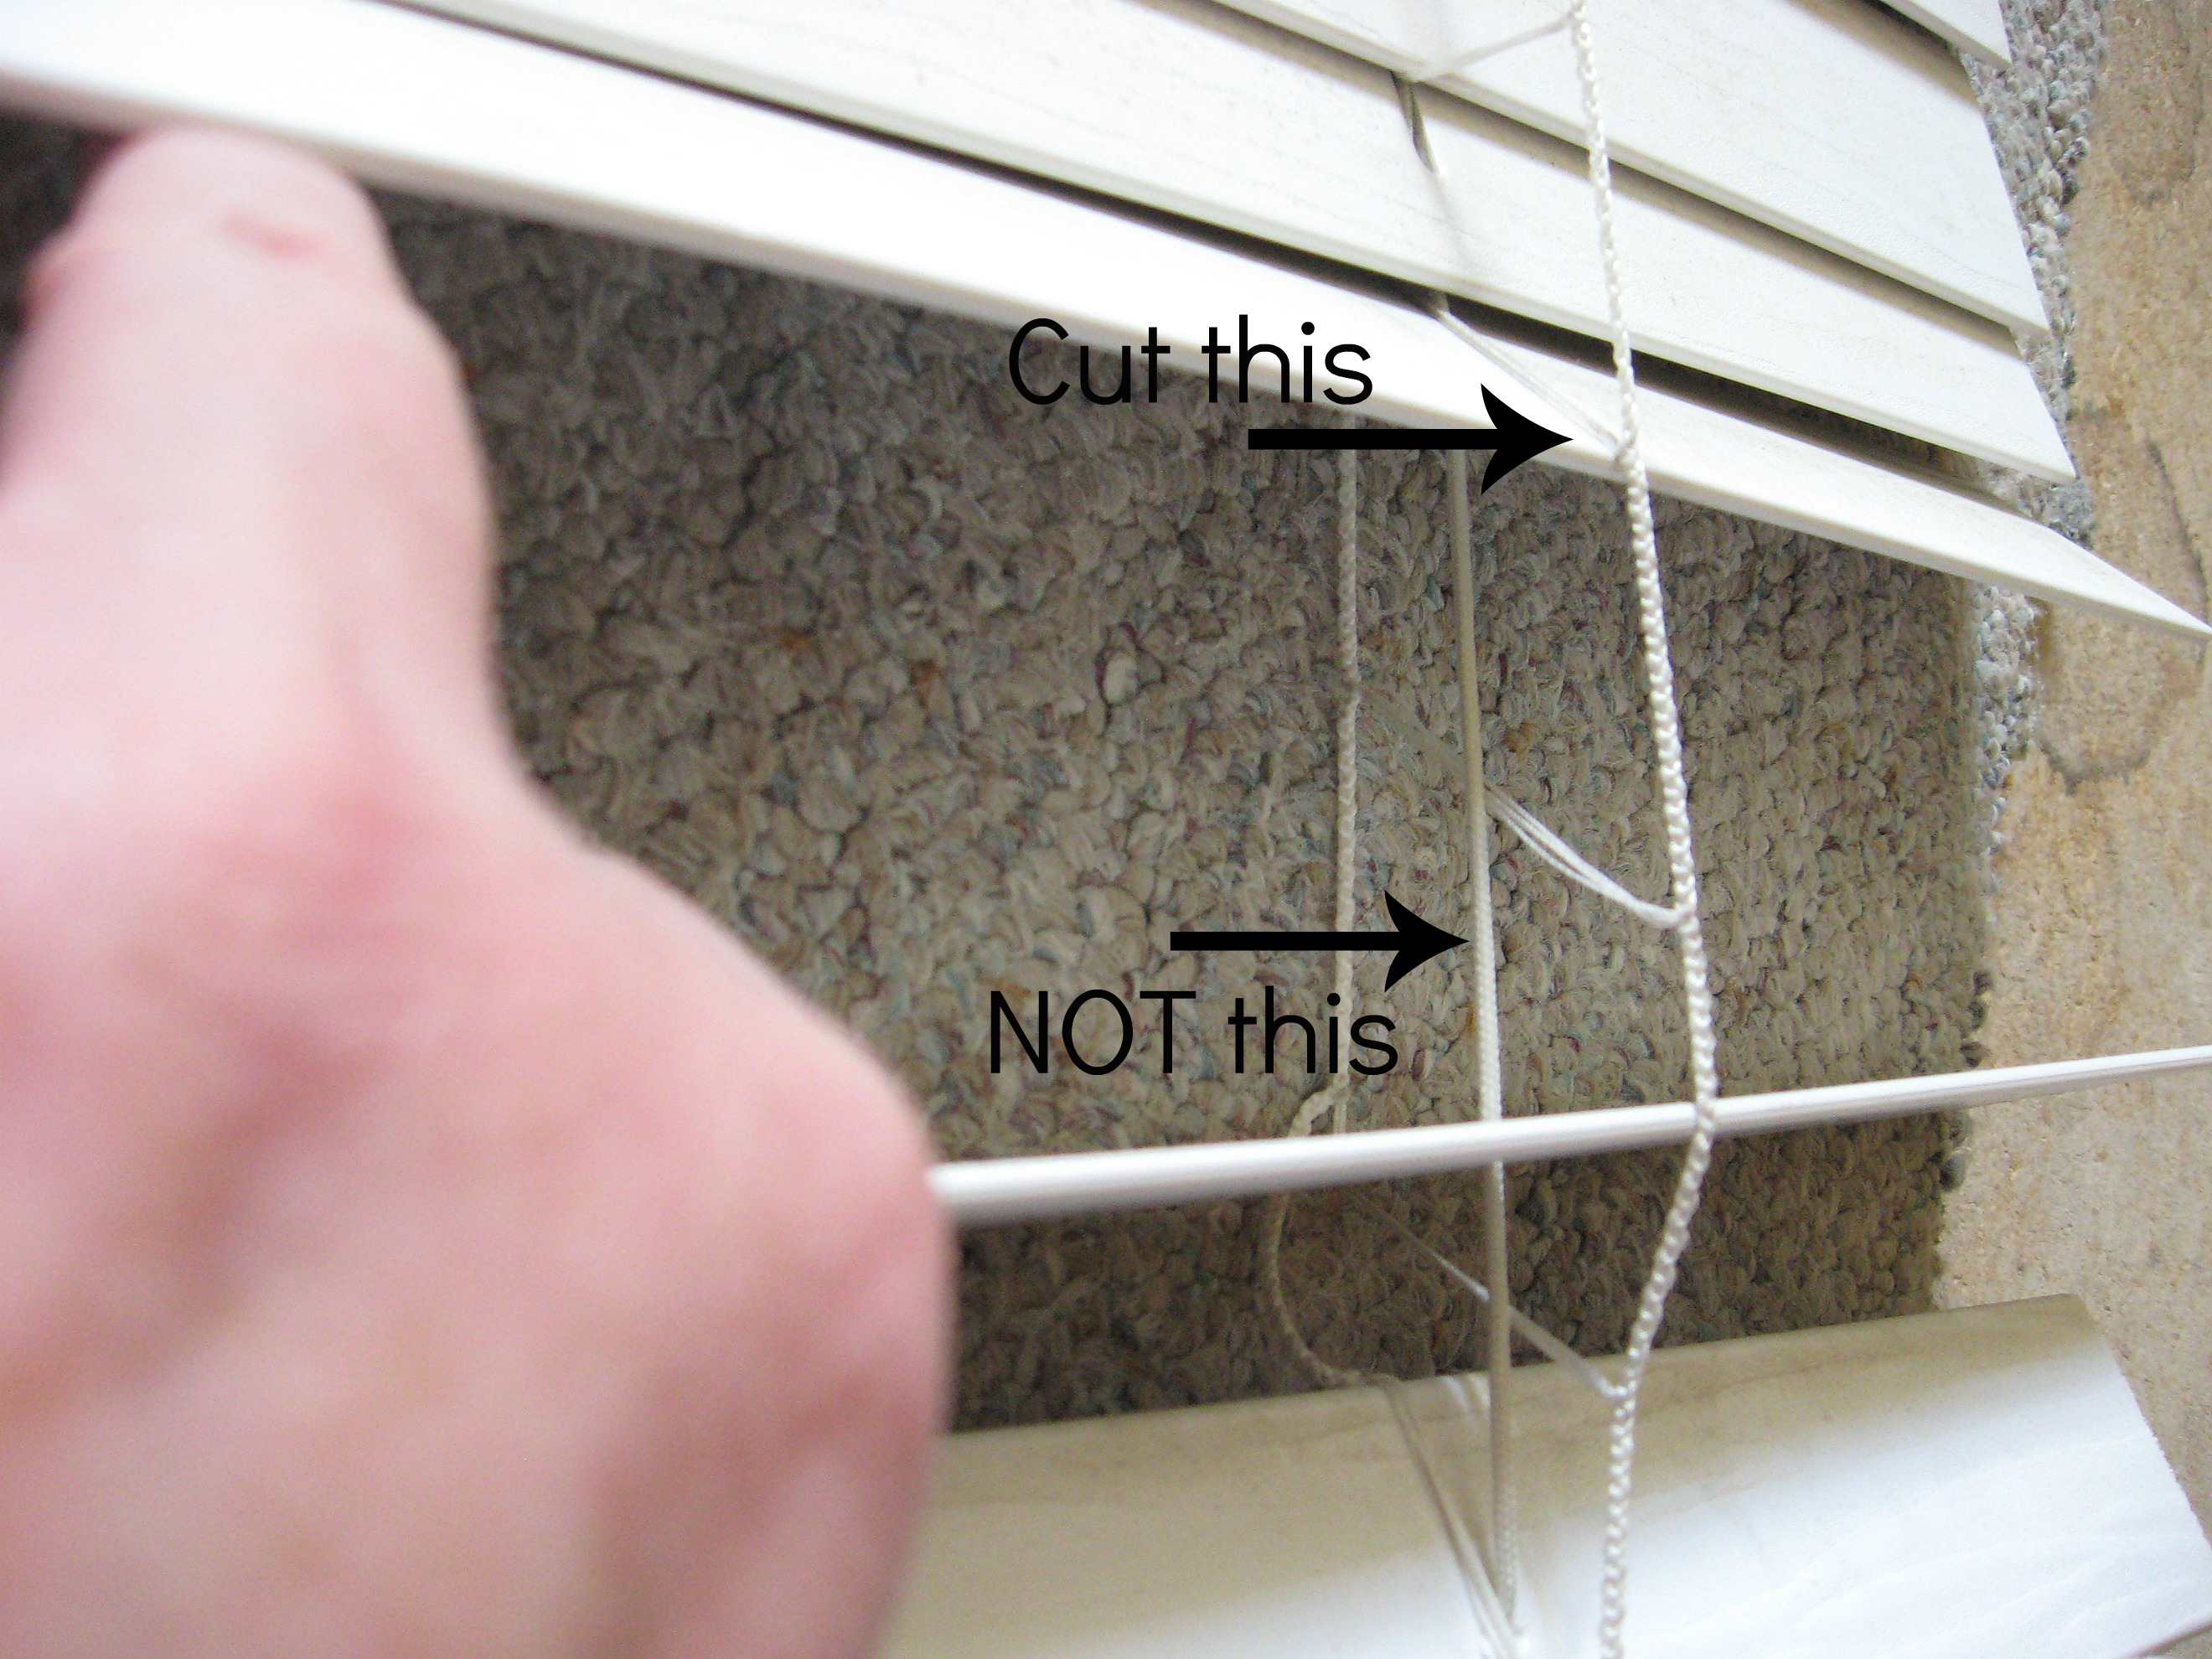
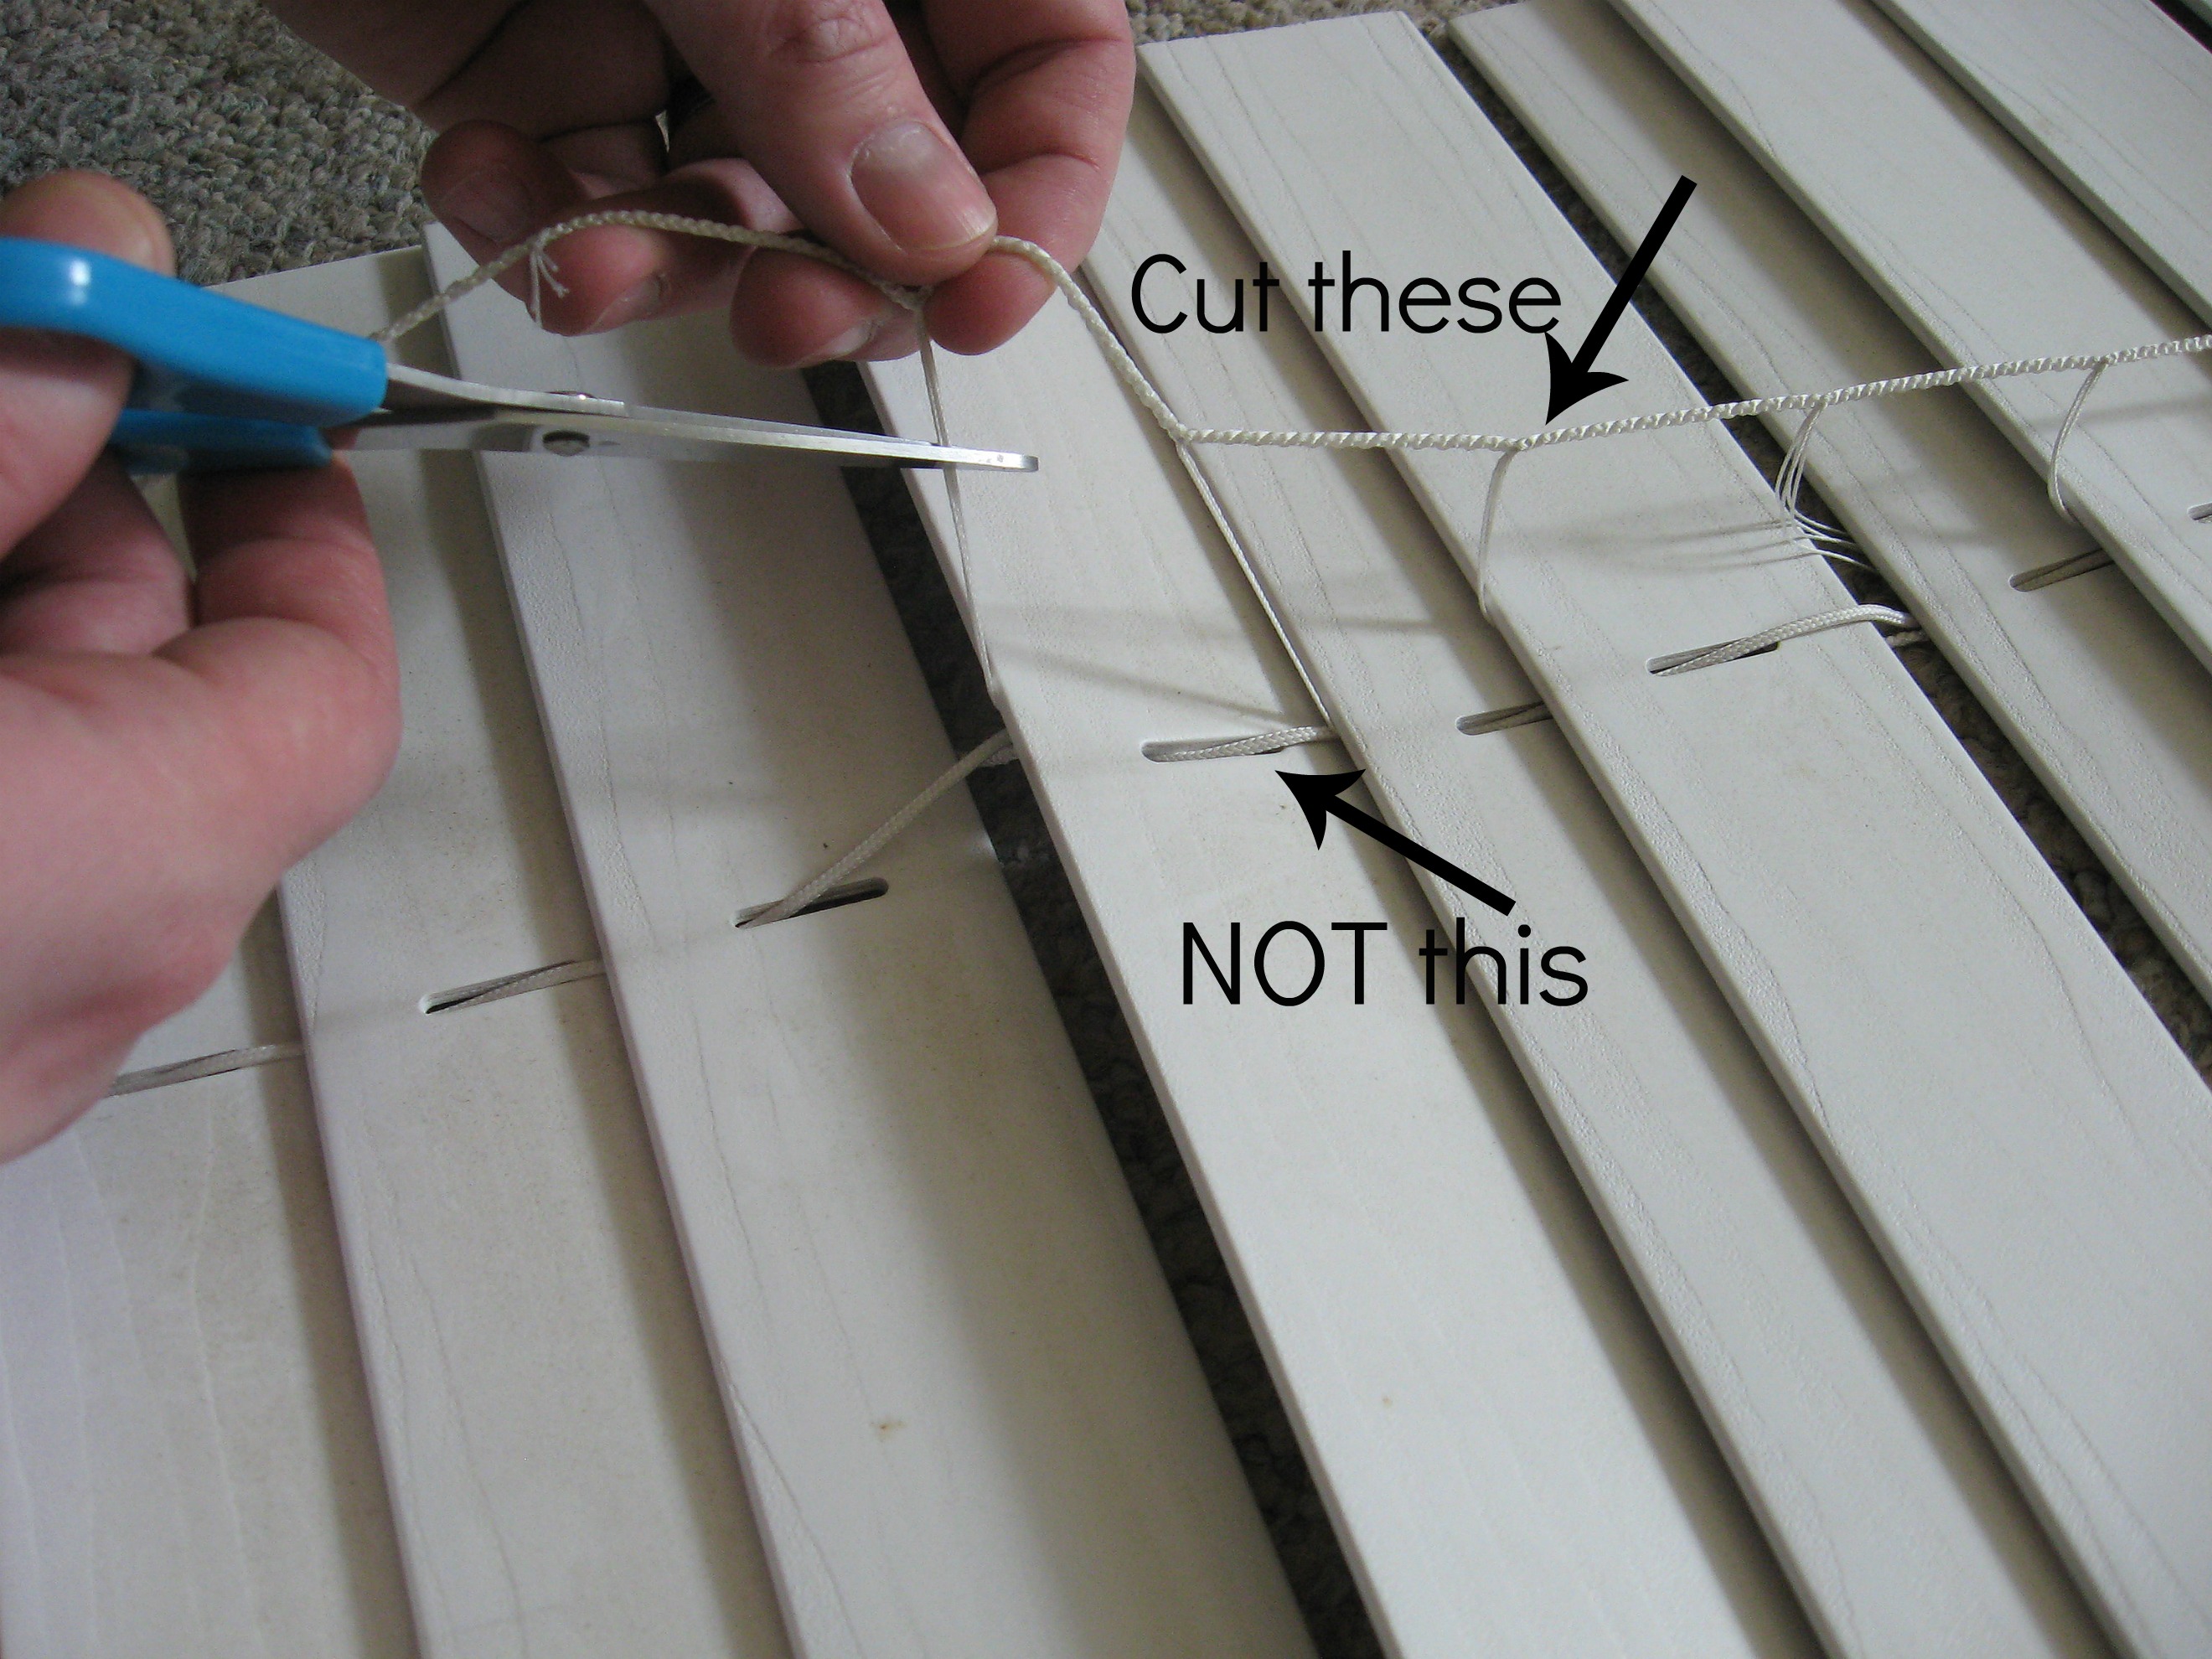
You will cut the thin strings that hold the slats in place – the ones that look like a ladder. DO NOT cut the heavier string that runs up through the holes in the slats – that’s the string that makes the shade go up and down.
Cut them all the way, top to bottom.
Now remove the little plastic plug at the bottom to reveal the knotty mess of strings there. Pull all the strings out – the knots in the thin strings that you just cut can just be cut away. Carefully untie the other string – the thicker one.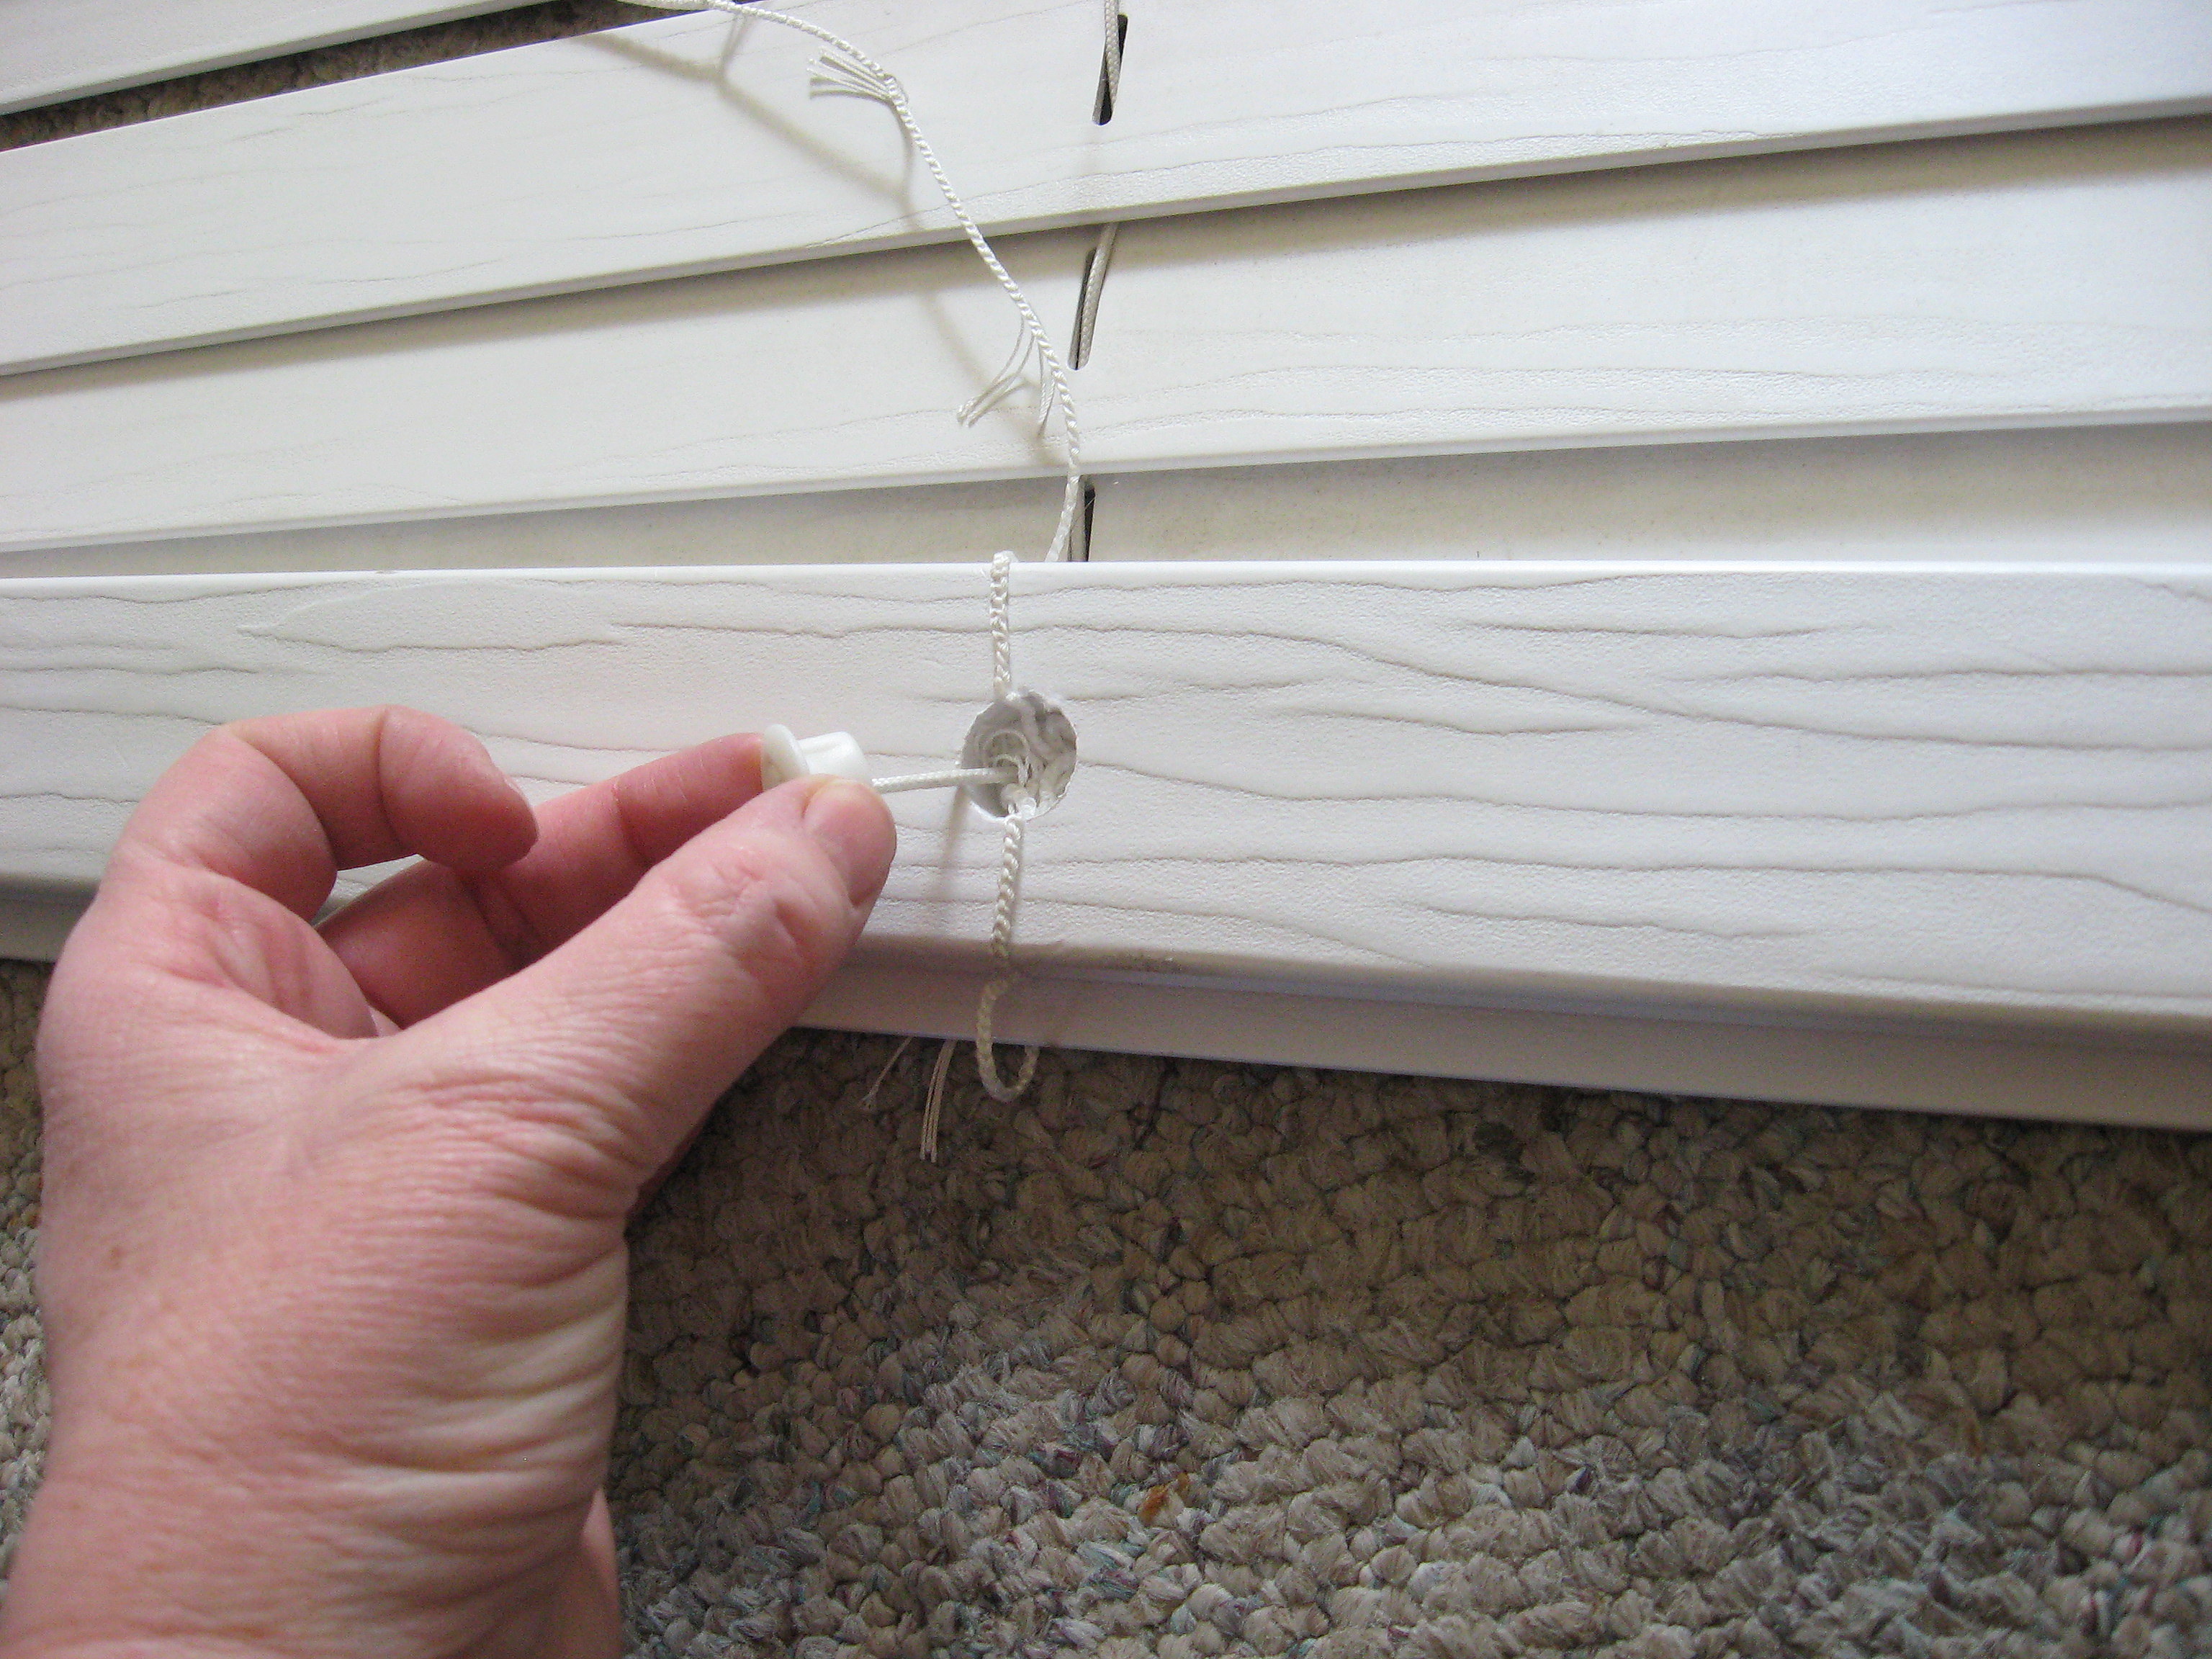
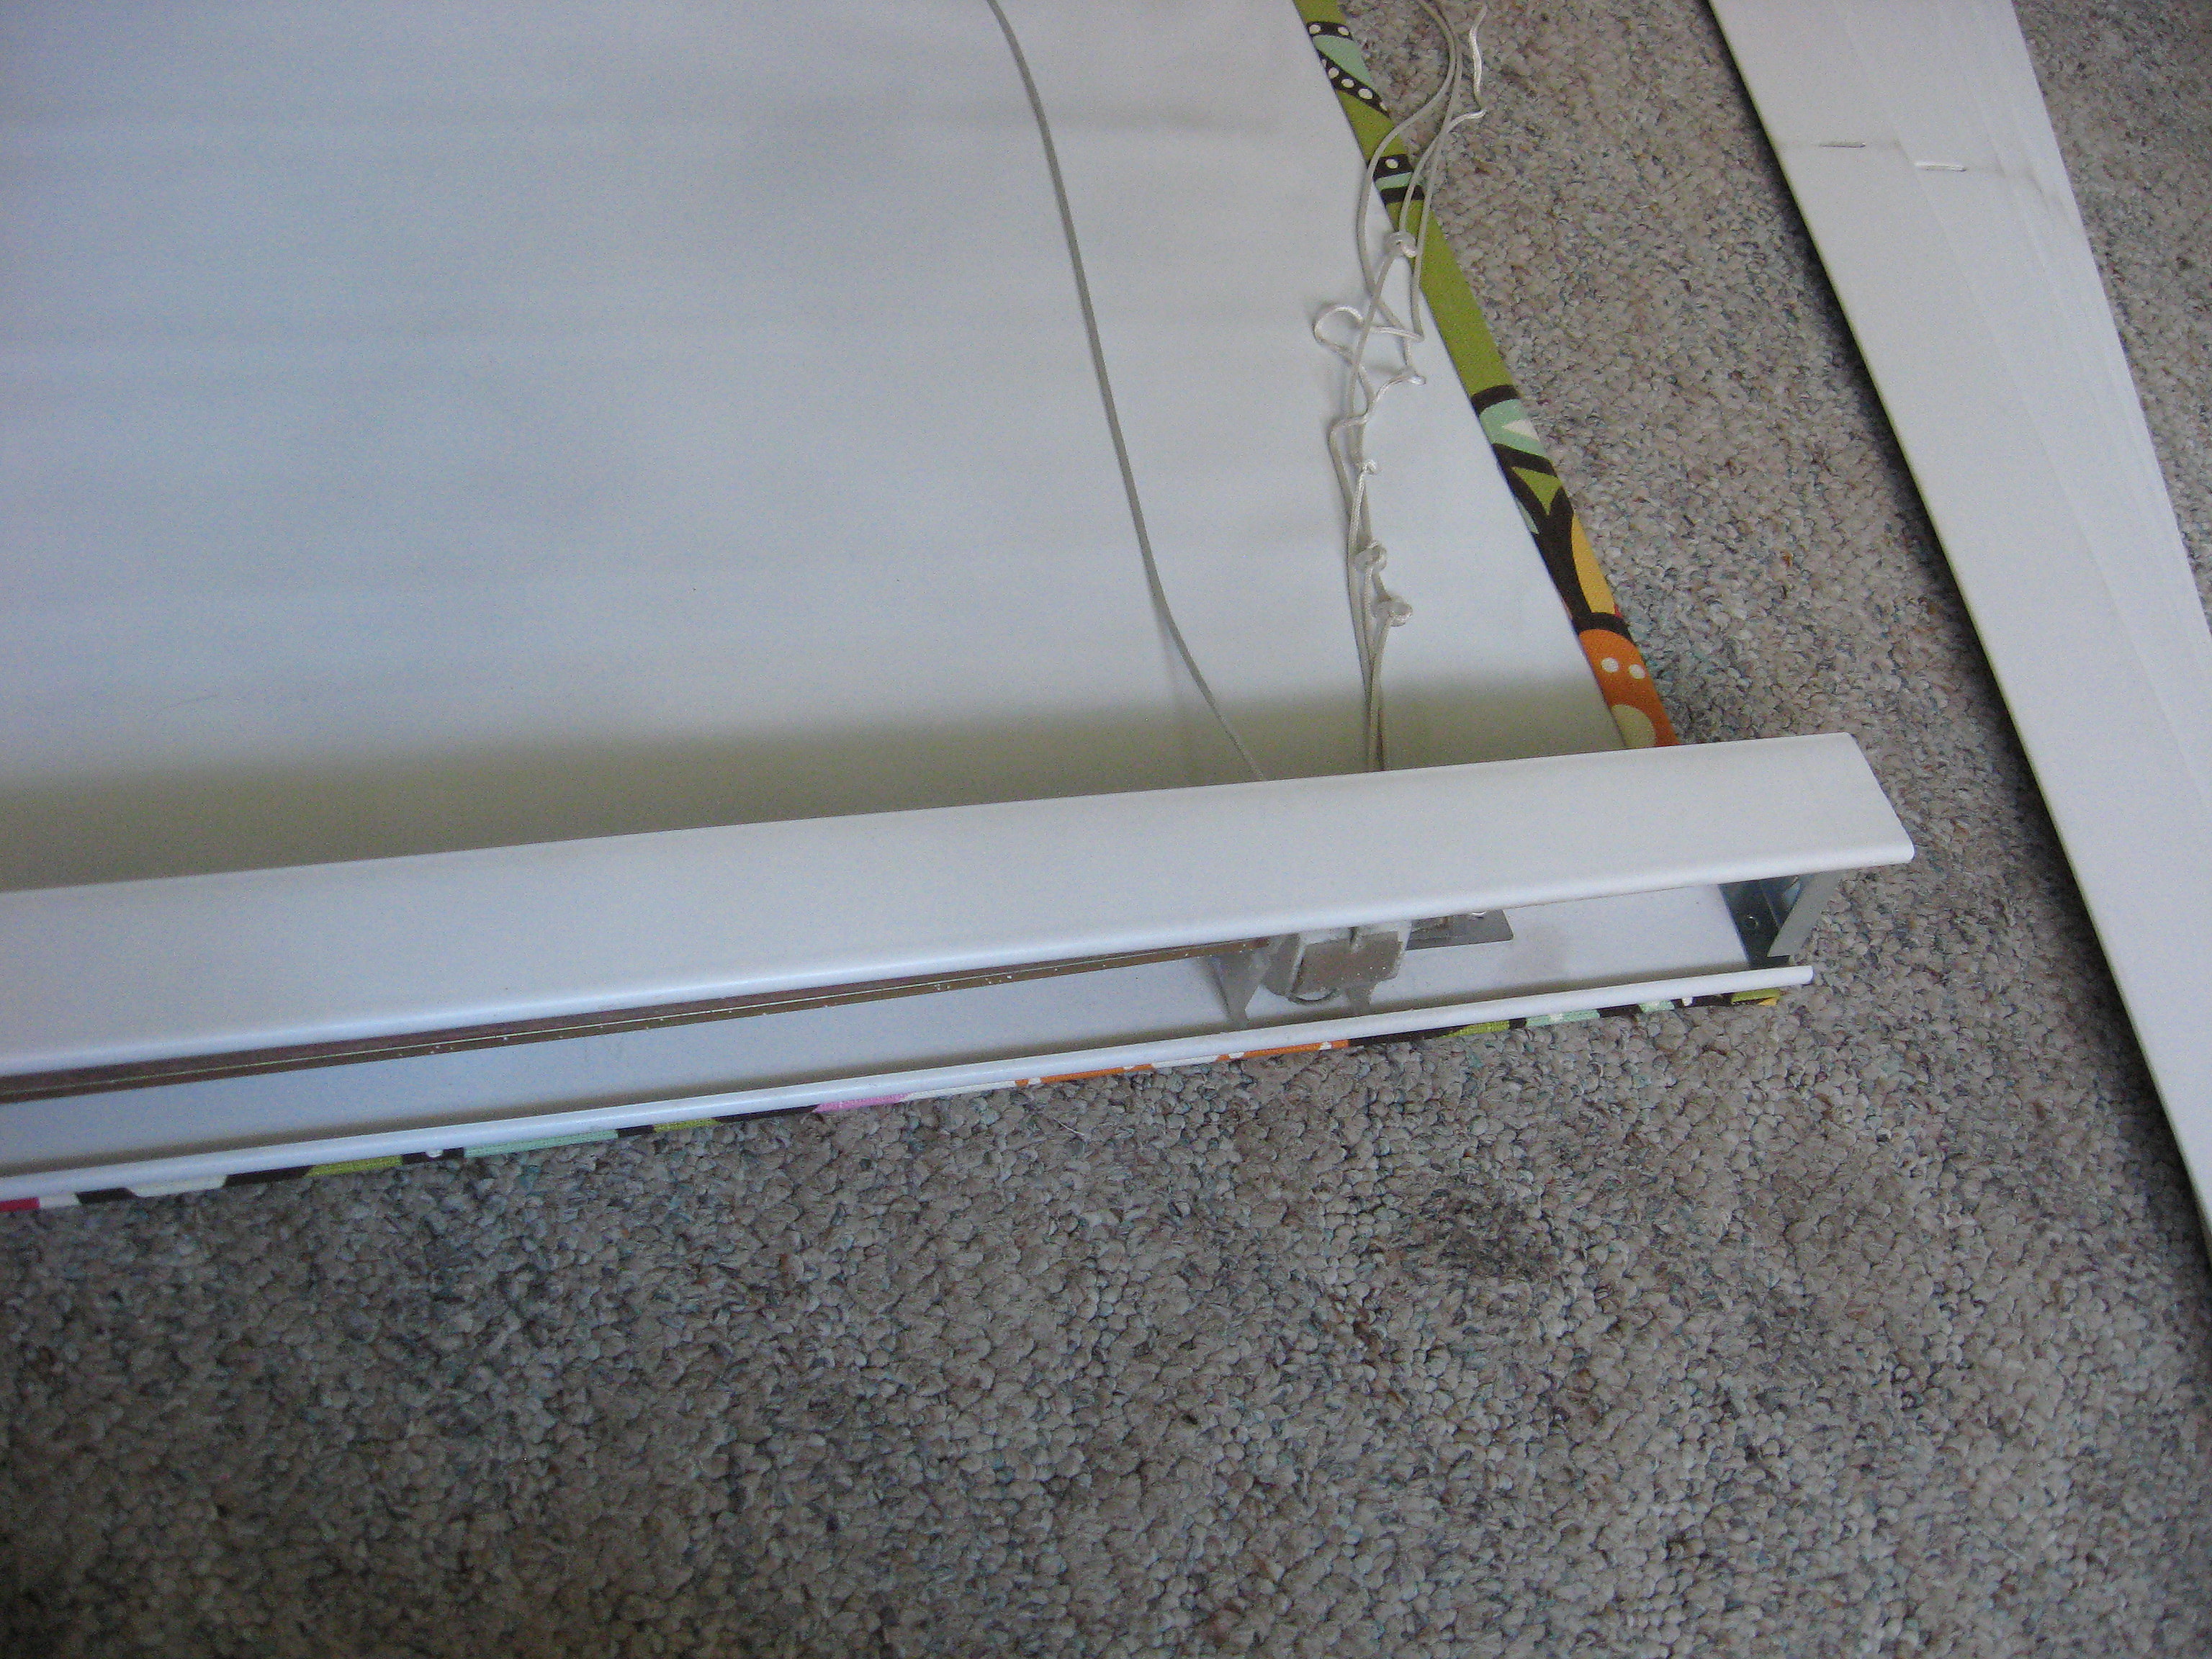
Now take that bottom board off and you will be left with the slats on the thicker string.
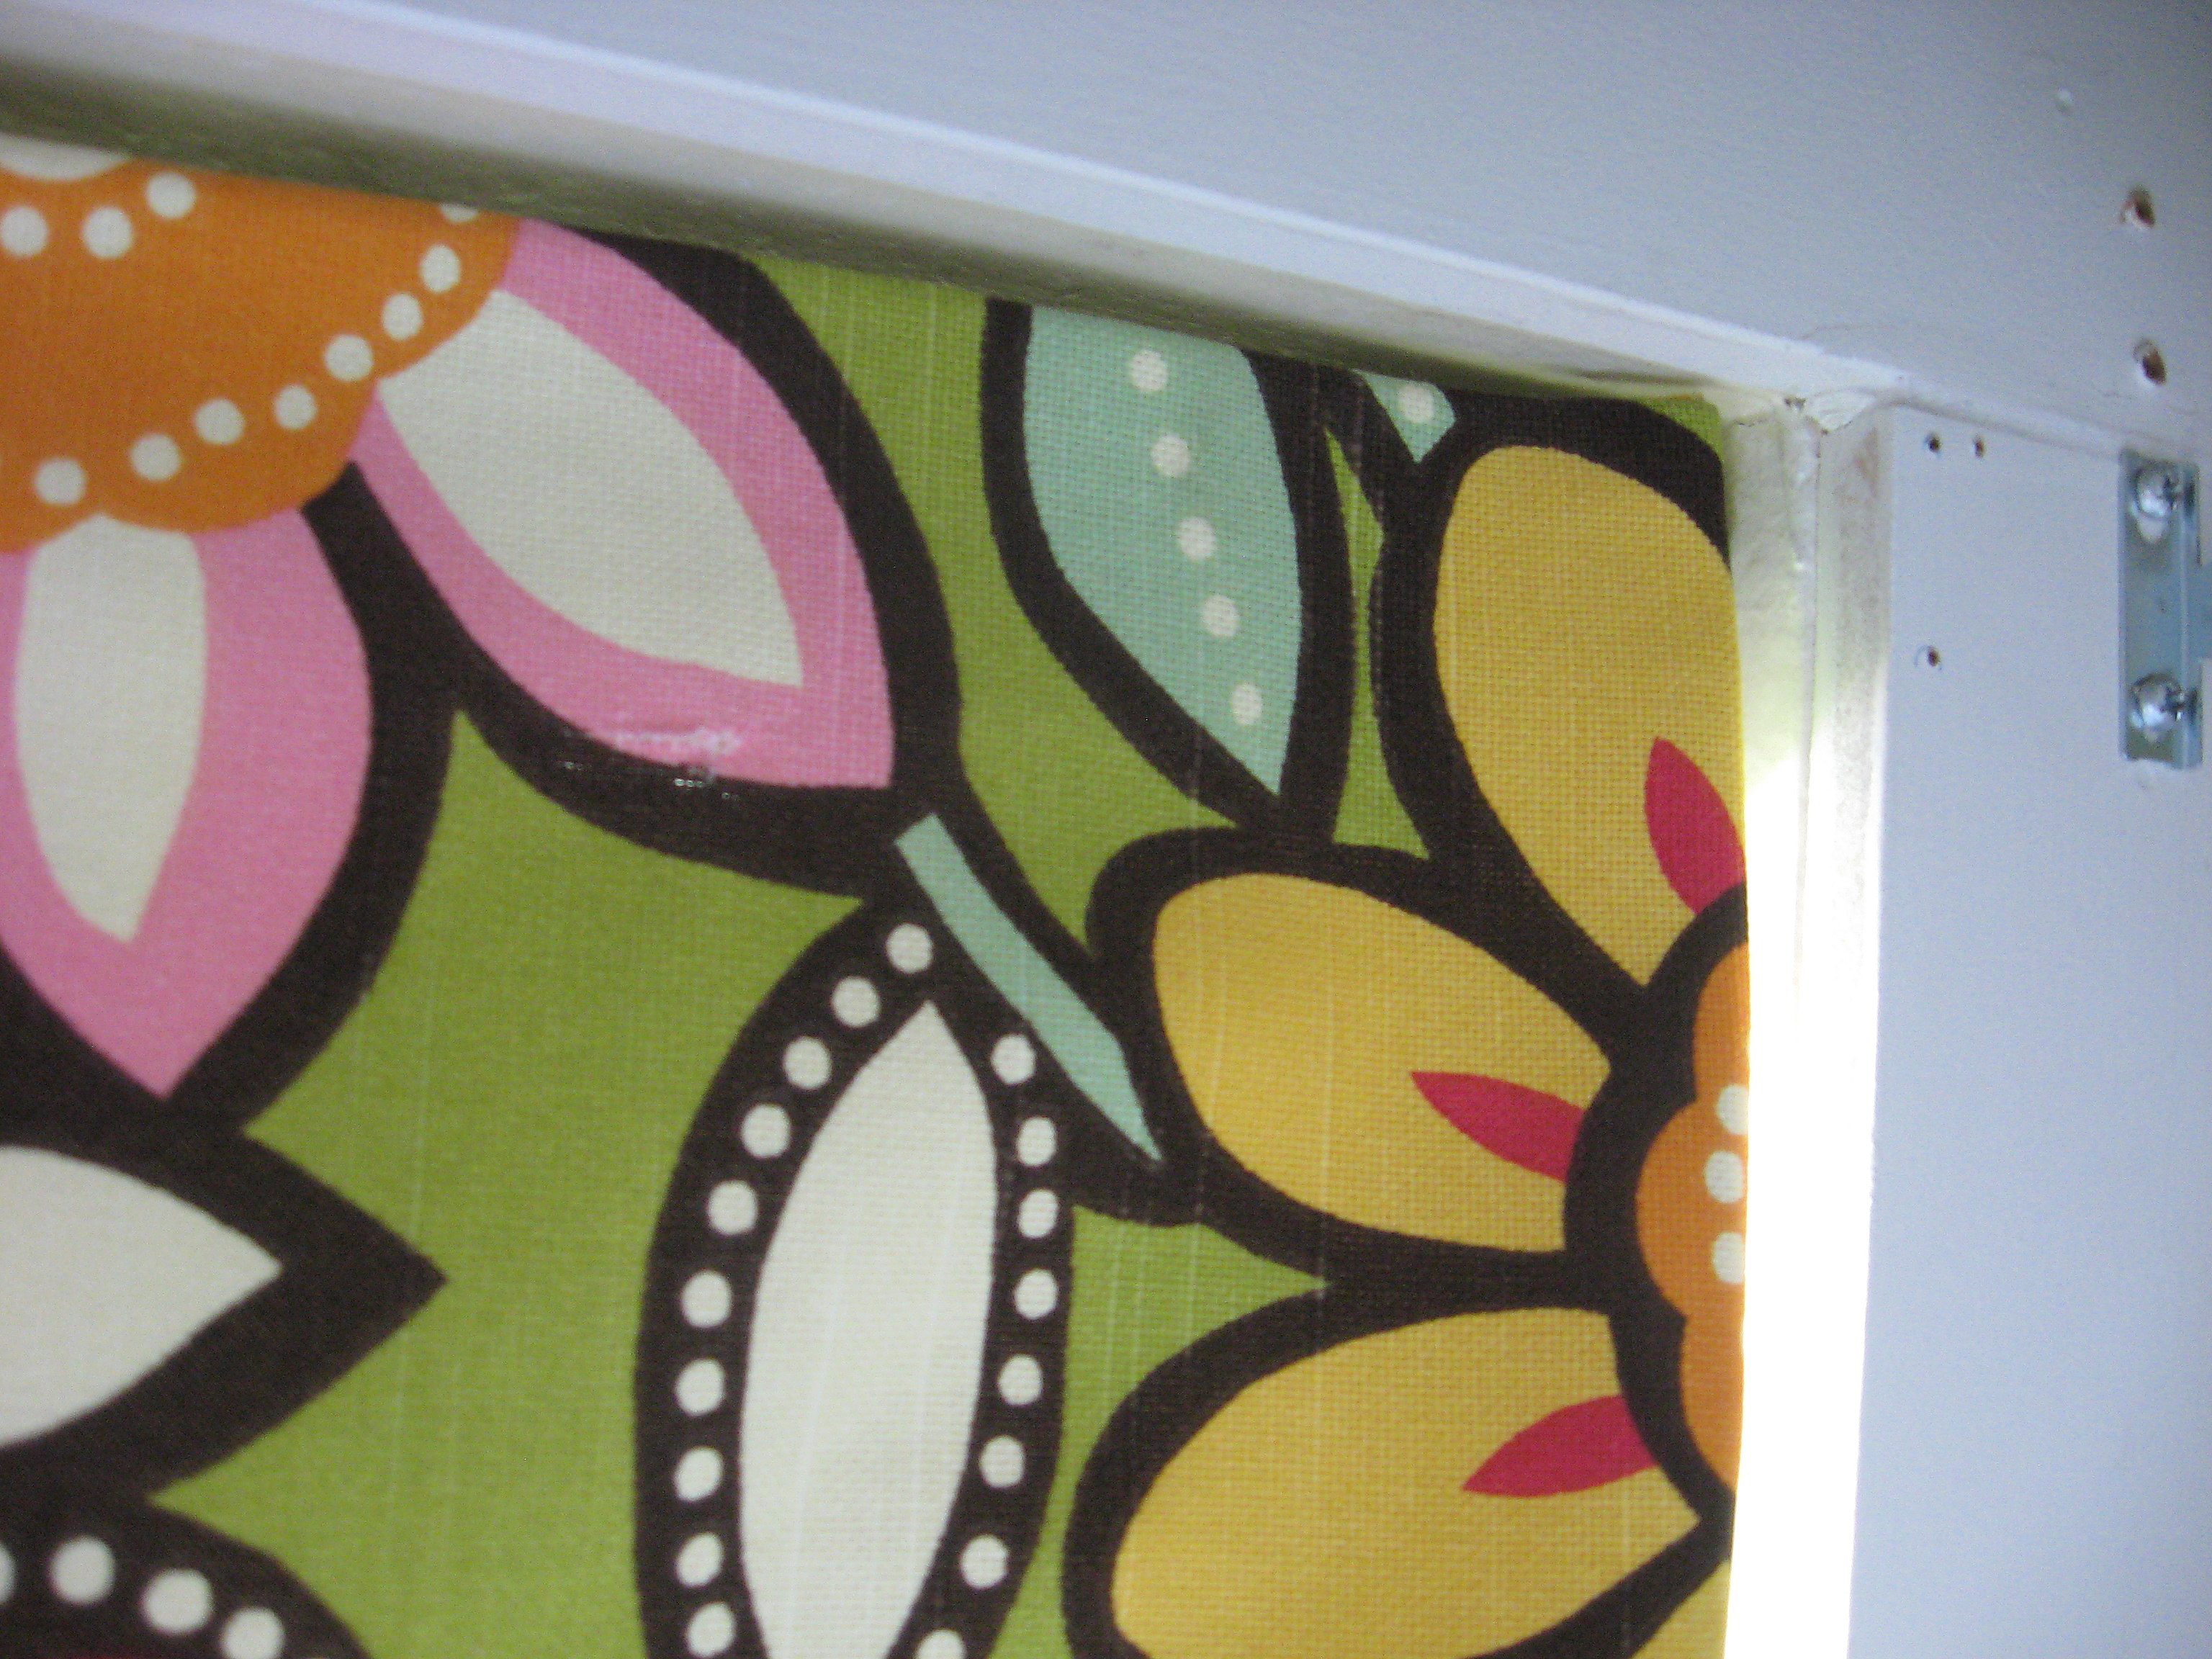
Remove all the slats and it will leave you with this:
Set this aside and prep the fabric.
I am using a piece of fabric and the plastic from the broken shade. You can buy black out fabric, or you can use just the decorative fabric if your shade is more decorative than for light control.
First, you will cut the black out fabric -if you’re using it- to size for your window. Then cut the decorative fabric to size plus one inch on all sides.
Fold the decorative fabric over 1/2 inch on all sides and iron.
Then fold over 1/2 inch again and iron.
BE CAREFUL if you are using plastic that you don’t melt it!
Now use fabric glue to glue this hem down on all four sides – gluing it to the black out fabric if you are using it.
Glue it down on all four sides and weight it down while it dries (I used the slats from the blinds).

Once that’s dry, you will glue the top of the blinds to the top of the fabric. Stop the glue a couple of inches from the ends so that you can hang it back in the brackets when you’re done.
Line it up carefully, weight it down and let it dry. Make sure you don’t get glue on any of the strings.
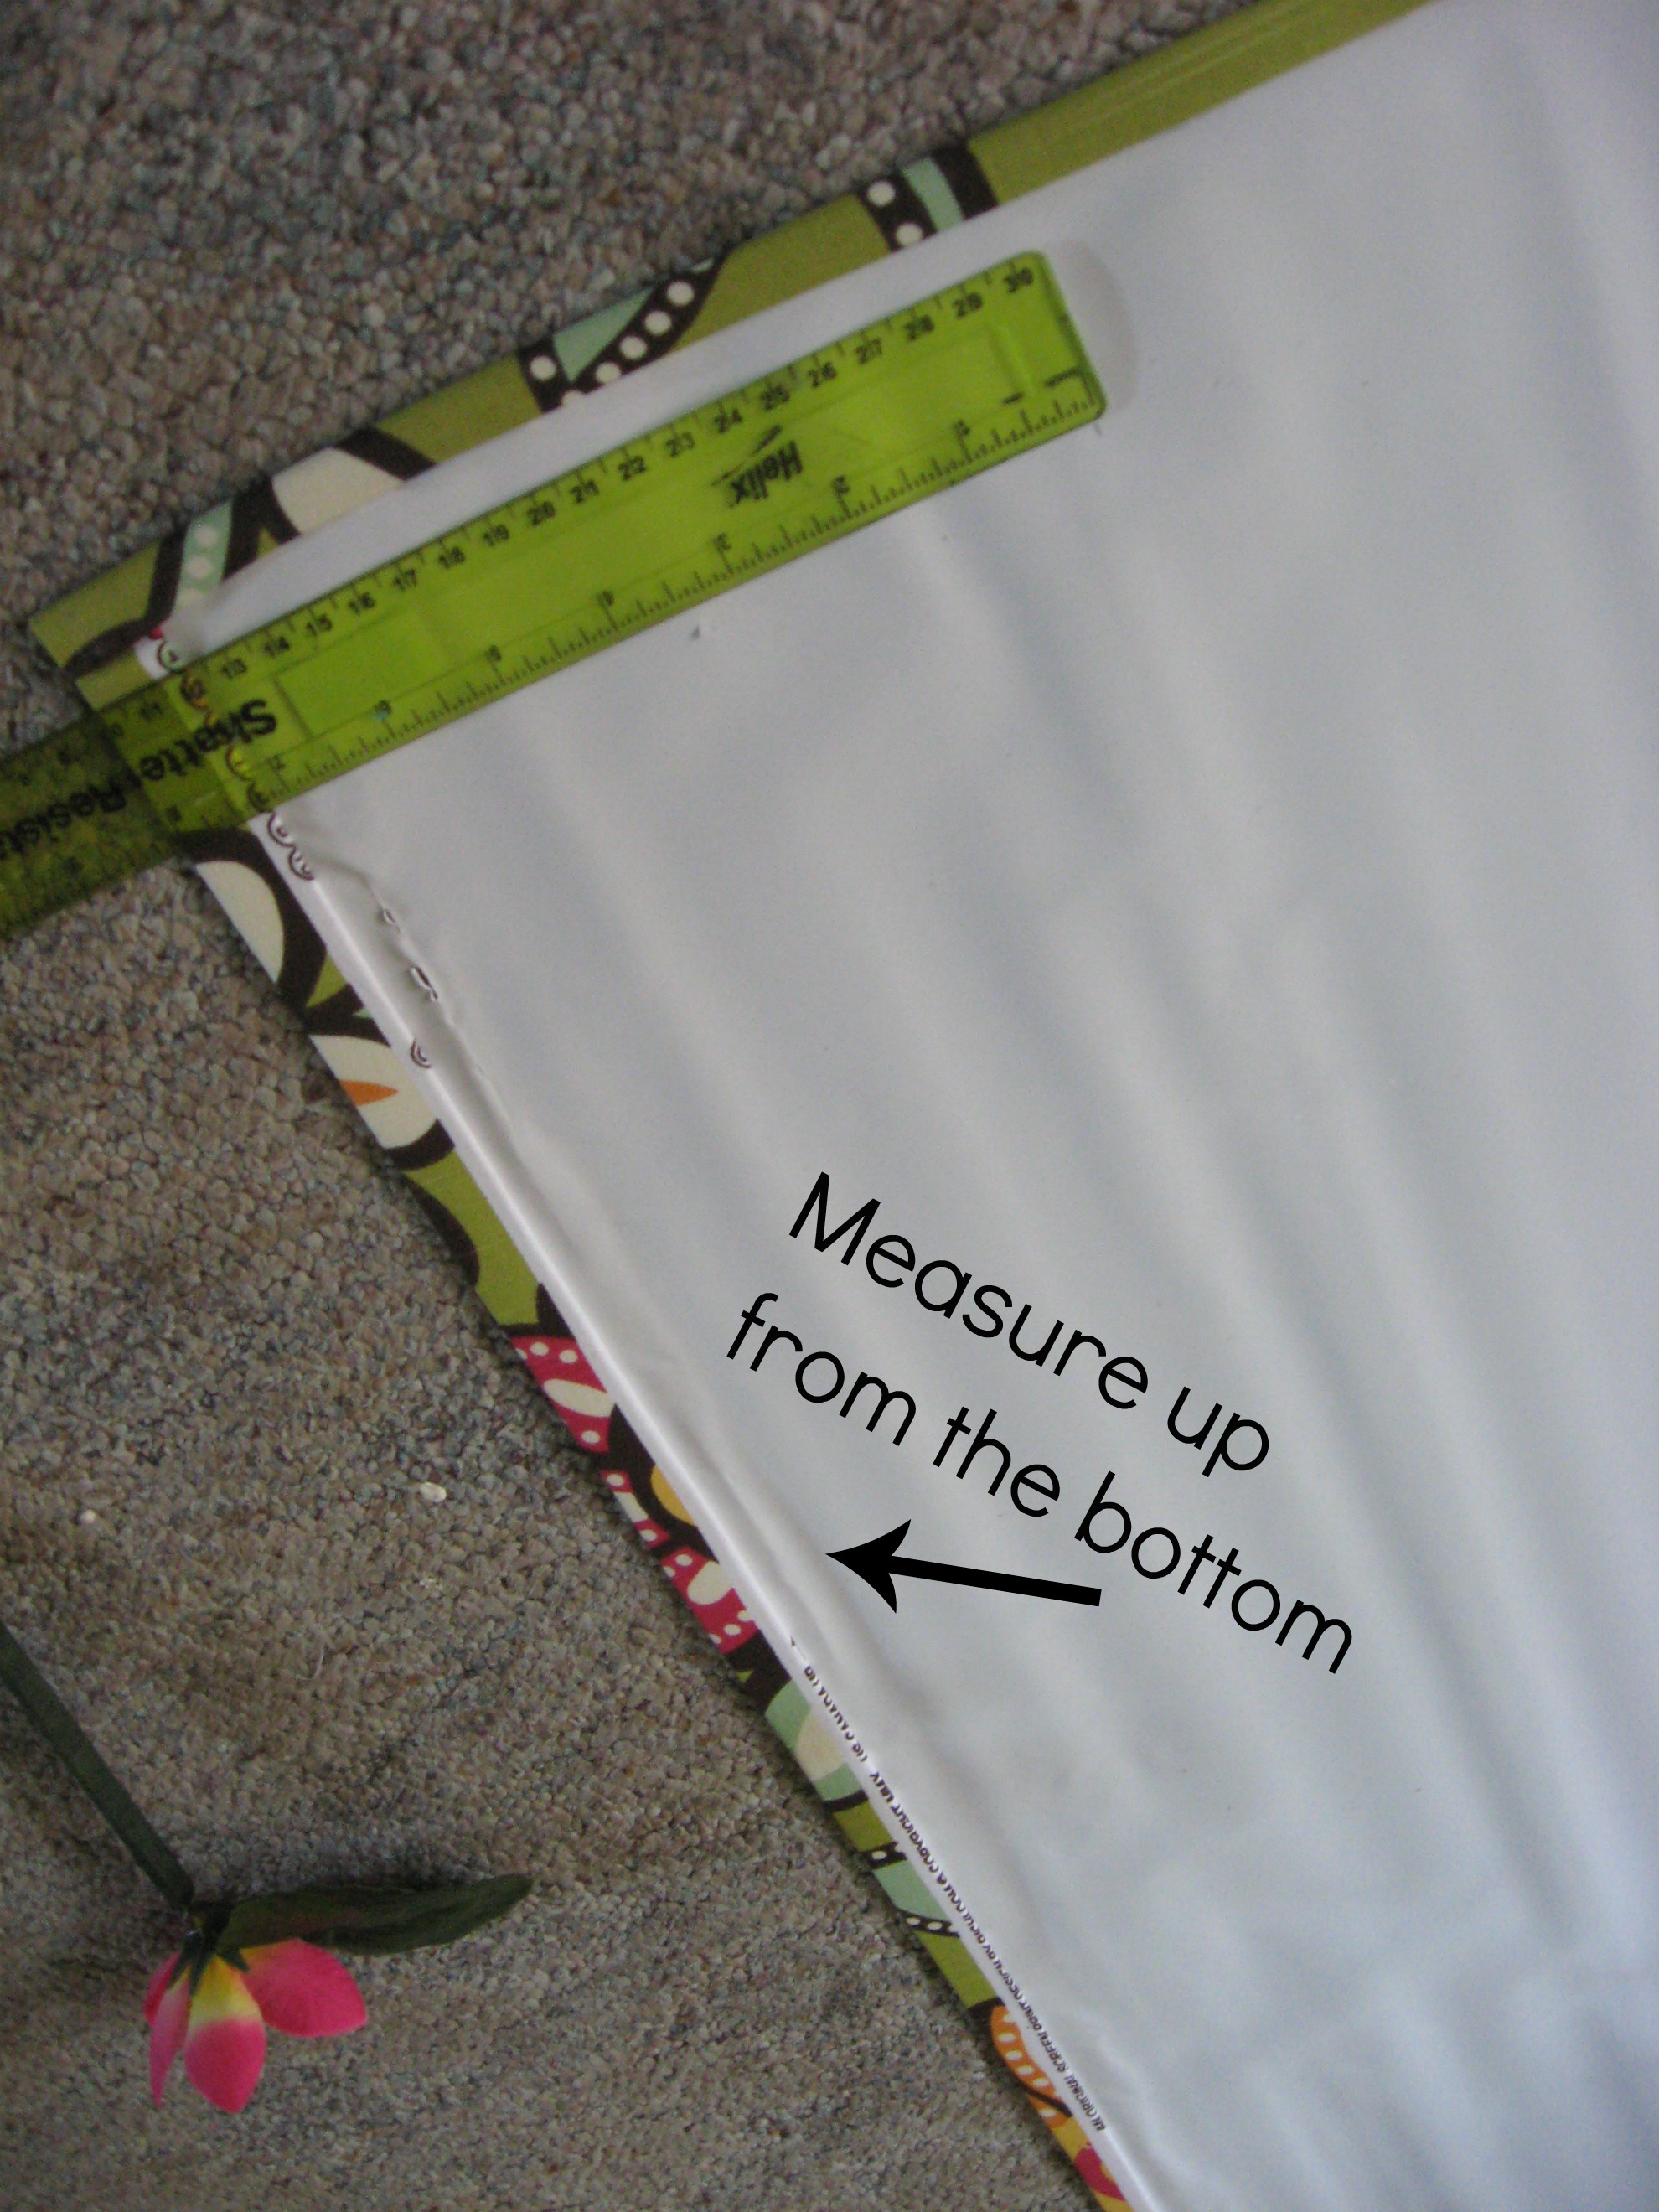
Once that’s dry, you will start to reassemble the shade. First, you need to decide how many folds you want in the shade when it opens. It’s totally up to you; I just measured the length of my shade and came up with a number that made sense to me; mine are about 9 inches apart.
Start at the bottom of the shade and measure up, making a mark on each side of the shade.
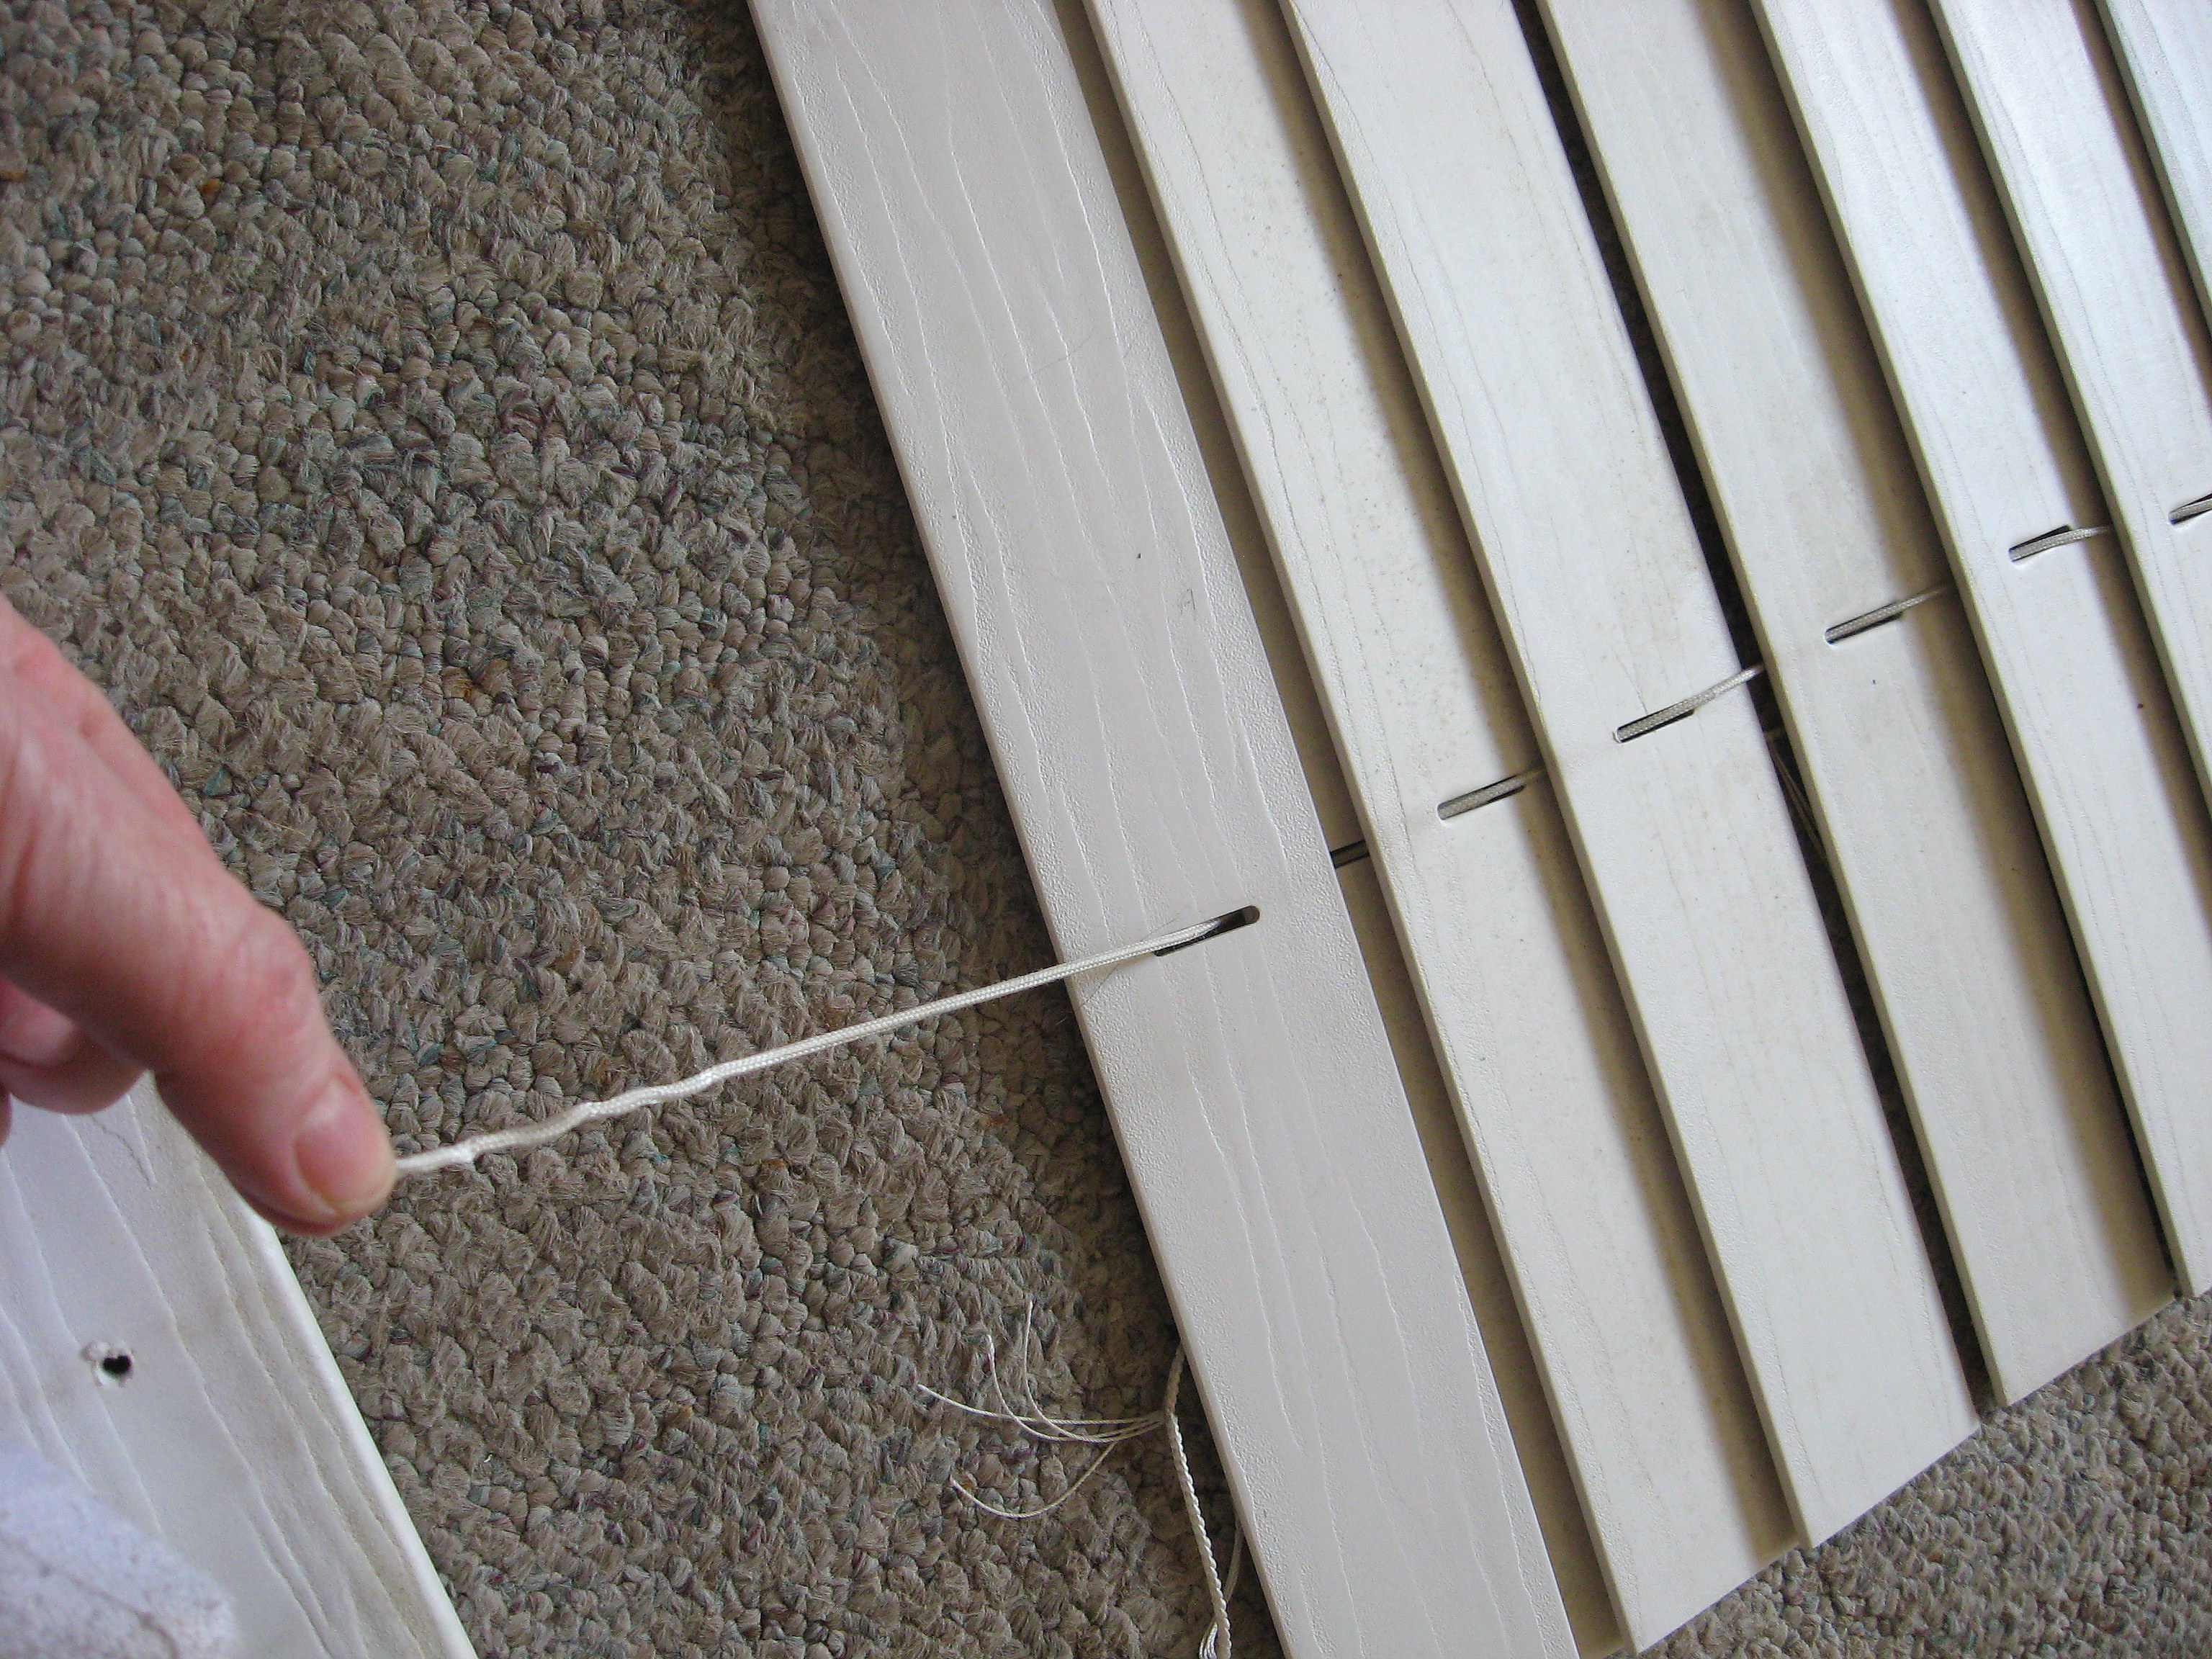
However many folds you want (however many marks you made) – that’s how many slats you will use. Slide them back onto the strings.

Put glue on the back of the slat – being careful to avoid the strings – and line it up with the marks you made.
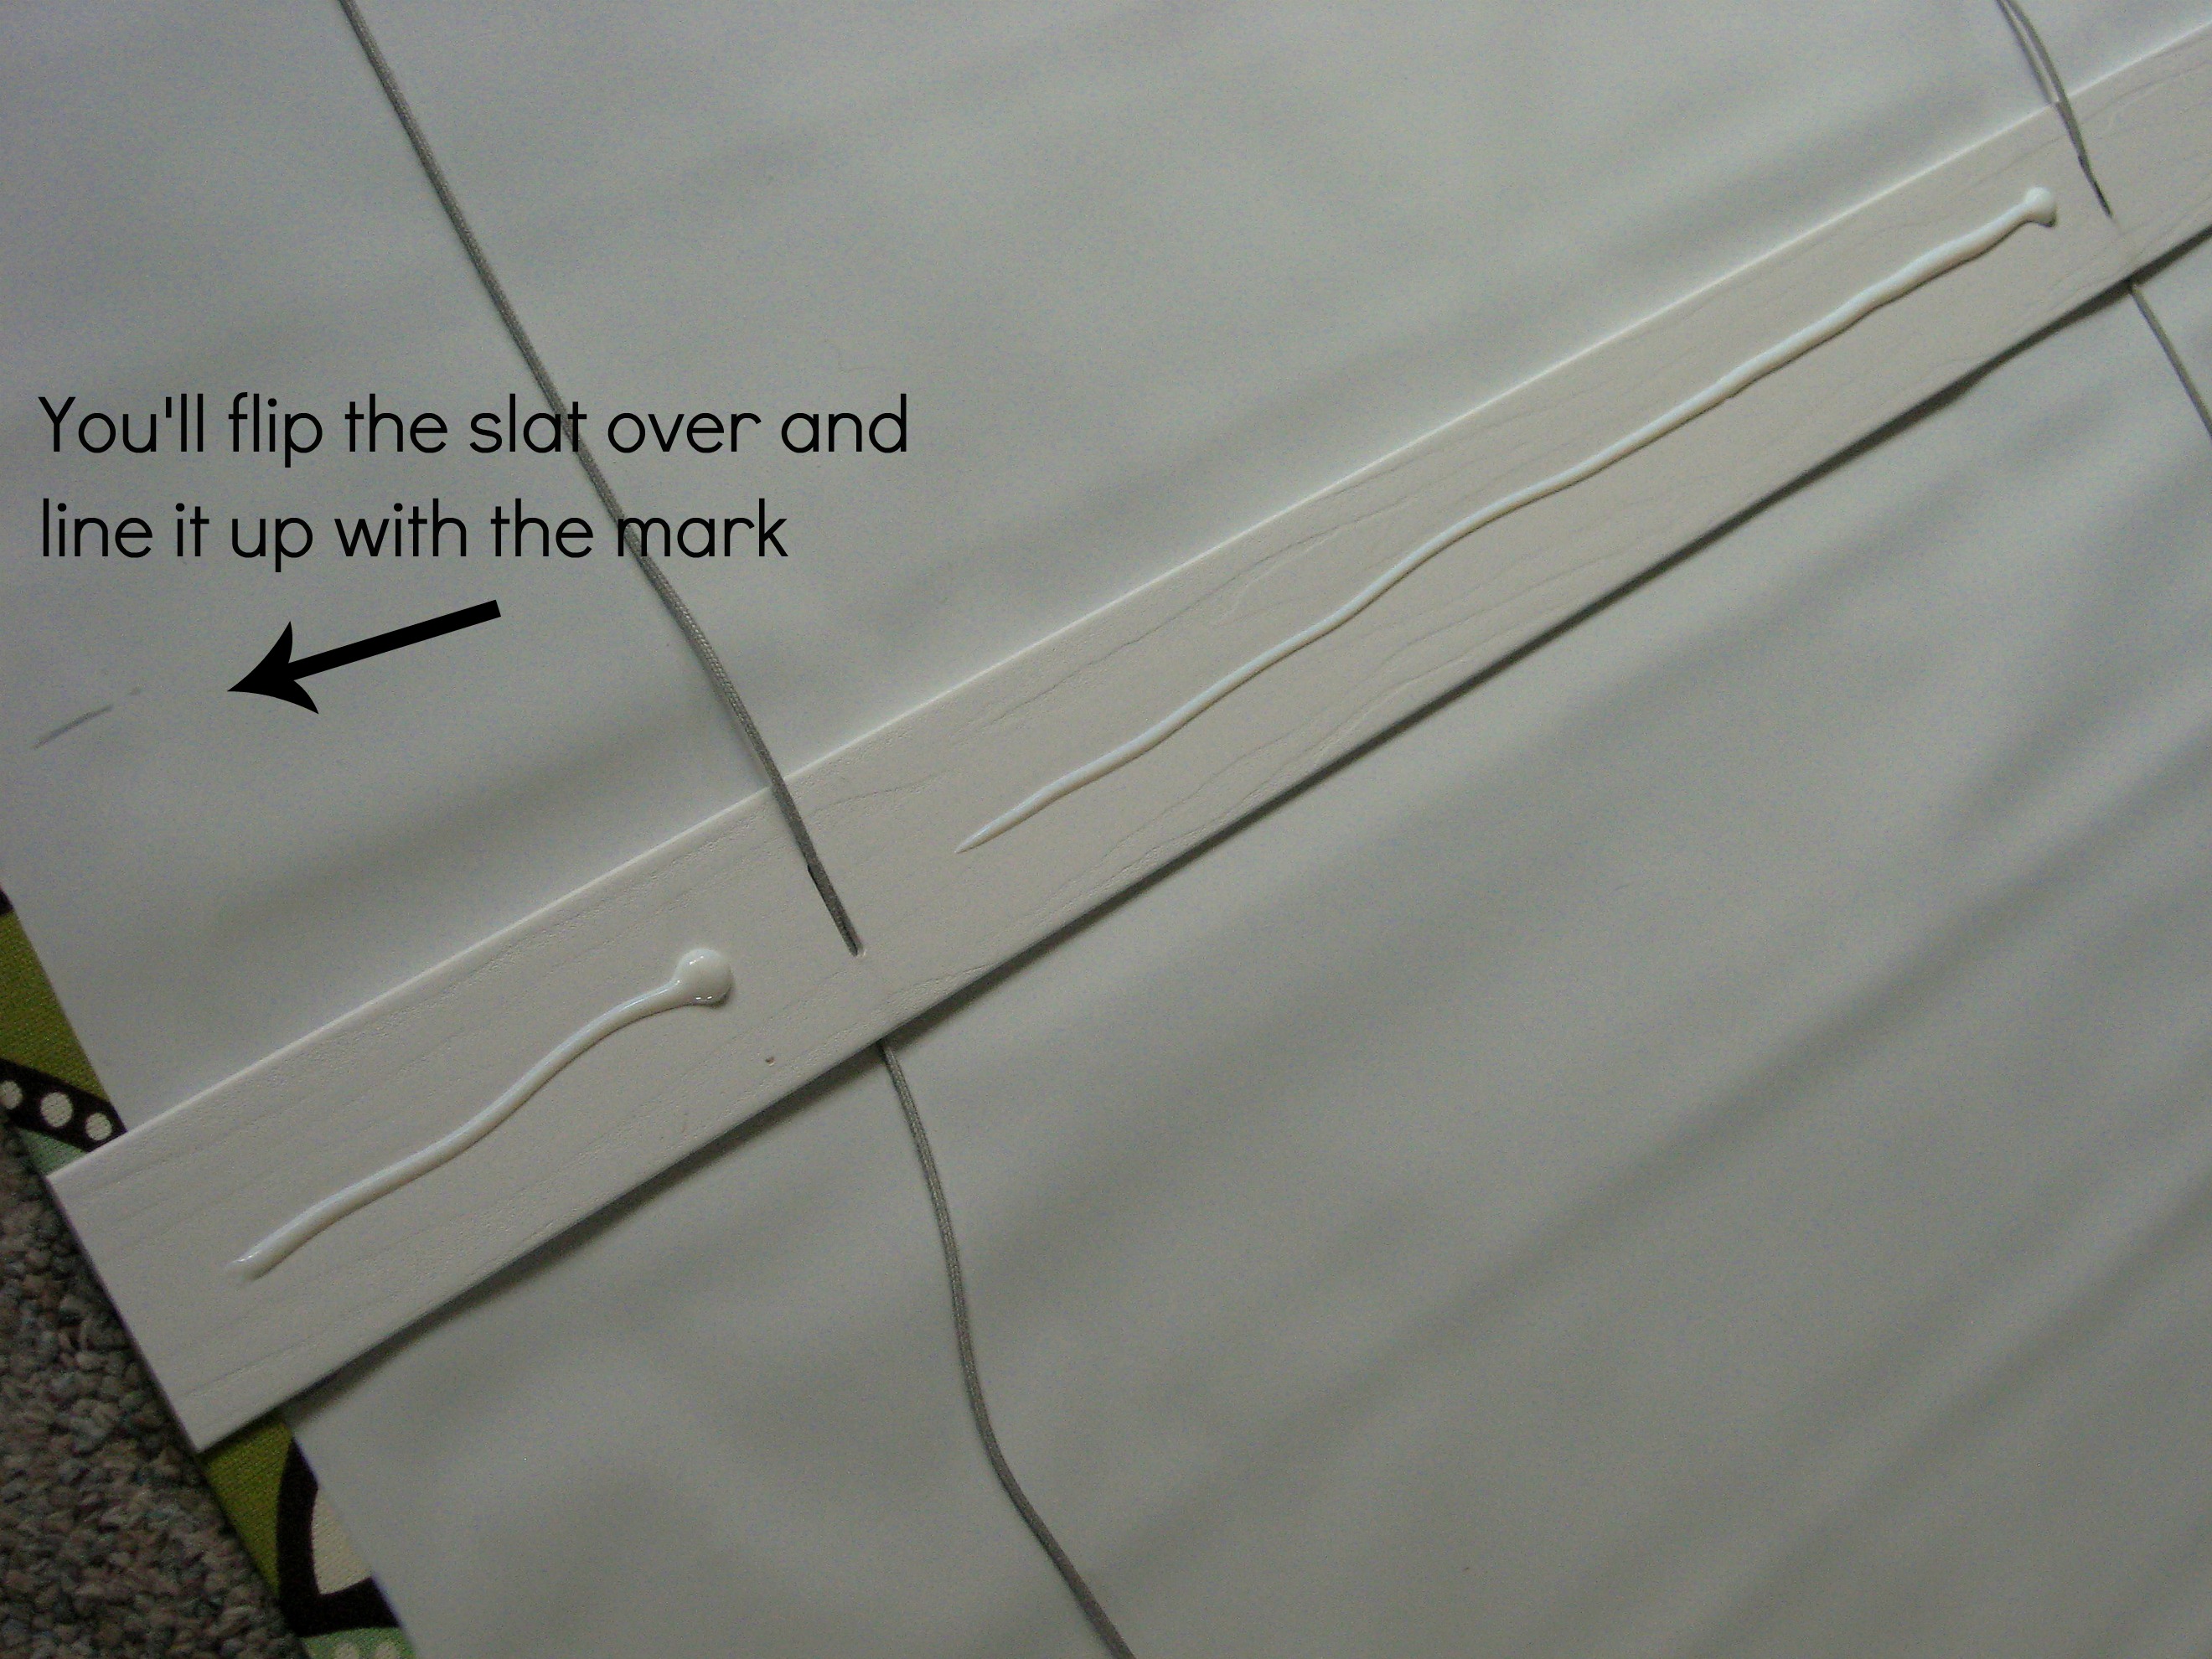
Repeat for all of the marks, weight them down and let them dry.
Now restring the bottom board back on, glue it to the bottom of the shade, and weight it down while it dries.

When everything is dry, retie the strings at the bottom and replace the little plastic plugs.
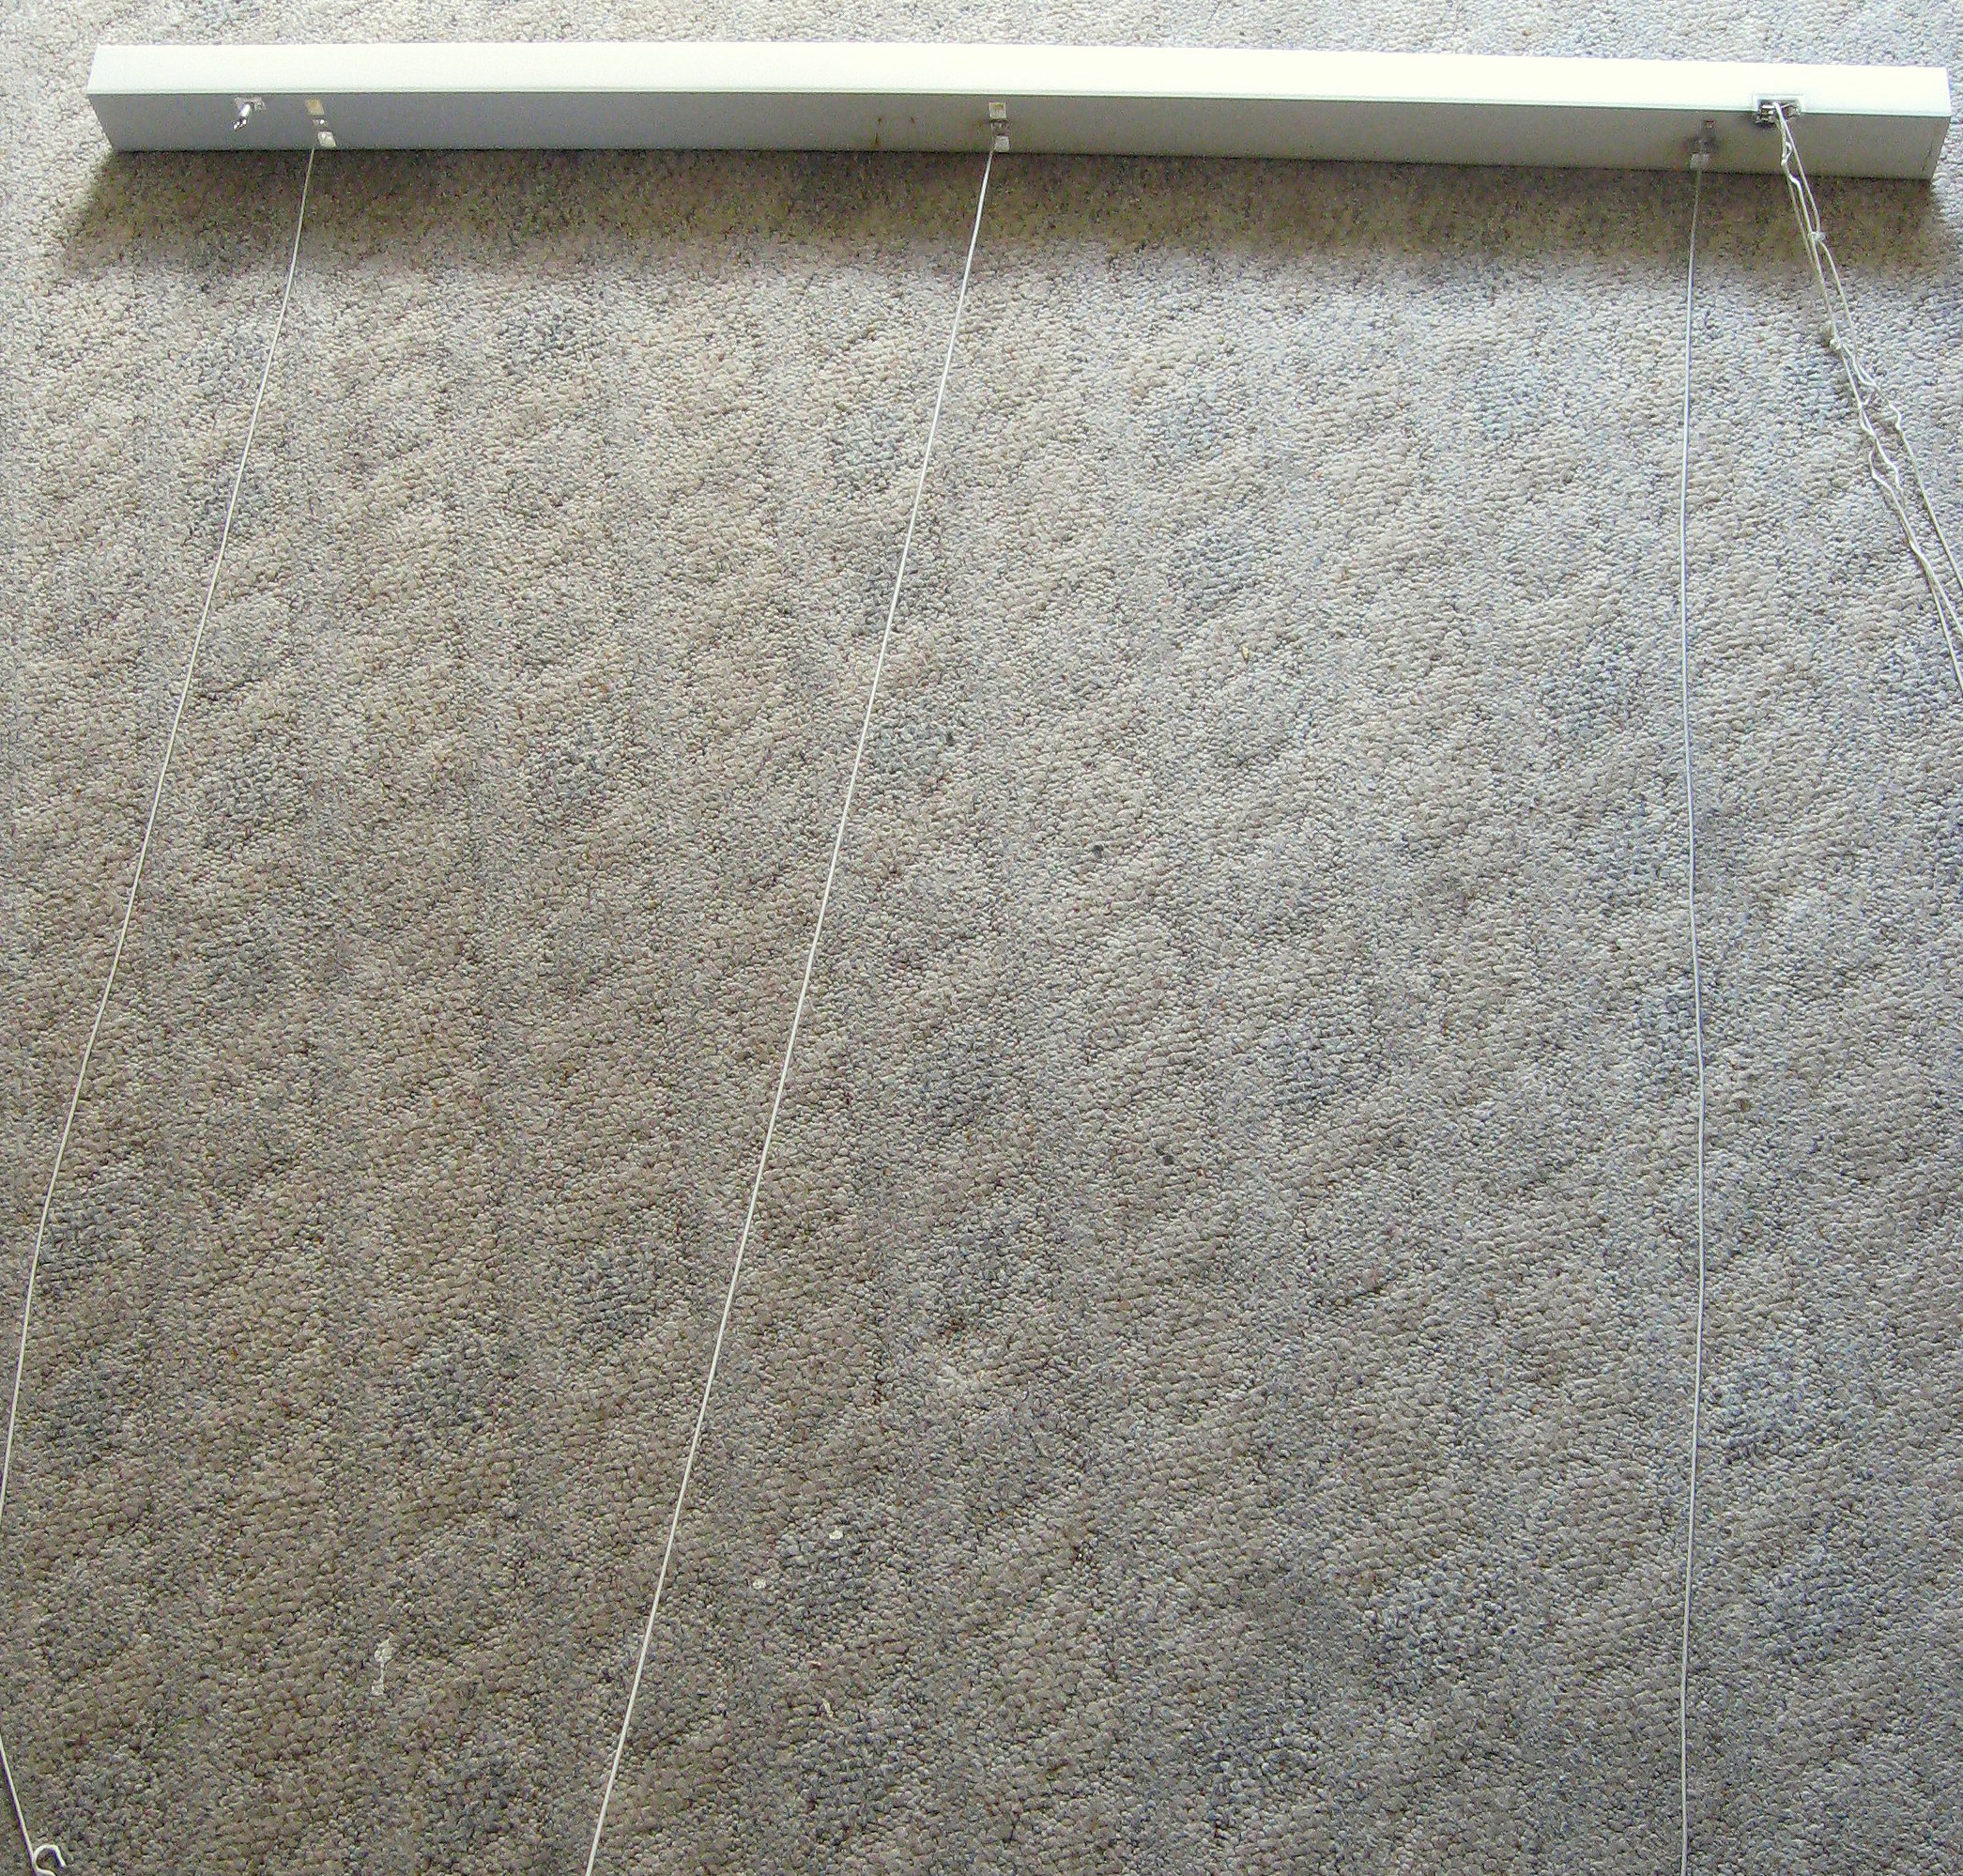
Now rehang the blinds in the brackets. You can see here how I left the fabric loose at the ends, so that I could lock the blinds back in the bracket properly.

But it lies nice and flat:
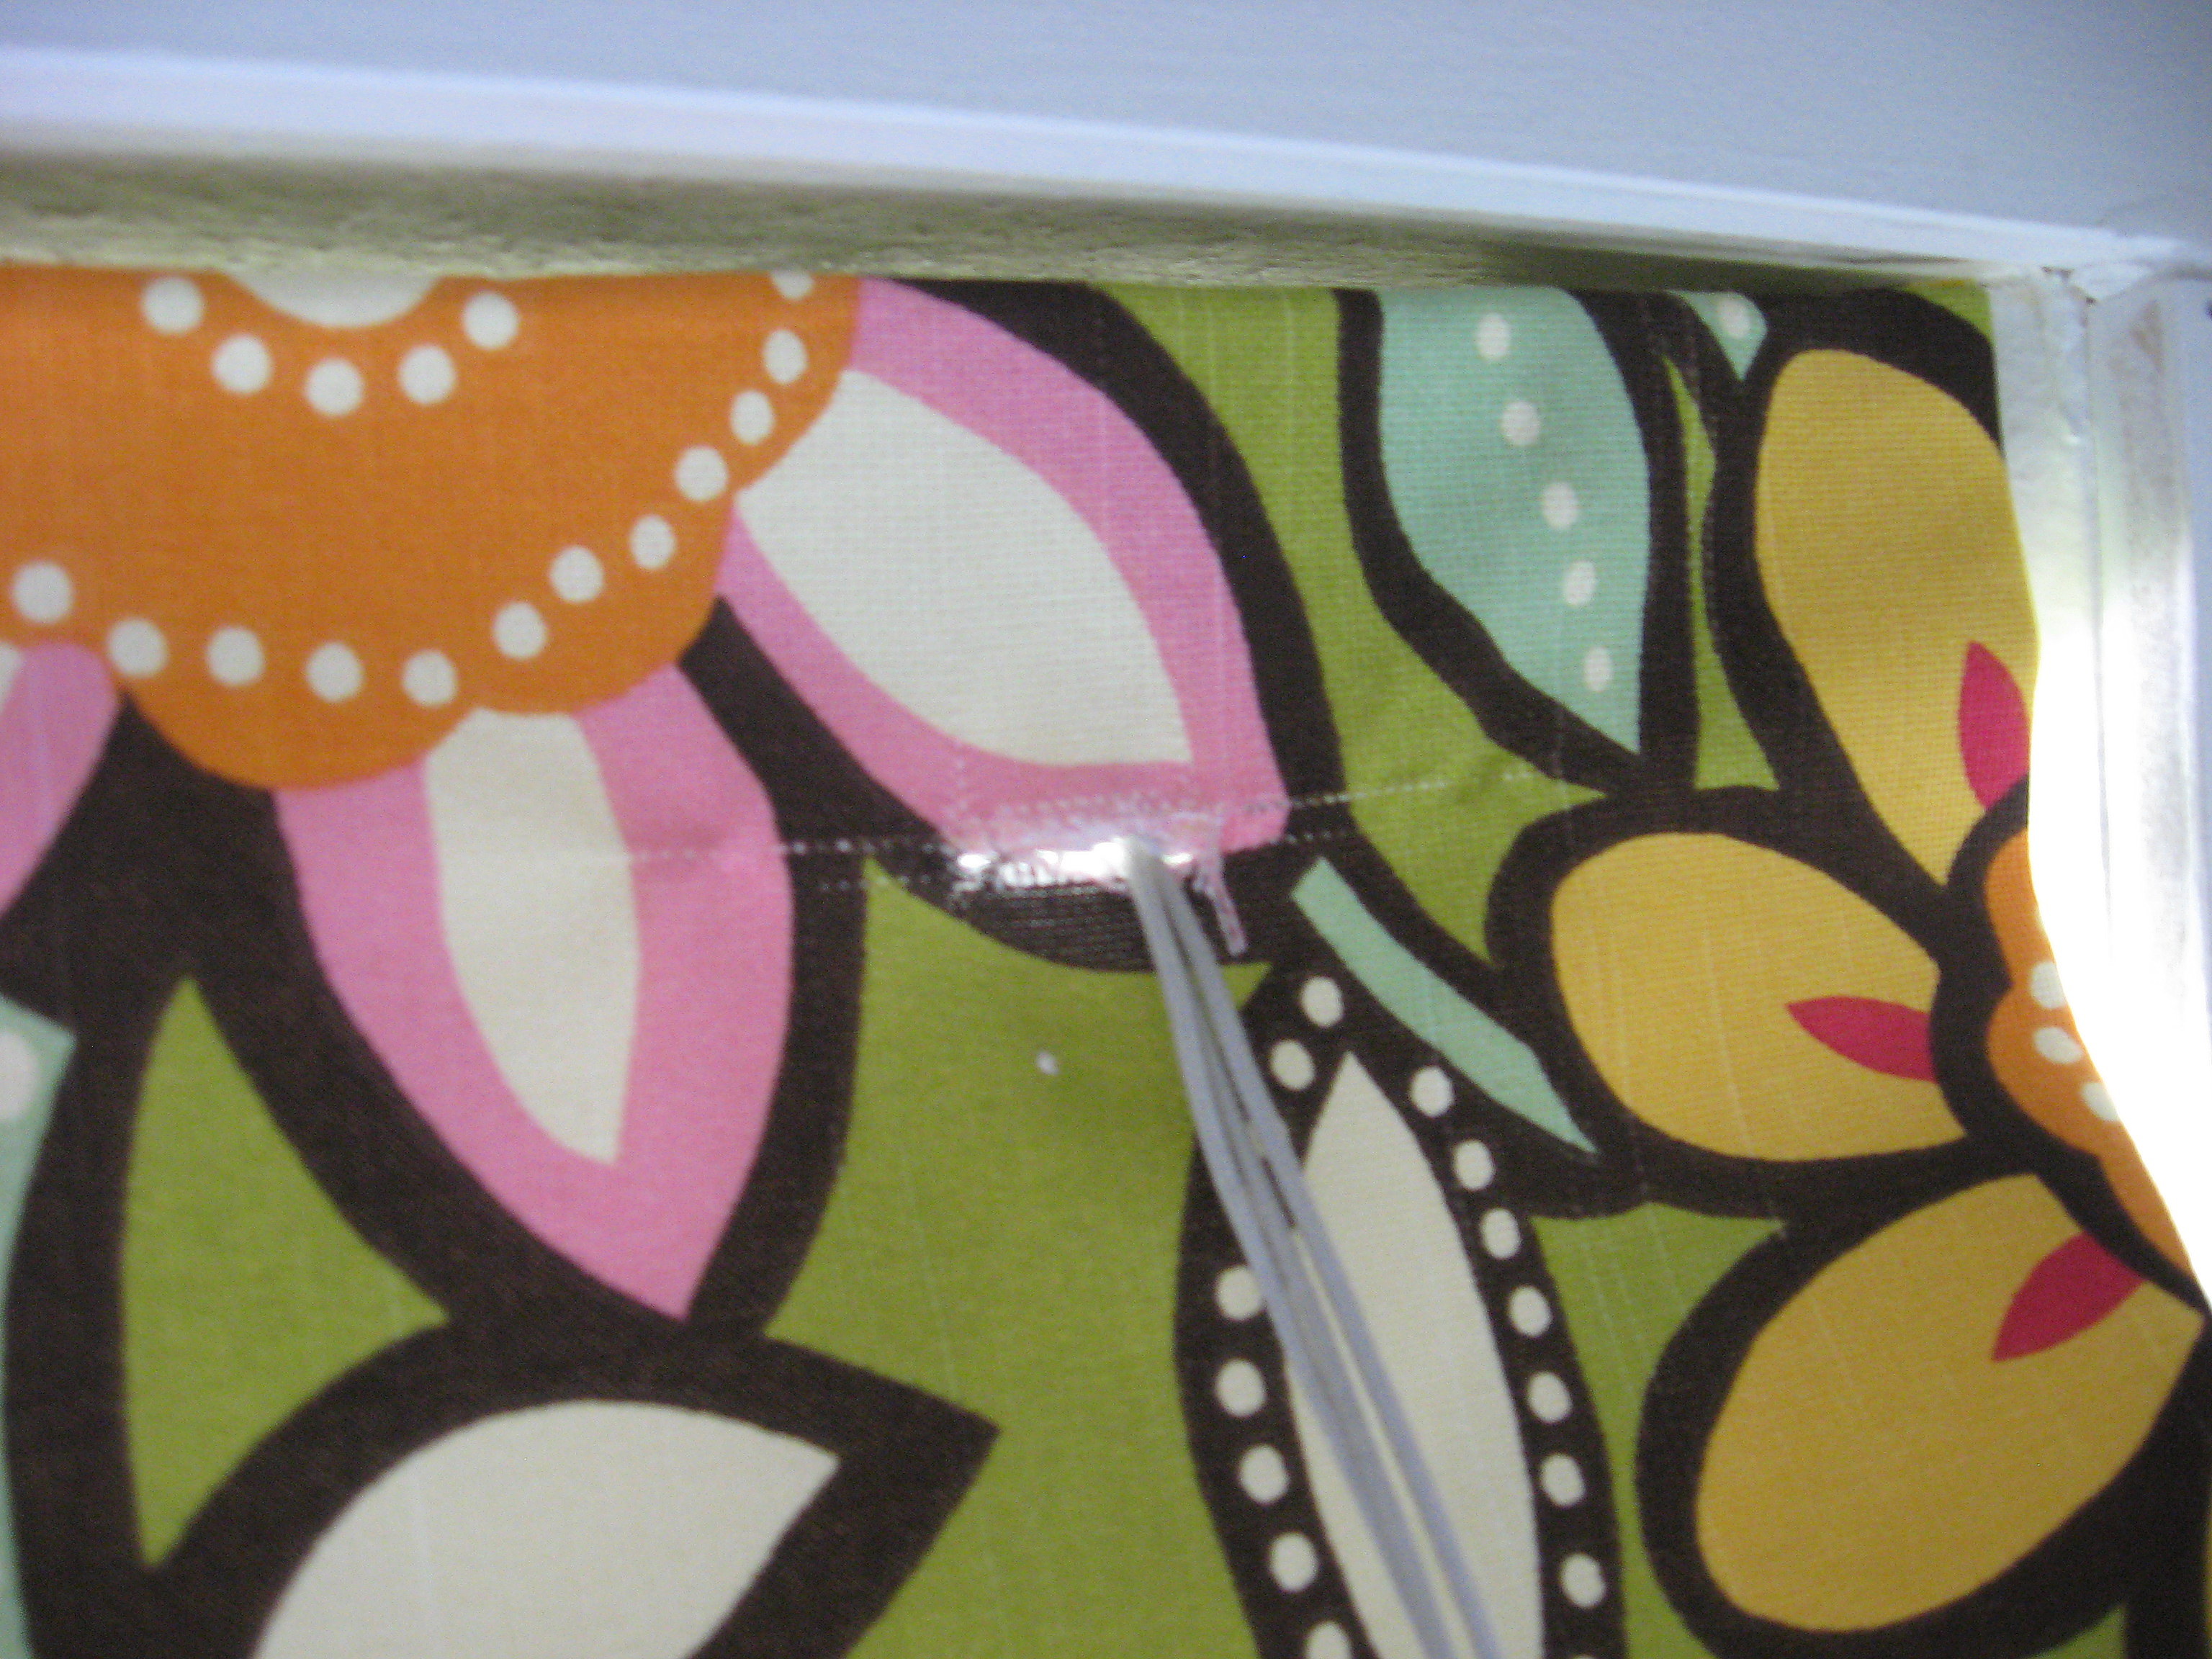
At this point the strings are behind the blind. I’ve seen people deal with this a couple of ways; I’ve seen a few people glue the fabric to the BACK of the top bar on the blinds, but I don’t like the way that looks. Most people seem to leave it behind – you can open and close the shade, but I think it’s inconvenient, and since this is in my little girl’s room I needed her to be able to do it on her own.
I opted to cut a slit in the shade right where the pull strings come out of the top bar. I threaded the pull strings through the slit to the front of the shade. Put a little fabric glue on the fabric around the slit so that it doesn’t fray or tear.
Here they are open:

And closed:
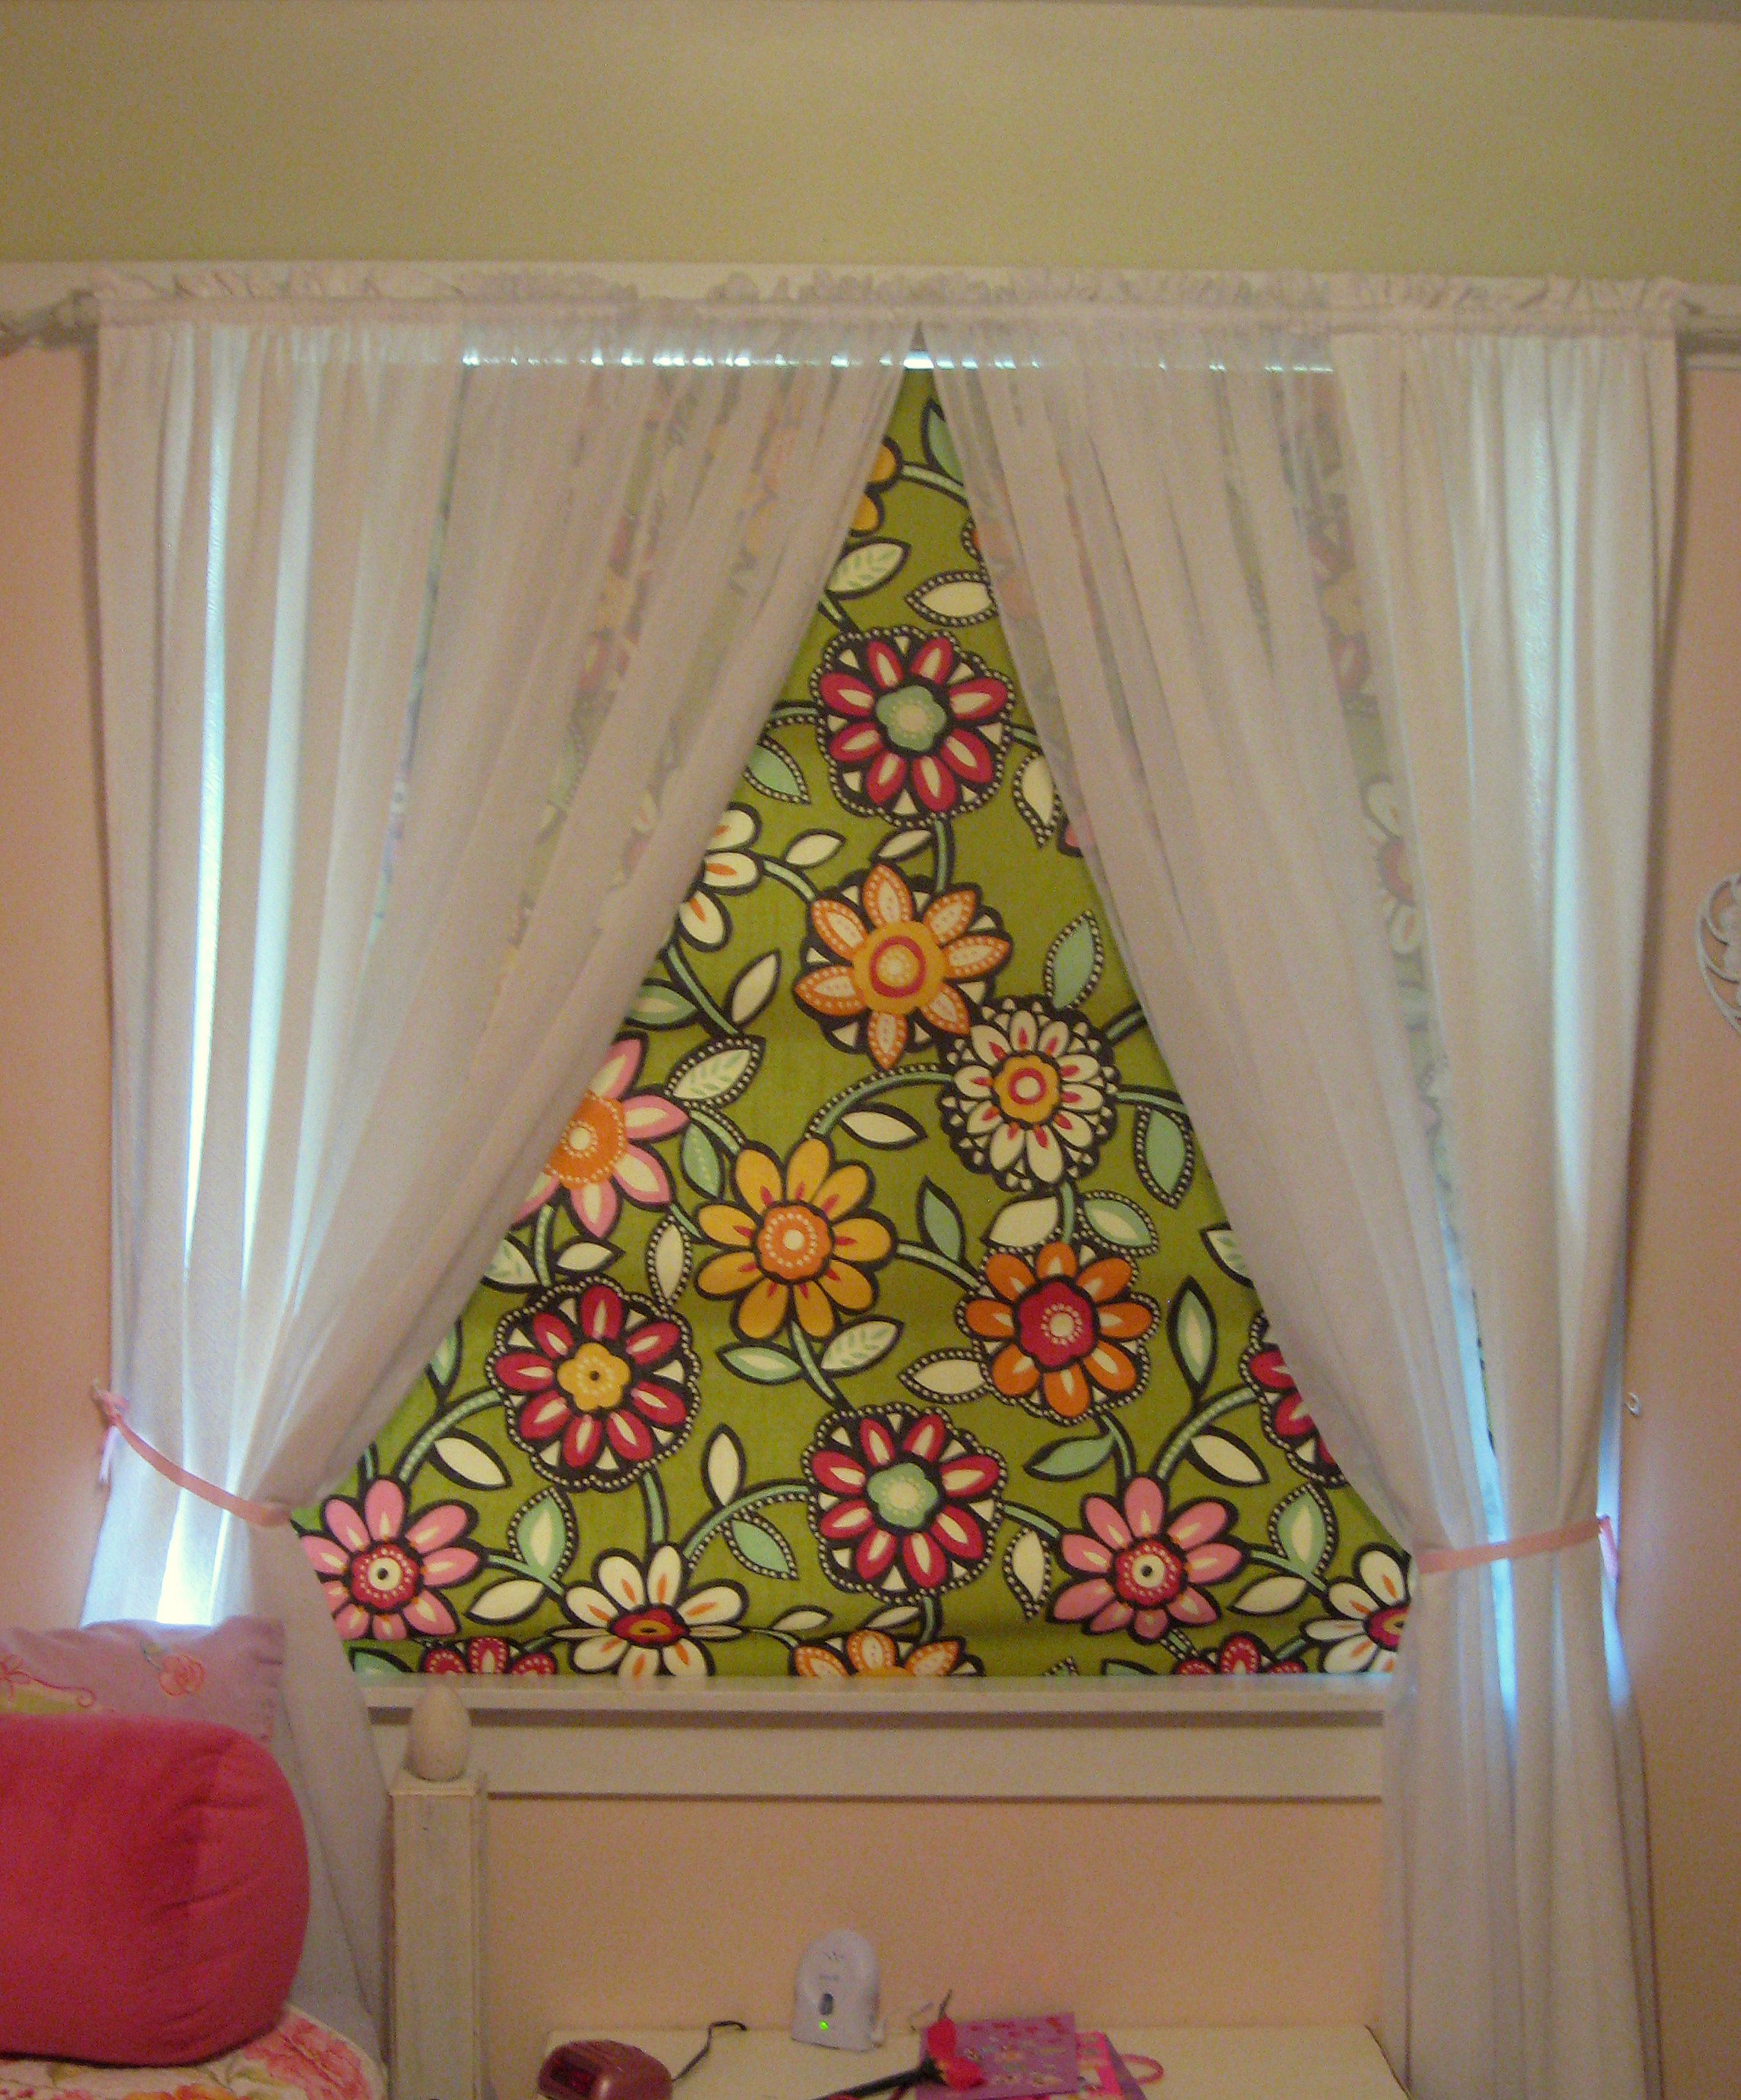
Much better!
A PYP Best Blog! Update a Boring Ceiling Fan!
Just in case you missed this article on updating a boring ceiling fan the first time we shared it a couple of years ago, we are republishing it. After Sharon wrote this blog originally, we got an awesome response. This is one of the PYP Best Blogs!
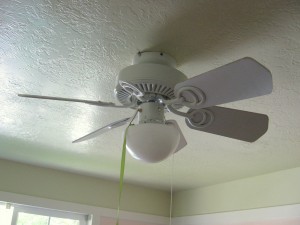
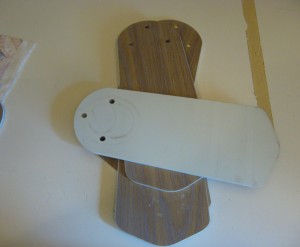
This is the ceiling fan that was in my daughter’s room when we bought our house:
I used the leftover fabric from the roman shade that I made for her room and a bottle of Mod Podge and the whole project took about an hour.
Start by removing the fan blades. They come off easily with a screwdriver. Use this opportunity to give both fan and blades a good scrubbing!
Most fan blades will be reversible with a different color on each side so that you can change them out if you want to. This fan had brown wood grain on the other side, and since I can’t see myself EVER using it that way, that is the side I decided to cover.
Lay a fan blade out on the backside of the fabric and trace around it once for each fan blade, then cut them out.
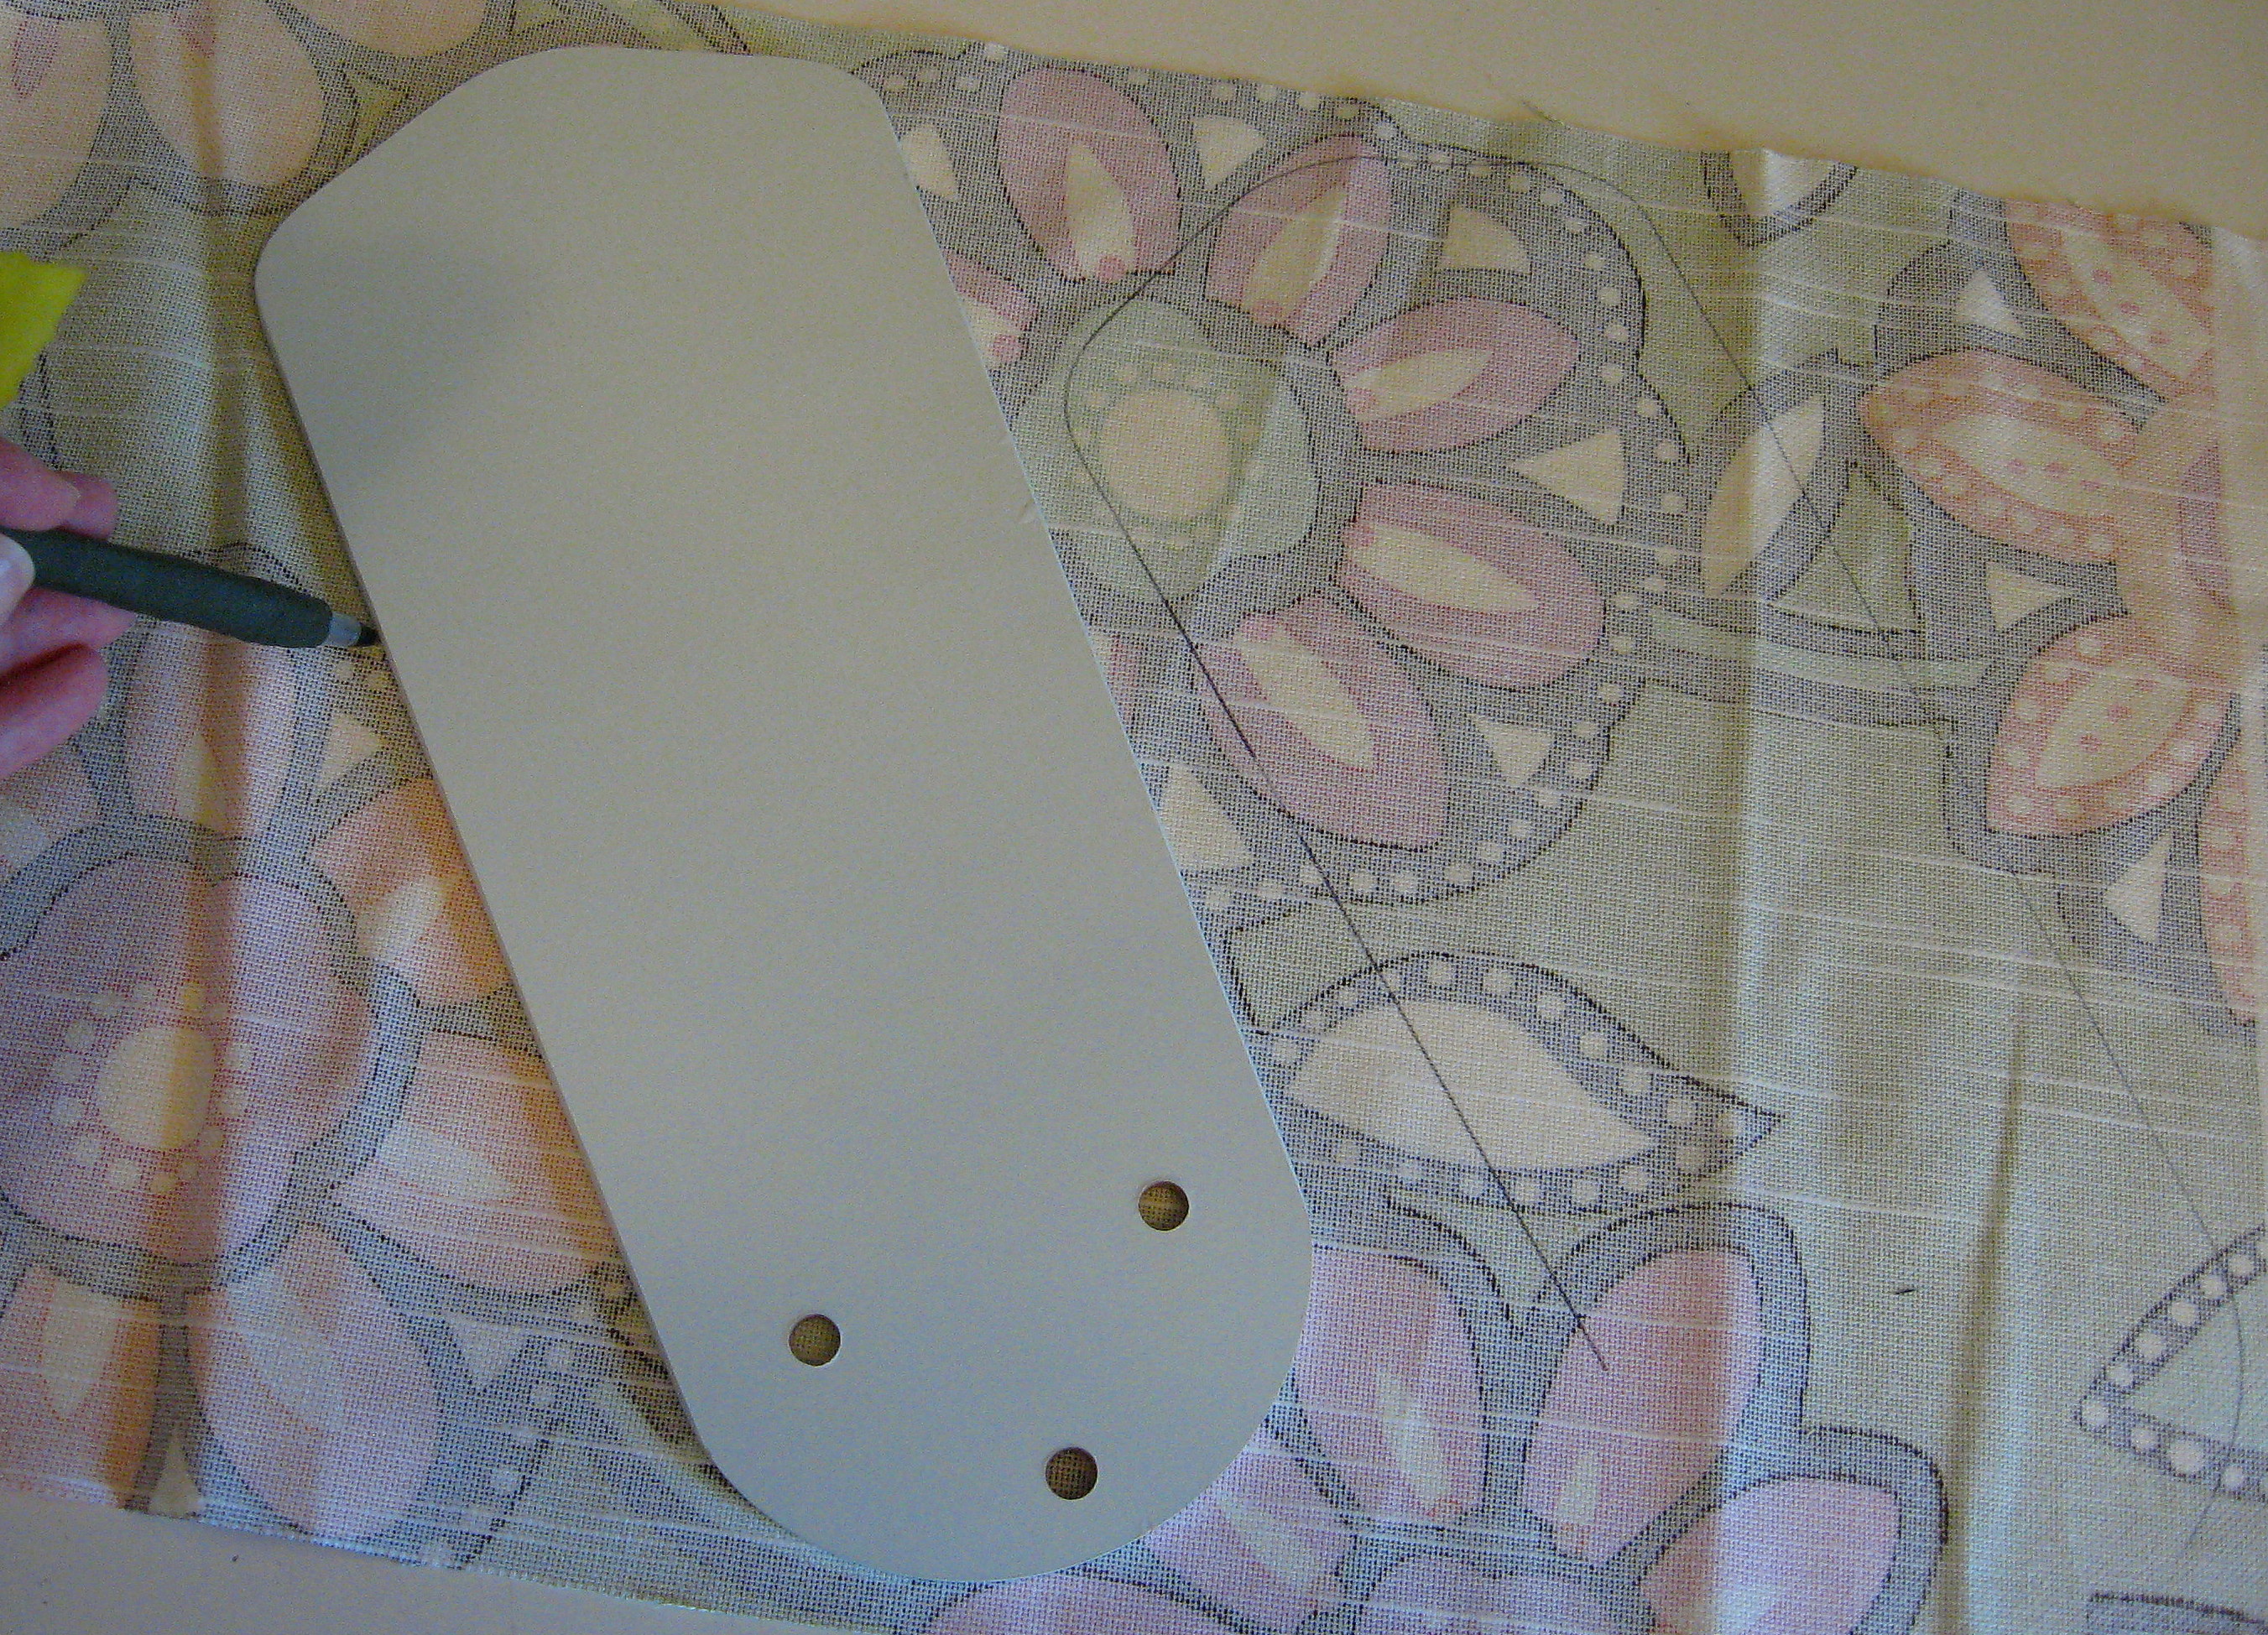
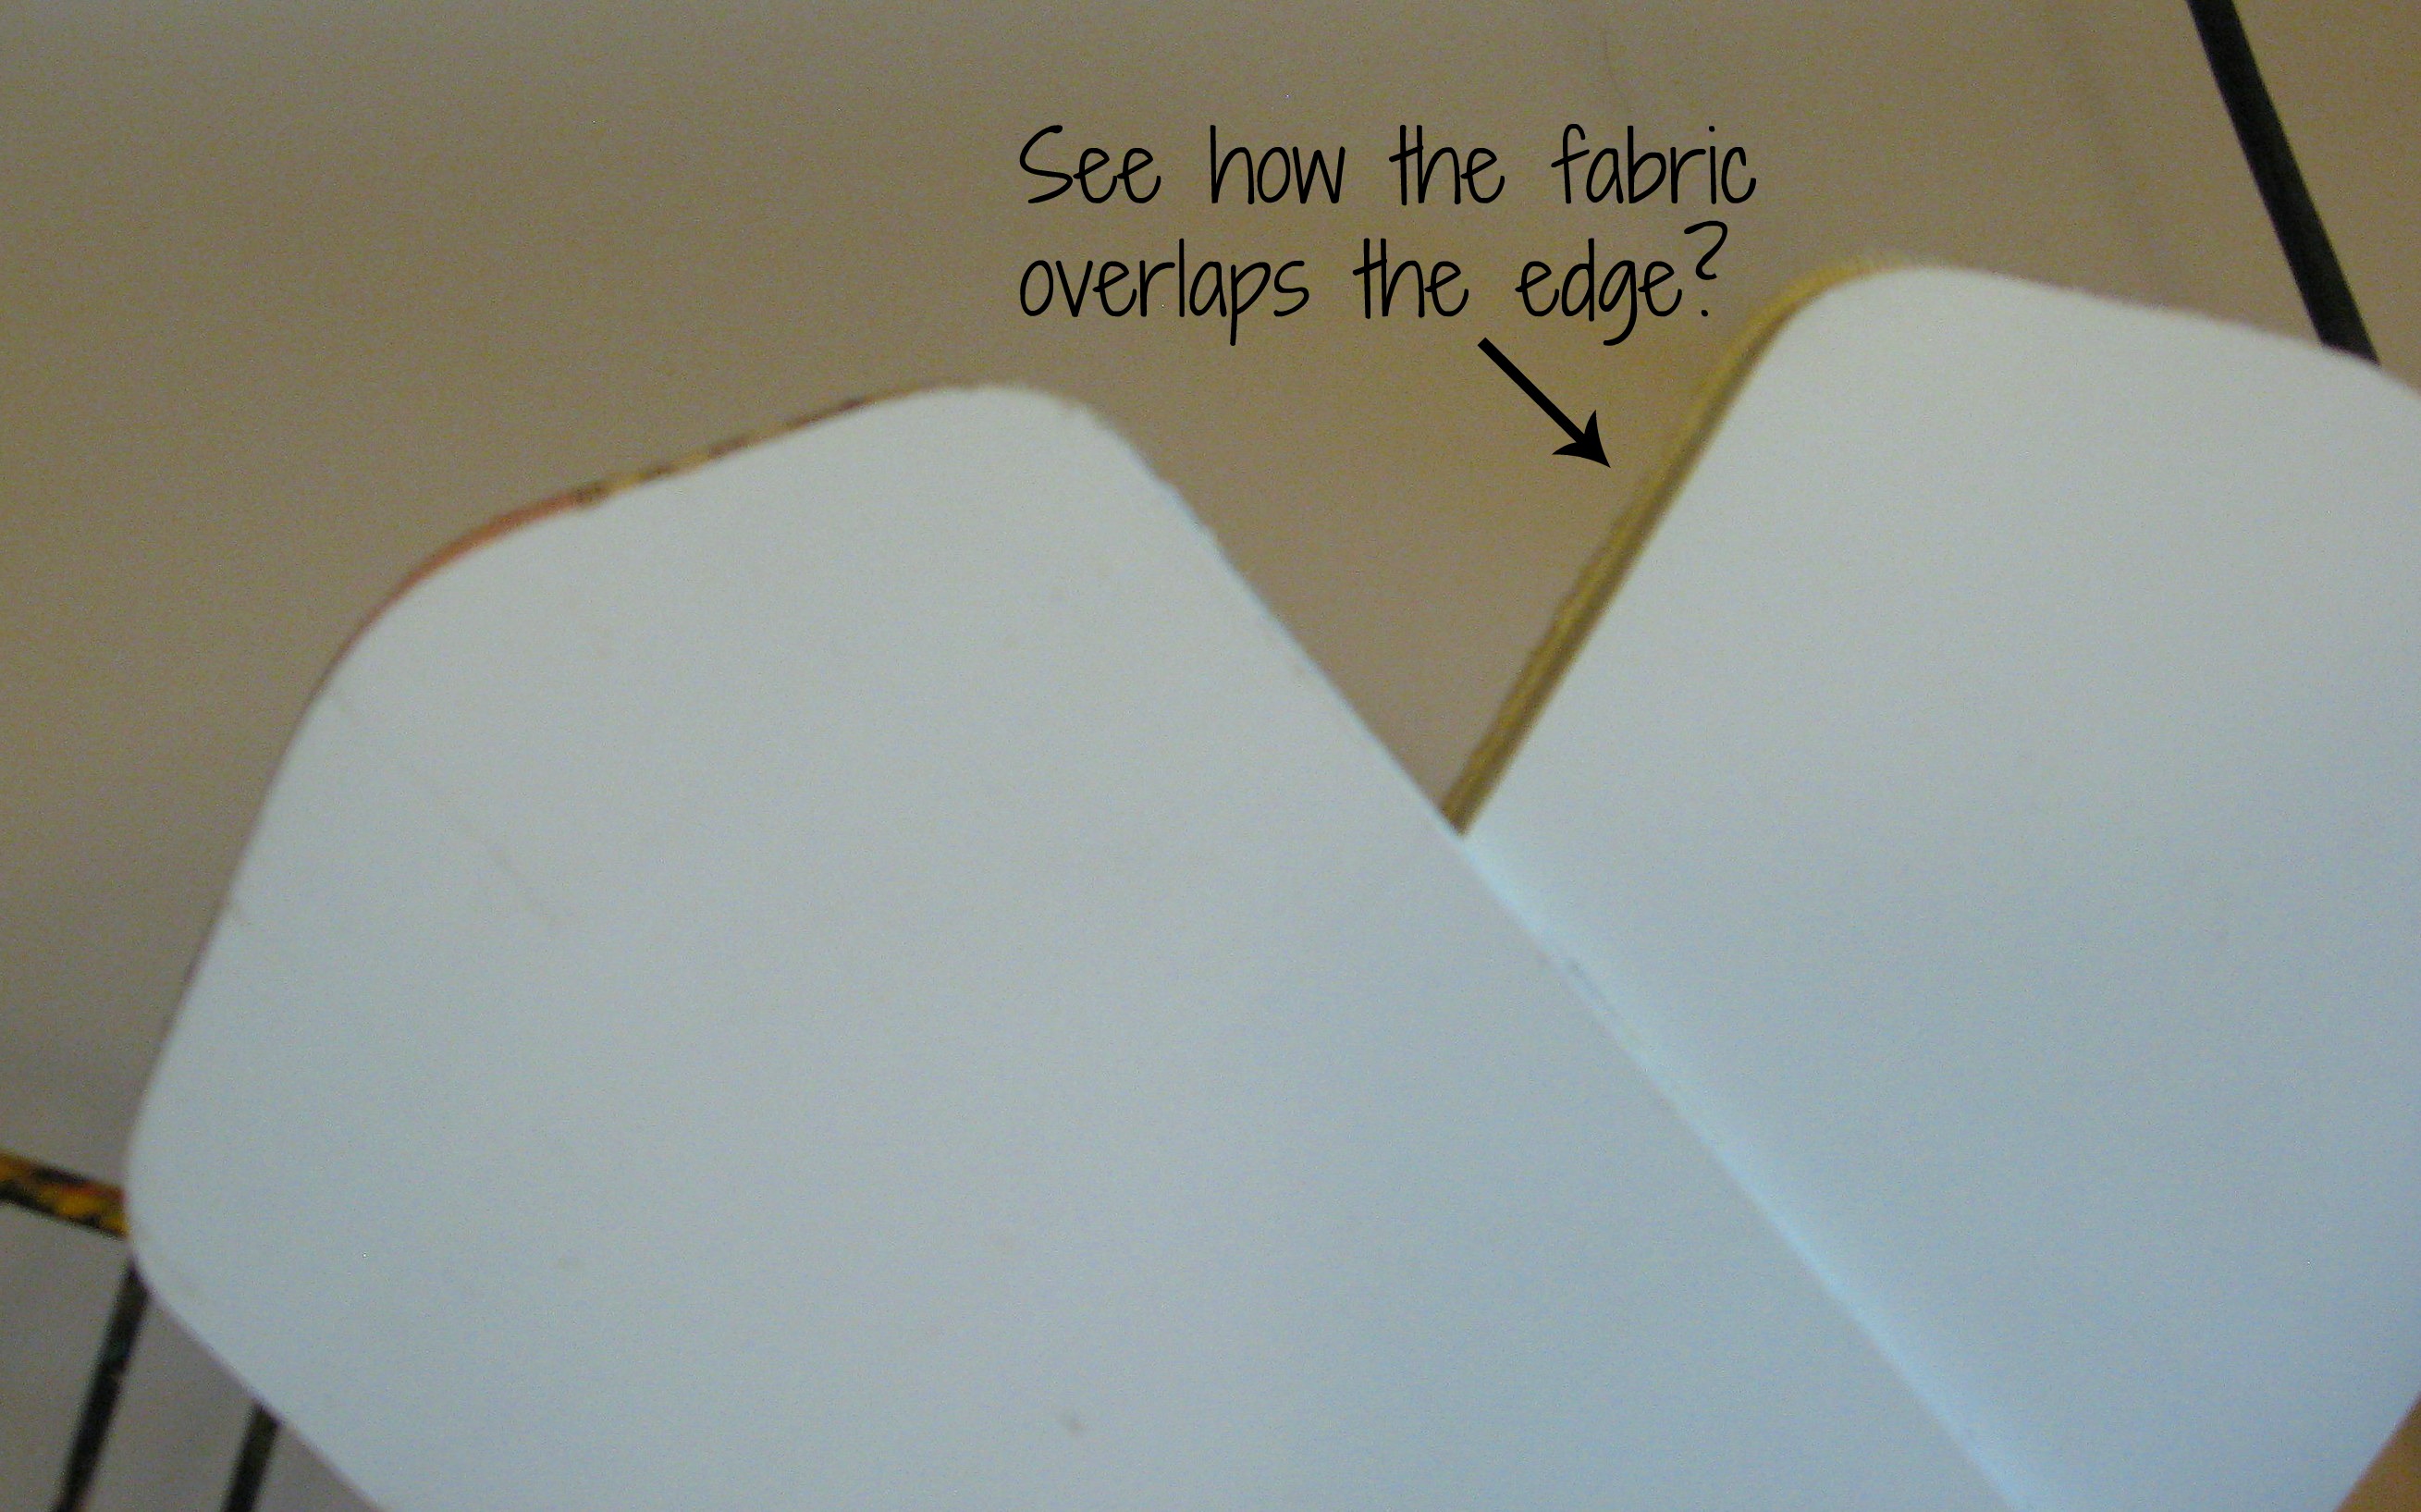
Err on the side of cutting too big and not too small. You don’t have to be too careful about the fabric fitting on exactly – if it hangs over just a touch it will be fine because no one will ever see the tops!
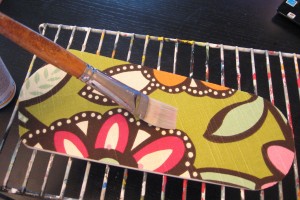
Now put a generous coat of Mod Podge on the fan blade
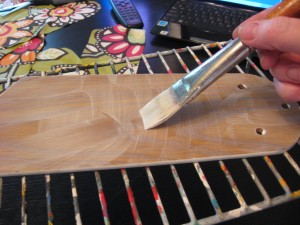 and then put the fabric on it. Smooth it down with your hand as it begins to dry; I didn’t even iron the fabric first. Between the Mod Podge and the smoothing, it will get the wrinkles out!
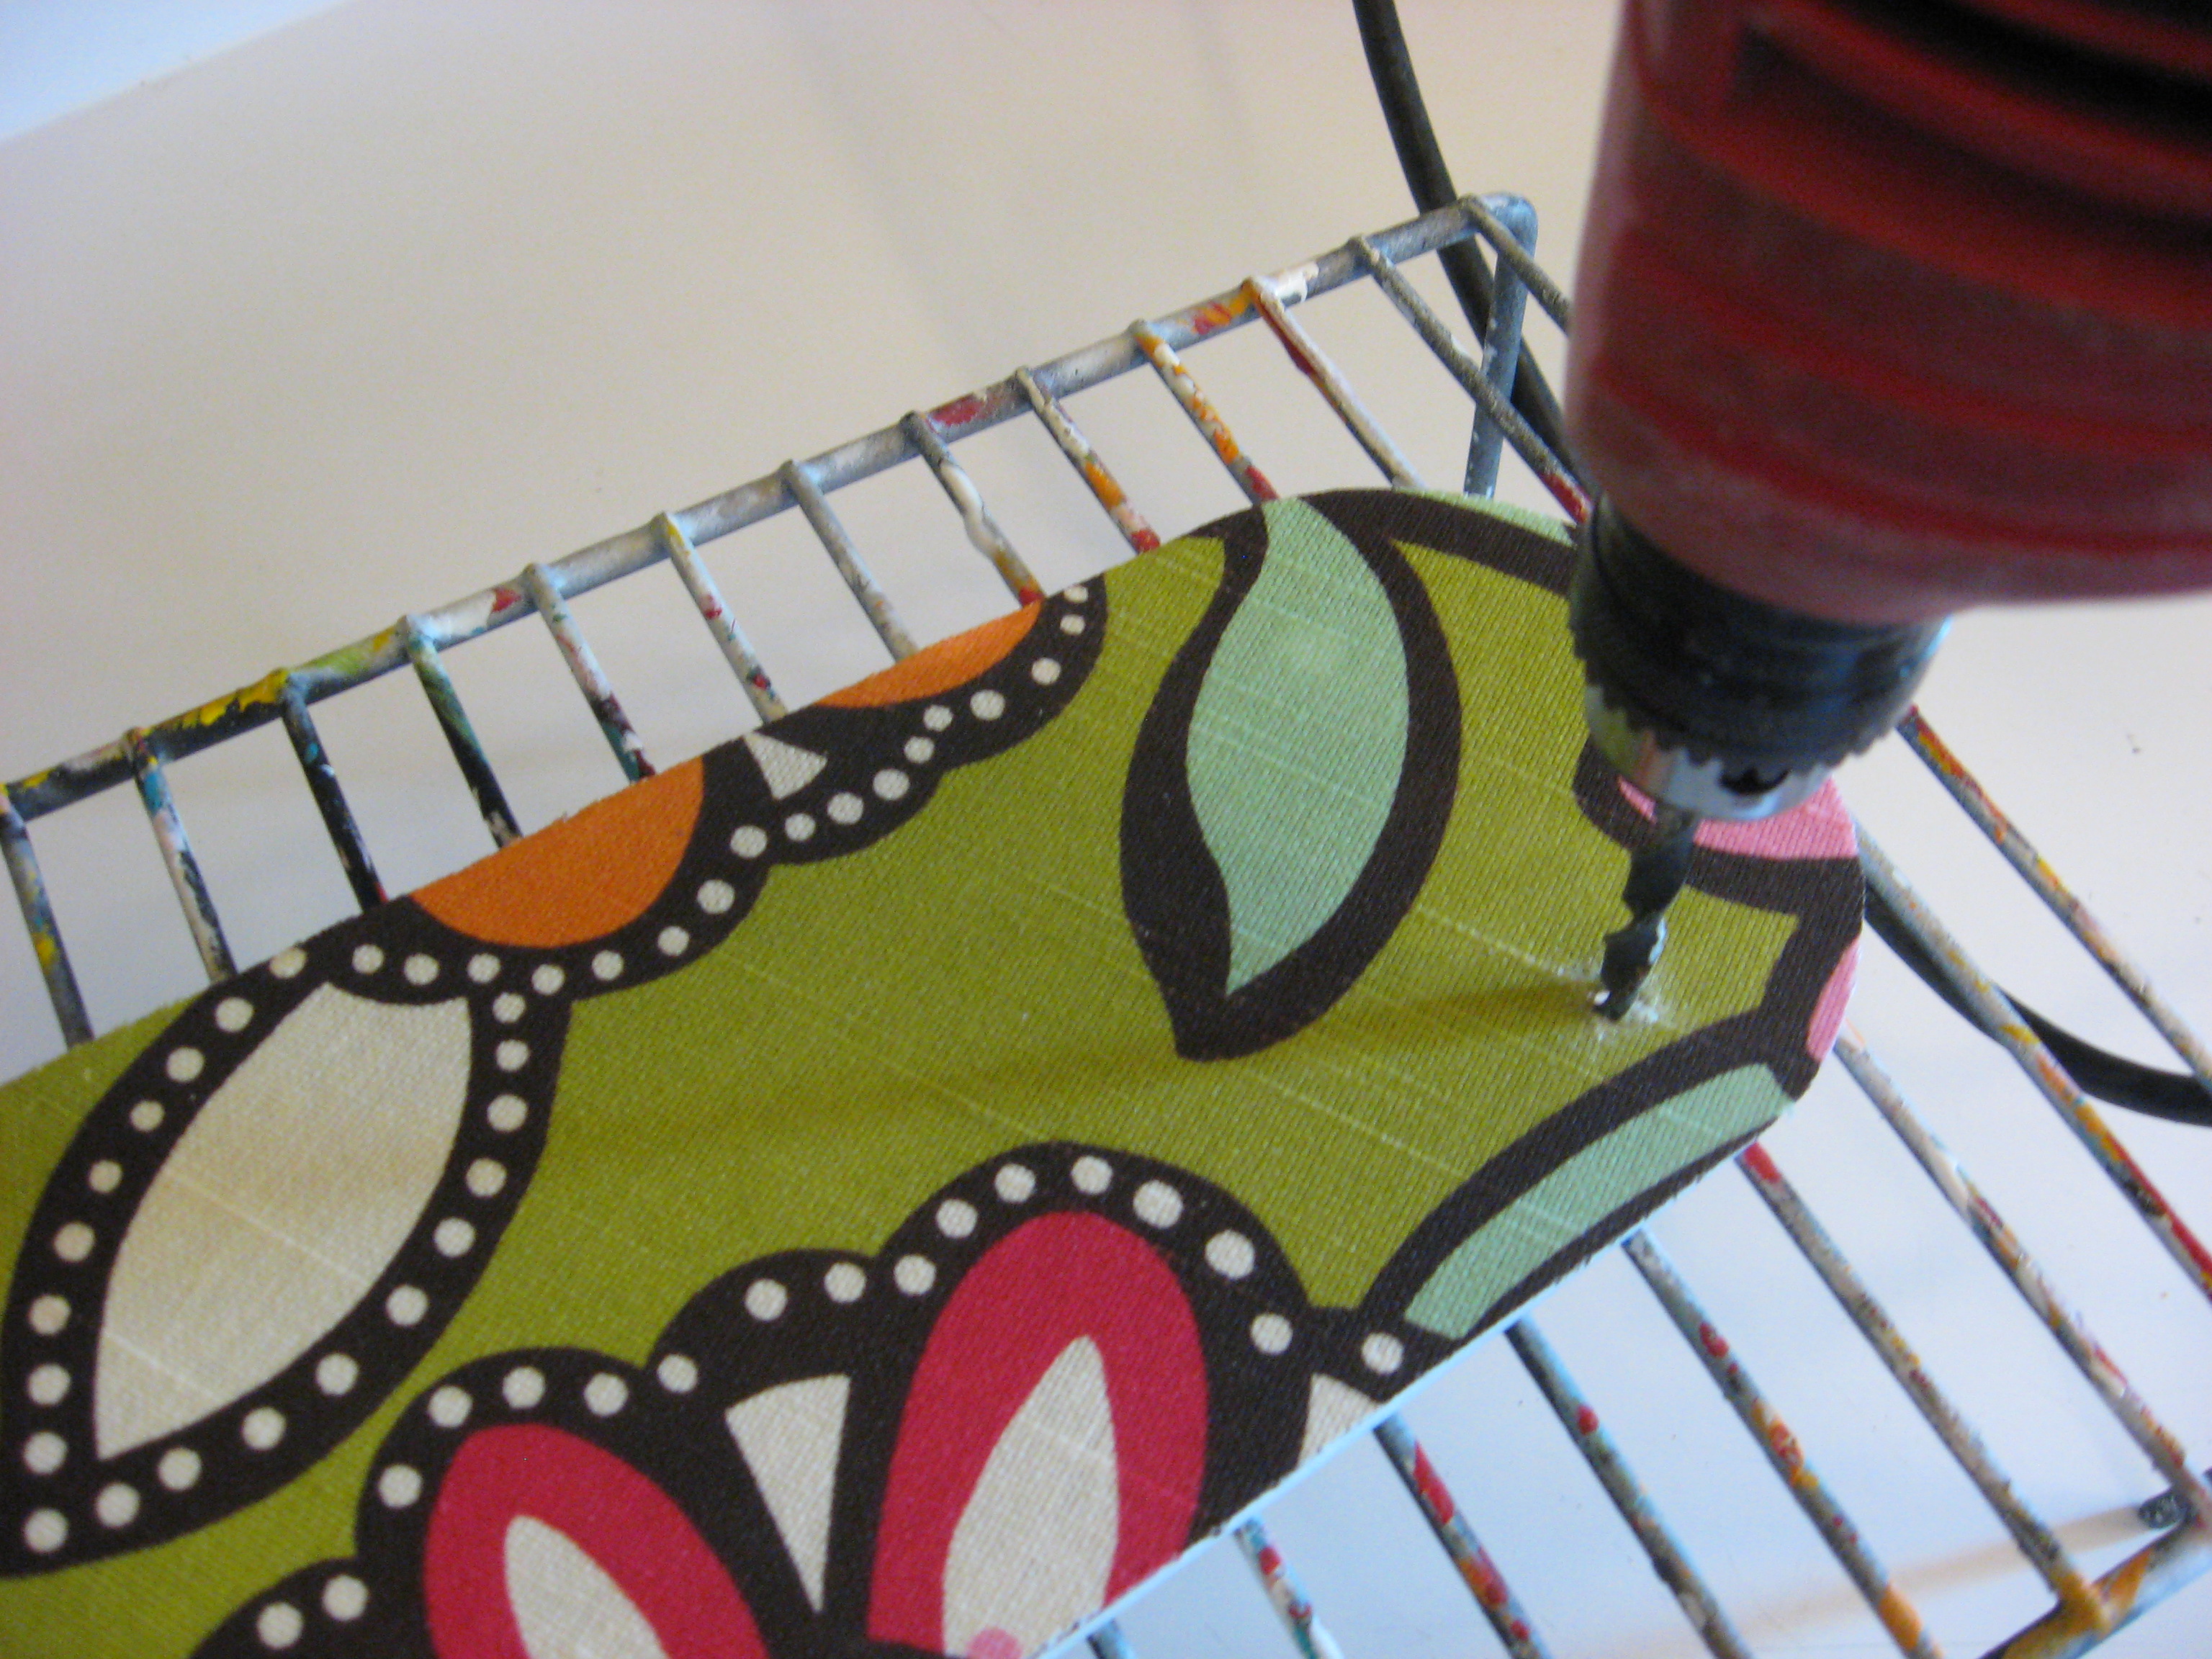
Let that dry about 15 minutes, then put a coat of Mod Podge on top of the fabric to seal it. Let that sit until it is completely dry,
 then use a drill bit to drill a hole through the fabric where the screw holes are in the fan blade. Make sure the Mod Podge is totally dry or the fabric will come twisting off when you start to drill through it (uh…you know. I’m IMAGINING that is what would happen anyway…..)
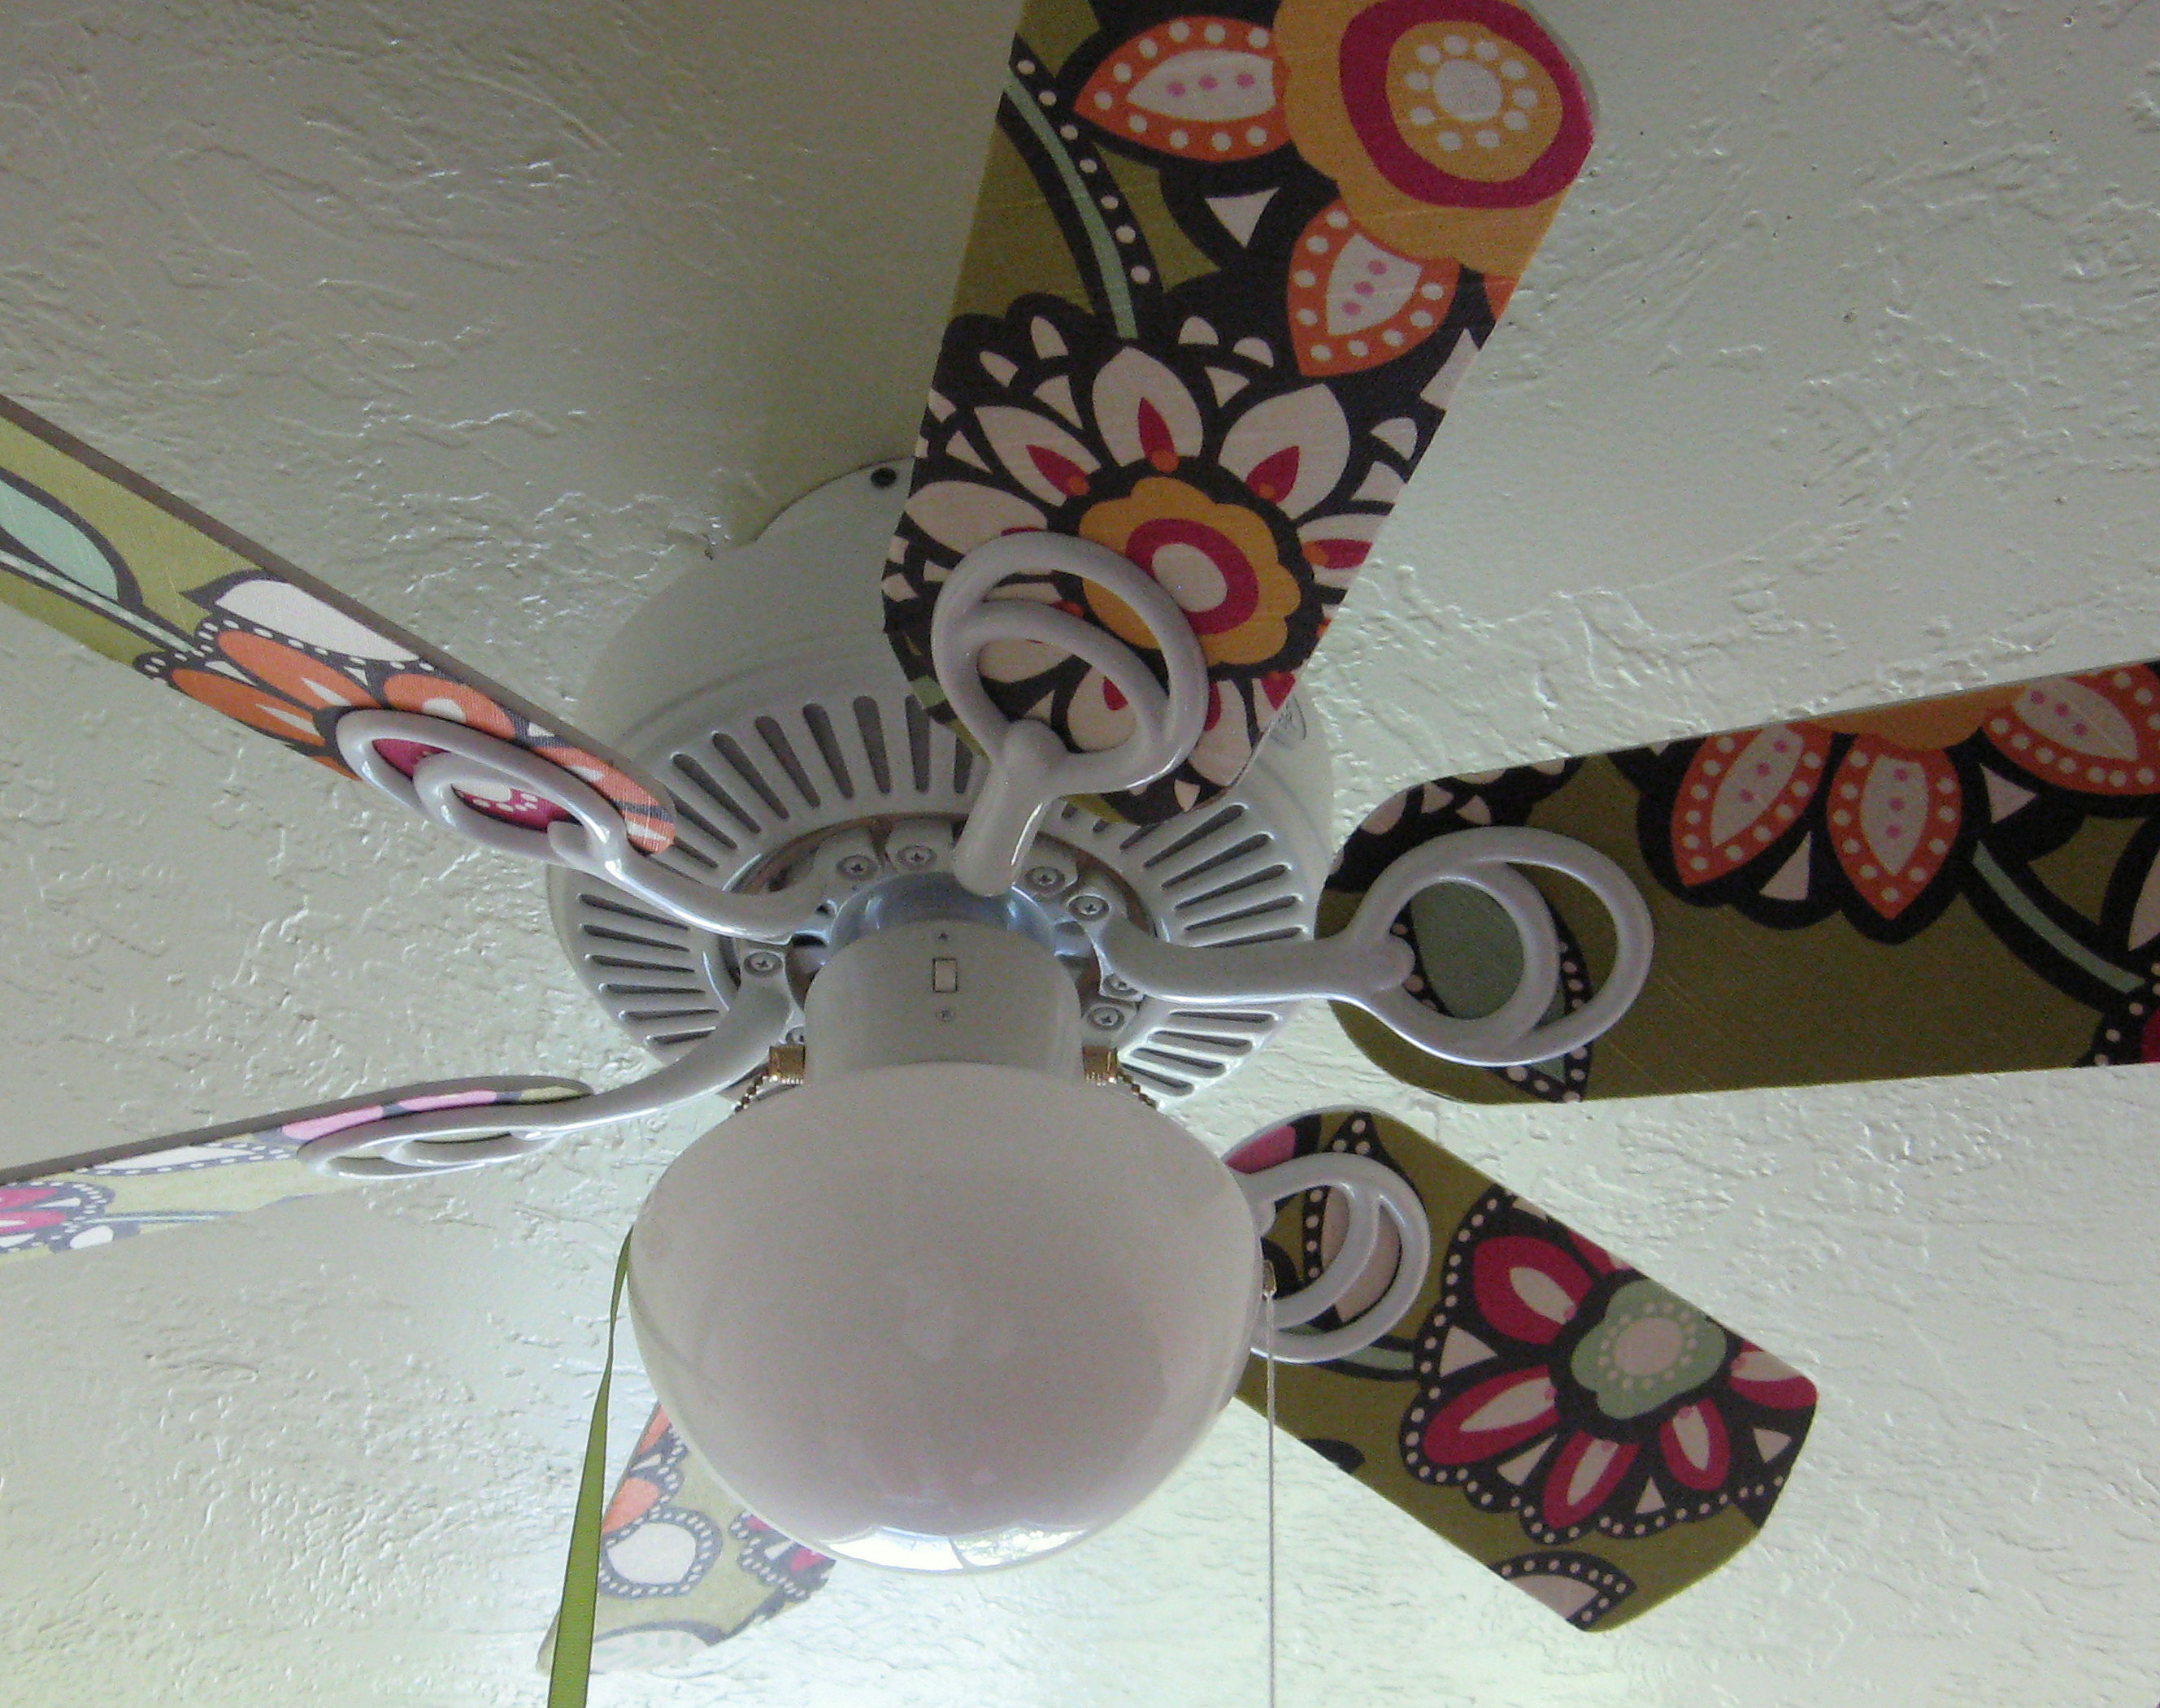
Screw the finished fan blades back into place and enjoy!
A PYP Best Blog! Painting Laminate Furniture!
Just in case you missed this article on painting laminate furniture the first time we shared it a couple of years ago, we are republishing it. After Sharon wrote this blog originally, we got an awesome response. This is one of the PYP Best Blogs!
If you google “How to paint laminate furniture” you will get dozens of different results. Being able to paint cheap laminate furniture and give it new life is the hallmark of the DIY blogger. I will admit that until recently I usually ignored these posts. I’ve been painting laminate furniture since before most of these bloggers were out of diapers – back in the day when everyone said it was impossible to do! I got great results – I have a cheap WalMart shelf in my kitchen that I first painted 19 years ago and it still looks great – but it was labor intensive with days of sanding, priming, painting and more sanding to get the desired results.
Well, I am glad that this old dog finally paid attention to some of those DIY bloggers and learned a new trick; I’m converted! I have always used Kilz brand primer, and I’m sure I still will, but what I have learned is that some primers are gripping primers and some are not. If you want to paint a surface like laminate that the paint won’t adhere to, you’ve got to give it something to stick to. Enter this wonder:
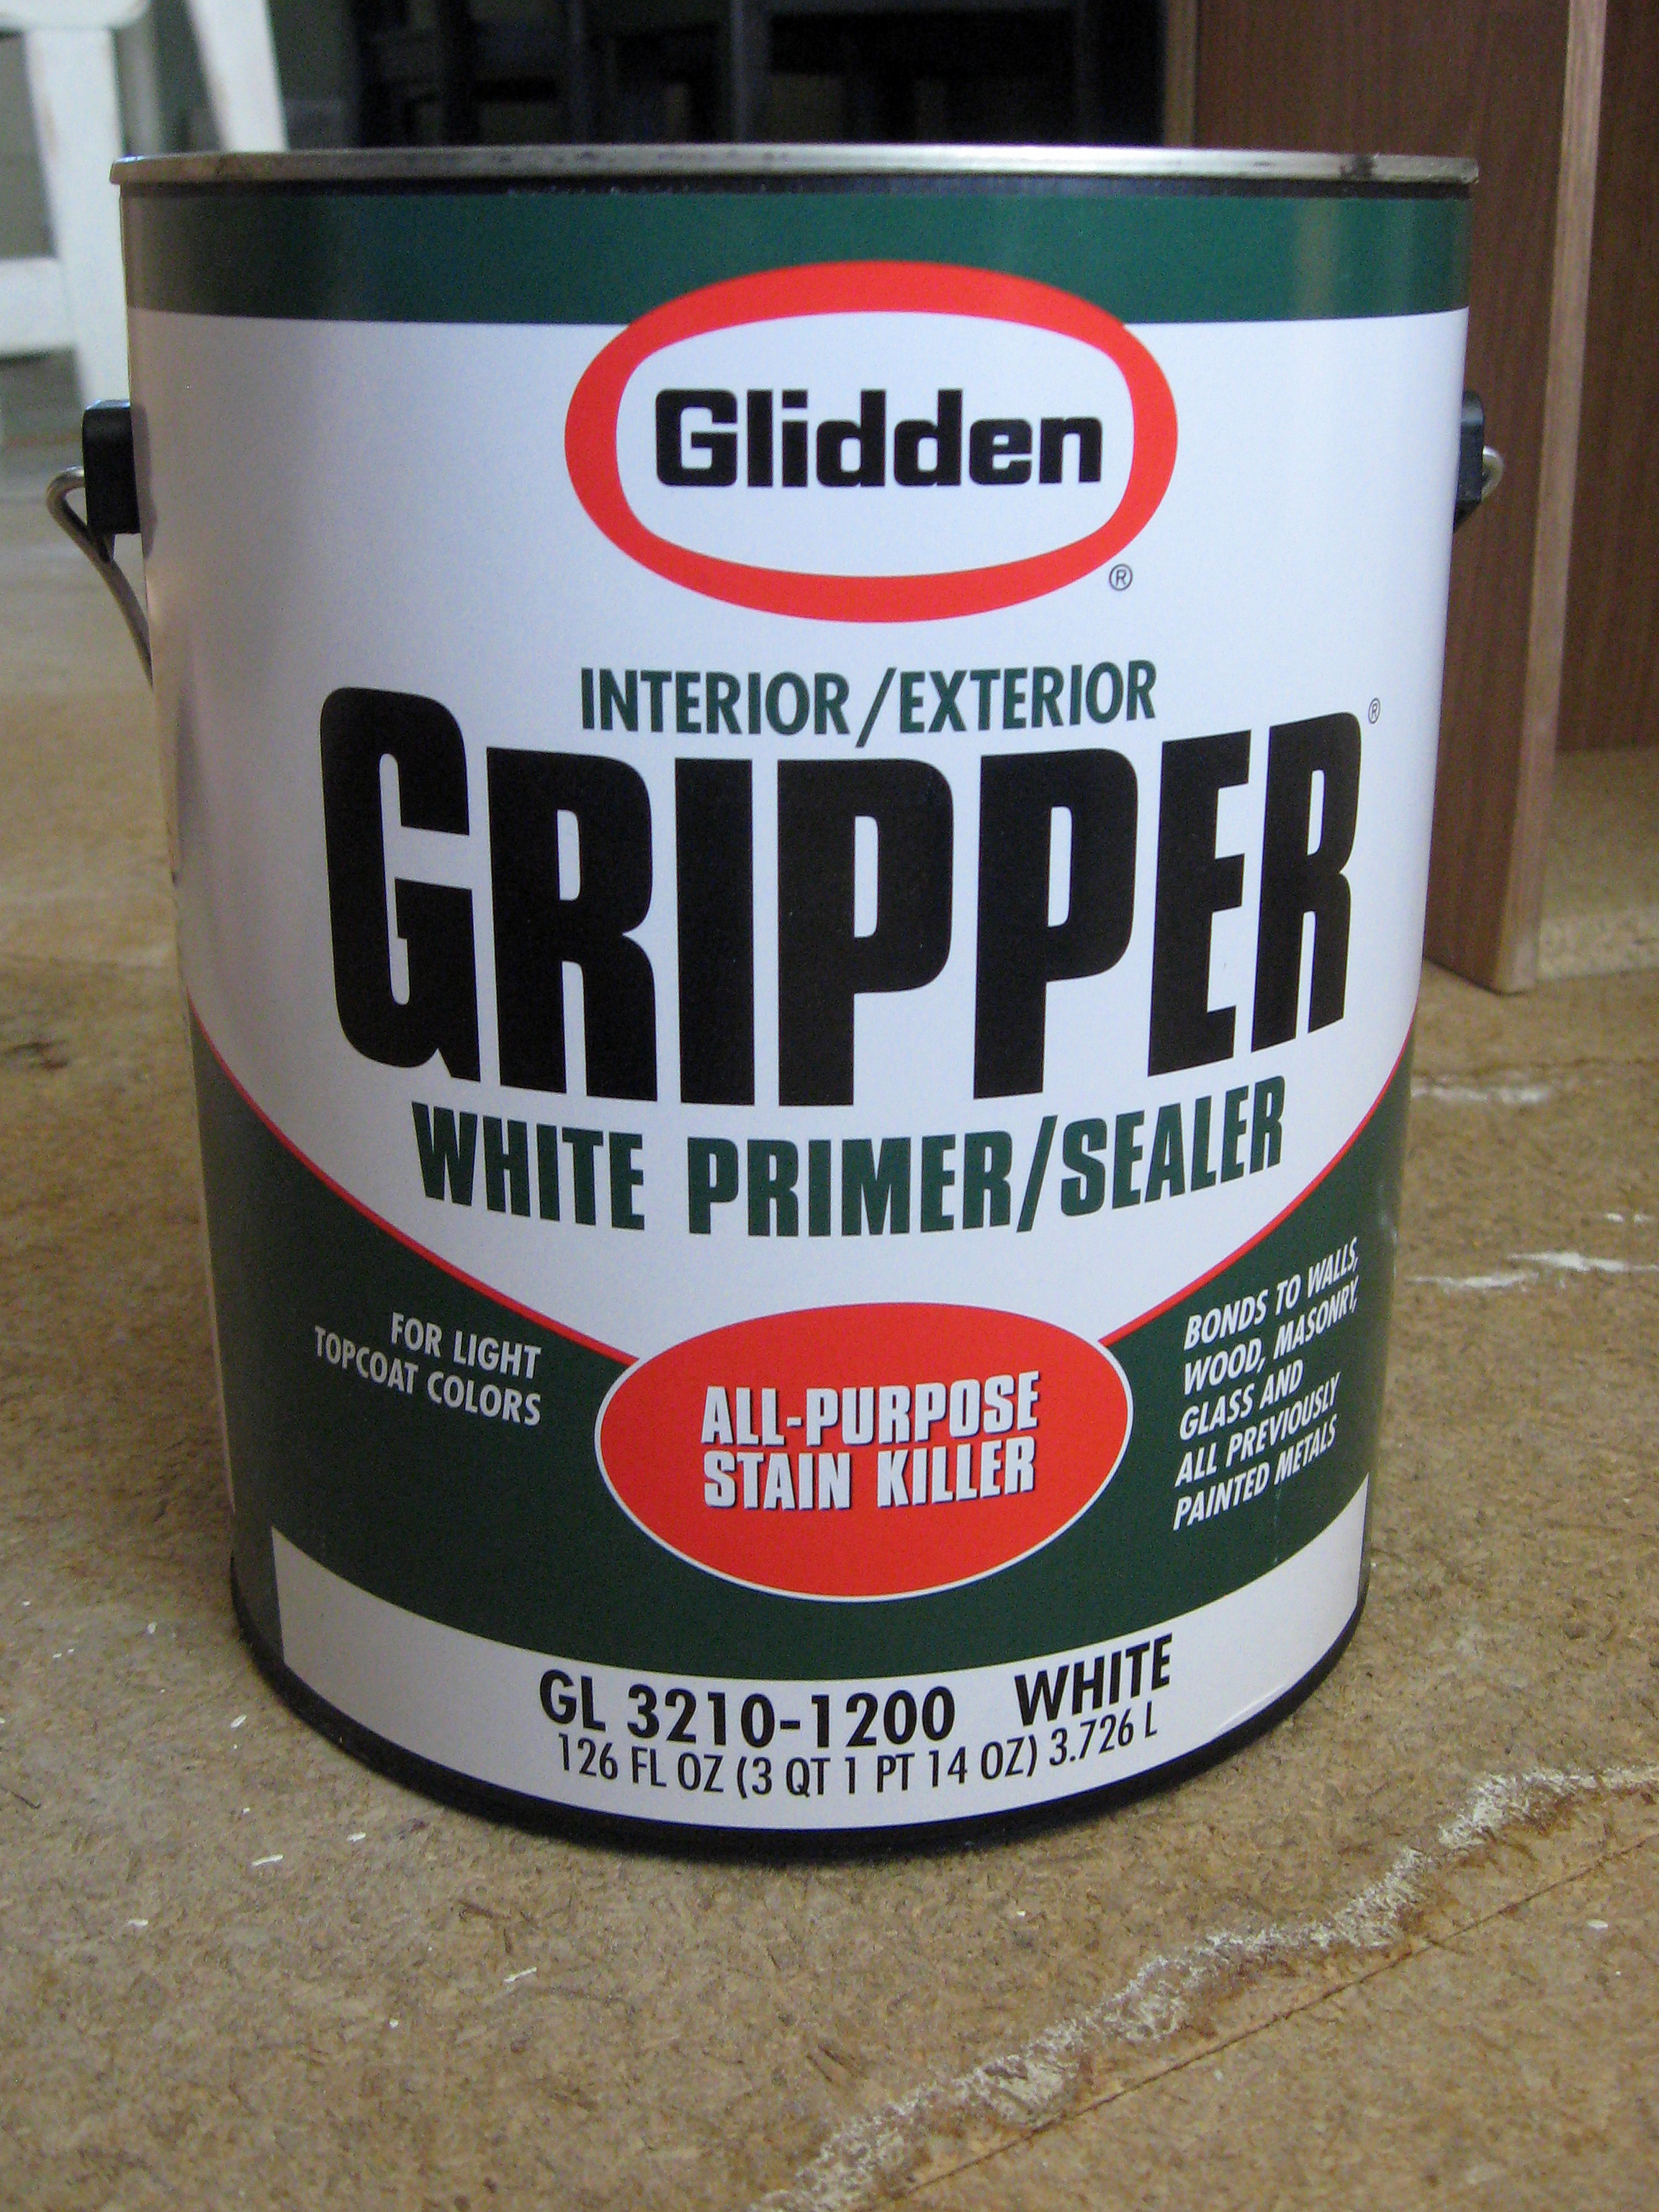
It grips to the surface to be painted with NO SANDING. I bought this straight off the shelf at Home Depot (have them shake it up for you while you’re there!). It is pretty pricey stuff, but it seems to go a long way. It comes in both white and grey; get white if your paint is light and use grey if it is dark.
I had a laminate Ikea wardrobe that I have been wanting to paint forever, but I knew all that sanding was going to be a pain so I kept putting it off. I thought this was the perfect project to try out the Gripper on.
I forgot to take a picture of it before I took the doors off, but you get the idea…
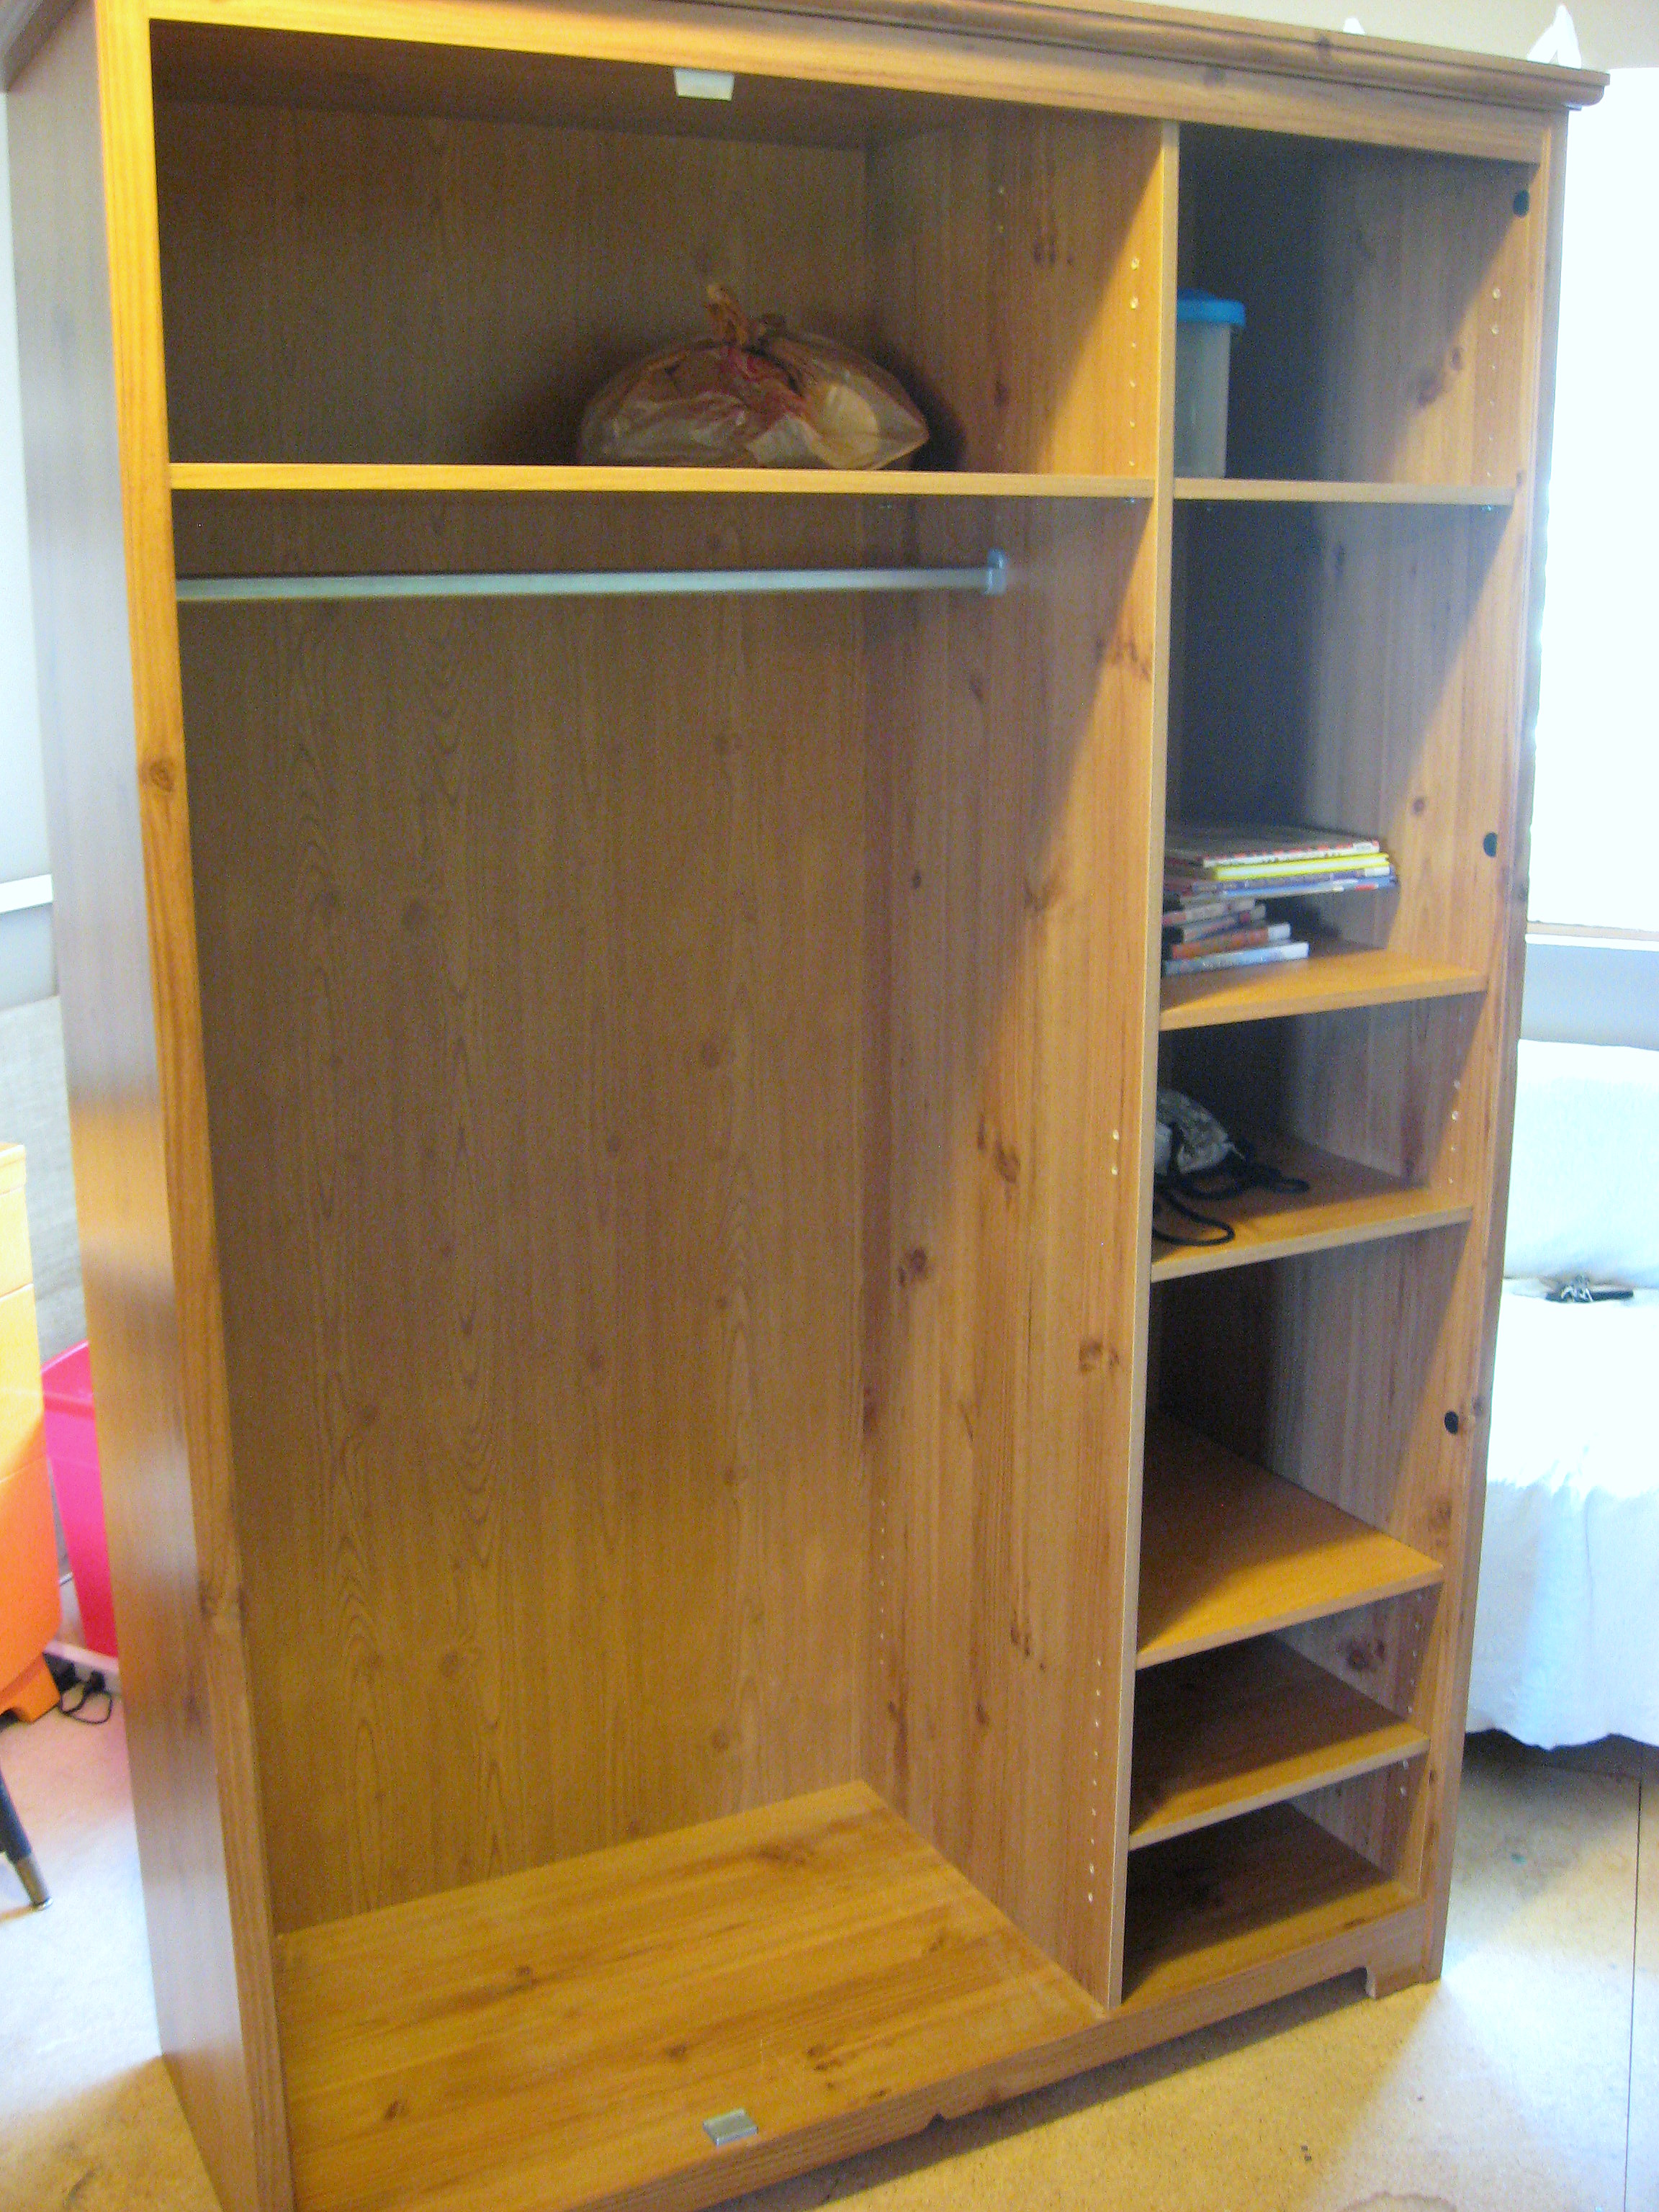
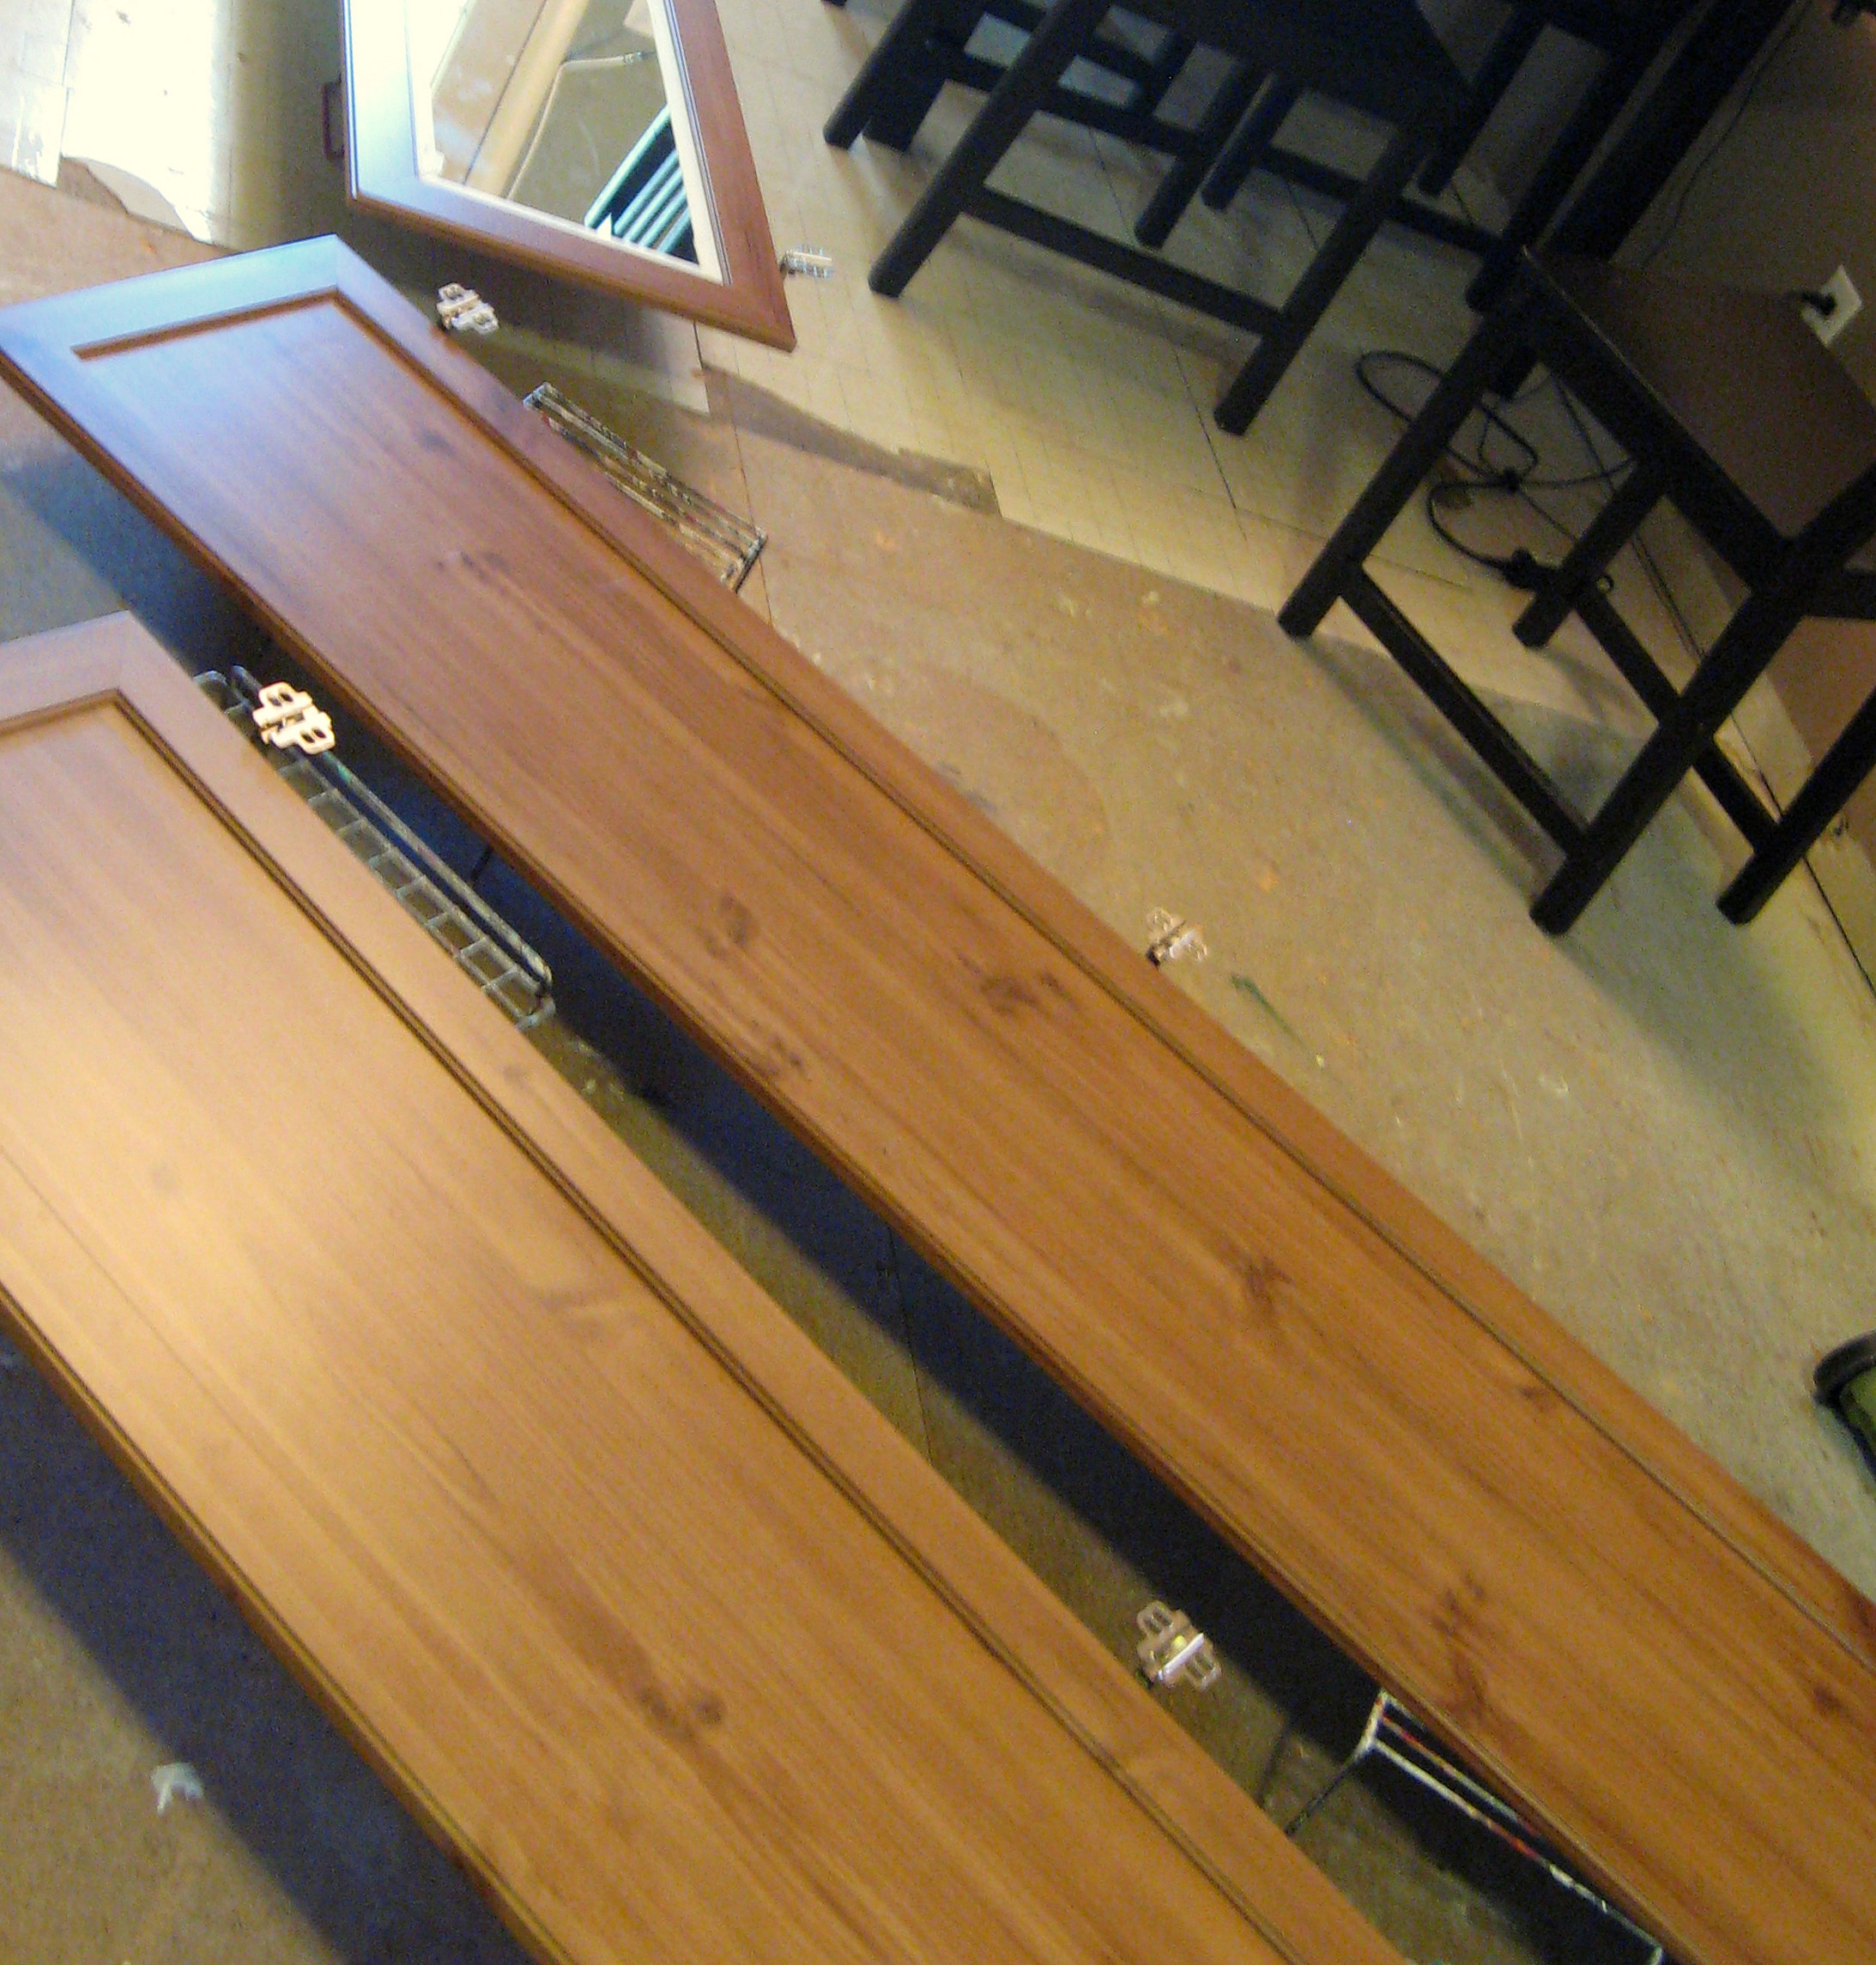
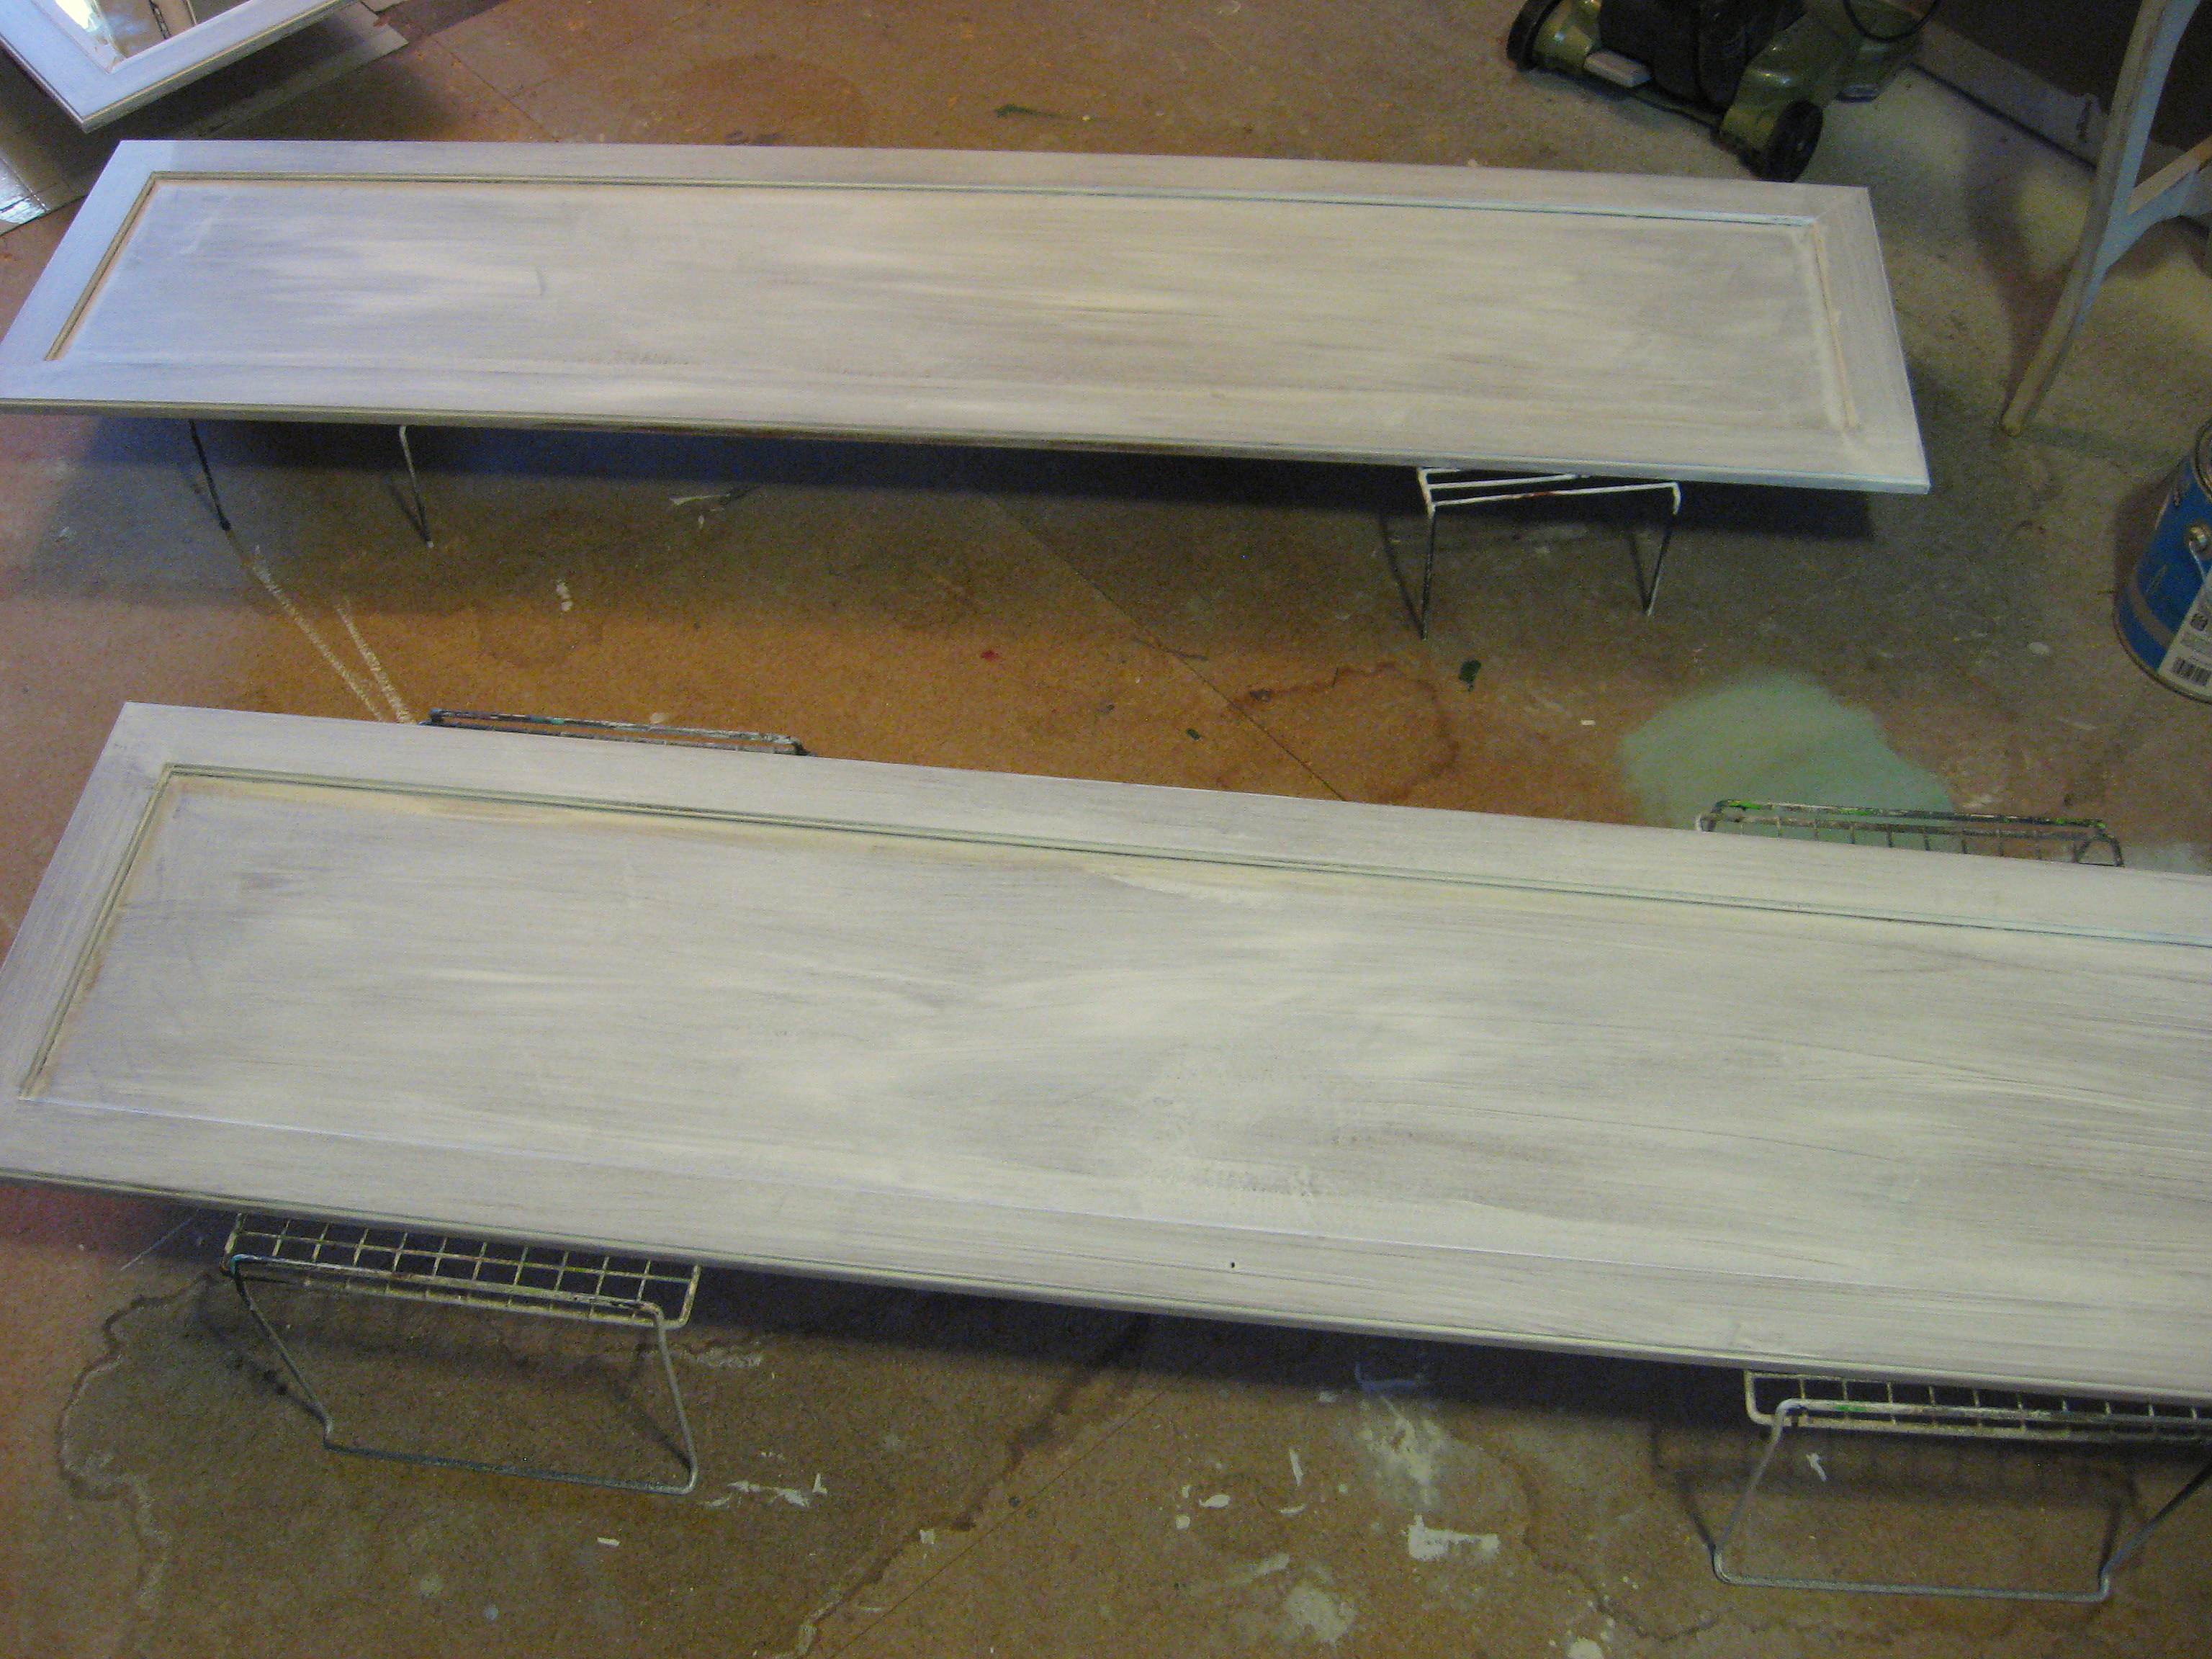
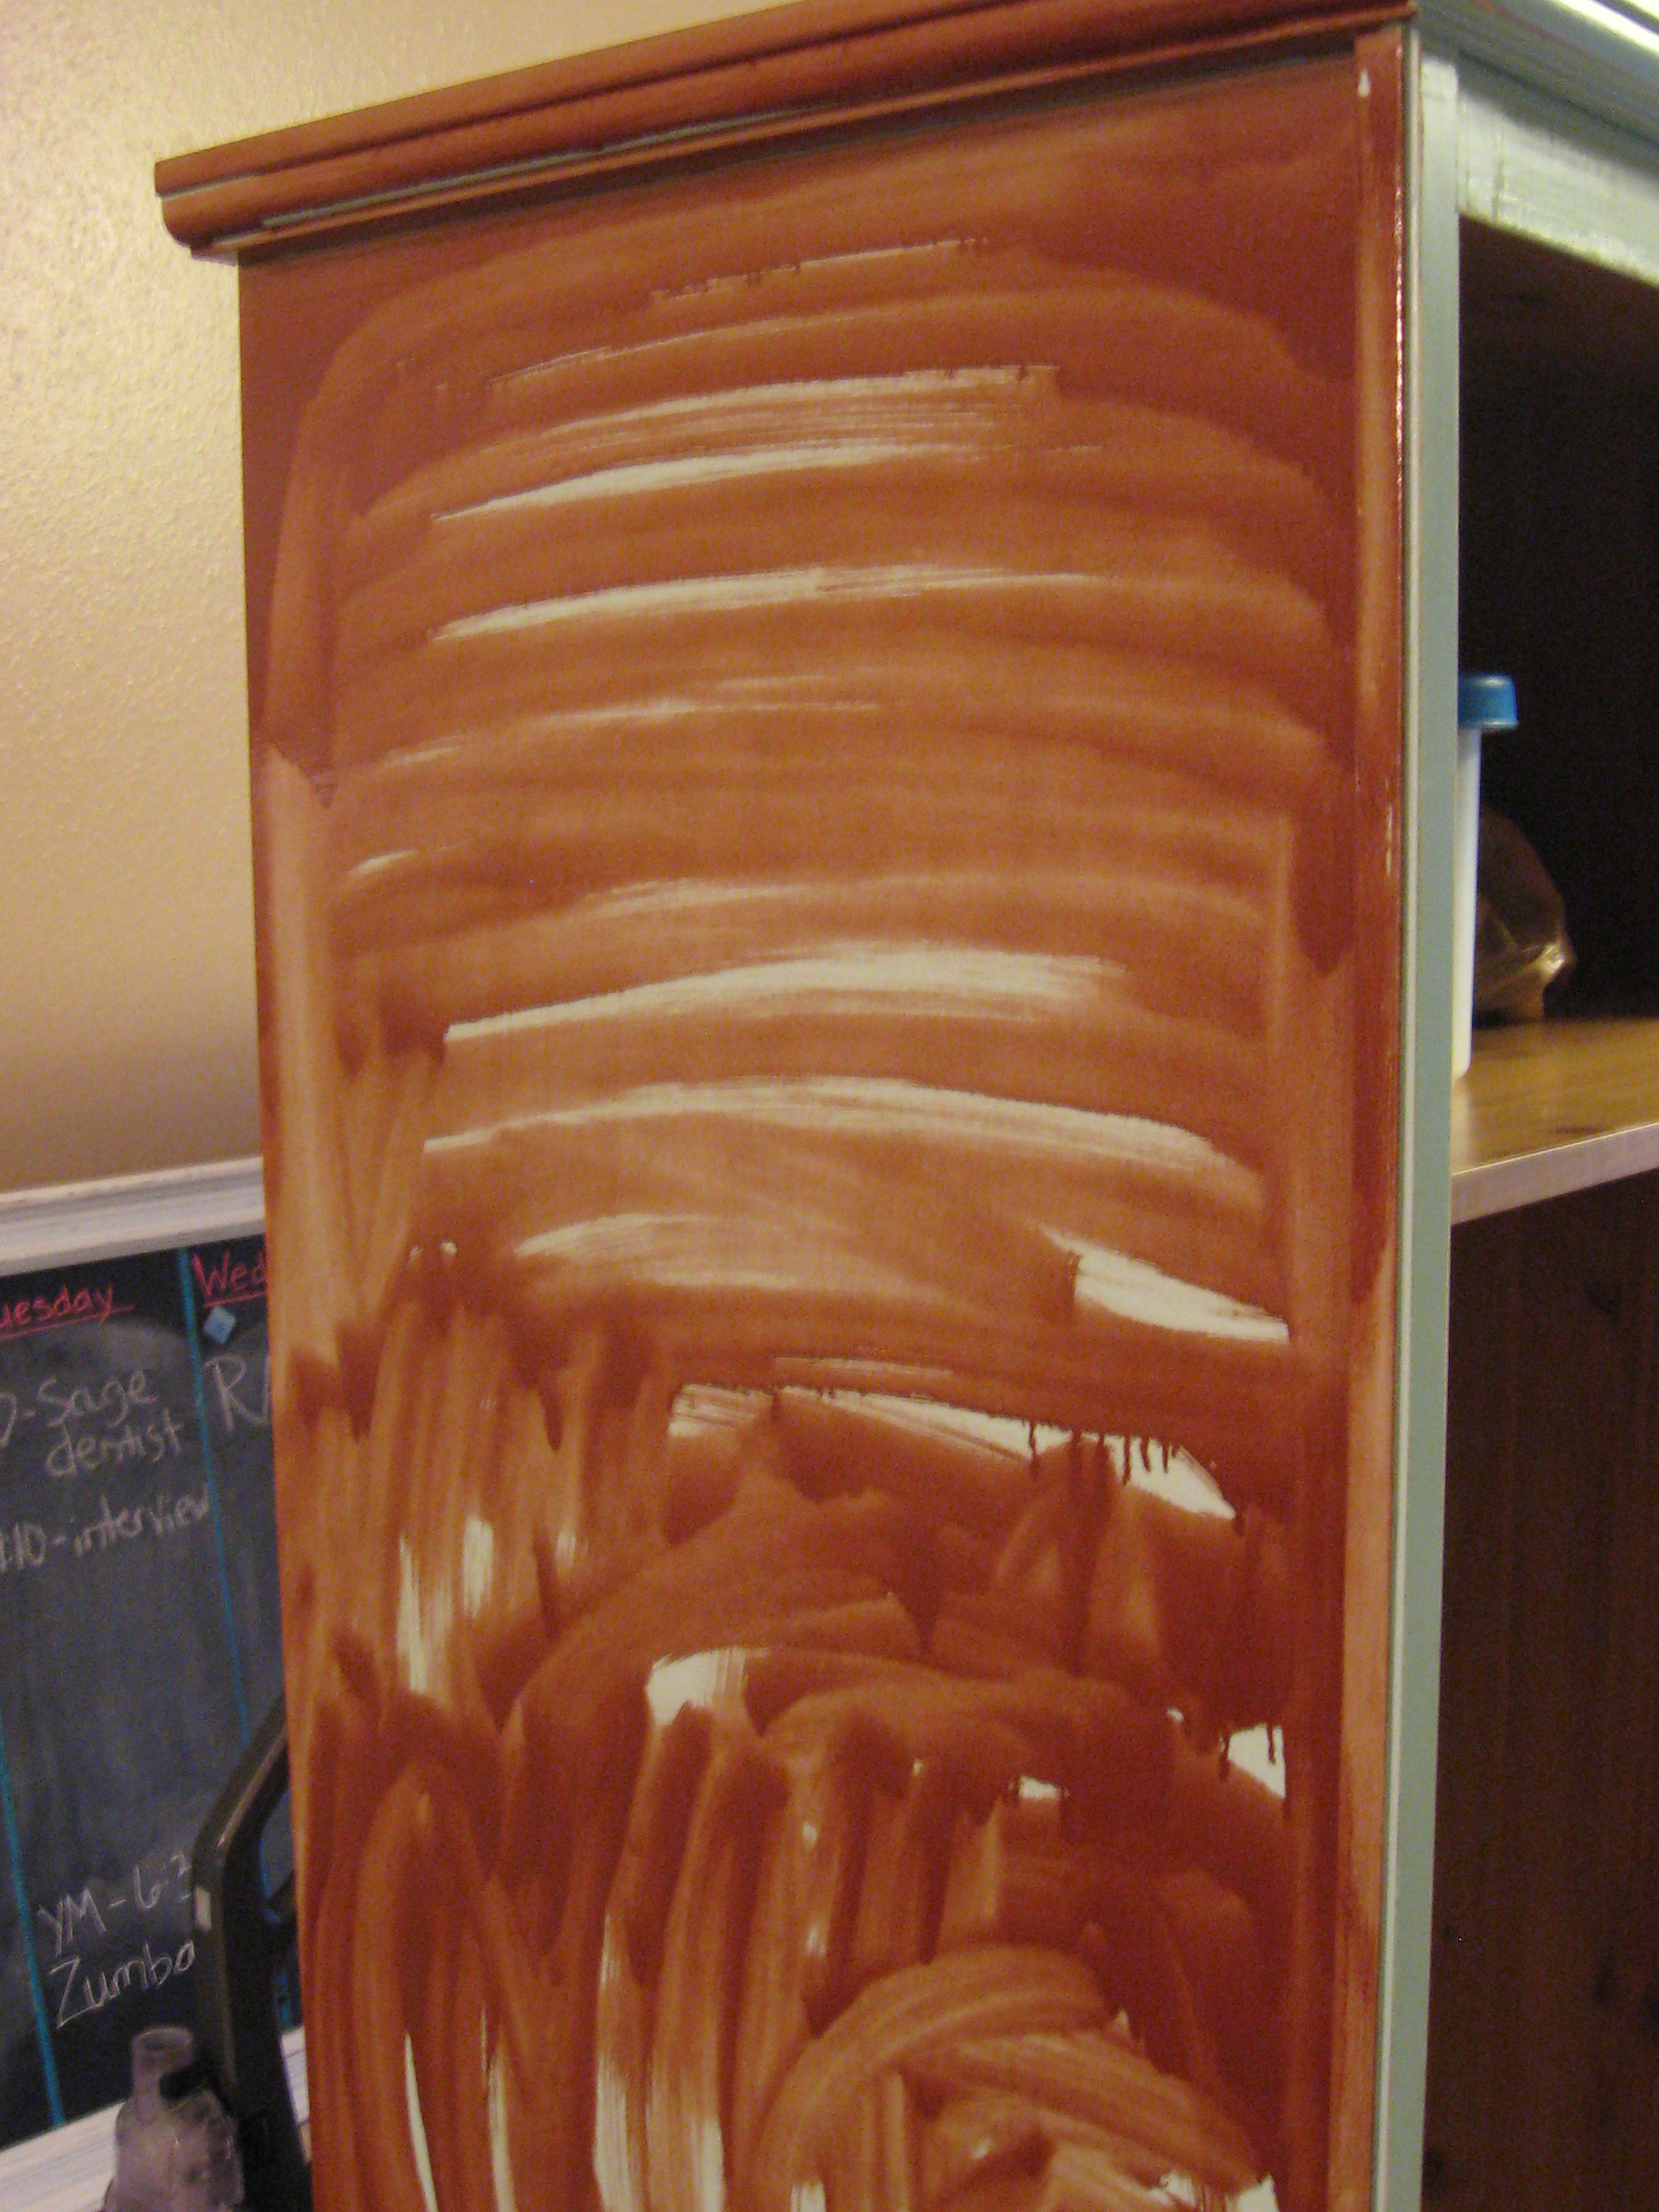
Take the doors off, tape around the mirror and remove or tape all the hardware. I chose not to paint the inside, so I taped around there too. Give everything a good coat of the Gripper with a regular brush or roller.
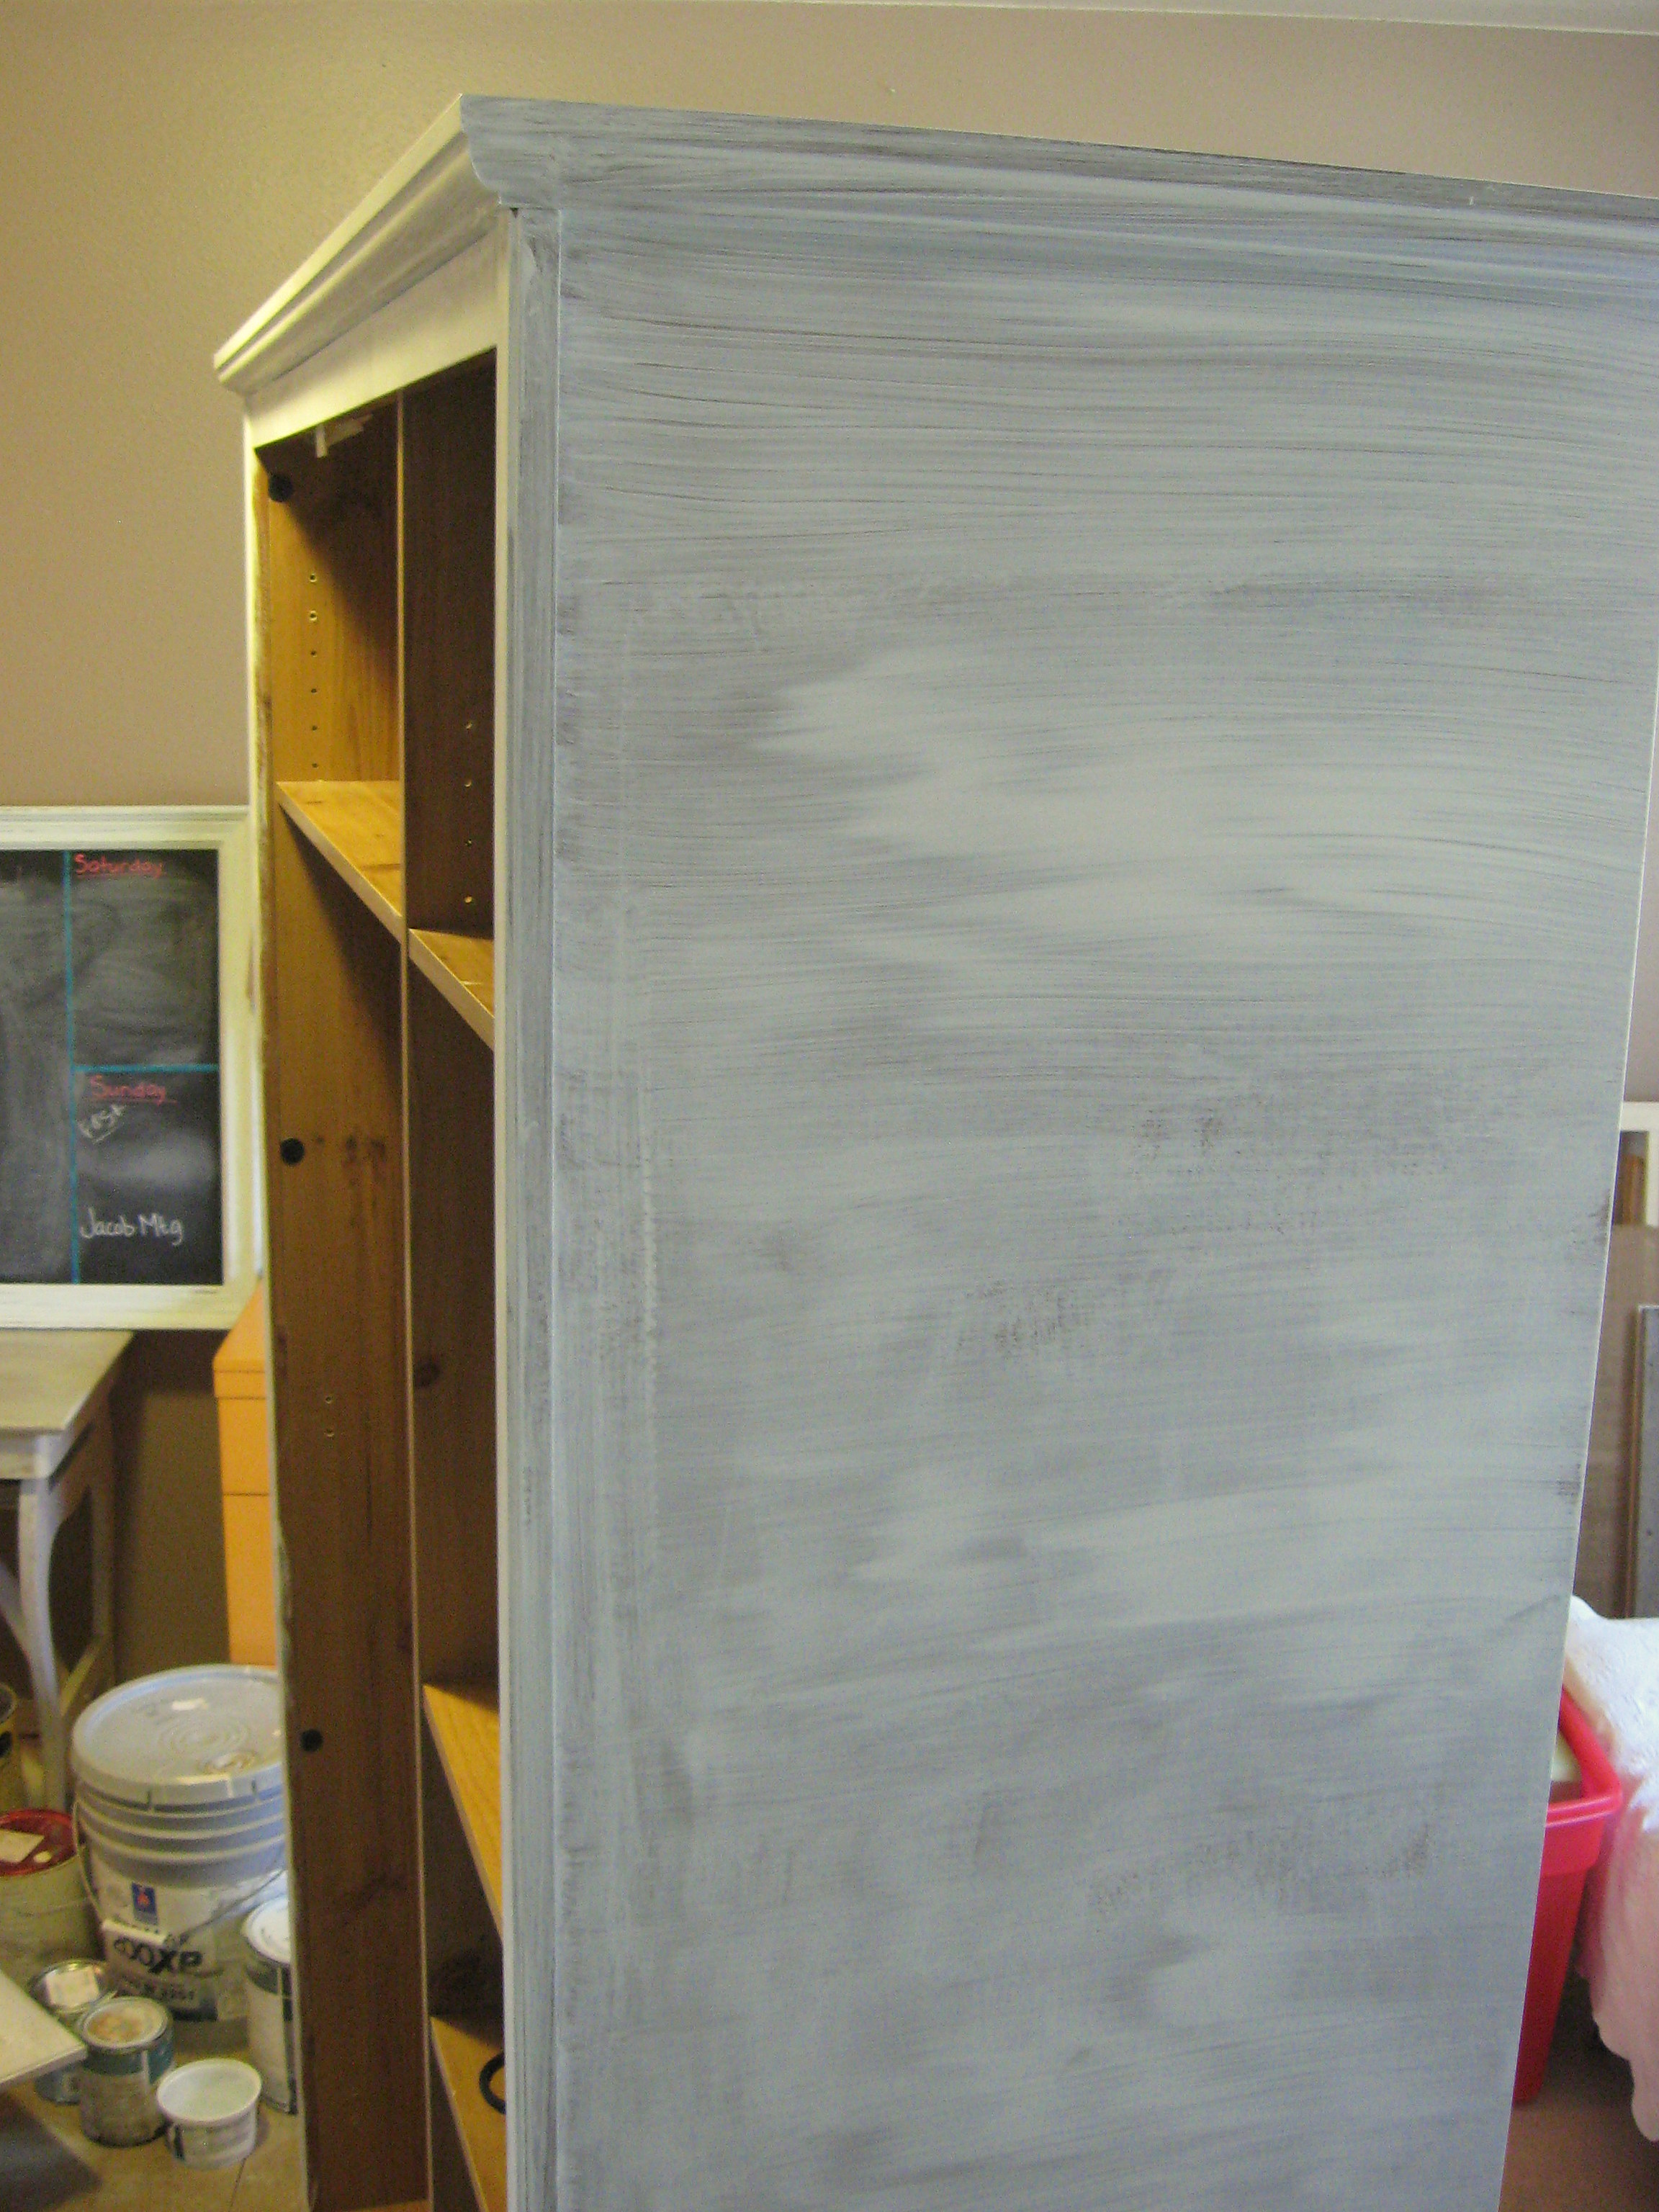
You can see here that I wasn’t even too careful about getting the coat even. Here are my thoughts on this – I wanted this finished project to be something I could sand back into and expose some of the “wood” underneath. Usually when you try that on laminate furniture, the paint will just lift right off. I was curious how it would work here, so I only did one coat of Gripper. I have a dresser that I used it on that I wanted to be solid and smooth so I used 2 coats of Gripper and I was more careful to brush it on smoothly.
Let that dry according to the directions on the can, then cover with the paint of your choice. I didn’t get a picture of this step, but I used 2 coats of pale blue Satin interior house paint
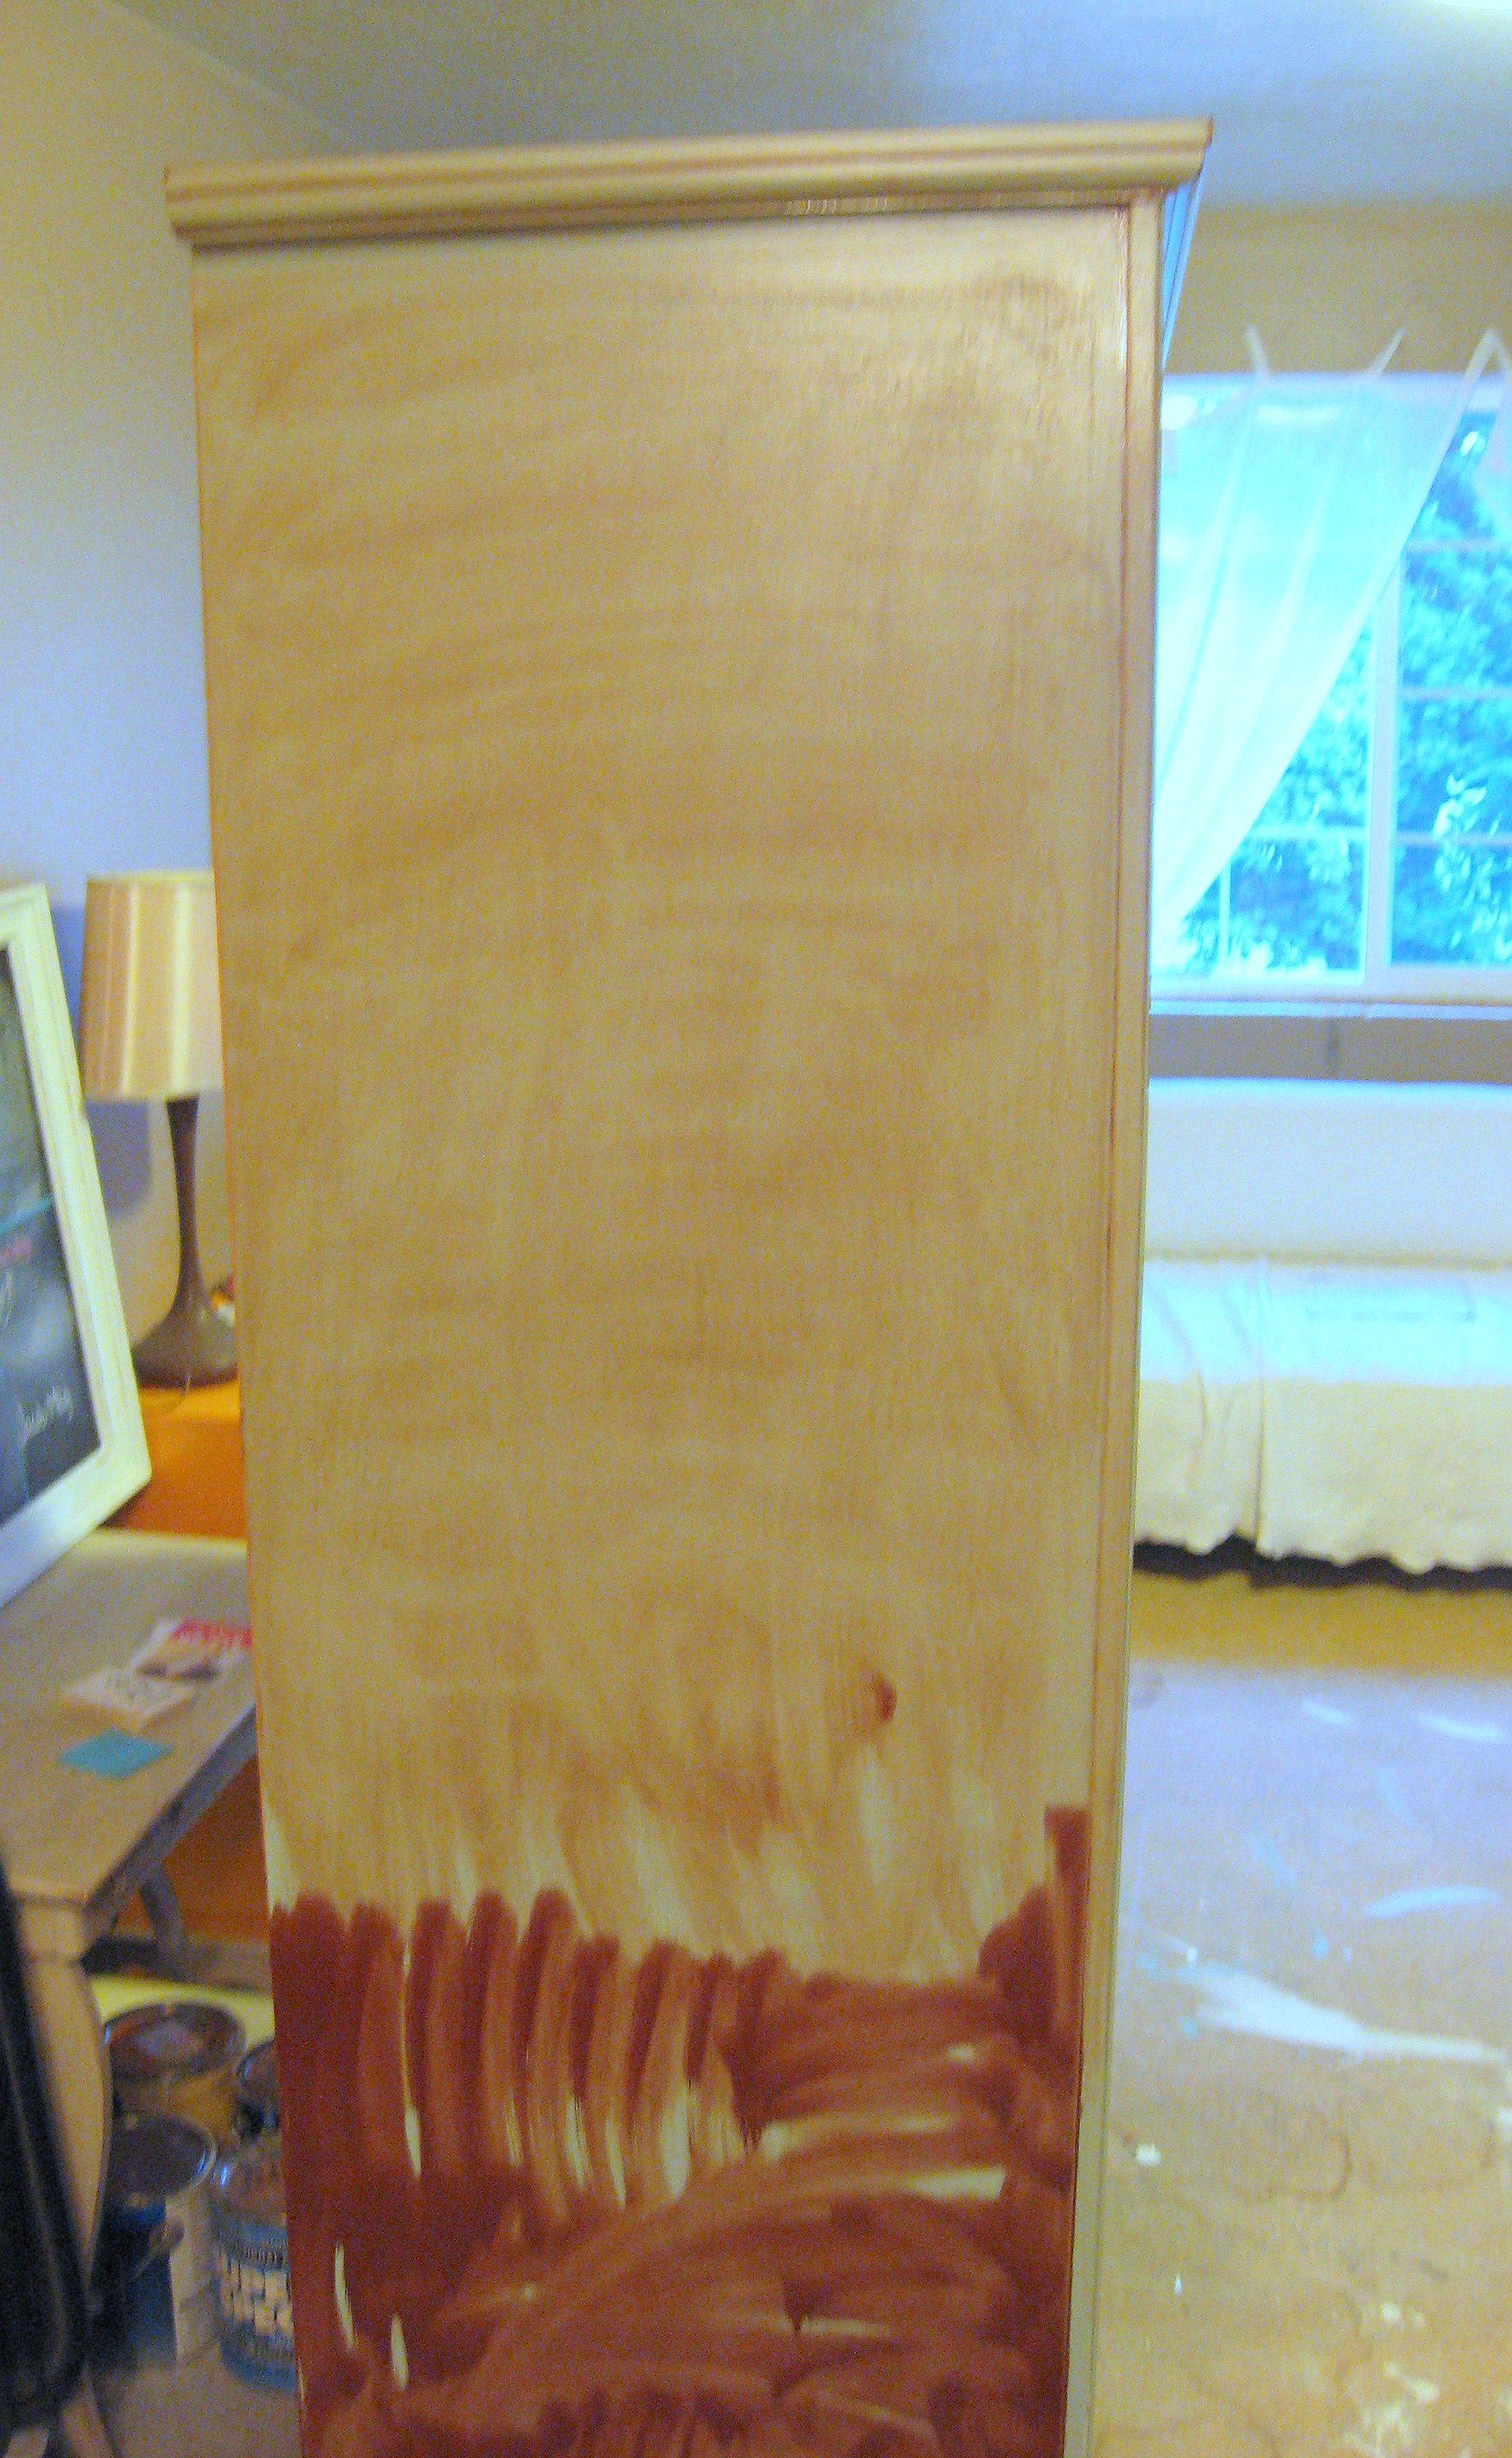
Once that is dry, I went over the whole piece with a fine grit sandpaper on a small detail electric sander, roughing up the whole surface and concentrating (holding my breath!) in a few spots along the edges to wear the paint down to the wood. The paint came off very worn and natural-looking just as if it had been on raw wood! Wonderful!
Next I put on a wood stain. Just brush it all over with a paintbrush – working in small sections –
and then rub it back off with a rag. If you want it darker, then leave the stain on longer. If you want it lighter, continue to rub and buff it off with a rag until you get the desired results. Be sure to leave more stain in the crevices and cracks, where age build up would naturally occur.
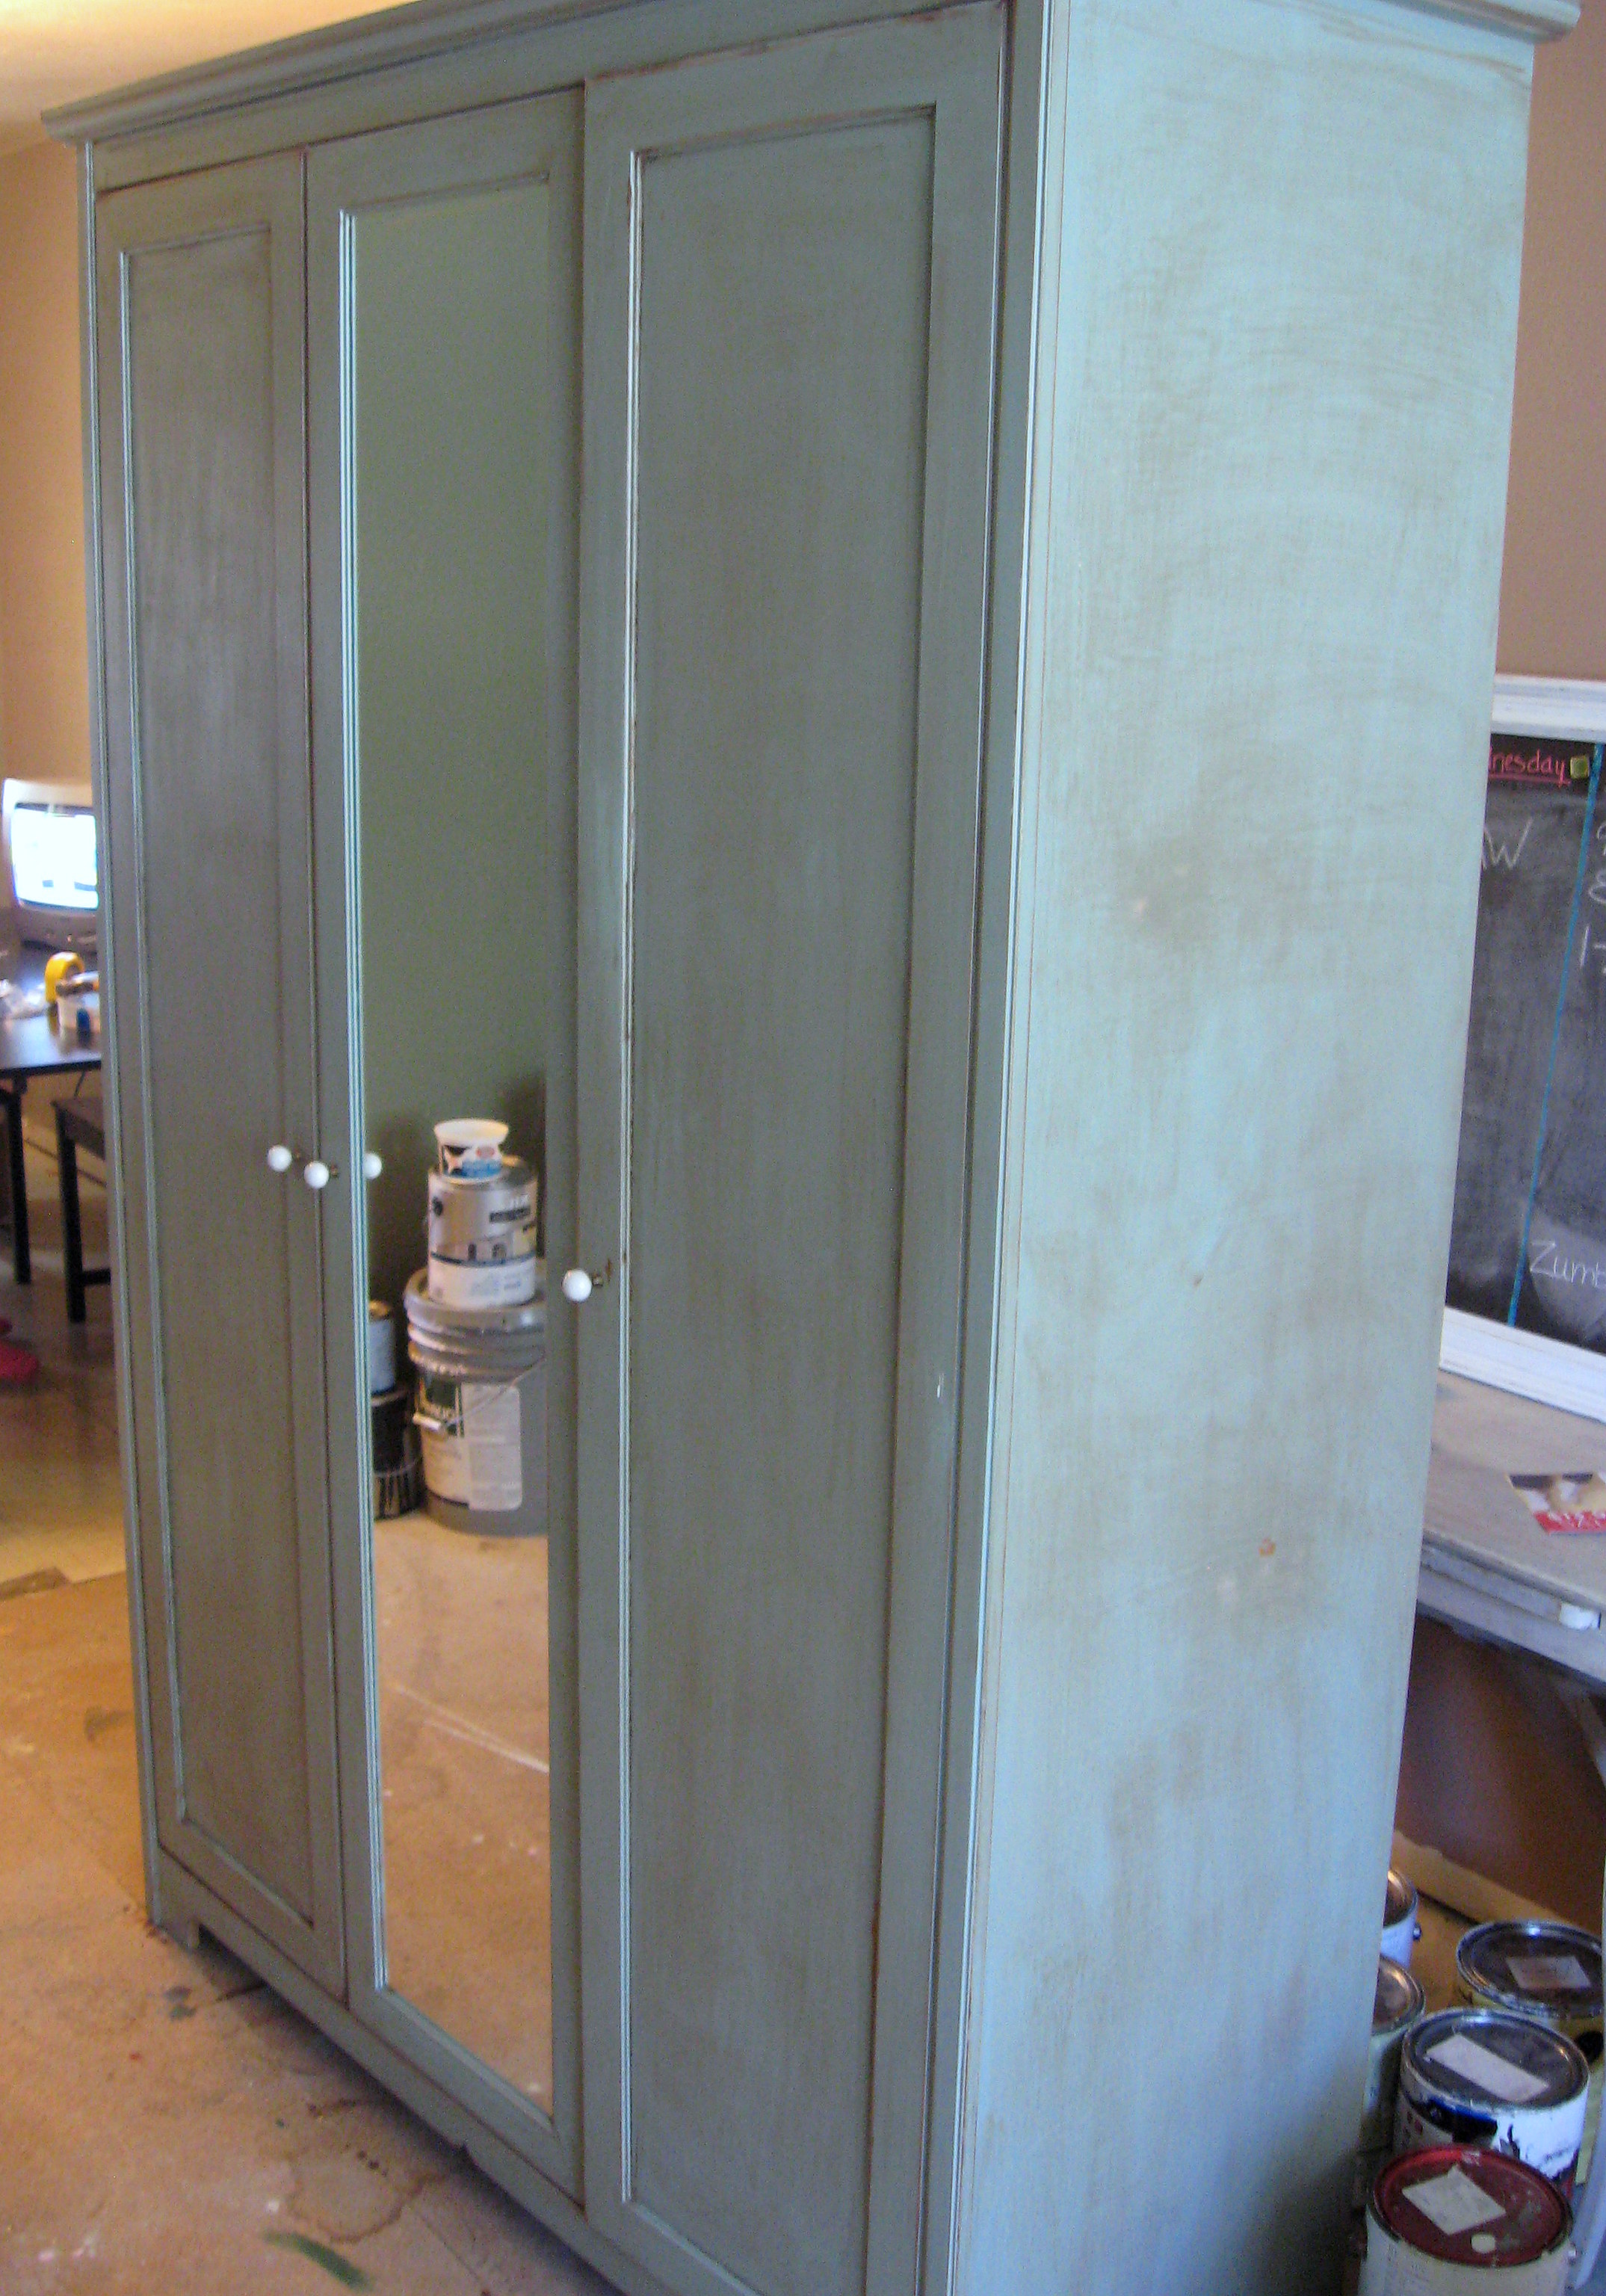
Replace the doors and hardware – I got these cute little white ceramic knobs on a 50% off sale at Hobby Lobby for $2/knob. I saw the exact same knobs at Anthropologie for $7!
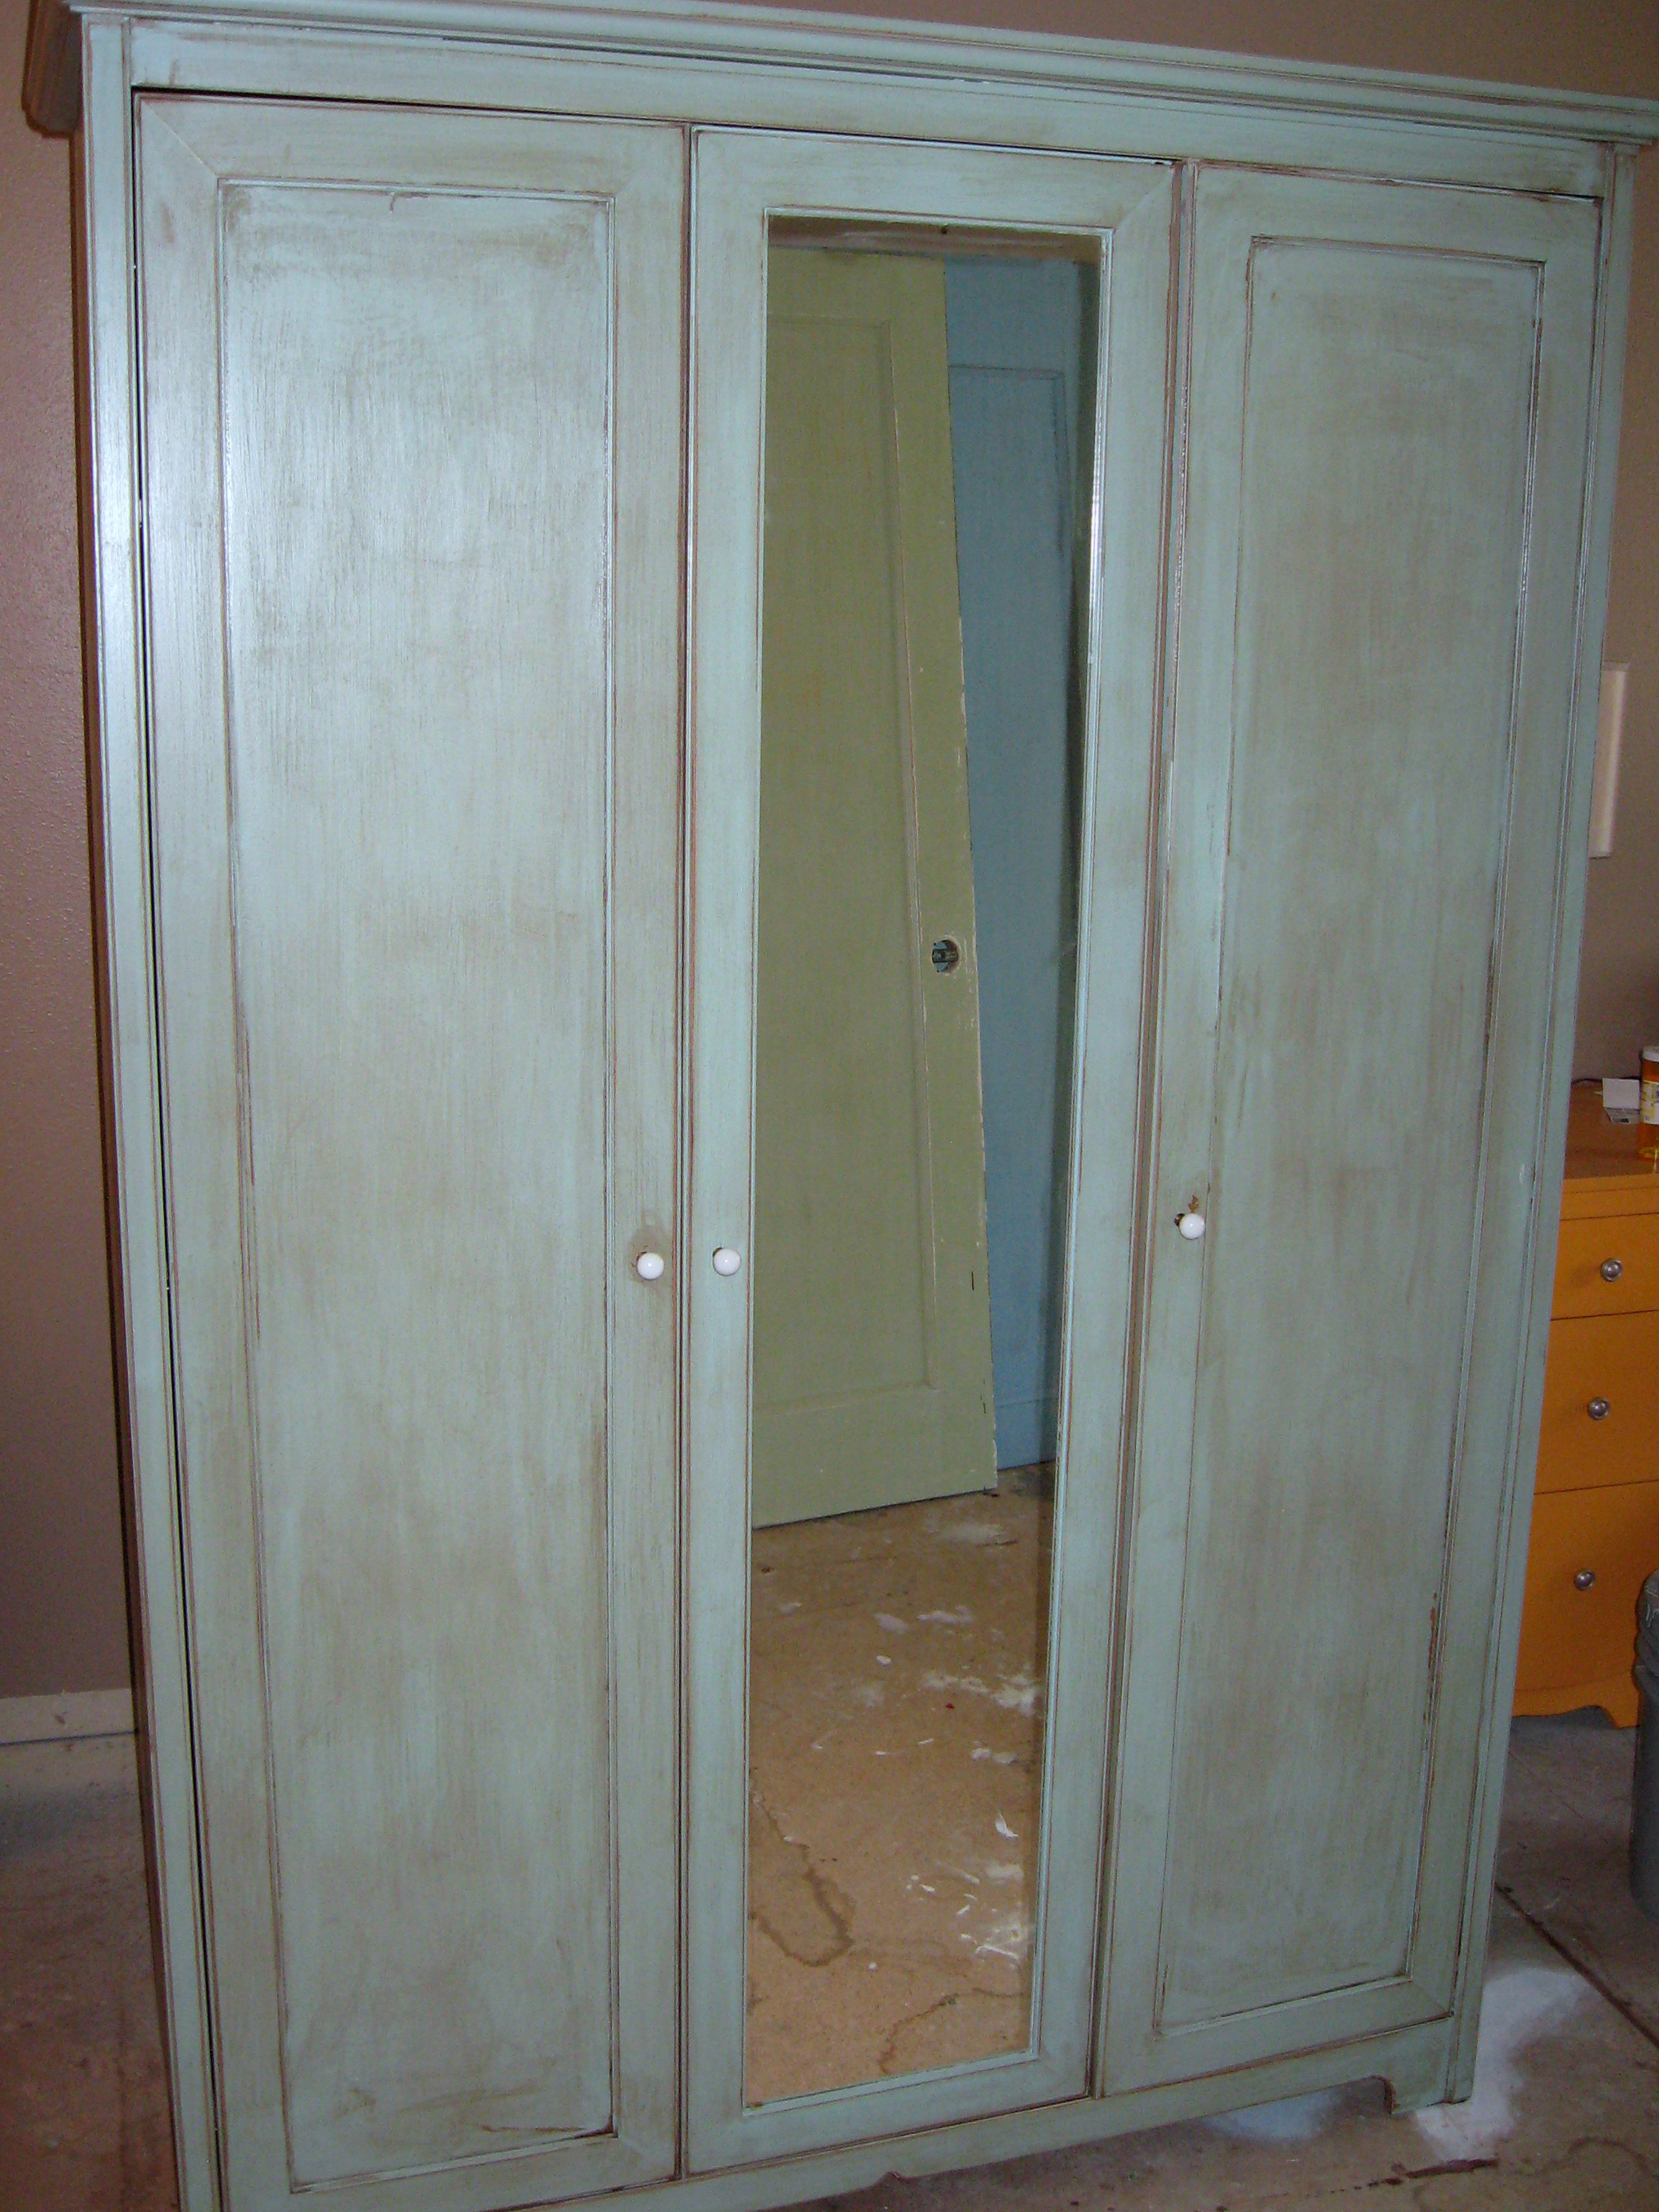
This has been sitting in the middle of our massive-messy remodel now for 3 weeks waiting patiently for us to finish the floor in it’s eventual home. It has been bumped, scraped, brushed up against and generally abused and it still looks great and COULD NOT have been easier to do.
A PYP Best Blog! DIY Dulce de Leche!
Just in case you missed this article on making your own dulce de leche the first time we shared it a couple of years ago, we are republishing it. After Sharon wrote this blog originally, we got an awesome response. This is one of the PYP Best Blogs!
I made a discovery of epic proportions this weekend! Dramatic? Maybe a bit, but if you – like I – didn’t know this before, I think you’ll be happy I shared!
My boys found a recipe they were dying to try, but it called for Dulce de Leche. Whether that is available in my store or not, I don’t know, I never looked. Since I had cans and cans of sweetened condensed milk in my pantry and knew you could use it to make dulce de leche, I wasn’t going to spend the extra money. The internet is full of “recipes” about how you can boil a closed can of sweetened condensed milk either in a pan or in your crock pot for hours until it turns into thick, gooey, carmely goodness.
The internet is also full of stories about said cans exploding as they heat and making a thick, gooey carmely mess in your kitchen and potentially harming anyone nearby.
I will admit that I tried it once; it works, but I was nervous the whole time, so even though I knew I could do it again, I kept putting it off. Finally, I searched the internet to see if there was another option. I found one blogger who said that you can pour the milk into the top of a double boiler and stir it over heat for 2 1/2 hours as it cooks. No thanks; keep searching…
BINGO!
You can cook it in the oven!!!
Turn your oven on to 425*. Open the sweetened condensed milk and pour it into an oven safe glass pan…a pie plate is perfect for one can. I used a bigger pyrex pan here because the recipe I’m making required 2 cans worth of the finished product. 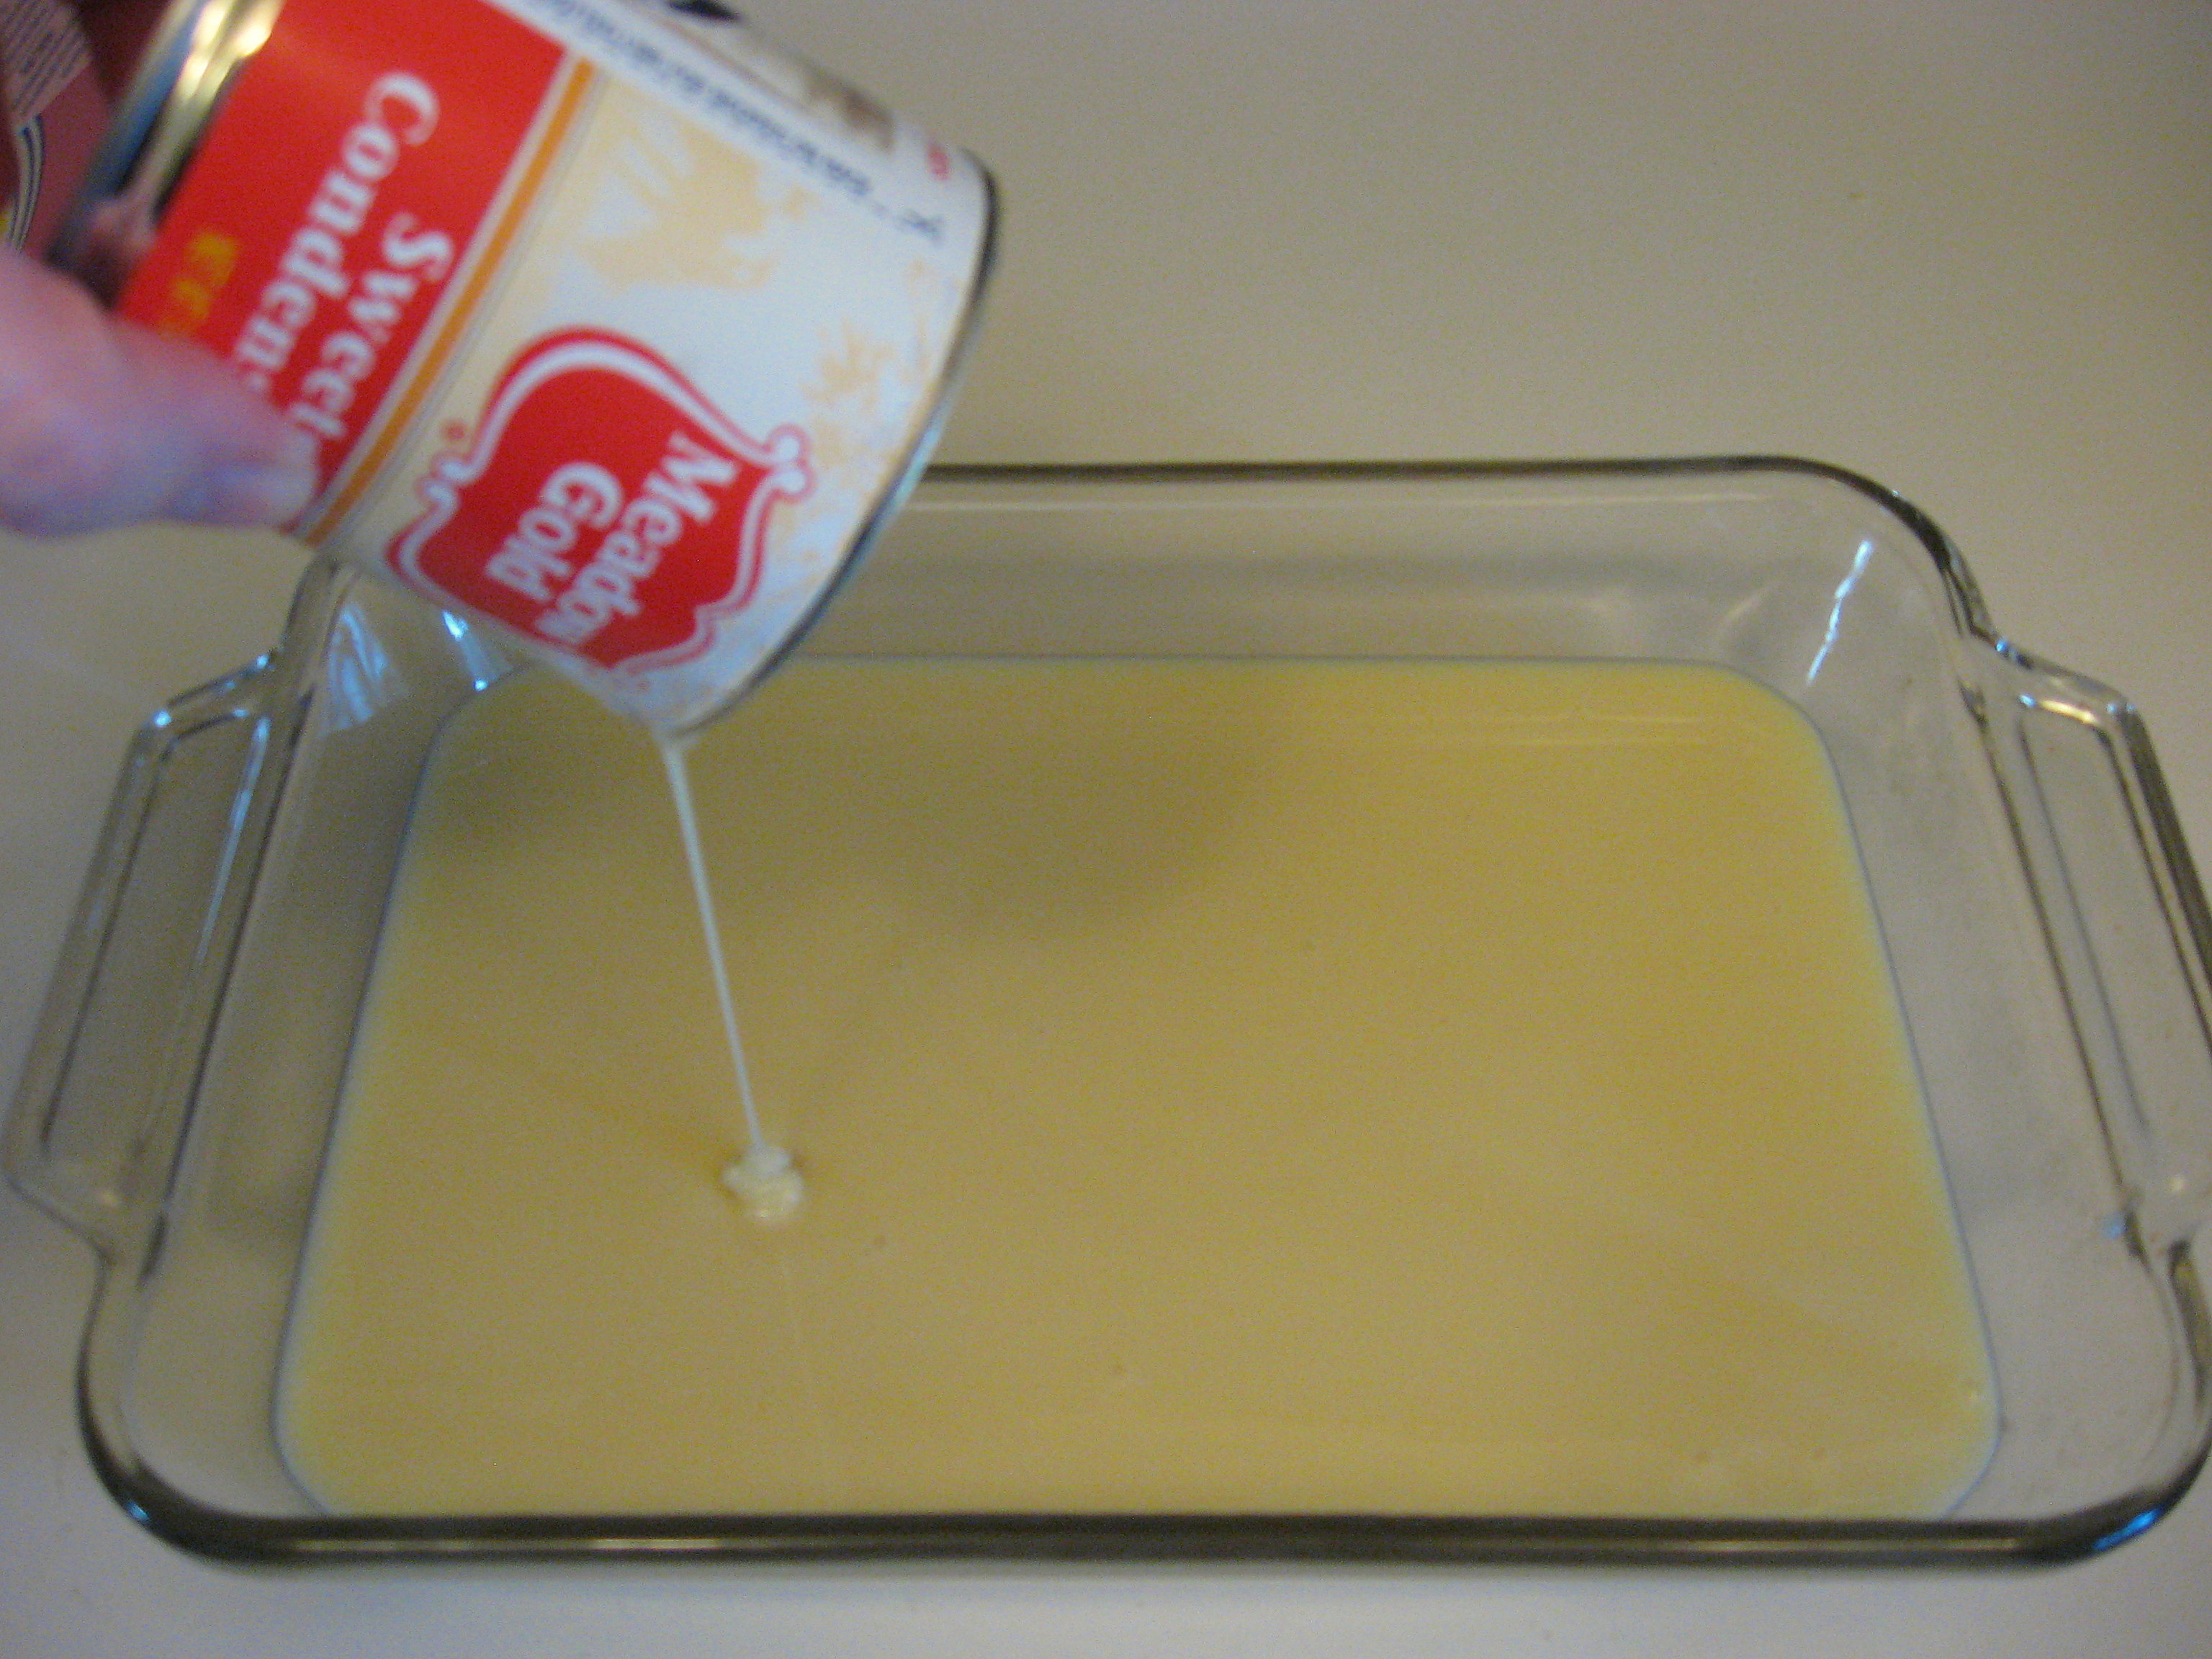
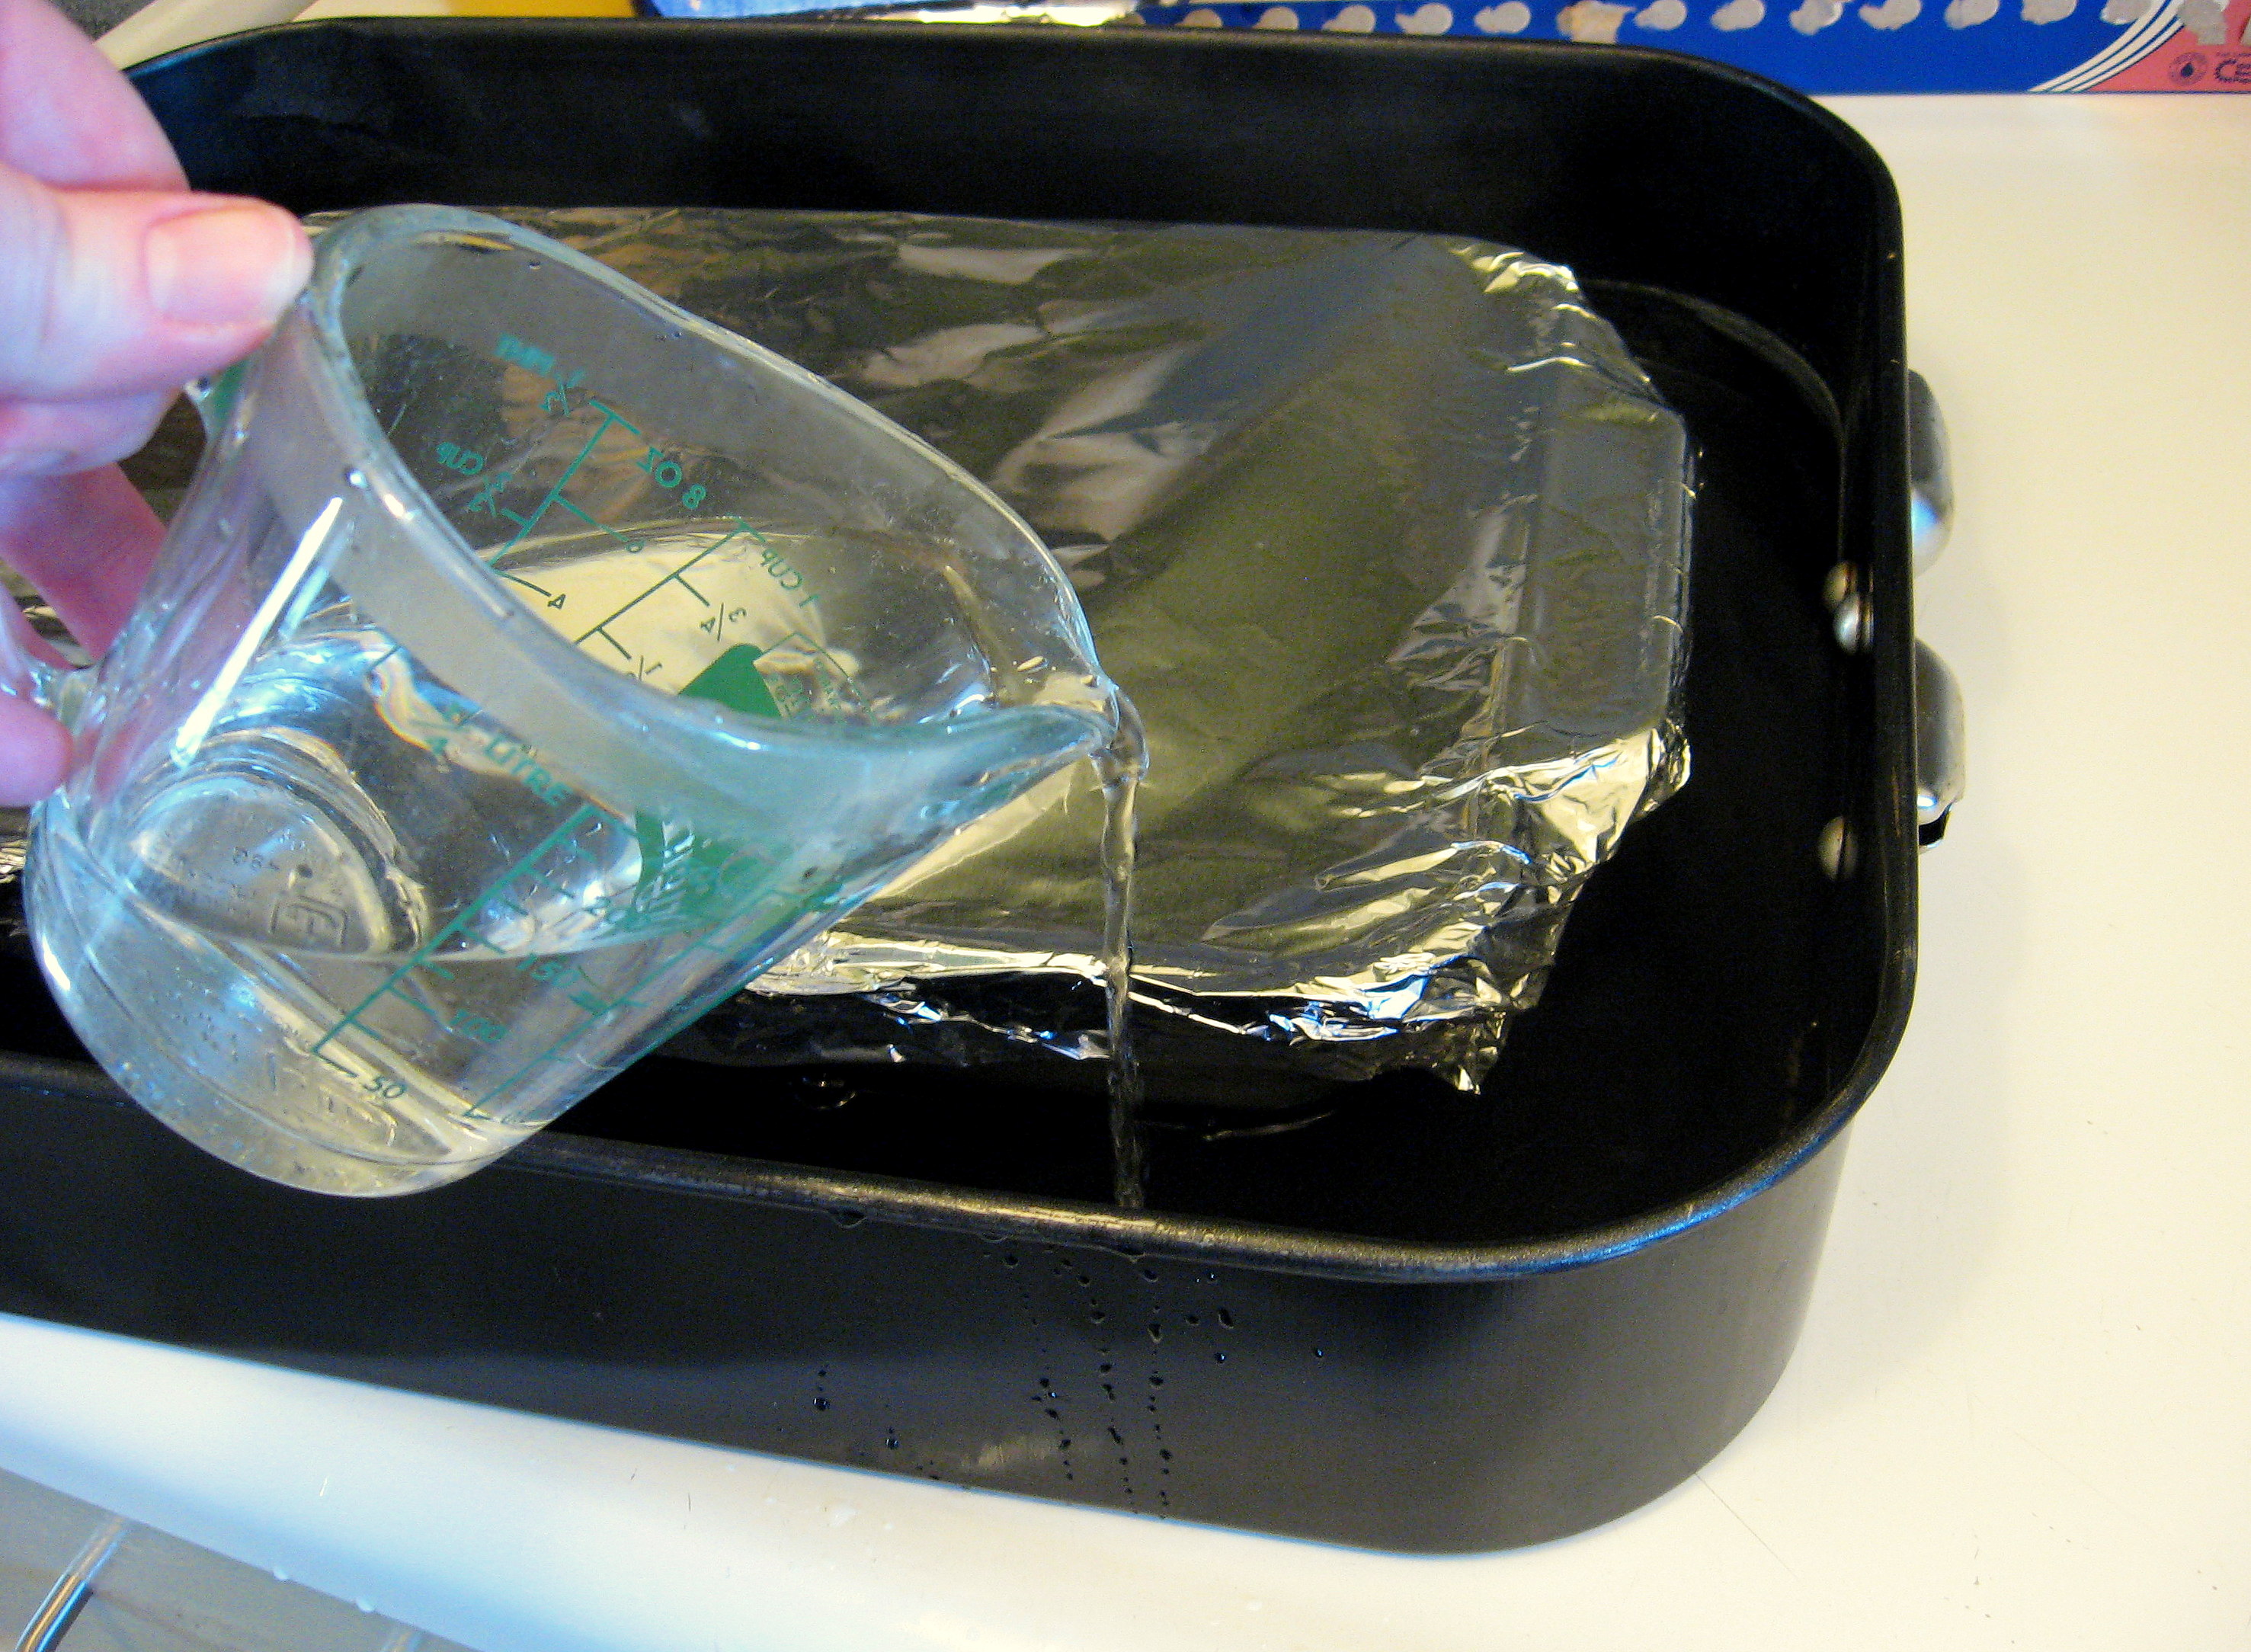
Cover this tightly with aluminum foil.
Put the glass pan into a bigger pan – like a roaster pan – and fill with hot water up to about halfway up the sides of the glass pan.
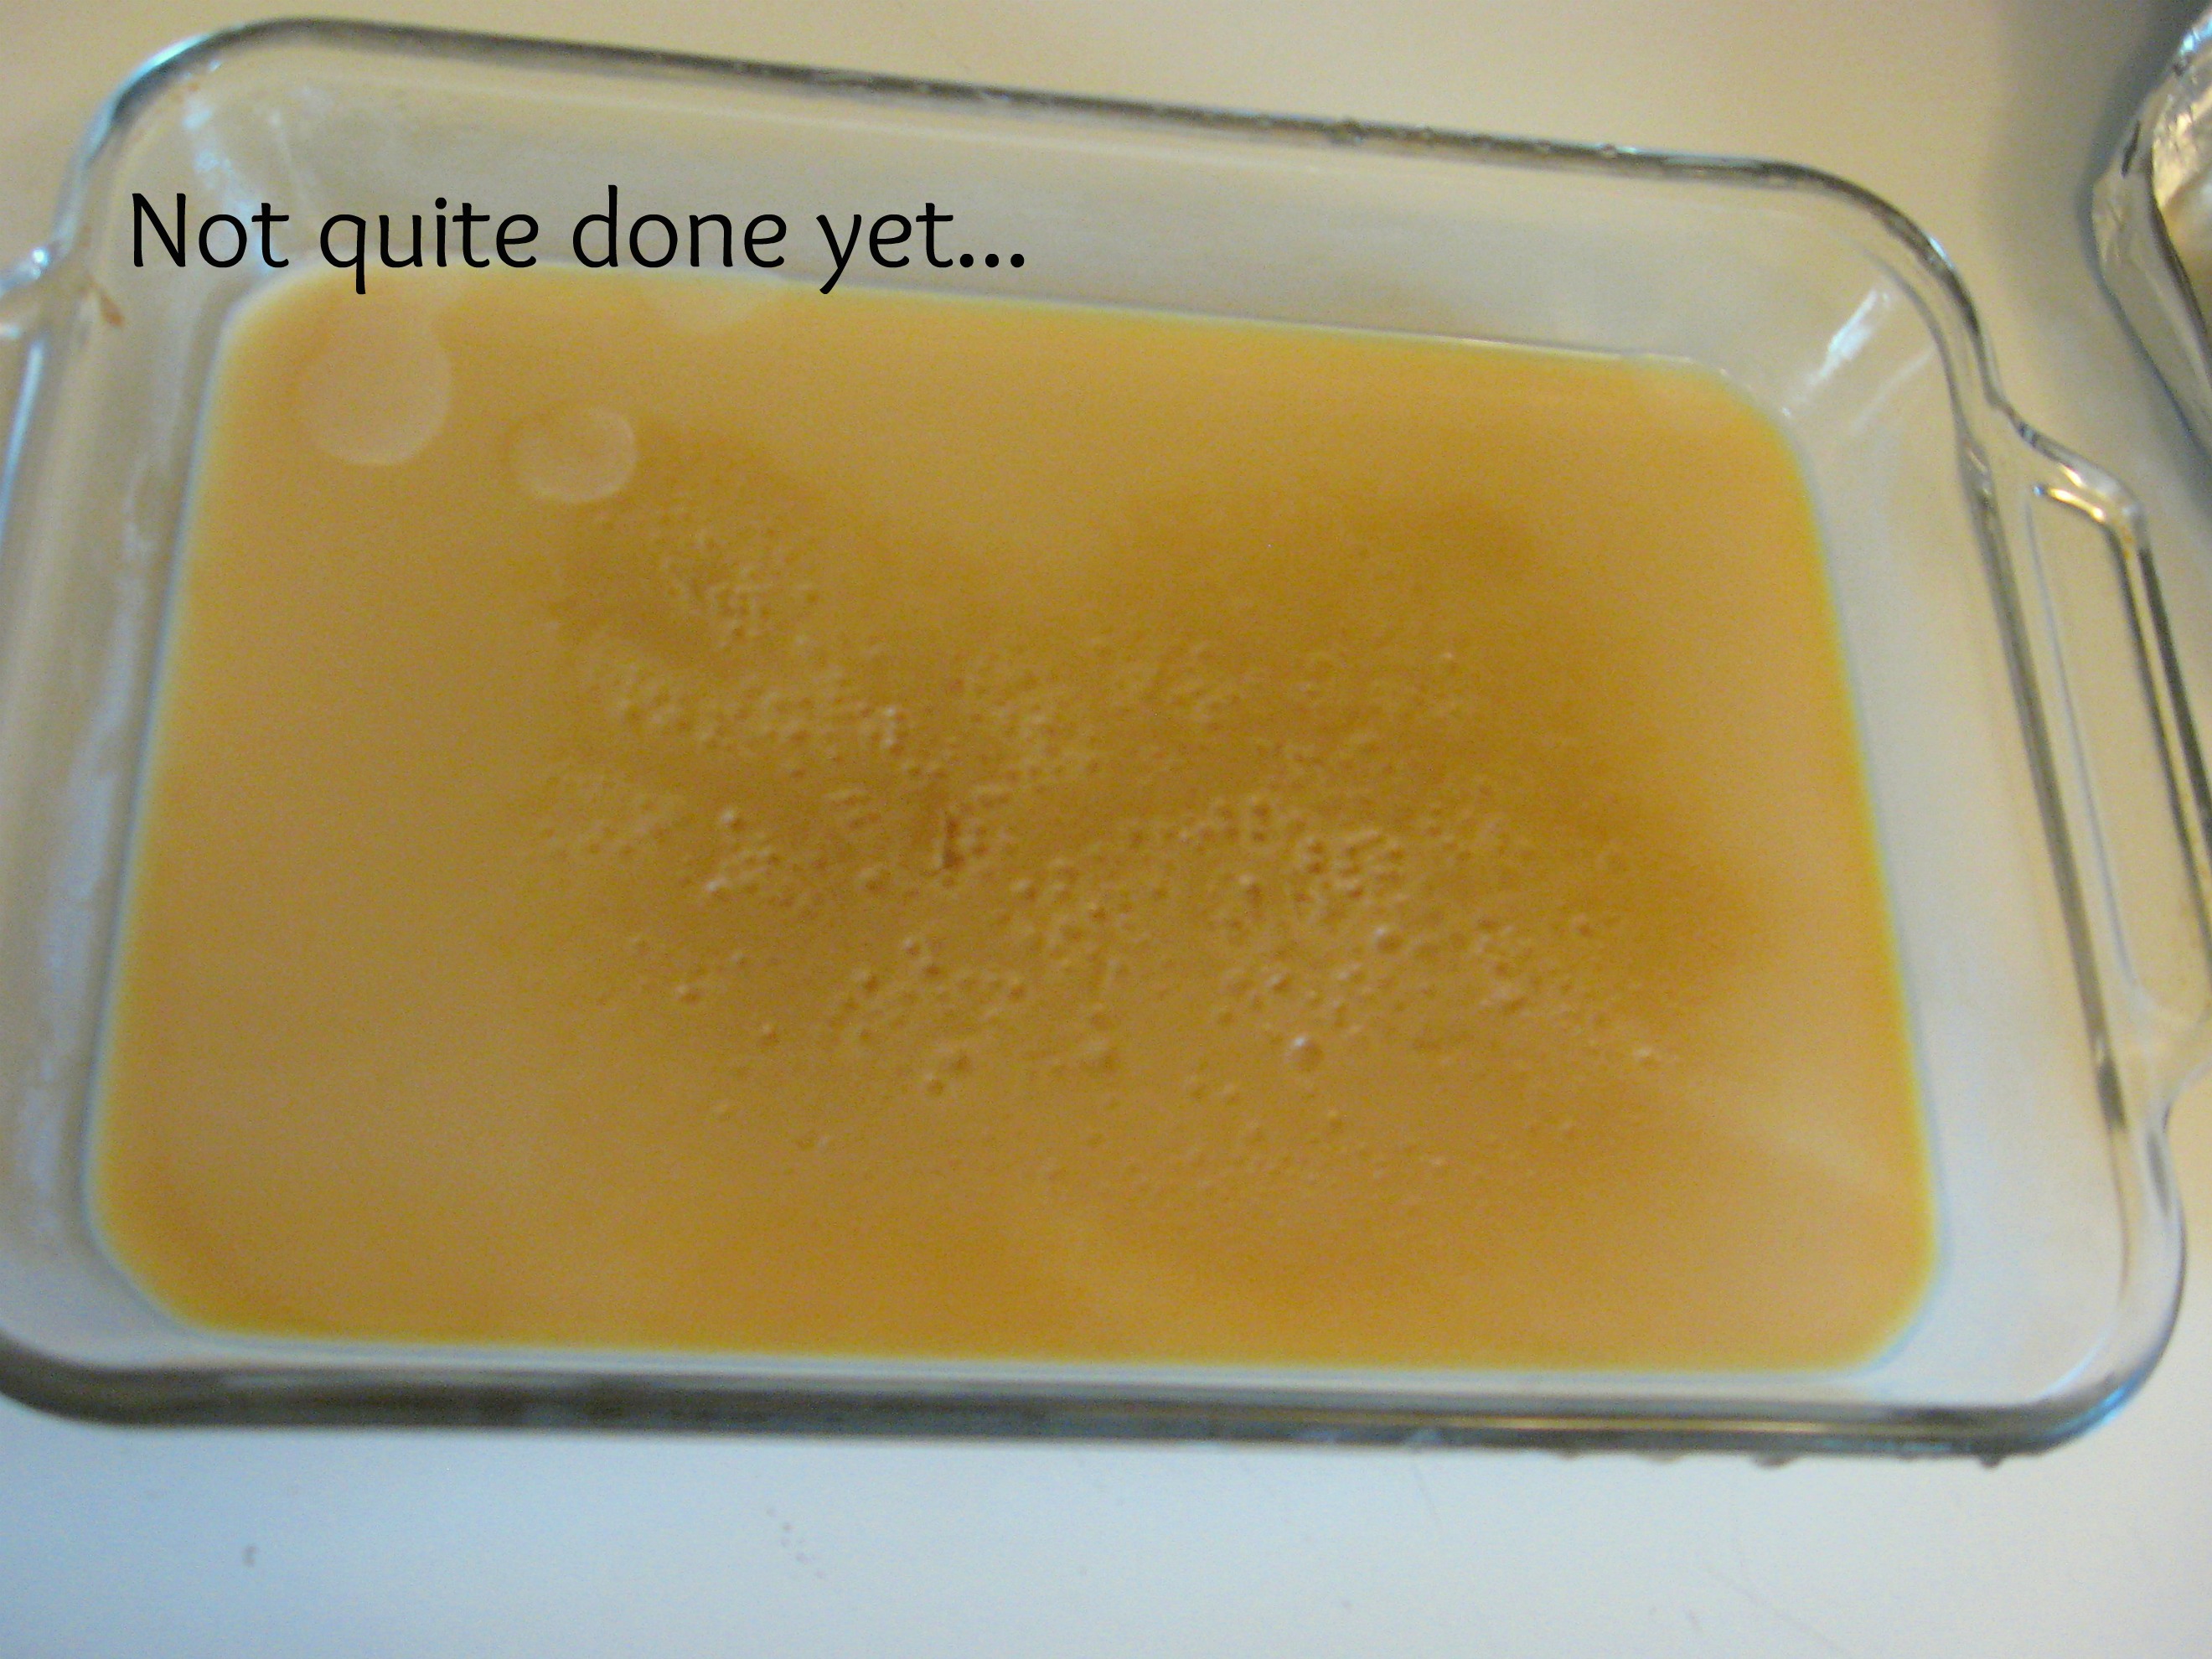
Pop the whole thing in the oven and leave it to cook for 1 to 1 1/2 hours. Check it once in awhile to make sure that there is plenty of water and replenish when necessary.
After about an hour, pull back the corner of the foil and have a look. When it’s done it should be thick and brown. (With the 2 cans that I did, it took more like 2-and-a-bit hours, but the one can was perfect after about an hour and 15 minutes).
**BE VERY CAREFUL when you open the oven door. Open it and stand back or you will get hit in the face with very hot steam!!
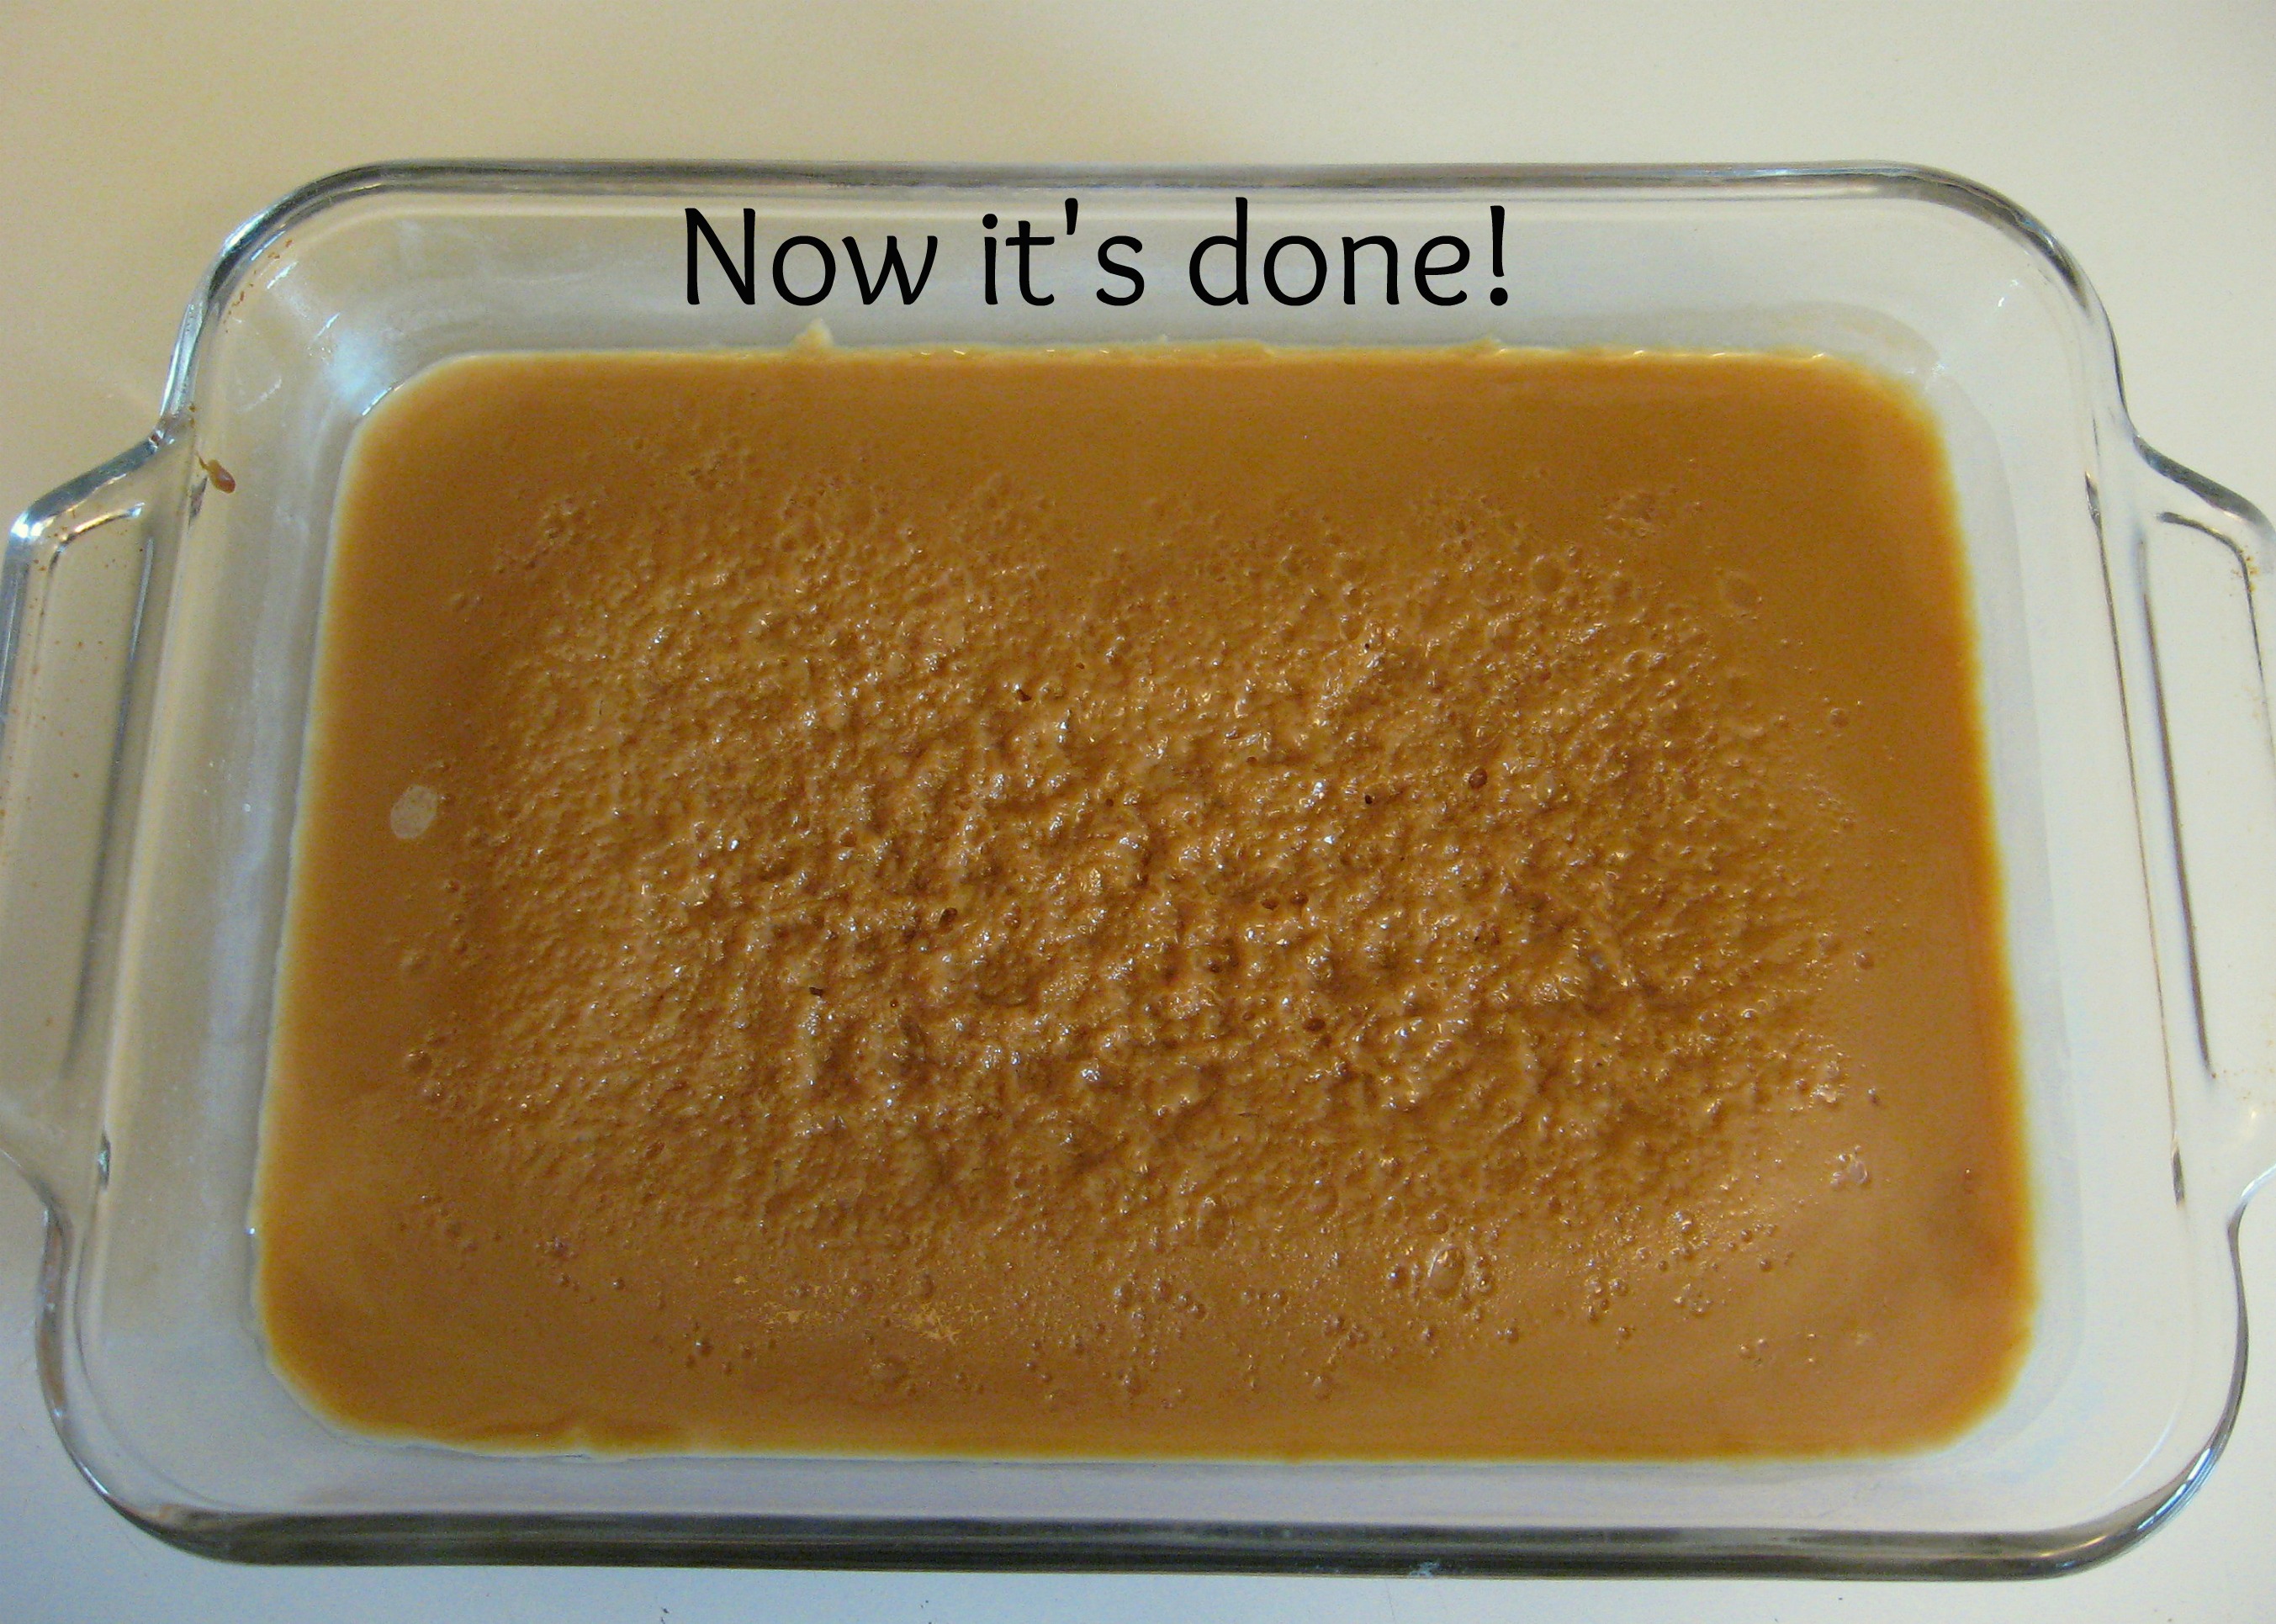
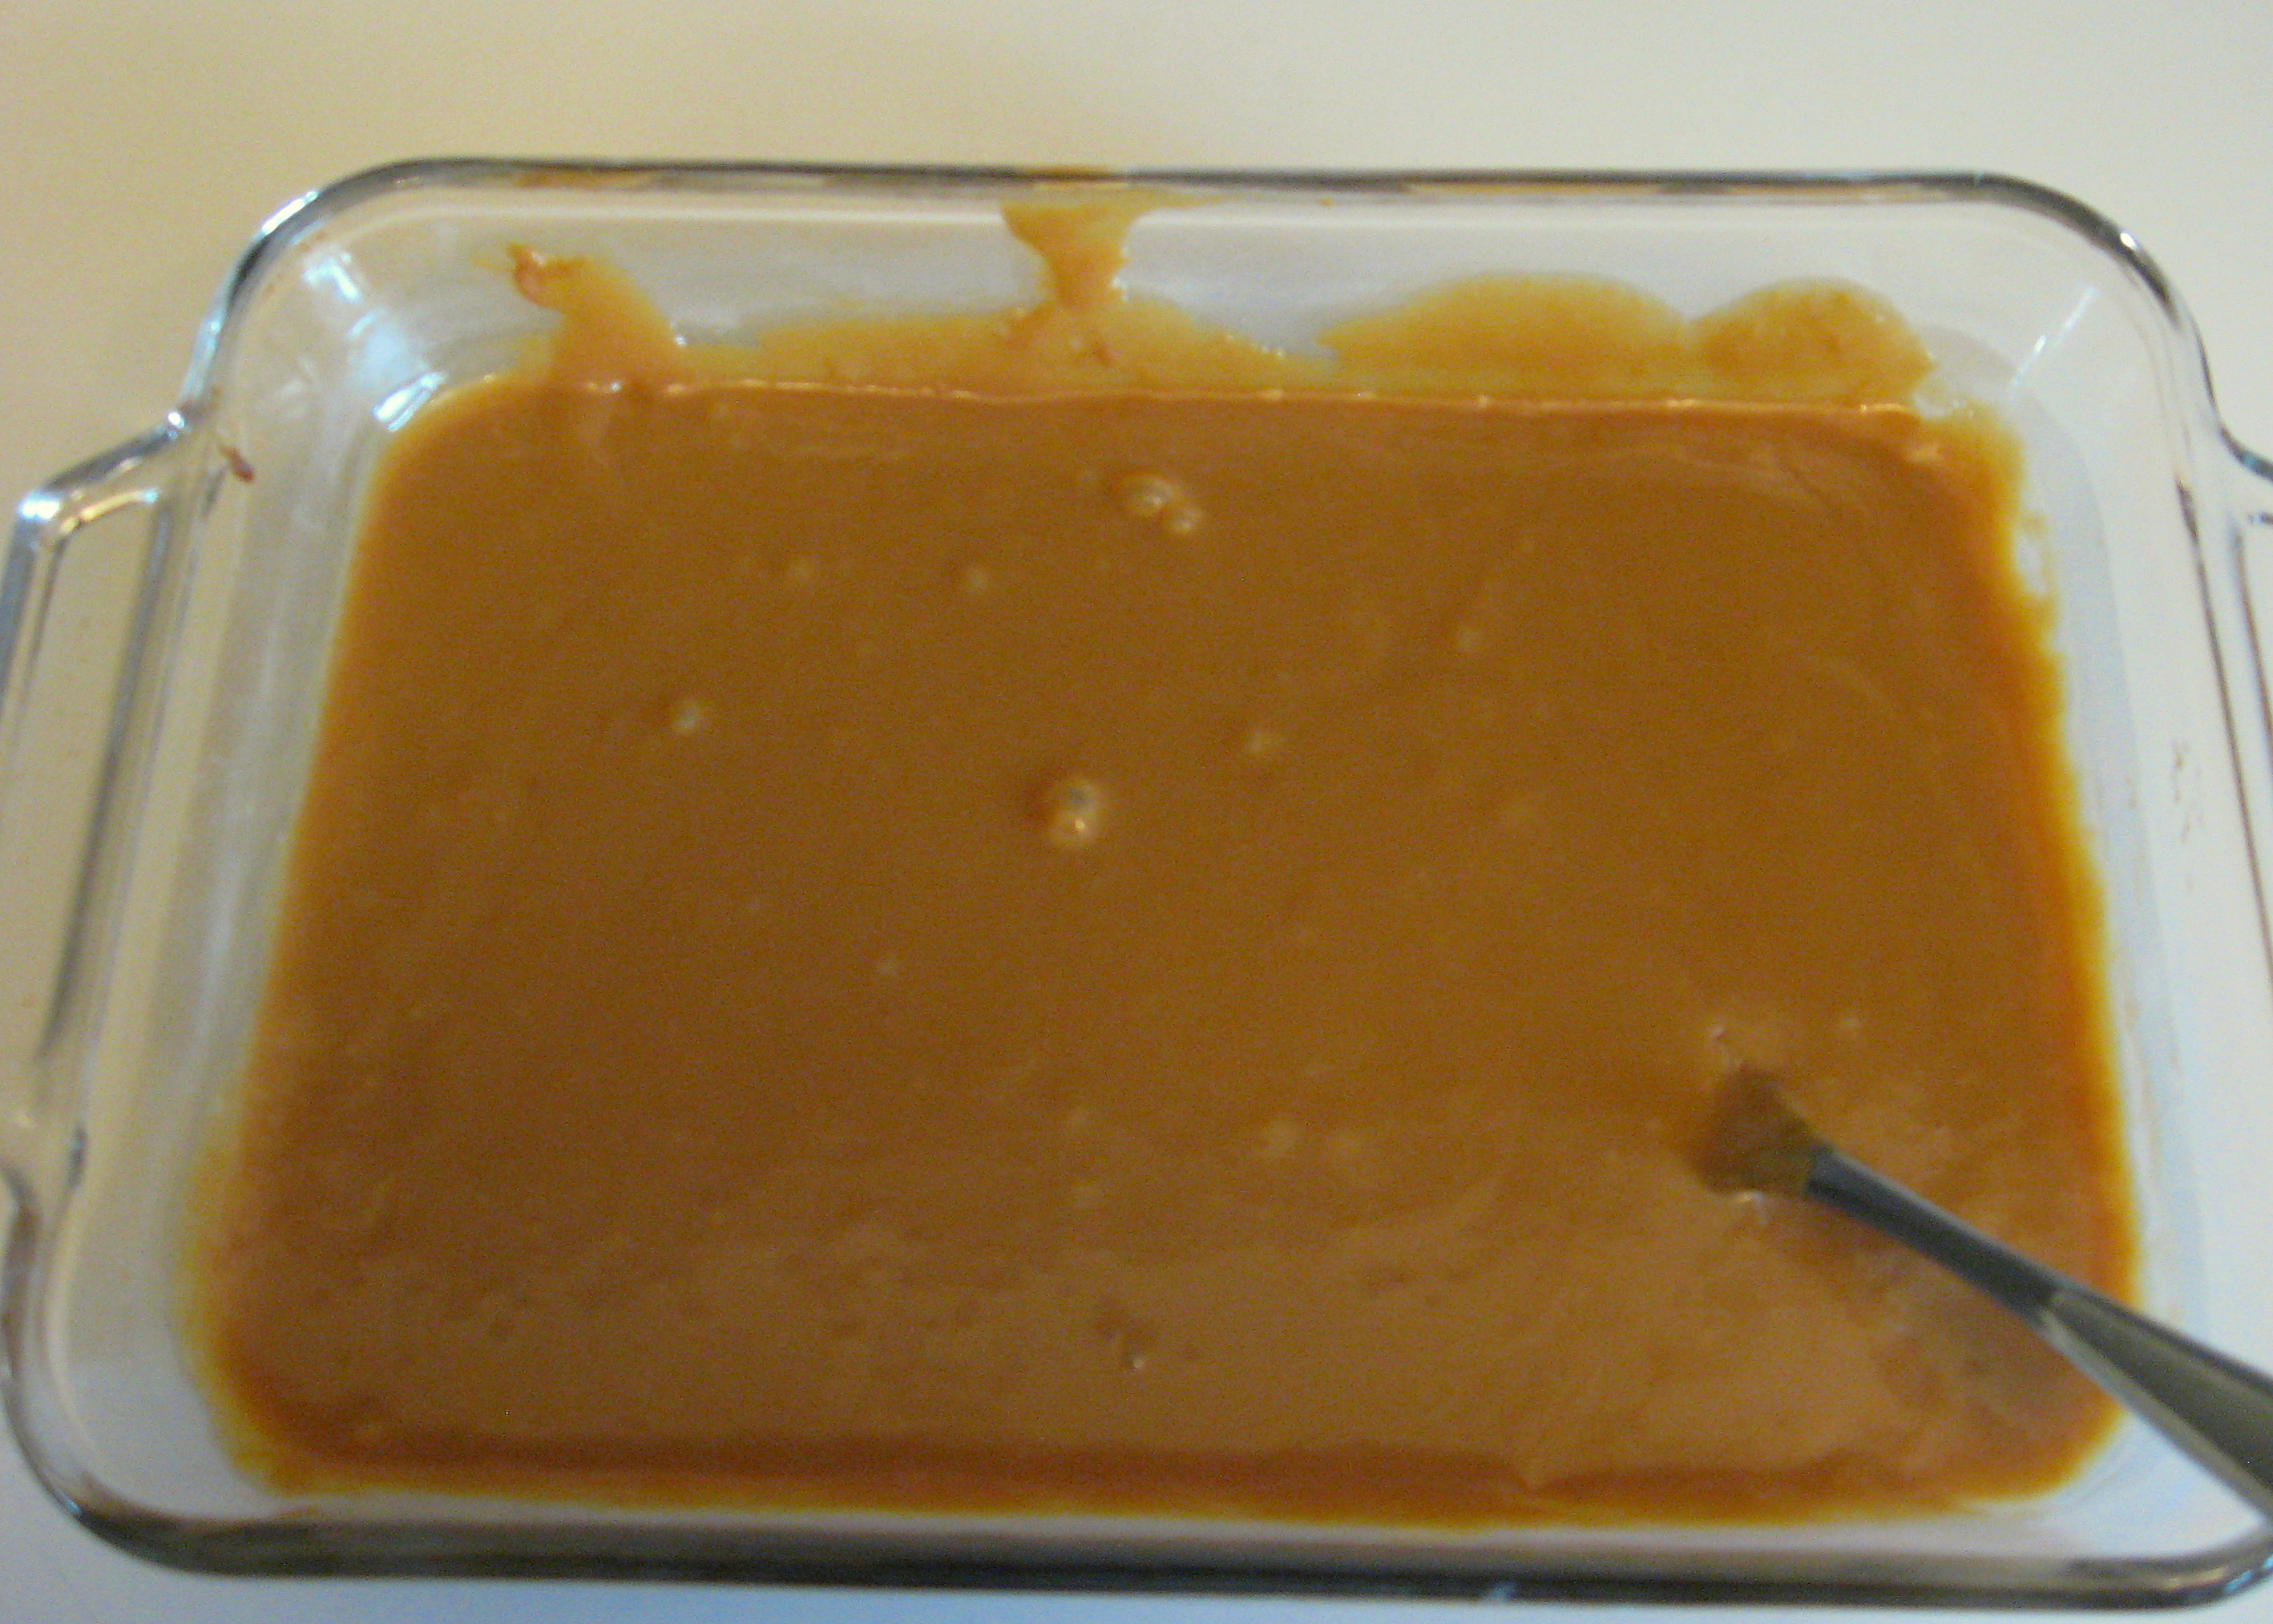
Once it is dark and carmely looking, remove the pan from the water and whip it with a whisk or a fork until it is smooth.
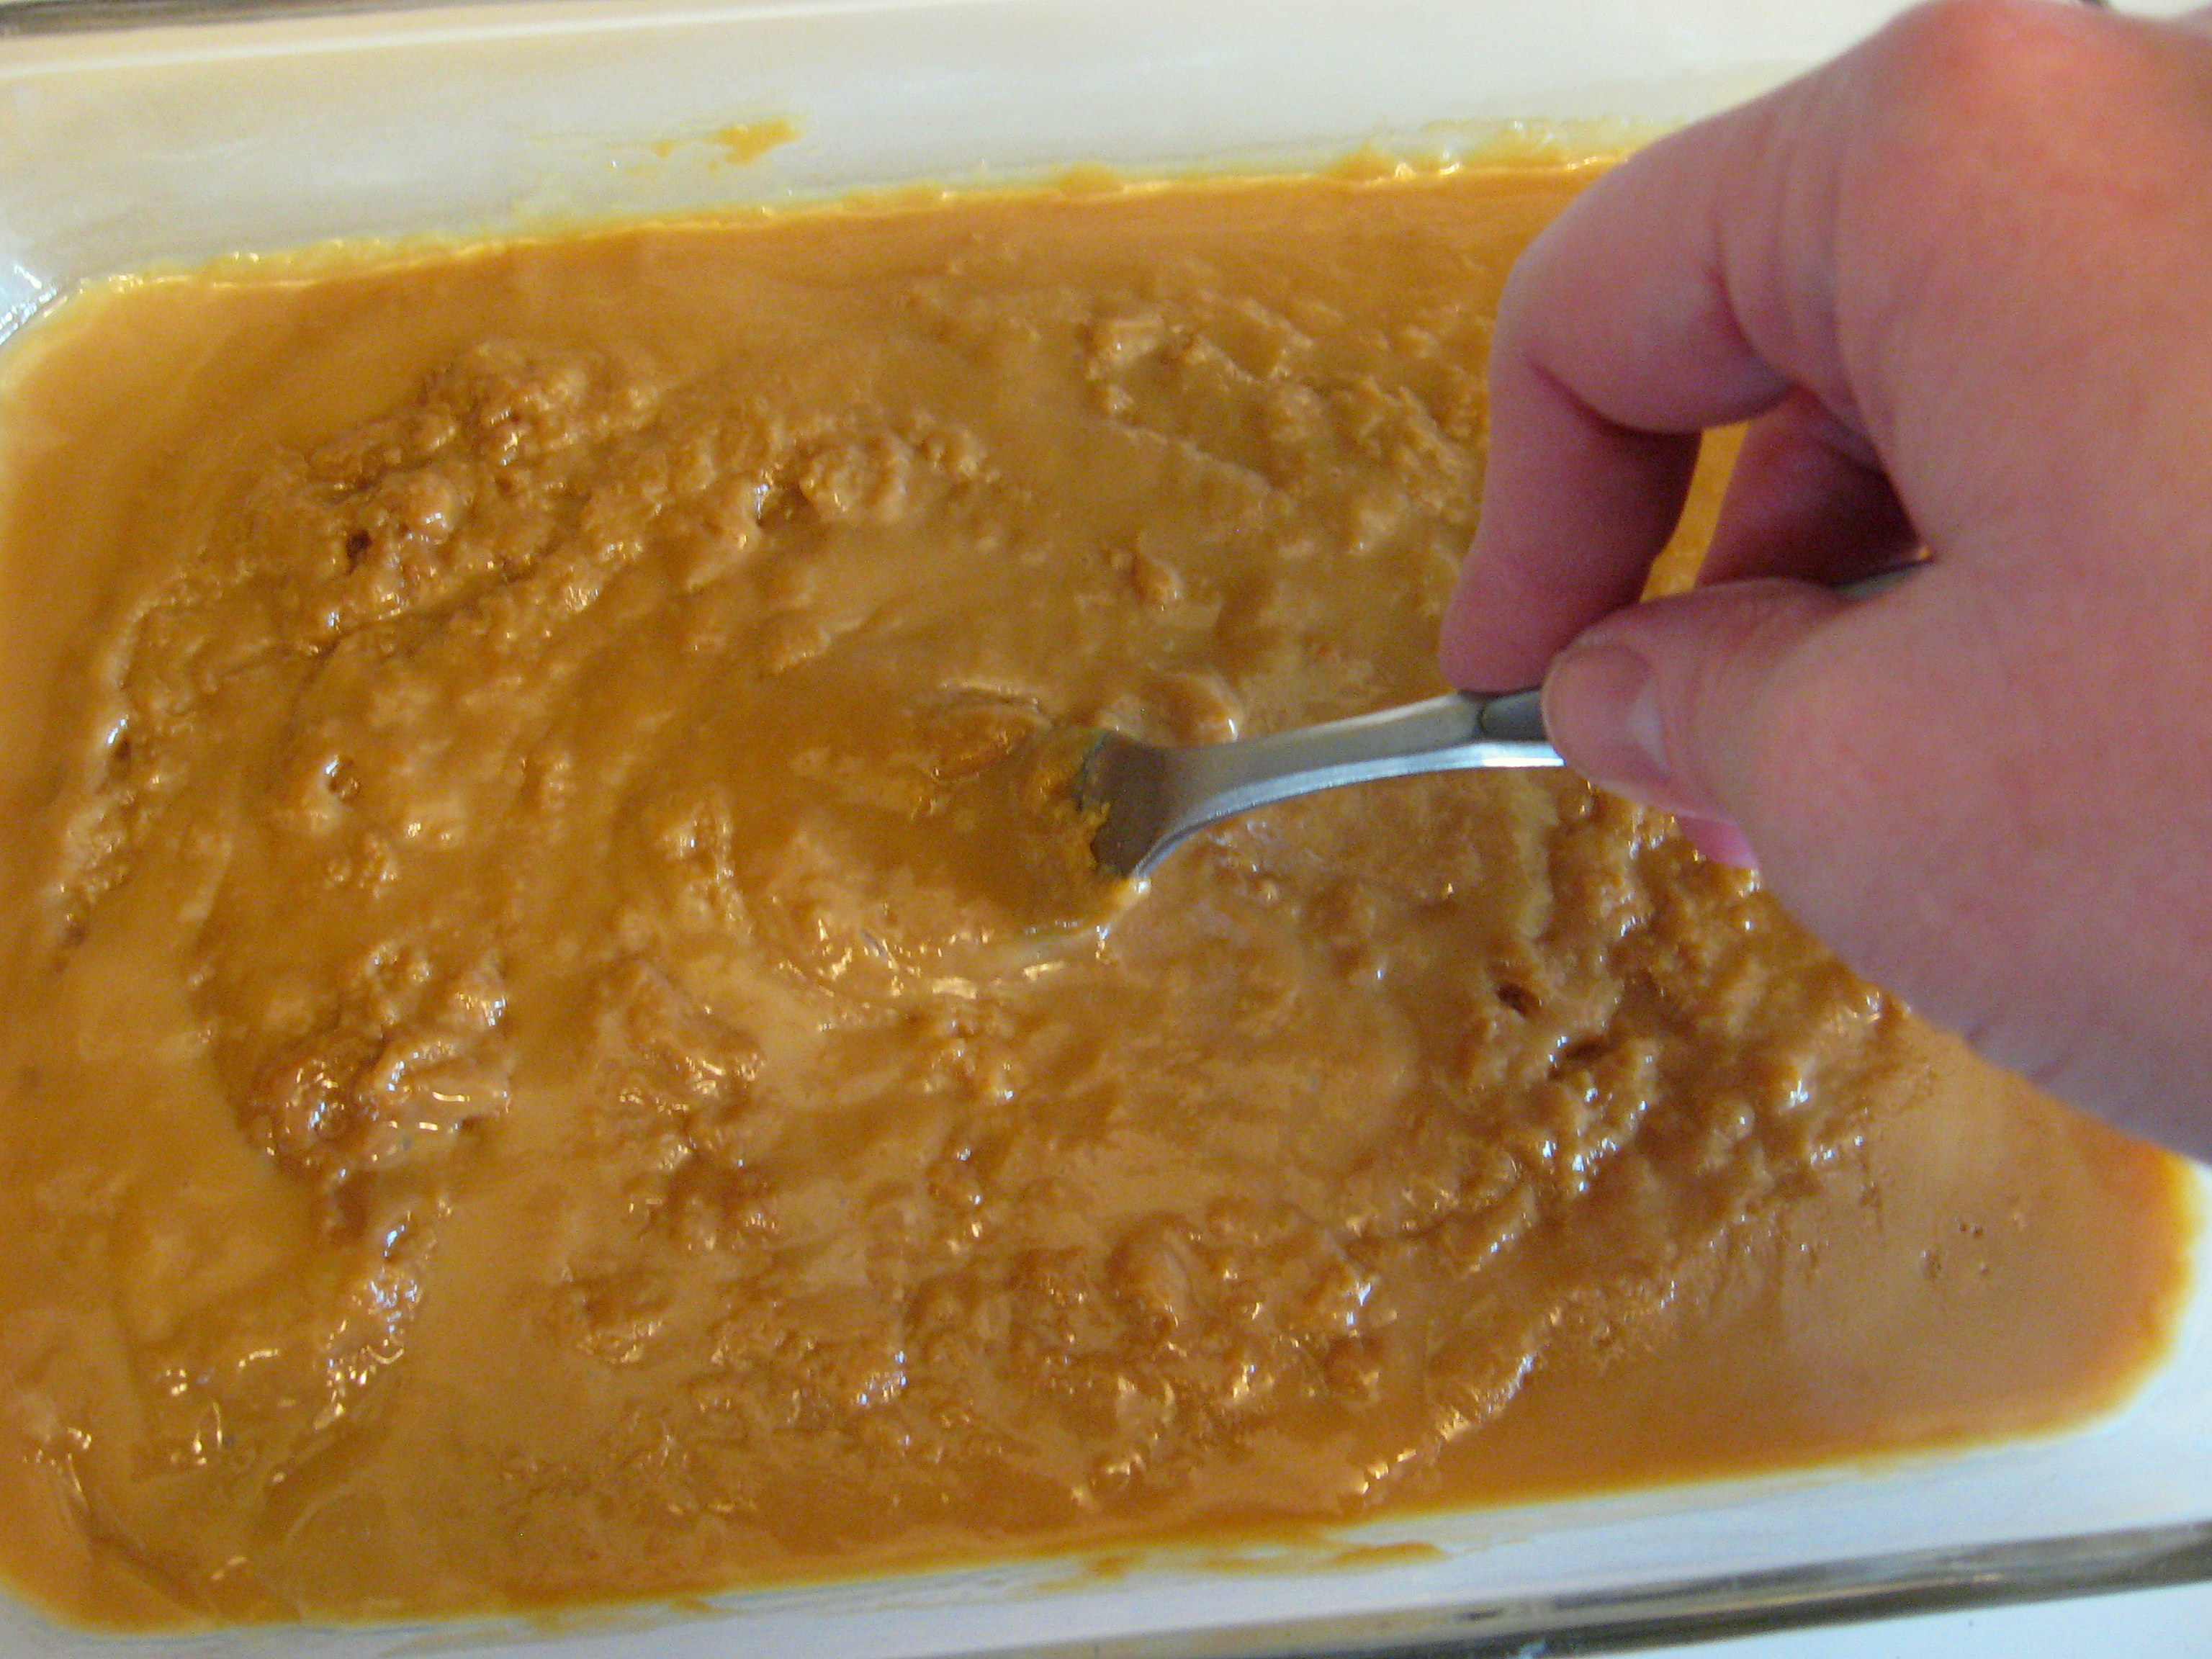
Now just try not to eat it all with a spoon…
Milwaukee Airless/Fine Finish Paint Sprayer Hub $265.30 Today Only (reg $379)
 Milwaukee Airless/Fine Finish Paint Sprayer Hub
Internet# 202019771
$379.00 WAS
-$113.70 SPECIAL BUY SAVINGS
$265.30 – YOUR NEW PRICE
May be available for FREE Store Pickup!
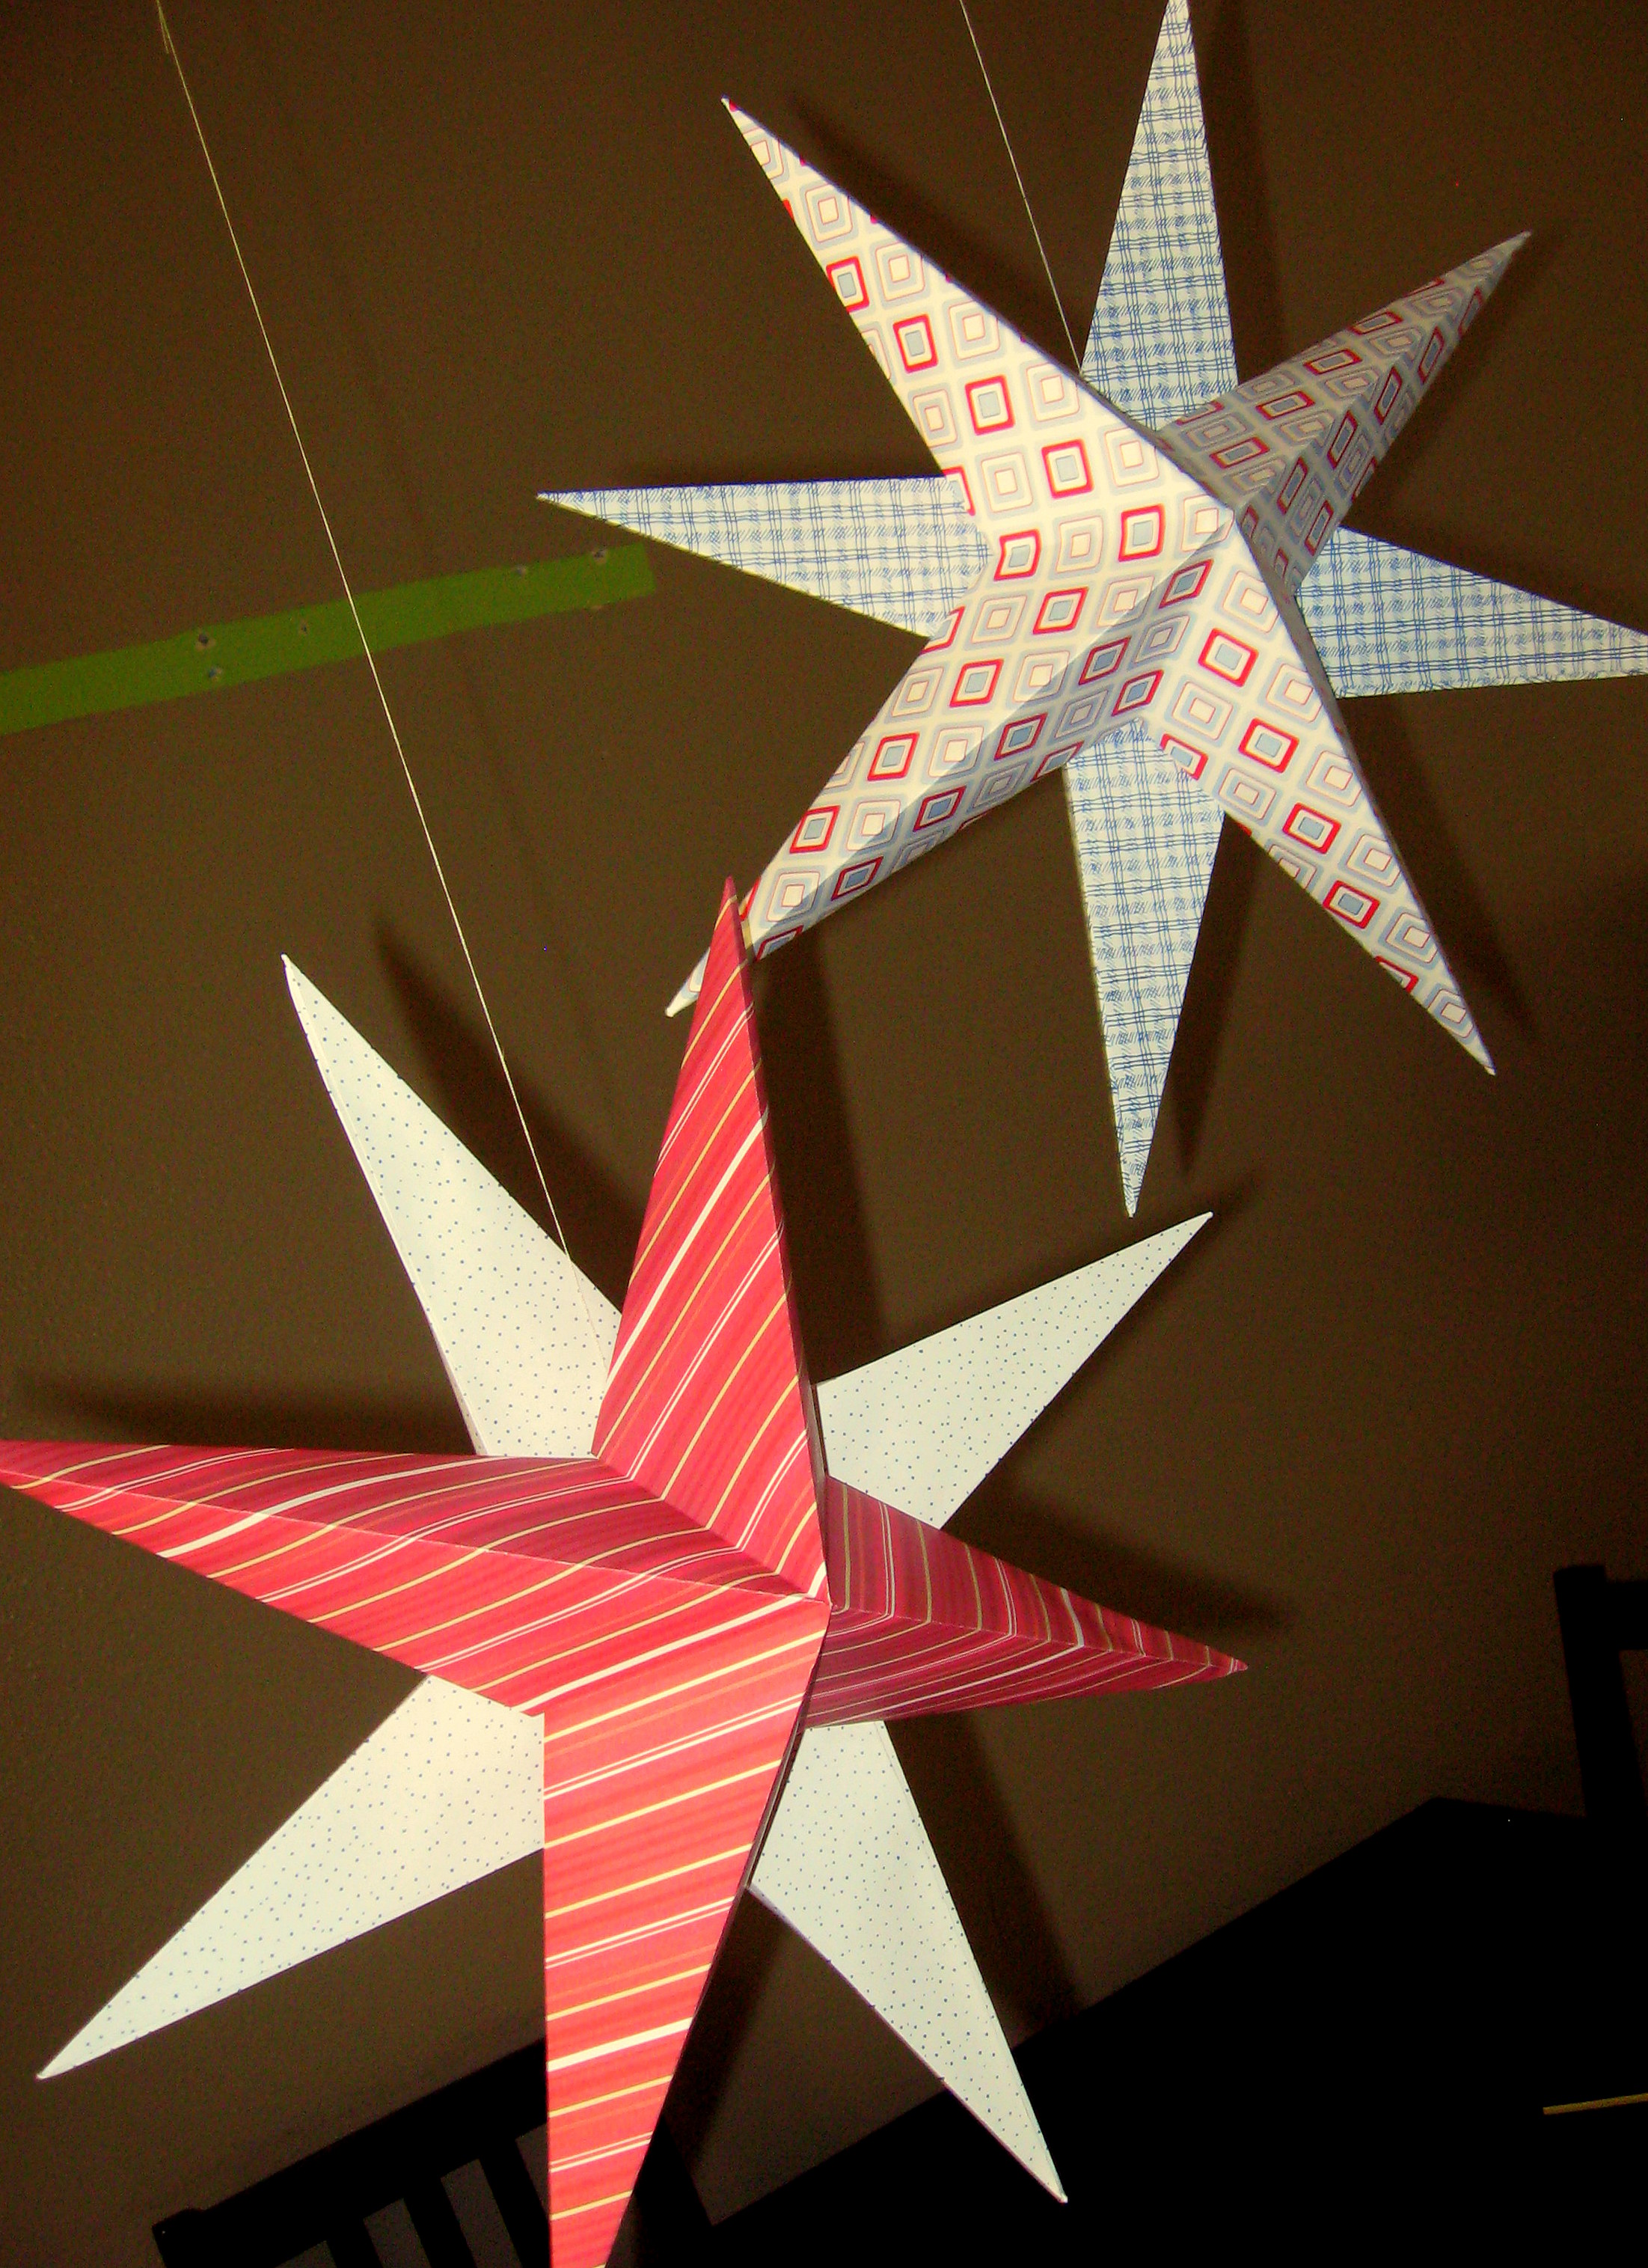
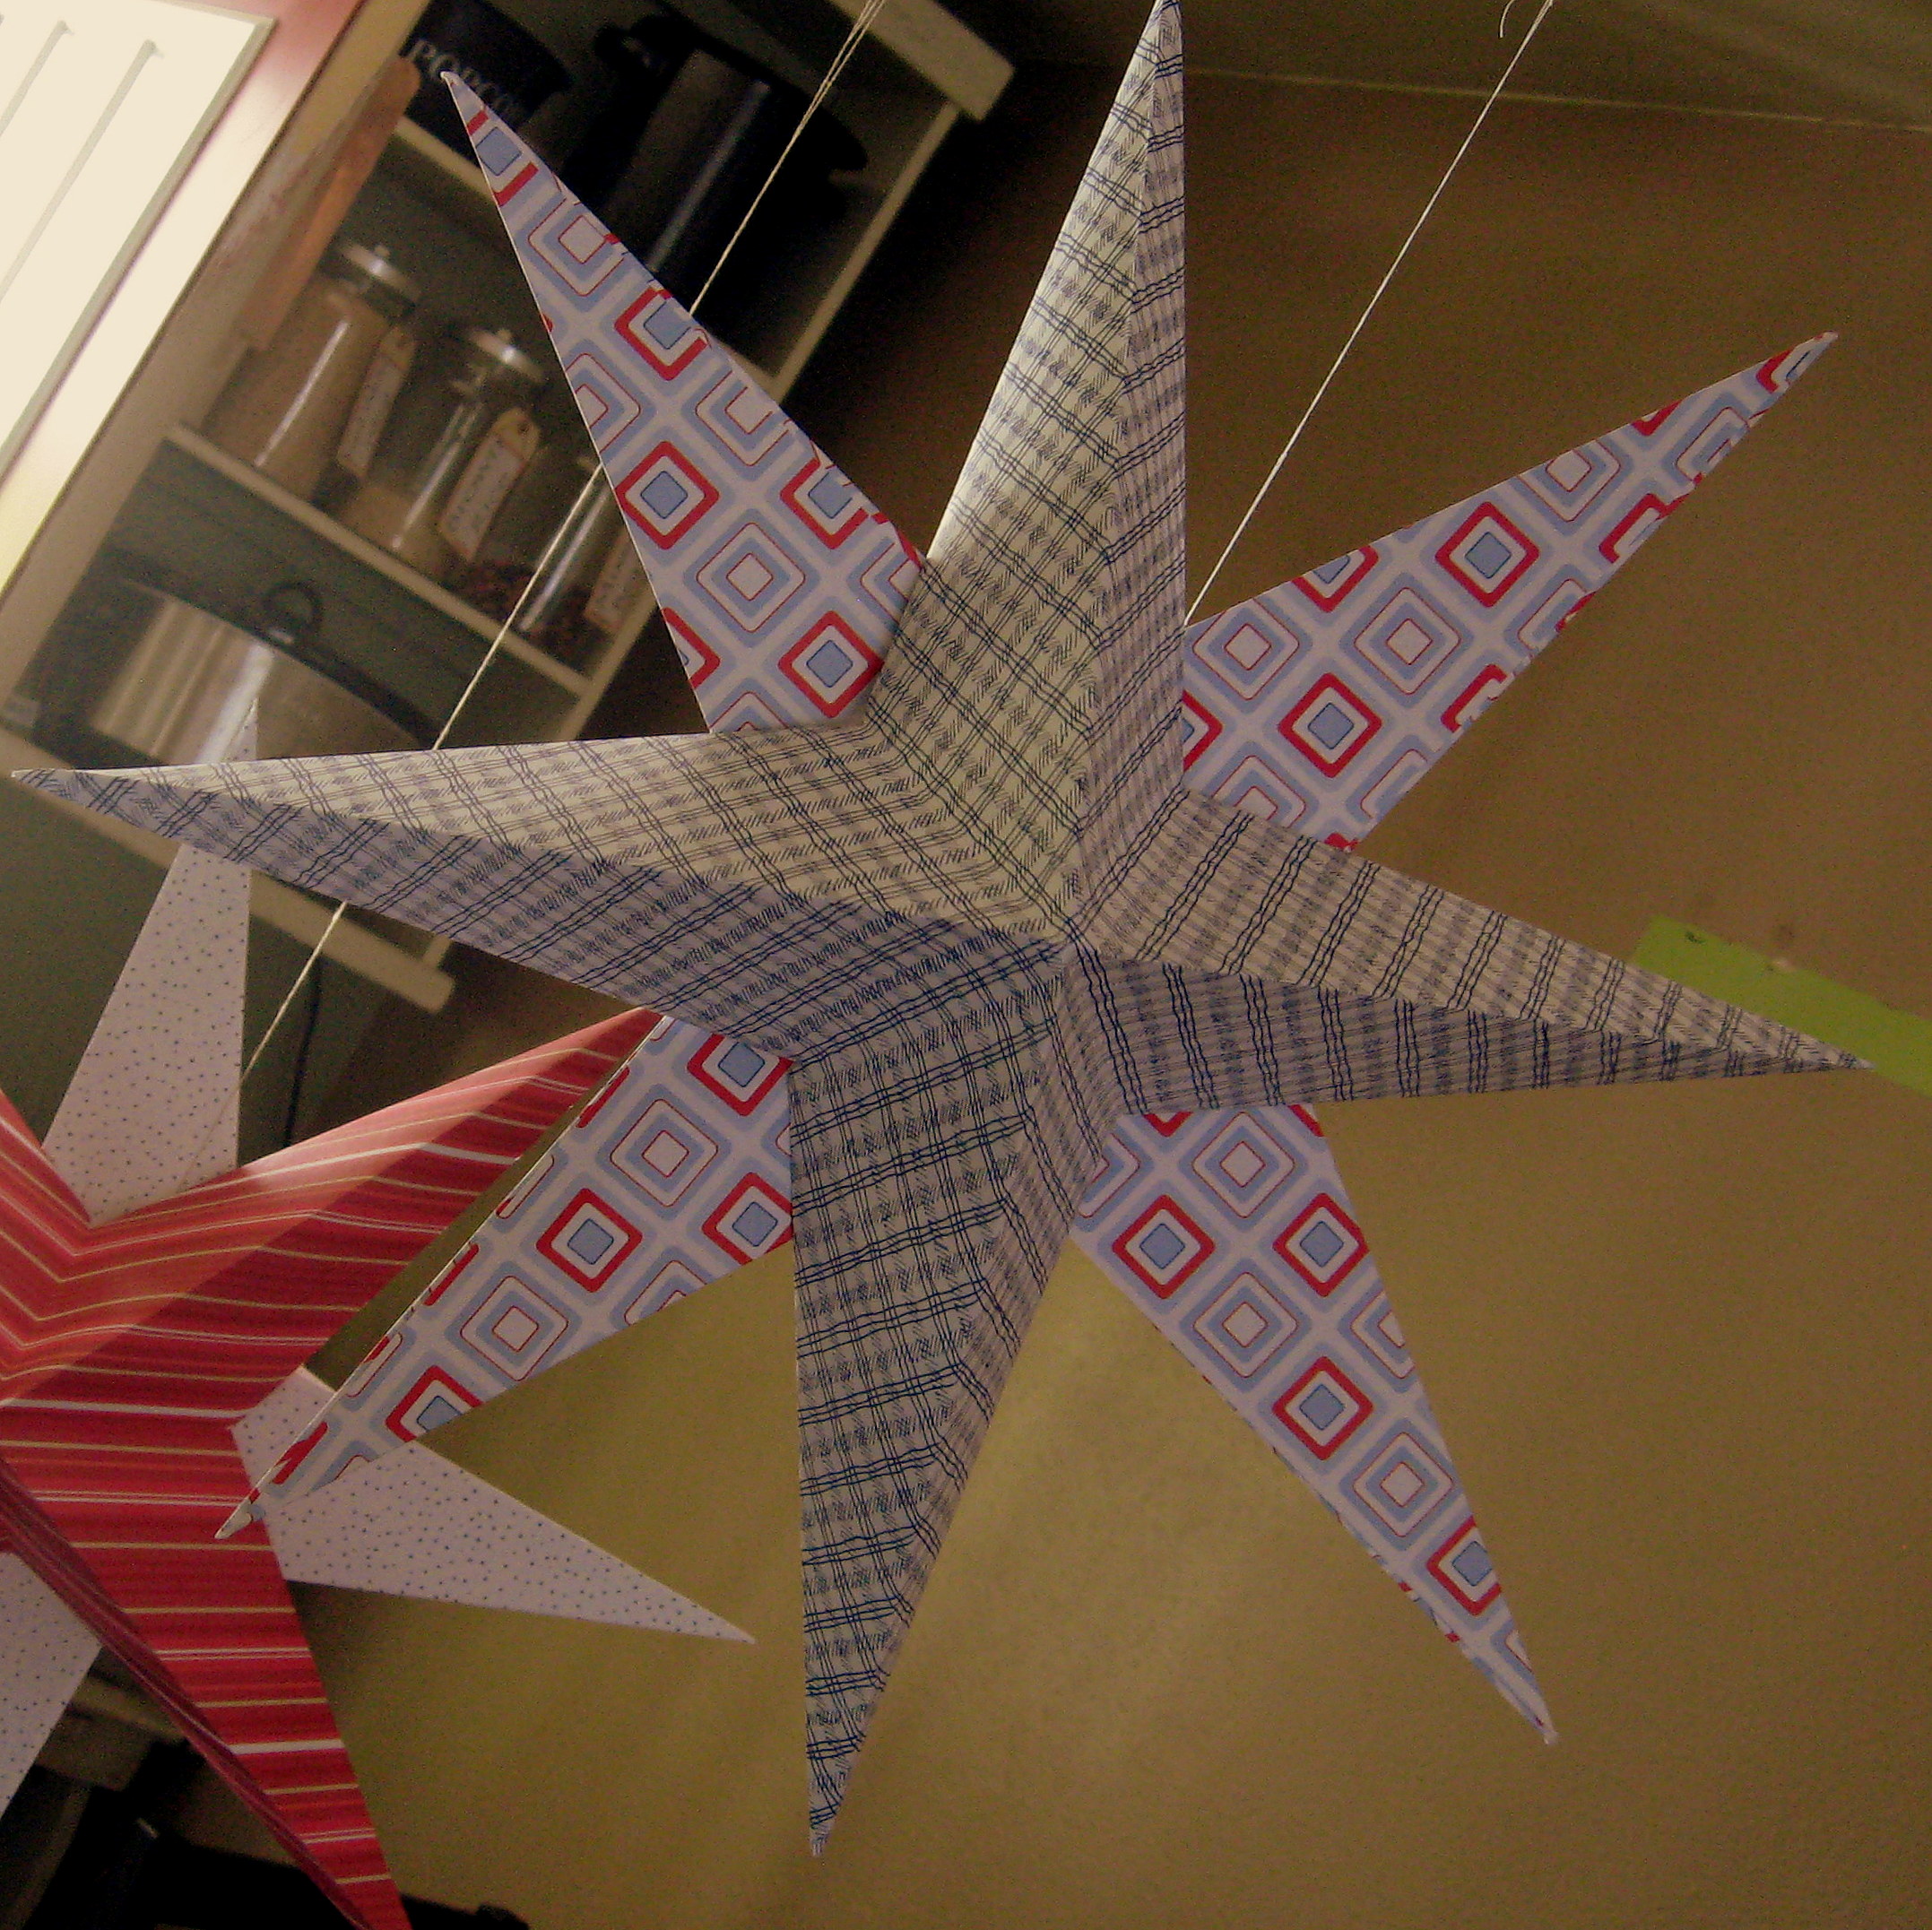
A PYP Best Blog! Making Paper Stars!
Just in case you missed this article on making paper stars the first time we shared it a couple of years ago, we are republishing it. After Sharon wrote this blog originally, we got an awesome response. This is one of the PYP Best Blogs!
I’ll show you two different ways to fold a paper star. They are both fun projects to do with your kids and they make cute and easy 4th of July decor when you use red, white and blue paper.
Star #1
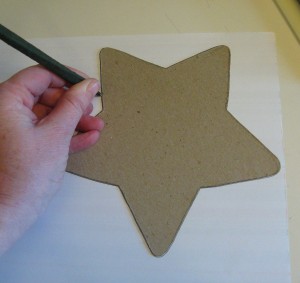
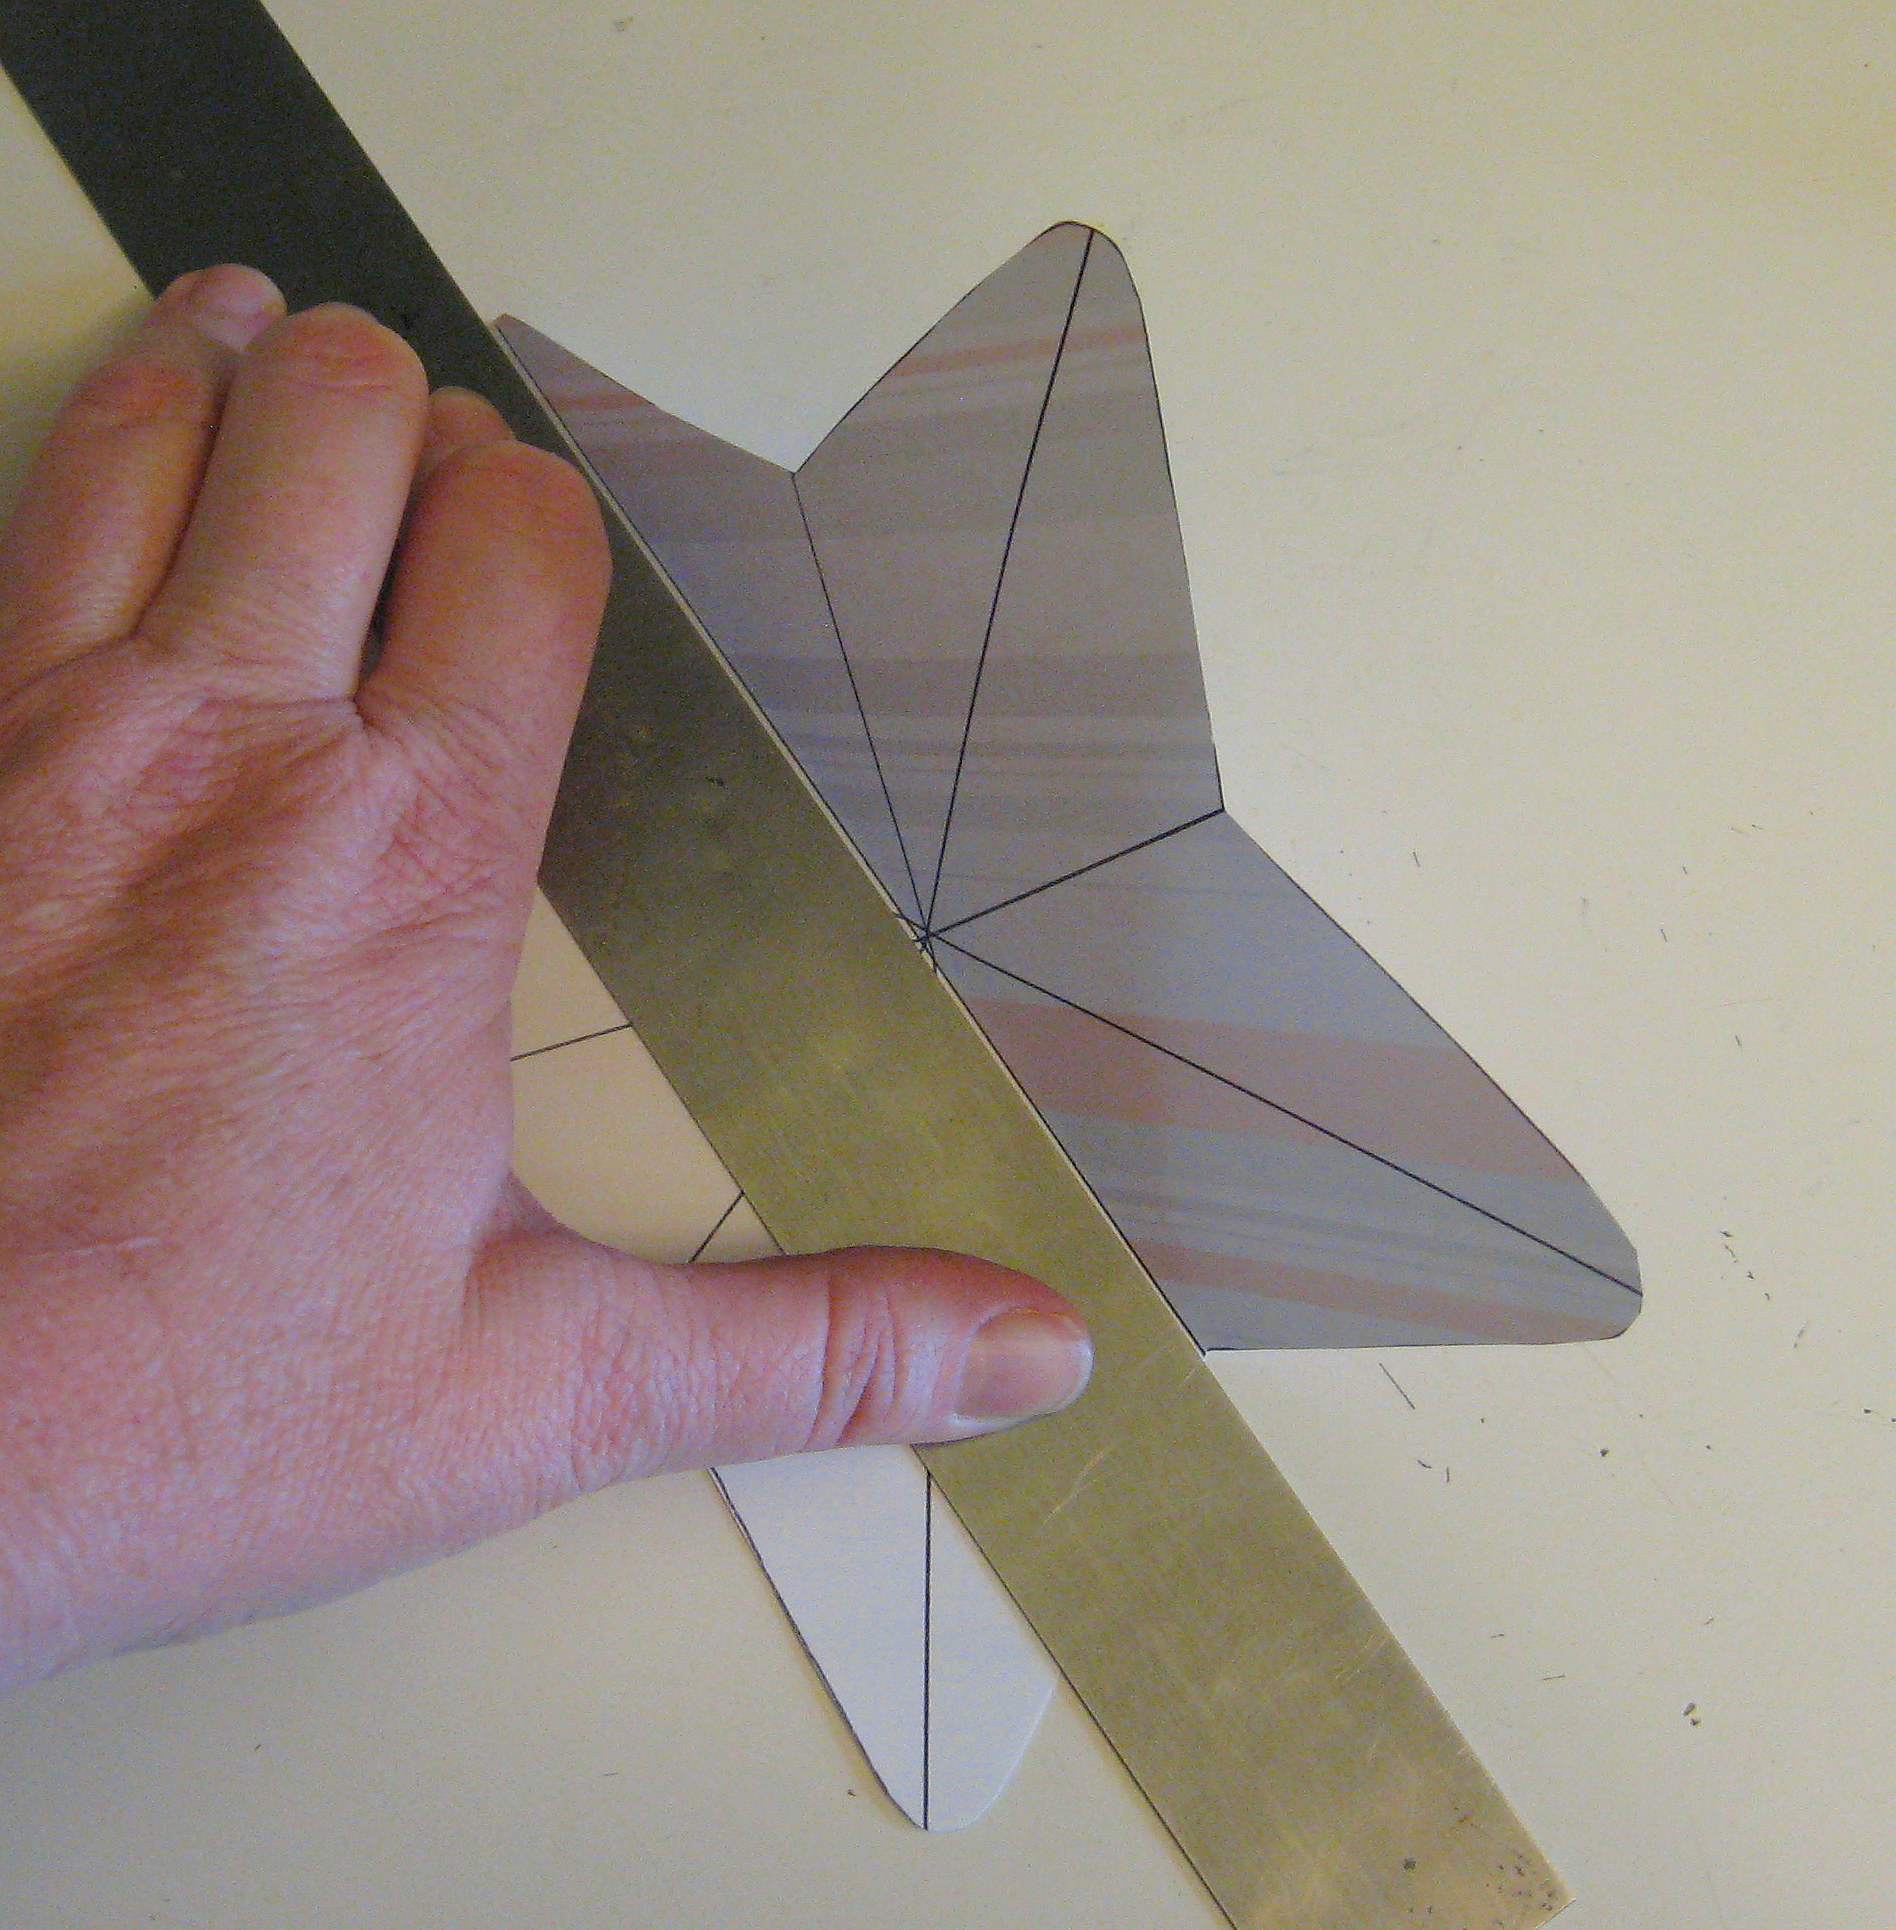
Start with any paper, and any size and shape of star. Trace the star shape onto the paper and cut it out.
Using a ruler, connect each star point with the “valley” opposite it and fold.
I have drawn lines here to show you where you will fold – you don’t need to draw the lines (you should, though, probably be more careful to make sure all folds meet in the middle!)
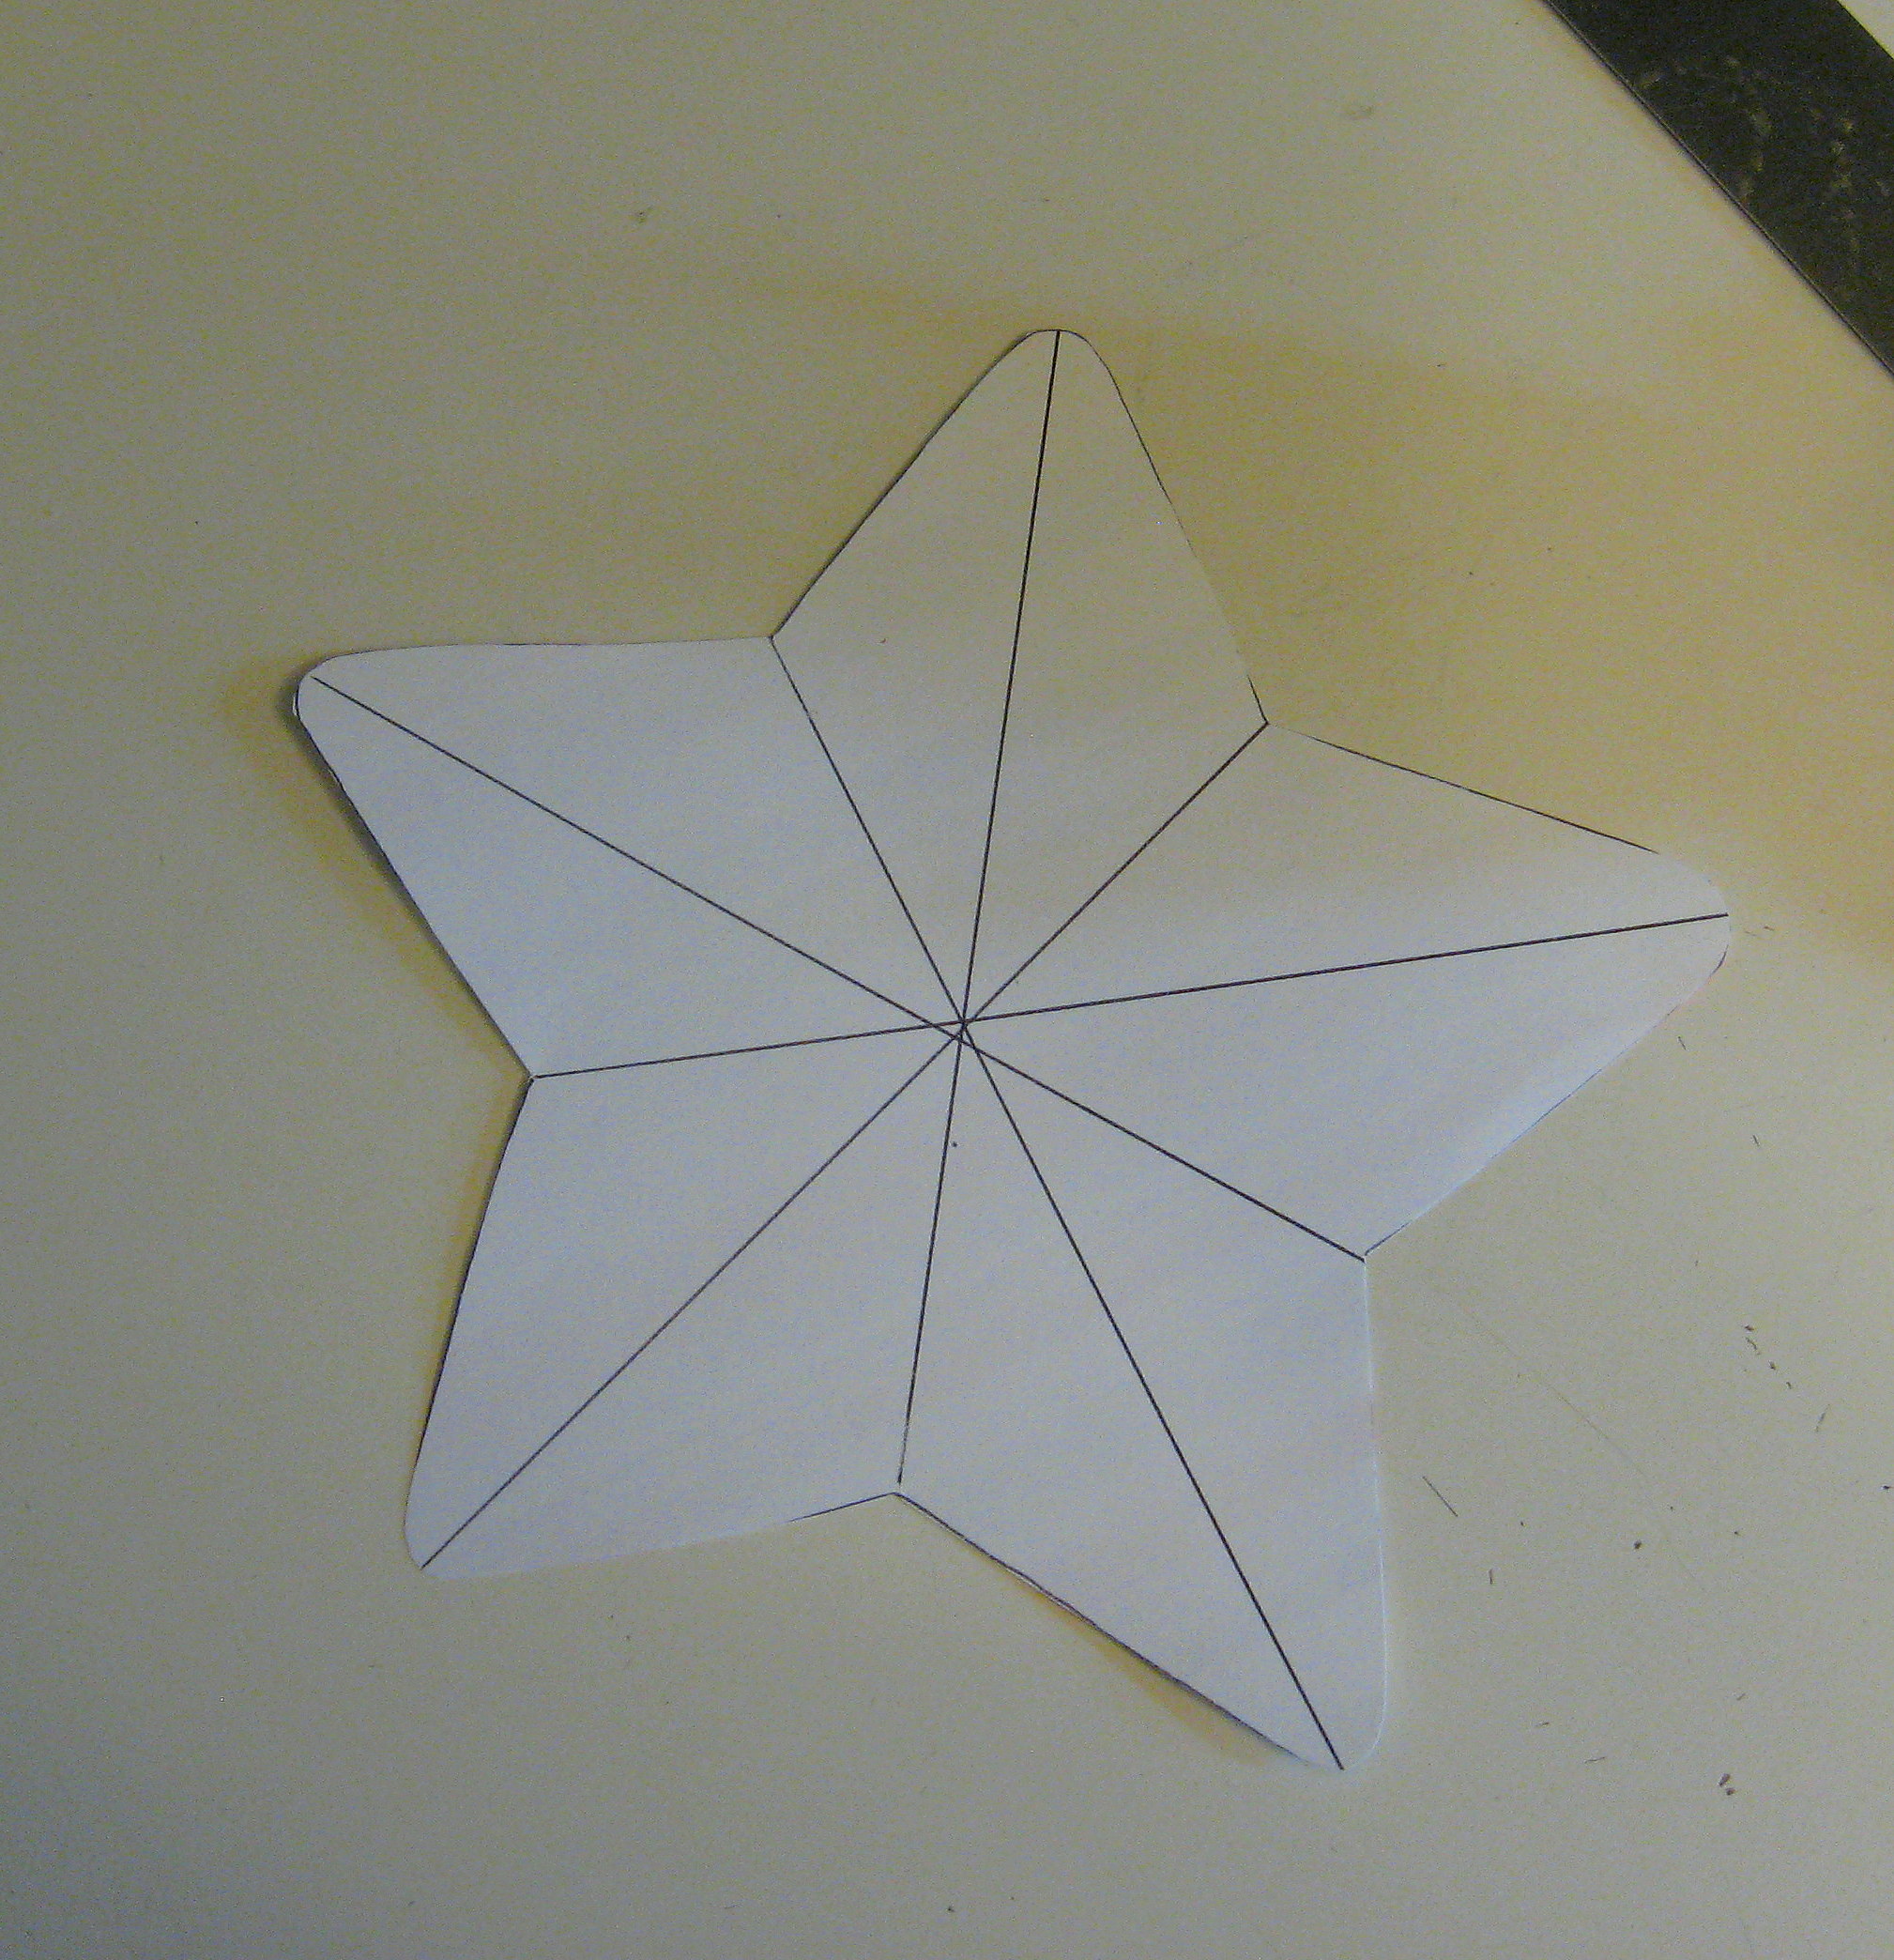
Make a nice sharp crease by using a bone folder, or if you don’t have one, you can use a pen cap or another ruler.
Now flip the star over to the right side and make the folds go the way you want them to go – folds from the center to a point will point up and the folds from the center to a “valley” will point down – like this:
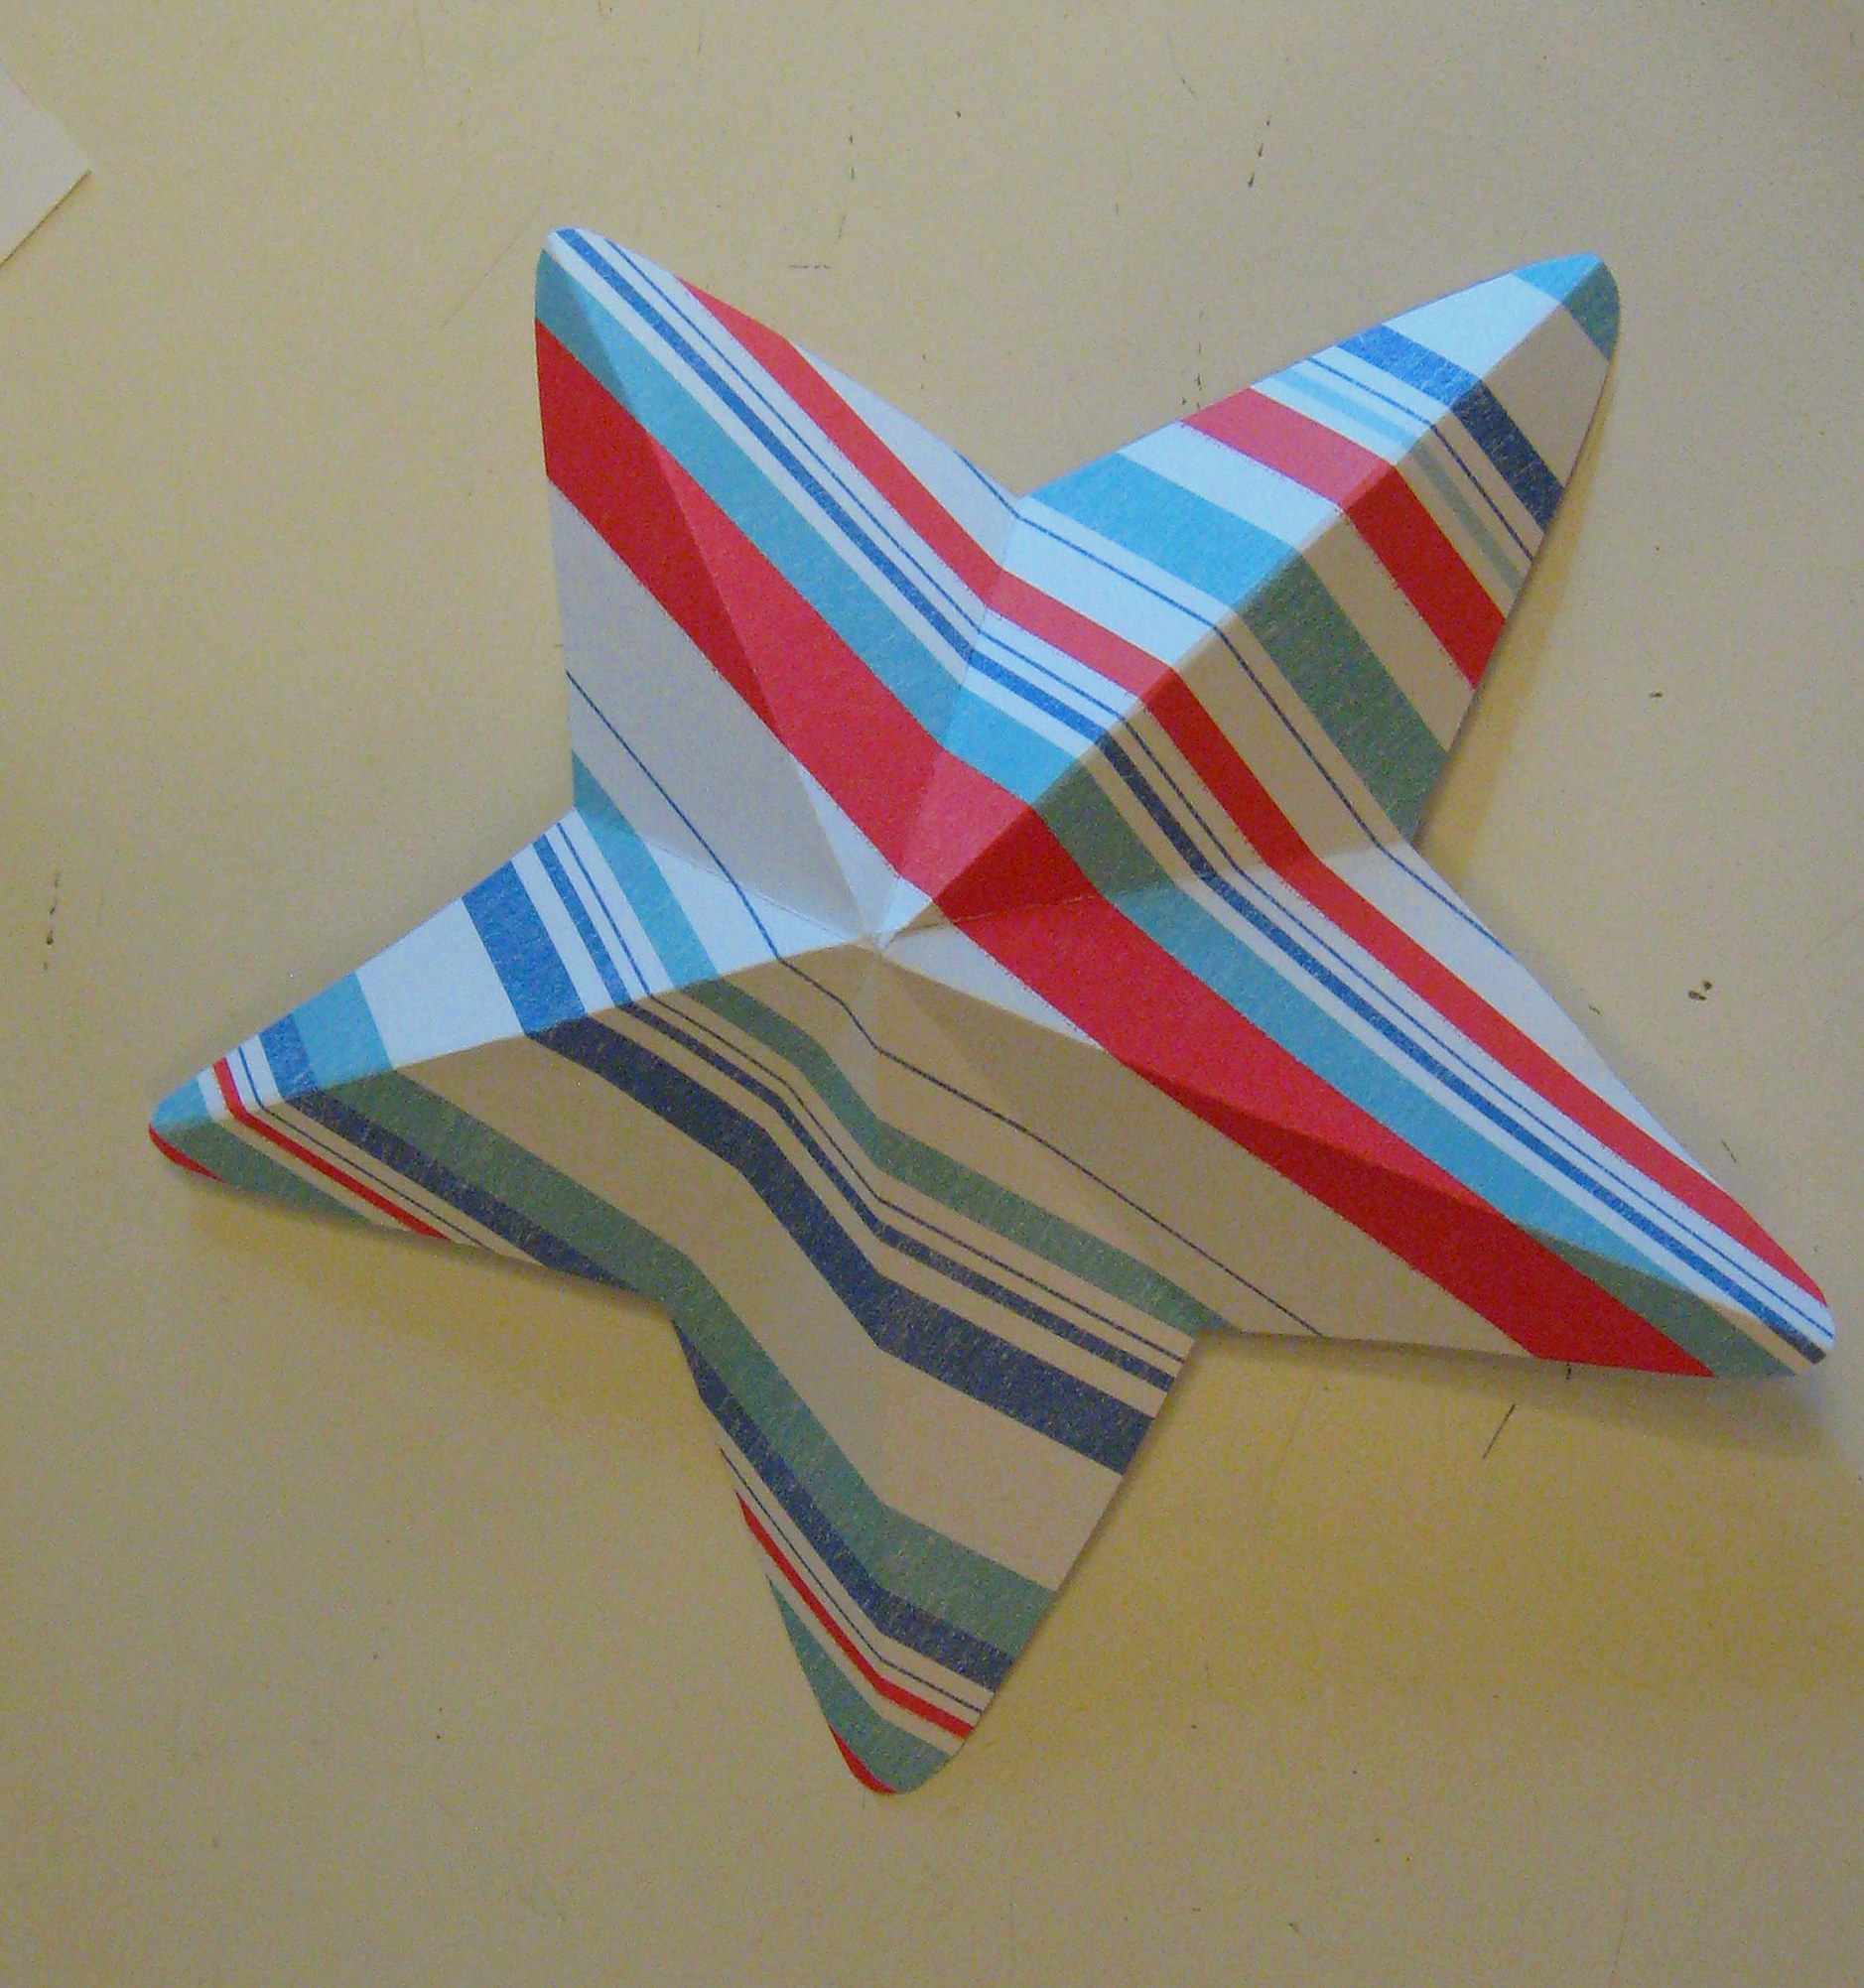
Once you’ve perfected it with paper, try it with metal! I cut apart some pop cans and folded them the same way.
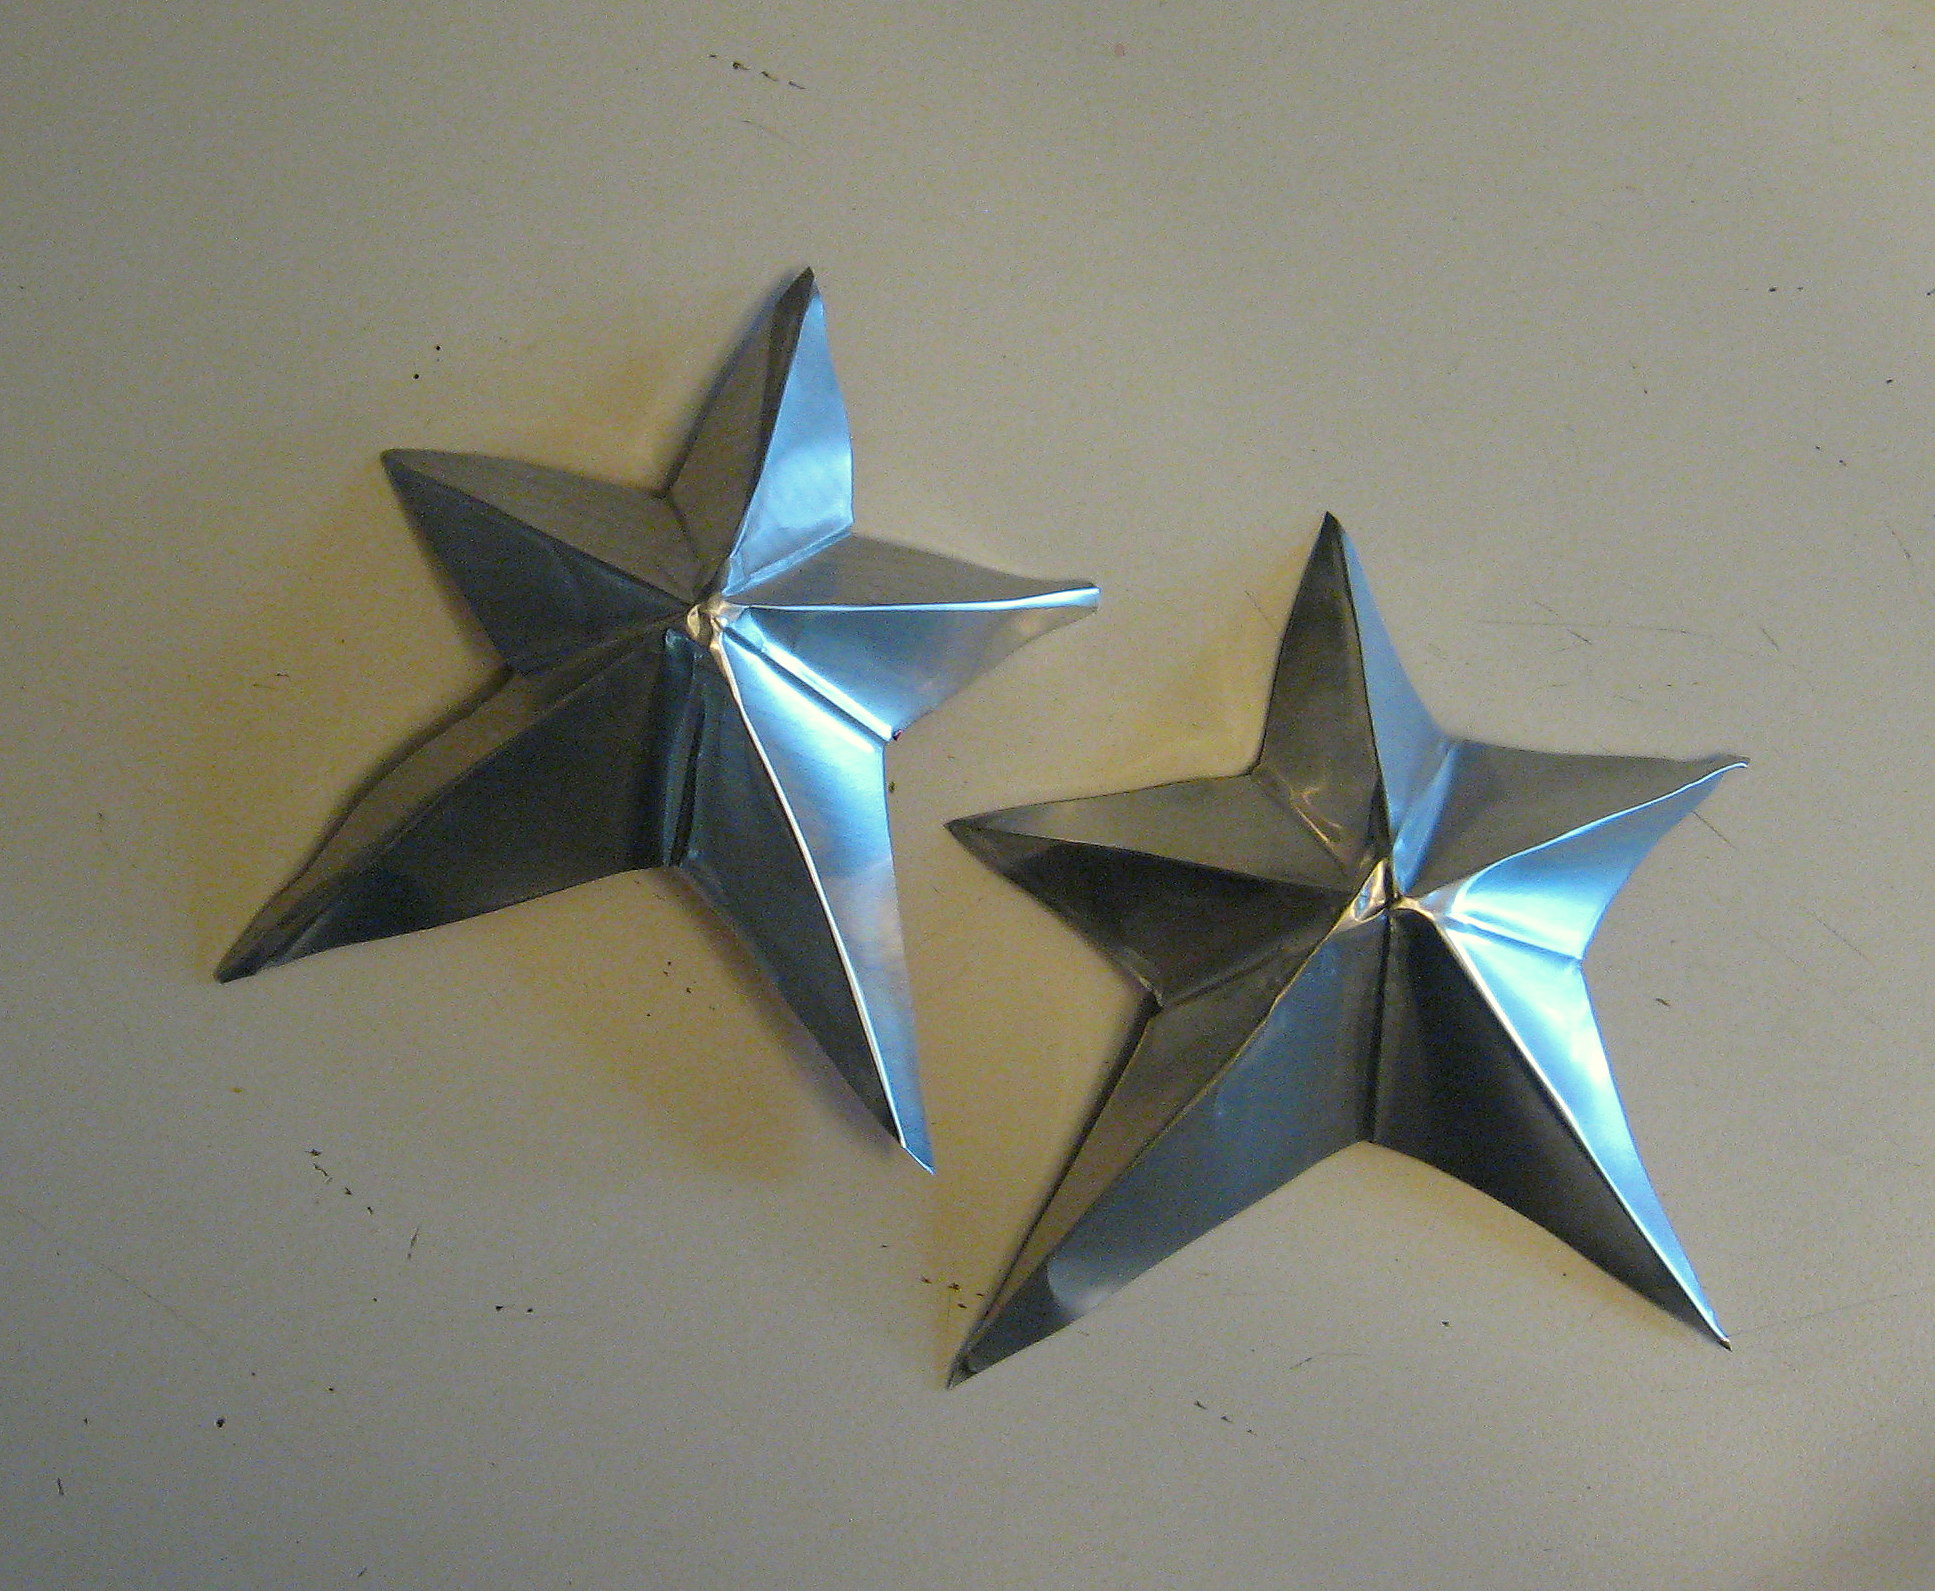
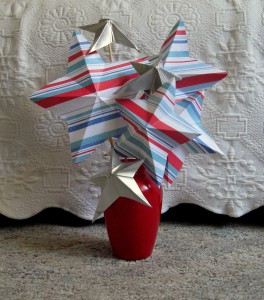
You can put a string through one point and hang them from the ceiling, or string them together to make a garland. We opted to hot glue them to small dowels and display them in a vase.
Star #2
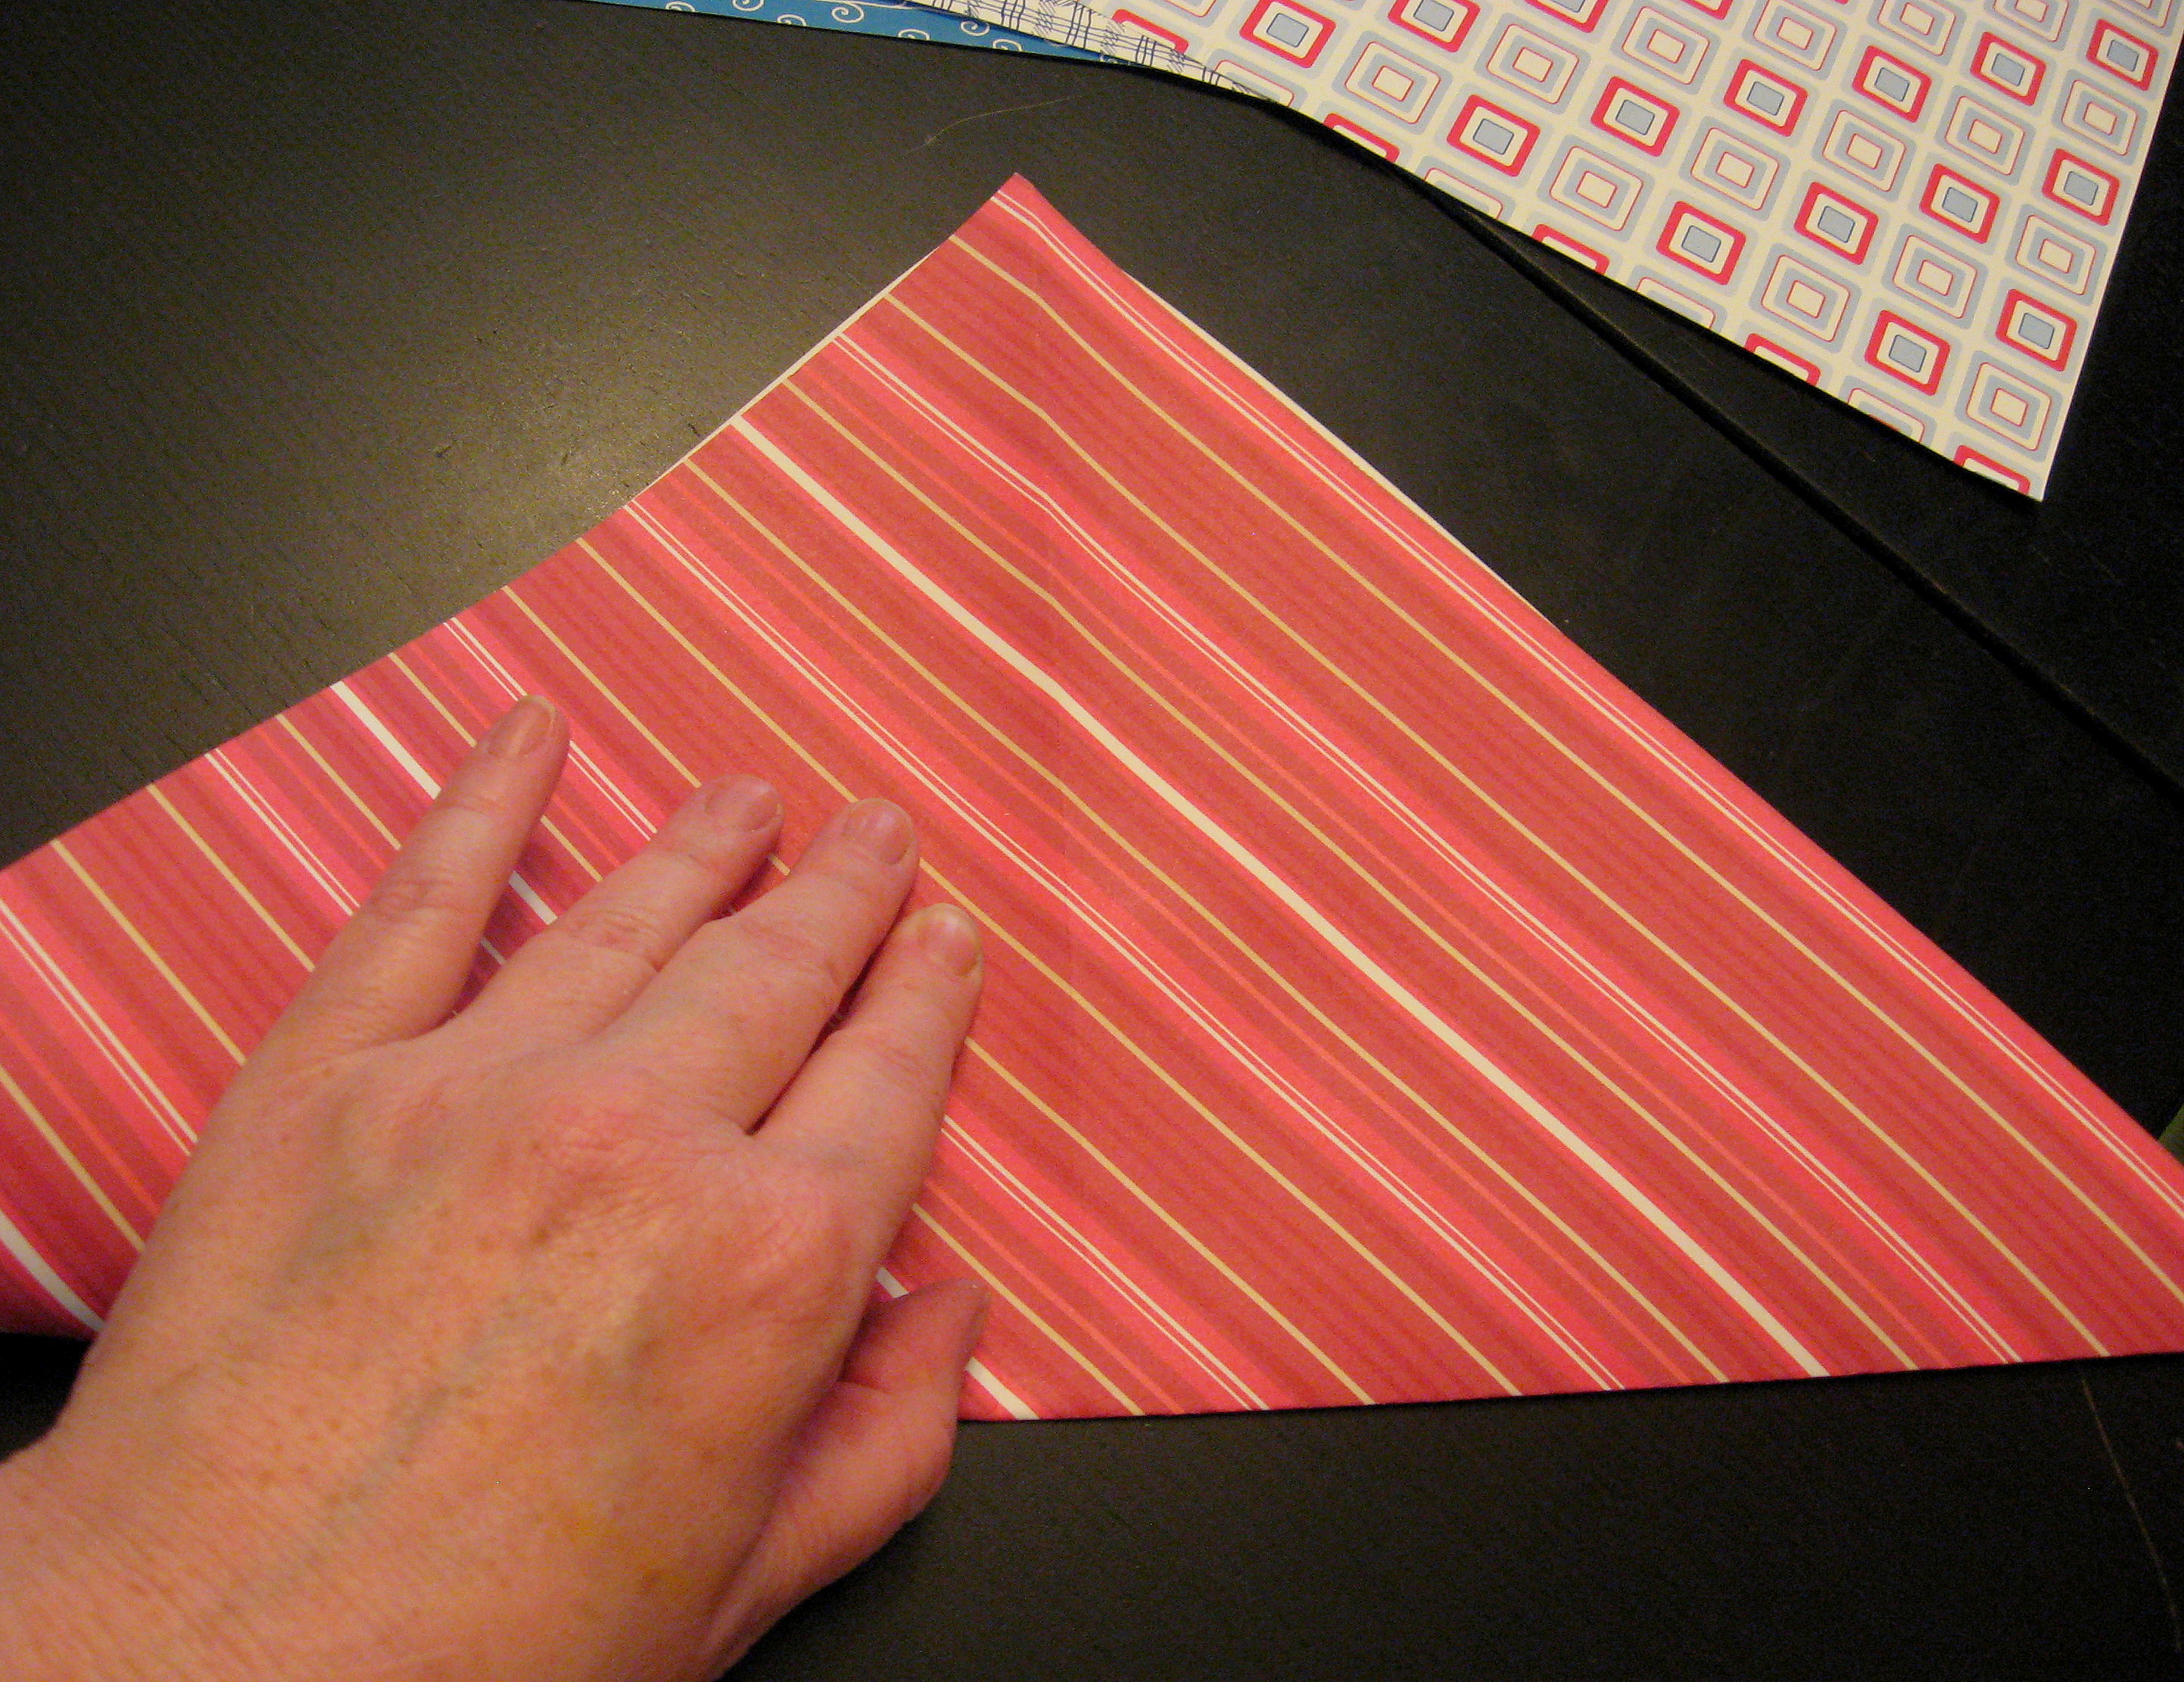
You can use any size of paper for this star, but it needs to start out as a square and you will need two squares for each star. I used 12 X 12 scrapbook paper. I made my stars 2 different colors, but they look great all the same color too.
Start by folding the paper corner to corner on the diagonal; then open back up and fold on the other diagonal.
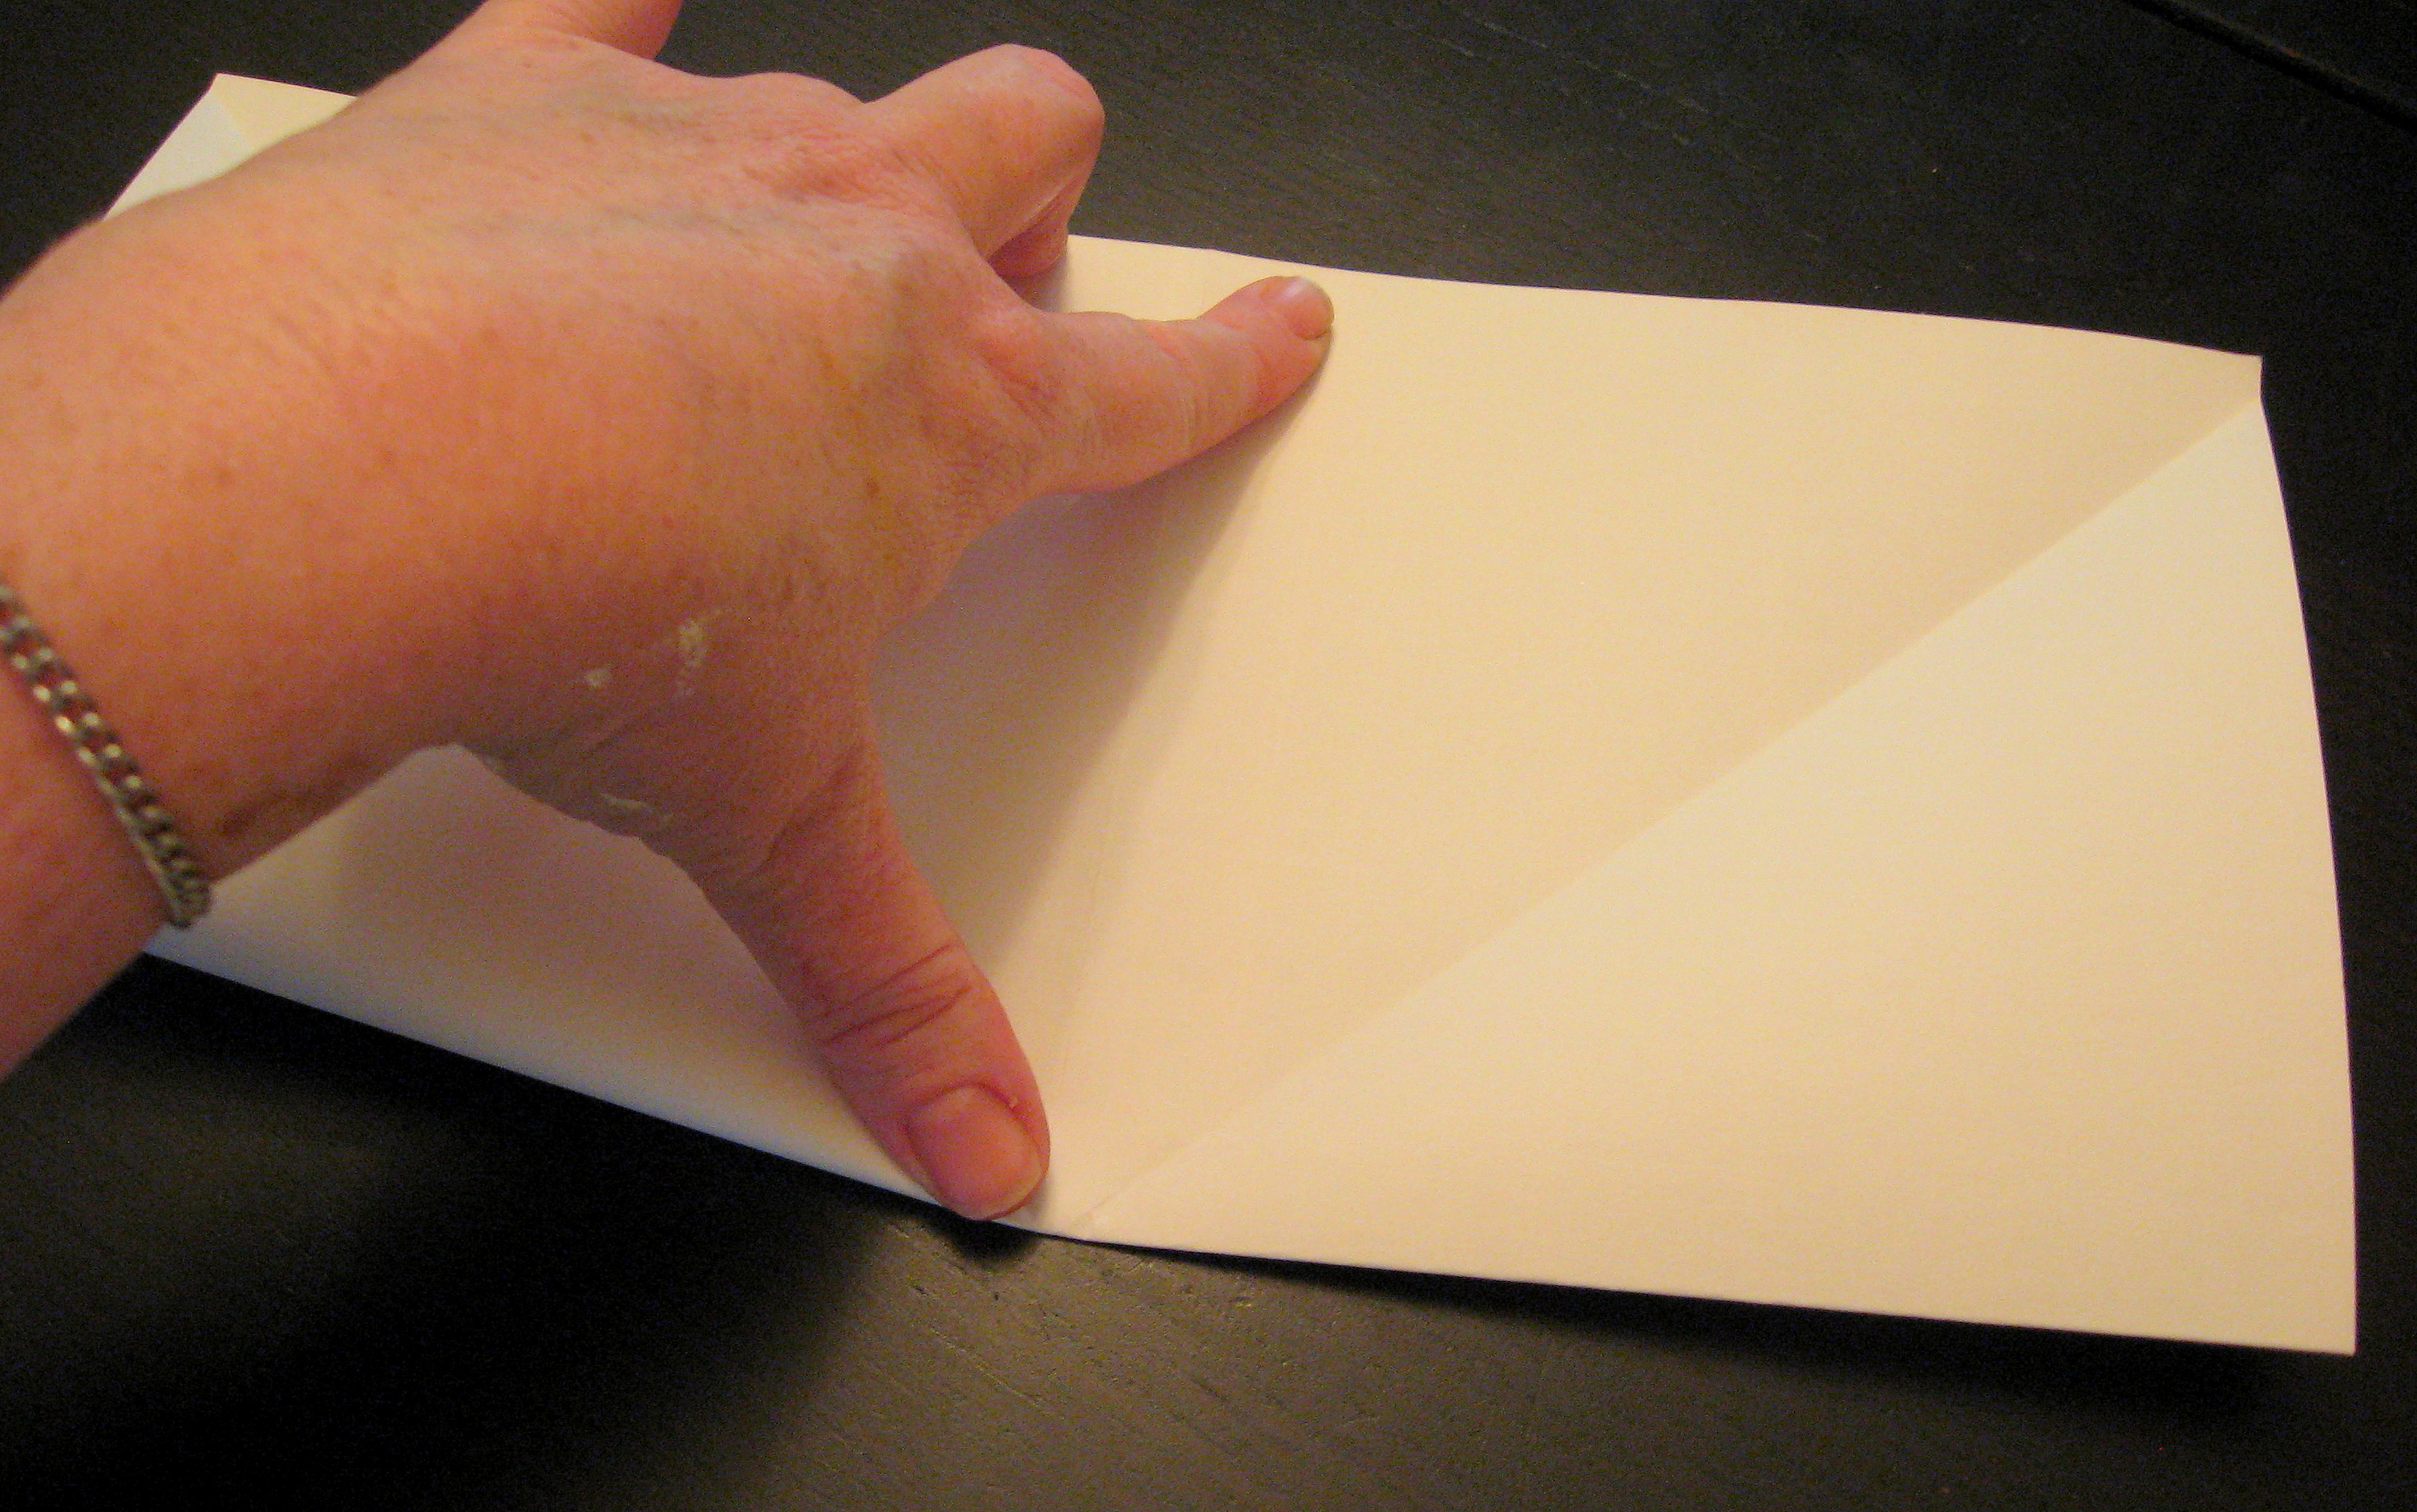
Now fold in half one way, then open back up and fold in half the other way.
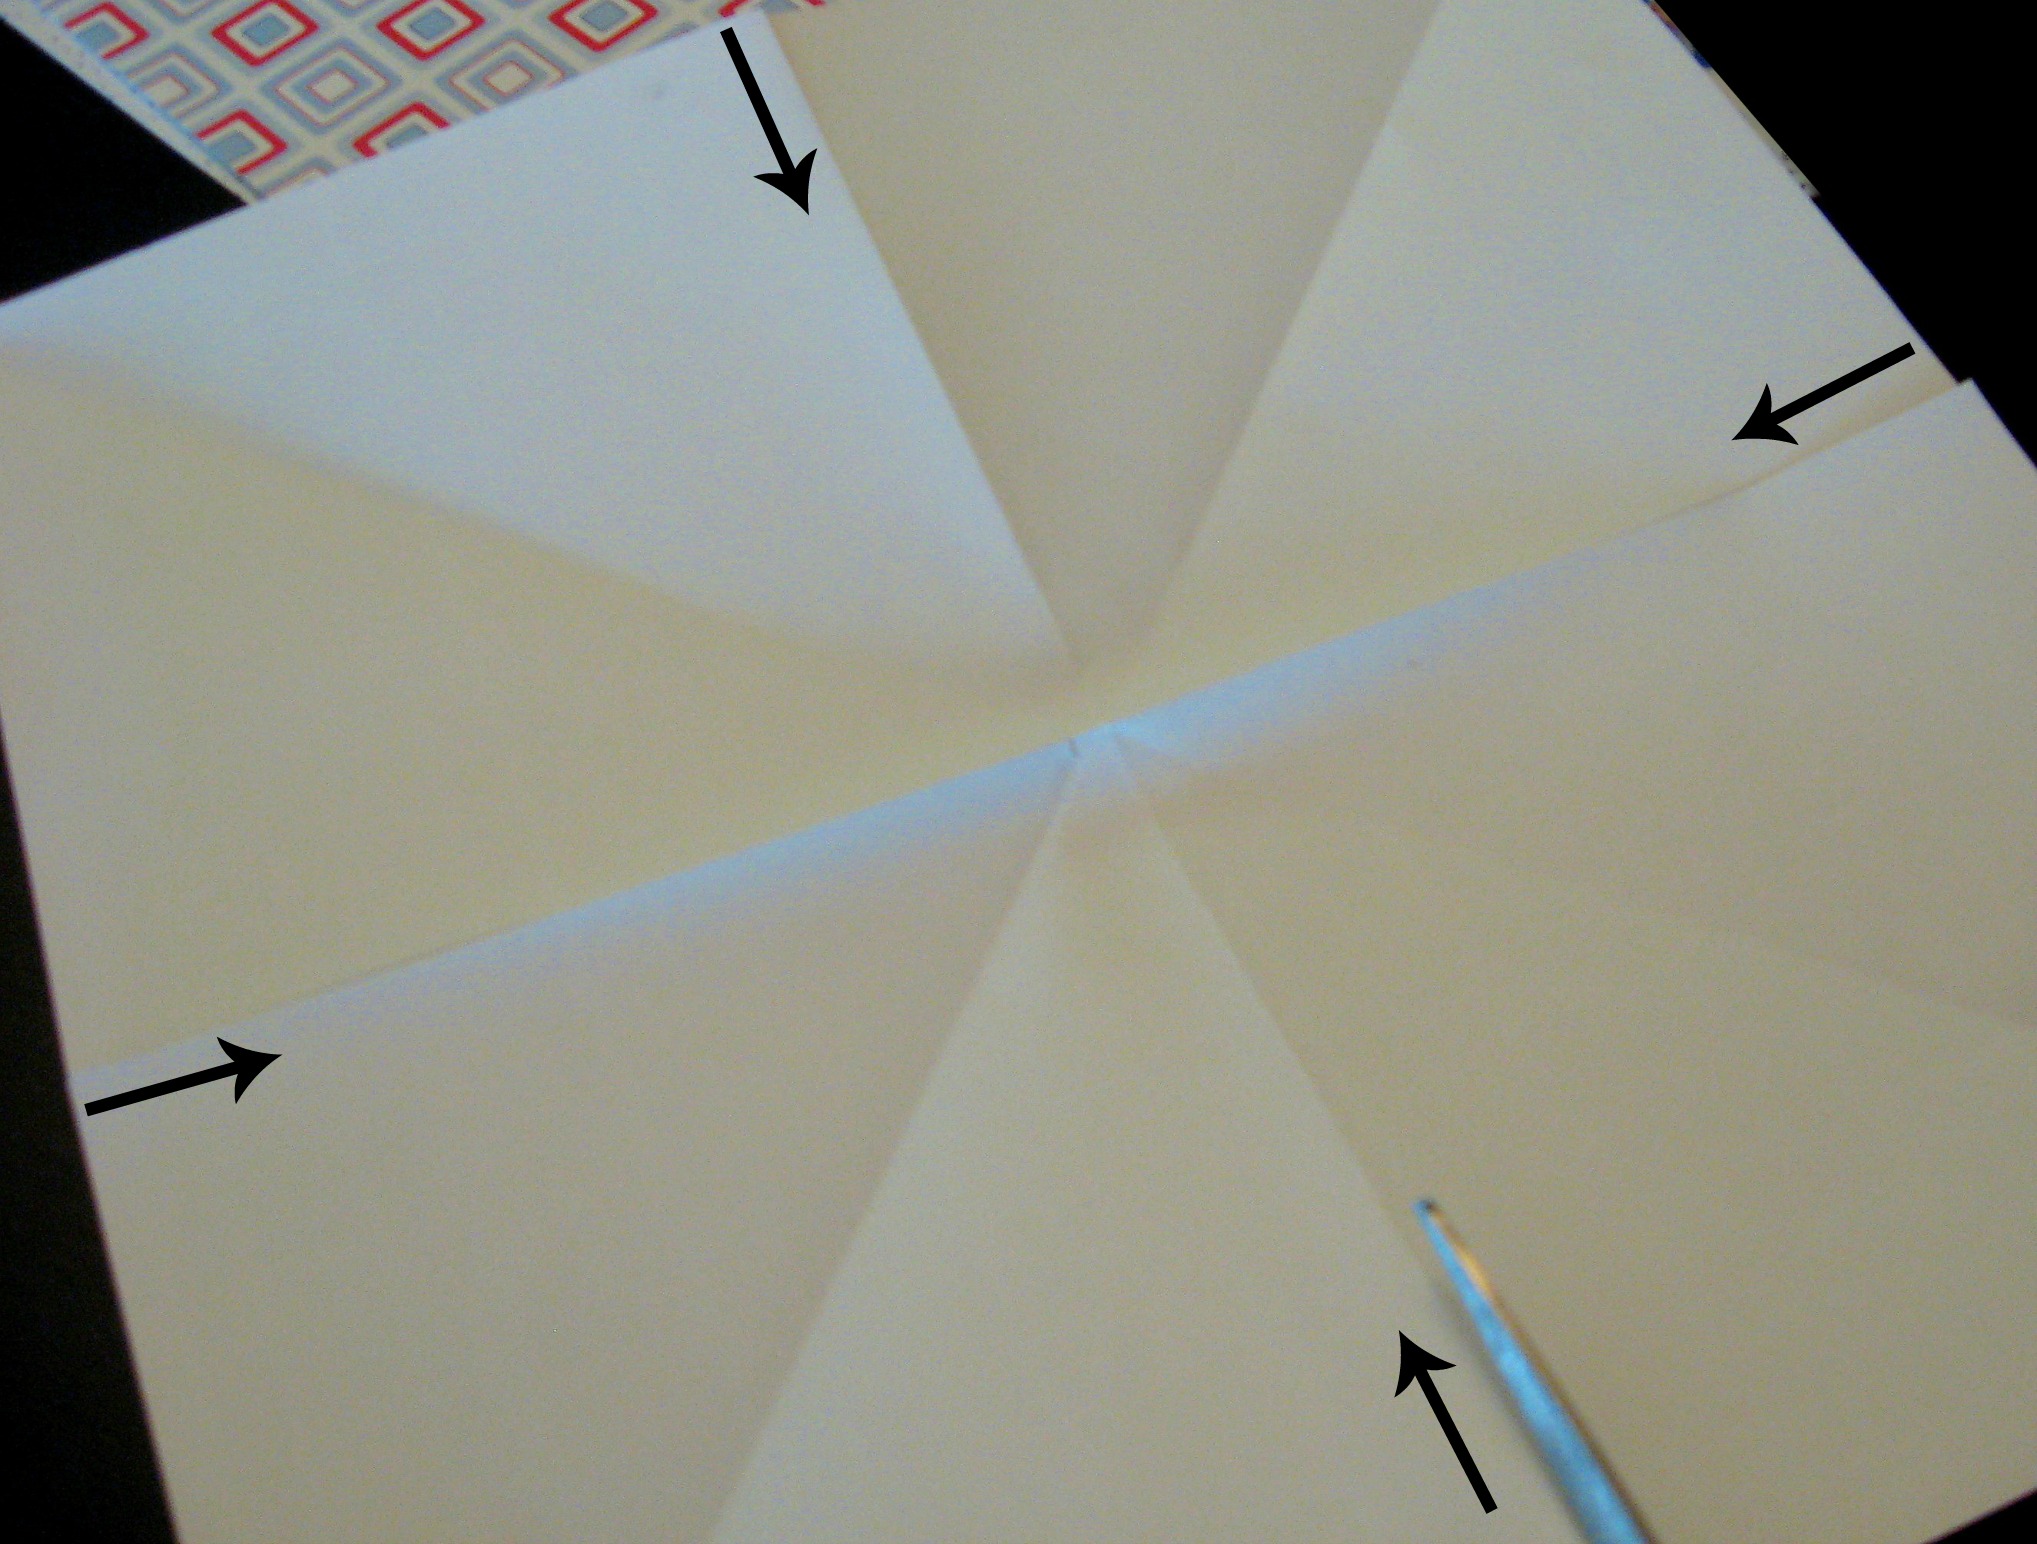
Open the paper back up and cut along the folds that you just made – the horizontal/vertical ones, not the diagonal ones (see arrows in the picture below). Cut about 2 1/2 inches in on each fold.
Now fold each cut edge in to meet at the diagonal fold and form a sharp point at the end.
For each point, put glue (I used a glue stick) on one of the flaps:
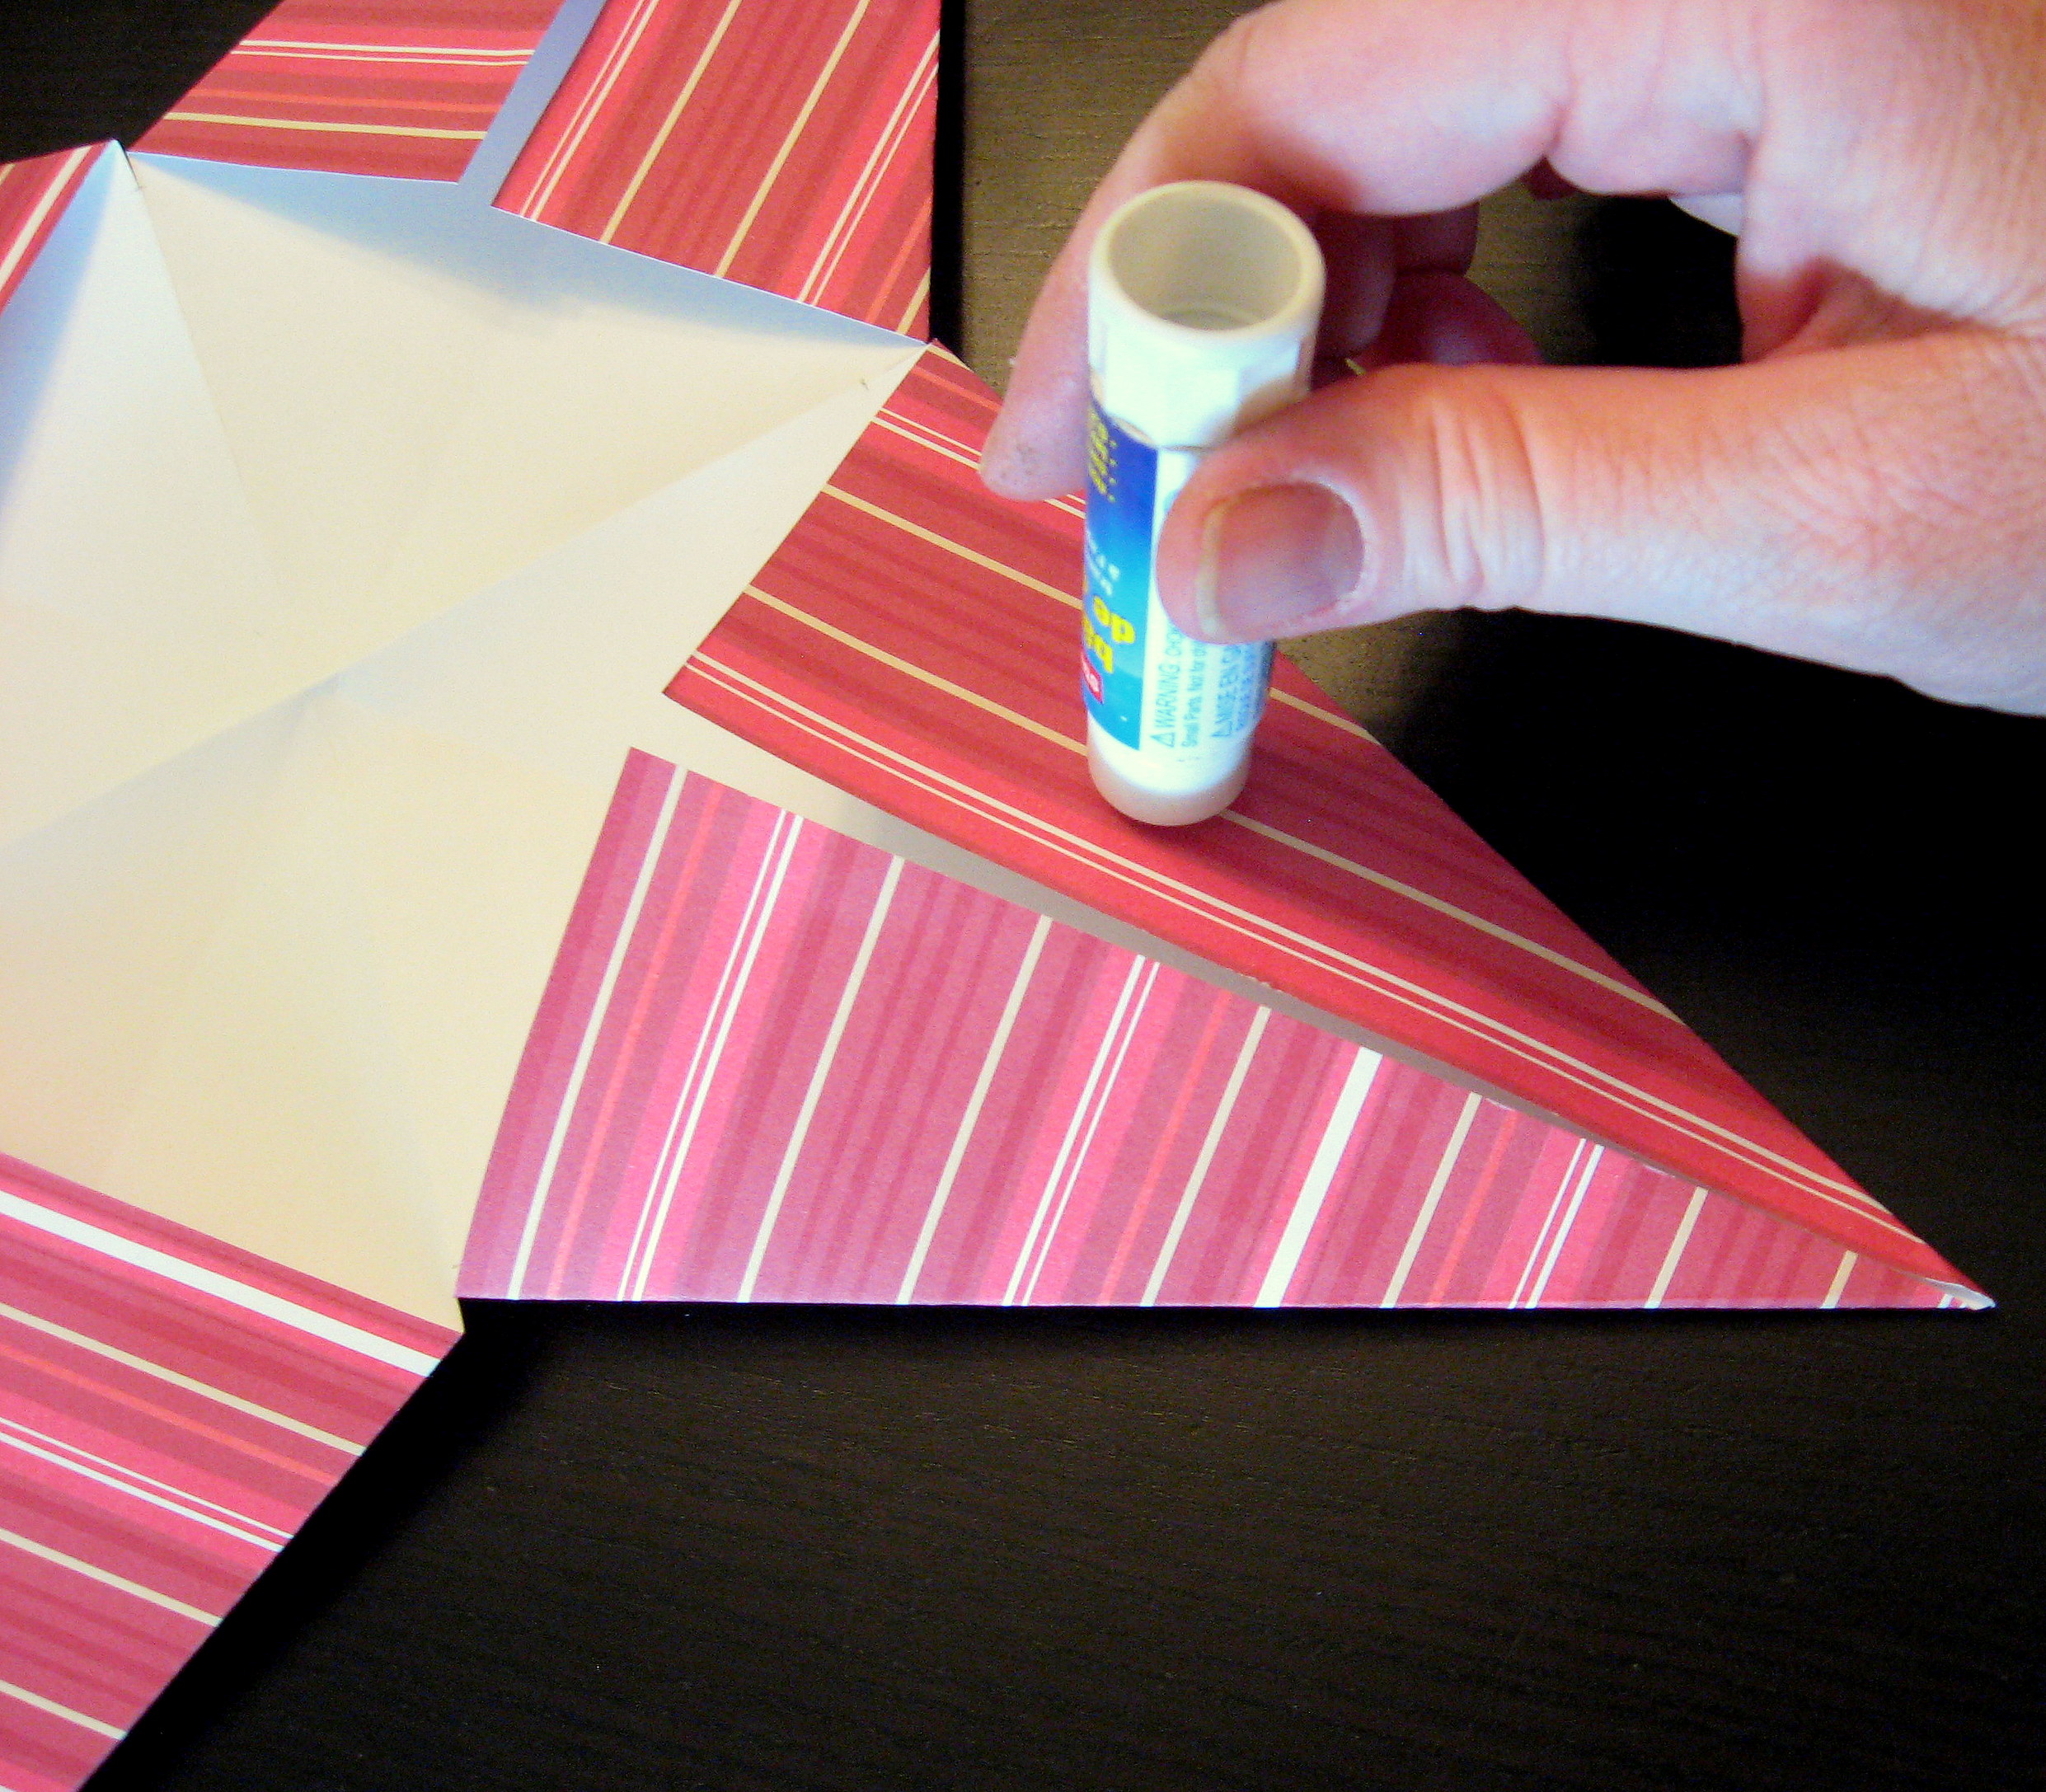
then position the other flap on top of it and hold for a minute until it dries.
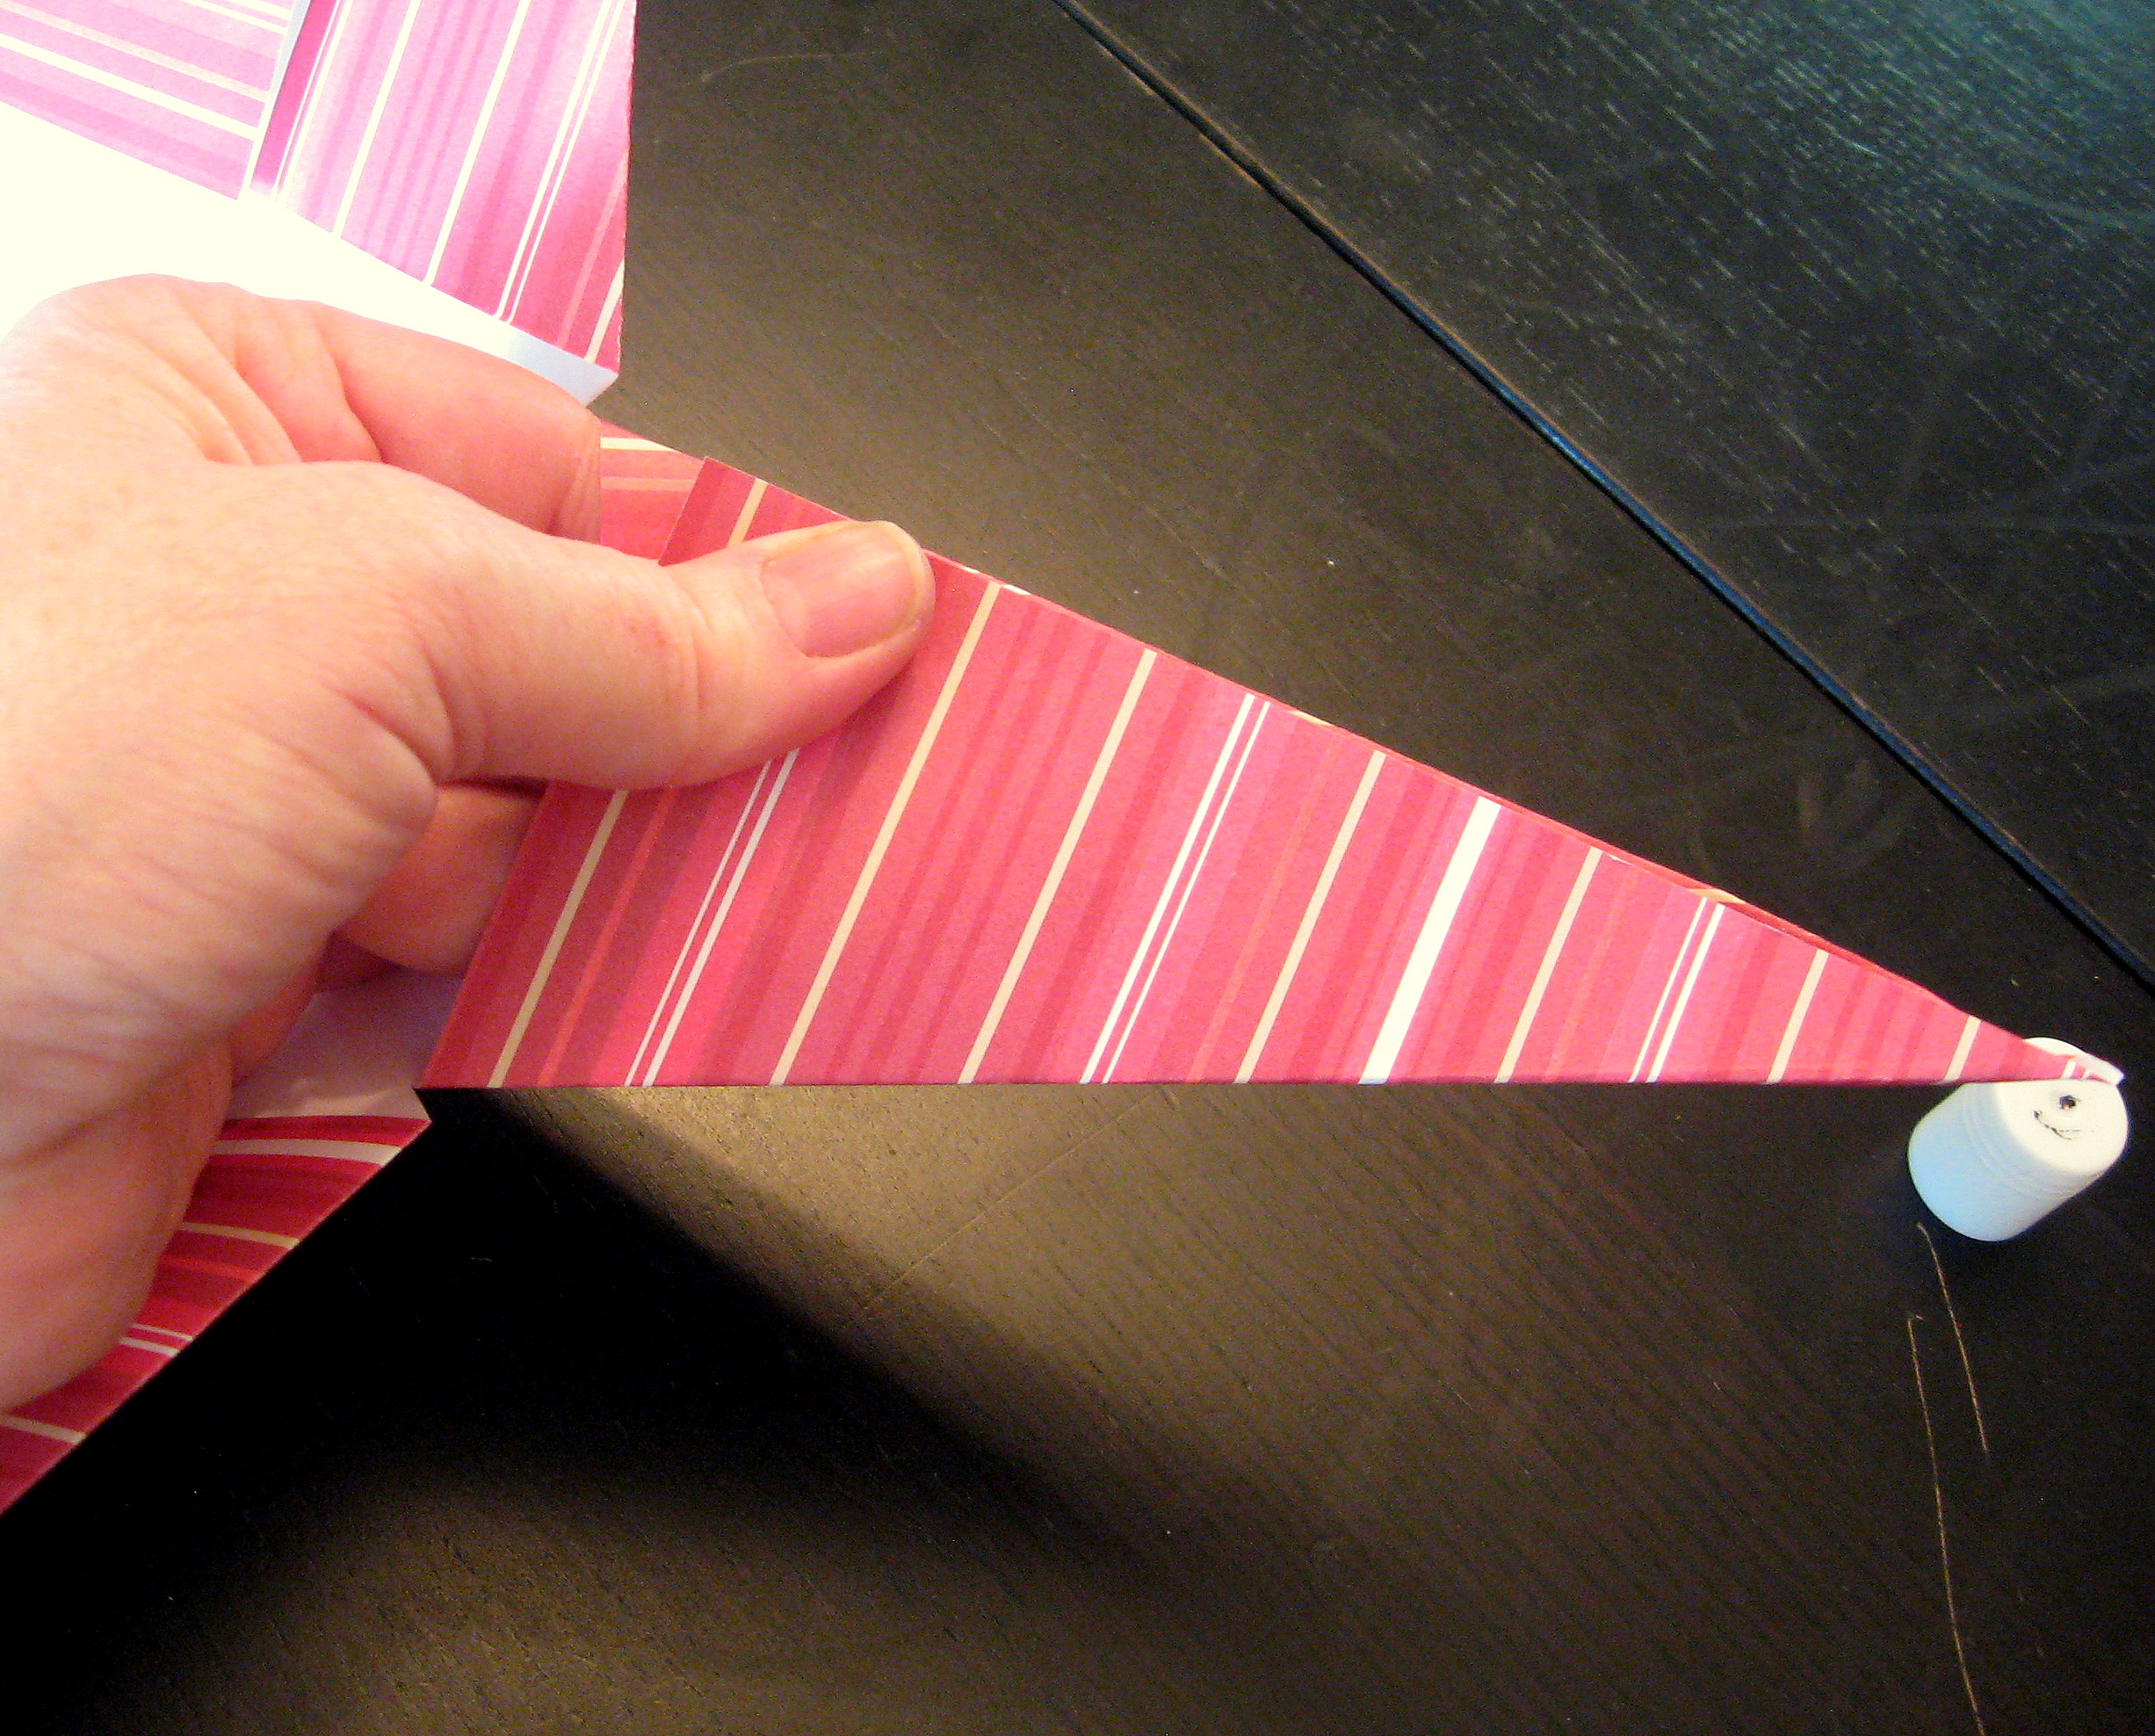
Once all 4 points are glued, it will look like this:
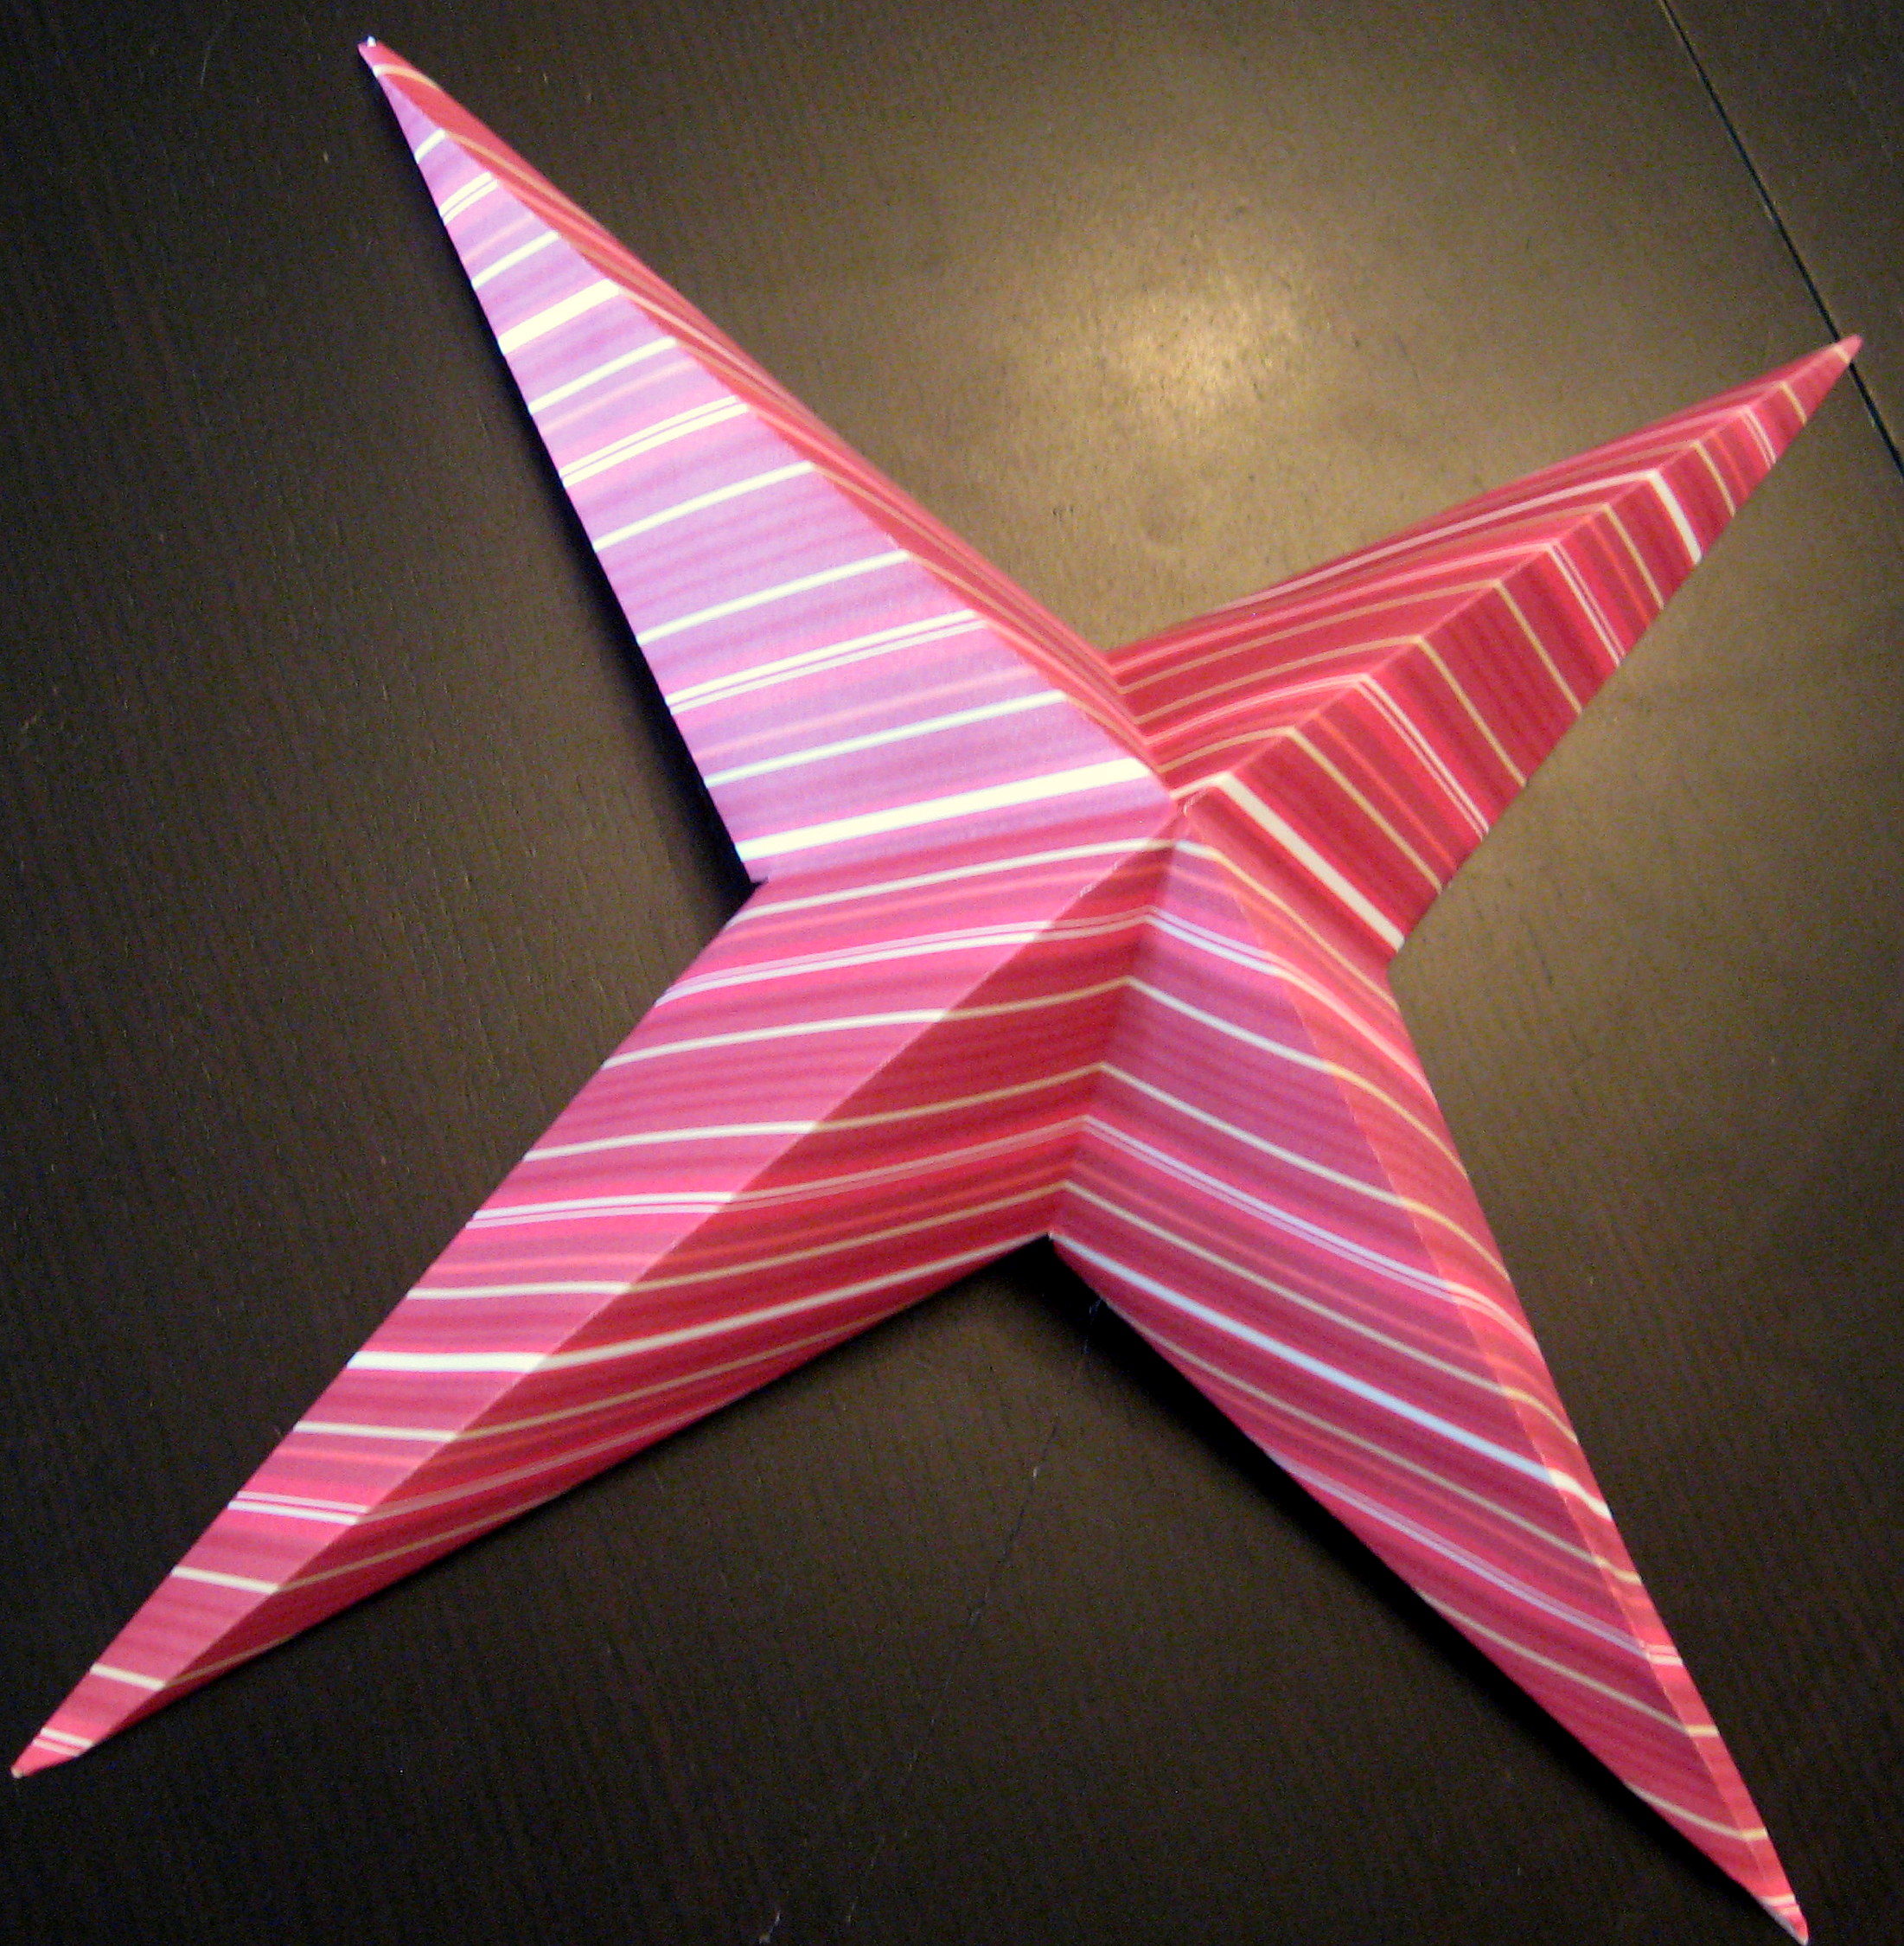
Now make a second one, exactly the same way, and attach them together back to back – double stick tape or sticky dots work great for this. Use a needle to thread a piece of string through for hanging.
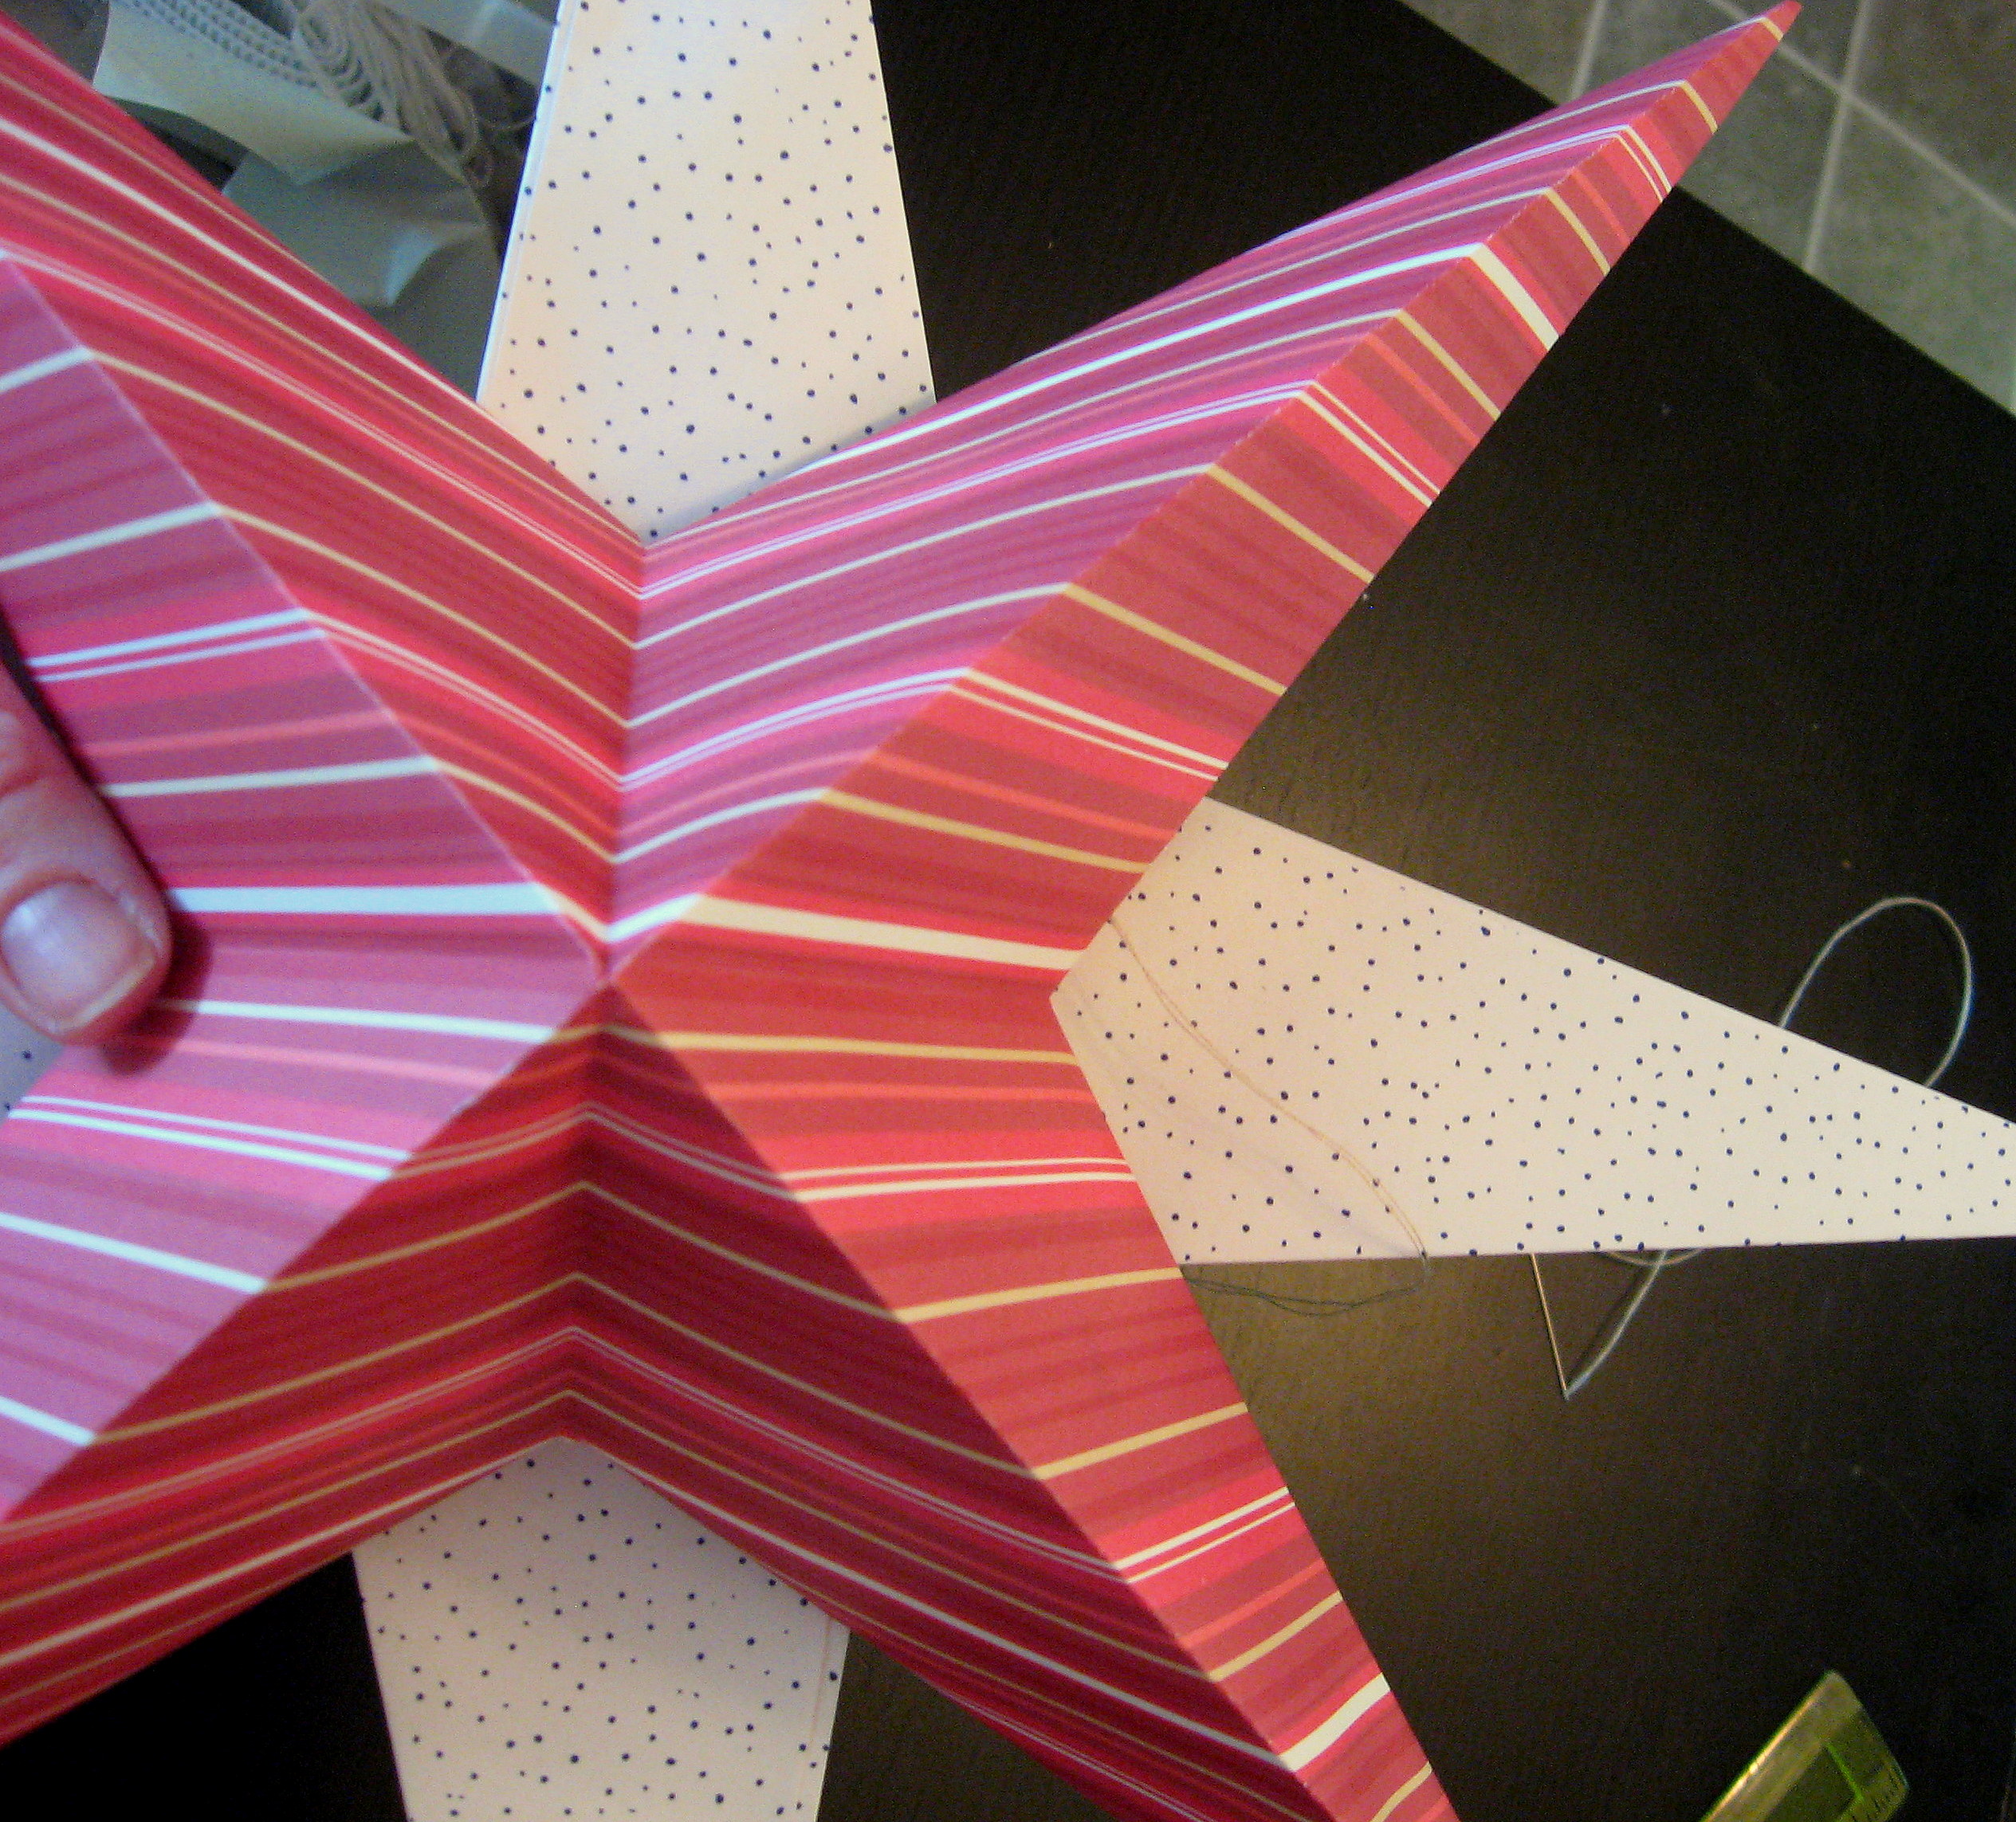
We hung them from the light above our dining table; don’t judge them too harshly based on this bad picture quality – I either had to open the door to get natural light, which made them swing and spin from the wind, or try the pictures with the door closed and glaring overhead light! In person they are super cute!
A PYP Best Blog! Making Shabby Wooden Fireworks!
Just in case you missed this article on making shabby wooden fireworks the first time we shared it a couple of years ago, we are republishing it. After Sharon wrote this blog originally, we got an awesome response. This is one of the PYP Best Blogs!
I was reading someone’s blog today and she said that for her, the hardest thing about blogging was coming up with the first sentence of a post…I didn’t realize how much I agreed until she said it…
SO! Let’s make some fireworks!
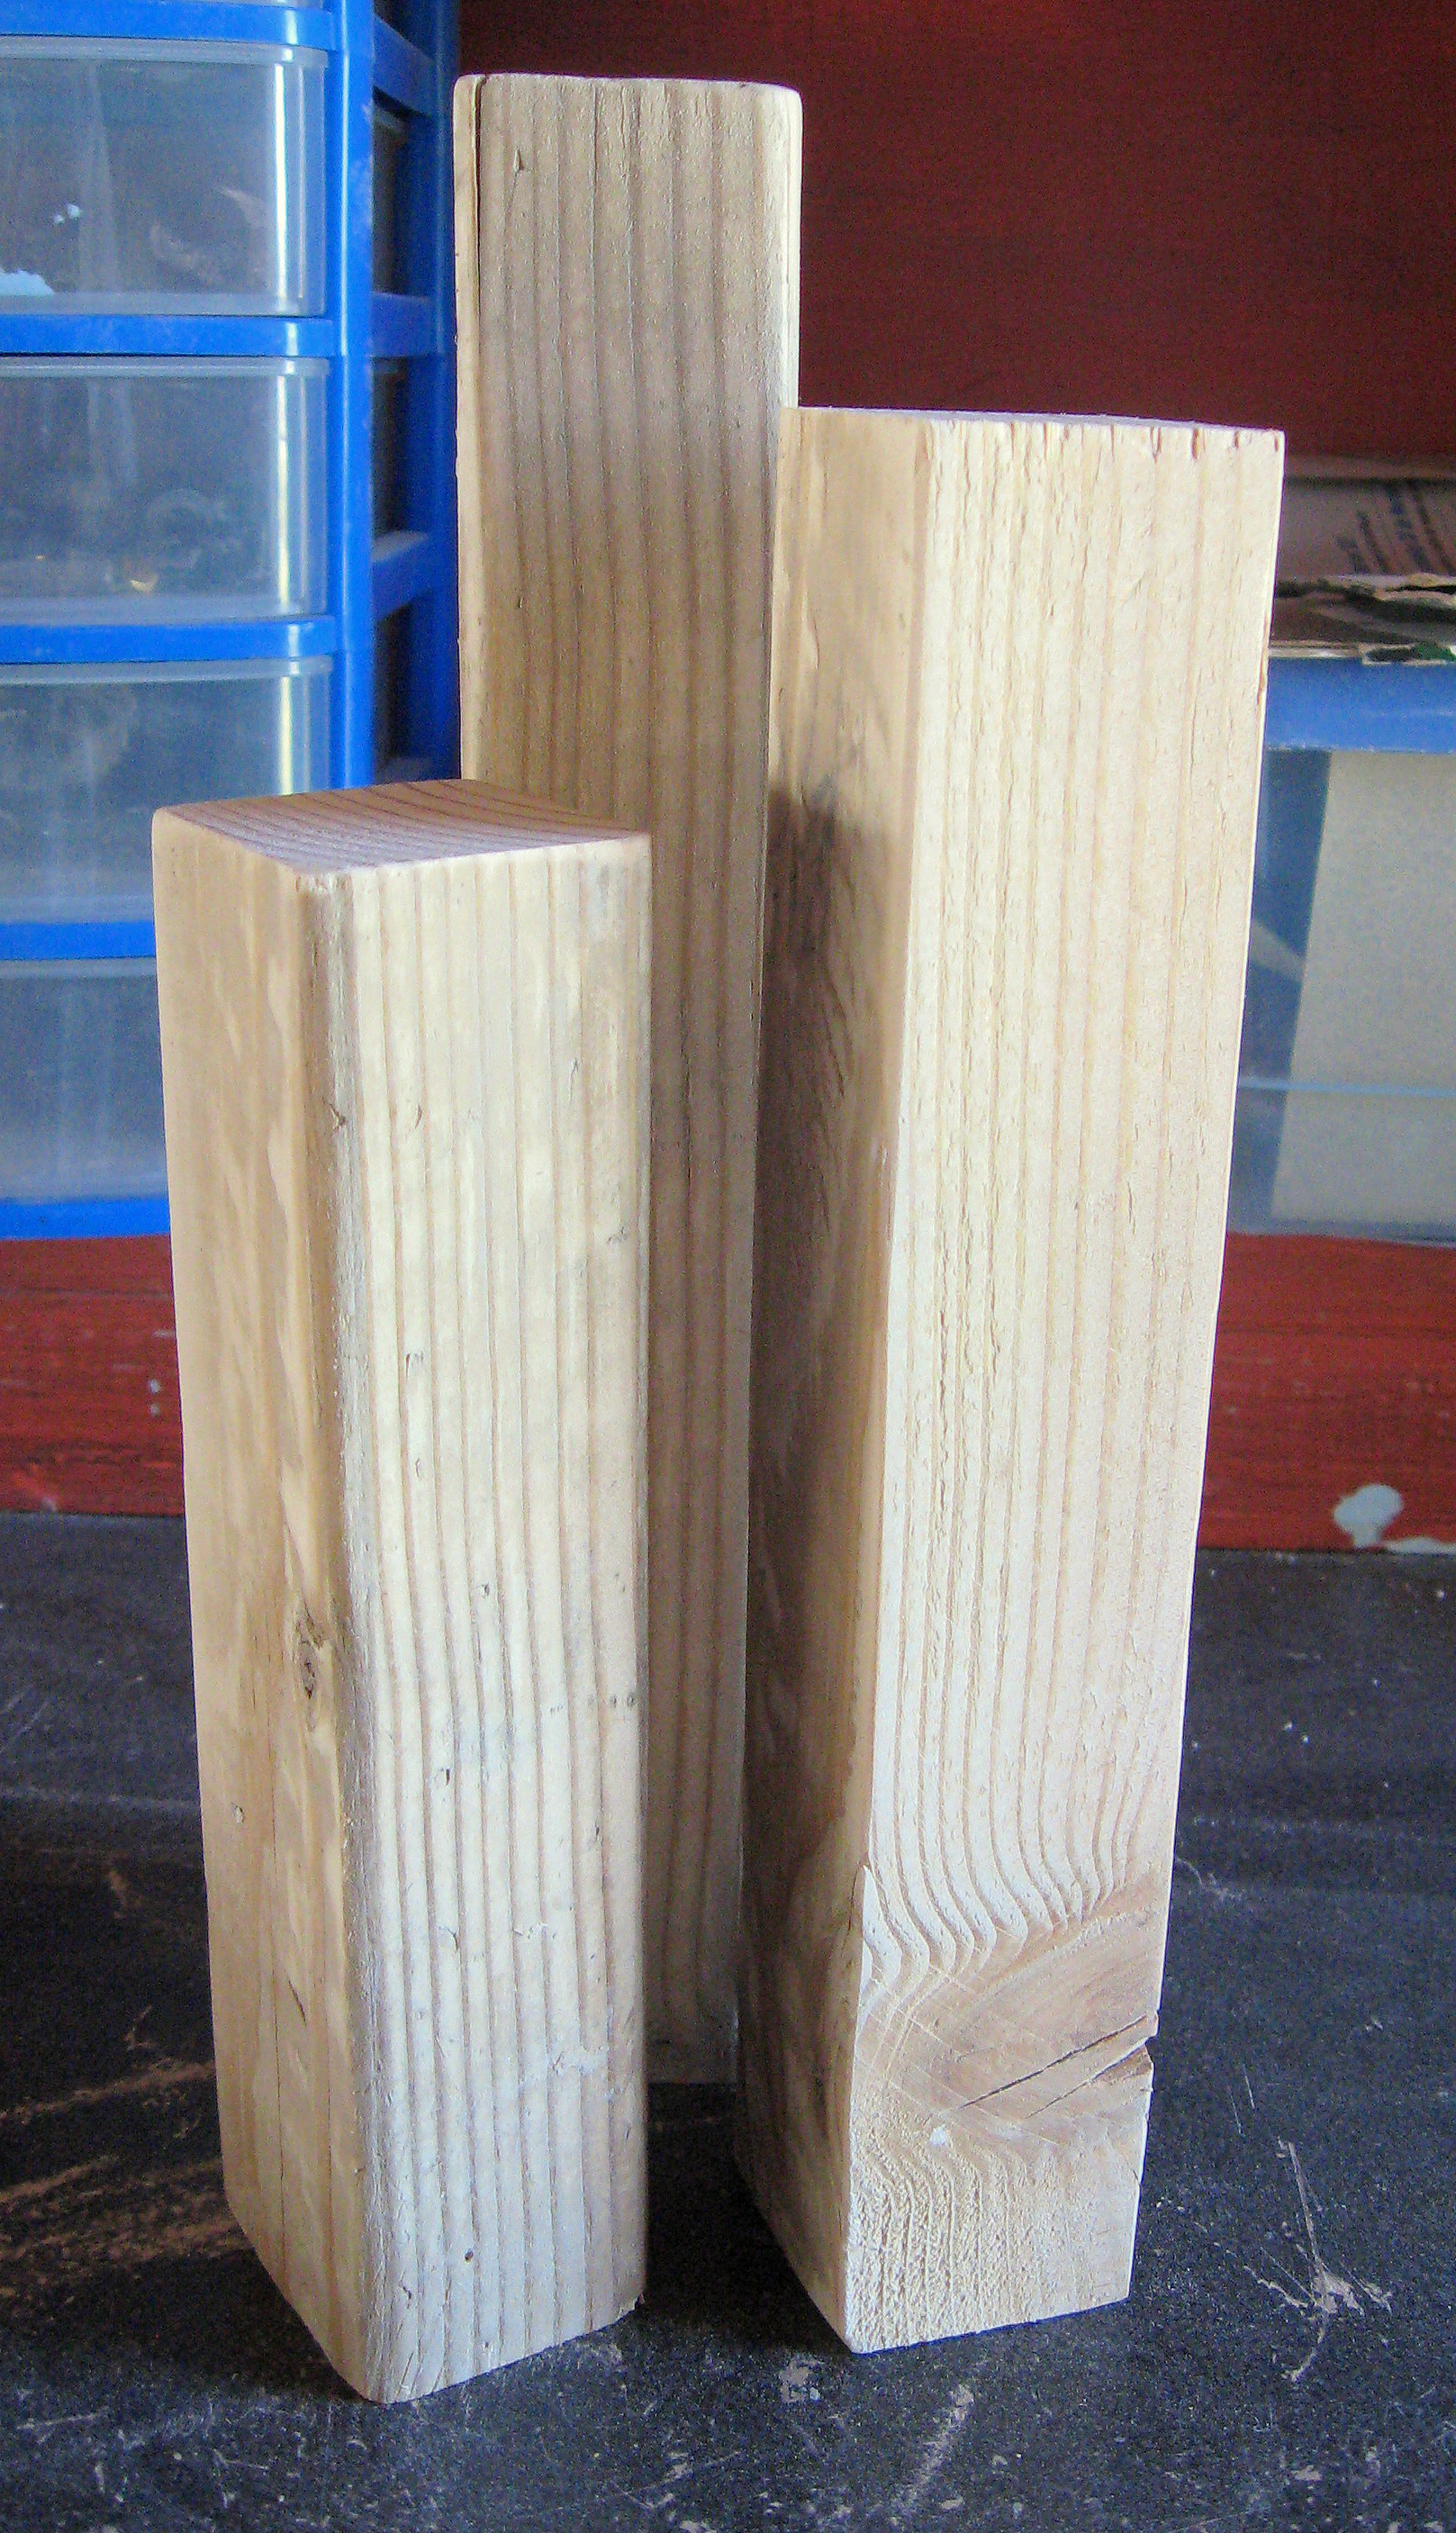
I started with this piece of wood that I found in my garage. It is about 1 1/2 inches square, but you could use square, round, bigger, smaller… whatever strikes your fancy! 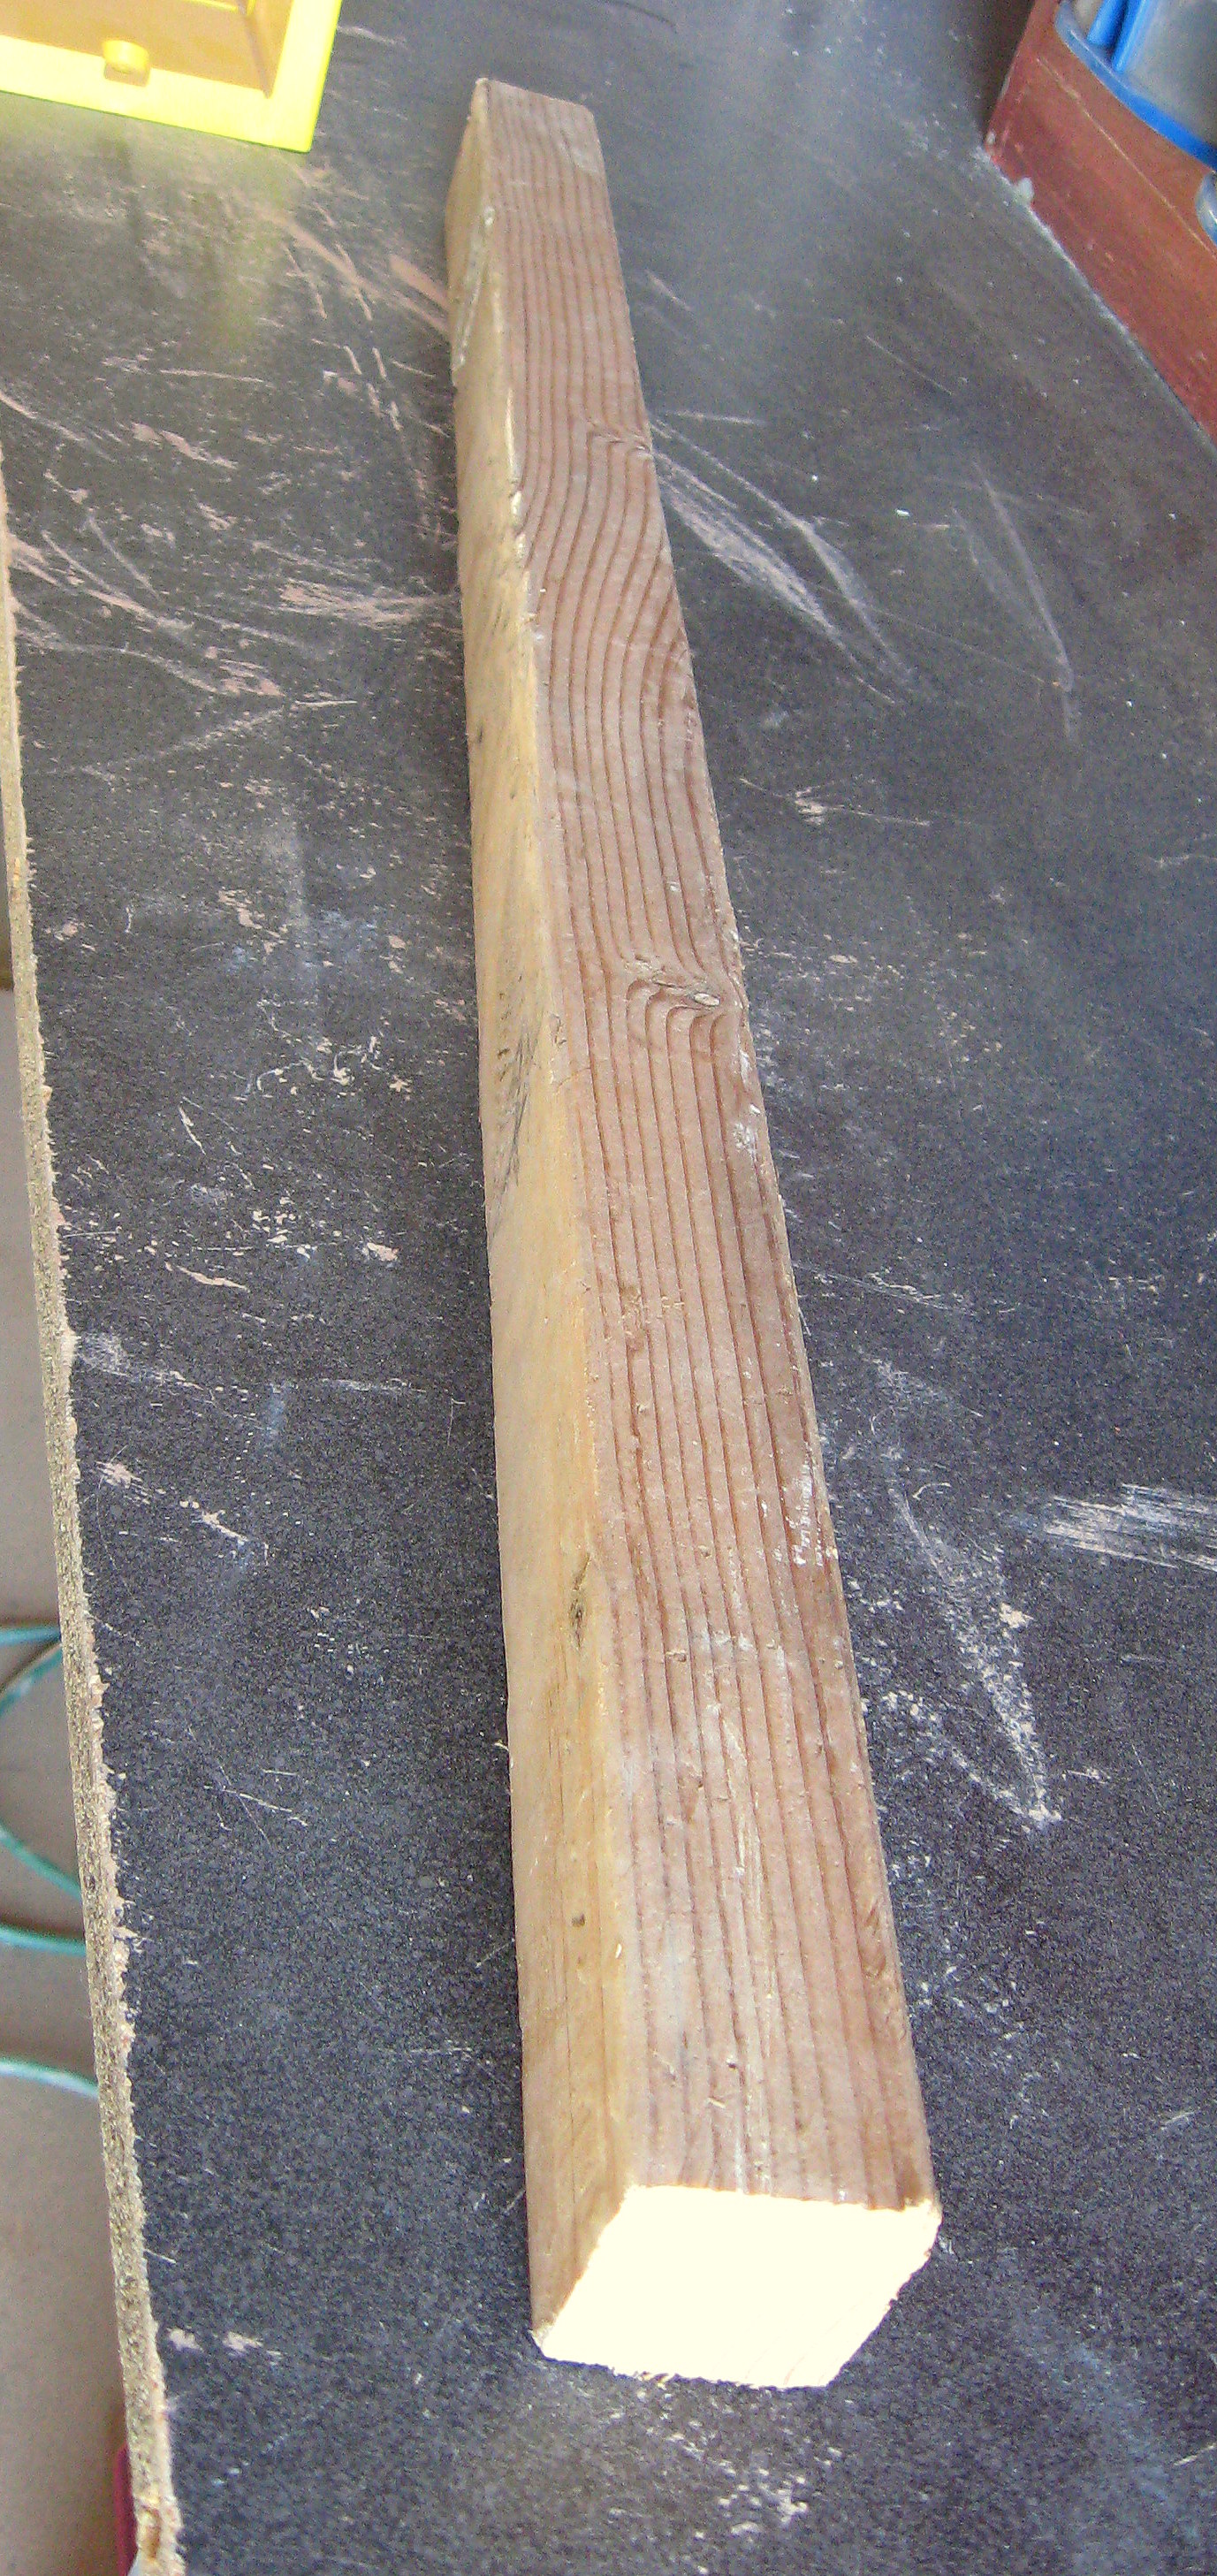
Cut into three pieces…I just eyeballed what I thought looked good – mine are about 10, 8 1/2 and 7 inches – and then give them a good sanding.
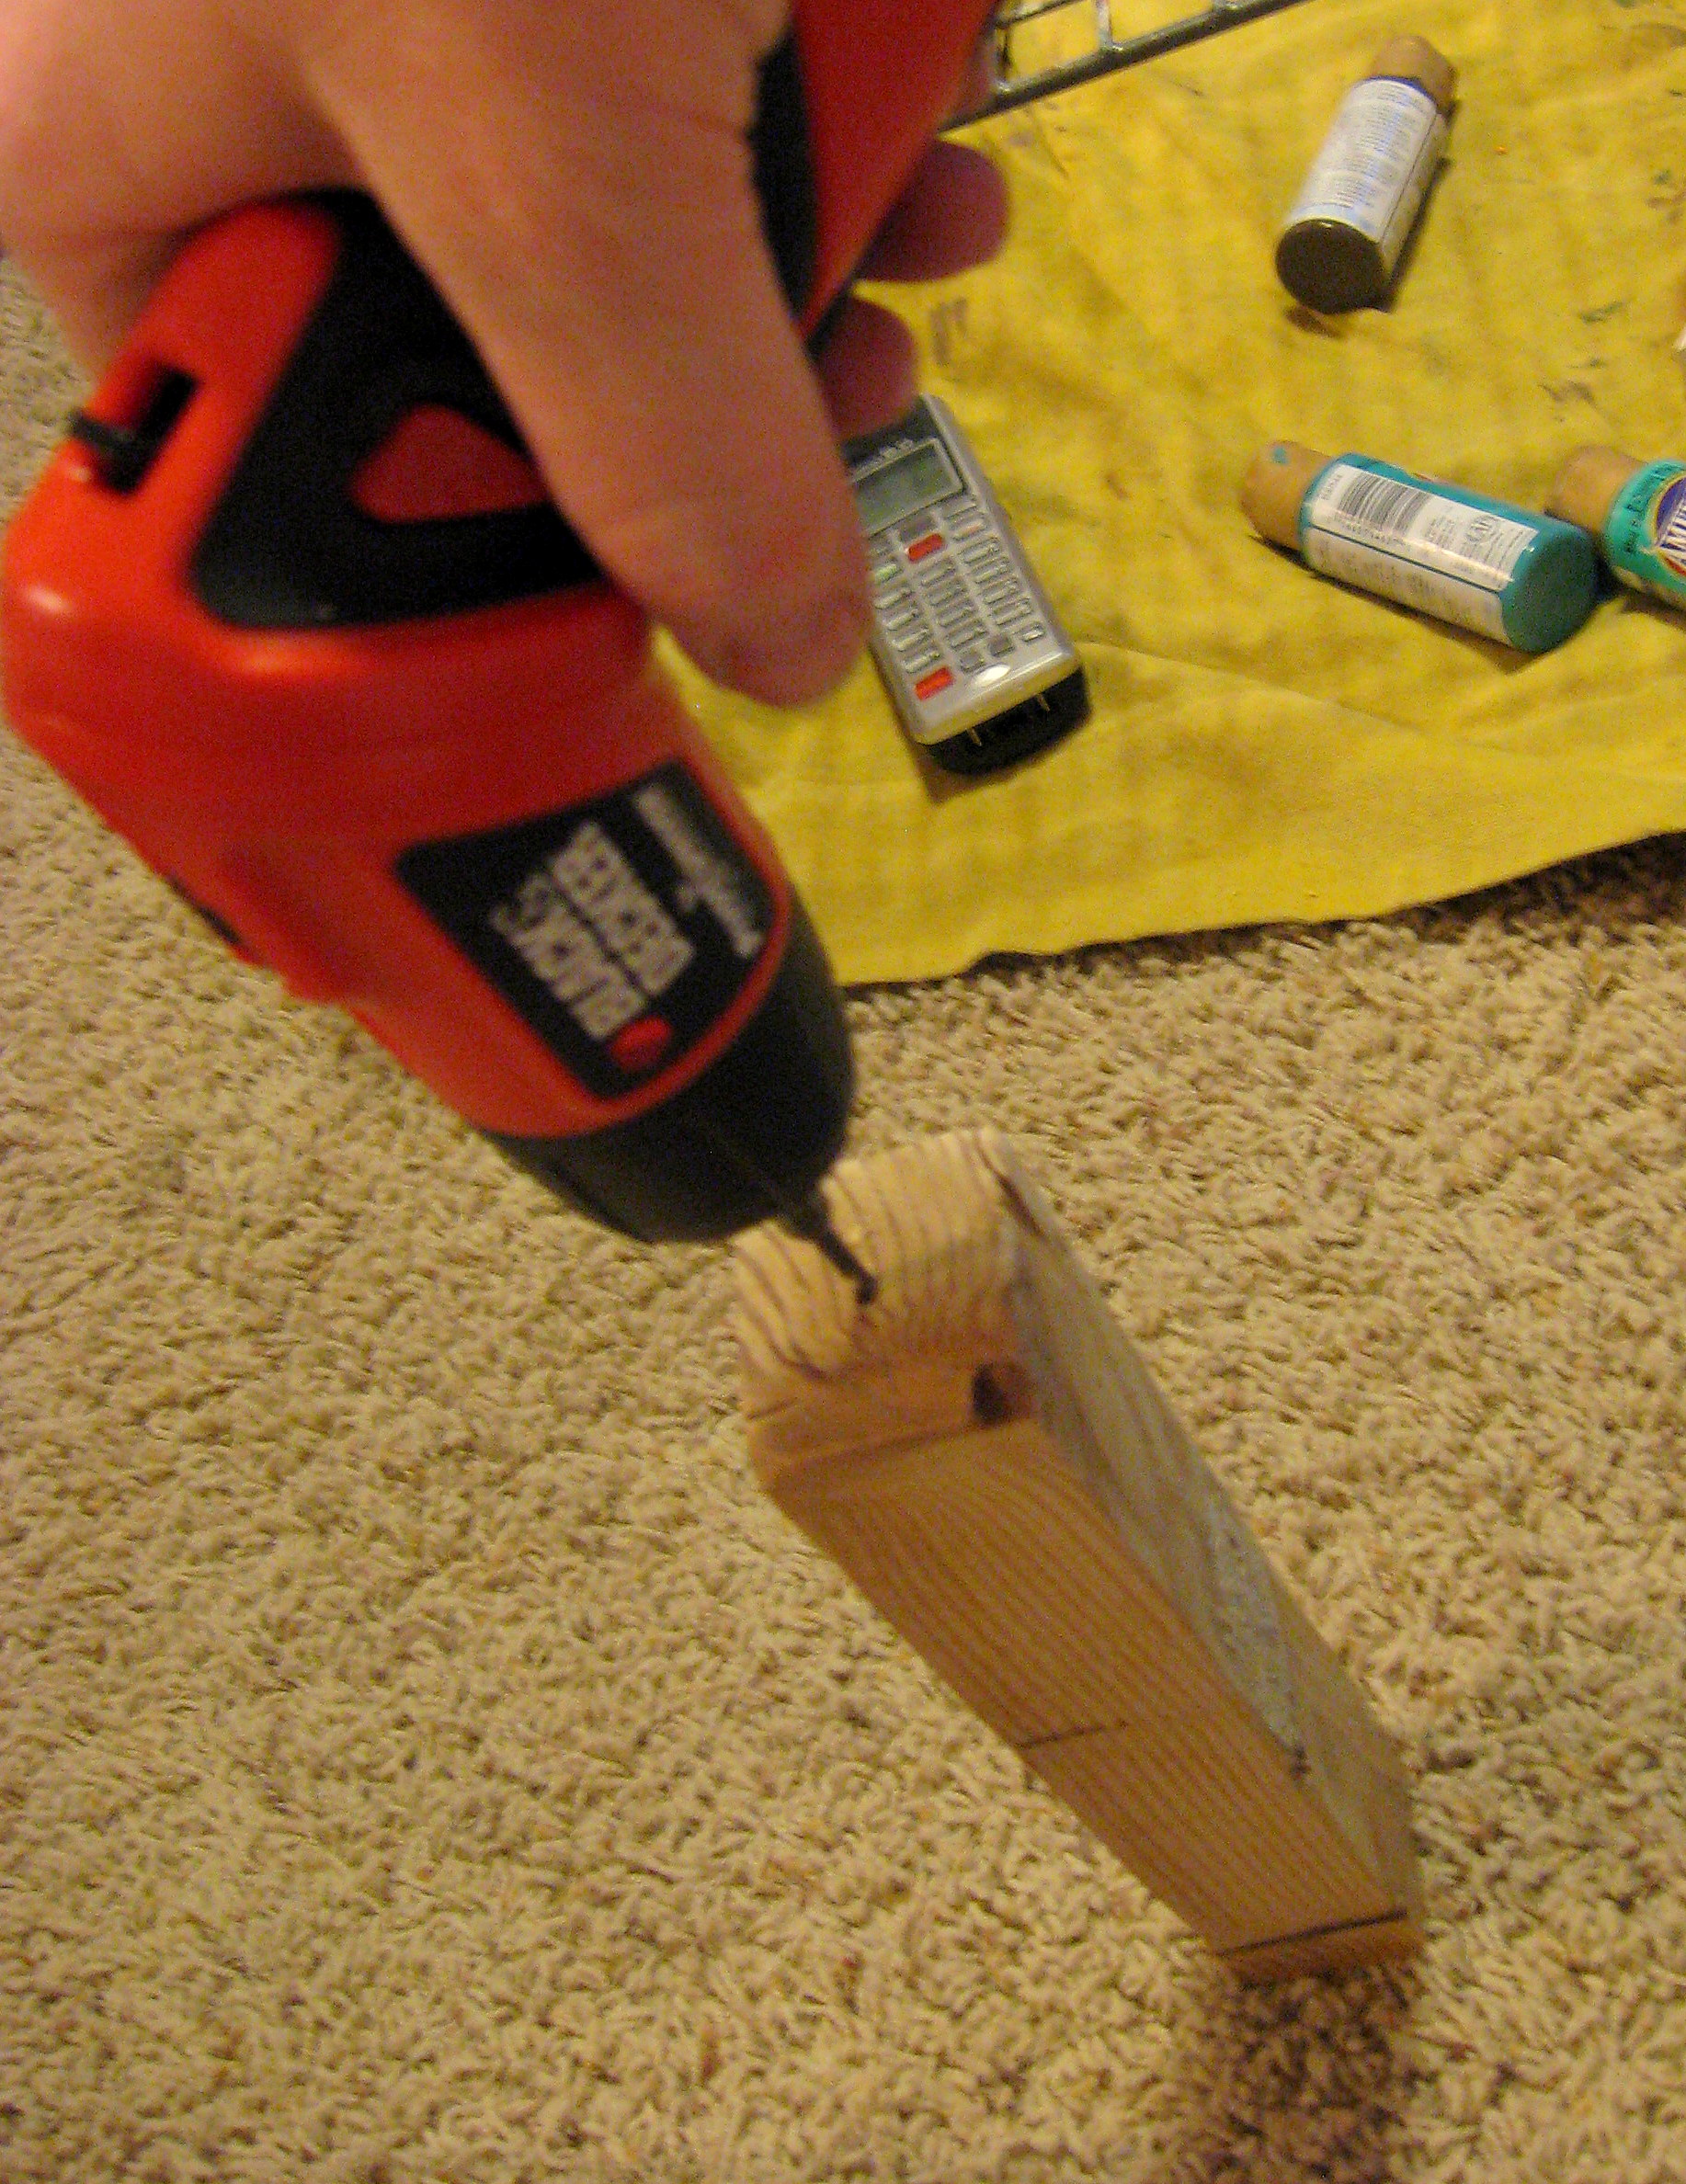
Drill a hole in the middle of the top of each stick – you will use this later for the “fuse” on the fireworks.
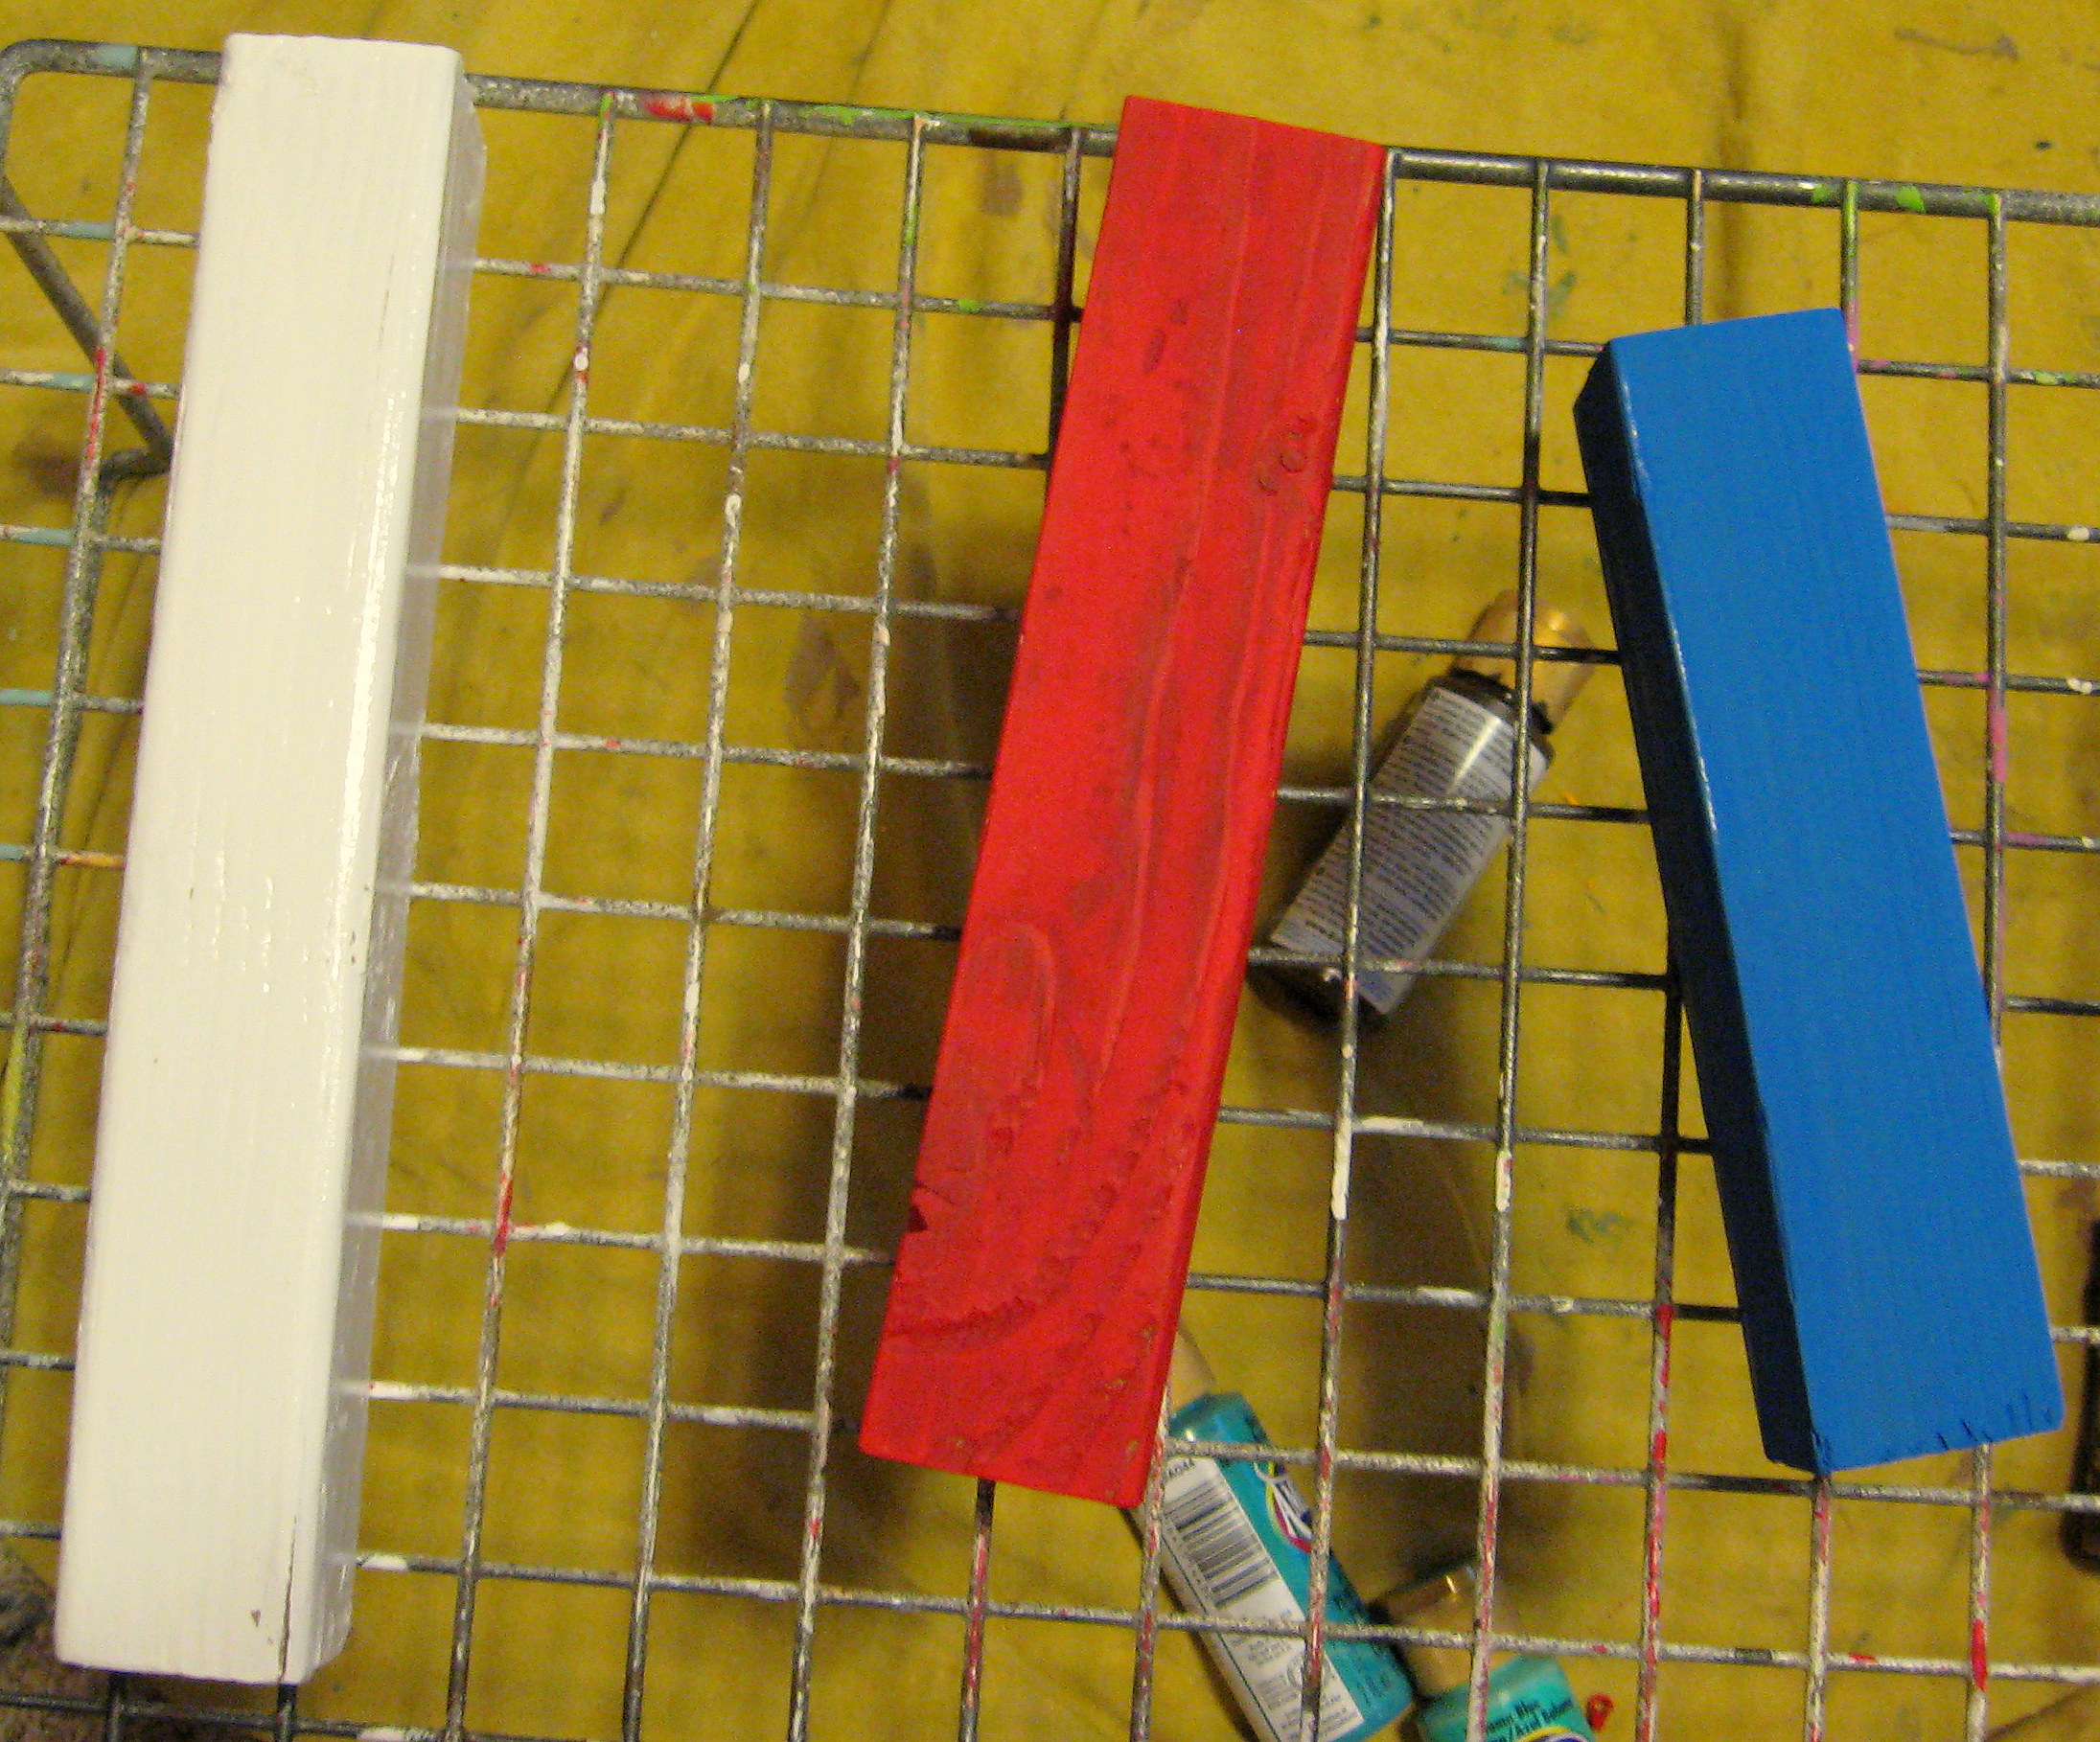
Now paint them and let them dry, then give the edges a light sanding to distress the fireworks a bit.
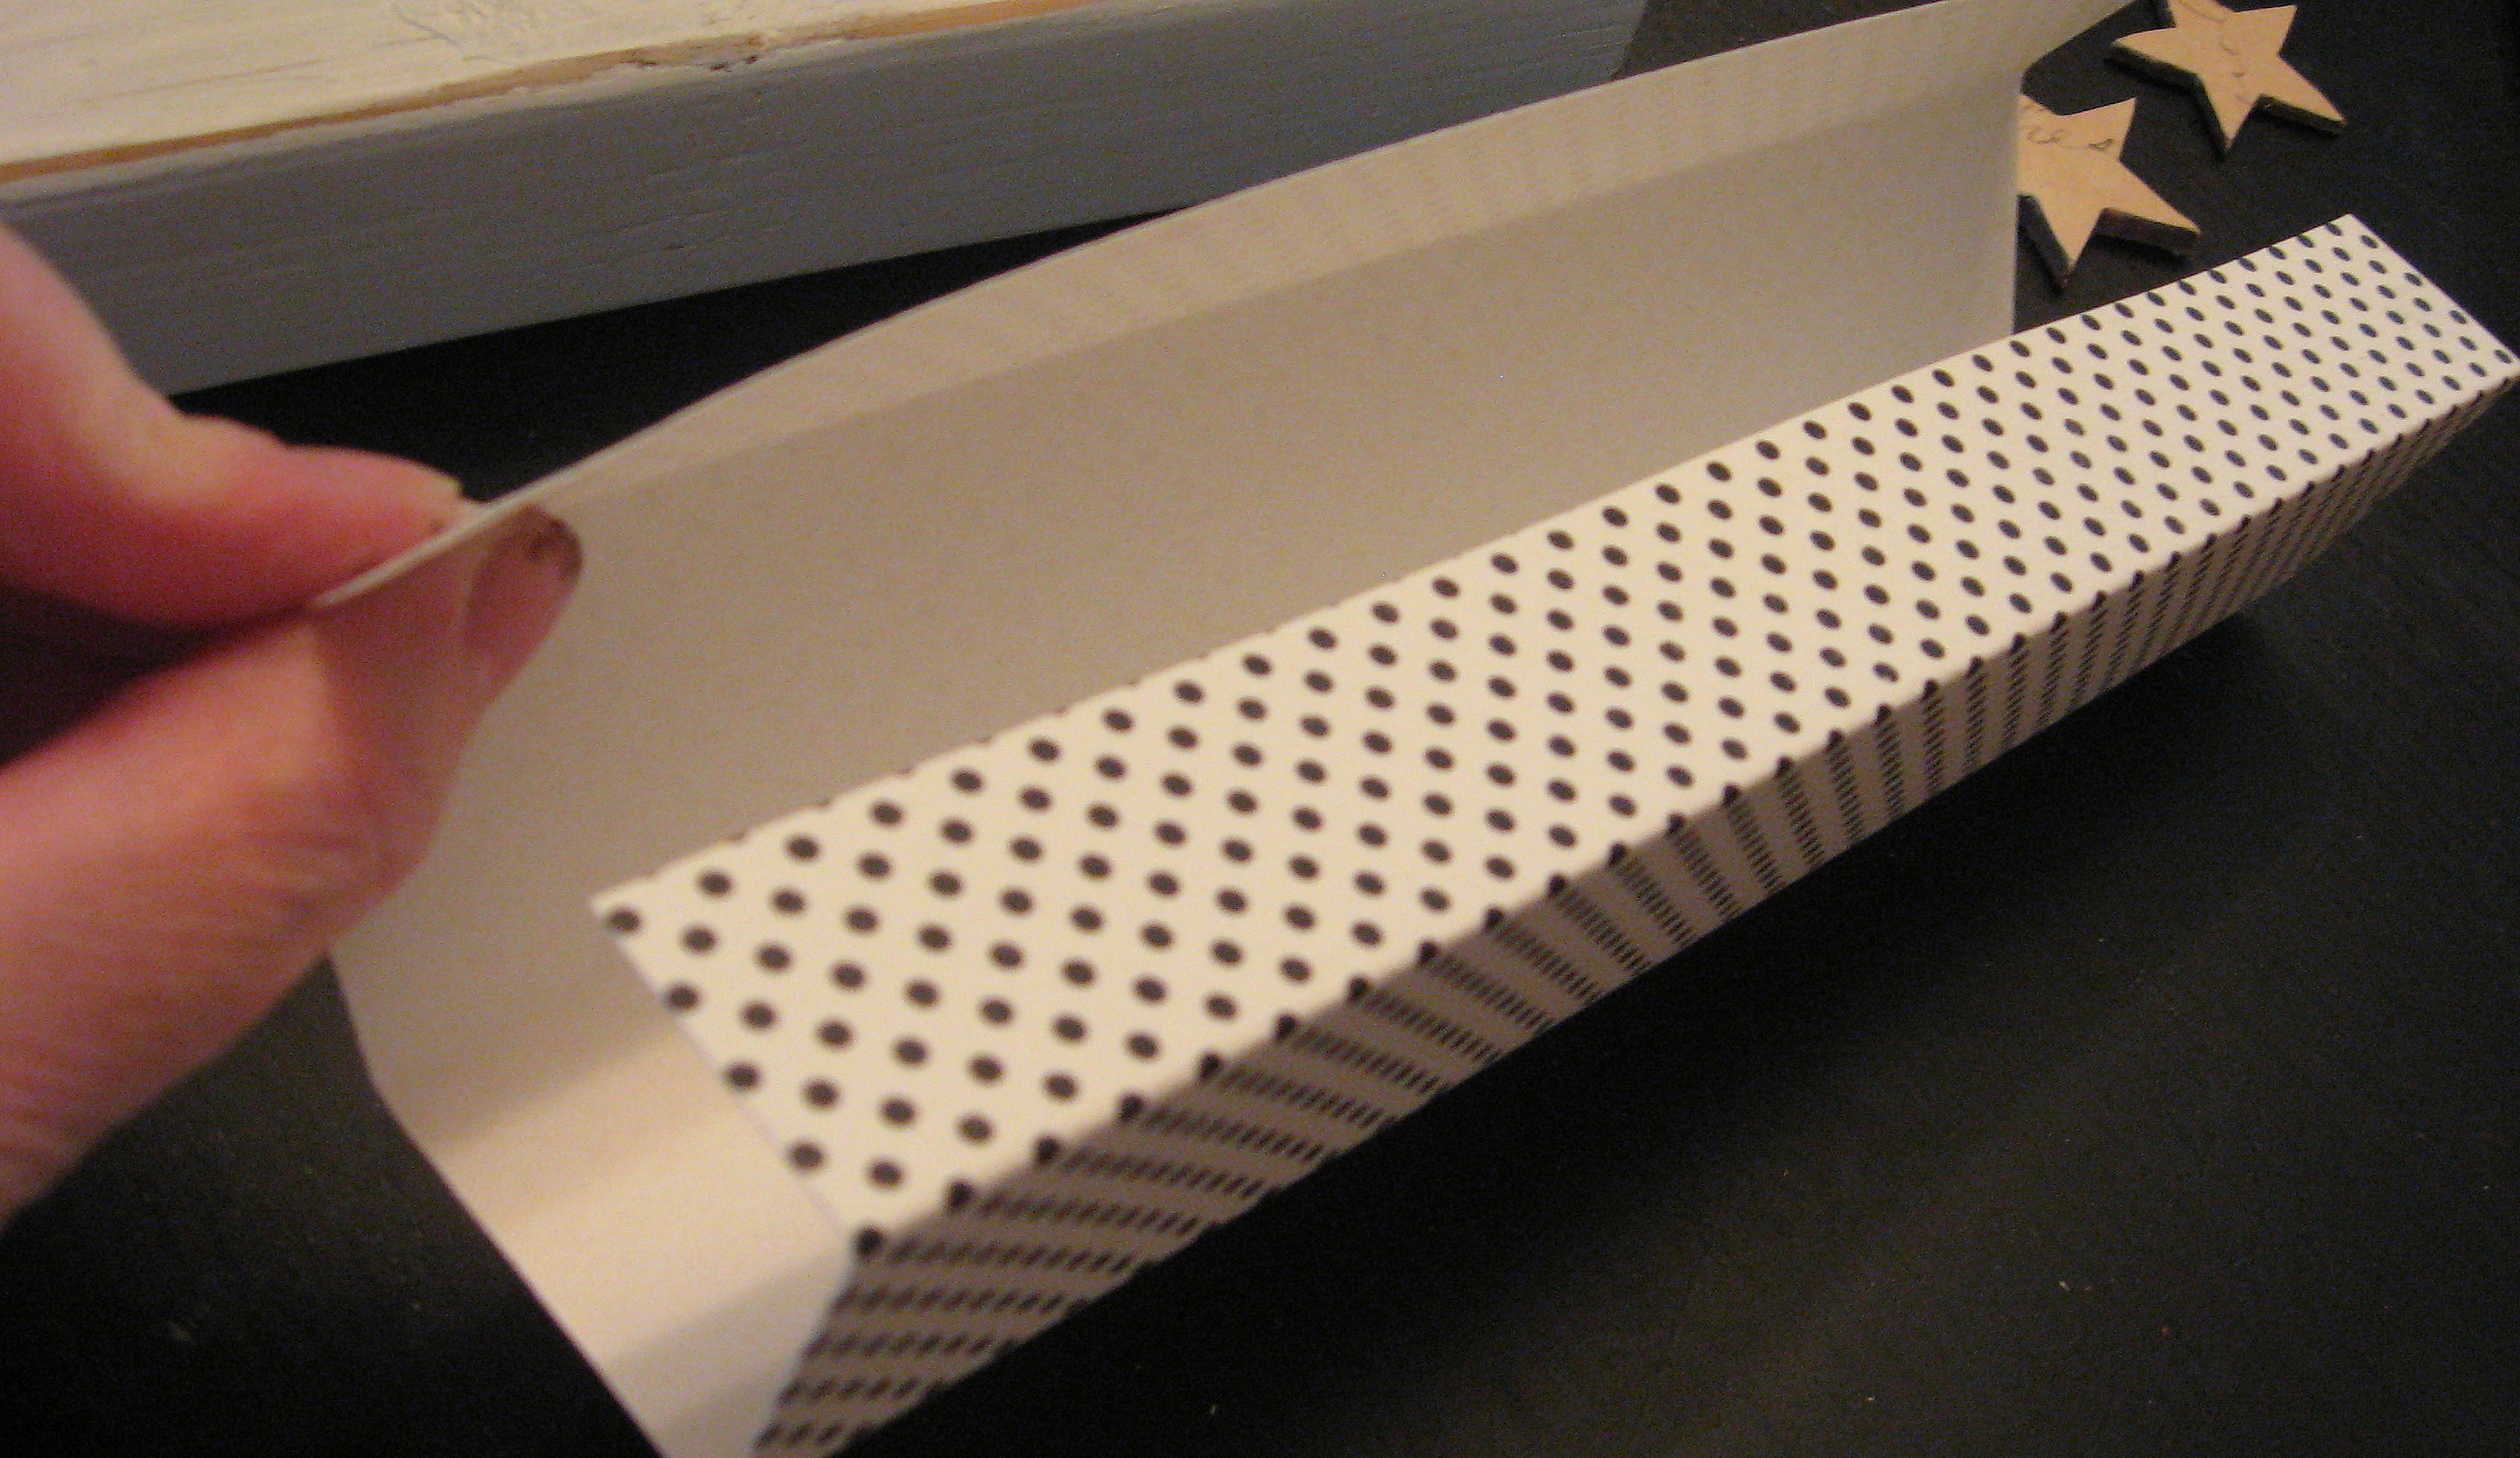
Next, cover each of the fireworks sticks with scrapbook paper. Cut a strip that is long enough to go all the way around and overlap just a little on the back.
Wrap it around the stick, using the edges to crease the paper, then take the paper off and make the creases sharp.
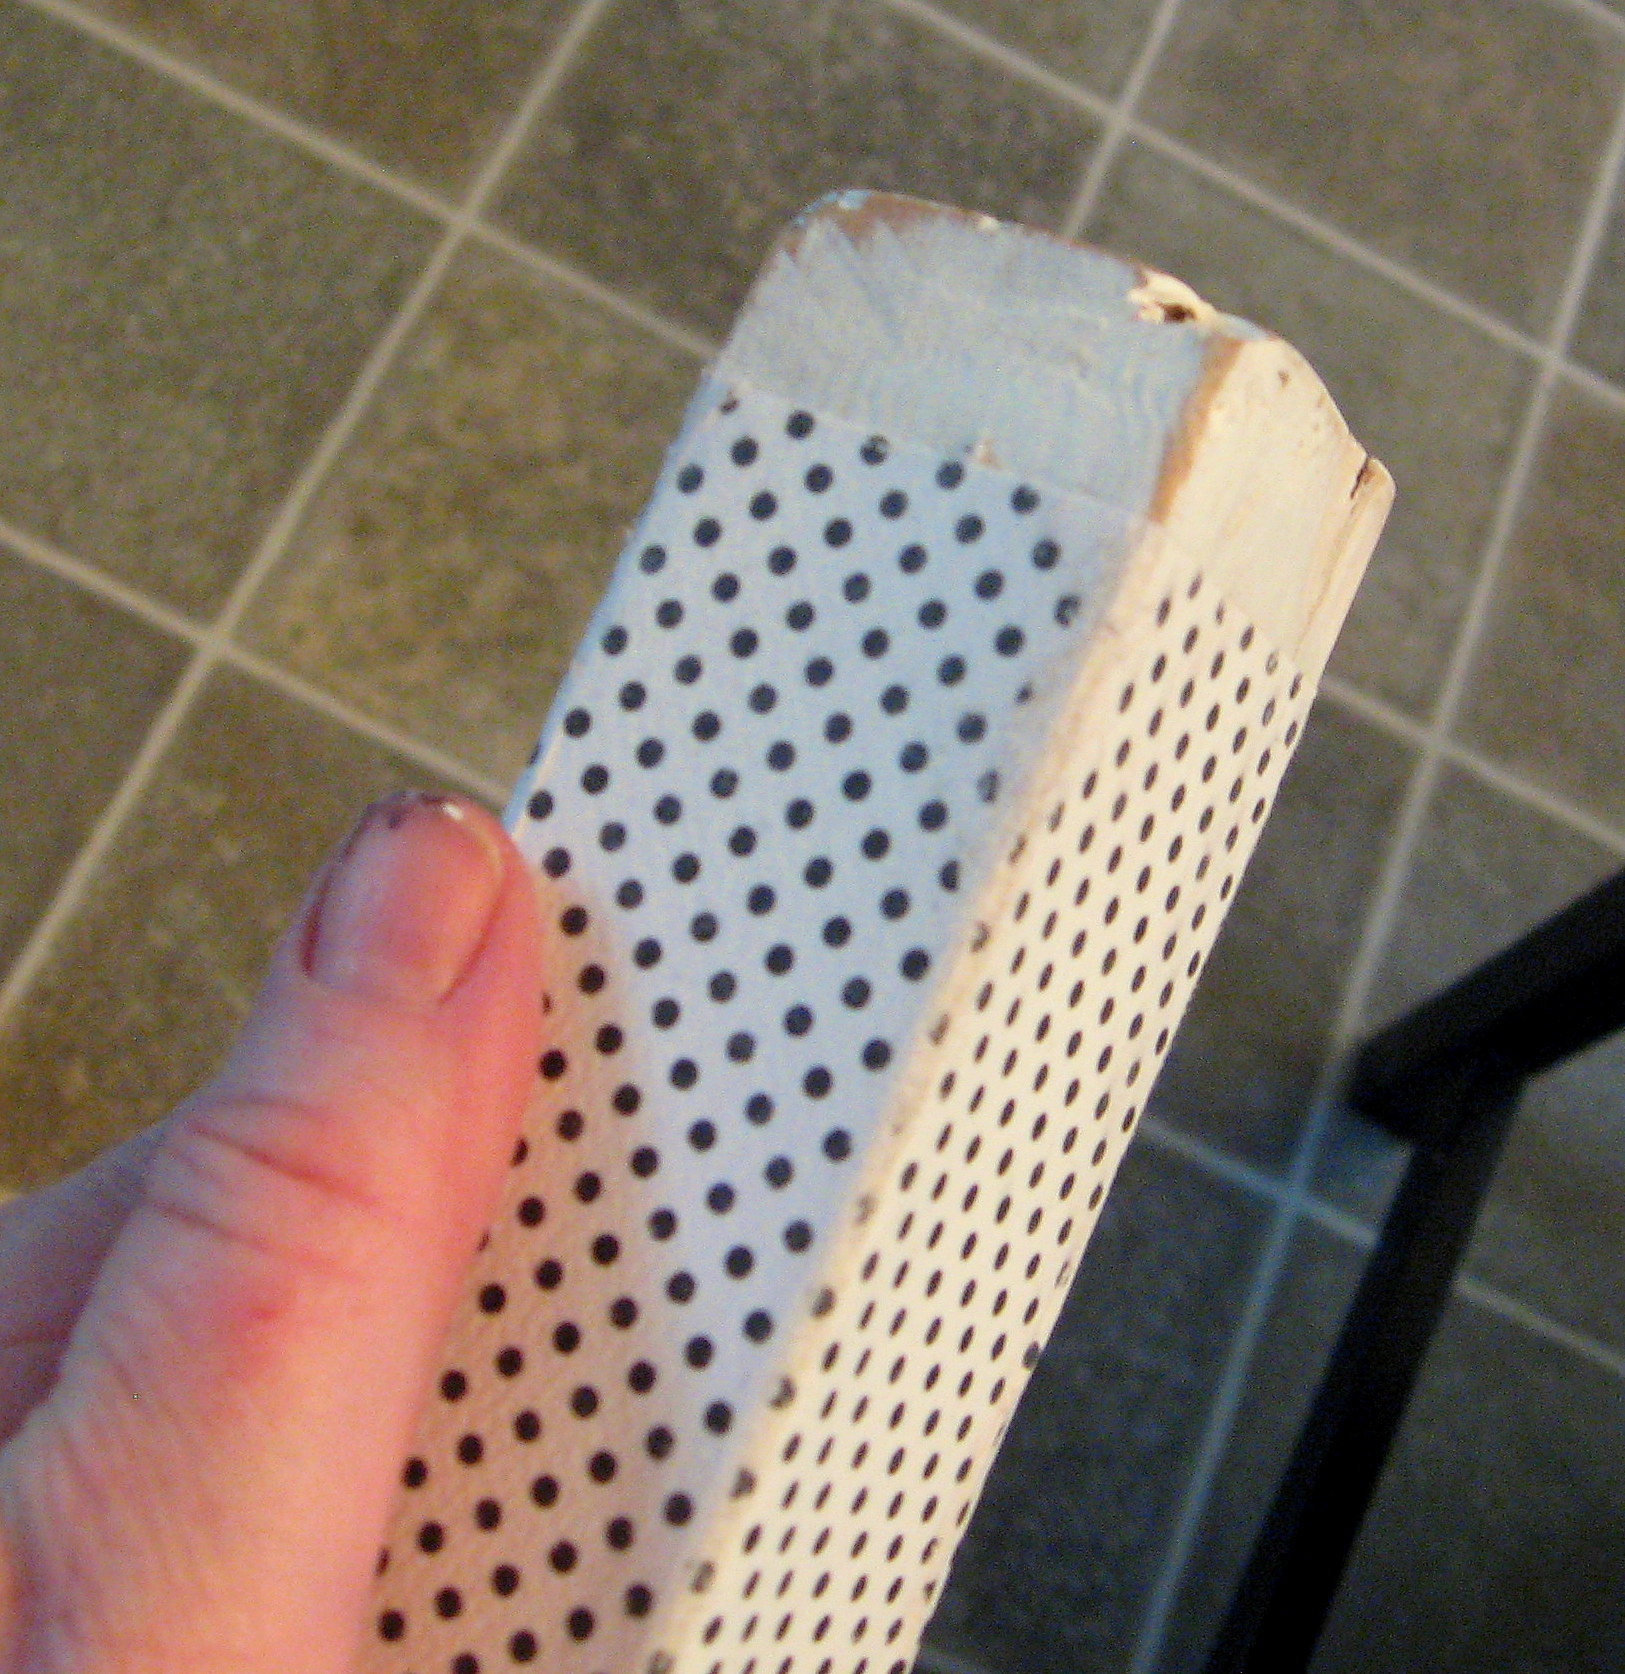
Mod Podge the paper onto the sticks and let dry. Once it’s dry, take sandpaper to the edges and corners to rough up the paper a little and give it that shabby, worn look. Just be sure to use a light touch – the paper will tear easily.
When the fireworks look just the way you want them, seal them with a coat of Mod Podge on top of the paper.
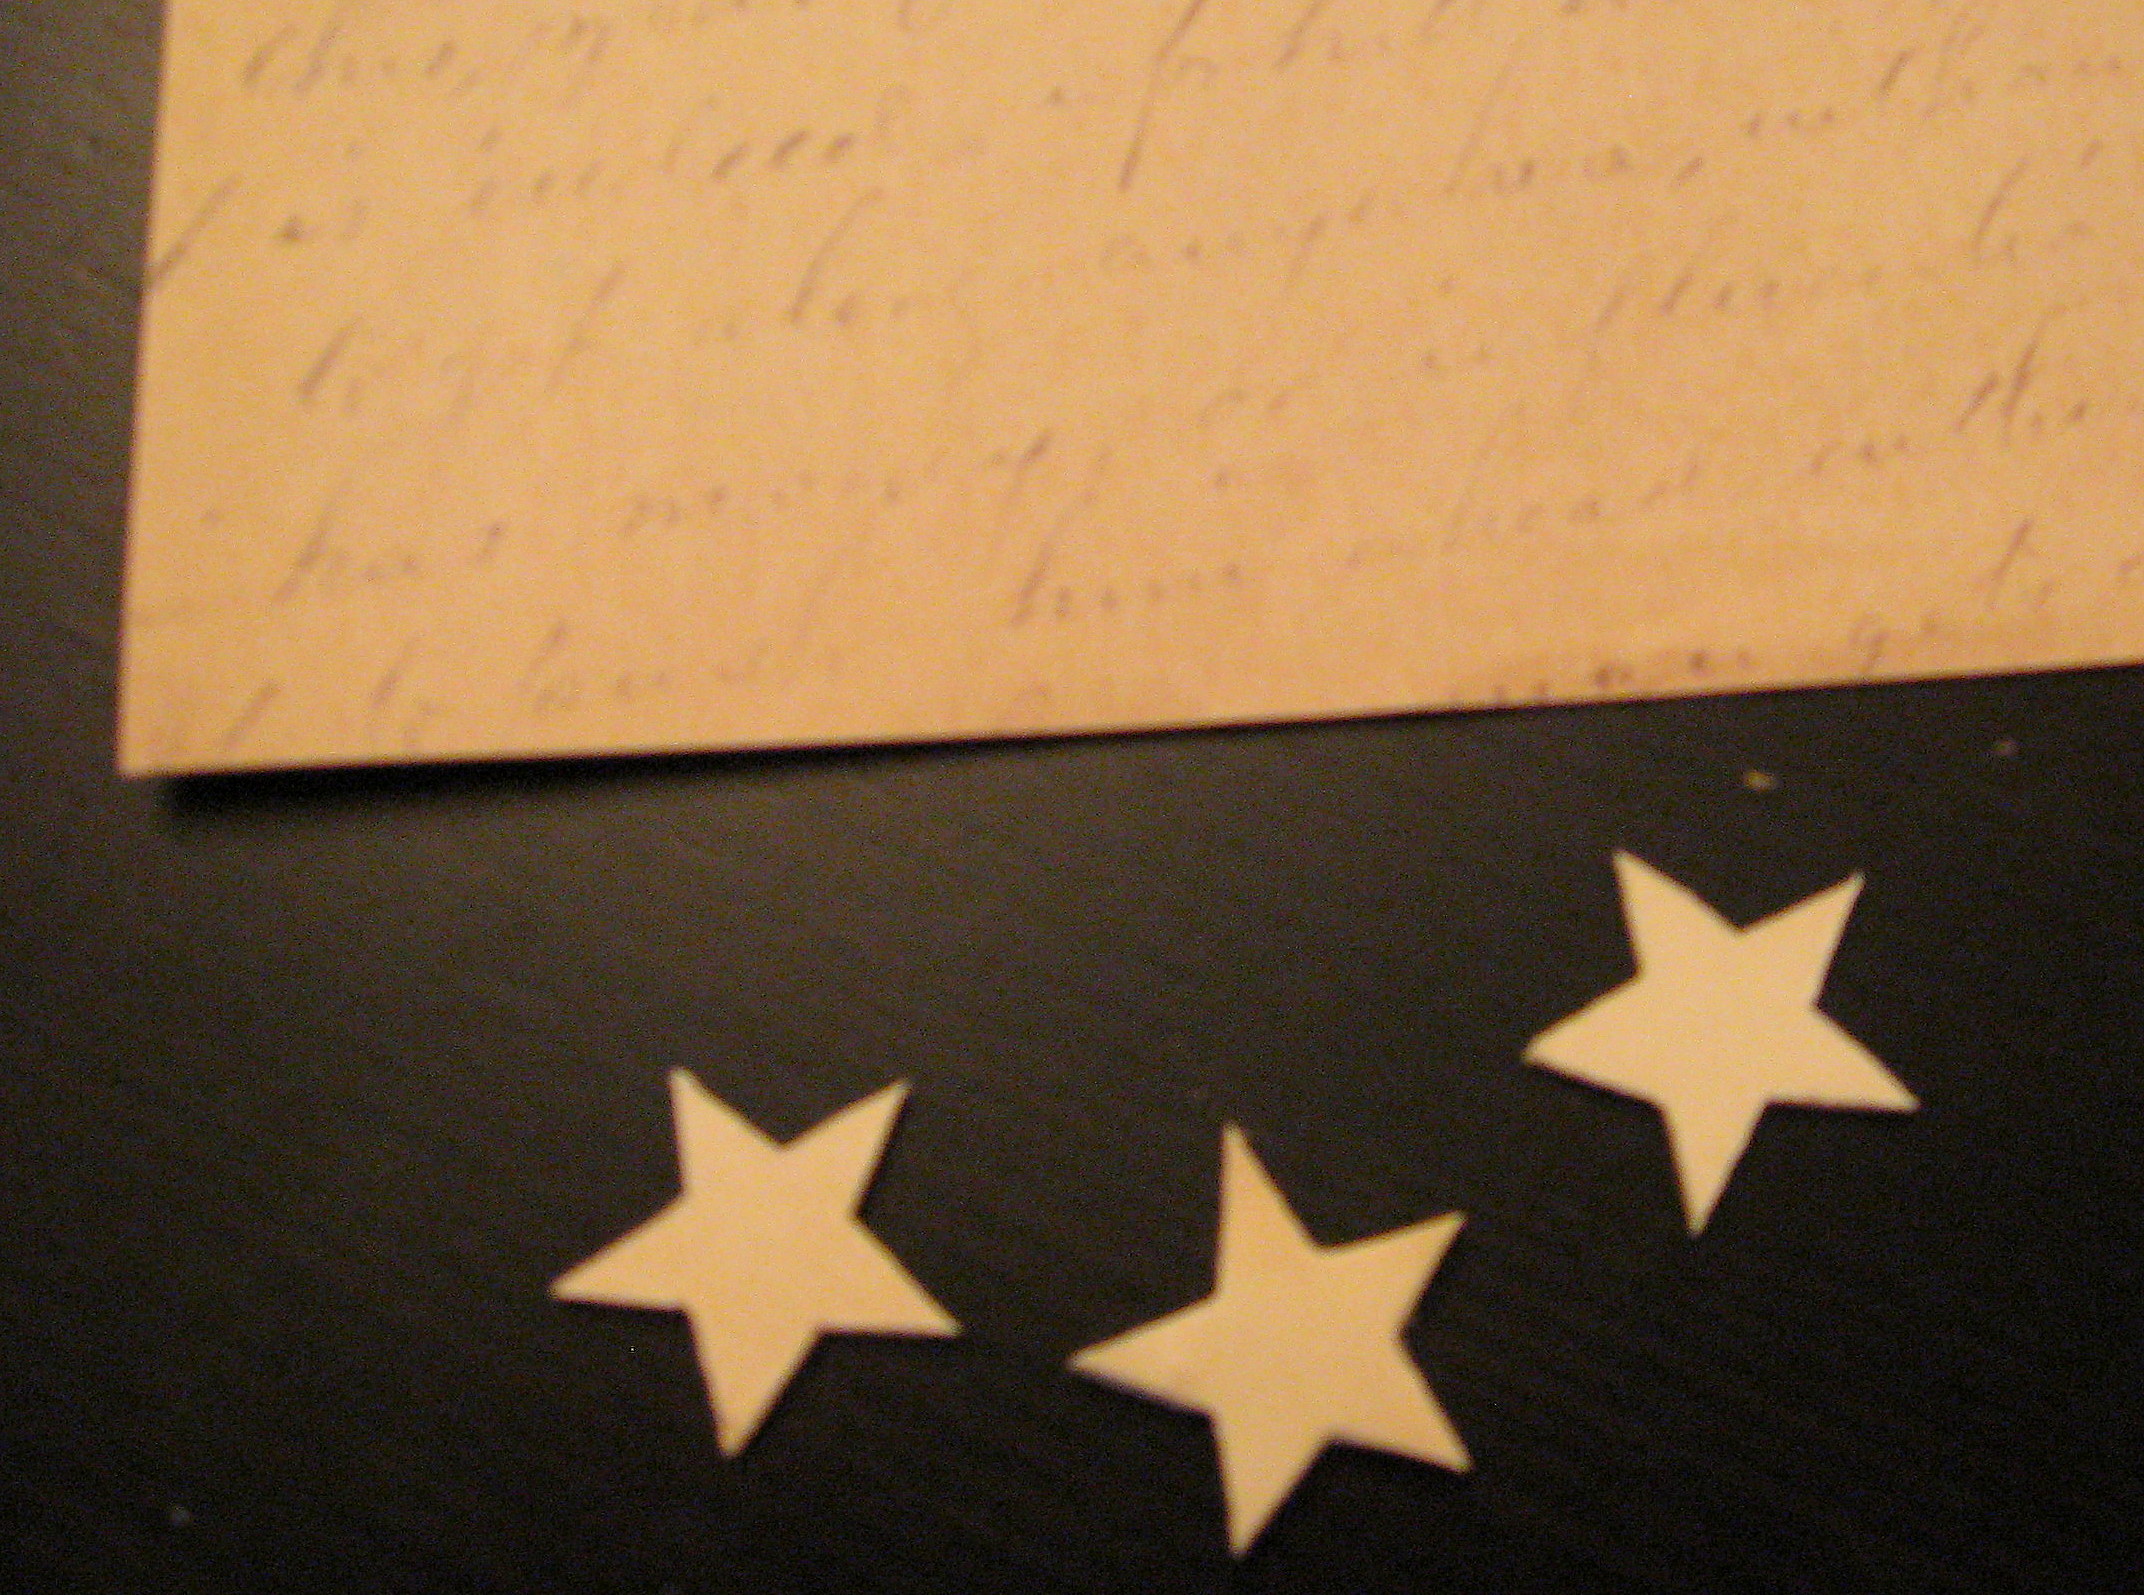
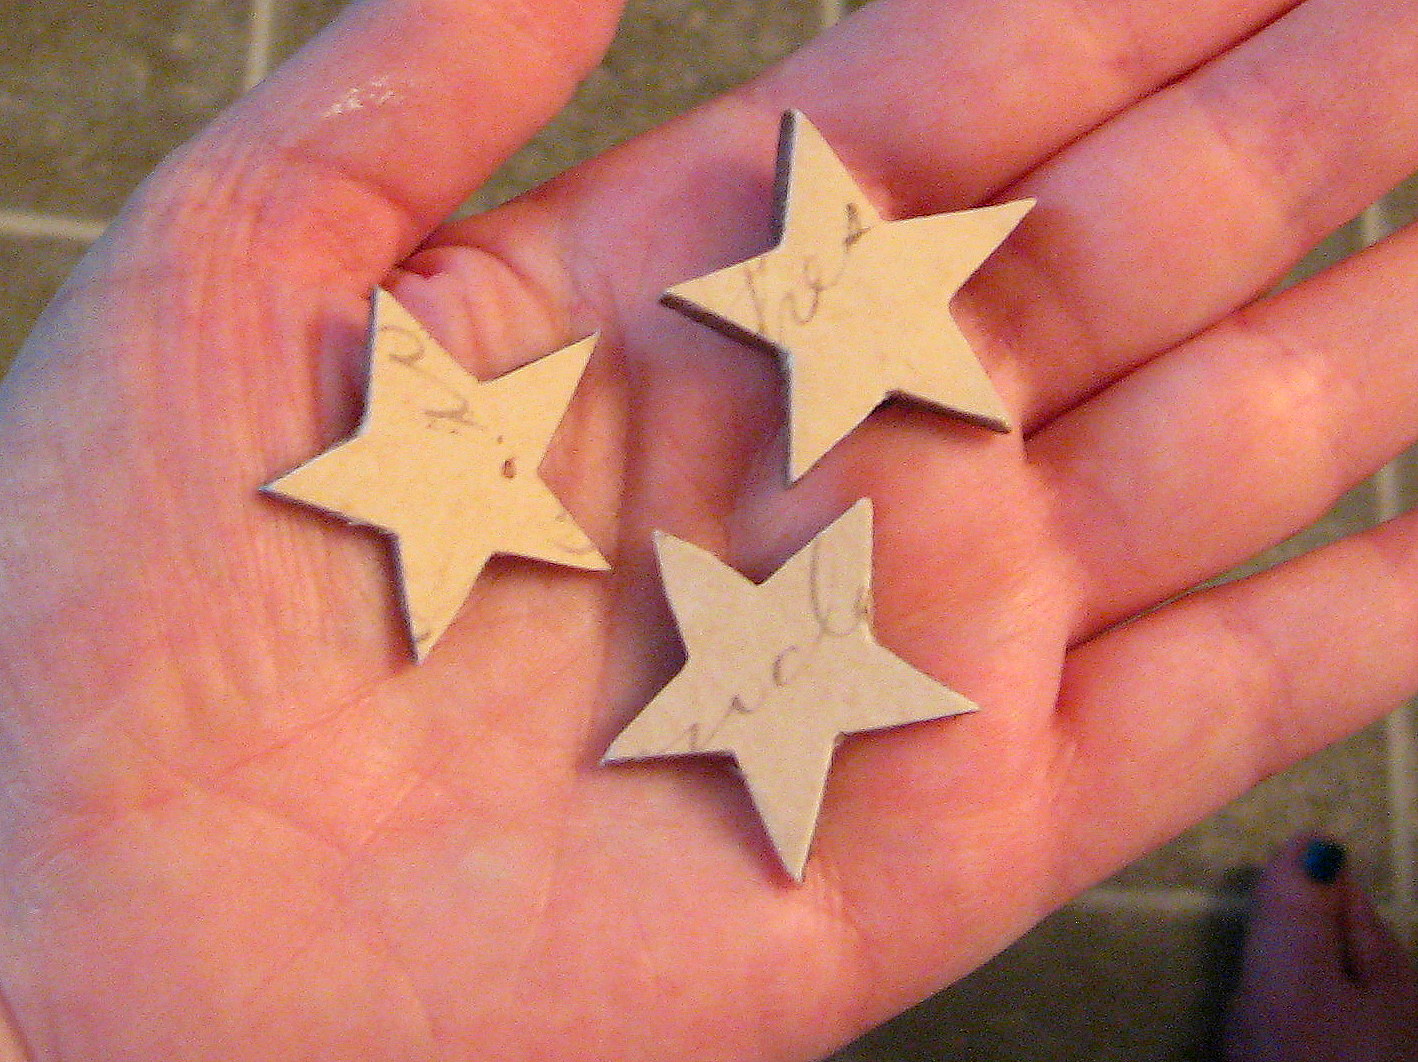
Next we will make the “fuse”. I started with three wood stars that I bought at a craft store. trace them onto a piece of scrapbook paper – mine is a creamy white with old-fashioned script writing on it – and cut them out. Cut them a little bit on the big side rather than trying to line them up exactly…you will see why in the pictures below.
Paint the edges and the backs of the stars with a coordinating paint color – I used brown –
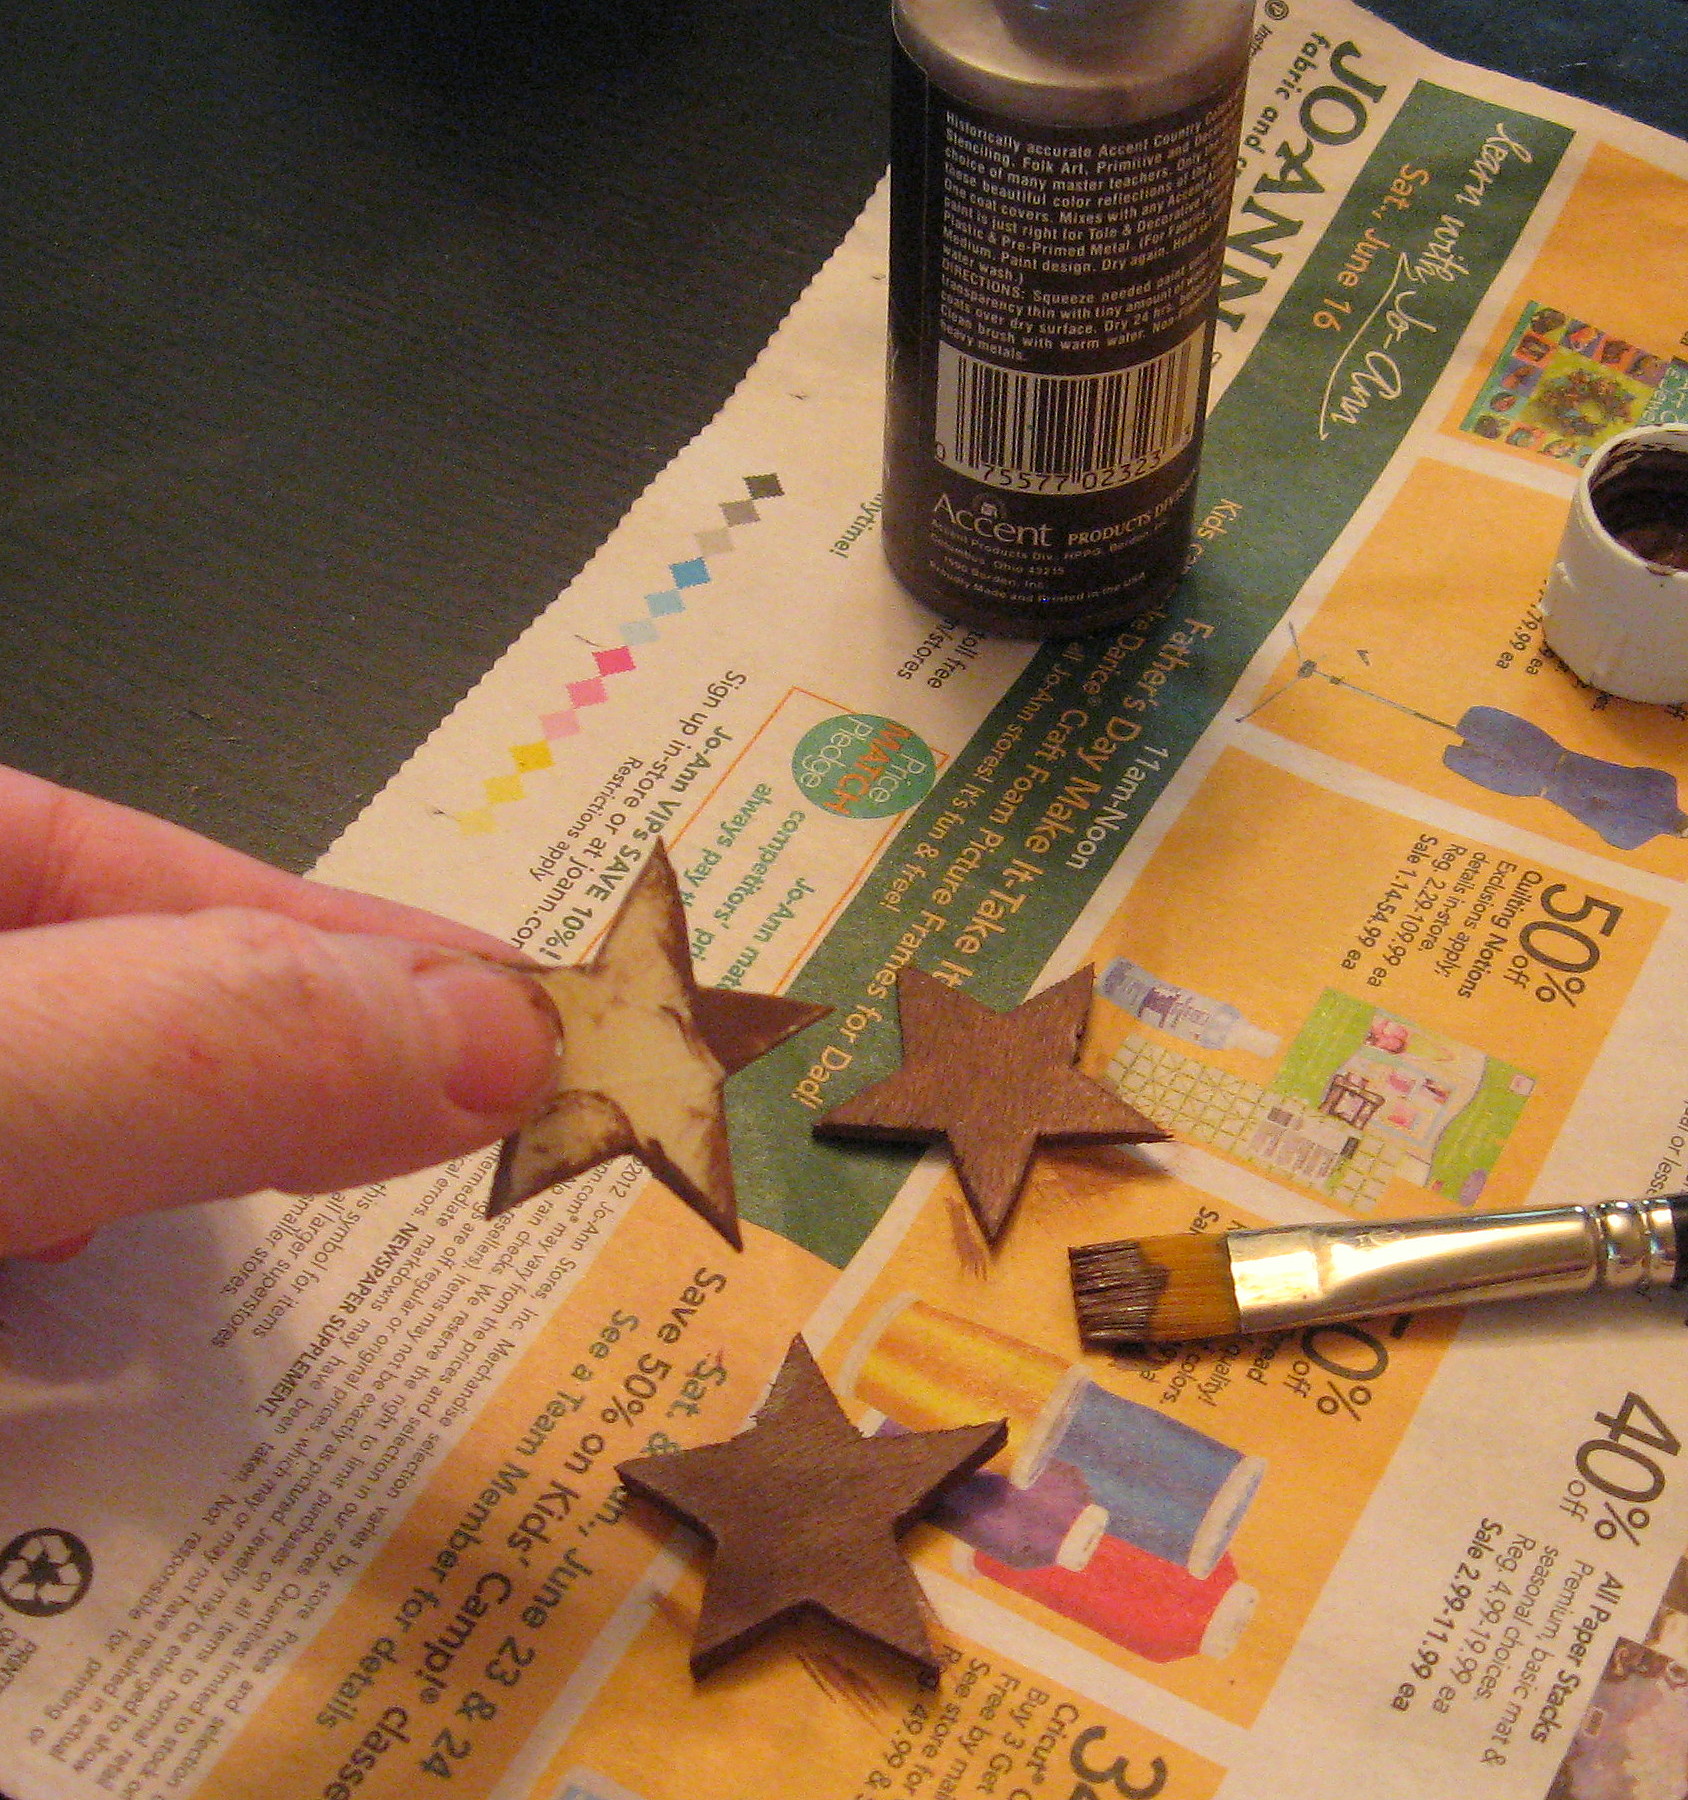
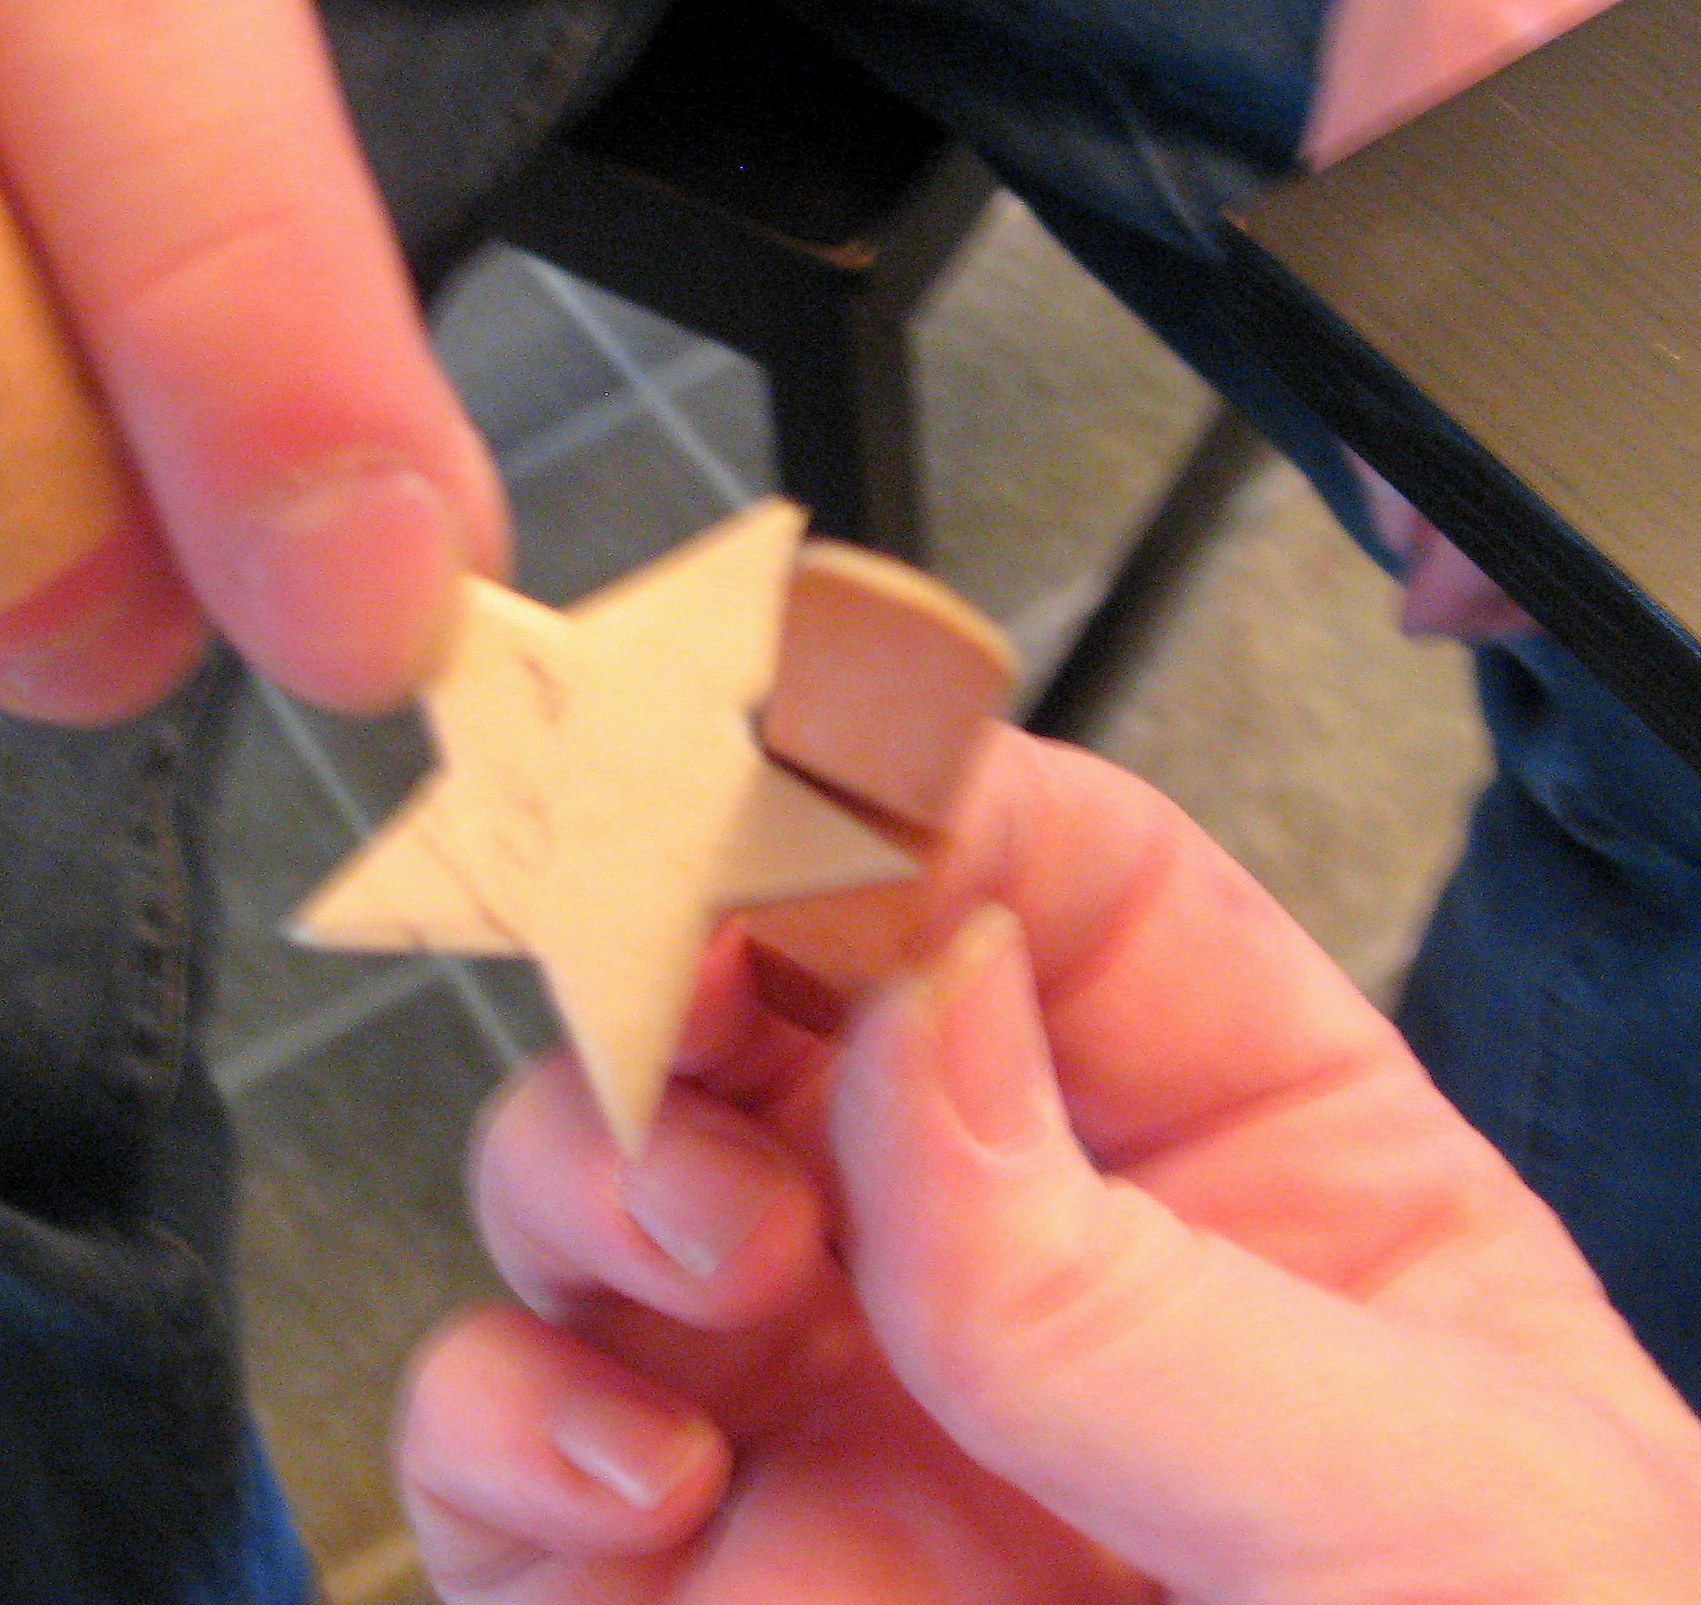
and once that is dry, Mod Podge the paper stars onto the unpainted side of the wood stars. Notice in the picture below how the paper is bigger than the wood?
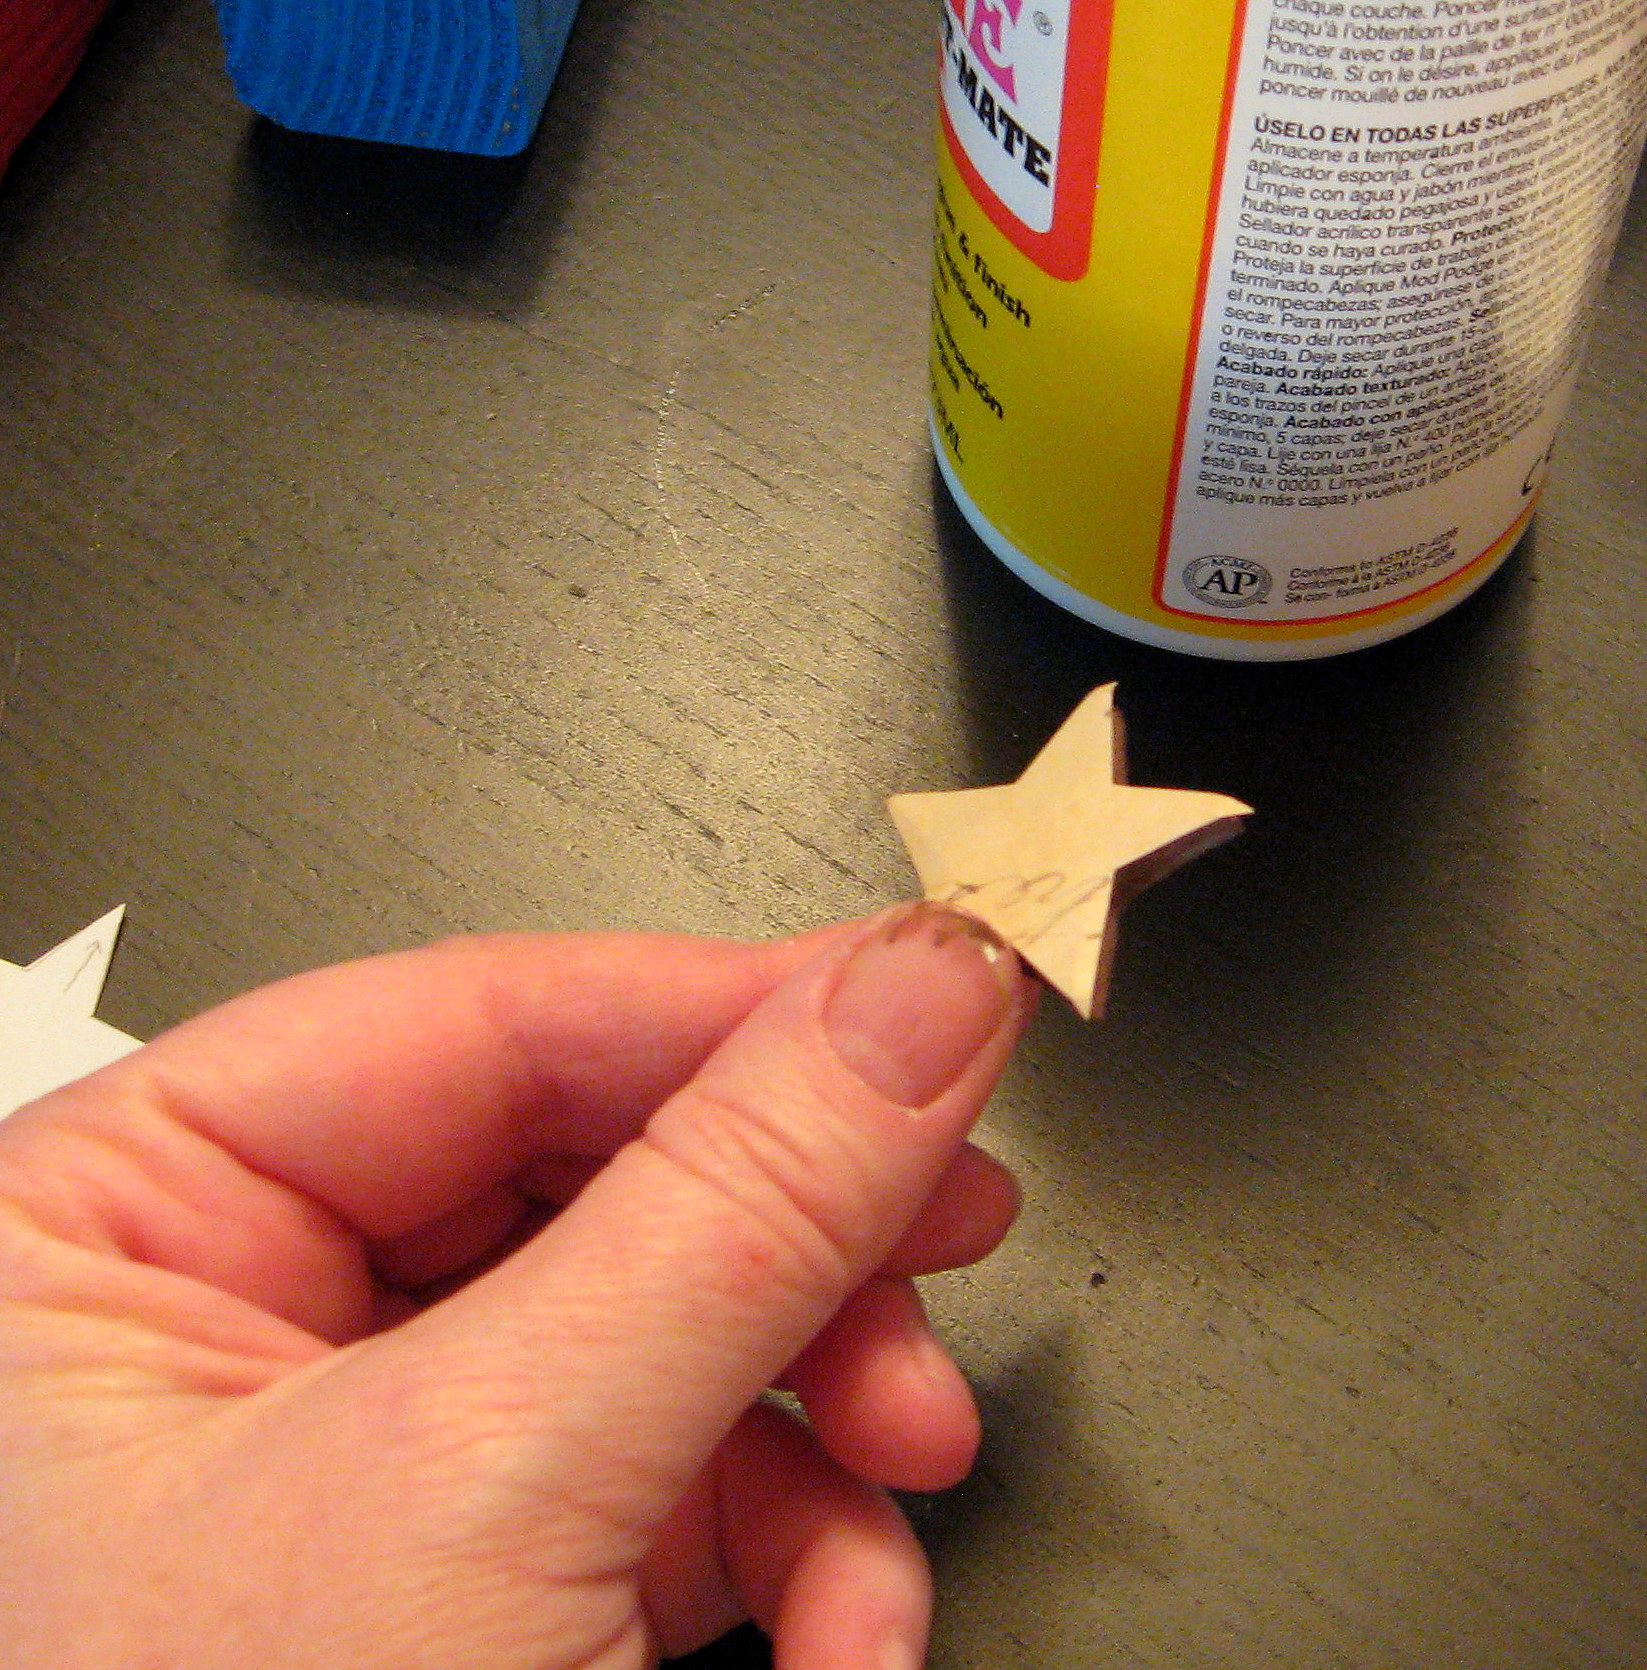
Using an emery board (I buy packs of them at the dollar store just for crafting!) or a piece of sandpaper, sand the overlapping edges of the paper off by holding the emery board perpendicular to the star and sanding in downward strokes.
The paper will be cut off and you will end up with perfectly covered stars with perfectly crisp and even edges.
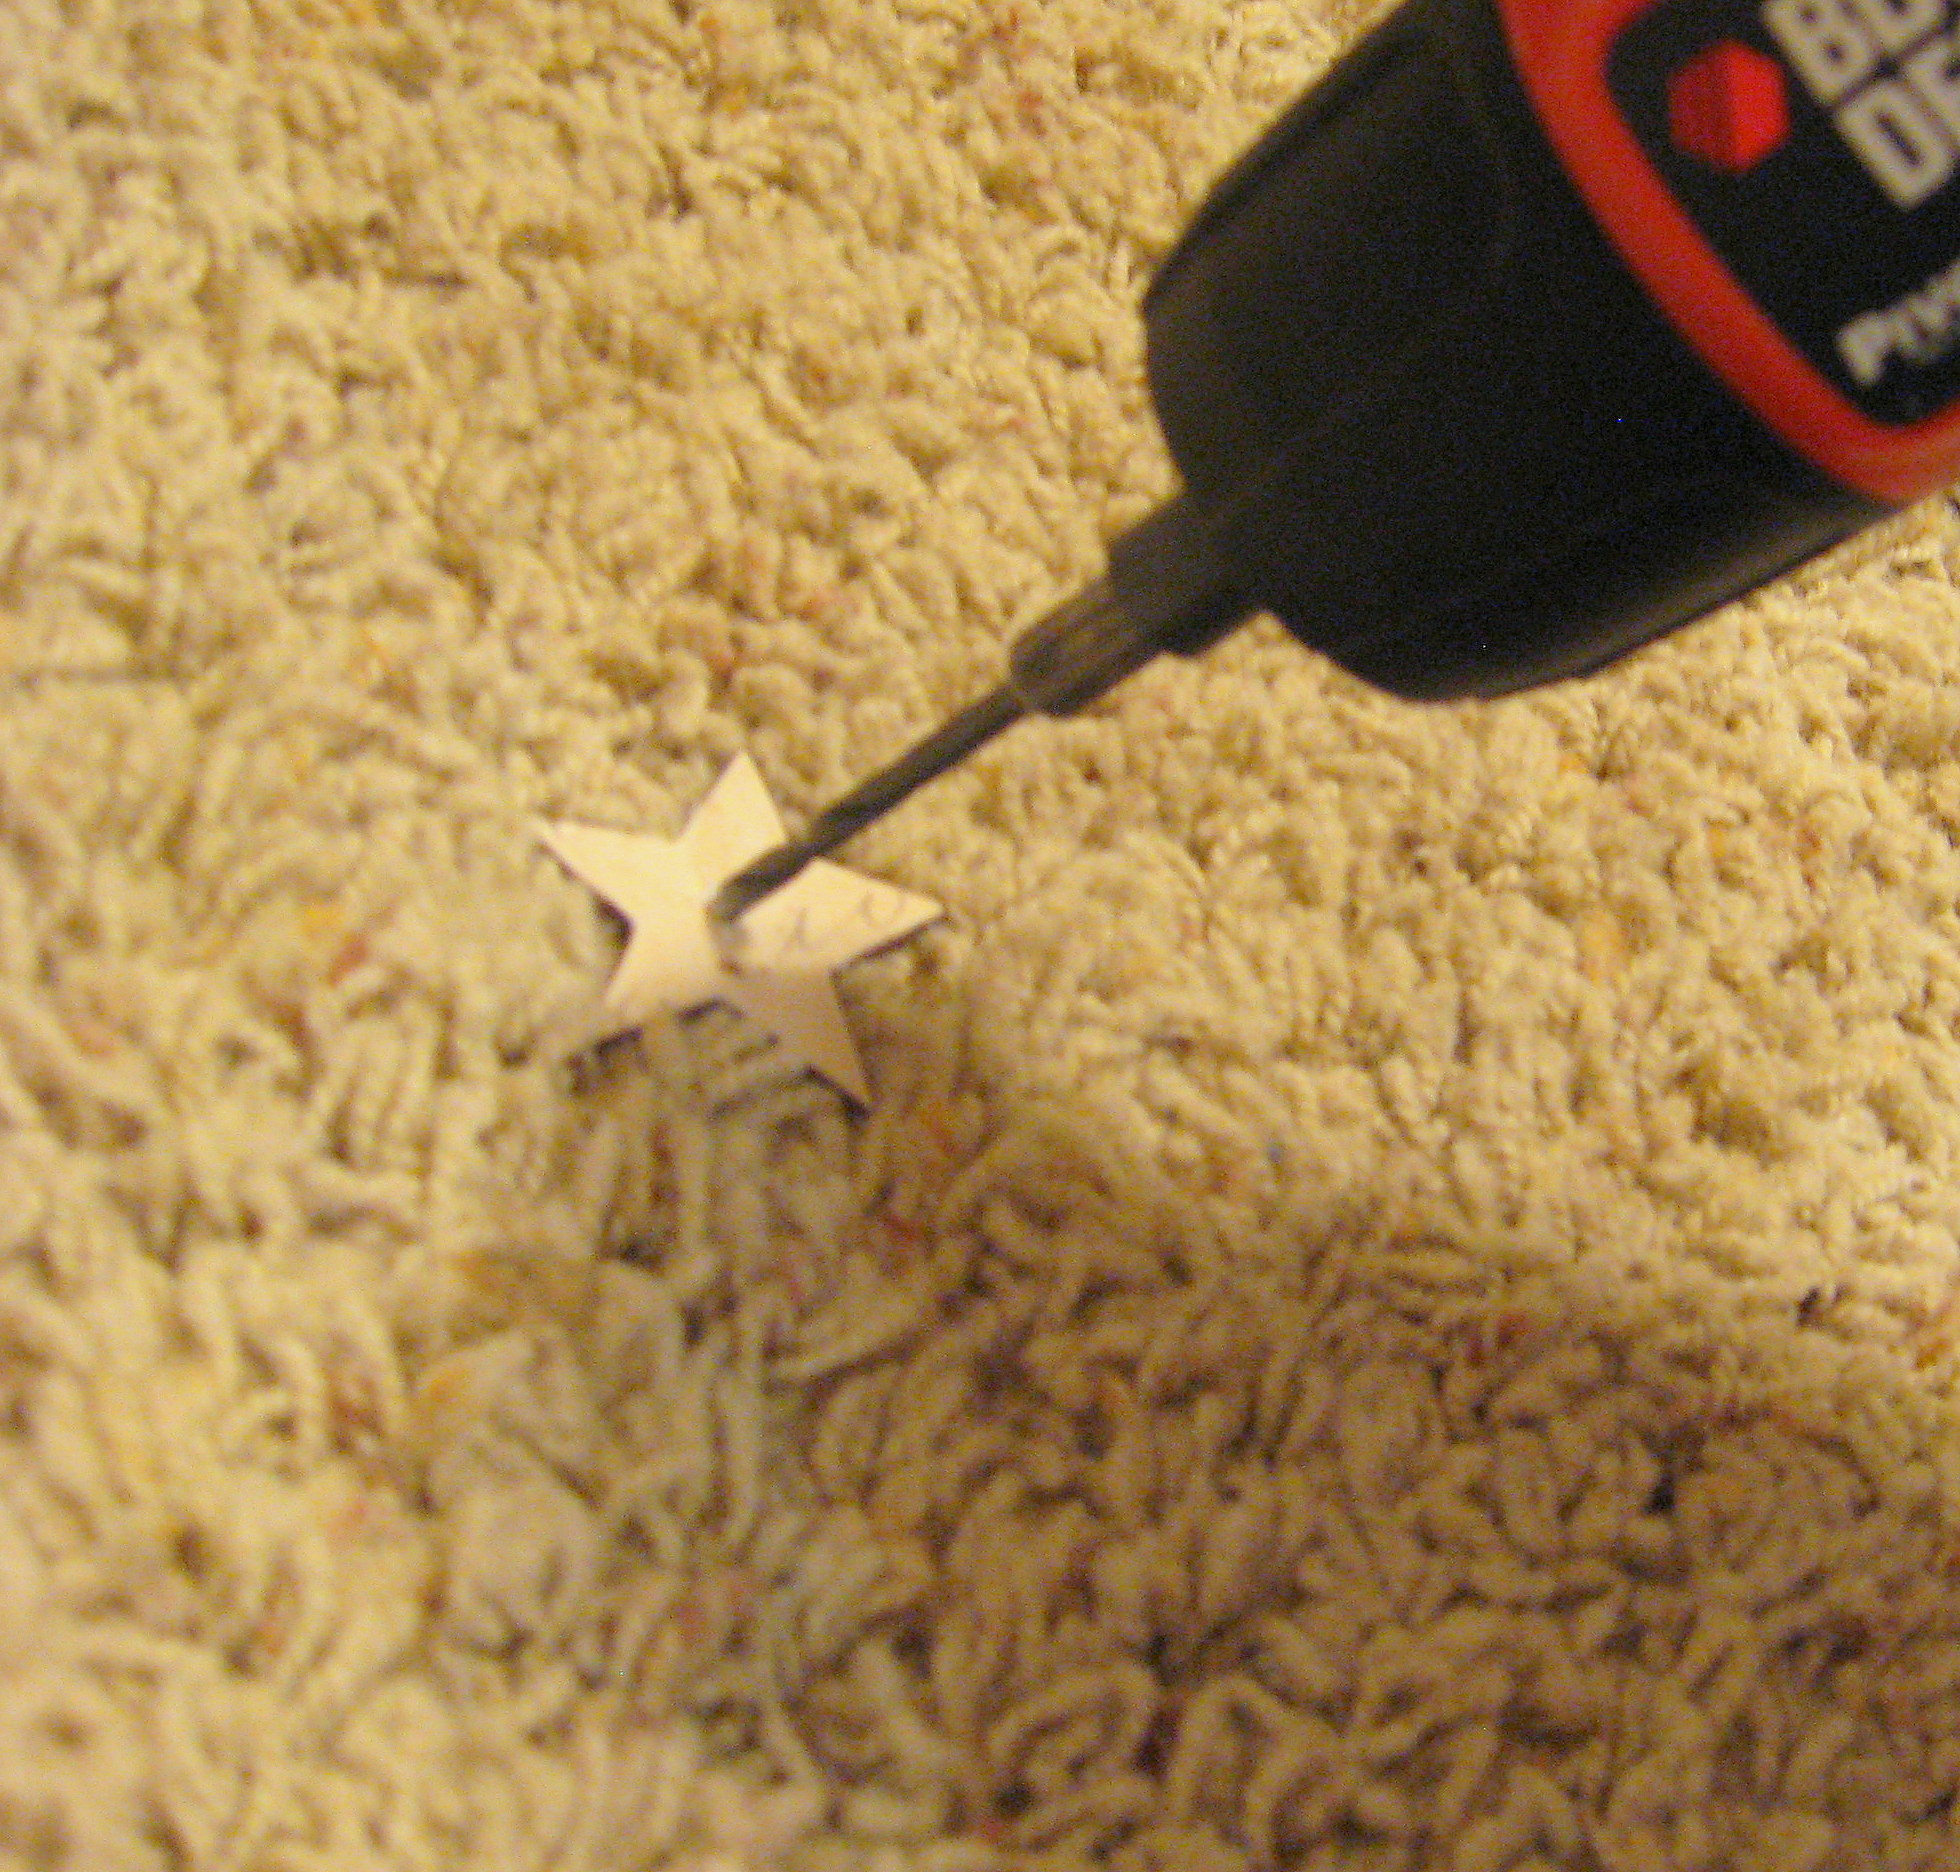
Seal the paper with Mod Podge and let them dry. Once they are dry, drill a hole through the middle of each star. BE CAREFUL! This wood will split easily, so go slow and don’t push too hard or you could break the whole star in half. Mine splintered off a little bit of wood on the back, so I just touched up the paint and it looks just fine.
Cut off a few inches of a heavy wire for each star. Using a pair of needle nose pliers, curl the end, then bend the curled part over about 90*
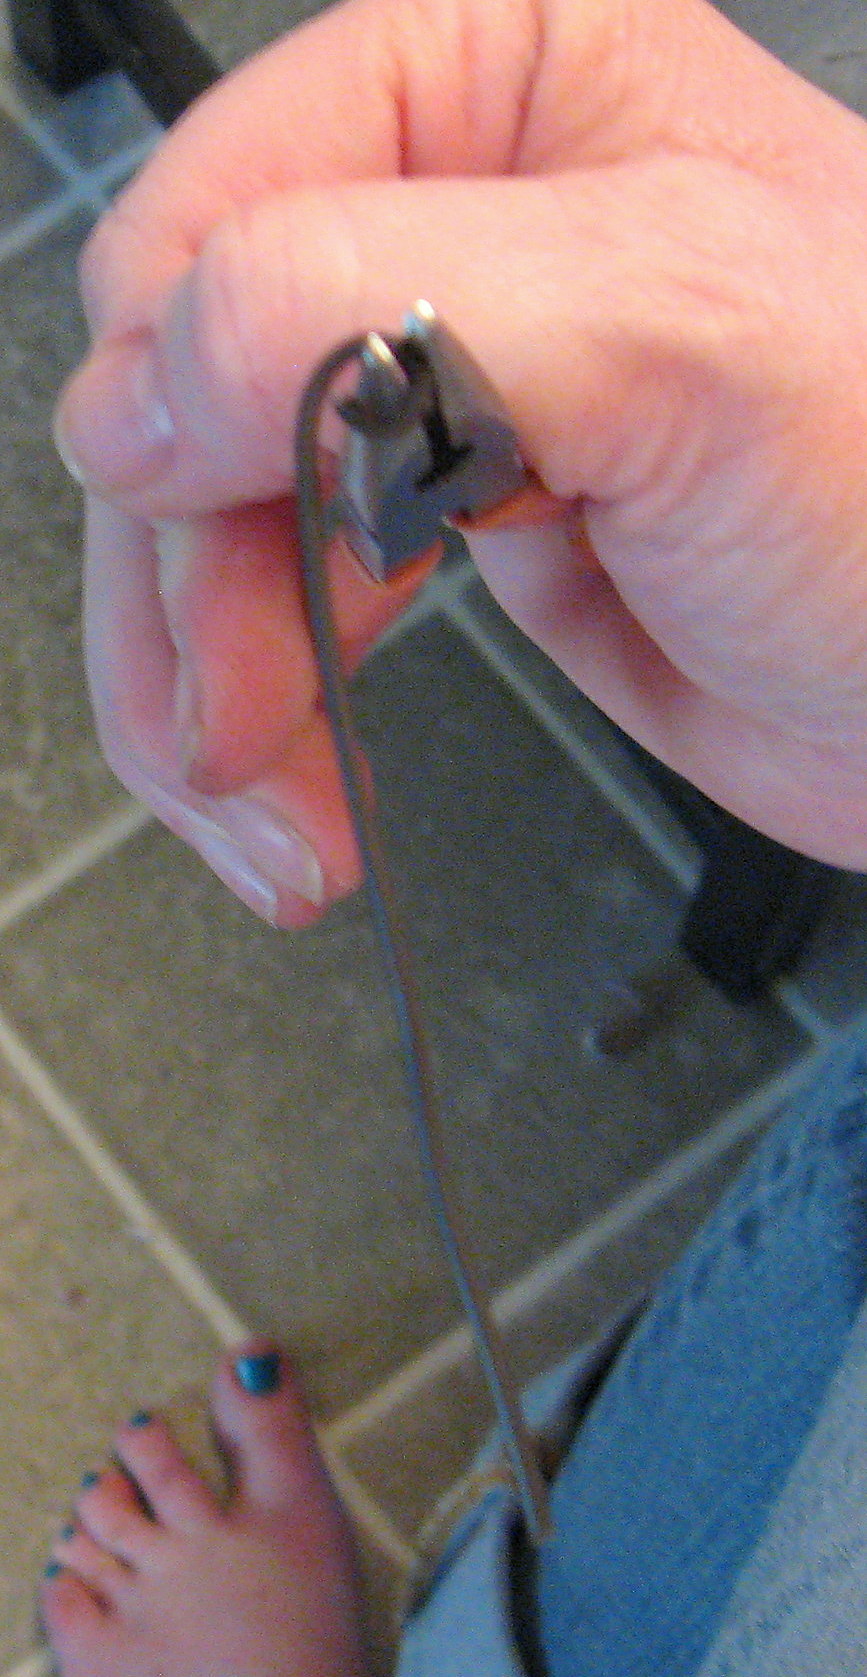
insert the other end through the hole in the star, position it how you want it, and – using the pliers – squeeze the wire together on either side of the star to hold it in place.
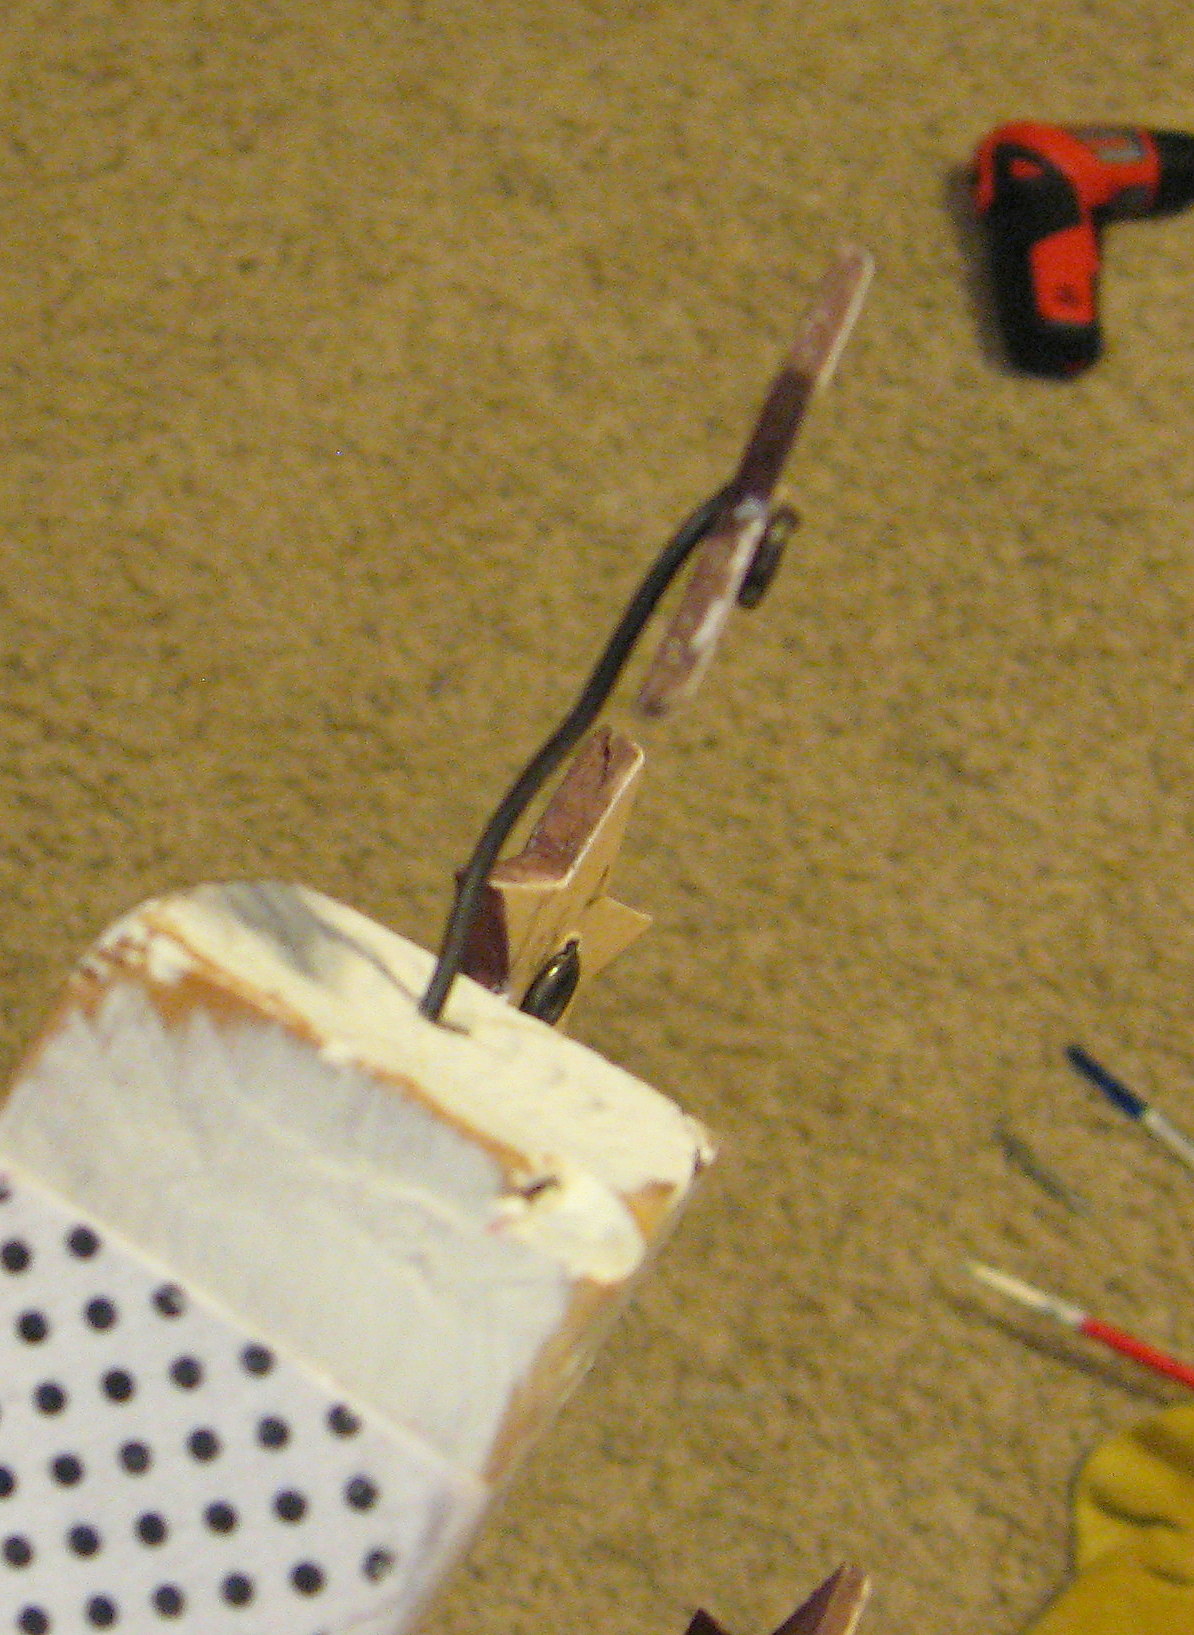
Cut the wire to the desired length, squirt a little glue into the hole you drilled in the stick and insert the finished fuse.
I stacked the three fireworks together and used a little dab of hot glue to hold them together so they wouldn’t shift around during this next step.
Wrap twine around them, leaving a tail, and using a dot of hot glue on the back to hold it in place.
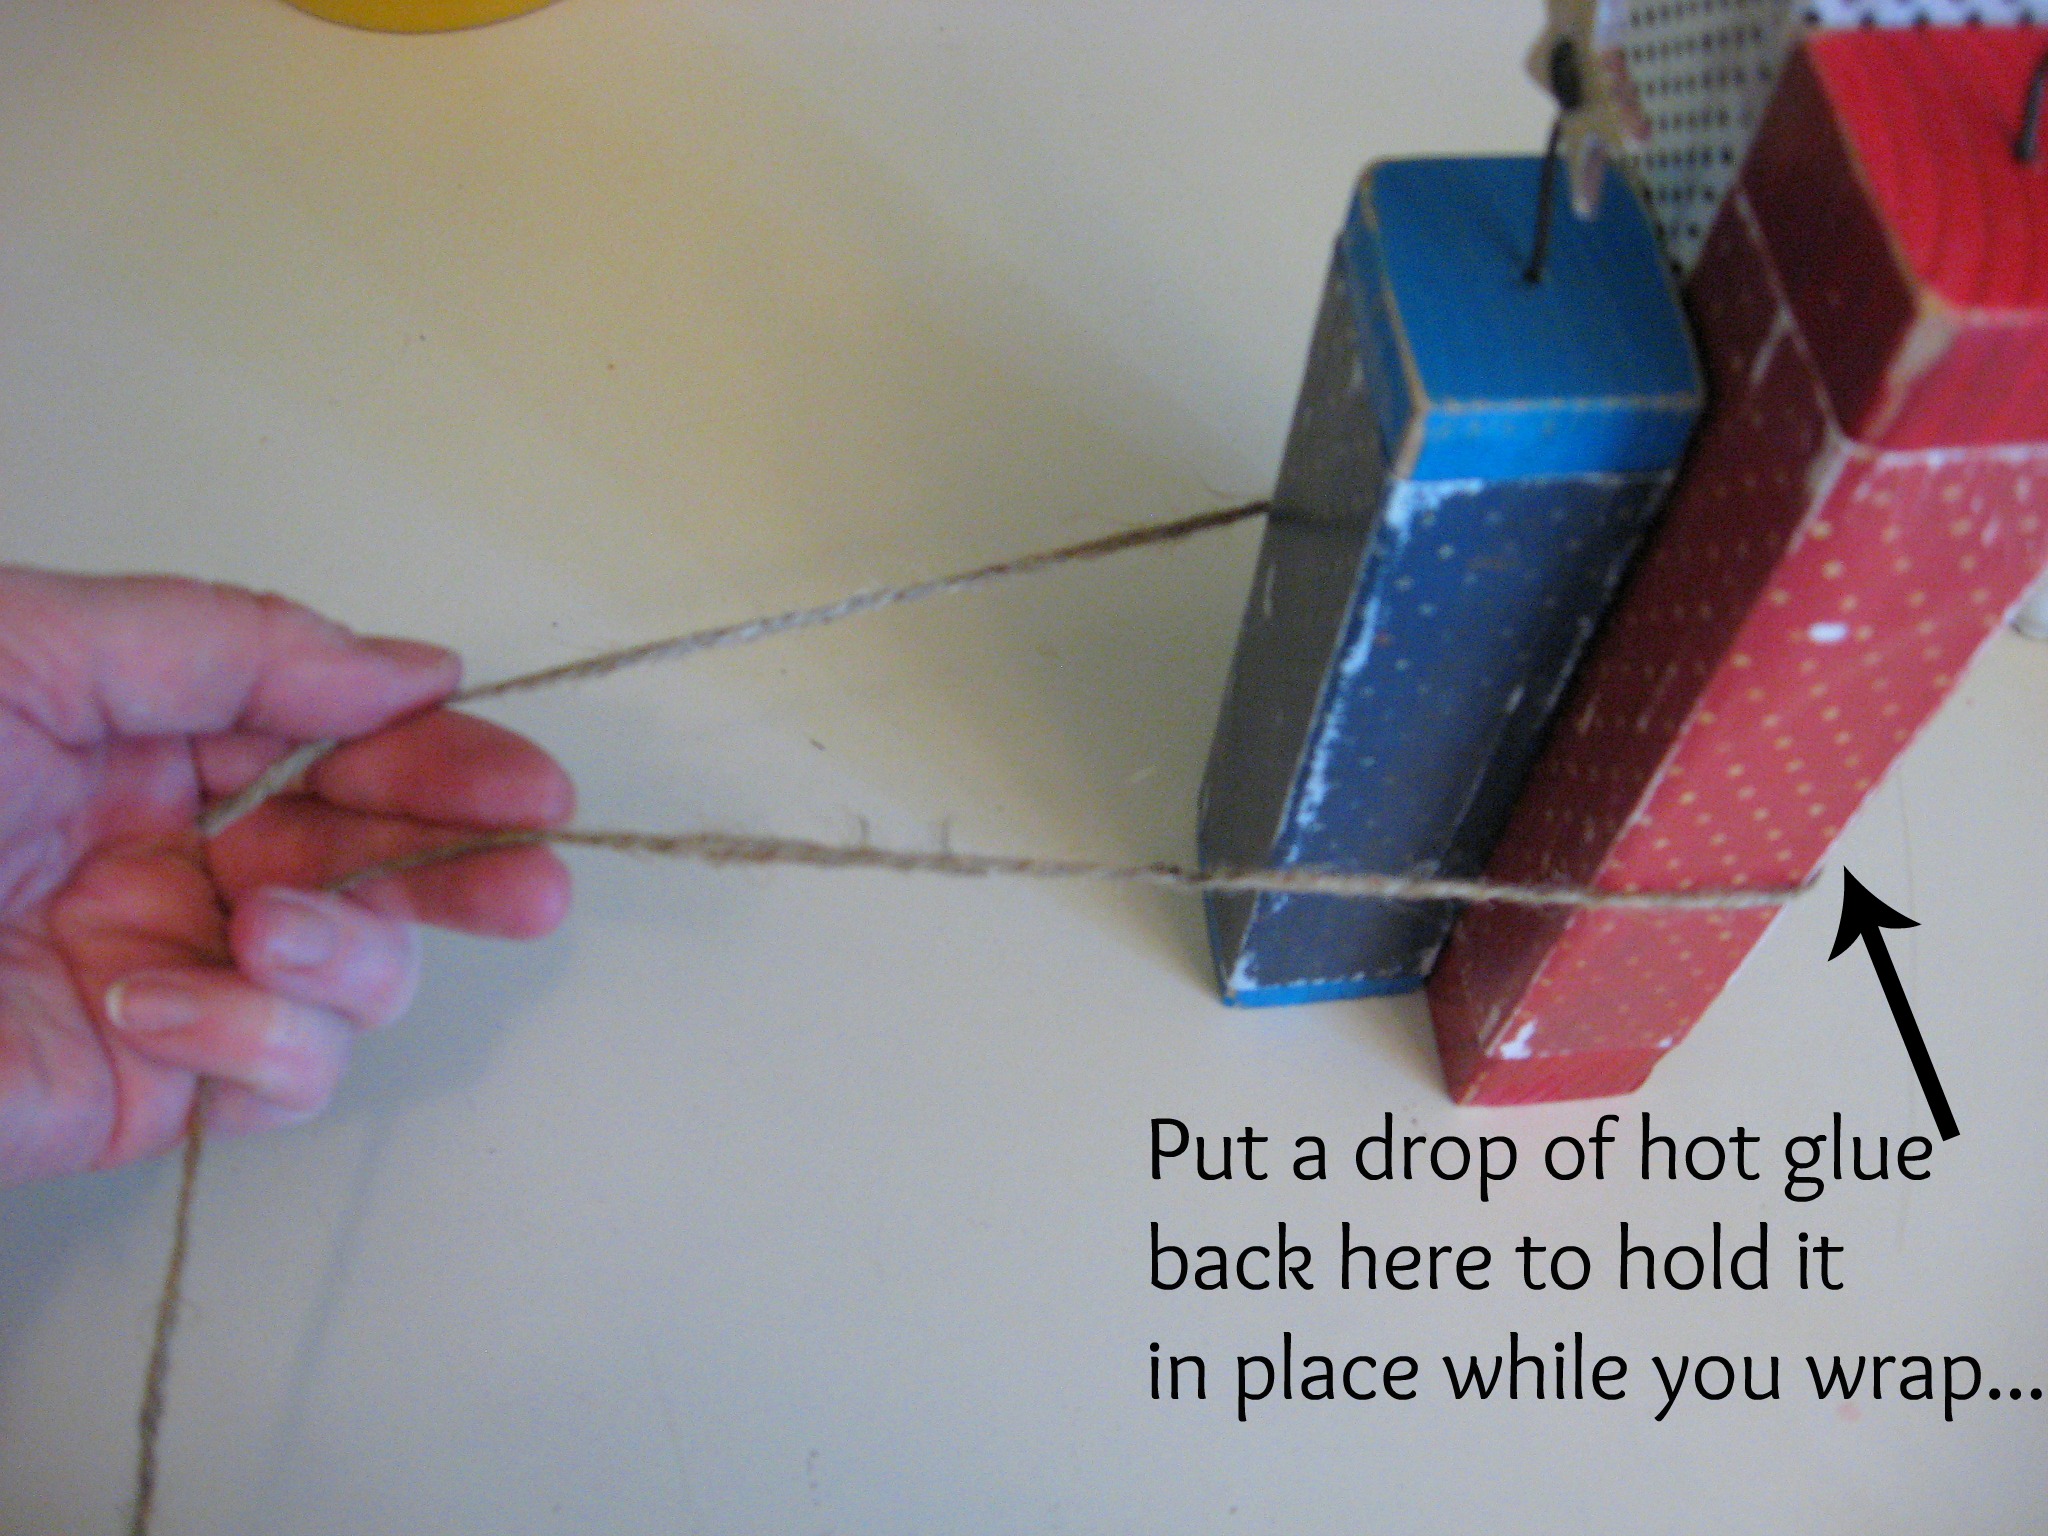
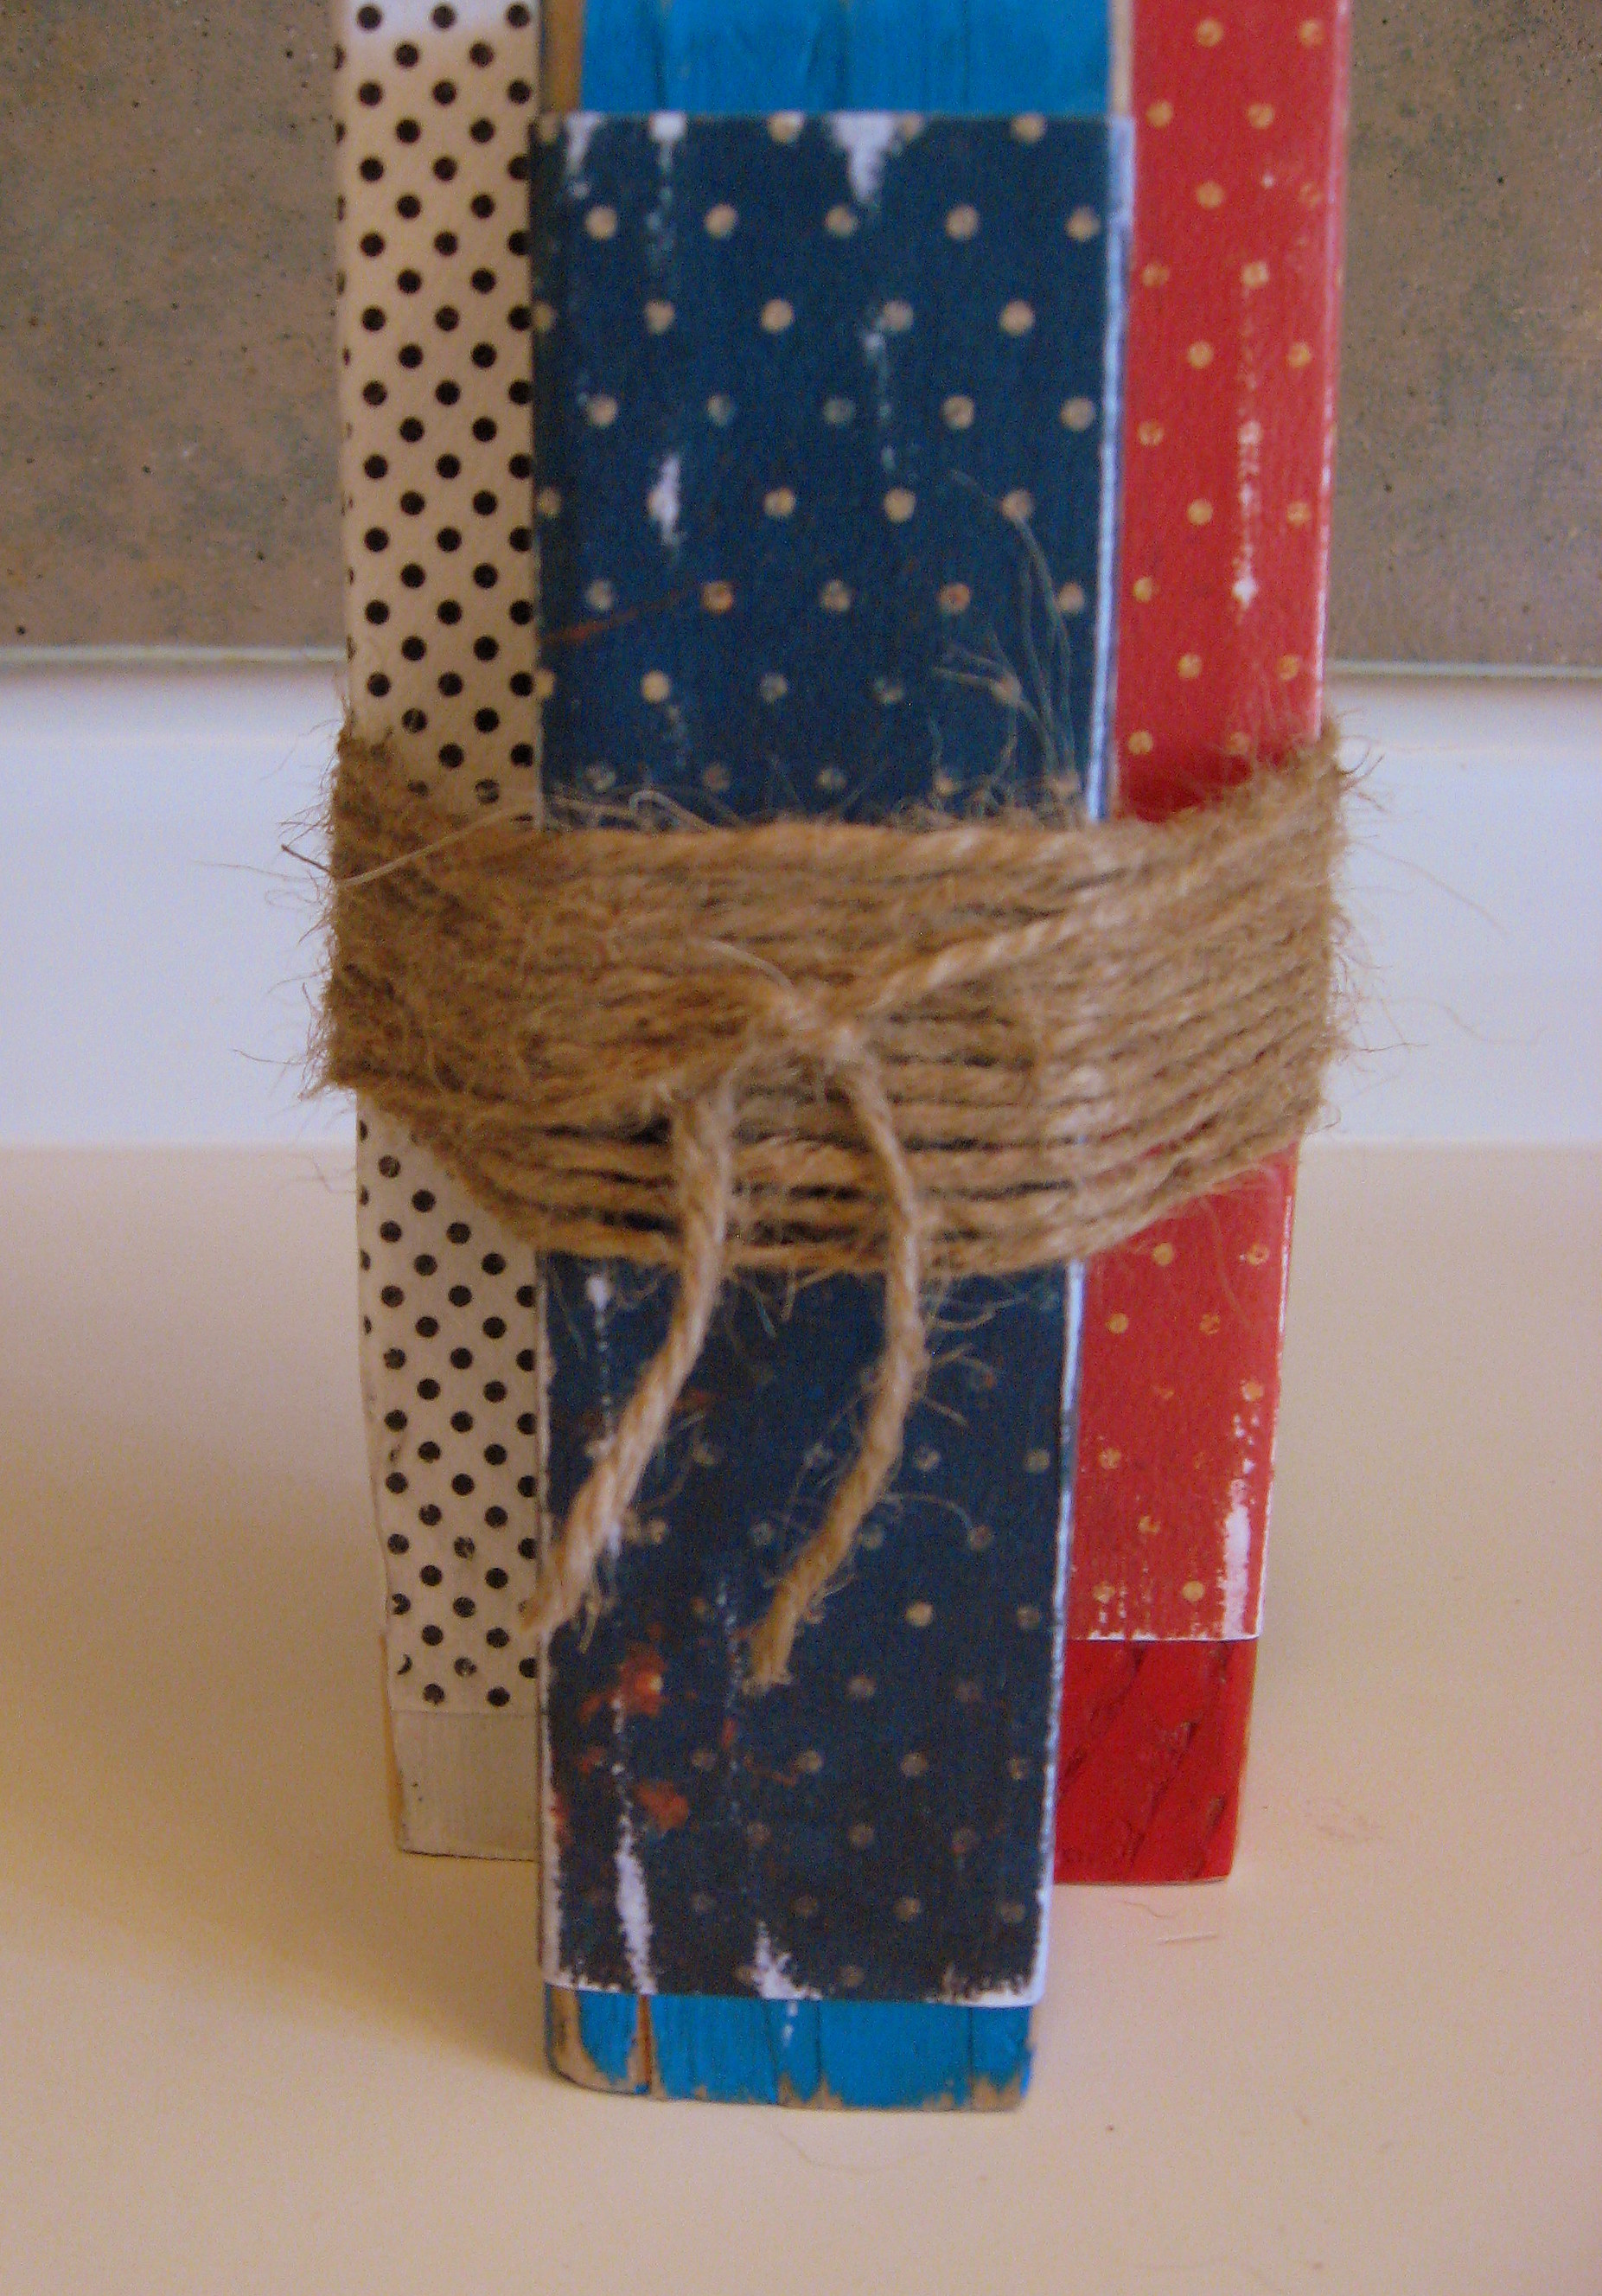
Wrap the other end of the twine around the whole bundle until it looks good, then cut the twine and tie the two ends together like this:
The last sentence is just as hard as the first….ummmm….
TA DA! Finished fireworks!

Burlap Stockings, BACK TO SCHOOL TEES, Essential Oils, Midi Skirts & More!
Such cute stuff today!
 $12.99 | Christmas in July! LOWEST Price ever!!! Personalized Burlap Stockings!!!!
|
 $4.99 | BLOWOUT on BAKERS TWINE
|


More cute stuff available today! Low shipping prices!
A PYP Best Blog! Create an Ombre Painted Dresser!
Just in case you missed this article on creating an ombre painted dresser the first time we shared it a couple of years ago, we are republishing it. After Sharon wrote this blog originally, we got an awesome response. This is one of the PYP Best Blogs!
I’m not usually one for following what is trendy in my home decor, but I do love the ombre look. Even if you don’t know the word, I’m sure you’ve seen it around; it refers to a gradation of color and can be spotted everywhere – from ombre home decor:

to ombre clothing:

to ombre hair:

and I love it!
If you want to add this ombre trend to your home, it is a pretty easy technique to produce a big wow factor.
I started with the dresser that’s been in my daughter’s room. I didn’t get a picture of it before I took the drawers out (what is with me and before pictures!?!) but it is your basic inexpensive laminate furniture store dresser.

Start by taking the drawers out and removing all the knobs. I stick the screw part of the knob through a box like this to hold them while they dry.
 Give everything two smooth coats of a good gripping primer (if you’re unfamiliar with painting laminate furniture, read this post first.) and let it dry. I chose for this project to paint the body of the cabinet white, so I did that next and set it aside to dry while I worked on the drawers.
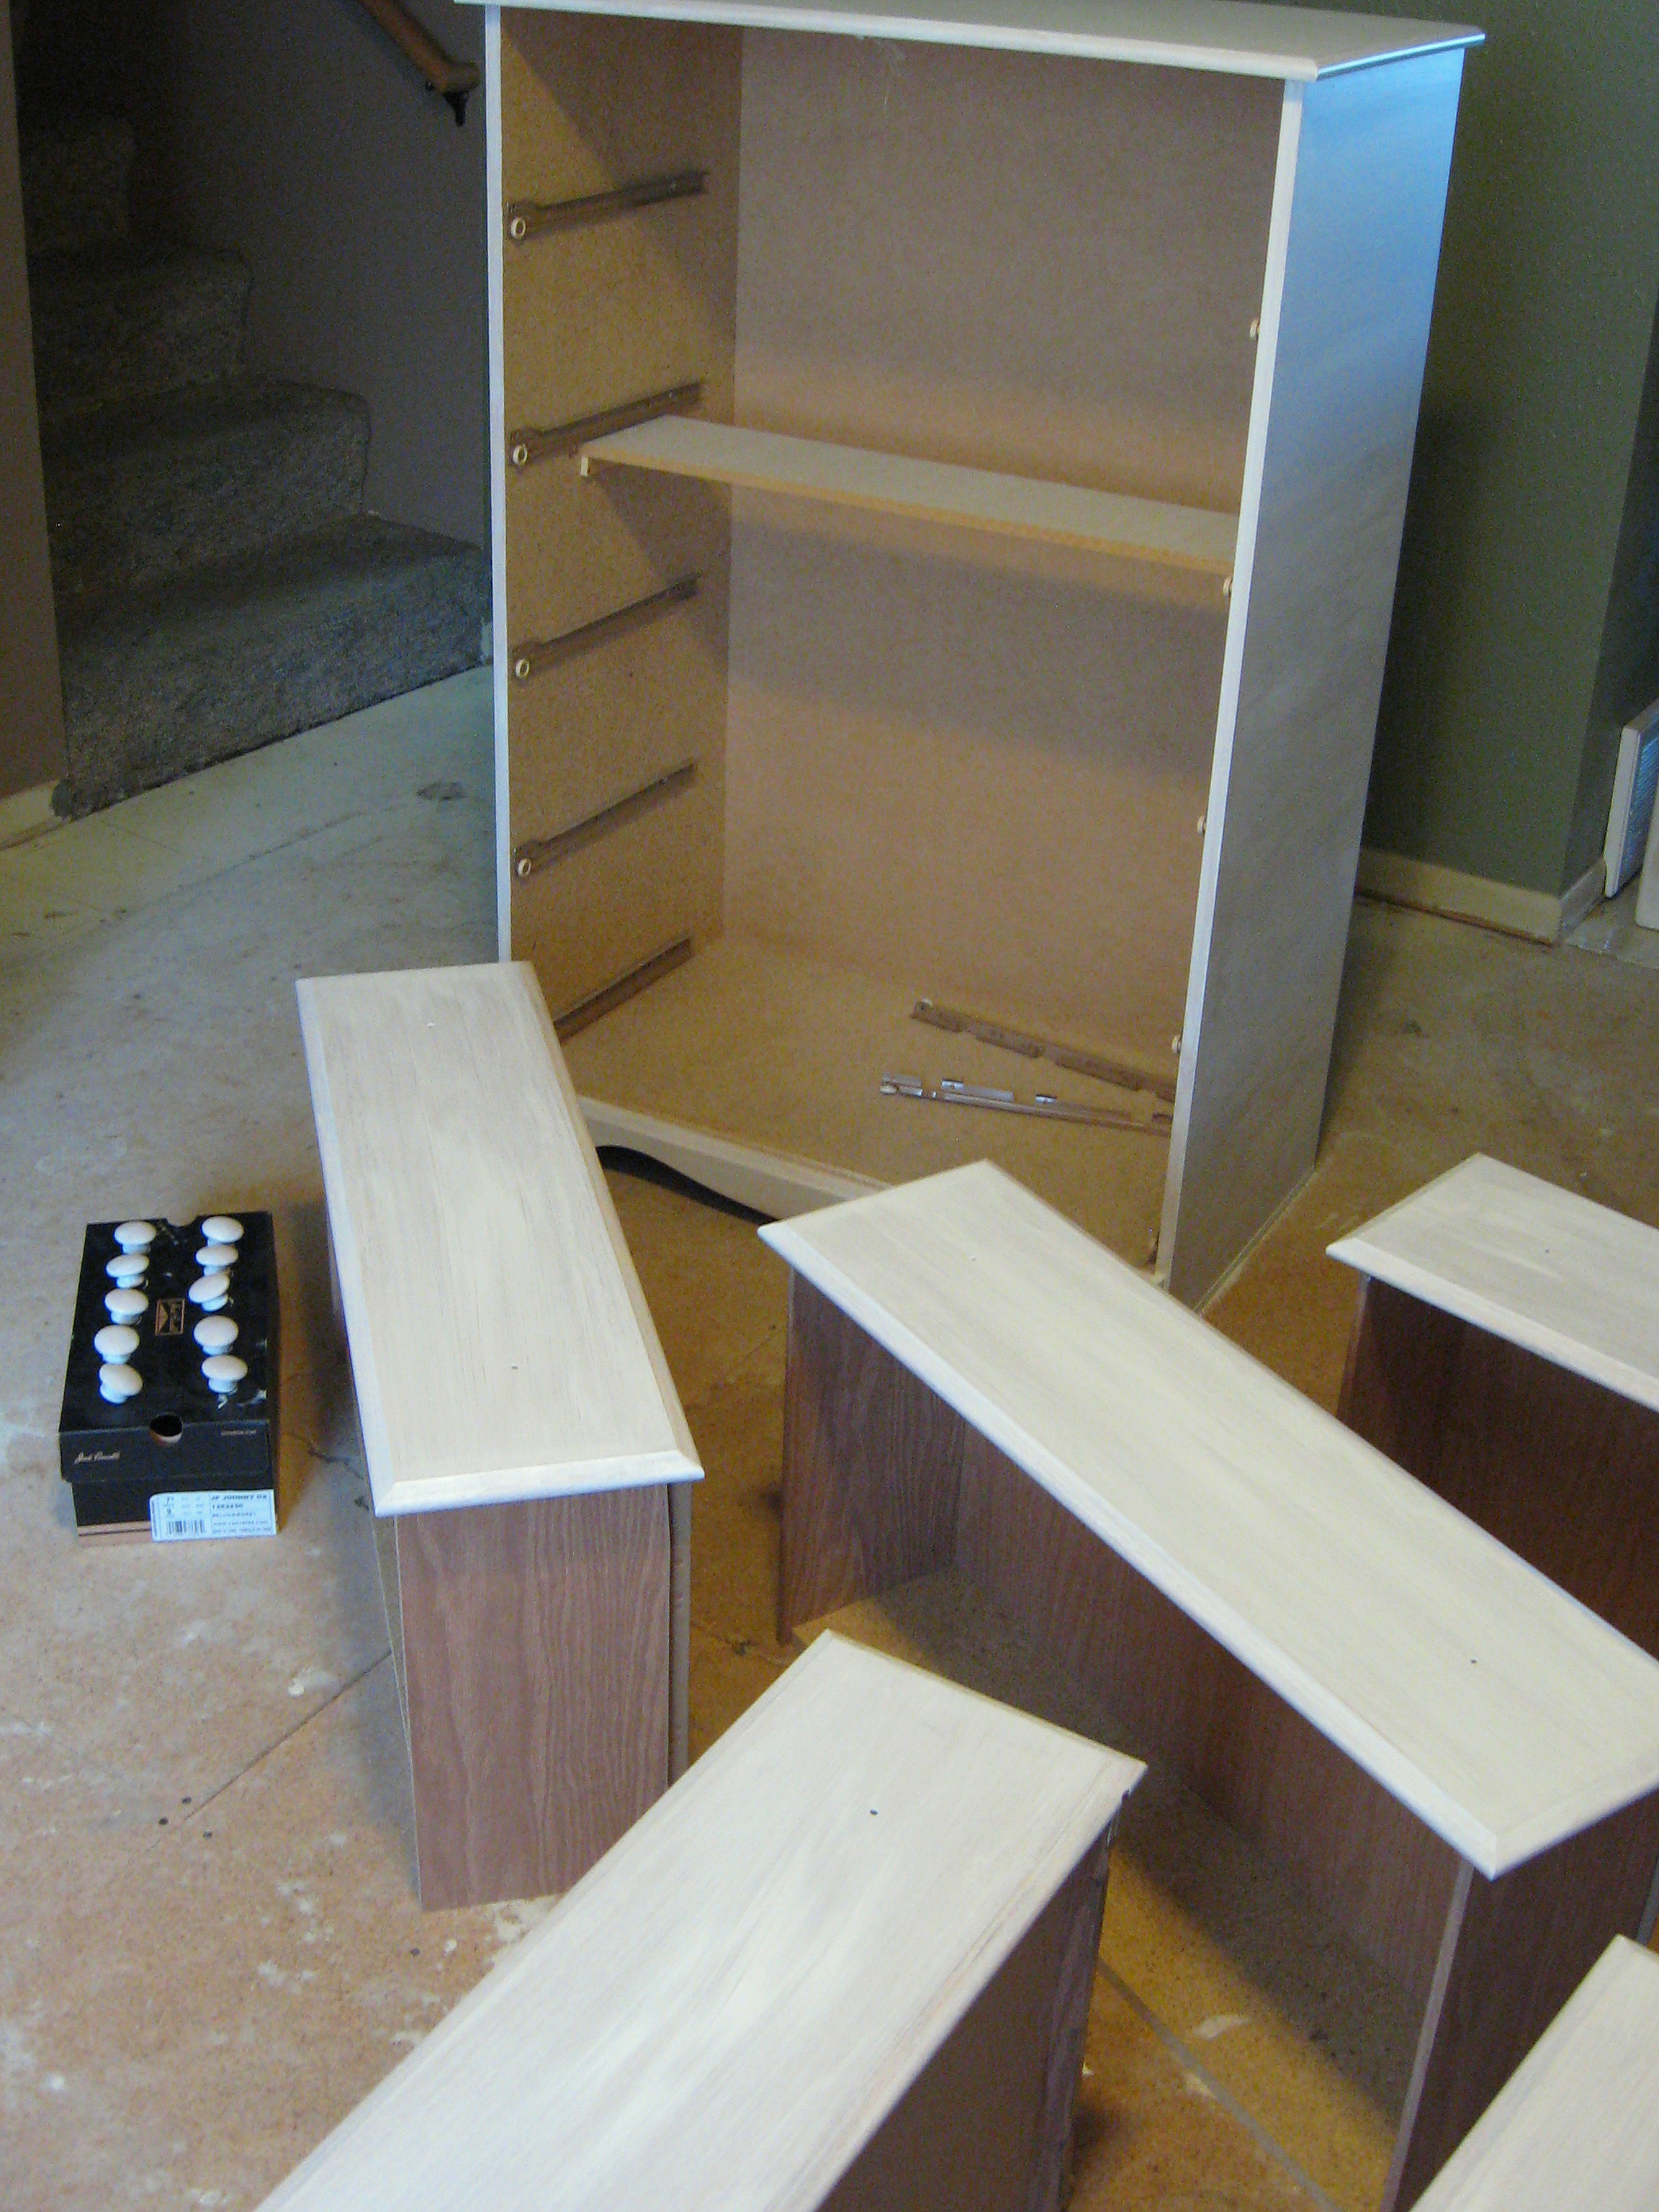
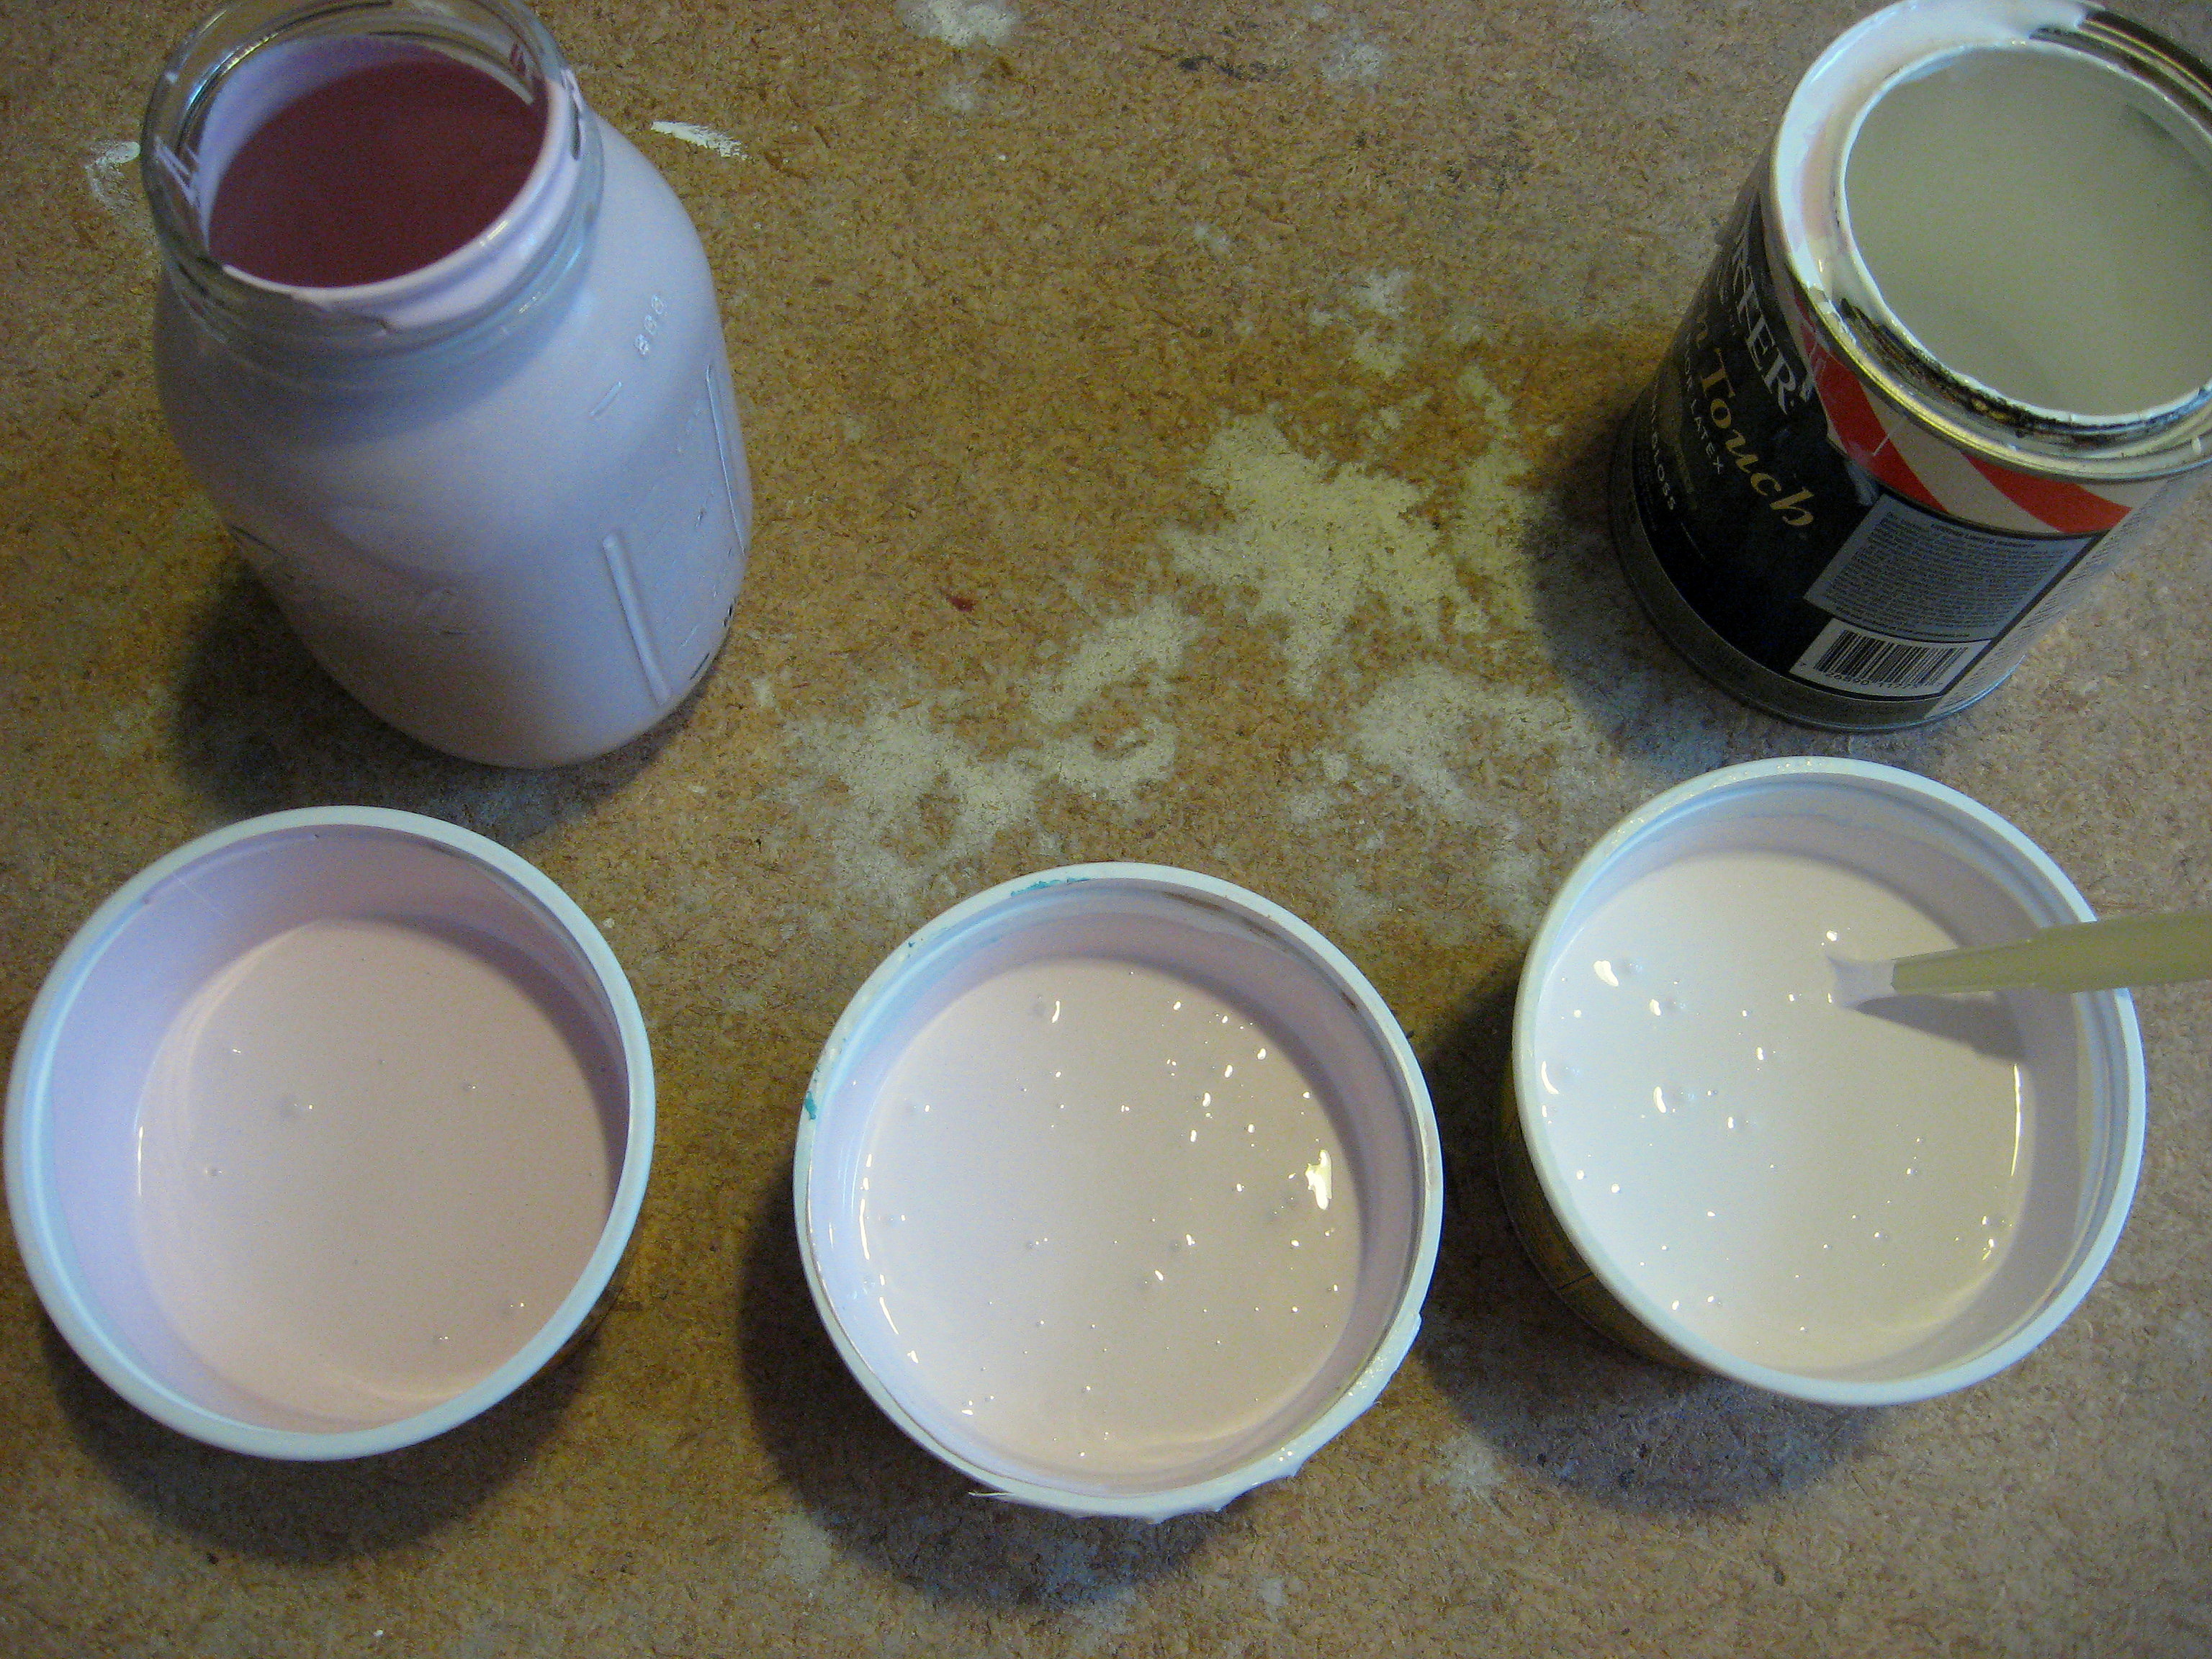
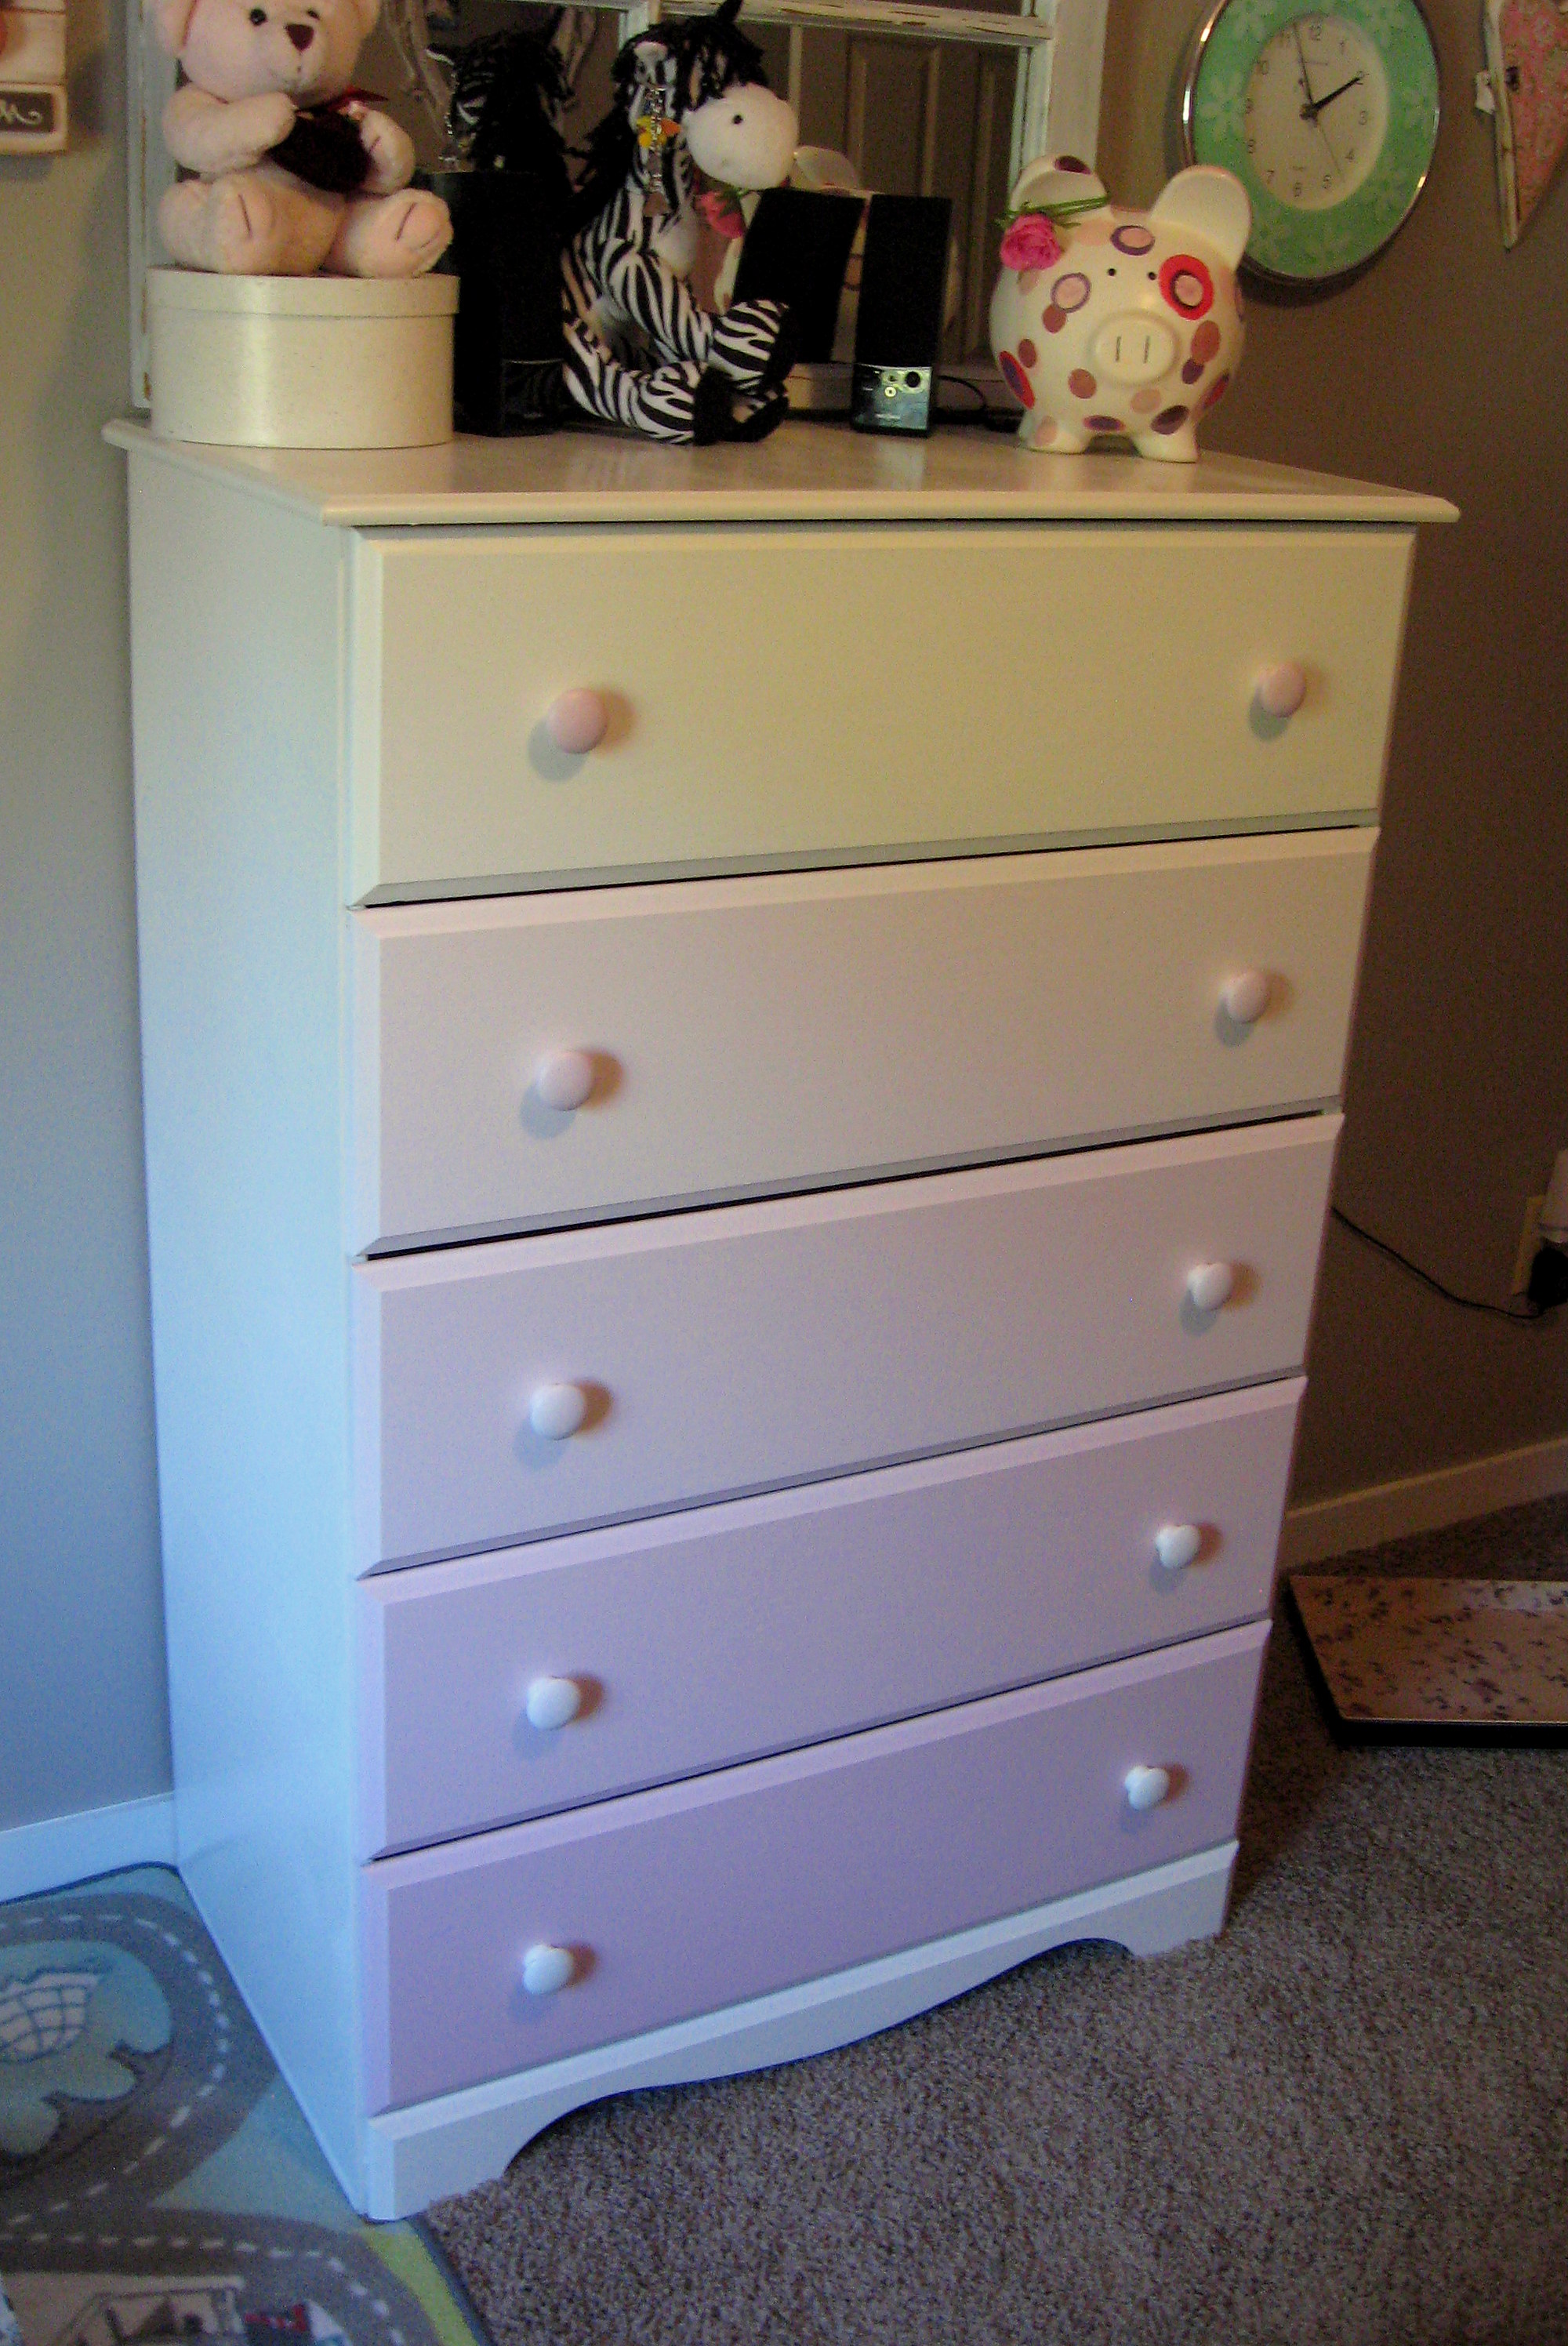
First up, mixing the paint for the ombre effect. This dresser has 5 drawers, so I needed 5 different colors. I started with the top drawer being white and the bottom drawer being the same color of pink that I painted her bedroom ceiling.
I poured an equal amount of pink and white into one container (the middle one), then about the same amount of paint into another container, but this time more pink than white (the lefthand one) and then the same thing in reverse in a third container – more white than pink (the righthand one).
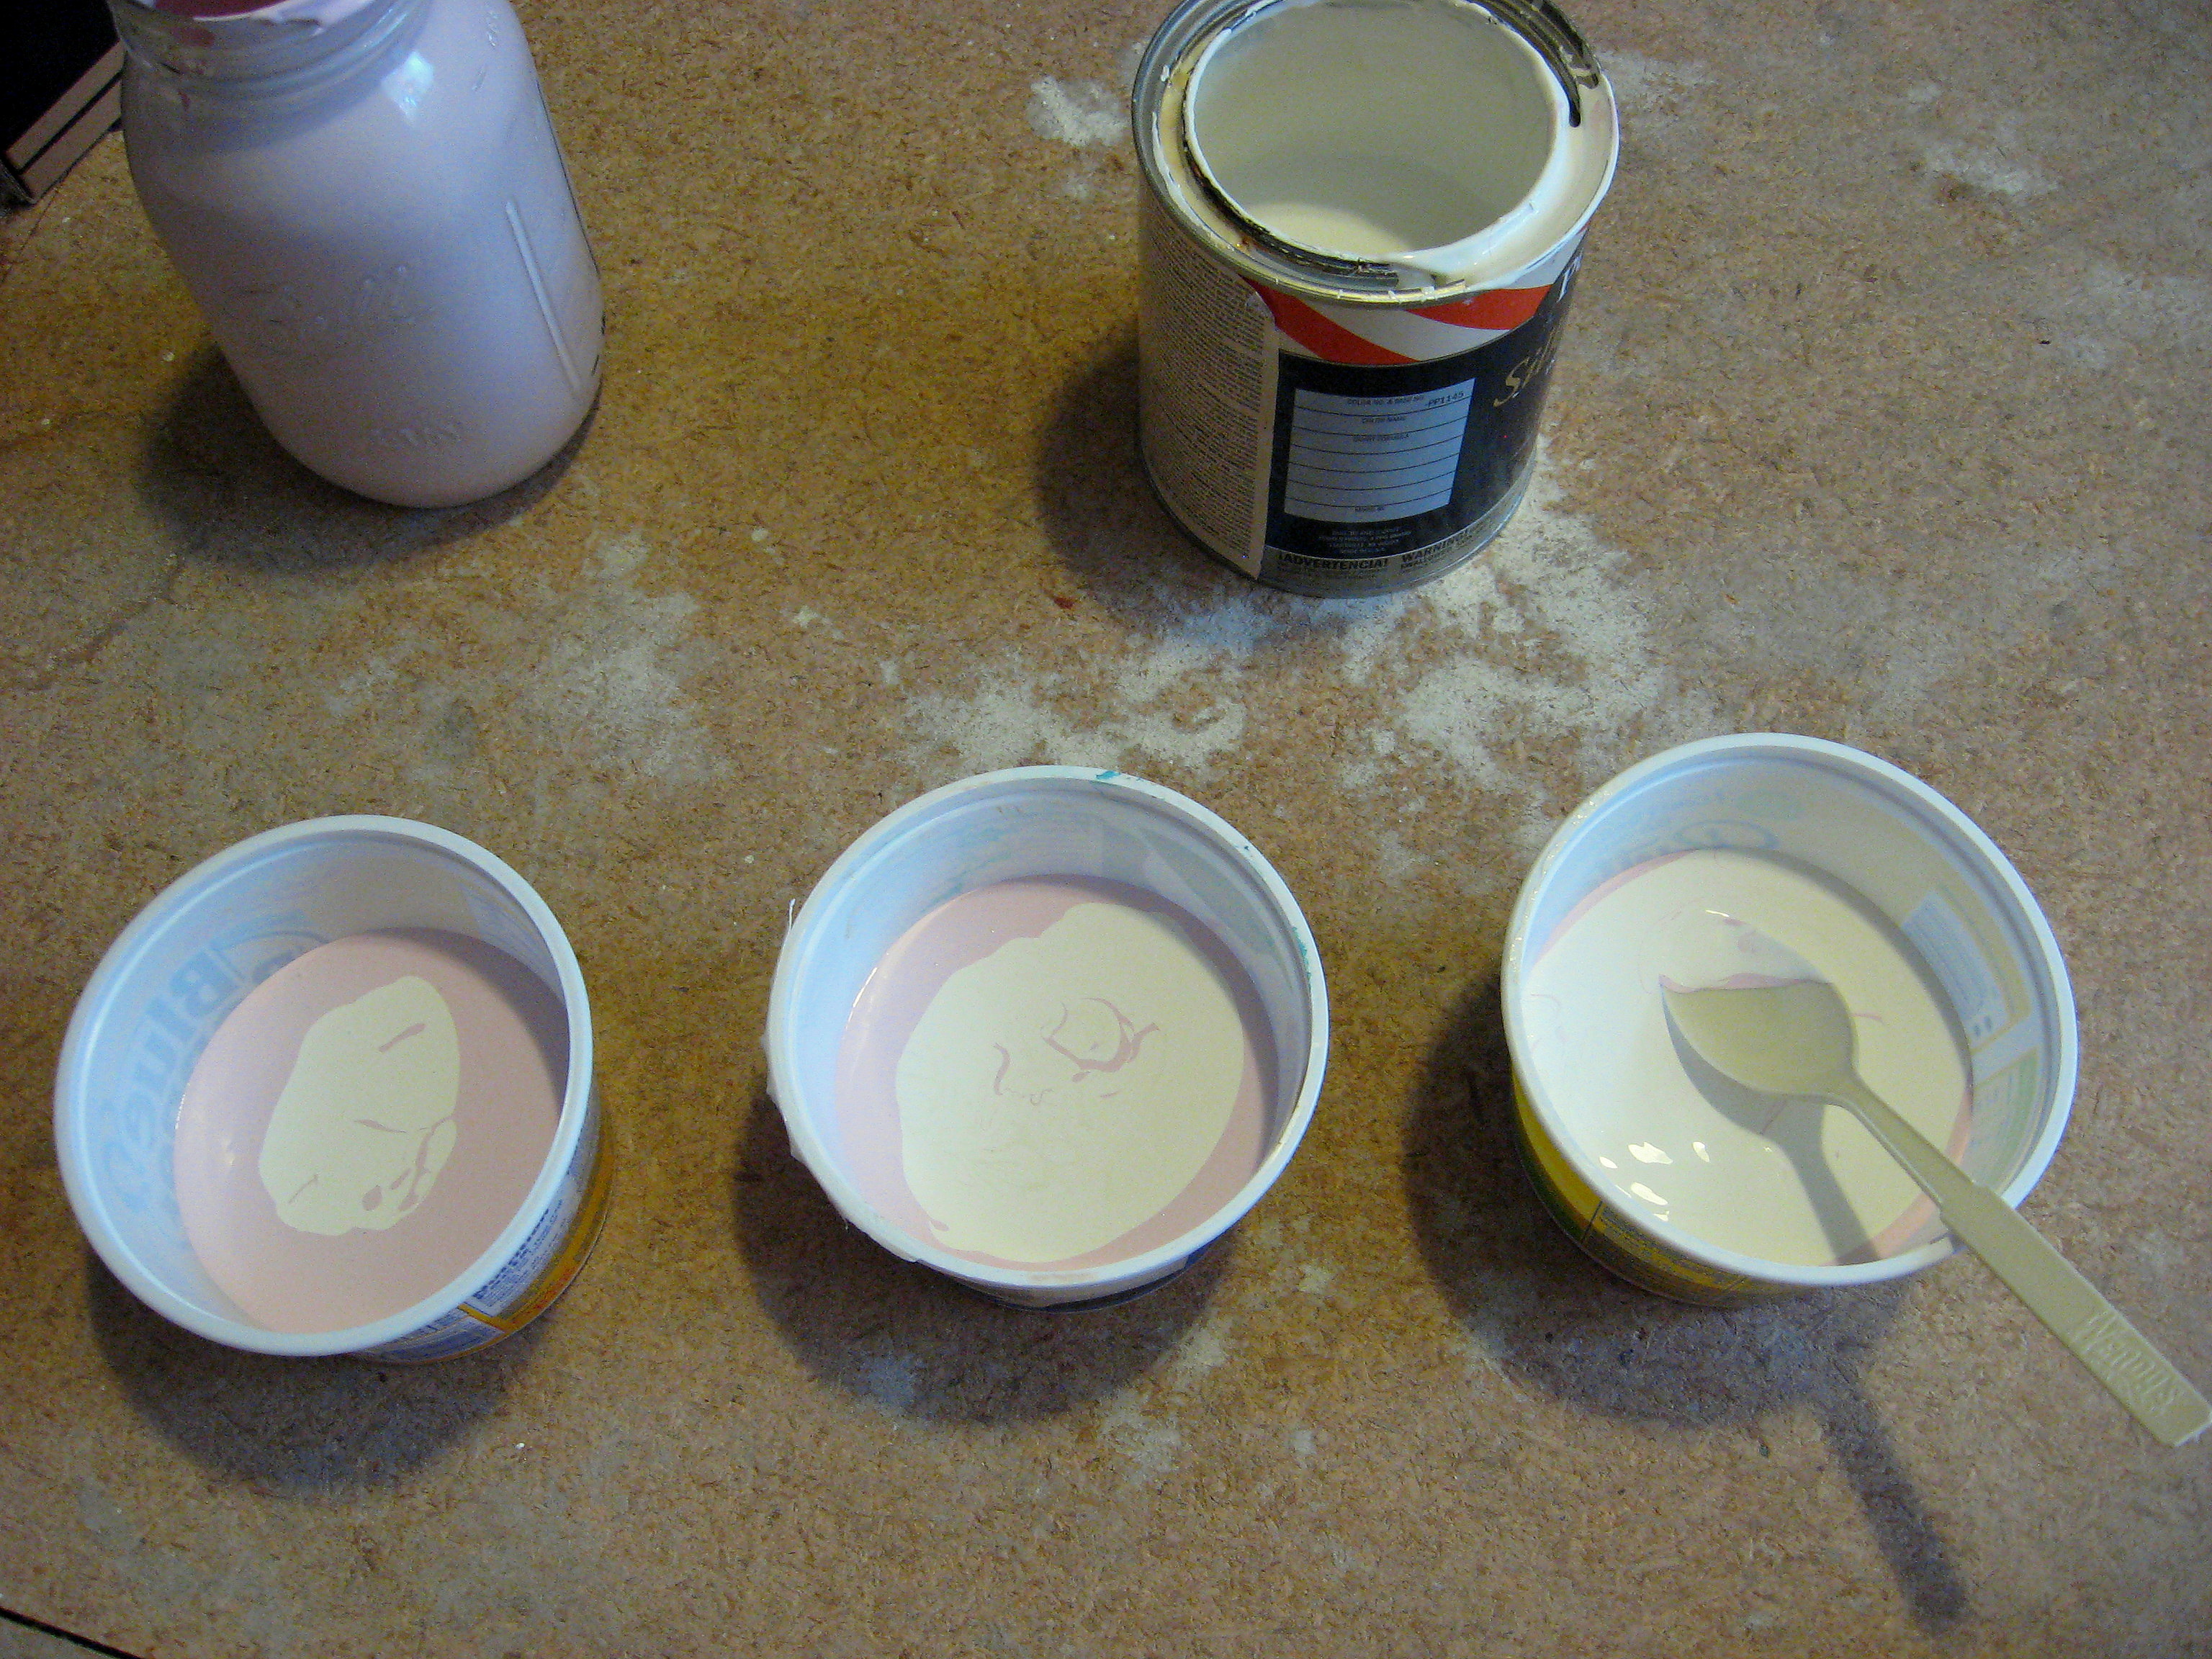
Mix them all well and line them up with the plain pink and plain white to see if you like the color values. Add more pink and/or white as needed to achieve the color gradation you are happy with.
Don’t forget about the knobs! This is the world’s worst picture to show what I actually did – sorry – but I painted each set of 2 knobs one of the five colors.
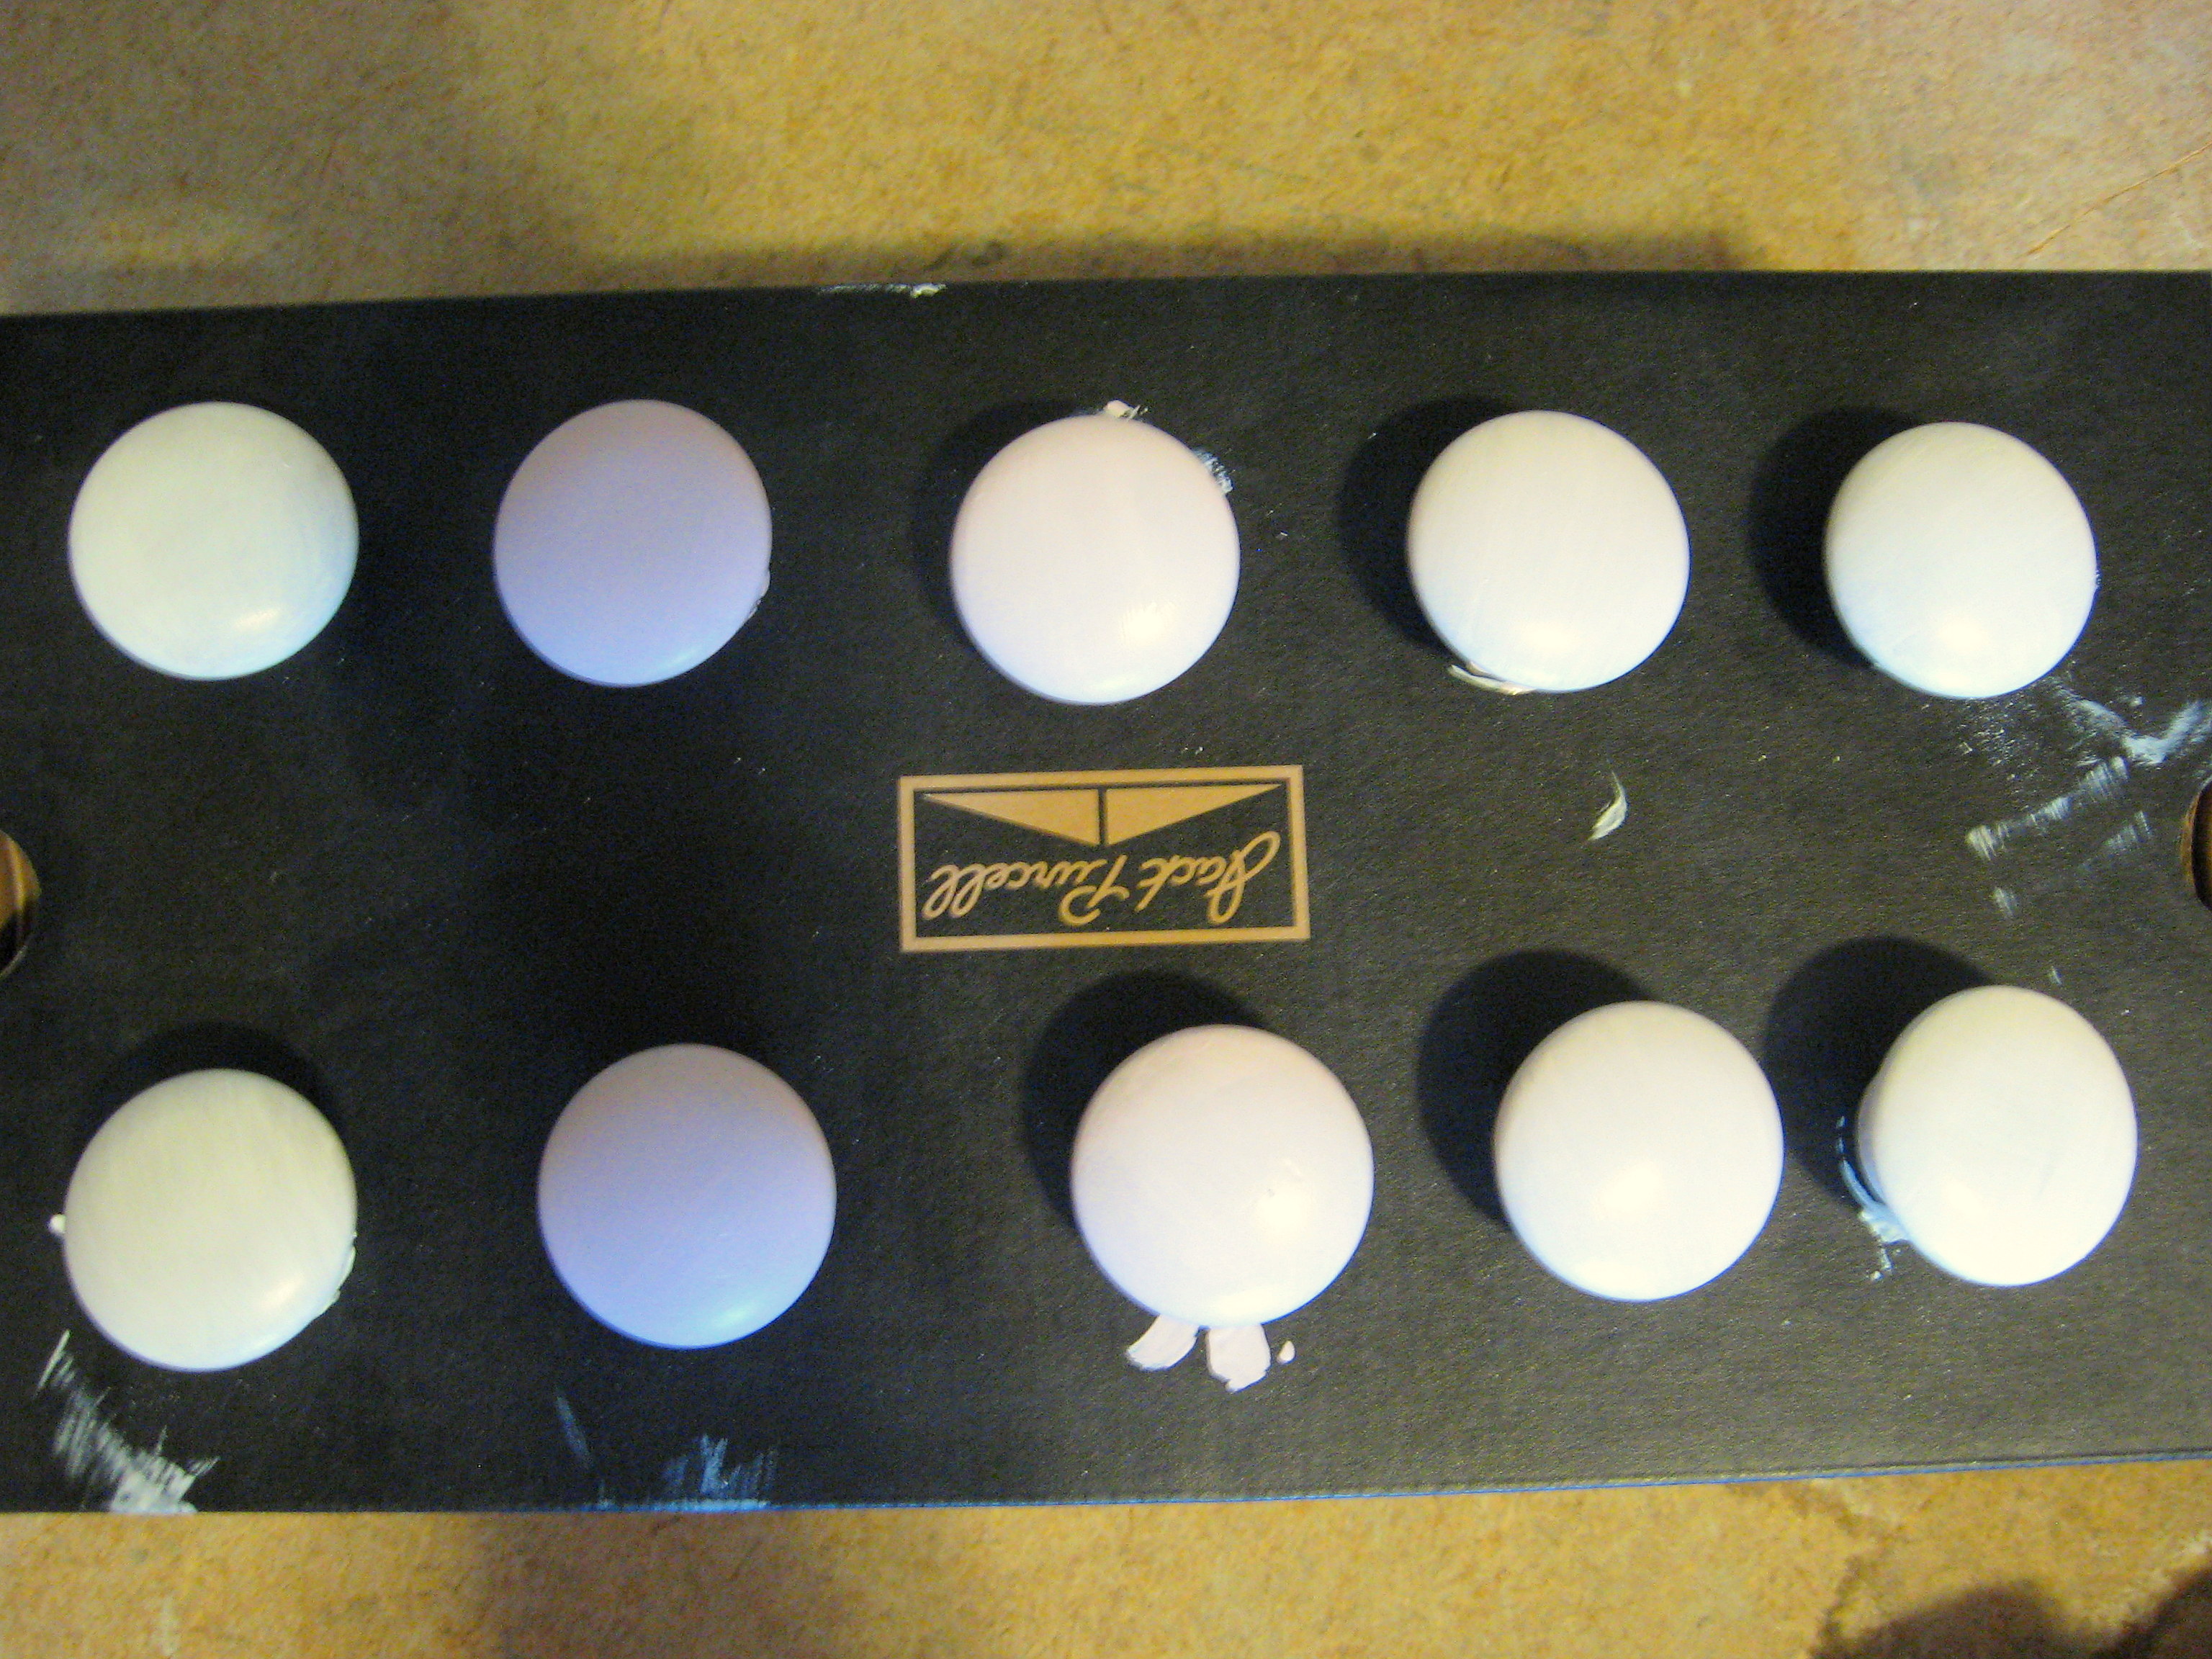
Once everything has received 2 coats and is very dry (wait at least overnight – the longer you let this cure the sturdier the paint will be!) reassemble the drawers. I reversed the knobs, so that the darkest pink ones are on the white drawer and vice versa.
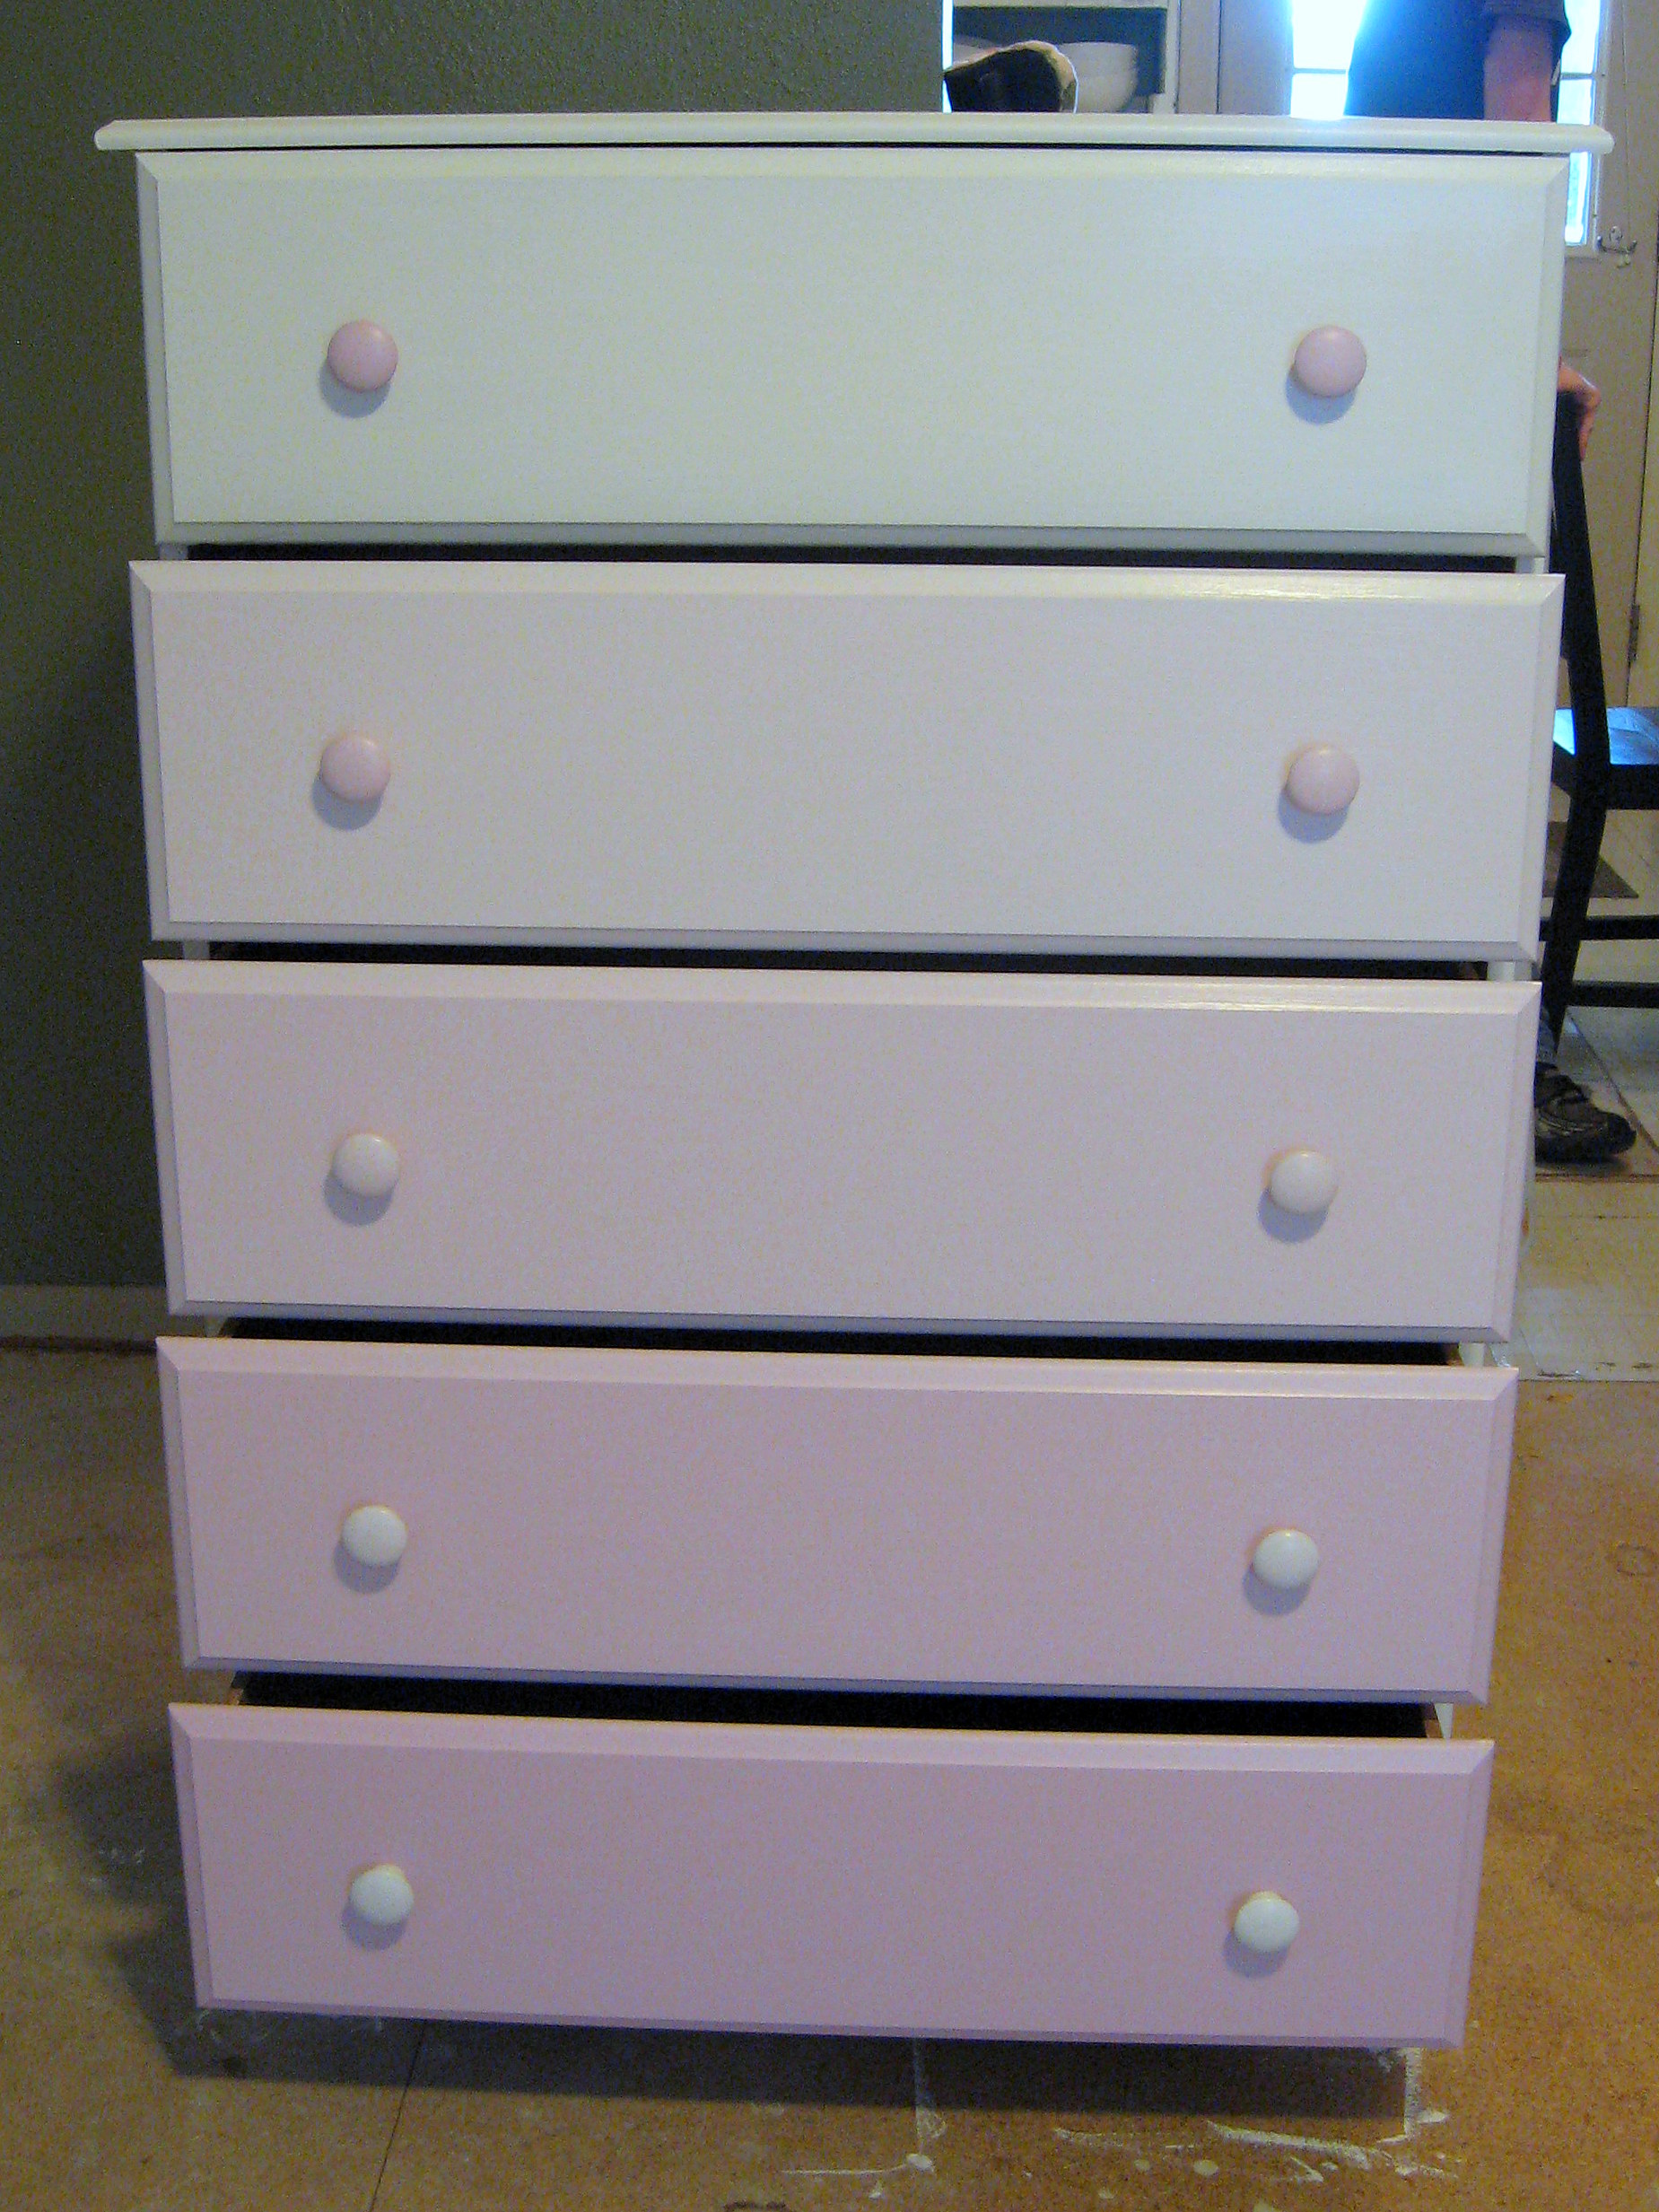
Love how this ombre turned out, and not any harder than just painting it plain!
A PYP Best Blog! Making a Polymer Bouncing Ball!
Just in case you missed this article on making a polymer bouncing ball the first time we shared it a couple of years ago, we are republishing it. After Sharon wrote this blog originally, we got an awesome response. This is one of the PYP Best Blogs!
 I saw “recipes” all over Pinterest last summer for making your own bouncing ball. Since I have a daughter who is OBSESSED with them, I thought it would be a fun activity, and even went so far as to buy the ingredients – which then sat on my counter until now. I never really got around to reading the instructions and assumed that it would be complicated. Finally, I got tired of the stuff being in my way and made a few of them this afternoon.
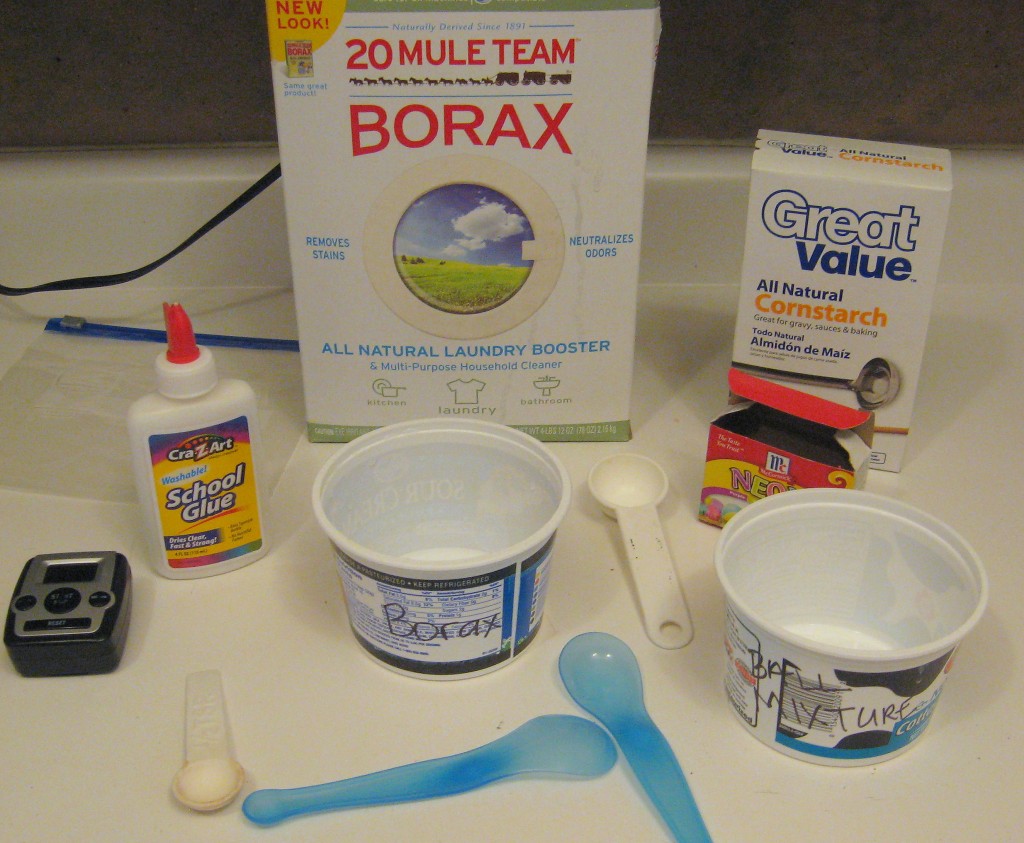
I used the recipe on this site:
https://chemistry.about.com/od/demonstrationsexperiments/ss/bounceball.htm
Here is what we thought:
- It was certainly NOT complicated. It was super easy and only took a few minutes to make. It probably took longer to read through the recipe than it did to make it.
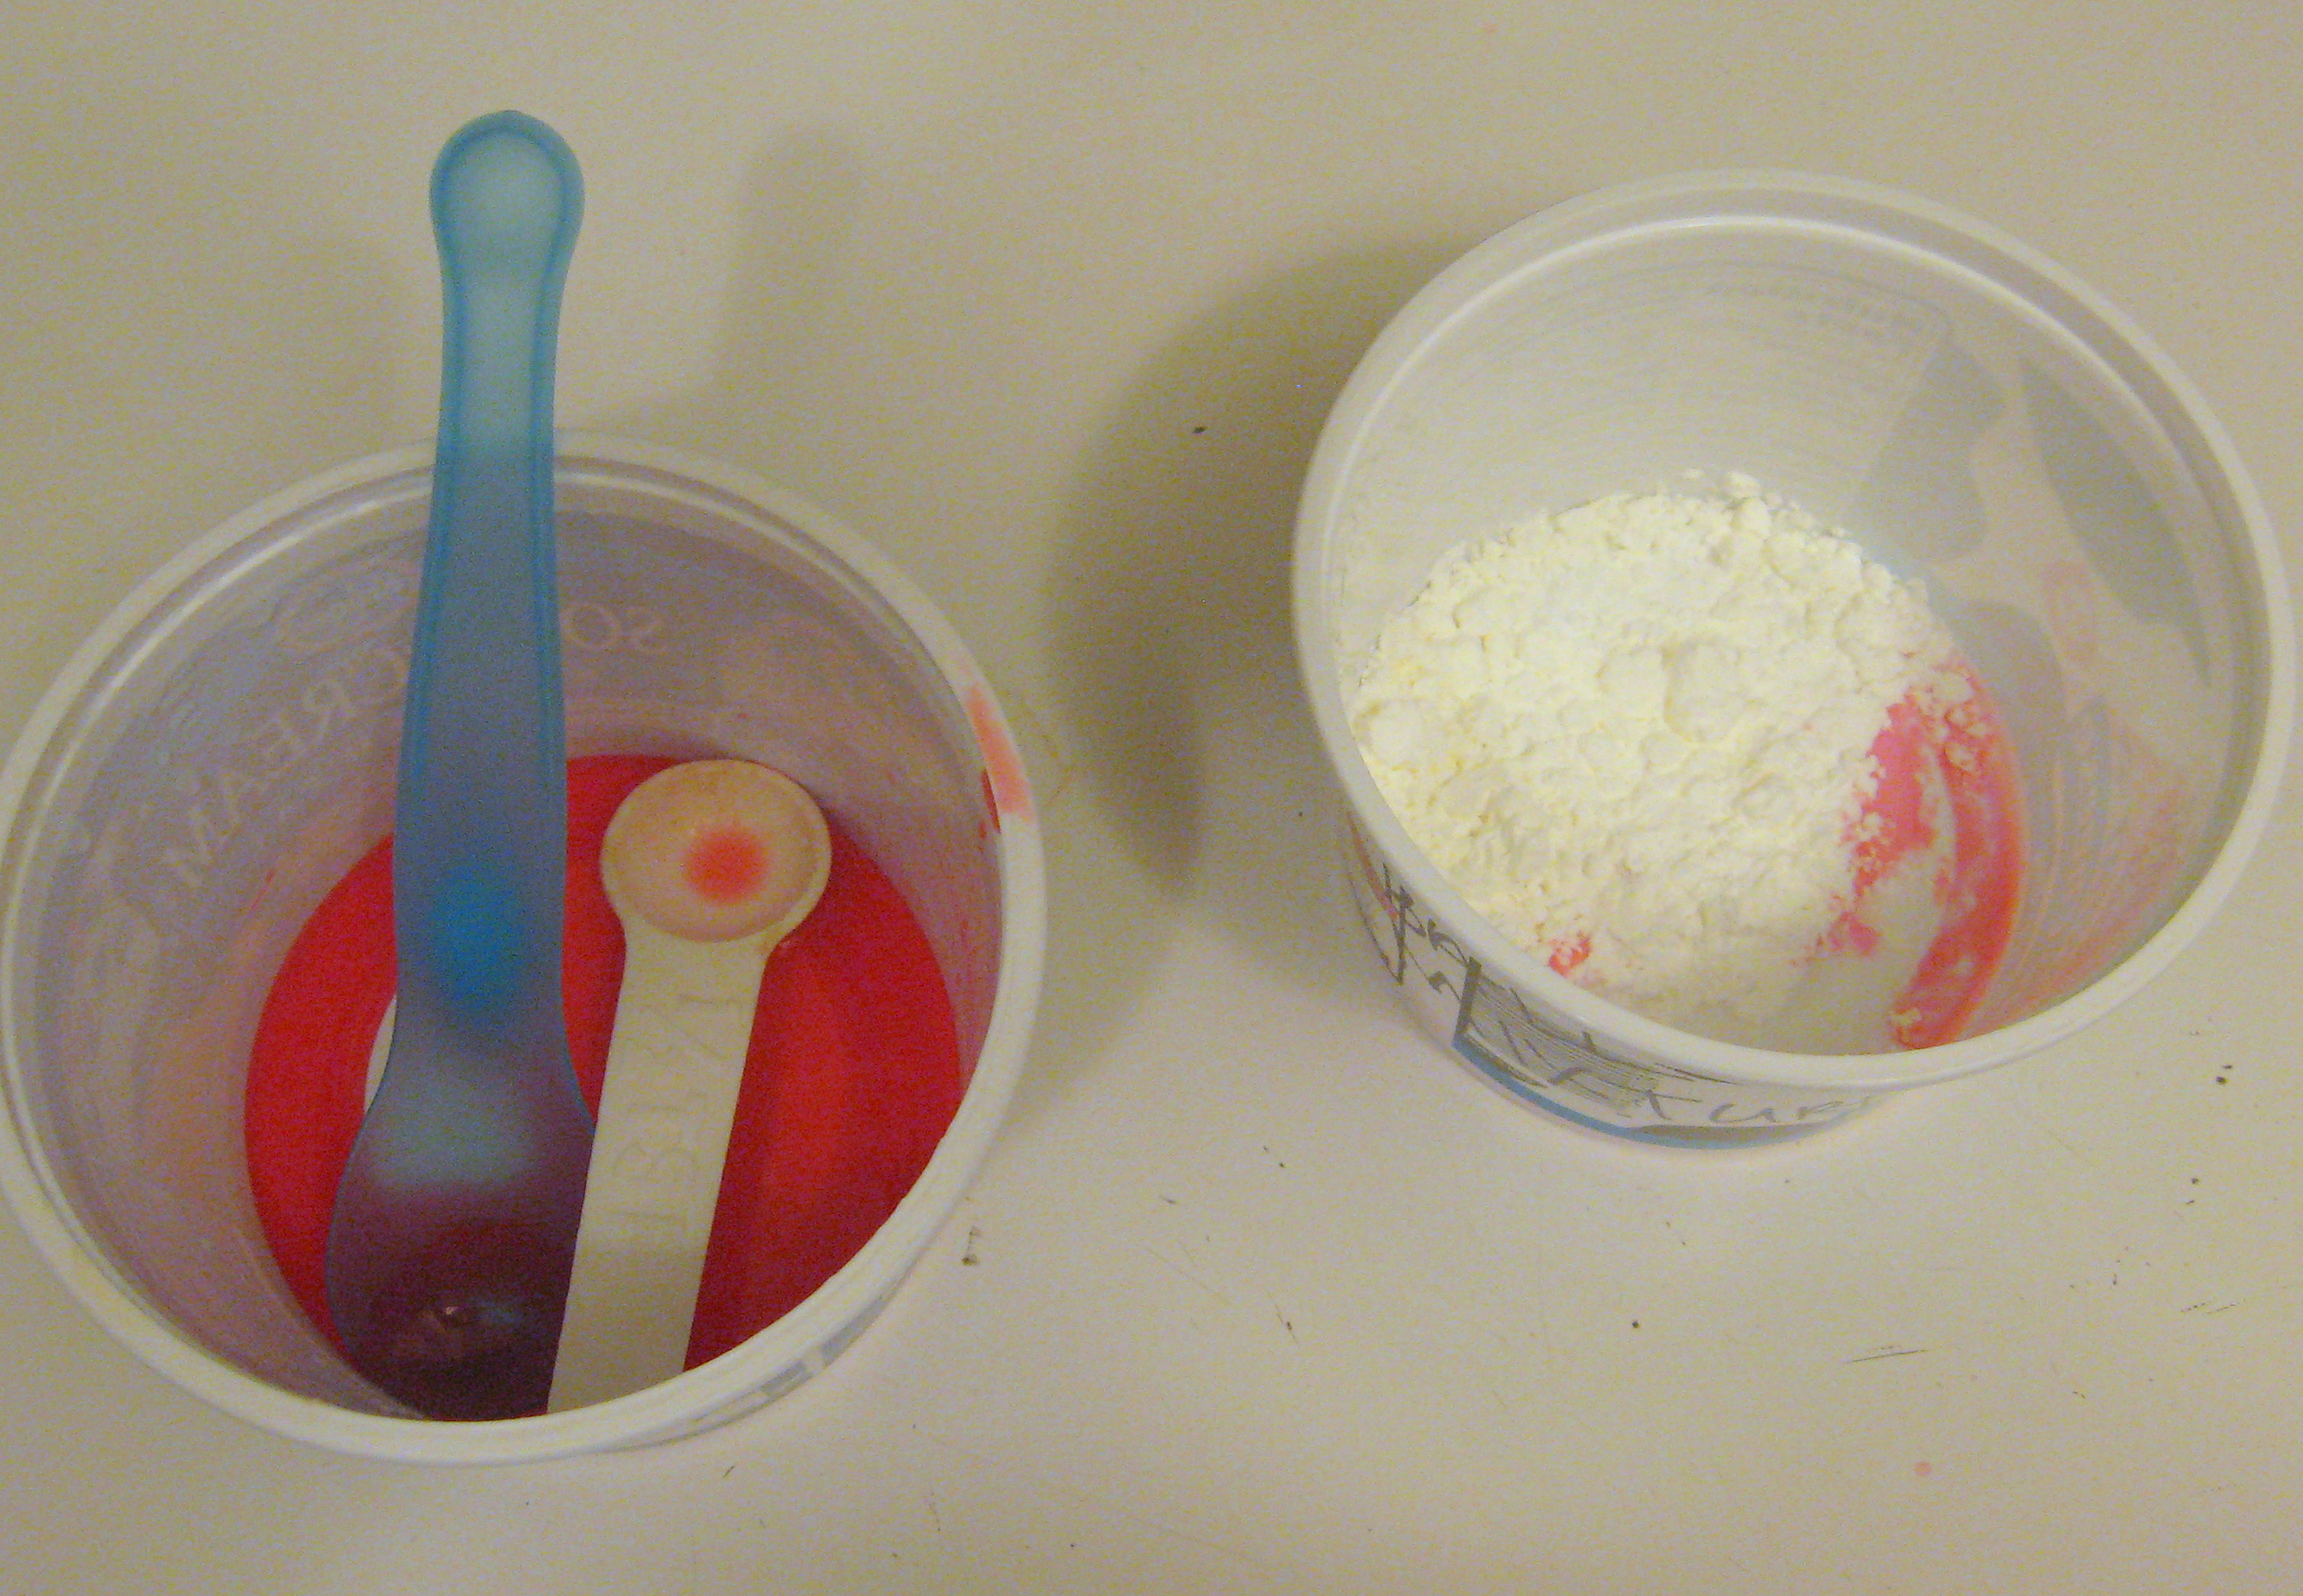
- It also isn’t super messy. If you are doing it with very small children, you may want to put down newspaper or an old towel, but really, I did it right on my counter top using old butter tubs and plastic spoons. Once I threw those away, there was no other mess.
- I used white glue, but if I were to make this again, I would definitely use glitter glue or clear glue; I think it would look much cooler
- Our balls didn’t really bounce. They are super soft – basically like slightly more solid Gak. We all thought it was fun to play with it – like you would play dough or silly putty – but they definitely didn’t come out like a bouncing ball.

- The website explains the science behind how it works, but it is more on a level for middle school students, not little ones. My high schoolers understood it, but I didn’t!! so if you’re looking for a science lesson and – like me – haven’t taken chemistry since the 80’s, you may need to google for a simpler explanation. We did change up the ingredients on the second ball as per their suggestion (we added more cornstarch) but thought it was only barely different from the first one.
Final analysis? I think you should give it a try! It is easy and fast, and takes ingredients that you likely already have sitting around the house. It is fun to play with (it would make a great stress ball). If I had had more time, I think I would have gone ahead and made gak as well, so we could have talked about the differences (here’s a good gak recipe if you don’t know what I’m talking about: https://lilluna.com/homemade-gak-recipe/).
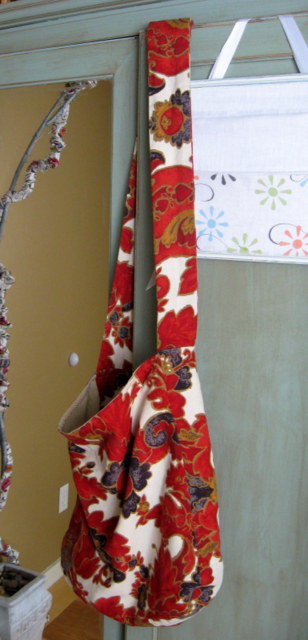
A PYP Best Blog: Making Custom Purses and Bags! One of my personal favorites!
Just in case you missed this article on making custom purses and bags the first time we shared it a couple of years ago, we are republishing it. After Sharon wrote this blog originally, we got an awesome response. This is one of the PYP Best Blogs!
I love purses. And bags. And totes. And purses. And bags. I may have a problem.
I am kind of picky about them though…if they don’t meet certain requirements, they find themselves on a one way trip to the local donation center sooner rather than later. For me, those criteria are that they:
- have to be roomy enough to throw in all the stuff required by a busy mom on the go (lotion, gloves, notebook, random medicine, books for waiting rooms, stuffties, snacks, kleenex…),
- have to have pockets to keep my keys and cell phone from joining the bottomless pit of aforementioned stuff,
- have a long enough shoulder strap to wear across my body,
- have to be washable,
- have to be affordable, and
- have to be cute.
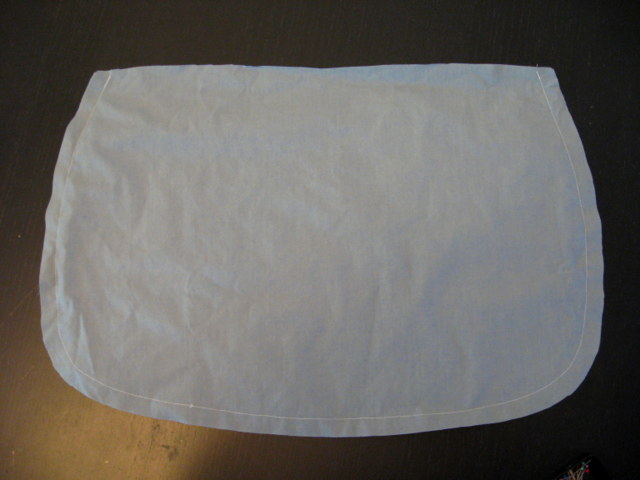
That doesn’t seem like an unreasonable list to me, but I have found that it is difficult to find a purse that fits all of those criteria. Several years ago, I bought a pattern at the fabric store and decided to try my hand at making one on my own. Once I made that first one and saw how easy it was, I’ve been making my own bags ever since. I decide what I want and draw the basic pattern out on craft paper. I absolutely LOVE that they are endlessly customizable. My purses can all have pockets to fit exactly the things I need them to fit. Library bags don’t need pockets, but they do need to be sturdy, so I use a heavy fabric. A purse can get away with a less sturdy fabric, as long as it’s washable. I experiment with size, shape, inside and outside pockets, appliqued designs, flaps, closures, long straps, shorter straps – no two bags look the same and they all follow the same basic instructions and only a very beginning sewing ability. I now have a stack of patterns with different- and interchangeable – sizes and shapes of bodies and straps.
I will walk you through how I made my latest bag and then show you some examples of others to get your creative juices flowing. Once you understand the idea, you should be able to make a bag in a couple of hours. I didn’t use a pattern for this one, because I started with a skirt, but you will get the idea, and if you have any questions, ask!
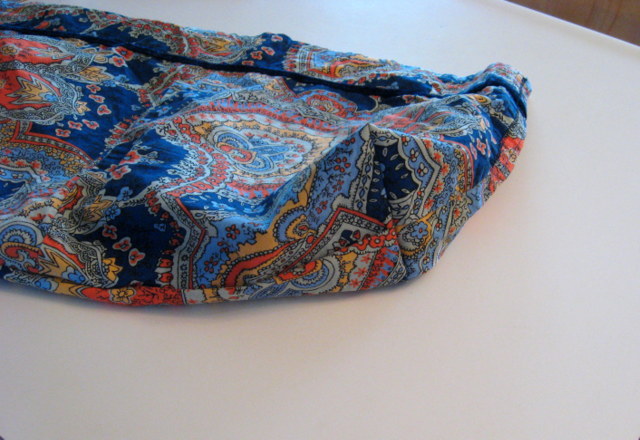
I started with this skirt that I picked up at a thrift store:
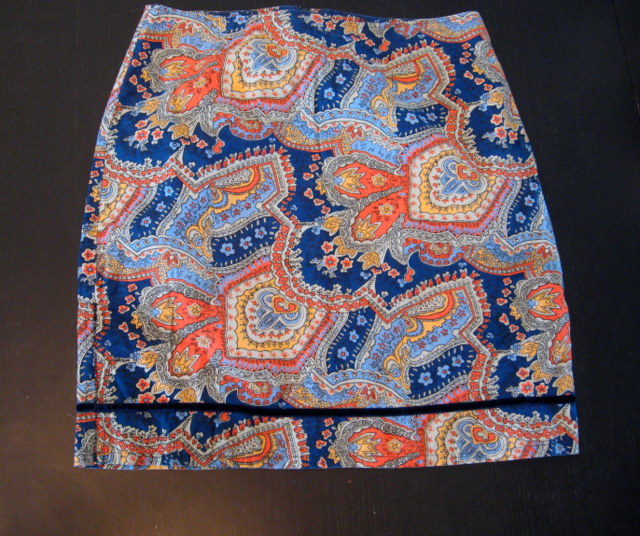
Much too small for me – and too short even if it did fit – but I just fell in love with the fabric. I toyed with the idea of making it into a pillow, but then decided it would be better as a purse.
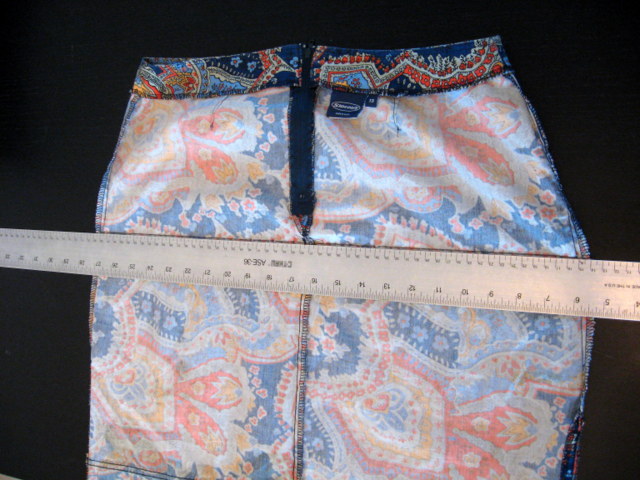
I turned it inside out and lined up a straight edge along the width of it, just under the zipper. Draw a line and cut – making sure that you keep the bottom hem even and straight. I discarded the top part, but you could use that fabric to make pockets.
Sew straight across the newly cut edge, forming the bottom seam of your bag. I like to sew this seam twice, just to make sure it is strong.
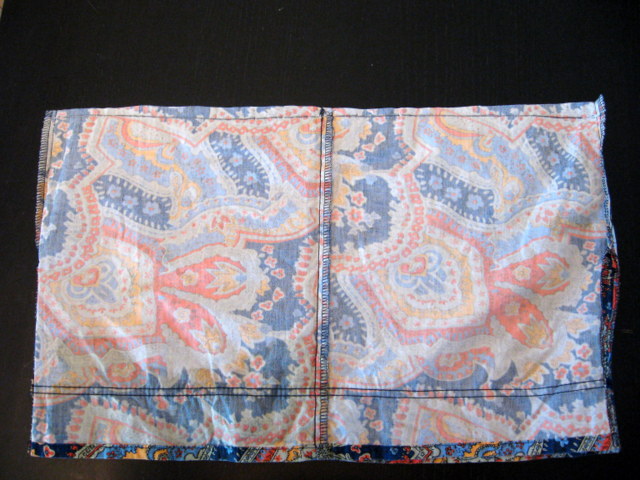
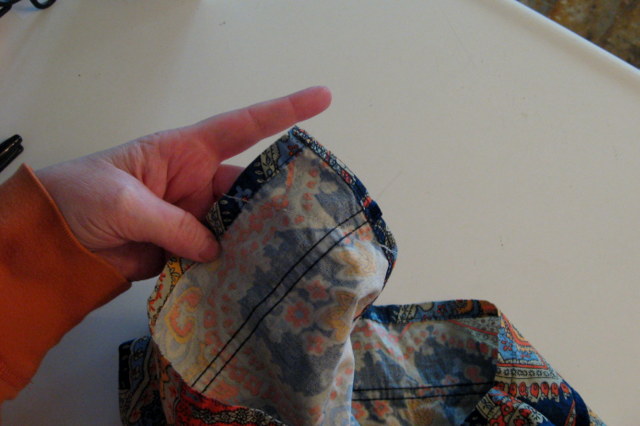
You can leave it like this if you want, but I like to sew across the corners to give the bag a little shape. Take one bottom corner and pinch it together then lay it out flat, being sure to line up the bottom seam and the side seam. Measure in from the point (I did 2 inches, but experiment with making it smaller or larger to change the look of the bag) and draw a line across it. Pin it in place, then sew along the line. Do this on both corners.

That leaves you with these little floppy ‘ears’
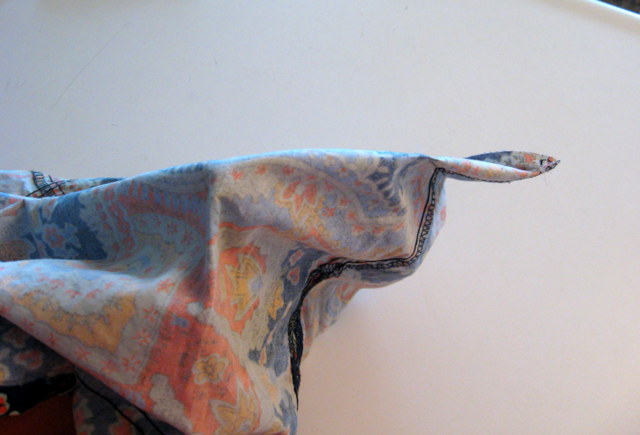
that make a nice, neat bottom when turned right side out.
Again, you could stop here if you like the shape, but I thought it was too wide at the top, so I measured down the top inside seams a few inches on both sides and sewed a triangle to taper the top sides in a little, like this:
There; I like that shape better.
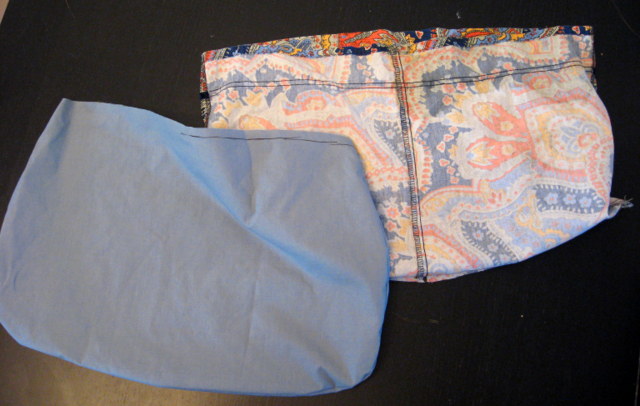
Now, if you don’t want your bag to be lined, you can stop there and add straps. I will leave the inside unfinished occasionally on tote bags or shopping bags, but generally, I prefer my bags to be lined and it really is quite simple!
I folded my bag in half and layed it out on the fold of my lining fabric, then I drew around the shape of the bag and cut out two.
**If you are making your bag from scratch from flat fabric, then just cut out all four of these shapes at the beginning – 2 outside pieces and 2 inside pieces, all the same size.
Sew the two lining pieces together, all the way around, but leaving the top open. Make sure you have right sides together!
Now you have two fabric pouches that we will stitch together once we make the straps and pockets…
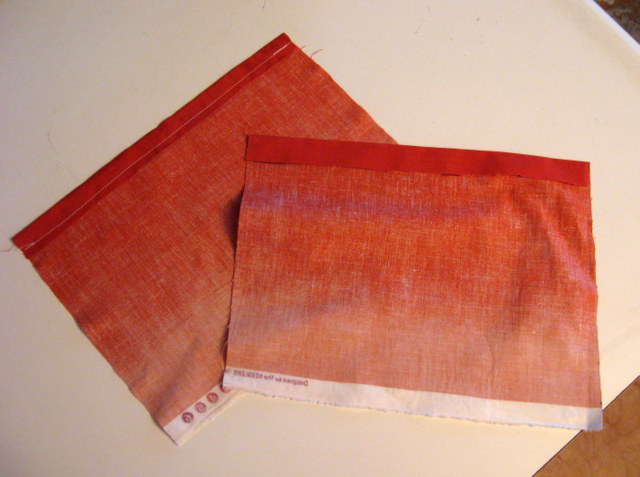
For my pockets, I like to make two; one big one on one side, to catch the random small stuff that tends to get lost in the bottom of my purse, and one on the other side, split into two pockets for my keys and phone. Decide how big you want your pockets to be, and cut the squares out of fabric – about an inch or so bigger than you want the finished pocket.
Press down a small seam on the top and stitch across it.
Then you will press a seam allowance on both sides and the bottom, but don’t sew it.

Pin the pocket centered in place on lining of the bag – make sure that the “up” side of the pocket is facing the “up” side of the bag. Also, don’t put it up too high…you will lose a little at the top of the bag when you sew the lining to the outside.
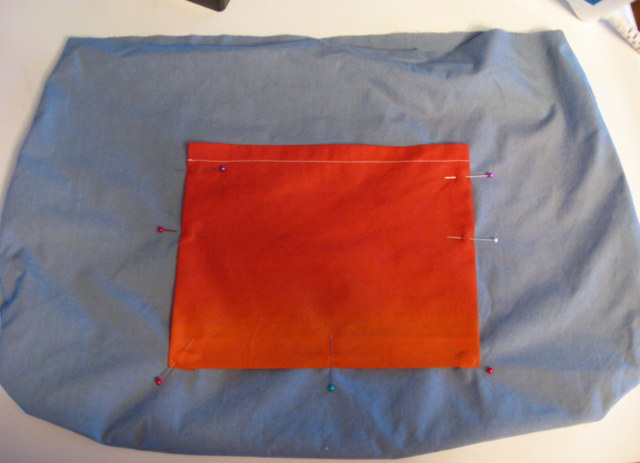
Sew the pocket onto the lining along the three edges, leaving the top open.
Now repeat with the pocket on the other side. Once it’s attached, you can just sew a line right down the middle to separate it into two pockets. I used my phone to decide exactly how big I needed it to be, since that is what will go in there!
Now for the strap. Determine how long of a strap you would like. The first couple of times might take some trial and error until you find exactly what you love. Use a bag you already have or have someone help you with a measuring tape to get a good measurement to start with. For me, I like a 42 inch strap – short enough to carry on my shoulder, but still long enough to sling across my body. I cut out a long rectangle of fabric about 4 inches longer than the finished size (so 46 inches long) and about 6 inches wide.
Again, depending on what you’re going for, you can decide how you want the finished strap to be. If it is a small or delicate bag, you might choose to use just one layer of fabric for the strap. If it is a heavy bag, you will want to make the strap heavier. You can do that by using iron on interfacing, or by just using two pieces of fabric, which is what I did here.
Lay them out on top of each other, and fold them in half lengthwise, with the right side of the outside fabric on the inside of the fold. Press it all flat, then sew up the long edge. Turn it all right side out, smooth it all flat and press it again.
Now, here comes the trickiest part – I still mess up on this part once in awhile if I’m not paying attention, so go slow, take a breath and think it through before you sew and you’ll be fine, I promise!
With the OUTSIDE pouch turned inside out, lay the strap along the bottom of the pouch and up the sides. Make sure that the strap isn’t twisted. Now check again. Really.
Center the strap with the side seam of the pouch and sticking up beyond the top about 2 inches and pin it. Now do the same on the other side. Now check again to make sure it isn’t twisted – just to be safe 🙂
Now with the INSIDE pouch also turned inside out, put it down inside the outer pouch. So, you will have a “pouch sandwich” with the strap between them. Line up the side seams and the front and back centers and pin them together, stretching to ease in any excess fabric (you shouldn’t have a lot, but you will likely have a little). You will now sew around the whole top where you just pinned, but you will have to leave a space so that you can turn them inside out. The smaller the opening you leave, the harder it will be to get it turned, but the larger the opening, the more work you will have to do to close it up. I probably leave about 3 inches. I have been known to forget and just keep sewing, so when I pin, I will pin an X where I want to leave the opening just to remind myself.
Take a minute to look at it and make sure you have everything assembled the way it should be; it should look like this:
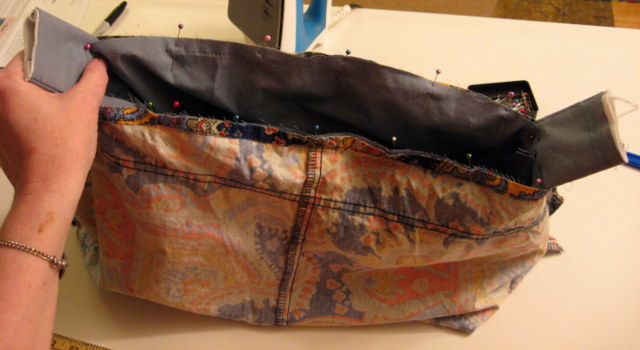
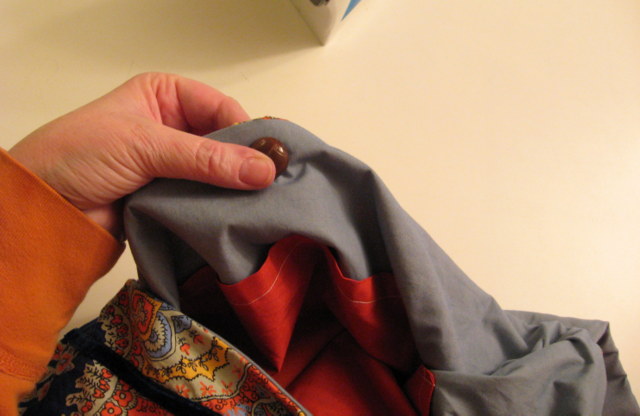
Then, sew around the top edge, backstitching at the beginning and end. Carefully reach into the opening that you left and pull out the strap, then work the rest of the purse through until the whole thing is turned right side out. Now press around the top where you just sewed, to make it look nice and neat, and press down the edges of the opening as you go. Slip stitch or blind stitch the opening closed by hand – or you can topstitch around the entire top edge, closing the opening in the process.
I chose to close this bag with a button, so I found the center of one side and attached a big vintage button, sewing it just to the lining so the stitches don’t show on the outside. Then I lined it up with the center on the other side of the bag and made a buttonhole.
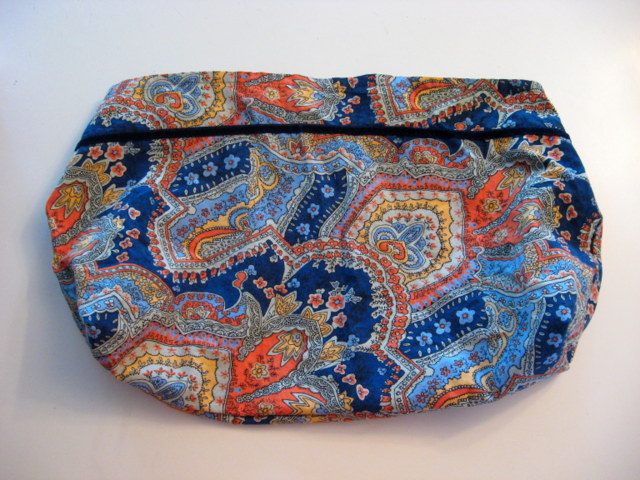
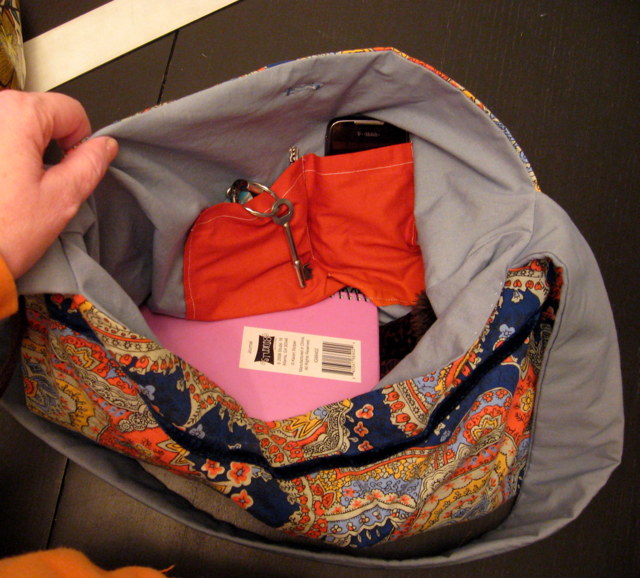
Here’s a shot of the inside of the finished bag:
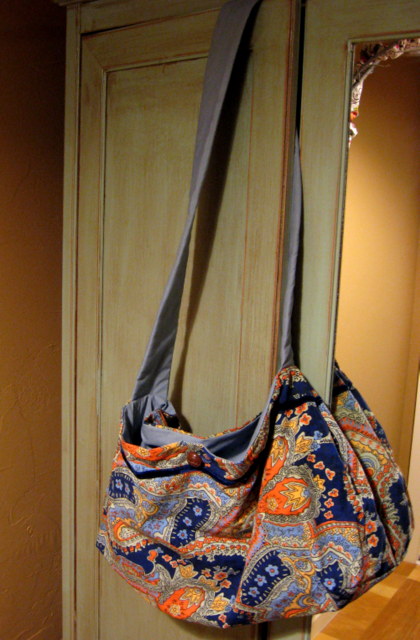
And the outside:
And a few of my other favorites…
My favorite overall tote bag, made from an old pair of curtains.
And a simple scripture bag: 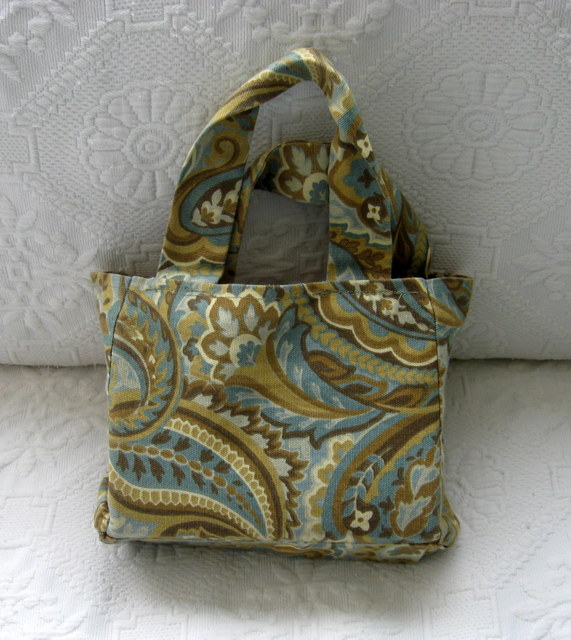
And my library bag – two straps instead of one – and made from a heavy duty upholstery fabric that I picked up for pennies on clearance.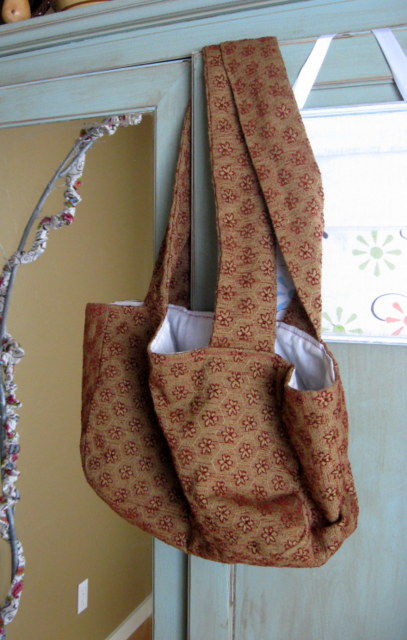
Cute Car Trash Bag, Interchangeable Wreath, Super Hero Capes, Growth Chart DIY Kits & More!
Cute Car Trash Bag, Interchangeable Wreath, Super Hero Capes, Growth Chart DIY Kits & More!
 $11.99 | Car Trash Bag
|
 $32.99 | Interchangeable Wreath: 2 Looks in 1
|


More cute stuff available today! Low shipping prices!
A PYP Best Blog! Free DIY pajamas!
Just in case you missed this article on making free DIY pajamas the first time we shared it a couple of years ago, we are republishing it. After Trish wrote this blog originally, we got an awesome response. This is one of the PYP Best Blogs!
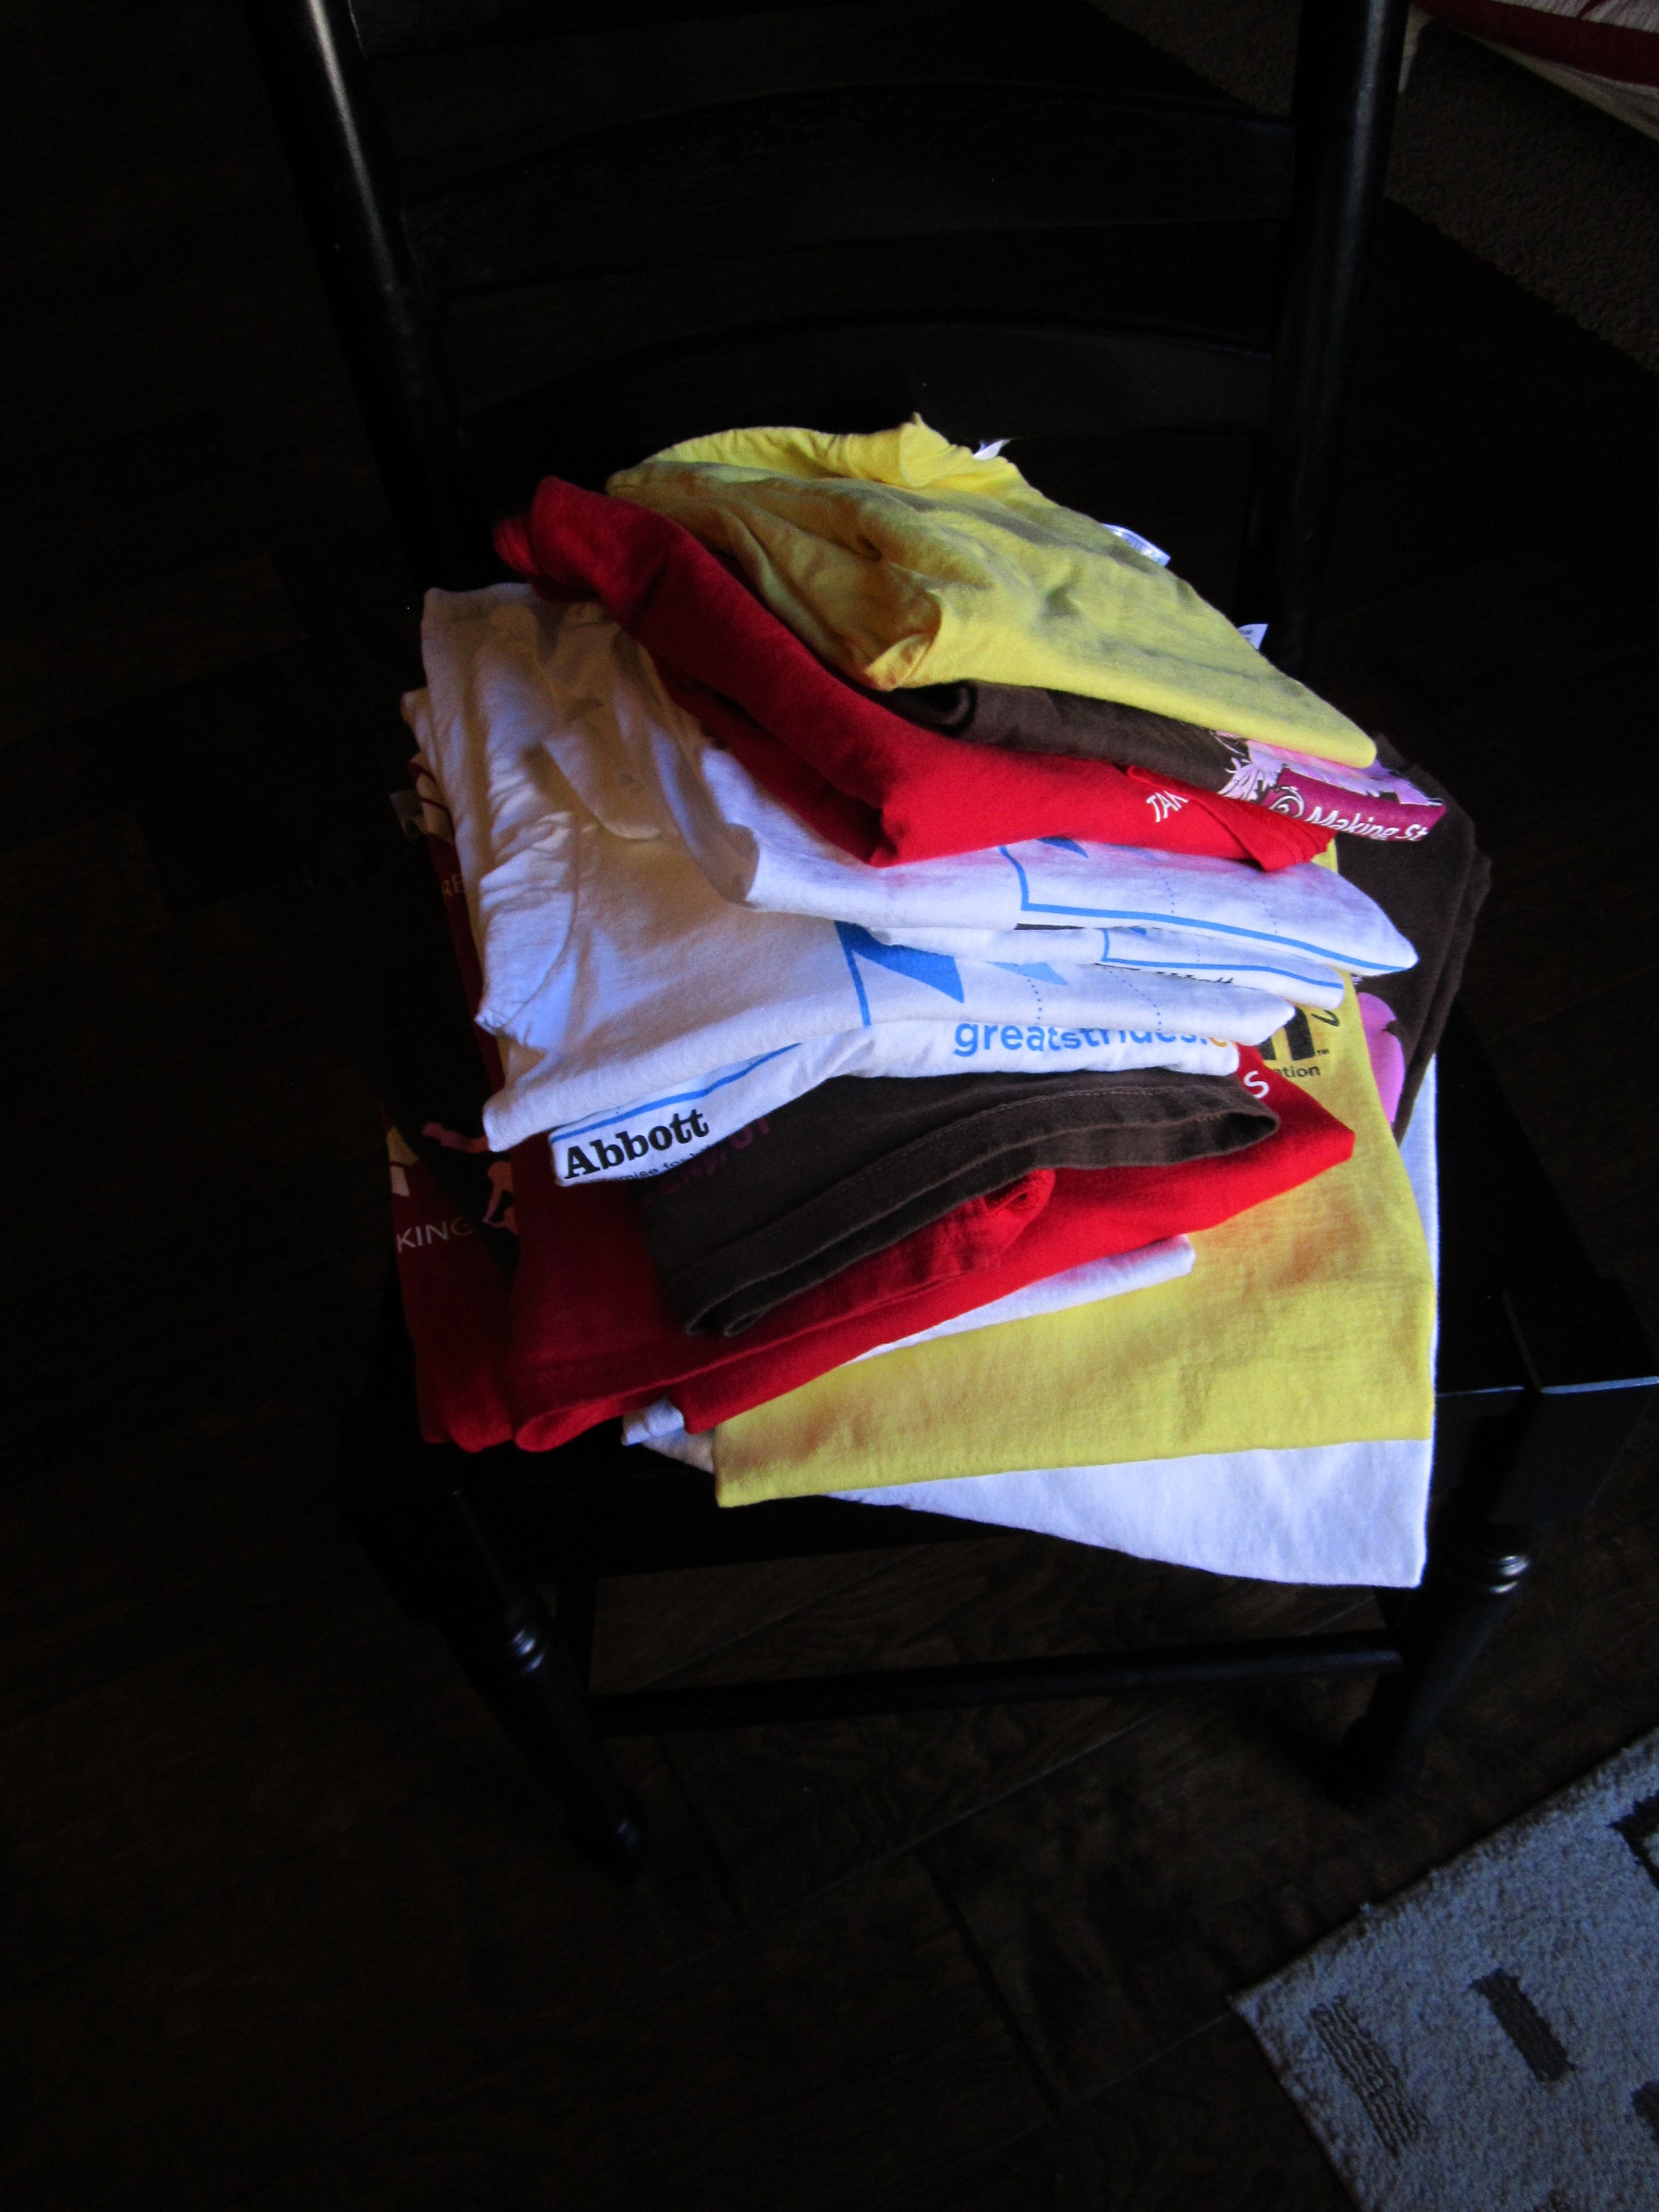
I’ve had a plan brewing for a while now to re-purpose a pile of t-shirts into pajamas for my son.
A few days ago I was making my way around blog land and came across an idea to make leggings for baby girls. So Cute! But I don’t have any sweet baby girls anymore. Just one 5 year old boy who is growing like a weed! All arms and legs!

Our family participates in a few company sponsored charity events each year. We always get at least one promotional t-shirt per family member for each event. Sometimes two! That adds up to a pretty large stack of t-shirts pretty fast.
I thought this would be a great way to put them to good use. I love a cute pair of PJs as much as the next mom, but let’s face it, all they do is sleep in them. Well, and occasionally they might get dragged to the store for an emergency milk run at 6 am in them. But still, pajamas don’t really NEED to be high fashion.
So, using that blog as a starting point, I decided to make some pajamas.
I took one of the largest t-shirts (Adult size L) and cut off the sleeves, neck and shoulder seams and then up each side of the shirt to harvest two pieces of fabric as large as possible.

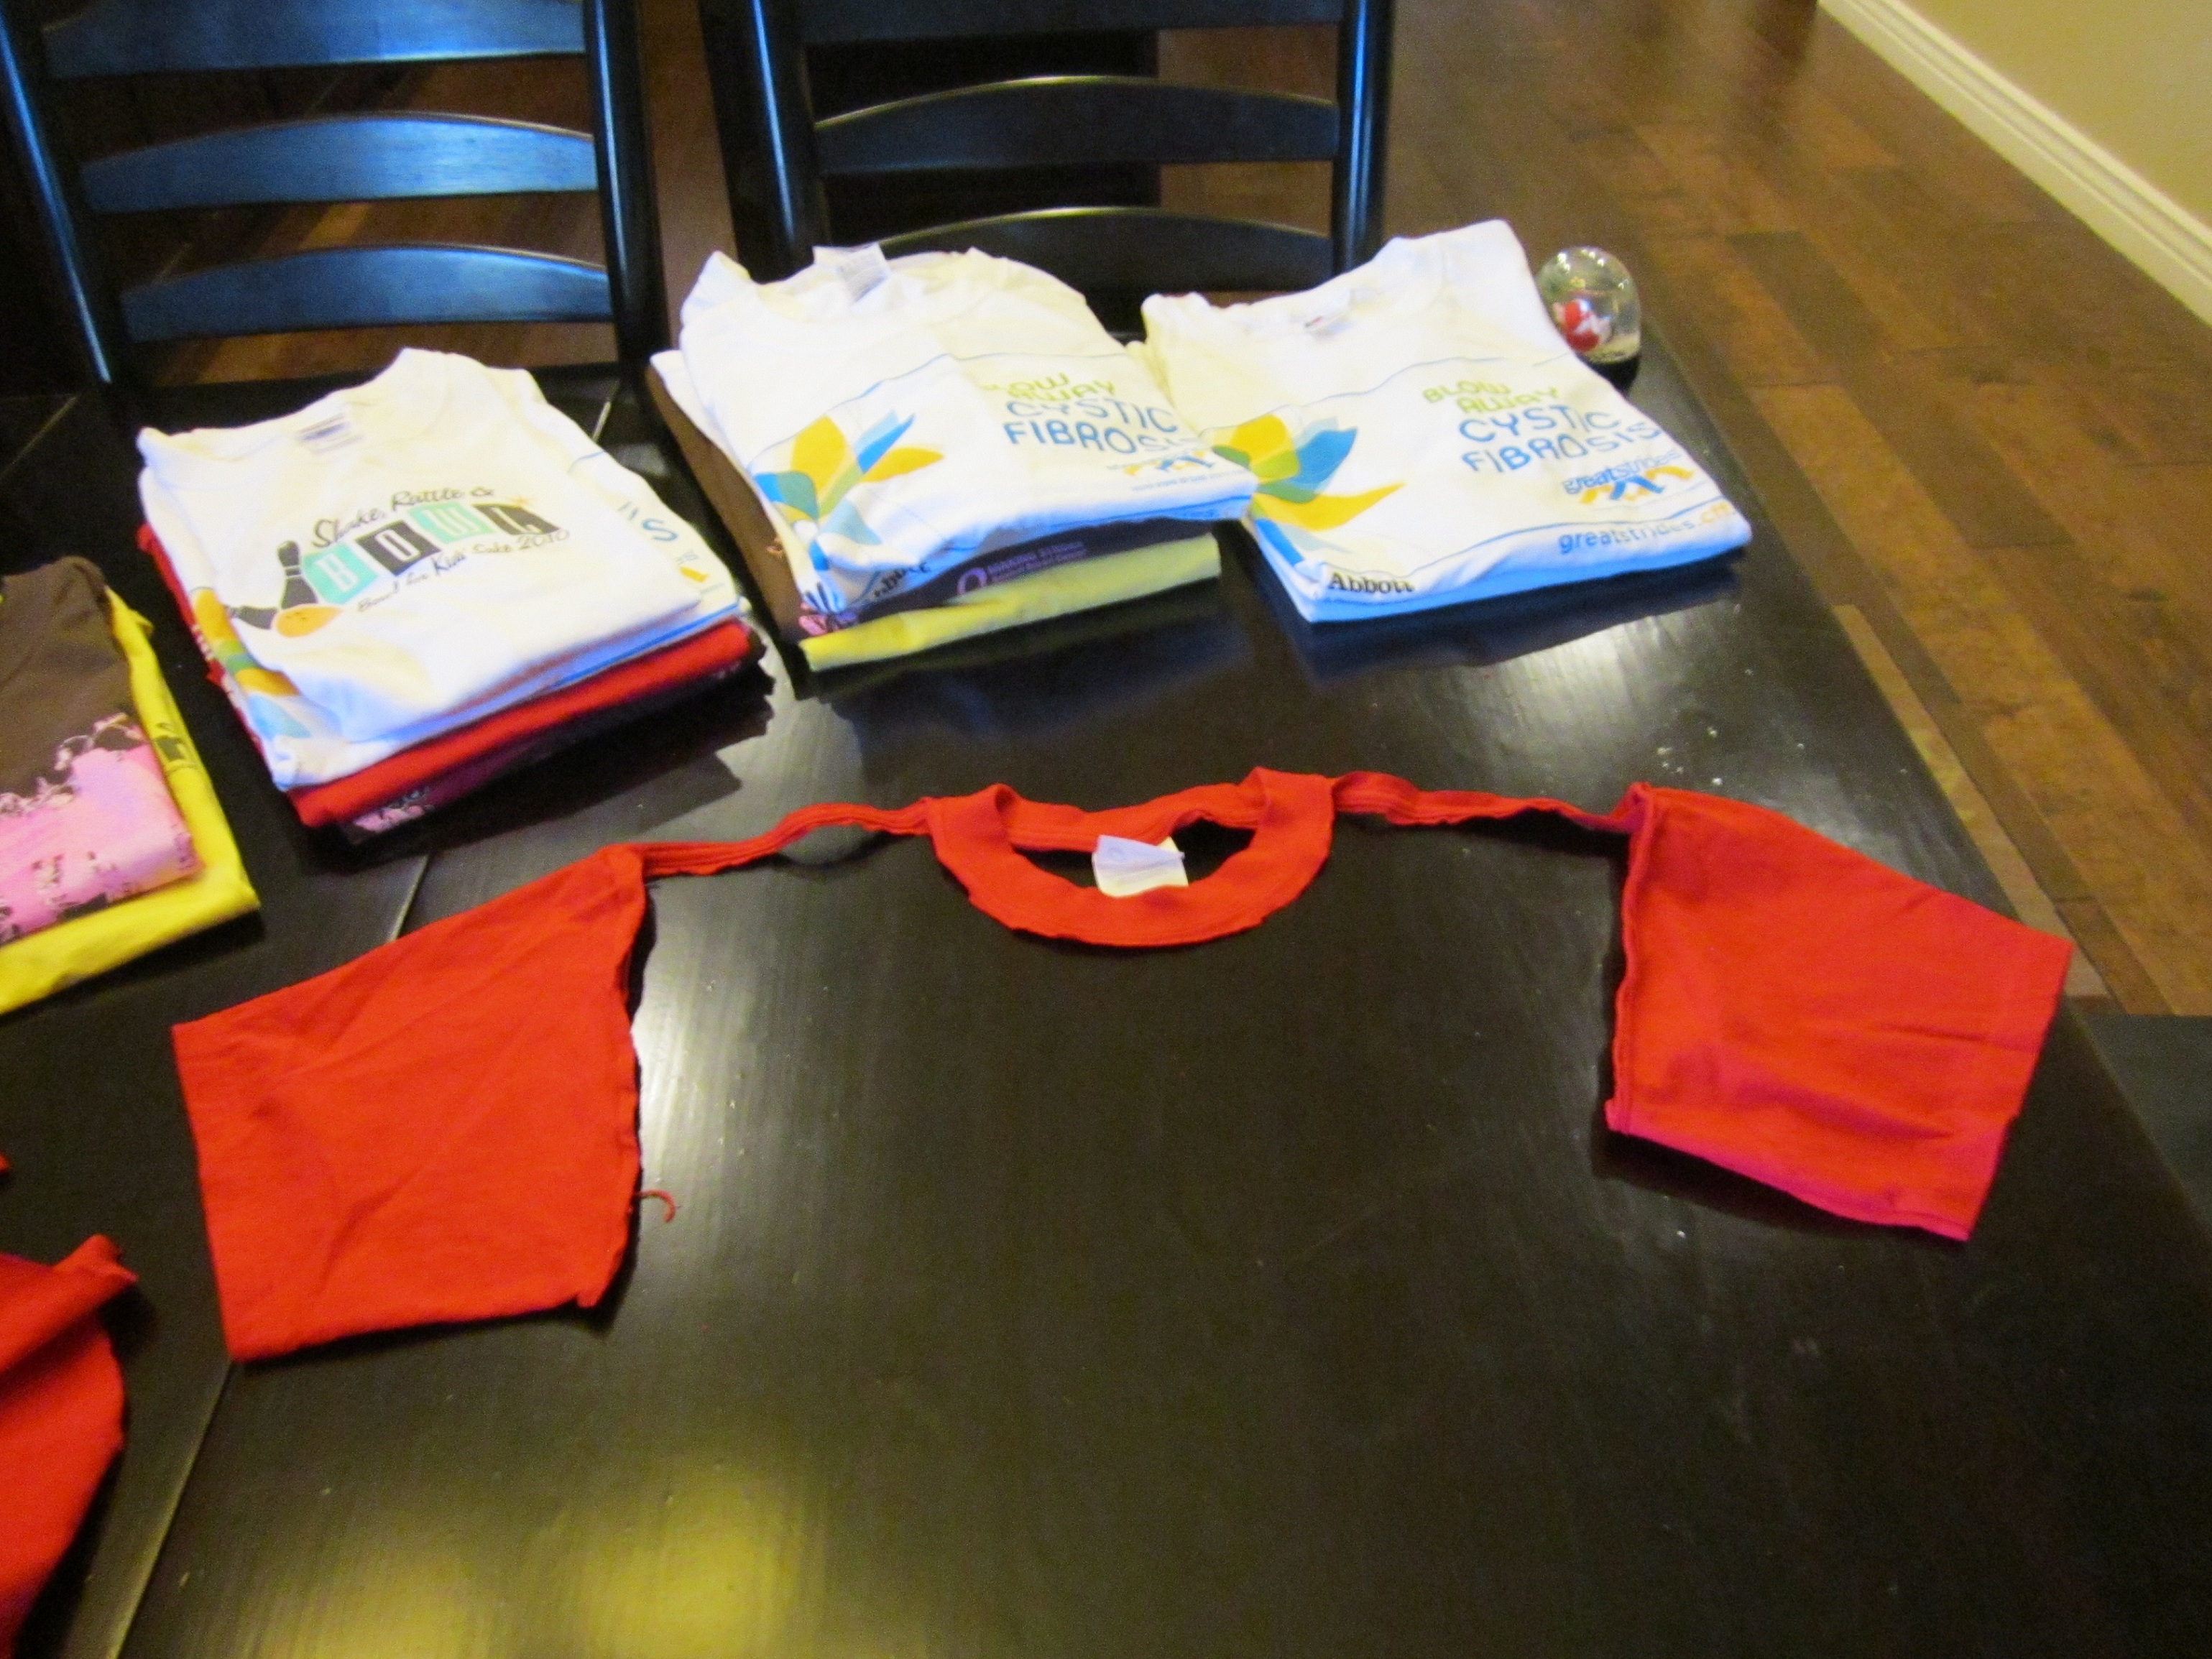

Now fold what was the back of the shirt in half with the right sides together and place it on a flat surface.
Next, fold what was the front of the shirt in half with the right sides together and lay it on top of the first piece with the folds lined up on top of each other. And the t-shirt hems lined up at the bottom.
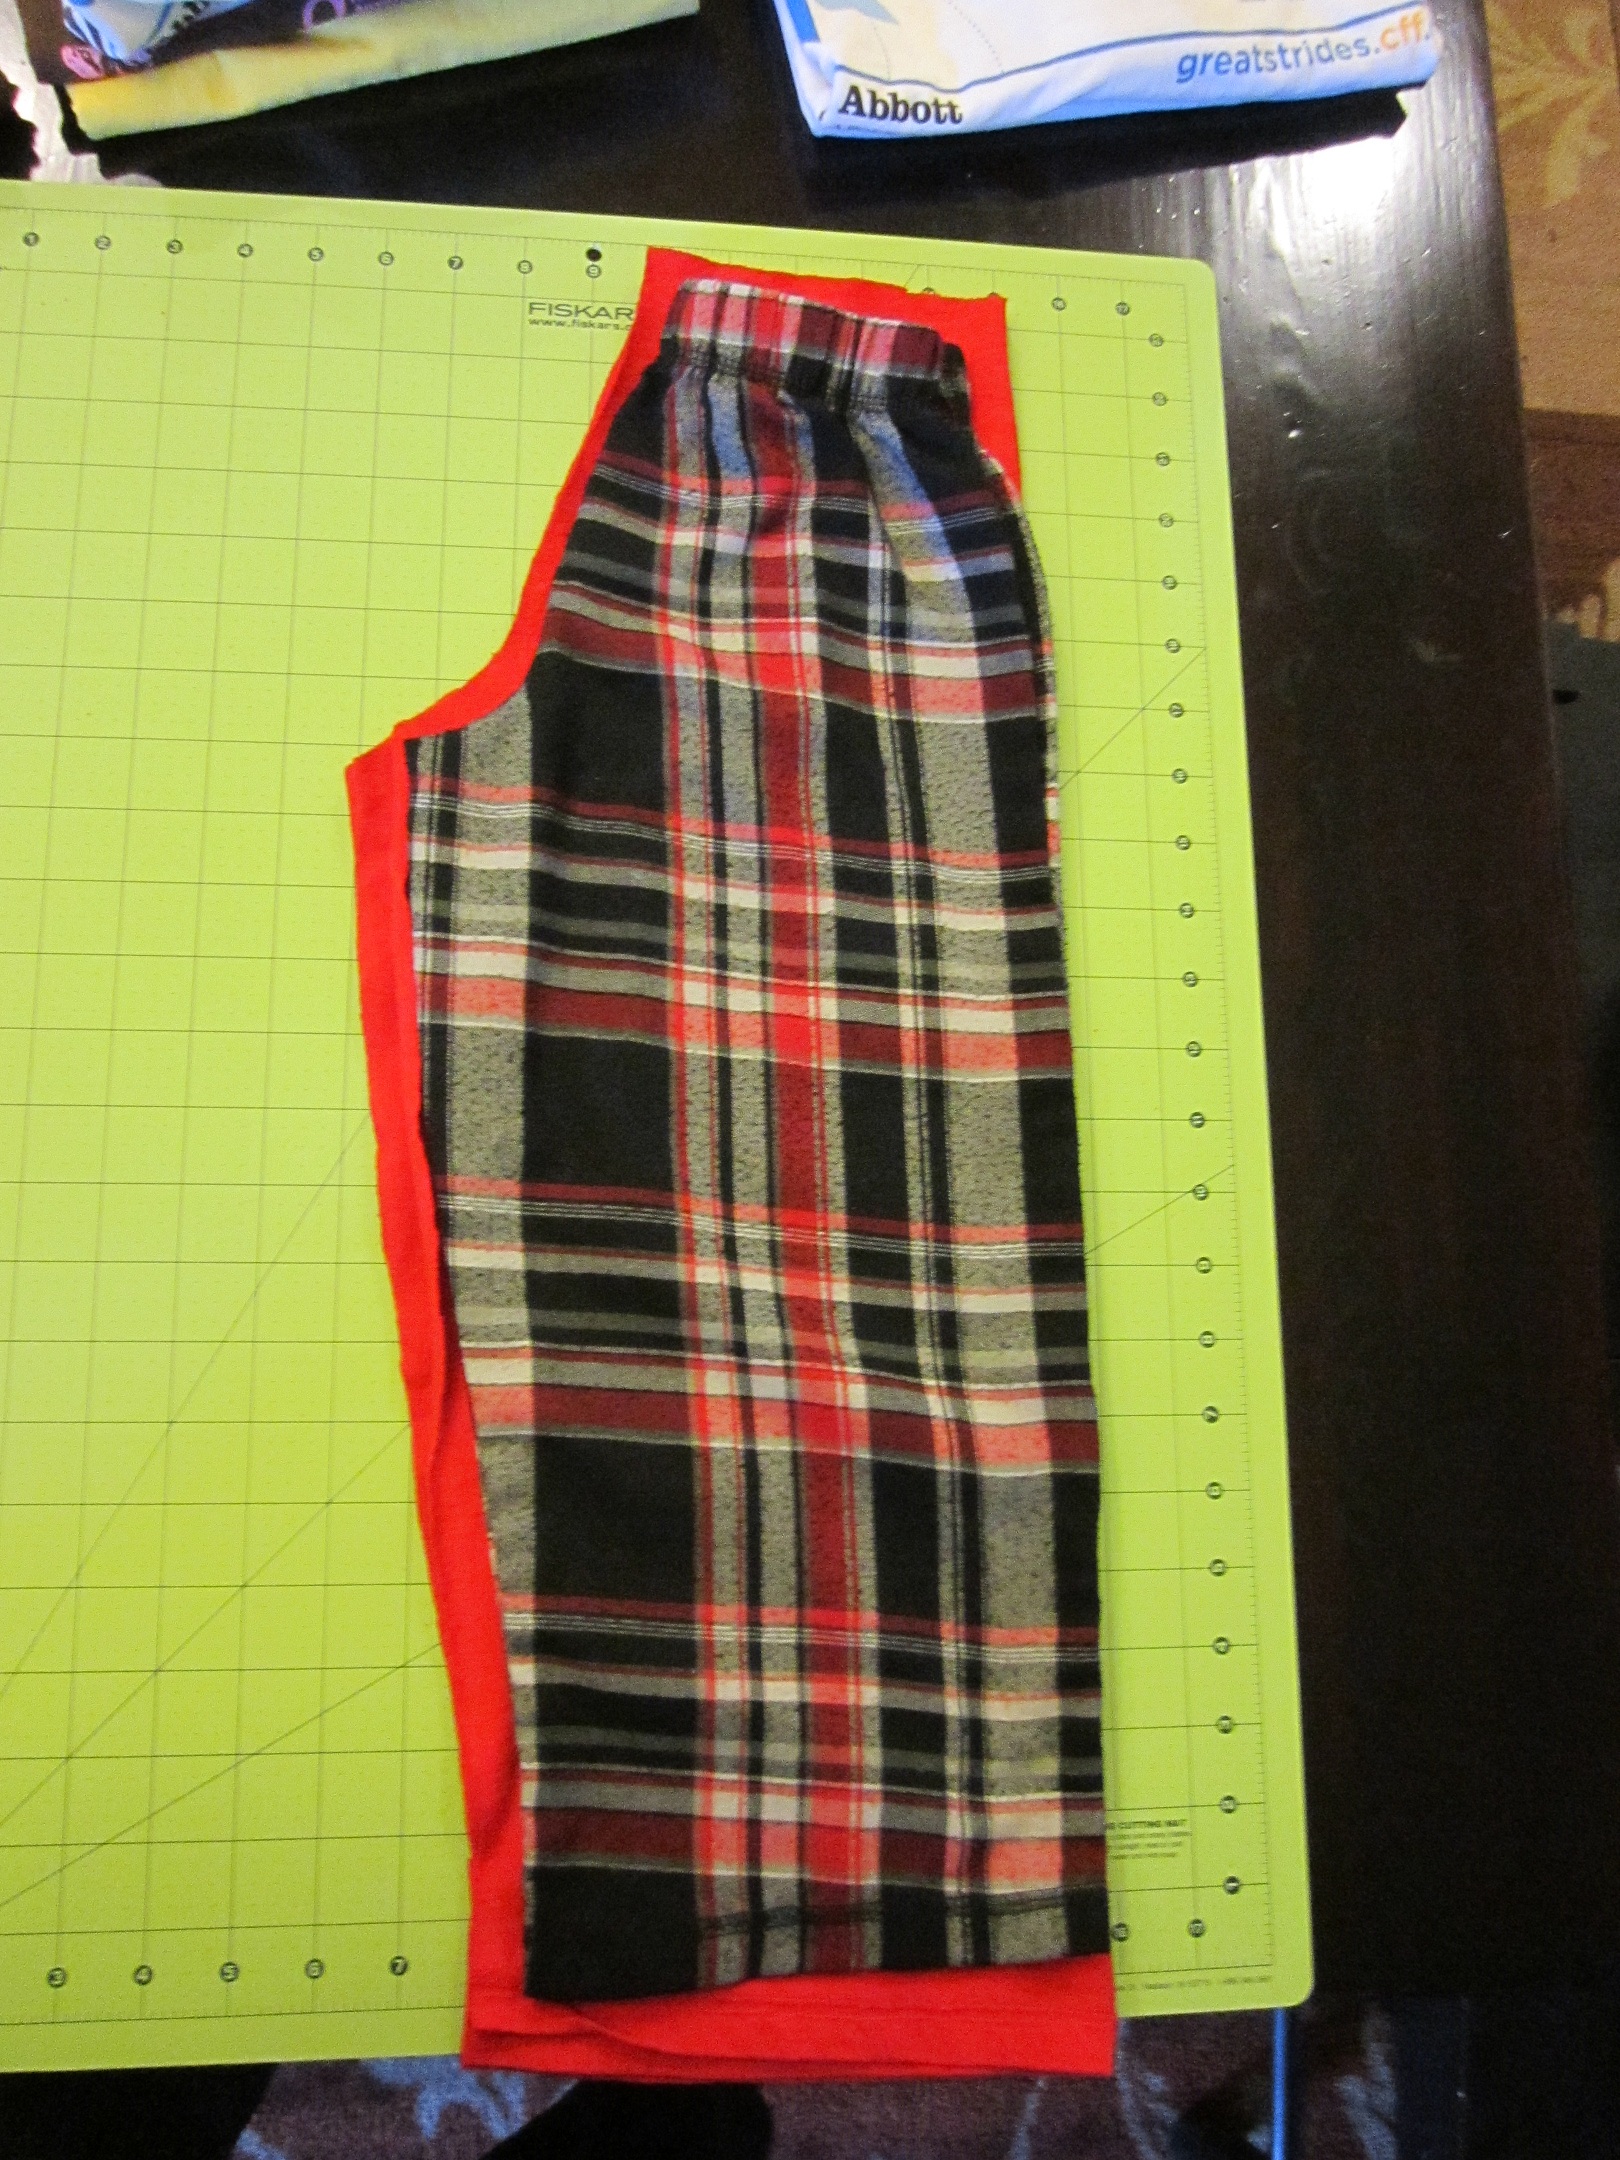
I grabbed the pair of pajama pants that currently fit him best (But still too small! ugh!), fold them in half and line the straight side up on top of the folds of t-shirt fabric.

I wanted to take advantage of the hem at the bottom of the t-shirt and make it the hem of the pants. Less sewing for me! And you will need about an inch or so at the top to create a waist band later. This gave me some extra length for future growth. Perfect!
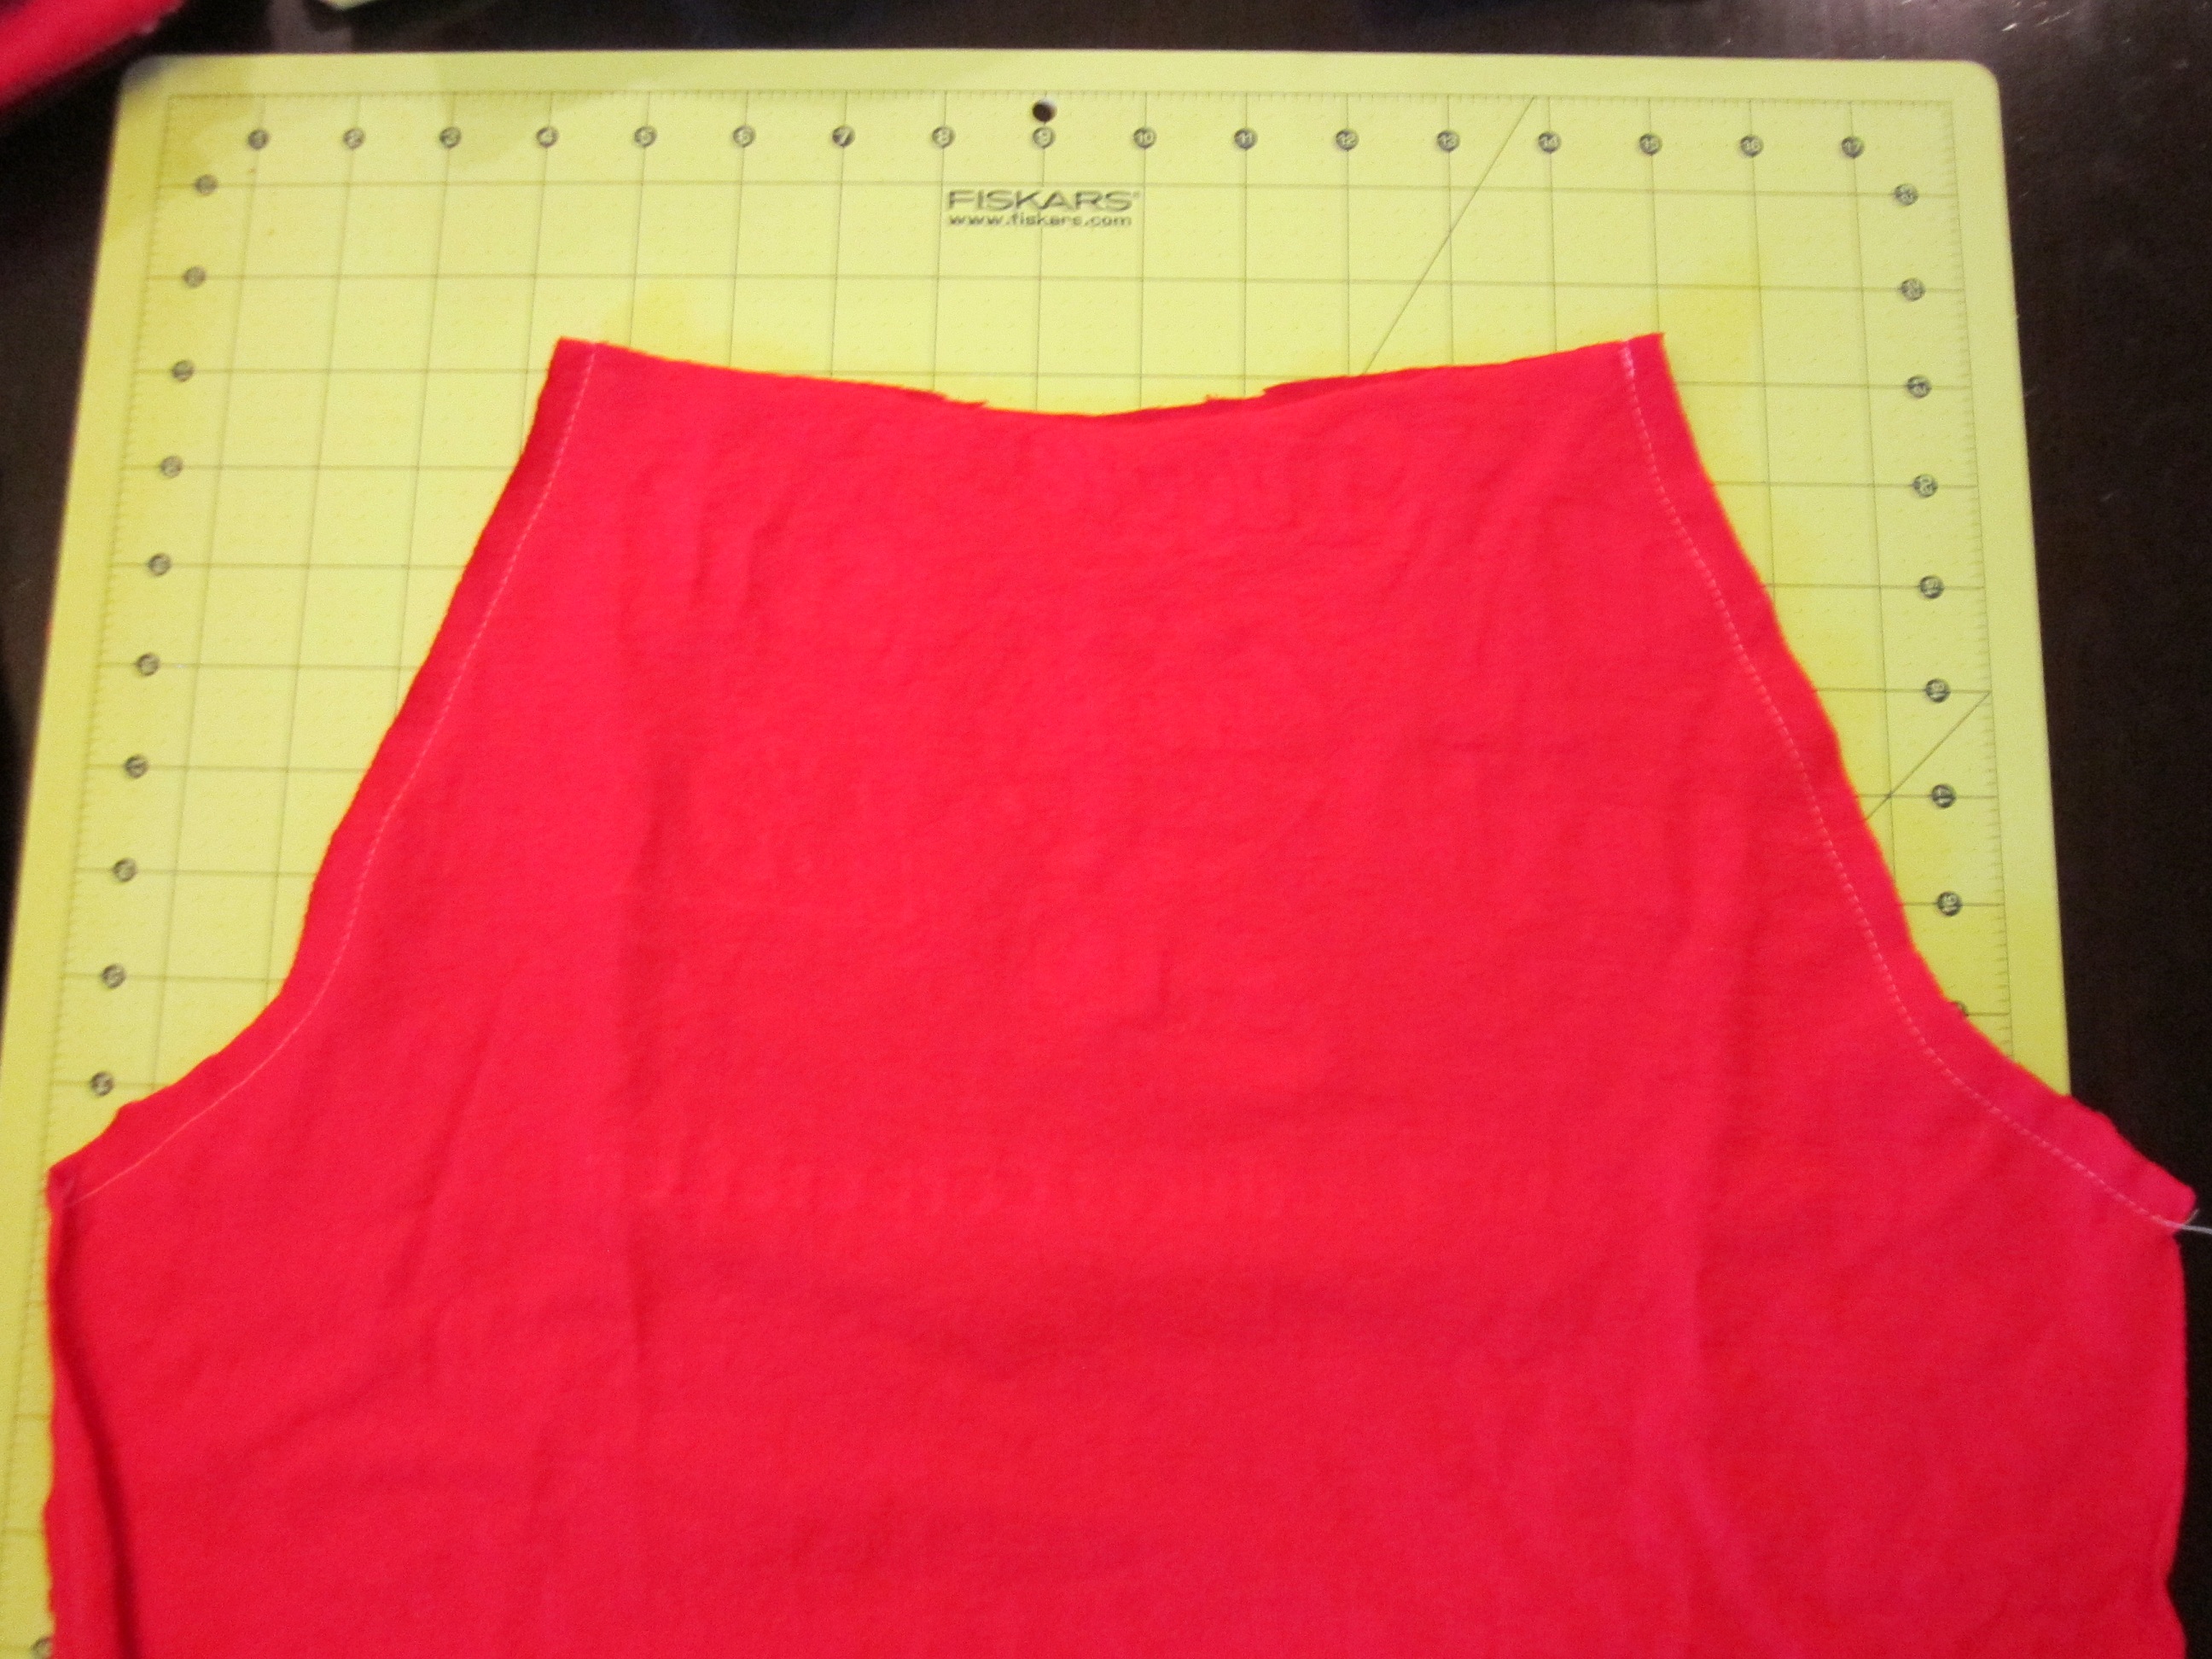
Now, being careful to make sure you’re always cutting through 4 thicknesses of fabric, just cut about an inch above the top of the pants and then all along the crotch side all the way down to the hem, leaving about a half inch for seam allowances.
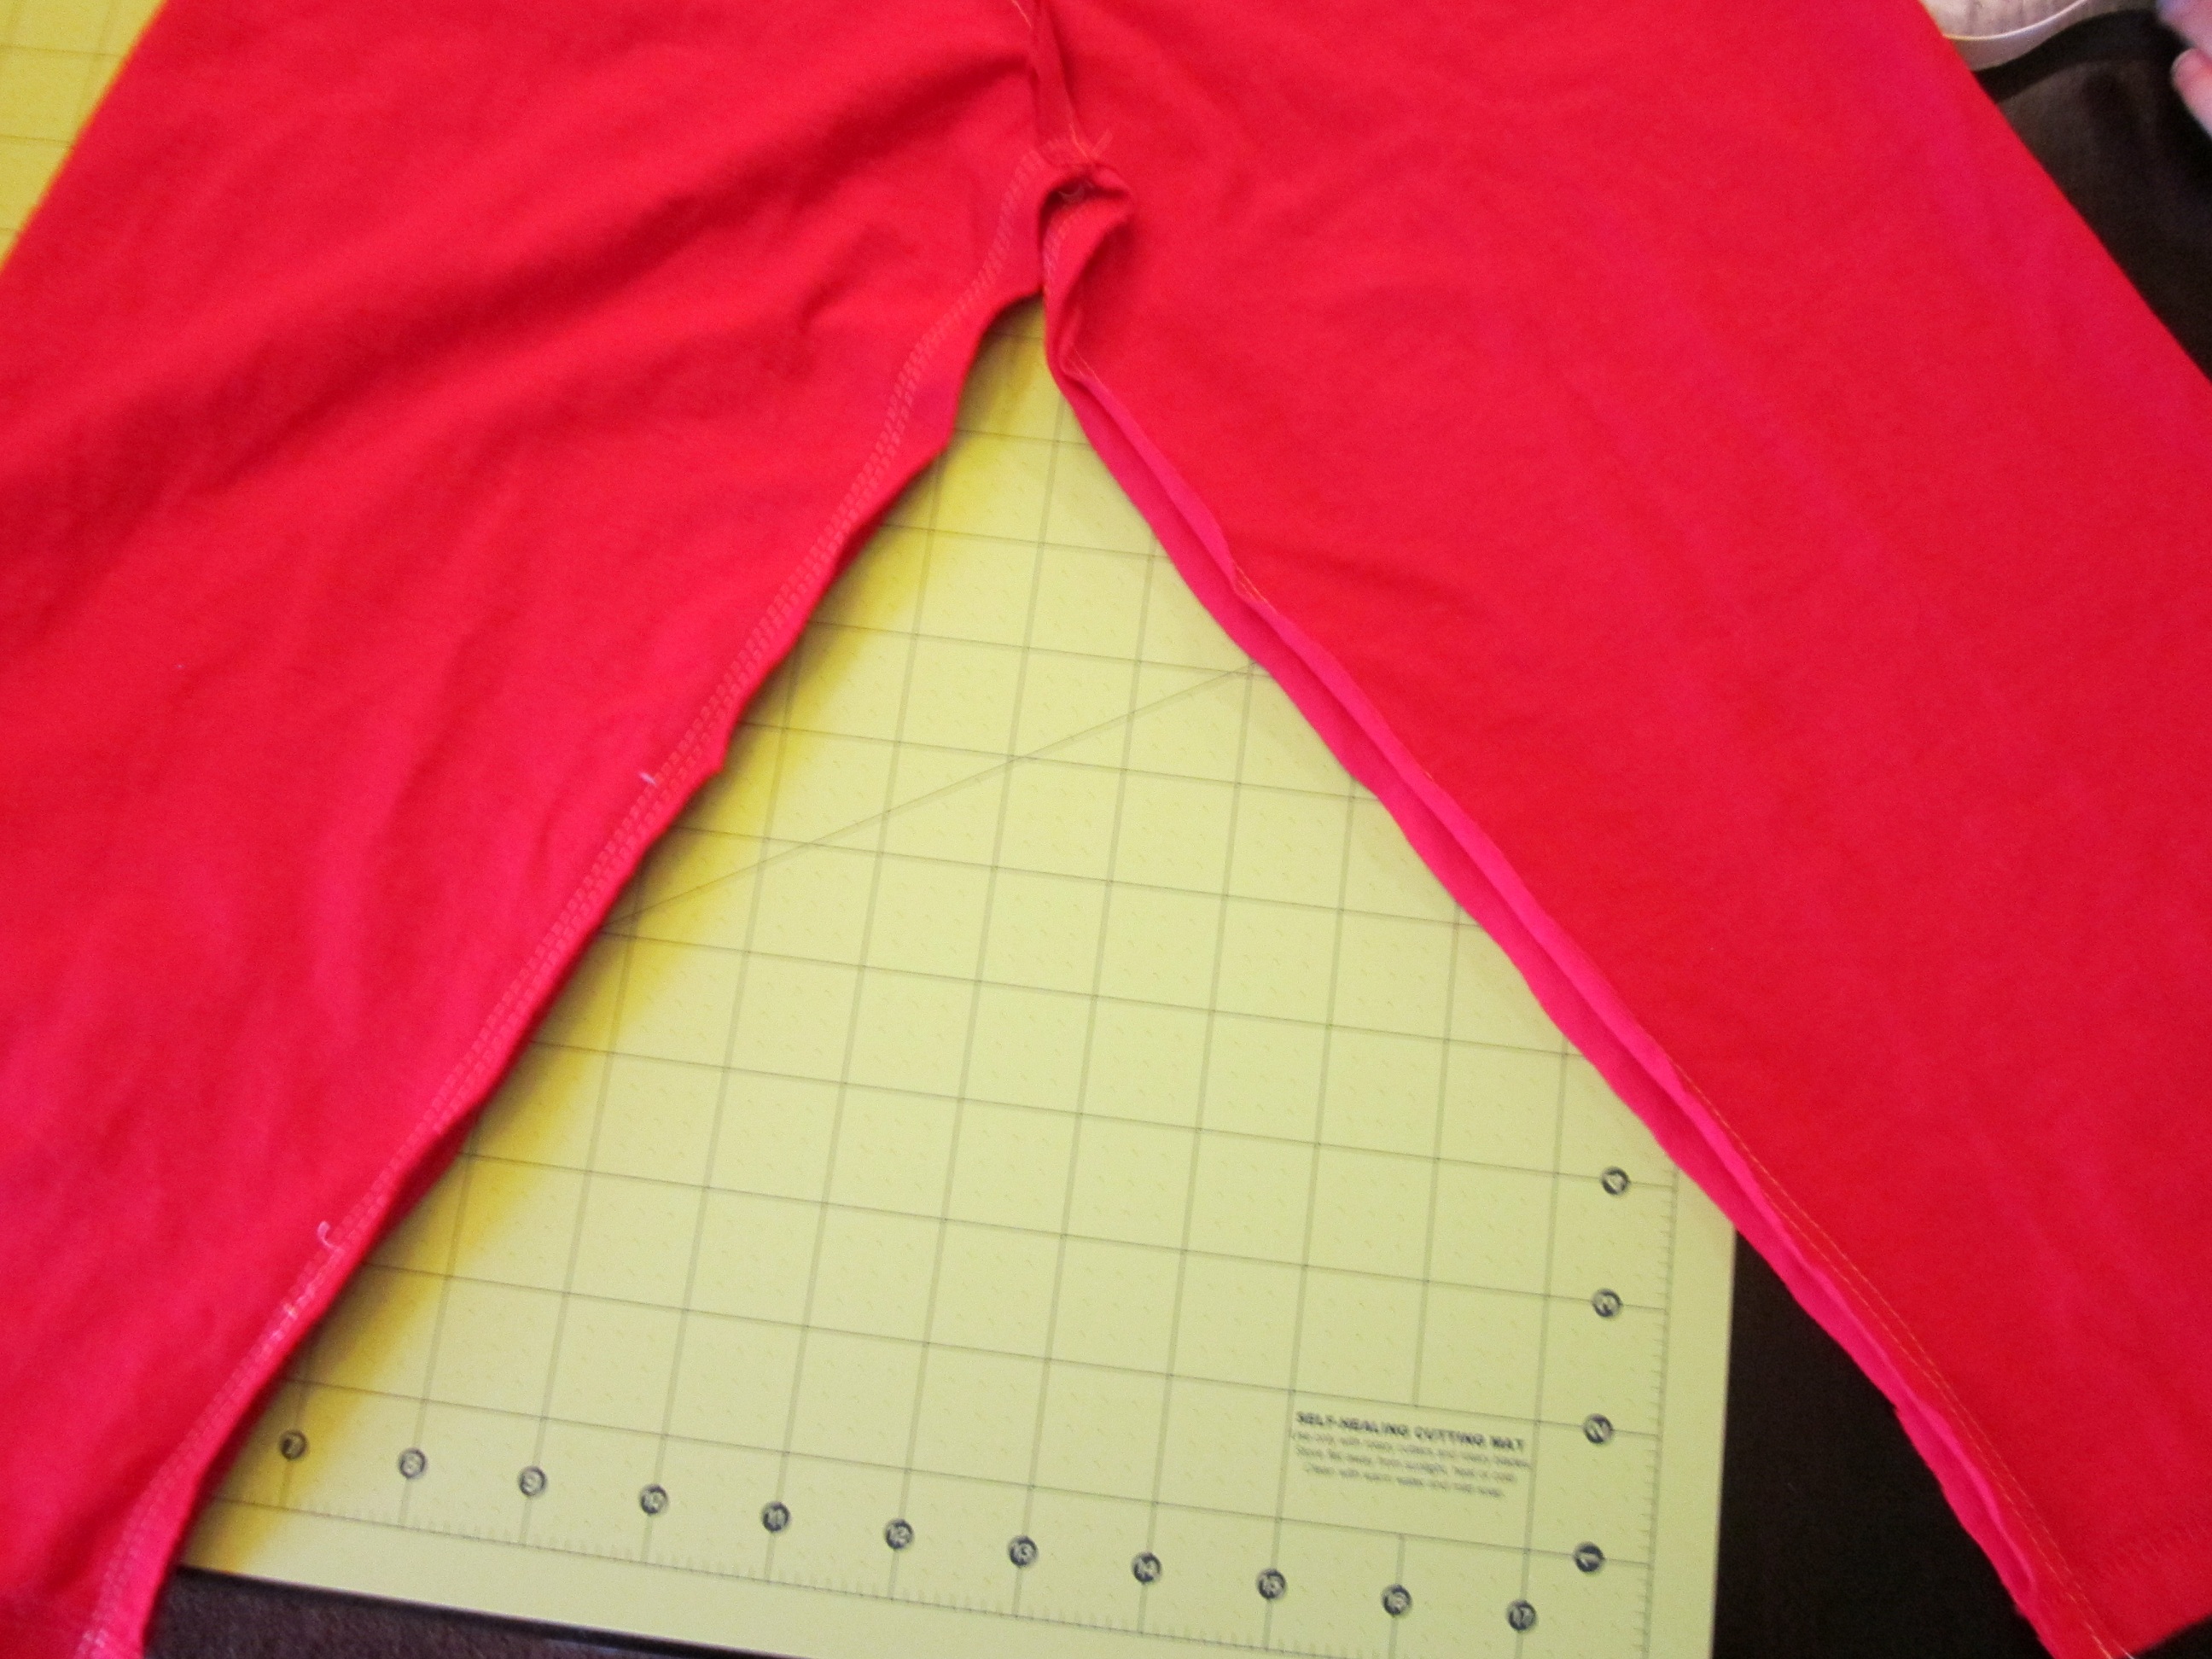
Open up the two pieces of fabric you just cut and line them up with right sides together. Stitch from the waist (top, unhemmed edge of pieces) to the crotch.
Next line the legs up and stitch the inseams. I made two lines of stitching for a little reinforcement. One at 5/8 inch and one at 3/8 inch.
For the waistband (forgot to take a picture of this step. sorry!) Just fold the cut edge down about an inch and stitch almost all the way around, leaving an opening for elastic. Cut a piece of 1/2 inch elastic to fit your child’s waist and insert it into the waistband casing you just created. Stitch the ends of the elastic together and then stitch the opening of the casing closed.
No need to finish any edges since these are made of t-shirt material and will not fray.
Matched up with the t-shirt that he had from the charity event, he now has a pair of pajamas that will last through another growth spurt or two so I can focus our clothing budget on school clothes! yay!

It took me about 20 minutes to make these, including time to take pictures.
He loves them!
Pin It
A PYP Best Blog: Make Your Own Ketchup
Just in case you missed this article on making your own ketchup the first time we shared it a couple of years ago, we are republishing it. After Trish wrote this blog originally, we got an awesome response. This is one of the PYP Best Blogs!
This is a penny pinching recipe in that it cost me nearly nothing to make. My garden has been abundant with Roma tomatoes.
But, of course, time has a value and this does take an investment of time.
This was my first time making homemade ketchup and I really think the flavor is worth the effort. It’s not at all like store bought ketchup. Much more complex flavor, which is wonderful for me since I don’t much care for regular ketchup.
This is adapted from a Jamie Oliver recipe based on the ingredients I had on hand today.
For 2 pints of ketchup you will need:
3 pounds of peeled, diced, Roma tomatoes
(Roma are best for this because of their low water content. You can use others but you’ll need an extra pound or so and after chopping them, allow them to drain in a colander for a bit. I’d like to try this next time with some of the different colored heirloom varieties. I’ll bet the colors and flavors would be quite unique.)
1 1/2 cups water
1 stalk celery, coarsely chopped
1 large onion, coarsely chopped
one inch piece of fresh ginger, coarsely chopped
2 cloves garlic, chopped
1/4 teaspoon red pepper flakes
1/4 teaspoon fennel seeds
1 Tablespoon dried basil
1 teaspoon ground coriander
2 whole cloves
salt (start with 2 teaspoons and adjust later)
1 teaspoon ground black pepper
3/4 cup plus 2 Tablespoons red wine vinegar
1/3 cup packed brown sugar
2 Tablespoons olive oil
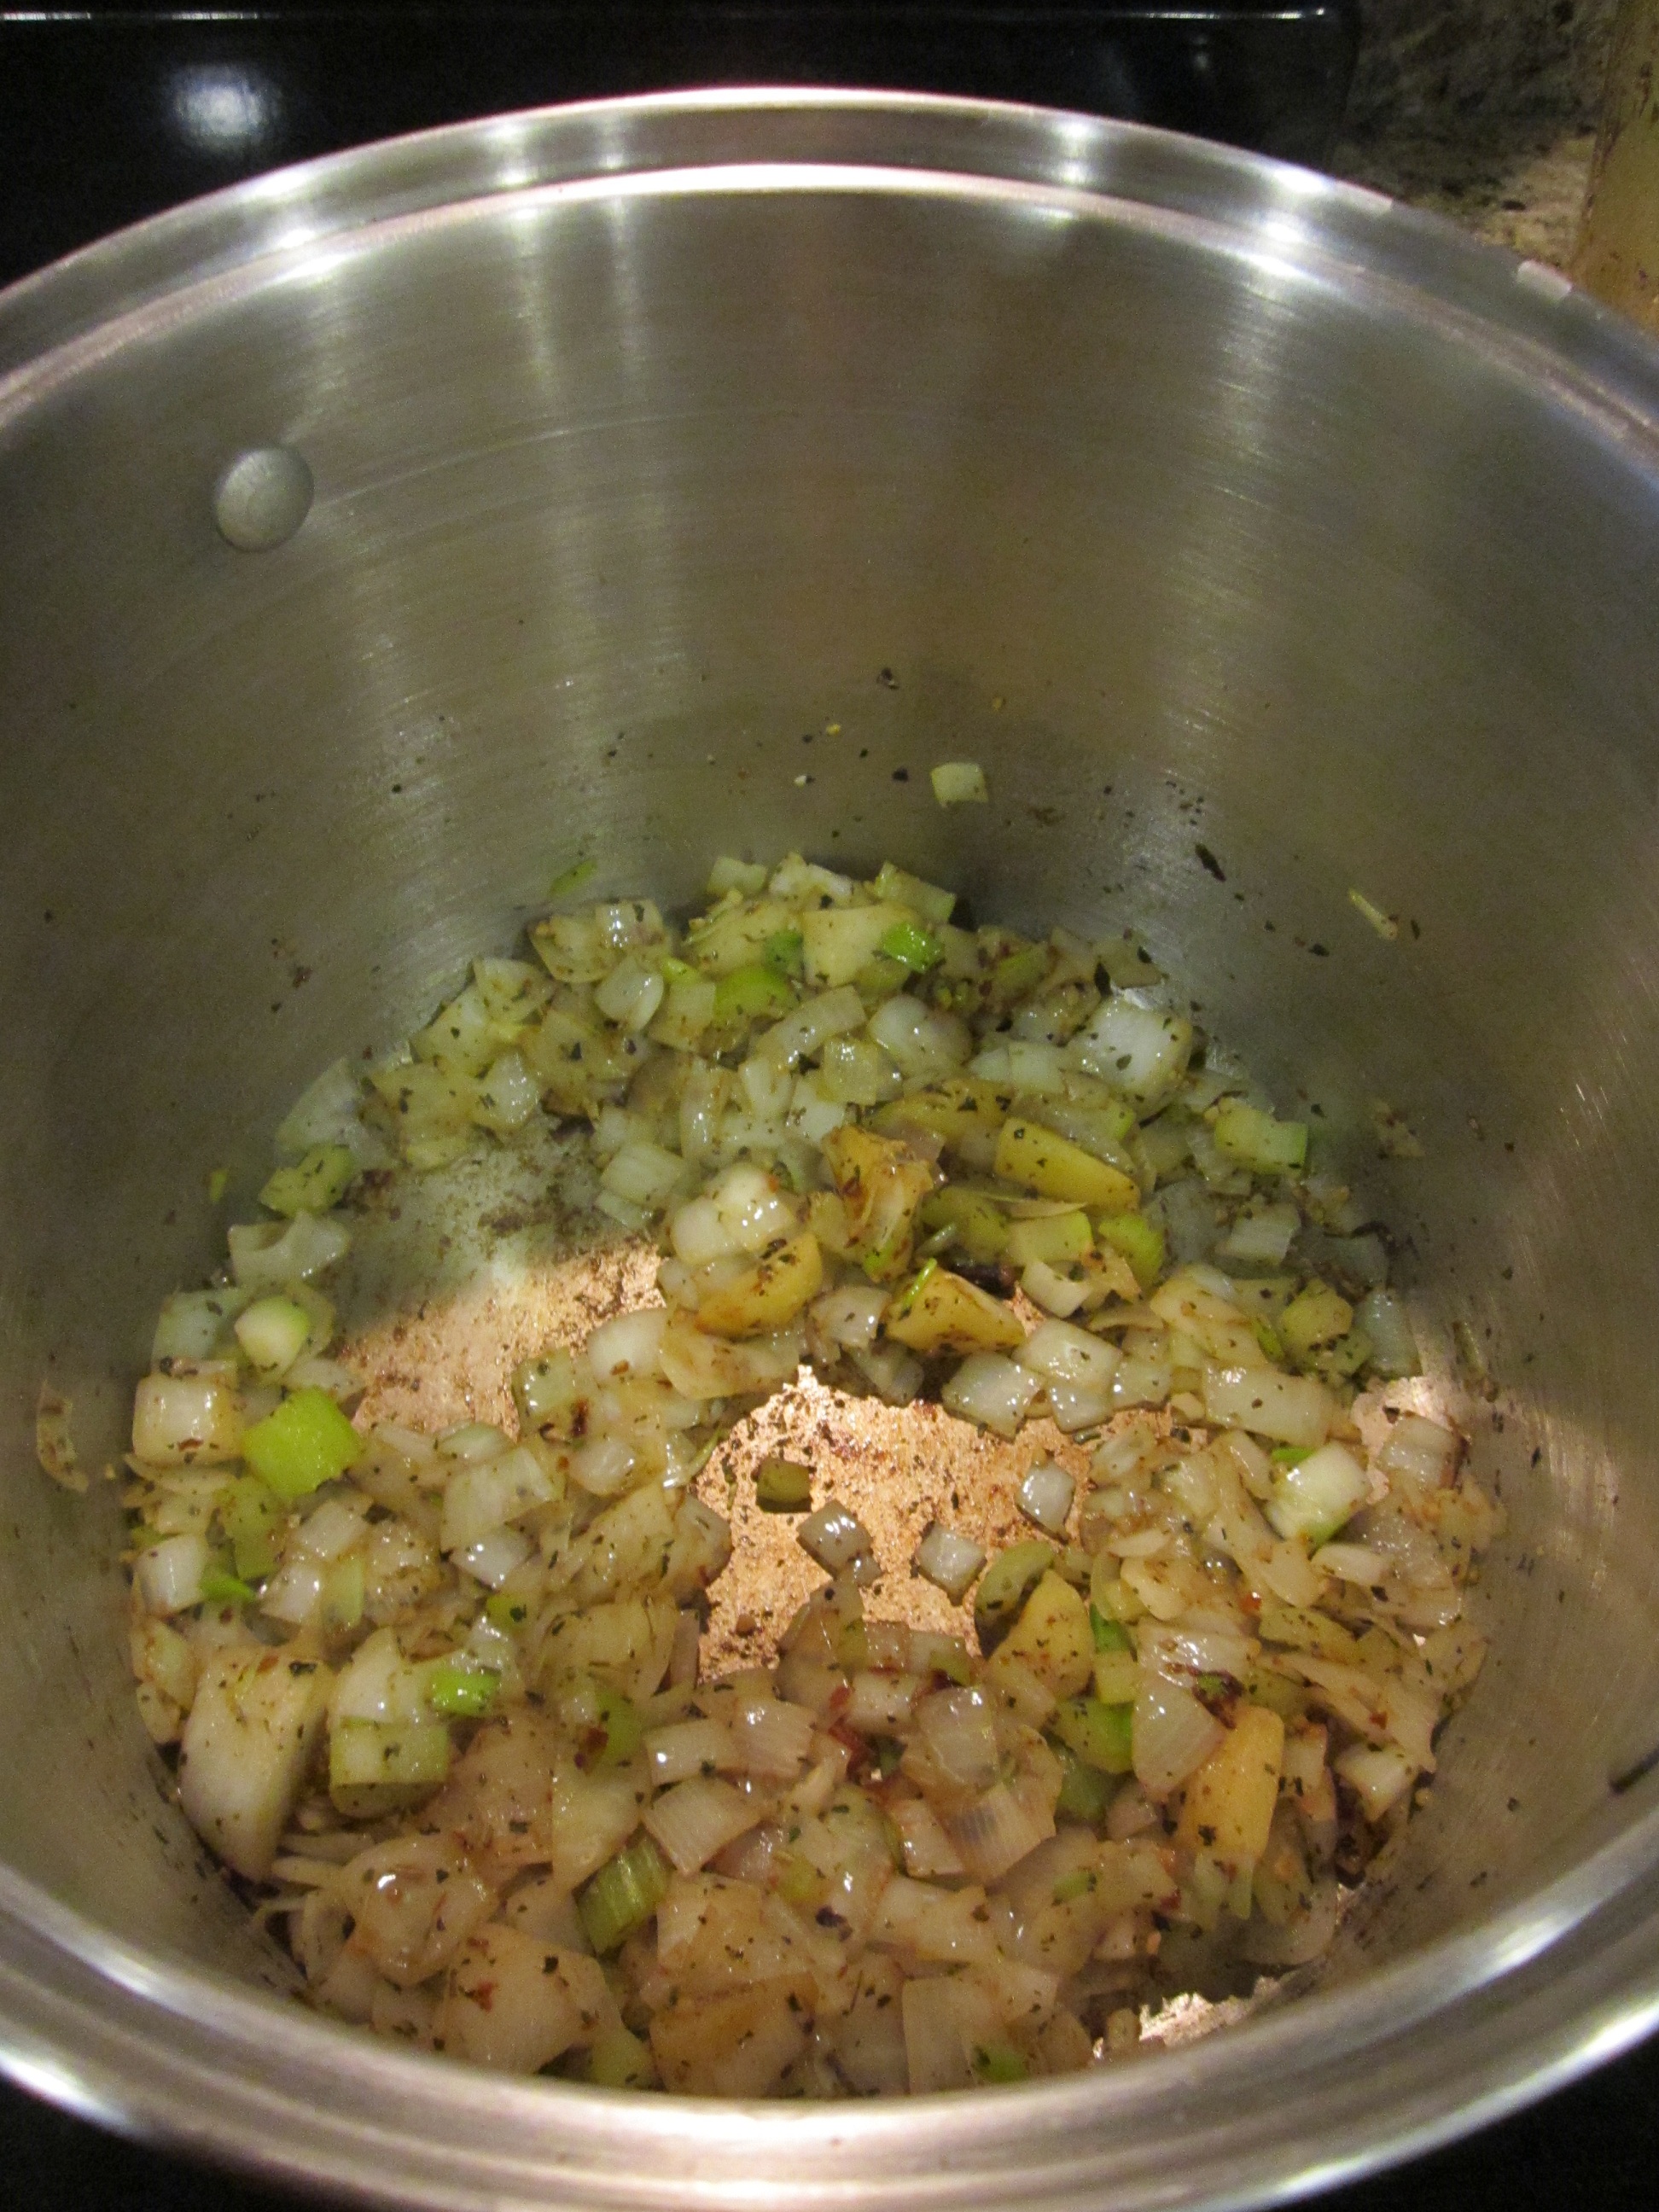
Heat the olive oil in a large stock pot, over medium heat. Add the celery, onion, ginger, garlic, red pepper flakes, basil, coriander, fennel, cloves, salt and pepper. Cook until veggies are soft, about 10 minutes.
It’s okay to let them brown a bit. That’s flavor!
Now add the tomatoes and the water. Stir, scraping the bottom of the pot to deglaze the pot and get all the flavor stirred in.
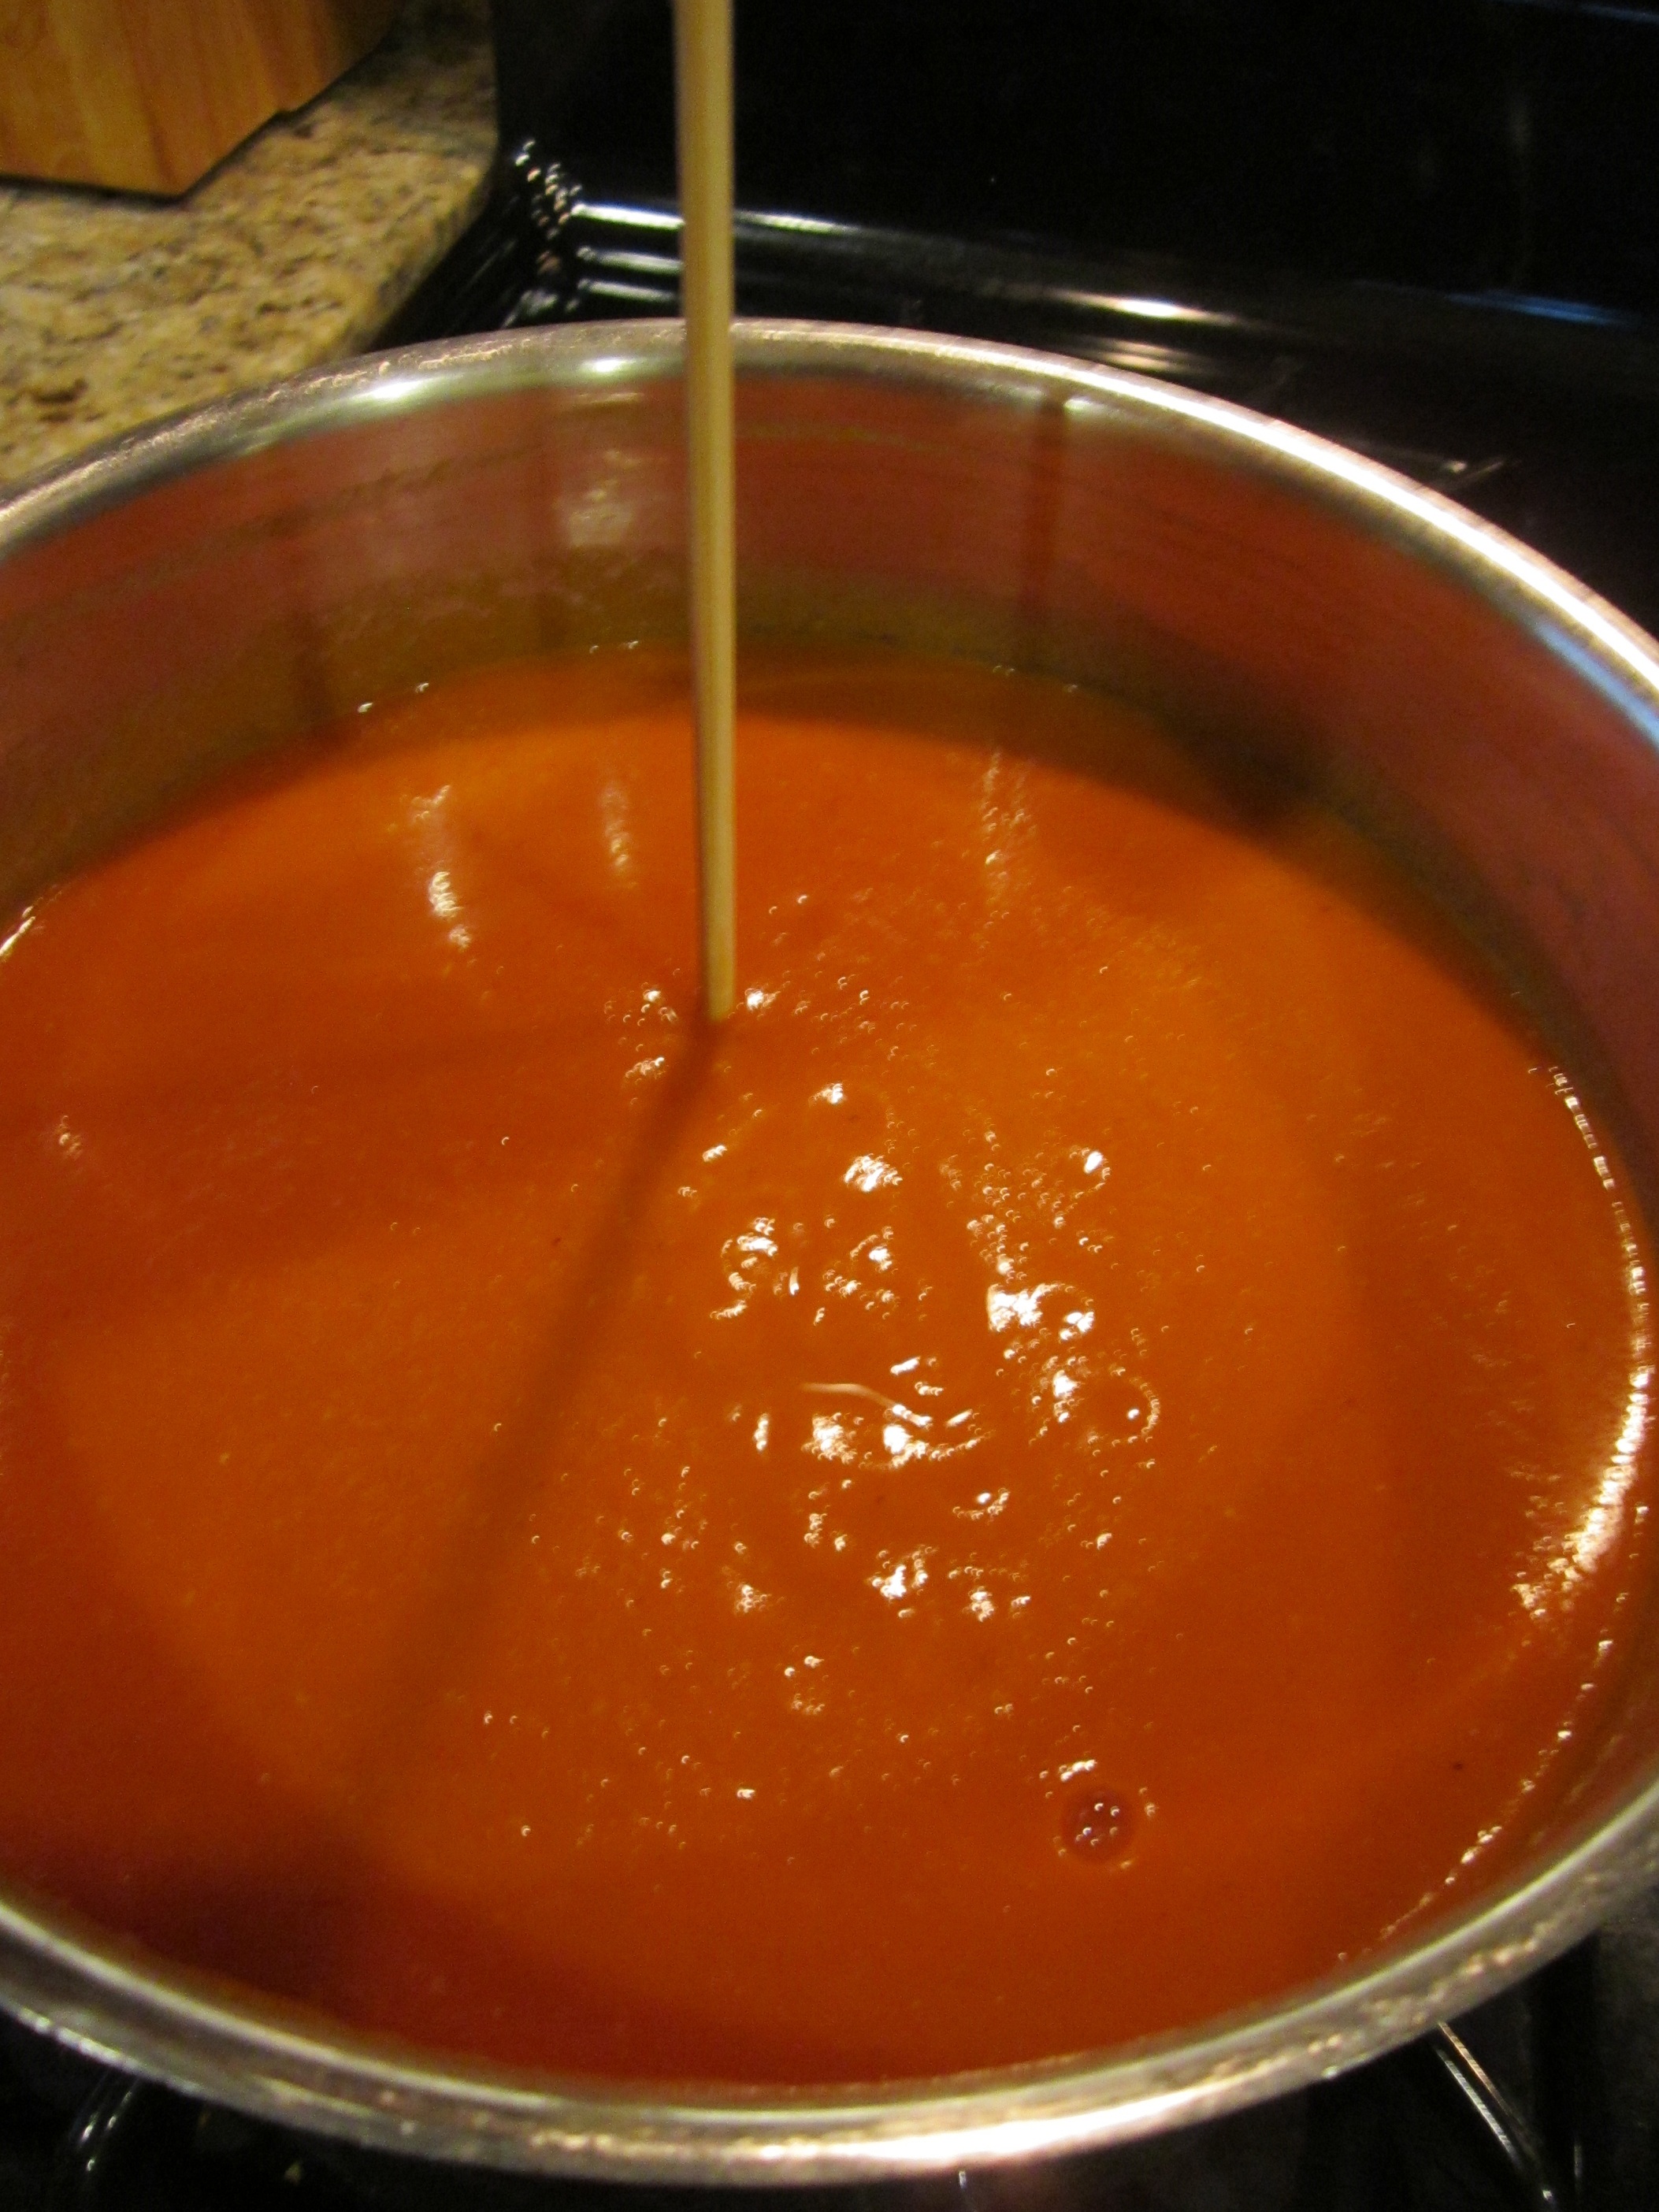
Now you will reduce this by half. Here’s a little (admittedly OCD) trick that I use to judge when it has been reduced by half.
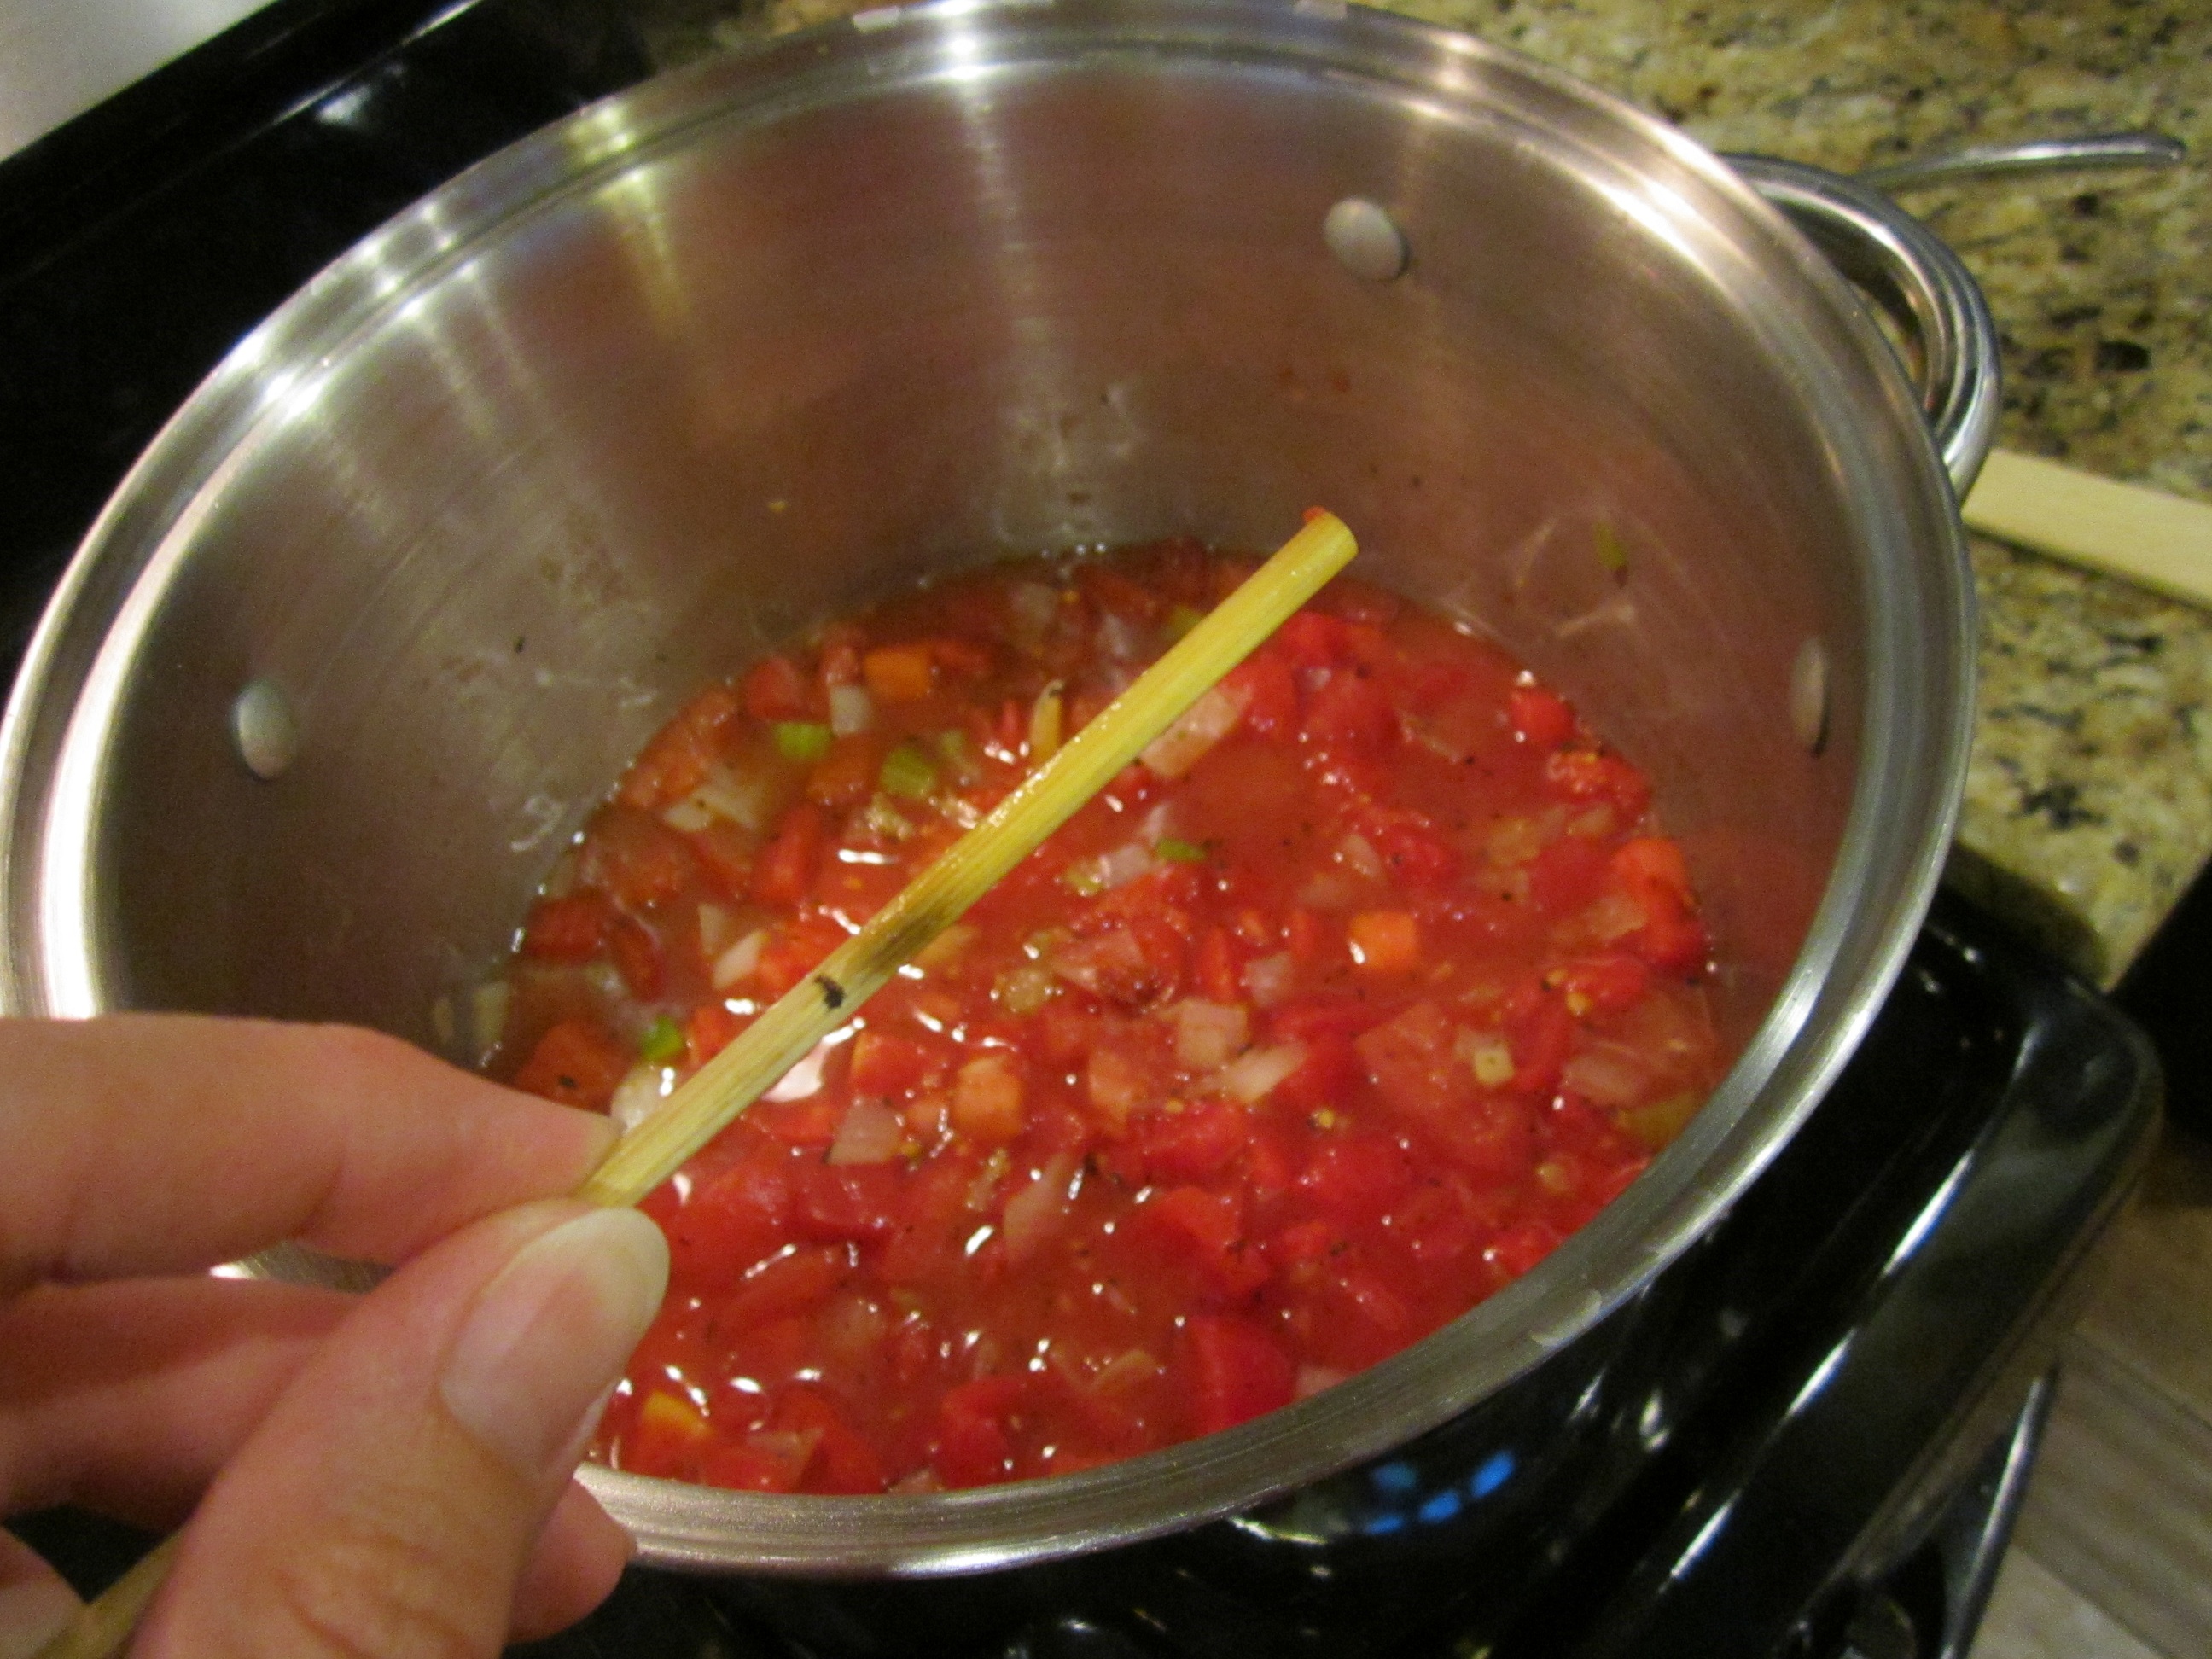
Put a skewer into the pot, all the way to the bottom.
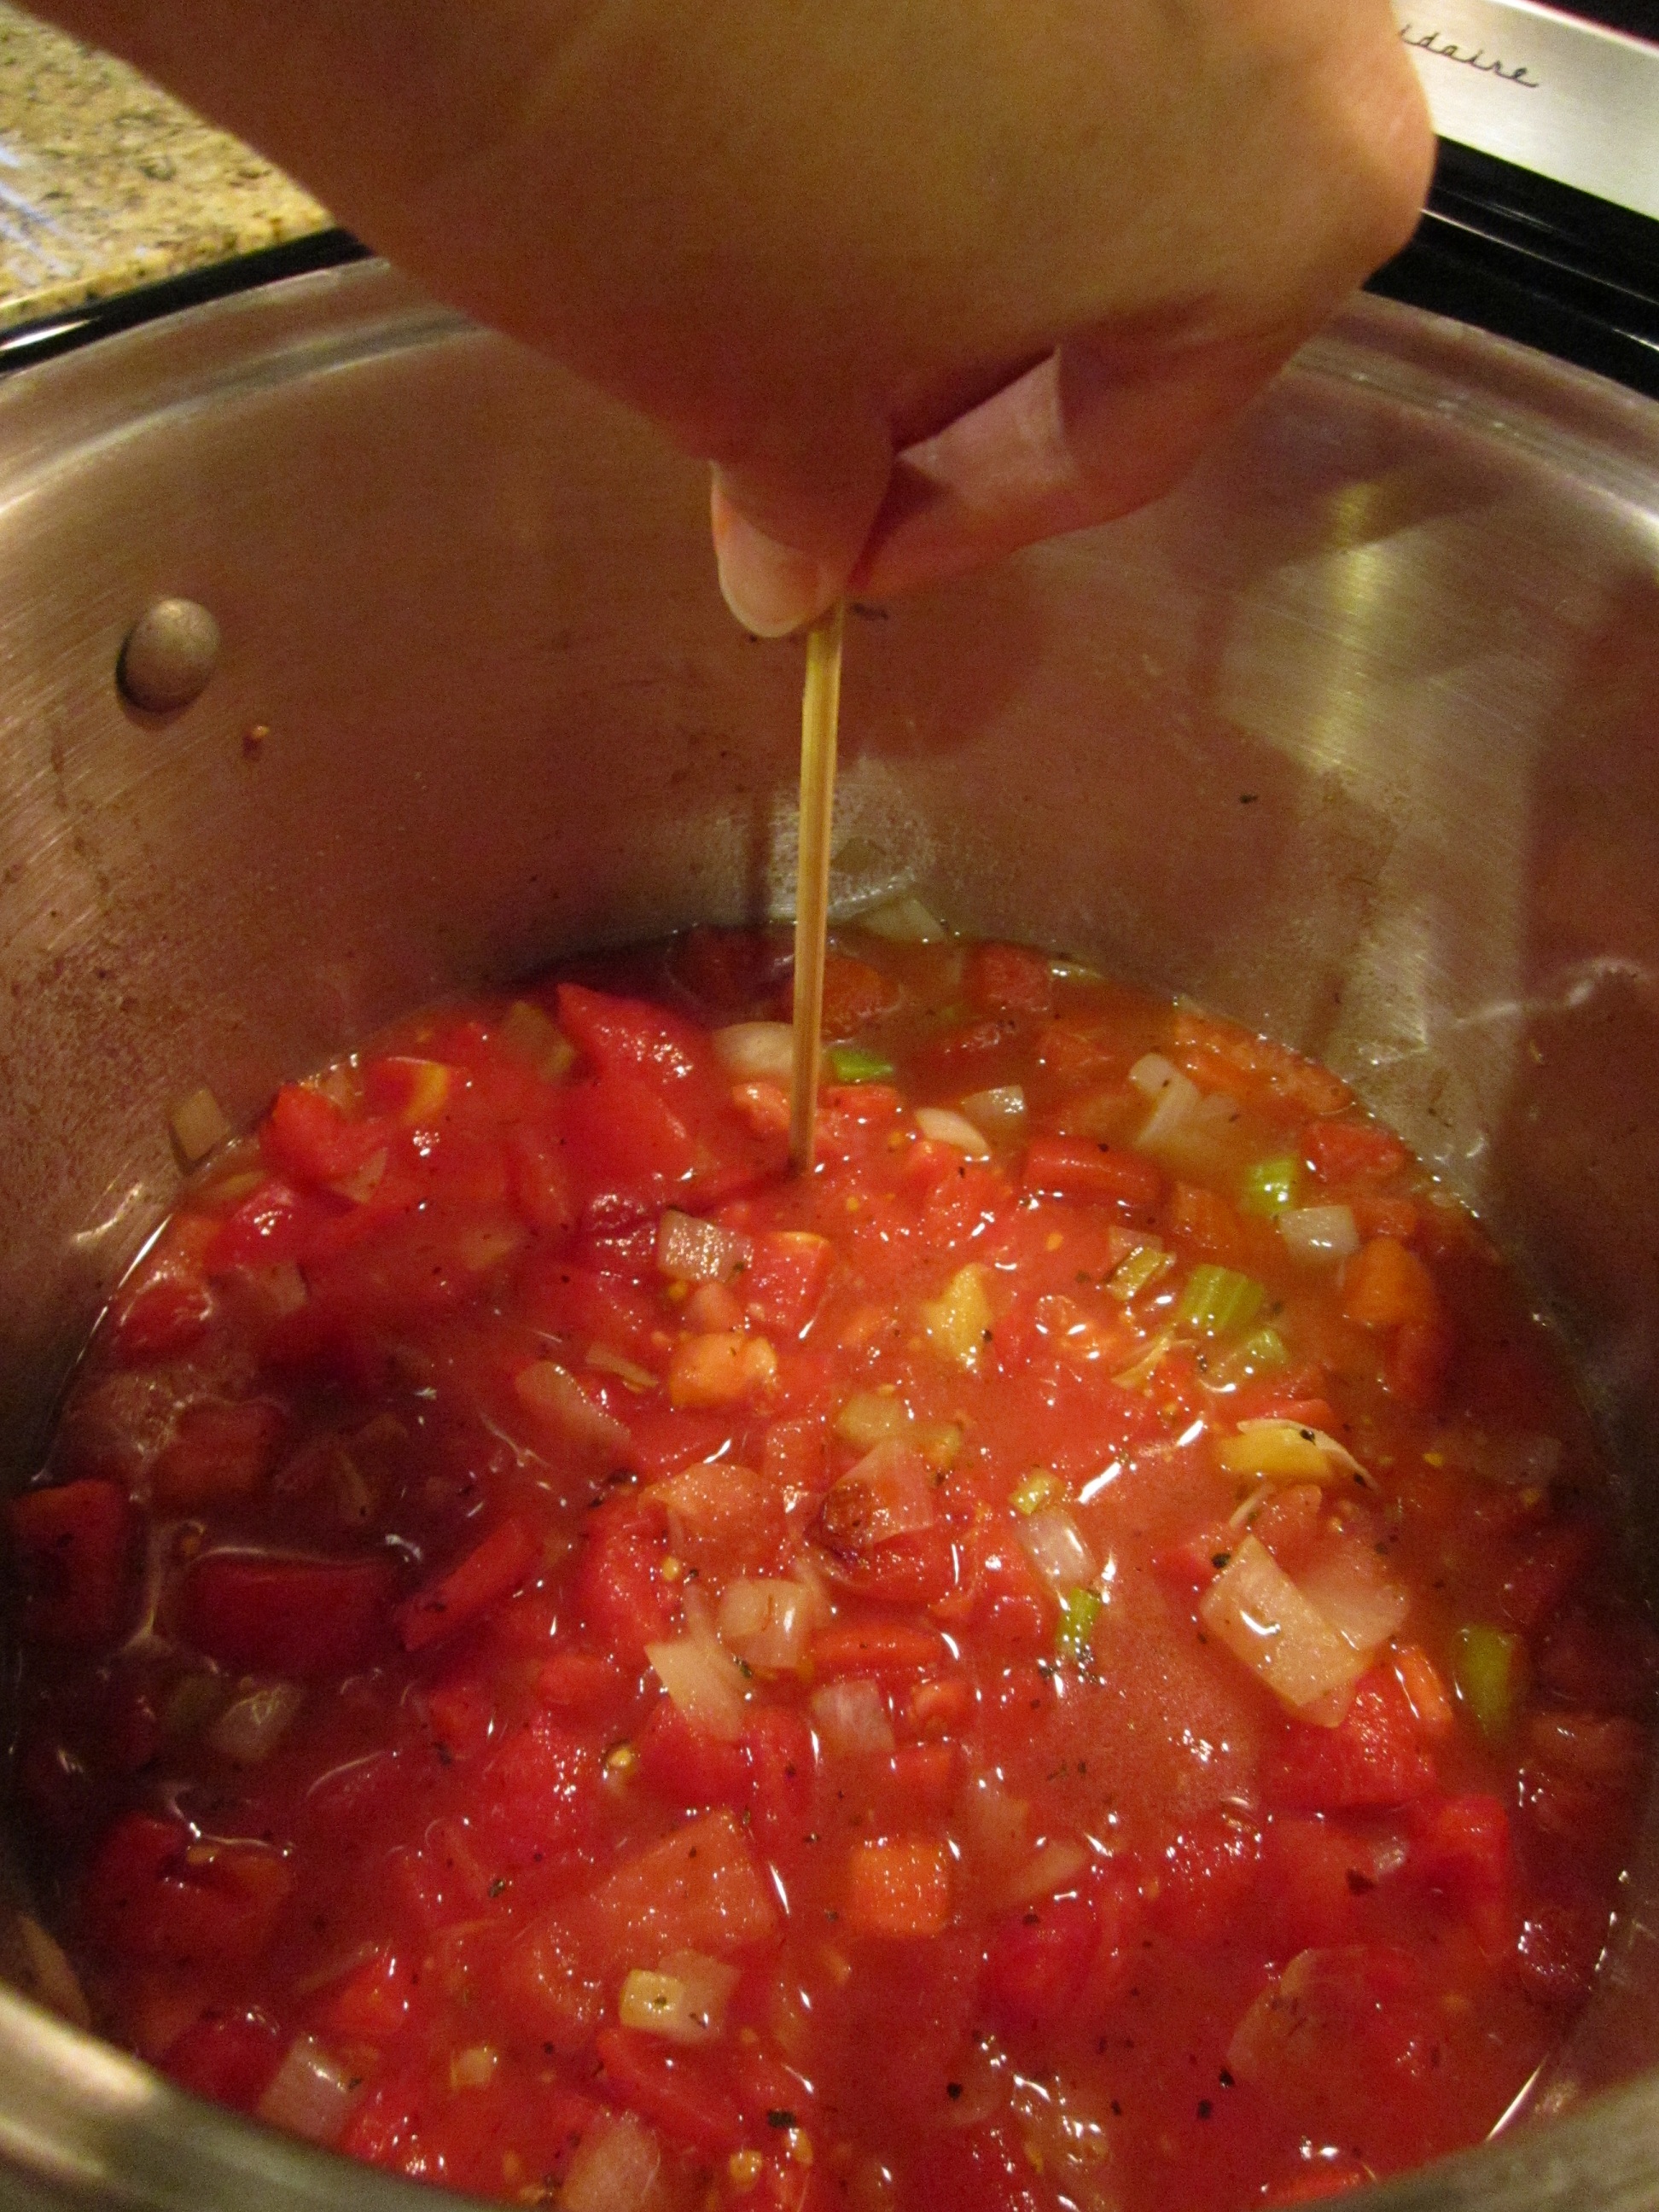
Now mark that skewer where the top of the sauce was so you’ll have a way to judge when it has reduced enough. I use a sharpie.
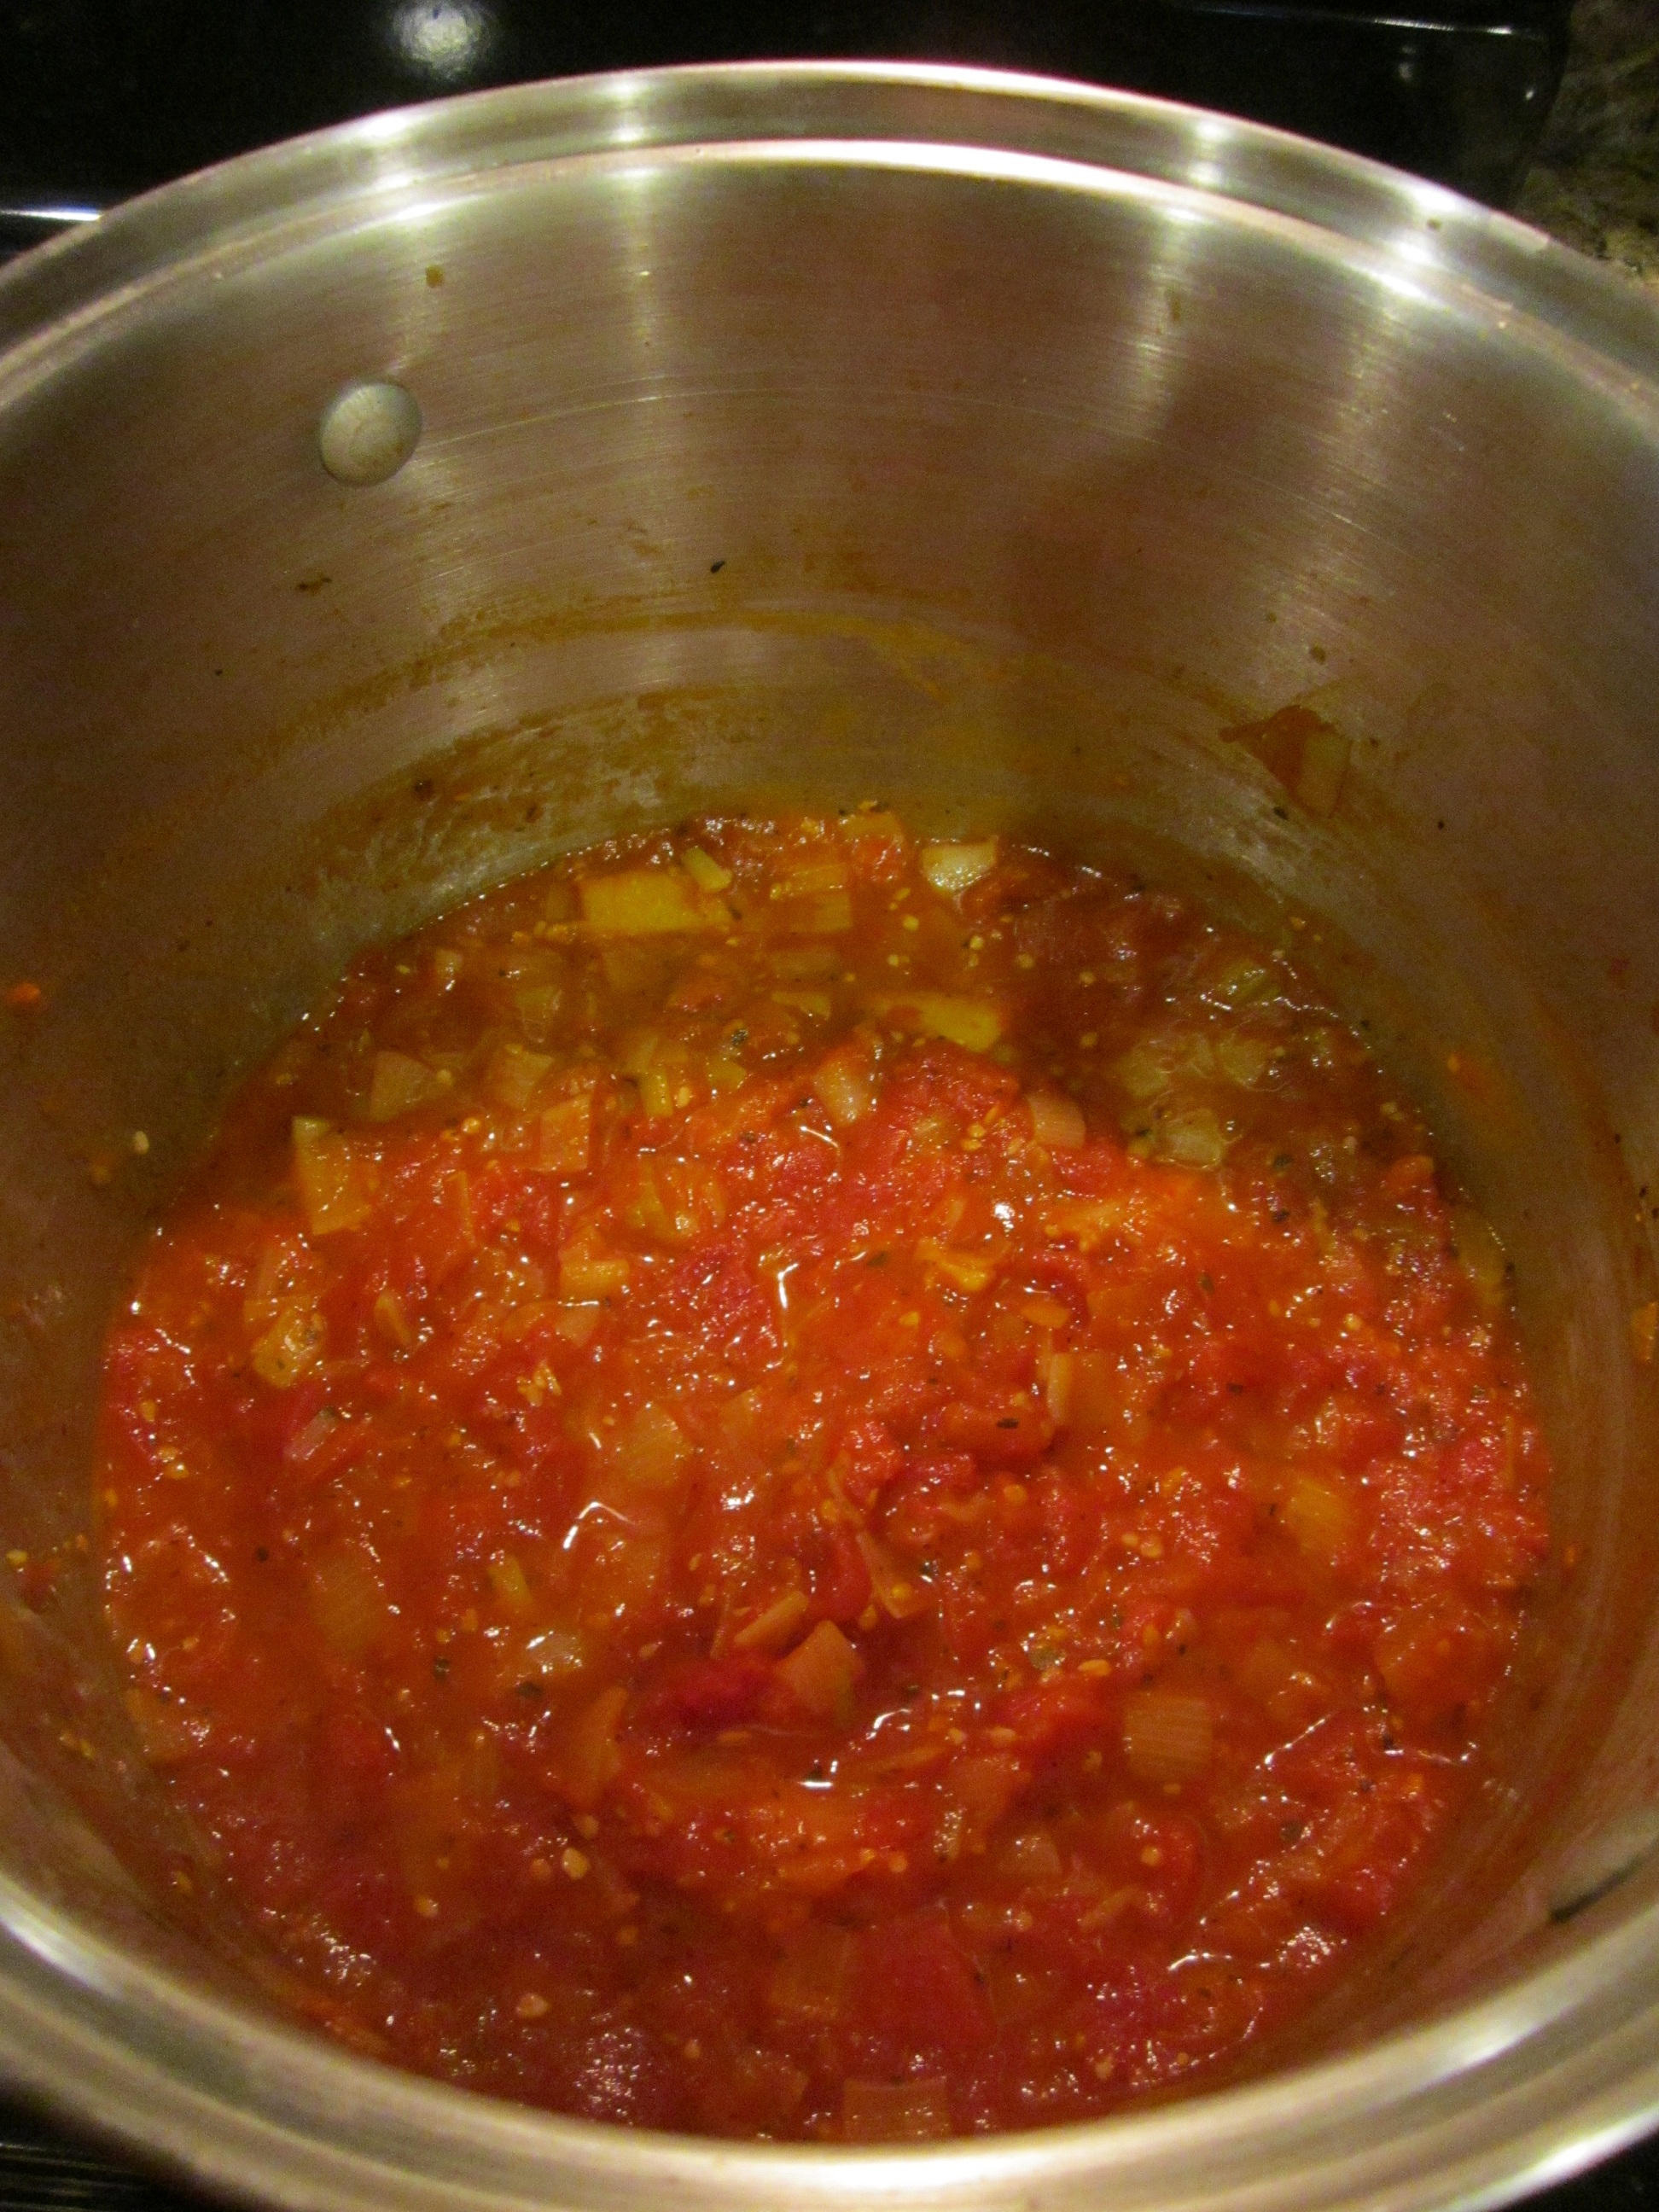
Bring the sauce to a boil over high heat. Reduce the heat and let it simmer, uncovered until it has reduced by half, stirring occasionally. This took abut an hour for me. And it looked like this when it was done.
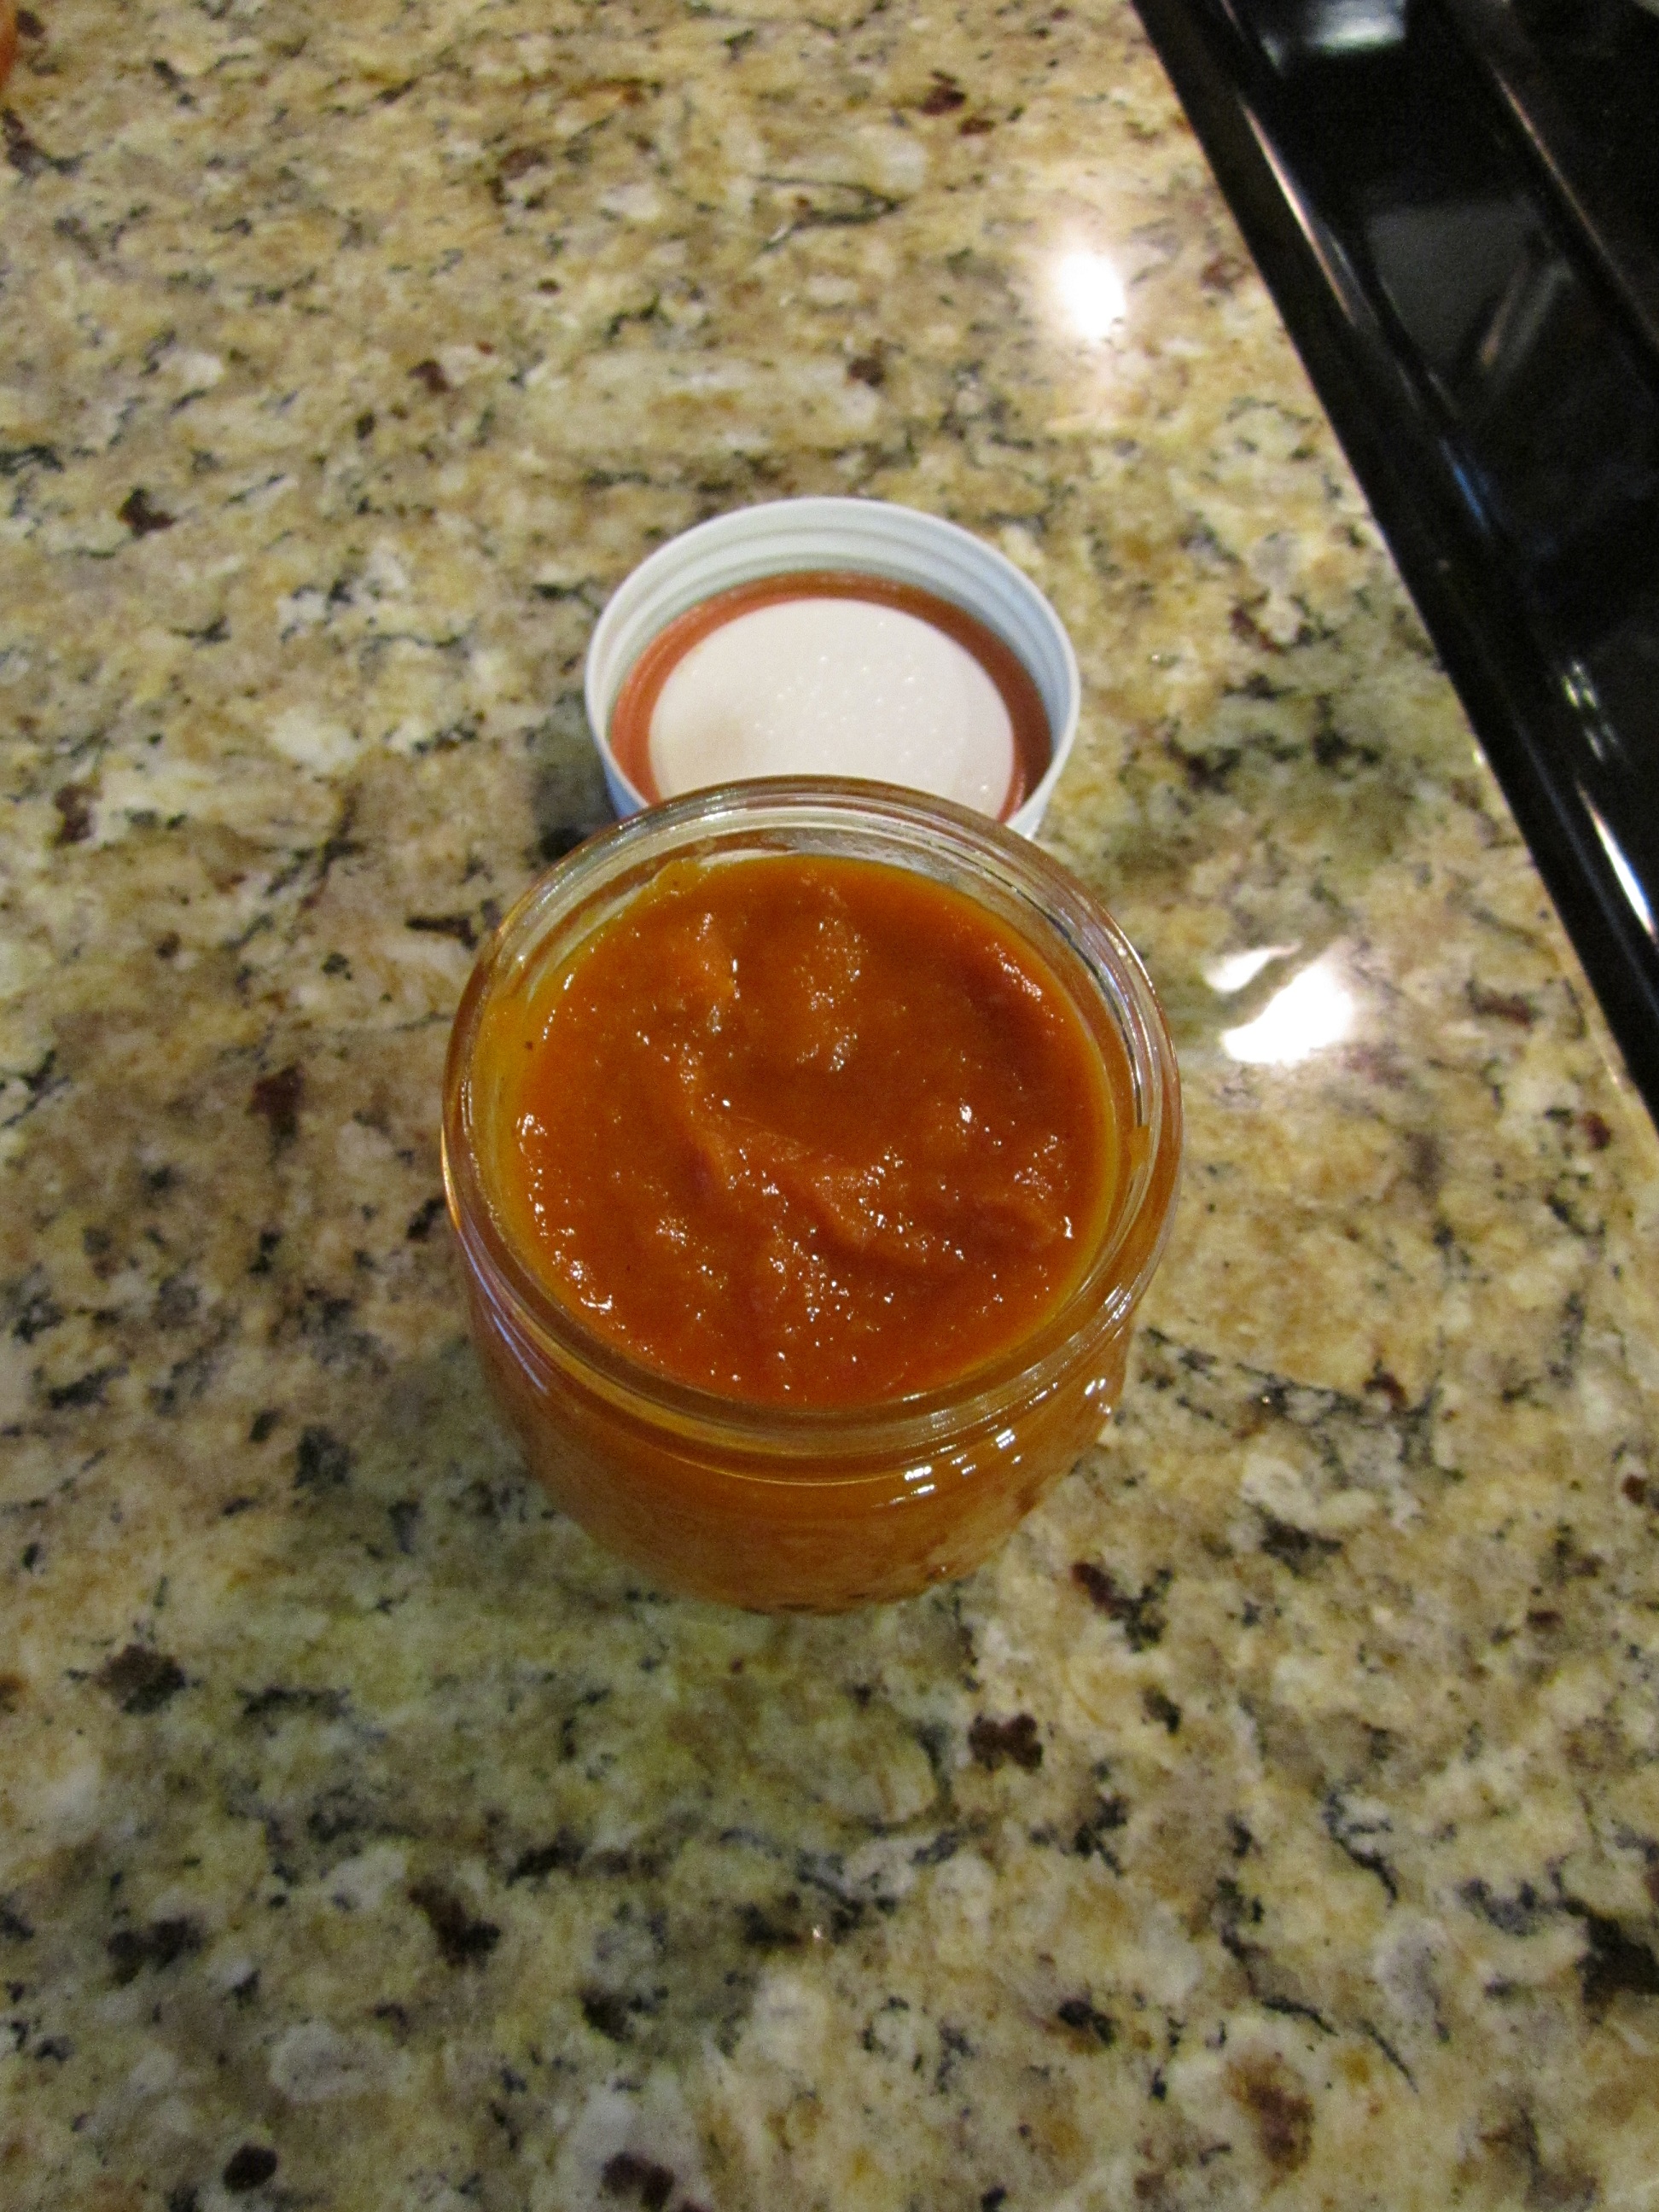
At this point, you can push the sauce through a food mill or a fine sieve to make the sauce as smooth as possible and remove the fennel seeds and cloves.
I have a powerful blender and don’t have a problem with a little texture to my ketchup so I just put it through the blender, in two batches, until it was as smooth as possible.
Put the sauce into a clean pan and stir in the red wine vinegar and the brown sugar.
Mark your skewer again, because it needs to reduce by half again.
Bring the sauce to a boil over high heat, reduce heat and simmer, stirring occasionally until reduced by half or as thick as you want your ketchup to be. It will thicken a little more as it cools.
This is a good time to check for seasoning and add more salt if you like. If it tastes a little too tart form the vinegar, a little more salt will tone that down.
This took another hour for me and the last half hour needed more frequent stirring as it was getting very thick by that time.
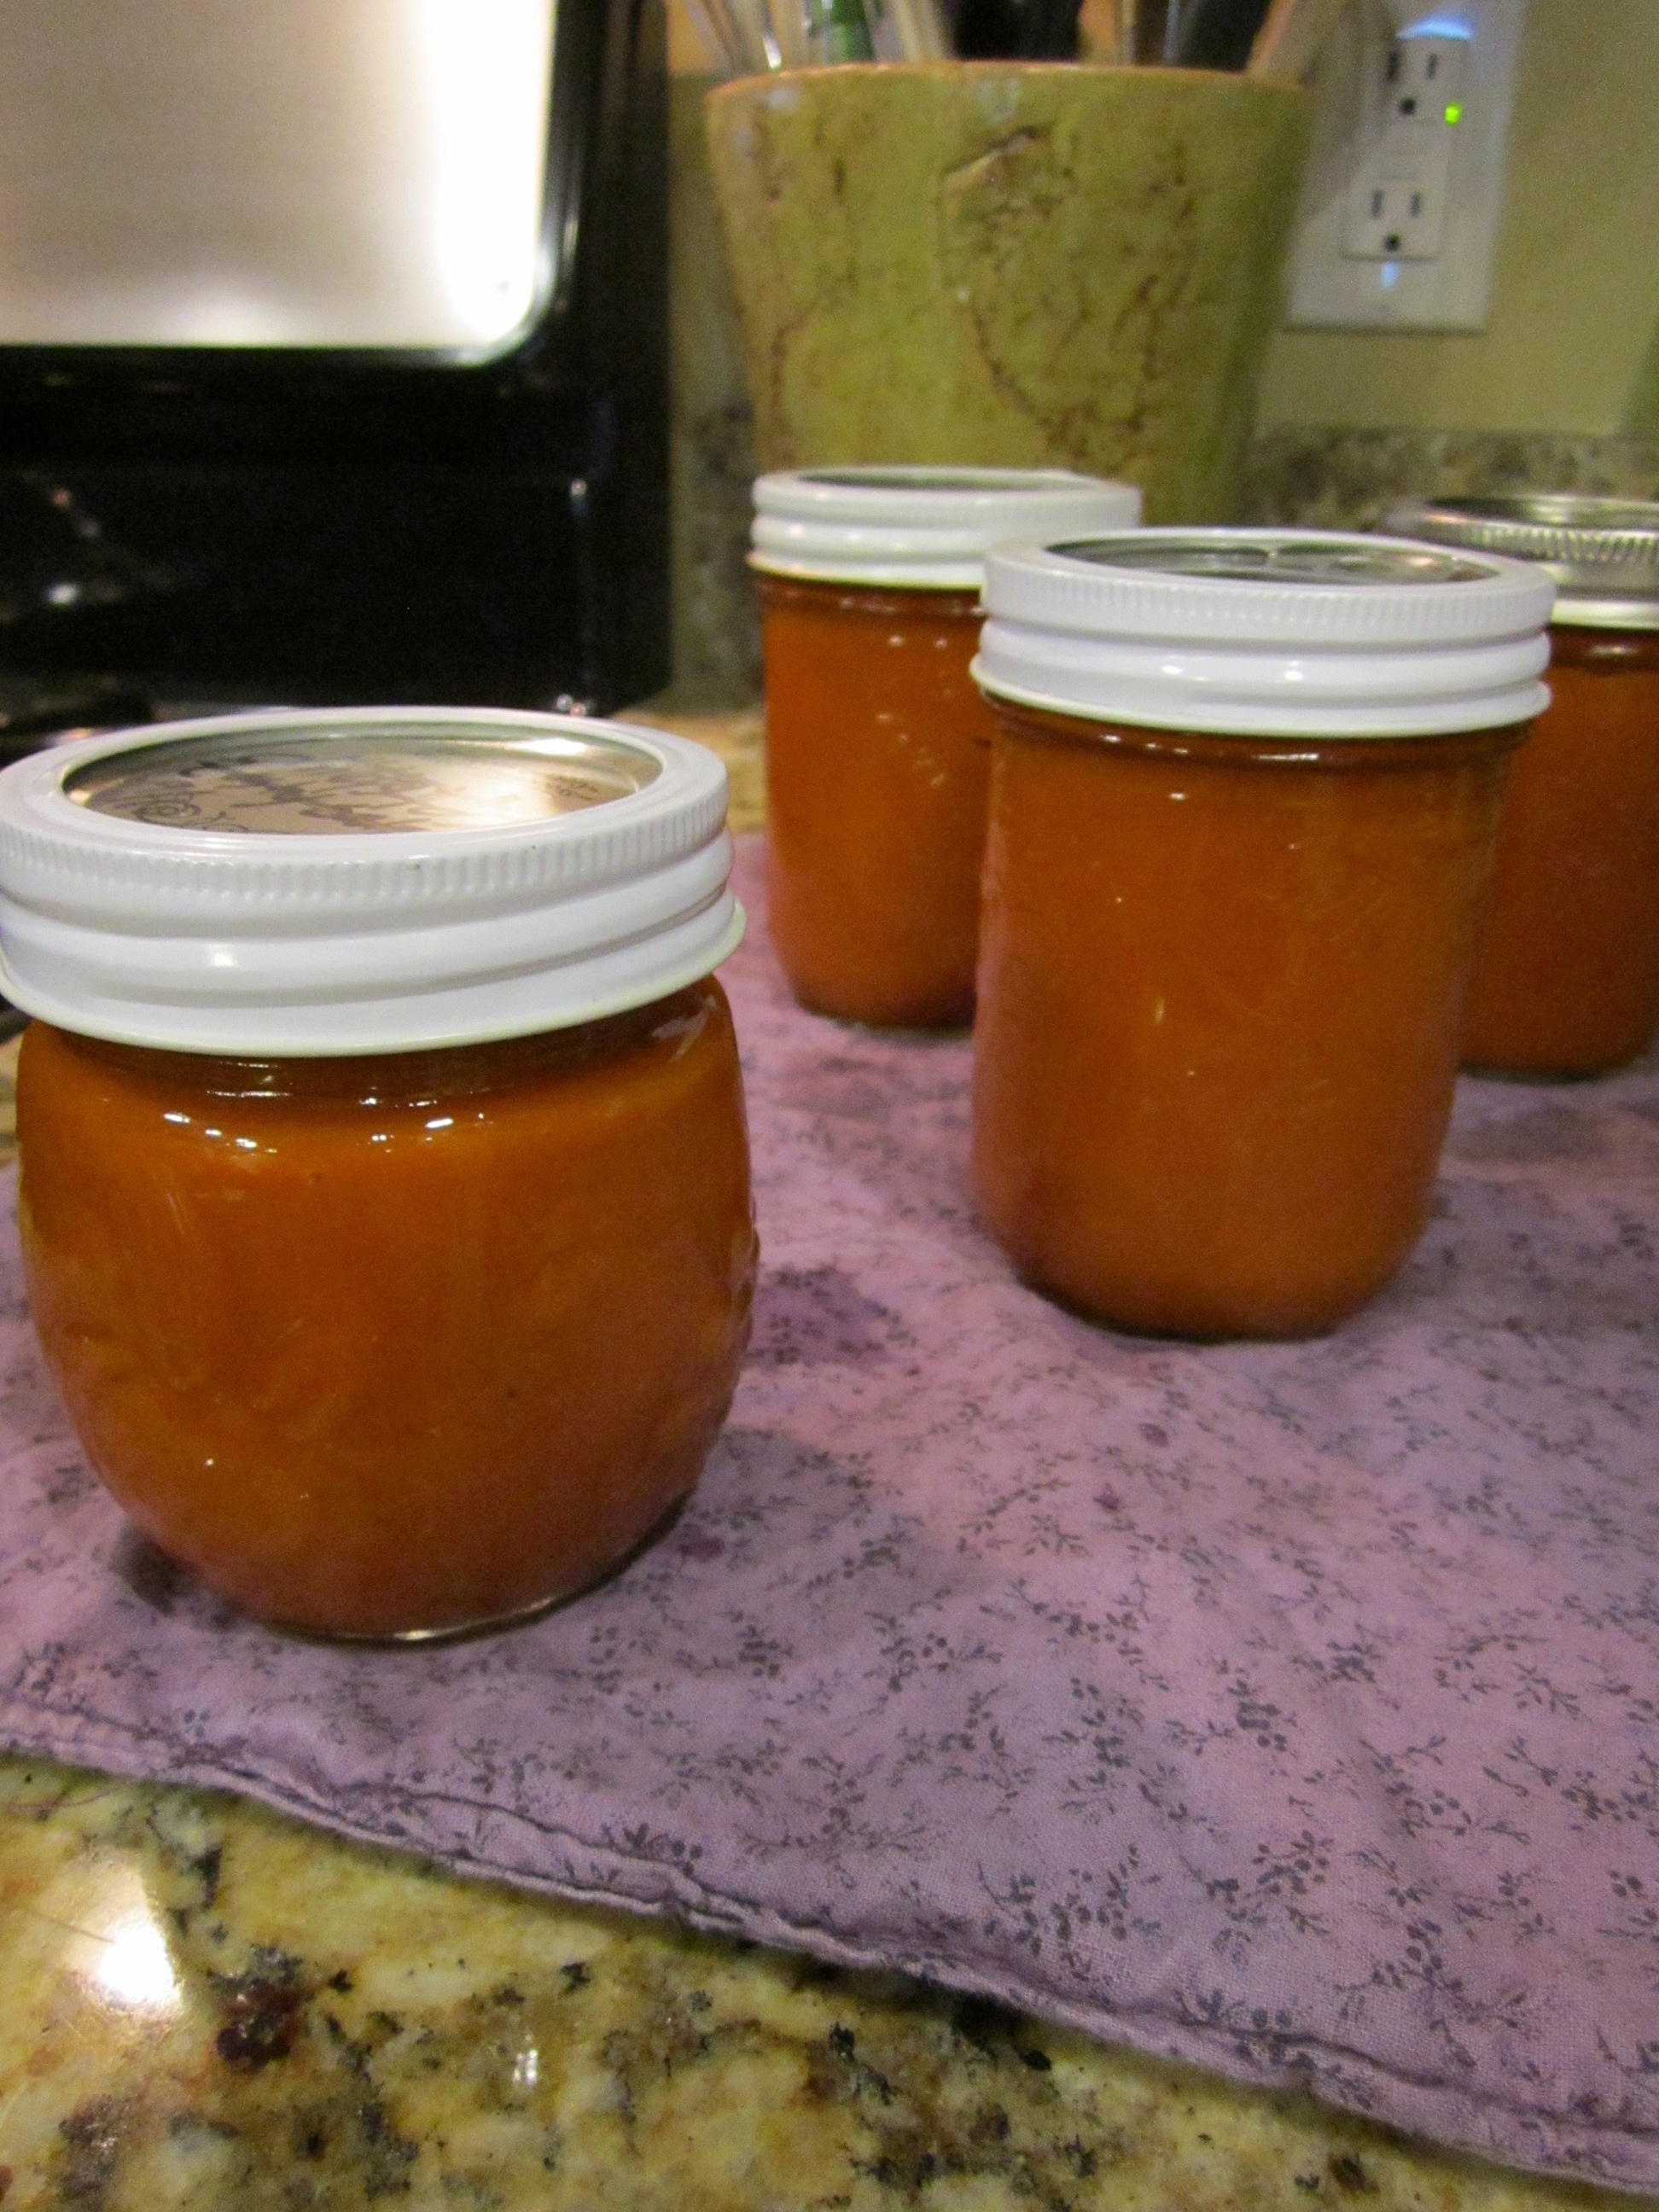
When the ketchup is finished, it can be kept in the refrigerator for several weeks.
I have no delusions that my two kids will choose this gourmet delight over the shiny, bright red gel that comes from the store. So I chose to can mine. This recipe yielded 4 half pints. I processed 3 and put one in the fridge. I’m excited to get some gourmet burgers and fries on the menu this week for my ketchup’s grand premiere!
If you want to can yours, put your water bath canner on to boil during the last half hour of reducing the ketchup.
Heat jars and lids in simmering water until ready to use. Do not boil.
Ladle hot ketchup into hot jars leaving 1/2 inch headspace. Remove air bubbles. Wipe rim. Center lid on jar. Apply band until fit is fingertip tight.
Process jars in boiling water canner for 15 minutes, adjusting for altitude. Remove jars and cool. Check lids for seal after 24 hours. Lid should not flex when pressed in center. Enjoy!
Pin It