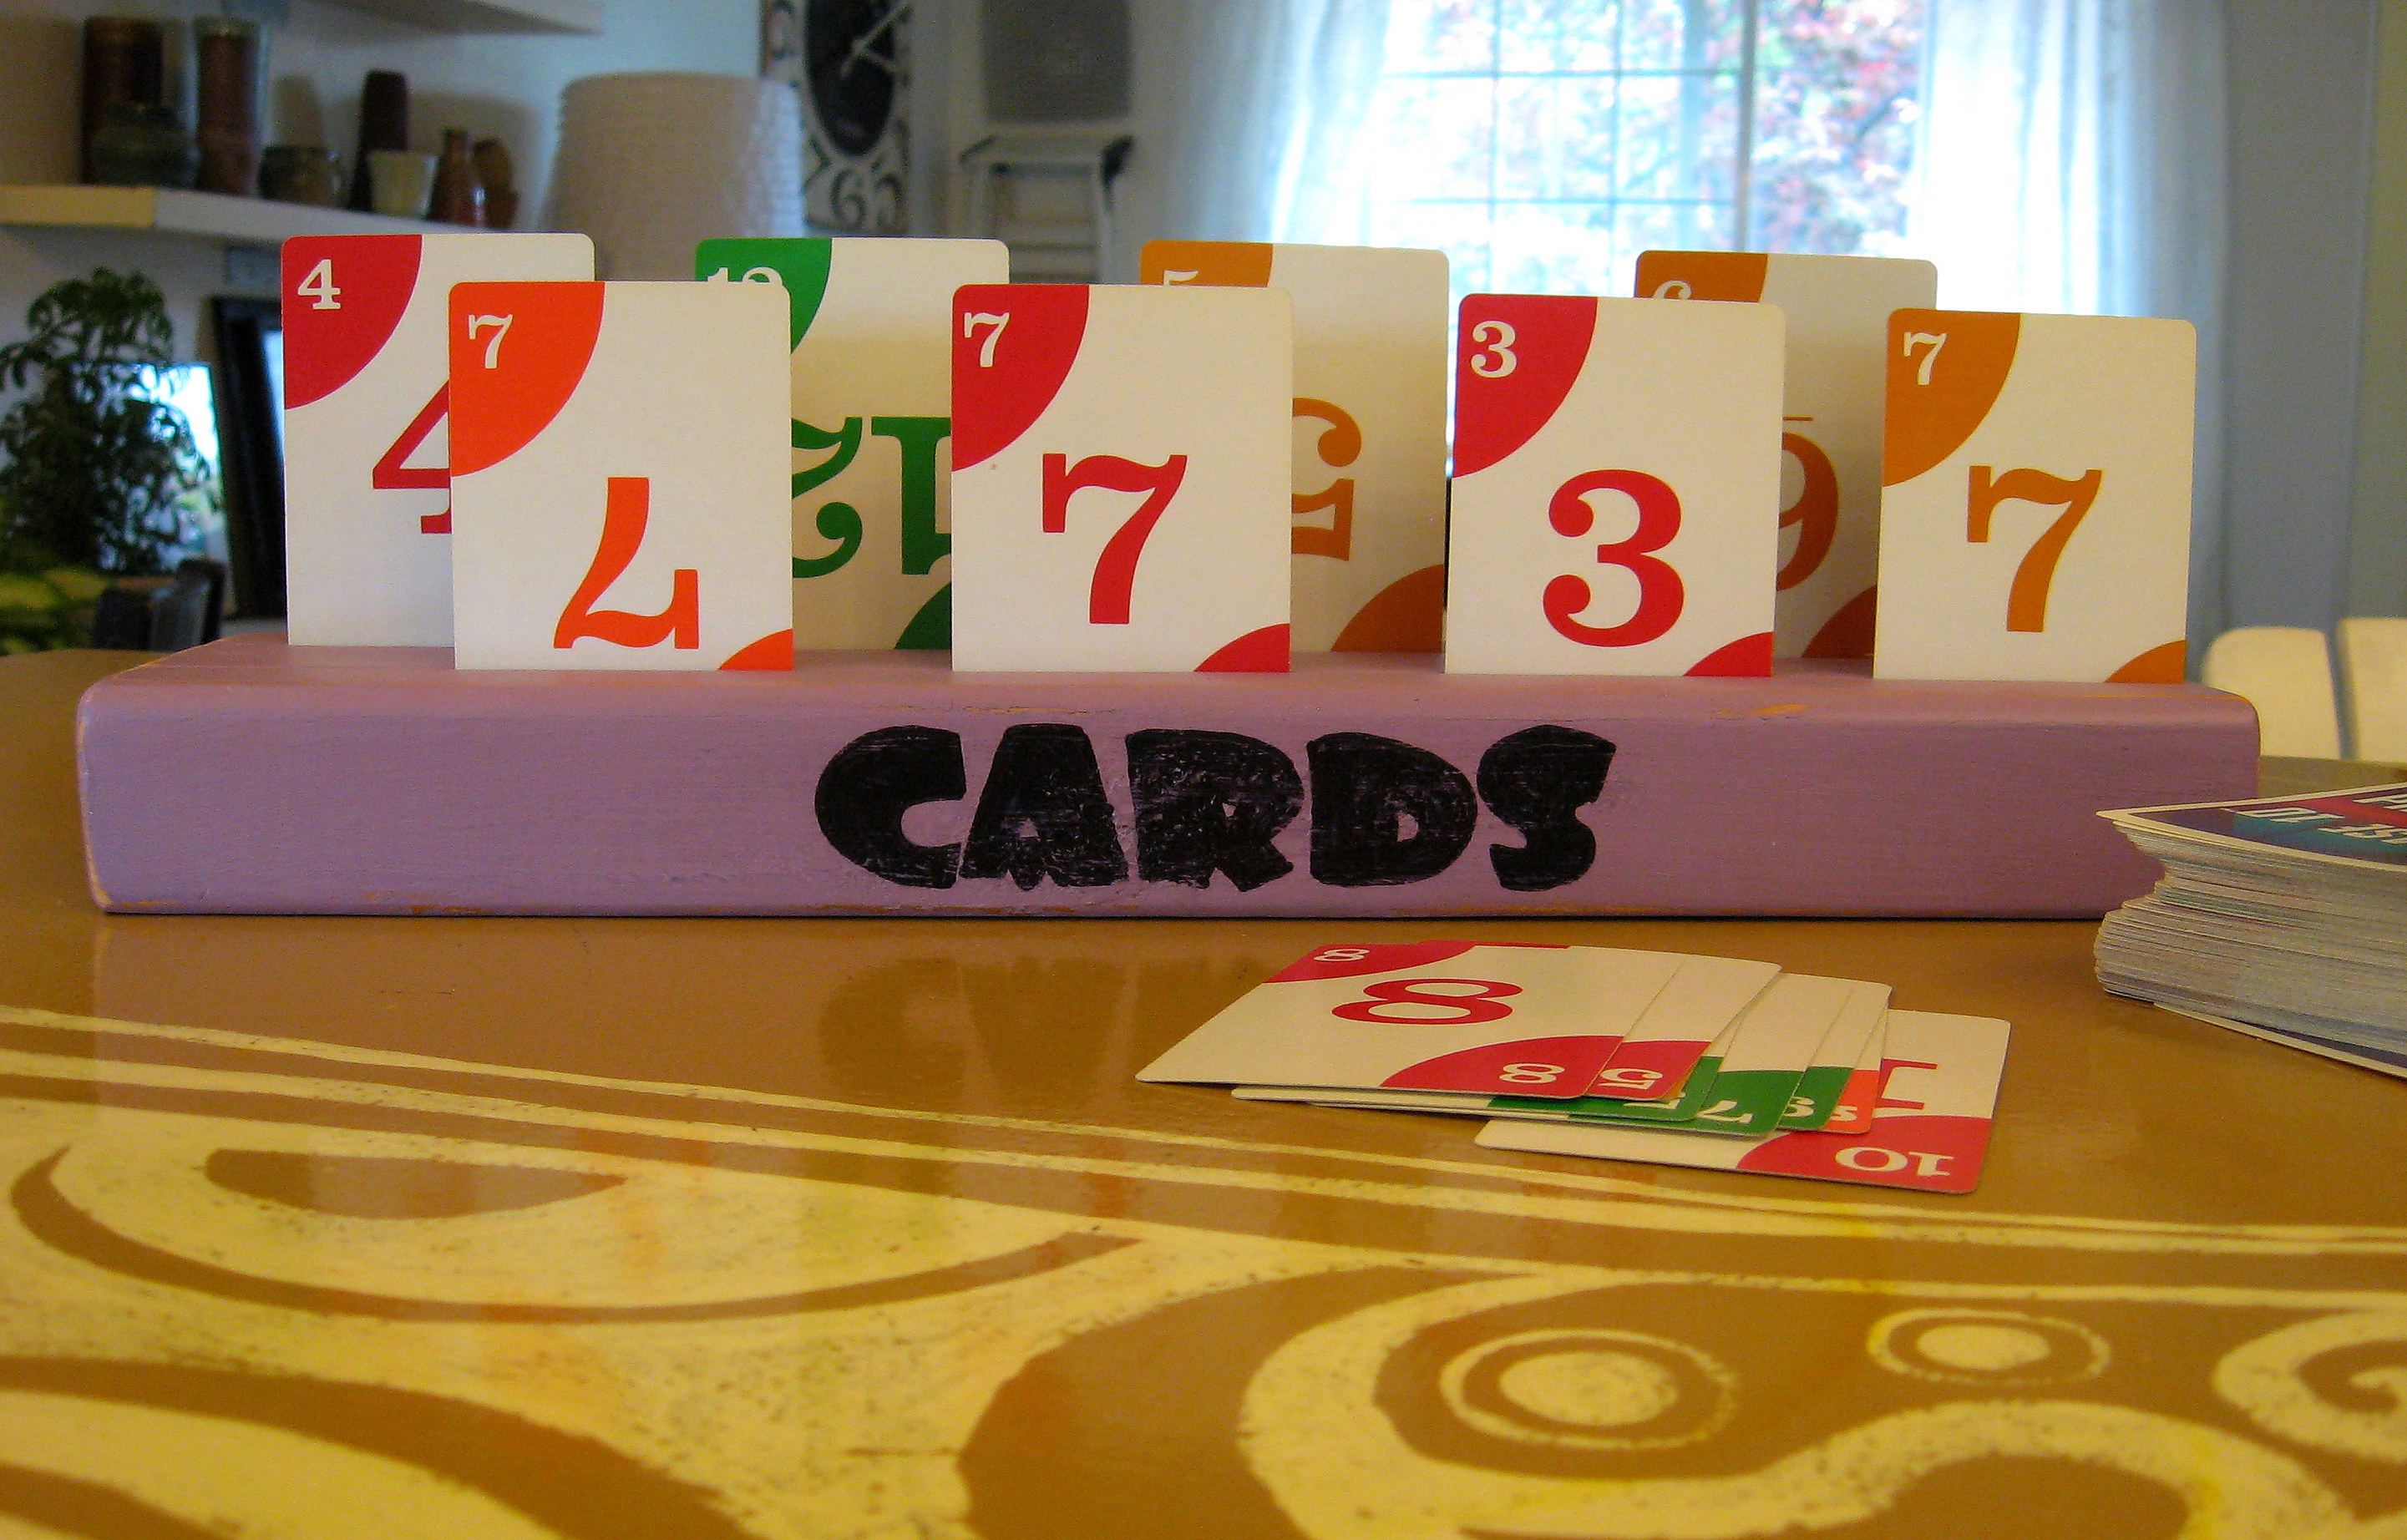
Card Holder for Little Hands
If you’ve ever tried to play a card game with a little one, you already know where this is going…their little hands are just too small to hold and manage the cards. My daughter has been on a big card game kick lately, and has grown increasingly frustrated that she has to lay the cards down so that everyone else can see them in order to play. I pondered a few ways of making a card holder for her, and finally decided that simple was best. This project went from mulling-it-over to on-the-floor knee-deep-in-Uno in less than an hour, and cost me nothing.
I started by grabbing a piece of a 2 X 4 from my garage. This one is about 14 inches or so, but you could make it longer or shorter. I set the blade on my table saw to cut about one inch deep and about one inch in from the side of the wood and ran the 2 X 4 all the way across. Then, I changed the depth to about half an inch, flipped the board around and did the same thing on the other side, creating two different troughs along the top of the board.
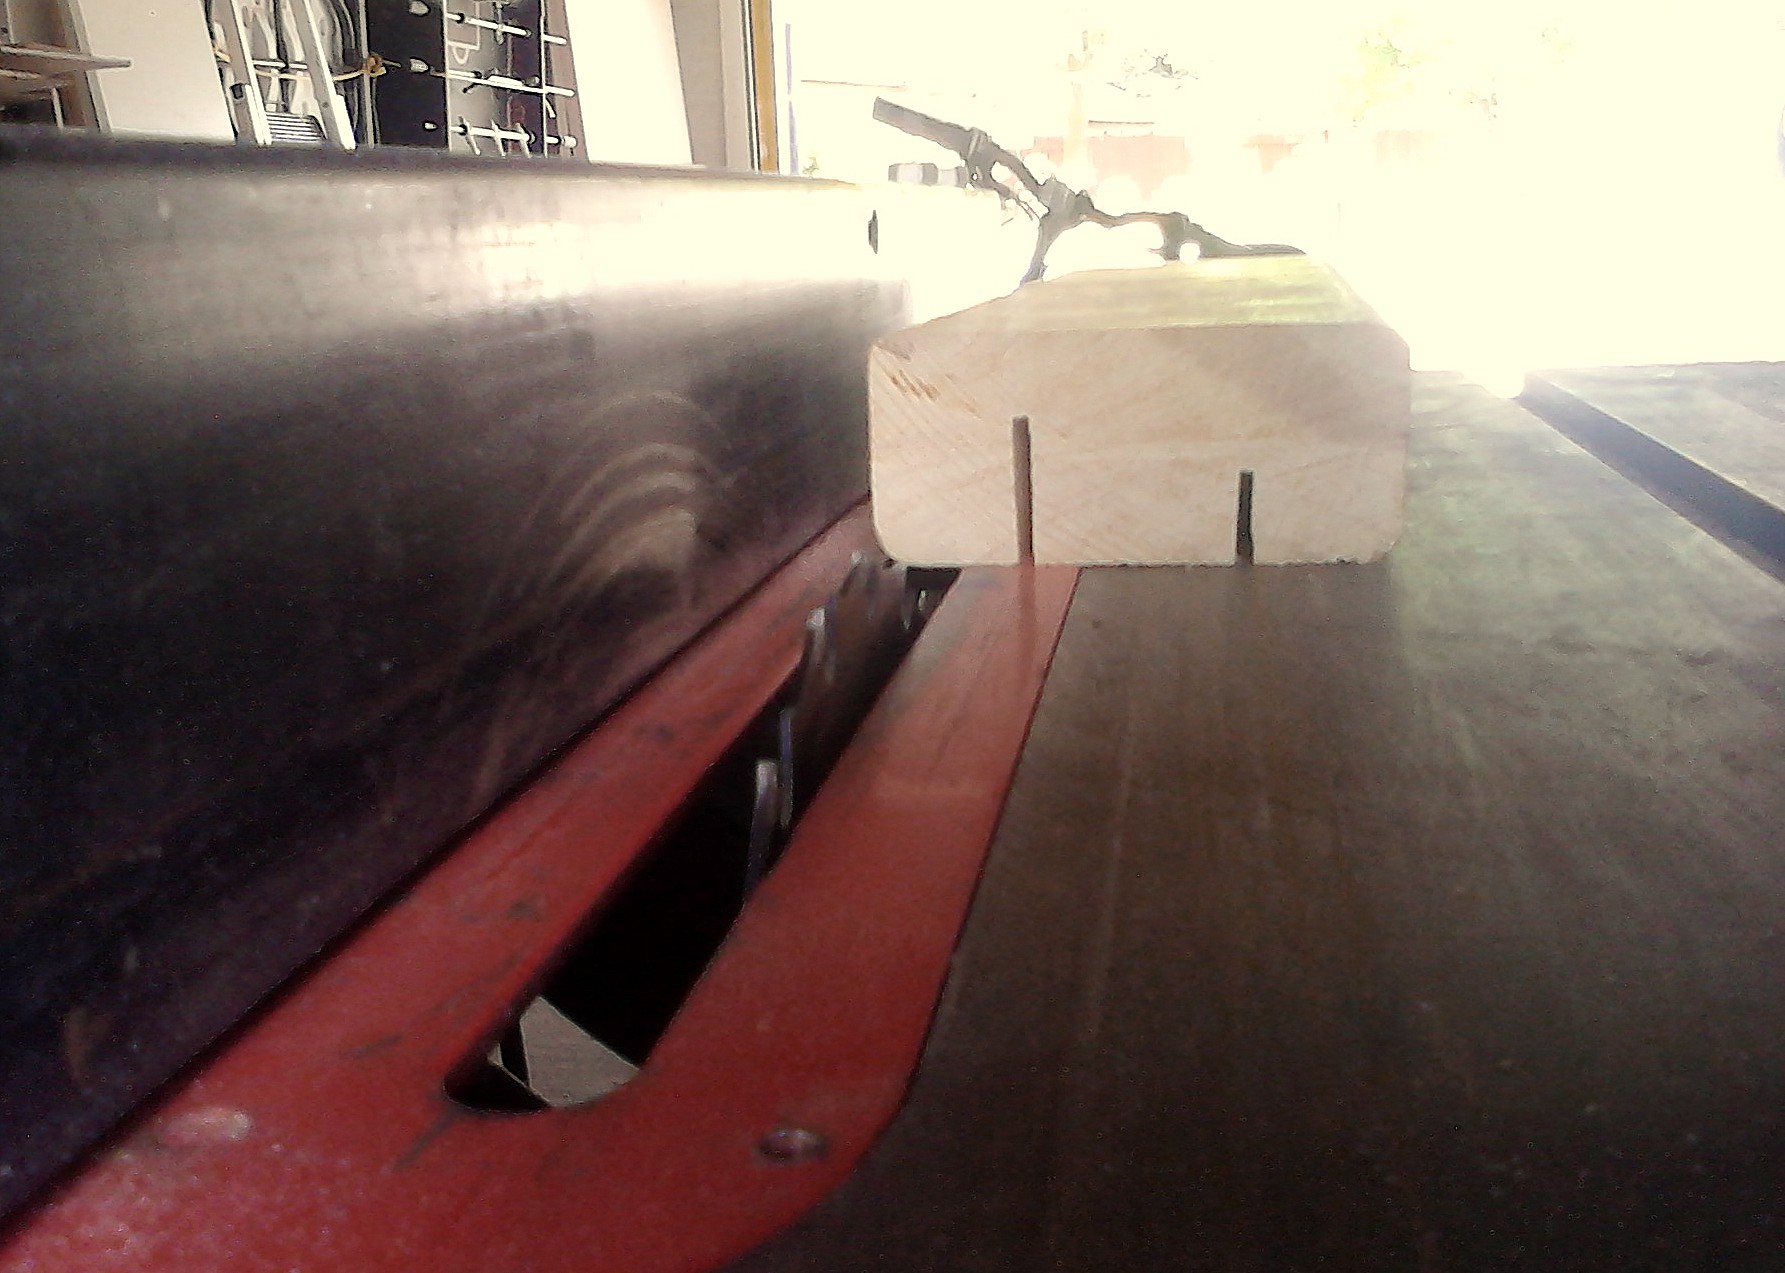
If you don’t have a table saw, ask around your neighborhood. Surely someone that you know does, and this is such a simple project that only the hardest of hearts would balk at being asked.
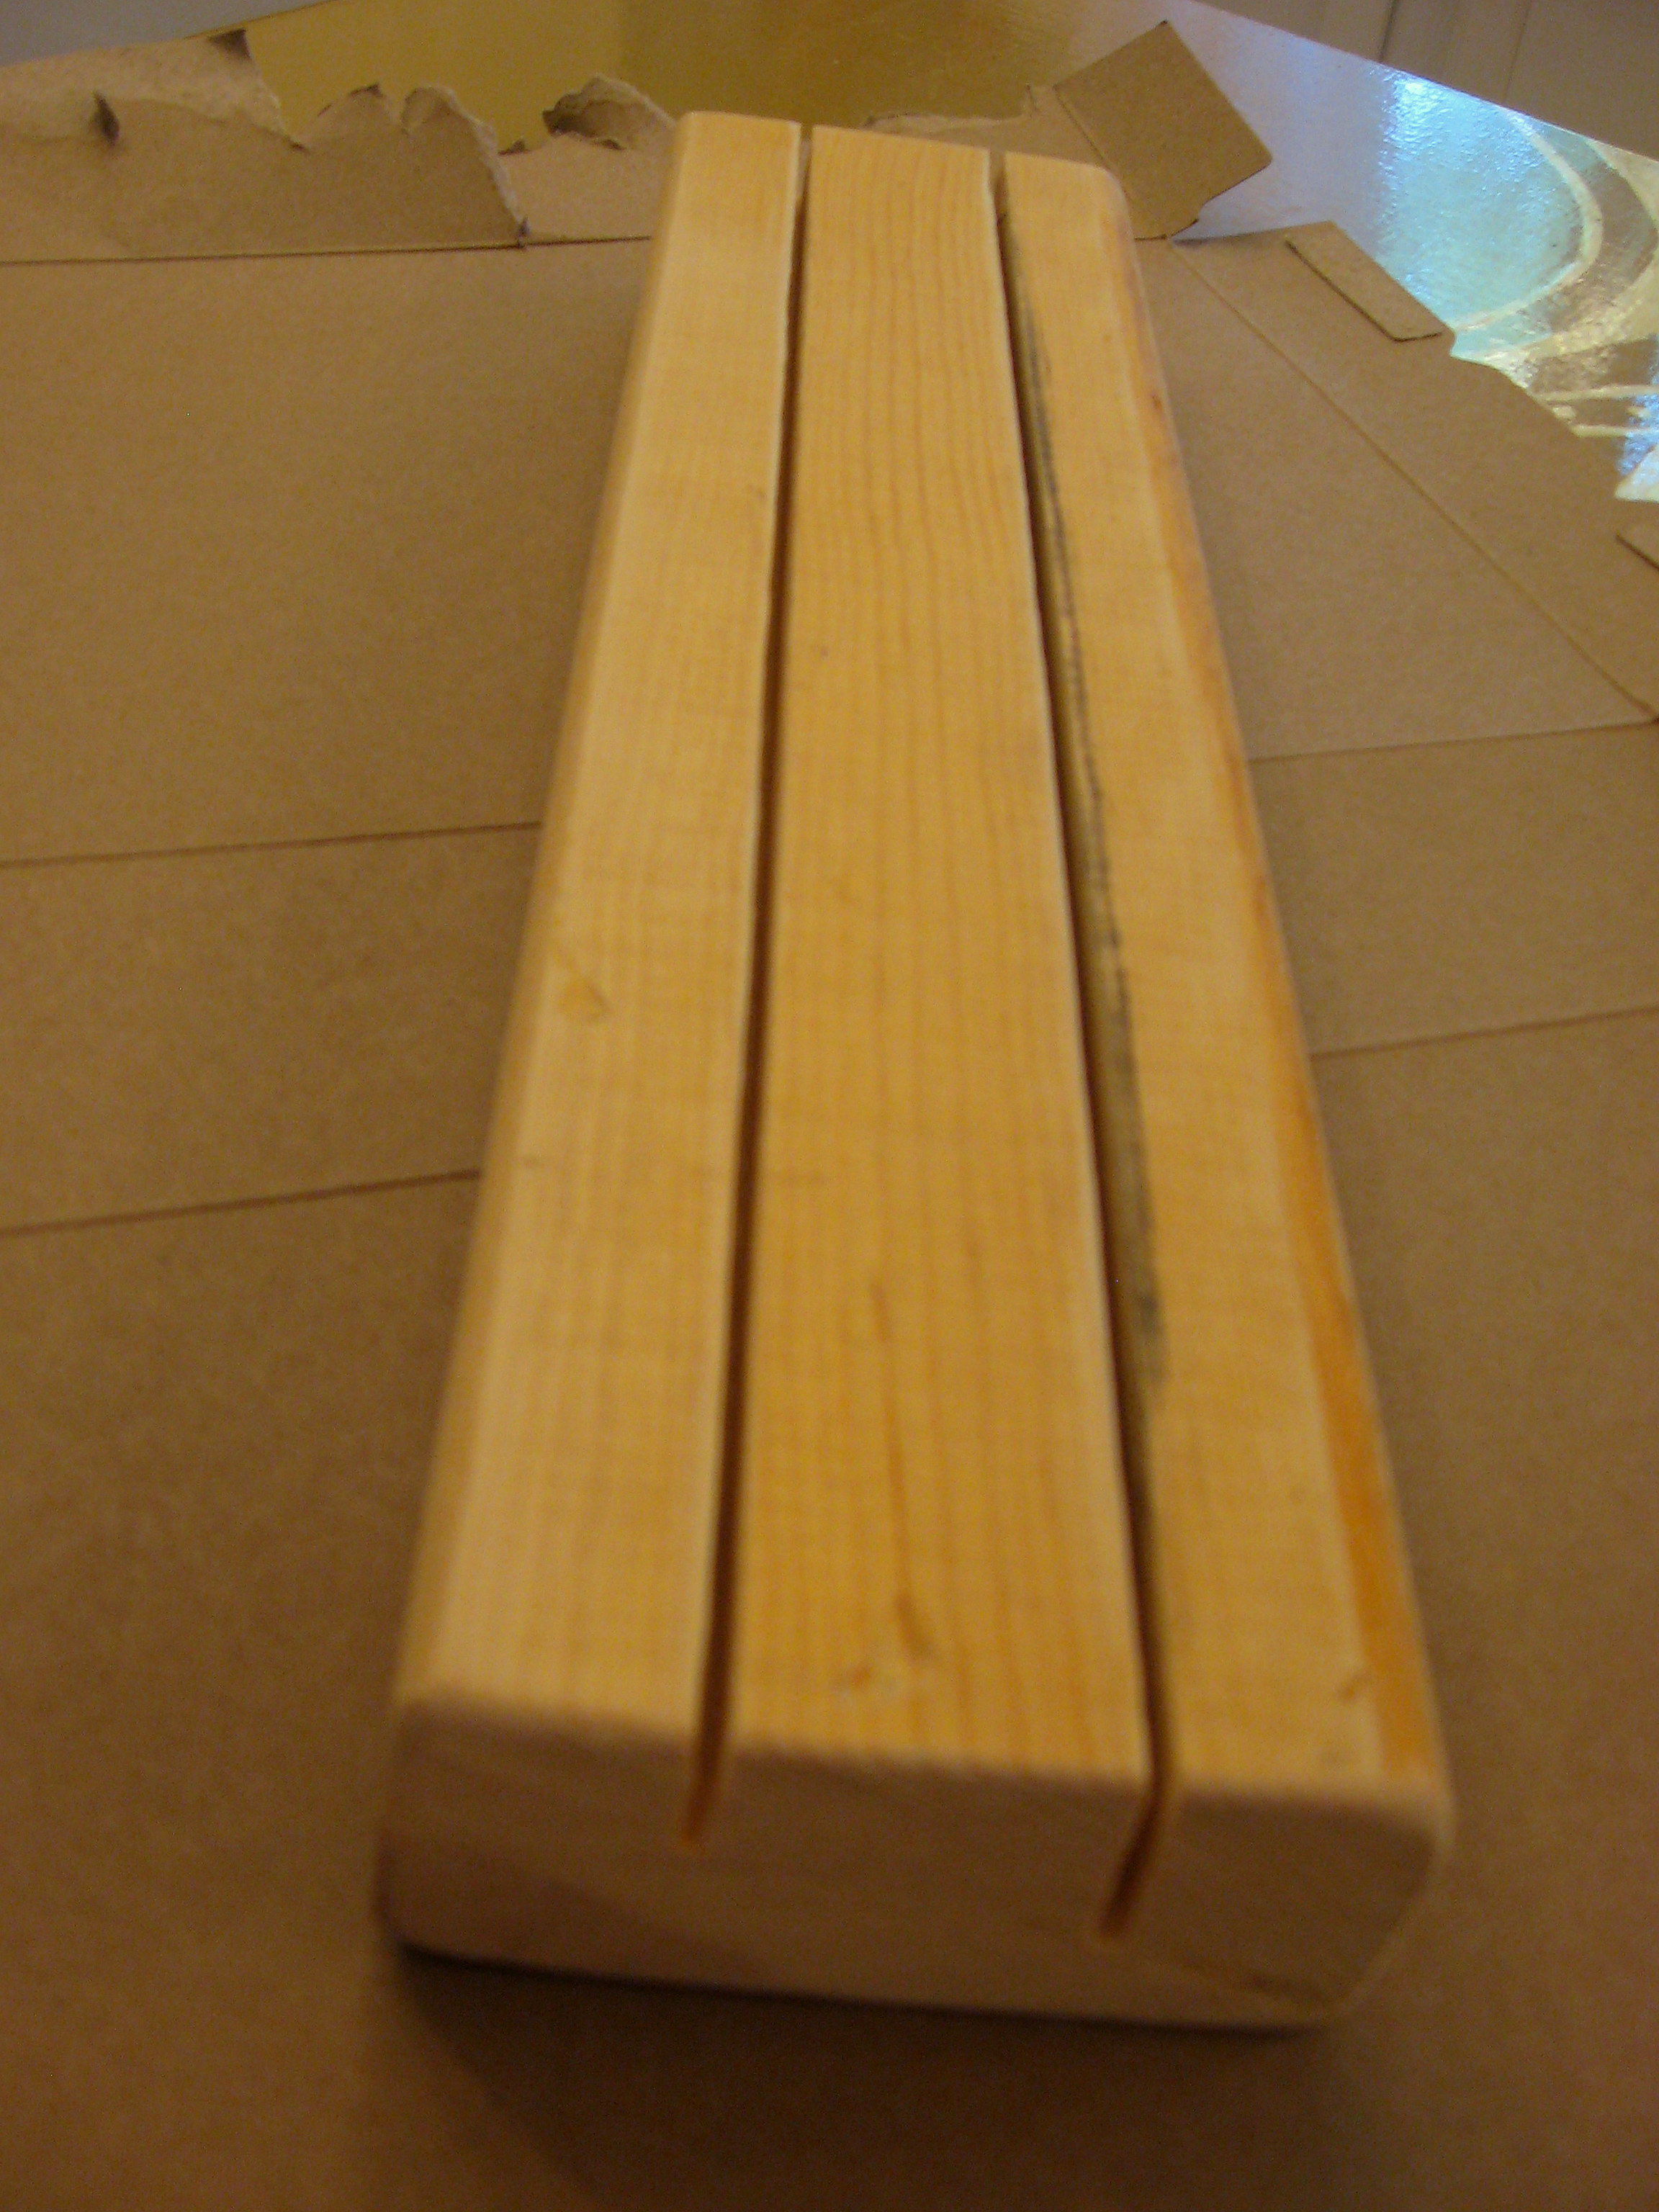
I sanded it very well, slightly rounding the hard edges as I went (NO SPLINTERS!) then covered the whole thing with a coat of craft paint. You could be done at this point, but I wanted my daughter to be able to know which was was the front (you want the deeper trough to be in the front, so the back row of cards stands up taller) so I stenciled the word “cards” on the front. Major craft-cheating here; I didn’t even paint it. I just used a black Sharpie. I ran the sander all over the finished product to rough it up, because that’s the way I roll, then sprayed the whole thing with a spray sealer. Easy Peasy! Now if you’ll excuse my, I must get back to getting whooped at card games…

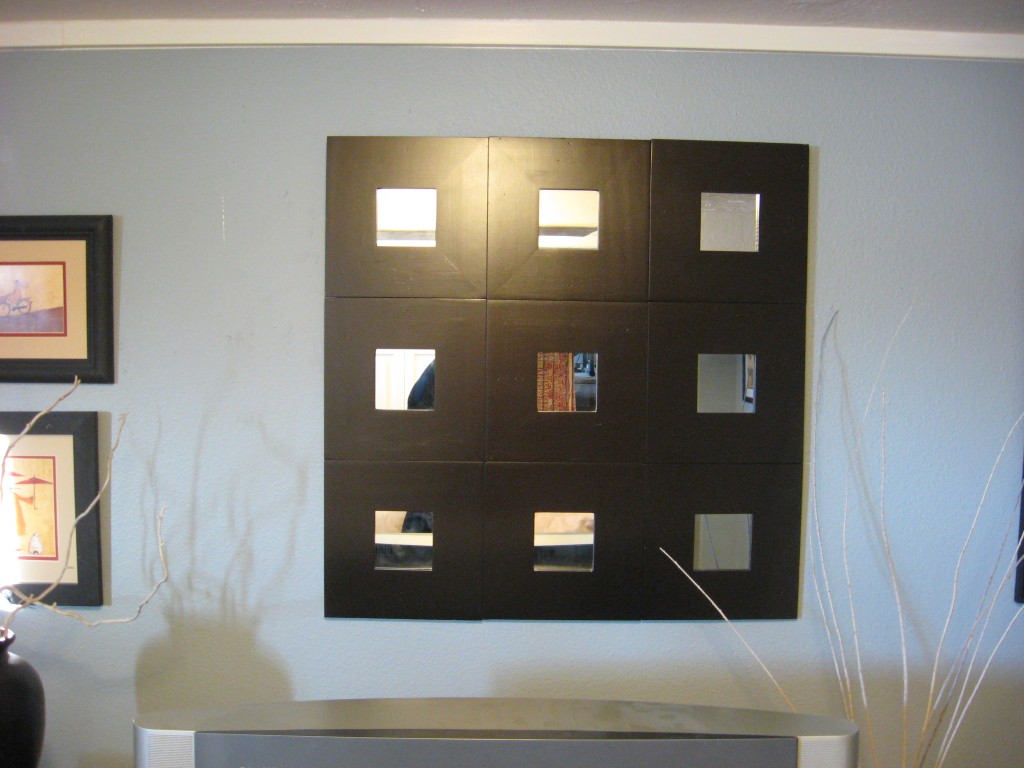
Big Wall Mirror
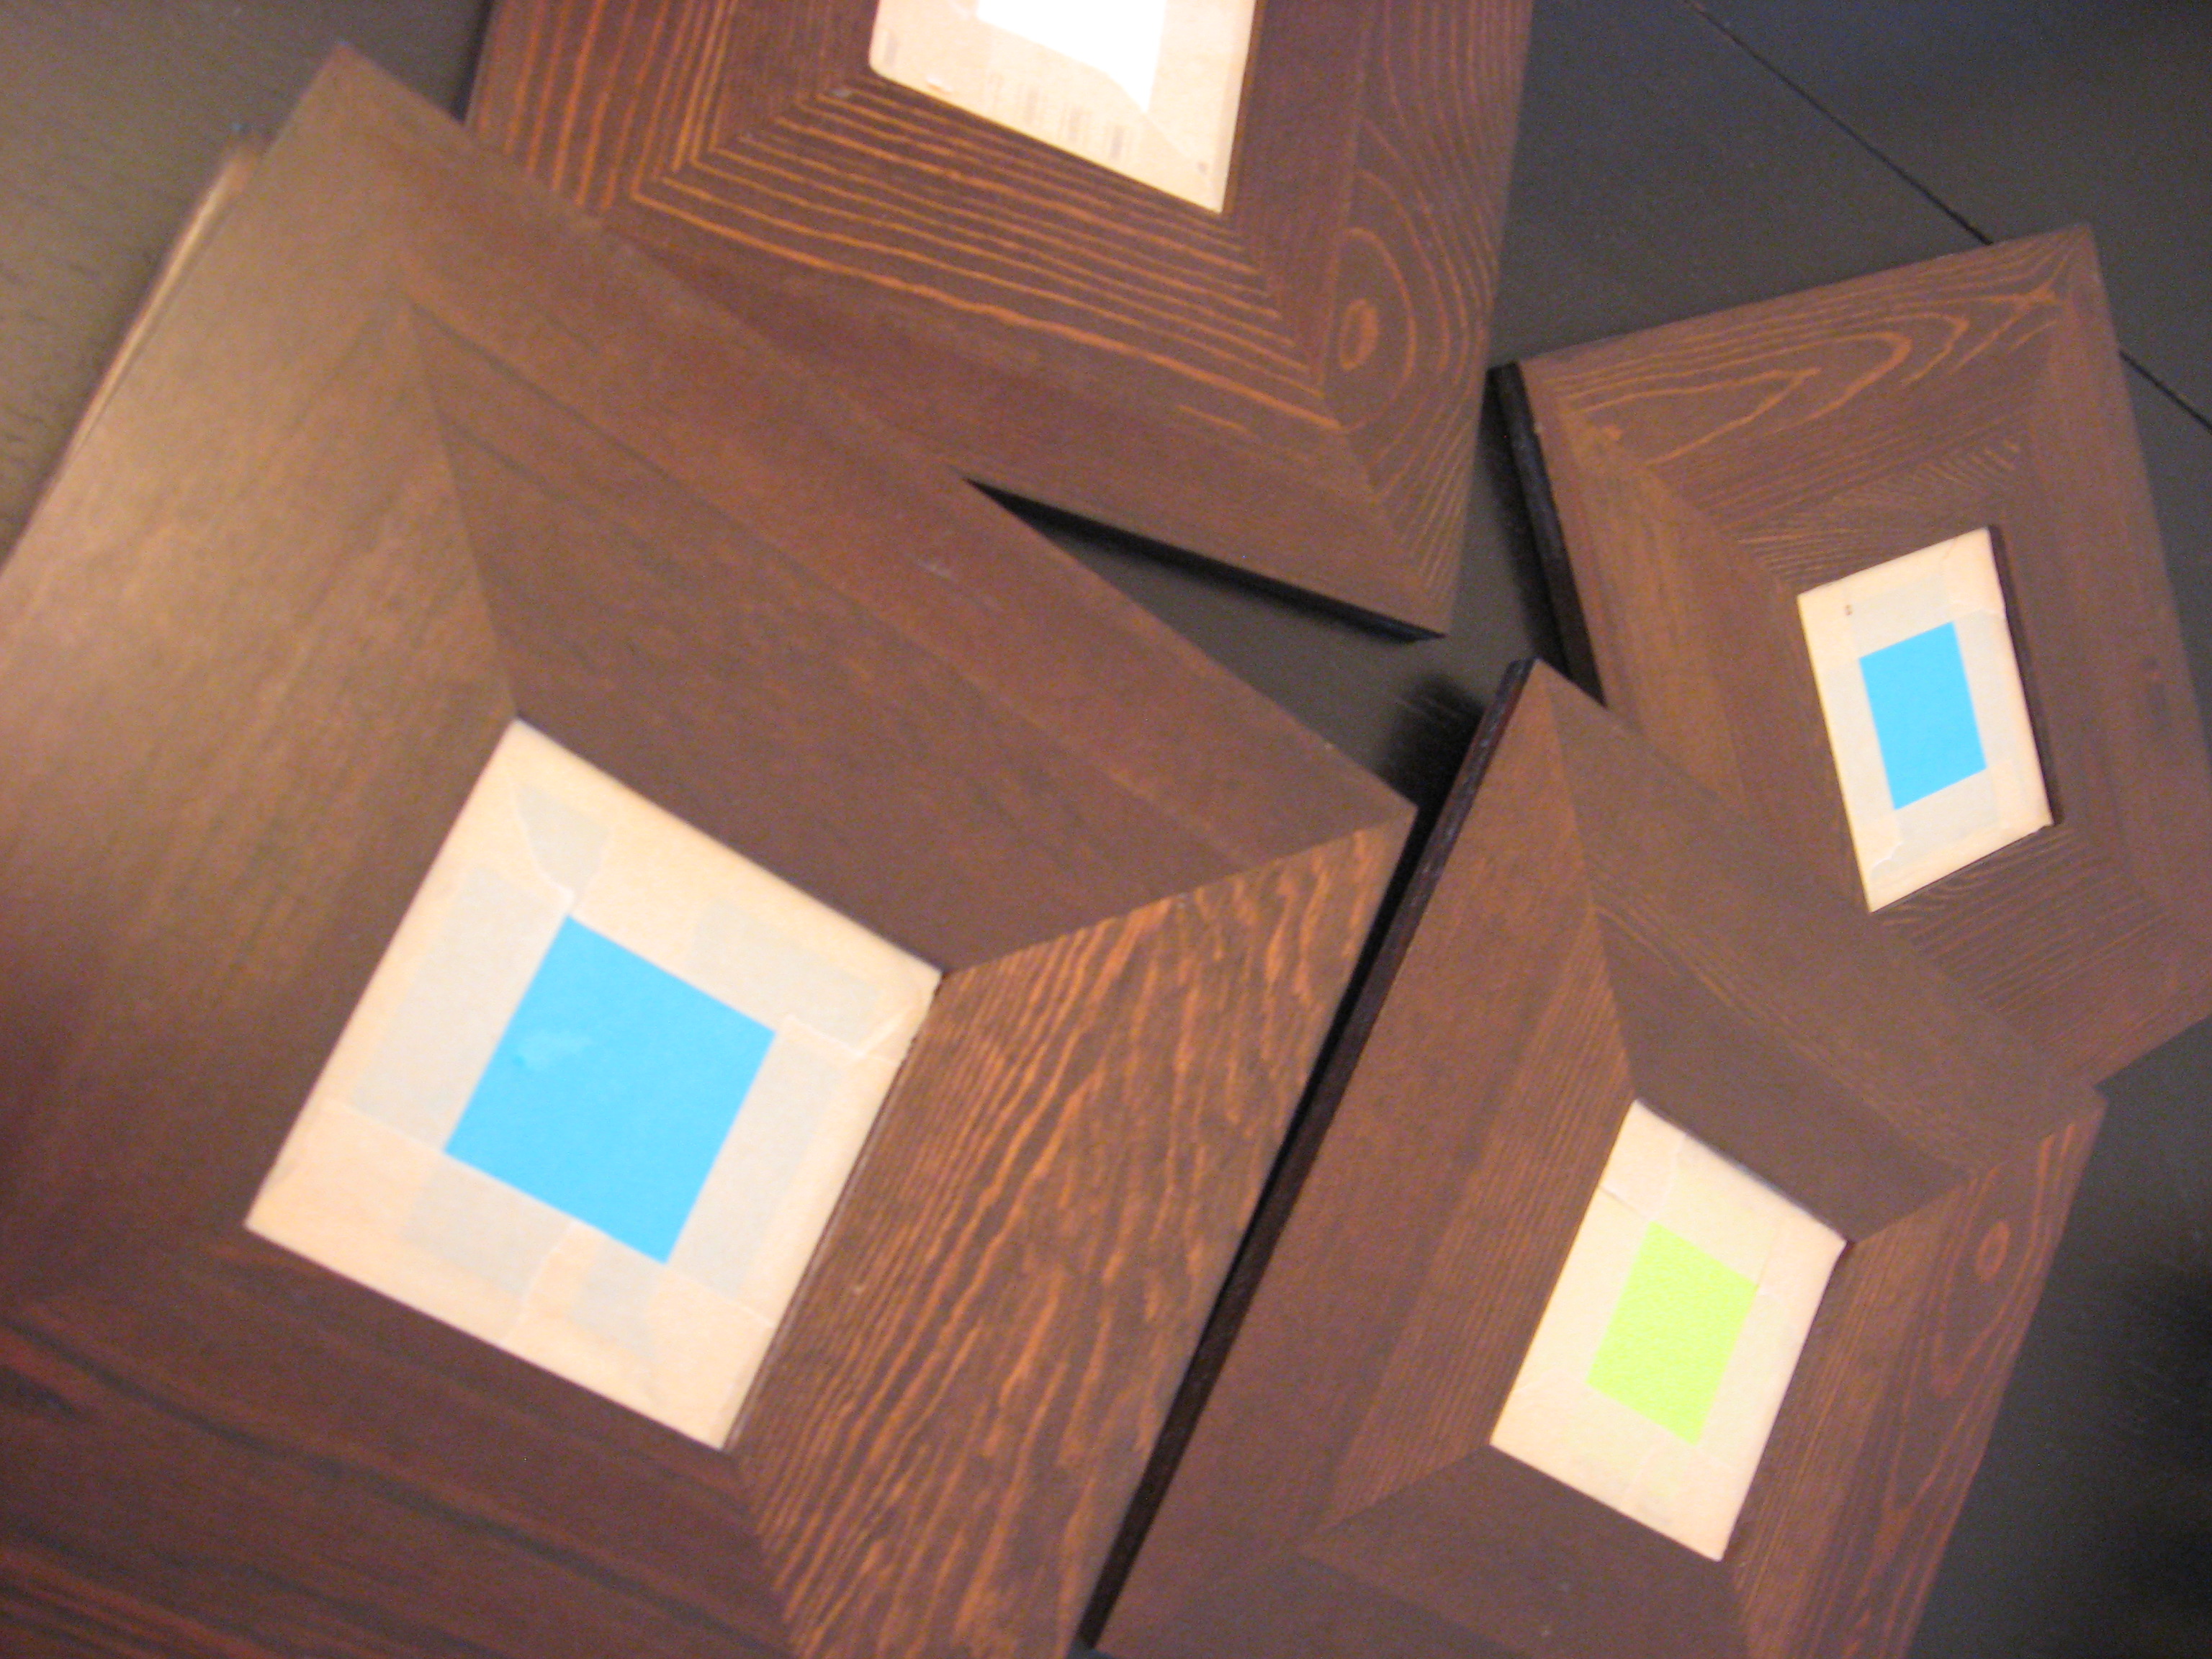
I love a free room makeover! I recently did some remodeling in my basement, and used the opportunity to repaint and freshen my family room. Everything got a fresh coat of paint, and I moved some artwork that had previously been in my upstairs hall down to live above the TV. I loved the colors in that space, but it was much too small; I needed a big statement piece without a big price tag. That’s when I remembered these Ikea mirrors that I had stolen rescued from my sister’s “donate” pile.

And then I remembered that the reason she was getting rid of them was that it was so hard to hang them all straight and that drove her crazy. I really liked the thought of them being one big piece, so I decided to attach them together.
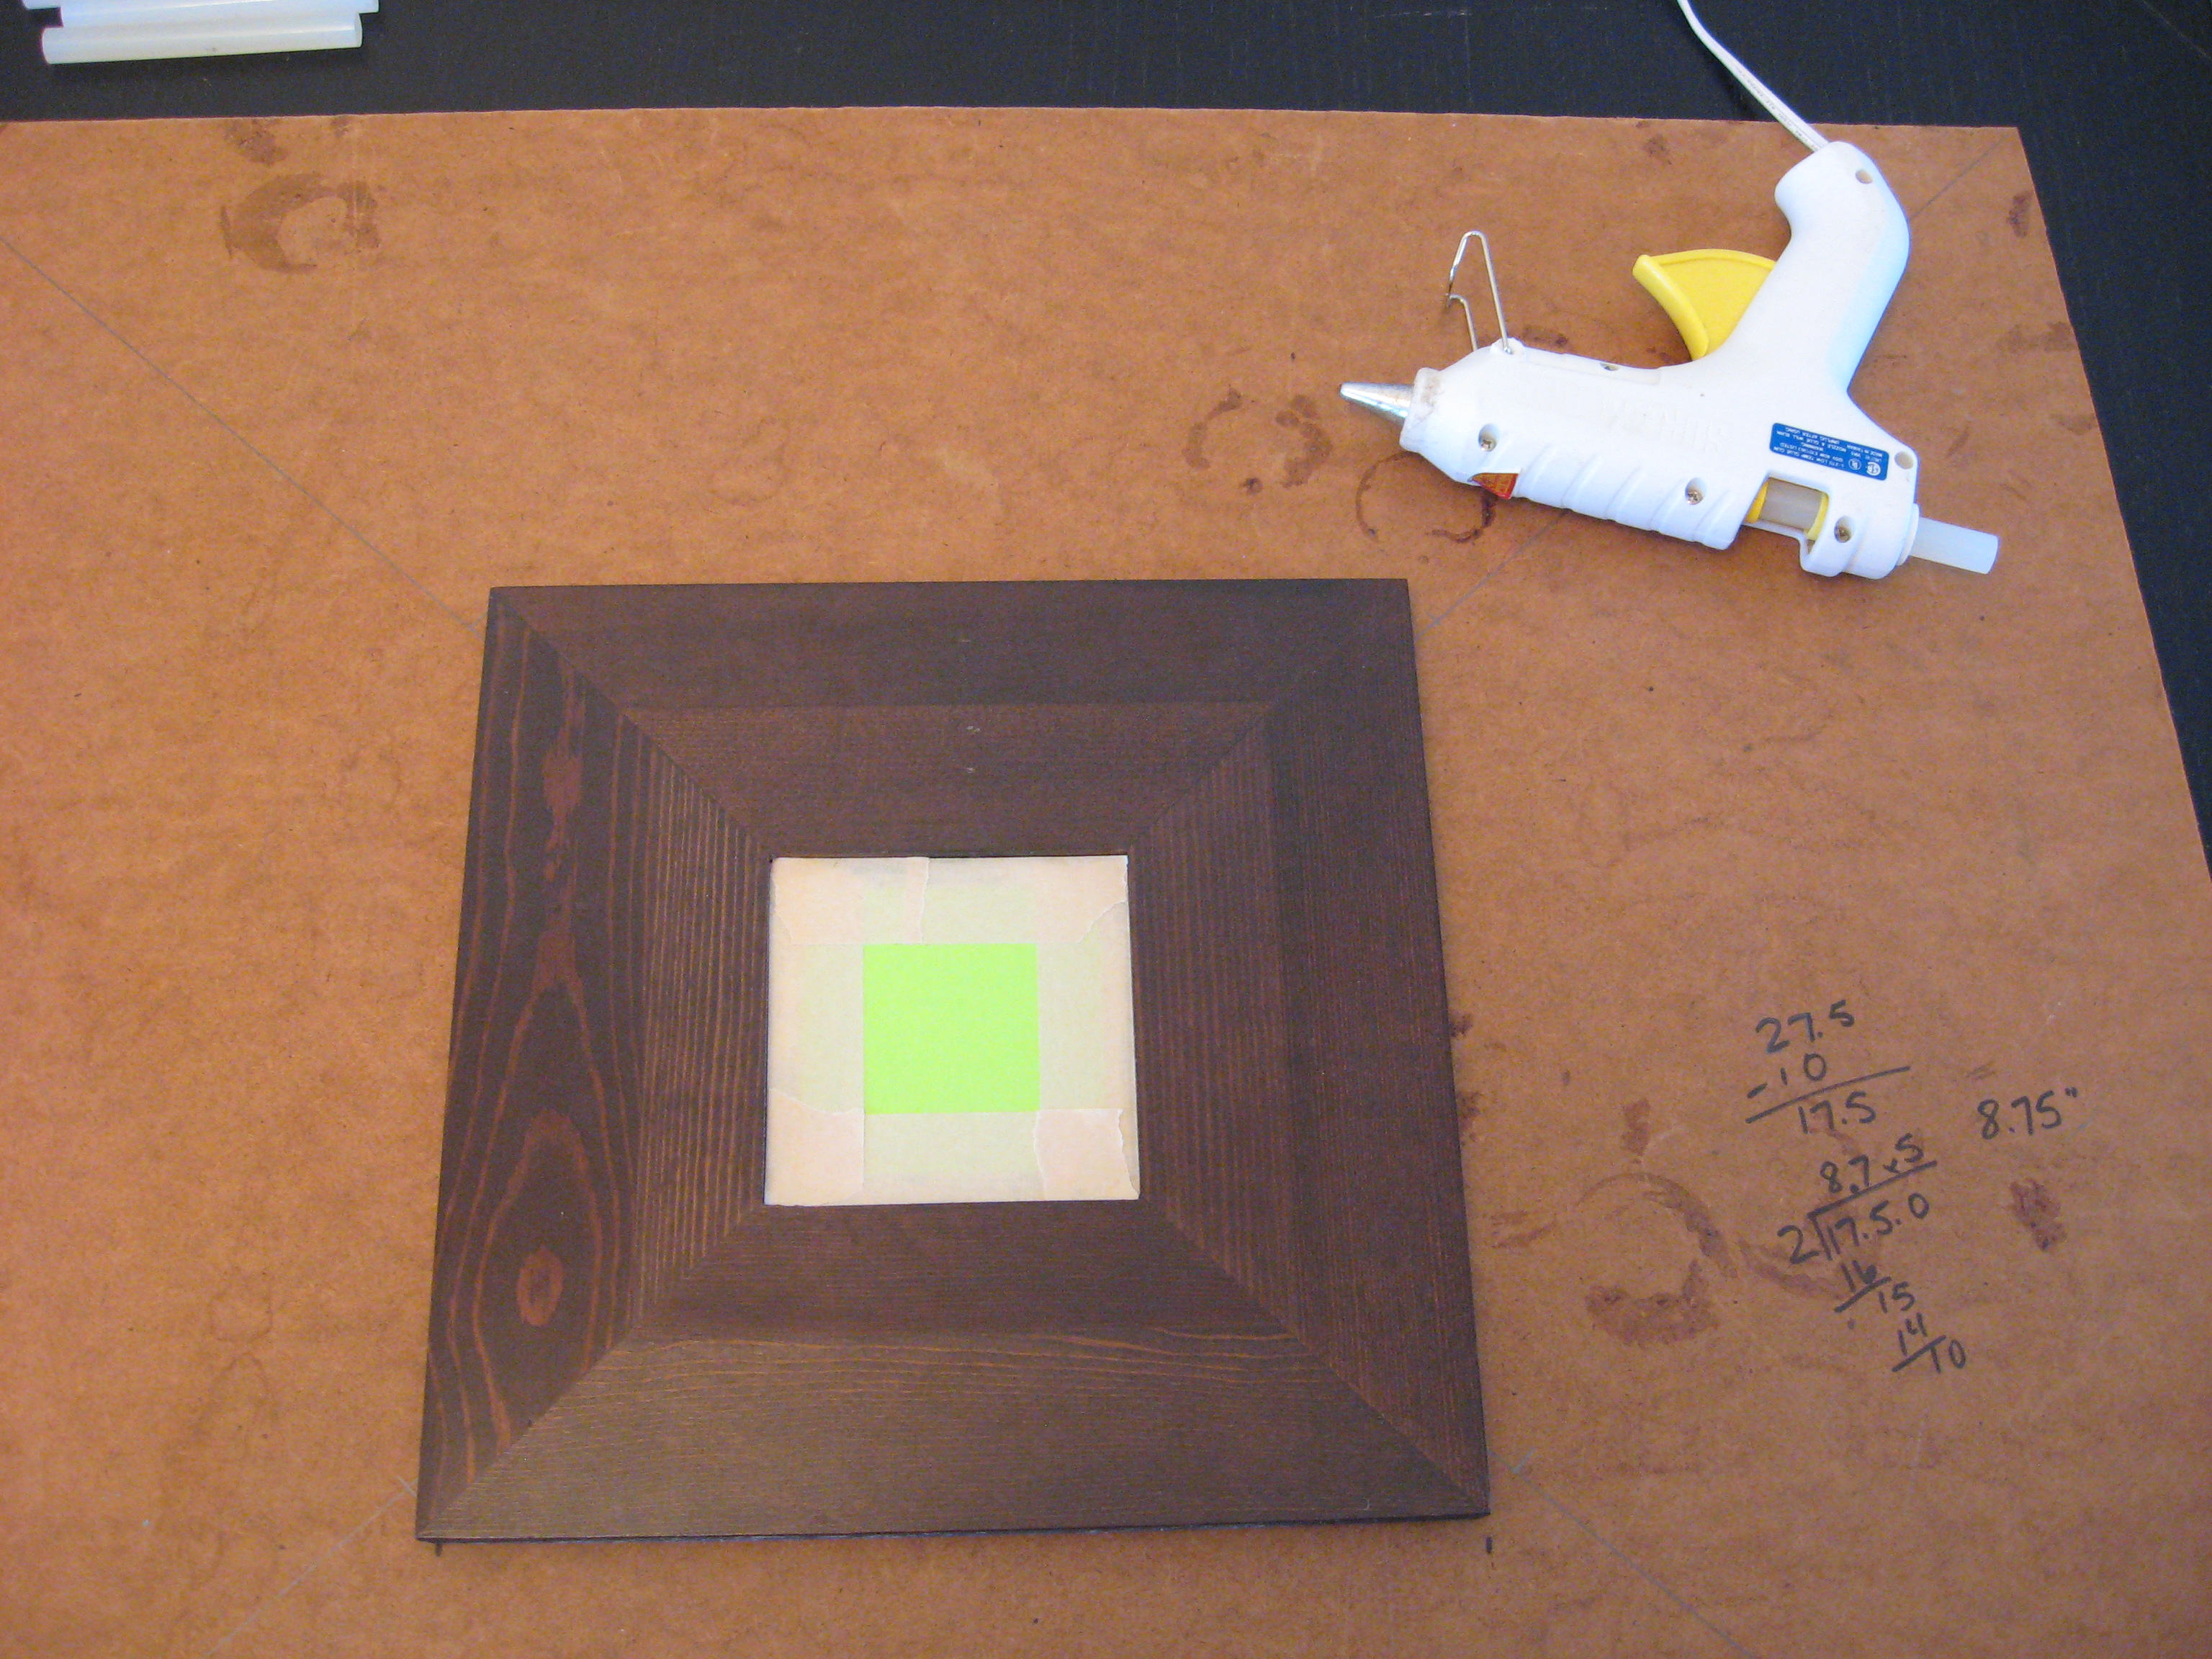
I didn’t want the finished product to be this color, so I started by taping off the mirrors on each piece (I used a post-it in the center, then taped around it.)
I found a piece of cast-off artwork on a large sheet of masonite in the garage and cut it down to use as the backing. I just cut it so that it was big enough for each mirror to attach to it, but a few inches smaller than the overall finished piece so it wouldn’t show from the front.
I drew some guide marks to show where the first mirror would go, then hot glued it right in the center. I chose to hot glue them on to hold them in place while I turned the whole thing over to nail it together. You could also just glue them if you wanted to, but I would recommend a very heavy duty adhesive like Gorilla Glue or Liquid Nails.
Once they were all glued on, I turned the whole piece over and used a Sharpie to mark a couple of points on each mirror where I would nail it through.
I would actually recommend using screws for this, but I didn’t have screws short enough – and since we were having a blizzard this day there was no way I was leaving the house! – so I used nails. They were still too long, so I angled them in like this:
and them hammered them flat. If you’re worried about the screw or nail scratching your wall, just dab a little dot of hot glue on each and let dry. Now it will be sturdy enough to move and hang as one piece.

I spray painted the whole piece with Oil Rubbed Bronze Krylon spraypaint, then removed the tape. Once it was dry, I installed a hanger on the back (I forgot to take a picture of this step, but if you look in the framing section of a store like Hobby Lobby or Michael’s, you’ll see that they have lots of choices.)
Now it’s the perfect focal point above my TV.

Hanging Bedroom Lamps
I love it when the cheap option ends up also being exactly what I wanted, and that is definitely the case with my new bedside lamps.
My husband and I have a tiny little bedroom. Here it is after the last makeover, when we downgraded from out larger nightstands to these smaller ones.
Well, you KNOW it was only ever this clean for this picture and the rest of the time those teeny, tiny nightstands were overflowing – both under and on top – with messy, messy stuff. They just didn’t have enough usable storage and since the lamps sitting on them weighed about as much as the tables themselves, we were constantly knocking them over. I had some Expedit shelves from Ikea that were no longer being used in the room they were bought for, and I wanted to put them beside my bed. Since I already had the shelves and the paint, I knew I could do a bedroom makeover for practically free. The problem is that you couldn’t put a lamp on them. I began my search for hanging bedside lamps and came up empty handed. It wasn’t just that I couldn’t find anything in my price range…I couldn’t find anything I liked at all!
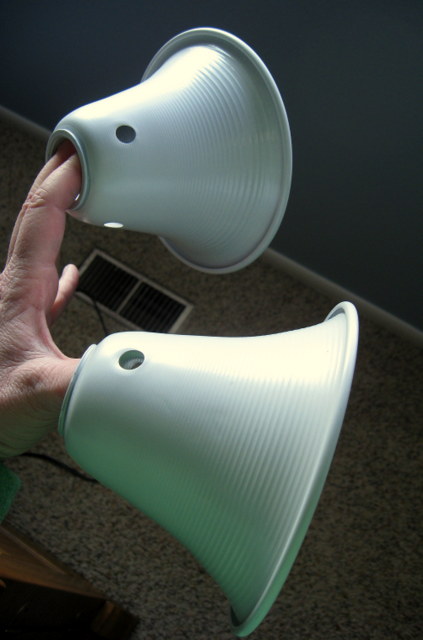
One day my husband and I were wandering the aisles of Lowes and came across these little task lights:
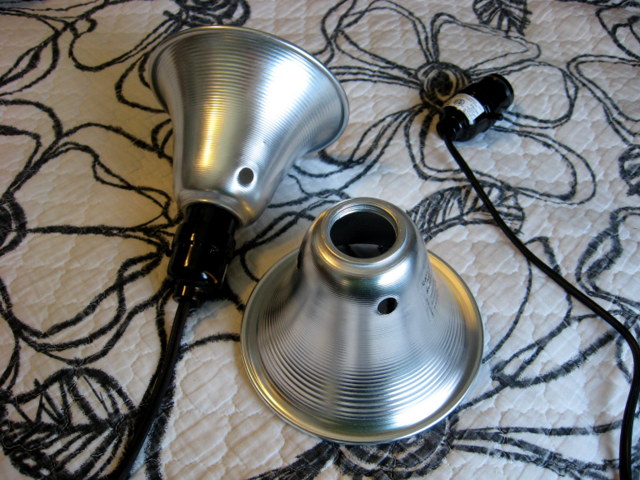
If memory serves me correctly, they were $1.99 each. They come with a clamp that you can remove, and they come in many different sizes (this one was the small one). Since I had been looking for the perfect hanging light for about a month and was really getting antsy to get on with it already, we decided that for less than $5, we could use these until we could find what we wanted.
The entire light assembly screws out of it, so I removed that, then covered the holes from inside with tape.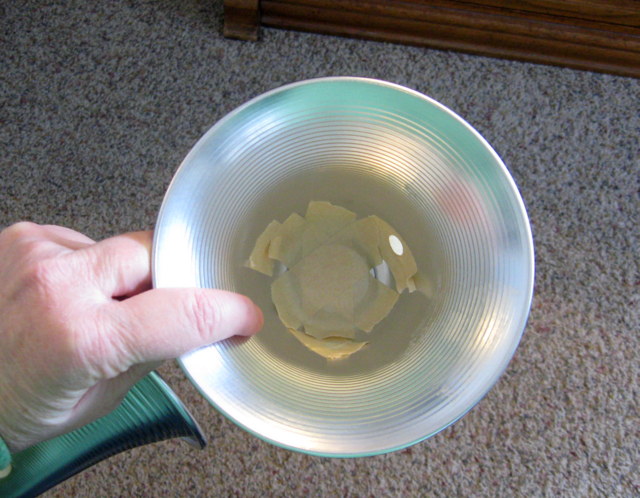 I wanted the inside to stay silver, so I sat them open-side-down on a flat surface and gave them several good coats of white spray paint.
I loved them already! The paint gave them sort of an old-fashioned enamel look. I reassembled the light, then sewed a simple fabric sleeve that would cover the cord (cut the fabric 3-4 times the length of the cord and about 4-5 inches wide). I had some metal brackets in my garage that I had picked up on clearance from a garden shop. I screwed them straight into the side of the shelves, and hung the lamps from them.

The search is over! I love them so much that I’m no longer even looking for a replacement. They’re perfect!
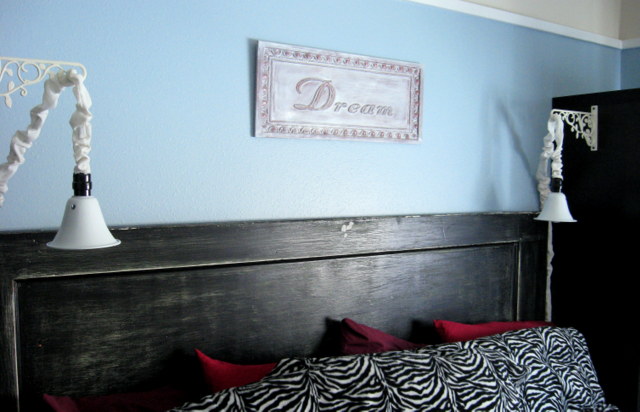
And I just adore my new, lighter, brighter, neater bedroom! 
Making Custom Purses and Bags
I love purses. And bags. And totes. And purses. And bags. I may have a problem.
I am kind of picky about them though…if they don’t meet certain requirements, they find themselves on a one way trip to the local donation center sooner rather than later. For me, those criteria are that they:
- have to be roomy enough to throw in all the stuff required by a busy mom on the go (lotion, gloves, notebook, random medicine, books for waiting rooms, stuffties, snacks, kleenex…),
- have to have pockets to keep my keys and cell phone from joining the bottomless pit of aforementioned stuff,
- have a long enough shoulder strap to wear across my body,
- have to be washable,
- have to be affordable, and
- have to be cute.
That doesn’t seem like an unreasonable list to me, but I have found that it is difficult to find a purse that fits all of those criteria. Several years ago, I bought a pattern at the fabric store and decided to try my hand at making one on my own. Once I made that first one and saw how easy it was, I’ve been making my own bags ever since. I decide what I want and draw the basic pattern out on craft paper. I absolutely LOVE that they are endlessly customizable. My purses can all have pockets to fit exactly the things I need them to fit. Library bags don’t need pockets, but they do need to be sturdy, so I use a heavy fabric. A purse can get away with a less sturdy fabric, as long as it’s washable. I experiment with size, shape, inside and outside pockets, appliqued designs, flaps, closures, long straps, shorter straps – no two bags look the same and they all follow the same basic instructions and only a very beginning sewing ability. I now have a stack of patterns with different- and interchangeable – sizes and shapes of bodies and straps.
I will walk you through how I made my latest bag and then show you some examples of others to get your creative juices flowing. Once you understand the idea, you should be able to make a bag in a couple of hours. I didn’t use a pattern for this one, because I started with a skirt, but you will get the idea, and if you have any questions, ask!
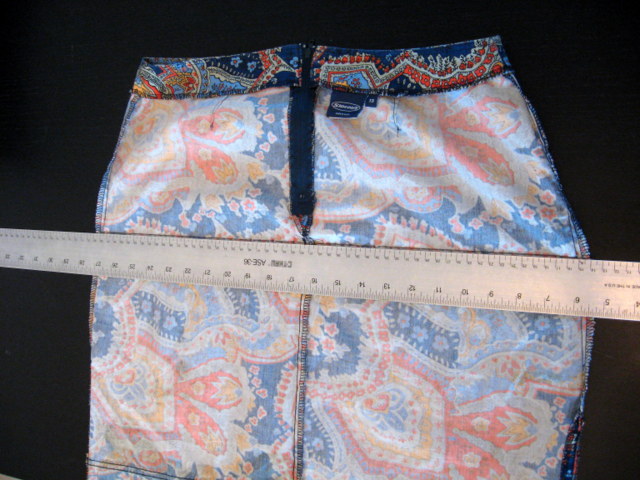
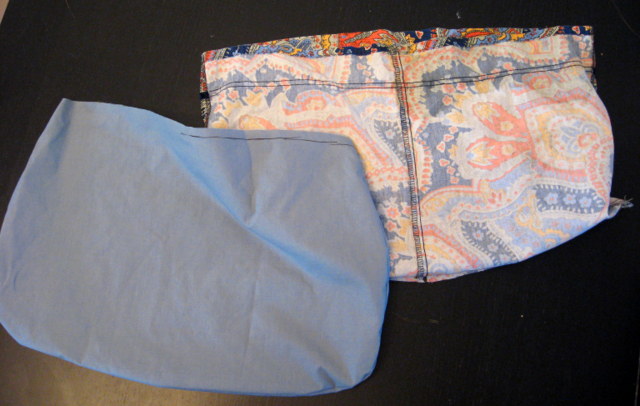
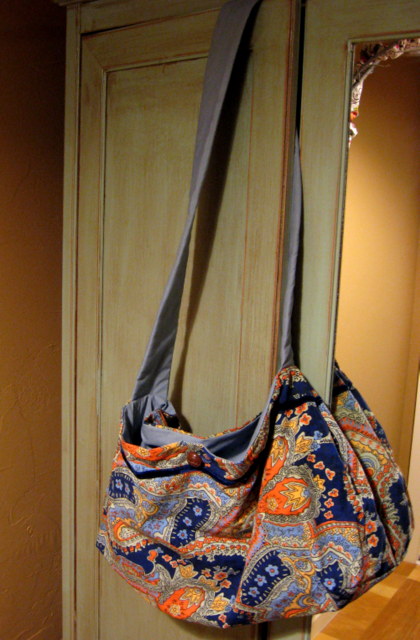
I started with this skirt that I picked up at a thrift store:
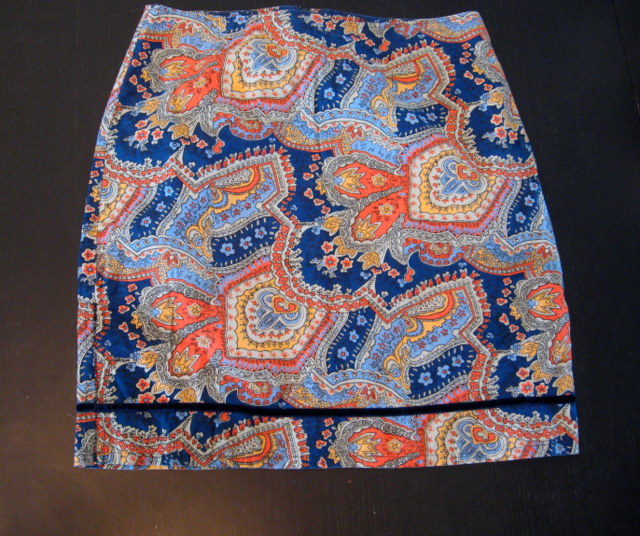
Much too small for me – and too short even if it did fit – but I just fell in love with the fabric. I toyed with the idea of making it into a pillow, but then decided it would be better as a purse.
I turned it inside out and lined up a straight edge along the width of it, just under the zipper. Draw a line and cut – making sure that you keep the bottom hem even and straight. I discarded the top part, but you could use that fabric to make pockets.
Sew straight across the newly cut edge, forming the bottom seam of your bag. I like to sew this seam twice, just to make sure it is strong.
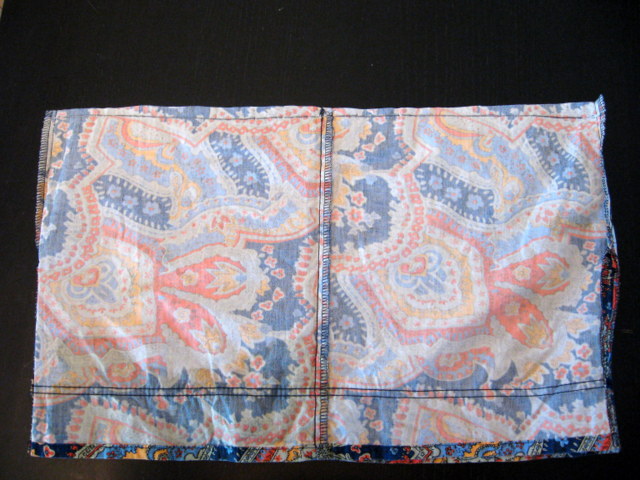
You can leave it like this if you want, but I like to sew across the corners to give the bag a little shape. Take one bottom corner and pinch it together then lay it out flat, being sure to line up the bottom seam and the side seam. Measure in from the point (I did 2 inches, but experiment with making it smaller or larger to change the look of the bag) and draw a line across it. Pin it in place, then sew along the line. Do this on both corners.

That leaves you with these little floppy ‘ears’
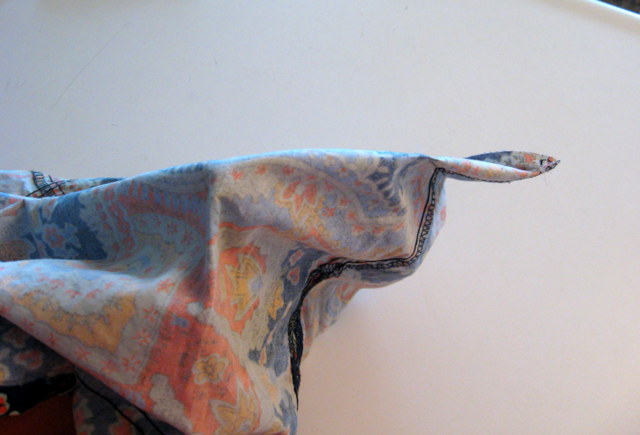
that make a nice, neat bottom when turned right side out.
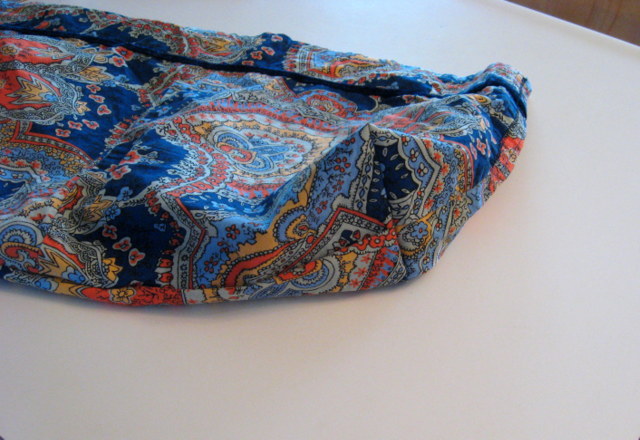
Again, you could stop here if you like the shape, but I thought it was too wide at the top, so I measured down the top inside seams a few inches on both sides and sewed a triangle to taper the top sides in a little, like this:
There; I like that shape better.
Now, if you don’t want your bag to be lined, you can stop there and add straps. I will leave the inside unfinished occasionally on tote bags or shopping bags, but generally, I prefer my bags to be lined and it really is quite simple!
I folded my bag in half and layed it out on the fold of my lining fabric, then I drew around the shape of the bag and cut out two.
**If you are making your bag from scratch from flat fabric, then just cut out all four of these shapes at the beginning – 2 outside pieces and 2 inside pieces, all the same size.
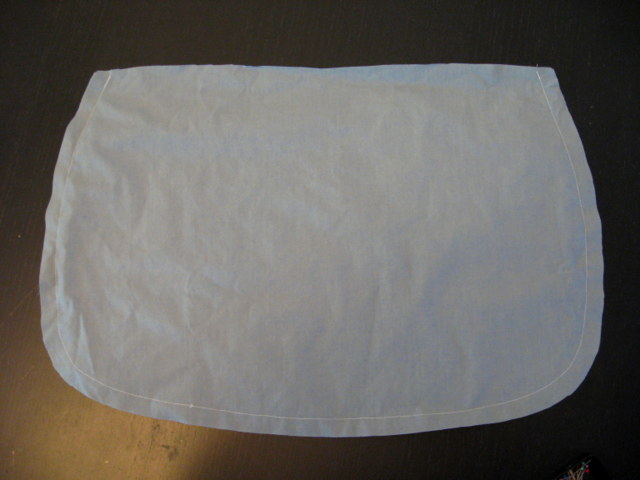
Sew the two lining pieces together, all the way around, but leaving the top open. Make sure you have right sides together!
Now you have two fabric pouches that we will stitch together once we make the straps and pockets…
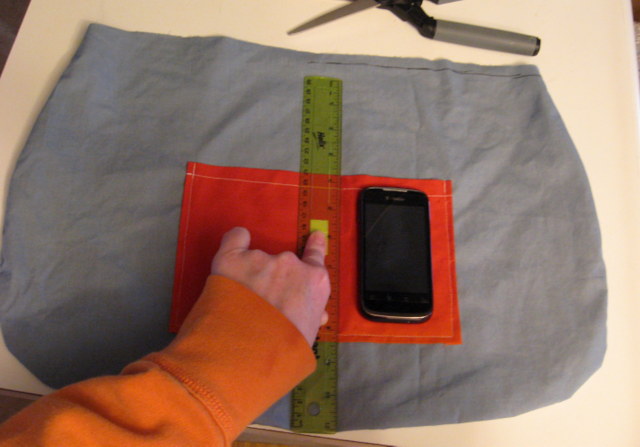
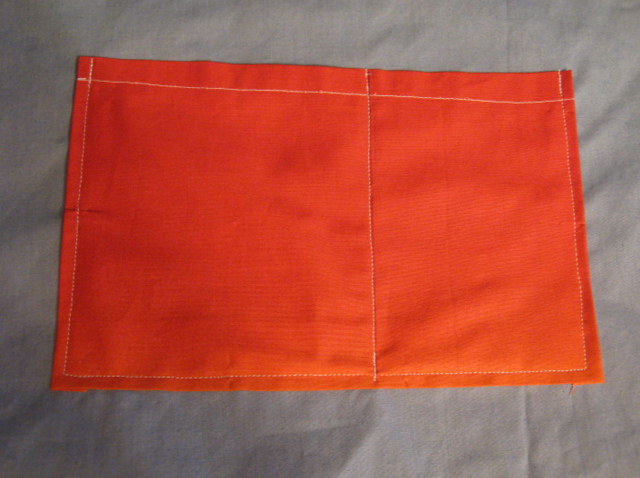
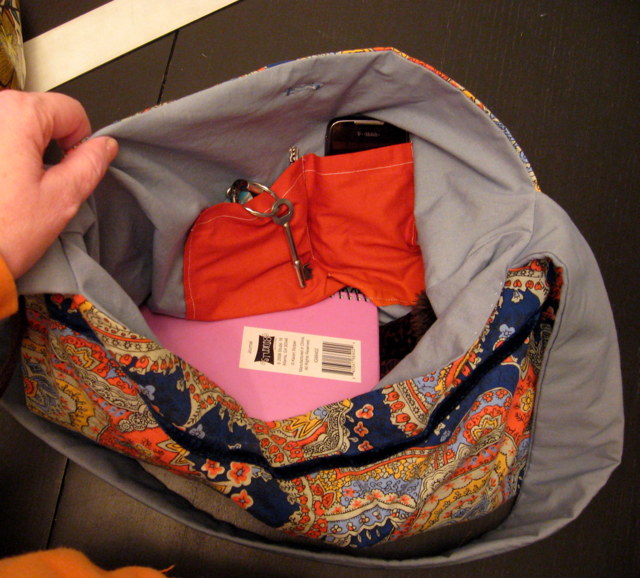
For my pockets, I like to make two; one big one on one side, to catch the random small stuff that tends to get lost in the bottom of my purse, and one on the other side, split into two pockets for my keys and phone. Decide how big you want your pockets to be, and cut the squares out of fabric – about an inch or so bigger than you want the finished pocket.
Press down a small seam on the top and stitch across it.
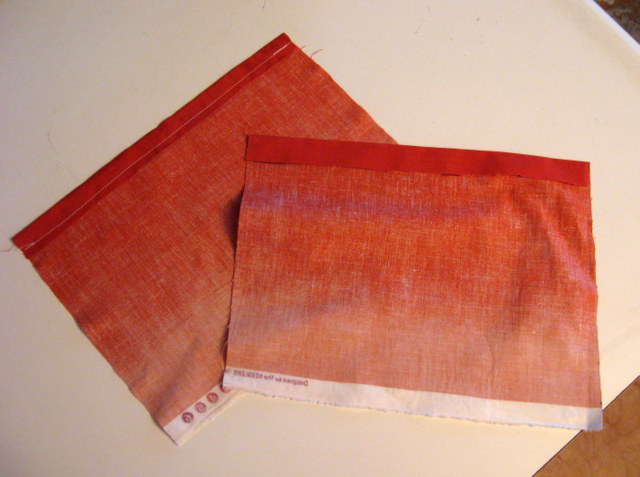
Then you will press a seam allowance on both sides and the bottom, but don’t sew it.

Pin the pocket centered in place on lining of the bag – make sure that the “up” side of the pocket is facing the “up” side of the bag. Also, don’t put it up too high…you will lose a little at the top of the bag when you sew the lining to the outside.
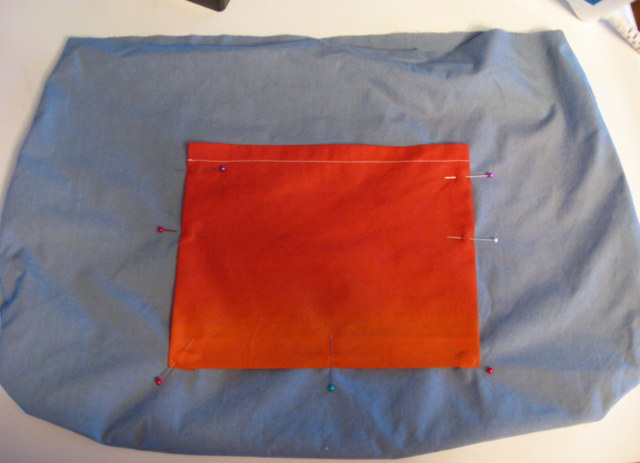
Sew the pocket onto the lining along the three edges, leaving the top open.
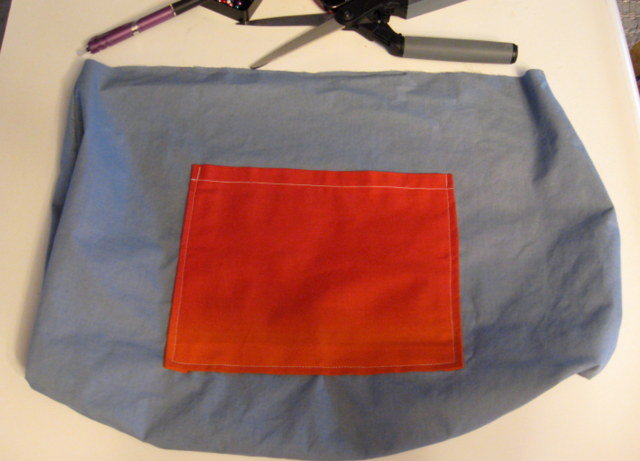
Now repeat with the pocket on the other side. Once it’s attached, you can just sew a line right down the middle to separate it into two pockets. I used my phone to decide exactly how big I needed it to be, since that is what will go in there!
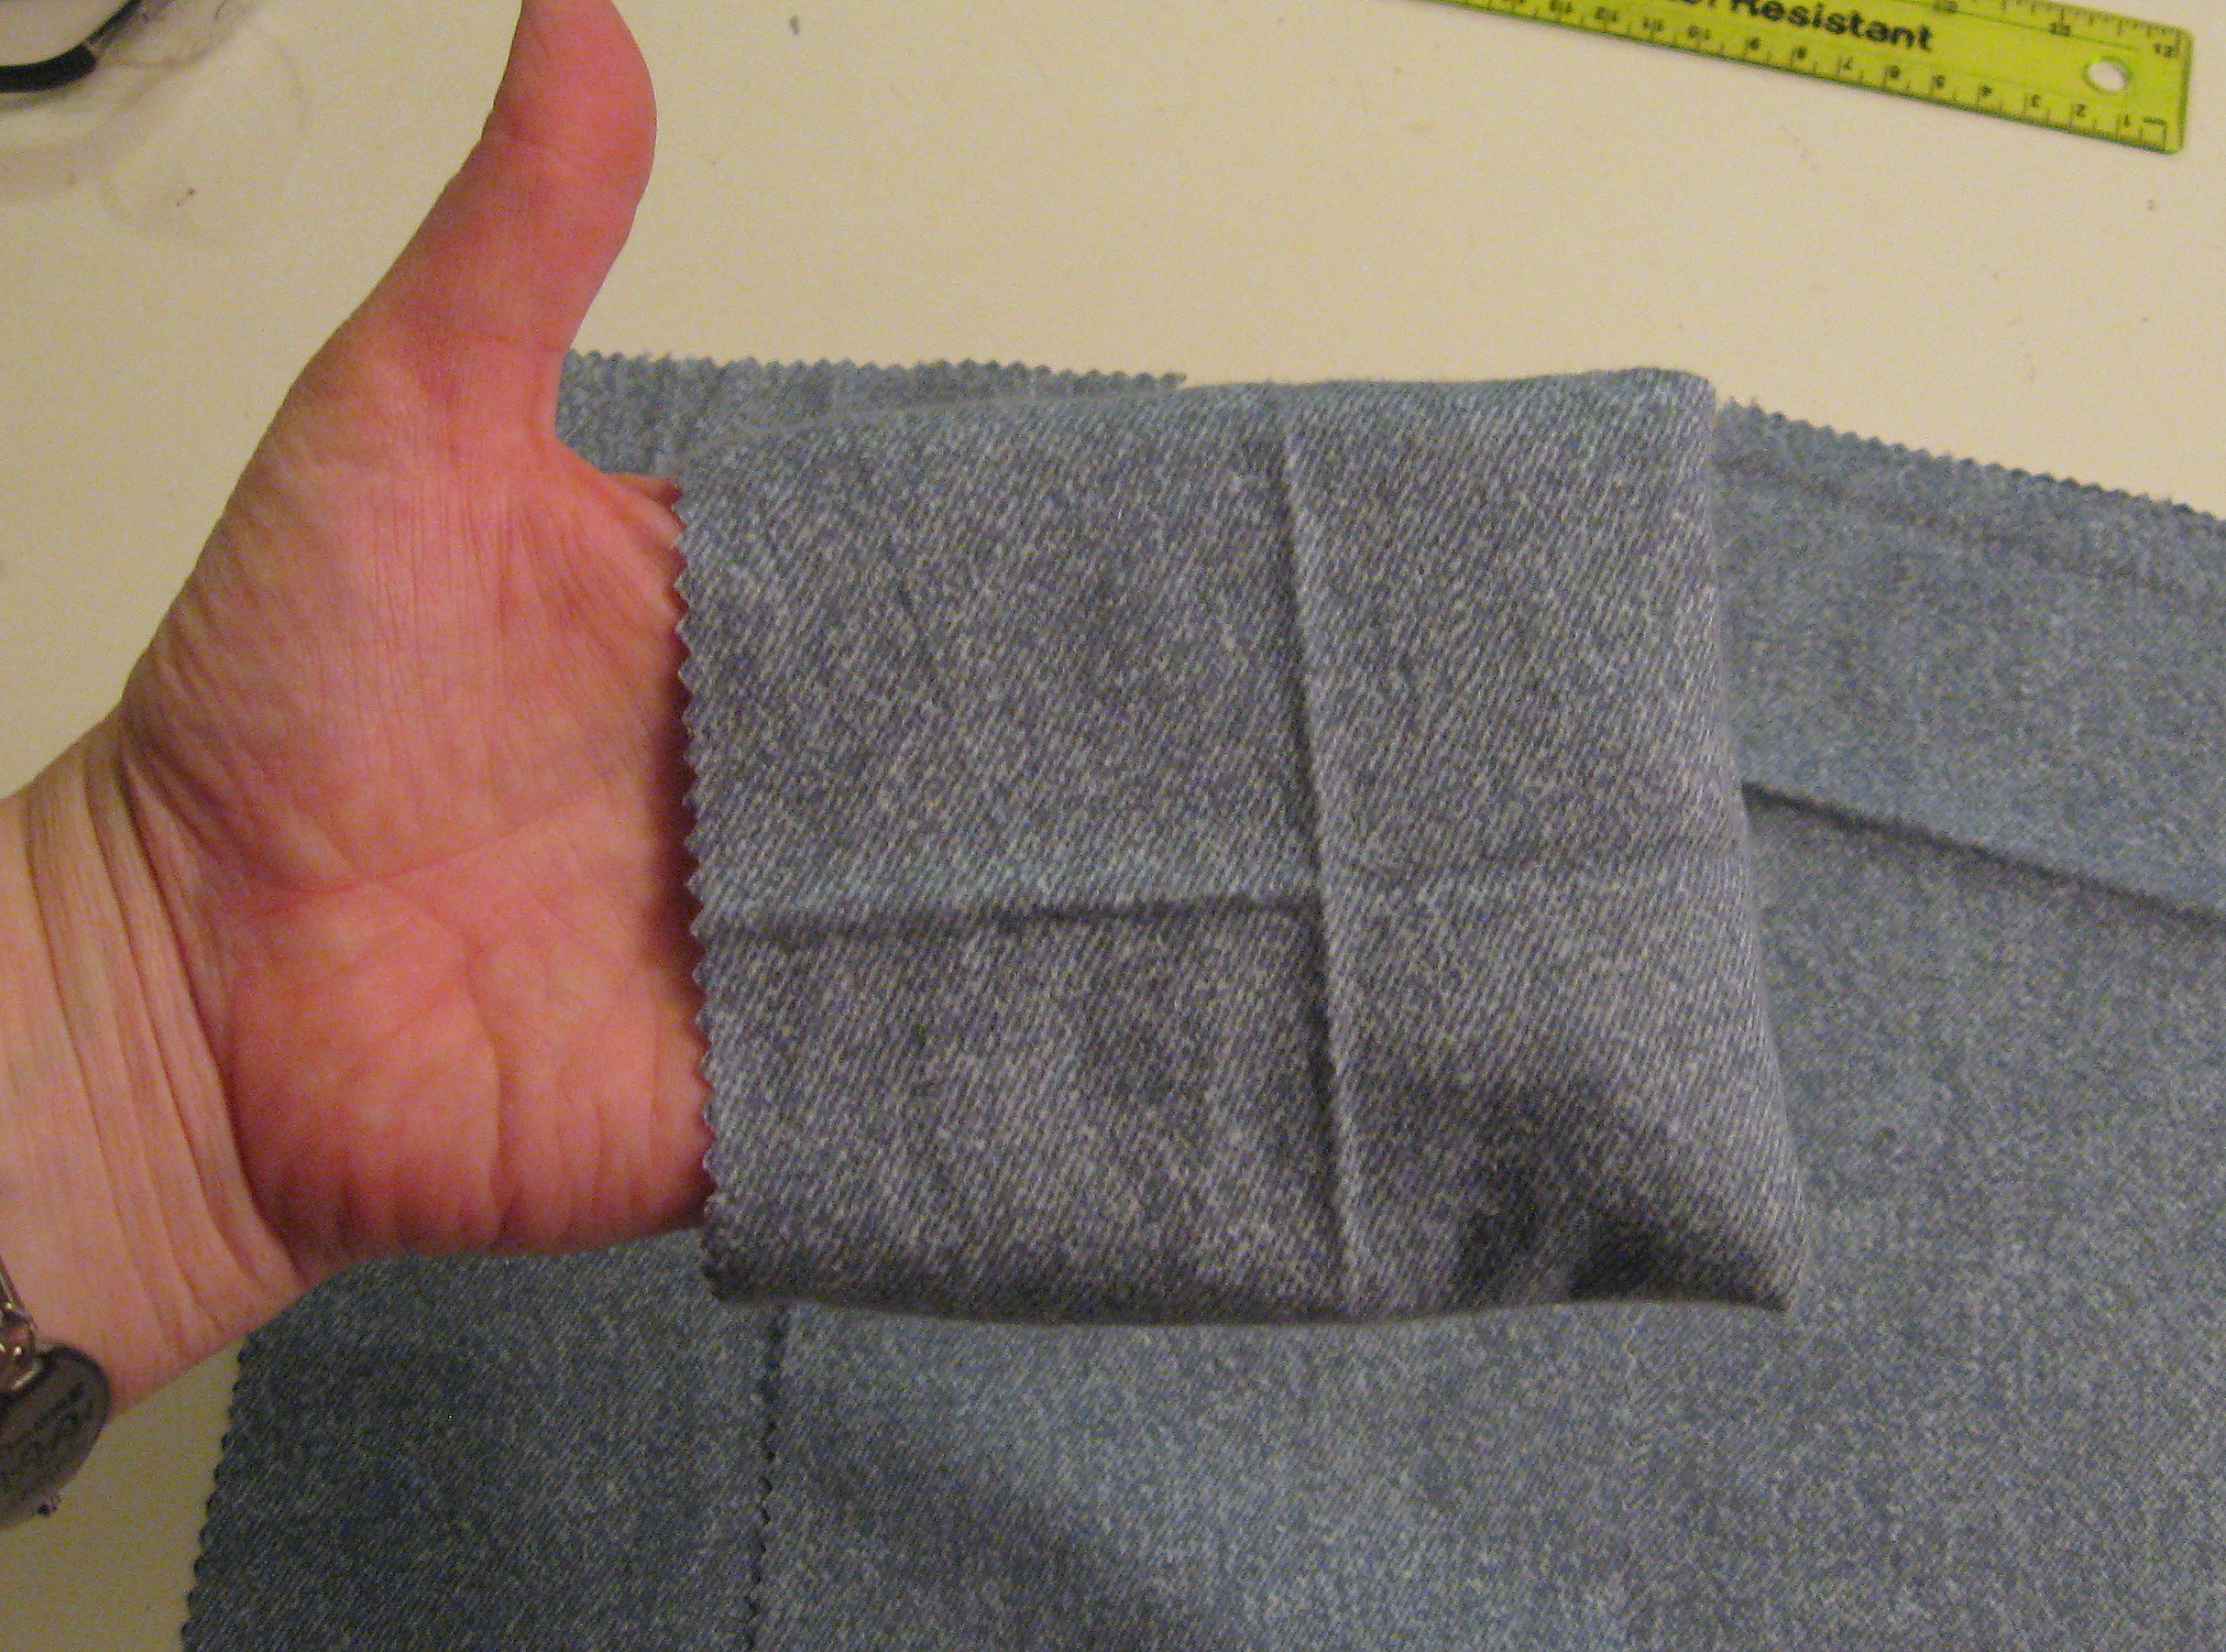
Now for the strap. Determine how long of a strap you would like. The first couple of times might take some trial and error until you find exactly what you love. Use a bag you already have or have someone help you with a measuring tape to get a good measurement to start with. For me, I like a 42 inch strap – short enough to carry on my shoulder, but still long enough to sling across my body. I cut out a long rectangle of fabric about 4 inches longer than the finished size (so 46 inches long) and about 6 inches wide.
Again, depending on what you’re going for, you can decide how you want the finished strap to be. If it is a small or delicate bag, you might choose to use just one layer of fabric for the strap. If it is a heavy bag, you will want to make the strap heavier. You can do that by using iron on interfacing, or by just using two pieces of fabric, which is what I did here.
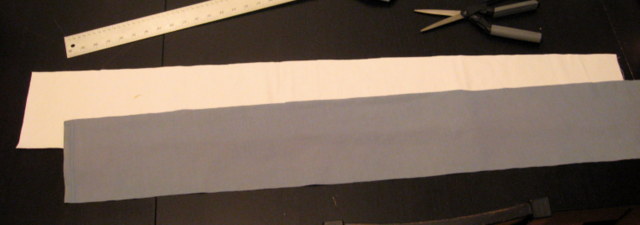
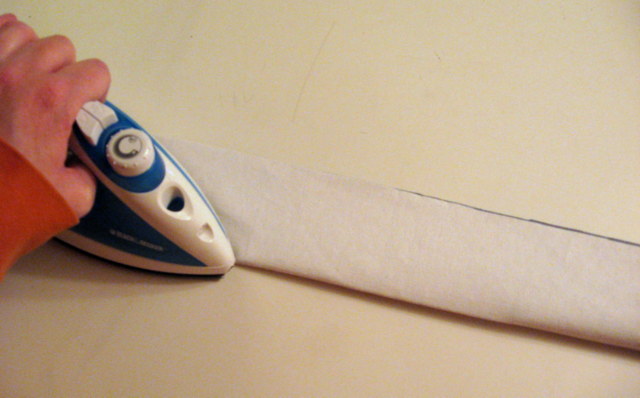
Lay them out on top of each other, and fold them in half lengthwise, with the right side of the outside fabric on the inside of the fold. Press it all flat, then sew up the long edge. Turn it all right side out, smooth it all flat and press it again.
Now, here comes the trickiest part – I still mess up on this part once in awhile if I’m not paying attention, so go slow, take a breath and think it through before you sew and you’ll be fine, I promise!
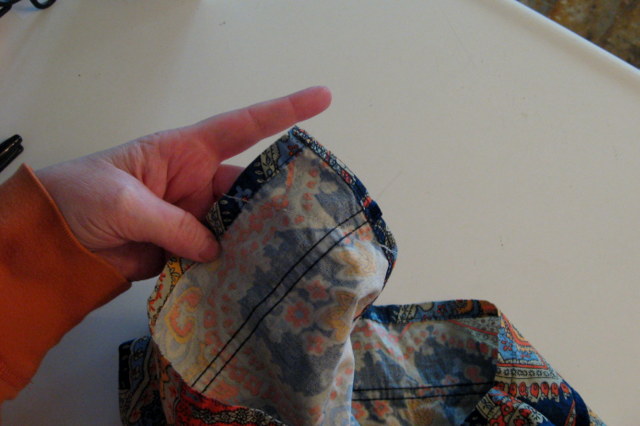
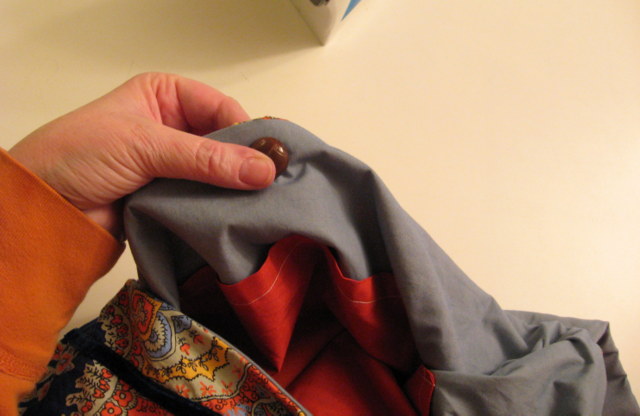
With the OUTSIDE pouch turned inside out, lay the strap along the bottom of the pouch and up the sides. Make sure that the strap isn’t twisted. Now check again. Really.
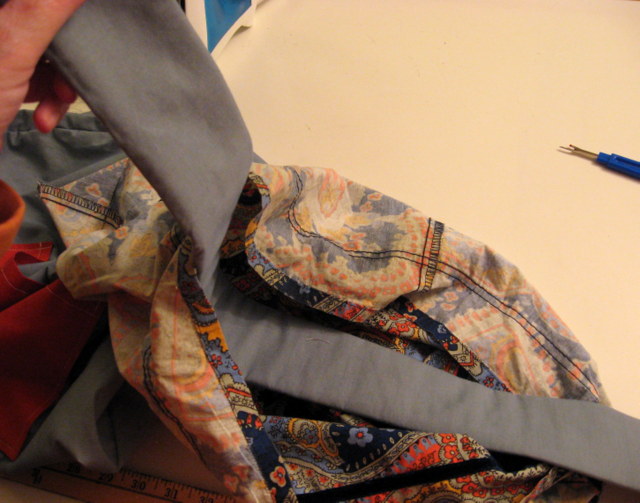
Center the strap with the side seam of the pouch and sticking up beyond the top about 2 inches and pin it. Now do the same on the other side. Now check again to make sure it isn’t twisted – just to be safe 🙂
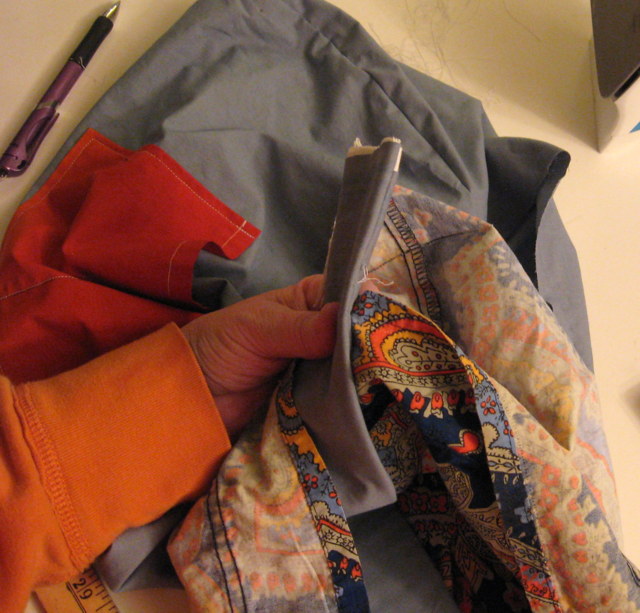
Now with the INSIDE pouch also turned inside out, put it down inside the outer pouch. So, you will have a “pouch sandwich” with the strap between them. Line up the side seams and the front and back centers and pin them together, stretching to ease in any excess fabric (you shouldn’t have a lot, but you will likely have a little). You will now sew around the whole top where you just pinned, but you will have to leave a space so that you can turn them inside out. The smaller the opening you leave, the harder it will be to get it turned, but the larger the opening, the more work you will have to do to close it up. I probably leave about 3 inches. I have been known to forget and just keep sewing, so when I pin, I will pin an X where I want to leave the opening just to remind myself.
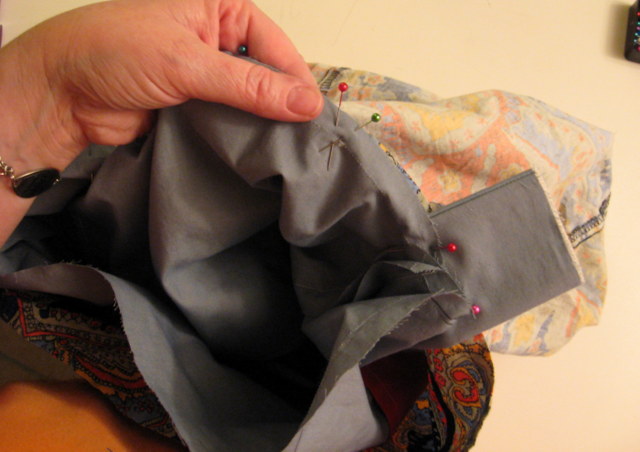
Take a minute to look at it and make sure you have everything assembled the way it should be; it should look like this:
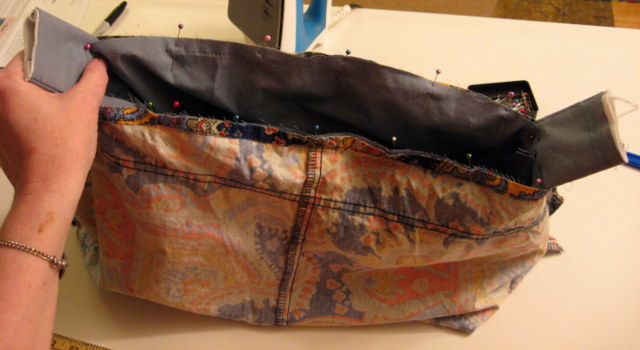
Then, sew around the top edge, backstitching at the beginning and end. Carefully reach into the opening that you left and pull out the strap, then work the rest of the purse through until the whole thing is turned right side out. Now press around the top where you just sewed, to make it look nice and neat, and press down the edges of the opening as you go. Slip stitch or blind stitch the opening closed by hand – or you can topstitch around the entire top edge, closing the opening in the process.
I chose to close this bag with a button, so I found the center of one side and attached a big vintage button, sewing it just to the lining so the stitches don’t show on the outside. Then I lined it up with the center on the other side of the bag and made a buttonhole.
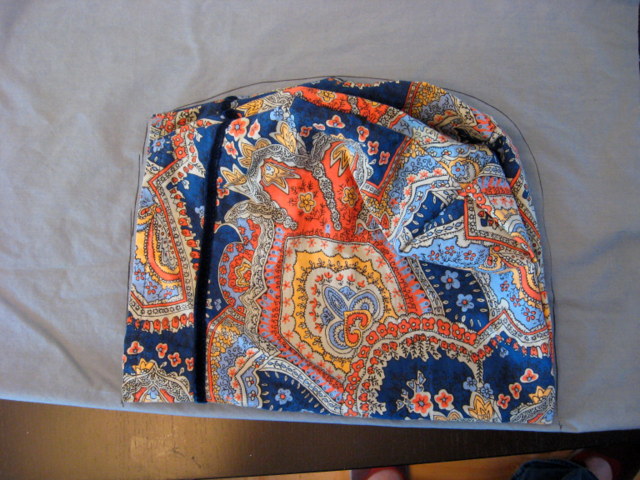
Here’s a shot of the inside of the finished bag:
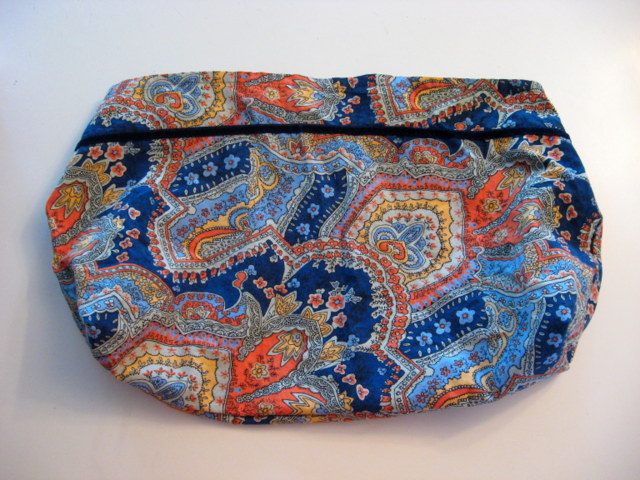
And the outside:
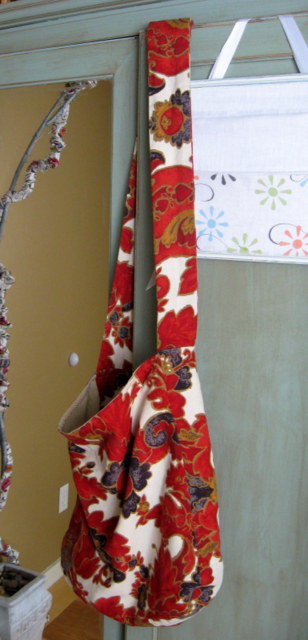
And a few of my other favorites…
My favorite overall tote bag, made from an old pair of curtains.
And a simple scripture bag: 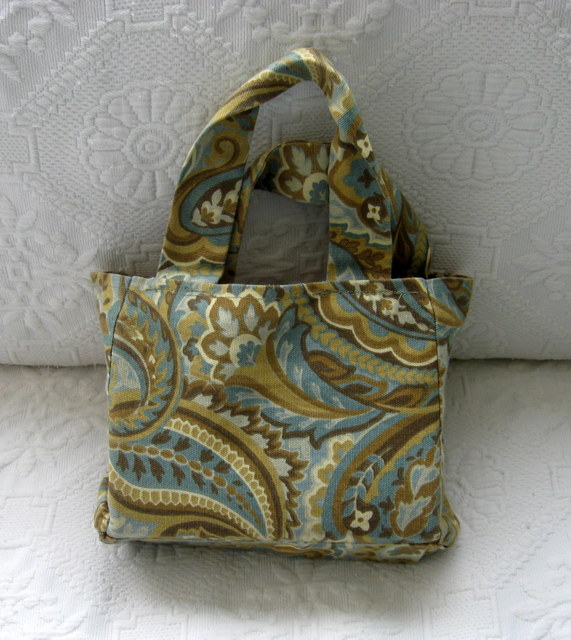
And my library bag – two straps instead of one – and made from a heavy duty upholstery fabric that I picked up for pennies on clearance.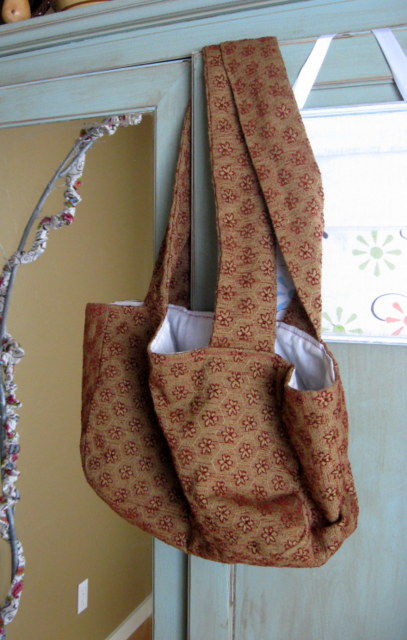
Winter Decorating
January is a hard month to decorate. In my own home, I tend to keep things clean and minimal in January; a nice contrast to the decorating-overload that tends to be Christmas! Still about this time I do want a little something that speaks to the season.
The elementary school where my friend is the principal has a little alcove in the entry way. I go in once a month or so and change the seasonal decor in that alcove. This can be a challenge; I need to find things that are warm and friendly, widely appealing, quick and very inexpensive!
As I was putting up the Winter decor there this week, it occurred to me that there were lots of items there that could serve as a jumping off point for your own decor. Since none of these things are new, I don’t have tutorials for them, but I’ll walk you through them, and you can add your own creativity!
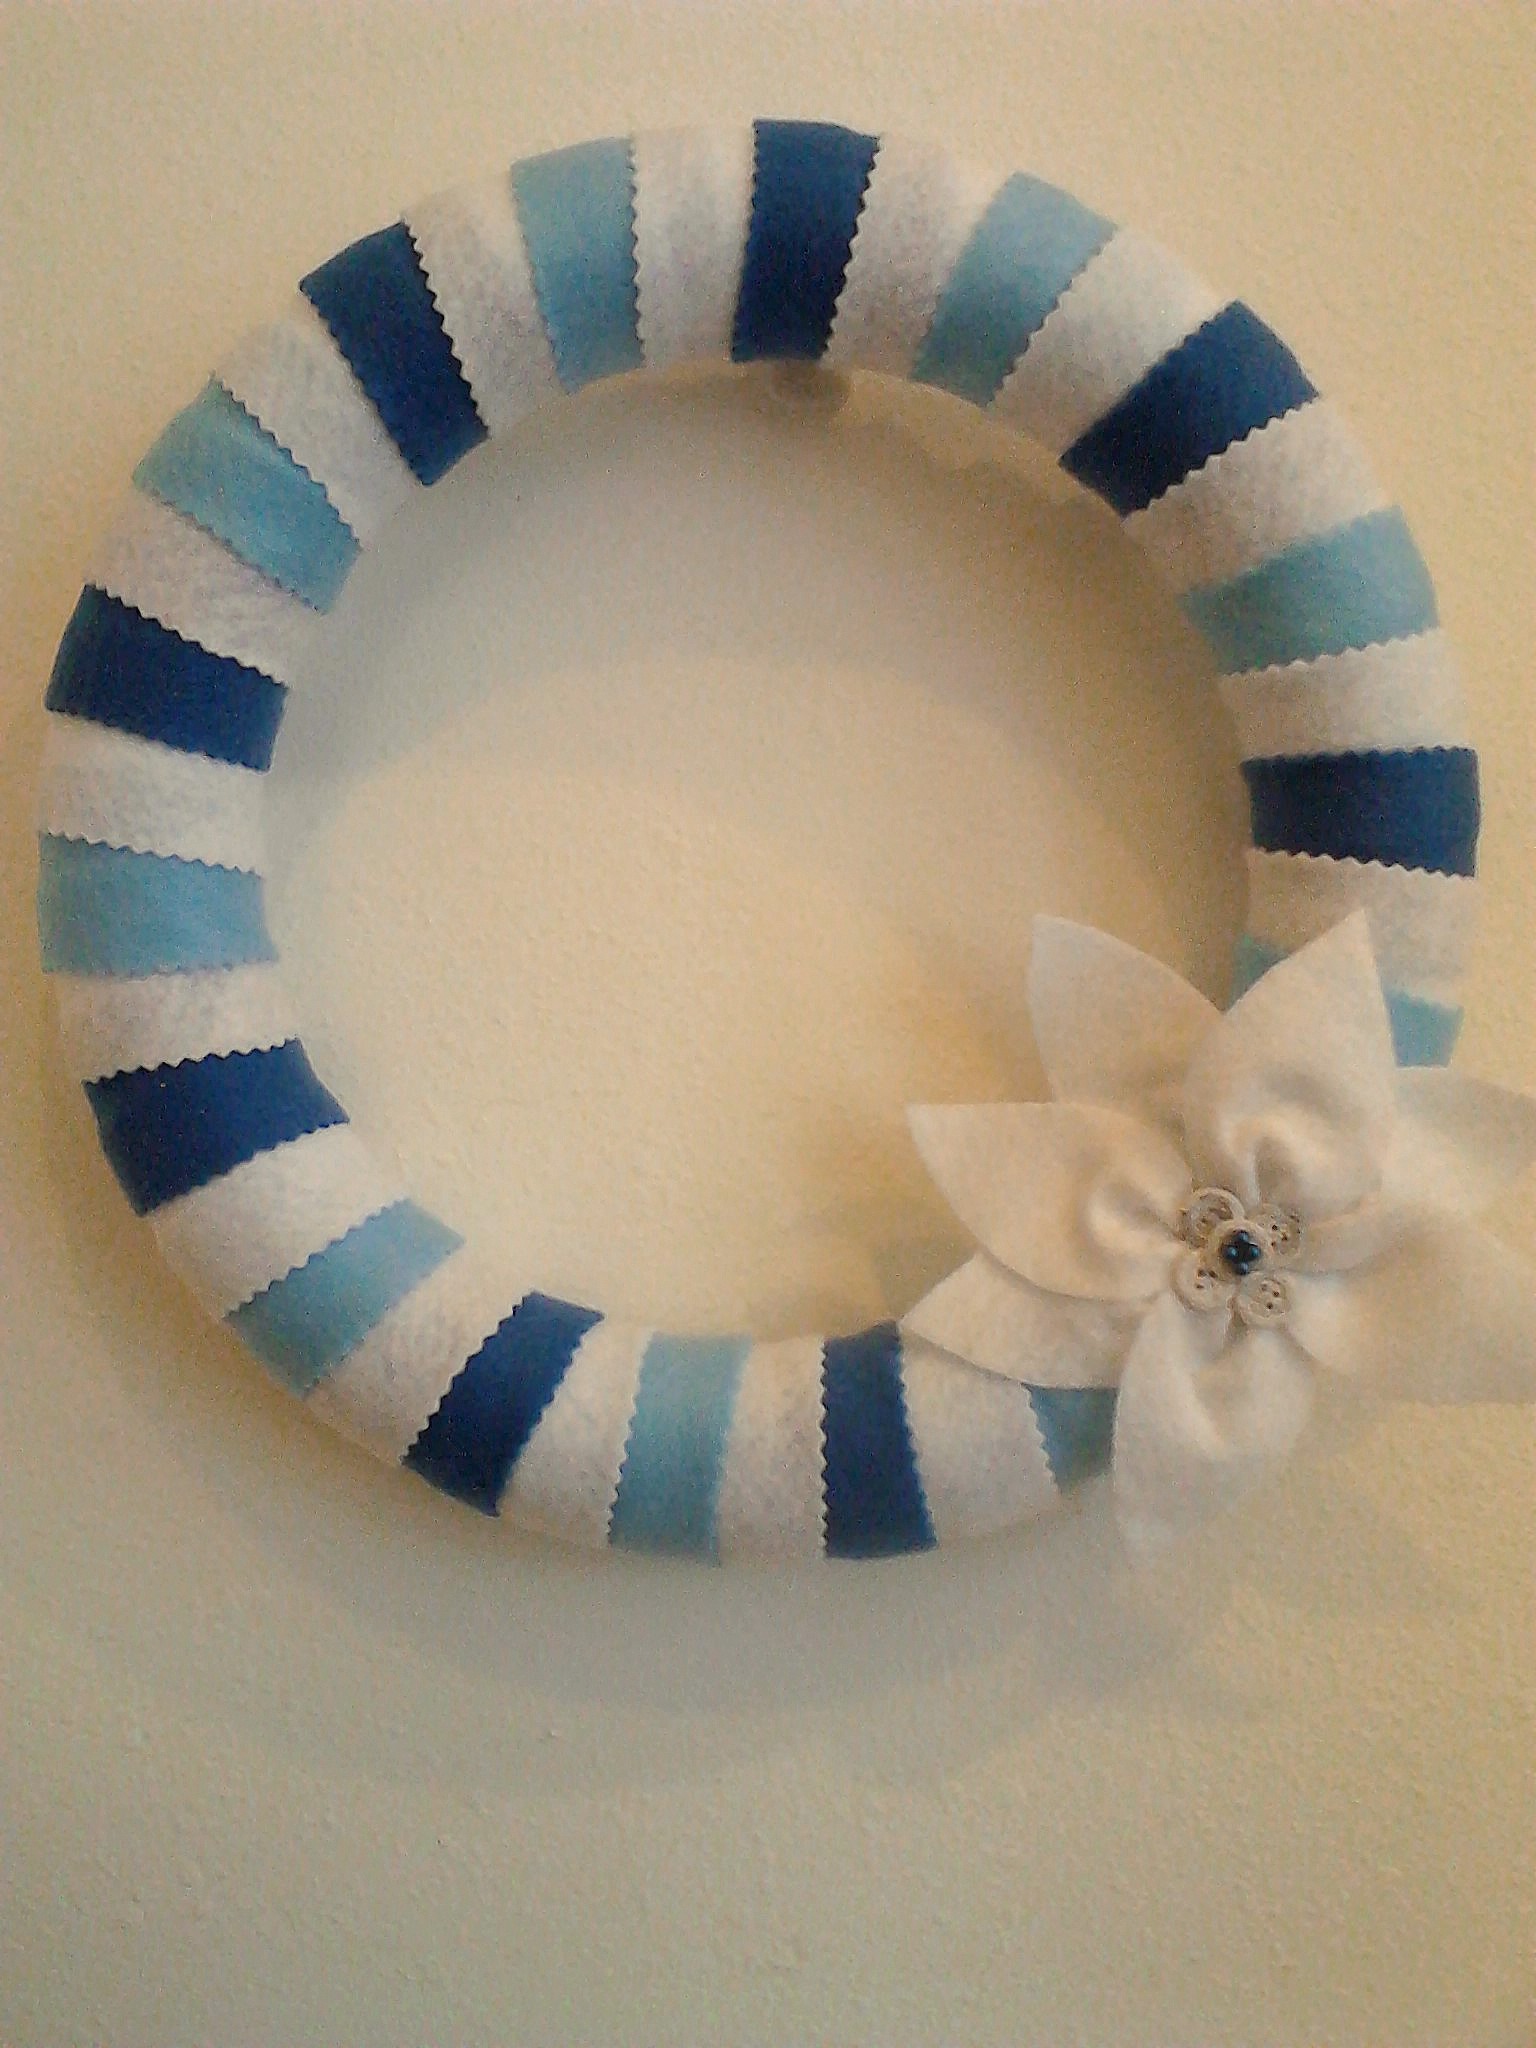
First up, a simple wreath. See this post here if you missed the Christmas version. For this one, I changed the colors and used small buttons – that I painted with white glitter paint – for the center of the flower.
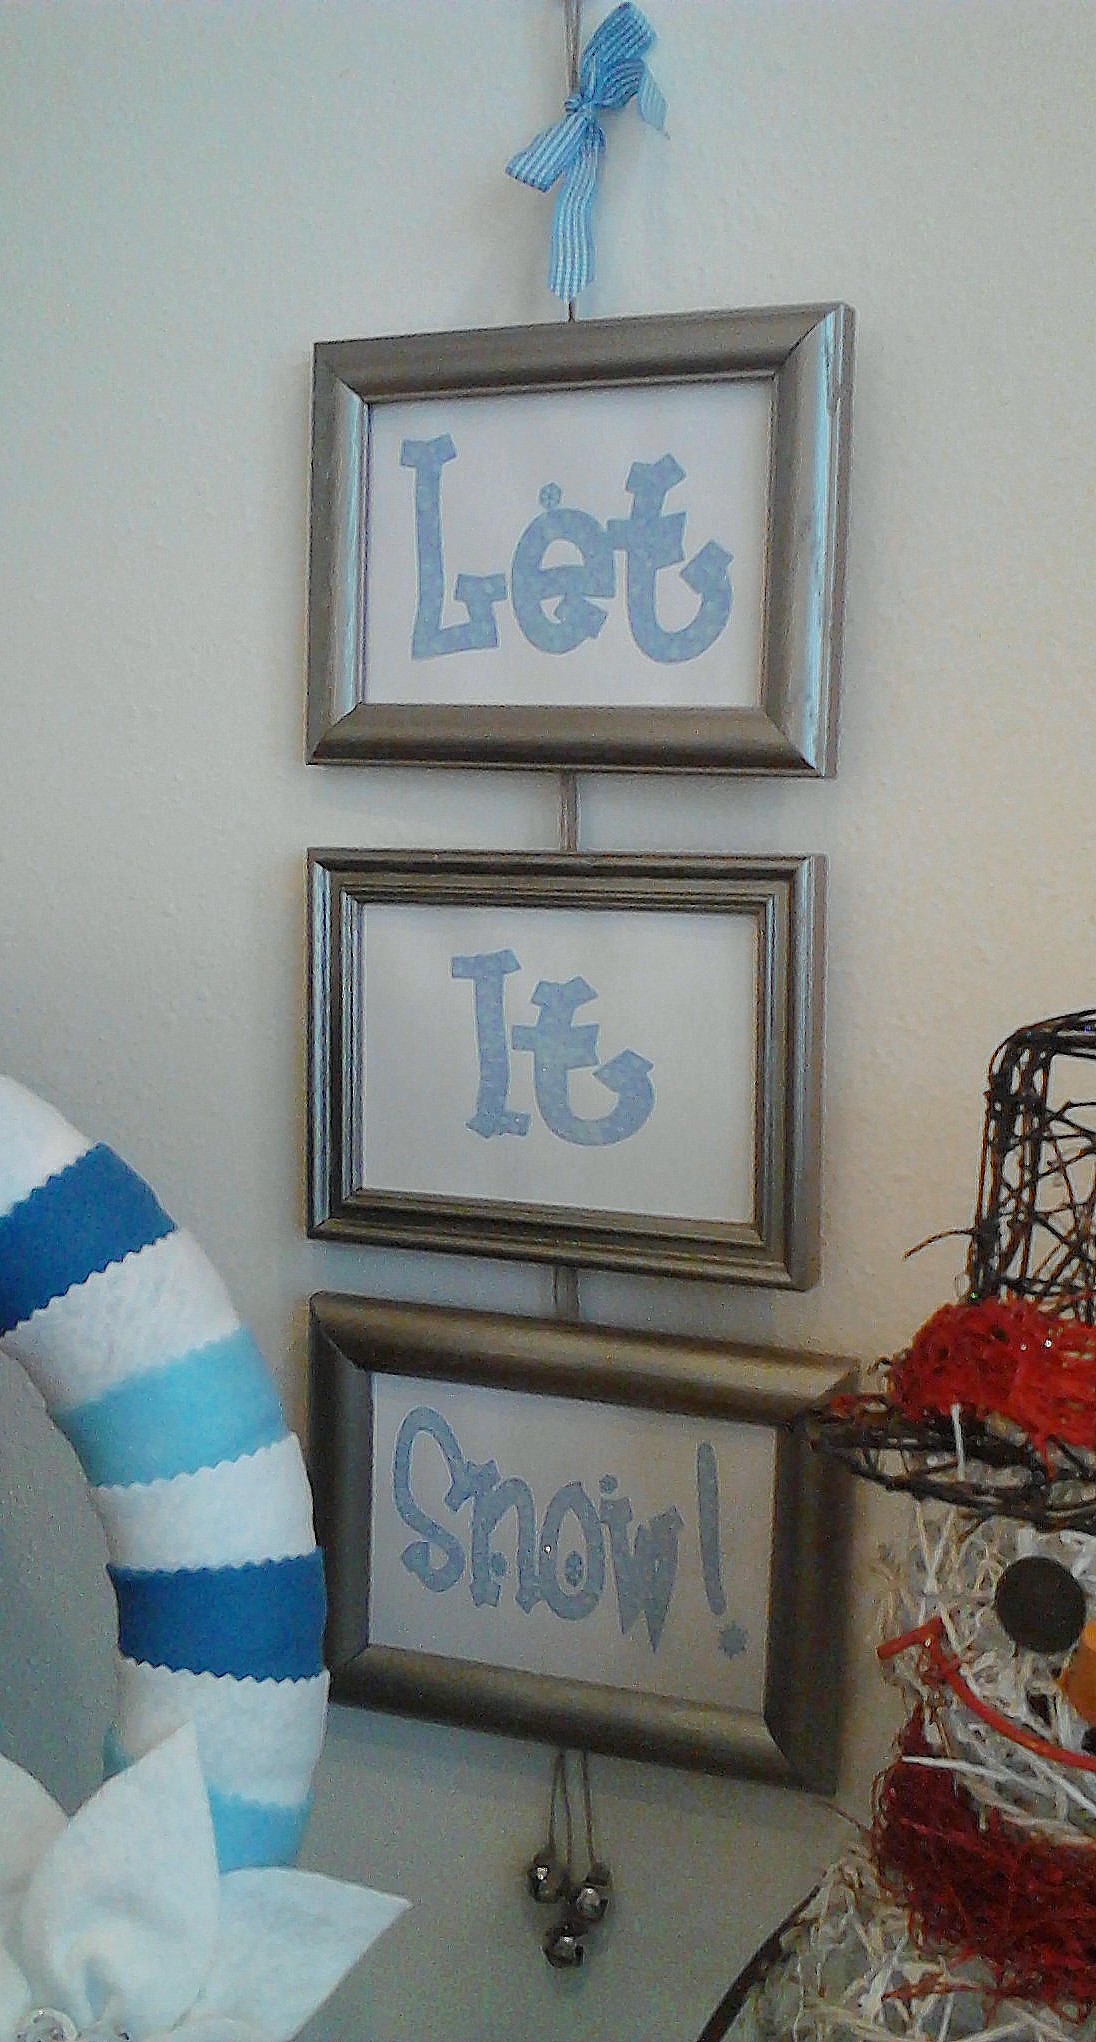
This is one of my favorites – so simple and cost me almost nothing – but I just love the way it turned out. I bought 3 small frames in the same size at a thrift store and painted them silver. Then, using WordArt in a Word document, I printed out the words “Let It Snow” using blue ink on white cardstock. Using a small paint brush, I painted over the text with Mod Podge and sprinkled them with fine white glitter. Cut the cardstock to size and mount them in the frames. Position them right side down on a table and lay out a piece of twine or ribbon on the back. Using a staple gun, staple the twine in place to the backs of the frames. I tied a blue ribbon to the top and some silver jingle bells to the bottom for that finishing touch.
I’m not generally a fan of glitter, but in January, it just seems perfect! I especially like the Martha Stewart line of glitter that they sell at Michaels. It’s super fine and just so pretty. I wanted some wintery, snowy trees and finally decided to go with a glittery green, but this would also look great with white. Just paint Mod Podge or glue onto a styrofoam cone, and sprinkle the glitter on. Once it dries, it is pretty sturdy; these trees are 3 years old and they have lost almost none of the glitter. I love the way the green gives a pop of color against the blues and whites.
Also notice the crumpled white tissue paper. I would go easy on using this in my house – it could easily look chintzy – but this shelf is up higher and I love that the paper ties the items together and gives the display a little bulk.
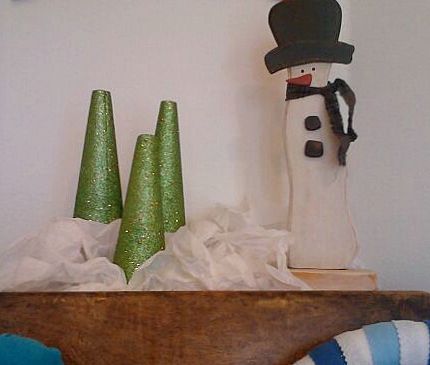
Here’s our big snowman friend –
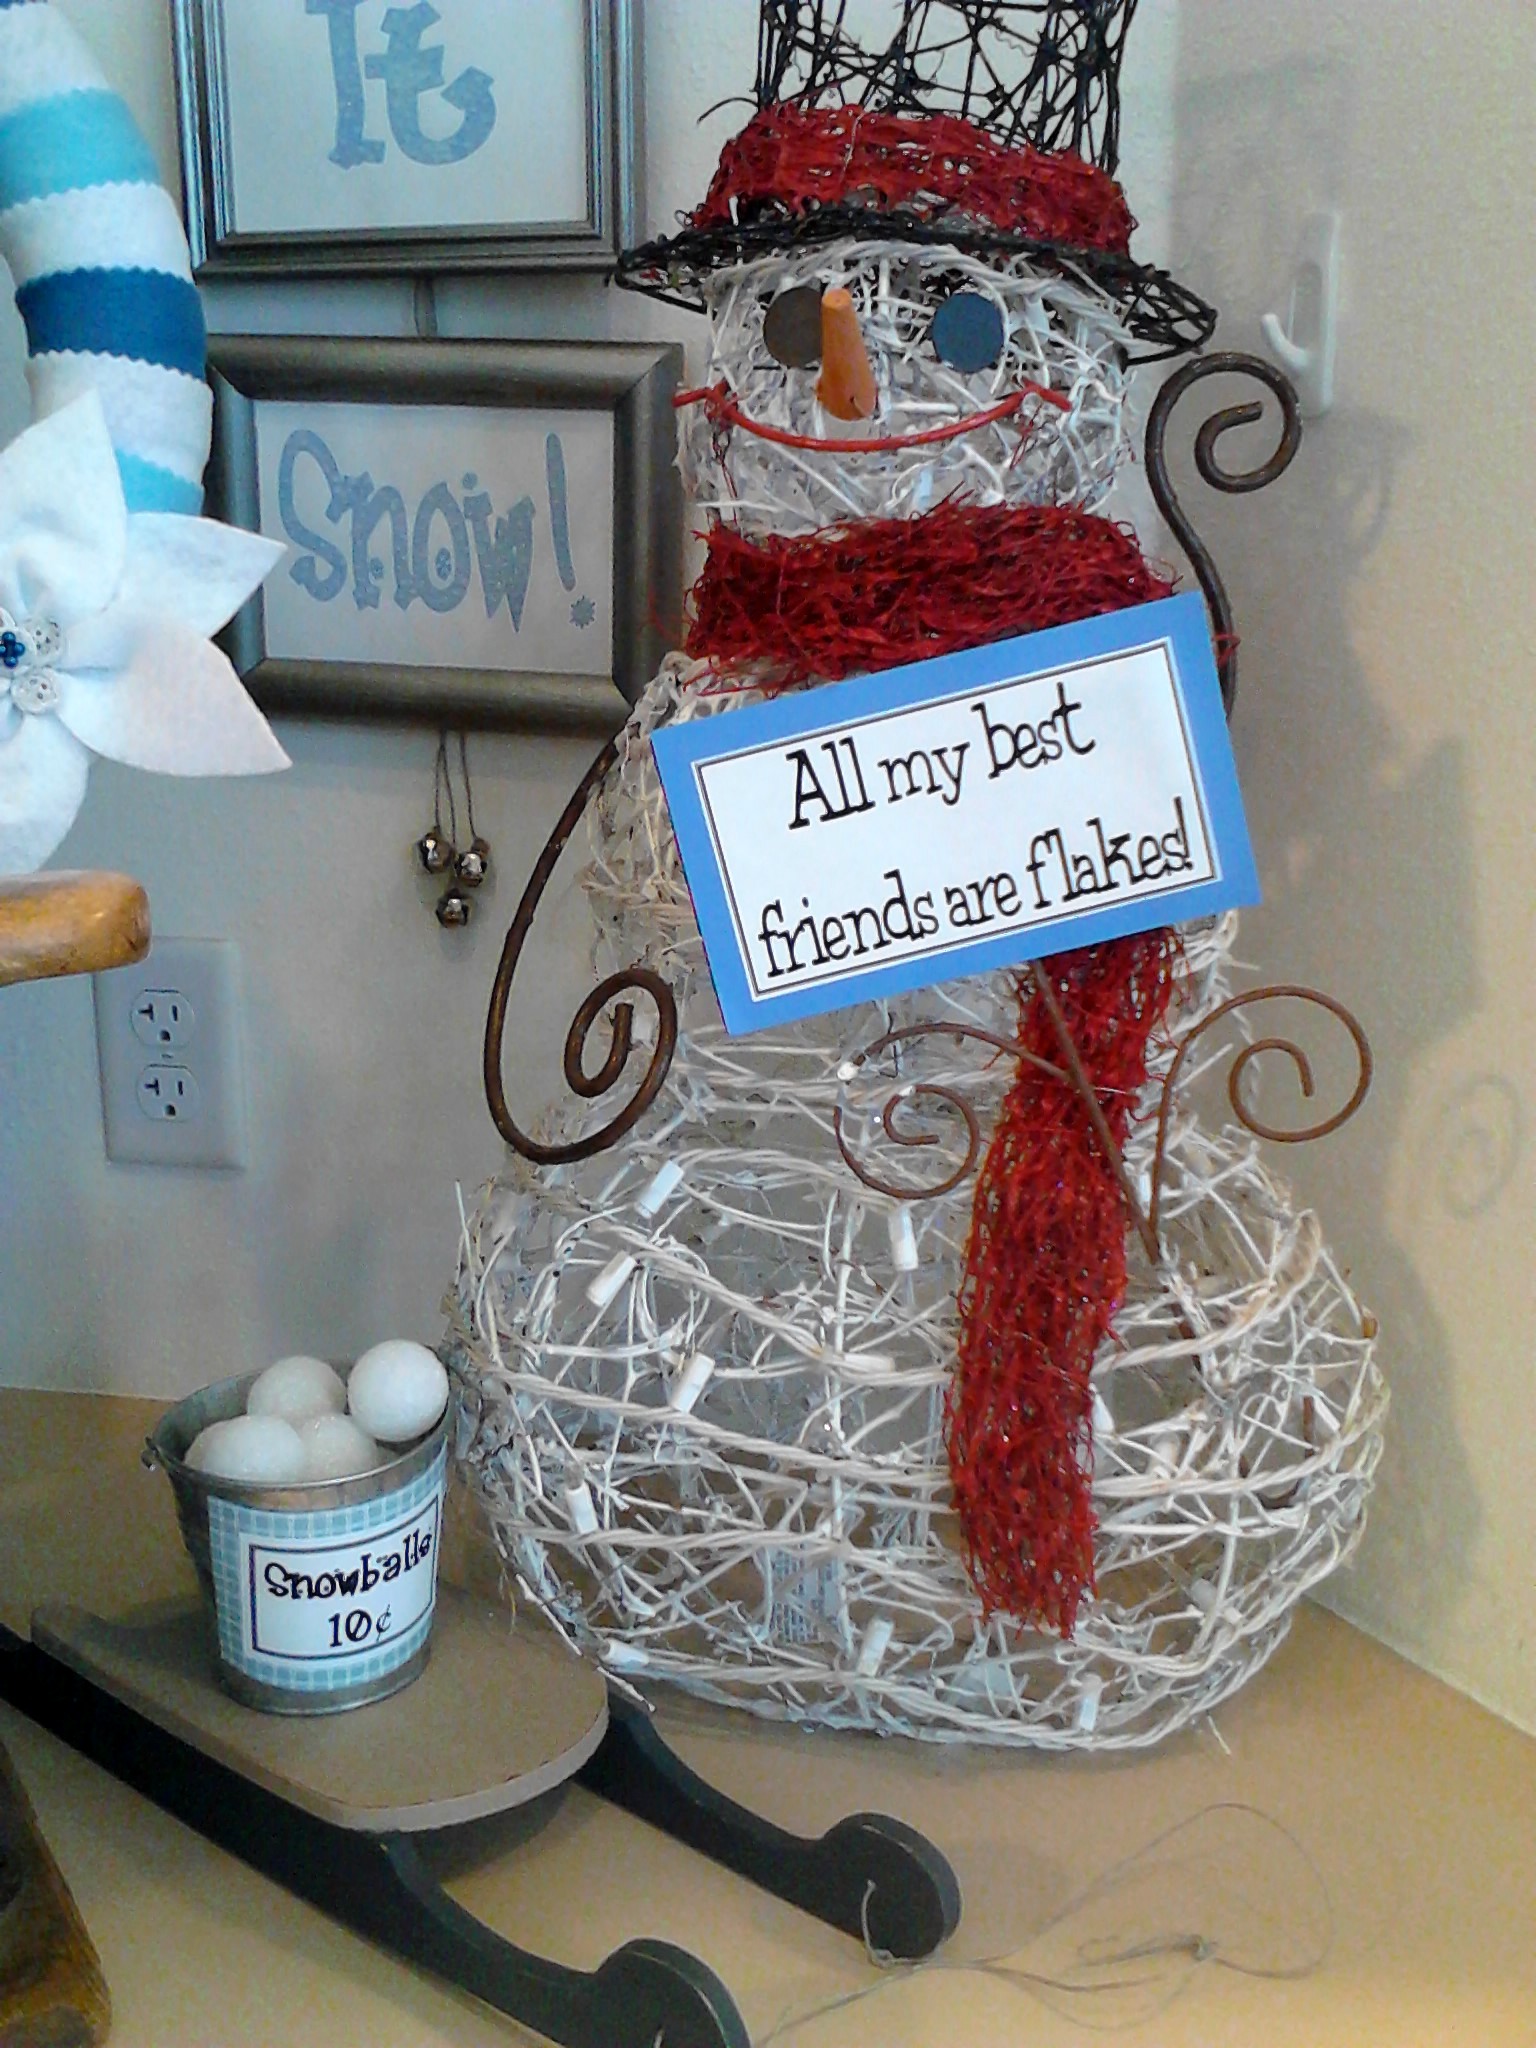
We didn’t like the way his sign looked before, so I redid it in Word, mounted it on cardstock and attached it to the original sign using double sided tape. His sled was another thrift store find. It cost me a dollar and was garish red and green. I repainted it and now it hold Mr. Snowman’s bucket of snowballs. The bucket was 50 cents at the thrift store; just add a printed tag to the front and fill it with small styrofoam balls.

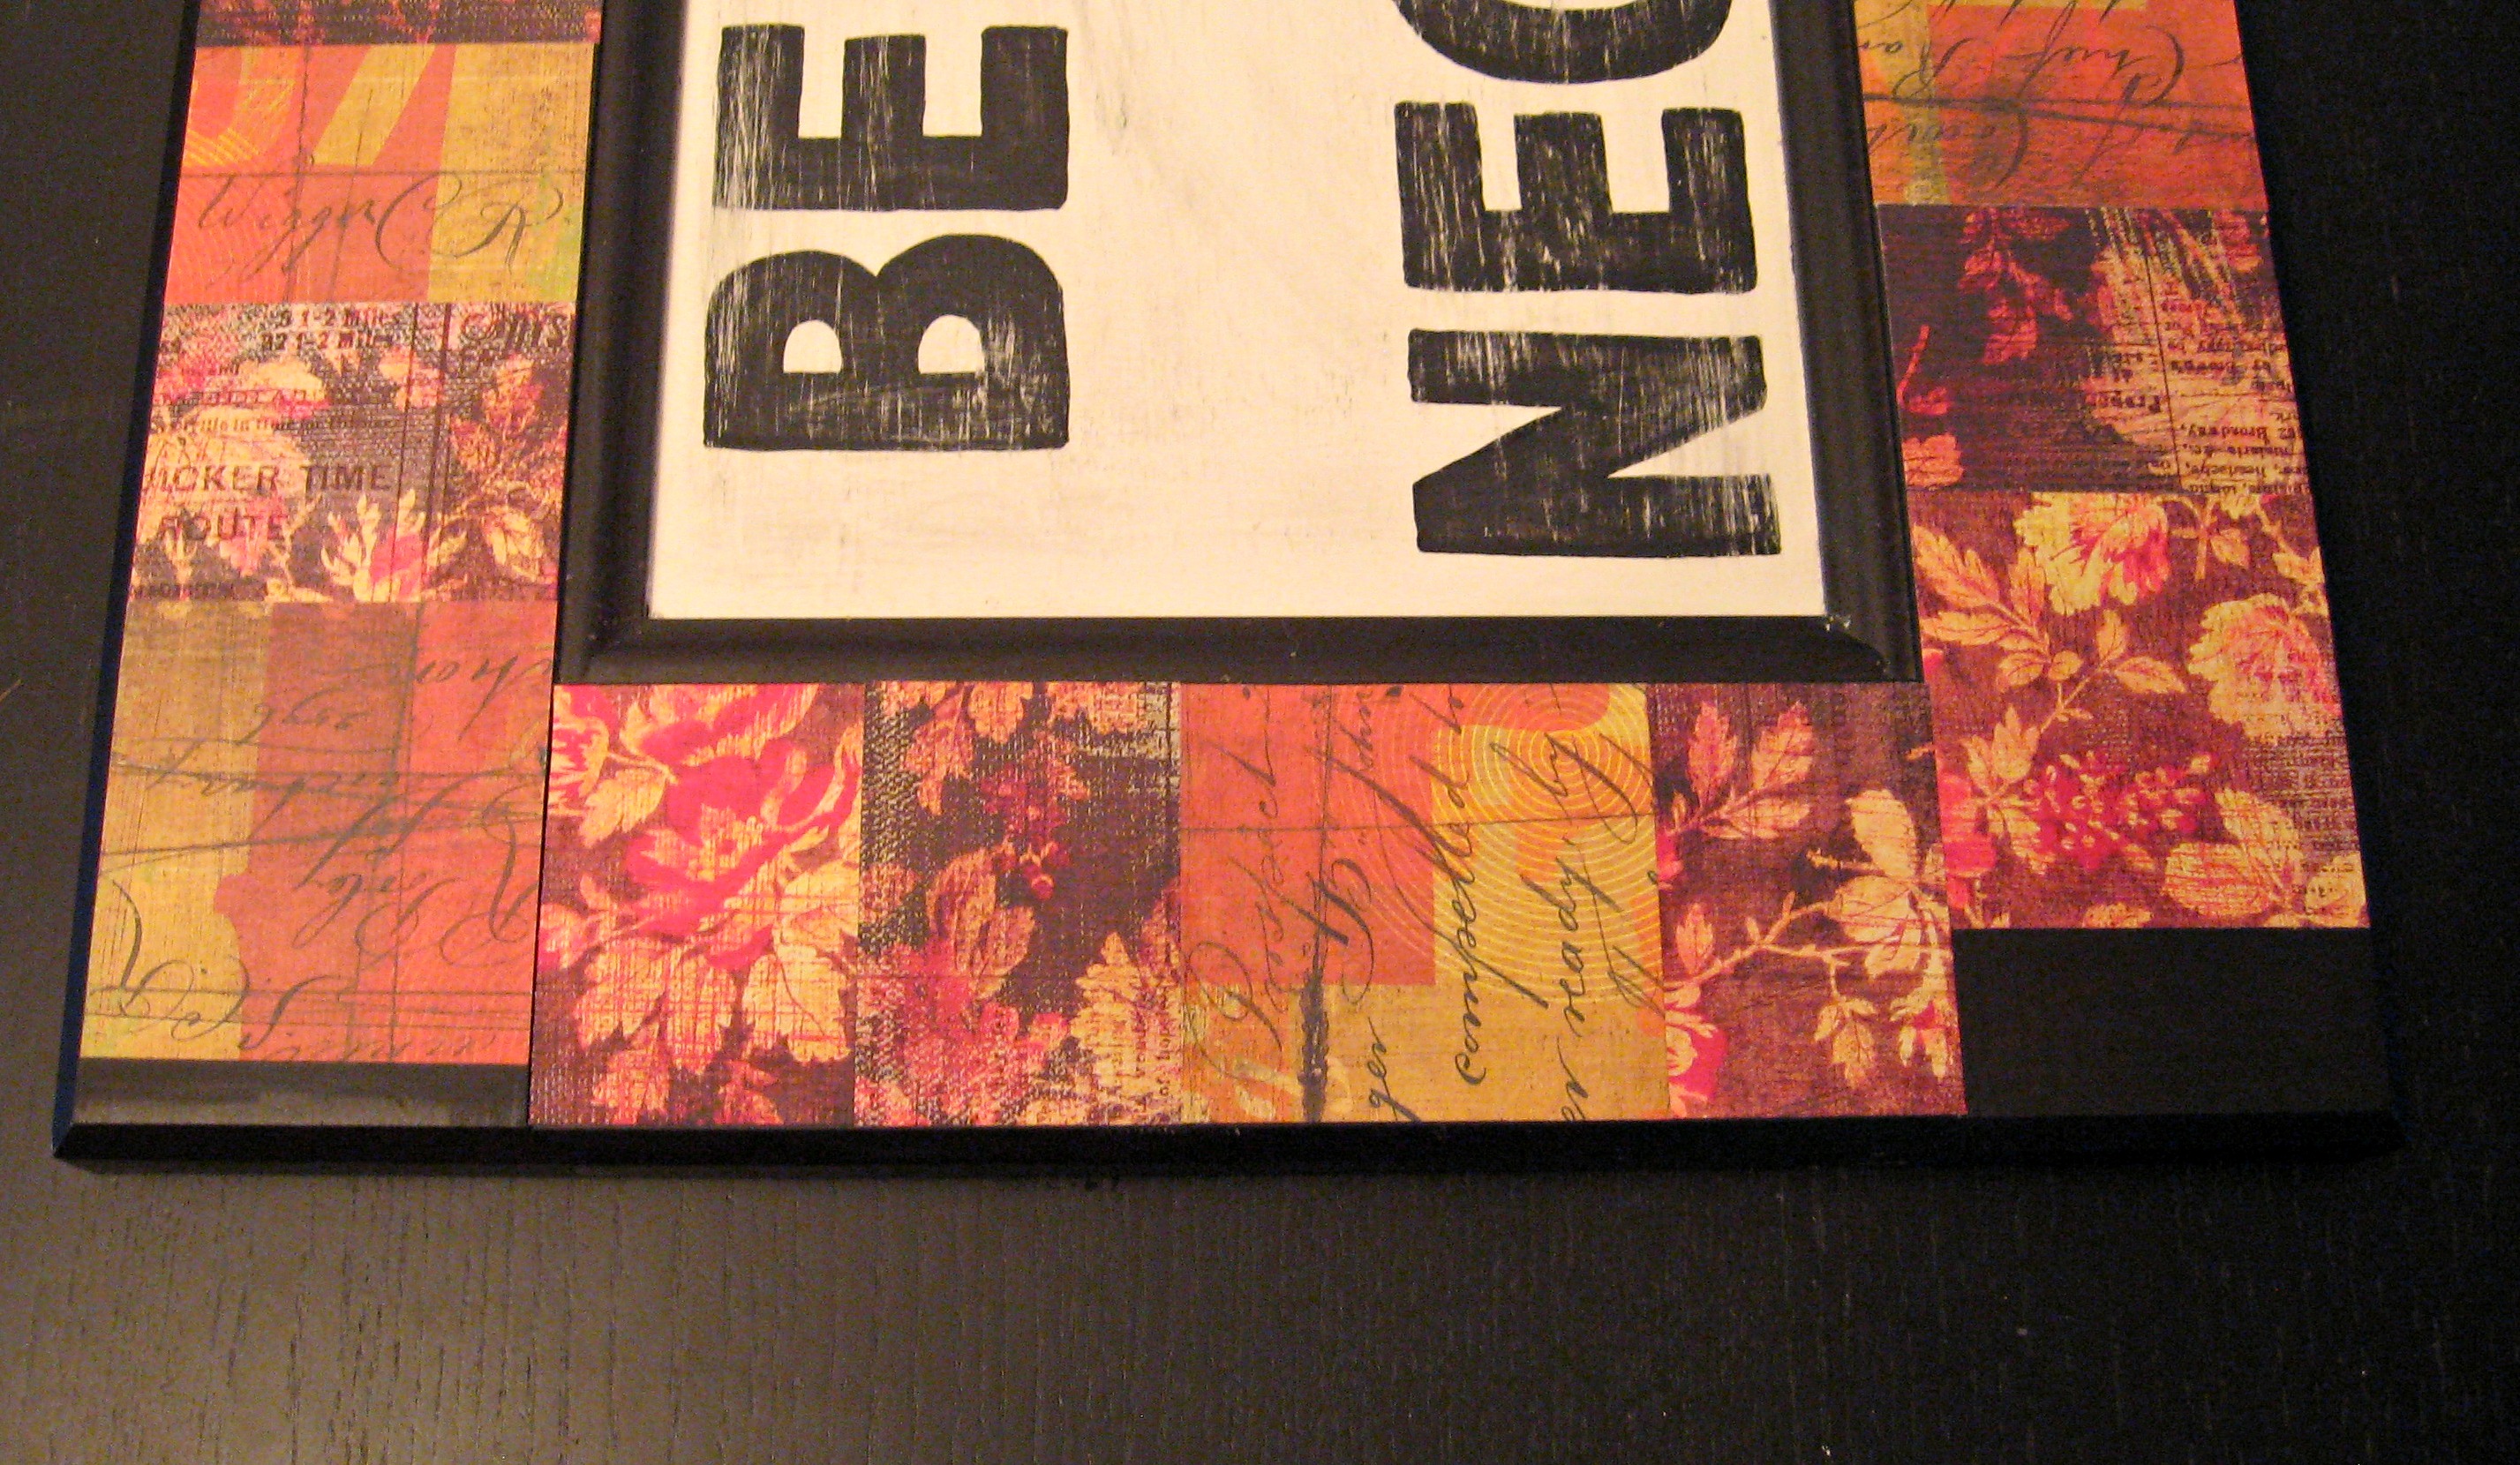
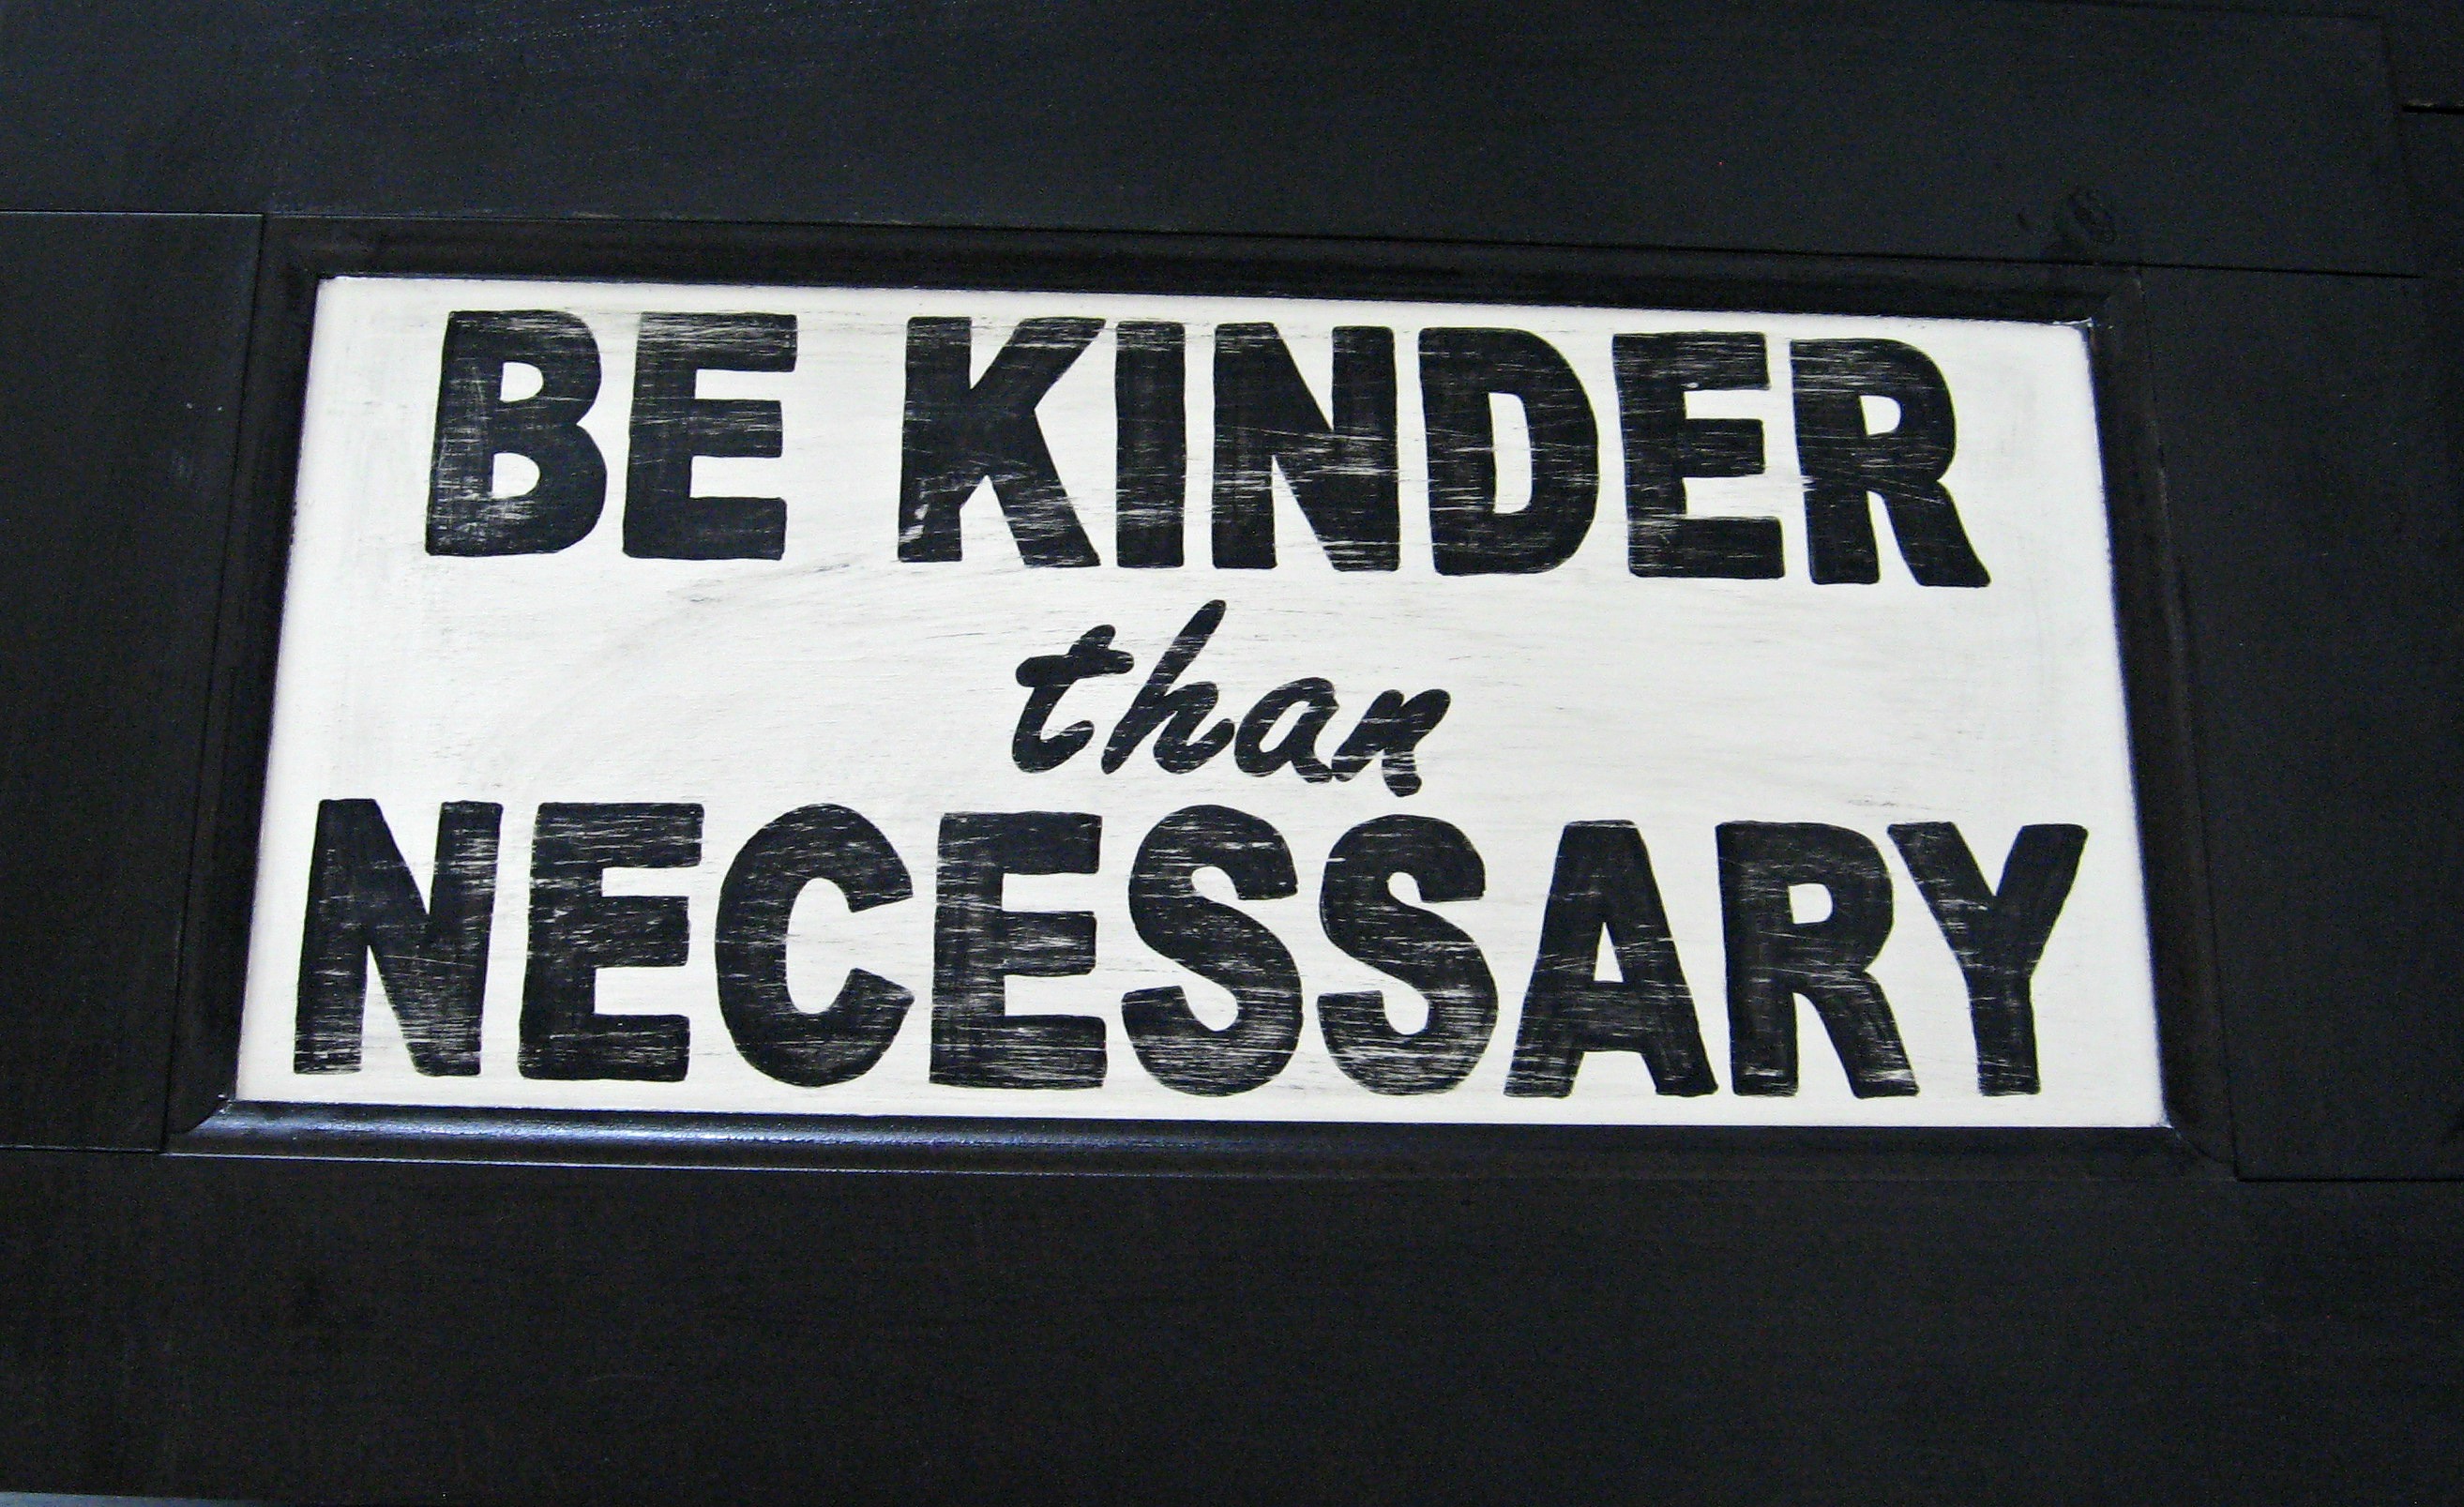
Be Kind Sign
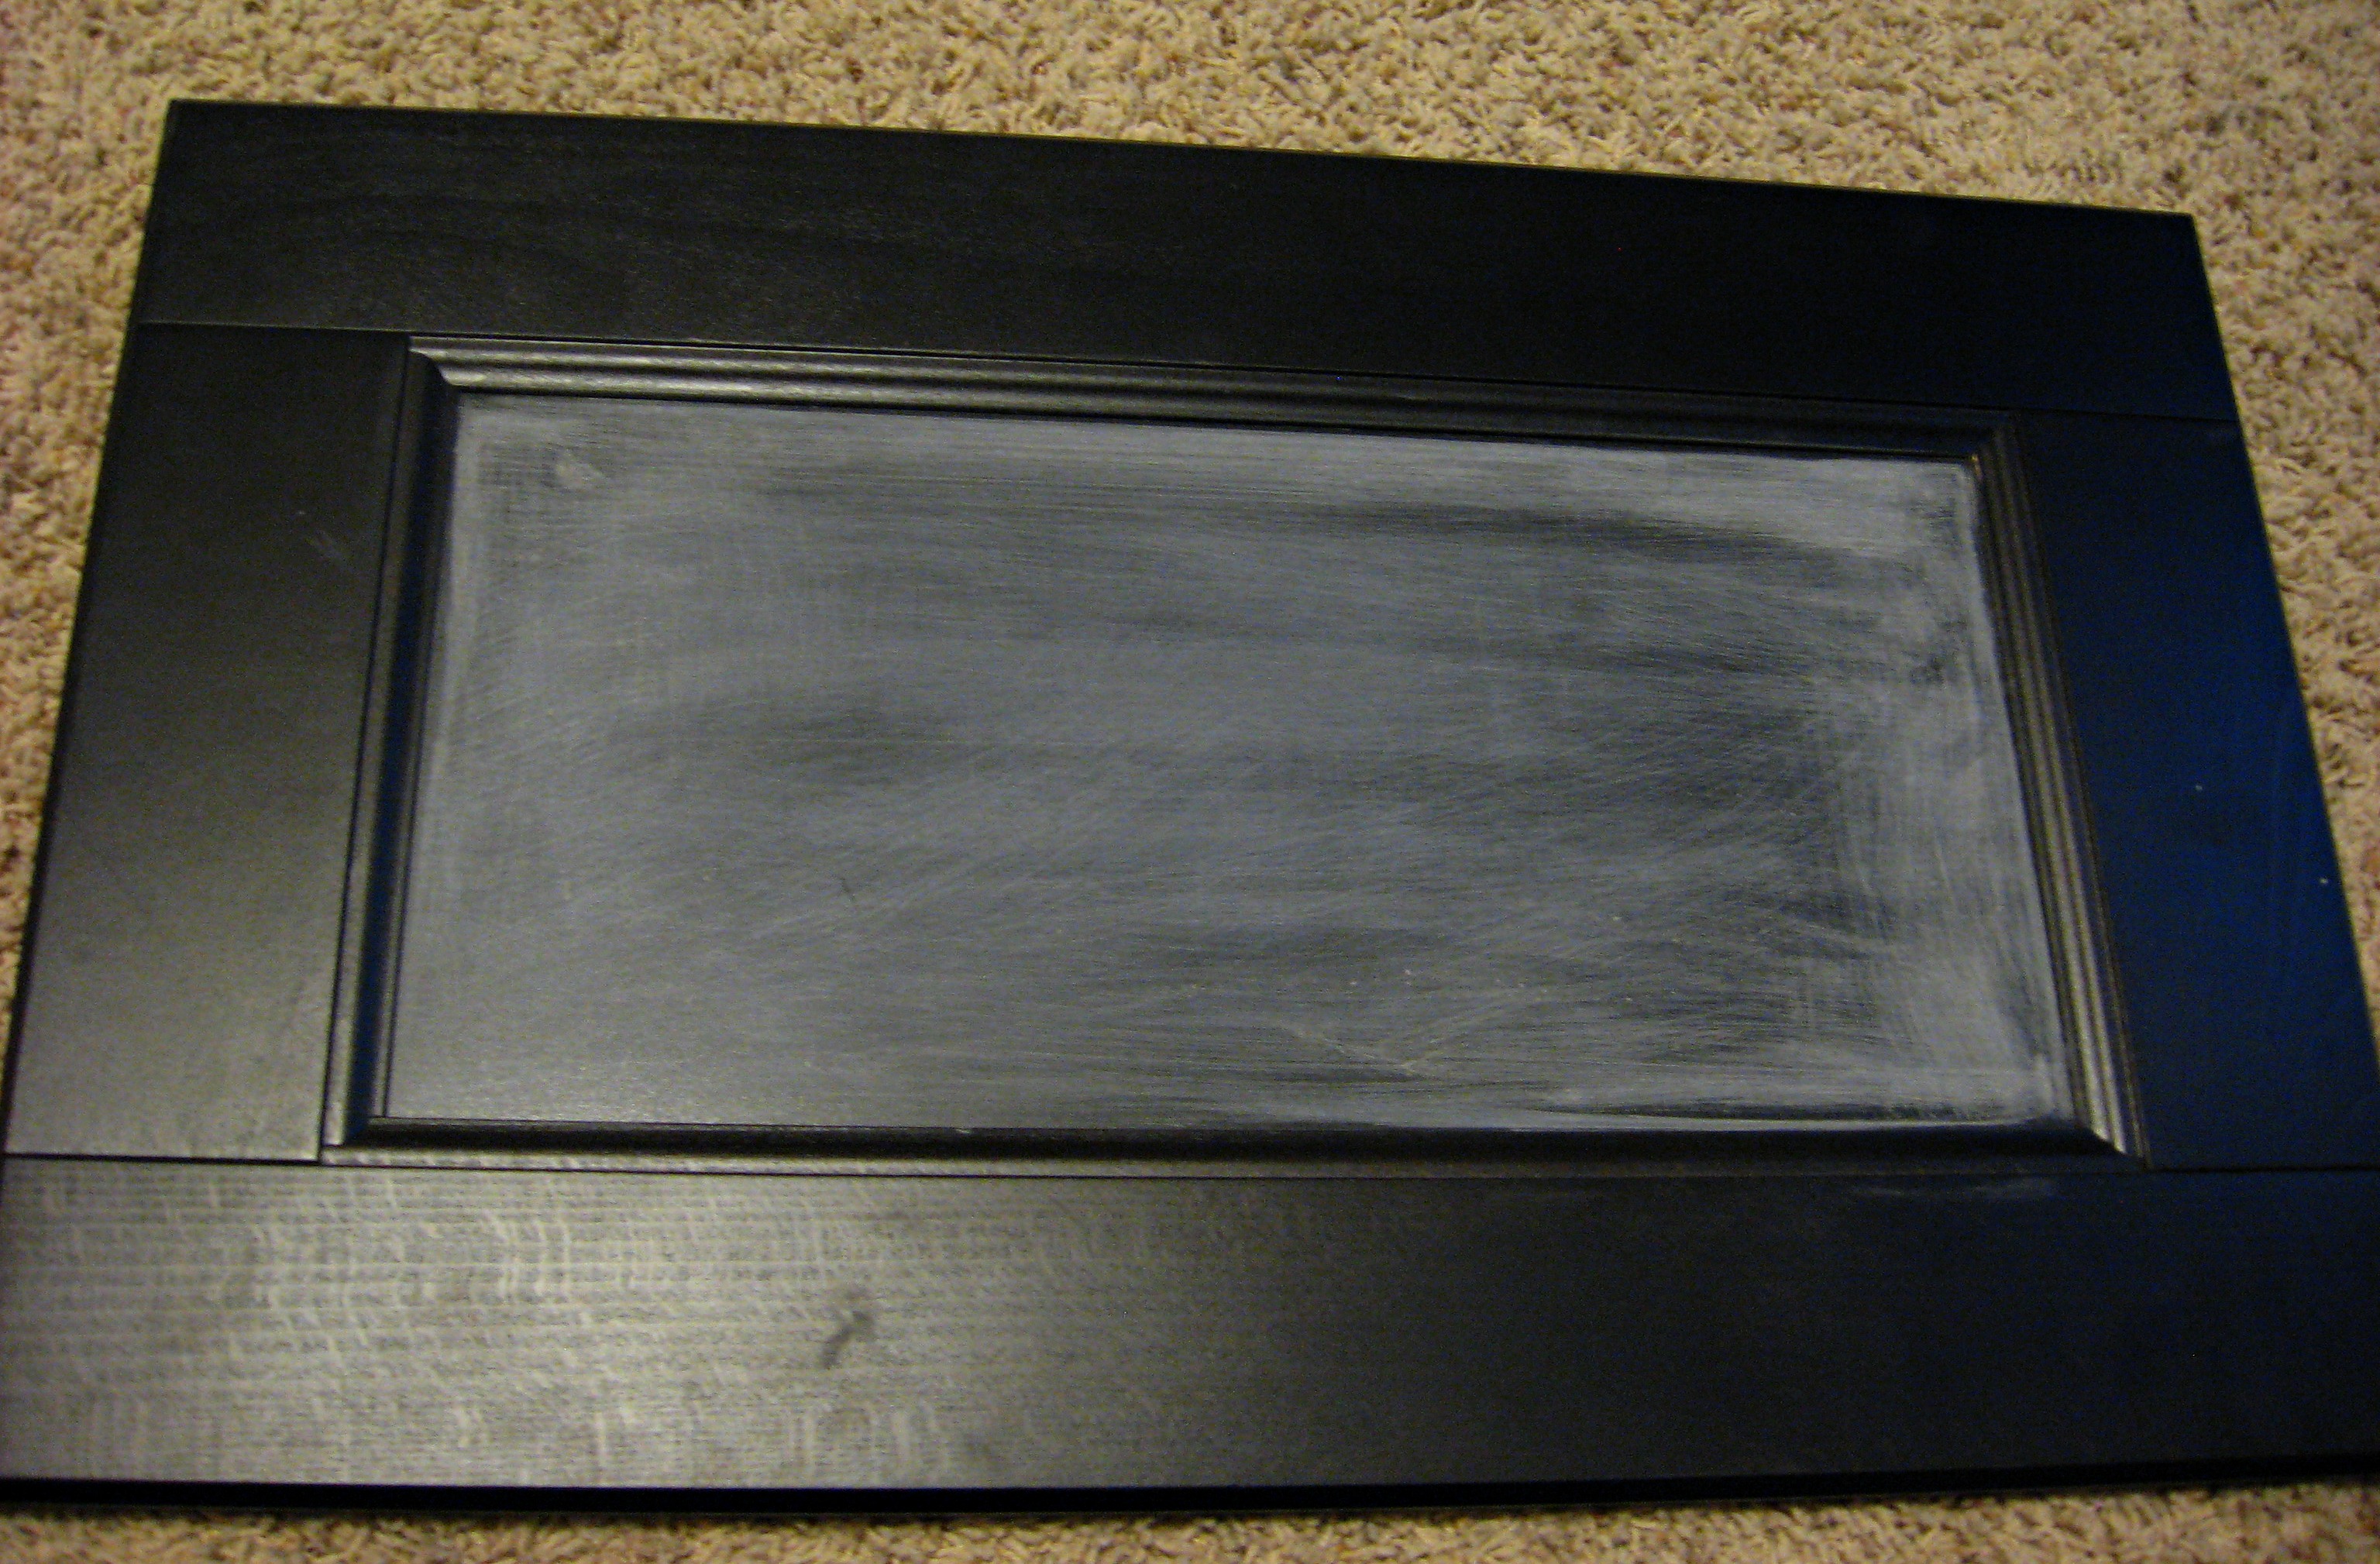
Here is the latest in my “Crafting with Cabinet Doors” series. (Did that make it sound official, or what?!) My sister picked up this door from the “As Is” section of Ikea for $4.

Give the center section a light sanding to rough it up – allowing the paint to stick to it’s smooth surface. Then paint it in the color of your choice. I taped off the beveled edge and kept the paint only on the flat surface. I wanted the black bevel to look like a mat on the finished project. You can see how I painted the center part in this post here.
Now to make the “frame”. I chose a couple of different coordinating scrapbook papers and cut them into squares and rectangles the exact width of the “frame” part around the door. I laid them out to get a feel for arrangement. Once I had them the way I wanted them, I moved them off-being careful to keep them in the same position-onto the table. If you have spots where the papers overlap or leave small gaps, don’t worry about that at this stage. We’ll fix it later.
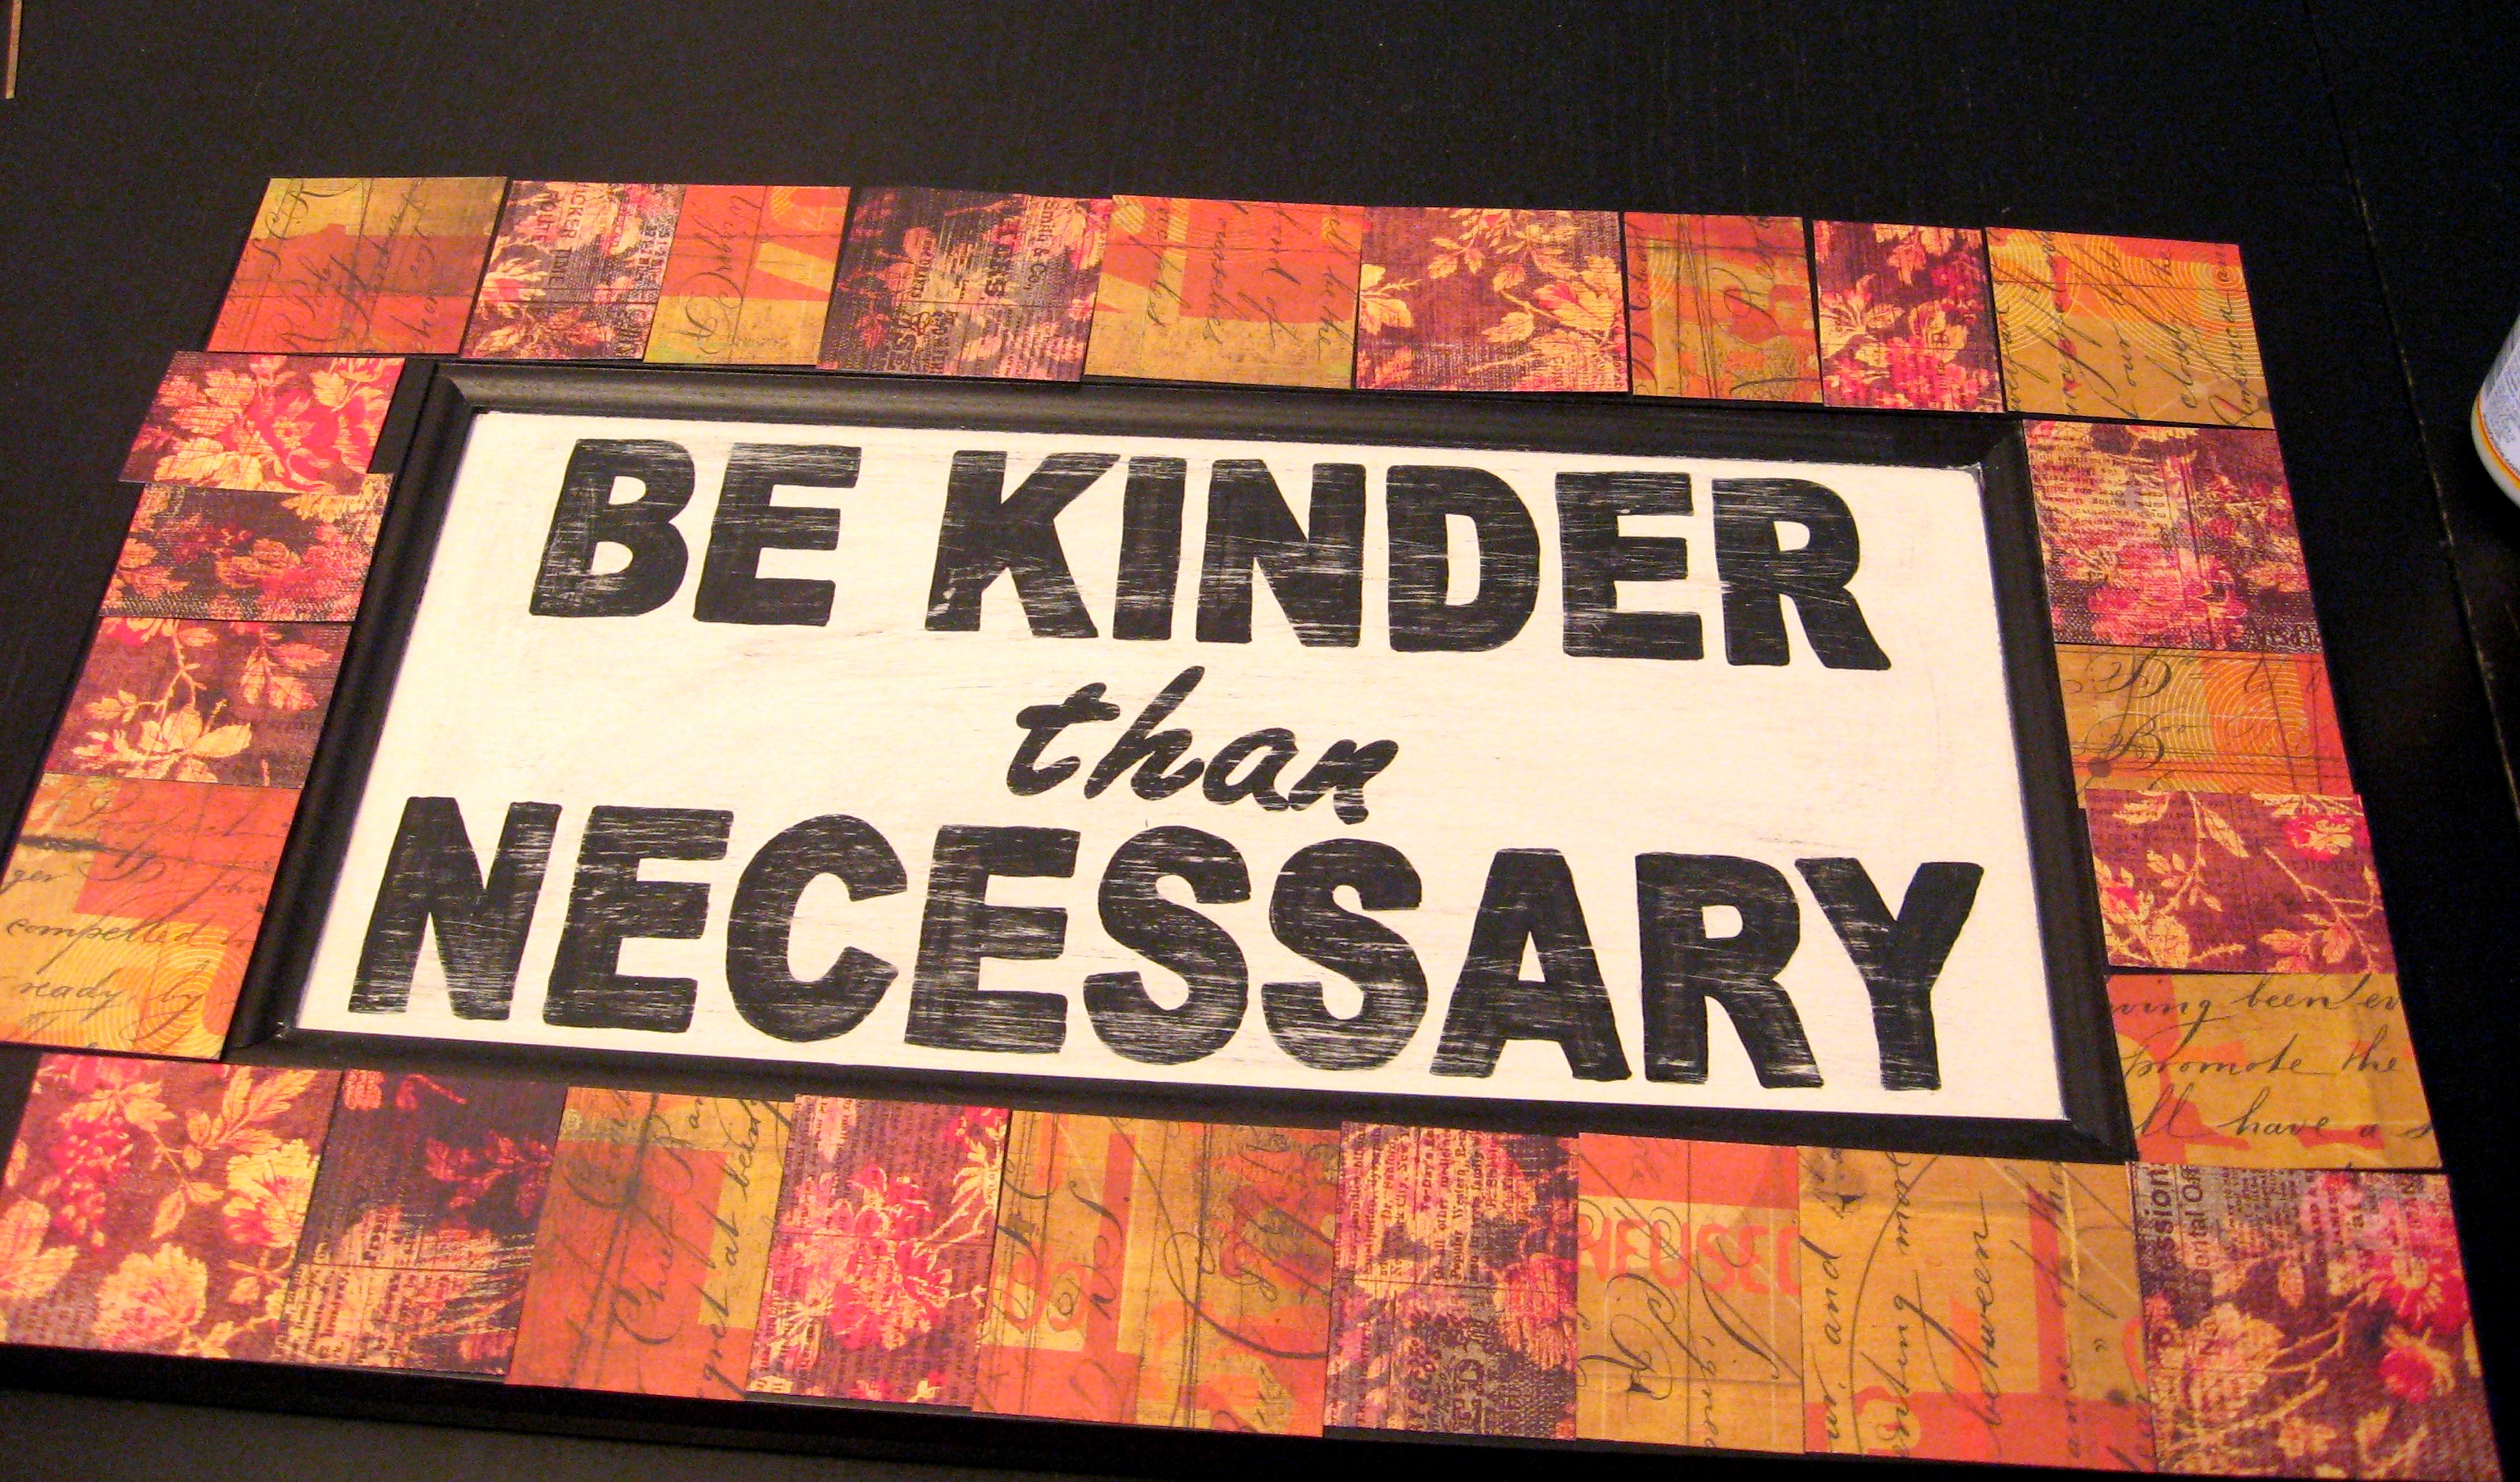
Now begin Mod Podging the paper pieces in place. Dry fit each piece before you paint on the Mod Podge to make sure the width is right. If your papers are all different sizes around either the outside or inside edge, it won’t look nice; you want nice crisp, even edges. Cut any pieces to fit; you want the papers to butt right up against each other, but not overlap.
When you’re finished, you may find that you have a few spots where you have small gaps. Once everything else is secured, then you can easily cut small pieces exactly the right size to fit in those spots.
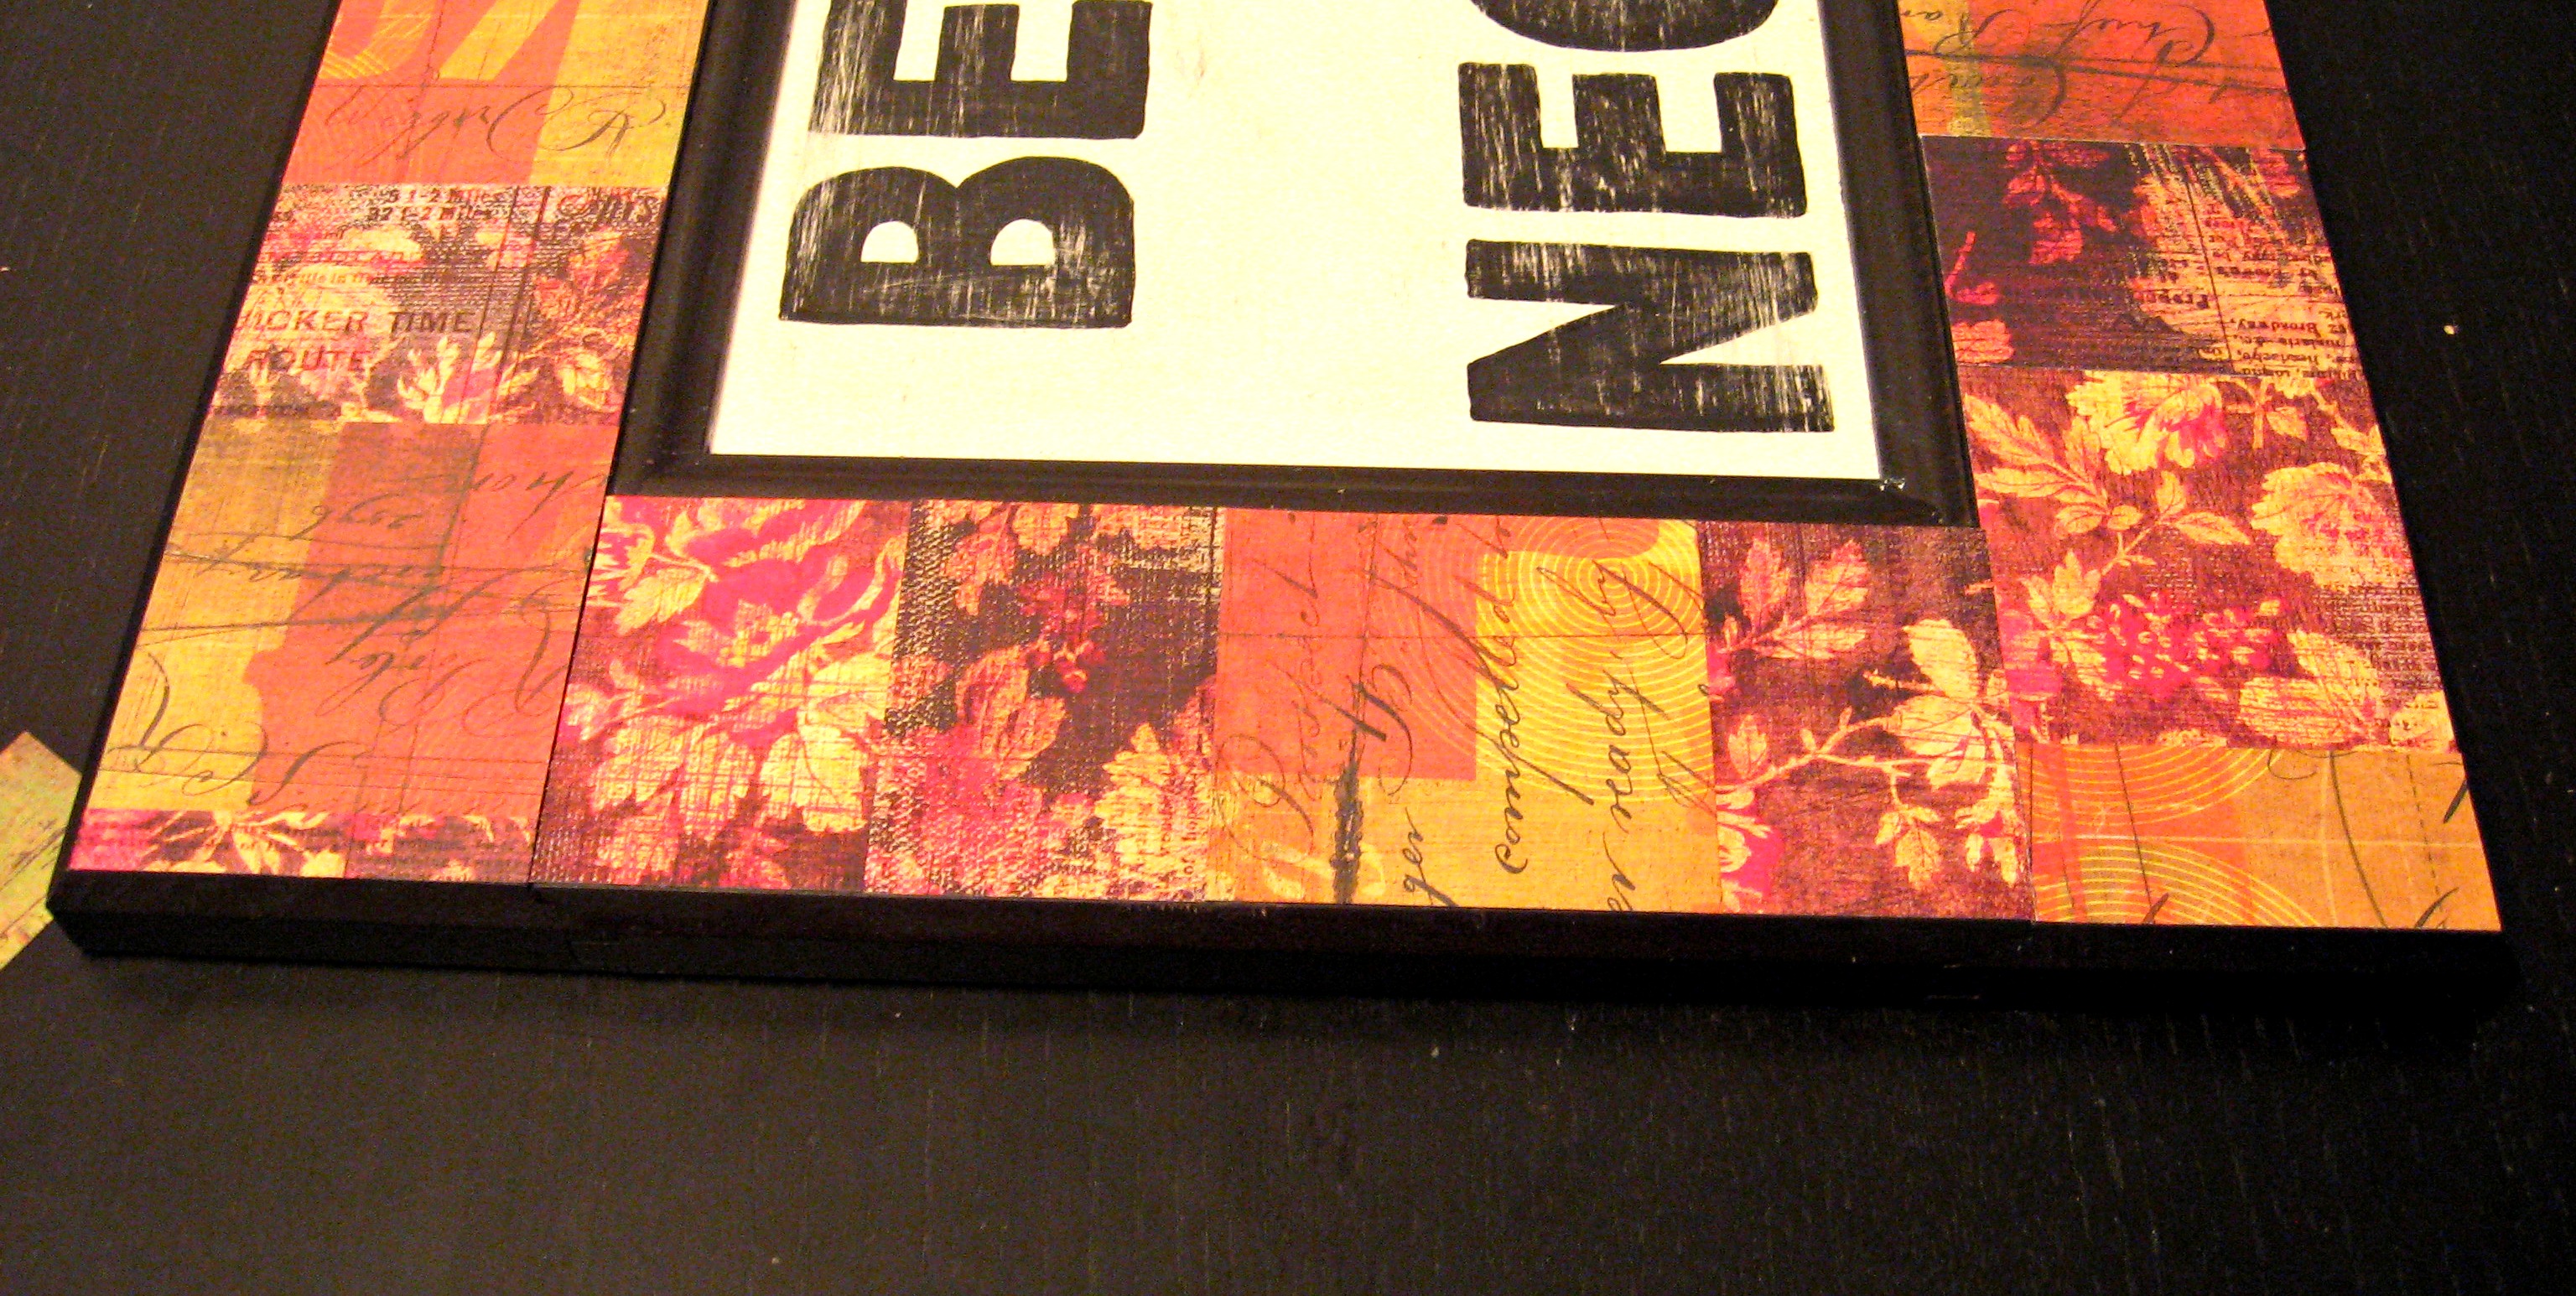
Now, leave it as it is, or go around the edges with a piece of fine sandpaper. I also lightly sanded right on top of the paper to rough it up, but BE CAREFUL. Use a very light hand, or you will find that the paper can tear off in strips.
Finish the whole piece with another coat of Mod Podge to protect it, and install screw-in hangers on the back.
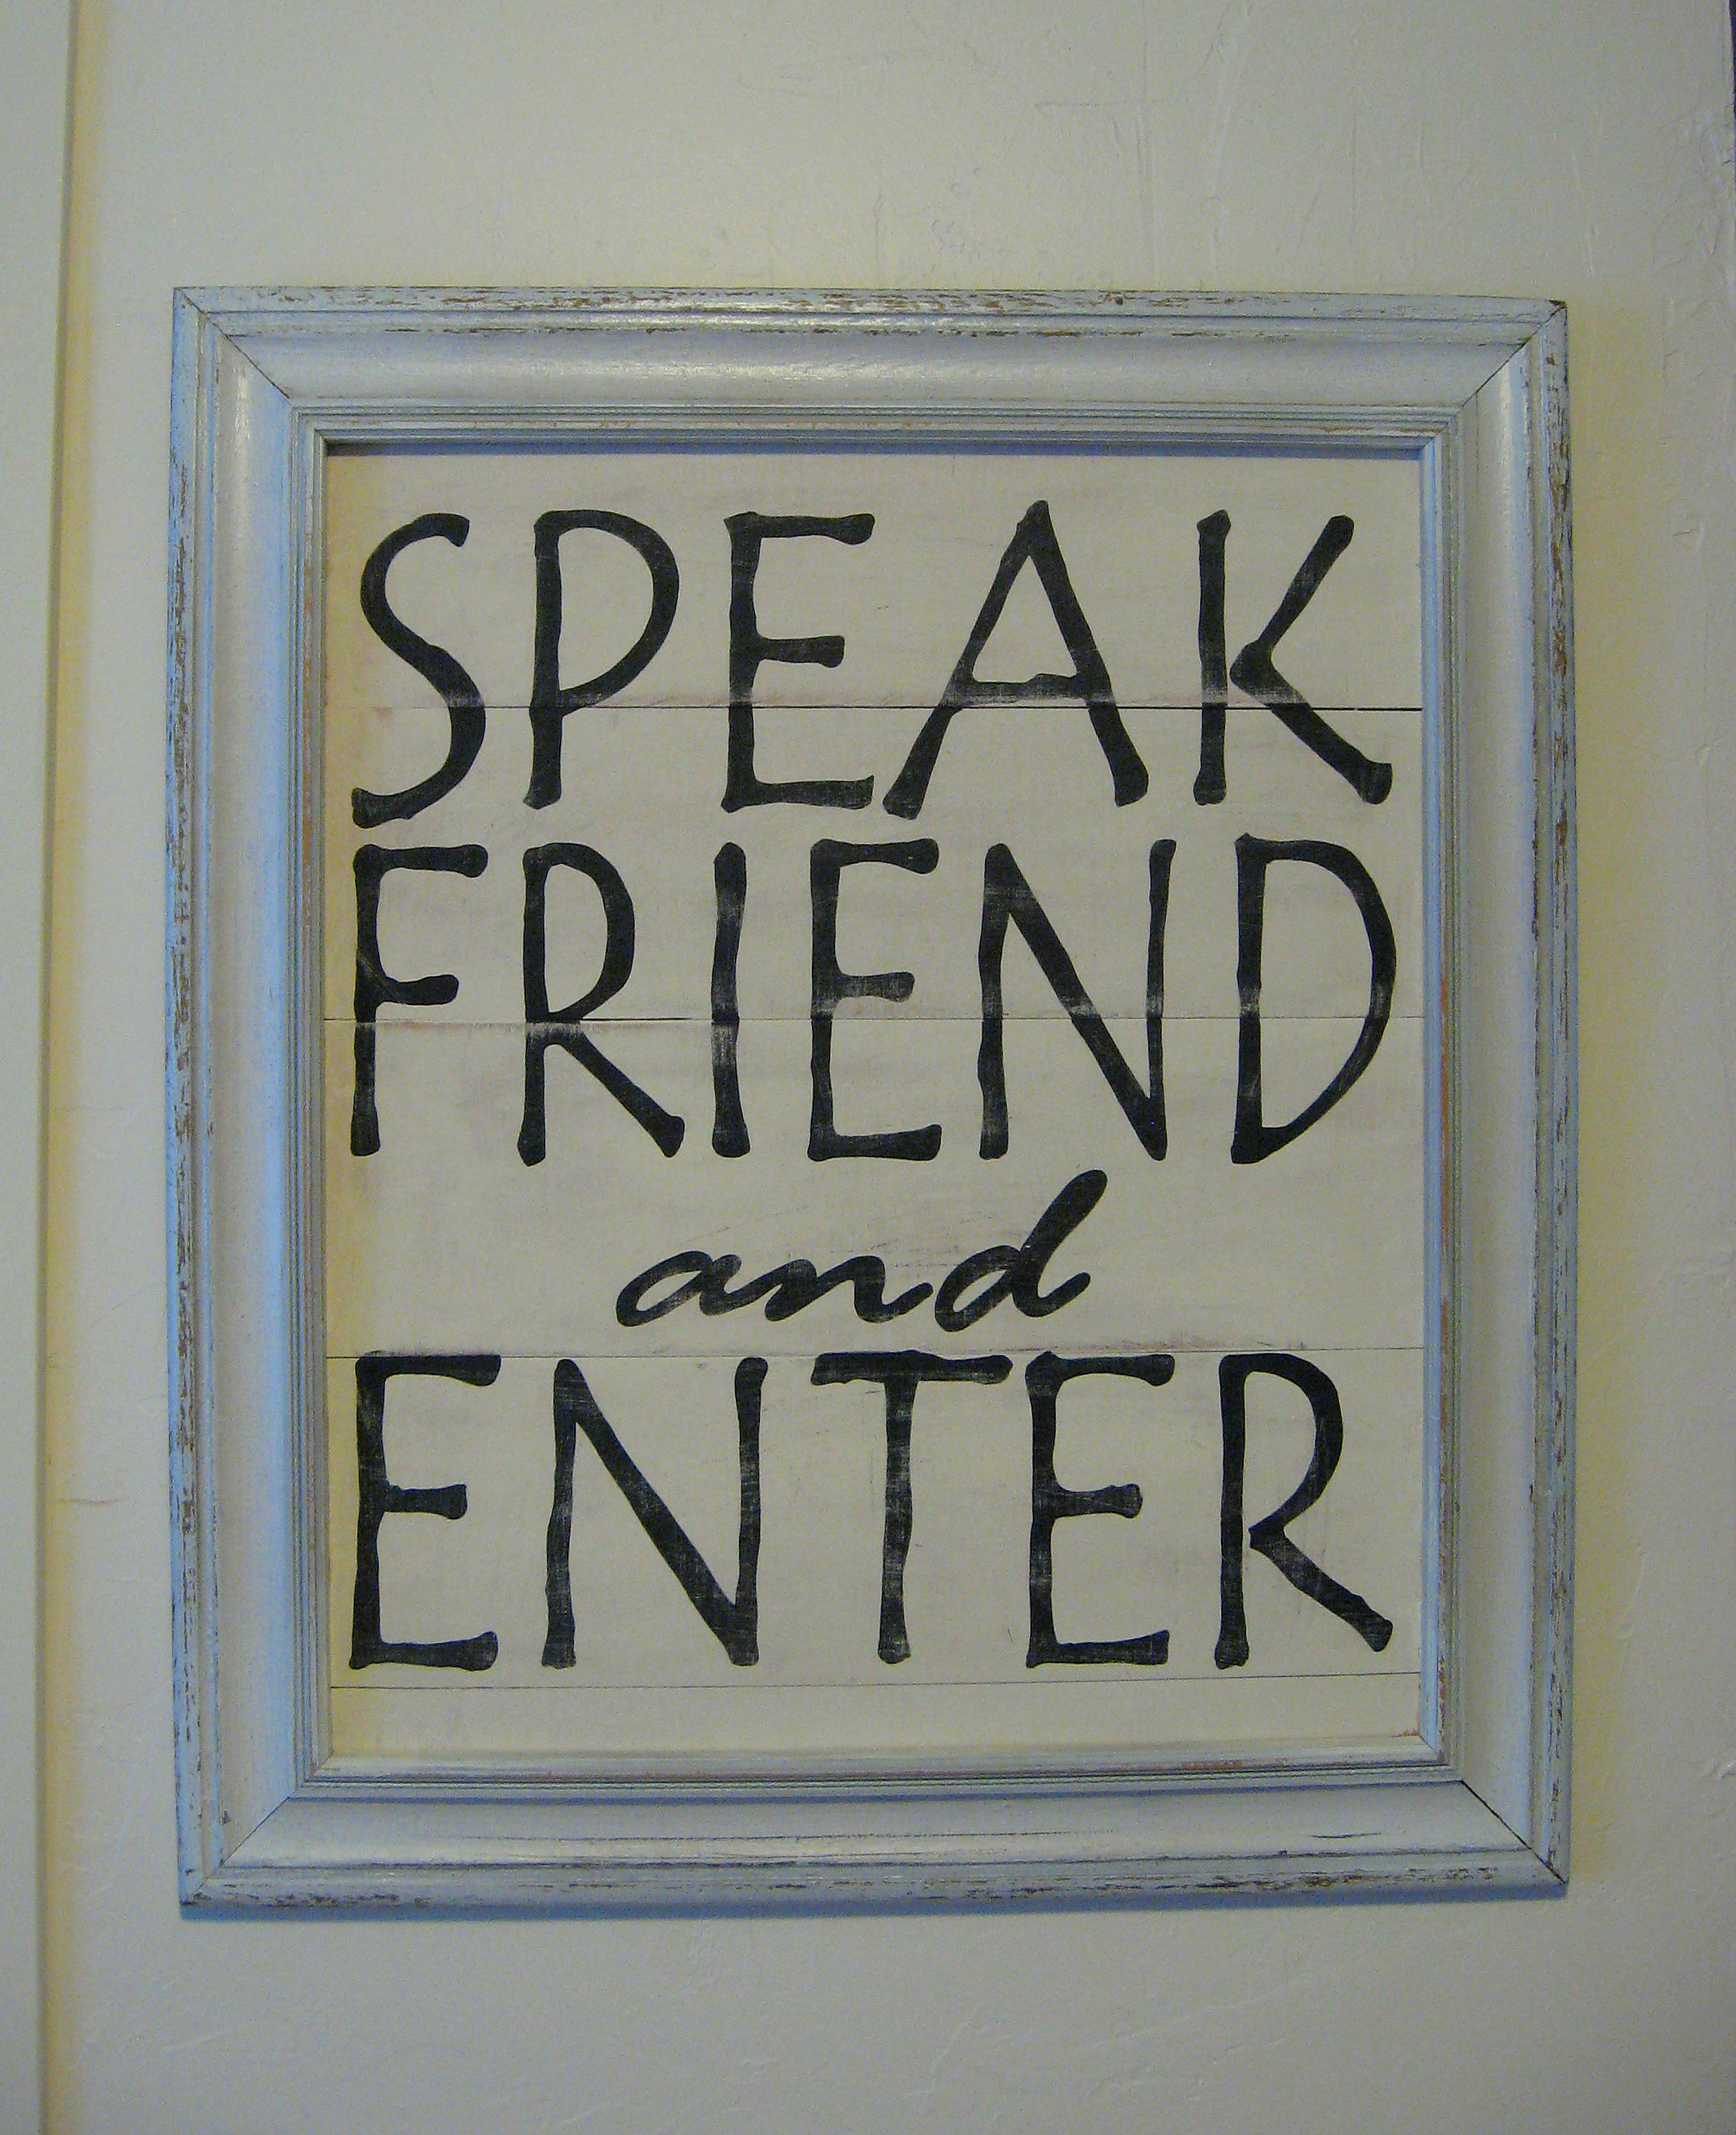
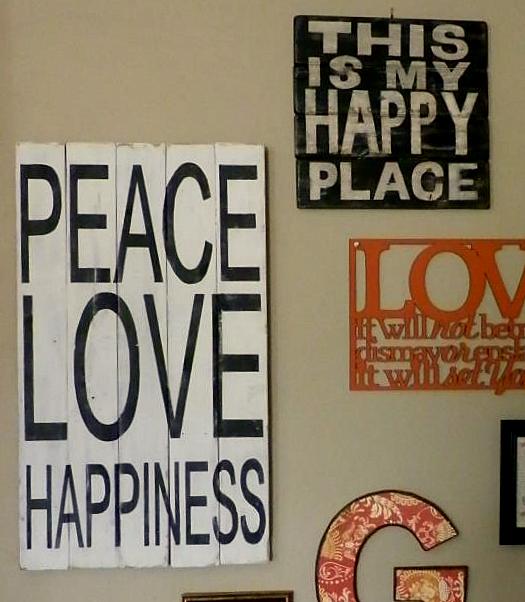
Handpainting Signs
I love the posters and signs with messages on them. I love that you can customize and personalize them to fit you and your home. I do prefer to paint things like this by hand, though, and often get asked about my method for hand painting, so I thought I would share it here. I paint a lot and have been doing it for years; it does take some practice, but I think this is a pretty foolproof method, even for a beginner!
I start by printing out my finished words or design on the computer. If it’s bigger than one piece of paper, I just tape them together.
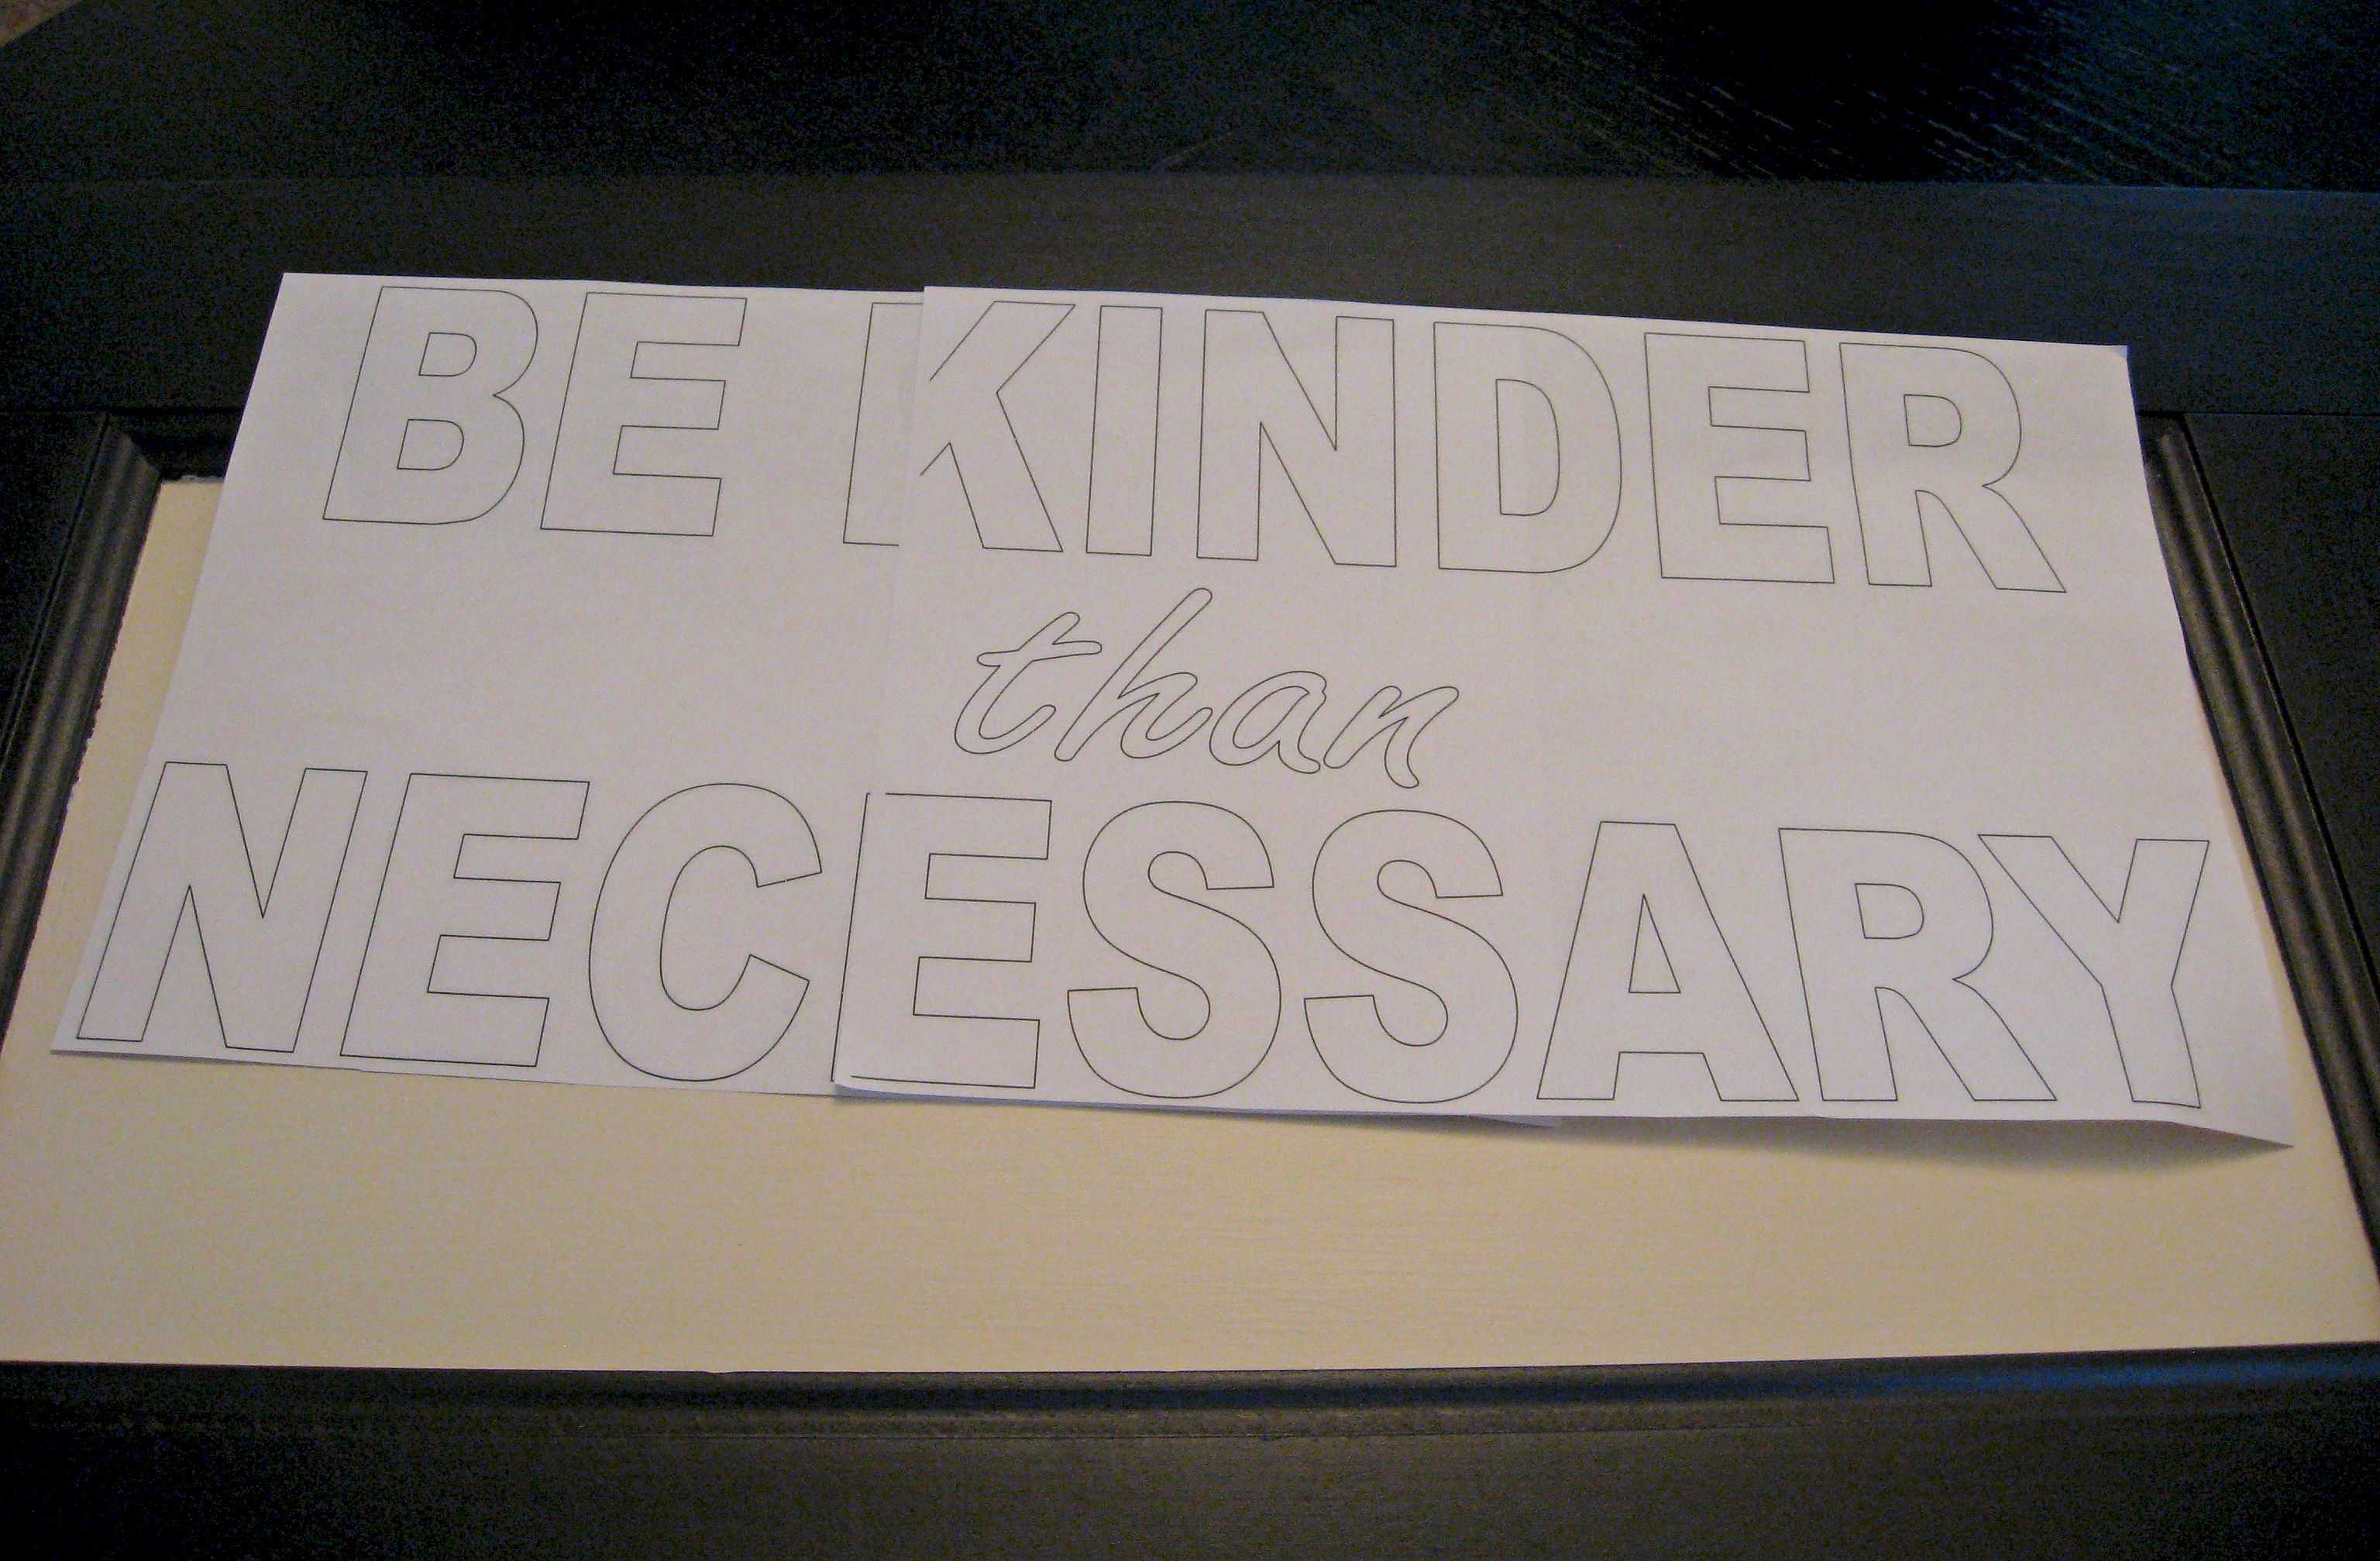
Now, I scribble over the lines on the BACK of the paper with a pencil. You could use actual carbon paper, but I just don’t see the point of the expense and mess when this works great.
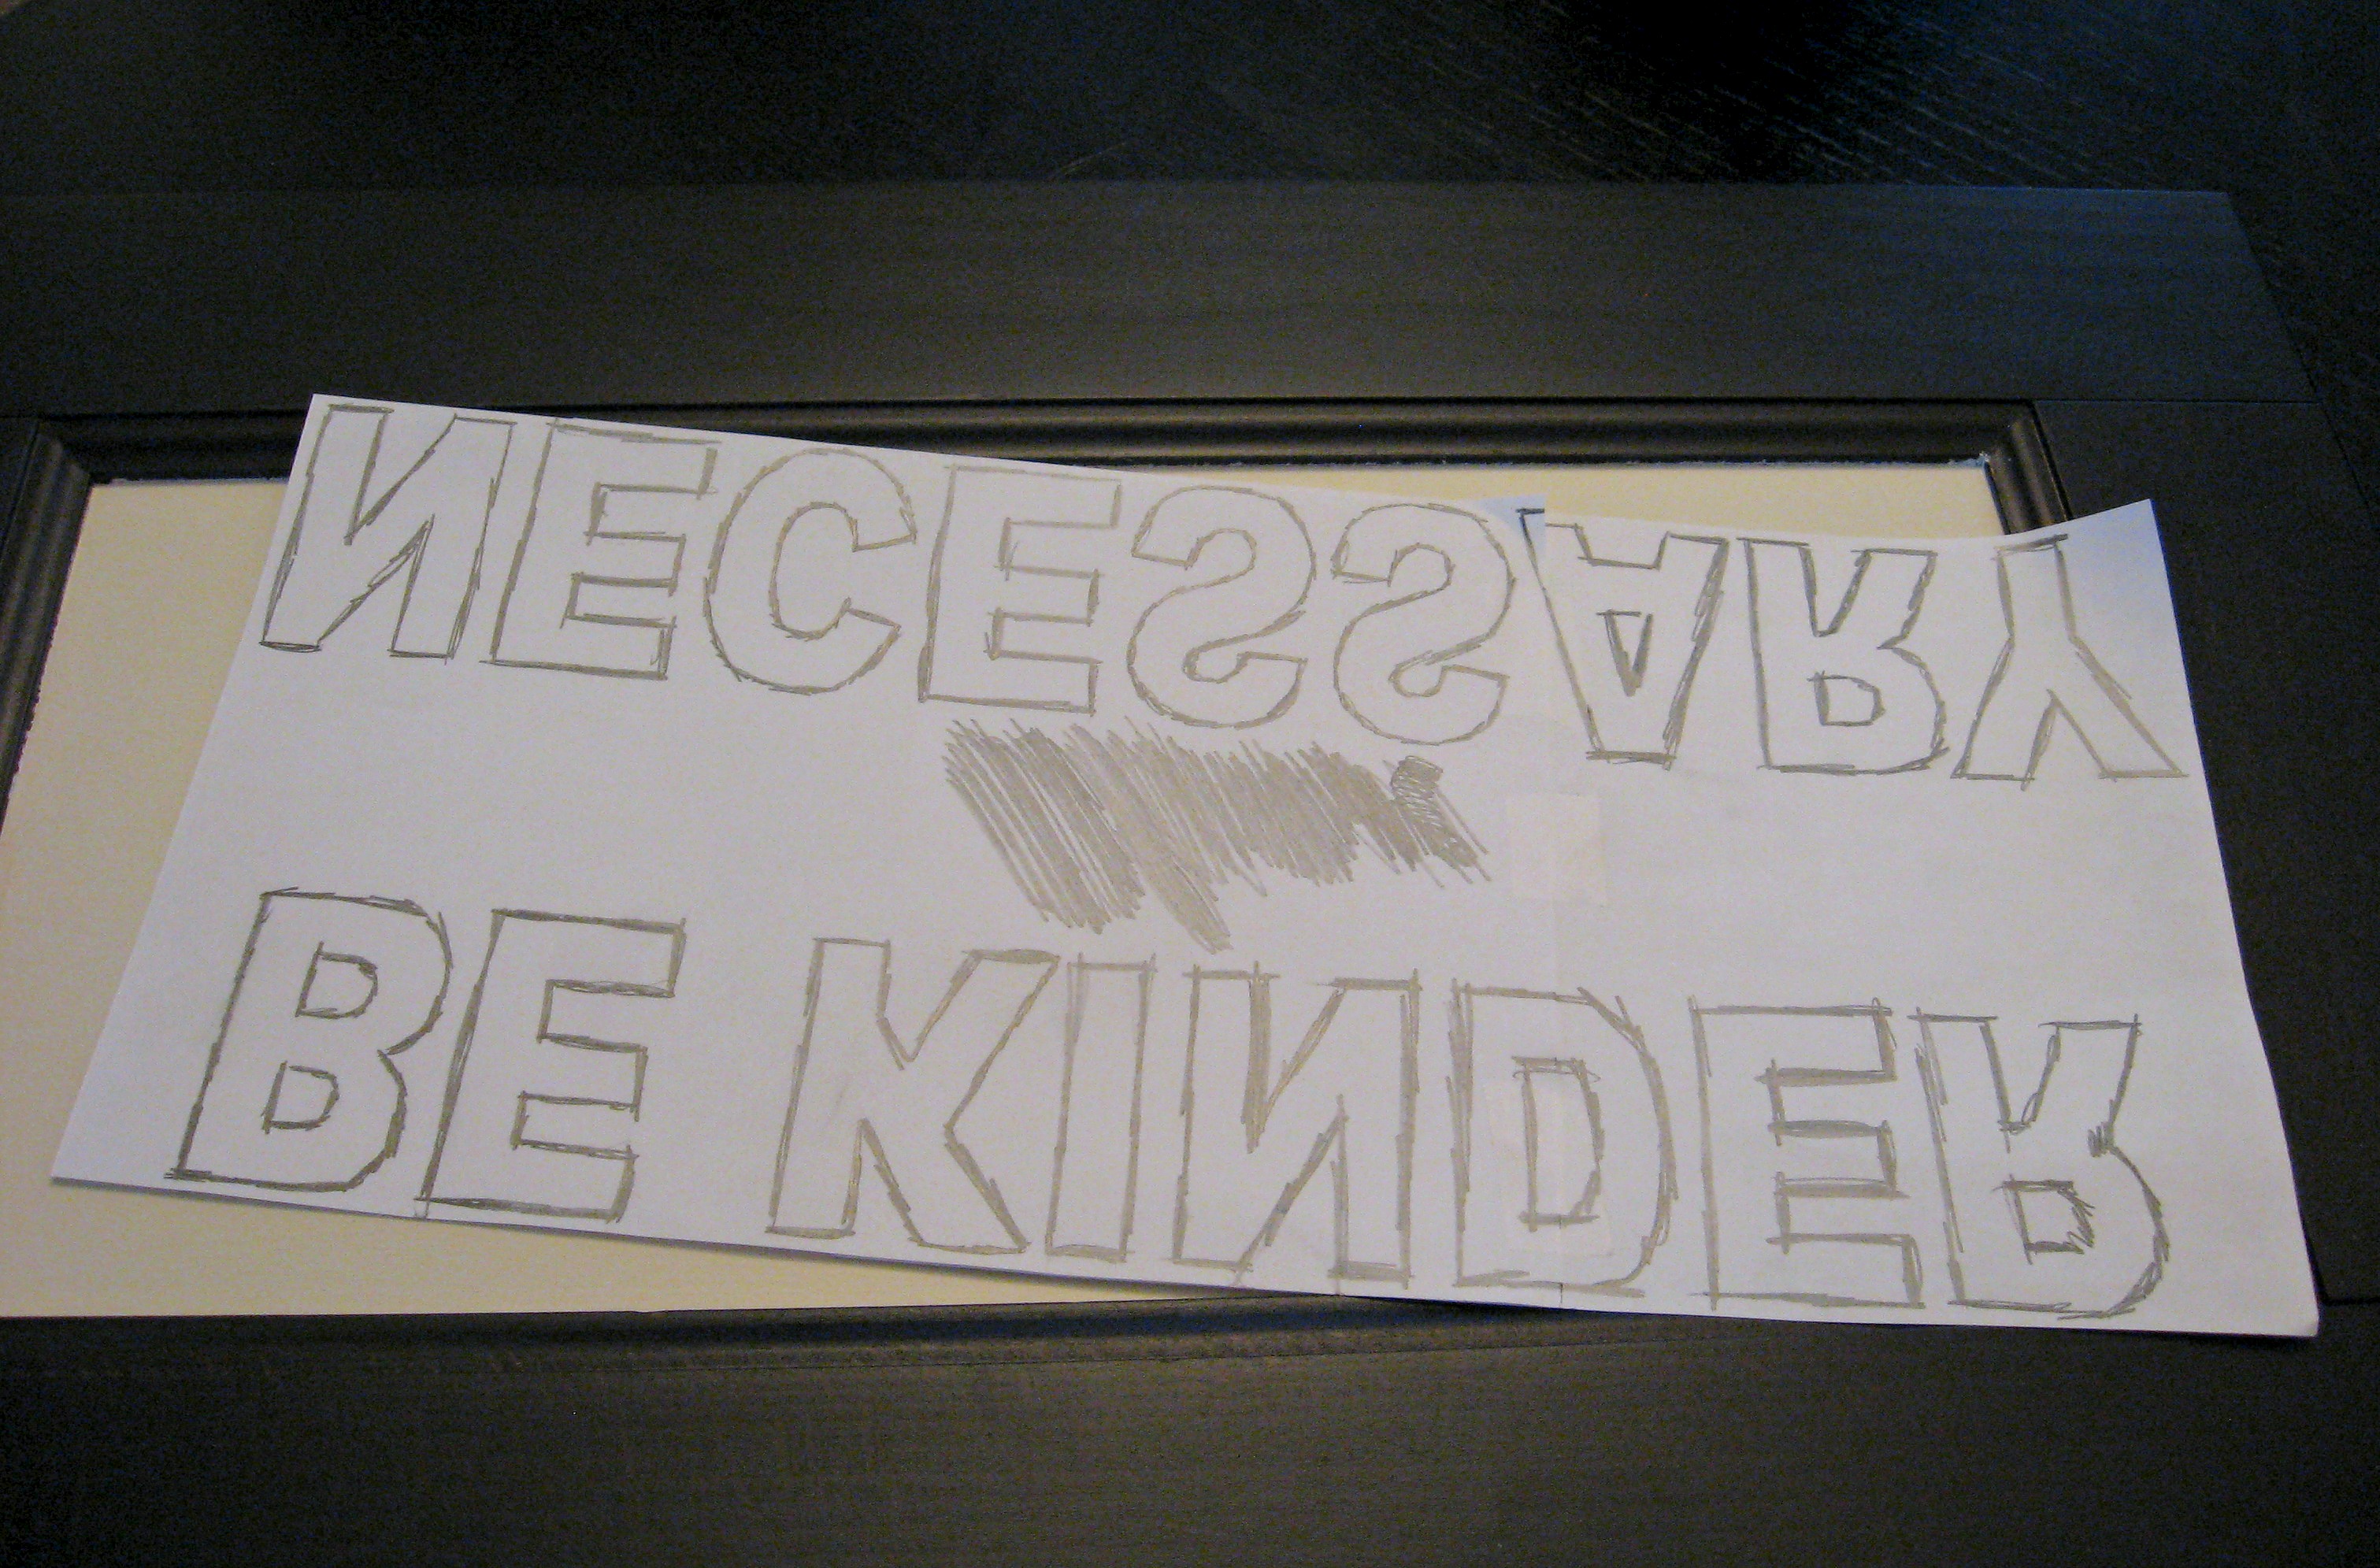
Position the pattern where you want it. Tape down the corners if you are afraid it will move around. Use a pen or pencil – whatever is more comfortable to you – to trace the design onto the surface you will be painting.
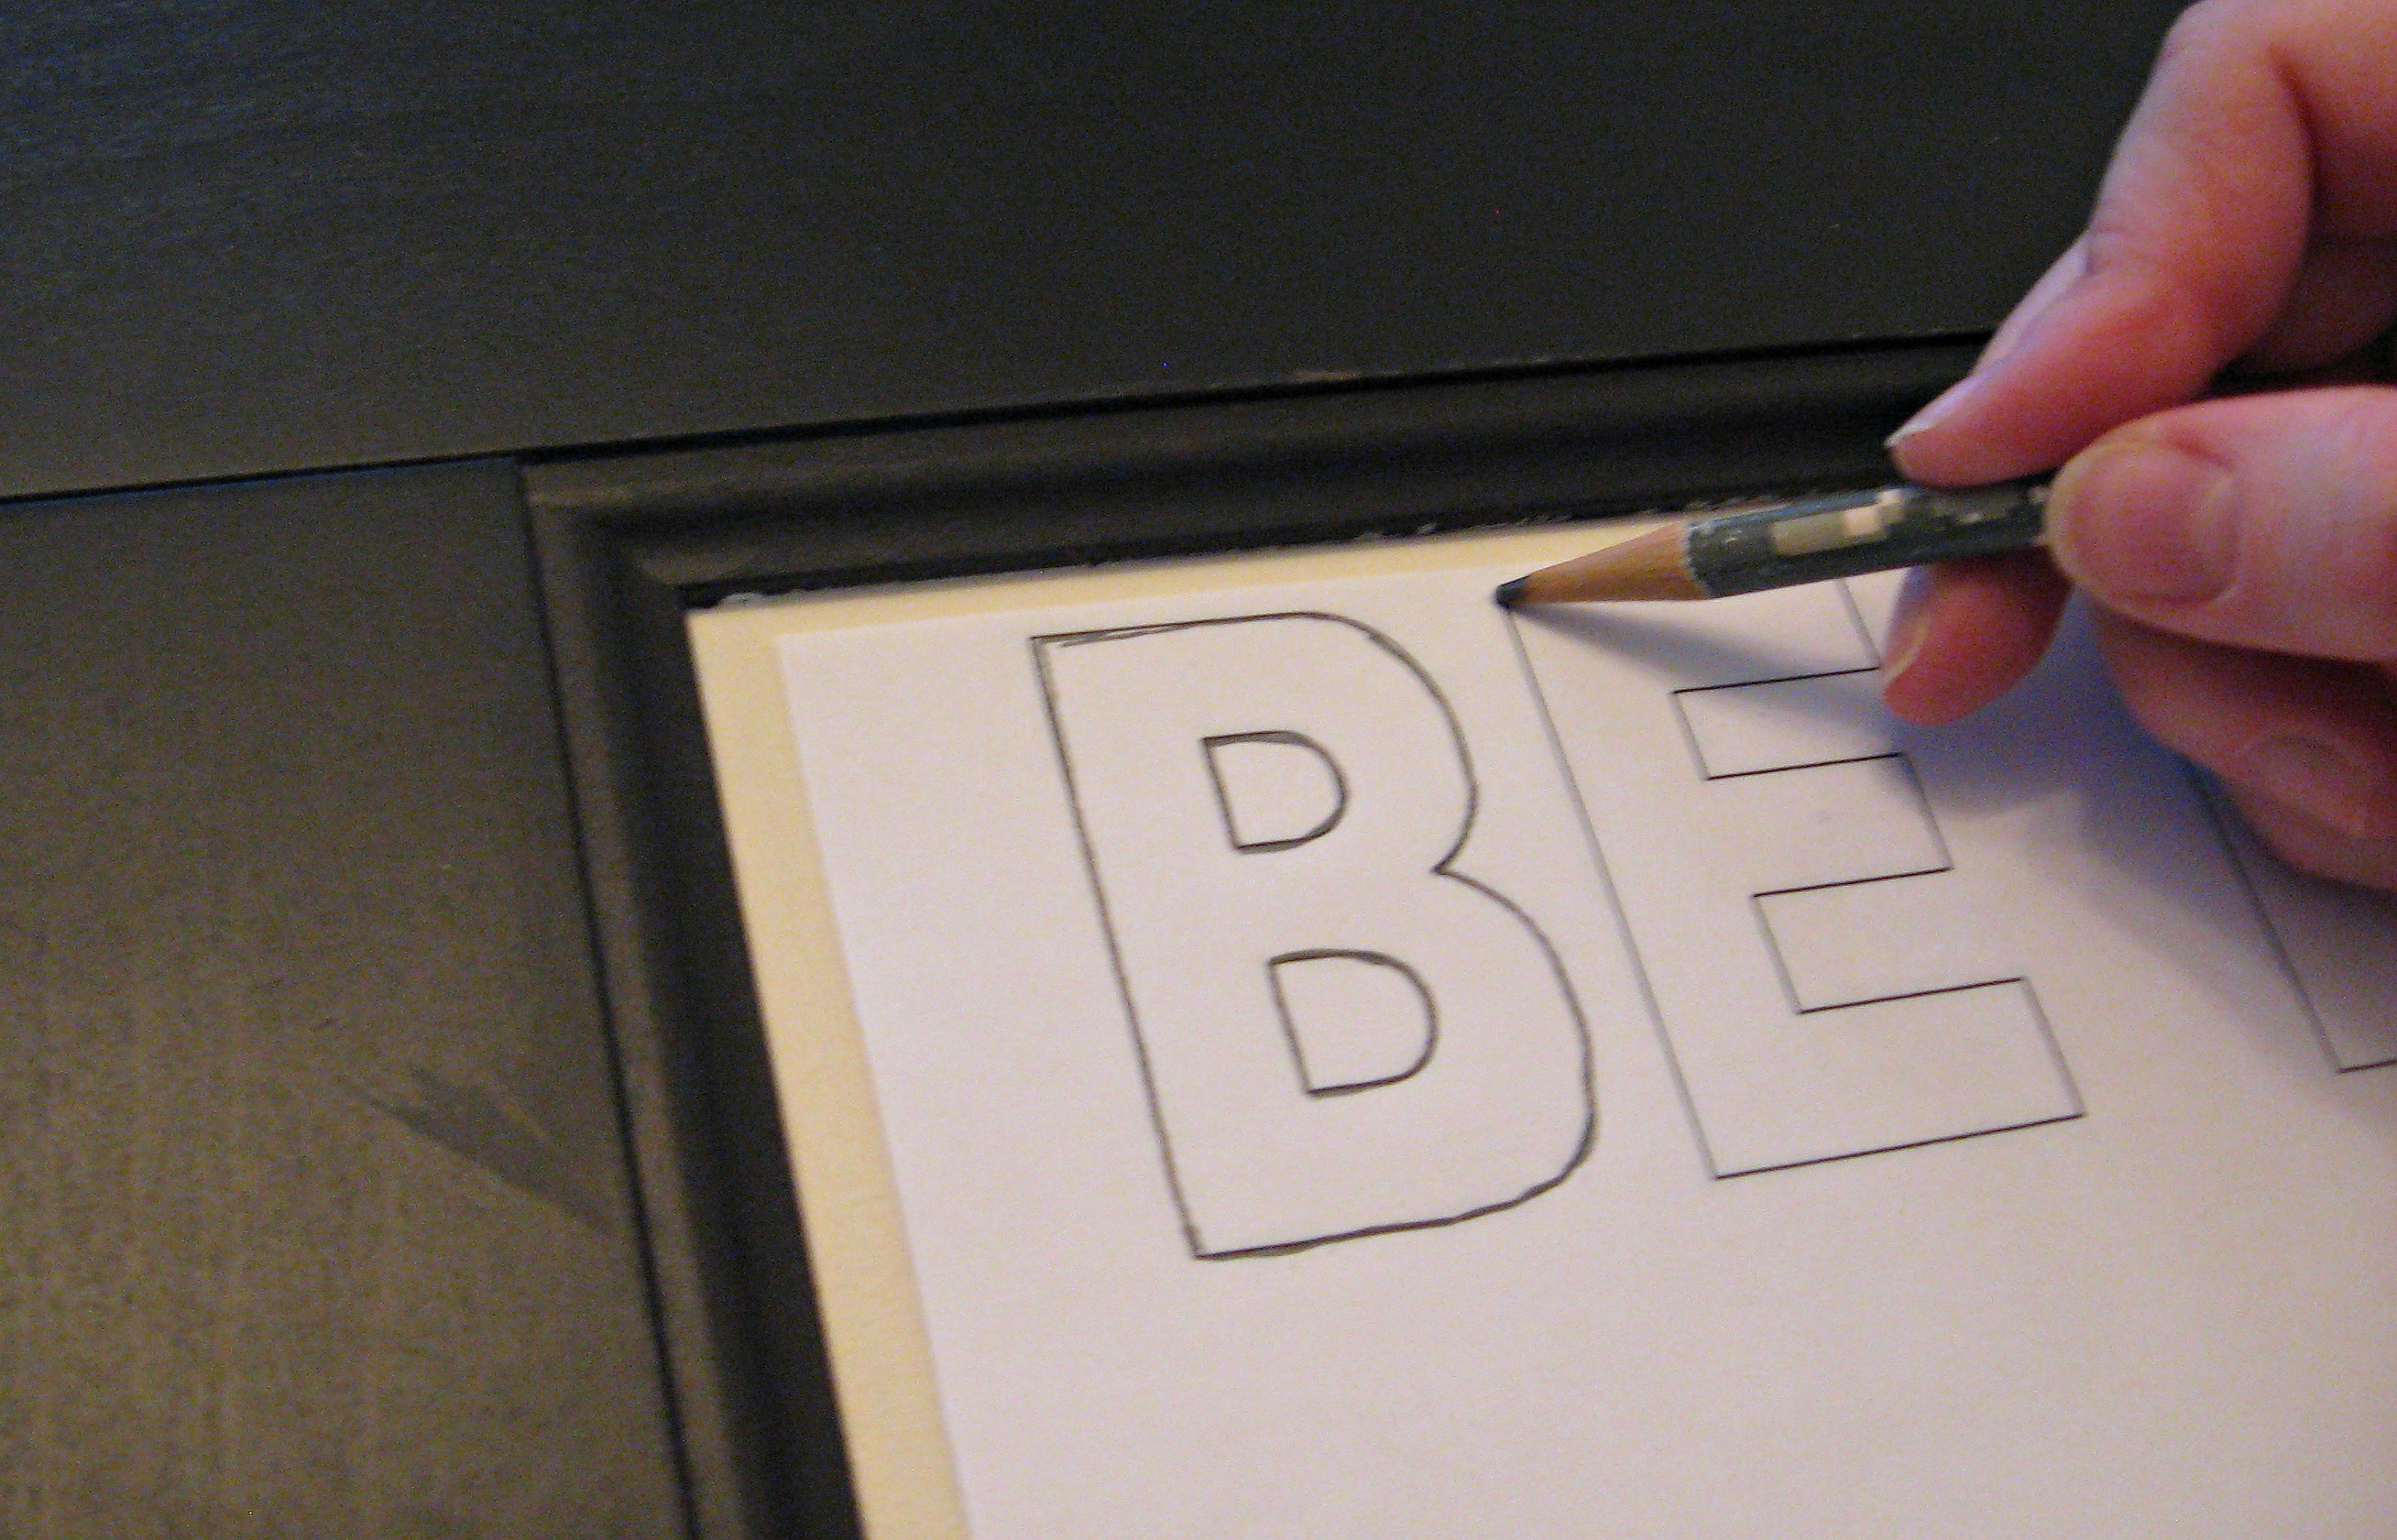
Now you have a perfect outline.
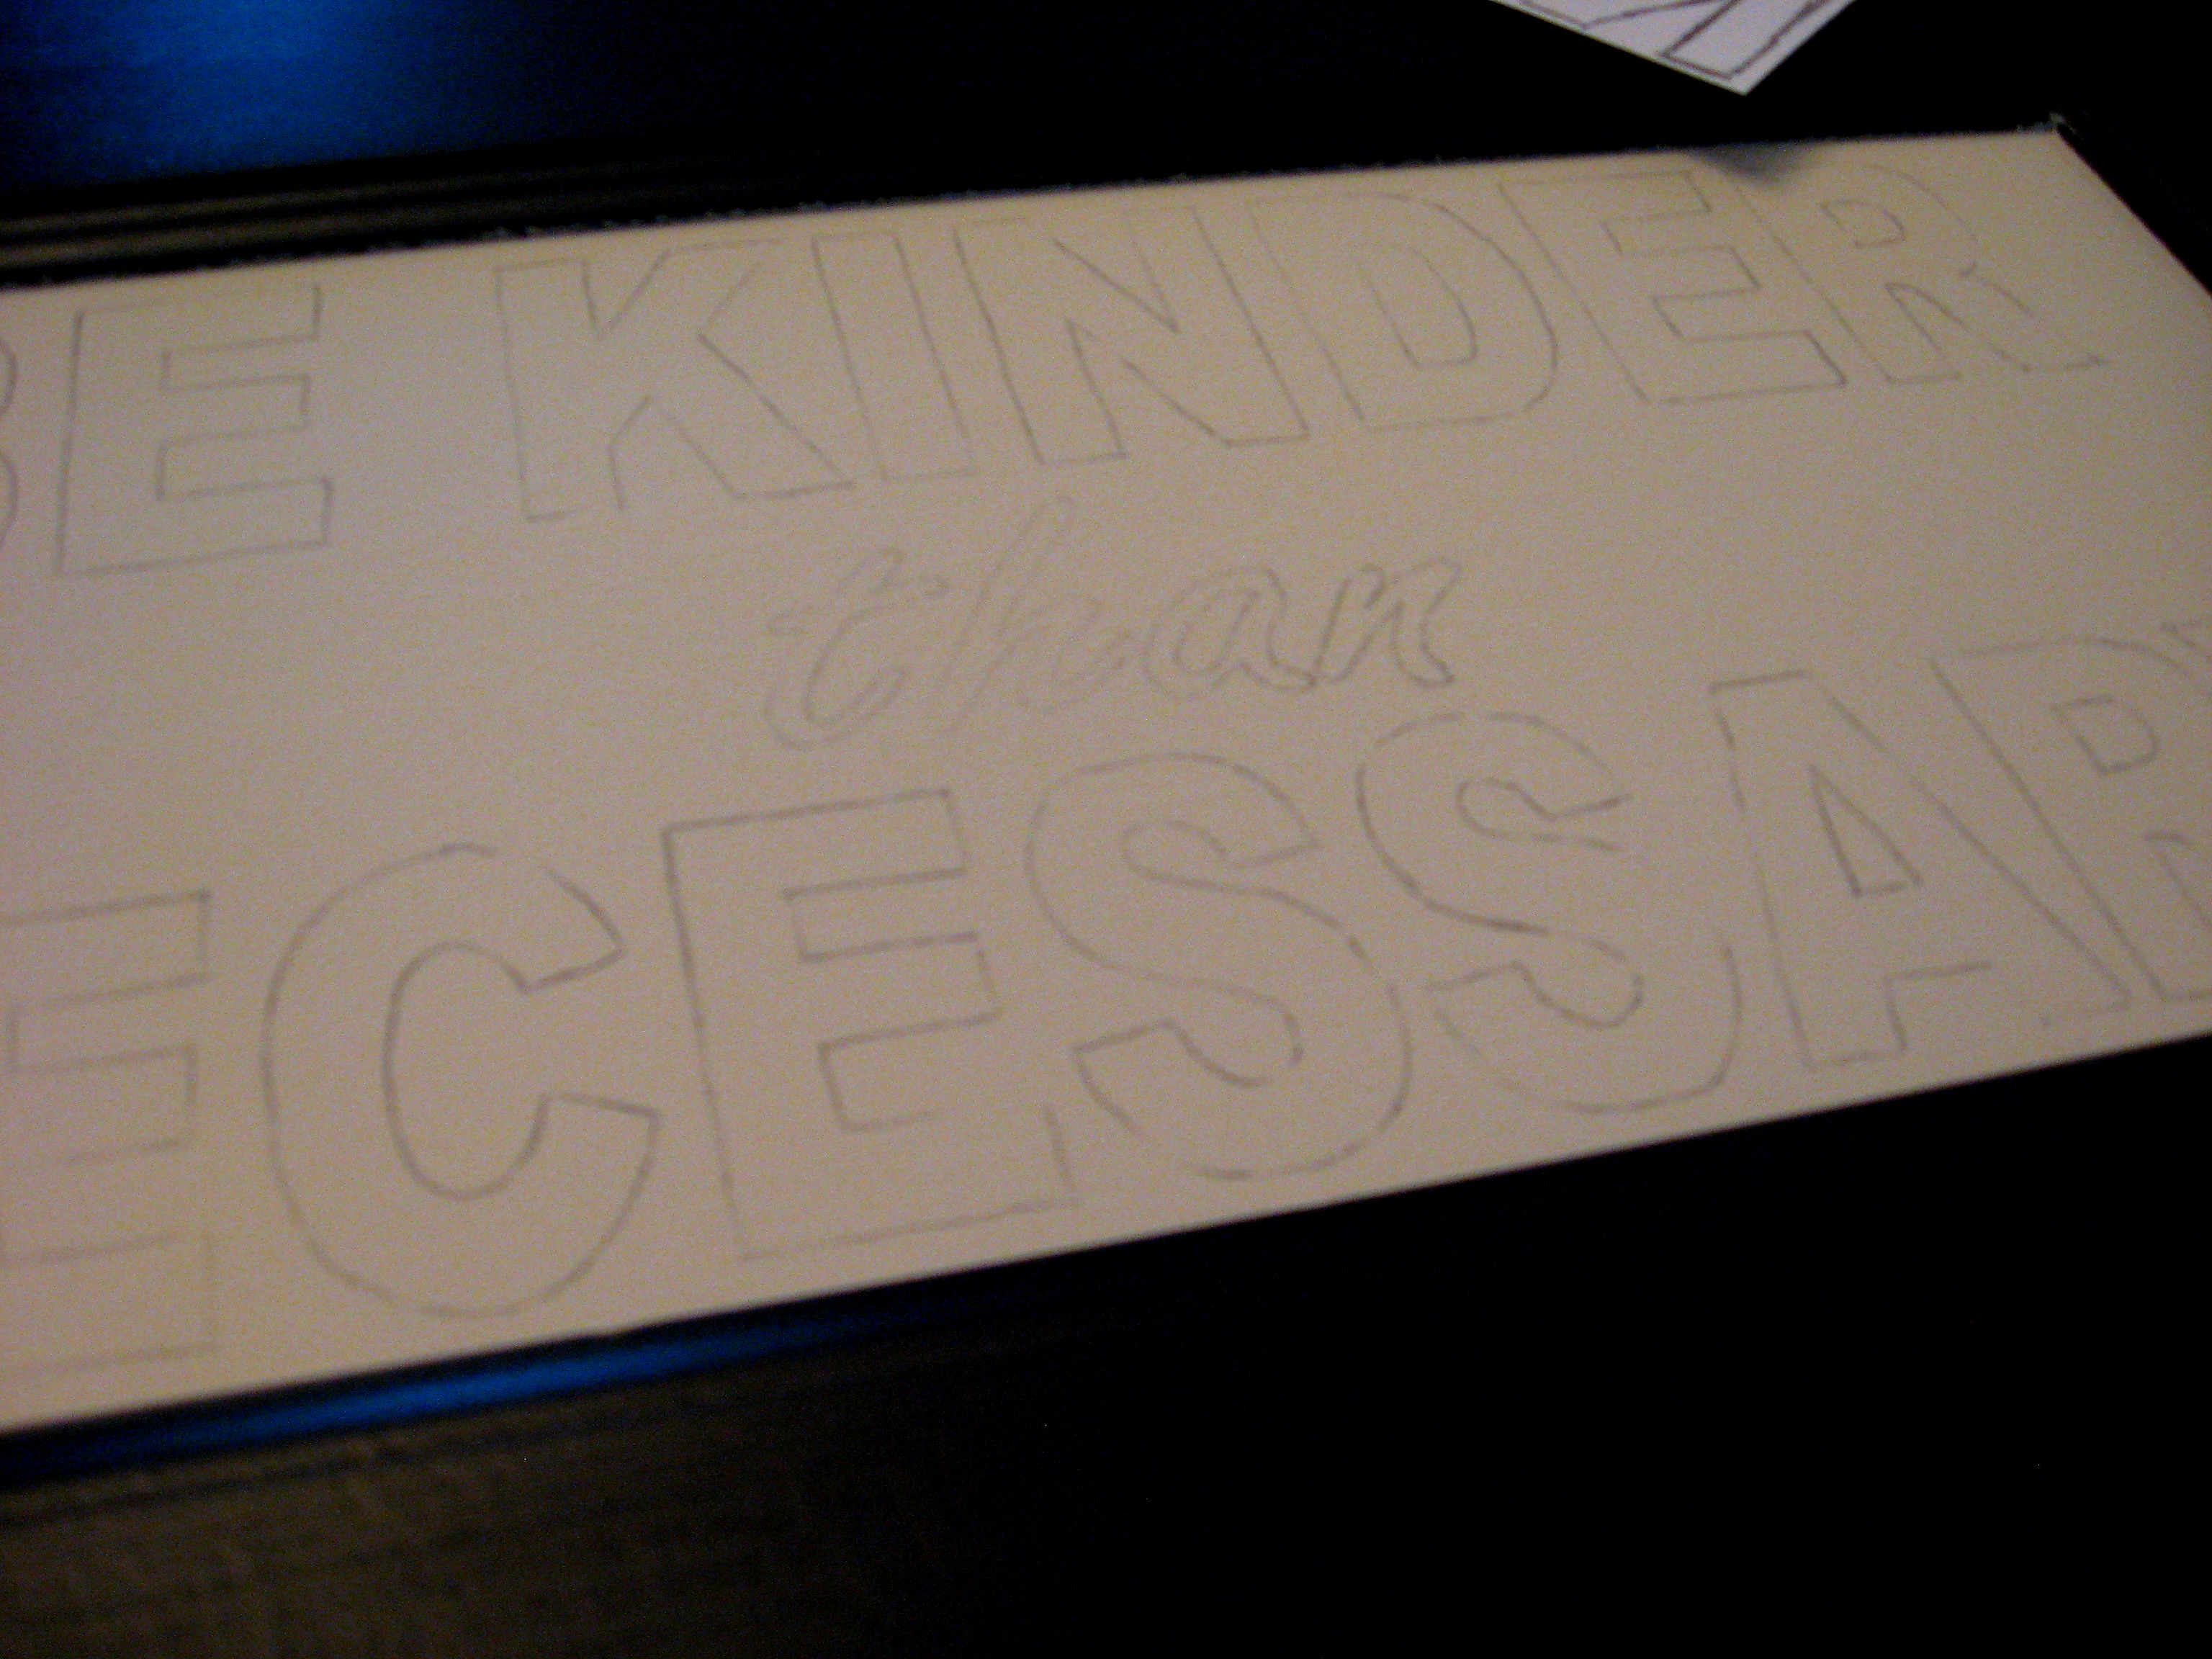
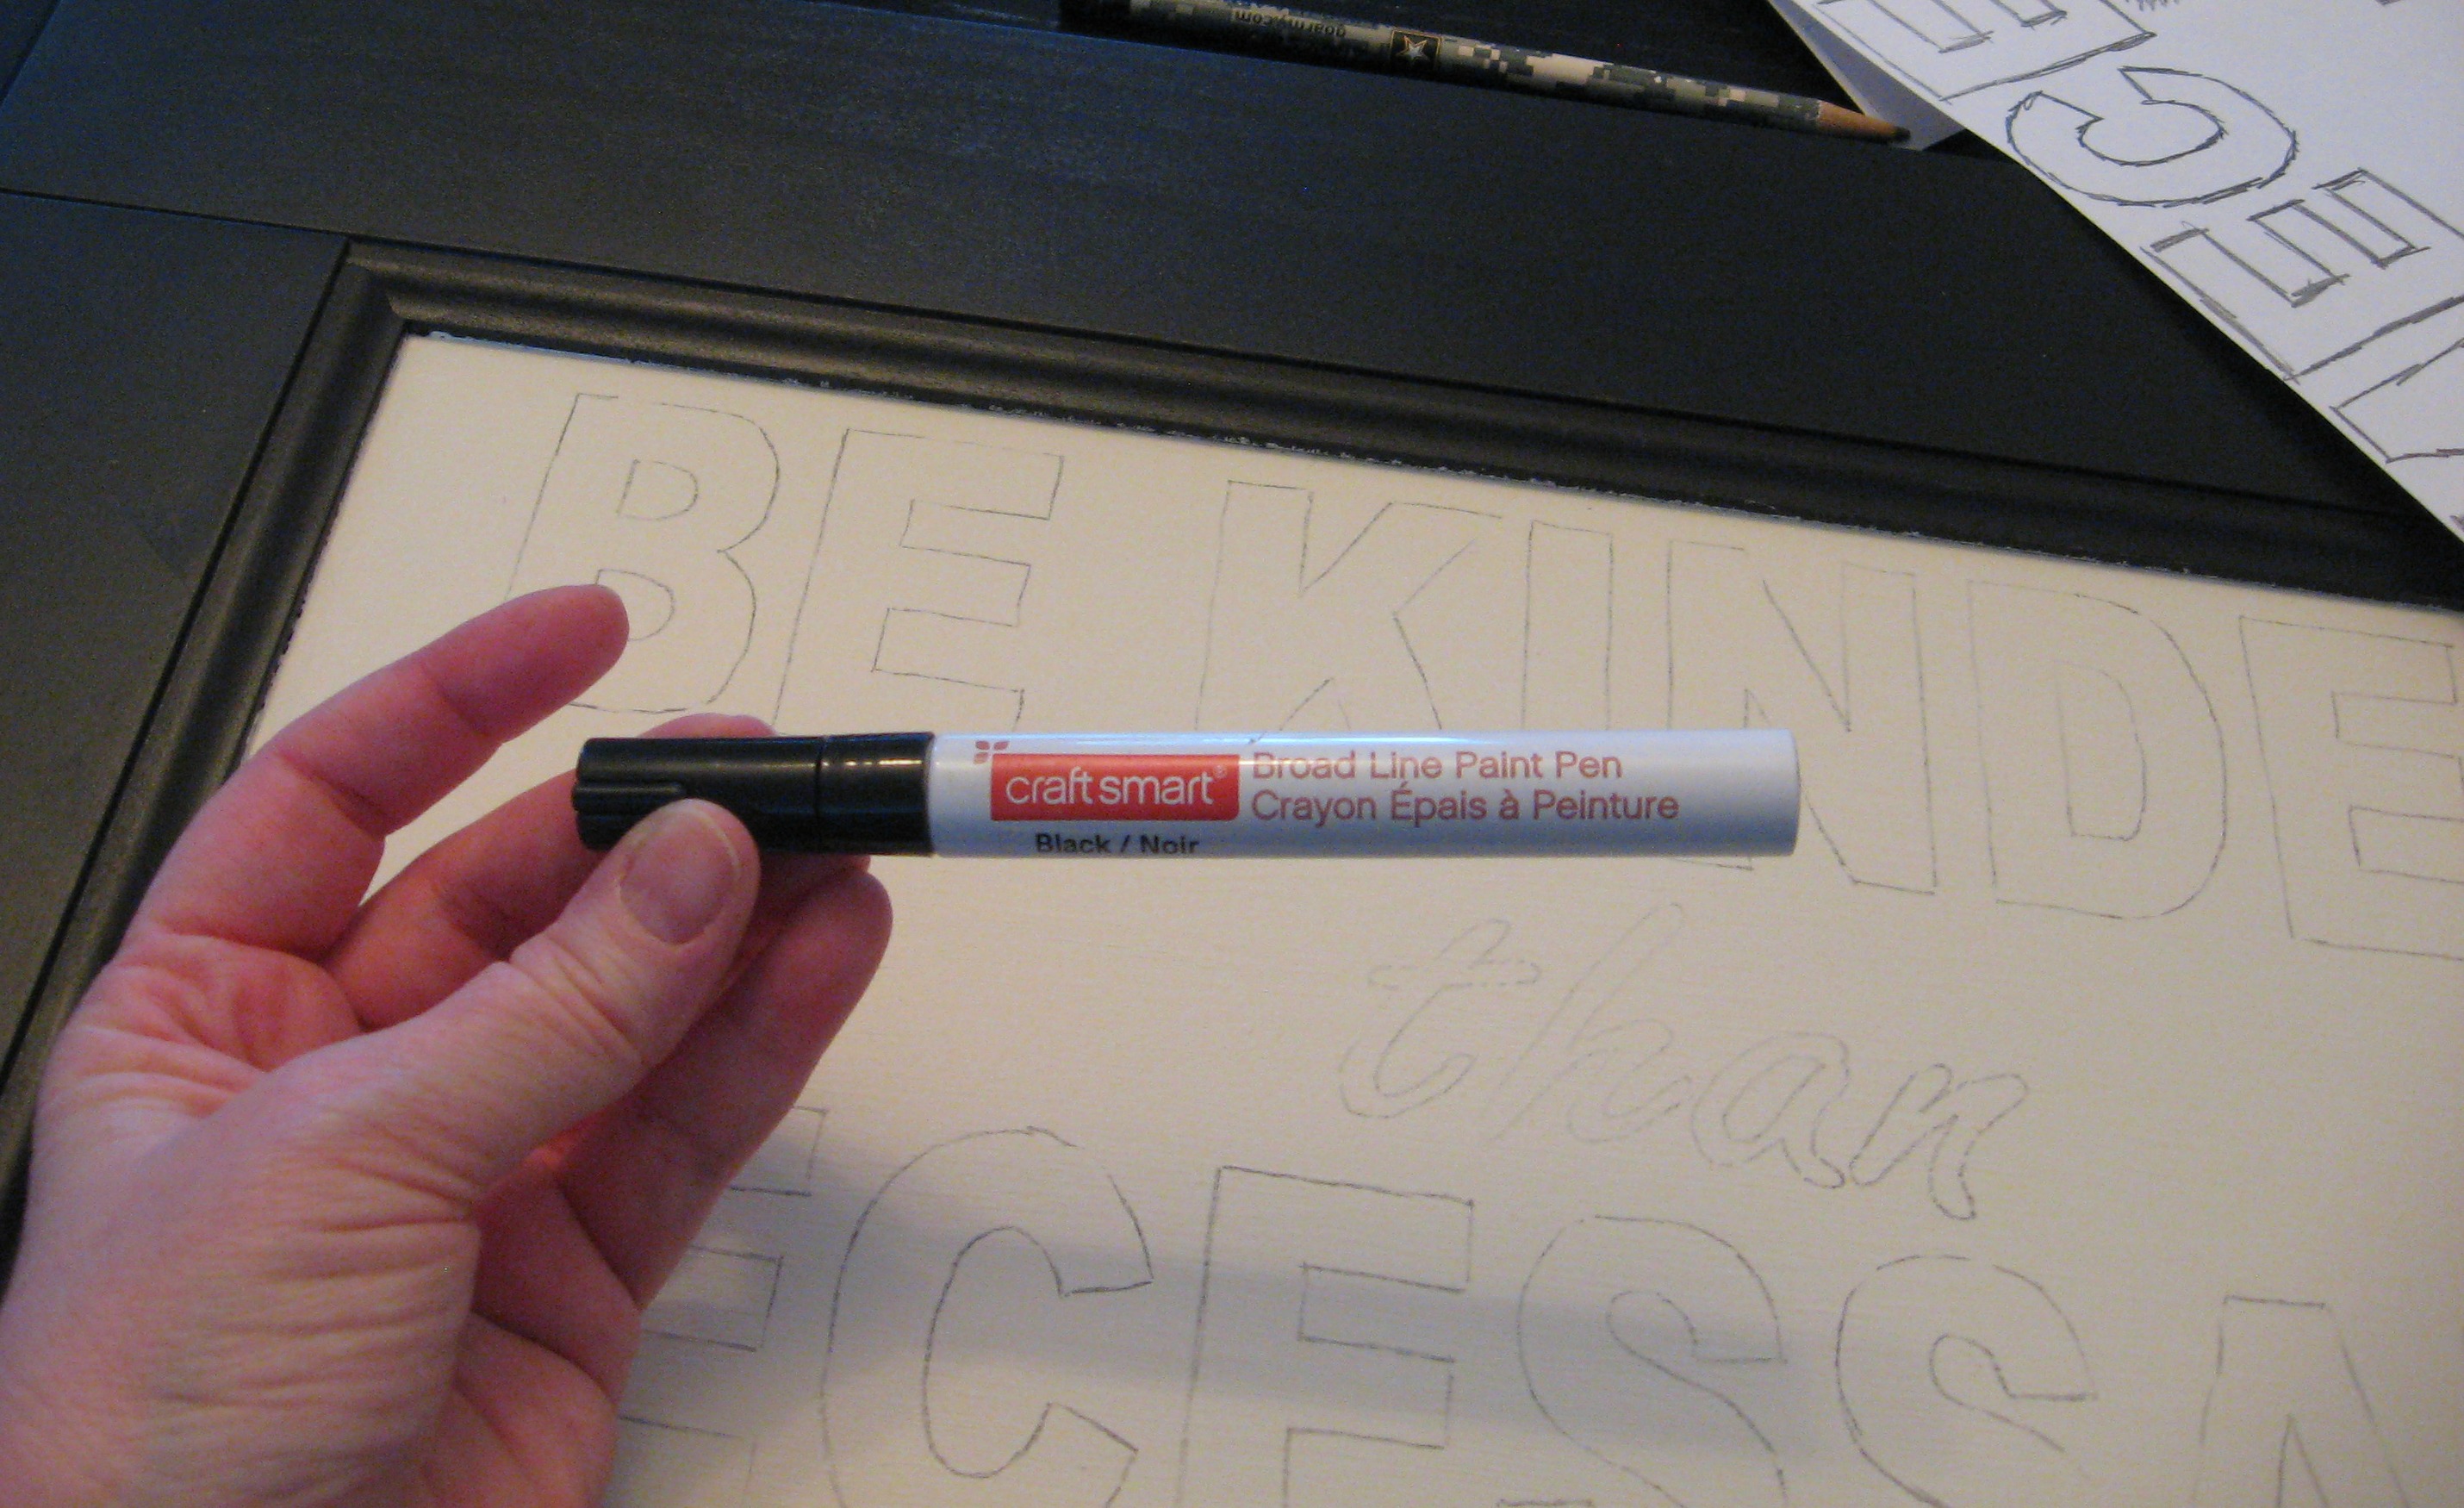
Next step, I outline everything with a paint pen. You can buy them at any craft store for a couple of dollars. I don’t have a favorite brand; this is one that came from Michaels.
Here it is with the letters outlined.
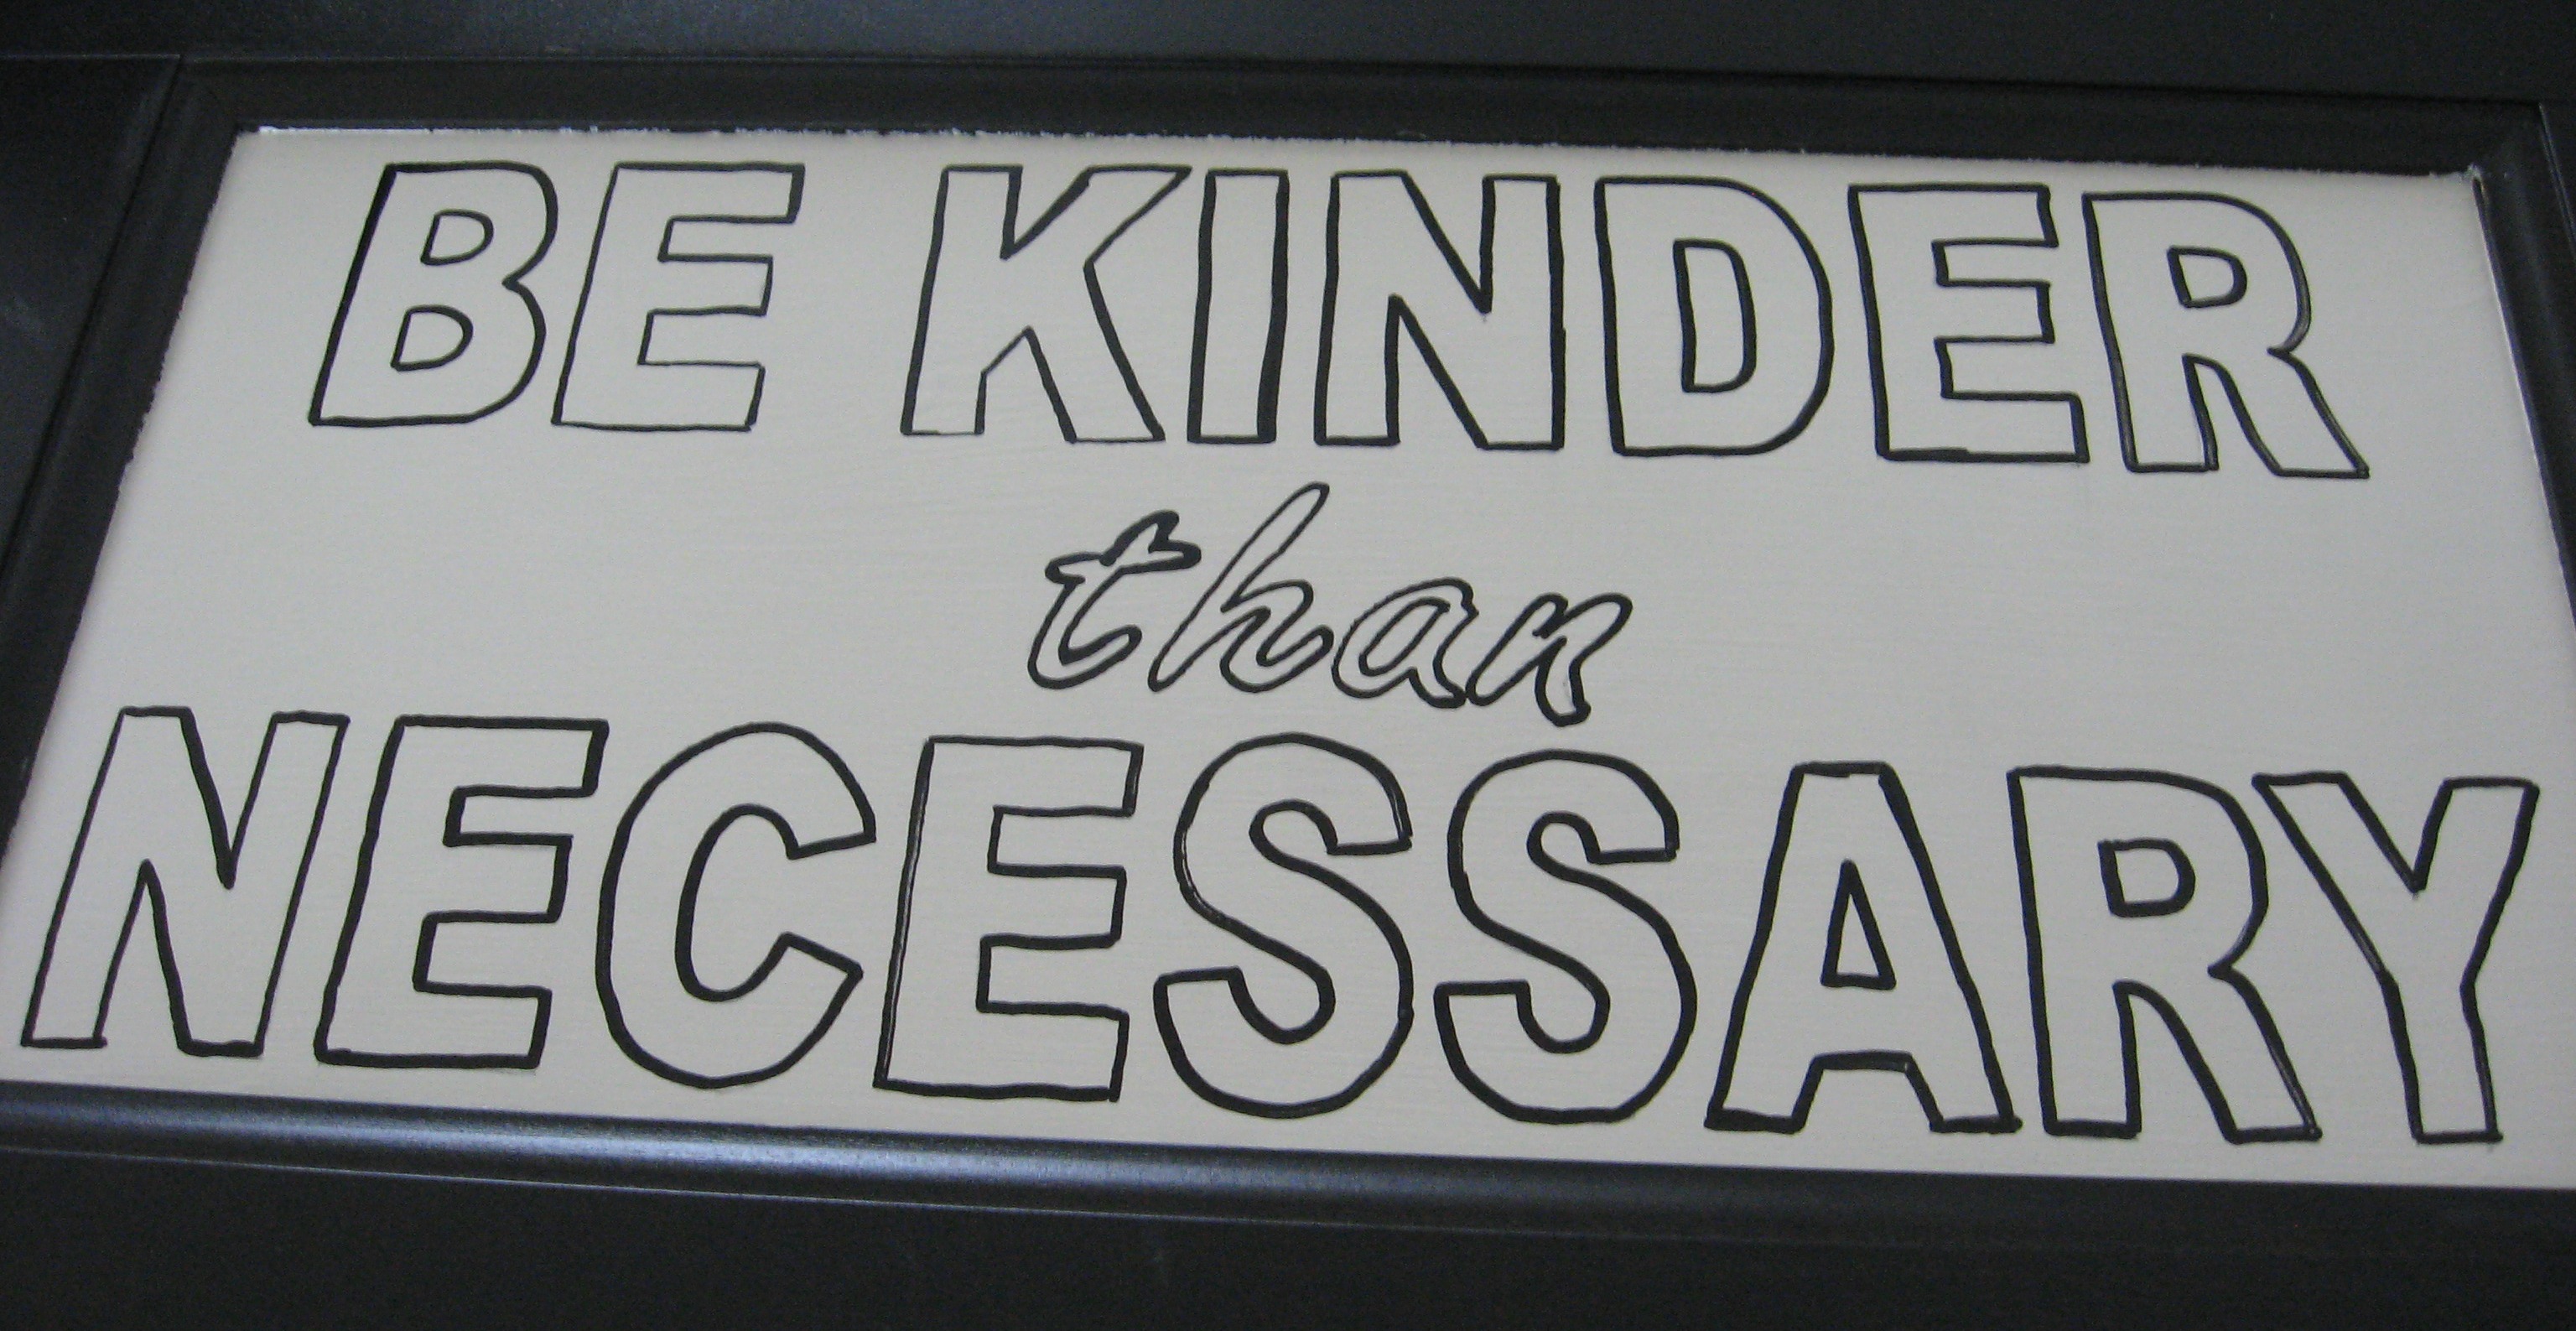
Then begin filling it all in with craft paint and a small brush. Depending on the color, quality of paint and surface you’re painting on, it will take 2-3 coats to get good coverage.

Use a small brush and the background color to clean up any mistakes. When it is all dry, you can sand it to get a distressed look.
Stay tuned later in the week to see how I finished this sign. In the meantime, here are a few others I’ve done:
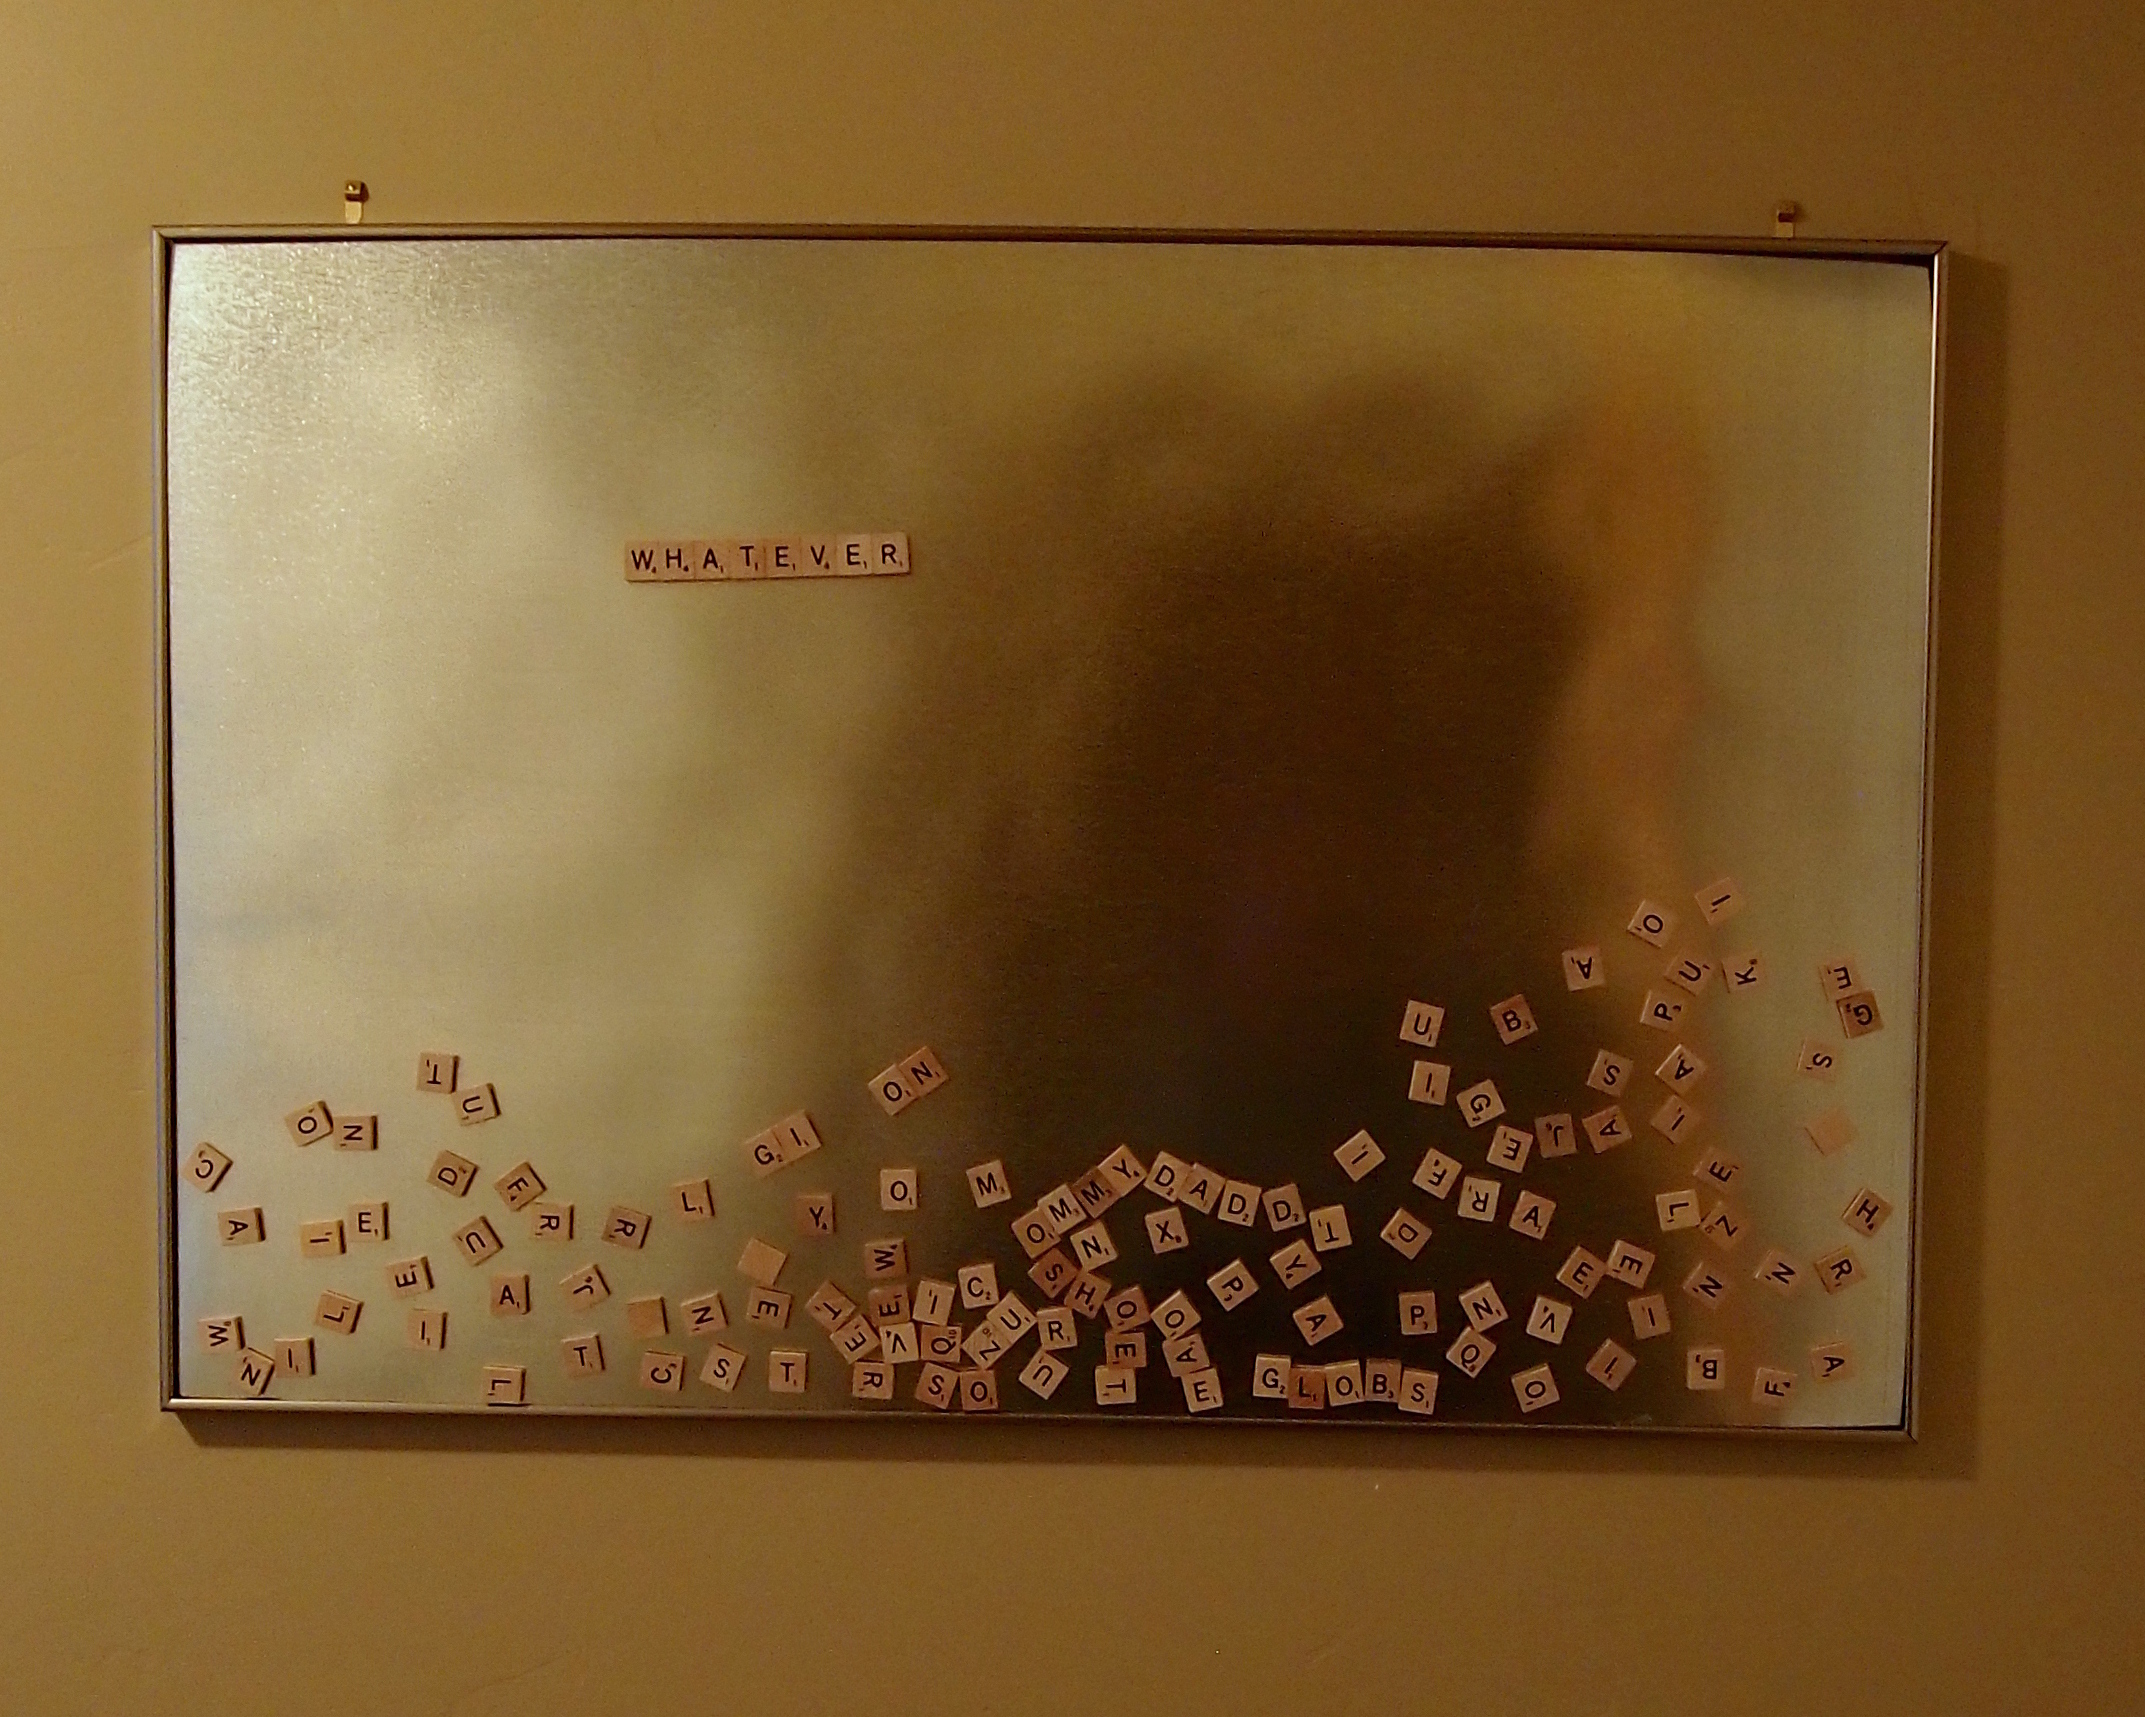
Magnetic Scrabble Board
My sister and her family are big Scrabble fans, so when I saw her pin a magnetic Scrabble board on Pinterest, I knew I had to try my hand at making her one for Christmas. I had almost everything I needed on hand already; your costs will vary depending on what you have to buy for it. I recommend trying a thrift store for an old Scrabble game and for a frame.
I started with a magnet roll like this:
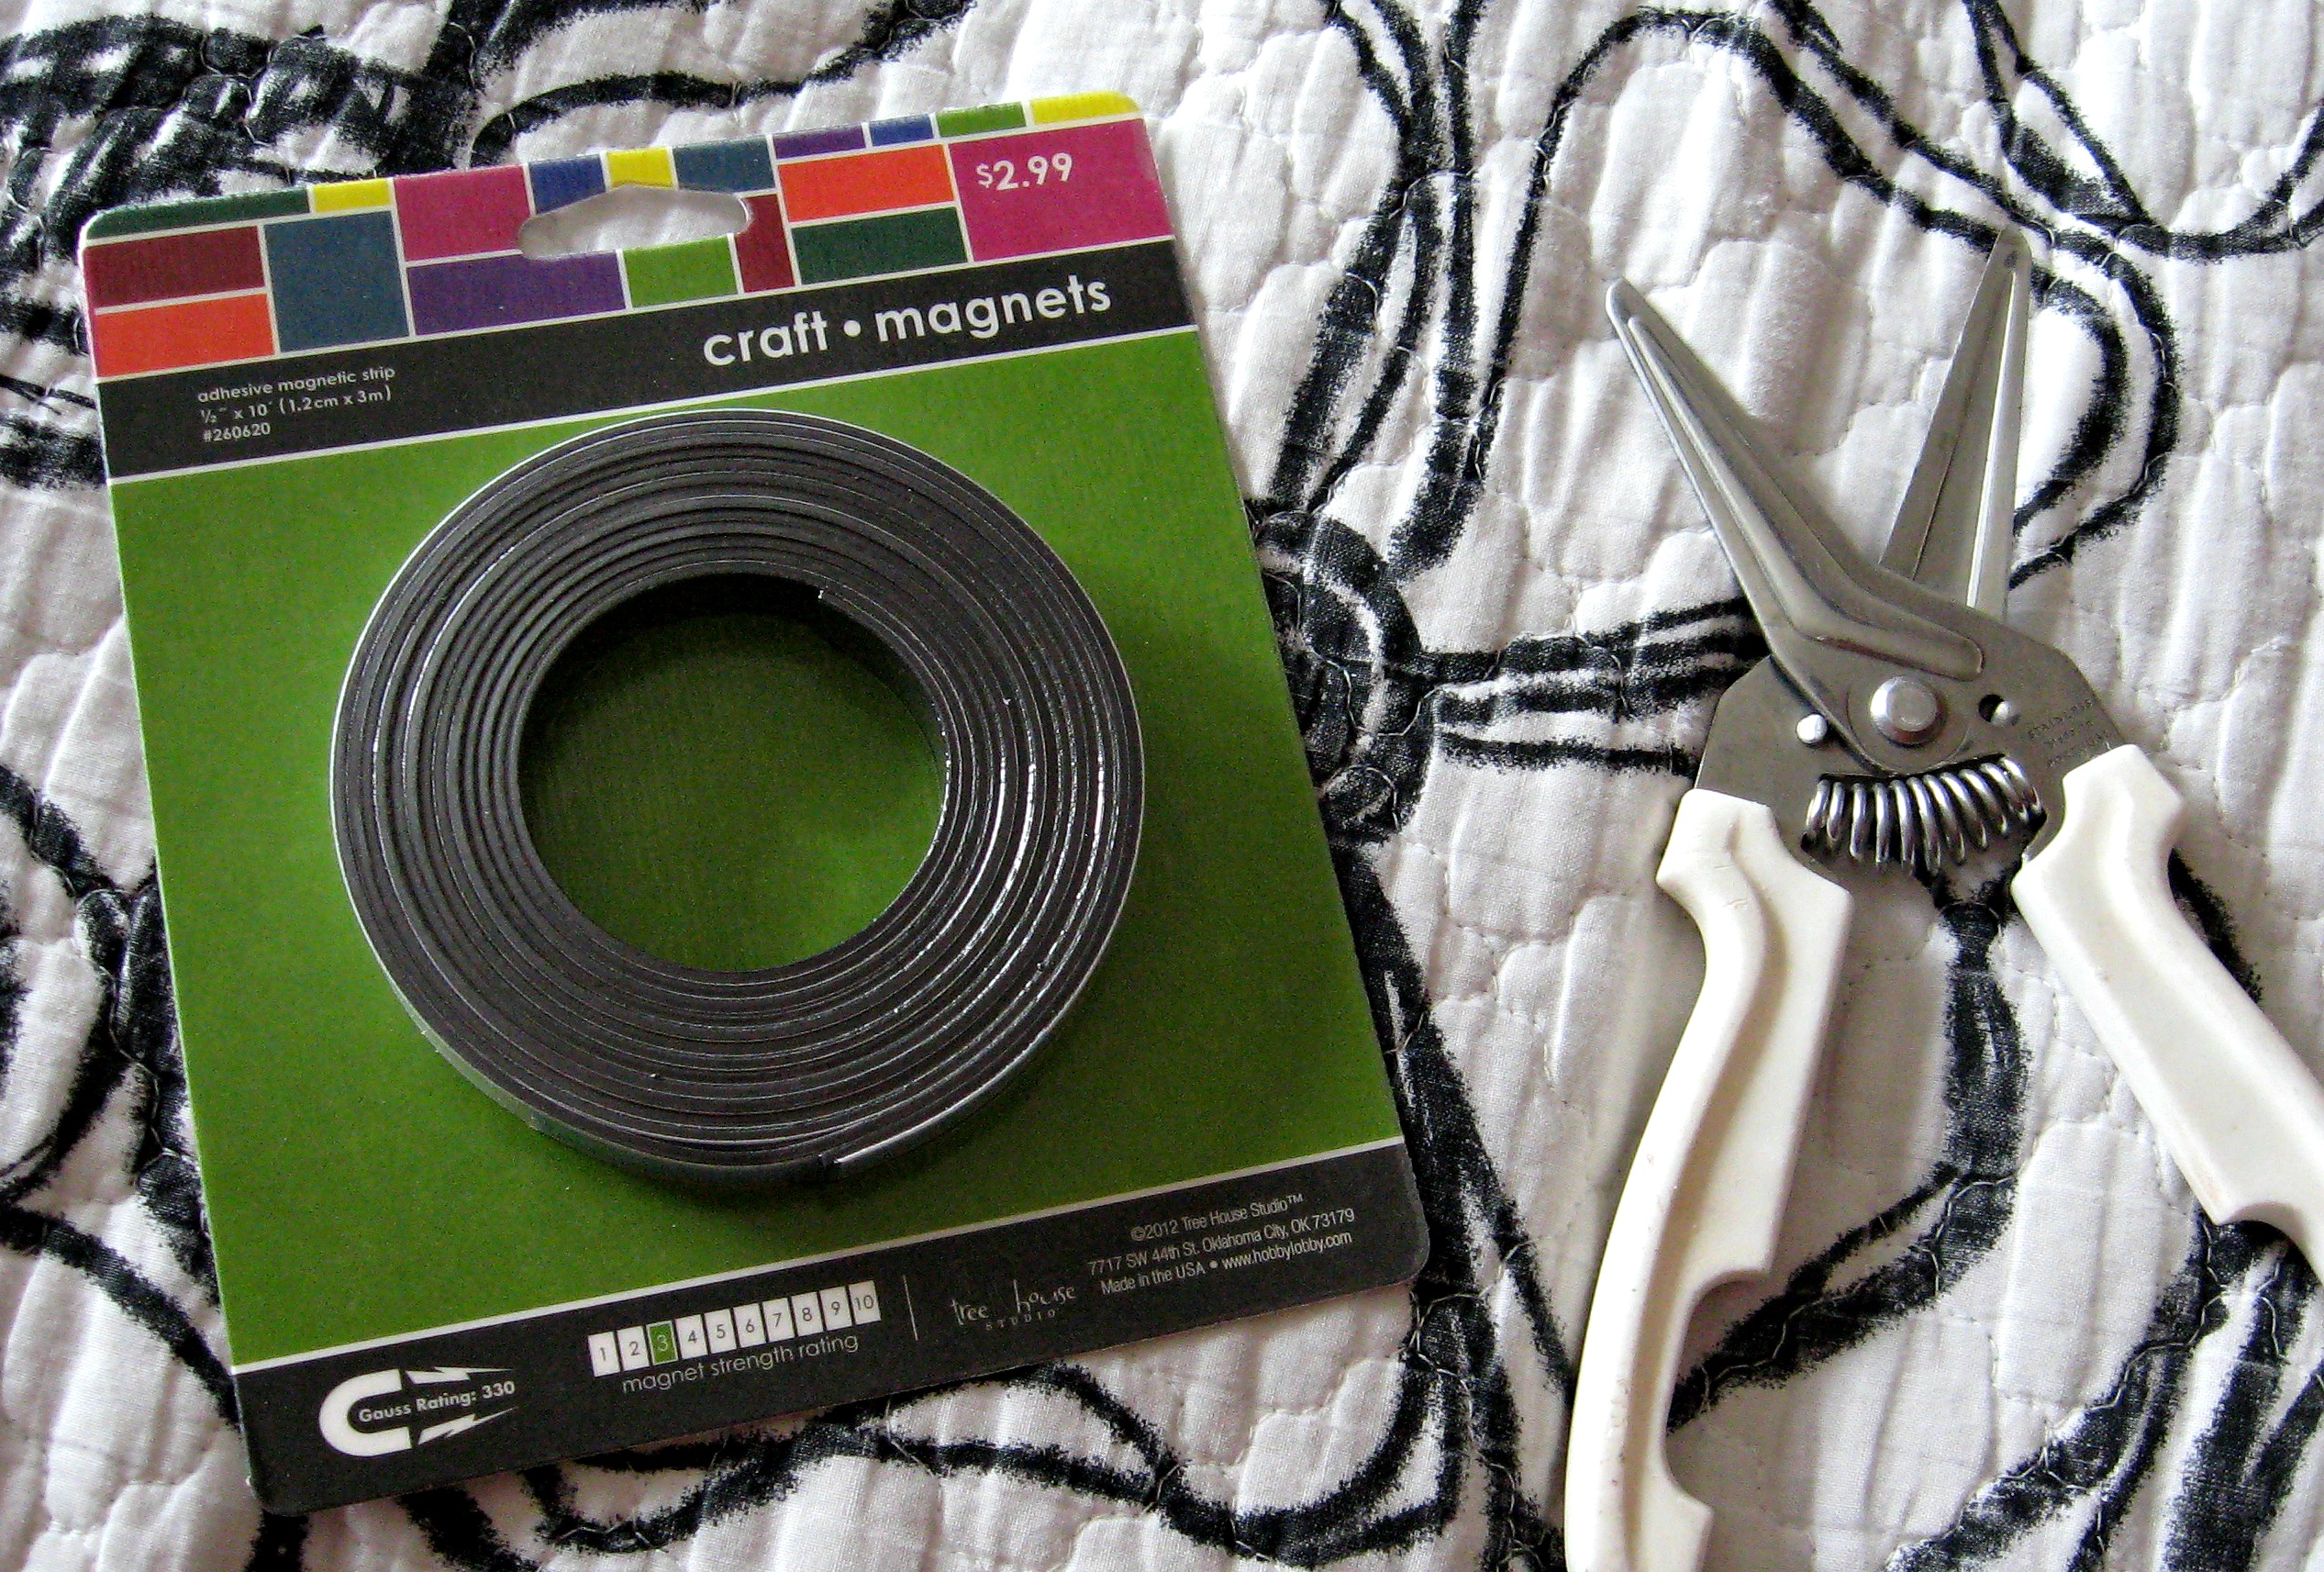
You can cut this easily using sturdy kitchen scissors. I just cut pieces out to be slightly smaller than the Scrabble tiles.
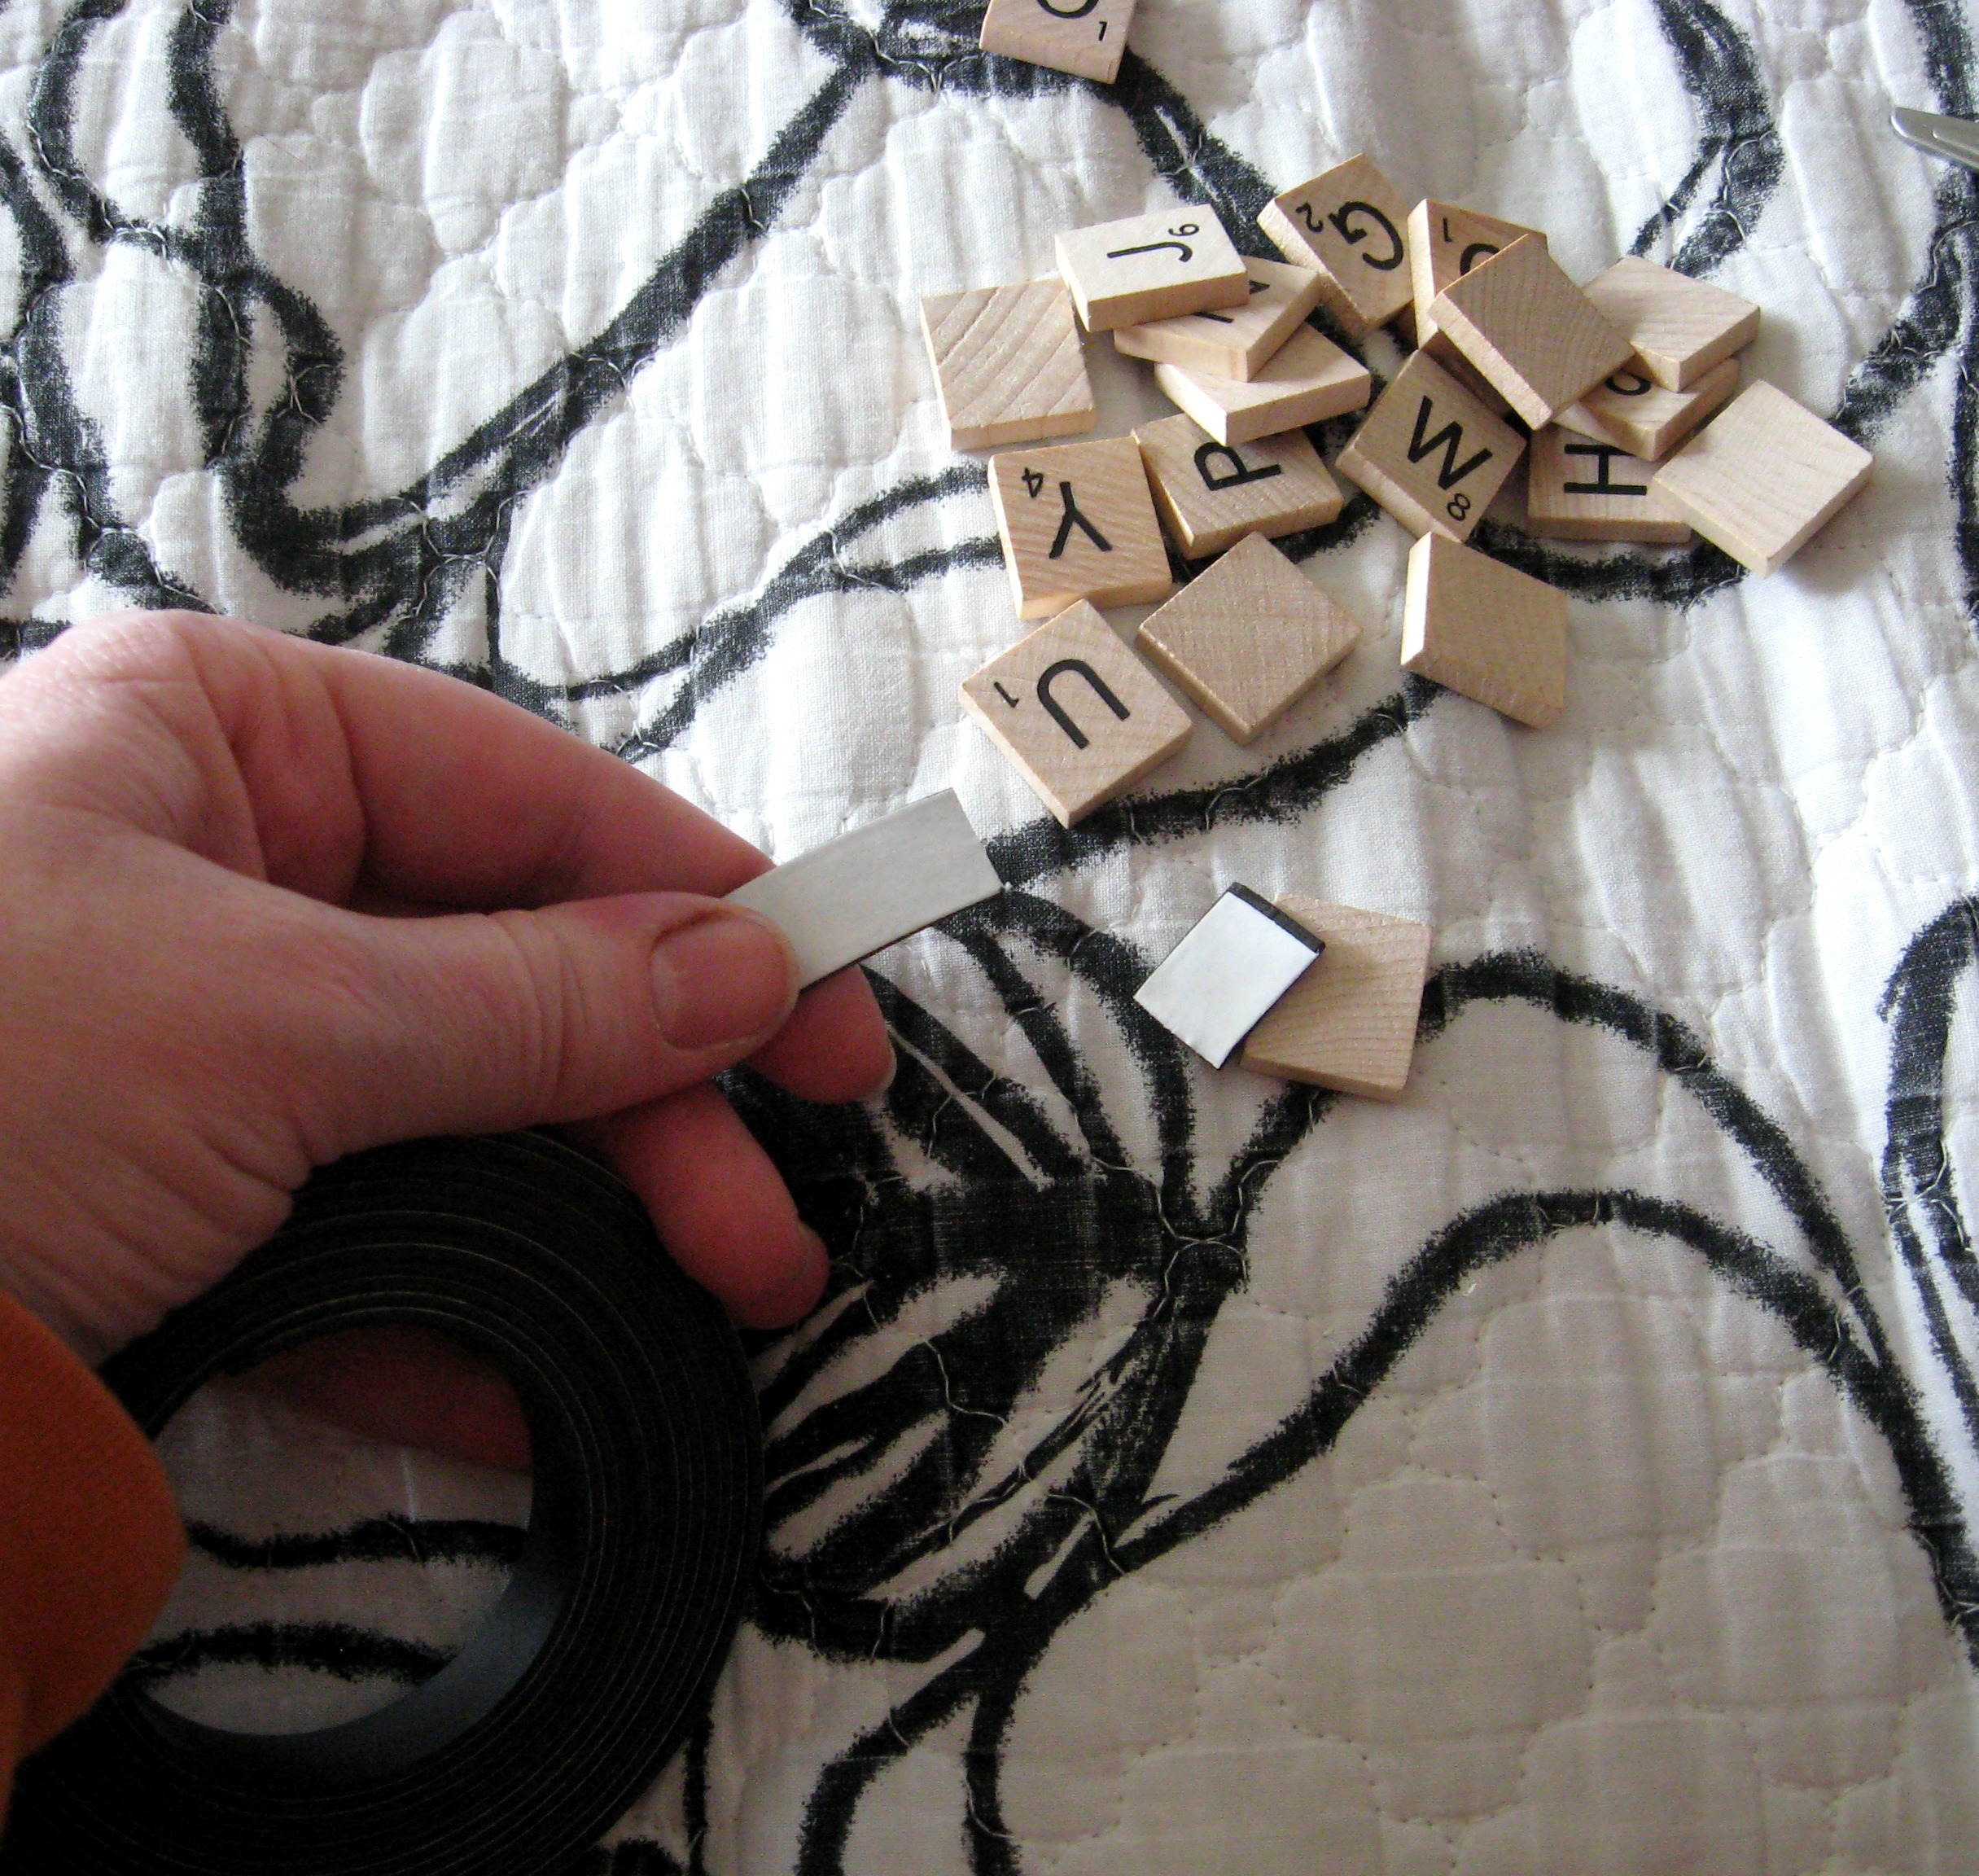
Stick a magnet on the back of each tile. Since the magnet comes on a roll, I found that it was a little curved after I stuck it on. I laid all the finished magnets out like this:
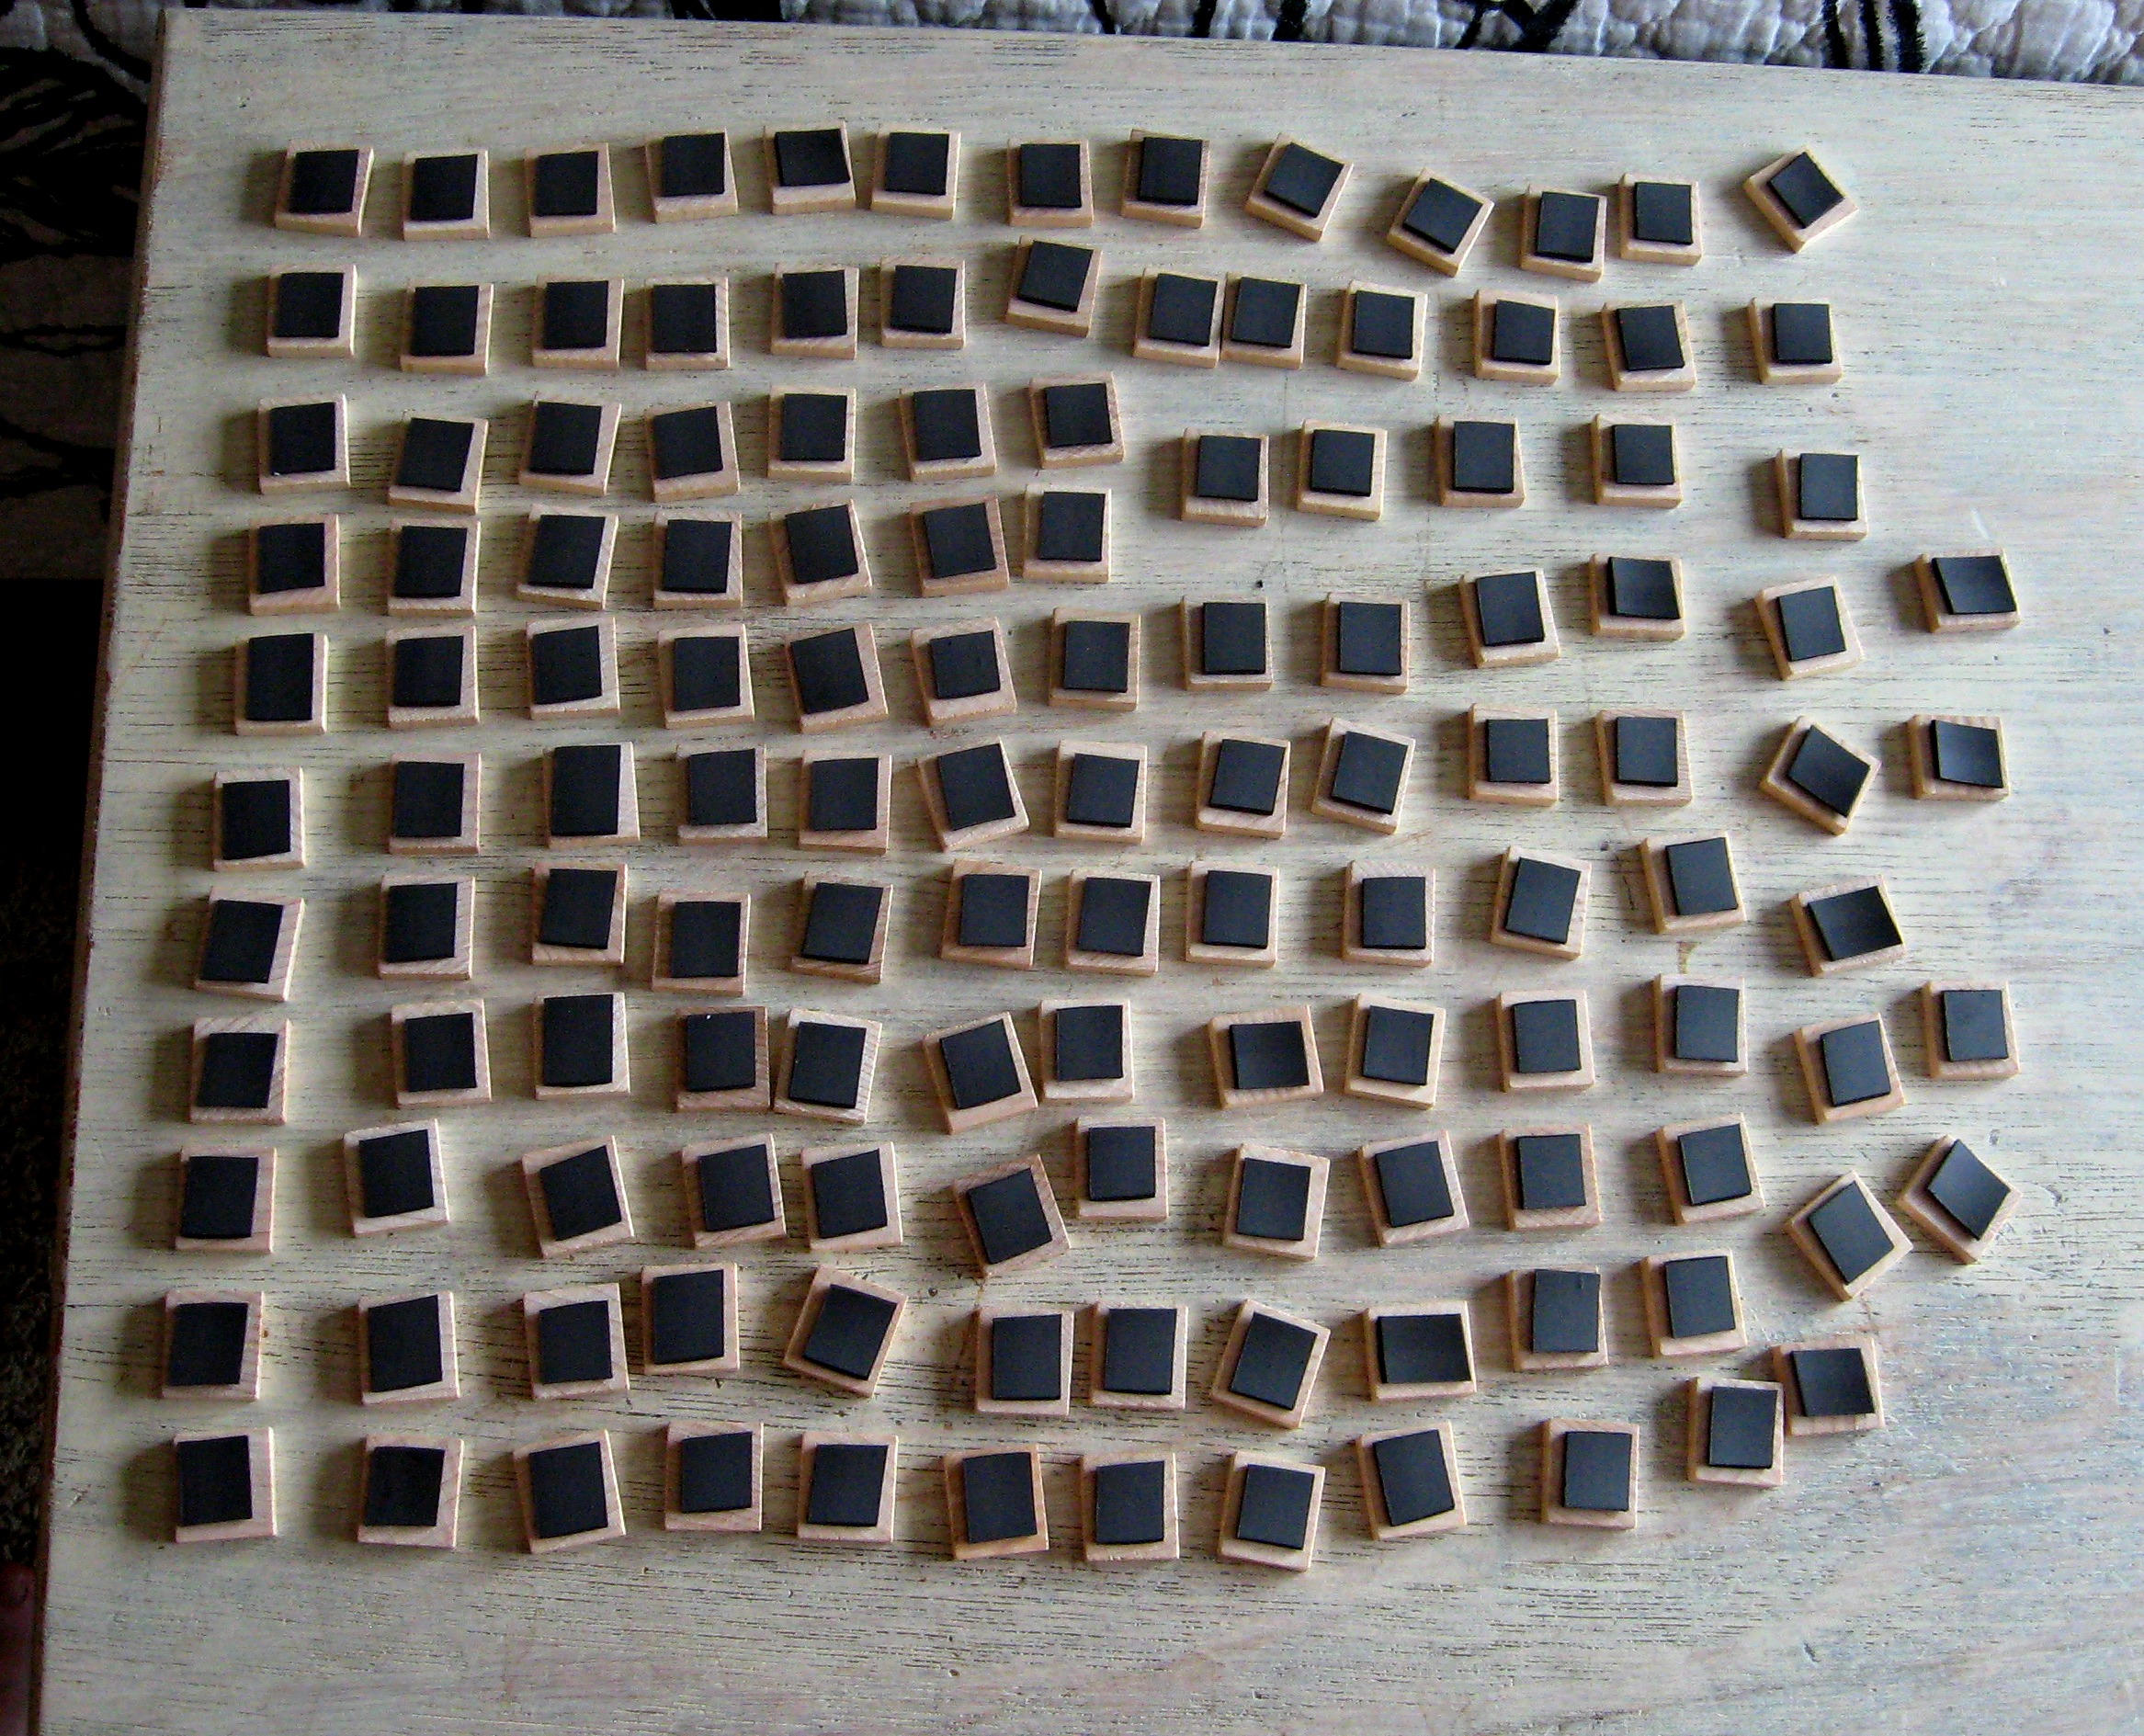
And covered them with a board and some heavy books overnight to make sure they stayed stuck.
Next, I went to Lowe’s and bought a piece of metal. They come in all different sizes, but this one was 36″ X 48″. I found it in the roofing section, and it was less than $10. I already had a poster frame that was the same size, so I chose to use that. If you have a smaller frame that you want to use, you can cut the metal with a straight edge and a very sharp blade, or with scissors like the ones in the picture above, or with tin snips. It will leave a not-so-smooth edge, but you should be fine because you will cover it with a frame.
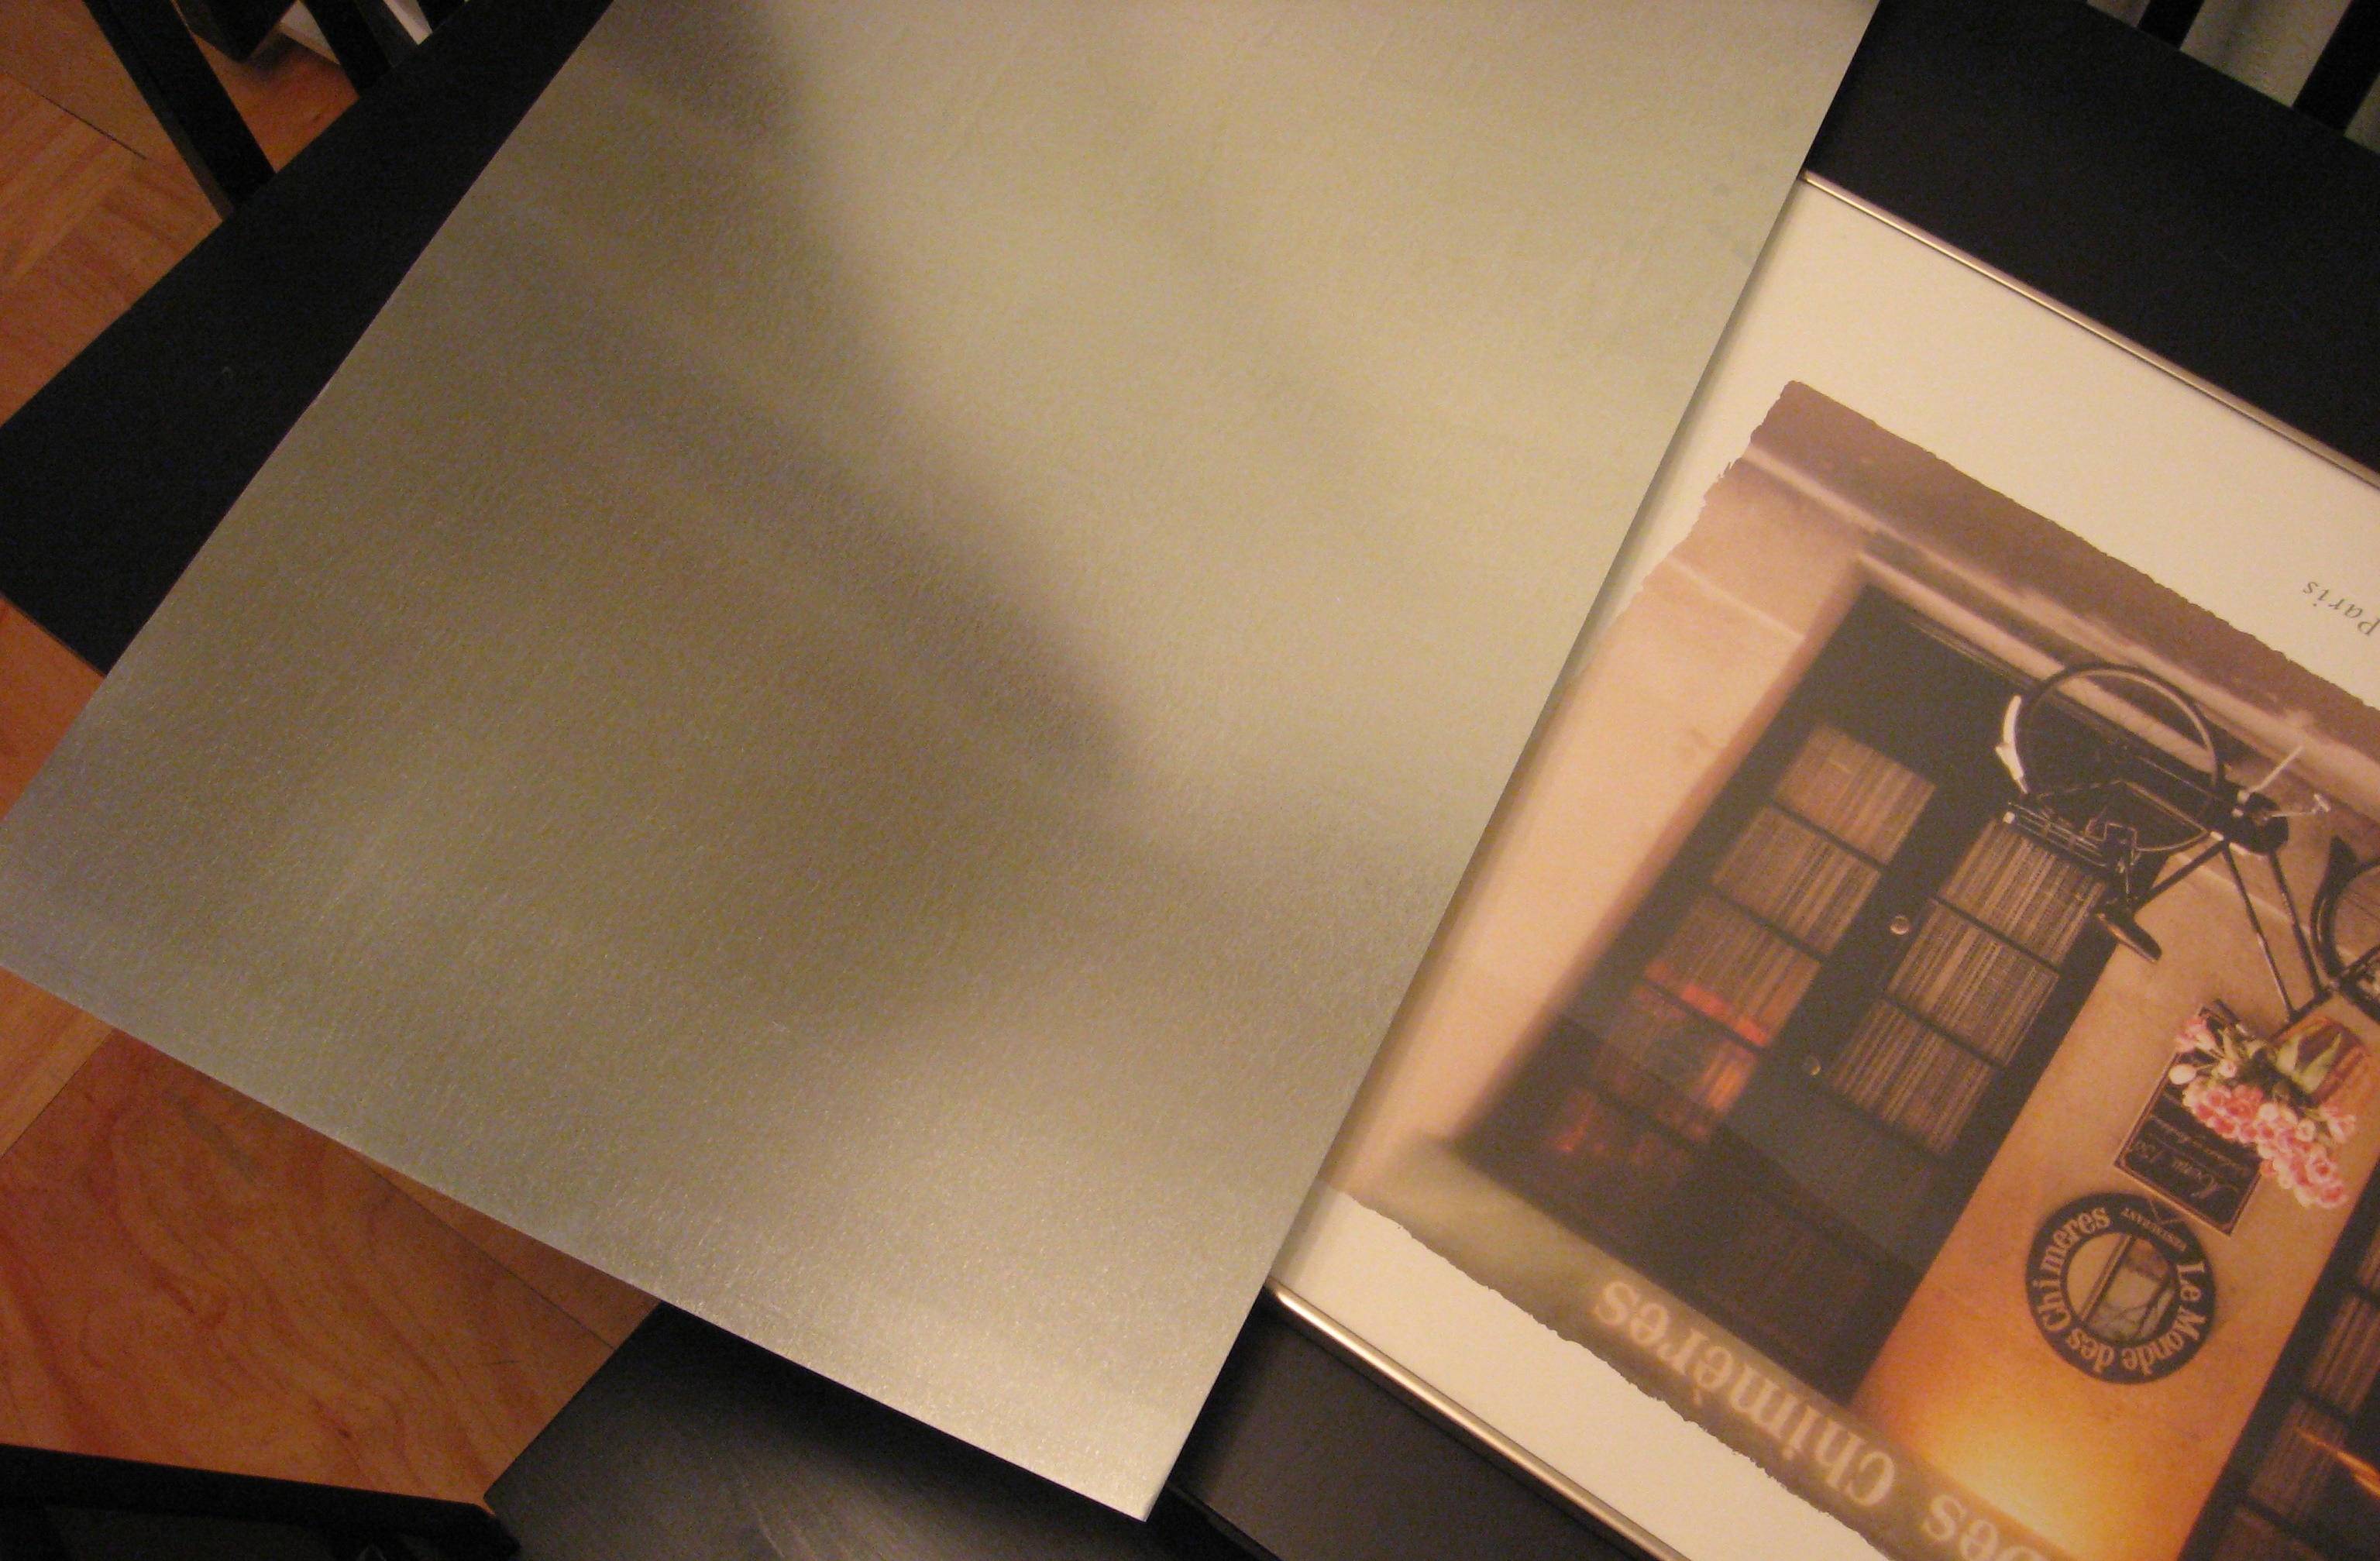
My frame had a sturdy piece of masonite for the backing, so I just attached the metal straight to that. If your frame doesn’t have that, you may need to cut (or buy) a piece of masonite or plywood the same size as the metal.
I dotted the metal with Liquid Nails and carefully centered it onto the masonite backing. Weigh it down and leave it for several hours or overnight.
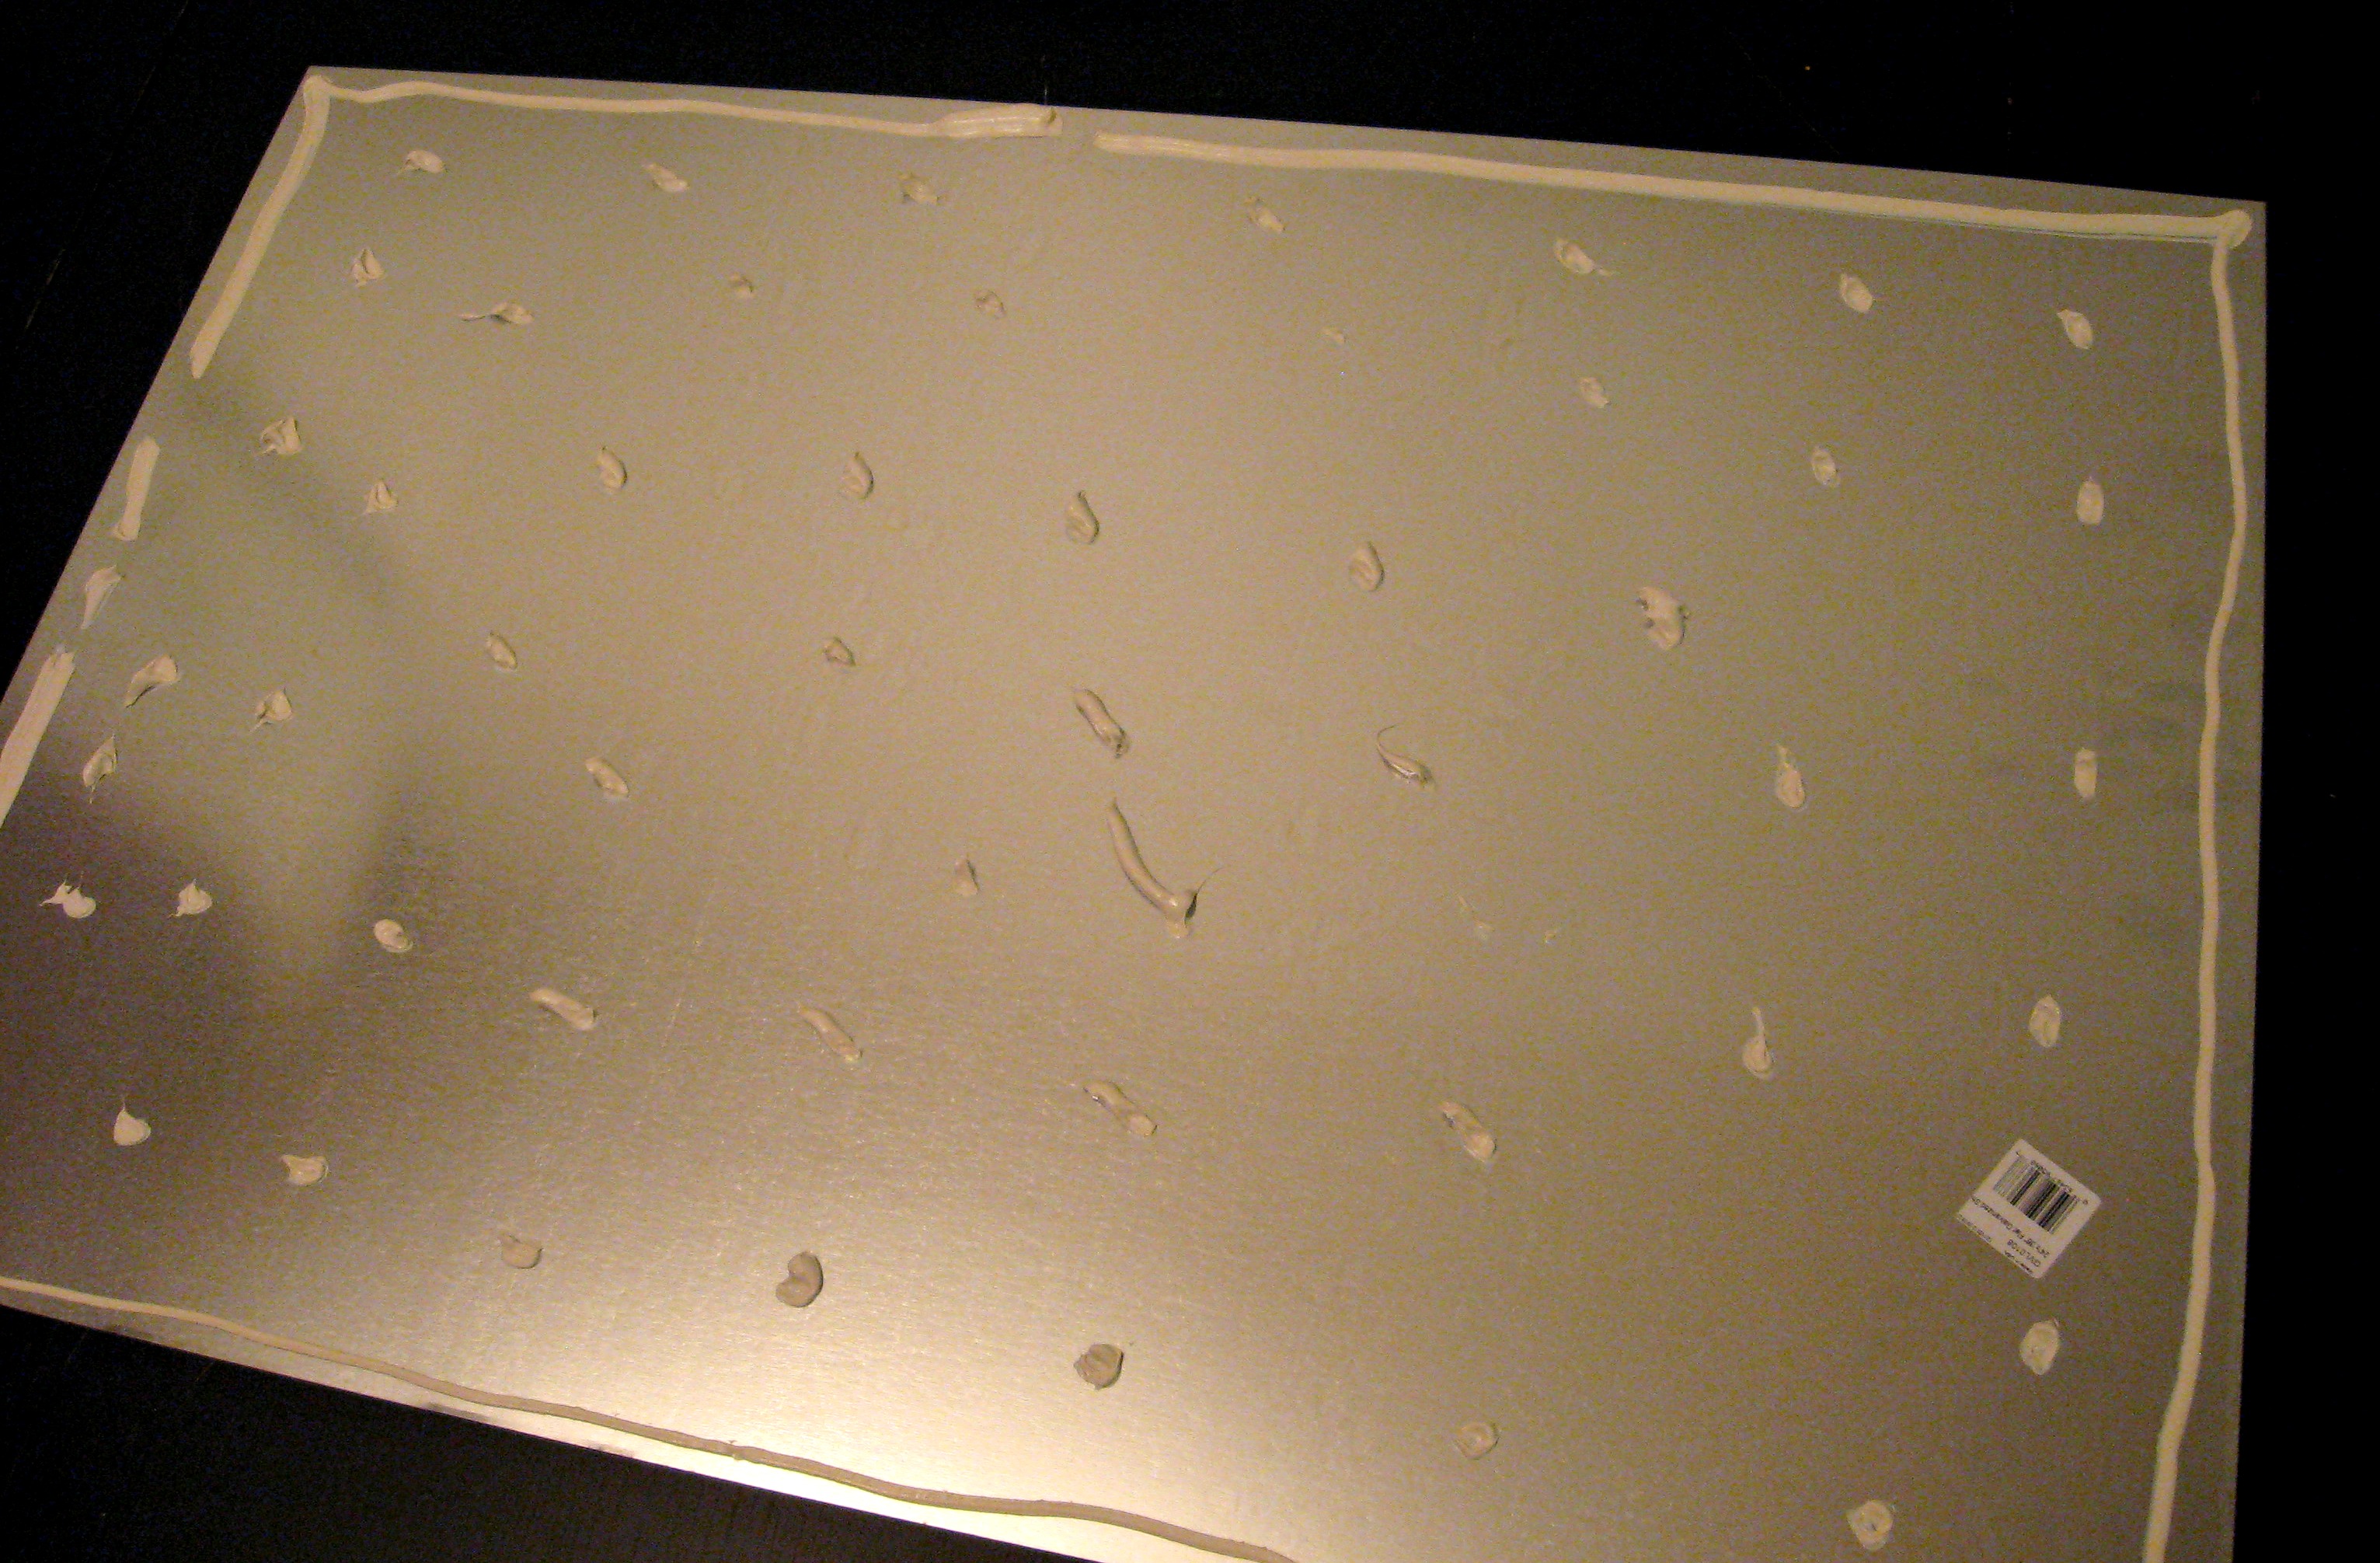
Insert the backing/metal back into the frame and let the games begin!
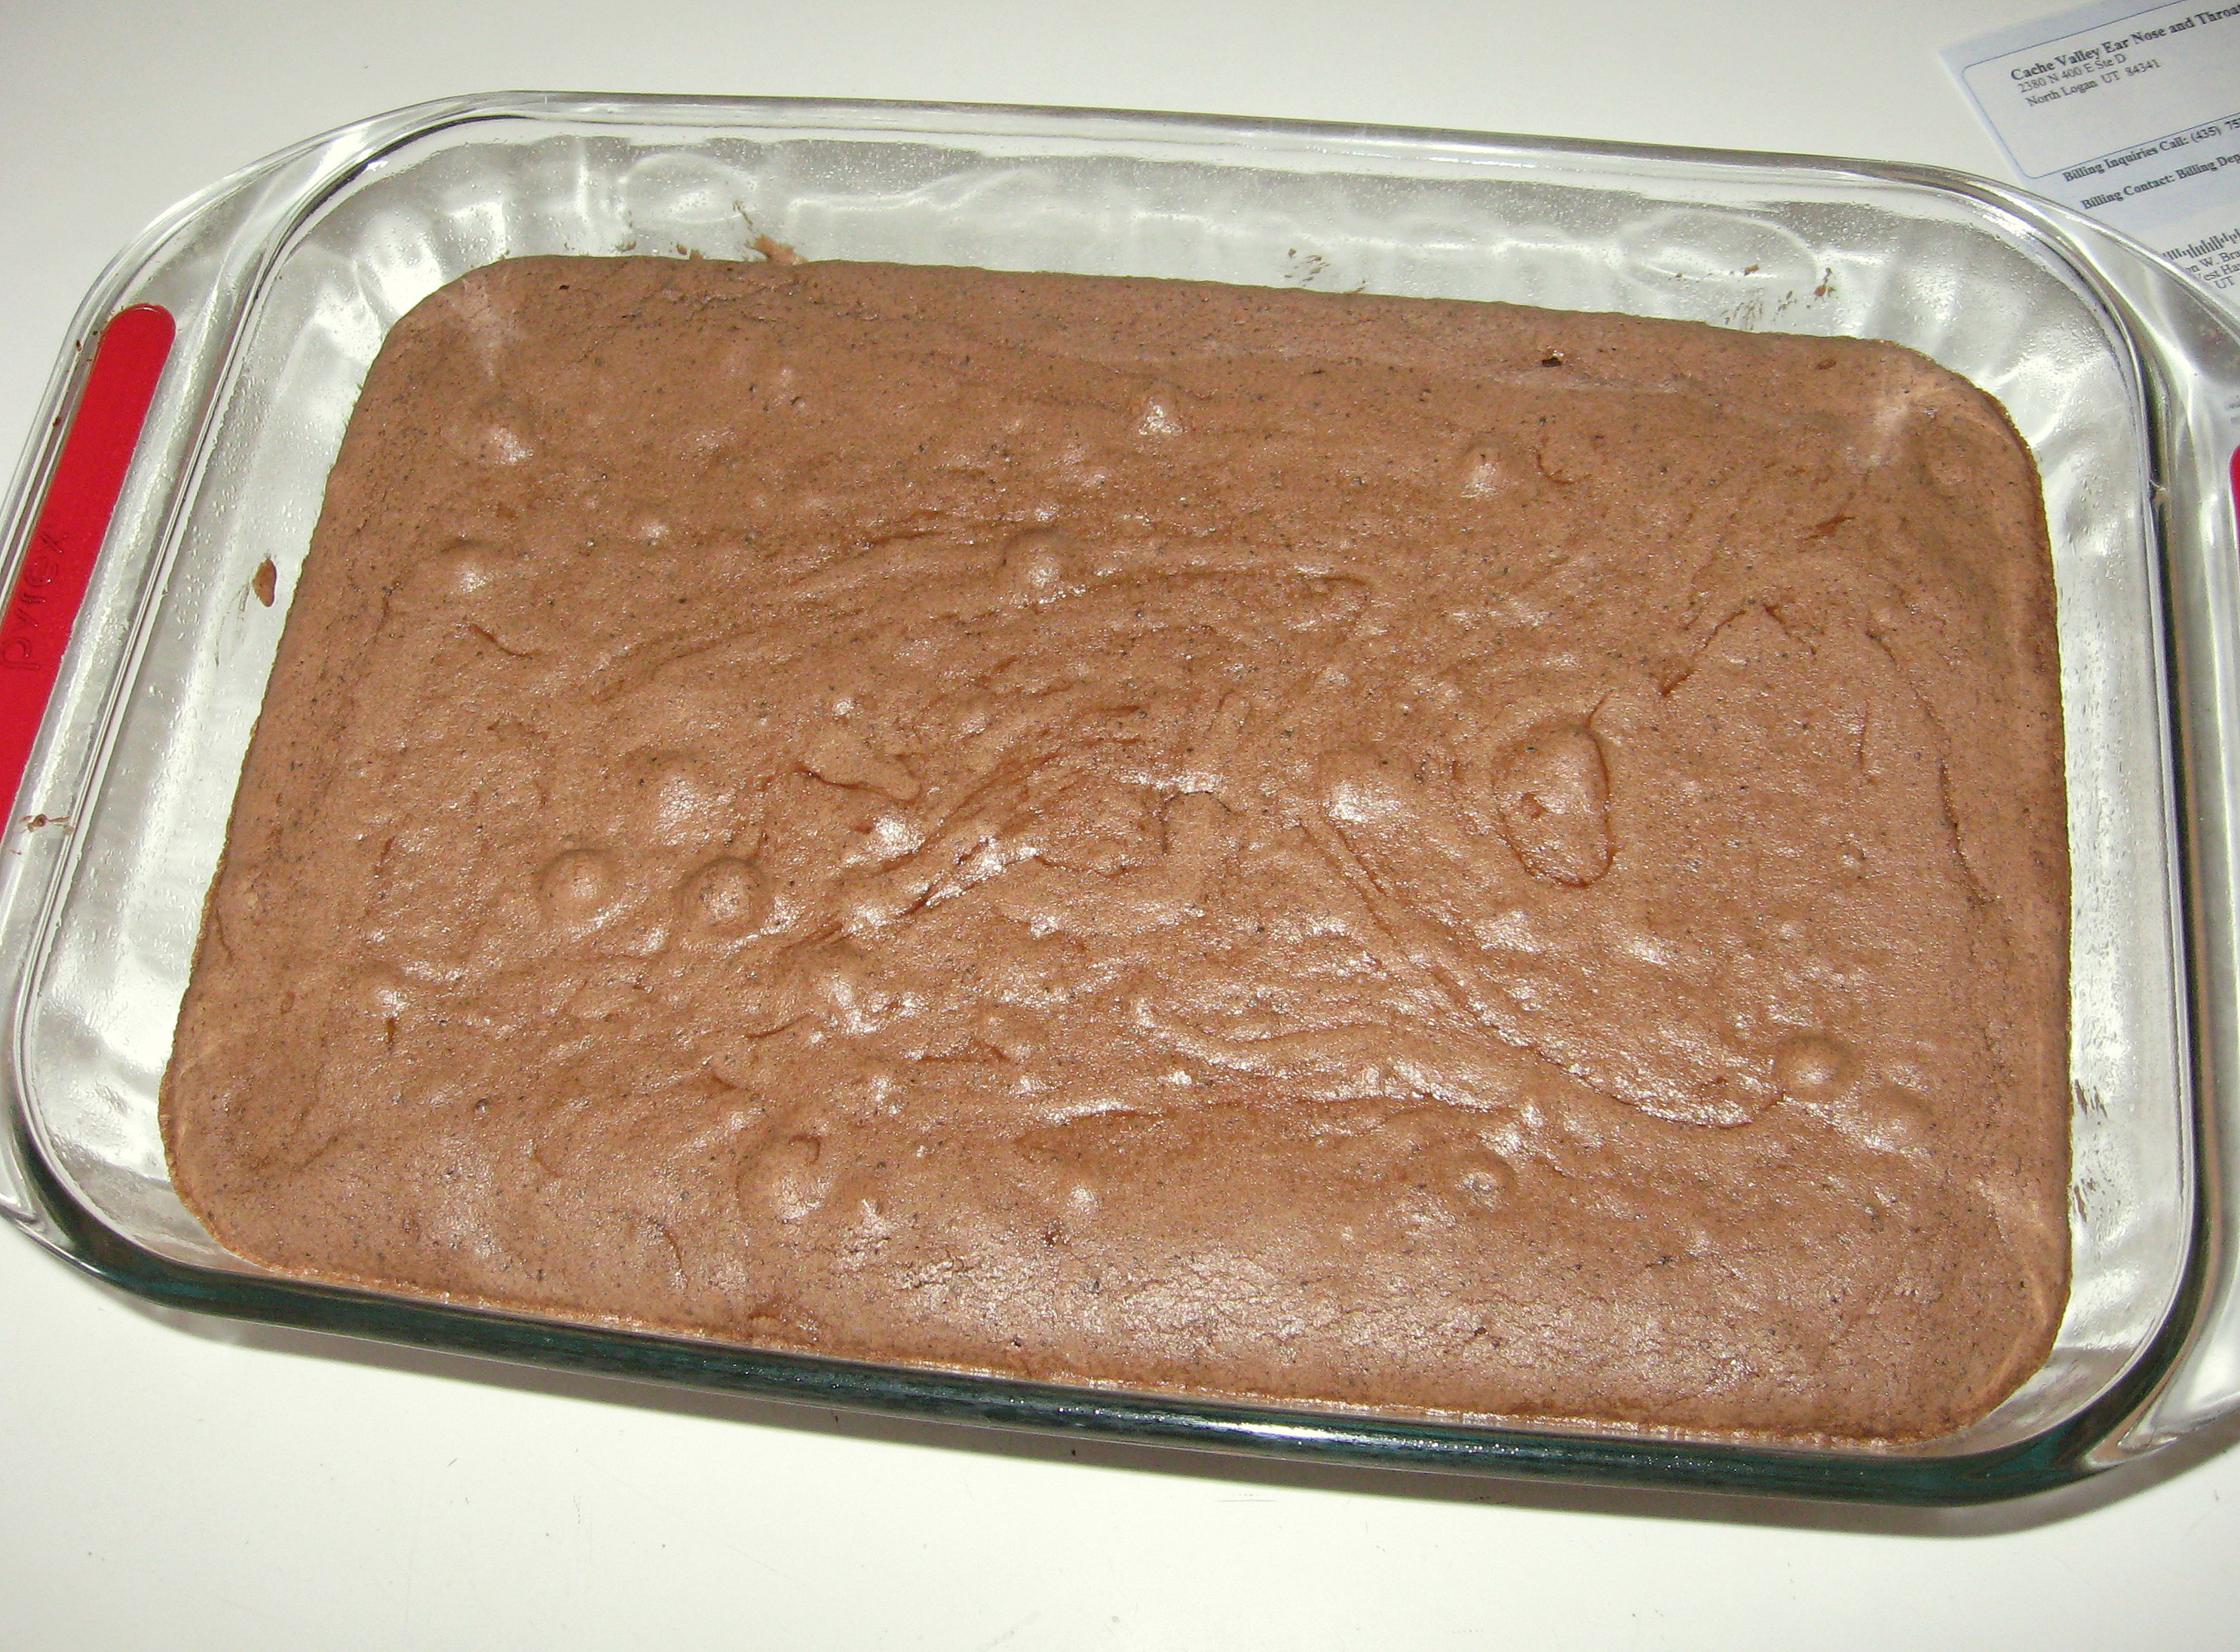
Fudge Freezer Brownies
This recipe is part of my happy memories from college. I would go to visit my older sister for the weekends (laundry in hand, of course) and she would make these brownies. Very dense and fudgy, they are simply DIVINE. Make sure you have a glass of milk nearby!
FUDGE FREEZER BROWNIES
1 cup Butter, melted
3/4 cup Cocoa
2 cups Sugar
1 1/2 cups Flour
In a bowl, combine butter and cocoa. Mix in sugar and flour. It will be dry and crumbly at this point.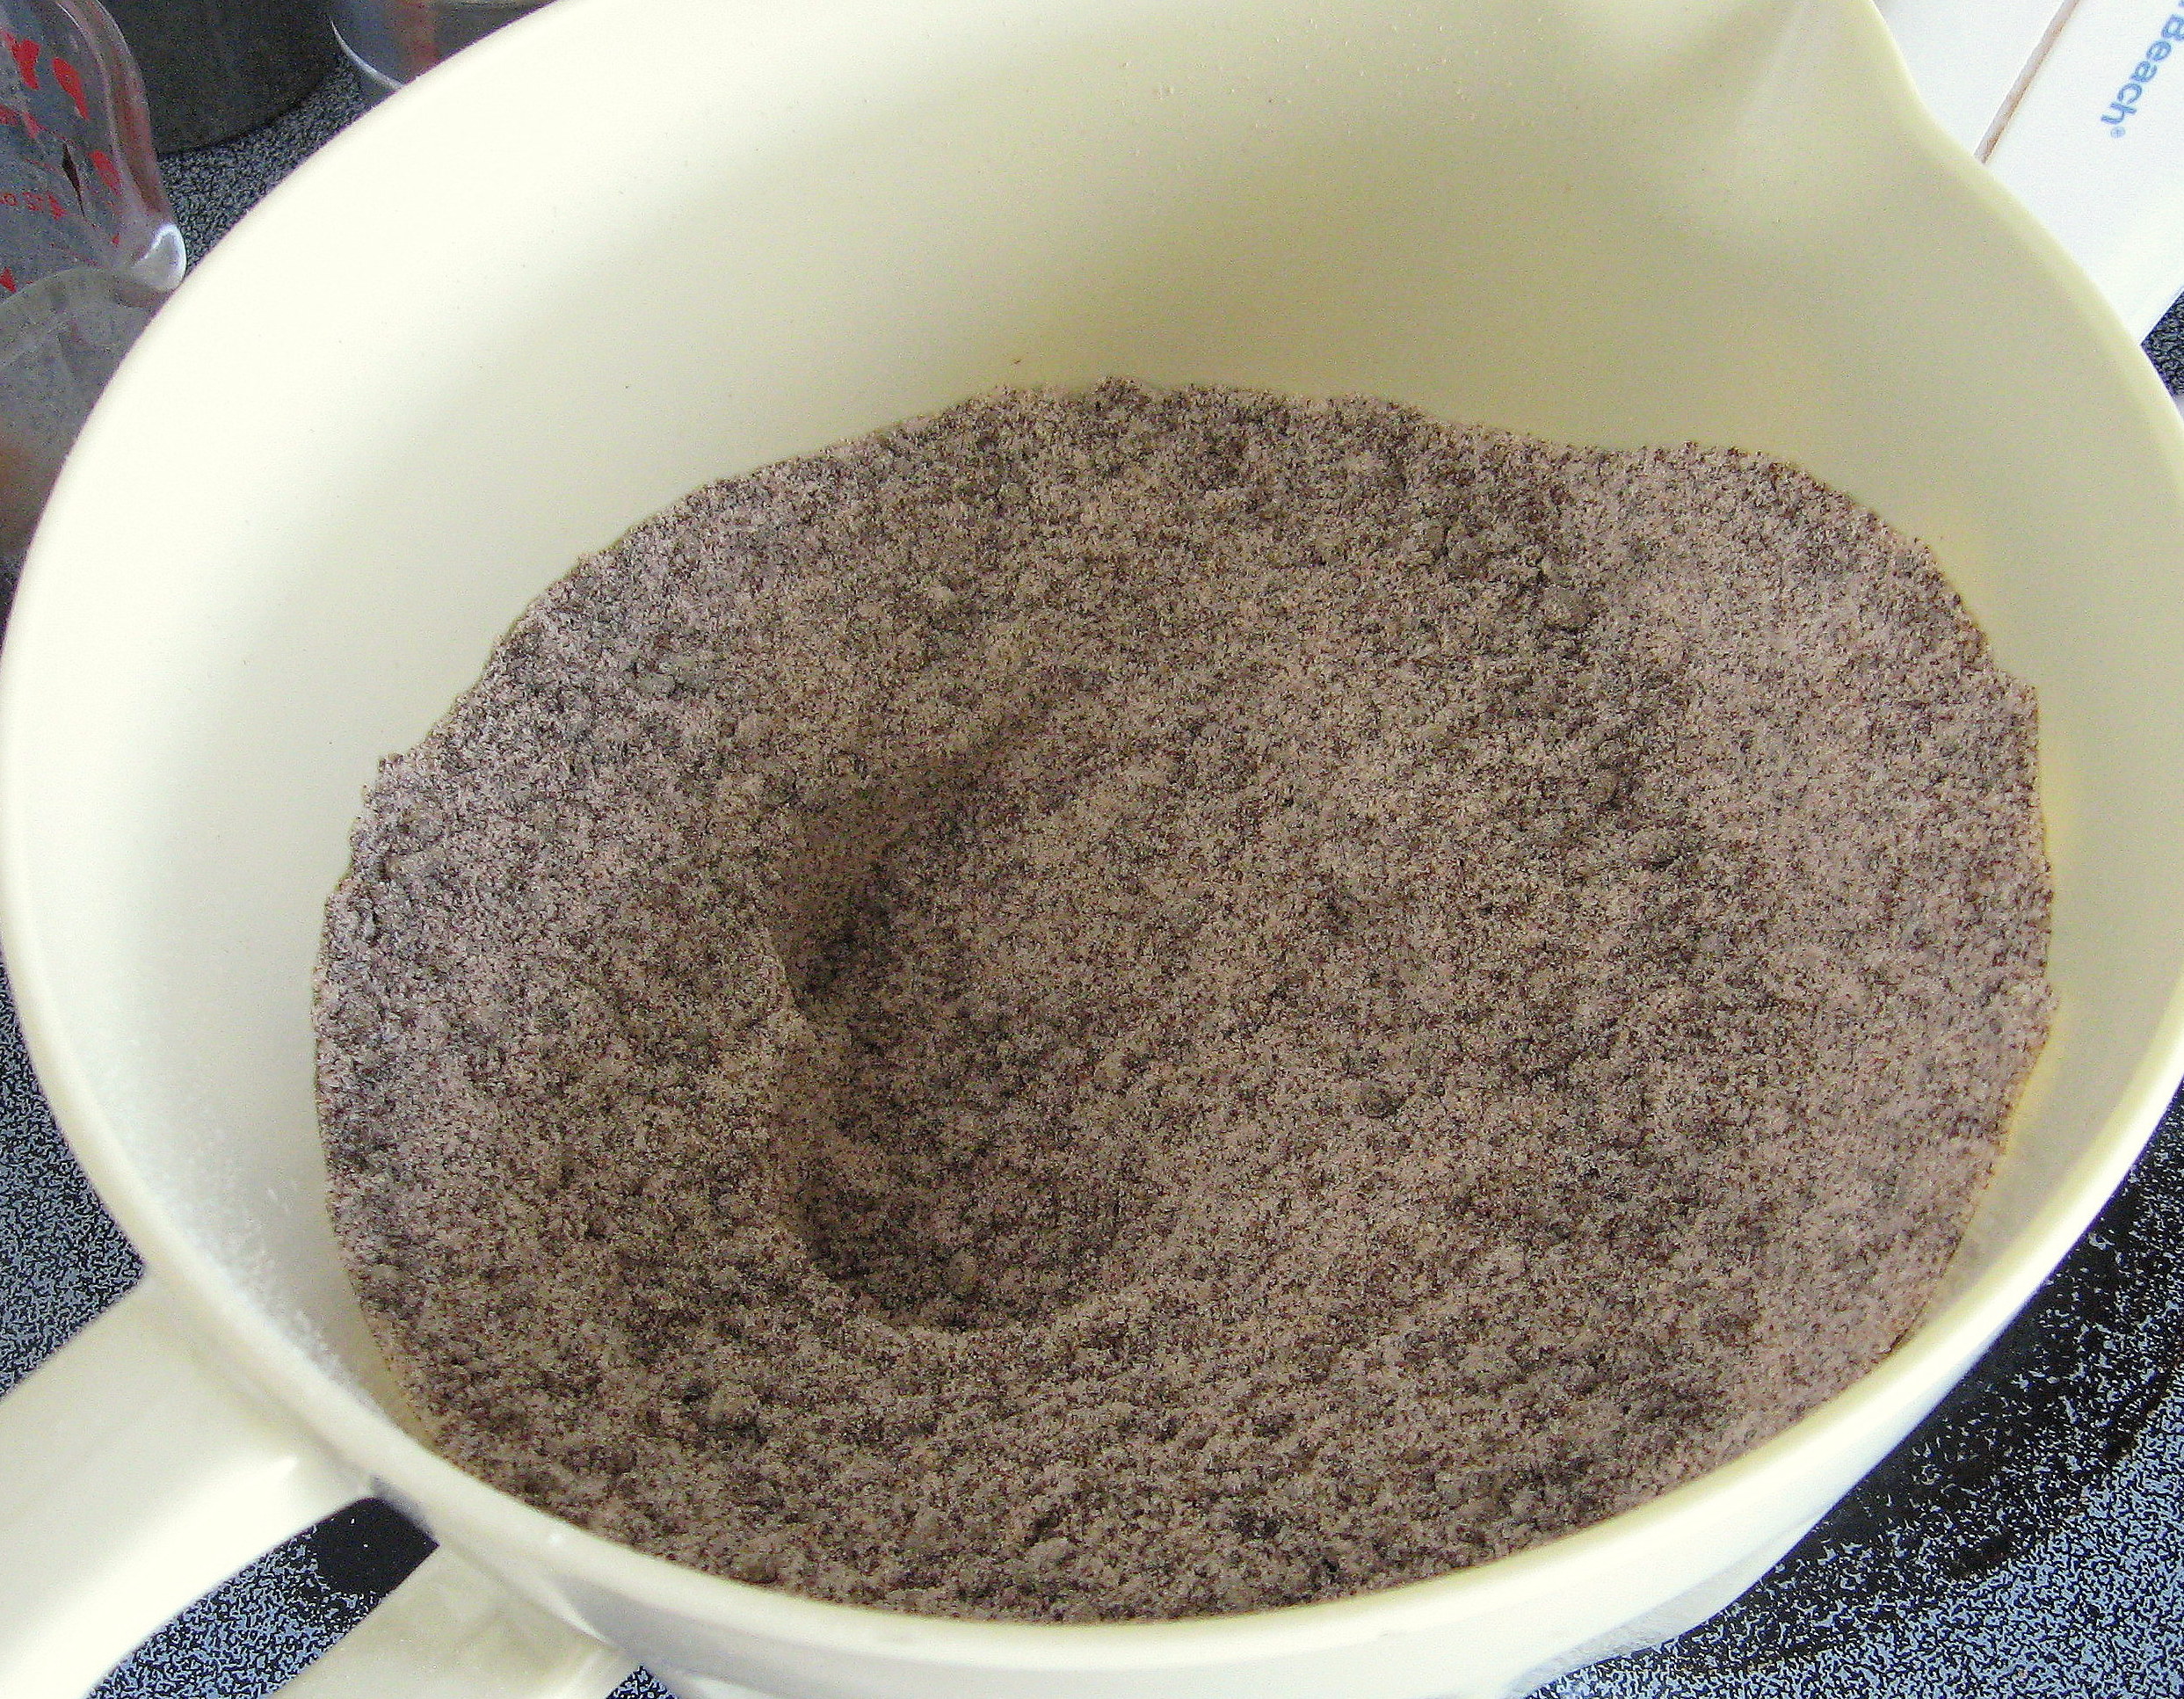
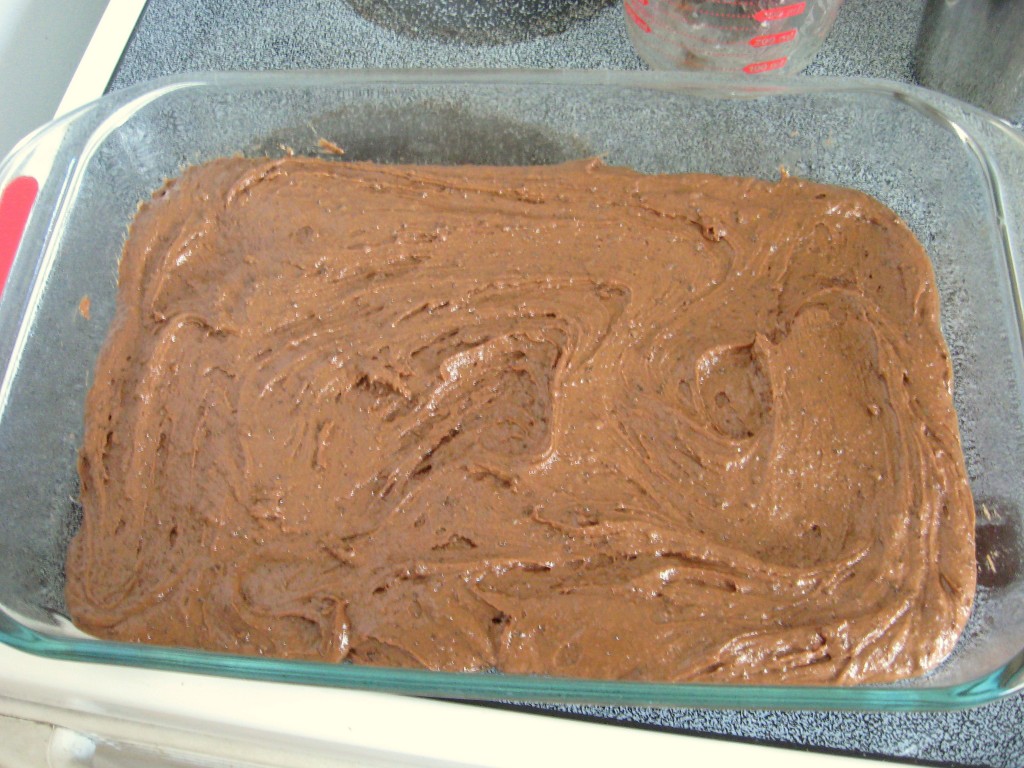
Add eggs; mix well. Batter will be very thick.
FROSTING
1/4 cup softened Butter
2 tsp. Vanilla
1/3 cup Milk
2 1/2 cups Powdered Sugar
3 T. baking Cocoa
Beat together all ingredients until smooth. This will be a little thin – not runny, but definitely not thick. You want it to soak into the brownie. Spread frosting onto the brownies and let cool completely. Cover with foil and freeze several hours until firm. You can thaw them before you eat them, but we love them straight out of the freezer. 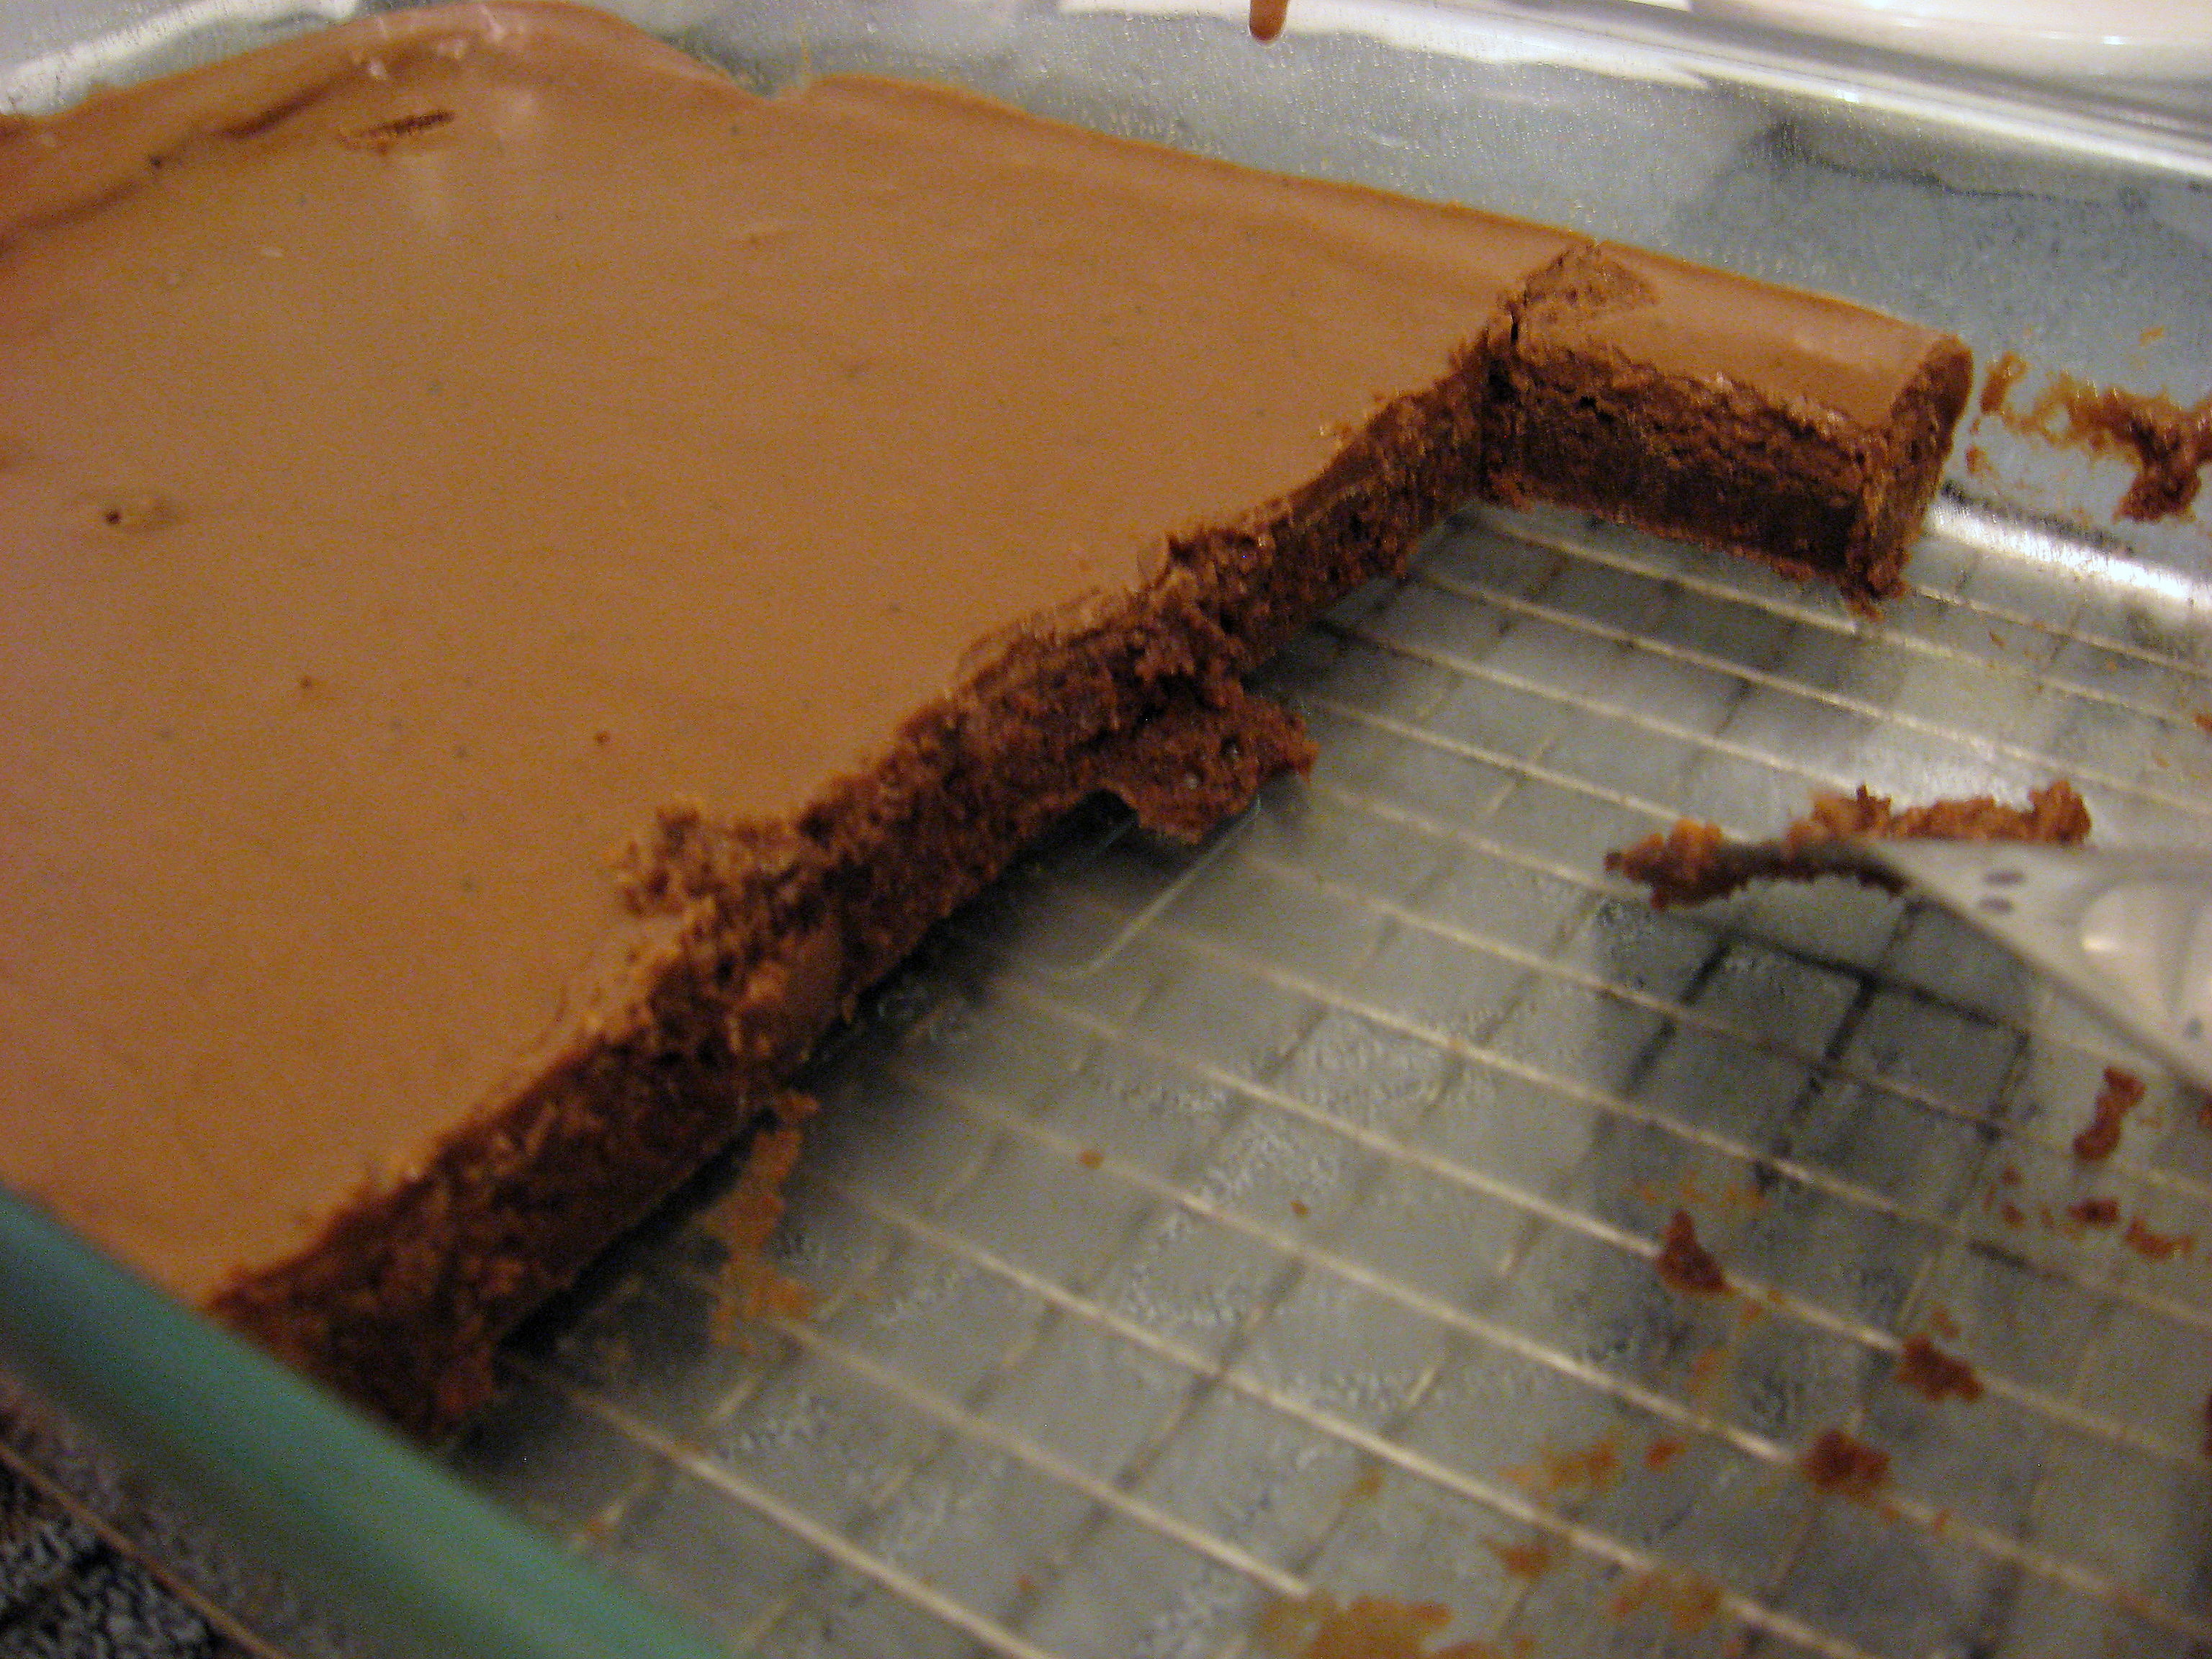
Fabric Candy Canes
This cute little candy cane decor is perfect for a last minute neighbor or teacher gift.
If you’re the crafty type, you probably have everything you need on hand already; if not, it will just take a quick trip to the craft store to get what you need.
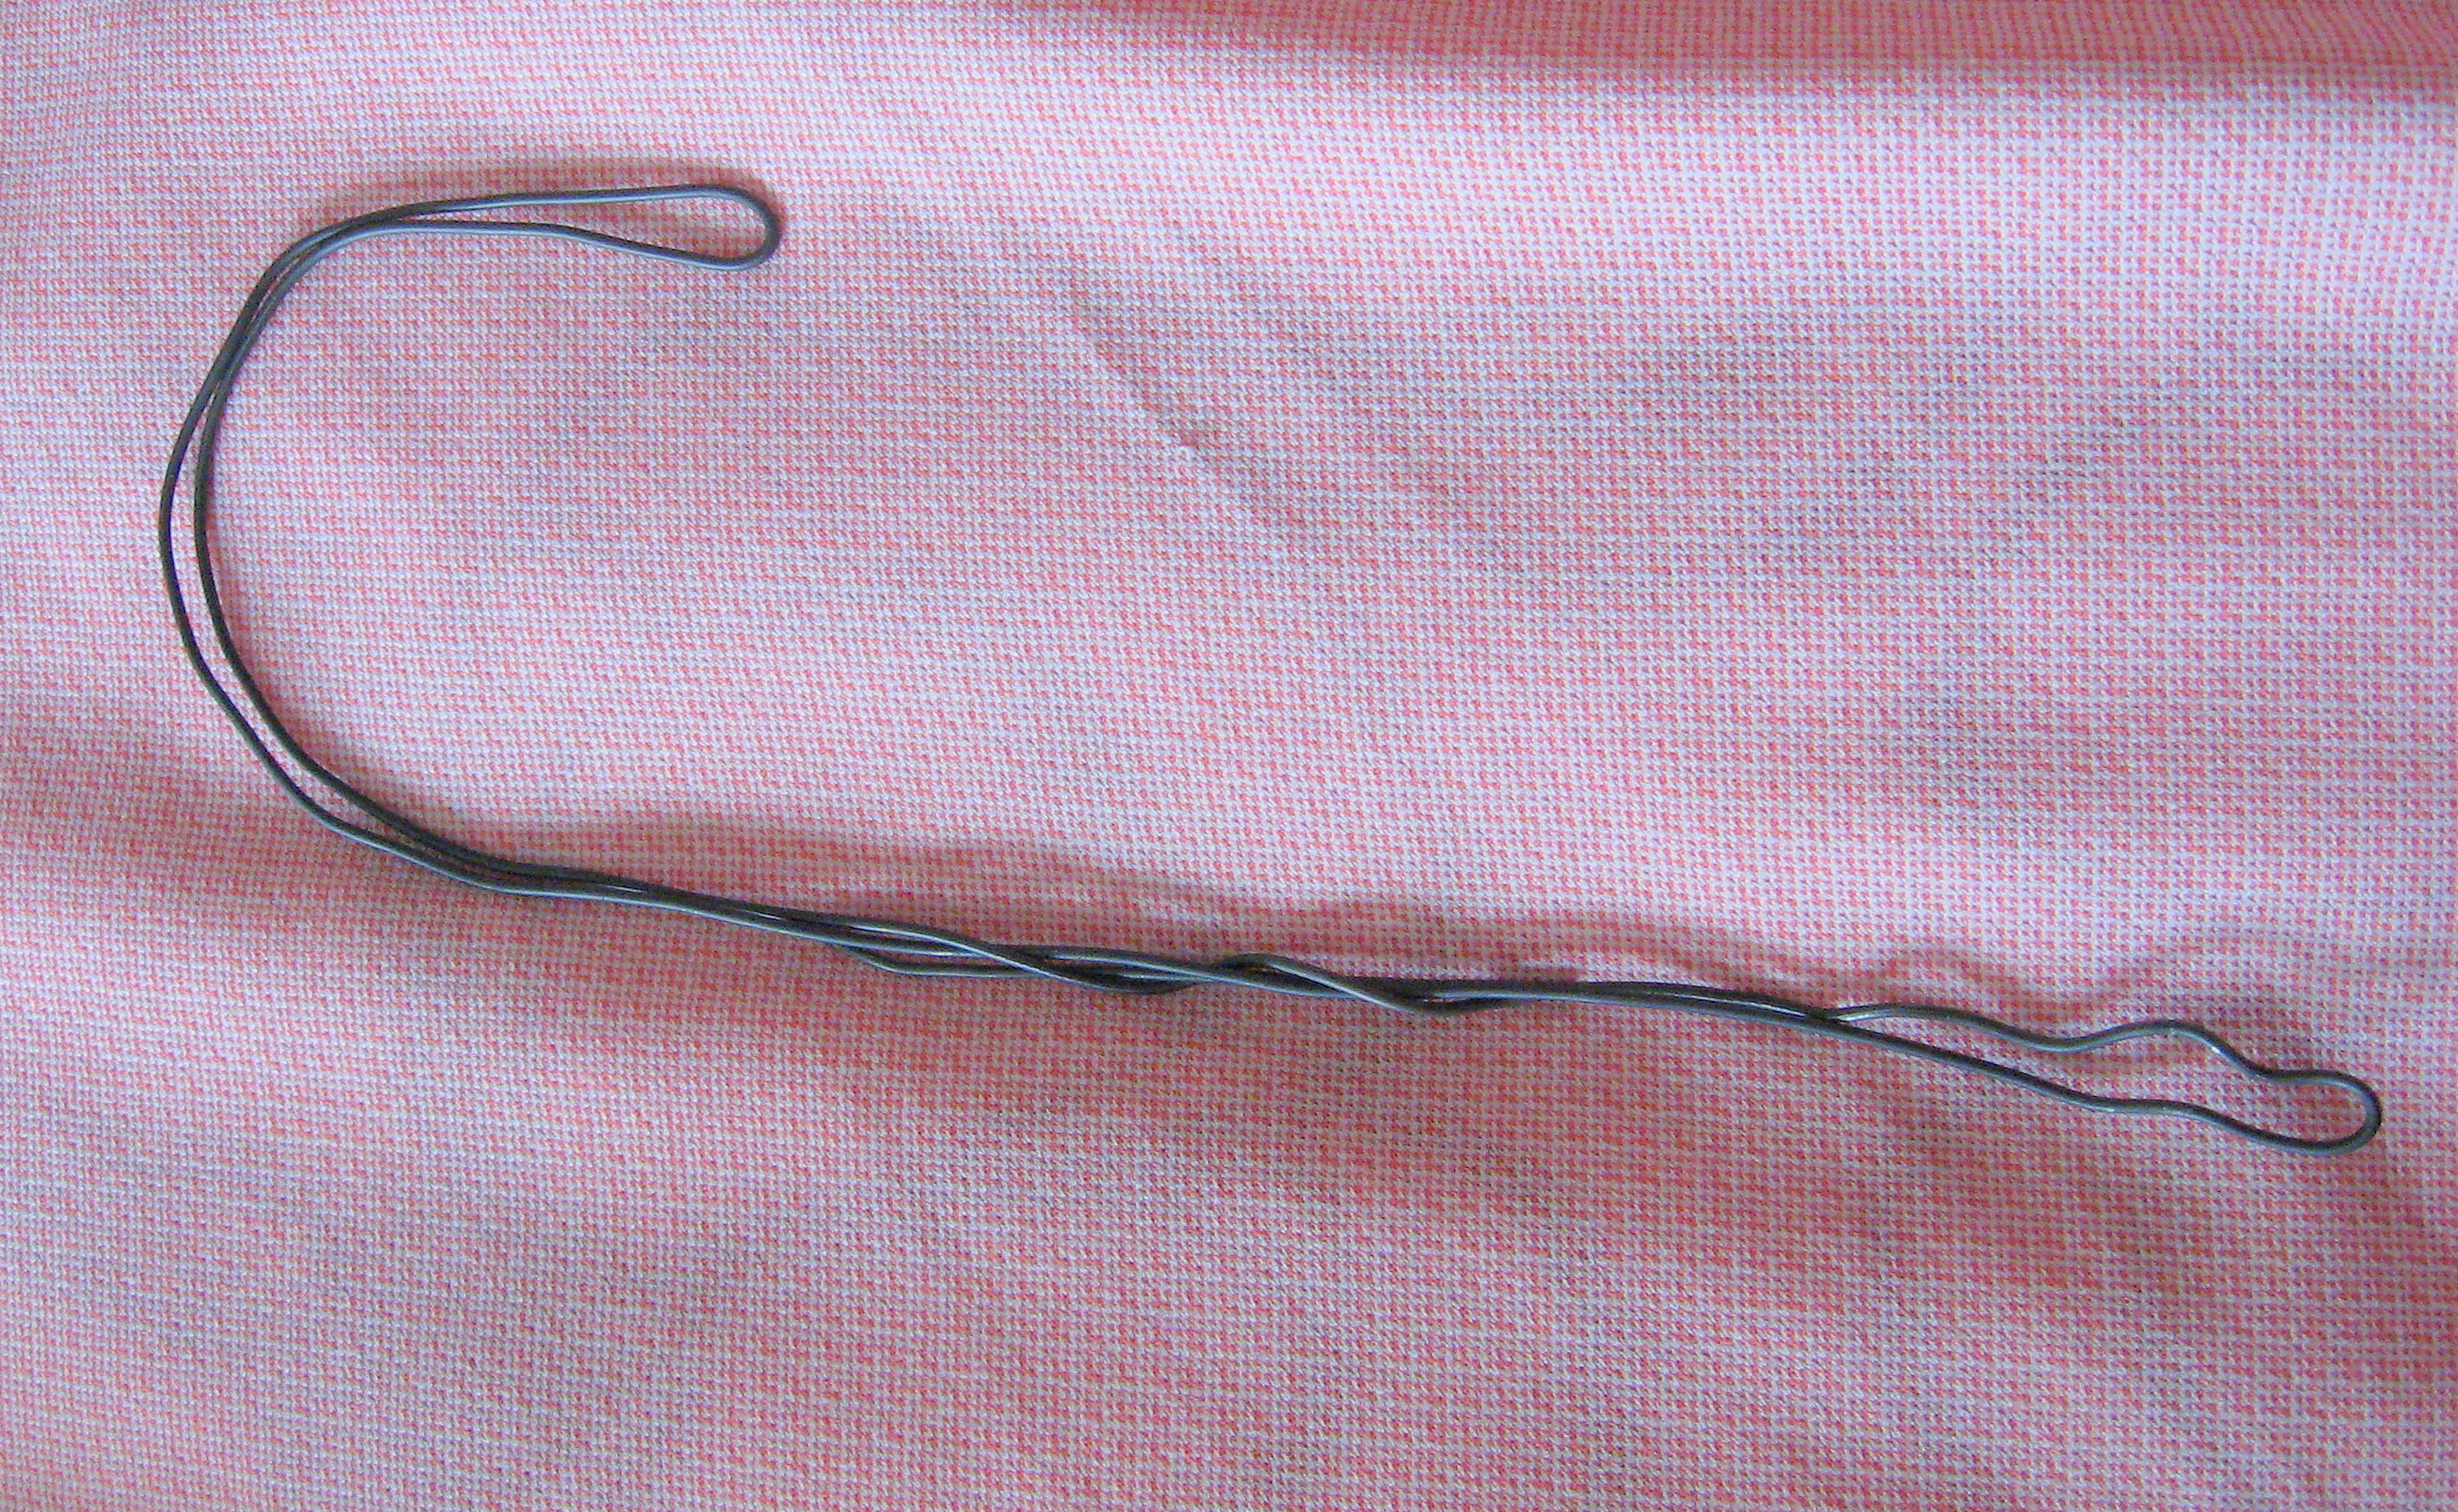
Start with some heavy wire – use a wire hanger if you’ve got one. Bend it into a loose candy cane shape. Once it looks about how you want it to, use pliers to squeeze it together tightly, and tuck in the sharp ends
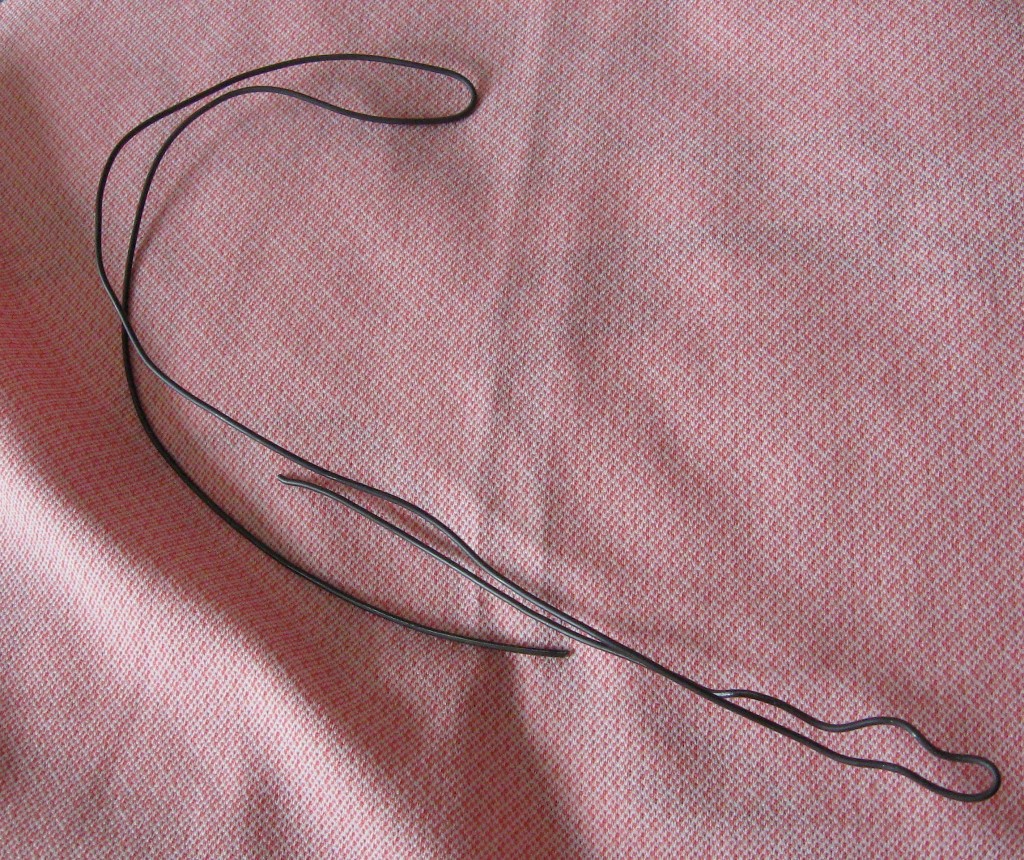
so it looks like this:
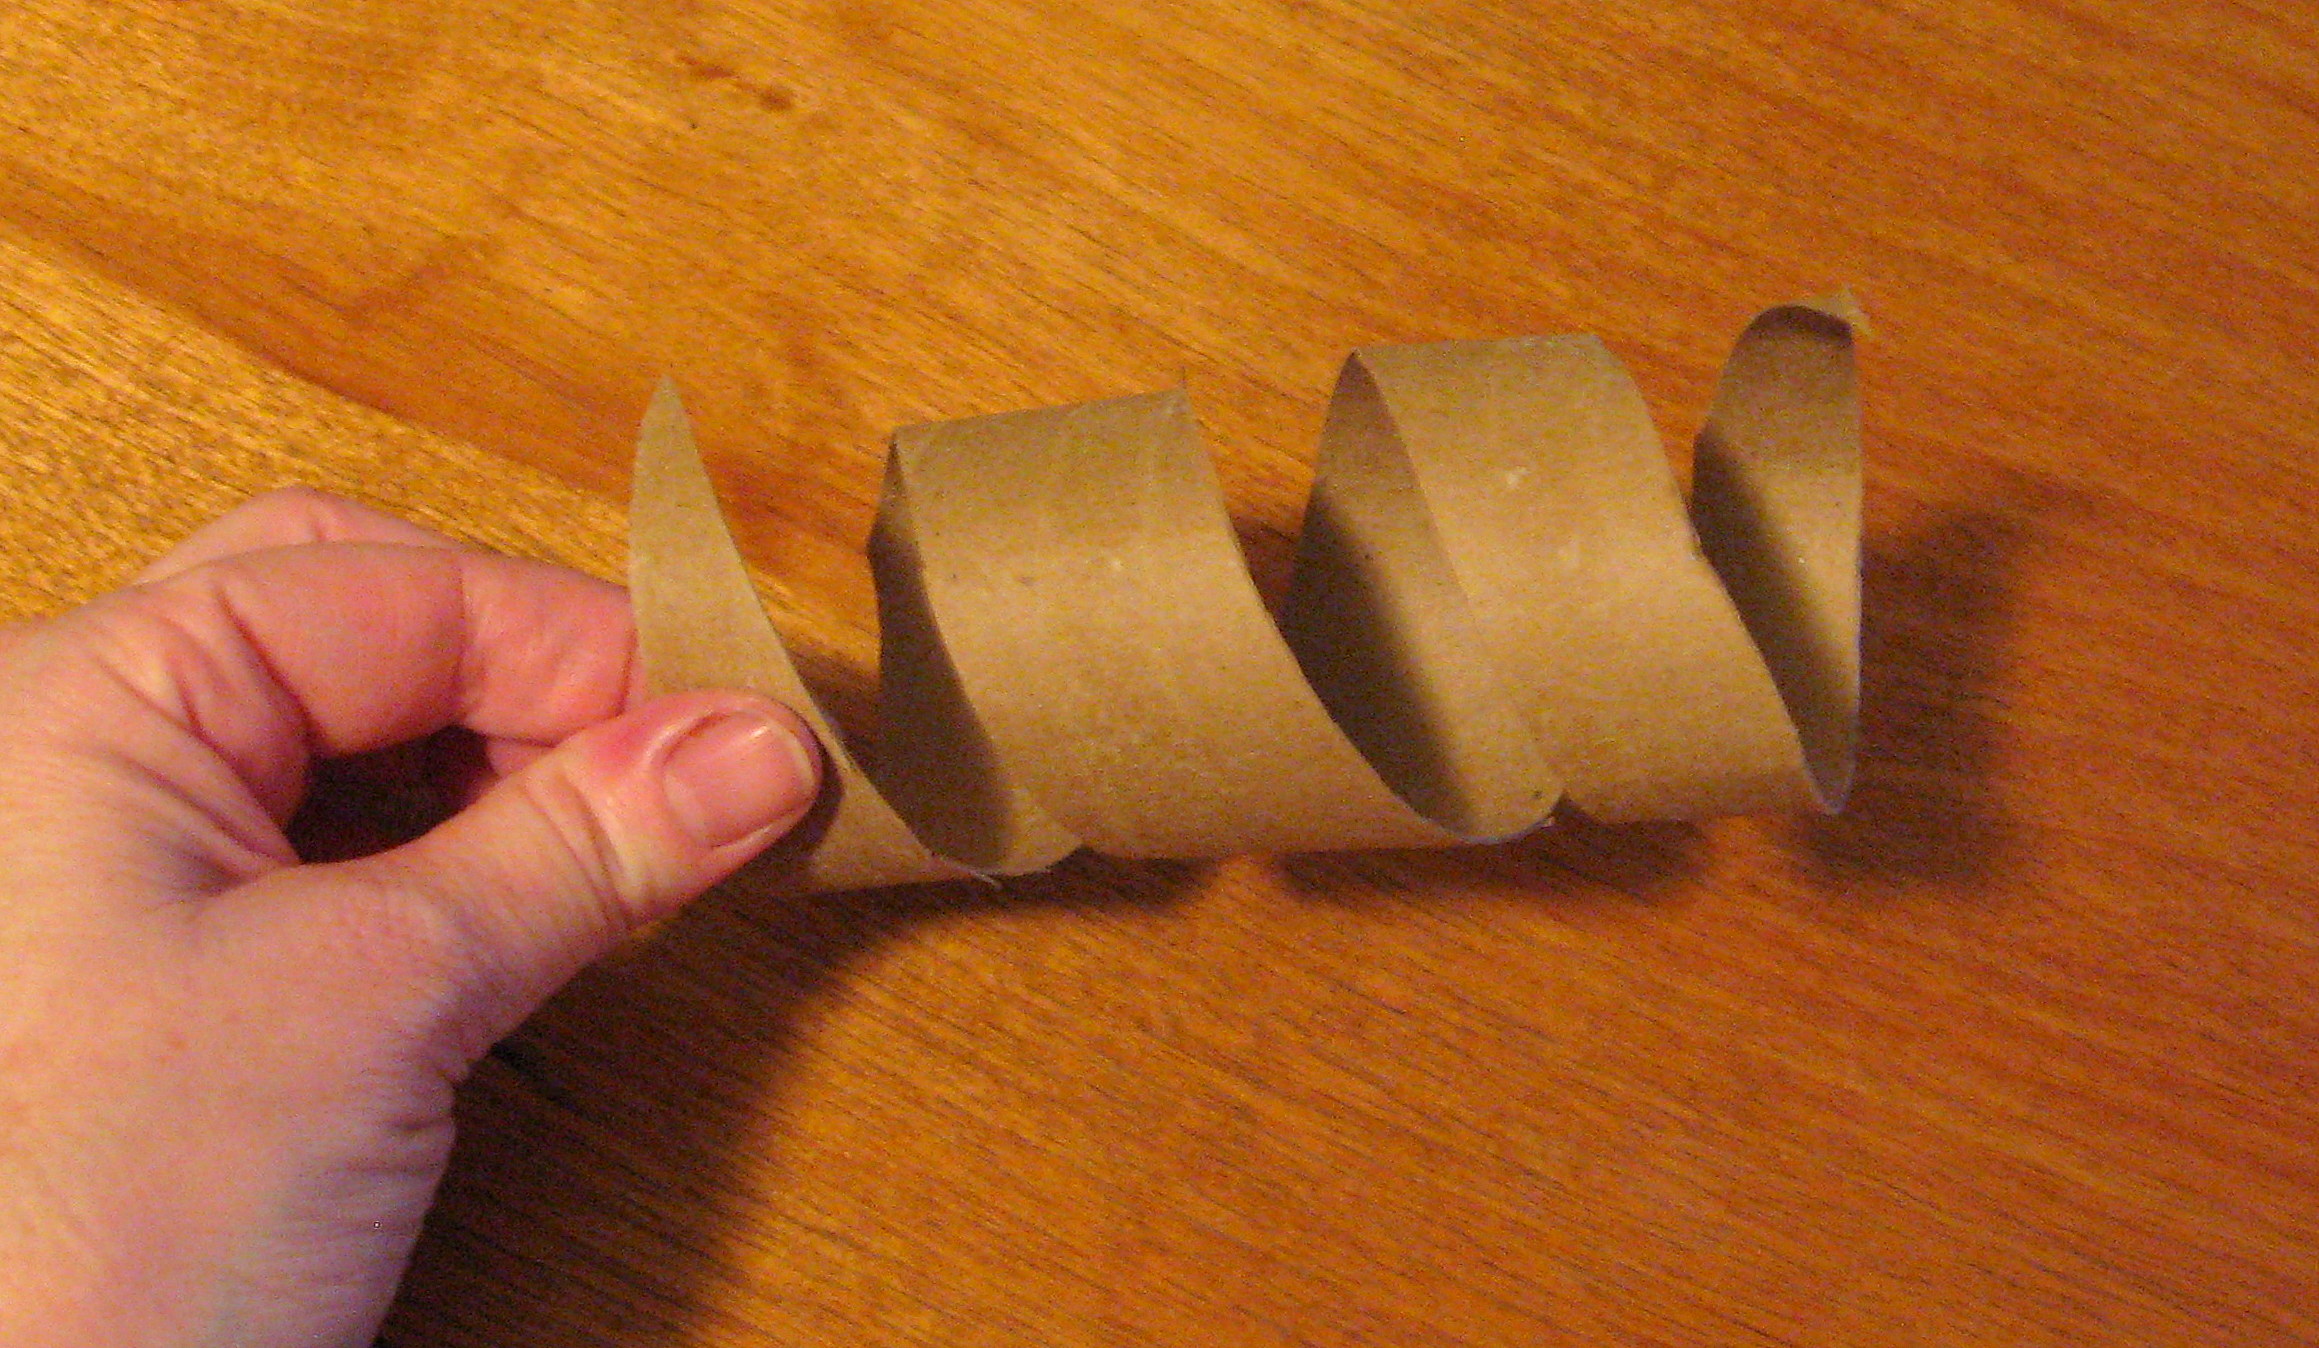
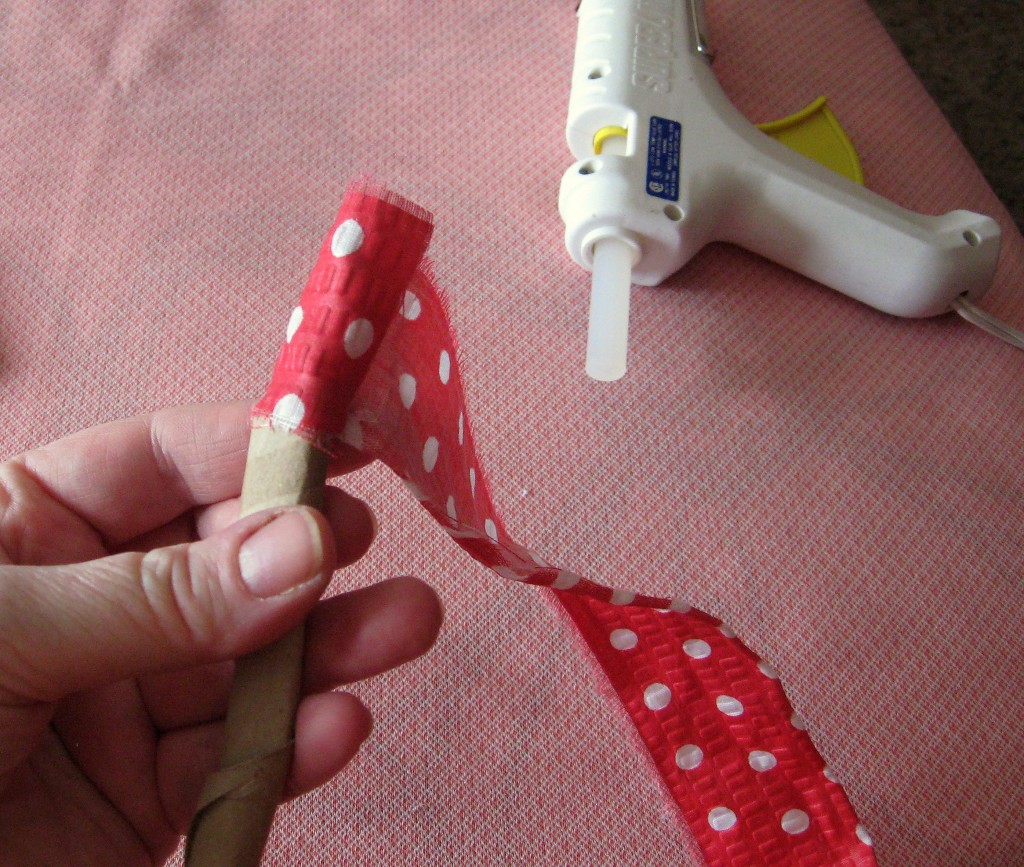
Now you will wrap it with cardboard. I used a paper towel tube, but you could use cardstock, or whatever you like. The point is simply to give yourself something to attach the fabric to and to give the shape a little more substance. I cut the tube into a spring like this

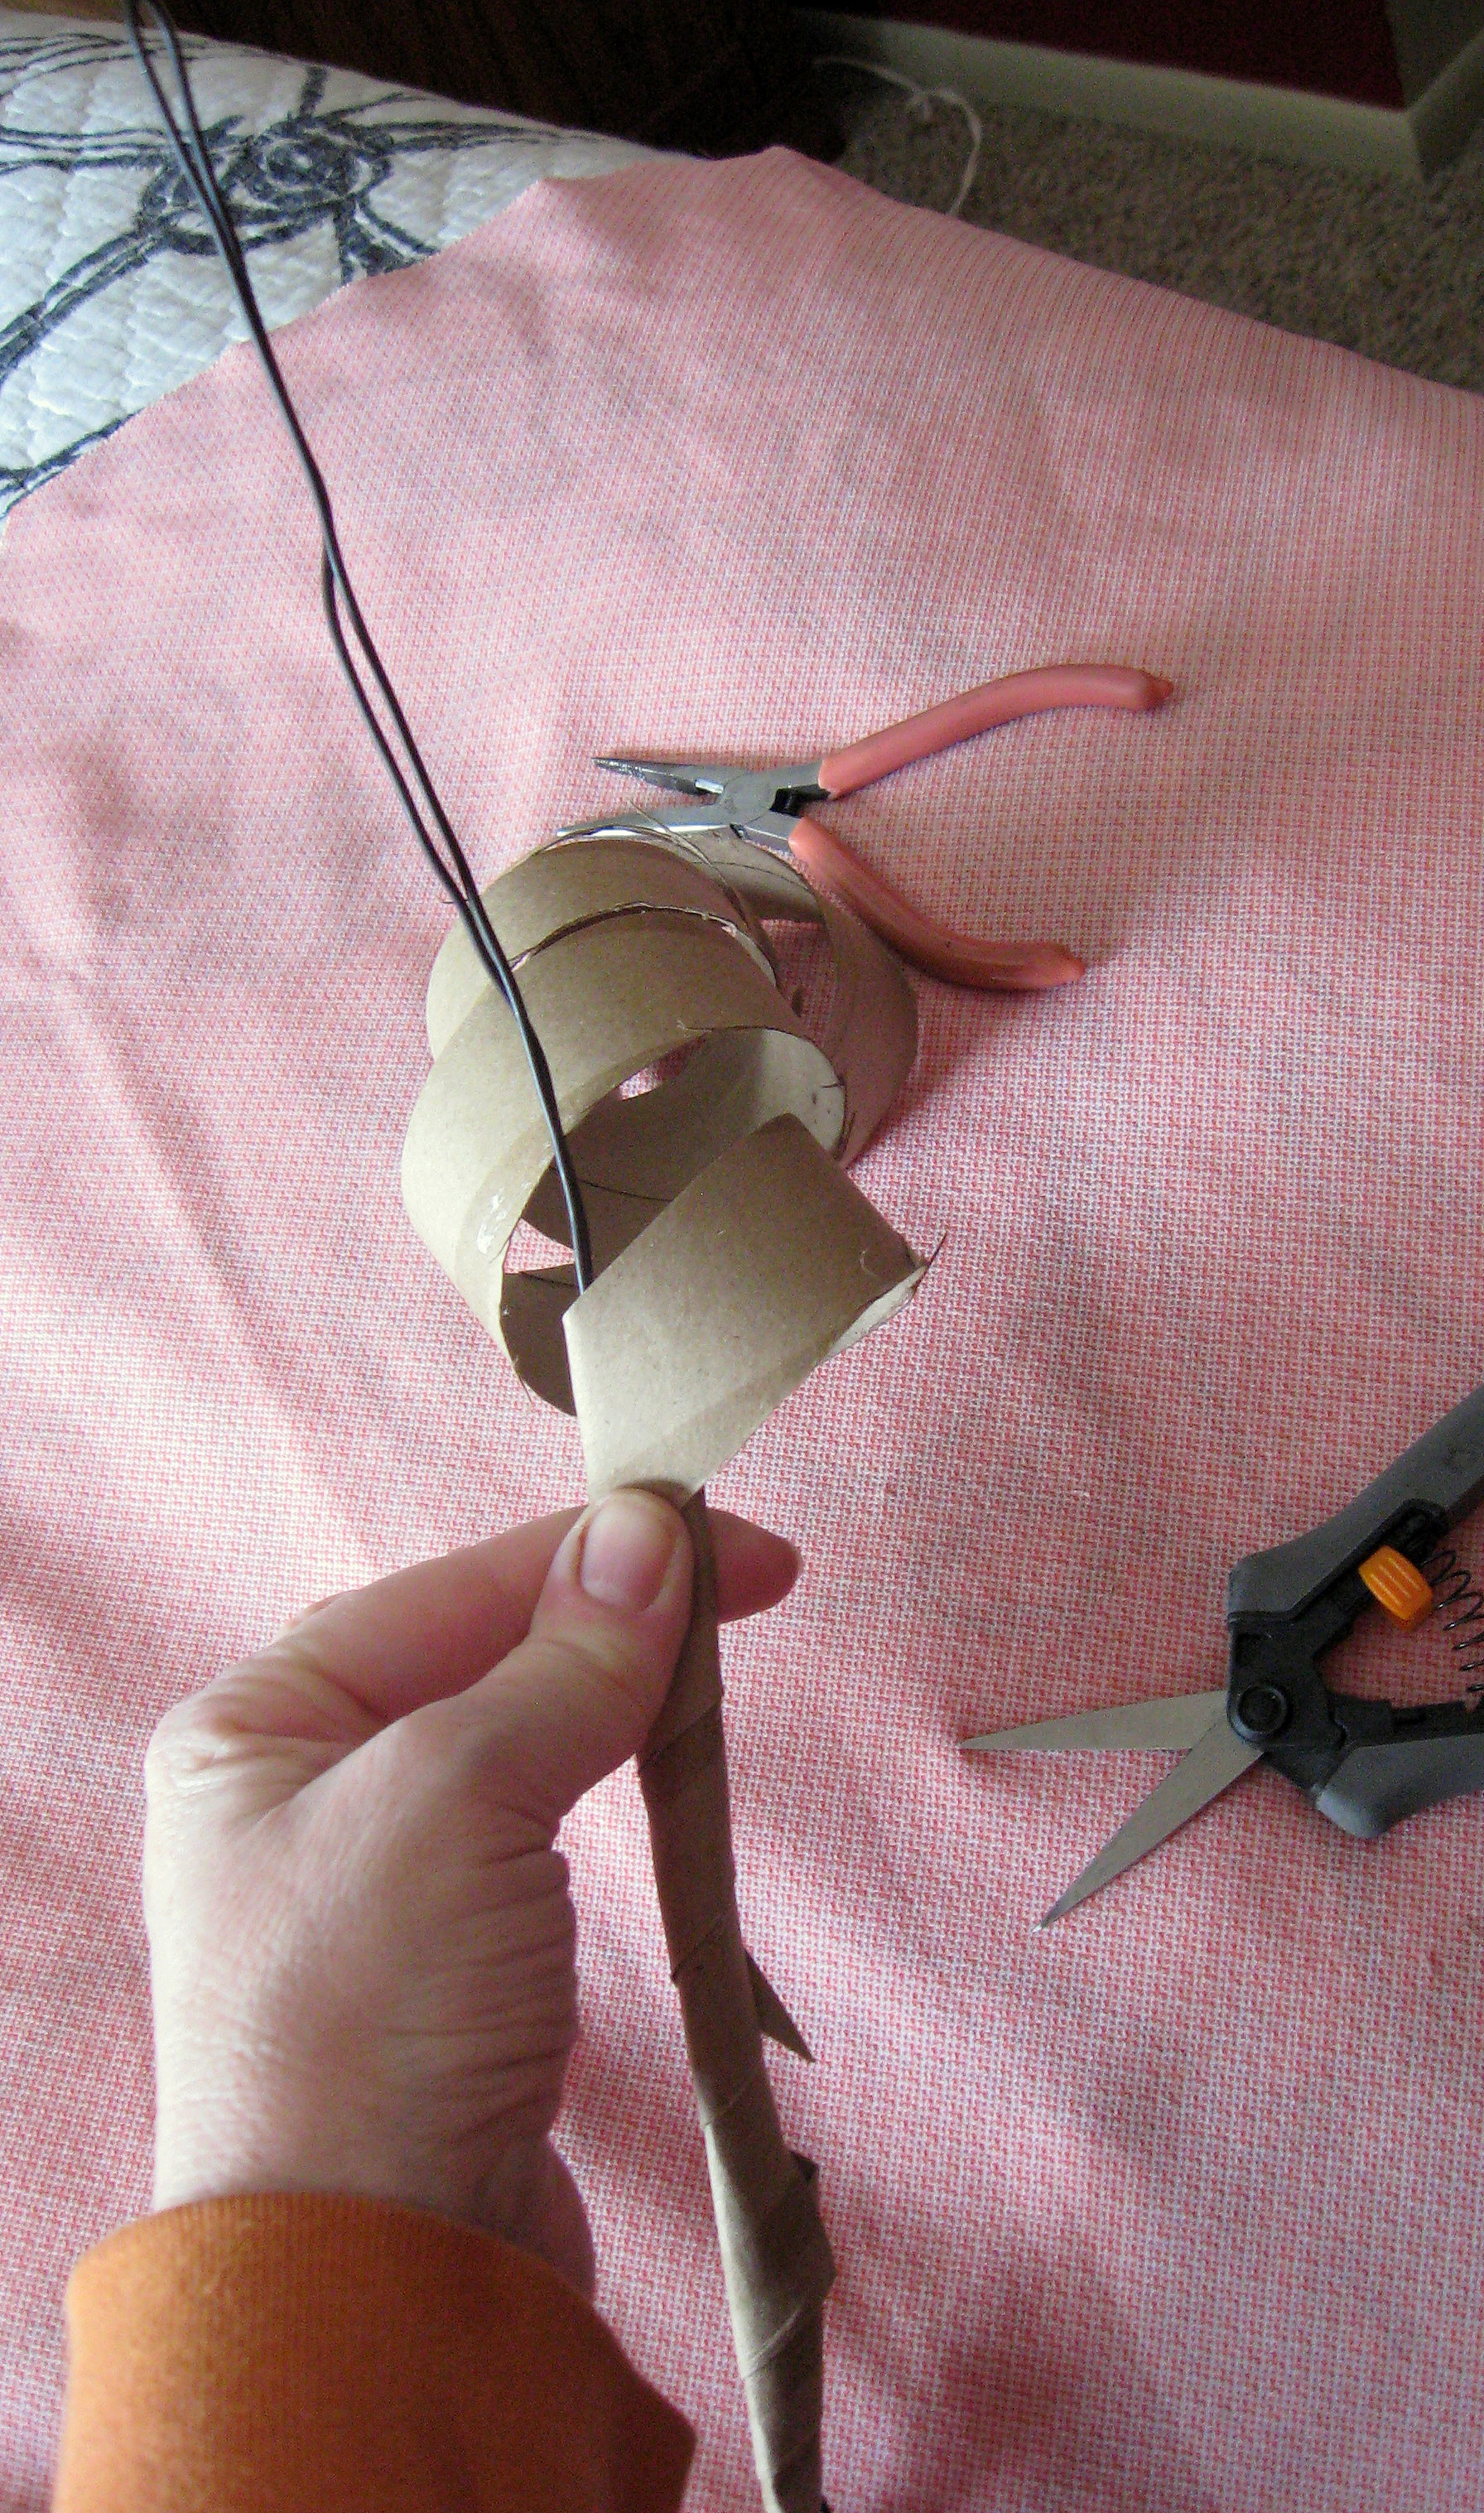
and started wrapping it up the wire form, dotting it here and there with hot glue as needed. I found it easier to straighten the wire out to wrap the cardboard, then re-bend it once the glue was set.
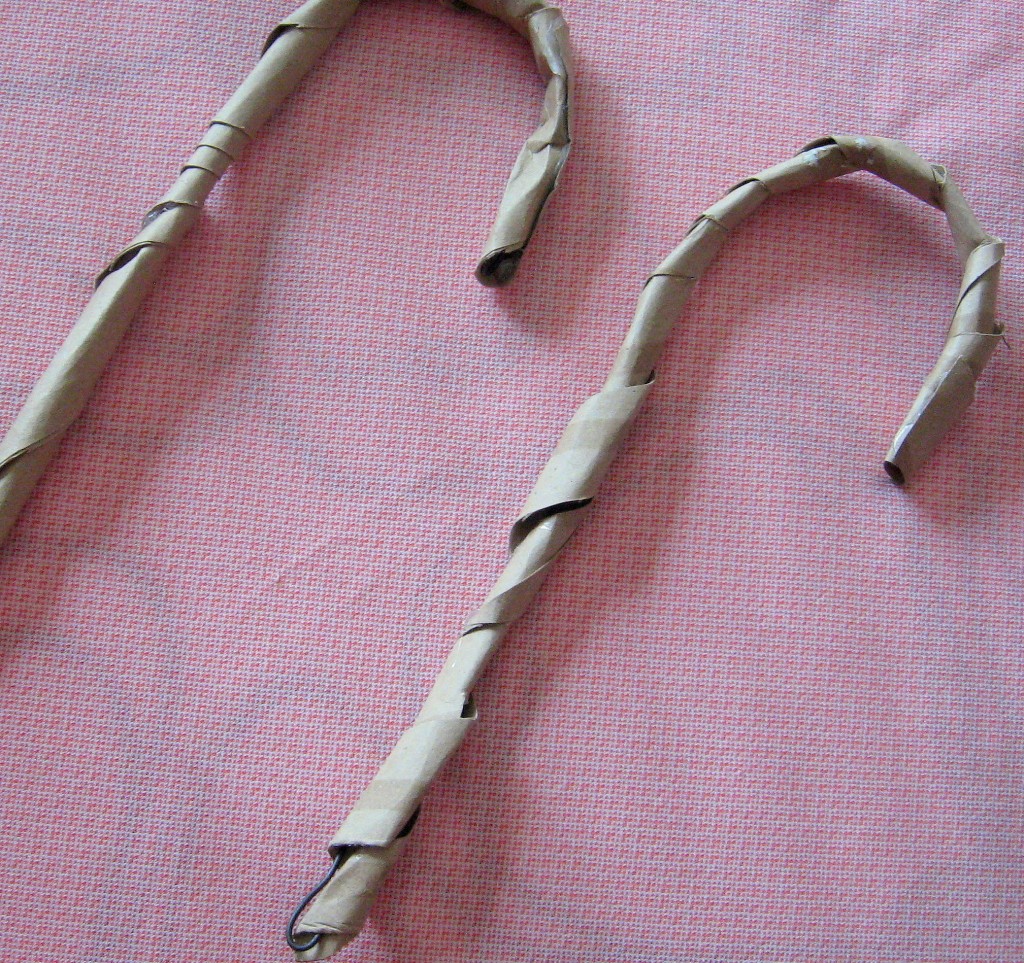
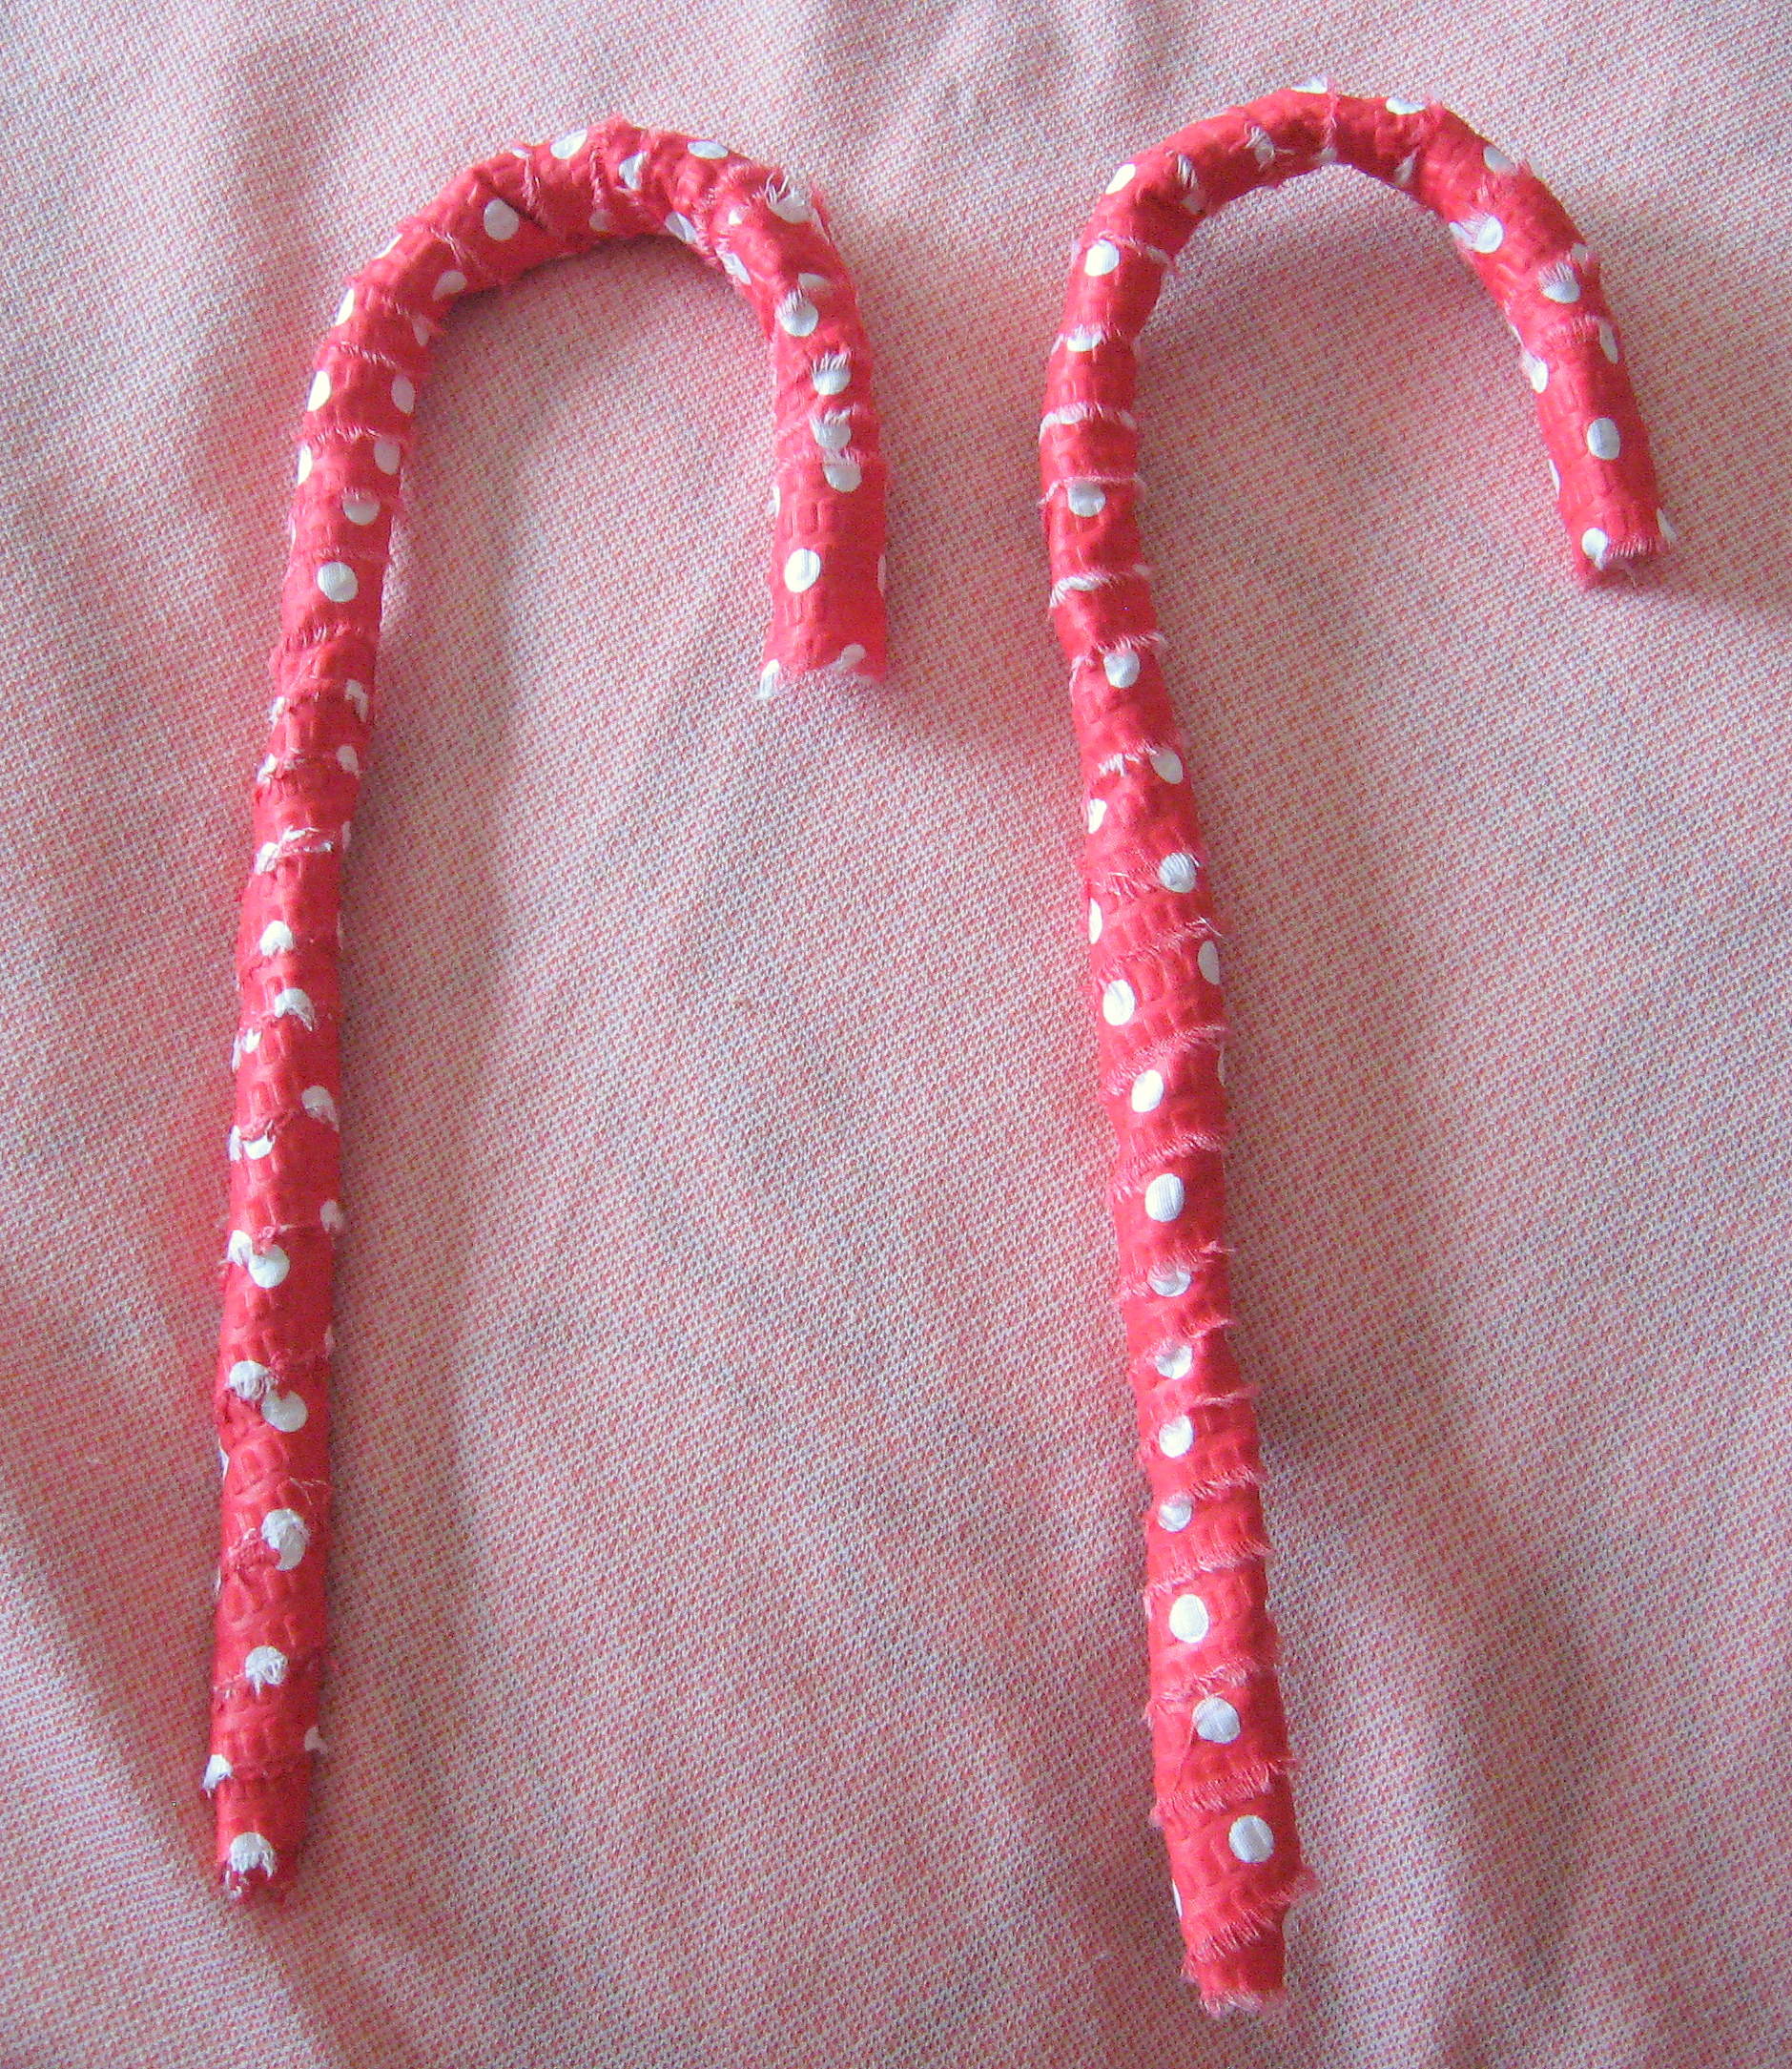
Make a second one just like it, and the finished forms will look like this
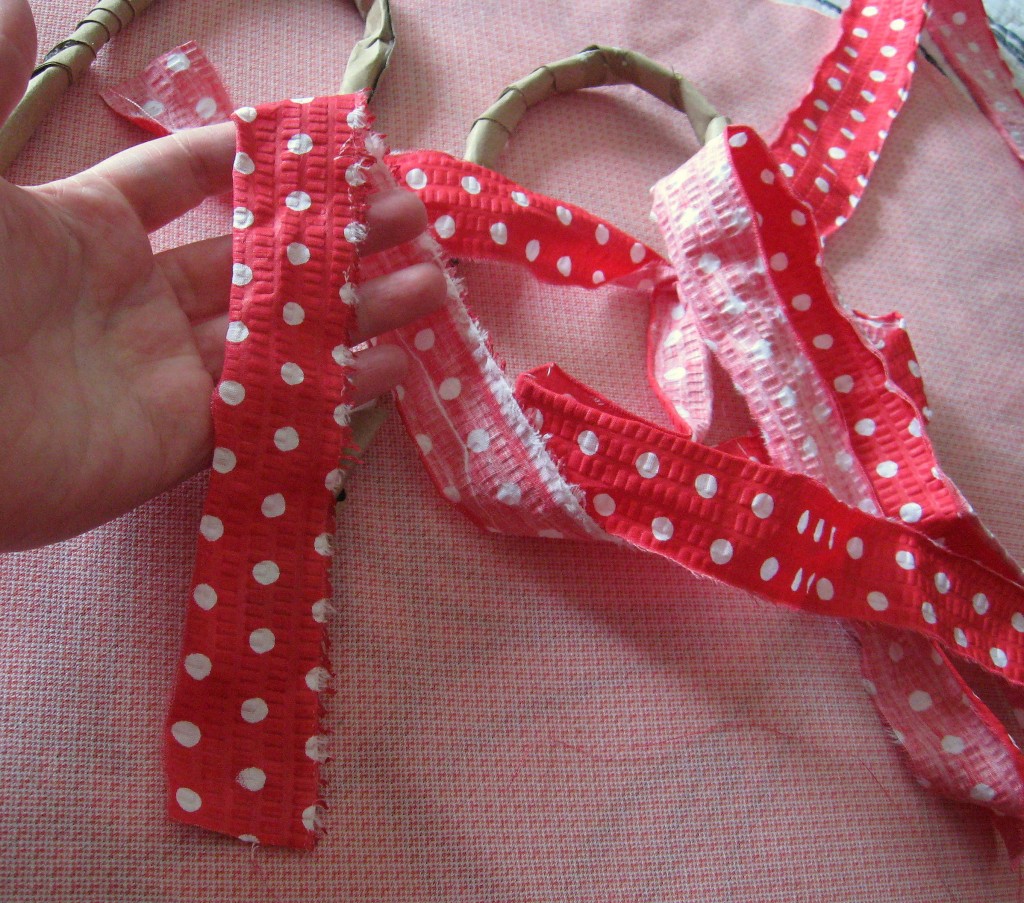
Wrap the strips around the cane, overlapping slightly as you go, and using a bead of hot glue along the top of the strip to hold it in place. Make sure that the fabric starts and ends beyond the top and bottom of the cane enough to cover the wire form.
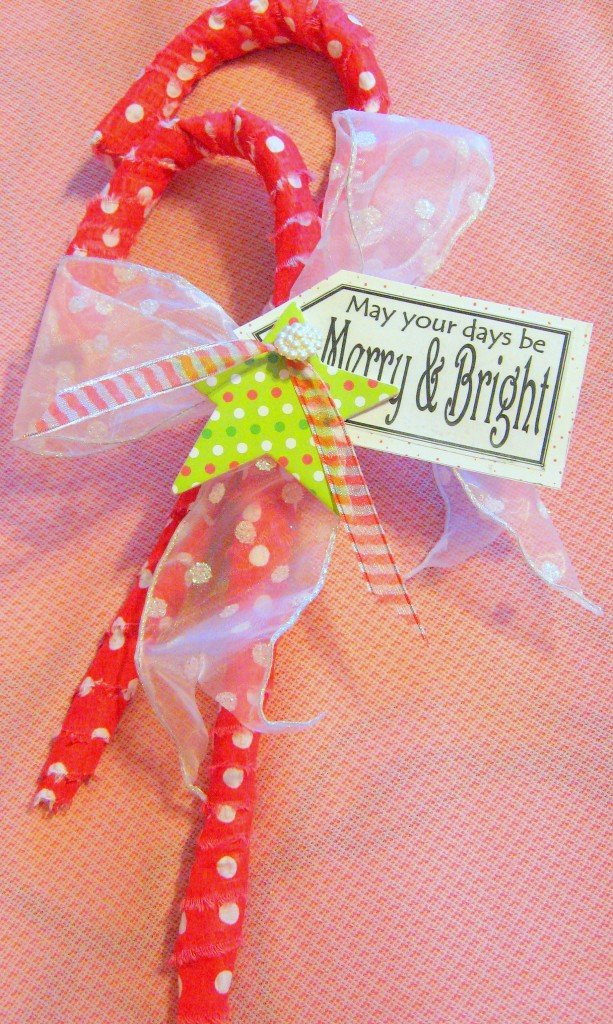
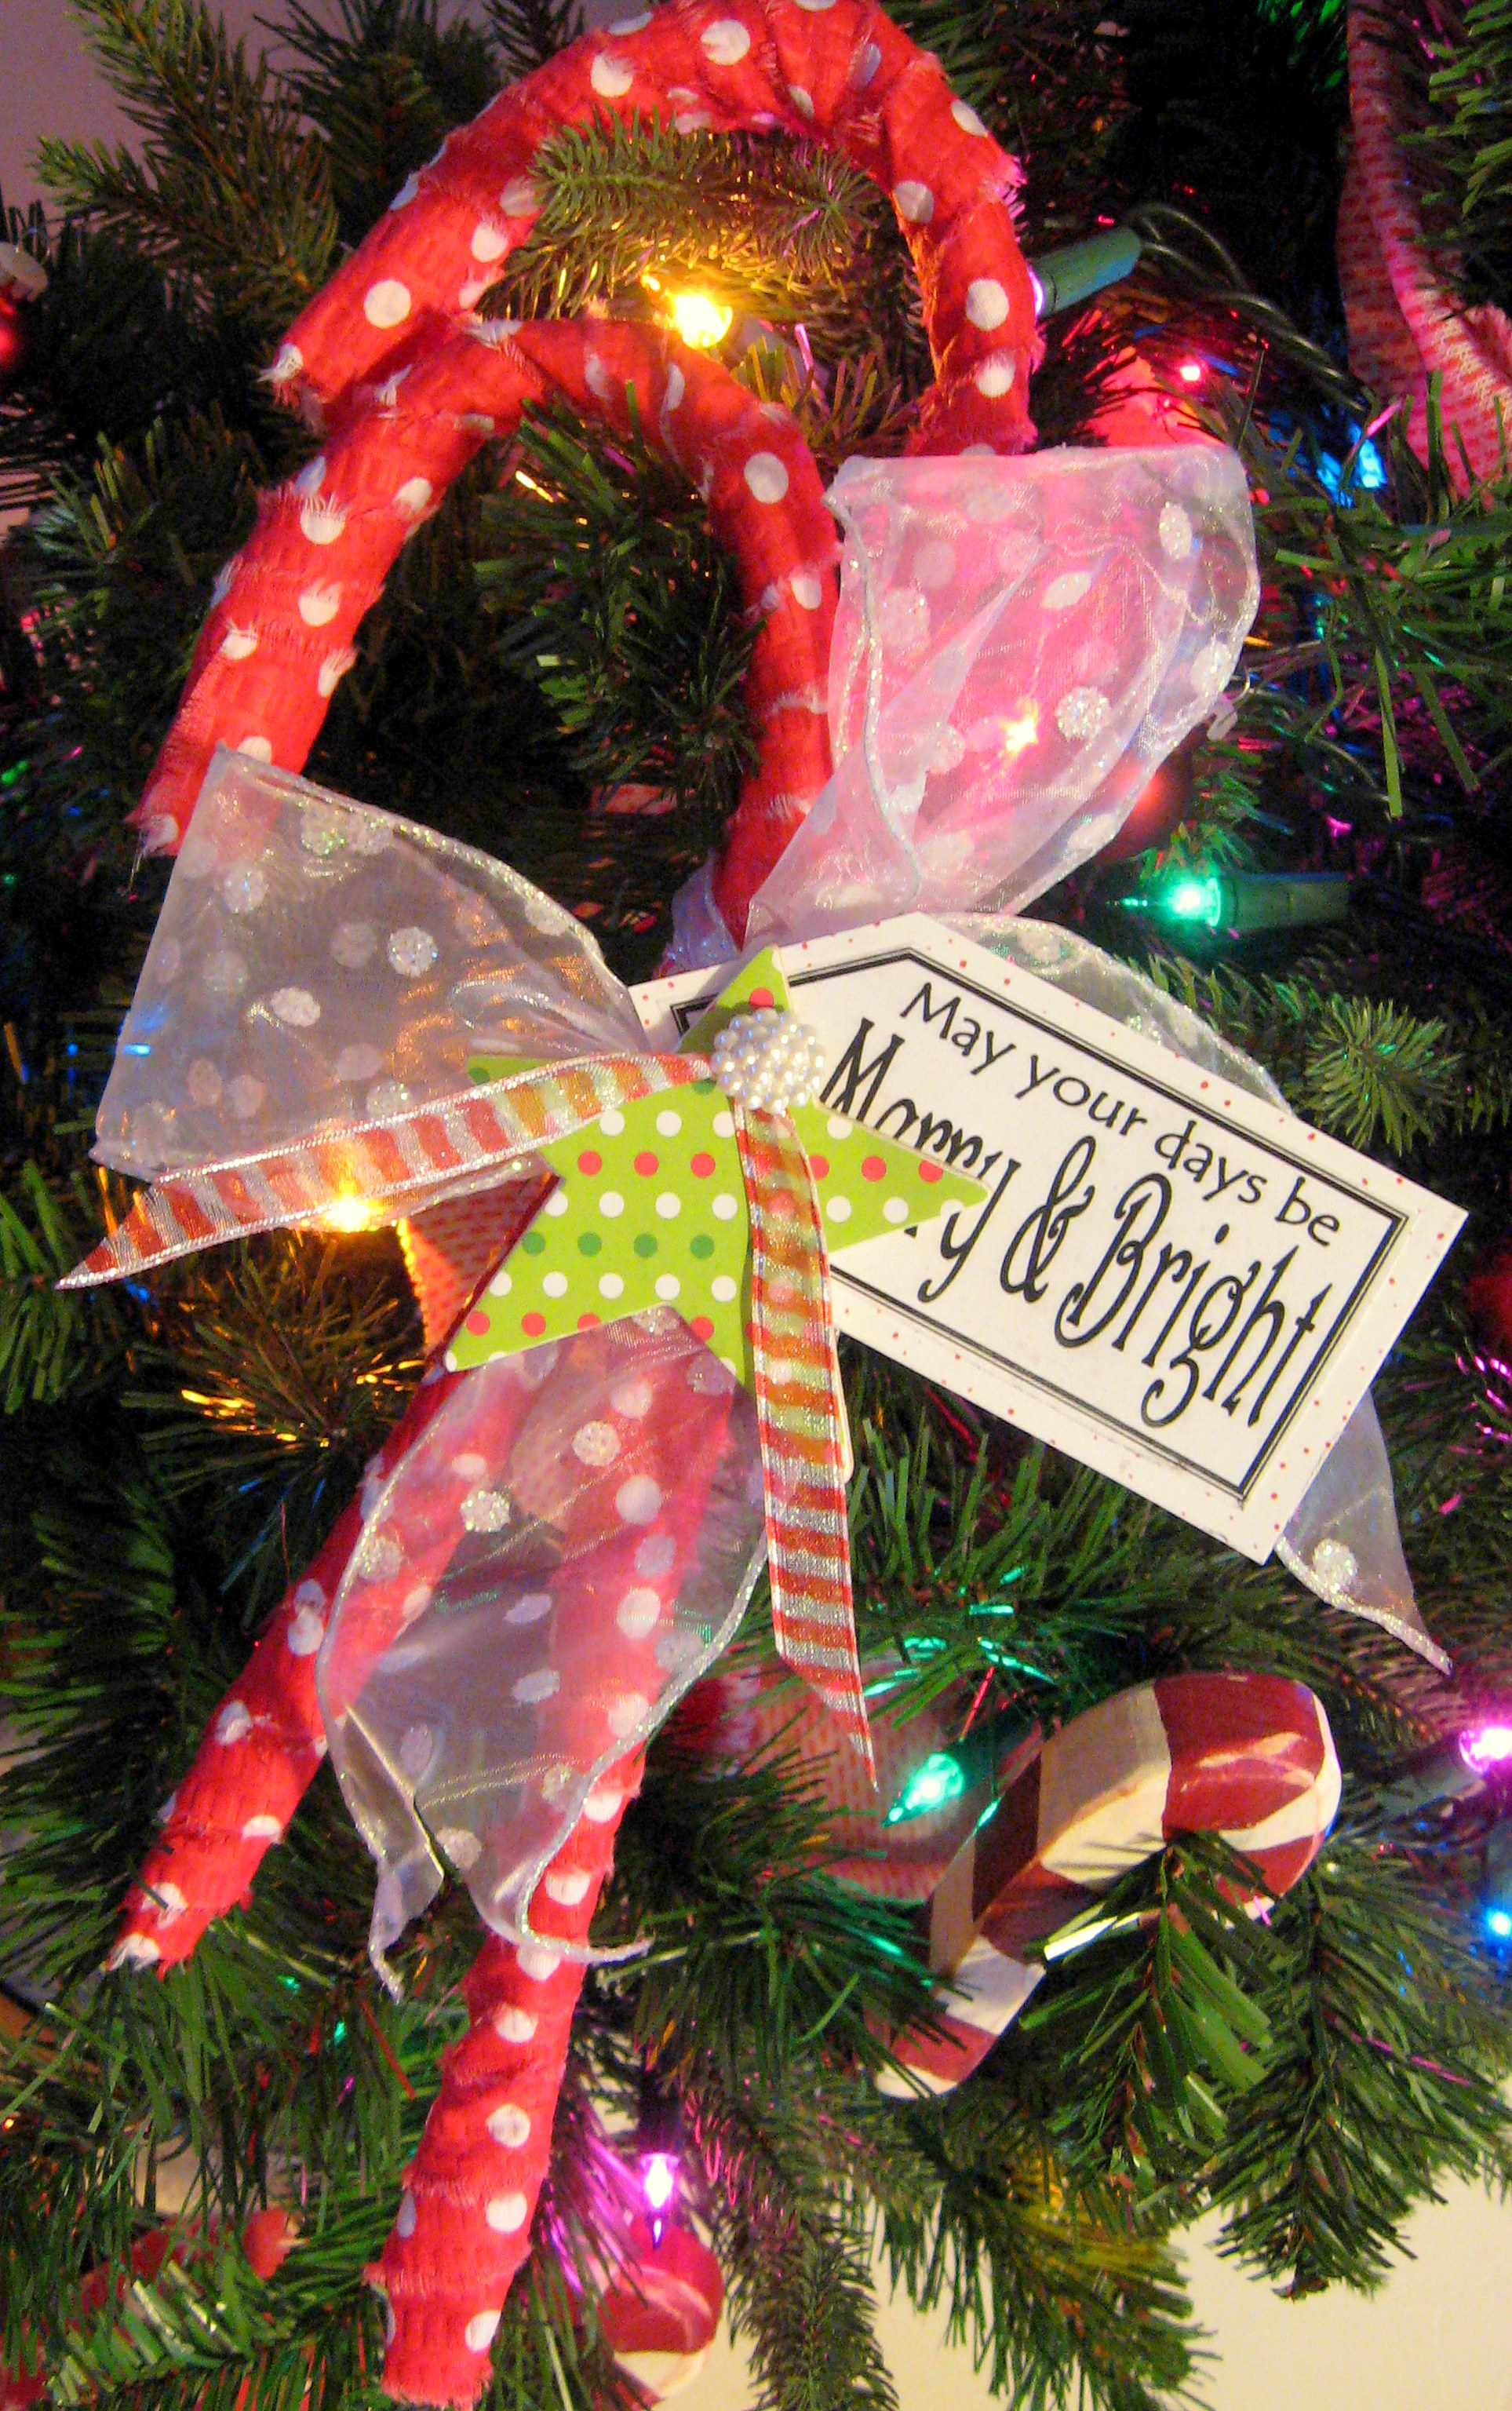
With one cane on top of the other, tie them together with a ribbon, then embellish.

I Mod Podged scrapbook paper onto a small wood star, then drilled a hole through the top point. Print a tag with a Christmas message, cut it out and punch a hole in it. Then, using another, smaller ribbon, thread it through the tag, then through the star, then through a decorative button and tie it all around the larger bow.
Hand Warmers
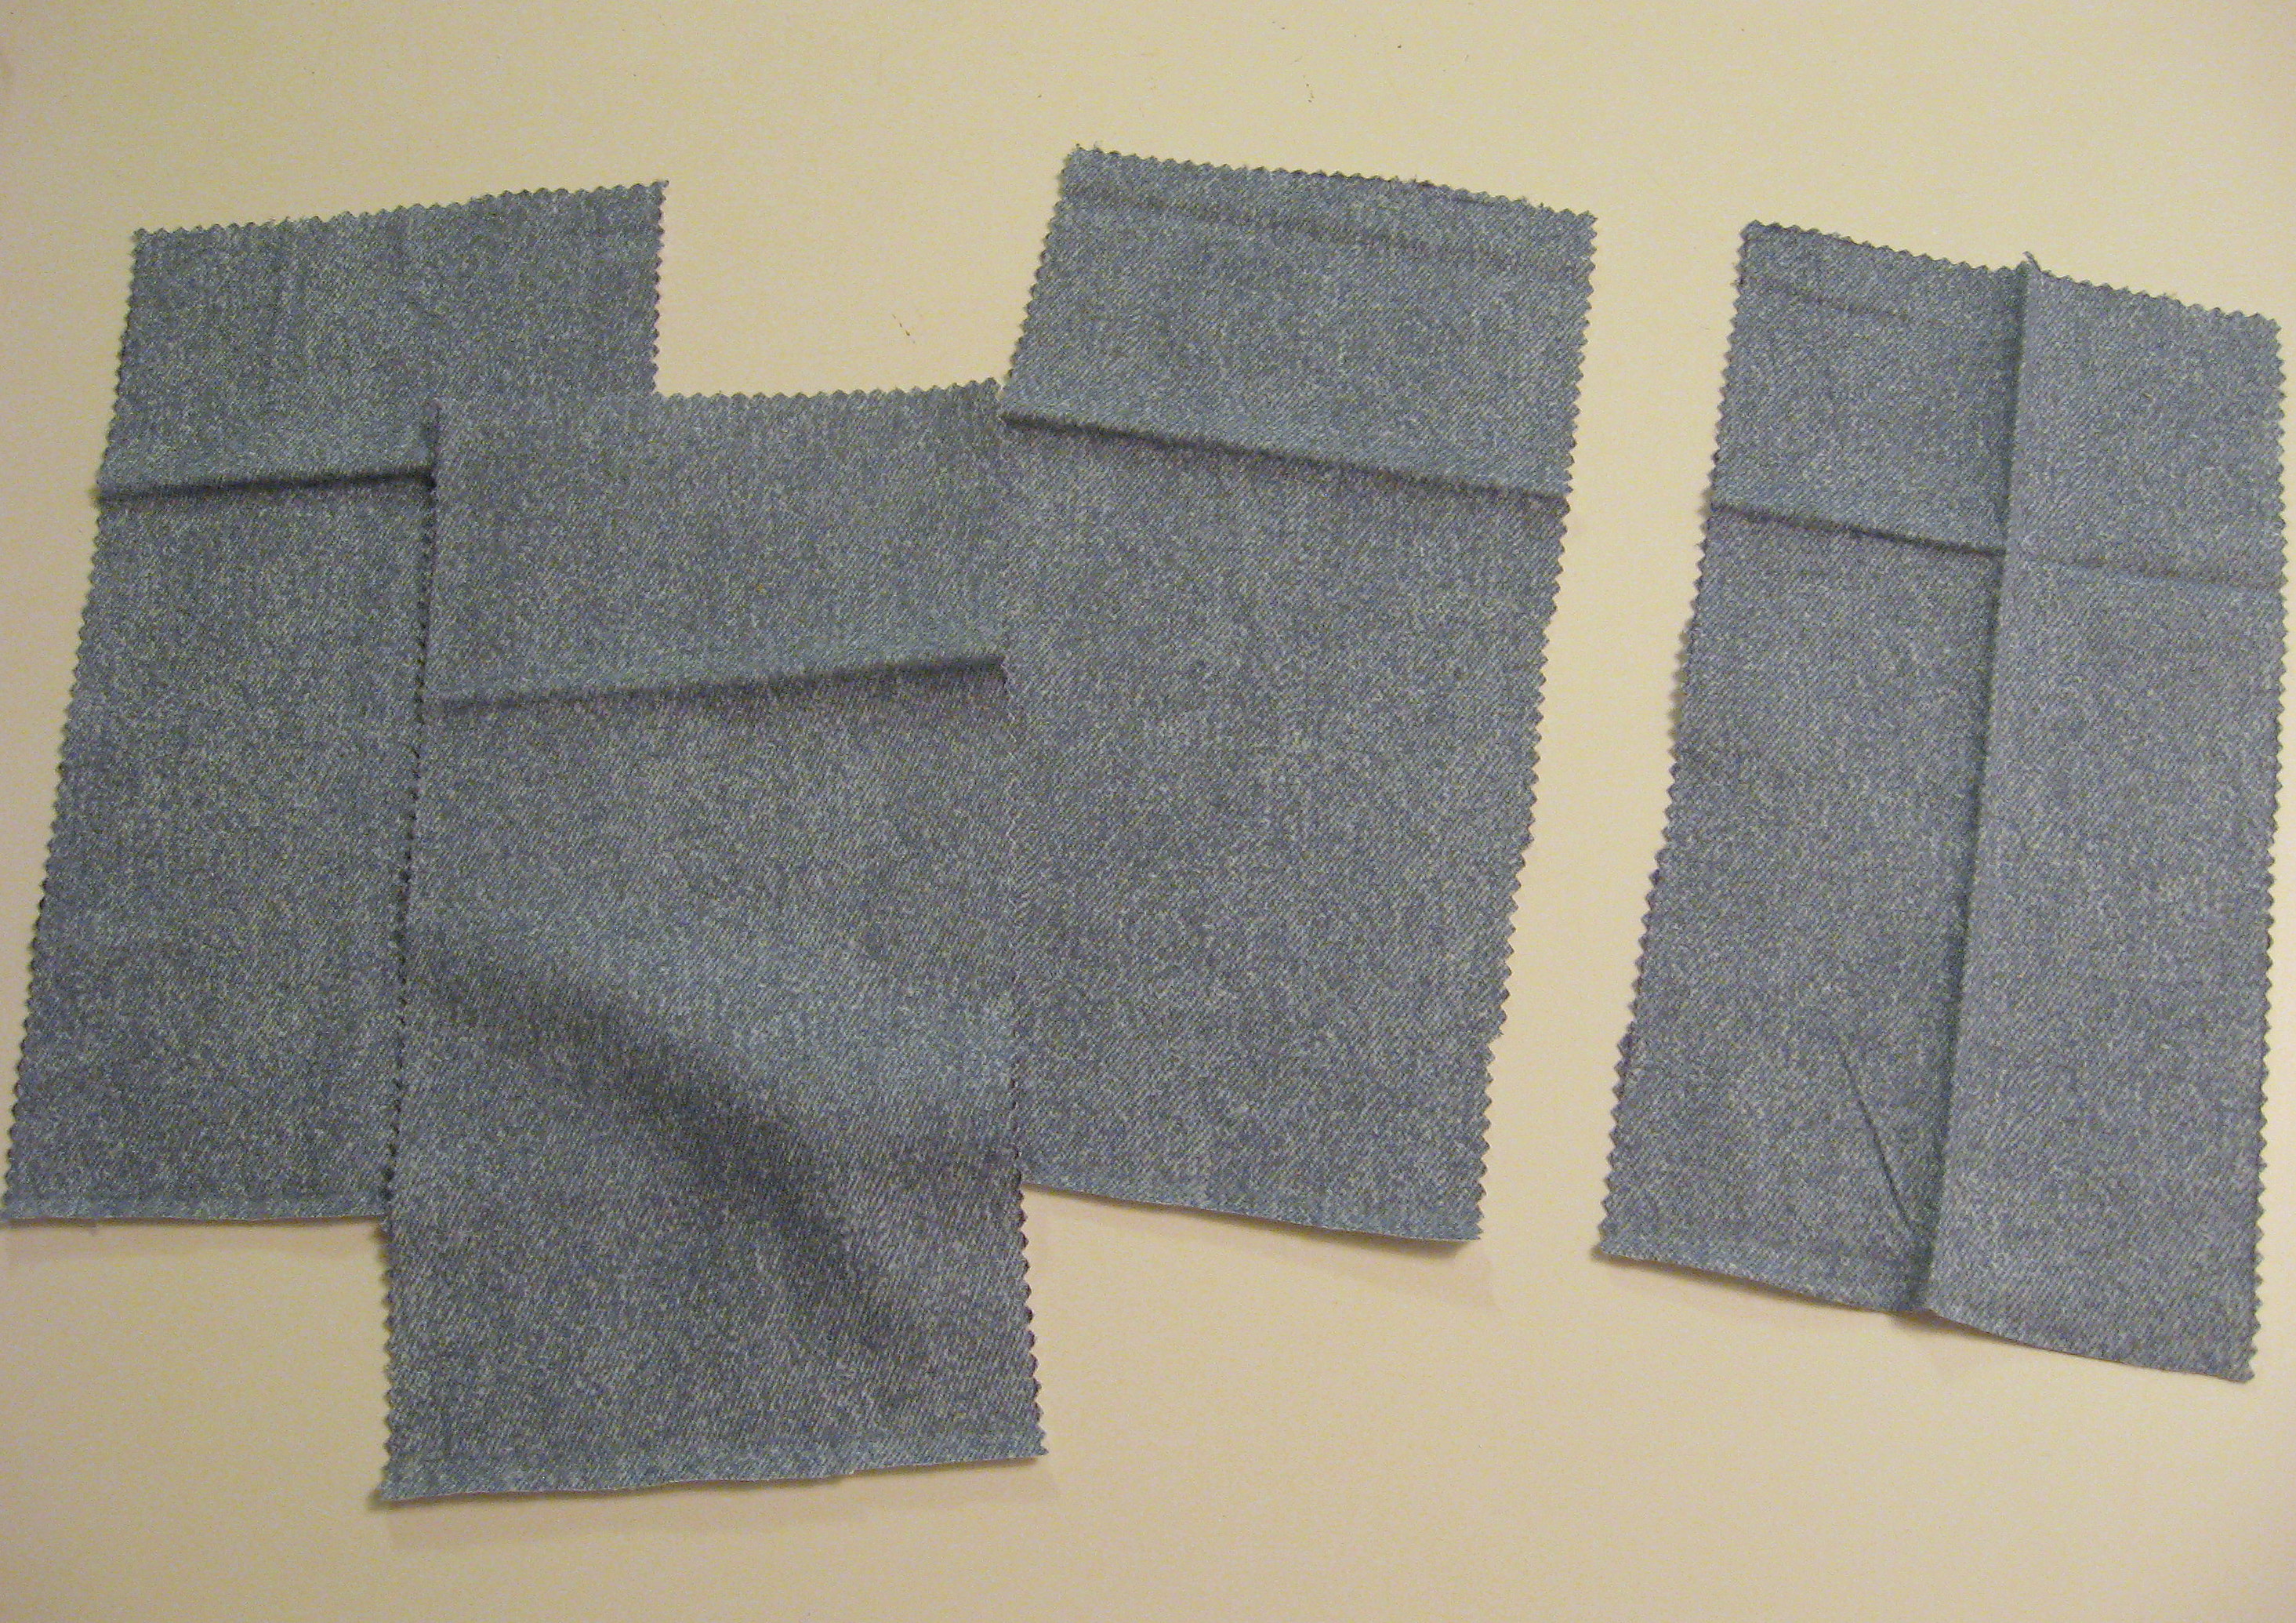
My teenage boys leave for school at 6:30 in the morning – and during those cold Utah winters, that time of morning can be pretty hard to face! One thing they always seem to complain about is their cold, cold hands, so I took a minute this week and whipped them up some microwaveable pocket warmers. The sewing skill needed for this is practically none and the cost to make 6 of them was about $2.
I bought 1/4 yard flannel from Hobby Lobby, for a total cost of $1.25. Make sure you look for a fabric that is 100% cotton, as any fabric with polyester in it could melt in the microwave. I straightened up the edges a little, and ended up with a long strip that was about 10 1/2 inches wide. I cut that into 5 1/2 inch pieces. I didn’t even bother to iron it; a time or two in the microwave and those wrinkles will be gone.
Fold the rectangle in half with right sides together,
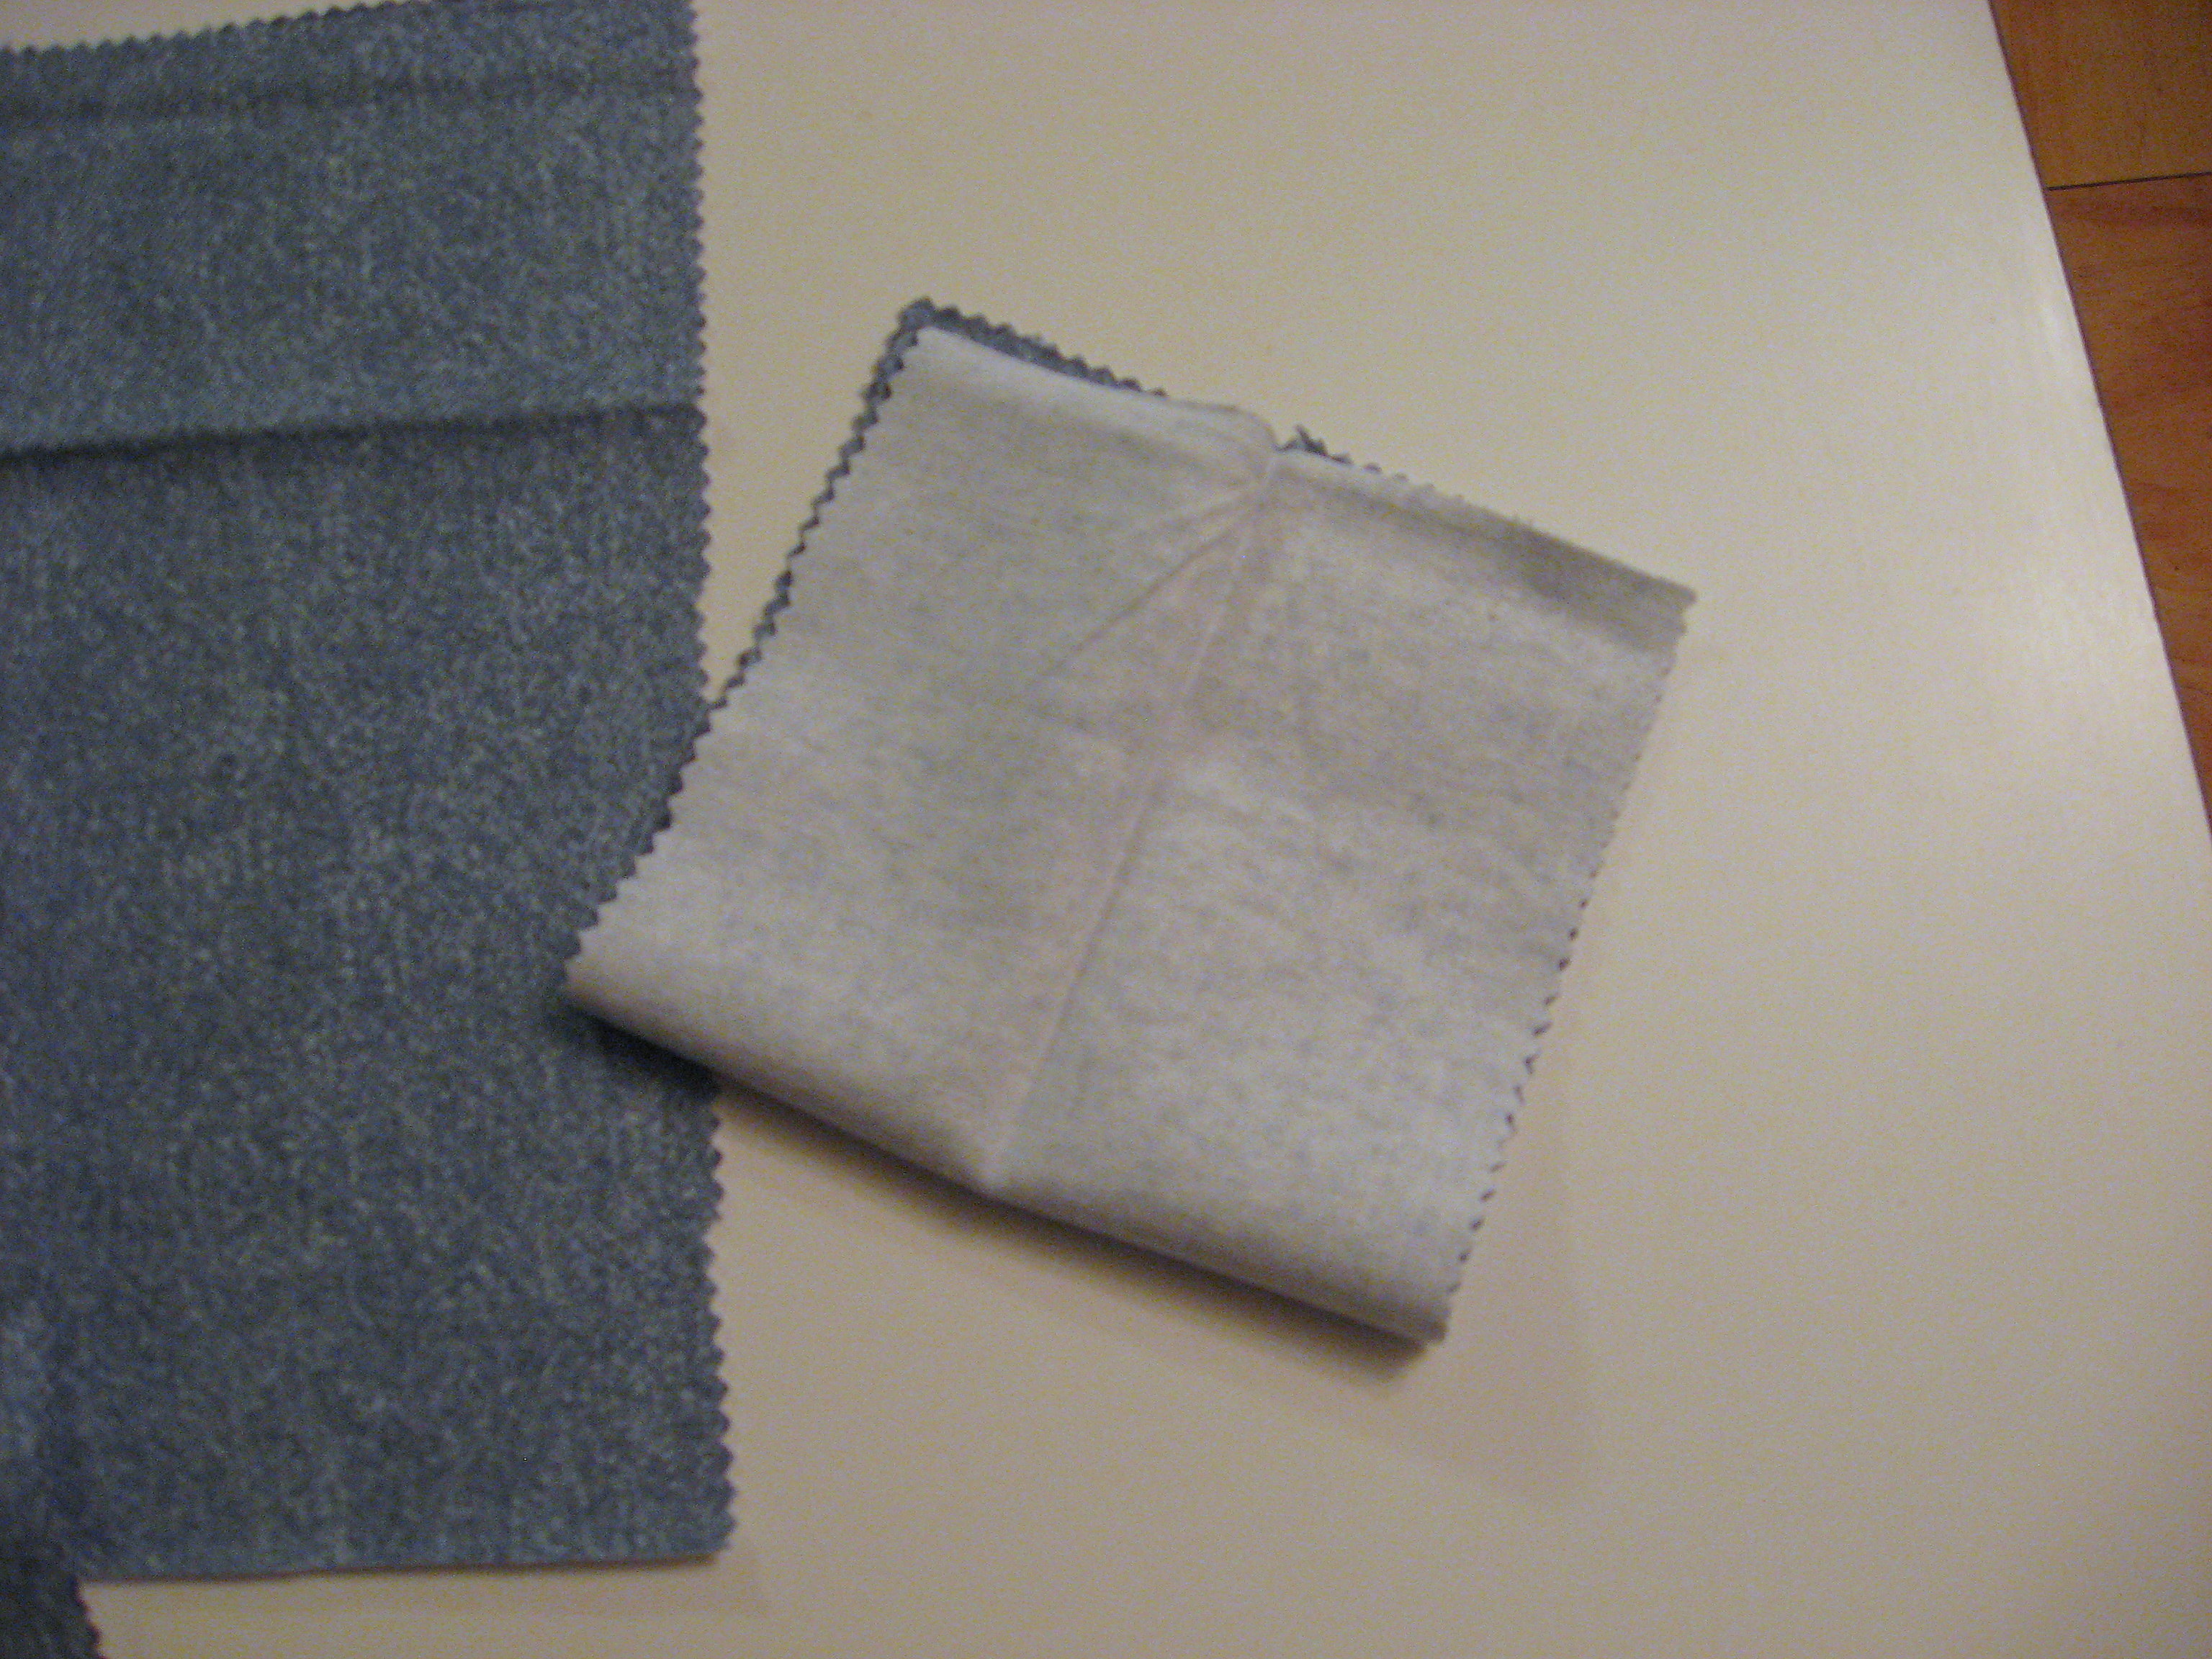
and sew around two of the open sides.
Now turn that right side out
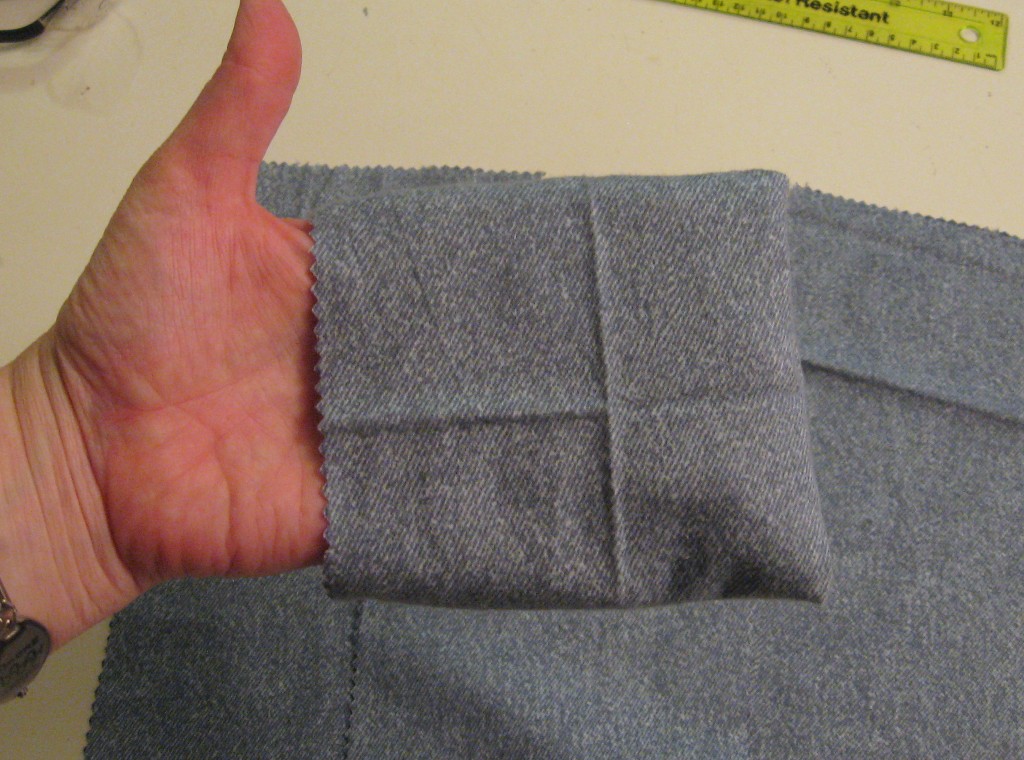
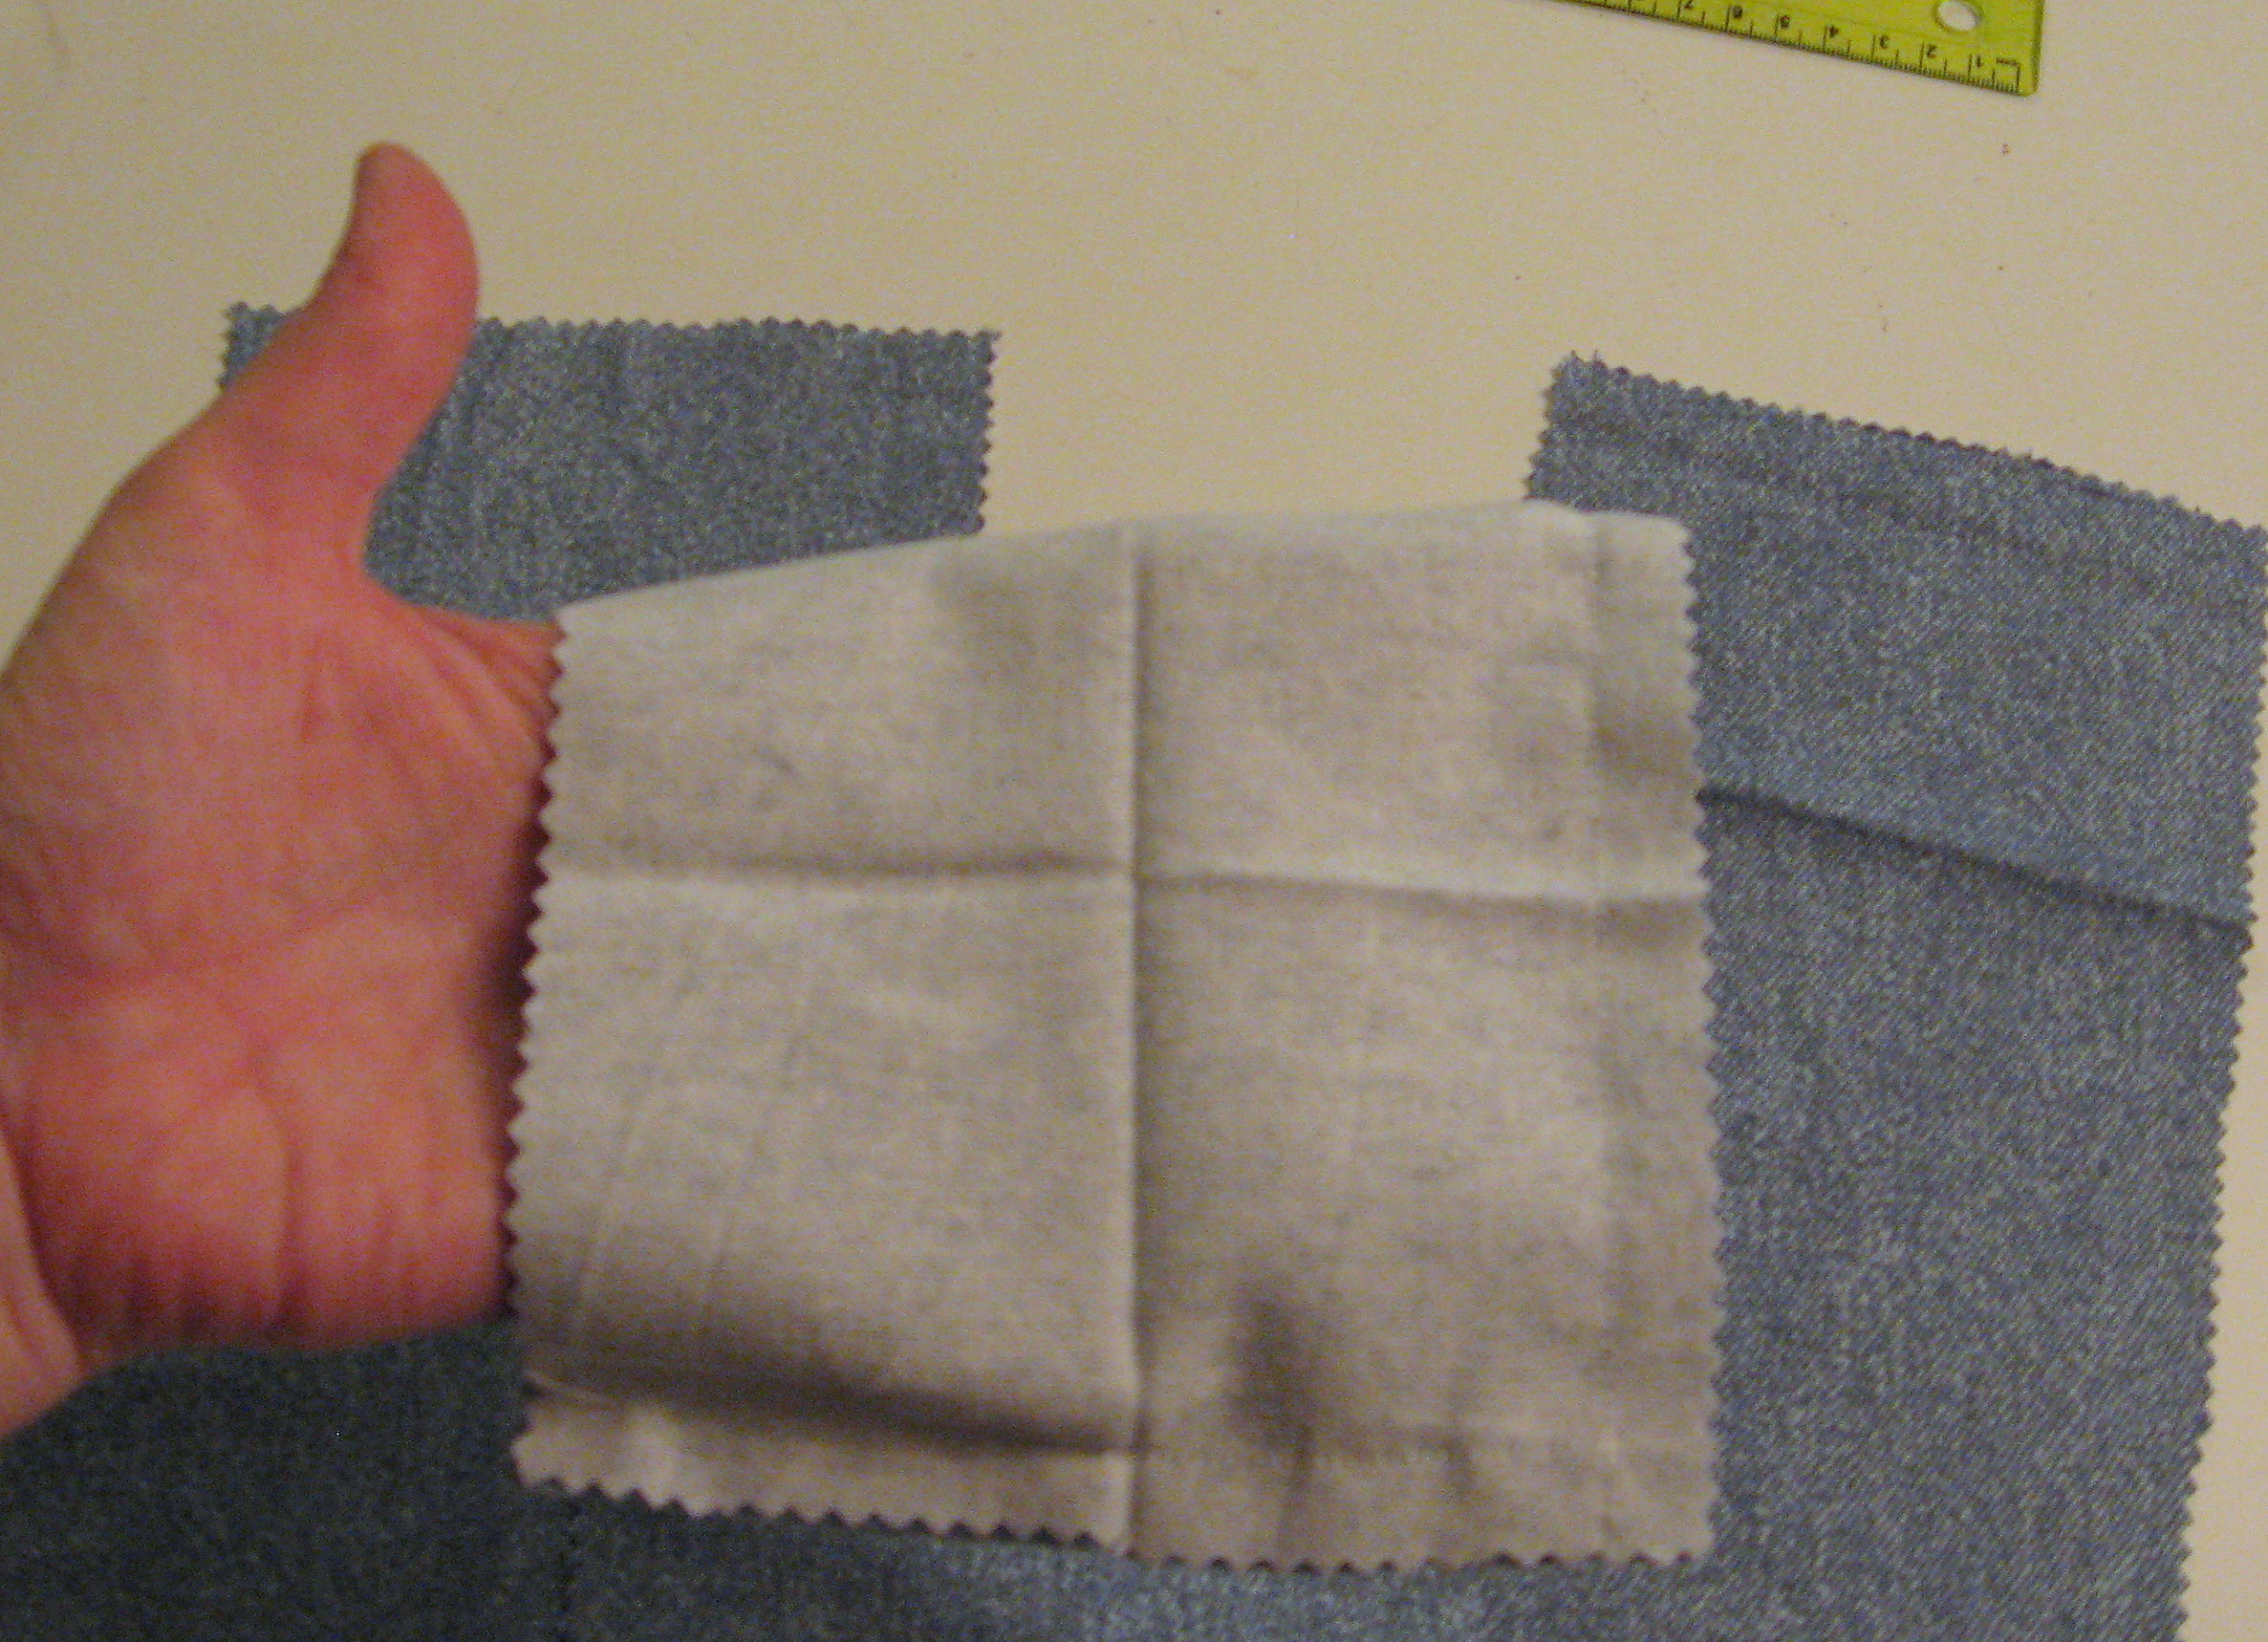
and fill it with your choice of filler. You can use feed corn, barley, wheat, rice or flax. I used wheat because I had an open can. You don’t want it to be too full; I thought that 3/4 cup of wheat was perfect.
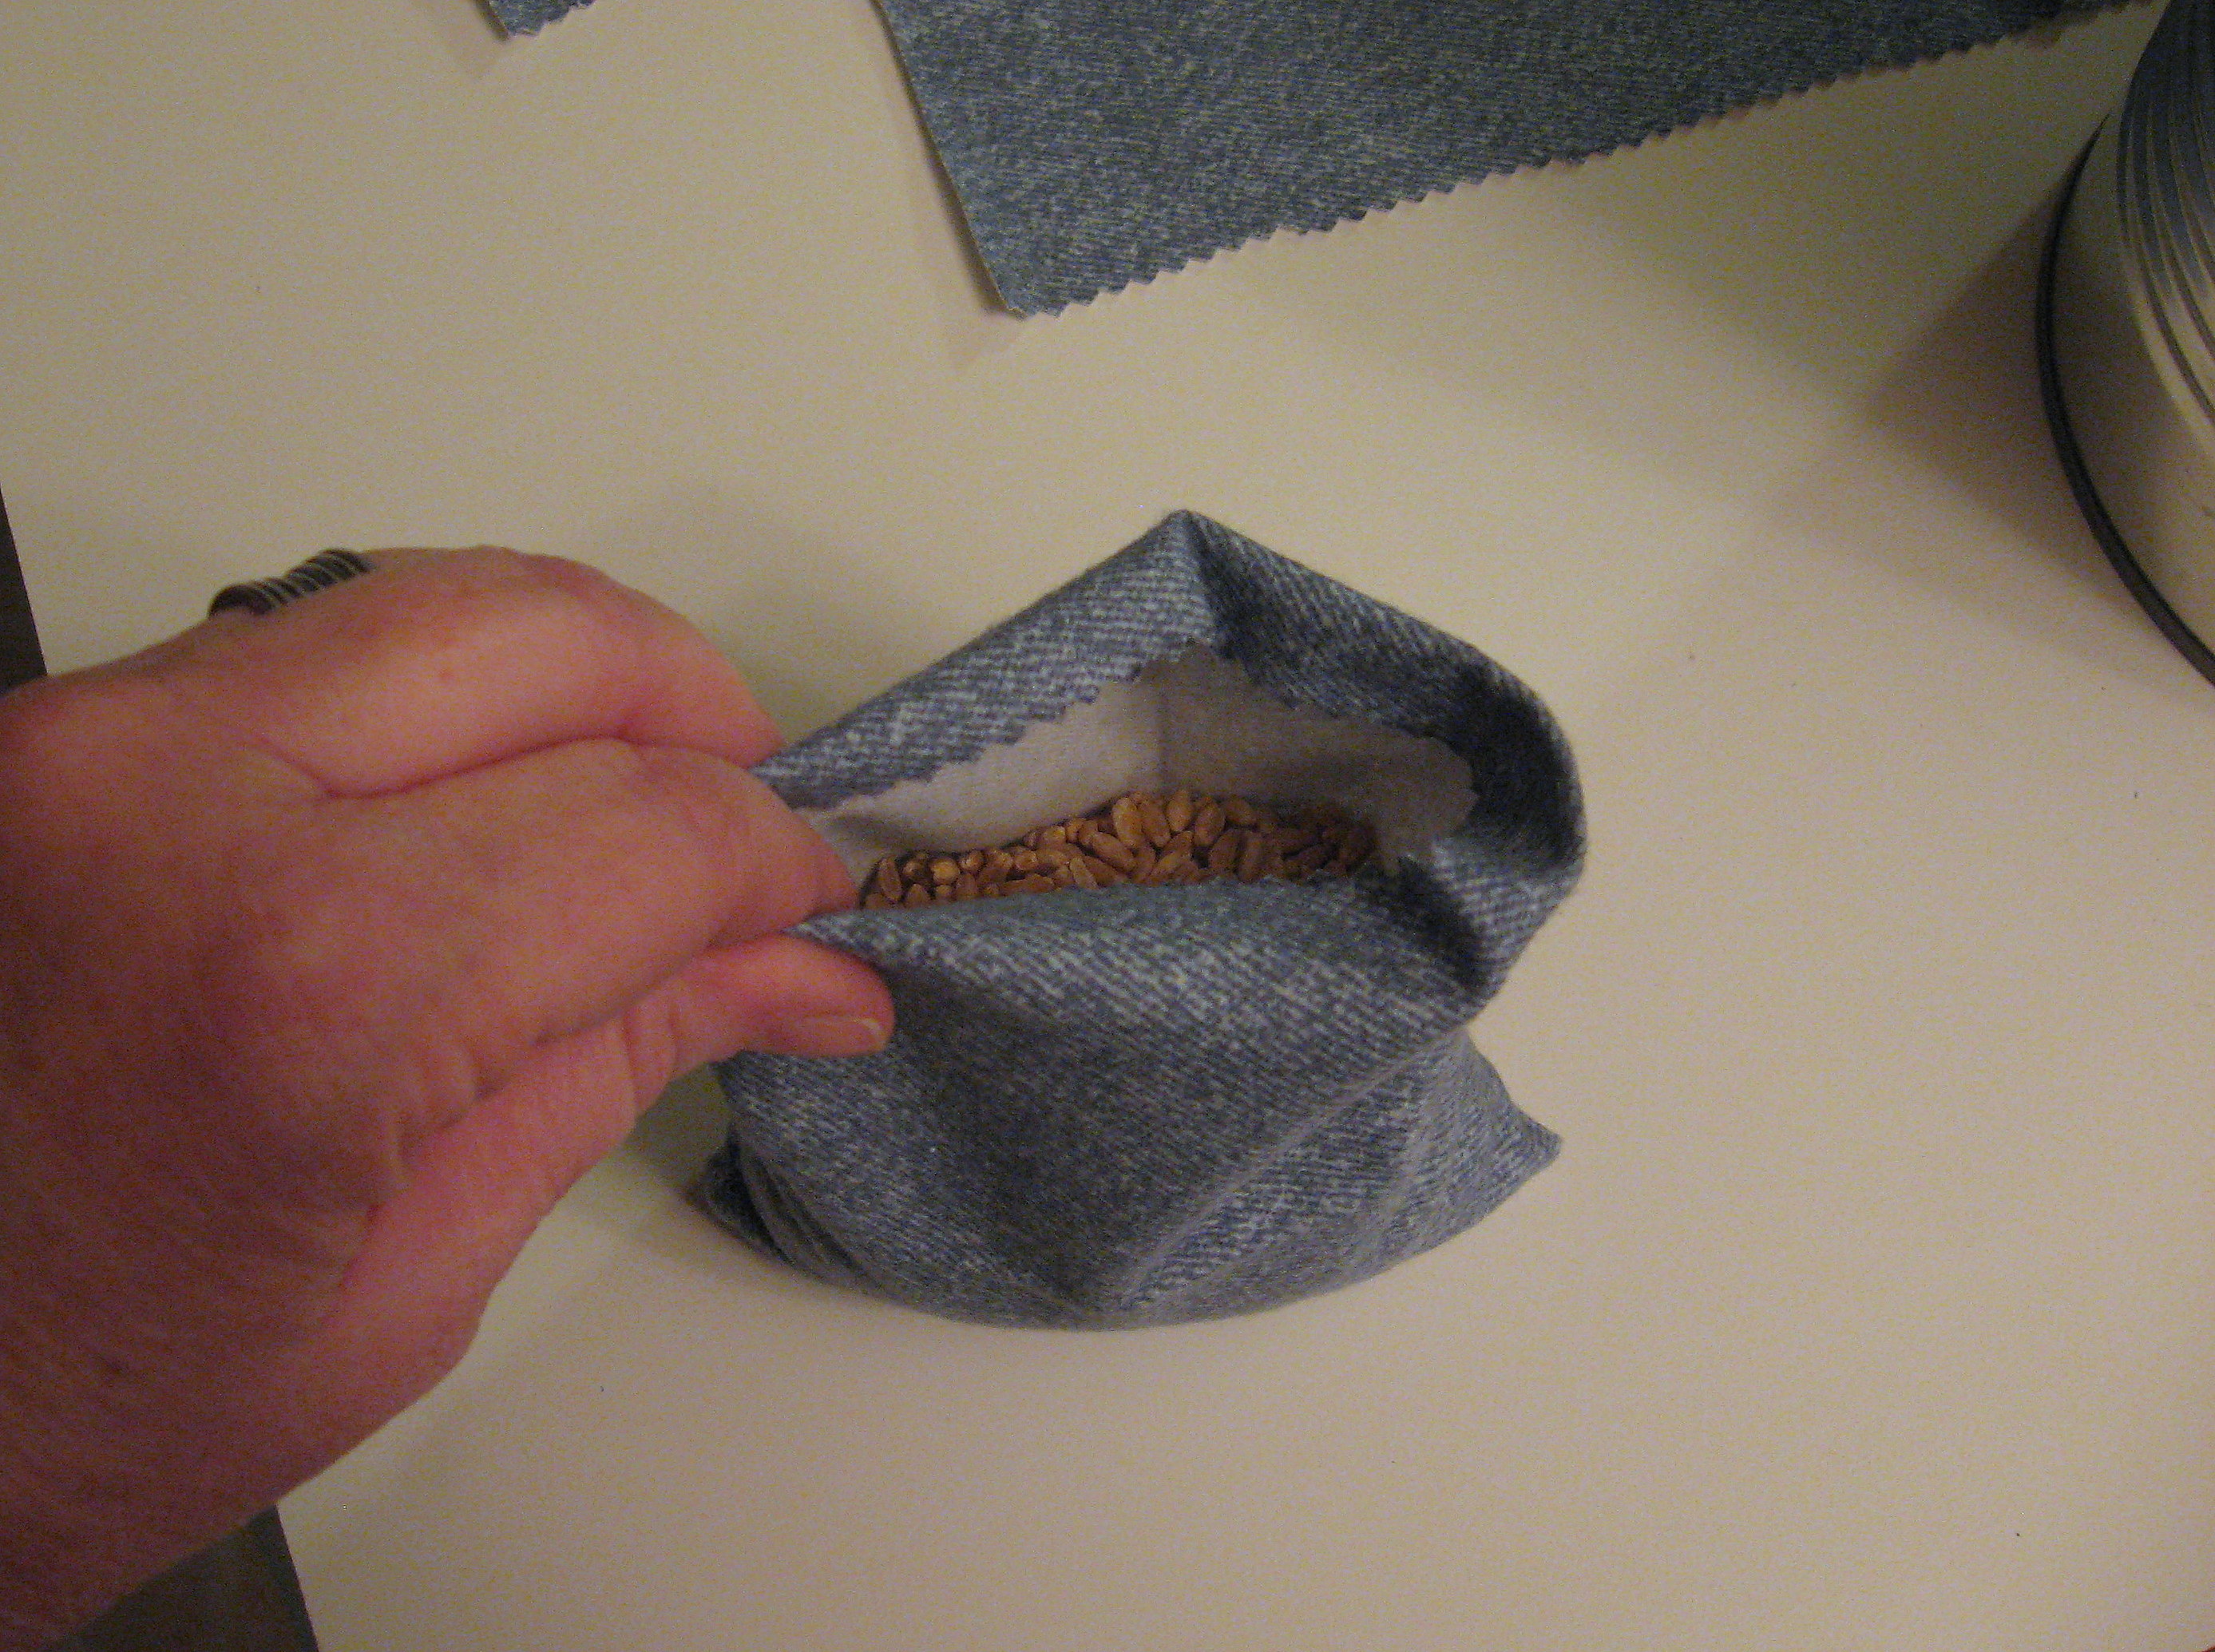
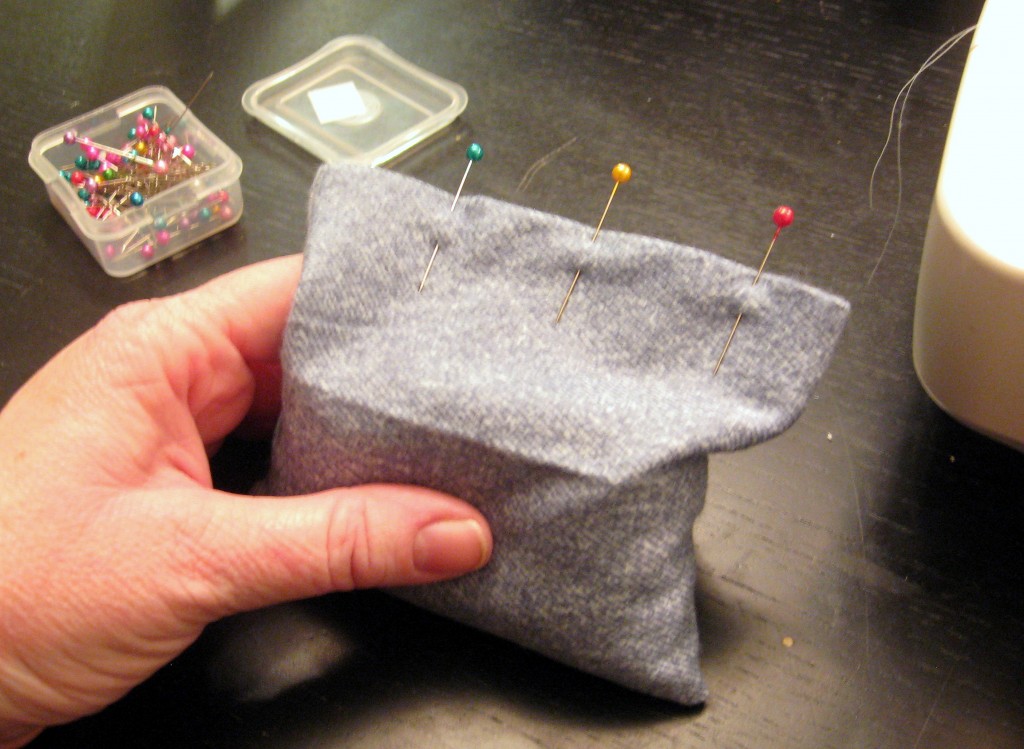
Now fold the open edge under about 1/4-1/2 inch and pin it. Being very careful to keep the filler away from the needle, sew the opening closed.
To use, put in the microwave for 20-30 seconds and pop them in your coat pocket.
Ahhhh….happy teenager.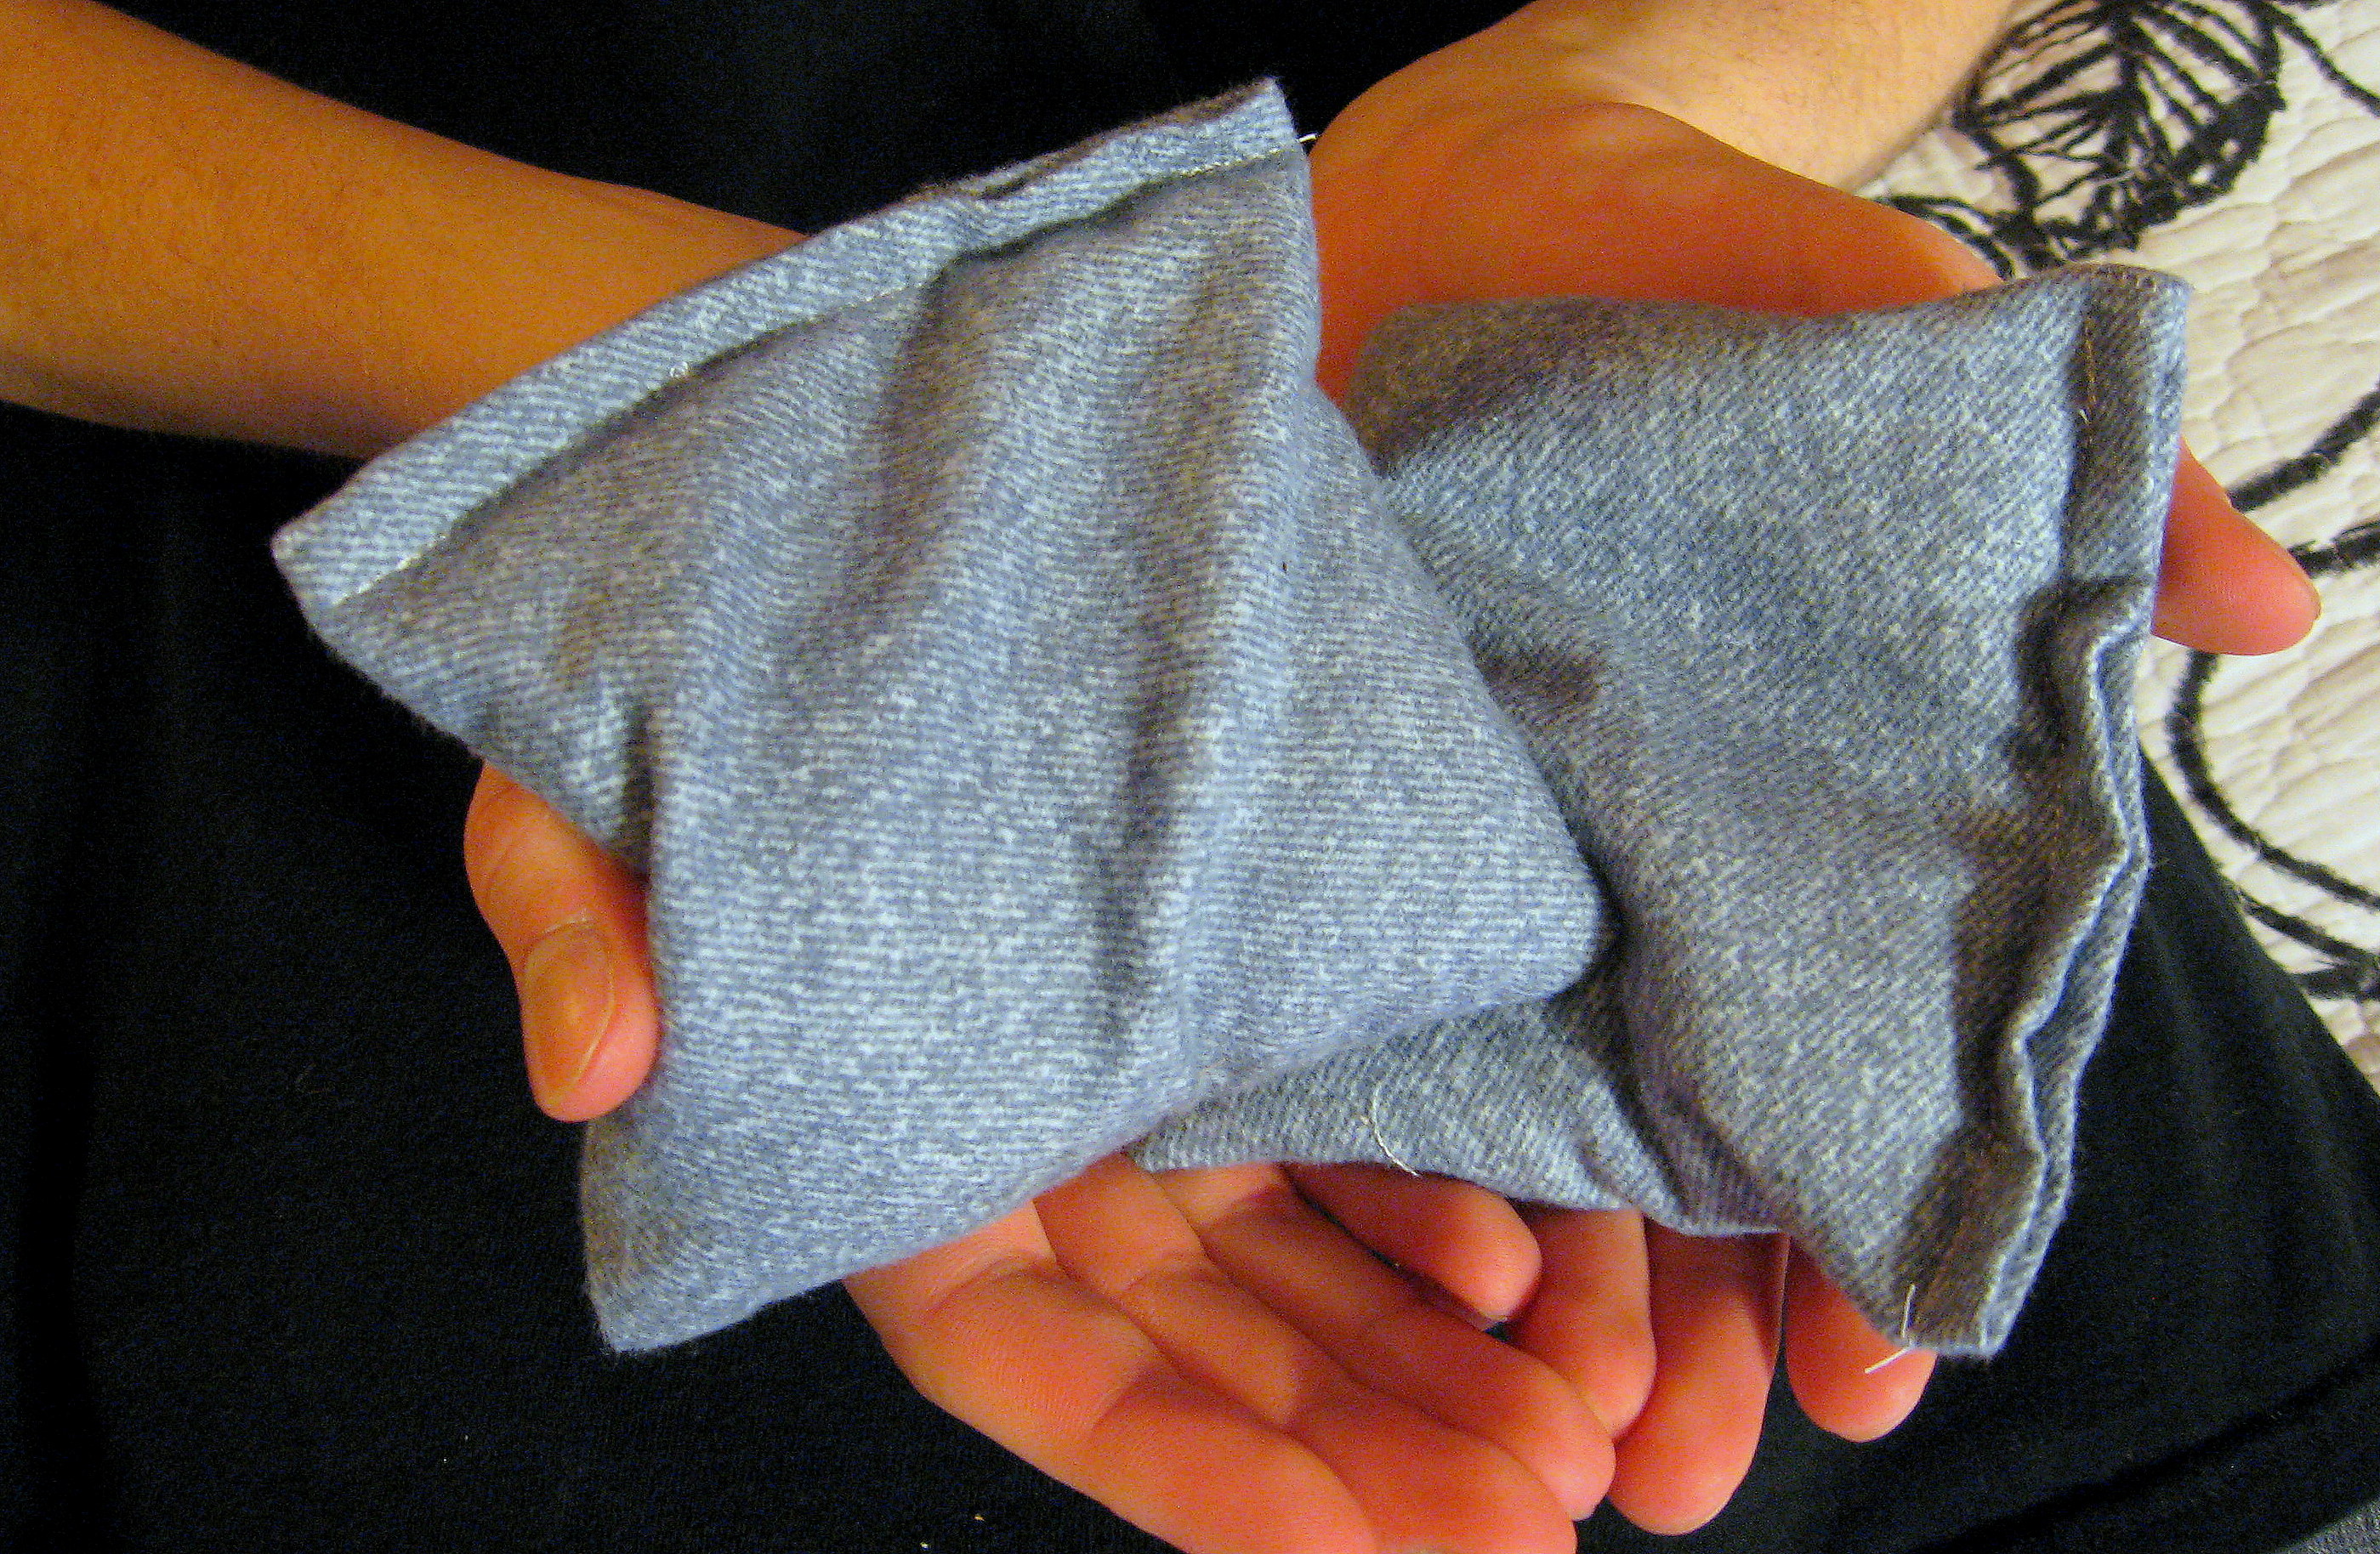
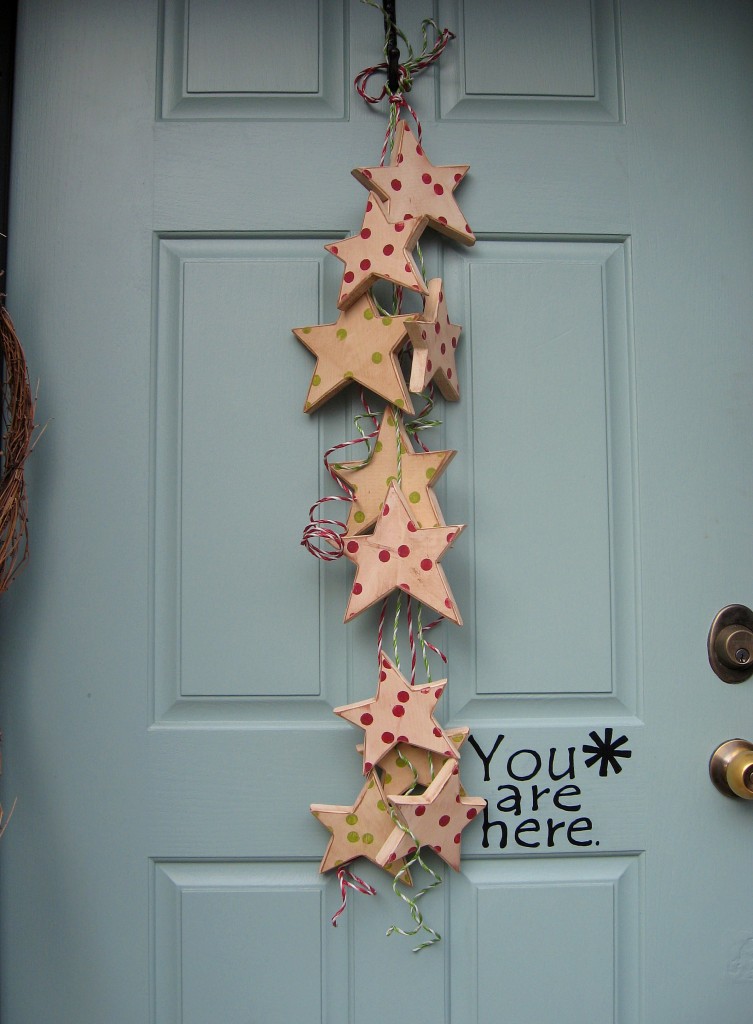
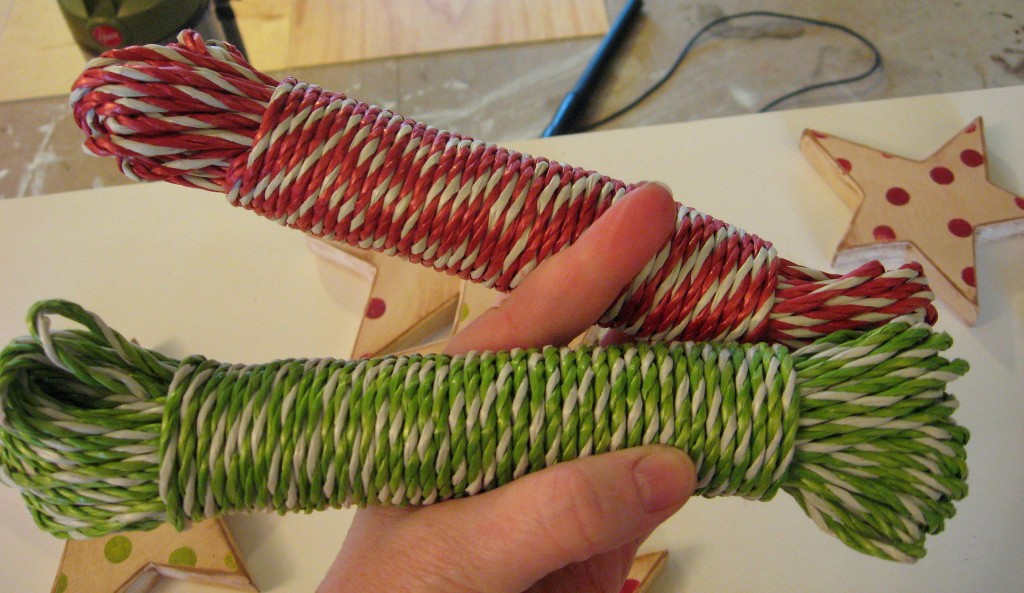
Cascading Christmas Stars
This is the time of year that I most enjoy crafting, and the time of year that I have the least amount of time to do it. So when I come up with a craft that’s this fast and easy, it is right up my Christmas-crafting alley!
I made these stars a few years ago, and I love them. I’ve tried putting them in boxes and baskets and bowls (oh my!) but I have never been totally happy with any of those displays. As I pulled them out of my Christmas box today, inspiration struck and I turned them into a cascading front door hanging.
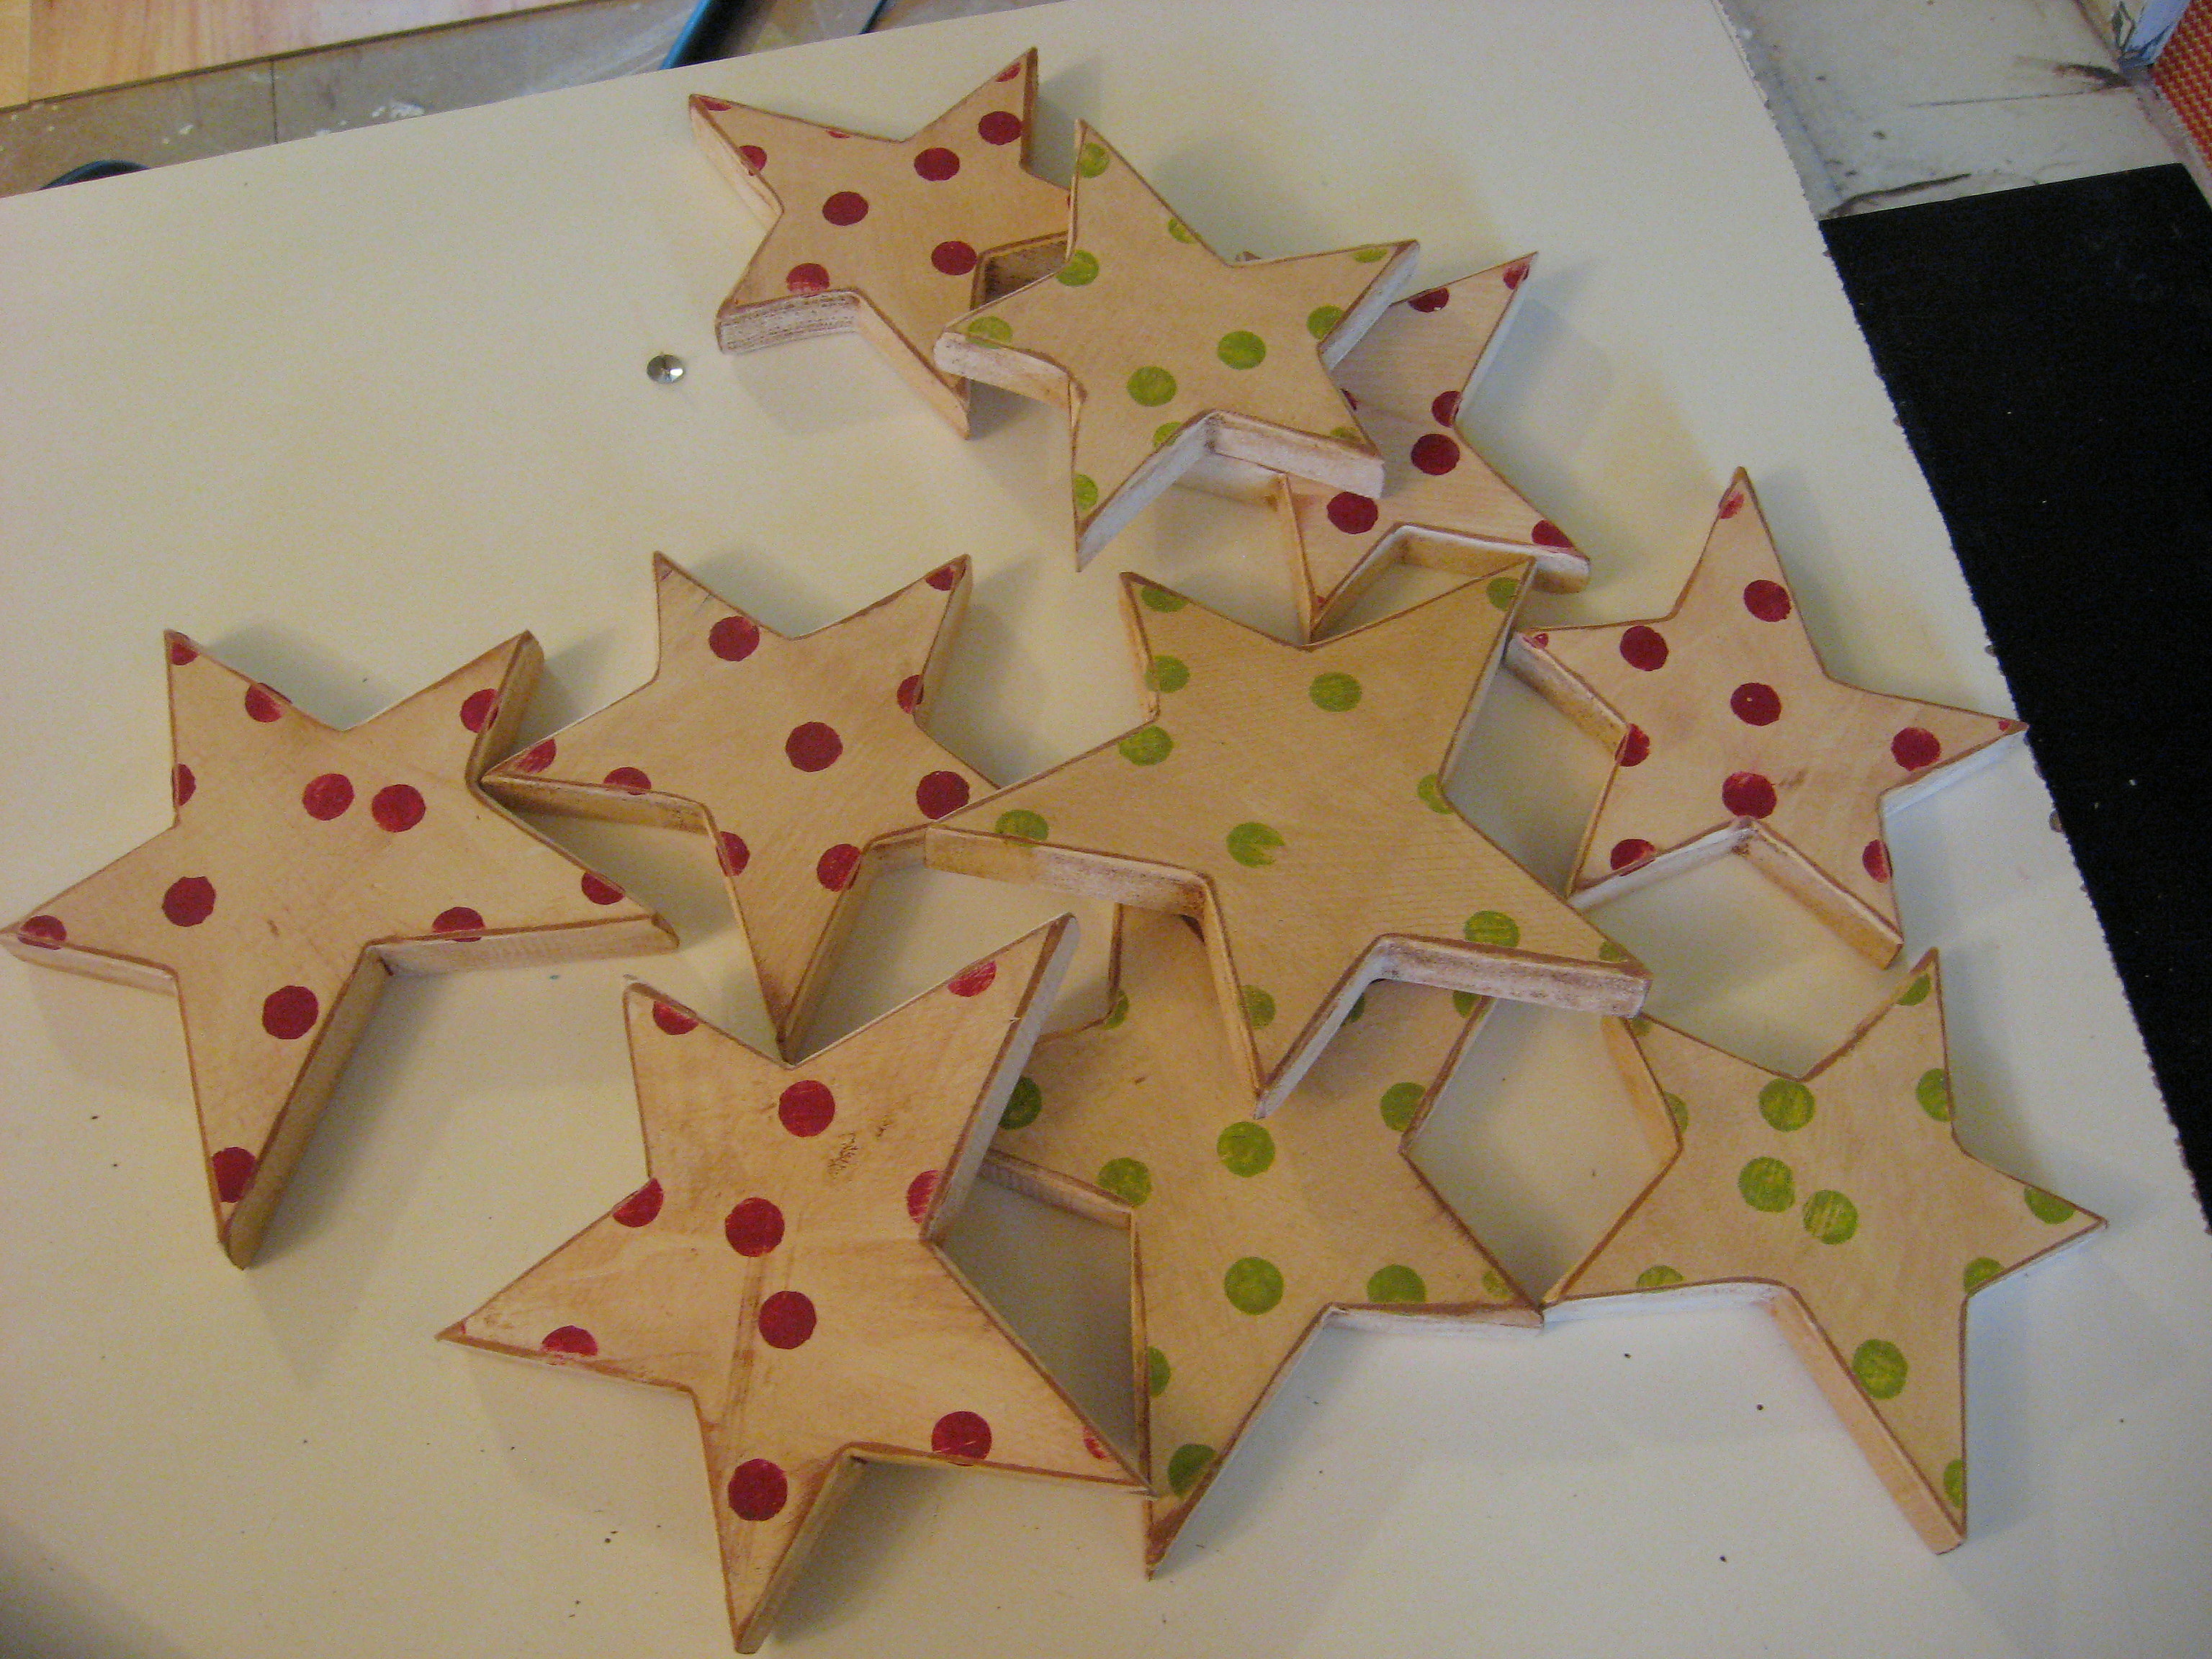
I made these stars from scratch, but you can find unfinished wood stars at the craft store. I painted mine white, added red and green polka dots, then sanded and stained them.
Then I used red and green clothesline from Dollar Tree (also see here and here)
and cut four long pieces of varying lengths (I just kind of eyeballed how long to cut them. Fold each one in half and put all of the folds together.
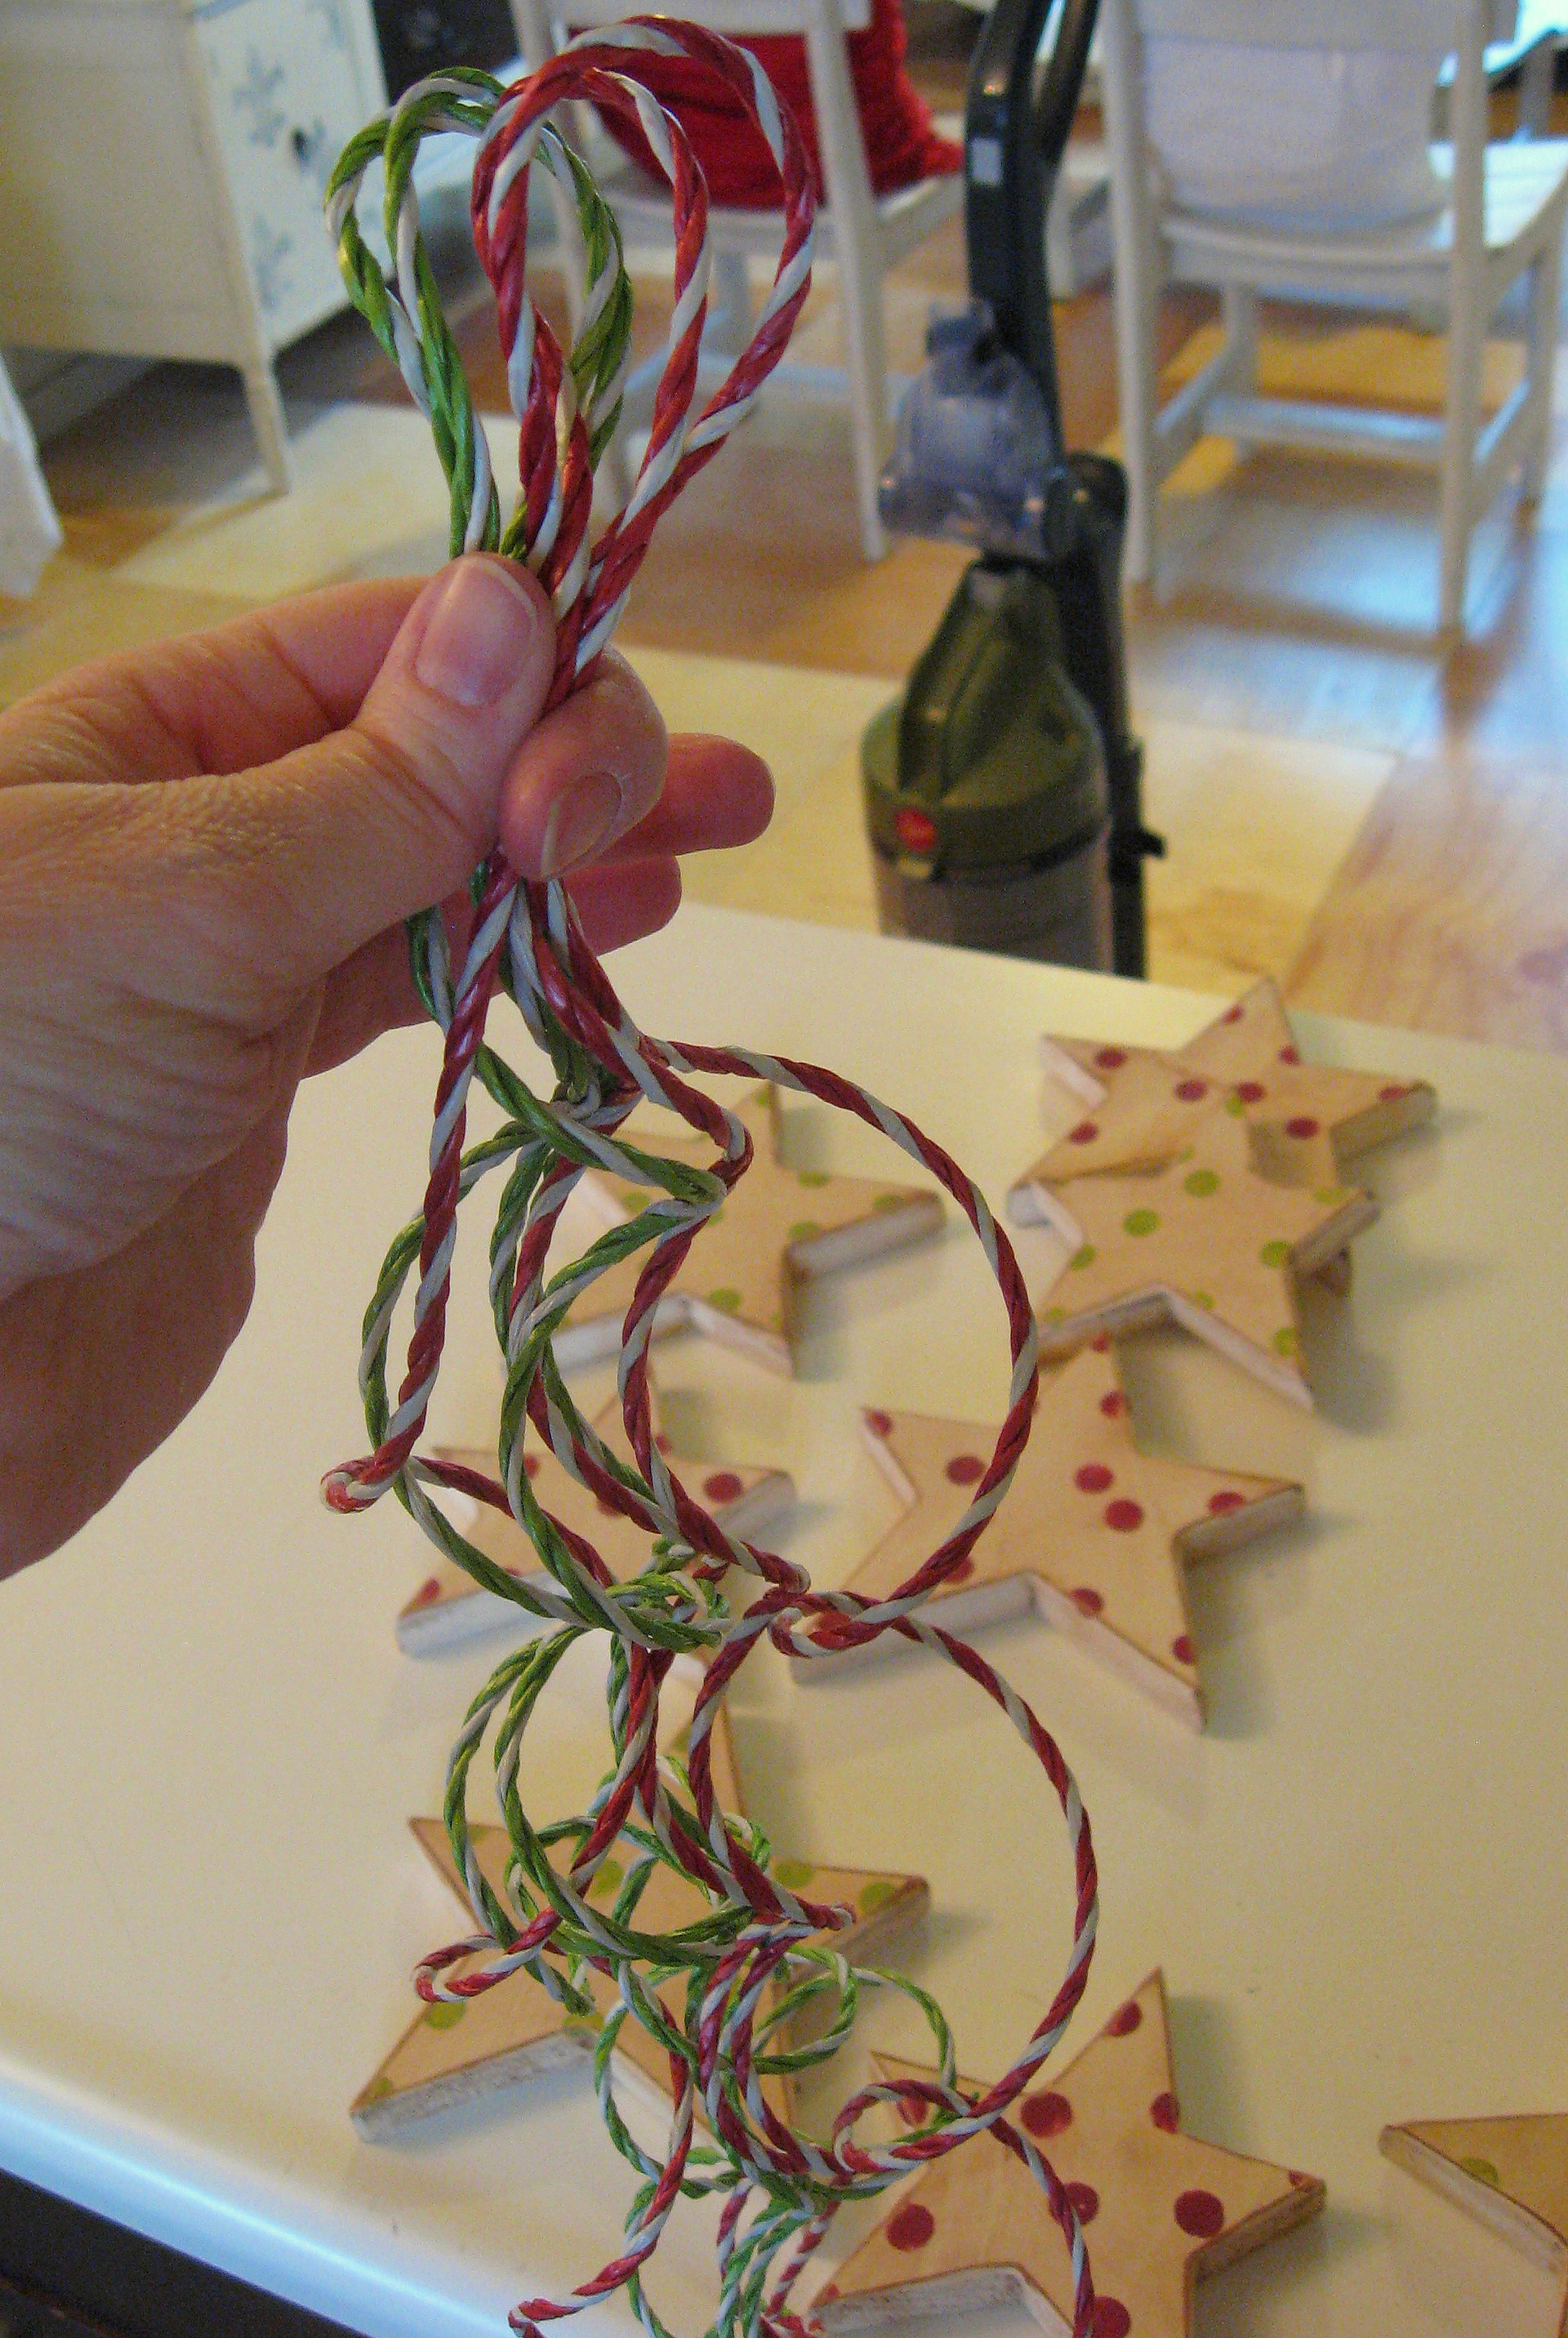
Tie them all together in a knot, and then lay it stretched out on a table or counter.
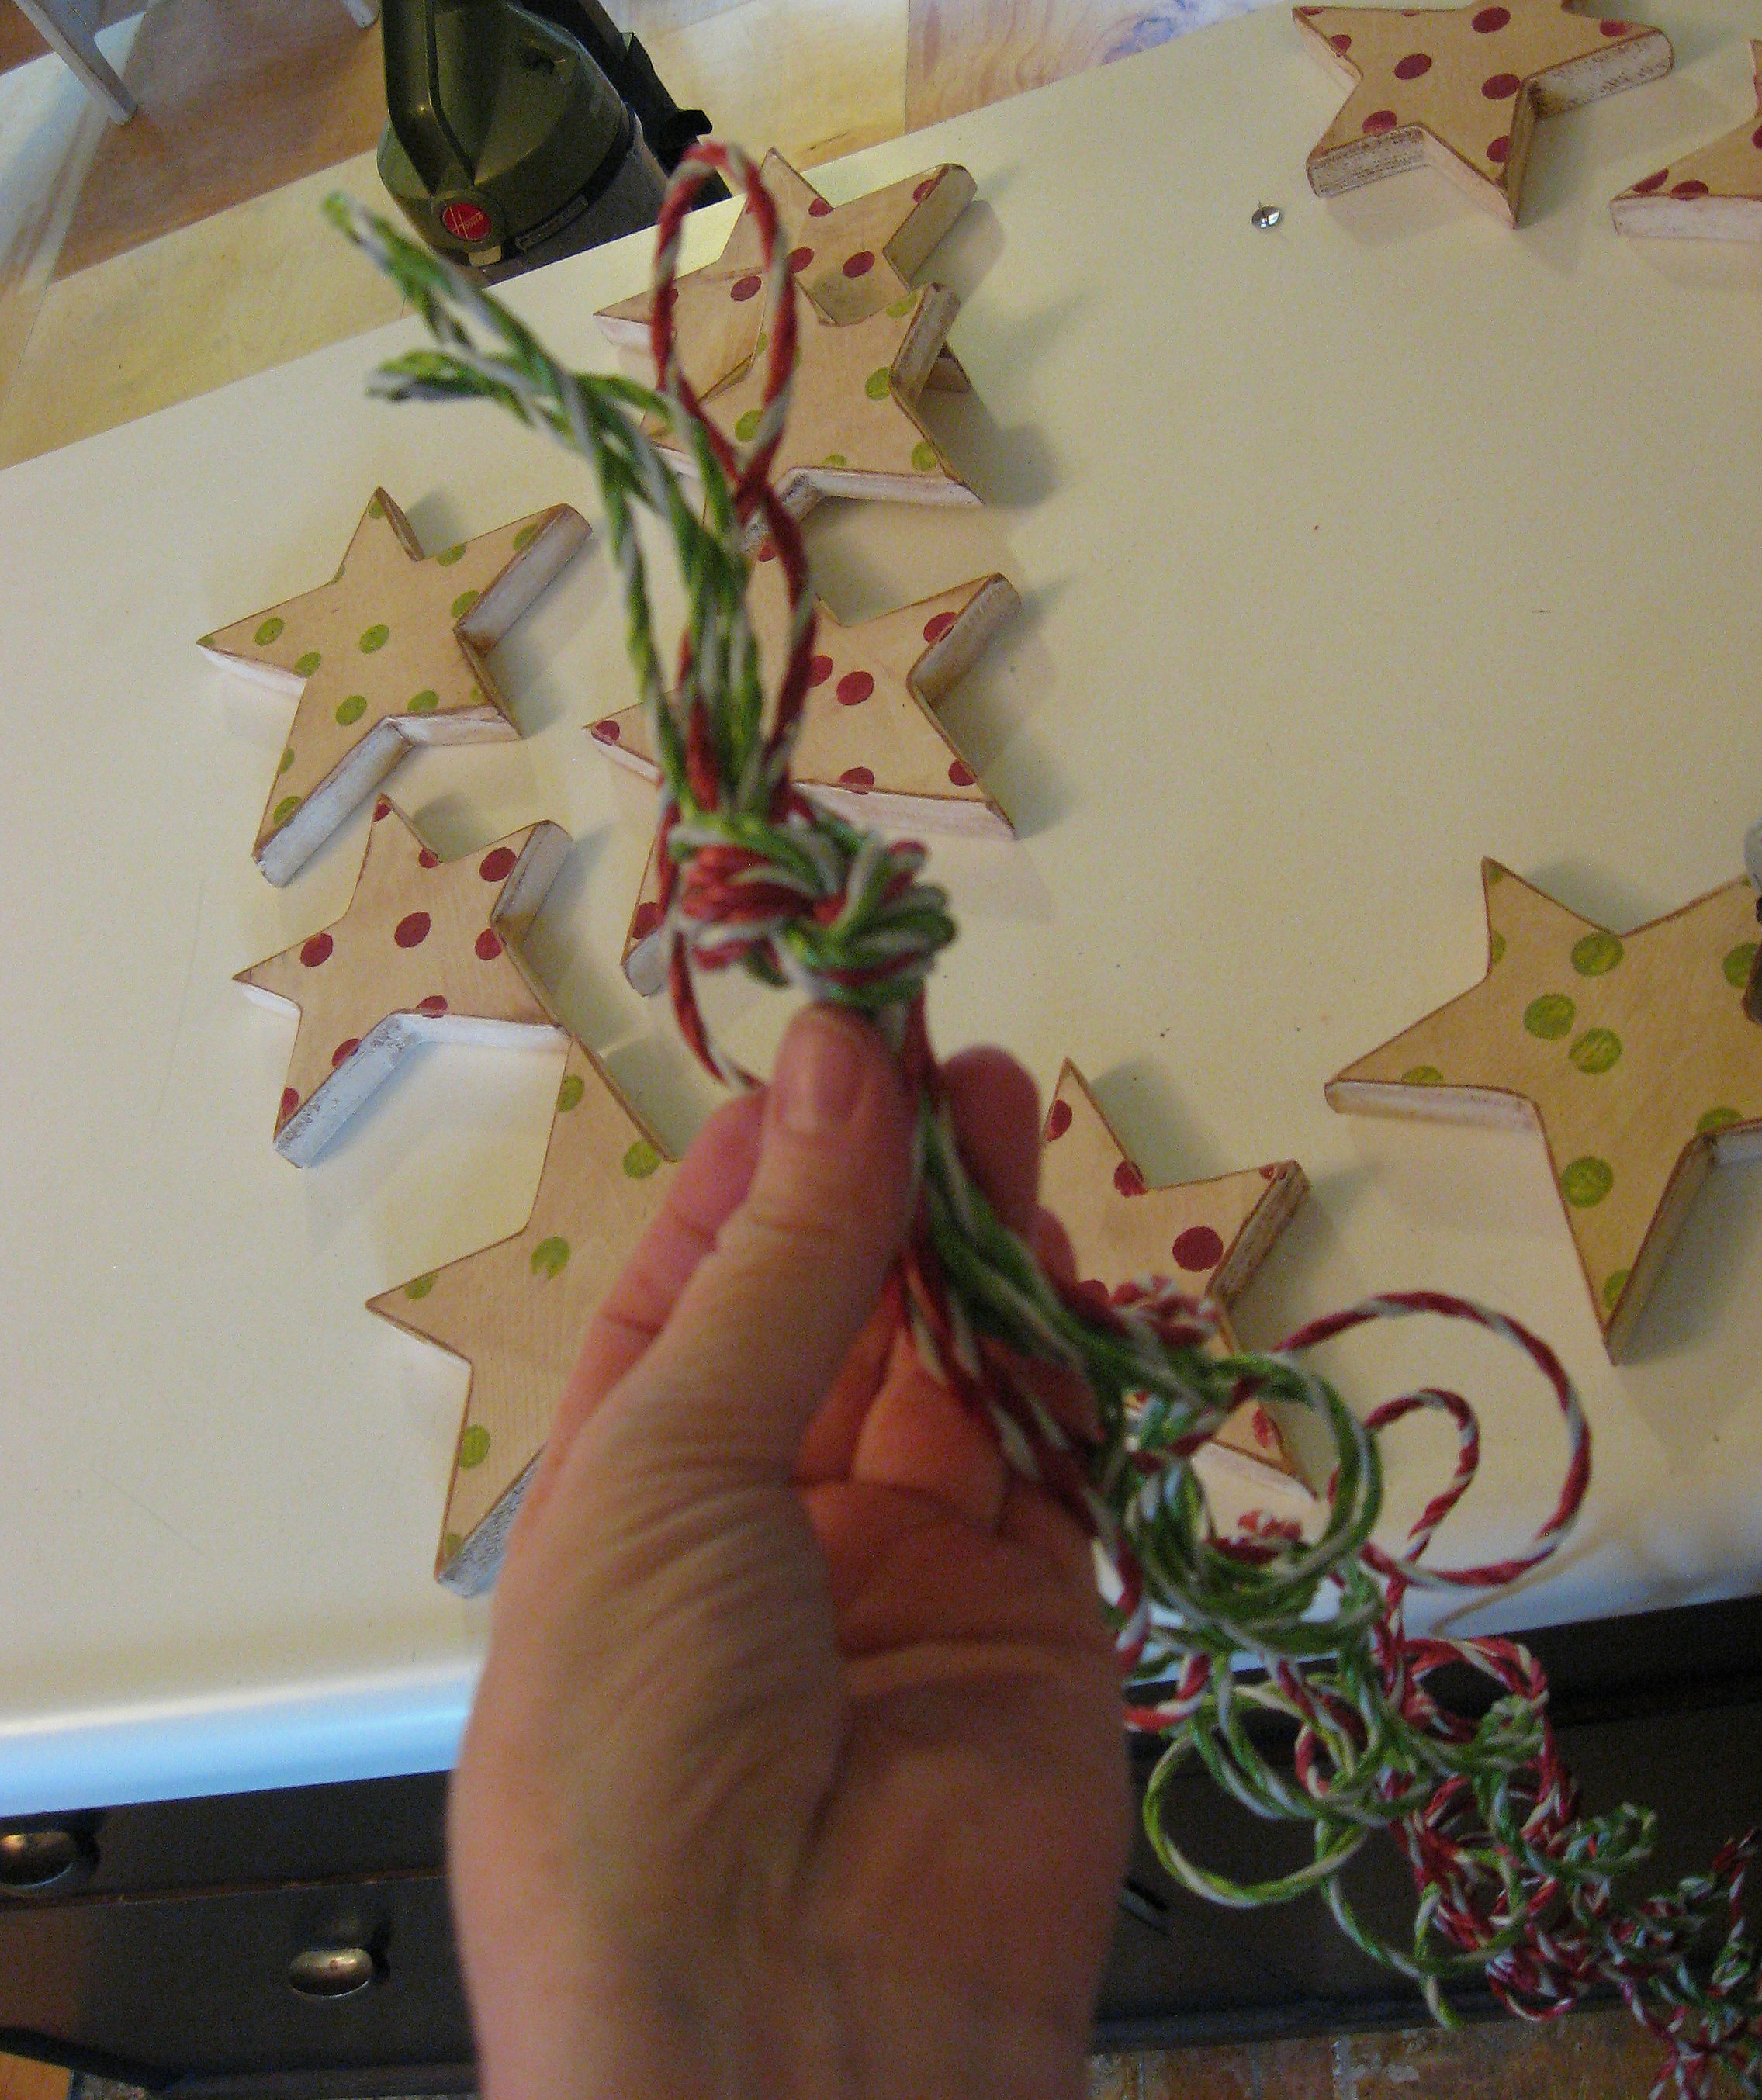
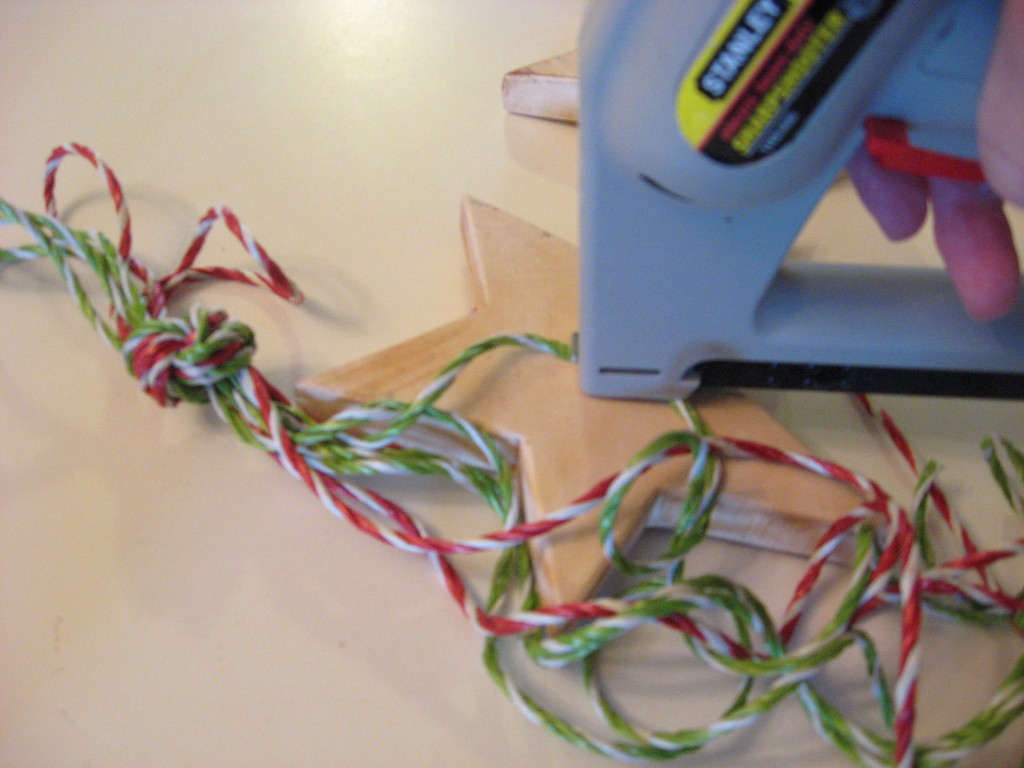
Start stapling the stars to the clothesline. I put one staple in the middle of the star, and then another at the top of the star to help them lay flat.
Pick the whole thing up after every star or two to make sure they are spaced out in a way that you like. I left some of the strands with no stars because I liked the way they curled up.
Hang and done!